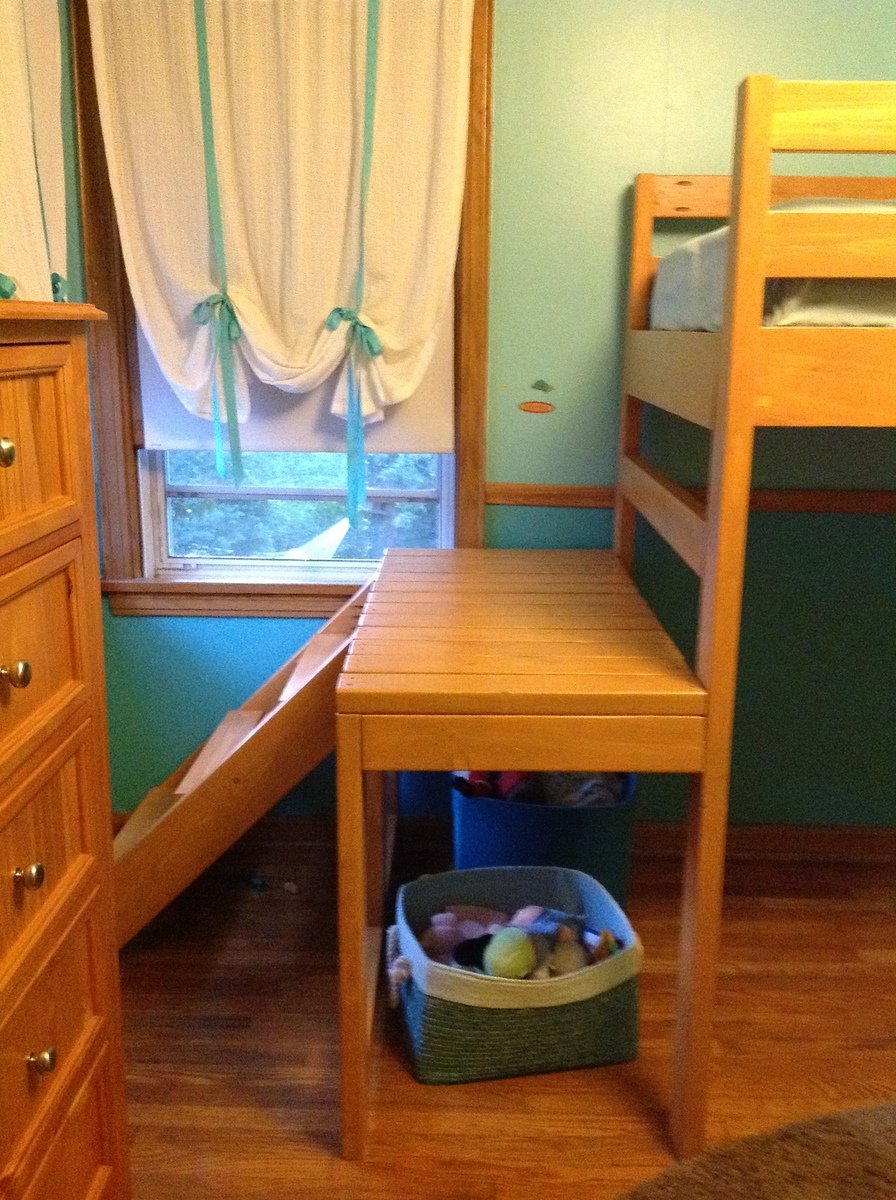
Tall Loft Bed

My husband, Daughter and I built this loft bunkbed for our seven-year-old granddaughter‘s birthday. It turned out wonderful and she squealed when she saw it! Thanks so much for your online plans.
Jan Ott
Built from Plan(s)
My husband, Daughter and I built this loft bunkbed for our seven-year-old granddaughter‘s birthday. It turned out wonderful and she squealed when she saw it! Thanks so much for your online plans.
Jan Ott
Chairs made as birthday gifts.

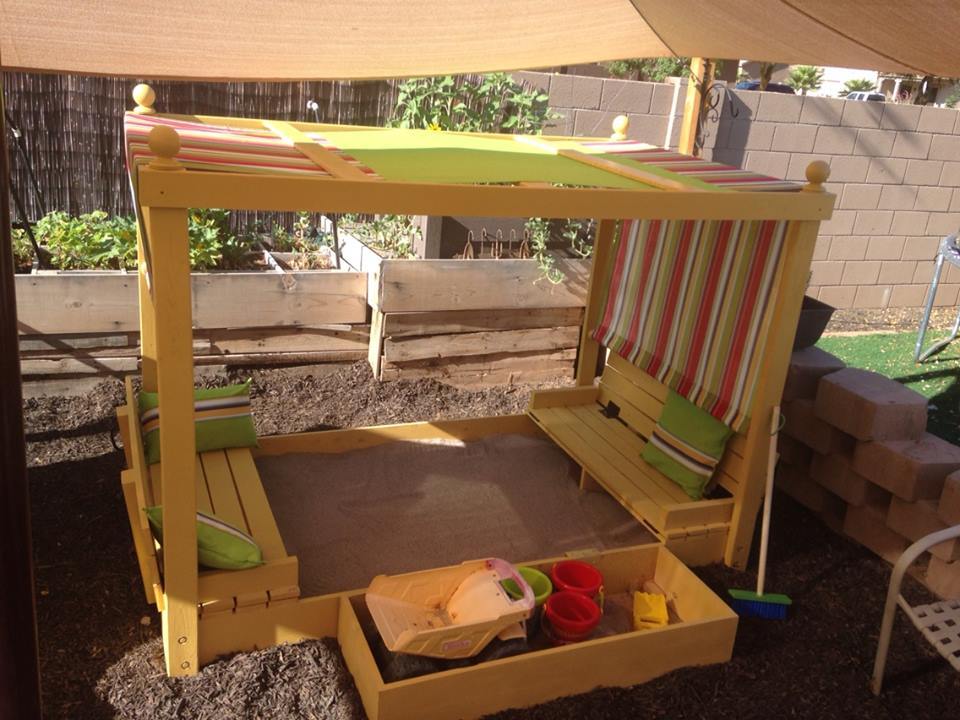
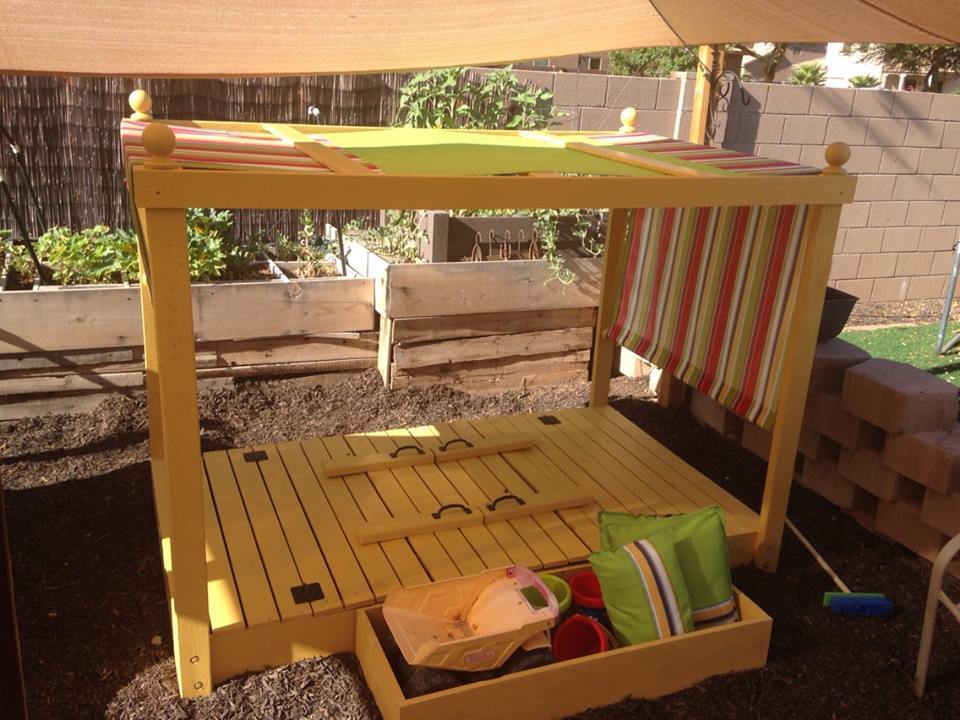
We adjusted the plan and created a 4x7 sand box with toy box and canopy. We are in love with the way this has turned out!

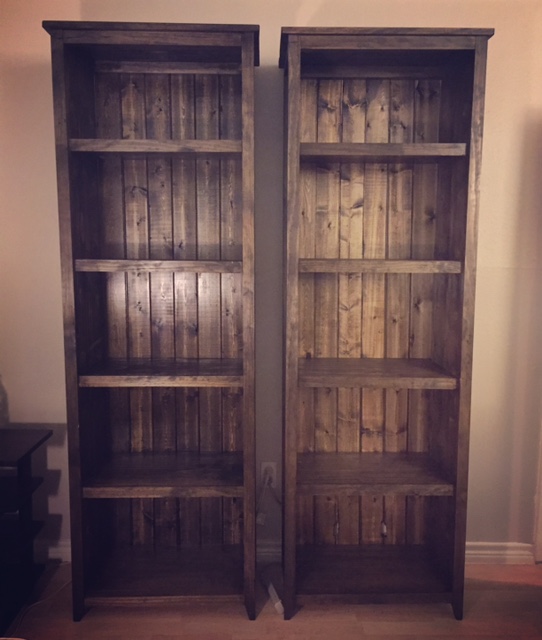
Stained with Minwax Jacobean. Thank you for the plans!
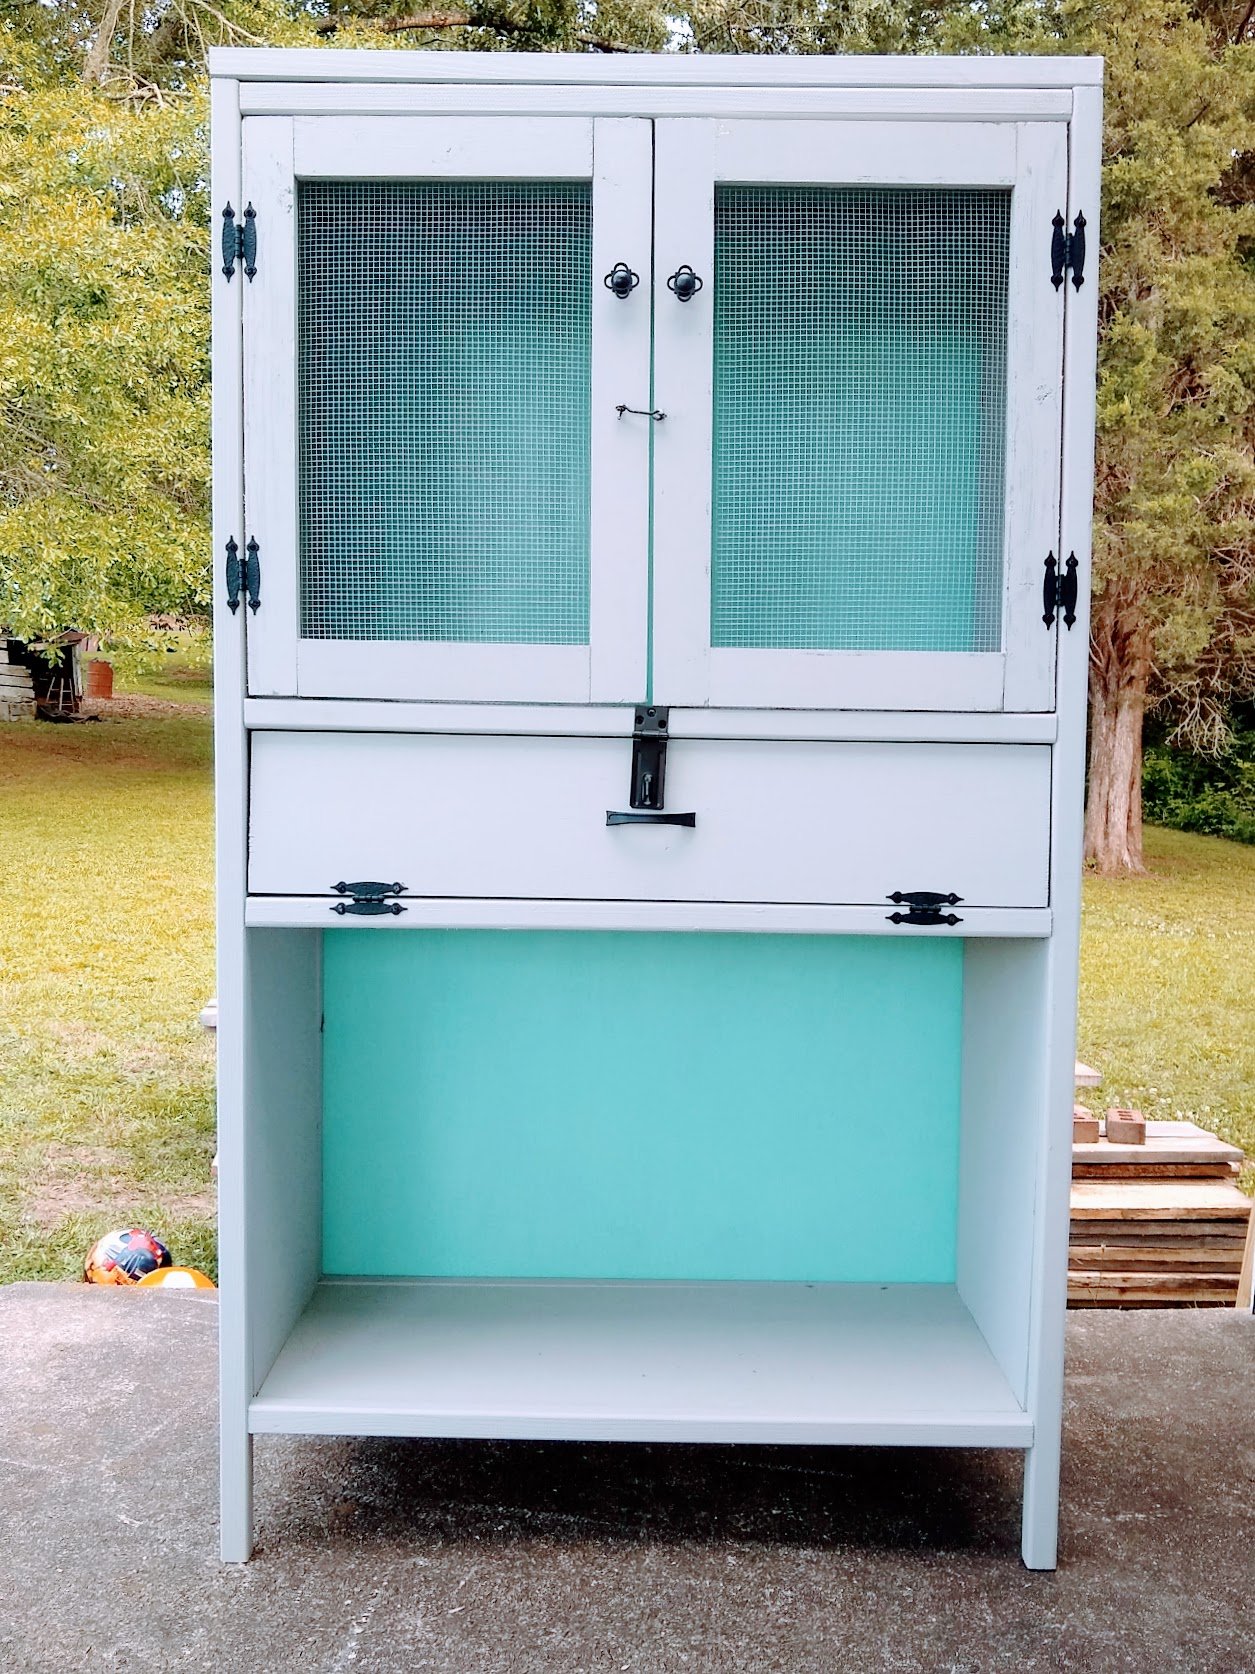
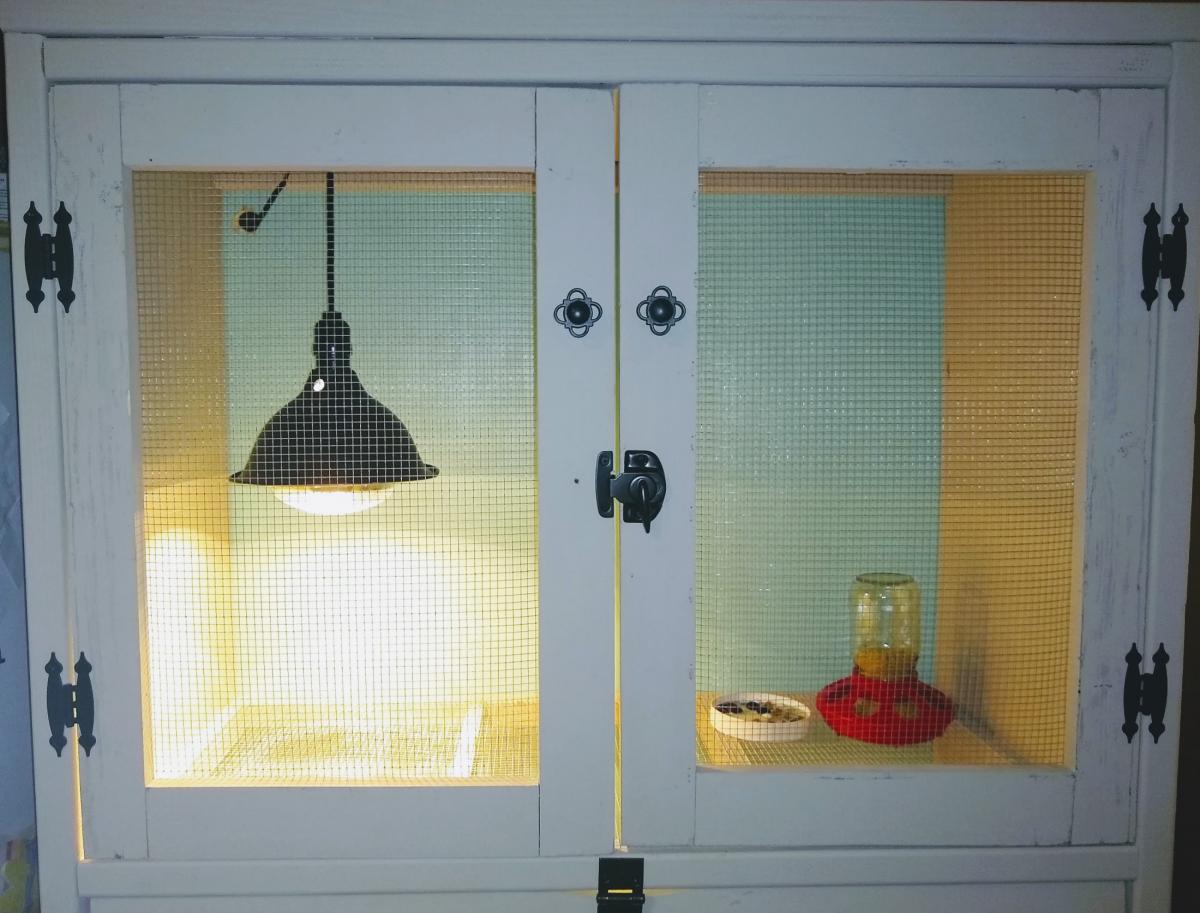
My family has started raising quail recently and I built their first home while they were still in the incubator. I have never done any wood work before, so this turned out much nicer than I expected! I followed the suggestion of having the brooder part on the top instead of the bottom and omitted the extra shelf. Two 5-gallon buckets fit nicely below the chicks. Since the quail are so small when they hatch, I used 1/4 inch hardware cloth for the "floor" but it wasn't long before that was too small so we had to change it to 1/2 inch. I am going to make a tray with each size of hardware cloth on it to make it easier to change out for next time, because they really do need both sizes.
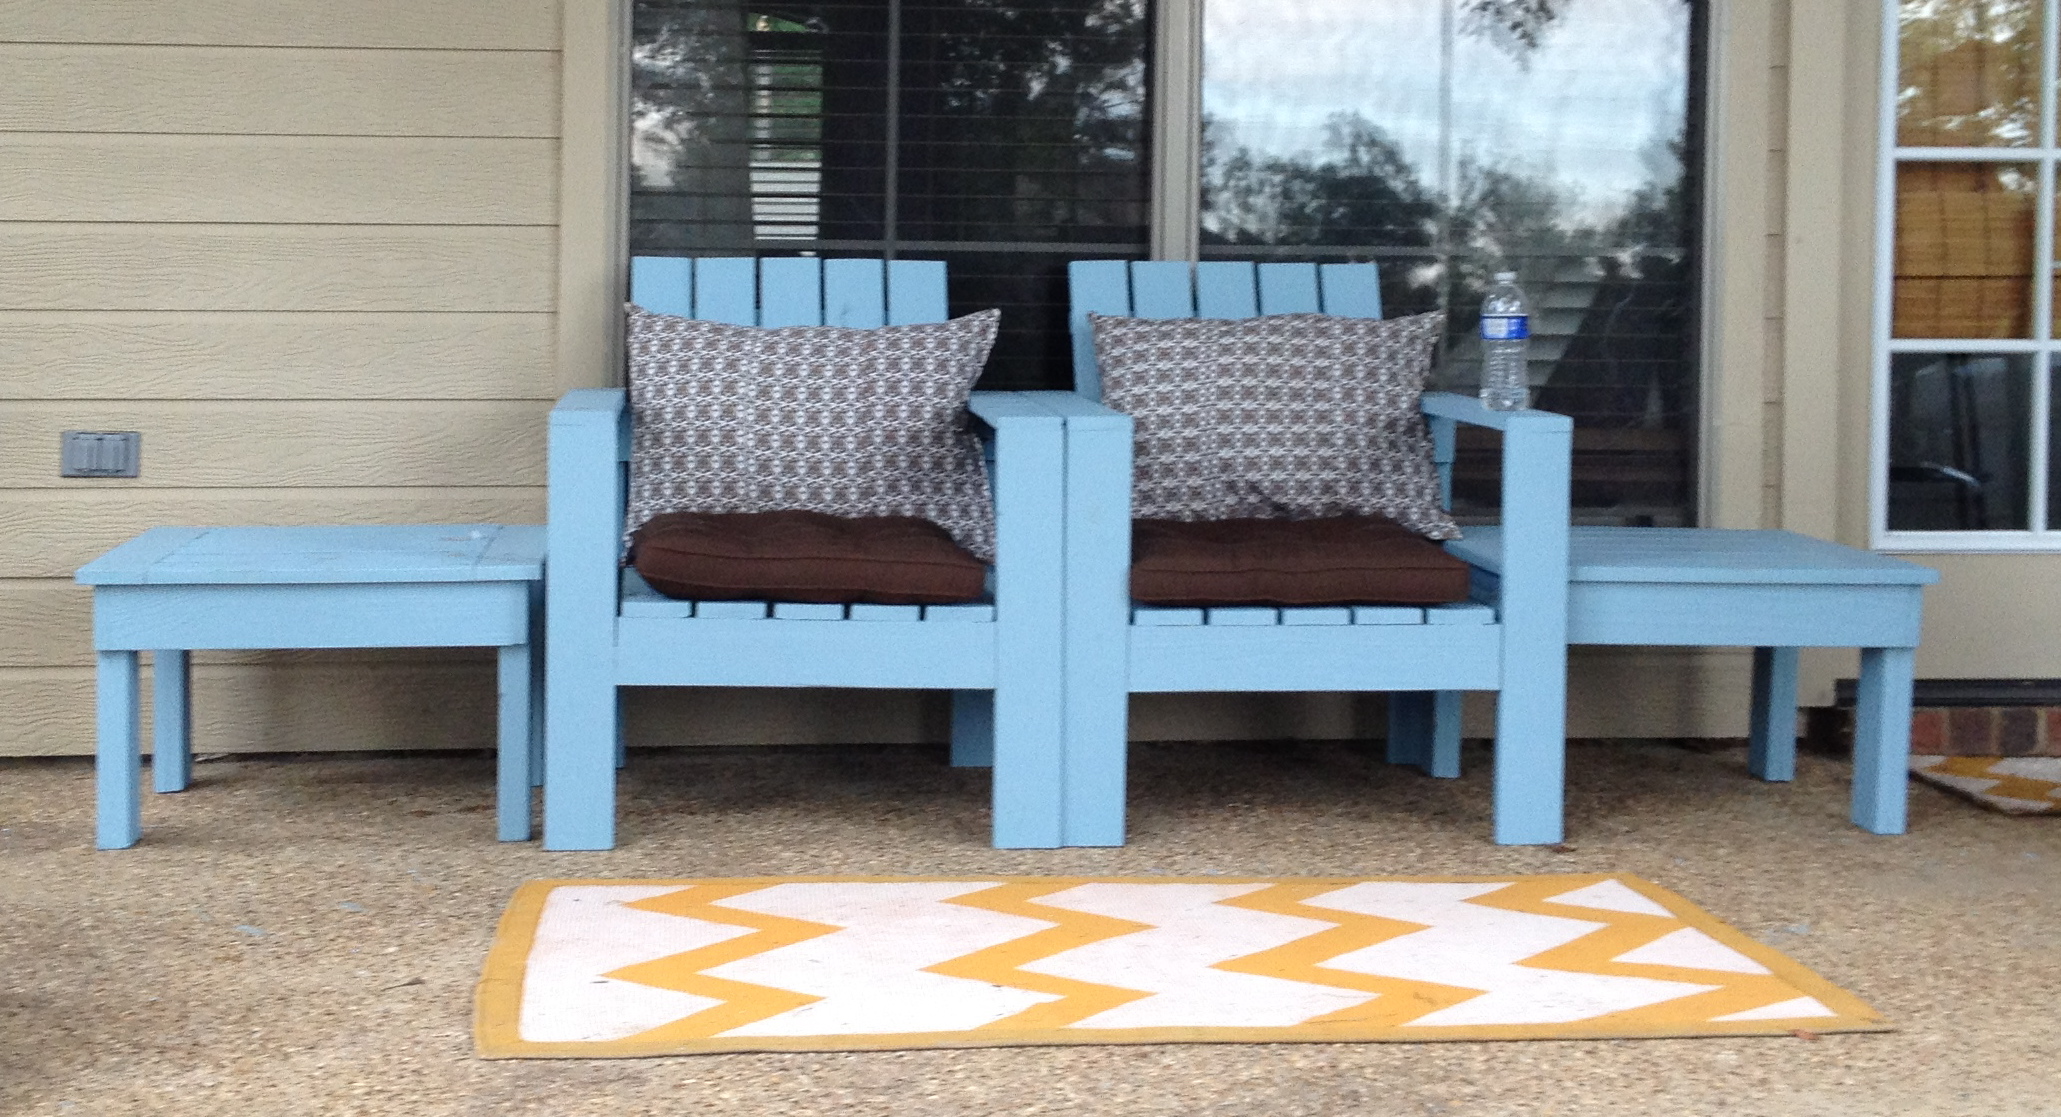
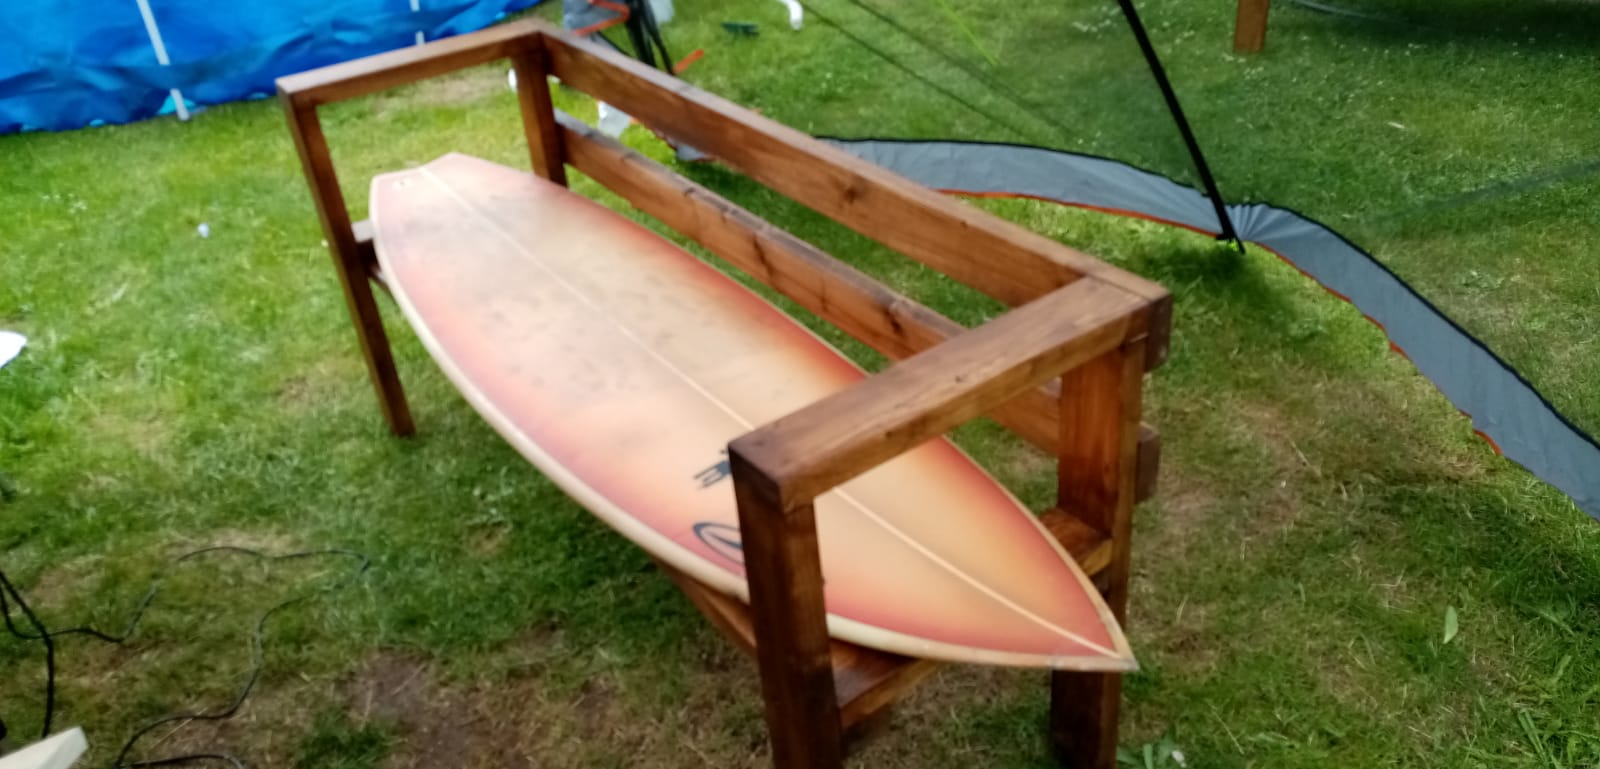
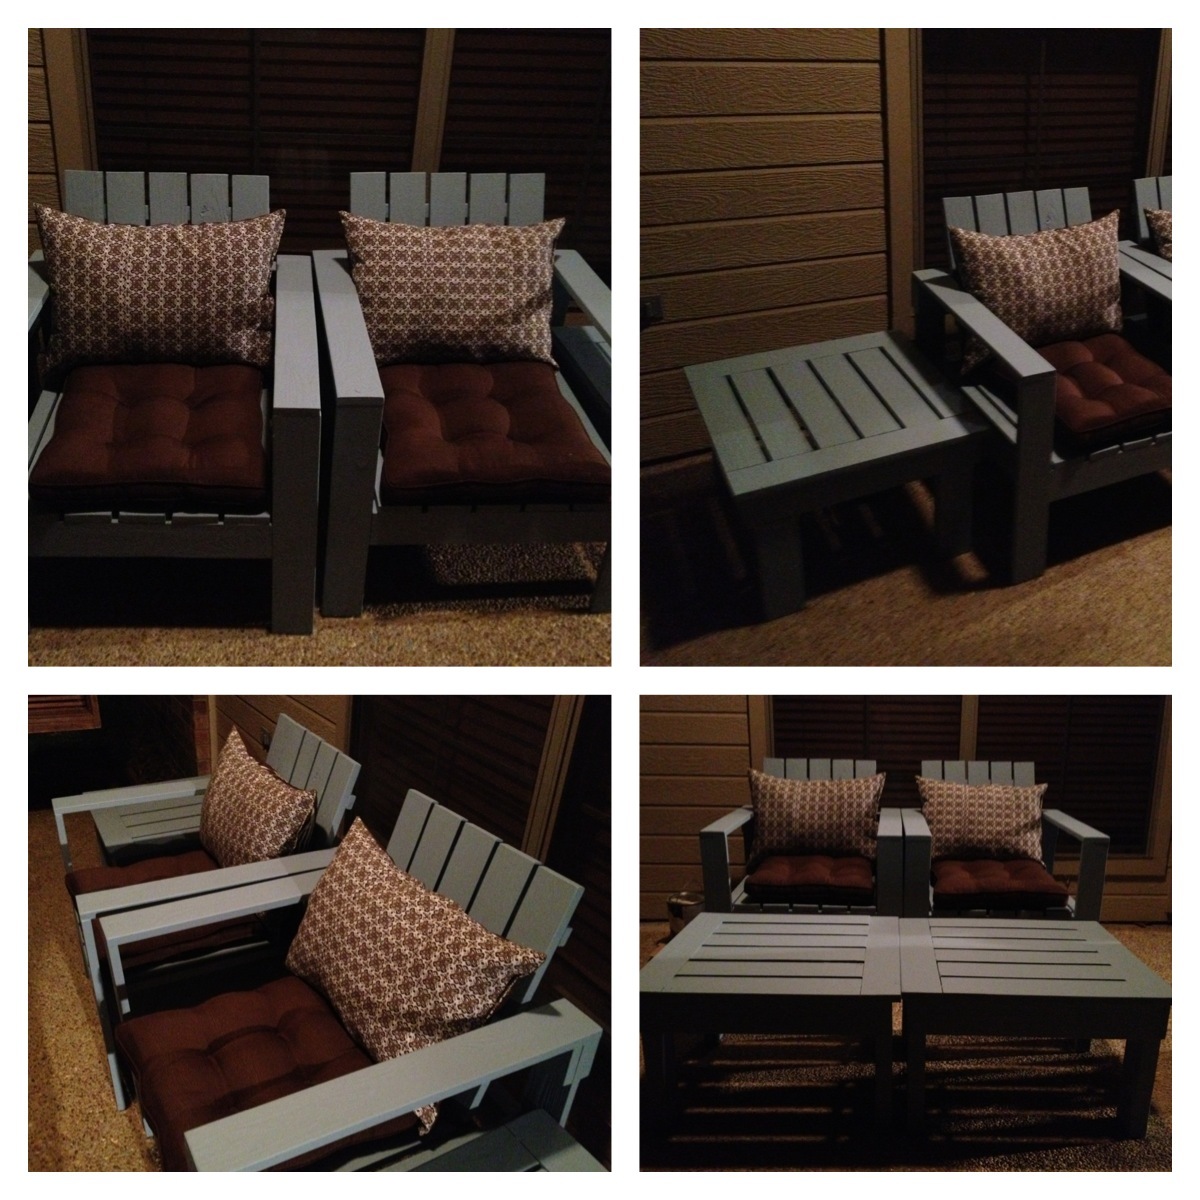
We wanted outdoor furniture but did not want to pay over $500. Very sturdy and will last forever!
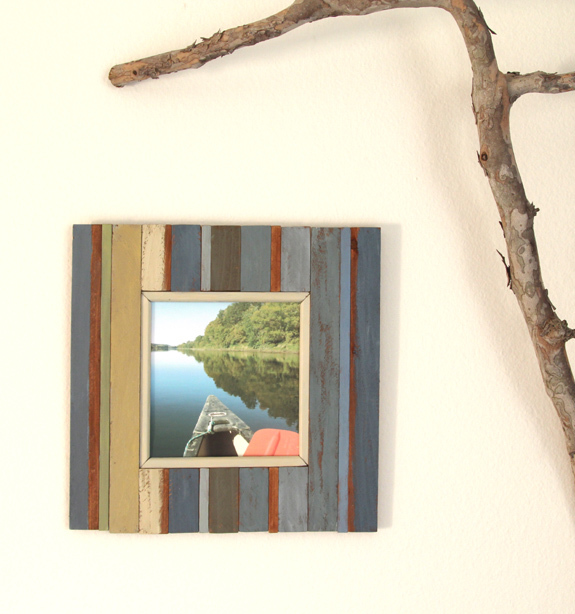
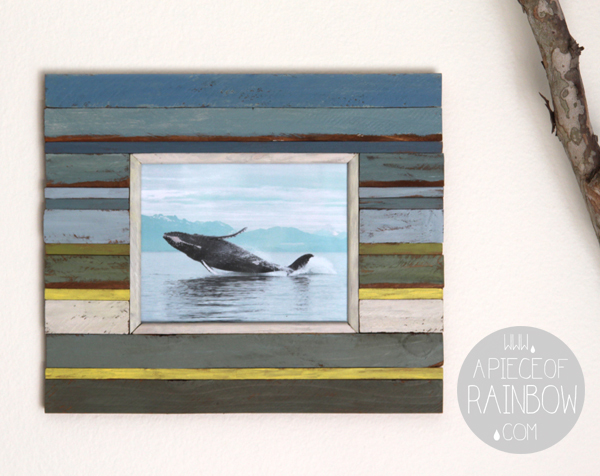
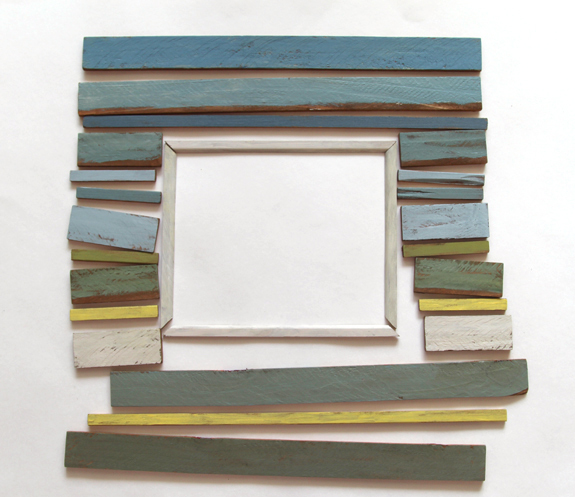
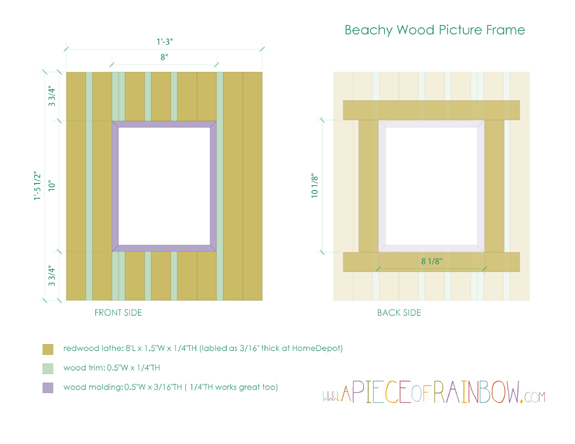
These picture frames are inspired by furniture and frames made from
reclaimed boat wood which came from fishing villages in many parts of
the world. The frames here are made from readily available materials – the humble fence wood boards, some stores call it lathe. An 8' long piece only cost $1-$2. The complete detailed tutorial is here- http://www.apieceofrainbow.com/diy-make-beachy-style-picture-frames-from-fence-wood/
I built this for fun and my sister ended up wanting it. Therefore I never stained it as she has her own style. Hopefully I can update it when she stains it.
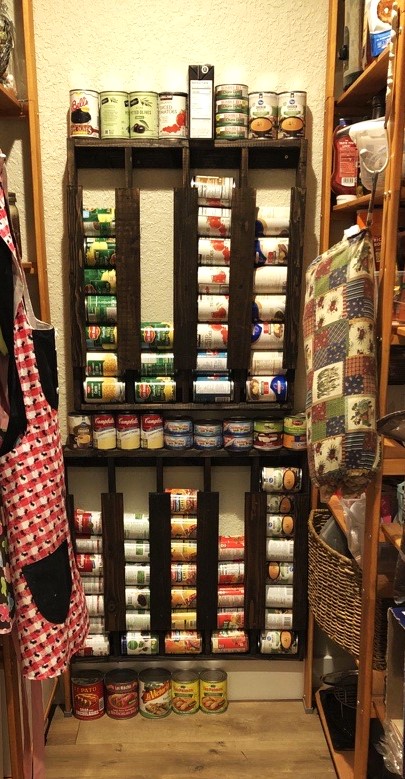
Loved these plans. Top unit was built exactly to specs. Bottom unit was built to accommodate one column of cans. I have also built one for my sis-in-law and will be building one more for this pantry. Love this project!
Leah
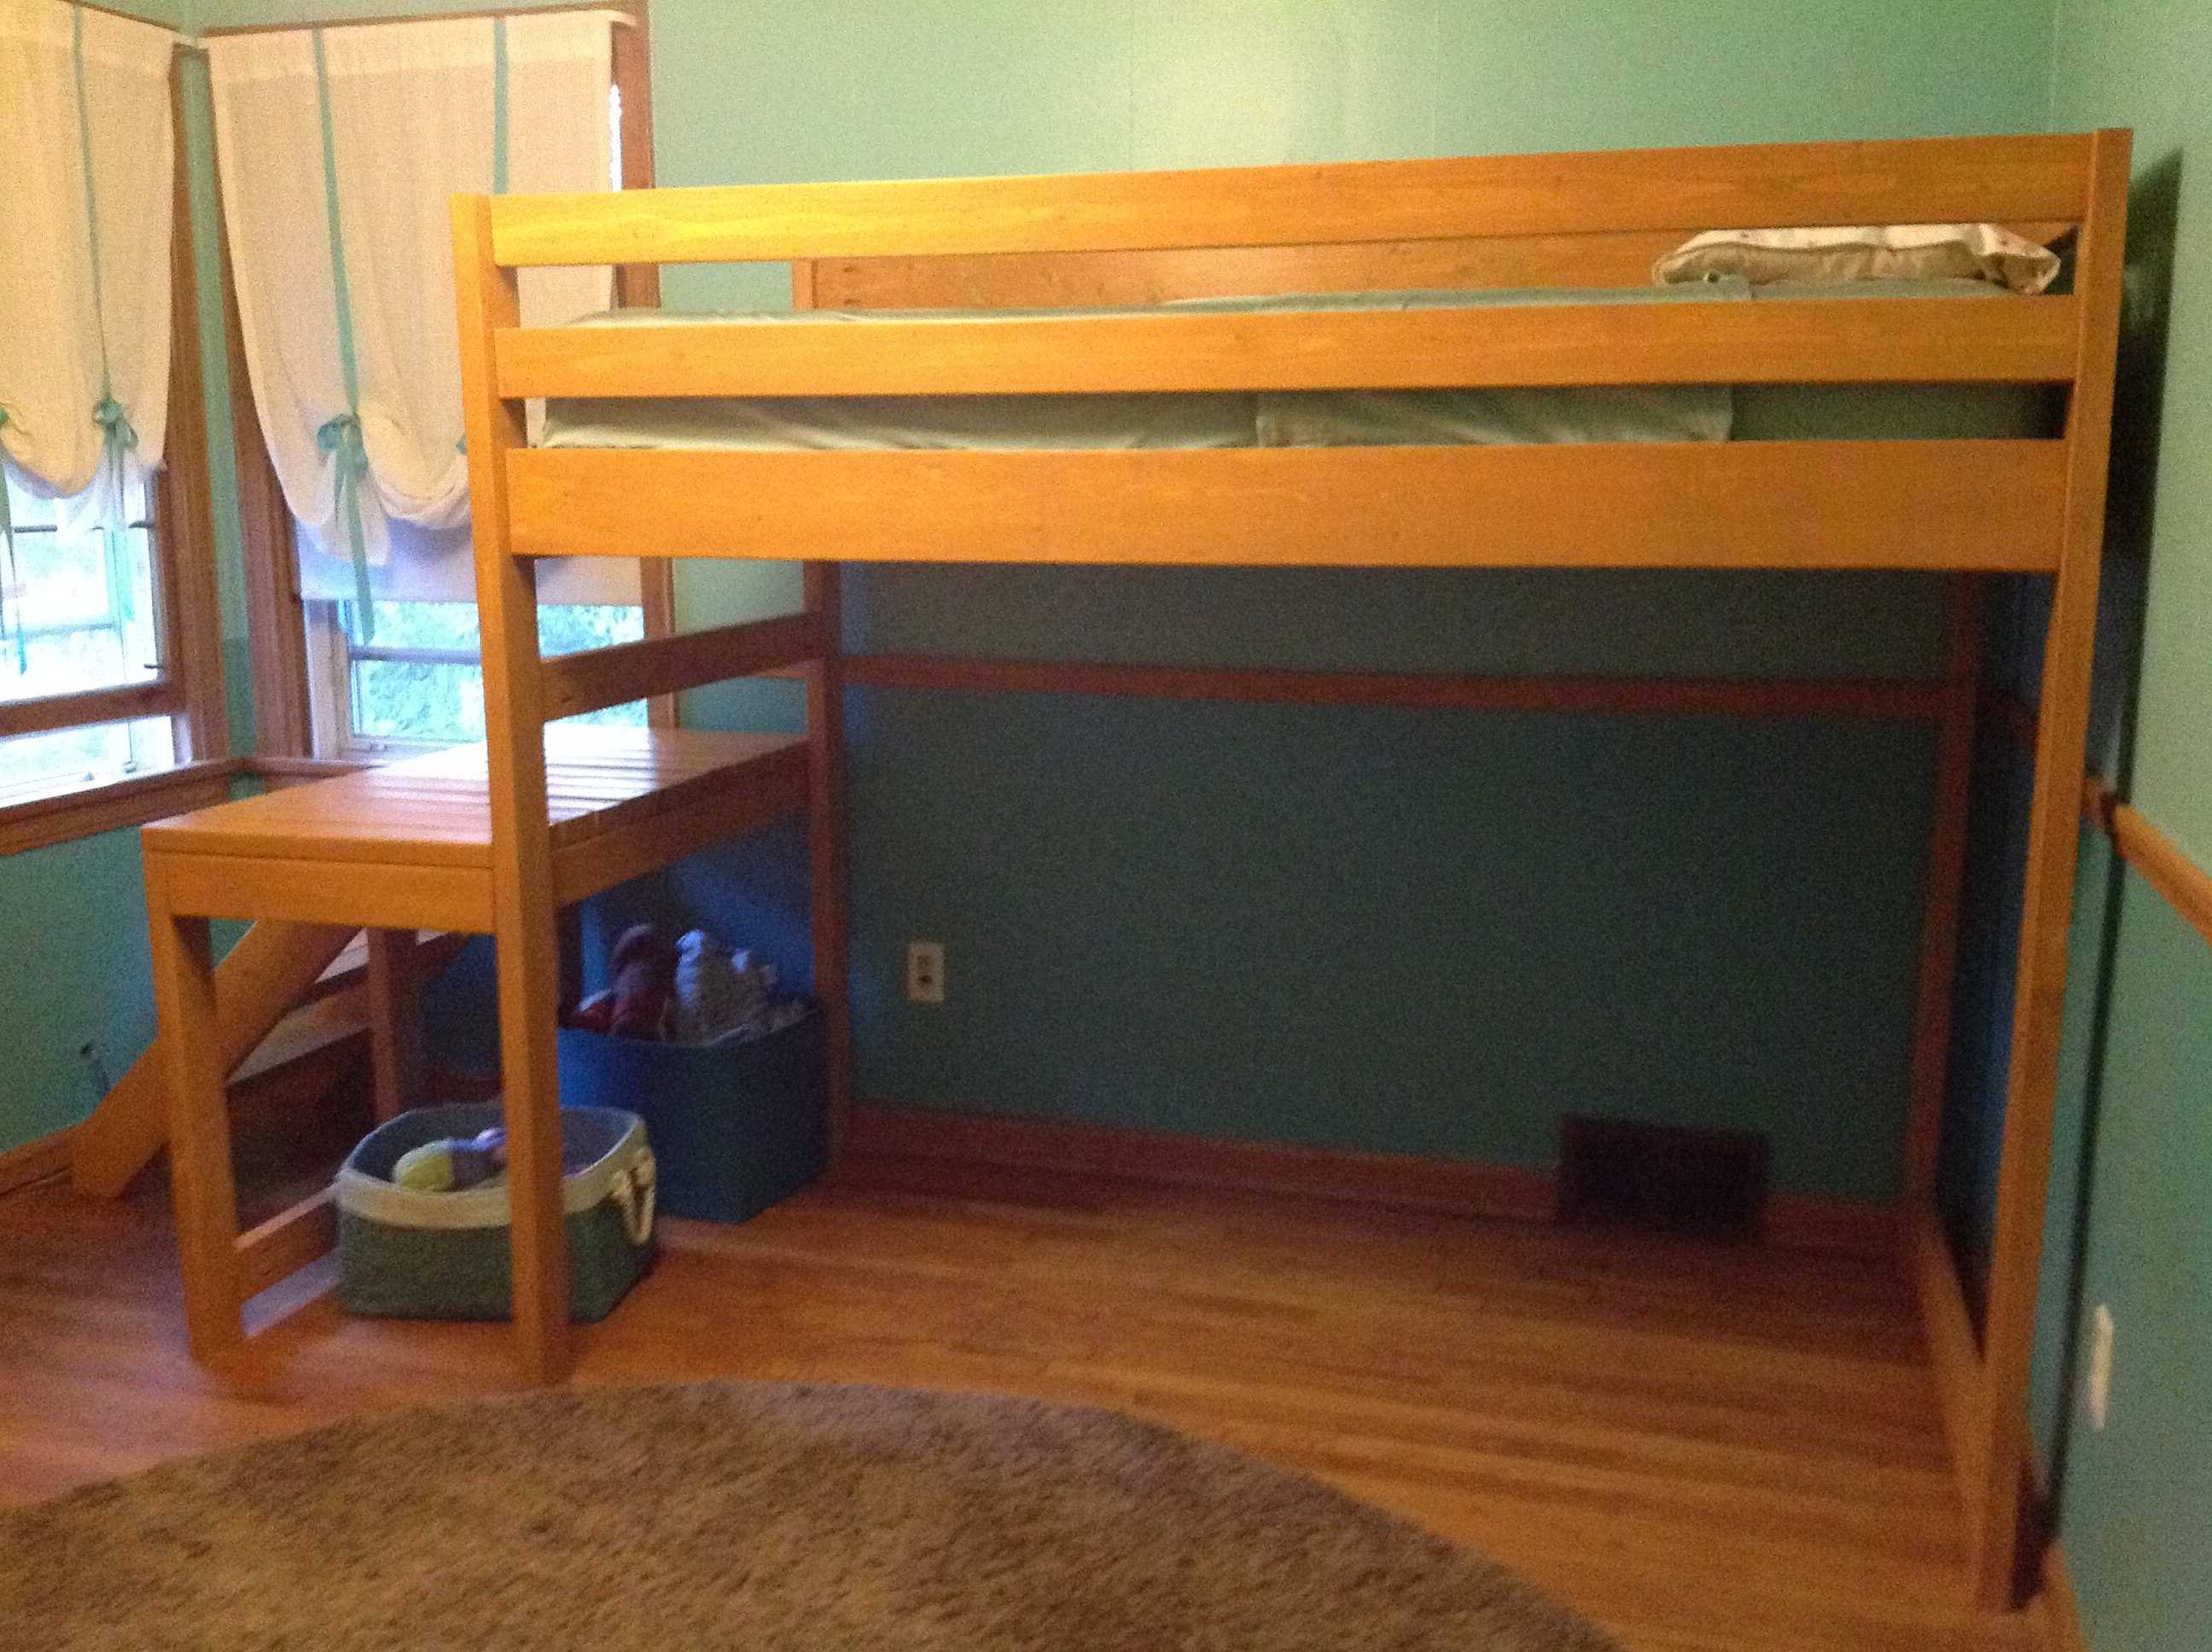
I finally decided I was going to make the fort bed for my daughter and was about to print off the materials list to take to the lumber yard and the junior height camp loft was front and center on the webpage. Though significantly more bed, it looked perfect my little girl. We really wanted her bed high enough to avoid the only heating vent in the room and didn't want to lose the floor space for play, this seemed to be an ideal fit. When I finally put the bed together I realized that keeping the staircase as in the original plans resulted in a bowling alley sort of space left over. It was awkward and really shrunk the room as the 'alley' wasn't usable for much of anything. I played around a little bit and my husband and I decided that we would put it on the side. It fit perfectly to the wall and was much more space efficient for the room. I am a little nervous about the new openness of the deck portion, but both kids have found it a fun place to read and pretend fish. It was my first project of this size and I did everything until the final assembly by myself and I am so glad to have done it. It took more time than I imagined, but again I am a true novice.
I really wanted it stained so that it would camouflage the wear a little better, but I had a great deal of trouble finding a low VOC stain in my town. I used the lowest I could find and a low VOC water based poly. It matches her dressers and trim nearly perfectly. Her older brother likes the bed so much that nearly everyday he tries to convince her that she wants to switch beds with him.
Tue, 08/28/2012 - 11:28
I love your bed so much! And I love the idea of having the stairs on the side like that. :)
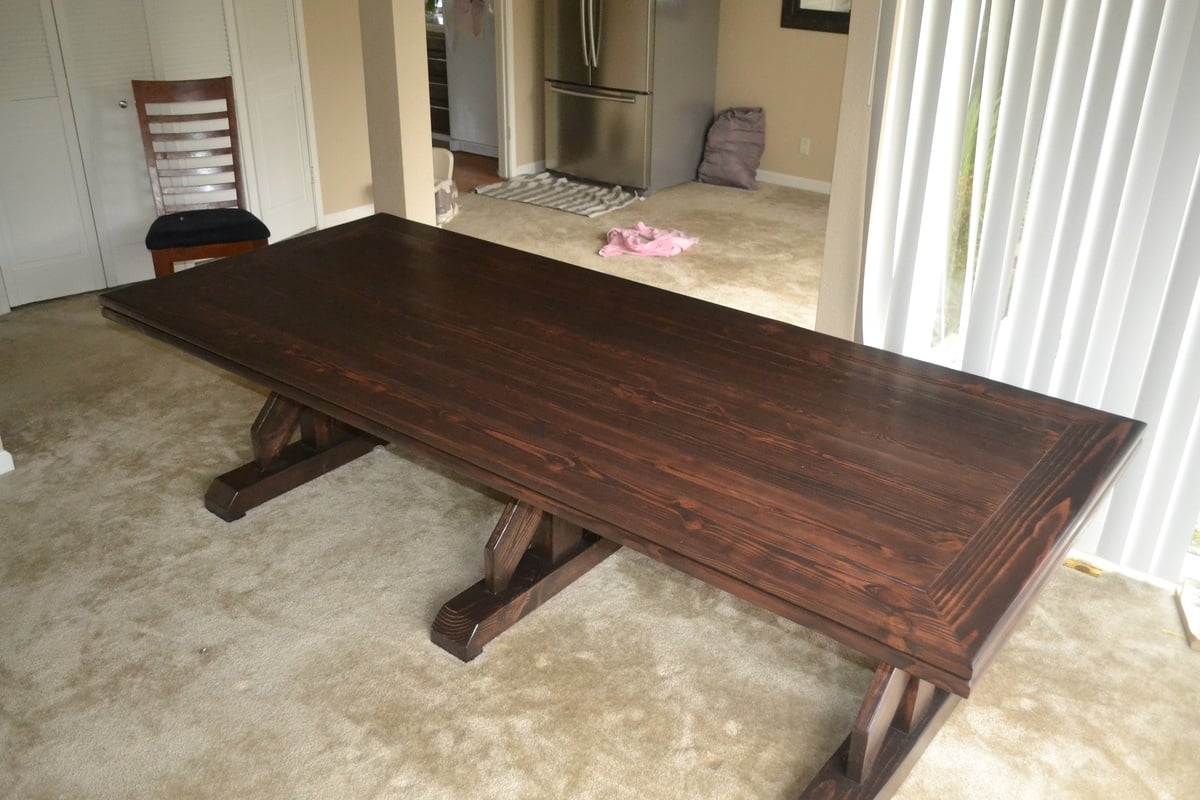
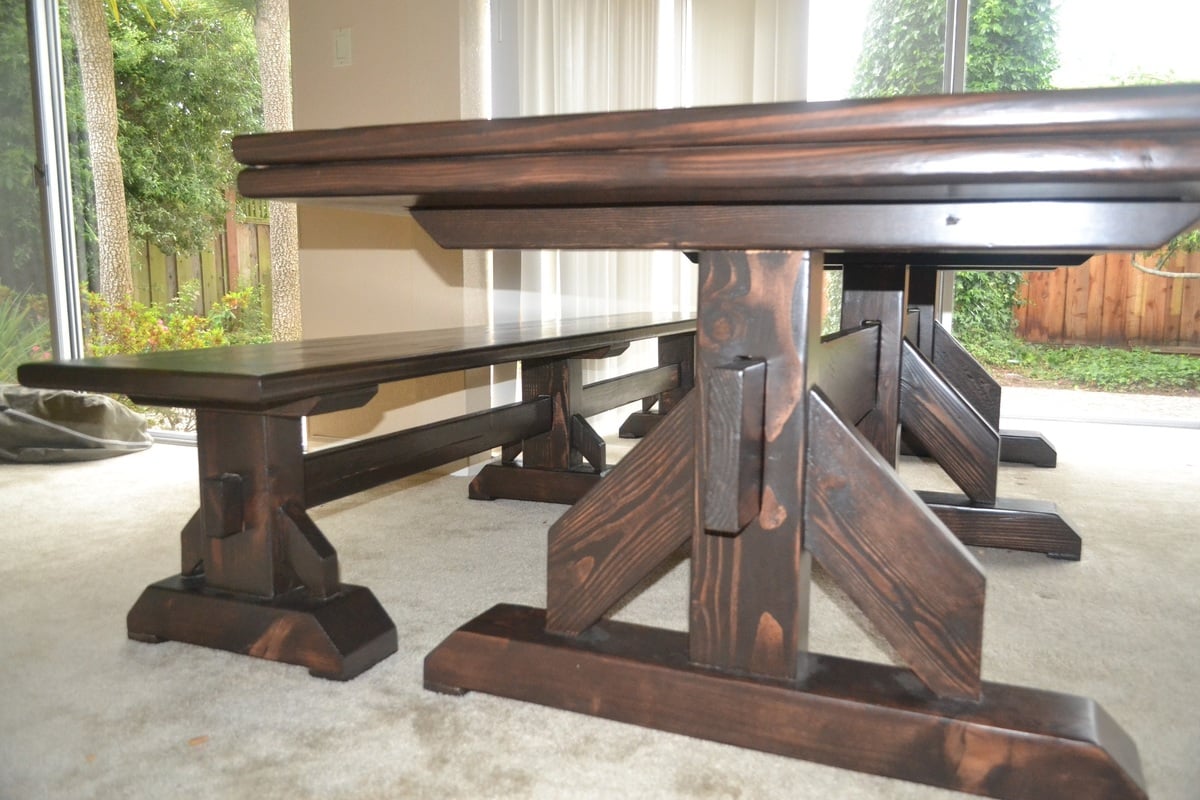
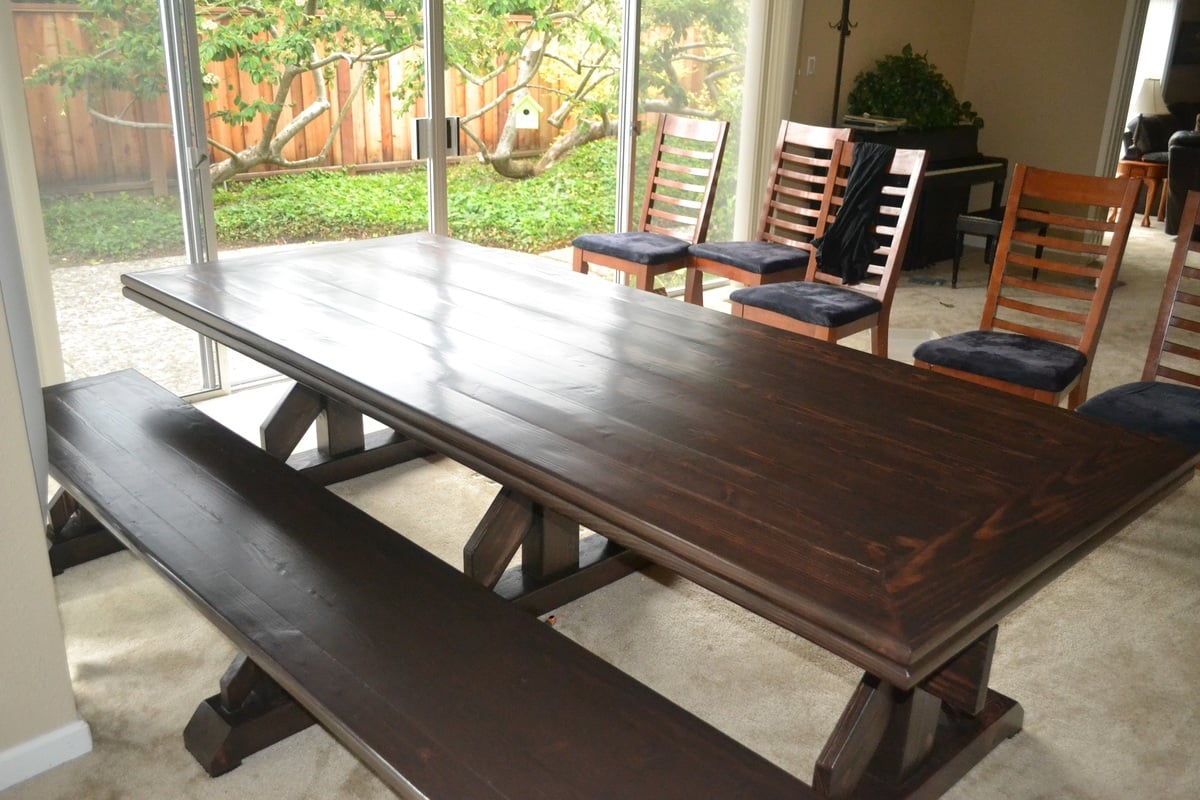
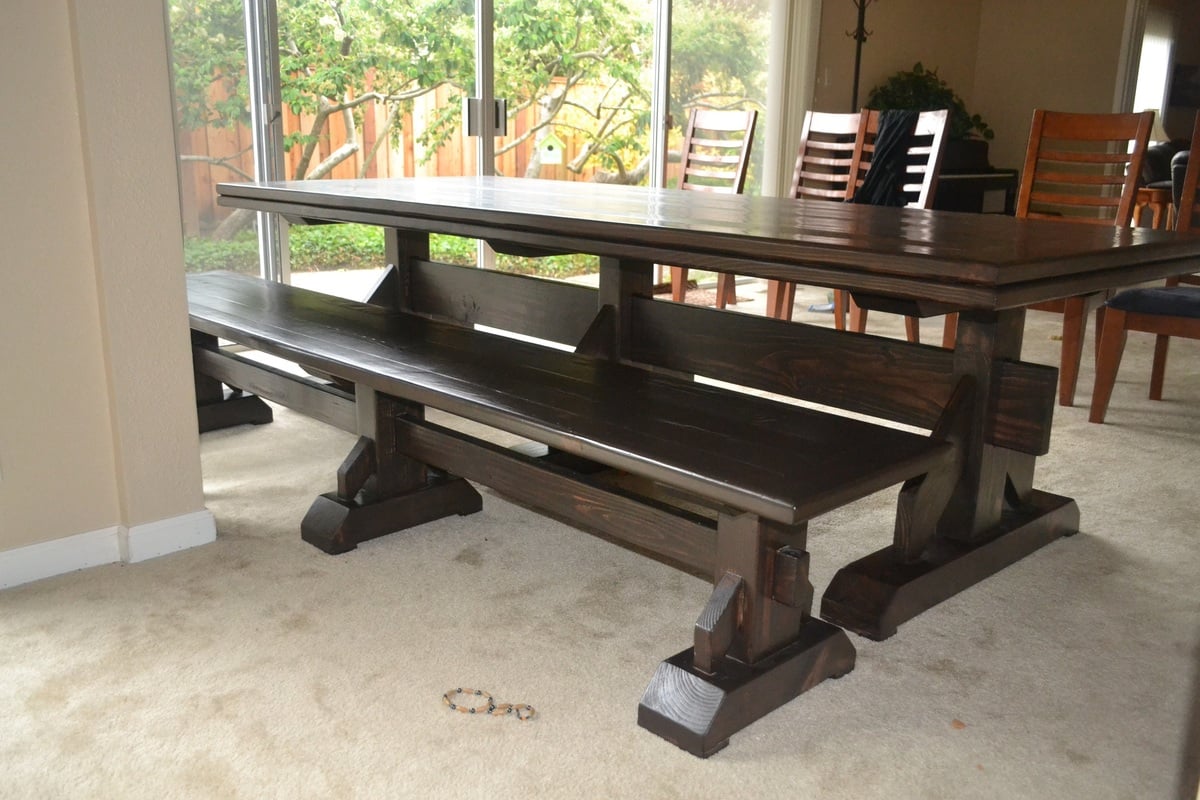
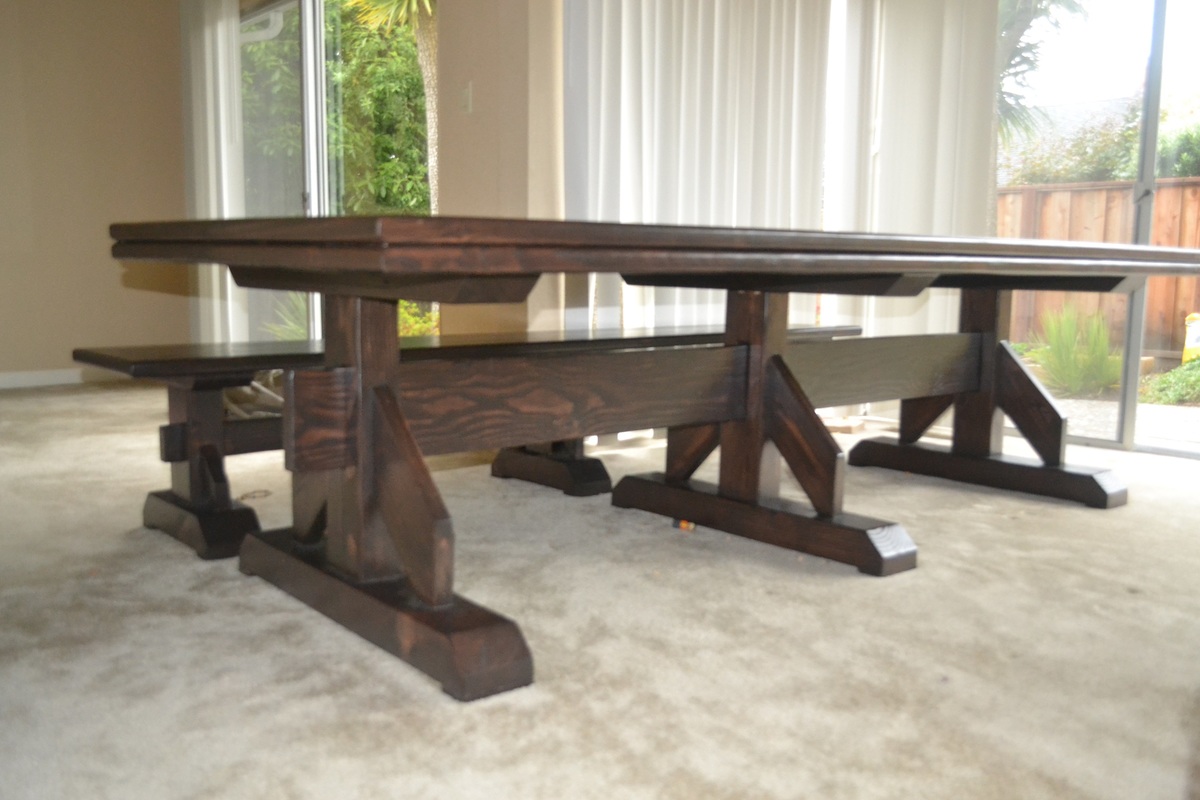
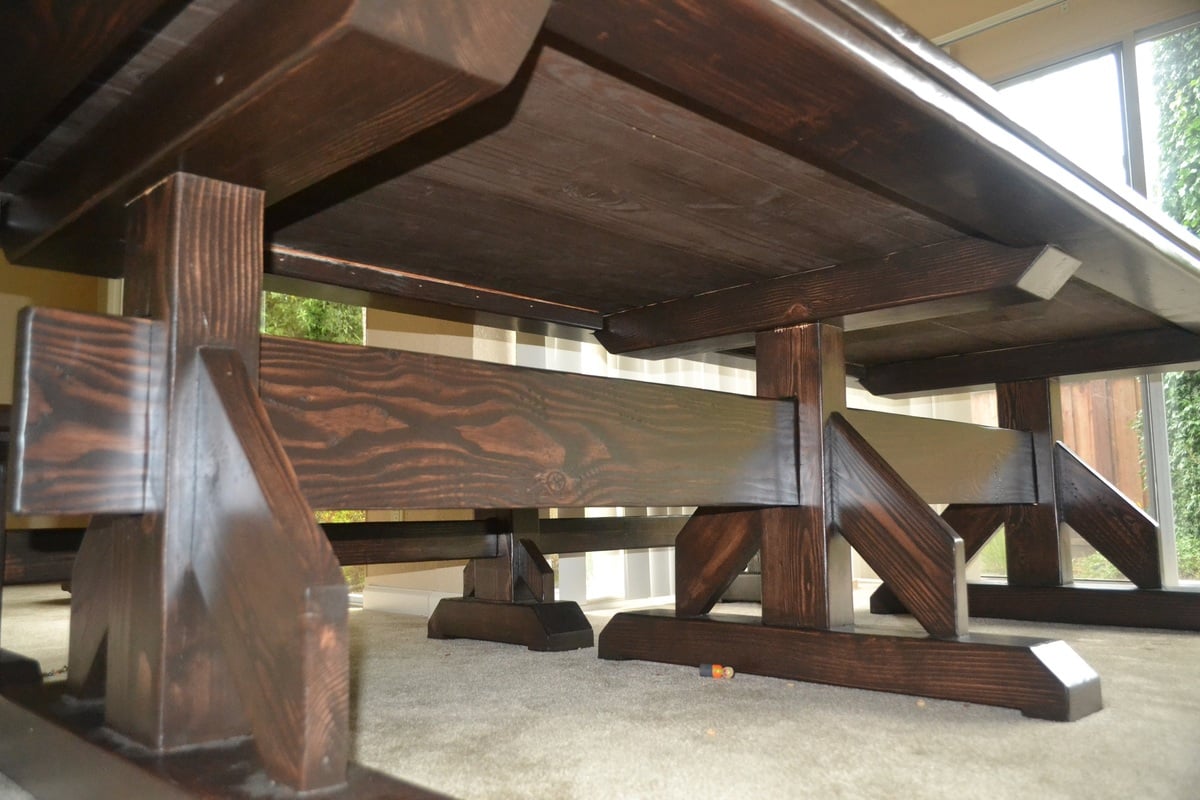
So I finally broke down and decided to make the table that my wife had been asking for sometime. This after our last table was damaged by mold in our last move. I have completed a few woodworking projects before this so from a skill level on this project it was not too hard. The problem was that I wanted the table to be perfect but my wife wanted the dings and dents that came along with a farm table, so we compromised somewhat.
I did run into one significant issue that will be a life long lesson. The Douglas Fir wood that I bought had a very high moisture content and during the course of the project most of the wood began to shrink up to a half an inch in some parts as the wood dried out. I was talking to a construction friend in the area when I was finishing up the table and he confirmed that he had the same issue with this wood locally. Would have been nice to know this from the beginning.
Anyways, we followed the Triple Pedestal Table and Bench with the following adjustments. We used all 2x6 boards for the table top in order to provide additional thickness for durability, we also removed the center divider and just opted to use the full length of the 8 foot boards. We then framed the table with 2x6 and then added another lip of 2x6 below the table top. The purpose of this was to create a large enough area to notch the boards for a resting areas of the leg tops. We also rounded all of the 2x6 edges on the top with a router as we didn't want to have any sharp corners for the kids to run into.
On the legs, we opted to use 4x6 posts for the leg bases and tops, as well as the leg post. We (meaning me) wanted to have a nice clean look rather than the layers of 2x6 and 2x4's in the original design. I used the router to create the hole in the post for the runner beam, and used a 2x8 beam rather than the 2x6 beam. Finally I did not have the patience to cut out all of the arches for both the table and the bench and my jig-saw was not working properly, so we just decided to improvise with the design as shown in the pictures.
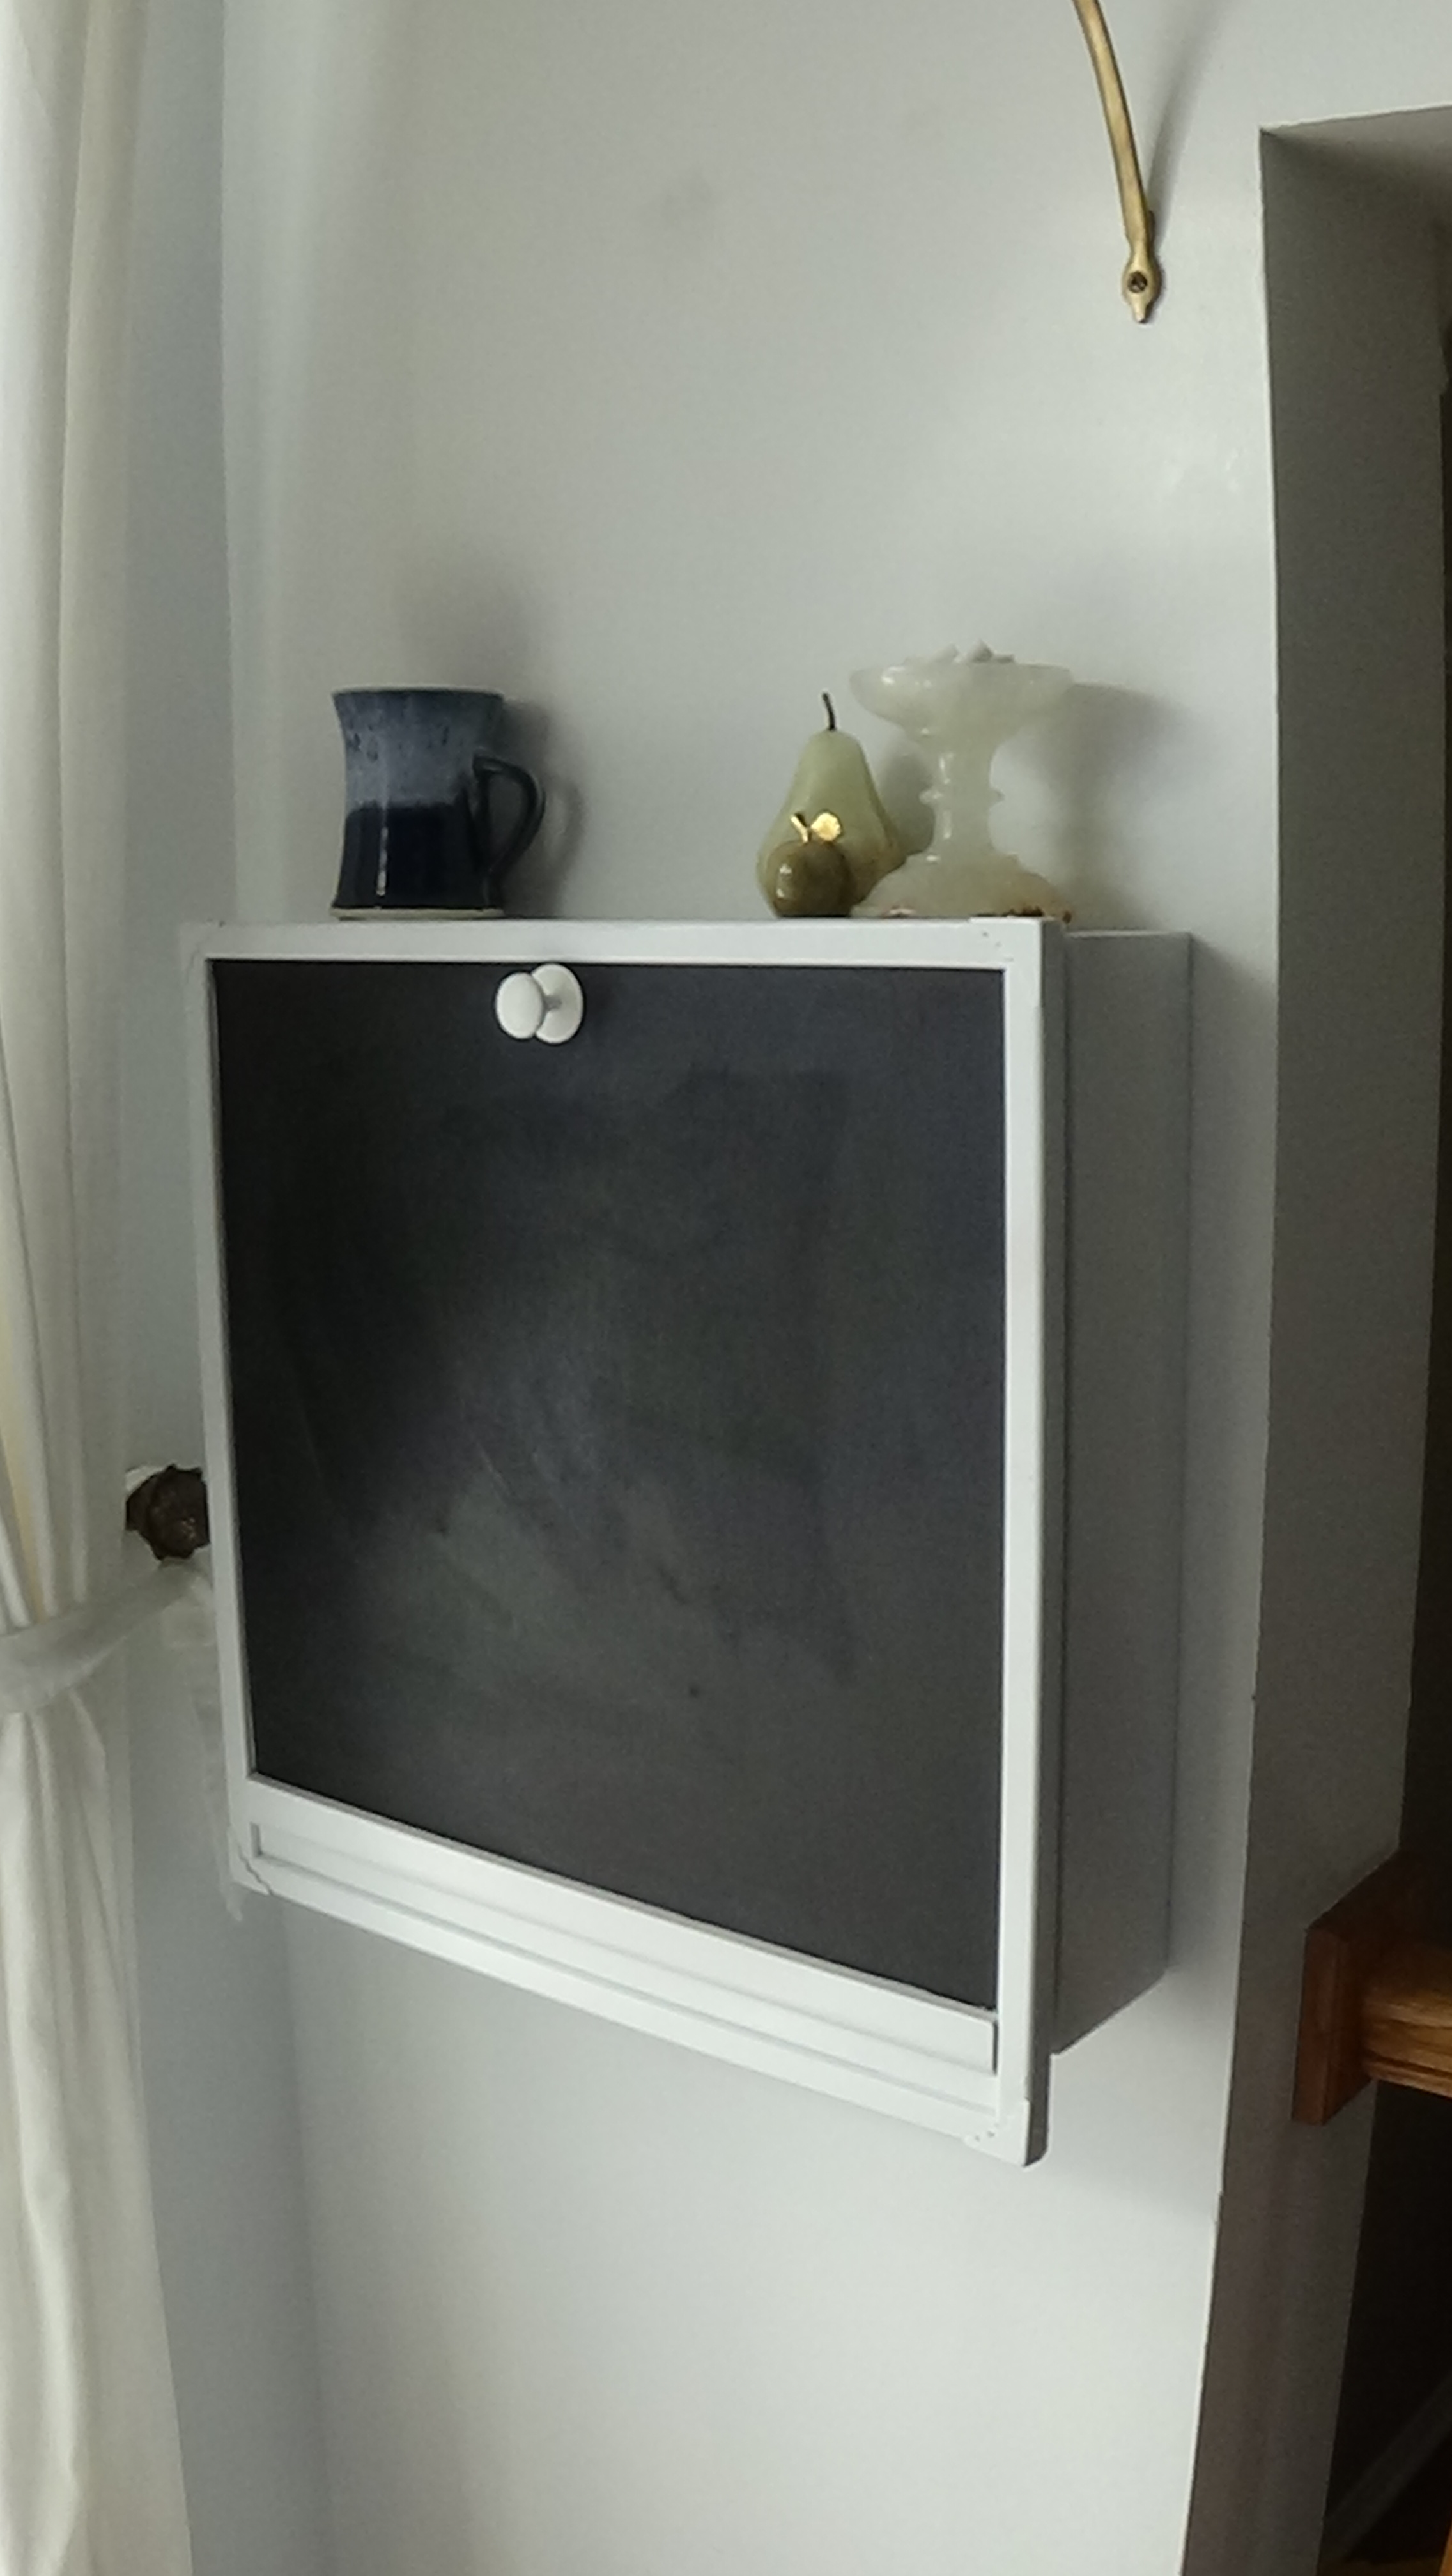
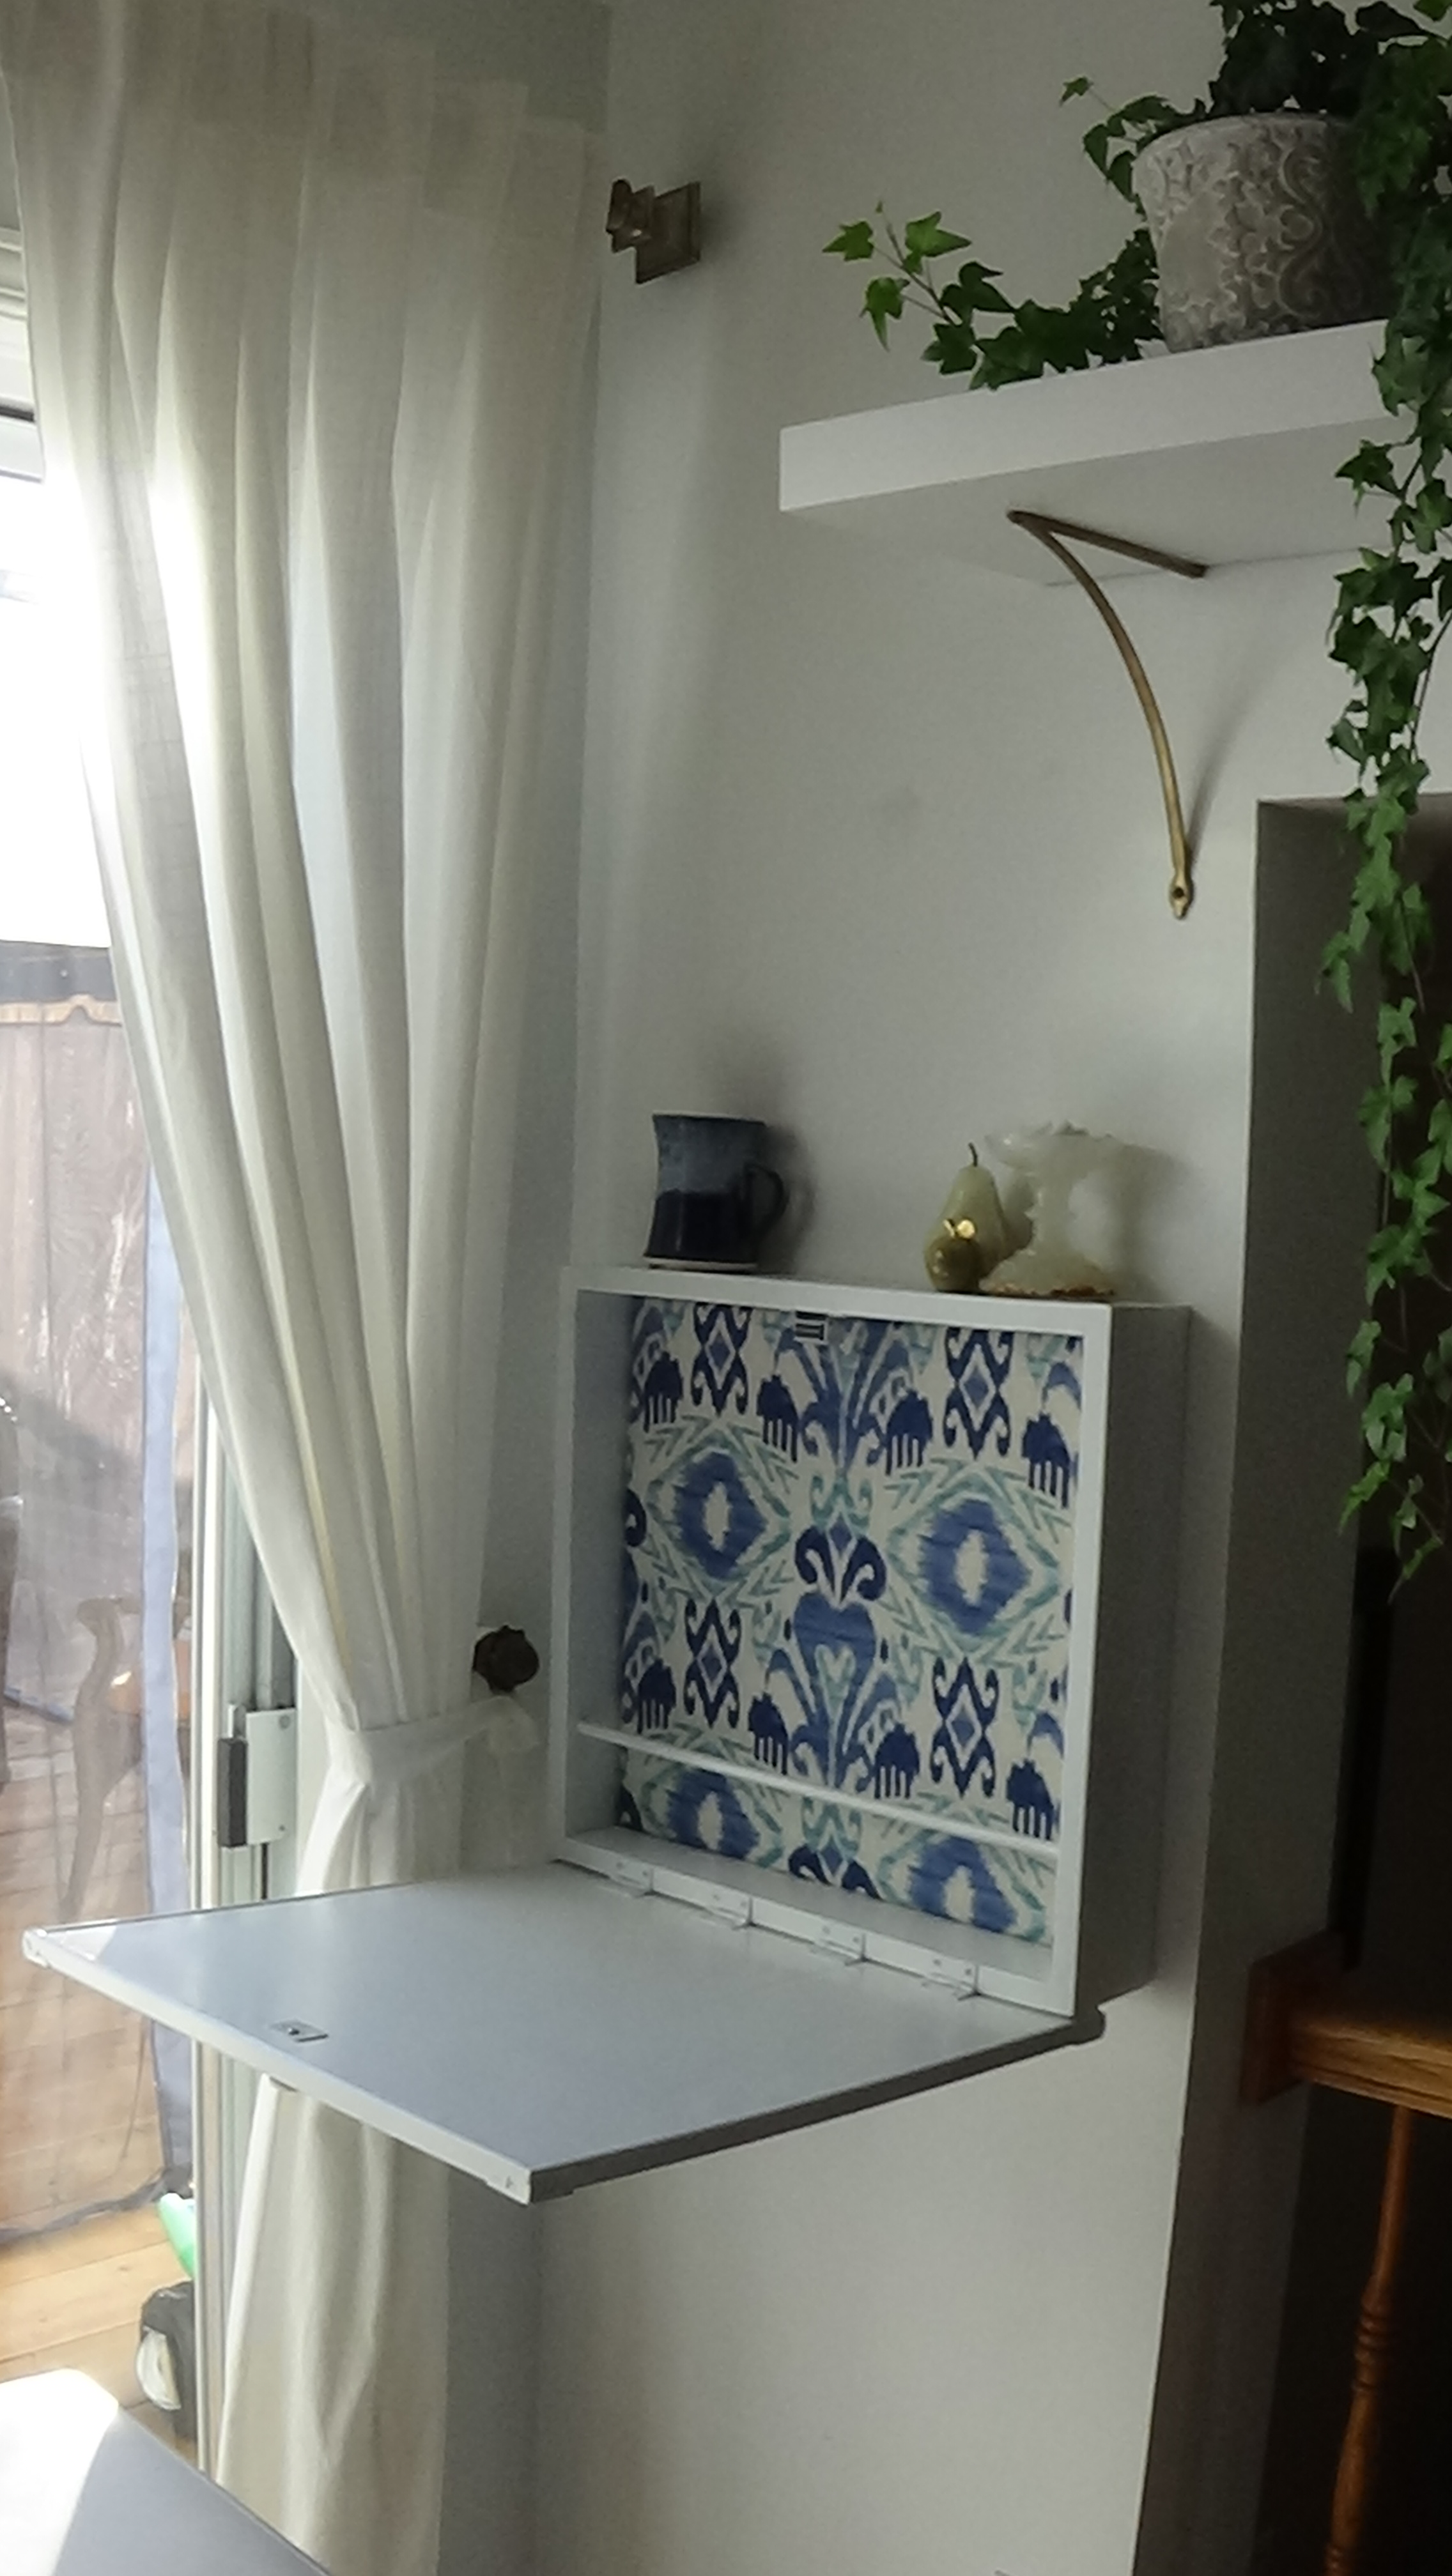
Inspired by Ana's Flip down wall art desk. It has different dimentions since wall space was limited. I used a magnet as a lock, added upholstered back, dowel for storage and extended the bottom part to add some strength. It is very handy!
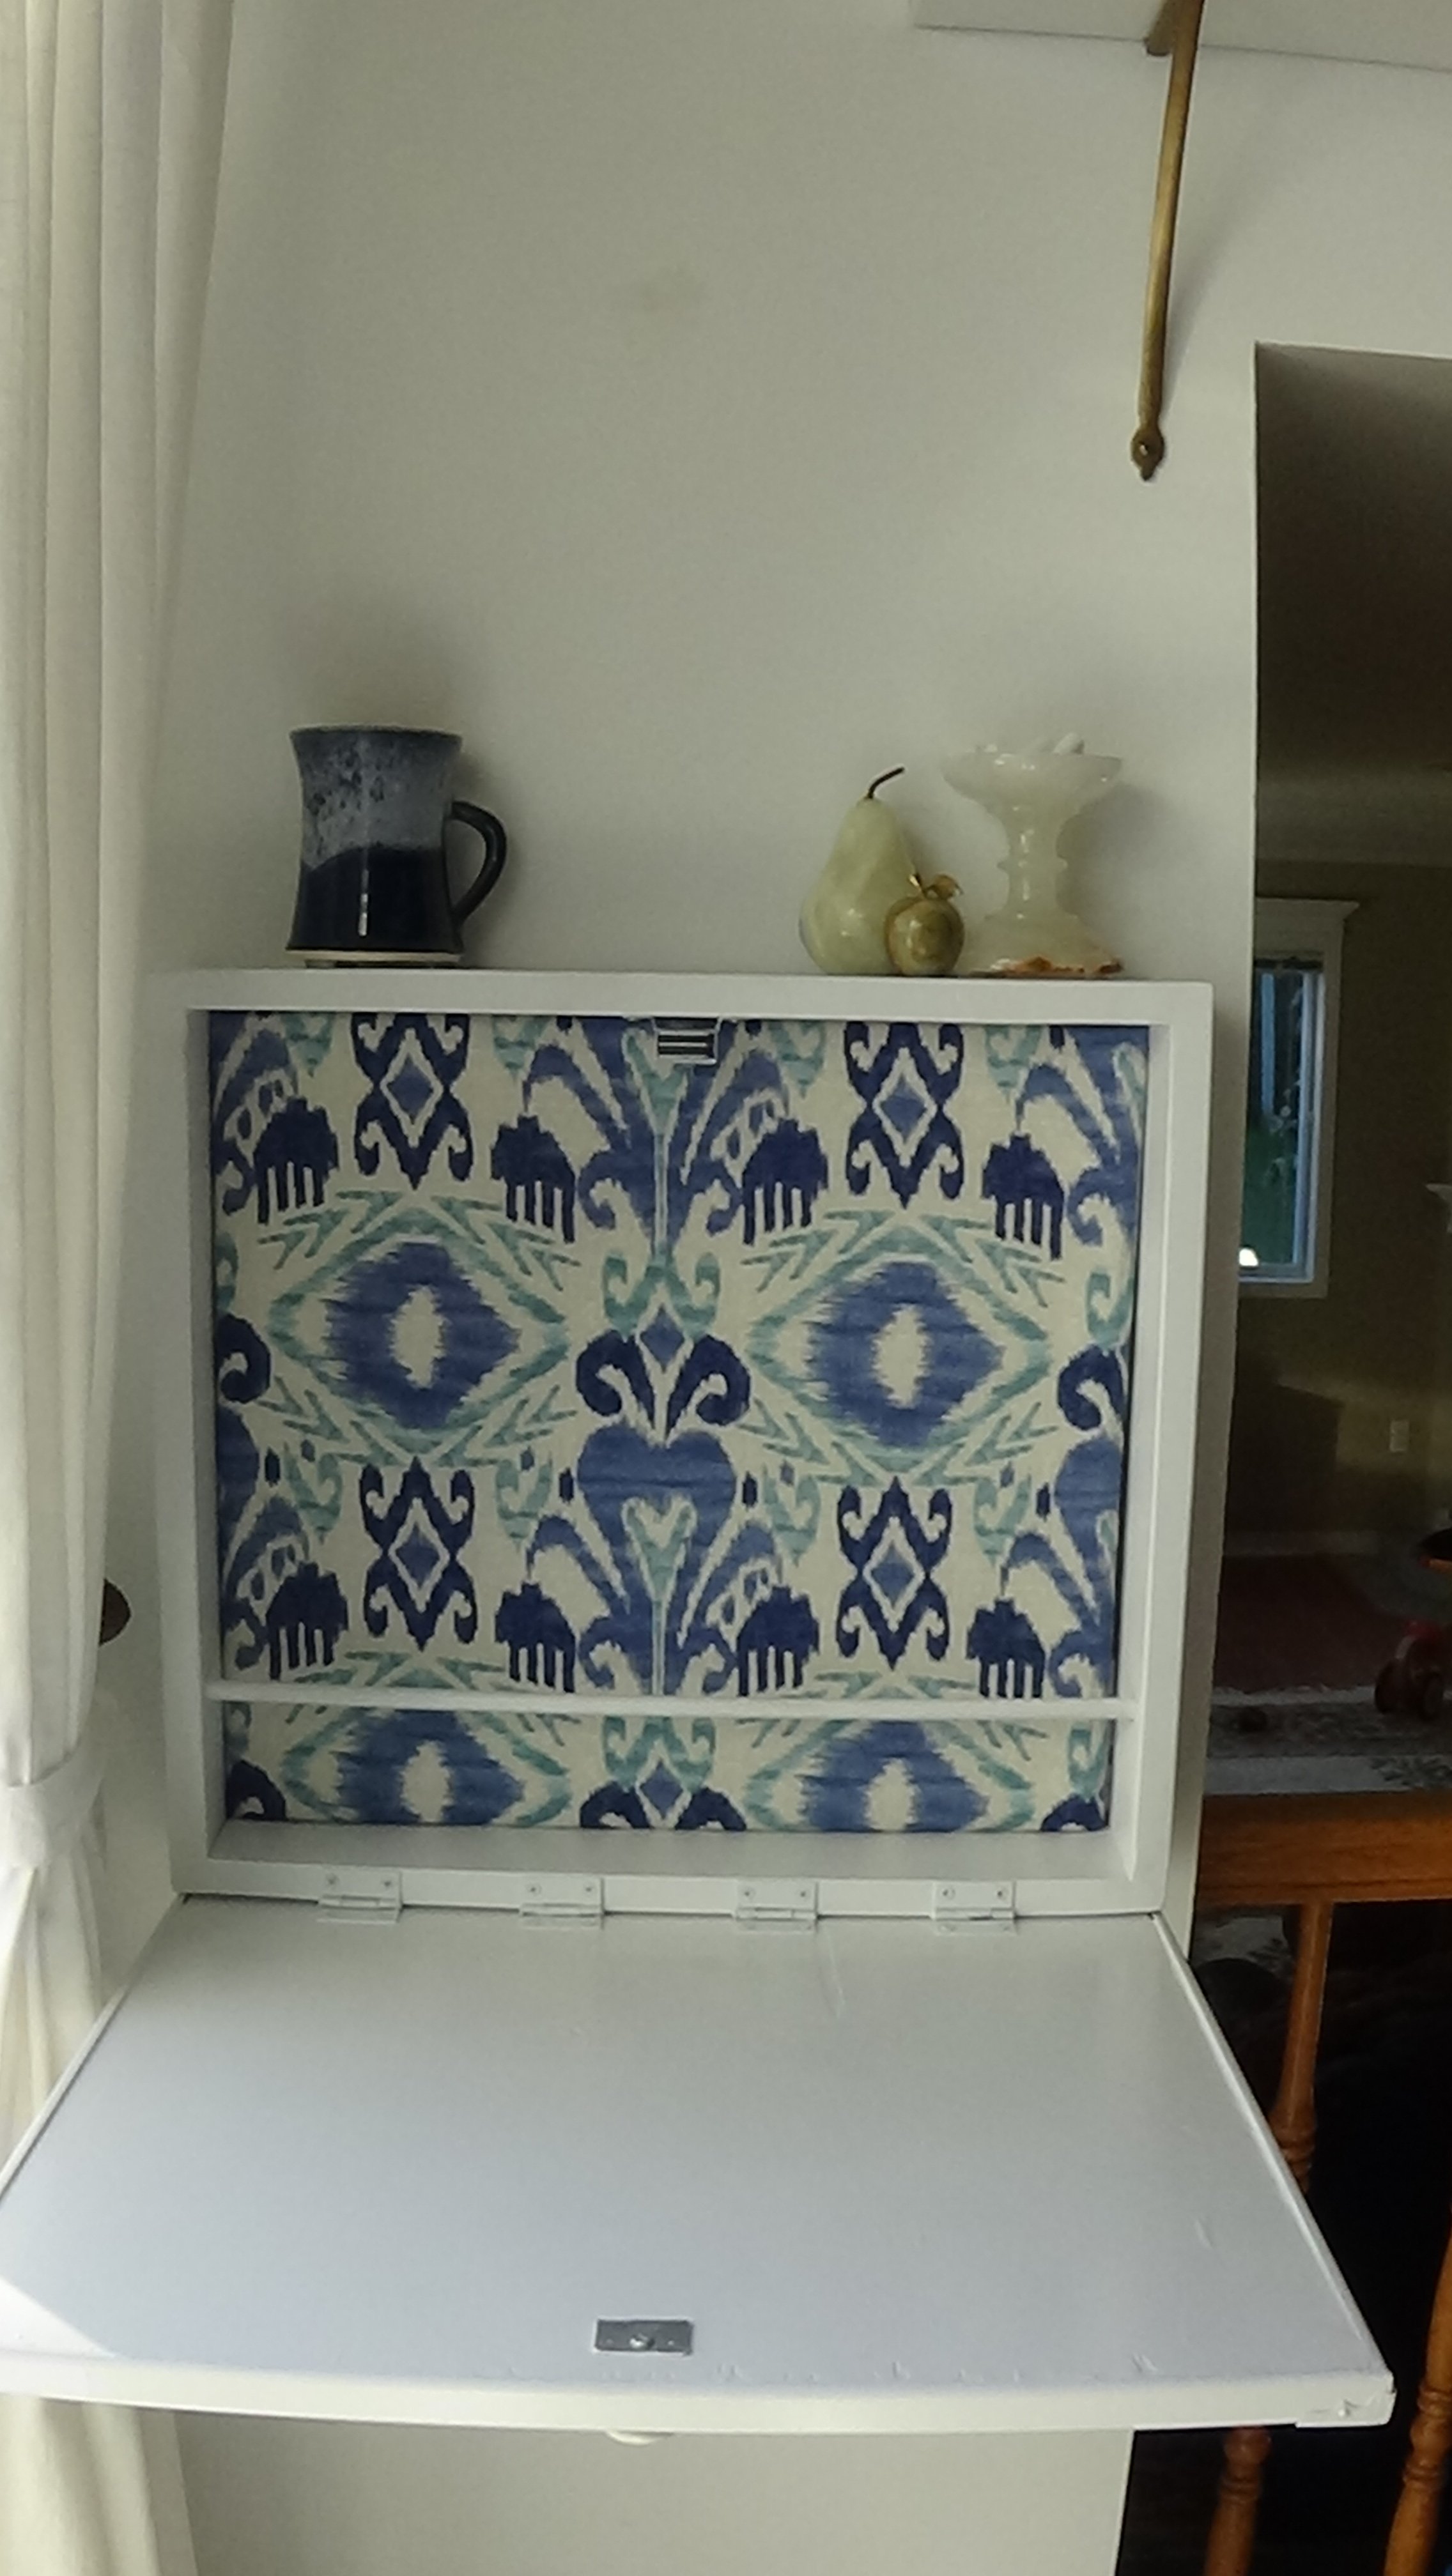

Thu, 09/22/2016 - 09:06
Very cool, love the upholstered back! Thanks for bragging your project!
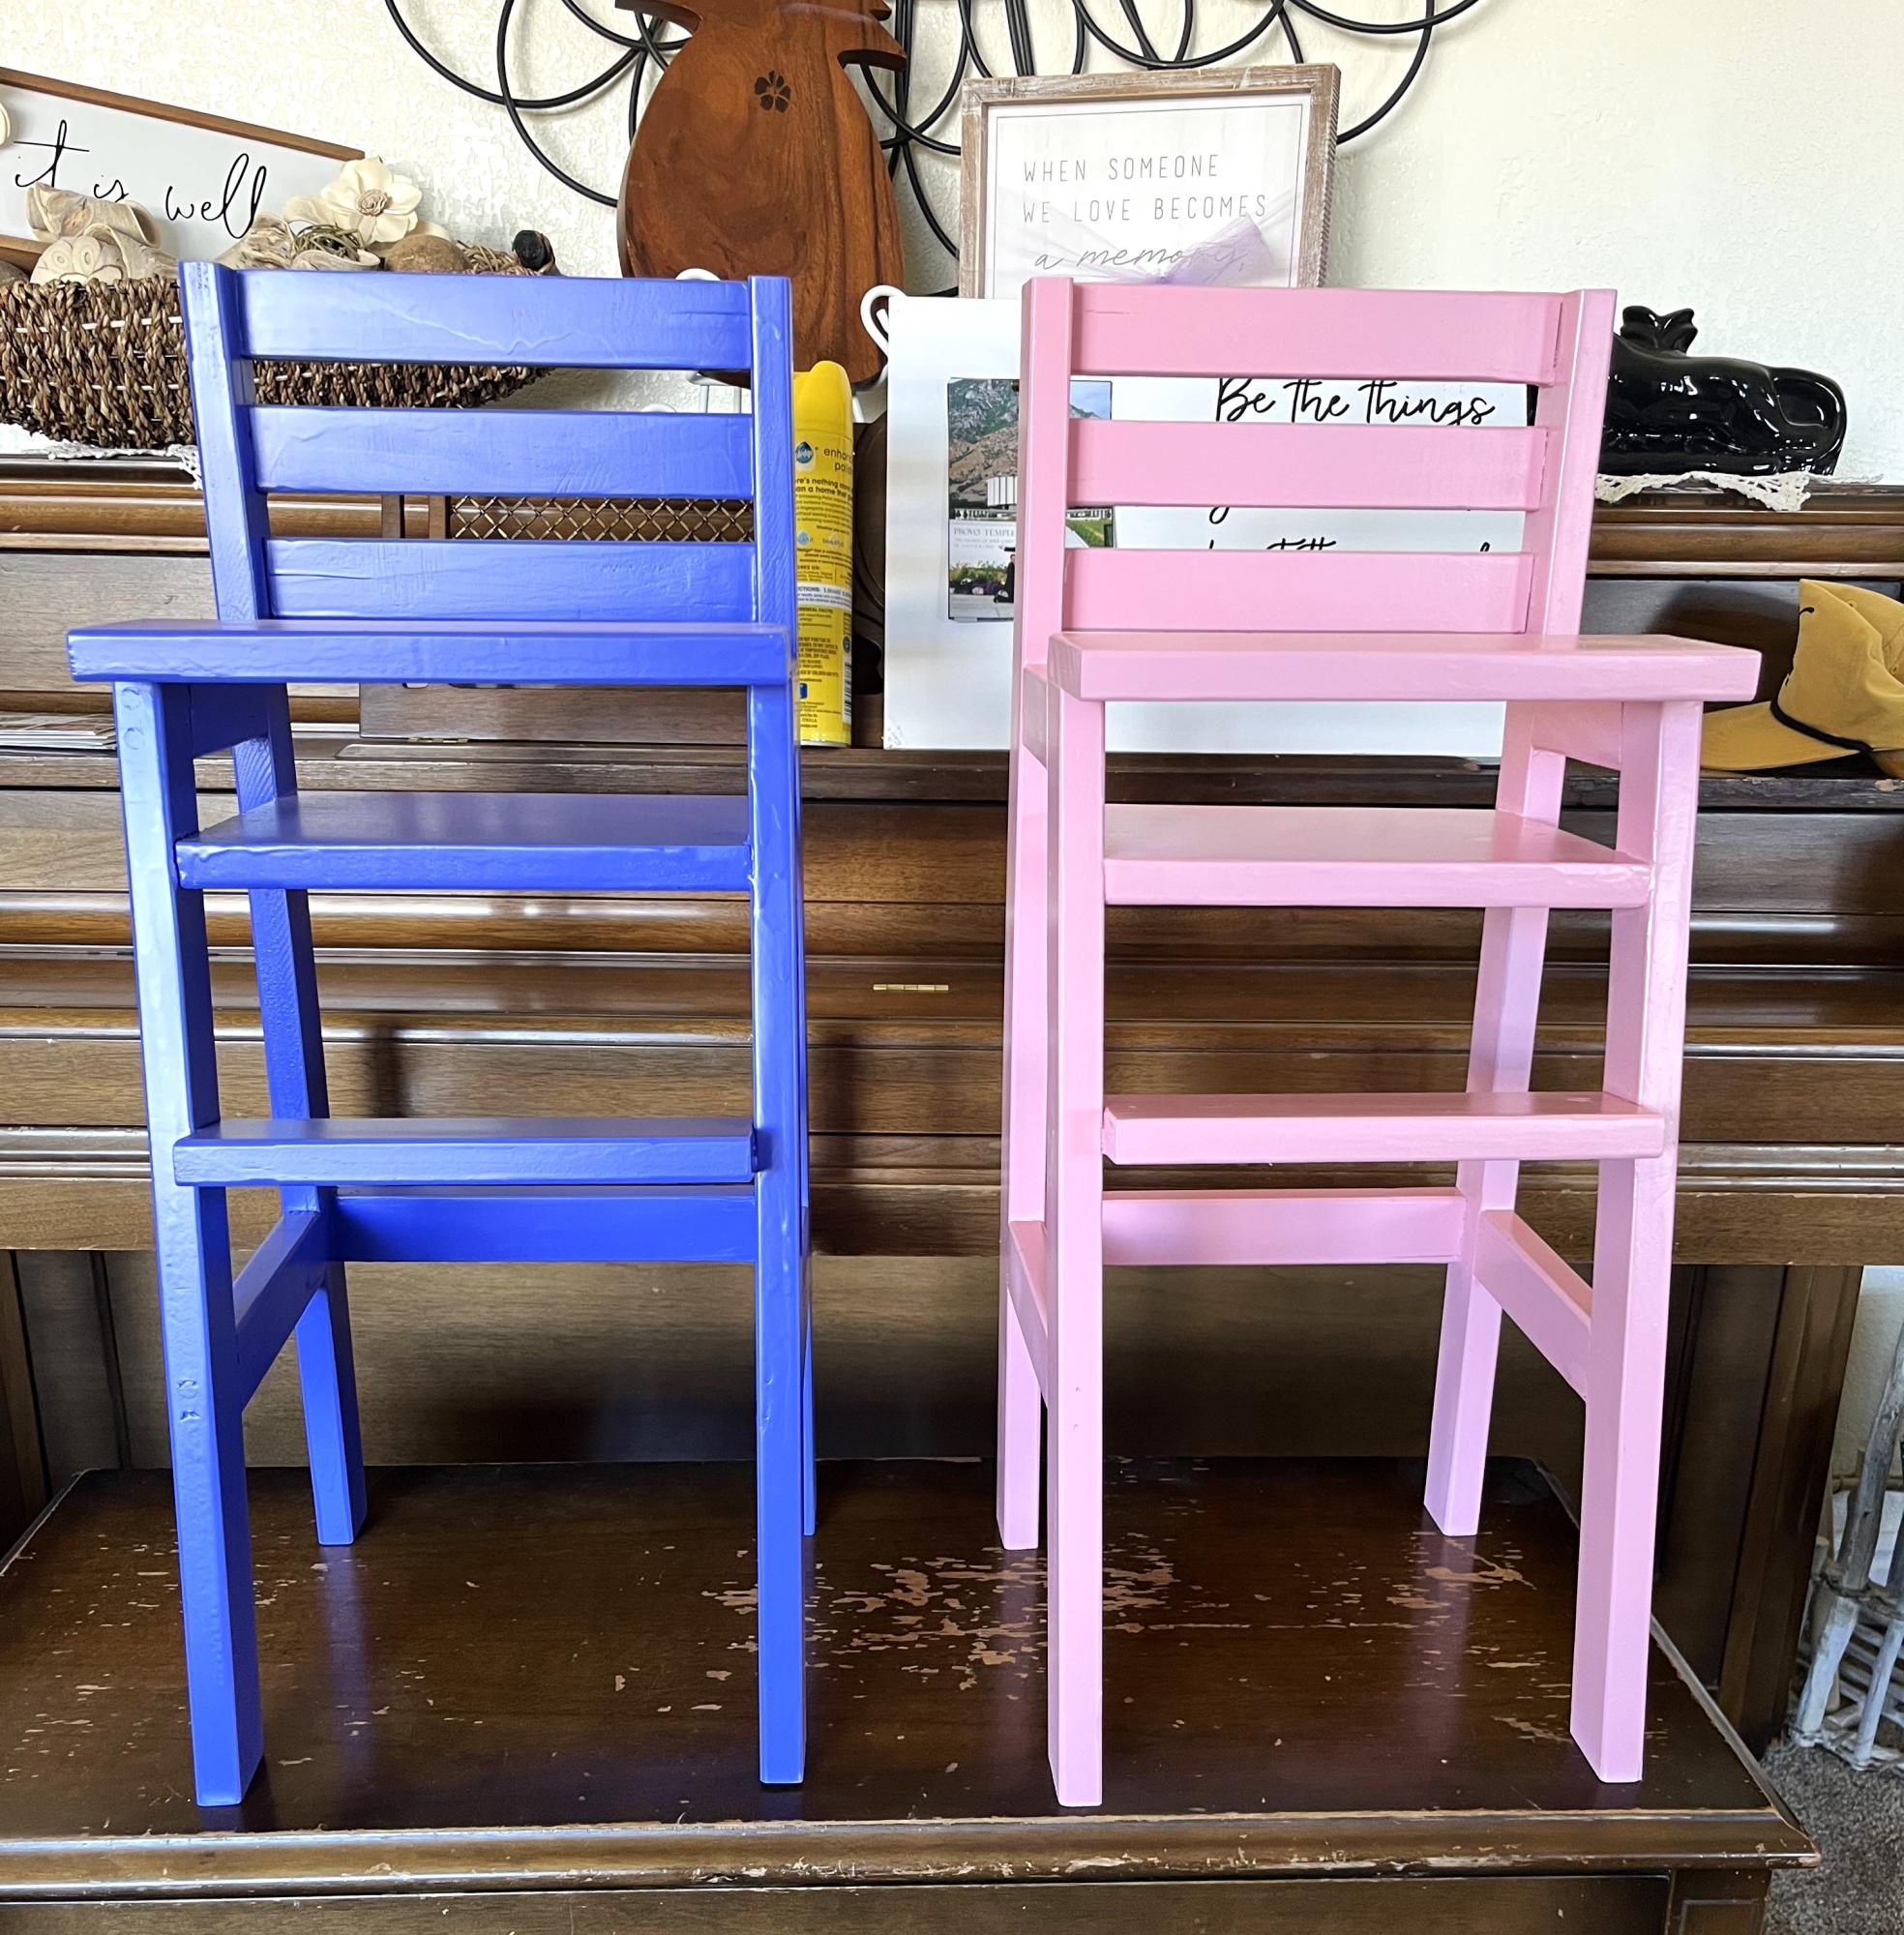
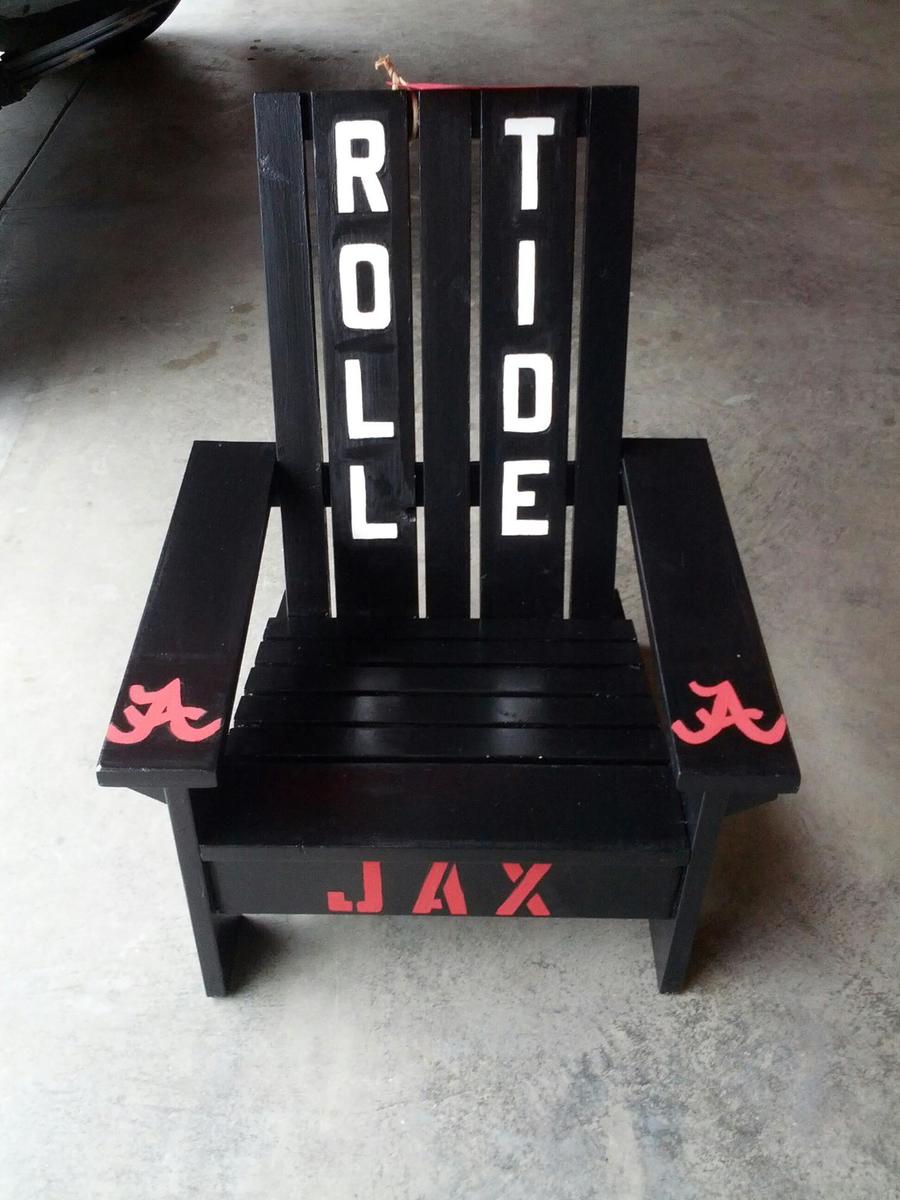
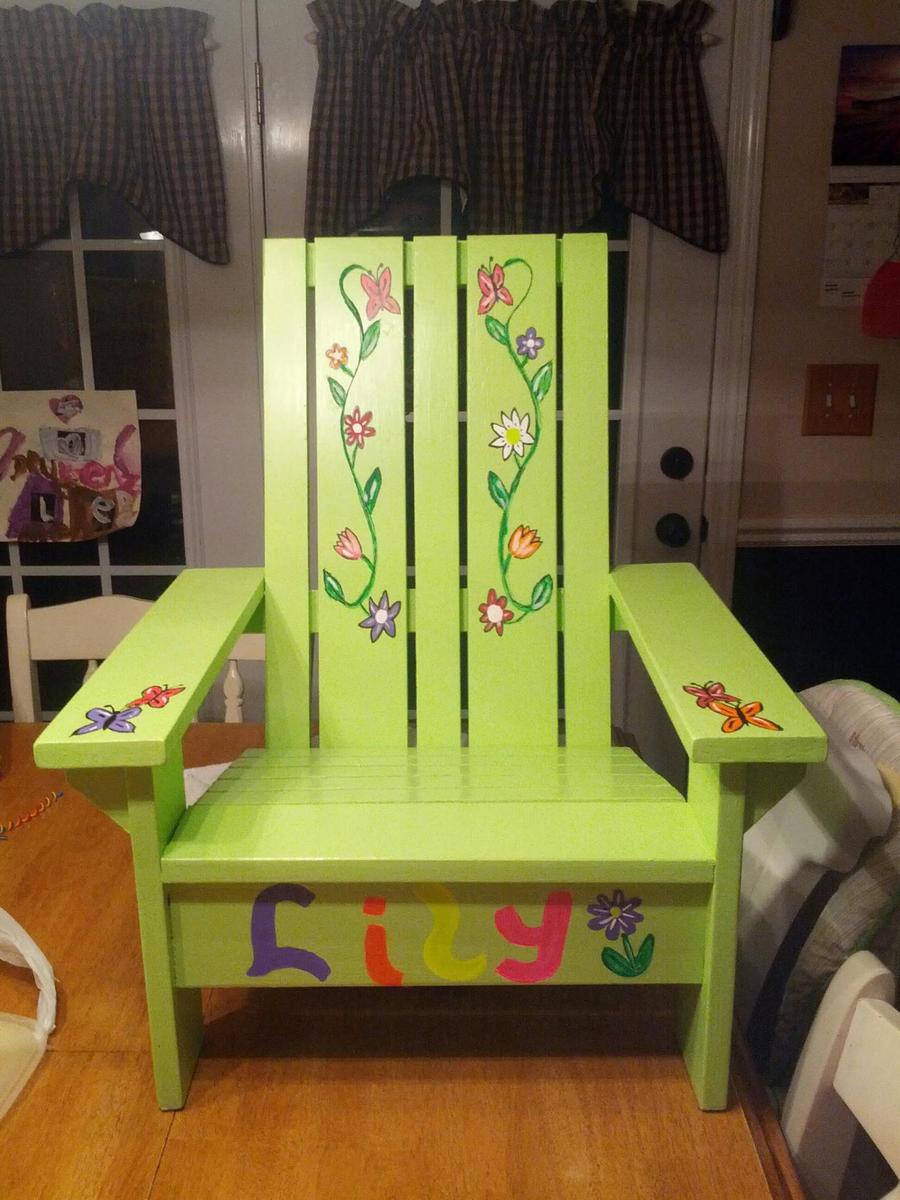
I have 4 young Granddaughter's. They each got a chair from Grampa.
mtnmike
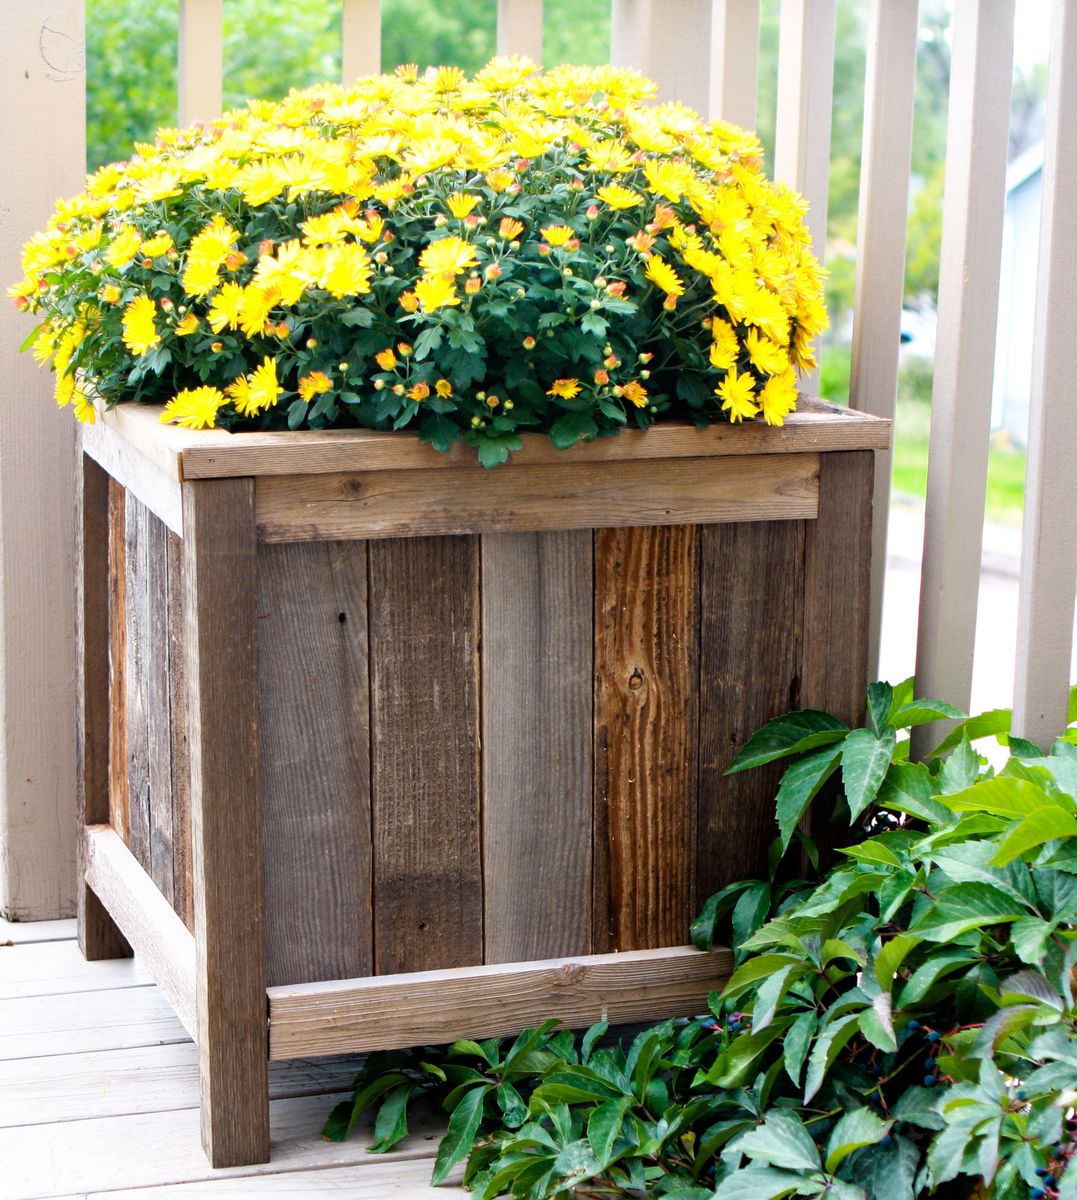
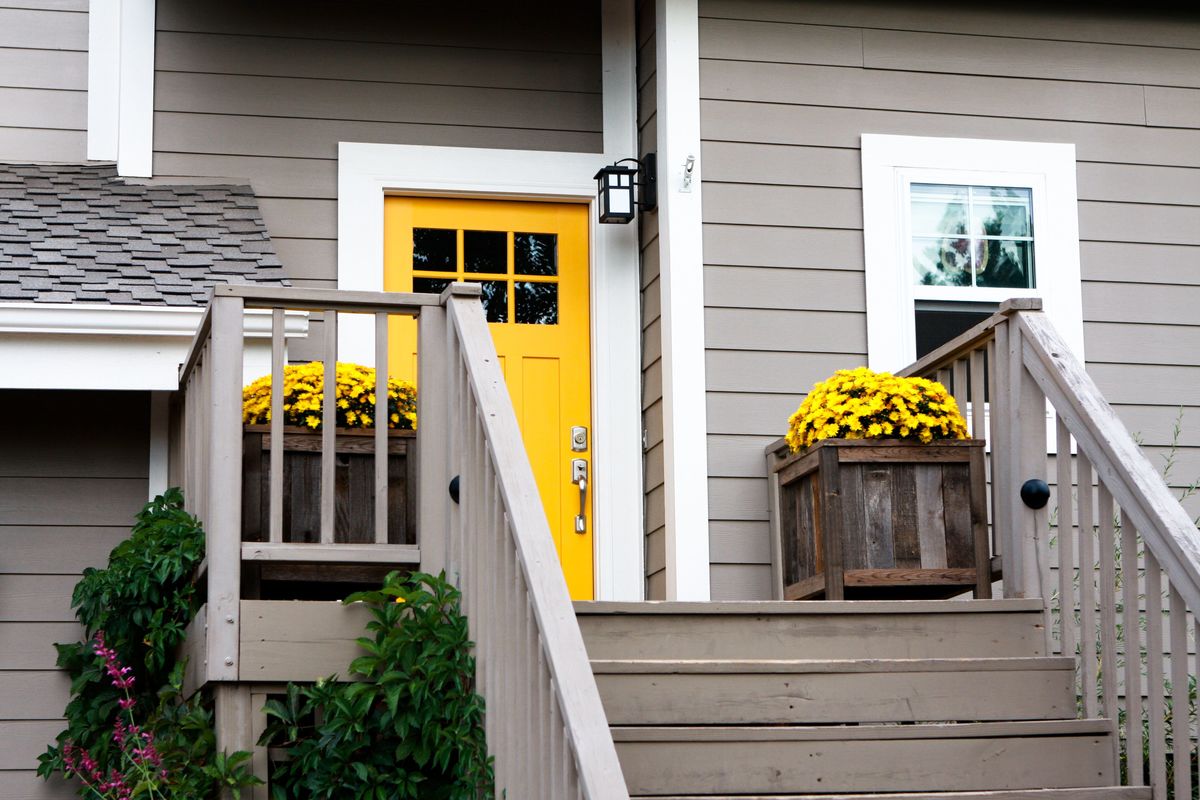
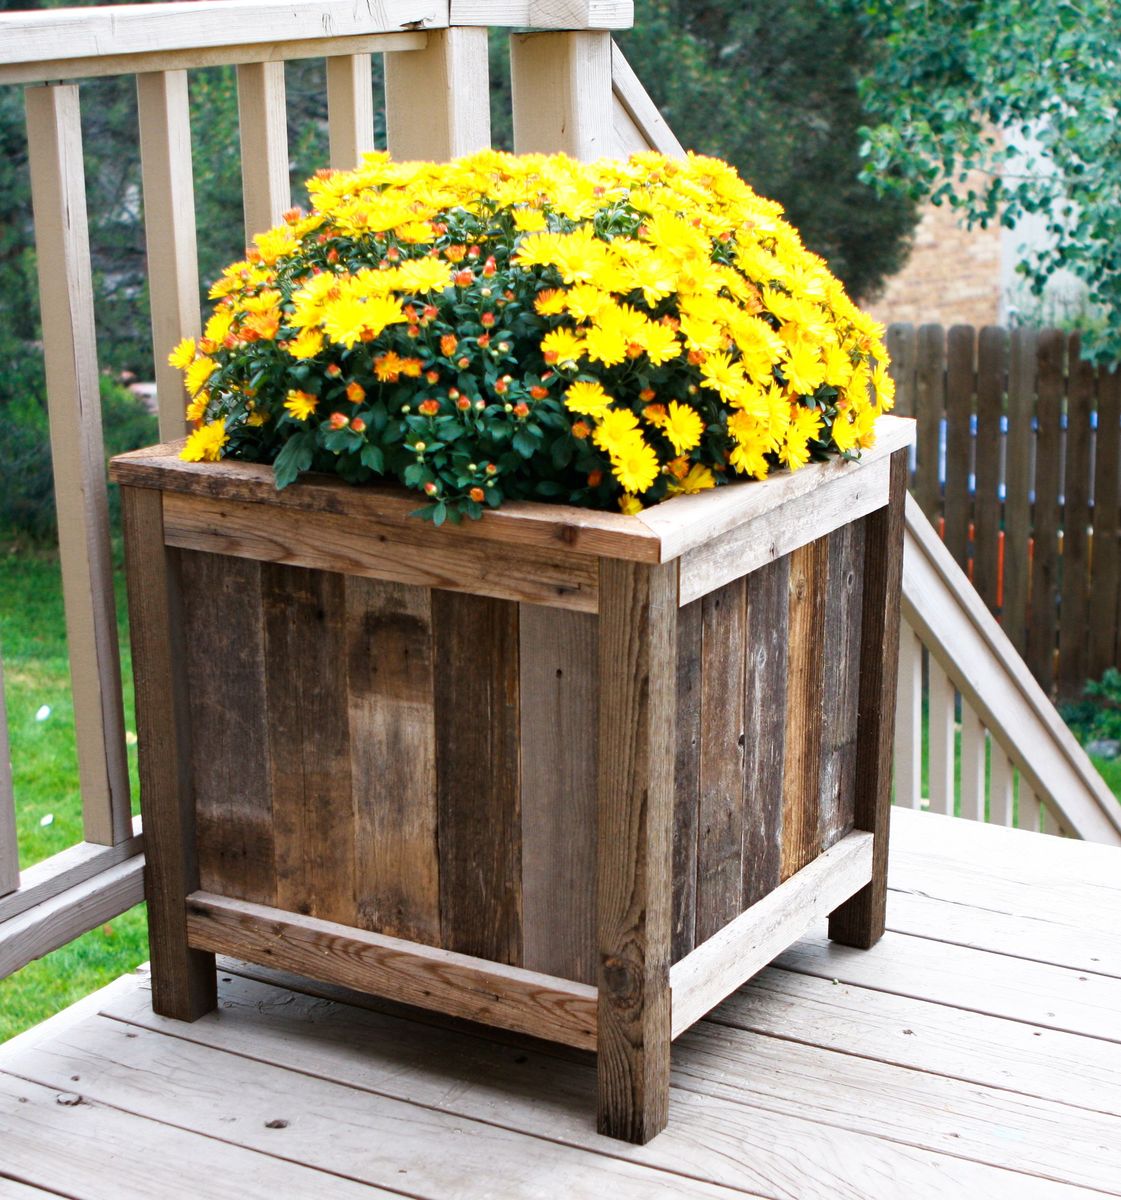
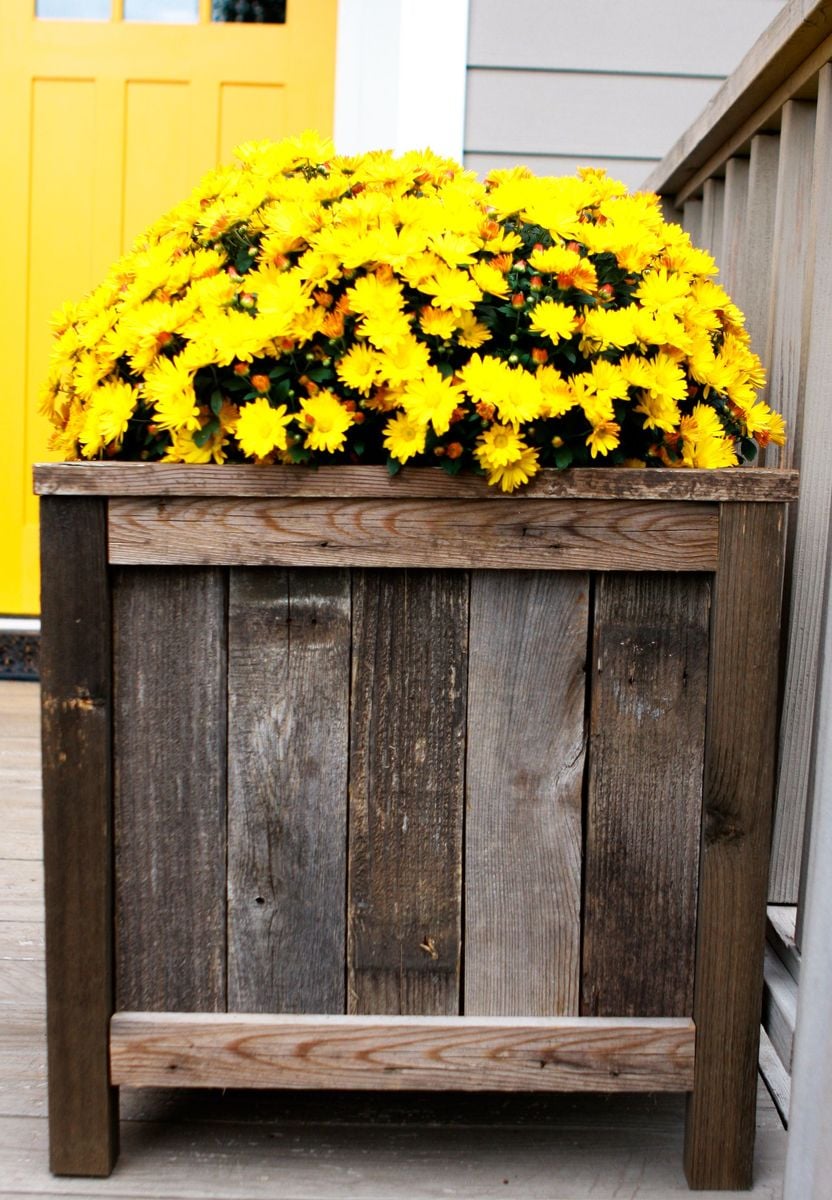
I built Ana's under $20 cedar planters for free. Or, almost free! I had to buy some more wood glue, but I had some of the wood on hand and took some from a friend's pile of old fence wood. It took me about five hours to build both planters from start to finish. See the blog link below for more info.


Tue, 09/08/2020 - 16:12
This is great. I just tore down my old fence and have tons of old cedar pickets. I want to make some planters for my new patio.
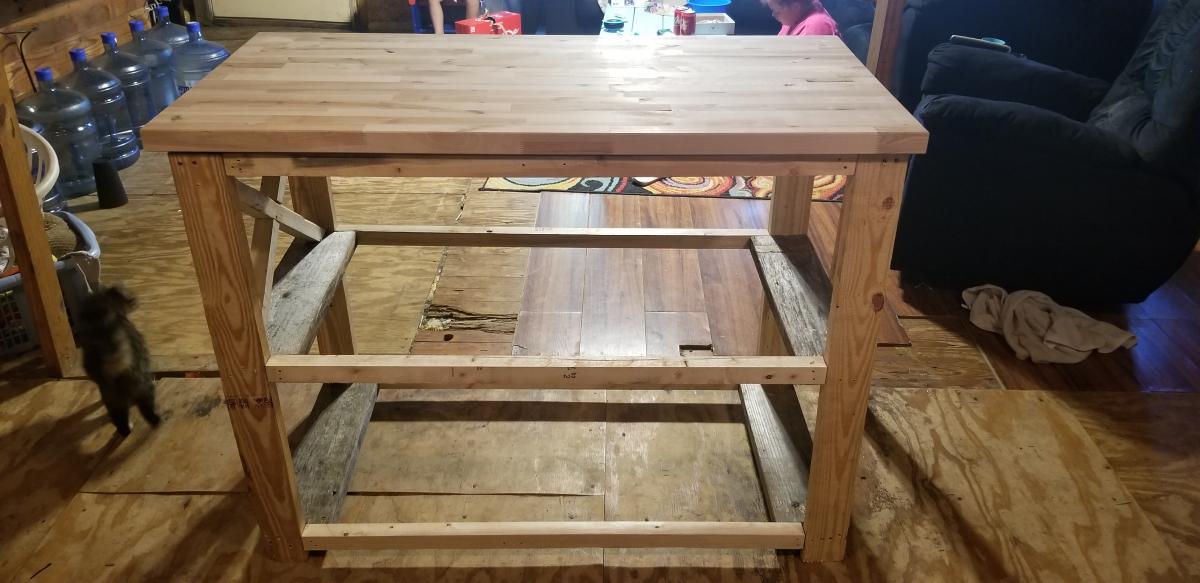
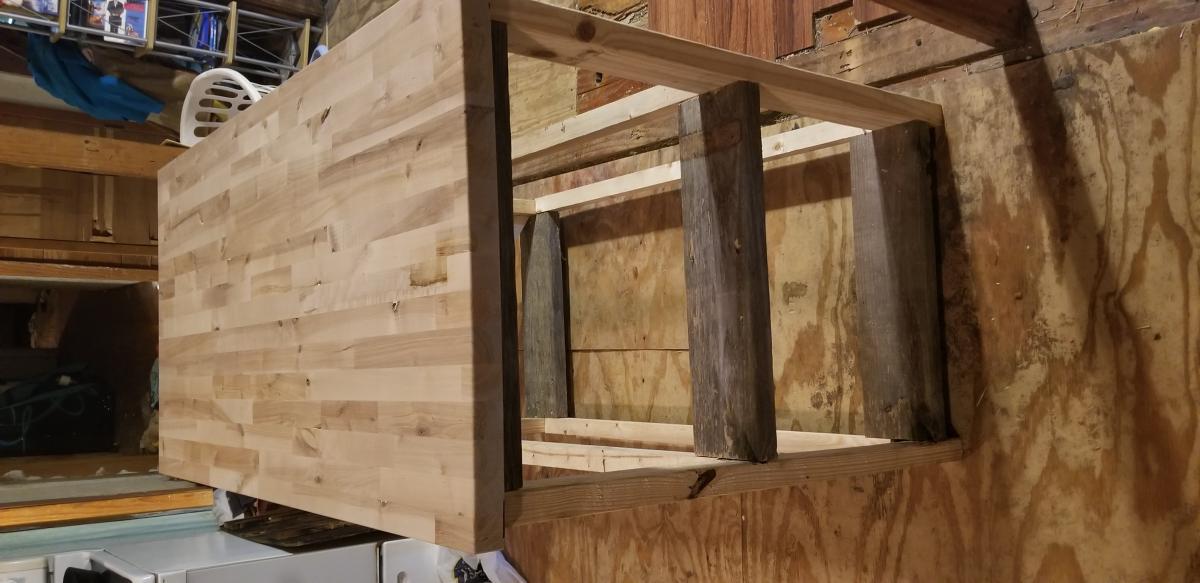
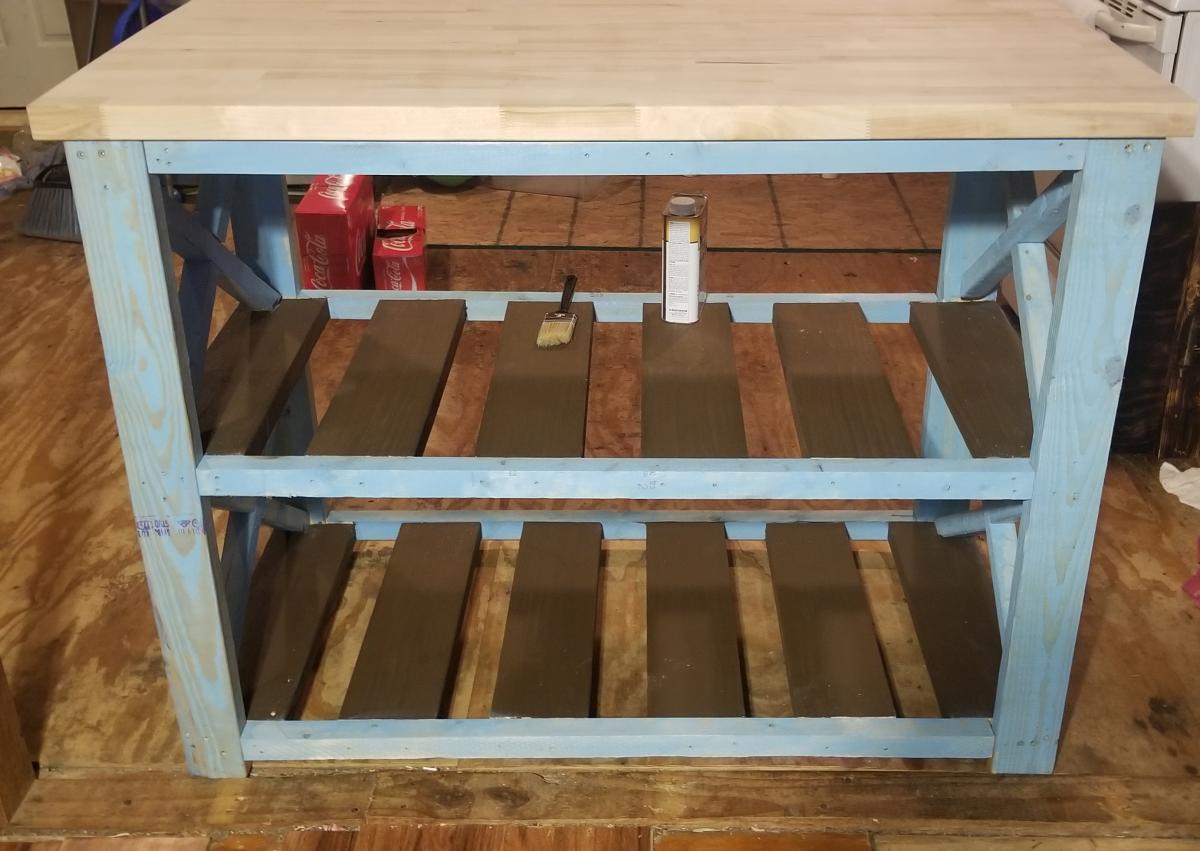
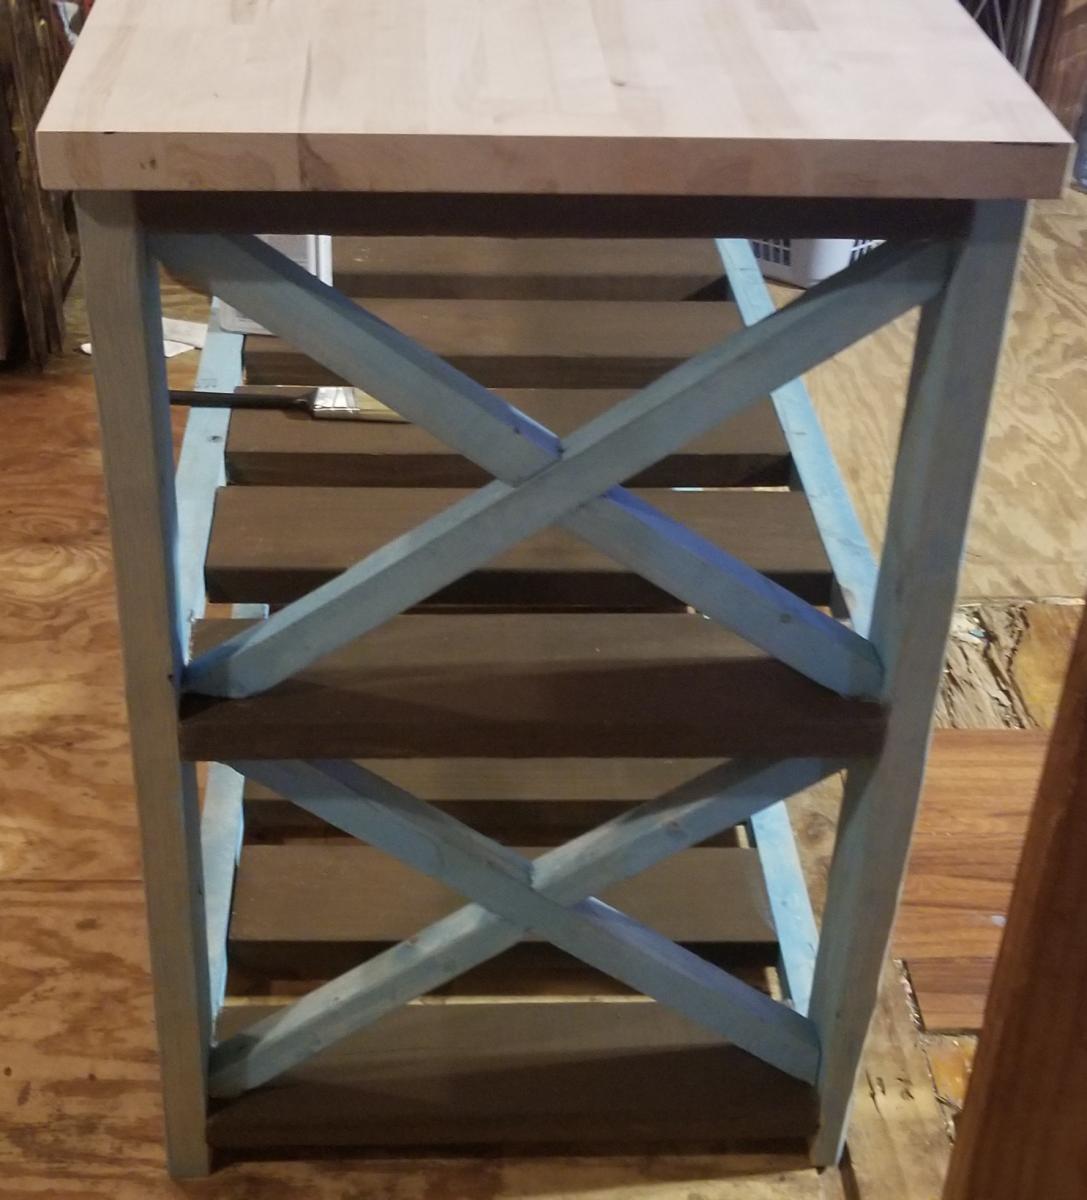
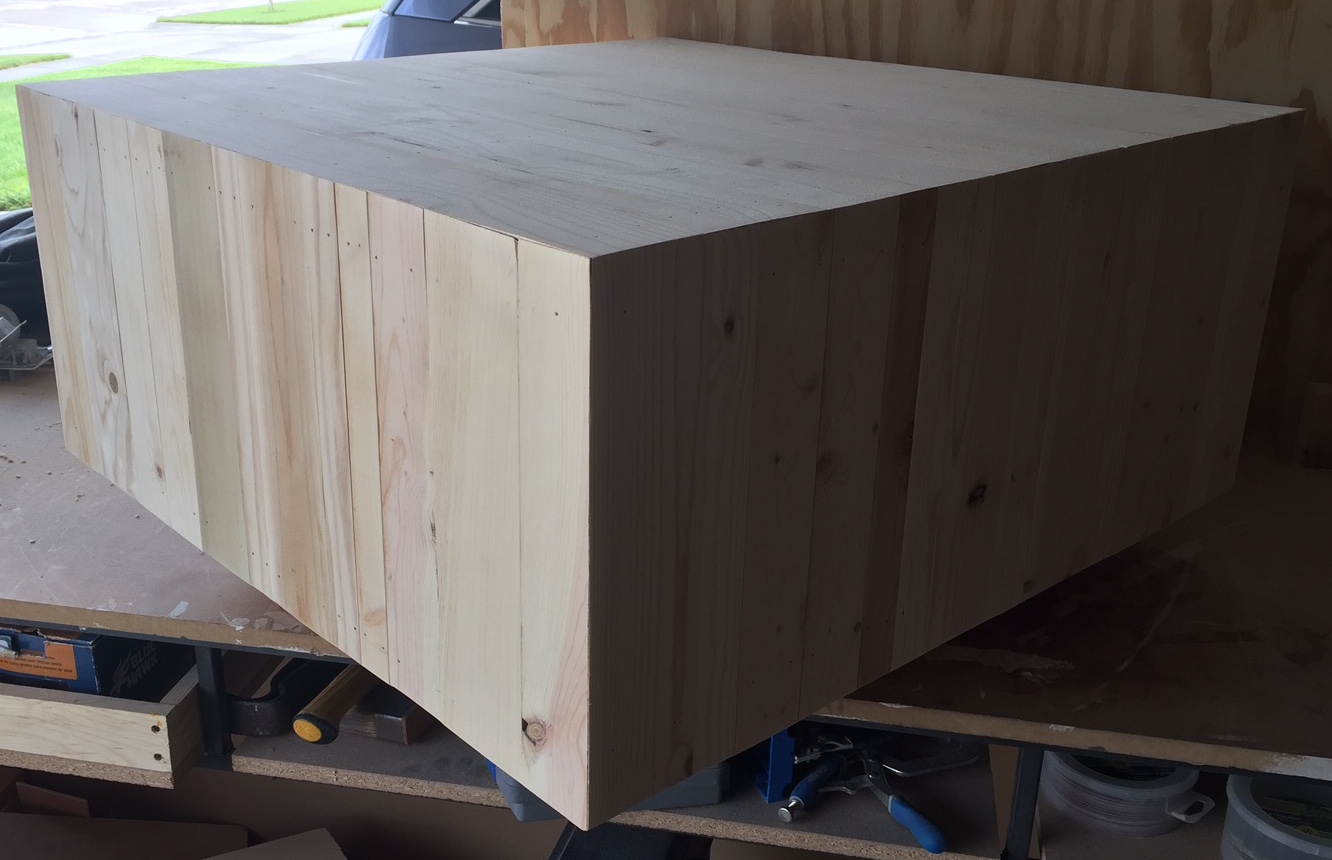
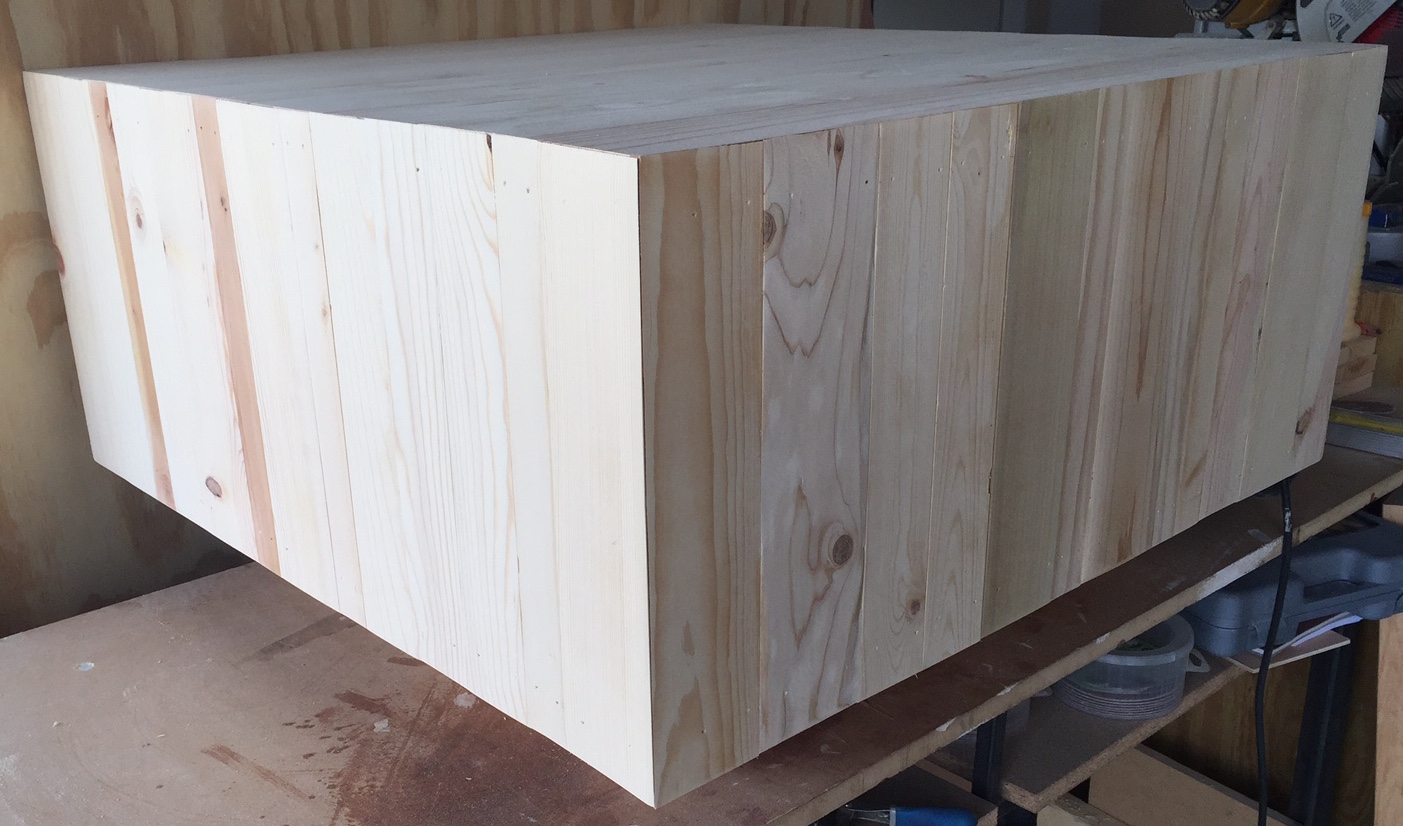
used the plan on this site then modified it.
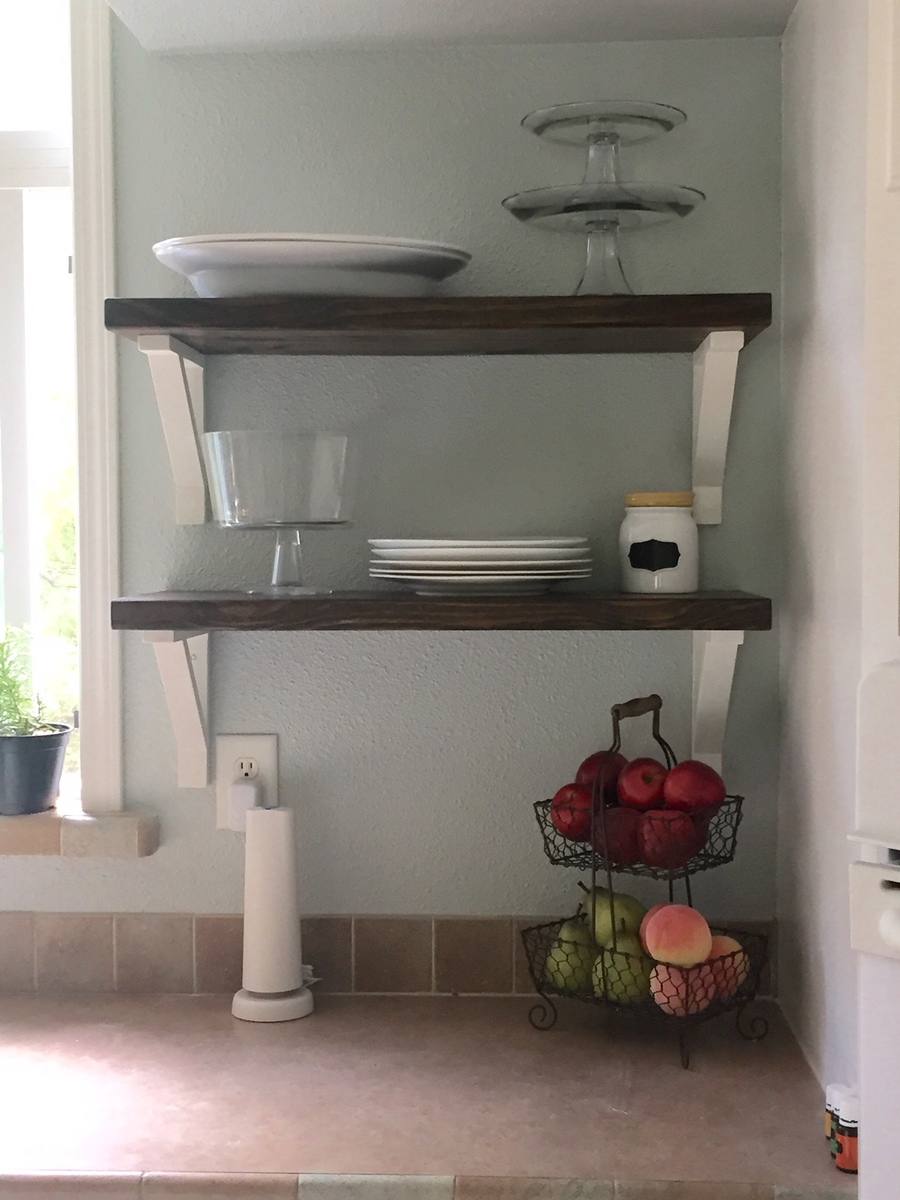
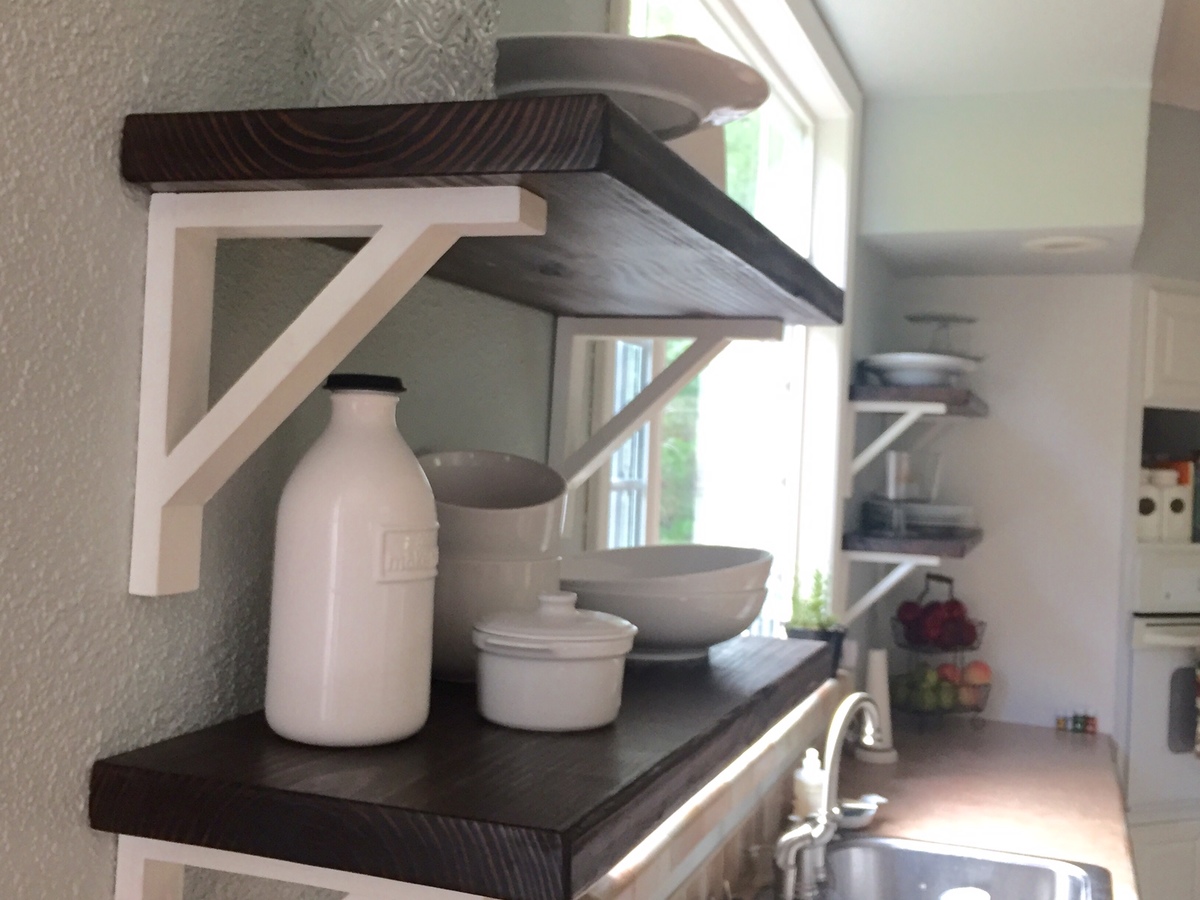
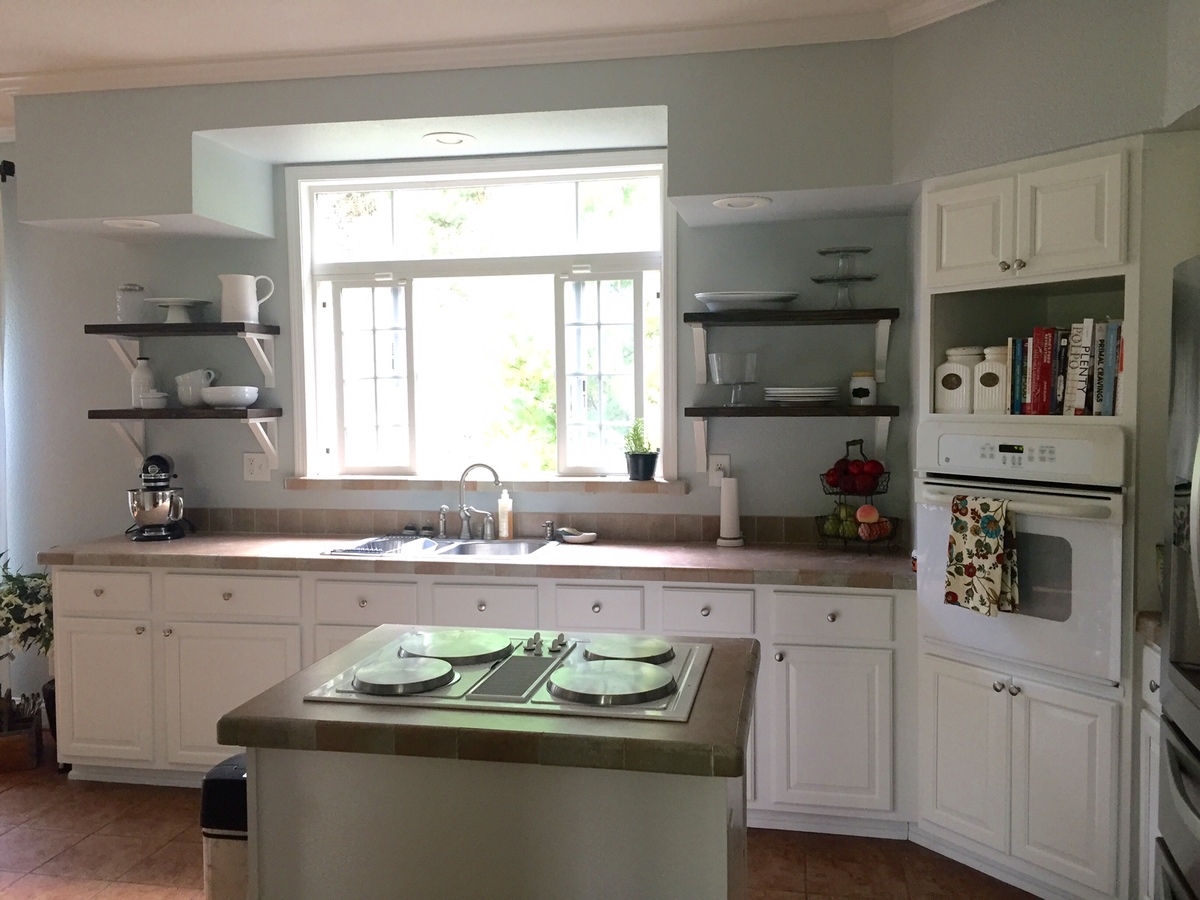
We used Ana's plans for her Tiny House shelves and the only real difference was that we decided to use slightly thicker wood. We stained the wood espresso and painted the brackets Albaster by Sherwin Williams.
The longest part of this process was the staining because the sealer took quite a bit of time to dry before being handled, but this was overall a very simple project with not a lot of effort. It just requires patience!
We couldn't be happier and it was MUCH cheaper than the custom shelves we had quoted!
Thanks Ana!
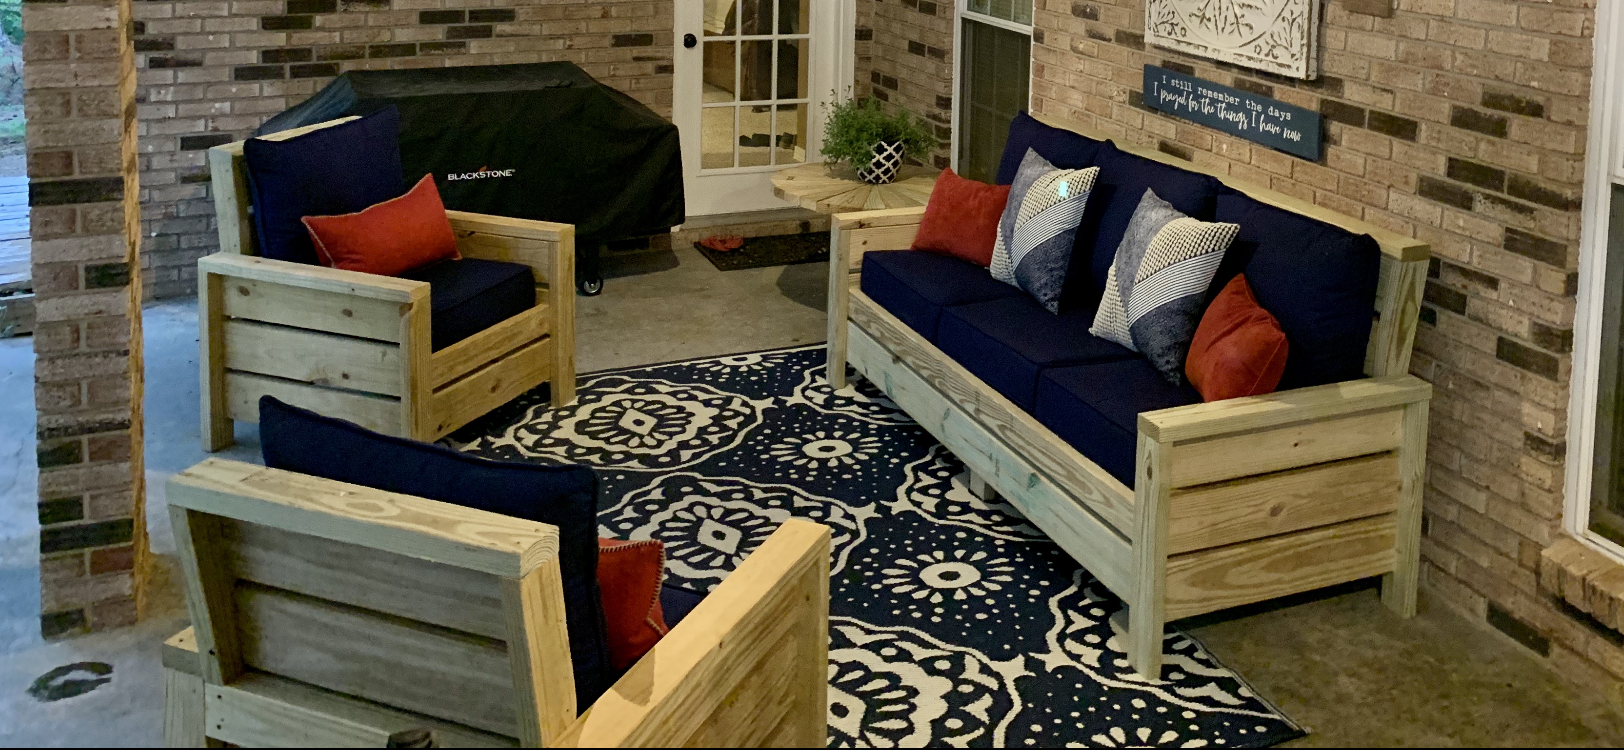
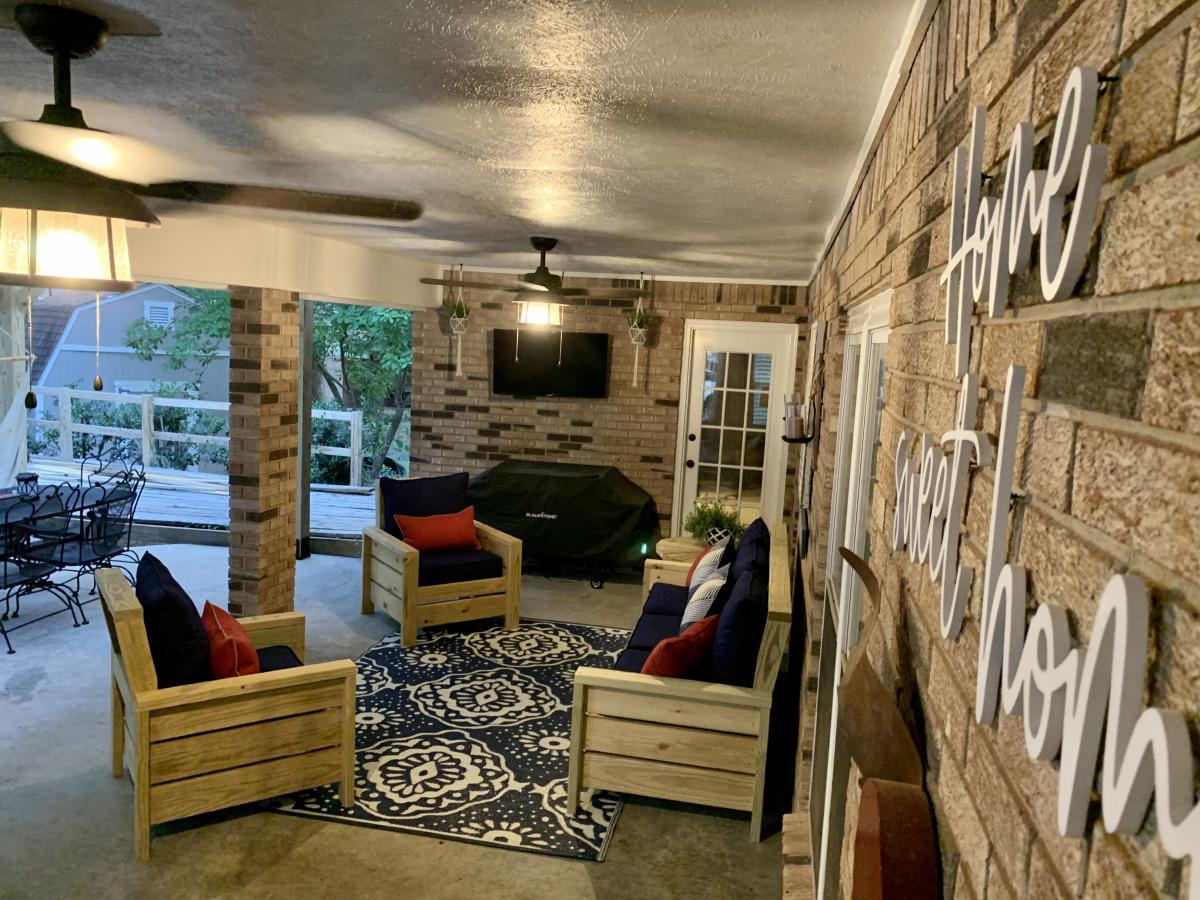
Cushions are the most expensive part. These are very nice and VERY heavy. Easy build.
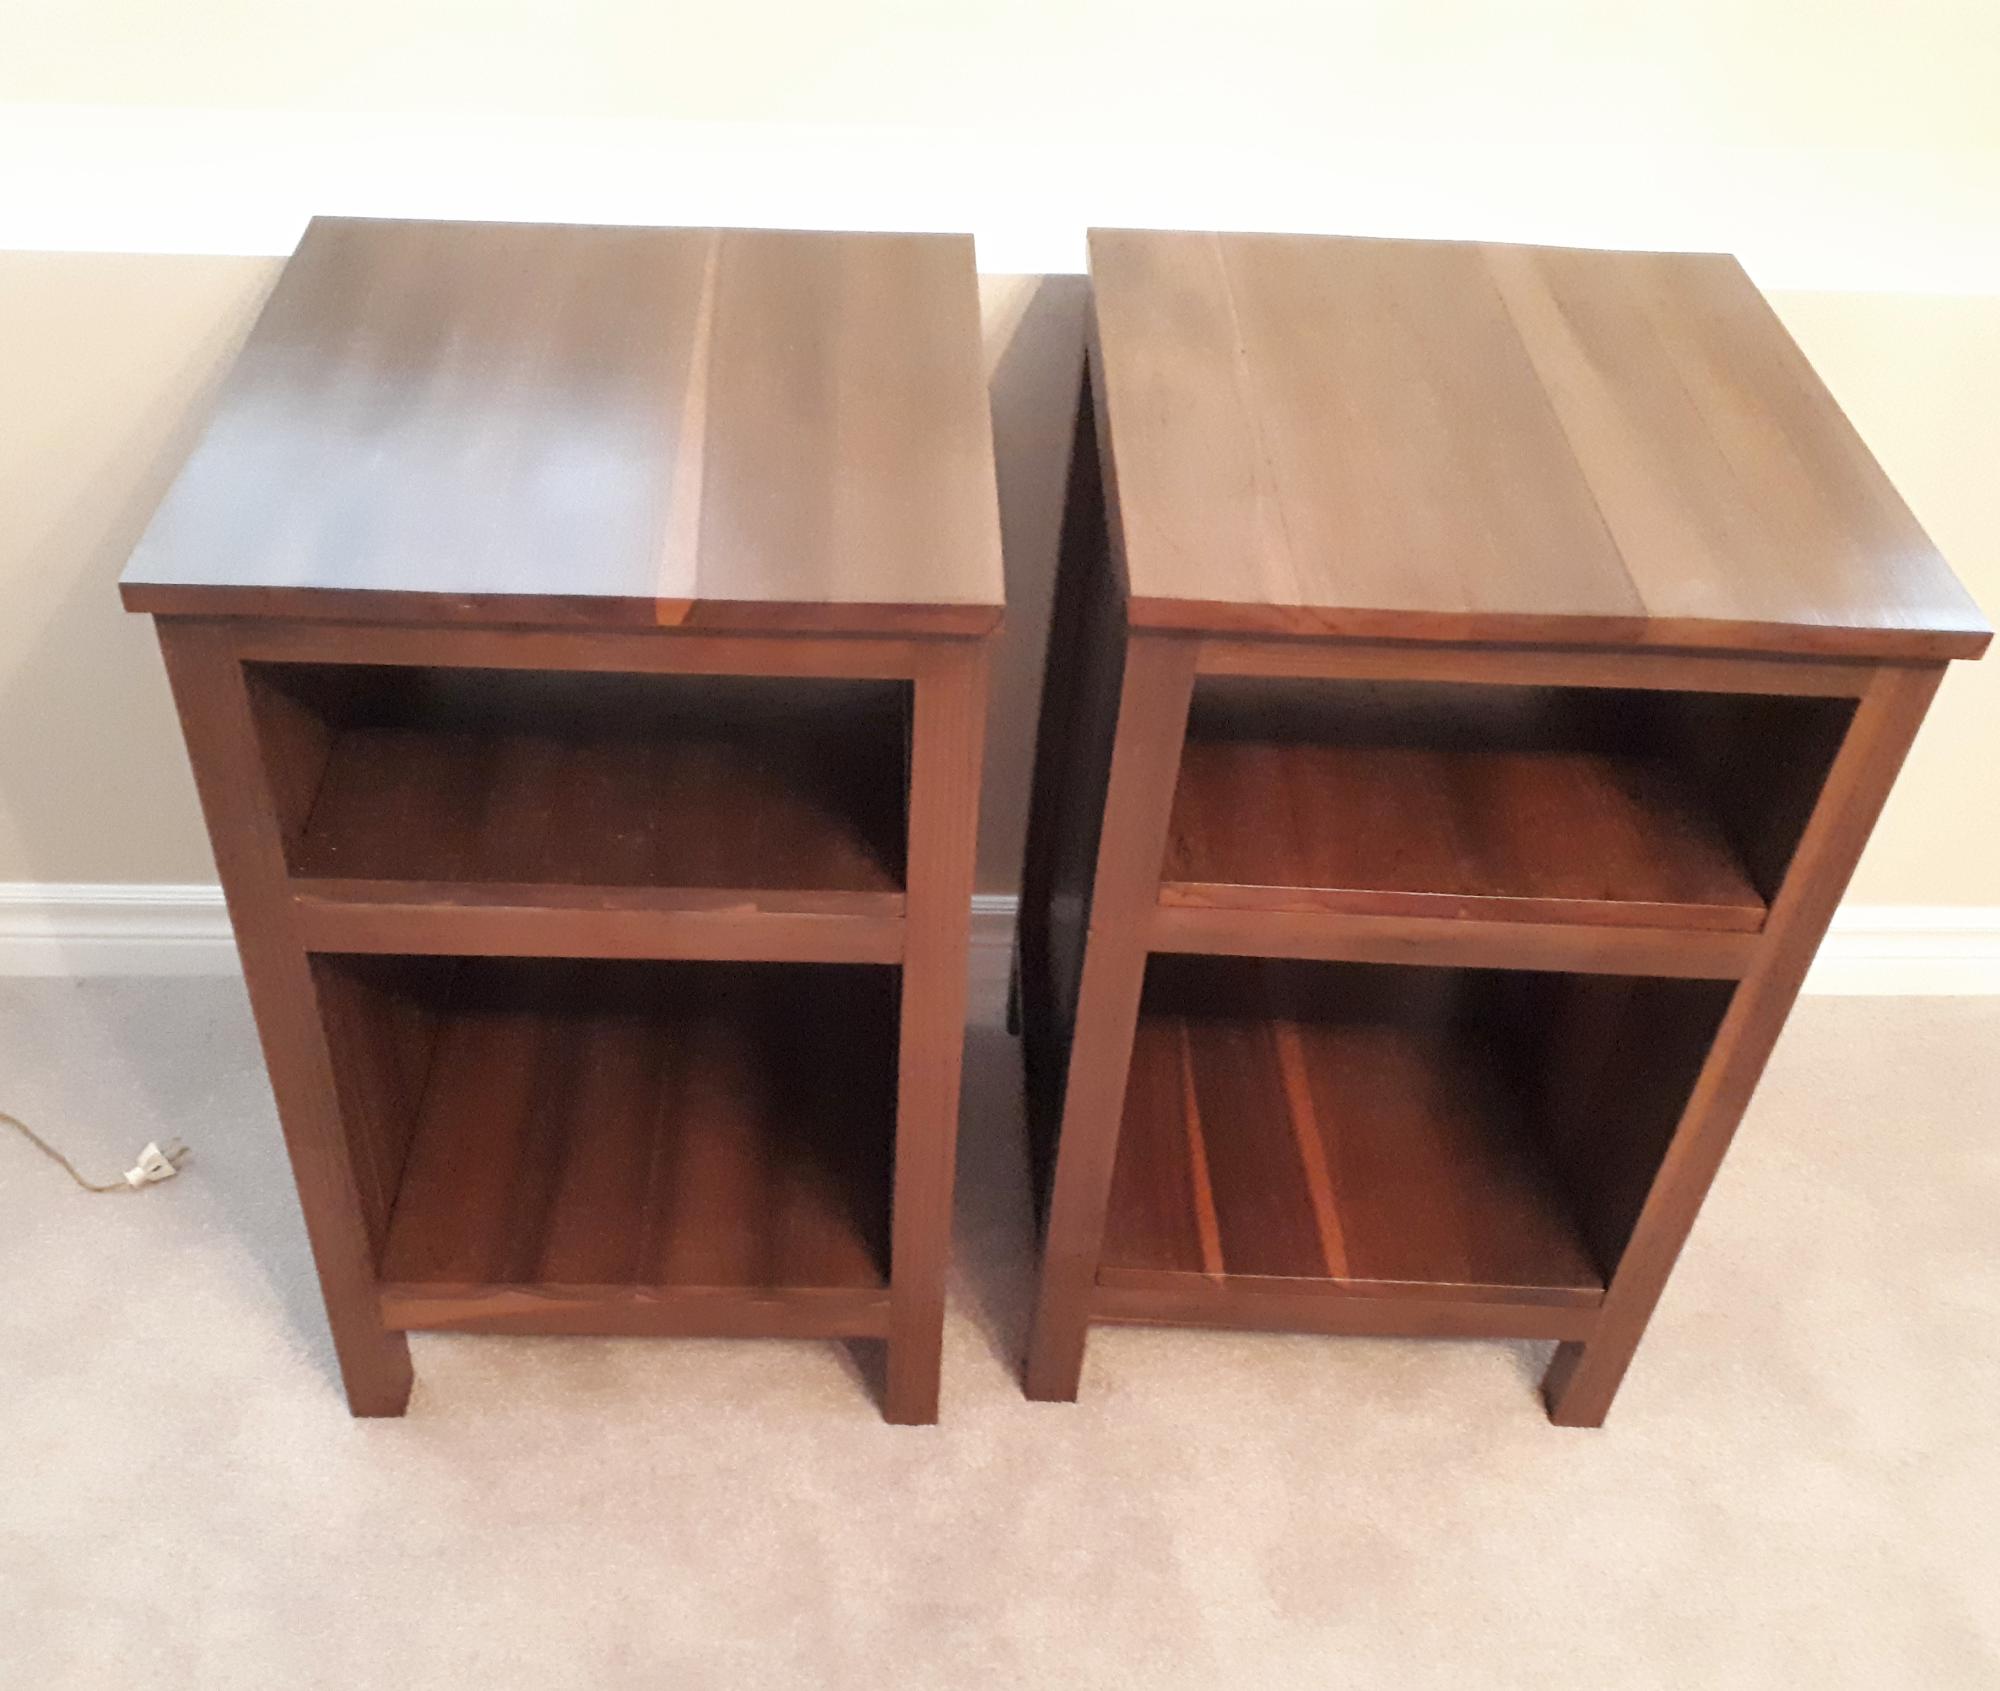
I built these for my daughter's birthday, after she showed me a set of night stands that resembled these from the site. I used cedar with a steel wool and viniger stain to give them a aged look. With 4 coats of a water based urathane as a finish. Your plans were accurate and simple to follow. Thanks