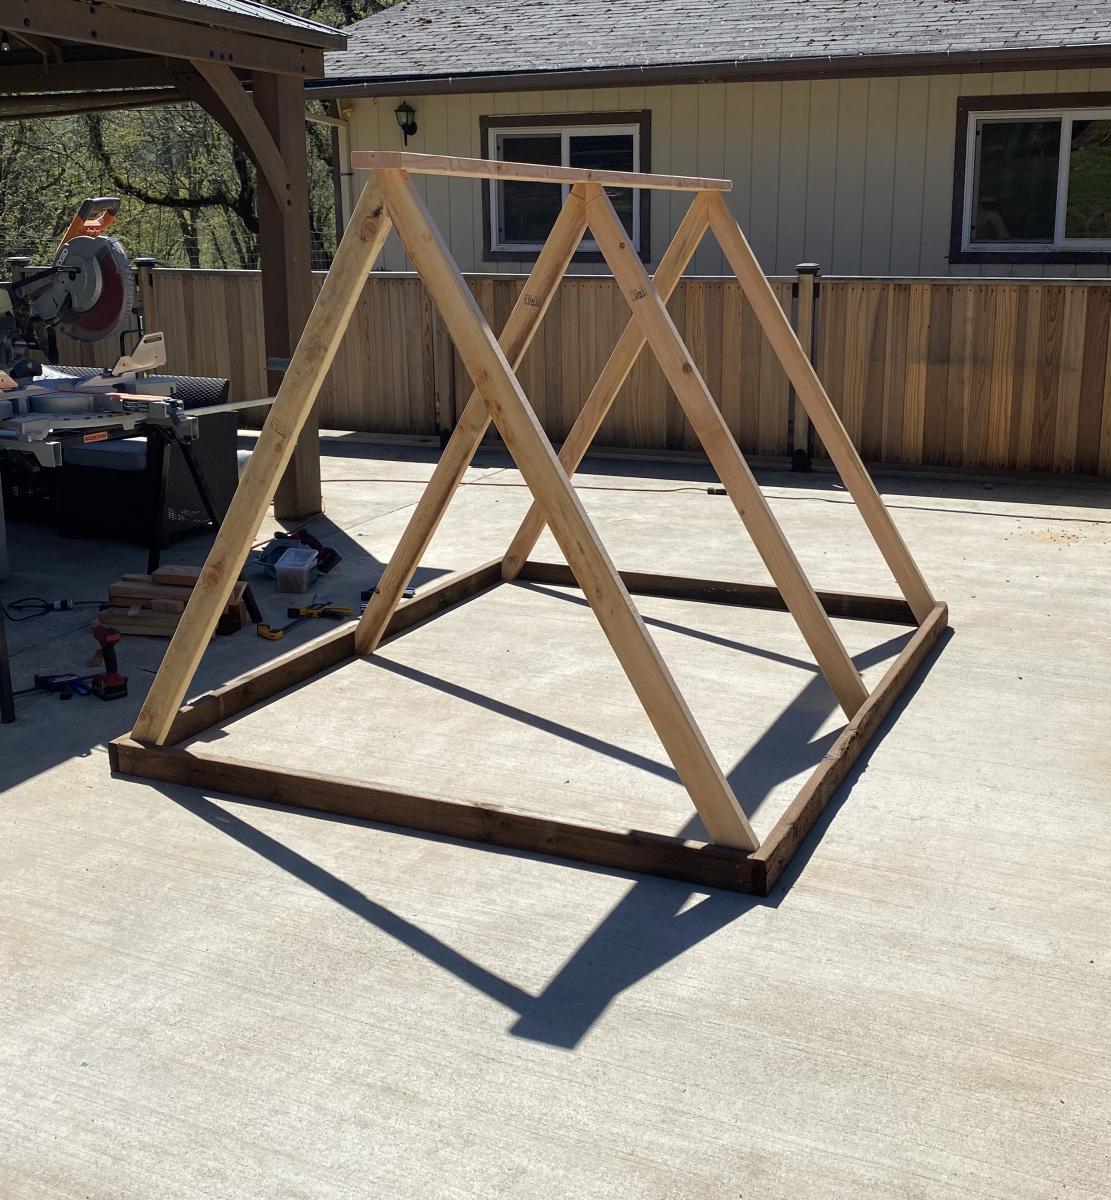
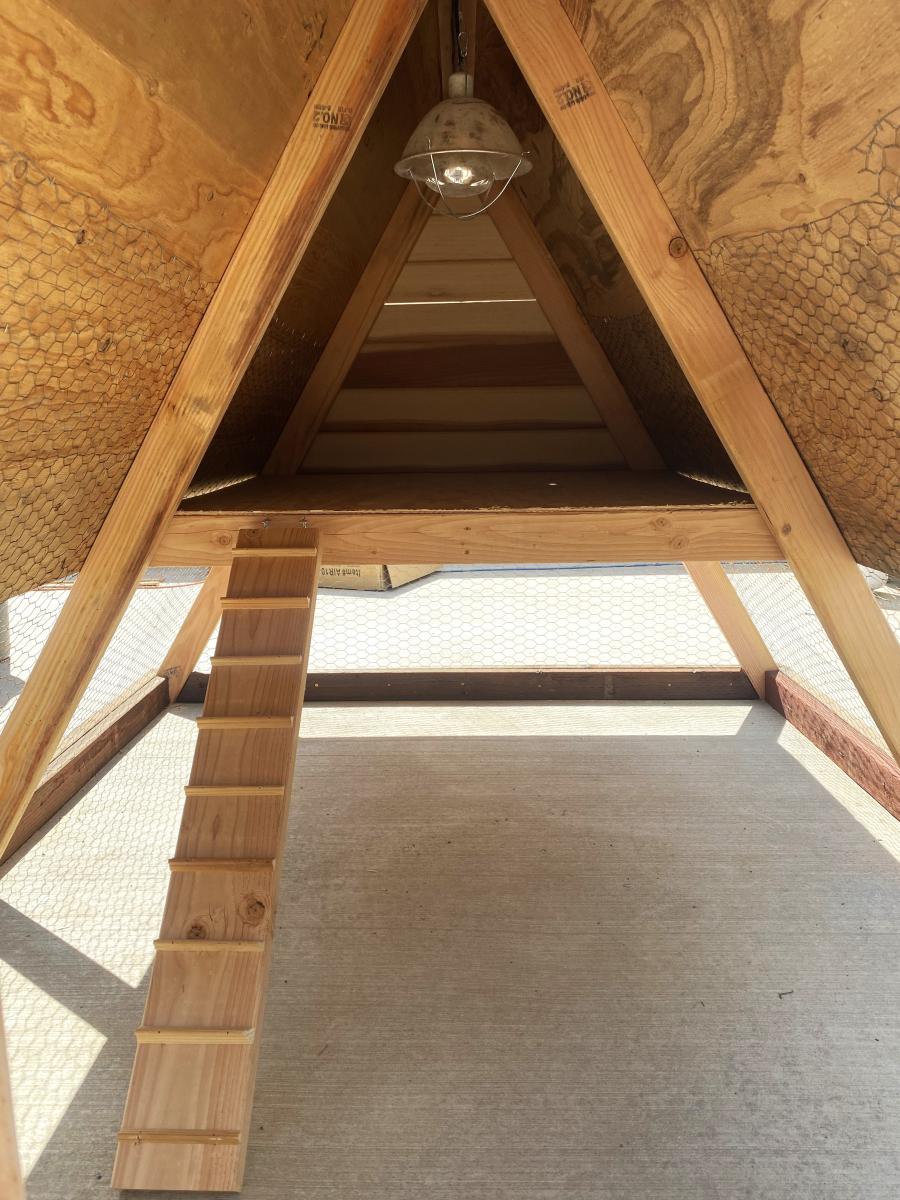
A-Frame Hen House
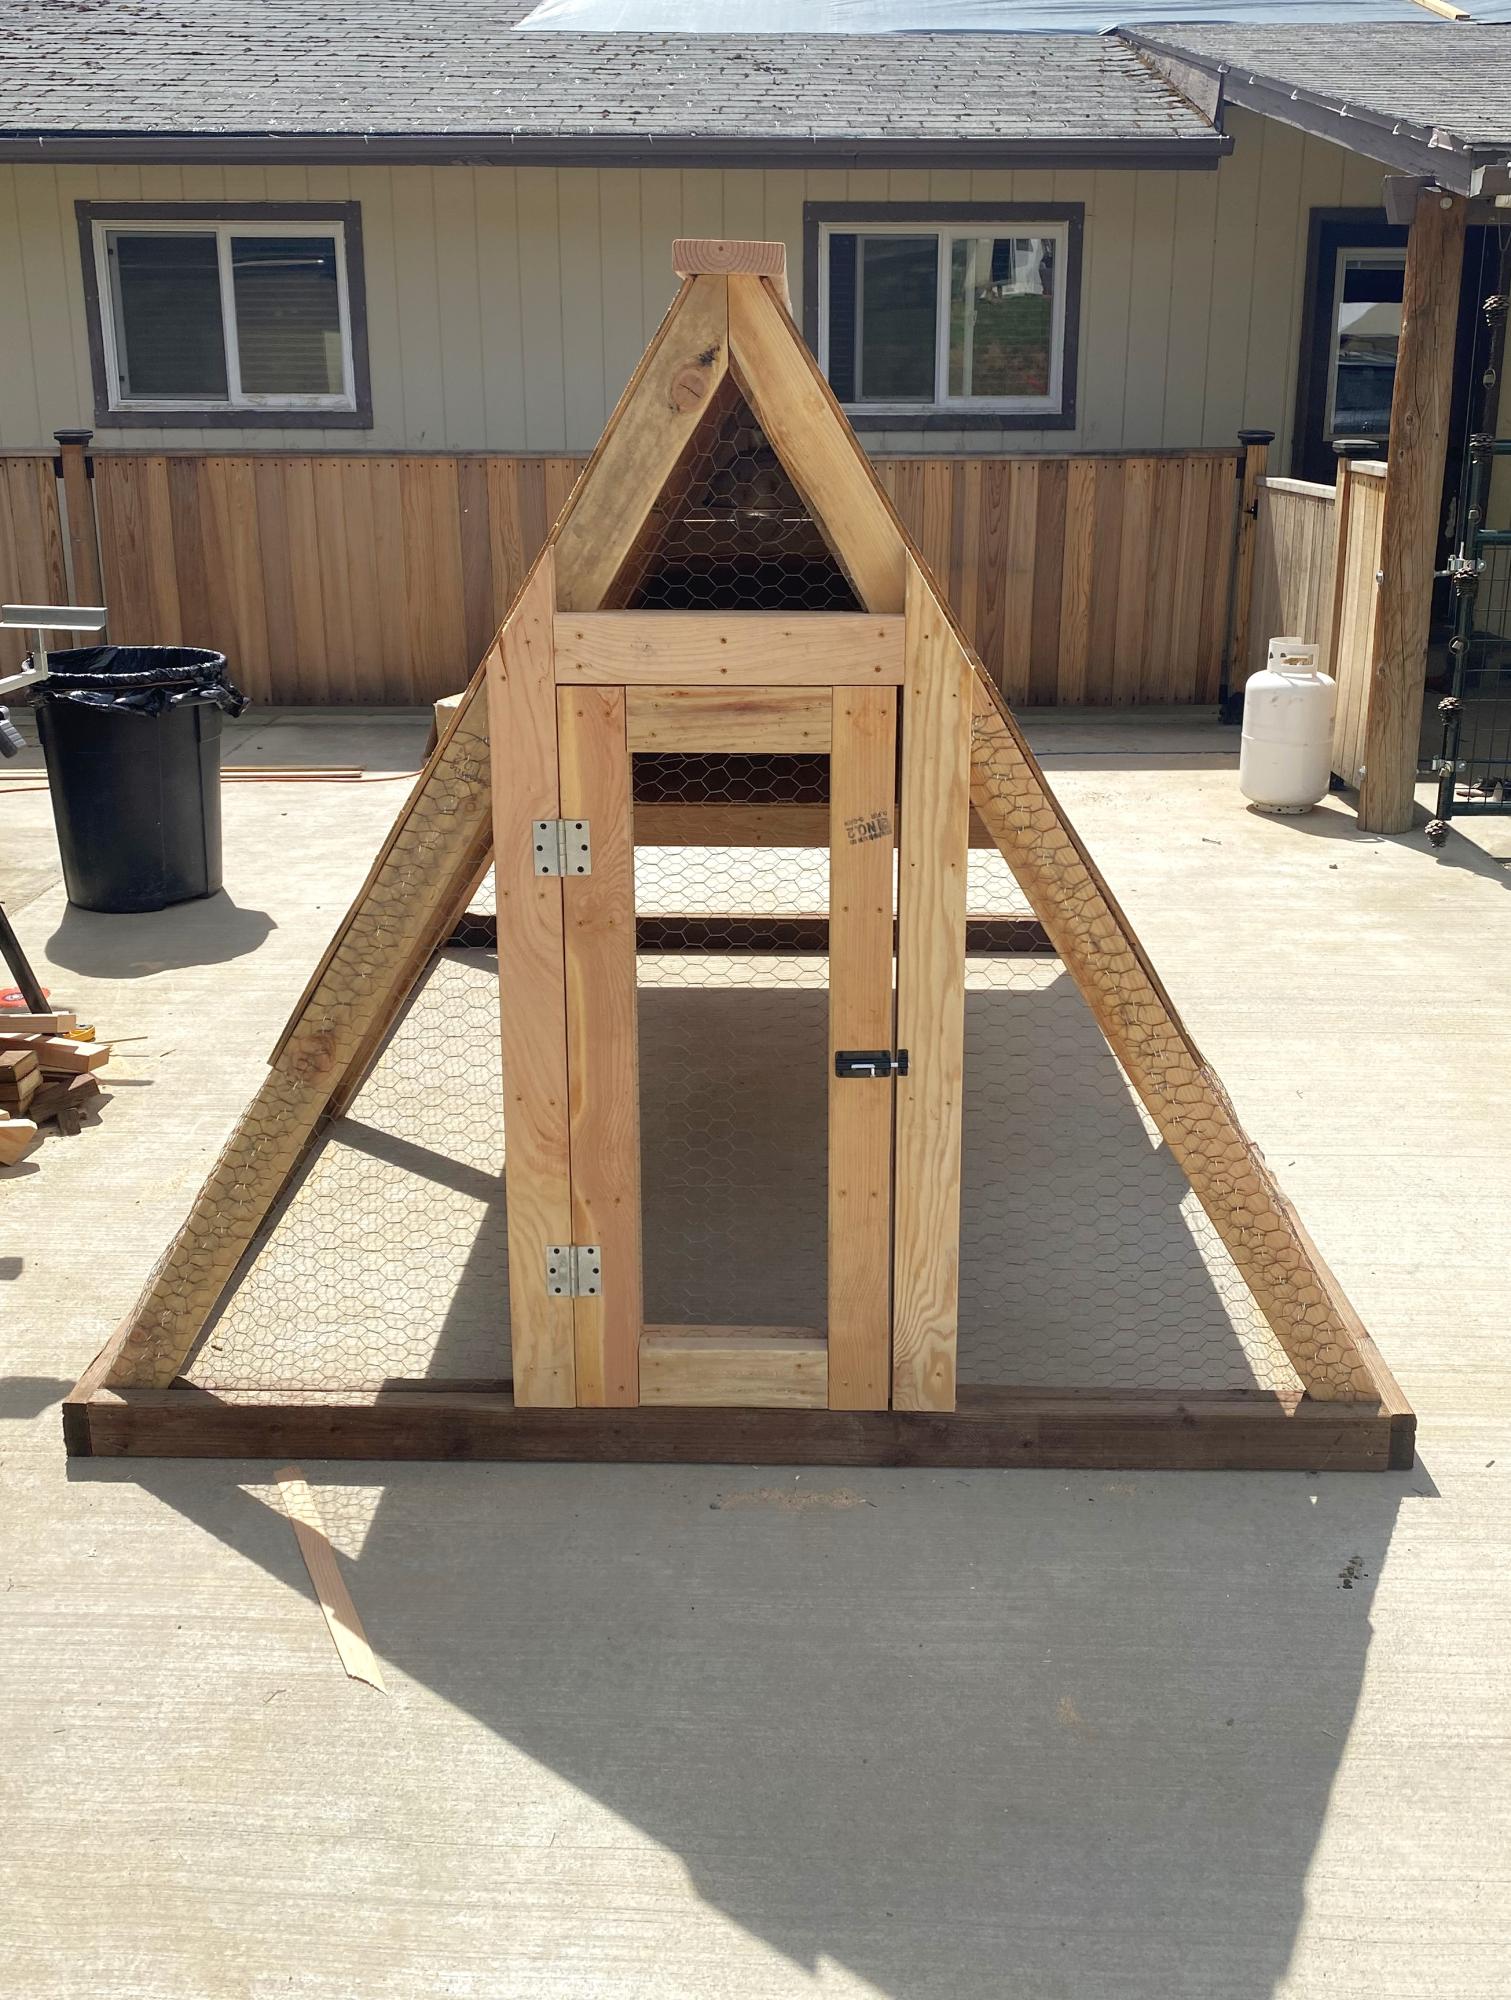
Great easy project to get the bigger chicks out of the garage to integrate with the older hens. Made some modifications because we have a lot of critters trying to kill the chickens/chicks.

Built from Plan(s)
Great easy project to get the bigger chicks out of the garage to integrate with the older hens. Made some modifications because we have a lot of critters trying to kill the chickens/chicks.

Love these plans for the farmhouse table comsole
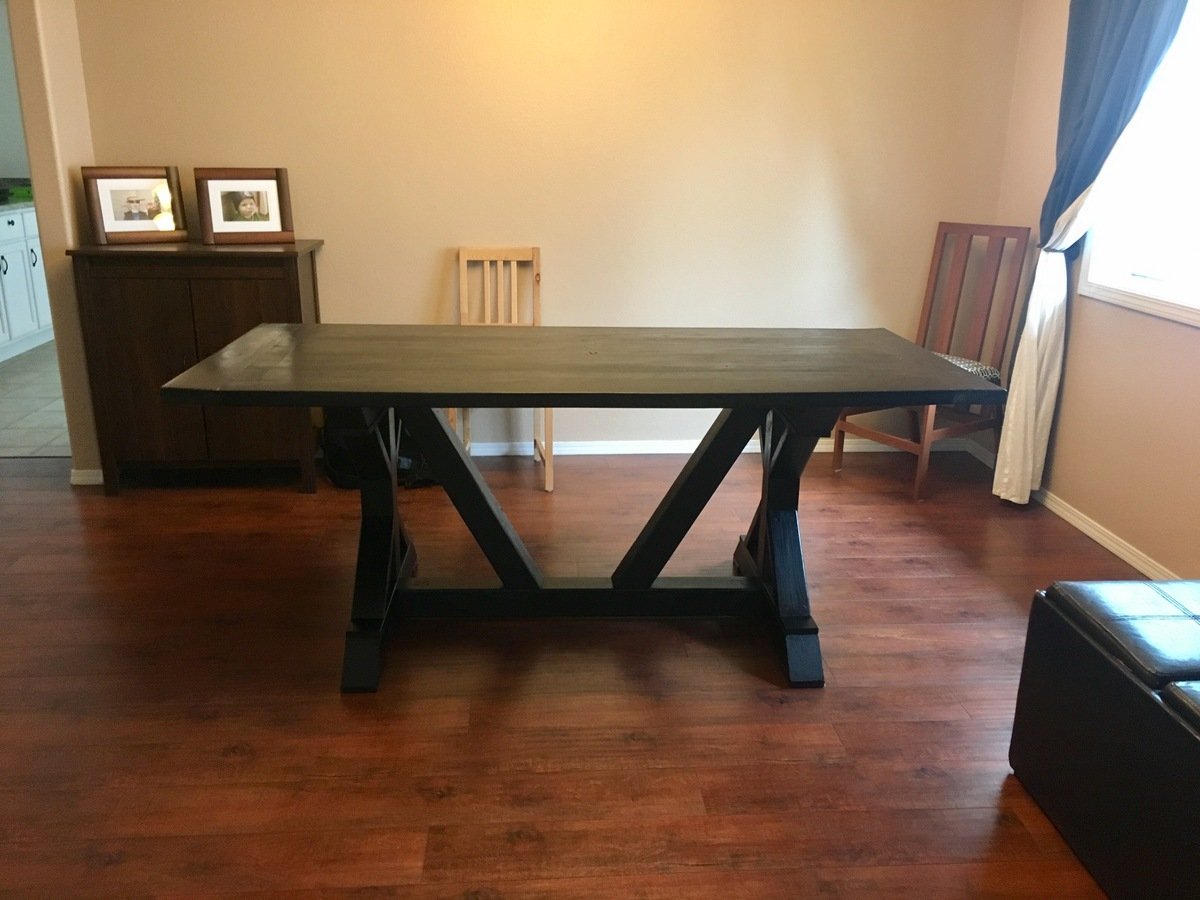
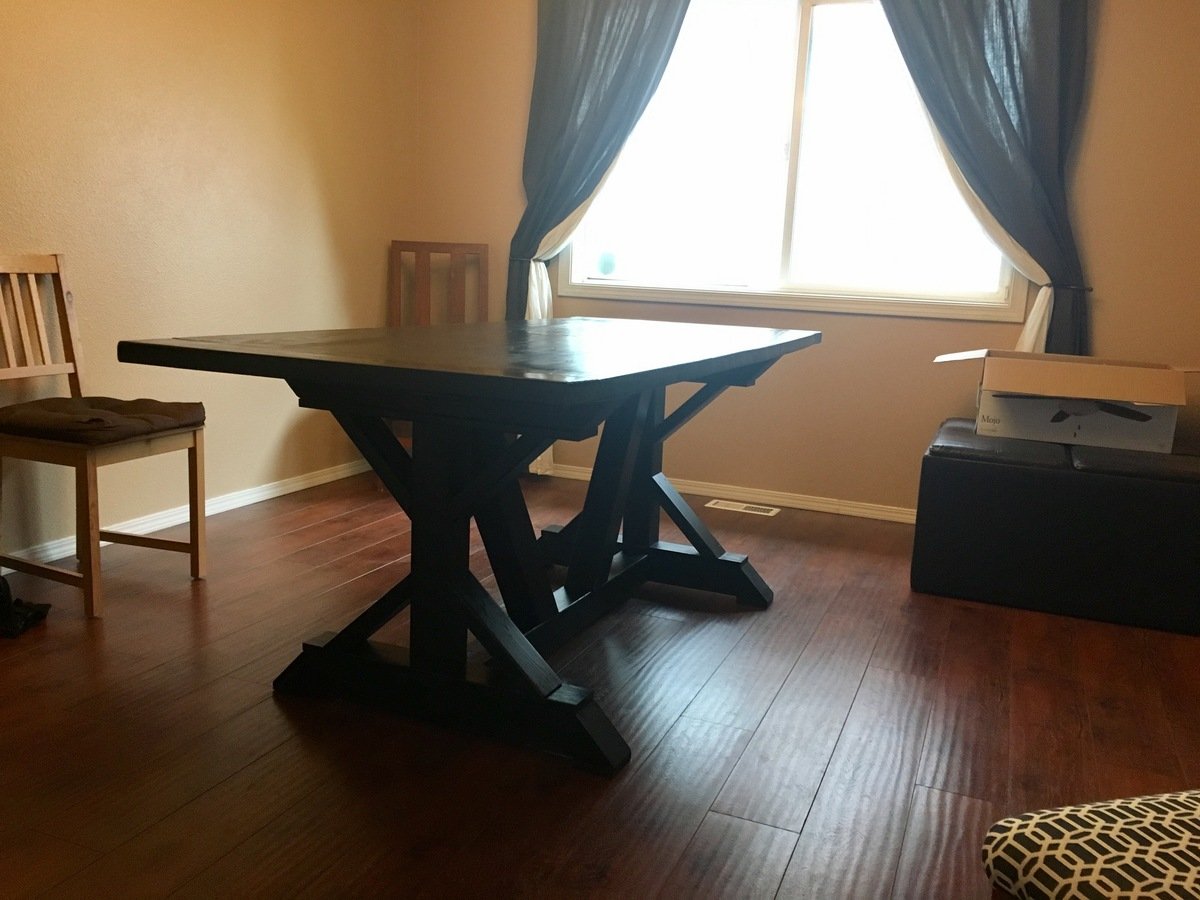
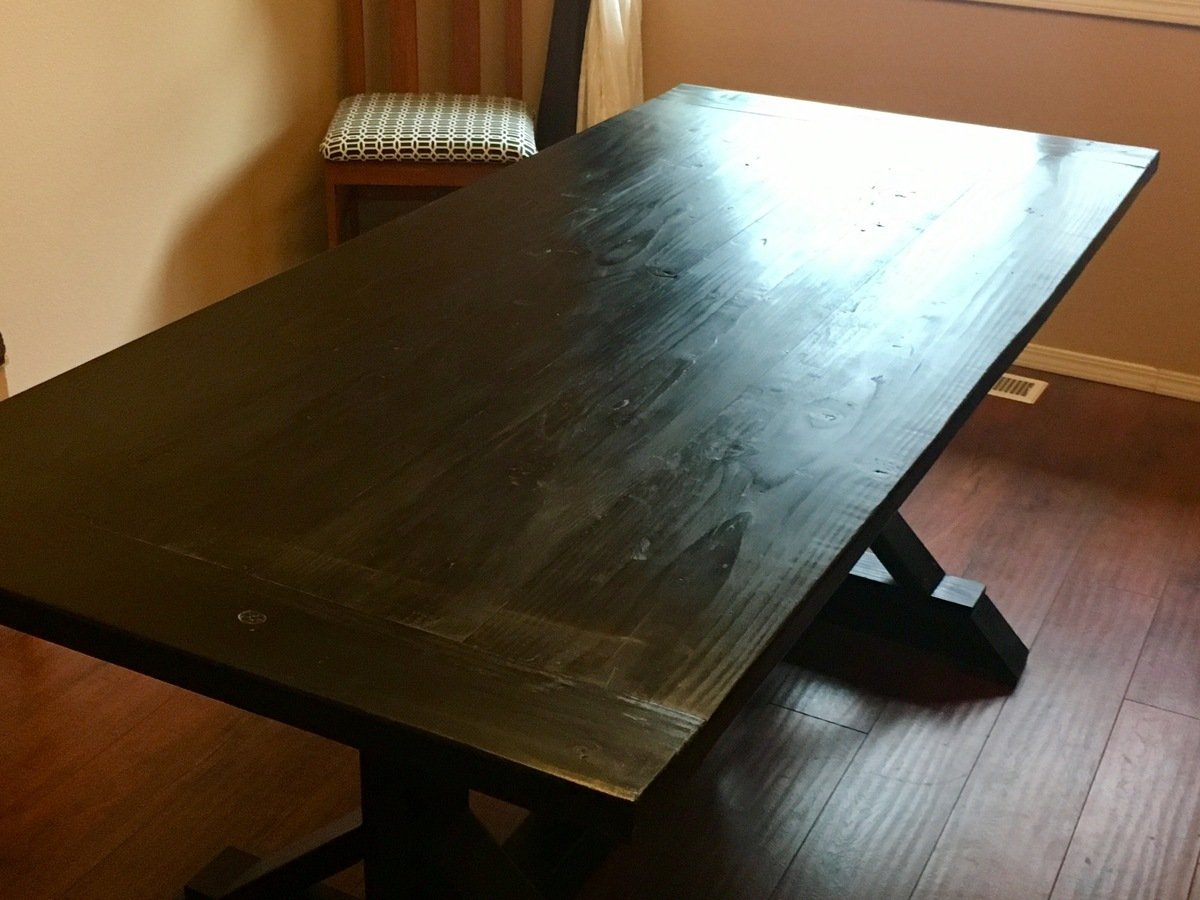
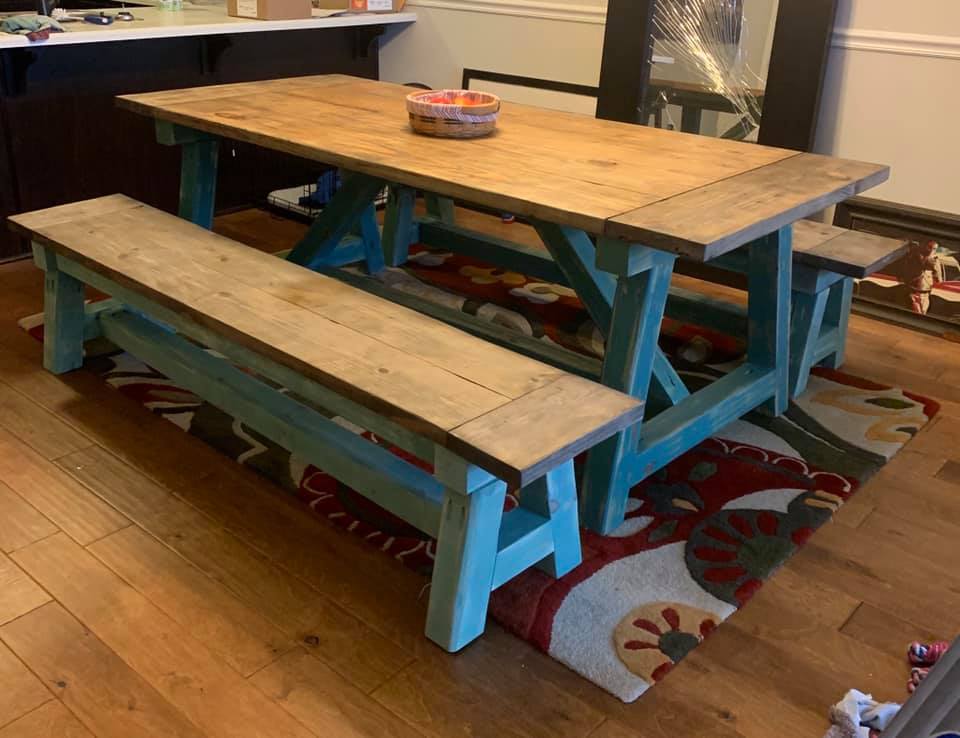
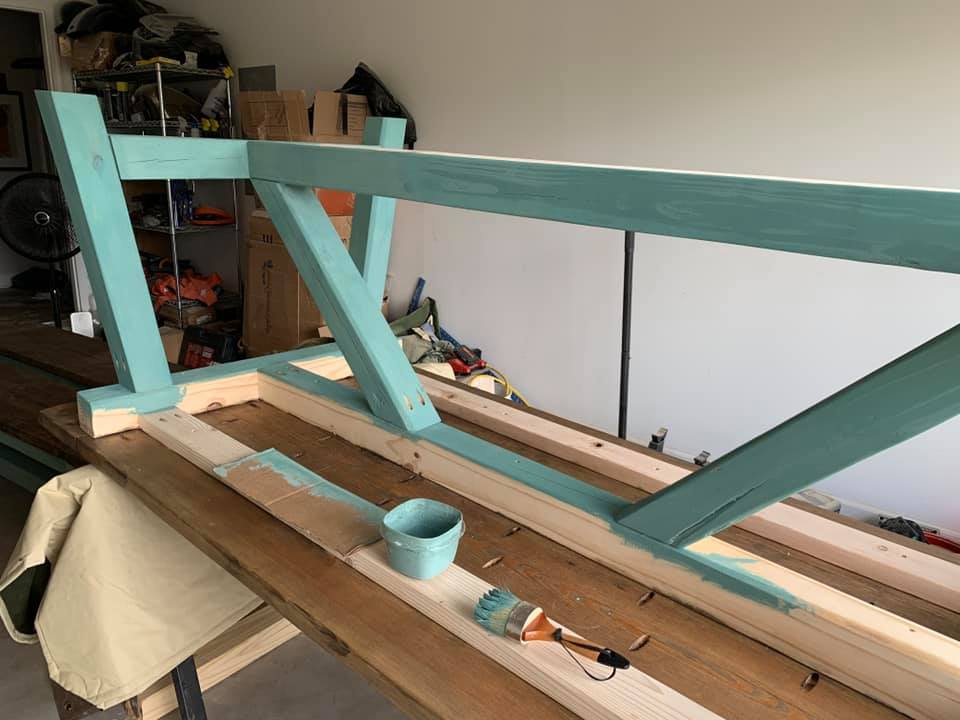
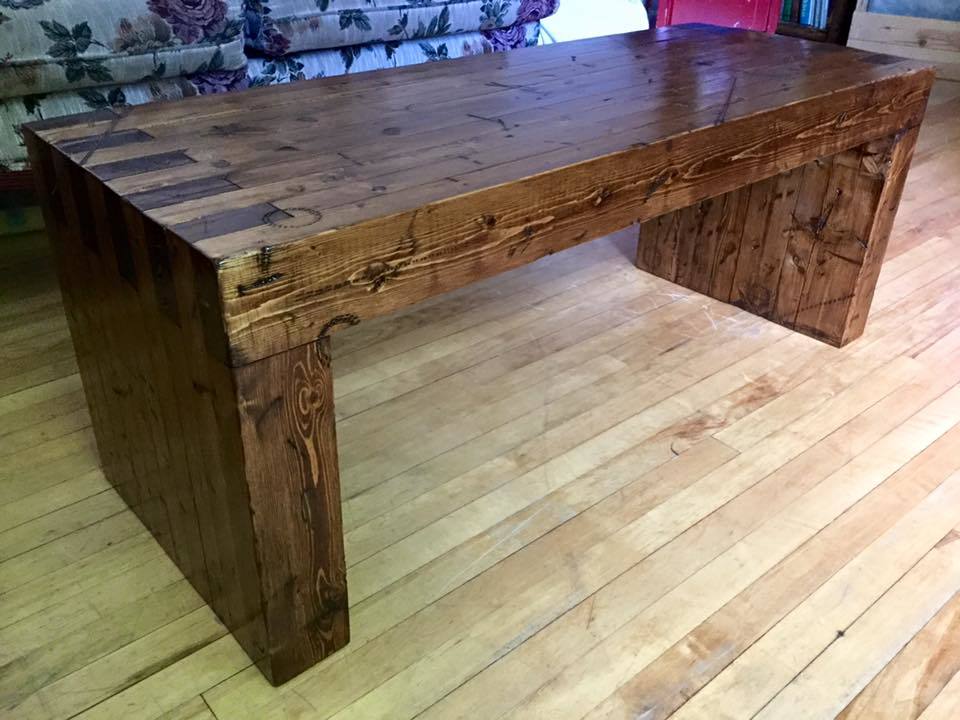
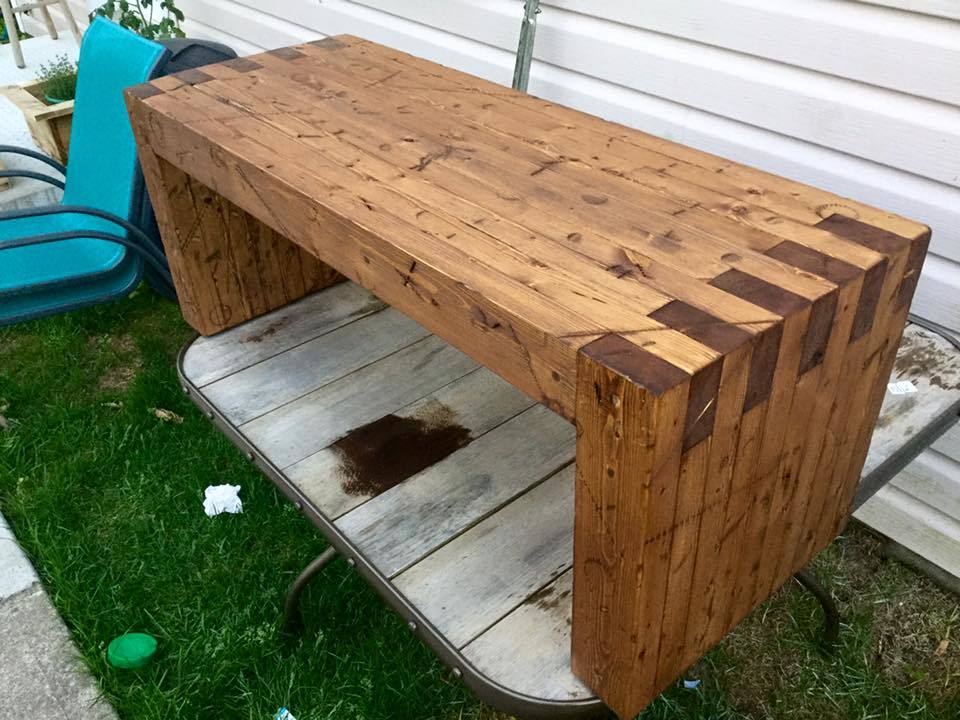
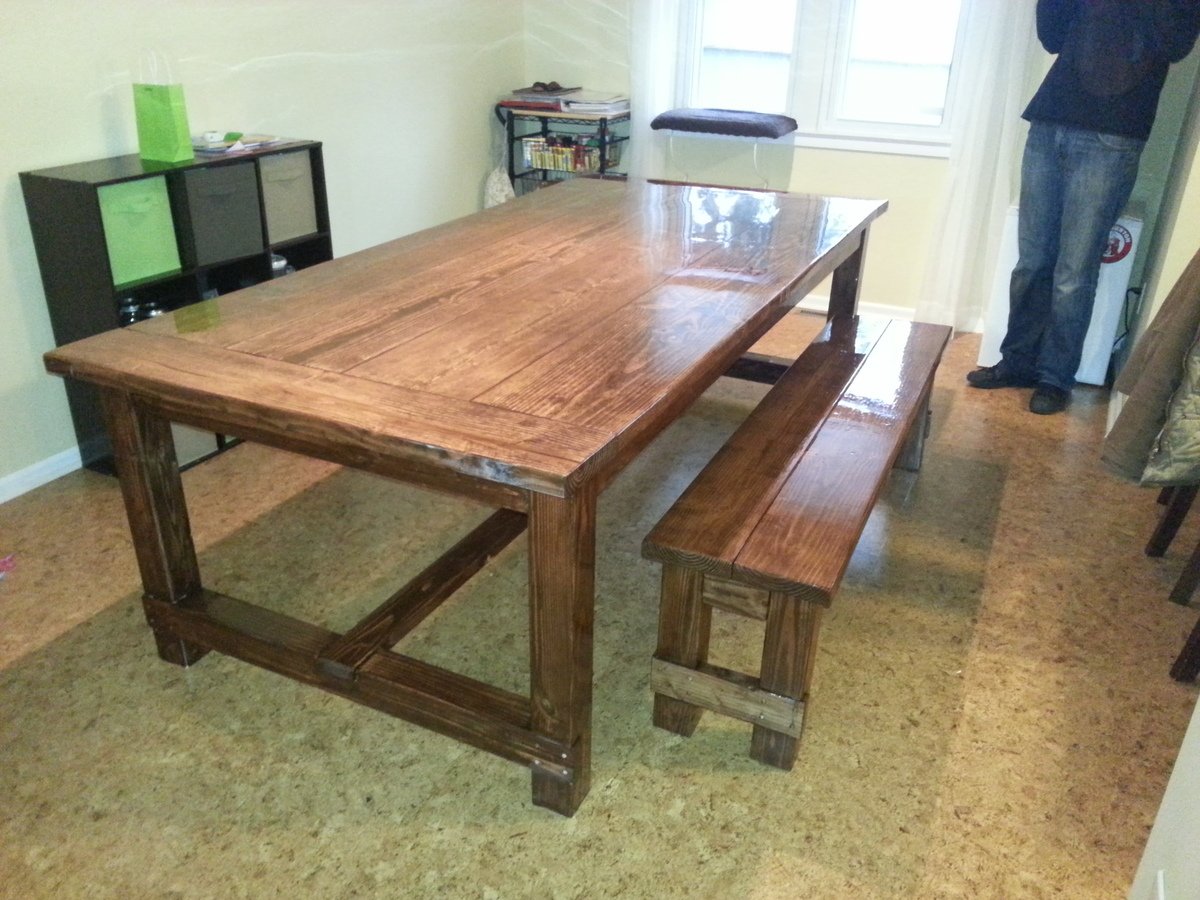
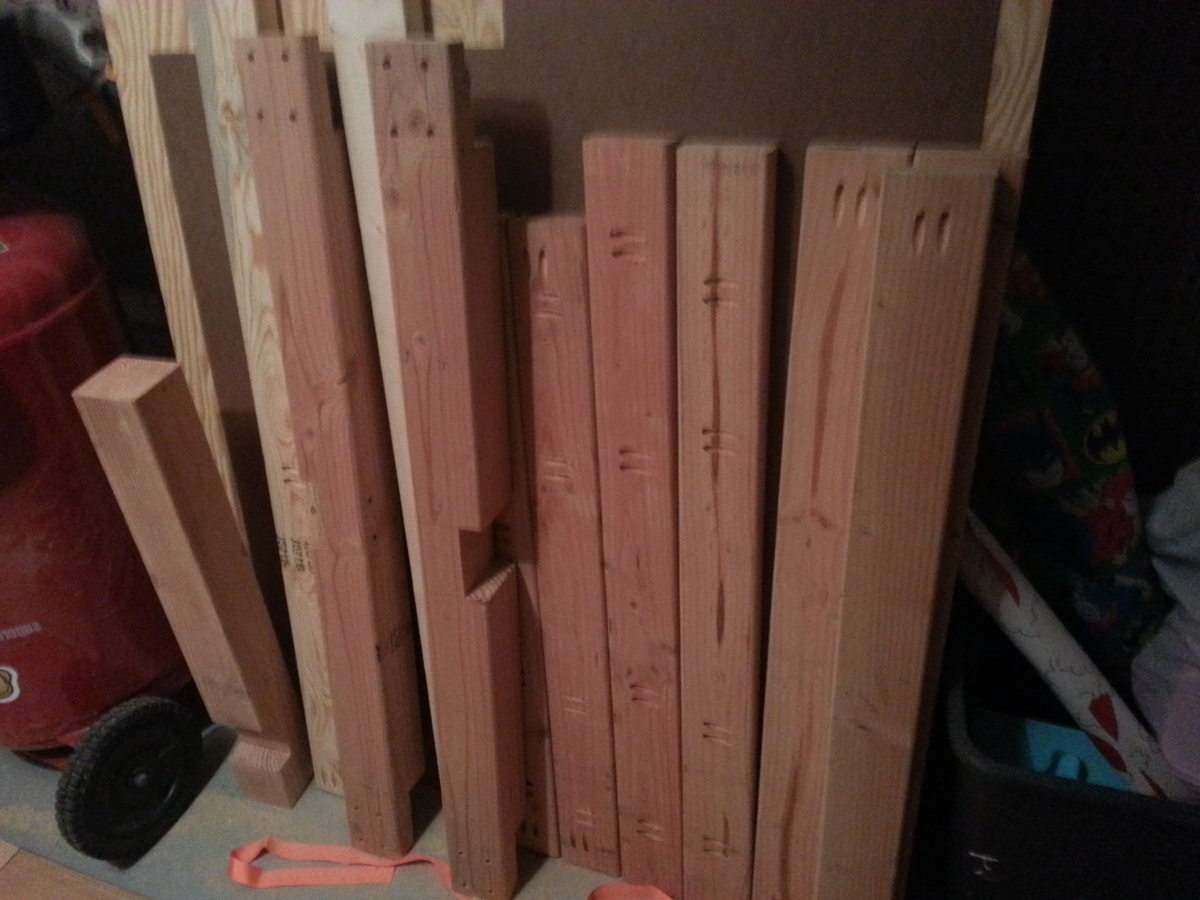
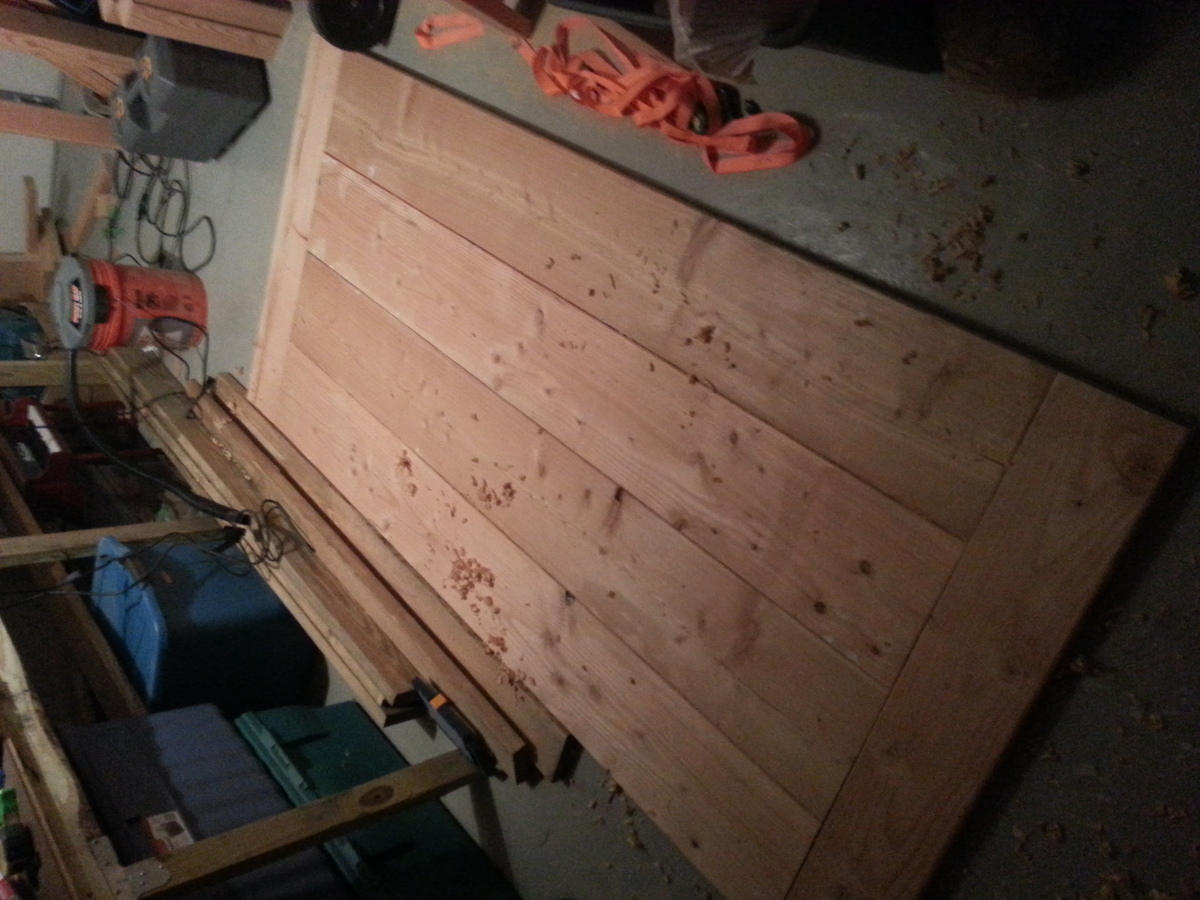
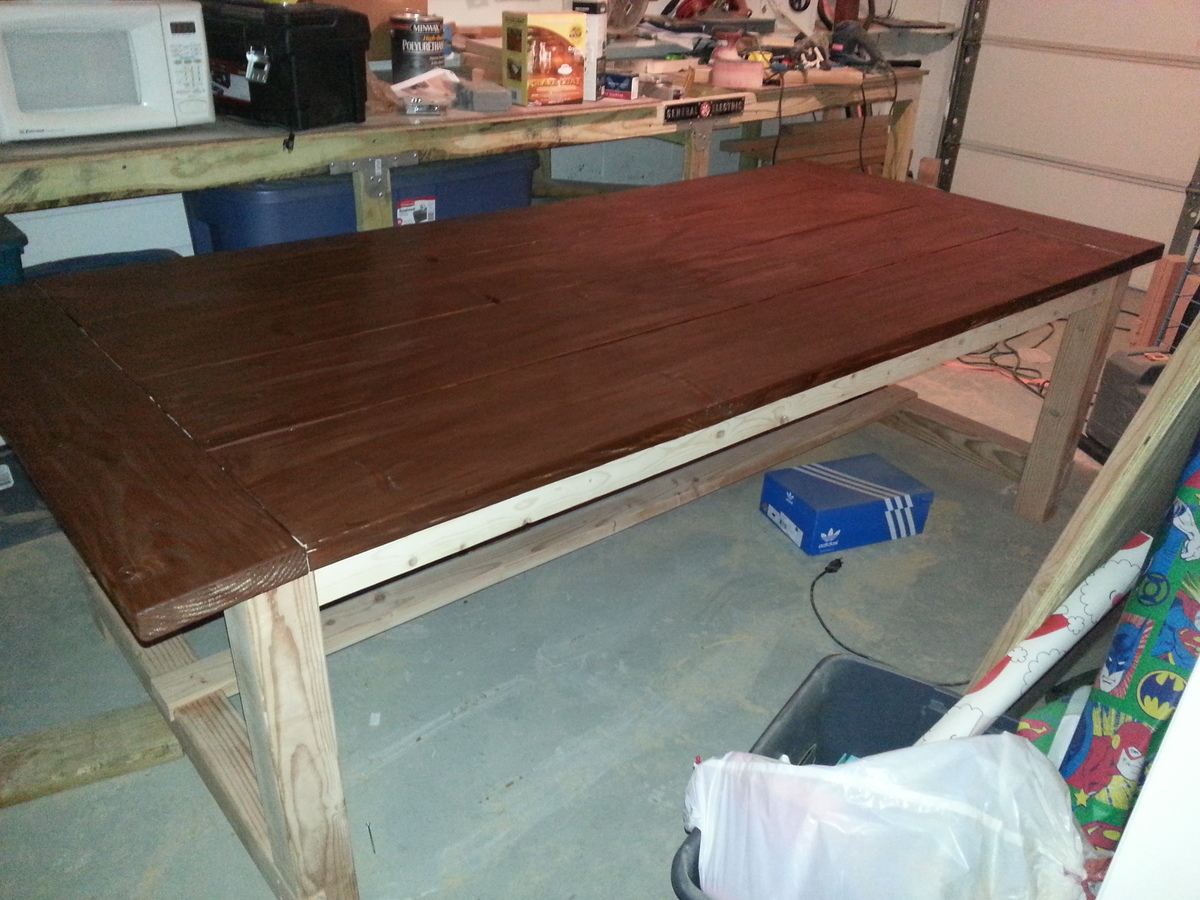
I made two of these tables and they were pretty fun, but were a little more work than I thought they would be. All of the wood is kiln dried douglas fir, as the first table top I made warped as it was green wood and not the look I was going for. I shortened the length to 72" so I had to adjust the angles for the center pieces. I decided to build the tables, stain it, them took them apart and glued important joints, prior to staining the tables a second coat to avoid the glue standing out. I also used 4x4's instead of sandwiched 2x4's as I thought it looked nicer that way. I finished with 9 coats of polyurethane on the top and than a coat of wax using 0000 steel wool to get all the little imperfections out.
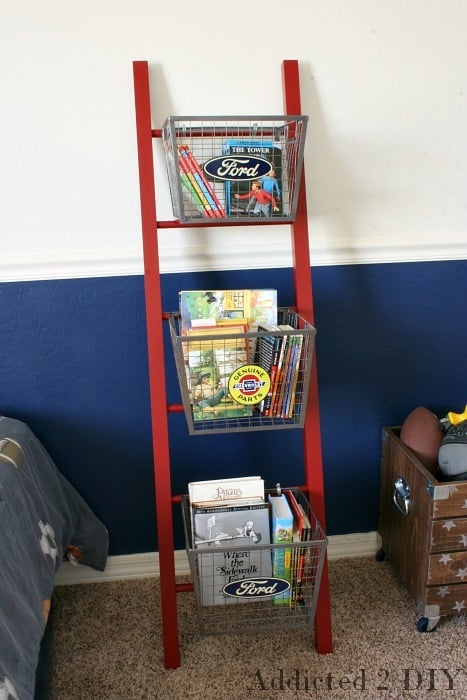
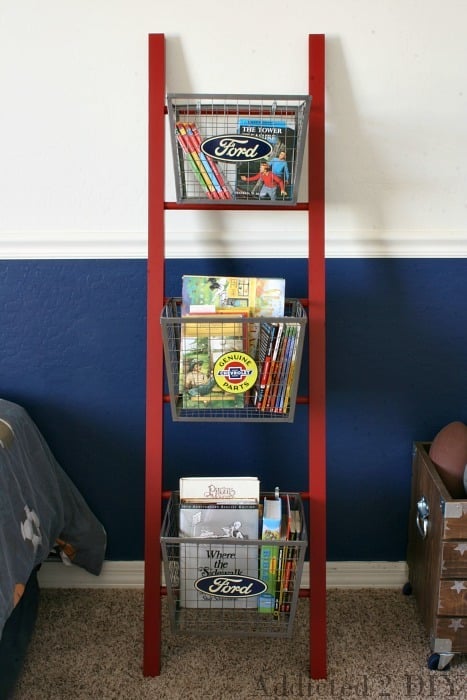
I saw this Ladder Shelf in the PB Teen catalog months ago and knew it would be an easy knockoff project. It took maybe 20 minutes to build the ladder, and then I painted it using a paint sprayer. All-in-all, it only took a few hours to build (minus the glue dry time). And I was able to build it for 1/3 the price of the original! Check out my blog for the instructions on how I built it. http://addicted2diy.com/2014/07/01/pb-teen-inspired-ladder-shelf/

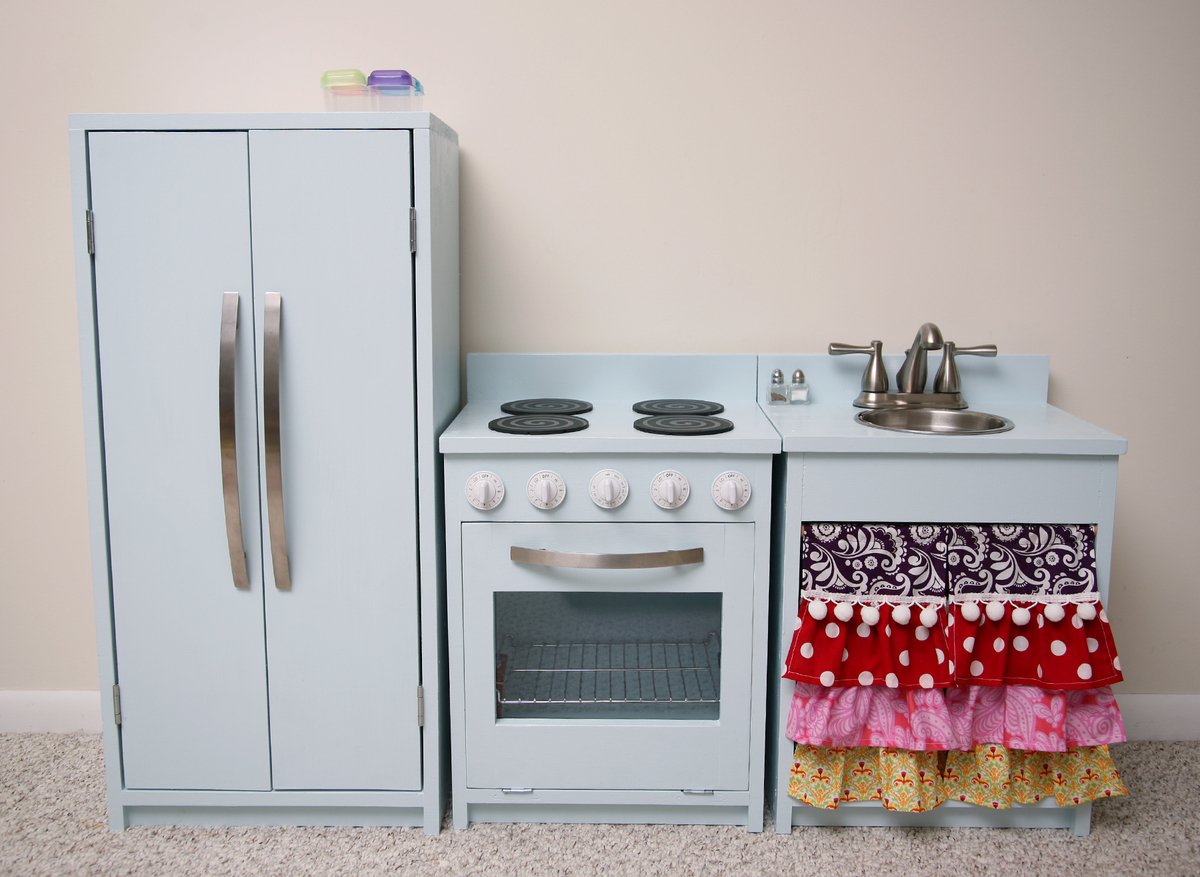
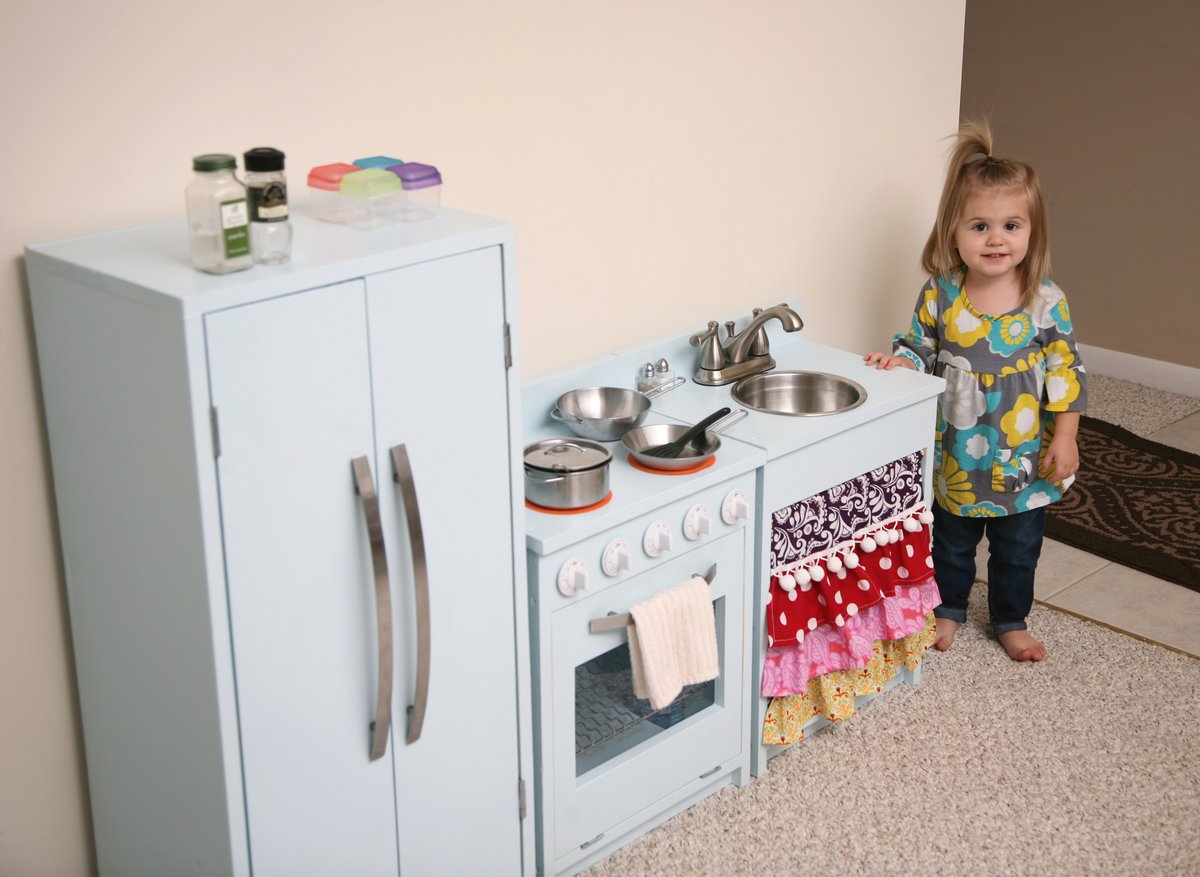
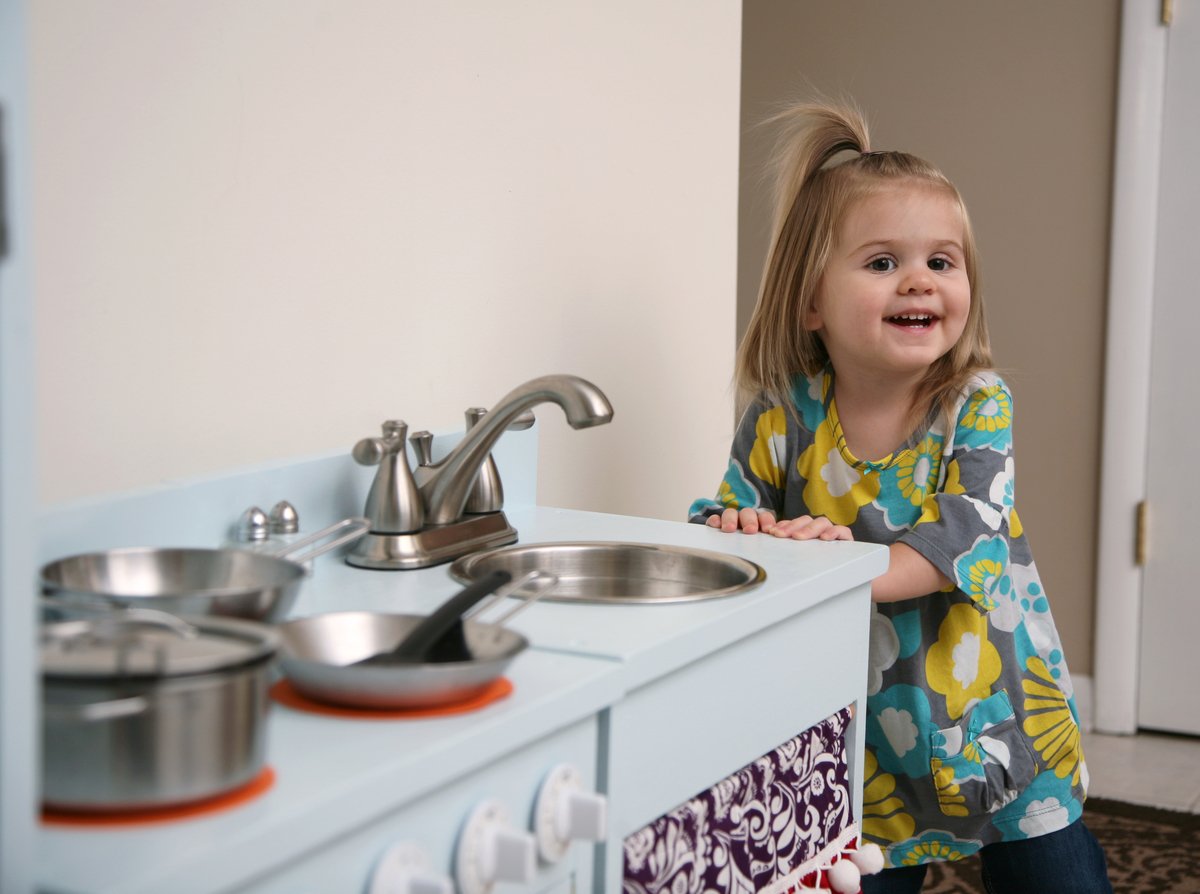
After spending what seemed like forever on Pinterest, drooling over all the adorable DIY play kitchens, I decided to build this one. The plans were so easy to follow and a guy at Lowe's did all the cutting for me, which was a huge time saver. I literally had it actually built in just a few hours with the help of my mom. Then I was able to primer, add two coats of paint, and accessorize over the next few days. I LOVE the results!! And I was so inspired by the one I originally saw online that I even made my own ruffled sink skirt!!! The fabric was leftovers from the handmade crib bedding set that my mom had made for my daughter. So everything coordinates perfectly!! I am in love....I think I even love it more than she does at this point because she is only 23 months old!! :) Hope she'll enjoy it for years to come!
***Update - Just added "burners" to her stove so now it looks complete!!***
Mon, 09/10/2012 - 22:04
Very cute!! What little girl won't love something like this! My oldest son would have loved this. He is 6 now so maybe his little brother may want something like this built.
easy

We live in the south so we opted for treated wood. We weren’t able to locate all the connectors to combine sink sprayer and water hose so we ended up just getting another garden hose and sprayer. Works just as well. We used Smokey Mirror exterior stain to add some color. Didn’t have all the tools handy so we opted for a farm style sink that sits on top of the wood. Kids loving it so far, they have been playing non stop. Thanks for the great plan.
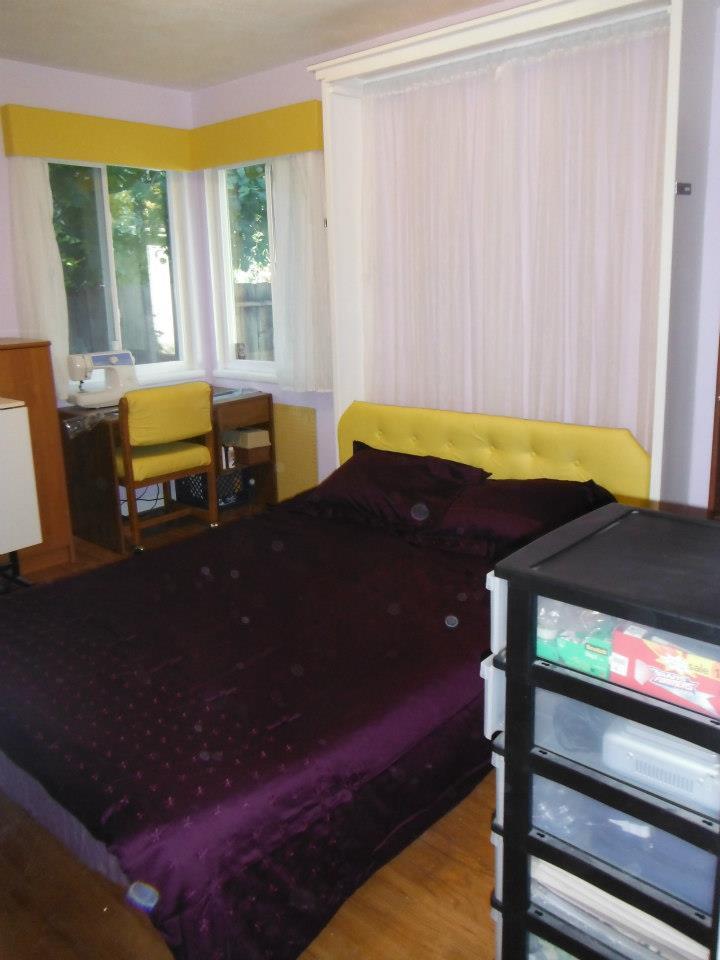
Taking the plans for the full sized Murphy bed (http://ana-white.com/2010/03/plans-a-murphy-bed-you-can-build-and-affor…) I added a few inches to convert to a queen and raised it off the floor 5 1/2 inches with removable fence post toppers.
The yellow head board lifts up and stores inside the frame when up. If I had it to do over again, I would sand and paint as I built. Thanks to Ana, I now have a guest room!
Mon, 10/08/2012 - 11:13
Holy smokes! Great job! I just got my early birthday present - a Kreg Jig Master System!!! One of the first things I will be building is a murphy bed, so thank you for the inspiration.
It looks great!
Fri, 11/30/2012 - 20:18
This is fabulous! What did you use at the backing of the box? Is that fabric? The whole thing looks so nice!
Wed, 02/13/2013 - 11:45
I just wanted to know if you used the jig required or if you used something else? Camille
Thu, 04/25/2013 - 11:44
The jig is not required but it sure makes everything fast and easy
Wed, 04/24/2013 - 19:55
I love your adaptation of Ana's plans. Would you be willing to share the dimension for the queen murphy? Thank you!
Mon, 04/29/2013 - 14:32
I am wondering what king of hinges you used for the bed. Did you use continuous (piano) hinges or regular door hinges? How wide are they? I am not sure what the acceptable width for the hinges is to be safe. Thanks.
Wed, 06/12/2013 - 16:35
What were the altered measurements and exactly how did you raise it? I really like Anas plan except that the mattress was so close to the ground. I want to make this for my apartment and I'm painting the outside like a tardis. (:
Fri, 07/26/2013 - 18:50
I raised it 5 1/4 " using fence post toppers from home depot. The fence post toppers unscrew for upright storage. You could leave them in for a more dramatic look but I liked the cleaner lines with them out until needed
Sat, 11/02/2013 - 15:33
Would you be willing to share the dimensions you used when building your queen murphy? Even if they aren't exact, it would be such a big help to me!
Sat, 12/28/2013 - 22:56
In that same picture, if you look at the bottom 6 inches of the closed bed (under the hinge) there is a storage section where I hide the legs when the bed is raised. It is otherwise dead space and made for an easy storage conversion at the last minute.
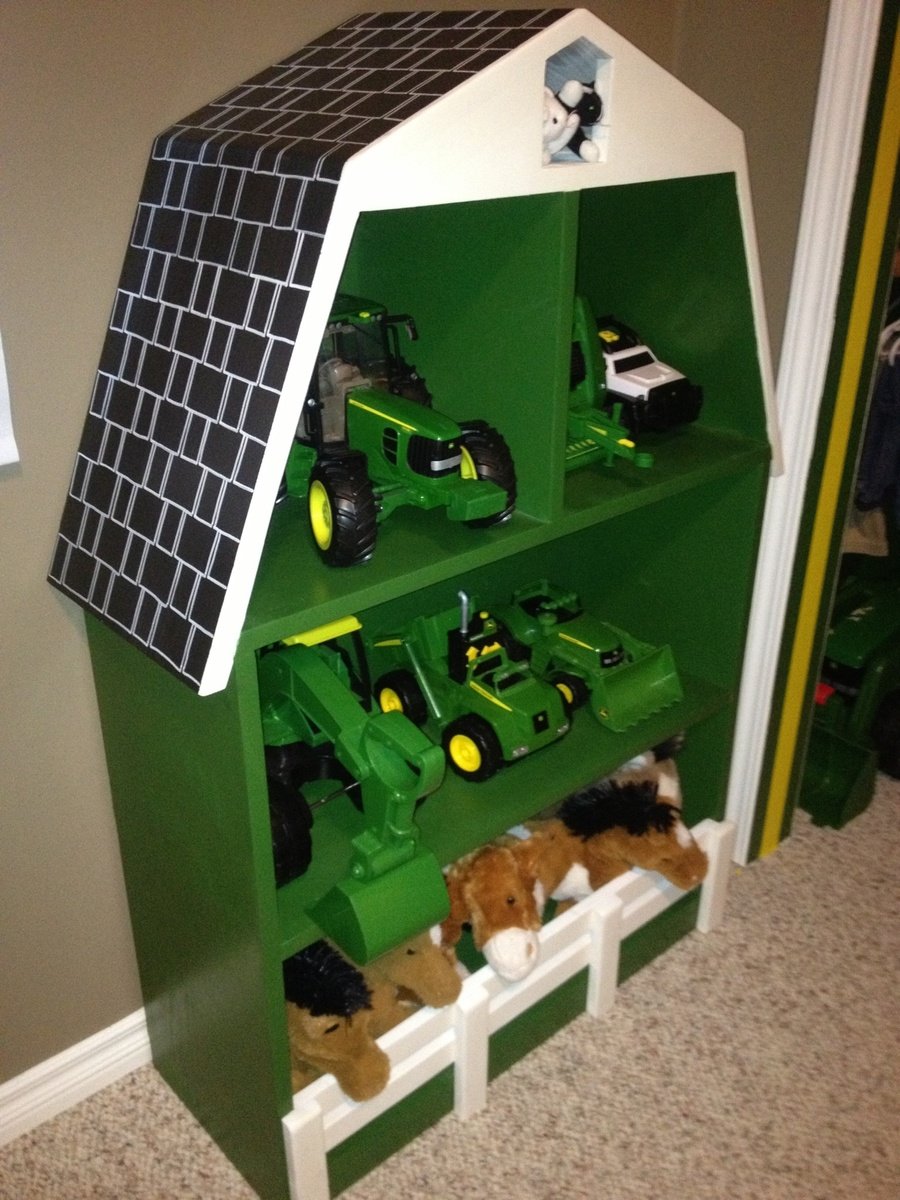
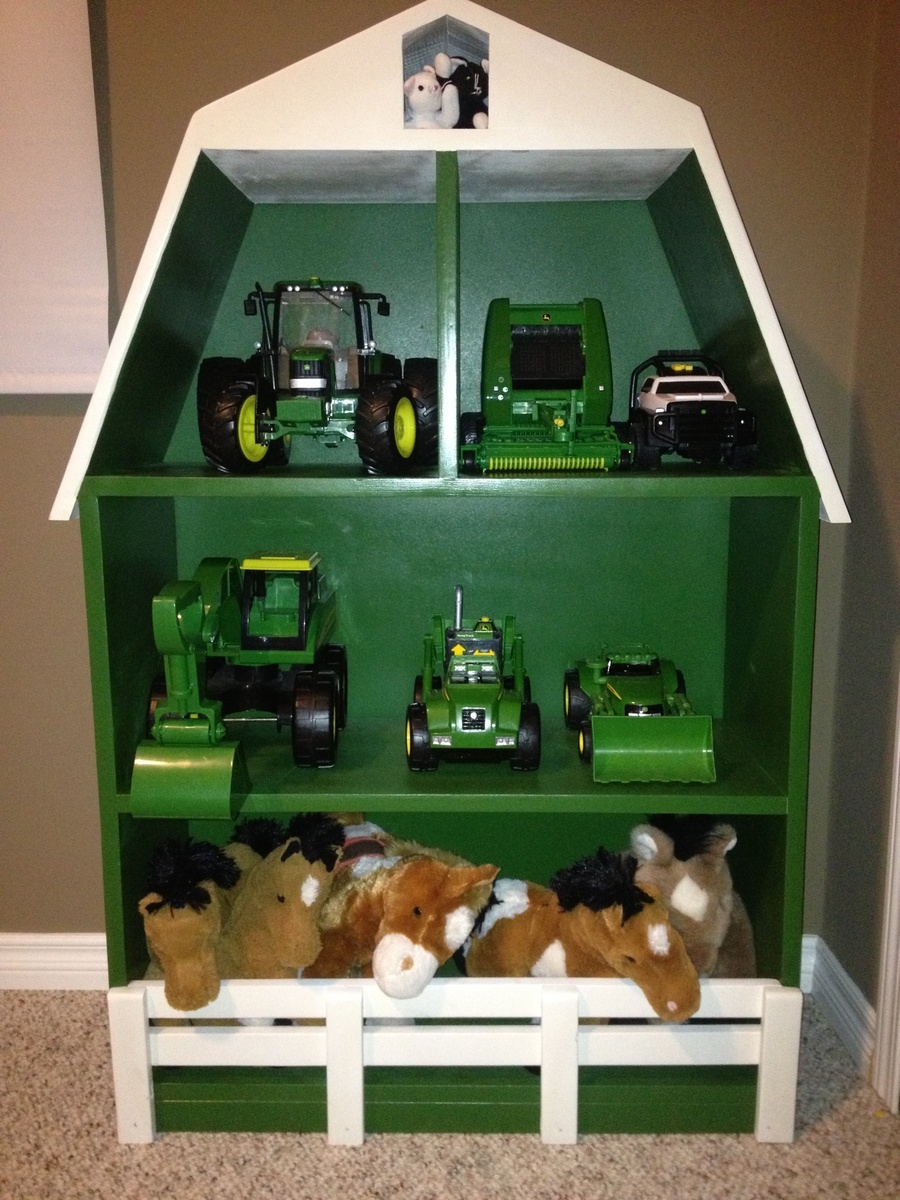
After finishing my boys' new John Deere room and tractor bunk bed (also posted), I saw this plan and thought it would be the perfect thing for some extra toy storage.
Yes, I know, barns are supposed to be red. Everything else in the room is John Deere green and I had paint leftover, which is not cheap. So green it is! I used my new paint sprayer for the first time on this project and am thrilled with it. I would recommend it to anyone who dislikes painting as much as I do. I bought the Wagner Flexio 590 which comes with a detail sprayer as well as the full size and I'm very happy with both.
Thanks to Ana for the well laid out, easy to follow plan and also for helping me create a big boy room that my boys love!
Thu, 07/31/2014 - 07:24
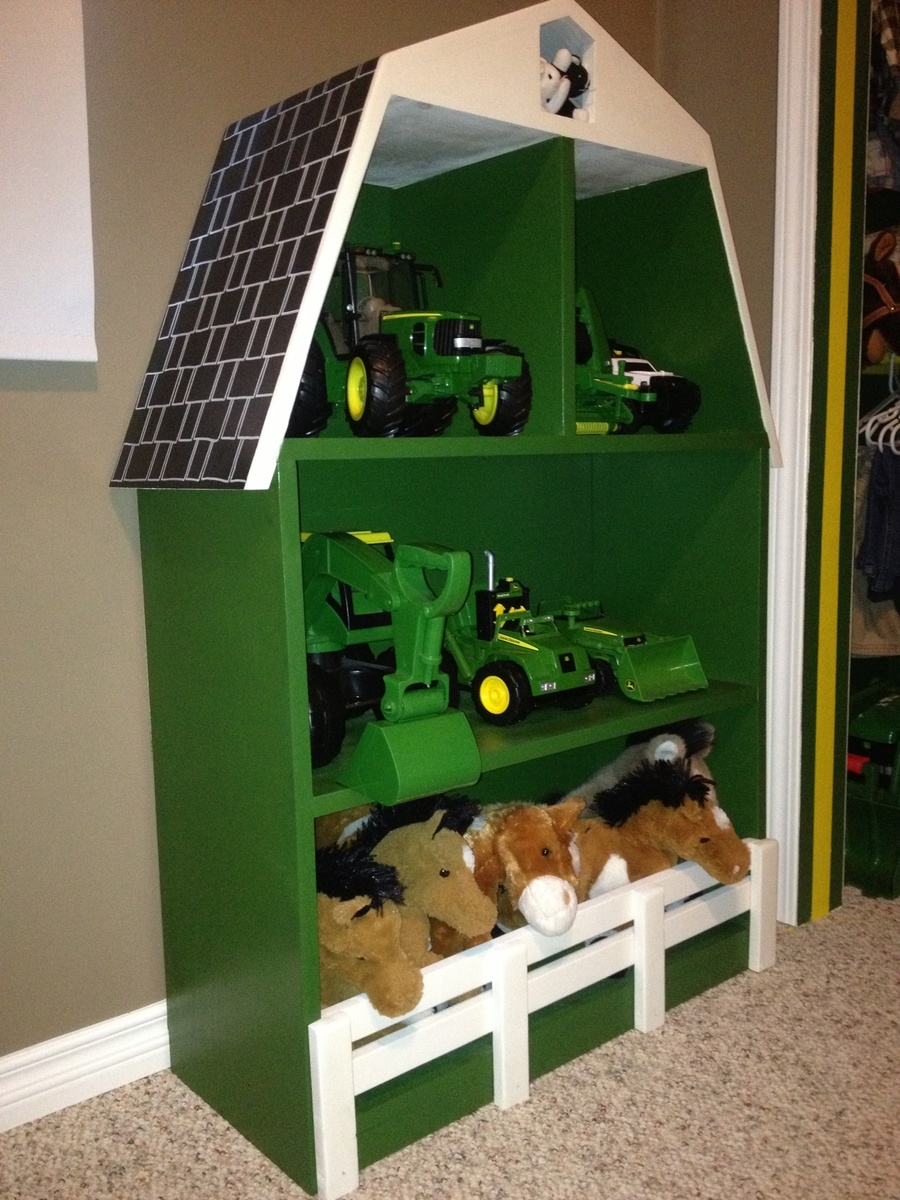
I love this. :) I especially love the spacing of your horses and cats... very realistic. lol. I also saw the bed when you posted it. VERY impressive little details!
Thu, 07/31/2014 - 09:38
Thanks so much for your comments. It's so nice to hear positive feedback since I'm very new to this! My 3yr old is quite particular about everything being in its place, I'll pass along that you liked his animal placement. Lol :)
Sun, 09/27/2015 - 18:26
Could u please send me the plans for this? My email addy is [email protected]
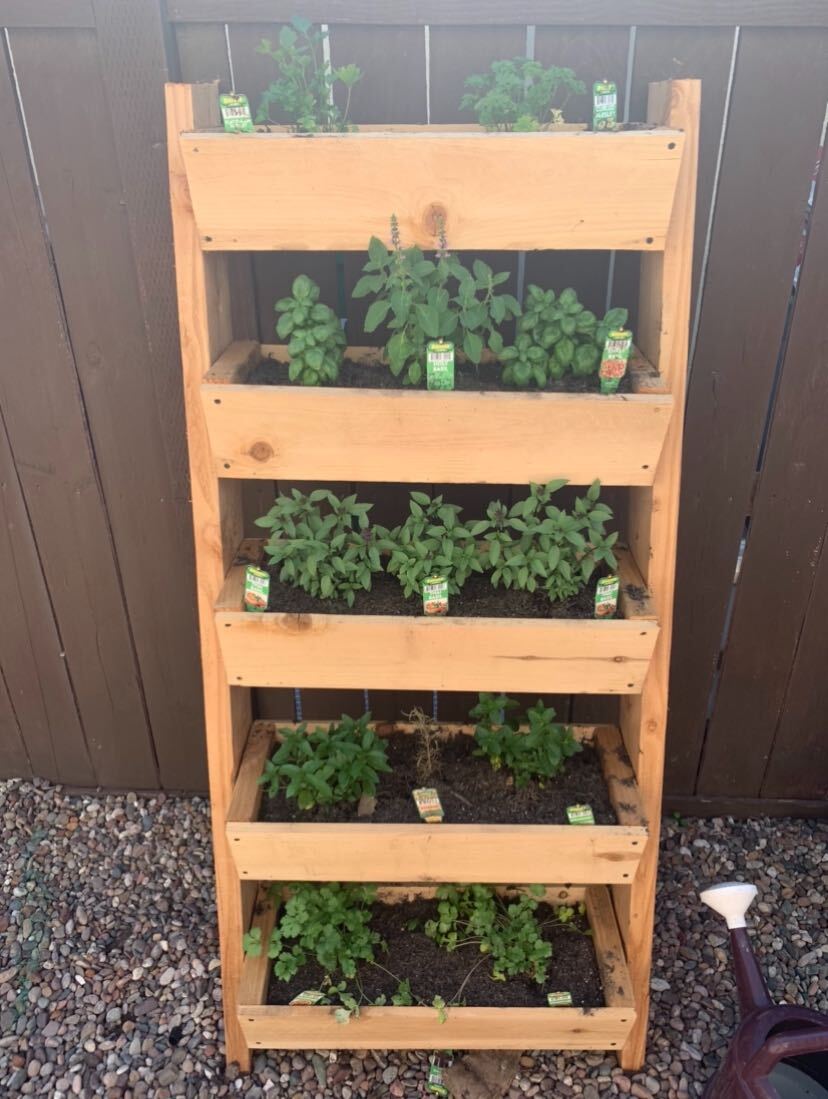
Staying at home during this pandemic pretty much inspired a lot of families to build, discover a new hobby or have their own vegetable garden. Built this ladder garden recently but had to cut it a little short because fences here in California are not as high, at least most I think. We use it to plant different kinds of herbs that we actually use like basil, Thai basil, peppermint, cilantro and parsley and loving it so far.
Sat, 08/22/2020 - 11:36
Hi - This looks very nice!
Are there any plans available?
Best,
Eric
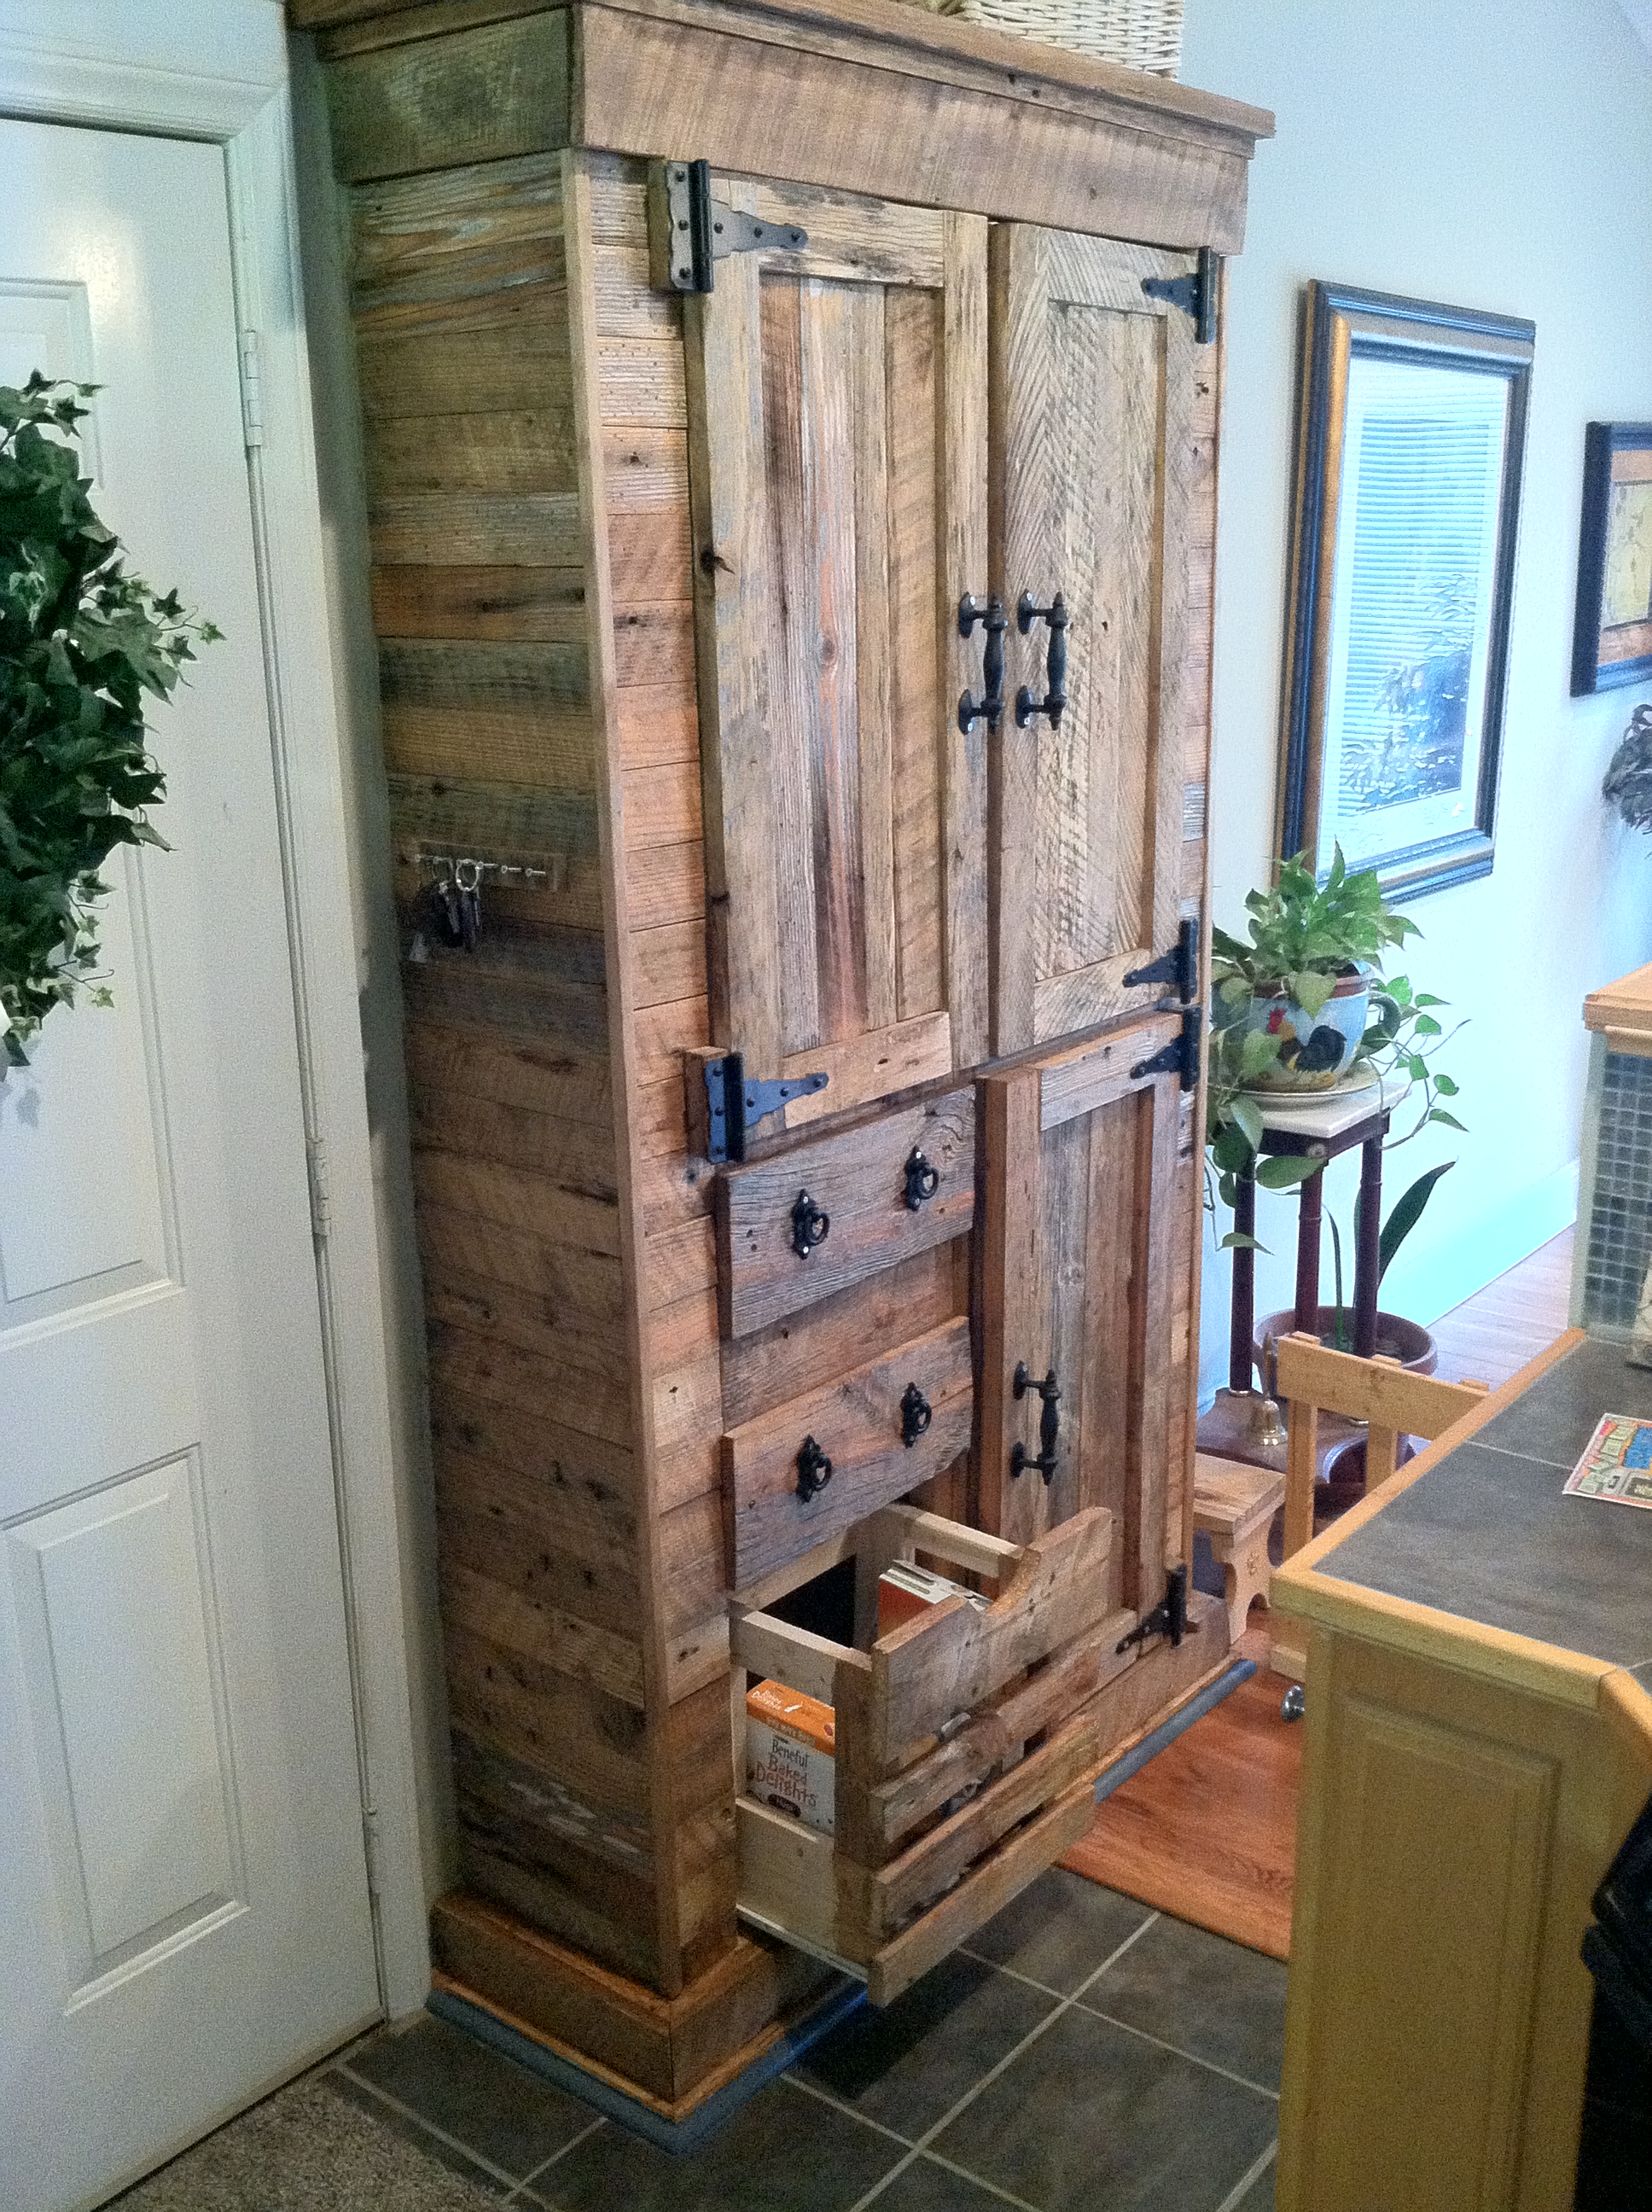
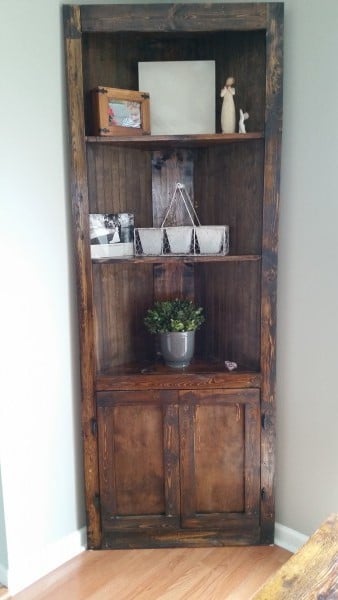
Built this out of old Barnwood Pine !
Sun, 11/02/2014 - 18:27
This is beautiful and I just purchased my first home with my fiance and we have an old farm house. This would be amazing in our kitchen as our pantry. I must attempt to make it! Please help me :)
Sun, 11/29/2020 - 15:26
Where can I find the plans for the barn wood pantry? I NEED to make this!!???
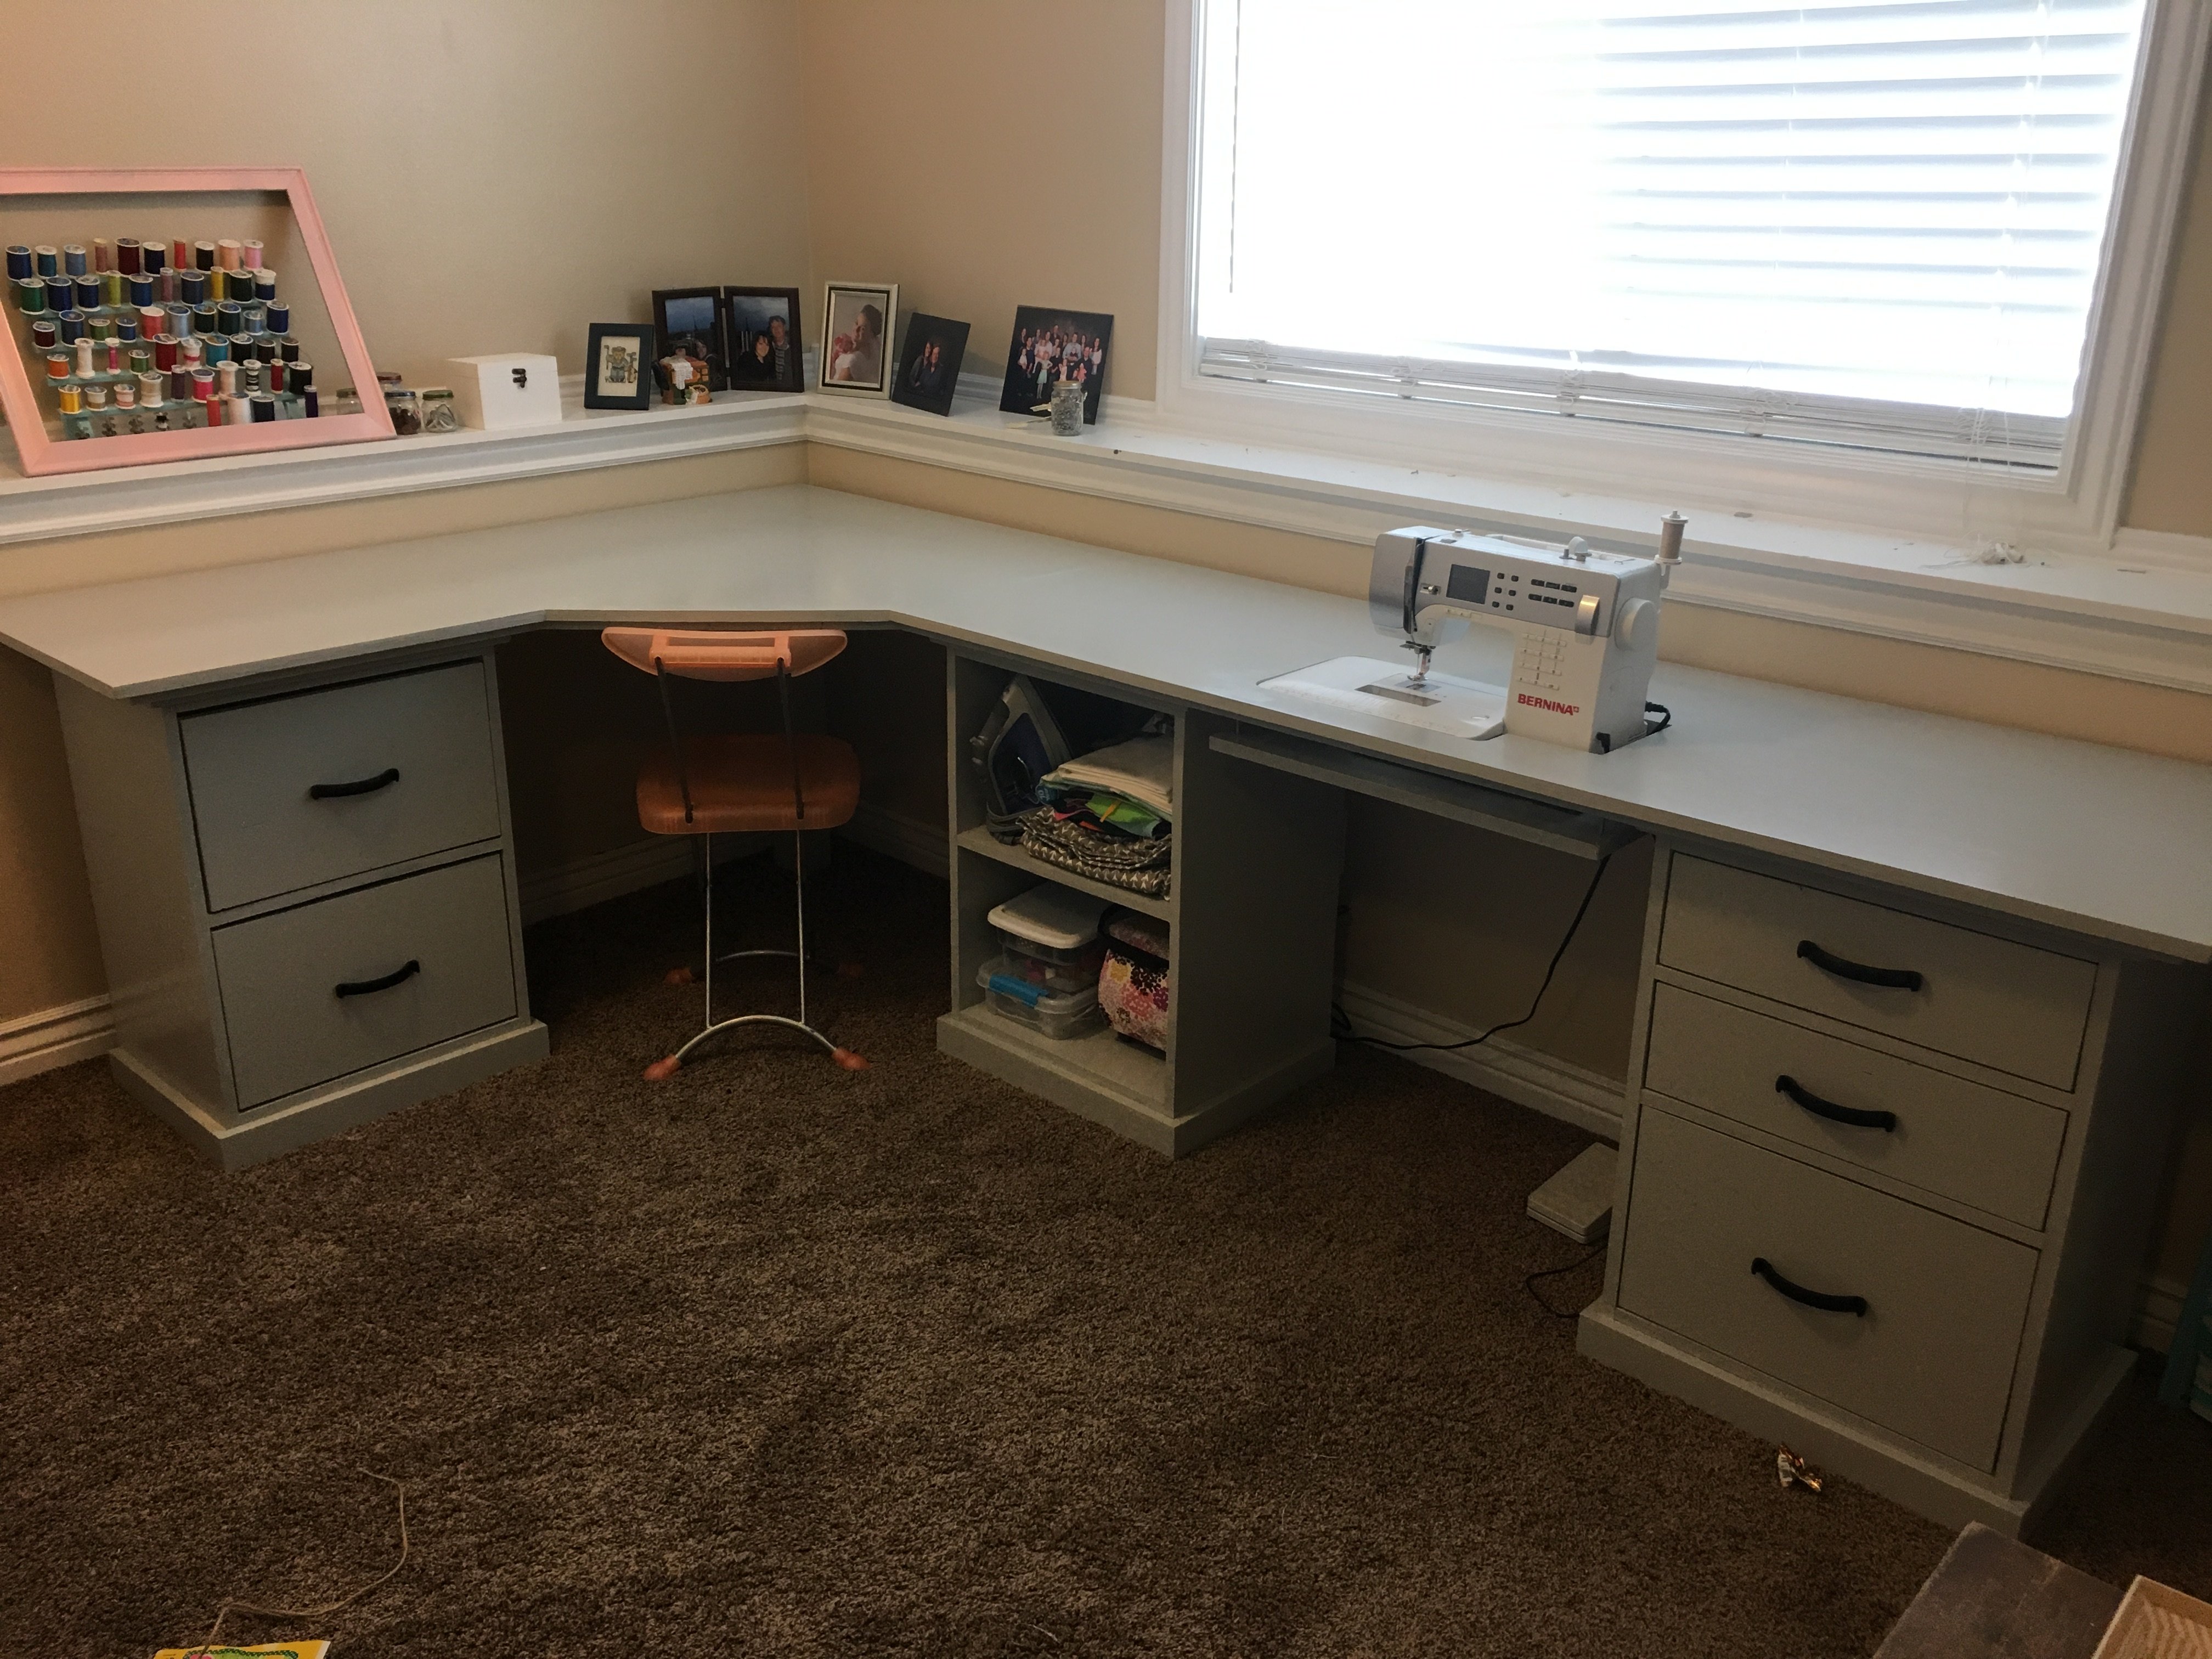
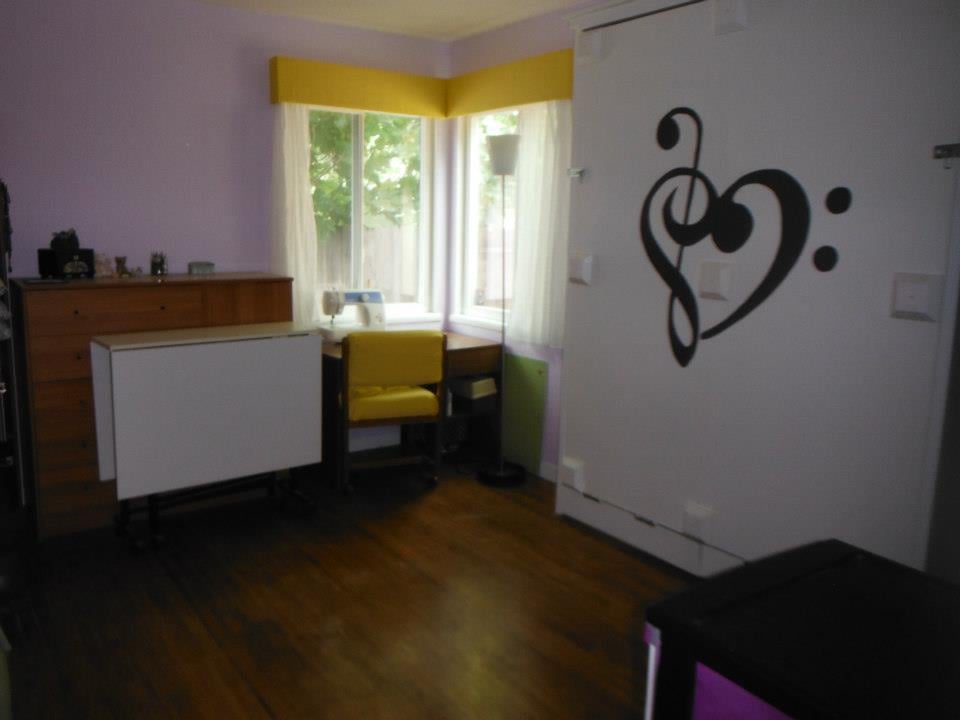
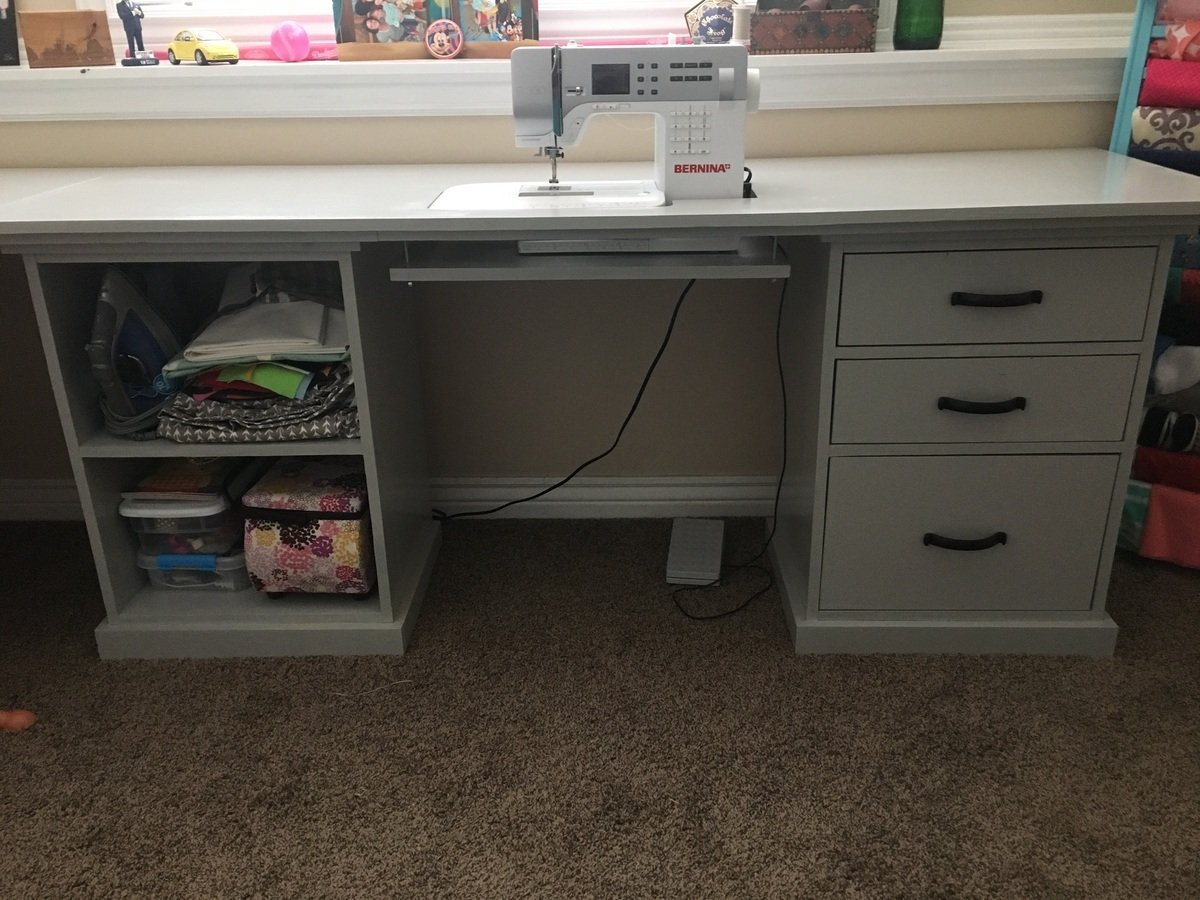
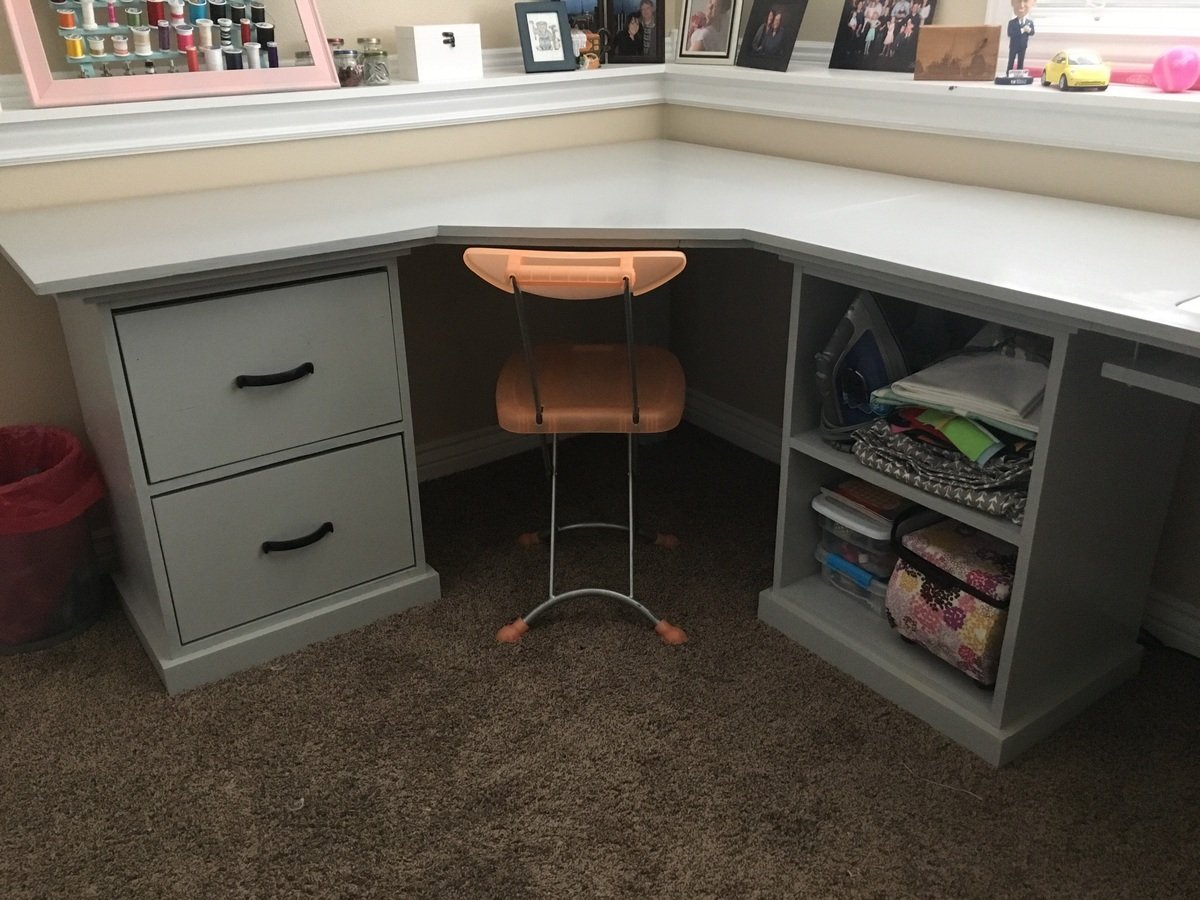
We built three base units-each with different storage options and used the corner desk plans. Then created our own long desk top using a 6ft long board and using a jigsaw to create an open space for the sewing machine.
Mon, 01/20/2020 - 07:49
It seems to me that this room is suitable for yoga or painting.
Mon, 12/27/2021 - 18:28
How did you go about cutting the hole for the sewing machine and what extra building did you do underneath?
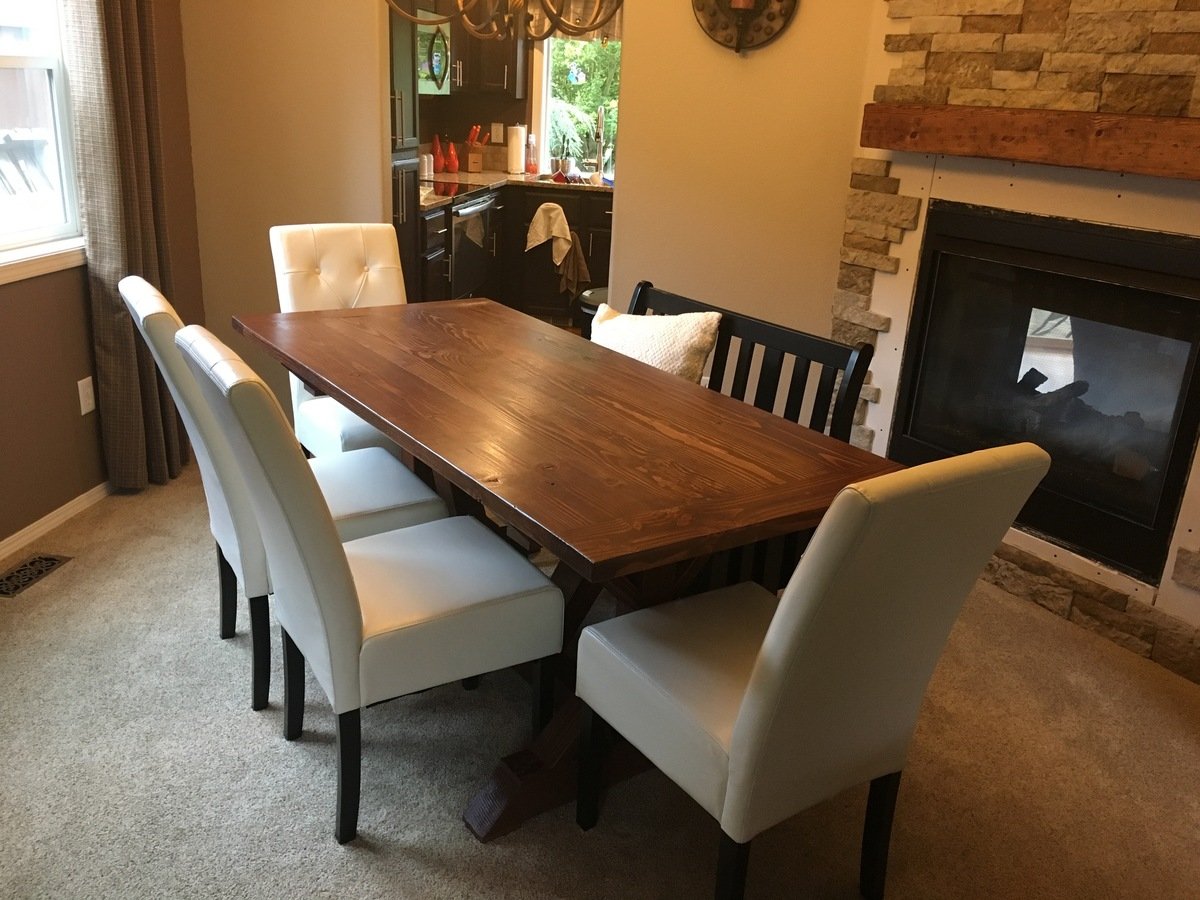
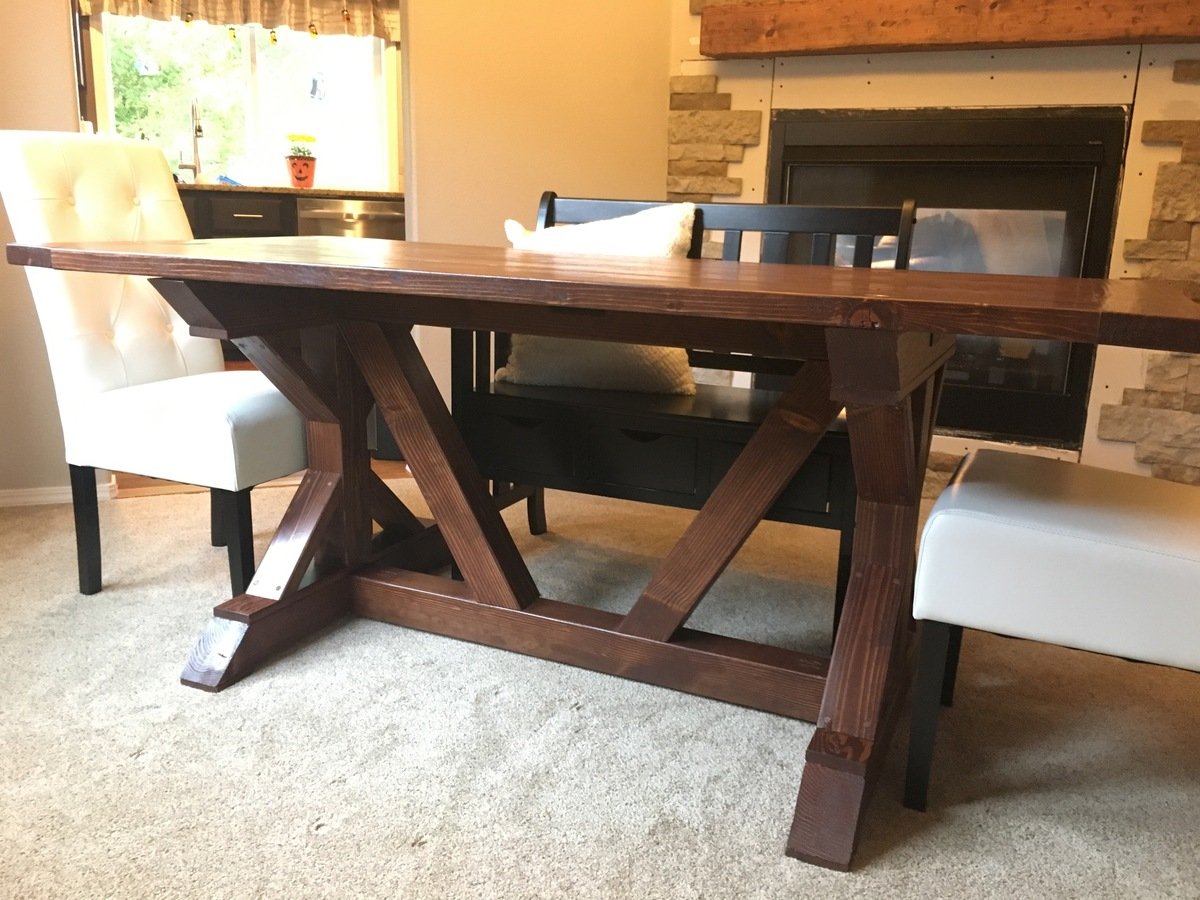
I followed the directions for every step but the down strut supports in the middle of the table. I reversed them purely for aesthetic reasons, I thought i looked better that way.
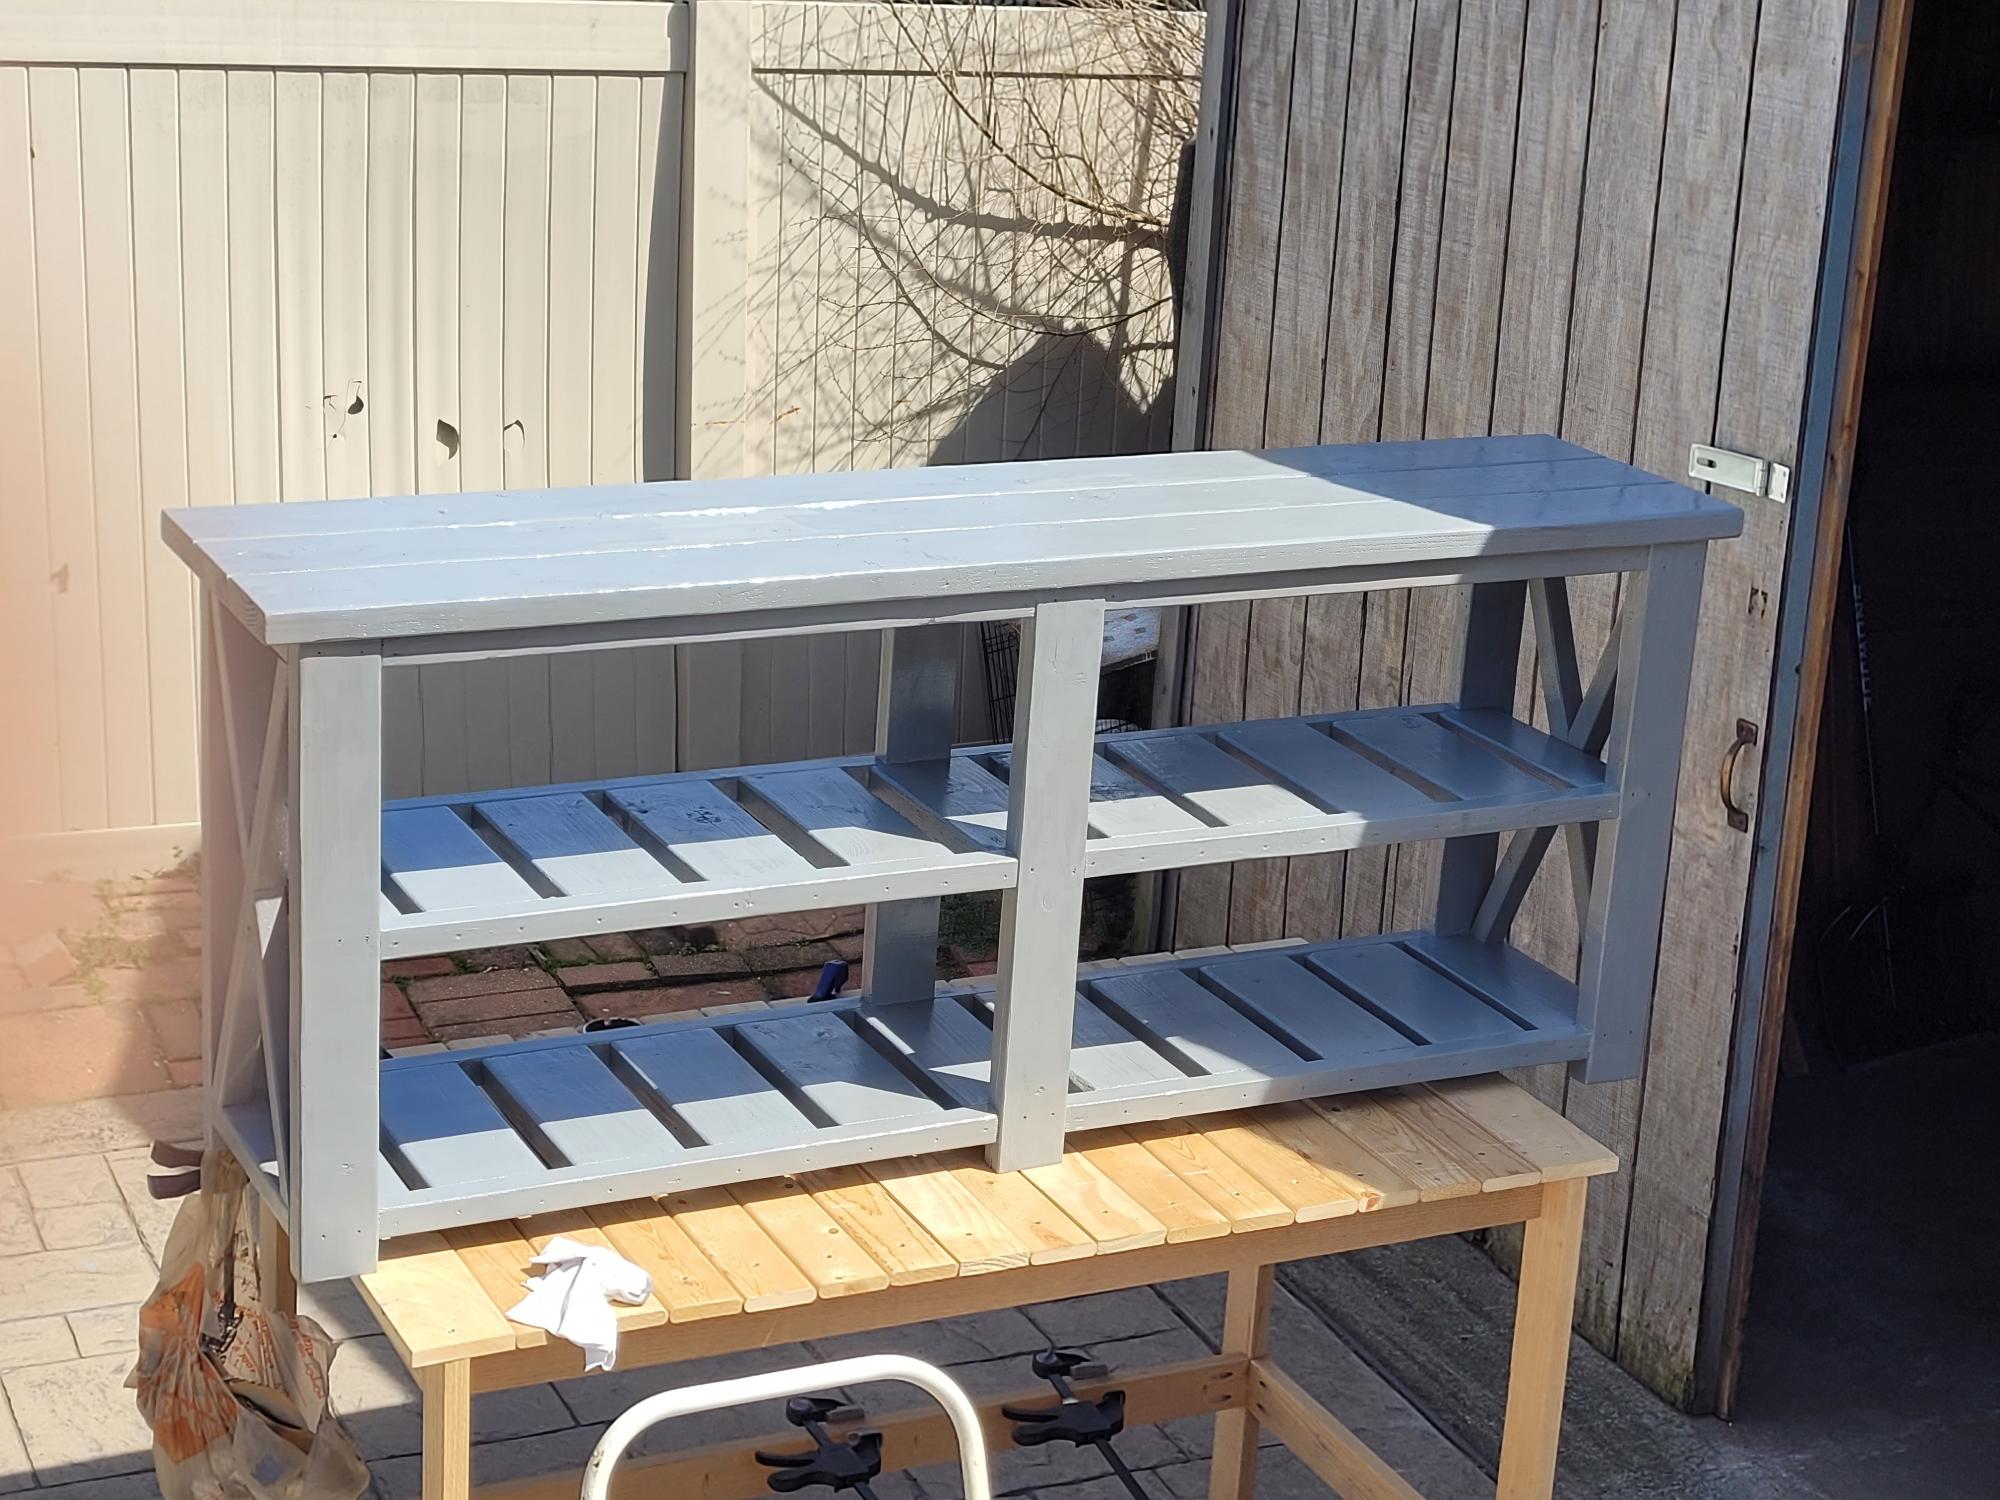
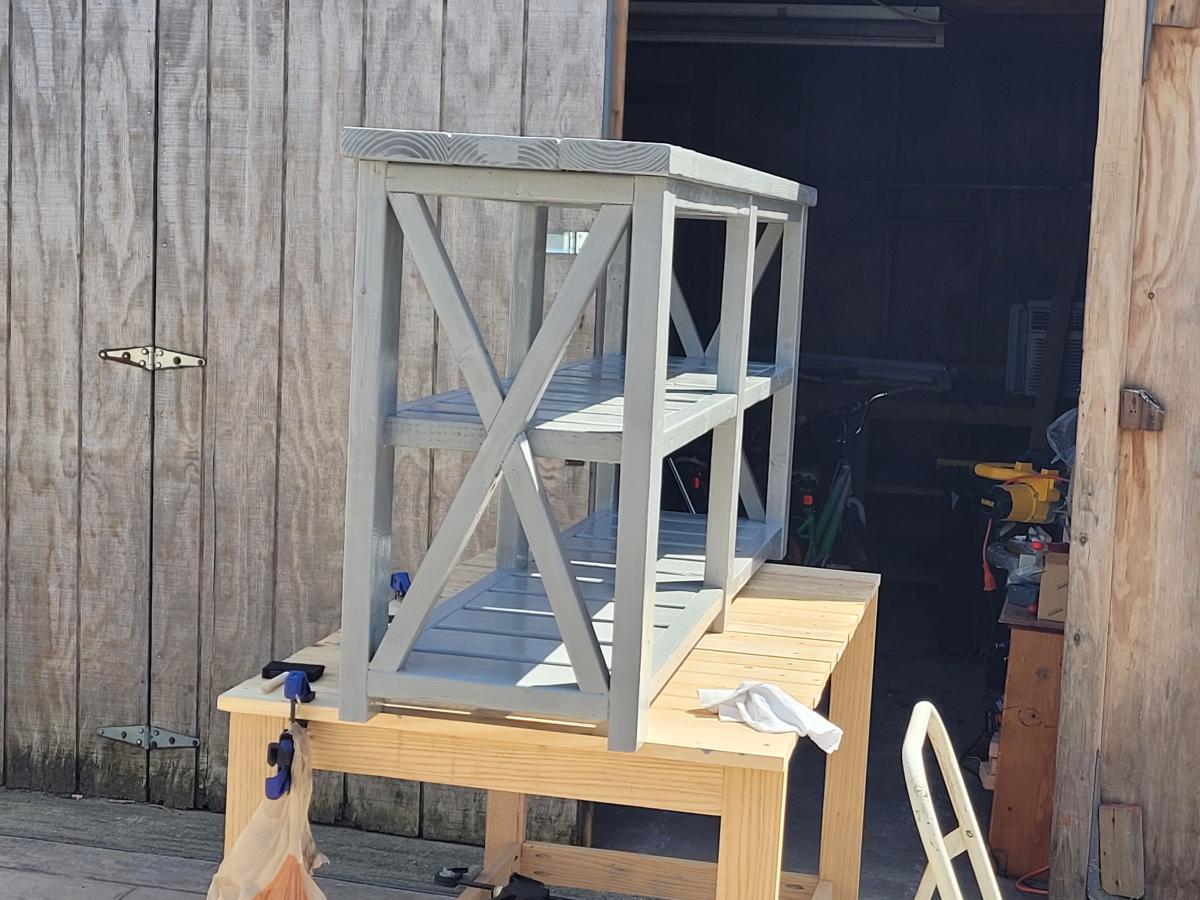
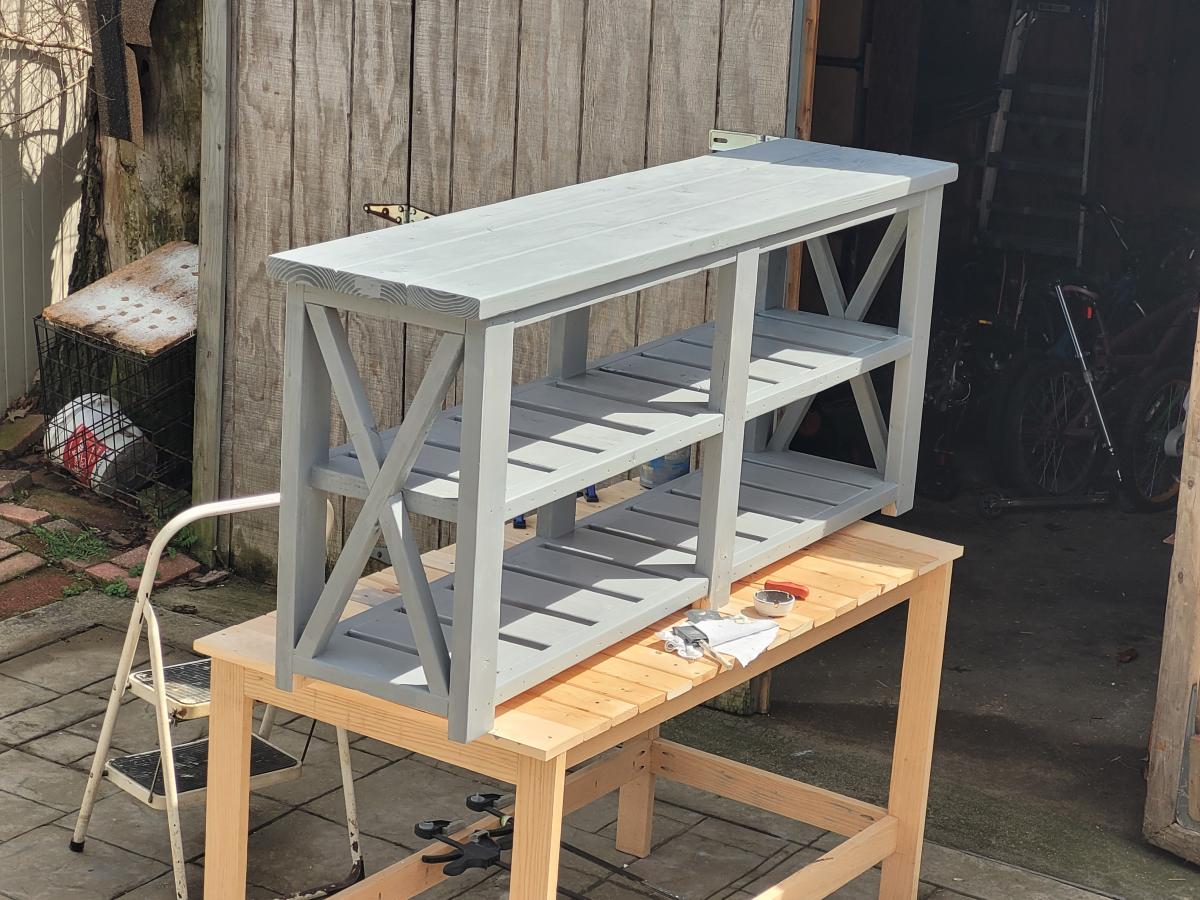
We had seen the modern slat bench before, and stumbled upon the plans on Ana-White, we did look further to see if we could find a style for us and had seen one made entirely out of 2x4's that also cam with plans, http://diycandy.com/2015/06/modern-williams-sonoma-inspired-diy-outdoor…
I thought I would share mine as it differs slightly, I opted to age my bench before staining as well as added adjustible feet so I can level it no matter where I put it. I am using mine as a coffee table, and if I have too many people over, I just use it as a bench to accomodate.
I hope that everyone enjoys the look of how my bench turned out. To reproduce the look of mine I described and linked the 2 products I used for the finish. But I also used the following power tools, Table Saw, Drill and Sawzall, belt sander and palm sander. I used the sawzall as I made a slight error and had some overhang that needed trimming. We used numerous items to get the outside beat up prior to the stain and sealer. The finished product looks amazing and I don't fear someone running away with it at 80lbs.

I basically stuck to the plans, but I shortened the length of the table just a touch, and lengthened the bench to fit just inside the legs. I also used 2x4s for the legs, tapered them for aesthetics (similar to some other posters), and reinforced them with "L" brackets to reduce the wobble. We finished it with Semigloss white paint, Minwax Honey stain, and Minwax Gloss Polyurethane.
If I can make this table, just about anyone can.


Mon, 11/07/2016 - 11:29
Your table is beautiful!
Do you remember how you tapered your legs? I'm trying to figure out if I can do it without a table saw.
Thank you!

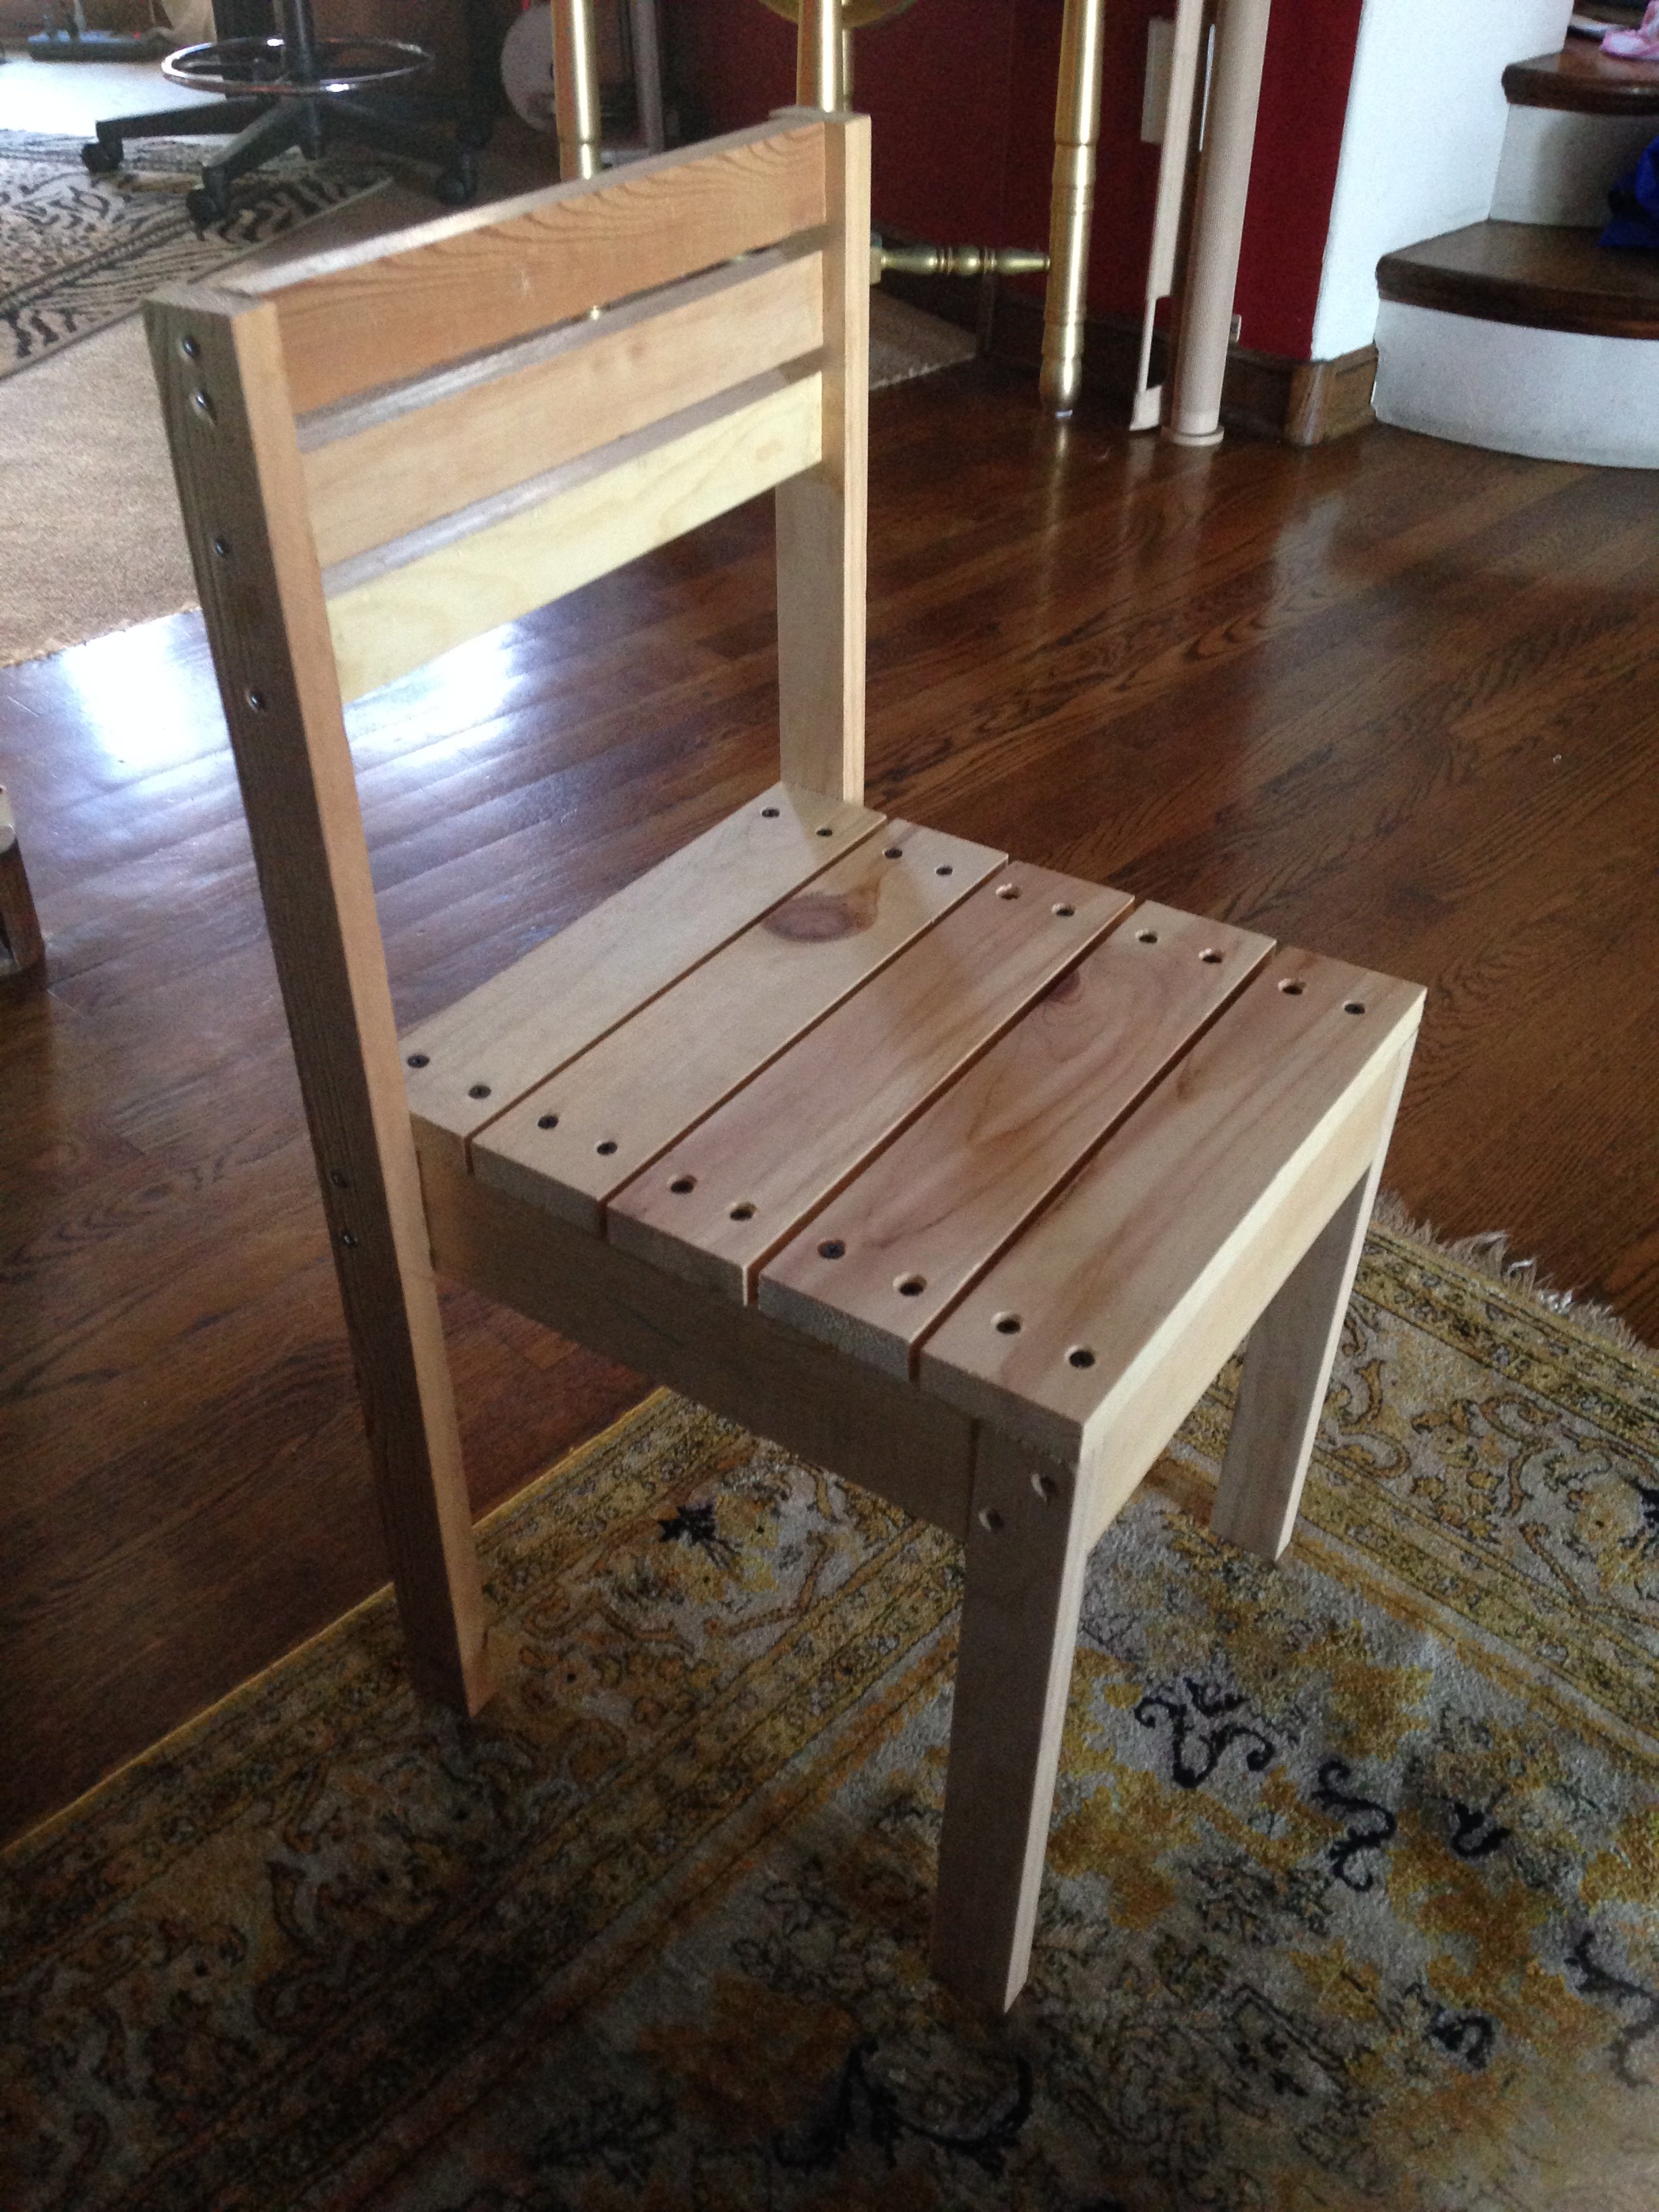
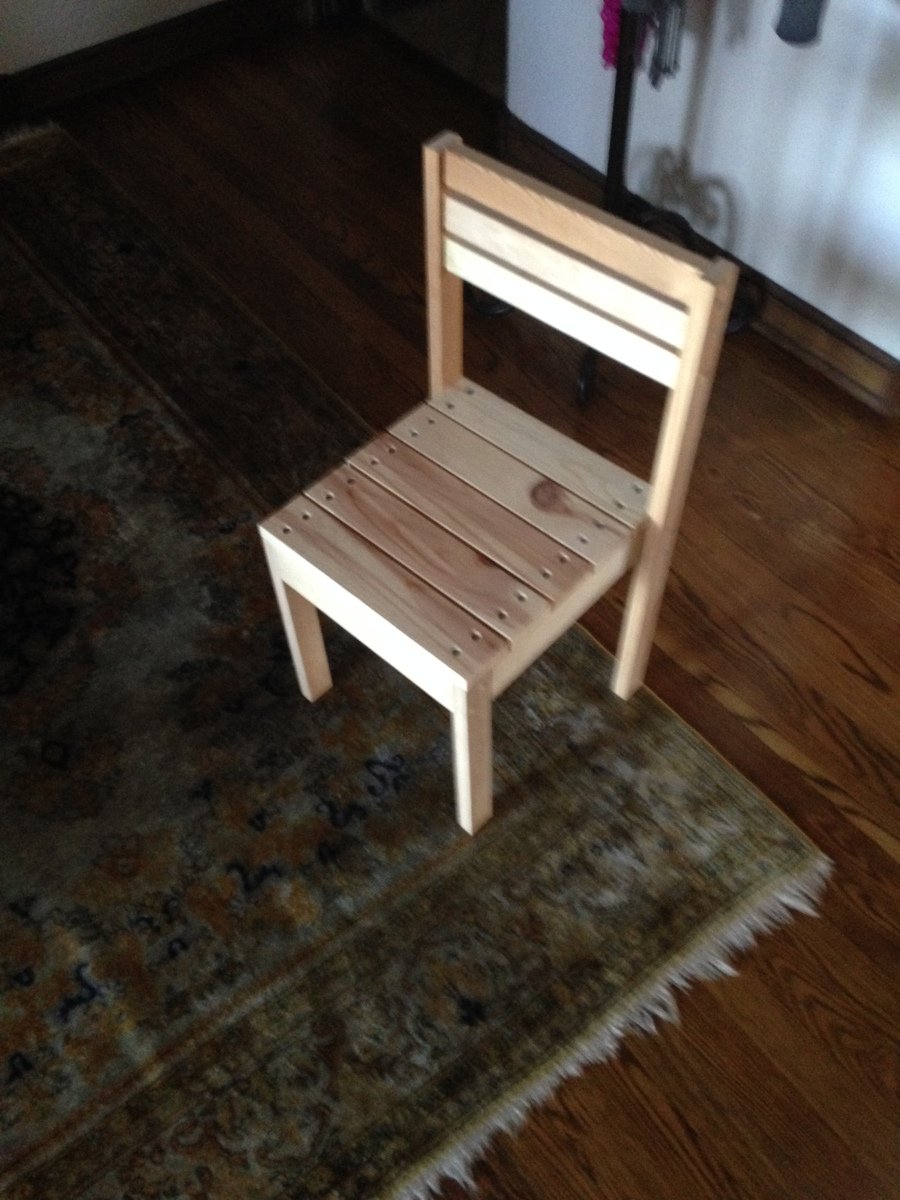
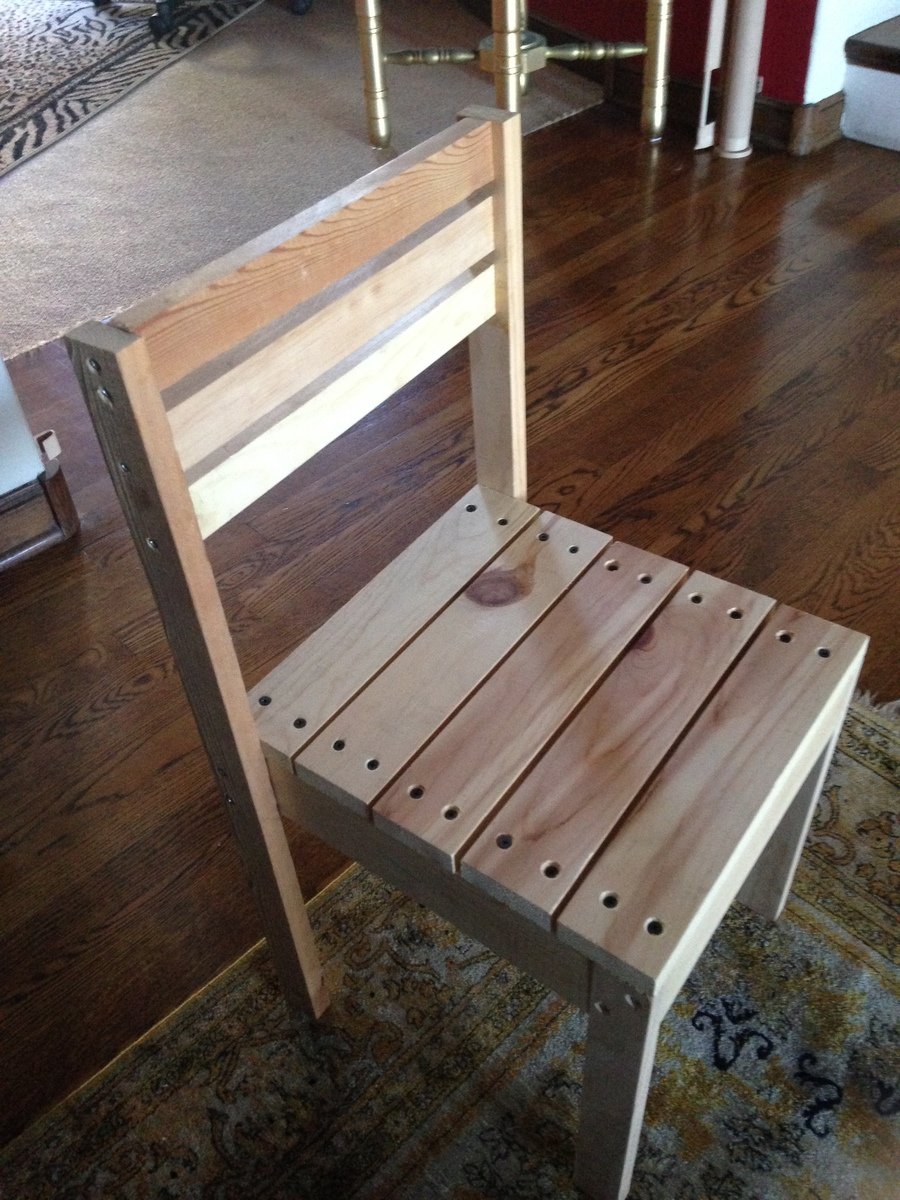
I decided to try and use the plans on Ana's site but with a twist. I wanted to limit myself to using only pallets. I think it turned out great! I can't upload all the photos because they exceed the maximum size limit. If I was able to you could see how each chair is slightly different and has a lot of character. I finished them with a waterproofing oil which I highly recommend over other finishes.


Mon, 04/10/2017 - 08:51
This is exactly what I'm looking for !! Fantastic build and re-purposing is always better.
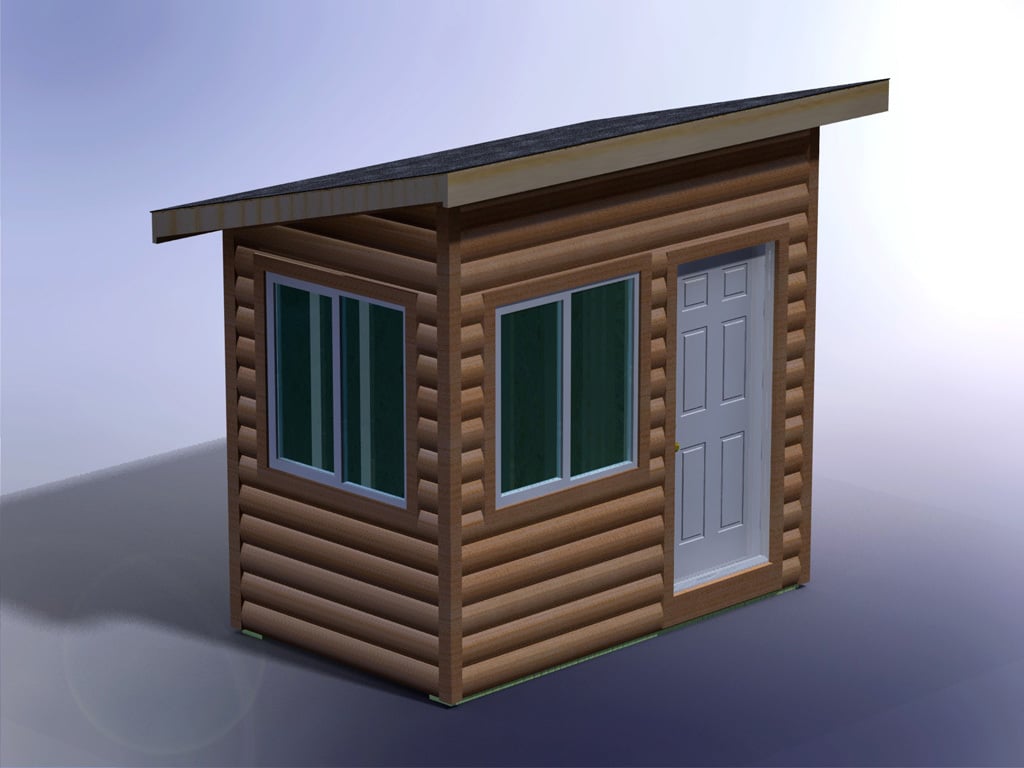
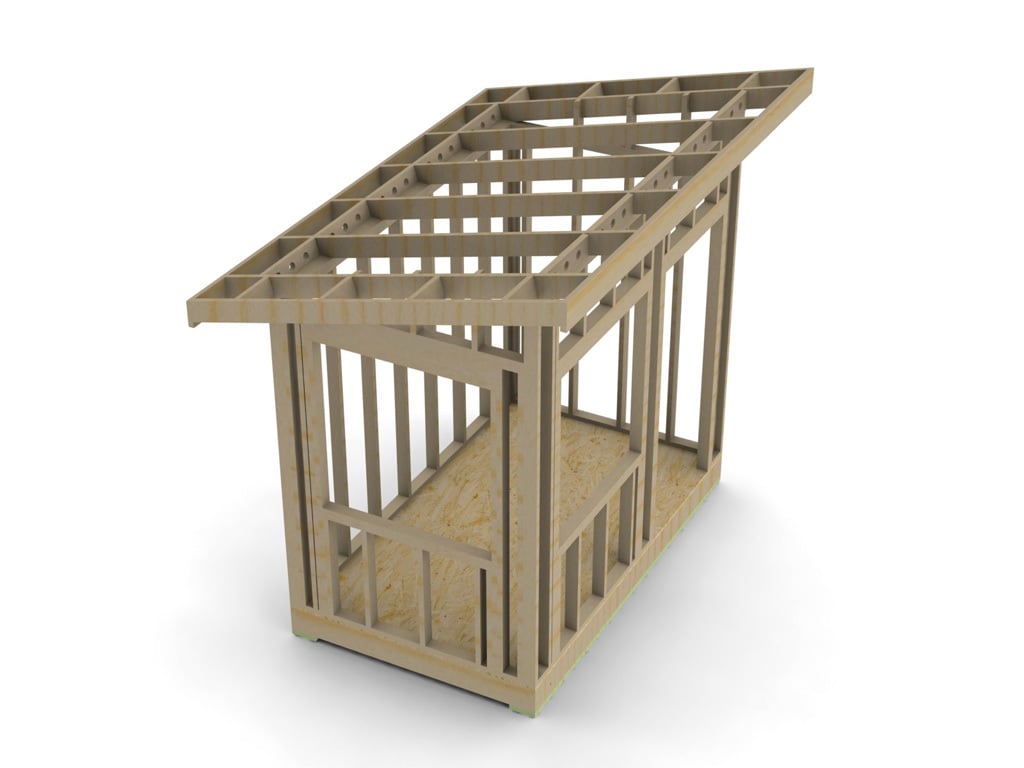
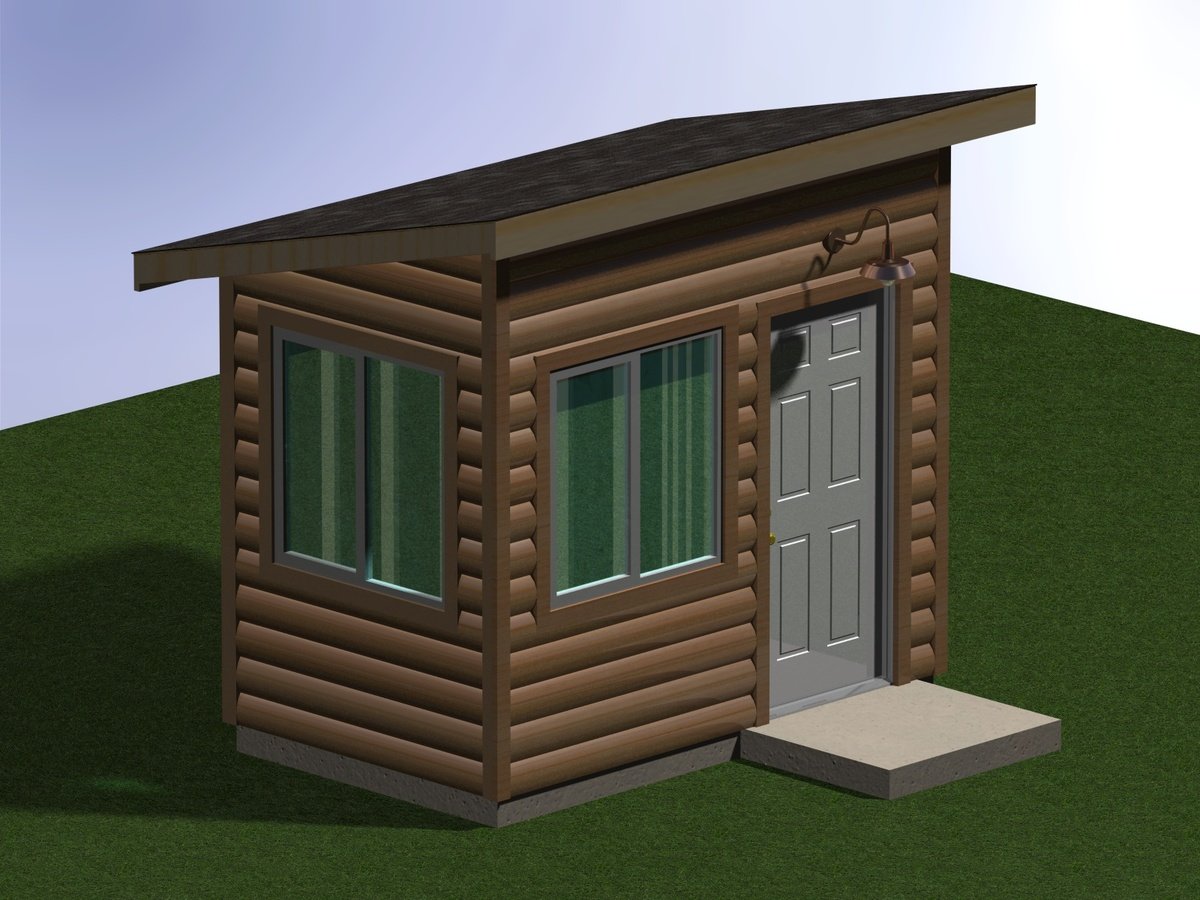
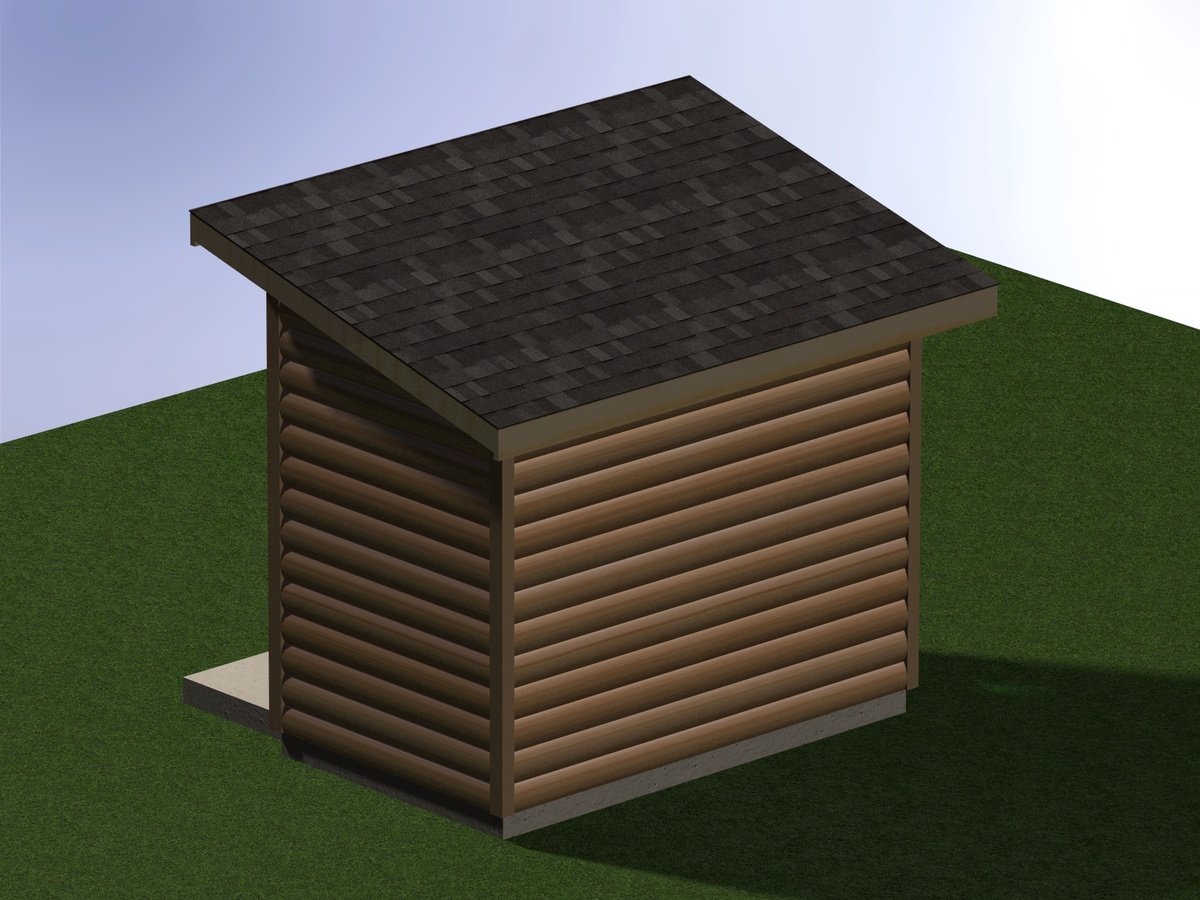
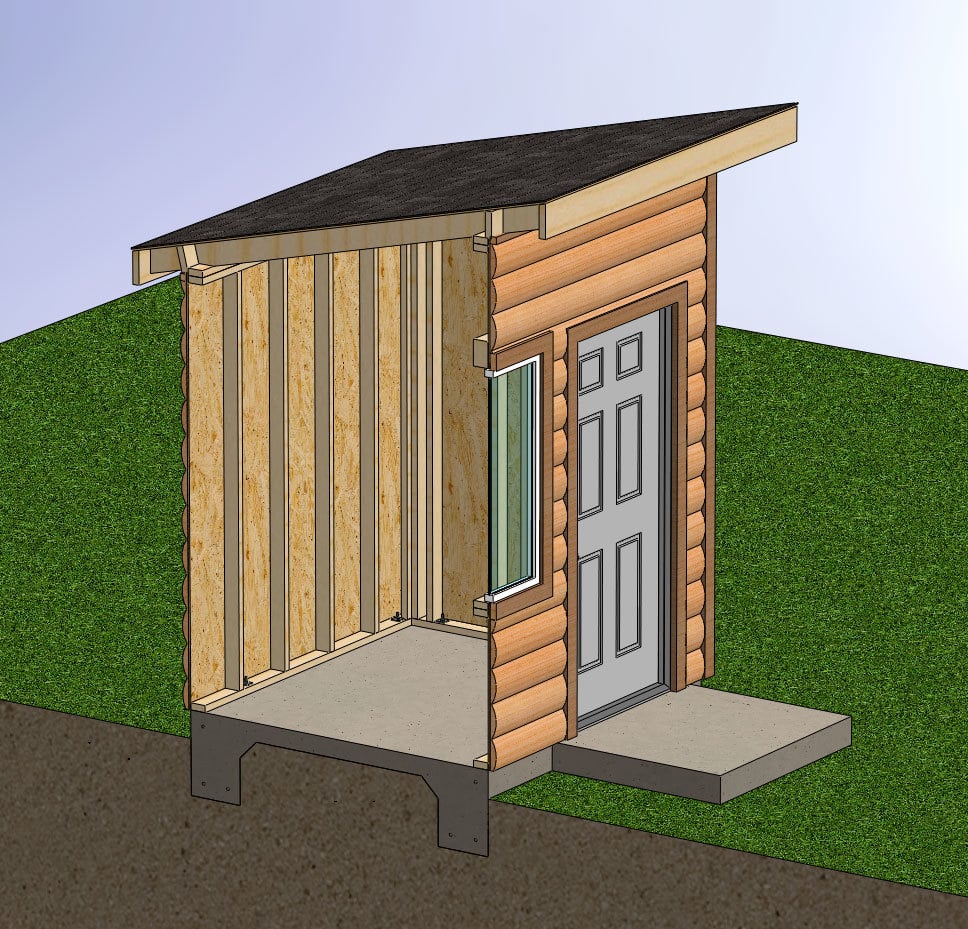
Rural Bus Shelter with 3/12 shed roof, designed to keep your kids out of the elements as they wait for the bus. Shown with log siding and 2x trim. Can be constructed on a slab on grade or remain portable with pressure treated runners and wood floor as shown.
Upgrade further with electricity and insulation for those really cold and dark climates (ie. Washington, Oregon, Alaska, B.C.).
I will make the plans for this shelter freely available to all that are interested.

This was very easy to make. Stained with minwax dark walnut. It's very sturdy too.
My first build in my new house I didn't think it would come out so well. Thanks for the plans. I love working with my hands
Sat, 04/24/2021 - 05:20
Lumber is quite expensive right now so I'm not sure what's next but once I figure it out I'll be sure to post it :)
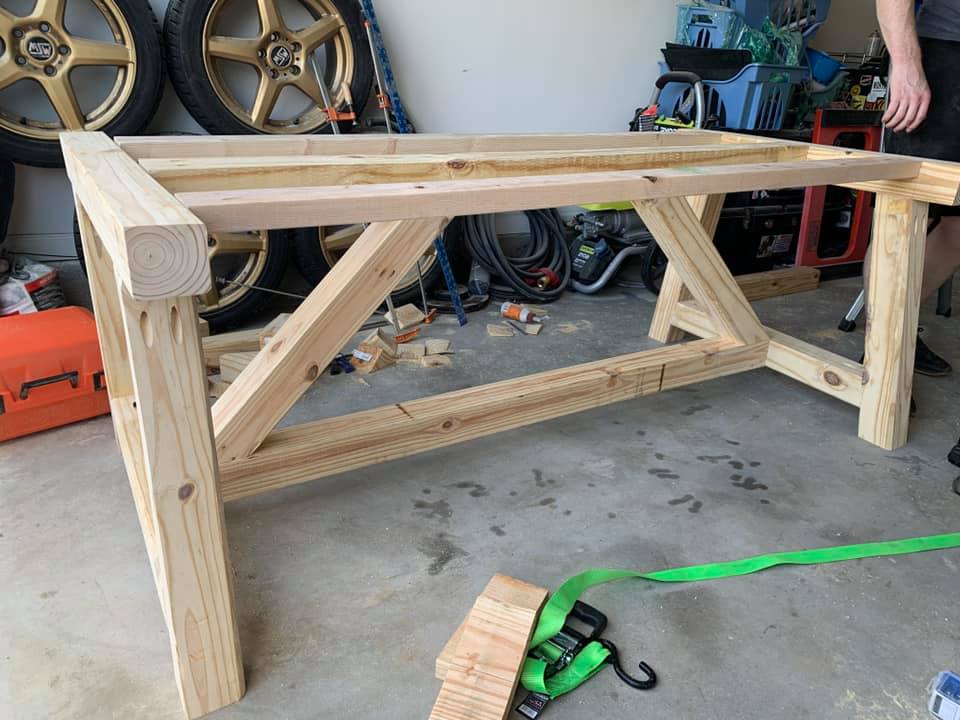
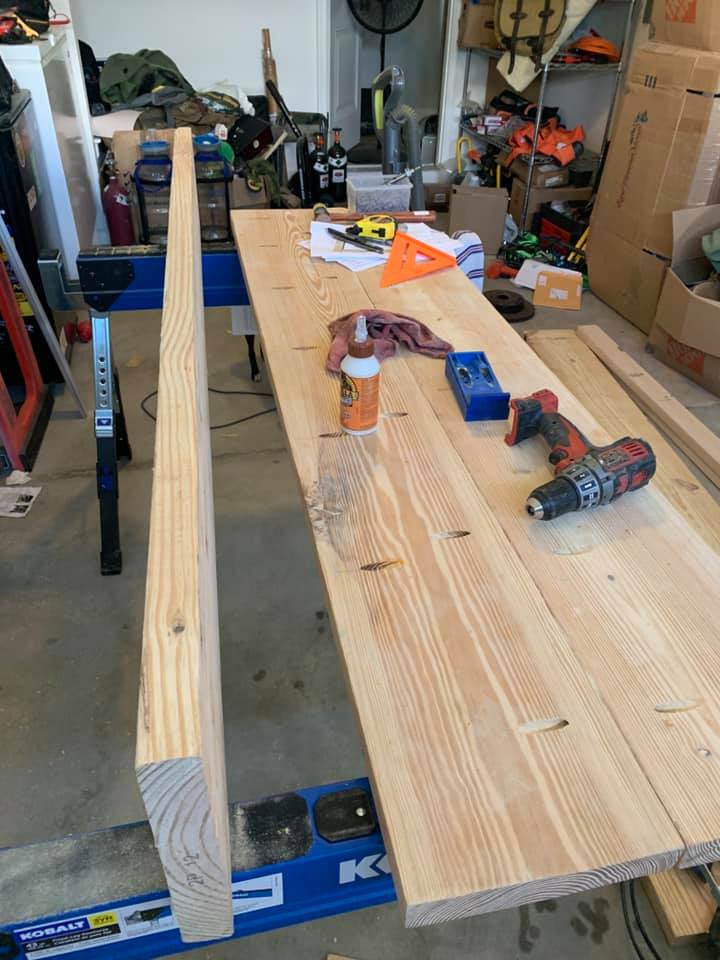
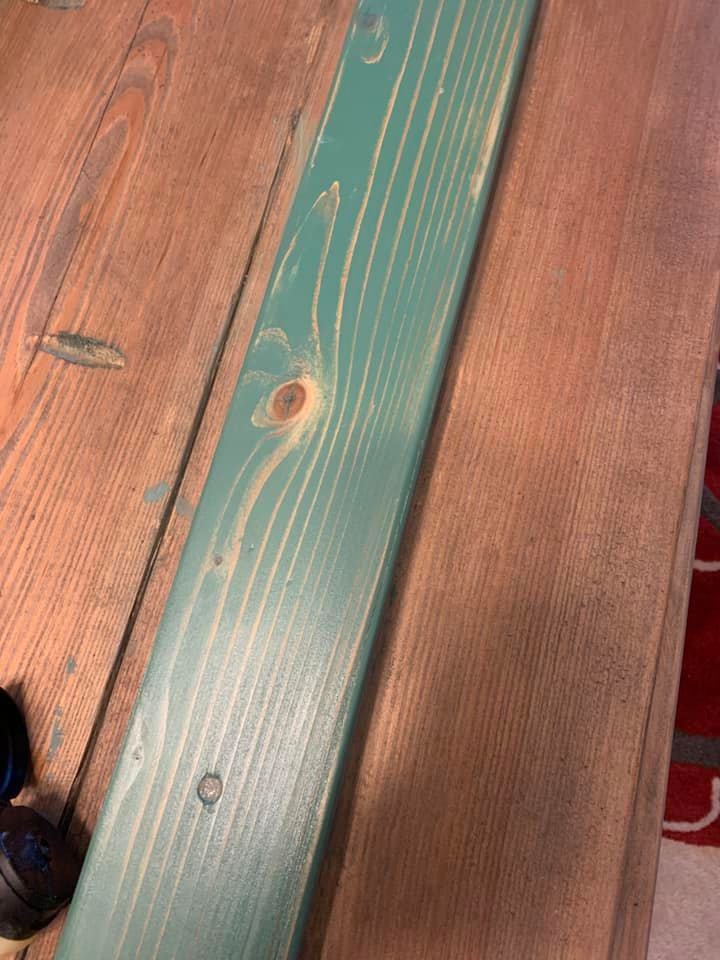
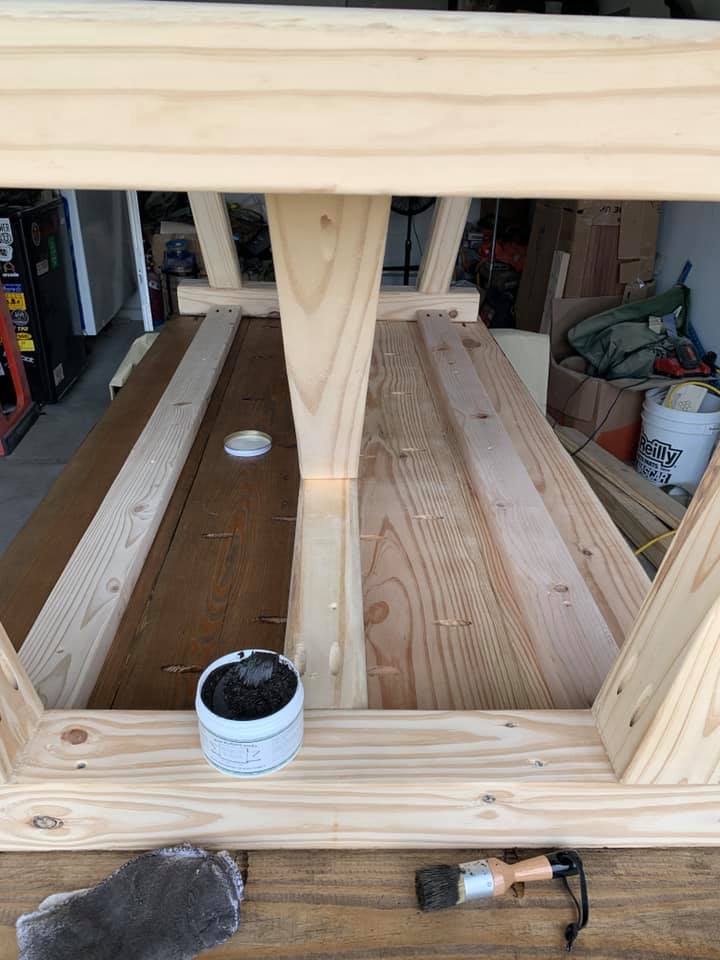
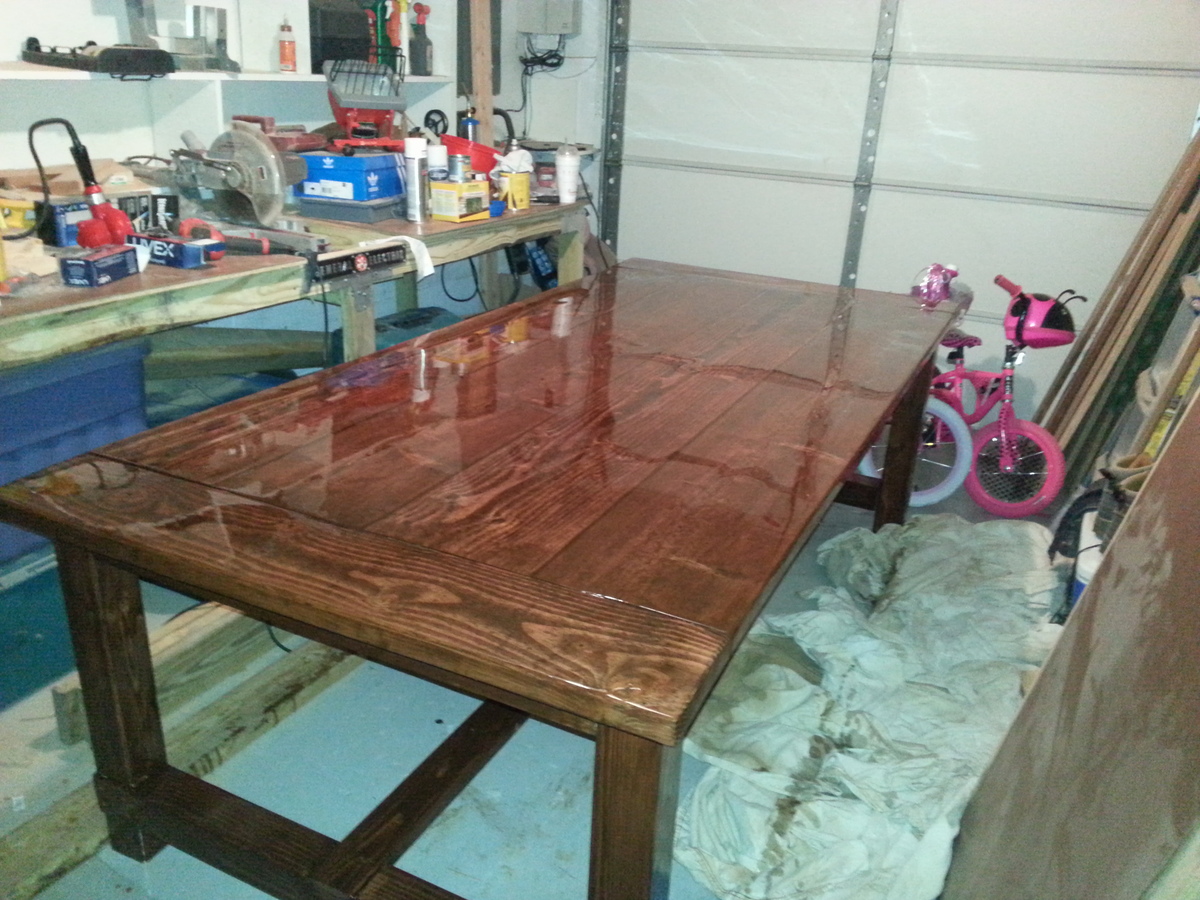
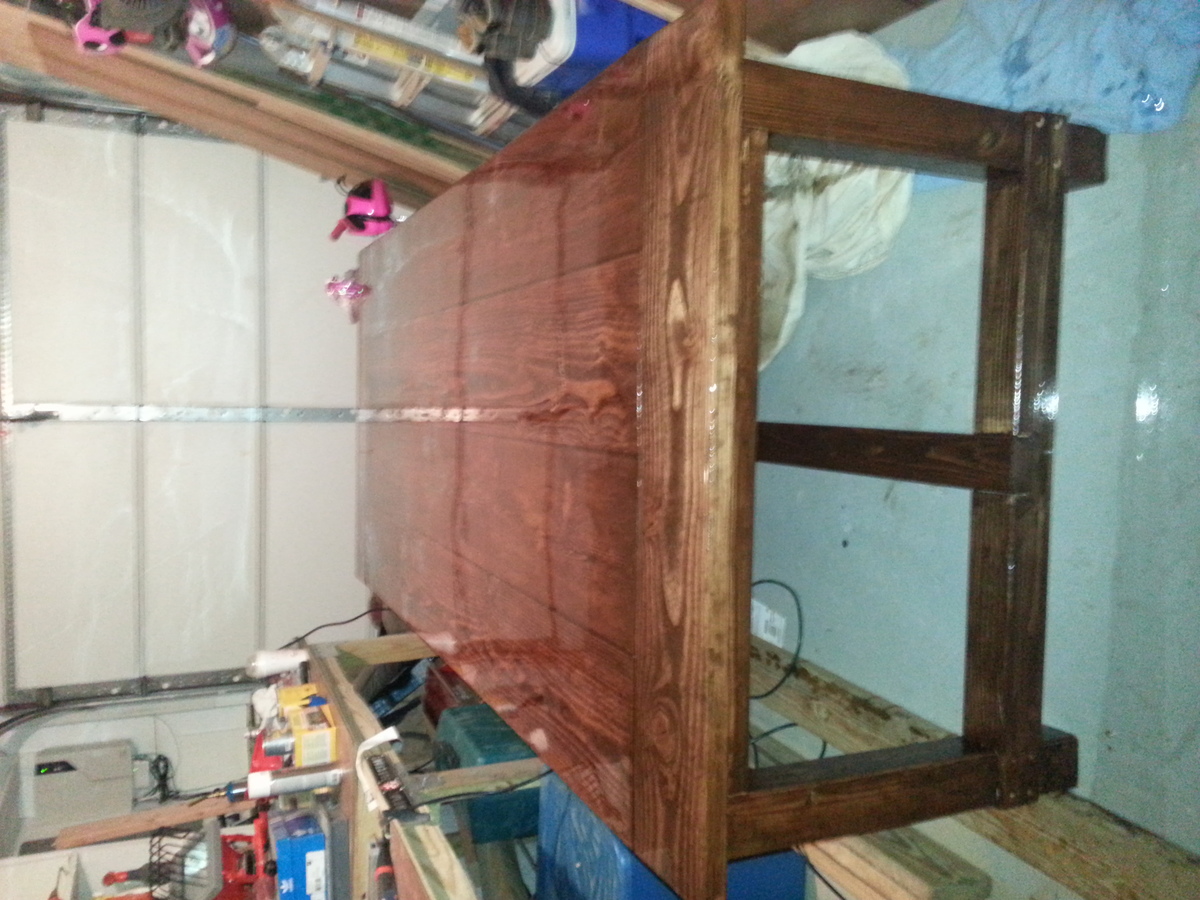
This is my first big woodworking project. That being said, there were a lot of mistakes that were made. In the pictures you can see the beginning stages when I was making the base cuts and assembling the table top. The picture with the dark top and natural legs was the beginning of one mistake. I bought gel stain because it was the color I liked but I had no idea how to use it correctly. Because of this I left the stain on and it was waaayyyyy too dark. I had to sand down the entire top and redo it. After fixing that I correctly stained the base, extensions, and bench. The extensions I made are not in the photos because I forgot to make the cuts to slide them in. I'm supposed to do that this weekend... After staining I polyurethaned the base, bench, and extensions to give them a nice shine. The table top I finished with Liquid Glass two part epoxy. That gave the top a super hard surface that shines and makes the normally soft pine top, rock hard. I figured this way when my daughters do homework on it they wouldn't leave their writing indented in my nice, new table. I hope you guys like it and I plan to do many more projects and post my results here. Thanks for taking the time to check this out.

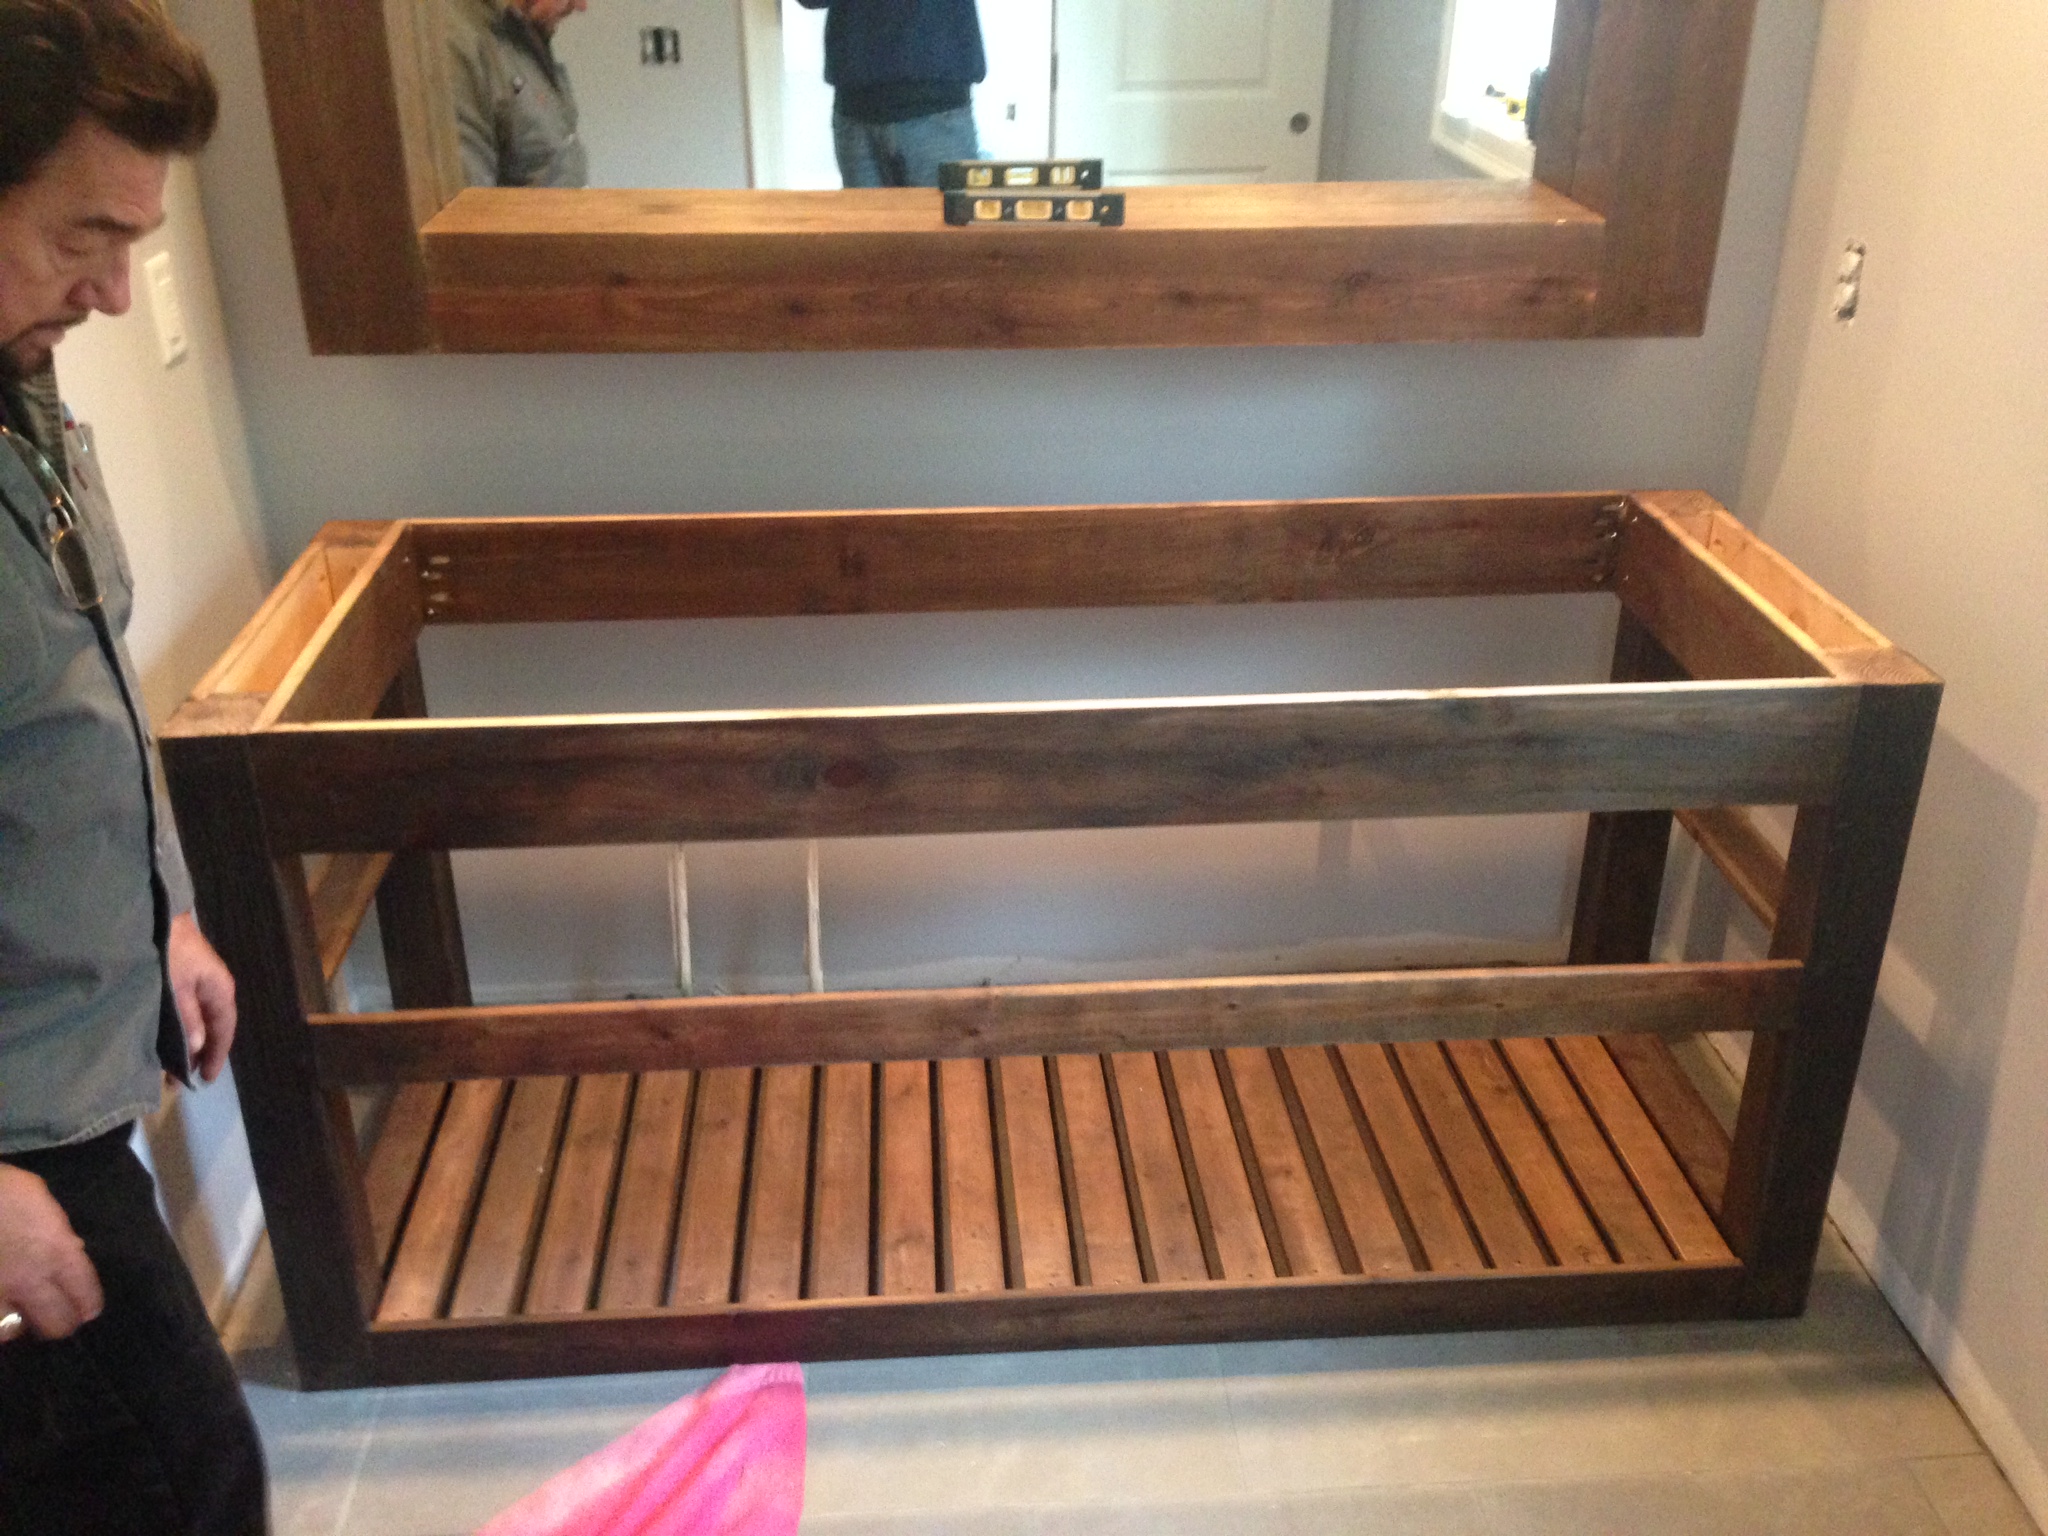
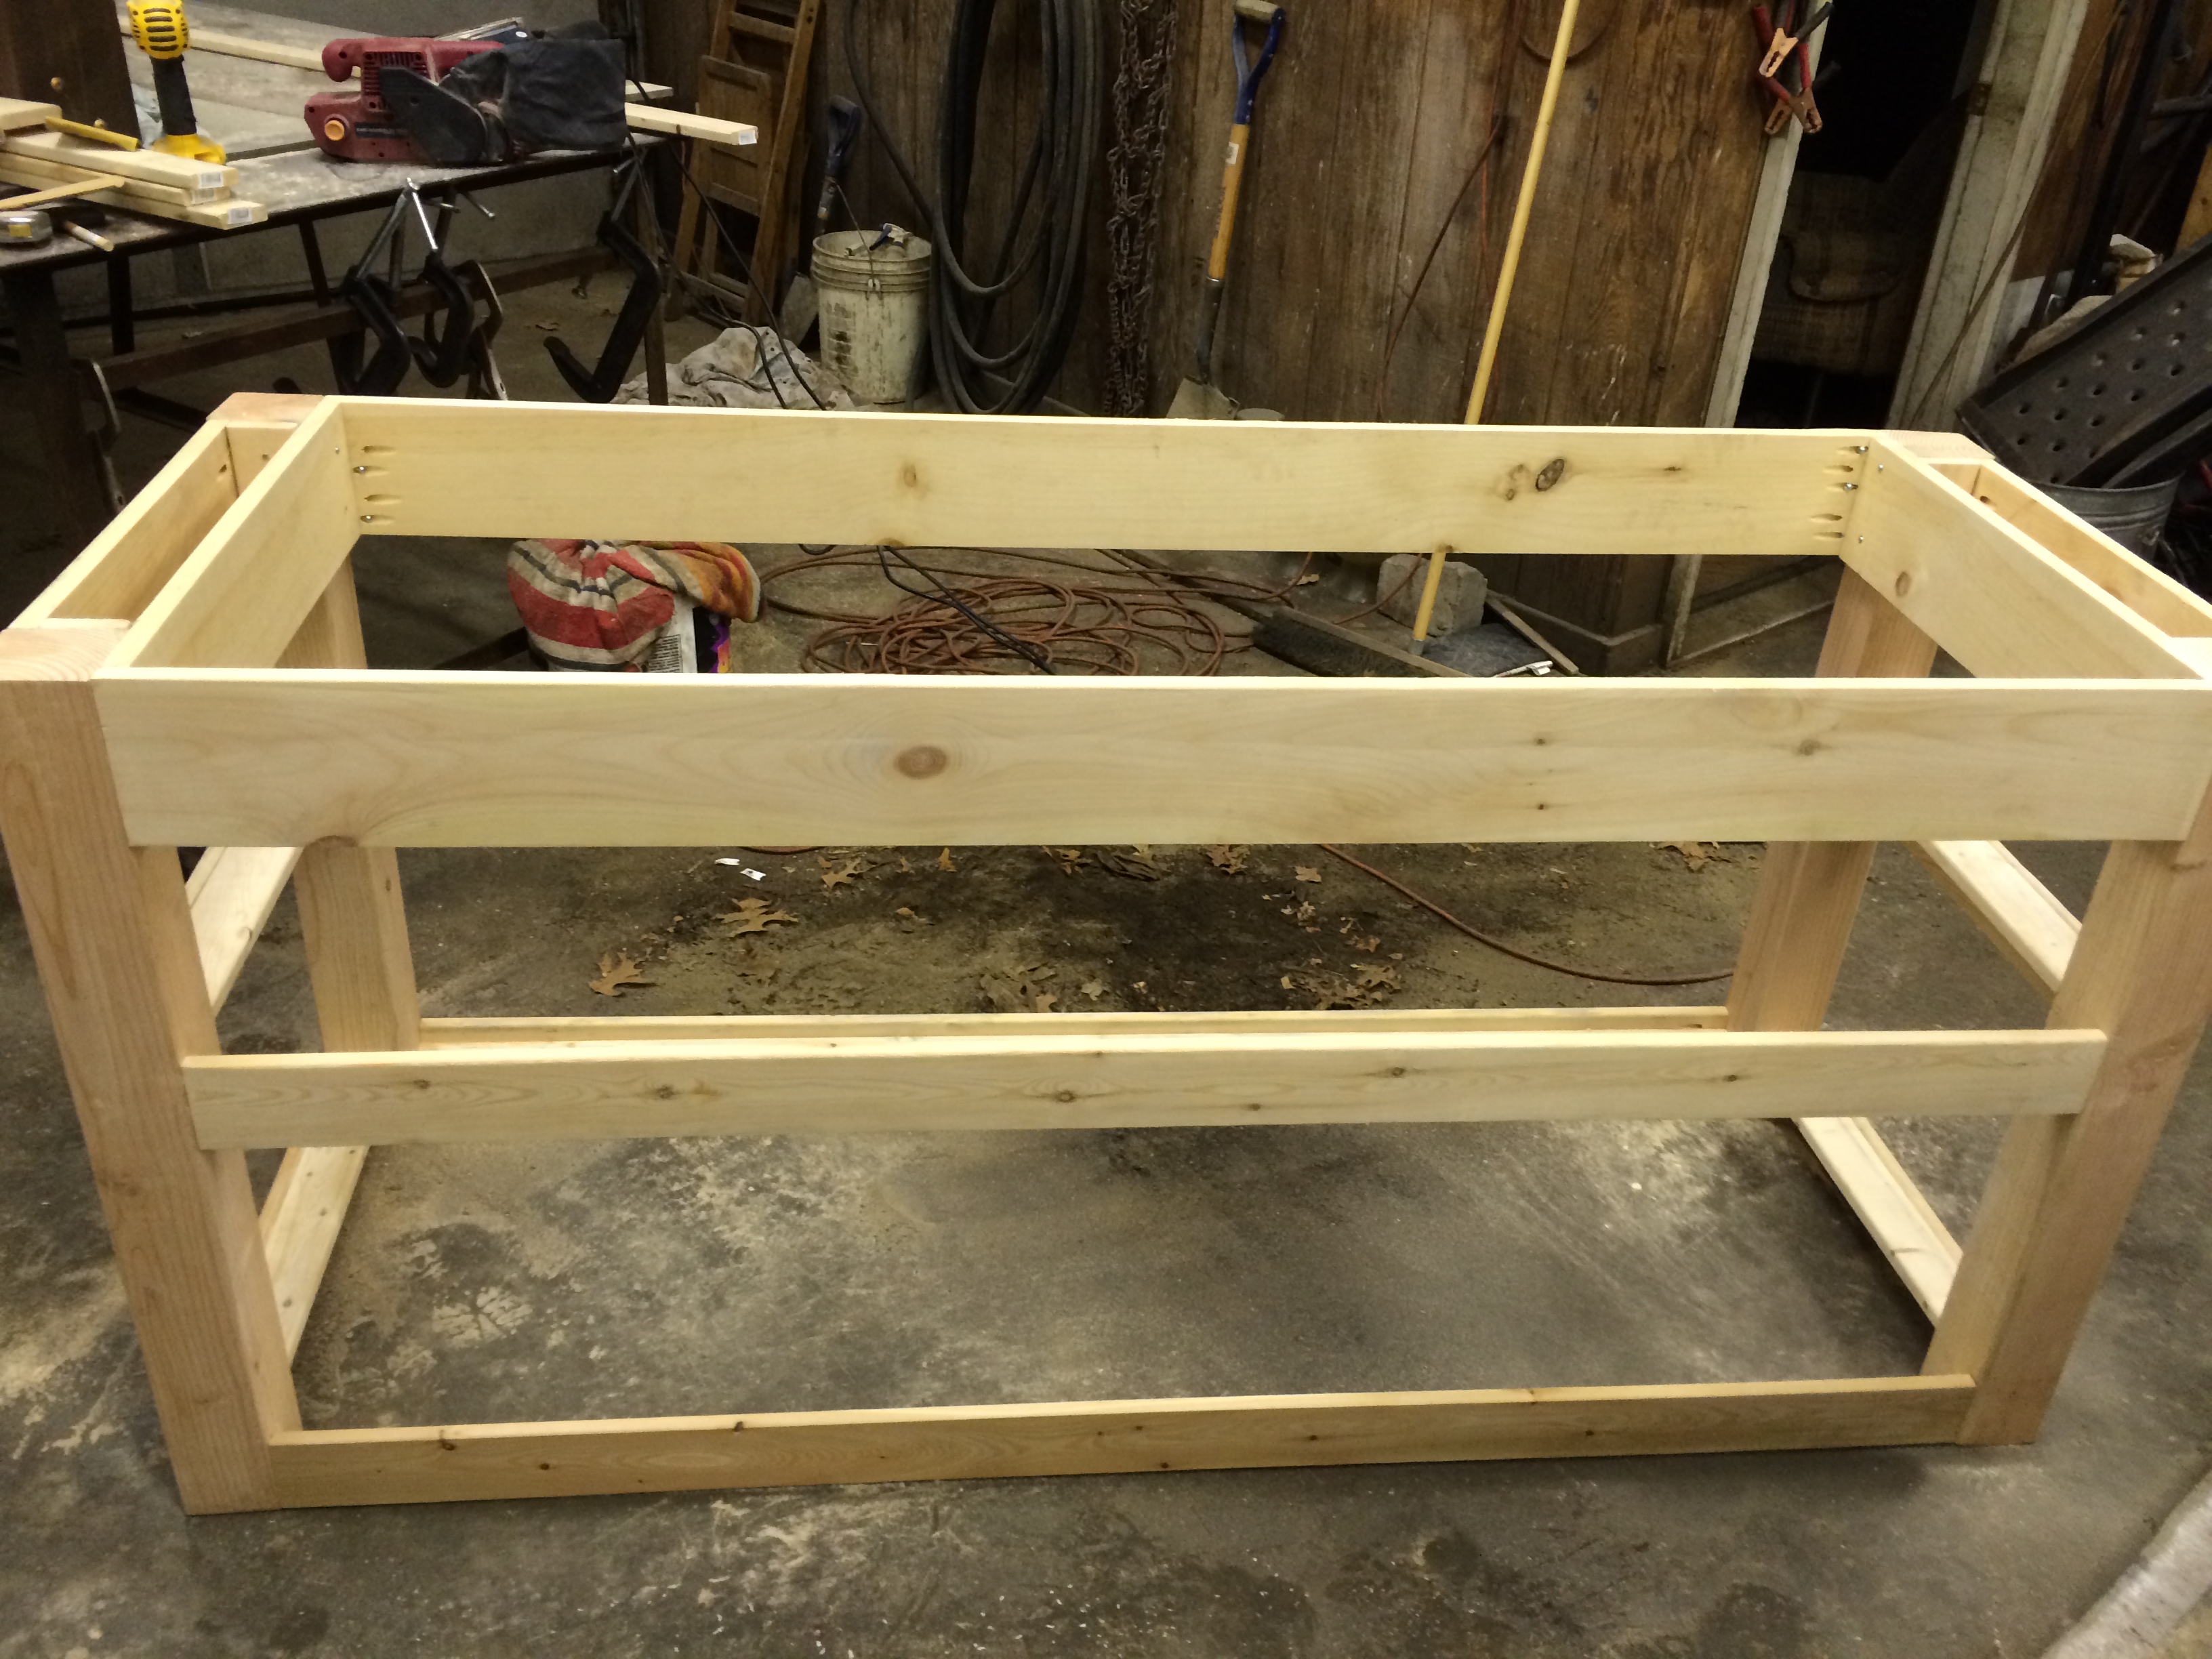
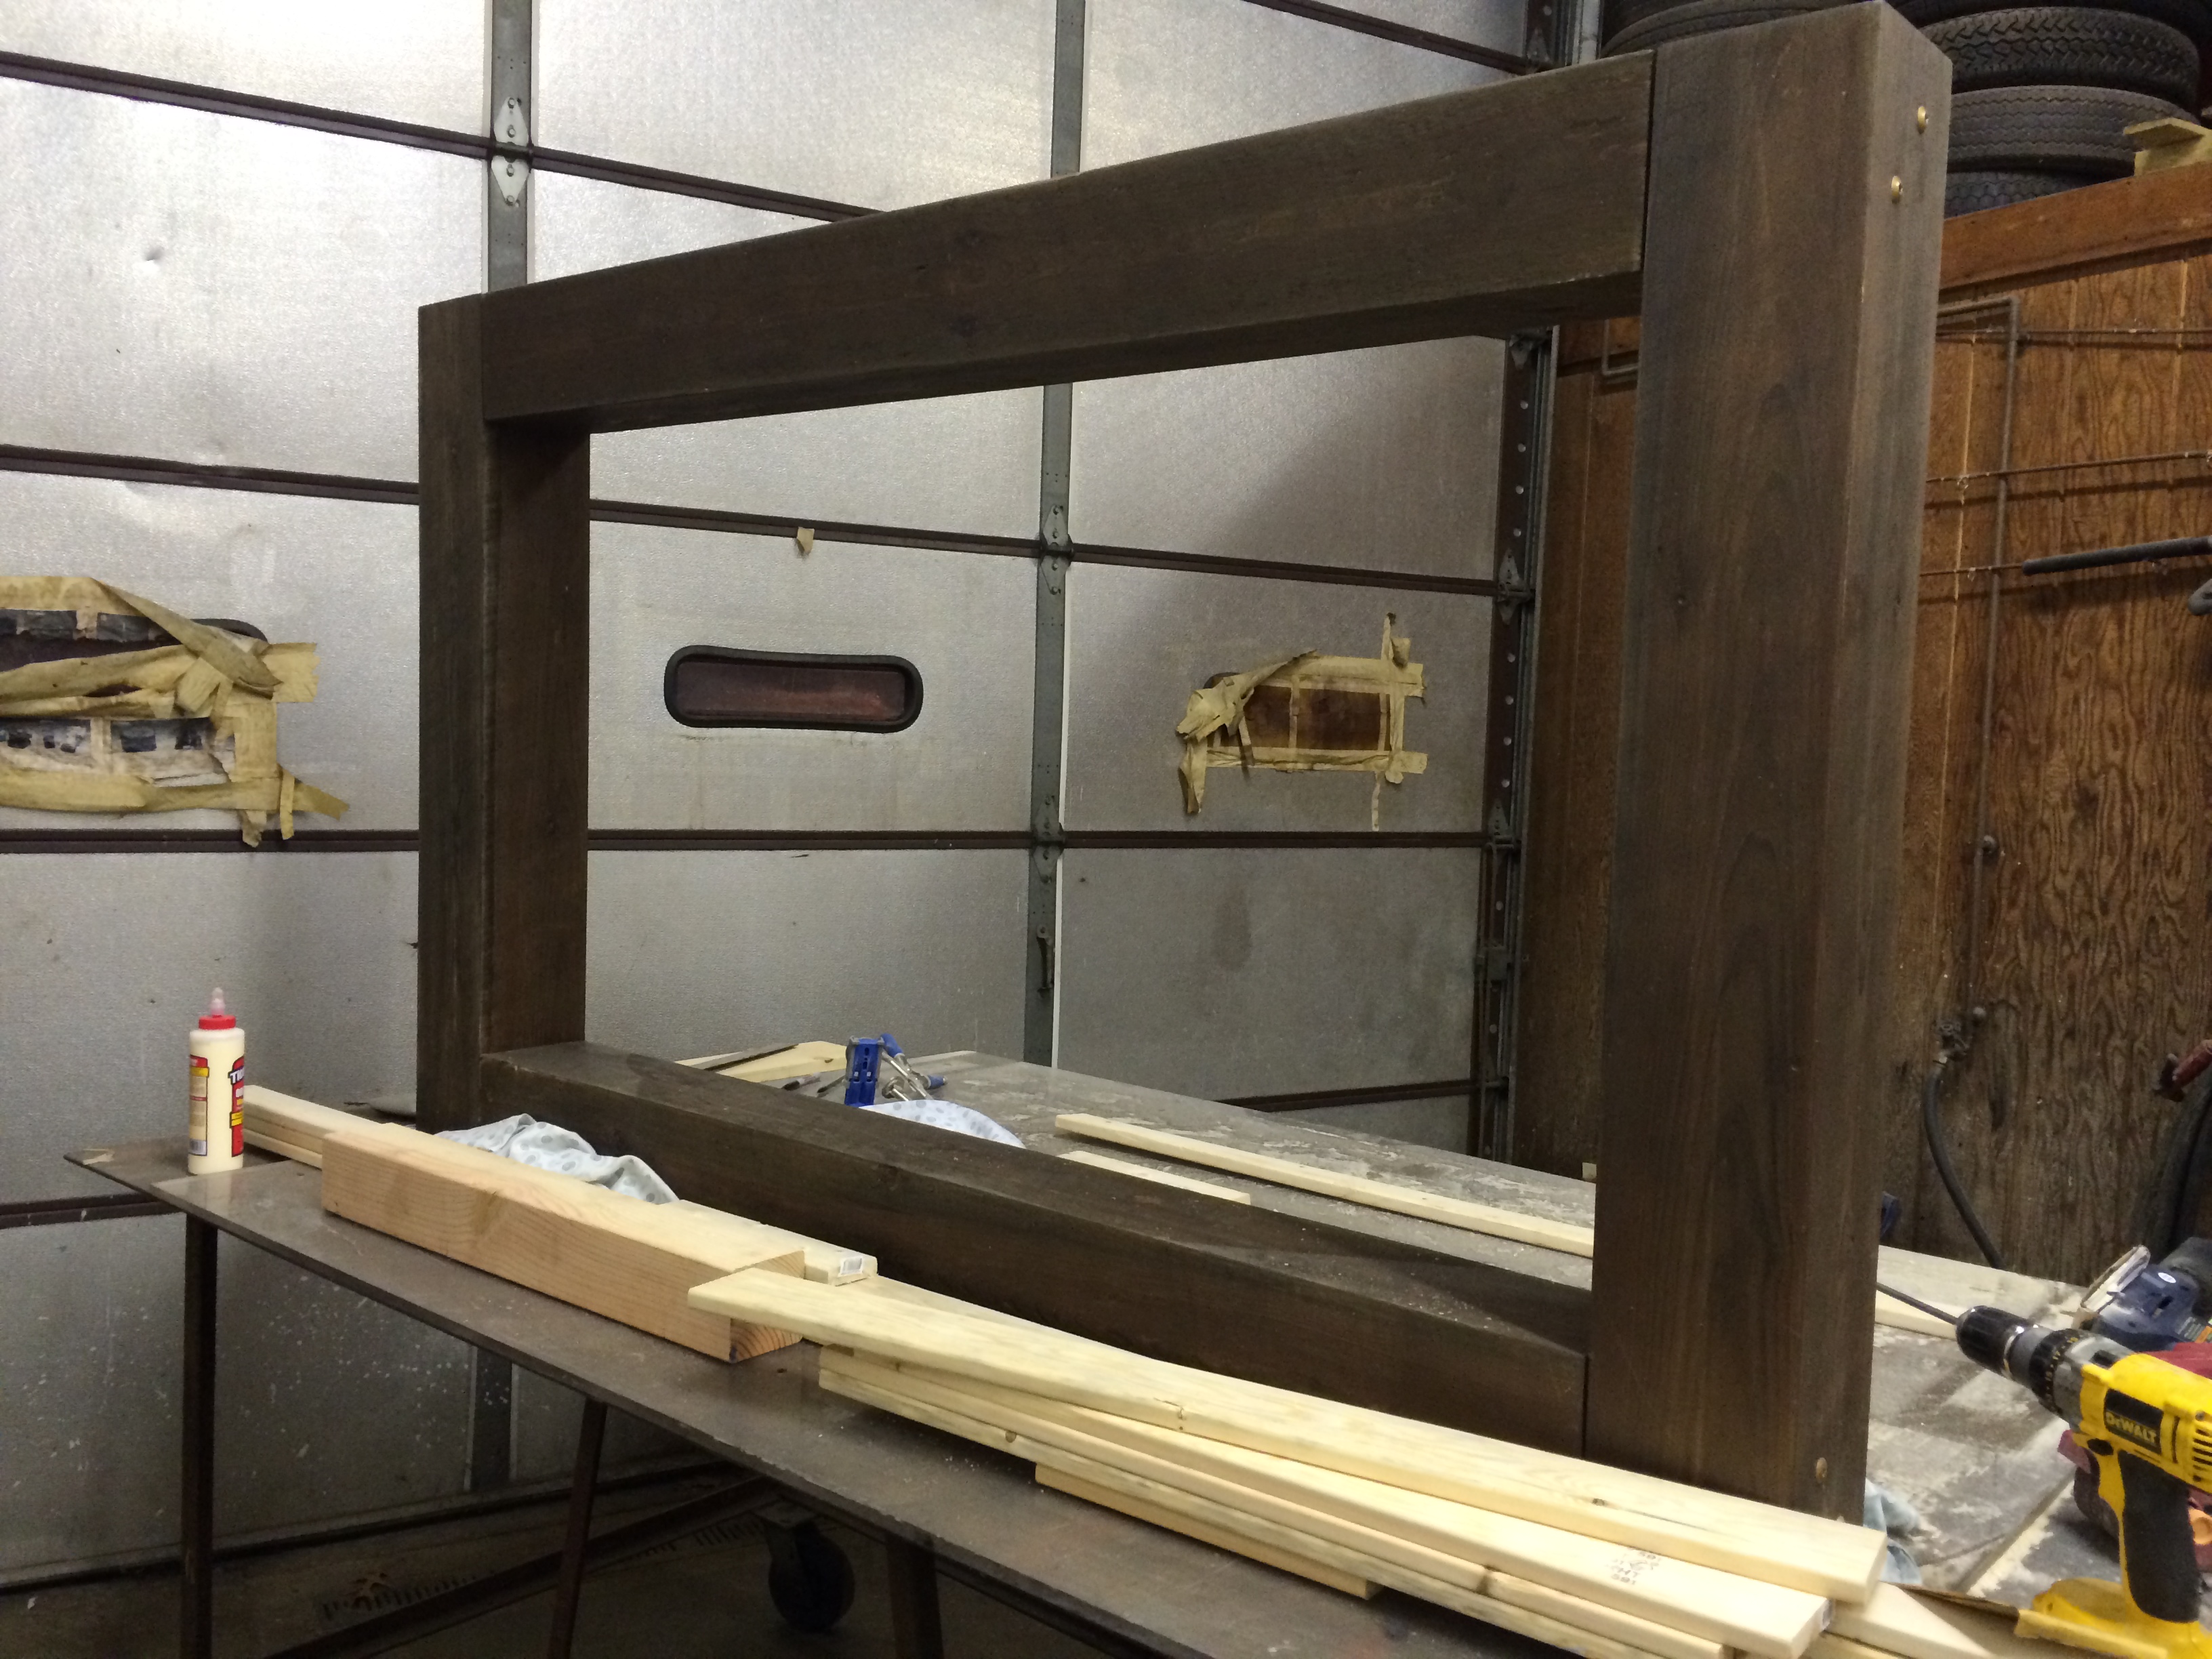
I was a bit over my head with this one but I am so far very happy with the project. It is not quite finished. The marble was installed last week and we are awating the plumber to come back to hook up the sinks. I will install the second slatted shelf once the plumbing is in. Will post finished pictures soon. The mirror is made from 6x6 posts from the lumber yard. We had a friend cut them to size using a band saw. We made the mirror frame based on a picture I found on Houzz.com. The mirror glass was something I picked up off of craigslist for next to nothing and removed from the original frame. It is HEAVY (~200lbs) and attached to the wall with metal brackets. We purchased the sinks/faucets on ebay.

Mon, 02/16/2015 - 13:14
Wonderful! Love it! Thanks for showing us the steps too!

In reply to Wonderful! Love it! Thanks by Ana White
Tue, 03/31/2015 - 14:18
Thank you Ana! It's finally done, yay!