Planter, Lemonade Stand and Home Projects!
Lot's of fun projects!
by Rob

Lot's of fun projects!
by Rob
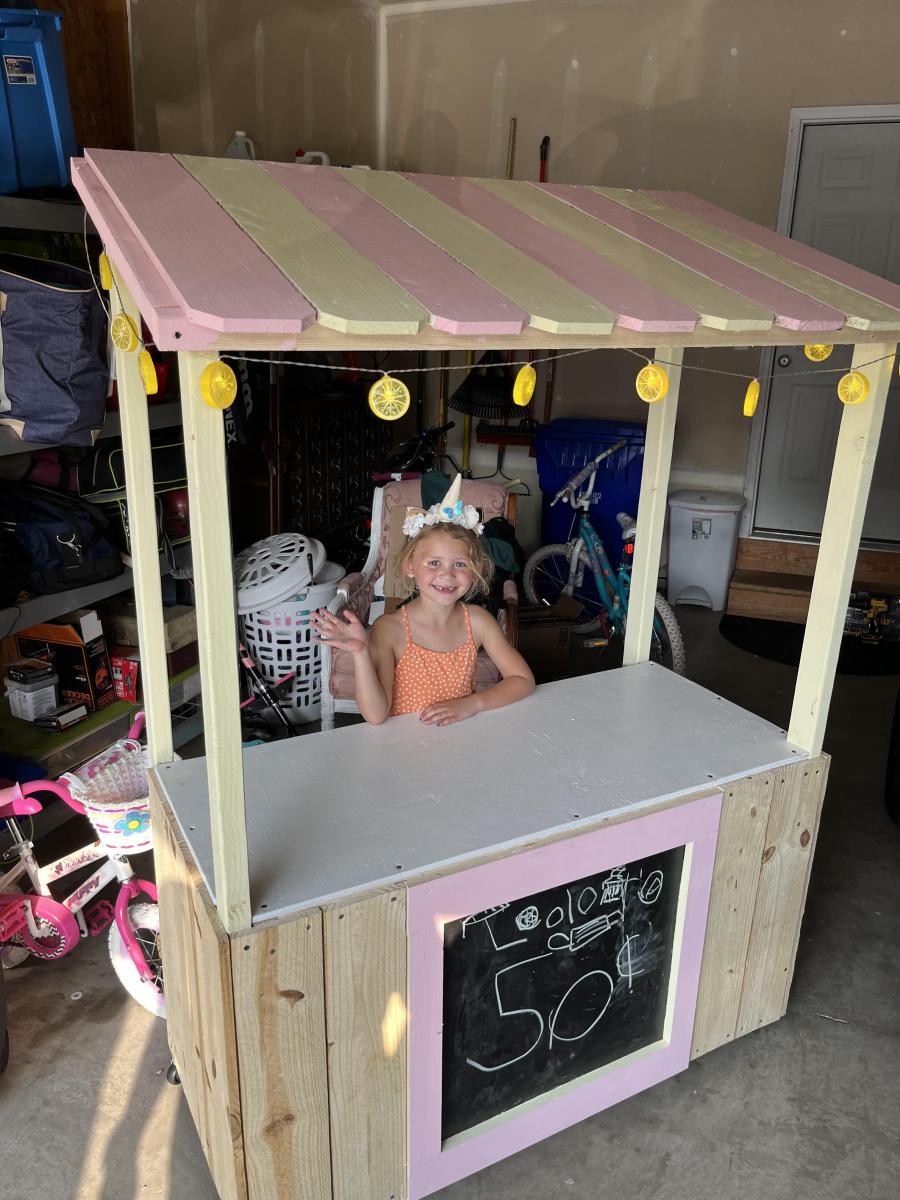
I recently built this for a fundraiser for a friend, who suffered from a stroke, people loved it.
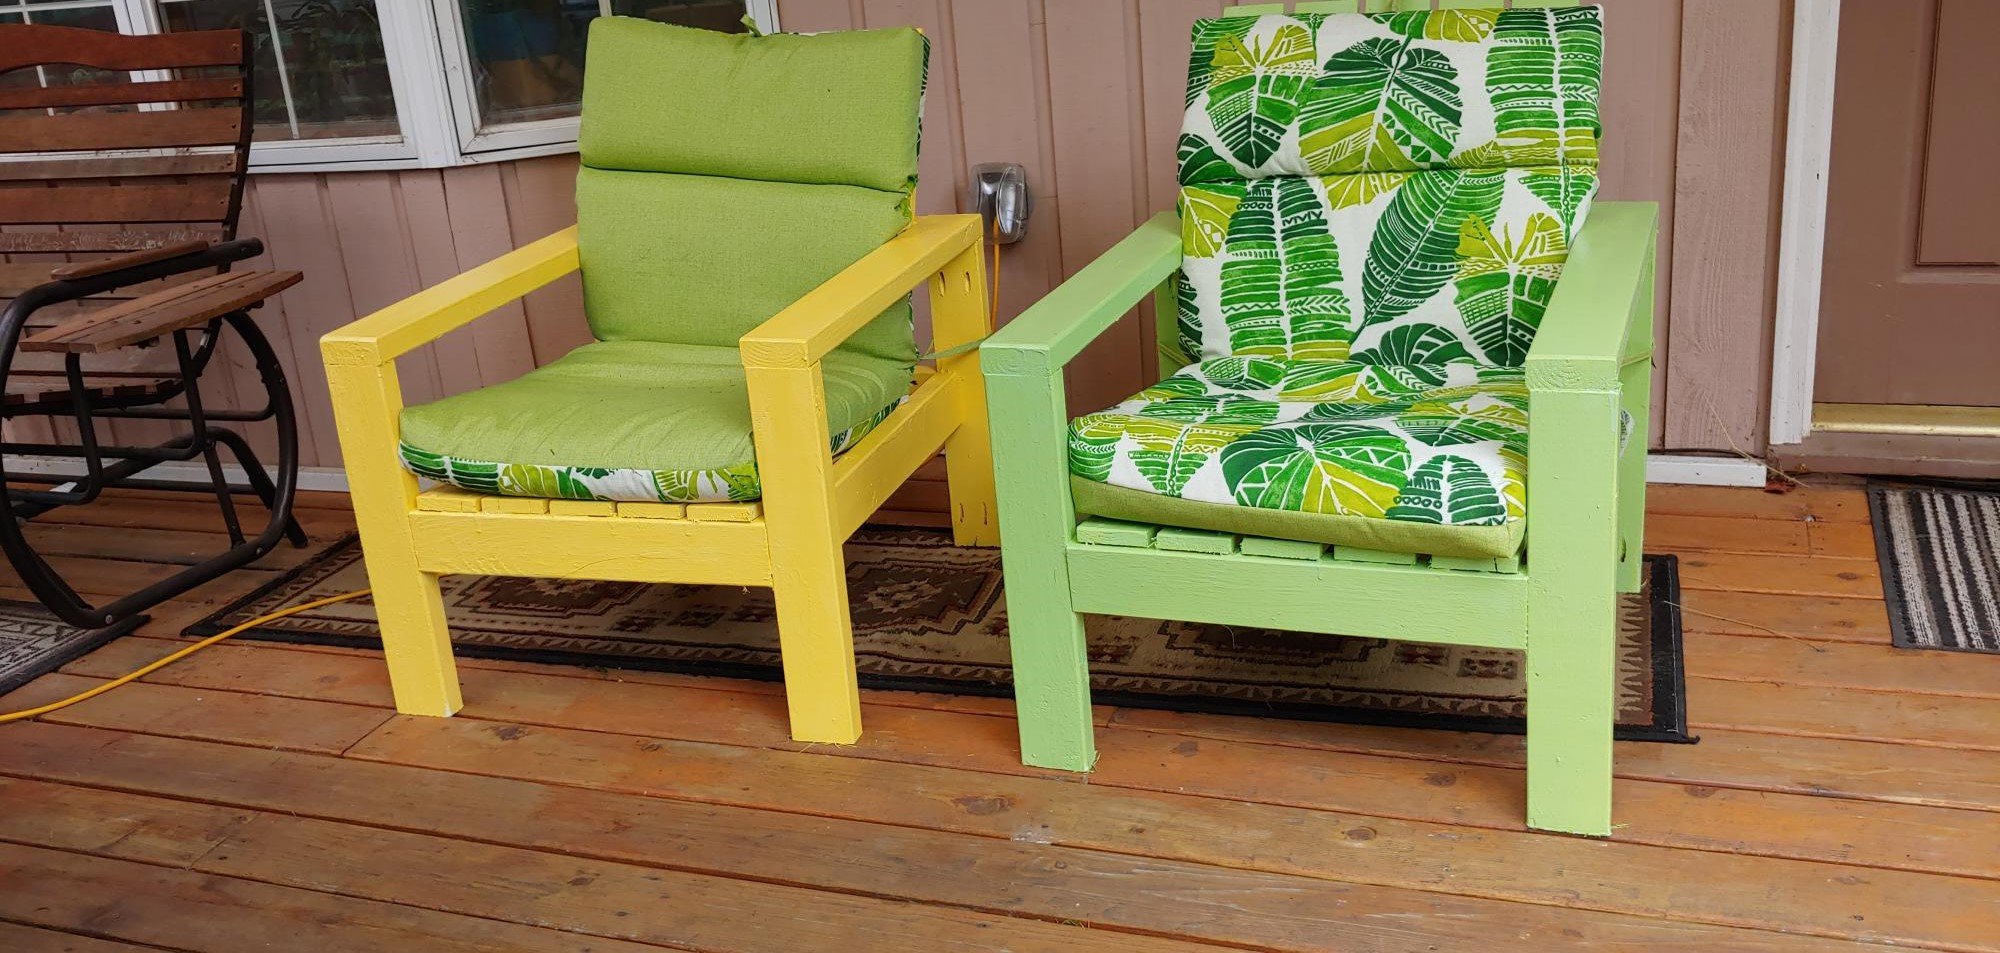
Brightly Painted chairs are popular here. I made two unpainted chairs in an afternoon. I would paint the pieces before putting them together if I made them again. Very comfortable!
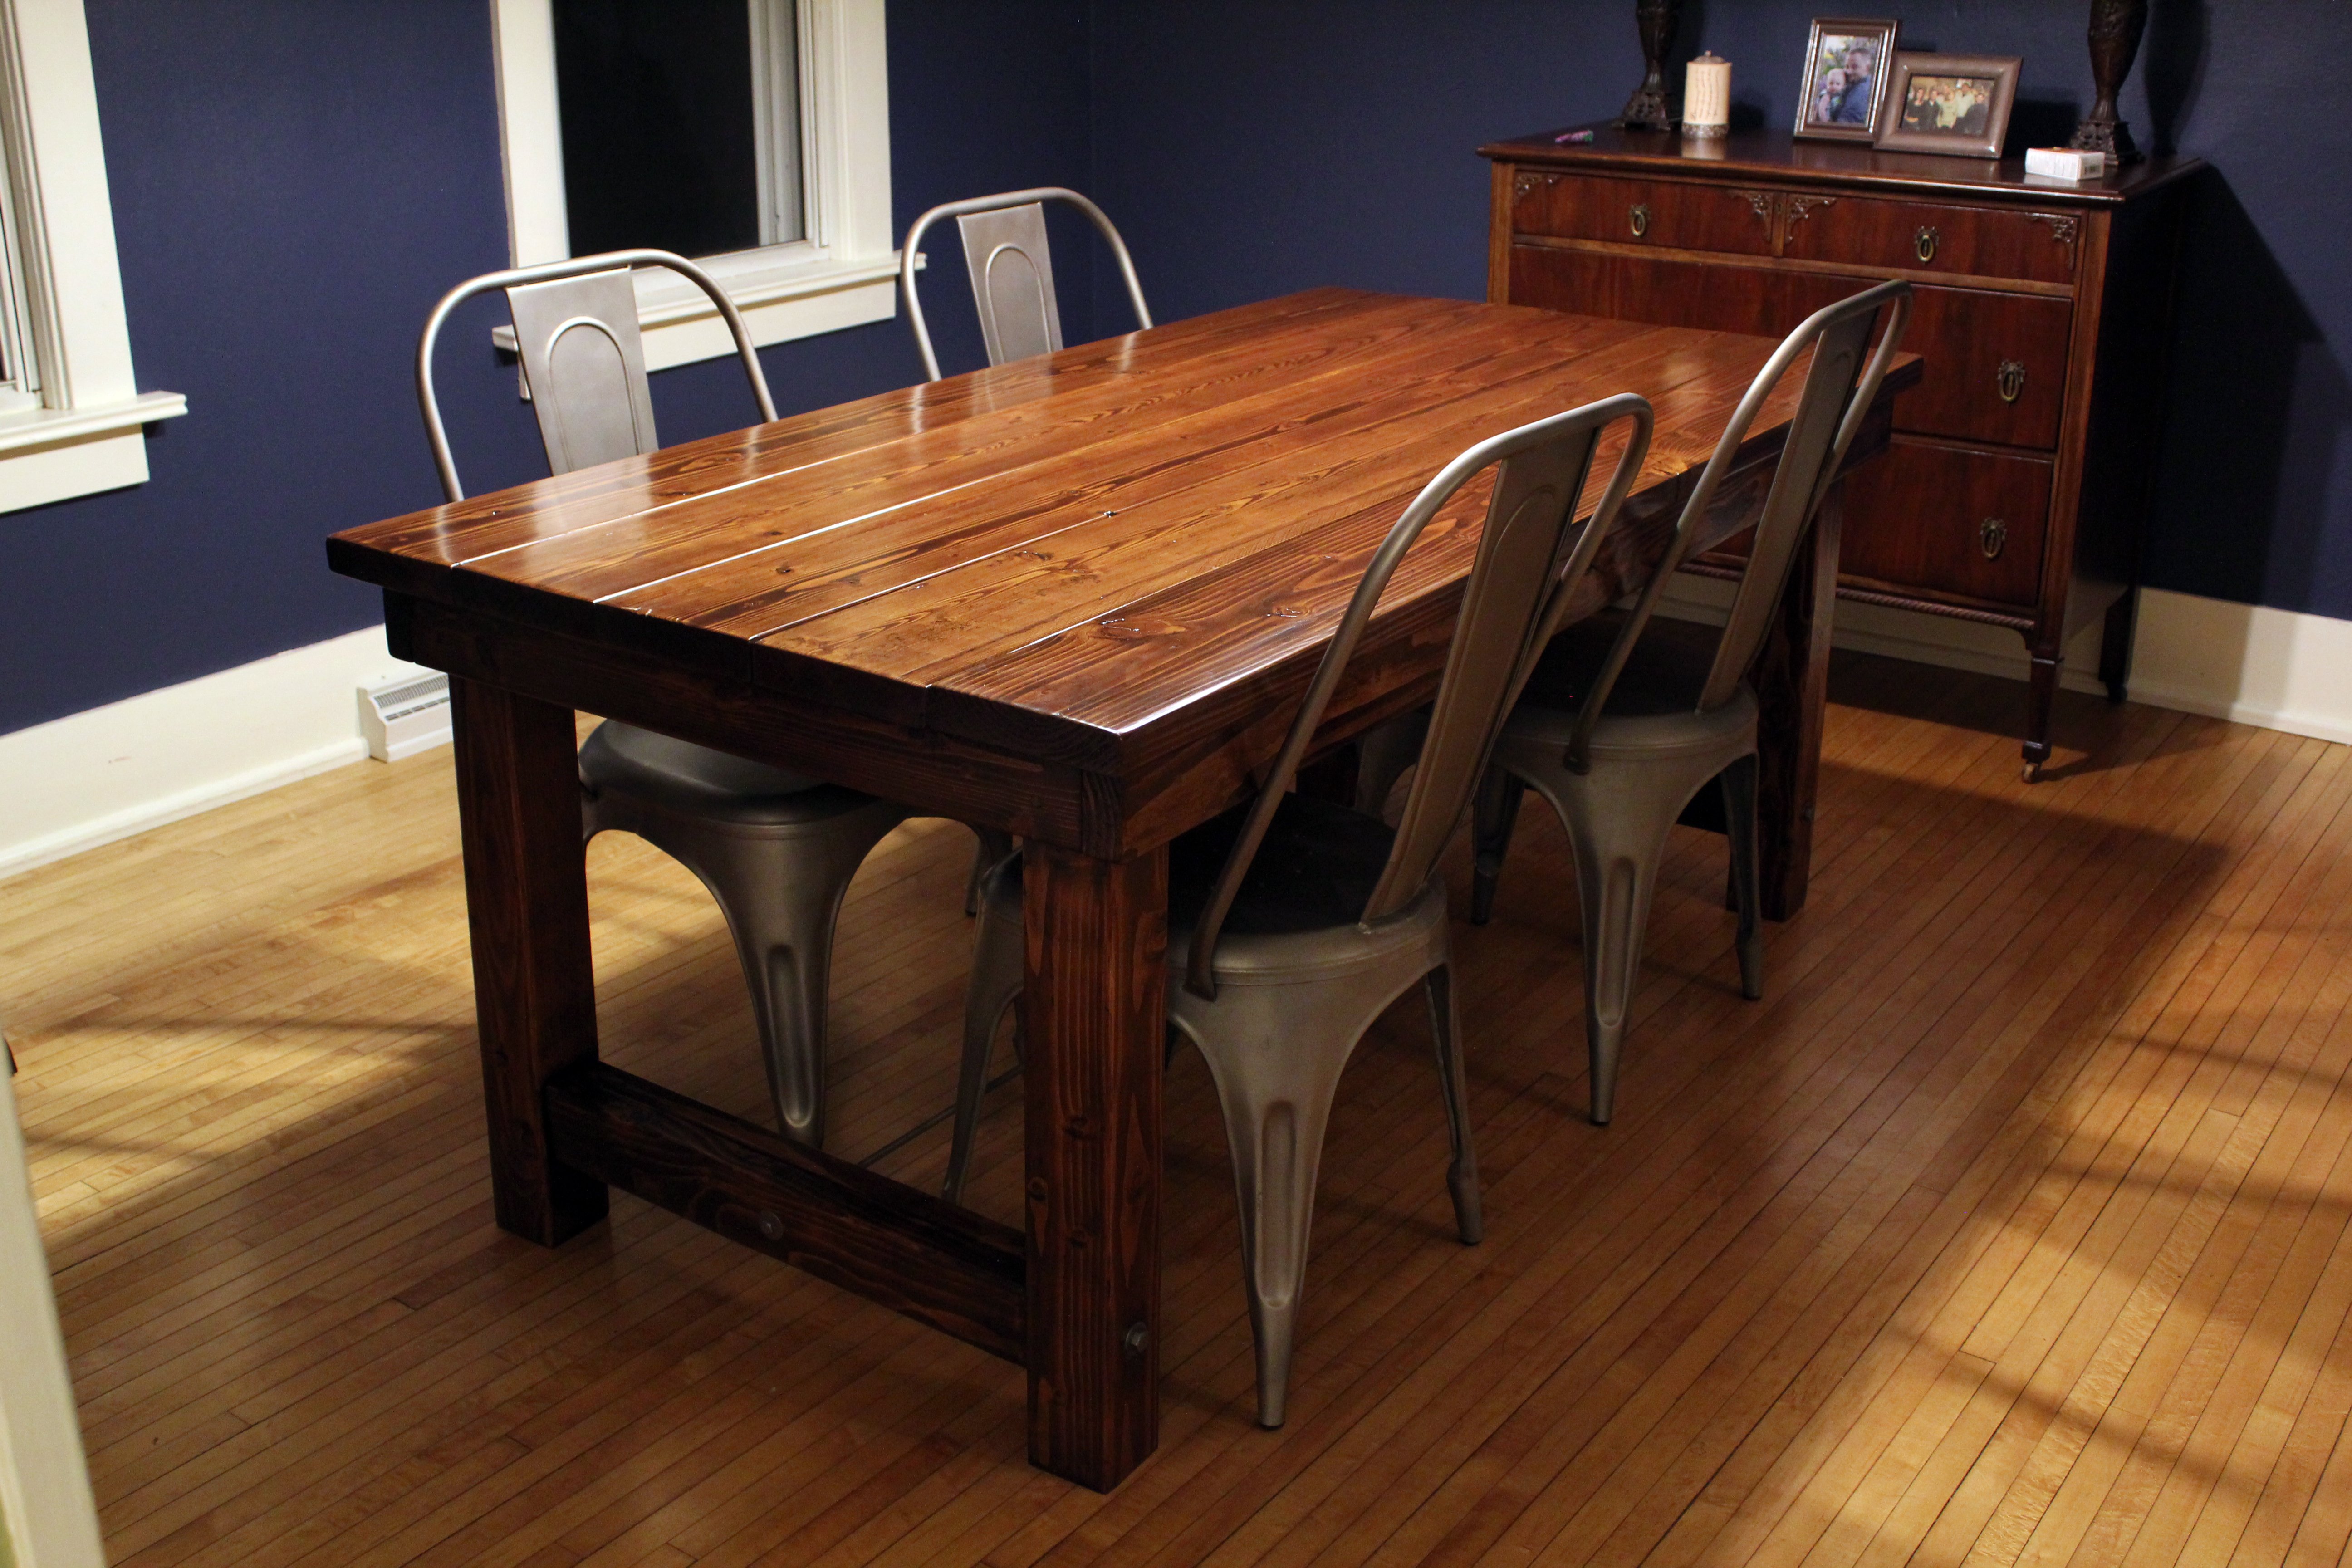
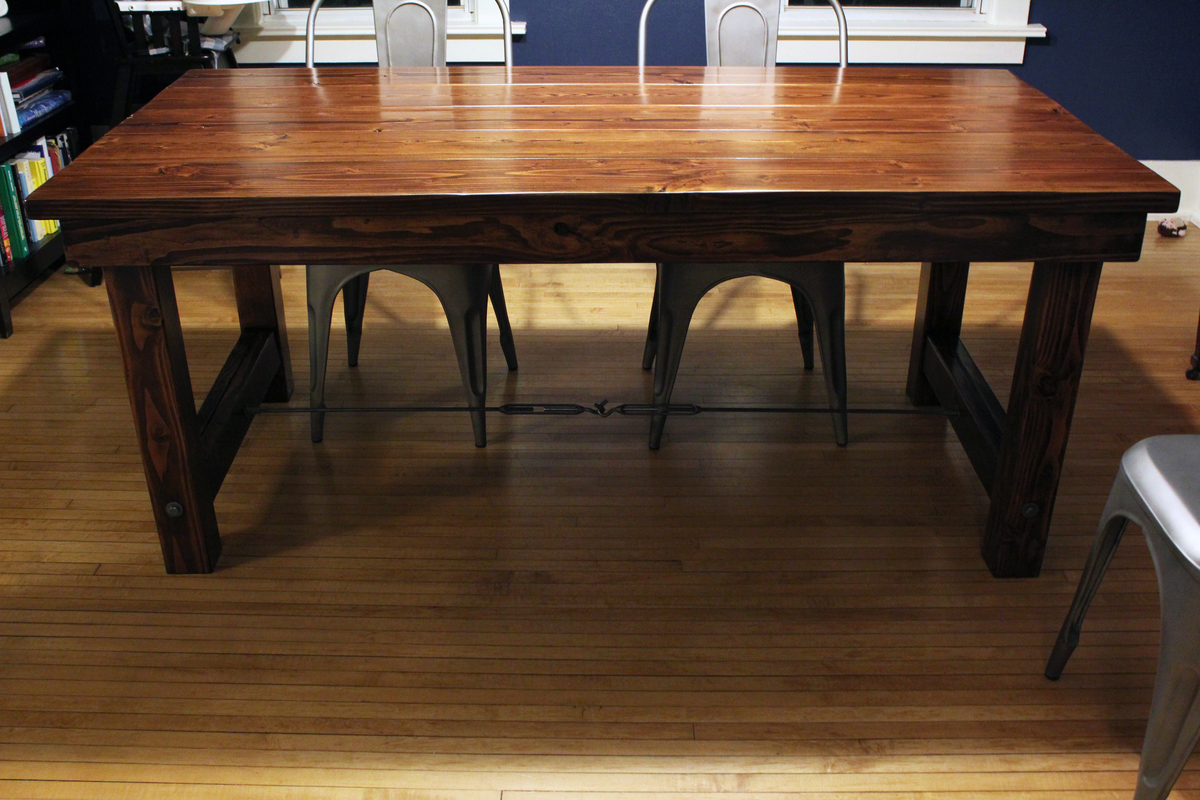
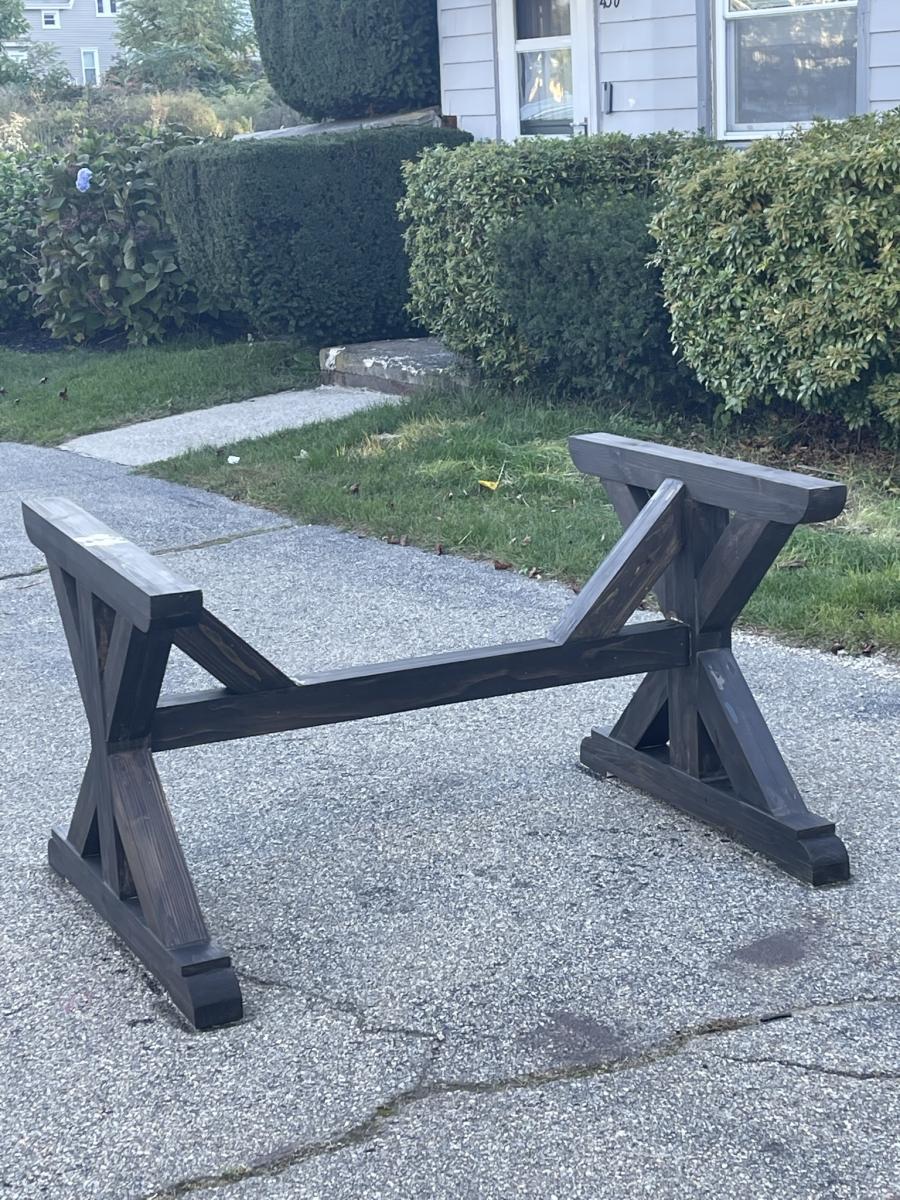
This was my first large project. Built it in one very long day and then finished over a few weeks. Instead of 2x4's for legs I opted for a 4x4 post with a bolt running through. I didn't really want to figure out the square washer so I just went with standard round. I spray painted all of the hardware silver with Rust-Oleum Universal Hammered Spray paint to coordinate with the Tolix like chairs I purchased from Restoration Hardware.
Mon, 09/02/2013 - 07:12
I was wondering the same thing as Medickep, were all of the coats necessary or was it just the way you wanted it finished? I do like the end results though.
Tue, 09/03/2013 - 09:03
The multiple coats wasn't intentional. I just couldn't get the right look so kept on going with the colors. I'd say the finish portion of the project was the most difficult for me. I am happy with out it turned out and cannot wait to build something again!
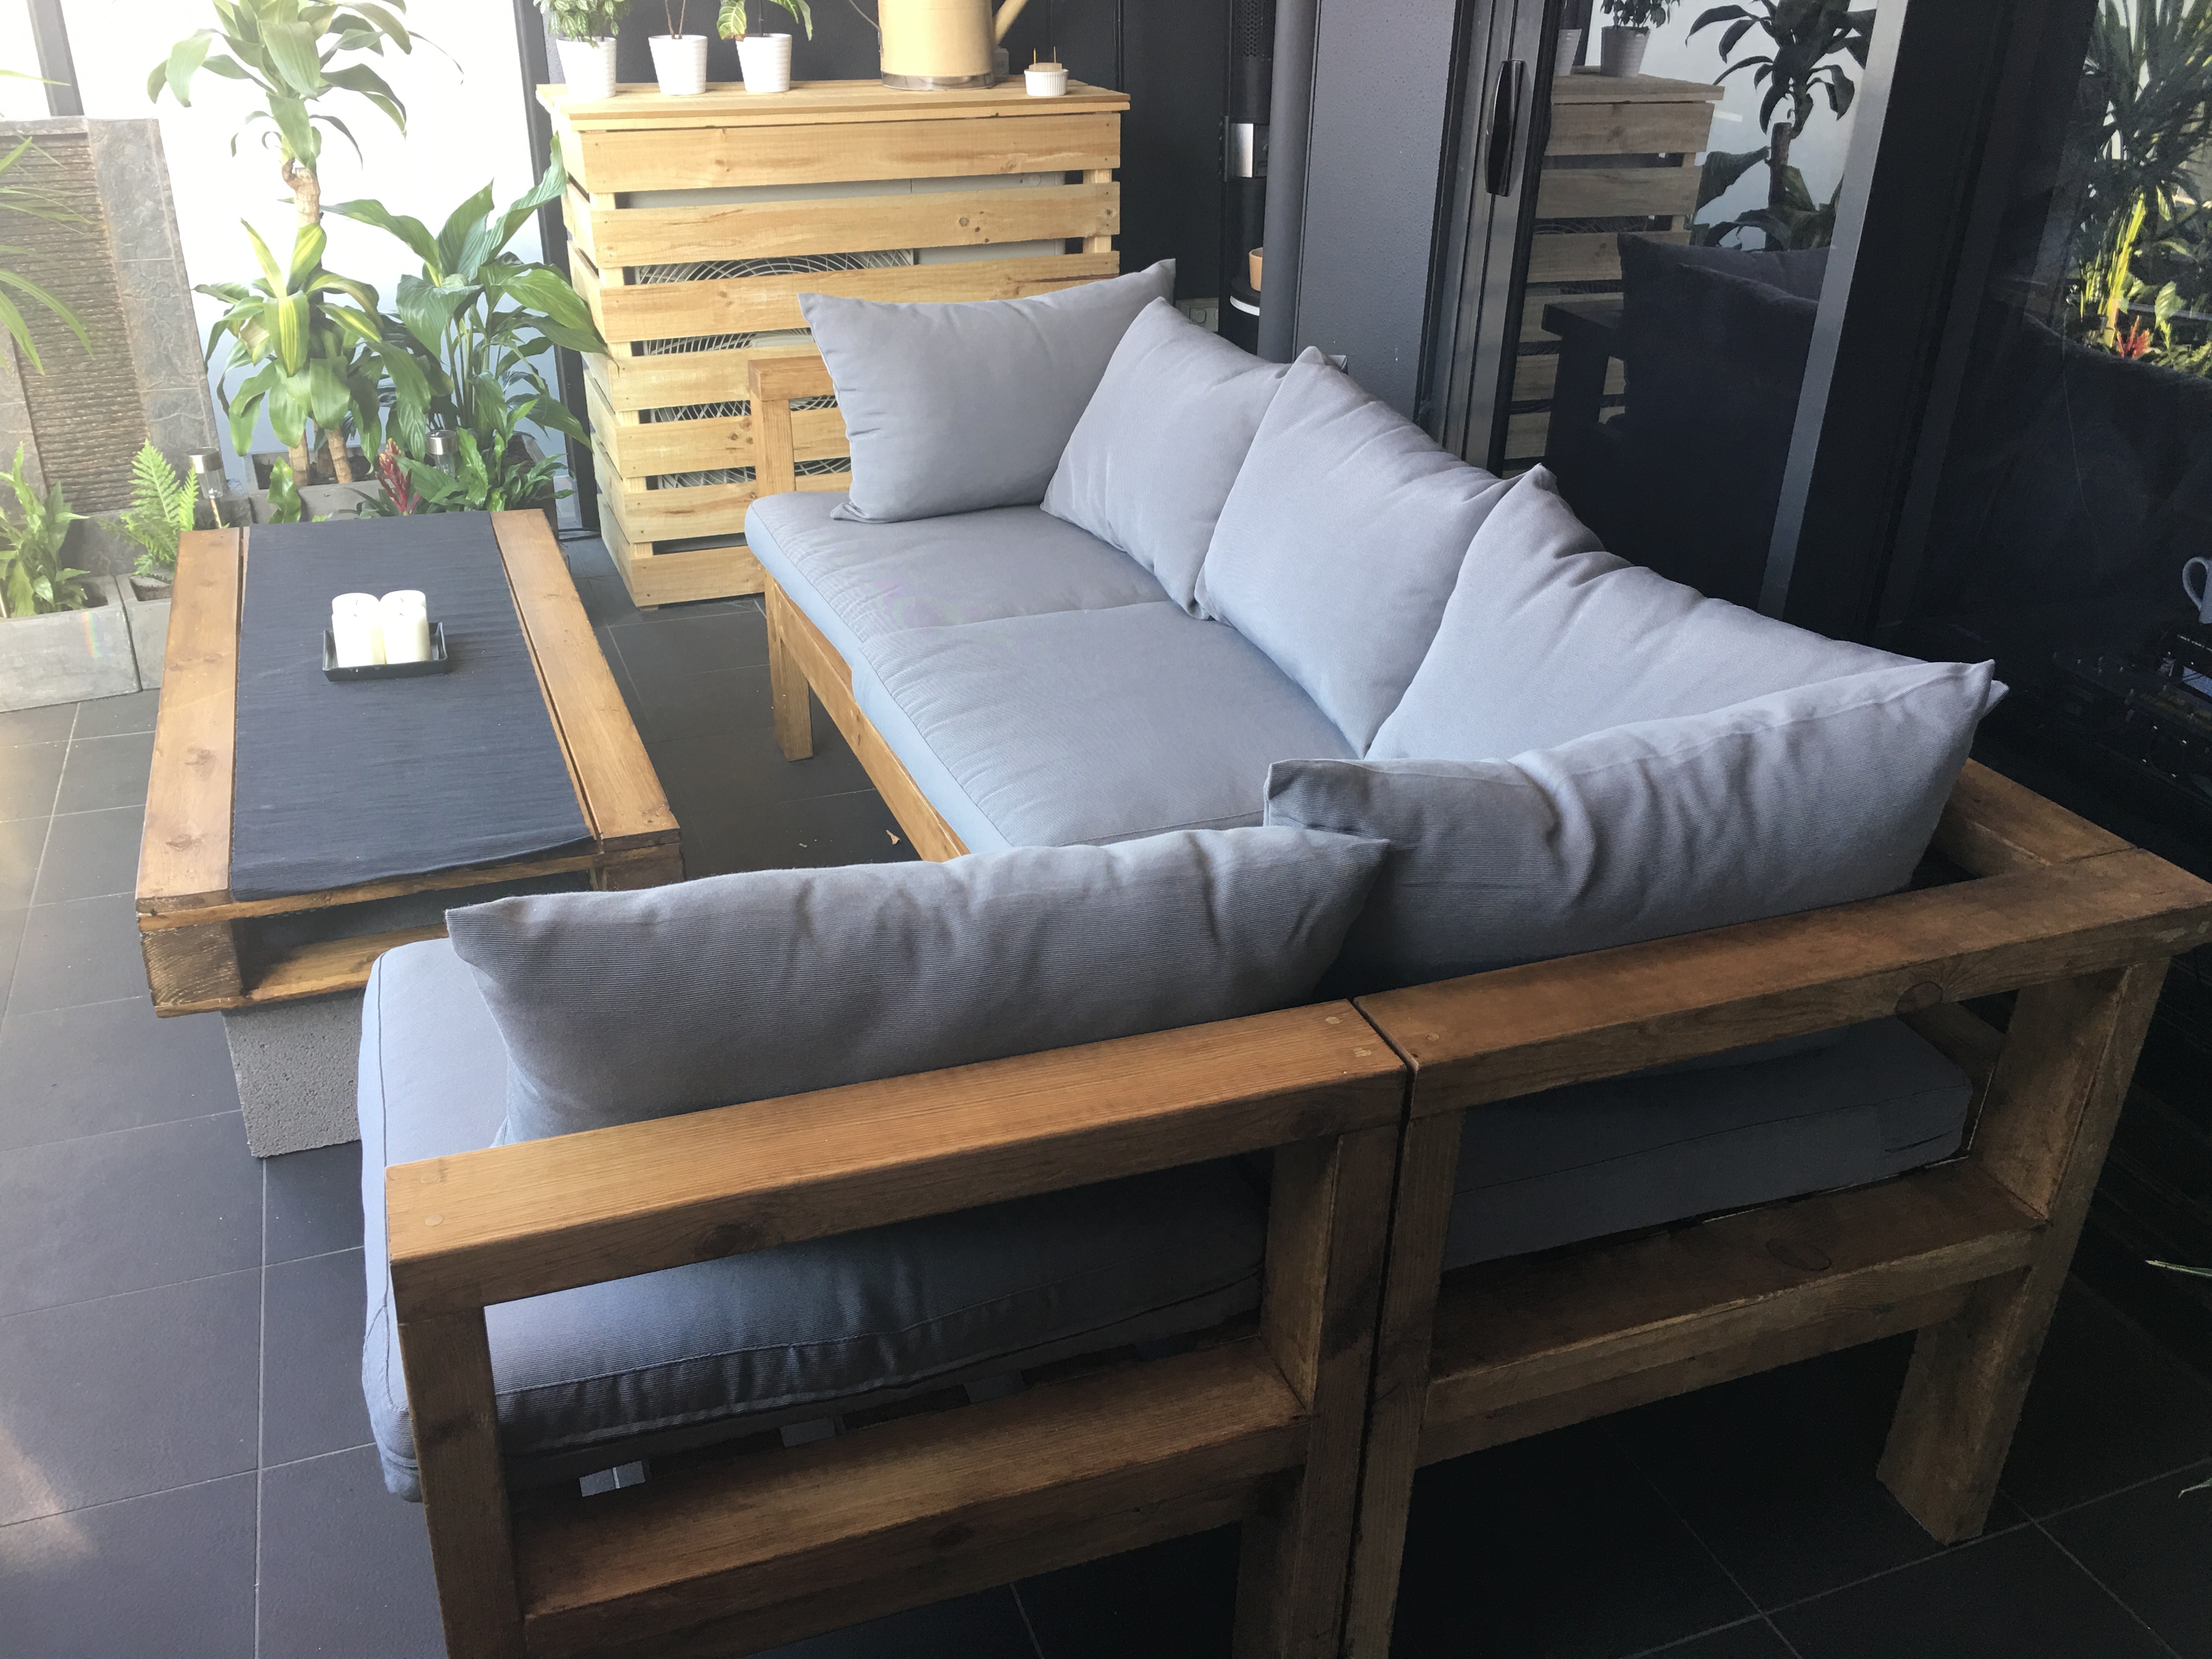
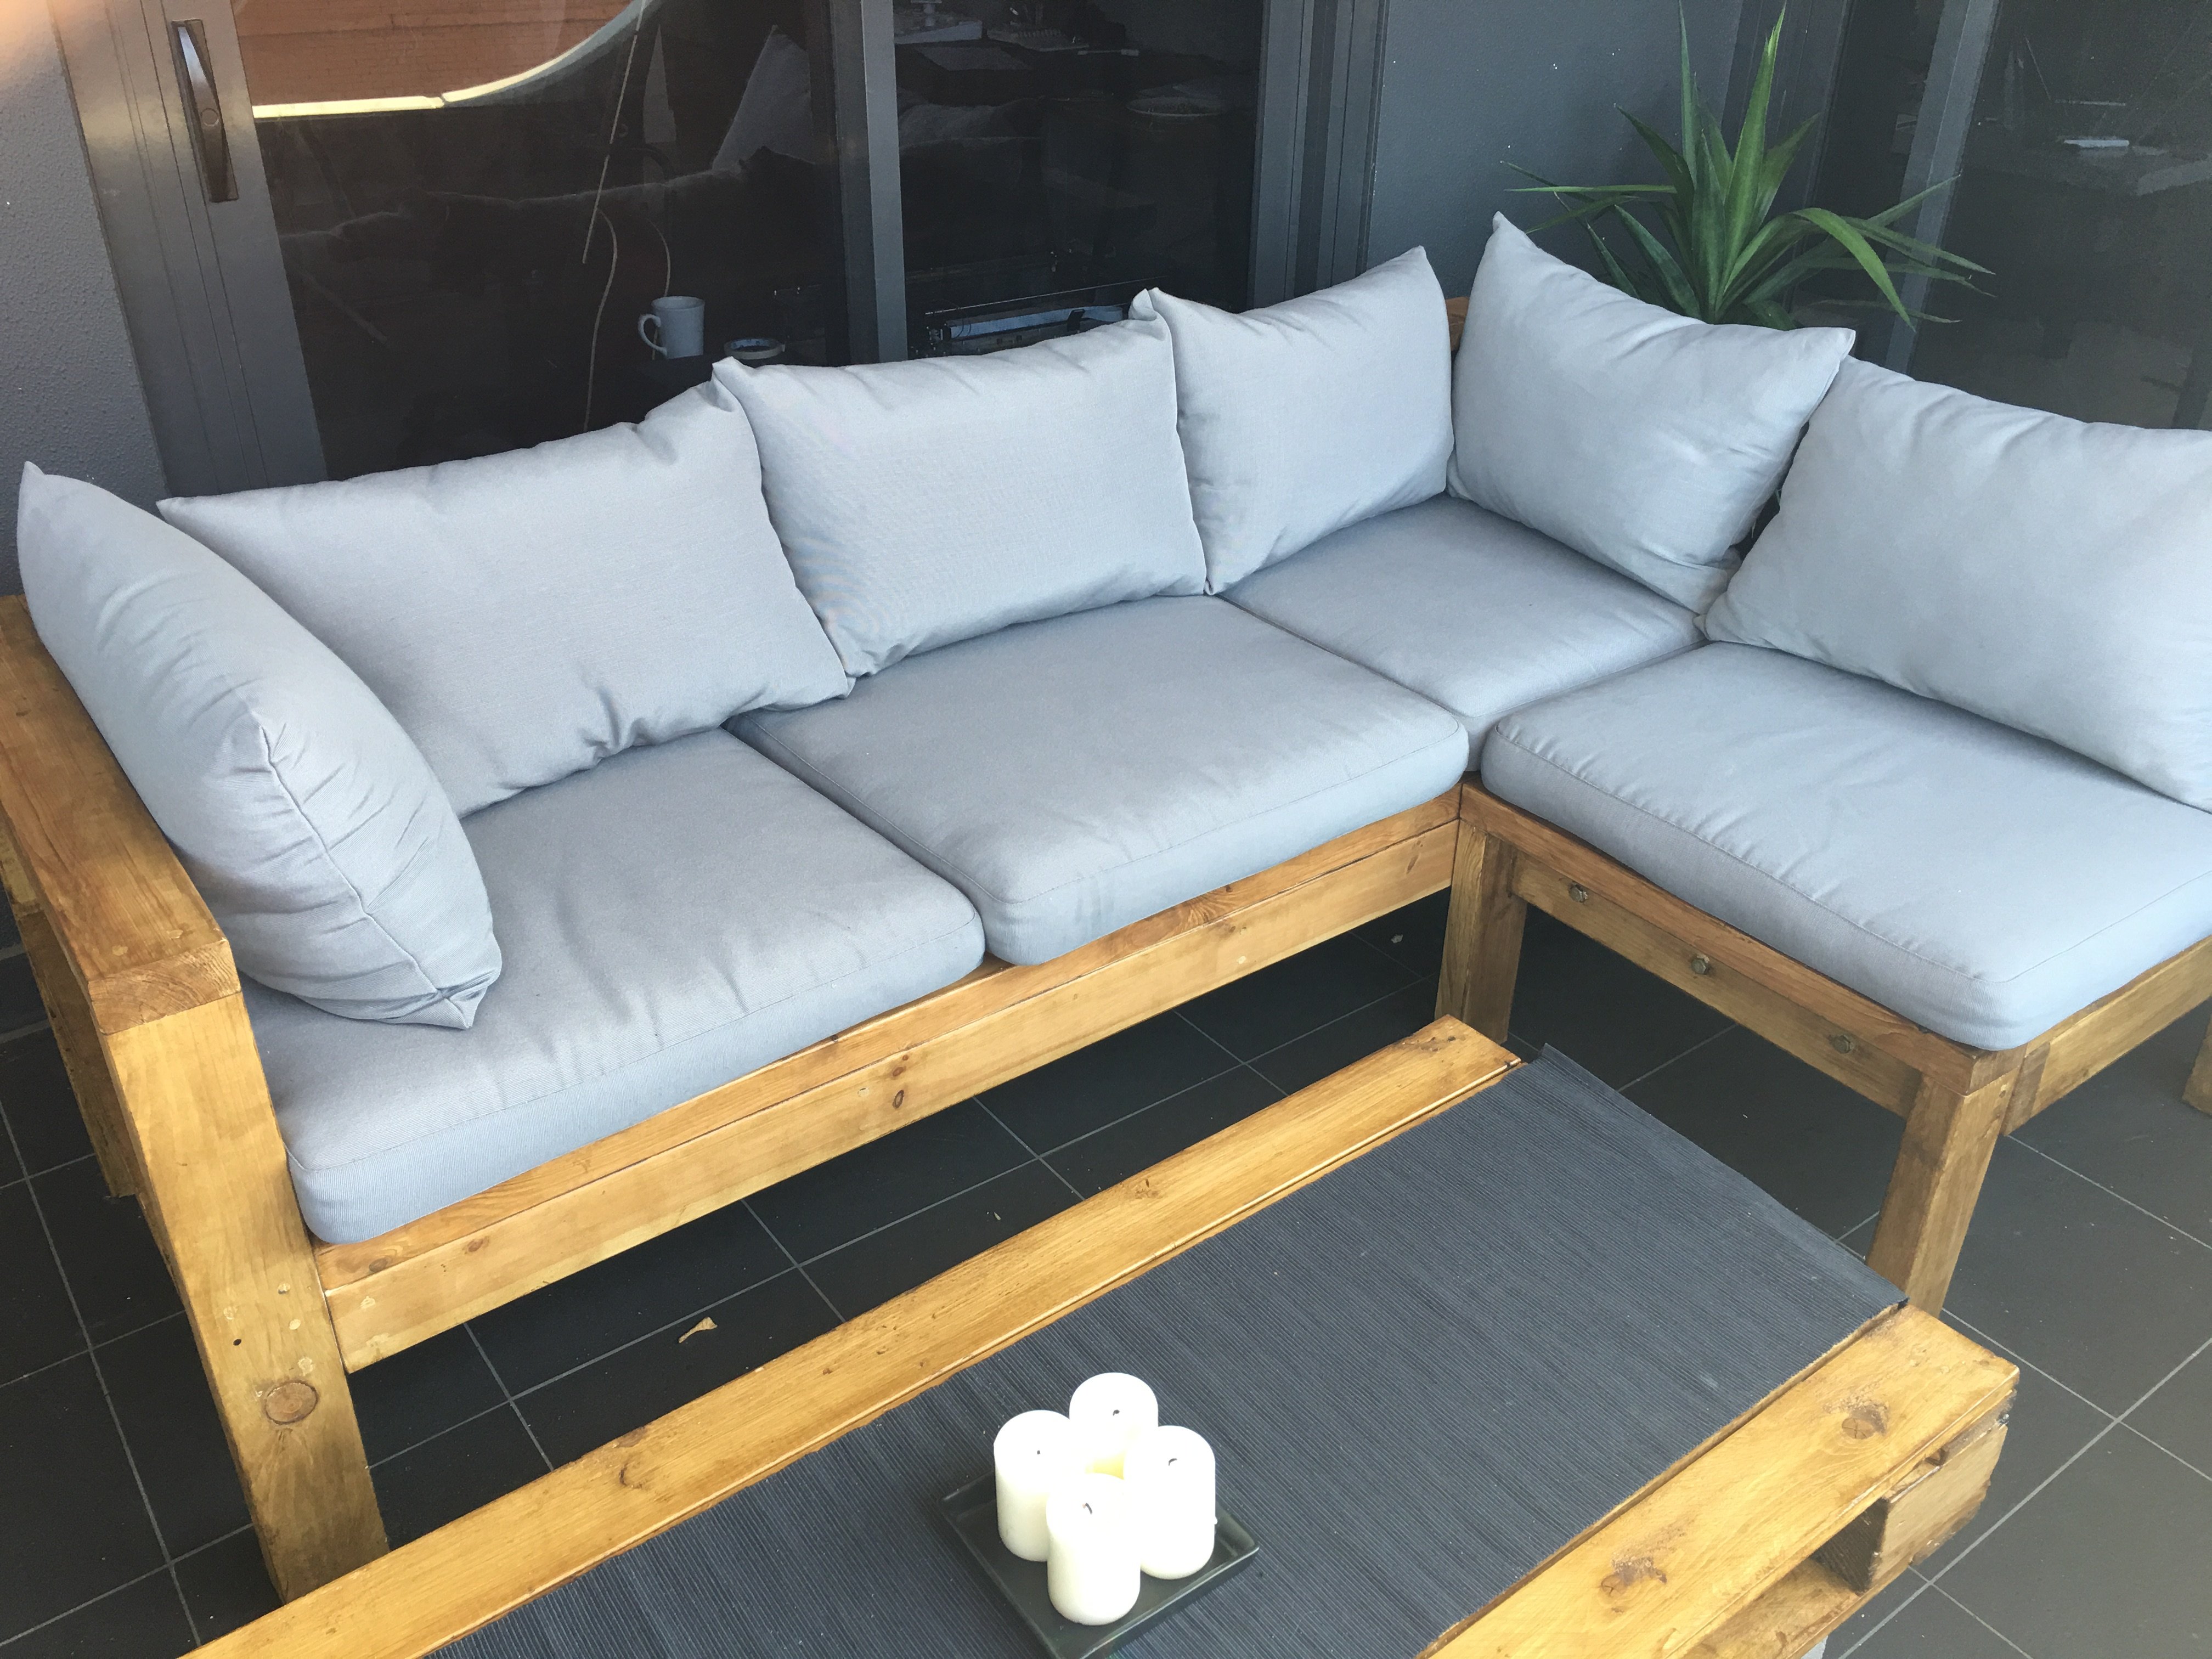
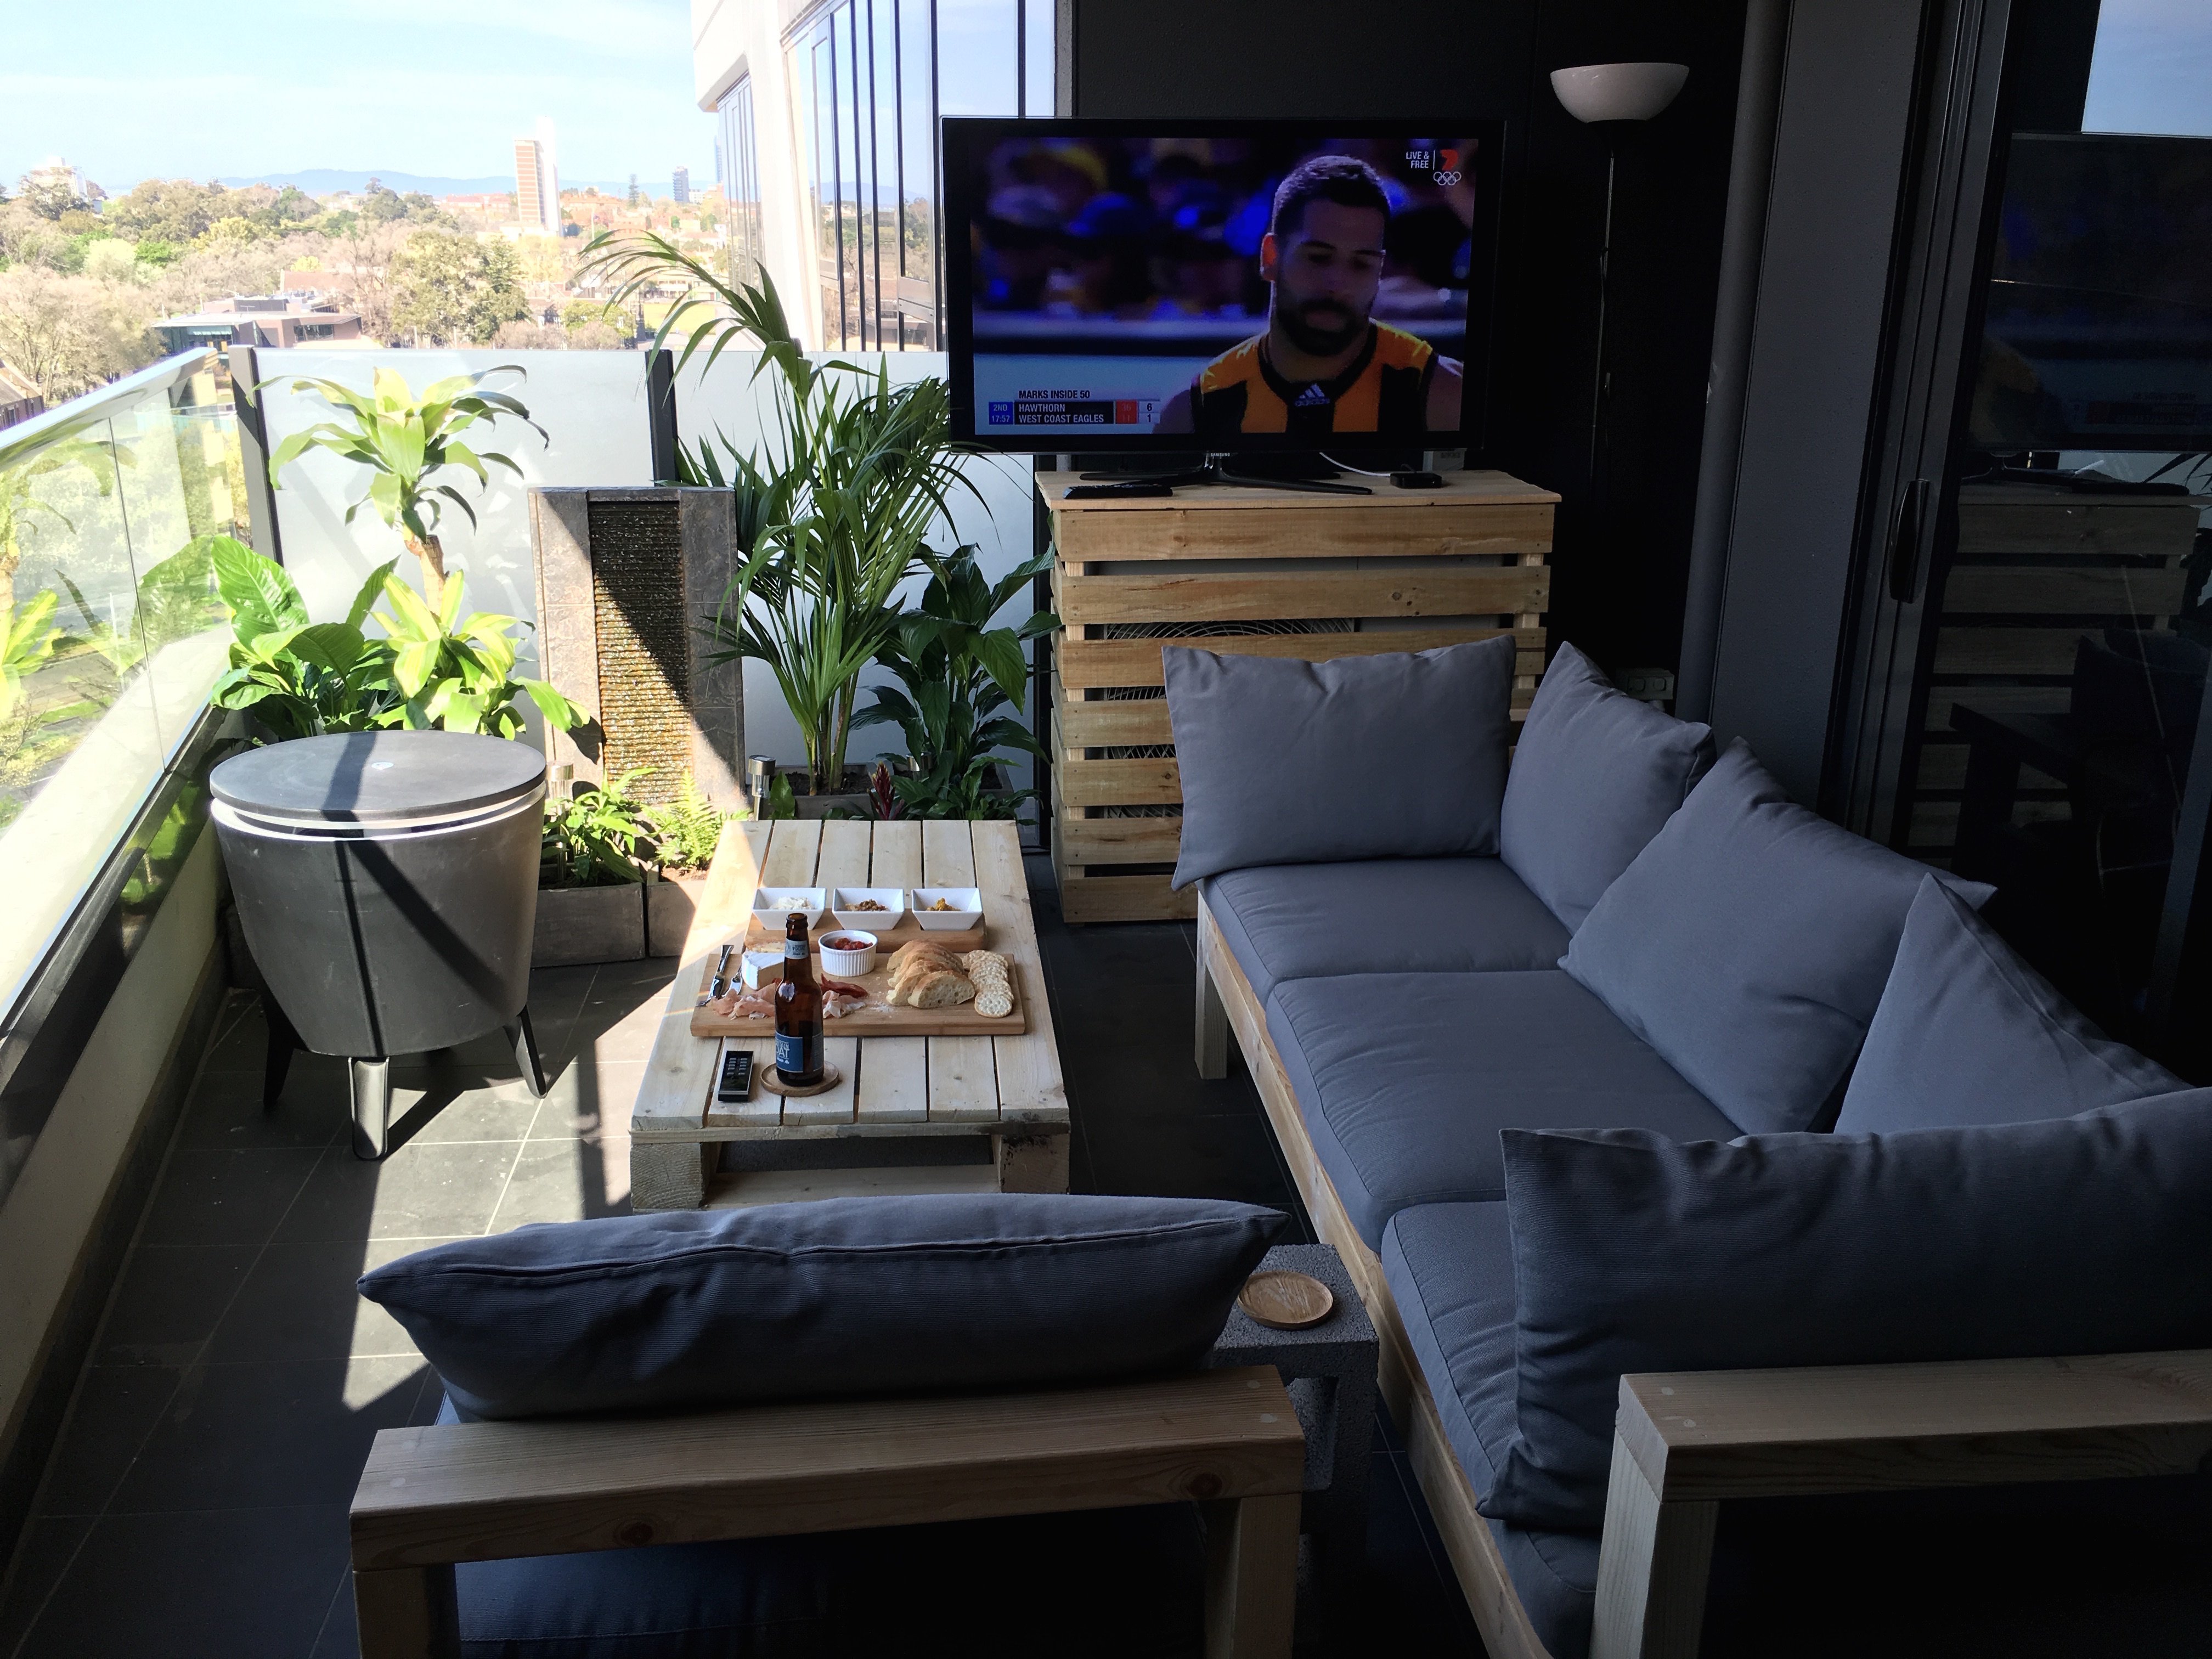
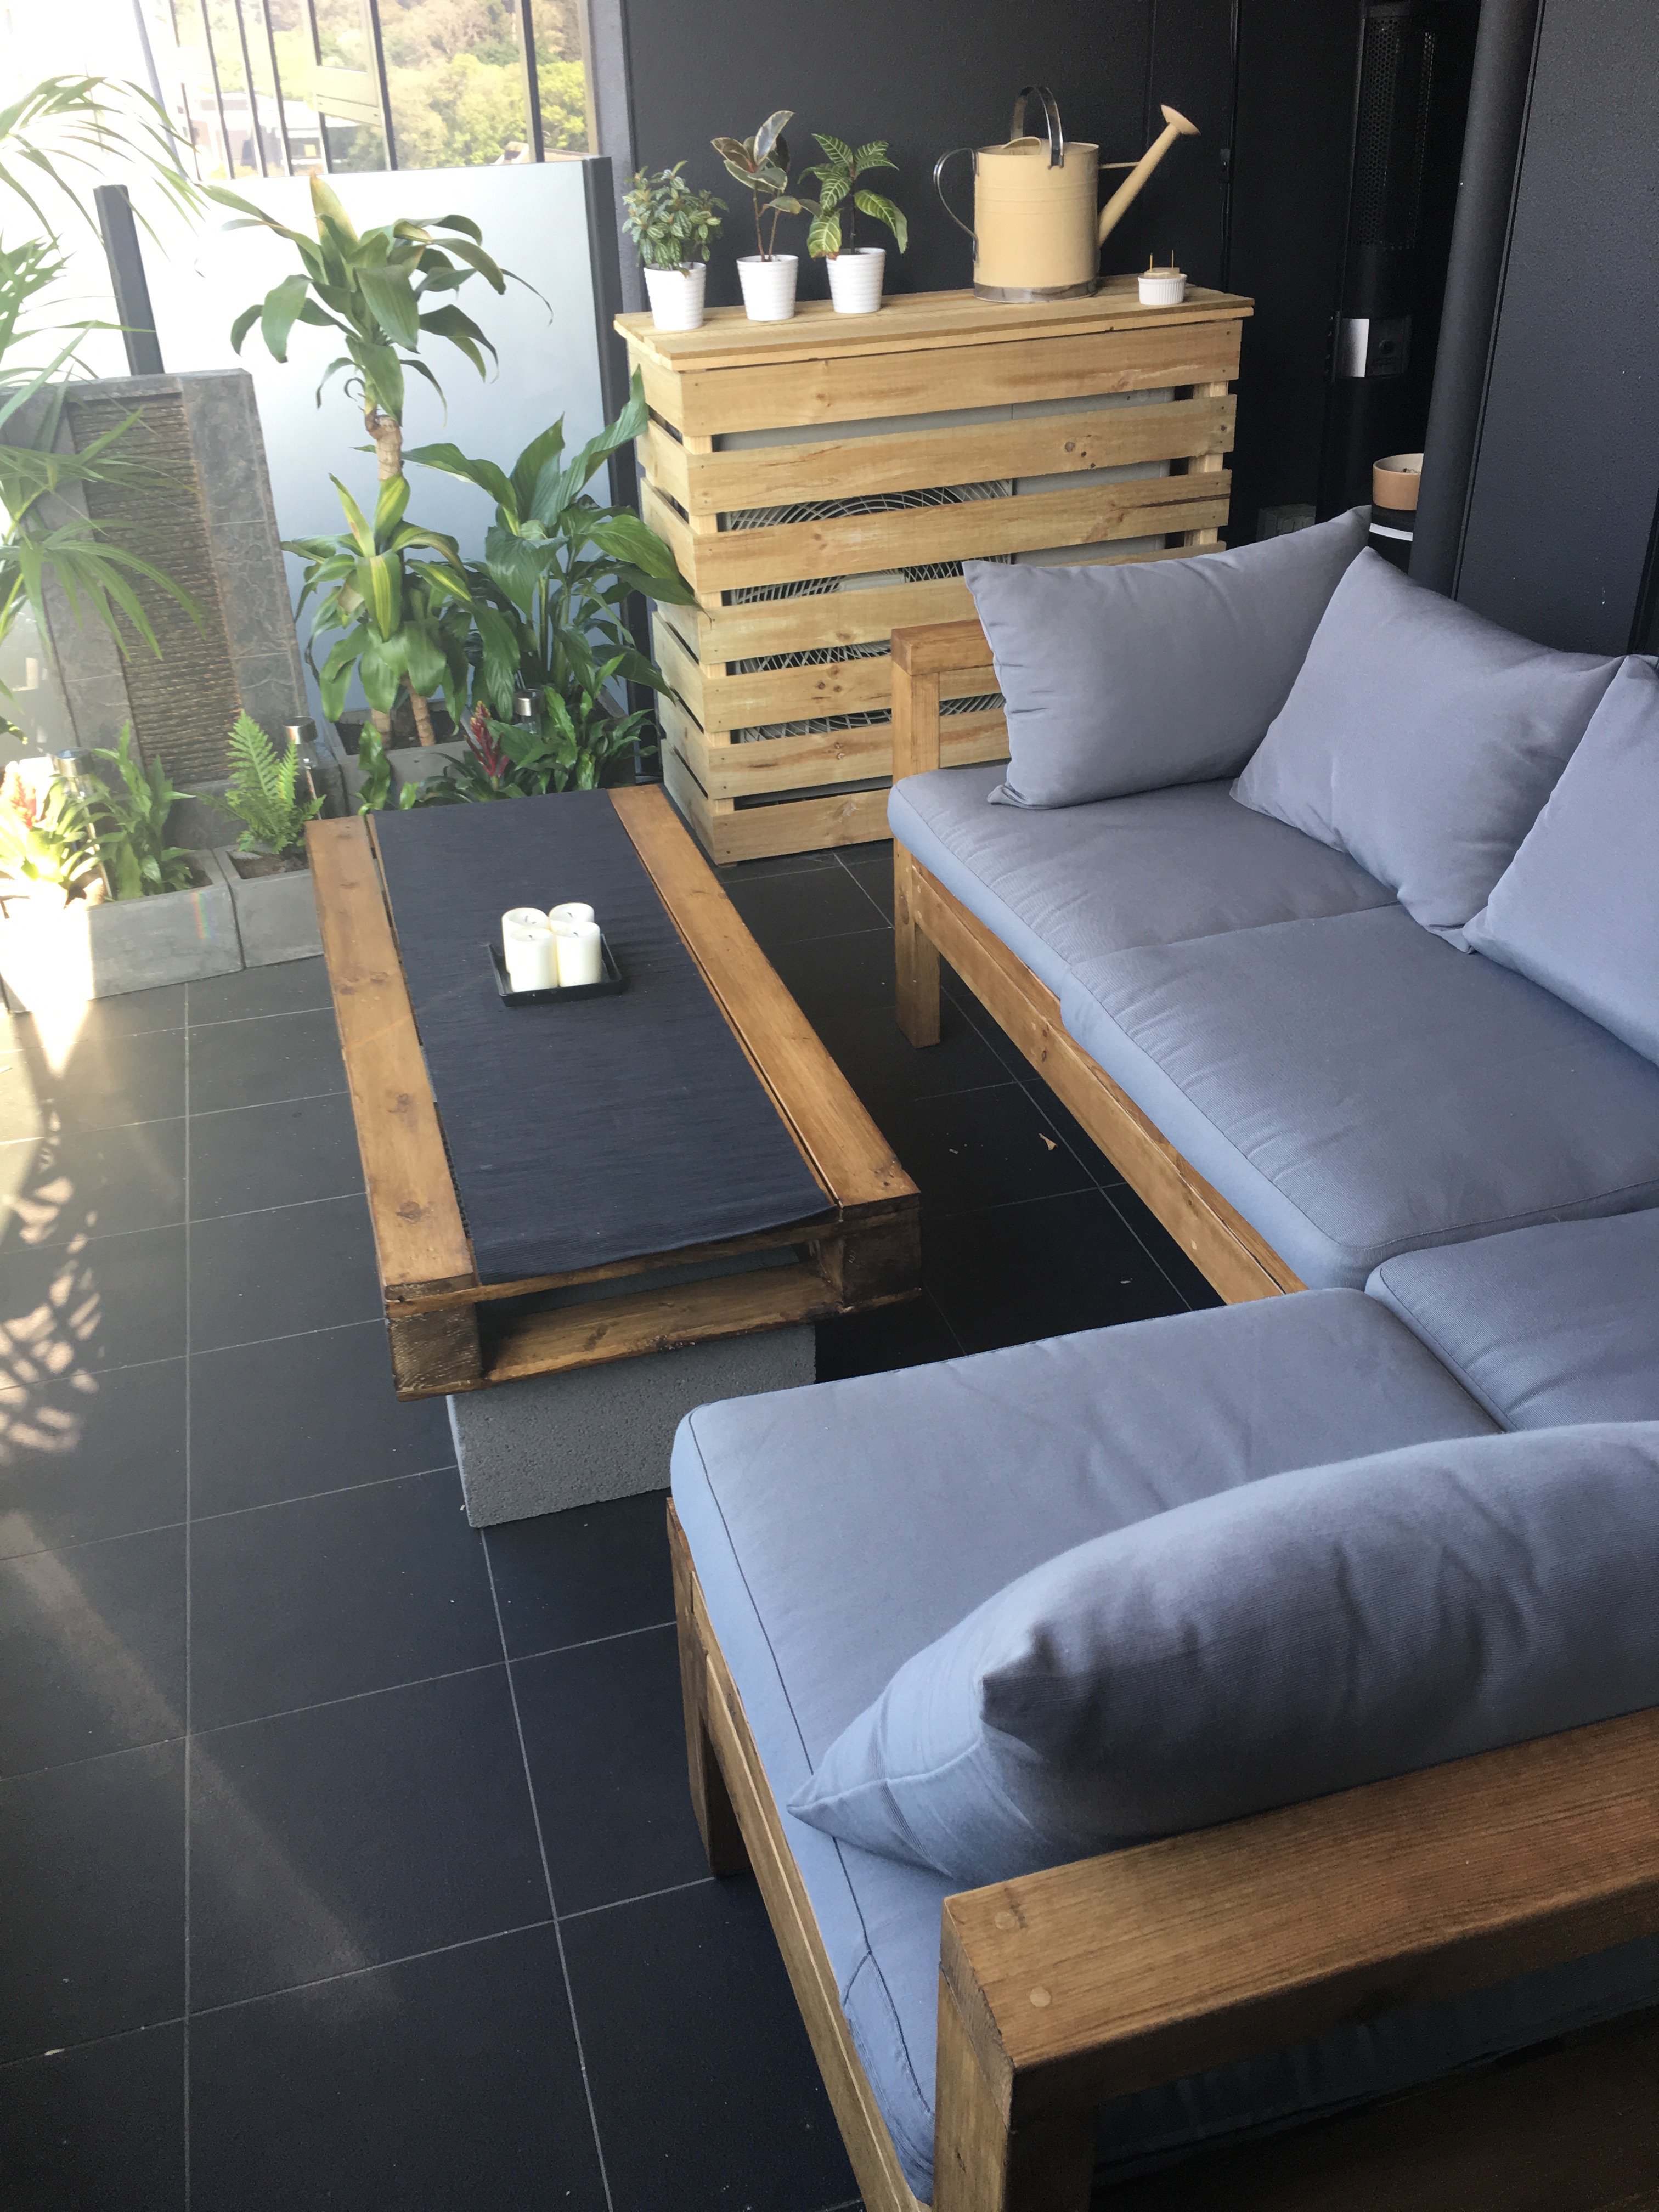
I needed to transform my balcony in Australia into an outdoor oasis! I used Ana's plans for the outdoor sofa and modified them to make it a sectional. I converted into metric measurements and modified these to fit some pre-purchased cushions. The coffee table is made from a pallet and cinder blocks. The coffee table can be transformed into a dining table (with bench style lounge dining seats) by adding another 2 cinder blocks under the table. The table also perfectly fits into the space in front of the sofa and is the exact right size to add two extra seat cushions on top to form a full double bed. We sometimes put the tv outside on warm nights, transform the sofa into the bed and create an outdoor cinema...
Thanks Ana!
Mon, 10/12/2015 - 23:01
The photos keep turning themselves the wrong way around even though the ones I have taken are correct! Sorry.
Tue, 10/13/2015 - 22:10
Hi,
They are from Ikea's Hallo range. The seat cushions are great and I added some additional foam to the insert of the back cushions as I initially could feel the wooden support bar when I leant back.
I don't know how many stores Ikea have in the states but I just looked on their site and it is $25 for the seat pad and $15 for the back cushions. They come in a range of colours. Hope this helps!
Tue, 10/13/2015 - 22:16
Also, they have a range called Kungso that is slightly more expensive but is thicker and maybe you wouldn't have to put foam in the back cushion. The only problem for me was that they only came in black or white and that wasn't suitable for my needs.
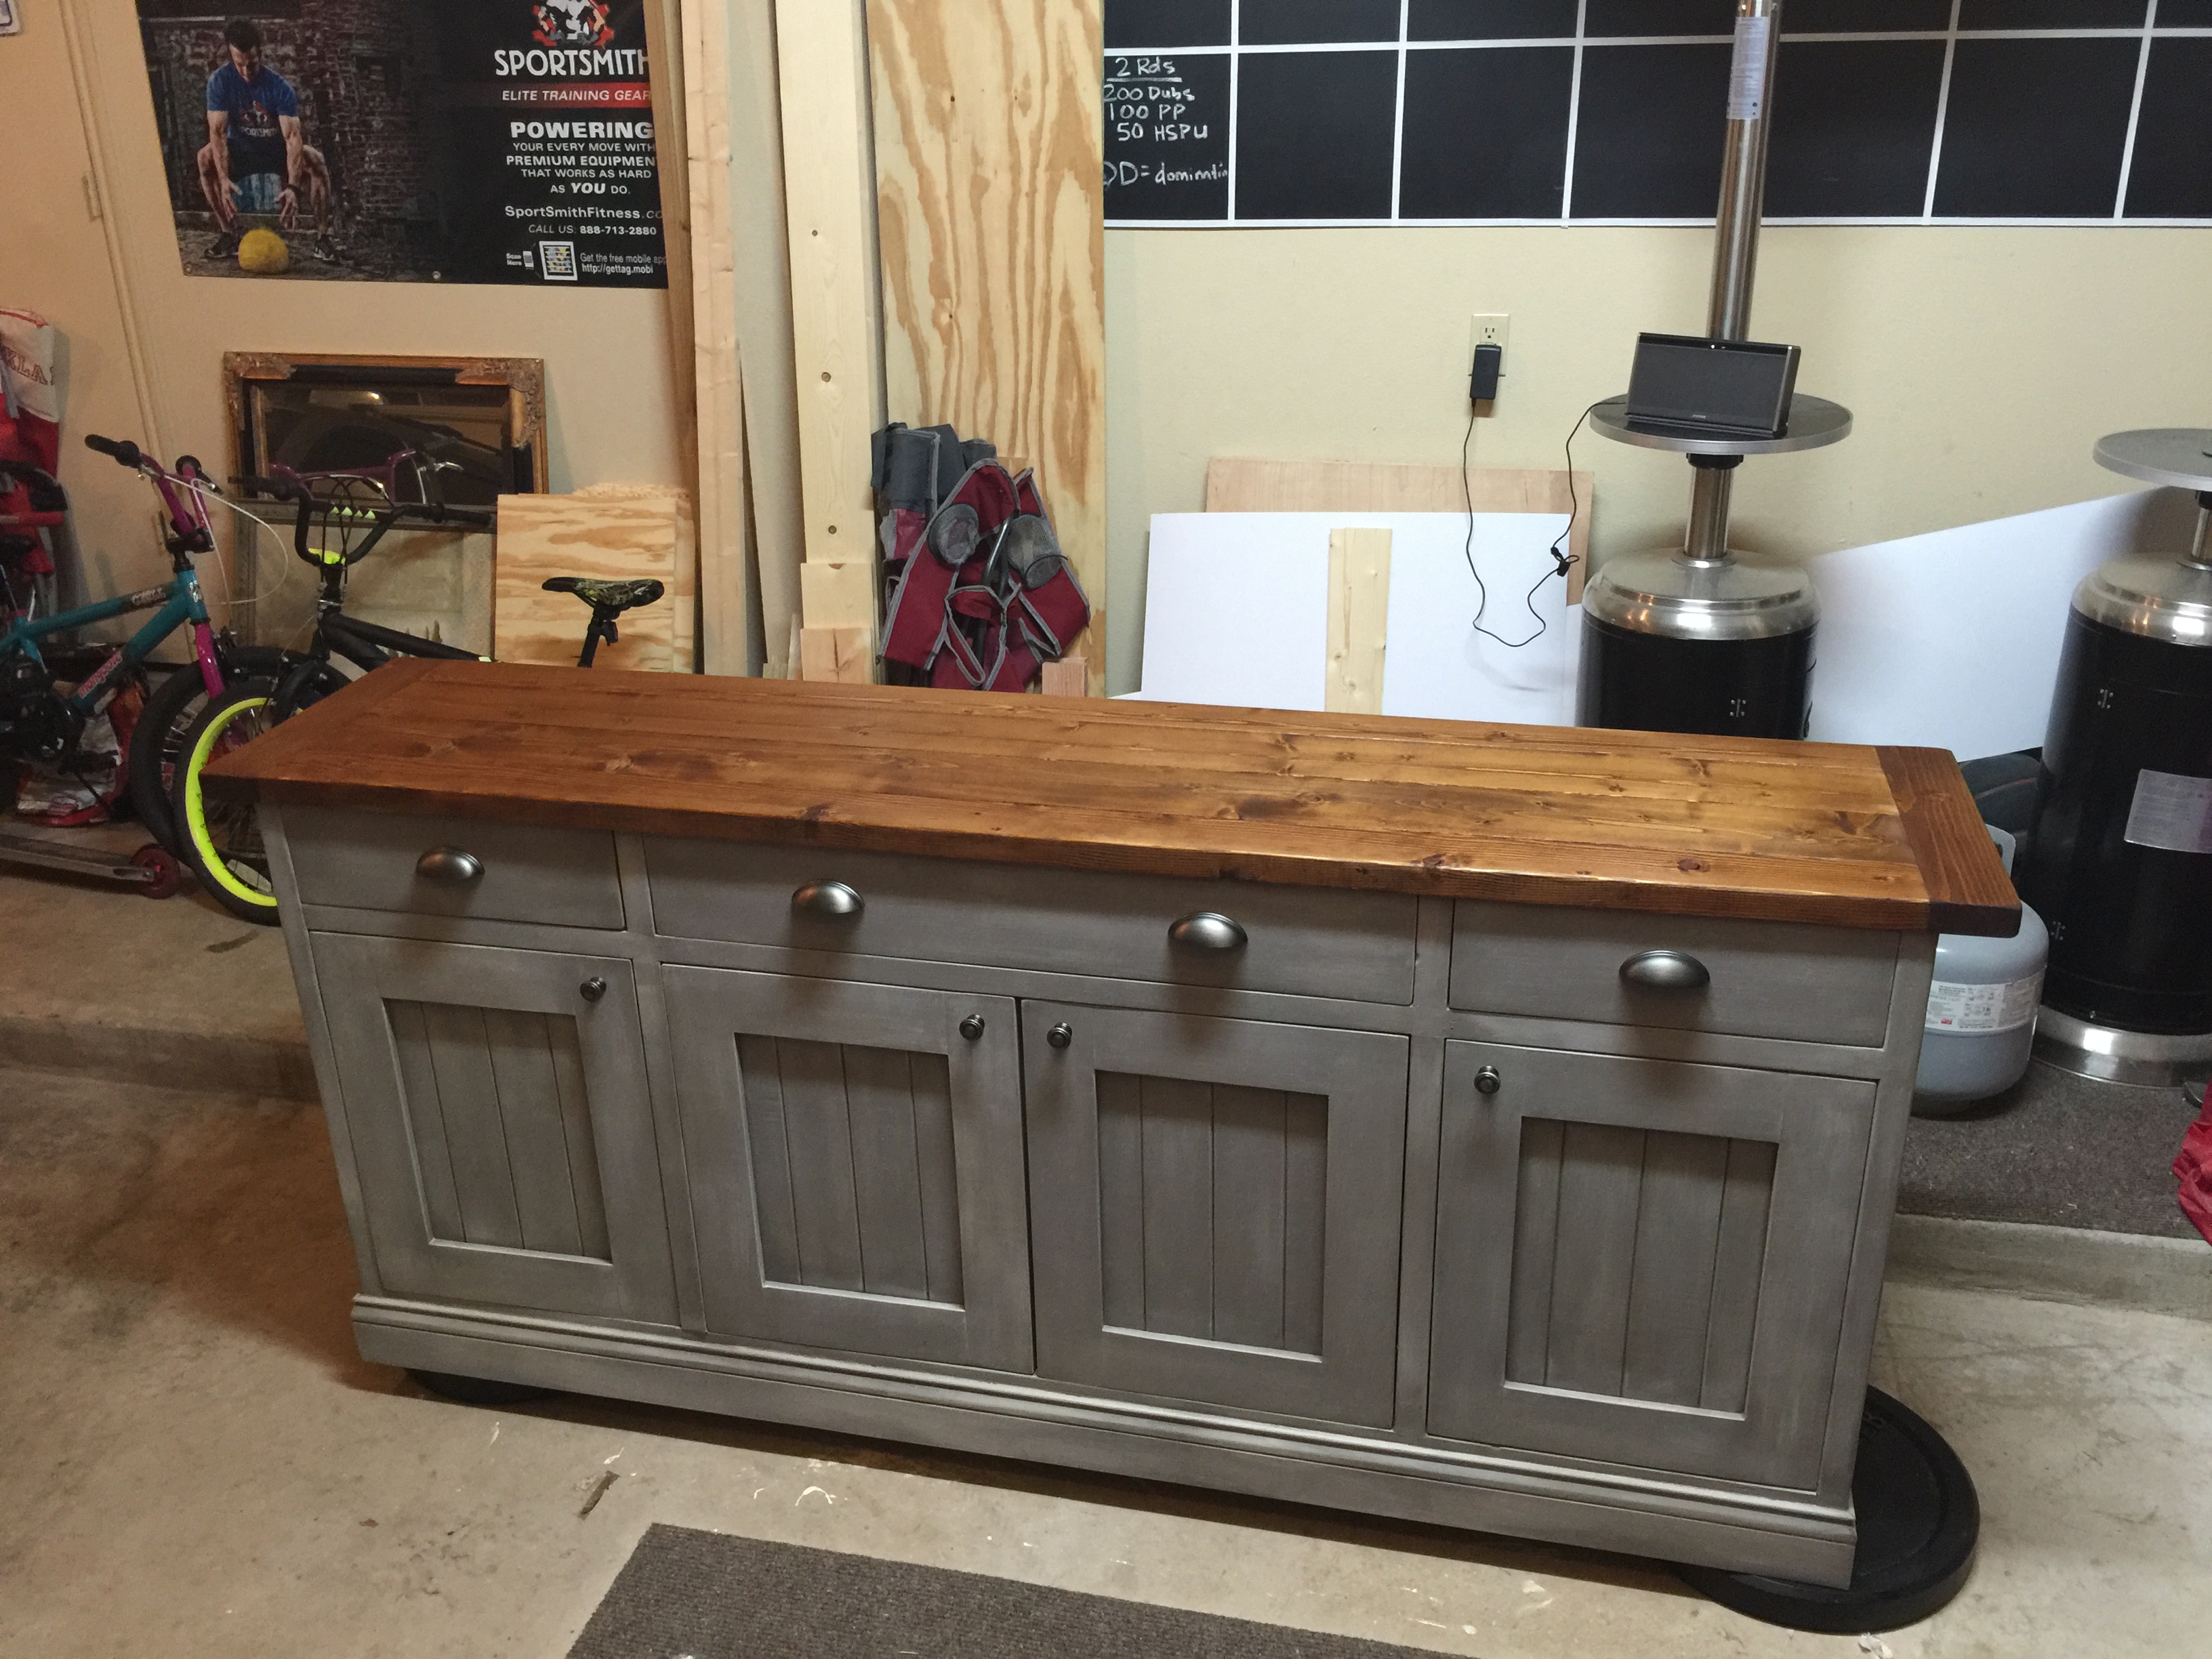
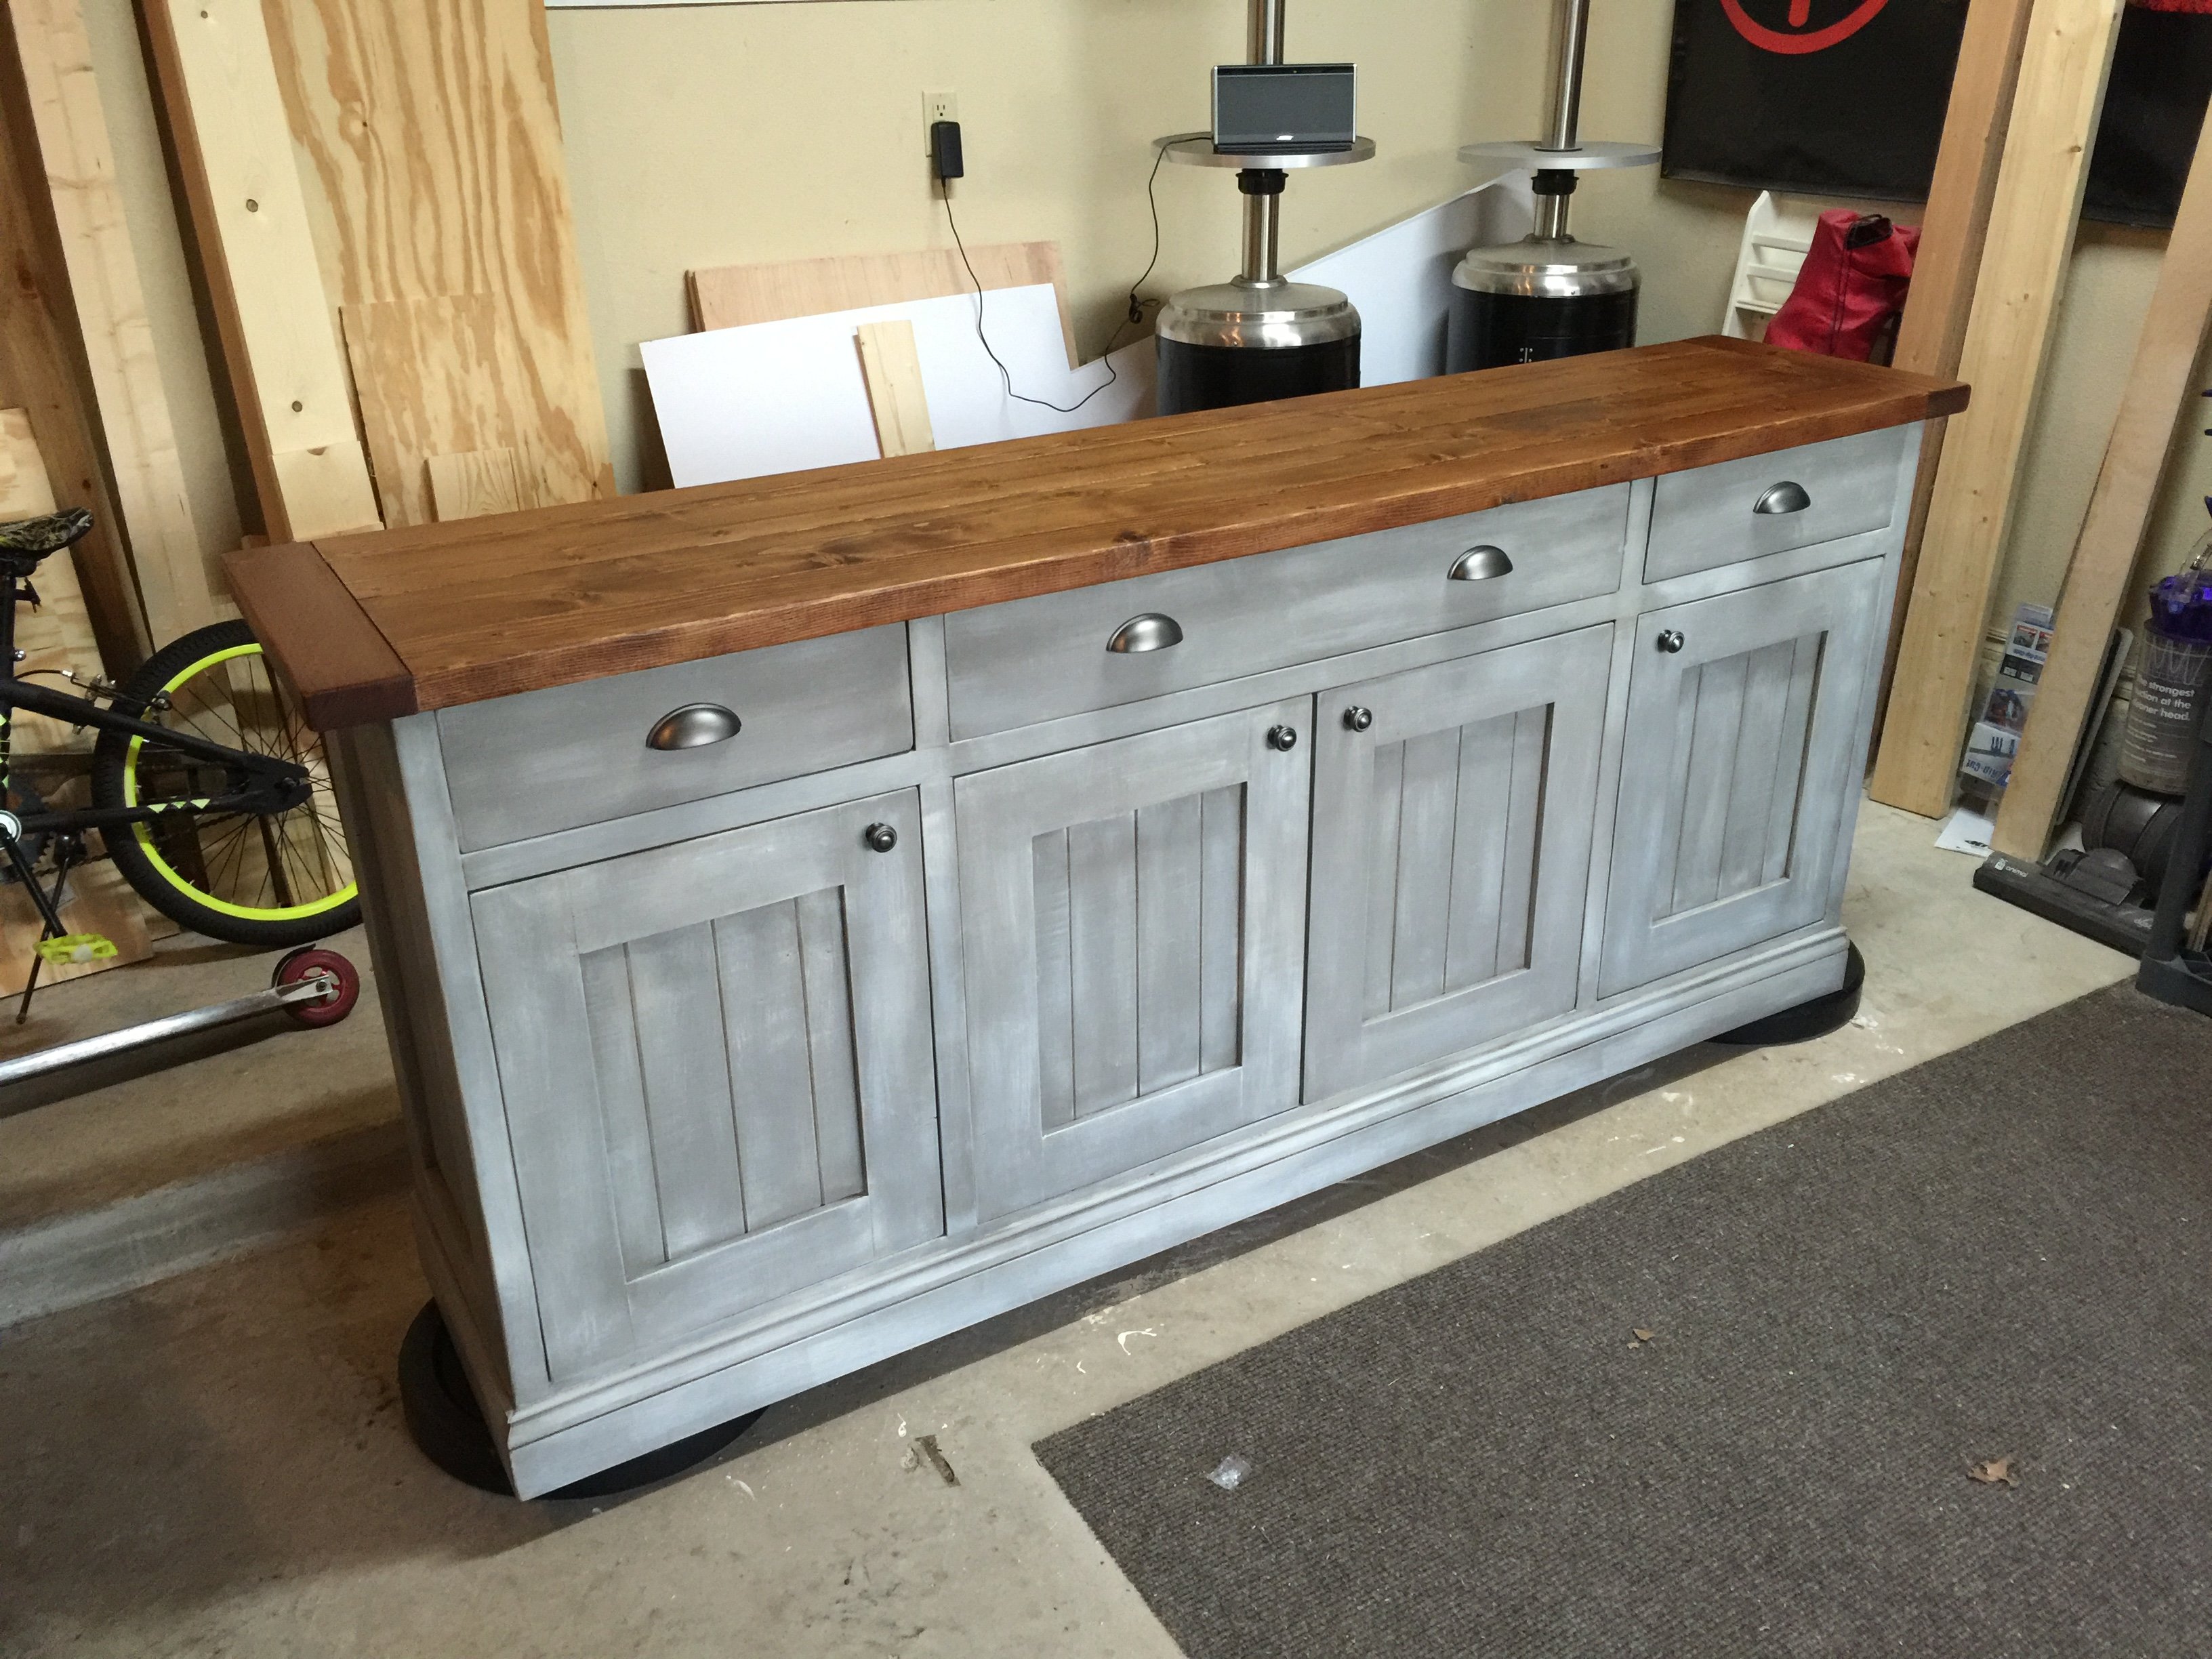
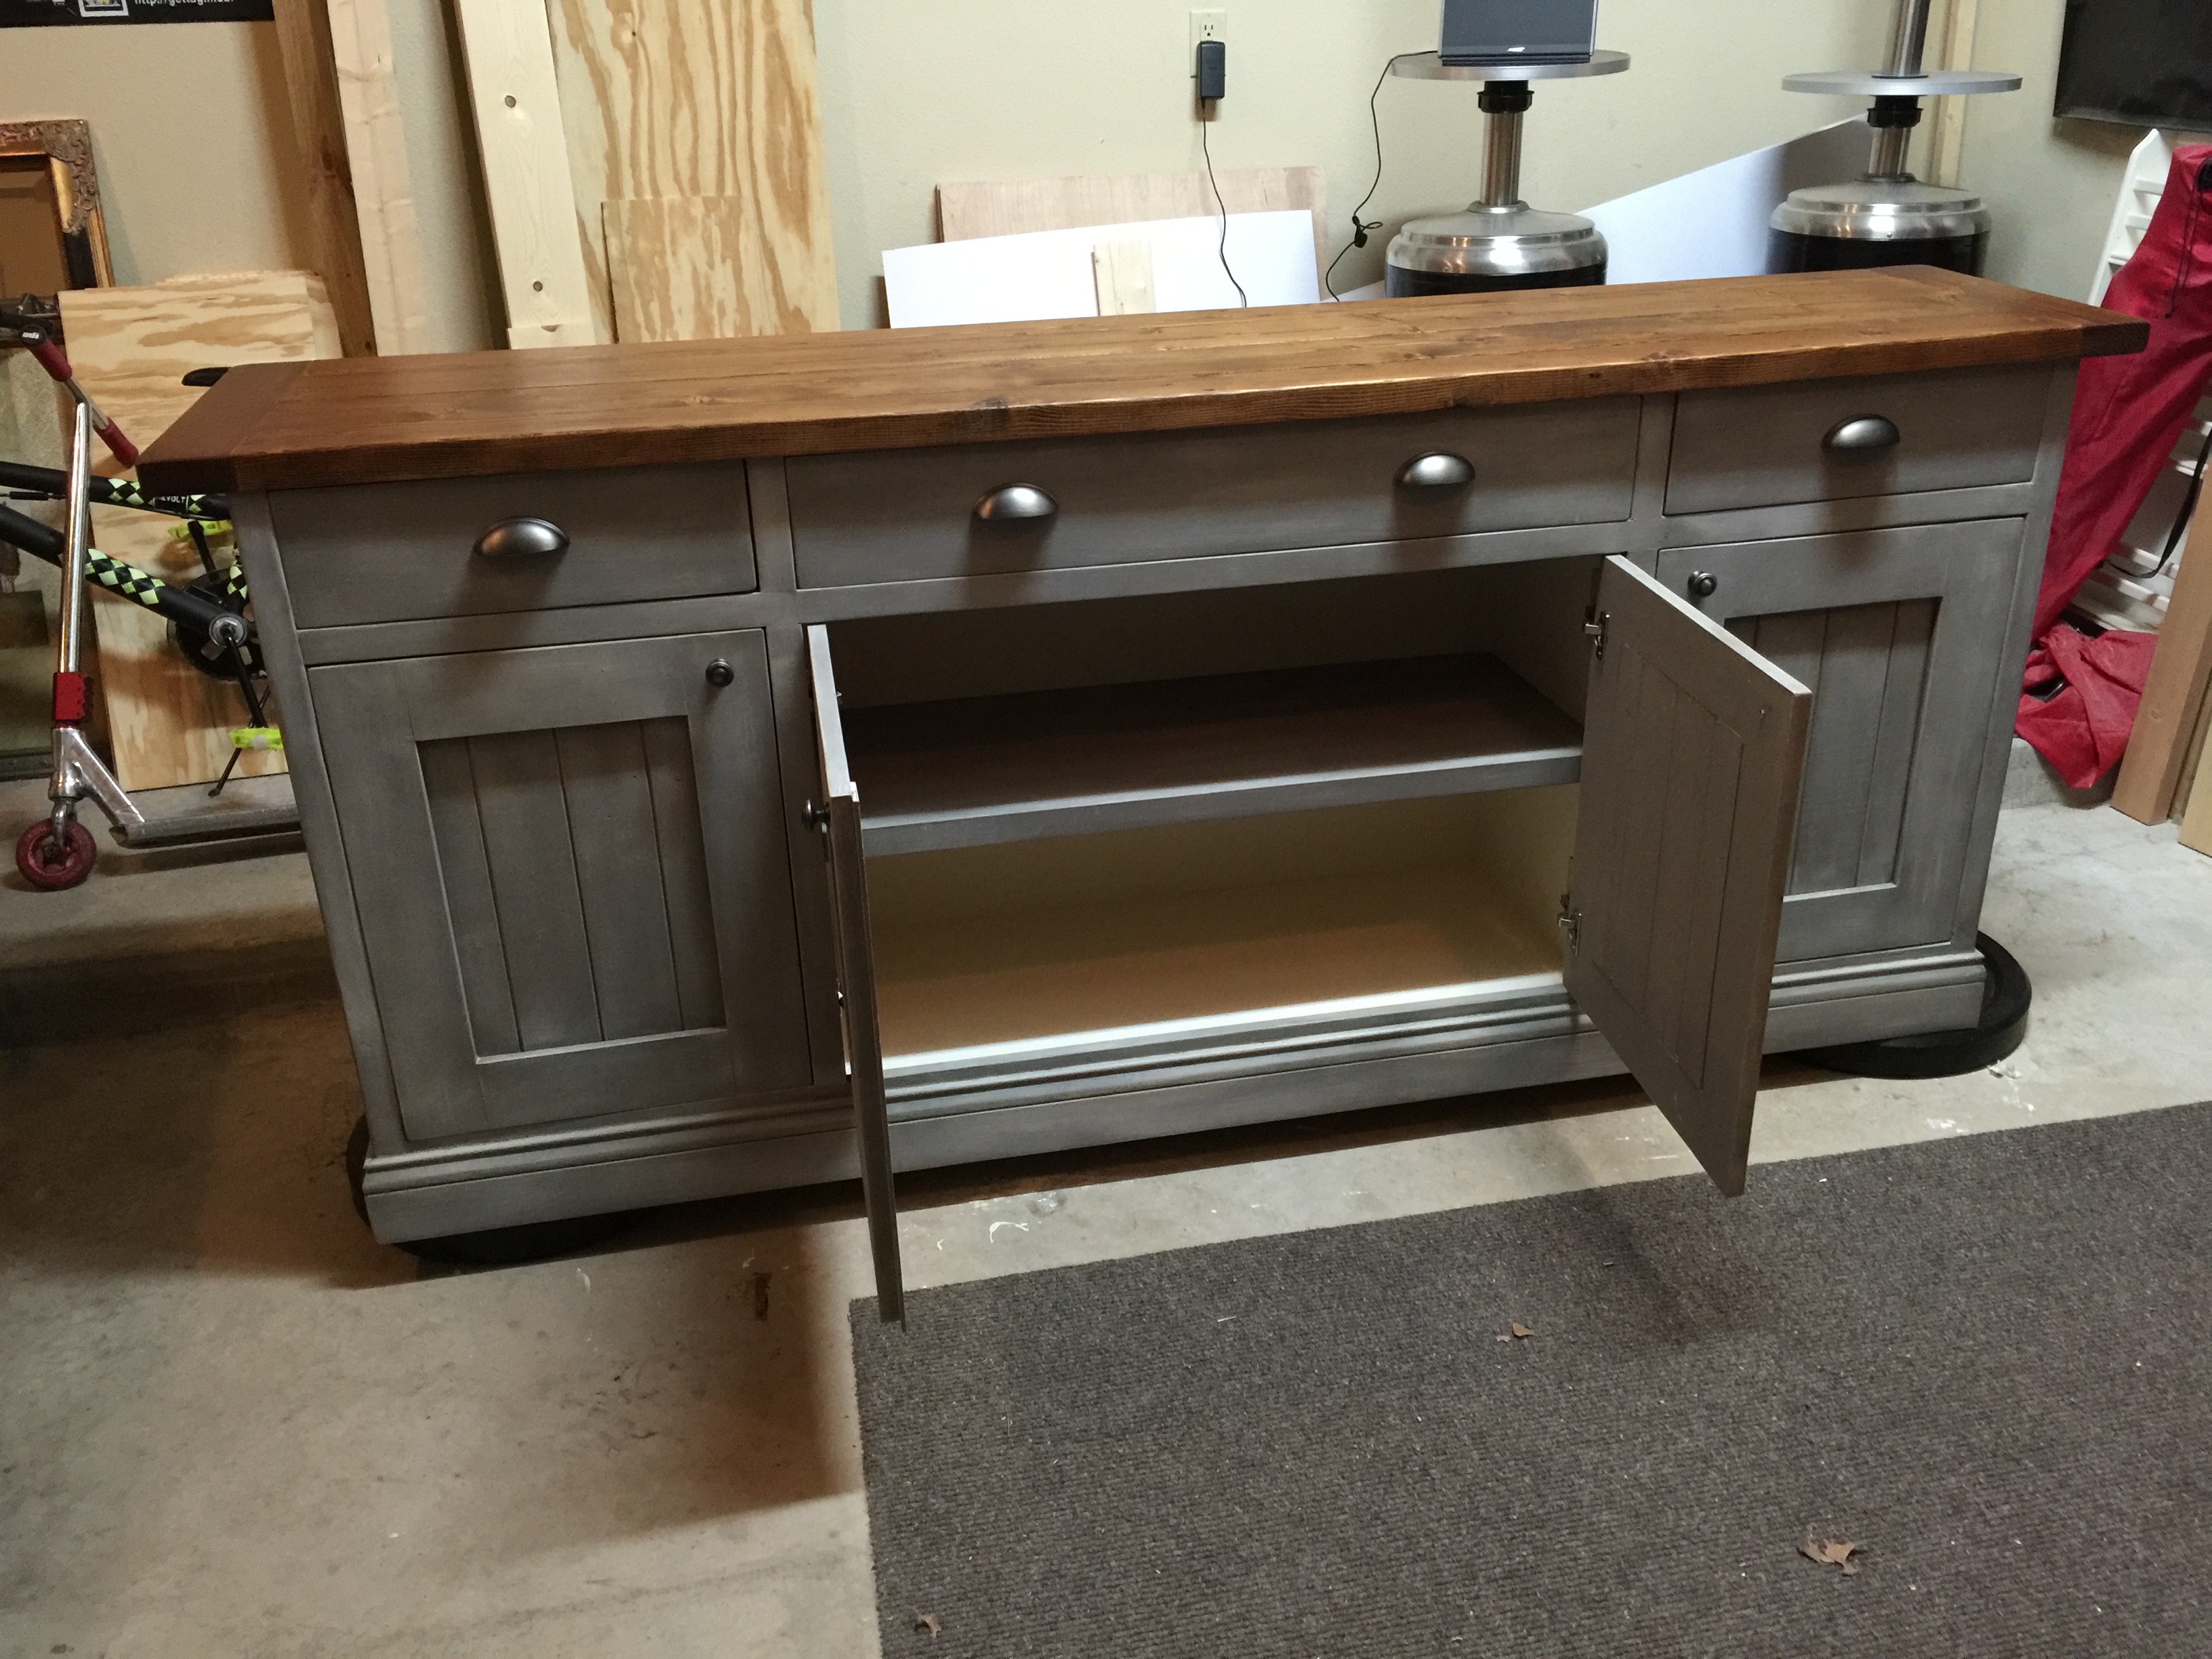
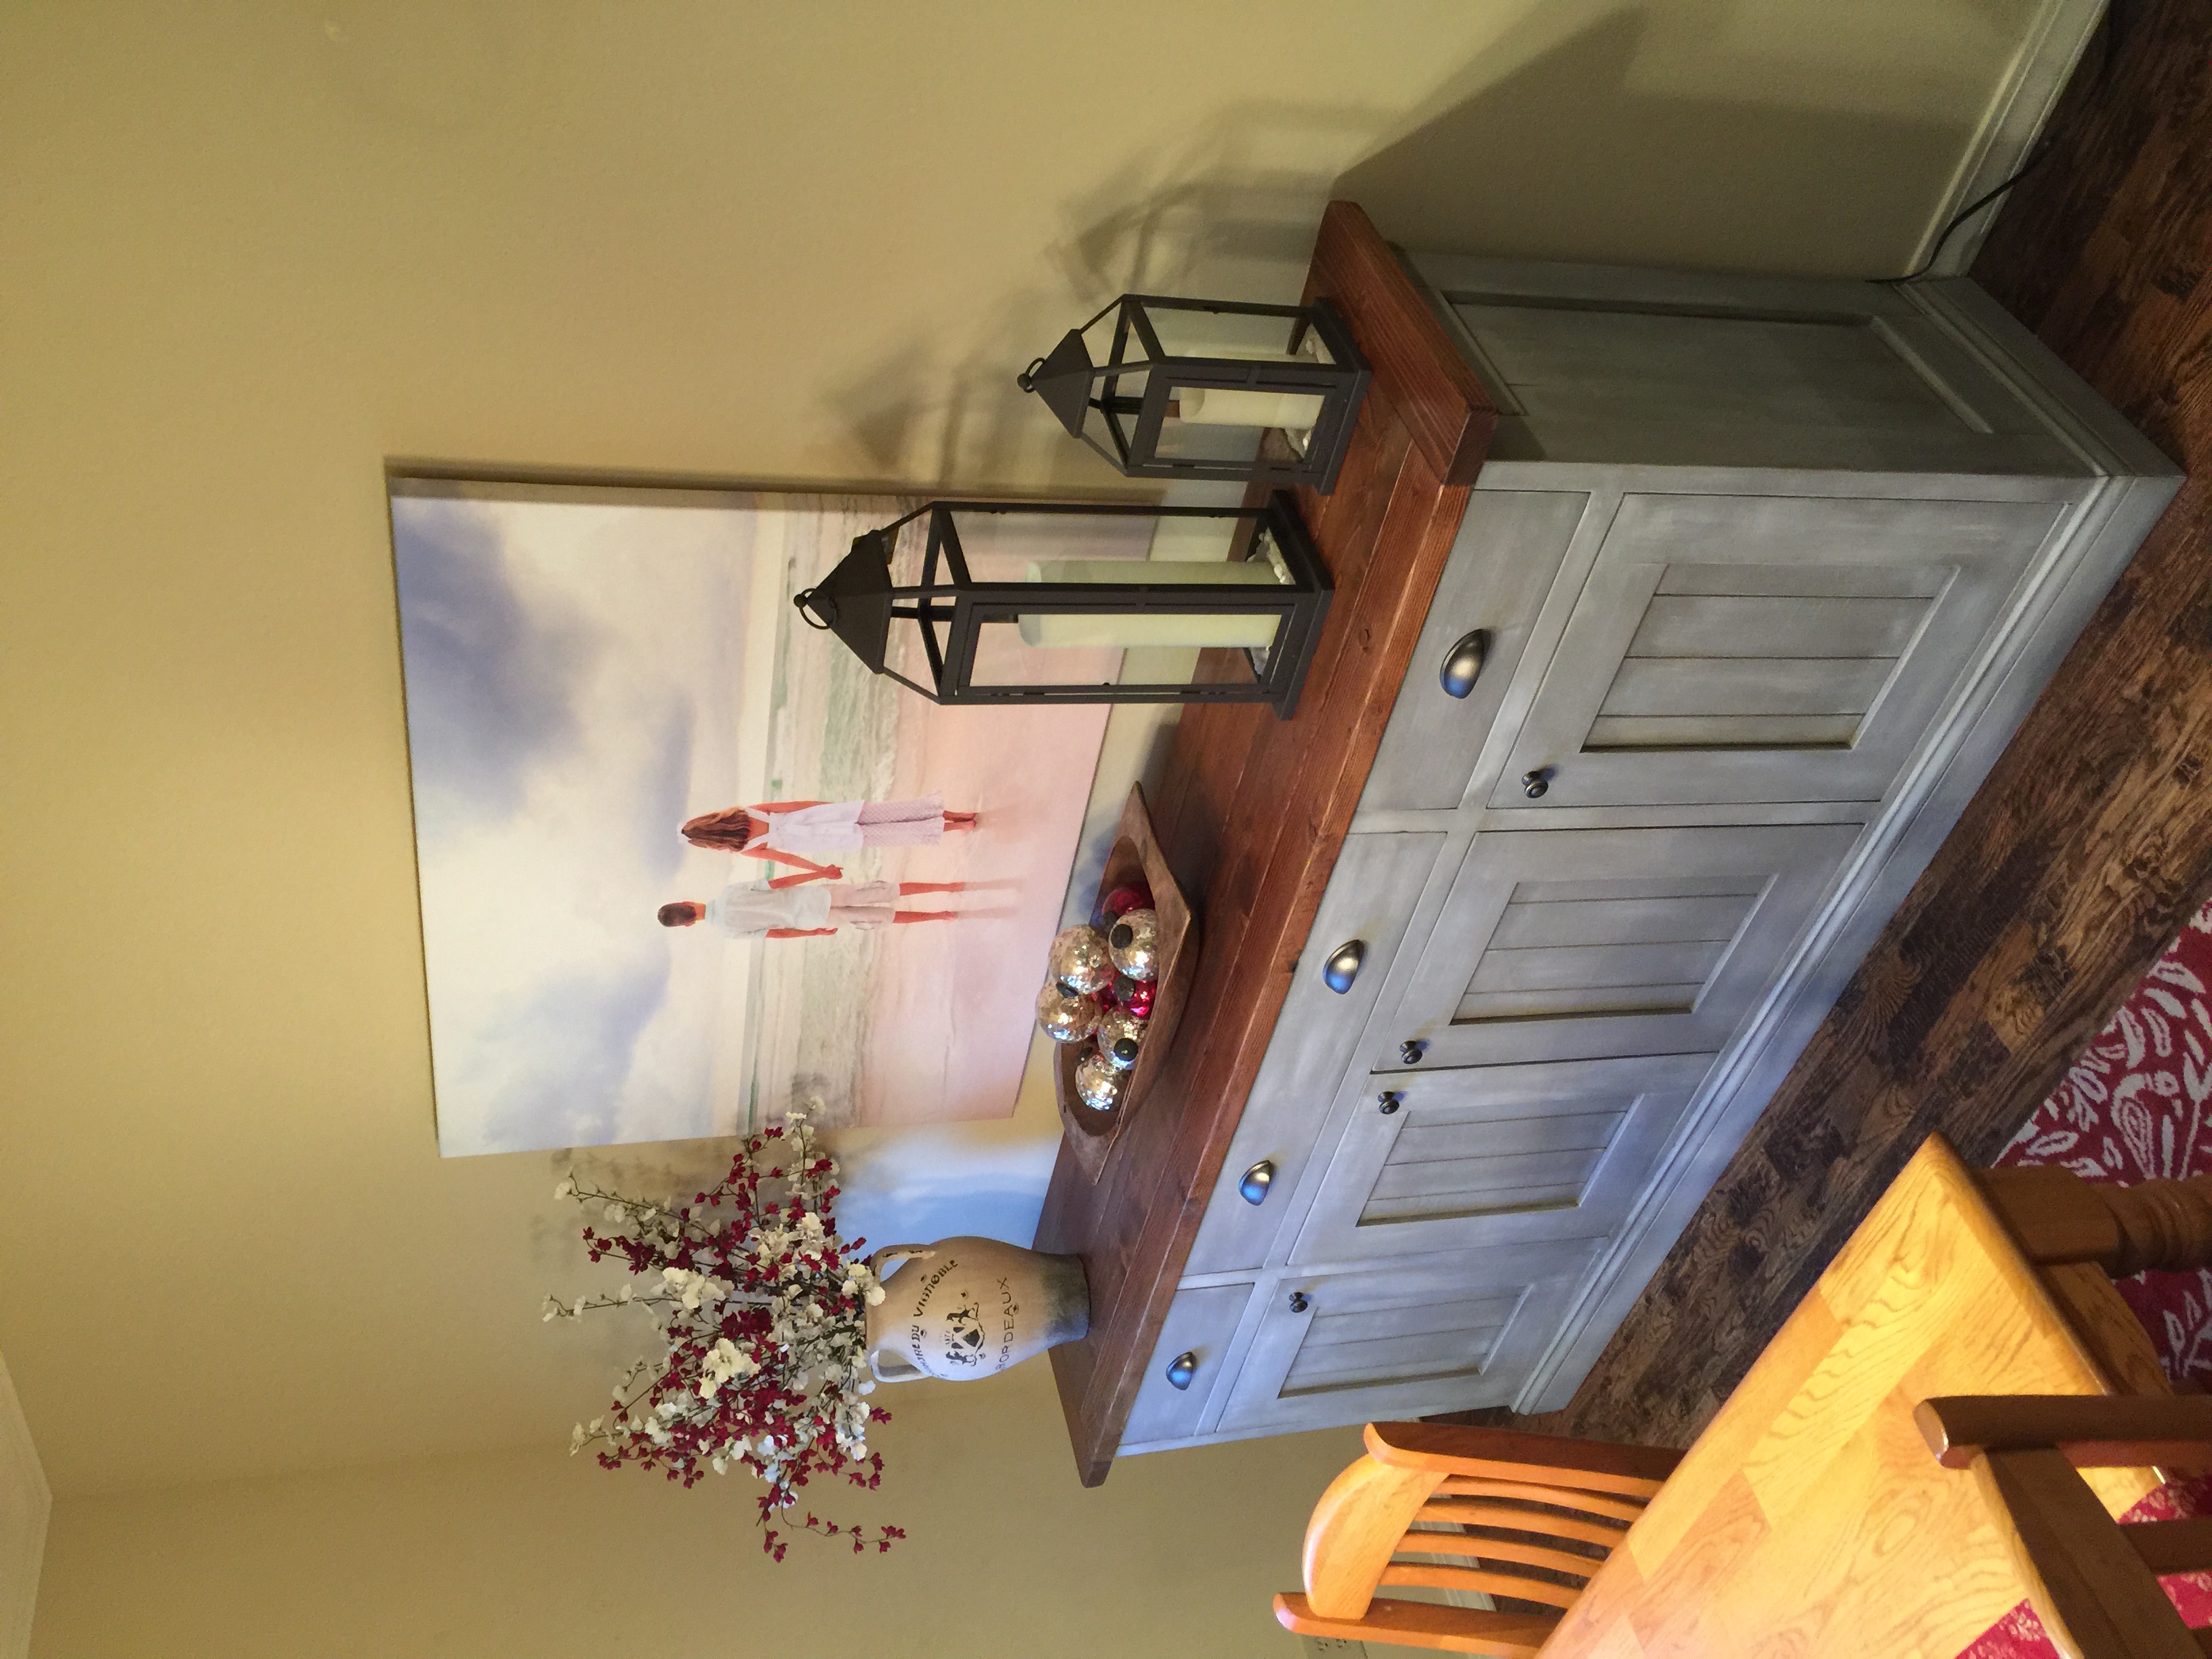
I used Ana's plans and Hillary's suggestions to build this extra large buffet. It took probably 25-30 hours if you consider the extra trips to Home Depot and Lowe's because I didn't yet have the proper tools. I used Annie Sloan's French Linen as my base coat, Old White as my dry brush coat, Annie Sloan Clear Wax throughout and Dark Wax in the crevices. This was my first big league build, so I had to recruit a skilled neighbor for assistance with the drawers and doors. My two recommendations would be to ensure the piece is square at every step, and to cut the wood as you go. Don't make all the cuts at once because there will be adjustments.

Fri, 10/30/2015 - 20:14
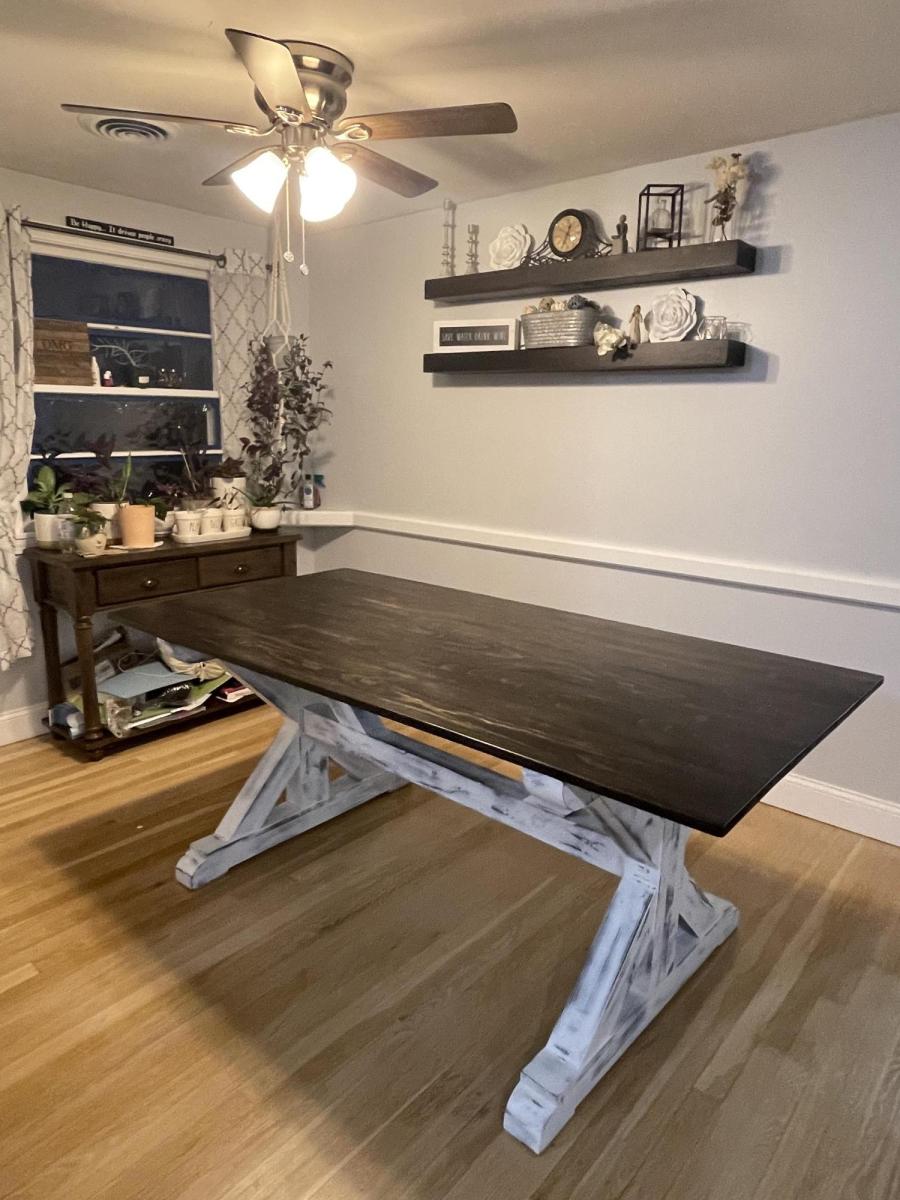
this is awesome! I love the colors. Especially the color for the top. What stain is that?
Thu, 11/05/2015 - 12:12
Thanks for your comment! I used Minwax Early American and a matte poly finish. My intention was to paint the top, but someone convinced me to stain it to see how it would look. I liked the stained version better.
Wed, 11/04/2015 - 09:06
I'm building this a we speak....got the sides finished this weekend. Question: Did you router the exposed front, top and side edges?
Thu, 11/05/2015 - 12:10
I think you mean along the bottom? If so, I basically purchased some baseboard moulding at Lowe's. I didn't care that it was primed because my plan was to paint it.
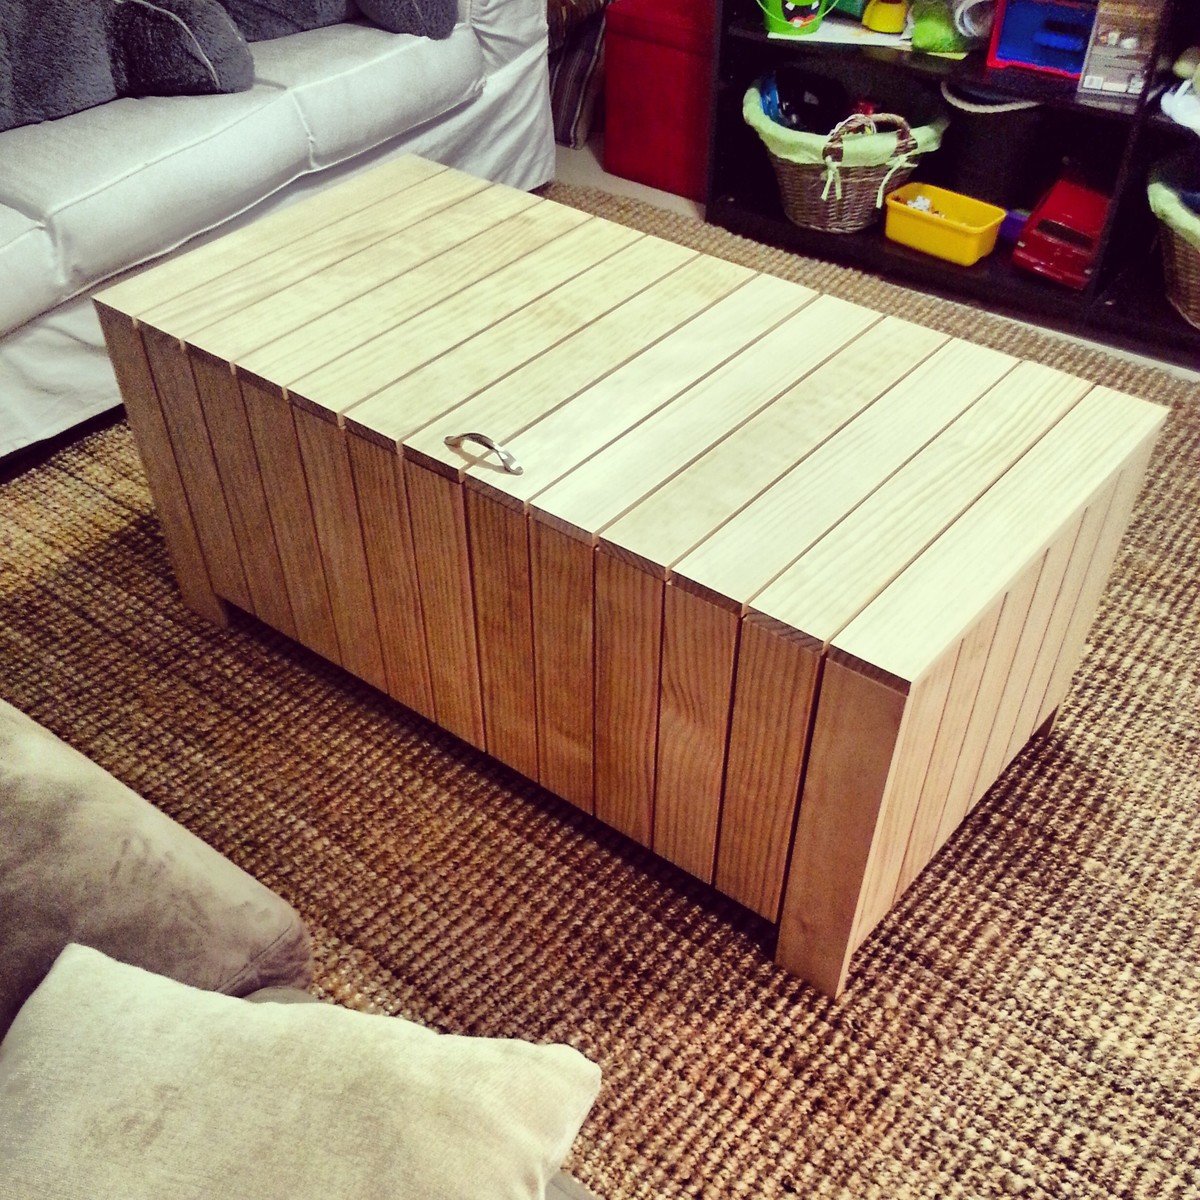
I am redesigning my family, which is really the children's playroom. I have decided to change it to a beach theme. I saw the project on this site and knew immediately it would be a perfect fit as a storage/coffee table. Within 5 minutes of me completing the box, my three year old started filling it up with toys.
I have to admit it is slightly tall for a coffee table, so I'm debating cutting off the legs. It would be easy enough to do without taking the entire project apart and it would make it the perfect height.
I did have to plan my build around my work schedule and the kids, so I did what Ana suggested and built a panel a day. I cut all the wood one day, then built a panel a day. The last day, I started putting the pieces together, put the bottom boards in and made the top.

I just finished my first project with upholstery! I built a bench following Ana's plans from a couple of 2x4s and used this gorgeous fabric from Minted. Minted is November's sponsor for the Fab Furniture Flippin Contest. The paint color is Behr's Island Aqua. I used 3" thick upholstery foam (and WOW that stuff is super expensive). I love diamond tufting and followed a tutorial from Addicted 2 Decorating.
The bench is super compfy. I love it and I love the bright cheery colors.


I used my router and router Ed the edges. Love this!!
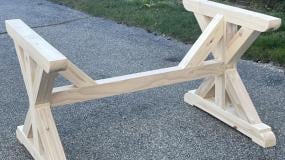
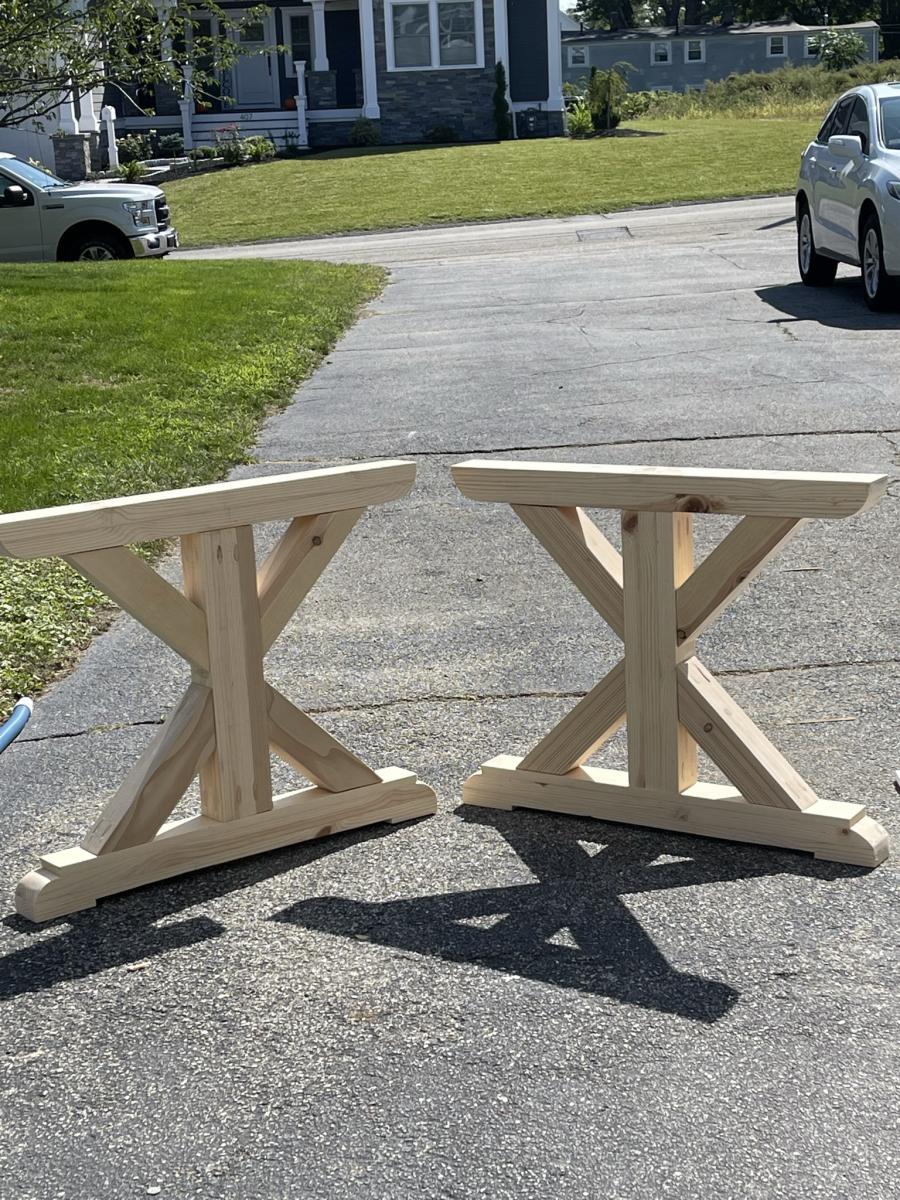
A farmhouse table I built based on one of your inspiration projects! All by hand and chiseled myself 😍

Thu, 12/29/2022 - 11:13
Thank you for sharing, such a beautiful handmade piece!
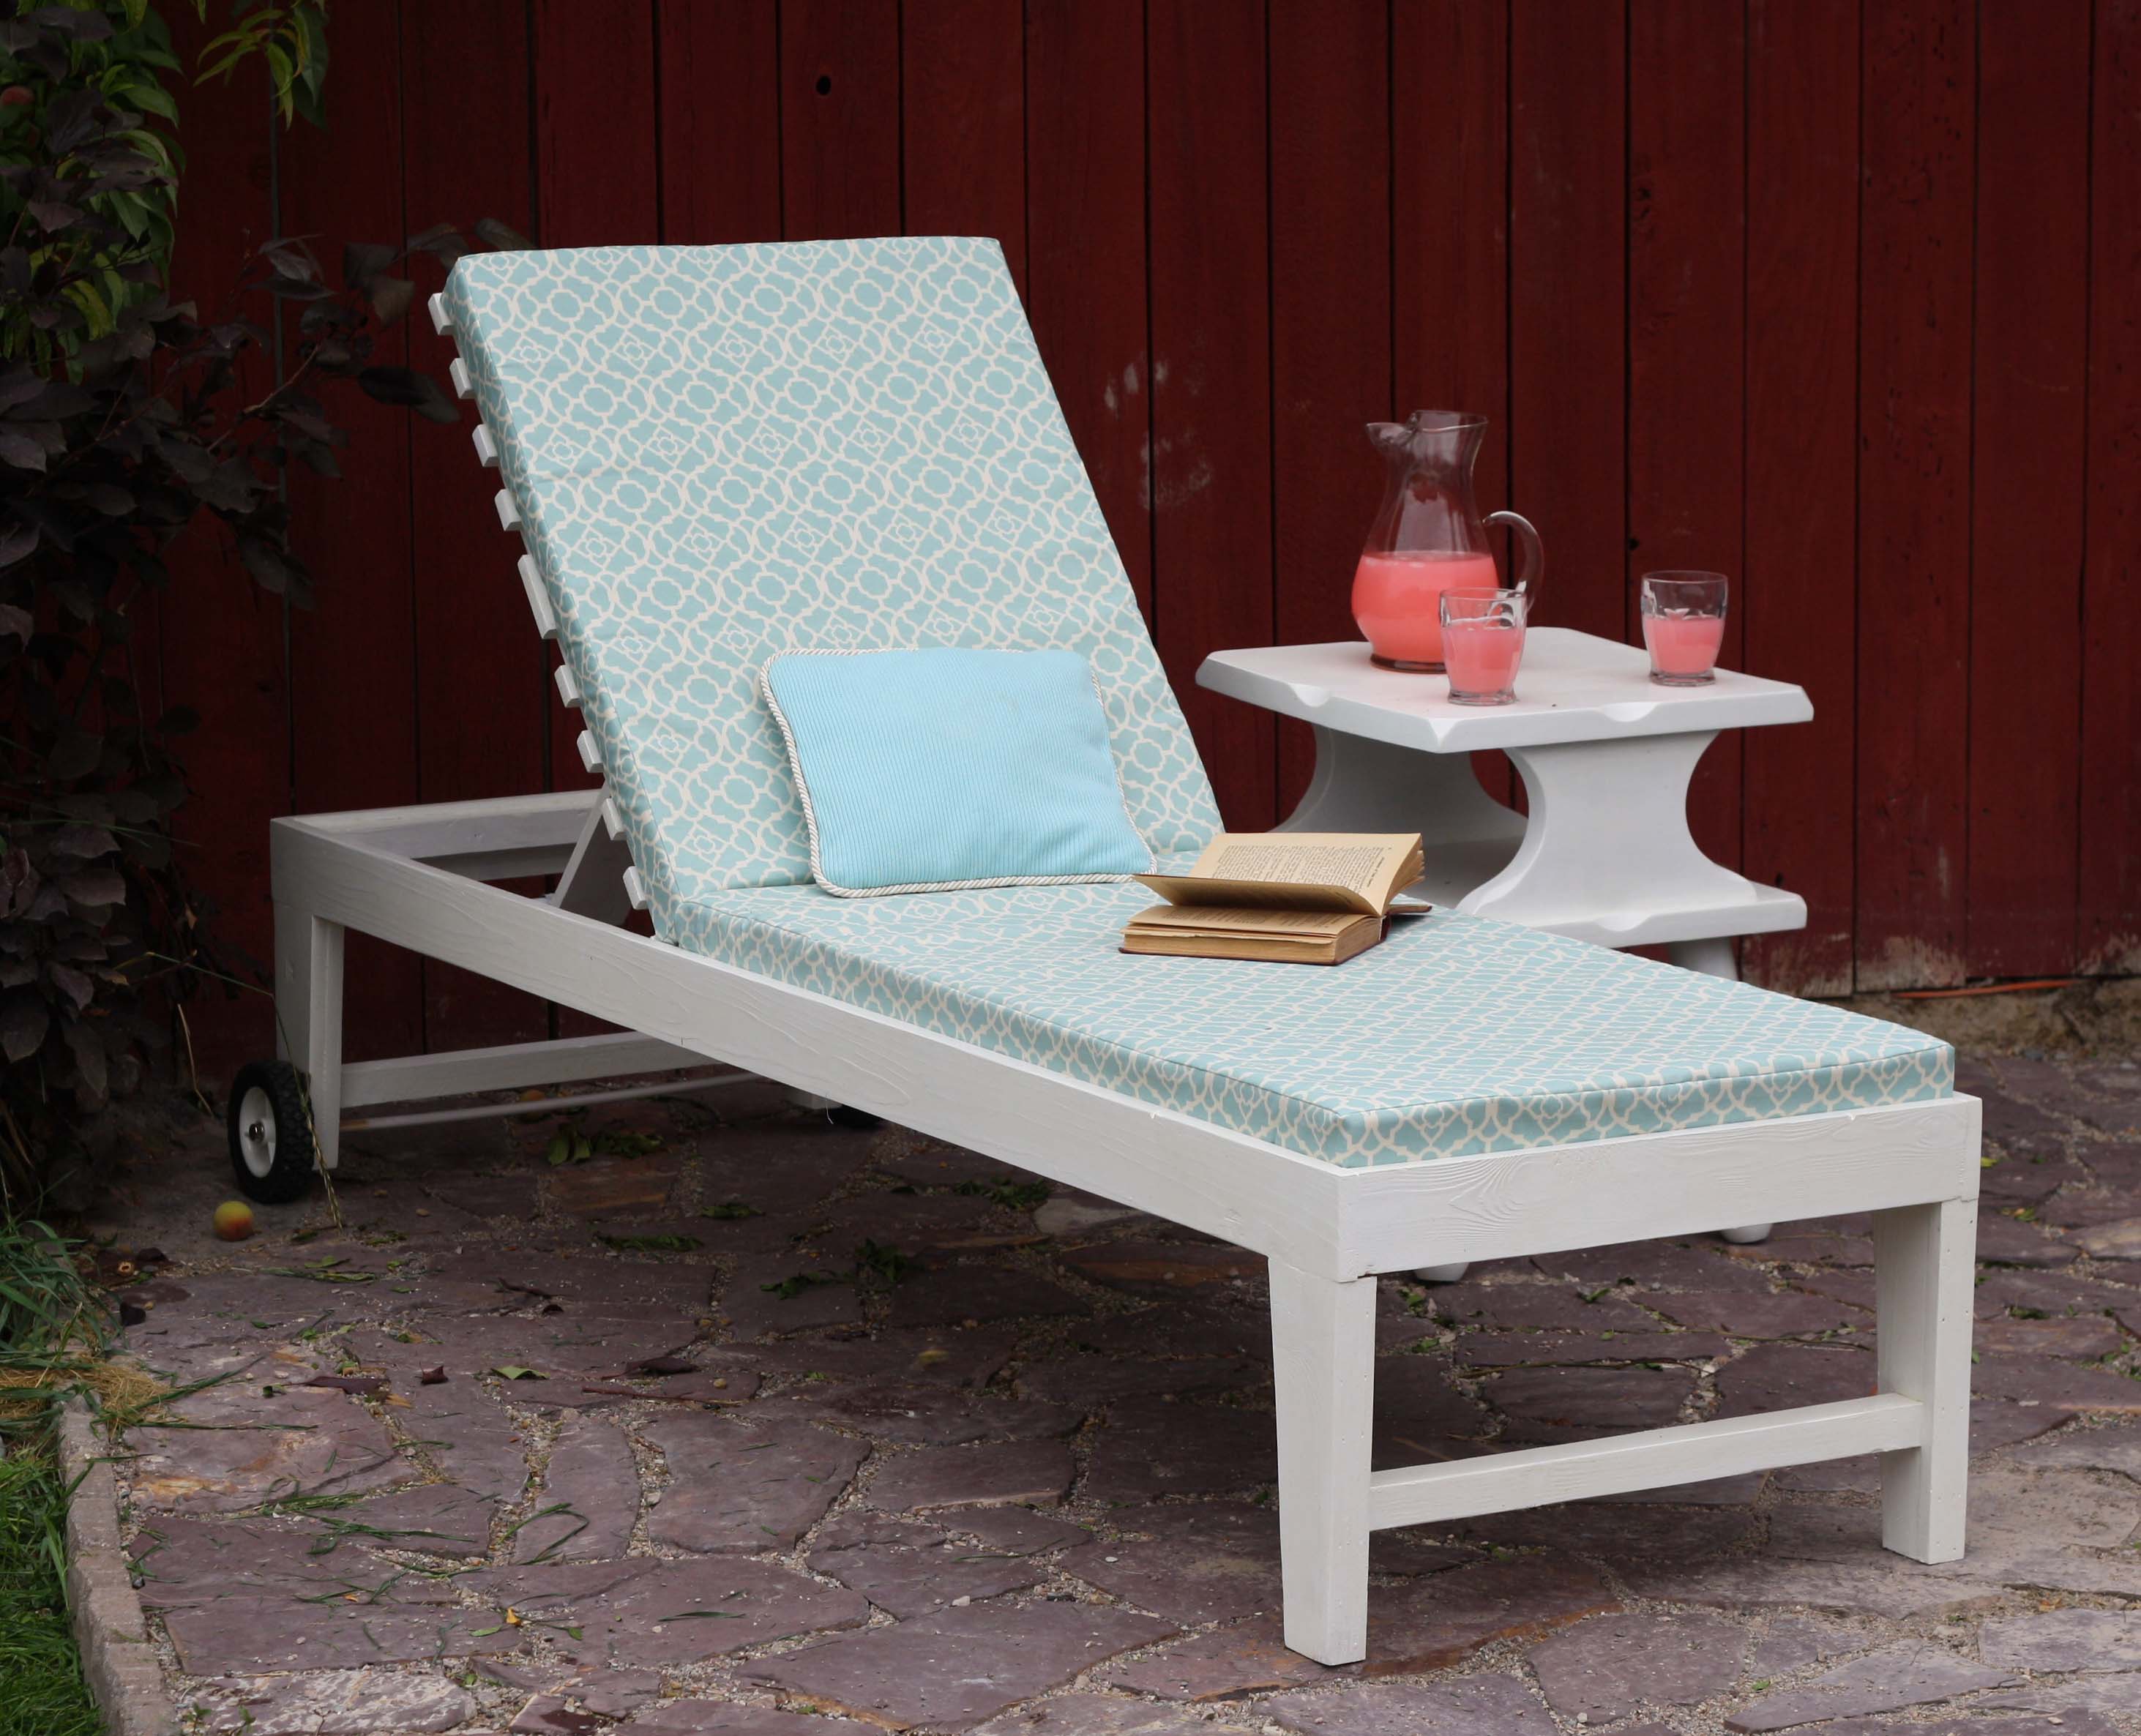
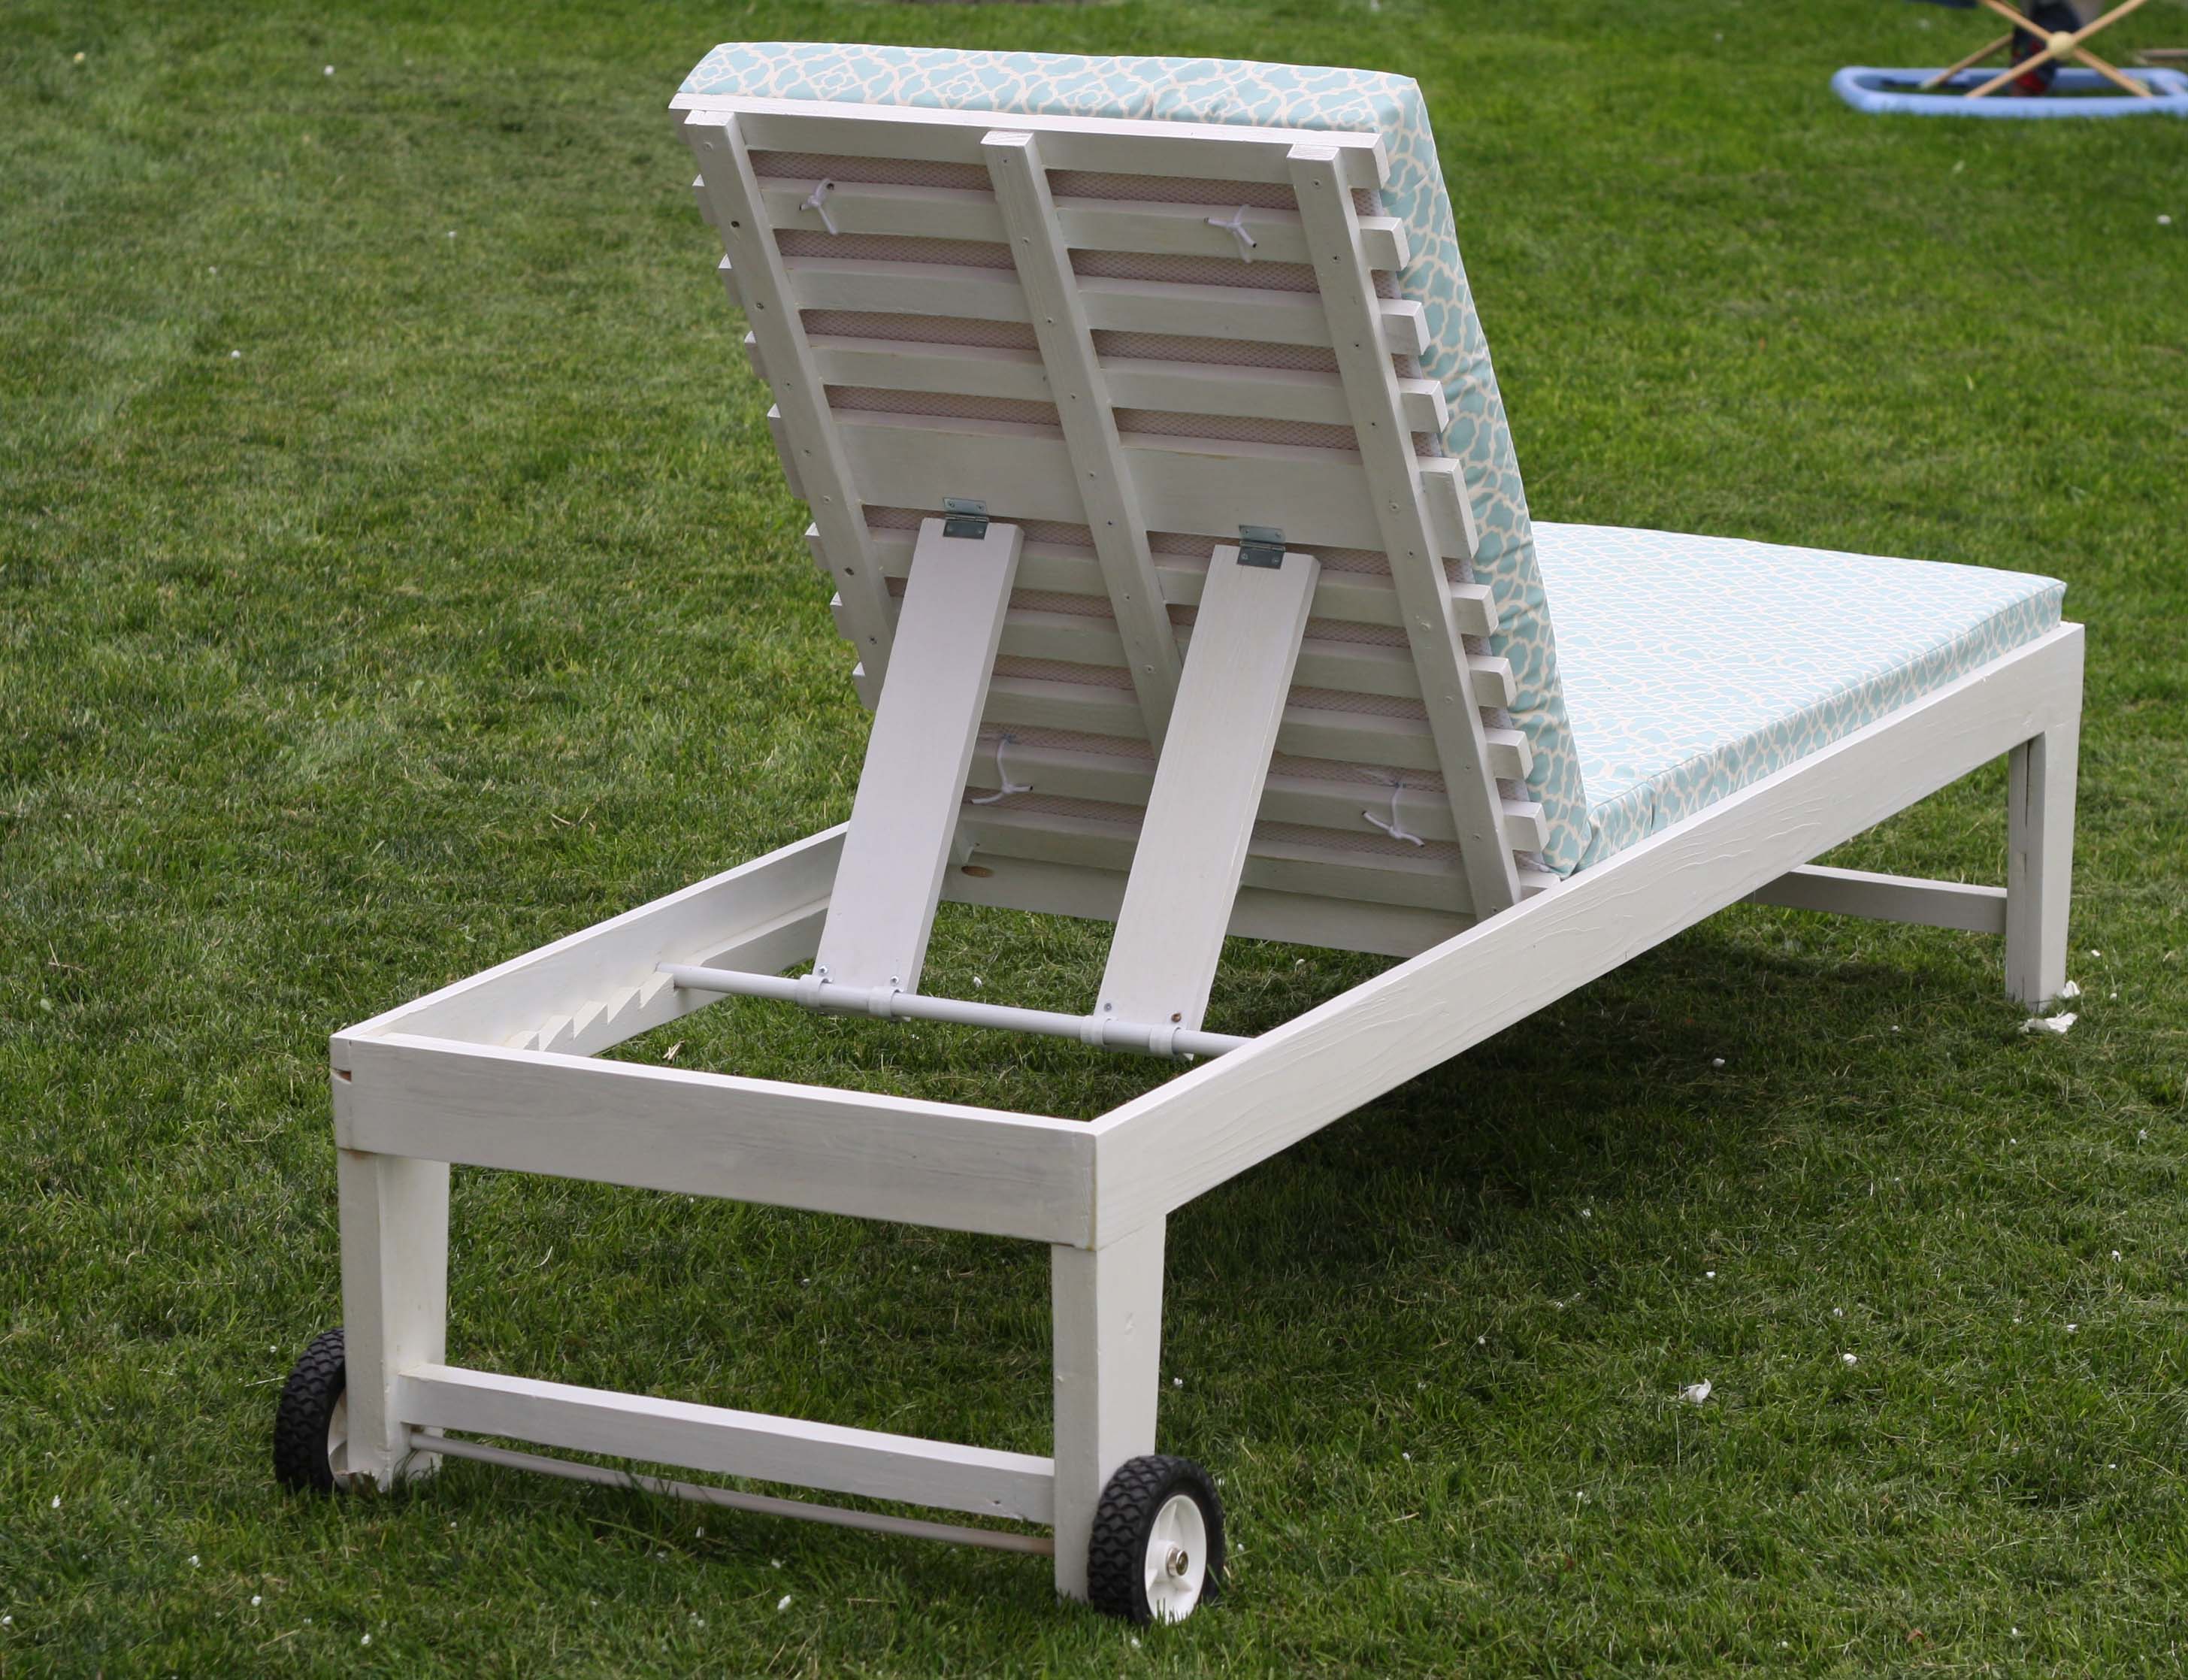
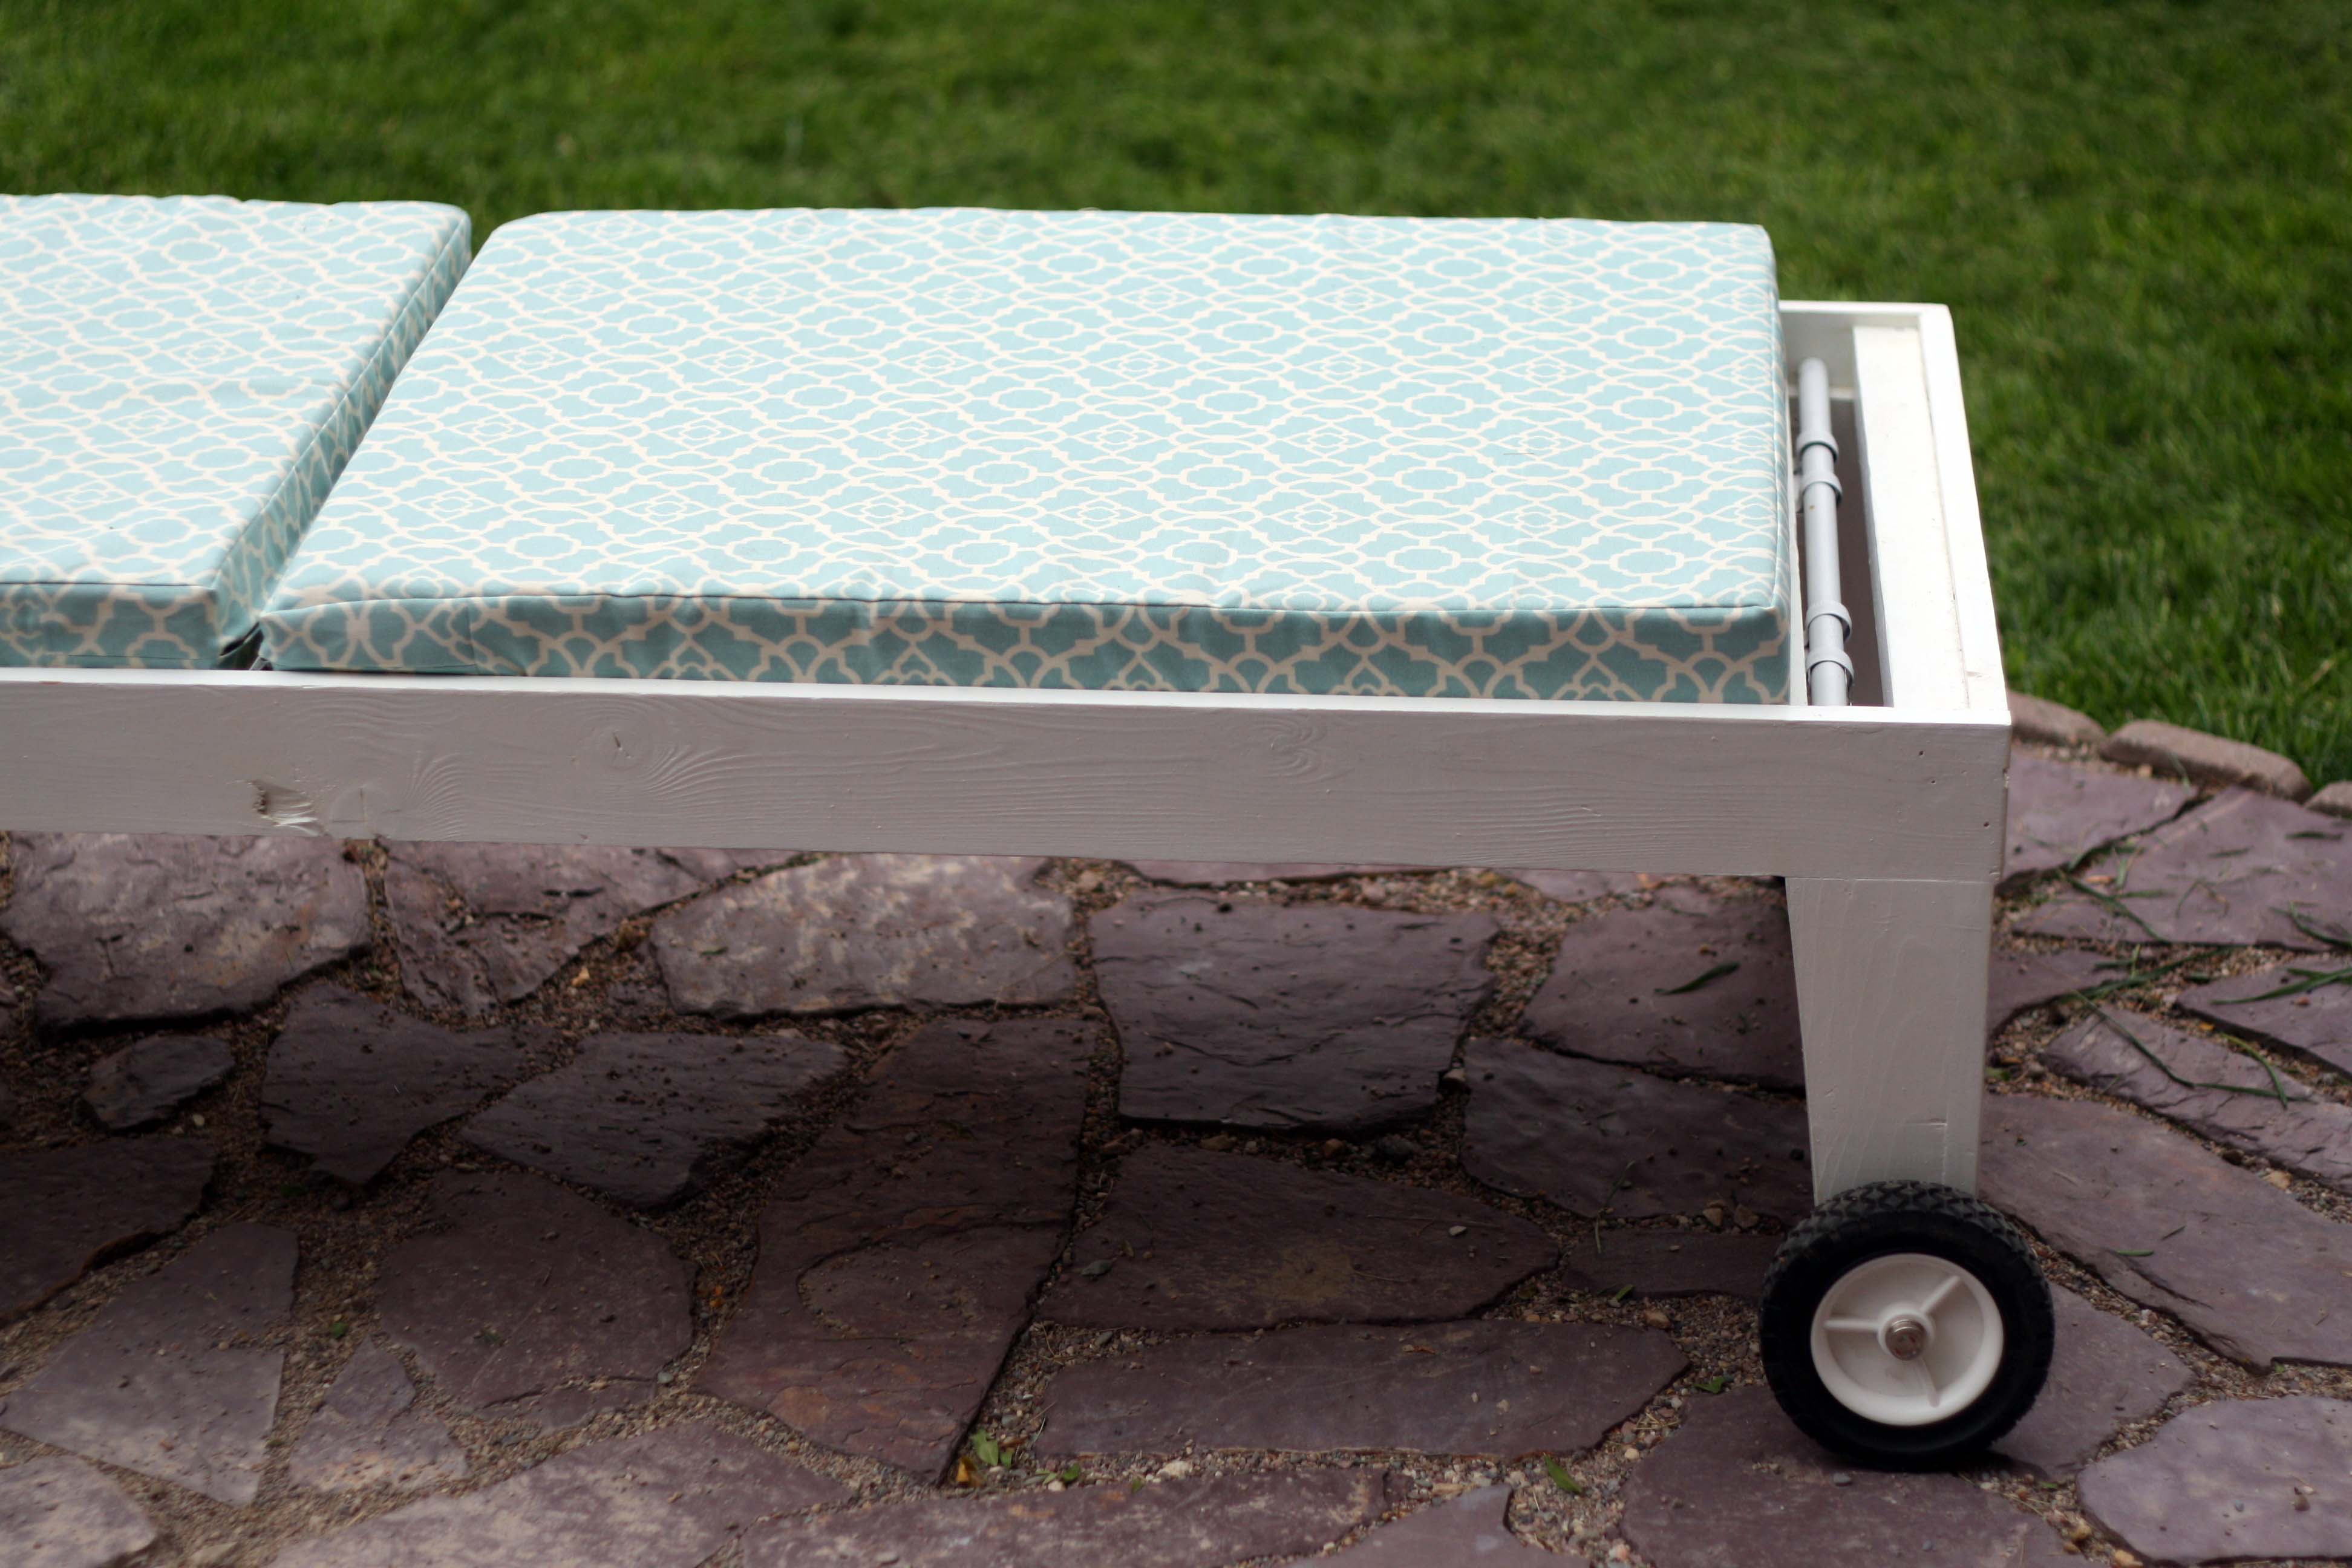
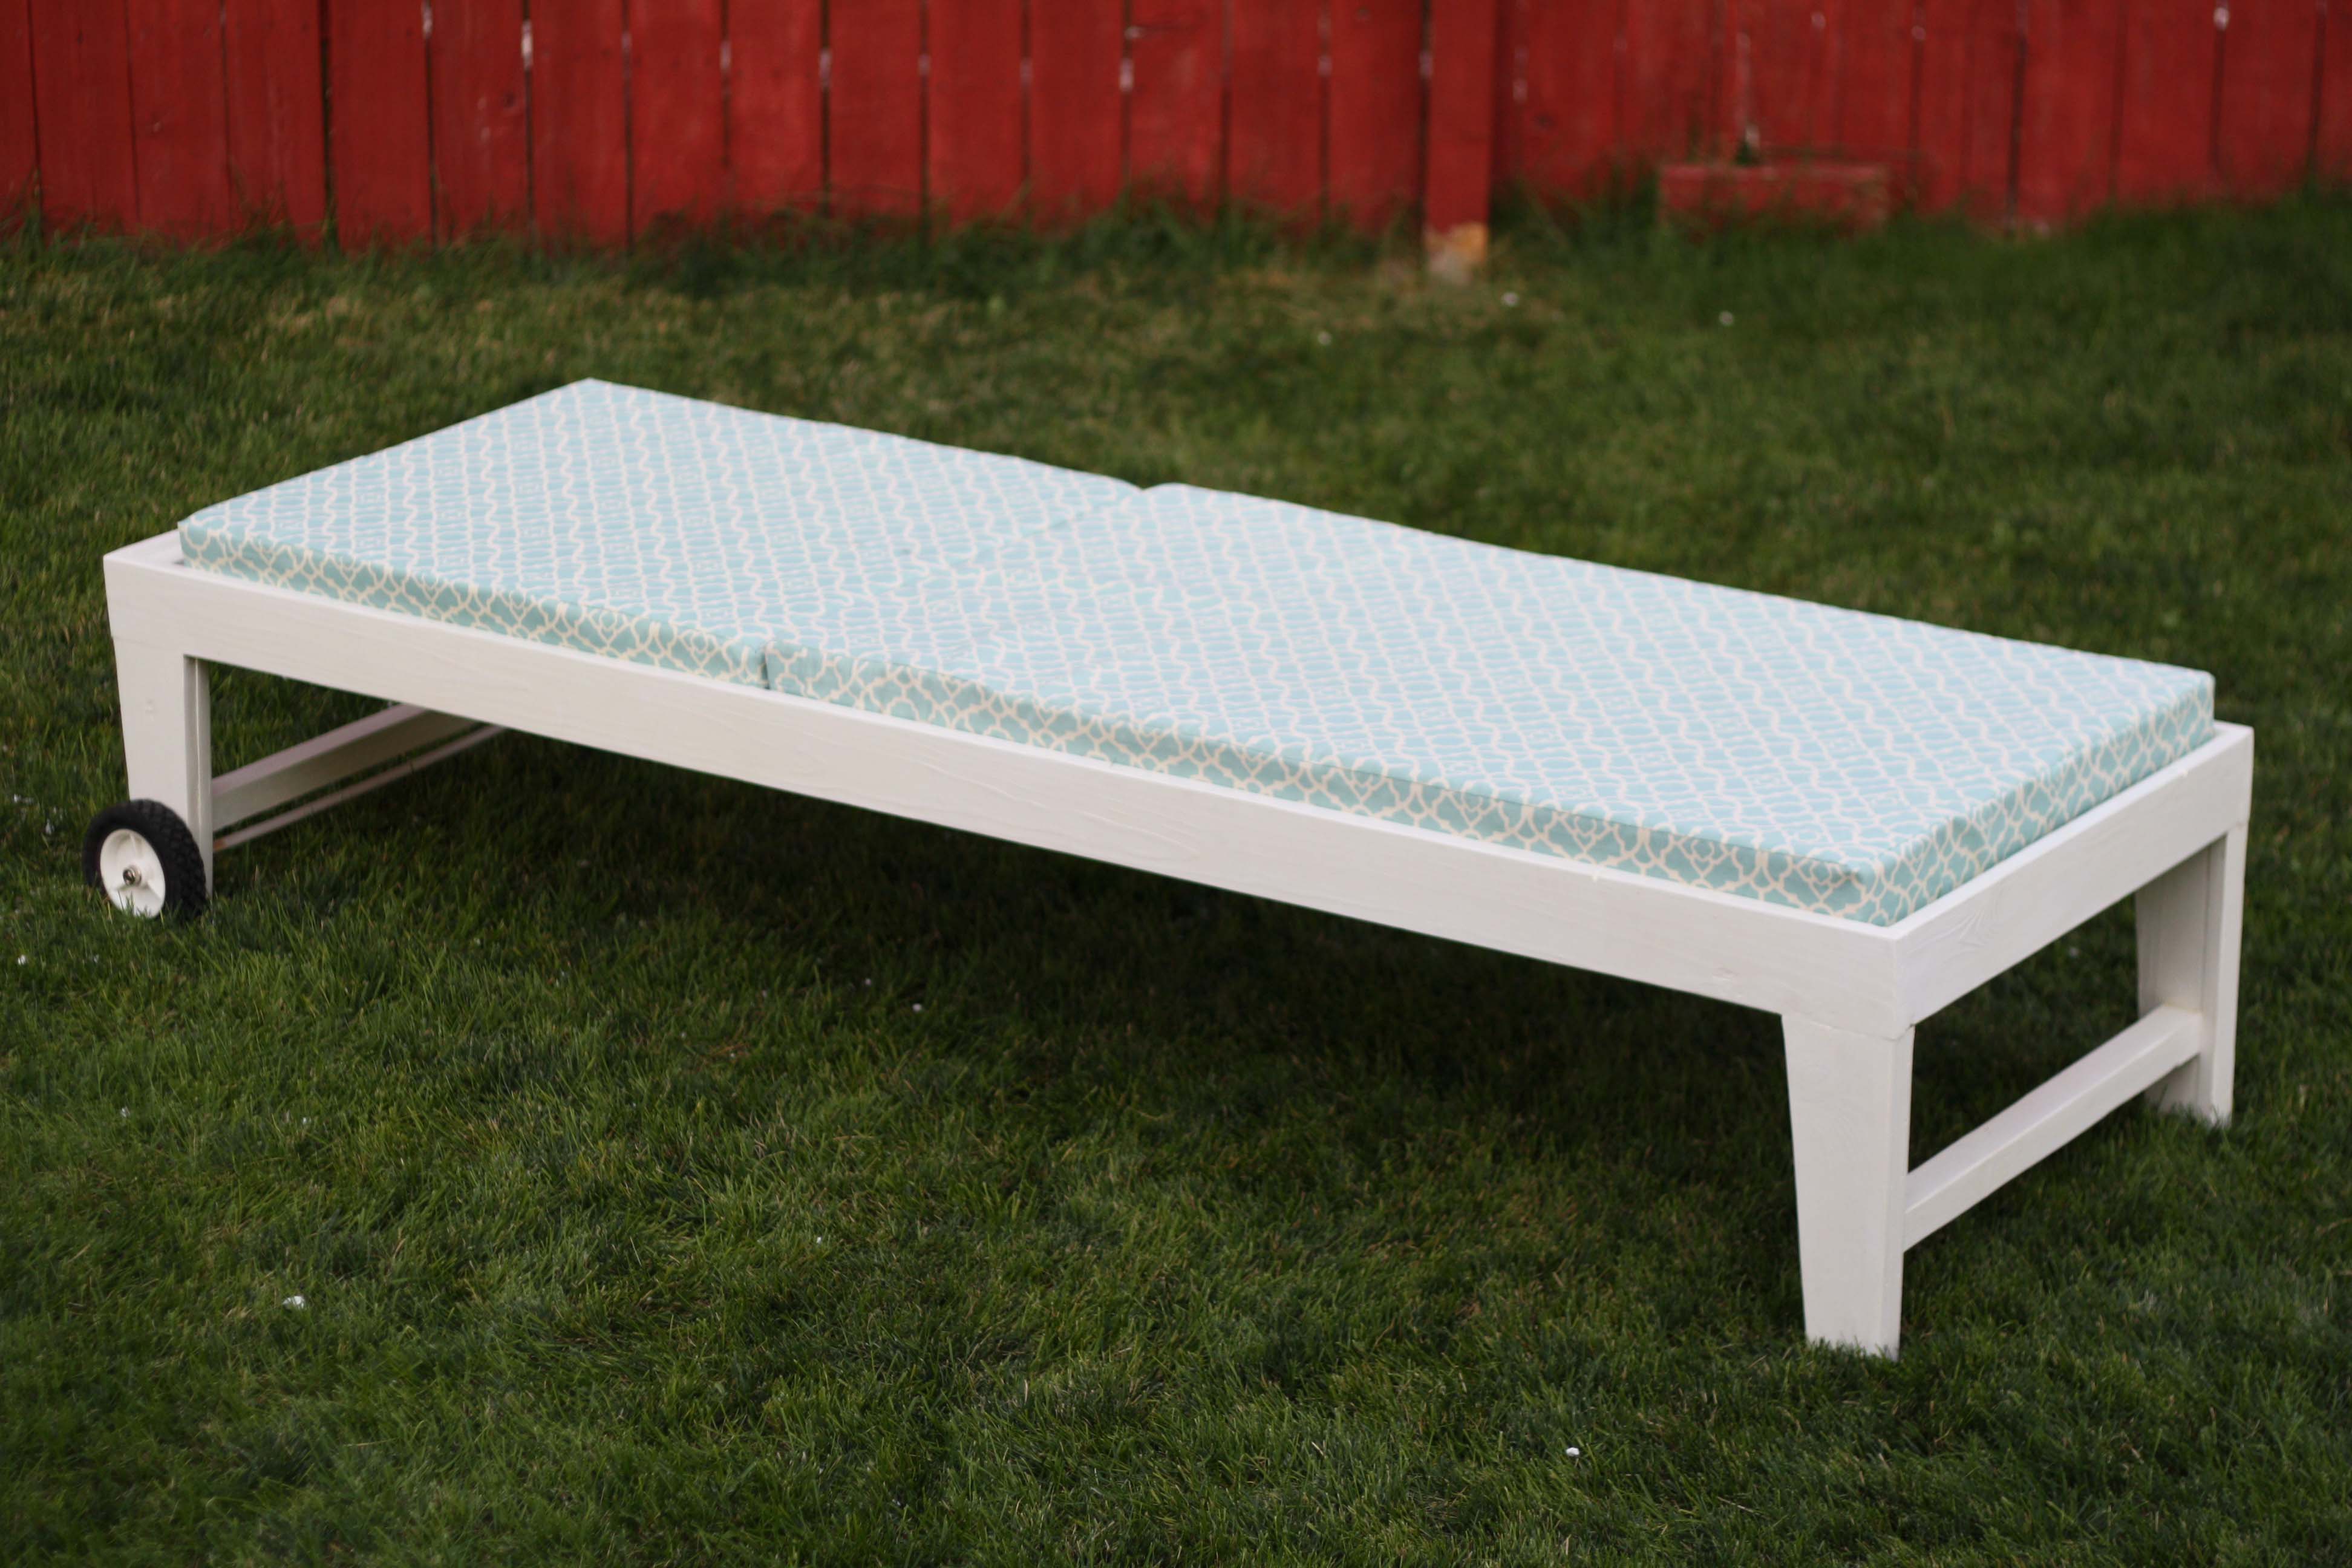
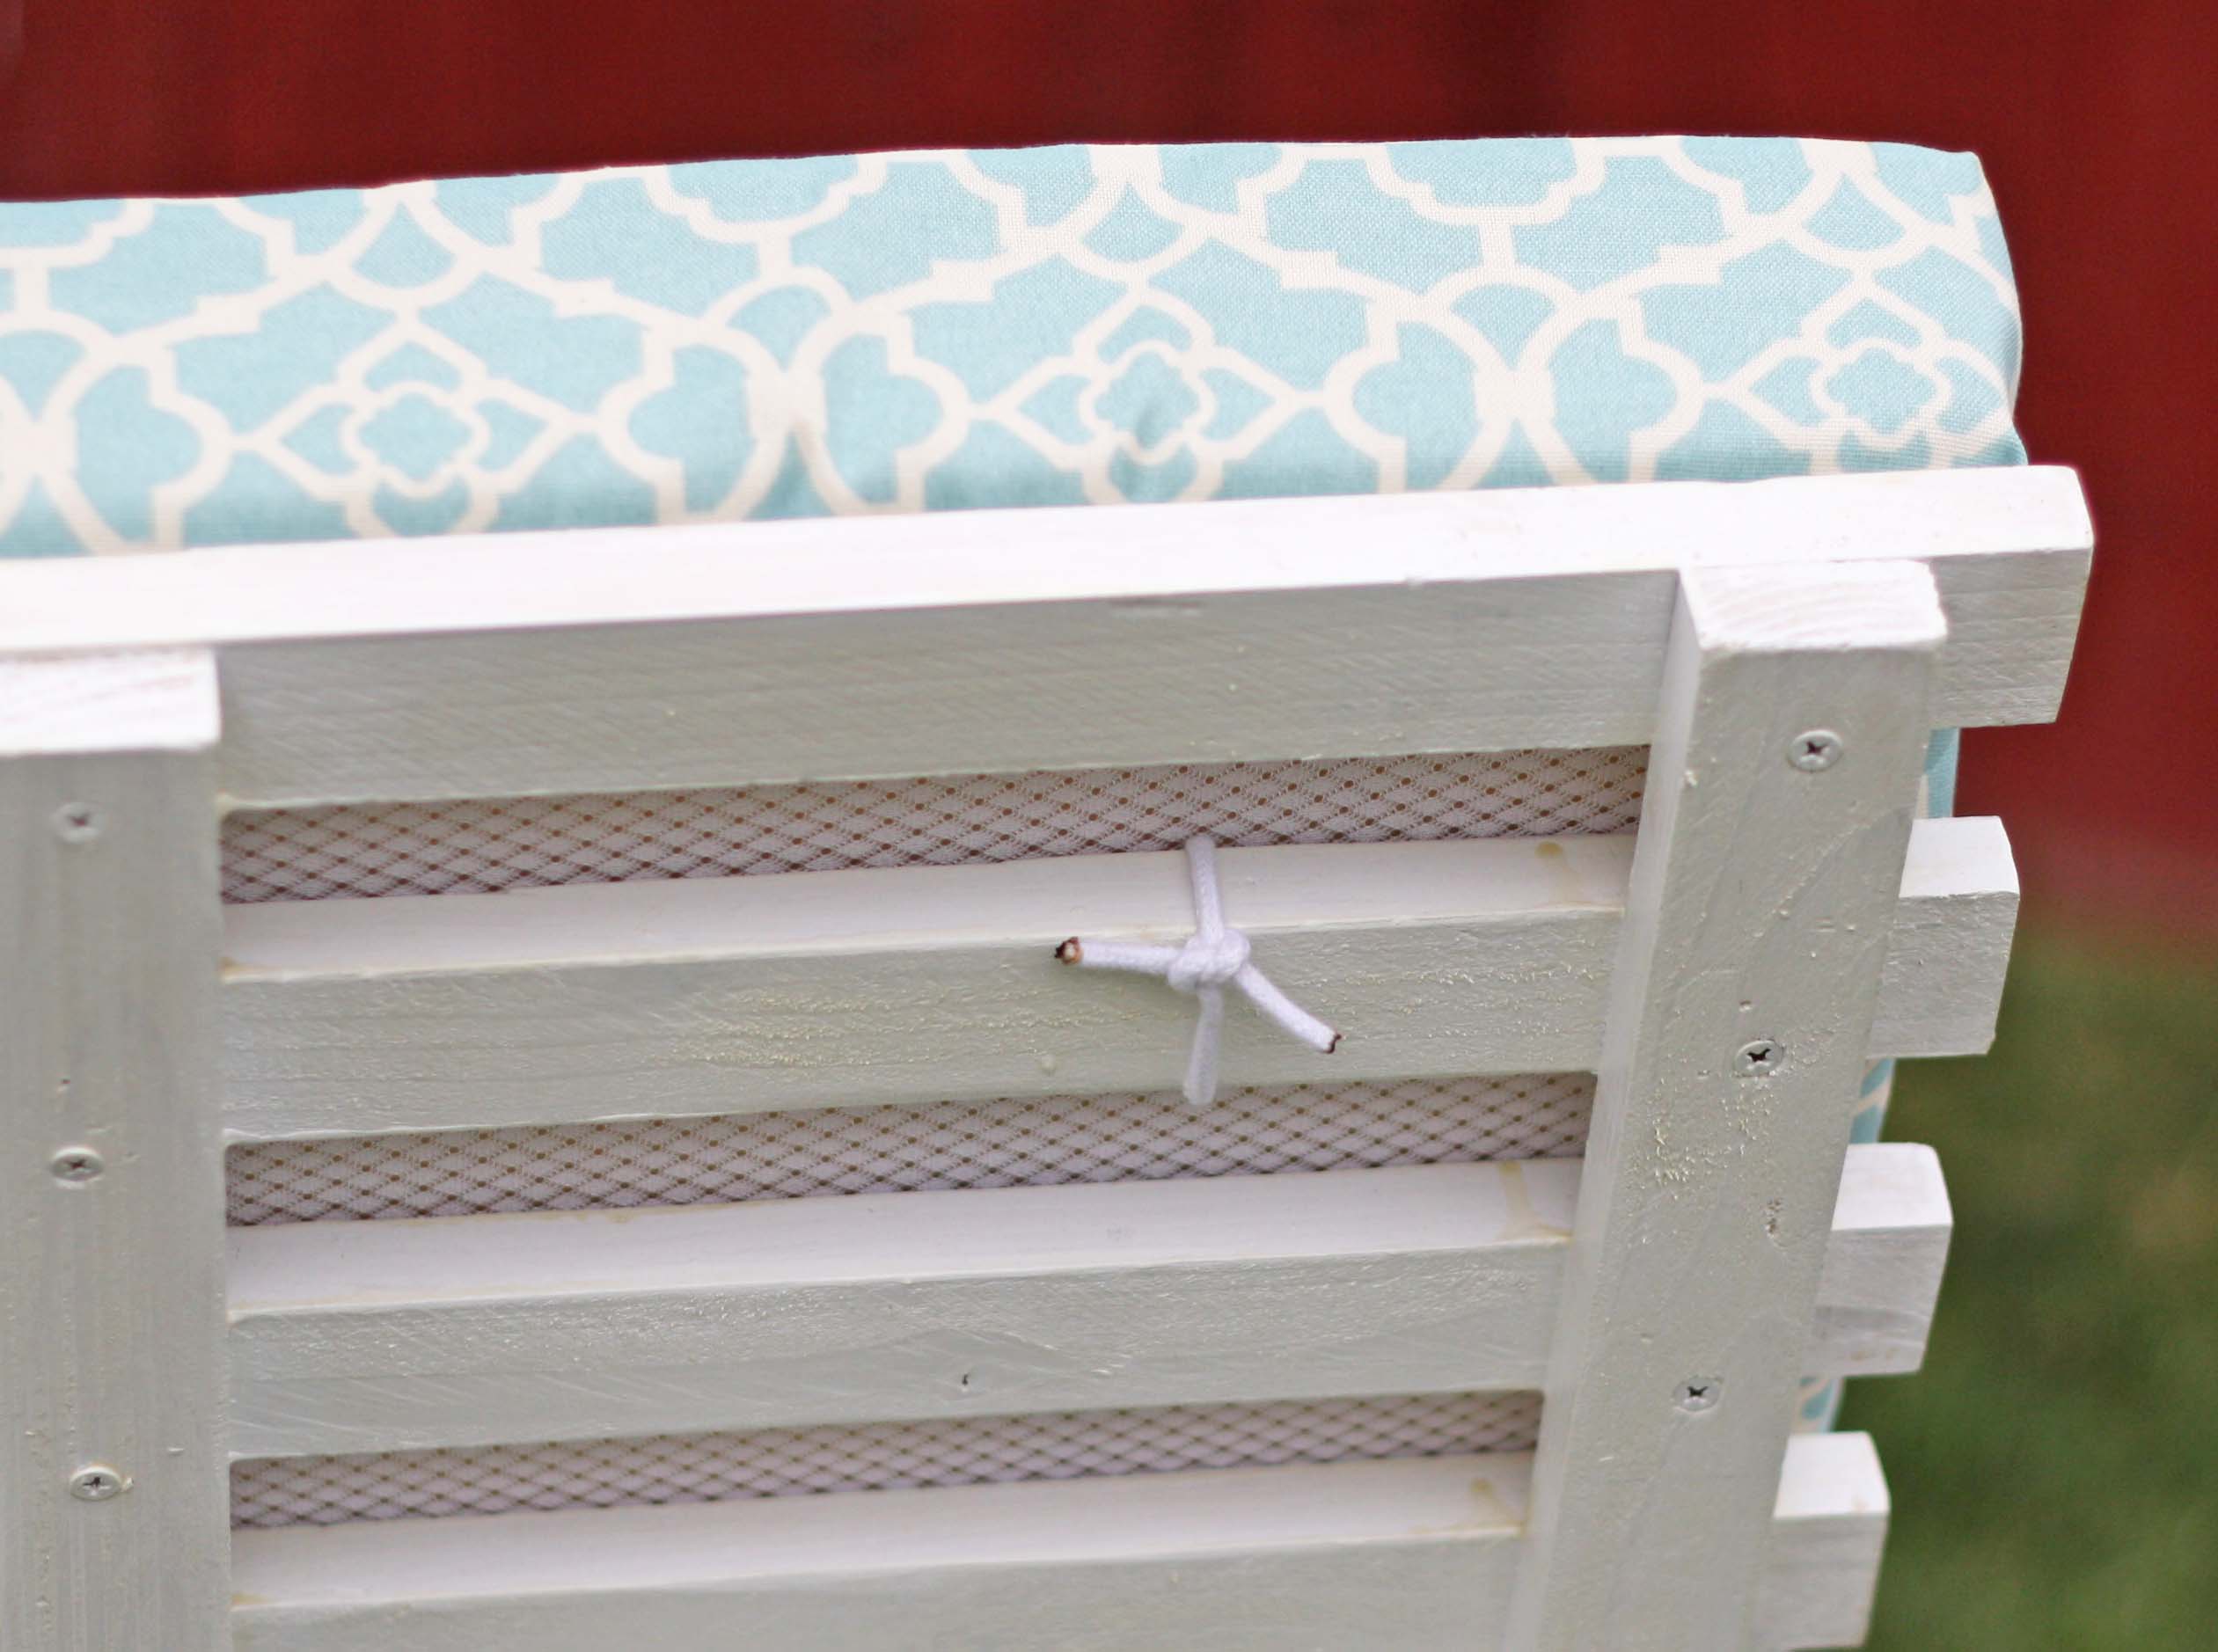
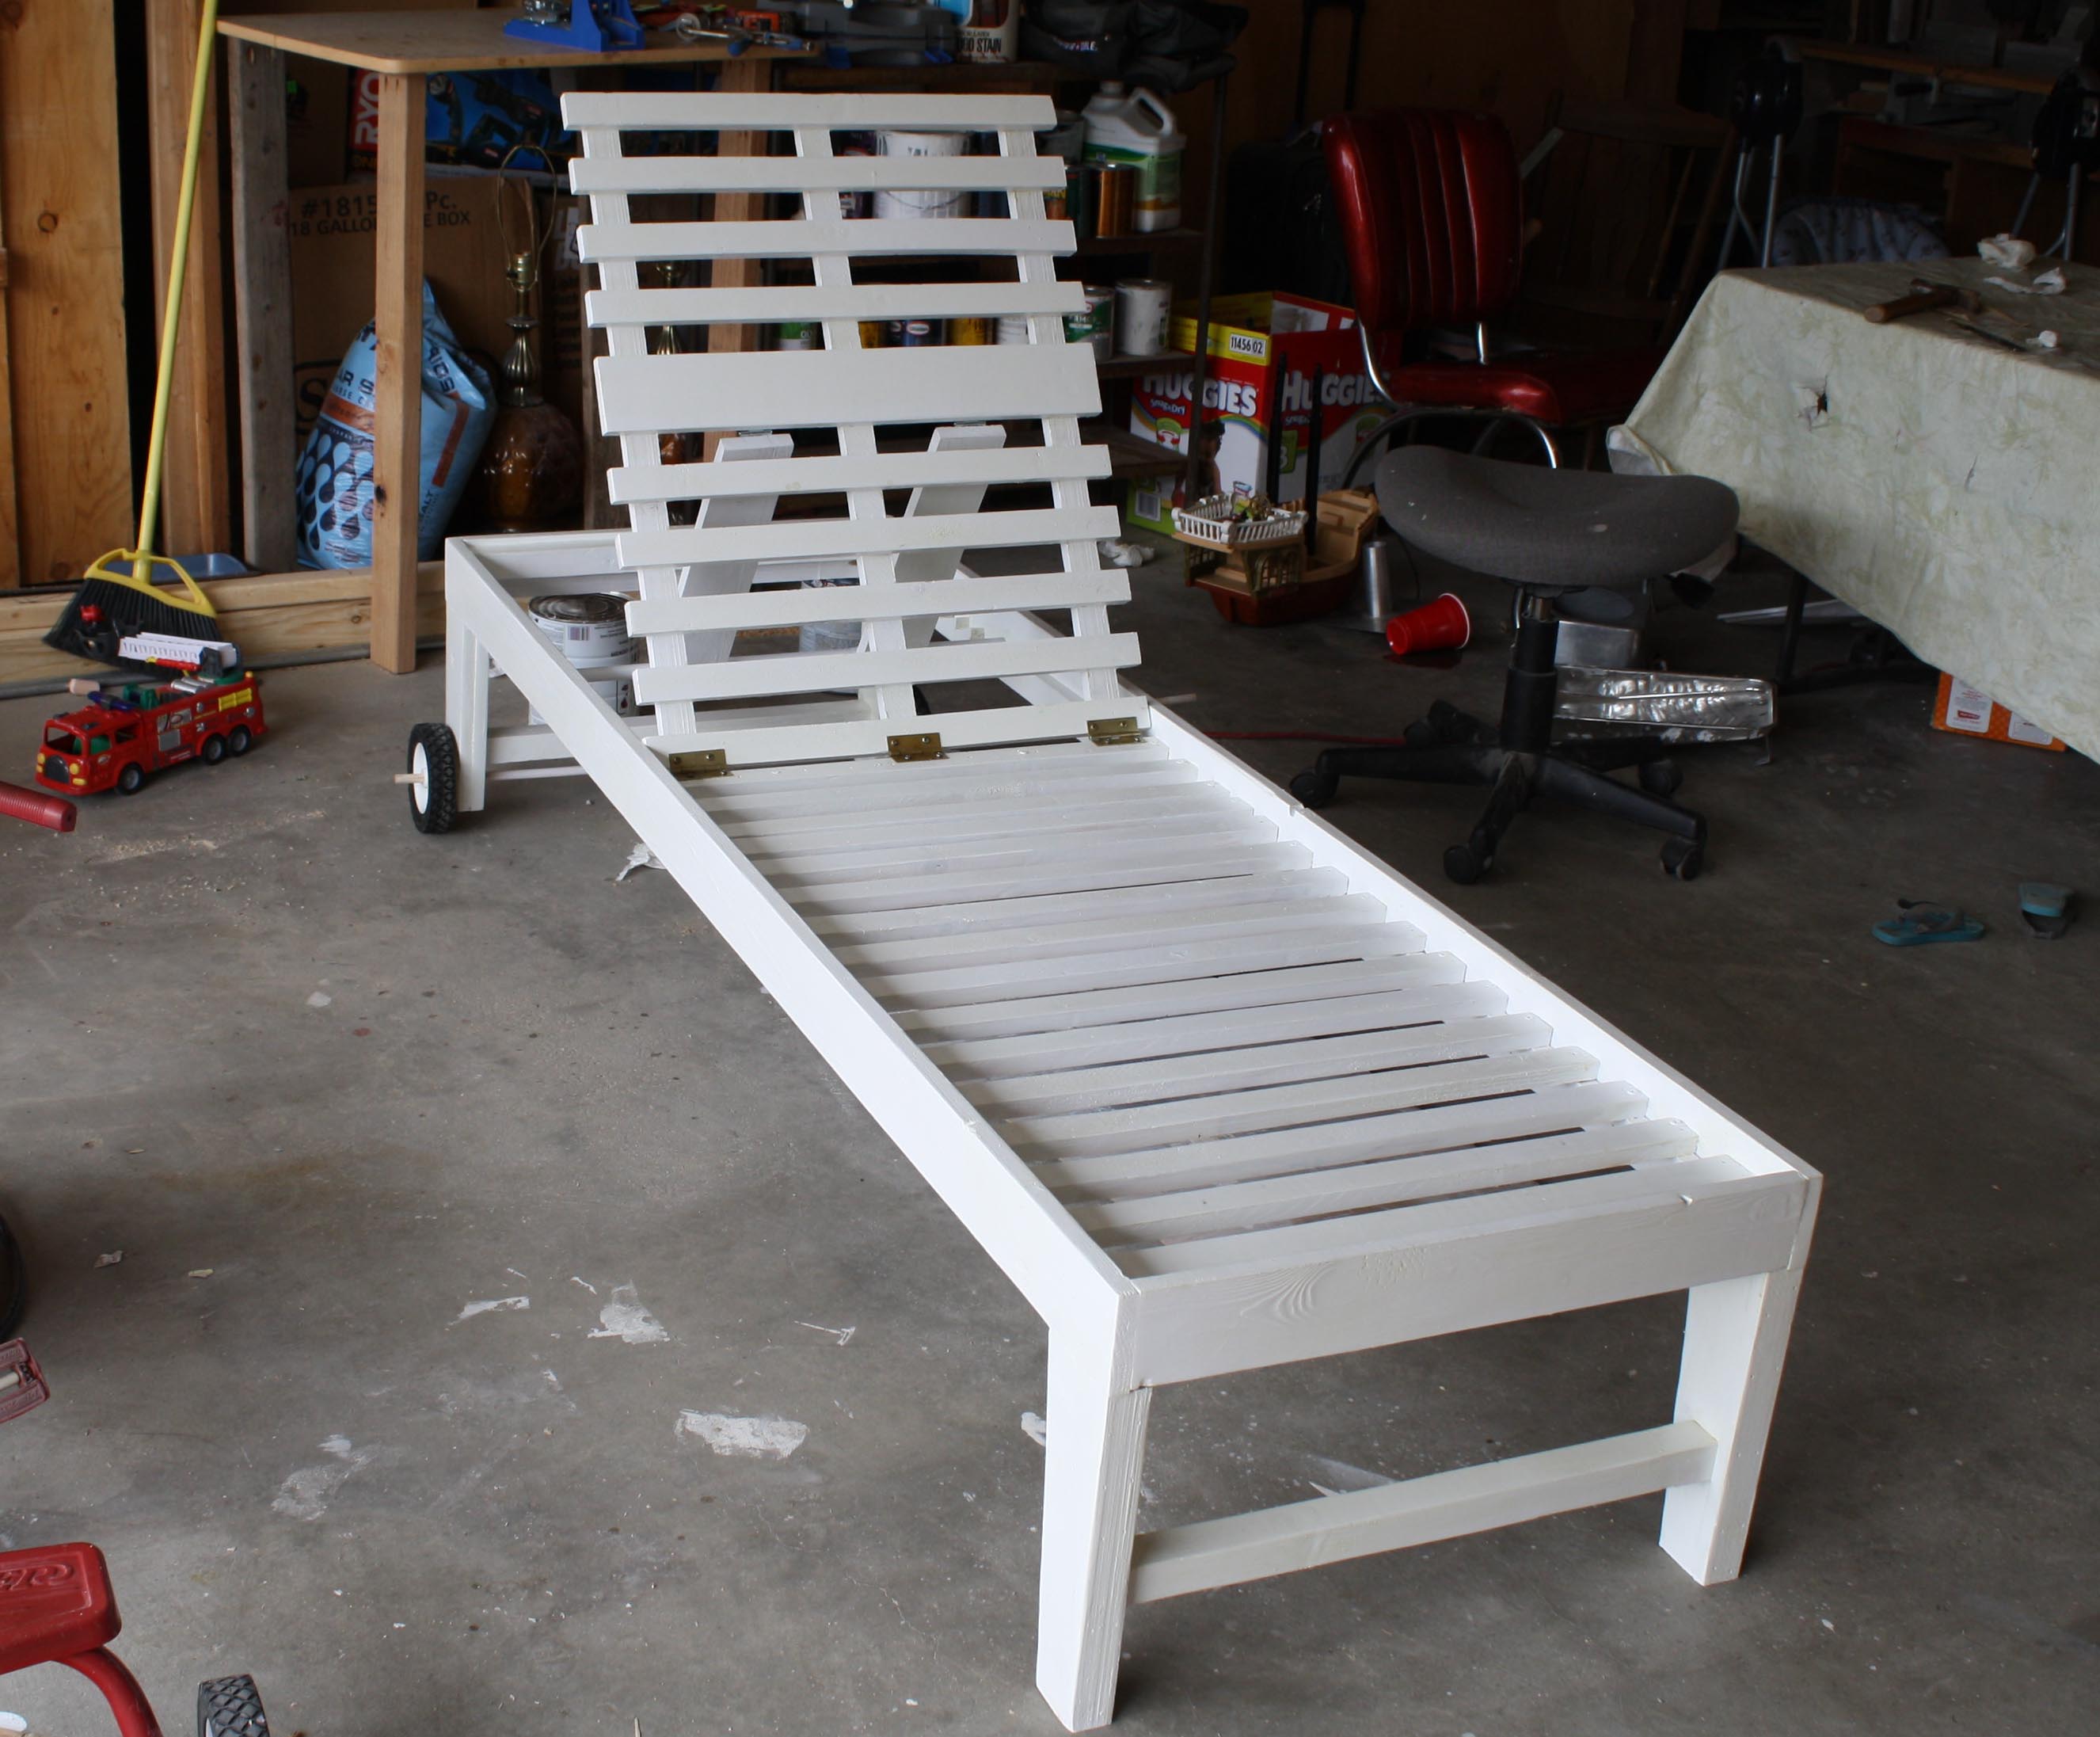
Using this plan I built my lounger with some changes, mainly adding lawn mower wheels to one end. The cushions I made have a mesh bottom to let the cushions dry faster, and zippers so they can be removed and machine washed. More details on what I used and many more photos on my blog.
Tue, 09/20/2011 - 12:49
I love the idea of the mesh! It would work as a great bench when you need more seating too. I think it'd be nice with huge wooden wheels also.
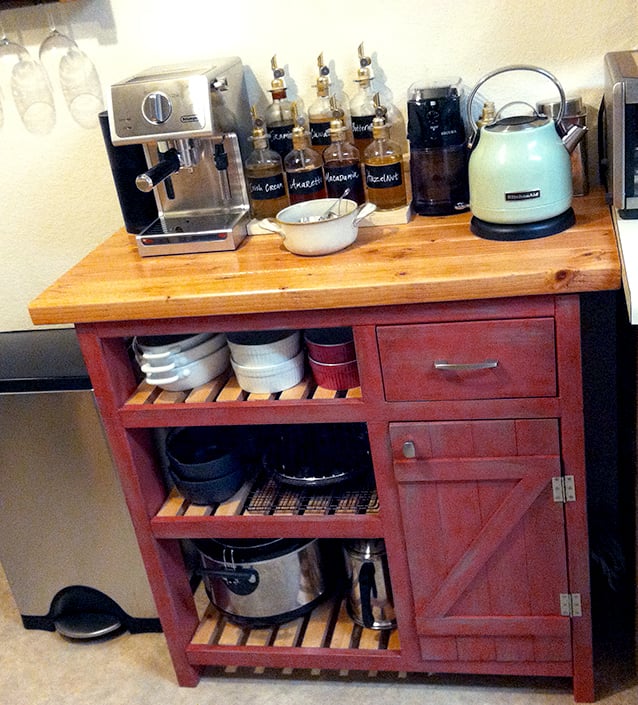
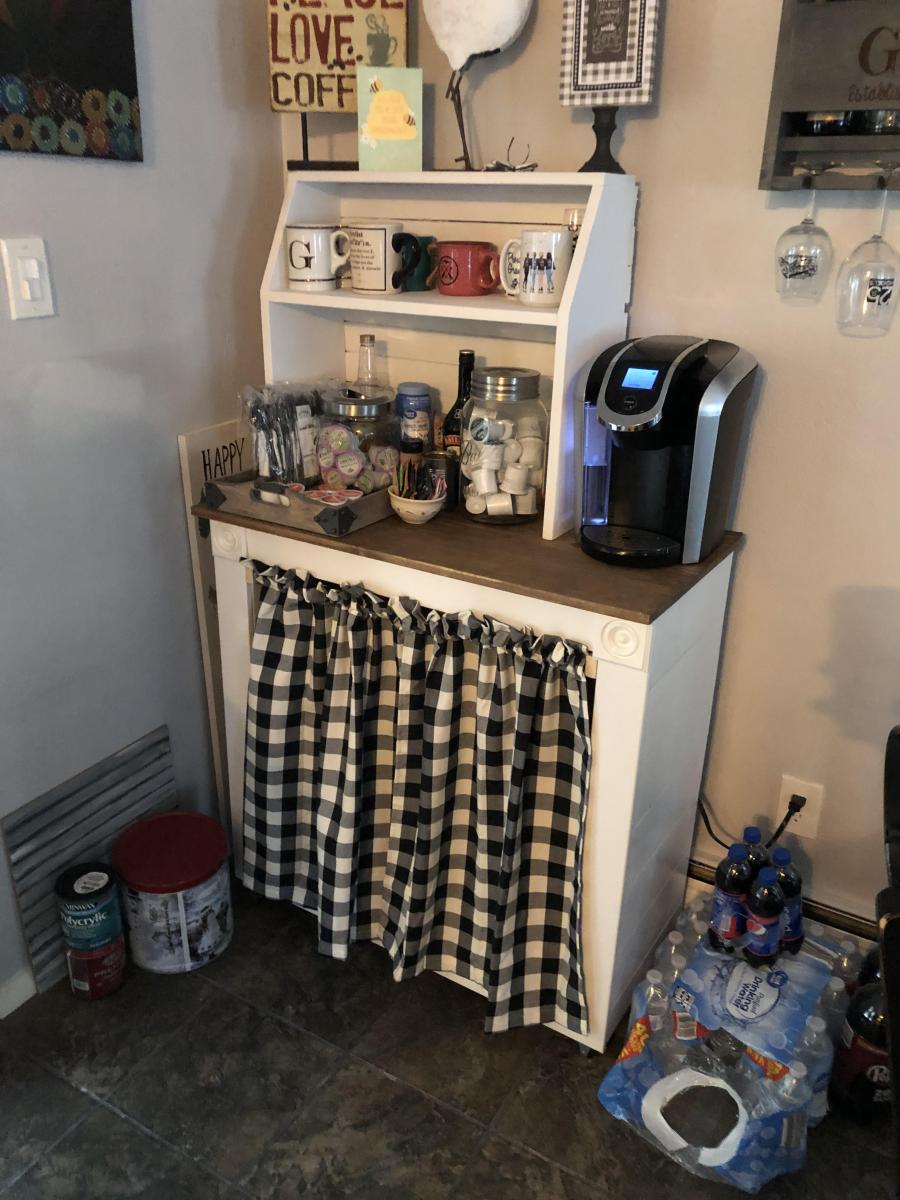
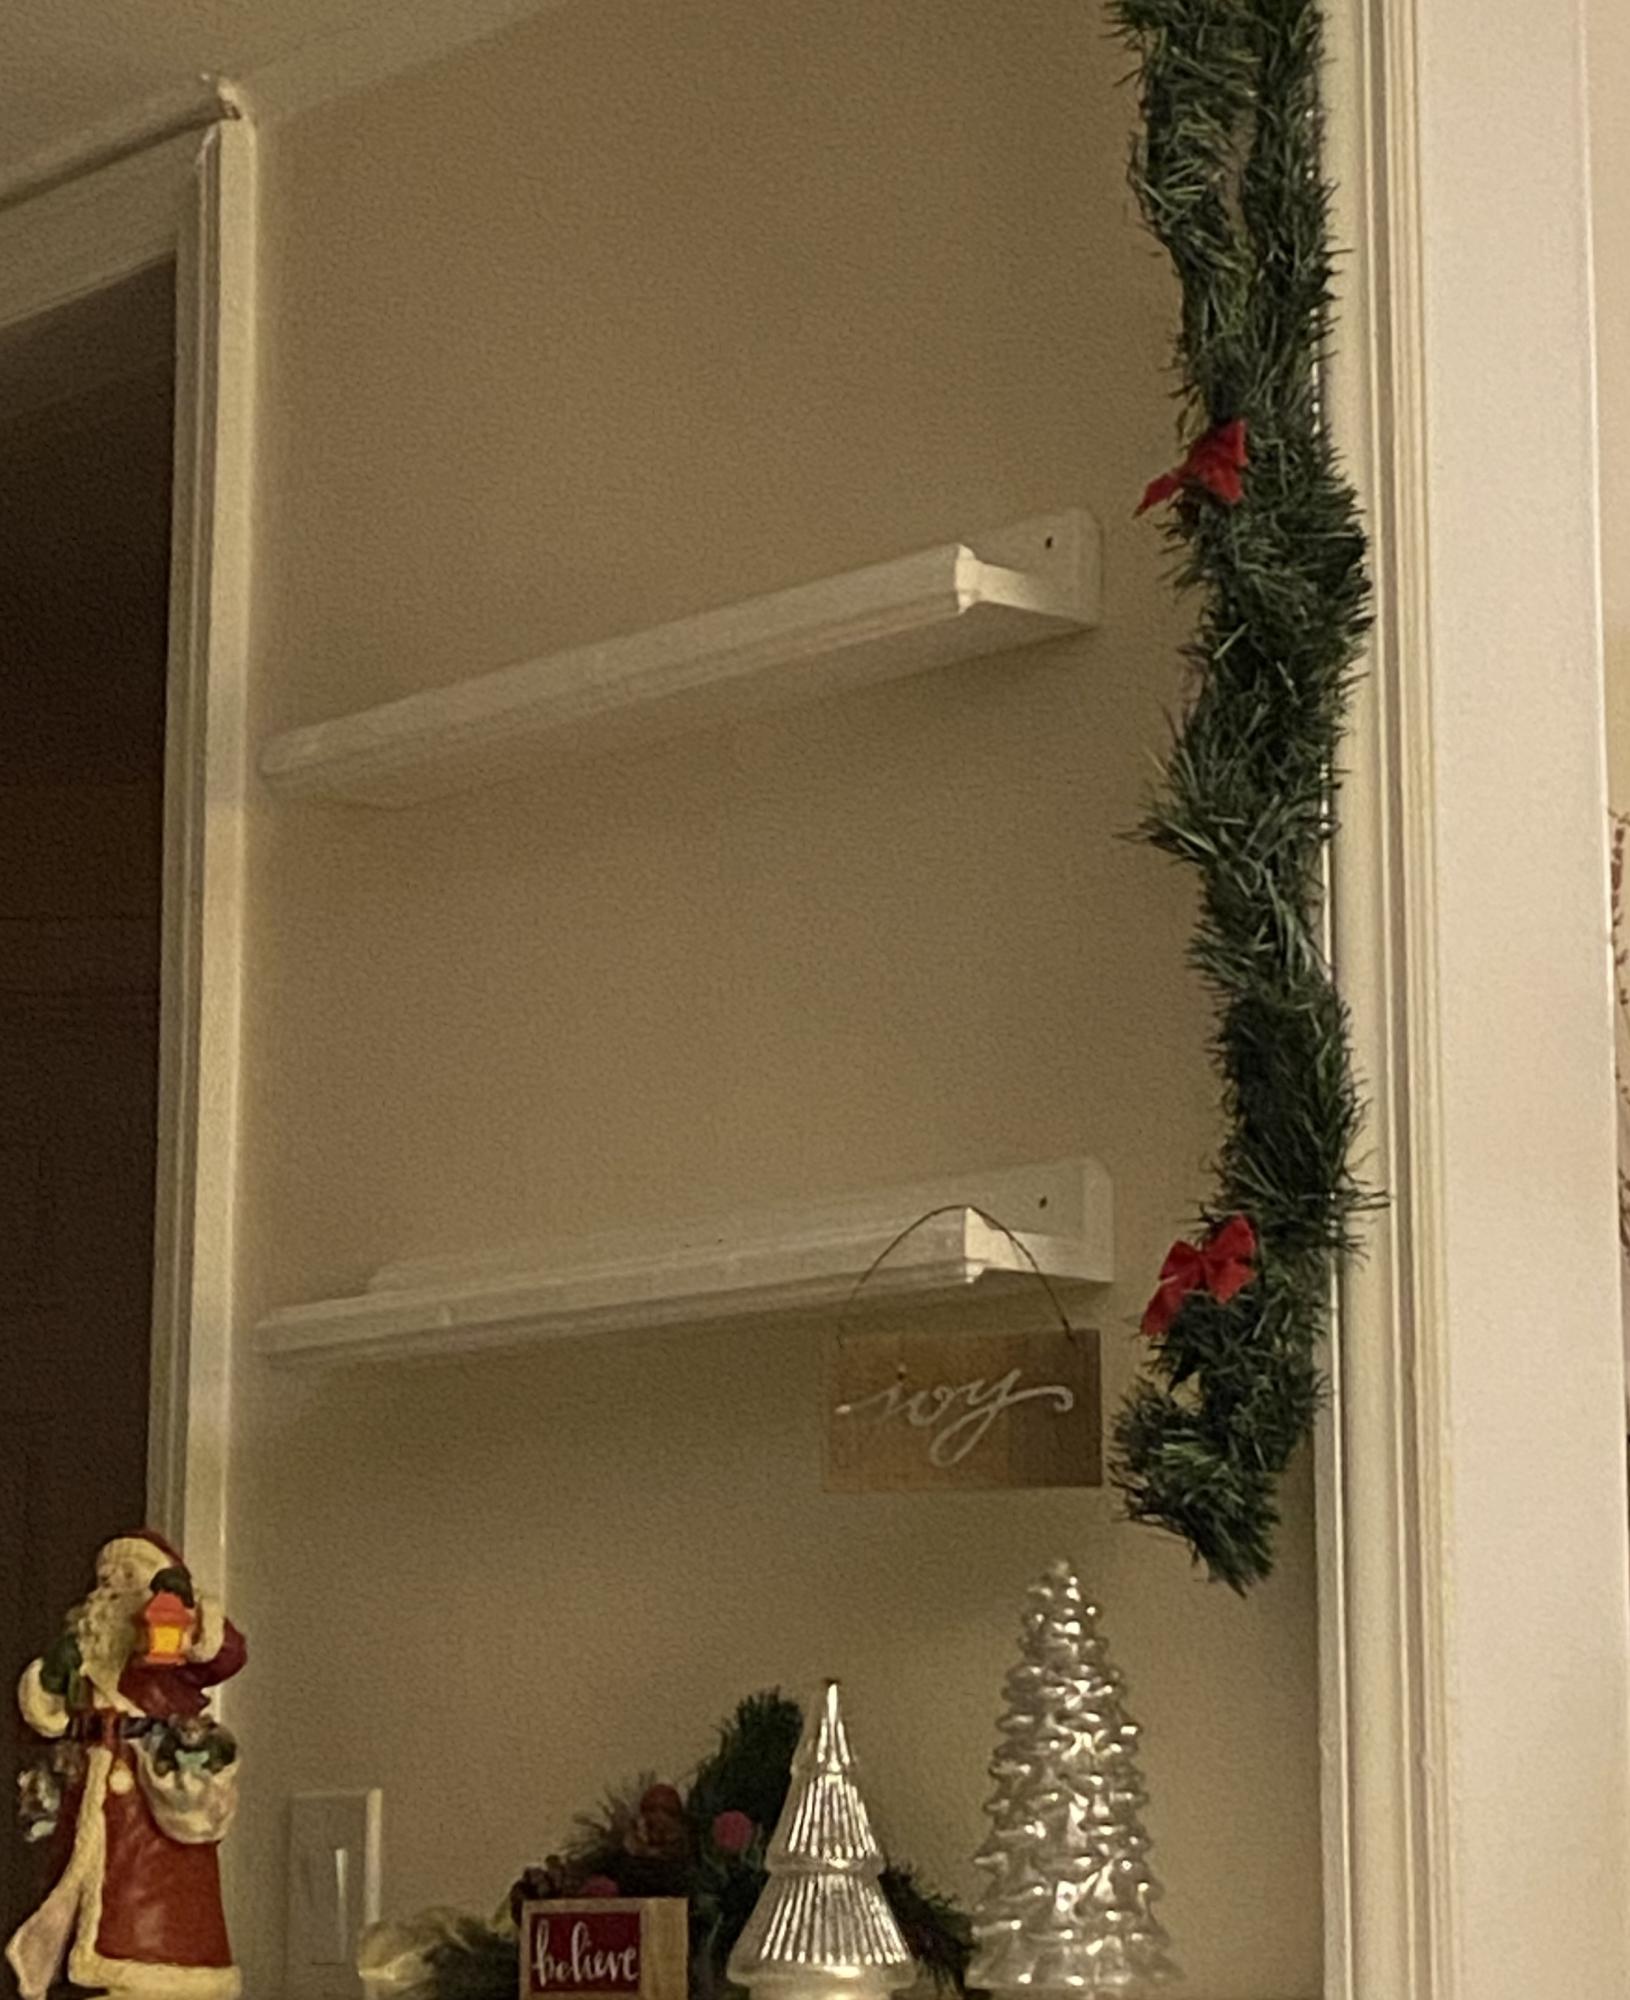
Used 2x4s for the top instead of 2x6s. All the shelves are 1x2s. My first attempt at a door and drawer - it kicked my a**!
Top stain: Minwax Golden Pecan
Then Minwax Polycrylic 3 coats

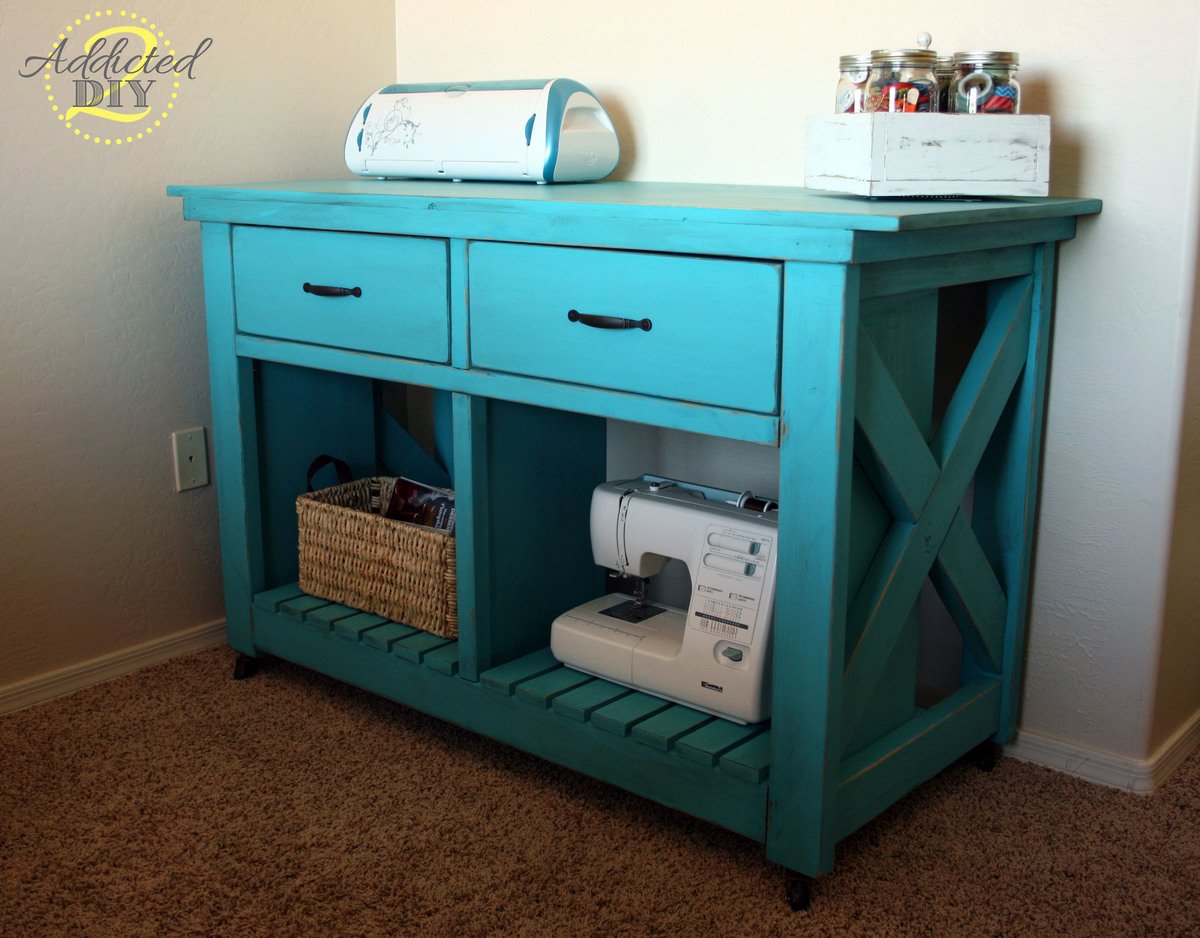
This is my latest project and my first project post on my new blog. I've included some step-by-step photos on my blog. I'm using this kitchen island as a craft cart in my craft room. This project was so fun and easy to put together. I love how it turned out!
Wed, 10/02/2013 - 06:52
We have a small house and my craft closet shares space with well other household stuff. :( My sewing table is the computer table when my self employed husband doesn't need to work. Your work has give me a great idea for a roll away craft table. Something like this could really work for me. Thanks for posting it, and good work!

Thu, 10/31/2013 - 19:10
I'm in the middle of making one of these also. I had to shorten by 4" so it will fit where I need it to go. I love the color you used. I might need to try that with a dark stained top.
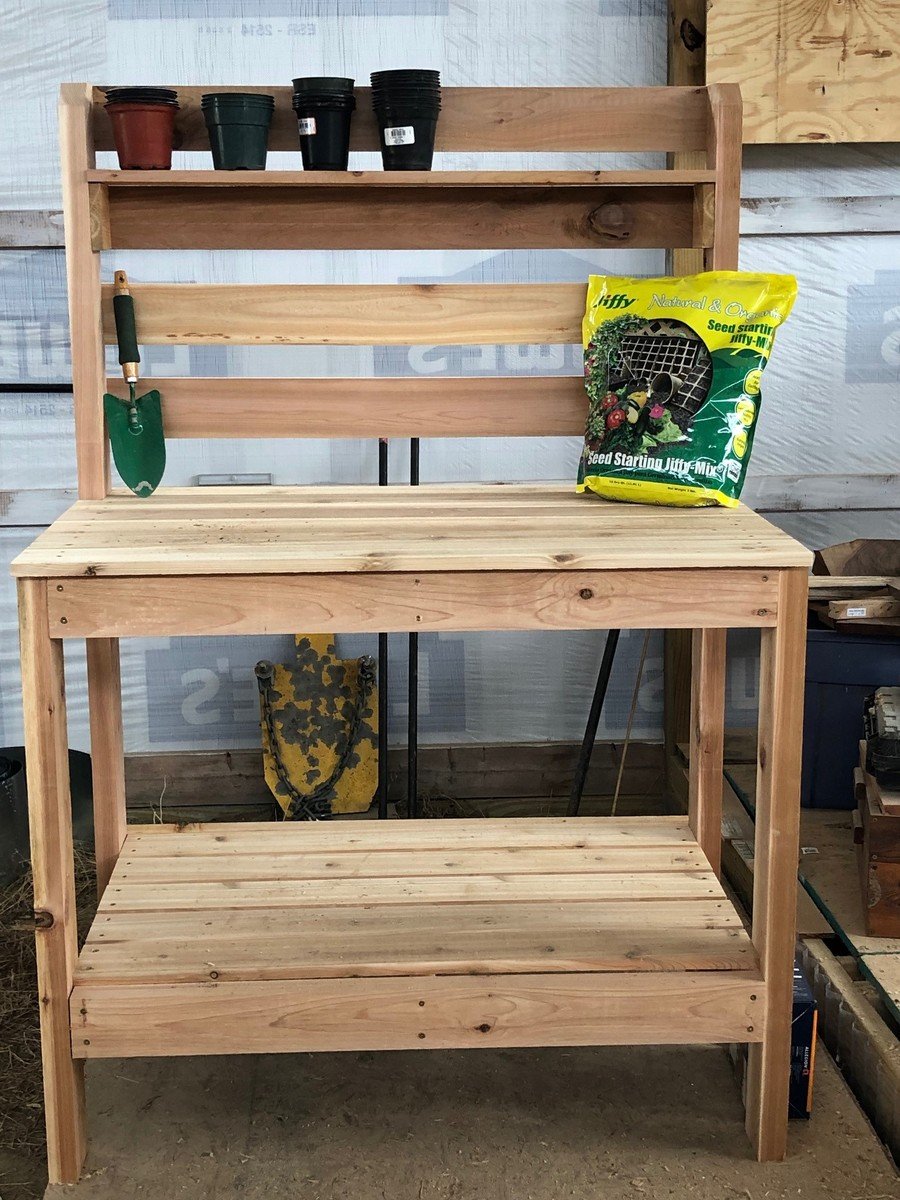
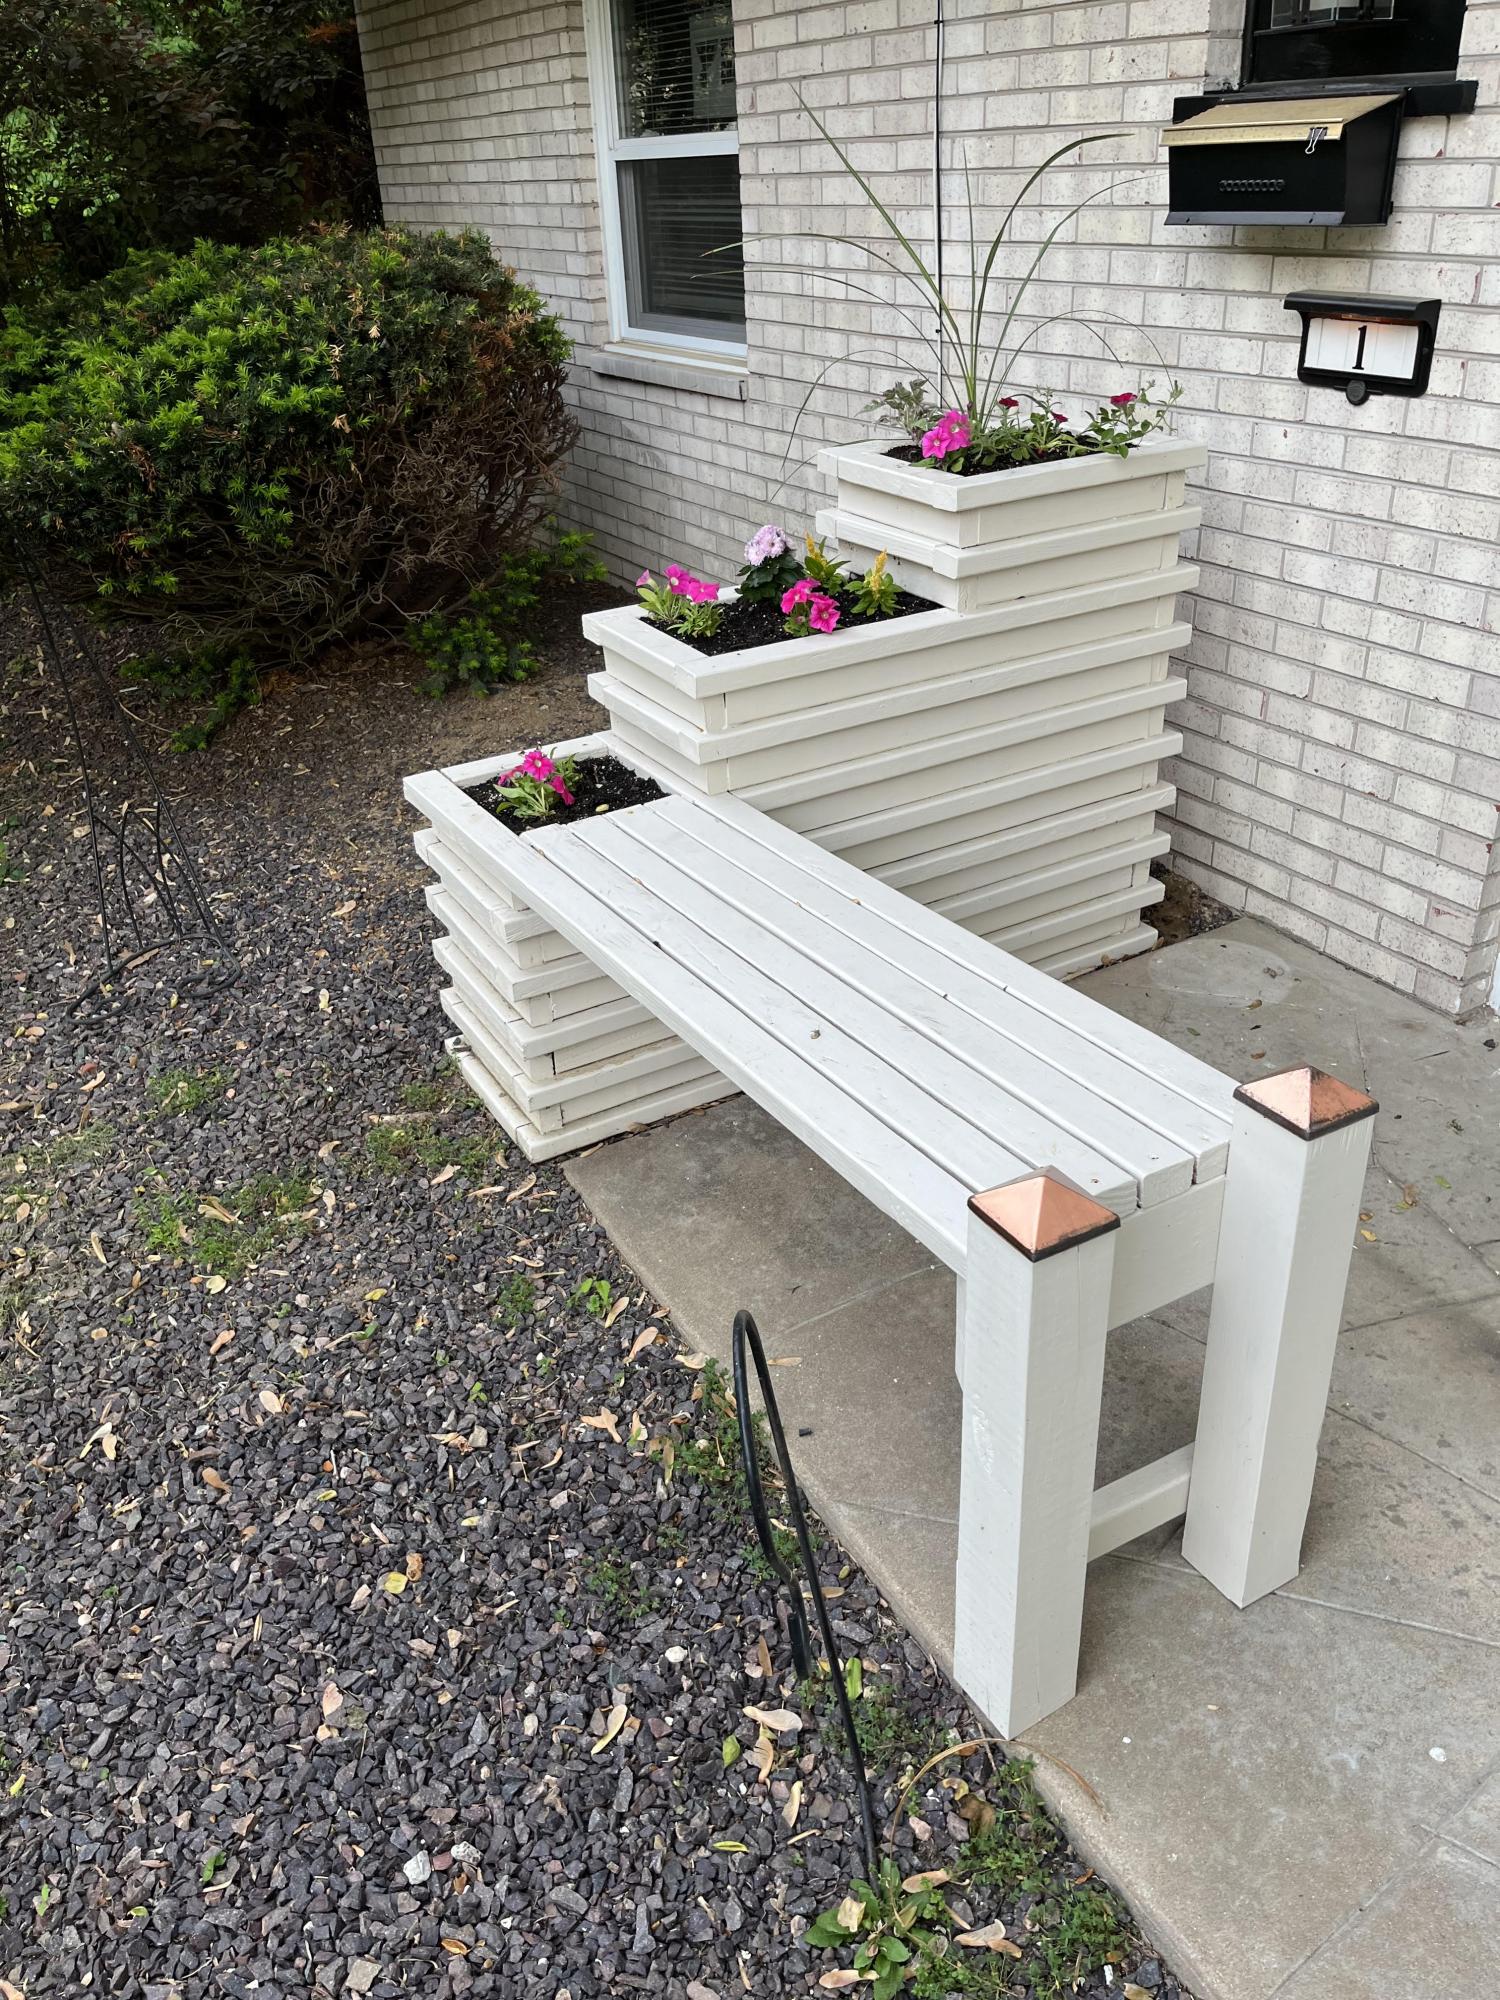
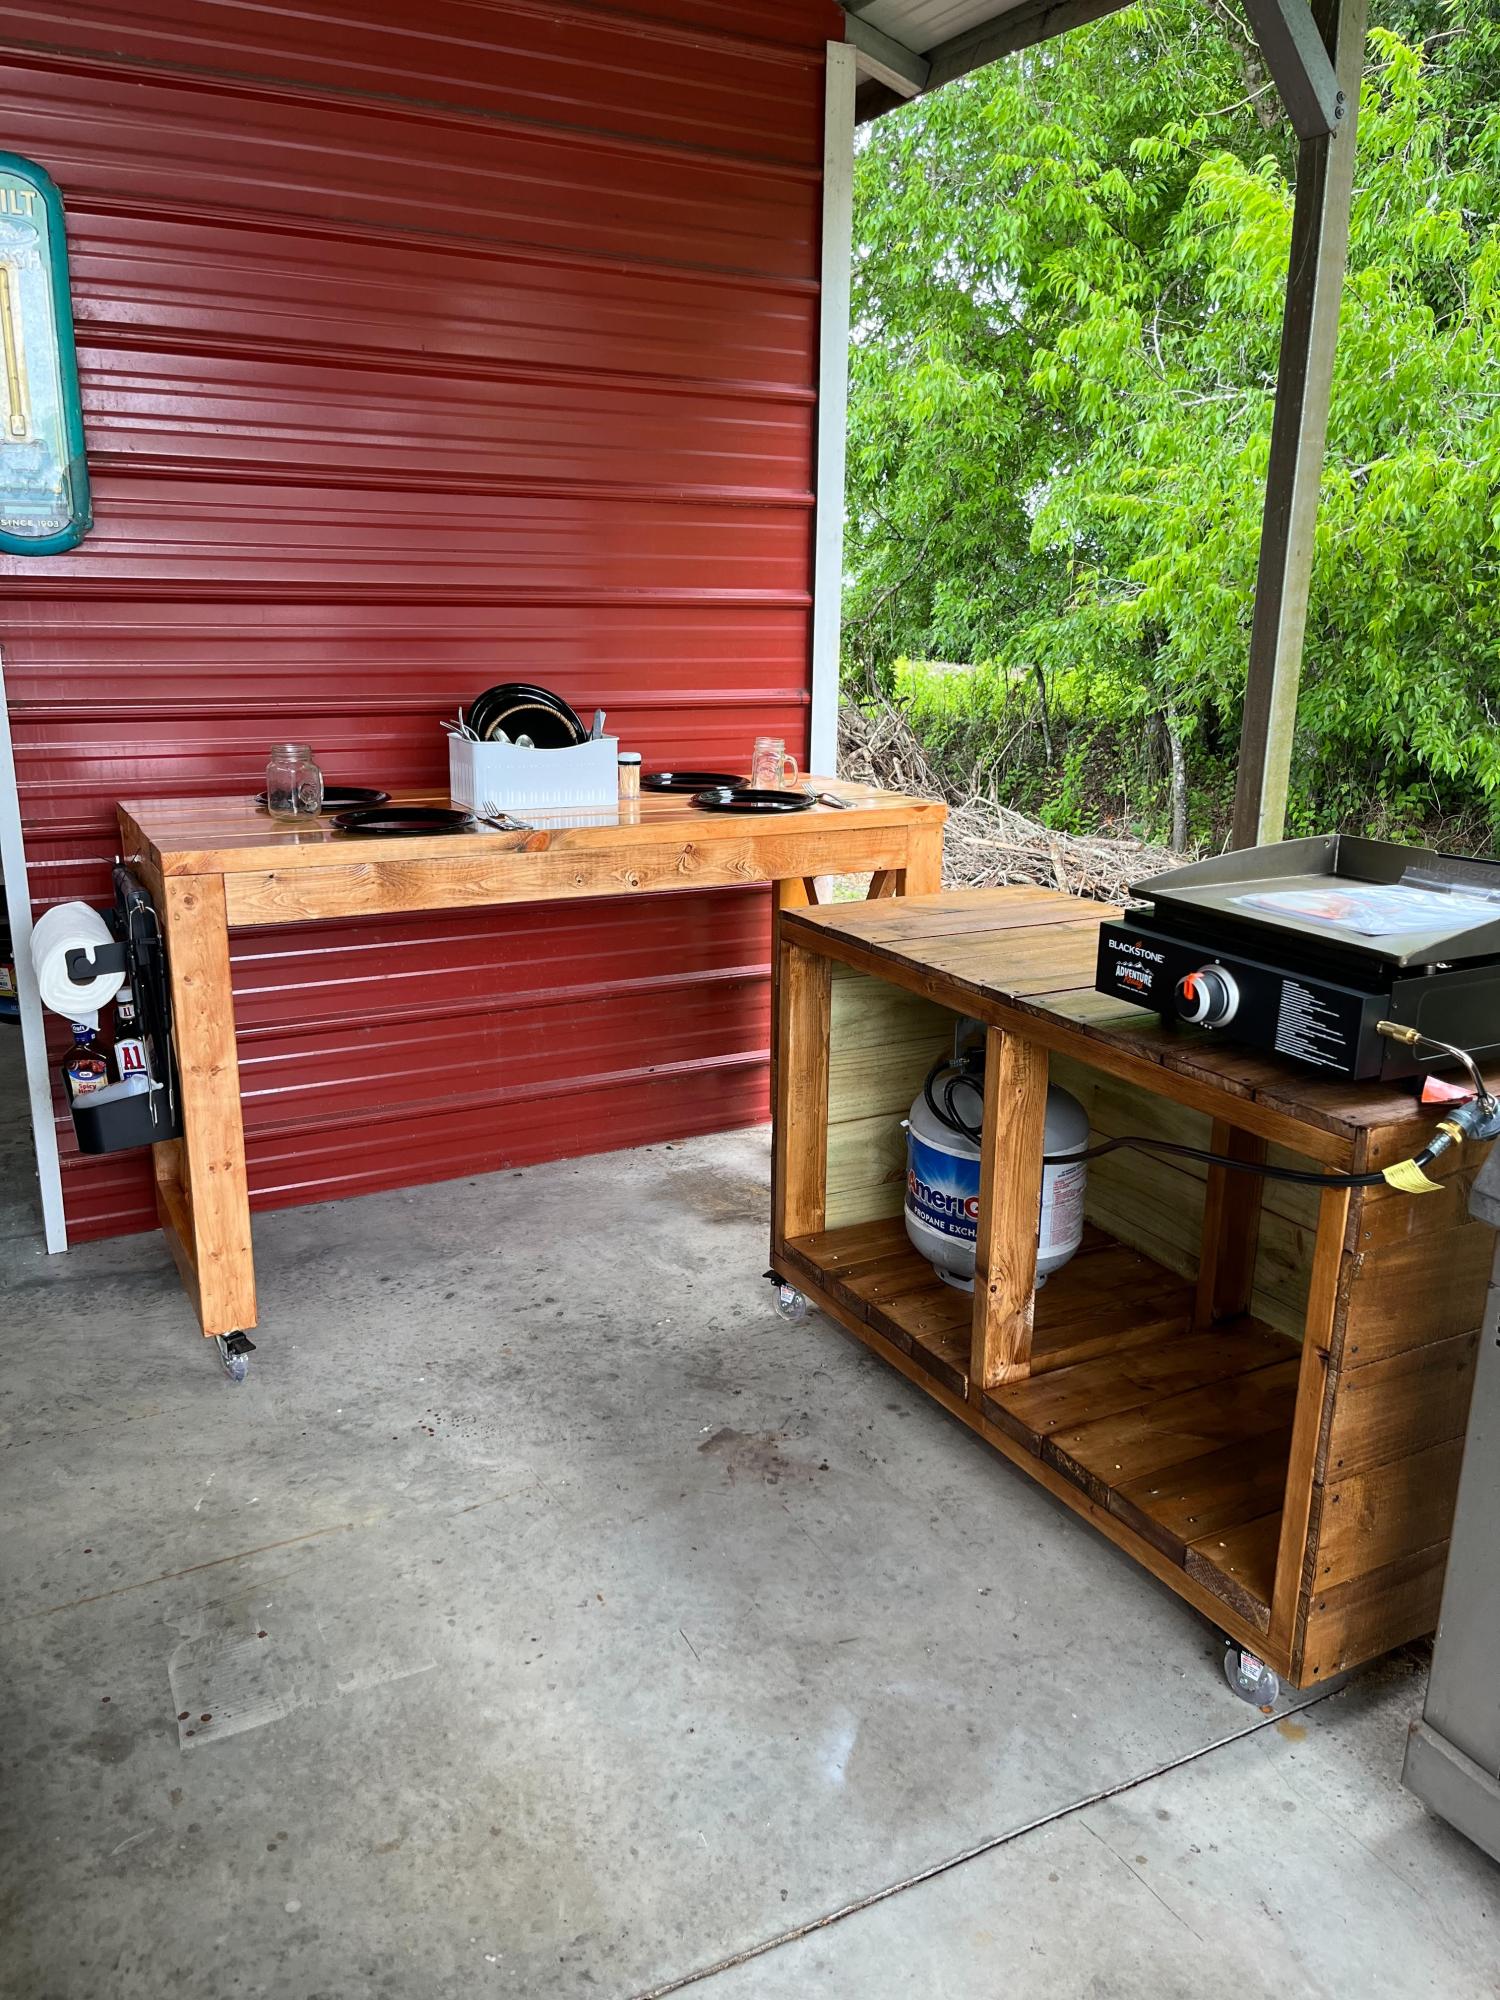
I decided to build my potting bench out of all cedar. I added some extra reinforcements, especially under the table top and shelf, since cedar isn't the strongest wood around. But I love the look!

Your outhouse design was modified for a snowmobile club project as the building needs to be towed across a lake to a site next to a warming shelter. An LED light with a timer switch and solar battery charger were installed to provide light in a remote area of Lake of the Woods.
A steel hitch and skids with hyfax were added to the design.
Thank you for providing a design that allowed us to make modifications for winter outdoor recreation accommodations.
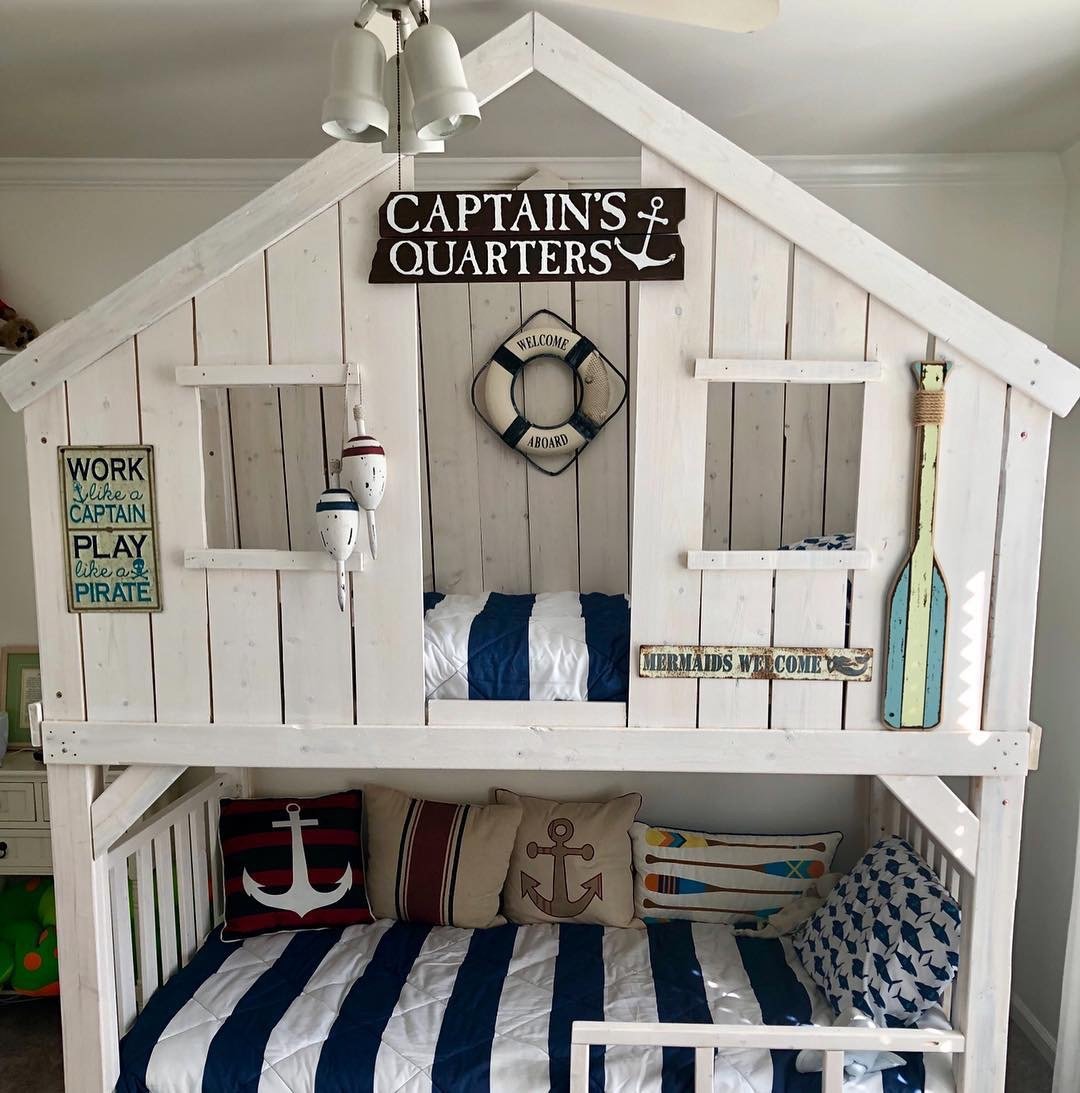
Used the Clubhouse Plans as the base. Added length to the 2x4's for the second bunk. Made upper and lower railings. Used 2x4's between the legs with 2x2's screwed in for the lower bunk. Hobby Lobby for the nautical swag. So now me and the grandkids have a place to hide!

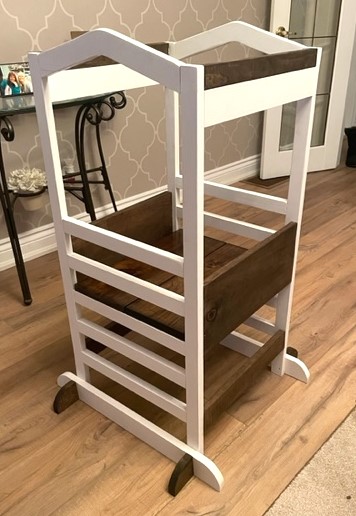
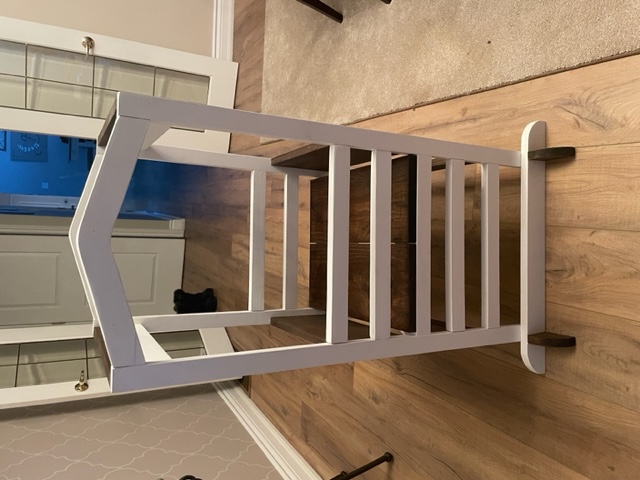
I built this Tower from plans found on Ana's site.
Decided to do with a two tone colour.
I'm very happy how it turned out.
All three Grand Kids fit in there and love it.
Thanks Ana

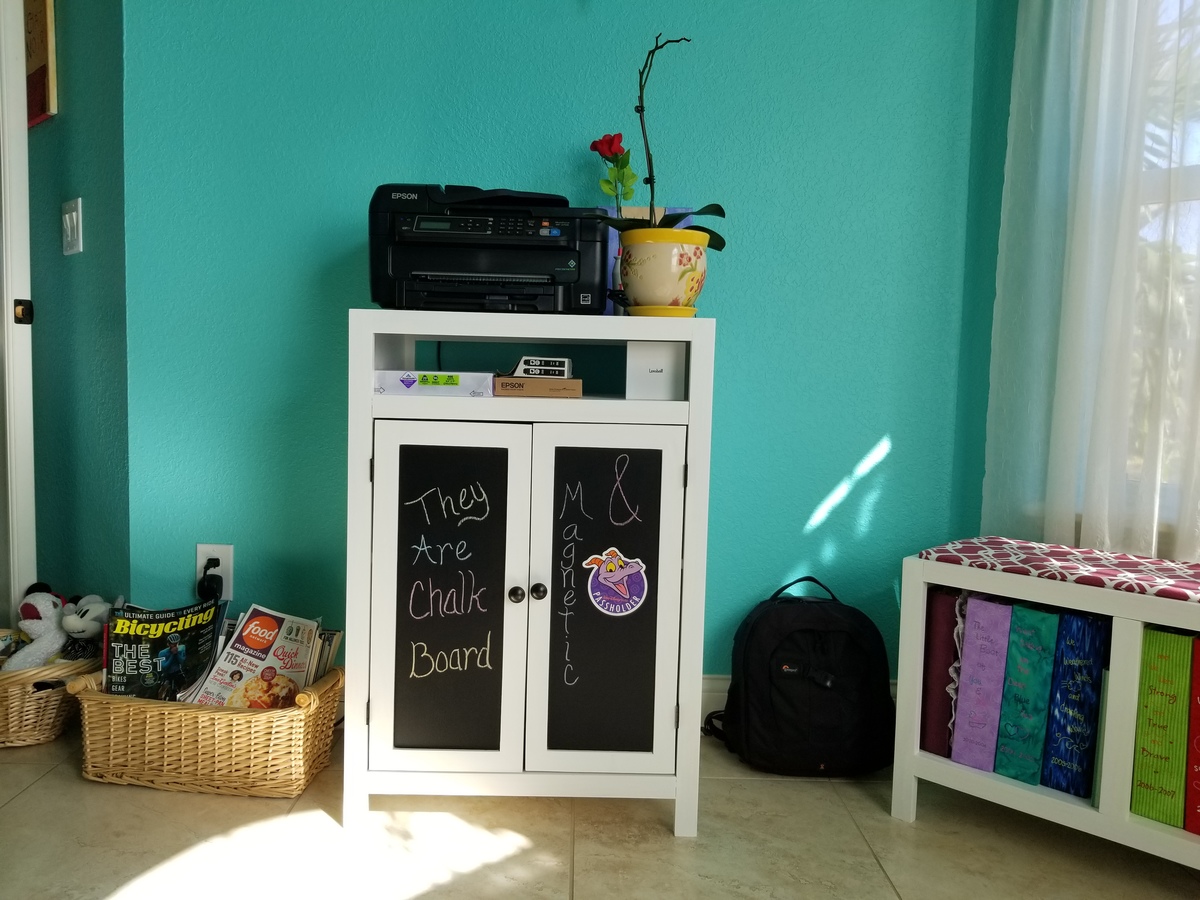
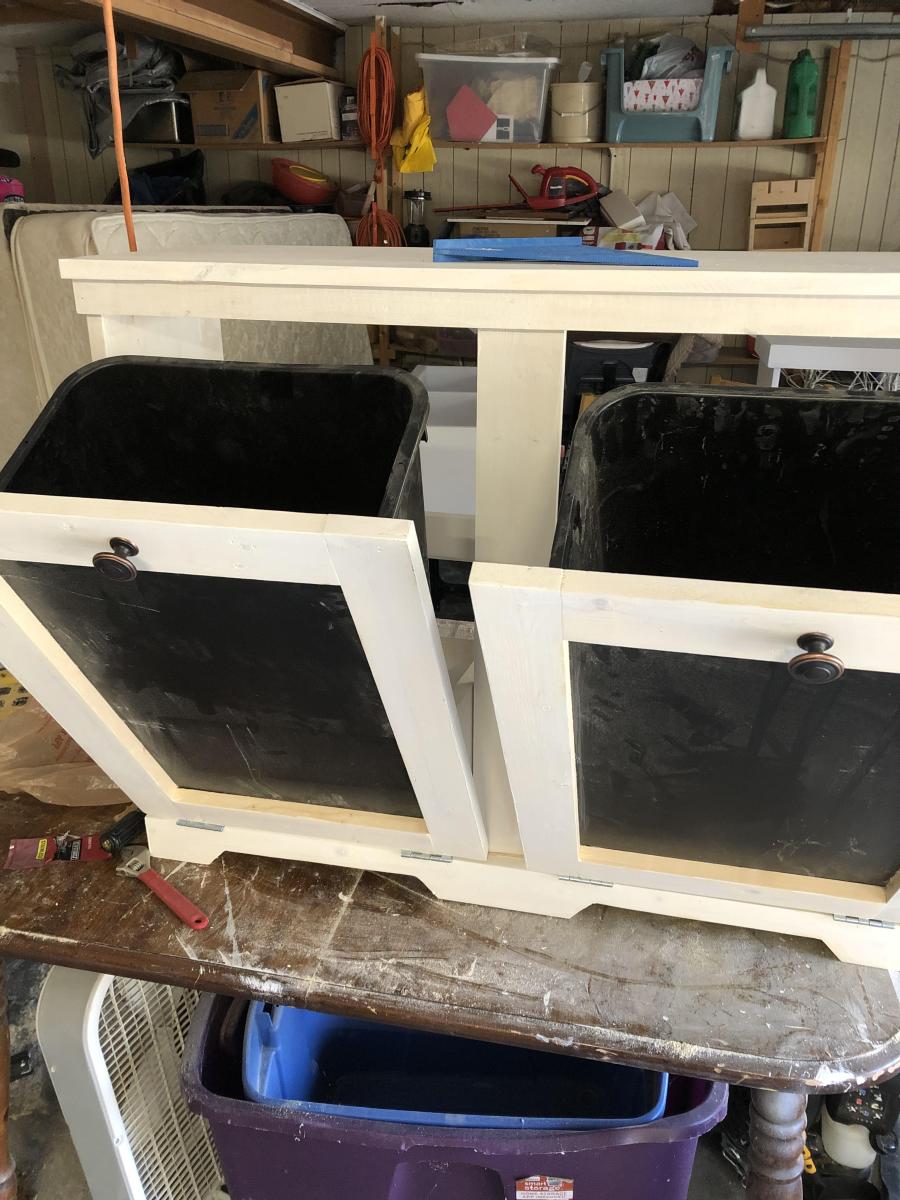
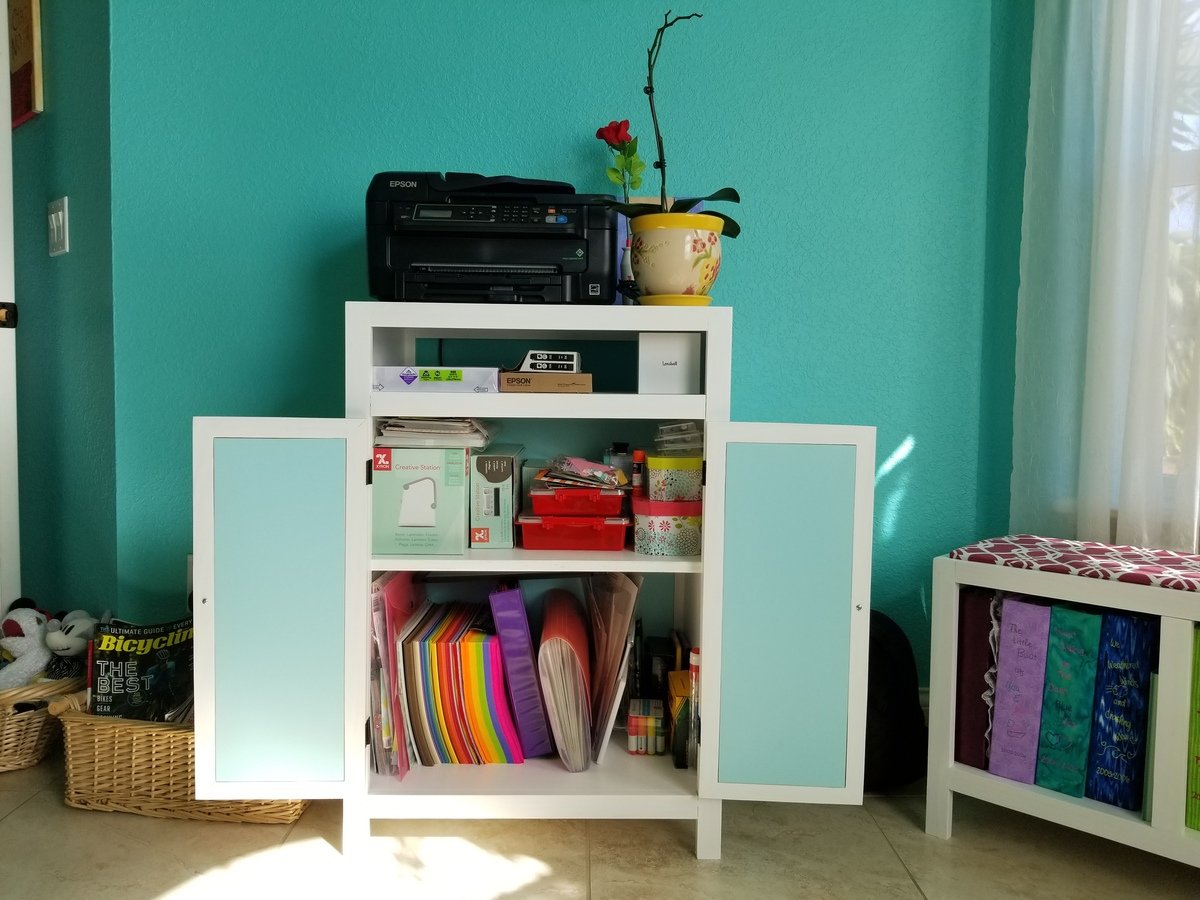
I designed this Printer Stand in a style to match the Easy Three Cube Benches I had already created for my craft room. I built the box out of whiteboard plywood and used good pine 1x2s for the legs and trim. I added doors made from trim, luaun and sheet metal. I thought it would be cool to have the doors be magnetic and also chalkboard. I cut out the door inserts from luaun, then bought an inexpensive piece of galvanized sheet metal, cut the sheet metal to the size of the luaun and glue it on. Then painted it with chalkboard paint and glued them into the frames. This project only took a day to build the basic box with trim. The doors took a little longer, and it took about a week to get it sanded and painted.
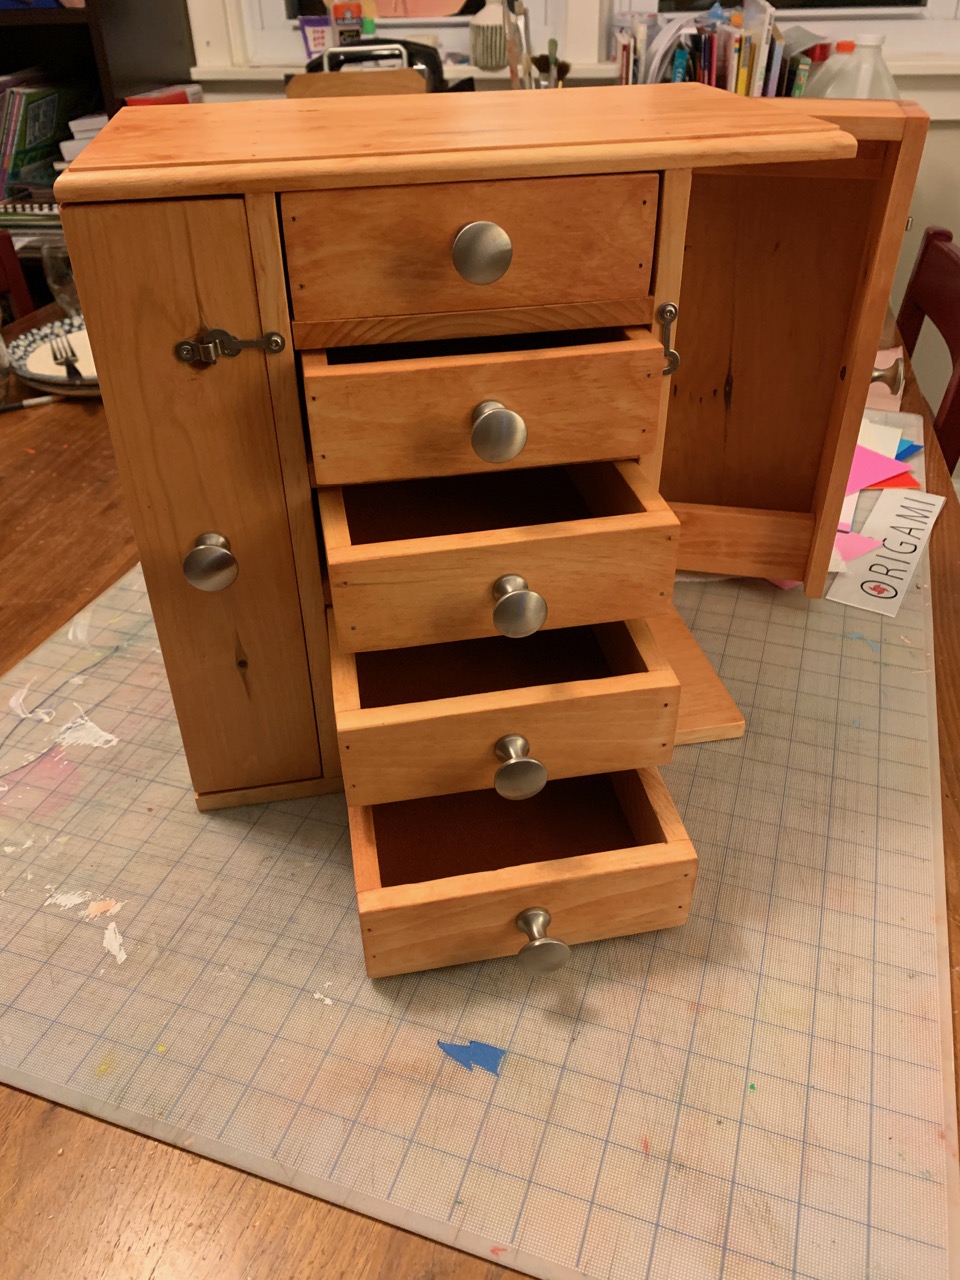
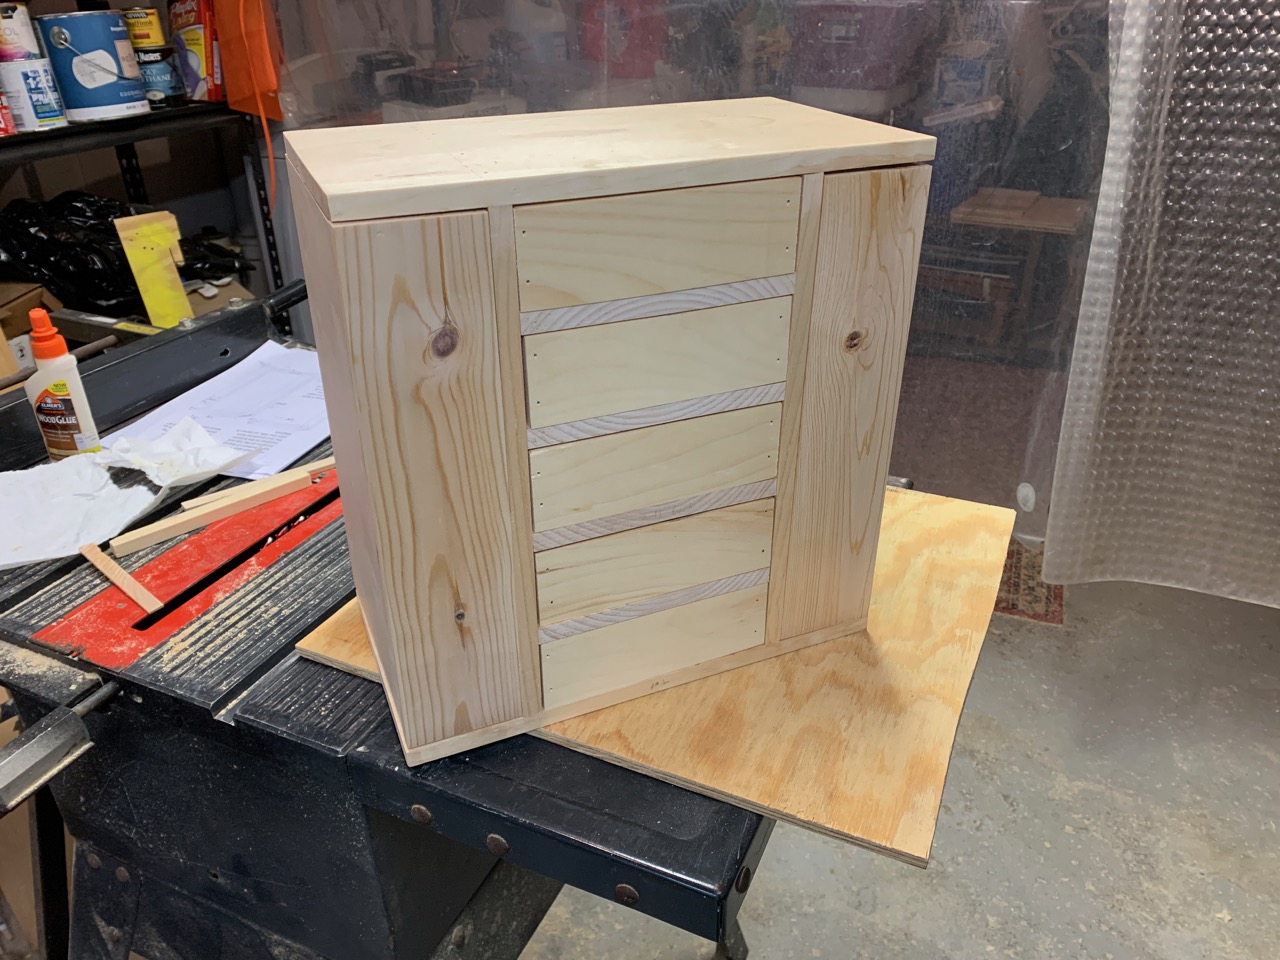
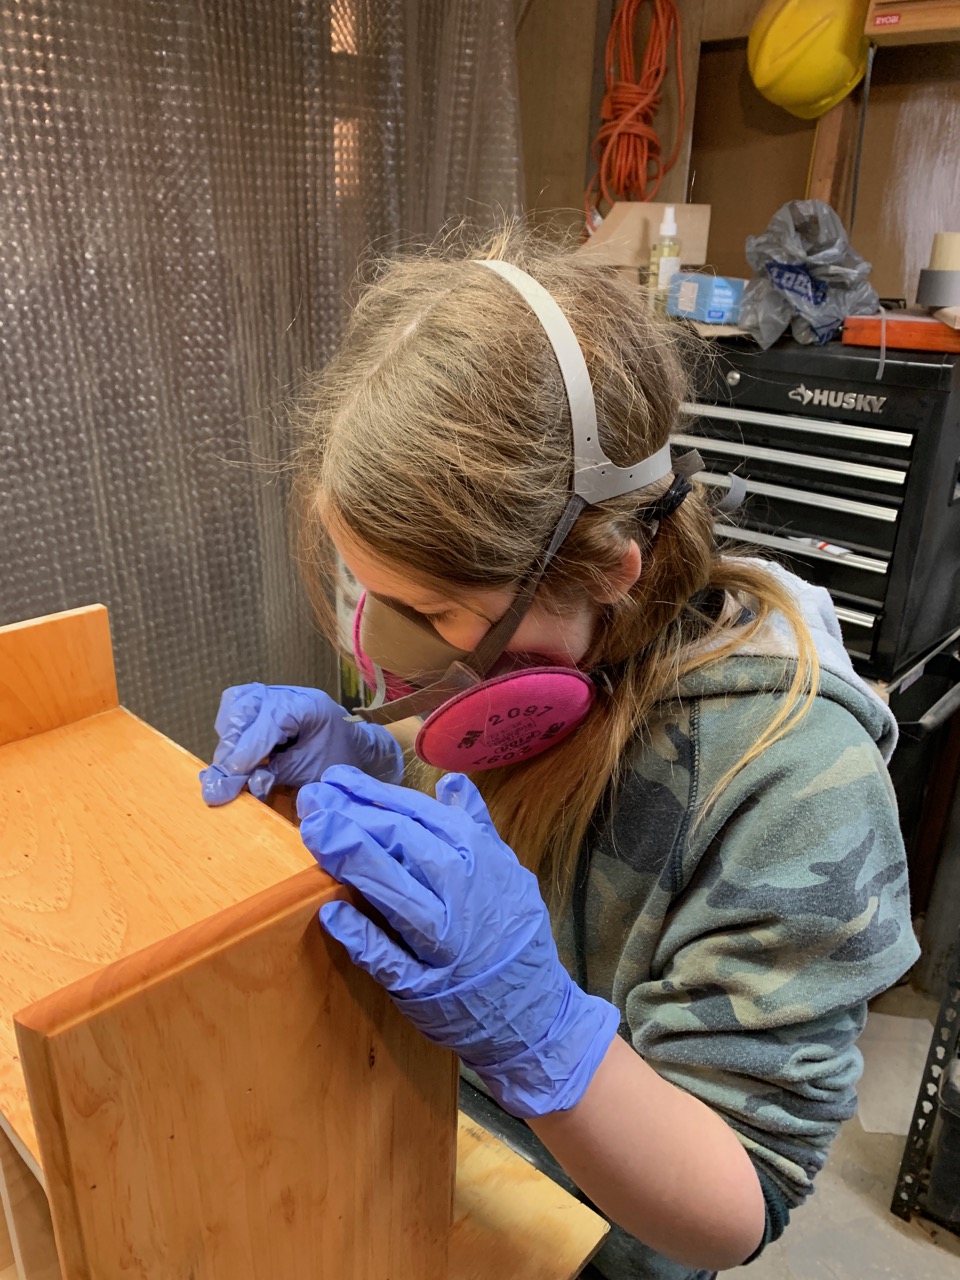
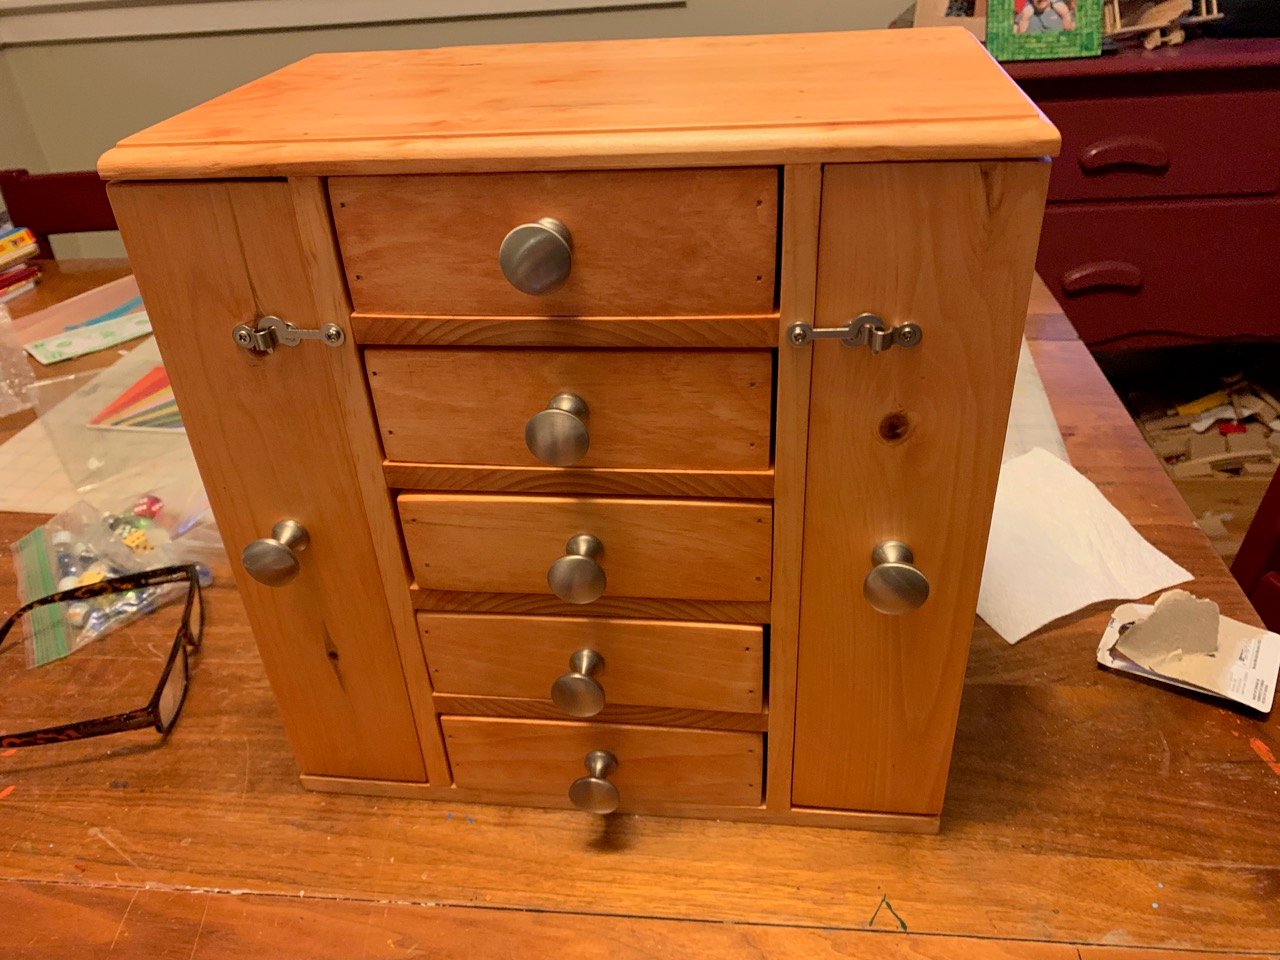
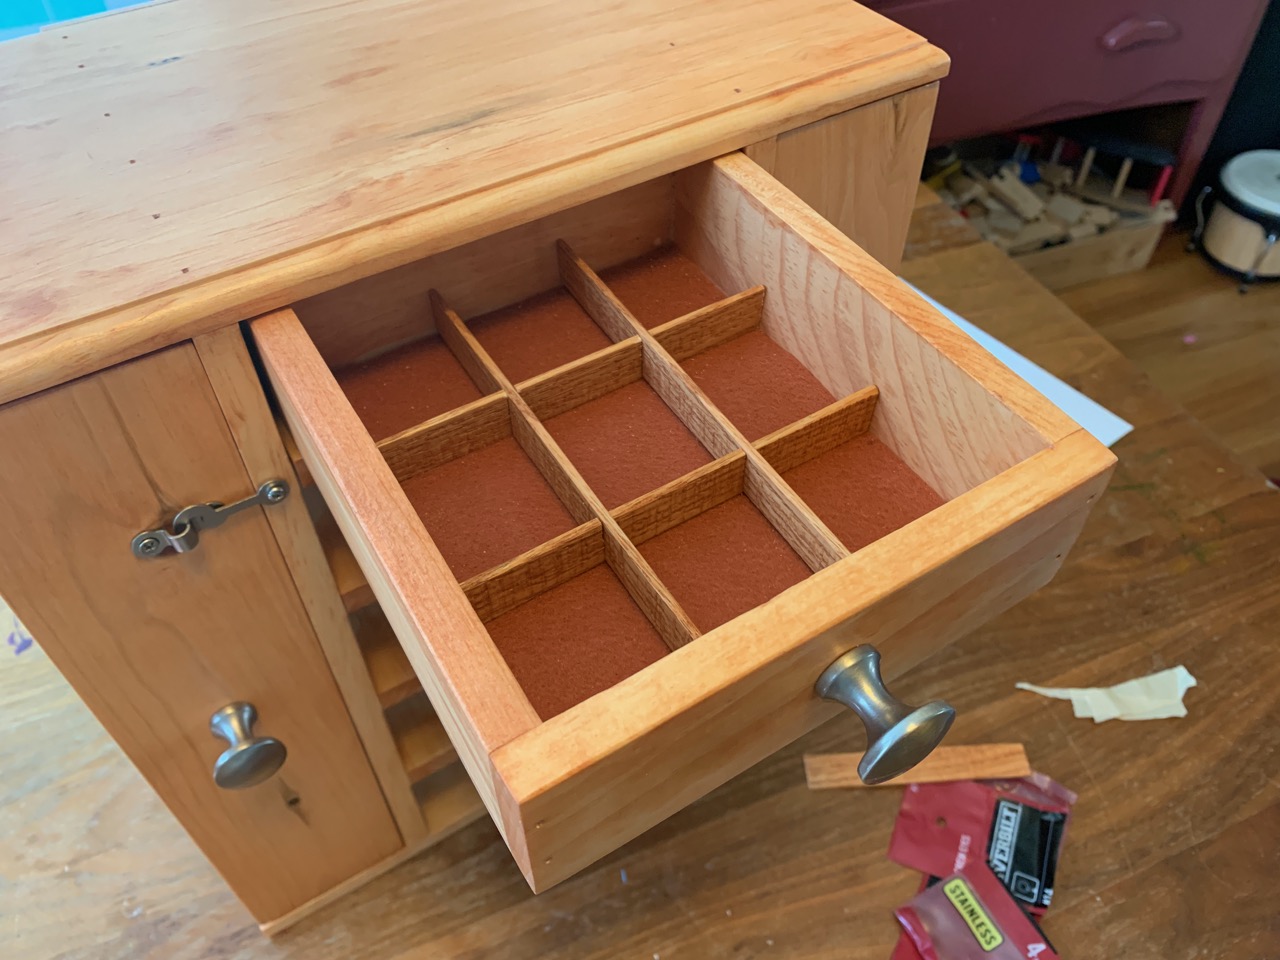
My 10 year old daughter is always creating. She recently decided that she wanted to do a woodworking project with me. We started by searching online for a design that looked doable and came up with the Fancy Jewelry Box from the Ana White website.
We decided that using the full thickness of 1x stock gave the piece a bit more of a clunky look than we were after. And since I have a thickness plainer, we milled our stock down to just under 1/2”. But that meant that we had to rework many of the measurements on the plan. This also made the drawers deeper and wider. Which is nice. A happy mistake happened when, while rough cutting the individual pieces before milling them down, I inadvertently cut the pieces between the drawers too narrow. We ended up turning them 90 degrees which allowed them to fit. This is why you see the end grain on those pieces. But we like it.
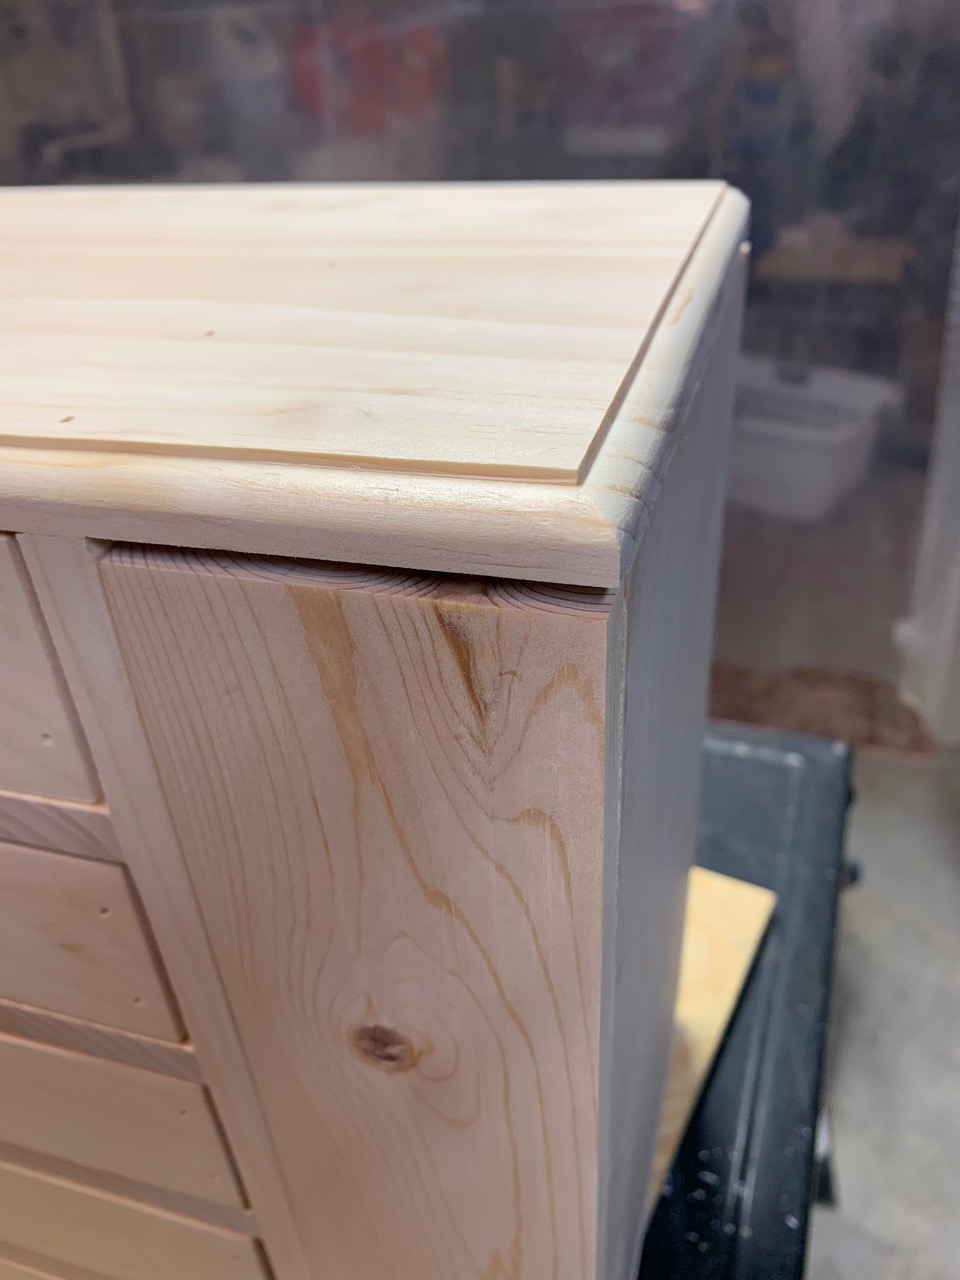
We also altered the plan a bit so that the edges of the plywood on the faces of the drawers and doors do not show. We added a nice border to the top of the box with a curved router bit. We lined the drawers with felt and then added some dividers here and there using some scraps of oak which we sawed thin with a bandsaw.
The original plan was to paint the box, as opposed to staining it. It wasn't until after I had nailed on the top and the drawer fronts that my daughter decided she wanted to stain it. That's why you can see those nail holes!
We had such fun making this Jewelry box.

Sat, 09/07/2019 - 13:43
You did a fantastic job on the jewelry box! It's absolutely gorgeous!
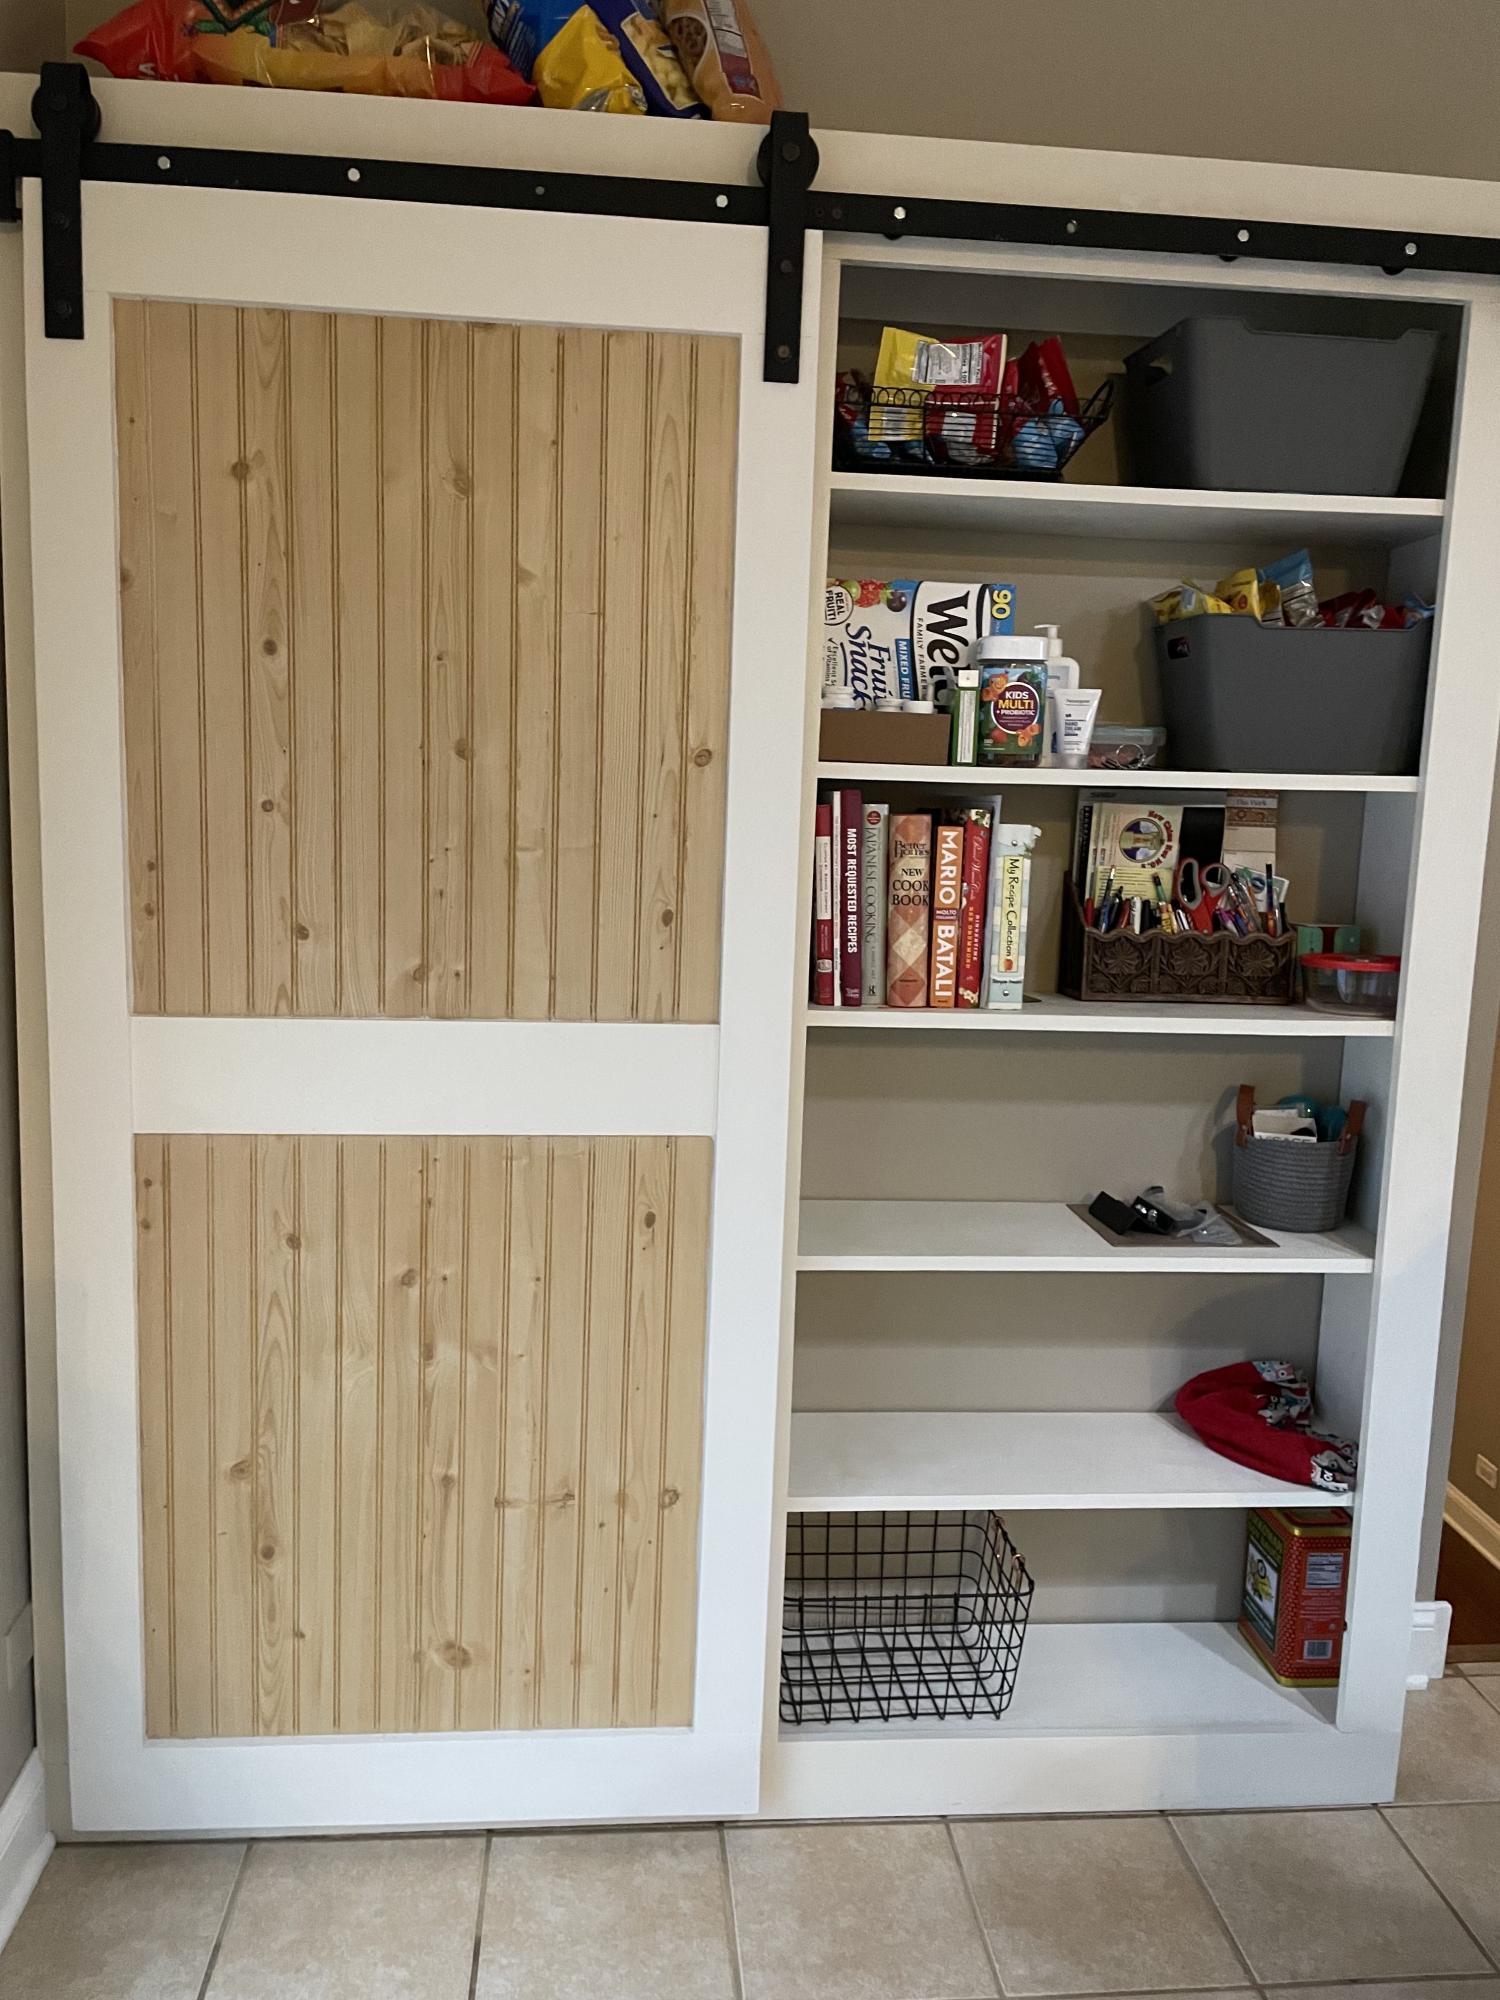
Using the Barn Door Pantry plan, I partially built this in my shop then took it apart and transported it to my son's house where we reconstructed it. This is a massive project and I recommend that you have enough room (and help) to build it and move it. The door is built with 1/2 inch plywood, framed with 1 by 4's with bead board inserts.
Sat, 03/18/2023 - 19:18
Very pretty and functional, what more can you ask for! Thanks for sharing:)
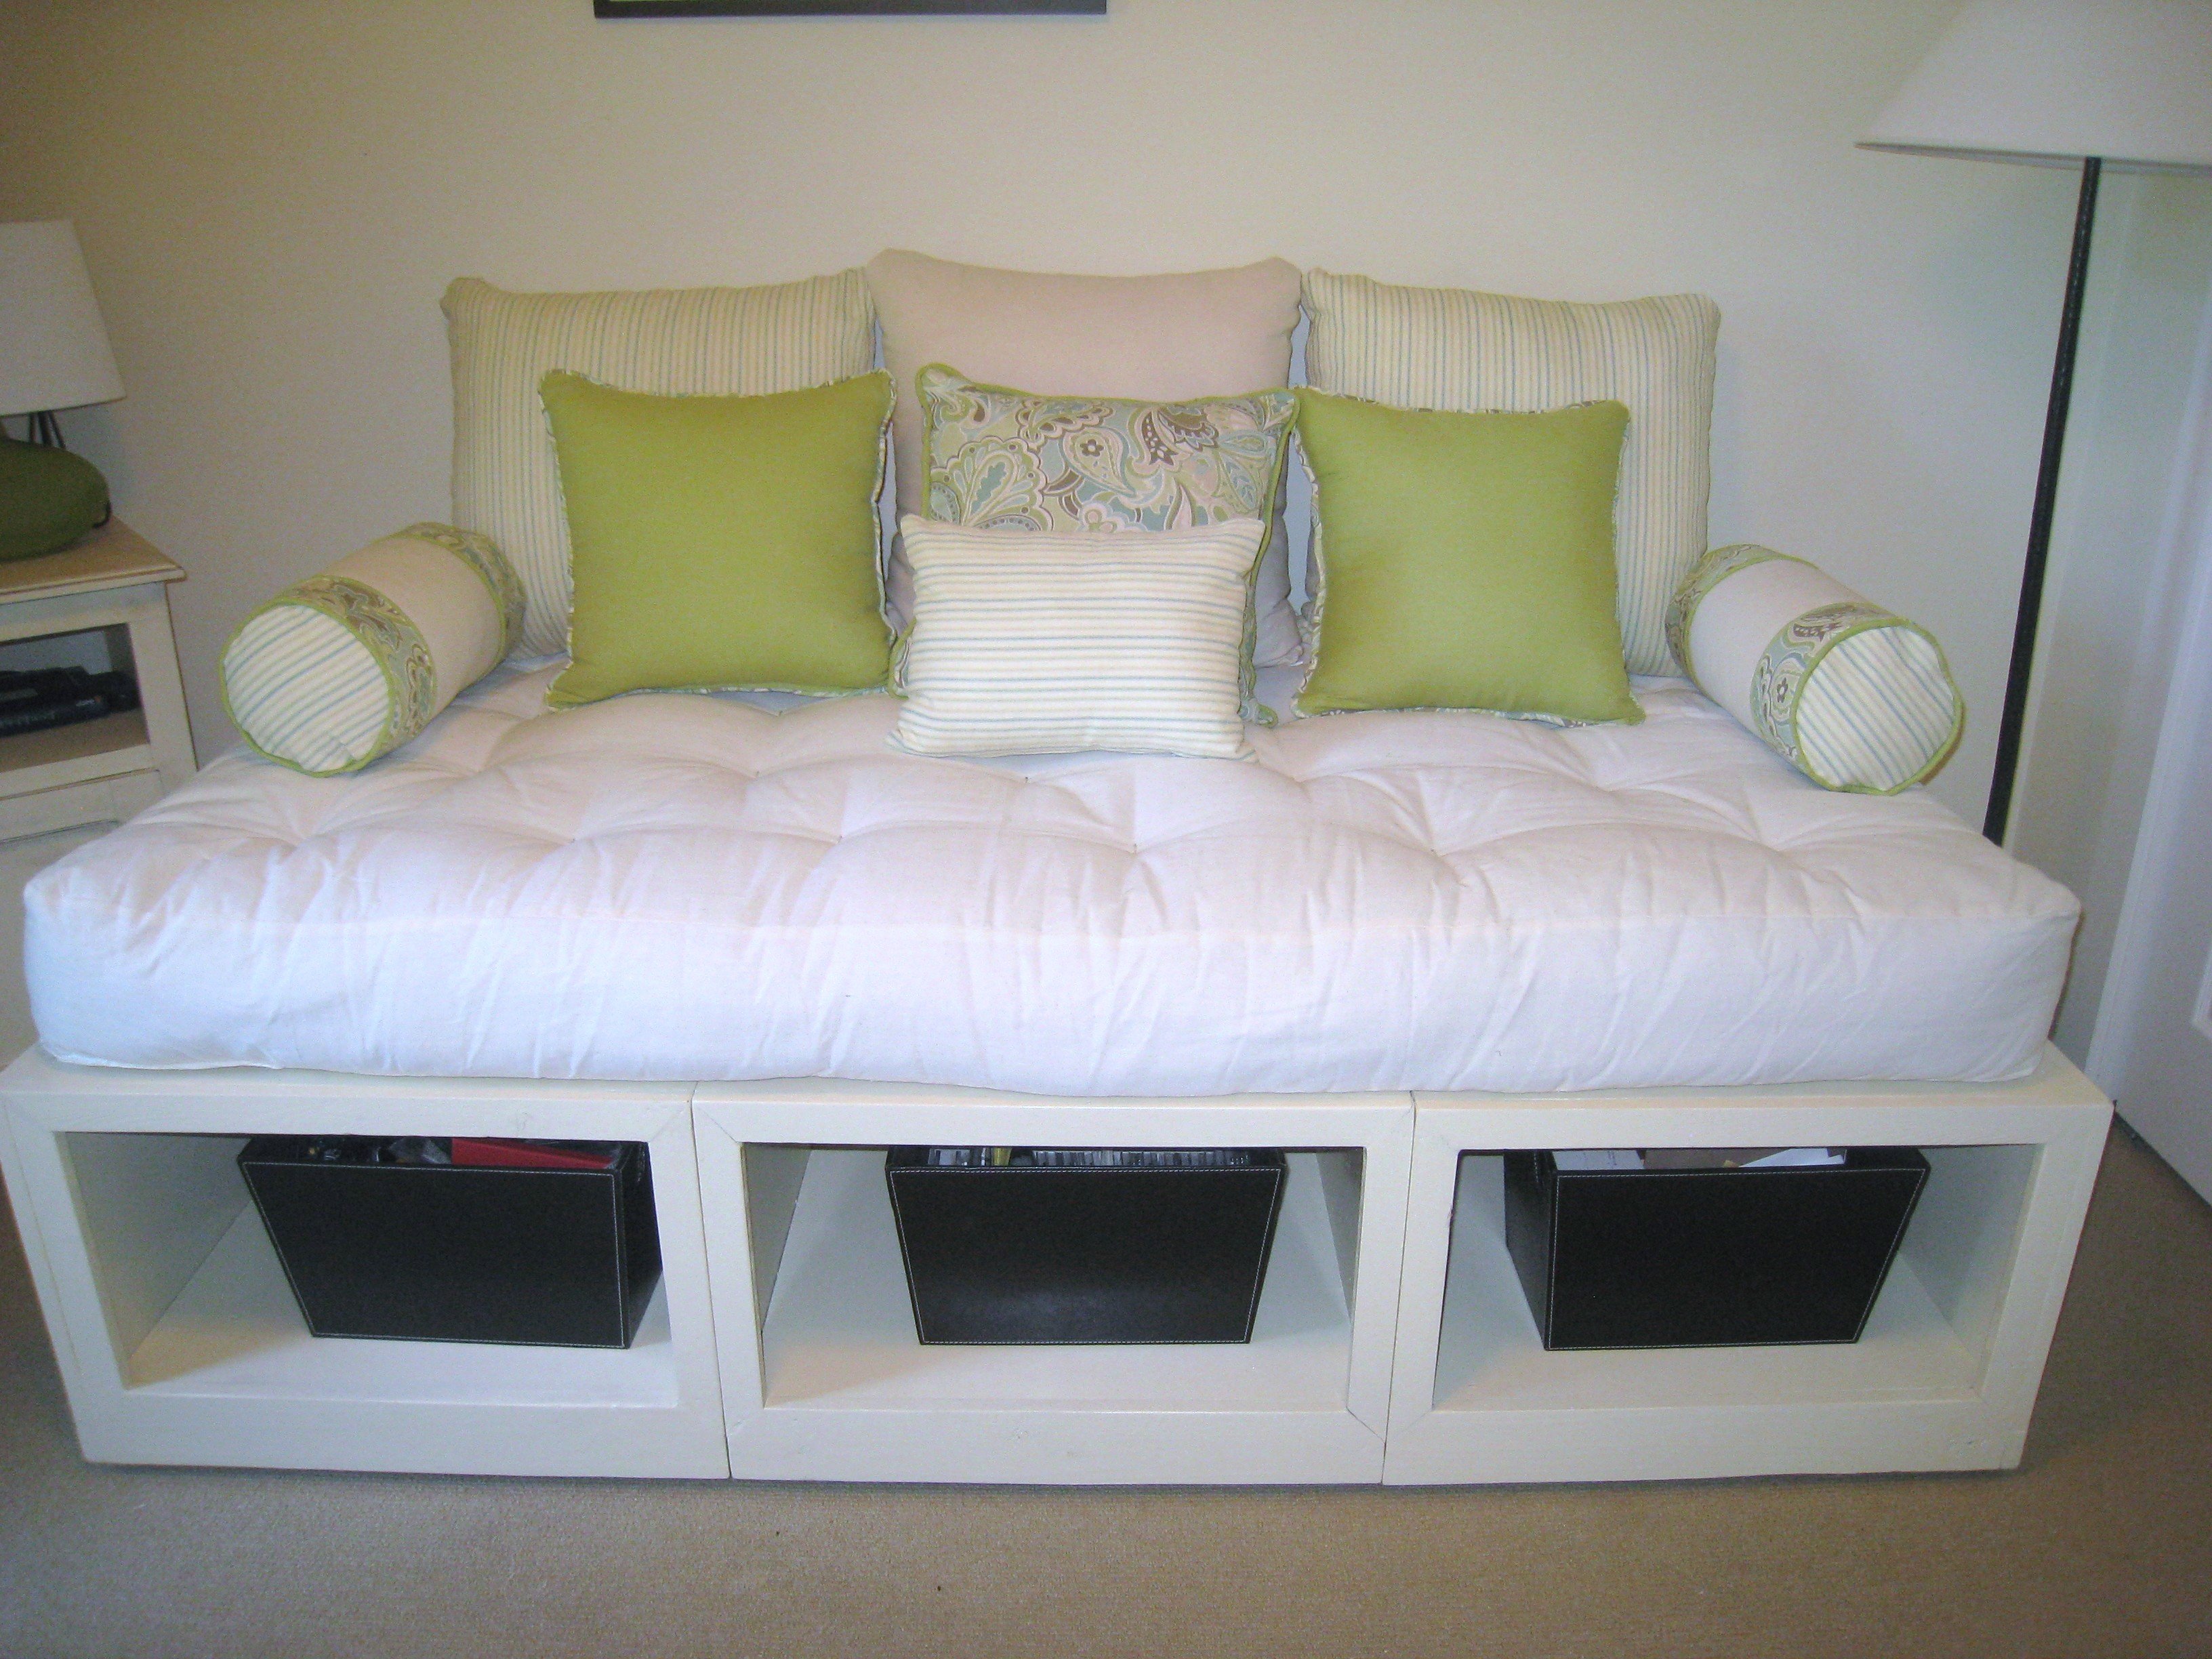
My first project using Ana's plans. Quite a learning experience with a few rookie mistakes but all in all I think it turned out pretty ok.
I followed the plans to the T. Trusted my lumber yard to make most of the cuts since I was not really equipped and that was a HUGE MISTAKE. So I went out, bought some tools, recut some boards and whatever mistakes I made, at least they were mine.
I followed other people advice on this site and added some casters under the boxes after I screwed them together. Makes it a lot easier to move around.
Thank you Ana - your website is truly inspiring.
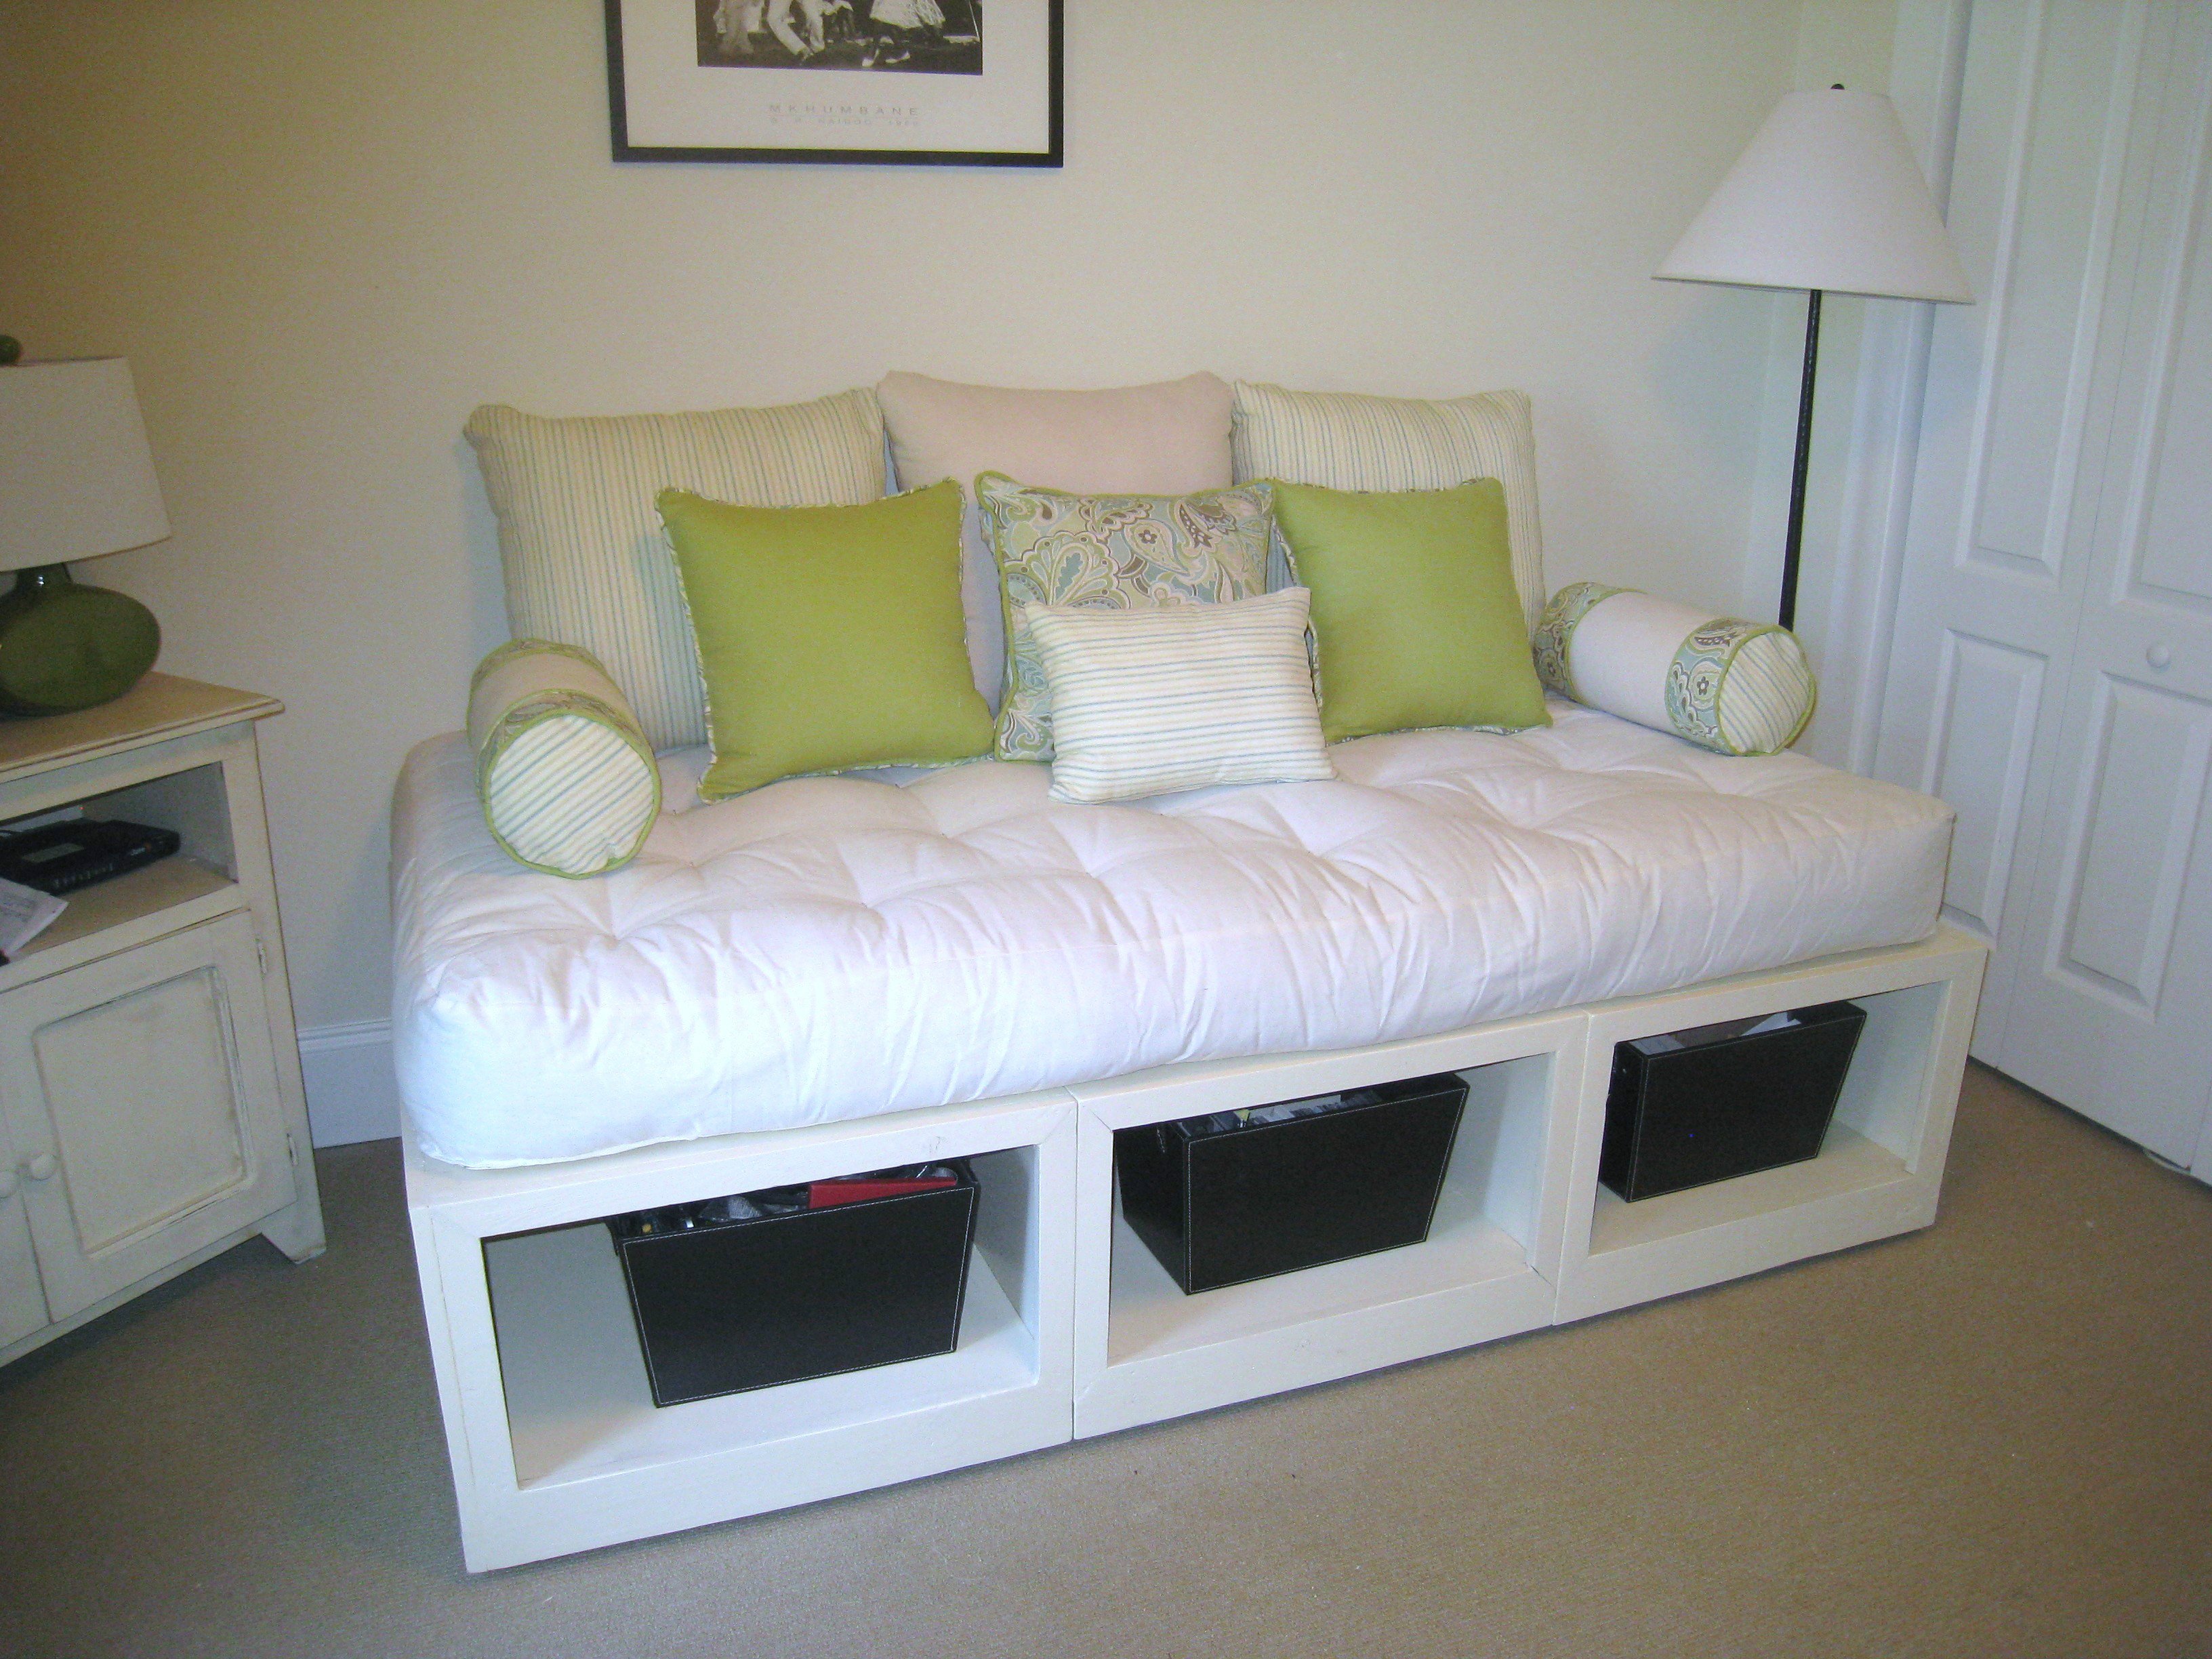
Fri, 01/06/2012 - 07:35
Thank you:) I ordered the mattress online - Futon mattress - can't remember where from though... But for $118 I'm REALLY happy with it!

In reply to Thank you:) I ordered the by SophieW
Fri, 01/06/2012 - 08:34
Oh, ok, that was smart! I wouldn't think it was from a futon as it's pretty thick. Love!