Community Brag Posts

Adirondack chairs for the family

Submitted by ddaavviidd on Sun, 08/14/2011 - 11:34

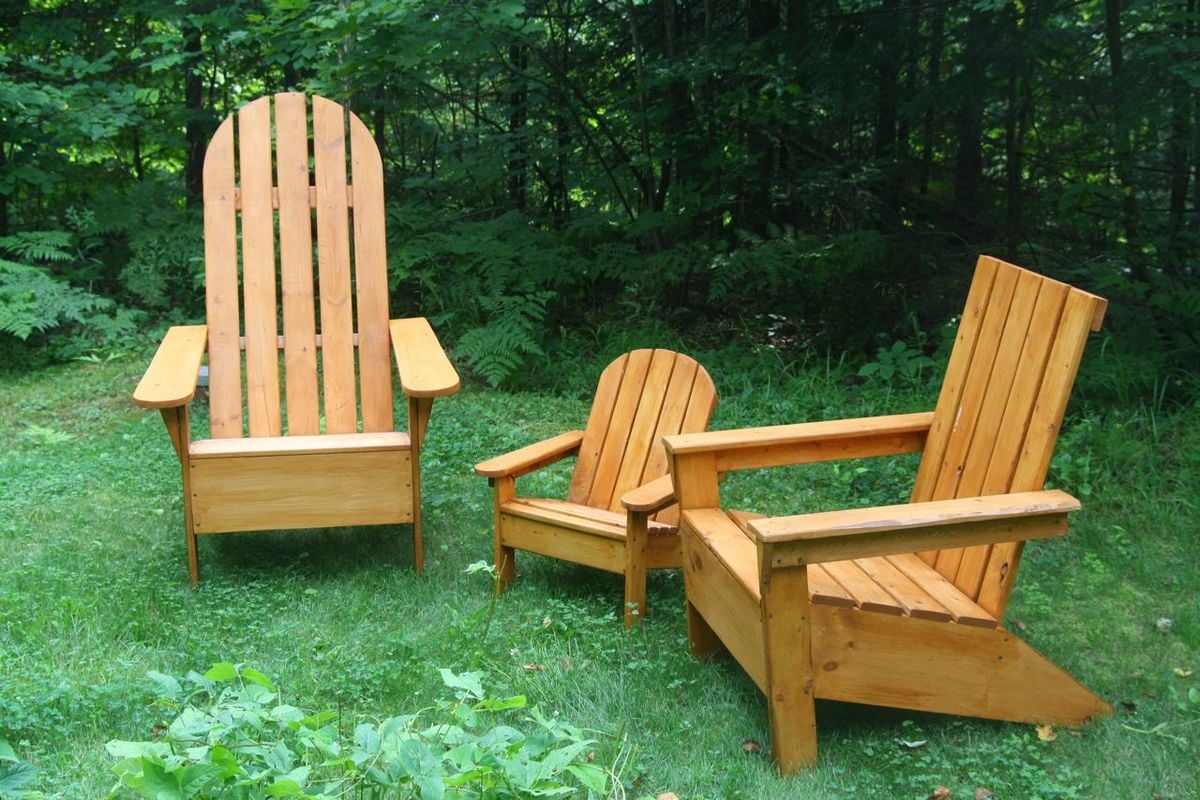
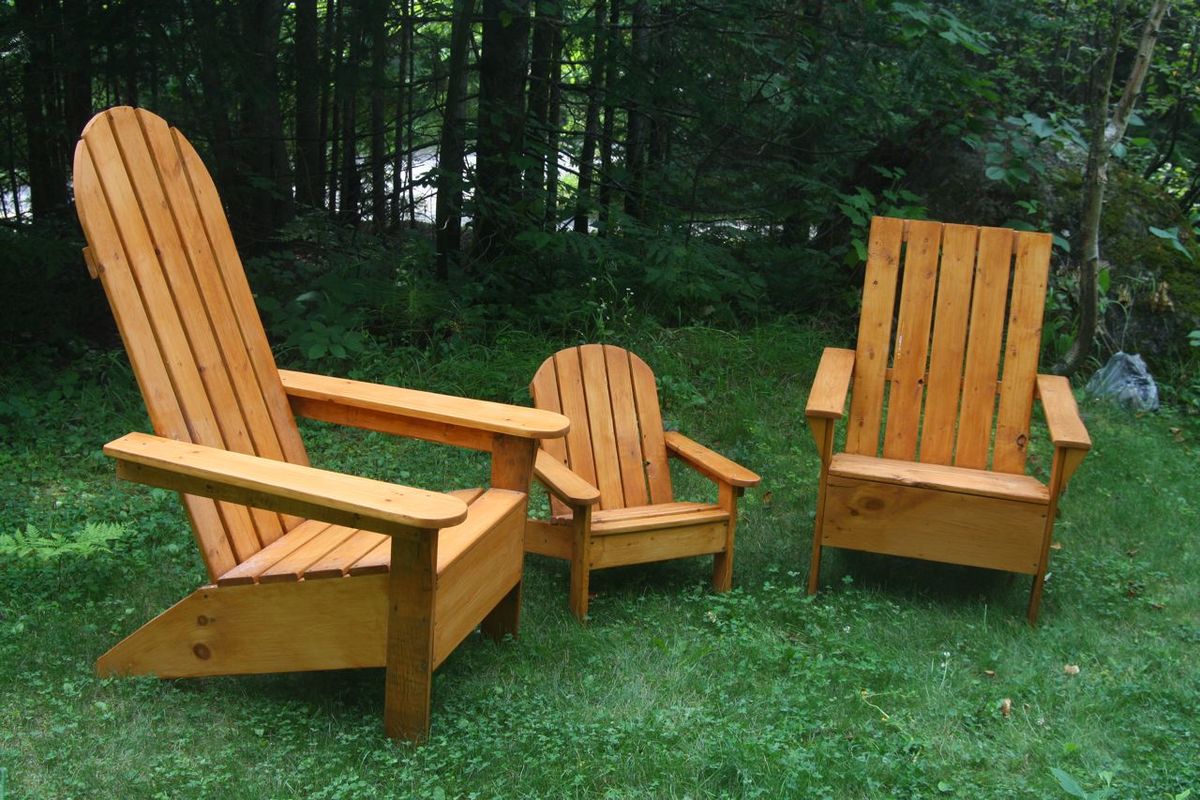
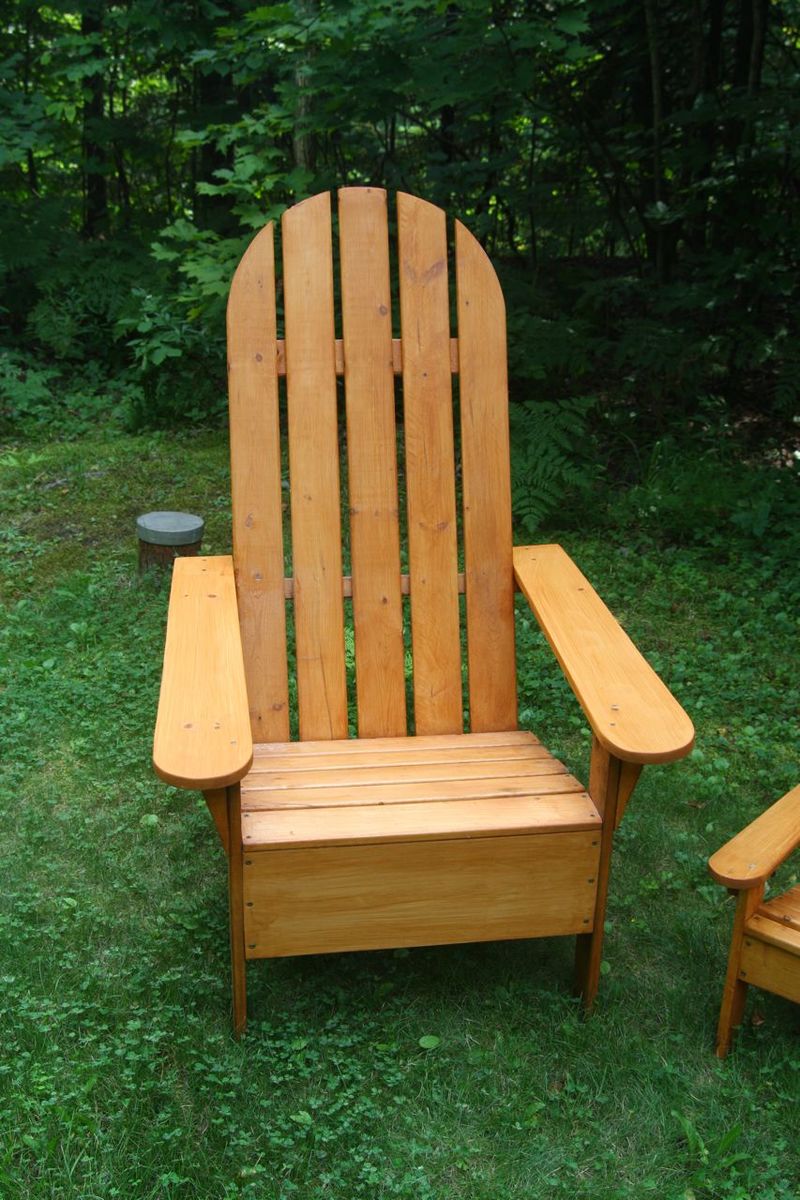
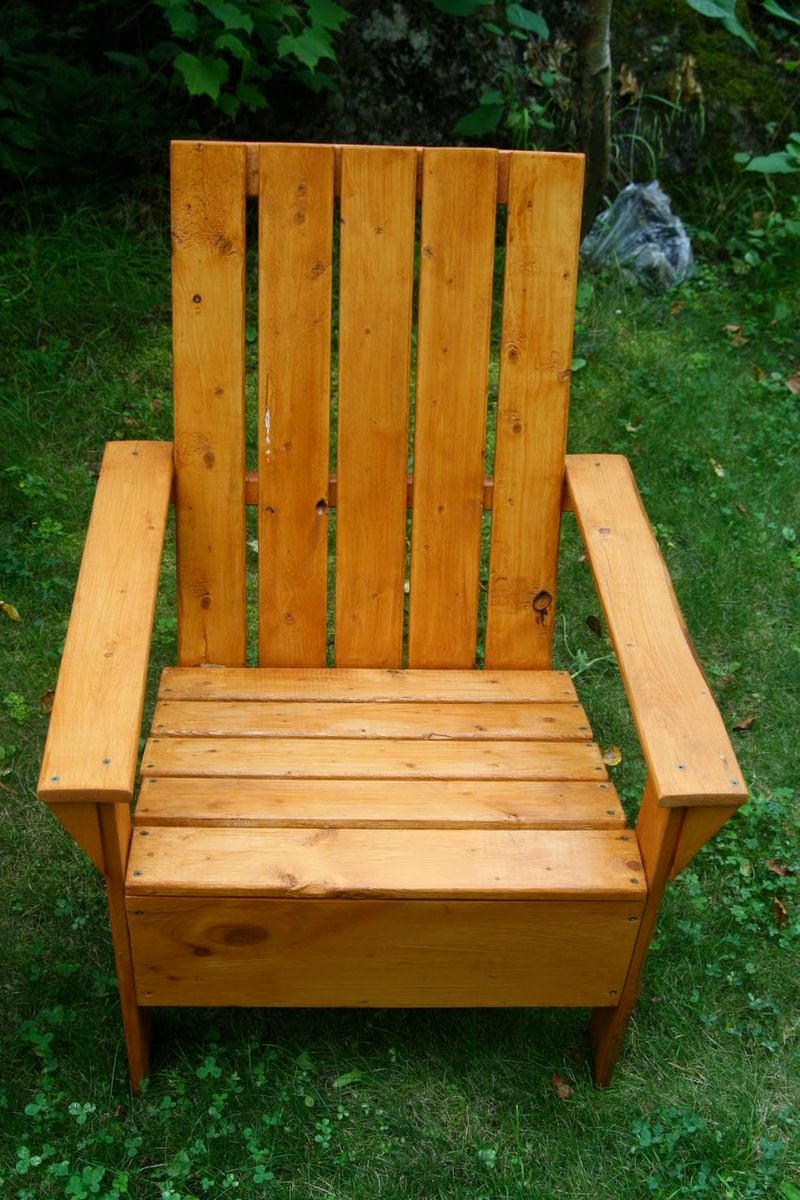
I've always wanted Adirondack chairs but found them way too expensive to buy. I found Ana's plan a while ago and promised myself I'd make one this summer. Well I enjoyed it so much I did three of them!

Built from Plan(s)
Estimated Cost
CAD$50
Estimated Time Investment
Weekend Project (10-20 Hours)
Finish Used
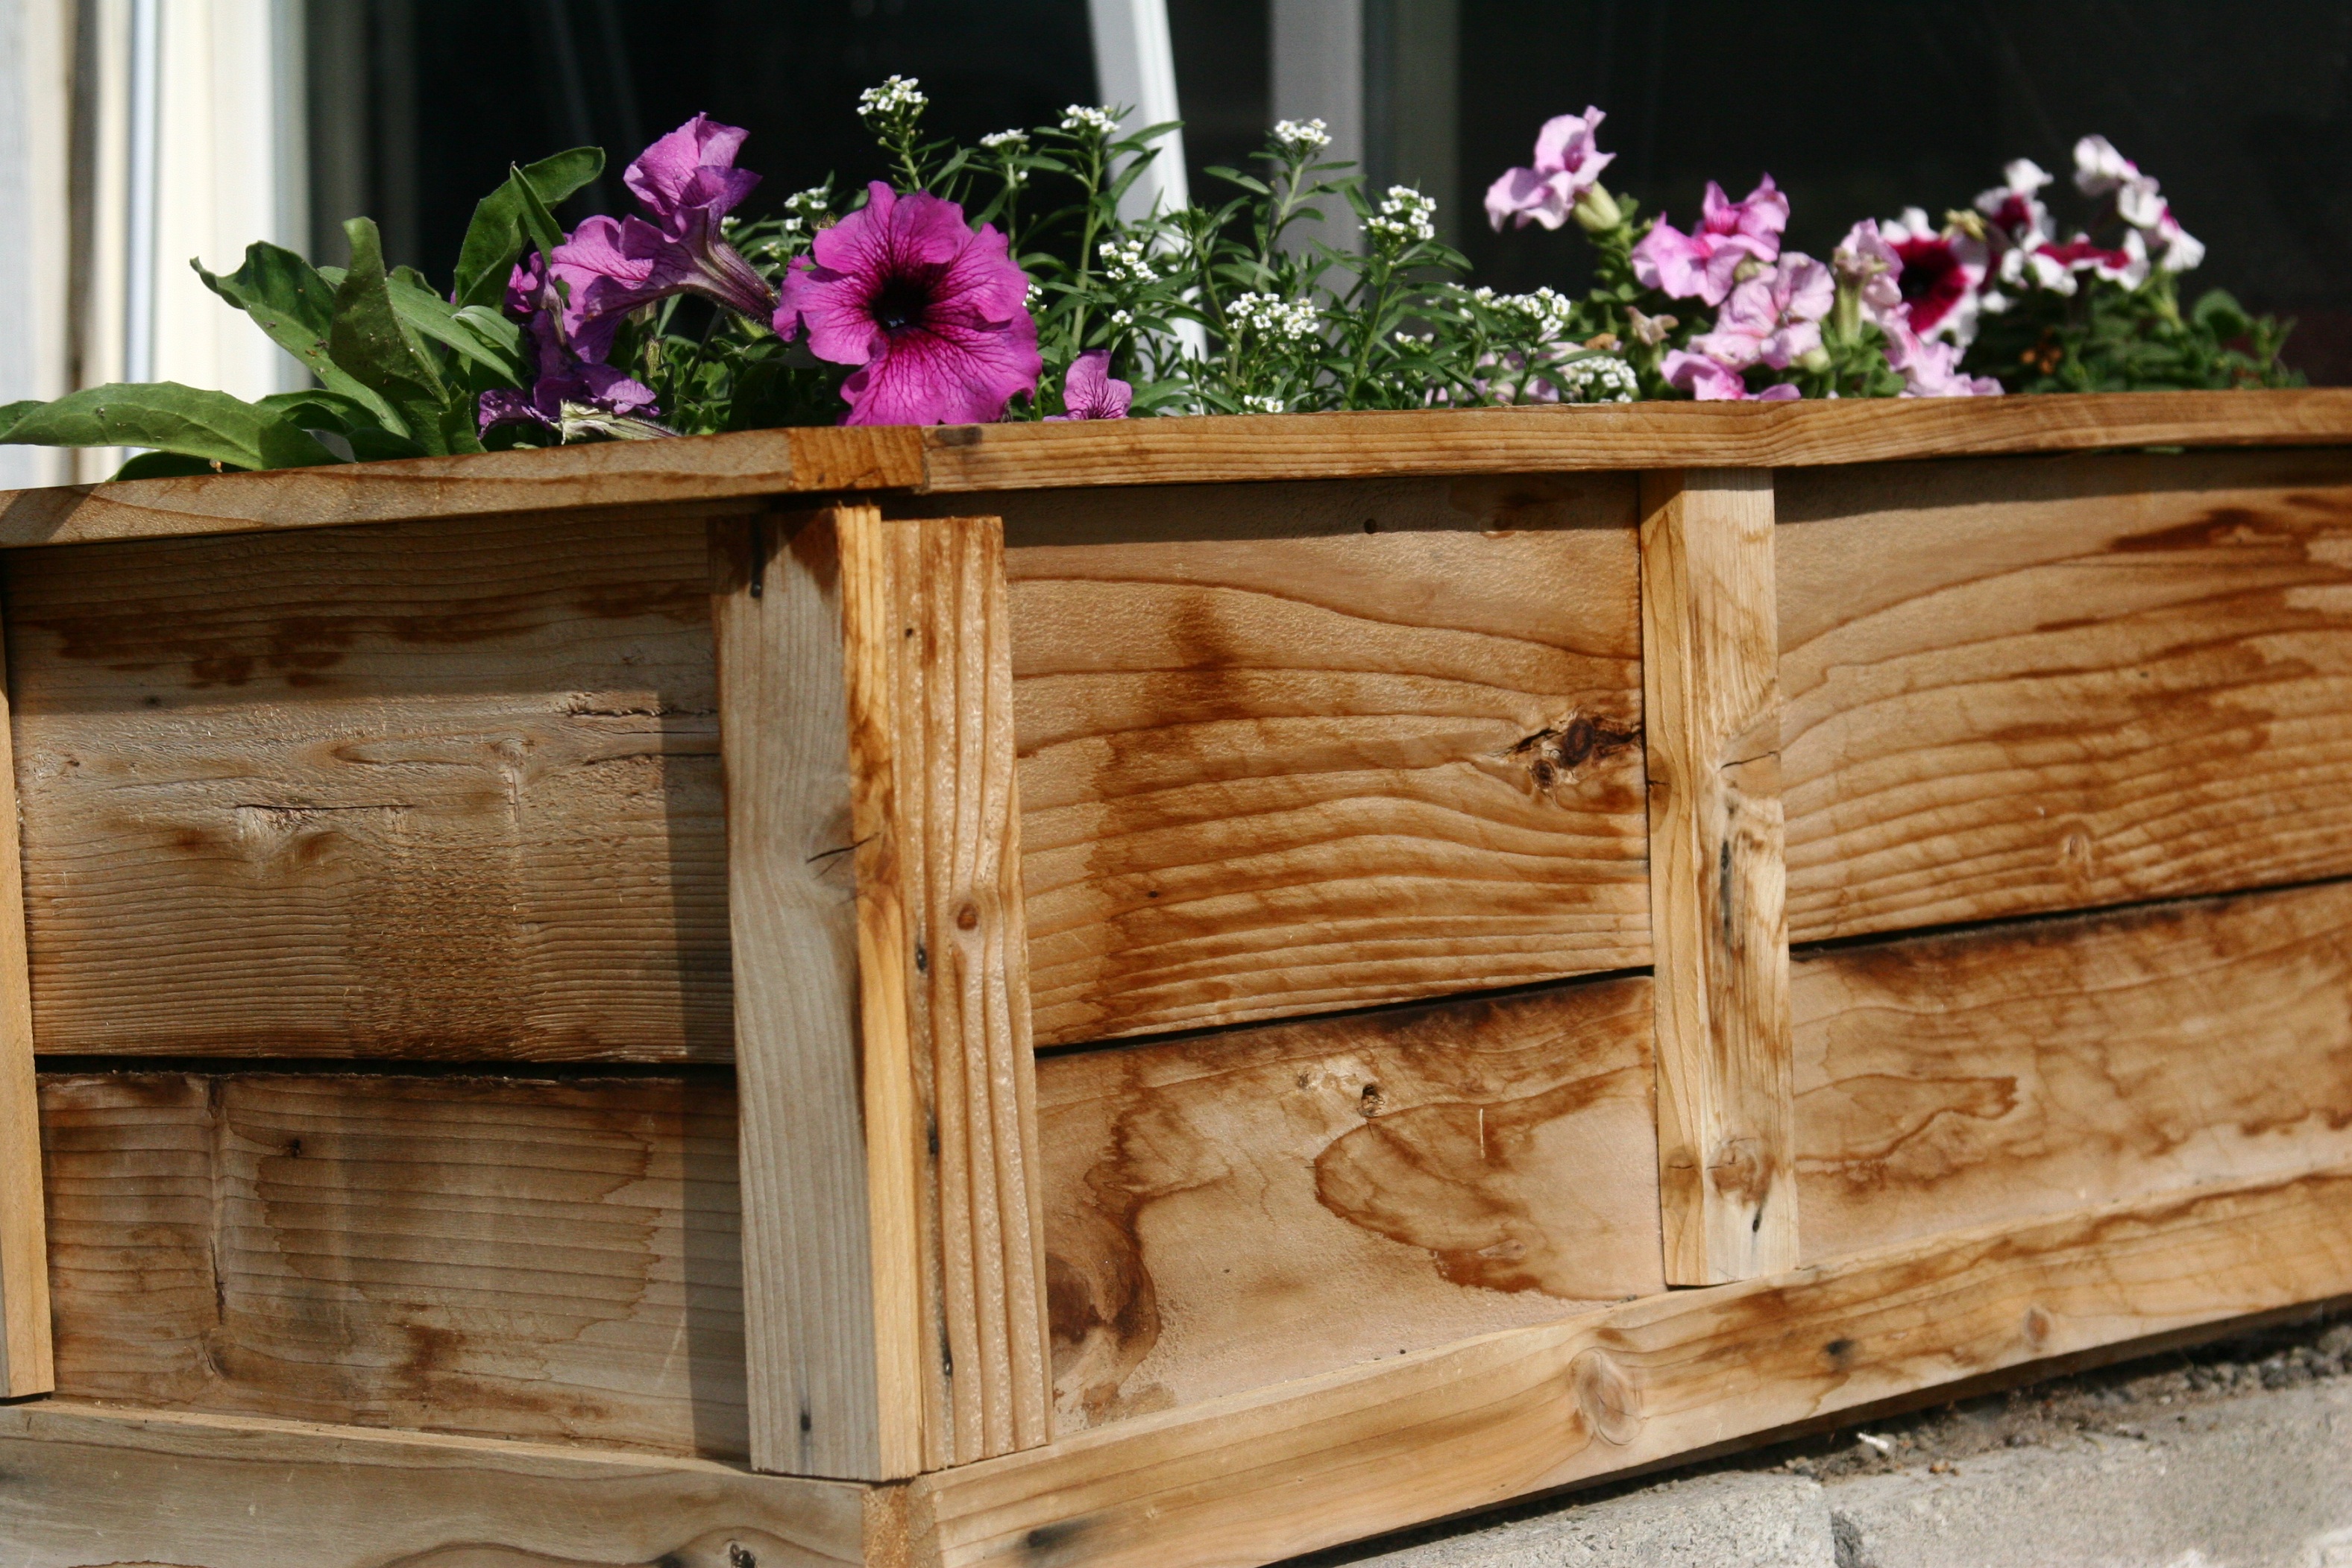
Since I used mostly spruce (which was much cheaper) I needed to sand all parts that made contact when you sit (seat, back, armrests for the kid's chair). The first chair (to the right in the featured picture) is exactly like the one in Ana's plan. I sanded and painted it after it was built. The other big one was slightly modified: I made the arms and the back longer so that it is more inclined and I cut the top portion in a round shape with a jigsaw. I also made the armrests larger (6") and longer and also gave them a rounded end. I used cedar-colored protective stain, two layers. The kid's chair's armrests are also larger (4") and longer and have the same rounded end. I plan on getting cushions for them during the Fall promotions. All I have left to do is a small table and a second kid's chair for the new baby that's arriving soon!
Recommended Skill Level
Beginner

Comments

Miasmom (not verified)

Mon, 08/15/2011 - 08:31

Those are awesome! All you need to make now is a doll adirondak chair and you've got a complete set of Ana White Adirondack chairs! ;)

Raised flower planter beds

Submitted by stcarroll on Fri, 08/26/2011 - 10:36

We bought a house with a death trap for a back step. Until we get to re-doing the entire back patio area I needed a temporary solution to keeping the kids from toddling off the back 'ledge'. I modified Ana's plans to make a nice border around the step so kids can't fall off when they are coming and going from the backyard. We had left over cedar fence slats from when we did our fence last spring...PERFECT and FREE!!!!!

Estimated Cost
Free!!!!
Estimated Time Investment
An Hour or Two (0-2 Hours)
Recommended Skill Level
Beginner

Comments

Sandie

Fri, 08/26/2011 - 14:56

This is a really good idea - much better than spending $ on a banister or rail that you will need to remove later! Good parenting, too!

The perfect sewing table!

I have been looking at sewing furniture for years, but the prices always made my jaw drop. I have a small craft room, so I needed a table that could also triple as a cutting table and fabric storage. Thank you so much to Ana White for this plan! I built exactly to the plan in The Handbuilt Home, and it's the PERFECT size.

So the sewing machine can sit flush with the top, making working on big sewing projects way easier, I traced the outline of my machine on the MDF and cut it out with a jig saw. Then I built a small shelf using a 1x12 scrap and 2 1x3 scraps. Putting the 1x3s on top of the 1x12 made the shelf 3.75 inches deep, which is exactly the depth I needed. I attached it to the underside of the tabetop using a pockethole jig and screws.

I built 2 boxes using 1/4 inch plywood, and installed drawer pulls on them, giving the illusion that the table has 2 drawers built in. This is where I keep my ugly stuff--interfacing and fabric scraps.

I got the color scheme for the table from the entryway console plan in The Handbuilt Home. In order to make the MDF top look like it had a wood grain, I applied mahogany gel stain with an old washcloth in very thick strokes that spanned the length of the tabletop. It soaked in and lost the "grain" look in some places, but the majority still looks like wood. I did have to apply several coats of polyurathane over the stain; the MDF has a prickly texture that grabs fabric and makes it hard to feed through the sewing machine.

My only complaint is that I didn't quite think through the fact that seating is bar height and I'm 5'7". It's a little difficult to reach my sewing machine pedal. I may build a small stool for the pedal to sit on so I don't have to half sit/stand to sew.

This is the first woodworking project I've done alone from start to finish: from going to Lowe's and picking out the wood, to cutting the wood with a circular saw, assembly, and finishing. (My fiance did carry it up the stairs for me. :) )

I'm so in love with this table! And now to finish the quilt I started 6 months ago....

Built from Plan(s)
Estimated Time Investment
Week Long Project (20 Hours or More)
Finish Used
I used 2 coats of Valspar Signature paint in Laguna Beach, and Minwax mahogany gel stain on the MDF tabletop.
Recommended Skill Level
Intermediate

Comments

MissMehndi

Mon, 09/23/2013 - 15:22

I love this idea!! I too have wanted a sewing table for a long time but the prices of them take my breath away. I may have to make myself one! Thanks for the inspiration!!

Students build an Outdoor Classroom

Submitted by Anonymous (not verified) on Sun, 11/27/2022 - 06:26

The high school environmental club built an outdoor learning space for classes. The plans were super easy to follow and the students were able to put them together with minimum direction. Imagine being able to take your lessons while out in a field beside the woods! Thank you Ana!

Herringbone Bar Height Dining Table with Hairpin Legs

Submitted by kwildman on Fri, 02/08/2019 - 07:13

We used 3/4" birch plywood and glued 1/2" thick x 3" wide wood pieces in a herringbone pattern to make the top.  We used 1 x 3 oak boards for the trim.  The wood is a variety including walnut, maple, cherry, sassafras, etc.   We ordered the metal hairpin legs.   

We started with a base stain of Danish Oil in Dark Walnut.  Once that dried, we went back over that with a very light coat of Minwax gray wash oil based stain.   We used 4 coats Laquer for the top coat.

Easy build and we love how it turned out!

Estimated Cost
$350 Bar Height hairpin legs were $100, 1/2" wood variety pack was $200
Estimated Time Investment
Weekend Project (10-20 Hours)
Finish Used
Two coats of Dark Walnut Danish Oil, one light coat of Minwax oil based gray wash, and four coats of laquer.
Recommended Skill Level
Intermediate

Comments

Ariel's Coffee Table

I built that table for a friend using primarily hand tools. The only power tools were a table saw to rip the legs from a scrap 2x12 from another project, and a drill for draw-bore holes.

The table is made from pine, so that it is light enough for a woman of small stature to carry it up to a third-floor apartment. The frame is made with mortise and tenon joinery for strength, and the joints are draw-bored to make sure it doesn't fall apart in our lifetime.

The top is a glued-up panel from five other boards. This was my first panel glue up, so it was a little bit exciting in the same way that a kitchen fire is exciting. The surface has a rustic texture, made by planing it smooth with a cambered jack plane. The texture isn't visible under normal lighting, but with a raking light you can see it. It's very interesting to run your fingers over this table because of the texture from the plane, and the strong grain of the white pine.

Estimated Time Investment
Week Long Project (20 Hours or More)
Finish Used
The finish is amber shellac, with four coats of gloss polyurethane, thinned 1:1 with mineral spirits to improve the flow and help the finish self-level.
Recommended Skill Level
Intermediate

DIY Farmhouse Table with Extensions

Submitted by katie0910 on Tue, 11/05/2013 - 06:03

We built this farmhouse table a few months ago and absolutely love it. We modified the plans a bit based on another brag post and went with a replica of the Restoration Hardware table. I also built the chairs for the table based on the Parsons chair plans

Estimated Cost
$300+
Estimated Time Investment
Week Long Project (20 Hours or More)
Finish Used
Minwax Provincial
Minwax Polycrylic in Satin
Recommended Skill Level
Intermediate

Comments

Joni

Tue, 11/05/2013 - 17:59

Really nice job! This was quite an accomplishment, especially given that you guys did additional chairs (that look fantastic). Also, great job documenting on your blog.

Potting bench

I made this with leftover lumber after my mom helped me make a swingset for my kids. It's the very first project I've ever done by myself and it turned out GREAT! 

Estimated Cost
About $60 worth of wood, a other 10-15 in screws and other supplies.
Estimated Time Investment
Day Project (6-9 Hours)
Finish Used
I'm not going to finish it probably.
Recommended Skill Level
Beginner

Comments

Nightstands

Submitted by DCecil43 on Mon, 07/08/2019 - 19:11

I used one of the plans found on the site but modified it by making mine 8 inches wider.  They are slightly higher as well to match what I replaced in our master bedroom.  This was actually the first project that I took on after looking at bedroom furniture for over a month and realizing how expensive cheap furniture is.

Estimated Cost
$300
Estimated Time Investment
Weekend Project (10-20 Hours)
Finish Used
Minwax Early American Stain and Minwax Satin Polyurethane
Recommended Skill Level
Intermediate

Modified washer/dryer pedestal

Submitted by KaraBoo on Wed, 02/03/2016 - 09:32

I loved the idea of building a washer and dryer pedestal for extra laundry basket storage underneath! Sashua's is beautiful so I took her idea and modified it a bit to work for me. My washer is very, very heavy and I was worried that if there was no support under the weight in the middle, it would start to bow and sag. The original plan also put the washer too high for me to have been able to use without a step stool. So in my modification I screwed cleats into the 2X4 frame of the laundry room wall, placed the 3/4" plywood on top of it and screwed it in. In the front, I used 4X4's as the two corner leg supports and then added two 1X6 supports in the front center, creating three laundry basket bays. I placed it directly onto the floor as opposed to building the bottom base. This saved me money since I was able to buy half the lumber and also allowed me to lower the height of the platform while leaving enough space for my baskets. The top of my platform is approximately 14 1/2" high, which is just low enough so that I can see into the soap filling compartment at the top of the washer. Being that I'm only 5'2" I would have needed to use a step stool to use my washer at the original 19 1/2" plan height. I framed the top edge of the platform with 2X2's, to ensure that my washer or dryer never walked off the edge. Finally, I added some trim along the front edge and around the legs and that's it!

Estimated Cost
$60
Estimated Time Investment
Afternoon Project (3-6 Hours)
Recommended Skill Level
Beginner

Comments

Codding58

Mon, 02/15/2016 - 12:25

I REALLY like this modified version, I think it looks GREAT!    when you say you screwed cleats to the back wall, are you talking a 2x4 across the back fastened to the studs, or what did you use?    I think my wife would love this version, and I may just have to get started on one myself.   yes

Chick Brood Box Enclosure & Steps

Submitted by Anonymous (not verified) on Sun, 04/30/2023 - 11:28

We have our new chicks in a 2’x4’ stock tank as a brooder. Since it’s outside on a covered porch, I wanted something to keep predators out, but also to allow our kids to reach in and hold the chicks—they love holding them! I built the 32”x54”x32” enclosure with 2x4s and hardware cloth. The bottom and sides are sealed with wire and the top has a lid that closes securely with a latch on either side. The steps are perfect for our kids to stand on so they can reach in to refill the food and water and pet or hold the chicks.

Comments

King Size Farmhouse Storage bed from 2 Ana White PLans

This was my first build! I combined 2 of Ana White's plans, the King size Farmhouse bed with the Queen size storage bed, I didn't do drawers as the cubbies worked better. So this was a nice merge of two of the plans! LOVE LOVE LOVE our bed, and the 2 tone stain/paint combo.

Estimated Cost
$750
Estimated Time Investment
Week Long Project (20 Hours or More)
Finish Used
I stained the headboard and footboard with Minwax Dark Walnut and then used a cottage white paint for the "white" portions. then finished with a satin polyurethane coat over everything.
Recommended Skill Level
Intermediate

Comments

joshuaaslocum15

Mon, 11/25/2013 - 07:53

My wife asked me to find a bed idea for our little girls room. She said she wanted her to have a bed with storage. Well I think I found the bed I am going to build her. Now the fun part making it into a twin size! I like it so much I am going to build one for us in our bedroom. Again I love it great job!!!

KansasDad12

Thu, 04/17/2014 - 08:43

Was just curious if you actually spent $750 building this or if that was a typo? Would really like to build this same bed with the except of using drawers. Nice work!

Mothers Day

Submitted by Anonymous (not verified) on Wed, 05/17/2023 - 20:20

I made this tall planter for my Mom for Mothers Day. She loves it!

Built from Plan(s)

Comments

Toy Box

Submitted by bsbdays on Mon, 02/15/2016 - 20:20

Built this using Ana's plans, thanks Ana!!!!

Recommended Skill Level
Intermediate

Chaise Lounge

Submitted by Anonymous (not verified) on Fri, 06/09/2023 - 15:53

It was so much fun to do and it's perfect for my front porch! I modified it a bit to fit and it was easy to do so.

Built from Plan(s)

Comments

4 sided picnic table

Submitted by Anonymous (not verified) on Fri, 06/16/2023 - 13:59

4 sides for the whole family to sit.

Built from Plan(s)

Comments

Seasonal And Holiday

Simple Step Stool

Submitted by bblanchard on Mon, 10/07/2019 - 16:06

This step stool is my first project made from Ana White plans. It is perfect for my almost 2 year old daughter and it's become her new favorite toy! She likes to turn it upside down and ride in it like a boat :)

I love how simple and sturdy it is. It easily holds my weight (180 lbs), and I look forward to many years of useful fun from this great project. This was also my first project that incorporated beveled and angled cuts, but once I got started, it wasn't as intimidating as I initially thought. 

I had some leftover pieces of 1x10 and 1x3 pine boards from building a sidecar crib, so this was a perfect was to use the scraps. I used a table saw for cutting the 1x10s. My miter saw isn't large enough to accommodate 10 inch wide boards, but it was perfect for the 1x3s.

After assembling the stool the first time, I took it back apart and ripped the top down to 8 inches wide. I thought the stool had a tendency to tip with the full width of the 1x10. 

Can't wait to build more of these! For the next one, I'd like to try cutting half circles out of the bottom of the legs with the jigsaw instead of straight cuts and trying some decorative  cutout handles on the sides as well. 

Thanks, Ana!

Estimated Cost
10.00
Estimated Time Investment
An Hour or Two (0-2 Hours)
Finish Used
Honey stain by Minwax
Covered with one coat of triple thick polyurethane by Minwax
Recommended Skill Level
Beginner

From Logs to Famhouse Table

Submitted by Anonymous (not verified) on Sun, 10/13/2019 - 18:45

So this DIY Farmhouse Style Table has been on my “make it” list for a while now. And what better time to make it than now, since we just got a saw mill. Check out the blog link below to read all about it.

Built from Plan(s)
Estimated Time Investment
Weekend Project (10-20 Hours)
Finish Used
Minwax Early American Stain
Minwax Polycrylic Clear Sealer
Recommended Skill Level
Intermediate
Seasonal And Holiday

Refreshment center console with barn door

Submitted by calcowoods on Sat, 10/19/2019 - 07:10

My wife and I built this Refreshment Console as a birthday present for our daughter. She had previously purchased a beverage refrigerator and wanted us to adapt it inspired by your barn door console project. Thus, we modified your plan to accommodate the height of the refrigerator. Also, she wanted three shelves with a closed back on the right side of the cabinet. Simply plan adjustments were all that was needed.

Using your plans, material list and excellent video we were able to construct the barn door rails and hangers using 1 ½ inch fender washers which sandwiched three 1-inch fender washers.  The metal bar was sized to fit the top of the cabinet and connected to the top trim board using spacers, washers and bolts.  As we decided to place a middle support for the bar, we added a t-nut into a center plywood partition so that we could use the same bolts, spacers and washers to support the rail.   

As we were following a rustic theme, we decided to add the X Braces to the barn door and used a project panel board as the top. The barn door is guided at the bottom using a simple U shaped metal bracket that we lined with felt for a smooth glide.

Estimated Cost
$100
Estimated Time Investment
Weekend Project (10-20 Hours)
Finish Used
Top, barn Door and Bottom Trim treated with one coat of Varathane Aged Wood Accelerator using a rag to create a rustic brown look.
Cabinet carcass and surrounding trim painted with one coat of Behr Premium Plus Ultra Satin Finish Metropolis Grey.
Entire cabinet finished using MinWax Paste Finishing Wax Natural applied with a rag and buffed for a durable finish.
Recommended Skill Level
Intermediate