Community Brag Posts

Chaise lounge chairs

Submitted by jsutton78 on Wed, 08/03/2016 - 09:35

These lounge chairs were made from 100% redwood.  The cushions were from Pottery Barn and were about $130 each.  


I went off Ana's plans but also had inspiration from other sources.

Built from Plan(s)
Estimated Cost
$330
Estimated Time Investment
Weekend Project (10-20 Hours)
Finish Used
Solid stain and gloss finish.
Recommended Skill Level
Beginner

Lounge Chair

I made this lounge chair from a sketchup file which I found on the Internet; thanks to Ana White site, I discovered the Sketchup software and I learnt to use it. I measured all the elements and thanks to the plans of lounge chairs of the site, I was able to build that.I have to buy some plywood to make the tray and put it under the chair.
It is a present for my mother. I am very happy of the result.
.

Estimated Time Investment
Weekend Project (10-20 Hours)
Finish Used
Teck color lasure, 3 coats
Recommended Skill Level
Beginner

Comments

Phoebe's Castle bed

Submitted by acopier on Mon, 05/26/2014 - 19:51

With thanks to others that had posted before me. I took my inspiration from all the Castle beds I could find and customized this Castle Bed for my Granddaughters room. We made the bottom bed full size and the top twin size. She has a closet on the inside and two bedside tables. The slide lifts for additional storage. We made a cloud ceiling filled with a moon and stars that all glow in the dark. I used 3 18' rope lights that operate By remote control. Since I did not have enough space to add the stairs in the room I built the bed, I made the arched window on the right side to be used as a ladder. The steps are next. This took 8 months, 10 sheets of plywood and ultralight MDF. a few hundred board feet of pine, 5 gallons of paint and primer, 350 biscuits. About 1,500 Grandma and Grandpa hours of pure love.

Thanks again for everyone's inspiration.

No plans I measured as I went.

Estimated Cost
$750.00 material only
Finish Used
Satin paint, Peralcoat spray over colors
Recommended Skill Level
Advanced

Comments

Veronica P

Mon, 05/26/2014 - 20:12

Absolutely beautiful right down to every little detail! What a lucky little girl to not only have that amazing bed but to have such devoted loving grandparents! You really can see how much love went into every bit of that build!

spiceylg

Tue, 05/27/2014 - 10:06

This is utterly amazing. What a beautiful build and what a blessed little girl.

Storage Dining Bench

Submitted by Anonymous (not verified) on Fri, 03/22/2024 - 07:34

Kitchen dining bench with storage. Due to the plugs being in an awkward position, I opted to build this bench with a facade as opposed to adding a back and sides. This also meant it had to be panelled in situ which was a fun challenge! It has piano hinges as well as soft close pistons making for a great storage bench that is in keeping with the rest of our kitchen.

Chaise Lounge by Pallirondack

I saw these plans on Ana White's website, so I figured I would try to make one with recycled wooden pallets. It was a fun and easy project. I added a third set of legs in the center of the chair to provide extra support. Using the pallet wood offered a few challenges, mostly relating to the size of 2x4s you buy versus the ones used to build pallets.

The end user of this chaise lounge chair is going to seal it with a cedar colored stain/sealer so that is matches the Pallirondack Double Settee (one of my other projects) I made for them earlier this year.

Great plans, great fun.

Estimated Cost
A box of screws and a little sandpaper.
Estimated Time Investment
Day Project (6-9 Hours)
Recommended Skill Level
Beginner

Modern Adirondack Chairs. Thanks

Submitted by Anonymous (not verified) on Sun, 07/19/2020 - 16:16

Ana,

Thanks for making the plans available. Was looking for a simple plan and here is it. Needed to replace 4 aging chairs to match a pine table and a bar. Looking forward to another project in the fall. You definitely made a good choice on the pitch of that chairs. Very comfortable.

Estimated Cost
$50
Estimated Time Investment
Afternoon Project (3-6 Hours)
Finish Used
Spar urethane
Recommended Skill Level
Intermediate
Seasonal And Holiday

A-Frame Chicken Coop

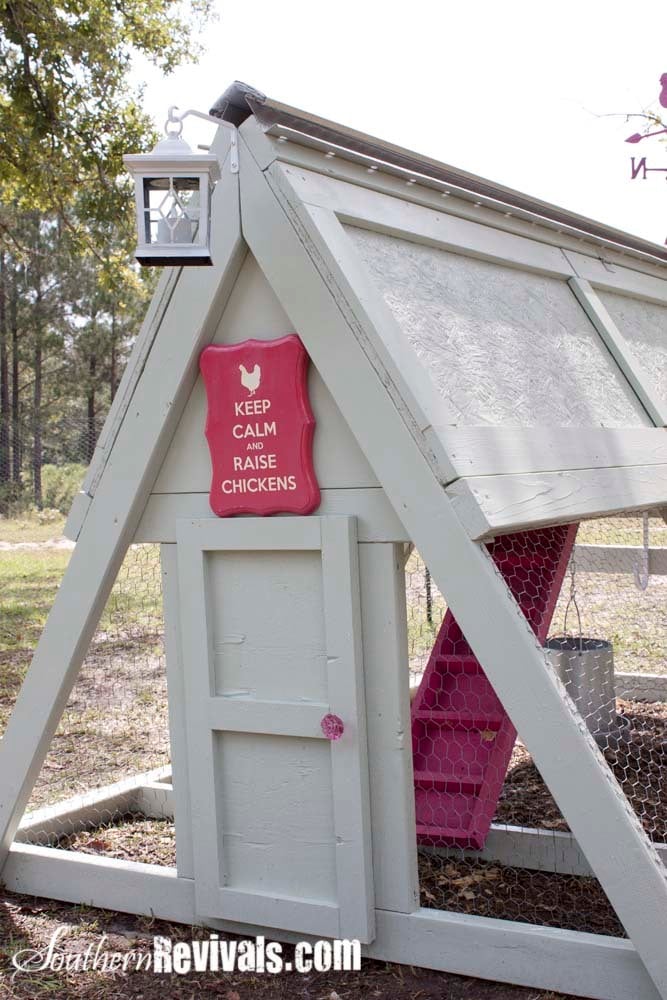
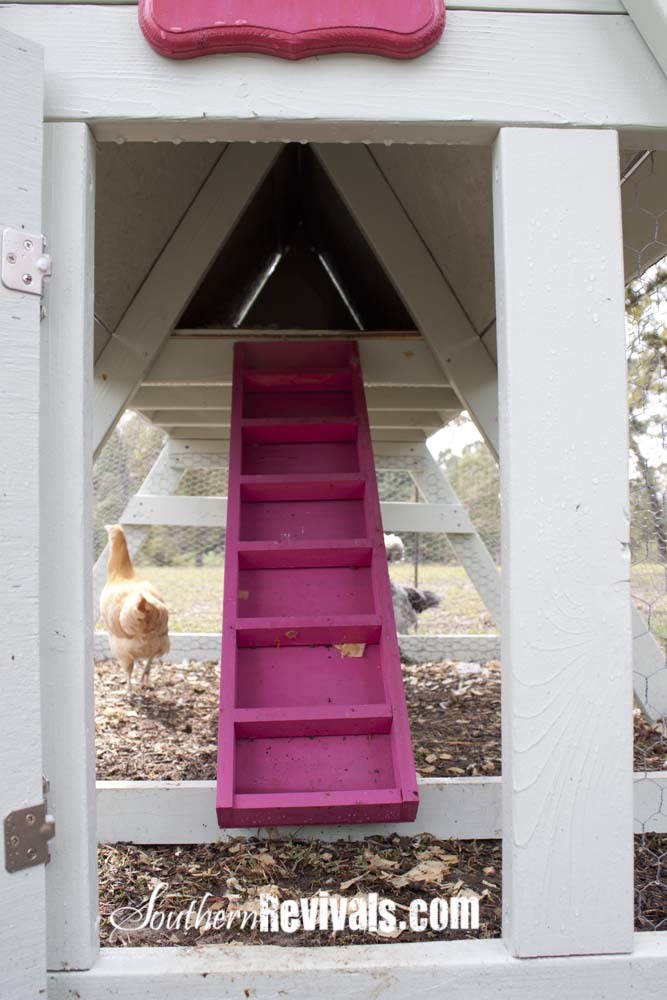
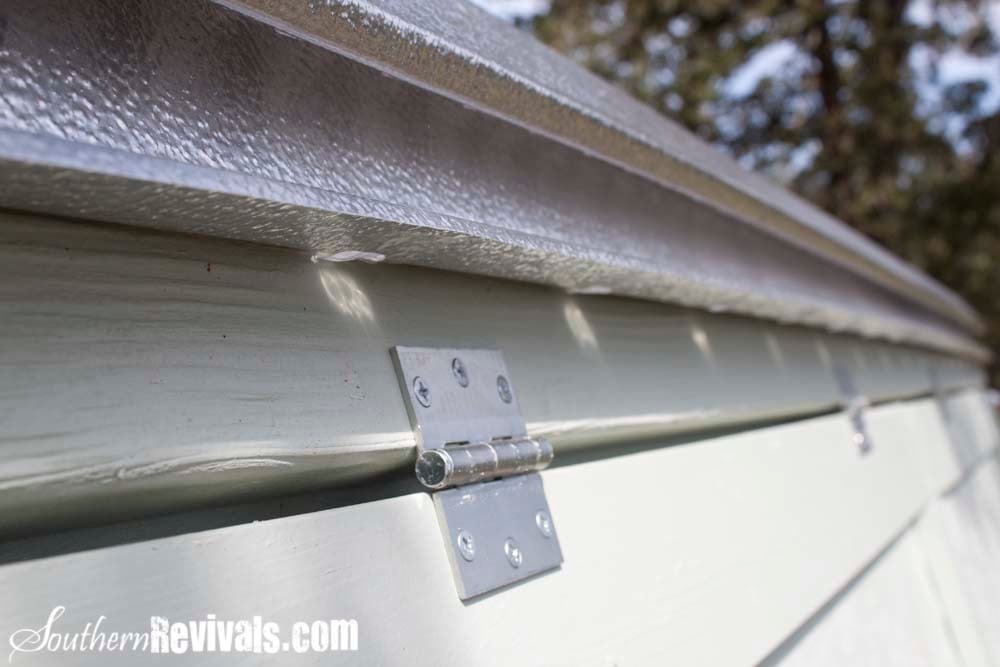
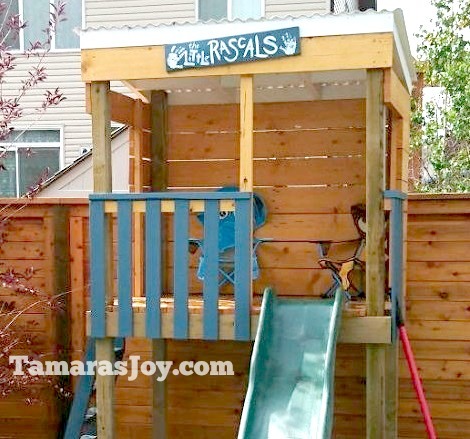
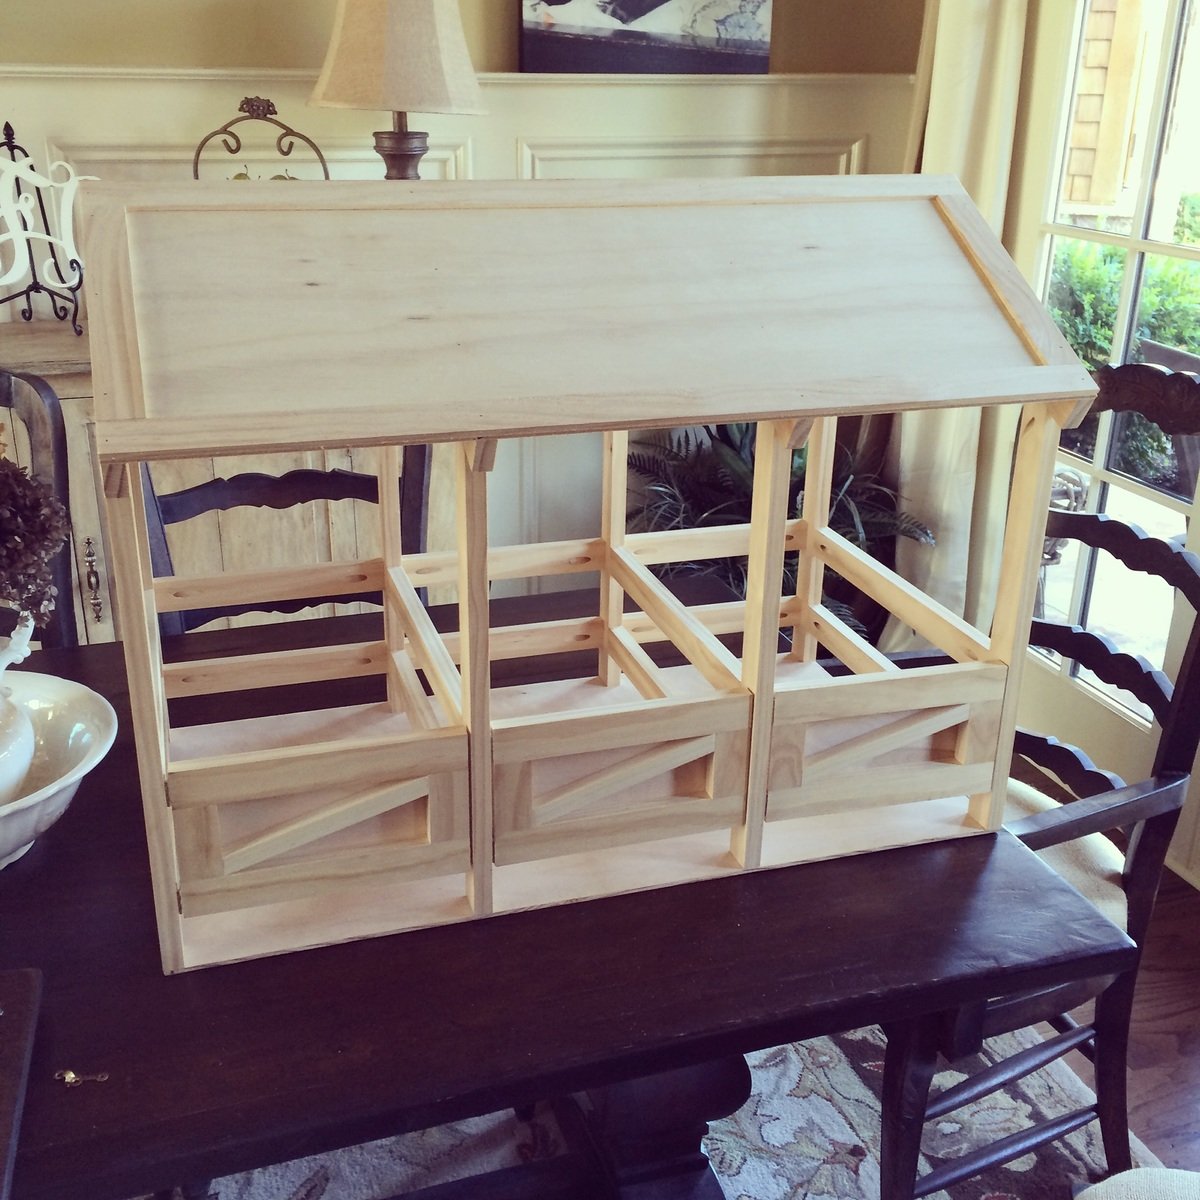
We took Ana's original coop plans and diva'd it up a bit to suit our needs and our climate. We added a pop door and decided to split the roof panels into four, three of which open up. We put the hinges on the top of the roof panels so we could easily prop them open. We also added a brace across the bottom of our ladder for support. Since we added a door I believe our ladder is a bit more steep than in the original plans.

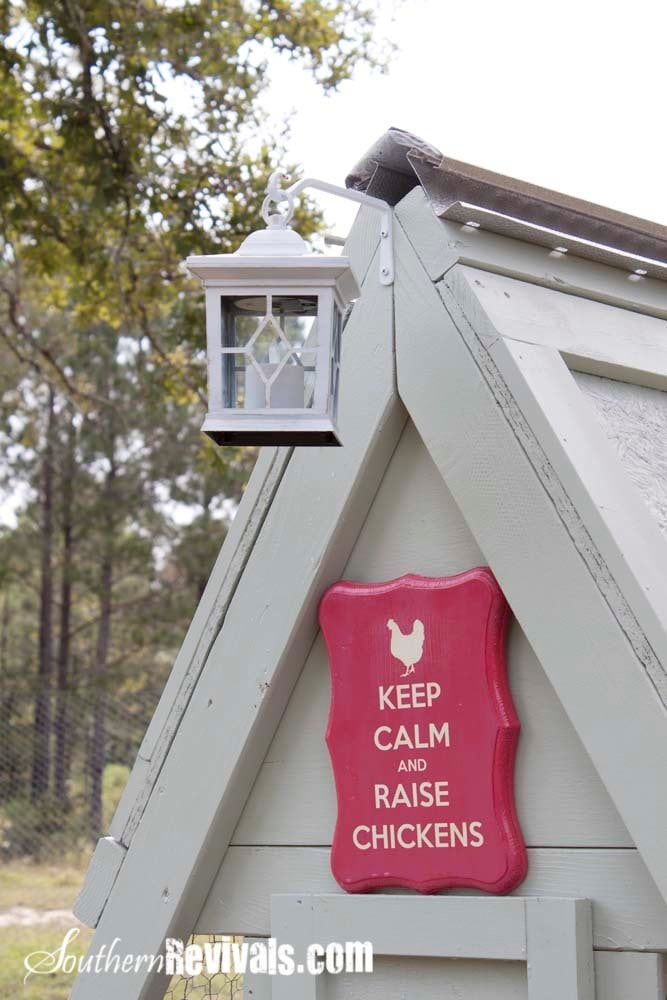
Because we put our hinges on top we added lattice strips inside on the top of the door panels that go just under the 2x4 of the roof peak to keep the rain out. We also used a roof cap for the same reason. We went back and added silicone to the strategic places to prevent water leaking into the nesting box while also being careful not to affect the necessary ventilation.

We used OSB for our roof panels instead of T111 because it's what we had on hand and also because we were going to be painting it.

Finally I added handles to each of the hinged panels to make opening easy. And cute!

Built from Plan(s)
Estimated Time Investment
Weekend Project (10-20 Hours)
Finish Used
I used a no VOC exterior paint from Valspar (green) that I found in the mistinted section at Lowe's. The pink (ladder) is Very Berry by Valspar and is not an exterior paint.
Recommended Skill Level
Intermediate

Comments

anniejw17

Wed, 02/27/2013 - 11:11

Love your coop! It's so cute! I need to find a weather vane. We ended up adding a roof cap of sorts - just aluminum flashing really. It does still leak in the nest box, though, which just encourages me to change out the bedding for fresh straw, which is a good thing I guess!

Southern Revivals

Wed, 02/27/2013 - 13:24

Yes mine leaked, too. We added the roof cap and some silicone but that still didn't stop it. So I finally went in and added some screen molding behind the panels in the nesting box. It still isn't quite "leak proof" but it is better. I will share if I figure out how to make it leak proof! Thank You!

billd333

Mon, 01/13/2014 - 09:45

These were great plans, thanks for sharing!
I'm new to having chickens so since it's cold now is Massachusetts I'm holding off on getting a couple of hens. The 2 main questions I have are where did you end up mounting the roost? And where did you end up putting the nesting box? I only put a floor on half so was thinking the roost board could be suspended above the ground on the open side. That leaves the 1/2 floor to hold the nest box?? Please any comments on the roost, nest box, watering and feeding systems are welcome.
thx..Bill

Southern Revivals

Mon, 01/13/2014 - 10:03

Hi Bill,

I am actually in the process of writing another blog post about this coop. I have gotten so many questions about the modifications we did and have lived with it long enough to know what I would have done differently. You doing the 1/2 is great and is one of the things I would do differently if we had it to do over again.

I will post an update here as soon as that post is live. In the meantime, feel free to contact me directly at Jamie @ Southern Revivals.com

Thanks!
Jamie

Ana White Farmhouse Potters Bench

Submitted by Anonymous (not verified) on Mon, 07/27/2020 - 09:51

My hubby made it for me after seeing yours!! I LOVE IT THANK YOU SO MUCH!
The buy list is correct the cut list is wrong the bottom 2*4's listed should both be 2*6's

Built from Plan(s)
Estimated Cost
$56
Estimated Time Investment
Day Project (6-9 Hours)
Finish Used
Golden Oak
Recommended Skill Level
Beginner

Outdoor Modern Sofa

Submitted by Anonymous (not verified) on Sat, 08/08/2020 - 07:31

This was my first time DIYing furniture, so I definitely came up with a very easy design!

The dimensions for this sofa are modern as it sits low to the ground and has a squarish appearance.

Free detailed plan on Blog: www.MinimalistFarmStyle.com

Estimated Cost
$100
Estimated Time Investment
Day Project (6-9 Hours)
Finish Used
Watered down Varathane Water-based Java Bean.
Recommended Skill Level
Beginner

Converted TV wall niche

Submitted by Vol4Life1 on Tue, 12/13/2016 - 05:35

We bought this house about a year ago and we finally got around to removing this pointless niche!  The center divider and bottom were removed.  The cabinet and hutch were assembled seperately.  


This is still a work of progress.  I am looking for a nice decorative molding face for the top.  If anyone has any suggestions please let me know!  We will most likely paint it white to match the fireplace mantle.

Estimated Cost
300
Estimated Time Investment
Week Long Project (20 Hours or More)
Finish Used
Paint
Recommended Skill Level
Intermediate

Double Trash Bin

Submitted by Anonymous (not verified) on Wed, 08/26/2020 - 08:32

This was based on the "Small Kitchen Island" Plans but needed to put 2 - 33 Gal Trash cans in. I used Select Square edged Pine. The depth remained the same as the plans but the width changed dramatically (52" wide). I also increased the height to match the other furniture (3' High). I added 4 - 1 X 2's to the top of the cabinet to secure the top.

Estimated Cost
$350-$400
Estimated Time Investment
Week Long Project (20 Hours or More)
Finish Used
The bottom was paint that matched the other furniture, the top is an Classic Oak Poly/Stain - 3 coats
Recommended Skill Level
Intermediate

Comments

Miter Saw Cart

Submitted by ivyfamily5 on Sat, 09/19/2020 - 13:49

I love this Miter Saw Cart. The plans were easy to follow and tweak to work with what I had on hand. I love all of Ana White's plans, passion, and inspiration. Happy Building!

Built from Plan(s)
Estimated Time Investment
Afternoon Project (3-6 Hours)
Finish Used
I left it raw, but I might paint it later. I also plan to add a Stop Block to it soon.
Recommended Skill Level
Beginner

Comments

Garage Shelves

Submitted by scoricha on Mon, 01/09/2017 - 11:01

I am loving my new garage shelves.  They were my first woodworking project and very easy to do!  I left the bottom right side open to fit my outdoor table and chairs in the winter (I live in Michigan).  I also used thicker plywood than plan because my shelves are a bit deeper.

Estimated Cost
$130
Estimated Time Investment
Weekend Project (10-20 Hours)
Finish Used
none
Recommended Skill Level
Beginner

Camp Loft Bed With Stairs Bunk Style

Used the Camp Loft Bed with Stairs Plans but double the bed rails. I just loved that the stairs and platform make it a little safer getting in and out.

Estimated Time Investment
Weekend Project (10-20 Hours)
Finish Used
Just Ultra White.

Comments

Garage Loft Bed

Submitted by GAno1Dad on Tue, 10/21/2014 - 20:24

The garage loft bed was inspired by the plans on your site. I beefed up the framing with 2xs and found siding panels at my local big box. 

Built from Plan(s)
Estimated Cost
$600
Estimated Time Investment
Weekend Project (10-20 Hours)
Recommended Skill Level
Intermediate

Comments

Wolfeman188

Wed, 08/03/2016 - 13:15

Hi, i was just curious if there was plans for this bed anywhere? My son has that exact corvette bed and he is not with me for a little while and i wanted to make it for him to come home to.

Tree house without a tree

Submitted by TamarasJoy on Thu, 02/02/2017 - 18:52

Full Tutorial with a LOT more photos on the Blog HERE

We had measured the garden space so we could build this frame to fit the space. The deck frame was made to be the correct height for the slide that we would attach later.

Once all the boards were put onto the frame I added some rails for safety of course. Then stained everything....


PS This IS a beginner project! I promise!!!! I am a beginner and I built it, it's still standing so you can do it too! I promise!

Estimated Cost
$300

IF you can't scrounge around for old wood and someones old slide!
Estimated Time Investment
Week Long Project (20 Hours or More)
Finish Used
Used blue & white outdoor paint & simple stain (left over from our fence)
Roof was a a green house product.
Recommended Skill Level
Beginner

Loft bed with stairs

Submitted by donk on Tue, 11/24/2020 - 15:14

I started planning this project this spring when we bought and moved into our new house. I knew with the room size a loft bed would make the most of the room. My daughter is scared of heights a little bit so I was worried about using a ladder. I stumbled on this site and these plans and knew this is exactly what I was going to build. Ever since we finished painting it and getting her room done she has been glued to it!

Comments