Community Brag Posts

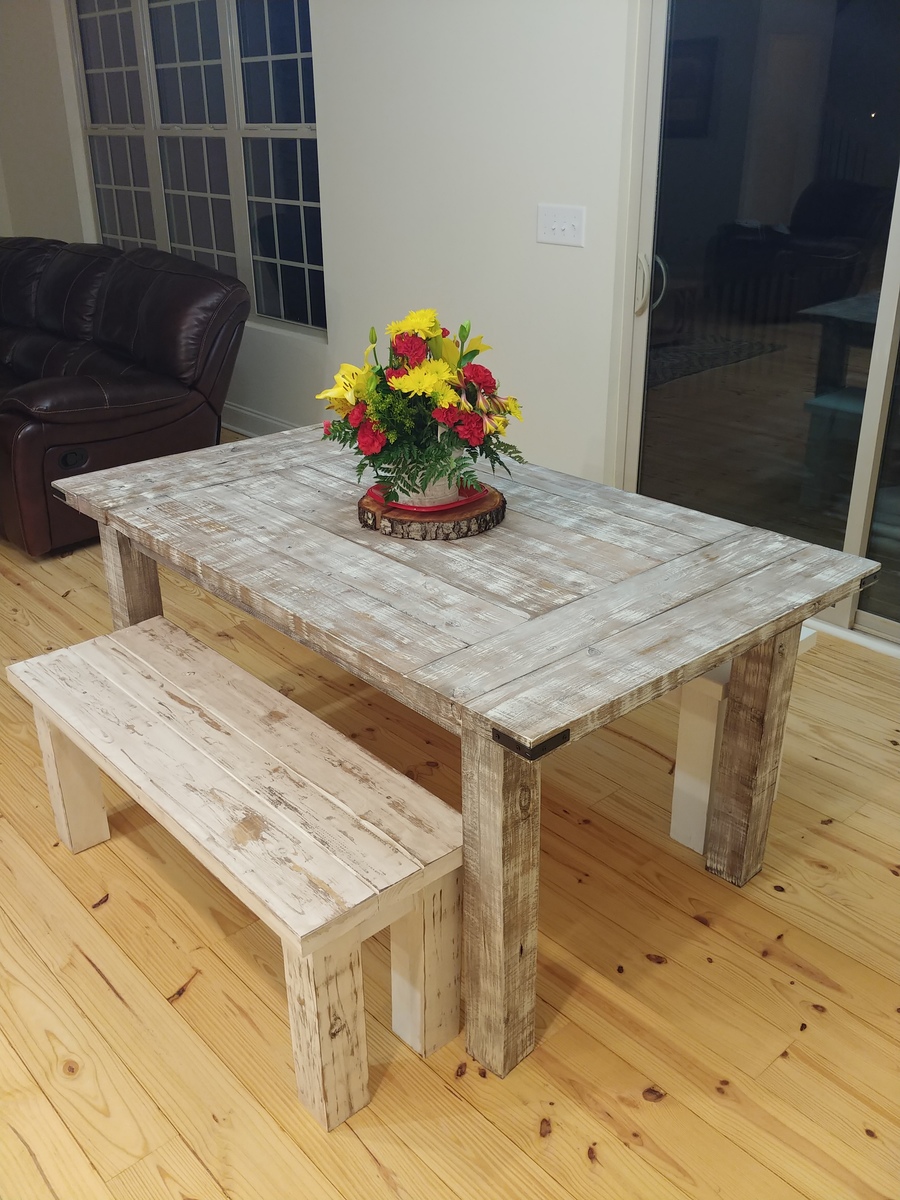
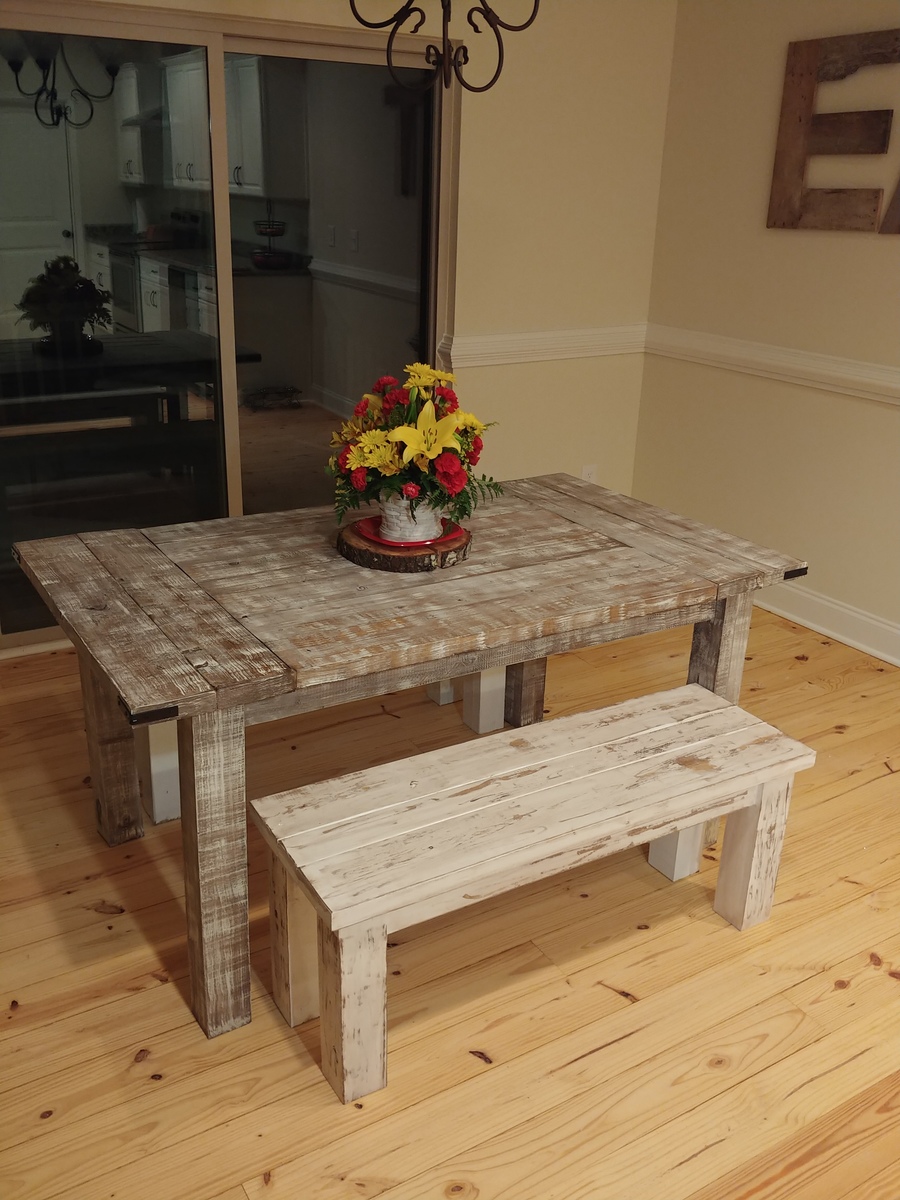
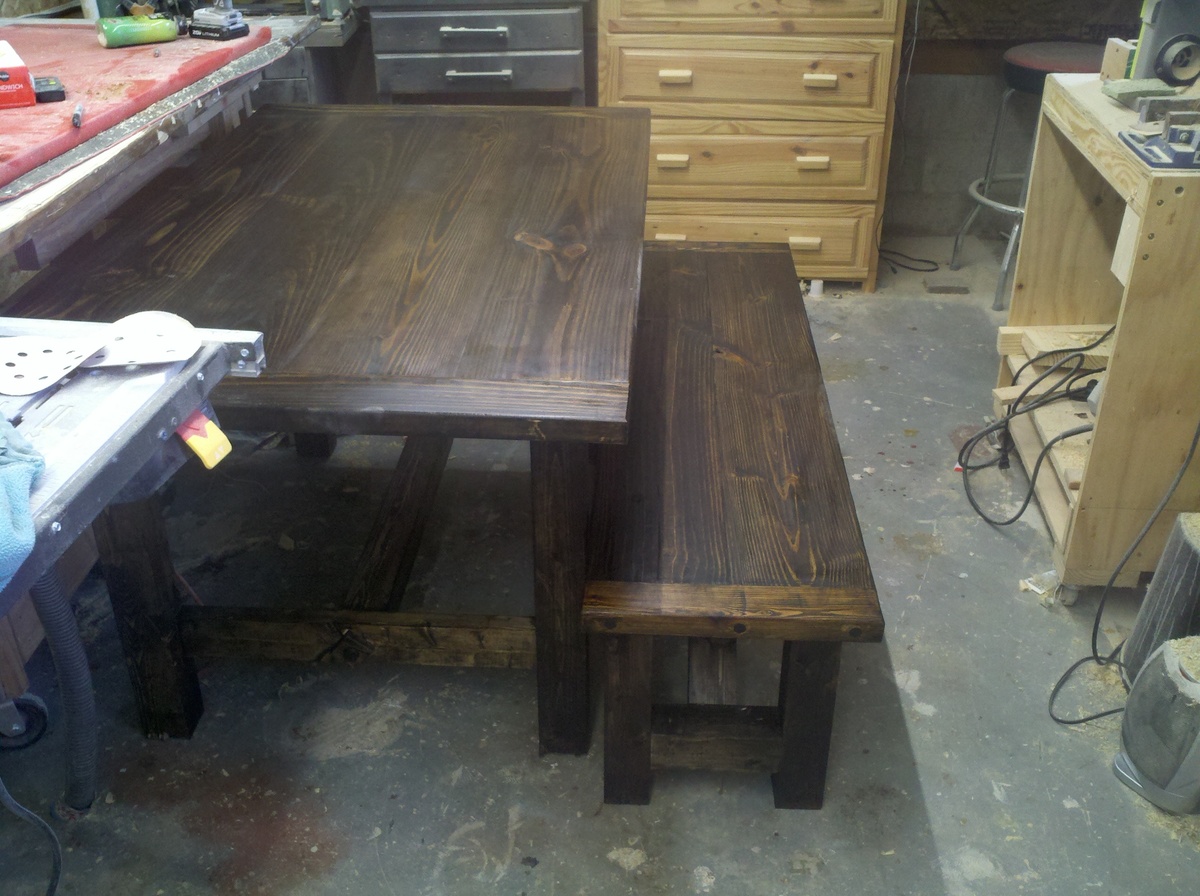
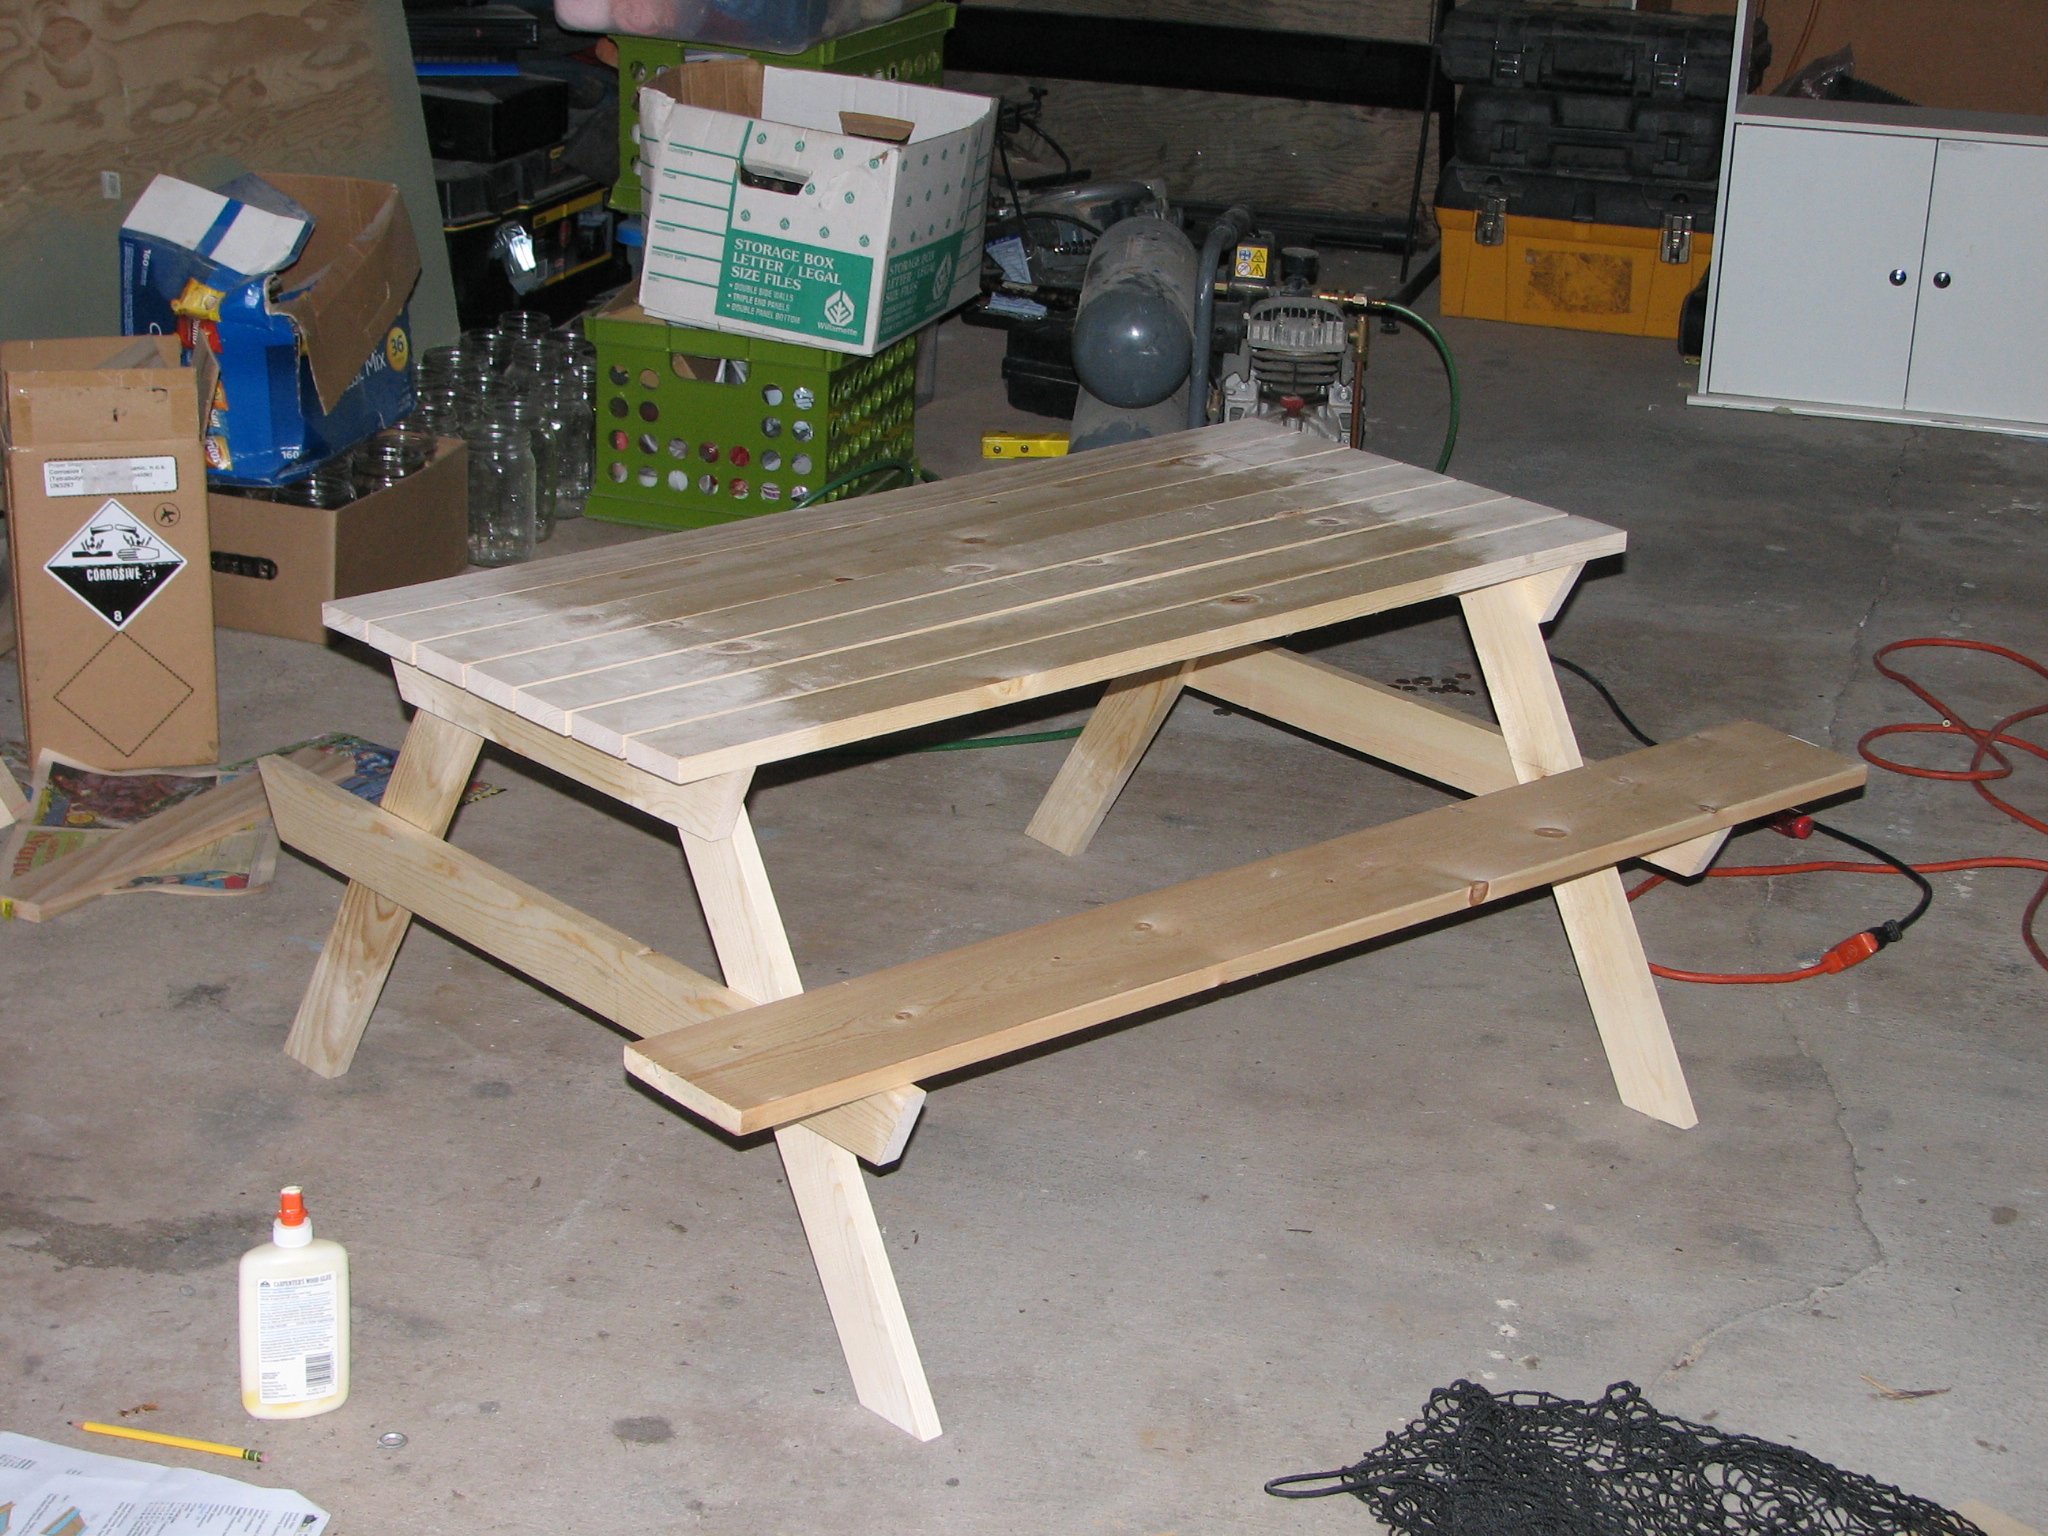
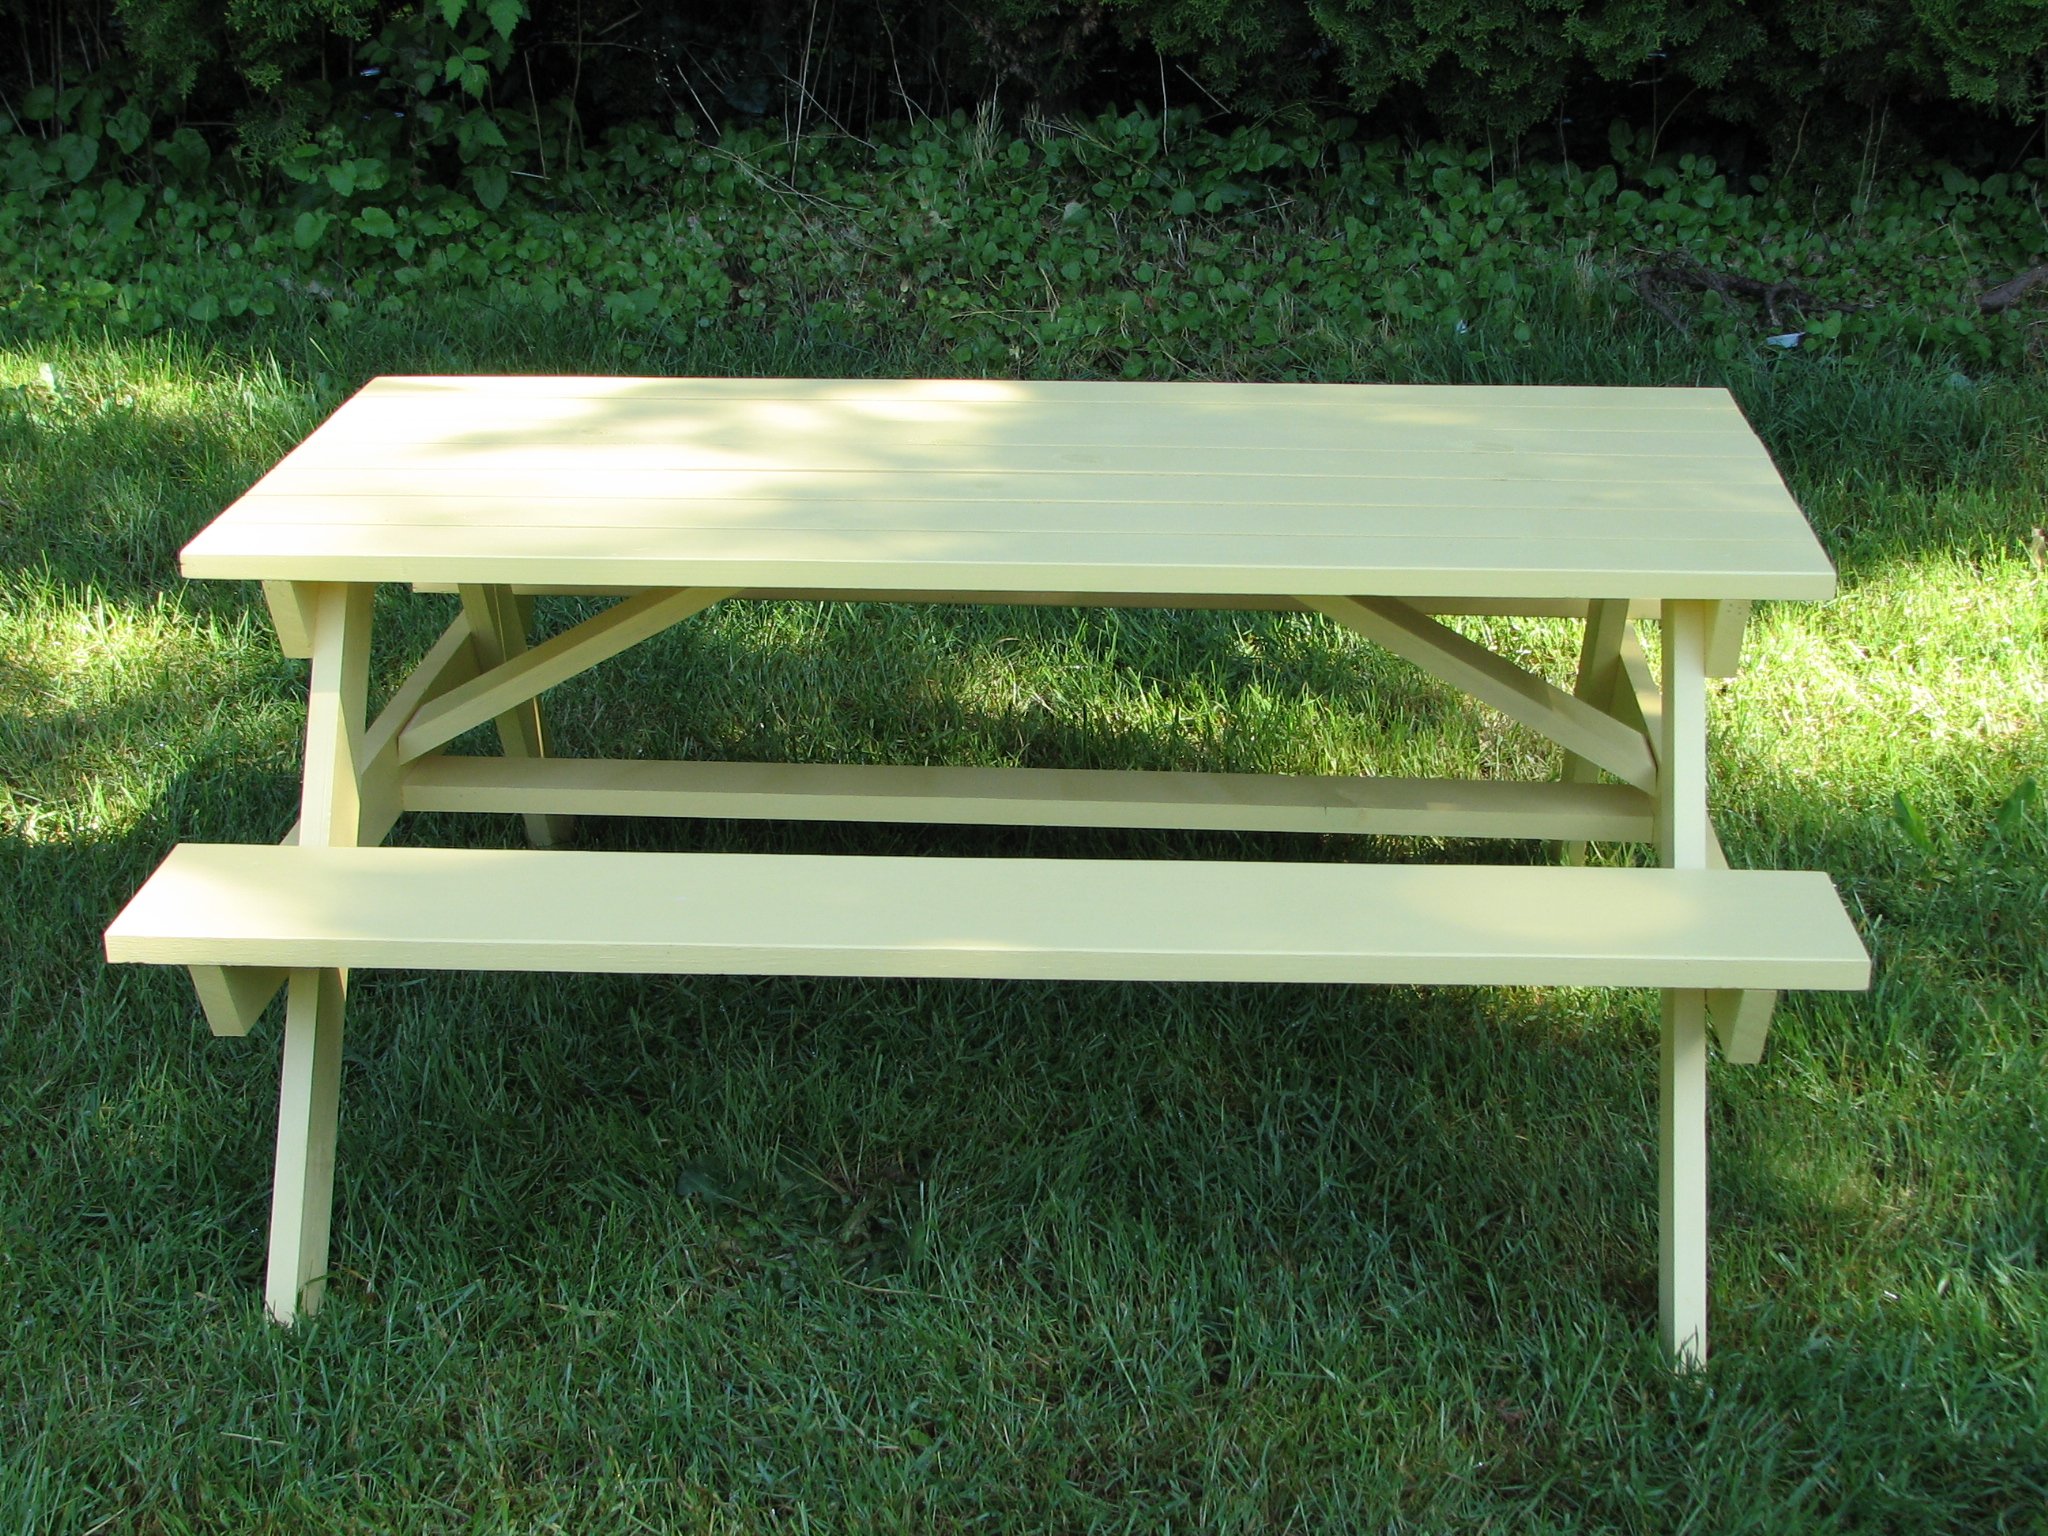
Little Kids Picnic Table with alterations

Submitted by jsle_bel on Thu, 05/12/2011 - 10:22

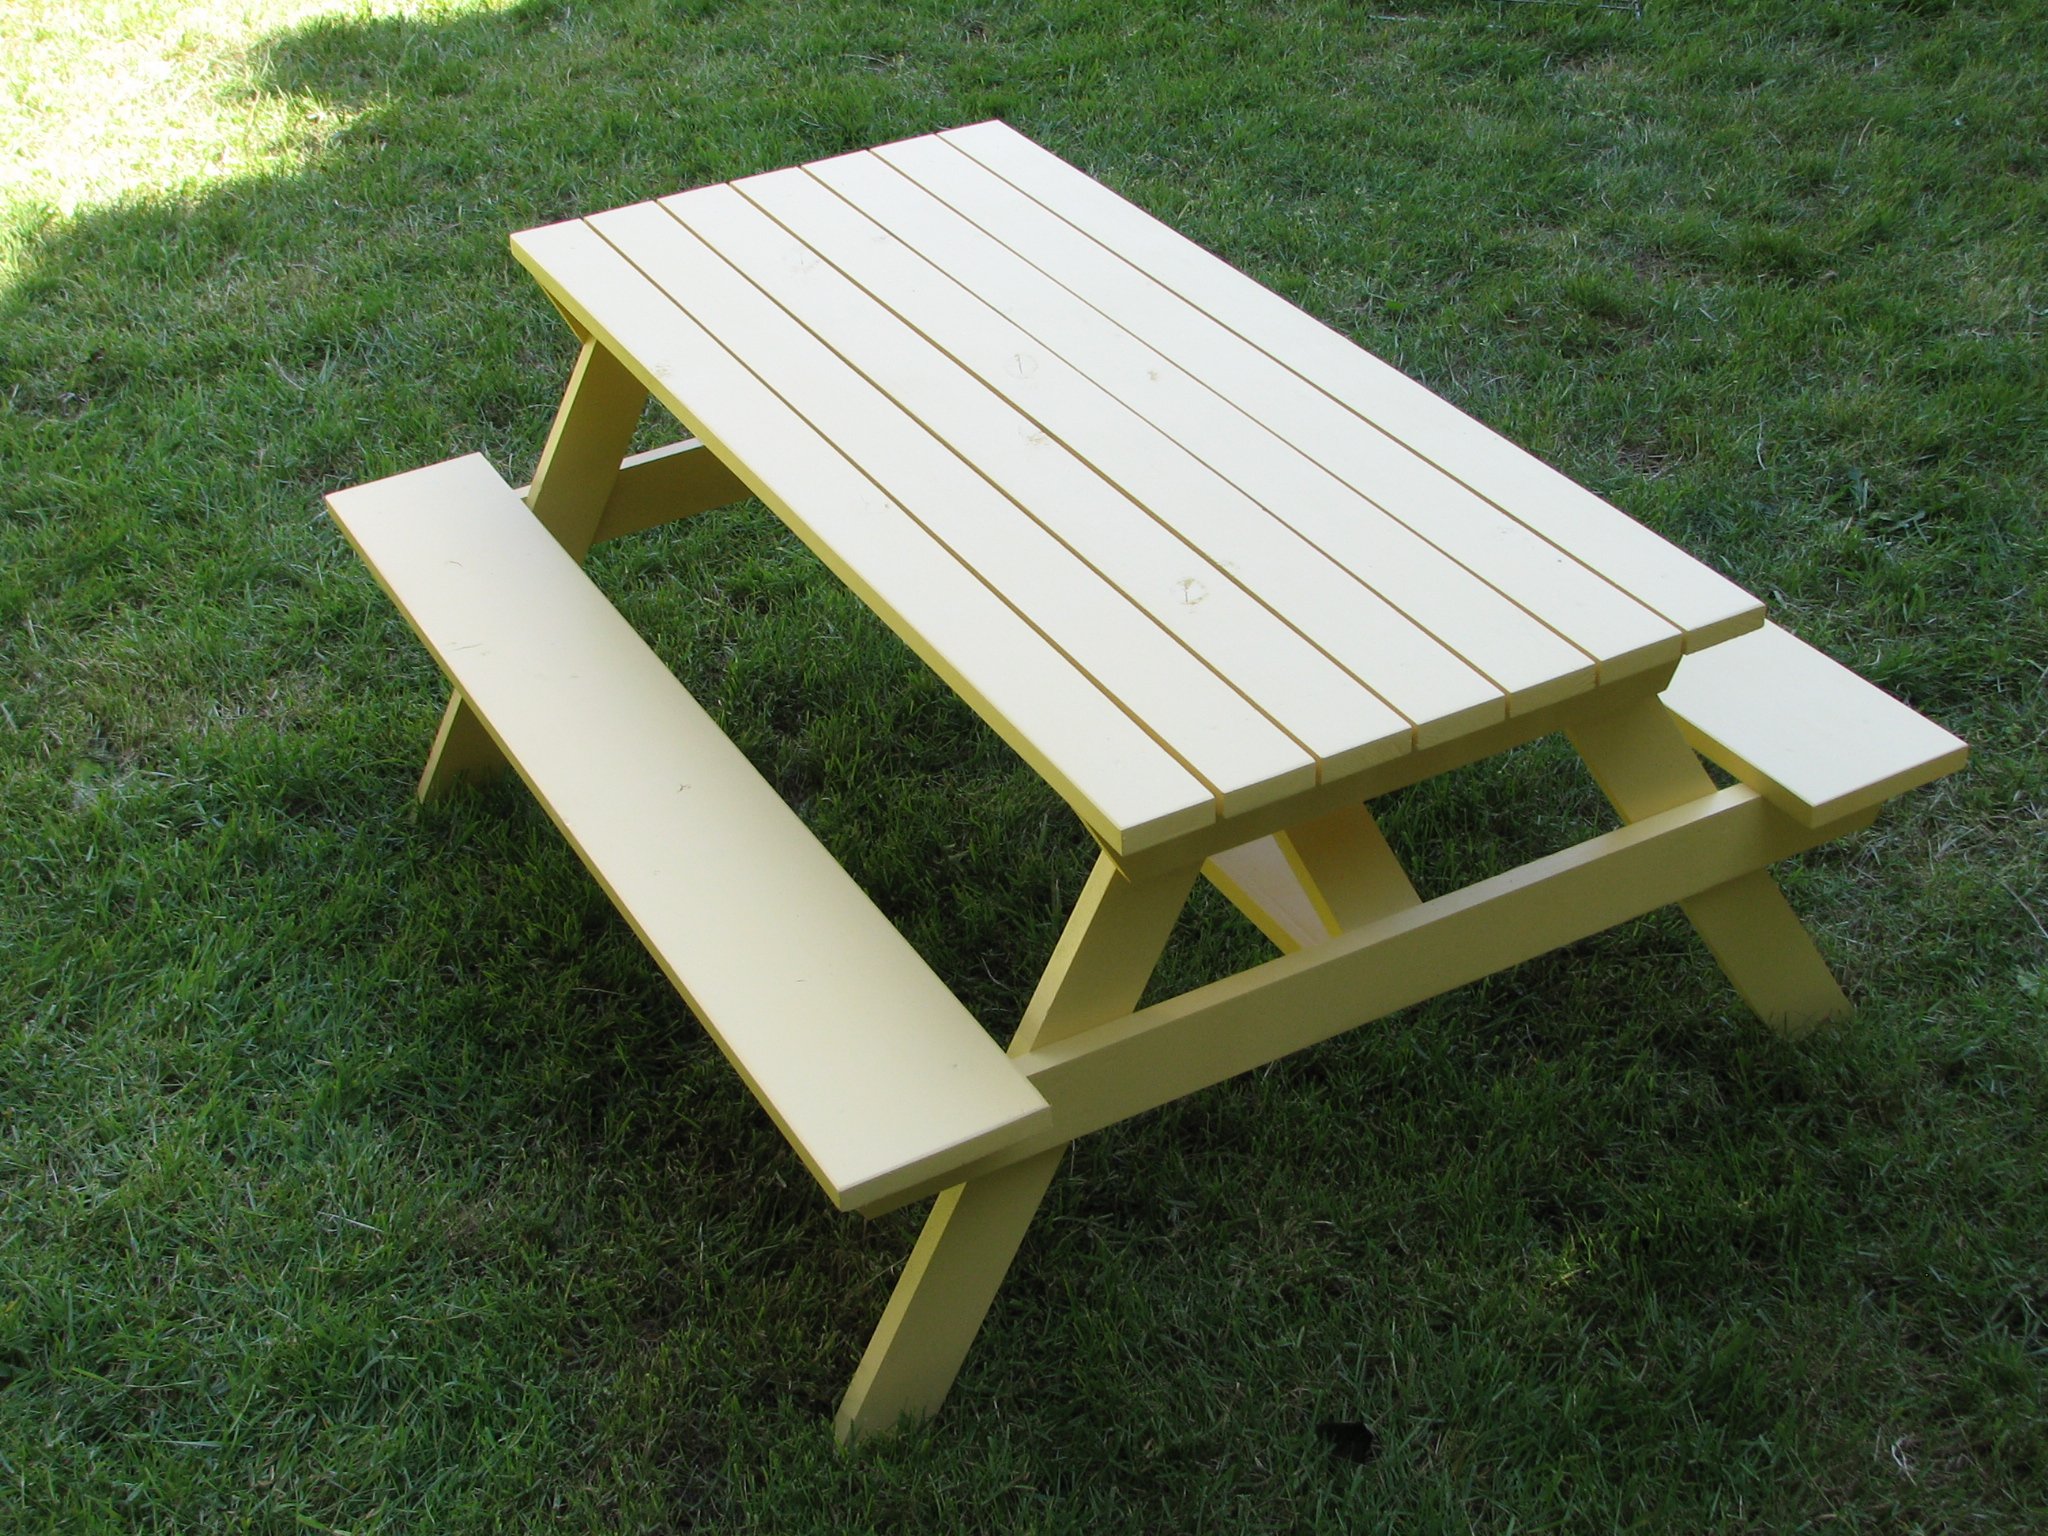
While out shopping with my 4 year old son we came across a picnic table that he absolutely adored. I had wanted to purchase a kids picnic table last summer but never got around to it. After checking out the price tag on this little gem I decided I would check out Ana White’s collection of plans before I spent $80!!! I made a few alterations in size and added extra support for those changes, but even with the added lumber I got it ½ off the $80 store price!!

Built from Plan(s)
Recommended Skill Level
Starter Project

Leftovers and Reclaimed Wood Media Console

Last winter, our friend's boss built our kitchen cabinets. We've had cuts of plywood leftover, sitting in our garage since then.

Our home needed a media console, so I thought to give building one a shot now that I own a circular saw and am only slightly afraid of it. I didn't follow a plan, honestly, but I did look at Ana's Classic Storage Wall, Extra Wide Media Unit as inspiration.

The console is actually a slate-indigo-black, called Napoleon. The top is made of reclaimed 1x6s that I mixed and matched with scrap 1x6s and gave one coat of Dark Walnut. We ordered handles for the doors and it needs another coat of paint (we ran out of the quart we had on hand), but we love it!

Estimated Cost
$30 using leftover plywood, otherwise, $100
Estimated Time Investment
Week Long Project (20 Hours or More)
Finish Used
Olympic Flat in Napoleon
Watco Danish Oil in Dark Walnut, Watco Wipe-On Poly
Recommended Skill Level
Intermediate

Comments

JoanneS

Tue, 07/09/2013 - 16:30

Love this! The reclaimed wood top is fab, and the color looks perfect. I checked out your blog - your apartment is looking awesome!

yurra-bazain

Wed, 07/10/2013 - 02:18

Thank you for your kind words. :) Our apartment wouldn't be furnished today if not for ana-white.com. The motivation I've gained by learning and sharing back here has been key to keep me building the things we need, the way we want them. =D You've built so many things; I'm so impressed!

Bunk Beds for 4 to 6

Submitted by Judianne on Thu, 07/02/2015 - 10:32

We used the Build a Simple Bed plan and the Bunk Bed from Simple Bed. I modified the plans to build a double bunk bed. We needed a way to fit up to 6 small children in a long, narrow room. Although we haven't built the trundle beds yet, each bunk will also have a trundle bed. The kids especially love their "privacy" curtains!

Built from Plan(s)
Estimated Cost
Under $300
Estimated Time Investment
Weekend Project (10-20 Hours)
Finish Used
paint
Recommended Skill Level
Beginner

farmhouse table and bench

Submitted by Don123 on Fri, 01/19/2018 - 09:28

I built this table and two simple benches, inspired by the farmhouse table plans. I modified the plan slightly, in that I didn't add the center 2x4 on the bottom, or the two 2x4's between the legs. I also added a second "bread end board," and customized the corners with some "L" bracket accessories. It took me a week to build everything, then add the finish. It would have gone quicker, had I had time to do it all at the same time, but I had to make time after work to do everything. All, in all, this is probably a weekend job, at most. 

Estimated Cost
approximately $100.00 for everything
Estimated Time Investment
Week Long Project (20 Hours or More)
Finish Used
For the table, I stained with a dark stain, then sanded with a fine grit sand paper, then lightly painted with a light colored paint to give the wood that weathered and worn appearance.

For the bench, I whitewashed with a white paint, then rough sanded, to expose the wood in places, then where the wood is exposed, I added dark stain, then wiped clean to give that worn, paint flaking appearance.
Recommended Skill Level
Beginner

Patrick's Jelly Cupboard

Submitted by srodge1 on Thu, 01/06/2022 - 16:48

I love, love how this turned out. I was originally going to build it exactly as the plans are written, but somehow a screen doors came into the design. Thanks again Ana for sharing!!

Built from Plan(s)

Comments

Flat Wall Book Shelves

Submitted by river4250 on Mon, 05/16/2011 - 16:30

This plan was a breeze to put together (go out and buy some clamps if you don't have any!!) until I finished it, then looked at my wall and saw the baseboards. I really wanted it to be screwed/nailed into the wall, so it needed to be flush. That's where the nightmare being. Eventually (over a week later) I got that finished, however, and am loving my little one's new bookcase! I just can't decide where to put it now, in her bedroom or in her playroom. Maybe I'll make another and she'll have two! :D This plan was very simple to follow, and the materials weren't expensive, so I could definitely do that.

Built from Plan(s)
Estimated Time Investment
Afternoon Project (3-6 Hours)
Recommended Skill Level
Beginner

modified kids Adirondack

Submitted by jrh413 on Wed, 07/10/2013 - 09:27

Modified back to match my adult chairs. Armrests are also cut out like adult chairs you just cant tell in picture. Also put an arc on faceplate. Then i couldn't resist routing her name into it. Enjoy!

Built from Plan(s)
Estimated Time Investment
Afternoon Project (3-6 Hours)
Finish Used
Just some exterior pink paint.
Recommended Skill Level
Beginner

Farmhouse table

This table was inspired by the pocket screw table. only I did not use pocket screws. it is constructed using loose tenon construction and dowels. Notice the middle stretcher  and the wooden nut and bolt that holds it together

Estimated Time Investment
Day Project (6-9 Hours)
Finish Used
minwax jacobean stain and Minwax clear satin finish
Recommended Skill Level
Beginner

Farmhouse Style Hall Tree

Submitted by Anonymous (not verified) on Mon, 01/17/2022 - 07:43

Hi, I'm Kevin, (Kevin's Woodkraft) I've made 4 of these so far and really enjoy building them. I decided to cut vertical grooves to make the back panel more like paneling but also going vertical instead of horizontal it allowed me to space the grooves perfectly symmetrical.

Built from Plan(s)

Comments

Ladder Shelf

We modified this project to fit our space. We also made the shelves sturdier by cutting a groove for the bottom of the shelves to slide into. This project is much easier when completed by two people.

Built from Plan(s)
Estimated Cost
$35
Estimated Time Investment
Day Project (6-9 Hours)
Finish Used
Glossy black paint.
Recommended Skill Level
Intermediate

Playhouse loft bed with stairs and slide

Submitted by alminter on Wed, 07/08/2015 - 21:29

This is by far the biggest project I've completed yet. It actually surprised me how easy it was to complete. It did take me about 4 days to build the project and an additional week to sand and paint the project.

I followed the playhouse loft plans and the storage stairs plans, adjusting only the back to allow for the additional length of the slide. I didn't add the windows to the sides (I didn't see any point in having them there). I also used the castle loft plans for the slide. When I first started this project I was planning on making the slide completely separate. I changed my mind mid project after I had the side wall cut to length at Lowe's, so I just added that small piece to the left of the slide to make up for the gap. I also made this project in 4 separate pieces (stairs, slide, front wall, back) so I could put it together in her room in one evening and not have to kick her out. Once we moved it to her room all I had to do was screw the four corners in and attach the back wall and bed slats.

I definitely recommend not using particle board. I had no idea what the difference was between particle board, mdf and plywood when I started this project. Particle board was less then half the cost of plywood, but looking back I would pay the extra for the plywood. I don't feel like the screws hold well in the particle board and it also chipped on the bottom some. I actually had a chunk come off in the corner where I must of screwed to closely to the edge. I'm sure this is basic knowledge for most, but for those newbies (like me) just a little tip.

I had a lot of fun building this bed (not so much sanding and painting) and learned a lot. Now off to browse for my next project :)

Estimated Cost
400-500
Estimated Time Investment
Week Long Project (20 Hours or More)
Recommended Skill Level
Beginner

Comments

Distressed Bed Side Tables

Submitted by Ryan in NH on Mon, 01/29/2018 - 07:38

This was a really fun project. I altered the dimensions slighly to fit my space. I also used a piece of 1/4" ply for the bottom shelf instead of thicker common board. You can keep the cost way down if you rip 2x6's into 2x2's. A single 2x2 is about $10 whereas a 2x6 is $6. You get three 2x2's out of the 2x6, so you're basically getting triple for half the cost. Pick REALLY straight 2x6's though! 

Estimated Time Investment
Day Project (6-9 Hours)
Finish Used
Ipswitch pine on distressed top
Recommended Skill Level
Intermediate

Leaning Wall Shelf - My First Build

Submitted by dhrider33 on Sun, 05/22/2011 - 17:23

Finally I drummed up enough courage to try a project ... the leaning wall shelf. My husband and I had a great time working on it together.

Estimated Cost
$50
Estimated Time Investment
Day Project (6-9 Hours)
Finish Used
Primer / Paint
Recommended Skill Level
Starter Project

Clip strip art

This was a great way to keep my five year old daughter busy on a rainy afternoon. I had a scrap piece of 1x4 and bought some clothes pins and 10 cents clearance wooden figures at Joann. We also used some left over acrylic paint and some glitter nail polish. Thanks for a other great idea Ana!

Built from Plan(s)
Estimated Cost
$5
Estimated Time Investment
An Hour or Two (0-2 Hours)
Recommended Skill Level
Starter Project

Tall Corner Media Console

Submitted by sully777 on Mon, 07/13/2015 - 10:17

Easy excellent project for That odd room you may have that needs a corner tv stand.

I use pre made 16" wide 3/4" MDF shelving from Home Depot for the Shelves, Used 1" x 3" for the top, and sprayed it all with Rustoleum Industrial flat black which dries in 15min, was the large size cans for $5.40 and and only useds 3.25 cans to paint the whole thing. 


TV is a 55" Class so it actually works perfect, because the tv stand is two legs and not the typical center mounted ones. so  put the tv toward the front of the console and the console is as far as you can go into the corner.

I have two power strips screwed to the back of the console, along with a cable amplifier, my wireless router for the house sits right behind the TV and you can see the blue status lights under the bottom of the TV.

Have  my speaker bar in the added shelf #1 below the tv, comcast cable modem in the right side square, TIVO in the center top, DVD Player in the center bottom, and loads of extra shelf space for whatever else I can think of....

Built from Plan(s)
Recommended Skill Level
Beginner

Barn door cabinet

7.5' long cabinet, made with pine boards. Hardware purchased on Amazon.

Built from Plan(s)
Estimated Cost
$400
Estimated Time Investment
Weekend Project (10-20 Hours)
Finish Used
This was made to sit under our new wall mounted 75" tv!
Recommended Skill Level
Intermediate

Comments

Rustic reception desk

Submitted by Markb25 on Tue, 02/08/2022 - 13:21

A friend is opening a new tattoo parlor up and wanted a rustic looking reception desk making up.

Using reclaimed wood wasn't an option so we opted for 25mm t&g boards and randomly cut 1/4 way through it to give the appearance of individual boards. The main carcas is made with 2x4's clad with Baltic birch ply to give it a cleaner appearance from behind and, to give additional surface area to attach the boards to.

To finish inised a combination of forced aging with a solution of WWV, iron sulphate and black tea + coffee, varying degrees of Charing, the walnut and oak stains were by V33 and the whites and greys by French chic.

Comments

Guest Room update

Submitted by nlaupp on Wed, 05/25/2011 - 15:18

Our guest room had to be ready for some friends coming in town for the week. Before this room had no shelves and worse yet; no head board. Turned this boring room into...well a less boring room. In the picture are my first two projects; the Ten Dollar Ledges and the Reclaimed-wood headboard.

Estimated Cost
$200
Estimated Time Investment
Weekend Project (10-20 Hours)
Finish Used
The ledges were just painted with a glossy white and the head board was painted with a flat charcoal, distressed, and finished with a mahogany gel stain.
Recommended Skill Level
Starter Project

"Ameri-shelf"

Submitted by omarNY on Tue, 07/16/2013 - 18:19

My 8-year-old and I built a shelf for his room, based on the Rolling Cubby Bench plans. (The paint job is all him. He originally suggested trying to paint a picture of an eagle on it, we ultimately settled on a partial flag.)

I'm fairly new to woodworking, and this was my second of four projects I've built using plans from this site so far. Cutting and assembly was just a couple of hours, but finishing stretched this out into a several-night project.

Built from Plan(s)
Estimated Time Investment
Weekend Project (10-20 Hours)
Recommended Skill Level
Beginner