Modern Kid's Picnic Table and is two X Benches
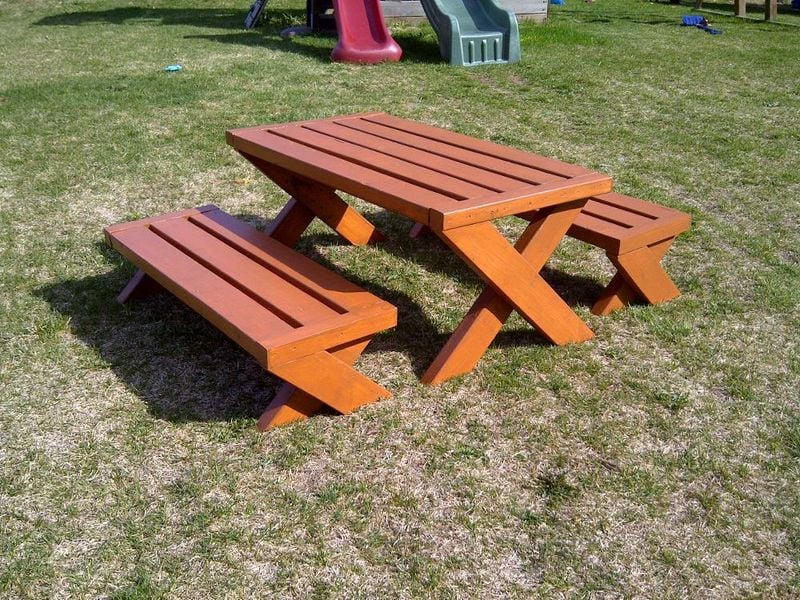
My first project on my own!
Built from Plan(s)
Recommended Skill Level
Intermediate
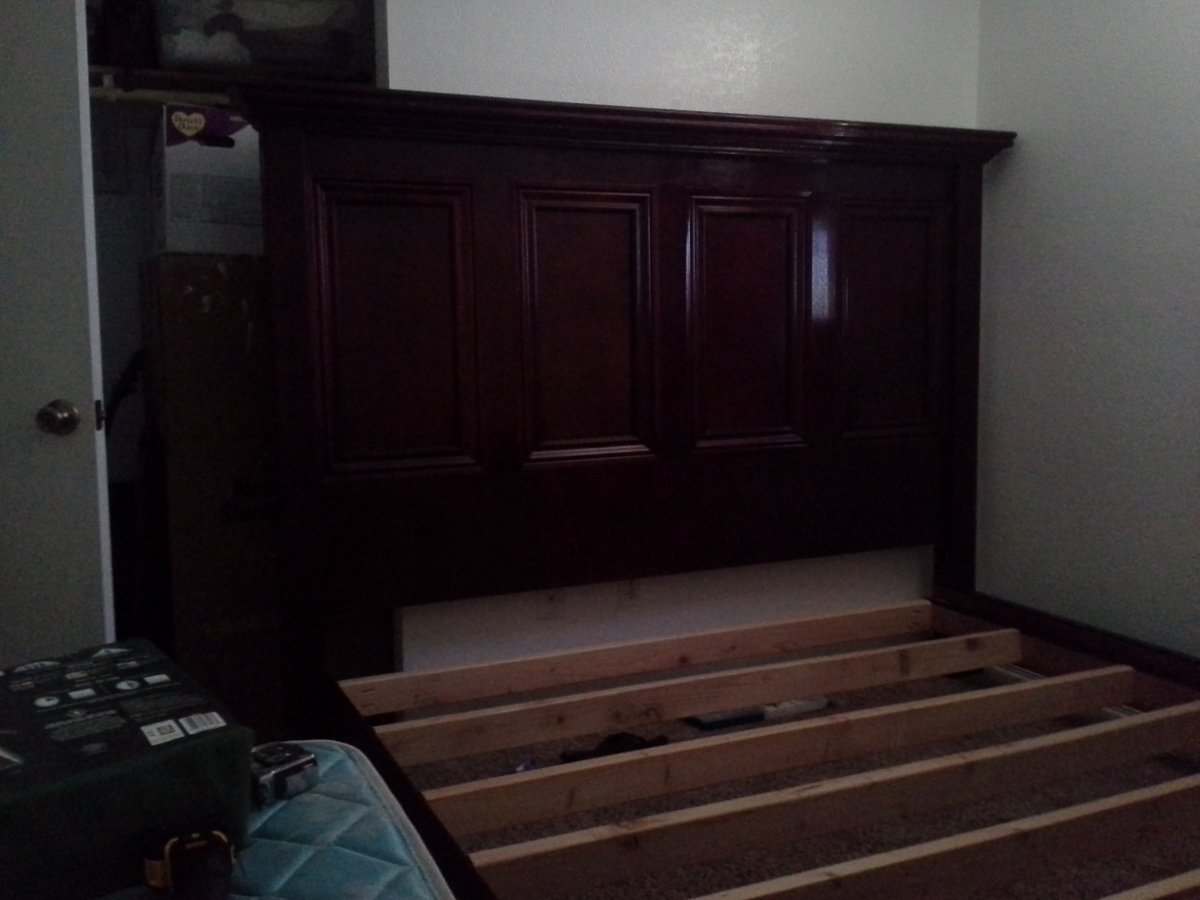
My first project on my own!
Sorry the the photos were taken from my phone so the lighting is making it look darker than it really is.
Basically I followed the plans to a T other than the poplar trim and crown molding.
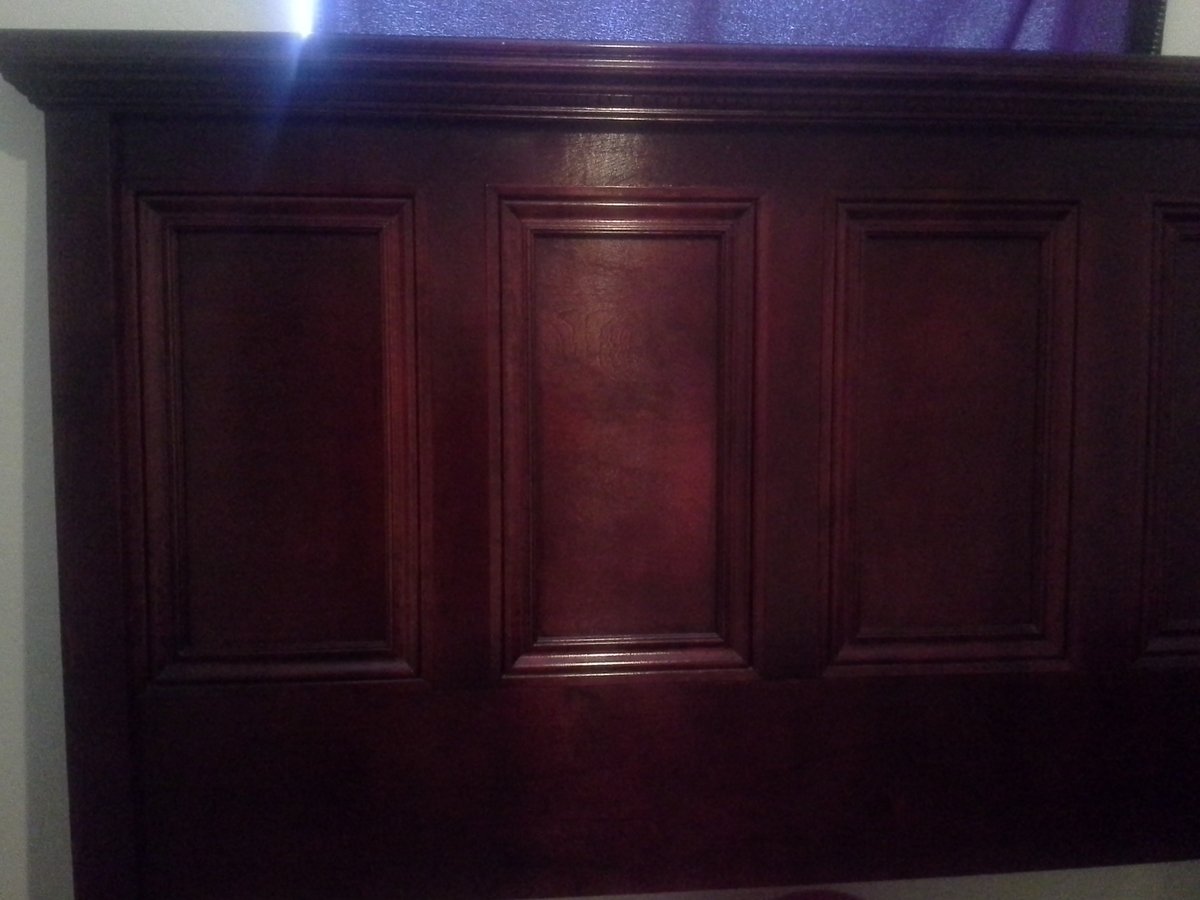
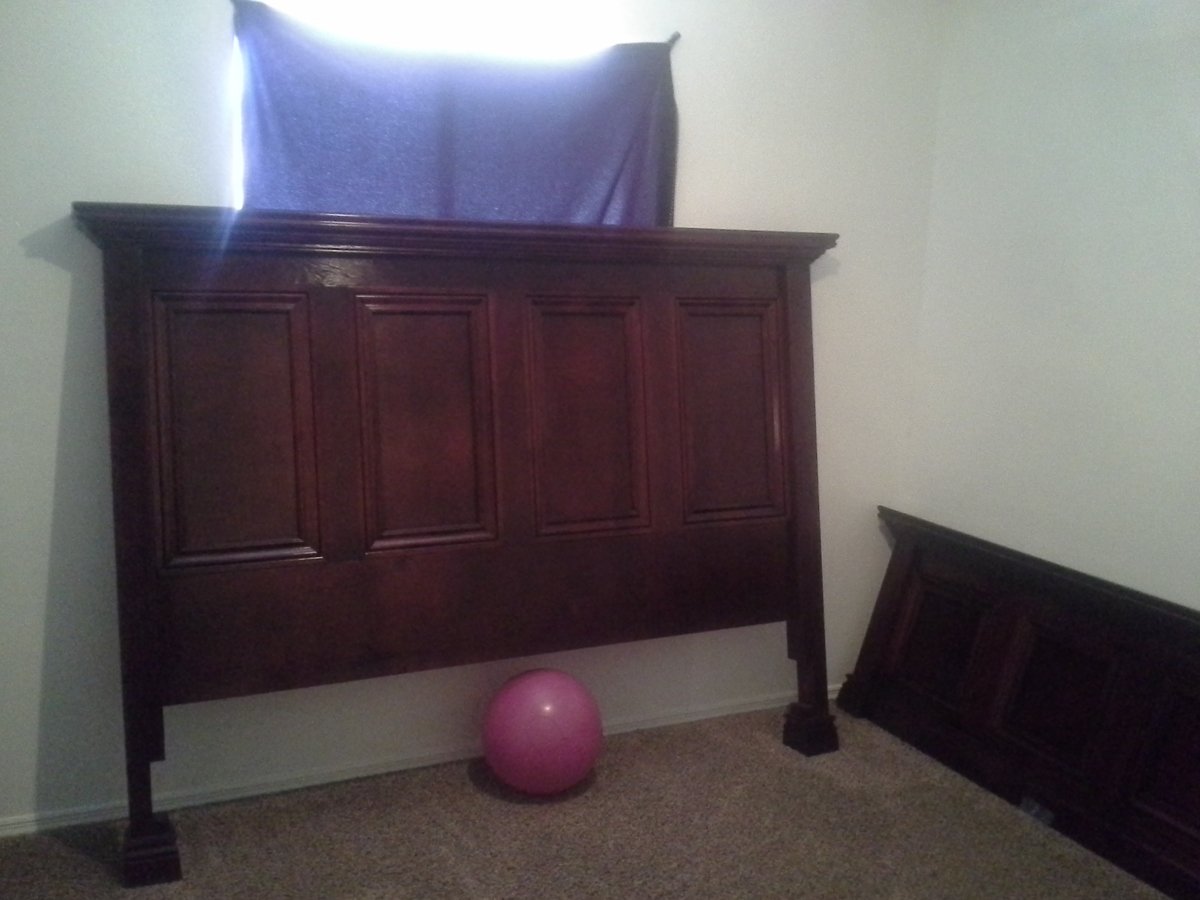
For the head board I Used 3/4" red birch ply and made some stiles with excess from the sheet and then just trimmed it with poplar molding. instead of stacking 2 2x4 for the sides i just used a solid 4x4 and cut the spot out to old the rails on. I was afraid how the stain would react or how it would look since 2x4 have rounded edges. Thats pretty much it. The finish was a tricky process. since I used red birch and white poplar I had to find a way to get everything to stain evenly. So basically I
Dyed all the wood then sealed then stained then toner then glaze then a little more toner then when i got the color i wanted i put 2 layers of top coat.

Wed, 05/16/2012 - 06:11
That's simply stunning. That WAS a tricky finishing process, but obviously well worth the effort.
Thu, 05/17/2012 - 03:41
That is one of the most beautiful finishes I have ever seen on this site.
Thu, 05/17/2012 - 11:38
I'm doing a bed very similar to this... but i'm only doing 2 larger panels rather than 4 like you have. How do you the insides of the panels? Quarter round and then crown molding? I was thinking I would attach the trim on top of the plywood and then just attach some quarter round on the inside to round it and make it stand out a little more.
Thu, 05/17/2012 - 17:00
I didn't use any round(but that is the idea to hide the ugly plywood layers that are exposed when cut). Its just 2 3/4 x3/4" whitewood/poplar casing that I had left over from a project i was working on. the frame of the squares was 3/4" birch ply so the casing laid nice and flush with it so it looked nice. the trick is to get the stiles(the frame of the squares to lay flat against the plywood backing other wise the casing won't lay even all the way around.
heres a link to the casing i used
http://www.lowes.com/pd_105664-81562-OML14-7FTWHW_4294801993_4294937087…
heres the link to the crown that i used on the top
http://www.lowes.com/pd_105626-81562-1069-8FTWHW_4294801991_4294937087_…
the trim stuff at the box places are considered paint grade and don't take stain very well. its easiest to paint if you don't have the right setup to finish things. and if you are going to stain I recommend a product called timbermate its stainable wood filler its hard to get but its amazing stuff it blows the minwax stuff out of the water.
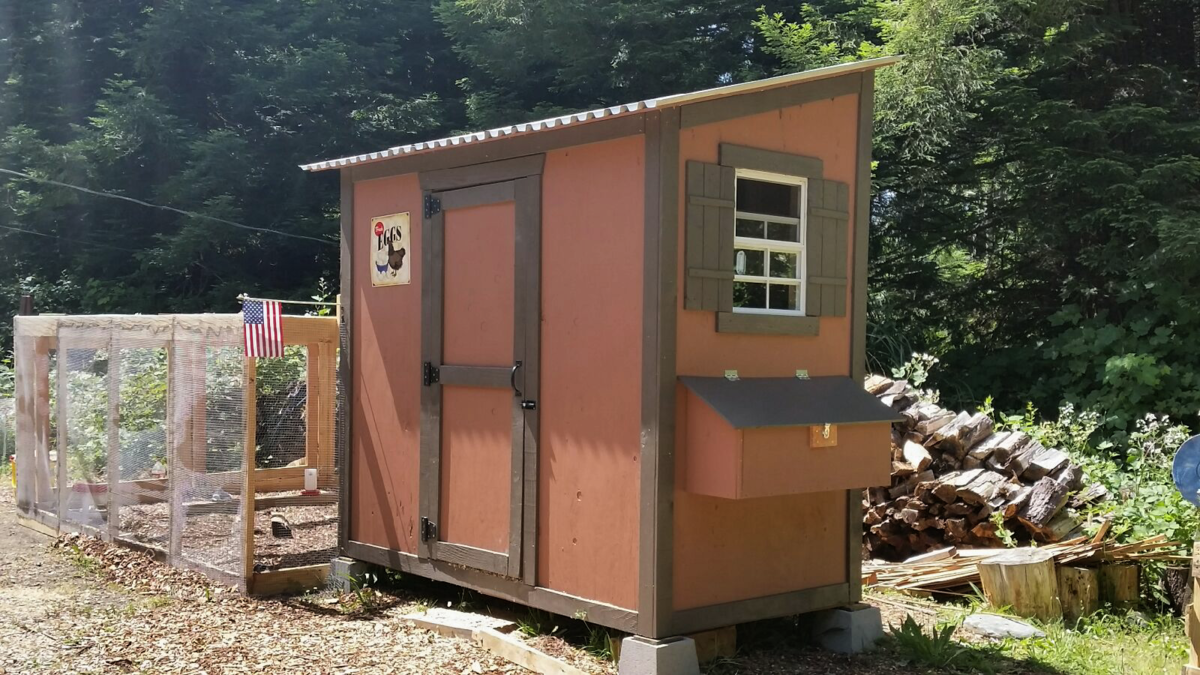
My 7 week old chicks love thier new home
Total cost was under $200. The wood was a combination of select pine, Douglas fir. I used Minwax clear finish. Instead of slats I used plywood. This is going into the spare bedroom. We are quite pleased.
Mon, 05/28/2012 - 19:51
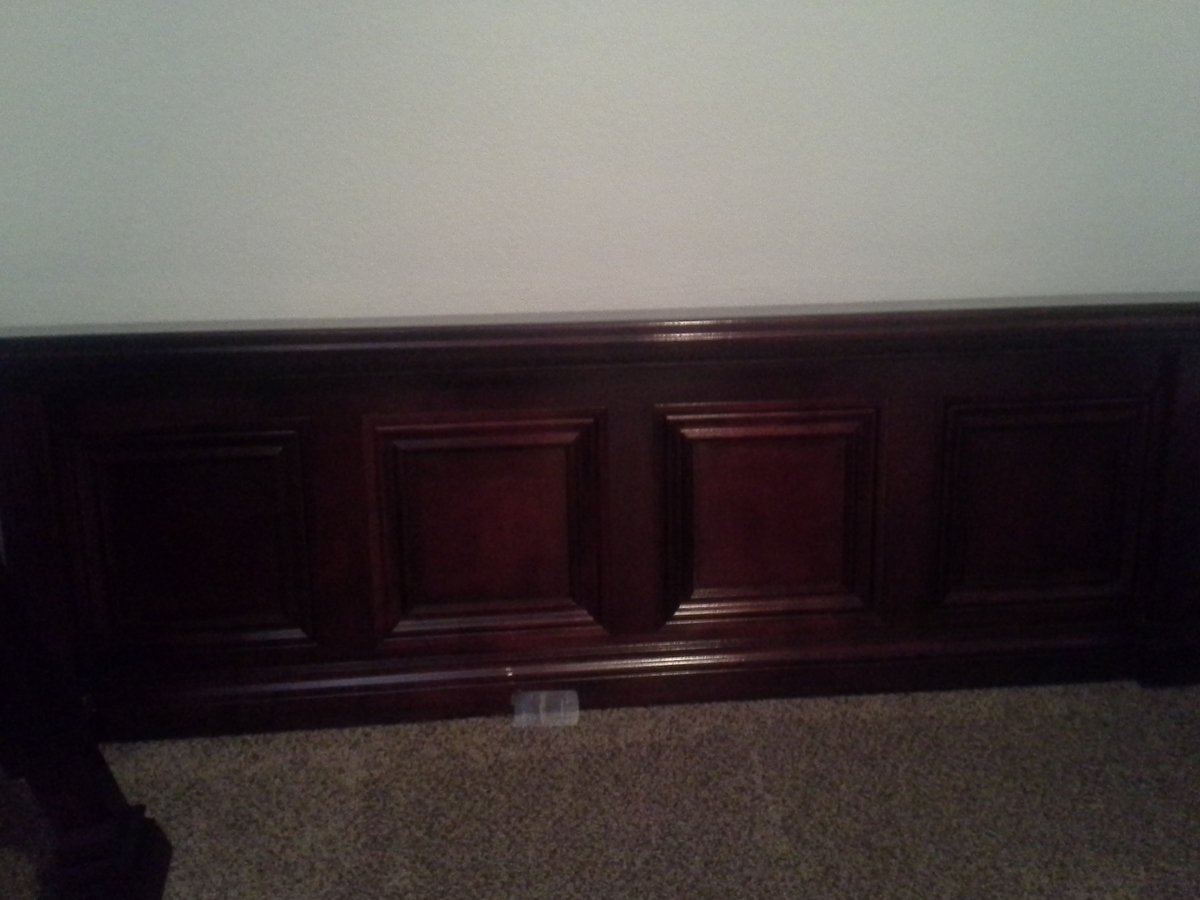
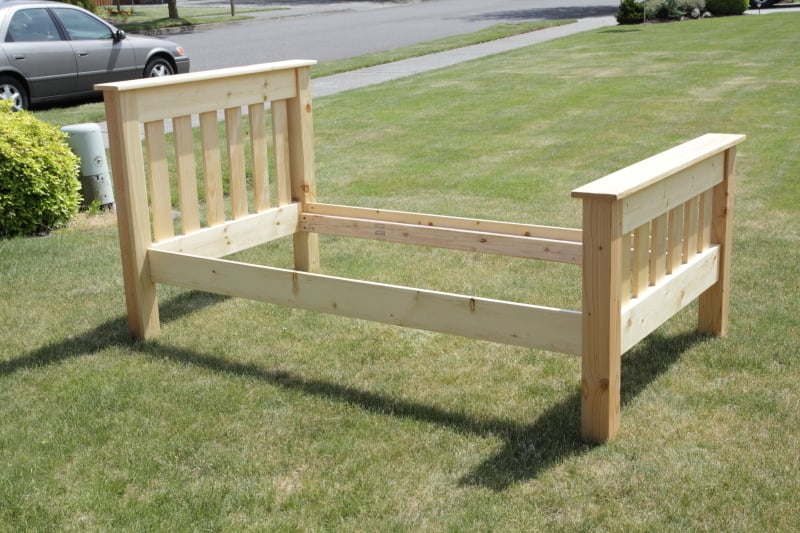
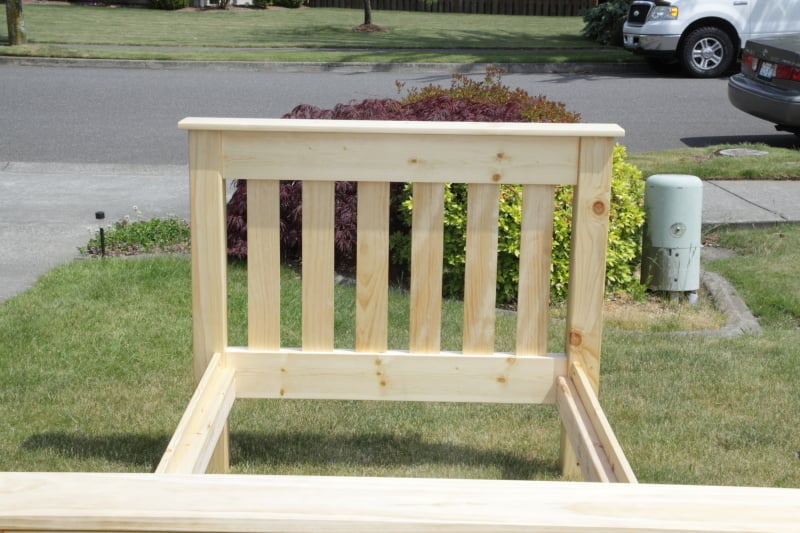
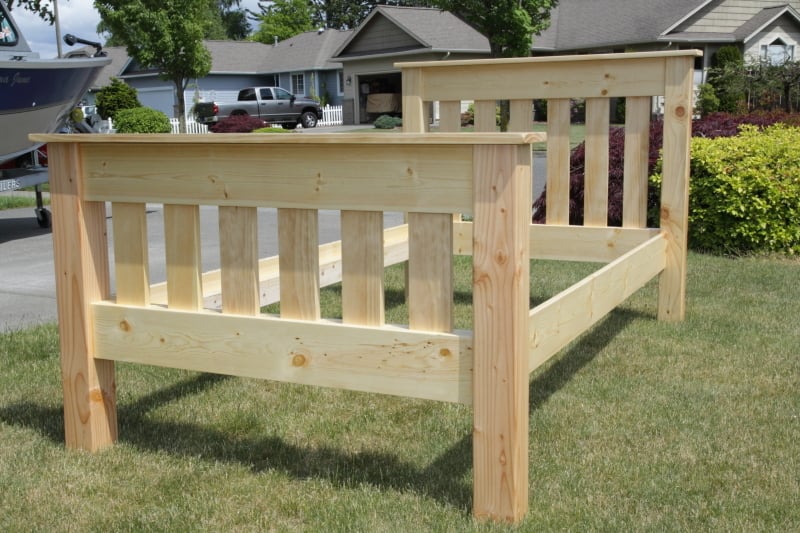
We chose to go with a 1 x 6 instead of a 2 x 4 for the top of the head and foot boards.
Tue, 05/29/2012 - 16:29
Can you take the bed apart in case you move? You did a great job.
Fri, 06/01/2012 - 20:45
Yes it comes apart. A total of four pieces. Headboard, footboard, and the two sides. Also a fith piece if you count the plywood base for the mattress. The sides are screwed in at each of the corners of the head and footboards.
Mon, 05/12/2014 - 19:01
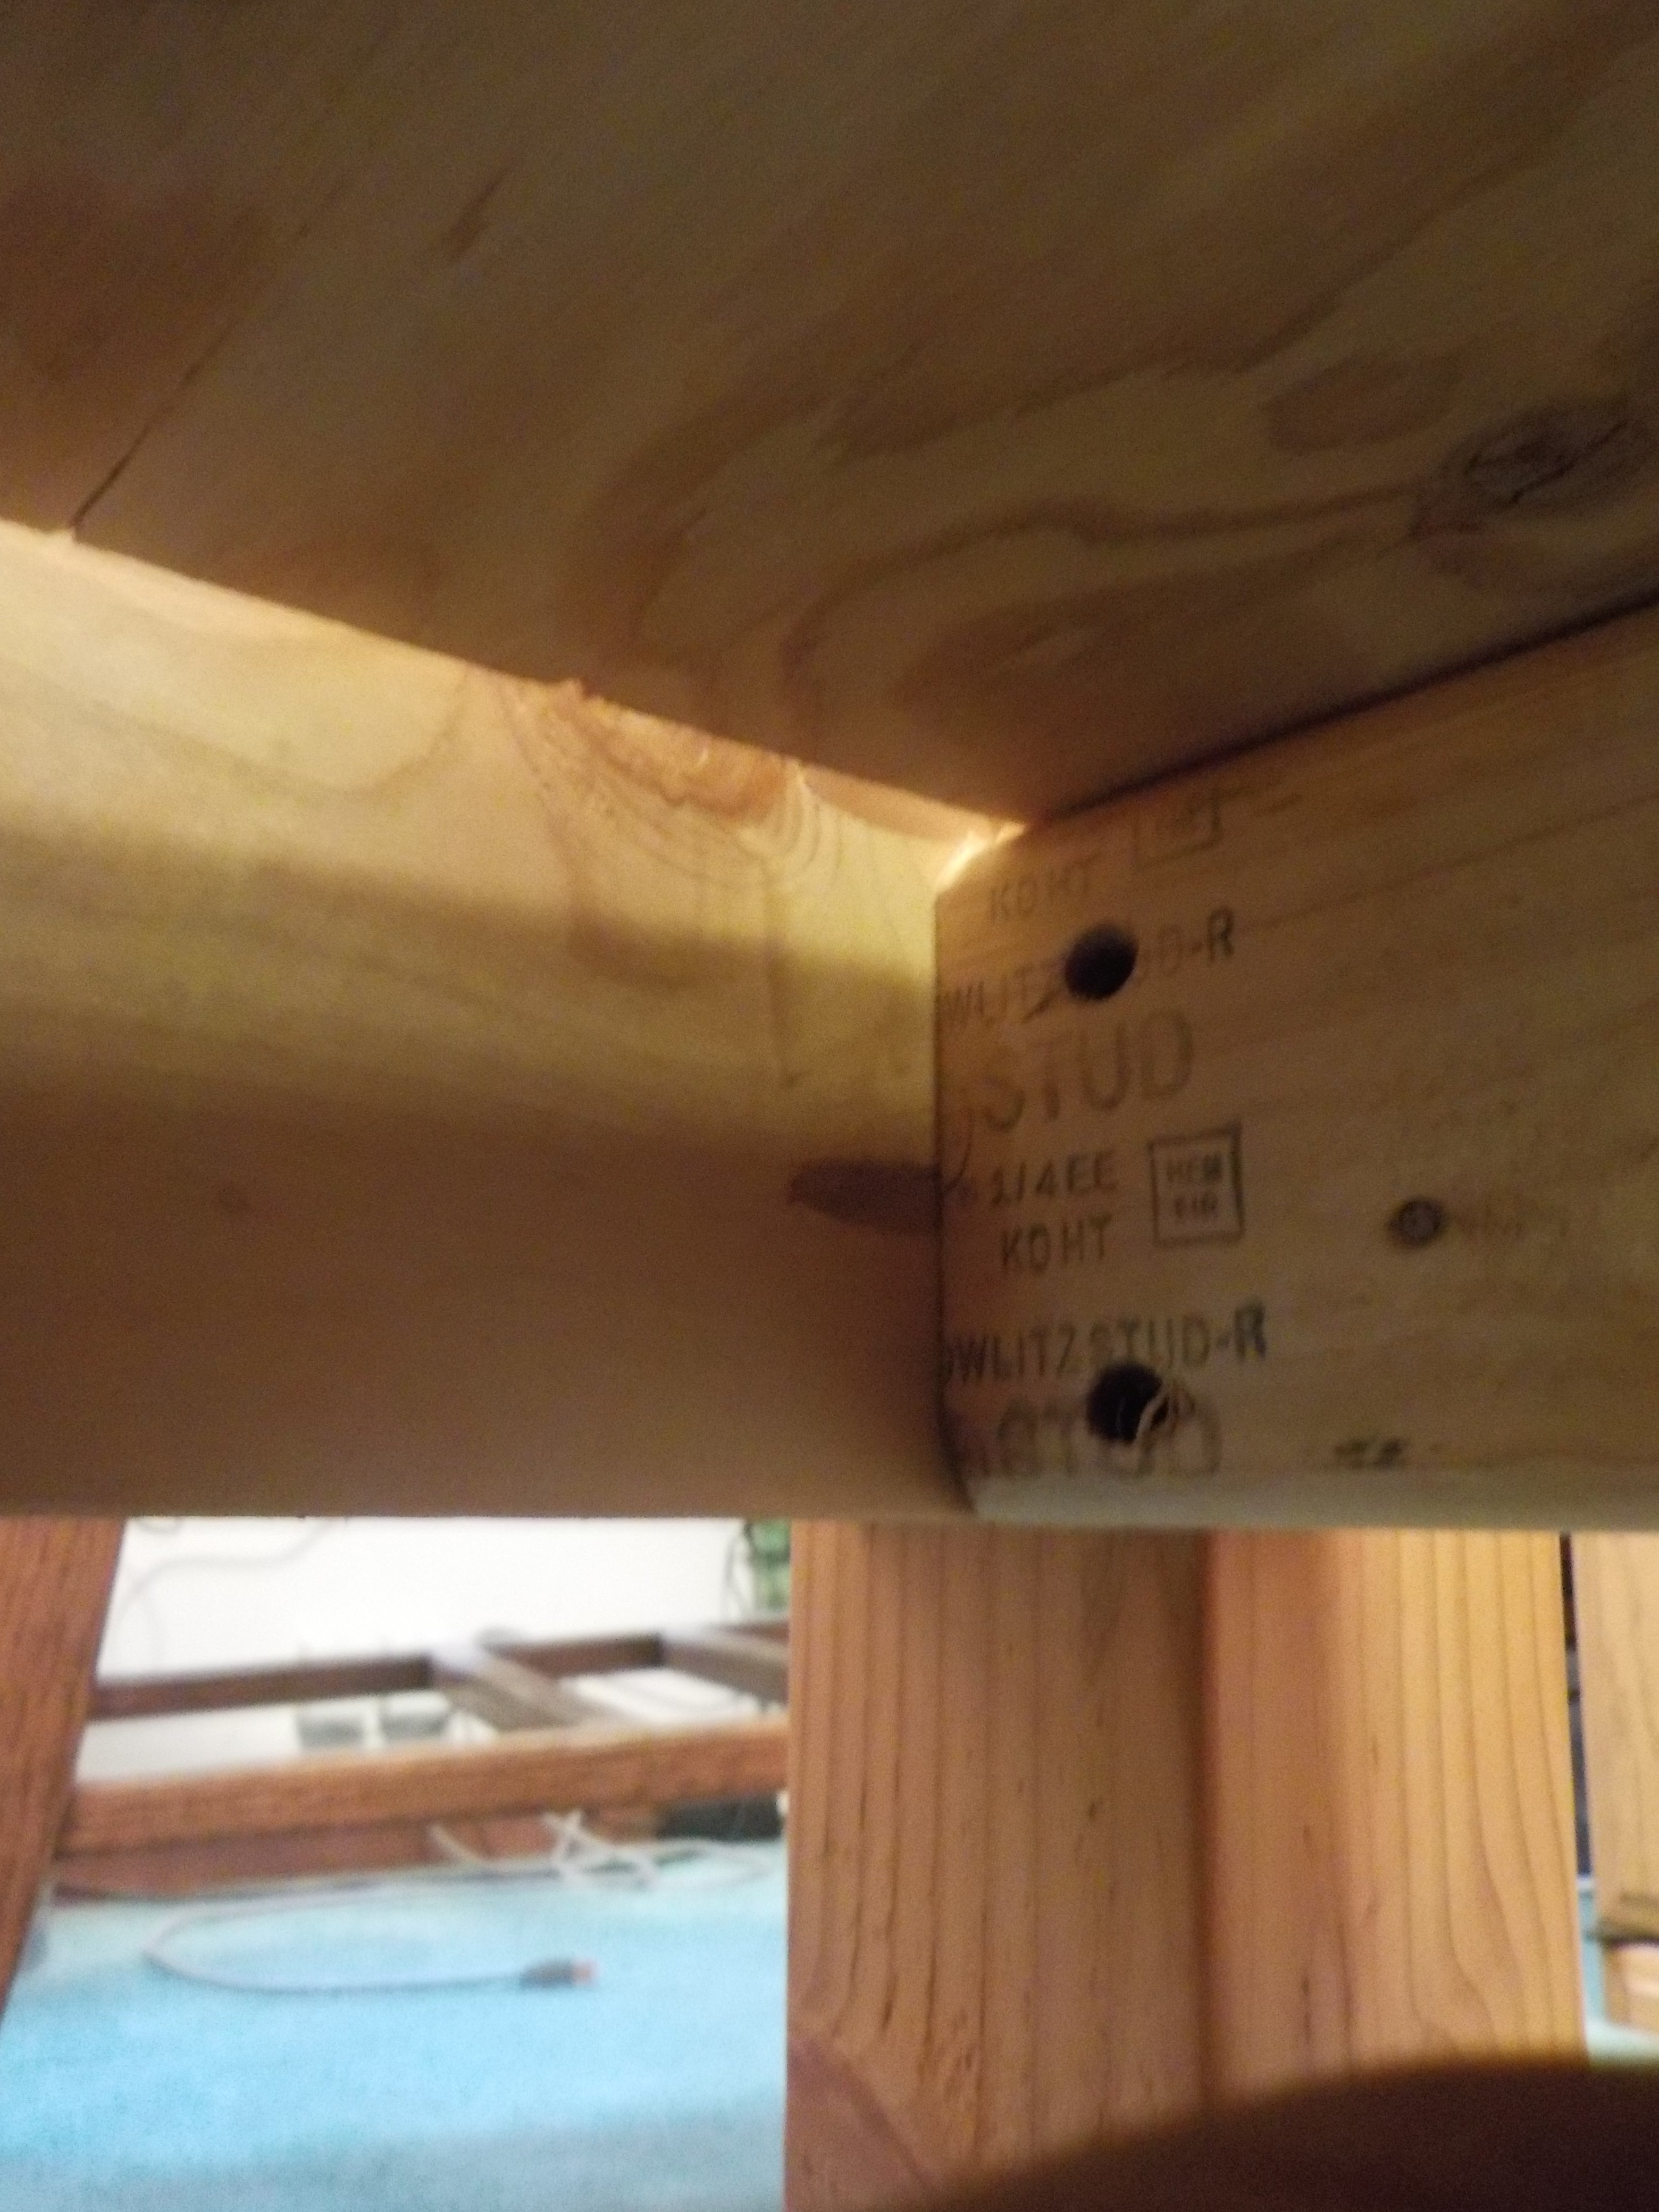
Thinking of building this for my son as we move from crib to bed. Just curious how sturdy and strong the bed is? From the pictures it doesn't look like there's much wood where the rails attach to the head and footboard. Did you use pocket holes and screws? Any comments on how it's held up, what you might do differently? Also any idea if it'll hold a kid and parent for nightly story time?
Thanks...nice work!
Wed, 05/14/2014 - 15:22
It is in our guest room and does not get much use. However, it is screwed in at the corners not with pocket screws because the rails were too close to the edges. I chose to screw them in starting farther back and at a 45 degree angle to send the screw deeper towards the center of the four posts. It is very strong. Another suggestion would to purchase bed hardware. Hardware can be found online or in a hardware stores for attaching rails to bed posts. I've used such hardware for fixing commercial beds I've purchased.
Hope this helps.
Tue, 01/20/2015 - 15:25
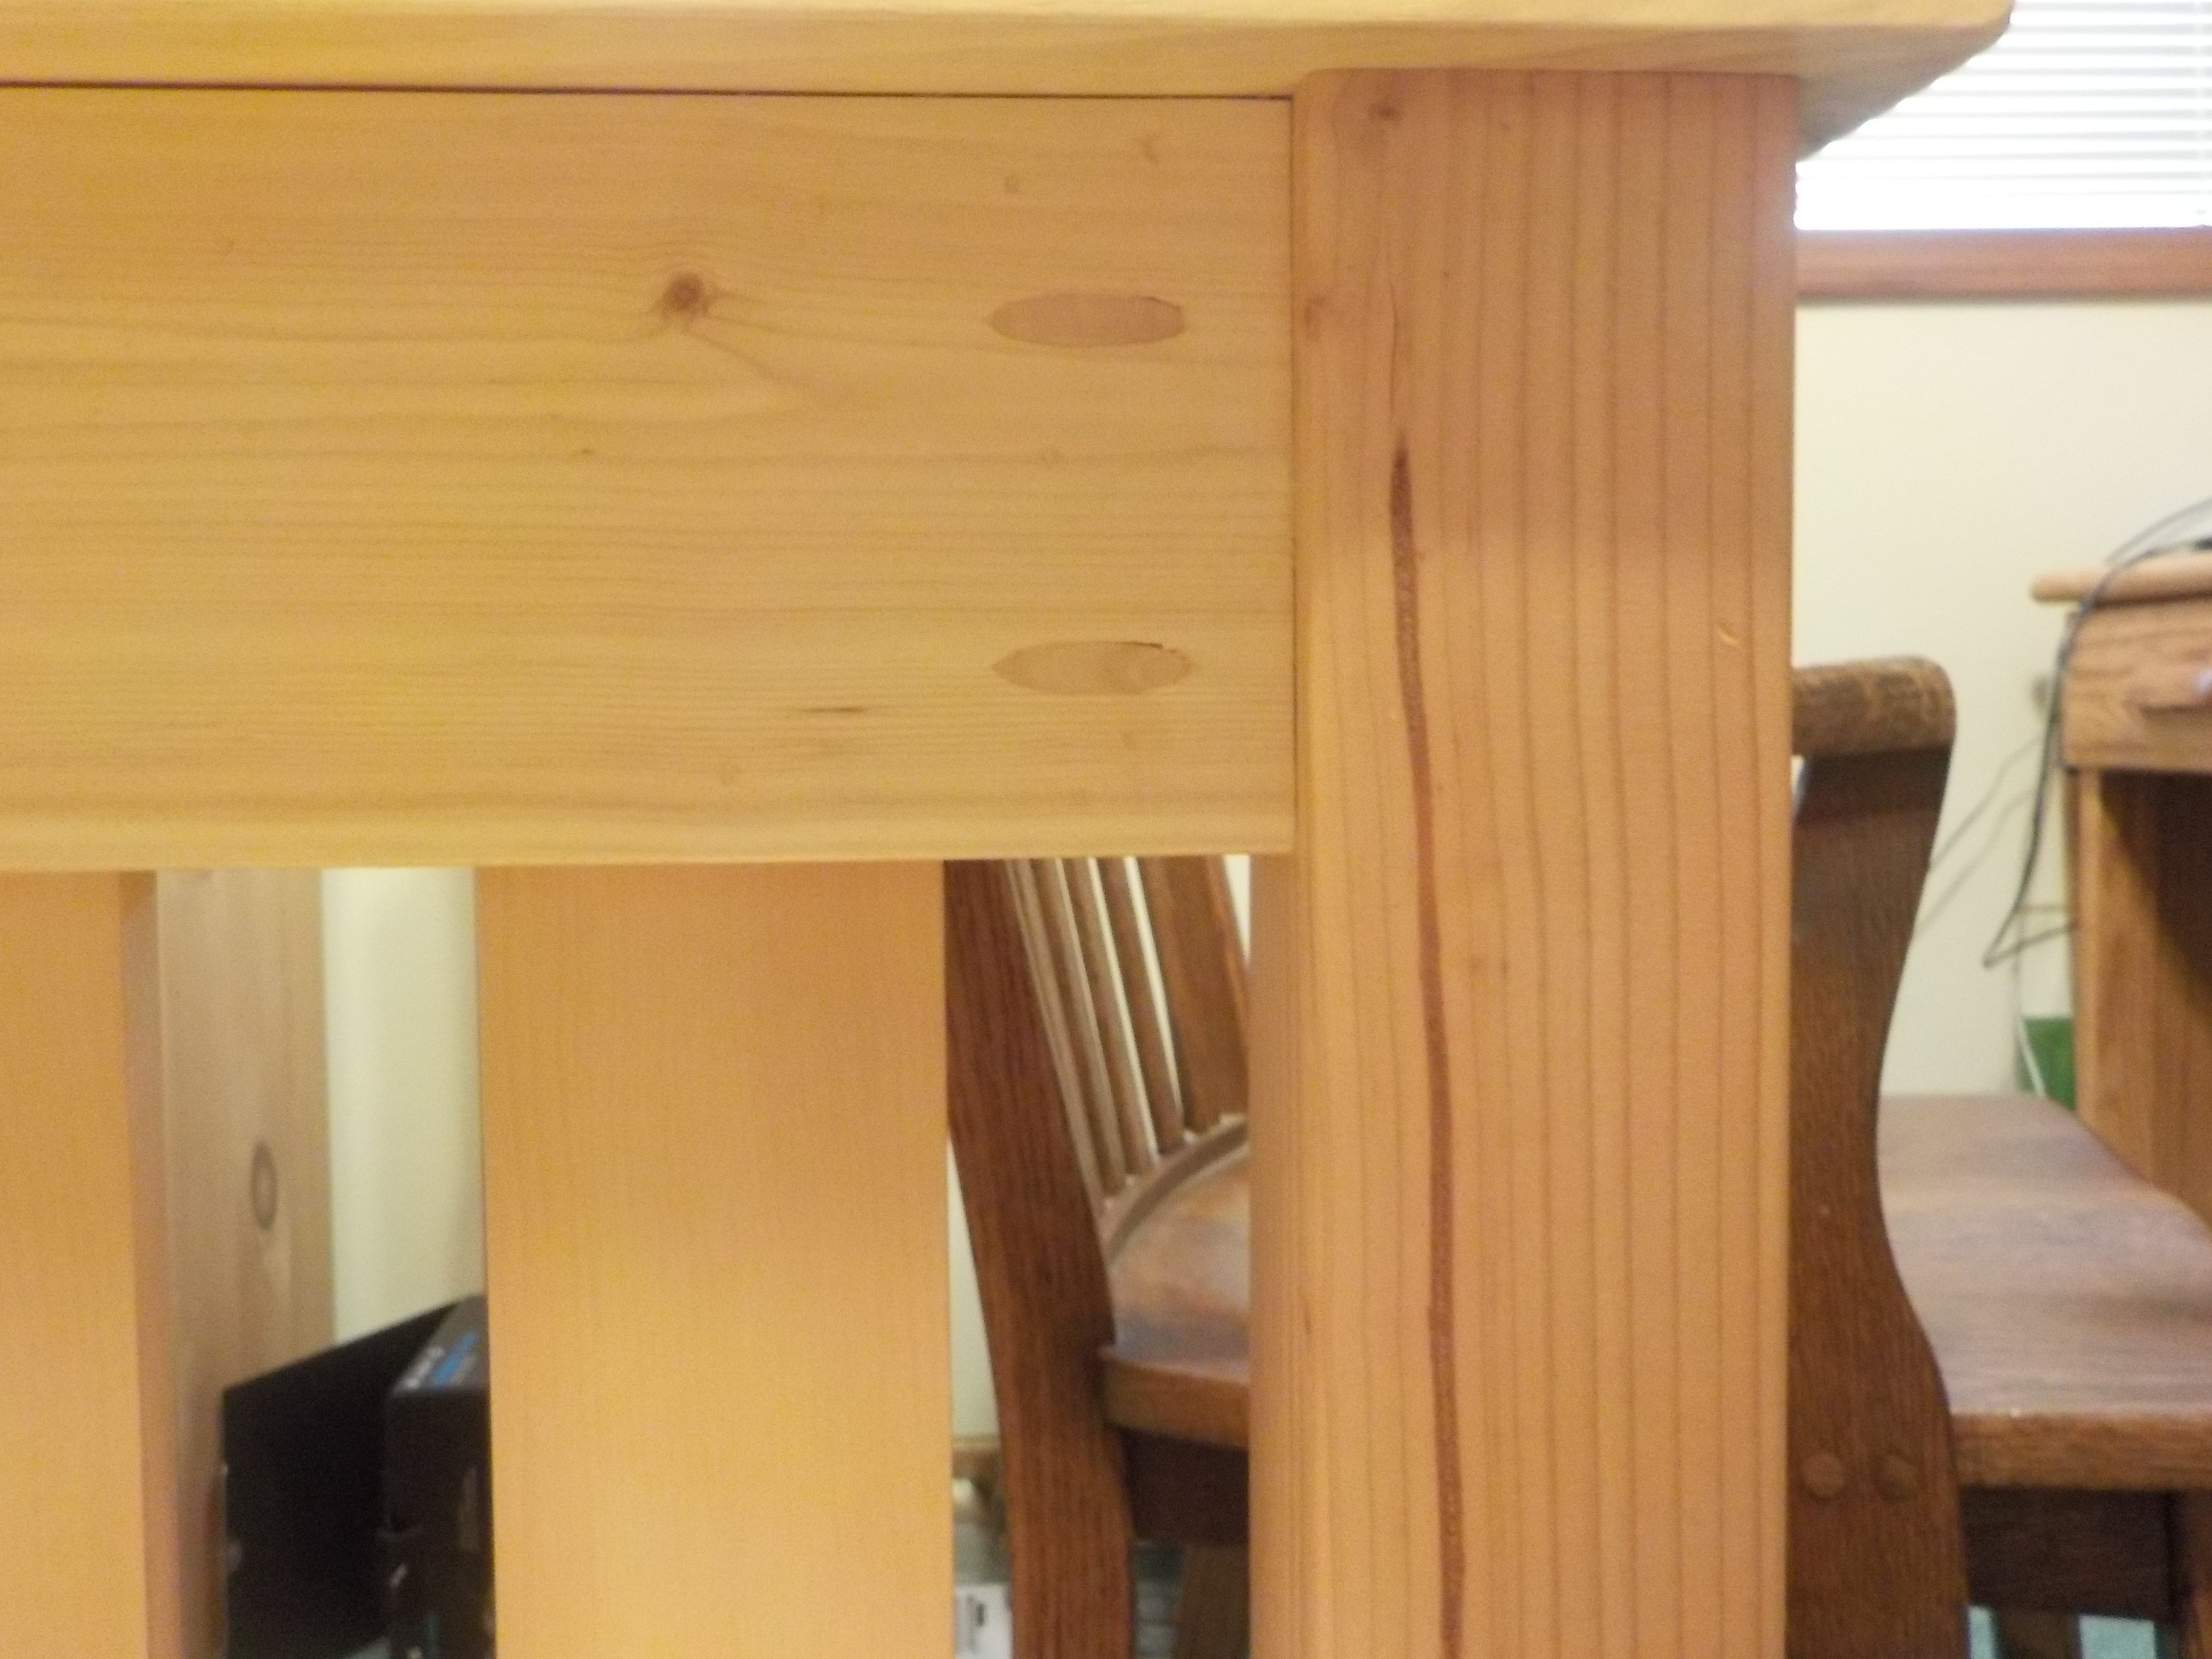
Sorry it took so long to answer. Where I put the screws depended on how the bed was going to be placed in the room. In our case, the headboard was going to up against a wall. Therefore the screws were on the wall side of the headboard. The footboard of the bed had the screws on the mattress side. Kreg sells pocket hole plugs that work very well. Glue them in after you screw the head and foot boards together and sand them before finishing.
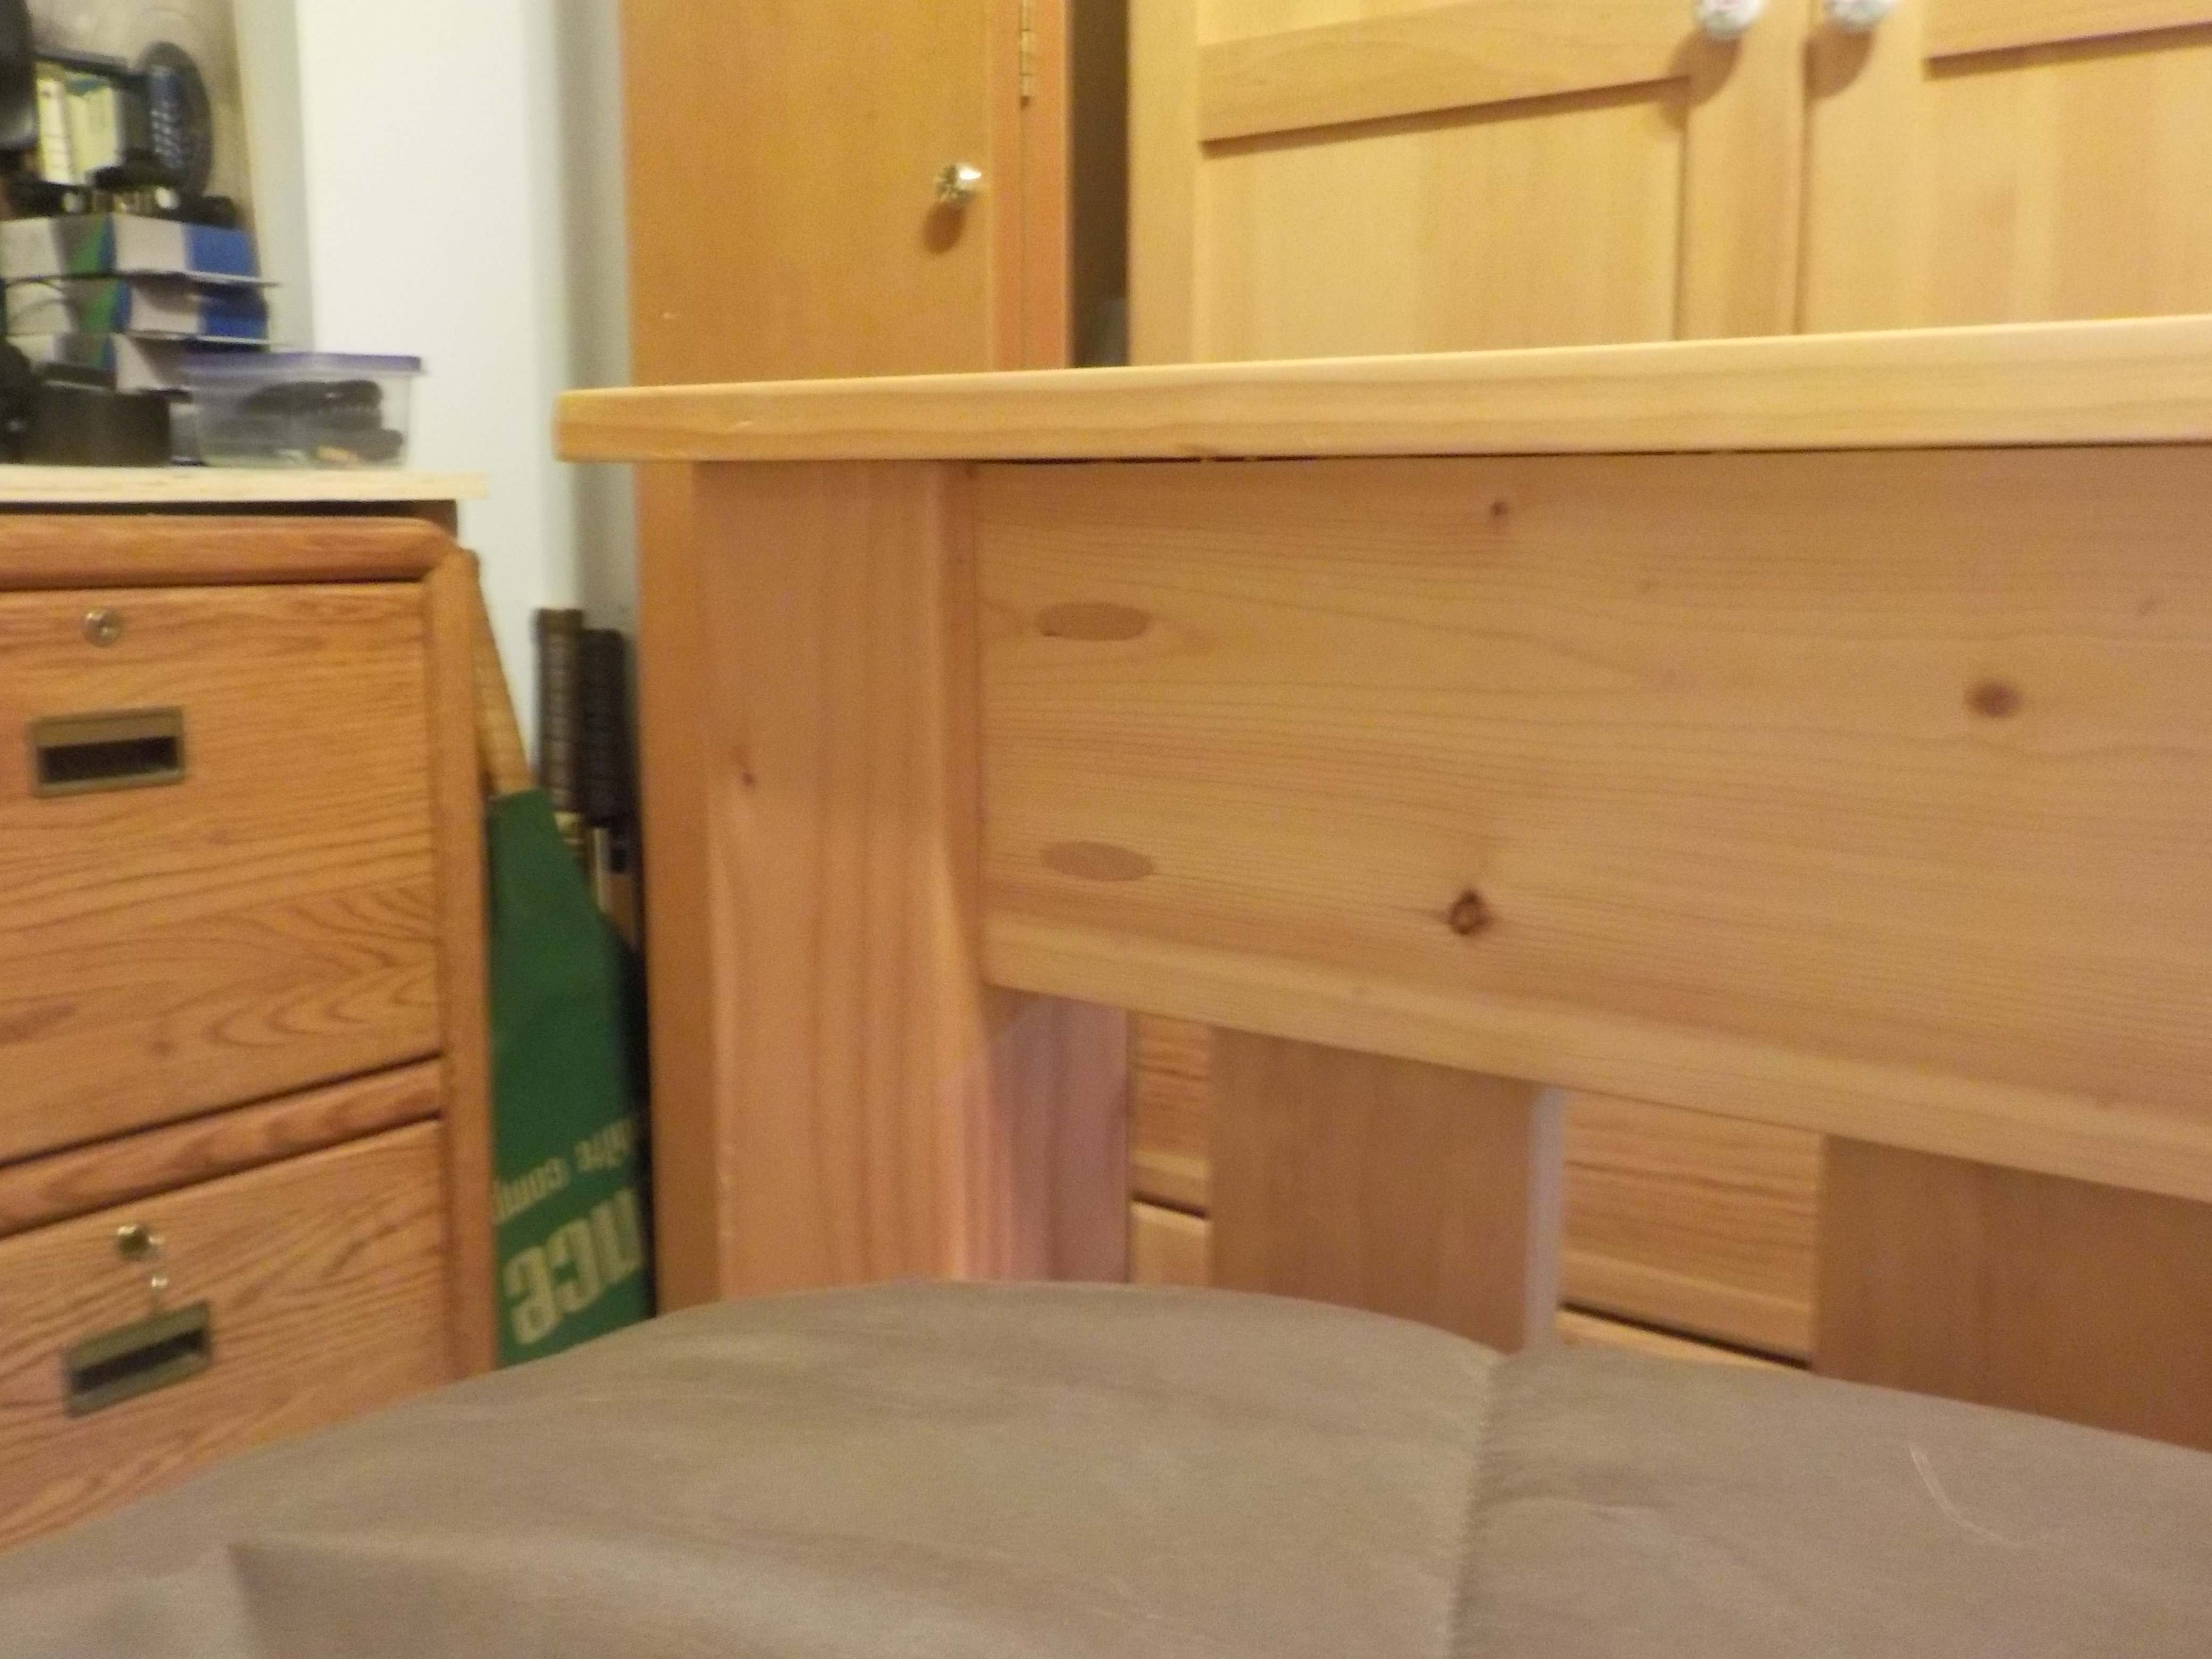
The sides of the bed that are attached to the head and foot boards and screwed in too. I had to screw them in at a sharper angle to get enough sideboard material but deep enough into the head and foot boards in. Use the longest screws possible for strength without going all the way through the four corner posts.
Tue, 01/20/2015 - 15:50
Either way described above will work. See added photos of plugged finished pocket holes and underside attachment to foot-board.
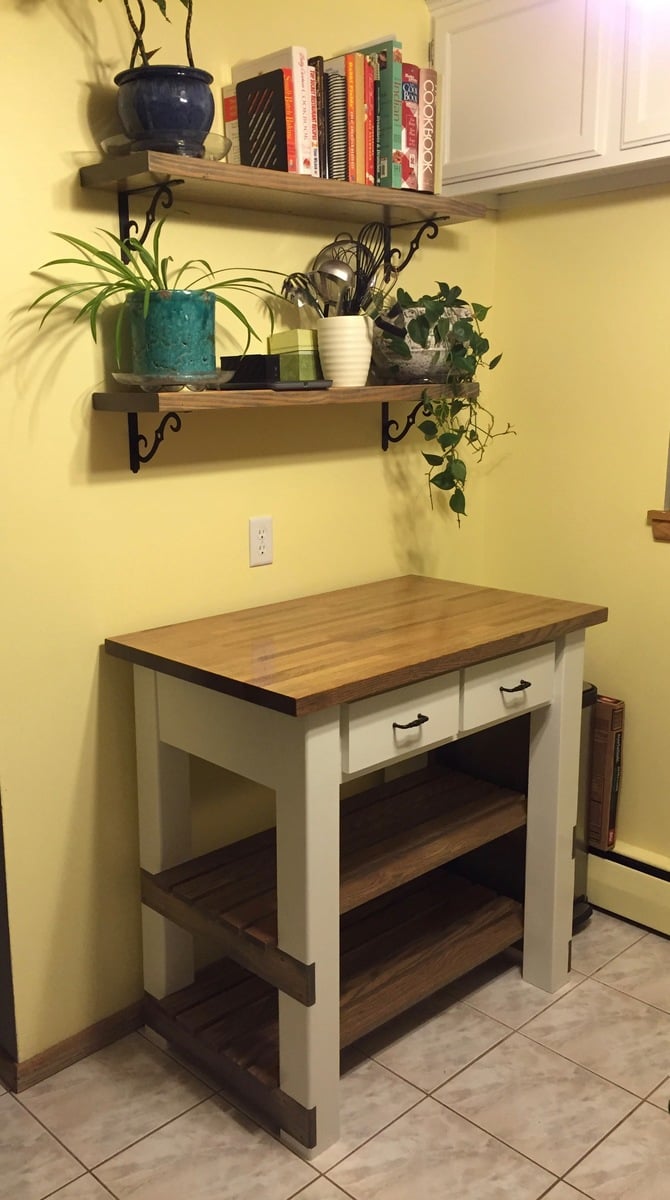
My wife and I wanted to replace an ugly metal wire shelf in our kitchen, fortunately Ana had plans for a nice-looking kitchen island! The two new challenges for me with this project were the notches for the shelf supports, and the drawers. I was able to figure both out and am glad to now have those skills in my toolbelt. The top was a pre-made red oak board from Menards. The other shelves are red oak, the rest of the frame is pine.
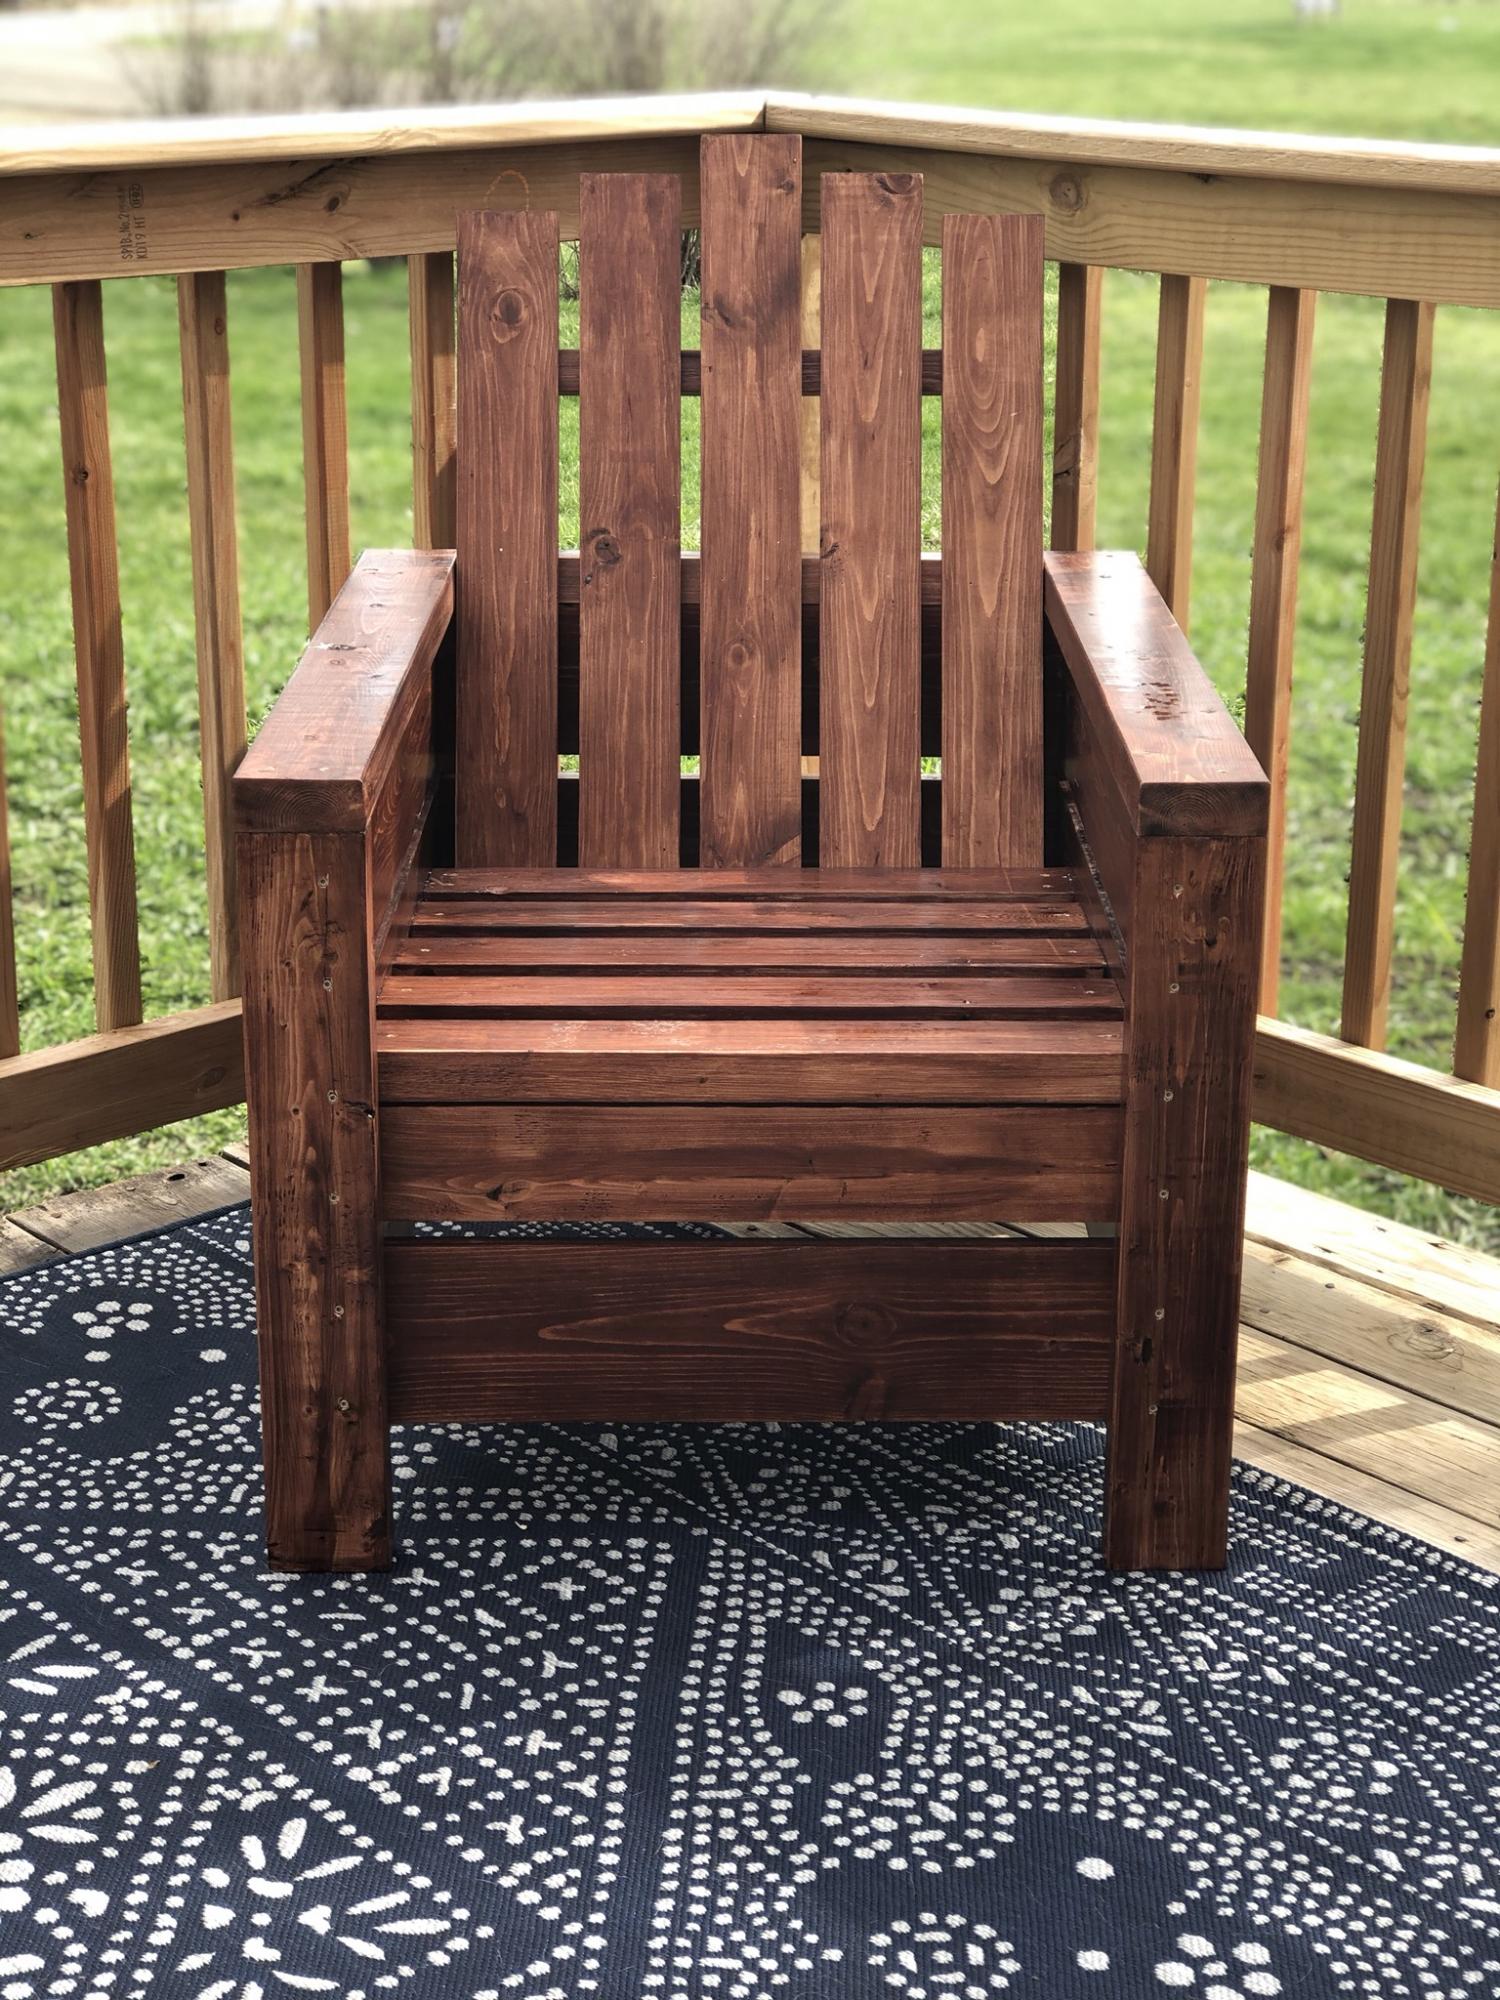
Adjusted the height of the back to better support back cushion.
Angled back and seat boards for relaxed fit.
Used pine boards for side of chair.
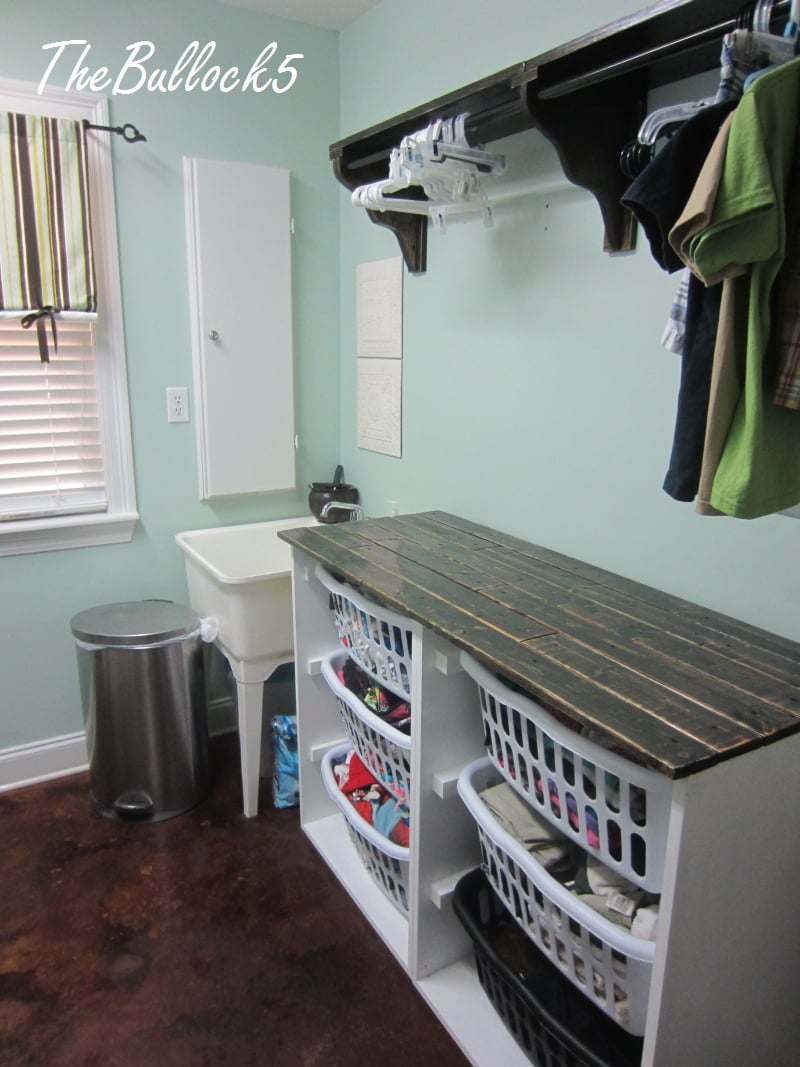
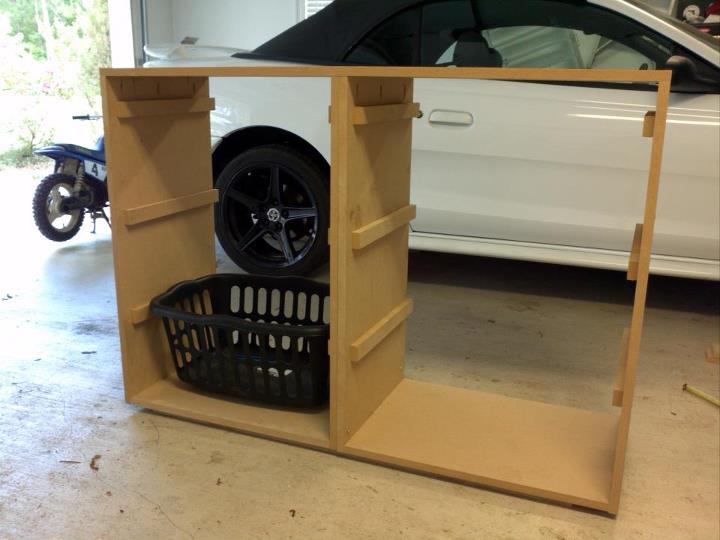
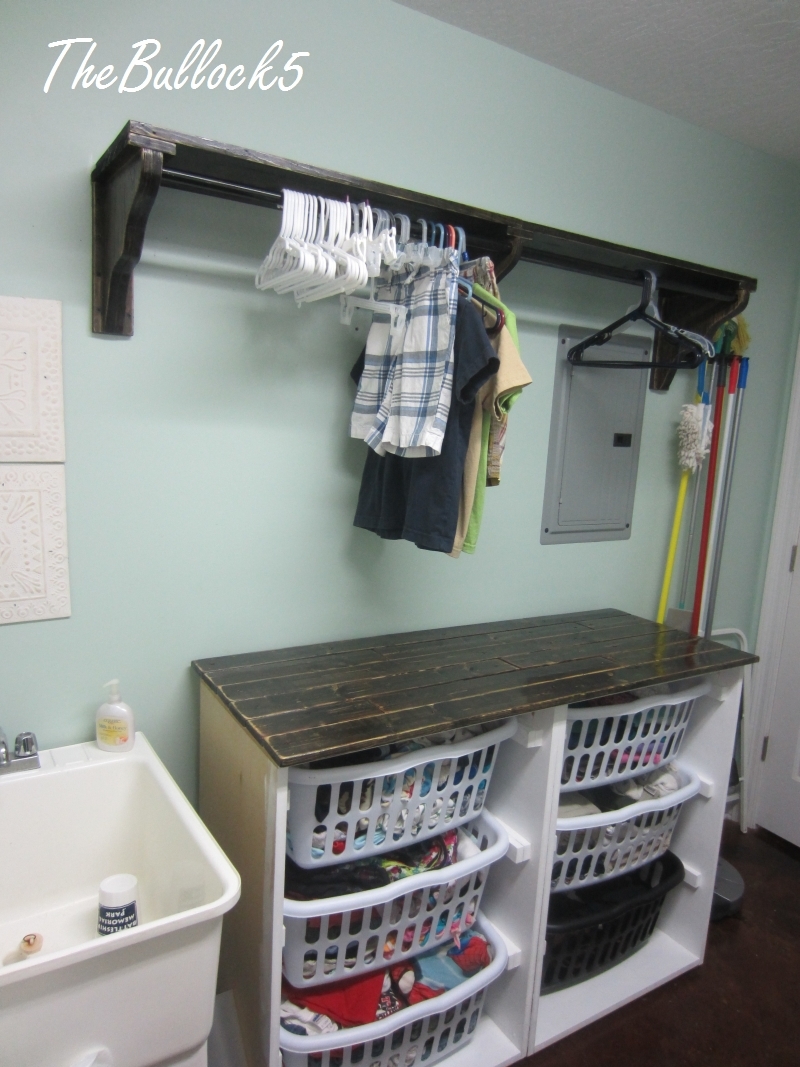
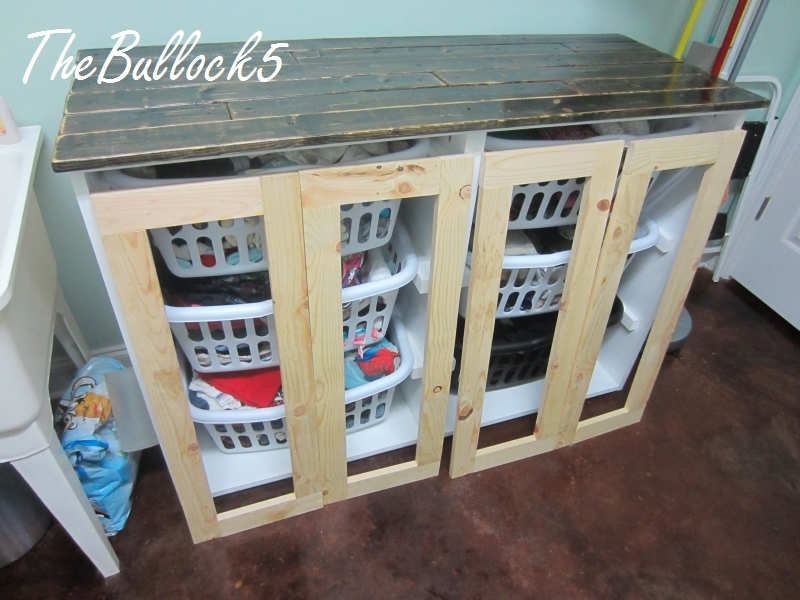
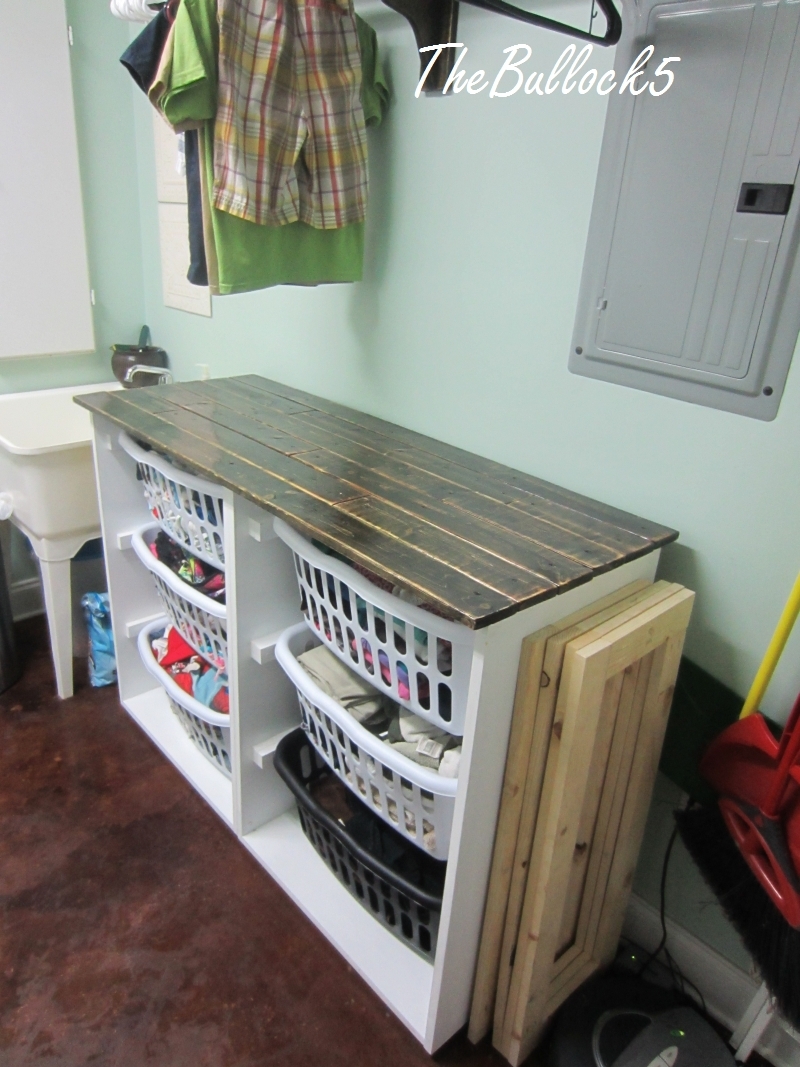
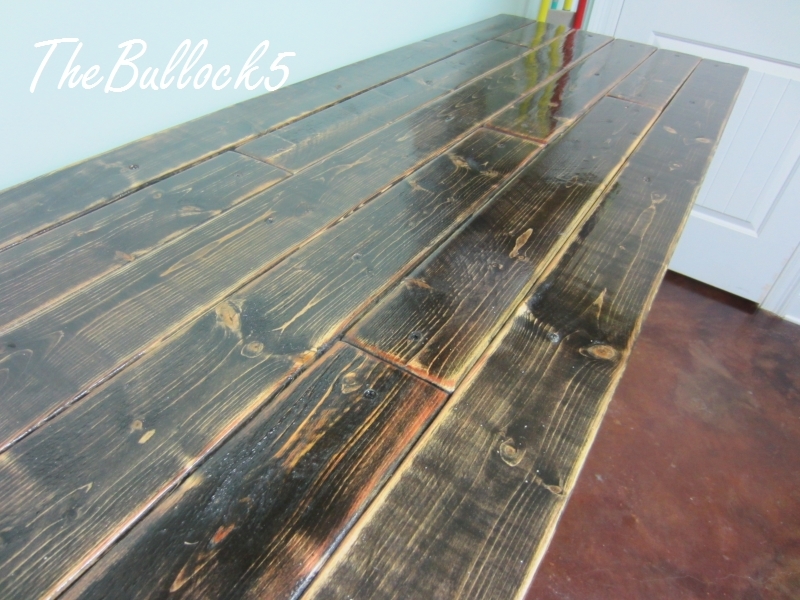
more details on my blog. I built 2 of the laundry dressers. adjusted the placement of my baskets due to restrictions in the overall height of my unit (I have a ironing board cabinet built into 1 wall that I still wanted to be able to open and use :) I used MDF, but it was a bear to work with and next time I would spend the extra $$ on birch. i painte the bottom in a semi gloss. and plan to add the doors (which will have a beadboard backing) they will be painted white with a dark walnut glaze. The top and shelf /brackets are all done in a distressed finish with ebony and mahogany stain mixed then 2 coats of poly very sturdy even filled!
Fri, 06/26/2015 - 00:00
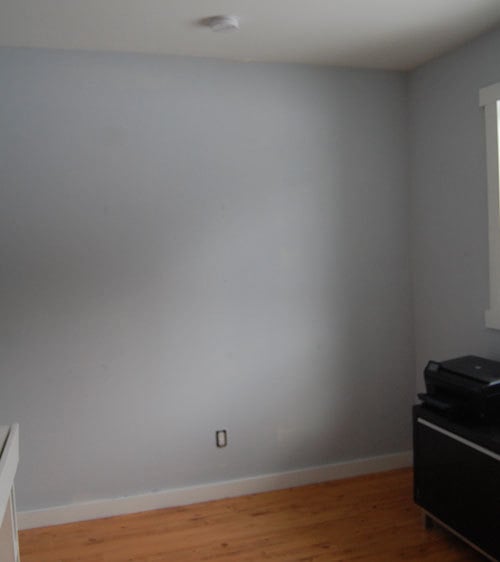
I have been wanting to make the laundry basket dresser but am holding off because we are moving. What color did you us on the walls, I love it.
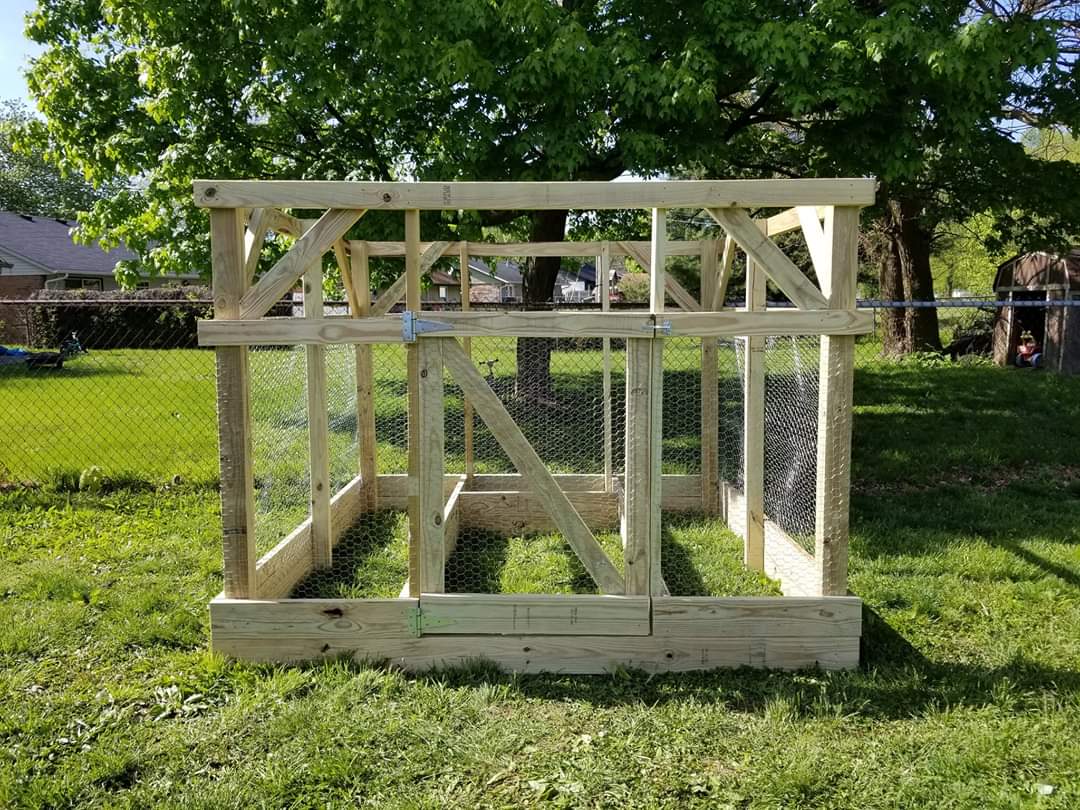
We decided that we wanted a raised garden and found the plans here on Ana's site that we really liked. The plans were really easy to follow and it only took about a day and half for our kids and myself to build for my wife. Only issue I had was the door... that is getting it square but I figured it our later after looking at it long enough. The two 2 x 4's the door sits in between were not level. So I have got to adjust them and the door in the coming days to correct it. Other than that we absolutely love it! Thank you for providing the plans to all these projects. This is the second thing that I have made from this site. I will be making another post later on regarding the other project! I might add I have never done anything like this ever and honestly I think it turned out great :-)

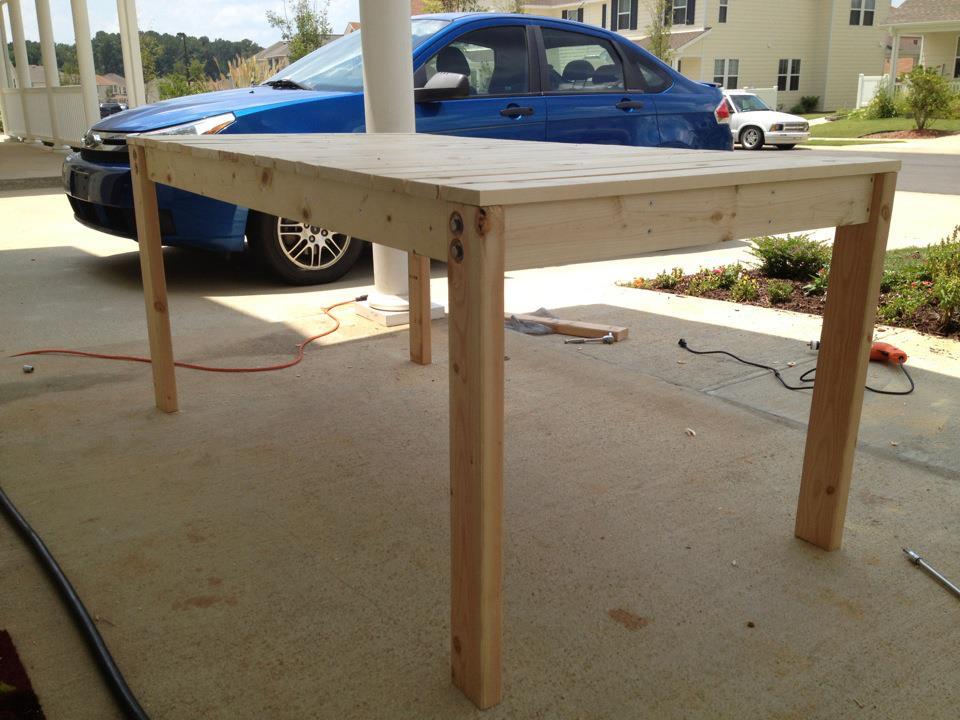
Followed the directions for the simple outdoor dining table. Mine is still unfinished. Plan to paint and primer it white. There were some errors in the plans. Do not screw the top framing together with butt joints and still expect to be able to put the leg bolts through. They will hit each other. It was only a real problem for me on one of the legs but if I had knownthere would be a problem I would have found another way from the start.
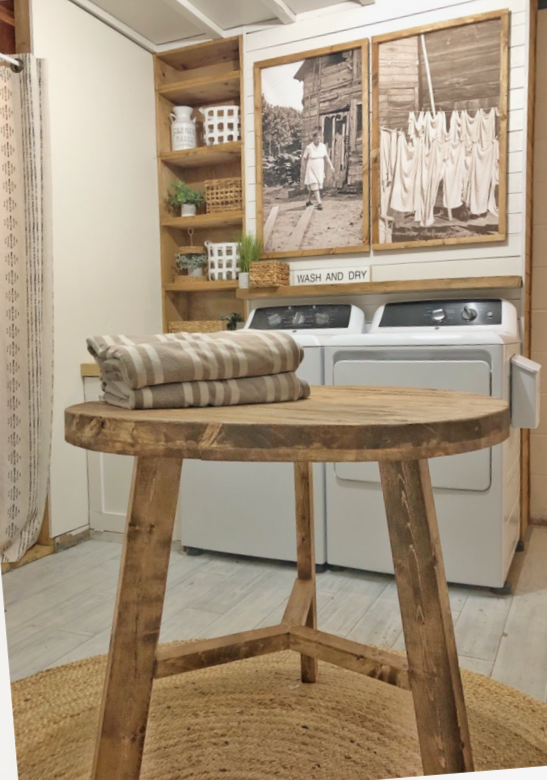
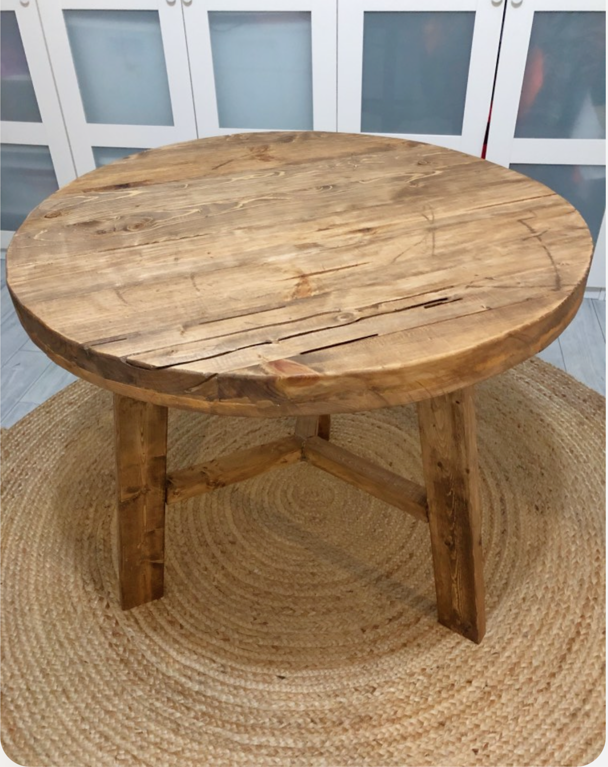
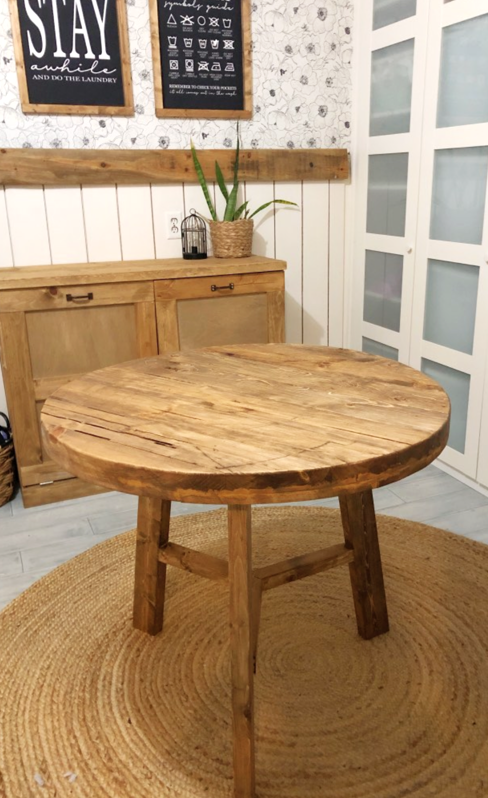
The perfect table to toss and fold my laundry! I love how it turned out. It’s practical, stylish and perfect for my laundry room vibes.
Another #anawhitediy for the win!
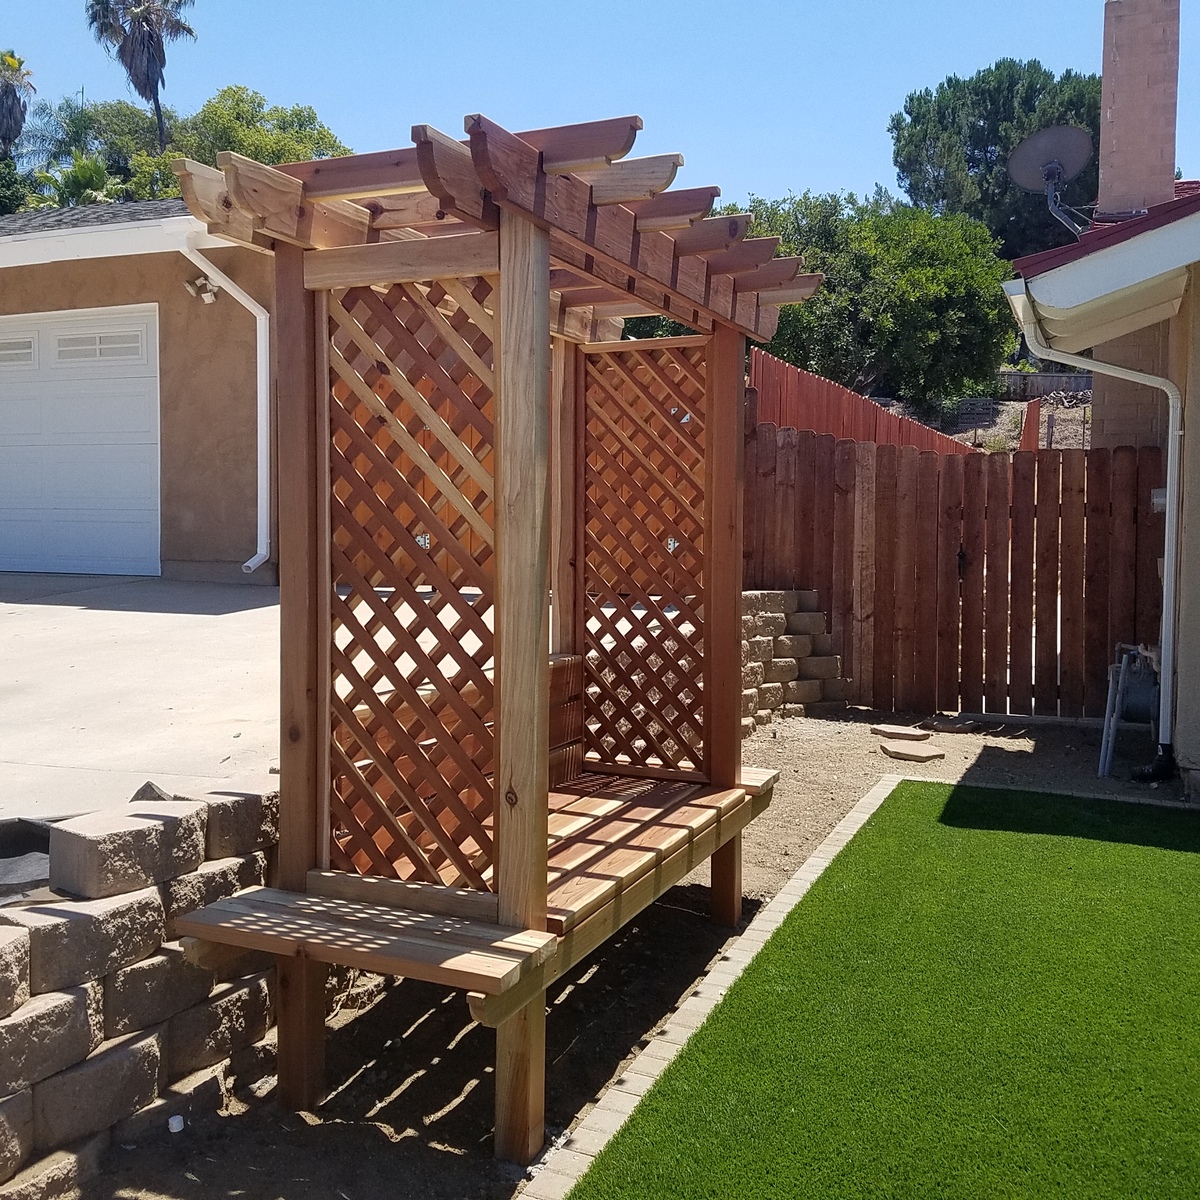
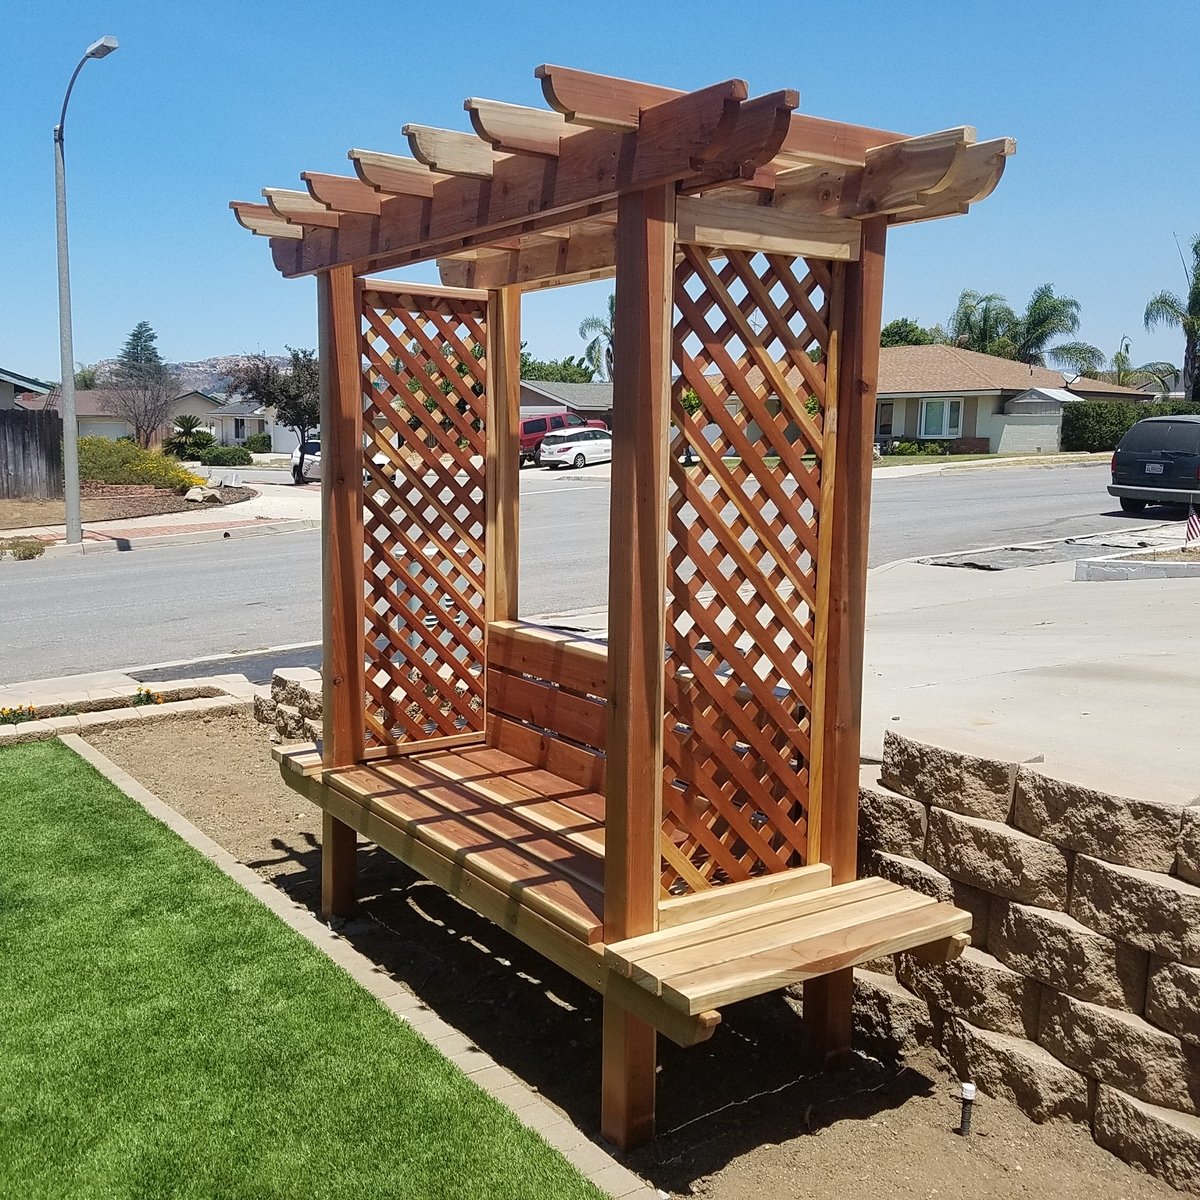
I built this arbor using the plans you provided (http://www.ana-white.com/2014/06/plans/outdoor-bench-arbor). Finish it just in time for my wifes birthday. She absolutely loved it. Thank you!
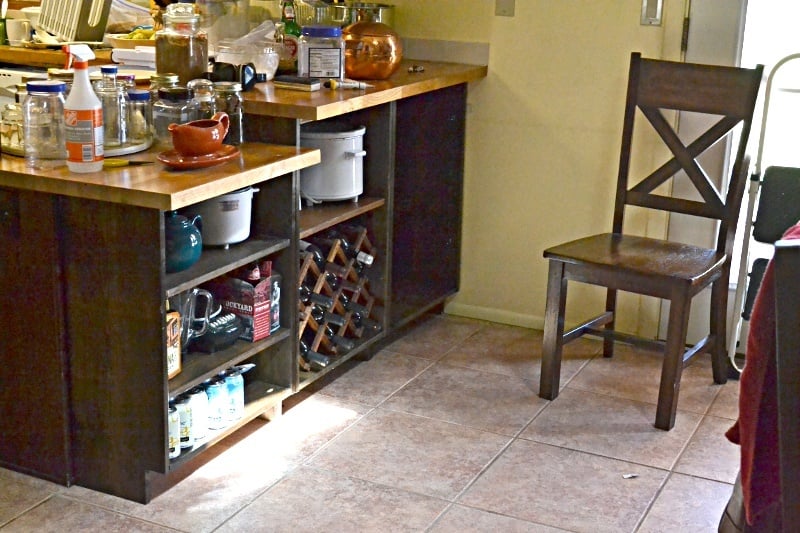
Added kitchen and dining room storage by building bookcases / shelf units to fit under the peninsula breakfast bar overhang. It's the simplest possible "box with a toe-kick", loosely based on Ana's plans for a bookshelf and the closet master system.
Much of the "working time" was stain and finishing time. Actual cutting and assembly time was under 3 hours.
No dimensions: every breakfast bar is different.
1 - The boards were cut to fit under the overhang, with 1/8 or less clearance. Top and bottom of unit is between the upright pieces.
2 - Width of units was also cut to fit. One unit is the width of the lower section of countertop (appx 23 in), the taller section was divided into 2 equal units (appx 21 in)
Shelves were cut about 1/4" narrower than the insiude dimension of the unit, to allow for insertion and the shelf pegs.
3 - Toekick space cut to match the cabinet on the far side of the peninsula. Used a circular saw and then a hand saw to finish the corners.
4 - Drilled pocketholes in the top and bottom boards.
5 - Used Rockler's jig for drilling shelf pin holes in the 6 uprights. Oops! I should have drilled every possible hole. I drilled every other hole and don't have the shelf flexibility I really need.
6 - Stained and topcoated everything, let it dry.
7 - Assembled each shelf unit, using corner clamps and a carpenter's square to make sure it was square. The bottom shelf is screwed at the same level as the toe-kick.
8 - Slid units under the overhang, shimmed them firmly under the countertop.
9 - Added shelf pegs and shelves
DONE!
Doors could be added, using the hinges for inset doors on frameless cabinets.
==========
NOTES:
The units are backless. I considered nailing a 1/8 hardboard back onto them, but because the finished back of the peninsula is visible behind them, and they are shimmed into place to prevent slouching it was not needed.
Cost is low because we had some 1x12 boards in the attic. Already had the tools and stain from earlier projects. 3 1x12 x 6ft boards were new, the rest were salvage.
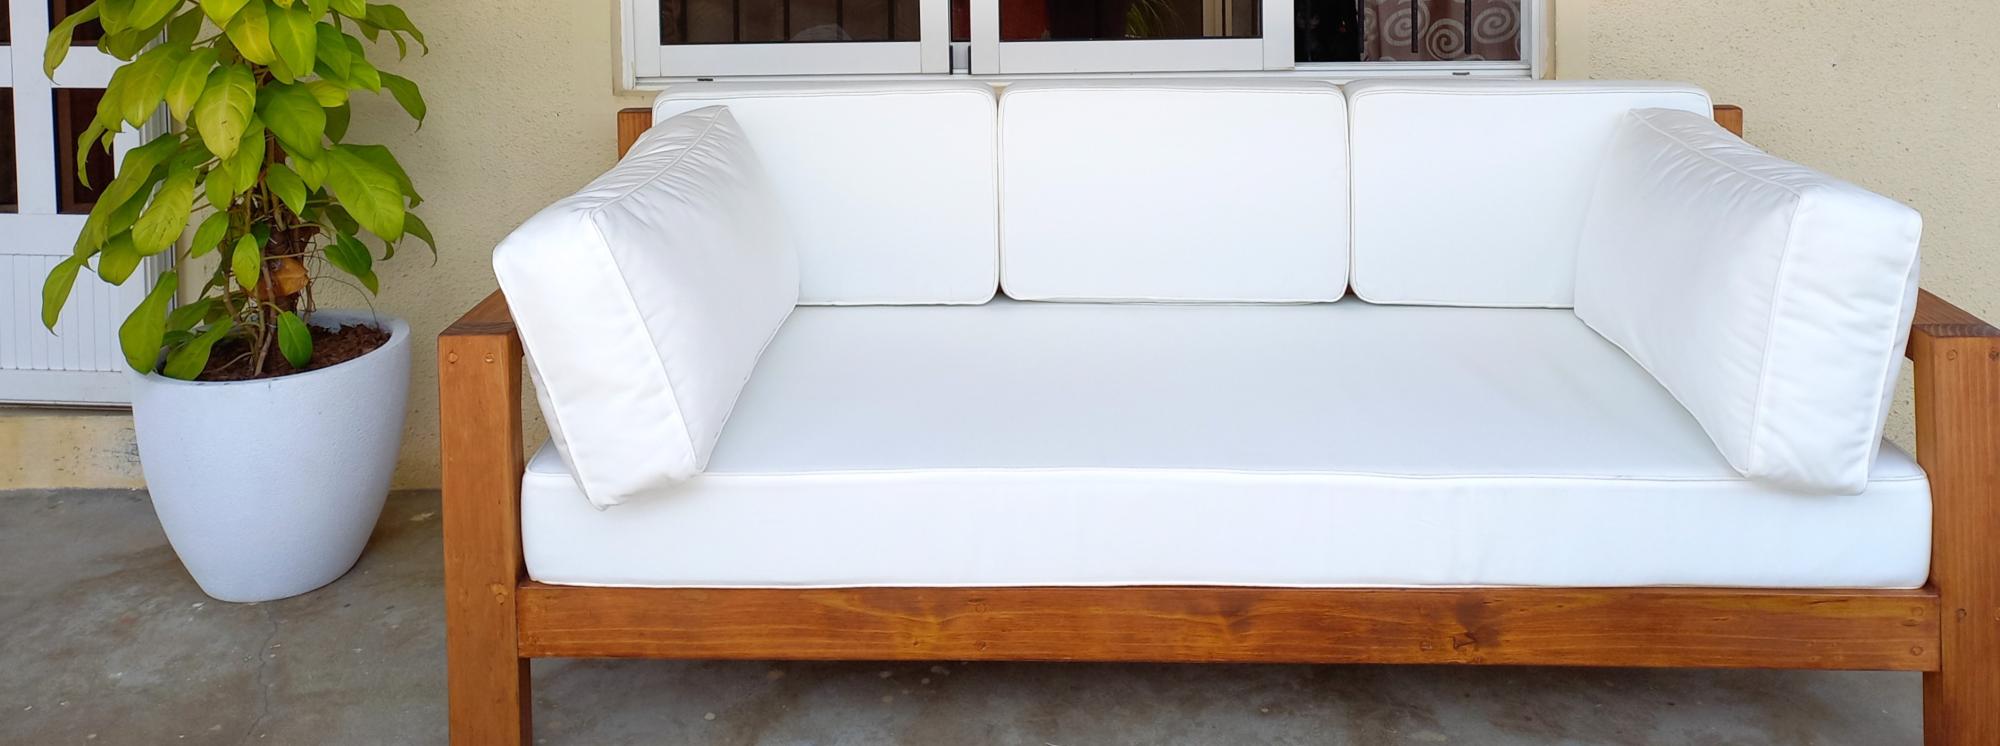
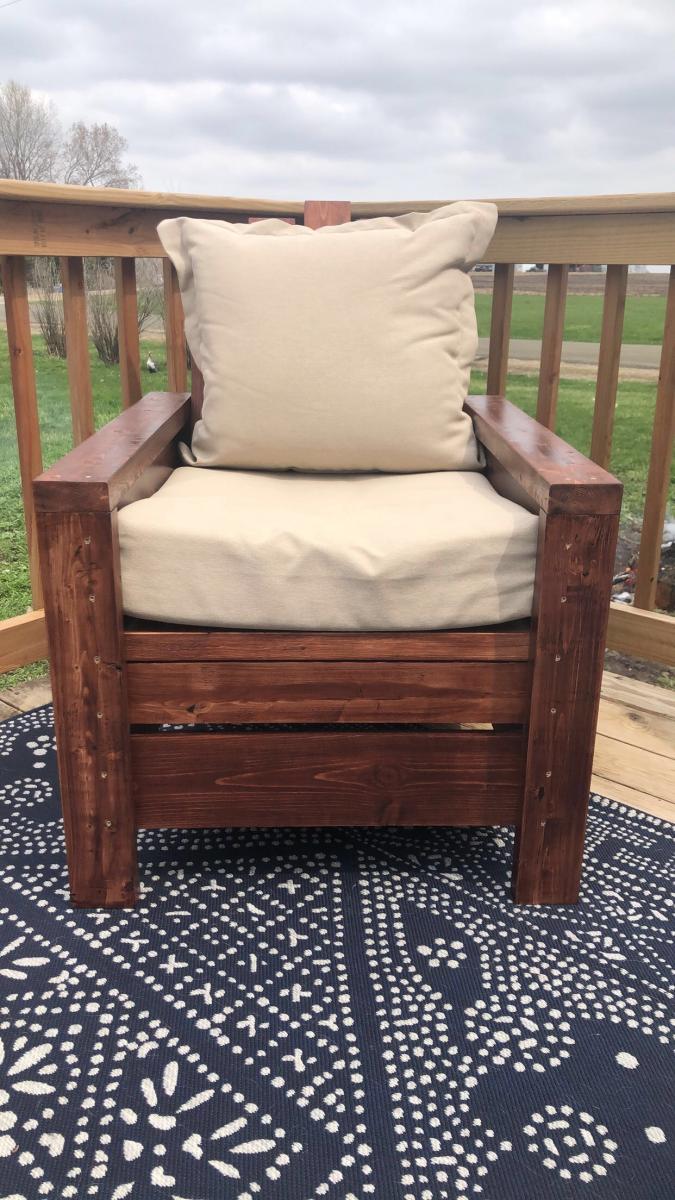
DIY outdoor couch, reader build
Daybed cushions and pillows, modified depth
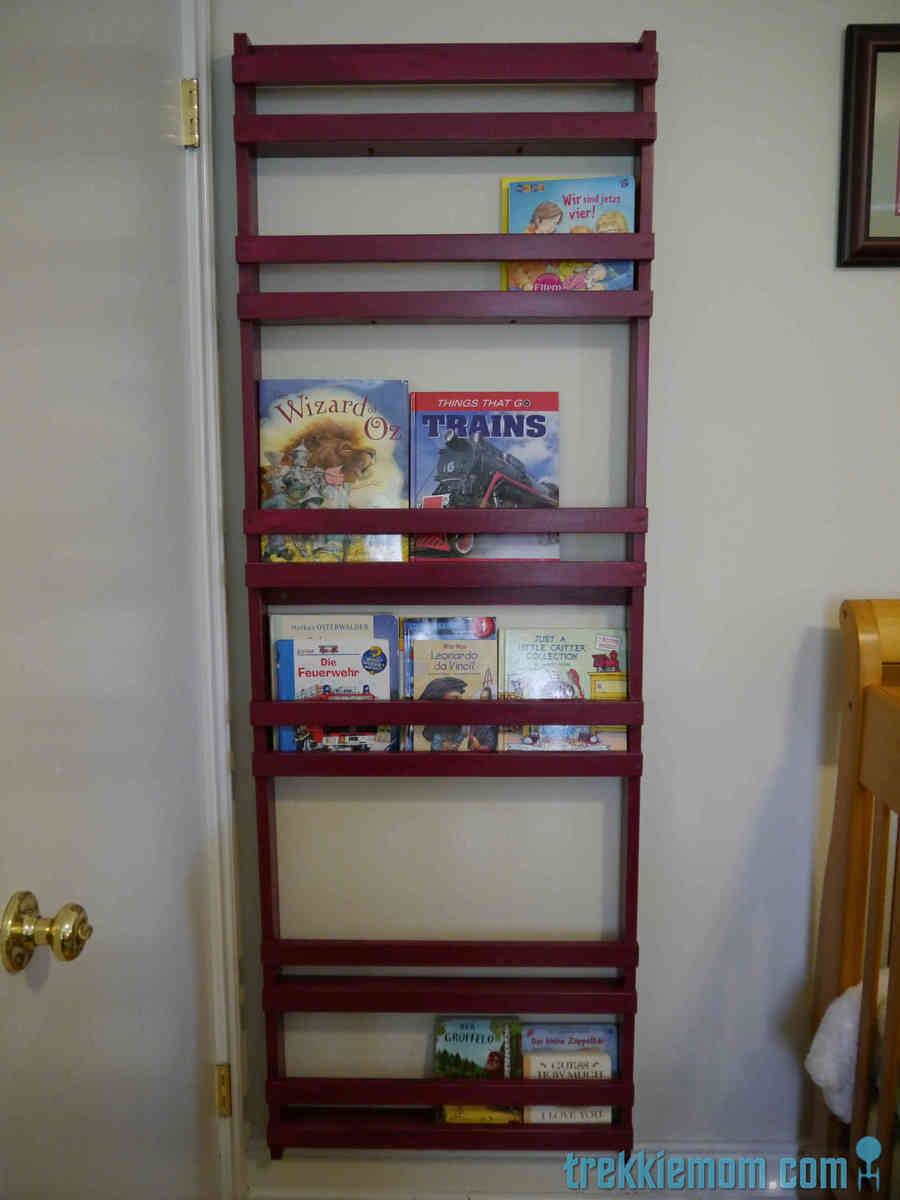
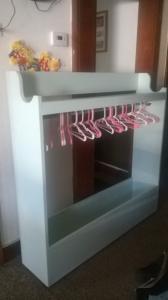
Our home is small, about 1600 sq/ft, so I am on a mission to create as much out of the way storage as possible. It feels like a loosing battle, but I suppose with 2 young children most mothers feel like this with or without more square footage. You might wonder why I don't buy furniture to solve my problems? My answer to that question is that most of the furniture out there is too expensive, it doesn't fit the space available, and just doesn't suit all of our needs. Most importantly, I know that I can make it myself, build it better, and use quality materials. No particle board here, thank you.
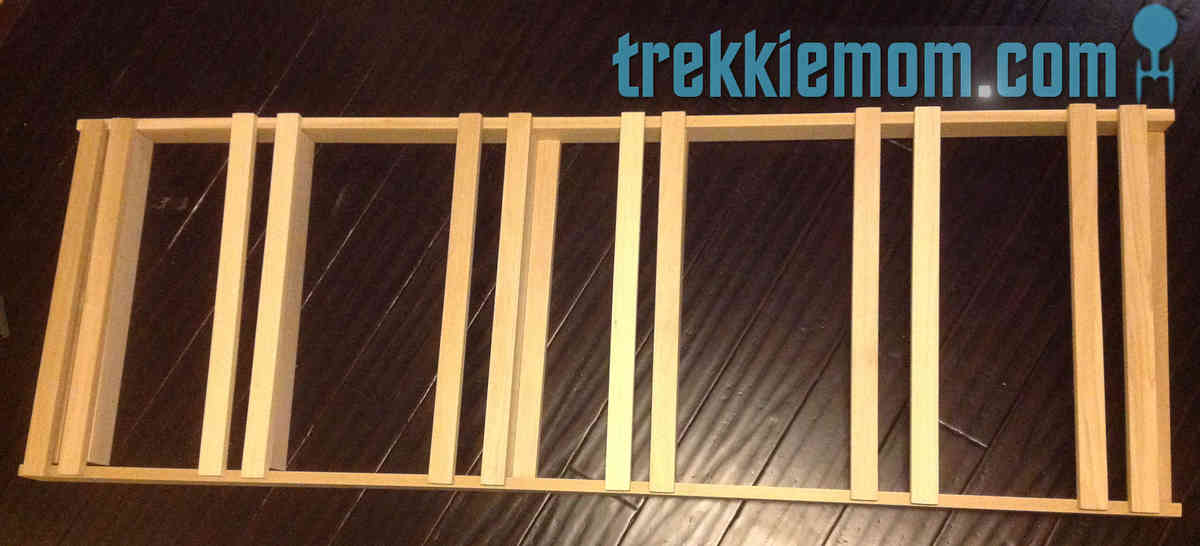
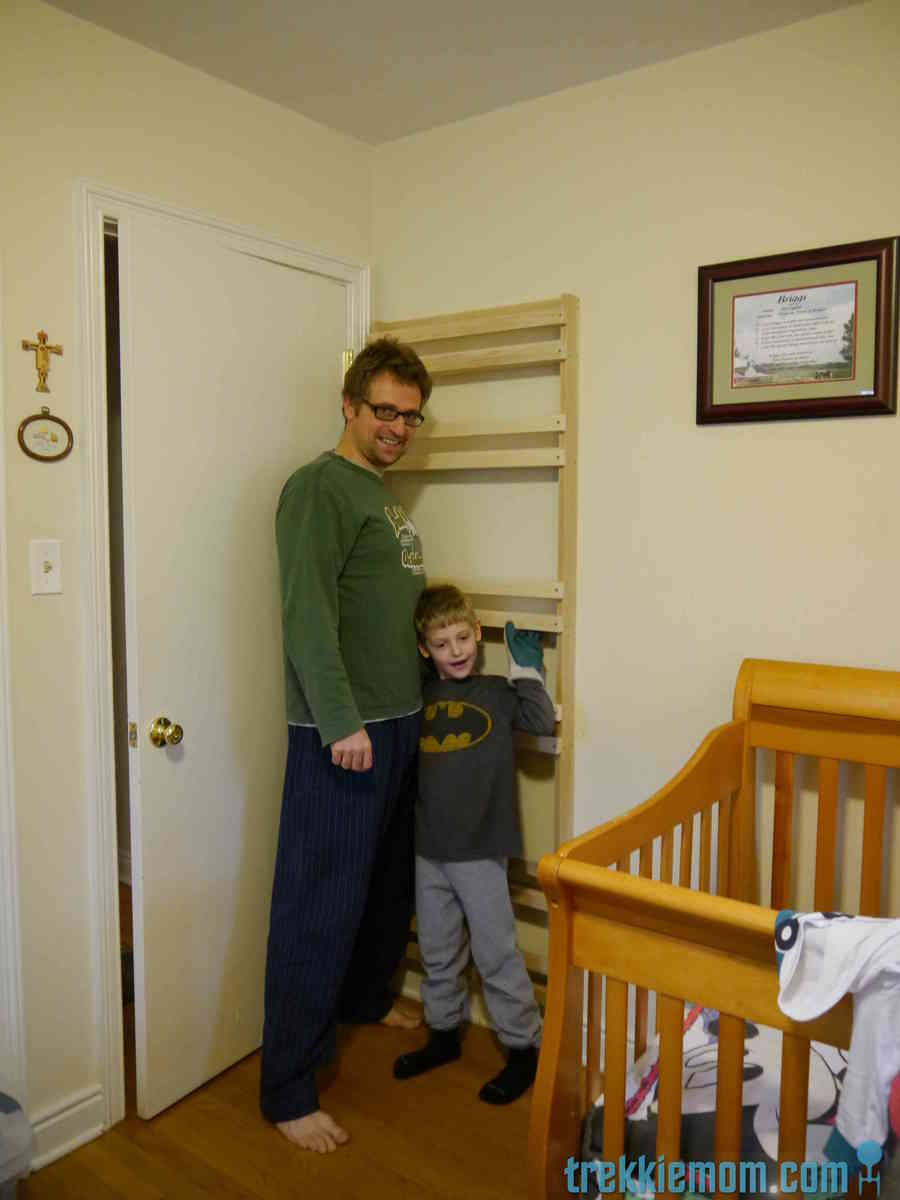
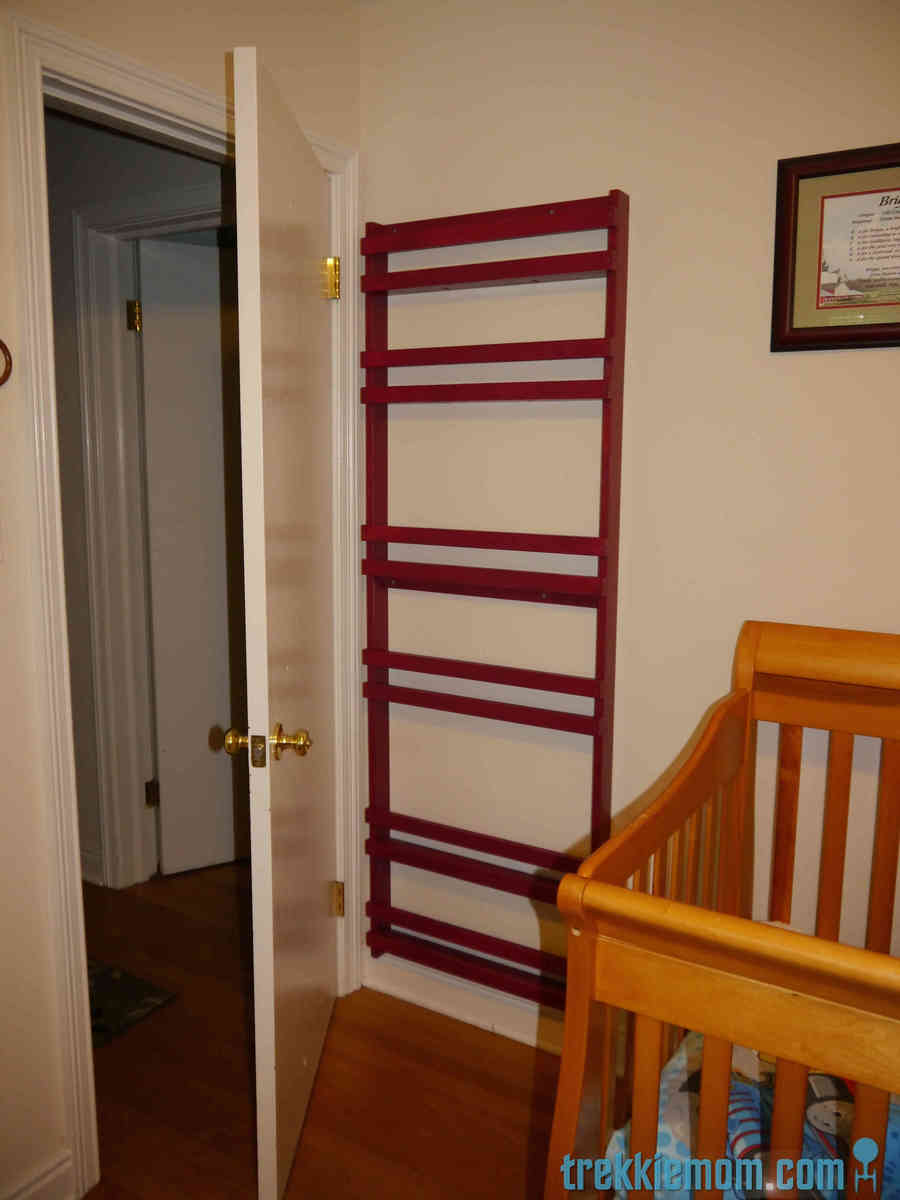
So, my storage solution for my boys books was inspired by the Ana Whites Flat Wall Book Shelves (http://ana-white.com/2010/04/plans-wall-book-racks-easy-and-inexpensive…). I wanted to maximize my storage and make a good use of space in our already cramped home.
Please visit my blog for a complete DIY on my version if you are interested.
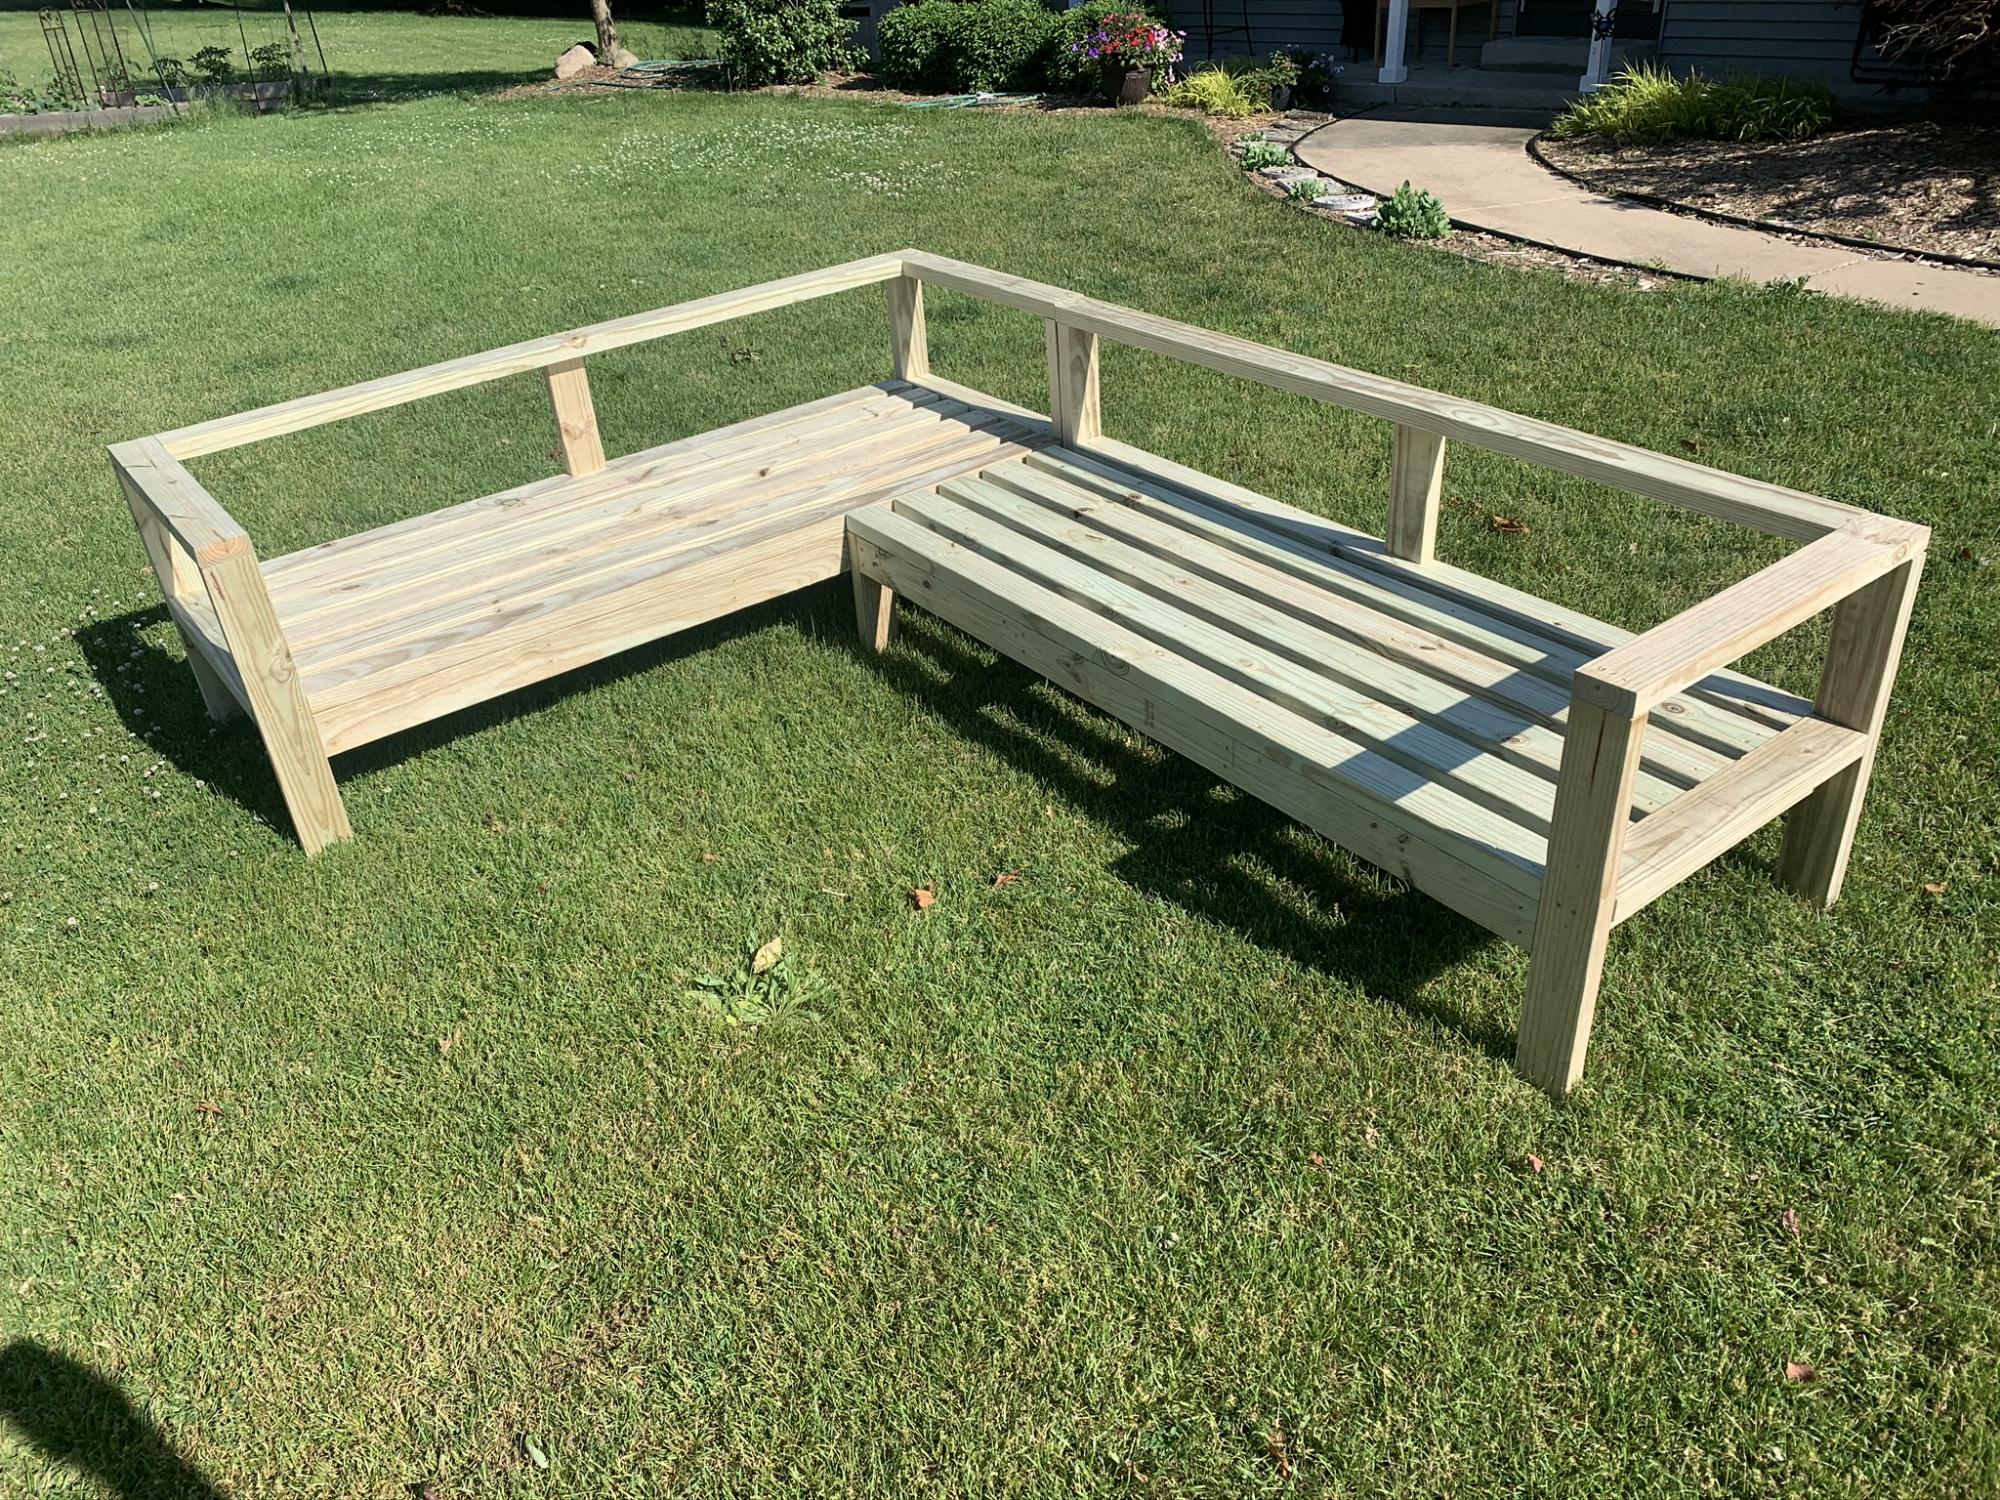
Decided to add extra support between top rail and seat. I envisioned some sitting on the rail while partying so I thought it could use a little strengthening. This is a good build for a beginner.
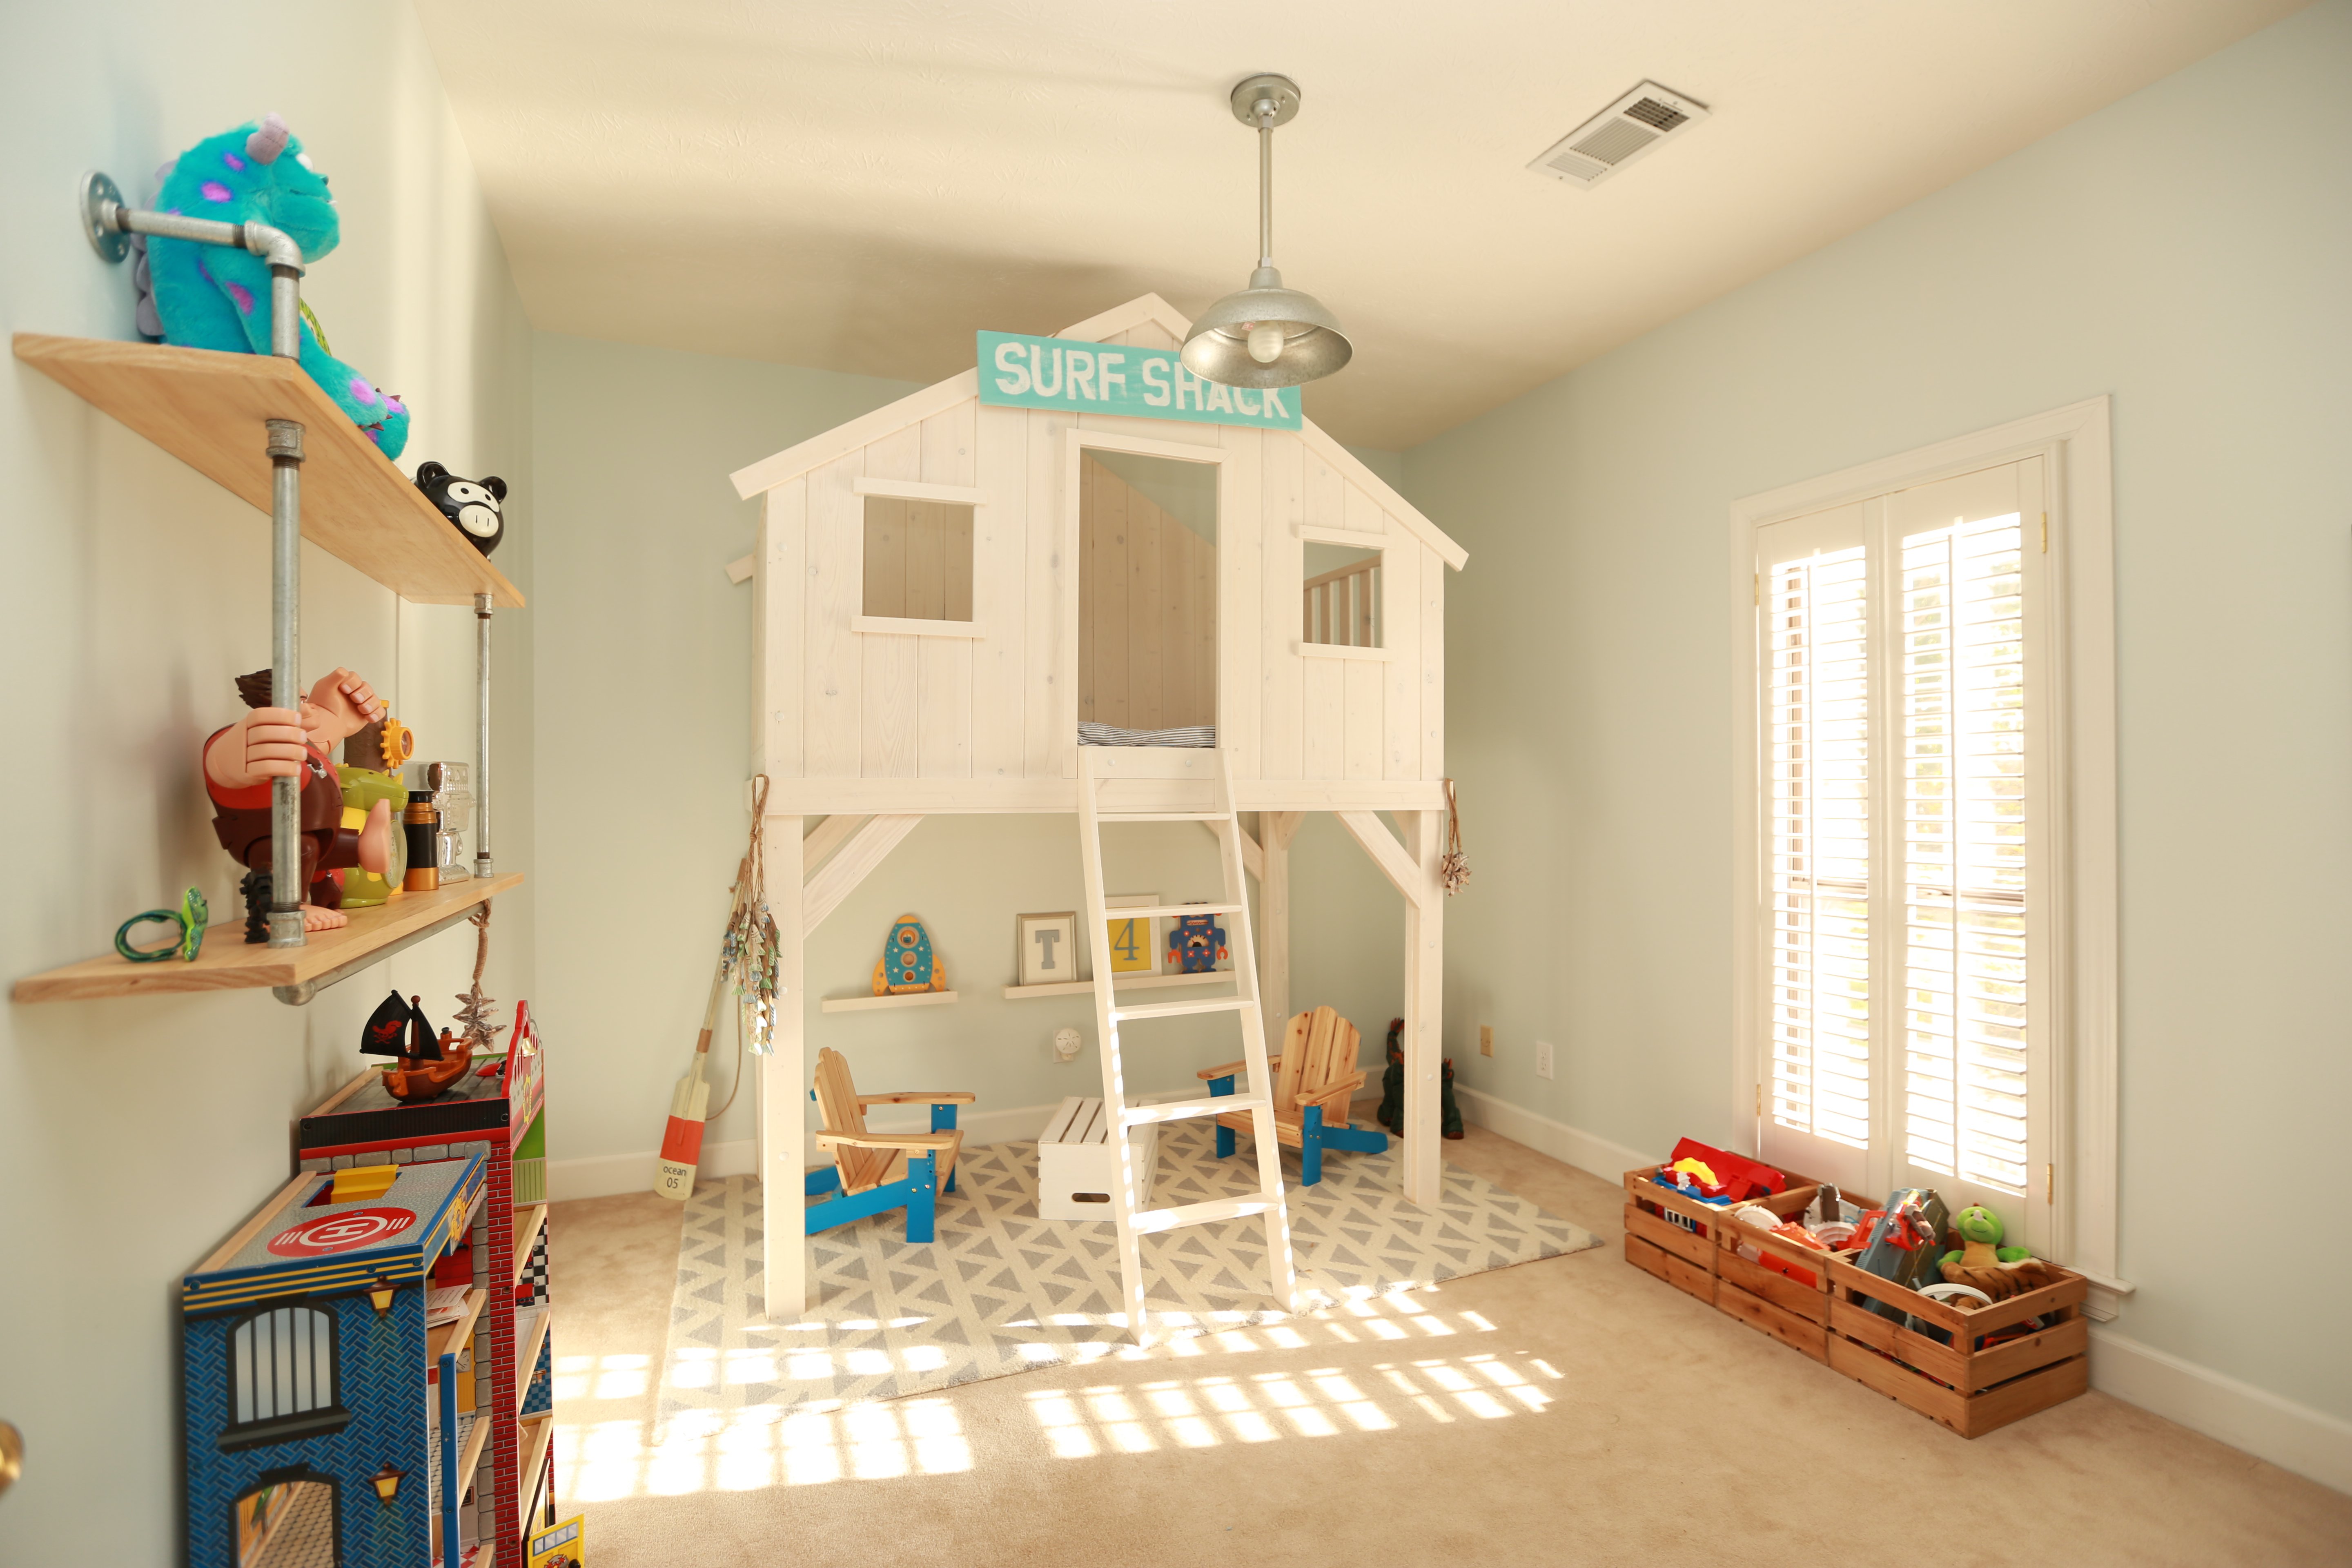
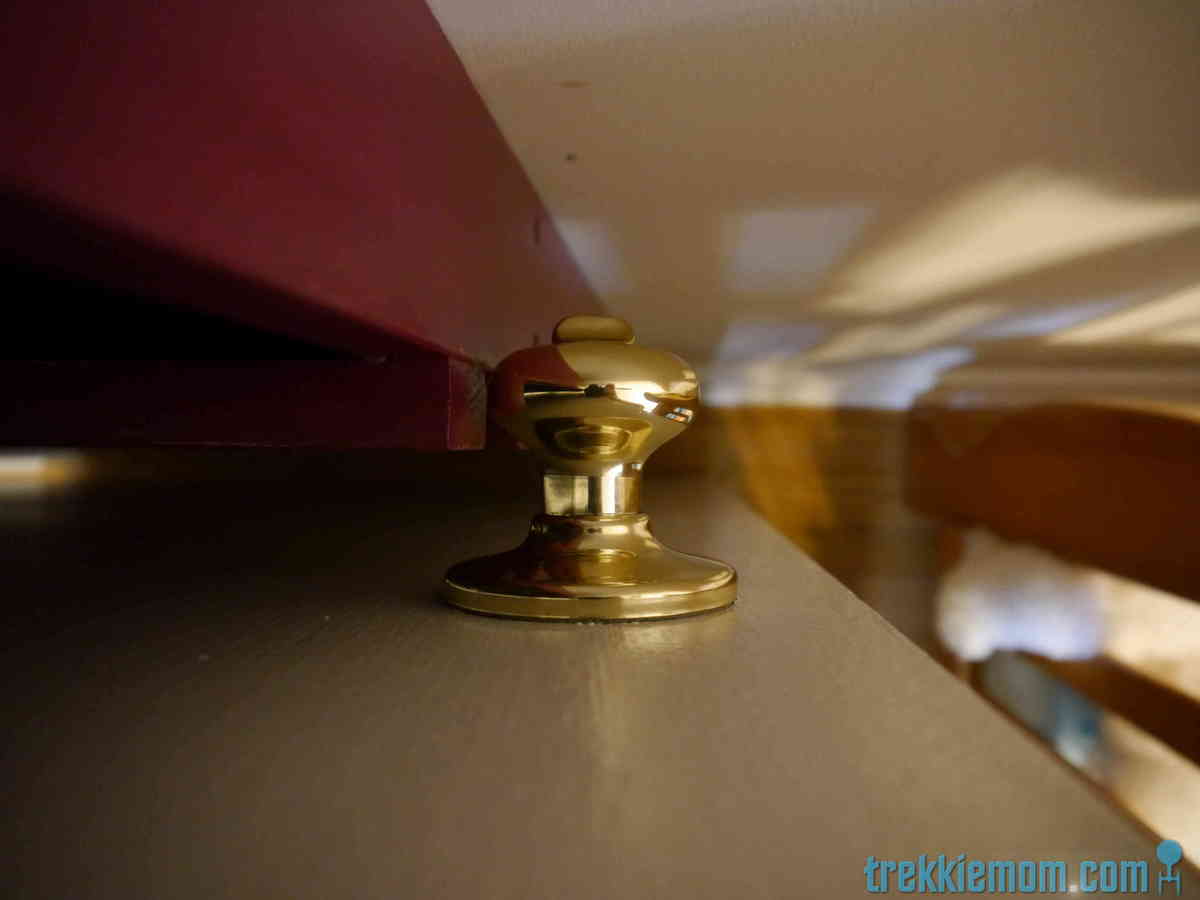
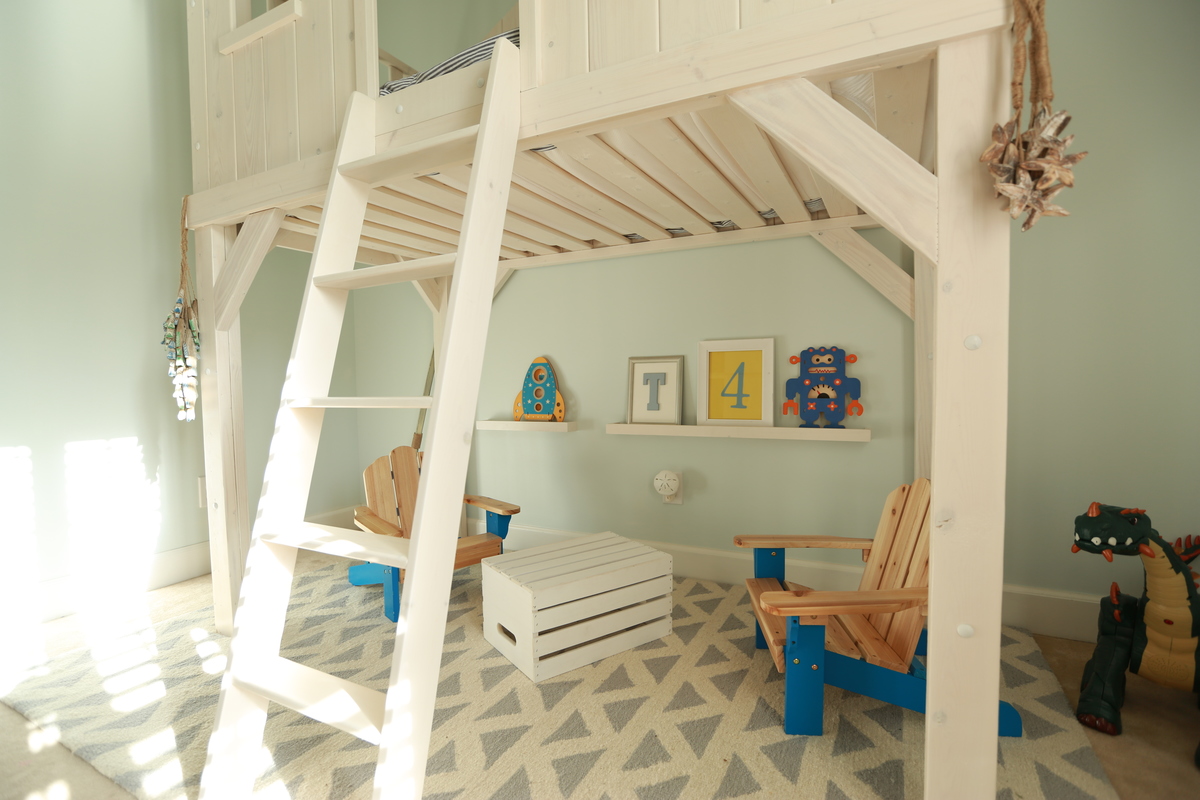
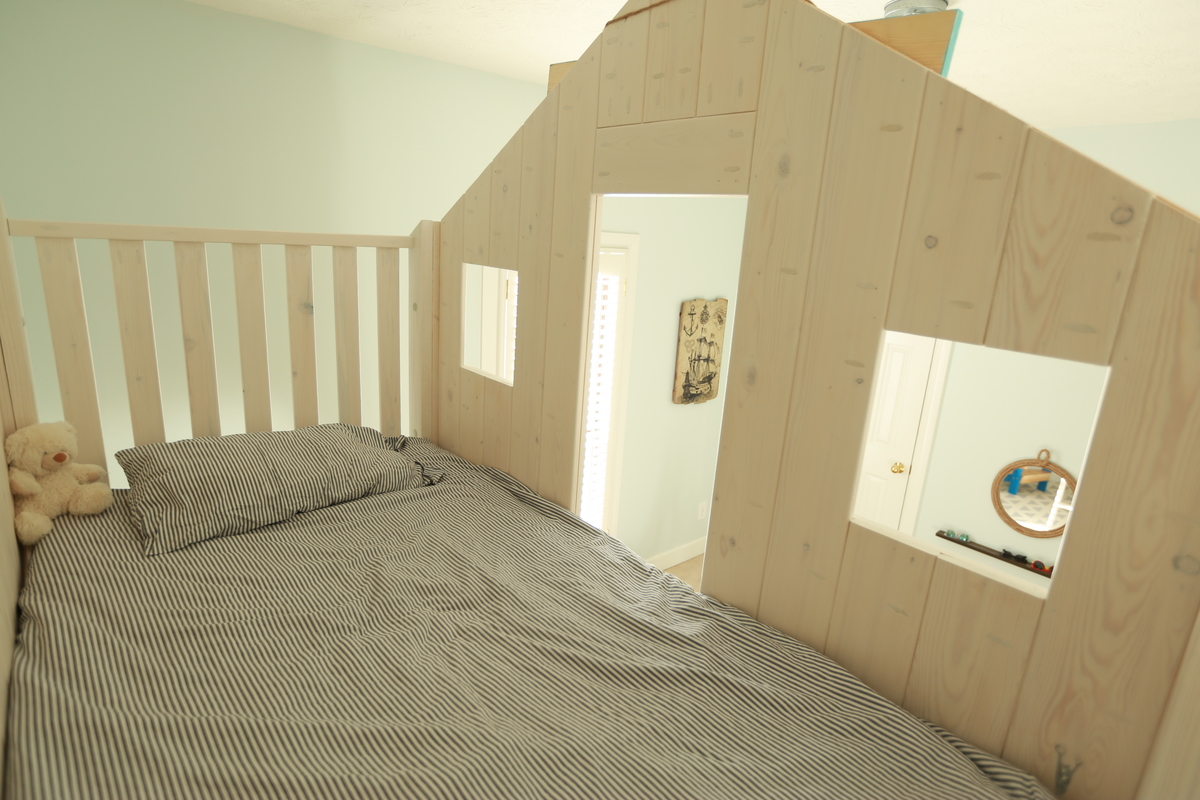
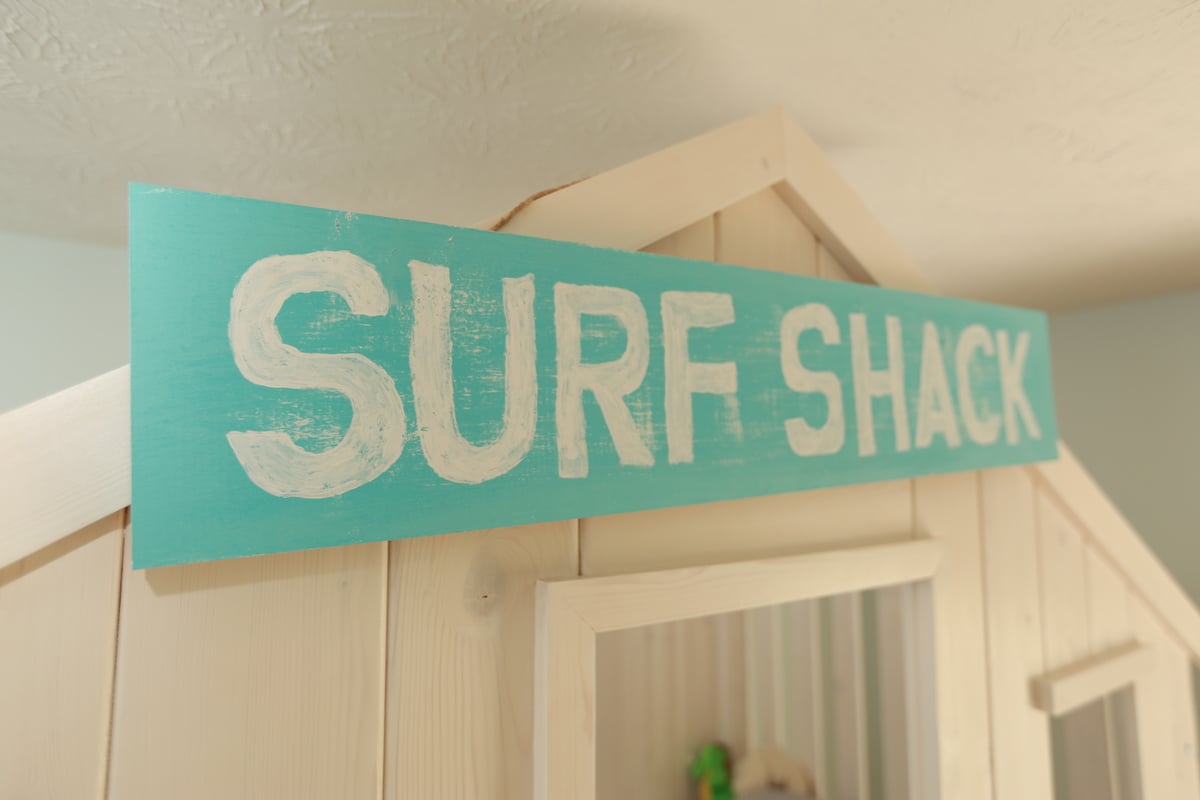
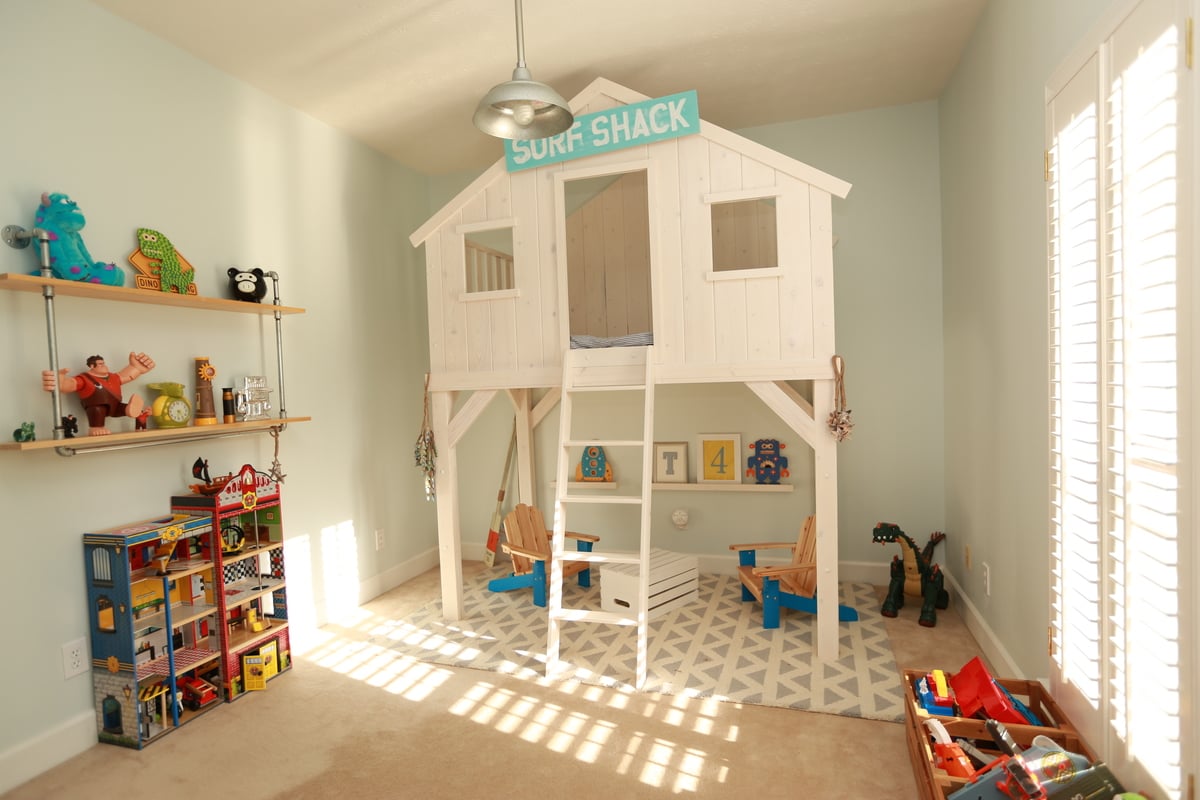
Customized version of the clubhouse bed that is so popular! We went the extra mile on the finishing touches to ensure an awesome bed for our little guy! We made the bed taller for more space underneath and polished up the finished product to create a higher end look. Care was taken to precisely sand all areas of the bed for a smooth finish and polished look. All pocket-holes are filled with plugs and sanded smooth on the inside of the bed for an overall finished product. No shortcuts taken! We went the extra mile and painted the carriage bolts so they would blend in with the whitewash finish and also recessed the nut on the back of the legs for safety and added a cap so they are not visible. Top of the bed, above the door, is filled in and a custom ladder finishes off the look. We went with smaller lumber to build the ladder and it is perfect!! We are over the moon with this project and will be building more items as fast as we can. Also, the sign, under-bed shelves, and industrial shelves were built by my husband. He did an epic job creating this room!! We used better grade wood and spent a lot of time sanding to ensure a great bed in the end. We also went with a Benjamin Moore stain that was a little more expensive and took the time to finish the slats under the bed.

Mon, 02/22/2016 - 07:38
I love this bed! I was looking at the BM site and was wondering what exact stain did you use? there are 5 different opacities & I want to make sure I get the right one. Thanks!!

In reply to what benjamin moore stain? by jeawels
Fri, 08/19/2016 - 05:58
Did you ever figure out what stain was used on this particular bed? I love it.
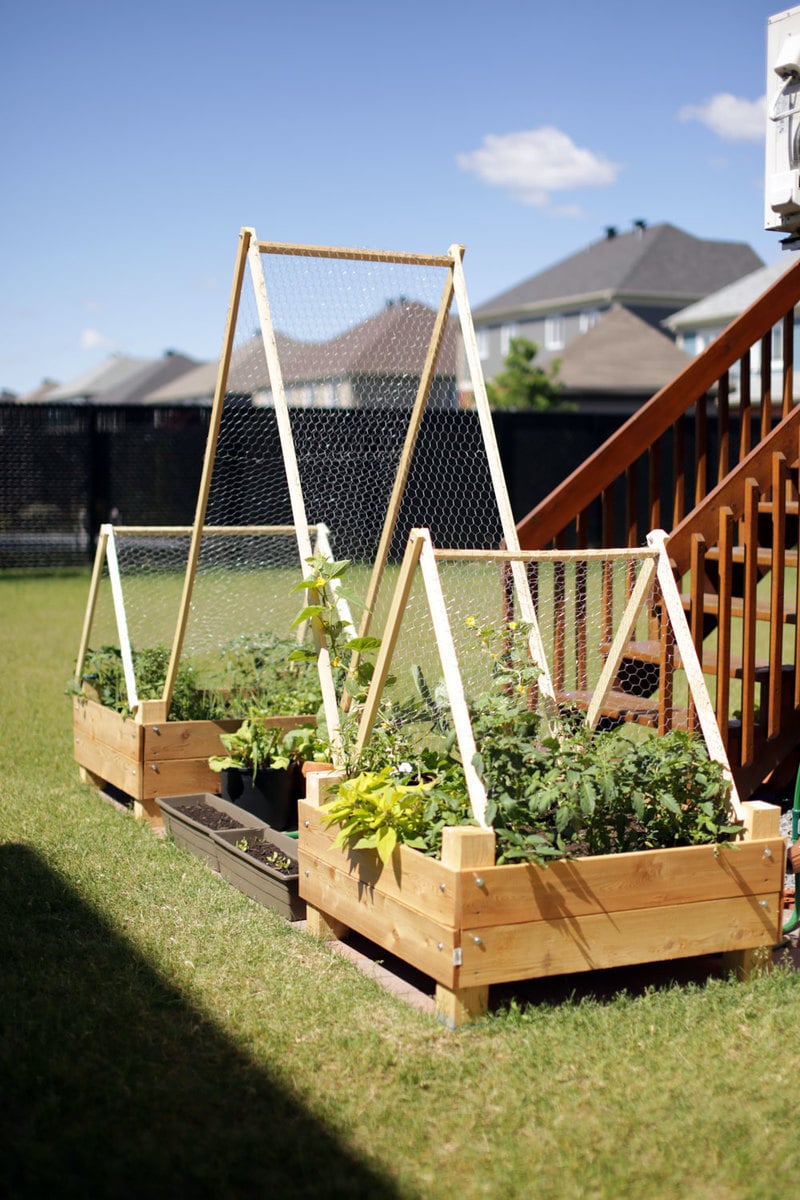
We wanted a small garden to fit on the back patio stones and this plan fit well. We reduced the height because we have 3 small children to "help" water the plants. The trellis was hoping that we could extend the amount of produce we could grow. They're very heavy, sturdy and straightforward to build. Thanks very much!!
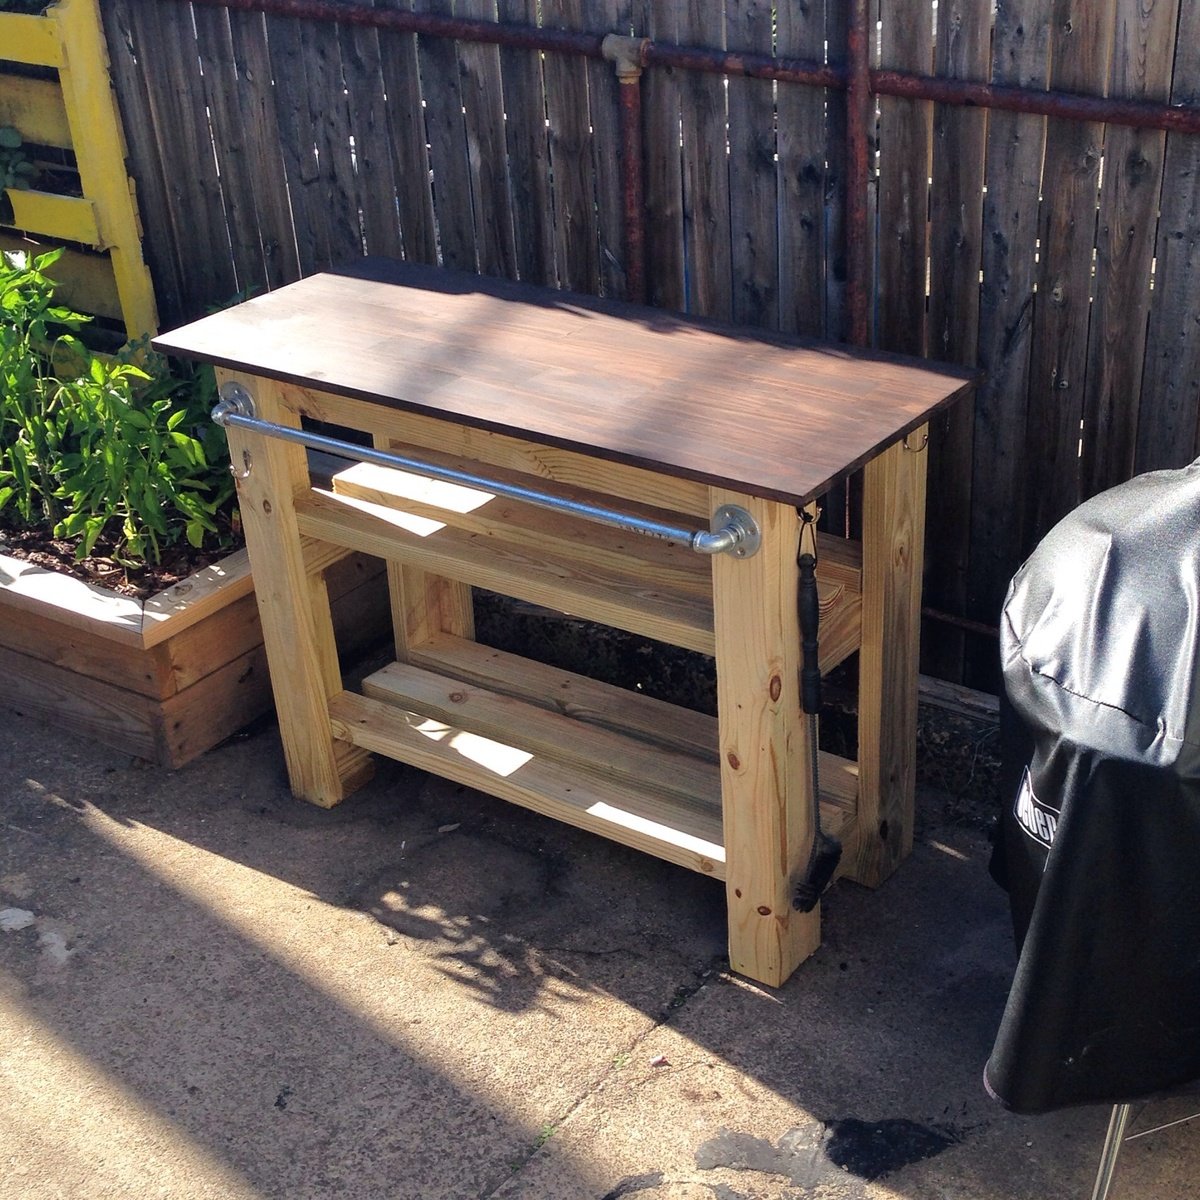
Grill station
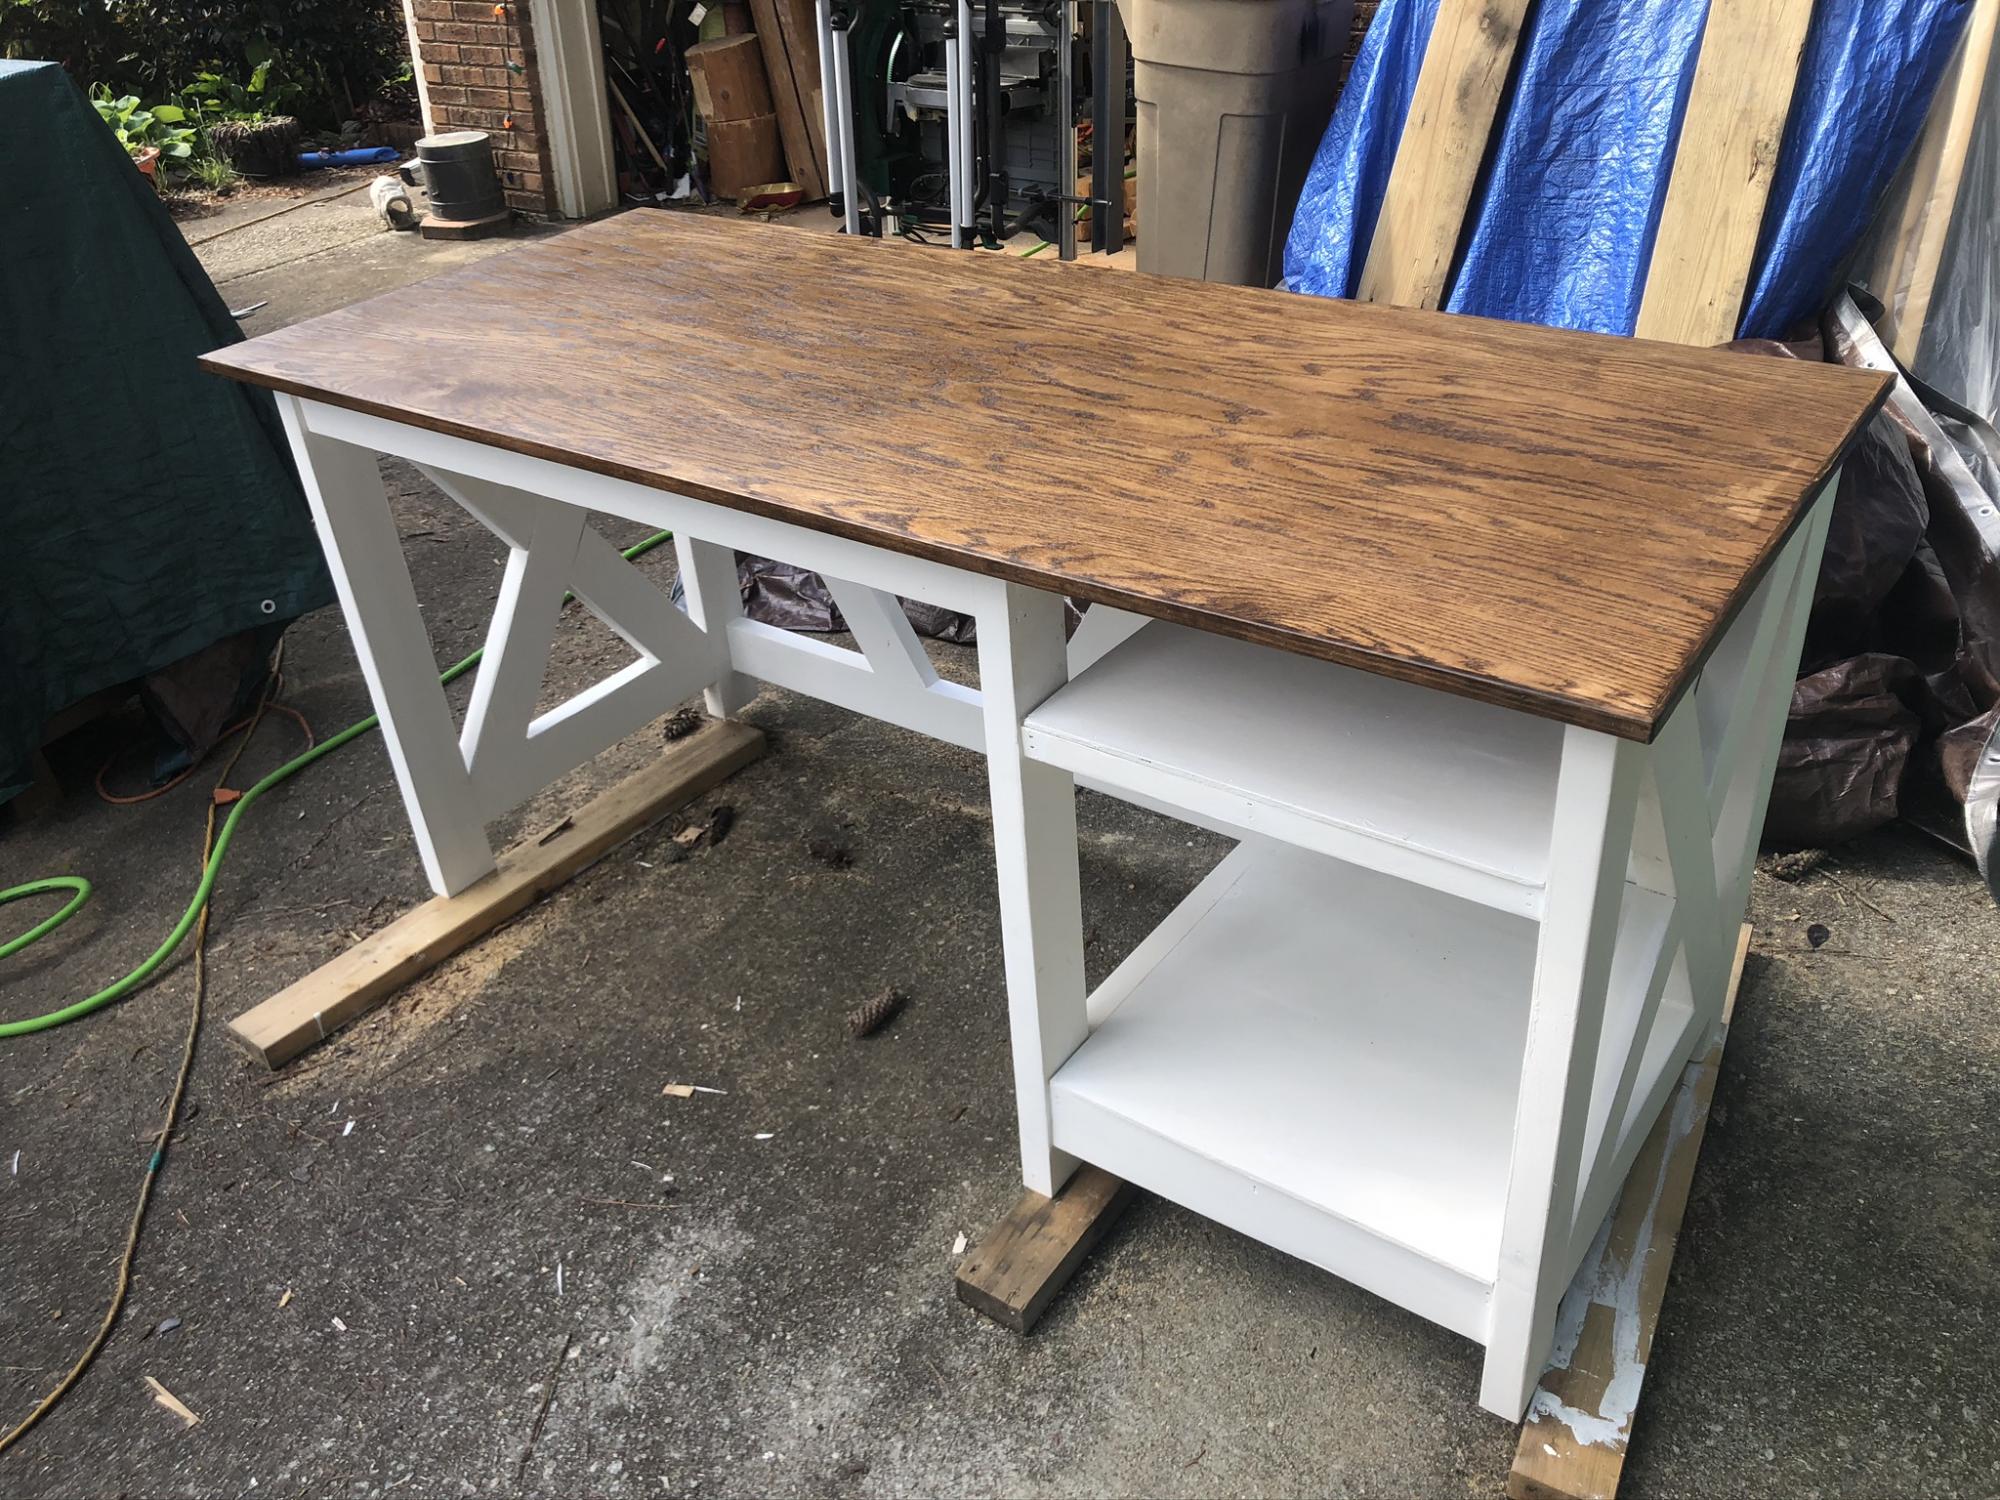
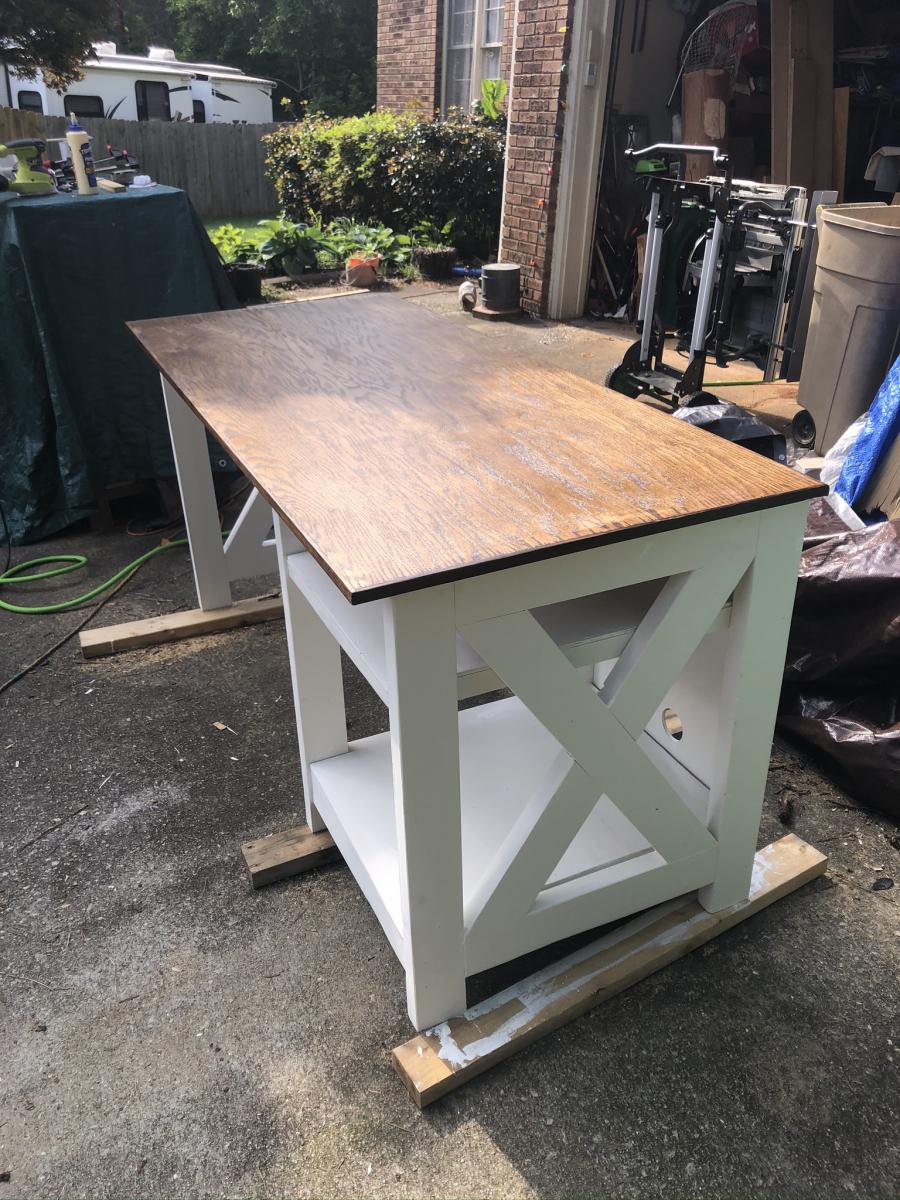
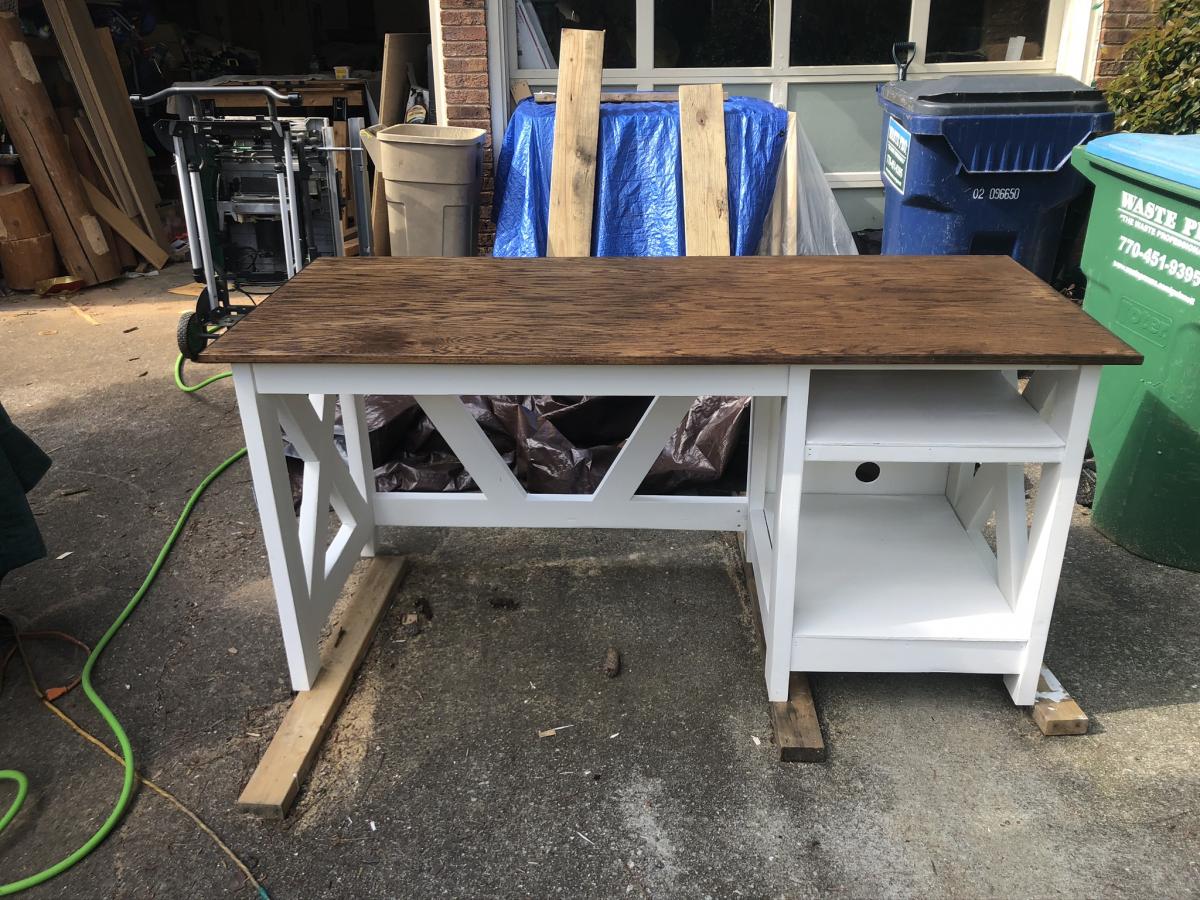
Base was completely made from reclaimed 2x4's. Desktop made from Oak plywood


Comments
AlexE
Thu, 05/10/2012 - 04:47
Mistake
Not really on my own.... with my tree kids! :)
Parkerdd
Wed, 05/14/2014 - 00:46
For the end pieces at either
For the end pieces at either end of the top of the bench and table, how did you secure them to the legs? It doesn't look like you cut the extra pieces to fill in the legs so that they are level with each other to make the base. I like how this version looks but it seems like half the 2x2 is barely attached to the legs. I'd love to hear how you did that so I can copy, thanks!