Community Brag Posts

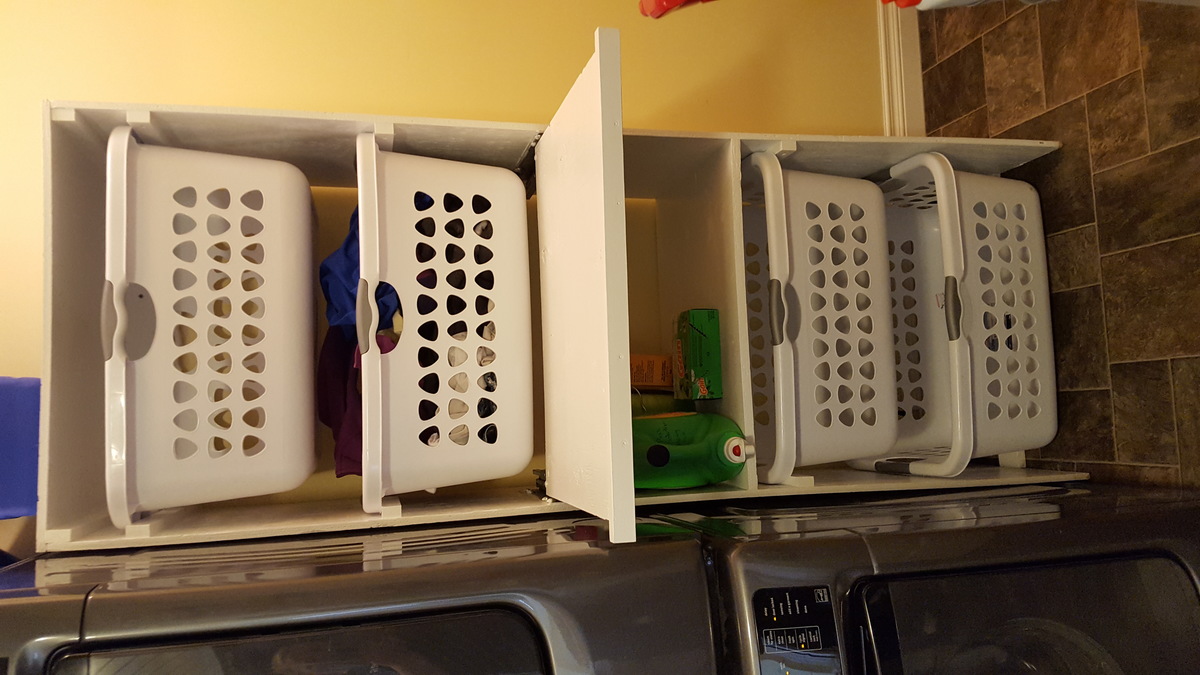
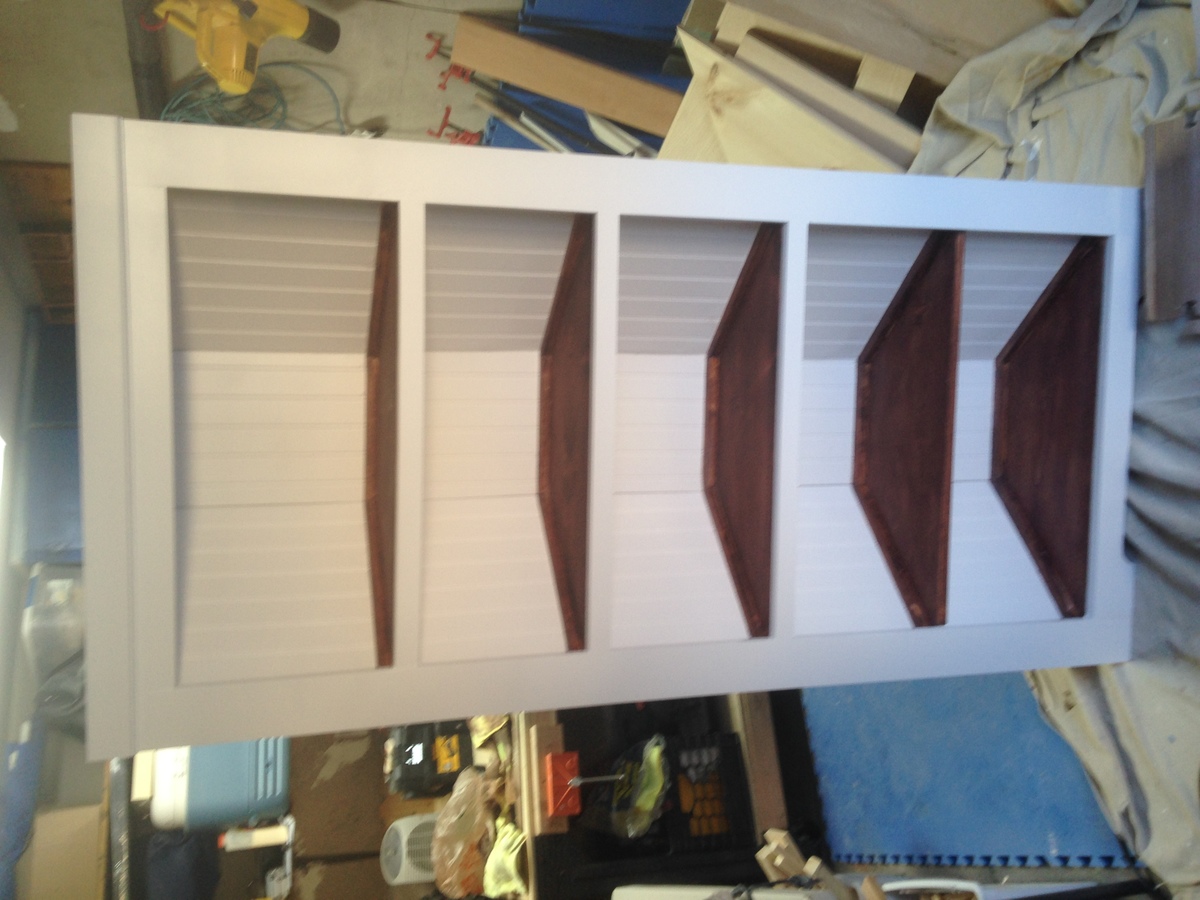
Corner Cupboard, Corner Cabinet

Submitted by Anonymous (not verified) on Fri, 04/15/2016 - 21:33

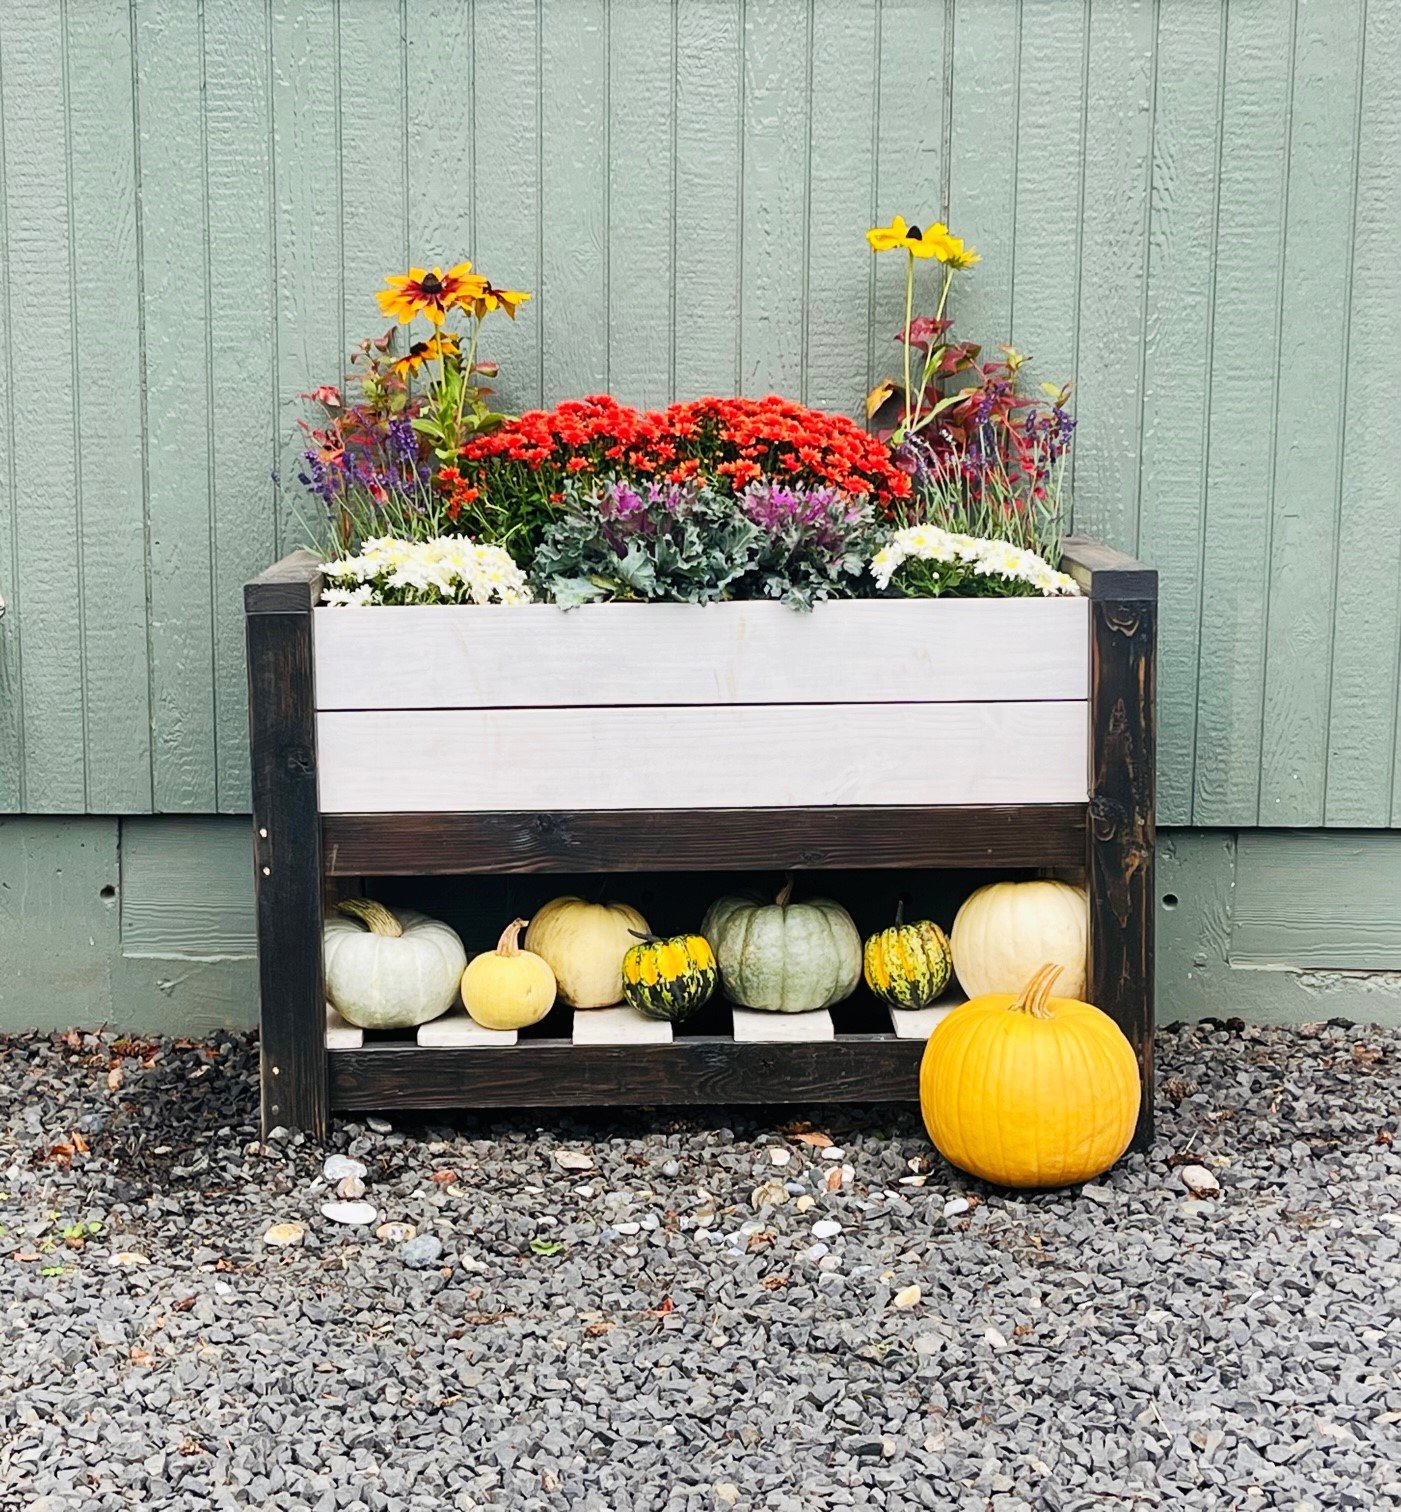
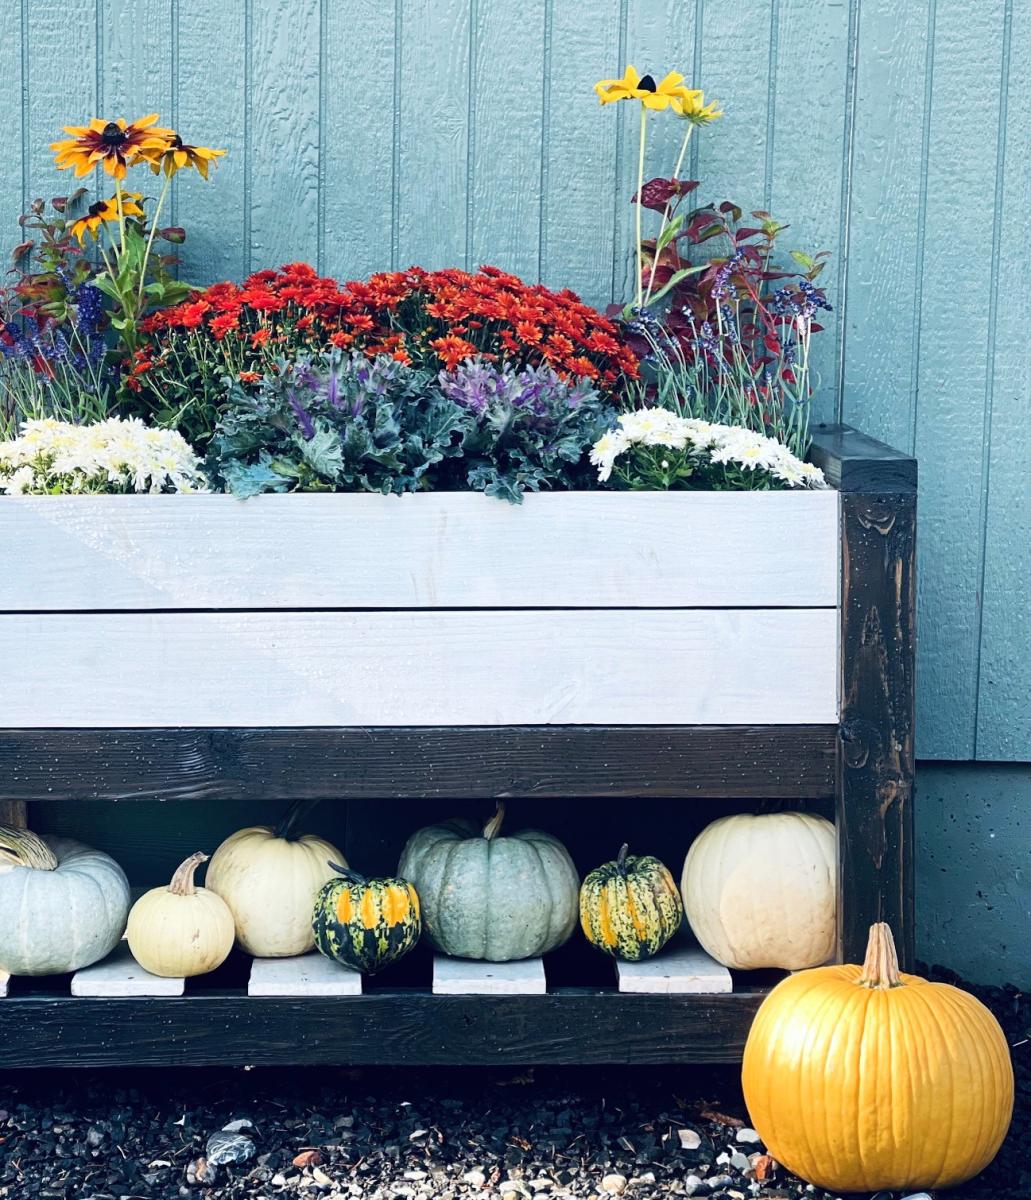
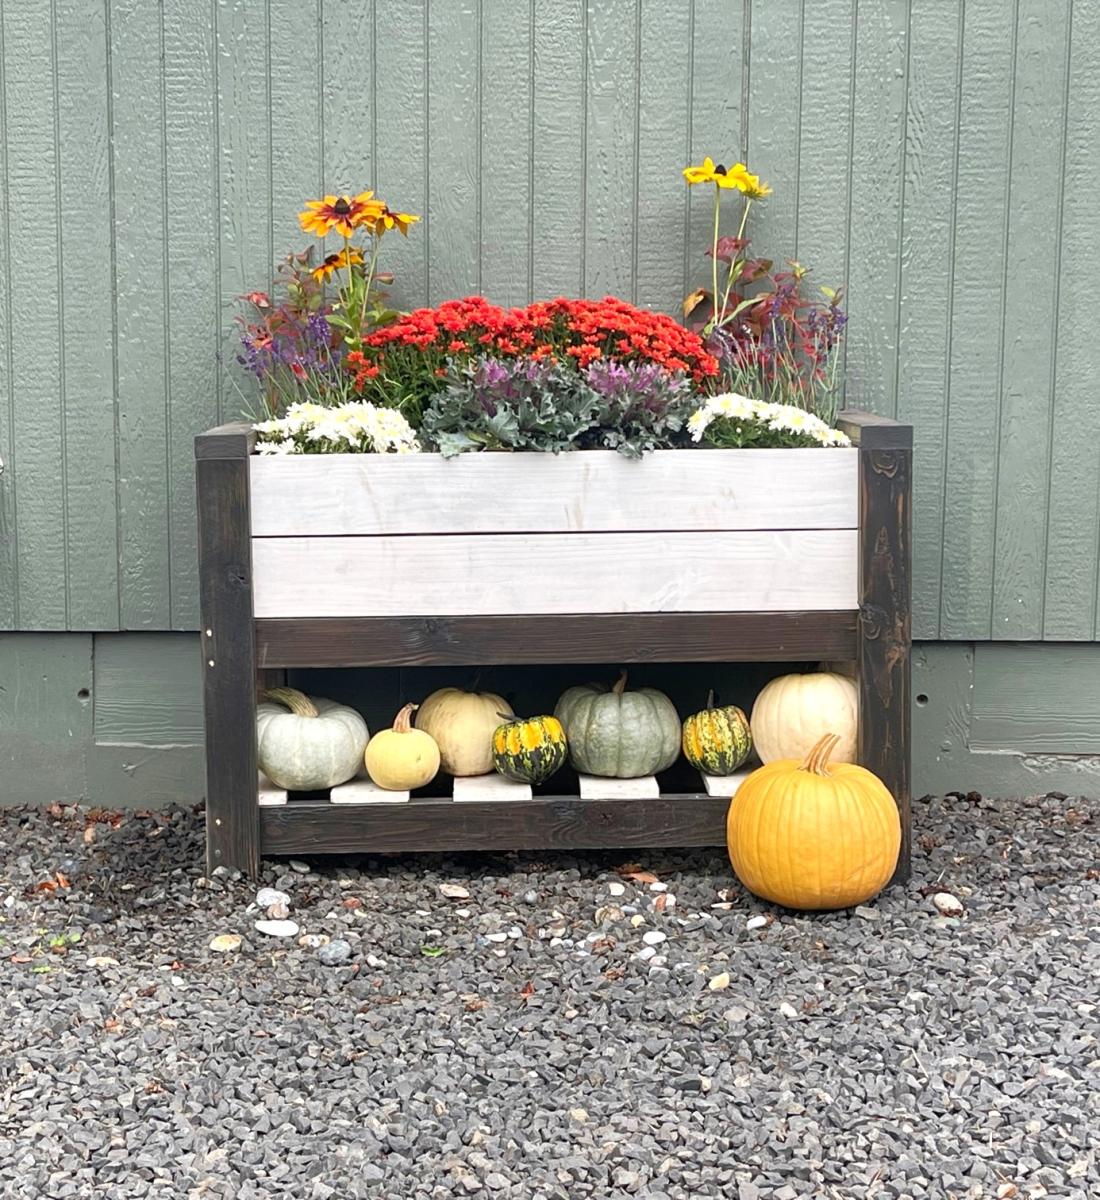
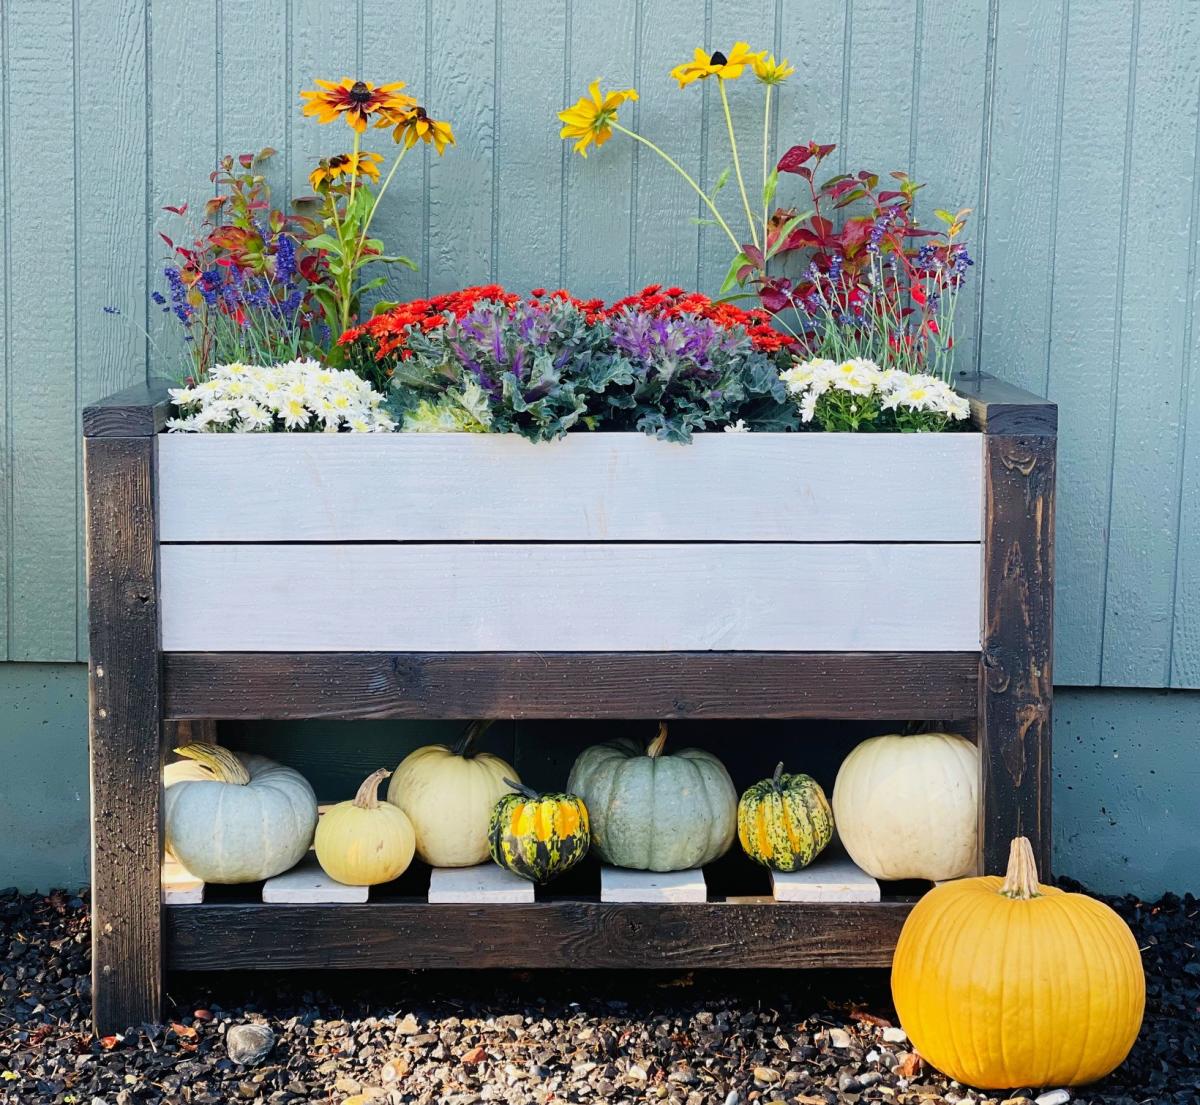
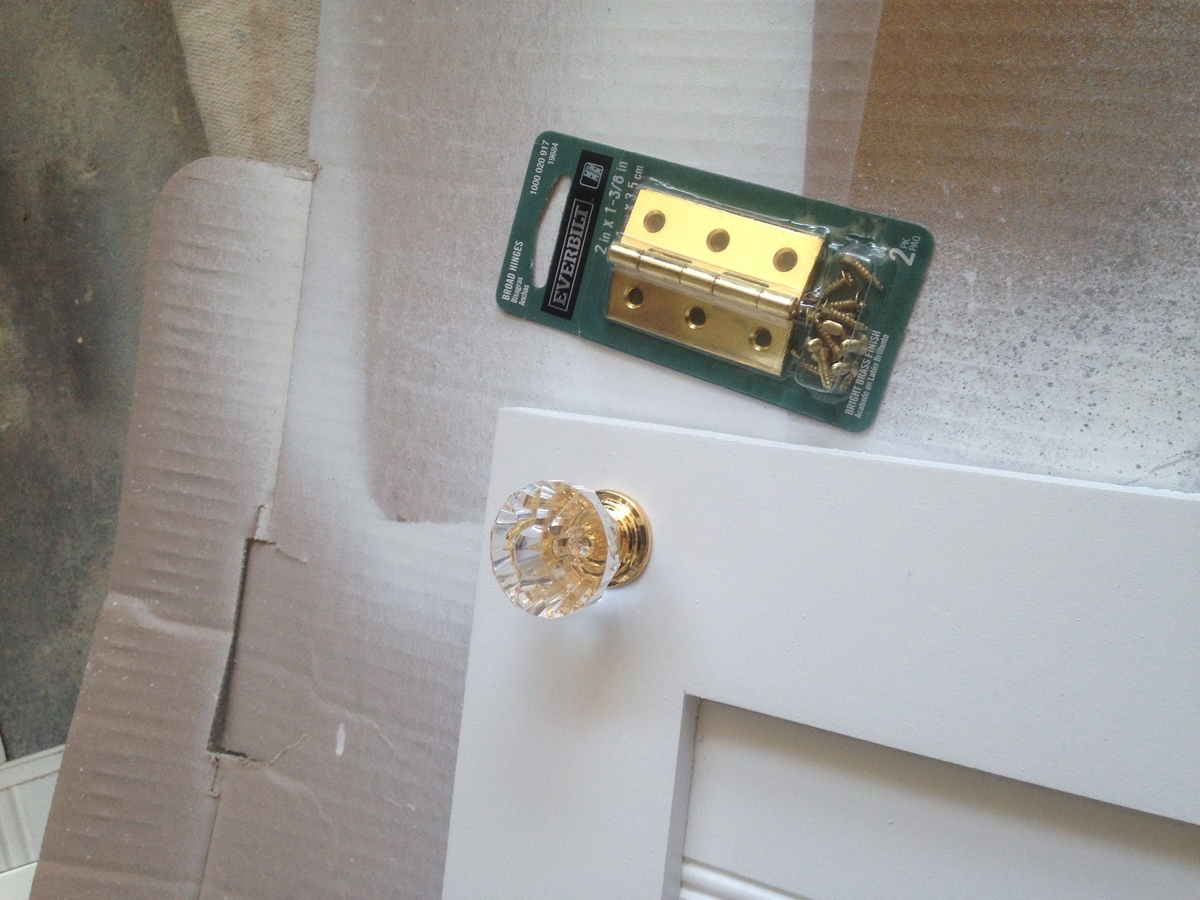
I saw the plans on Ana White website and and used them to put this together. I changed it slightly to fit my needs. I made this for my in-laws and it was a lot of fun to do. Hardest part was using blue tape on stain and paint.

Built from Plan(s)
Estimated Cost
125$ includes four cans of Rustoleum White Satin primer and paint from Home Depot, hardware, and lumber. Measure twice Cut once and all will be well.
Estimated Time Investment
Week Long Project (20 Hours or More)
Finish Used
Min wax Red Oak
Min wax satin poly
Rust oleum White Satin Paint and Primer
Recommended Skill Level
Intermediate

Indoor Punee/ Daybed

Submitted by hawaiitara on Mon, 04/09/2012 - 20:18

In our living room/sun room we needed a place to lounge as well as a place for guests to sleep. We used the chunky leg bed frame plans with the full size modifications to build 2 of them to make a giant Hawaii style Punee. We were able to build both of these easily in 1 day. We modified the legs and used 4x4's to make them taller and more rustic looking.

Estimated Cost
$200 for both
Estimated Time Investment
Day Project (6-9 Hours)
Finish Used
After priming, I spray painted them with Rustoleum 2x coverage in Satin Moss Green.
Recommended Skill Level
Beginner

Comments

theHammerGirl (not verified)

Sat, 05/19/2012 - 14:47

Nice beds! They are very tropical looking - really blends in the outdoor with the indoors.

Home Gym Yoga Nook

Submitted by kellystern on Thu, 09/07/2023 - 11:06

Exercise/Yoga nook. Built using the base plans from Ana's Shoe Bench Front with Hidden Storage and Easy to Build Floating Shelves.


Comments

Rustic bench

Submitted by Anonymous (not verified) on Sat, 01/11/2020 - 11:38

Love this little bench! My bench is a little bigger than Ana's, and the seat is not as deep, but the plans were super easy to follow. It's just what I needed to finish out my living room!

Built from Plan(s)
Estimated Cost
$3
Estimated Time Investment
Afternoon Project (3-6 Hours)
Finish Used
Dark walnut stain
Recommended Skill Level
Beginner

Baby Doll Crib

Submitted by BusyMomof1 on Wed, 04/18/2012 - 10:00

I made this as a birthday present for my two year old neice. It was really easy to make even for a beginner like myself. My five year daughter has been asking me every day if I would make her one "just like it" for her dolls, so I guess I know what I'm doing this weekend!

Built from Plan(s)
Estimated Cost
$41 (wood, paint, and fabric)
Estimated Time Investment
Afternoon Project (3-6 Hours)
Recommended Skill Level
Beginner

Media Center

Submitted by Felicka on Mon, 05/14/2012 - 22:29

Easy, fun great project that my husband and I did together. This project cost about $202, and I will take that price over the price that you would have to pay in the furniture store any day. We found some great wood at Lowe's that worked perfectly and gave it the "rustic" look that we like. Thanks Ana for the plans and sharing them with us.

Estimated Cost
$202.54
Estimated Time Investment
Week Long Project (20 Hours or More)
Finish Used
We used Minwax wood conditioner and then a coat of Minwax Dark Walnut stain. We then used a coat of poly followed by wet-dry sandpaper for the smooth finish.
Recommended Skill Level
Intermediate

Comments

Debi_G (not verified)

Wed, 05/16/2012 - 19:01

That's a fine quality piece of furniture!

Why can't I get dark walnut stain to look like that?

Felicka

Wed, 05/16/2012 - 22:07

Thanks

My hubby used wood conditioner prior to applying the dark walnut. with using the conditioner especially with soft wood such as pine it allows the stain to adsorb in evenly. we only used one coat of both.

claydowling

Wed, 05/16/2012 - 19:45

Debi_G, I've had lots of trouble getting stains to look the way I want too. What I've taken to doing is either mixing my own (see http://claydowling.com), as well as trying out various commercial stains until I find one that satisfies my desires. Good use for your scrap.

So far the best commercial stains I've found are from General Finishes. They're designed to sit partially on top of the wood, which prevents some of the splotchy and washed out look that make some stains unpleasant to work with.

Planked Wood Sideboard

Submitted by emilykay on Tue, 04/01/2014 - 18:42

This was my first build from this site! It took me about a month working on-and-off during my toddler's nap time. I thought this project was very accessible for a beginner--or, in my case, a distracted mom who is six months pregnant. I scaled down the plans to fit my dining nook, but I forgot to account for a half width of face framing when I subtracted so my third door hole came out a little narrow. I decided to just put open shelves in odd-sized middle opening. I used euro cabinet hinges instead of the butt hinge style because they are more adjustable for not-so-perfect openings/doors. I bought a 1 3/8" Forstner bit to drill the hinge mortises. I was intimidated by the hinges & drawer glides but that part went surprisingly well! I used a plastic template to locate the cup handles on the drawer faces--that purchase was definitely worth a couple of bucks! I wish I had borrowed a router to make a rabbet for the door panels, but I got impatient & just tacked them on. I also wished I had replaced or sharpened the blade on my circular saw because it chewed up the plywood making long cuts. (There's a lot of wood filler on those plywood edges. I ended up painting the shelves with leftover interior latex because they looked like a dog attacked them.) There are also a few shims under the drawer glides to correct the width, but oh well, you can't see them :) Before my next project, I am going to get a couple right angle clamps and make sure I buy the BIG box of pocket hole screws!

Built from Plan(s)
Estimated Cost
$250
Estimated Time Investment
Week Long Project (20 Hours or More)
Finish Used
Minwax Pre-Stain Conditioner, Early American Stain (distressed after dry with 220 grit) & Paste Finishing Wax
Recommended Skill Level
Beginner

Comments

Workbench with Drawers and Carts on Casters

Submitted by vendo on Tue, 03/19/2024 - 07:38

Using Ana's Ultimate Workbench Plan and her easy drawer method I built this. I decided to do storage carts that roll in and out for small scrap lumber storage. The Kreg Foreman got it's own cart, I made it so the deck of the machine was at the same height as the work surface. I added a drawer so all of my kreg bits and screws can be in one place. I had batteries and chargers laying all over my small shop, so I incorporated a battery charging drawer. I'm excited for the projects to come using my new set up!

Hidden Desk

Submitted by Anonymous (not verified) on Sat, 10/08/2016 - 12:24

I shrunk the size and dumbed down the plans to fit my skill level.

Built from Plan(s)
Estimated Cost
175
Estimated Time Investment
Weekend Project (10-20 Hours)
Finish Used
Walnut
Recommended Skill Level
Intermediate

Comments

Texastia

Mon, 10/10/2016 - 09:08

I love what you did! It looks so great! I prefer this style, which is more simplistic than the other. Great work!!


Jessi_ites

Tue, 10/11/2016 - 14:56

Thanks! I wish I would of set up an account before I posted so I could get notifications.  I honestly didn't think anyone would notice it :)

Jessi_ites

Tue, 10/11/2016 - 14:58

I am so excited that people noticed this :)  Is there any way of putting this under my account?  I didnt make an account until today and I would like to get notifications.   I have my project on my facebook page and can prove that I made it with other pictures. Thanks!

crstorm

Mon, 01/20/2020 - 07:44

I would love to see this in a farm-house (rather than rustic) aesthetic along with drawers under the seats for extra storage. Maybe on casters with a fold up extension on the other side? So many ideas running through my head with this!

Camp Loft BEd

Submitted by Anna H on Wed, 11/07/2012 - 17:09

My son has a very small room so this bed is perfect! It gives him much need play space. He loves it! It was super easy to build. I added a support across the back to make it even more sturdy. Thanks Ana for another great plan!

Estimated Cost
$80
Estimated Time Investment
Weekend Project (10-20 Hours)
Finish Used
Rustoleum Black Cherry Stain
Recommended Skill Level
Beginner

Basement Shelving....

Time to get organized in 2017....and what better way than with some custom shelving. This was not too bad of a project to complete. It only took about 6-8 hours to cut, frame, and assemble everything together (thanks to an interruption or two). 'Twas nice to have a project for once that I didn't have to care about finishing the project with wood filler, sanding, painting. I am sure my wife thanks me more as I would have been another week getting things just right​​​​​! 

A few changes that I made from the original plans:

- used 2x8 for the shelving runs as I only was dealing with a 10ft run and was a few bucks cheaper to buy 8 boards vs 16 boards. Plus less cuts!!! 

-installed adjustable furniture feet in the supports to deal with sloping basement floor. Unexpected side effect was it was easier to slide the unit around in the basement as I assembled it. 

Outside of those changes I remained faithful to the original design. I didn't bother filling the screw holes as we will be hiding the shelving unit with a curtain once  we turn the room into a TV/Office area. 

Also as it wasn't 100% clear from the original plans, but the height measurements for the shelf supports are to center... not sure why it didn't register with me right away... but just in case anyone else didn't realize that as well. 

Estimated Cost
$150 for wood, screws, wood glue, and adjustable furniture feet
Estimated Time Investment
Day Project (6-9 Hours)
Finish Used
None
Recommended Skill Level
Beginner

In love with my new miter saw stand and work benches

Submitted by seahawklvr on Fri, 11/27/2020 - 05:58

We purchased a fixer up house that requires a complete gut but the property came with a detached shop! I quickly realized I needed to get the shop cleaned up and organized so it would be easier and more efficient to work on projects for the house. I am a beginner as far as I am concerned and even though this was rated as an intermediate level build, as long as you take your time, it’s definitely doable for a beginner. The plans called for staples but since I just had a Brad nailer, I just used that and it worked fine. I did have one fail, and that was that I had a 1x2 to hang my clamps on but I placed it too far near the outside of the mobile work bench and when I went to store the work bench under the miter stand, the clamps prevented it from sliding in so I had to reposition it. Other than that, it was perfect and as soon as I save up for my Ryobi table saw then I will position it on one of the work benches. Because of the raise in the cost of lumber dut to COVID, the cost was probably twice as much as it should’ve been but I still feel I couldn’t have purchased a huge miter saw station and two mobile work stations for less than I spent on building this. Besides, I can be proud that I built this myself!

Estimated Cost
$325
Estimated Time Investment
Weekend Project (10-20 Hours)
Finish Used
Behr Marquee #MQ6-22 Gateway gray in satin enamel
I found it more cost effective to purchase a 6 pack of handles vs purchasing 4 individual handles. Now I have two spares for a project down the road.
The Caster Wheels were Moogiitools 3” locking from Amazon and were @$50 for 8 wheels. Very smooth and heavy duty
Recommended Skill Level
Beginner

Comments

Cabinet style farmhouse nightstands

Submitted by Anonymous (not verified) on Tue, 12/22/2020 - 10:13

Beautiful plans, thank you Anna! I can’t wait to build the king bed to match!

Estimated Cost
100
Estimated Time Investment
Weekend Project (10-20 Hours)
Finish Used
Varathane weathered wood accelerator first coat then the rustic accelerator for the second coat. Apply with a foam brush. Then sprayed on 4 coats of semi gloss clear and it’s done!
Recommended Skill Level
Intermediate

My Laundry Station

Submitted by Anonymous (not verified) on Mon, 03/06/2017 - 18:09

I love Ana's original design and it was a great inspiration. I needed to add more baskets so I adjusted it a little. I had some drawer slides sitting around so I added a pull out shelf to fold on as well.

Built from Plan(s)
Estimated Time Investment
Afternoon Project (3-6 Hours)
Finish Used
Primer and paint
Recommended Skill Level
Beginner
Back