Community Brag Posts

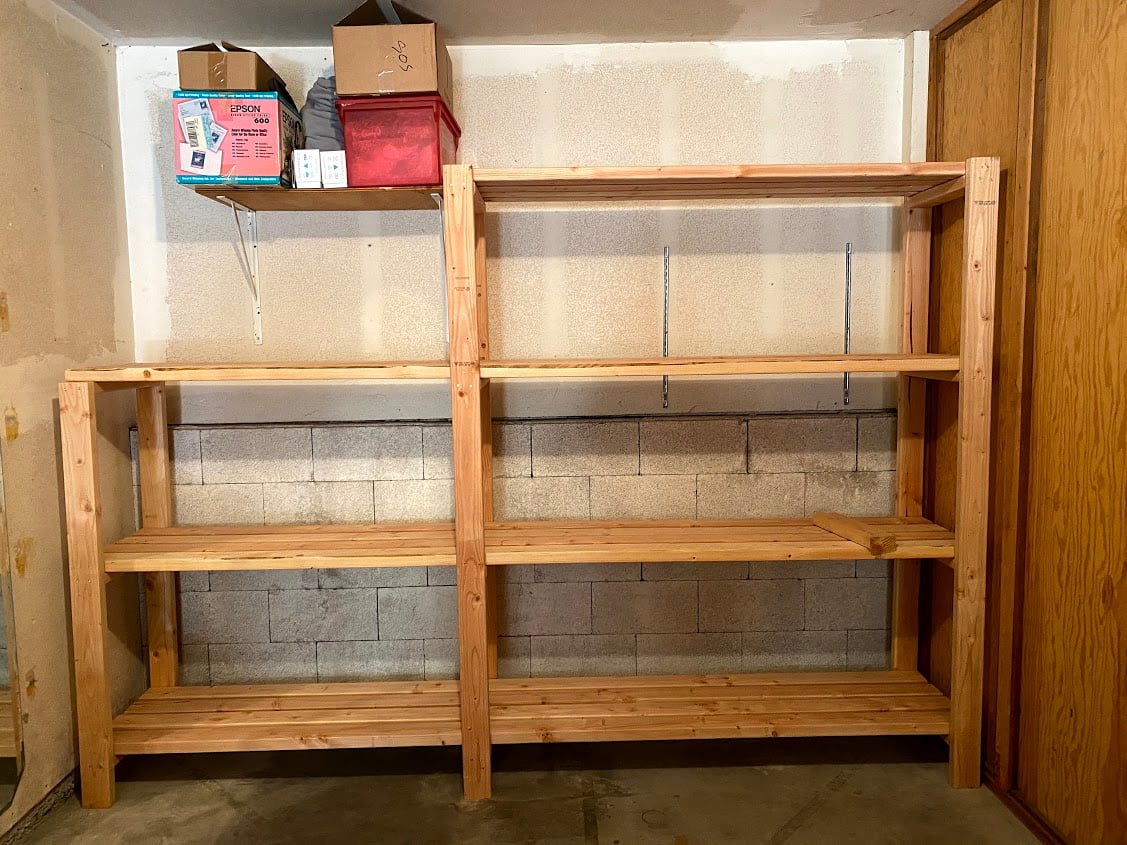
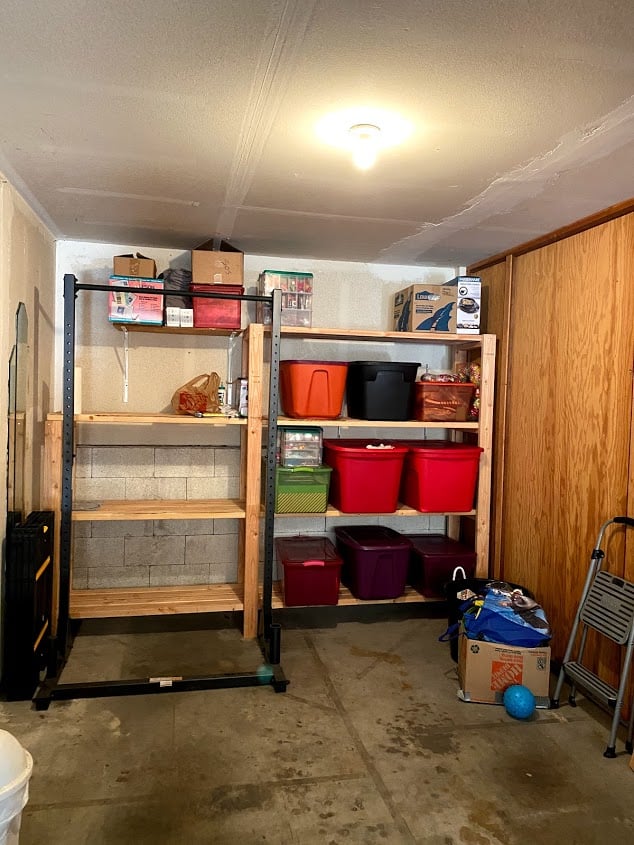
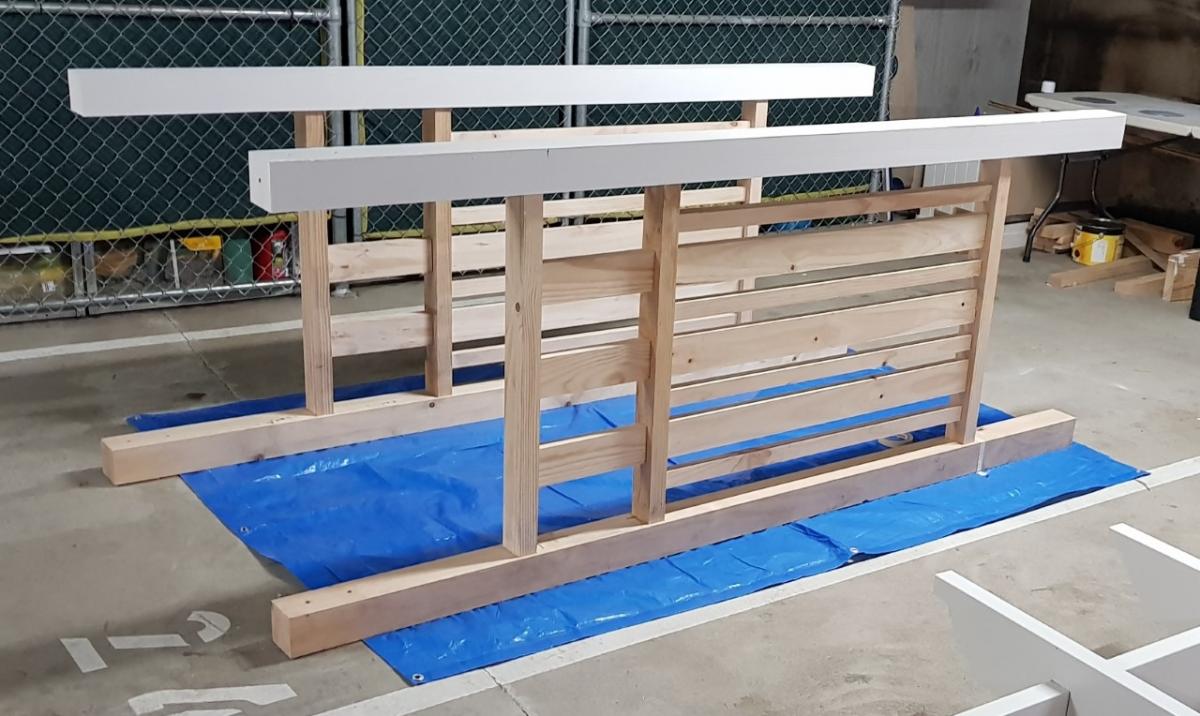
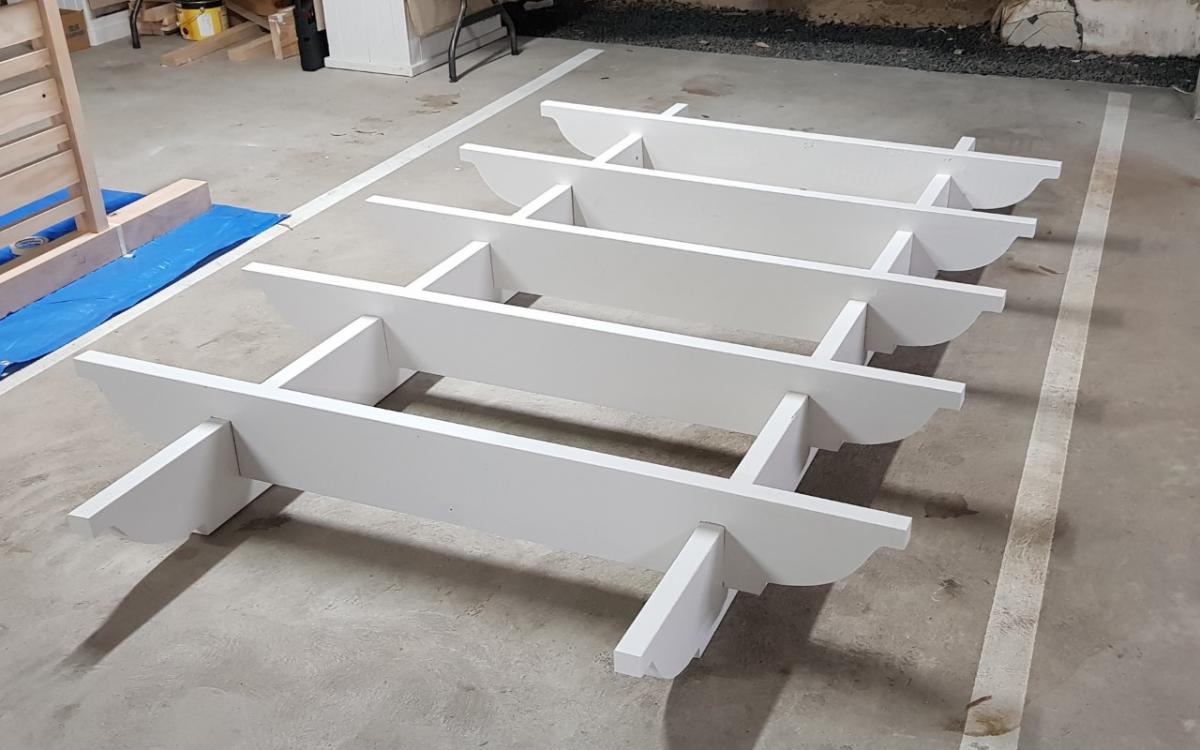
Floor-to-Ceiling Garage Storage

Submitted by Anonymous (not verified) on Mon, 09/05/2016 - 20:21

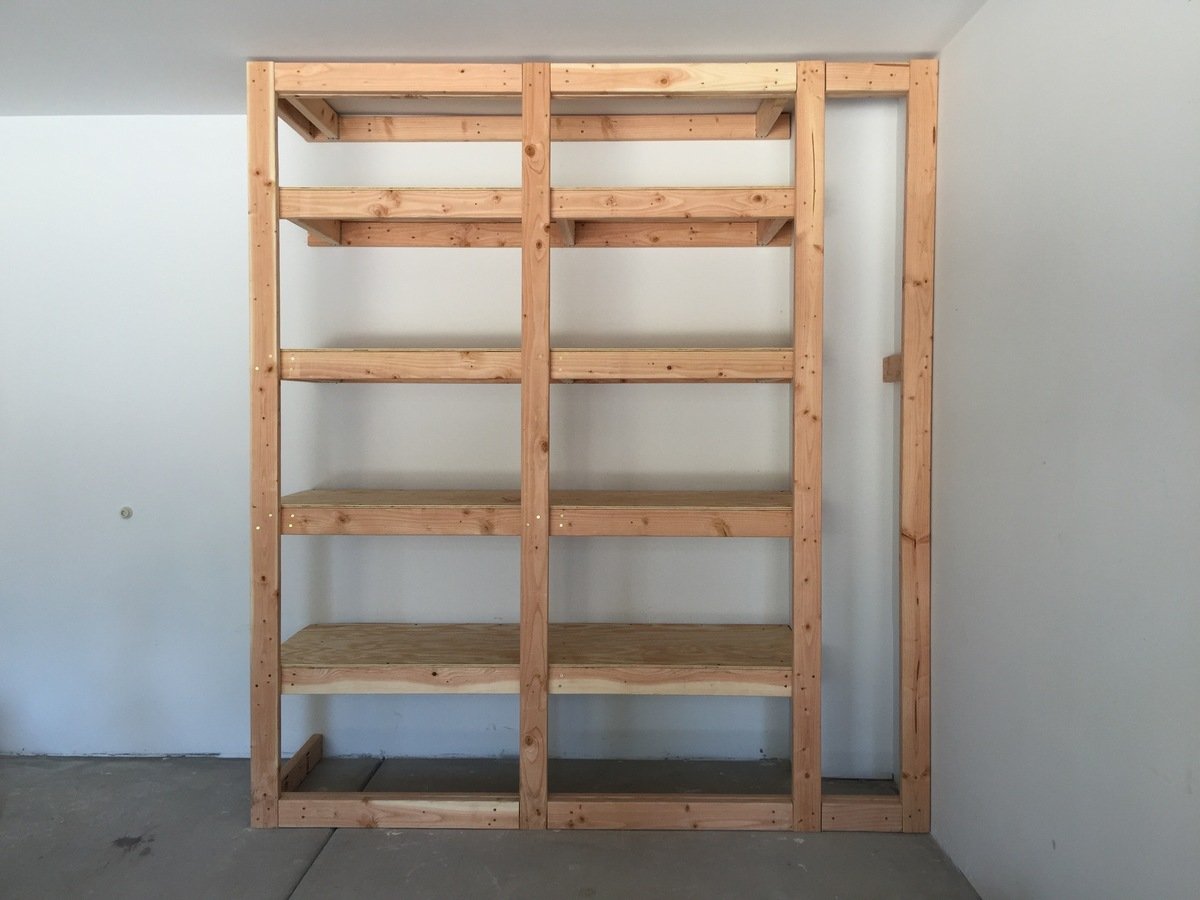
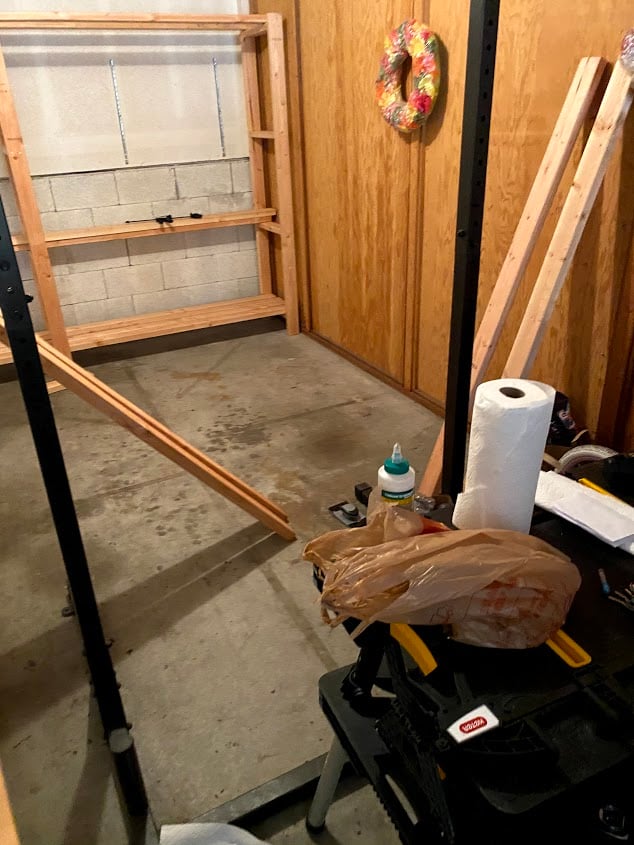
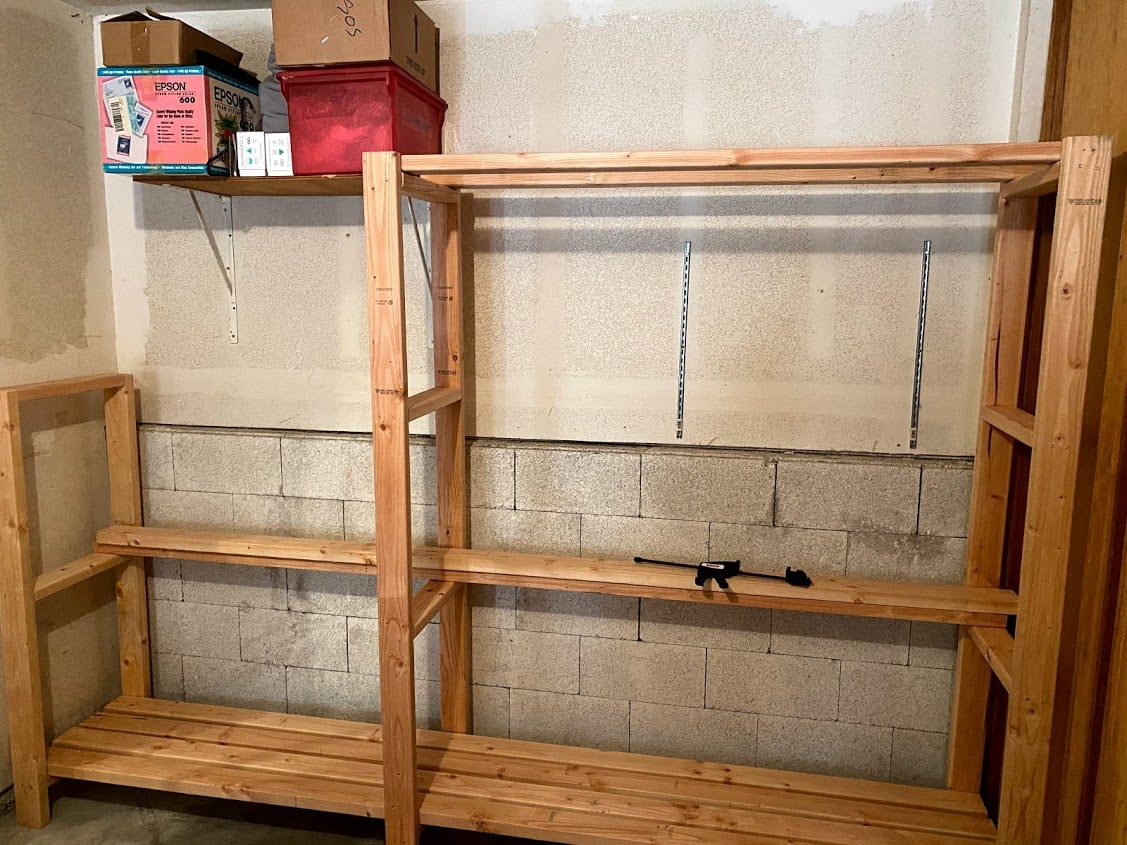
My floor-to-ceiling garage storage is 6' w x 8' h. I wanted to utilize the entire height of the wall for the rack. I also created a small cubby at the end for tall items like brooms, poles, etc. I also added 2x4 pieces on the top, sides and foot of the rack so I can add doors to hide the clutter stored on the shelves.

Estimated Cost
$80: $70 for wood and $10 for screws.
Estimated Time Investment
Day Project (6-9 Hours)
Recommended Skill Level
Starter Project

simple outdoor lounge chair

Submitted by ogie on Mon, 06/23/2014 - 10:20

I made two lounge chairs and two chaise lounge chairs for my pool deck. I think they look great as a set! I did use a 1 x 4 for the back brace instead of a 1 x 2.

Built from Plan(s)
Estimated Cost
$50 for one lounge chair
Estimated Time Investment
Afternoon Project (3-6 Hours)
Finish Used
I left them unfinished for now as cedar weathers well. I may use a transparent stain to keep the natural cedar color from graying.
Recommended Skill Level
Intermediate

Comments

Farmhouse L Desk

Submitted by kellyd77 on Mon, 08/17/2020 - 09:02

Put a twist on the farmhouse desk plans

Built from Plan(s)

Comments

Garage Shelves - Freestanding (Modified)

Submitted by Anonymous (not verified) on Tue, 09/15/2020 - 20:45

First project ever! I have been planning to build this for at least a year, and I finally did it! I had to modify the plan to fit my space, but it worked out well. They cut the wood for me at the store, so I did not make any cuts myself, just assembled all of the pieces together. I used all 2x4s, 8' and 10', cut down to my measurements. I did not finish the shelves since it is just for the garage, but I did sand rough board edges and some of the faces. I just used an palm sander and coarse sandpaper (80 grit). Please double check all measurements and lists because I forgot to add my shorter shelf supports to the list and had to go back to the store. I also forgot to add the width of the top shelf to those two shorter supports, so the shelf boards are resting on the top instead of nestled into the supports. It turned out not to be a functional problem, but a good lesson to learn. I also learned to make sure my driver battery is charged fully before starting - that took a large chunk out of my first day building and I had to finish the next day. My husband helped with some lifting and holding, but I mostly did this on my own in one weekend, so you CAN do it! Don't wait like I did - it is soooooooo useful and it looks great! All of my friends are really impressed and it feels so good to have made something like this! Thank you Ana!!

Estimated Cost
$180
Estimated Time Investment
Weekend Project (10-20 Hours)
Finish Used
N/A
Recommended Skill Level
Beginner

Comments

Welcome Post

Submitted by TamarasJoy on Thu, 02/02/2017 - 18:05

Full Instructions HERE

What you will need to build this DIY Welcome Post:

  1. 4 x4 Fence Post Cut: 30 inches long 1×6 down to make 2 5 1/2″x5 1/2″ squares and 2 4 1/2″x 4 1/2″ square.
  2. Different Widths of wood cut into squares. For the three tear welcome post I have 3 different sized squares. They measure: SMALL: 5 1/2 by 5 1/2 inches MEDIUM: 7 1/2 by 7 1/2 inches LARGE: 9 1/2 by 9 1/2 inches.
  3. Single Hook
  4. Long wood screws & Drill
  5. Stain
  6. Rust-Oleum Varathane Outdoor Classic Clear Water Based Spray, Gloss Finish
  7. Wood Glue
  8. Orbital Sander or some muscle & some sand paper
  9. Wood filler (not required)

Full instructions on how I put this together on my blog.

Estimated Cost
This is a project that I built from all scraps and left overs.

If I had to guess it shouldn't be more then $25 if you can do some scrounging :)
Estimated Time Investment
An Hour or Two (0-2 Hours)
Finish Used
Dark Stain & three coats of the spray can polyurethane
Recommended Skill Level
Starter Project

Children's Playhouse

Submitted by Markb25 on Wed, 10/28/2020 - 08:54

A few years back I decided to build a playhouse for my daughters birthday, the ones available locally were plastic garbage. Since then people started coming forward asking me to build ones for their kids, which is great as it's kept me busy and sane after being forced into early retirement. I've stuck mainly to the more traditional looking on ground house but, soon requests came in for treehouse-style ones; taking Ana's playhouse deck plans and adapting them slightly I now starting my fifth order for a platform house. Being in Cyprus all our timber is imported and very limited, I've more chance of seeing a Unicorn than a piece of Cedar which has meant a little more work involved to make sure they withstand up to the elements, we only get around 20 days of rain a year but, the summer heat is like the surface of the sun. Fortunately, with this not being a new problem there are plenty of options available for preservation/protection, the 'colours of Greece' range by Kraft paints perfect, its sprays beautifully and the colours spot-on for kids.

Estimated Cost
$1000
Estimated Time Investment
Week Long Project (20 Hours or More)
Finish Used
For the main part, the houses have been finished using wood aqua by kraft paints using the 'colours of Greece' range, lots of soft pastels and Mediterranean inspired colours. the application was using via HVLP spray gun and four coats. Sanded lightly with 220 grit in between coats and finished with up to and including 1500 grit post paint to give a glass-like finish.
Recommended Skill Level
Intermediate

Comments

4x4 Truss Table

Submitted by Eddie A on Fri, 12/11/2020 - 16:15

This was my first table build and I’m happy with the way it turned out! I adjusted the plans to account for wood movement of the table top using mortise and tenon joinery and draw board pins on the bread board ends. Also edge glued the table top boards and used z-clips to attach the table top.

Finish Used
General Finishes Nutmeg Gel Stain and Arm R Seal

Built-In Hall Tree Heated

Submitted by adamhatton on Sun, 03/10/2013 - 18:26

I made this hall tree as a gift for my wife. It's a classy way to store coats out in plain sight. it is larger than the design specs from Mimi (7'H by 4'1" W) and built-in instead of free standing. Our house has a boiler with floorboard radiators. There is a radiator inside the hutch, and heat comes out of the holes just behind the lid to the bench this heats up the coats as they hang on the rack. The radiator also heats the compartment under the bench which aids in drying damp boots and other items. Fun project, also an easy project thanks to the Kreg Jig!

Built from Plan(s)
Estimated Cost
$100
Estimated Time Investment
Day Project (6-9 Hours)
Finish Used
Bear semi-gloss interior latex.
Recommended Skill Level
Beginner

mitered corner farmhouse table - shiplap top.

Submitted by Anonymous (not verified) on Tue, 04/25/2017 - 13:07

Slightly modified the farmhouse table plans to build the top out of 6 inch pine shiplap, its thinner than the farmhouse plans (its 3/4inch), but I liked the rough cut on the top surface, and overlapping edges made for a great fit. 

I cut the outside edge boards down to 4inch wide, and then mitred the corners to act as a frame for the 6 inch boards. I will build copper corner protectors. 

Finish was: pre-conditioner on the wood, 3 coats of minwax weathered oak stain, 3 coats of polyurethane. Sanded the benches between coats, but not the table, as the table has a rough surface. 

benches are 2x6 fir boards, cut the long edges off on a table saw to make them join better, as I dont have a jointer.  Same finish applied as the table. 

Table is 8 feet long, 38 inches wide.  seats 10 comfortably.

It was half finished in my garage for several months, in which time I used it as a workbench - so it has plenty of authentic weathering dings and dents. 

It was my first project, as I have only recently moved into a house with a garage. 

Loved the construction part, hated the finishing steps. 

thanks!

oz


Estimated Cost
200 in wood, fasteners, stains, etc
Estimated Time Investment
Week Long Project (20 Hours or More)
Finish Used
minwax pre-conditioner, weathered oak and polyurethane
Recommended Skill Level
Intermediate

Window Shutters

Submitted by Anonymous (not verified) on Fri, 05/05/2017 - 09:33

I really wanted to add a layer of depth to the front of our house, and my favorite option was adding new shutters! I used fence boards to keep cost low and to be sure that the wood would stand up to all weather conditions. I protected the wood with an oil-based sealant made for exterior use. I attached the cross braces with chunky screws and painted those black. I love how they turned out!

Estimated Cost
About $45 for the wood (my shutters were just tall enough to need a full fence board each - you may be able to double up) and about $36 for the chunky screws.
Estimated Time Investment
Afternoon Project (3-6 Hours)
Finish Used
I used the oil-based Varathane Satin sealant - not stain color required.
Recommended Skill Level
Beginner

Day Bed

Queen size Day Bed with Full size trundle made of yellow pine and dark stain from Homedepot

Estimated Time Investment
Week Long Project (20 Hours or More)
Recommended Skill Level
Intermediate

Comments

suziewelker

Sat, 10/24/2020 - 00:05

Please may I have the plans for this bed? I want to build it in a twin XL size. 39x80. The mattresses are 10” thick. I have tried adapting several of your daybed/ farmhouse bed plans to include a trundle and to be long enough to accommodate the XL mattresses and have been stumped. I like the lower arms of the Hailey and simple daybed and wish this bed had a back piece. But this would be the closest “jumping off point” to get what I’m looking for. (I think) Any help would be greatly appreciated.

Cedar Tiered Flower Planter

Submitted by Anonymous (not verified) on Tue, 05/04/2021 - 14:30

We made this tiered planter for a Mother's Day gift for my wife. It was a simple build and the plans are very easy to follow. I couldn't get any cedar fence pickets so I used standard 1x6x8 cedar boards that were available at the local big box store; that's why the cost is a little high. The planters were made 24" wide for more room instead of 16'" wide as per the plans. We personalized it by adding the quotes to the boards and burning them into the wood with a pyrography pen.

Estimated Cost
$50
Estimated Time Investment
Afternoon Project (3-6 Hours)
Finish Used
Varathane Classic Penetrating Wood Stain - Natural
Recommended Skill Level
Beginner

Comments

5-Tier Wood Planter

This plan was easy to follow, accurate and came together in just a few hours. I used some reclaimed barn wood for the 2x6s and dog-ear pickets for the remainder.

I made it harder for myself than it had to be. I didn't follow the directions closely enough and cut the box ends at 5 1/2" instead of 5 1/4". That meant that the bottoms had nothing to press-fit against. So, I had to do a little workaround to fix that. I made a 1" shelf at each end of each box so that the bottom could sit on these little shelves. The upside to this mistake is that there was now a drainage slot all along the front and all along the back of each planter box. 

I stained and sealed it. Finally, I lined each planter box with weed matting that I'd cut to size and cut drain slits in. The matting doubles as a way to keep the planting mix from falling out of the long drainage slots while allowing water to drain through the little slits I poked in the fabric. (I poked drain slits only along the front edge so that water would drain into the planter box below instead of onto the ground.)

I'm happy with the plan and the finished planter!

Estimated Cost
$35
Estimated Time Investment
Afternoon Project (3-6 Hours)
Finish Used
One coat of Cabots Premium Stain and Sealer in Gingersnap. One coat of Minwax Helmsman Spar Urethane.
Recommended Skill Level
Beginner

Farmhouse nightstand

Submitted by Anonymous (not verified) on Mon, 10/04/2021 - 12:55

I have built various projects. A work table, a barn door cabinet and couple of Farmhouse nightstands for my grandson and granddaughter. It was fun!!

Comments

Counter height planter

Submitted by h.abbott on Sat, 05/11/2013 - 18:40

We needed extra garden space this year and I thought adding one of these planters would be a great addition. So far it has. It allows me to easily weed, which is my most despised gardening job. Added bonus that the dog can't dig it up, and bunnies can't nibble on my plants. It also makes a great art canvas for my son's chalk drawings.

Estimated Time Investment
An Hour or Two (0-2 Hours)
Recommended Skill Level
Starter Project

Comments

Janettx

Fri, 05/31/2013 - 04:25

Great job, glad you were able to follow my lame attempt at giving instruction! beautiful job!

pattyf50

Wed, 04/20/2016 - 12:55

Hi I live in north Dakota we get about 10 ft of snow every January, I am planning on making the counter height garden boxes, but how do I keep the snow in winter from crushing them. Patty

pattyf50

Wed, 04/20/2016 - 12:55

Hi I live in north Dakota we get about 10 ft of snow every January, I am planning on making the counter height garden boxes, but how do I keep the snow in winter from crushing them. Patty

Wedding Arbour

Submitted by Anonymous (not verified) on Mon, 10/04/2021 - 13:43

Hi, I built this wedding Arbour for my daughters wedding a while ago and unfortunately, I have no plans as I built from my head. It now sits in pride of place within thier garden as arch for thier garden.
I built this with a drop saw, hand saw, router, drill and hammer only.
I follow Ana's plans every release and save her plans for when I retire in two years to build for our house as well as try to run a small business from my shed.
Thank you Ana for you continued plans and wonderful advice.

Built from Plan(s)

Comments

Mini Farmhouse Bedside Table

Submitted by danicarby on Tue, 05/14/2013 - 06:59

I built these side tables with a friend. We under estimated the time it would take by a long shot! We estimated that with the both of us it took 15+ hours to complete. We spent $120 on all the wood, paint and hardware for both. It was a lot of work and the most time consuming part was the finish (sanding, painting, sanding, painting, clear coat, sanding, clear coat, sanding, clear coat). In the end, it was worth it! They turned out so cute!

Estimated Time Investment
Weekend Project (10-20 Hours)
Finish Used
Creme Spray Paint, Ebony Minwax Stain for top and shelf, and Spray Polyurethane. We sanded in between all the layers for a smooth finish.
Recommended Skill Level
Intermediate

Comments

Dog food storage bench

Submitted by DianeS on Wed, 03/09/2011 - 13:30

This project came from a plan I recieved when I bought my kreg jig, not sure of it origins, it was awhile ago. I needed a place to hide dog food, biscuits are on the left and food on the right!

Estimated Cost
75.00
Estimated Time Investment
Weekend Project (10-20 Hours)
Finish Used
I used the minwax goldon oak with a poly clear satin.
Recommended Skill Level
Intermediate

Red Hen Home's Narrow Cabin Dresser

This was my first project with drawers, and I learned through sad experience how important it is to have ULTRA straight boards to begin with! I am grateful for things like itty-bitty washers to help correct things that aren't quite straight enough. More info on my blog!

Estimated Cost
100
Estimated Time Investment
Weekend Project (10-20 Hours)
Finish Used
Top and shelf are a custom mix gray-brown stain. Red Valspar paint for the body, glazed with ebony stain.
Recommended Skill Level
Intermediate

Comments

IraqTANKER4thID

Mon, 10/21/2013 - 10:47

I had to use Full Extension slides instead of regular euros because of the seam for the drawer bottom being right in the middle of the mounting holes. Now my drawers are not quite mounting the correct way. I have learned a lot of painful lessons on this one. Man.