Modern Geo Headboard
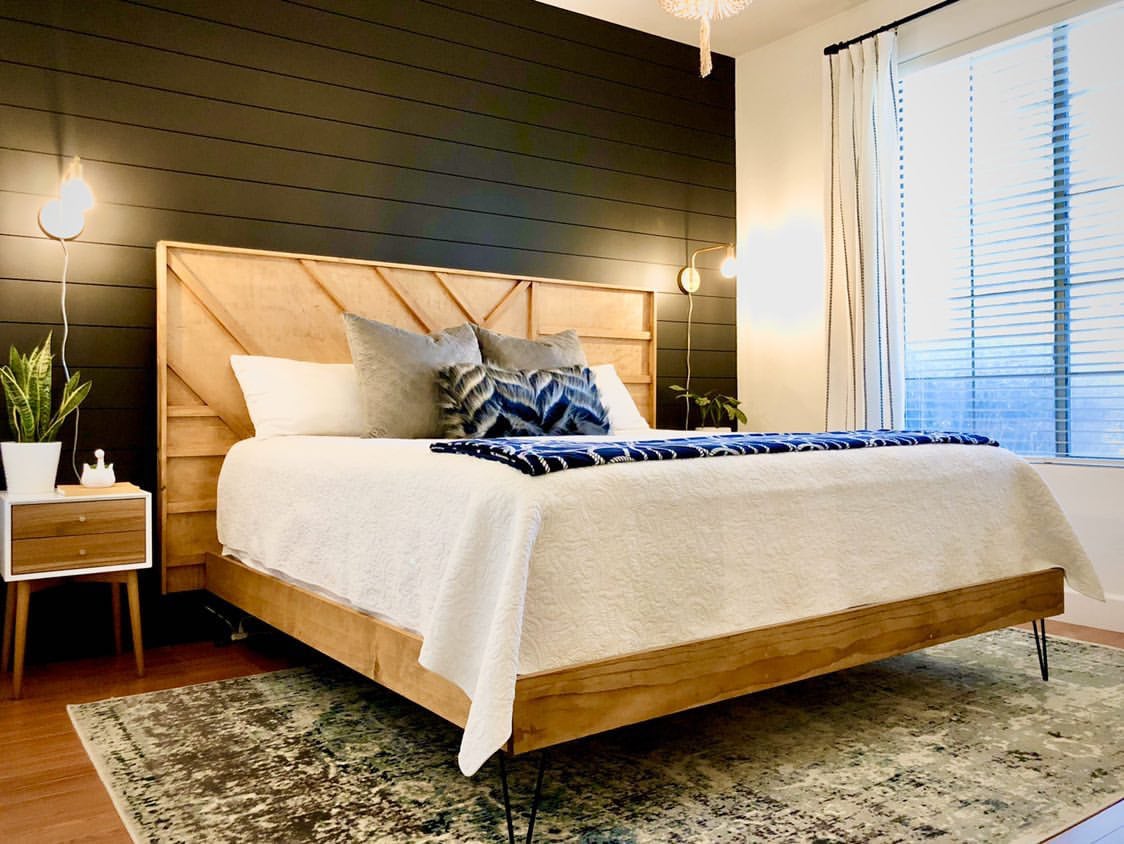
For more information and photos see House of Rumors in Instagram www.instagram.com/houseofrumours
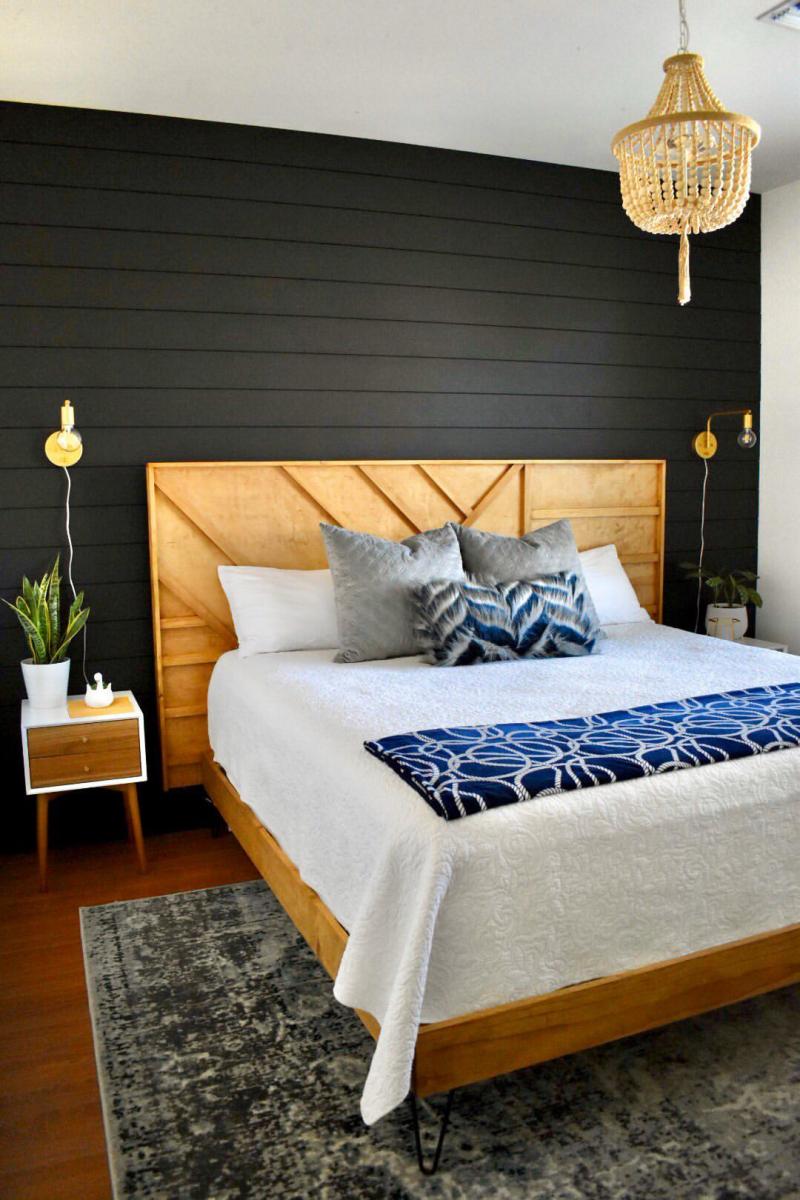
Built from Plan(s)
For more information and photos see House of Rumors in Instagram www.instagram.com/houseofrumours
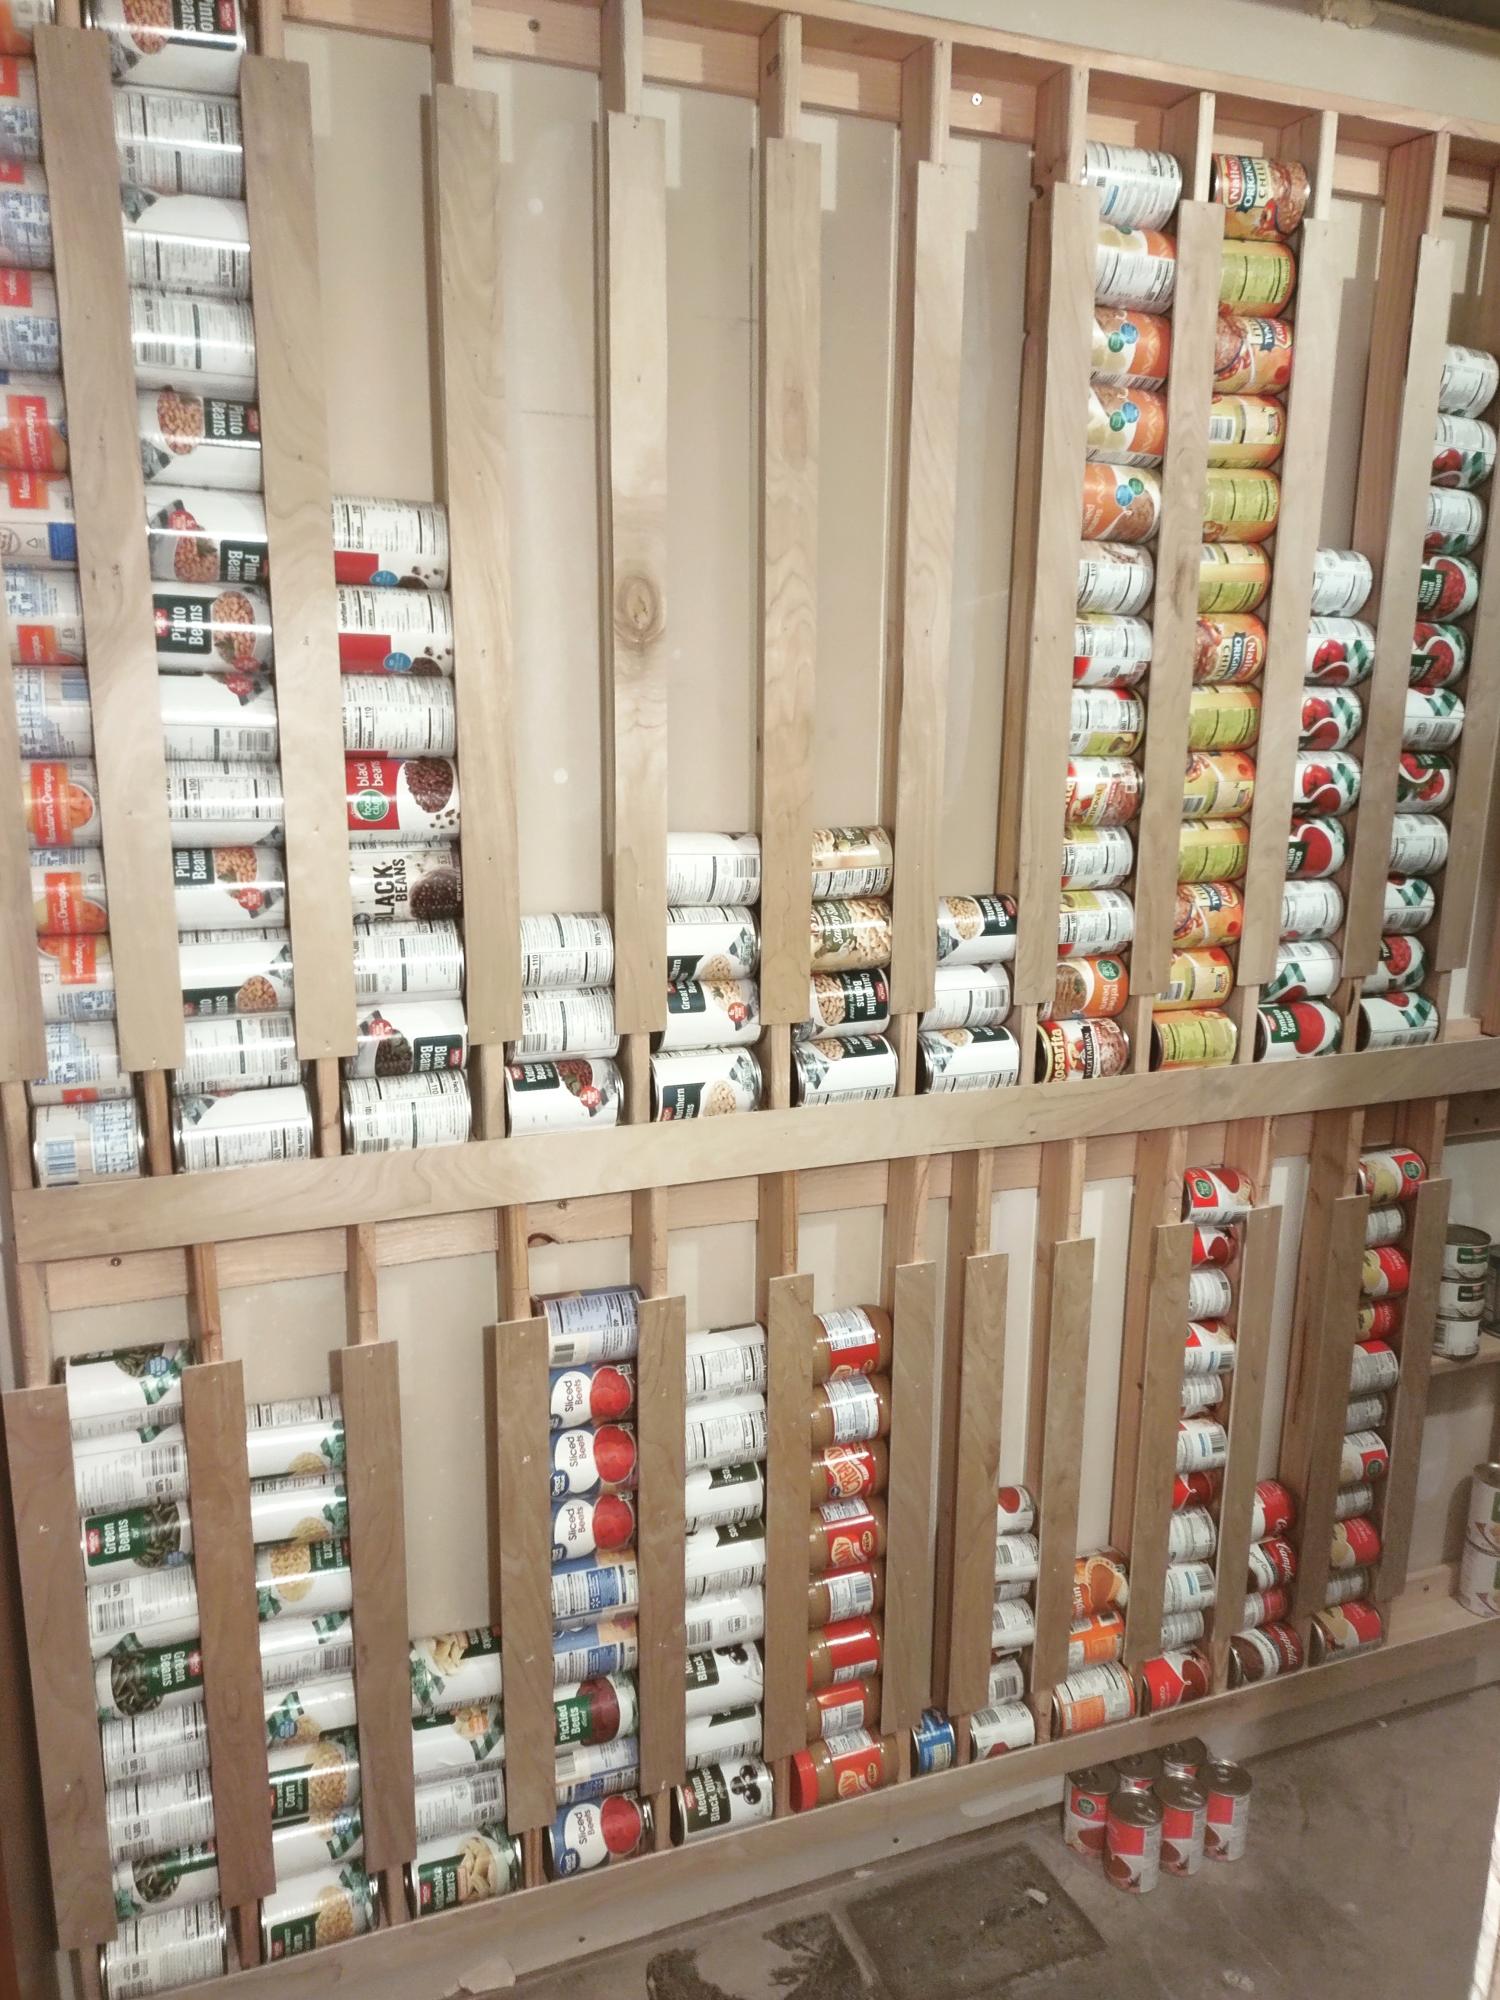
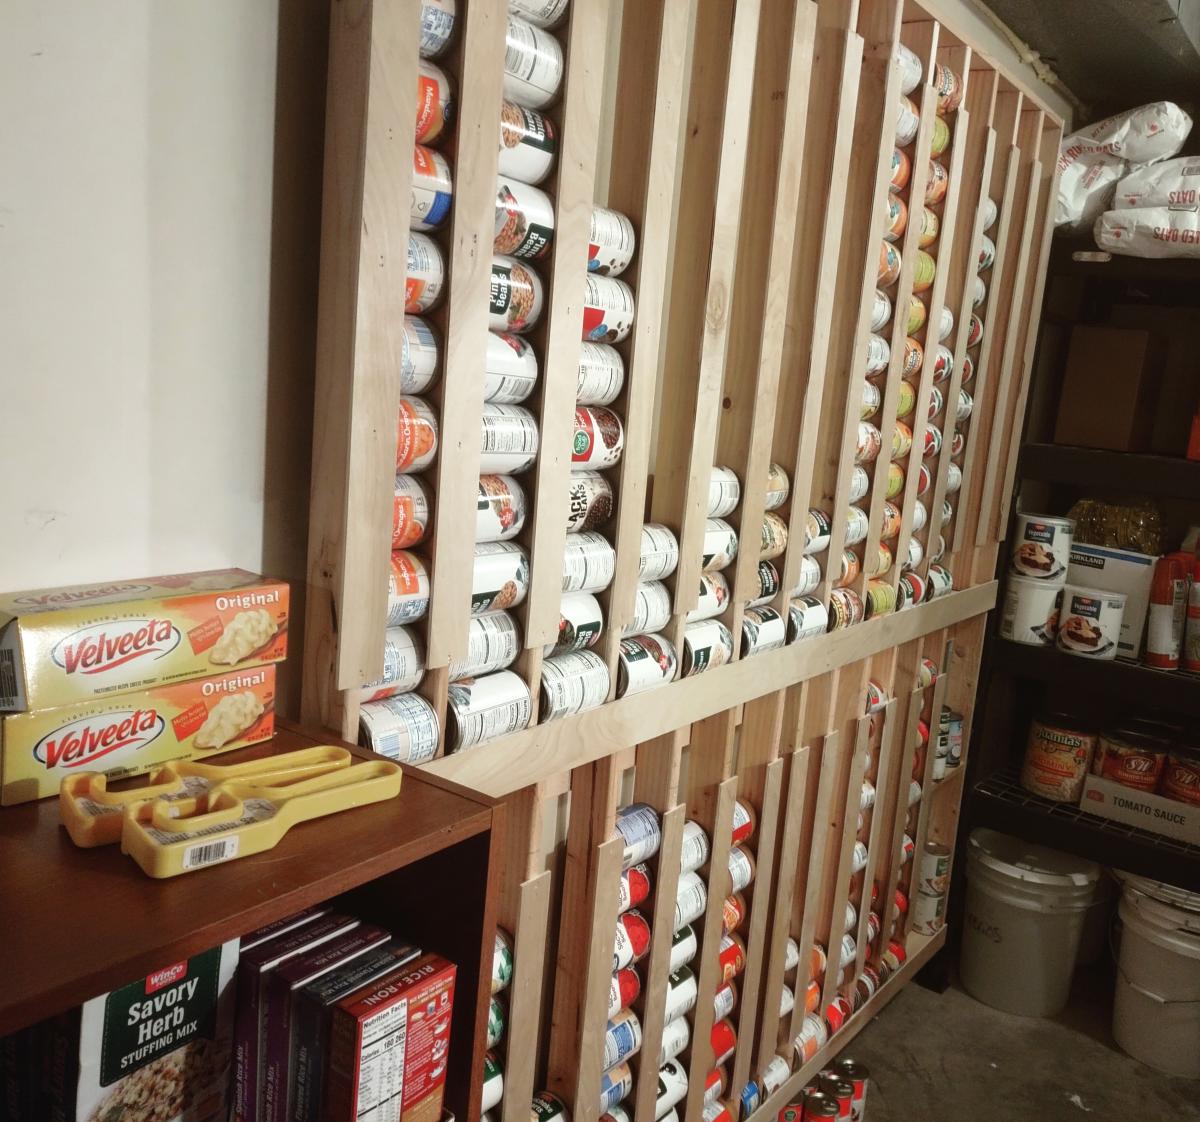
We love our new can storage!
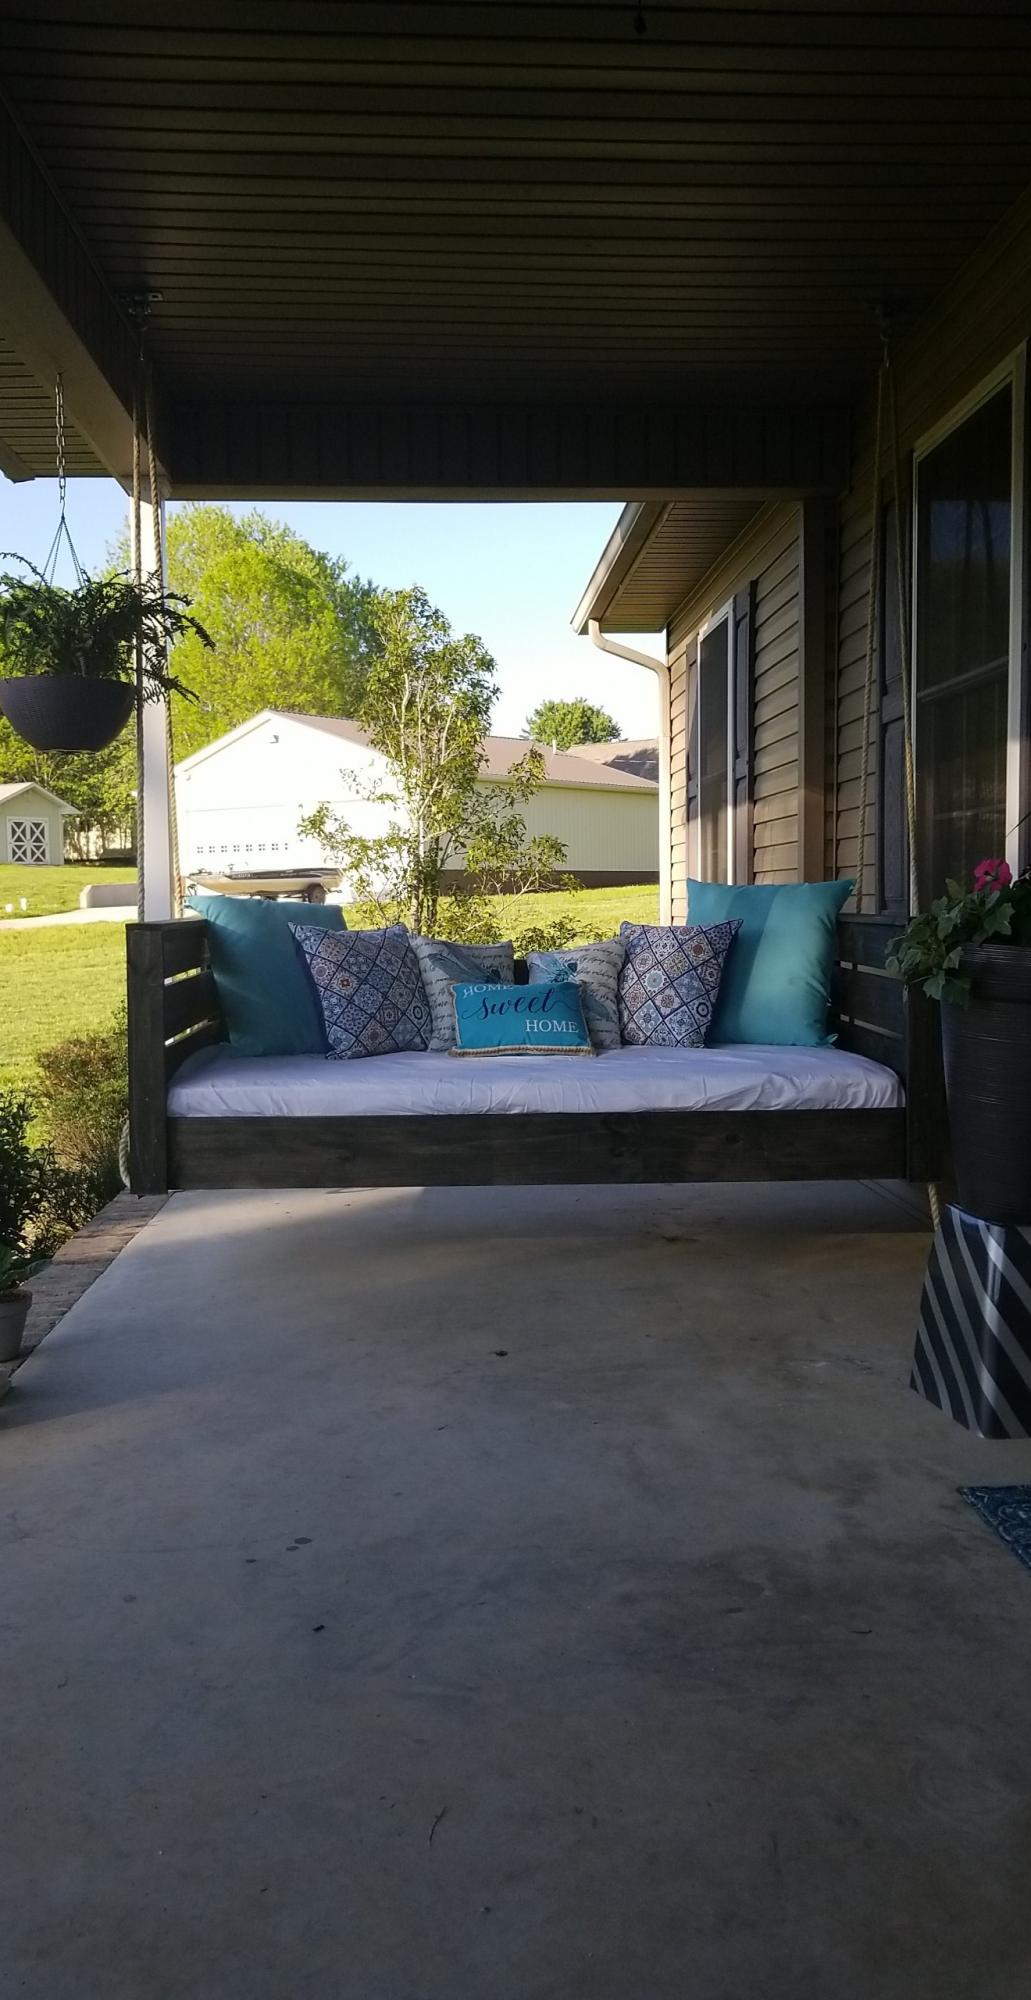
Shayla Shumaker

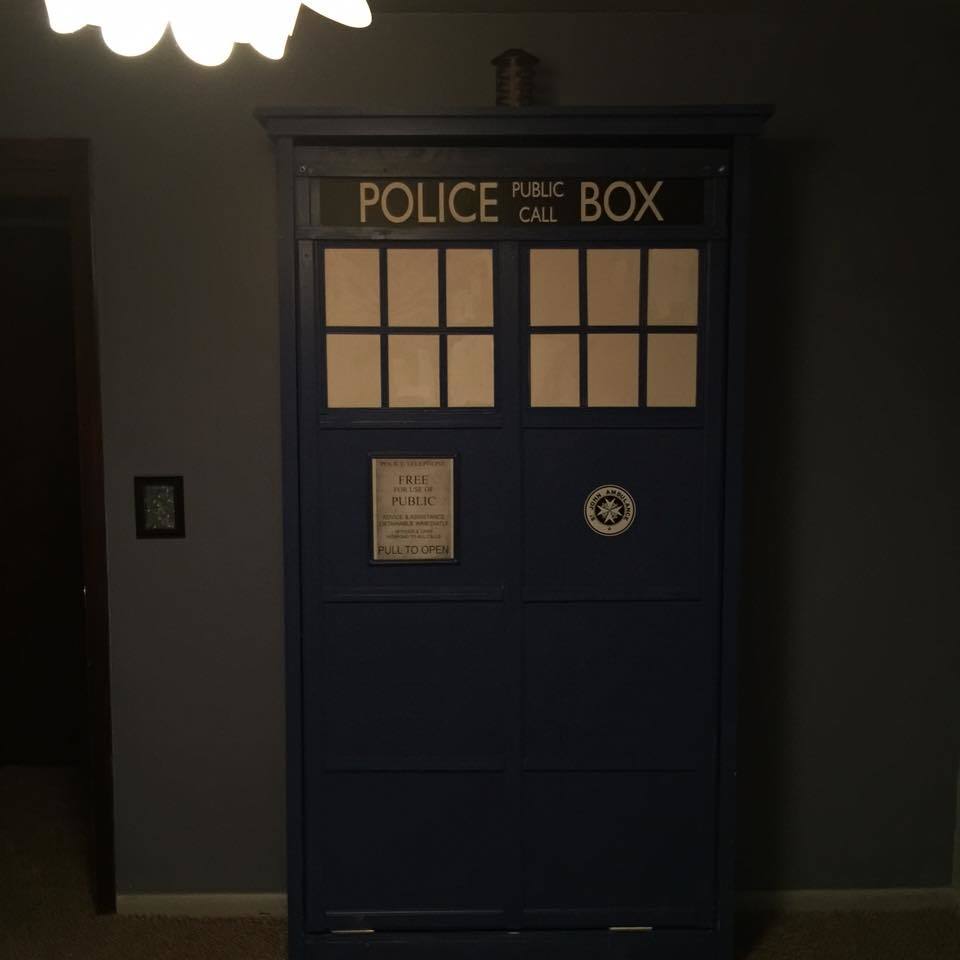
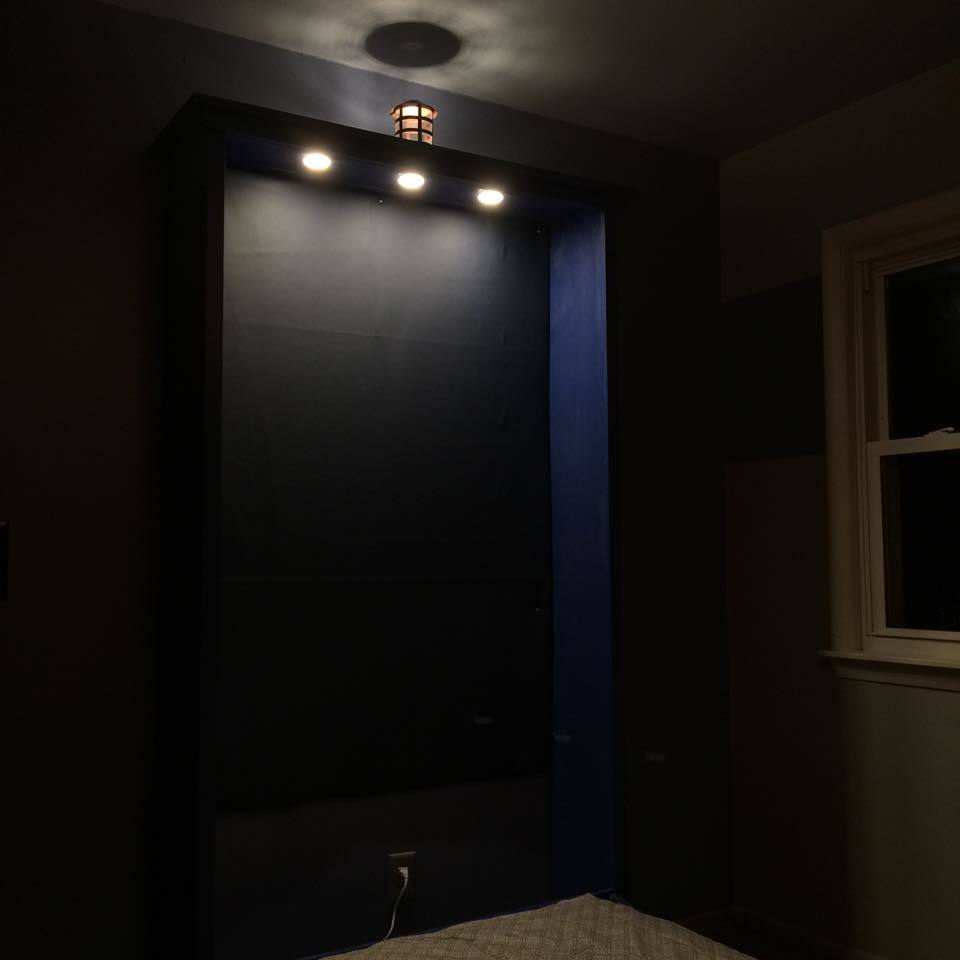
I took the original plan design for a Murphy bed - it was inspired by a Dr. Who themed bed that used a Murphy Bed Kit - I've used Ana White's plans before and thought why spend $$$ on a kit when you don't have to. I few trips to the store and a weekend later I have my very own Tardis Murphy Bed. It cost about $140 to build not including the mattress and accessories cost (light kit/upholstery panel/police box sign etc) I raised it up about 4" to attach legs and added some puck lights for a lighting effect. I think it came together rather nicely. I just have to add handles and the magnetic closures and it will be all done.
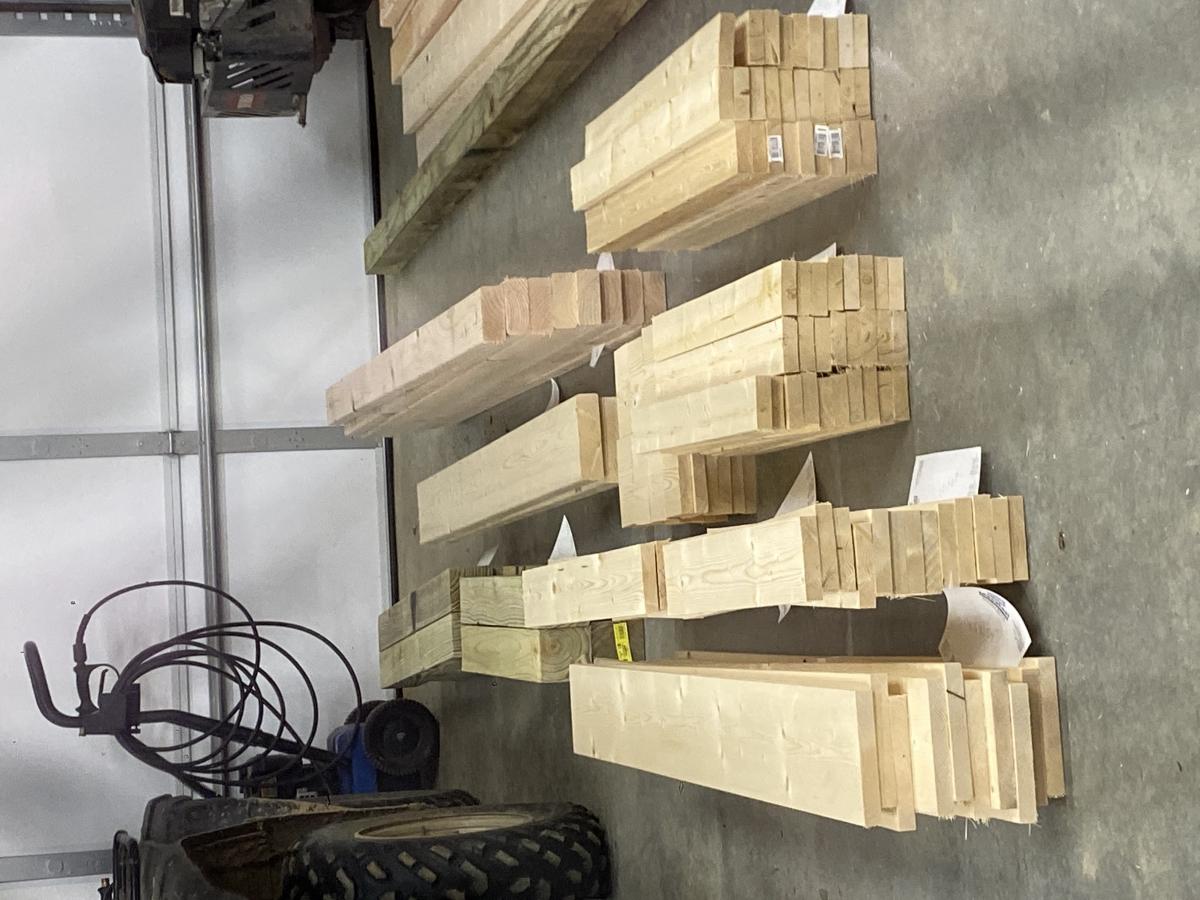
It took me all weekend to build by myself - had my brother help me with mounting the mattress box in the cabinet. I would suggest having wood cut at the lumbar yard as it is difficult to cut the 8 and 12" boards unless you have a bigger table saw that I do.
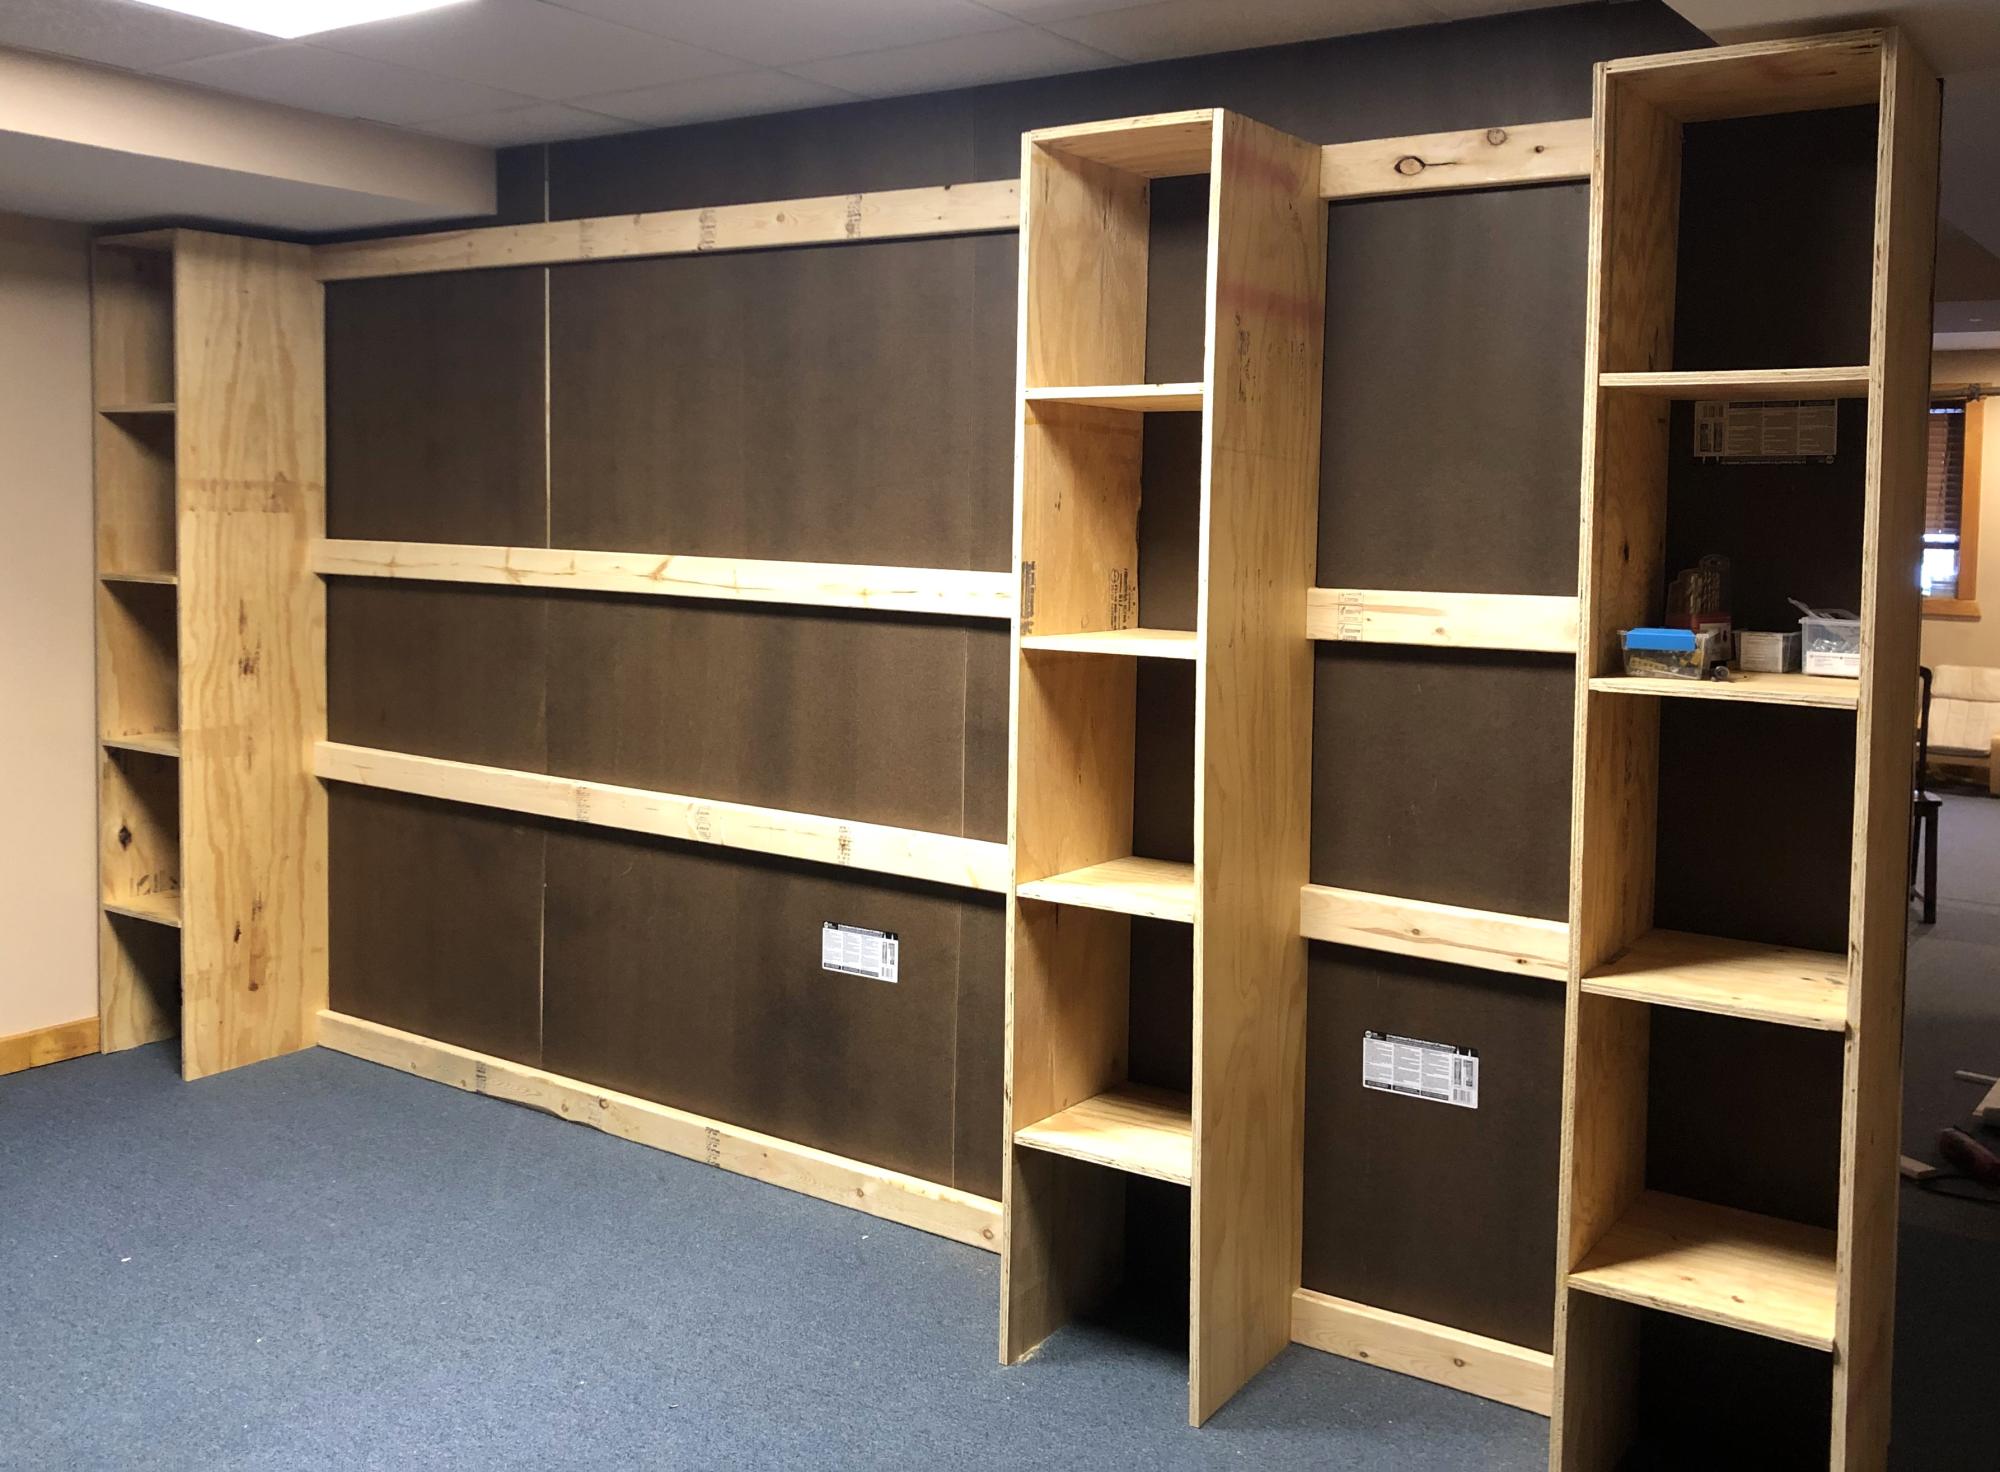
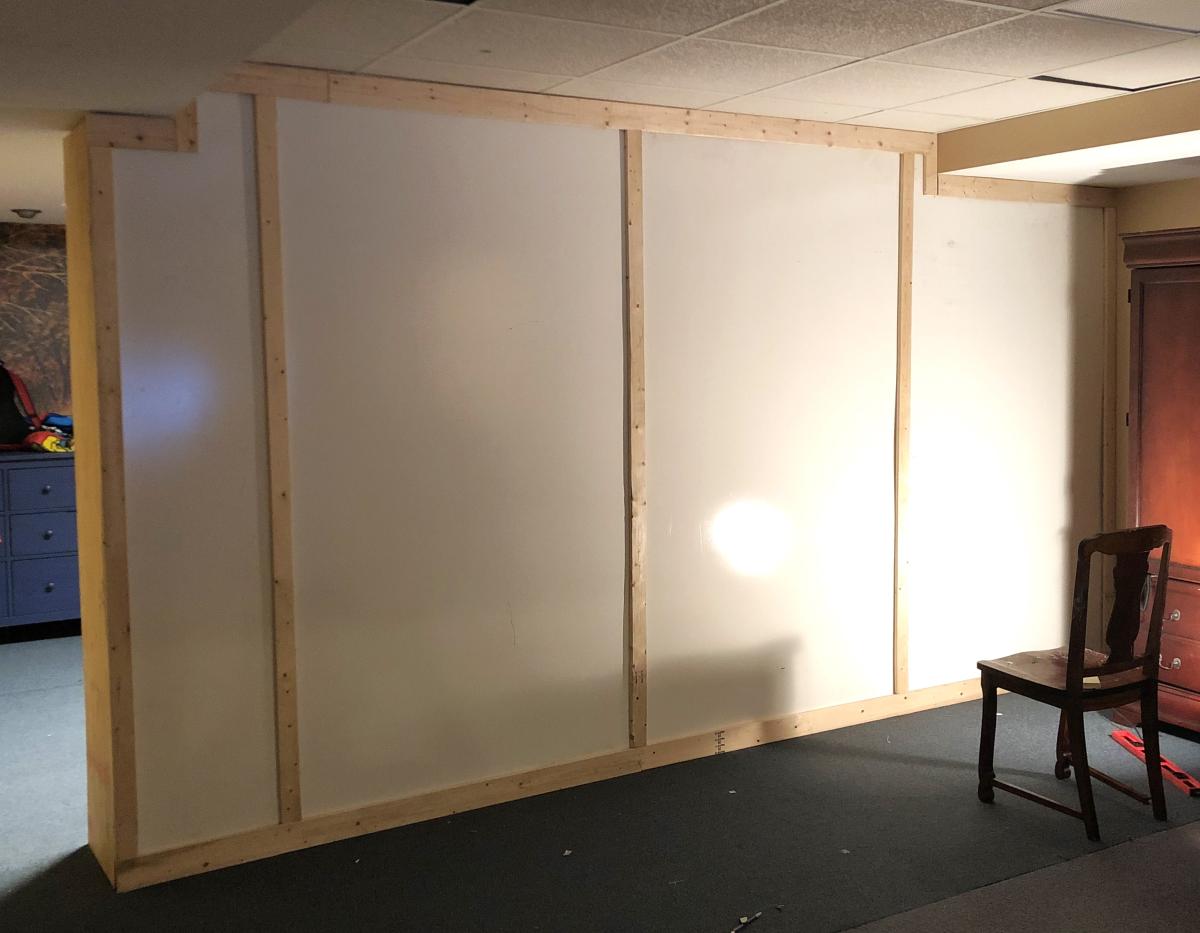
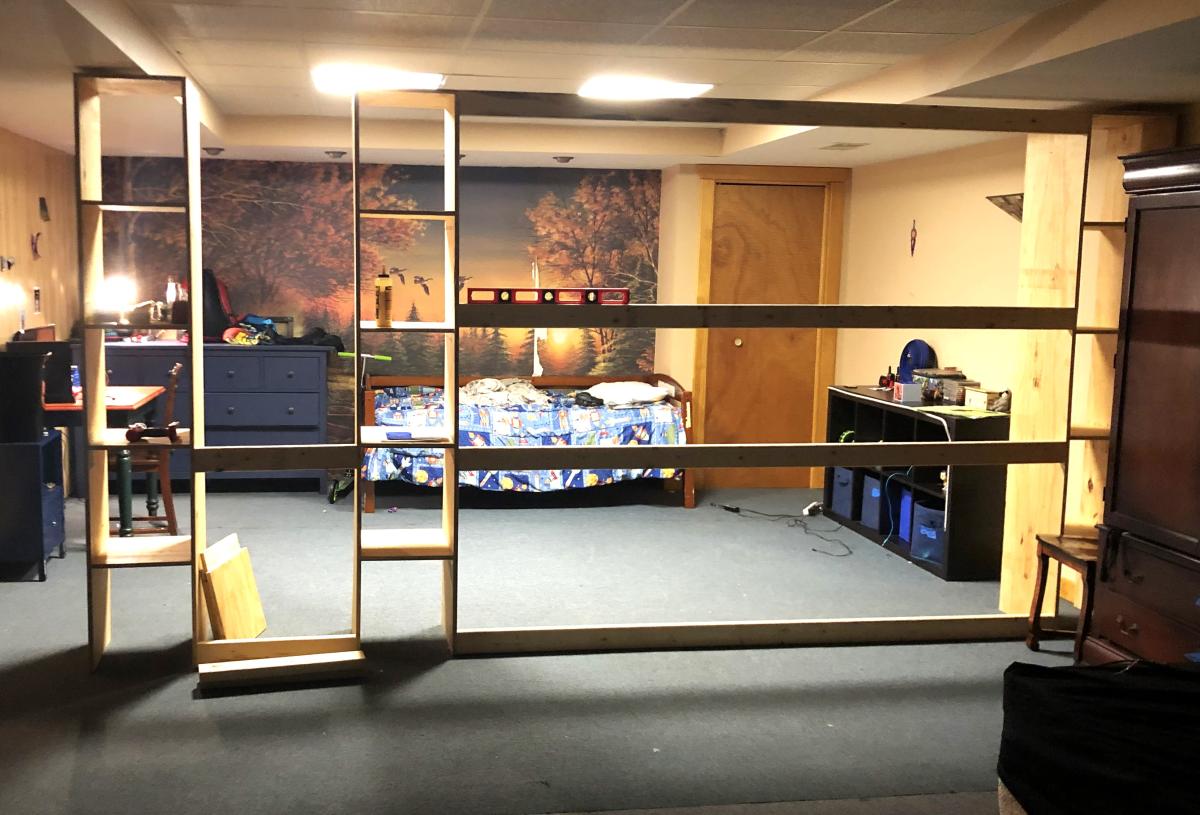
Modified the wall divider closet plan into a wall to serve as an extra bedroom in my basement. The inner wall was subsequently painted.
Grace LeBlanc
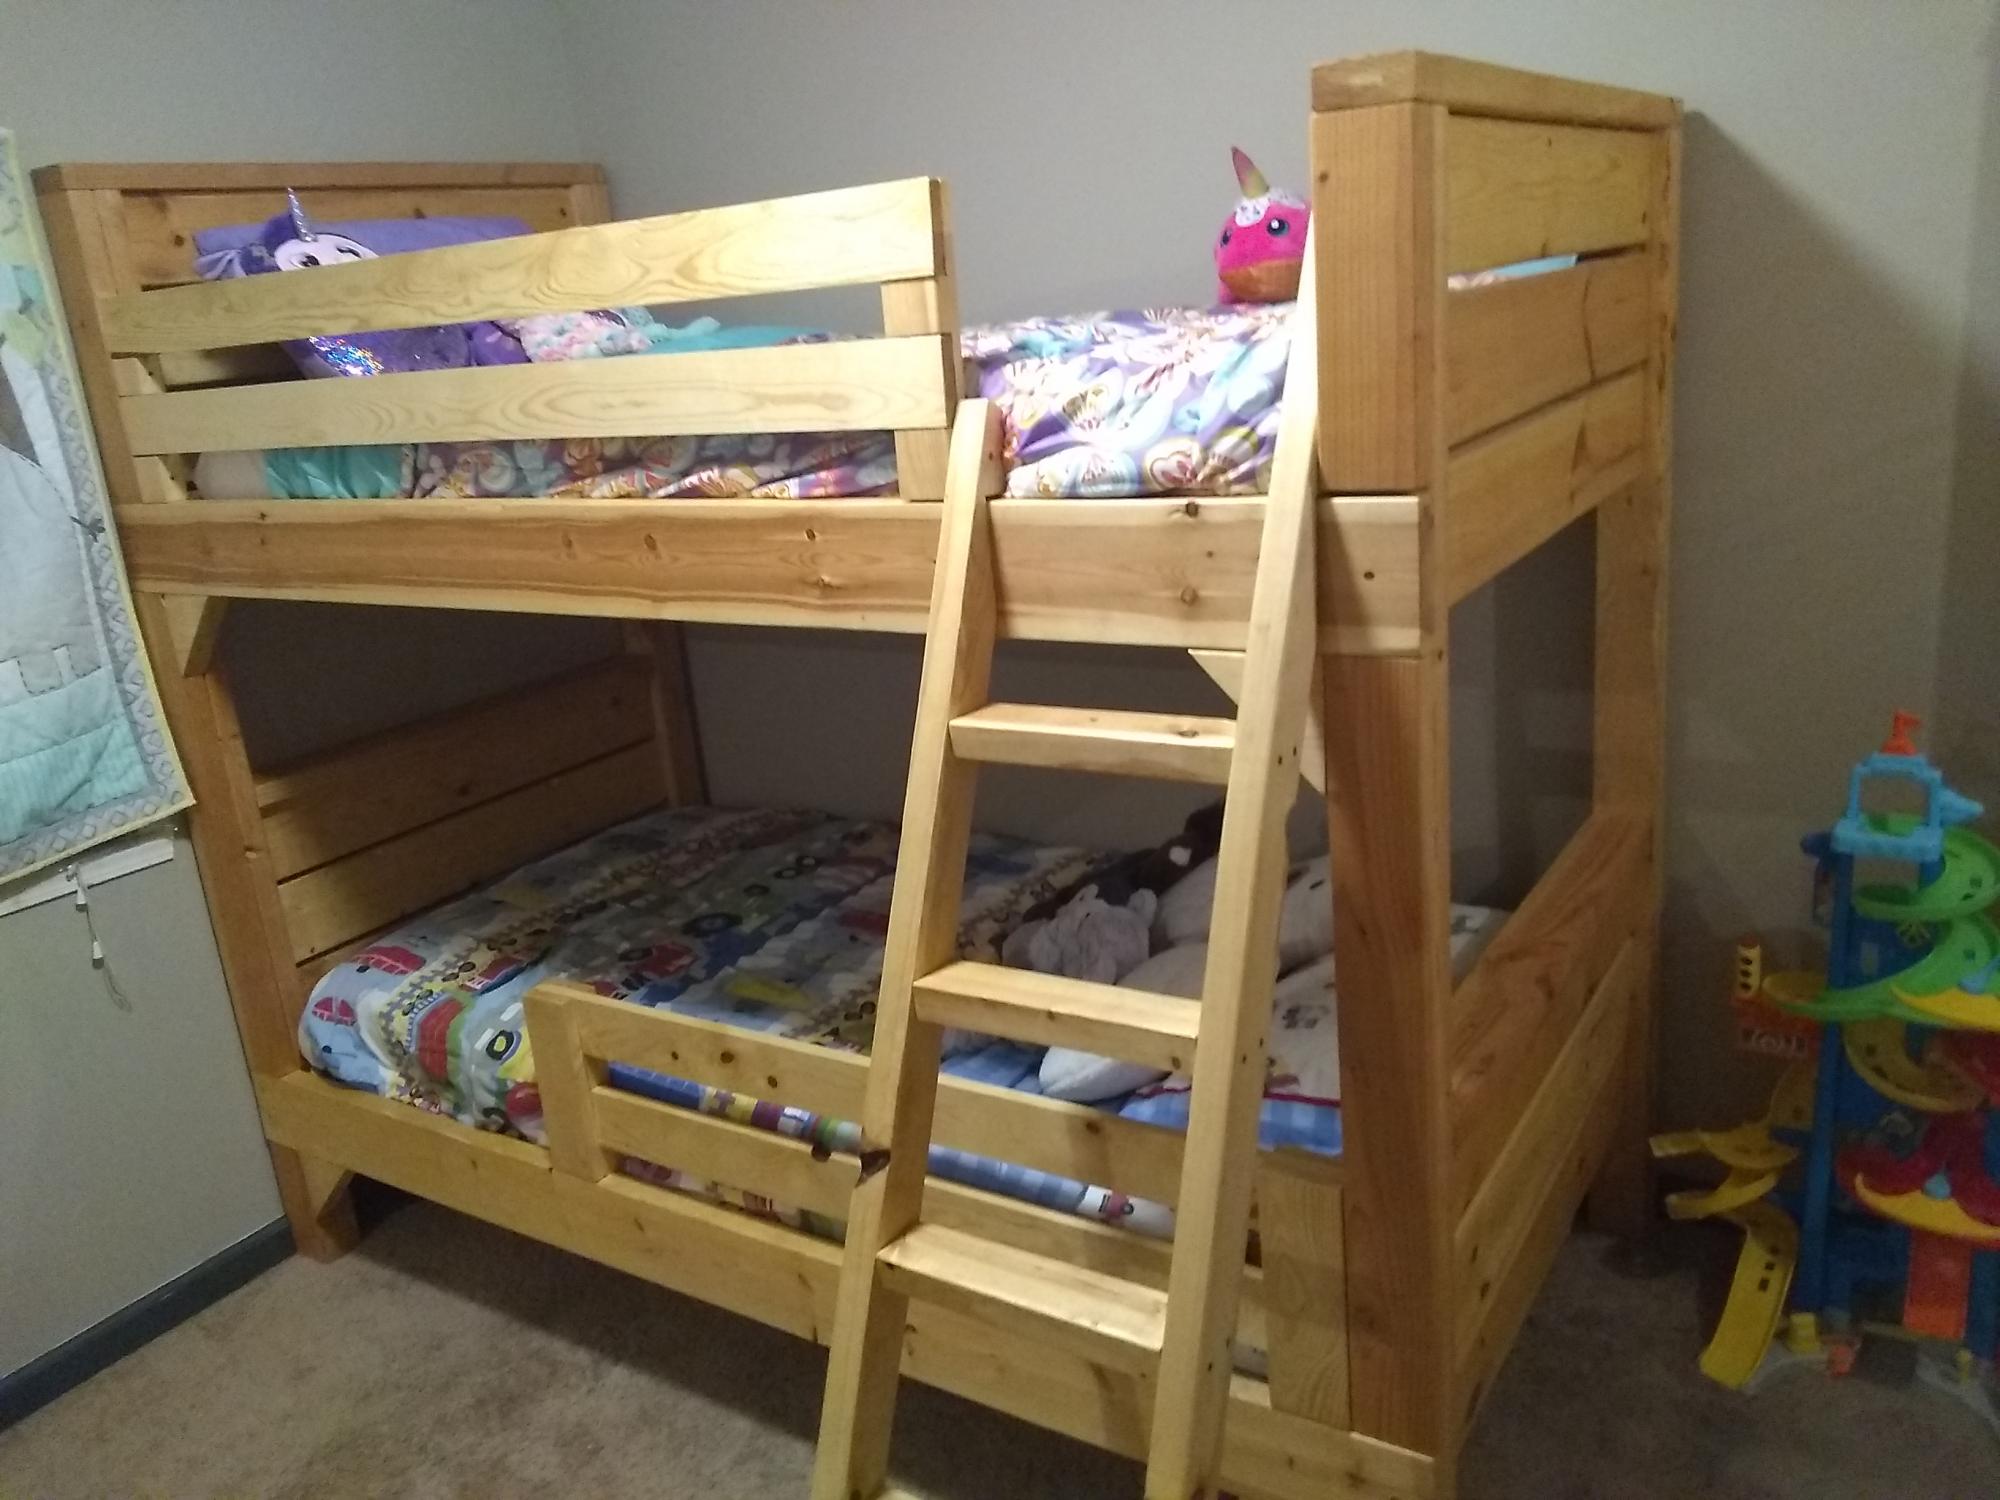
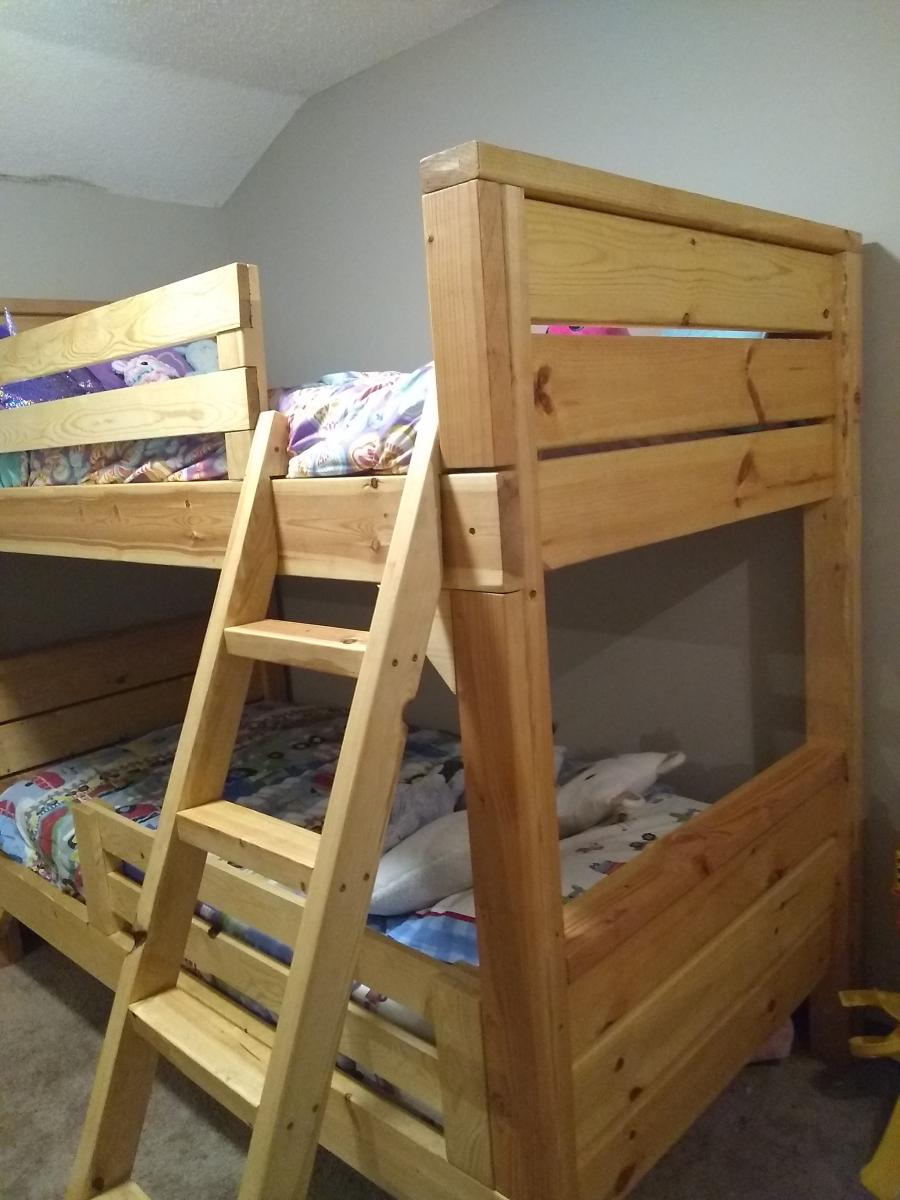
I built this bunk bed from the plans here on Anna white, I love this site. I think it came out really good. It took a little longer than expected because I sanded every piece down, every corner, every side, every end, because it's for my kids.
I devised the ladder myself for my situation and modified the rails I found as well.

A friend needed a raised garden bed for her husband who is in a wheel chair. I searched and found the VegTrug's. It took a lot of trial and error. I based it off Williams Sonoma's pictures. I wouldn't of attempted this with out a plan if it weren't for Ana's website.

Tue, 03/11/2014 - 09:57
Dear CaronGirls, Are plans available for this?
Tue, 05/19/2015 - 06:54
This looks great - I would love to try this...are there plans available?
Sun, 04/24/2016 - 06:25
All the responses say to go to the plan catalog. Link does not work. I looked for an hour. Please help, I really want this plan!,
Wed, 05/18/2016 - 21:45
Not sure what the story is here, Maybe she got in trouble for saying Vegtrug? I would like plans for a DIY Raised planter bed like the above.
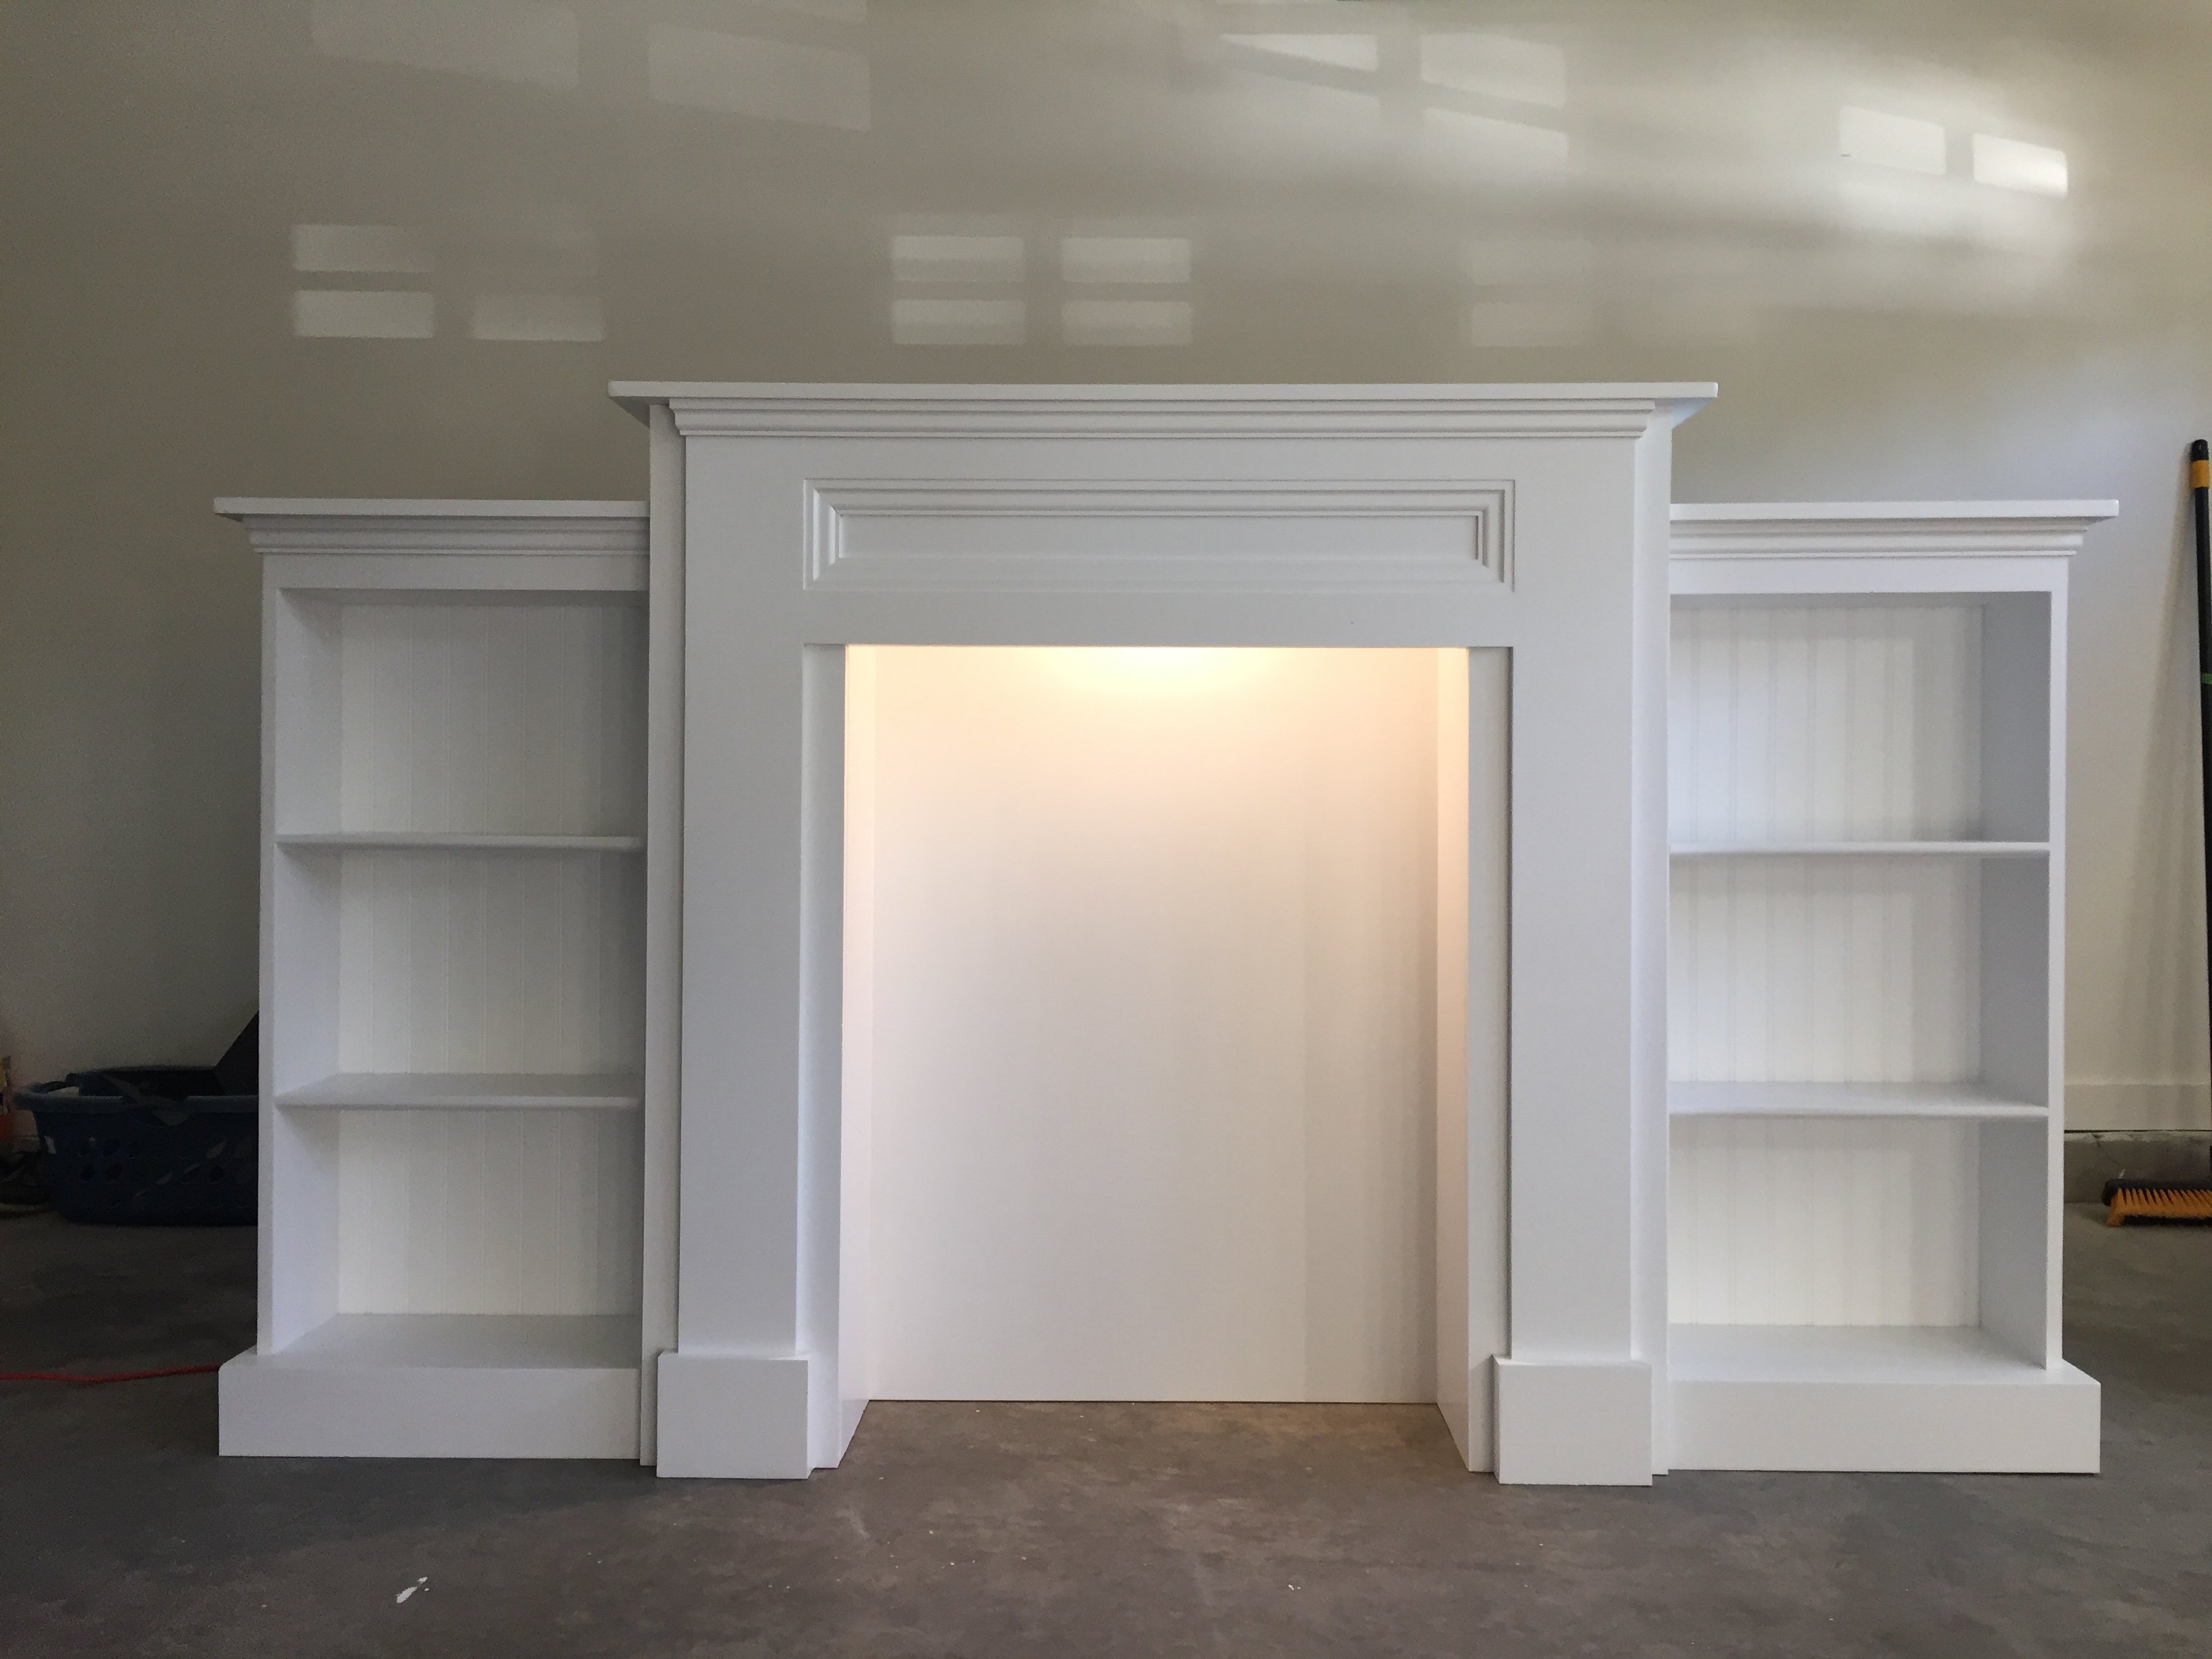
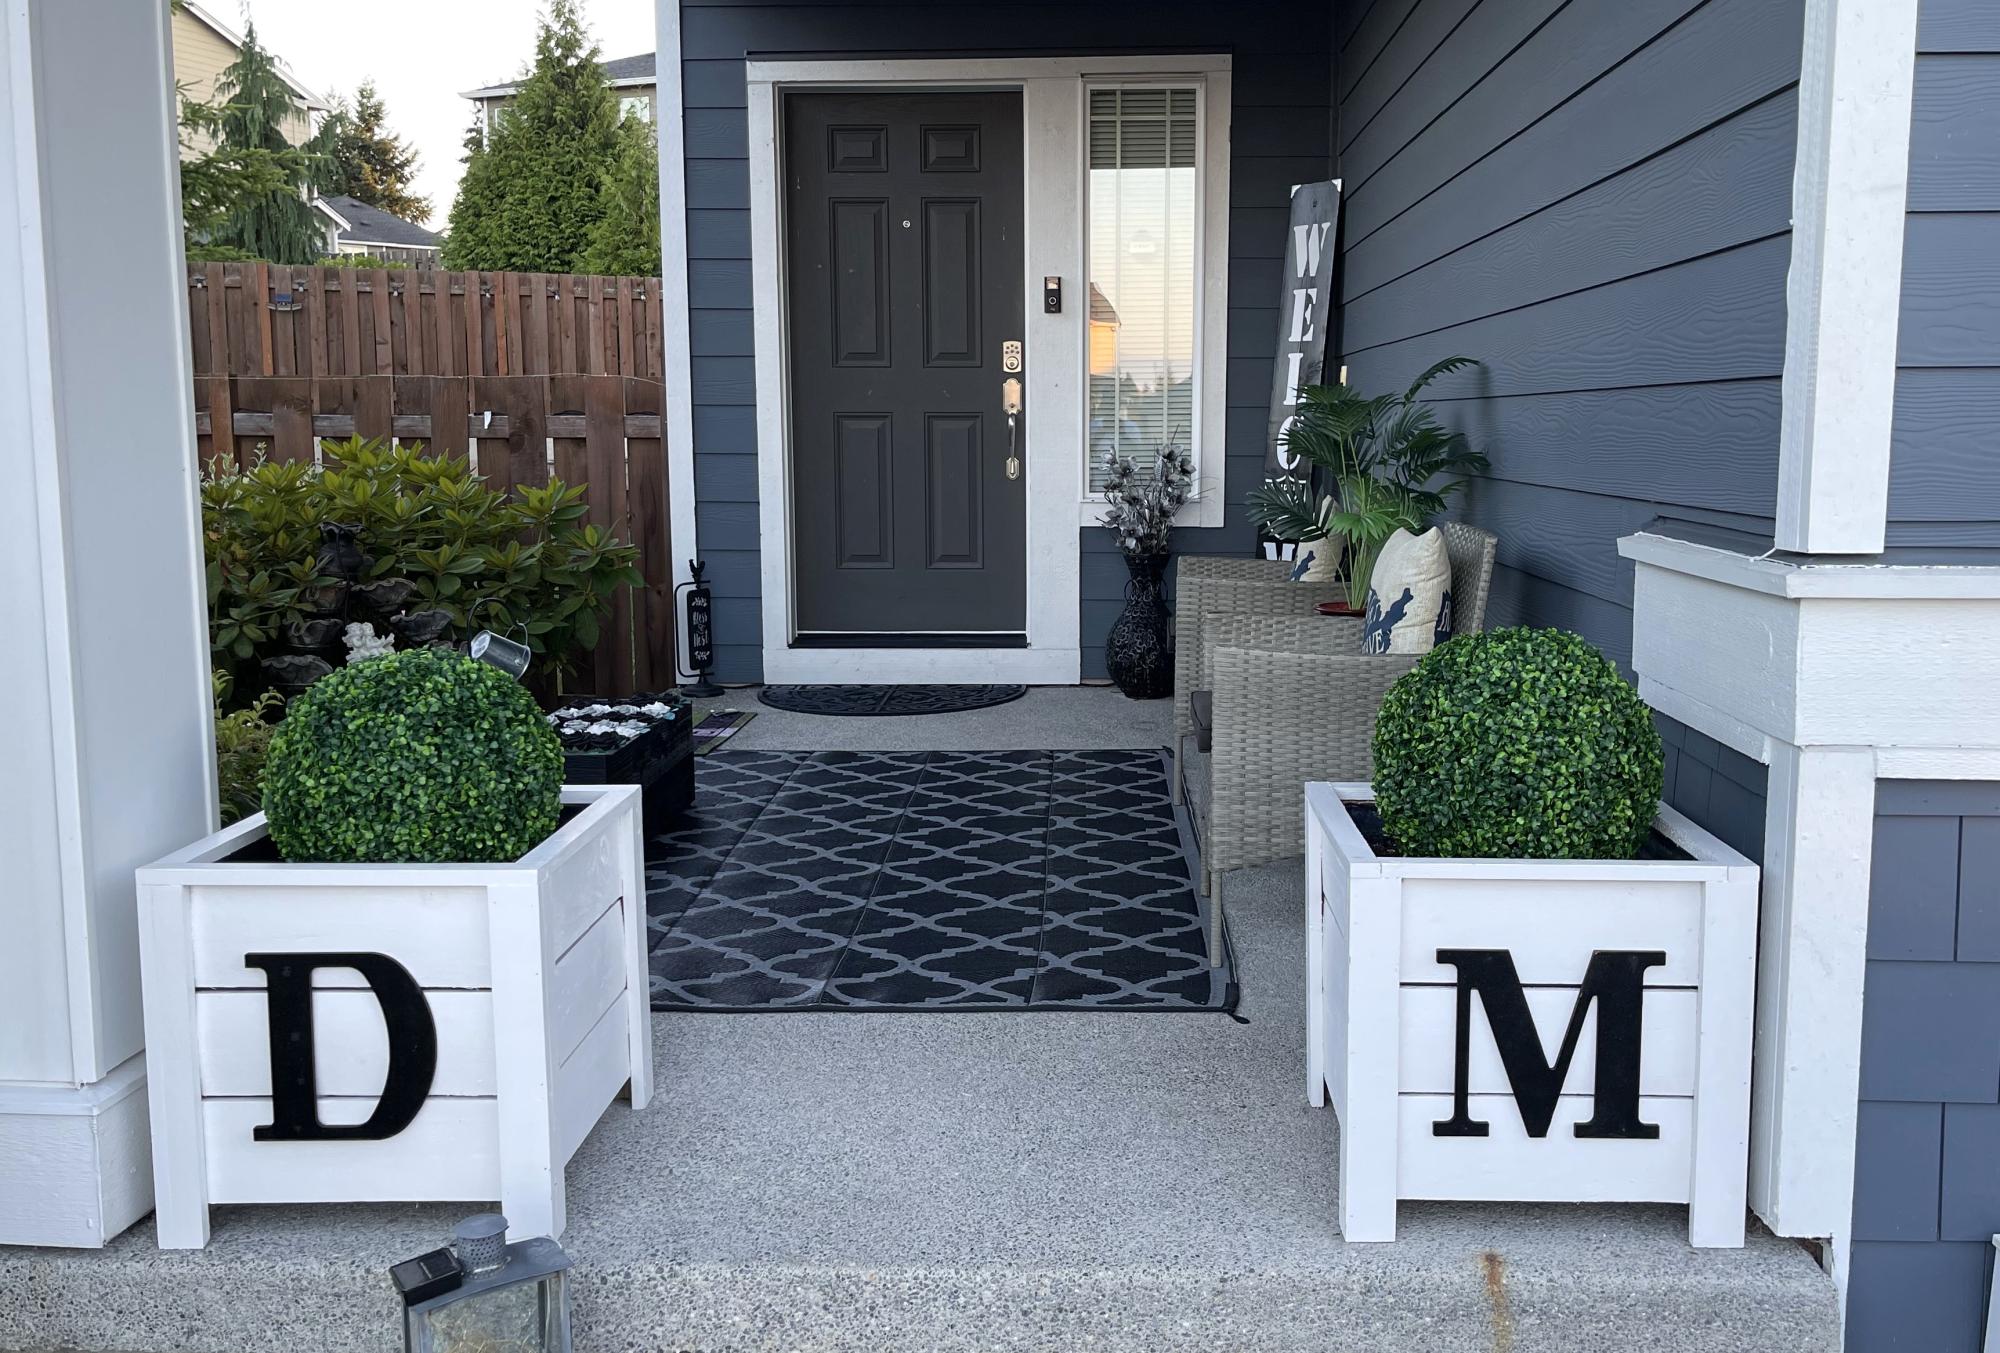
Made from the modified Mimi's Faux Mantle design from another brag post.
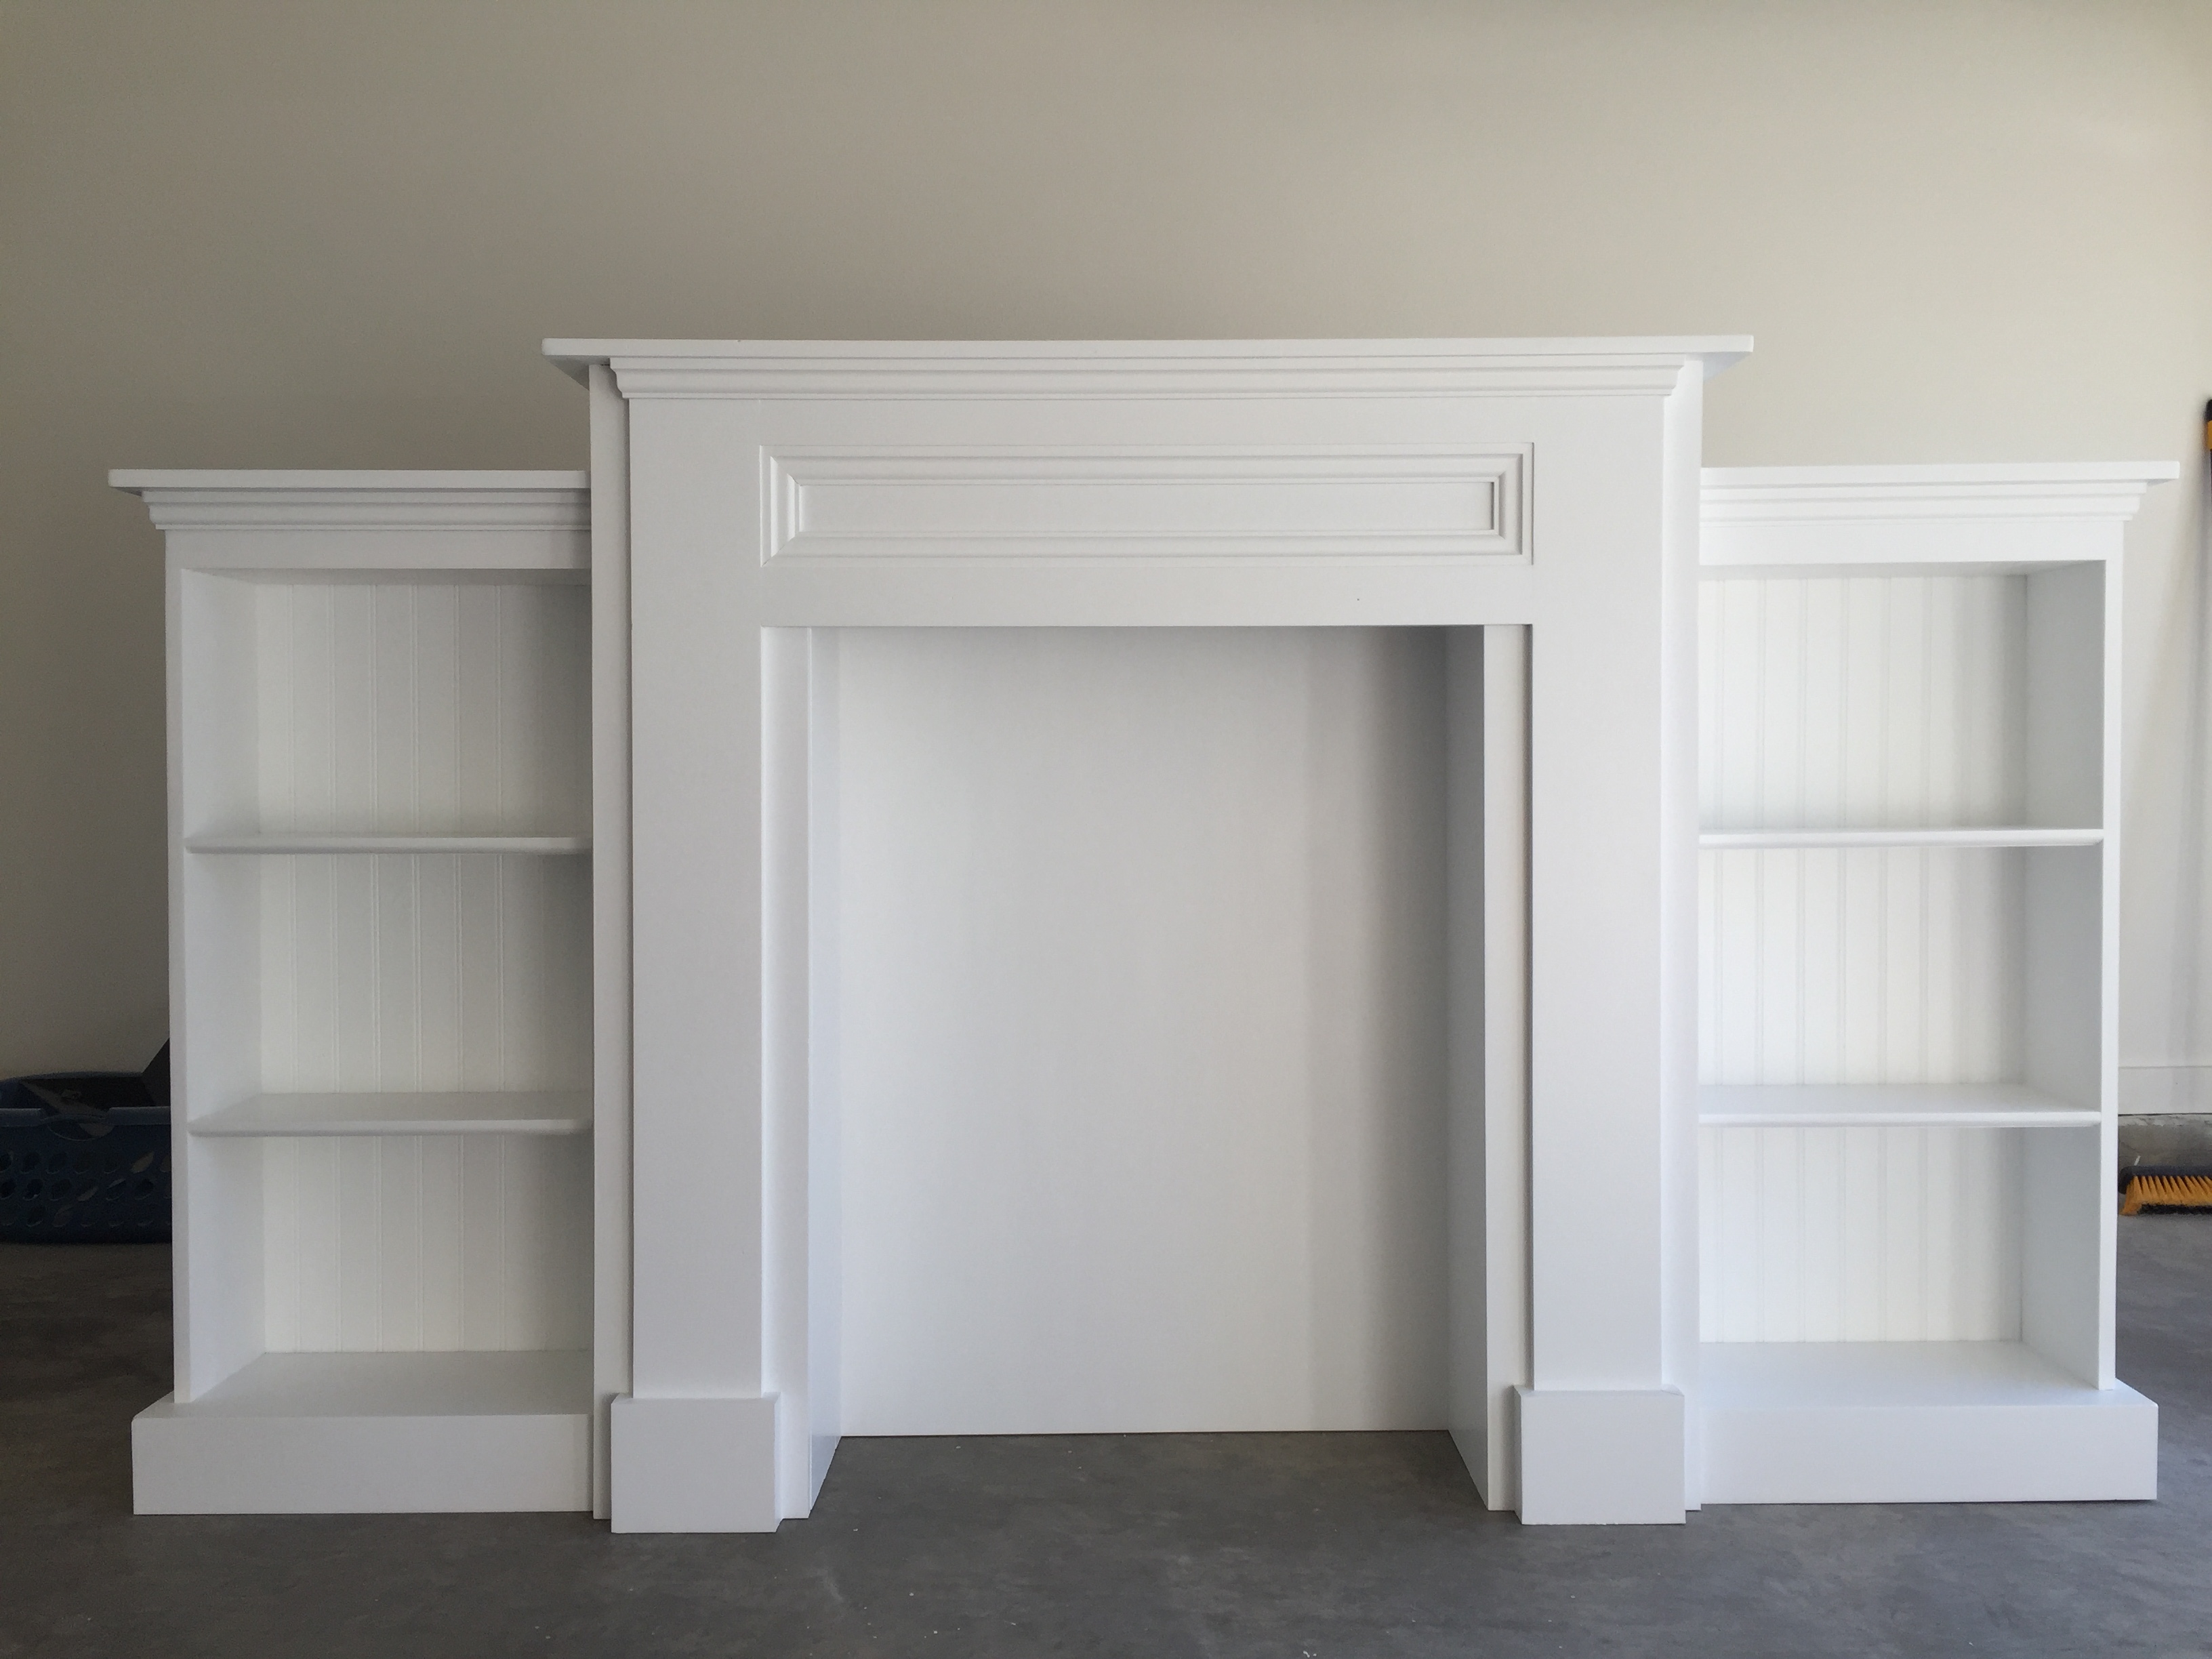
Tue, 12/19/2017 - 22:01
Are you able to tell me how wide this is from the end of one bookcase to the other? I'm trying to find out if it will fit in my living room. Thanks!
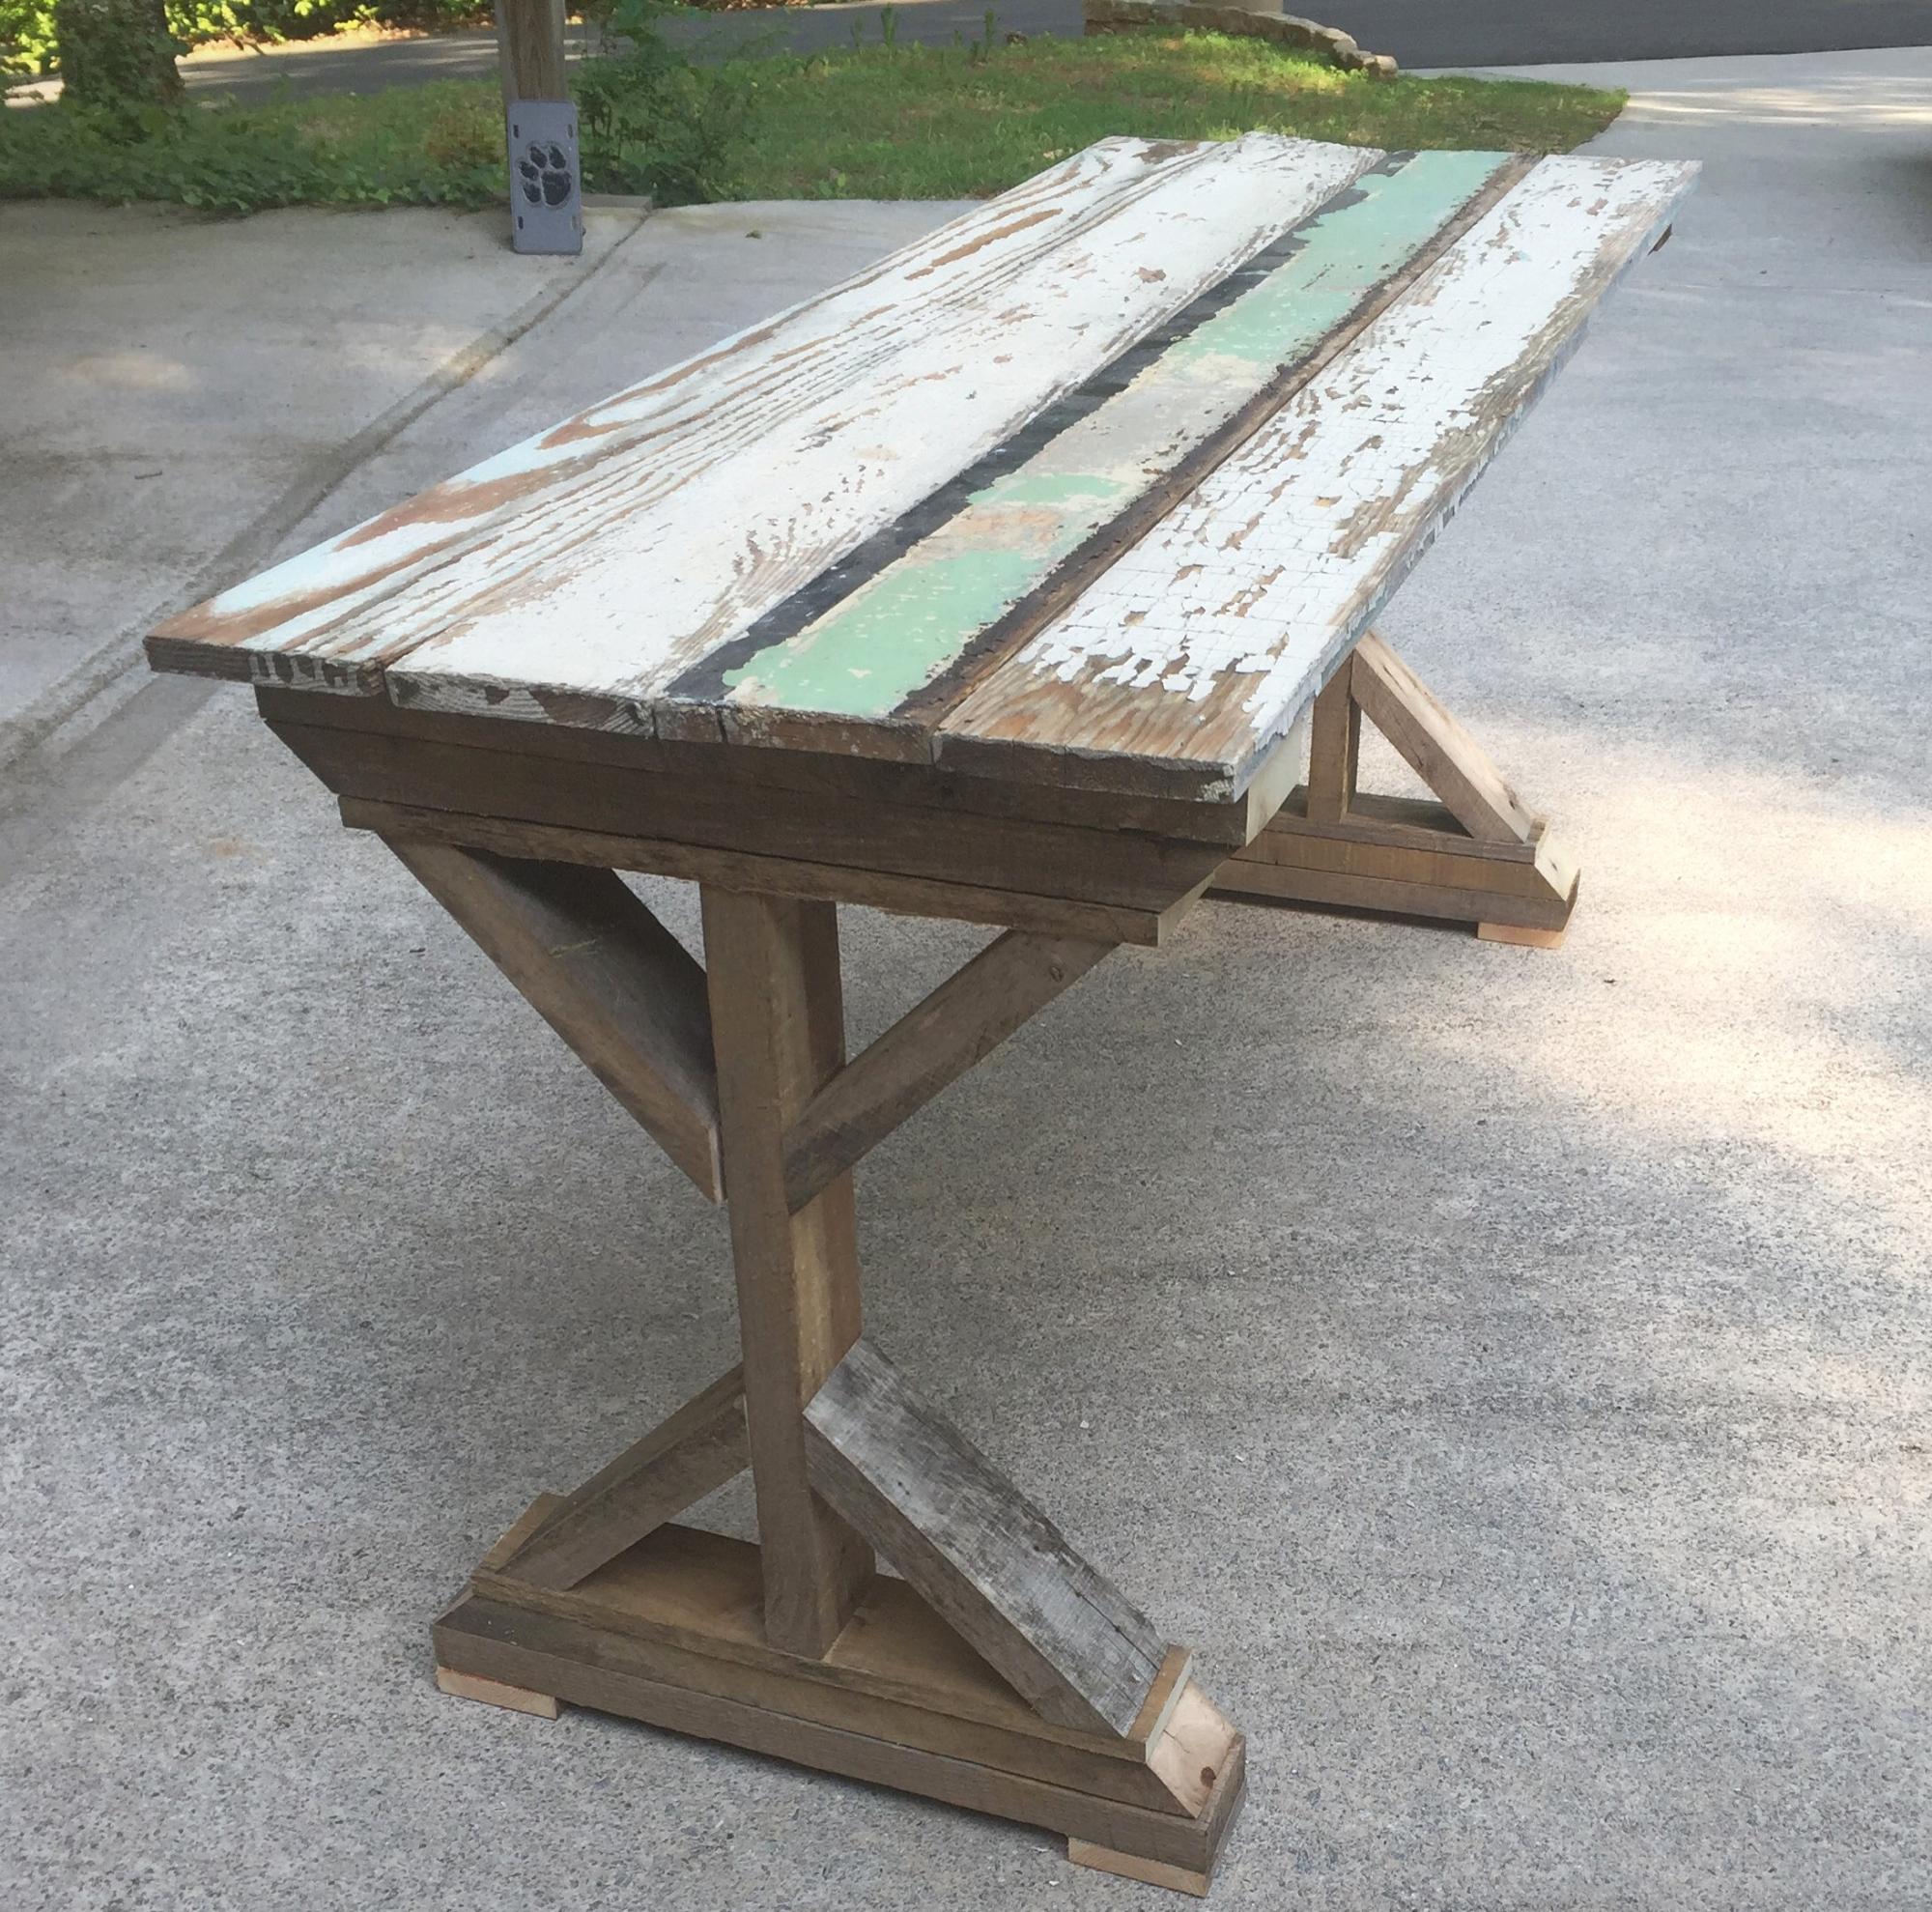
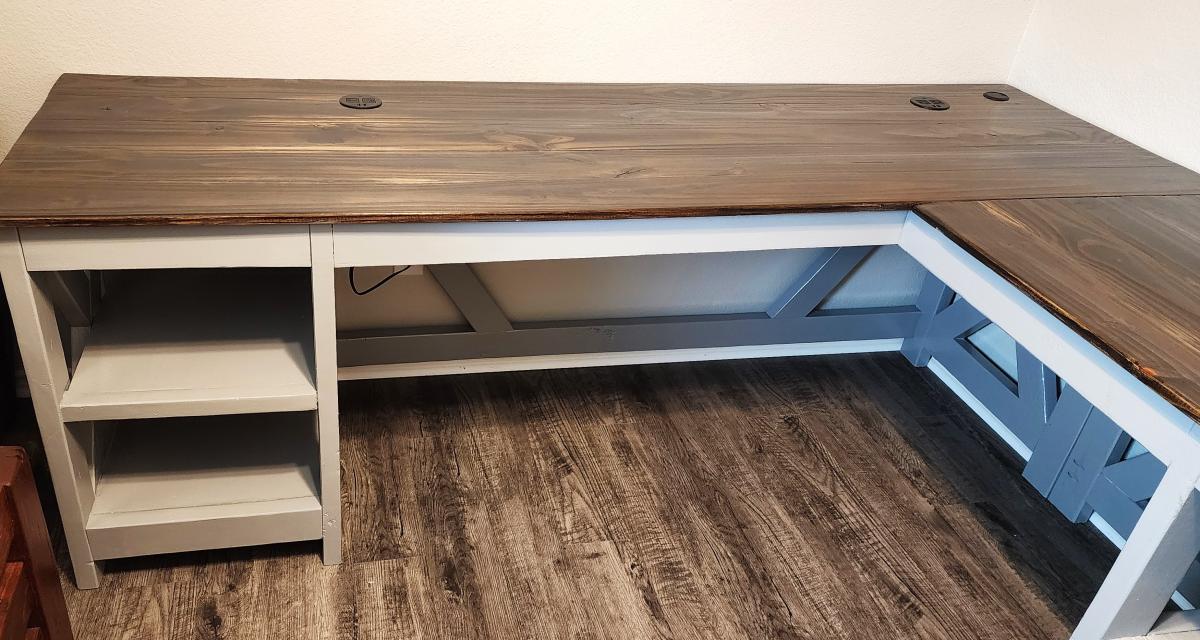
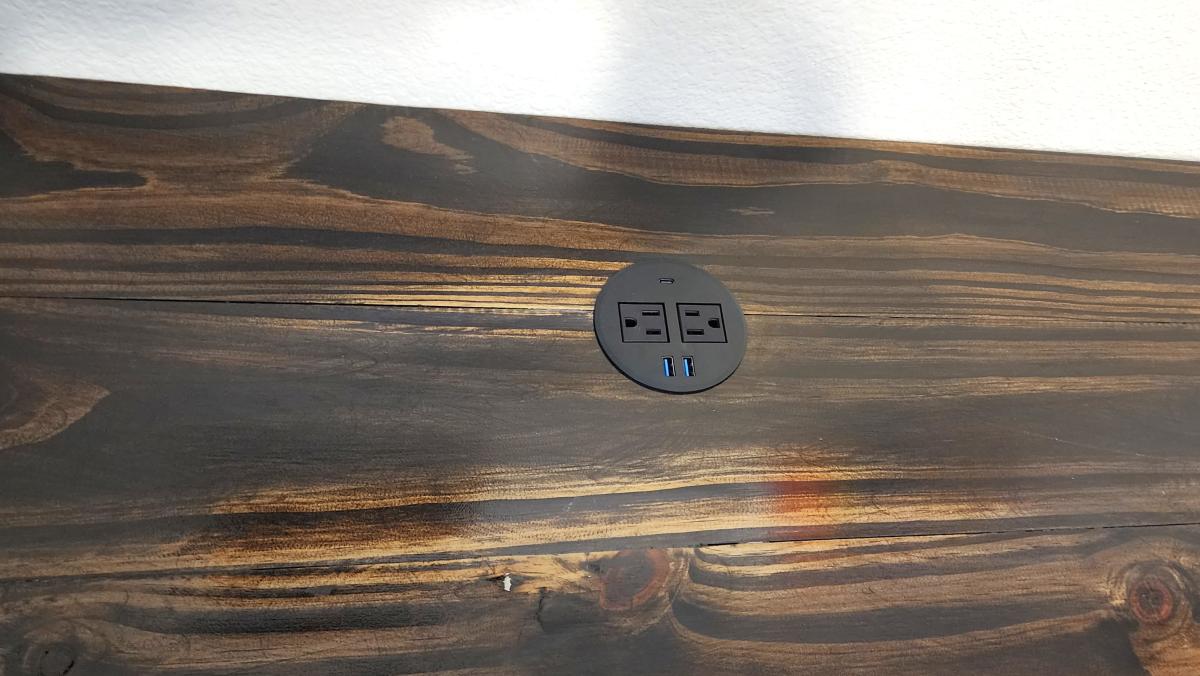
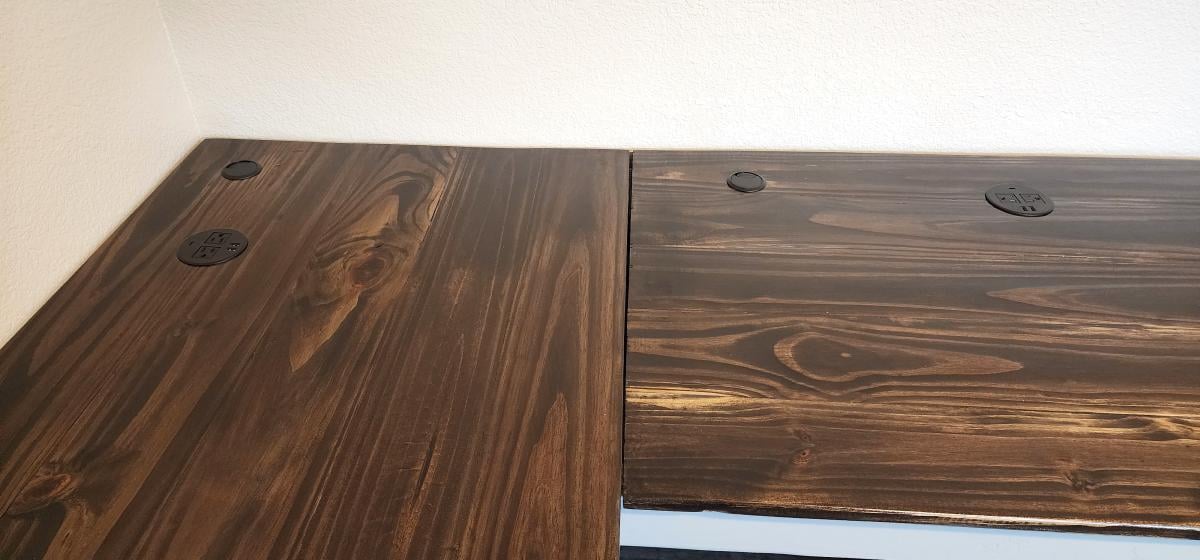
Started this project out of boredom. I had some time and some extra wood laying around. Some was from pallets I took apart, some from a salvage house, and some from an old barn. I built the table in a few hours and worked through any misshaped boards as best as possible. It was a relativley easy project and fun to see the legs turn out with each step. I plan to use cables and turnbuckles for the cross braces on the back and will update the pic when I do. I just need to find a home for it now.
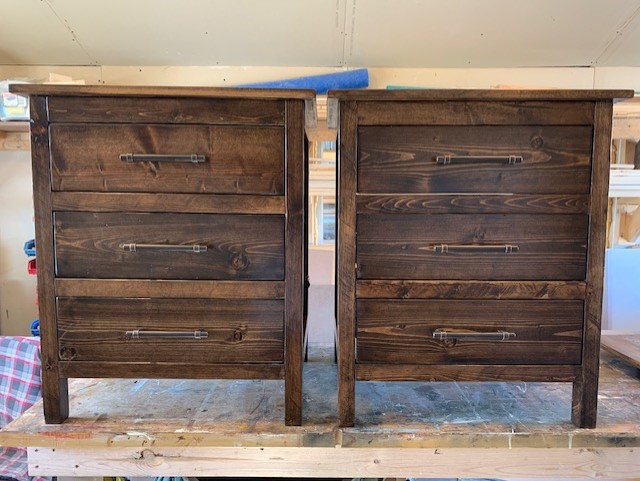
Made these rustic style bedside tables for my master bedroom. I used the Reclaimed Wood Bedside Tables plan, but modified it to make it a little wider- to 24" top width. I wished the plan had exact plans for the drawers, but I made do without them, and all in all, they turned out fantastic! I used pretty heavy duty 100 lb drawer slides, and used 1x6's for the entire drawer square (backer board for the bottoms). I wanted the slides to be able to handle the extra weight, plus all my books etc that will fill the drawers. I used standard spruce/pine from the store, but ripped my own 2x2's and 1x2's from 2x4's and 1x4's. I liked the crosscut look to stay, so I only sanded them minimally. The hardest part was putting on the top from underneath, as I didn't want my tops to have the nail holes in them, but my trusty brad-nailer came to my rescue!
It was a good day or two project by the time I got them built, stained (with Minwax Espresso), and sealed with (Minwax Poly-Acrylic).
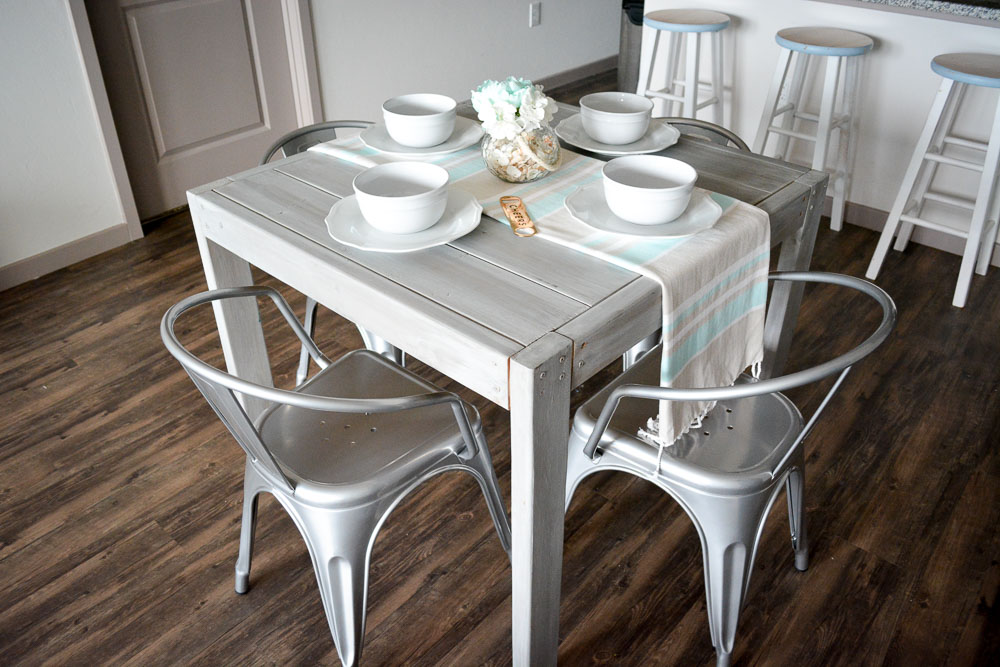
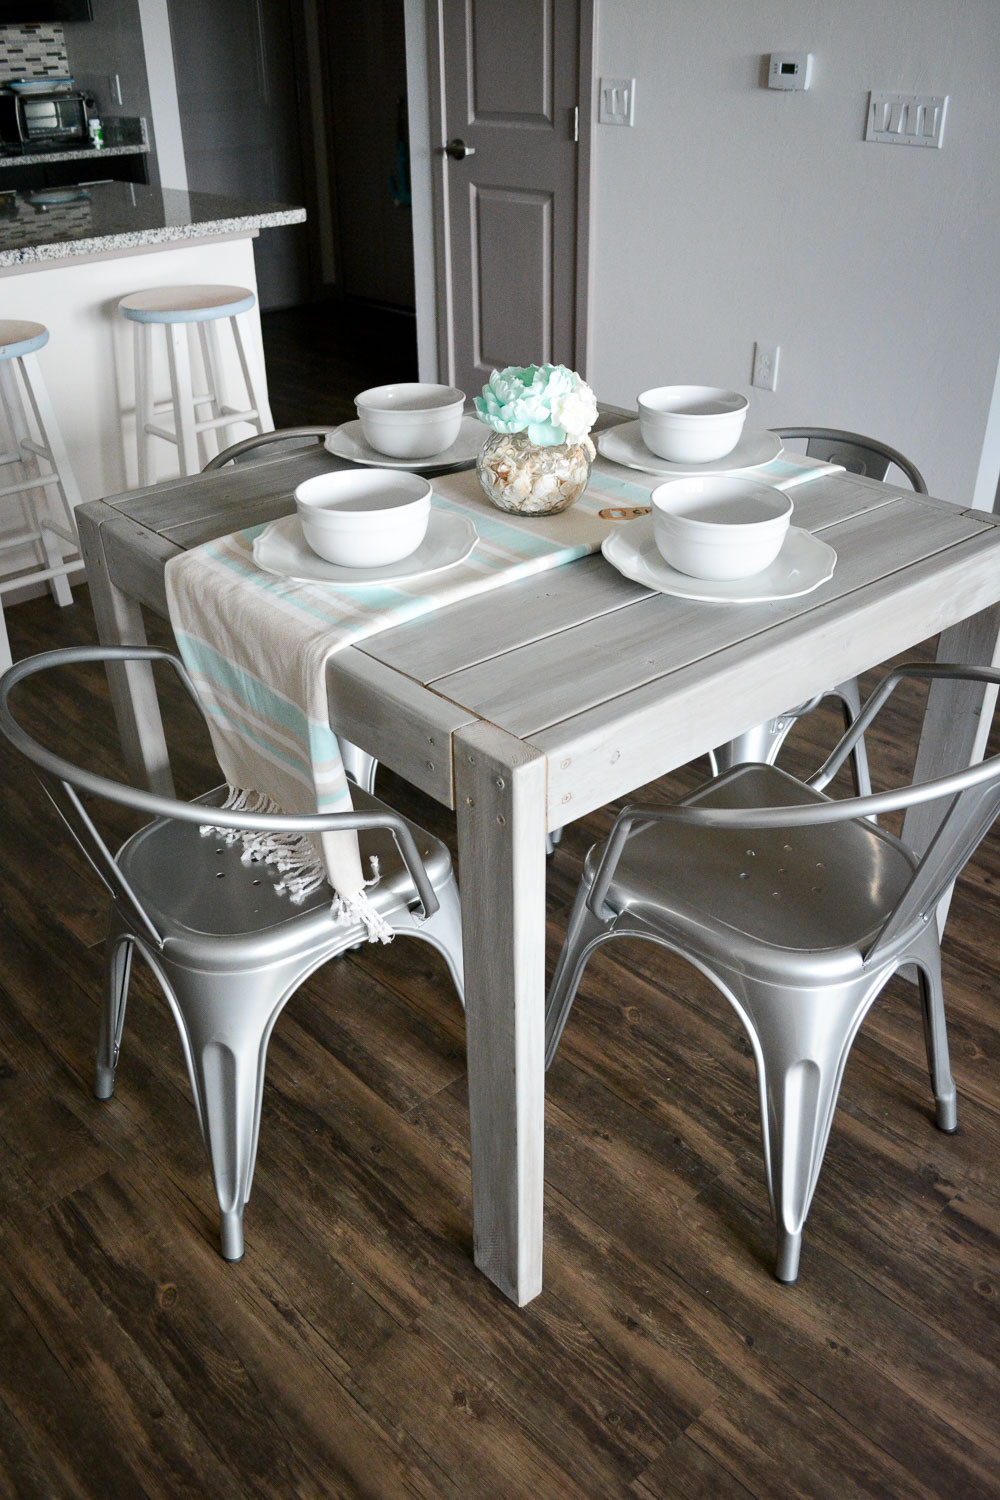
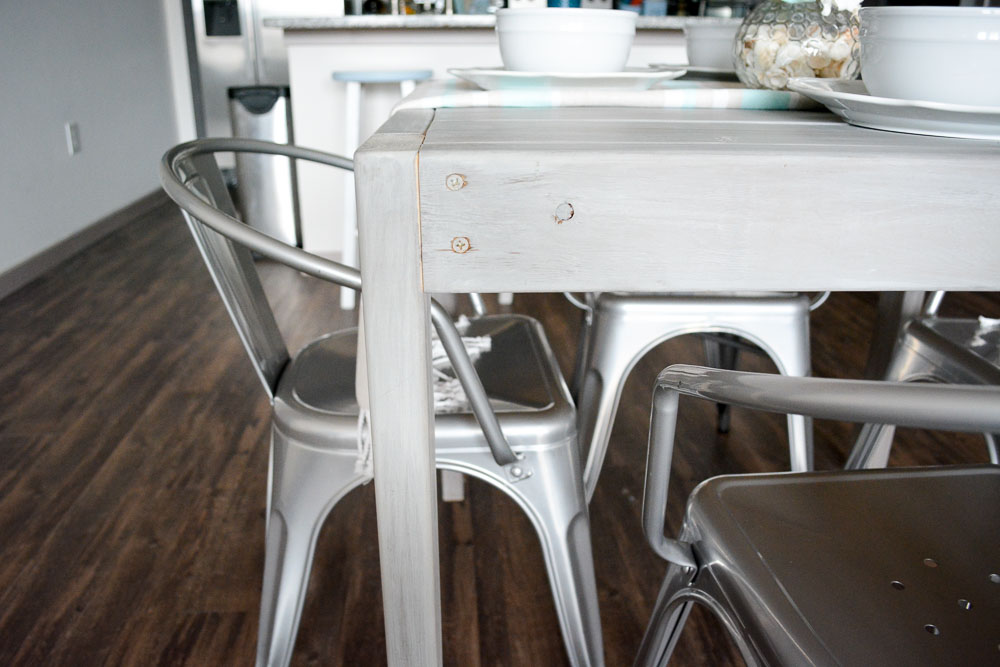
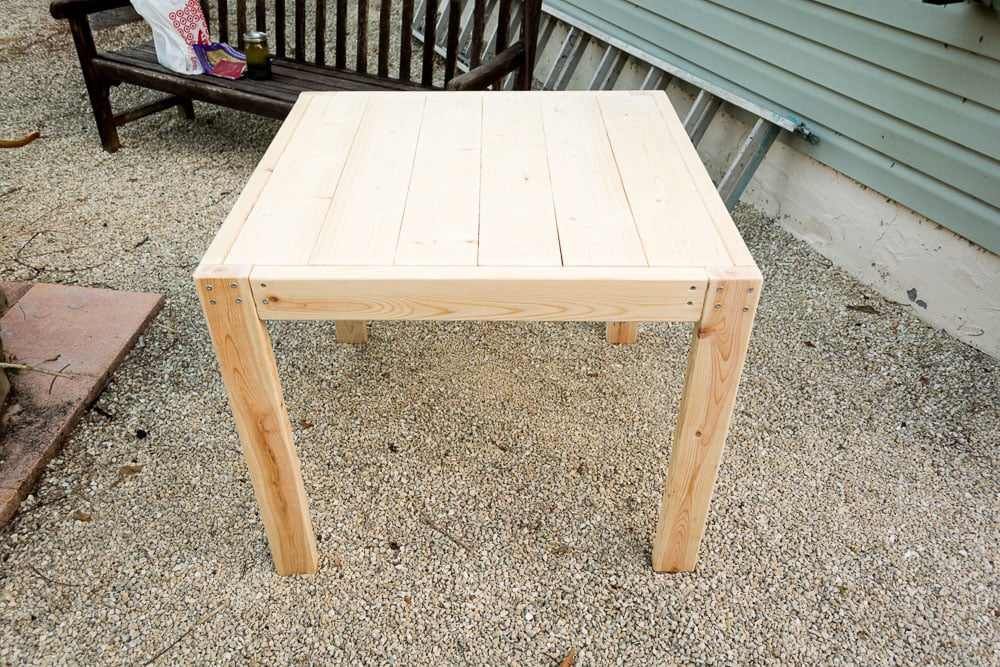
This is my sqaure farmhouse style dining table. It is so easy to make! An important tip is to get good pieces of wood. You don't want any bowing or else it won't be perfectly level. To see more photos and tips, go to SweetTeal.com/diy-farmhouse-table.
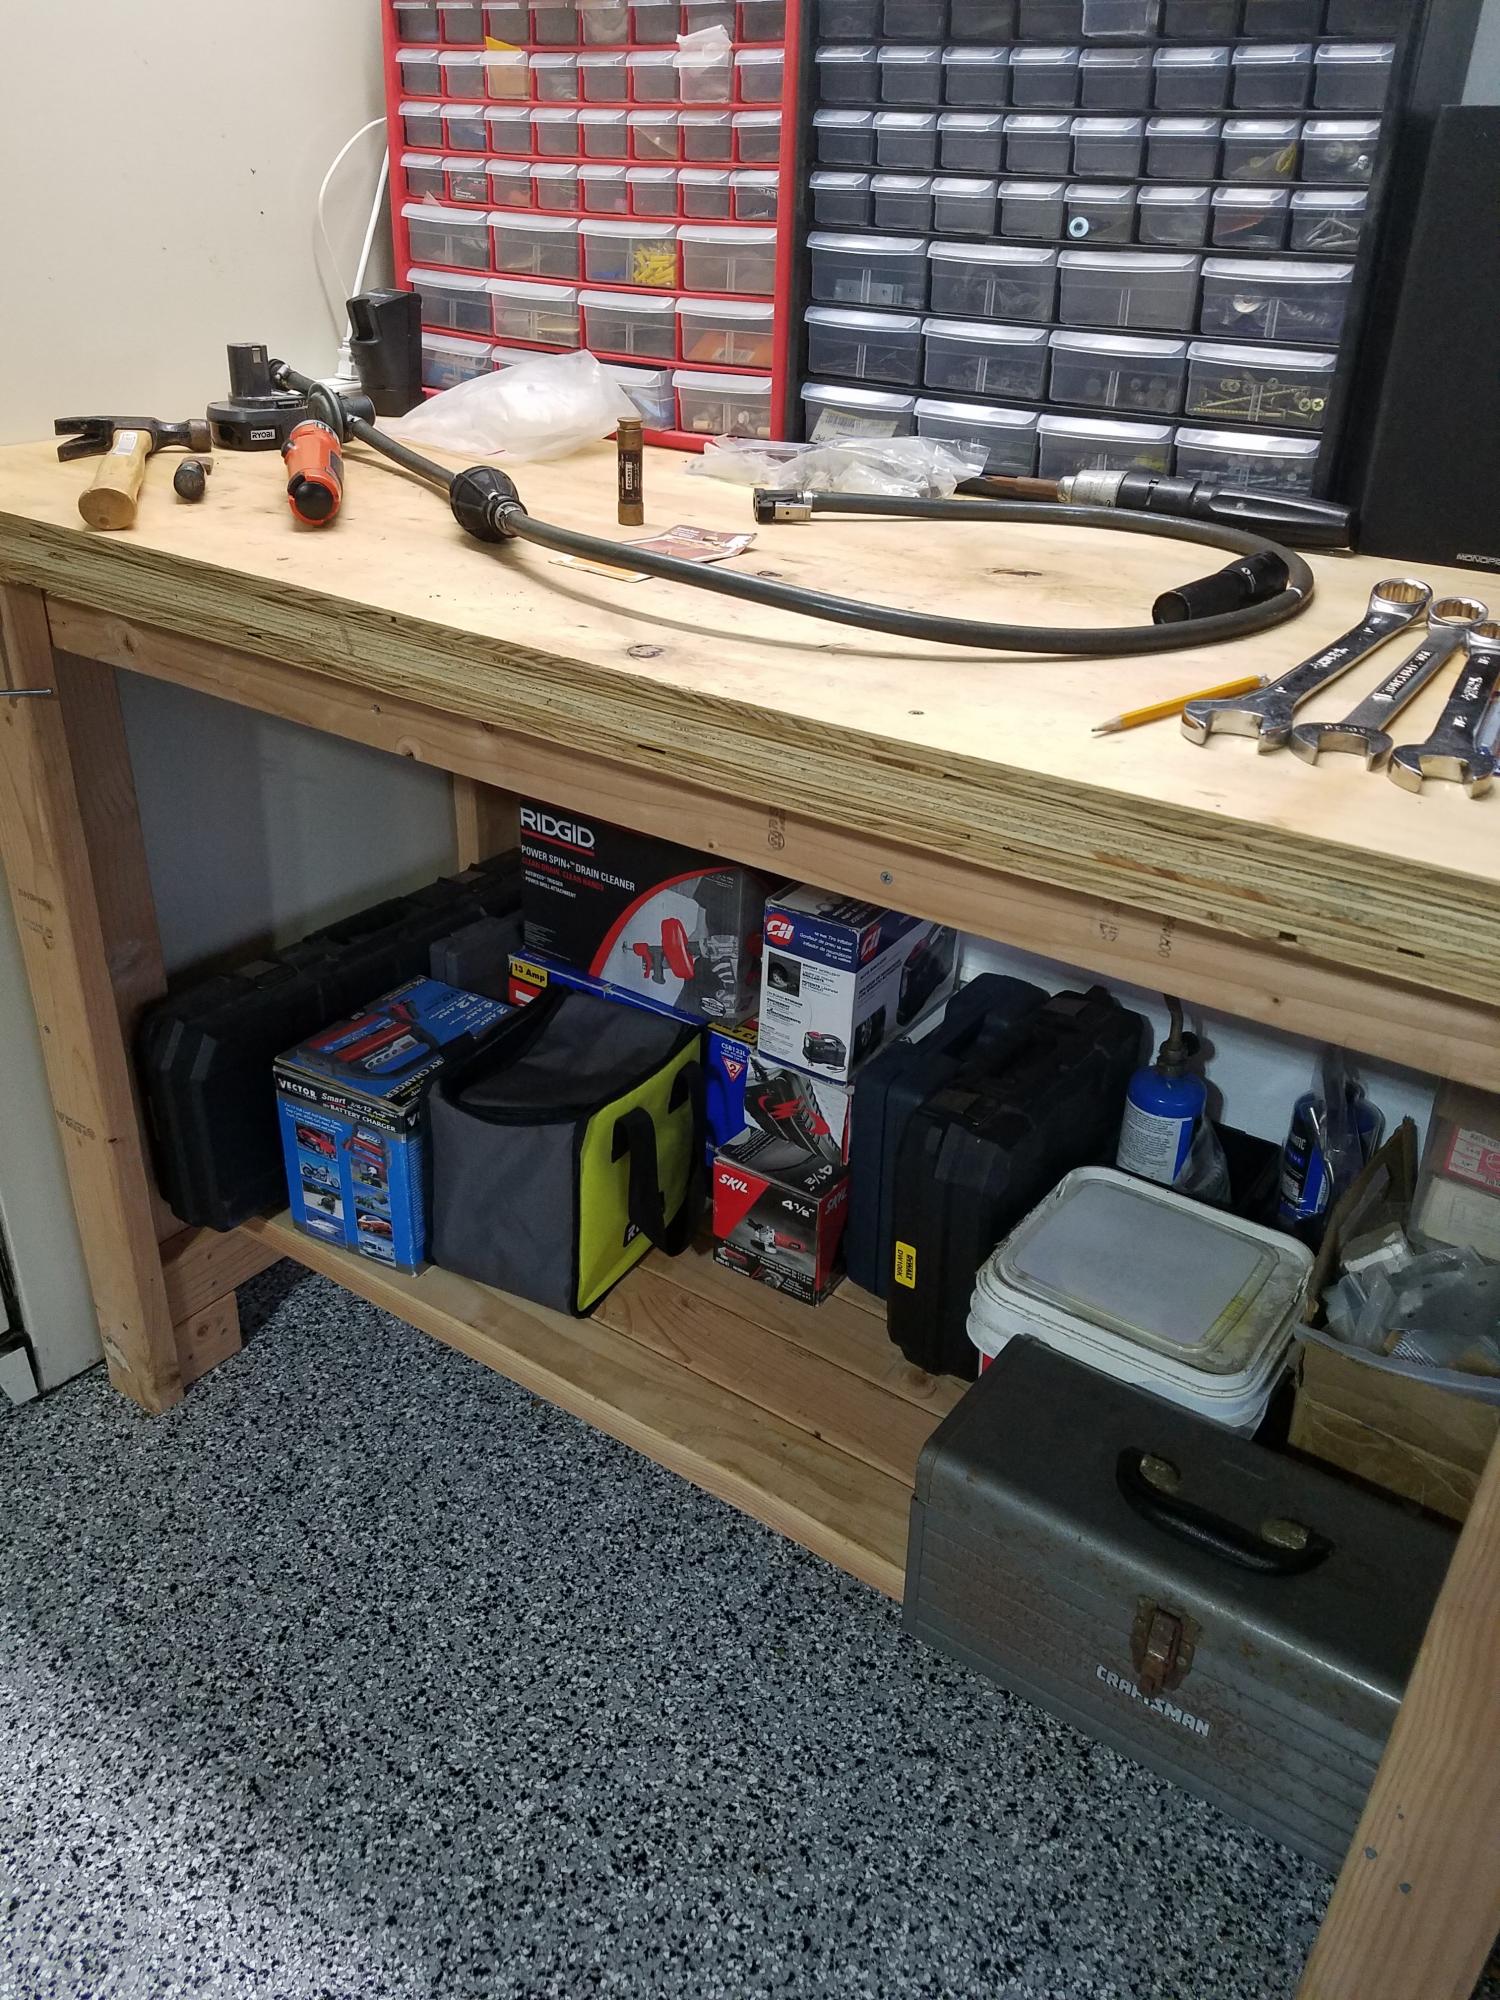
This is the perfect workbench for my garage here in South Florida. I modified the plans using 2x4 actual dimensions so that the outside dimensions were 60" wide x 40" height x 30" deep. I designed it for my husband and he is 6'4" so I wanted it to be taller for him. I used 3 sheets of plywood (3/4" thick each layer) for the top and it is super sturdy. For the bottom shelf, I left one 2x4 off so that it wouldn't hit our shins while standing at the front. I was concerned at first that the wider bench (60") may need an additional bottom shelf support in the middle. It did not need this extra support. The shelf can hold a lot of weight with no concern. See all the tools that are on that shelf in my pic. Thank you Ana White for these great plans - it was my first workbench that I have built. I am looking forward to more woodworking projects.
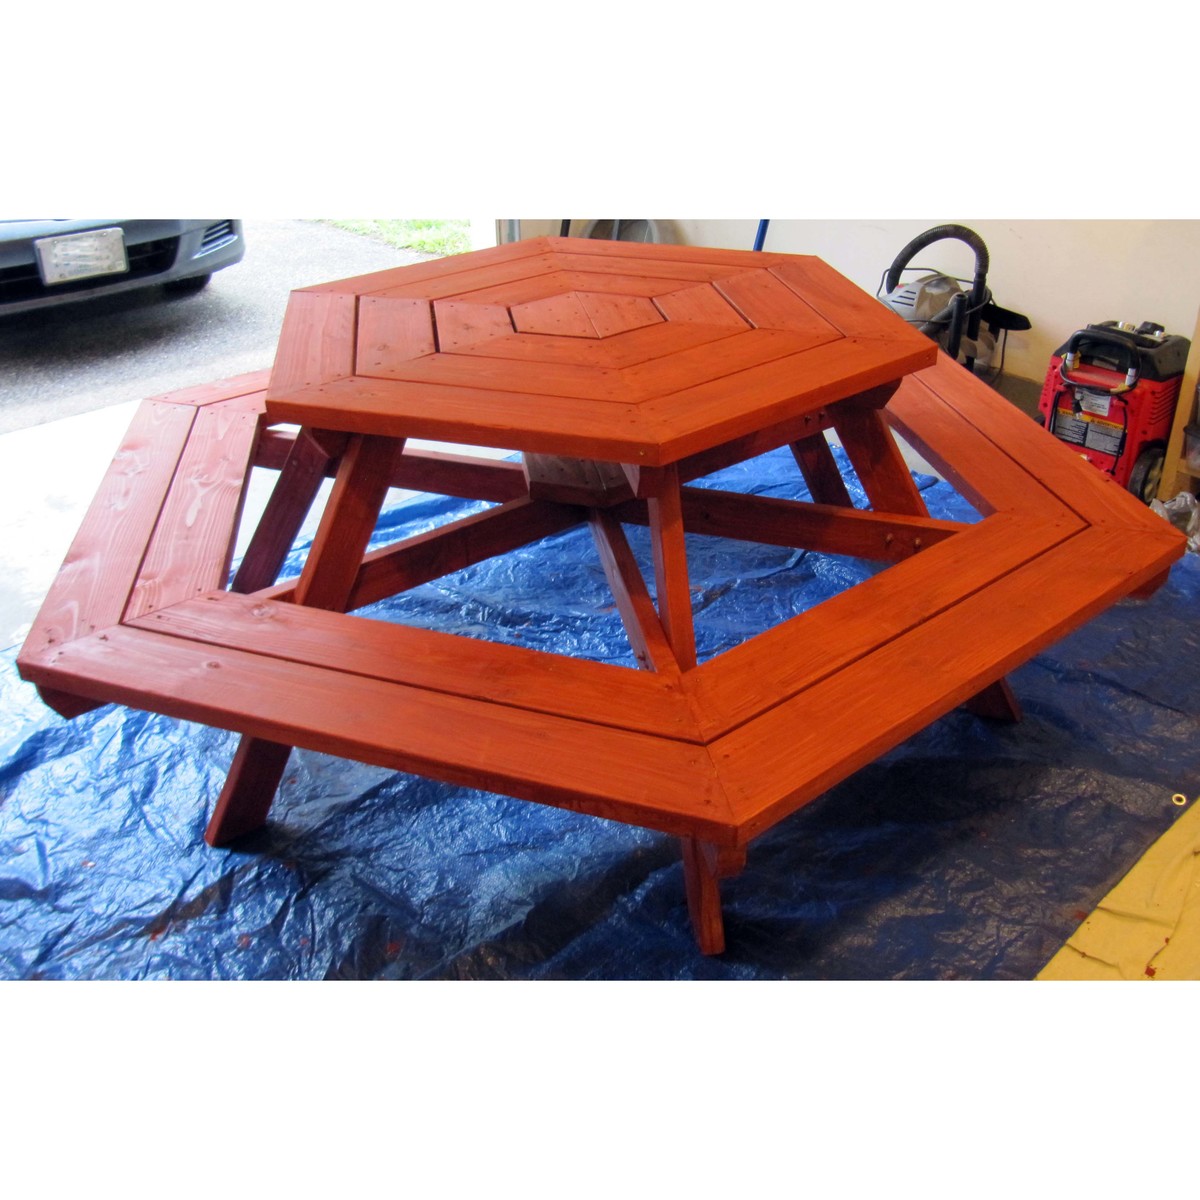
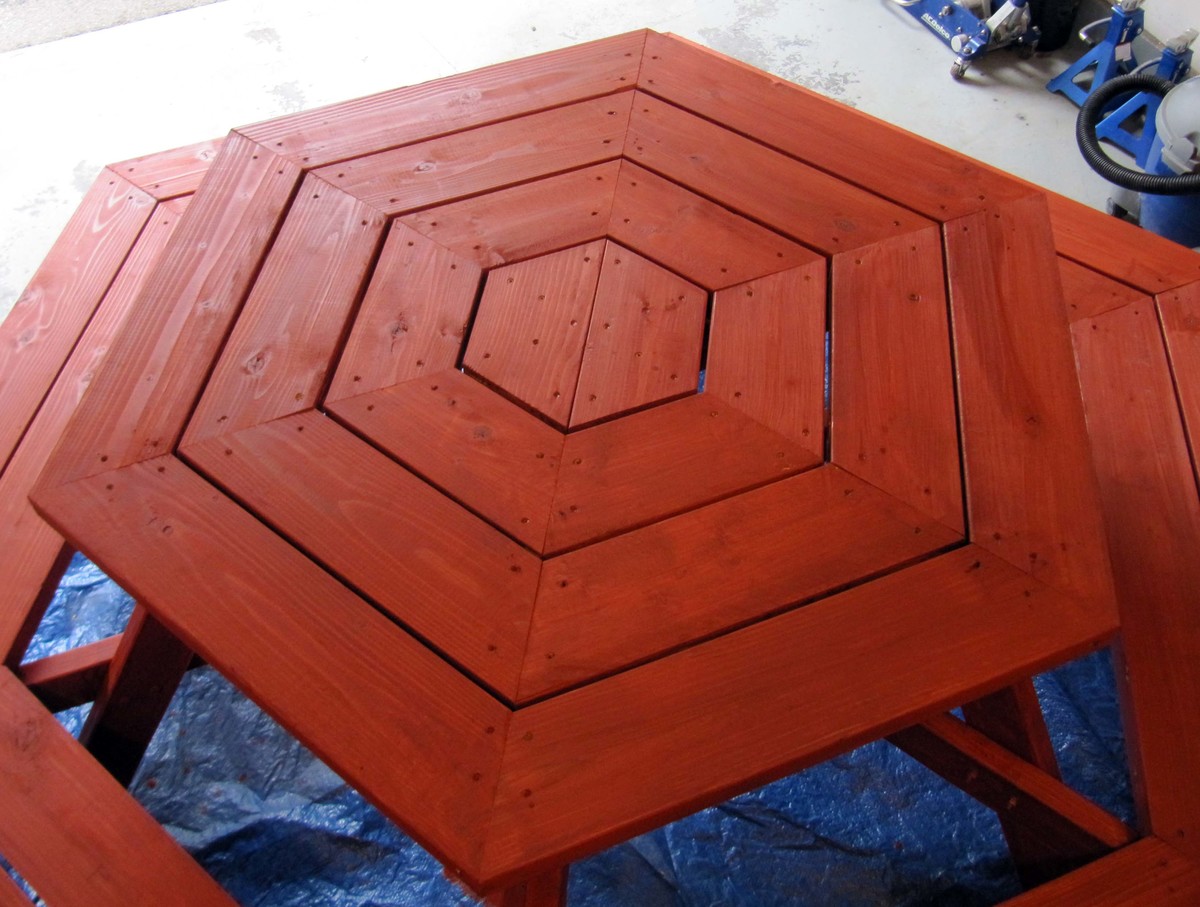
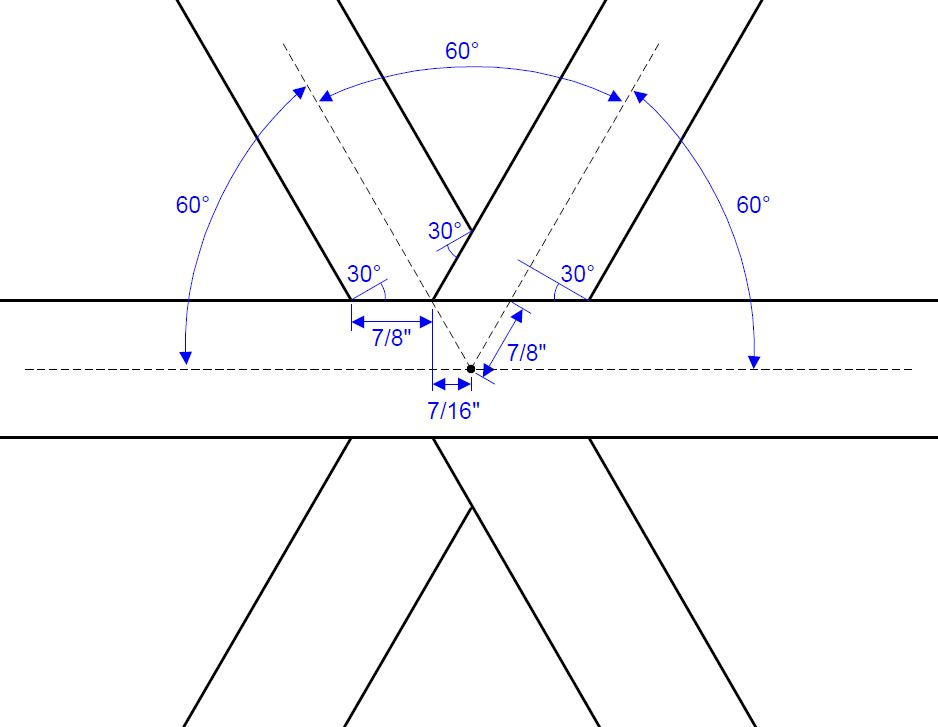
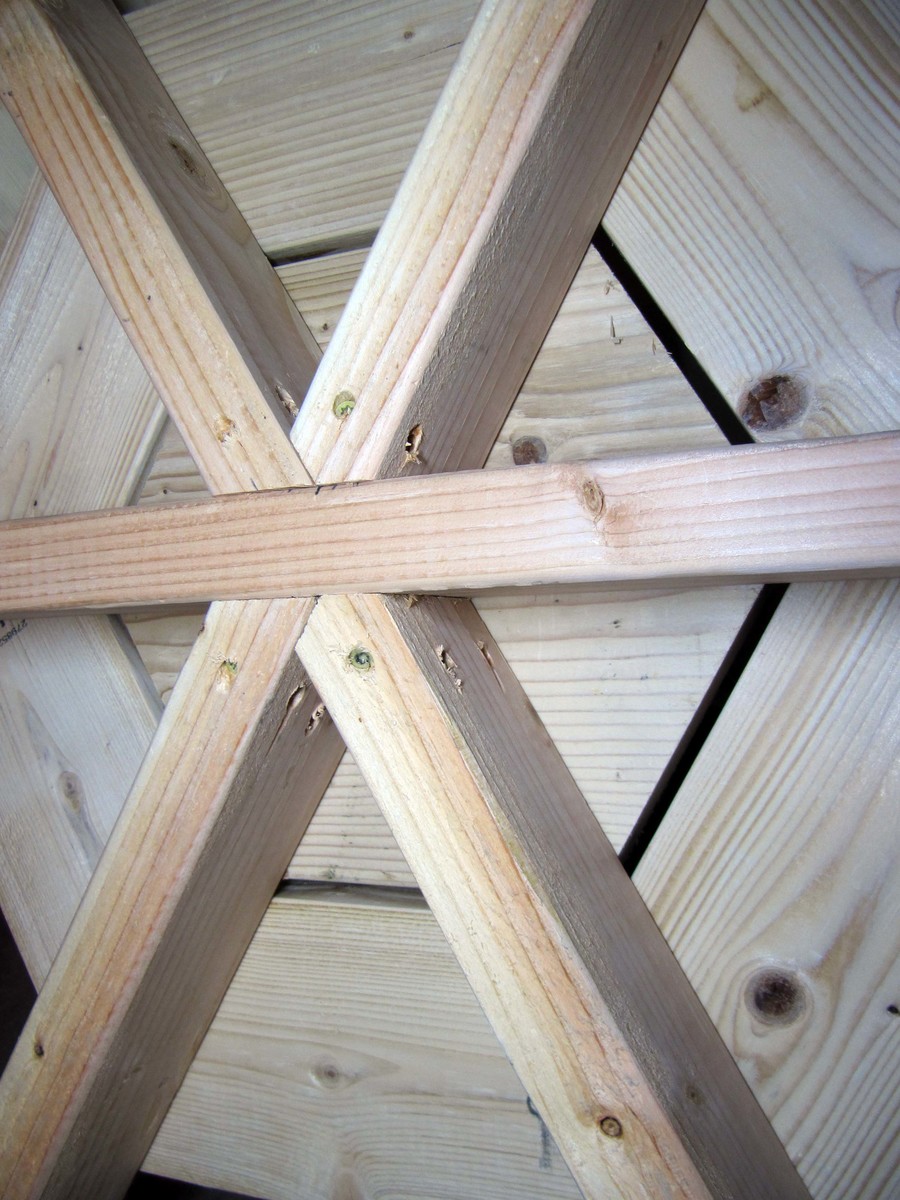
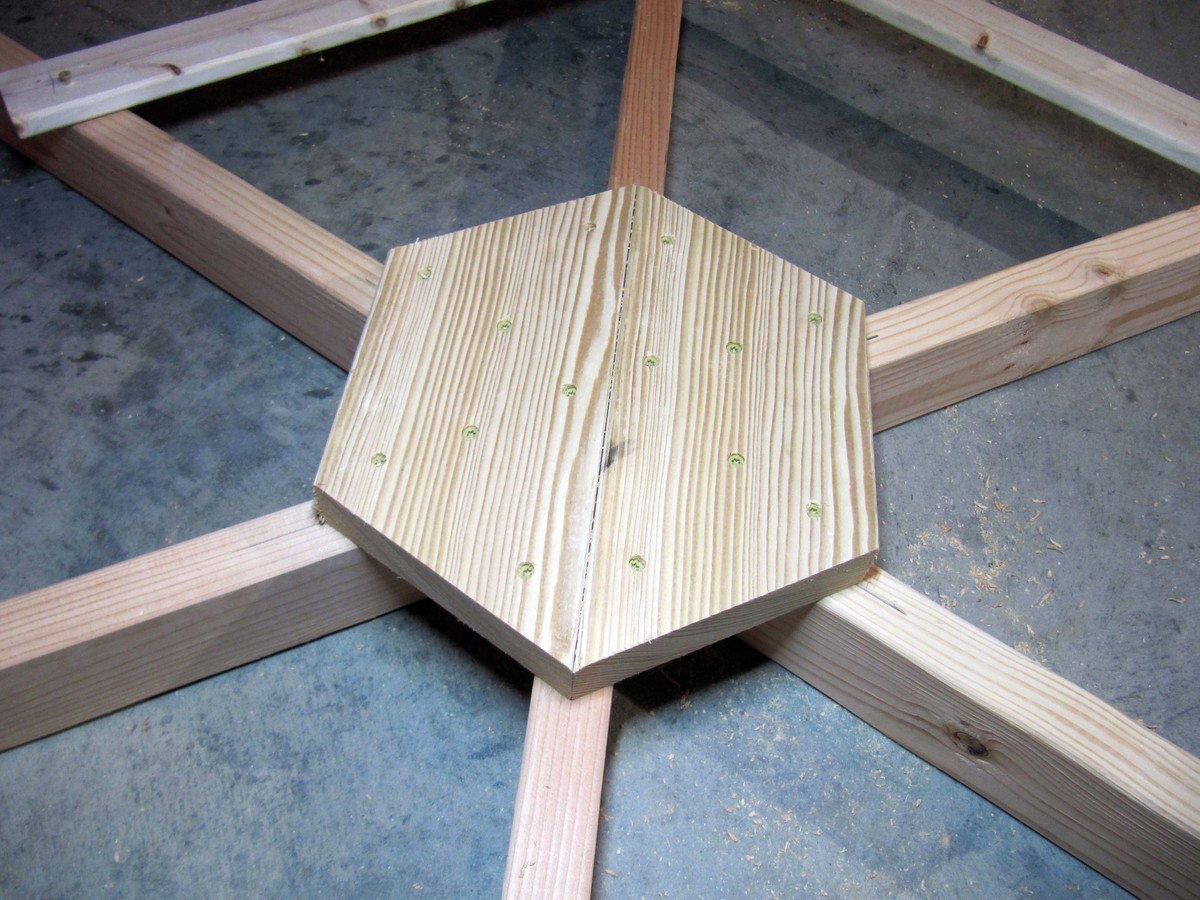
Thanks for the plans. My little brother from Big Brothers Big Sisters and I made this table and had lots of fun doing so. We made a few modifications which might be useful to others:
1. We modified the center joints (at the lower and table level) so that one 2x4 could continue across the entire diameter of the table for greater strength (see pictures for details).
2. As recommended we extended the seats out 4". This made it very comfortable to get in and out.
3. We started the center with 2 pieces of 2x6 rather than 6 with the thought being that this would help strengthen the center of the table. (see pictures for details).
4. We added a stiffener at the center 6-way joint on the lower level to help really strengthen that center joint. This was made out of 2 pieces of 2x6 as shown in the pictures.
Thanks,
John
Being my first DIY project - it was a pretty big task not using a saw before or doing any building. Following the plans was easy, just took a lot of time to learn how to do things for the first time.
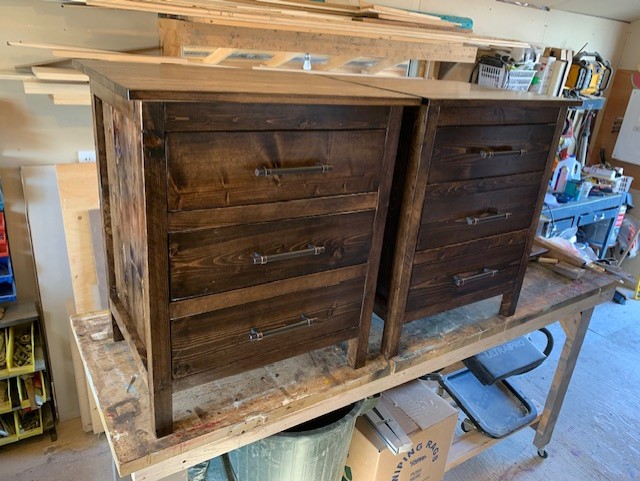
I modified her plans to have 3 drawers on the one side to match the pb design.
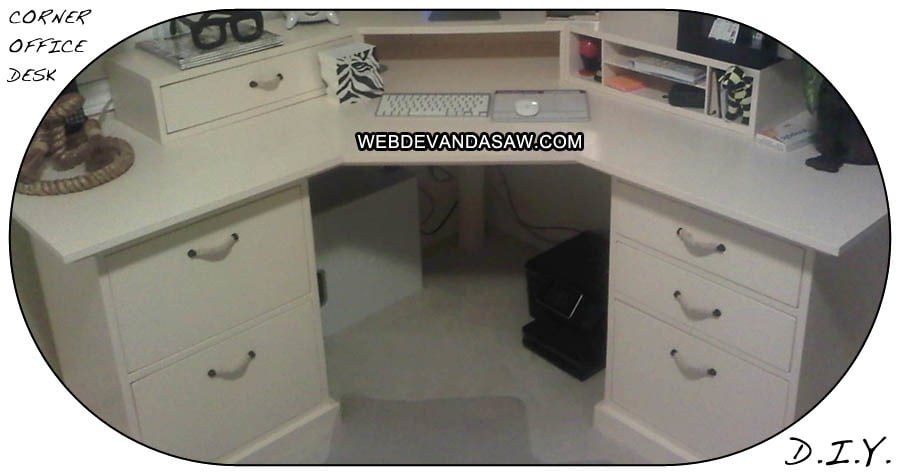
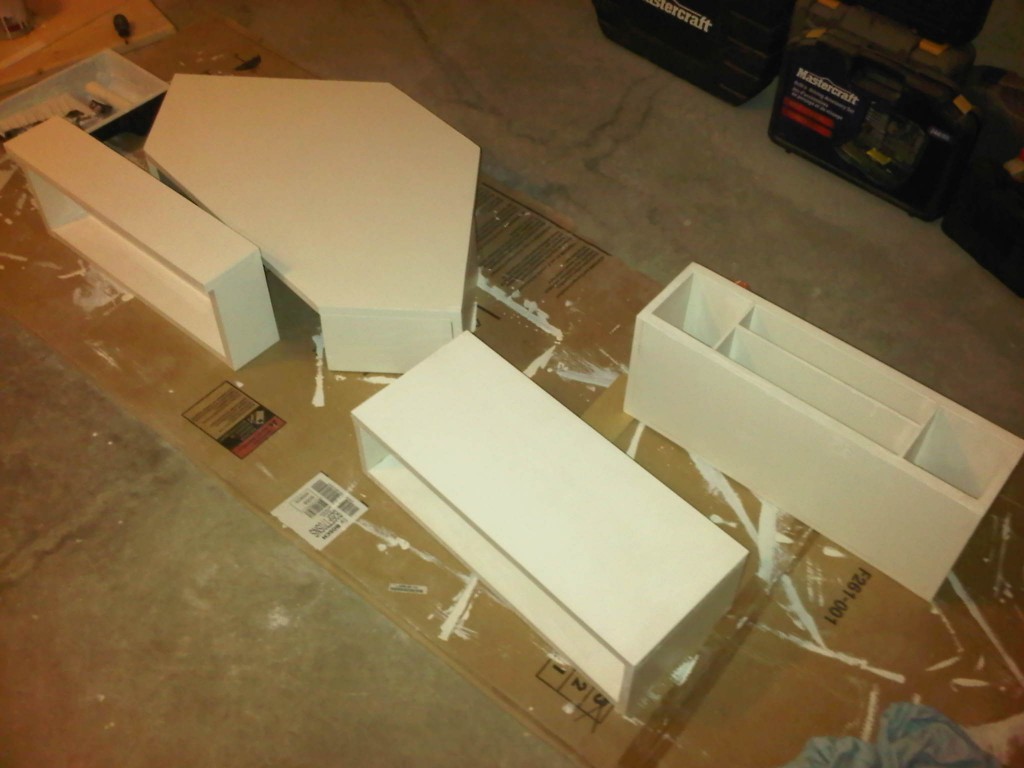
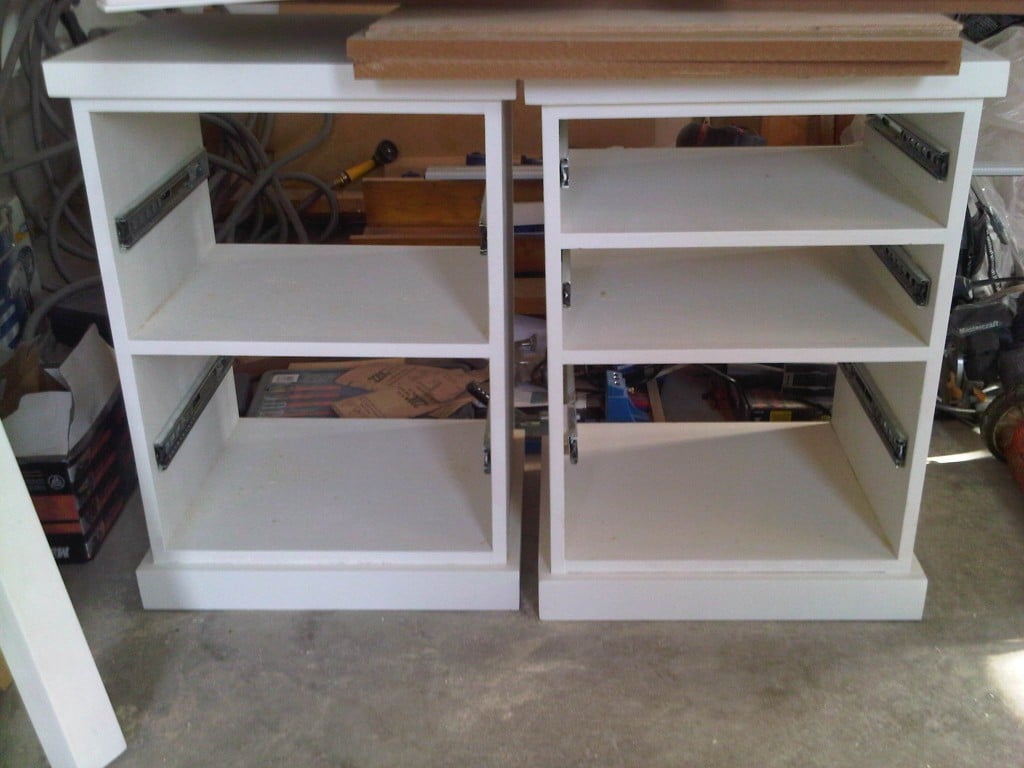
After finishing the table, I knew I needed to create the hutch that is sold along with this desk. After some rough paperwork estimates I went ahead and built the hutch.
Looks pretty amazing and similar to the real deal.
Check out my blog for further pics and details of paint, primer and drawer slides I used. Leave a comment if you'd like me to work on getting a hutch plan organized.
With doing the hutch without real plans, this project took me a while to get those cuts organized and completed.
Sat, 07/21/2012 - 15:08
I will work on getting some hutch plans up.. I did it sort of on the fly from a rough estimate on paper.. I will post up on my website and a link here when I do.. might take a bit of time to get it up and learn how to draw it up all nicely on the computer. Not sure why the website won't load for you? http://www.webdevandasaw.com/ should work. Had a few people test it :S
The desk is pretty heavy and solid. I was able to bring each part up a flight of stairs myself (all three parts of the hutch are seperate) - and the desk top is seperate, as well as each drawer I took out before bringing it up the stairs.
Tue, 08/28/2012 - 00:35
Thanks for sharing this great article!I love reading and I am always searching for informative information like this!
Mon, 08/08/2016 - 19:50
It's been a while since you built the corner desk with hutch that is posted on Ana White website, and I had a question. do you have a new blog or website where you have posted details on the paint and drawer slides you used as well as the plan for the drawers and hutch that you create? Thanks.
Maureen
Fri, 02/09/2018 - 12:22
I love this desk so much but I couldn't find a plan for this. If you could update your website, it'd be greatly appreciated!

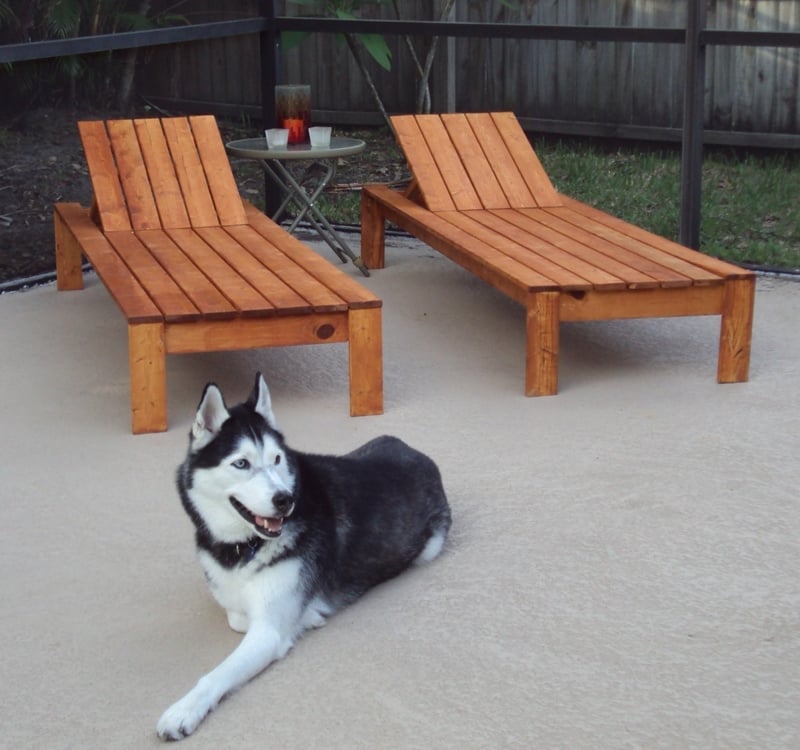
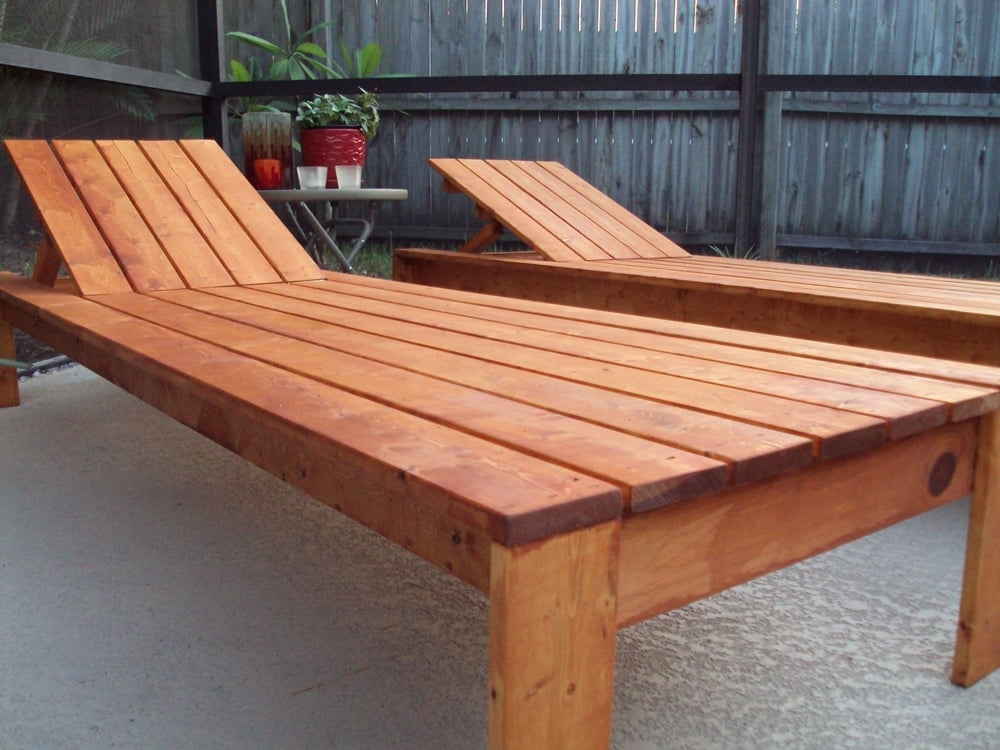
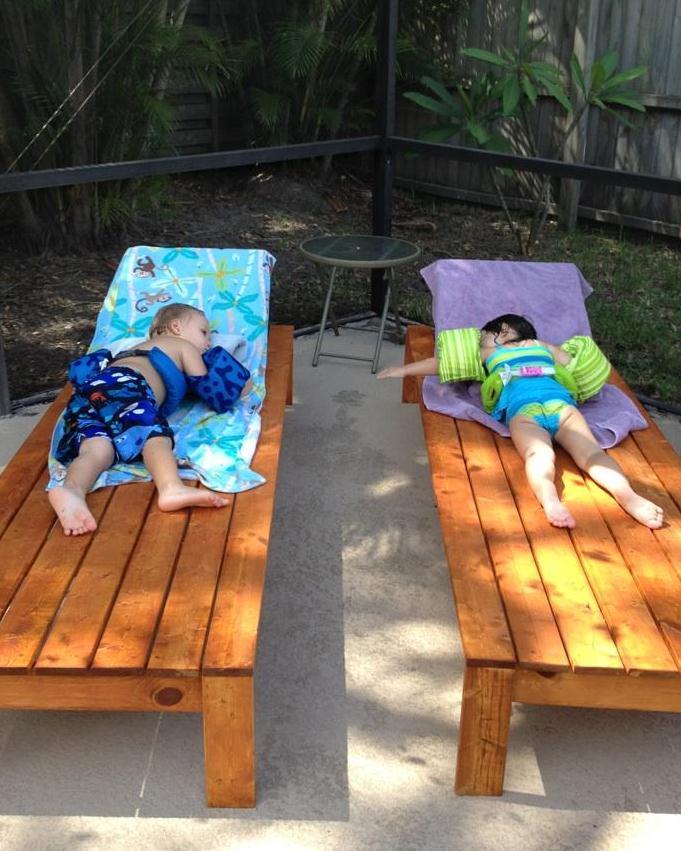
This was a very straightforward and easy build. As soon as they were compled, I wanted a dining table and chairs to coordinate. These chairs were intended to be used without cushins (is there anything better than laying out on a warm lounge chair when stepping out of the pool?) so I recessed the hinge completely below the deck. They were cut adn assembled in two evenings after the little one went to sleep. As you can see, my daughter and her friend approve.

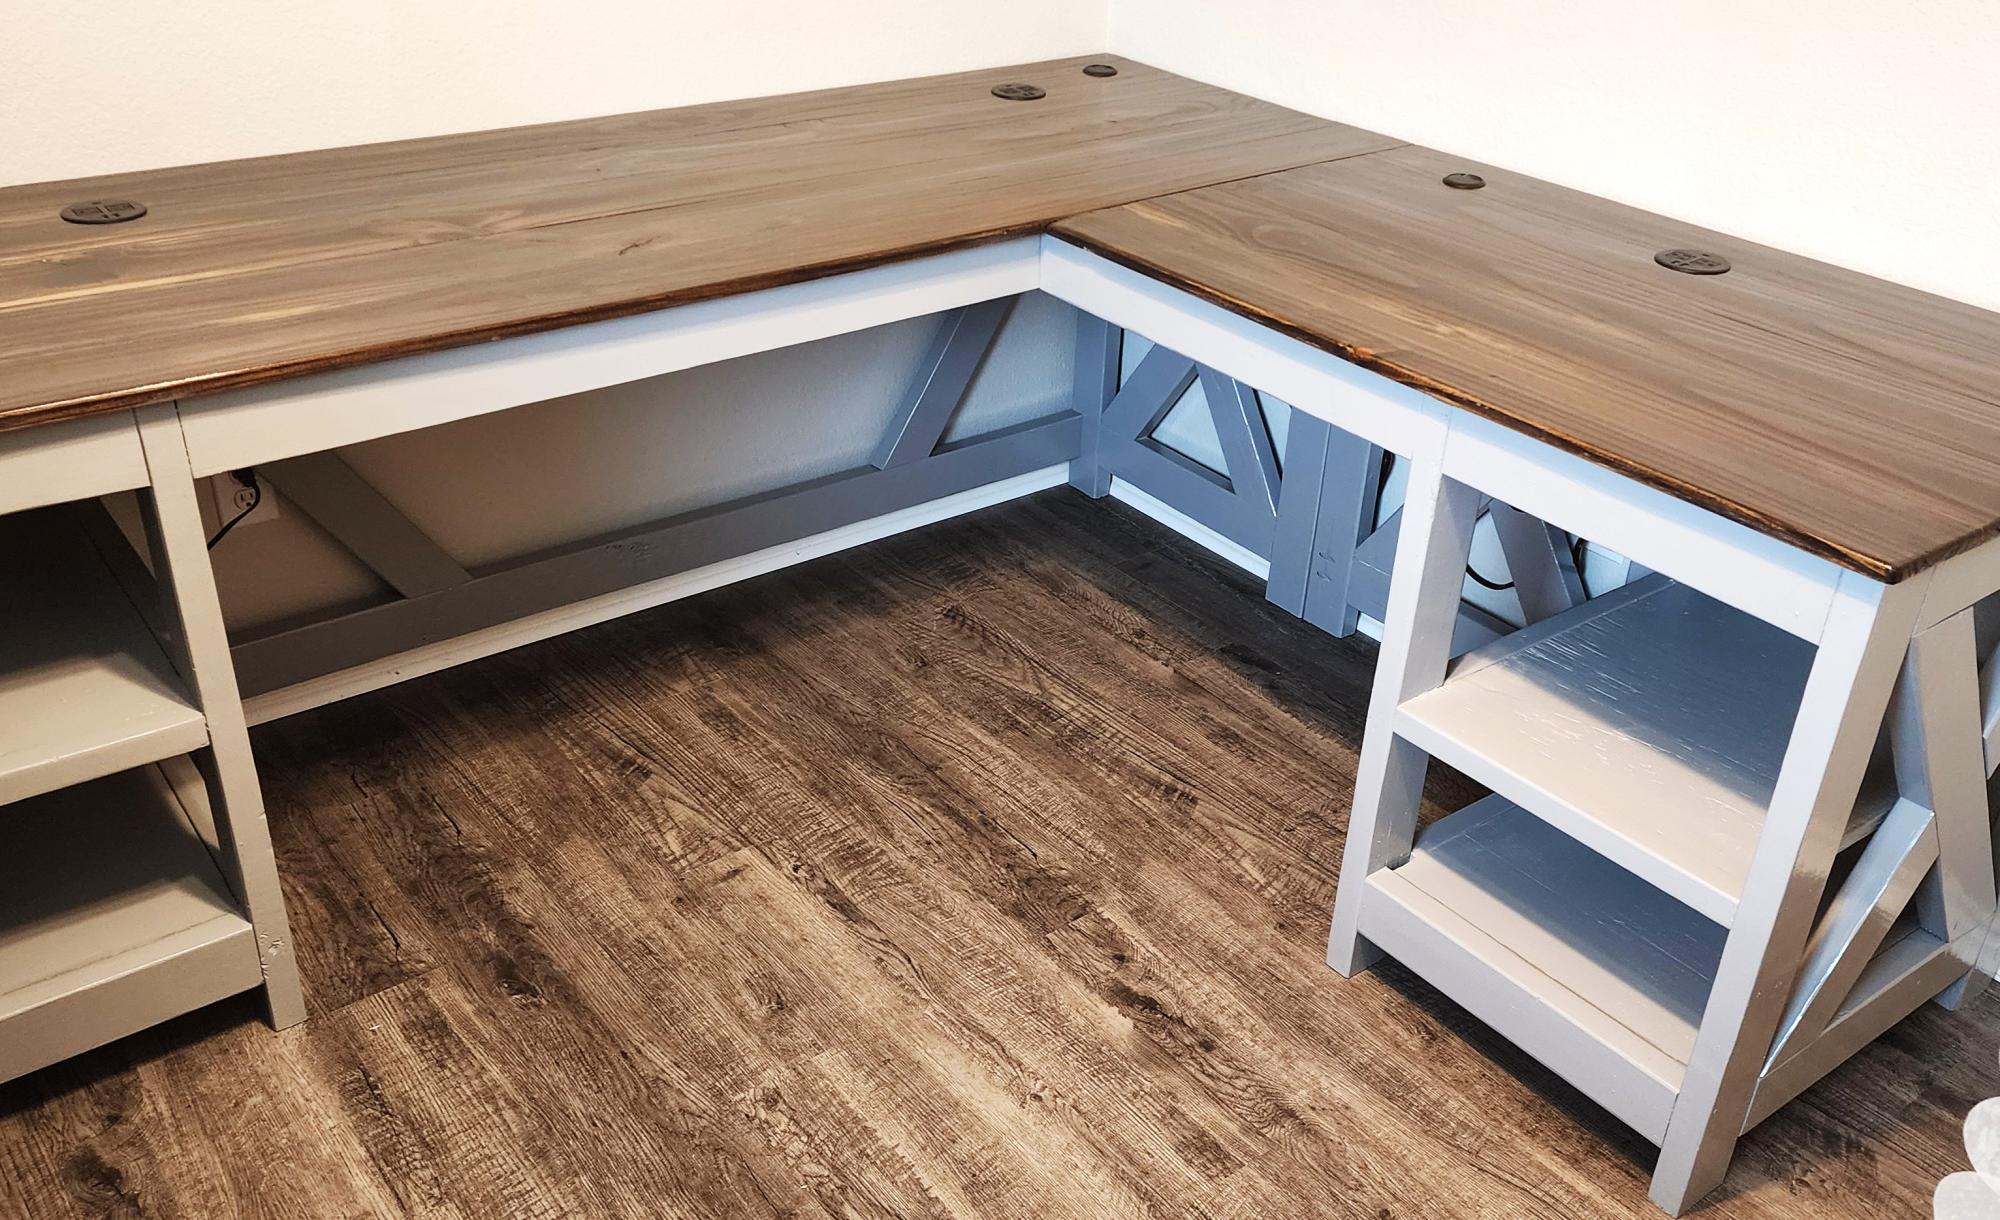
Desk for my wifes craft room.
Joshua Moore
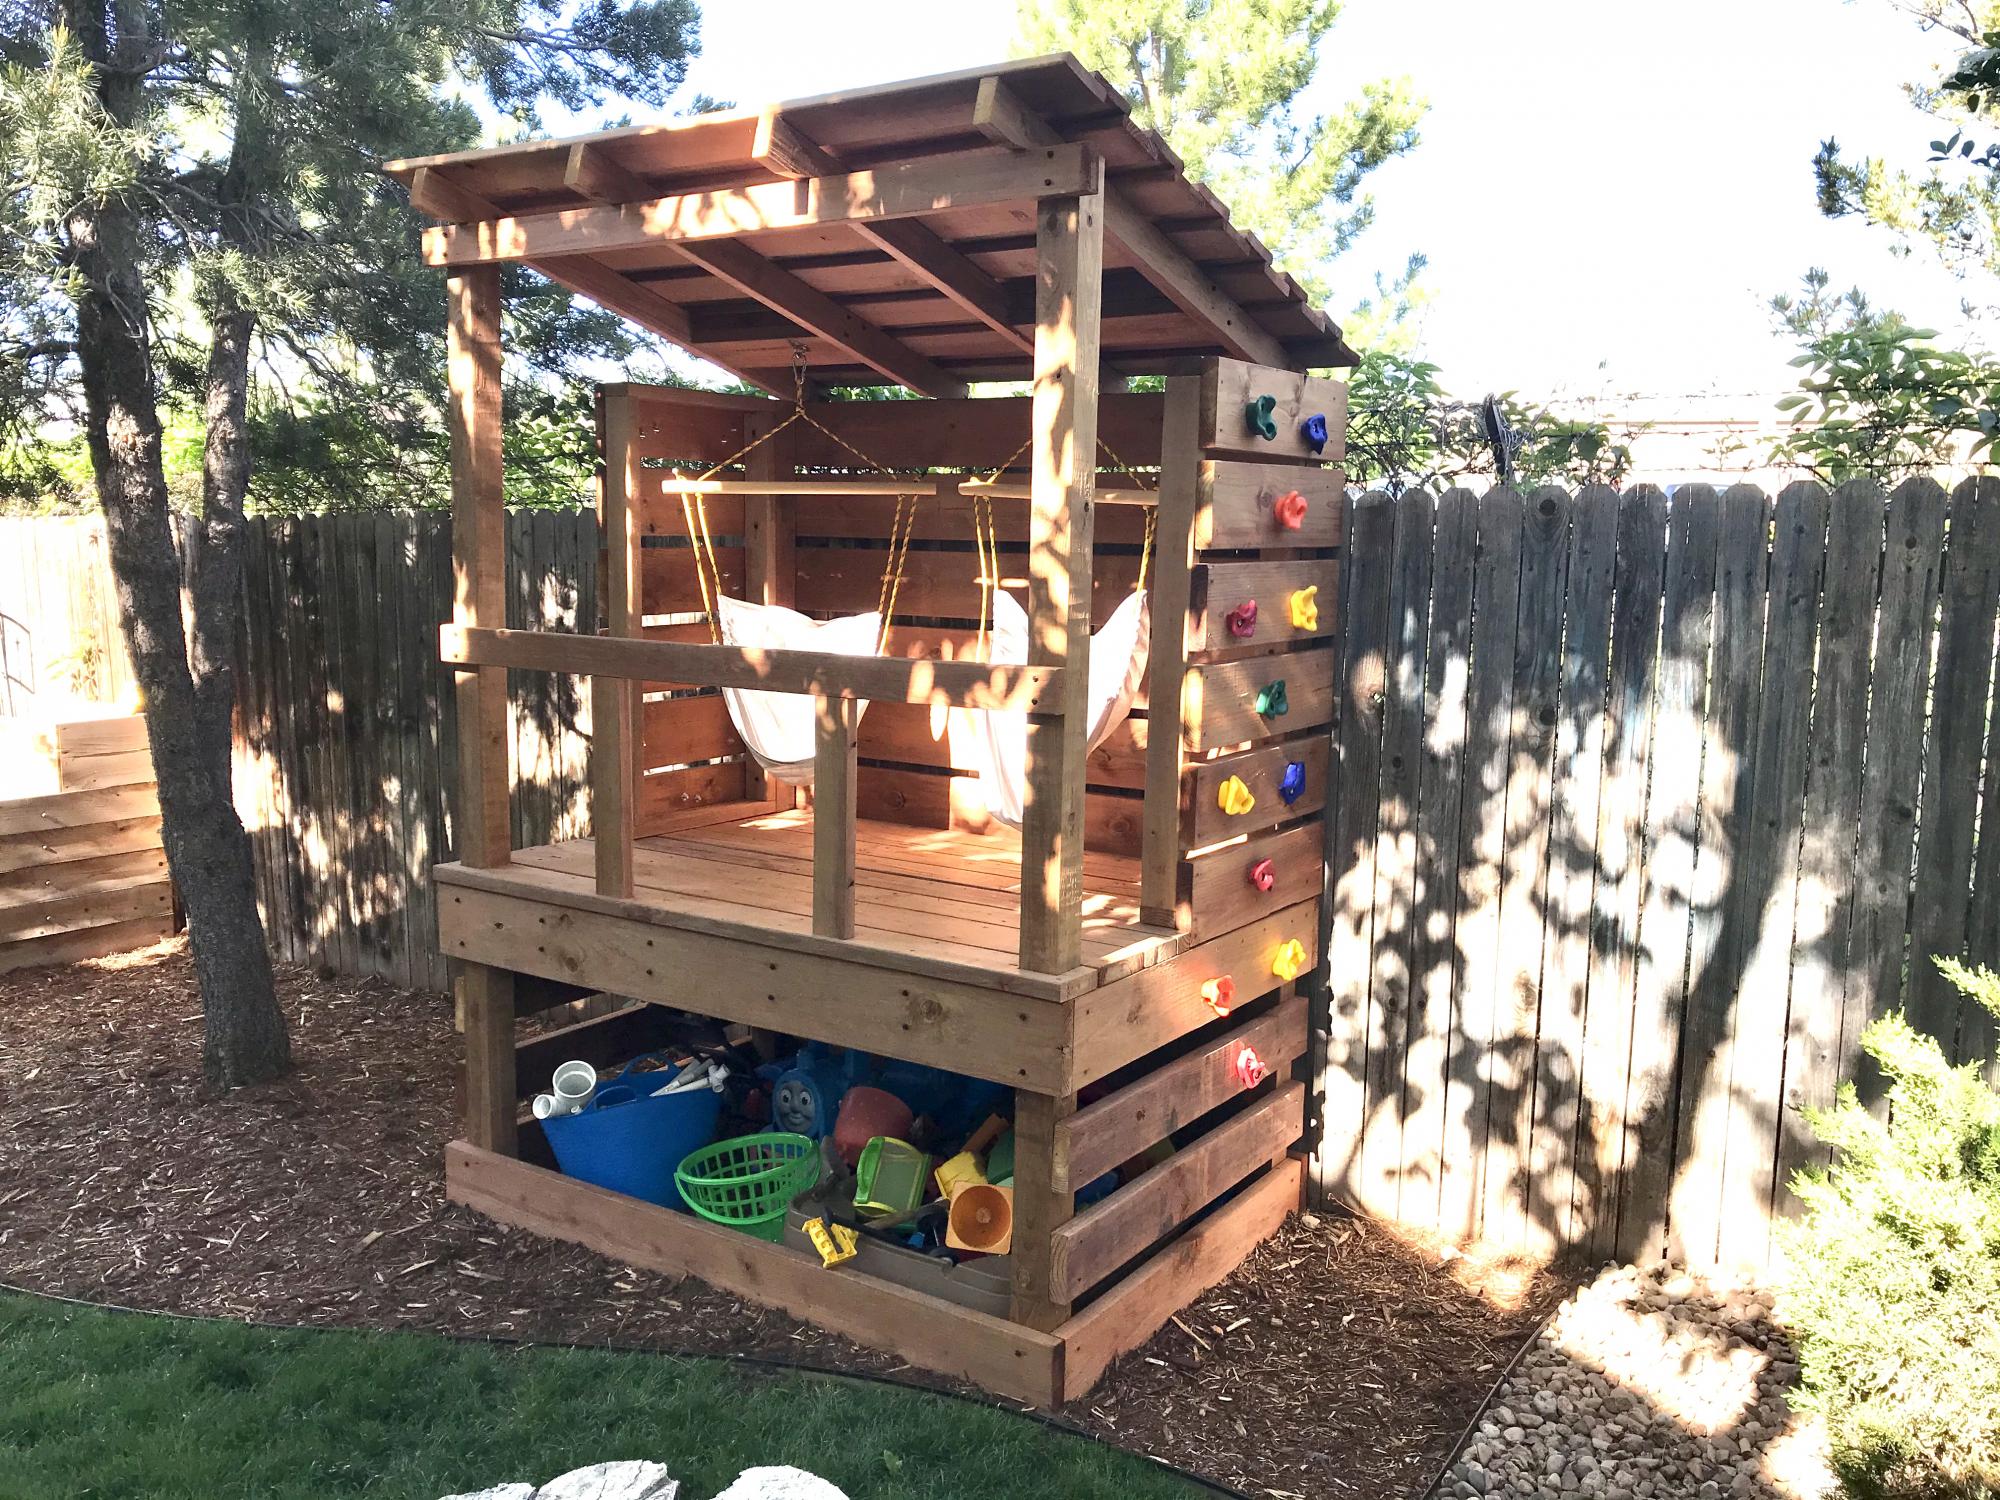
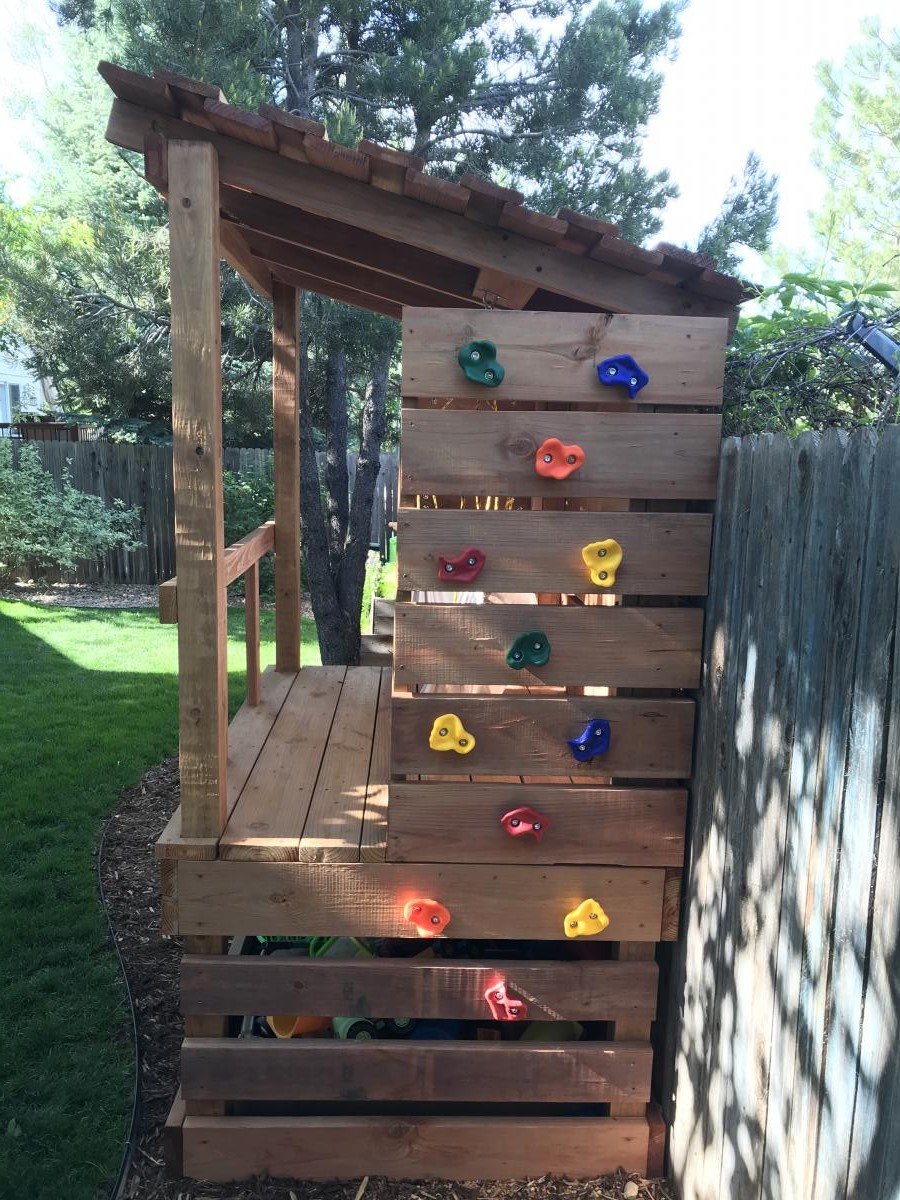
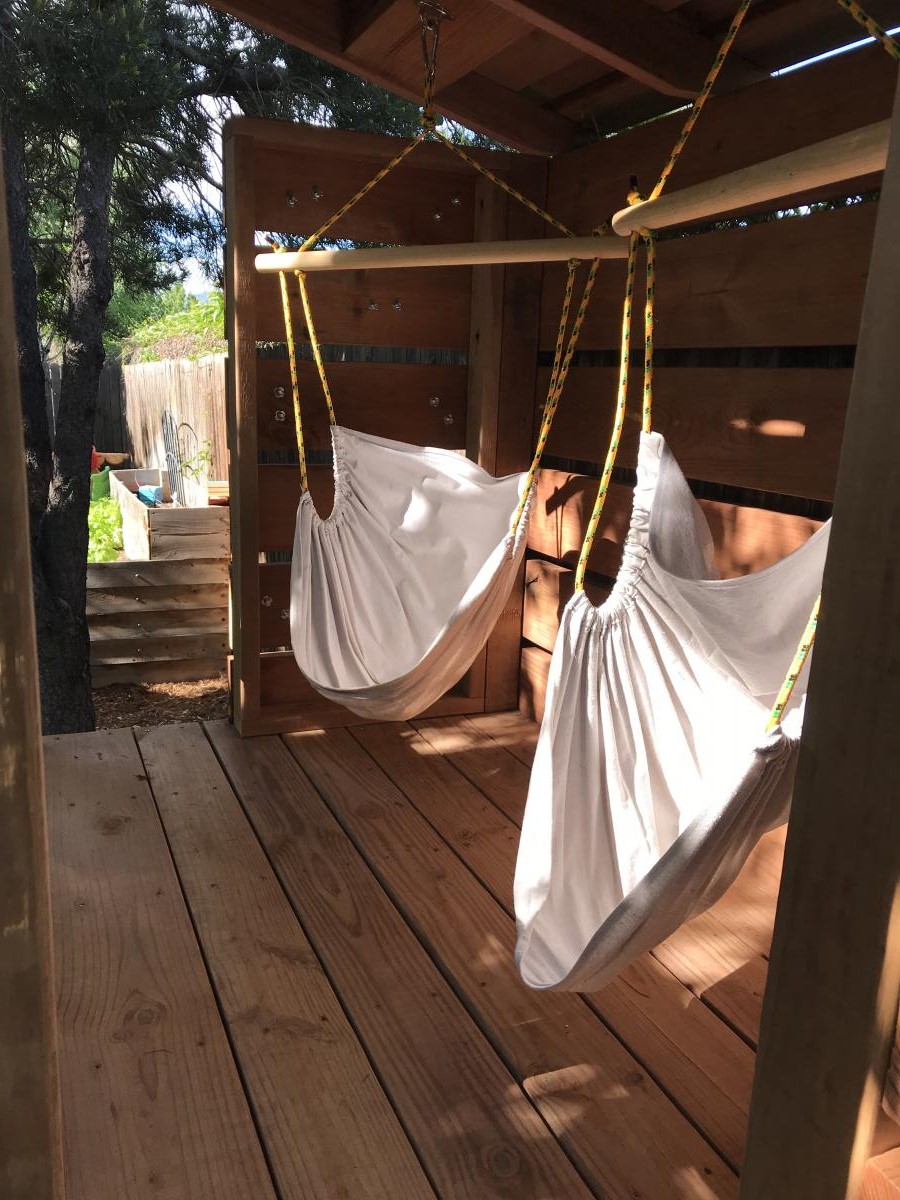
Built a fort for the boys with two climbing walls, a spot for their toys, and added some hammock swings

I made these modern Adirondack chairs for our business in Anchorage. GREAT and easy to build design by Ana - we upgraded the arms to tapered 2x6 and they're awesome!


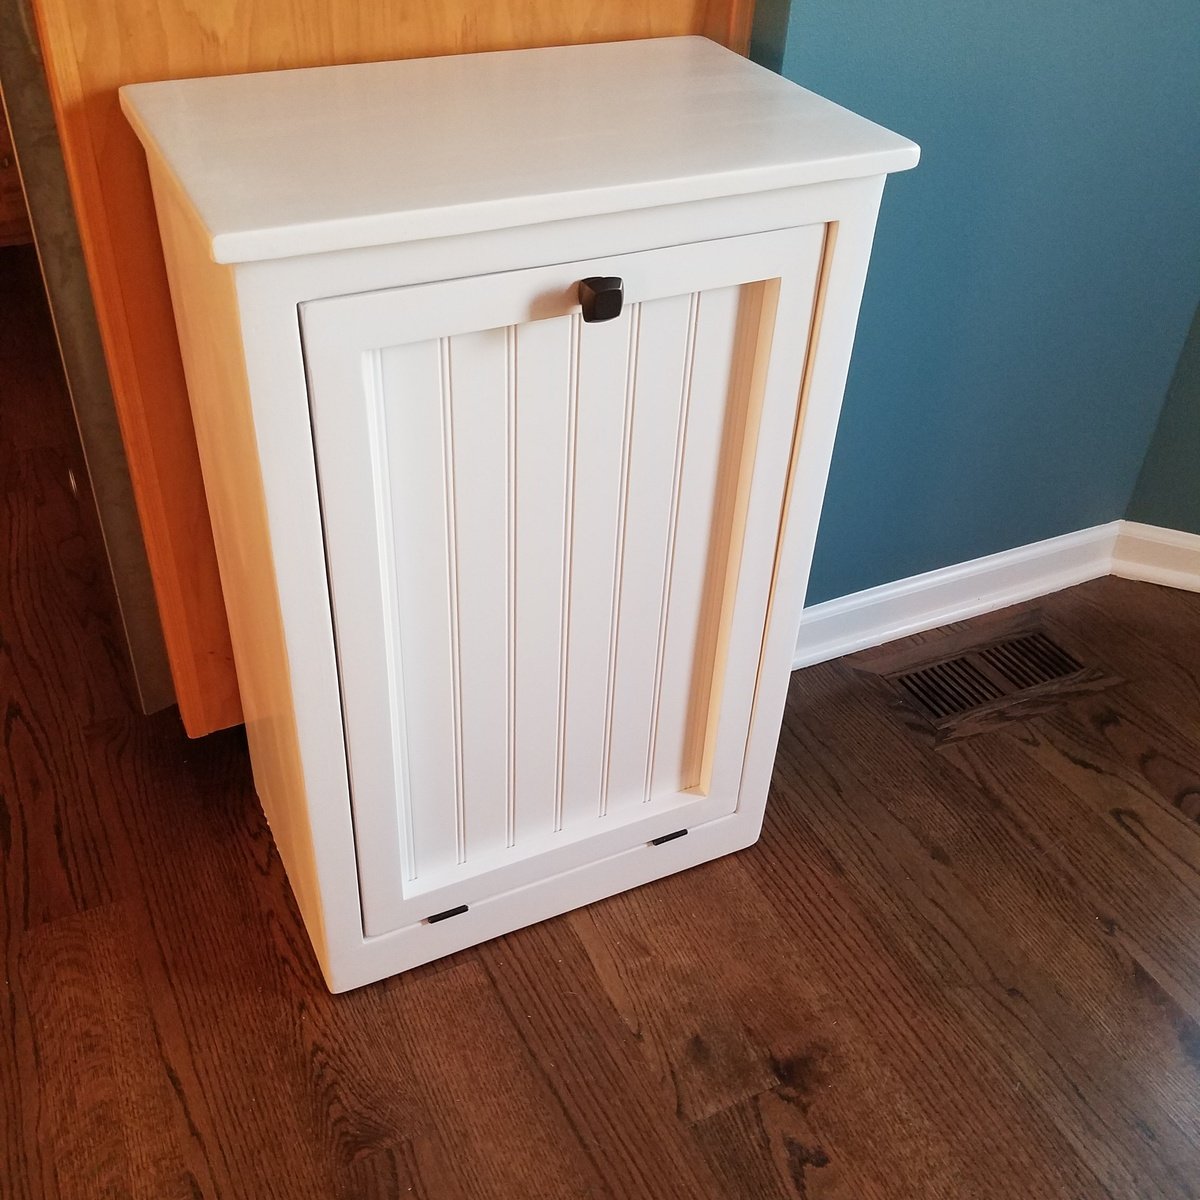
Our Australian Shepard will no longer be digging the trash out all over the floor! I did change the plans up a bit because I wanted a hangover off the sides as well as the front. And we used bead board instead of the solid panel. Thanks for the great plans Ana!

Wed, 09/21/2016 - 14:57
This turned out beautiful!!! I love the beadboard and the added overhang. Can't wait to see your next project!
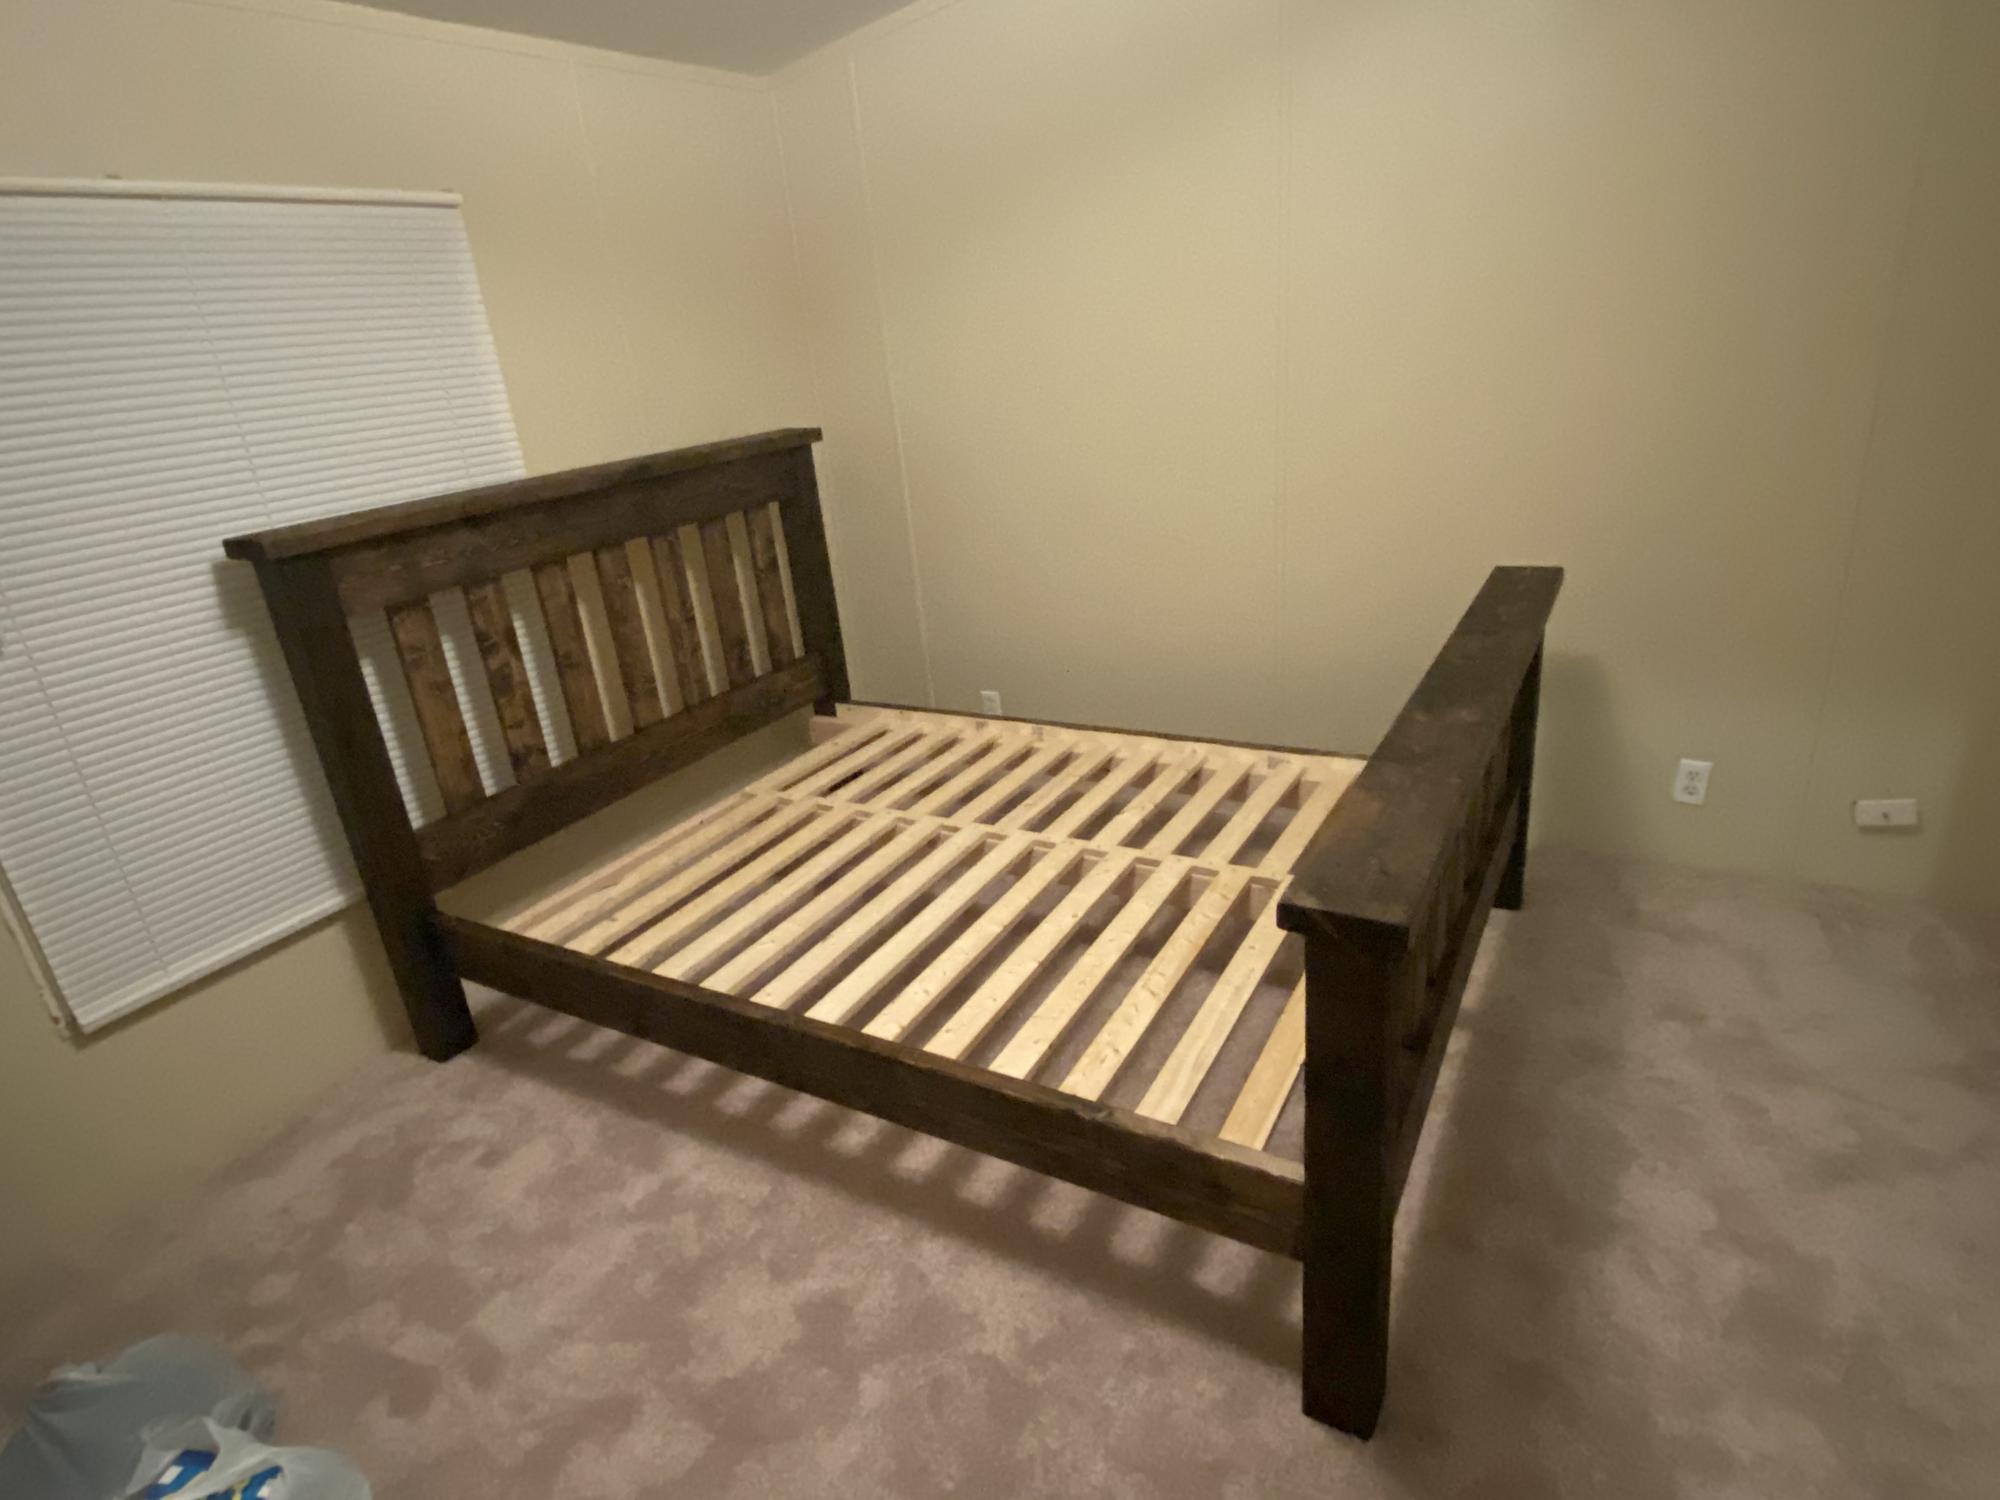
Thanks for great Farmhouse bed plans. Easy to follow material list, cut list and instructions.


Comments
Ana White
Mon, 08/24/2020 - 13:37
WOW!
Absolutely stunning, thank you for sharing!