Community Brag Posts

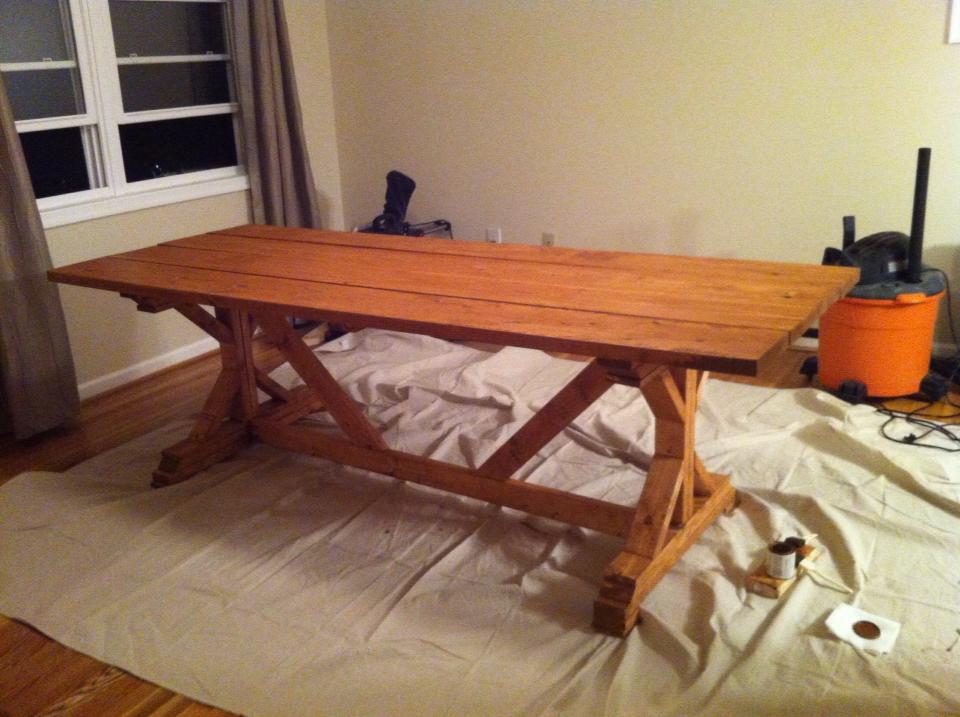
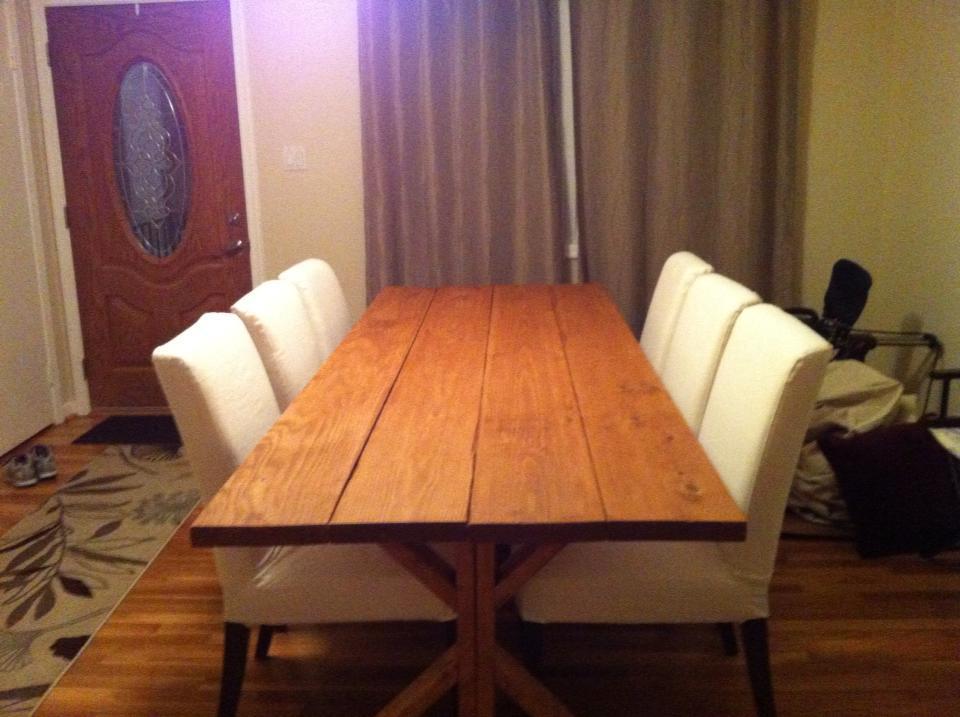
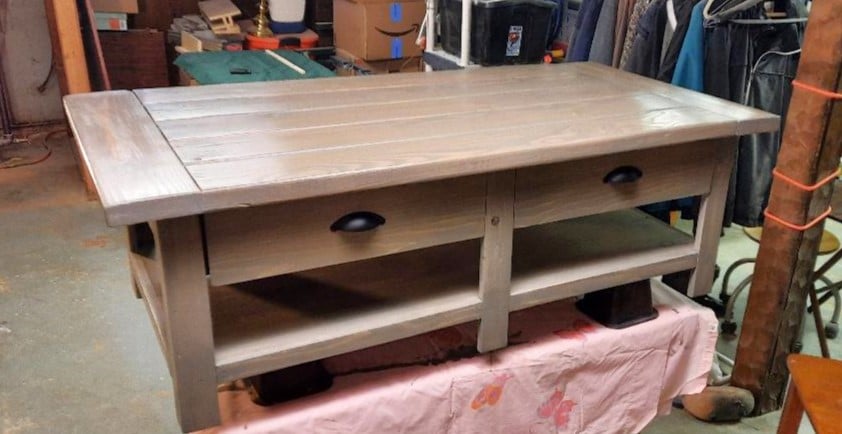
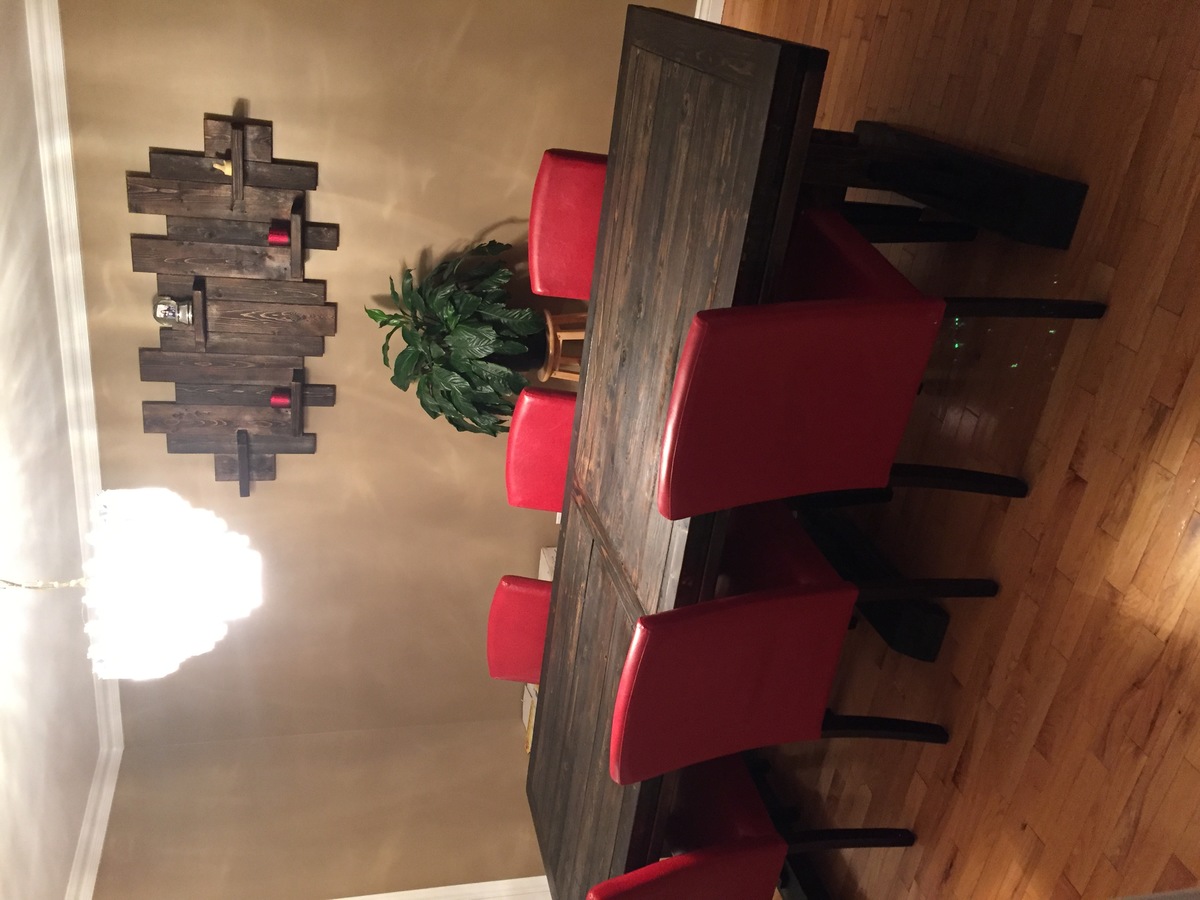
3 pedestal farmhouse table

Submitted by Anonymous (not verified) on Wed, 04/13/2016 - 18:00

Just love how this turned out
The plan was so easy to follow
I stained with black then sanded to give it a rough look marking up the corners etc and then applied dark walnut
I am waiting on brass studs /nails to trim the apron in the centre applying brass corners will keep you posted

Built from Plan(s)
Estimated Cost
150.00
Estimated Time Investment
Day Project (6-9 Hours)
Finish Used
Minwax
Recommended Skill Level
Advanced

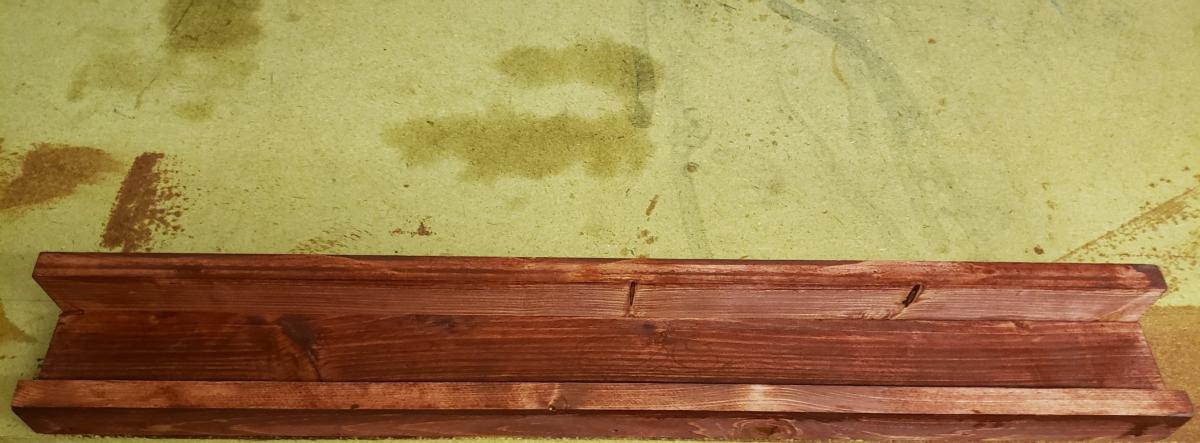
$10 Picture Ledge

I made it! Yes, my first project is complete. I made a small piece to place in my soon to be repainted half bath. It was not perfect, but for a first time project and stain job, I am proud of my work. 

Built from Plan(s)
Estimated Cost
$16
Estimated Time Investment
Afternoon Project (3-6 Hours)
Finish Used
Cherry
Recommended Skill Level
Starter Project

My farmhouse dinning room table

Submitted by BthAnn08 on Fri, 01/24/2014 - 17:45

I loved working on this project! This was my first real building project! My friend Jody and I had a blast working on it together. It can seat up to 8 people which I love when my family and friends come to visit.

Built from Plan(s)
Estimated Cost
$80
Estimated Time Investment
Weekend Project (10-20 Hours)
Finish Used
Minwax Stain in Early American and a Rust-Oleum polyurethane matte finish
Recommended Skill Level
Beginner

Camp Loft Bed

Submitted by Anonymous (not verified) on Fri, 04/22/2016 - 12:21

I used the Camp loft bed with stair plan. I raised the height by 4 inches to accommodate taller items being pushed under it. I also added the "railing" due to not being pushed up against the wall on the stair side.

Estimated Cost
About $75 dollars in lumber and $30 in stain and screws.
Estimated Time Investment
Weekend Project (10-20 Hours)
Finish Used
Rustoleum Drift-wood stain.
Recommended Skill Level
Beginner

Vertical Herb Planter

Submitted by Anonymous (not verified) on Tue, 05/10/2016 - 20:04

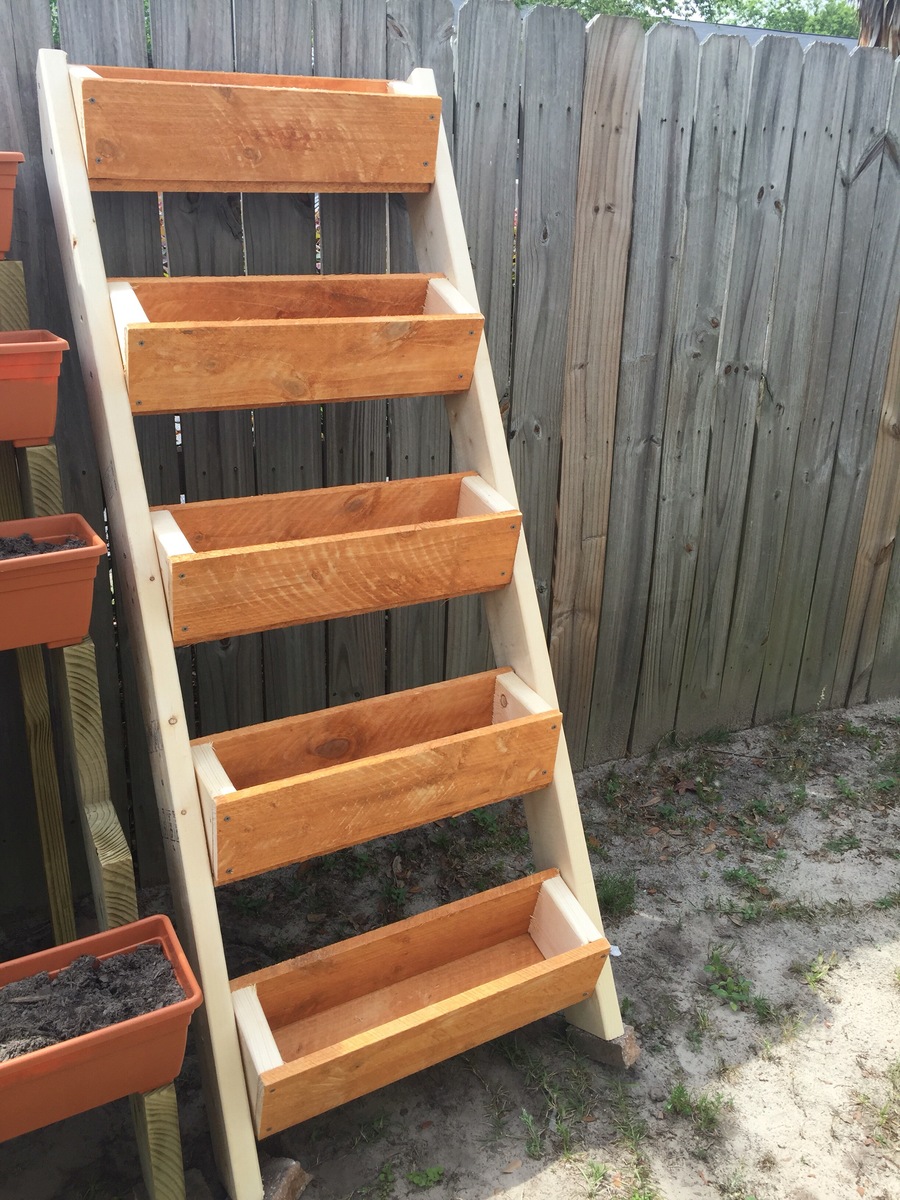
Used your plans but make changes to the planters since I do not own an angle machine.  They look great and the cost was less than $30

Estimated Cost
$28
Estimated Time Investment
Afternoon Project (3-6 Hours)
Finish Used
Deck screws
Recommended Skill Level
Starter Project

Comments

NextGreenLife

Tue, 05/30/2017 - 14:33

Can appreciate wanting to do projects but not having all the necessary fancy tools.  I need to make two of these anyway (one to give away), so going to steal this idea to make it a wham-bam quick job!

Lemonade Stand for Fundraiser

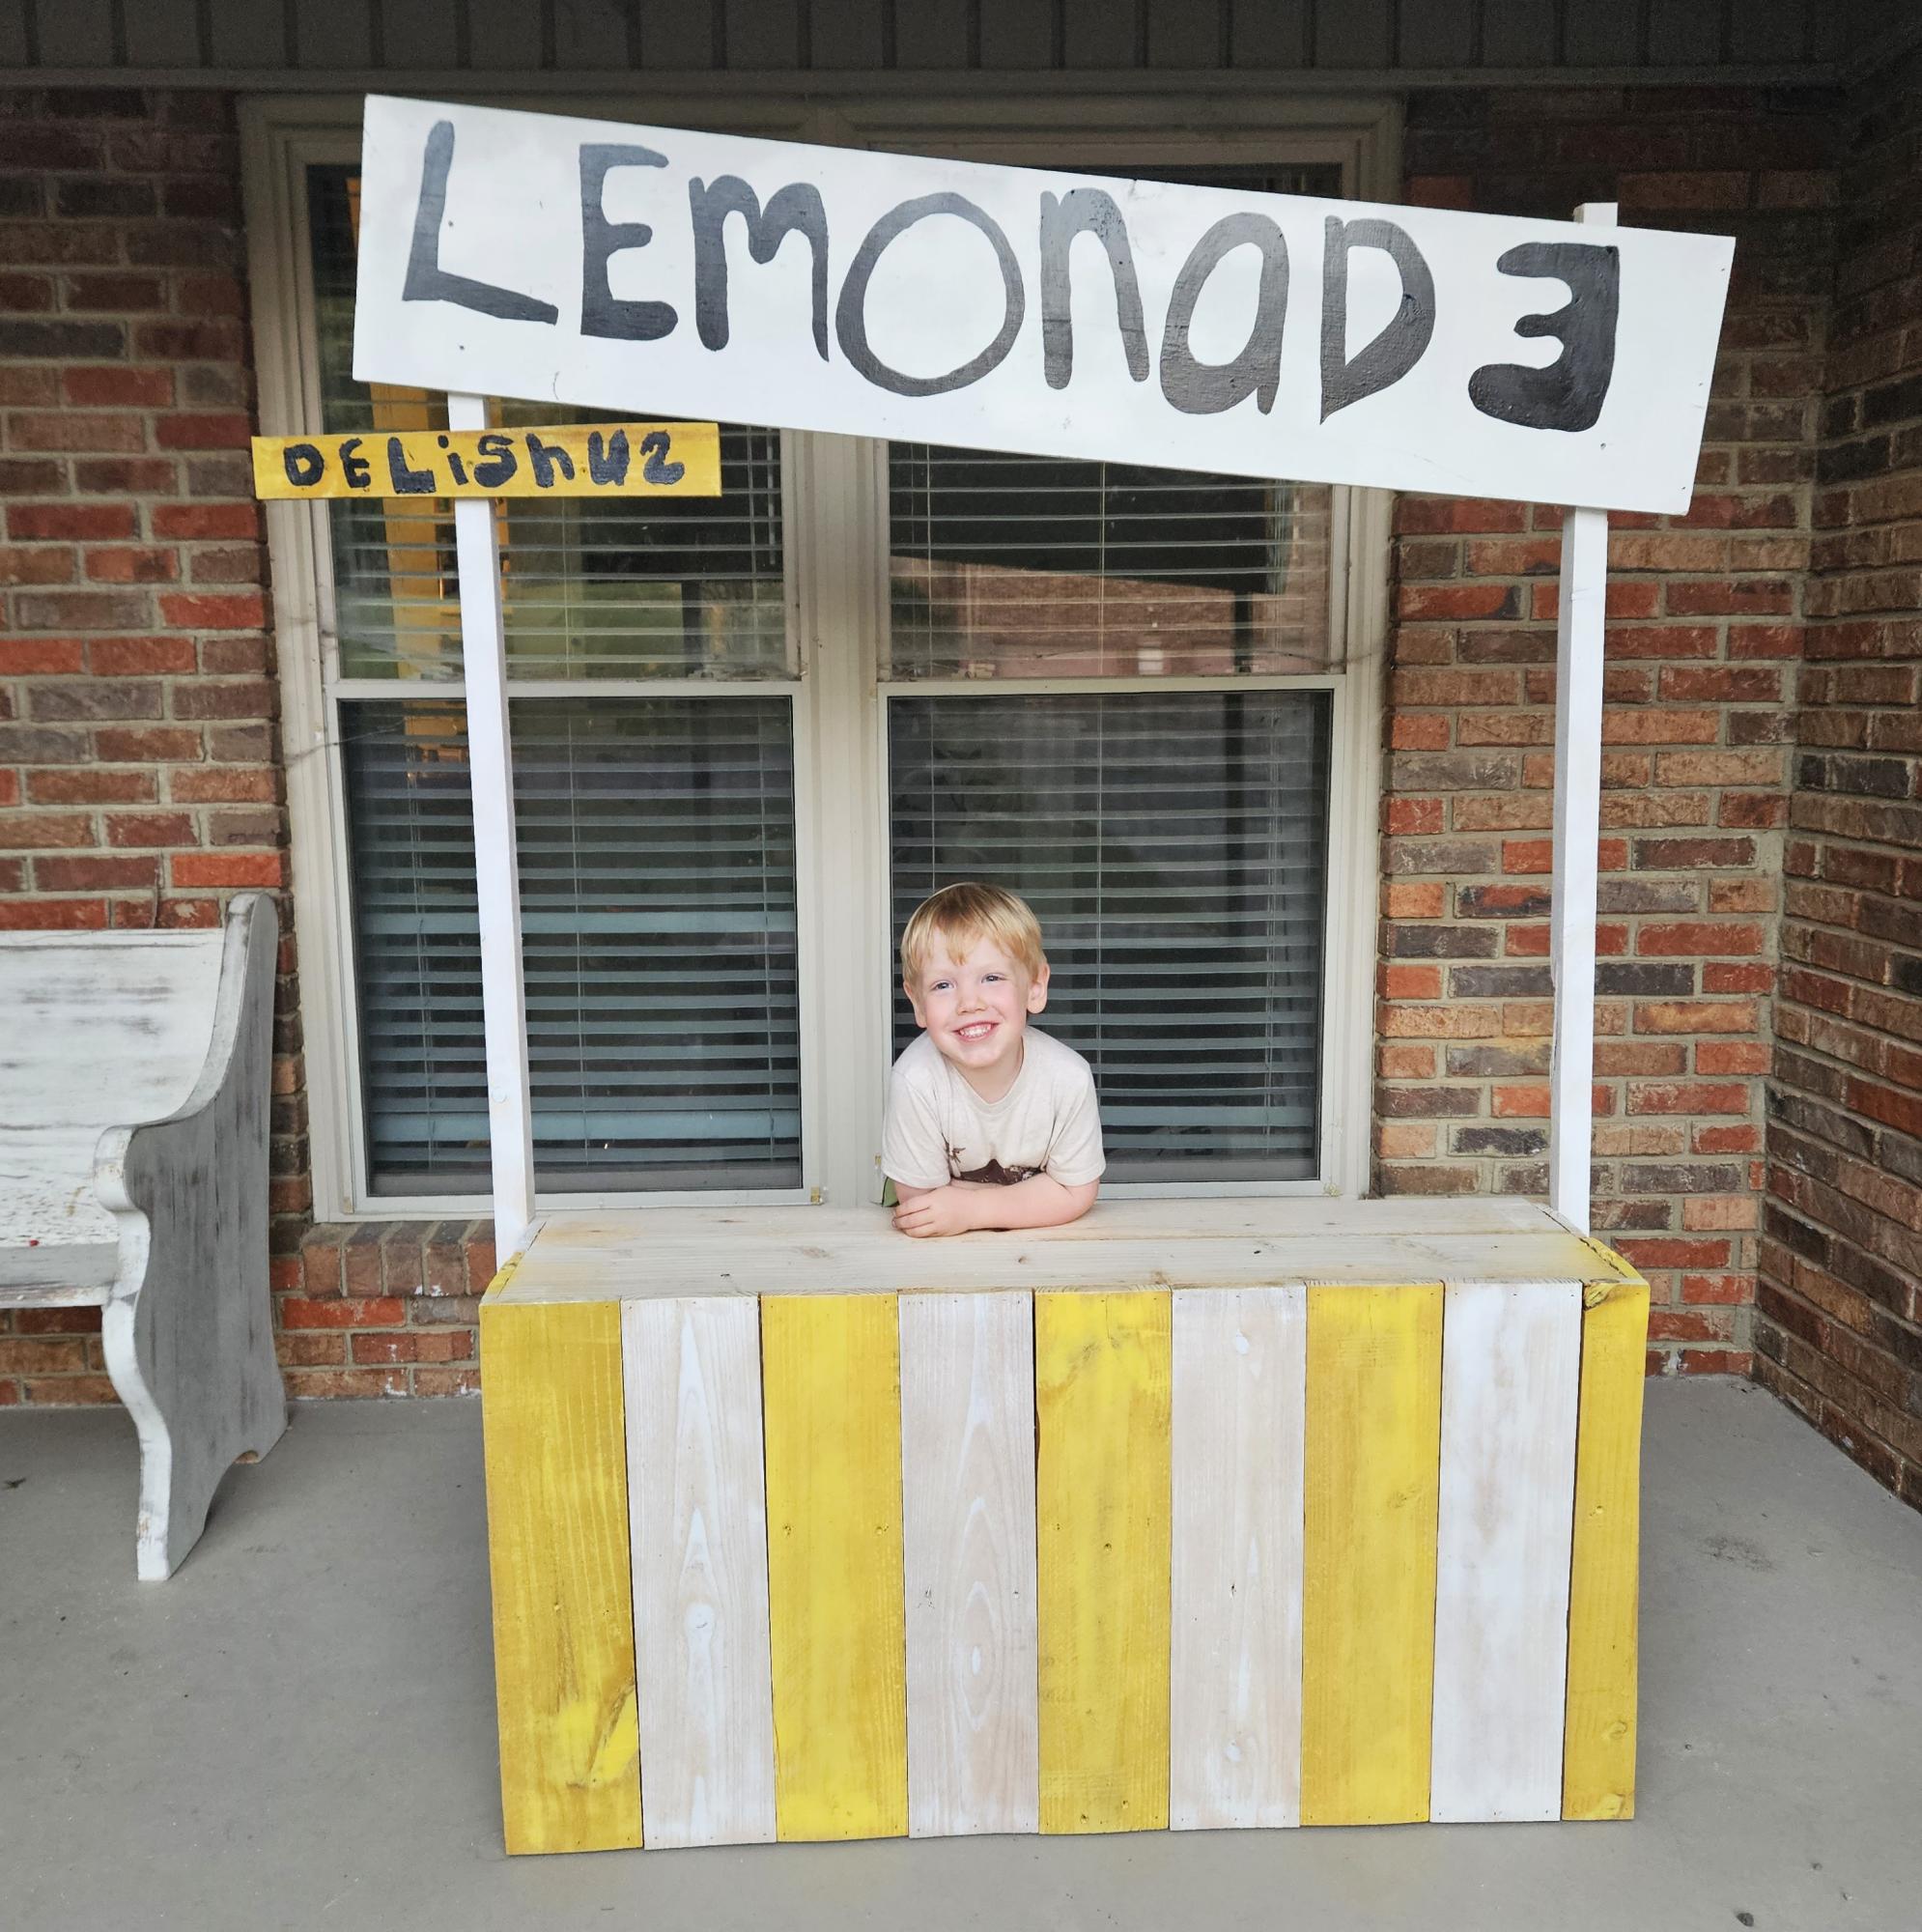
One of my daughters recently was diagnosed with Type 1 Diabetes. We are raising money to get a Service Dog for her and I was able to throw together this awesome Lemonade Stand from your plans, Ana. Thanks for the fun and QUICK project that will hopefully help my daughter with her fundraising goals. {Son not included with lemonade :)}

Gene

Chicken run

Submitted by Anonymous (not verified) on Thu, 05/19/2016 - 19:28

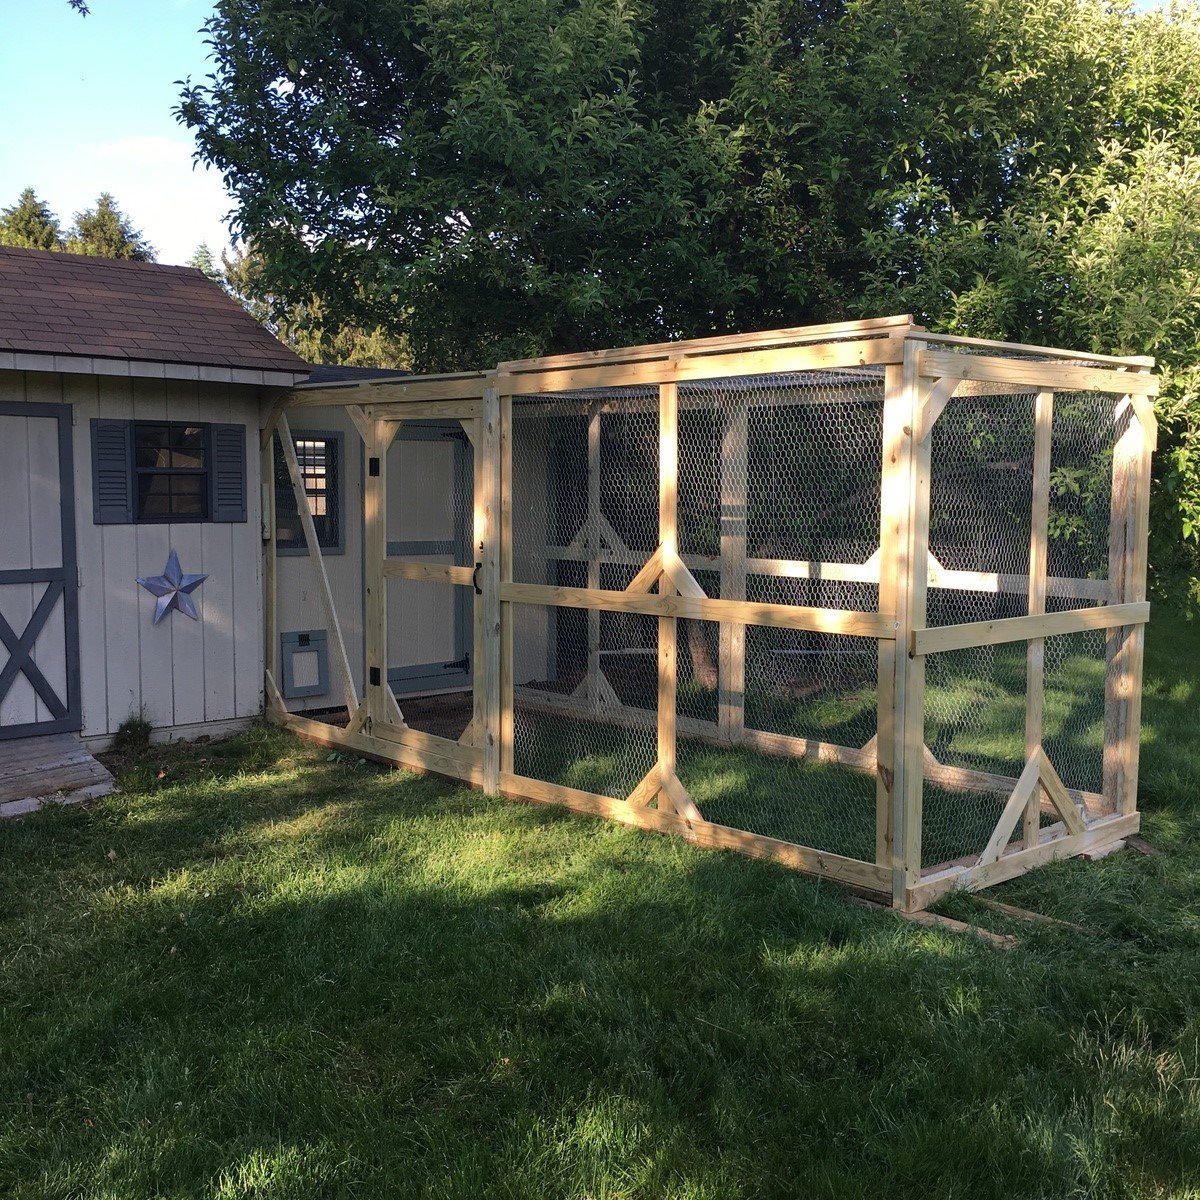
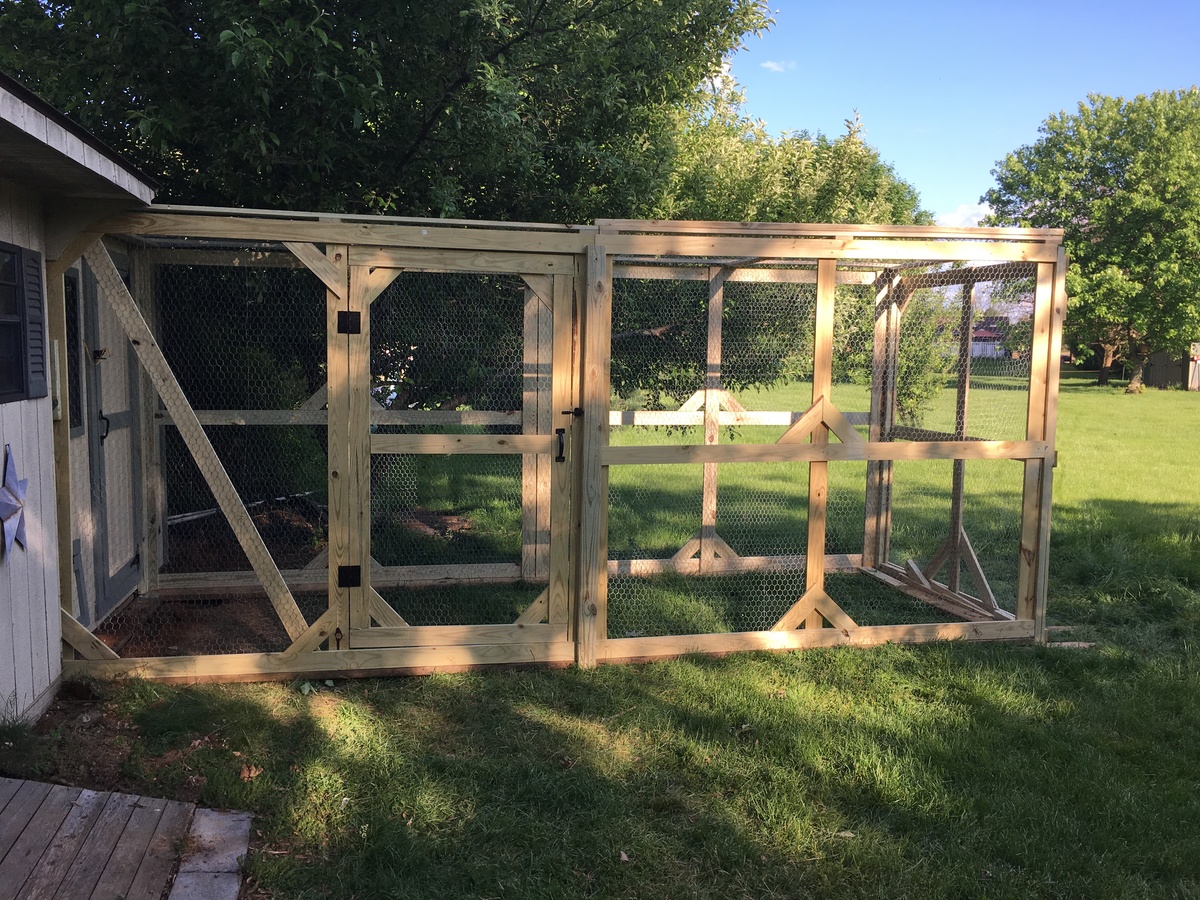
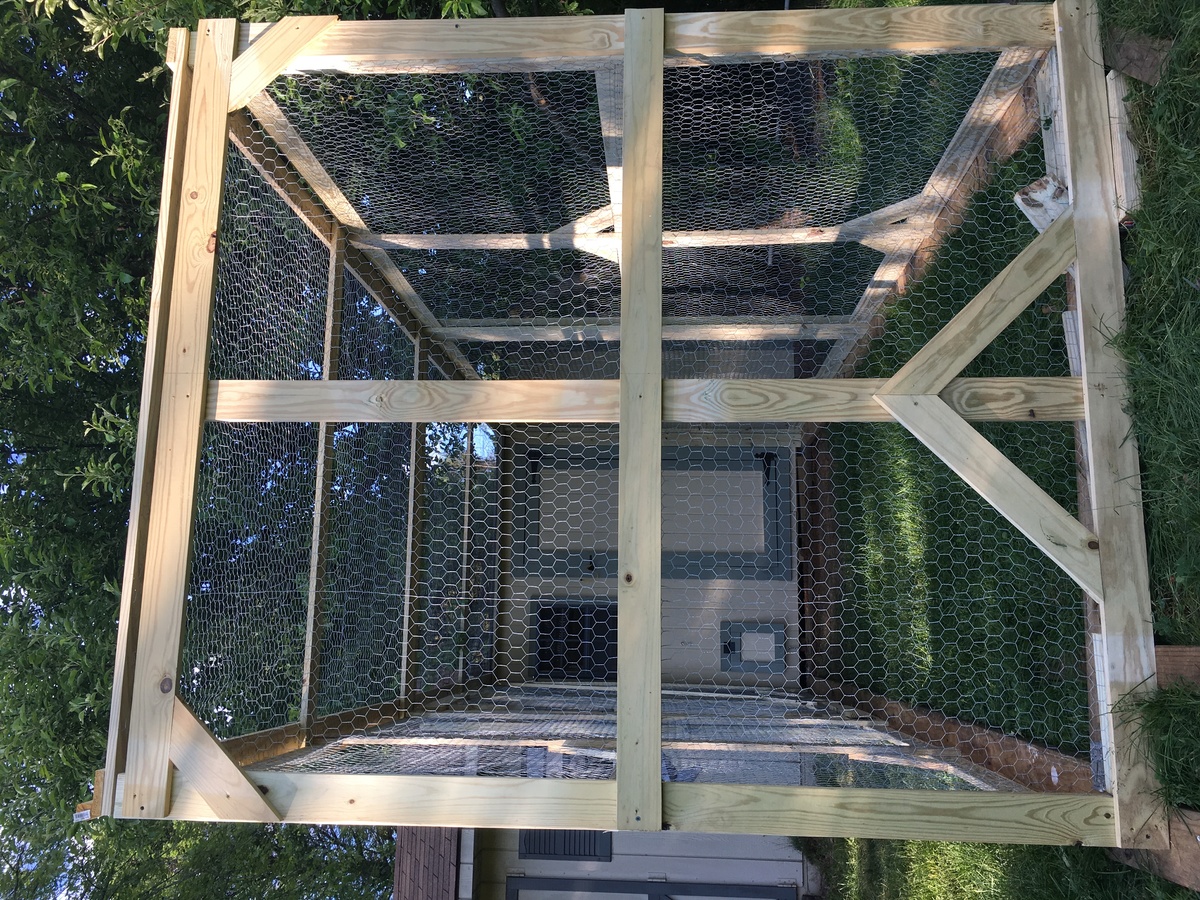
Or use the same plans with the exception of I extended the height so I could actually walk into the run fairly simple to assemble I would strongly recommend an air compressor staple gun or you'll end up with four arms like Popeye

Built from Plan(s)
Estimated Cost
$250-$300
Estimated Time Investment
Weekend Project (10-20 Hours)
Recommended Skill Level
Beginner

DIY Chicken Coop

Submitted by Anonymous (not verified) on Mon, 10/30/2023 - 17:55

As a first time chicken farmer, I have four chickens now fully grown. It was 29 degrees in Iowa this morning, wondering if I should wrap the lower portion of the coop on three sides with visqueen, and should the roost windows be covered? I have straw bales to roost on and add where needed . I don’t plan to heat the coop . Any help will be appreciated.

[email protected]

Seasonal And Holiday

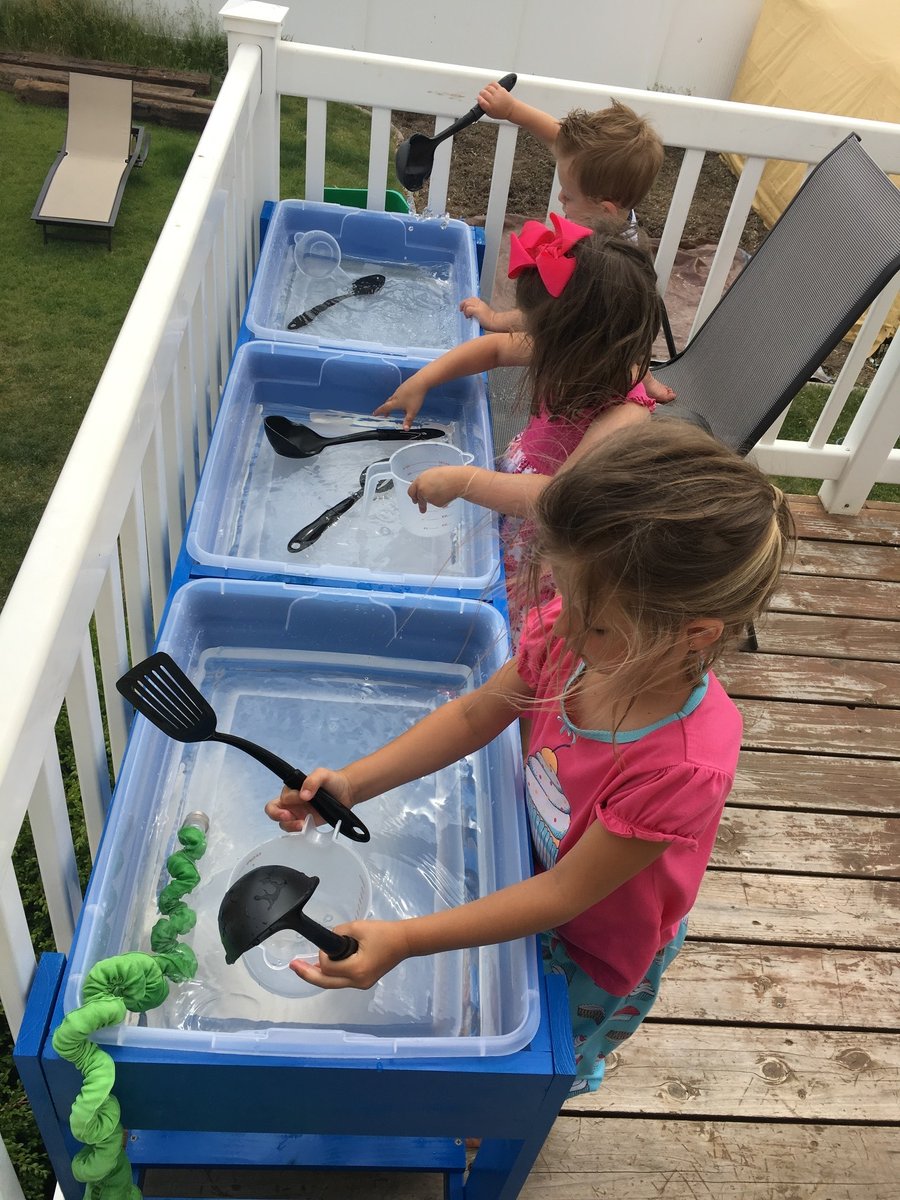
Water table for 3

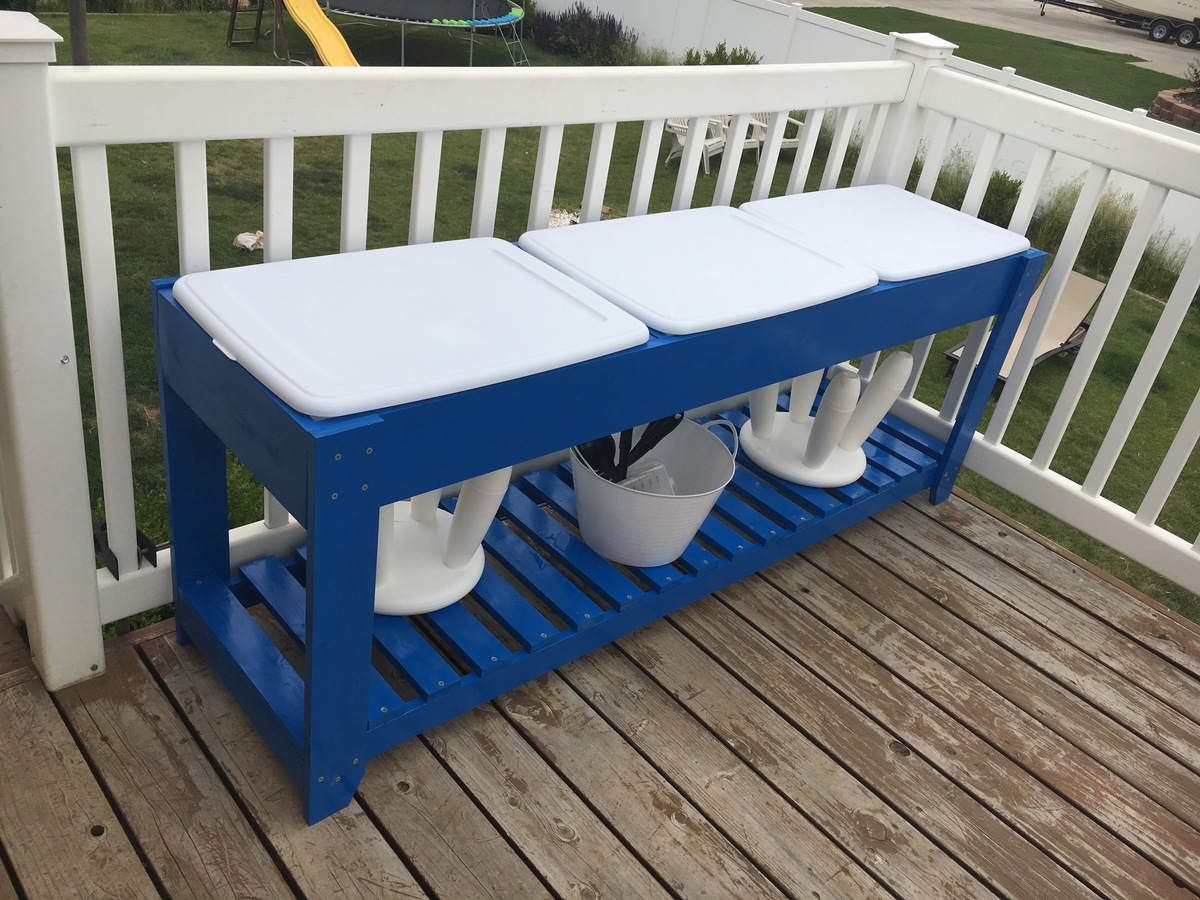
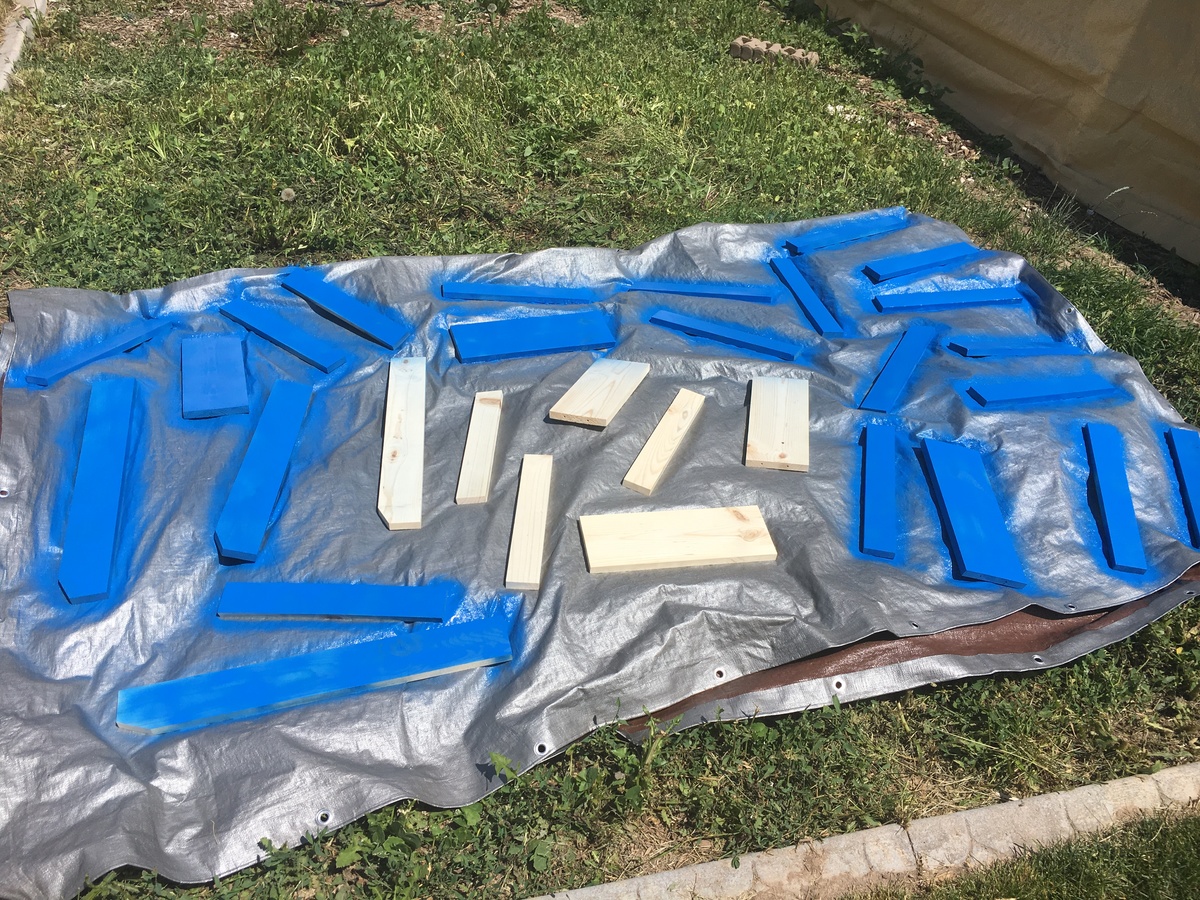
We have 3 kids and so I wanted them to each have their own place to cut down on arguments. I also chose to make this just a water table because of how close it is to the back door. I'd rather them not bring in a ton of sand each day. Because I wanted to be able to keep the lids on top when they weren't in use, we separated the bin areas so the lids can snap shut. We also made it a few inches taller to fit the stools underneath. It was a simple build, and didn't cost much more than a big box store small plastic sand and water table. Also I found those bins (same brand and size as in original plans) at Walmart with a white lid (which I preferred to the blue) for under $5 each.

Built from Plan(s)
Estimated Cost
<$85 including toys, bucket, bins, building materials, and spray paint.
Estimated Time Investment
Day Project (6-9 Hours)
Recommended Skill Level
Beginner

More angles - little ladder shelf

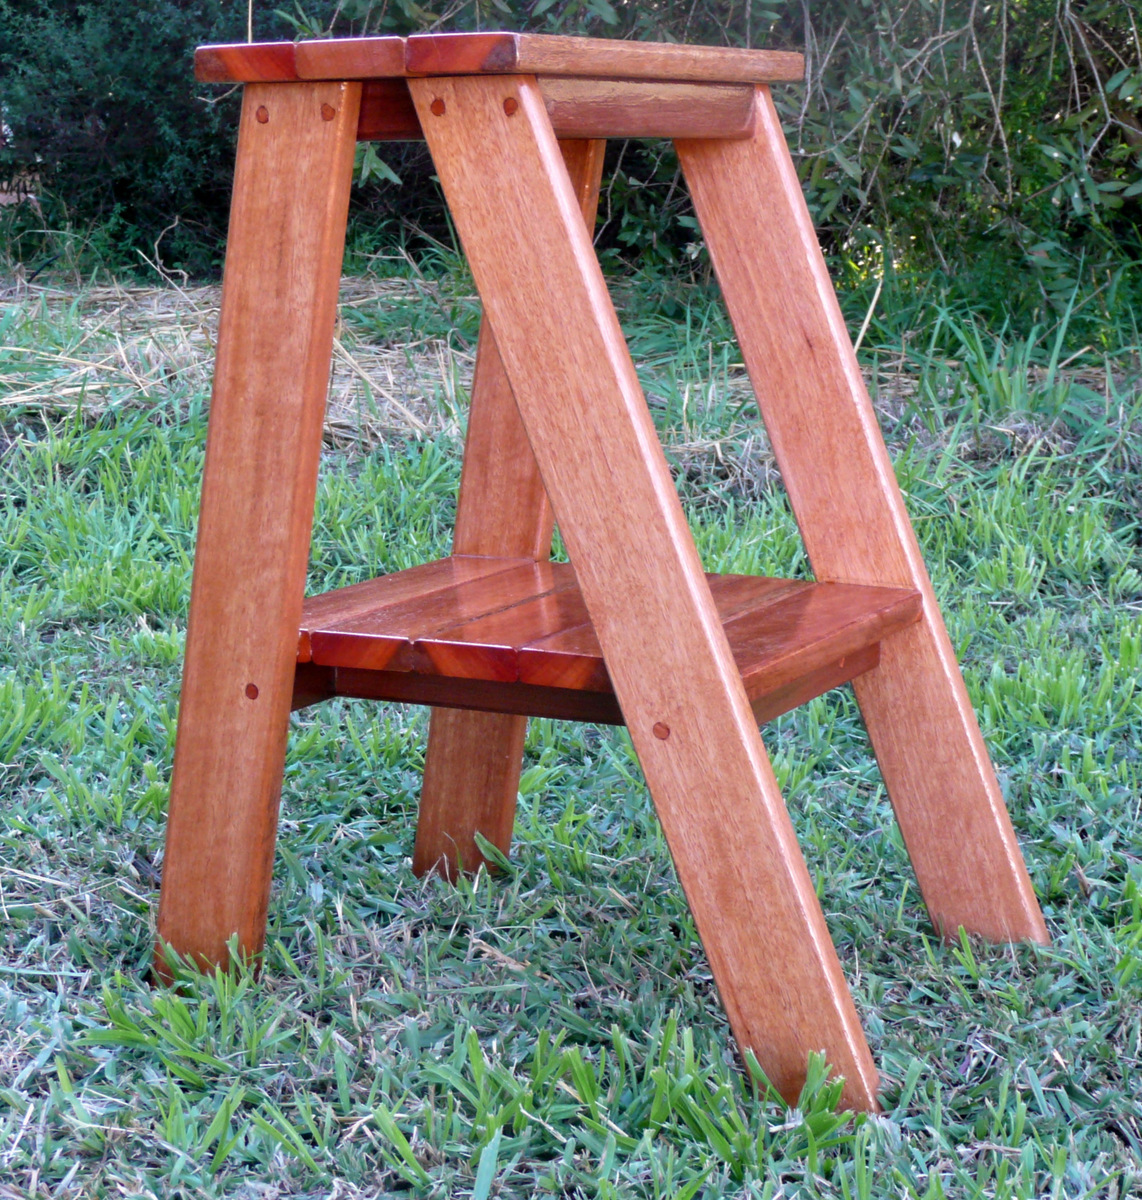
I like the clean lines of this little shelf. Not sure whether it will become a plant stand or bed side table in the spare room. Found it quite tricky to put the bottom shelf in the right spot - even though the legs were fastened with 2 screws each at the top there was still enough give so that pushing a leg out or in a bit created a wobble. Ended up putting glue on and with the help of an extra pair of hands and a spirit level put the shelf into place by trial & error, making sure the whole thing stood nice and firm on the ground. Put on some clamps & came back the next day to put the screws in. Used a plug cutter to cut 'covers' for my screws from off-cuts of the same timber, but didn't quite manage to get the grain aligned so you still see them. Made these from decking boards (very close in dimensions to 1x3 boards) sold as 'forest reds' in the hardware store, which are a mix of eucalypt hard woods.

Estimated Cost
$18 for timber
Estimated Time Investment
Day Project (6-9 Hours)
Finish Used
Exteriour grade clear poly-urethane
Recommended Skill Level
Beginner

Comments

Jake

Tue, 05/29/2012 - 16:35

Your step table, step stool, whatever you want to call it is beautiful. Great Job! I have made four of them. I reinforce the bottom shelf in case you want to use the step-?? to get stuff off high shelves or just paint a room and not mess with a step ladder. My first one is in our kitchen and it is the most used piece of furniture in the room. I got my grandkids and a little girl from across the street to build the others. The loved the experience. You can see pics at my page on Ana-White.

Barstools

Submitted by lazyLiz on Sat, 06/09/2012 - 21:22

A 30" tall bar stools inspired by the plan simplest stool.

Built from Plan(s)
Estimated Cost
$ 40- $60
Estimated Time Investment
Afternoon Project (3-6 Hours)
Finish Used
valspar white paint
Recommended Skill Level
Beginner

Comments

Handygirl

Sat, 07/07/2012 - 18:47

I love these stools! I love the curve in the top. Are yours square on top or rectangle?
Also, what size of board is the top (seat)?

Rusty Cottage

Fri, 07/20/2012 - 05:32

I like your design. Finally made an account and will be making matching ones. Thanks for the inspiration. If the better half doesn't like the first one I will have a new stool for my workbench

MrsPowers

Fri, 08/31/2012 - 20:27

Hi! You're stools came out wonderful. I was wondering how you got the seat to be curved that way.
Thanks!

Full Size Farmhouse Bed with Trundle

Submitted by eshelling on Sat, 07/09/2016 - 16:11

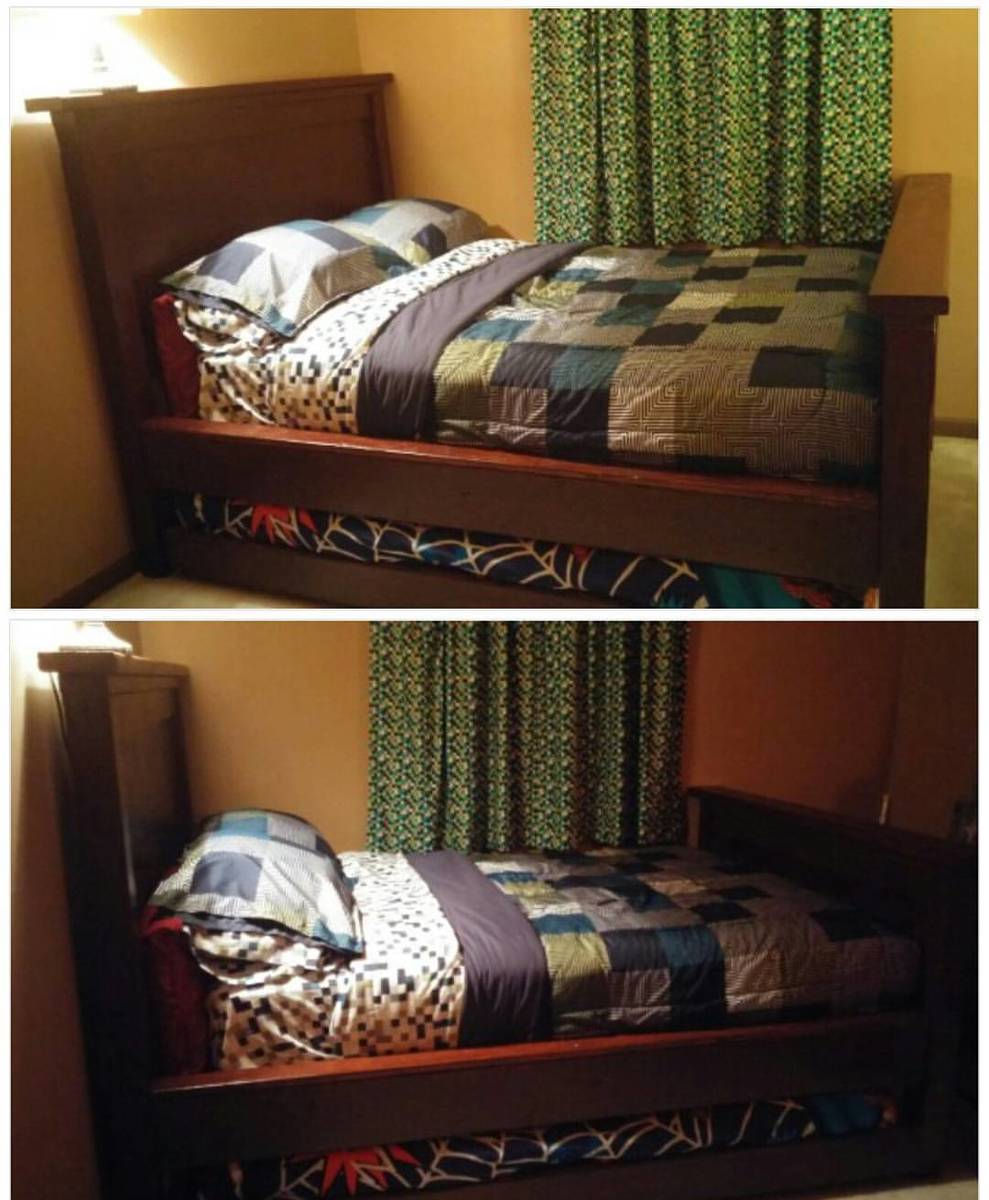
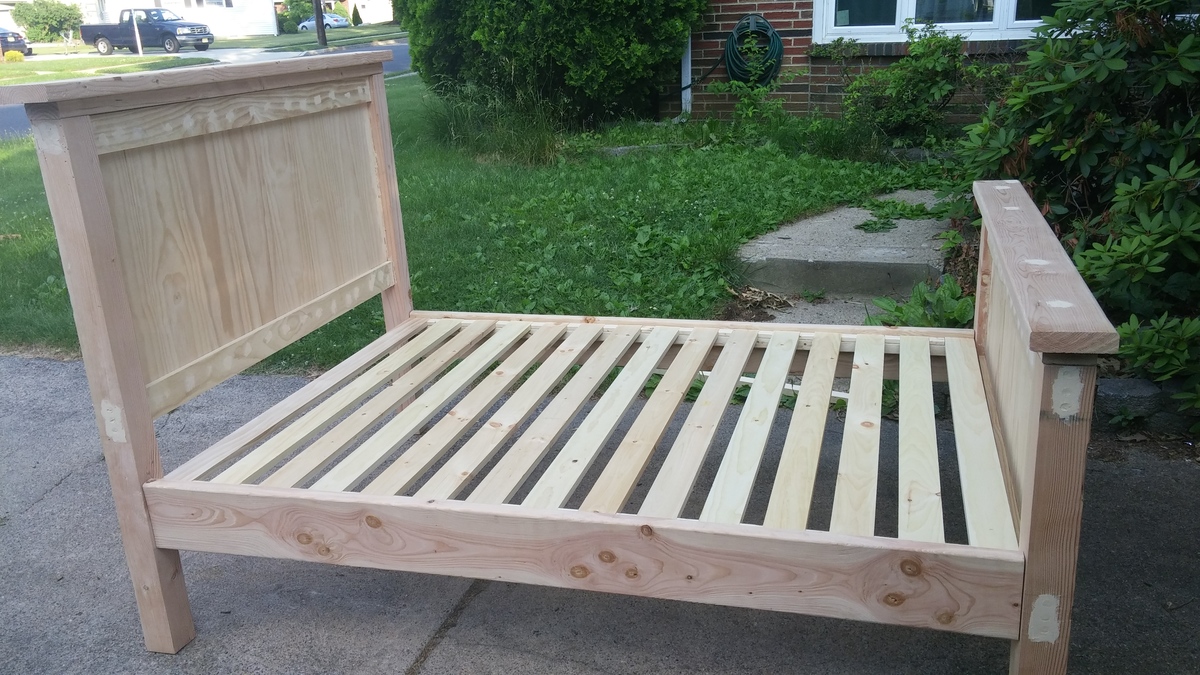
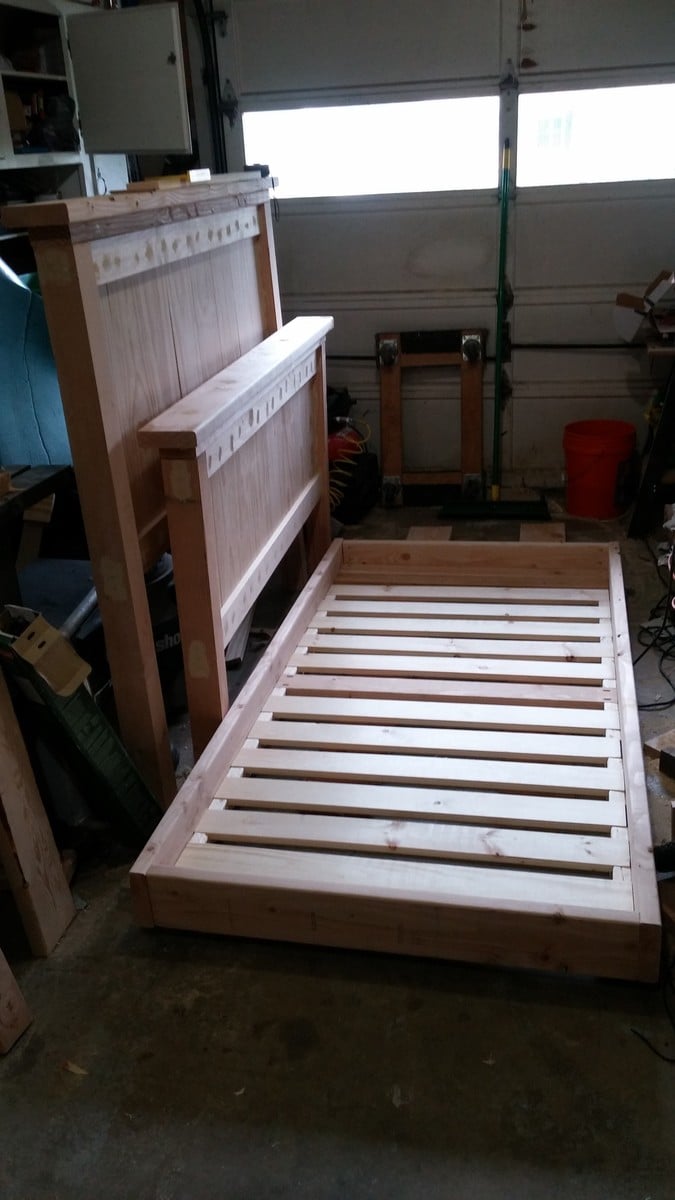
I wanted to make use of the twin size mattress from my son's old bed and I thought it would nice to have an extra place for his cousins and friends to sleep when visiting so I added a trundle.  I had to slightly alter the plans to accommodate this, and made some little happy mistakes along the way.  Because  I wanted to be able to take the bed apart I had purchased some surface mount hardware for the rails.  What I didn't account for was the extra width it would add for the platform.  It ended up making the frame large enough to fit a queen size mattress.  This would have been fine if I hadn't already purchased a new full size mattress!  Ha Ha.  I ended up having enough of the bed slats showing that it bugged me so I ended up taking a 2 x 4 and cutting out a notch so it would sit flush on the rail and cover up the slats.  I stained it using an American Chestnut Satin Polyshades Mix and overall I am pleased with how it came out.  This was a good learning experience and now I'll get started on a nightstand shortly.

Built from Plan(s)
Estimated Time Investment
Week Long Project (20 Hours or More)
Recommended Skill Level
Intermediate

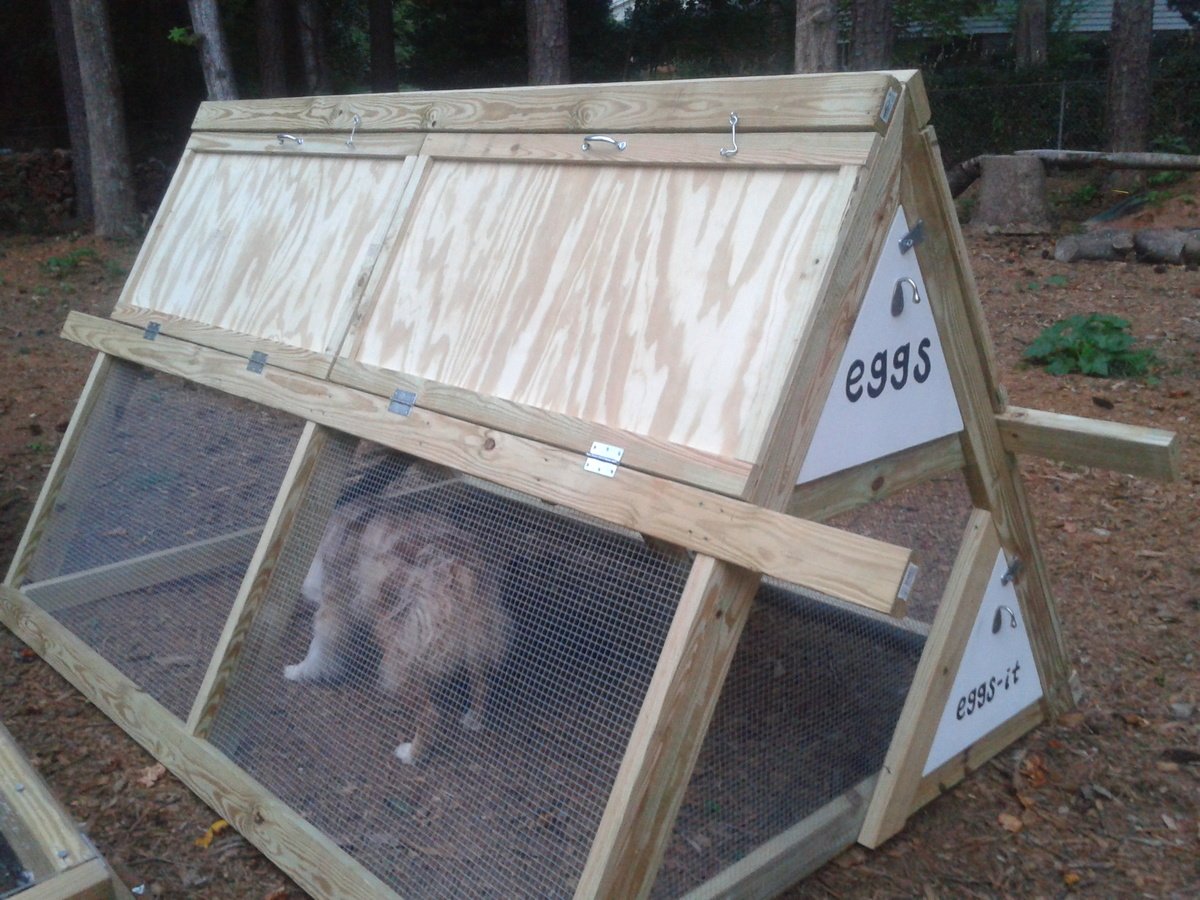
A-Frame Chicken Coop (with modifications)

Submitted by anniejw17 on Mon, 07/02/2012 - 18:39

We followed the plans for the A-frame chicken coop very closely, and then modified it a bit at the end.

1. Trim was added to two doors on each side, as suggested. They are secured with latches at the top, more to keep them from falling open than to keep critters from getting in. We used 2x4x10's instead of 2x4x8's on the middle horizontal rail, giving us foot-long handles on each side. My husband and I are able to move the coop about 15 feet at a time, which is pretty good considering it is STURDY!

2. We used 1/2" galvanized hardware cloth instead of chicken wire, as suggested by one commenter (and lots of others in blogland).

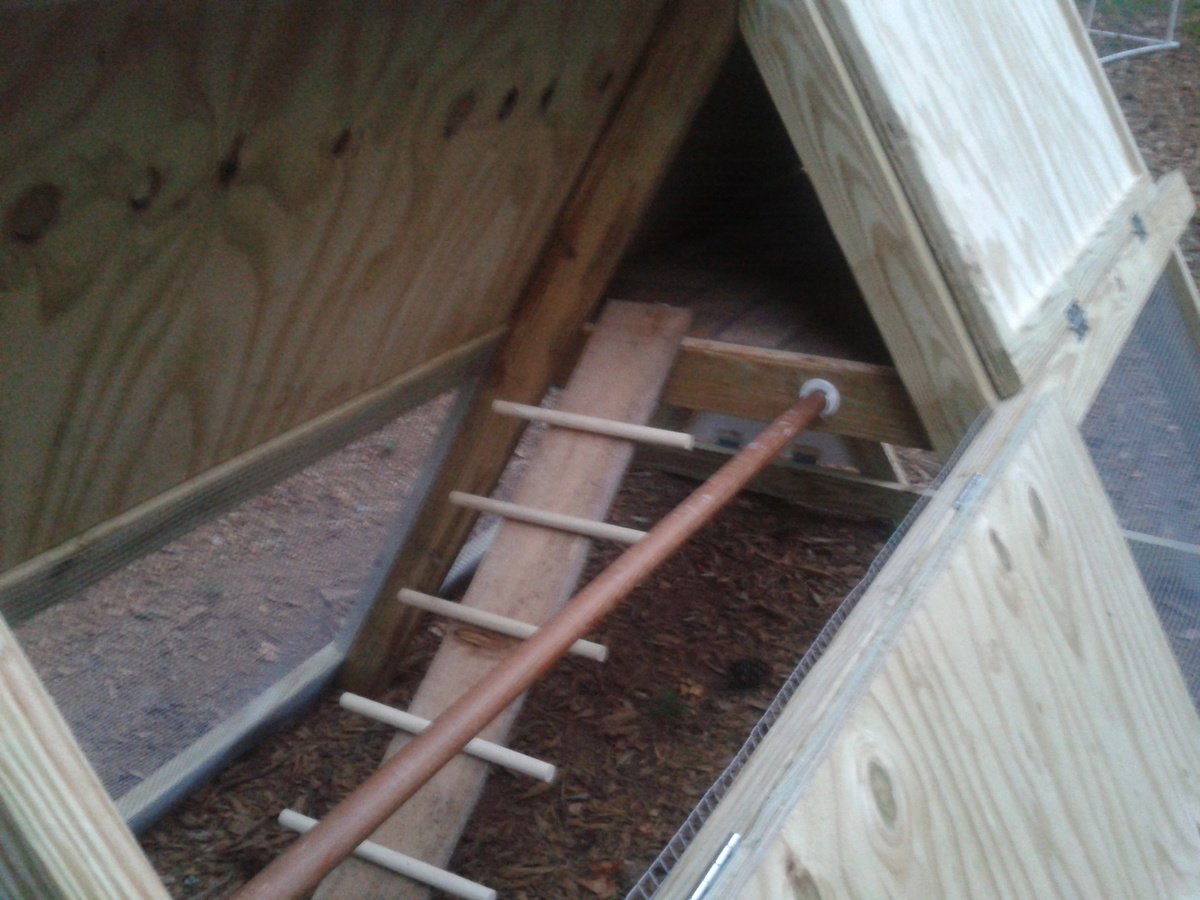
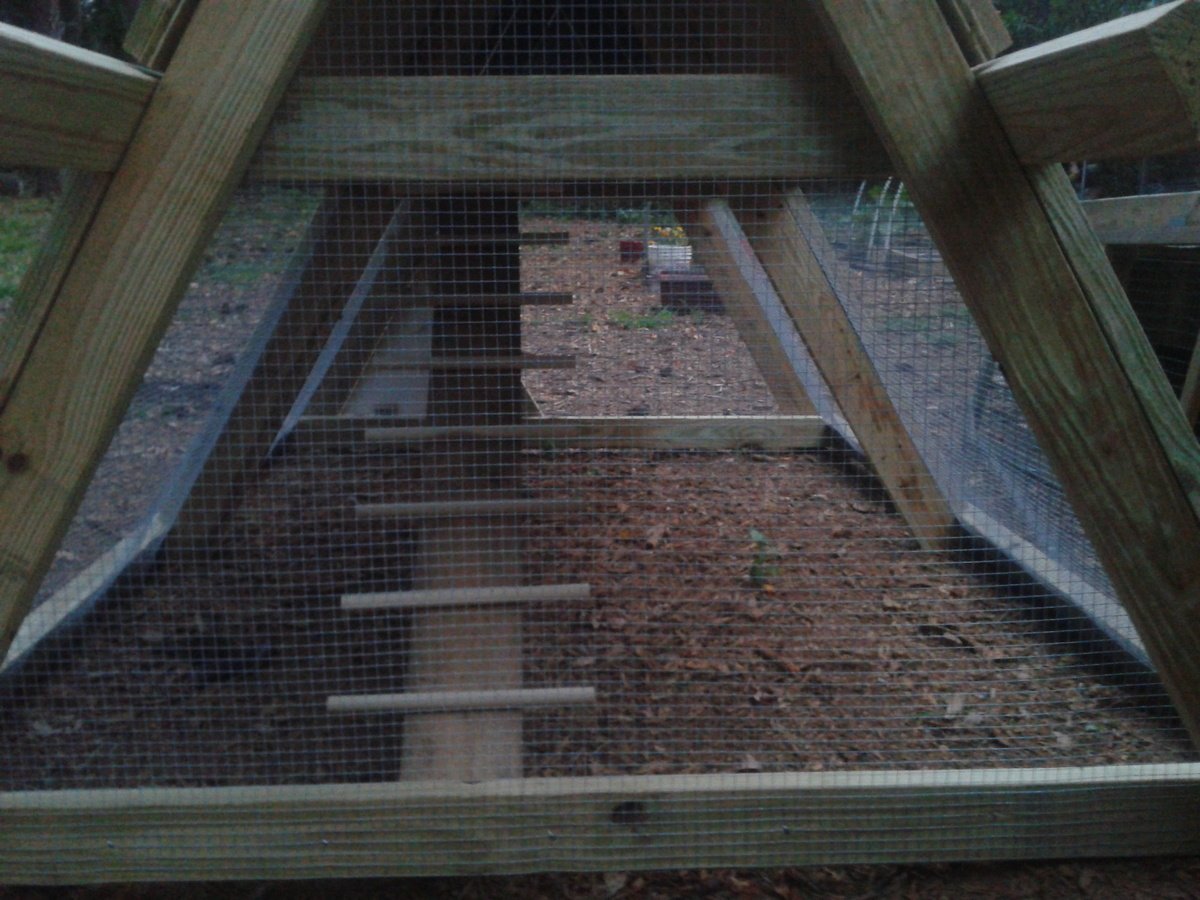
3. I cut 1/4" plywood to fit the loft space and coated it with vinyl stick-on tile. This should make it easier to clean. We didn't screw down the plywood, so if we have to, we can remove it to hose it off/scrub it.

4. I cut a triangle of plywood to make an egg door at the end of the roost. It hinges at the bottom (with a 2x4 ripped into a 1x4 to cover the hardware cloth and provide a mounting spot for hinges) and latches at the top. I plan to use cotter pins or something to secure the latch. There is also a piece of untreated 1x4 held in place with tabs at the egg door to prevent bedding from falling out once it's converted to the nesting box (I'm planning to get pullets, not ready to lay yet, so they won't even have a tempting nest box)

5. There was no bottom door in the plans (to allow free-ranging), so I cut a piece of 2x4 to make a triangle against the bottom (same size as the egg door). It folds out (just like the egg door) and will allow the chickens easy access to the yard. We do have hawks in our neighborhood so free time will always be supervised. We also have a dog (who I coaxed into the coop for the main picture, haha!) who will need supervising. She's been around chickens before but you never know what will make her turn on them!

6. There was also no roost in the plans (although if you look at Ana's coop, there is a 2x4 across the middle of the side walls). I had a leftover closet rod, so I mounted that in the covered section parallel to the ladder. The ladder was shifted to the side. For the ladder, I just used a piece of cedar fencing and cut 2 48" dowels into 4 pieces each, and secured those with screws from the underside. I hope my chickens will be able to get up the ladder!

7. I also made a tube feeder from PVC and a dog bowl, and am working on a nipple waterer. Will update post when those are finished!

Now I just have to get some hens! I've been searching craigslist and can't wait!
Built from Plan(s)
Estimated Cost
200
Estimated Time Investment
Day Project (6-9 Hours)
Finish Used
Unfinished except for plywood floor (vinyl stick-on tile) and plywood doors (white exterior acrylic paint)
Recommended Skill Level
Intermediate

Comments

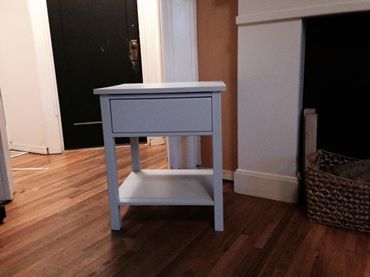
Farmhouse End Tables from Ana's Book!

Submitted by ksmith311 on Fri, 04/25/2014 - 10:48

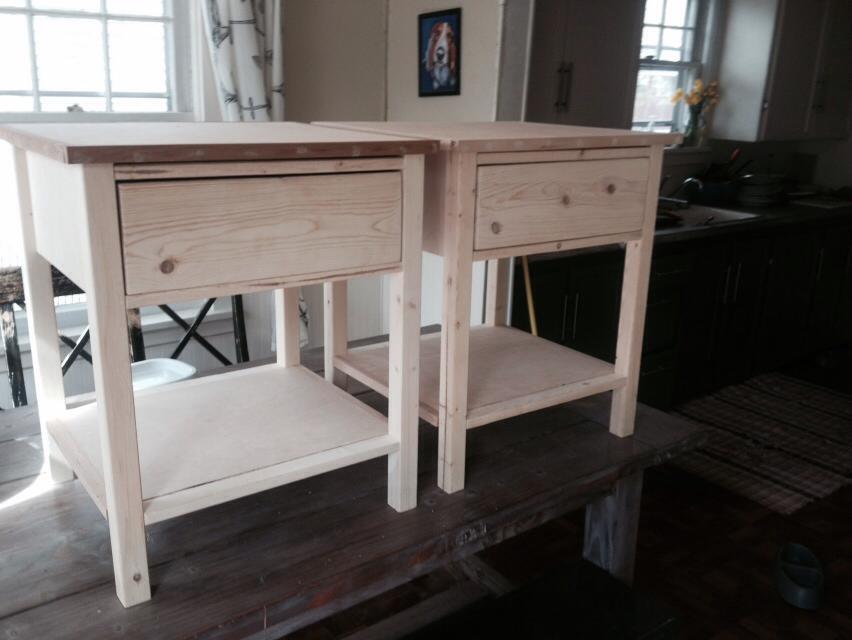
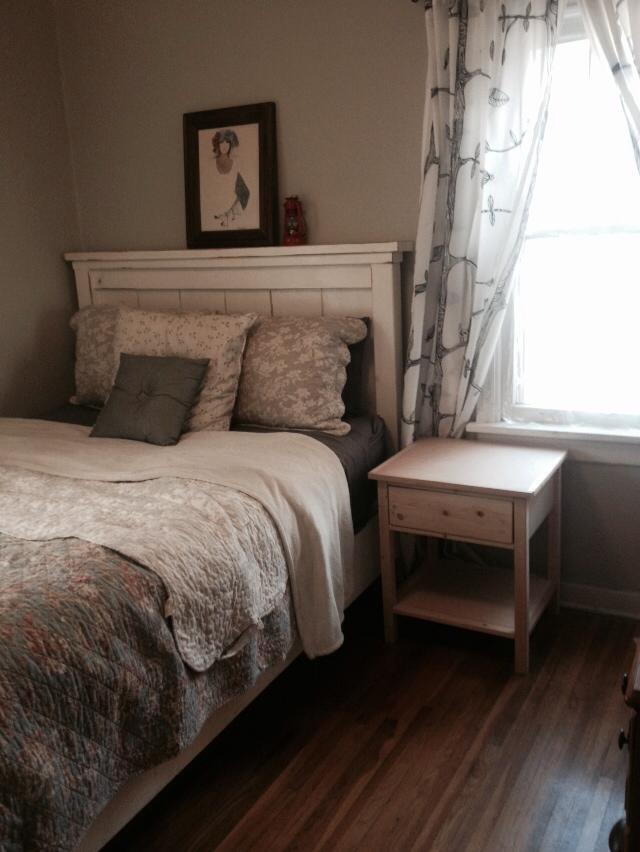
I made two of these farmhouse end tables for a friend/client. She wanted them to be very light gray when painted. I went to the blue store to get some paint mixed and waited... and waited.. and waited... and couldn't find anyone for the paint section. So I eventually just mixed it myself. It does have a bit of a bluish hint to it but I think they are very pretty.

These were a fun build and probably the best drawers we have ever made but we did have to use wooden guides on the inside to be sure it will close perfectly.

I hope she loves them!

Built from Plan(s)
Estimated Cost
100 for two
Estimated Time Investment
Weekend Project (10-20 Hours)
Finish Used
light gray paint
Recommended Skill Level
Intermediate

Chaise Lounge Chair

Submitted by dsipe on Mon, 05/18/2020 - 13:34

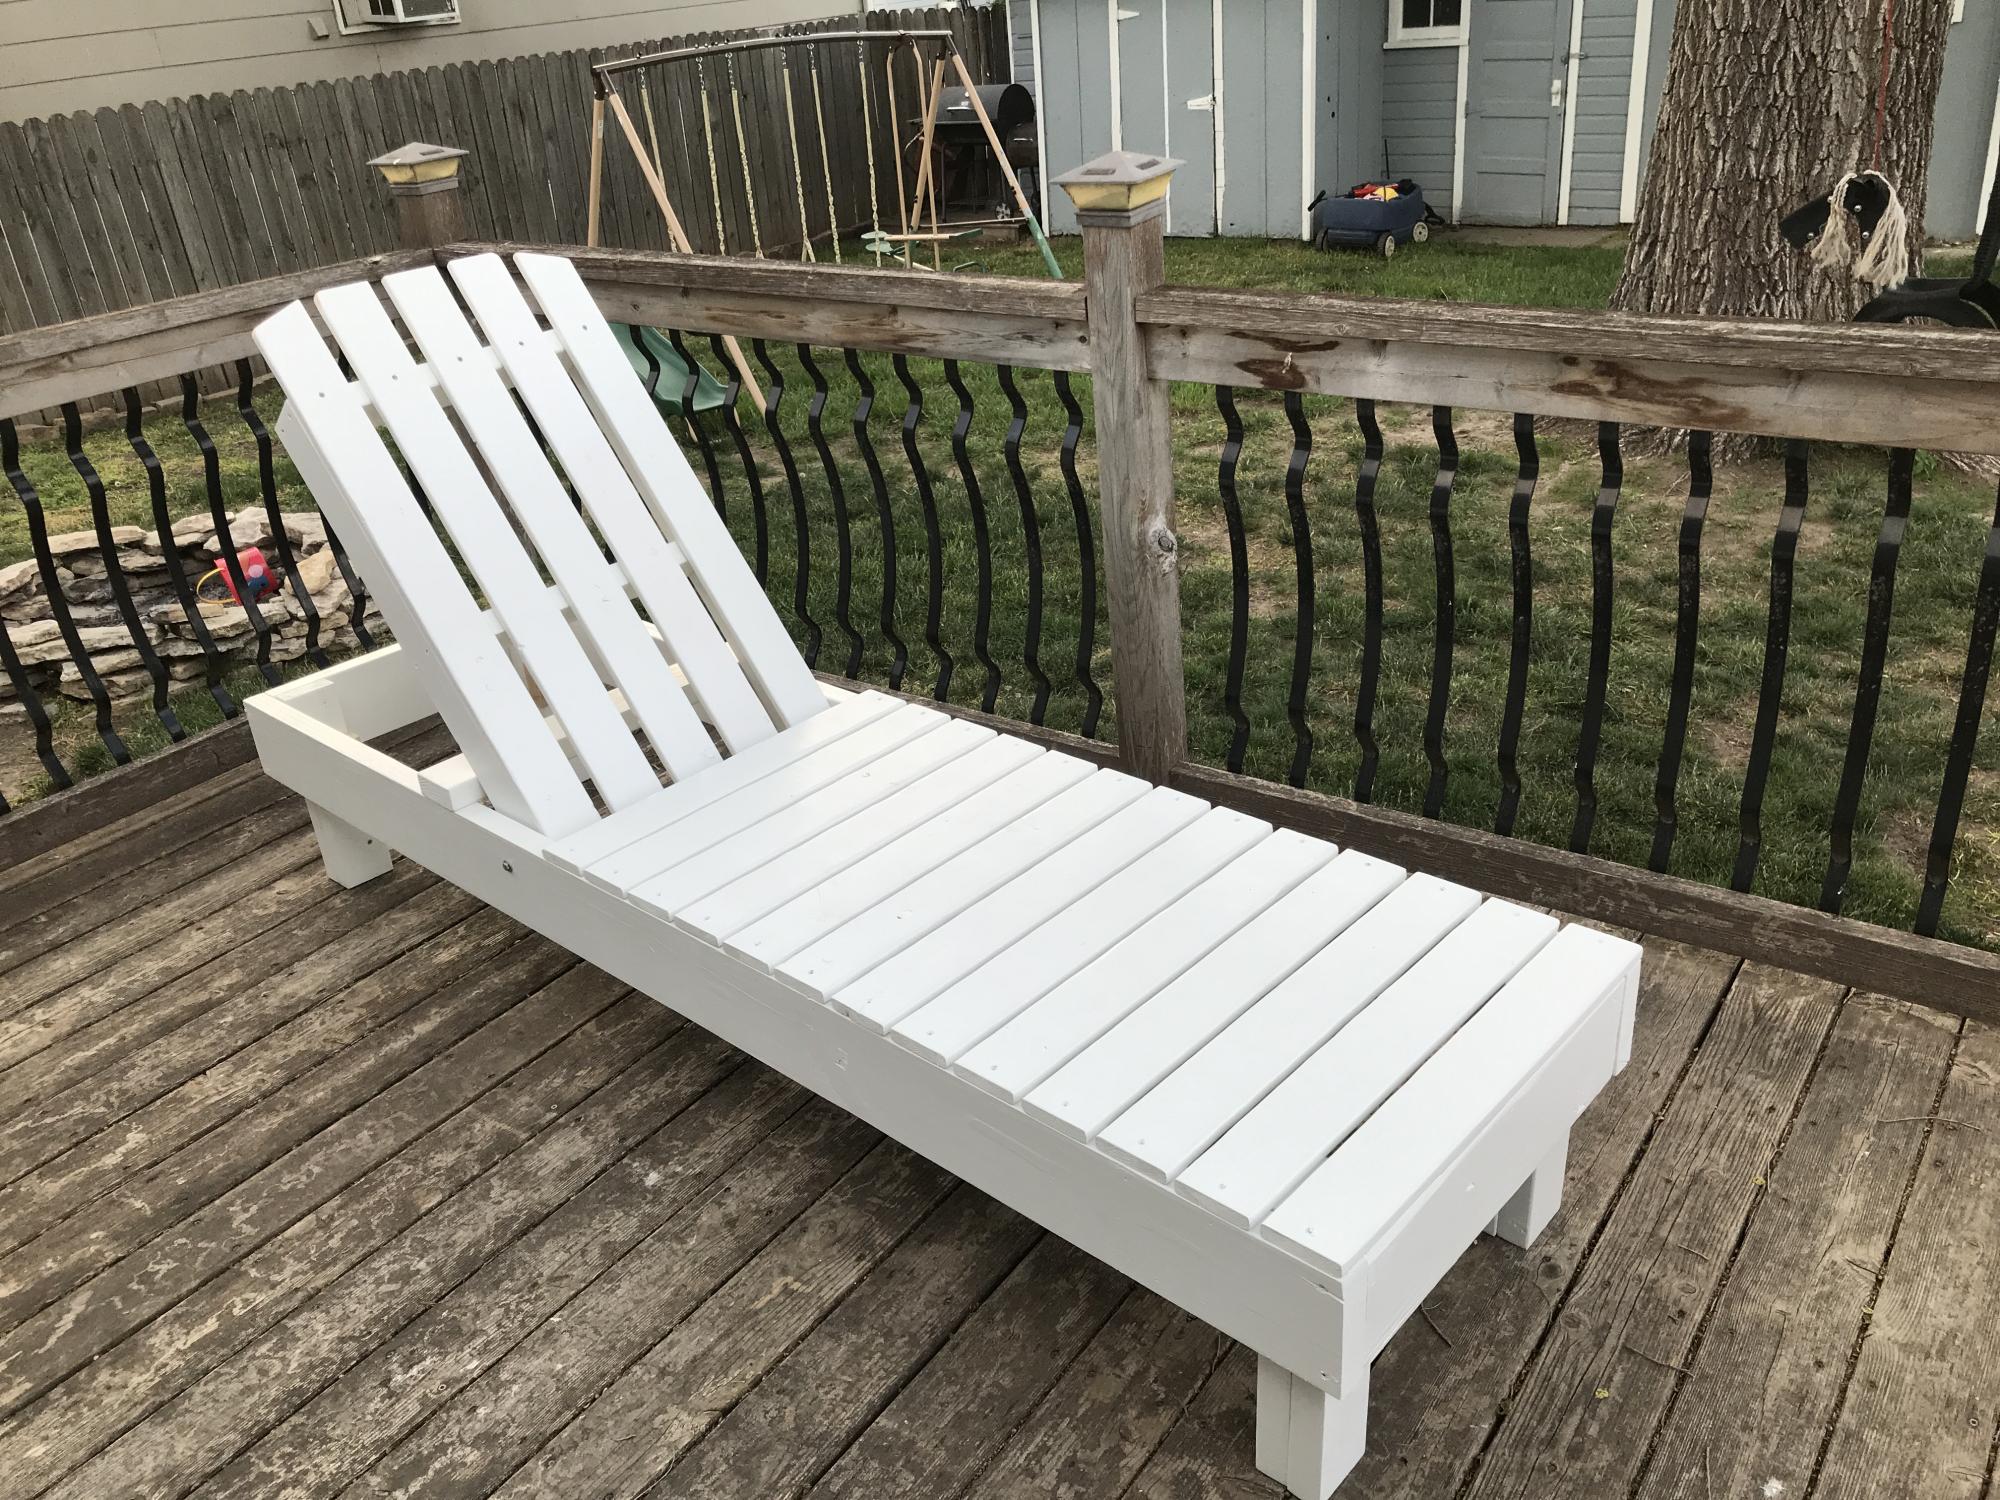
This took way longer than anticipated. I didn’t account for how much time would go into sanding, priming and painting the wood. Also, the plans were changed to use 2x6’s but didn’t take that into account for the stop block. Still trying to figure that part out when fully reclined. Other than that, it turned out really good.

Estimated Cost
$65
Estimated Time Investment
Weekend Project (10-20 Hours)
Recommended Skill Level
Intermediate

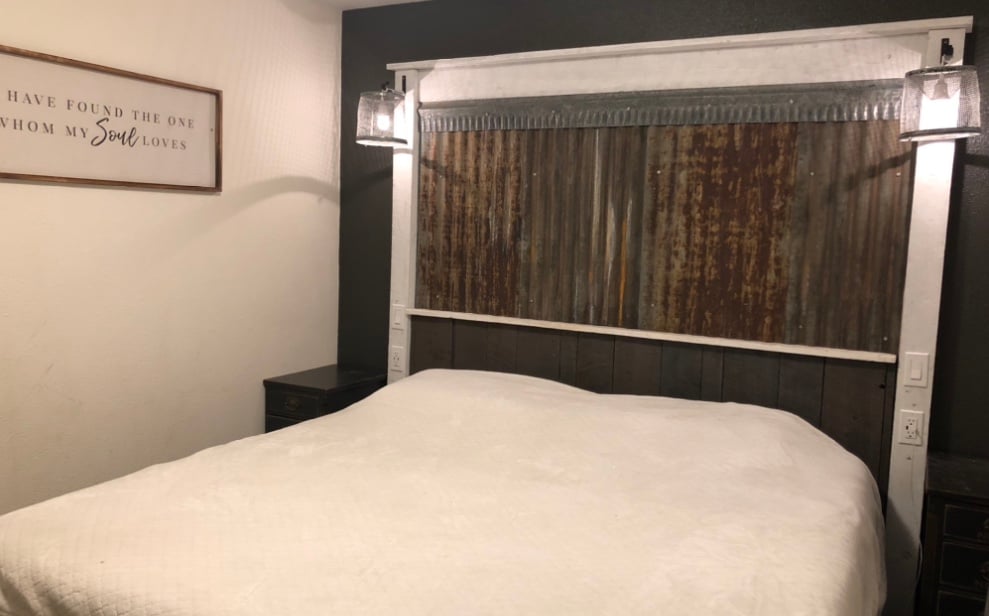
Farmhouse storage platform bed

Submitted by Anonymous (not verified) on Sat, 05/23/2020 - 20:01

Fellow Alaskan here!
Wood and screw Materials costed $320
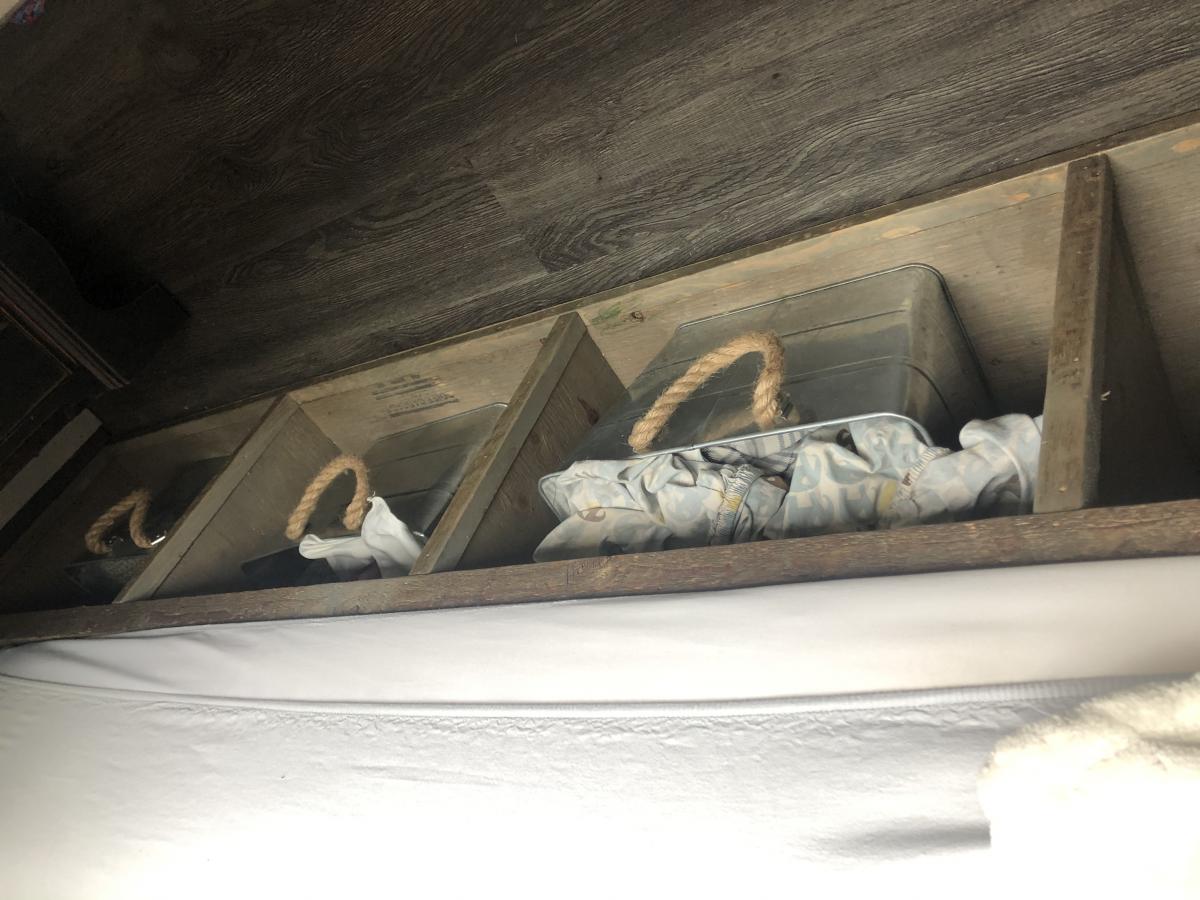
The metal storage buckets are outdoor drink buckets from Home Depot $200 for 8 of them!

There are 4 storage buckets on each side! We took this from your farmhouse plan and altered it for king size. And in after thought he made a baby co-sleeper to match, 30$ to make!

Estimated Cost
$550
Estimated Time Investment
Weekend Project (10-20 Hours)
Finish Used
Weather gray stain
Watered down white paint
Poly on top!
Corrugated rusted metal is restored from a local barn that was getting torn down.
Recommended Skill Level
Intermediate

Comments

Pony wall work bench

Submitted by Anonymous (not verified) on Wed, 06/10/2020 - 09:22

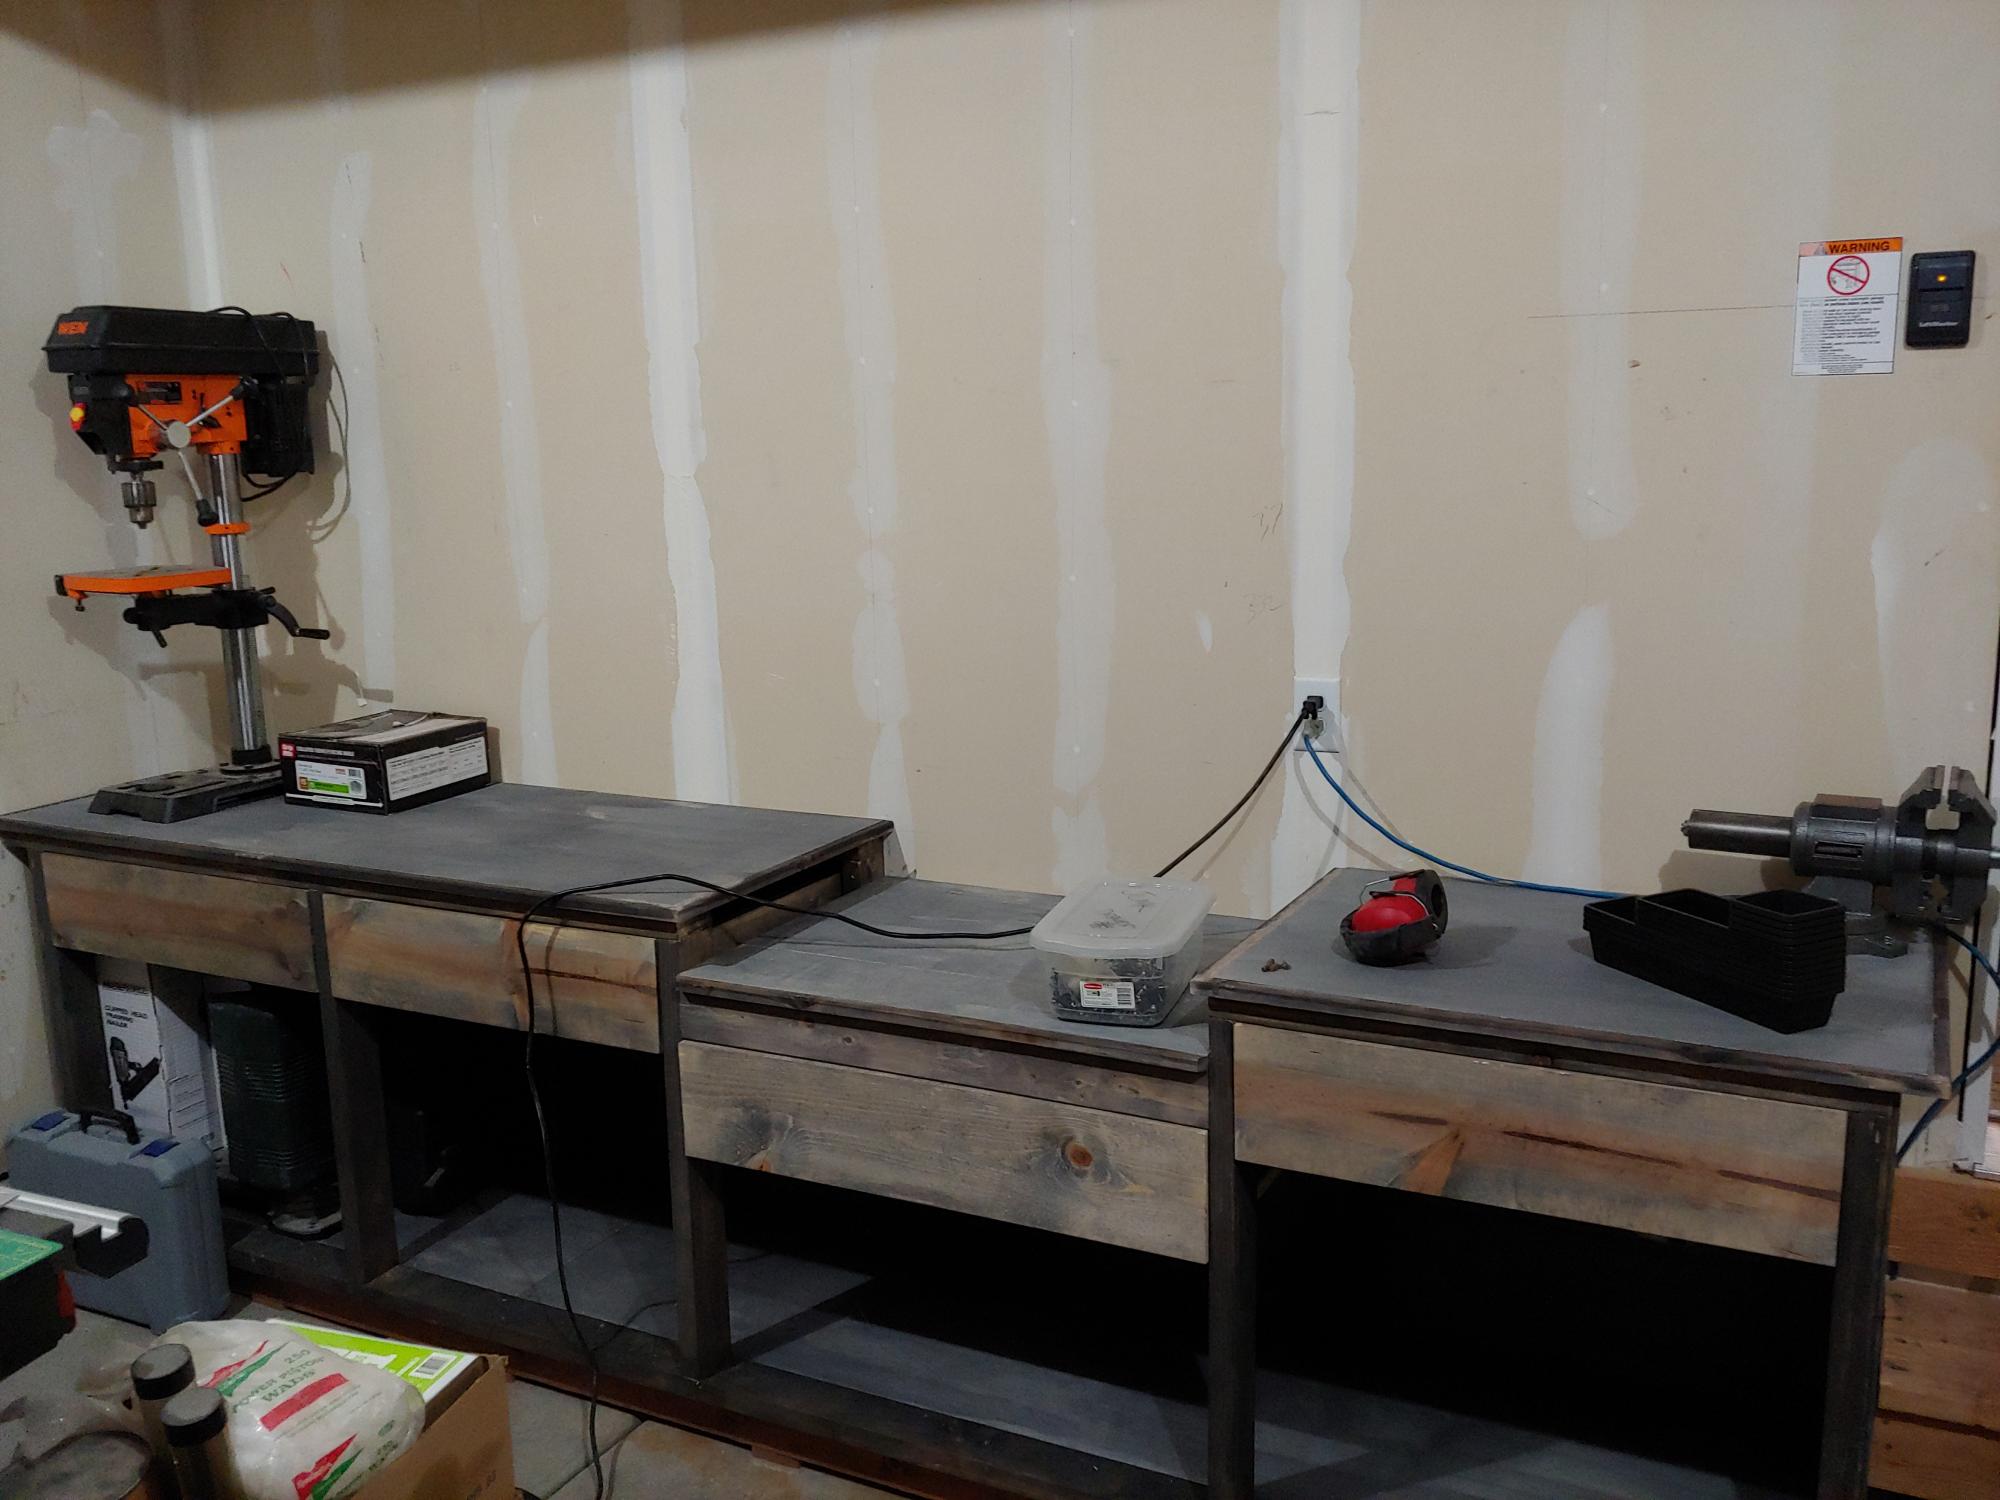
Had to shorten plan due to garage size. Added drawer under miter station. Pined weather wash.

Built from Plan(s)
Estimated Cost
$450
Estimated Time Investment
Weekend Project (10-20 Hours)
Finish Used
Pined
Recommended Skill Level
Intermediate
Back