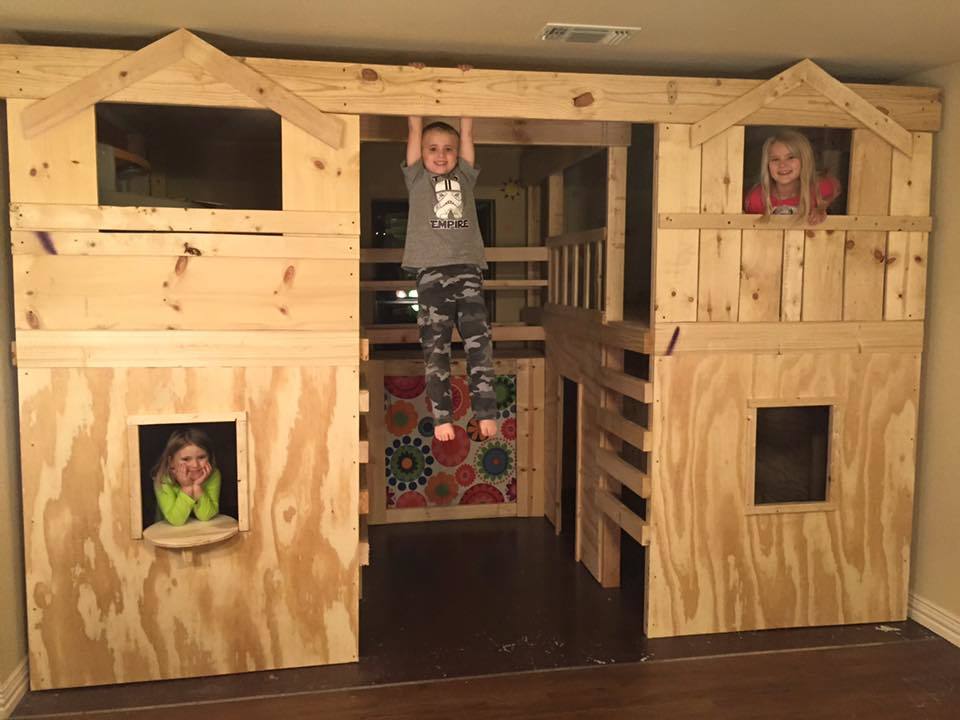
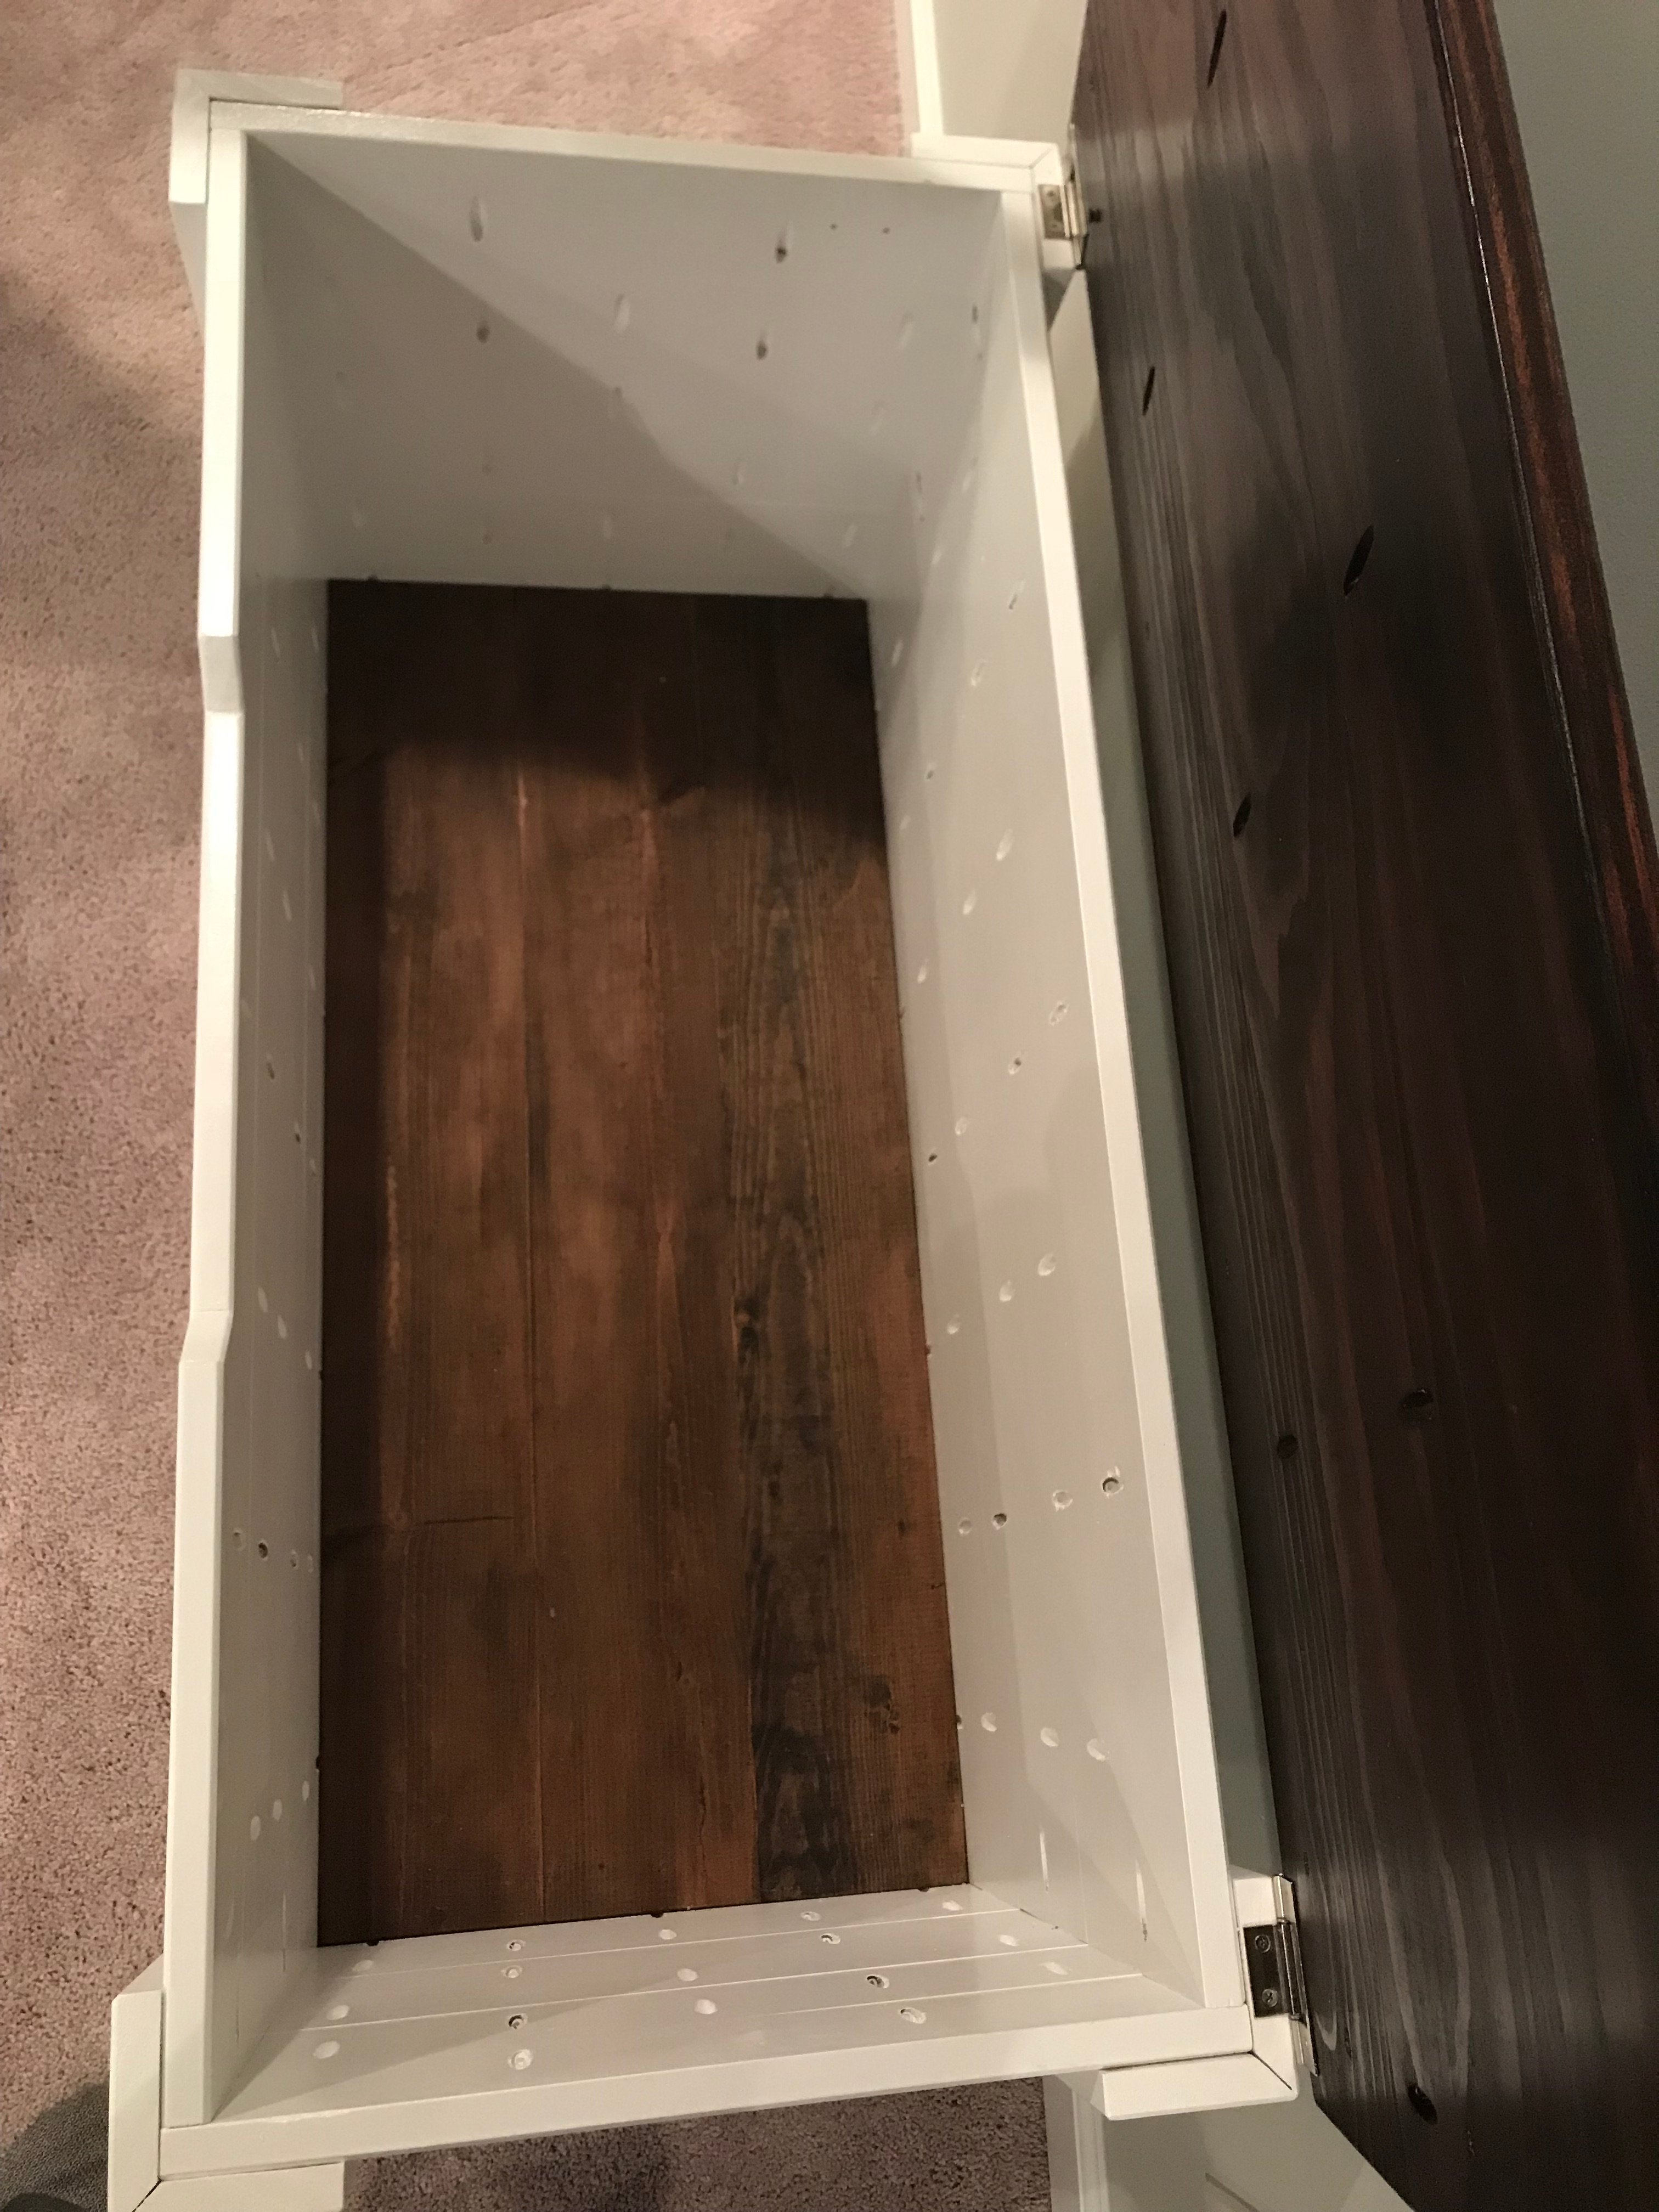
Community Brag Posts

Chelsea Loft Bed

Submitted by EricJohn12 on Tue, 06/25/2013 - 08:35

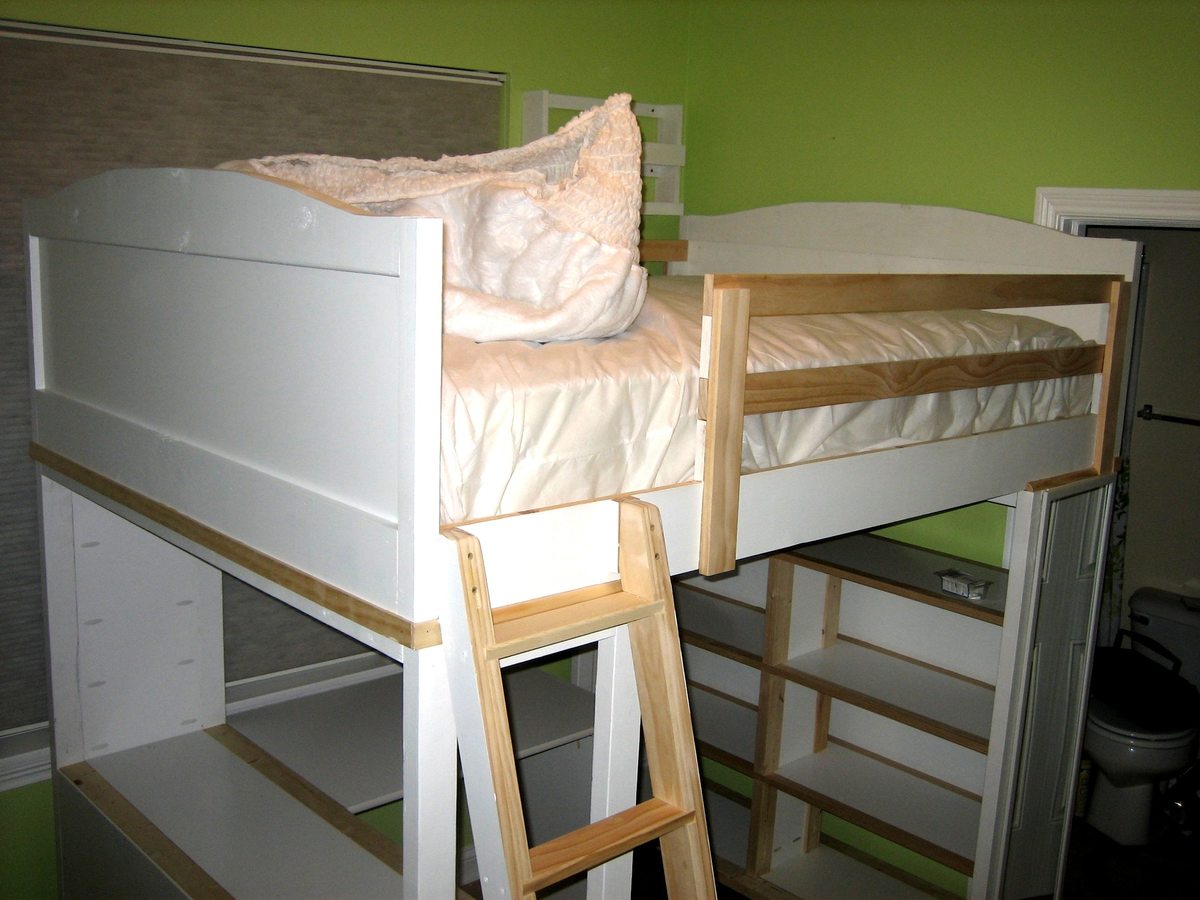
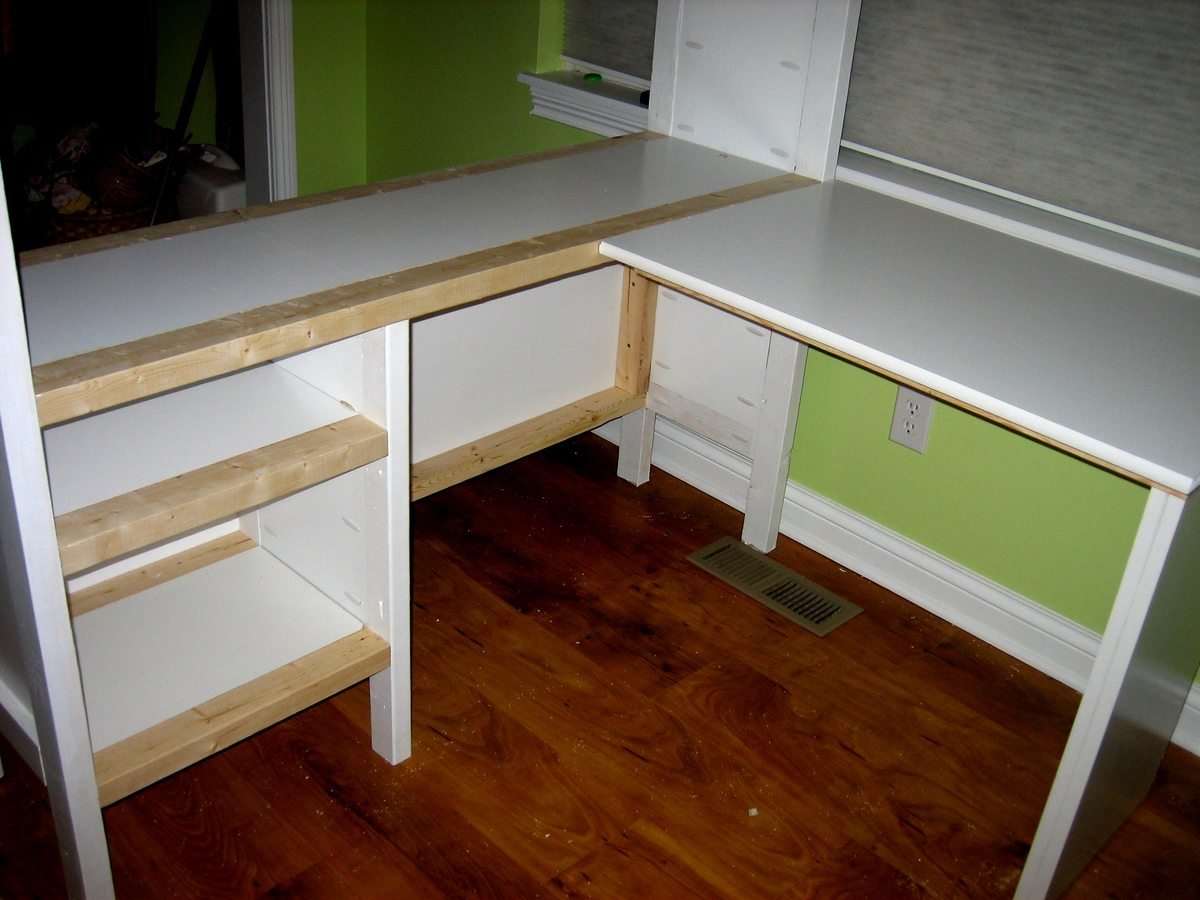
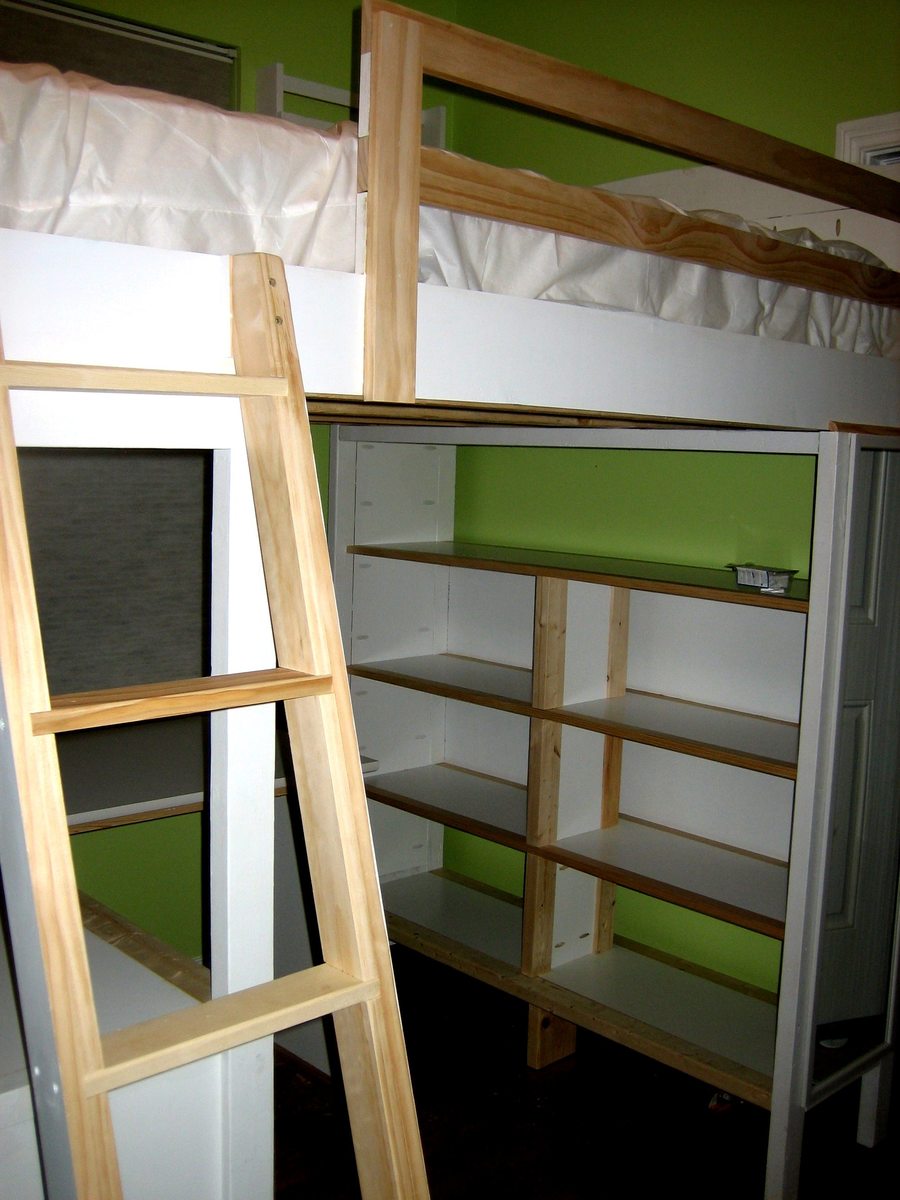
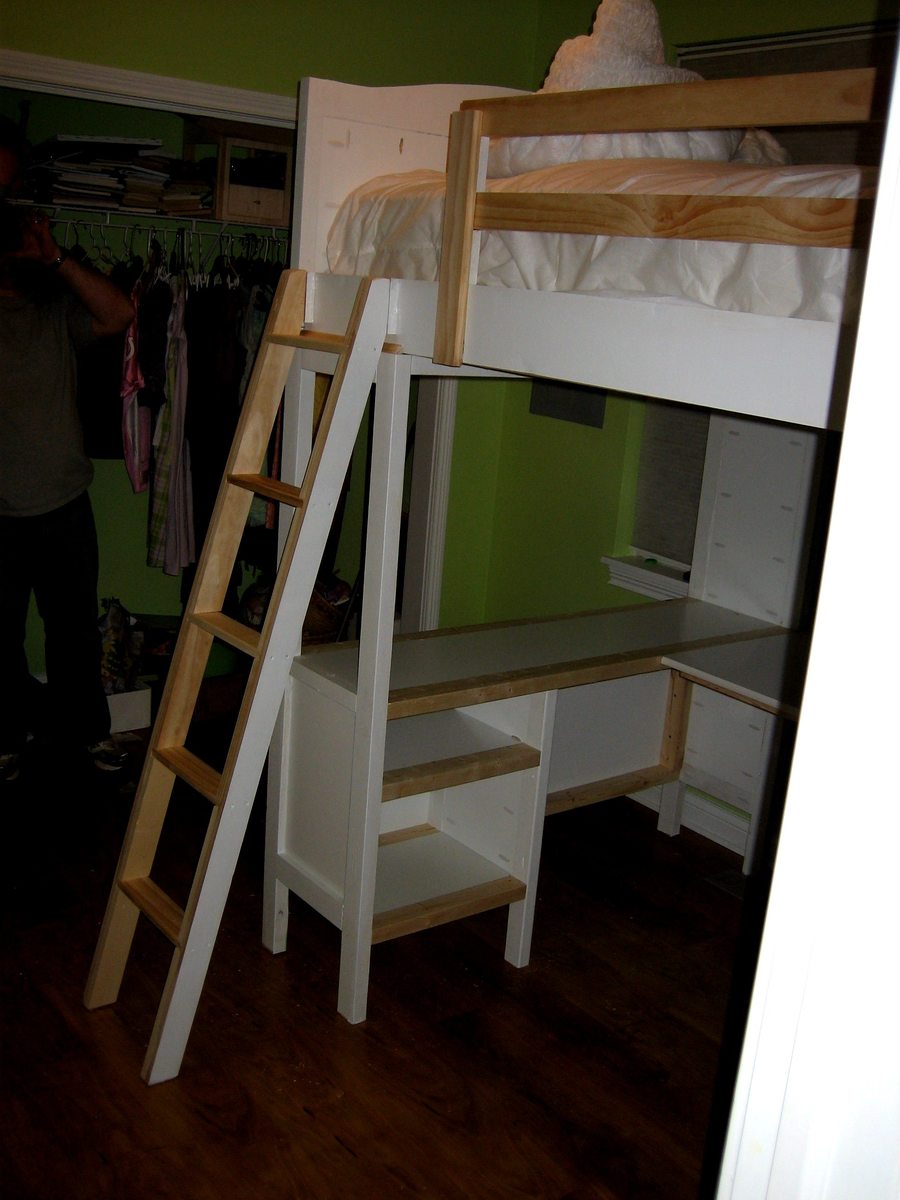
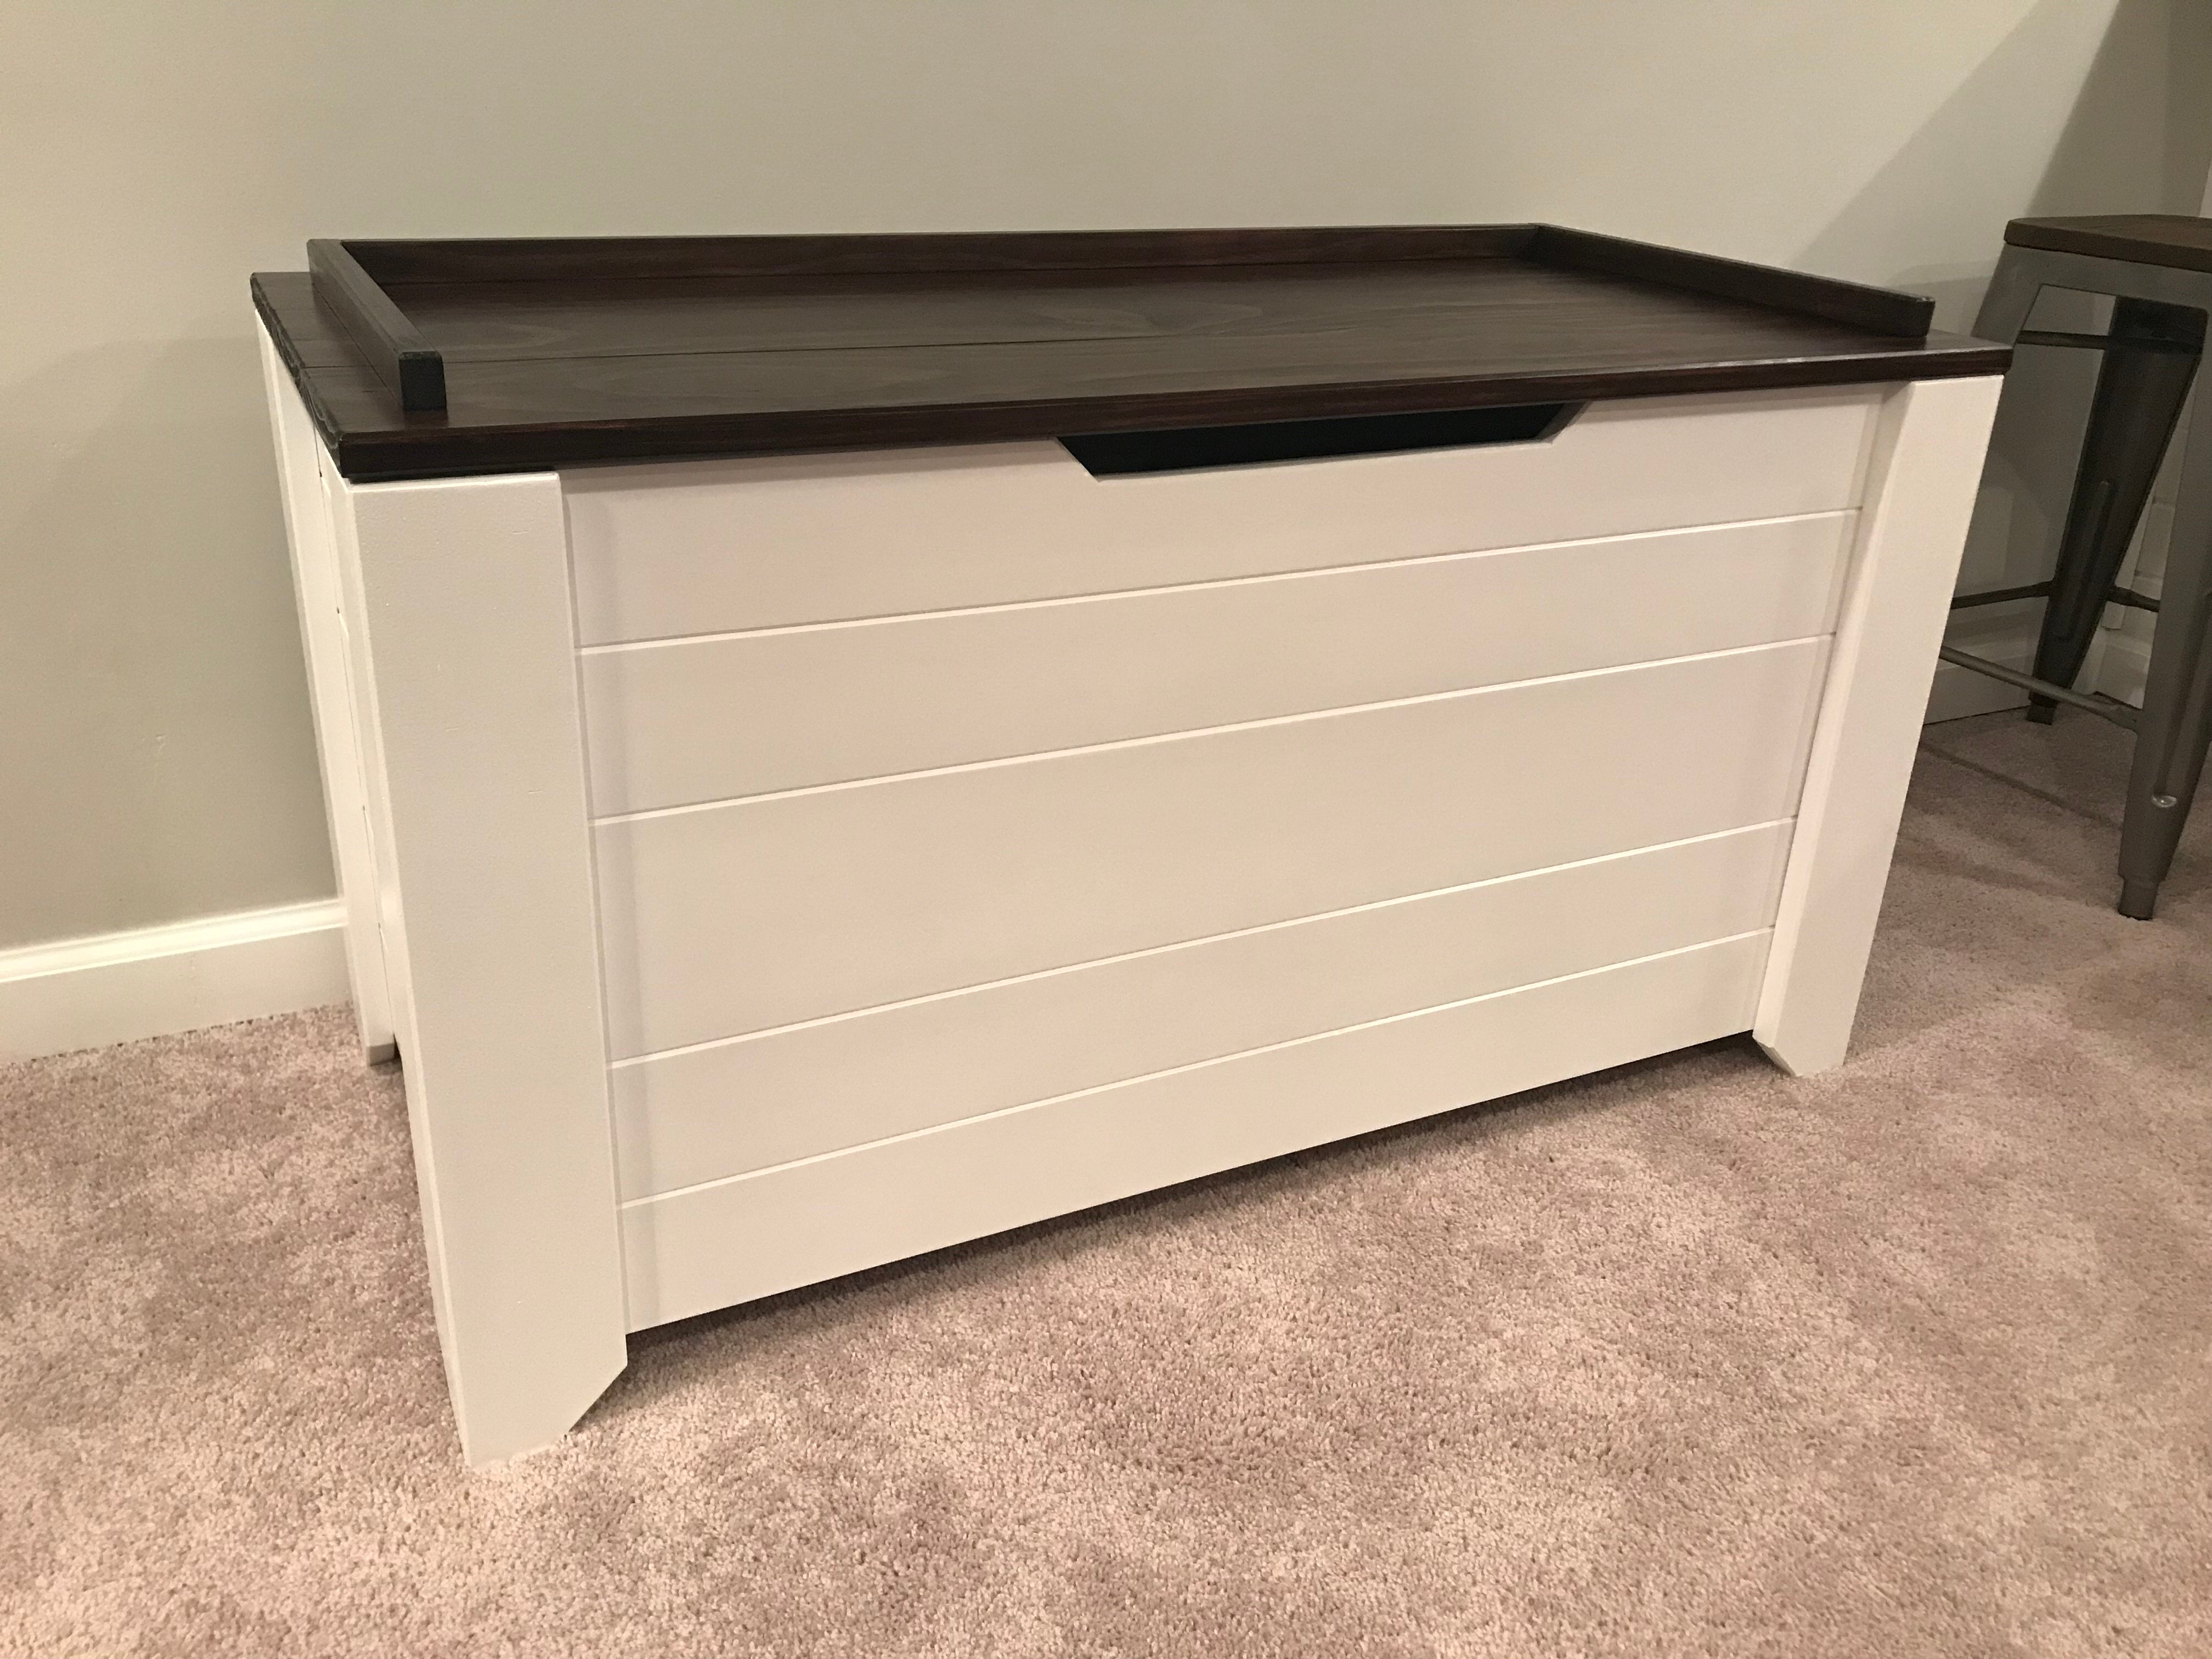
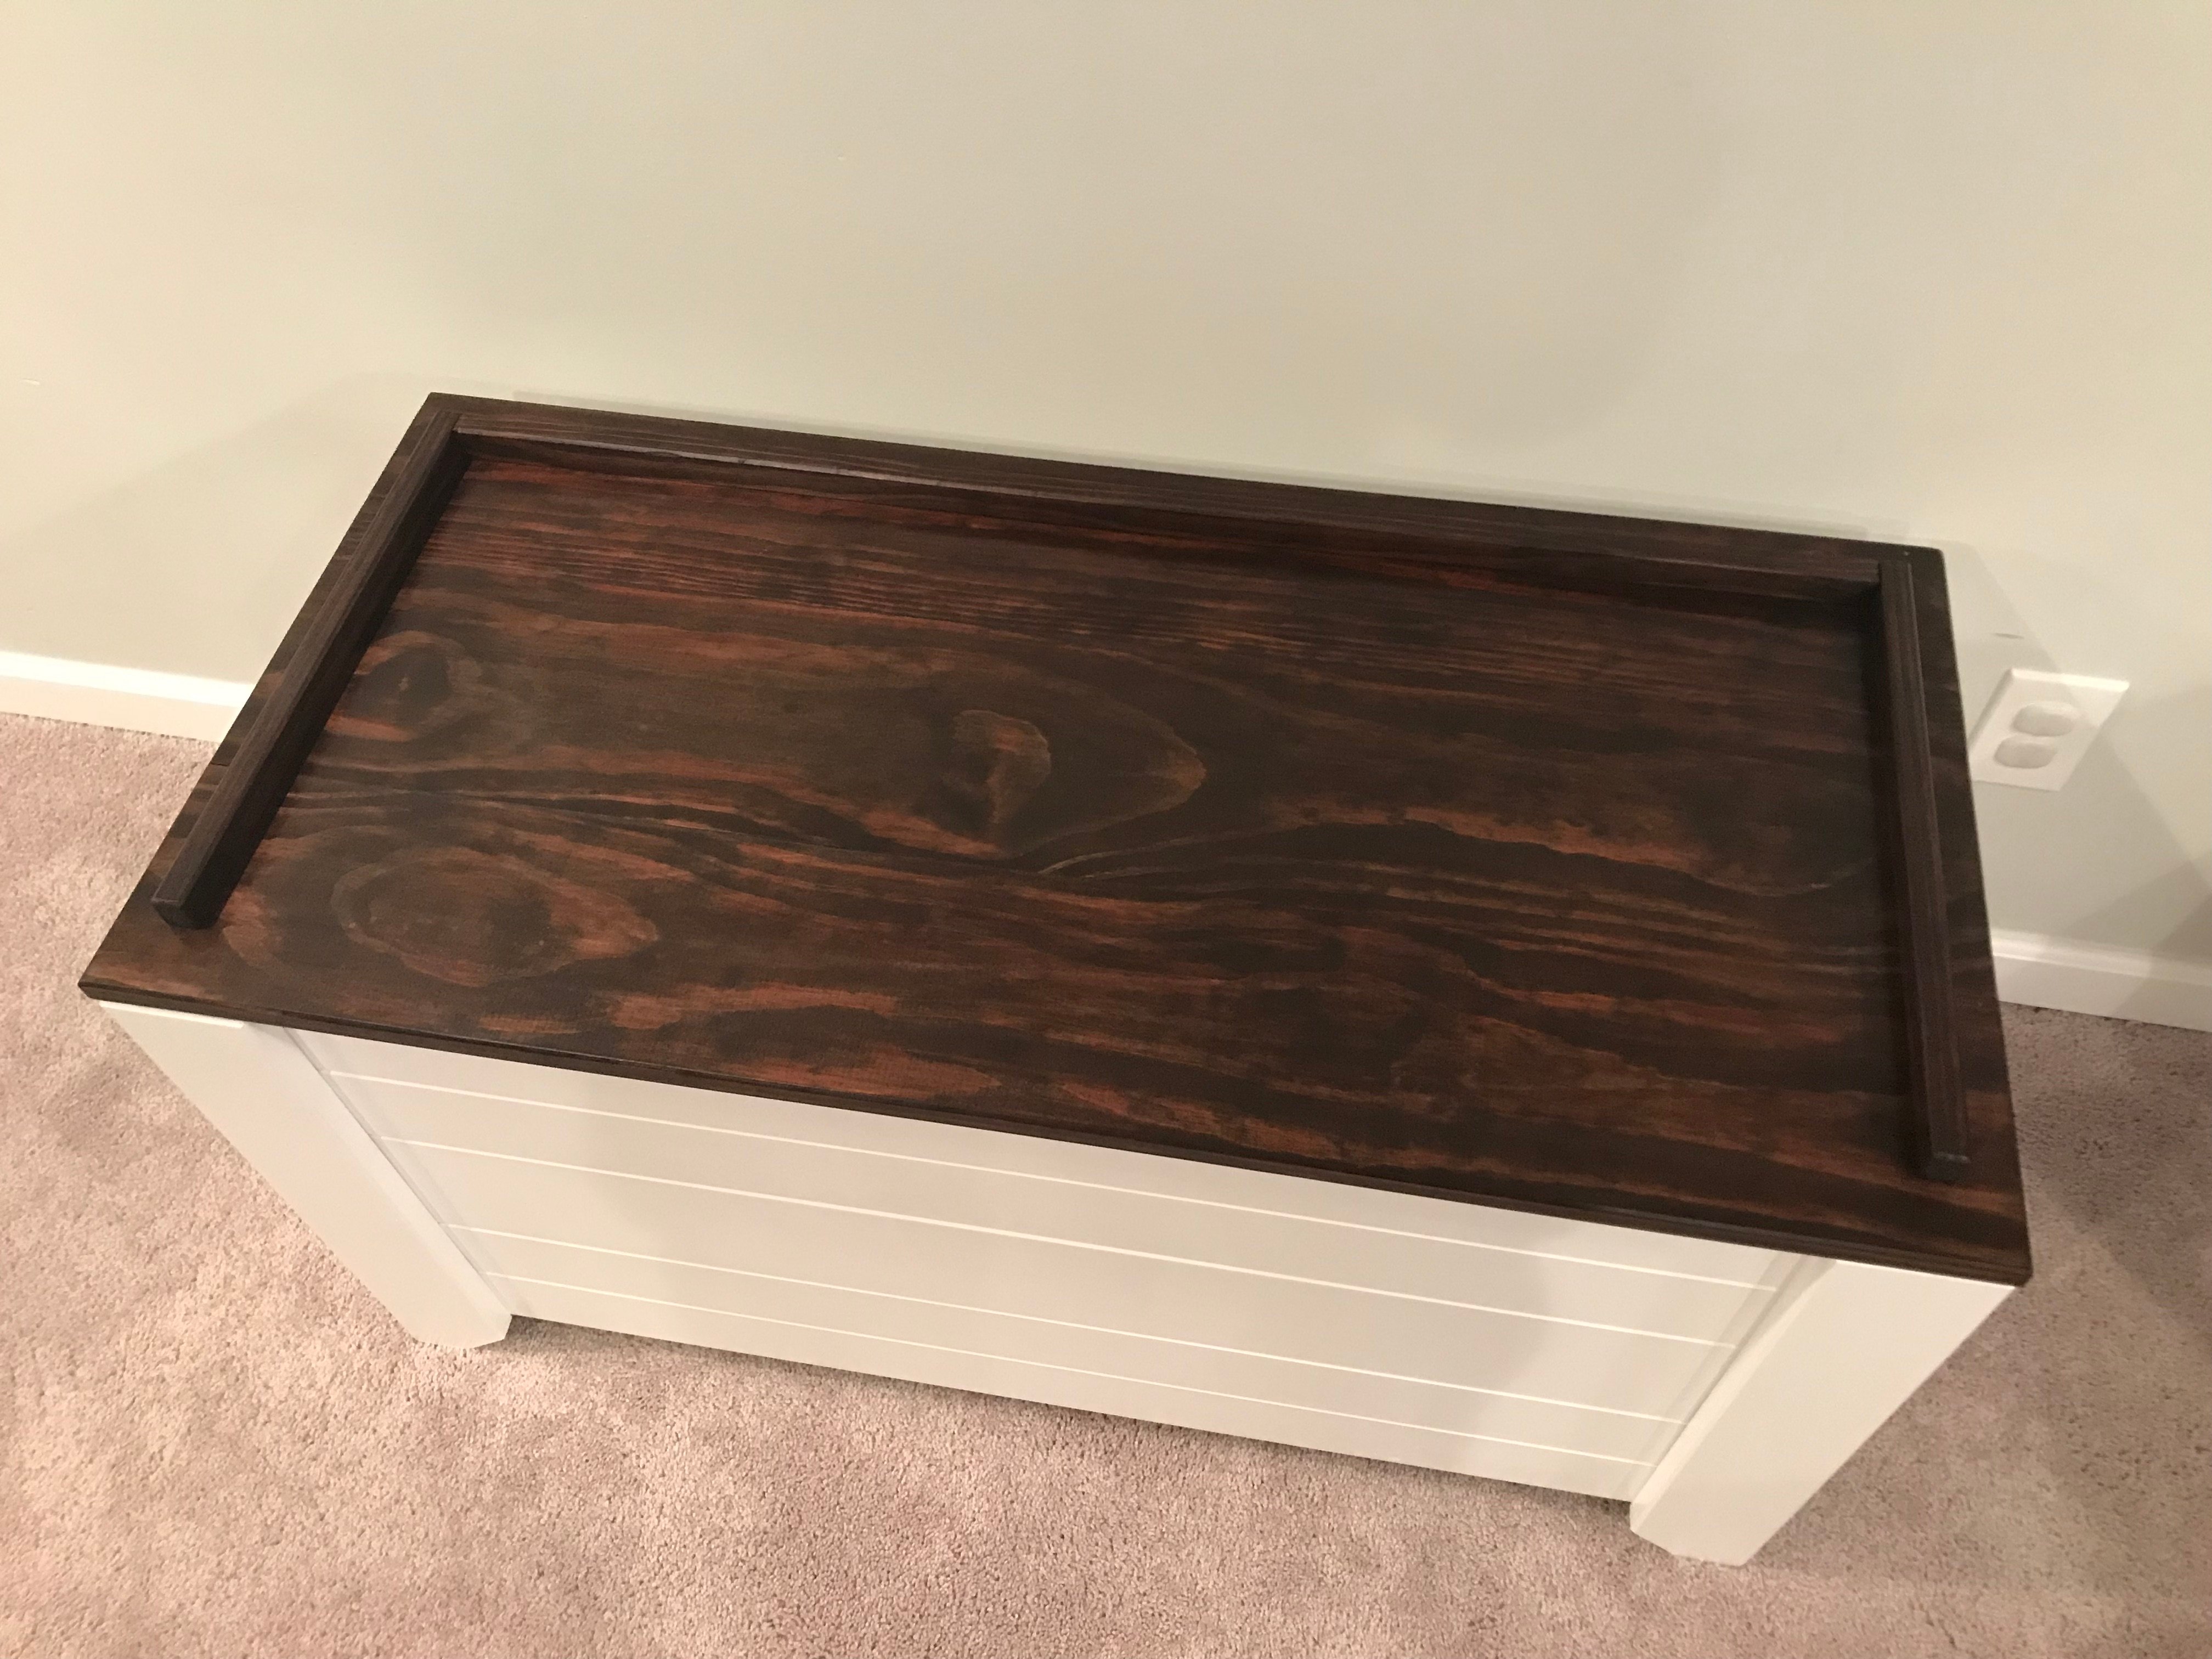
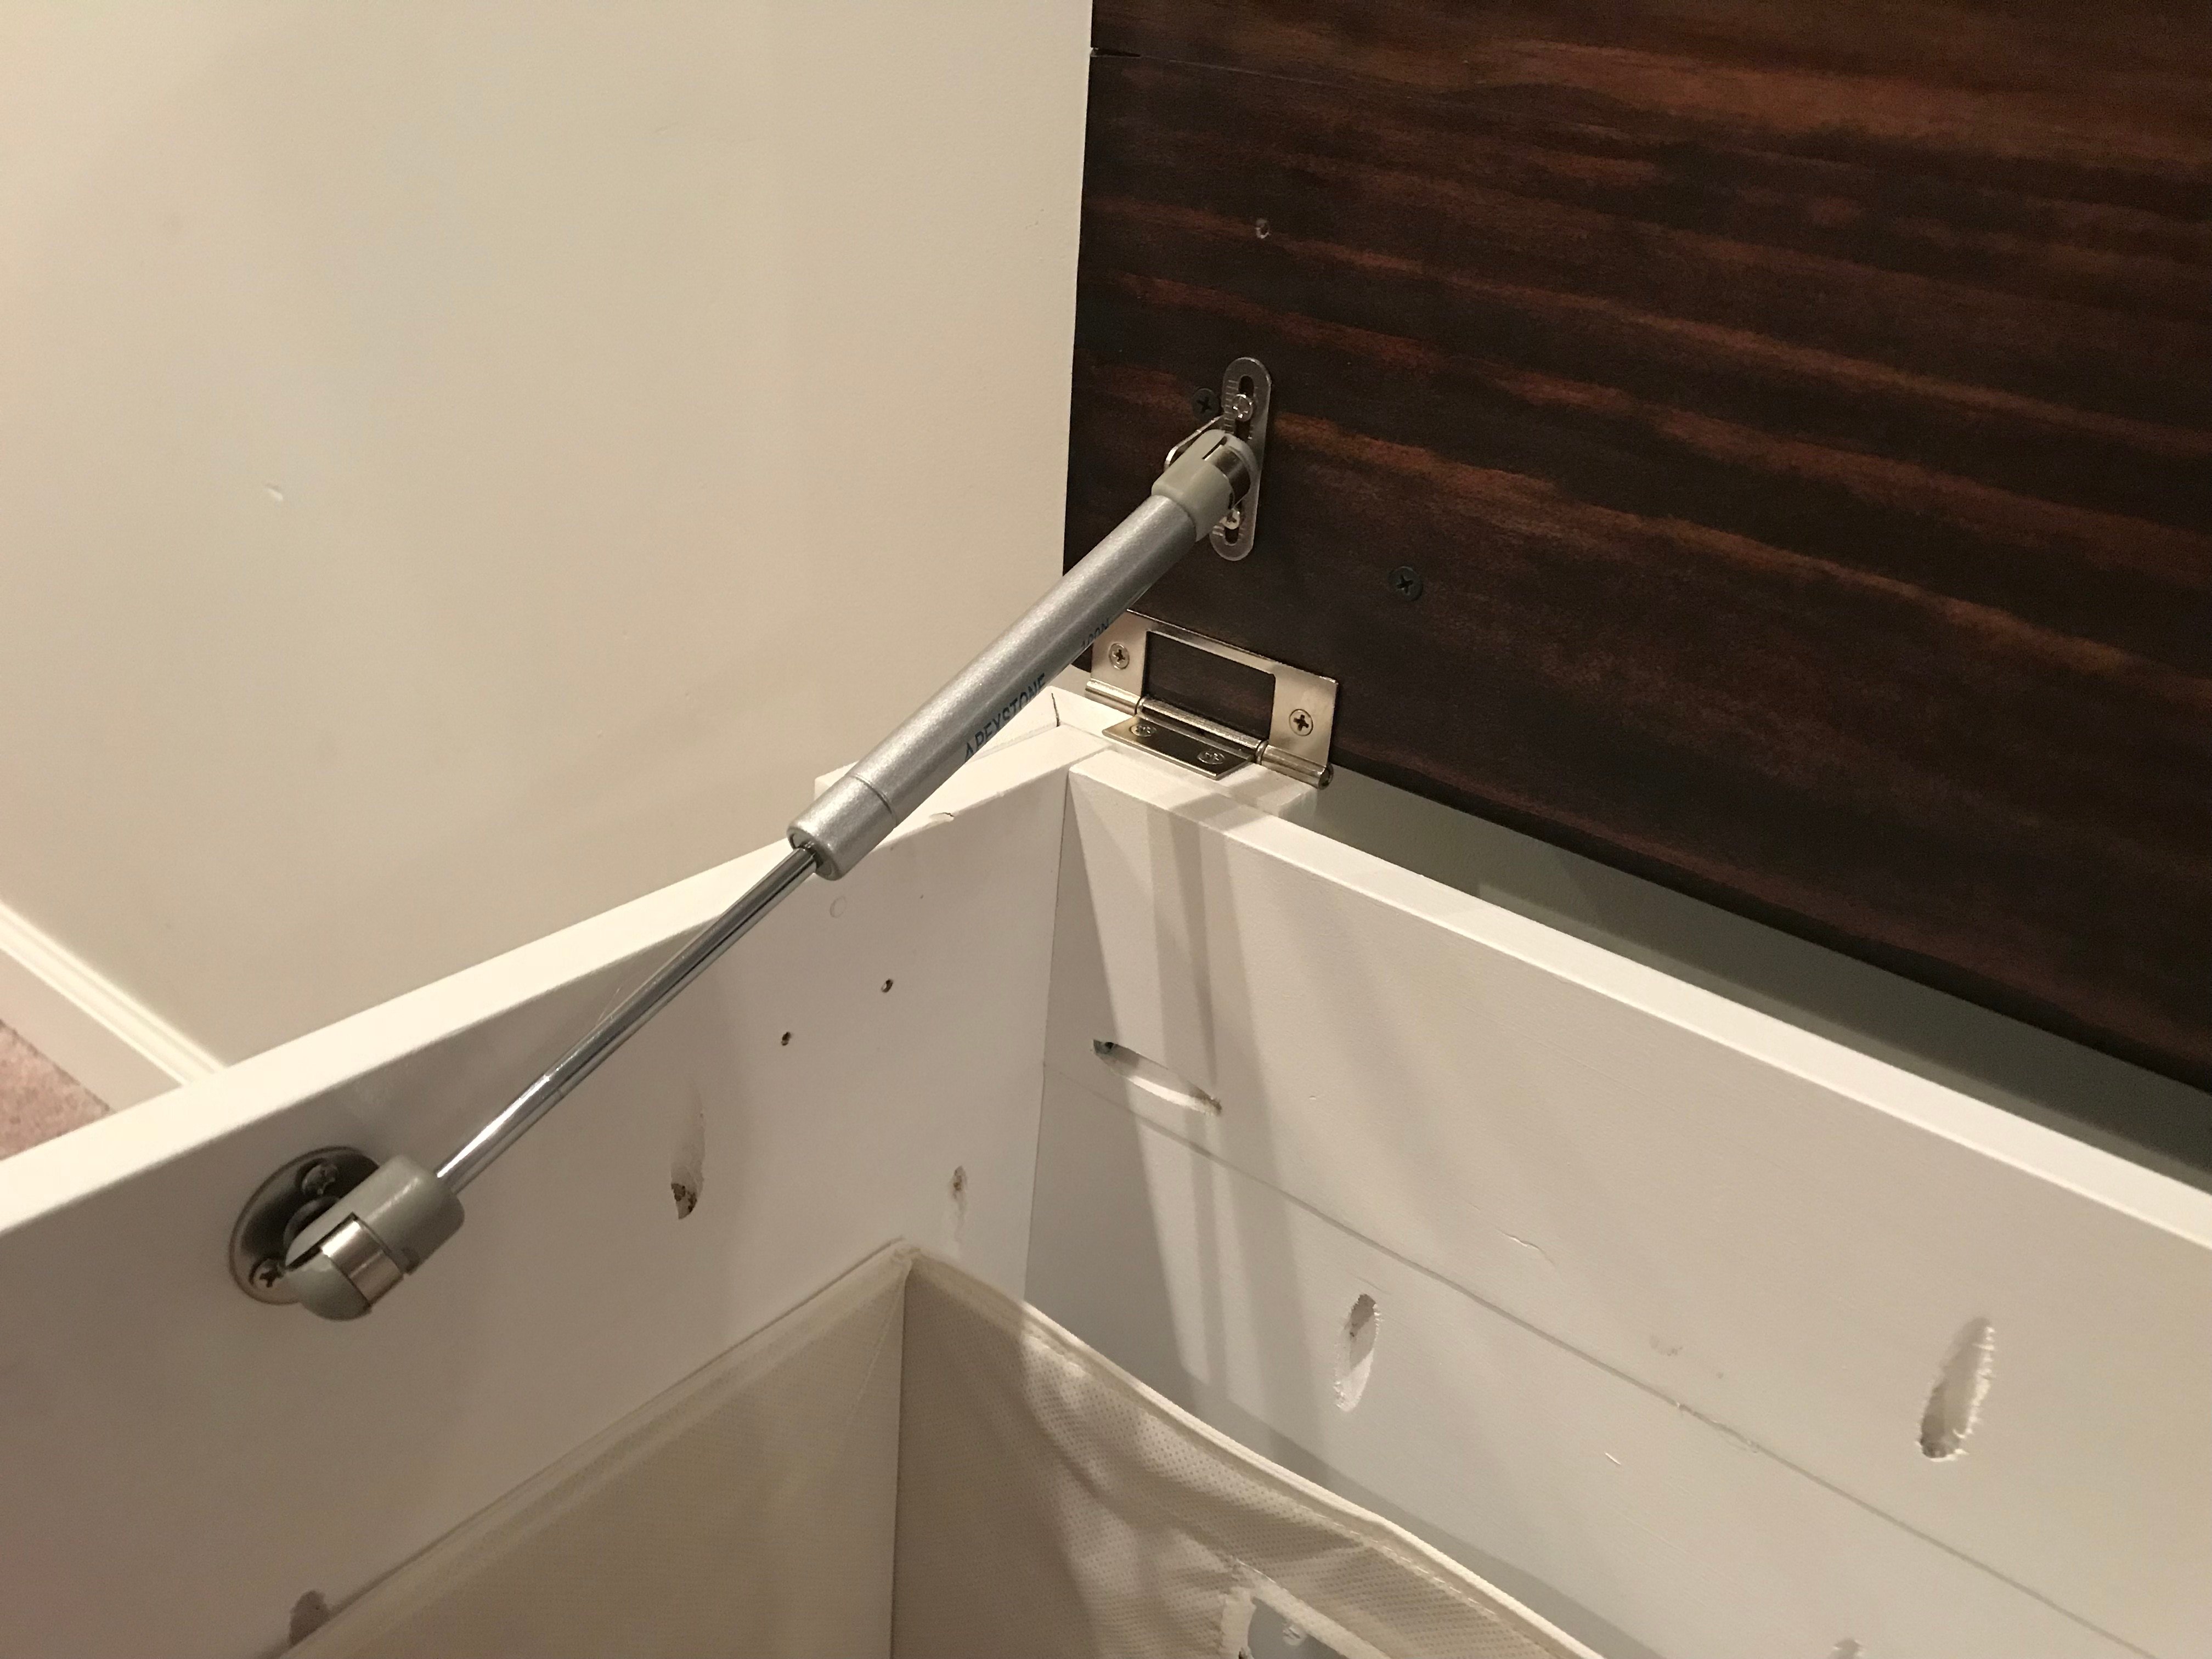
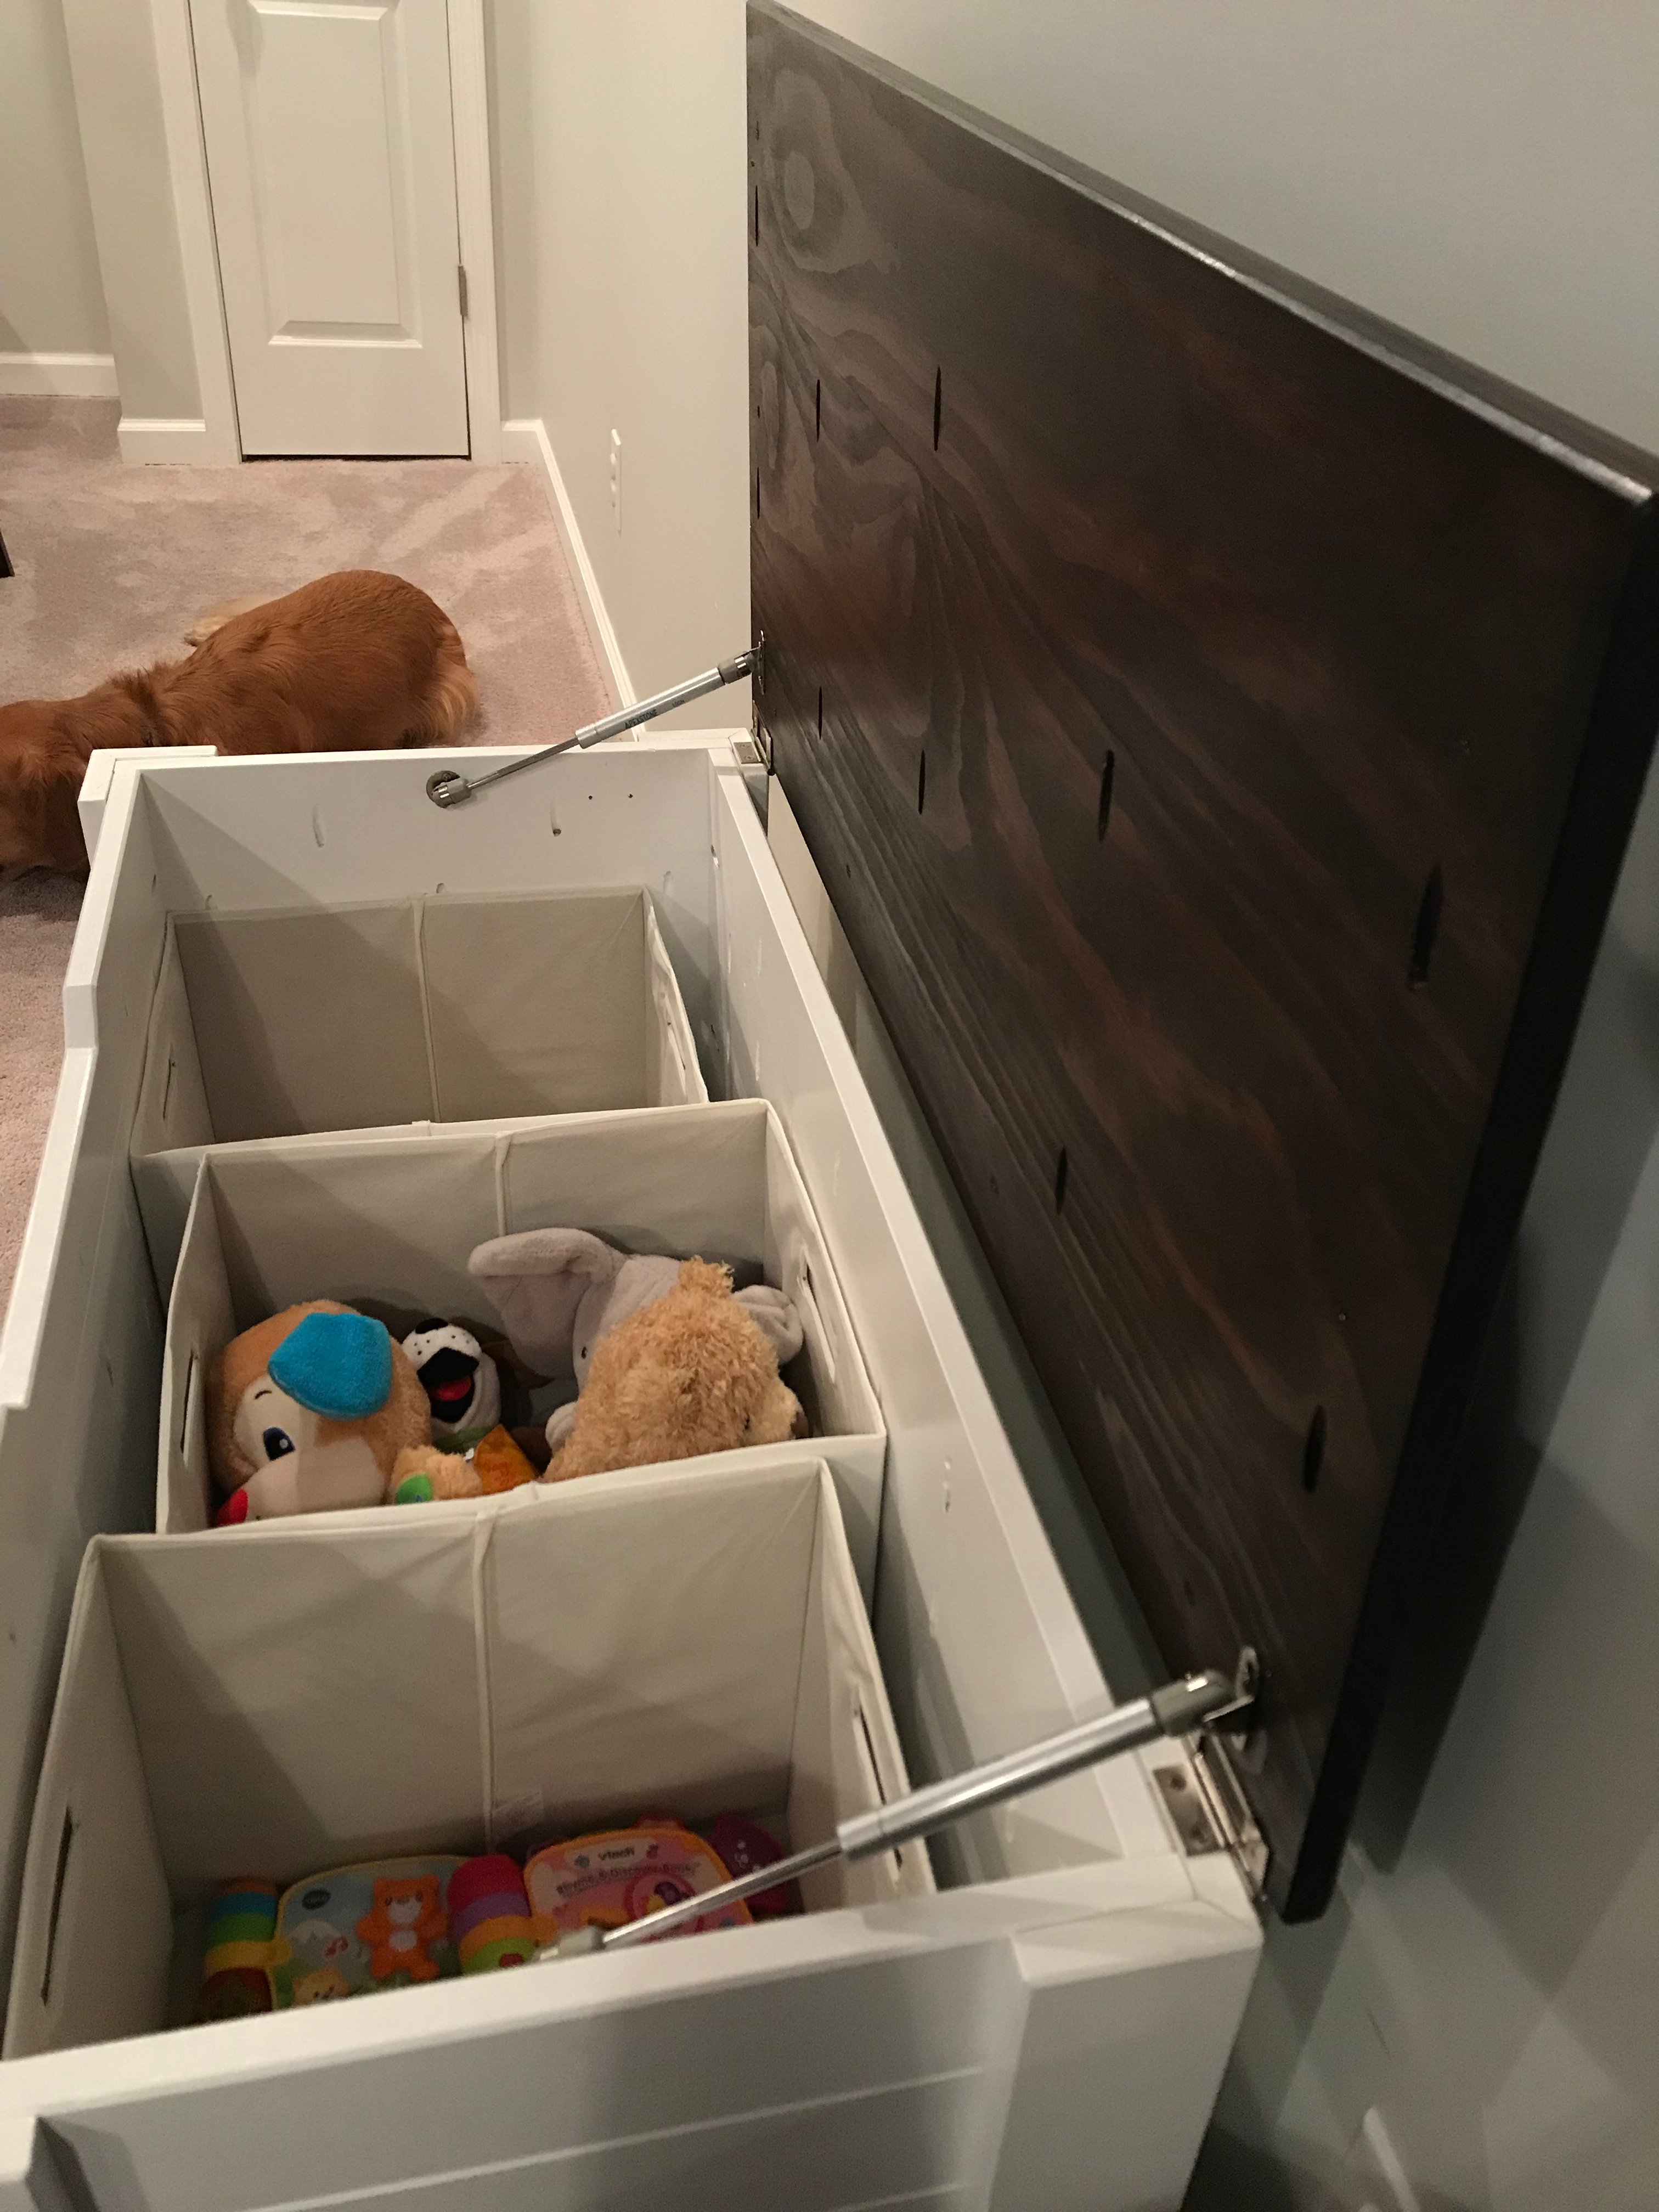
Two years ago my college roommate & fraternity brother passed away of cancer. When his wife contacted me and another of my brothers about building a loft bed for his daughter’s 12th birthday - we jumped at the chance. With mom’s input, we decided on the Chelsea bed design with a few modifications: full size, no decorative feet (for stability) & an extra desk portion. (The design was inspired by the Pottery Barn Teens Chelsea Vanity Loft Bed.) We ended up using ¾” thick white shelf boards instead of 1x12s for the panels and shelves & 15” wide shelf board for the extra desk portion as well as plywood on the back of half the selves & desk area. Used 2x3s instead of 2x2s as suggested. We added a few pieces of quarter round & lattice molding to give a nice finishing touch between the bed & bookshelf/desk and a full length mirror on the bookshelf end. We were going to paint everything white, but after seeing the wood trim against the white, the daughter decided she liked that look, so only select pieces of the wood were painted. Most importantly, she loves it. She has a small 10x10 room which made getting a full shot of the bed difficult.

Total cost of lumber, pocket screws, plugs, primer & miscellaneous was about $350. It took a week of evenings pre-cutting and some sub assembly then a Saturday to build and paint.

My roommate was a great friend. If there is one thing his life showed me, is that life is short – some lives shorter than others. If you make a difference for someone else, you will make a difference in yourself and the world becomes a better place. Make the decision to spend time with the ones you love & care for, you won’t regret it.

Estimated Cost
$350
Estimated Time Investment
Week Long Project (20 Hours or More)
Finish Used
Paint & linseed oil.
Recommended Skill Level
Intermediate

Comments

JoanneS

Tue, 06/25/2013 - 16:33

What a wonderful gift! This looks so beautiful, and the story behind it is inspiring! Great job!

Simple Bunk Beds - My First "Ana" Project!!

Submitted by margjack on Fri, 04/29/2011 - 07:17

I made the bunk beds from the simple bed plan, following tips from others who turned them into bunks. Instead of headboards on bottom and footboards on top, I used all headboards to add height, and made the posts a little longer so that an adult can sit up on the bottom bunk to read during bedtime. (the room has 9' ceilings) I used 2x4s glued and screwed together, as I could not find 4x4 non-pt posts. I made the ladder out of scrap 2x4s and the railings from scrap 1x3s. I did as suggested and attached the bottom header to the bottom of the top bed, which made it easy to attach. This bed is super sturdy! It will be painted one of these days!!

Estimated Cost
$200
Estimated Time Investment
Weekend Project (10-20 Hours)
Finish Used
None yet - will be painted!
Recommended Skill Level
Intermediate

Cedar Chest

Submitted by Keldani5 on Mon, 12/27/2021 - 06:42

I created this from rough cut cedar I glued everything together and finished it off with brad nails and brass hinges. Then I added a poly gloss on the outside.

Comments

Pergola

Pergola is 10x12 made of all cedar except posts.  Posts were 6x6 brown wood then covered in 1x6 cedar. Slats on top were attached using L brackets. Stained the same year.

Estimated Time Investment
Week Long Project (20 Hours or More)
Finish Used
Cabot in Natural finish
Recommended Skill Level
Intermediate

Garden Bench

Submitted by JMG on Wed, 07/06/2022 - 19:32

Combined several different plans from several different sites, but my mother in law is a master gardener who loves birds and wanted a new bench for her garden. I used 1x4's on the seat slats (instead of 2x4's- added an extra support in frame), made the seat a bit deeper, and I modified the arms to allow somewhere to rest a glass of her southern sweet tea. :) All made from box store non PT lumber and sealed for outdoors. The ideas for the "pickets" on the back and birdhouse came from "MyOutdoorPlans.com"- want to give credit where credit is due.

Built from Plan(s)

Comments

High chair

Submitted by Anonymous (not verified) on Sun, 10/28/2018 - 21:34

Thanks so much for the plans. Built it for my visiting nephew. Had a hard time with wood splitting, definitely predrill once you have the pocket holes lined up. I finished with food grade mineral oil, may go over it with beeswax.

Built from Plan(s)
Estimated Cost
$15
Estimated Time Investment
Afternoon Project (3-6 Hours)
Finish Used
Mineral oil
Recommended Skill Level
Beginner

Outdoor chairs

Submitted by Anonymous (not verified) on Sun, 07/17/2022 - 13:23

built straight from ana's plan. Used cedar 2x4s. super easy to make really happy how they came out. Cushions were like $52 per set at home depot.

Comments

Shiplap Fireplace

Submitted by Anonymous (not verified) on Tue, 12/20/2022 - 19:10

We did the Easiest Shiplap Fireplace in a weekend, thanks to Ana’s plans. I convinced my husband to help me build this by upgrading to a 65” tv and adjusting the dimensions. We also built a shelf behind the tv to hold our receiver and Xbox that is hidden when the tv is in place. Ana’s tutorial was amazingly and gave us the confidence to finally build something that’s been on our list for 2 years!

Comments

Small Garage Workbench

Submitted by dmozer74 on Fri, 12/18/2015 - 21:17

Easy project. I needed this bench a bit smaller due to space constraints so this is 28" x 42". I kept the height the same and finished the surfaces with some thick polyurethane. It should be noted my cost was a bit higher due to buying a sanded plywood, coated self-tapping screws and a more expensive polyurethane. I also went a bit slow on this project and it took about 2.5 hours including application of the single coat of poly.

Estimated Cost
$75
Estimated Time Investment
An Hour or Two (0-2 Hours)
Finish Used
Satin polyurethane.
Recommended Skill Level
Beginner

Comments

Farmhouse Toy Box

Submitted by Anonymous (not verified) on Thu, 03/21/2019 - 11:28

Picture of my own version of the Ana White Design linked here
http://www.ana-white.com/2017/01/DIY_furniture/farmhouse-style-toy-box-…

Added Gas Shocks from Amazon 100N/18lbs.

Estimated Time Investment
Week Long Project (20 Hours or More)
Finish Used
White Paint
Minwax Espresso
Minwax Red Mahogany
Recommended Skill Level
Intermediate

Adirondack Set

Submitted by JamieLynn on Mon, 06/24/2019 - 11:48

These were a labor of love!  I bought my first miter saw and decided this would be the project to try angles.  It wasn't easy but I figured it out.  

These were pretty easy otherwise to put together once you get past the stringers.  They aren't perfect but they are very sturdy.  I've had a few people ask me to make them one too!

Estimated Cost
$60 each
Scraps for the small table
Estimated Time Investment
Weekend Project (10-20 Hours)
Finish Used
Rustoleum Door Paint
Recommended Skill Level
Beginner

Another Ana White project complete!

Submitted by AKMan279 on Tue, 07/23/2019 - 21:14

This was an easy weekend project building the night stand to go with the Ana White bed that we built.  Looks great.  I used a round over bit on my router and rounded the top.  Additionally, I think if I were to build another one, I would simply attach the top to the base using pocket holes and screwing in from underneath rather than using 1 1/4” brad nails through the top.  Very hard to blend in wood filler when staining a lighter color stain.

Estimated Time Investment
Weekend Project (10-20 Hours)
Finish Used
Minwax poly/stain
Recommended Skill Level
Intermediate

Comments

Patio couches

Submitted by Anonymous (not verified) on Thu, 04/27/2023 - 19:14

This project was fun to build with hubby said the shopping list and the cut list was perfect! Love all your designs! King bed is next!

Comments

Seasonal And Holiday

Toys boxes

Submitted by Cheryl on Fri, 12/30/2011 - 21:15

We made two toy boxes for the Make Two Challenge. A single mom with two small children needed a little boost for christmas this year. I used the stacking toy box plans but dressed it up a bit with trim and added casters. The plan was very easy to follow.

Built from Plan(s)
Estimated Cost
$40.00
Estimated Time Investment
Afternoon Project (3-6 Hours)
Finish Used
Red and blue spray paint and minwax stain
Recommended Skill Level
Beginner

Comments

Small Cedar Shed with Living Roof

Submitted by Anonymous (not verified) on Mon, 09/09/2019 - 12:46

I built the shed during the summer of 2018, following Ana's plans but with the addition of a green roof. After almost a year the vegetation -- a variety of native plants from the upper Midwest -- has started to fill in pretty well. My carpentry skills are rudimentary so the project took a long time but was worth the effort.

Built from Plan(s)
Estimated Time Investment
Week Long Project (20 Hours or More)
Finish Used
Wolman™ F&P Cedar Finish and Preservative, if I remember correctly.
Recommended Skill Level
Intermediate

Comments

Nesting Tables

Submitted by jenn923 on Sun, 01/08/2012 - 10:40

I was really excited when I saw this plan. I needed a side table for my guest bedroom and these are perfect. The plans were very easy to follow - the only thing I did differently was I left off the angle braces. The hardest part of the project was waiting on the paint to dry. I've done a few other projects but this my best work so far...I'm getting better and better with each build. So excited to start something else...

Built from Plan(s)
Estimated Cost
$20
Estimated Time Investment
Afternoon Project (3-6 Hours)
Finish Used
Very light blue - Oops paint from Lowe's
Recommended Skill Level
Beginner

Comments

Kate (not verified)

Sun, 01/08/2012 - 13:08

They look great! I'm sure your guests will love them.

I'm currently still in the painting stage of a modified version of just the large of the Preston tables. I love seeing one fully completed!

Laura Fama

Sun, 01/08/2012 - 13:37

Awesome!!! ... What a great job you did!!! I am making these too... glad to see how great they look... can't wait to finish mine now!

Mailbox

Submitted by loniwolfe on Tue, 01/10/2012 - 13:50

My grandmother has been in terrible need of a new mailbox. The one she had was original to the house, 1972, I believe. Needless to say it was falling apart.
My stepdad and I built this for her, and my sister painted on the name adn address.
All better now!

PS, I chose Grace's Mailbox plan because you have to choose a plan when posting a brag blog and we didn't use one, we just kind of winged it.

Built from Plan(s)
Estimated Cost
$20-$30
Estimated Time Investment
Afternoon Project (3-6 Hours)
Finish Used
Clear wood sealer, spray can
Recommended Skill Level
Beginner

Comments