Community Brag Posts
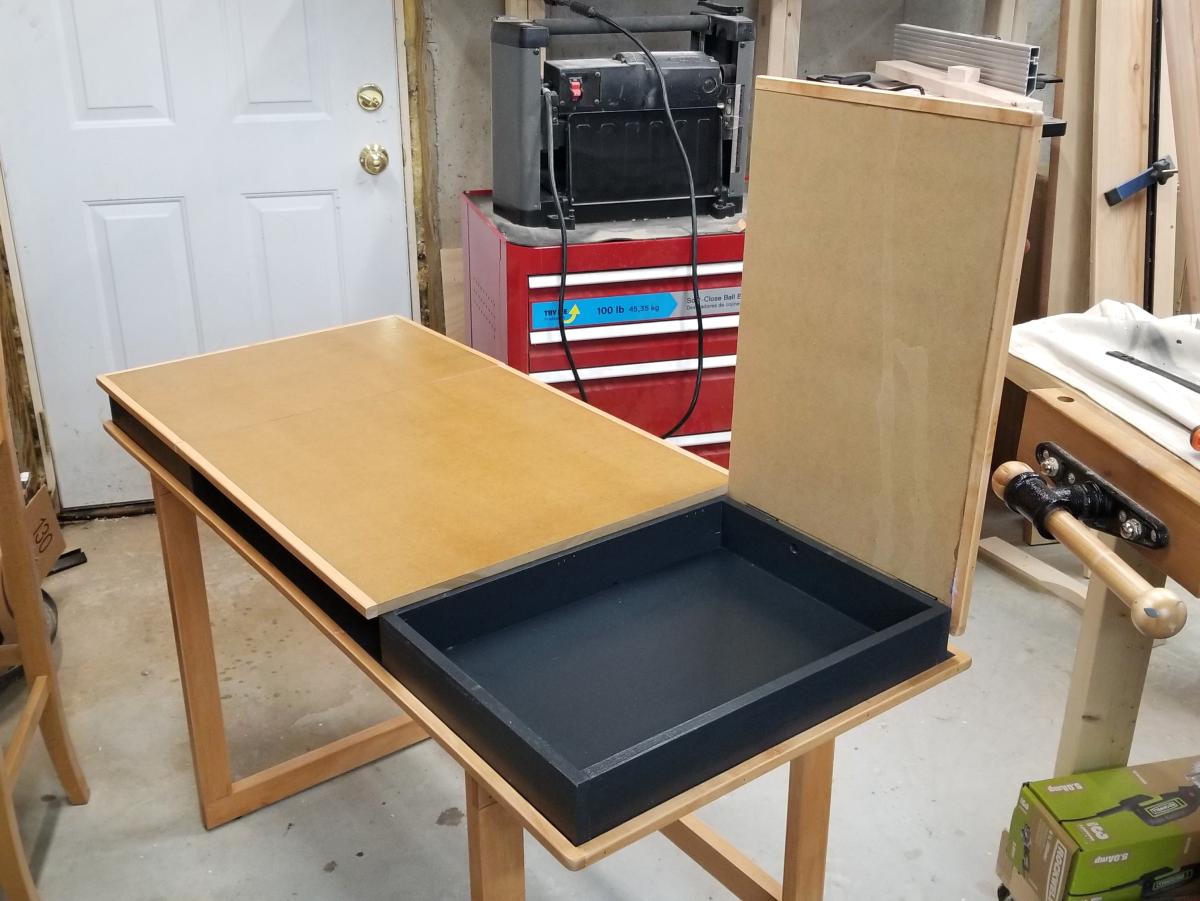
Modern Storage Desk
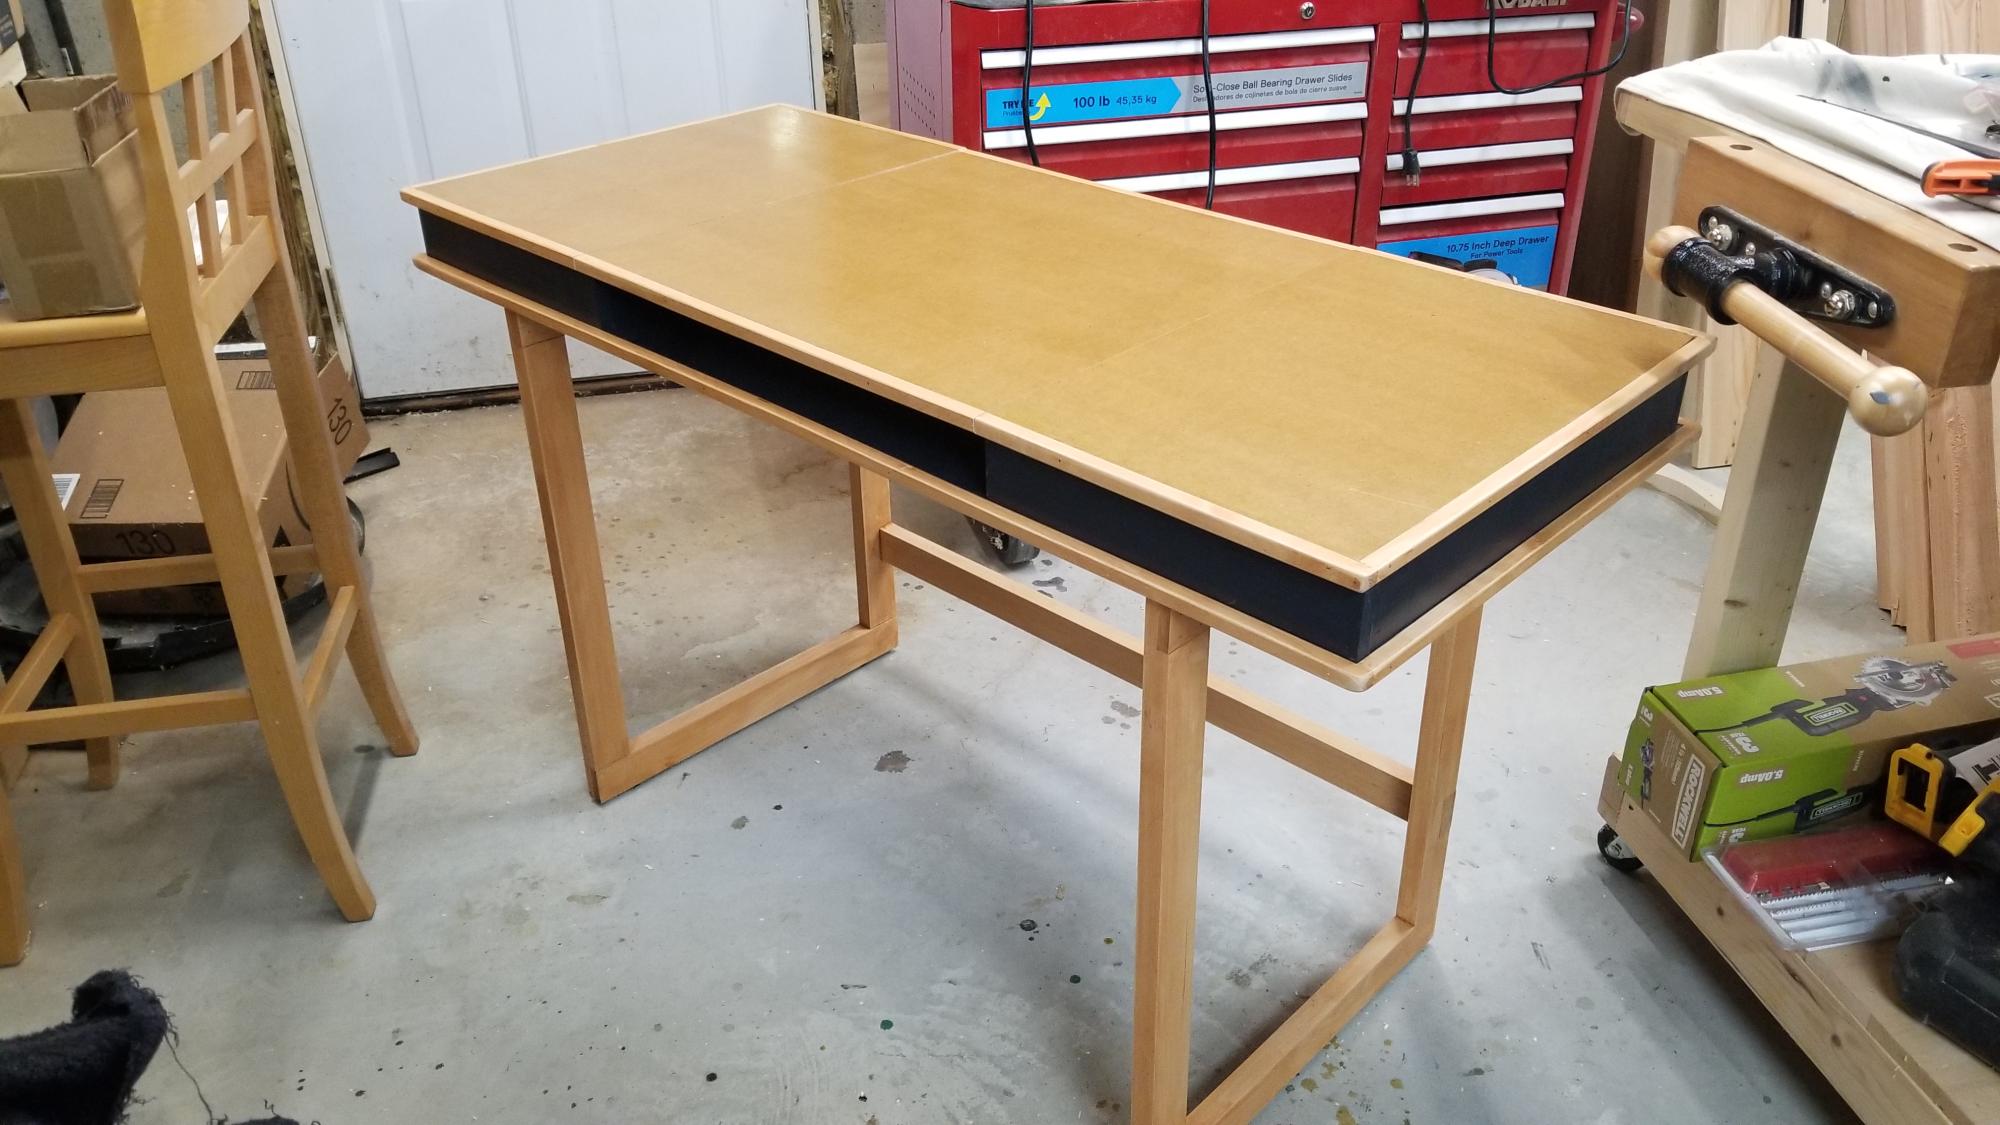
I used these plans as inspiration and made some changes per my son's request. I made the base out of maple and changed the board dimensions to 1x2" I also used half lap joints instead of pocket hole screws (personal preference). The top is MDF and I edged plywood and MDF in Maple. Fun Project
Zen
Built from Plan(s)
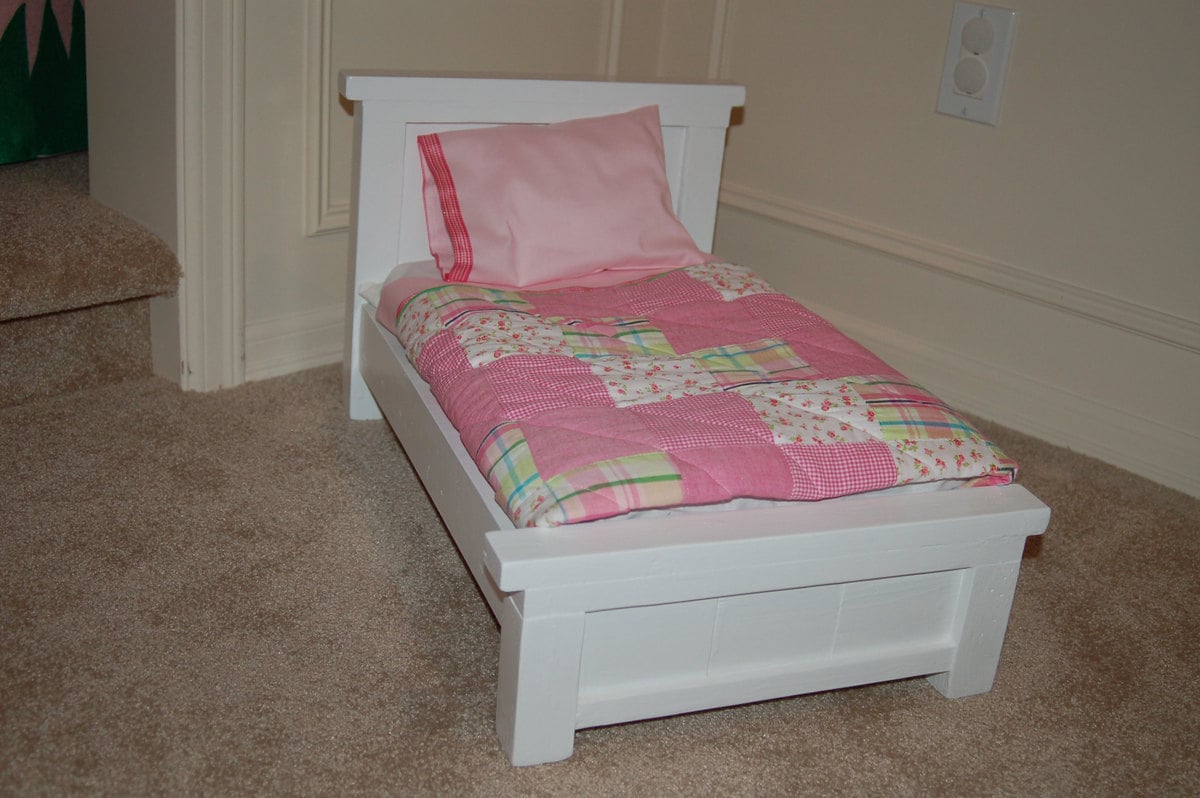
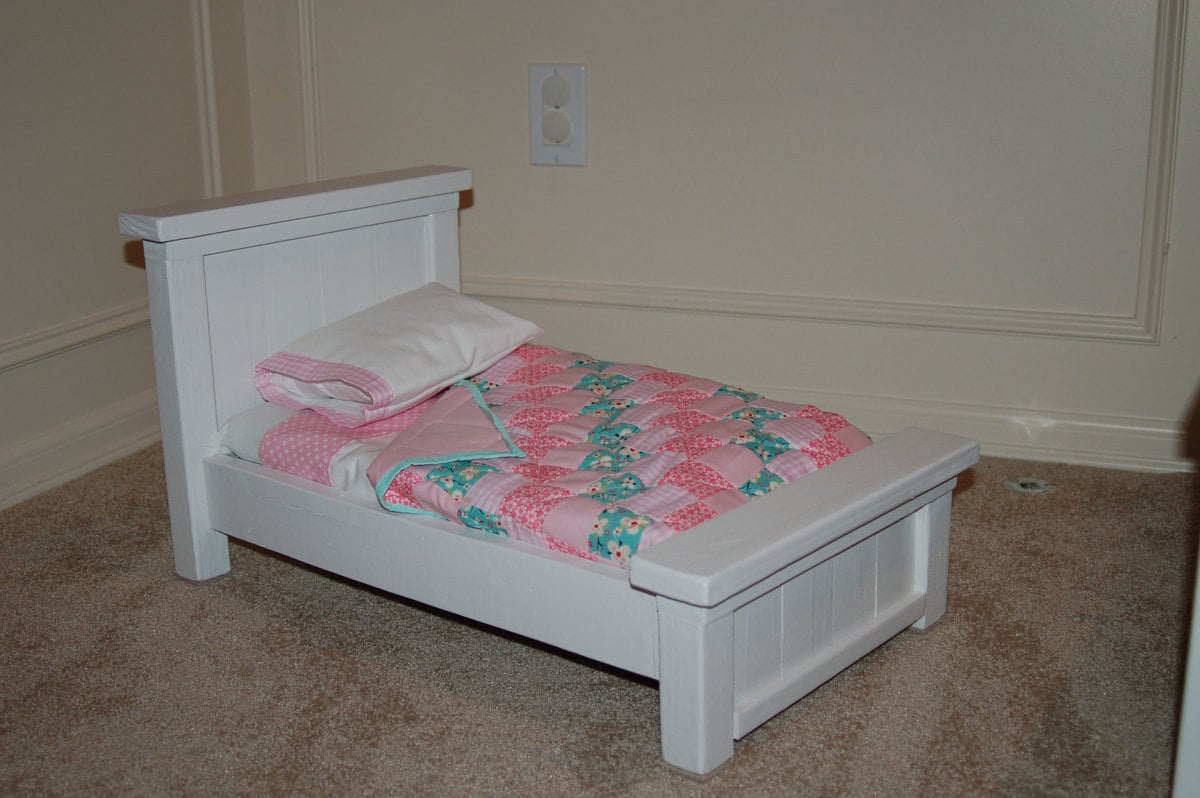
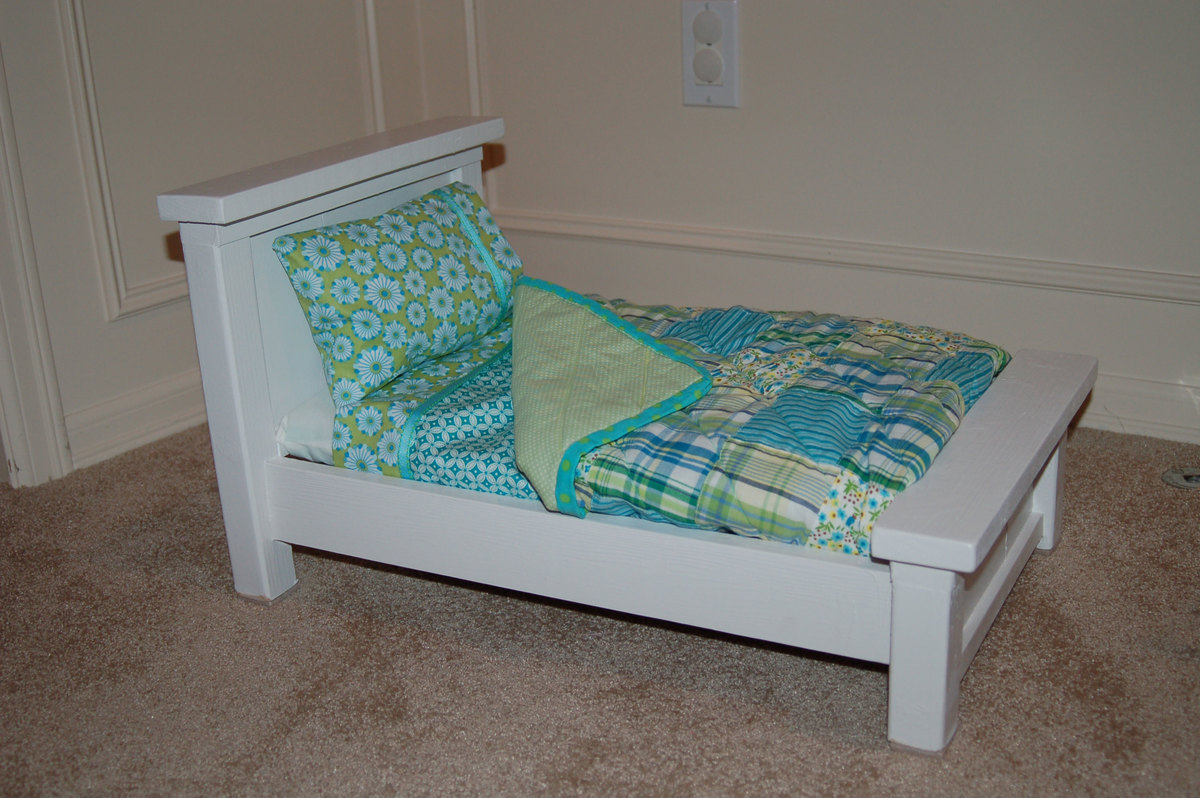
Farmhouse Doll Bed X 3
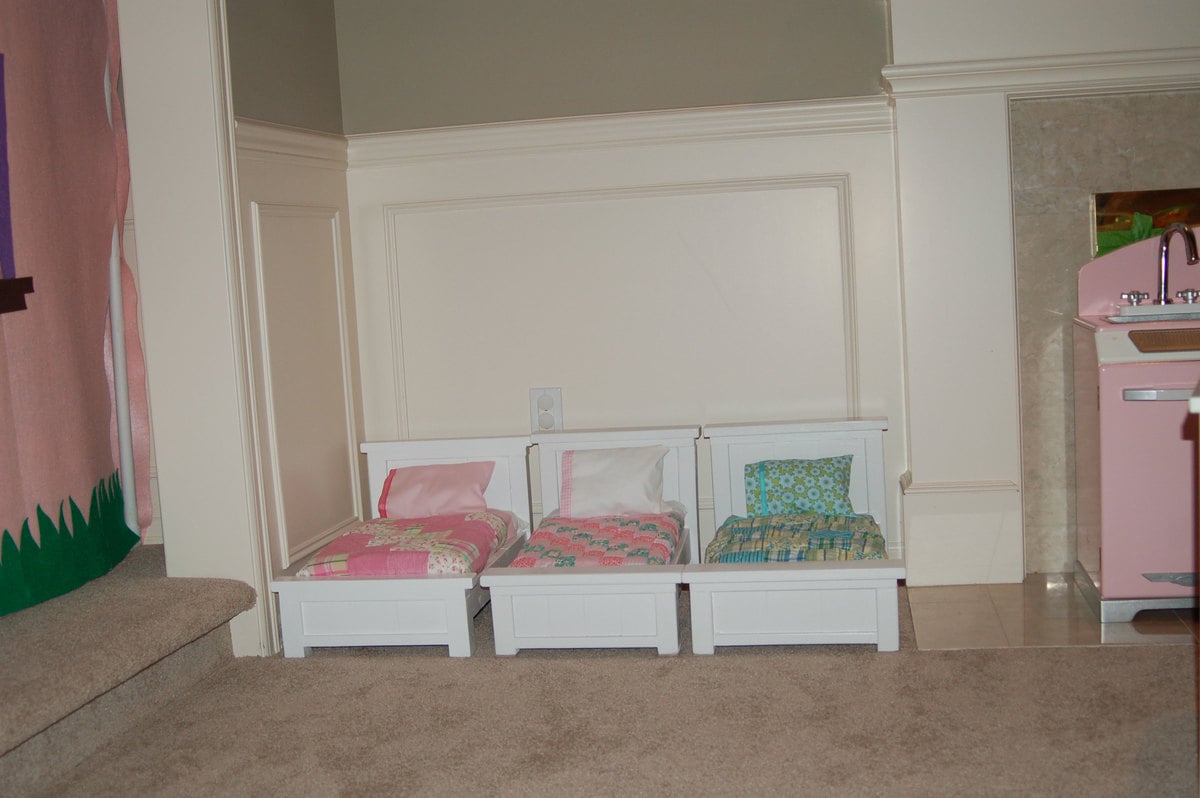
I made these three farmhouse doll beds for my daughters. Initially, I made two beds following the plan as written but started feeling like they would take up too much space. My girls are close in age (4 and 2 yo twins) so waiting for one to outgrow something and passing it on isn't an option.
I gave the first two regular sized beds away as gifts and made three narrow versions that I saw on another blog http://thatsmyletter.blogspot.com/2011/02/b-is-for-bed-5.html Her bedding is still the gold standard in my eyes. LOVE IT!
On two of my beds, I left off one 1x2 slat, and on the other I used 3-1x3's. The width of the 3 beds are slightly different. Heck, I think I am incapable of making two things exactly the same. lol The girls love them so that's all that matters. For the bed that used 3-1x3s, I didn't write down the width of the top boards. I measured and cut as I assembled.
I put an extra 1x2 mattress support in the middle because I knew they would sit on them and used masonite to hold the mattress. Seems strong enough so far.
Before painting, I used lots of wood filler and caulk to hide some flaws. By the way, I feel like painting the beds is the hardest part. So many little grooves, nooks, and crannies. I recently bought a Graco 3900 HVLP paint sprayer. Painted a half wall and 6 long pieces of trim in 30 minutes today---love it! If I make another bed (or anything for that matter), I'm totally going to spray it.
Oh and I have to confess that after the first two beds, I got too impatient to use just screws so I used the nailer, glue, and used a few screws at key points. It made things go so much quicker, and the beds still feel quite sturdy. If my kids manage to break them, I'll make them new ones. :-)
I used 1" foam and muslin for the mattress & cover and fabric that I obsessively buy and hoard for everything else. The middle quilt is an actual quilt. I cut the squares and all---first time for that too. The other two are made of pre-made patchwork fabric from Joann's.
Thank you to everyone for sharing your creations, and thank you, Ana, for the plans. I am so inspired!
Built from Plan(s)
Estimated Cost
$20 (best guess - for all three)
Estimated Time Investment
Afternoon Project (3-6 Hours)
Finish Used
Sherwin-Williams ProClassic Alkyd Interior Enamel in white and primed beforehand with the recommended primer. I had both on hand from another project.
Recommended Skill Level
Beginner
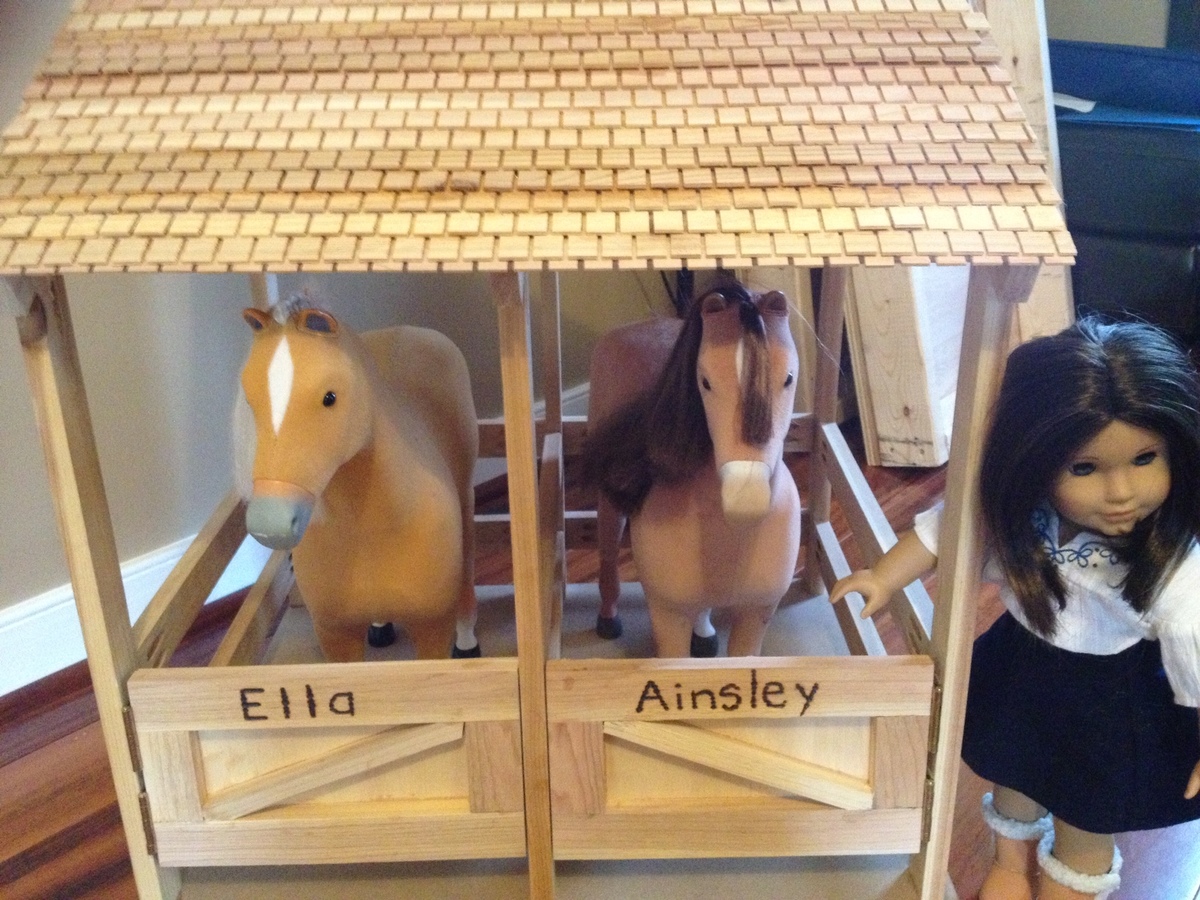
American Girl Doll Horse Stable
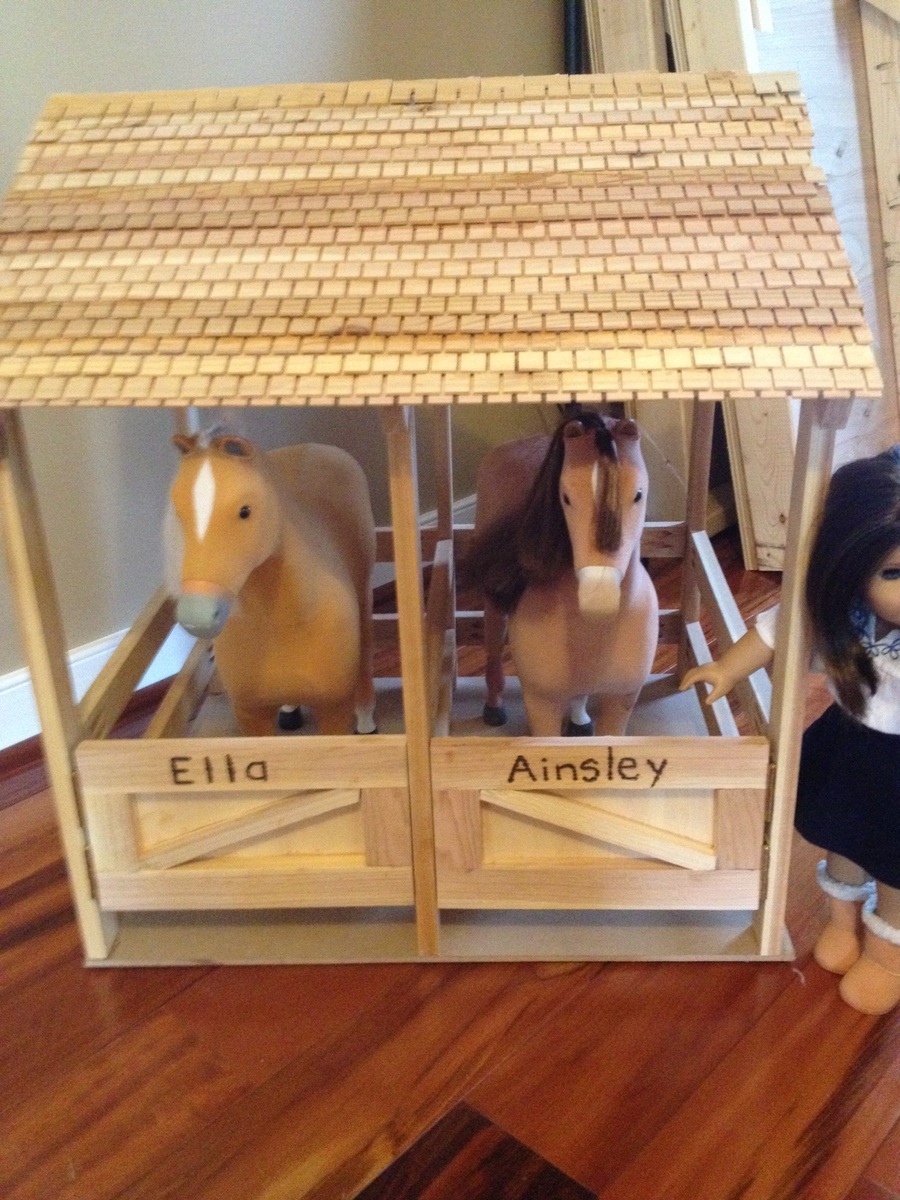
My two dauirlghters wanted a stable to protect their beloved American Girl Doll Horses.
Estimated Time Investment
Weekend Project (10-20 Hours)
Finish Used
None
Recommended Skill Level
Intermediate
Comments

Sun, 10/18/2015 - 19:55
AG stable
Hello Scott,
The links provided for the AG horse stable does not work or exist. I probablly cannot create one like you did because I don't have wood working tools but if you have the pics available somewhere I may be able to do a rough version for my daughter. It pains me to buy a horse she wants knowing she won't use it much but it's on her xmas list! :)
Christina
Mon, 10/19/2015 - 08:38
AG horse stables link
Here's Ana's plans
http://ana-white.com/2012/12/plans/horse-stables-american-girl-or-18quo…
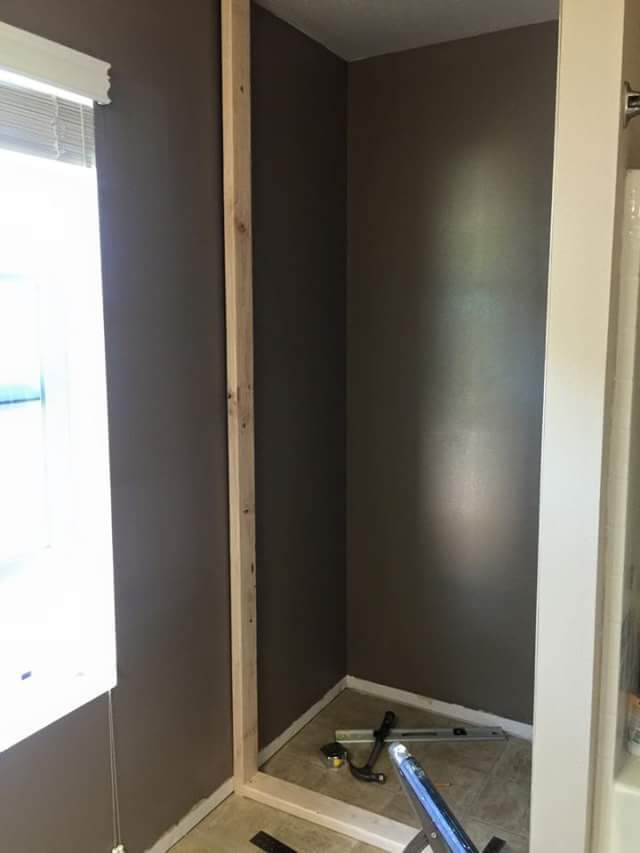
Bathroom Cabinet

My niece had an area in her master bathroom that she wanted to make into a closet. Since she is very interested in woodworking I was happy to assist her on her first project. It was a challenge as one wall was out of plum by 1.5 inches but we managed to successfully address the problem.
The project turned out very nice and now my niece has a large closet with lots of storage space. But we also created a monster as she has definitely caught the woodworking bug! Her birthday is coming up soon and all she wants are tools!
Built from Plan(s)
Estimated Cost
350.00
Estimated Time Investment
Week Long Project (20 Hours or More)
Finish Used
Interior white paint ... to be applied.
Recommended Skill Level
Intermediate
Comments
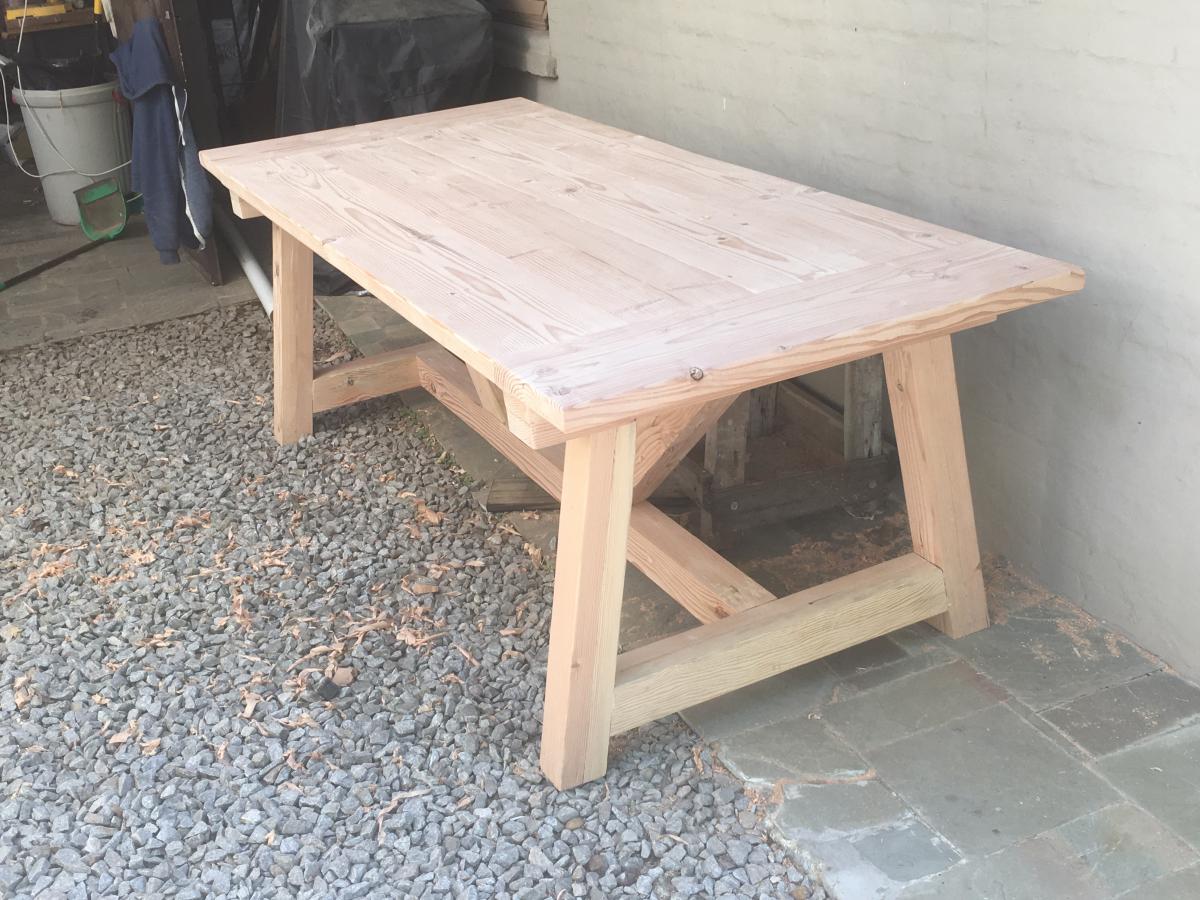
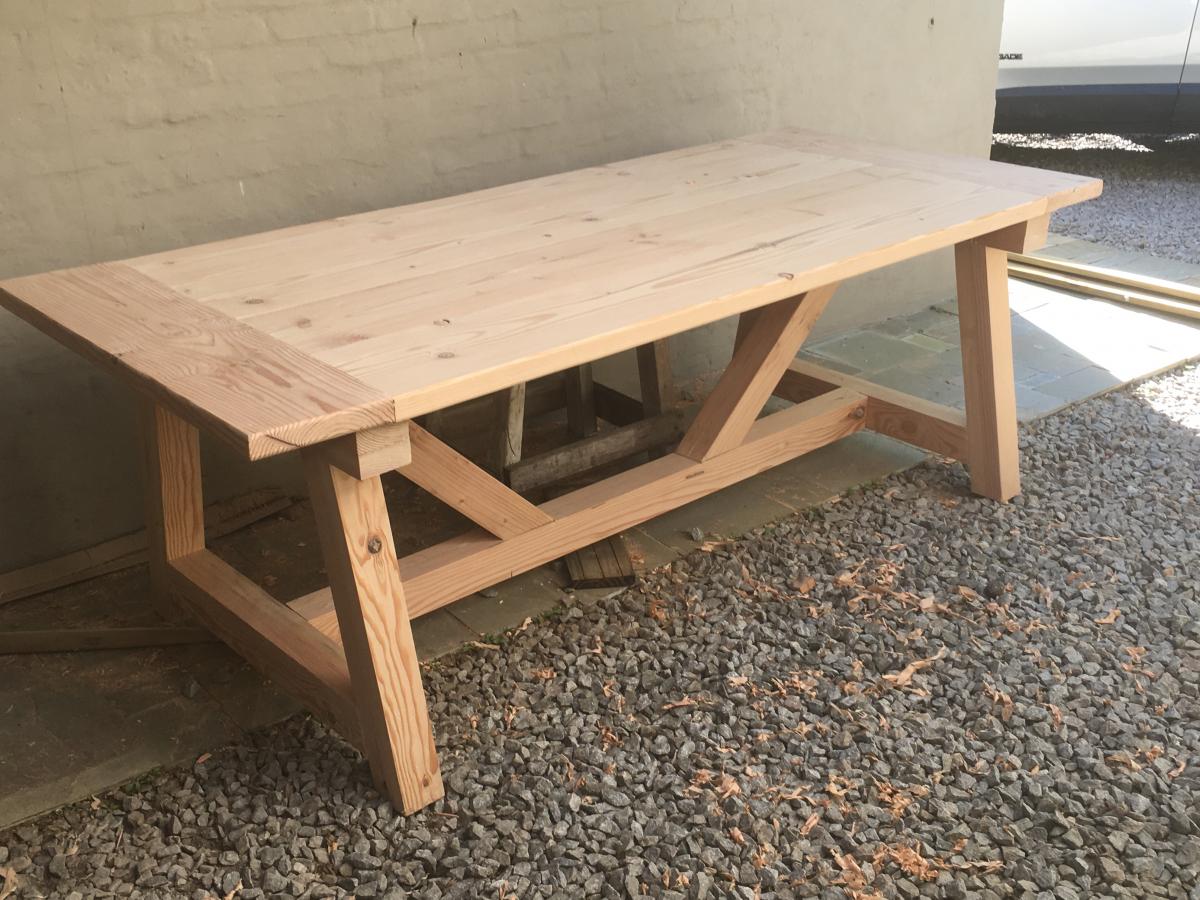
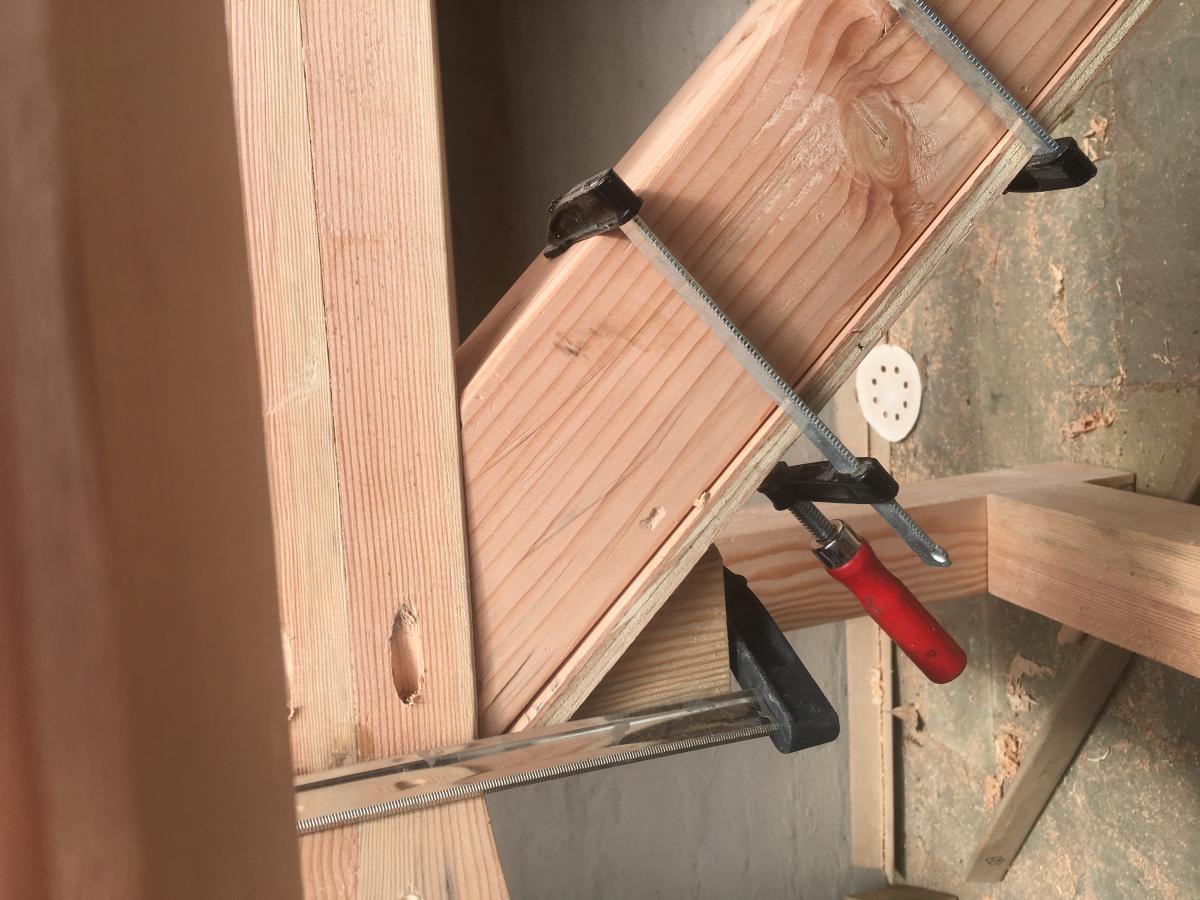
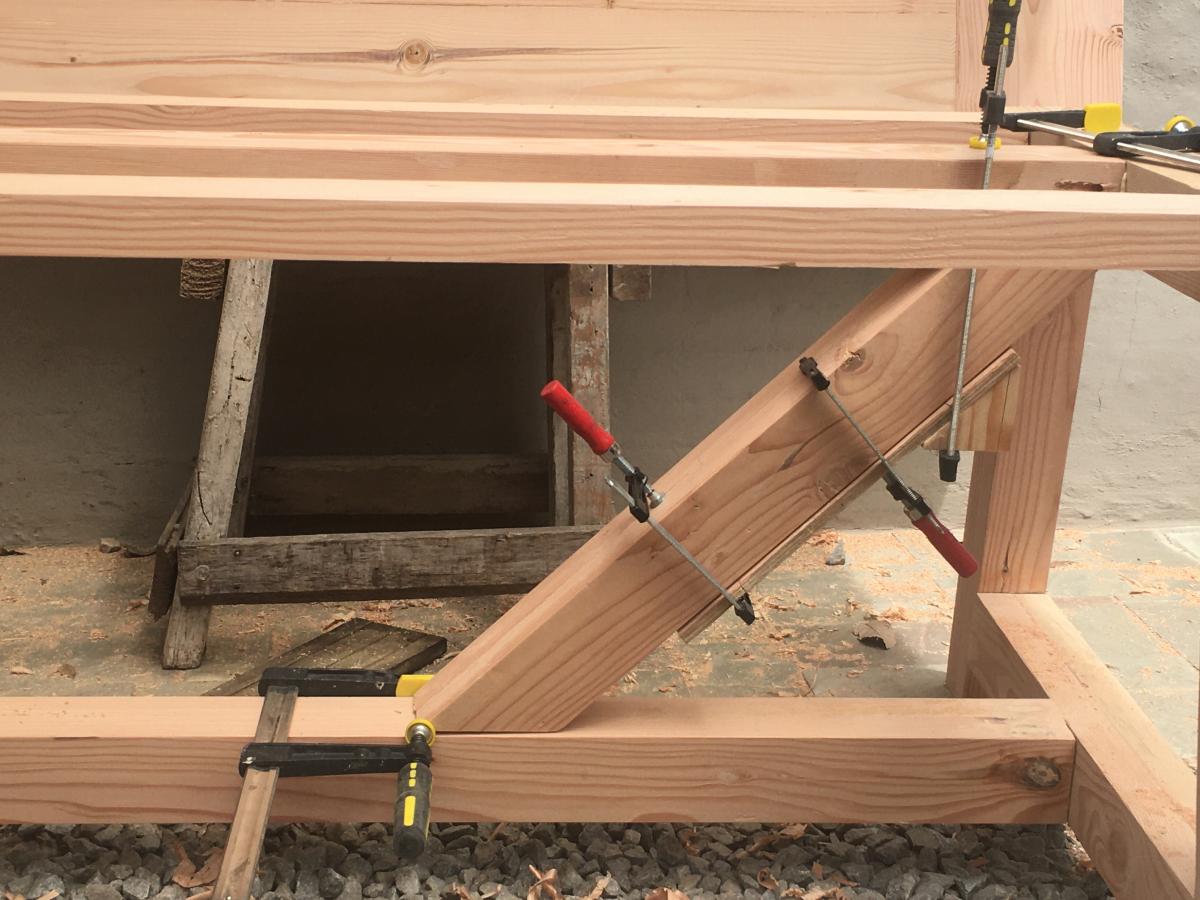
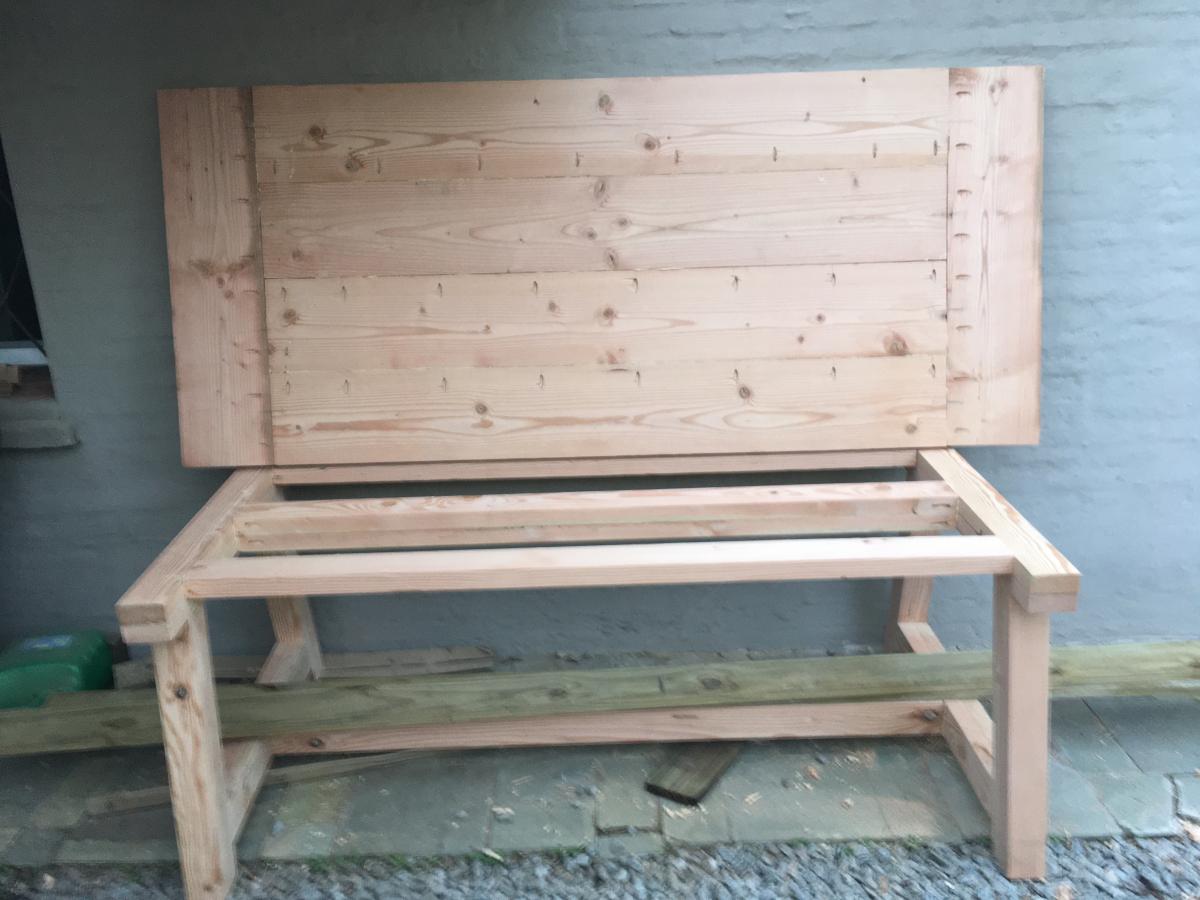
Farmhouse table

I just finished this table for our new house at the beach; I did a small modification at the moment of fixing the breadboards; besides the pocket holes I also used dowels for extra strength. If someone sits on the front of the table it could be a problem.
Another detail I included,is a simple way to clamp the diagonal pieces, much more firmly than with tape.
I am quite happy with the results, I will now finish the table with lacquer.
Estimated Time Investment
Week Long Project (20 Hours or More)
Finish Used
Lacquer
Dollhouse Bookcase

We built this dollhouse bookcase pretty much to plan. We did add "shingles" to the top.
View more on our blog: http://www.bearrabbitbear.com/2012/02/dollhouse-bookcase.html
Comments
Thu, 12/13/2012 - 06:21
My husband is about to start
My husband is about to start cutting the wood for this bookcase. He made the farmhouse doll bed last year! It turned out great! He is making the doll bed for a friend andthe doll bunkbeds for our daughter.
Yourbookcase is beautiful!:o)
Wed, 09/02/2015 - 06:27
Love this project
I made this for my daughter for her second birthday and she loved it too! 
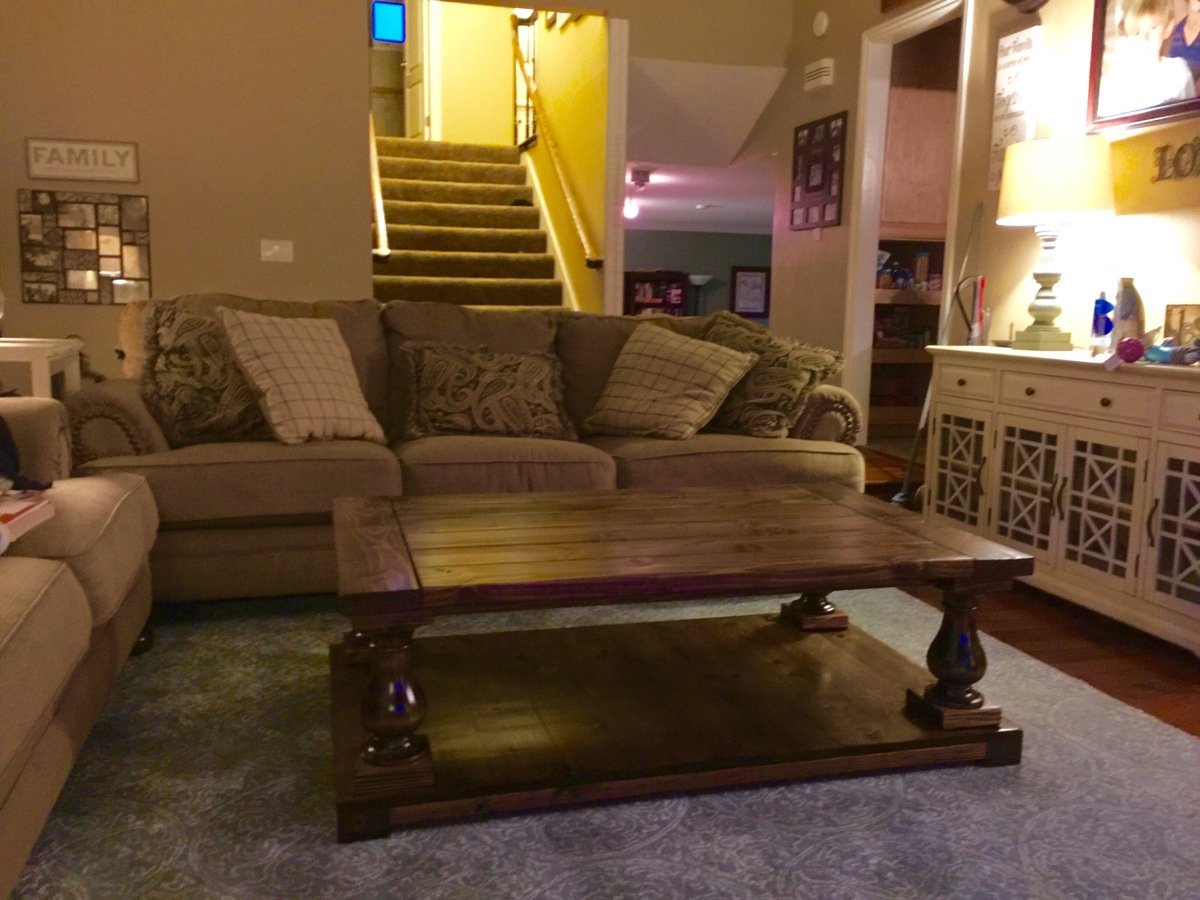
Corona Coffee Table
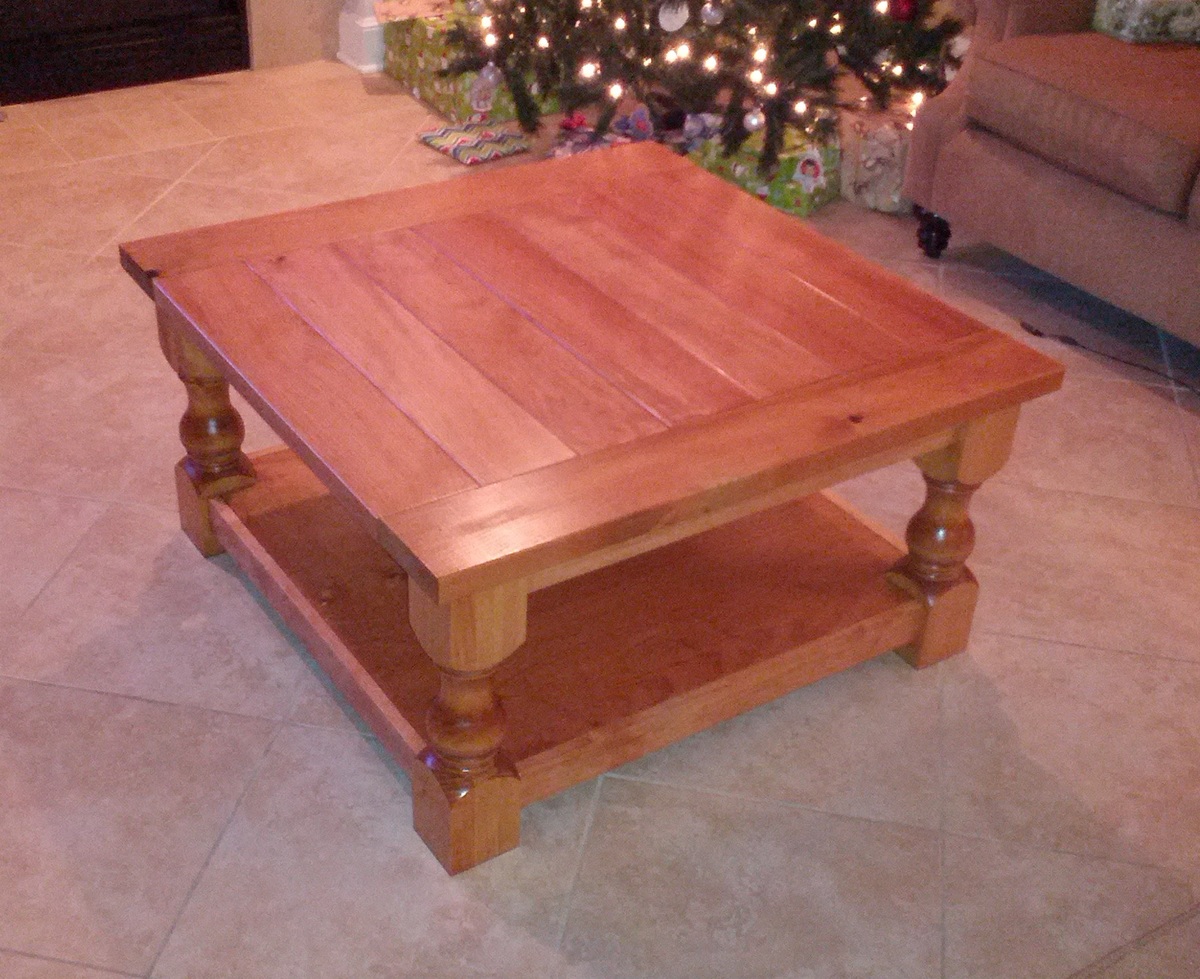
I first saw this table on the Shanty 2 Chic website and when I saw that it was based on a plan from Ana, I knew we had to build it. I asked my husband David to get started on it right away.
It turned out perfectly!!!
Built from Plan(s)
Estimated Cost
250
Estimated Time Investment
Weekend Project (10-20 Hours)
Finish Used
To finish the table, we started with Minwax Pre-Stain Conditioner, and followed it with Minwax Golden Pecan, Minwax in Golden Oak and finally Minwax Polyacrylic.
Recommended Skill Level
Intermediate
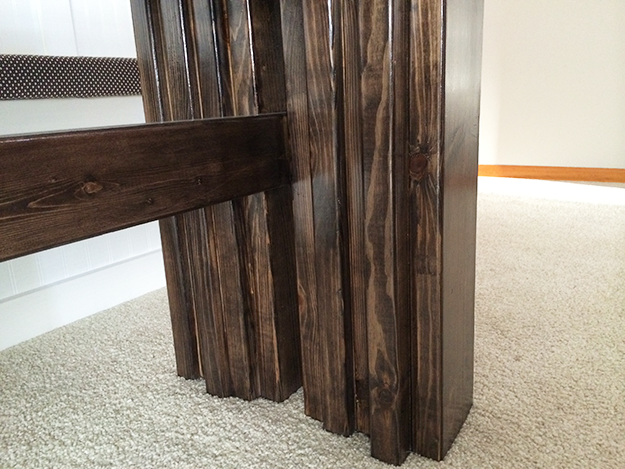
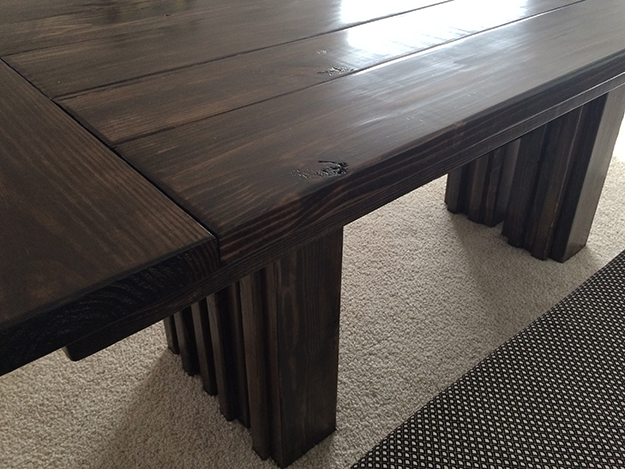
Rustic X-Entryway Table
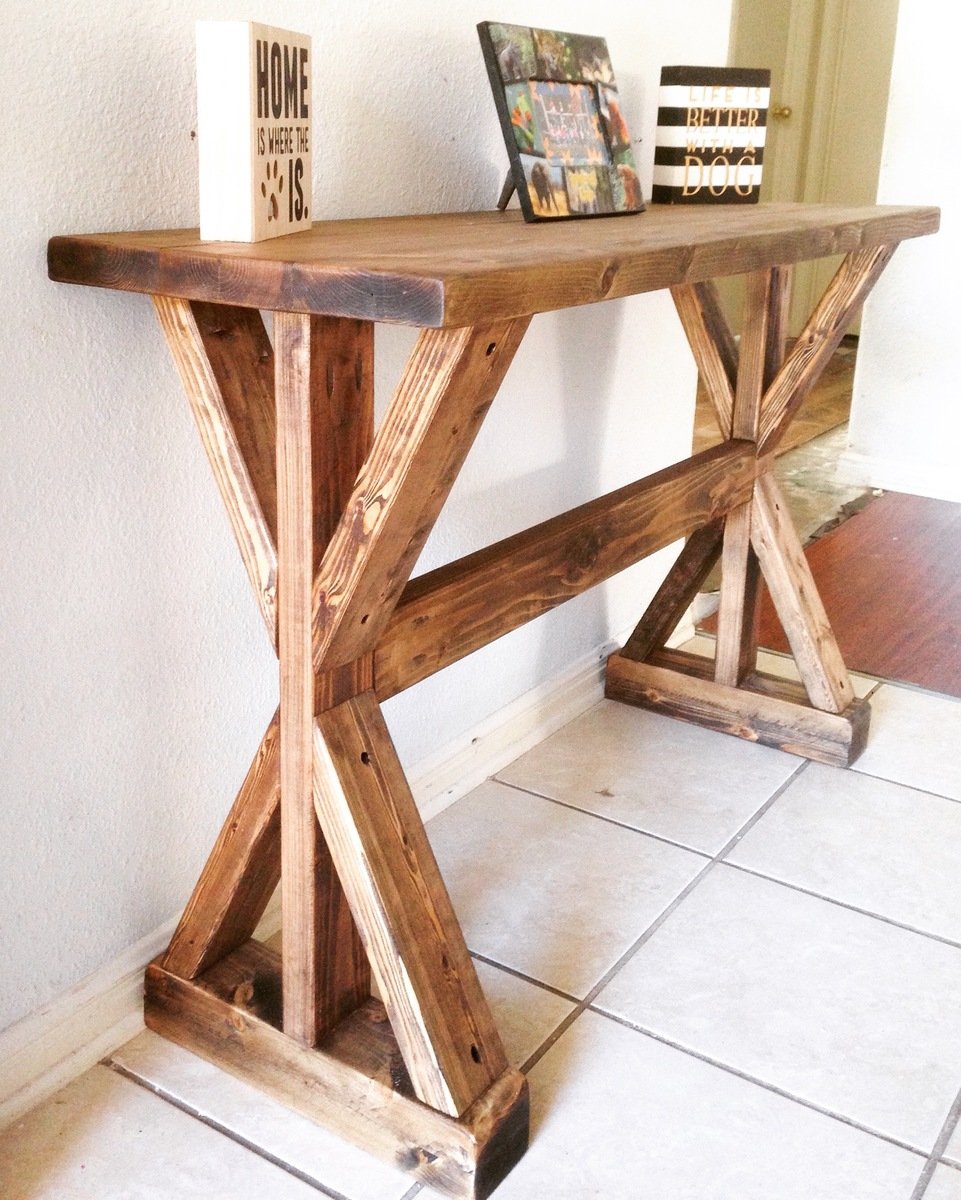
Handmade rustic entryway table. Stained with Varathane Stain and made from 2x4s & 2x6s Canadian white pine
Estimated Cost
$25
Estimated Time Investment
Day Project (6-9 Hours)
Finish Used
Varathane Ash Stain.
Varathane Polyurethane Satin
Varathane Polyurethane Satin
Recommended Skill Level
Intermediate
Comments
Mon, 04/11/2016 - 05:30
Dimensions
Hi,
I really love your entryway table. Do you have a plan that we can use with dimensions and cut list?
Thank you
Tue, 05/17/2016 - 20:33
Plans? What saw(s) did you use?
Hello can you provide us with plans for this? What saw(s) did you use?
Sun, 08/21/2016 - 08:18
Do you have plans for this
Do you have plans for this entry table?! I love it but can't seem to find the plans?
Thank you!
In reply to Are there plans for this ? by Jatin2286
Fri, 03/16/2018 - 10:49
I could draw you plans...
If you are OK with waiting a few days, I could draw you plans based off of the images.
In reply to Are there plans for this ? by Jatin2286
Sat, 03/17/2018 - 19:38
Here are plans for you.
I modified the design slightly, by adding feet and a 1x4 board accent (that makes it easier to build). I'm assuming the overall height is 29.5" and the length is 48". If you want these to be different, feel free to reach out to me and I can help you adjust.
You can find the plans here: http://famousartisan.com/diy-x-base-sofa-table-plans-or-entry-table/
In reply to Are there plans for this ? by Jatin2286
Sat, 03/17/2018 - 19:39
Here are plans for you.
I modified the design slightly, by adding feet and a 1x4 board accent (that makes it easier to build). I'm assuming the overall height is 29.5" and the length is 48". If you want these to be different, feel free to reach out to me and I can help you adjust.
You can find the plans here: http://famousartisan.com/diy-x-base-sofa-table-plans-or-entry-table/
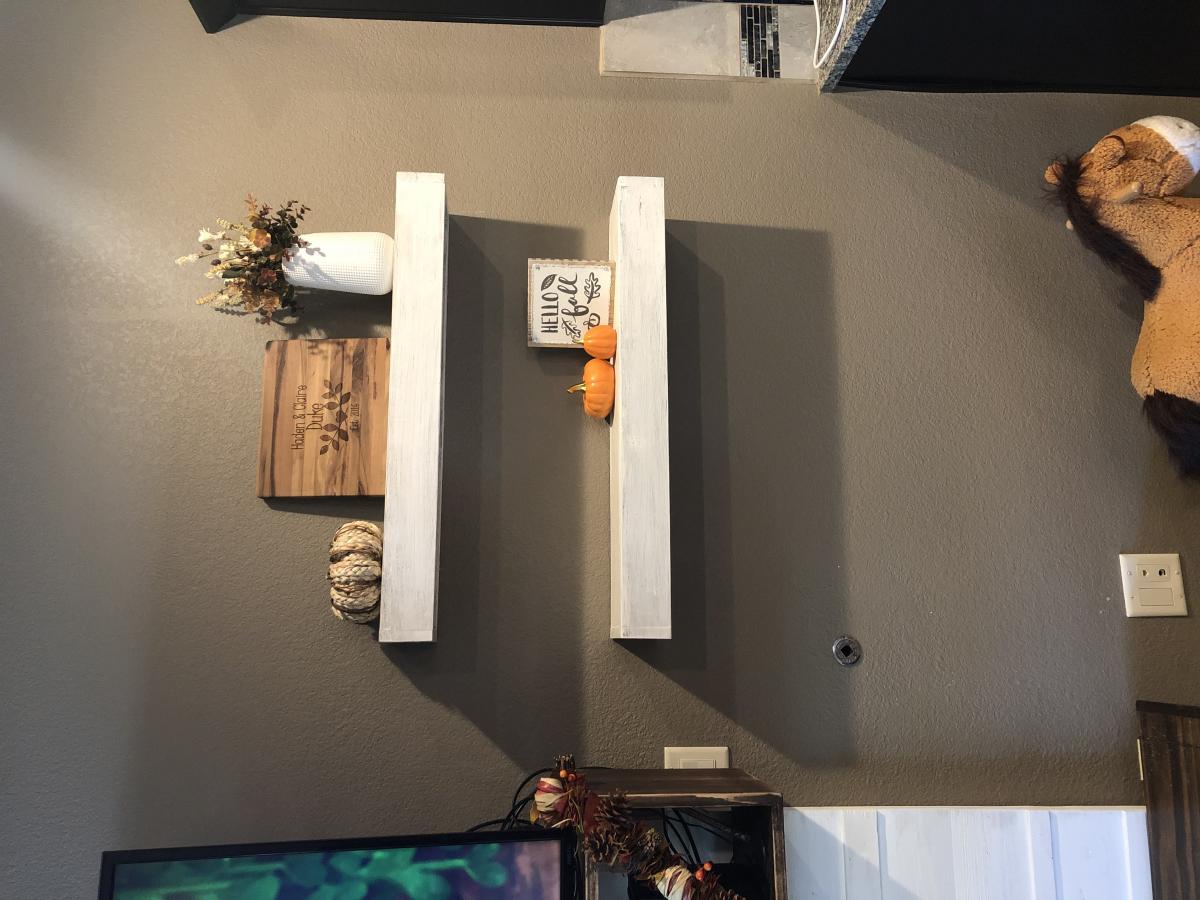
First Farmhouse Kitchen Table & Floating Shelves

Been loving our Ana White plans!! The table and shelves turned out exactly how we wanted them to & they were SO much cheaper than paying for lesser quality furniture store finds. We’ve received so many compliments!
Built from Plan(s)
Estimated Cost
$230
Estimated Time Investment
Week Long Project (20 Hours or More)
Finish Used
Stained the table top in Kona by Varathane. Painted the legs and shelves dark brown and white to create a weathered look.
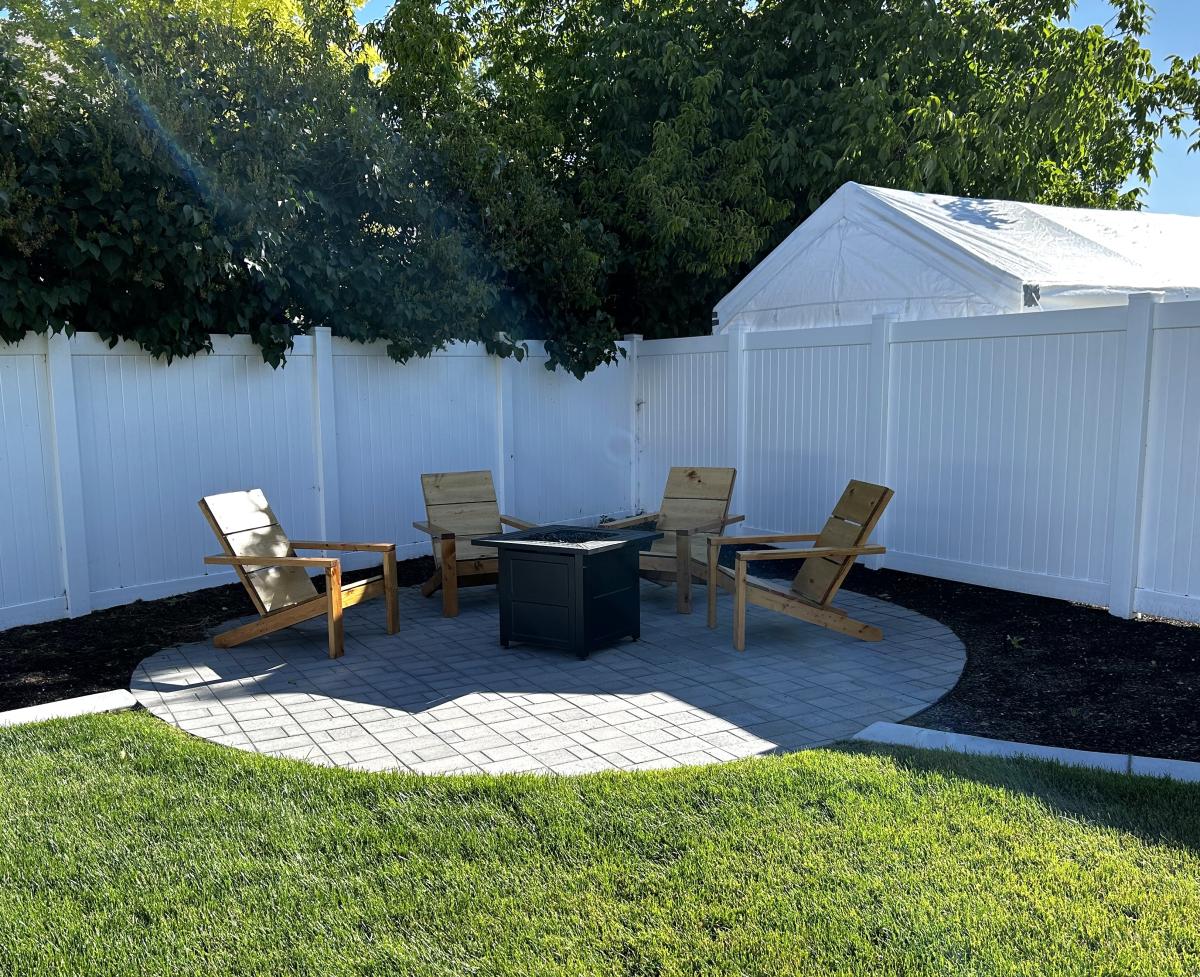
Adirondack Chairs for Fire Pit

Adirondack Chairs stained.
Rachel M
Built from Plan(s)
Changing Table/ Storage Shelf Combo
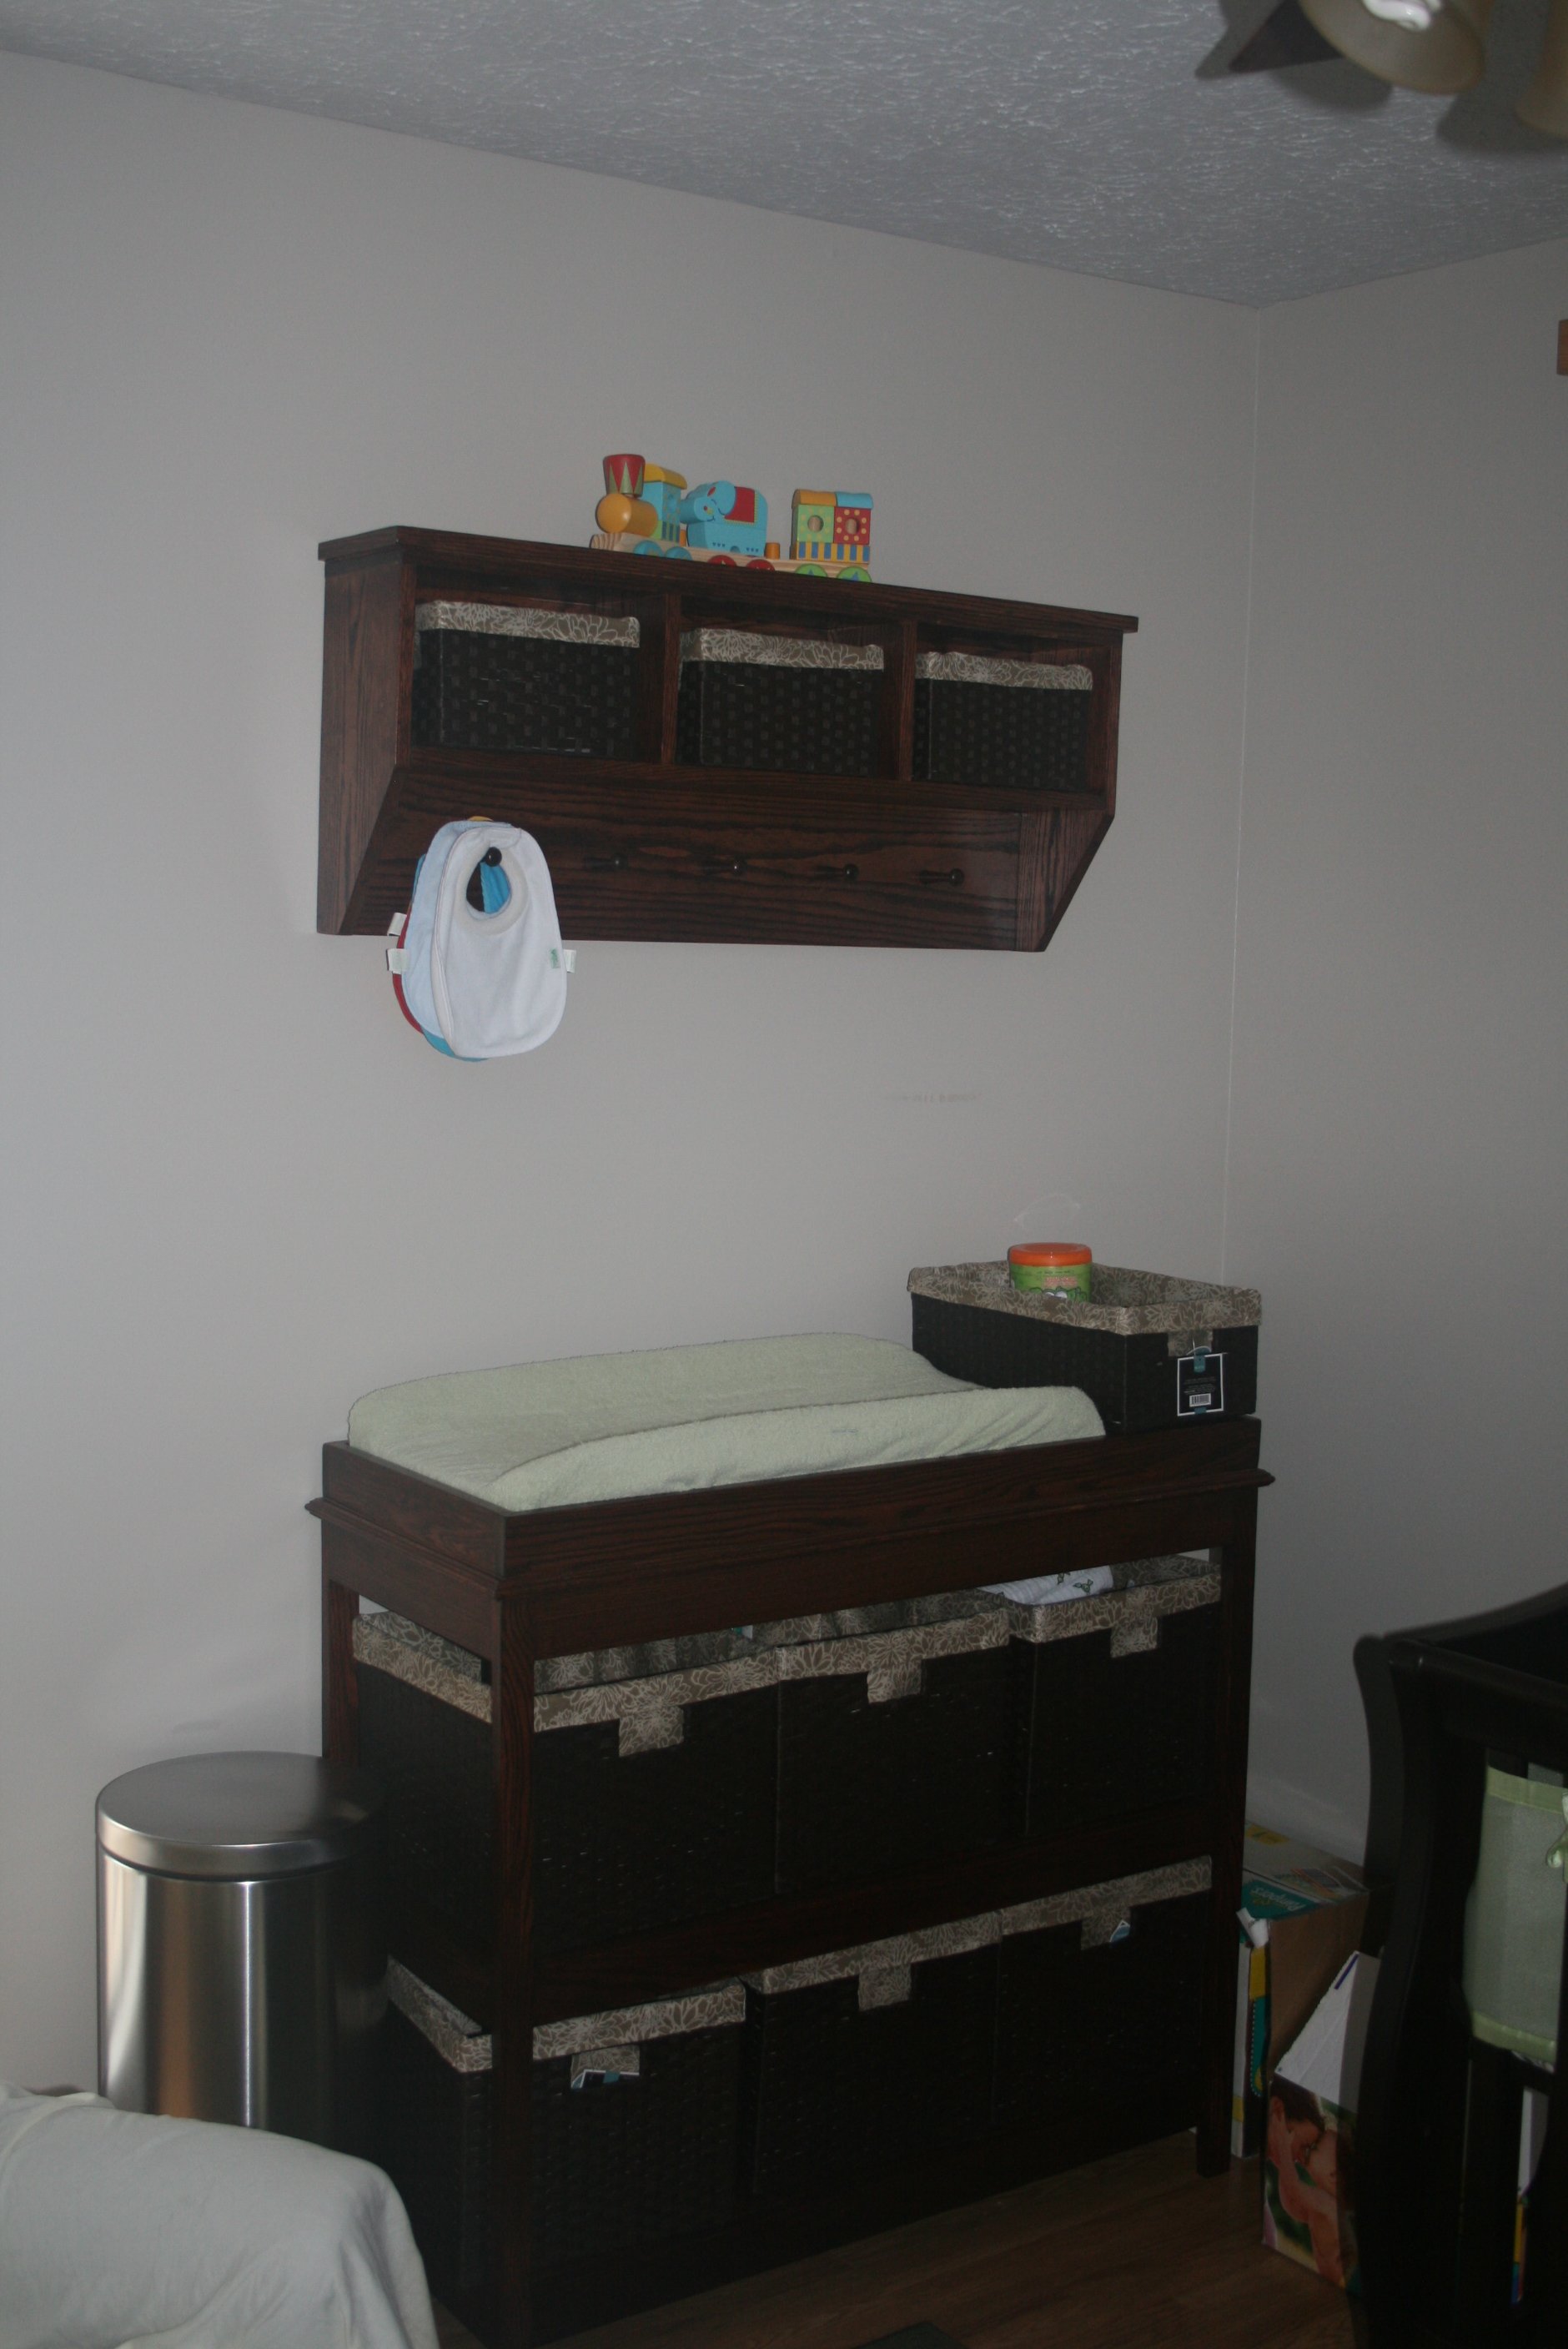
Combination of Entryway Bench and Storage Shelf with Hooks and simple changing table. I did make the table a little taller as my wife and i are pretty tall. I also had to add about an inch to the overall length of the table as well to fit the baskets. Mostly straight forward.
Built from Plan(s)
Estimated Cost
~$150
Estimated Time Investment
Weekend Project (10-20 Hours)
Finish Used
4 applications of Min-wax "Red Mahogany" stain, and 4 coats of satin polyurethane. Stain kind of hides the grain, but you do what your wife asks...
Recommended Skill Level
Intermediate
Comments
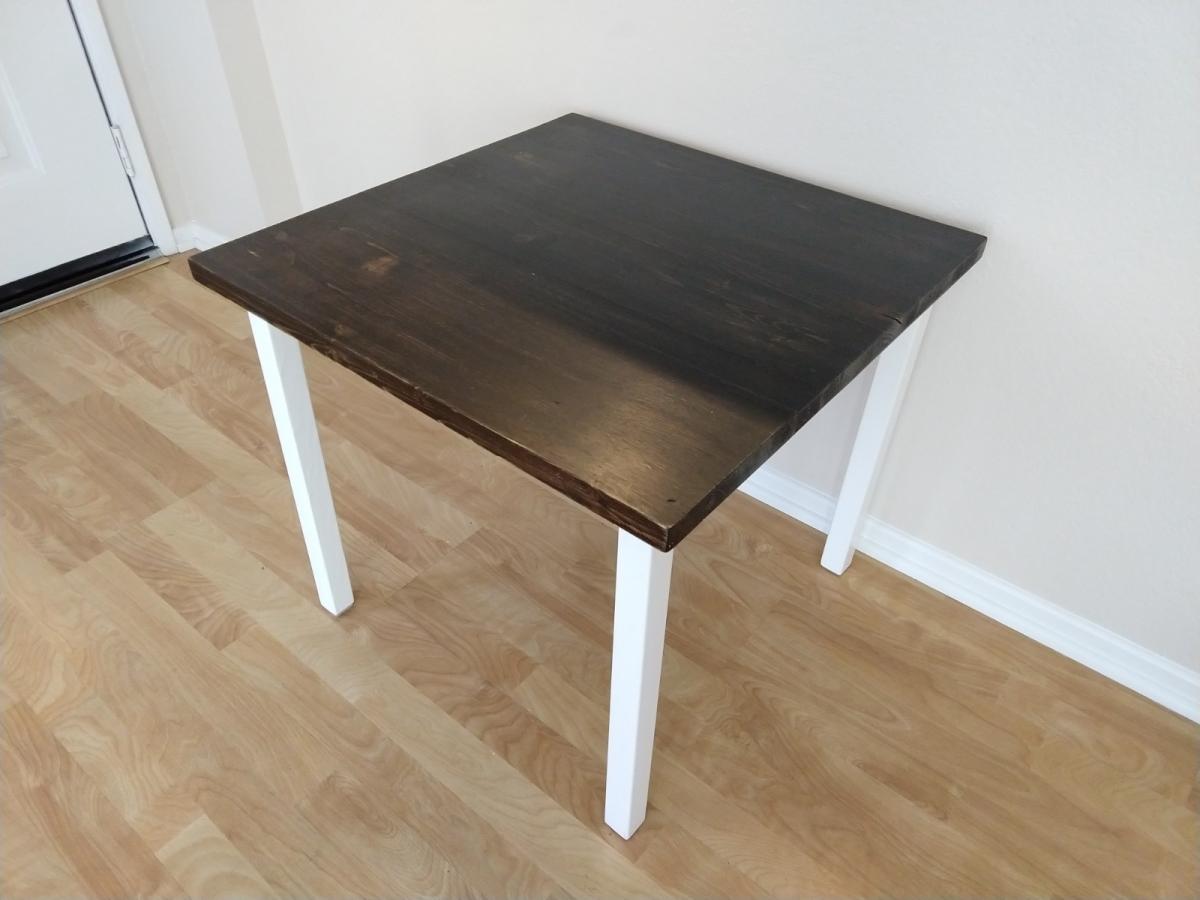
Clara inspired kid's table
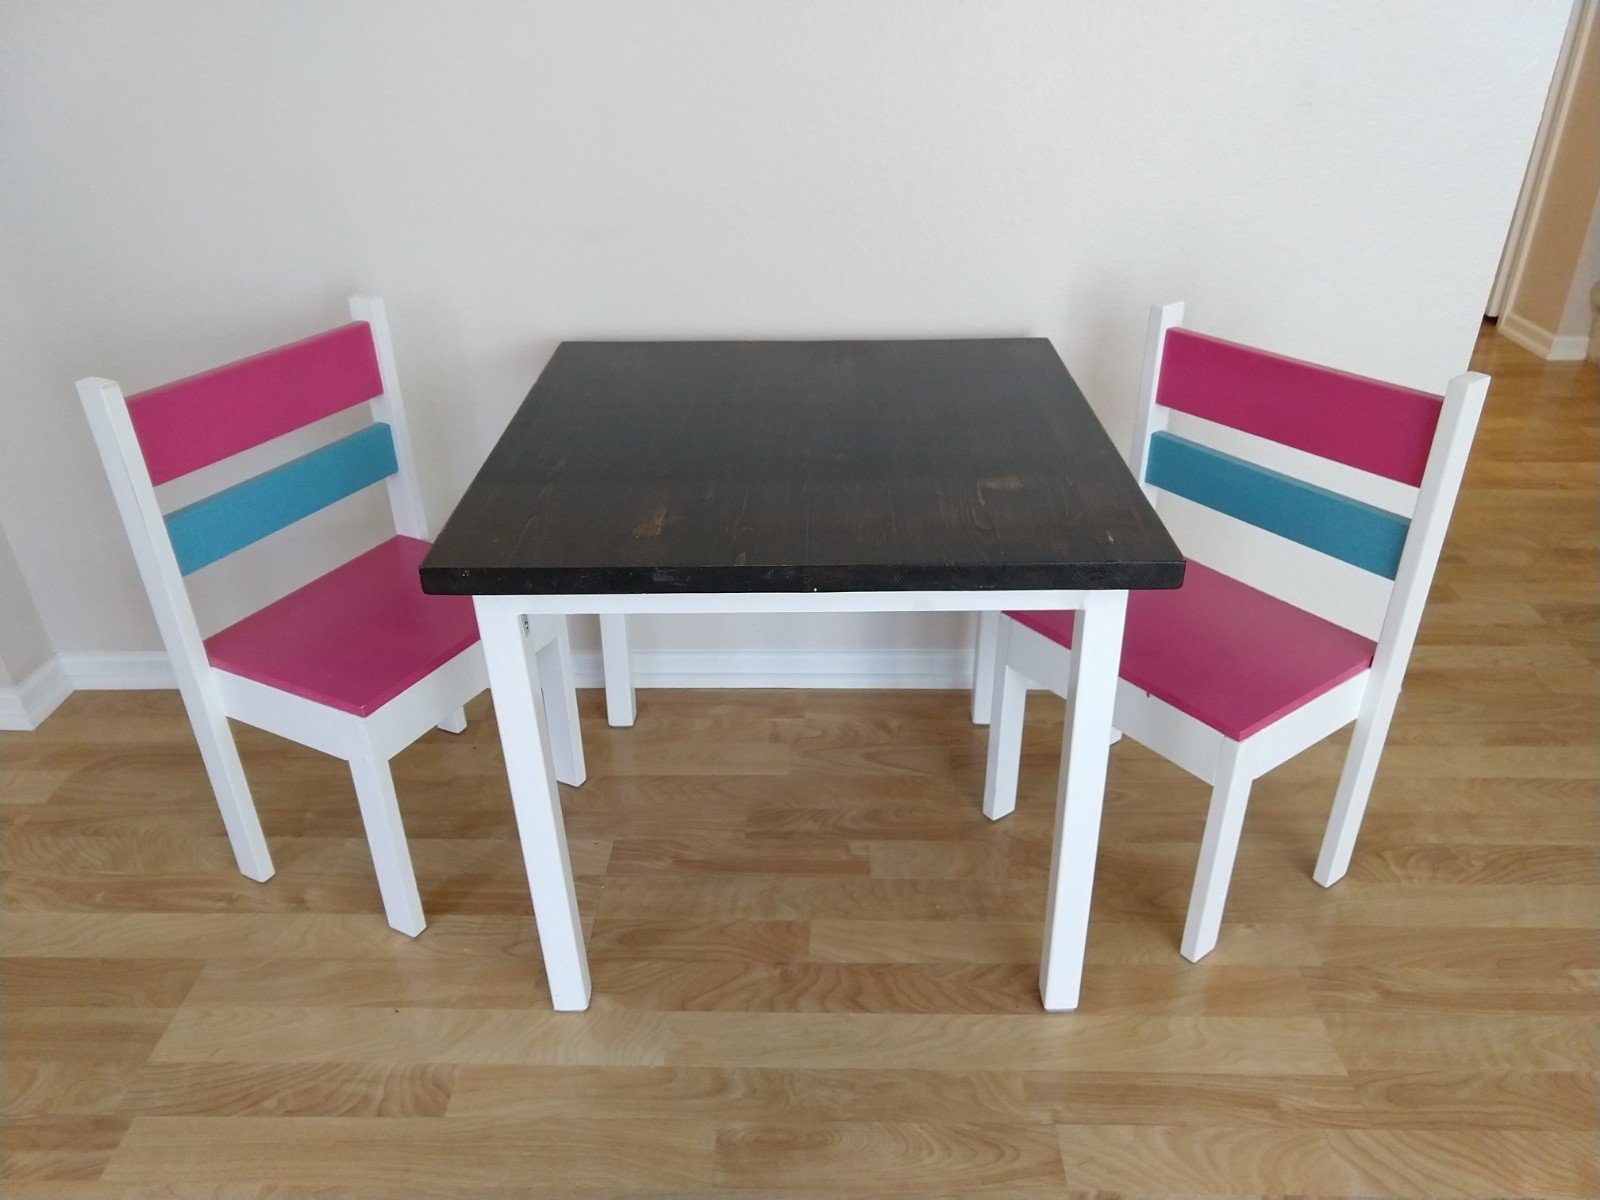
Child sized table. Used a 24" project-style top (all-in-one), 1x2s for the supports, and 2x2s for the legs.

Built from Plan(s)
Estimated Cost
$30
Estimated Time Investment
Day Project (6-9 Hours)
Finish Used
Minwax Penetrating Stain and Minwax Polyurethane for the top
White cabinet paint for the legs and supports
White cabinet paint for the legs and supports
Recommended Skill Level
Beginner
Big Kids Picnic Table
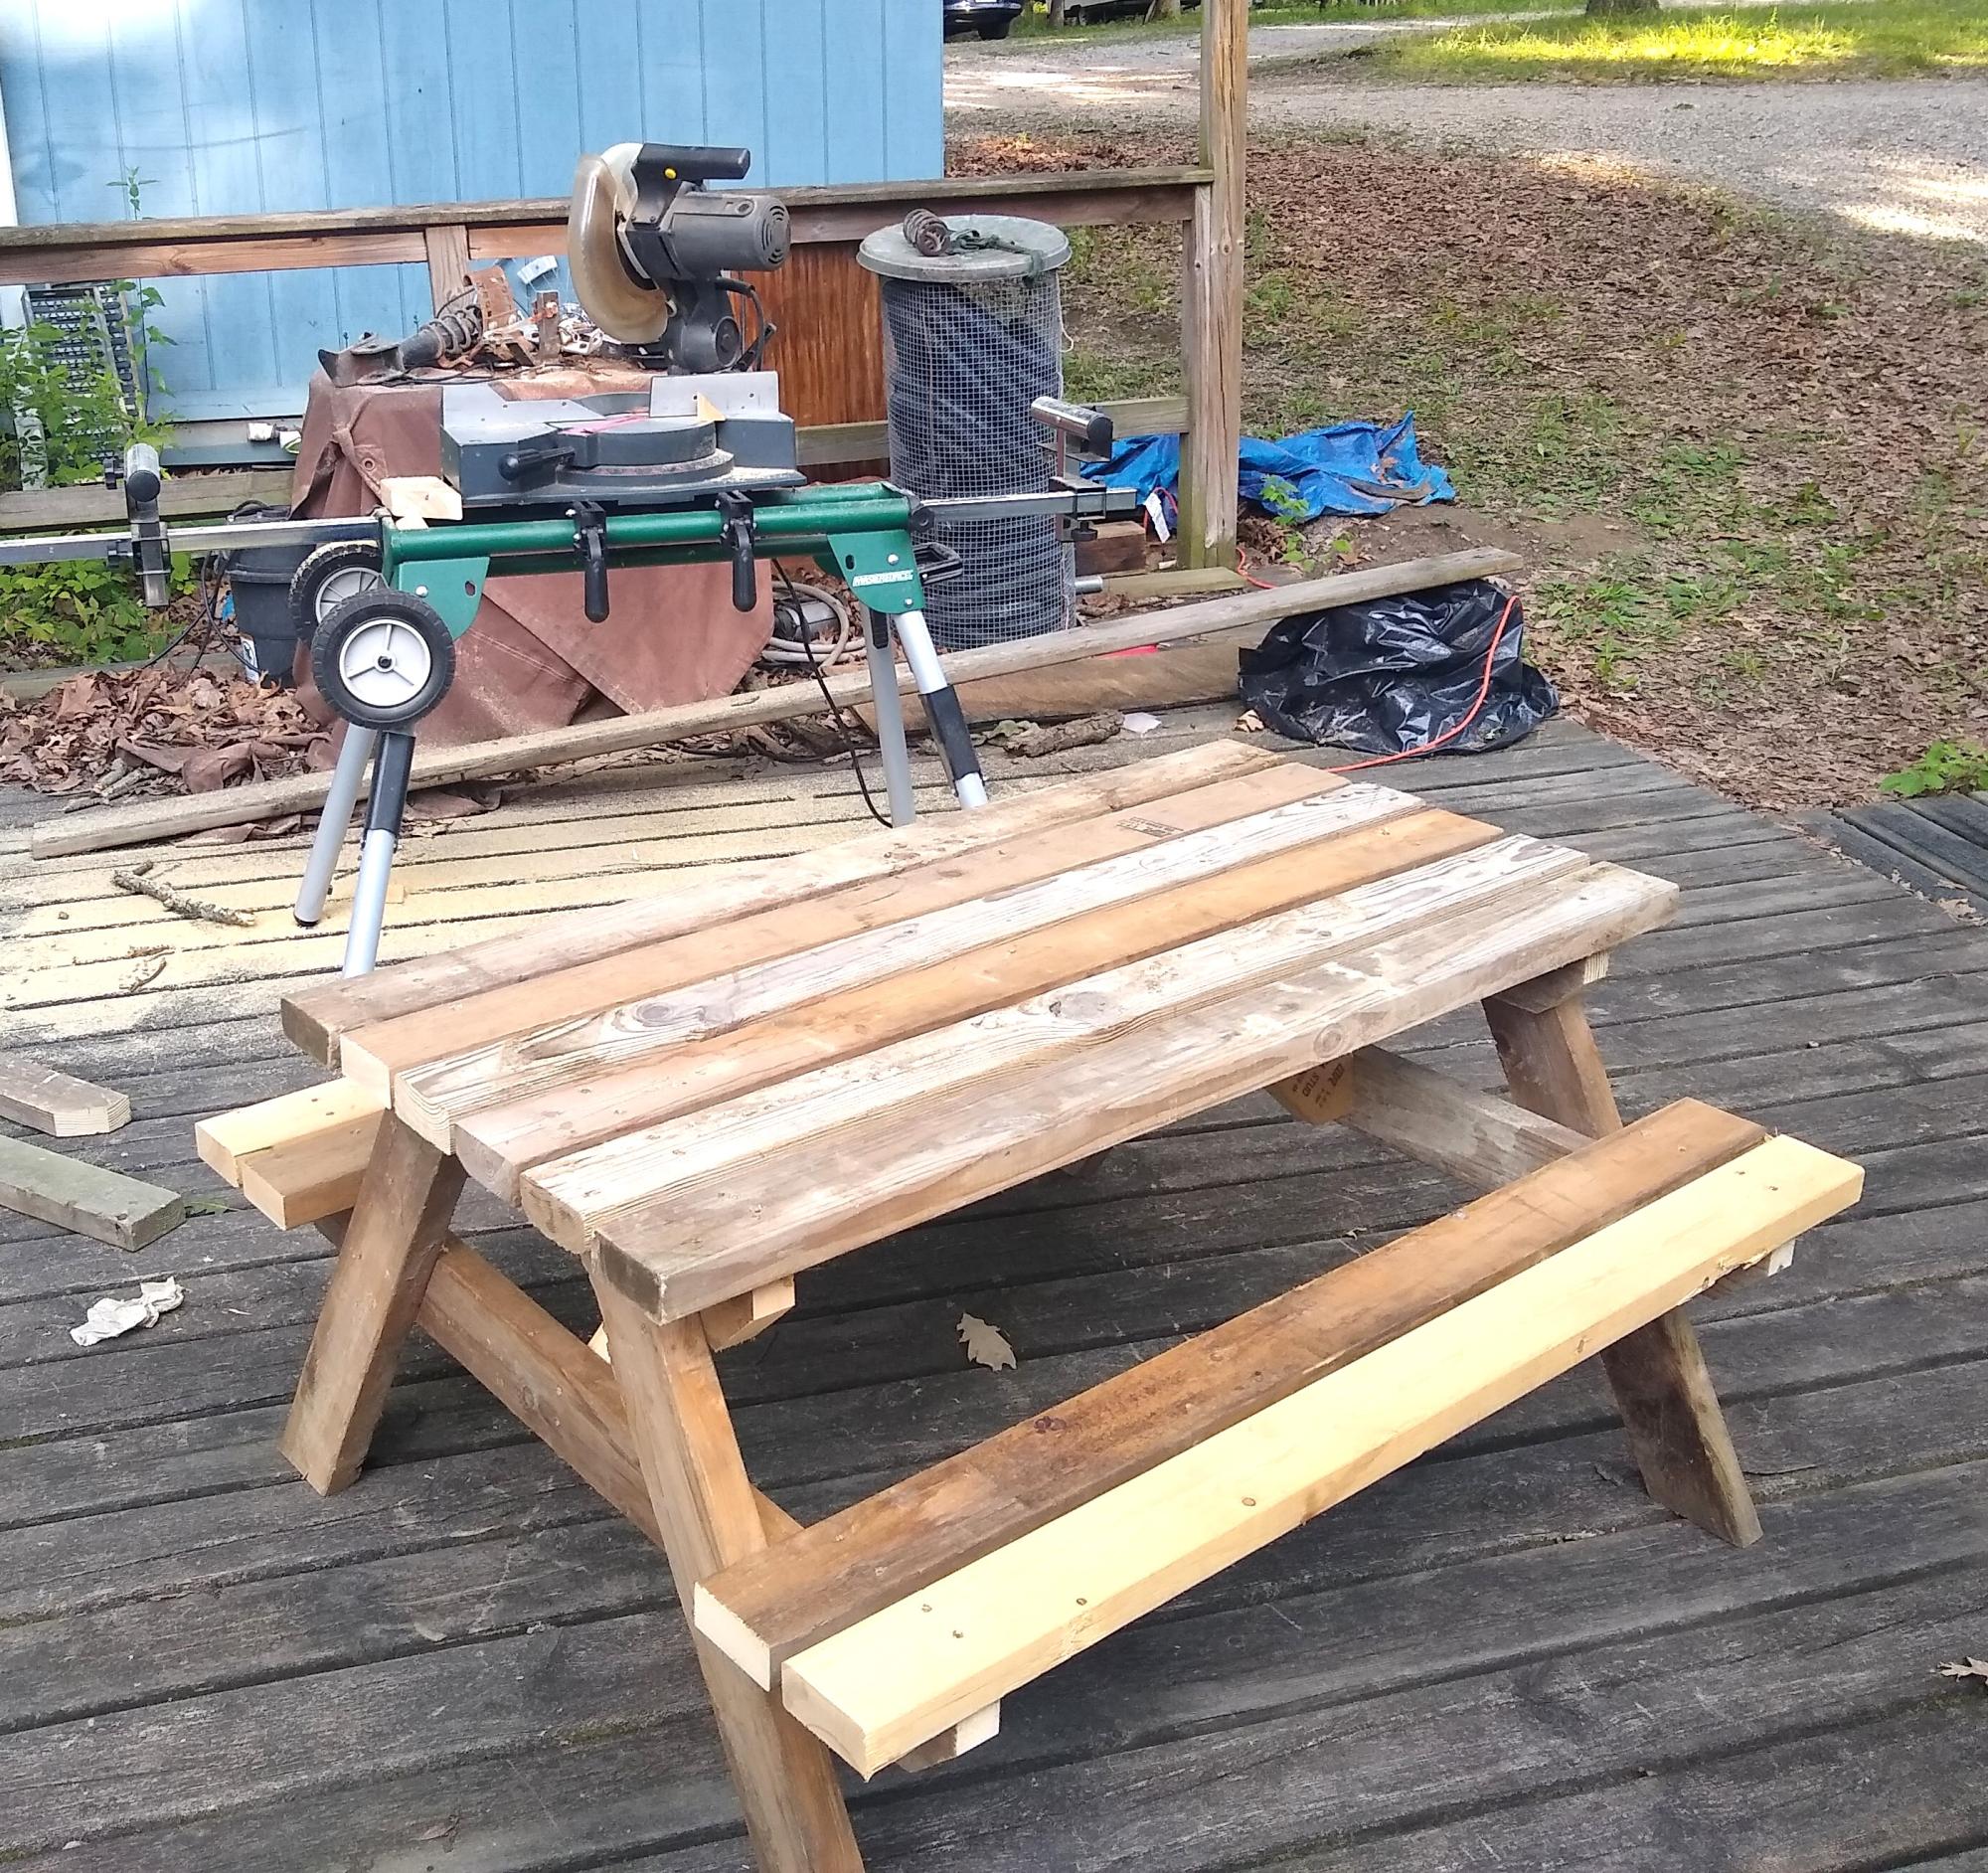
Thank you Ana for your work and making your plans available for free!
My table is based on your Big Kids Table, modified to use available free scrap wood.
tcphillips
Built from Plan(s)
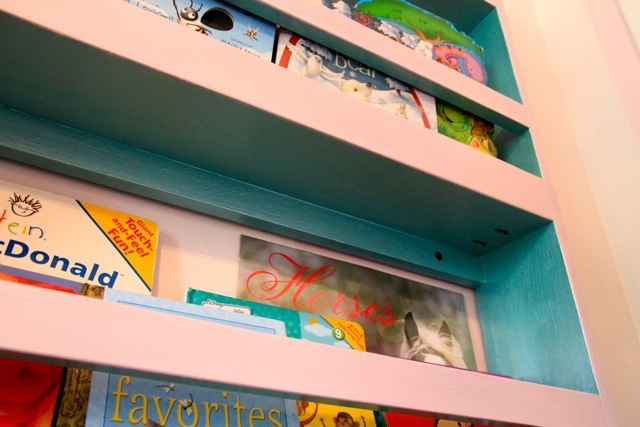
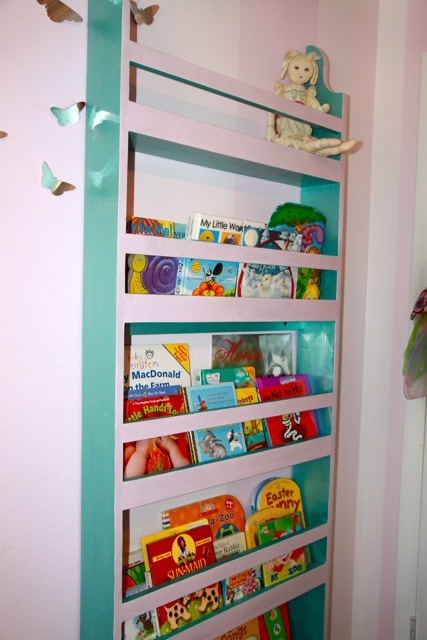
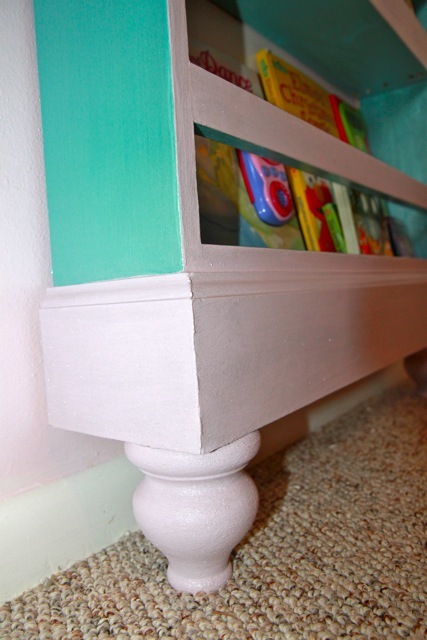
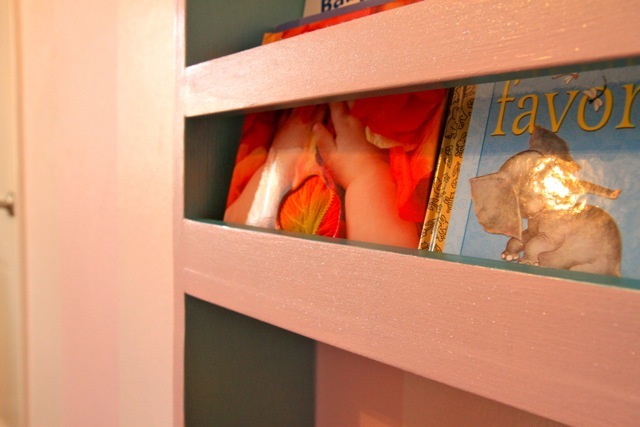
Girly Flat Wall Bookshelf

I built this bookshelf over the summer and finally decided on paint over the weekend. I LOVE how it turned out! I followed the plans for general directions, but my dimensions are taller and wider than the plans. I used 8' 1x6's for the sides and the shelves are about 14". I also added bun thingy's (or whatever they're called!) to the base so that the unit would fit completely flat against the wall. Otherwise you'd have to either cut out your existing wall trim or notch the shelf trim around your wall trim. This was my first time using the Kreg pocket hole jig. It took a little getting used to, so I'd suggest practicing with some scrap parts first to make sure you don't end up drilling the pocket hole completely through the board.
Built from Plan(s)
Estimated Time Investment
Afternoon Project (3-6 Hours)
Finish Used
Valspar Pink Glow and Valspar Brilliant Metals Grass Lake. For the 2nd coat of pink I mixed 3 packages of the Valspar glitter with about 1 1/2 cups of the paint. You can't see it very well from the picture, but the glitter is very visible and glistens in the sunlight!
Recommended Skill Level
Beginner
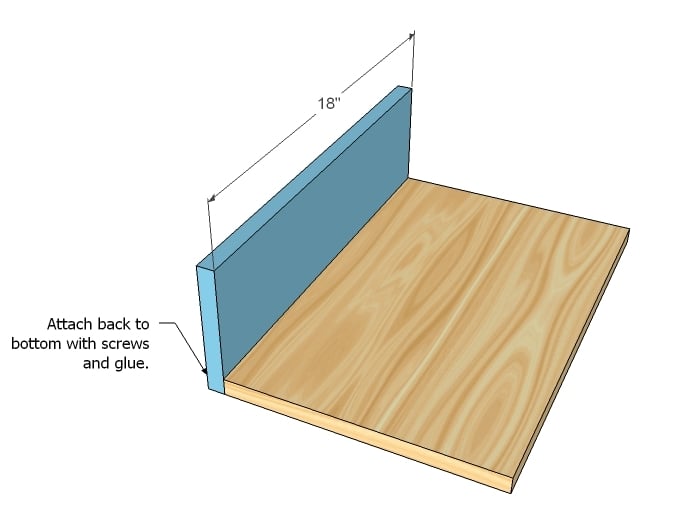
Baby boy misunderstands the concept of the 'Man Crate'
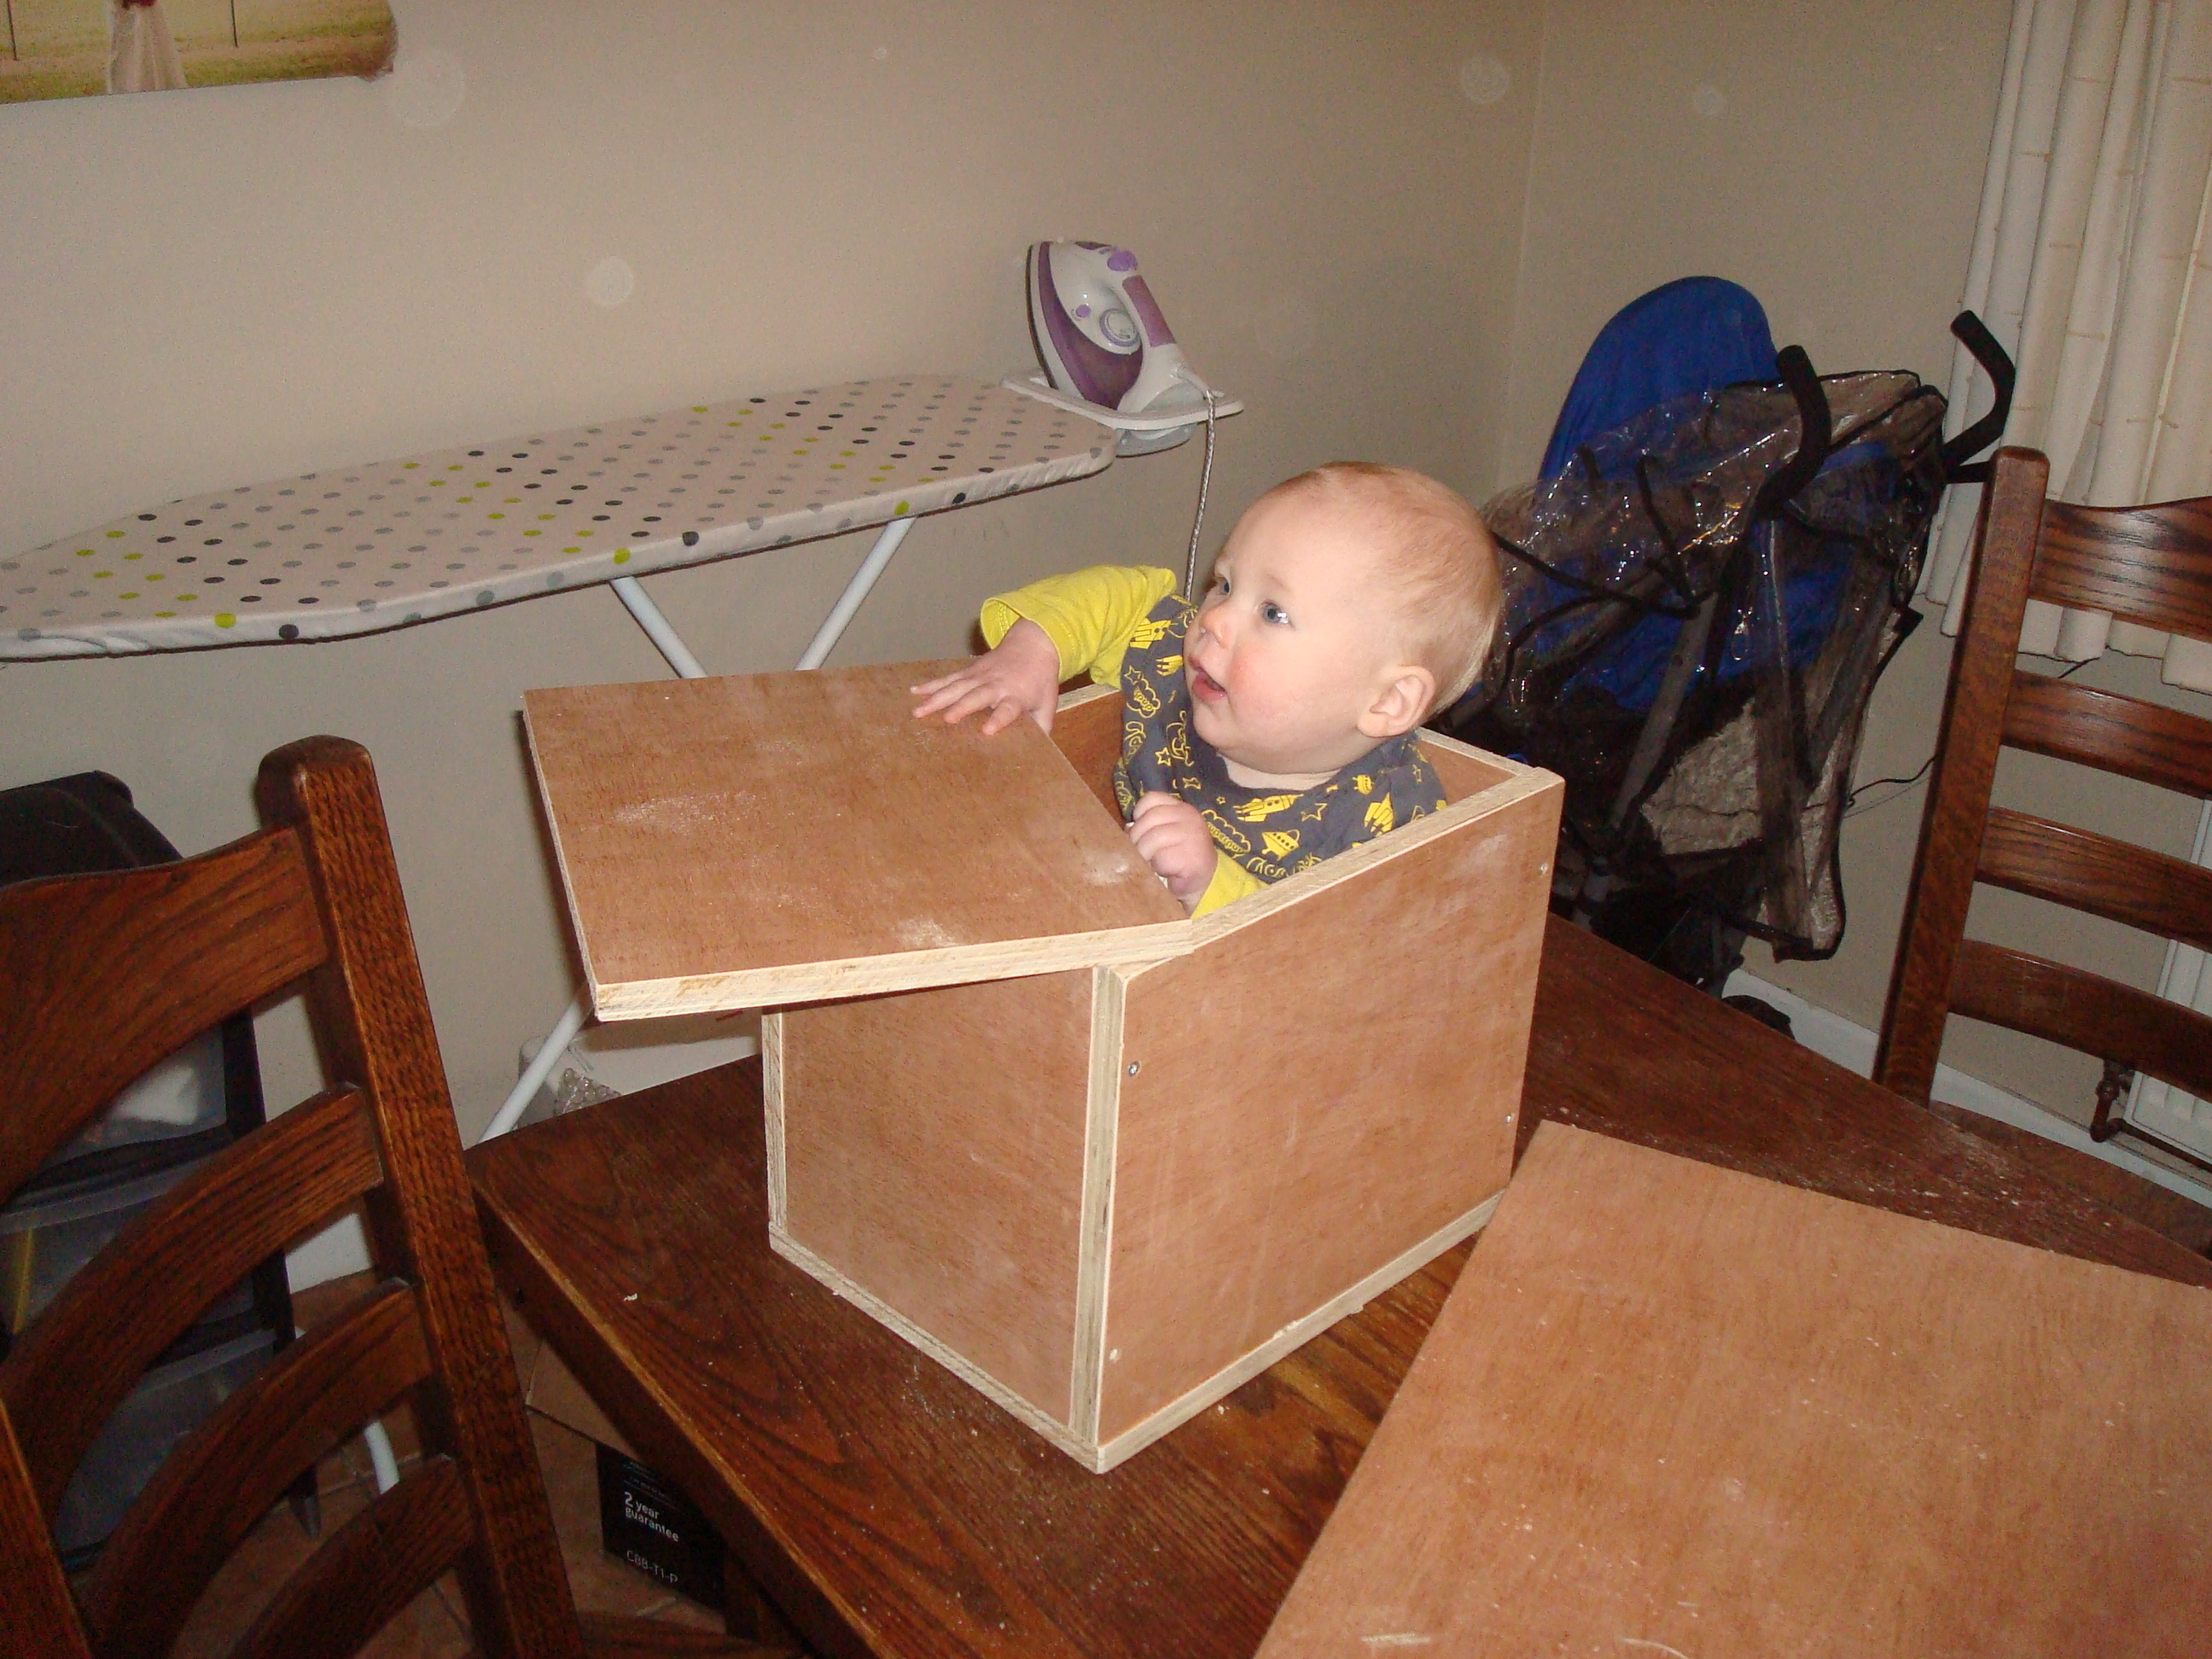
Men come in crates - who knew?
My crate is a gift for a friend, to be filled with manly foodstuffs, but in the mean time, the little 'un loved trying it out.
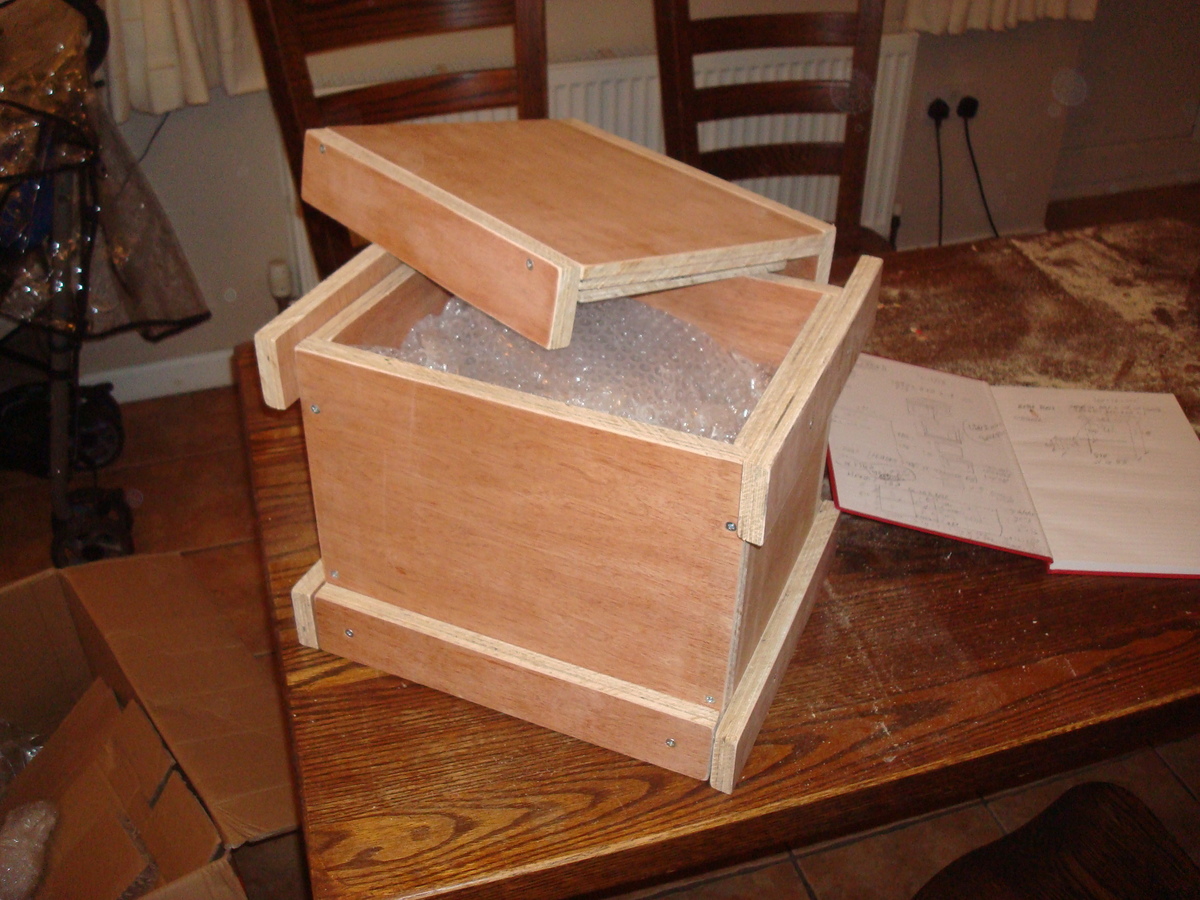
I didn't follow the plans rigidly, but I absolutely loved the idea and was inspired by all the great photos on this site. Mine looks the same from above and below, but the front and back side slats are attached to the lid while the left and right ones are attached to the box. Also, everything uses the same 18mm ply (what I had available!) which means you can easily lift it using the side slats, but lift the lid off with the front and back slats.
Enjoyed this project - will more than likely make others in the future. Maybe even spend a bit of time on the finish next time - the 'rough 'n' ready' look works well enough for this kind of project though, so it plays to my strengths!
Built from Plan(s)
Estimated Cost
15 GBP (approx 25 USD)
Estimated Time Investment
An Hour or Two (0-2 Hours)
Finish Used
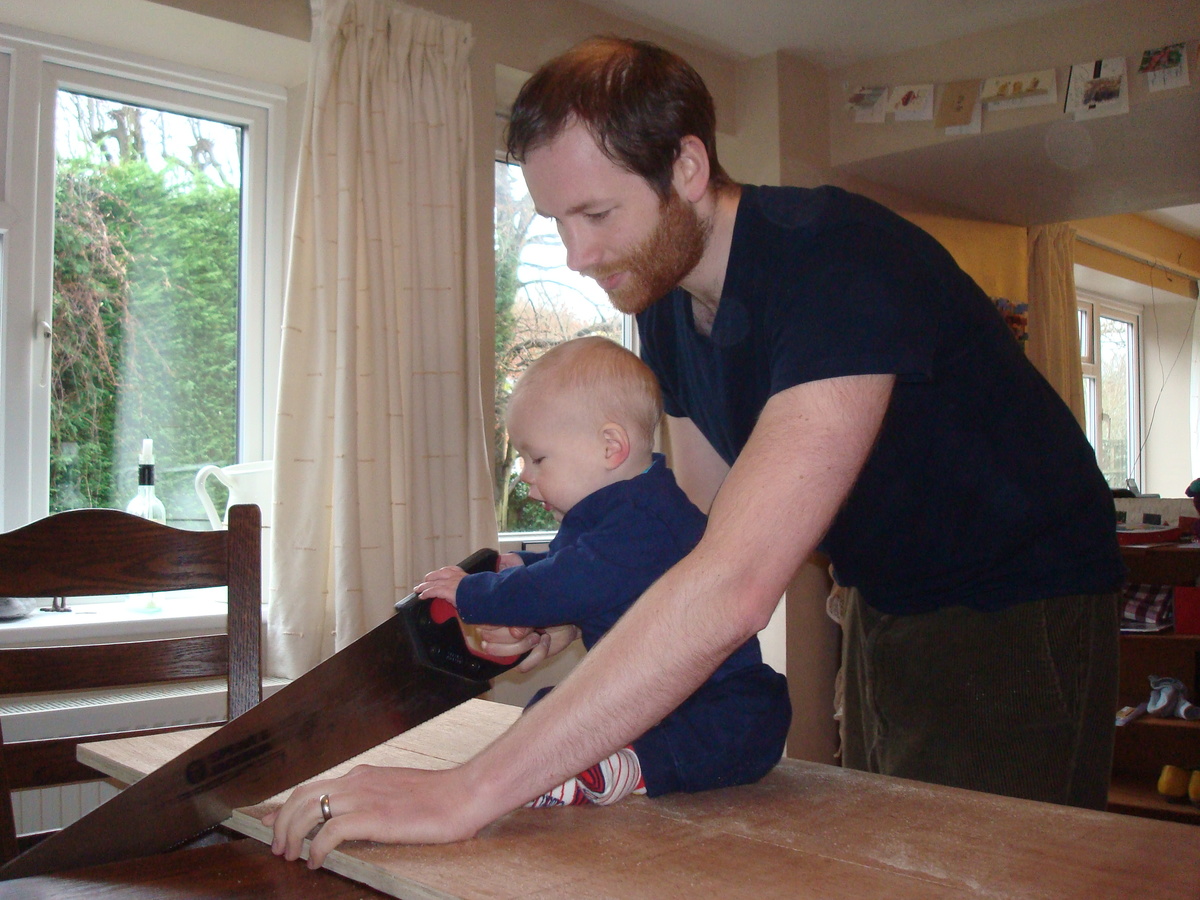
None on the wood. Briefly sanded, but no power tools used other than drill driver.
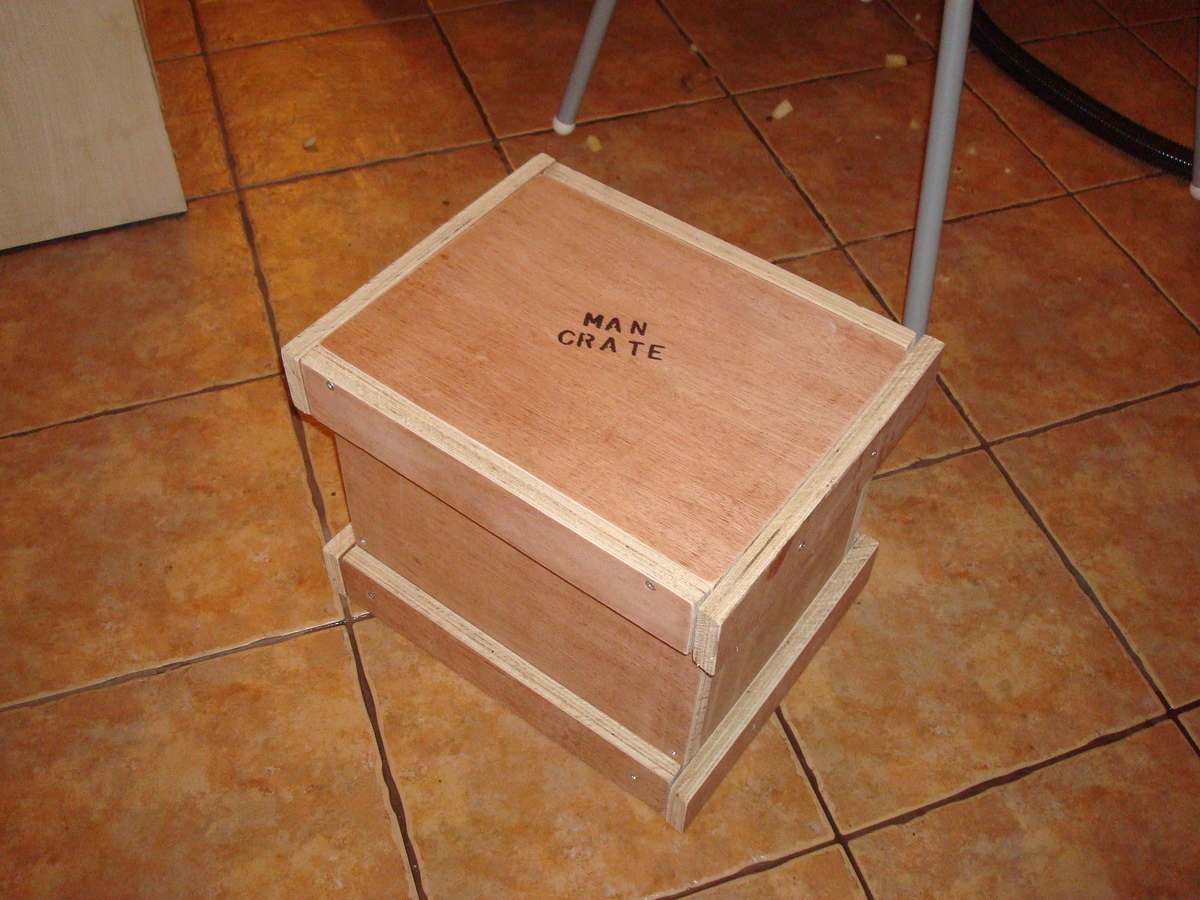
'Man Crate' lettering added with a sharpie and a template.
'Man Crate' lettering added with a sharpie and a template.
Recommended Skill Level
Beginner
Comments

Thu, 01/02/2014 - 11:04
Great job!
Your man crate looks great! You can definitely say your little guy has "man tested" it as well! (super cute pictures with him, by the way) The idea of using the top side trims for handles is super! Thanks for sharing this build! :)
Joanne
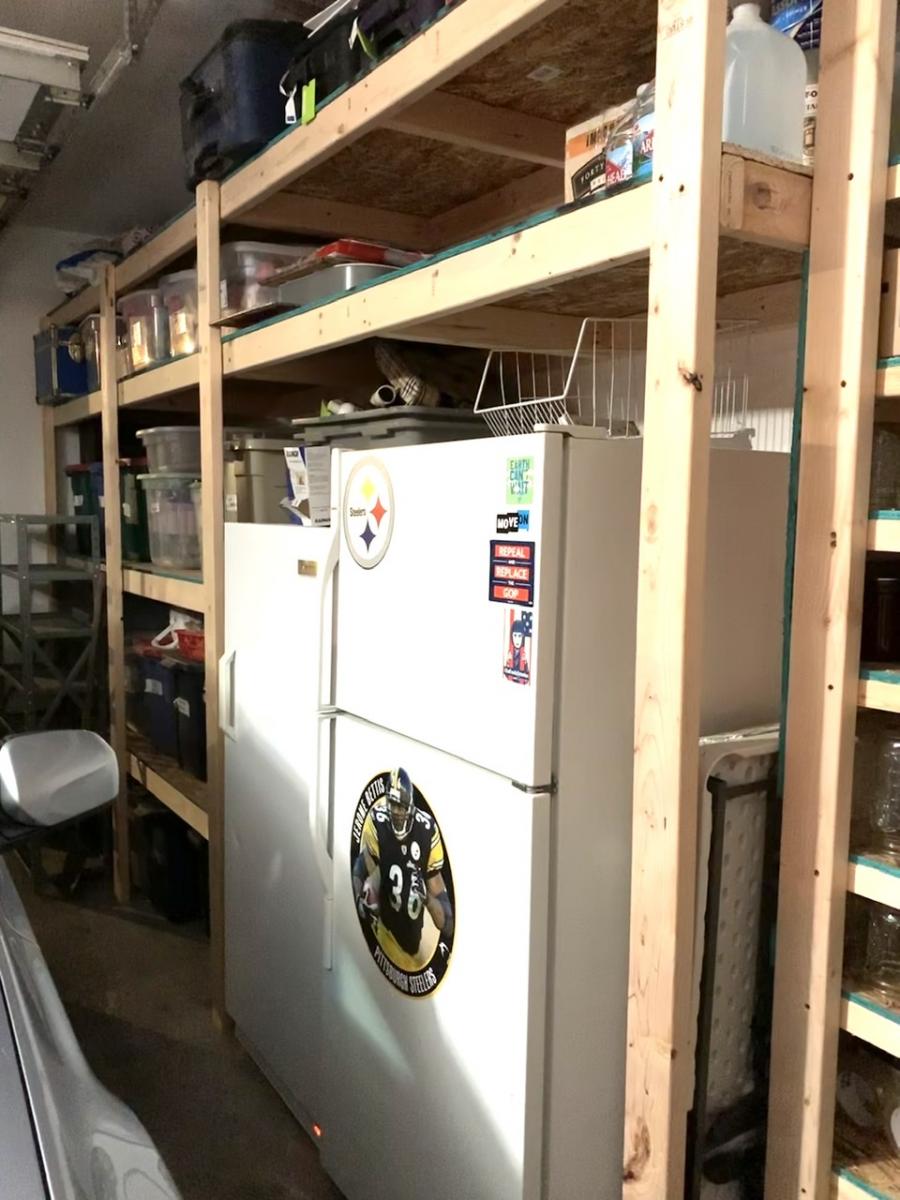
Garage shelves
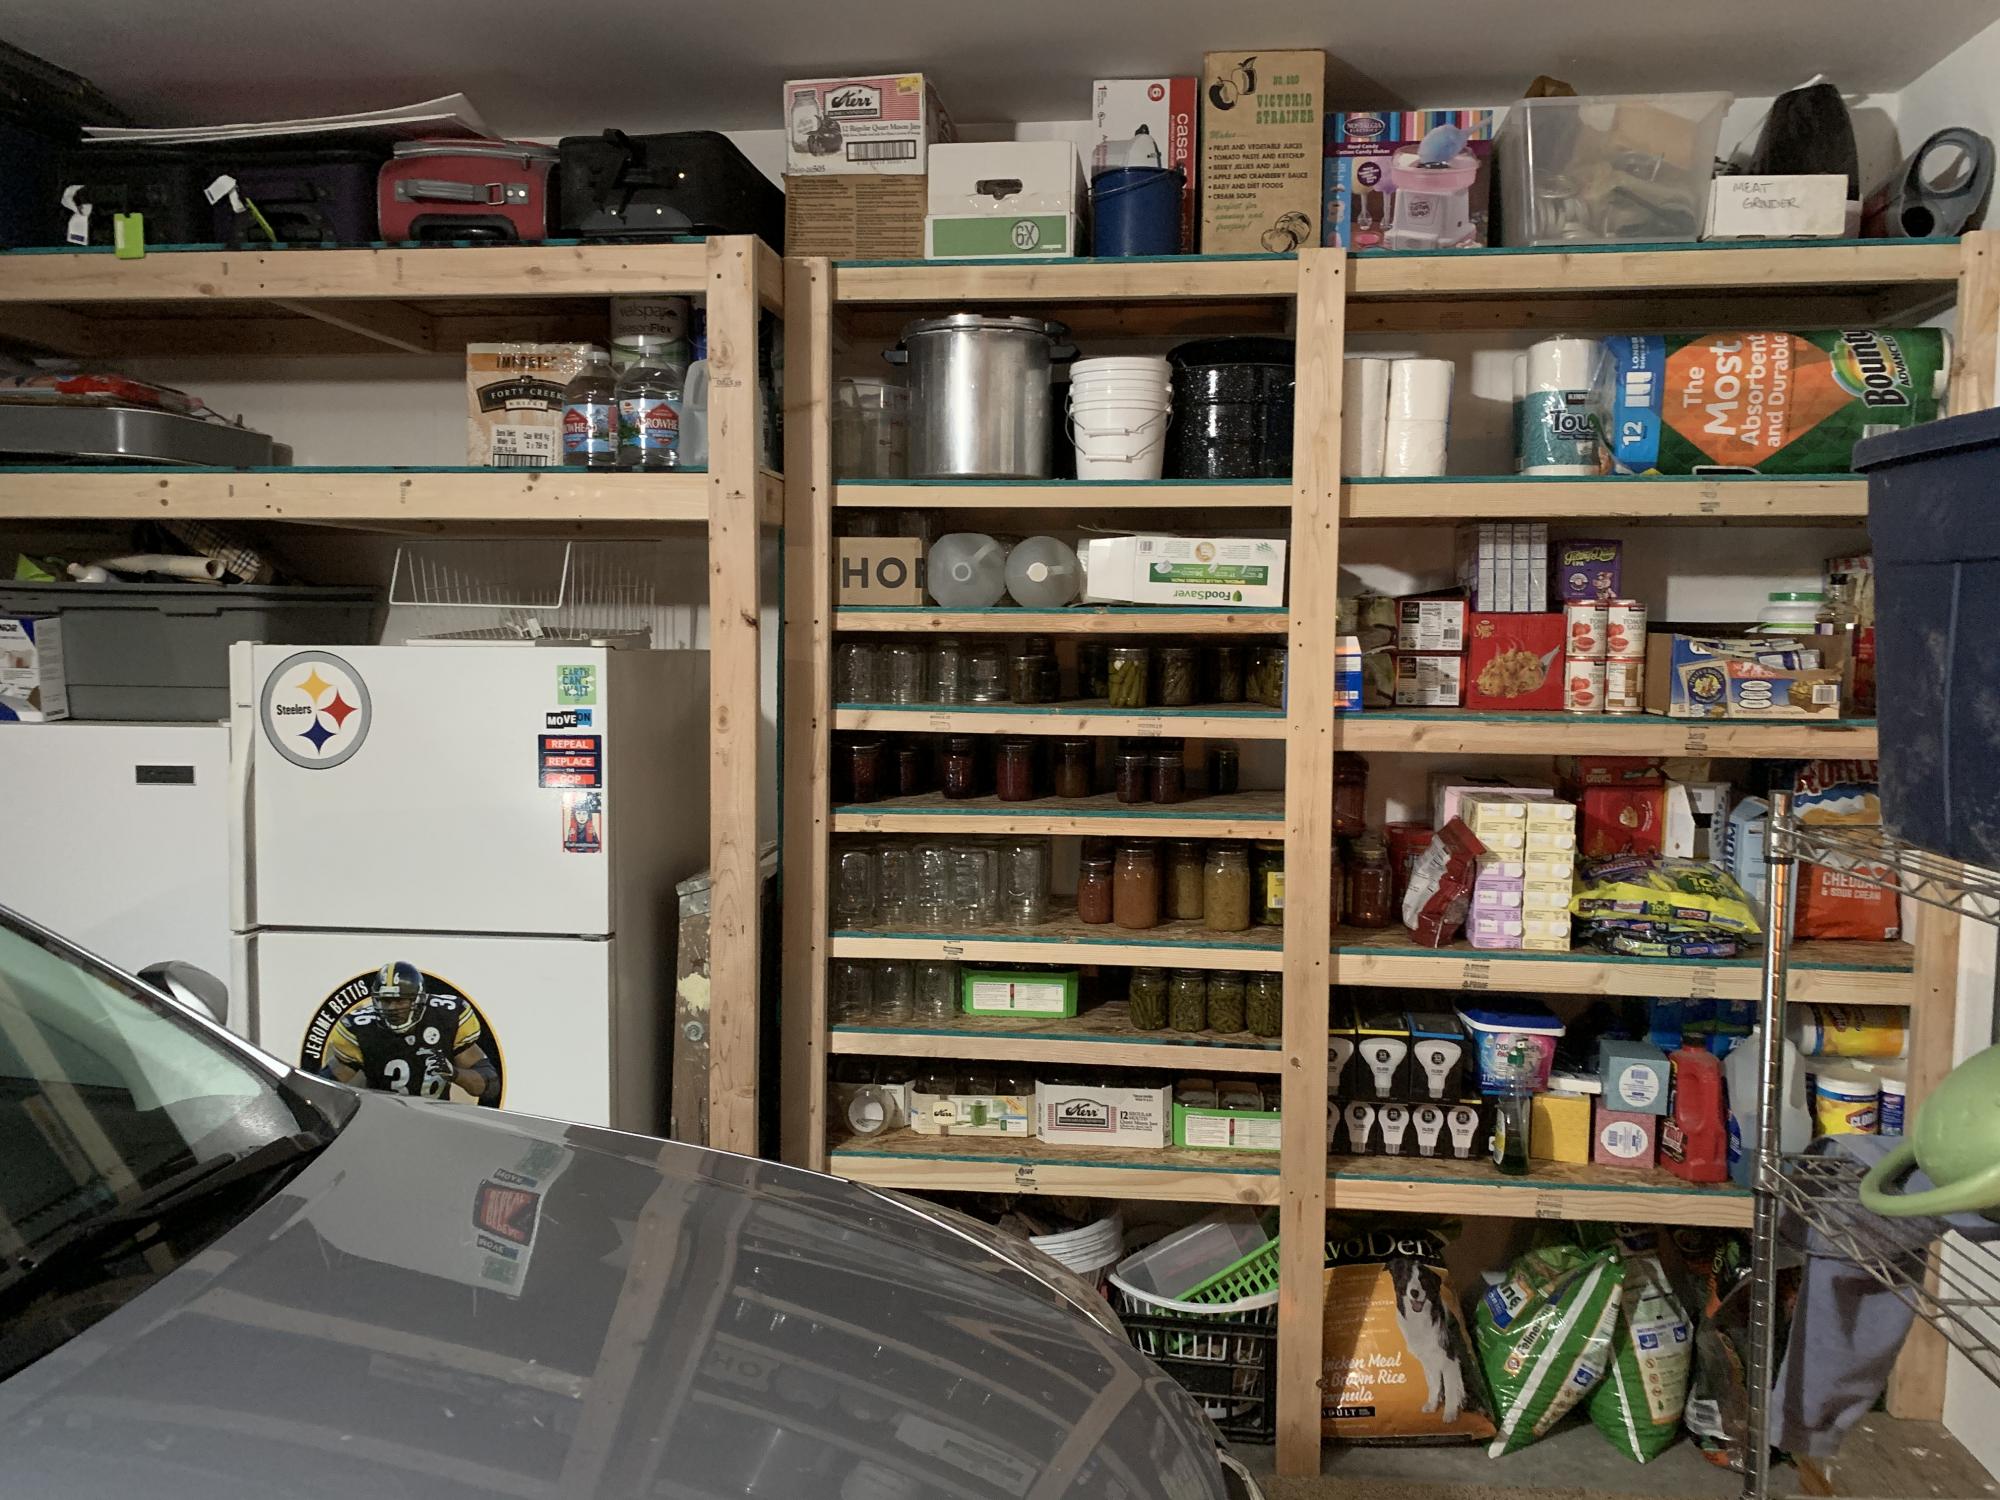
Added some storage to the garage. Wife got some more room for her canning. Looks much better than older metal shelving. Thanks for the ideas, again!
Built from Plan(s)
Estimated Cost
240
Estimated Time Investment
Day Project (6-9 Hours)
Finish Used
None
Recommended Skill Level
Beginner
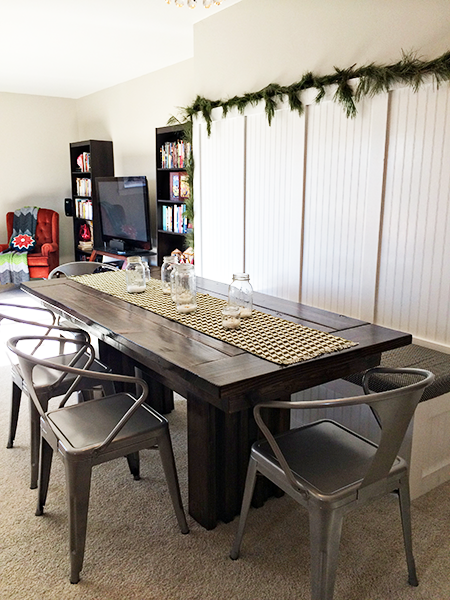
Modern Dining Table
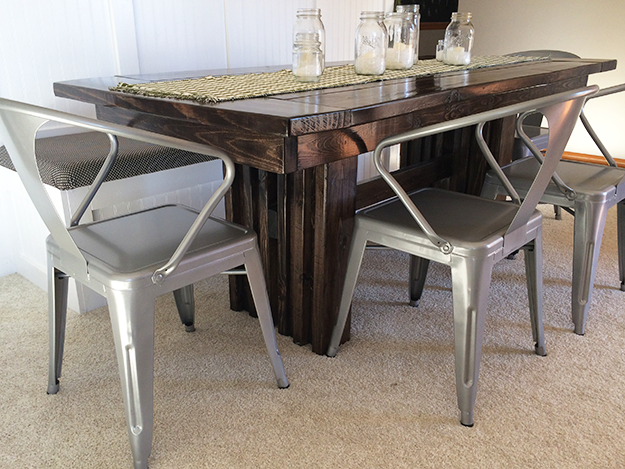
Our extra long living/dining room was just begging for a little definition. So I scoured all of Ana White's plans for some inspiration for the perfect-for-us table. I have never built anything, so I enlisted the help of my genius dad and we got to work!
We ended up using elements of the Modern Outdoor Patio Table and the Farmhouse Table. We sized the patio table down to six feet long and used the board layout from the farmhouse table for the table top. We also changed up the table legs a bit to add some visual interest.
After tackling the table, we built the banquette and beadboard wall. I never thought I would learn so much about power tools. Ha! This project was so much fun. Thank you for the free plans!! I can't wait to work on our next project!
You can read more about our table here: http://www.becomingwhitney.com/dining-area-progress/
here: http://www.becomingwhitney.com/it-is-finished/
and here: http://www.becomingwhitney.com/christmas-cheerin-it-up/

Built from Plan(s)
Estimated Cost
$200
Estimated Time Investment
Weekend Project (10-20 Hours)
Finish Used
I sanded this baby within an inch of its life. I chose not to use a wood conditioner because I wanted a rough look, and I adored the unevenness of the stain in some areas. I put on one heavy coat of Minwax Espresso stain with a rag. I used a teeny paintbrush to get the legs and between the planks of the table. Then I sealed it with a semi-gloss water-based poly. I put five coats on the table top and sides and three coats on the legs. It gave it a great finish, but isn't too shiny in person.
Recommended Skill Level
Intermediate
Comments

Tue, 01/07/2014 - 10:15
Awesome table!
The fabulous thing about DIY is how you can modify a plan to suit your needs. You and your dad have built a one-of-a-kind that can be handed down to future generations. Love the style and finish. Keep up the good work!
Tue, 02/18/2014 - 19:39
your table
can you share the cut list and measurements for your beautiful TABLE?
BIG STEVE
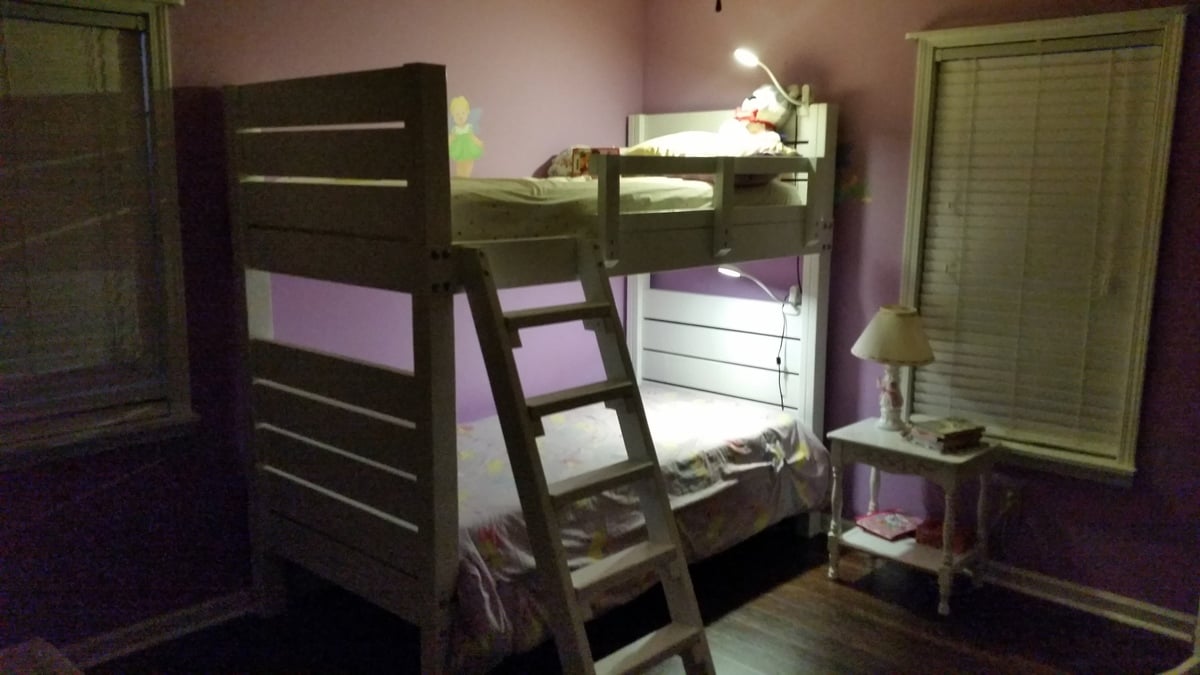
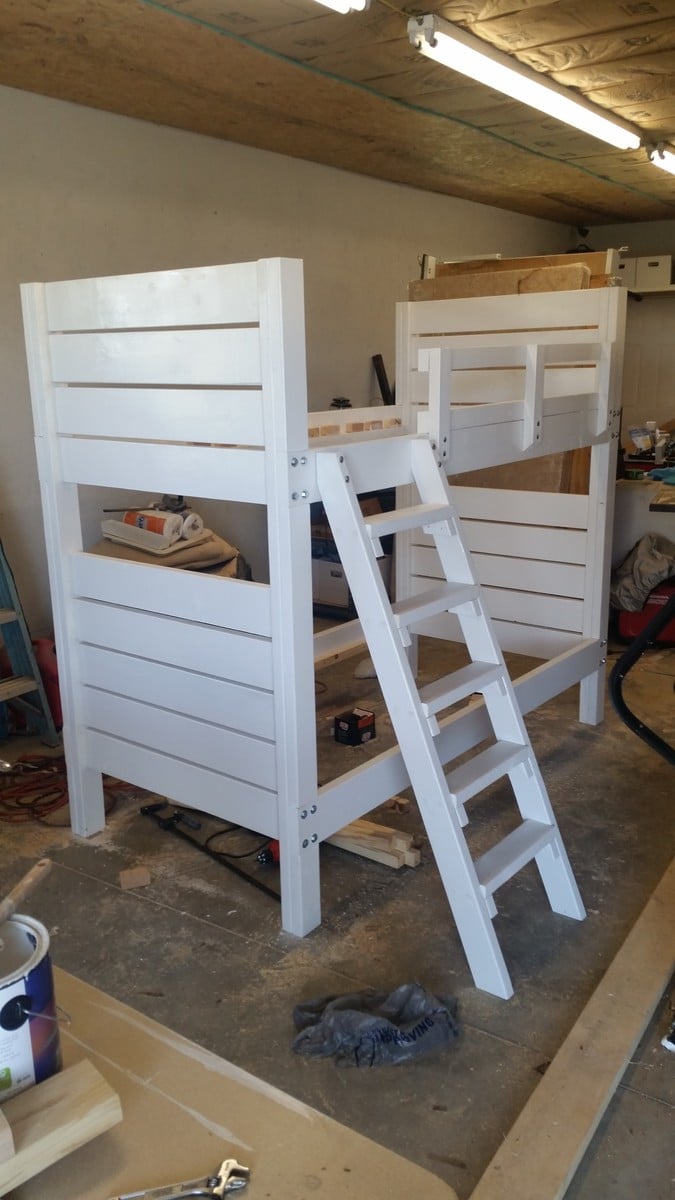
Worked great. Followed plans exactly..
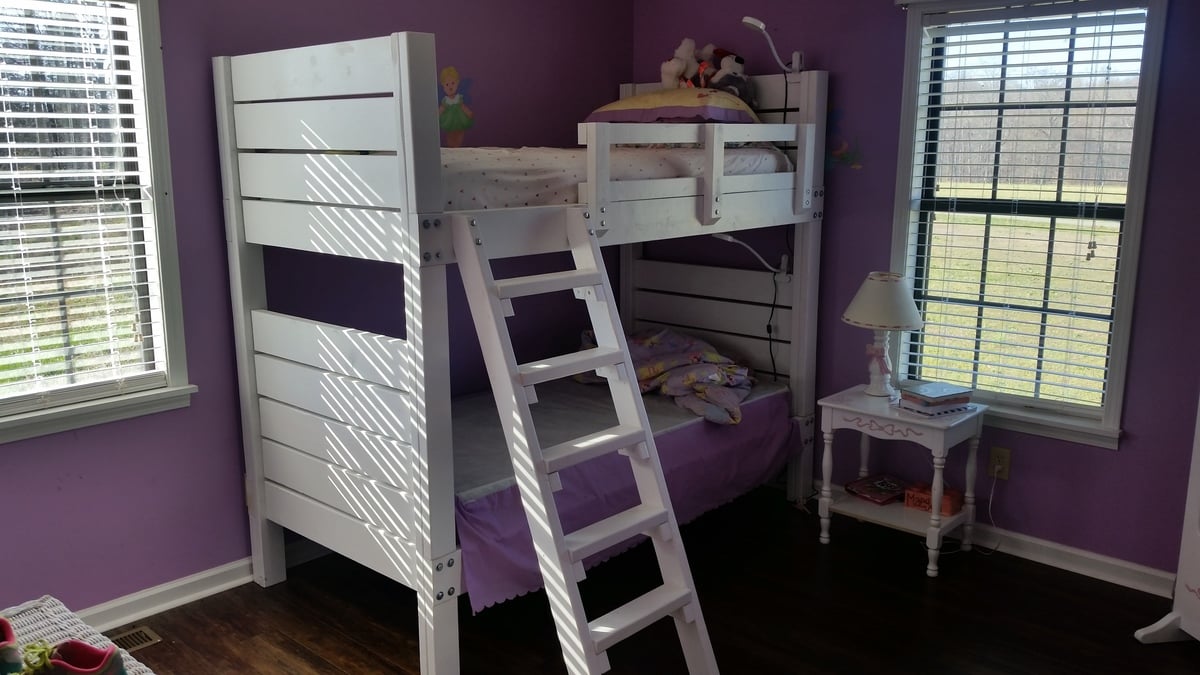
Followed the plans exactly and all worked out perfectly. I designed my own ladder and rails. Kids love this bed. Took about 1 gallon of valspare 2000 paint to paint everything.
Built from Plan(s)
Estimated Cost
$175 total. including paint ($20) and nuts, bolts, and screws ($30).
Estimated Time Investment
Weekend Project (10-20 Hours)
Finish Used
White gloss valspar 2000
Recommended Skill Level
Beginner
Comments
Jack's Play Kitchen
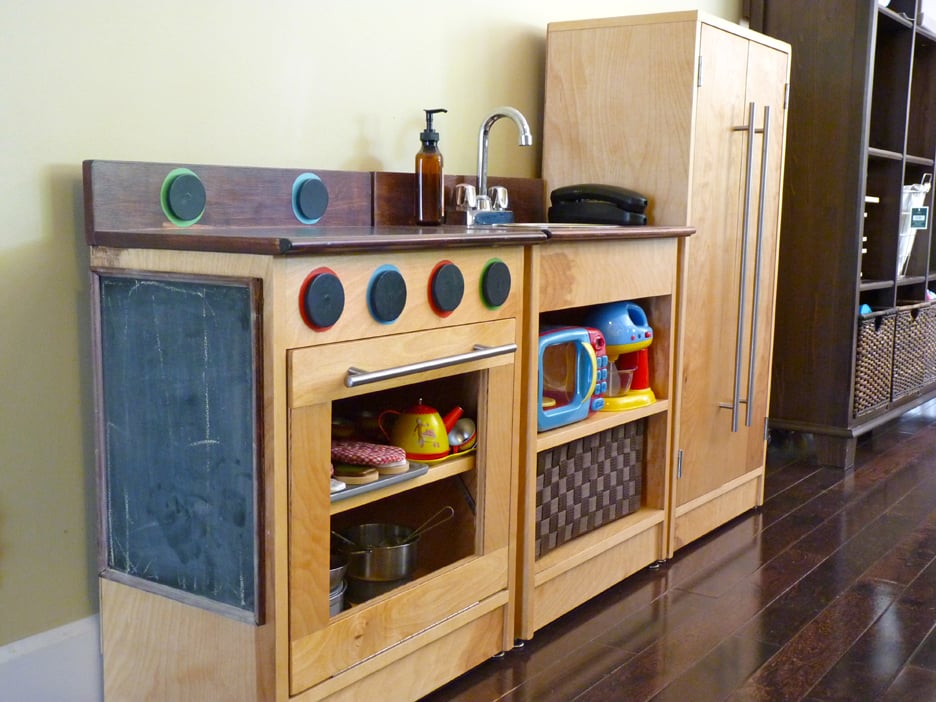
My husband and I built this kitchen for my son's 2nd birthday and it continues to be a huge hit. We scaled the dimensions up a bit so he can use it longer, and used 3/4" birch plywood with veneer on the ends. The oven knobs spin on dowels, the stove burners are just painted on and we added moulding to the edge of the countertops to give it a nice rounded edge. We used a cheap bar faucet from ebay, hardware from IKEA, and a stainless steel bowl with a rim for the sink. I highly recommend using a flap stay on the stove door to keep it from slamming open, and magnetic catches on the oven and fridge doors. We also used anti-tip furniture straps because these suckers are heavy.
Built from Plan(s)
Estimated Time Investment
Weekend Project (10-20 Hours)
Finish Used
clear stain on bases,
red mahogany stain on countertops,
many many coats of poly (this thing will survive the apocalypse)
red mahogany stain on countertops,
many many coats of poly (this thing will survive the apocalypse)
Recommended Skill Level
Beginner
Comments
Sun, 07/08/2012 - 22:00
Dimensions
Thanks Tiffonie!
We added three inches to the width and height. It was a bit large for him at two years old. Now that he is 3.5 it still gets played with every day, and the size works well. Good luck- your son will love it!