Benches that Convert to Picnic Tables

Simple benches that convert to picnic tables
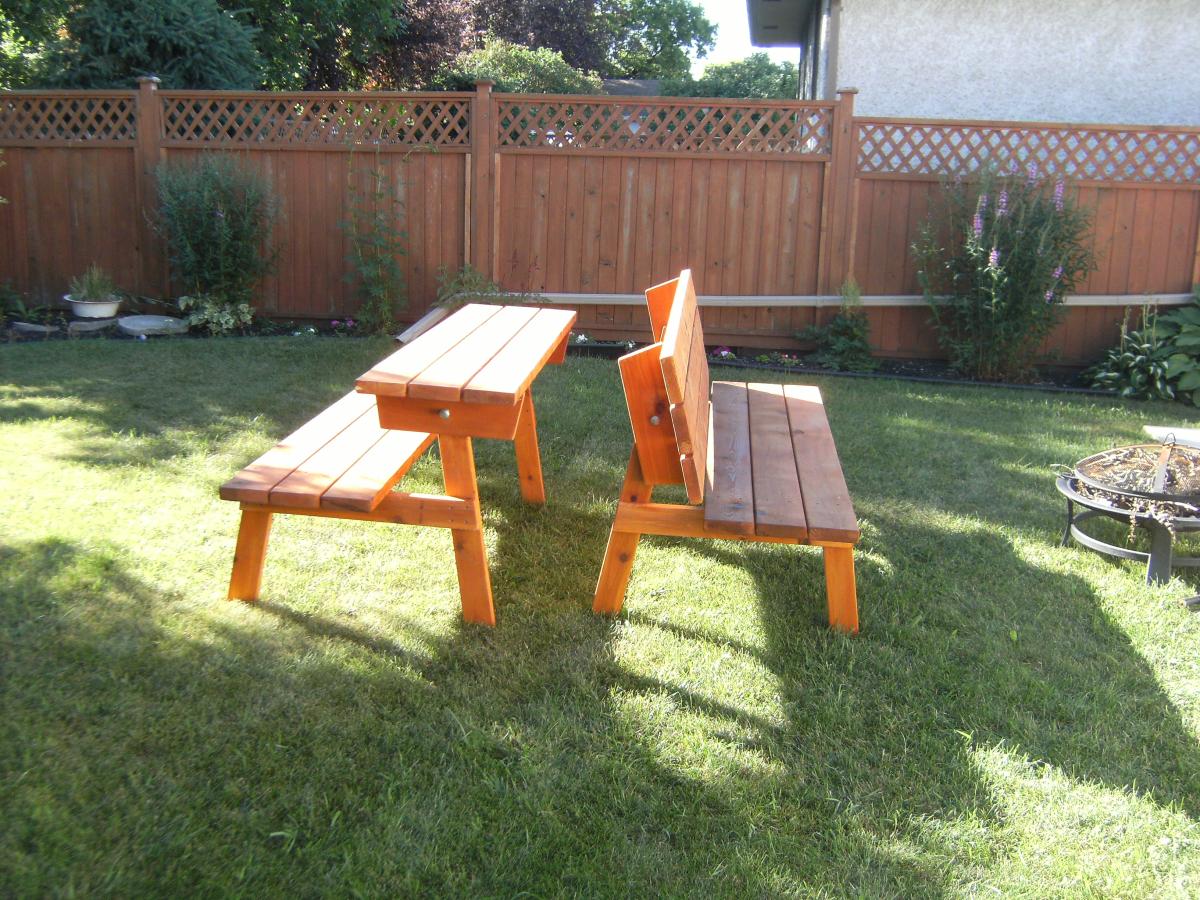
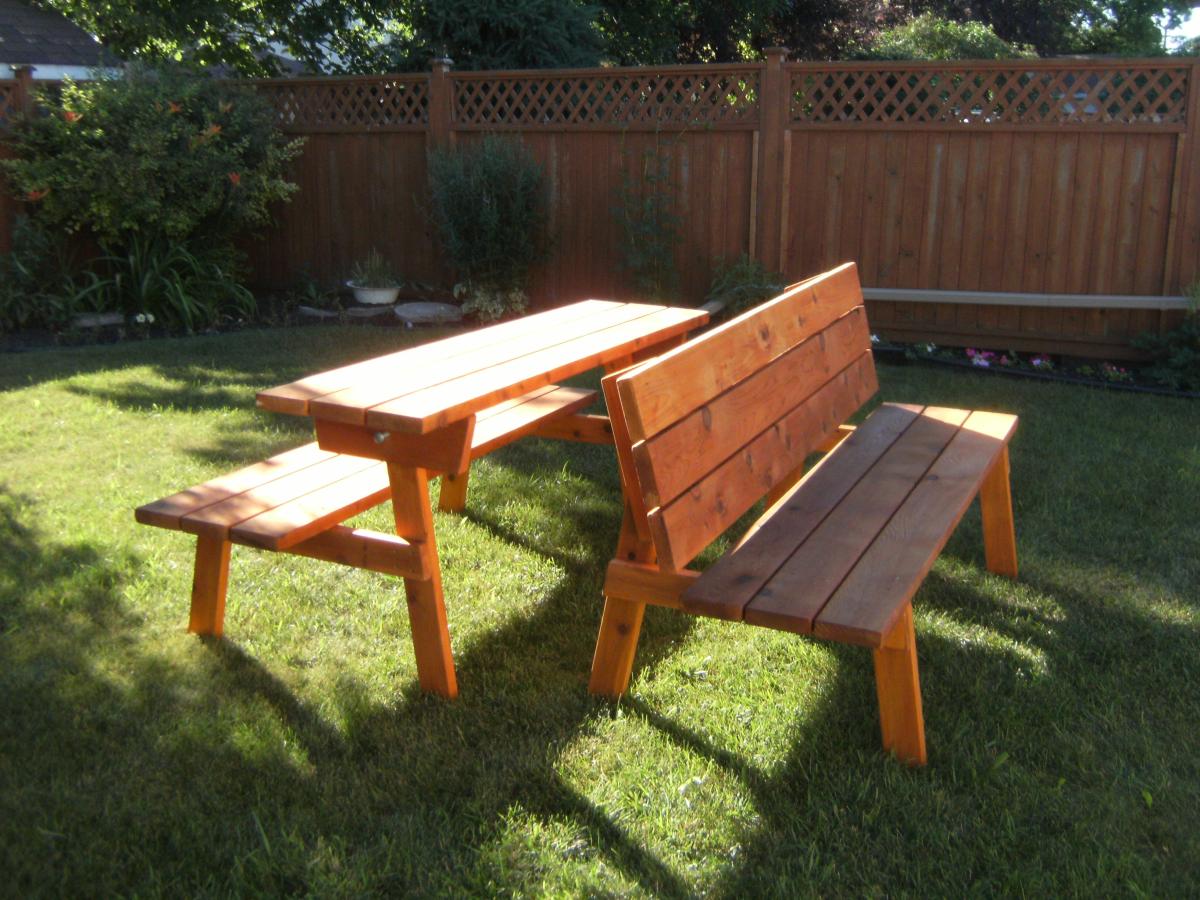
Built from Plan(s)
Simple benches that convert to picnic tables
Used your original plans for these. I'm very pleased with the result. Carpentry is not really my thing, but I'm inspired to do more now.
Sat, 02/25/2023 - 11:59
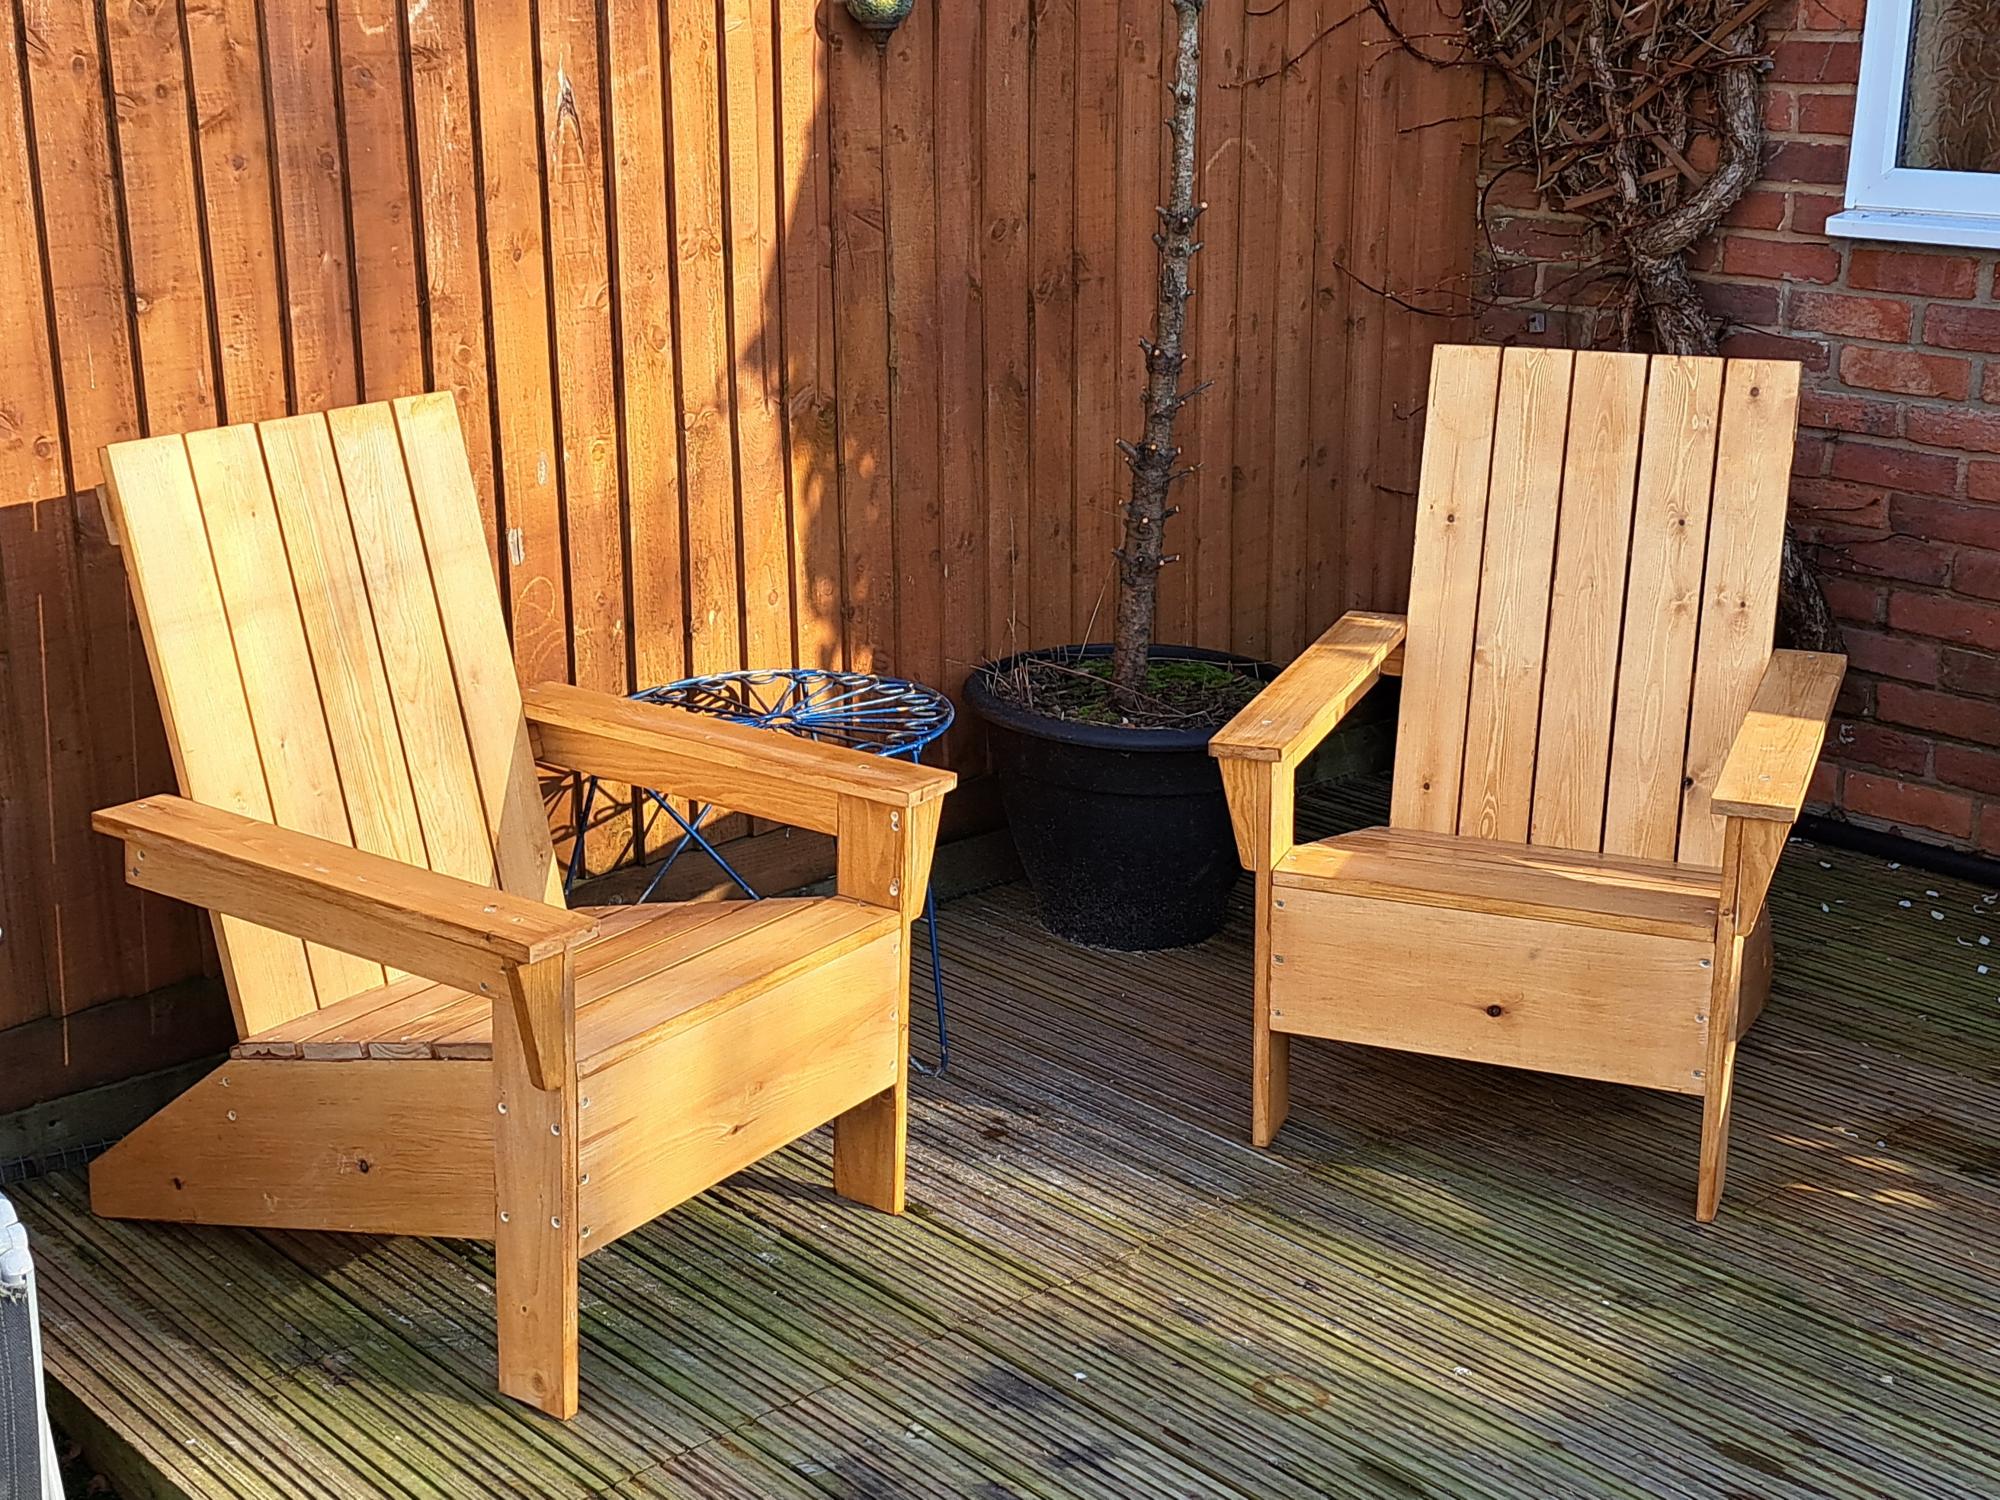
These look fabulous, thank you for sharing! Can't wait to see your next project.
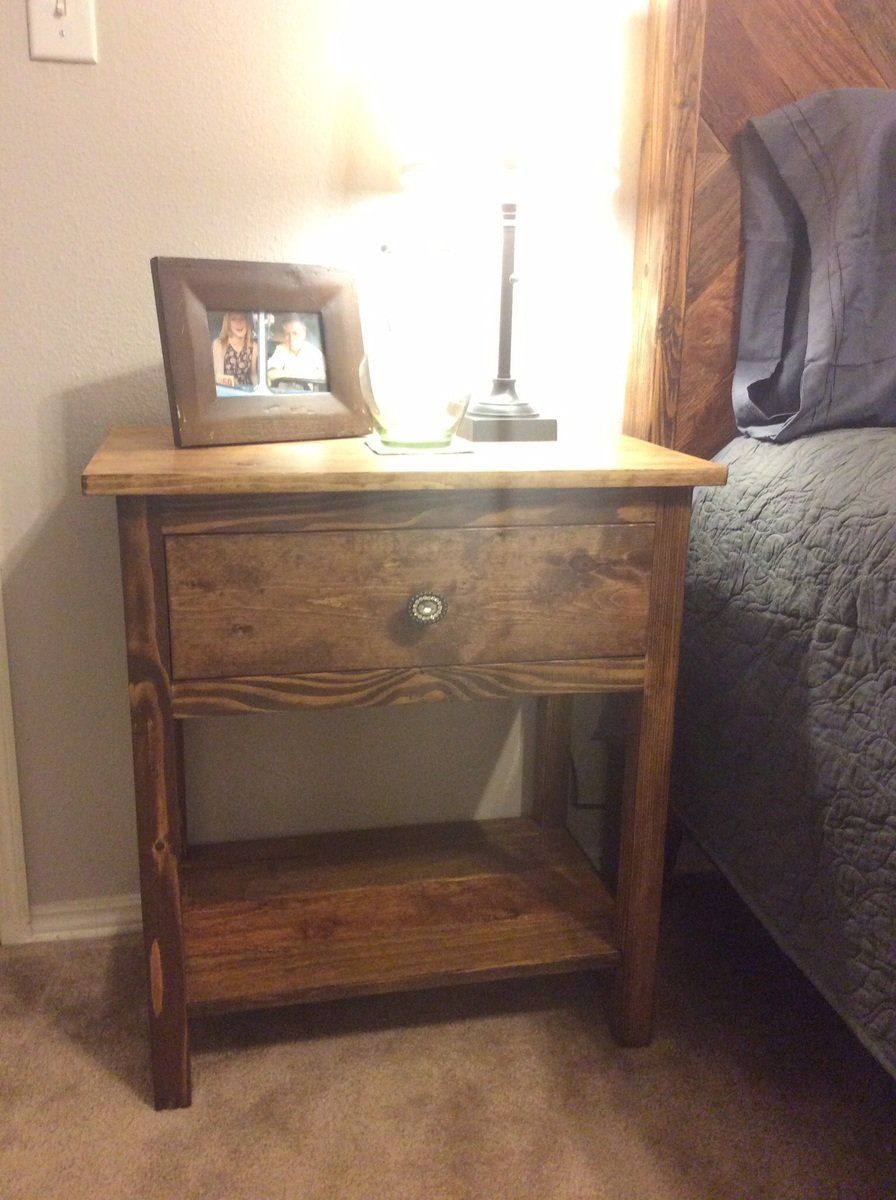
perfect nightstand for our guest bedroom. We love how easy the plans are. It was exactly what we were looking for and the cost to build was around $40.

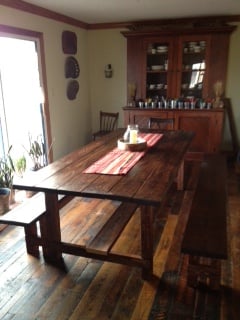
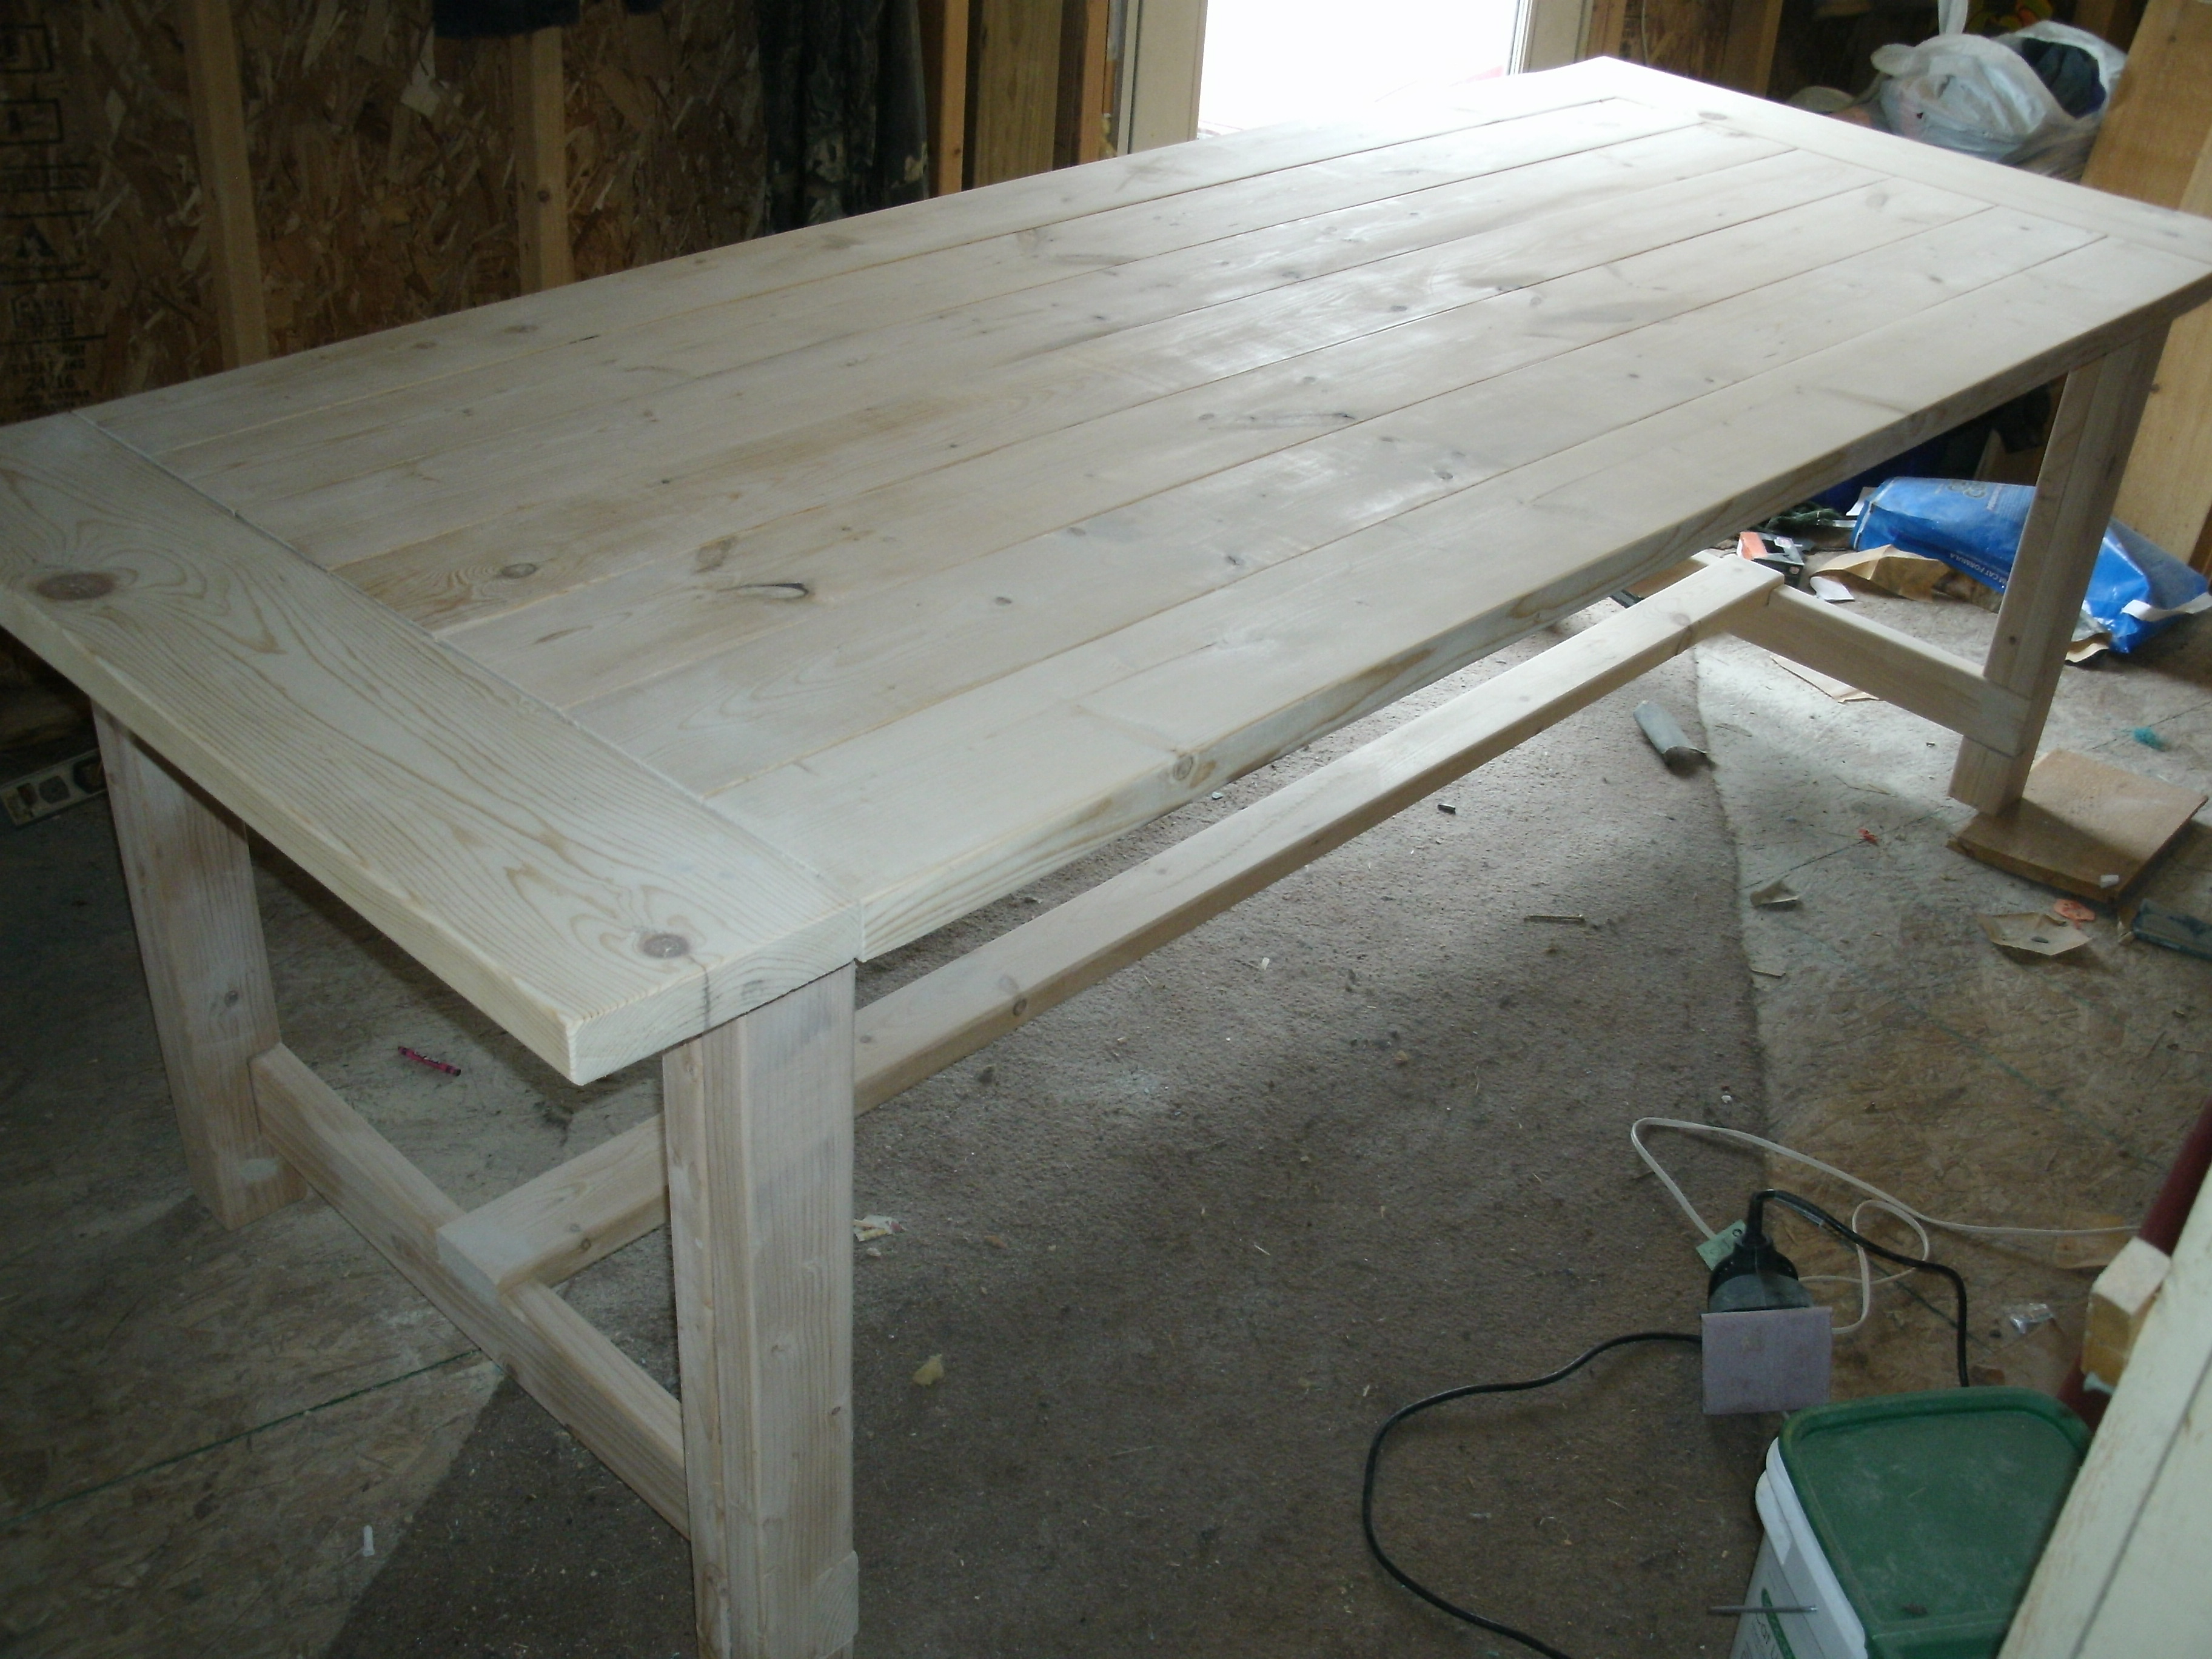
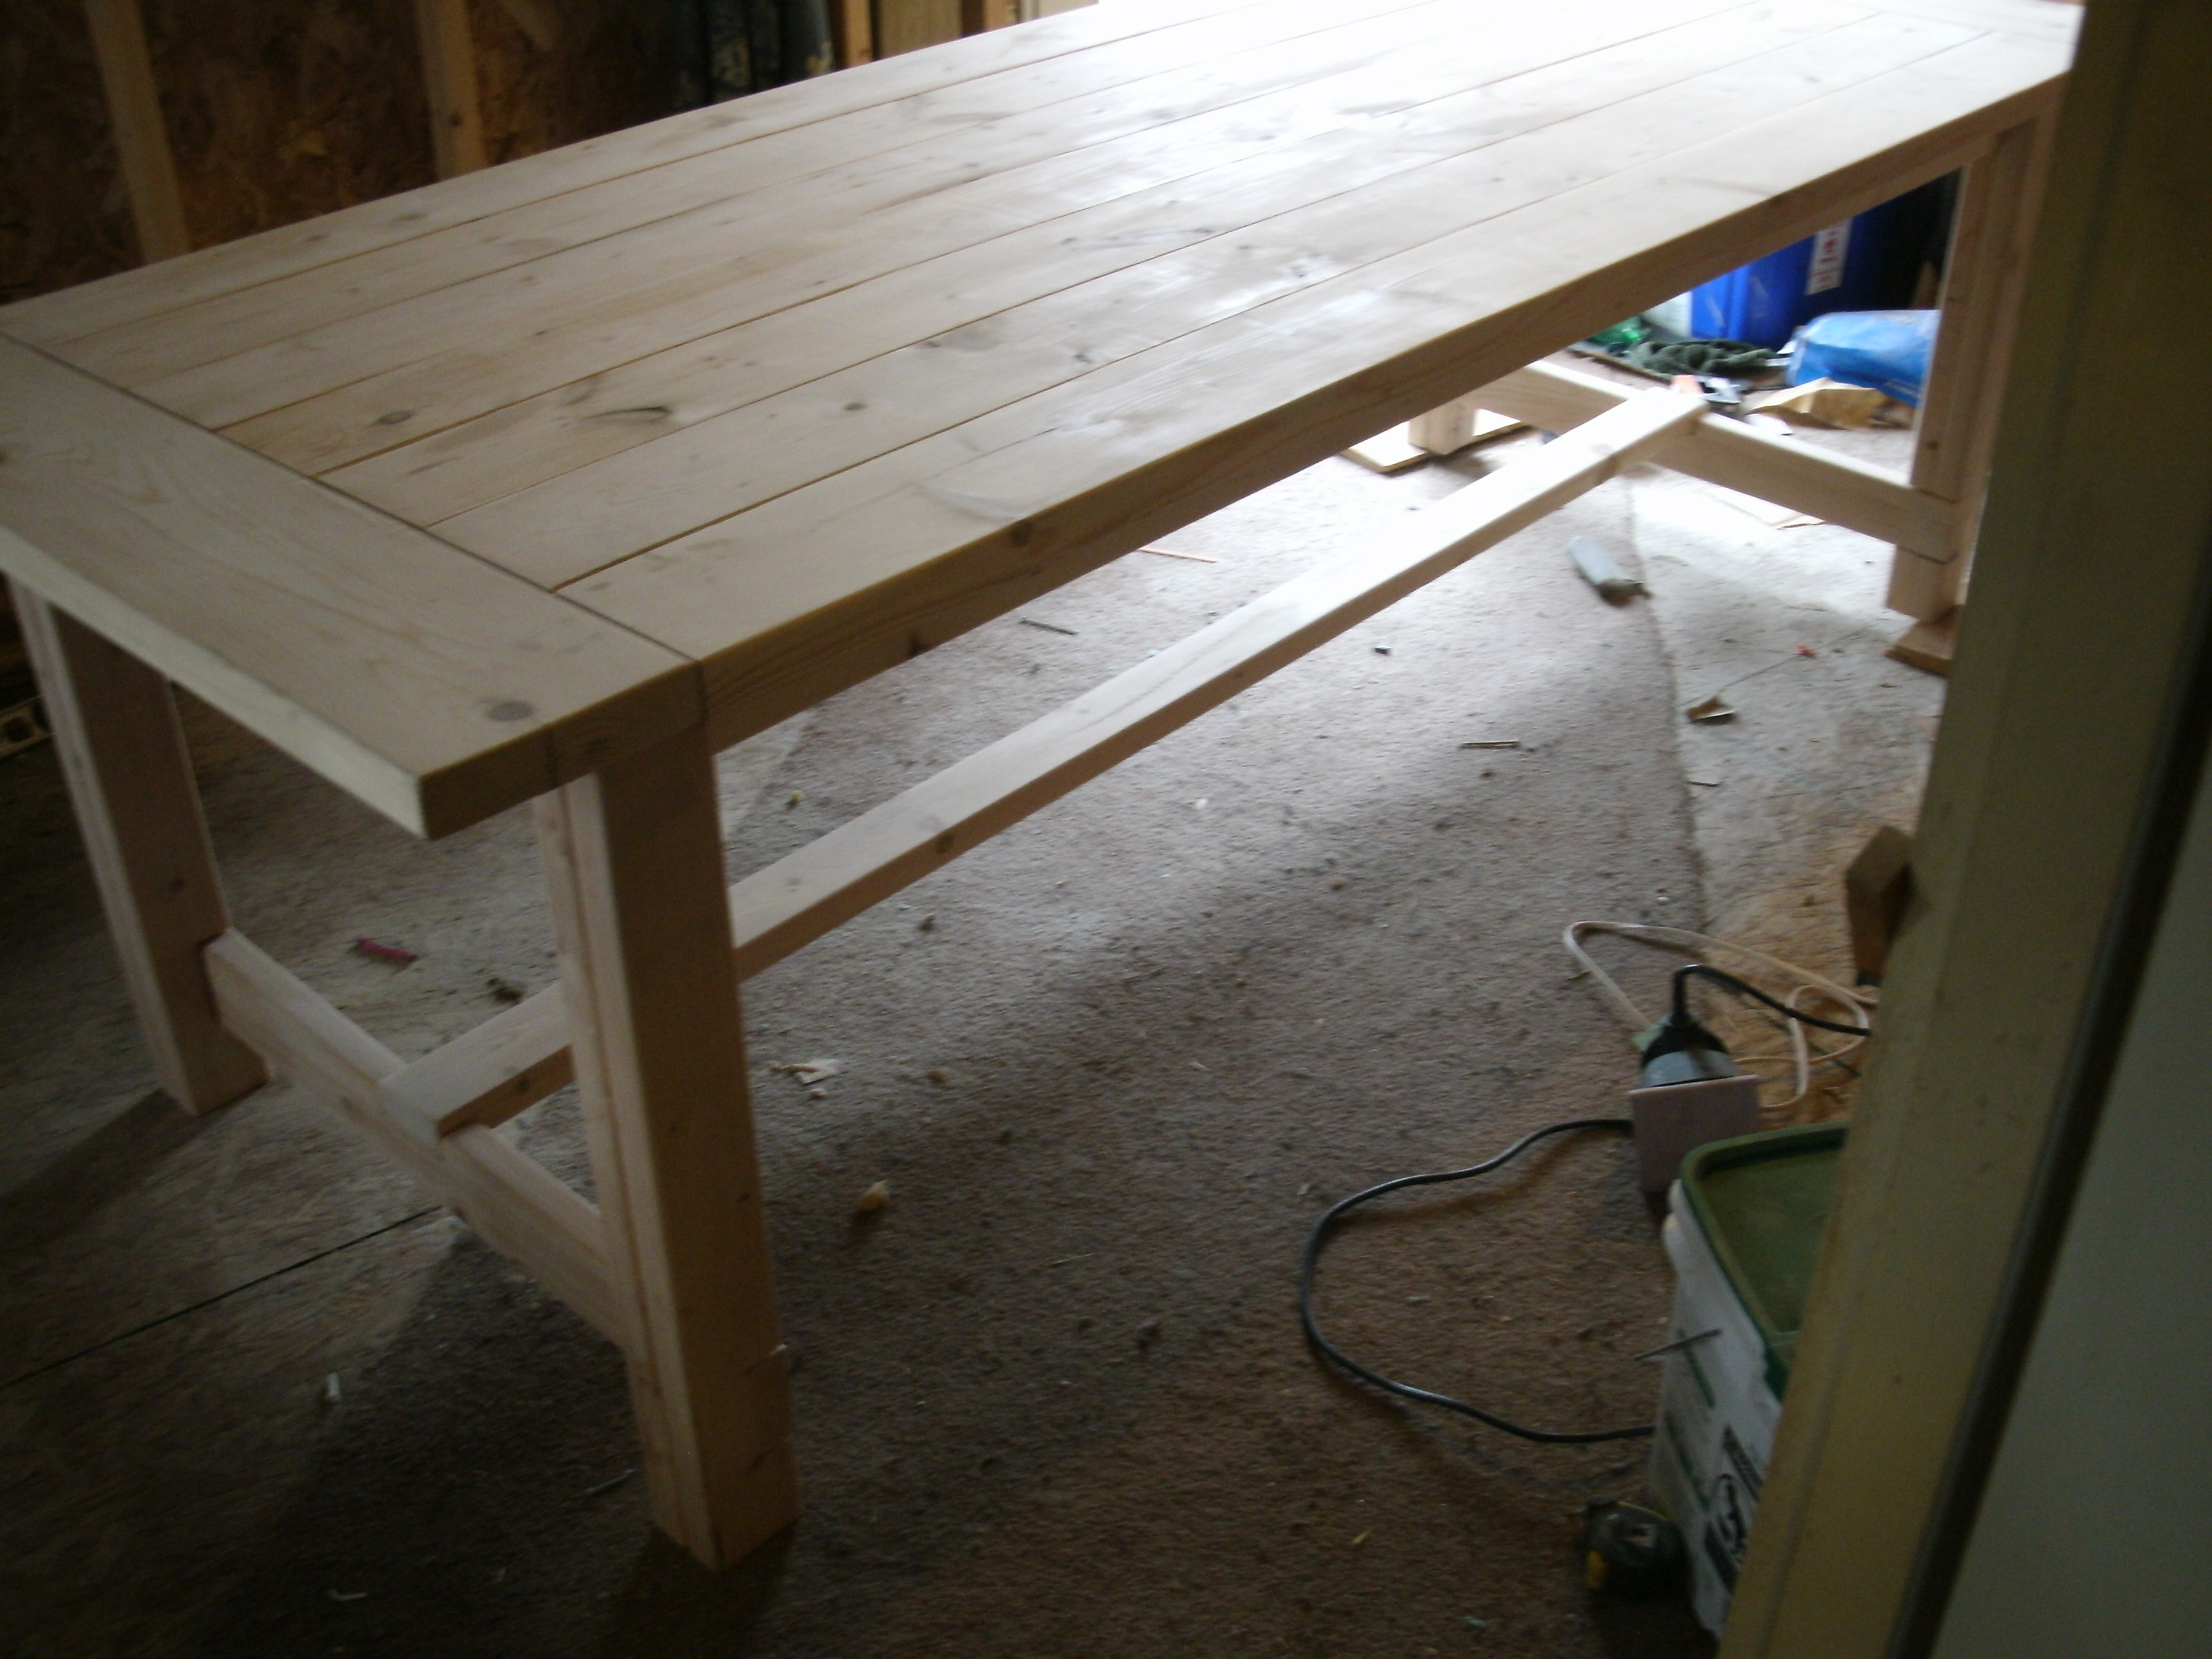
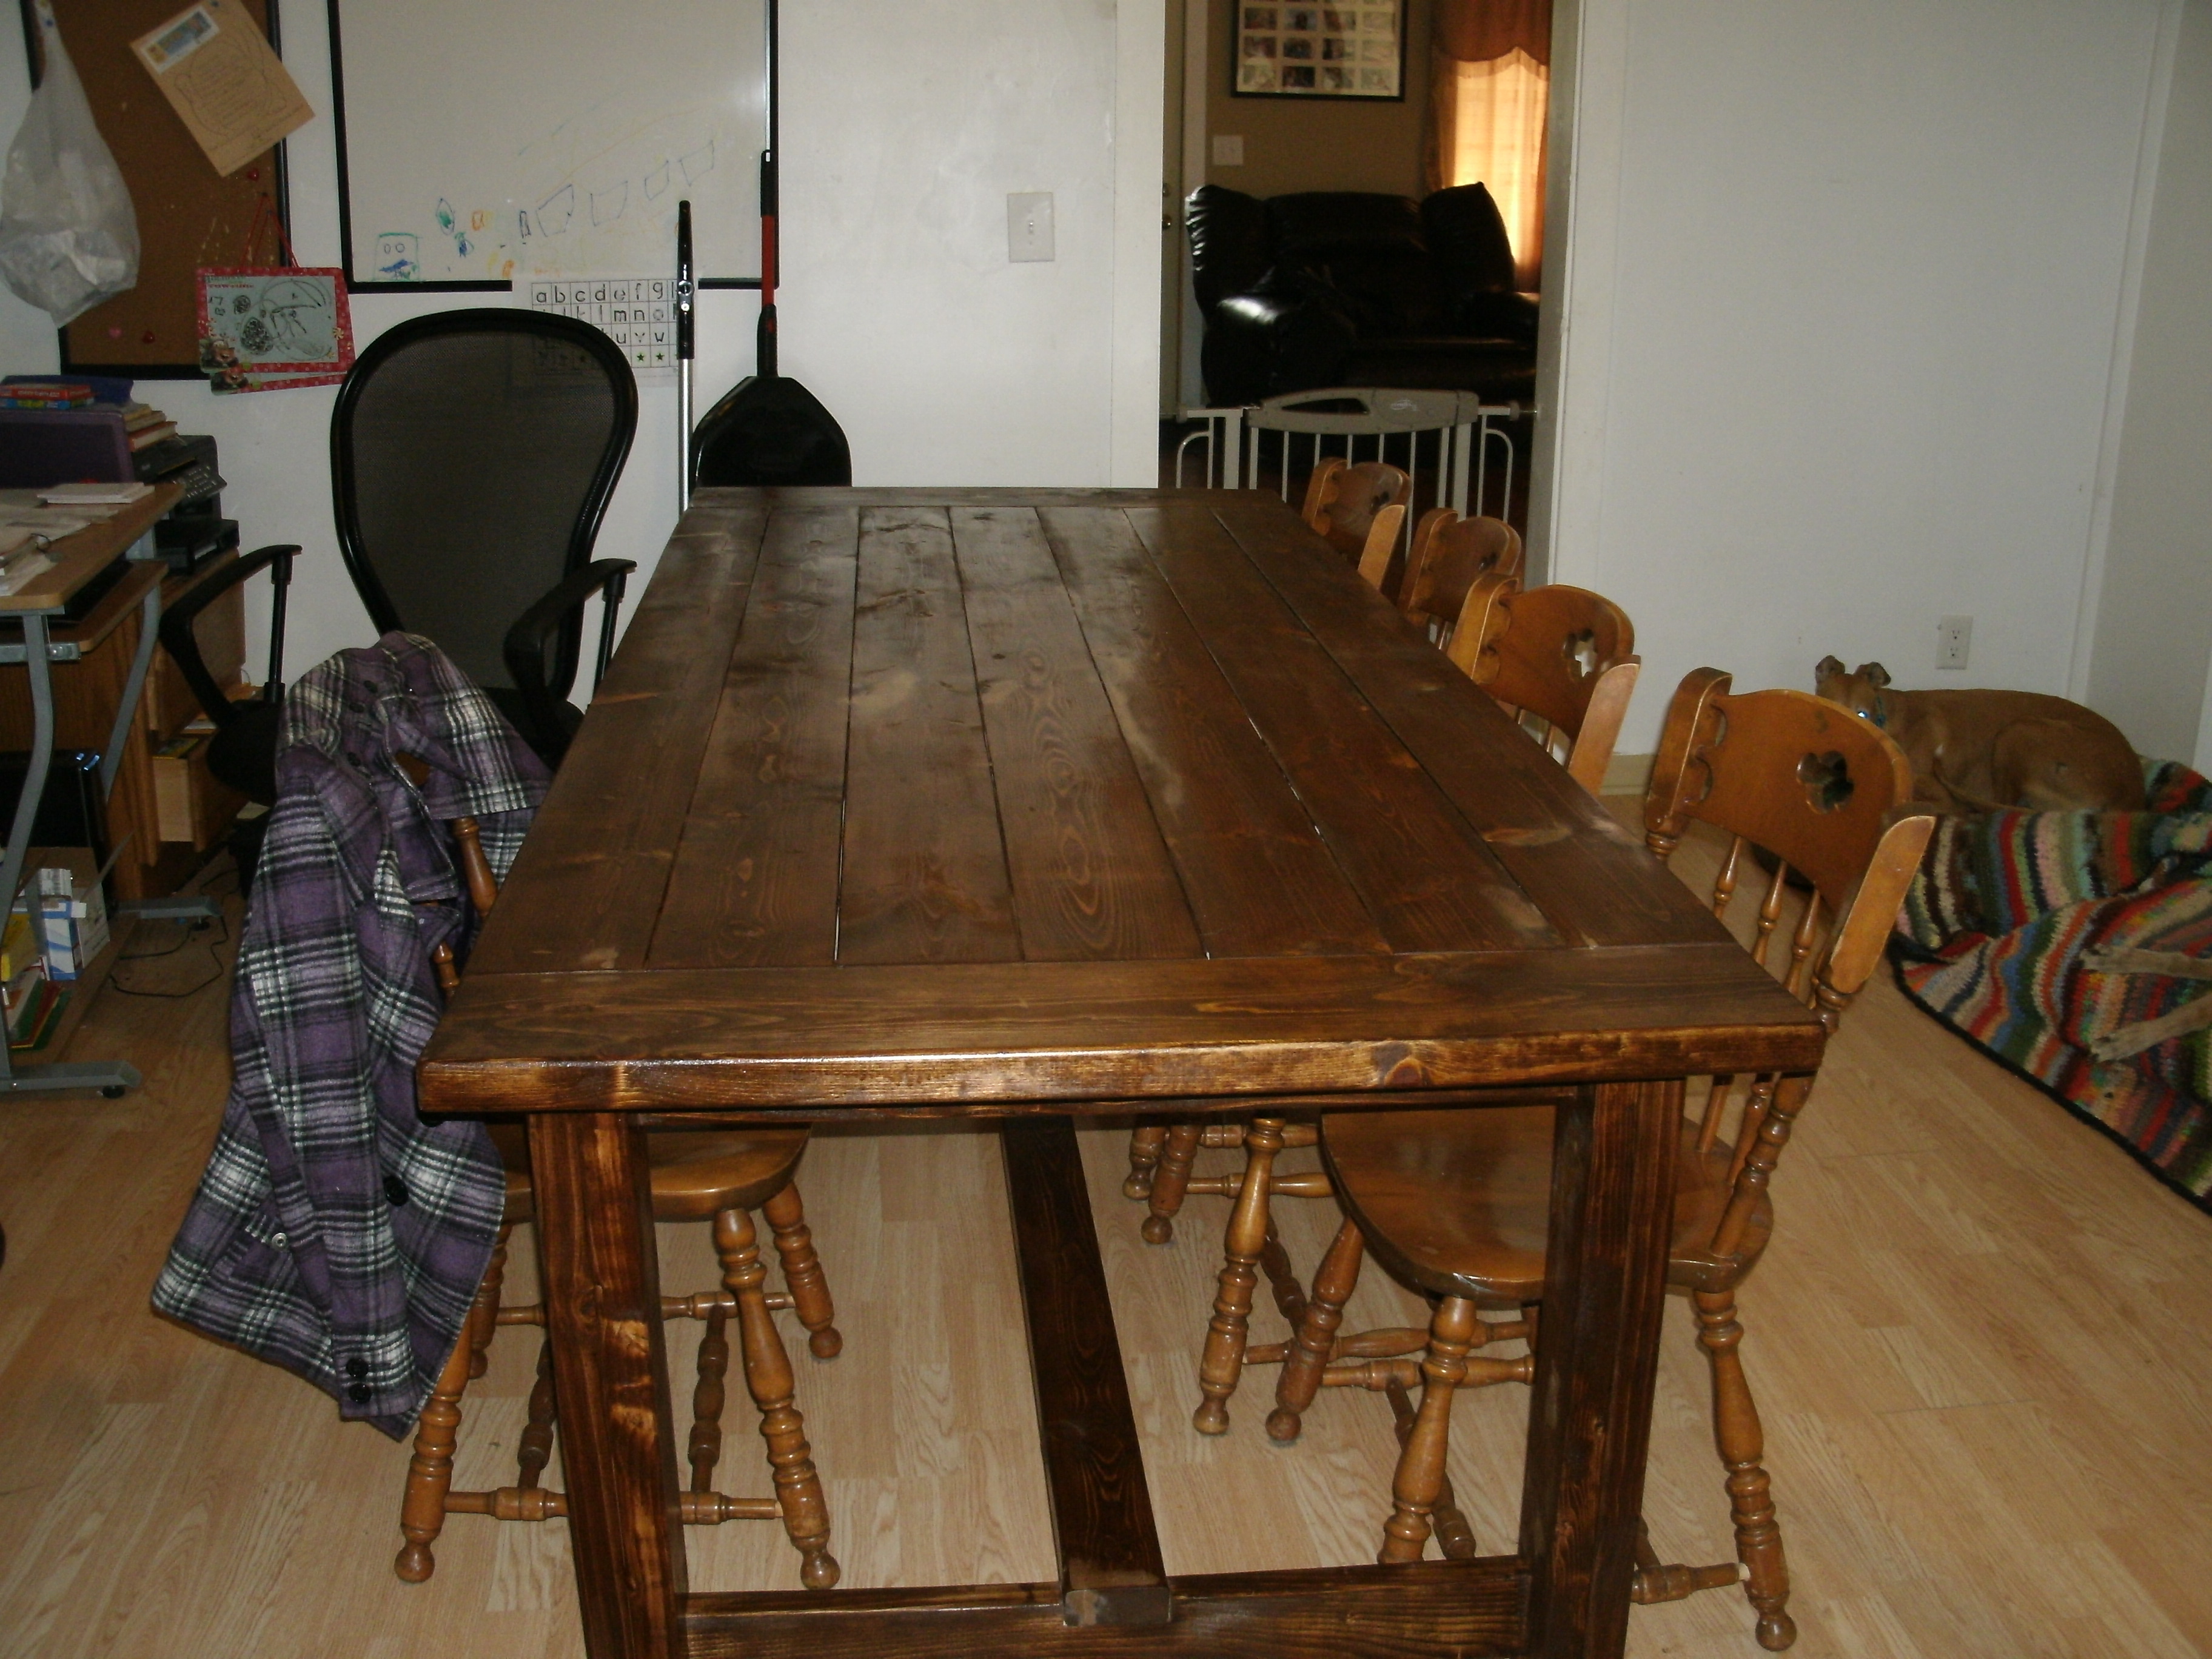
We built this Farmhouse table in a week. Unfortunately, we didn't get it completely put together for four months. Now it is finished. It is our first project. We used pine and fir boards from our local lumber store. It is finished with red chestnut and dark walnut stain and then a couple coats of briwax dark walnut (love that stuff!!). The table is 96" and pictured here without the 15" bread boards that go on either end. The benches are 8' as well.
Sat, 05/24/2014 - 01:12
I loved your stain. I see you used two types of wood and two types of stain. Can you tell me more? Did you alternate the wood pieces? Did you stain the red chestnut first and followed it with dark walnut? I'll probably copy what you did :)
My husband and I created this using farmhouse table plans and we're very excited. It took us longer to get done than most because we all ended up sick. :o) Total cost was under $100 and it is awesome!! Thank you so much for the plans!!
Sun, 12/11/2011 - 09:29
We are currently making a bench and a version of the stackable chairs for our 8 foot table. WE are so excited. I have work to do but only want to help build now. :o)
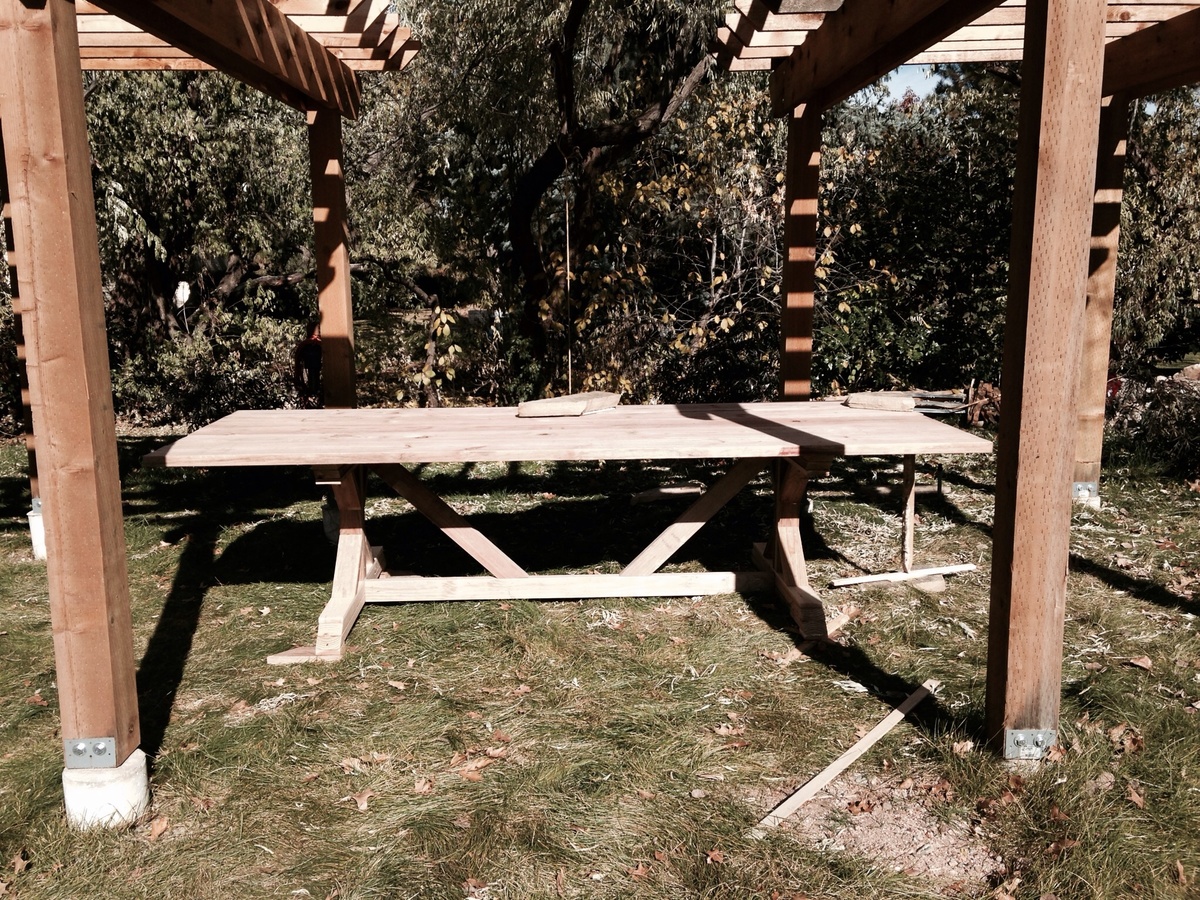
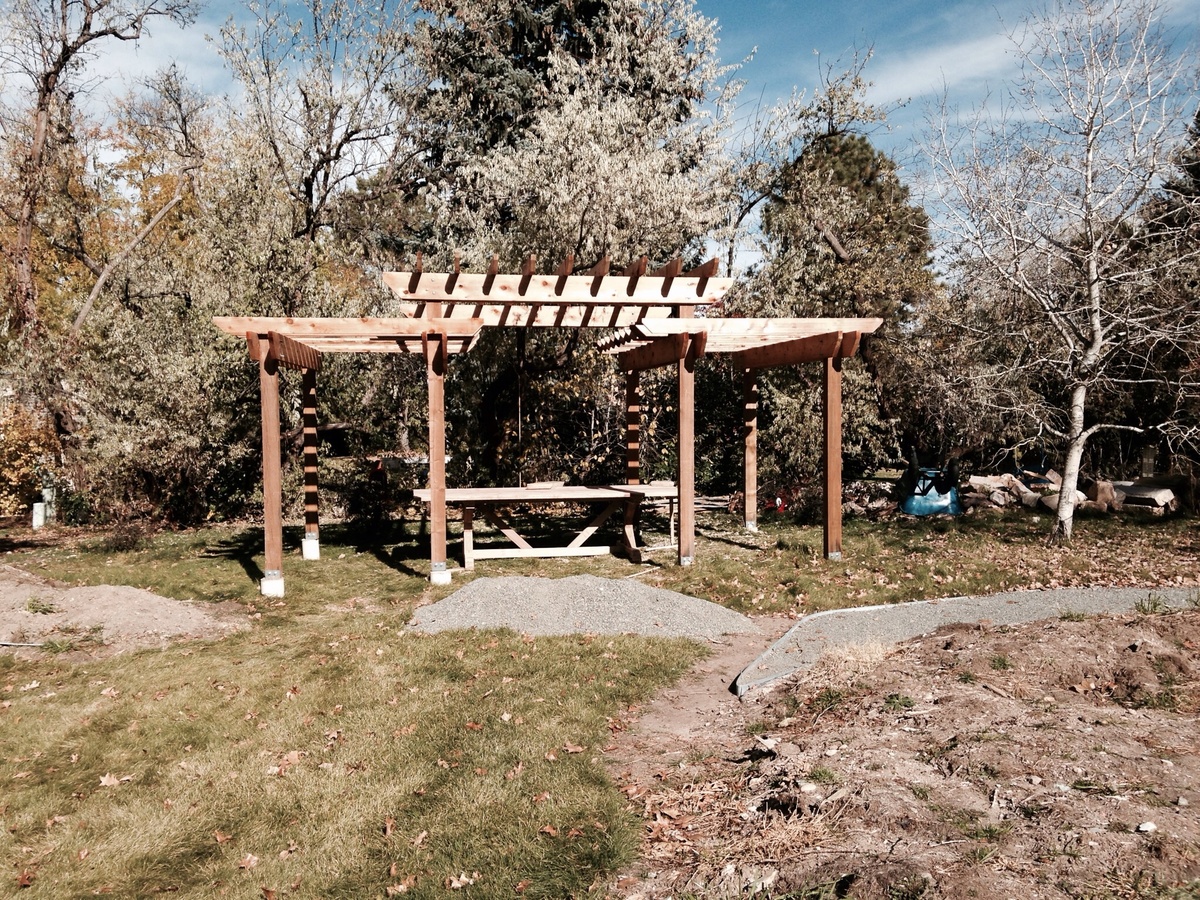
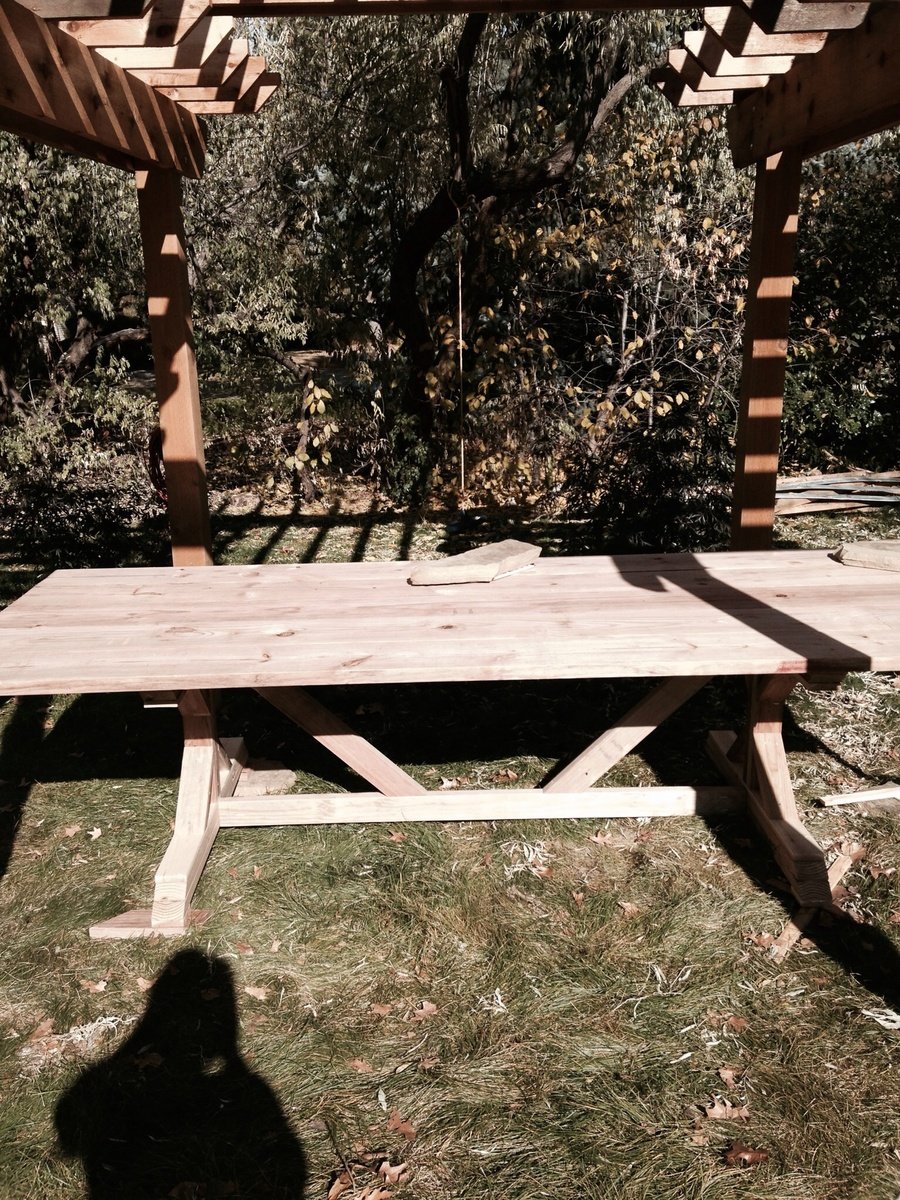
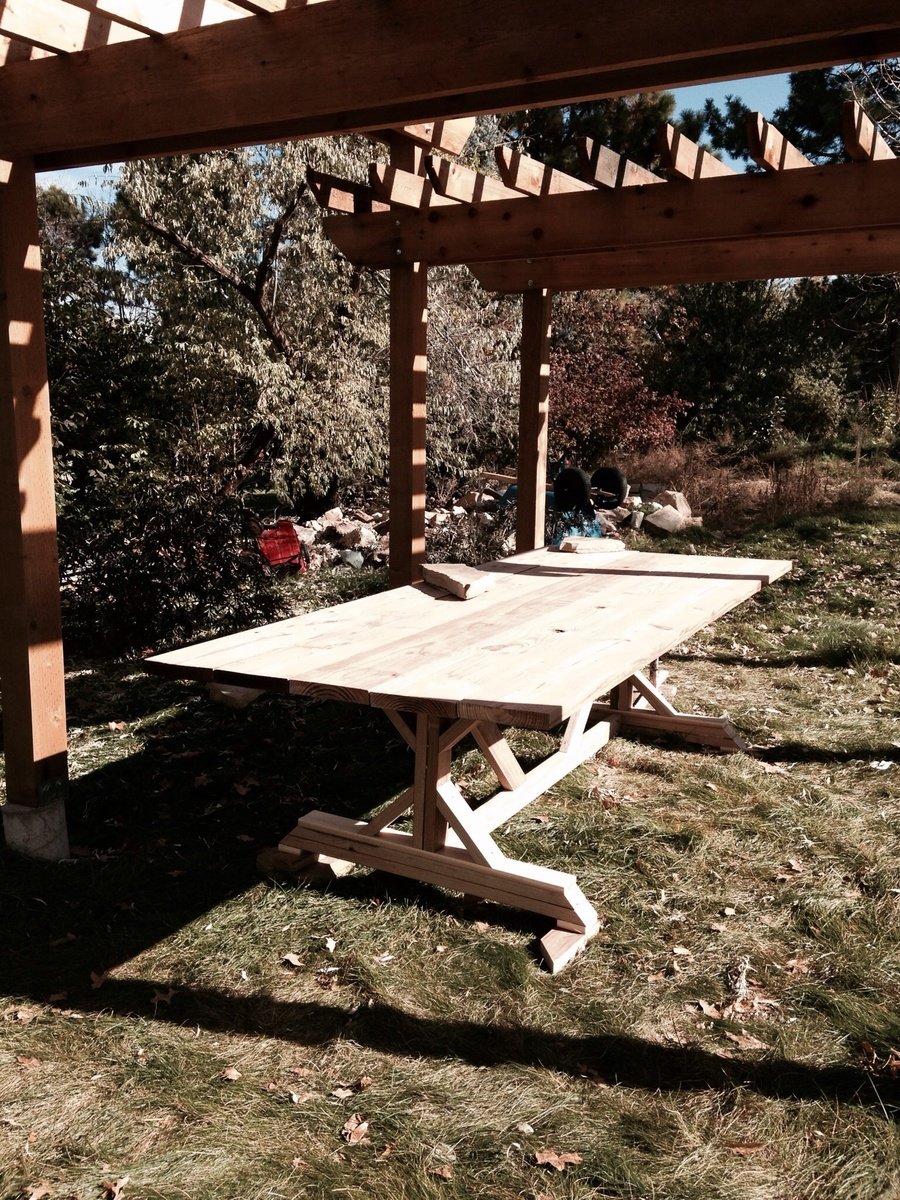
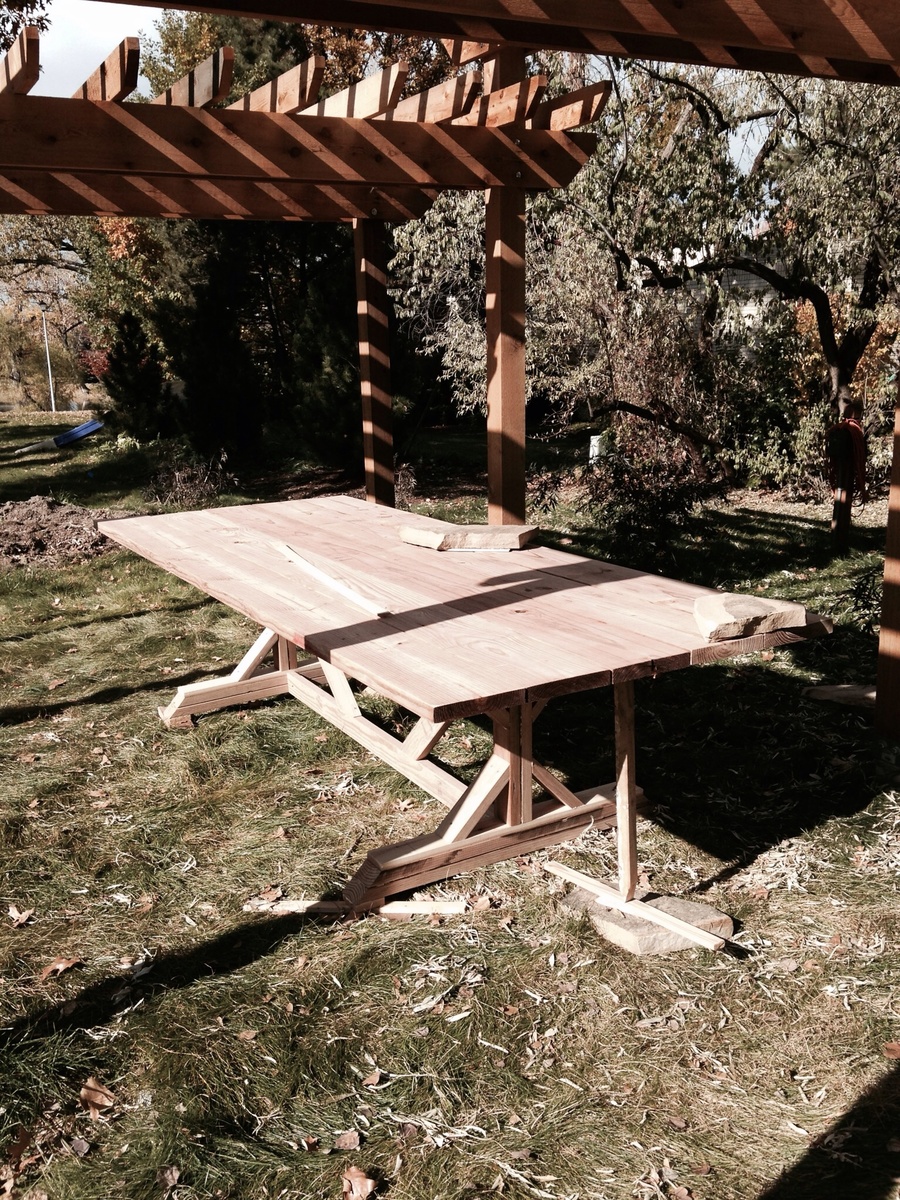
Our dear friends built us a pergola over the summer and I wanted a big outdoor farm table to go underneath but had no interest in spending thousands on one already made. So, thanks to Ana White, I found the directions to making this 'anthropologie knock-off' for under $200! We made ours 10' long by @46" wide. And I included support boards on the underside of the table top for additional support and to try to address the fact that one of the boards us a little warped. It's not nearly as beautiful as our pergola and still needs to be stained/treated, but I can't wait for next spring and summer when we can hang and laze around out here! I'm so proud of us. Thanks Ana!!!
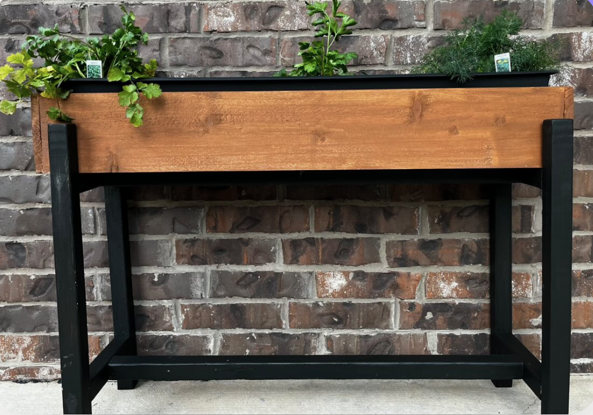
"Here's a pic of the planter I made! I modified it to fit a 36" planter. I LOVE it. Thanks!!"
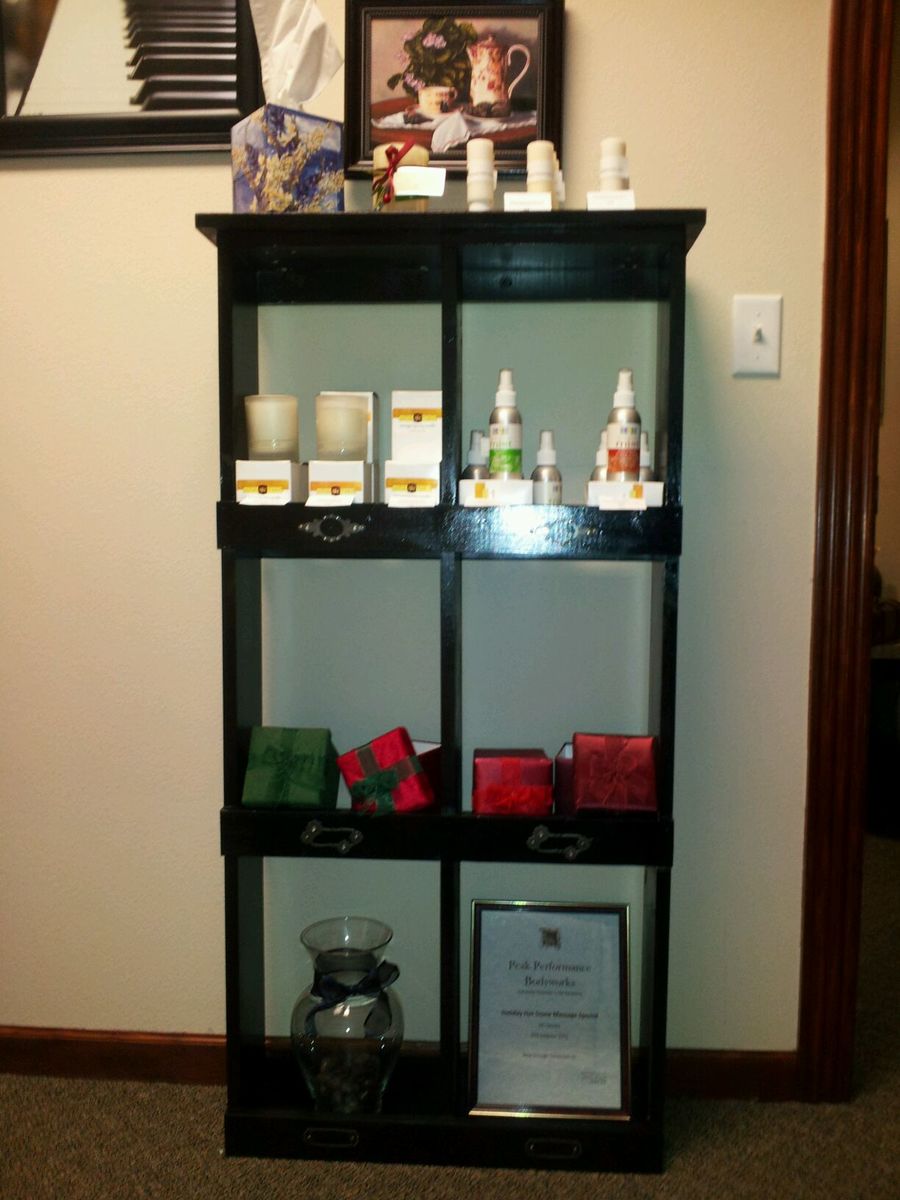
My daughter needed a custom sized shelf to display her retail products in her busy day spa. The shelf needed to be narrow to not block walk around access to the massage table. It needed to be functional without looking like a book shelf. Ana's plan for the General Store Cubbies was just what I was looking for. I sized it down to fit the space and it turned out great.
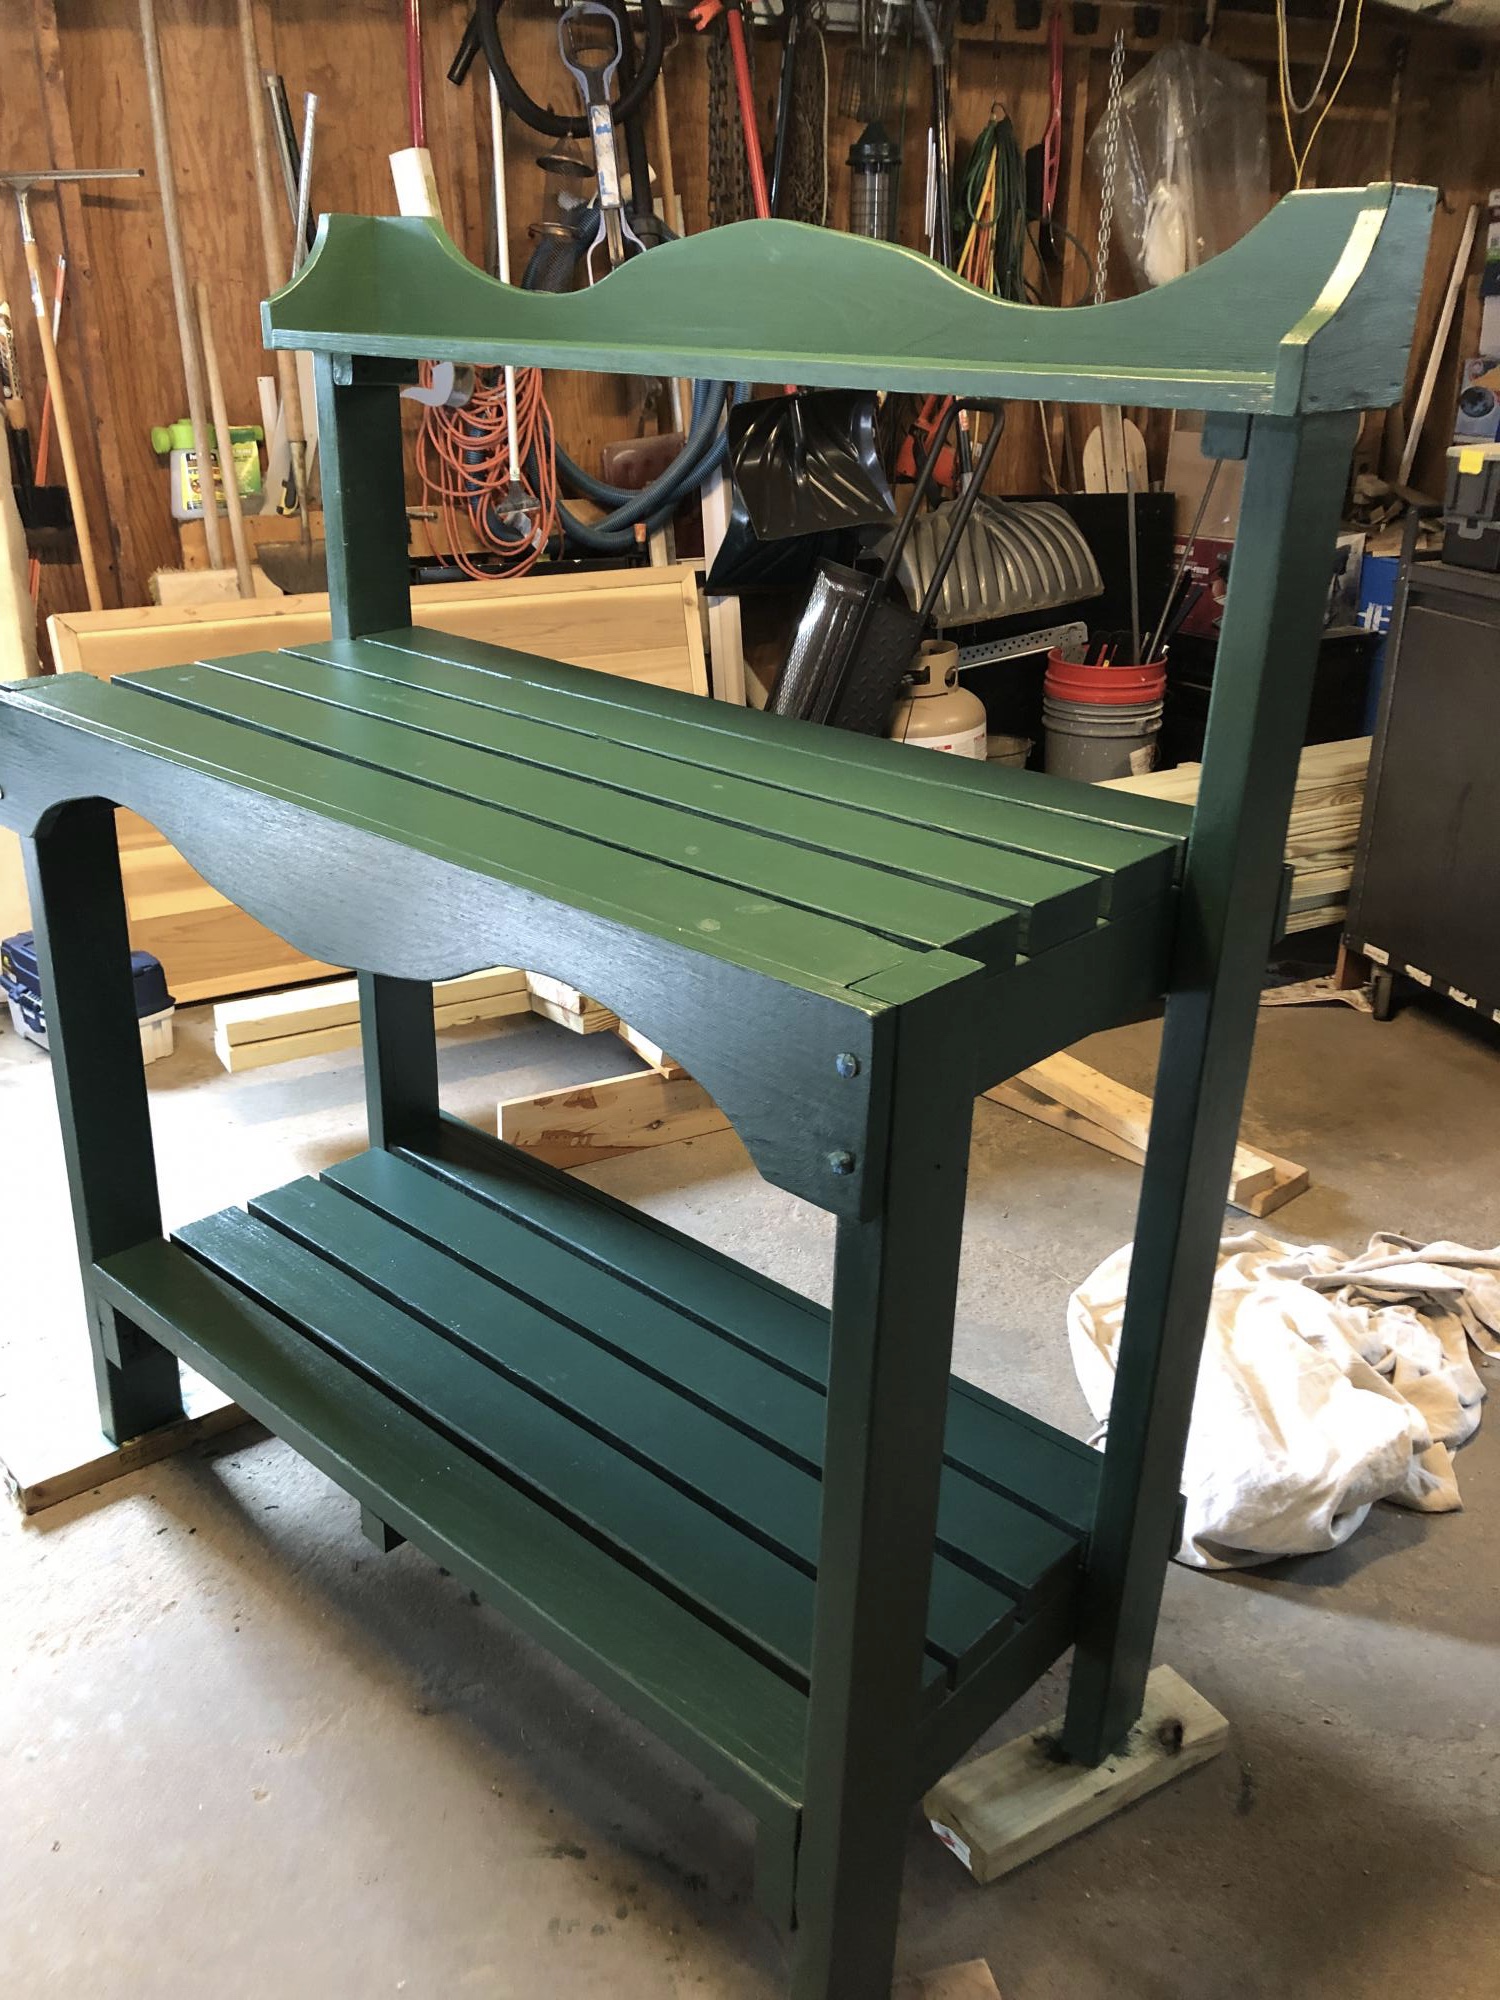
My good friend asked me to build her a potting bench for her garden wedding reception. She shouted me a photo of one from the internet. I used your plan and made a couple modifications. This is the color she requested and I used Cabot solid stain. I’m not a fan of solid stain and won’t use it again. She loved it.
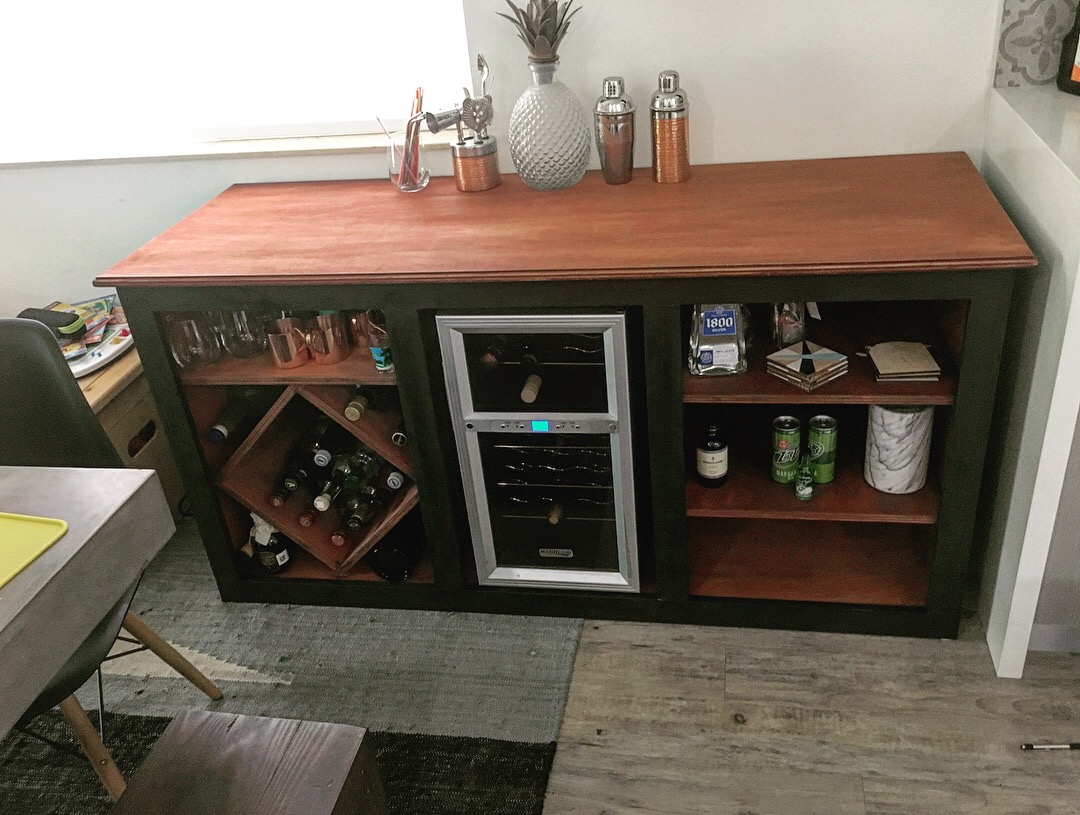
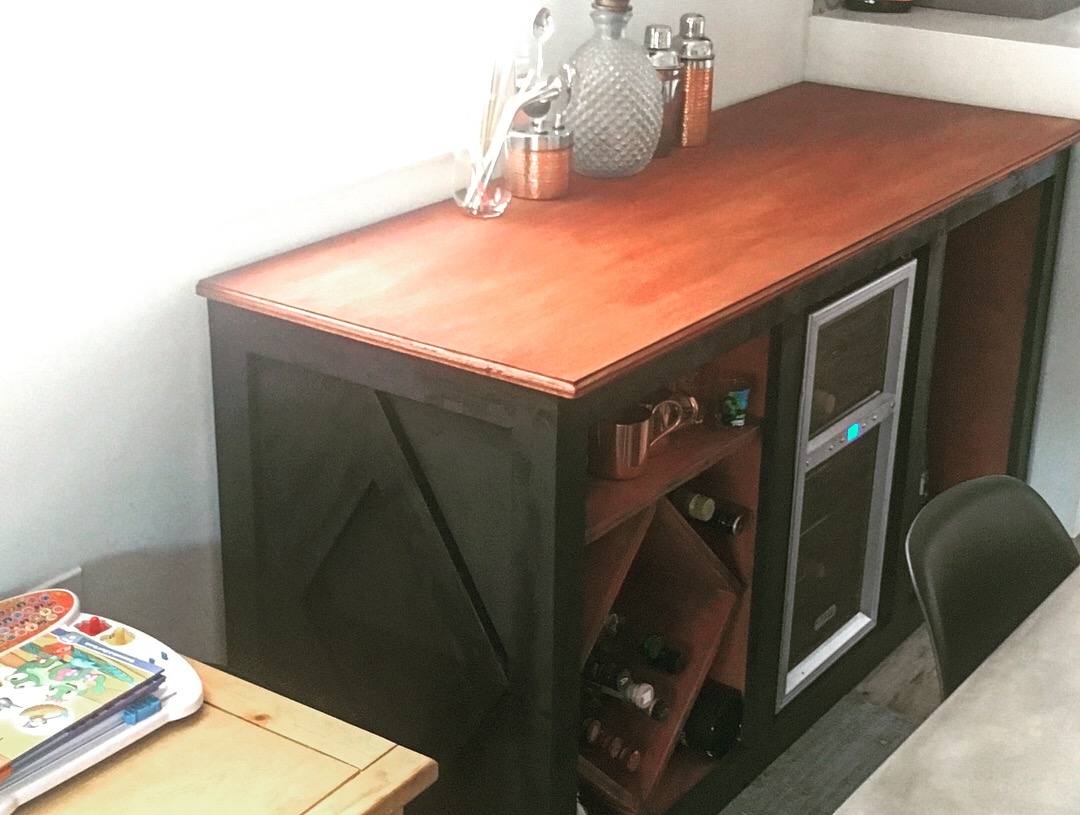
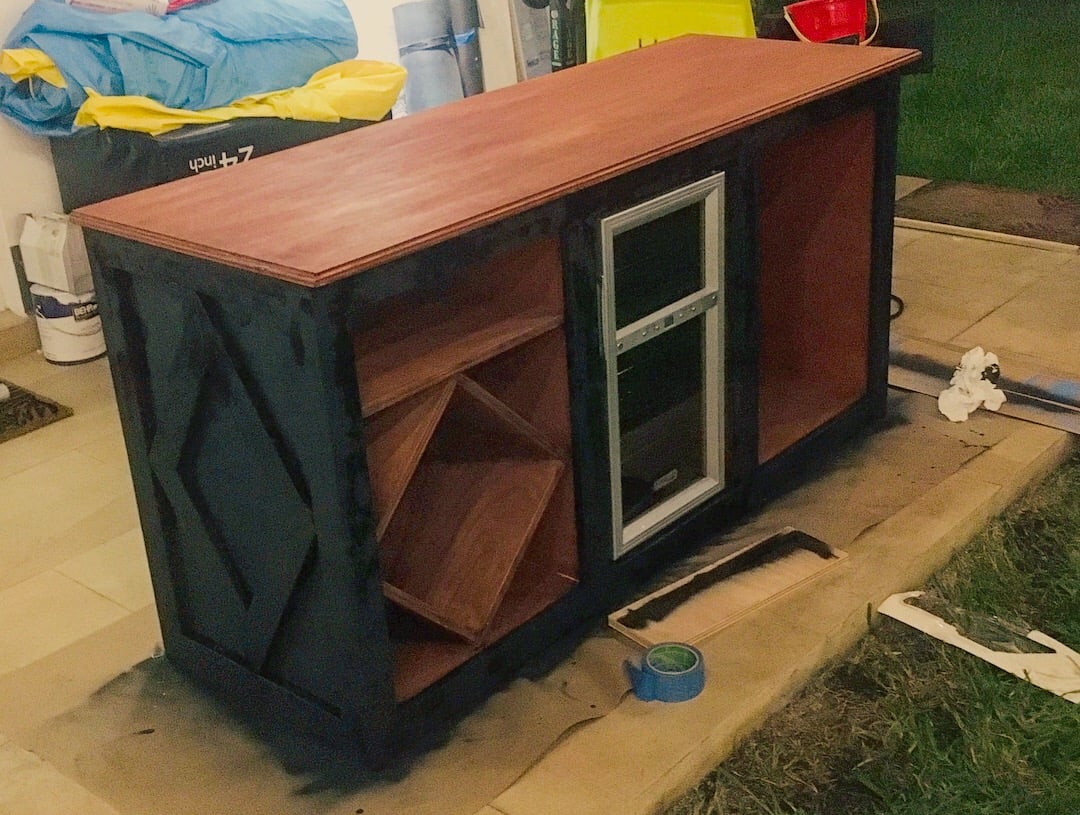
We had a wine fridge sitting around that we didnt know what to do with, we were hardly using it. We also had a cheap metal bar cart that was holding all of our wine glasses and liquor bottles, very much not user friendly. So, I decided to build this bar cabinet. I am big into diamonds on my projects, so their are diamonds on both ends of the cabinet with diamond on the inside of the left side of the cabinet to hold liquor bottles. The shelves in the right cabinet space are adjustable in height. All in all, I was very pleased with the finished product, and of course, I was able to finally get some use out of the wine fridge.
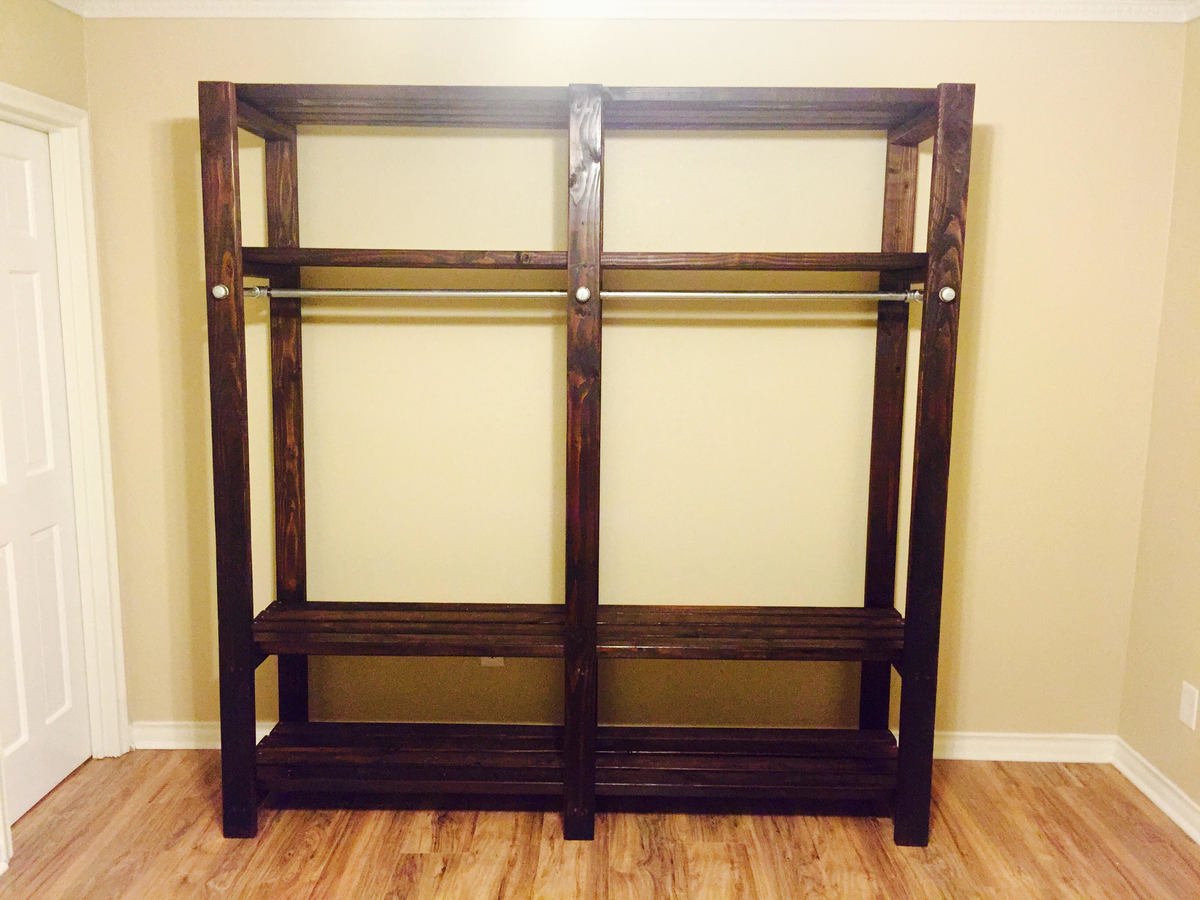
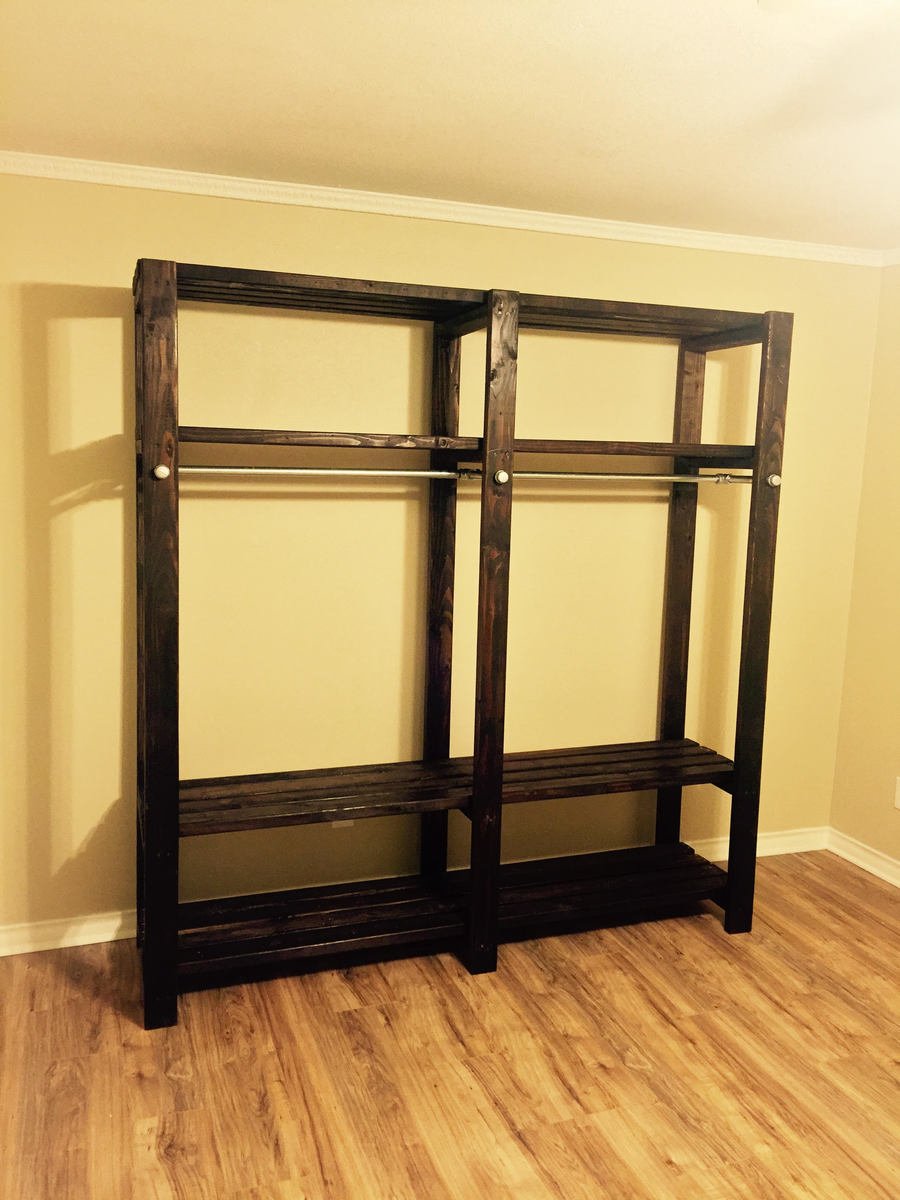
I built this closet for a room in a newly renovated house which was improved from a 3BR to a 4BR but the new additional BR didn't have space for a closet. The entire closet is made of only cheap 2X4's and galvanized pipe found at the local hardware store.
The user didn't need the middle shelves so I modified the original plans to make it shorter in width but 4 inches deeper by using 10" nipples instead of 8". I sanded and stained all the 2X4's first before doing anything. Then I created the 3 legs first (end boards - 82" inside boards - 17.5"). Once the legs were ready, I cut the boards for the shelves at 79" (4 boards for each shelf, evenly spaced out). Before putting the shelf on the legs, I laid each leg on the ground and unscrewed one side of the shelf and added wood glue in the hole, then screwed it back in to increase stability. Next, drill the pipe holes evenly and connect the pipe. Once the pipe is connected, place (4) 79" 2X4's evenly distributed on each shelf and drill 2 screws from the boards into the bottom of the legs on both ends and the middle to stabilize the shelf. From here, I took some pledge and wiped it down which smoothed down the surface. The longest part of the project was making sure the stain was dry and evenly applied.
I recommend using a miter saw for straight and smooth cuts and take the time to sand the wood (even the ends after you cut it).
2X4 Studs - 28
10" 3/4" Galvanized Pipe - 6
36" 3/4" Galvanized Pipe - 2
3/4" Galvanized Pipe T - 2
3/4" Galvanized Pipe Cross - 1
3/4" End Caps - 6
Pipe Wrench for tight connections
2.5" Screws (Drill pilot holes for everything)
1 1/8" drill bit for each hole
Stain - Minwax Espresso
Wood Glue

Mon, 02/29/2016 - 12:35
I accidently added this project without logging in so it shows it as Guest. Is there anyway to assign it to my username so if there are questions, I will receive a notice about it.
Mon, 02/29/2016 - 12:36
I accidently added this project without logging in so it shows it as Guest. Is there anyway to assign it to my username so if there are questions, I will receive a notice about it.
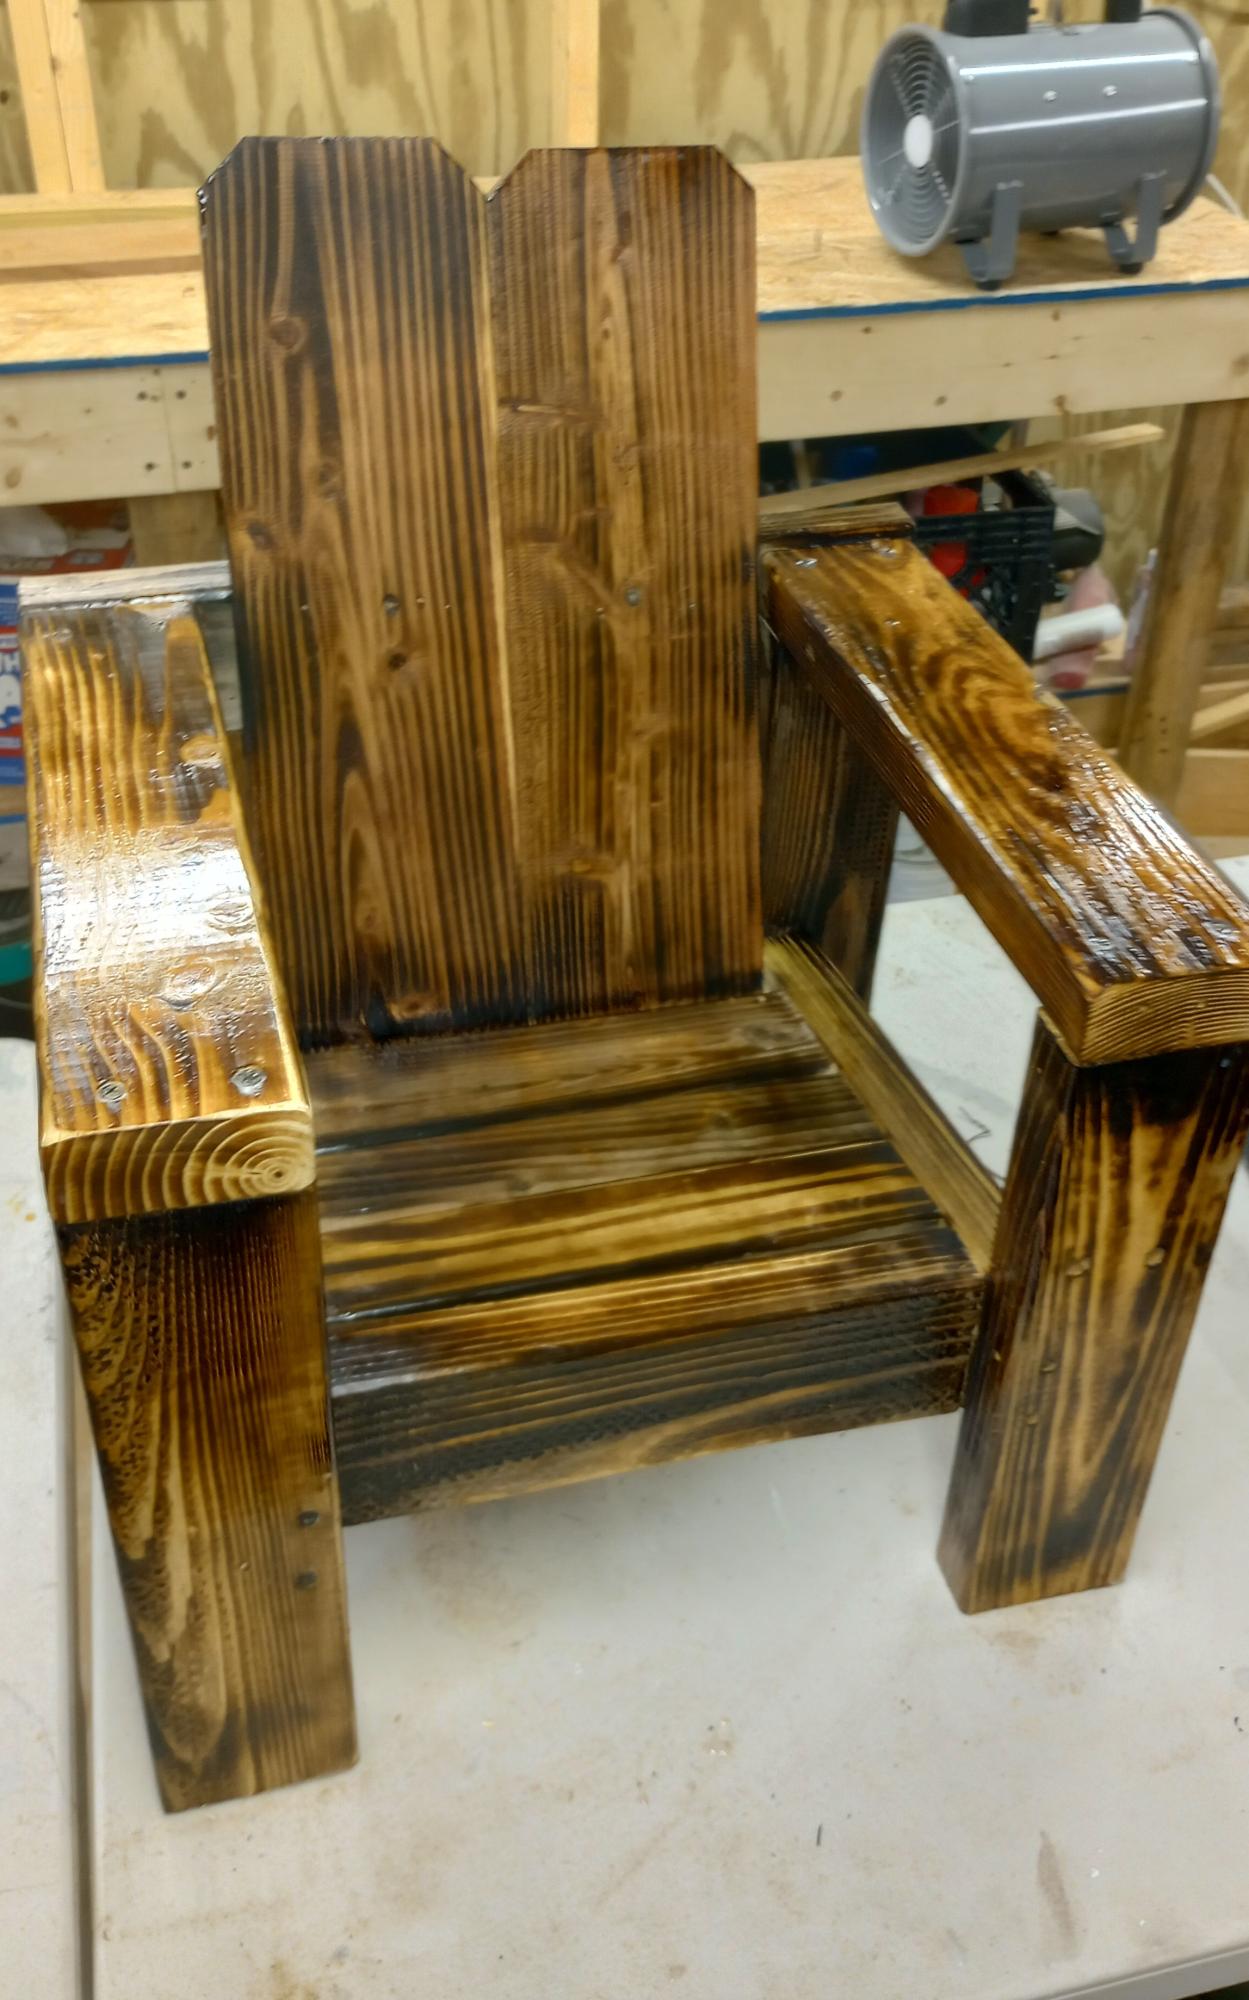
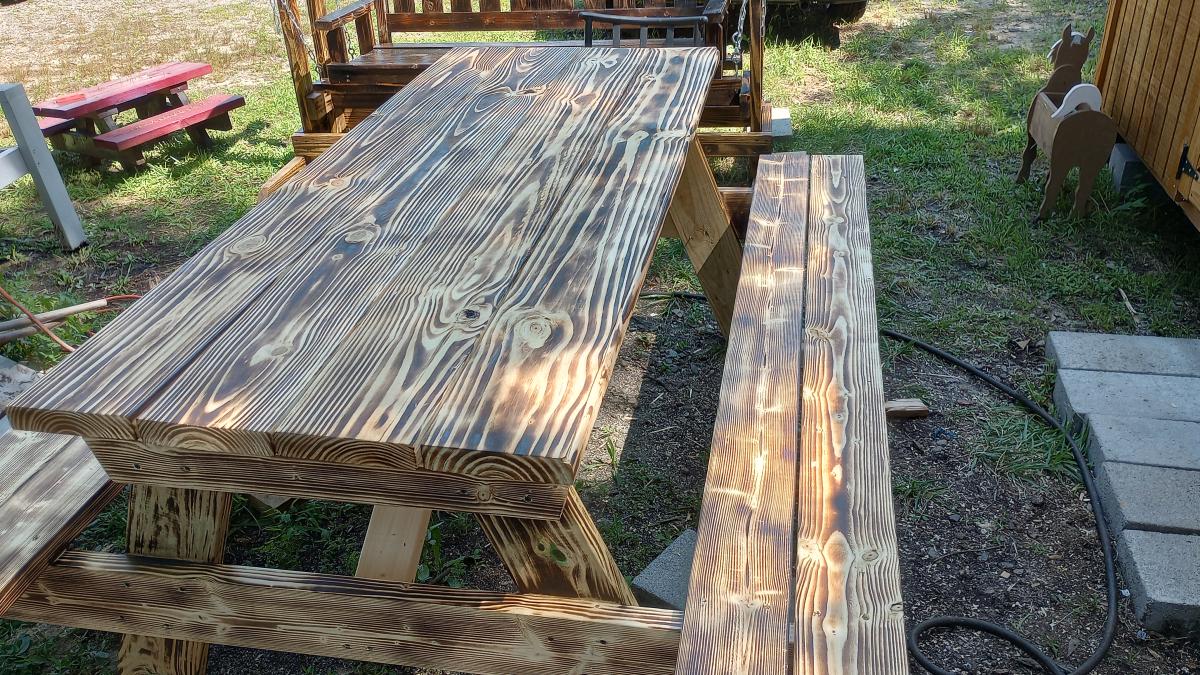
Hi Ana, after building your essential chairs I decided to build my grandson a small one I burned it with a torch and then clear coated it and it turned out so sweet. I also built a picnic table and added a different crossmember to it for strength. I also built a glider swing that I used from an old pattern from many years ago. Still without going to your site and watching you build on YouTube I would not have attempted any of this. I love all of the things that you build and you have inspired me so much. Thank you for all you do and keep those wonderful plans coming! My next project is going to be that little workshop that you build in panels and put together that you made for your friend. I'm going to make one and turn it into a lawn mower shed.
Darlene Sudderth the Twiddlebug woodshop

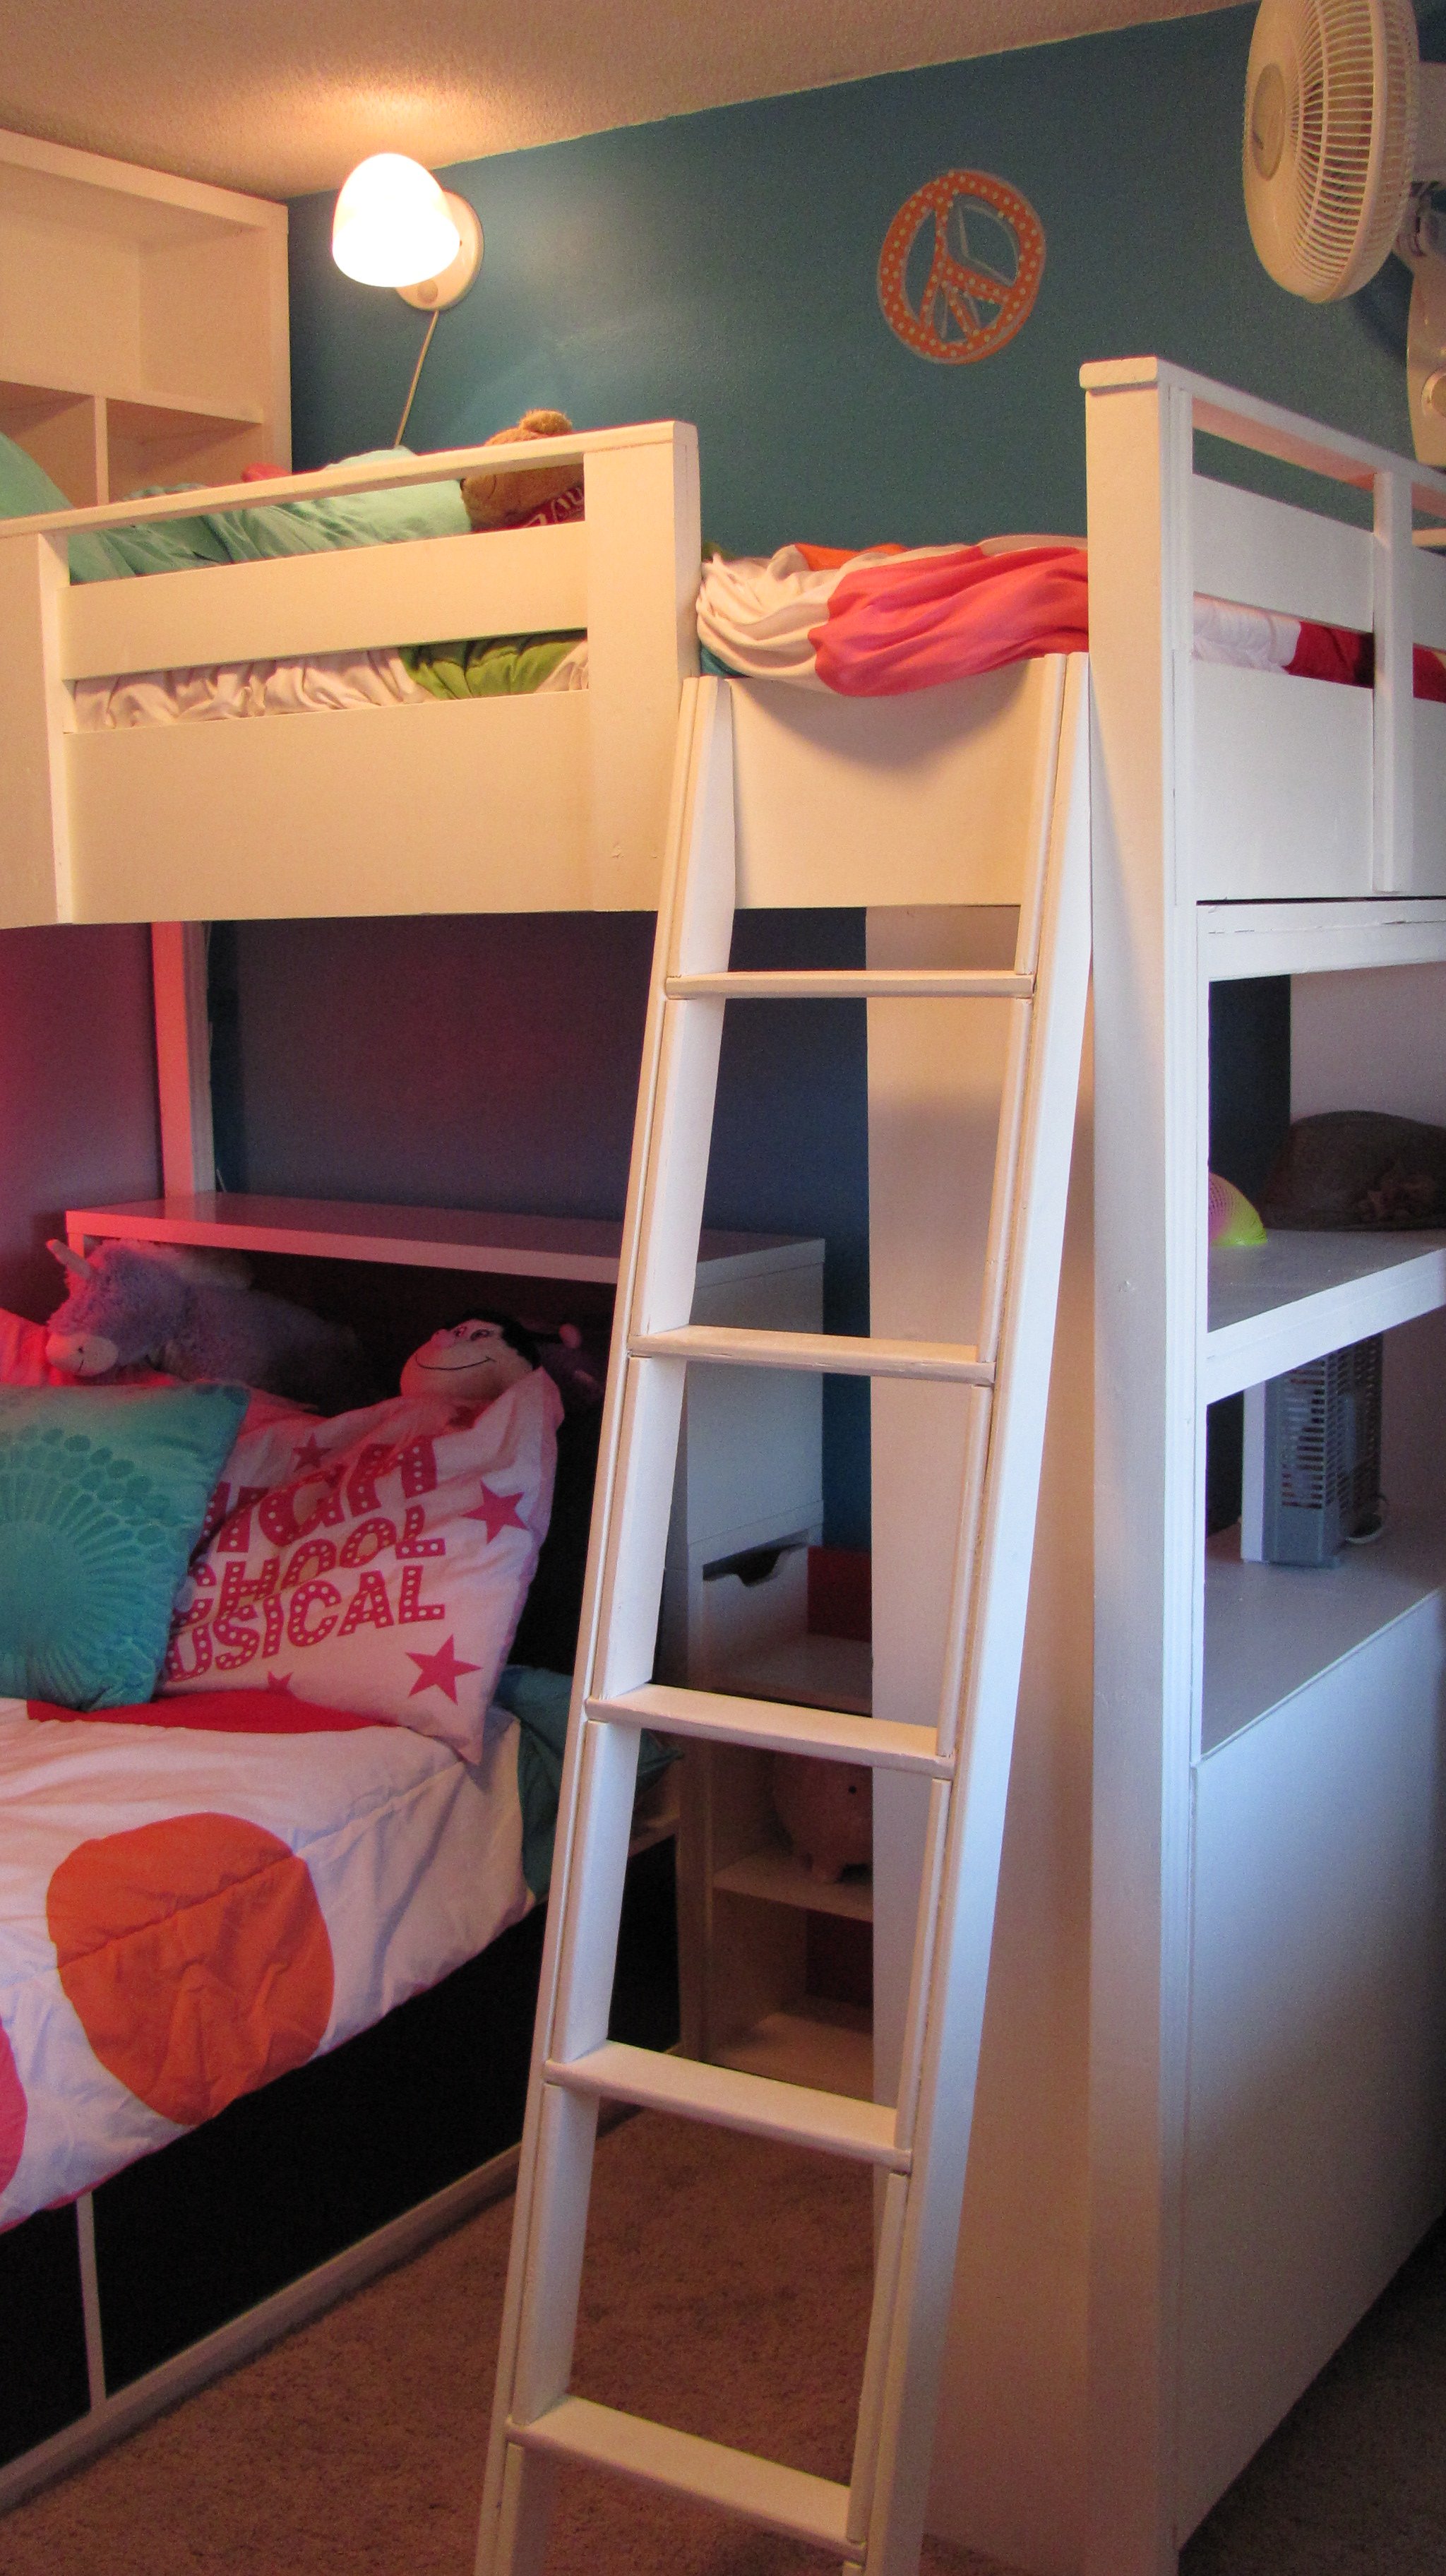
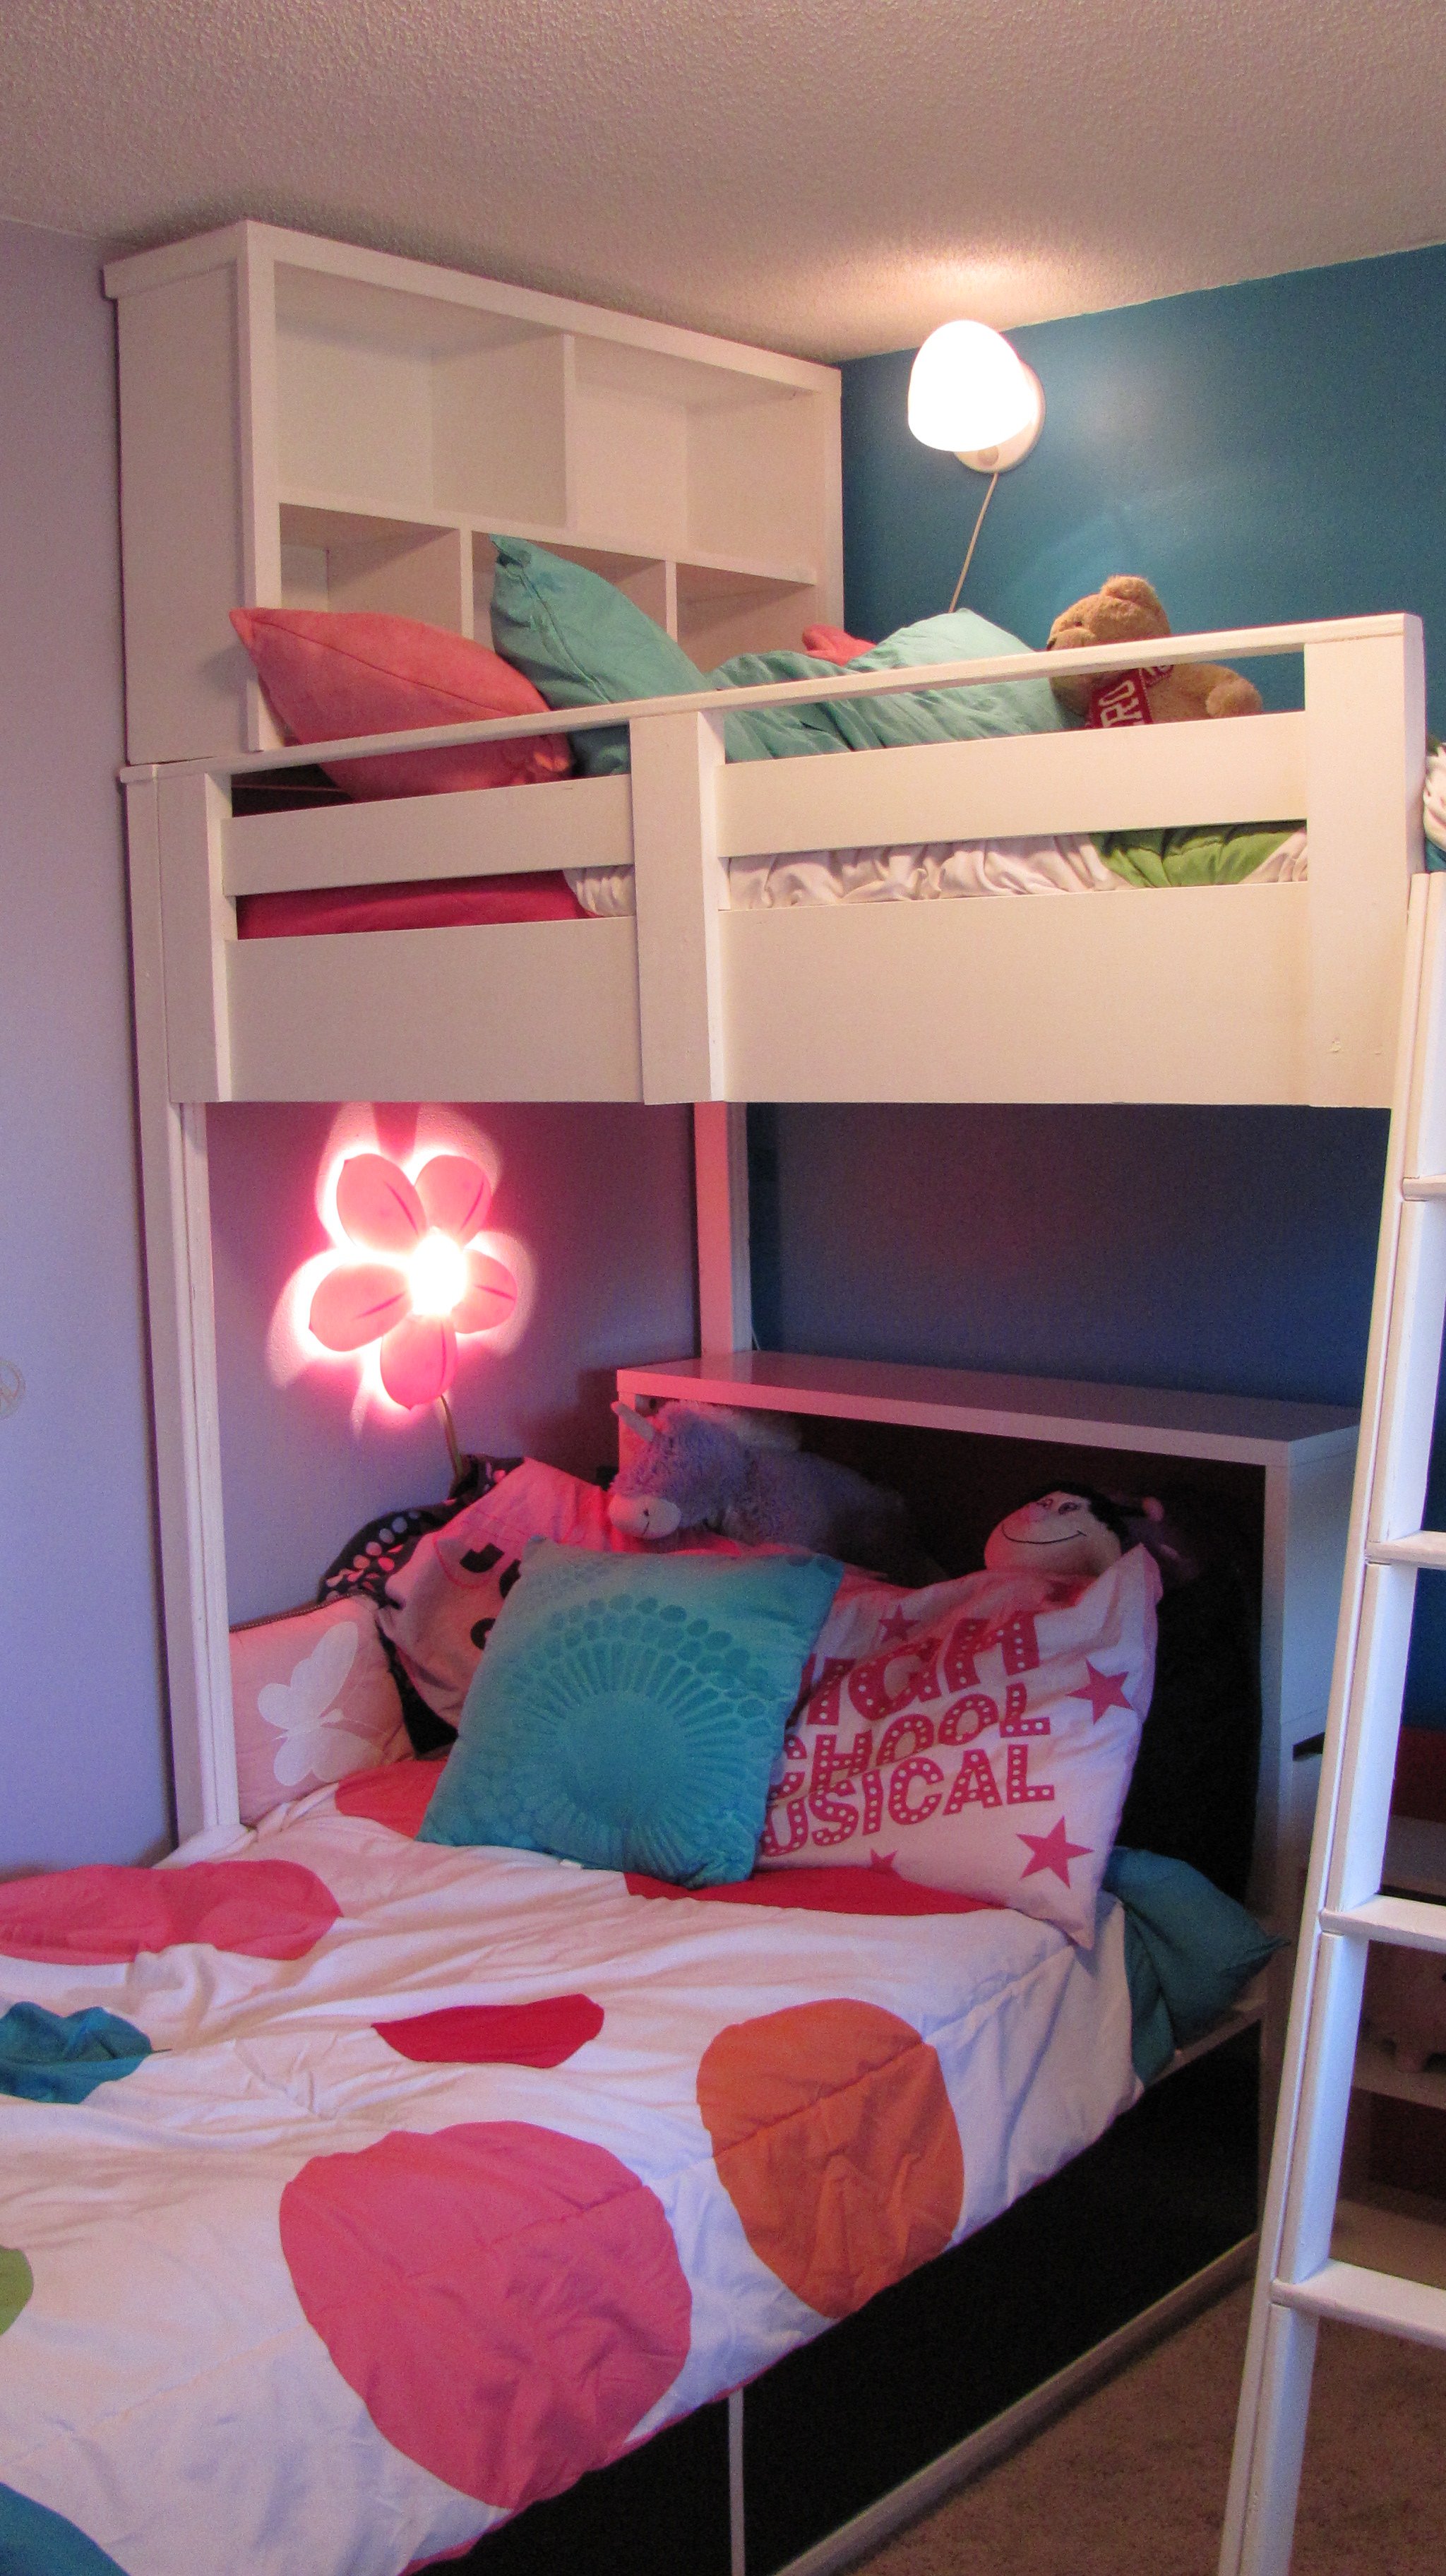
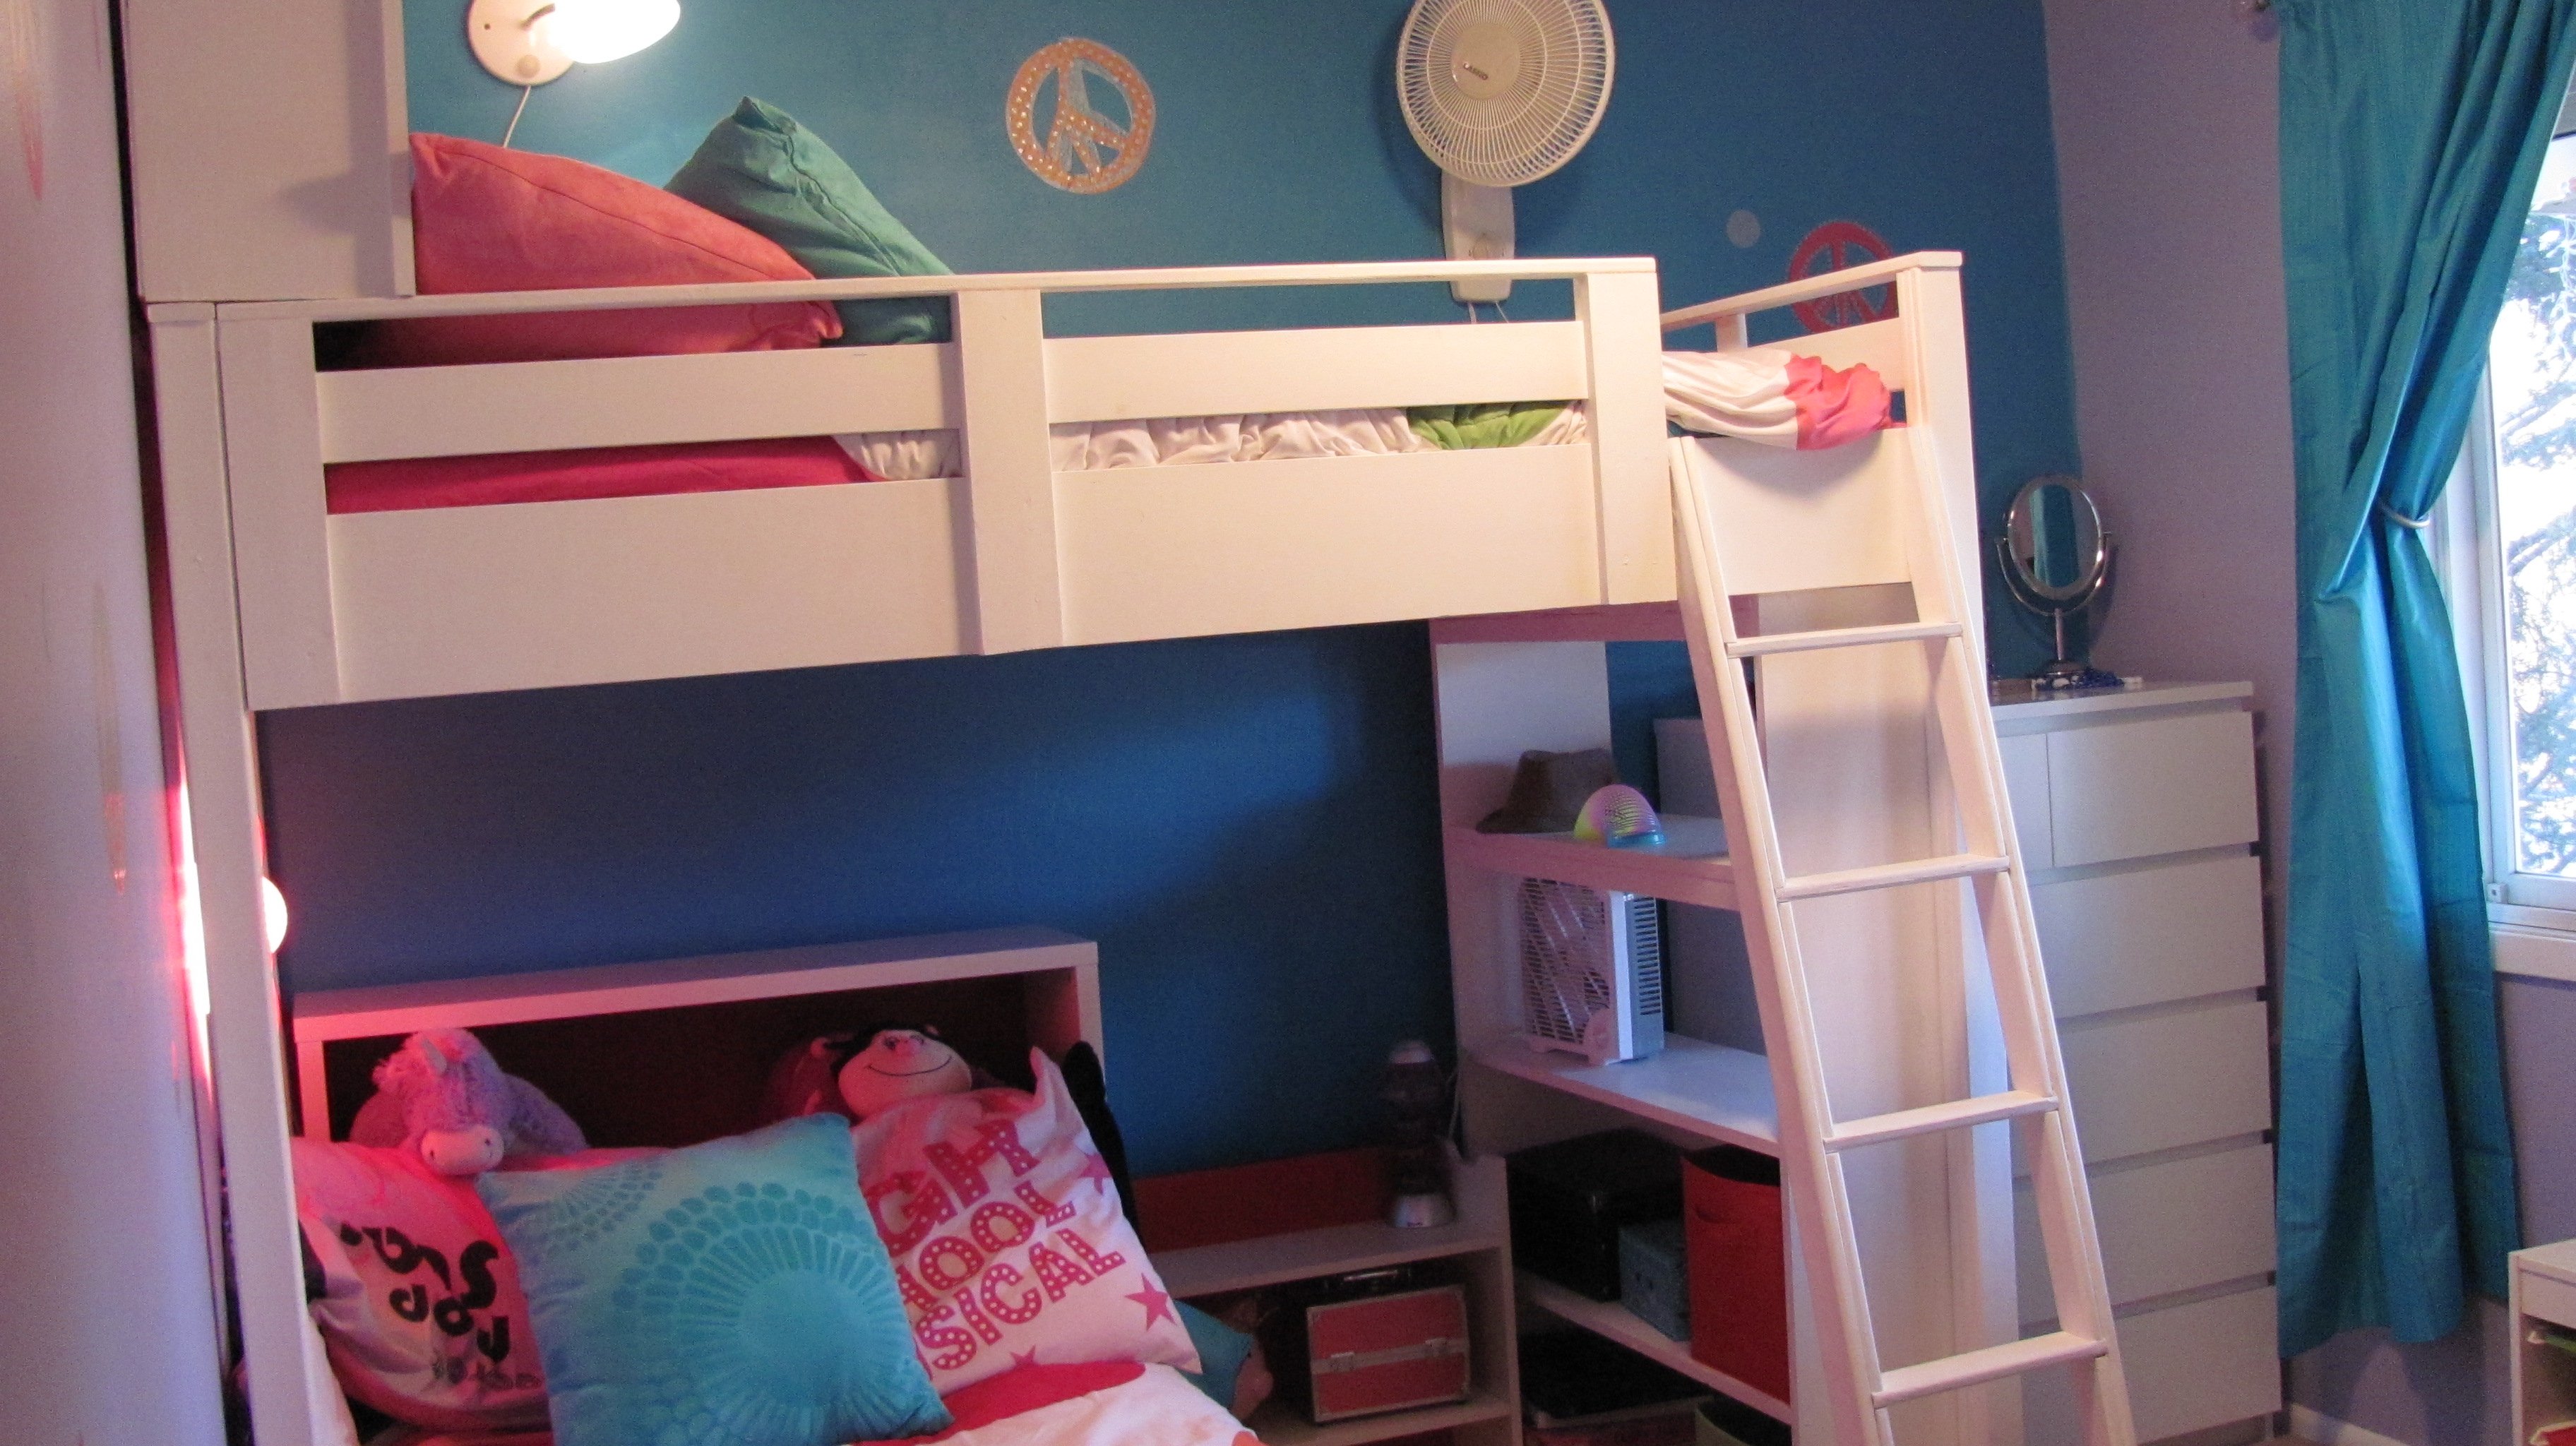
We used the loftbed plans, http://ana-white.com/2010/05/furniture-plans-loft-bed.html and the bookshelf plans, http://ana-white.com/2010/06/plans/what-goes-under-loft-bed-how-about-b…- then designed our own headboard. The girls love their new room and we're going to build another one for the boys! We just put a platform bed from Ikea underneath!

Sun, 12/30/2012 - 06:39
i want to build this project for my daughter, but the link for the bookcase is a dead link. where can i find the bookshelf plans? i plan on making the loft be a full size, so will be adding 15" to my project. thank you!
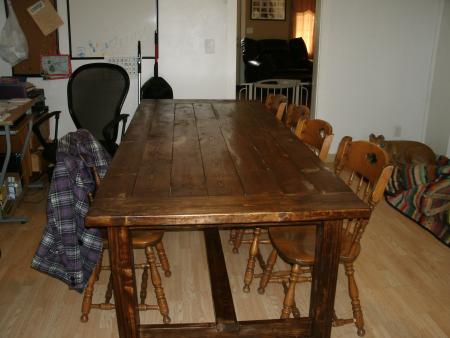
I used the farmhouse table plans, with a few modifications. I made two benches to go along with it. This was my first big wood project and I'm pretty proud of it. My daughter bought her first home and needed a table custom sized to her space so this was perfect. I love all of Ana's plans, so easy to follow.
This was one heck of a project LOL! But I am so pleased with the results!!
Wed, 02/29/2012 - 13:34
It looks awesome. I really like the built in look!!!
Mon, 07/23/2012 - 19:37
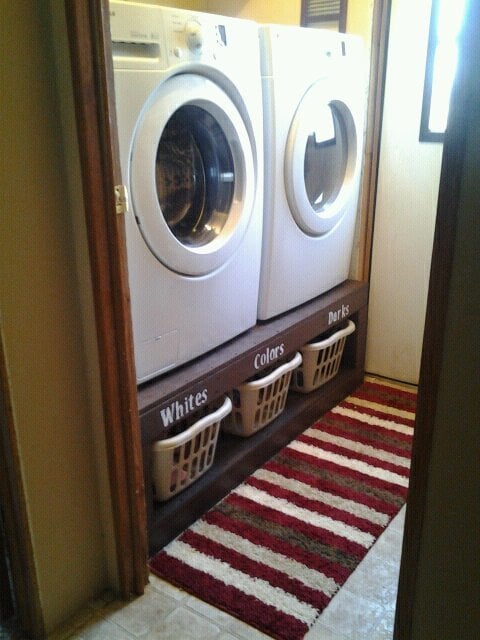
My husband just built us one of these for our laundry room, take a look!!
http://glamorousbride.blogspot.com/2012/07/making-most-of-your-space-la…
- Fotini
Mon, 07/23/2012 - 19:38
My husband just made us one of these!! Take a look :)
http://glamorousbride.blogspot.com/2012/07/making-most-of-your-space-la…
- Fotini
Mon, 09/03/2012 - 15:06
This excites me!! :) Such a great idea - practical, and yet pretty!
Sun, 09/23/2012 - 08:03
My washer will shake on the metal pedestals. Will it shake on this one?
Mon, 12/31/2012 - 19:01
My husband just finished one similar to this for me today-total cost about $65.....Thank you for the fabulous & frugal idea!!
Wed, 06/19/2013 - 11:33
Do you have the plans posted for the washer dryer pedestals?
Sat, 11/07/2015 - 07:47
Please help me find out where to get plan specifics, new here
Sat, 11/07/2015 - 10:54
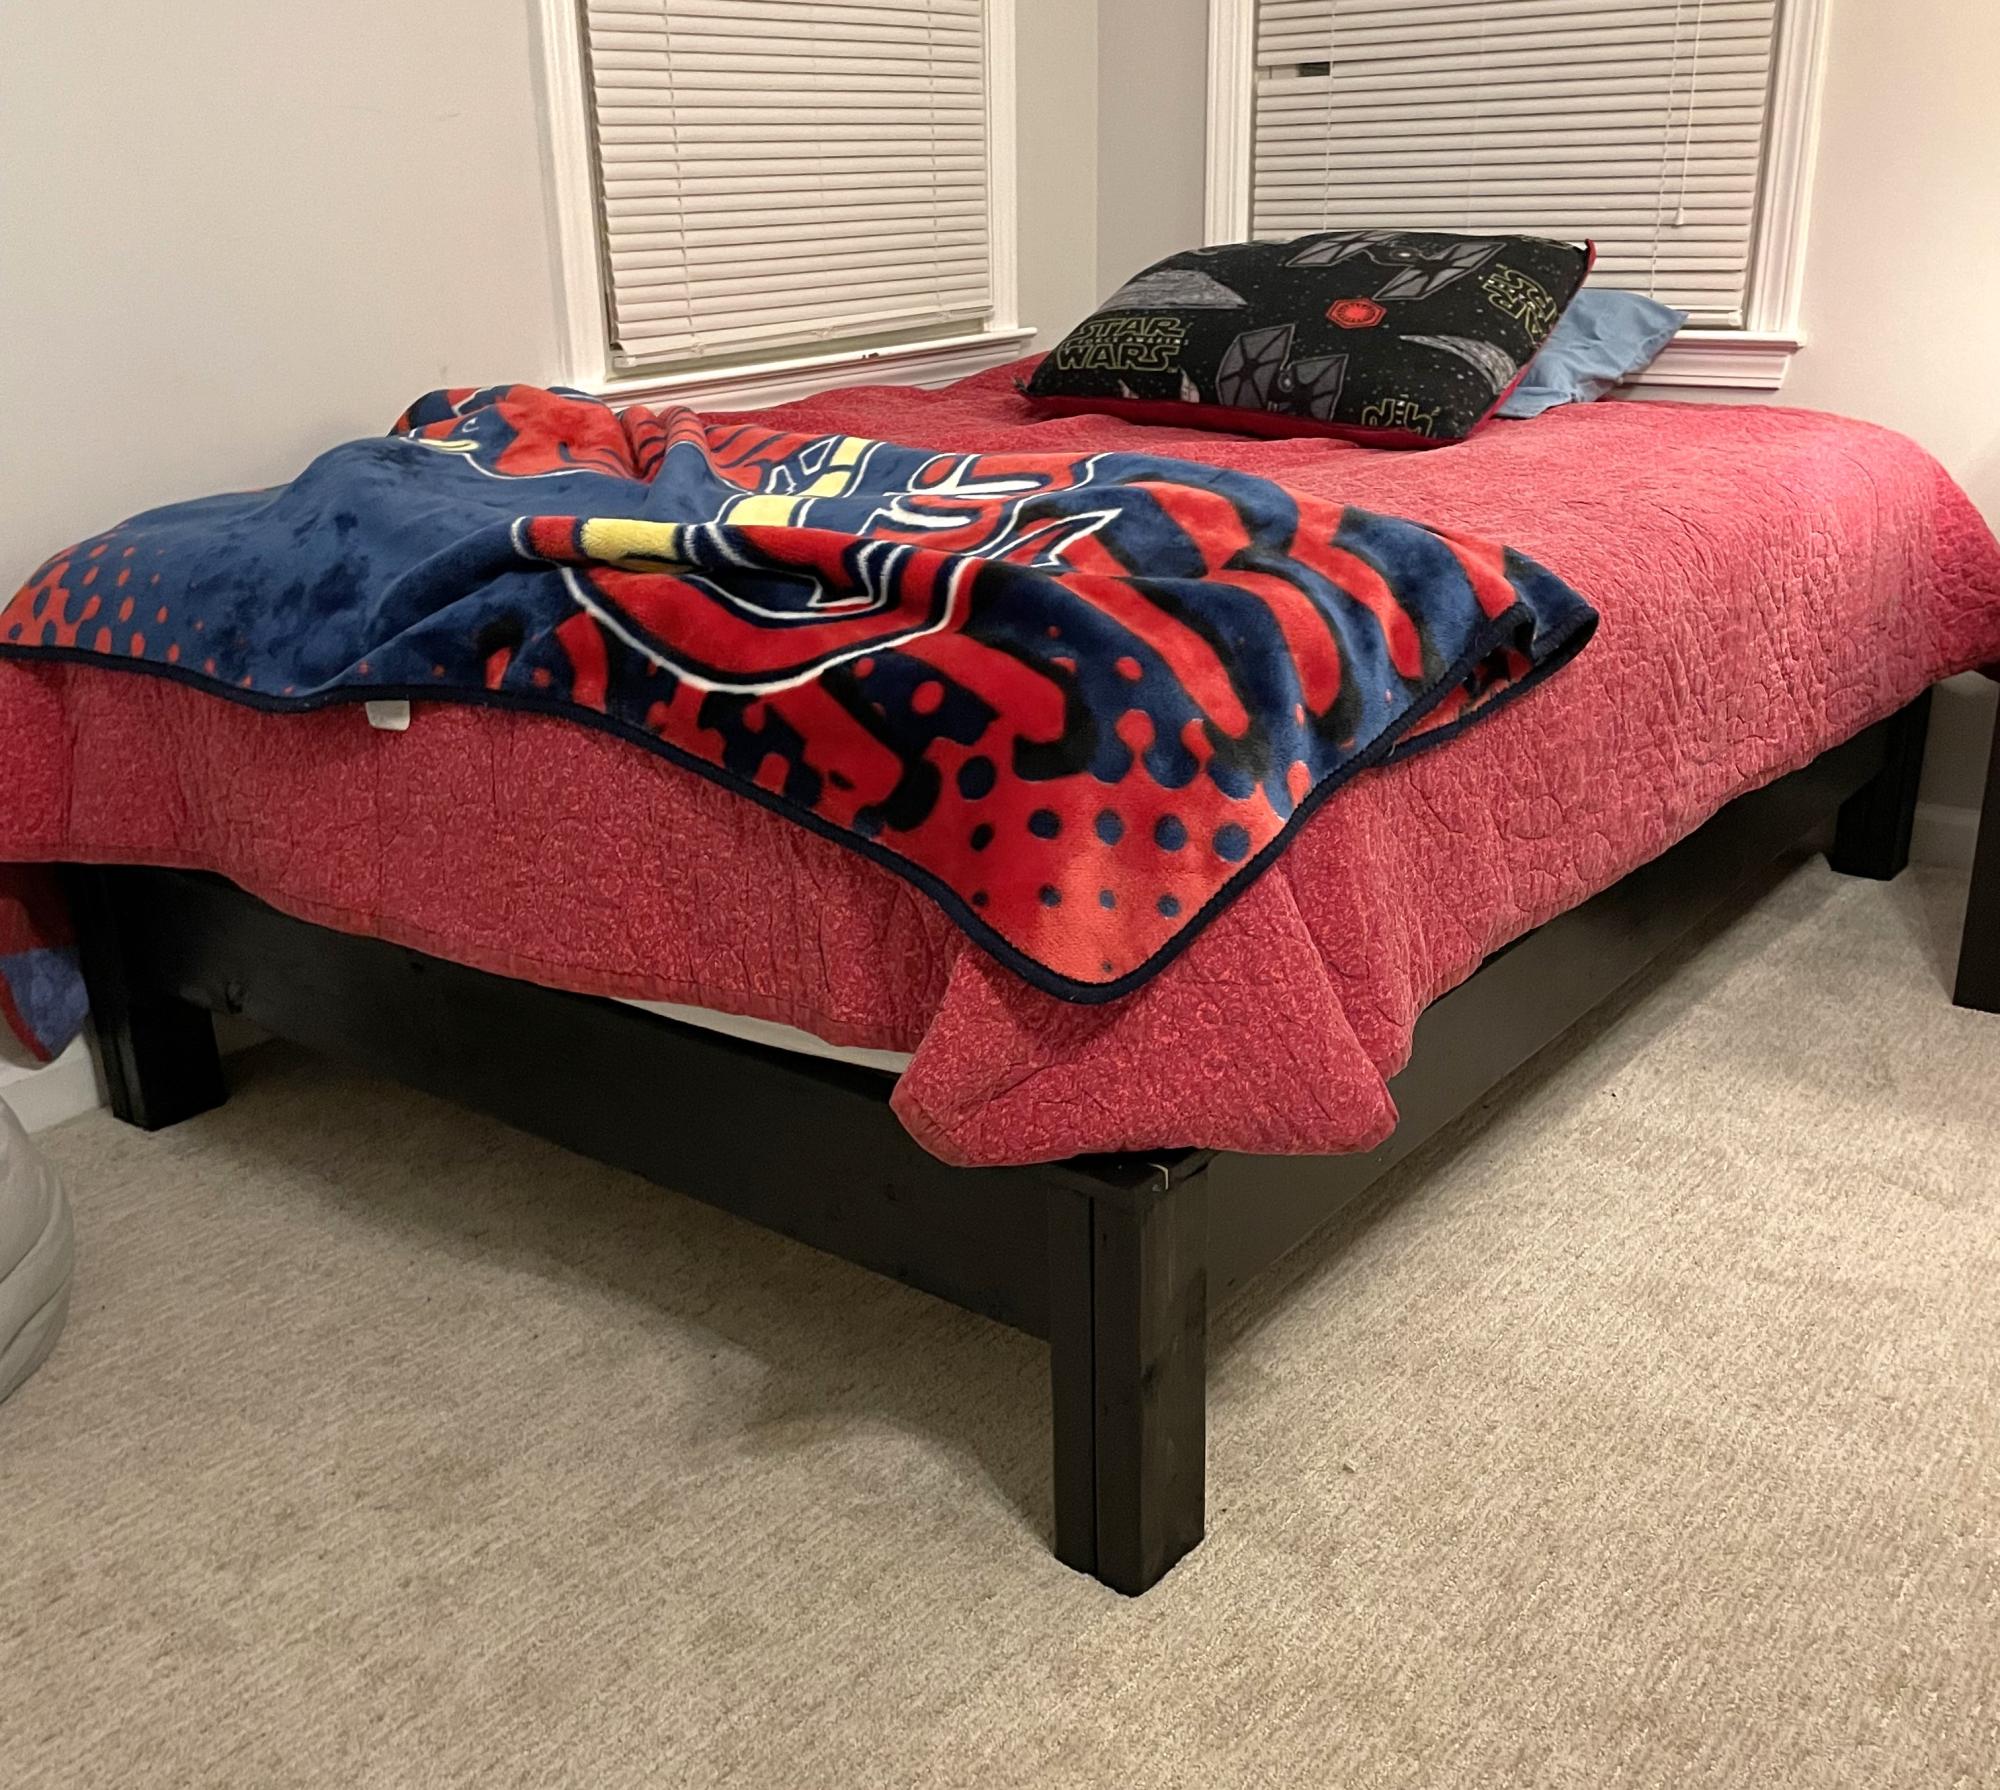
Great plans for a platform bed. My son loves it!
Jmimms
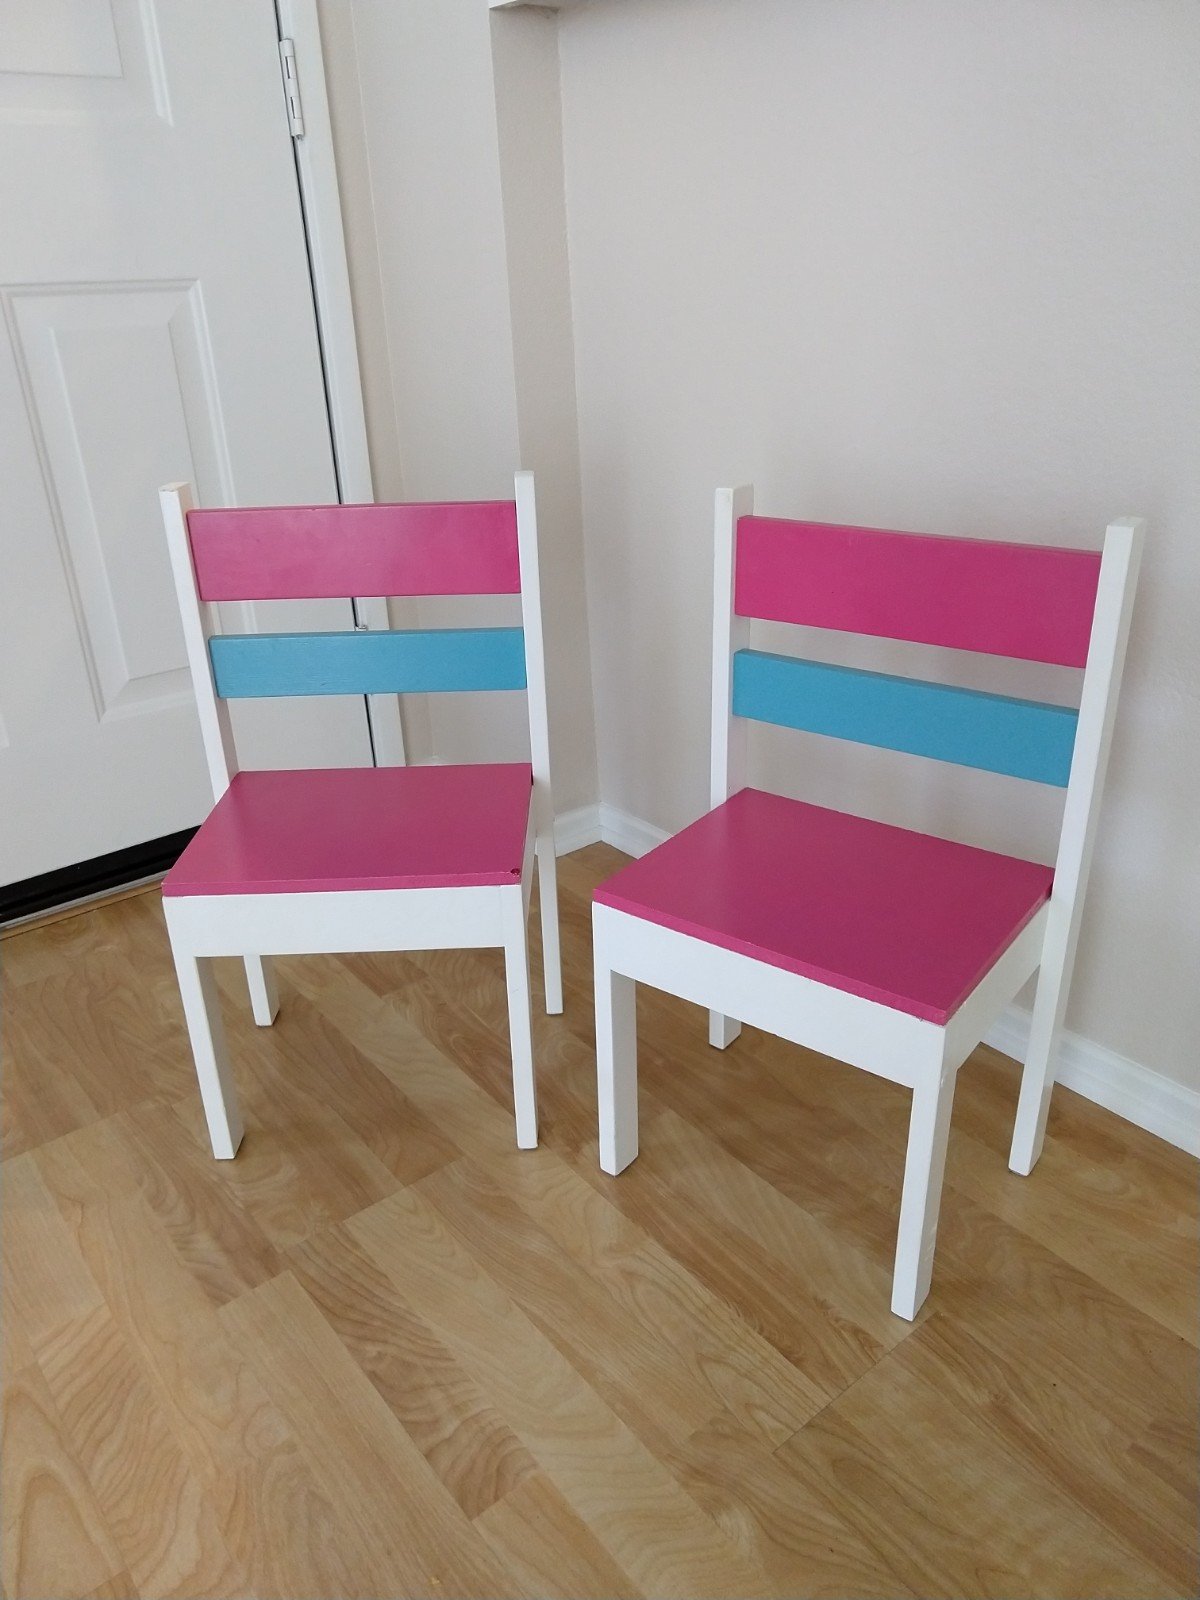
Chairs are hard.... when you don't use plans.
I used Ana's plans for round 2 of these chairs. I actually feared for my children's safety with the first set I made using no plans at all. With plans in hand, these turned out excellent and were actually quite easy to build.
I used 1x2s for the legs, 1x3s for the side supports and for the turquoise back panel, a 1x4 for the pink back panel, and scrap MDF board for the seat base.
I regret using the MDF board, it chips easily. In hindsight, I should have used 1x3s for the seat bottom.
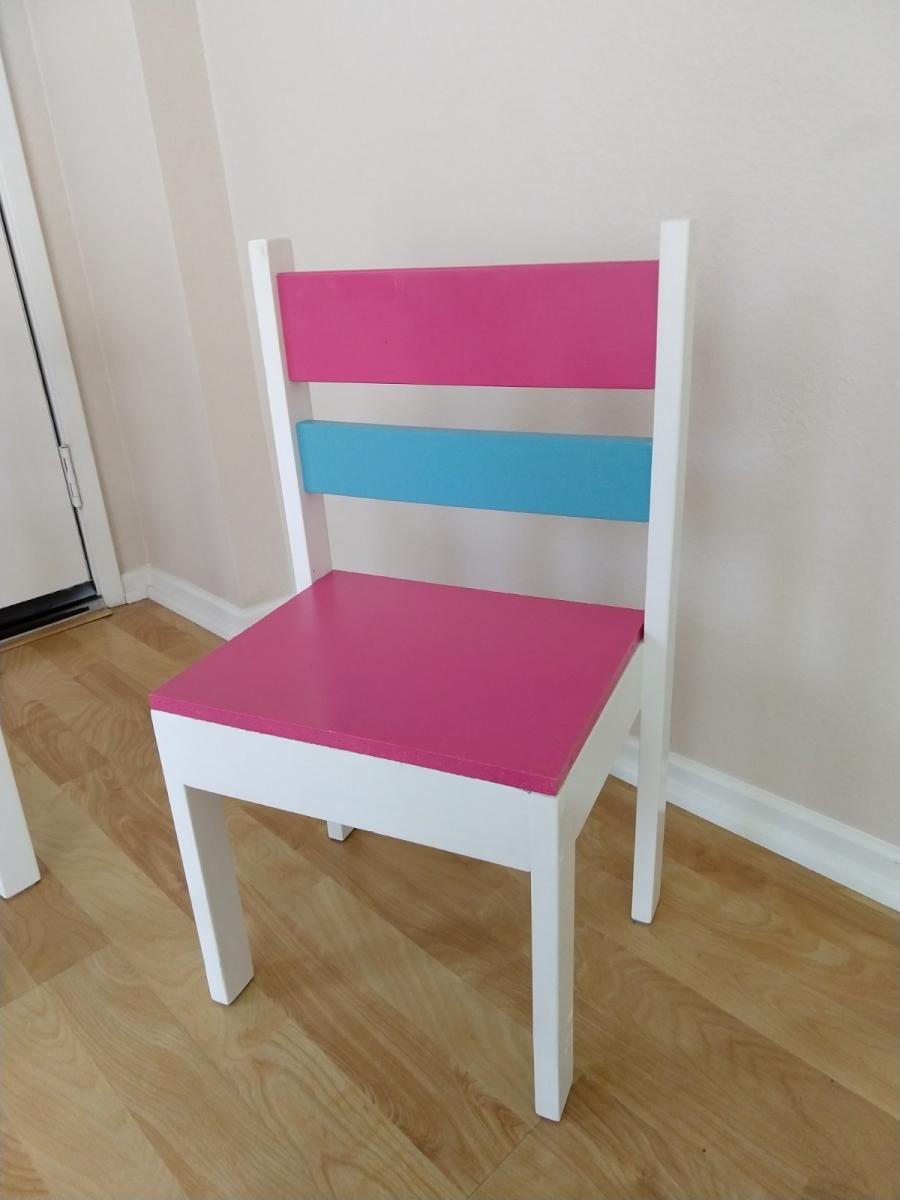
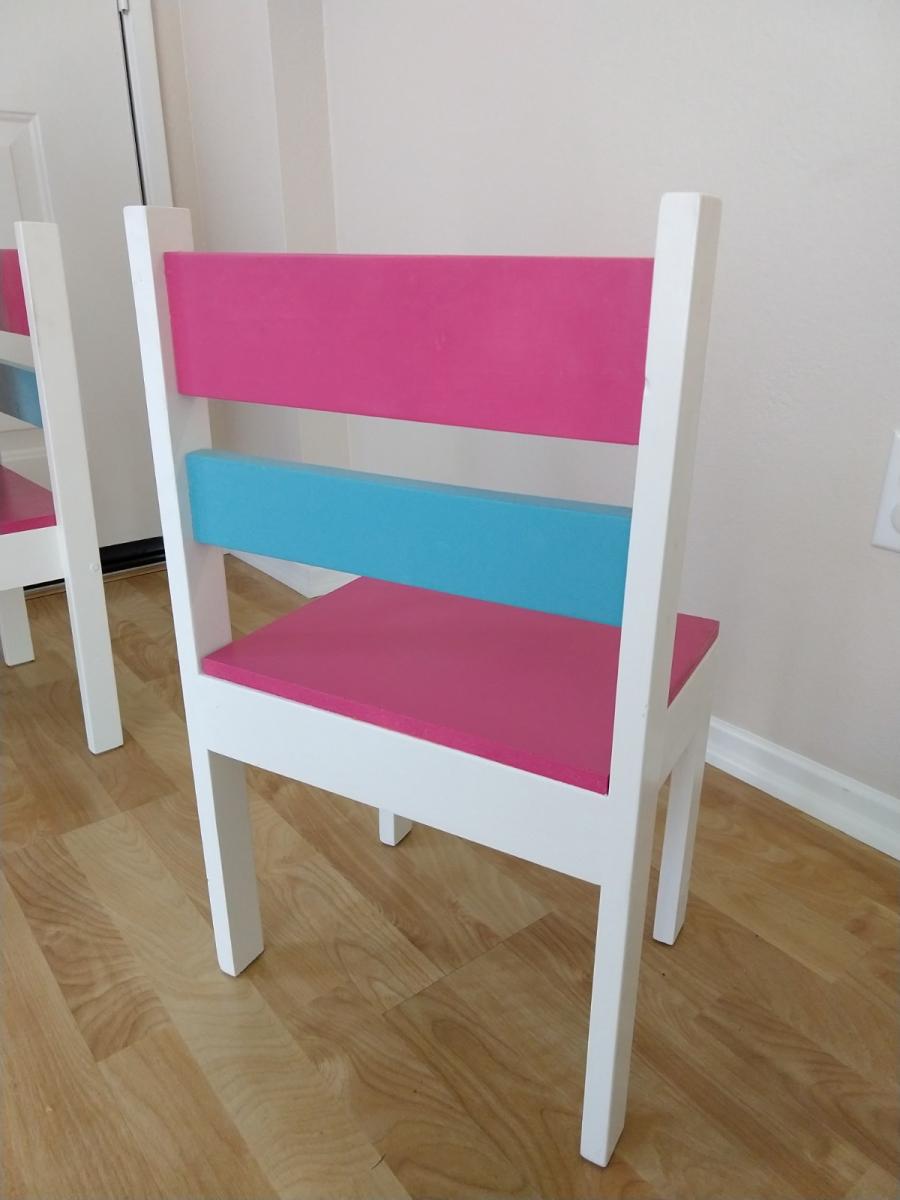
The most time consuming part was staining the wood, and getting the Xs to fit properly. We love how it came out and are making an outdoor bench and end tables to match.

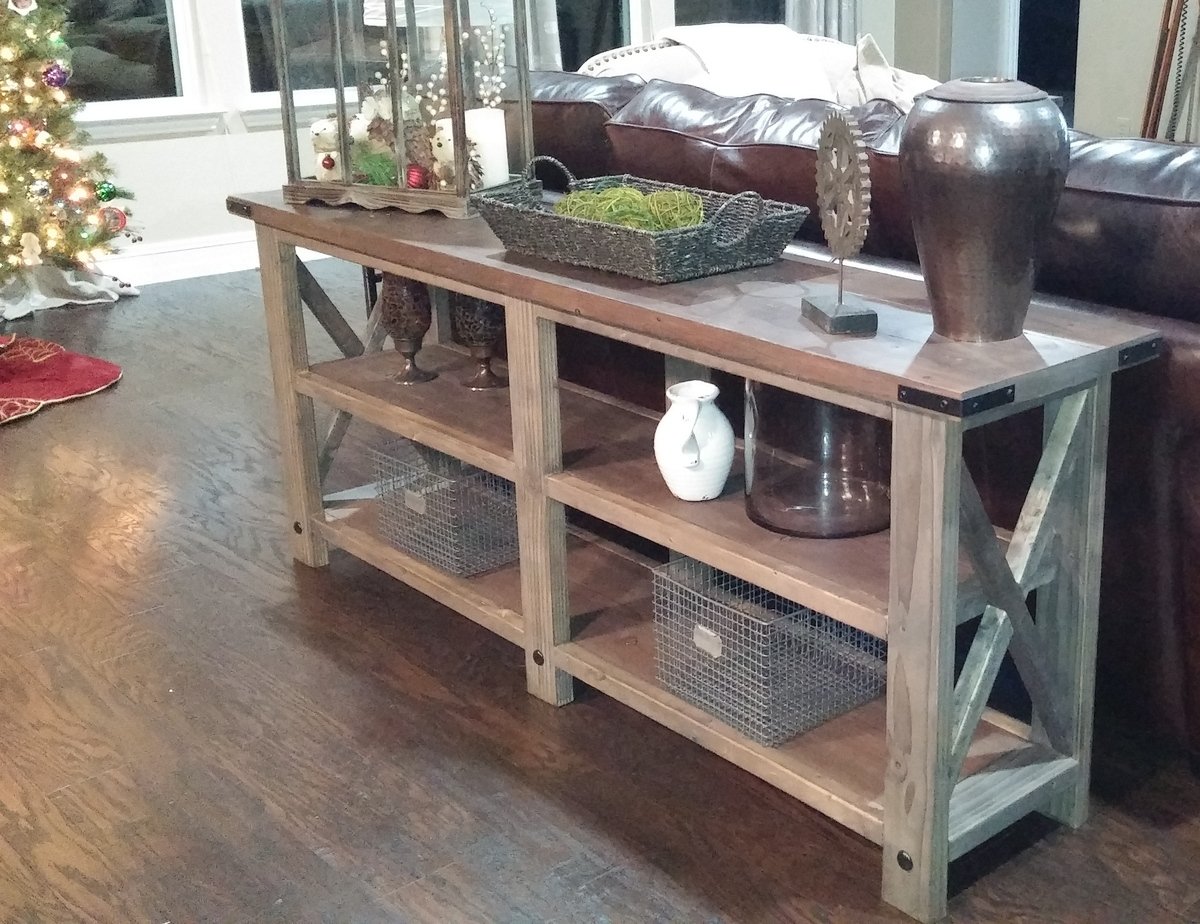
The Custom Built-ins started out with lots of research, and like many DIY project we looked to Pinterest and Houzz for inspiration. A lot of love and time went into this project. I can't stress enough how important research is. This process is often over looked because DIYers just want to get to the building process as quickly as possible, but trust me when I say doing solid research will save you a lot of stress and time when it comes to building.
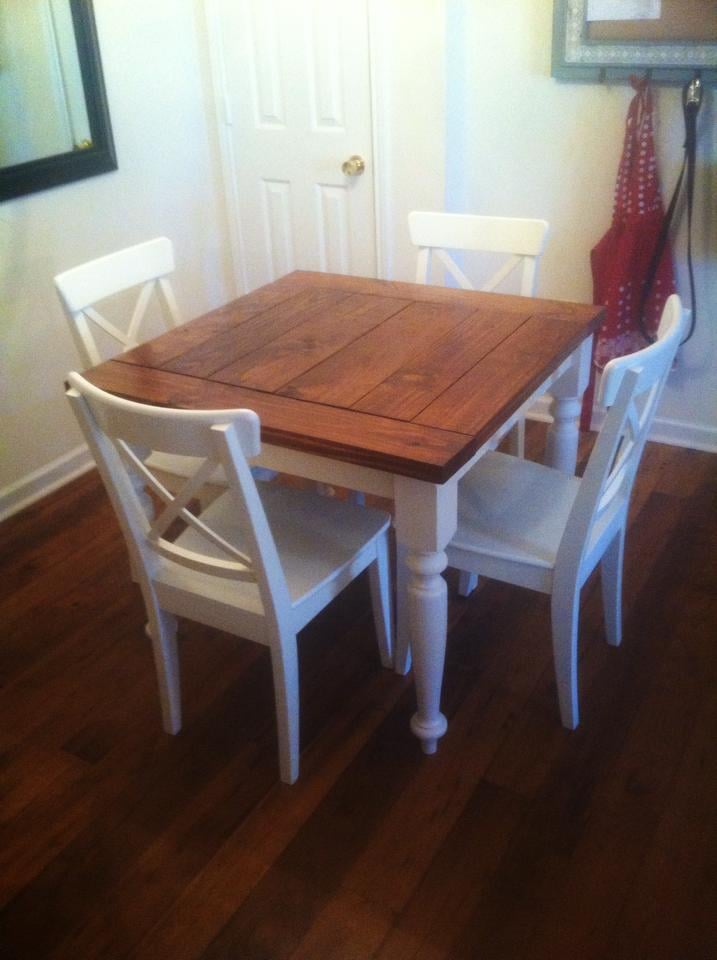
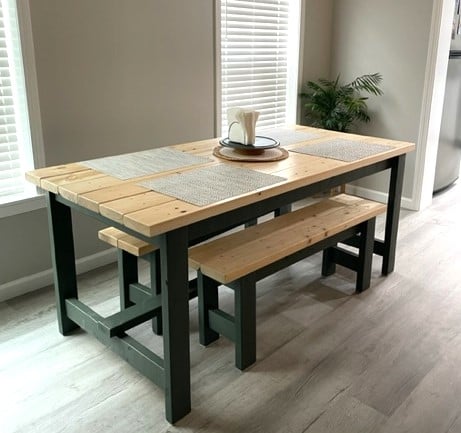
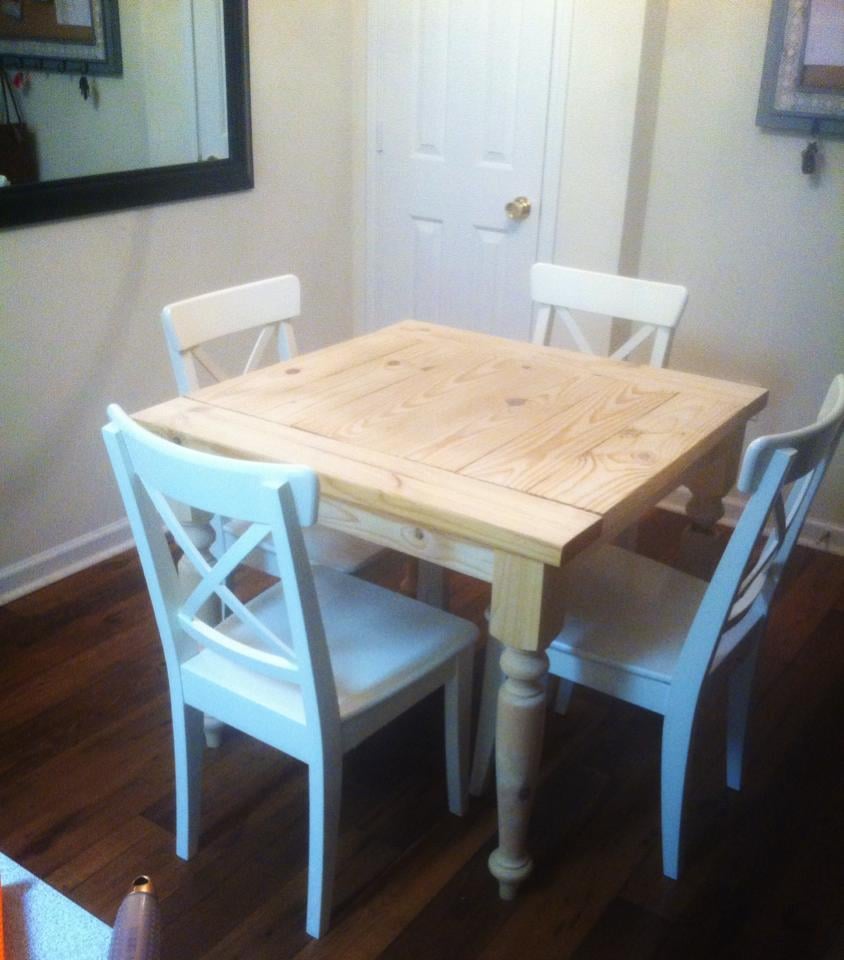
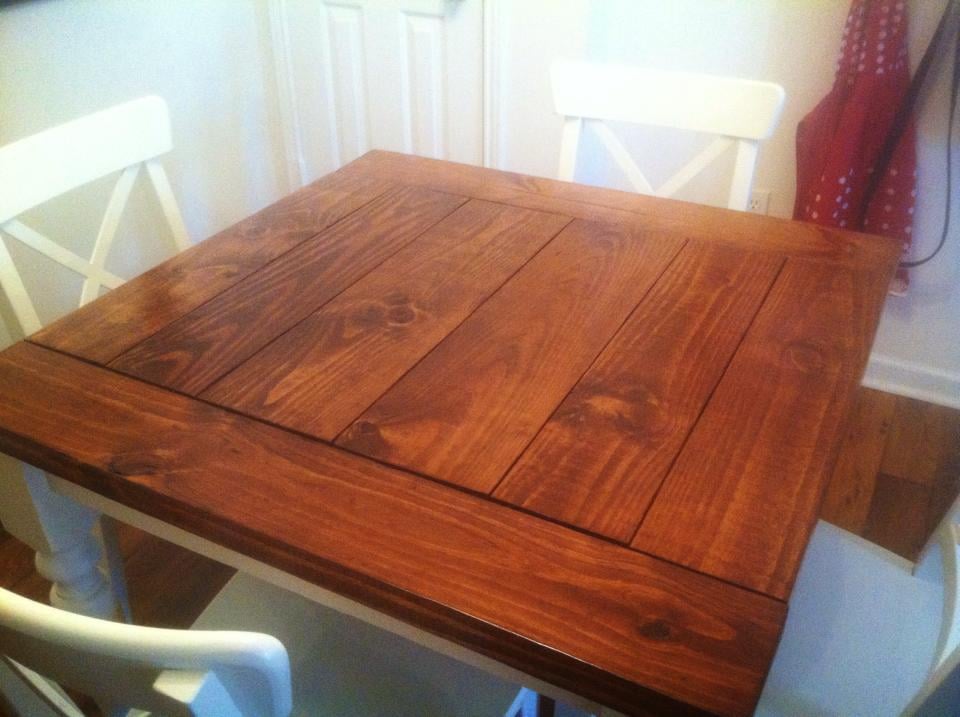
I had to do a 3ftx3ft square table since our eating area in the apartment isn't big enough for a dining table, but I really like how it turned out :) I also added breadboard ends because I can't stand how the cut ends look. I got the legs from osborne wood
Thu, 05/29/2014 - 23:09
I've been looking everywhere for a small farm table! Can you tell me which legs and lumber you used?
Sun, 01/22/2017 - 13:56
I love this table however i am a beginner. Where can i find the plans to this table and step by step instructions?
Thank you!
Tue, 03/28/2017 - 15:13
This 3x3 farmhouse table is exactly what I want to make with the breadboards. Any chance you can send your plans with the measurements for this 3x3 table. Thank you!

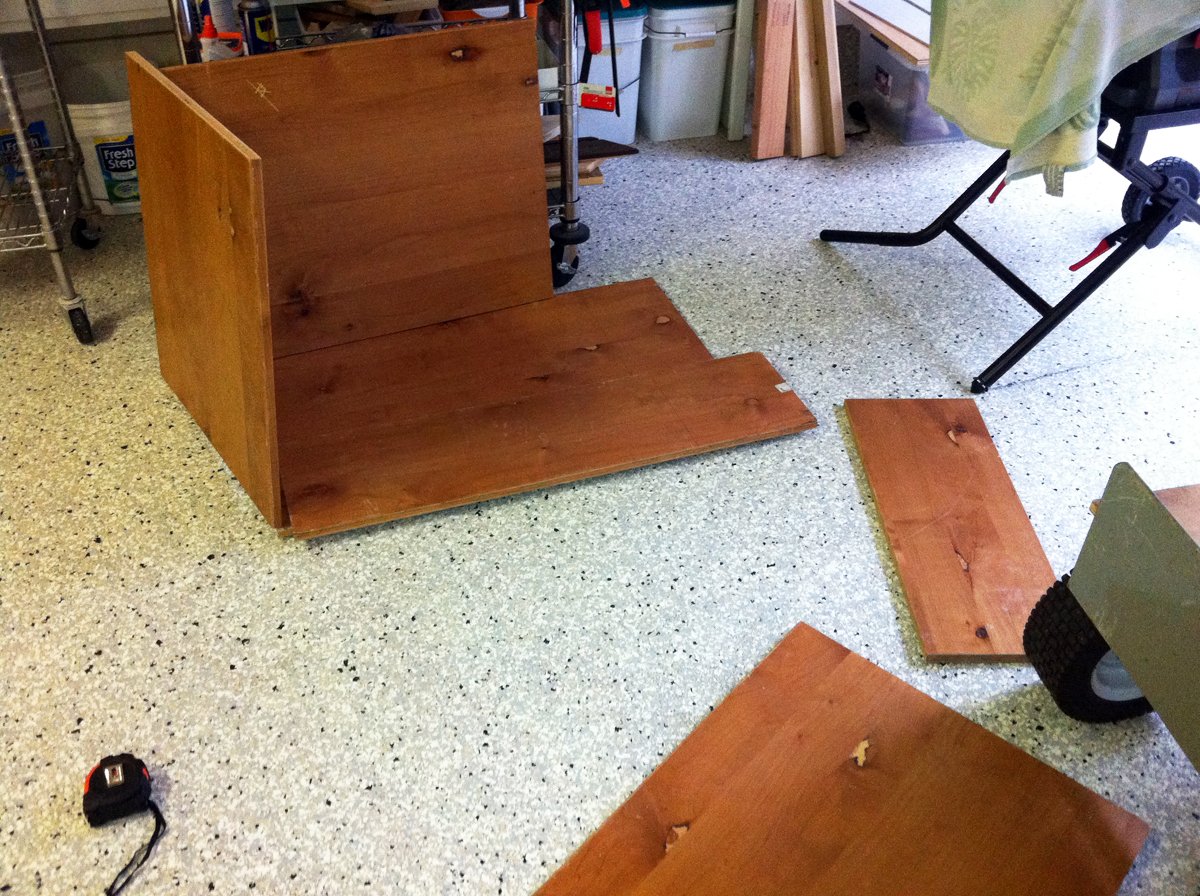
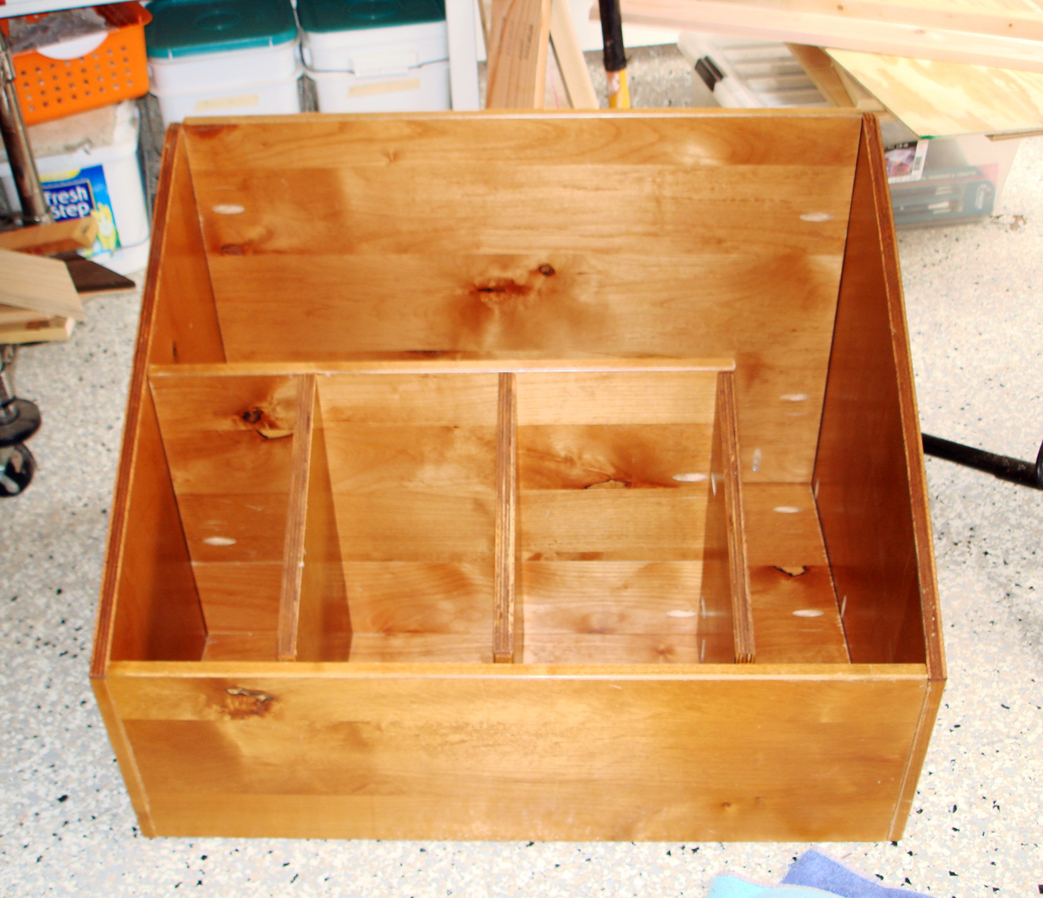
My wood scraps were definitely getting out of control, and I needed something to store the wood vertically. I had some spare wood (free from Craigslist), so I put together a wood storage bin. All in all, the project cost me the price of some Kreg screws.


Mon, 03/19/2012 - 20:13
Love it! I'm building some crates from pallet wood to store my scraps in. Your box turned out very nice.

Wed, 06/06/2012 - 13:21
I have been struggling to organize my space because my lumber is on one of my work spaces. I have the perfect space for that, thanks for the great post!

Comments
Ana White Admin
Thu, 02/02/2023 - 12:41
Beautiful work!
These look great, love the finish!