Community Brag Posts

New bed for my youngest

Submitted by Anonymous (not verified) on Mon, 04/10/2023 - 15:45

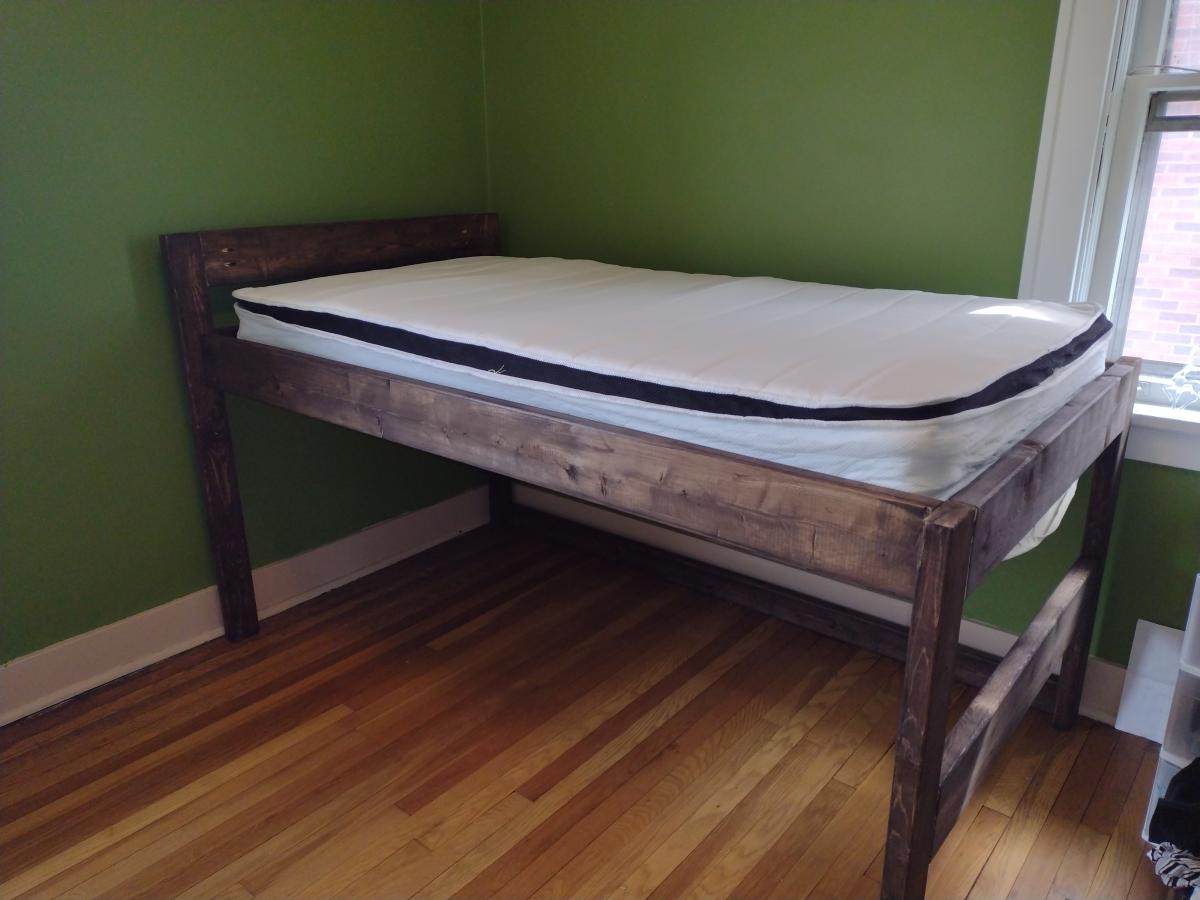
Moved into a new house after a fire destroyed almost everything, rather than buying new beds for my kids, we decided to build! They turned out beautifully, and the kids love them! Decided to modify the camp loft bed, removing the stairs and using the foot of the bed a ladder style.

Comments

chicken boxes that work!

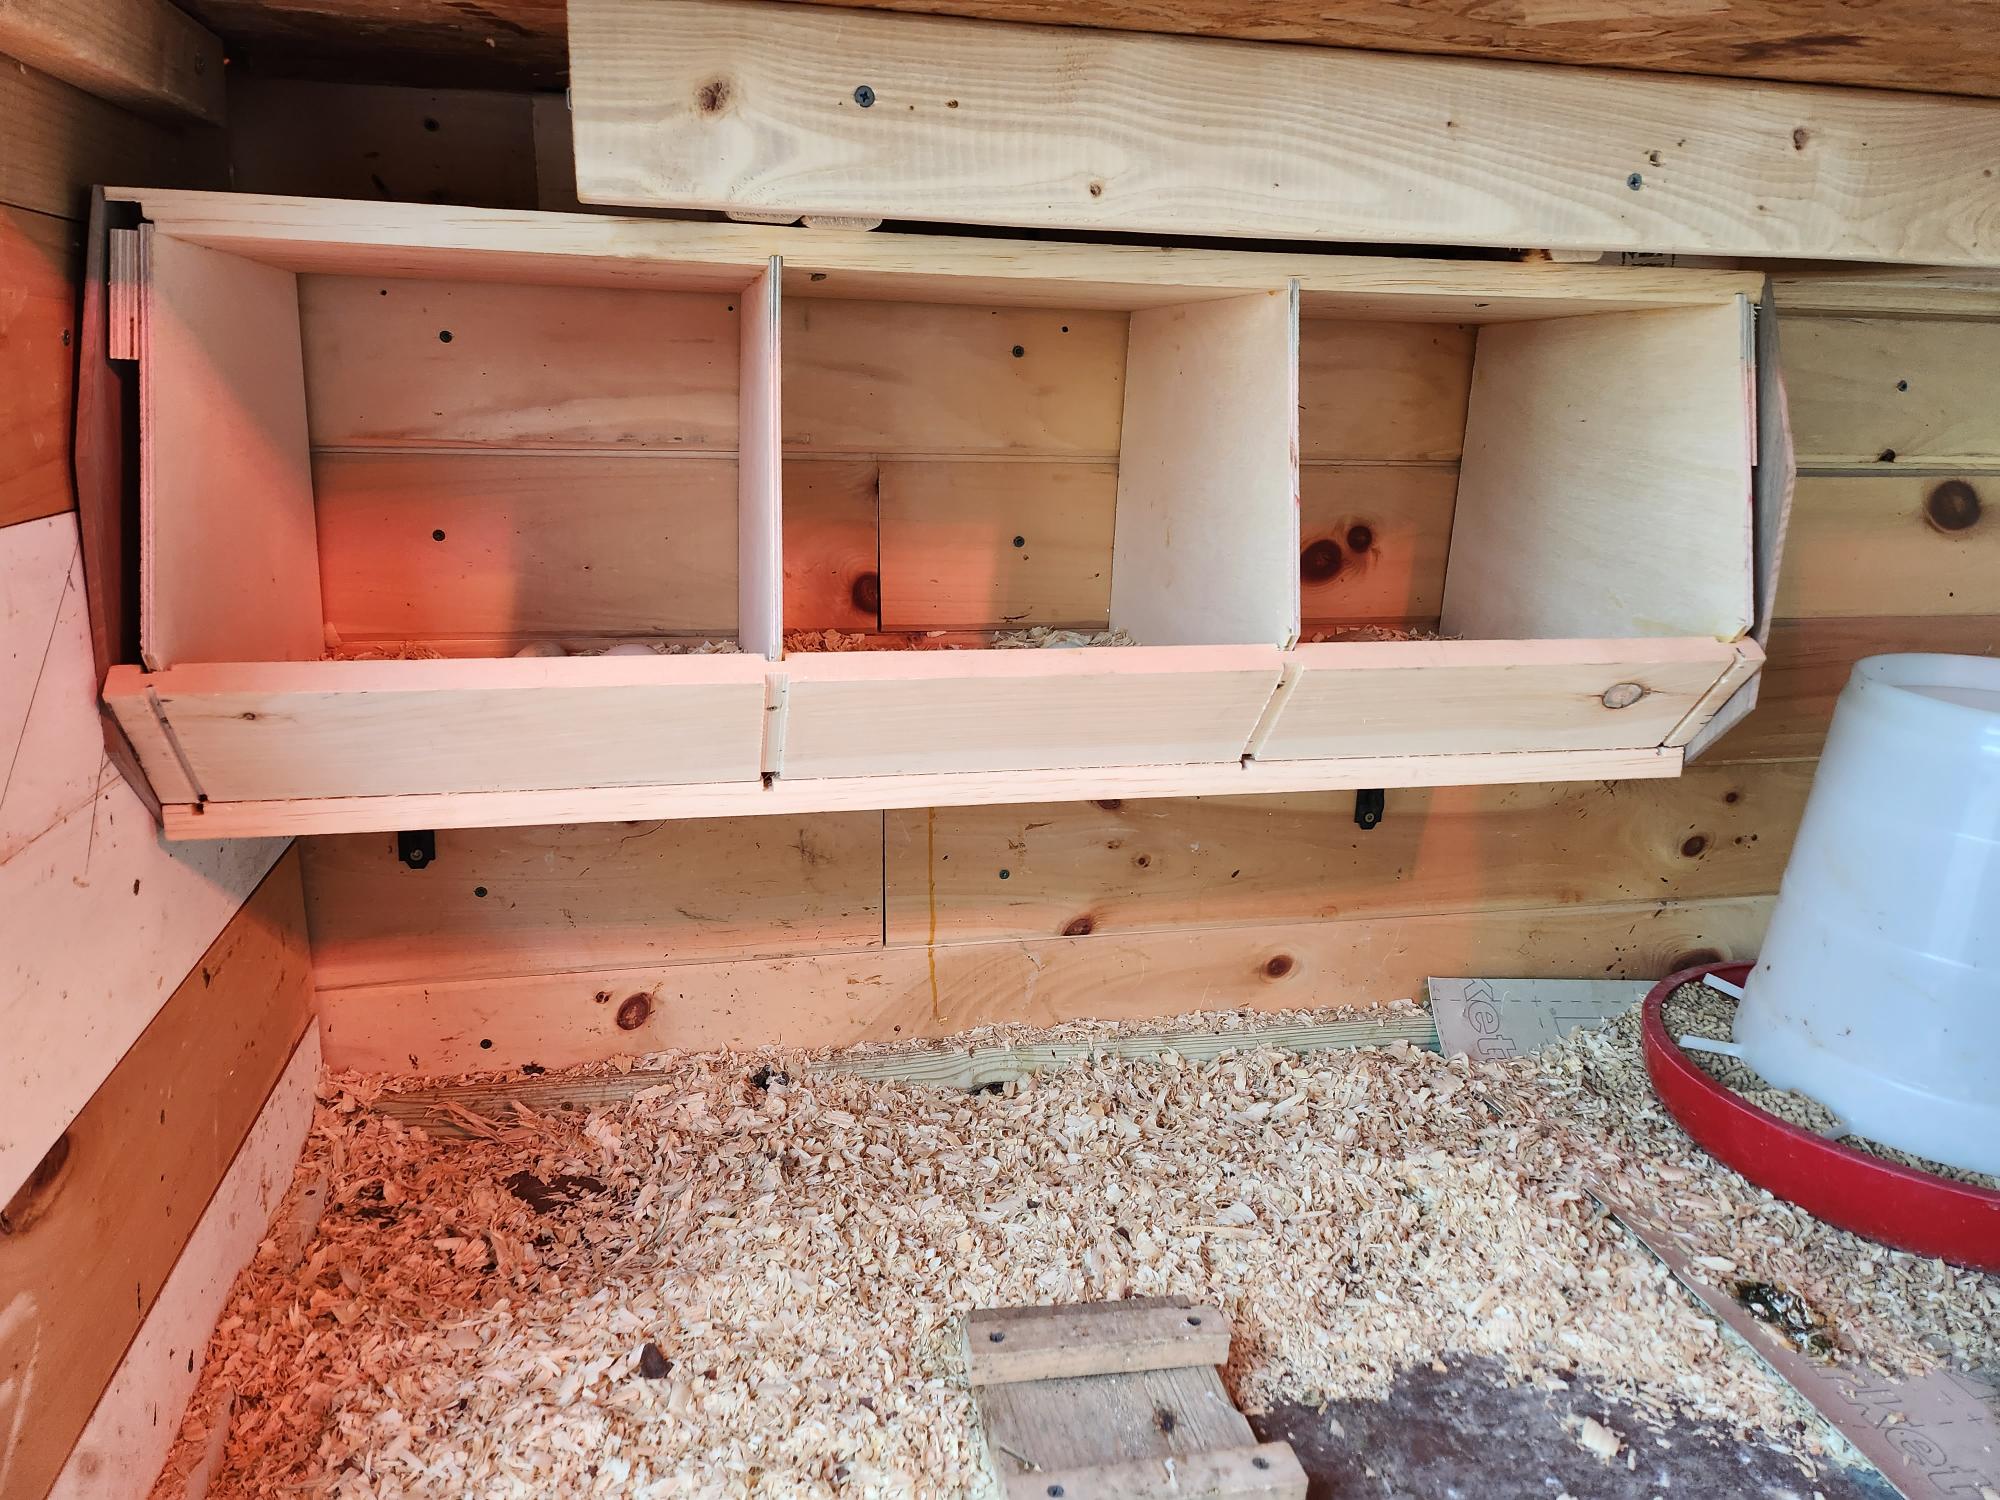
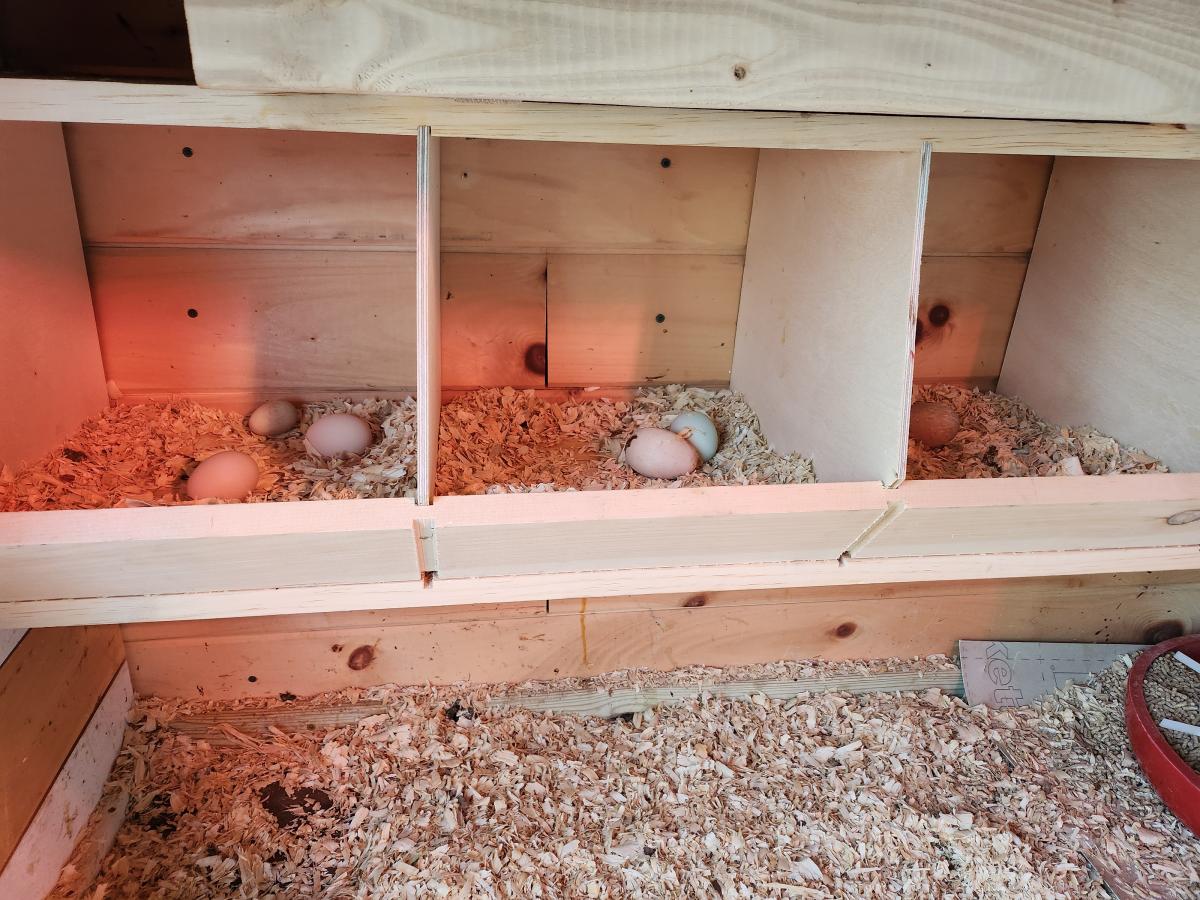
I have tried all sorts of nest boxes. No one ever used them. I decided to make the one from Anna White's site. I used joinery to attach the various pieces. The best thing of all: I find girls sitting in the boxes and take eggs from them. It really is awesome. I got a photo with real eggs and you can also see the wooden eggs to entice them to try it out. Thank you so much! I will build another one for the other side of the the wall.

Built from Plan(s)

Comments

Laundry Pedestal

Submitted by jerfer on Mon, 12/26/2011 - 18:00

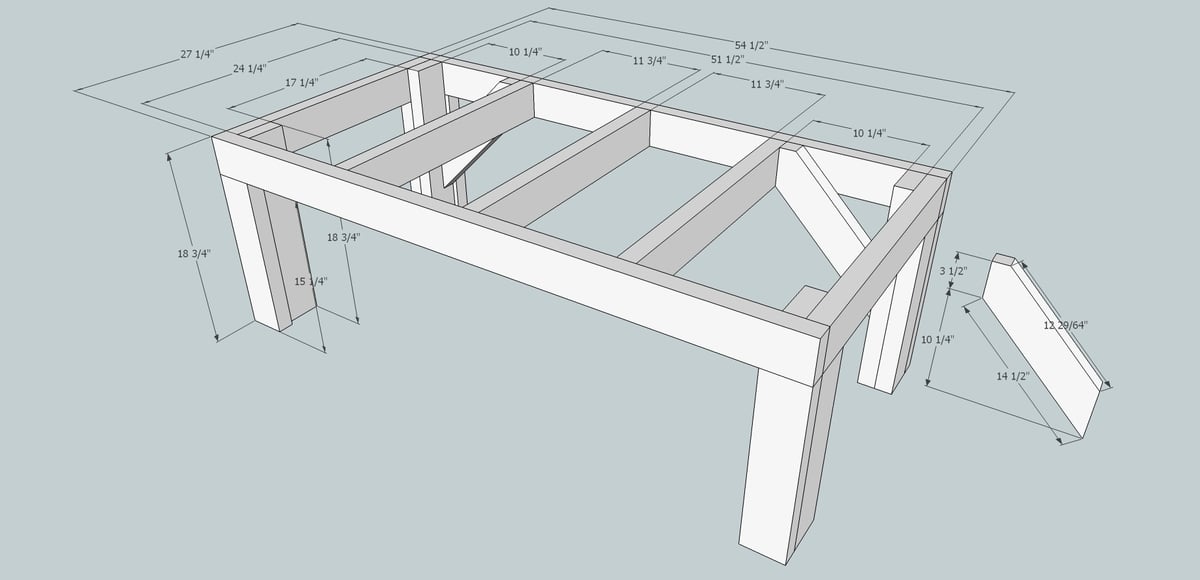
I modified Sausha's design, taking out the bottom shelf, adding a back brace, and putting fascia boards on. I also put in a 2x4 between the underframe and each back leg at a forty-five degree angle as braces. My legs are a bit different too. I used three 2x4's. The first leg piece goes from the plywood top to the ground. I put four screws between it and the frame. Then I took two 2x4's and placed them butted at a ninety degree angle around it flush with the frame above.

Estimated Time Investment
Weekend Project (10-20 Hours)
Finish Used
Mini-wax Bombay Mahogany
Recommended Skill Level
Beginner

Comments

moonhopping

Mon, 01/23/2012 - 13:08

I have been drooling over the original pedestal plans since they posted. When I showed them to my dad the first thing has said we could have more clearance without the bottom plat form. I am going to copy your plans this week end thank you very much.
I did want to ask do you have any vibration issue without the bottom plat form?

Thank you for sharing, great sketch –up!

Dave C (not verified)

Wed, 03/21/2012 - 14:00

Did you have any issues with machine vibration?

Cute Ladder Plant Stand

Submitted by Cheryl on Fri, 12/30/2011 - 20:37

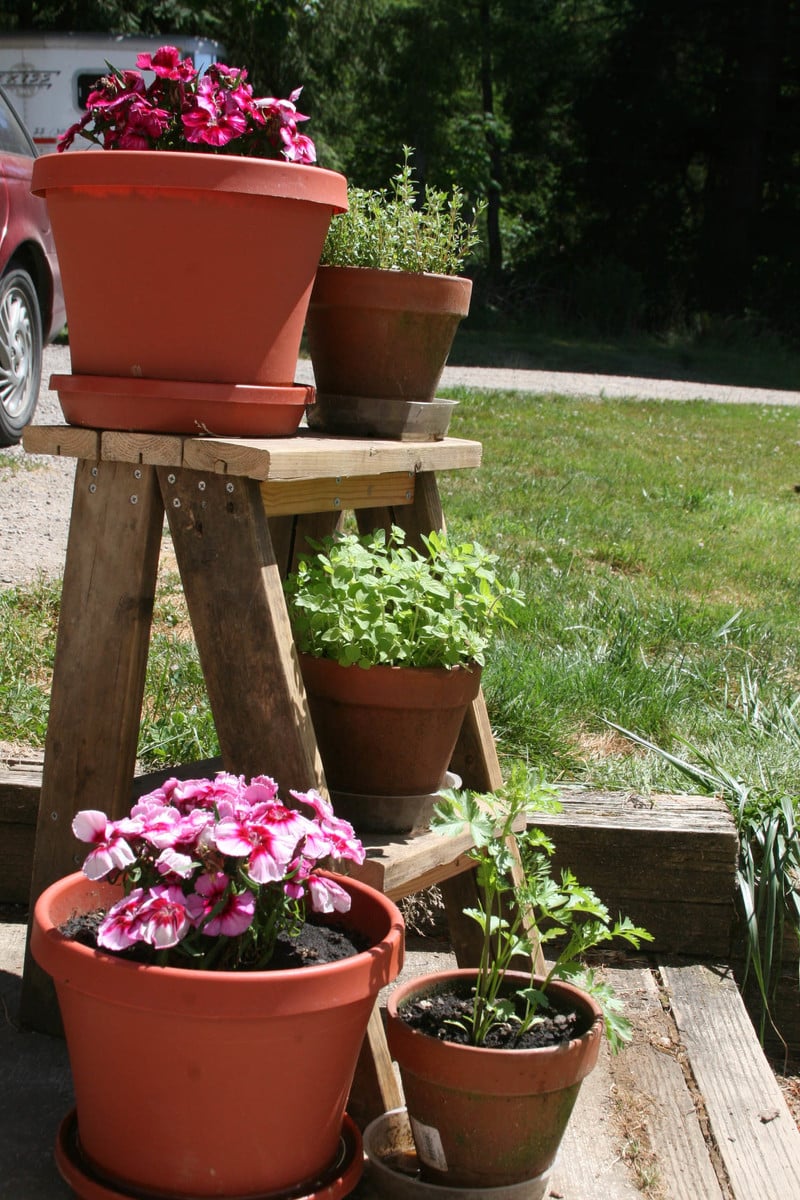
This is my first project from Ana's plans. I found a big pile of old wood left by the previous home owner. It looked like it was from old fencing. We used some for fire wood, some for fence repairs and still had a big pile. I was looking at it one day after finding Ana and thought it would make a really cute plant stand for my yard. My first project turned out great!

Estimated Time Investment
An Hour or Two (0-2 Hours)
Recommended Skill Level
Beginner

Comments

Carmen O (not verified)

Mon, 06/04/2012 - 05:37

I went to Lowes to get some plant stands and thought to myself, I am not paying $25 for that!!! I came across this blog while looking for ideas for diy plant stands and so glad I did! We made this stand yesterday and it turned out great! my husband had a ton of wood left over from prior house projects and we got pretty oops paint from Lowes for $3 dollars. Can't bit that! I am hoping to make another two before the week ends. Thank you!

Tilt Out Trash Bin

Submitted by loniwolfe on Tue, 01/10/2012 - 13:34

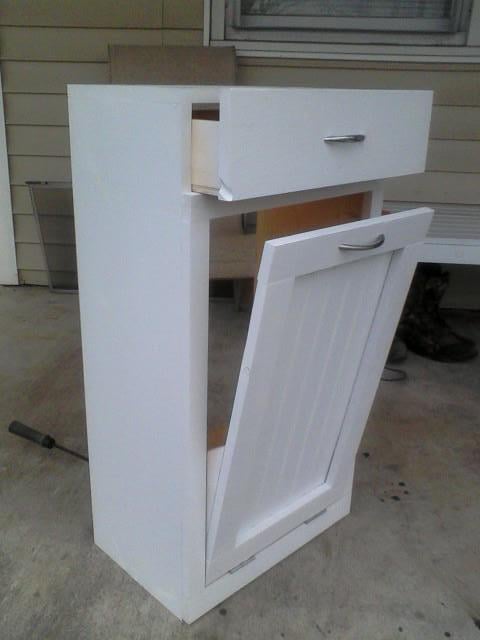
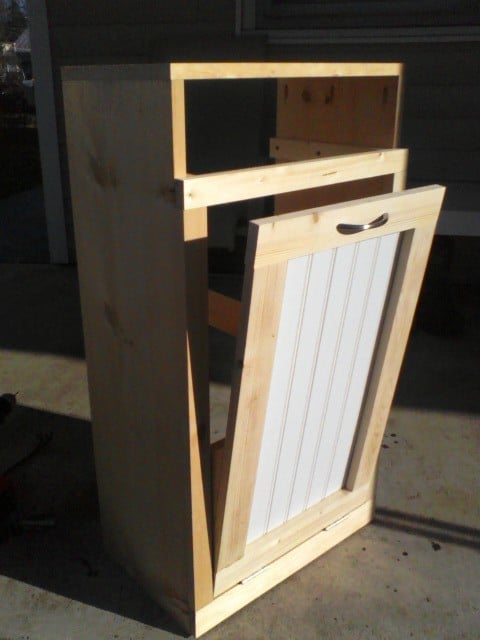
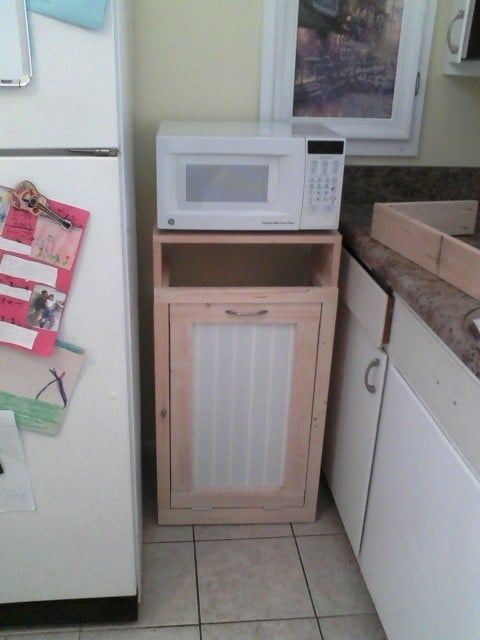
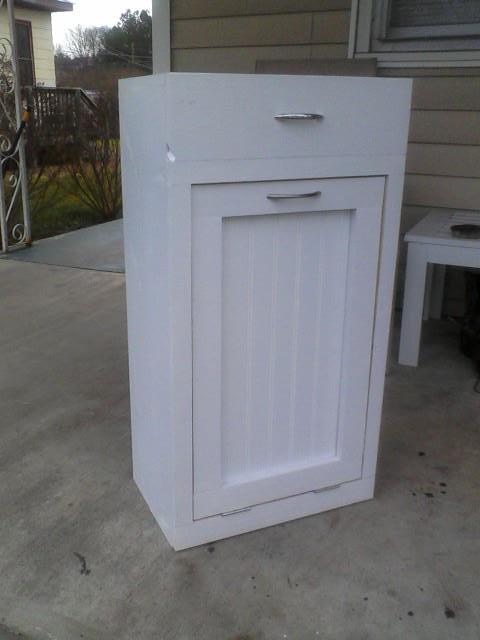
Our large lap dog finally discovered he could easily get whatever he wanted out of the trash, so I built the tilt out bin to help keep him out of trouble. lol. I made it cabinet height so we could move the microwave off the counter, and added a drawer to the extra space to keep garbage bags and such in.

Estimated Cost
$60
Estimated Time Investment
Afternoon Project (3-6 Hours)
Finish Used
minwax spray primer and white spray paint (I hate painting, lol)
Recommended Skill Level
Beginner

Comments

guest (not verified)

Sat, 01/14/2012 - 07:27

Looks clean and simple. I like it!

Aryanna and Aaralyn's first big girl bed

Submitted by Spolitte on Sun, 01/15/2012 - 22:49

We needed a bed for our girls but had very little time to build one. My husband found Anna's site and we were excited to give this project a try. In today's market it's easy to spend a lot and not get much with regards to quality or longevity. At least, if we build it, we know the quality of the material, the workmanship and the love that go into whatever it is we are making. Without the encouragement and easy to follow plans and instruction I doubt we'd have been able to accomplish so much. Our girls just love their new bed.. THANKS ANNA! Now... on to the next project. The folks at our local hardware stores are getting to know us by name! ;-)

Built from Plan(s)
Estimated Time Investment
Week Long Project (20 Hours or More)
Finish Used
Semi-Gloss, no voc paint. We did a lot of filling and sanding but the results were worth it. We also added a bit of shoe molding to soften the look of the head and foot boards.
Recommended Skill Level
Beginner

Comments

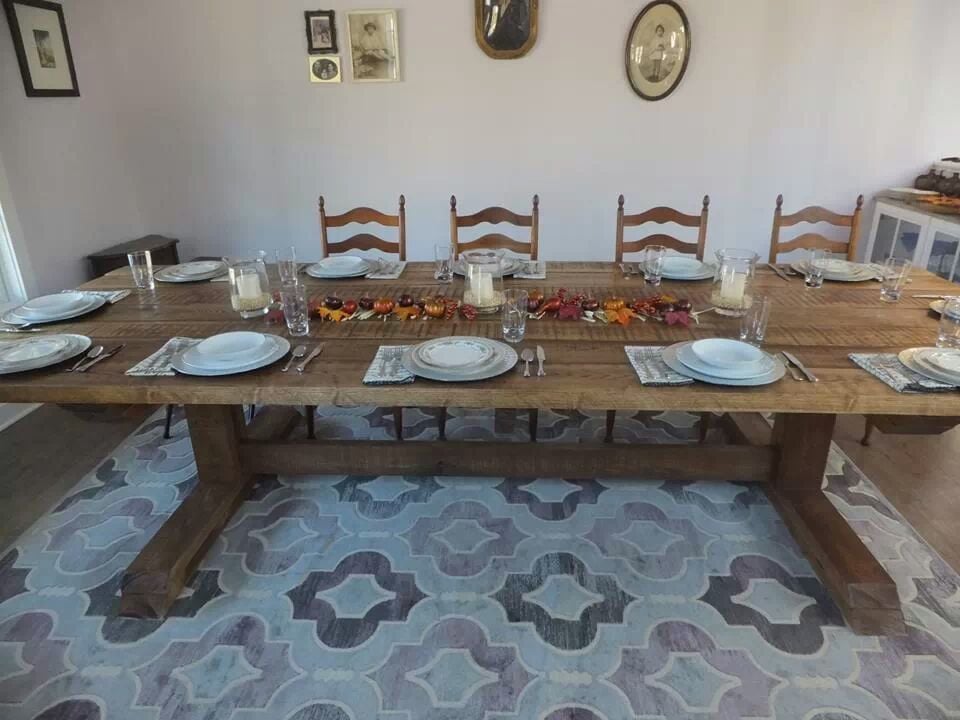
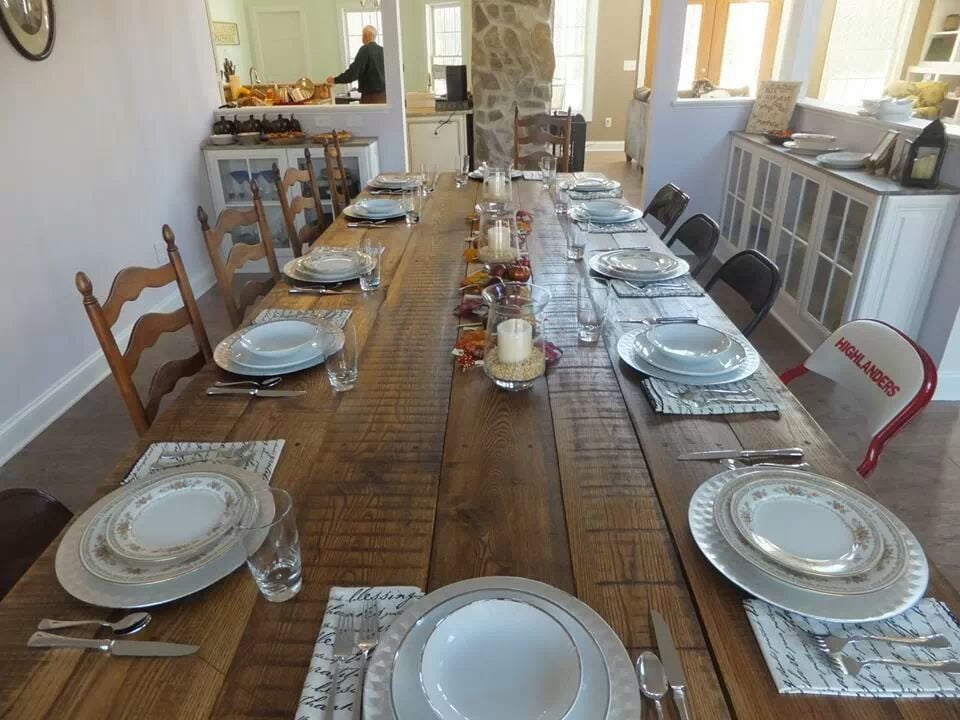
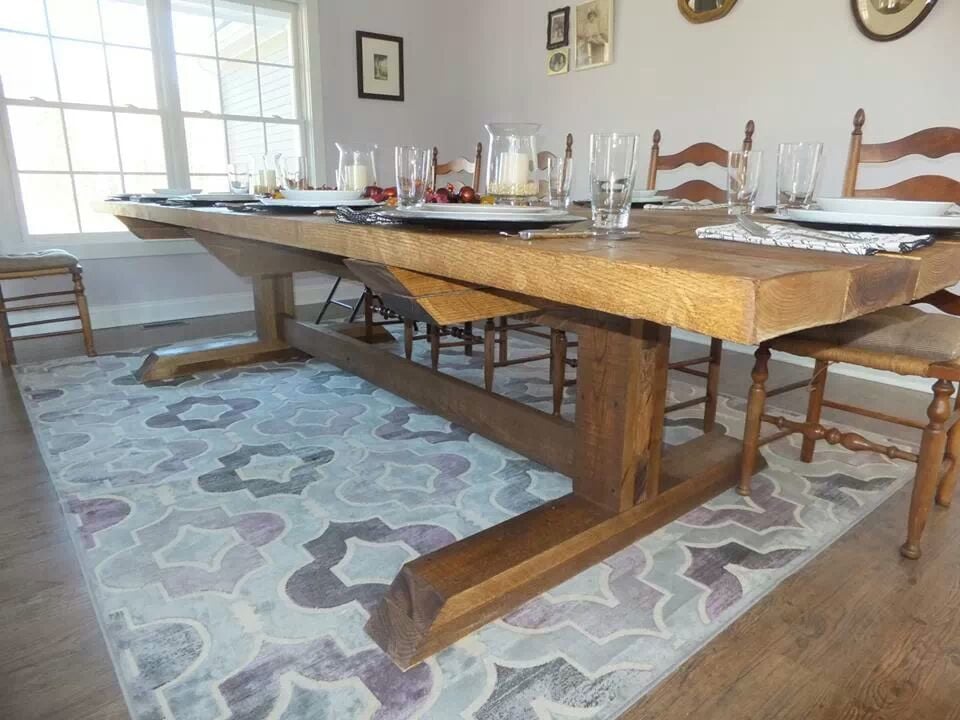
12' x 4.5' Custom Ash Table based off X table plans

Submitted by jeeptj12 on Mon, 12/02/2013 - 08:24

I used Ash wood from my local woodworking shop. The wood varied in width but is a true 2" thick. The table is 12' long and 4.5' wide. I didn't see the need in having the X on the leg ends as the ash was plenty strong enough to hold the top planks. Plus, I really like the look without it. I did add a cantilever beam in the center to stop sag. I didn't feel like I needed diagonal bracing in the center to support the cantilever beam (Note: Original design has center diagonal supports in wrong direction which do nothing for structural integrity of table). The table top planks were strong enough to span an 8' distance. The table top over hangs each end by 2' on center. I left the wood as rough cut as possible. I did rough it up a little more. I sanded with a #36 grit only to sand off writing, dirt, and burrs. I stained with MinWax Early American and sealed with Satin Poly by MinWax. Feel free to ask any questions. This is my 2nd wood project and I am hooked.

Built from Plan(s)
Estimated Cost
$1000 (wood has skyrocketed but this table would cost $7k-$9k if bought)
Estimated Time Investment
Weekend Project (10-20 Hours)
Finish Used
MinWax Early American
MinWax Satin Poly
Recommended Skill Level
Beginner

Comments

Wolvesey

Wed, 02/19/2014 - 14:37

Can I ask how you attached the top supporting plank under the table top and also how you attached the bottom cantilever into the upright supports?

jeeptj12

Fri, 04/04/2014 - 08:39

I screwed the top cantilever planks on each end into the post. I notched and screwed the center cantilever support. I actually didn't need the center cantilever support because the wood could span the distance but I did it just to be safe.

Picnic Table that Converts to Benches

Submitted by blakeallan on Wed, 02/22/2012 - 13:26

**The second pic is of the grill I built for our wedding. It was done in about 4 hours with NO plans, and a whole lot of on-the-spot thinking. All while precooking 120 lbs pork butt, 200 ribs, baked beans & whatever else that oven pushed through that day. I look forward to one day having the time to draw out the plans, and throw them up here :D **

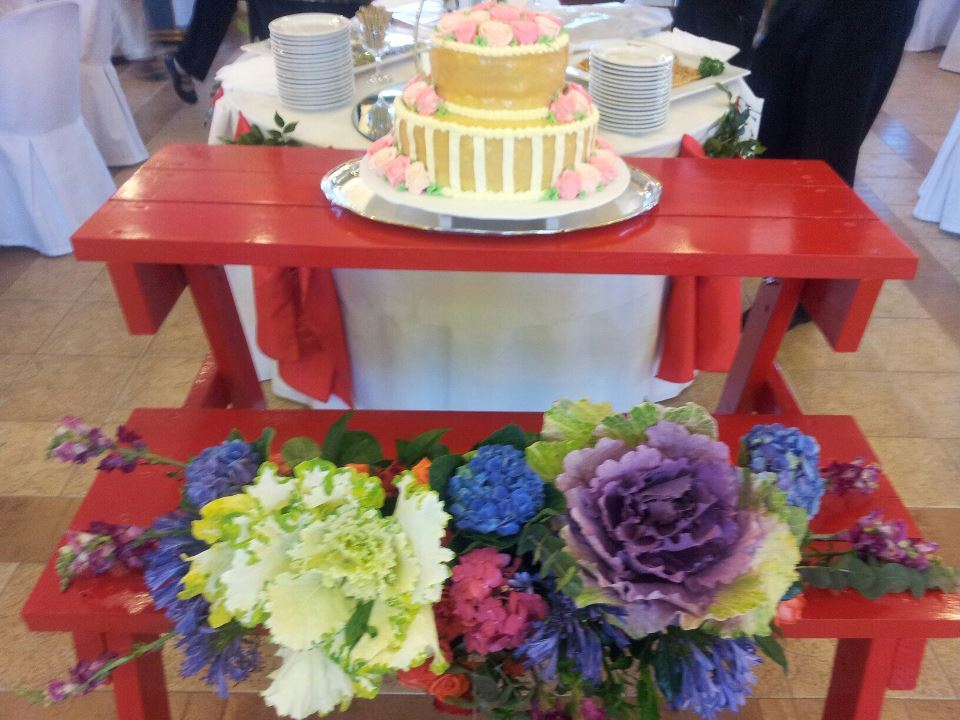
Hey! It's been a while since I've posted anything with so much going on, but I thought I'd share a photo of a project I finished a while back. These were actually built as a gift for my in-laws to thank them for organizing our wedding. They were thrilled, and decided to incorporate the benches into the reception. As of late, I've been remodeling one living unit, one office, and one new studio & on top of that, getting married. I'm sure you can see how uploading something as simple as a photo is a chore in itself. Nonetheless, here is the finished project.

I changed a few things from the original plans; The biggest being the holes that convert from picnic table to bench. I realize not everyone is the same height, body shape, etc, so I took this into account. I actually have an additional hole on each side. One to pivot the table, one to lock it in as a bench, one to lock it in as a table, and one extra bench hole for those who prefer more of a decline/incline position. It all turned out great & works perfect for either bench or table. Very sturdy, and nothing but compliments. As a matter of fact, people asking over and over again where I bought it & for how much :D The reason I put 10-20 hours is due to the paint. I used three coats because, even though I used plenty of primer, pine just loves to soak it up. I also wanted to make sure every bit of it would be covered as much as possible for the weather conditions outside. It turned out having a rubbery coating feel to it, much like those of galvanized benches dipped in paint. Overall, very pleased with the outcome.

Cheers for the plans!

Estimated Time Investment
Weekend Project (10-20 Hours)
Finish Used
Water-resistant enamel
Recommended Skill Level
Beginner

Comments

Pam the Goatherd

Wed, 02/22/2012 - 18:48

Congratulations on your marriage!
I love the red paint on the picnic table/benches. The grills remind me of growing up in Miami and having roast pig that was cooked in those huge steel barrels.

Pam the Goatherd

Wed, 02/22/2012 - 18:48

Congratulations on your marriage!
I love the red paint on the picnic table/benches. The grills remind me of growing up in Miami and having roast pig that was cooked in those huge steel barrels.

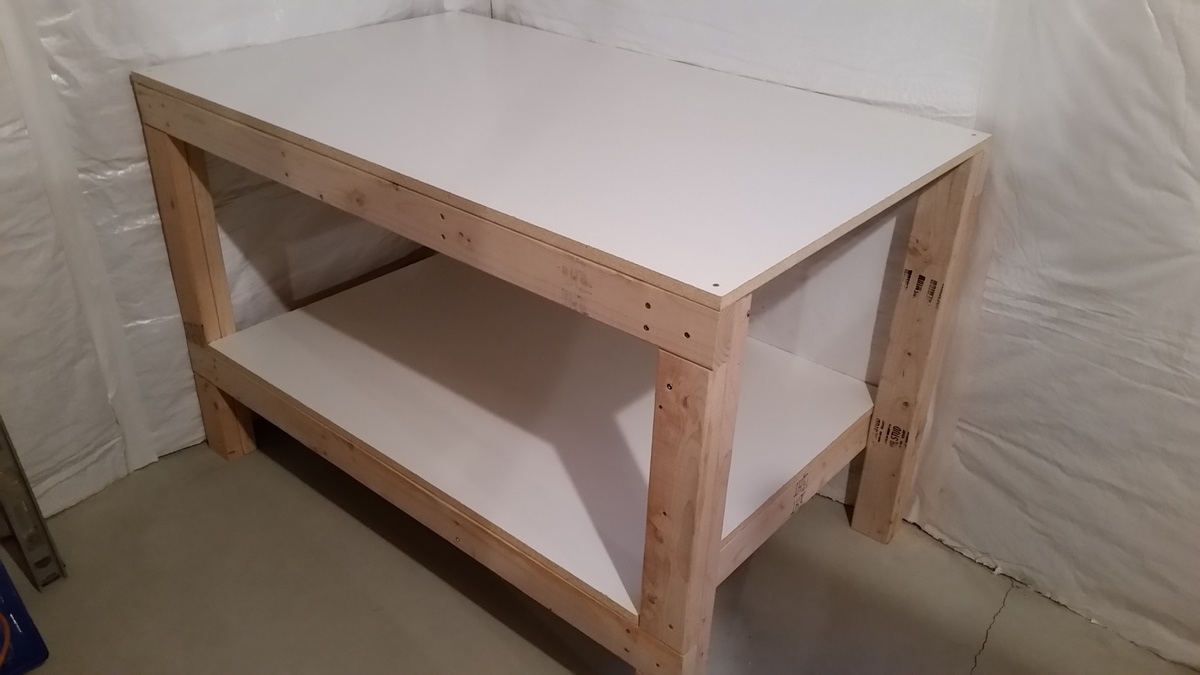
Workbench

Submitted by jbknakal on Wed, 04/20/2016 - 05:36

I used melamine for the top and shelf to get a nice surface for working on

Estimated Cost
$70
Estimated Time Investment
Afternoon Project (3-6 Hours)
Recommended Skill Level
Starter Project

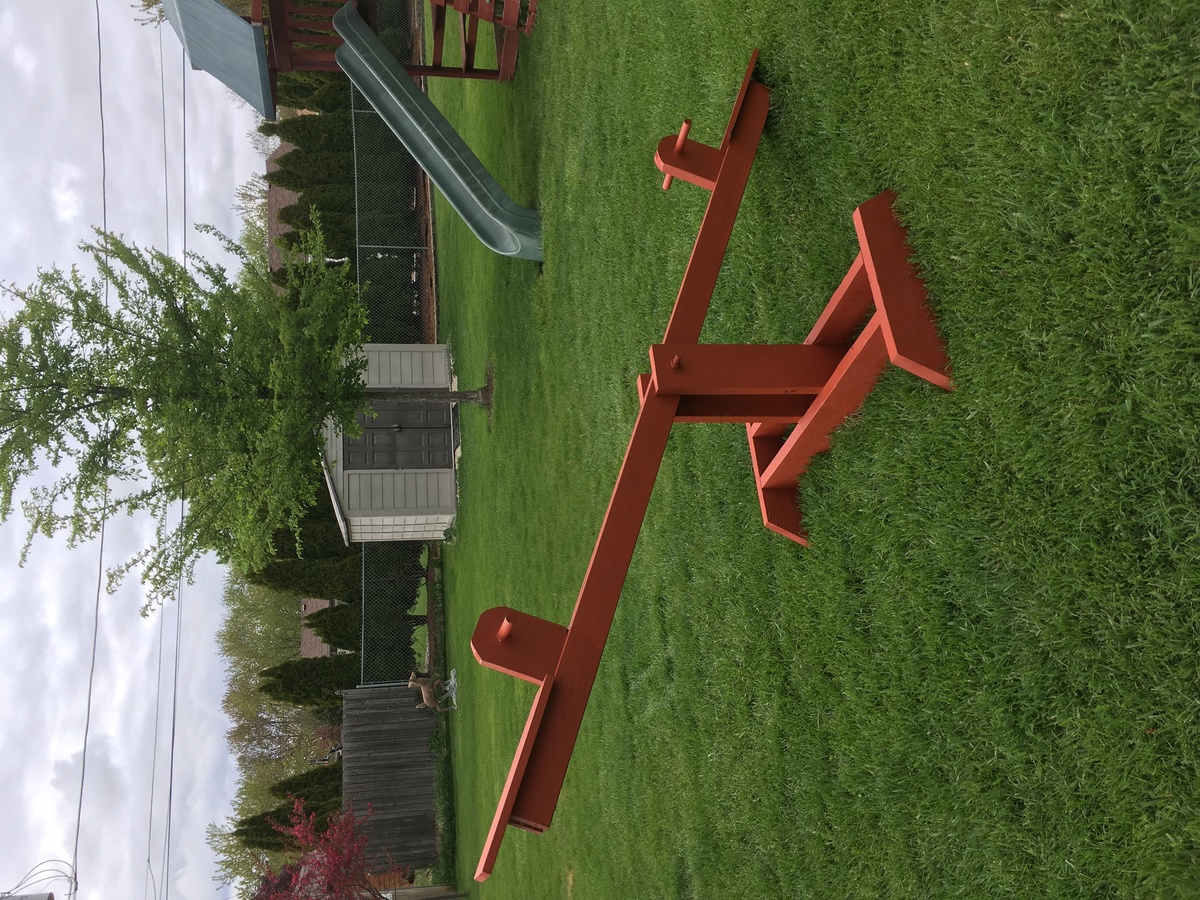
7 Year Old Loved Birthday SeeSaw

Submitted by Anonymous (not verified) on Mon, 05/16/2016 - 16:27

Used treated wood.  Stain was BEHR PREM SOLID STN REDWOOD.

Estimated Cost
$40 Treated Wood
Estimated Time Investment
Weekend Project (10-20 Hours)
Finish Used
BEHR PREM SOLID STN REDWOOD
Recommended Skill Level
Starter Project

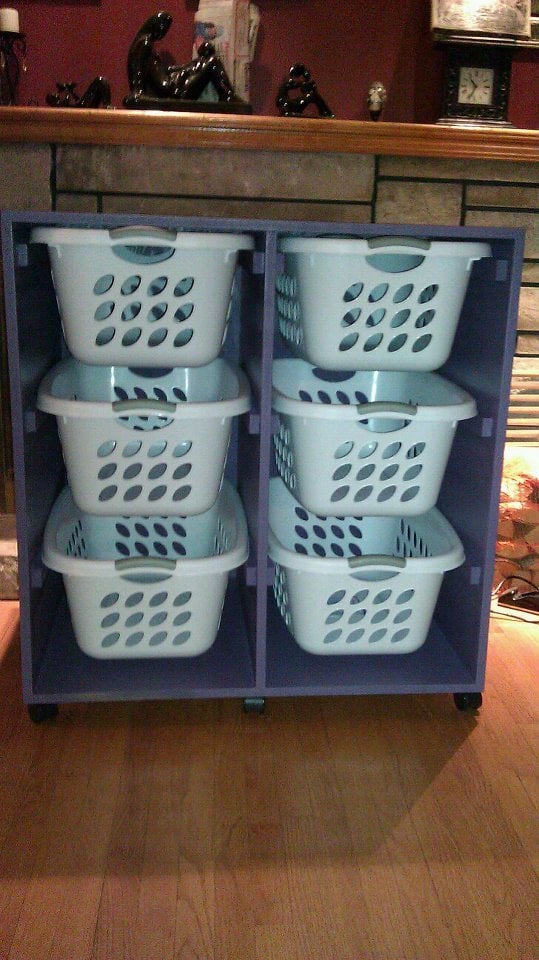
Laundry Basket Dresser

Submitted by KaraBoo on Mon, 05/07/2012 - 10:18

I modified the tall and lengthwise laundry basket dresser a bit to make this shorter version. I also combined it into a single dresser instead of it being two separate dressers side by side. I put the dresser on casters so that I can roll it around my laundry room. I can tuck it away in the closet area or roll it out and use it as a folding counter.

Estimated Cost
$100
Estimated Time Investment
Afternoon Project (3-6 Hours)
Finish Used
Behr Ultra, Enchanted Evening
Recommended Skill Level
Beginner

Comments

spiceylg

Mon, 05/07/2012 - 12:41

Love that it was combined into one and on casters. Very smart. Cool color, too!

Jenna Meagher (not verified)

Sun, 05/13/2012 - 09:02

I would love to do this modified version! Can you share your dimensions?

KaraBoo

Sun, 05/13/2012 - 19:35

Jenna, I used 3/4" MDF and these are the dimensions:

1 Back piece - 37 1/4" x 37 1/4"
2 pieces for top & bottom - 37 1/4" x 25"
3 pieces for sides and middle - 35 3/4" x 25"

I used the same dimensions for the 1x2's as are in the original project and pretty much assembled it following the steps as she has written. Just remember to add 1x2's on both sides of the center divider and you're good to go! Hope that helps and if you have any questions, I'll be happy to try to help. :)

Aimee Comte (not verified)

Tue, 08/07/2012 - 09:41

Do you know what kind of laundry basket you used & where you got them? Based on the pictures they look like the sterilite 2 bushel ultra however the dimensions look too big. Did you have to modify the plans to make them wider?

Thanks!

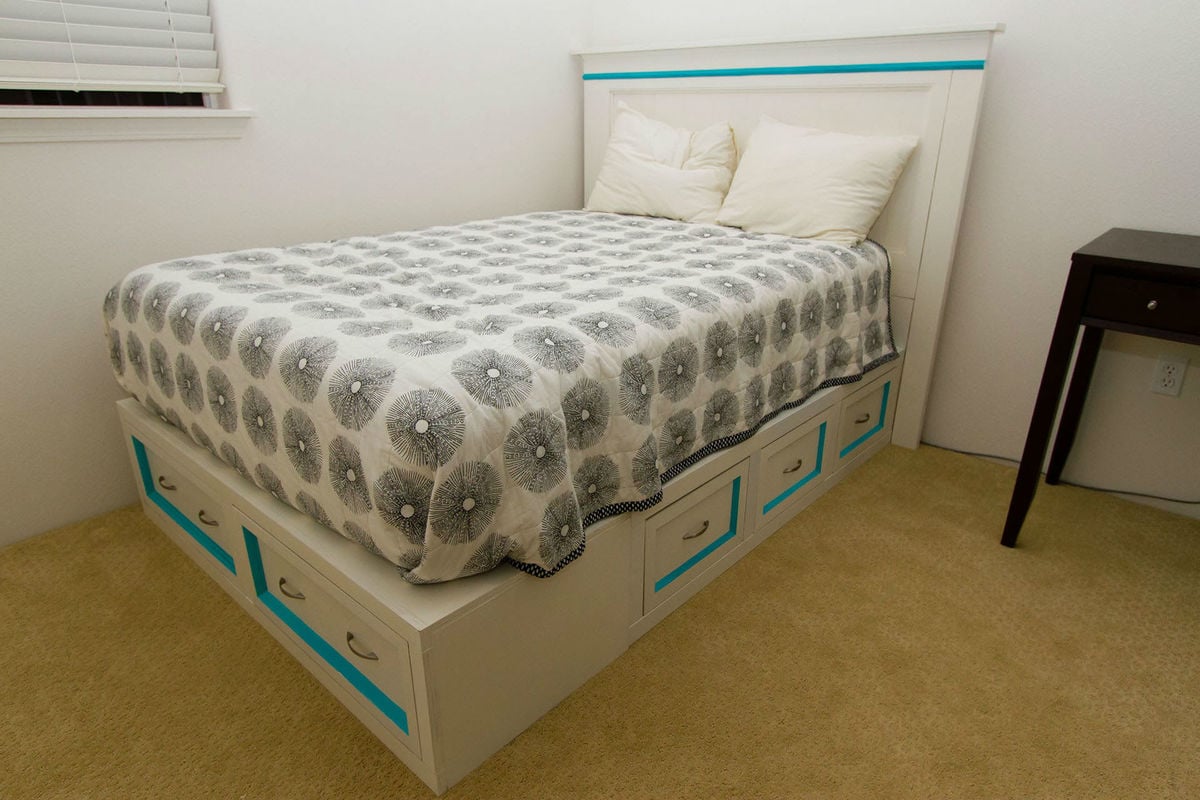
First project: Farmhouse Storage Bed

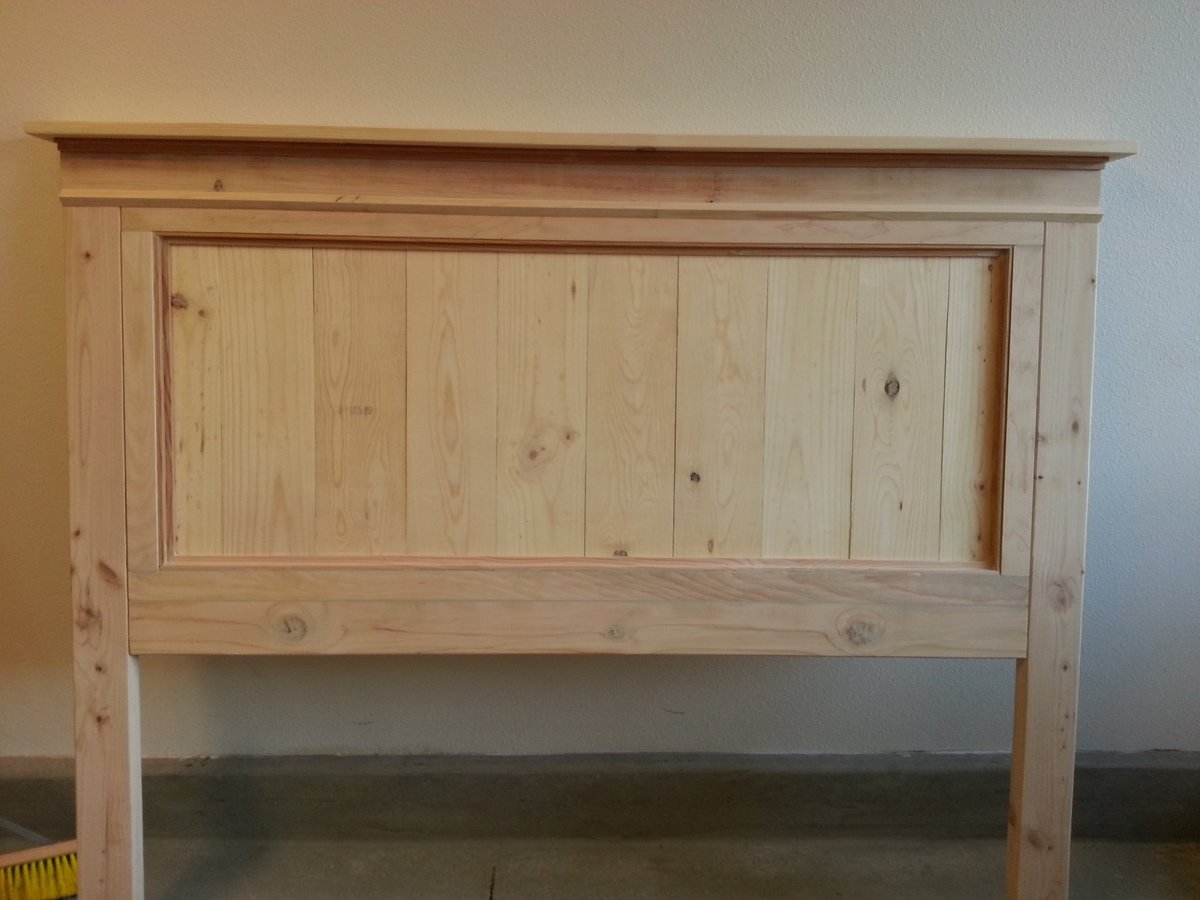
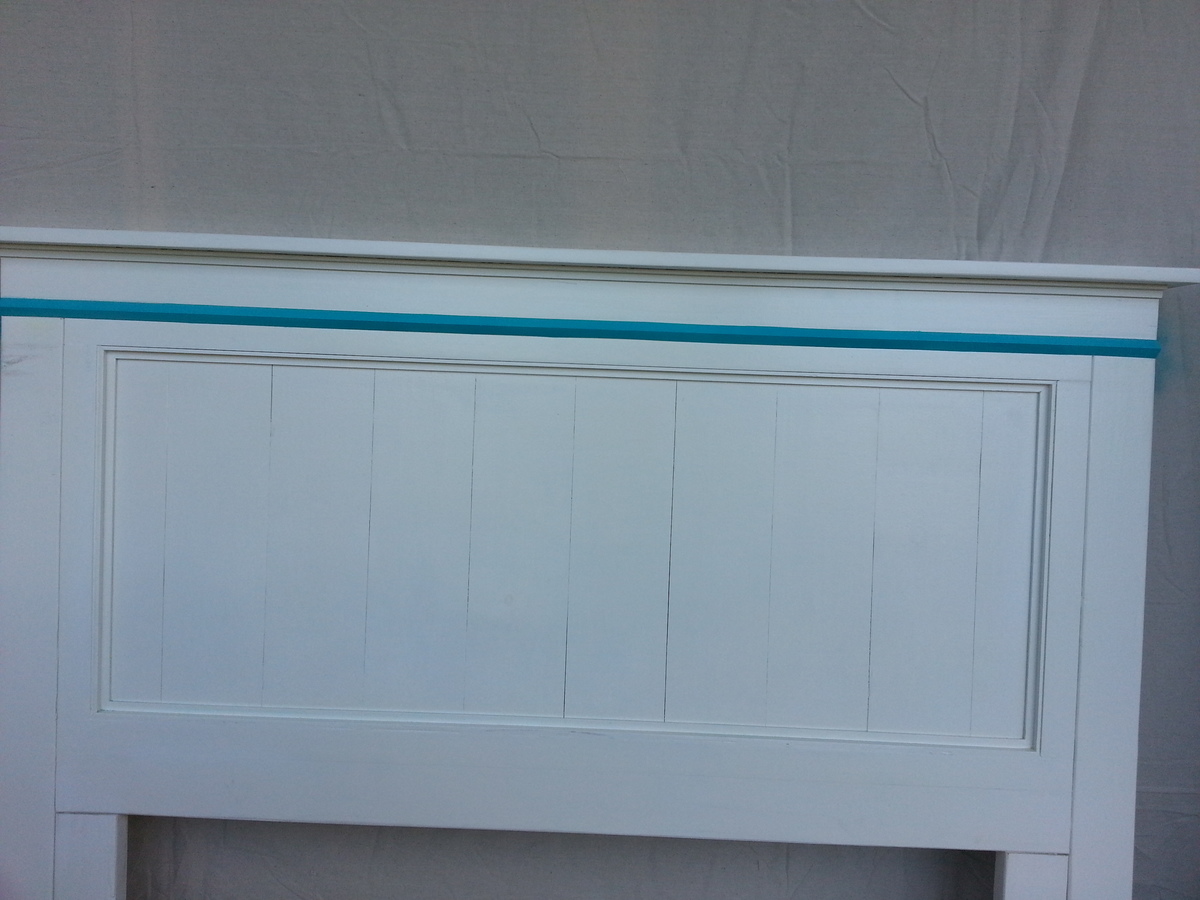
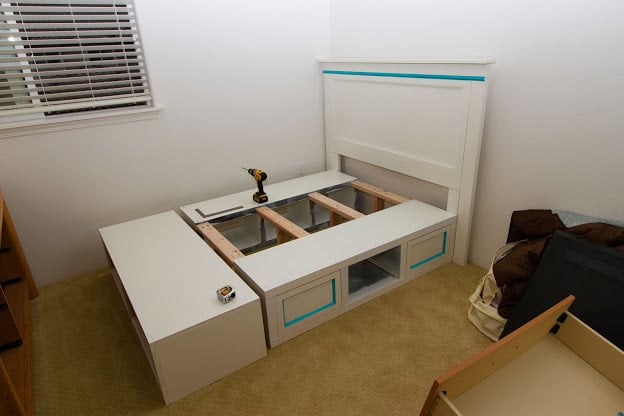
This bed frame was my first project. There are some mistakes, but overall, I love the way it turned out. I combined two plans: "Mom's fancy farmhouse bedframe" and the storage bed.

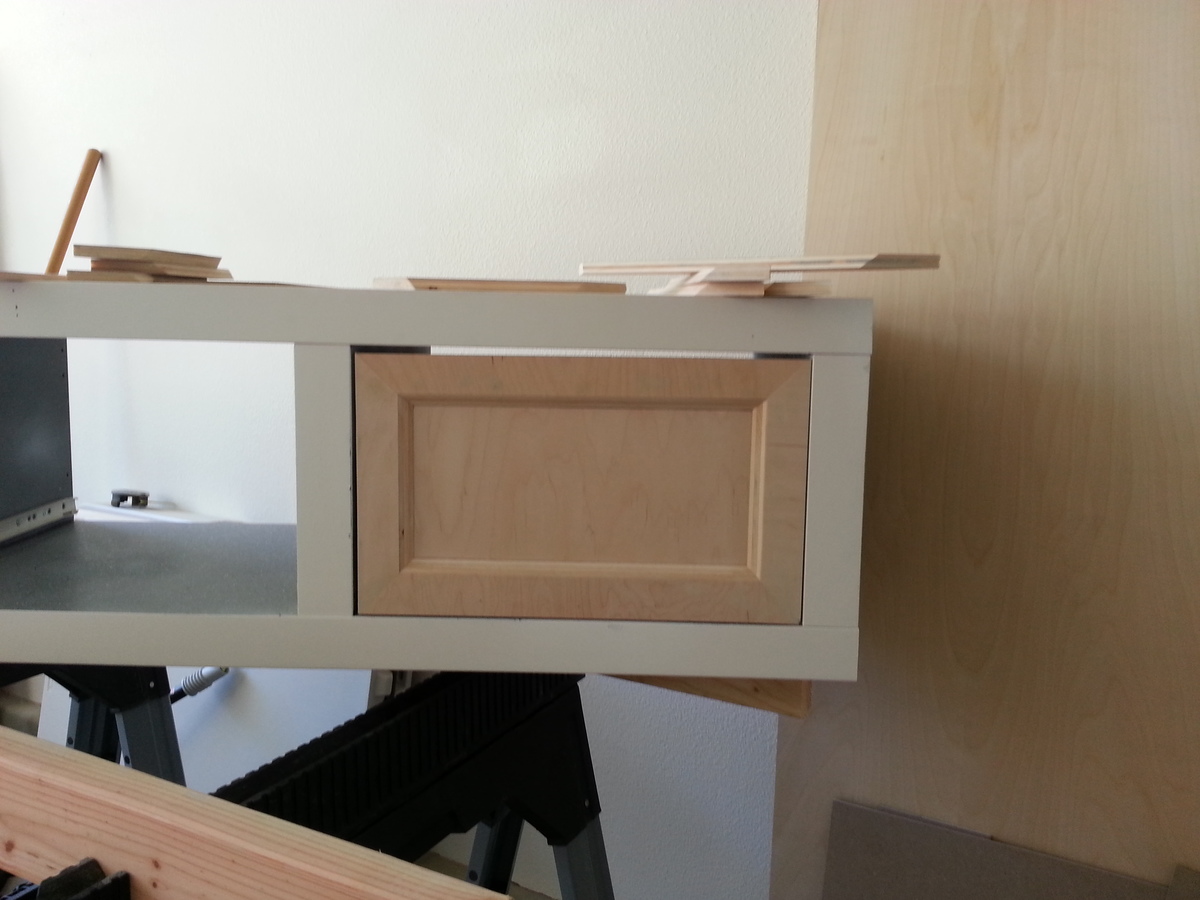
I love the look of wood and would have loved to stain this project. However, this project was painted due to the fact that I repurposed Ikea bookshelves for the two side pieces. The pieces I built were the headboard, bottom storage bench, and the drawers. 

There are a couple of things I learned during this project. 

1. Measure, remeasure and if you're building pieces like drawers to fit your frame, measure just one more time. I did not plan to frame the bottom storage box I built, so when I made measurements for my drawers, it was for the frameless box. I, however, changed my mind and ended up framing the box and cutting the drawers. I put them together and checked to see if they fit and ooops.....they don't because I added frames. So, lessoned learned was to double check before I make cuts especially since I made measurements at the beginning of my project. 

    1A. I also ended up going off the measurements for the "farmhouse bed frame" for the headboard and didn't match my calculations for the storage bed frame to match. So, the headboard ended up being wider than intended and it sticks out. I did not end up rebuilding the headboard or the bedframe since I thought it would be too much work.

2. Making drawers did not agree with me. I seriously had to redo my first drawer four times due to my mismeasuring or calculating. After everything clicked, the rest of the drawers were a breeze.

3. The drawers I made with 1/2 plywood. Looking back, I would have made them with 3/4 plywood. I also would have made the drawers shorter so I could have built the faces of the drawers using Ana-white's drawer face plans (they seem so much easier!).

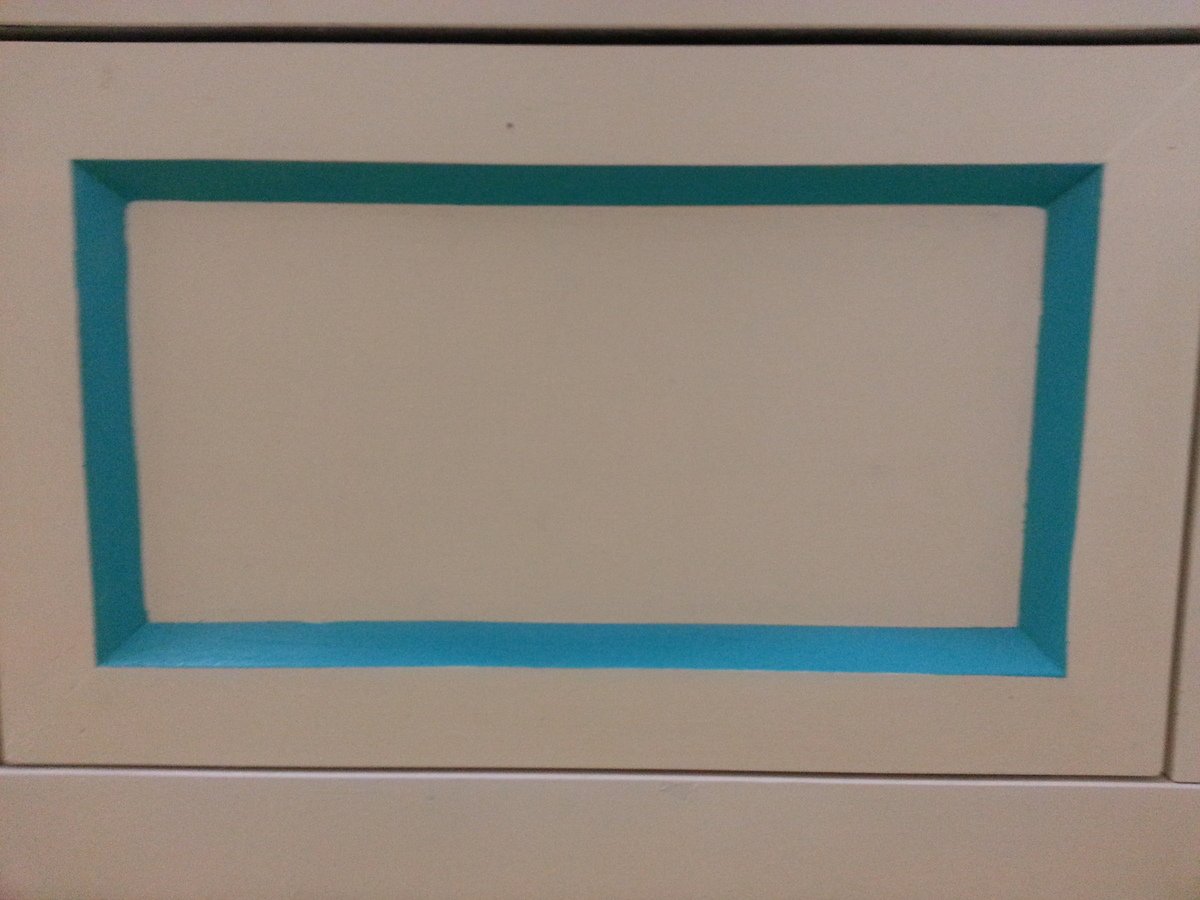
4. The drawer faces were made with 45 degree cuts to add more interest vs the straight pieces of wood. I'll admit, this was my husband's idea and I LOVE it. However, getting the pieces just right weren't the easiest thing (and they aren't perfect, but it's our first project and it's good enough). It made painting the bevel a little more difficult too.  So, if I were to do this again, I would have made the drawers shorter, used 1/2 ply for the face and glue the frame on the 1/2 ply to attach to the drawer.

5. The finishing part took the longest. I used Glidden semi-gloss white paint off the shelf. I actually used old paint that the previous owner of my house left. I would NOT use old paint again. The paint must have been at least 3 years old and I thought I mixed it well, but it seems like there's some yellow in the paint. I'm guessing I didn't mix it well enough.

Estimated Cost
$200
Estimated Time Investment
Week Long Project (20 Hours or More)
Finish Used
Glidden semi-gloss in white (off the shelf), Rustolem Seaside, and Minwax polycrylic.
Recommended Skill Level
Beginner

Super Mario Themed Simple Desk

Submitted by advanlente on Sat, 03/28/2020 - 10:49

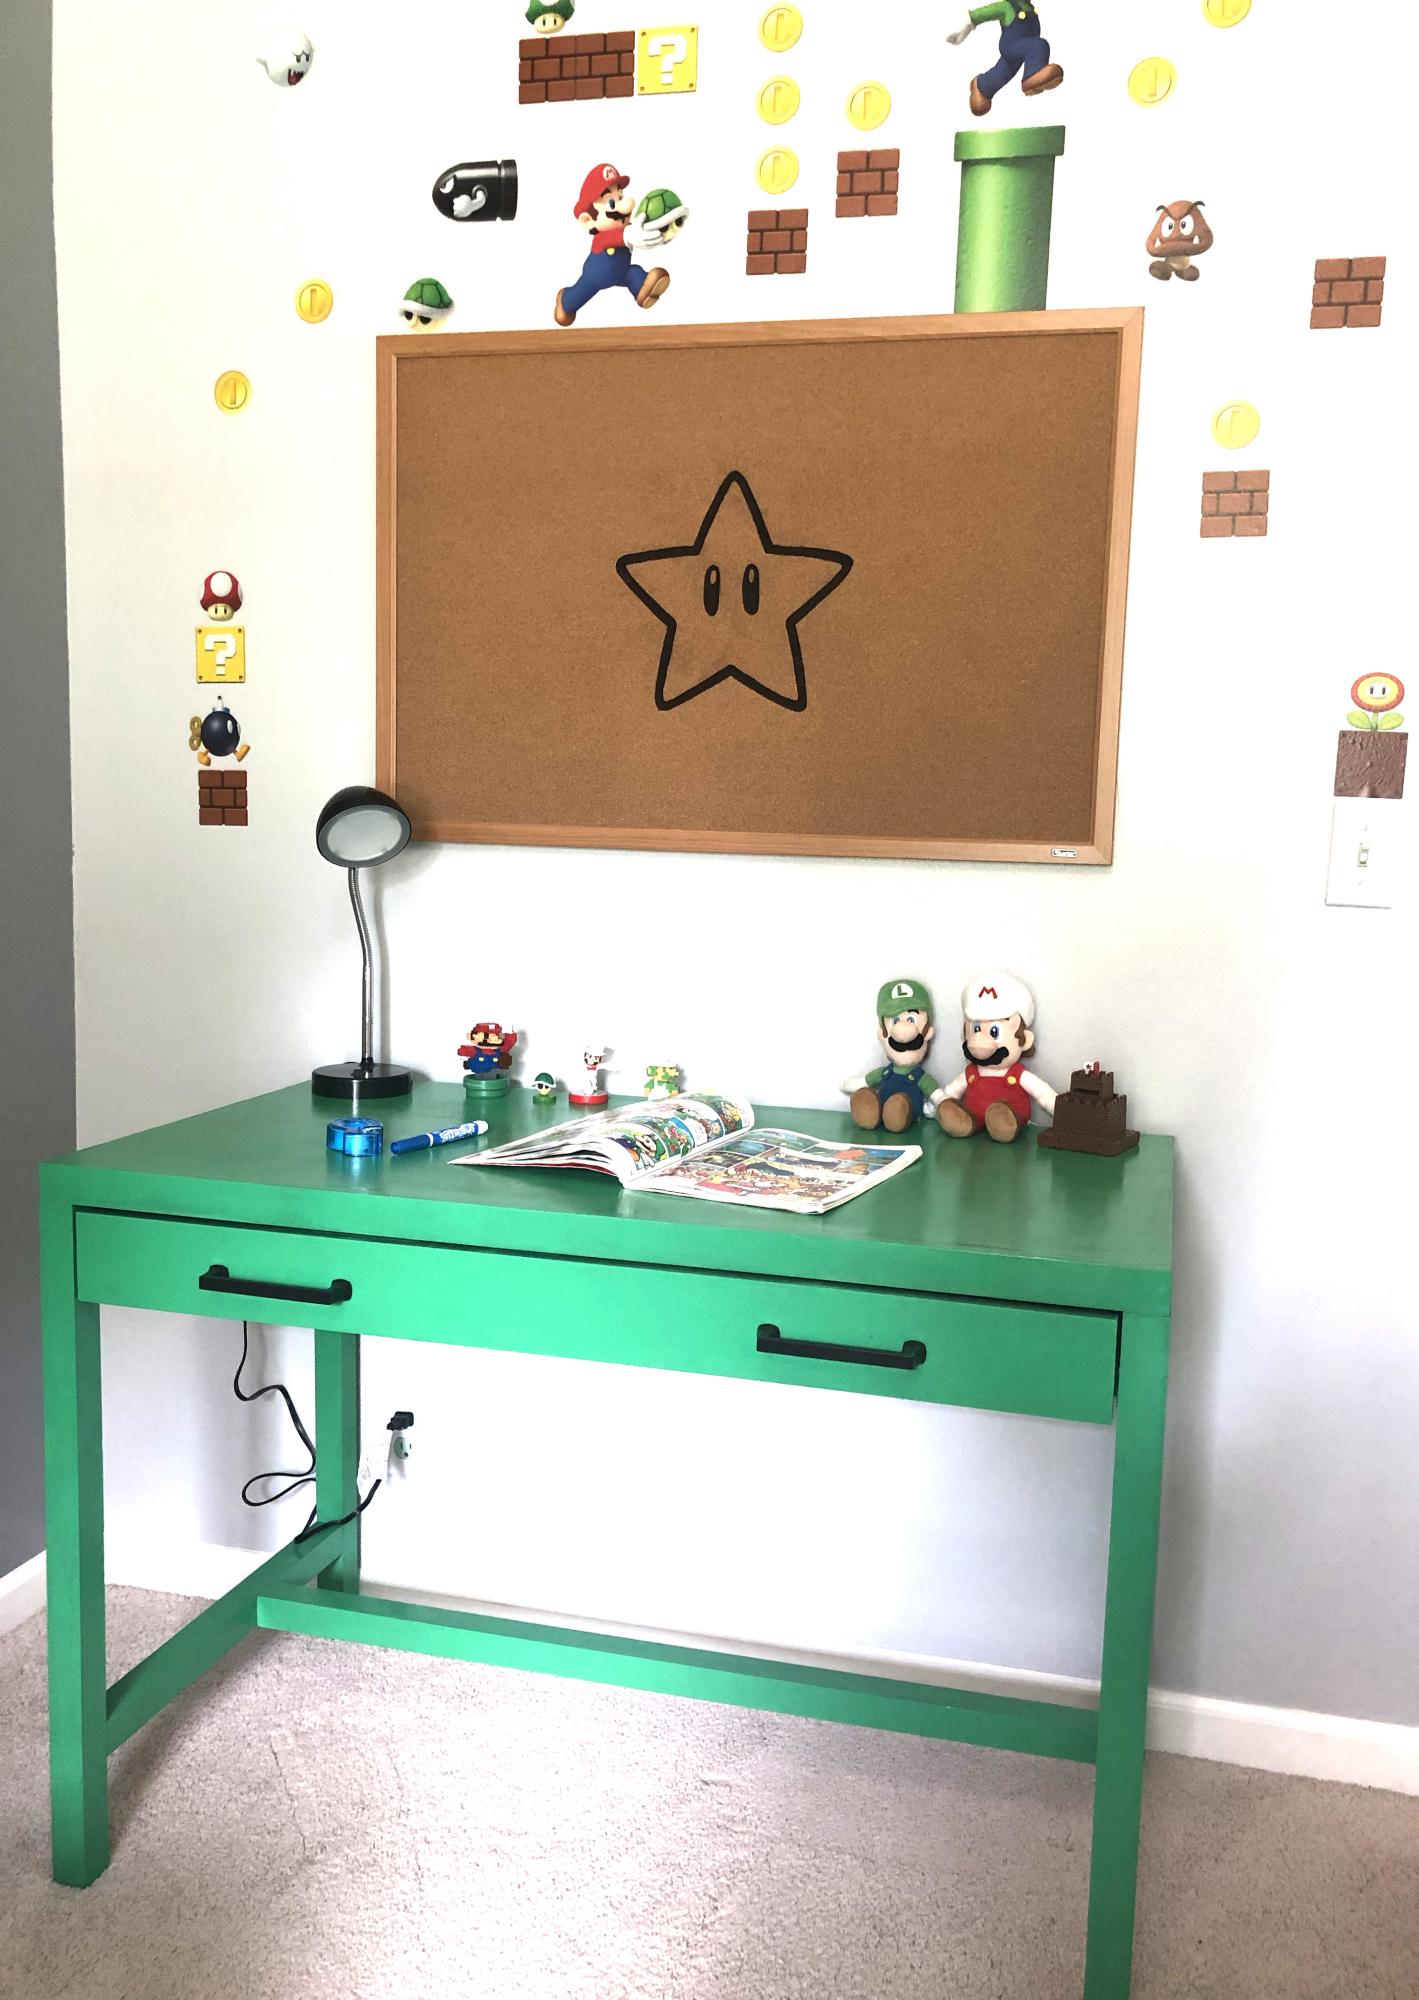
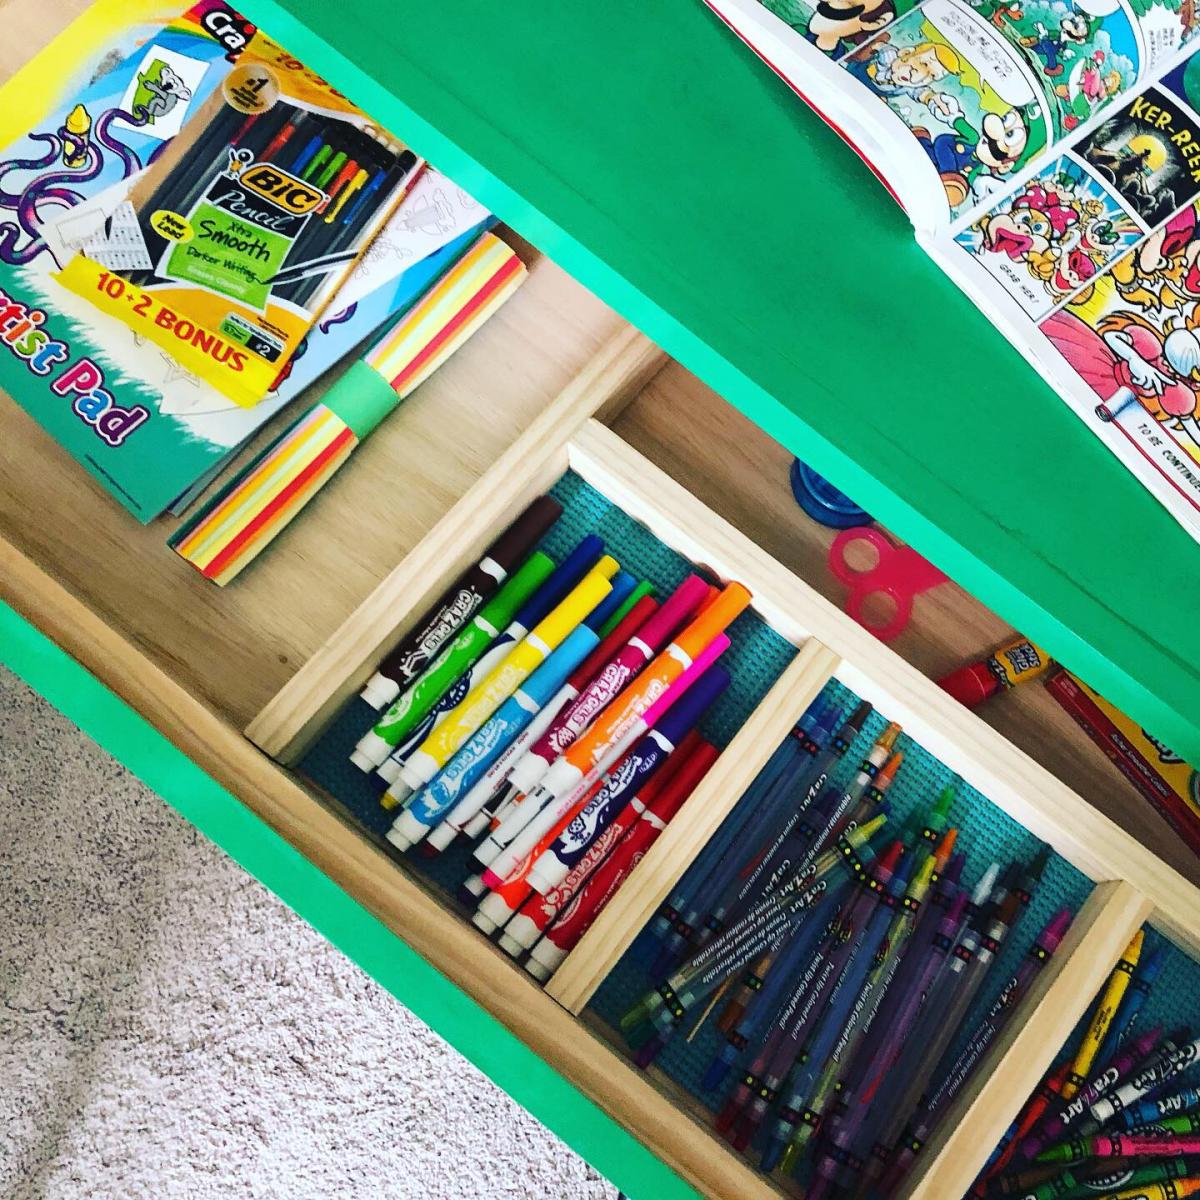
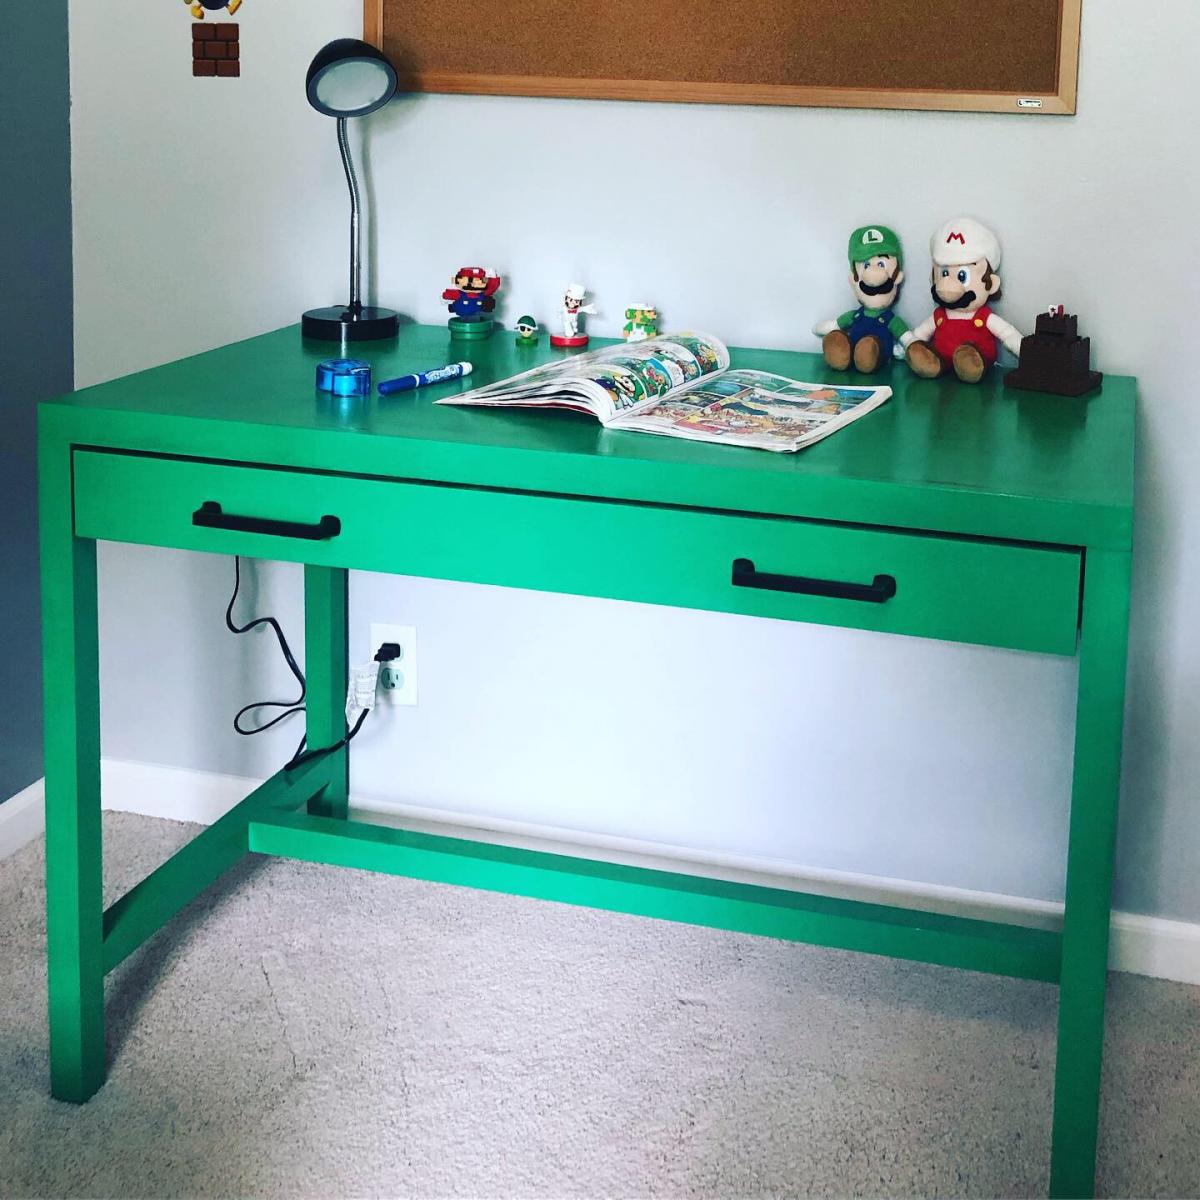
My youngest son is 6yo and he loves Mario! He is such as little artist so I thought it would be fun to surprise him with a Mario desk! I did not want to paint it red as he already has a ton of red Mario themed items in his room, so I chose pipe green instead! My little guy LOVED it! I even made some dividers to separate his crayons, markers, and other odds and ends in his desk. You will notice, I customized a normal bulletin board with a sharpie marker to make it go with the Mario theme :)

Built from Plan(s)
Estimated Cost
$100
Estimated Time Investment
Weekend Project (10-20 Hours)
Finish Used
Green Spray Paint and Polyurethane

Sliding Door Console

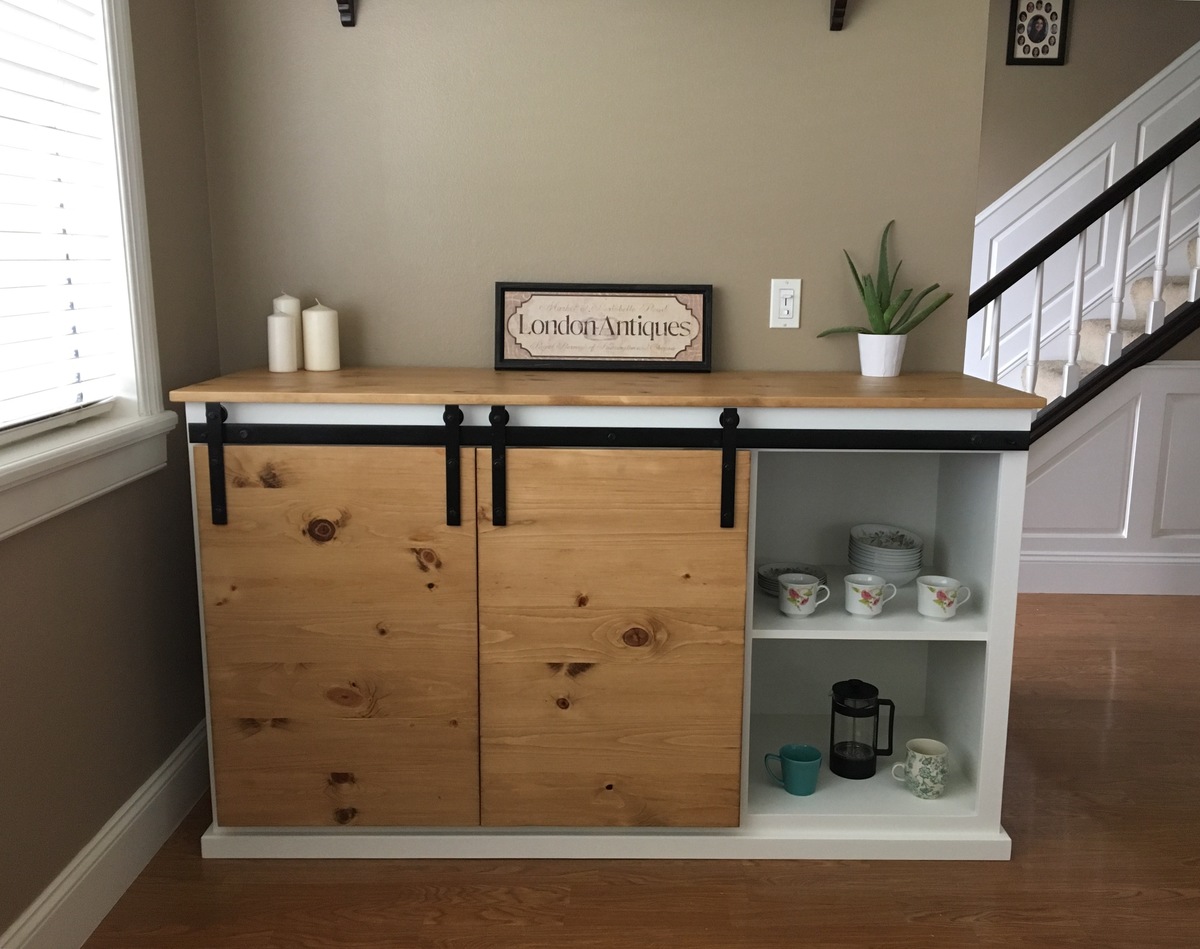
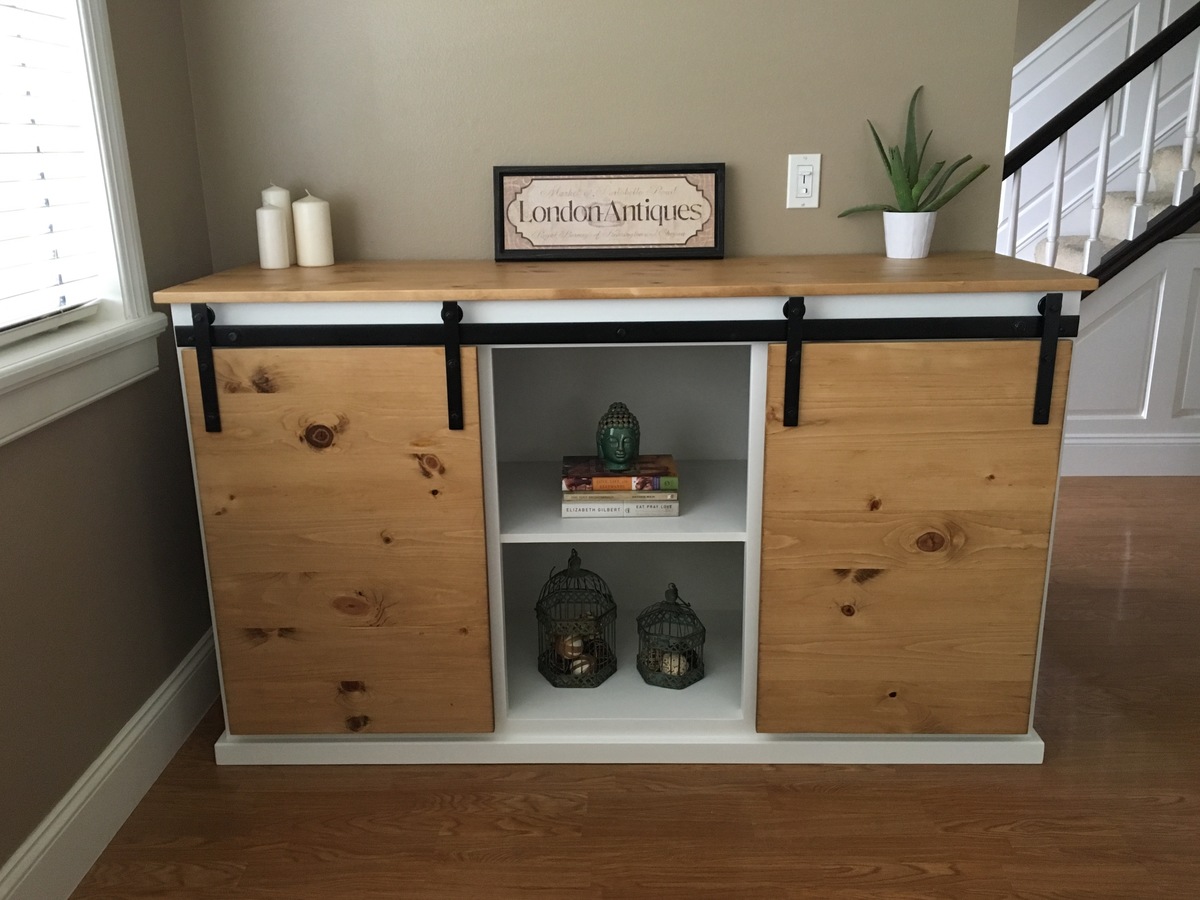
I modified the plans to have three compartments instead of four. Also, the hardware was a challenge.  Tip: use a wheel that has an internal bearing. 

Built from Plan(s)
Estimated Cost
$200.00
Estimated Time Investment
Weekend Project (10-20 Hours)
Finish Used
pre-stain and golden oak by minwax
Recommended Skill Level
Intermediate

Pottery Barn Inspired Chaise Lounger

Submitted by gtd869 on Wed, 04/15/2020 - 20:34

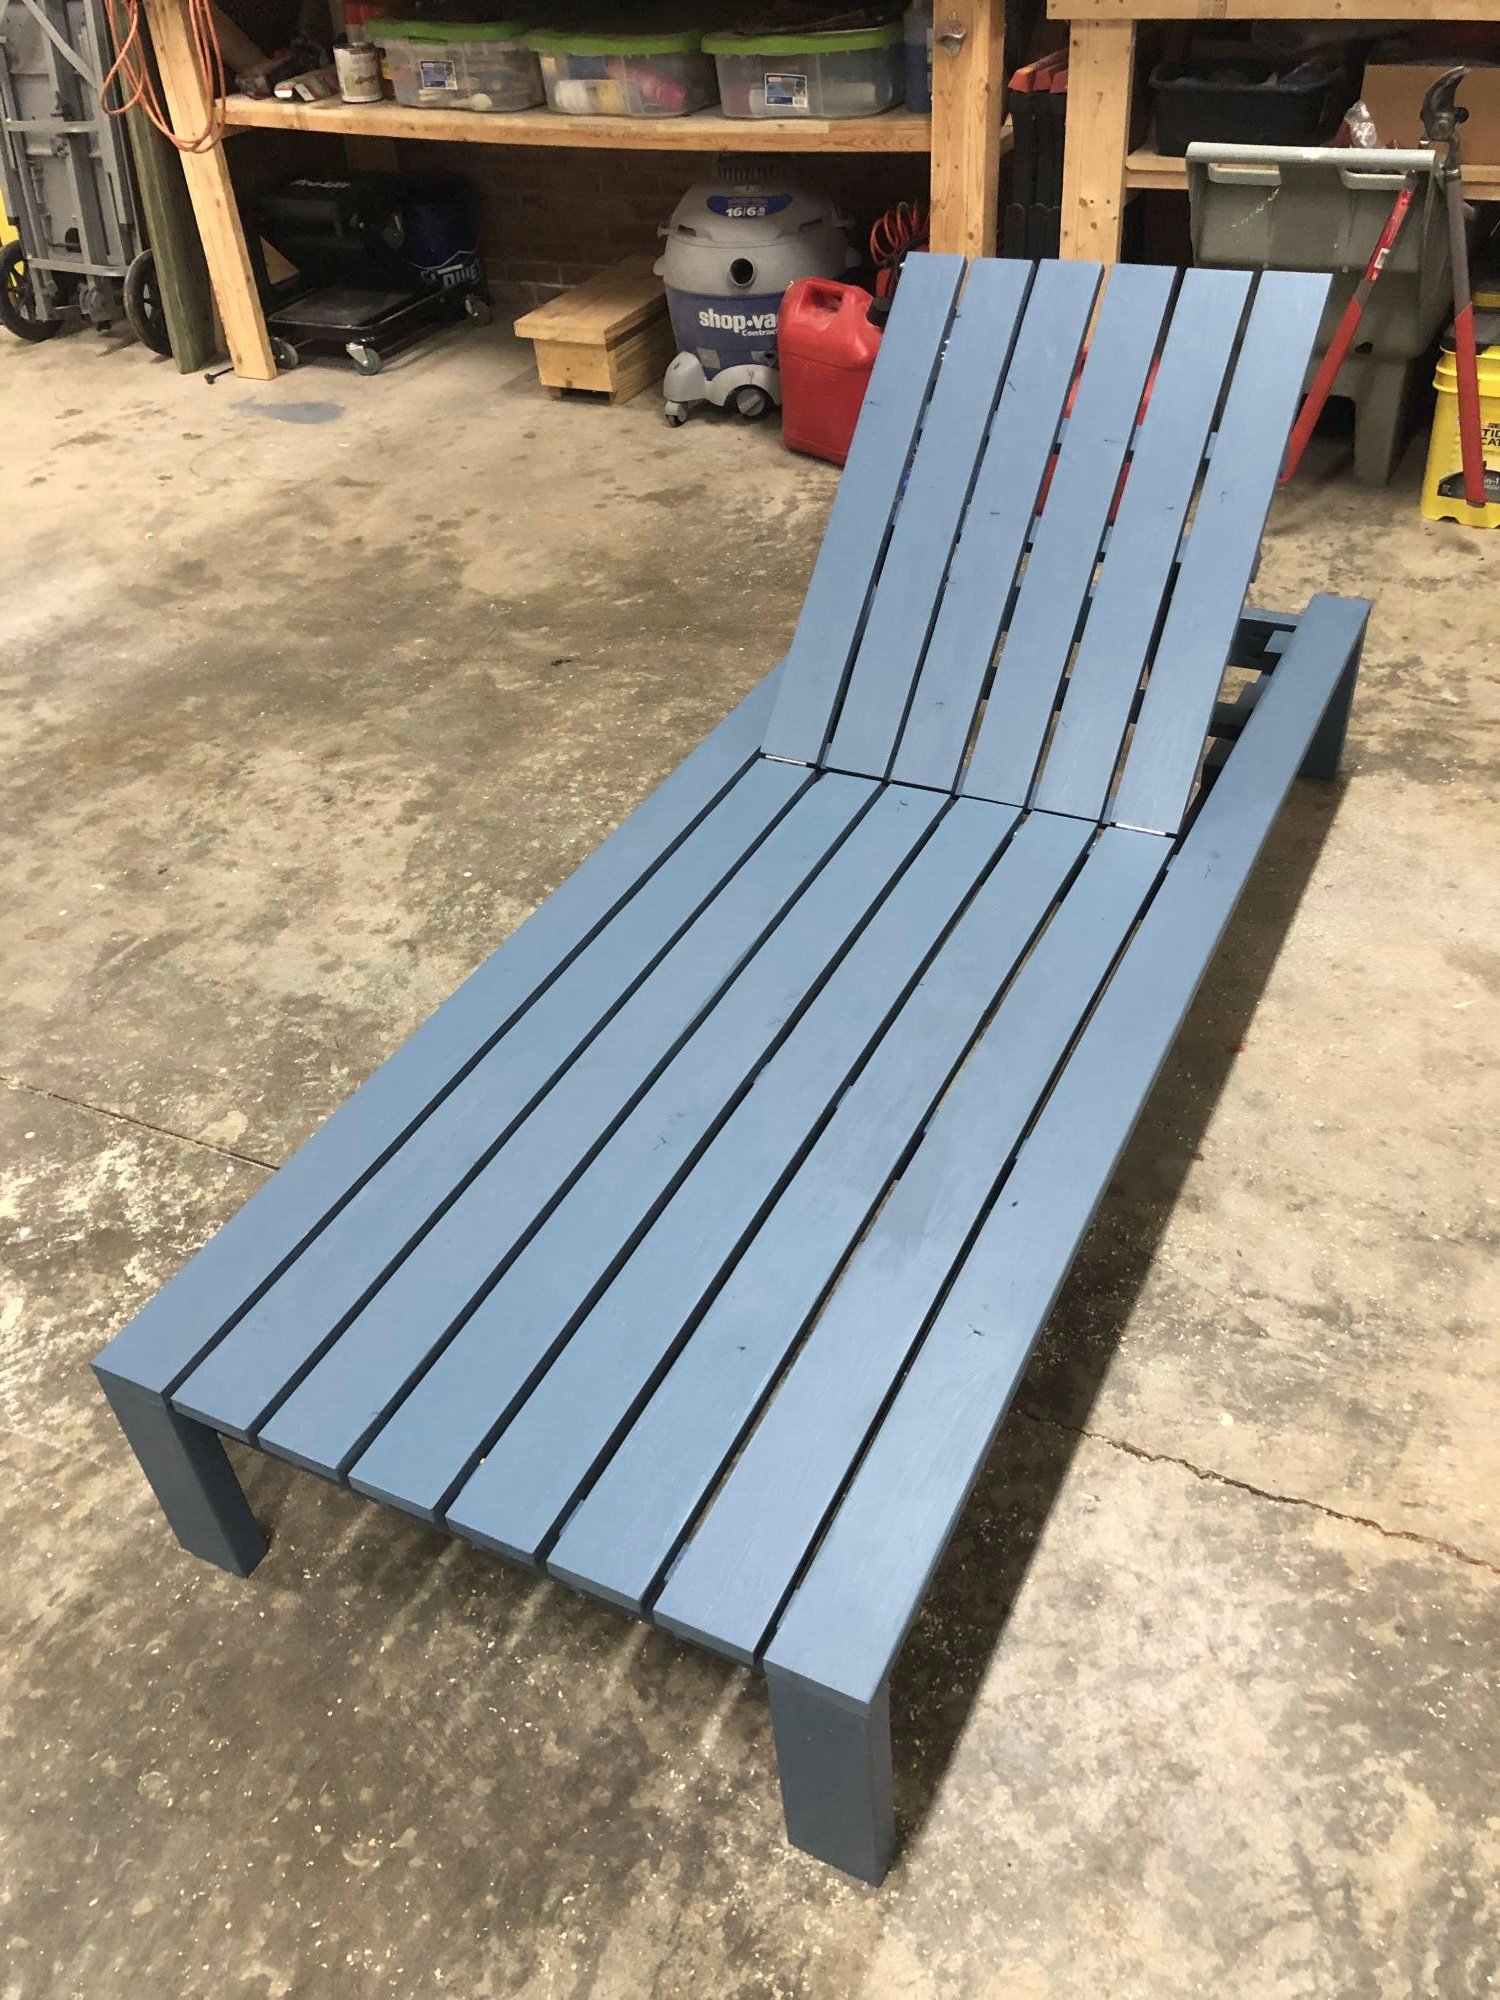
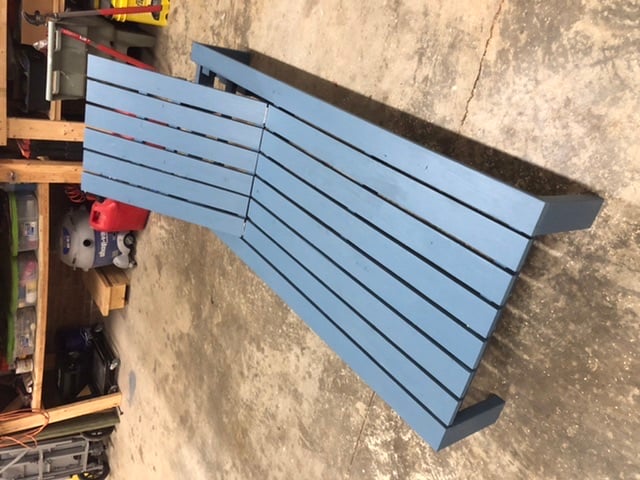
I followed Ana’s Modern Chaise build. The number of 2x4’s specified in the instructions is incorrect. You need 3 not 2. Other than that, a great plan.

Comments

Rustic X Coffee Table

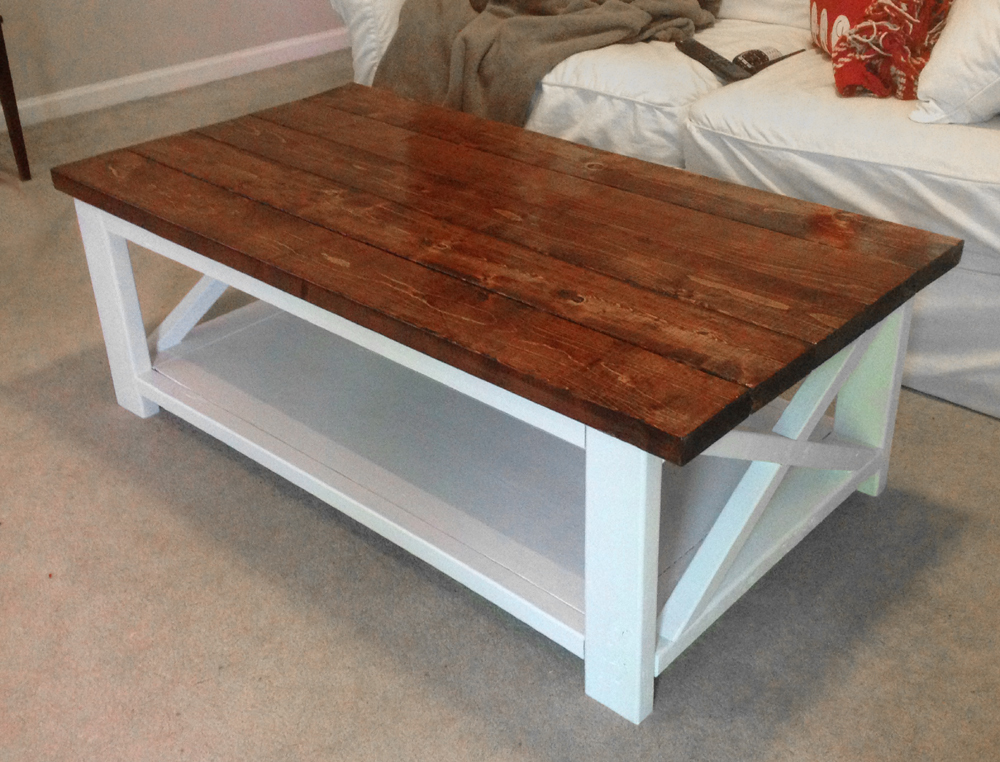
We moved into a new house with exposed dark beams and white railings. Plus, we were gifted a new white couch, so the wife wanted a new coffee table. I loved this project and decided to do it a little different and try the dual finish look to go with our furnishings and house. We love the finished product. Assembly was a snap. As always, the staining and clear coat step took the longest.

Built from Plan(s)
Estimated Time Investment
Weekend Project (10-20 Hours)
Finish Used
Red Oak Stain with clear gloss finish for the top. Plain white gloss paint for bottom frame.
Recommended Skill Level
Beginner

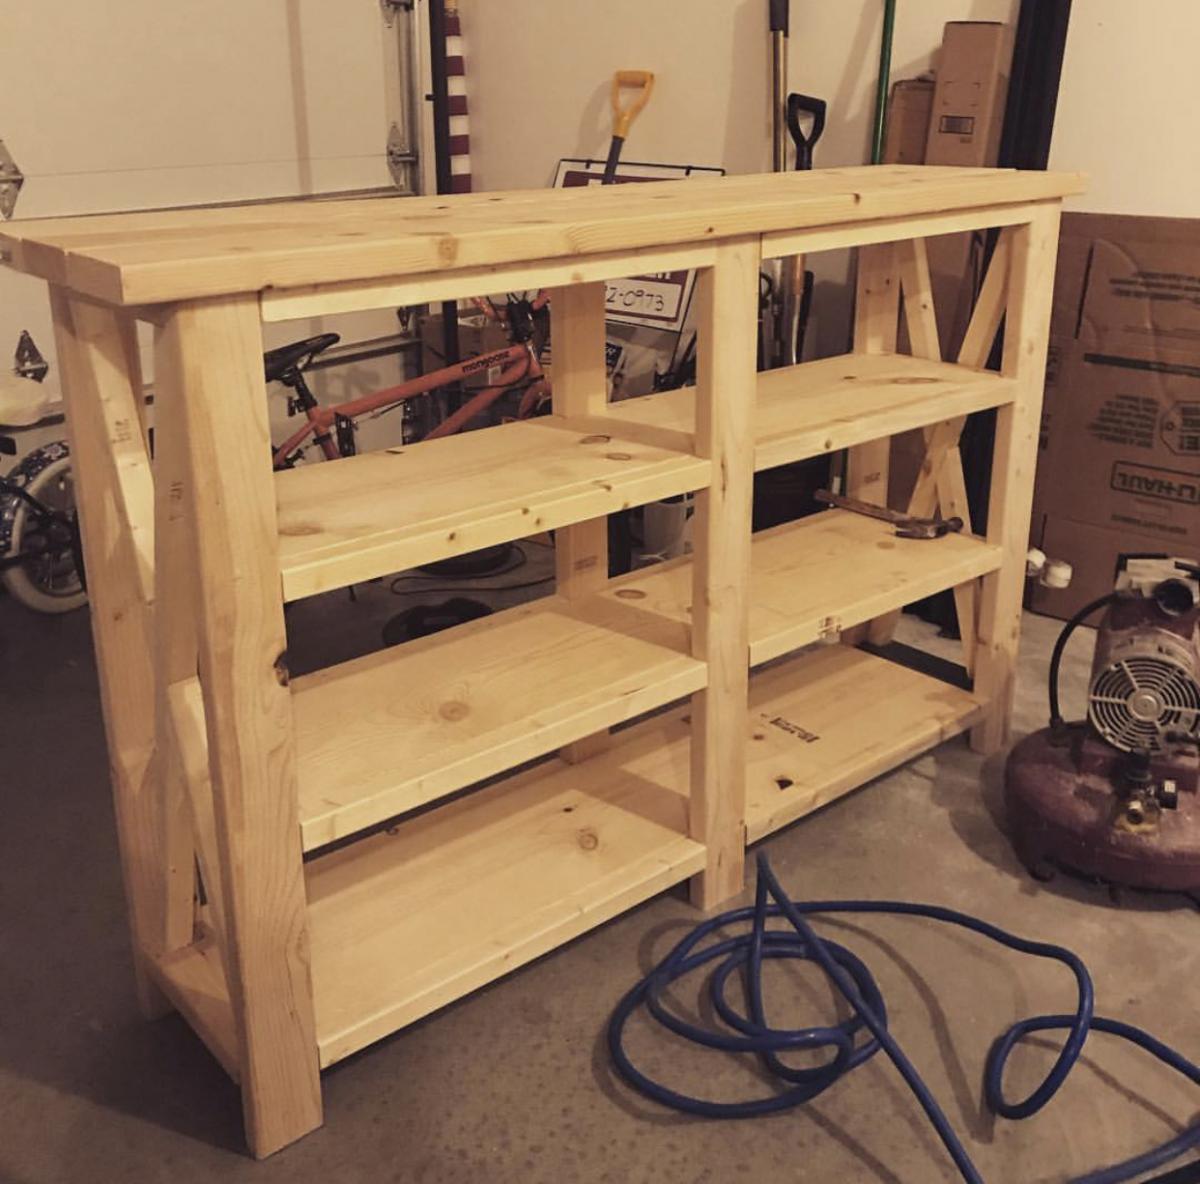
Rustic X Console with changes

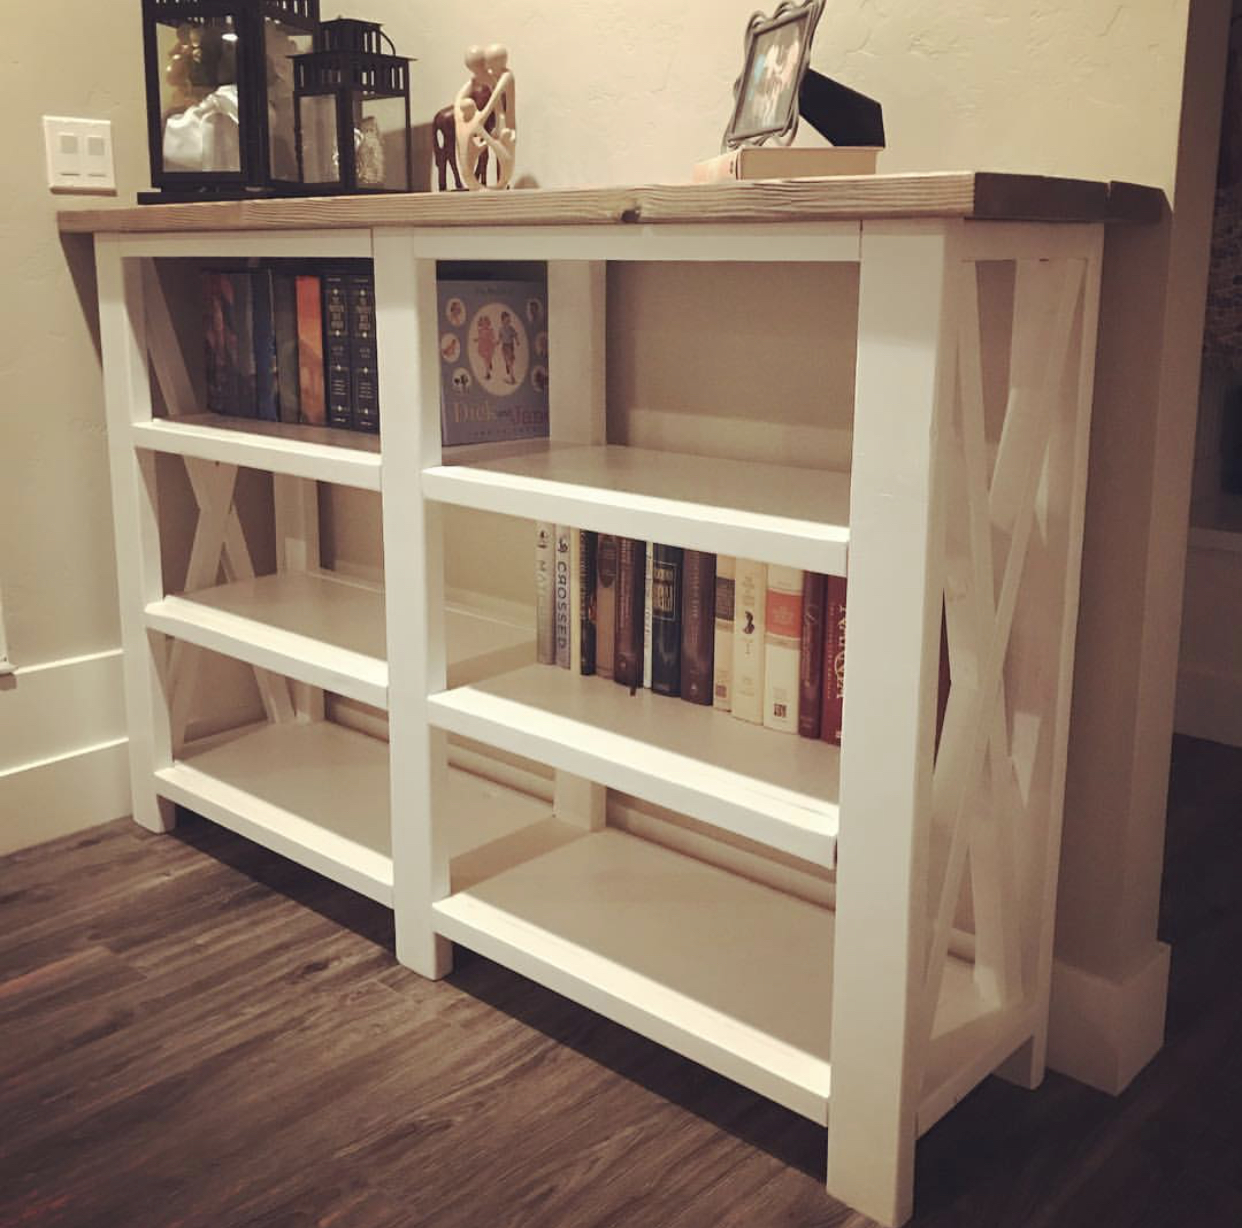
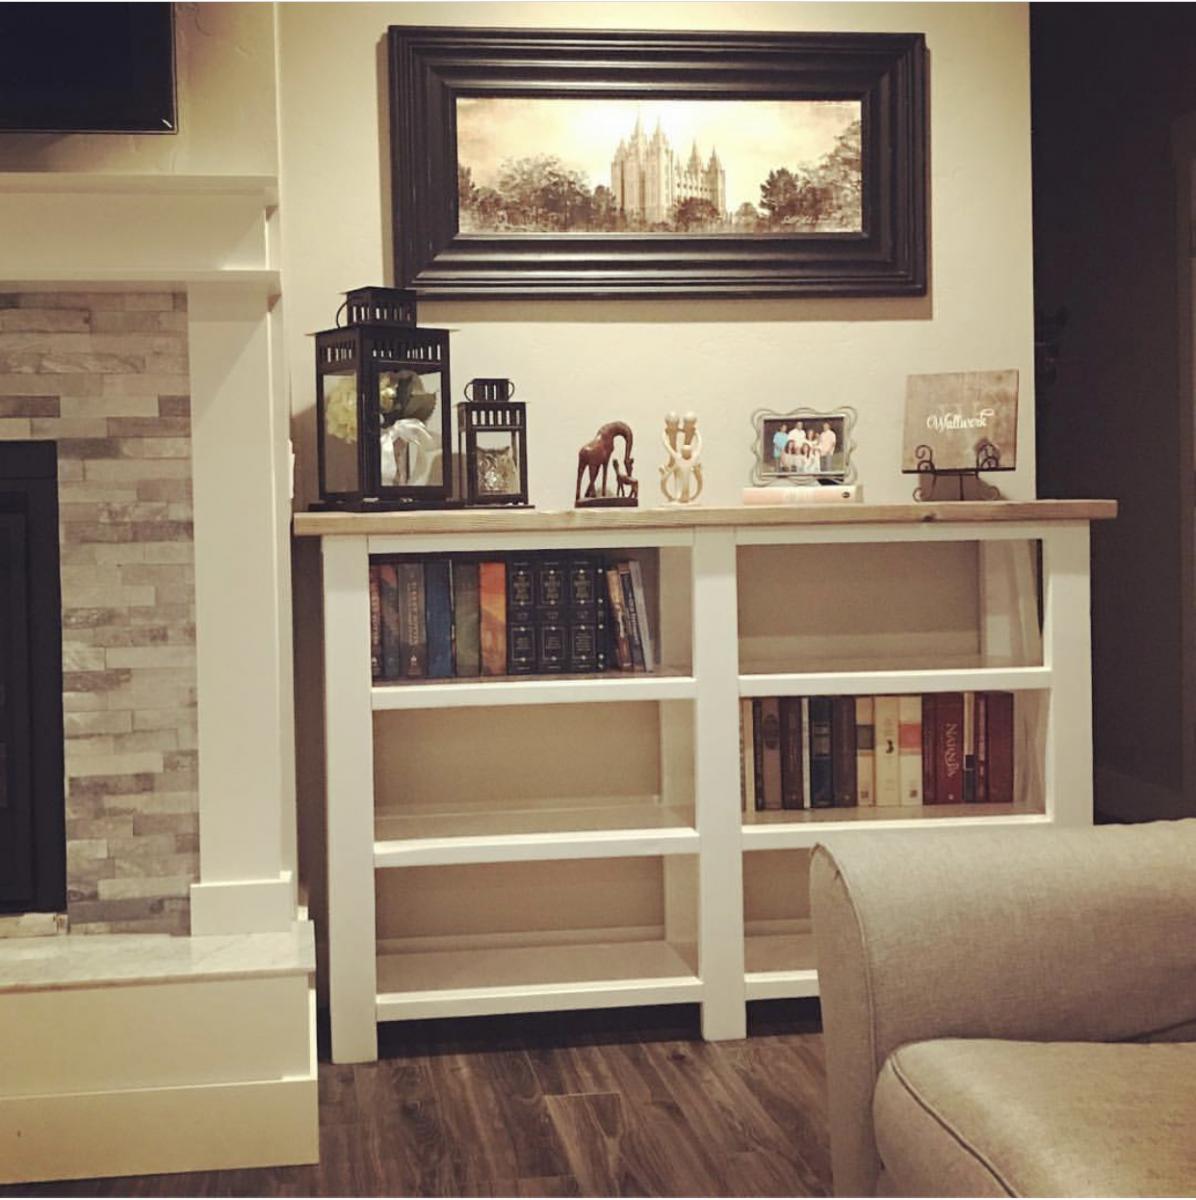
Wanted to make shelves to put on both sides of our fireplace but had to alter the dimensions. So I added another shelf and made it shorter in length. I was a bit nervous because I’ve always just built per the instructions. It turned out perfect! Just don’t look too closely at the X’s!
Built from Plan(s)
Estimated Cost
$80
Estimated Time Investment
Day Project (6-9 Hours)
Finish Used
Minwax Classic Gray
Paint-some leftover white I had
Recommended Skill Level
Beginner

easy Kitchen Island

I needed mine to move so I added some castors to the bottom. It is my bakery cart! I also had hubby put a double towel rack on it for my flour clothes. Thanks so much for the plans! This is my first project and I loved doing it! Hubby got me the Kreg Jig and it was a breeze. I even used that for the top!!

Built from Plan(s)
Estimated Cost
$90
Estimated Time Investment
Day Project (6-9 Hours)
Finish Used
Dark Walnut Stain, Flat white paint
Recommended Skill Level
Beginner