Community Brag Posts

Doll Farmhouse Bed

Submitted by spiceylg on Sun, 08/21/2011 - 12:42

One of my first projects and first attempt at sewing since 7th grade!

Estimated Time Investment
Day Project (6-9 Hours)
Finish Used
It's been a while since I completed this but I first primed and then spray painted the finish. I believe it was called Heirloom White. I use lengthier guestimated times to include sanding, painting and drying times.
Recommended Skill Level
Beginner

Simple, Cheap and Easy Console Table

Submitted by REASMOM on Thu, 09/12/2013 - 17:37

I used Ana's plans for the Simple, Cheap and Easy Console Table and modified it. I used 1x4 boards for the top of my table and added a bottom shelf using 1x3s. The top is stained with Minwax Early American and the bottom of the table has 2 coats of red paint and a chocolate glaze. I lightly sanded some areas of the table (it was my first time distressing a piece of furniture so I didn't want to overdo it) and then I used a chocolate glaze to get a distressed look. I finished it with 3 coats of Polyurethane.

Estimated Time Investment
Afternoon Project (3-6 Hours)
Recommended Skill Level
Beginner

Tryde media console and modified plans for matching stand

Submitted by StevenRLaw on Wed, 11/18/2015 - 13:27

Built the console (without the hutch) and my wife wanted another one a little diffrent for the other wall so I modified the plans a bit and made the second one. this was our first "distressed" paint job. I think it turned out great!

Built from Plan(s)
Estimated Cost
$100 for both including paint.
Estimated Time Investment
Day Project (6-9 Hours)
Recommended Skill Level
Beginner

4 ft table from plans

Submitted by Anonymous (not verified) on Sat, 01/05/2019 - 22:09

Great project and fun to do. I've actually made 6 tables off this same plan, all different sizes,from 4ft. To 8ft.. 

Built from Plan(s)
Estimated Cost
80.00
Estimated Time Investment
Weekend Project (10-20 Hours)
Finish Used
Walnut stain, 3 coats of poly, and distressed paint on bottom.
Recommended Skill Level
Beginner

Comments

Live Edge Coffee Table

This live edge coffee table is a perfect addition to my porch that has hand crafted furniture made by yours truly.

Comments

Spa Bench

Submitted by jont on Tue, 08/23/2011 - 20:16

First project. Followed the plans exactly. Since it was my first project I used furring strips to save money. It still ended up costing me a bit for some extra tools (counter sink drill bits, wood filler, sanding paper). Used a cream color water based paint for the base coat followed by a very light coat of bright blue on top. I sanded it to the desired distressed look I wanted then sealed it with a clear coat.

Built from Plan(s)
Estimated Cost
~$75
Estimated Time Investment
Day Project (6-9 Hours)
Recommended Skill Level
Beginner

Corner TV Stand

Submitted by mtr146 on Mon, 09/16/2013 - 12:57

edited the plans a little bit because the original plans were too tall. my cabinet is only 36 inches high. I did the inlet doors but if I had to do it over again i would ABSOLUTELY do overlay doors to cover up any imperfections in the opening. this project is a little bulky to move around and therefore get the shelves level, at least it was for me.

Also, I cut the back two inch strips to fit more snuggly. I ripped one piece at a 45 so it fit more flush against the other 1X2 on the back. This cut around the back of the shelves better in my opinion but isn't necessary.

I chose to do a similar paint treatment. i sprayed on a nice dark grey with my wagner 590 sprayer and then did a white wash with a big 4inch brush and just brushing on liberally (and mostly dry)

GREAT Project and fits the space very well. THANK YOU!

Estimated Time Investment
Weekend Project (10-20 Hours)
Finish Used
BEHR Dark Ask with a white wash of just 50/50 water and white satin paint I had laying around. I sprayed the Dark ASH on everywhere, but then did the white wash on the outside portion (not the inside shelves)
Recommended Skill Level
Intermediate

My First Big Project

Submitted by avandehei on Sun, 11/22/2015 - 09:38

I kind of took this project to the next level.  I have never built anything like this before, some shelves and minor wood working projects but I wanted this piece to be really special for my wife who requested I make this for our family room.  I made it out of solid poplar and used birch plywood for the sides.  I decided to dovetail the drawers and recess the drawer bottoms.  The entire frame was assembled using biscuits, dowels and glue rather than screws or nails and it took me 6 weeks to complete but I didn't work on it daily.  The project cost me about $450 in materials but it was worth it.  

I wish I had used joined wood for the sides rather than plywood because it did not take stain well (blotchy).  I upgraded the drawer slides to side mounted ball bearing made by Amerock that I got on Amazon for a great price.  The stain was custom mixed from two standard Minwax stain colors I used oil based semi-gloss on the top and water-based semi-gloss on the remainder.  I had some experience with doweling and biscuits but had never dovetailed before.  I purchased the Porter-Cable 4212 kit and opted for the through dovetails for added strength.  The drawers barely needed glue, and it was very easy to use!   I mounted the top using figure 8 fasteners which was another first for me but I highly recommend them.  The hardware I found on Amazon at very reasonable prices compared to big box stores but couldn’t find a silver colored label holder so I purchased brass and used Rust-Oleum Flat Antique Nickle to get them to match the pulls. 

I am a beginner at this but feel that this was a great project there was only one error in the list of materials to cut but other users have already identified that.  I anyone has questions on this project I will be happy to help! 

Estimated Cost
$450
Estimated Time Investment
Week Long Project (20 Hours or More)
Finish Used
Minwax Ebony & Classic Gray Stain & Semi-Gloss Polyurethane
Recommended Skill Level
Beginner

Comments

Farmhouse bed king

Submitted by Anonymous (not verified) on Wed, 01/09/2019 - 18:02

Such a fun project. This is the 5th piece my husband and I have completed by Ana White. This bed is by far my favorite piece of furniture in our home. So sturdy and only took a few hours (not including stain and poly). We have a love for knots, so we chose pieces of wood that had a lot of beautiful imperfections. We went very light on the stain, and it looks weathered with still some of the natural wood color shining through. We got our wood from our local Home Improvement store, and had minimal cutting to do. Neither of us are pro woodworkers by any means, and we completed this with ease.

Estimated Cost
$200
Estimated Time Investment
Day Project (6-9 Hours)
Finish Used
One thin coat of Rust-Oleum Weathered Gray then two coats of Minwax clear Polyurethane.
Recommended Skill Level
Beginner

Large Wood Pet Kennel End Table

Thanks for the plans!

Built from Plan(s)

Comments

Modified Cube Bookshelf

Submitted by liquidzoo on Fri, 08/26/2011 - 11:24

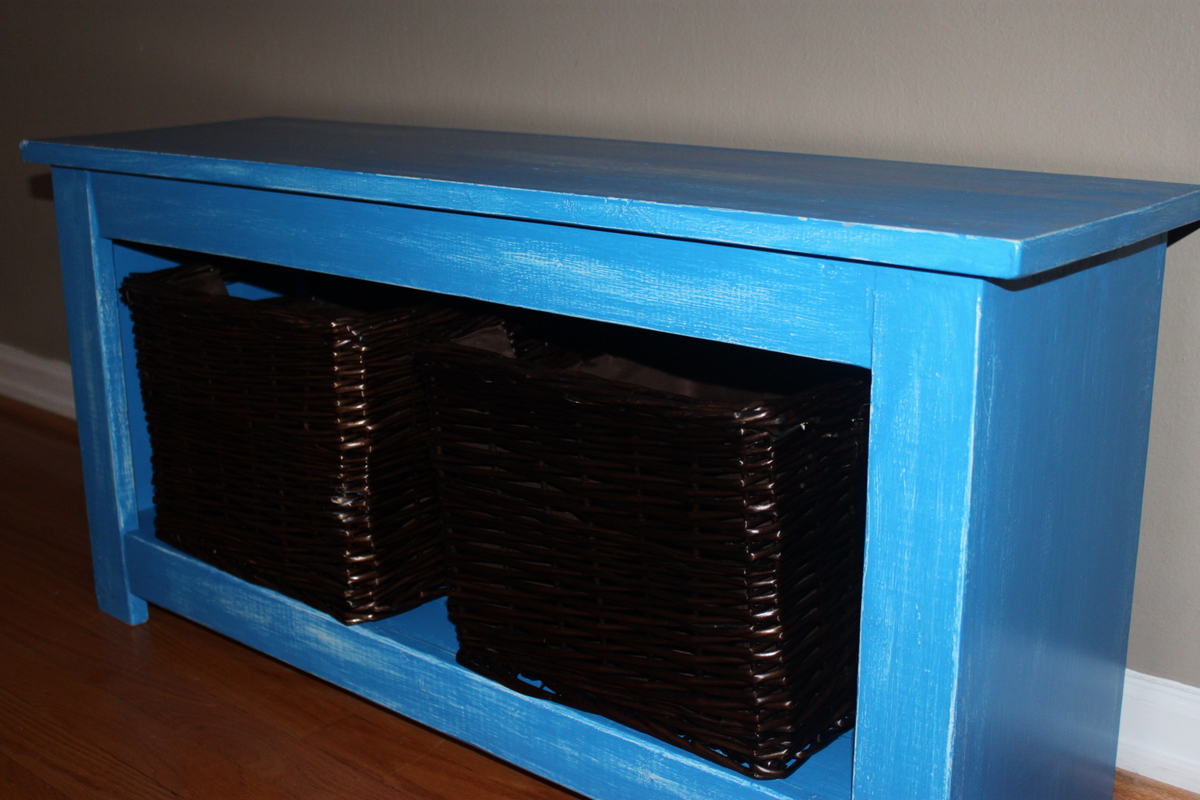
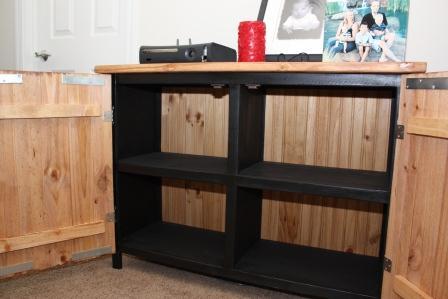
After building one 6 Cube Bookshelf (http://ana-white.com/2010/07/well-i-did-promise-you-i-would-work-on.html) so my wife would have somewhere to store toys for the kids, I decided to modify the plan to use in our bedroom.

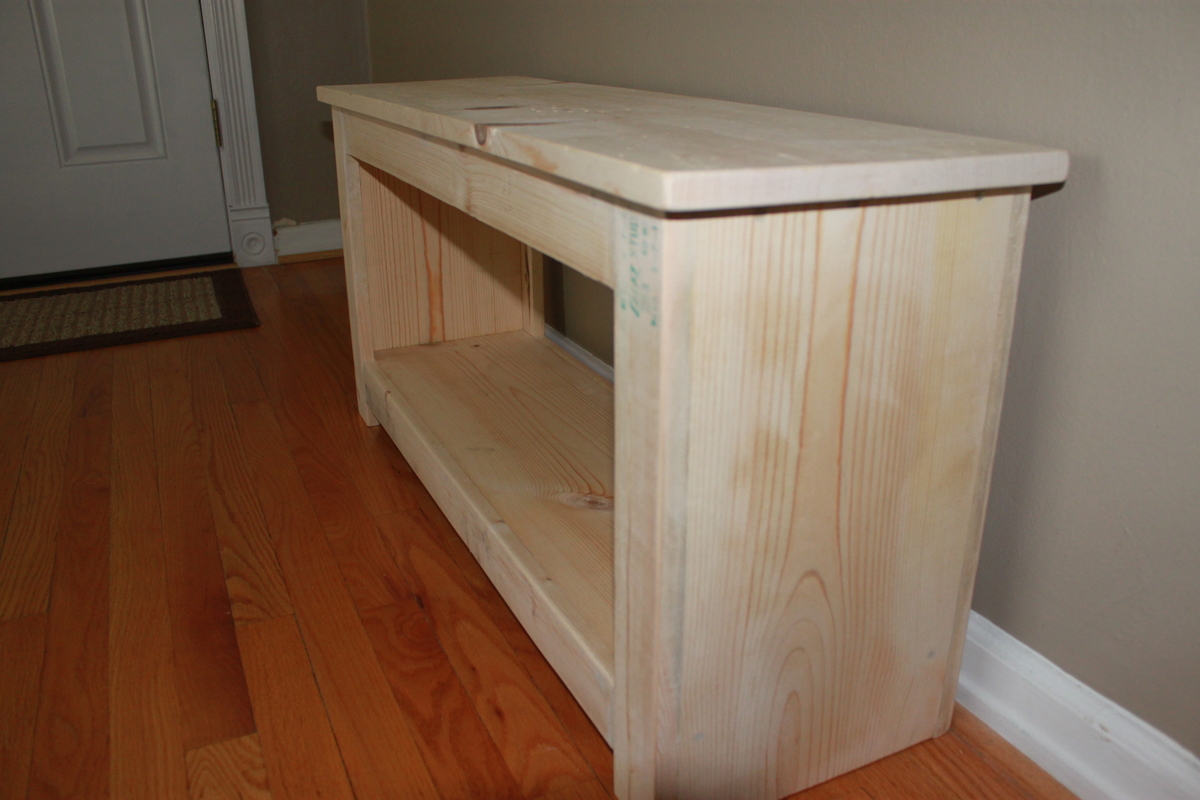
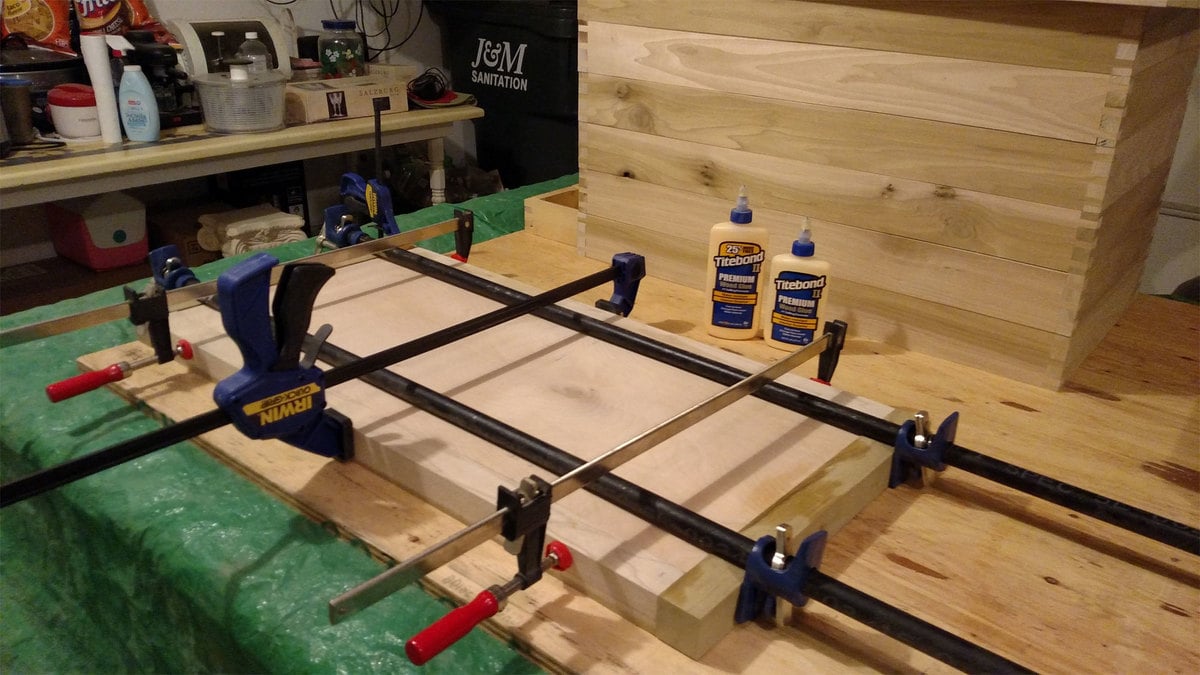
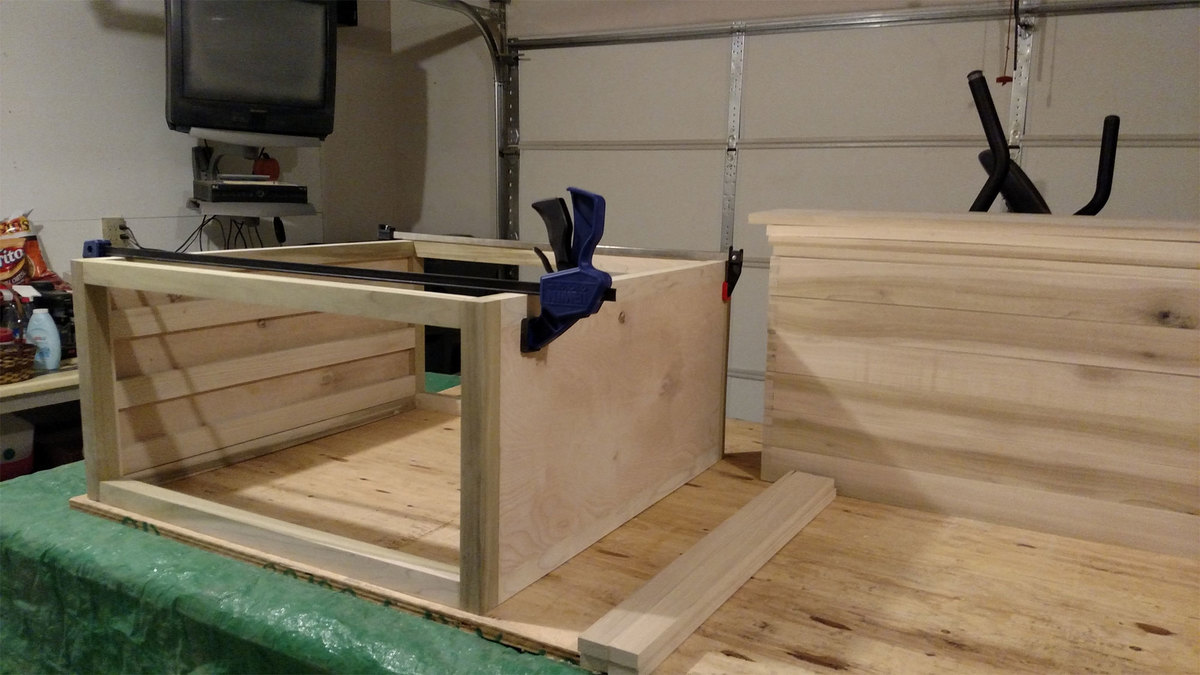
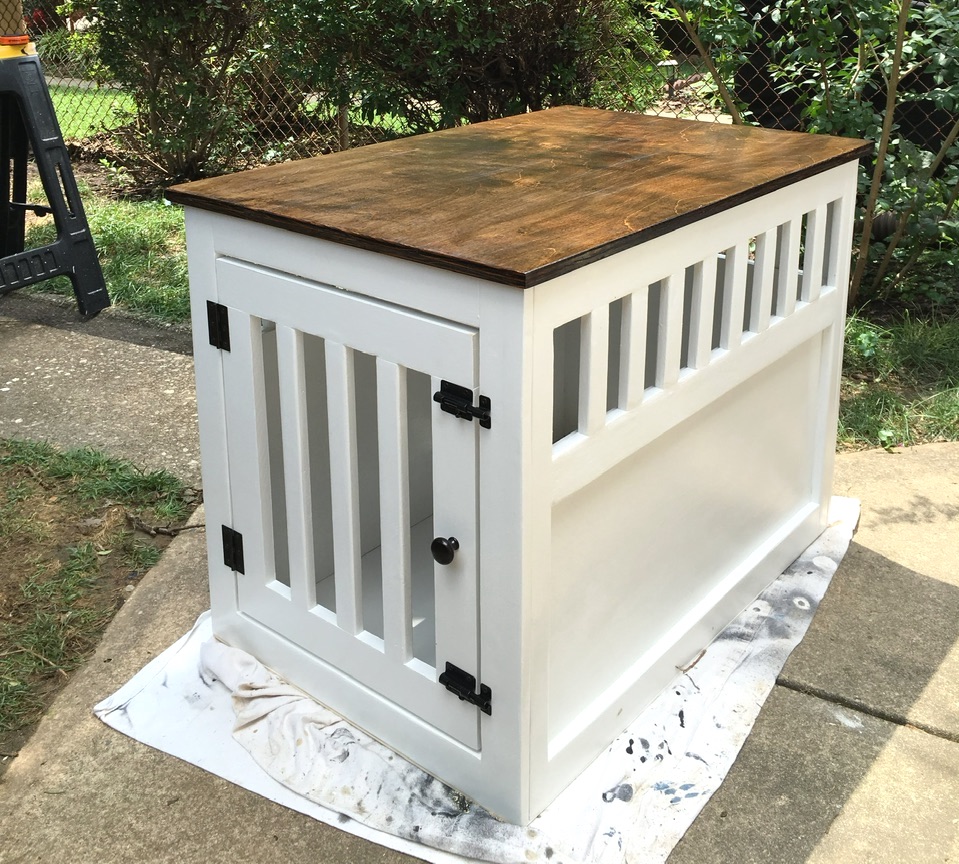
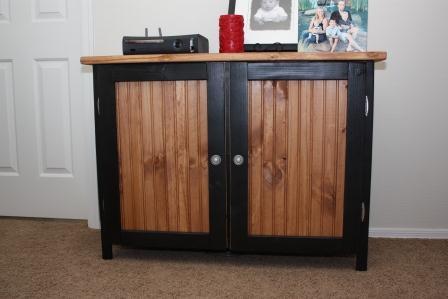
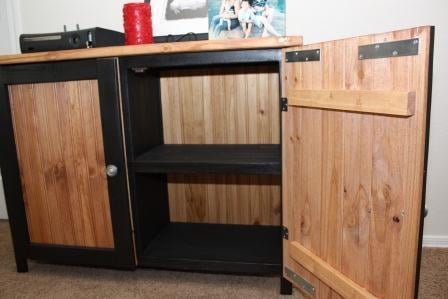
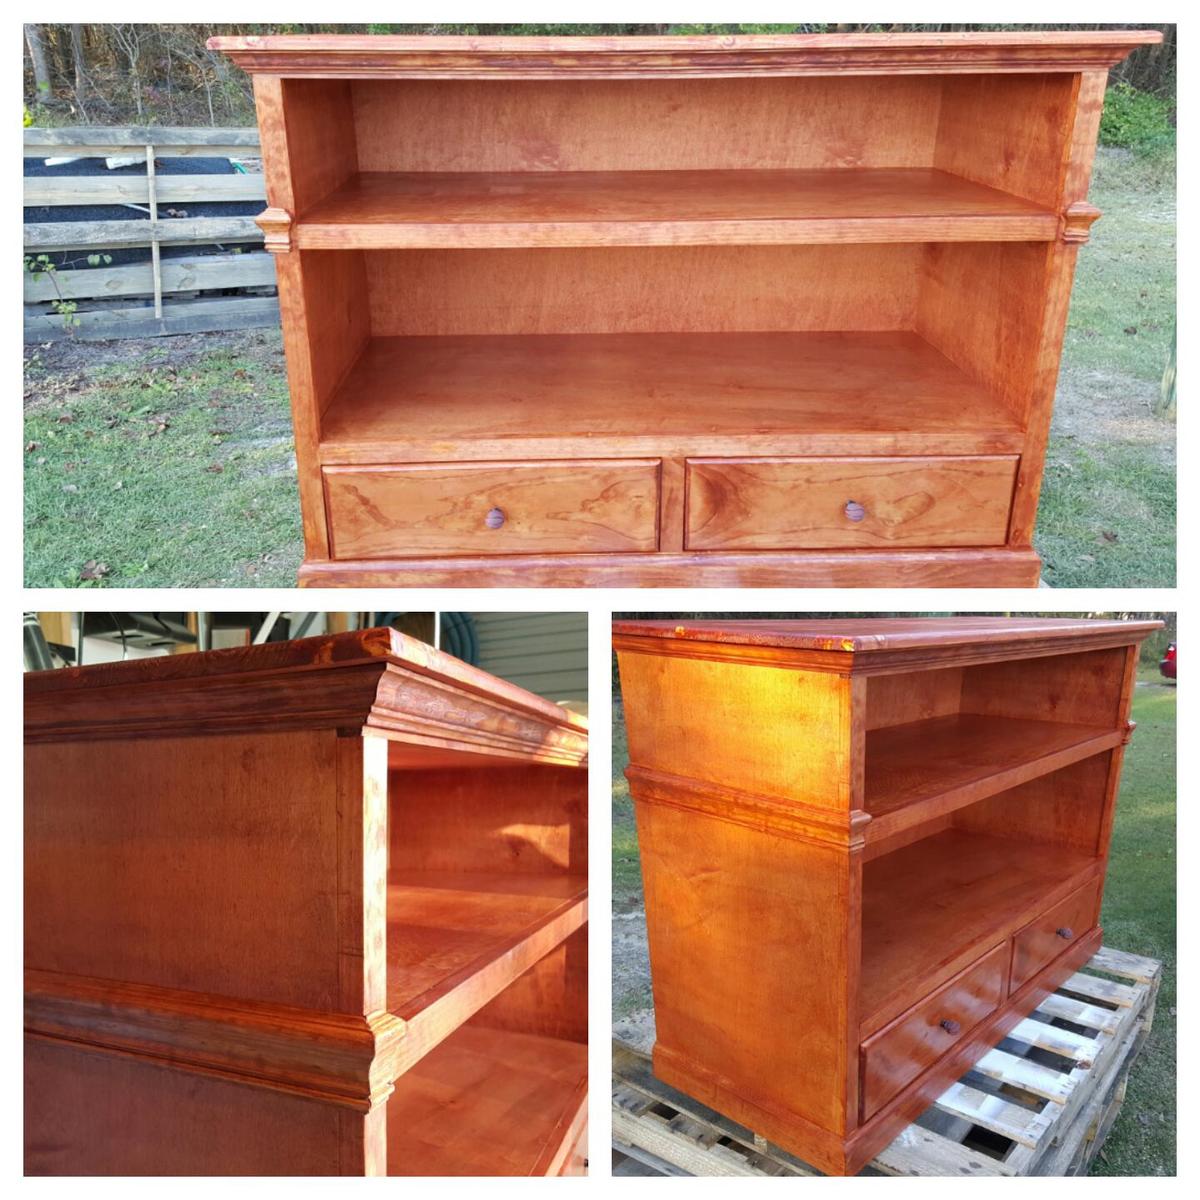
I chose to put doors on it, and learned quite a bit. Rather than 6 standard cubes, I went with a single divider on each shelf. The back and the doors are both made from some Bead Board trim packages that I found for about $12 at my local big-box.

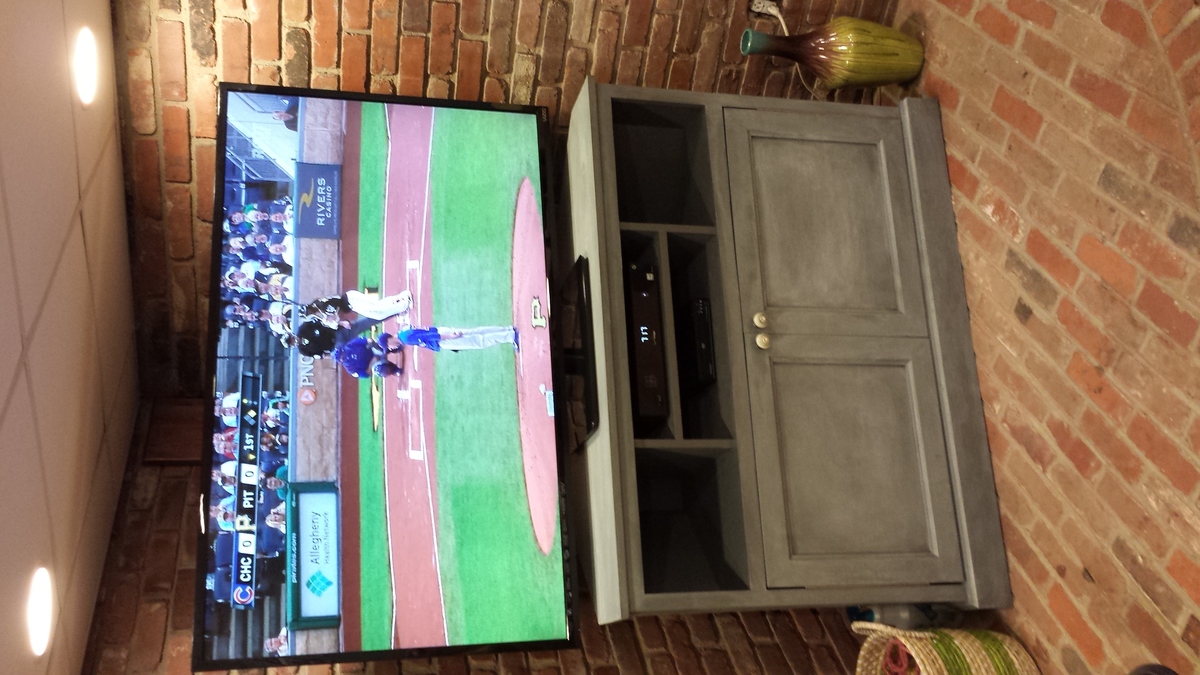
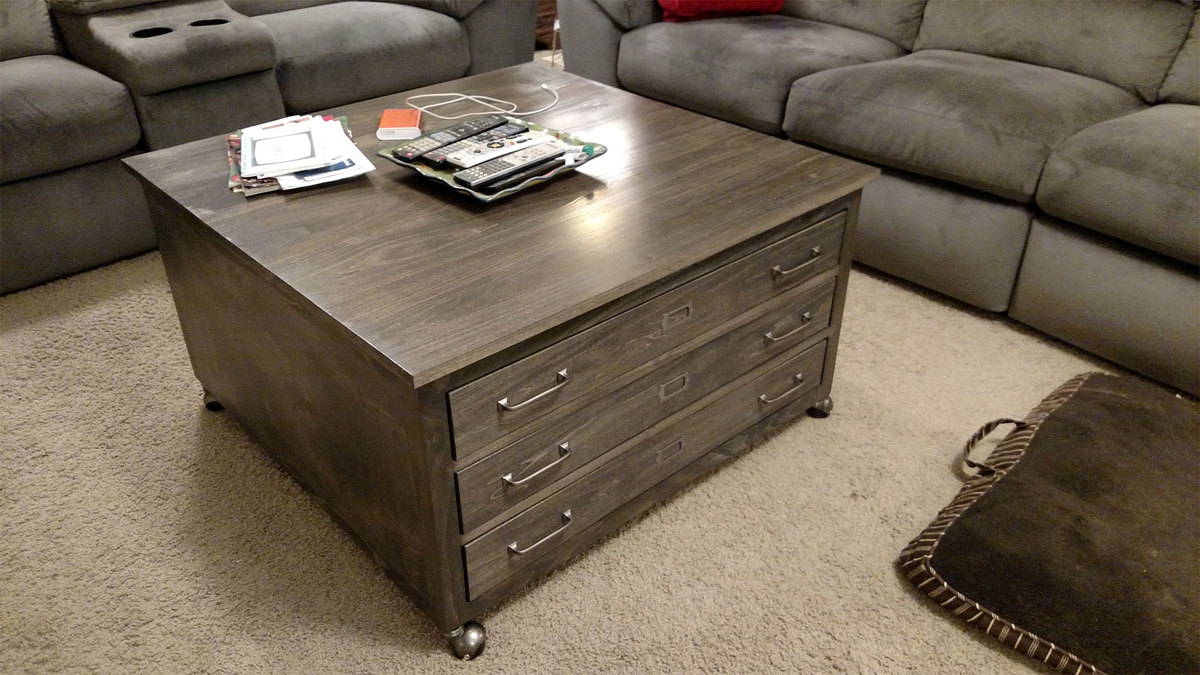
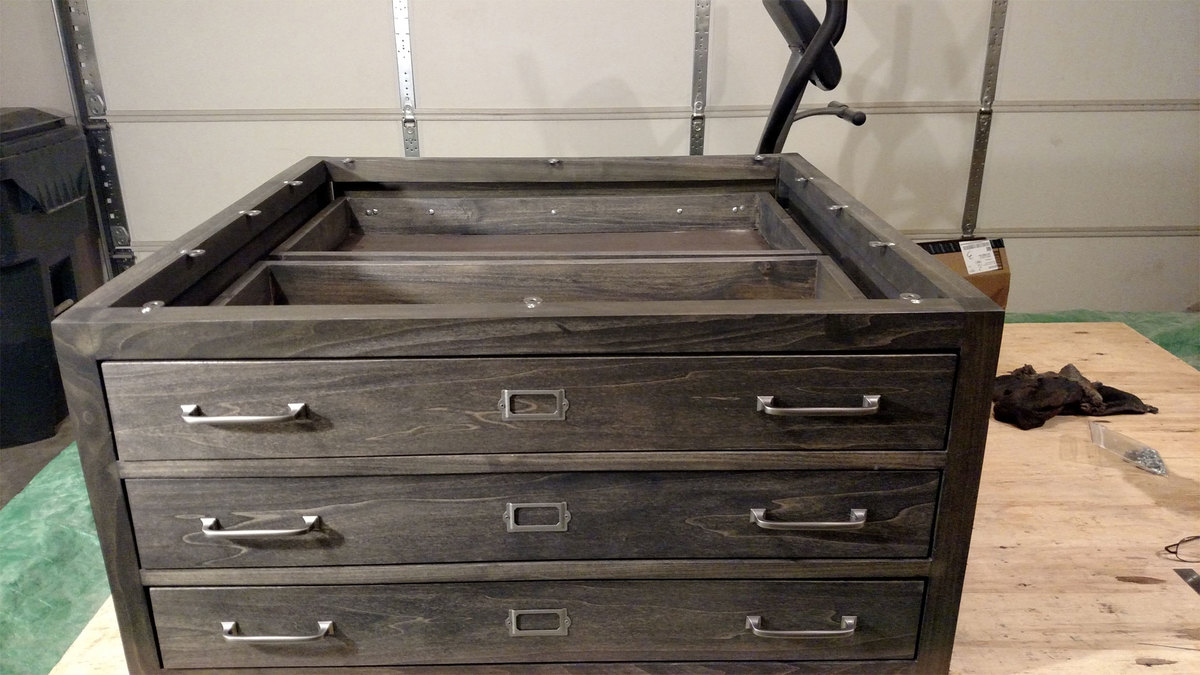
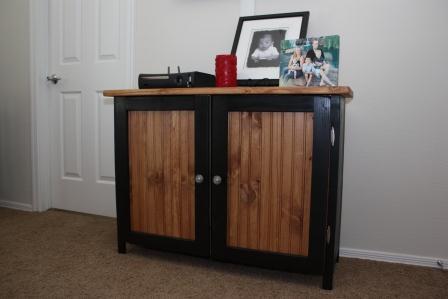
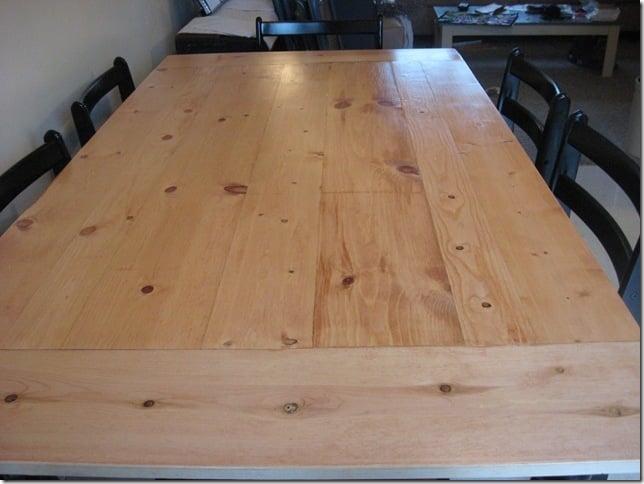
I added a 16" wide board on the top to create the look I wanted.

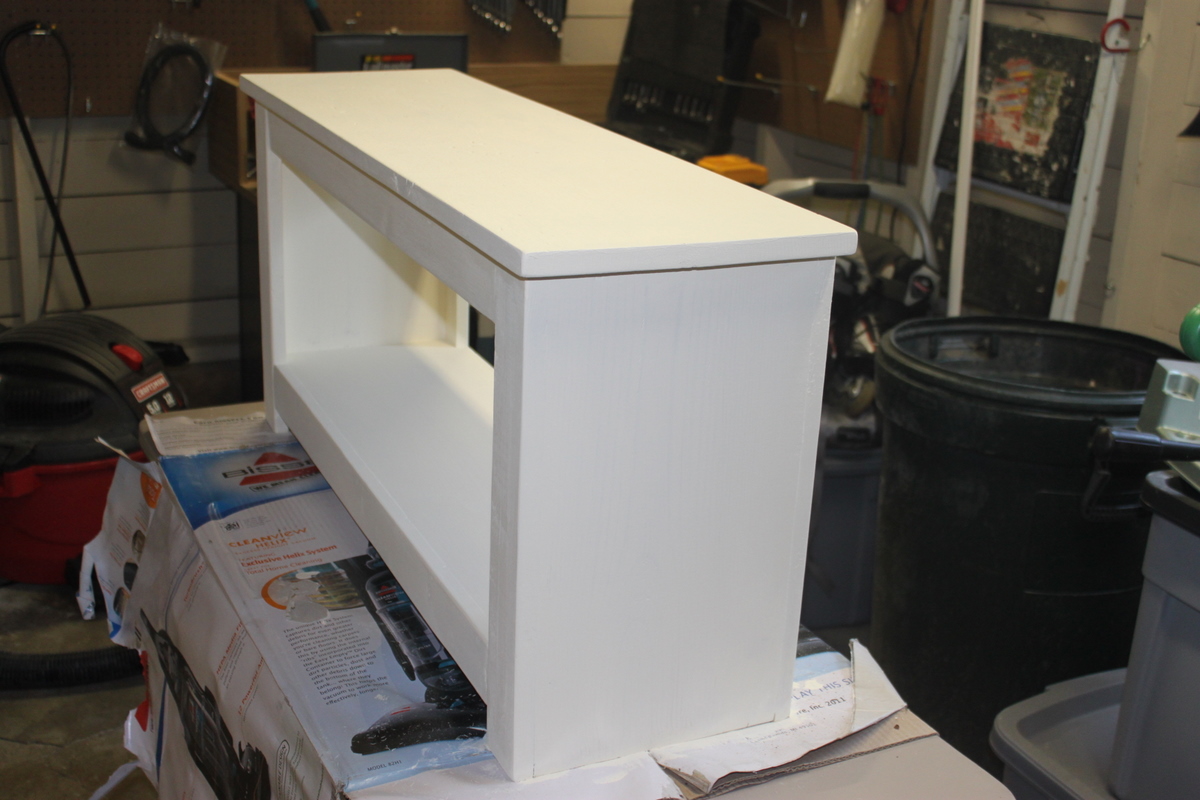
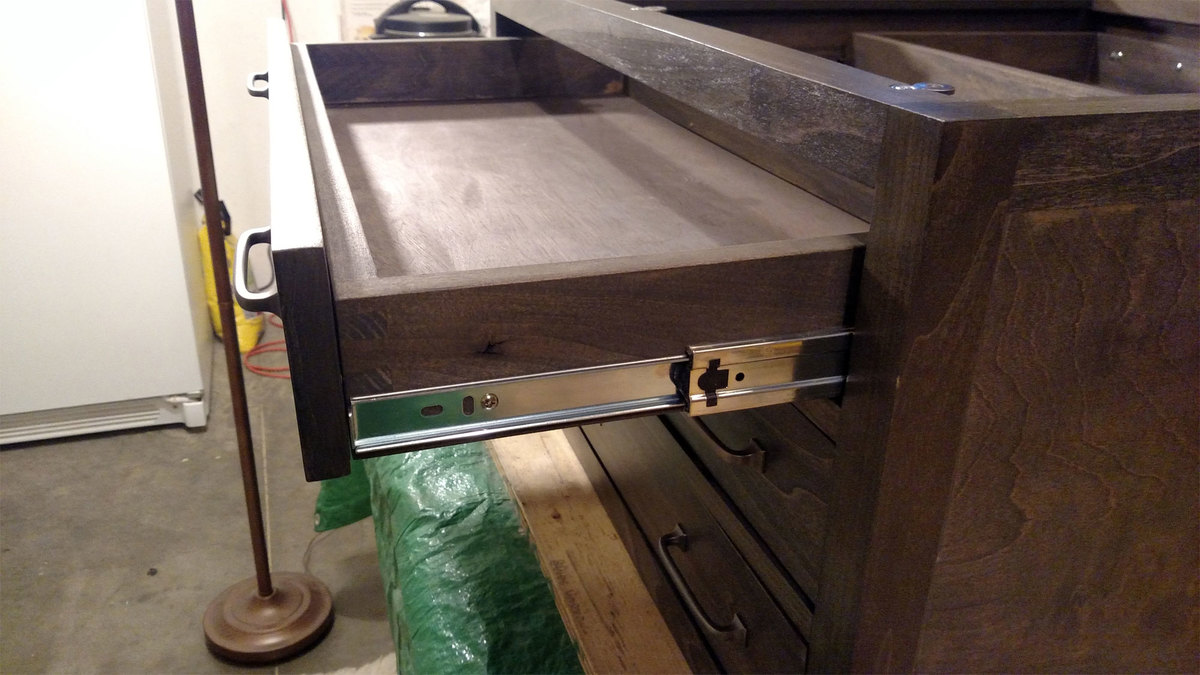
I also want to note that when you're working alone, some right-angle clamps are lifesavers! Makes it a lot easier to keep square and hold things together while you drill and screw everything together.

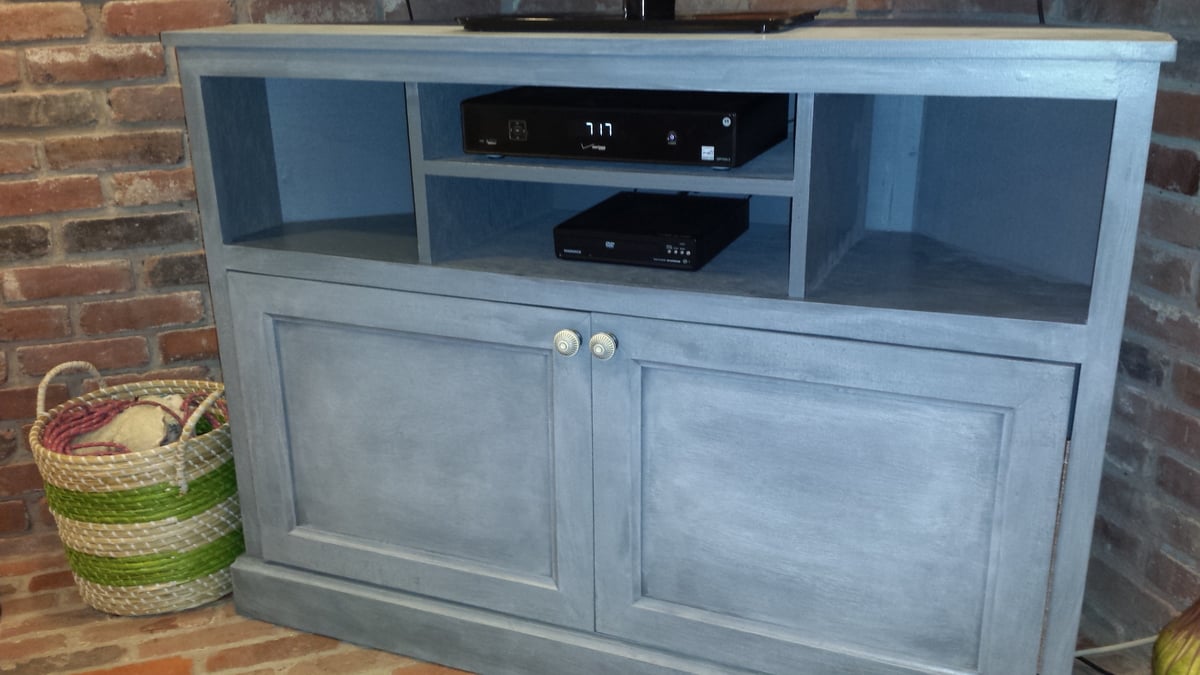
I chose some hardware that came close to what we already had in our bedroom. The hinges took me 4 different trips to get right (first was wrong type (did not want self-closing), second was wrong depth, third was wrong color).

Overall I'm very happy with it and so is my wife. We replaced a piece of furniture that was twice as wide and it's amazing how nice it is to not have to walk around it when walking through our bedroom.

Built from Plan(s)
Estimated Cost
$65
Estimated Time Investment
Day Project (6-9 Hours)
Finish Used
Top, door panels and back were stained using a satin cherry finish. Trim and main body was painted using an enamel black paint (1 coat is all it took with the enamel paint, Glidden Onyx Black using a Behr Enamel base)

After everything was dry and prior to assembly everything received 2 coats of Satin polyurethane.
Recommended Skill Level
Beginner

Storage/Coffee Table

Submitted by bvescovi on Wed, 09/18/2013 - 09:57

I am redesigning my family, which is really the children's playroom. I have decided to change it to a beach theme. I saw the project on this site and knew immediately it would be a perfect fit as a storage/coffee table. Within 5 minutes of me completing the box, my three year old started filling it up with toys.

I have to admit it is slightly tall for a coffee table, so I'm debating cutting off the legs. It would be easy enough to do without taking the entire project apart and it would make it the perfect height.

I did have to plan my build around my work schedule and the kids, so I did what Ana suggested and built a panel a day. I cut all the wood one day, then built a panel a day. The last day, I started putting the pieces together, put the bottom boards in and made the top.

Estimated Cost
$100
Estimated Time Investment
Day Project (6-9 Hours)
Finish Used
So far I have not finished the project. I haven't decided if I want to leave it and just Poly it or stain it with either sunbleached or weathered stain. It is a beach theme so either color stain would be great.
Recommended Skill Level
Starter Project

DIY Upholstered Bench

I just finished my first project with upholstery!  I built a bench following Ana's plans from a couple of 2x4s and used this gorgeous fabric from Minted.  Minted is November's sponsor for the Fab Furniture Flippin Contest.  The paint color is Behr's Island Aqua.  I used 3" thick upholstery foam (and WOW that stuff is super expensive).  I love diamond tufting and followed a tutorial from Addicted 2 Decorating.  


The bench is super compfy.  I love it and I love the bright cheery colors.  

Built from Plan(s)
Estimated Cost
100+
Estimated Time Investment
Day Project (6-9 Hours)
Finish Used
Behr Island Aqua
Recommended Skill Level
Beginner

Rustic X Kitchen Island - Double

Submitted by Anonymous (not verified) on Mon, 01/14/2019 - 01:54

I followed the plans except for the top, I used a 2x12, 2x4 and 2x12 pocket holes together.


Burnt the wood with a torch and stained over.

Thanks for the plans!


Questions? [email protected]

Built from Plan(s)
Estimated Cost
200$
Estimated Time Investment
Weekend Project (10-20 Hours)
Finish Used
Minwax provincial and topcoat polyurethane and mineral spirits 75/25 mix
Recommended Skill Level
Intermediate

Farmhouse Hall tree

Submitted by Anonymous (not verified) on Mon, 10/31/2022 - 14:53

Had fun making this one! Kept it rustic and added something other than white. Thanks for the great plan!

Built from Plan(s)

Comments

Numbered cubbies

Submitted by Kimberly W on Tue, 08/30/2011 - 09:49

I was so excited when I saw the plans for this and knew I had to make it. I love the way the wood looks with the numbers stained. It only took a couple of hours to get it exactly as I wanted. My kids love that they now have a place for all their crayons and school supplies.

Built from Plan(s)
Estimated Time Investment
An Hour or Two (0-2 Hours)
Recommended Skill Level
Beginner

double pedestal table

Submitted by Binda B on Fri, 09/20/2013 - 09:26

I think the hardest part of making this table was making it square. I think a tutorial video would be very beneficial. Took me a while to make due to life priorities, but it is finally done! Kids have already taken it over! My favorite part is letting them draw on it and make it theirs. Will be fun in the future to look back. We also wrote the date on it. I do think clamping is a must. I didn't do that at first and ended up taking the top apart and redueing it with clamps and glue.

I didn't want cracks that food could get into, and those 2x4's are rounded. So I ran those boards through a table saw to make sure they are flush with the 1x6's.

Built from Plan(s)
Estimated Cost
$150.00 for everything. the 1x6's were a higher quality pine. the rest was the cheaper pine.
Estimated Time Investment
Week Long Project (20 Hours or More)
Finish Used
Wood conditioner, american walnut by rustoleum, 4 coats of minwax semi gloss polyurethane. LOTS of sanding was done on the top of this table. Including steel wool.
Recommended Skill Level
Intermediate

Comments

TV Console

This TV console was made on request.  Its made from maple plywood and Pine top, trimmed with Small crown,  large chair rail  and base board moulding.  It has one media shelf a larger shelf for Pictures. The very bottom has two 18 inch drawers that are 5 1/4 inches deep for dvds or games.

Estimated Time Investment
Weekend Project (10-20 Hours)
Finish Used
Finish is Minwax Gunstock and cleared with Lacquer. 
Recommended Skill Level
Intermediate

Love this table!

Submitted by Anonymous (not verified) on Thu, 01/17/2019 - 14:37

Fell in love with this table! Couldn't wait to build it. Found a great mill that had raw stock of a variety of woods. I chose White Ash  because if the hardness and beautiful grain. They planed it to 1-3/4" thickness. Modifed the width to 50" and turned the truss supports underneath to add extra support for the table top due to the weight of the White Ash. Finished with provincial stain and 6 coats of hand rubbed poly. Used wood bleach on the 4x4's to take the red tint out before staining. Worked great!

Estimated Time Investment
Week Long Project (20 Hours or More)
Recommended Skill Level
Intermediate

Picture Ledge for Cutting Board Display

Submitted by vendo on Fri, 11/18/2022 - 10:19

My sophomore daughter built a cutting board in woodworking class. She did a beautiful job, so I wanted to display it. Took me about 10 minutes to build this little shelf. Can be used on the counter, or attached to a wall or pantry shelf. I decided to attach to the side of my DIY freestanding pantry that I built using Ana's Shelf Help service. I'm happy the whole family is able to enjoy her beautiful cutting board and this makes it easy to use and put up when not in use. 

Built from Plan(s)

Book Nook Tent

I loved this plan as soon as I saw it. The only modification I made was I used a 4x16 8oz drop cloth up on over the center instead of curtains or fabric and painted the wood with orange gloss spray paint. The kids love it. I think we may make come doors and ties to make it cozier but they love it!

Built from Plan(s)
Estimated Cost
$40.00
Estimated Time Investment
Afternoon Project (3-6 Hours)
Finish Used
Rust-Oleum Painter’s Touch Multi-Purpose Paint Spray in Real Orange
Recommended Skill Level
Beginner

Comments

Anna Lawrence (not verified)

Mon, 09/05/2011 - 13:05

I think I am in love with the look of the drop cloth and spray paint. :)

What a fabulous replacement for the curtains... I know at our HD or L a huge cloth is $8 or $9 bucks, so that's a really economical choice.

Guest (not verified)

Wed, 09/28/2011 - 13:44

I love your tent! I am thinking of making one but want to get an idea of the area it will take up. Can you tell me how much space (l, w, h) it takes when assembled? Thanks!

CraigCaggiano (not verified)

Sat, 02/11/2012 - 08:21

If you want to make one to sell let me know!