Community Brag Posts

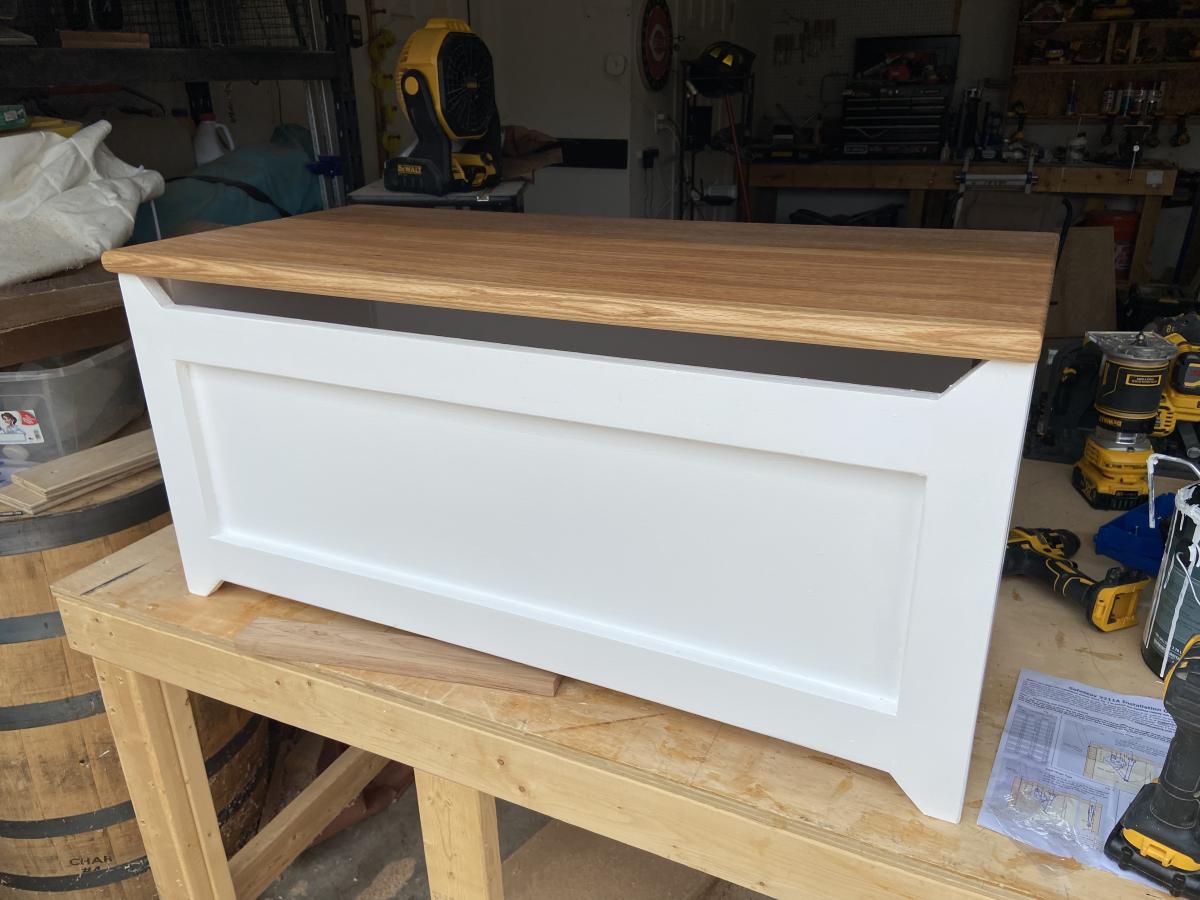
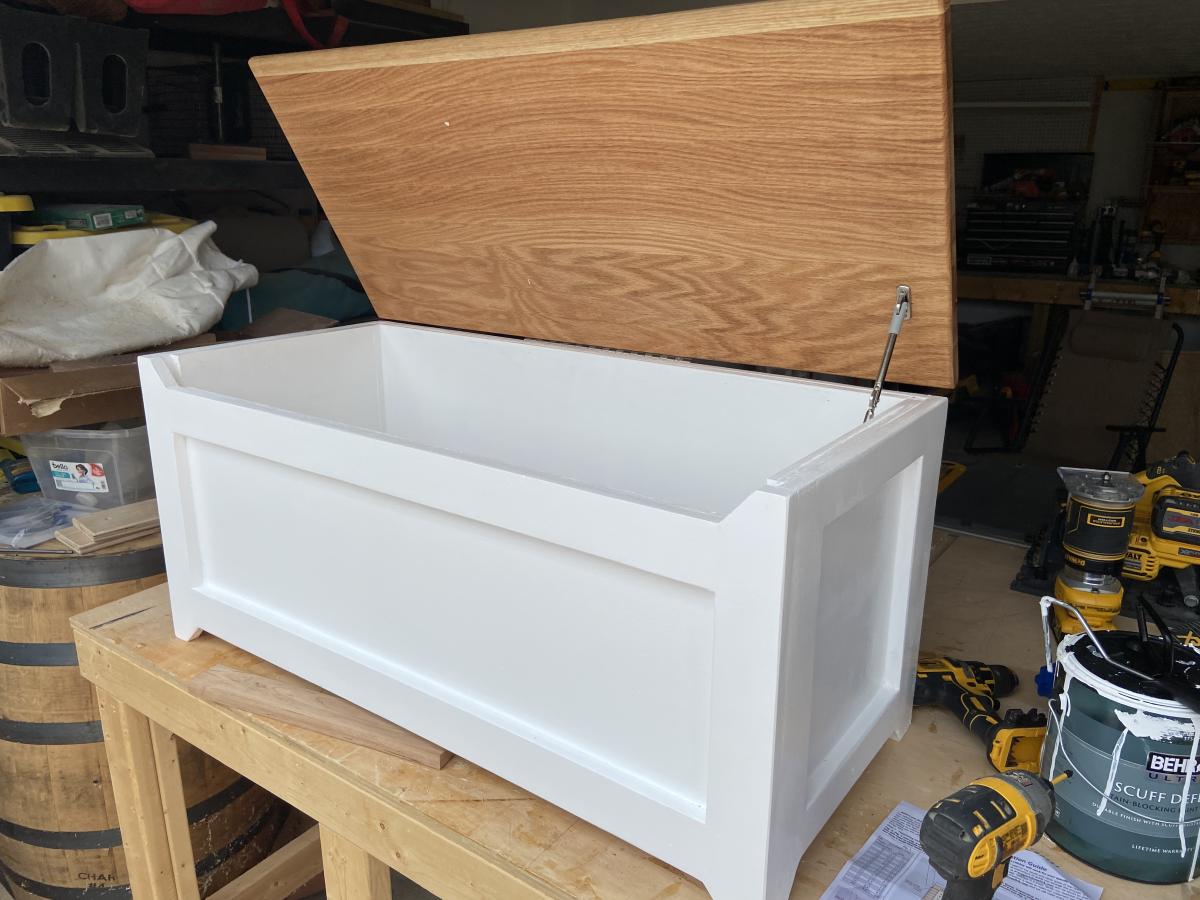
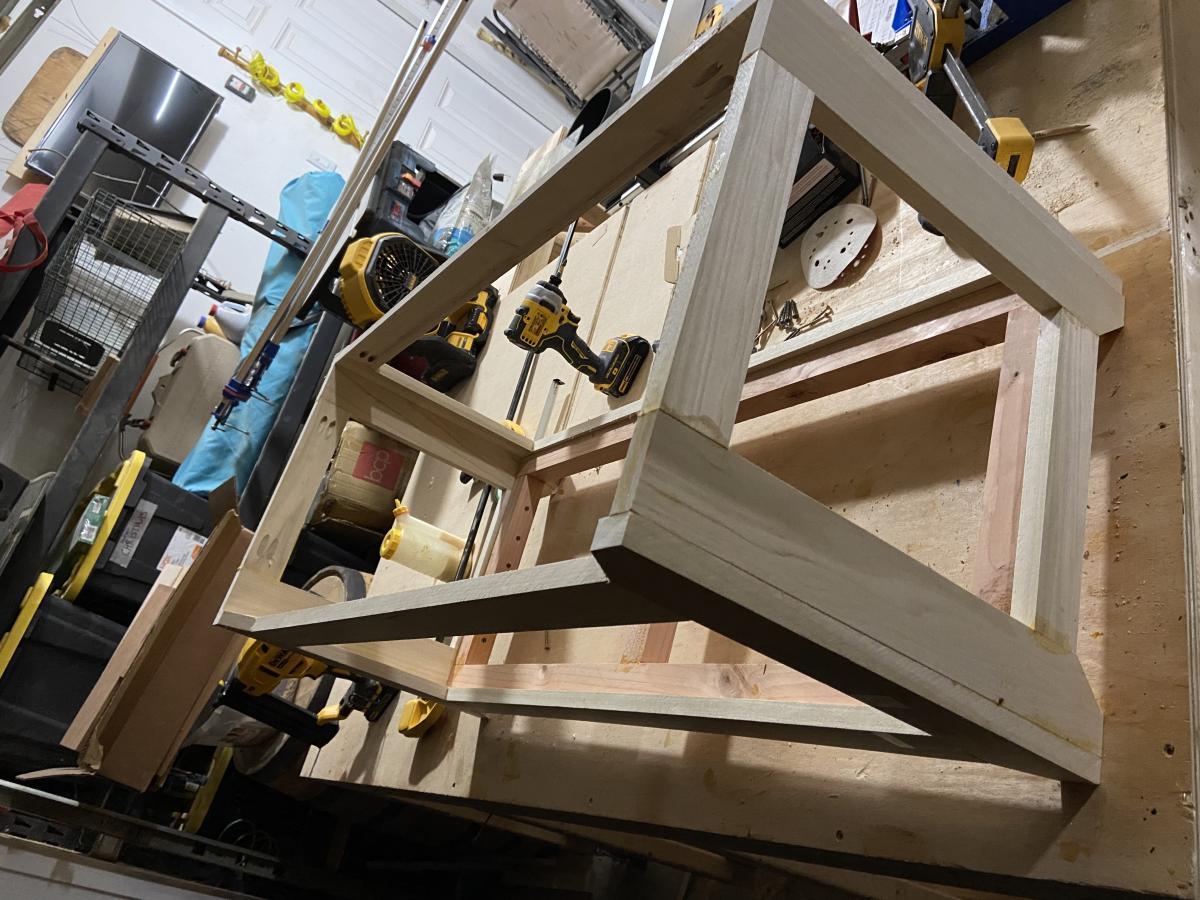
You chest

Submitted by Anonymous (not verified) on Sun, 12/26/2021 - 12:56

Ana White’s plans are the best I’ve seen. Some are easy and some are challenging builds. She’s so very encouraging in her videos. She makes me feel like I can keep on building. I’m very happy to say I started my business from her inspirations.

Built from Plan(s)

Comments

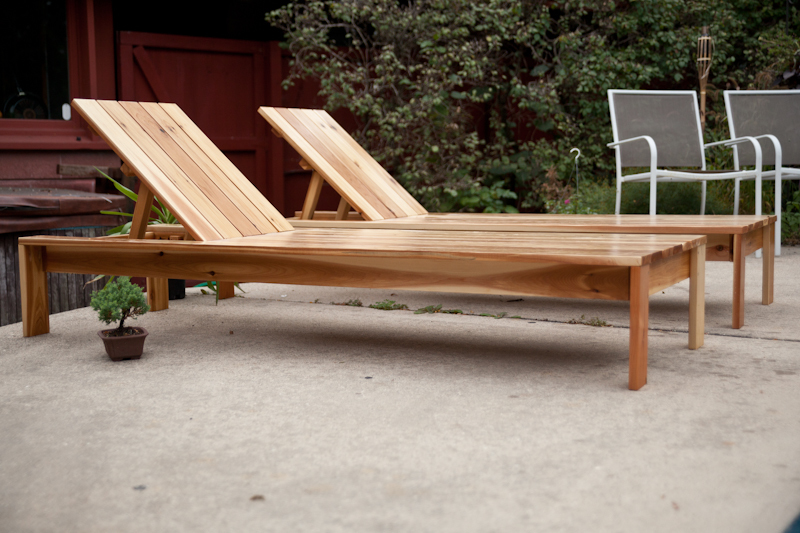
Single Simple Modern Outdoor Lounger

Submitted by Anonymous (not verified) on Fri, 04/22/2011 - 12:18

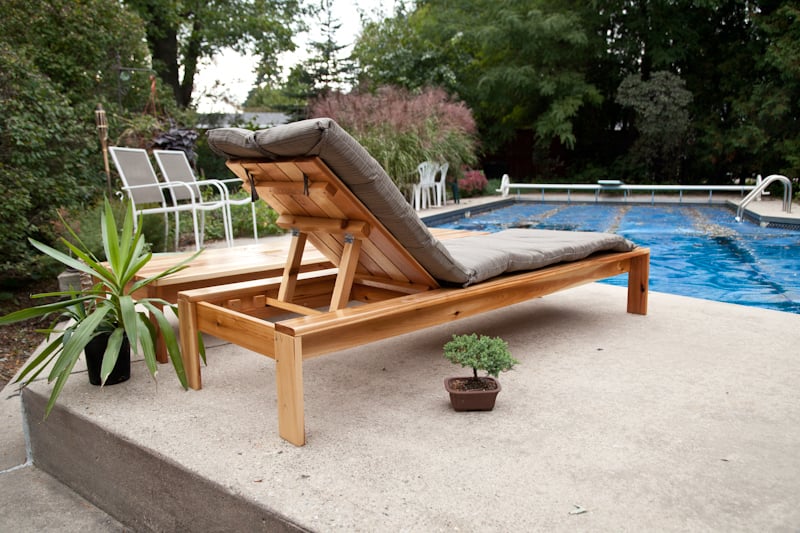
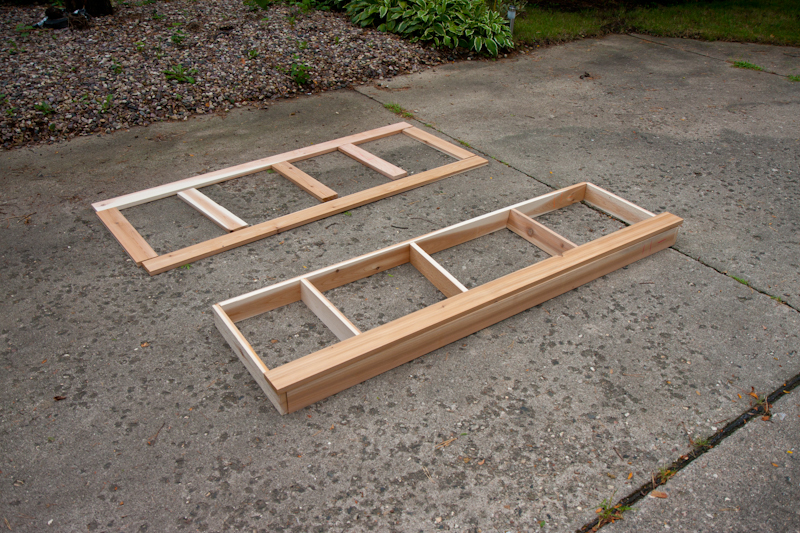
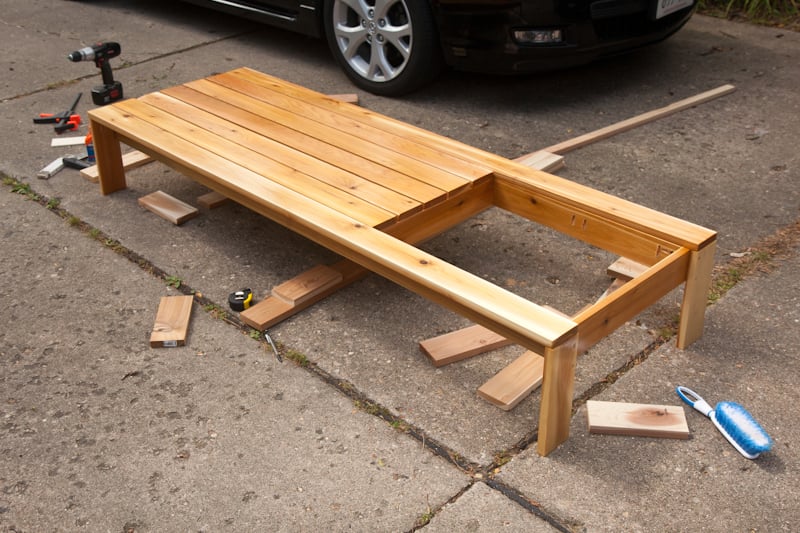
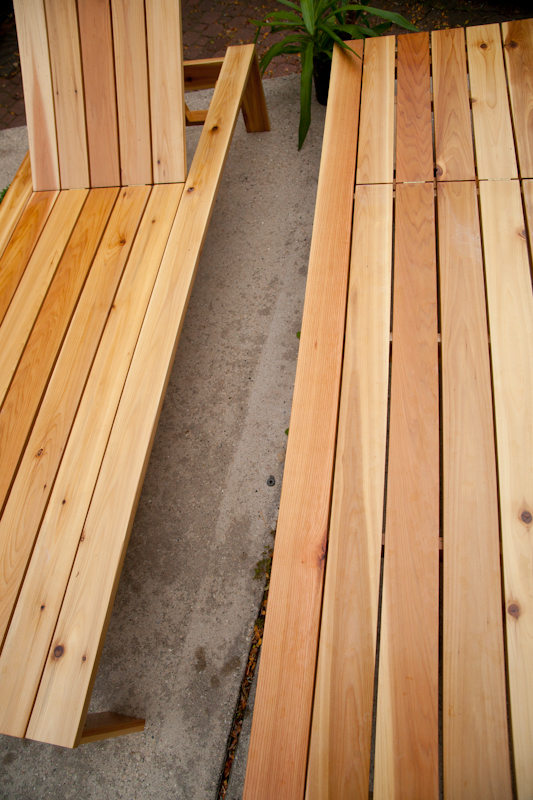
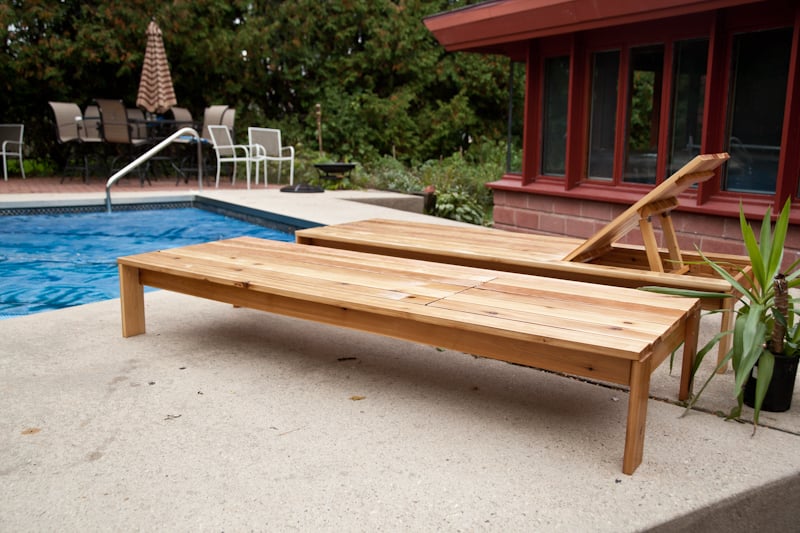
Modified the double lounger plans into 2 single loungers. I liked the idea of the boards running the long way rather than from side to side like the single lounger plan. These were pretty easy to build. All assembled with a Kreg for hidden screws. Made with Sanded and super polyurethaned cedar (3 or 4 coats). turned out beautiful with the matching boards running from head to toe!

Estimated Time Investment
Weekend Project (10-20 Hours)
Finish Used
Multiple coats of polyurethane with sanding between each coat.
Recommended Skill Level
Intermediate
Seasonal And Holiday

1st time project!

Submitted by The_big_al on Wed, 06/24/2015 - 19:10

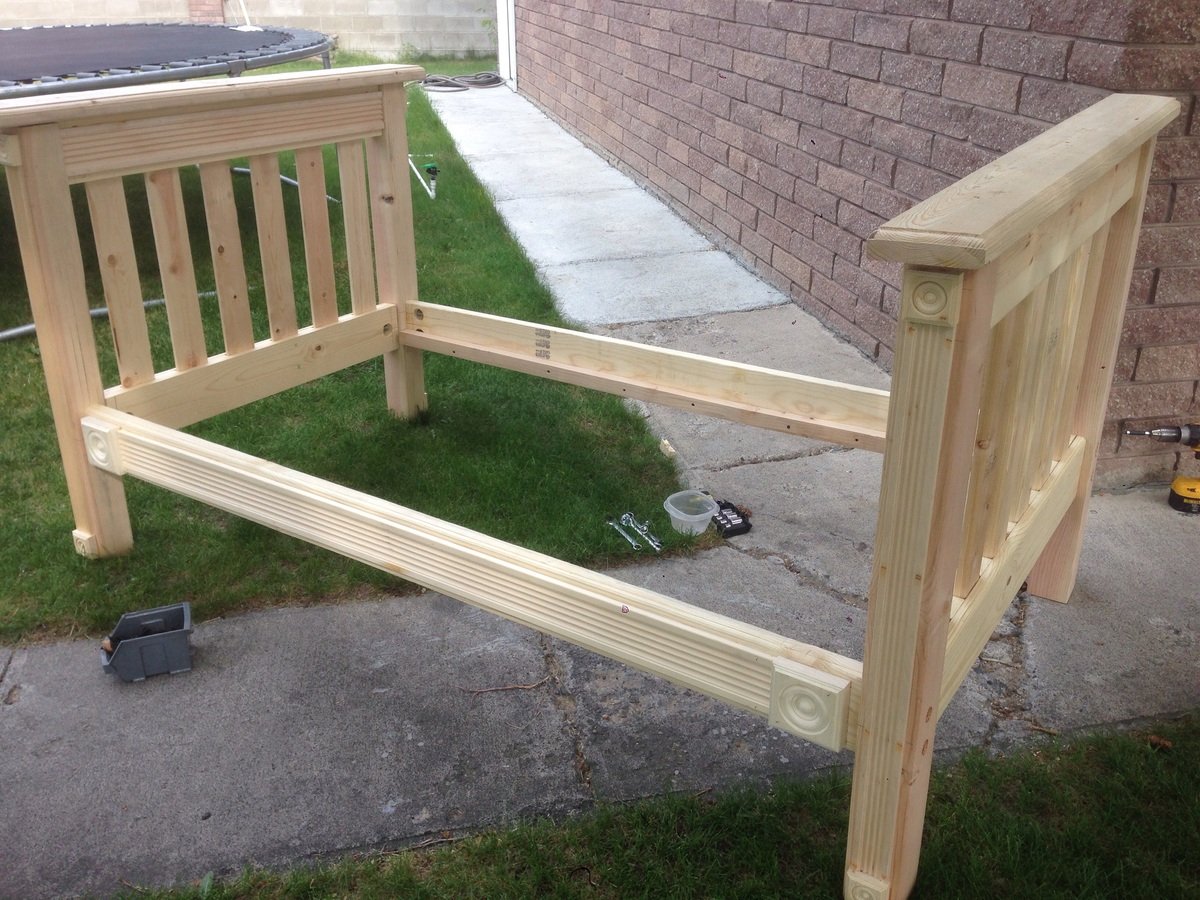
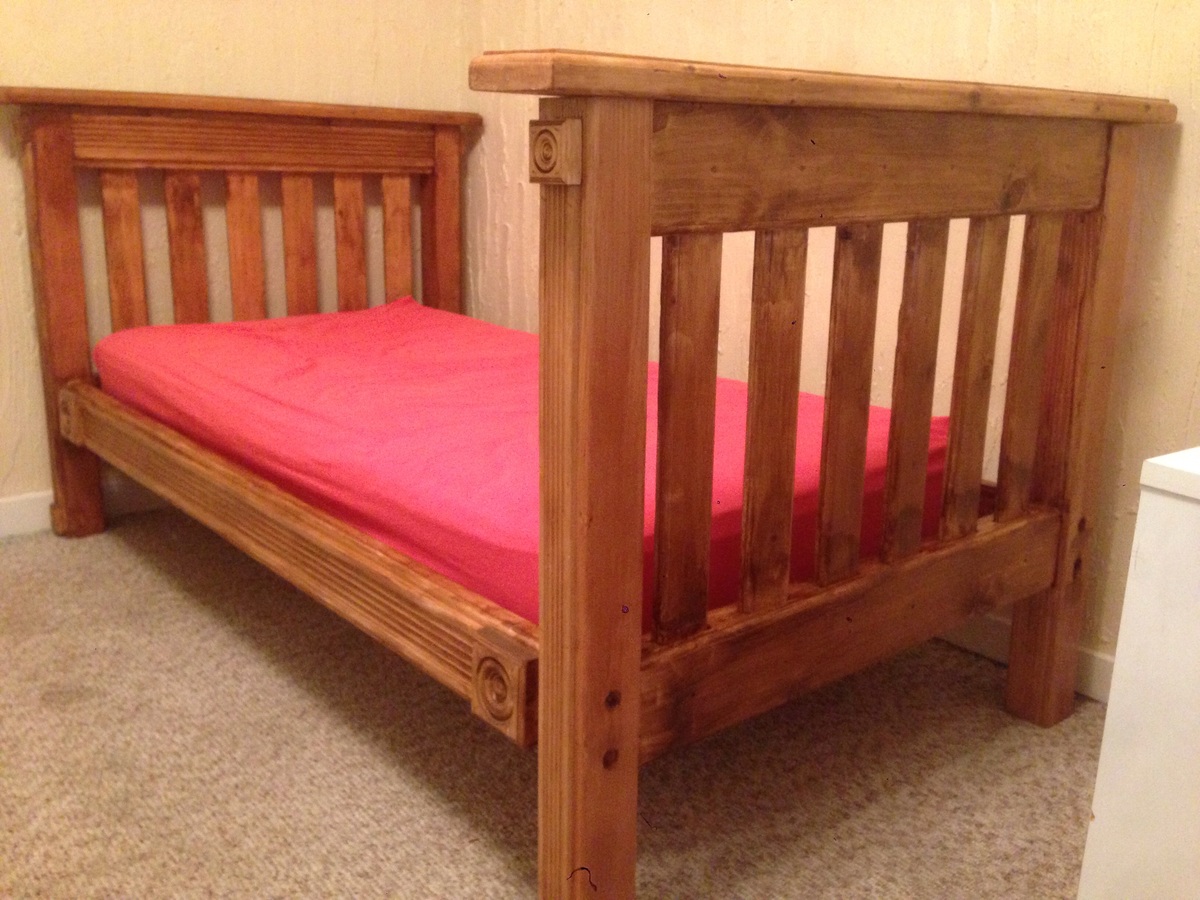
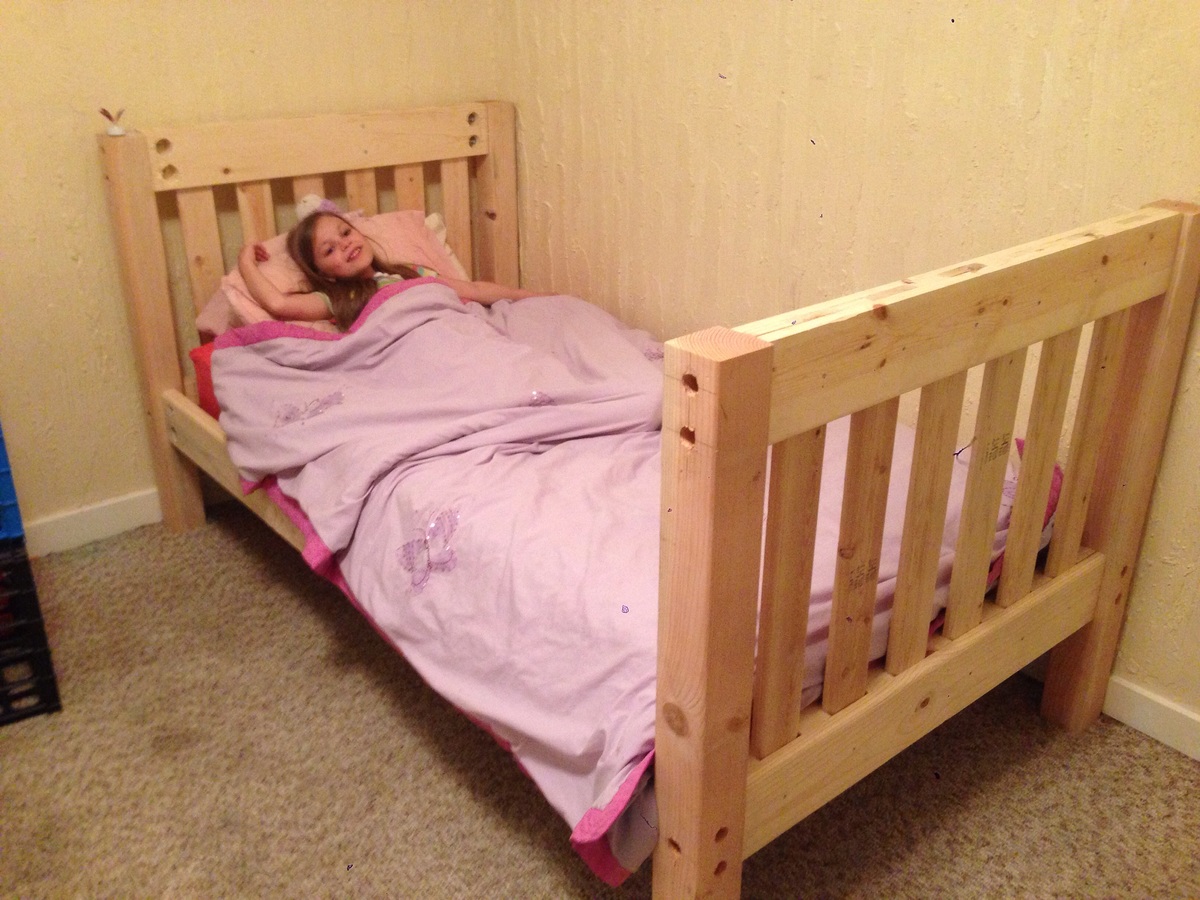
This was a pretty easy build. This was my first project and this looked like a pretty straightforward plan. I read over it several times before deciding what to do. I didn't like that it was held together using only screws. I anticipated that these beds will be moved several times over their lifetime and I did want to hassle with the screws stripping out the wood. Instead I used a 3/8 bolt and washer/nut set up so I could take the bed apart without worrying about stripping out the wood with screws. This necessitated drilling several large unsightly holes at the connection points. To help disguise this I trimmed it out using door casing and finished it out by staining the whole bed. The result was a classic look that will last my daughter's lifetime.

I will note that I changed a few parameters. I routed and the edges including the slats with a rounded corner edge. I used a 2x6 for the top cap of the head/footboards. With the addition of the trim work and bolt hardware, this did change the overall cost of the project. Total cost was probably close to $200. Had I stuck strictly to the plans I would have been closer to $100.

Built from Plan(s)
Estimated Cost
Because I changed a few parameters total cost was a bit higher. I think it was about $200 including hardware and stain.
Estimated Time Investment
Weekend Project (10-20 Hours)
Finish Used
The Simple Bed plans work great. They were easy to follow. They were also simple enough I could make modifications without too much issue.

To make the bed I made, I made two headboards (in anticipation of making a bunk bed). Instead of using screws to hold the bed together I used a 3/8 4" bolt and nut combo. 4 bolts to hold the 4x4 posts to the head/footboard and 8 (2 on each end) to hold the side rails. I countersunk the bolts into the posts to hide the bolt head. I drilled 1 1/2 inch holes on the inside of the side rails and headboards to access the bolts and attache a washer and nut. Once tightened,the bolts holding the posts to the headboard will never have to come apart. Only the bolts for the rails have to be left accessible to take the bed apart for moving. However I was then left with huge unsightly holes in the outsides of the side rails and the insides of the head/footboards. I was going to leave it thinking it wouldn't look that bad but after assembling the bed I realized how unfinished it would look. That is when I decided to add the trim work which not only really made the bed look finished it hid all holes I had to drill. I did leave the holes in the backs of the posts uncovered since access to them is needed for assembly and dis-assembly.

Dimensions for the holes were calculated based on using the 1x6's in the headboard and the 2x6's in the side rails. If you want exact dimensions I can give you those. Just email me, however it was simple enough to figure out where to place them. The trickiest part is getting the holes drilled in the posts to line up with the headboards and rails.
Recommended Skill Level
Intermediate

Simplest Armoire as Kitchen Pantry

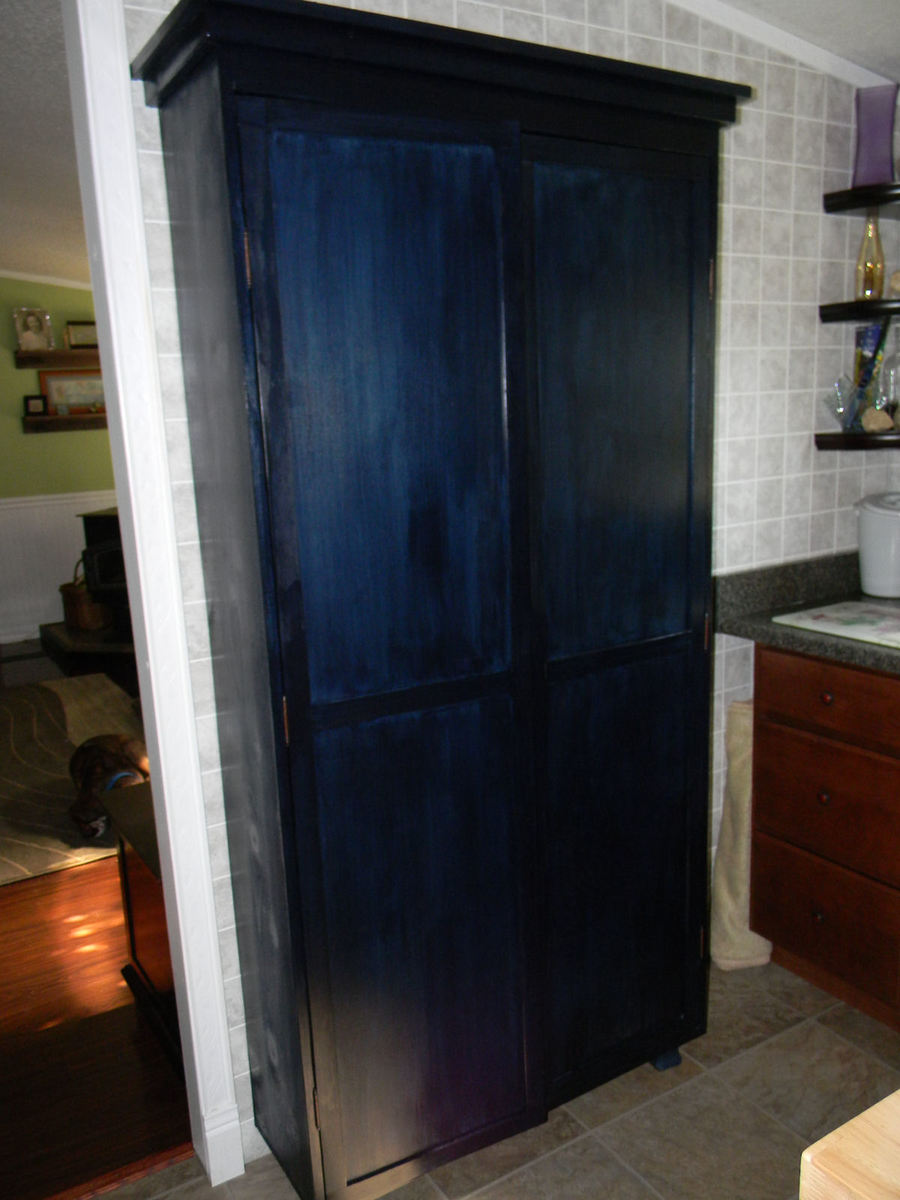
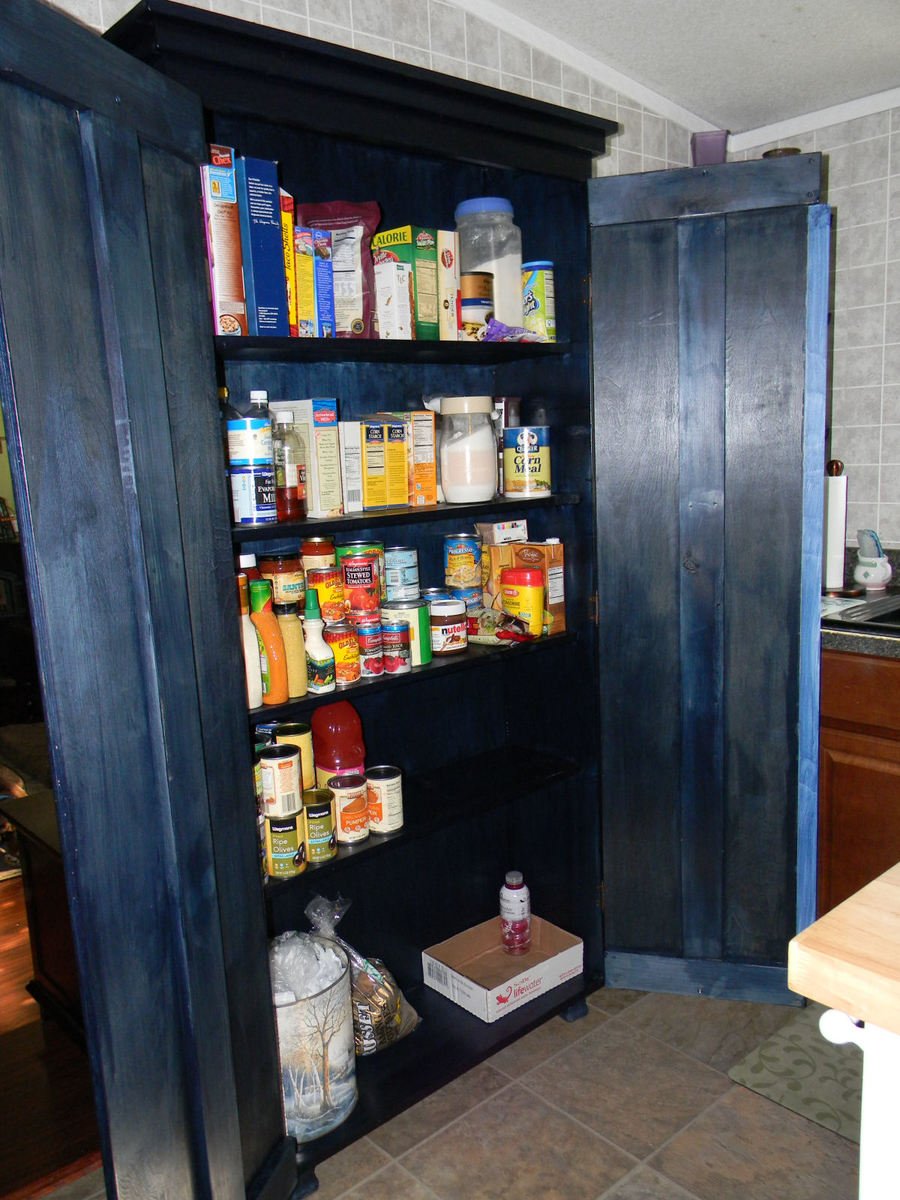
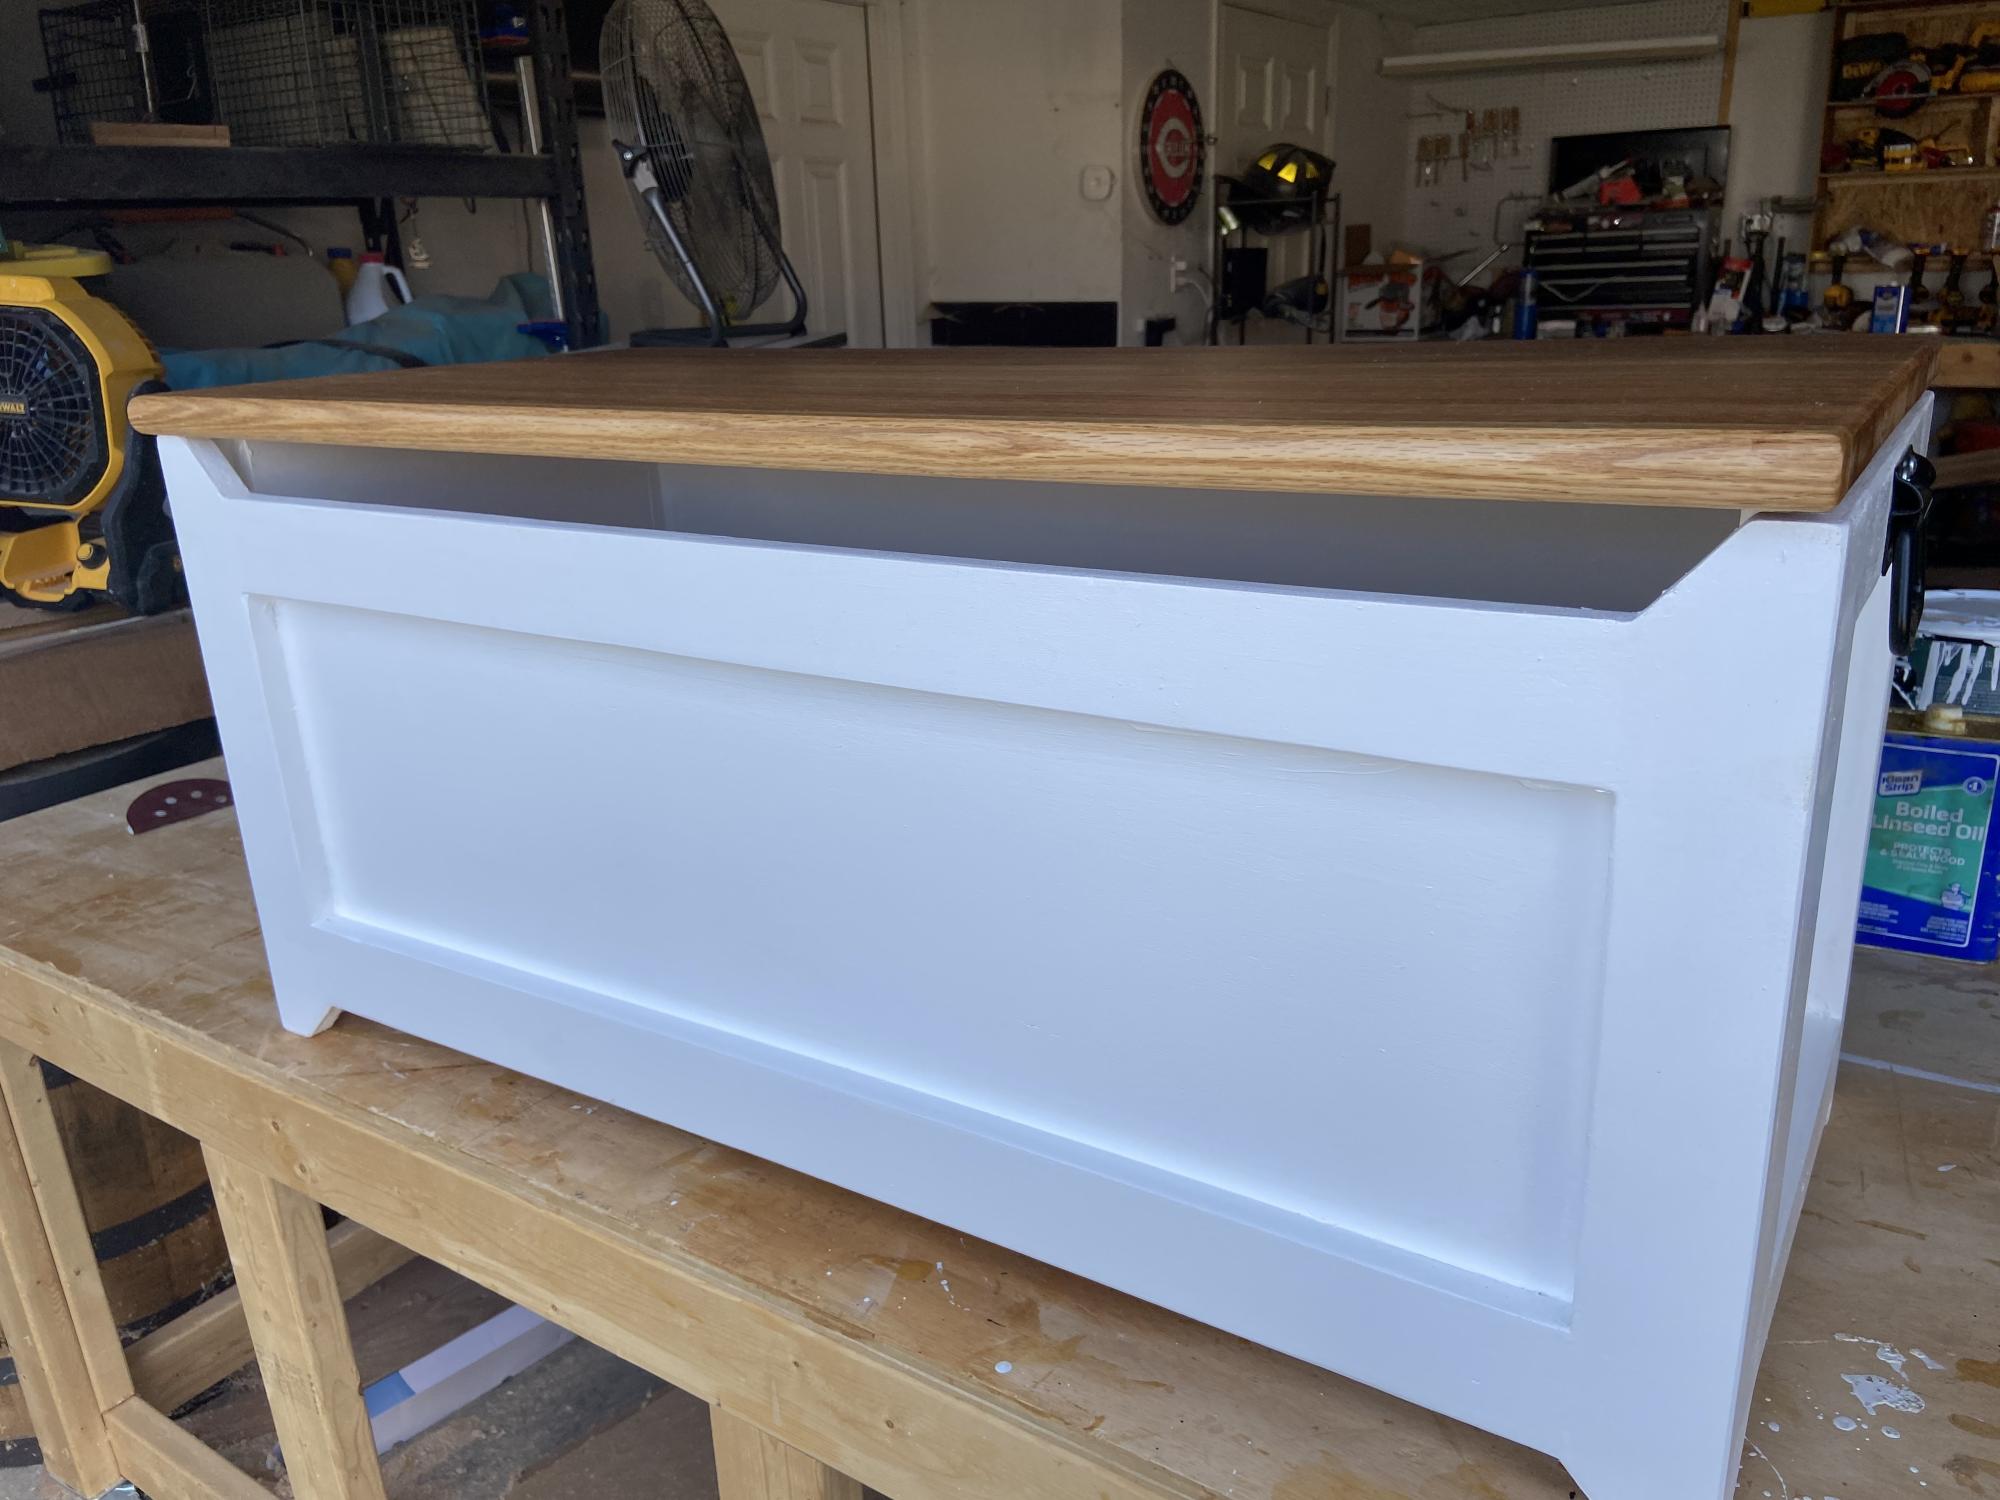
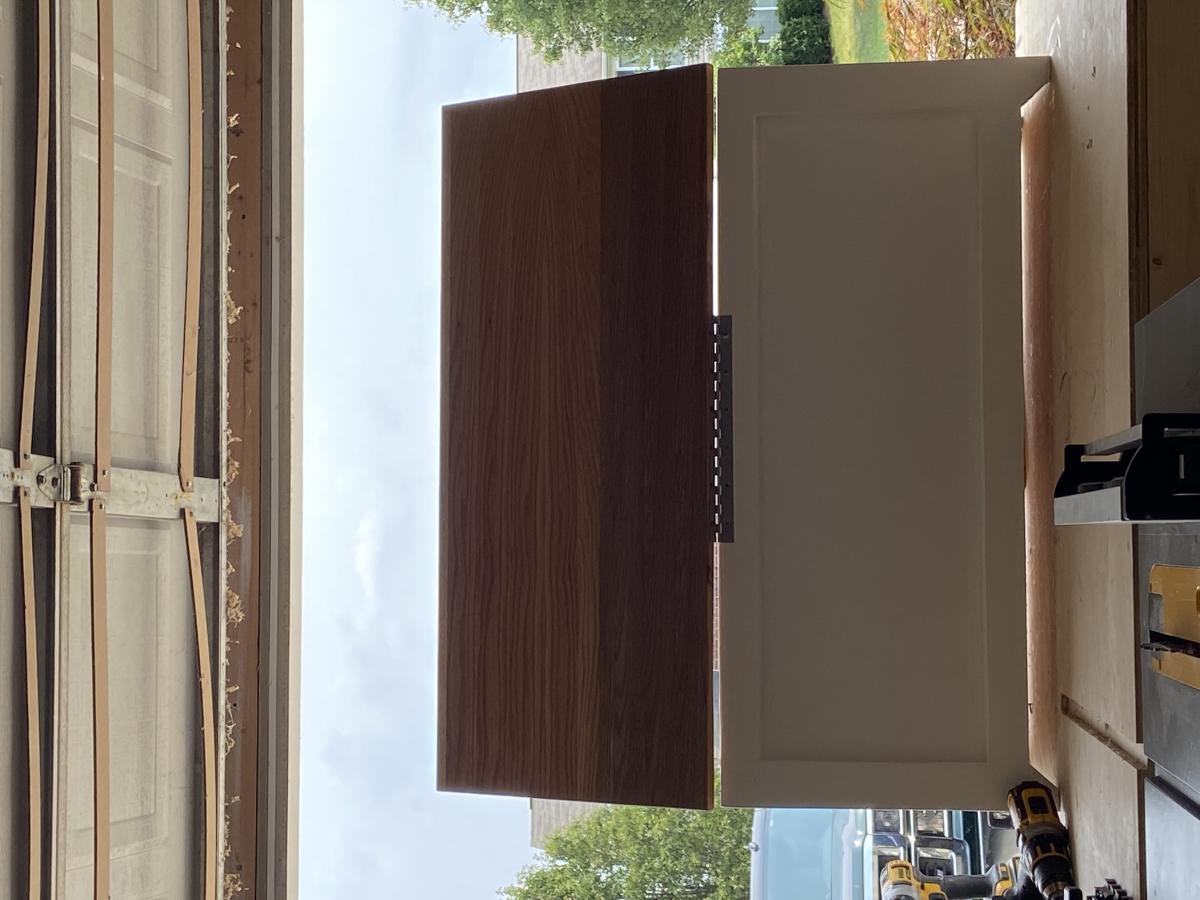
I ABSOLUTELY LOVE THIS CABINET! It's the perfect finishing touch to our kitchen remodel. We are still waiting on the finishing touch; a hand-polished Hoosier style latch for the doors. We found them at House of Antique Hardware. I will say that this cabinet required "non-mortising" hinges, ones that don't require you to dig out anything in the wood and that don't bulge up together in the space behind the door. These were nearly impossible to find in our town in a small enough size, even with the two big box stores and smaller hardware shops. We had to order them online HardwareSource. These were cheap at this source and we even ordered two styles in case we didn't like one of them. A local shop could order them for us @ 6 hinges for 48$!! The ones we found online came to $17 with shipping.

We modified our cabinet a bit because we wanted it to have feet that were different than the original plan. I have a thing about cabinetry that I can't see under! So, we just made the cabinet flat bottomed instead of having the bottom shelf sit higher and the facade on the bottom front. We also added I-frames to the interior of the doors because we have high humidity where we are and we thought it might help keep the doors keep their shape over time.

After building just the bookshelf part, we kept looking at it like we couldn't believe we built it. It's really beautiful. We do a lot of remodeling, demolition, and rebuilding in our home, but have always been intimidated by building furniture until finding this site.

My husband was so jazzed by our newfound furniture building skills that he built the planter/trellis for his mother last weekend for her birthday right after we finished this project. Pictures of that will be forthcoming as soon as we plant the rosebush in it. Thank you Ana White!!!!
Built from Plan(s)
Estimated Time Investment
Weekend Project (10-20 Hours)
Finish Used
A beautiful Minwax Waterbase Midnight Blue. Washed right off the brush and my hands and looks SOOO beautiful on this cabinet. It took two coats to look the way I wanted and I had to buy two quarts, but have about half a quart left.
Recommended Skill Level
Beginner

Comments

JES

Thu, 06/09/2011 - 03:35

This is lovely. The finish, shape and modifications you made are just wonderful. Congrats on a teriffic job! :)

Nicole S (not verified)

Wed, 06/29/2011 - 10:19

We are moving into a home that doesn't have alot of storage so I'm looking into building this. But depends on the cost. About how much would you estimate that this armoire pantry cost to build? PS- I love the look and color of yours! Awesome job!

In reply to by Nicole S (not verified)

mmhmakeover

Thu, 12/29/2011 - 20:14

Wow. Sorry I just realized your question was here! I would say we spent about 120$ on wood and finish products.

It was much less than buying the perfect piece of furniture somewhere else. For us, this piece, in this finish was THE perfect piece of furniture. I still love just looking at it in our space.

mmhmakeover

Tue, 07/12/2011 - 03:55

We used birch plywood for the back and the doors so it was a bit pricier because we wanted something that was already a smooth finish without much sanding. I would say all together with the stain and the Hoosier latch we ordered for it the cost totaled almost $150. The wood cost was about $90, plus we purchased feet, stain, hinges, and a latch.

We LOVE this pantry in our kitchen and although it took a week to build this and have it ready for use, it was worth it to take our time and put care into building something we love. It was our first project and it has inspired us to build a ton of stuff in just a few weeks since.

Good luck!

Glider

Submitted by Seansg5 on Sun, 08/09/2015 - 20:24

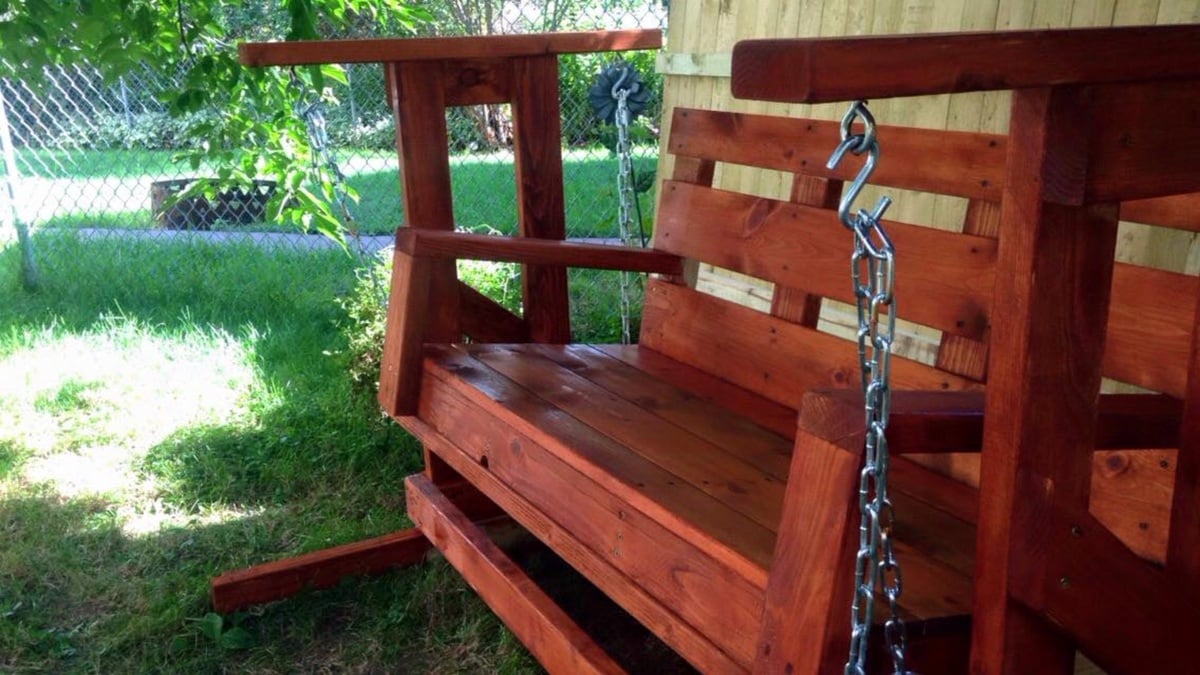
The bench was easy to build with great instructions. I had Home Depot make my cuts for this first project and then I went and bought a miter saw and other power tools for future ones. So much fun. 

Built from Plan(s)
Estimated Cost
$100
Estimated Time Investment
Afternoon Project (3-6 Hours)
Recommended Skill Level
Beginner

Comments

Cross35

Mon, 03/14/2016 - 08:35

Great work.  DId you do anything different to the swing itself?  How did you build the frame.  I'm looking to do this exact thing for my patio.  I don't have anywhere to hang the swing.


Thanks for sharing any info.

mbarland

Sat, 06/13/2020 - 16:54

Made the chair and then built the glider frame for it just eyeballing the picture. I can't figure out how to upload a photo of my design, but can try to describe it.

I made mine with a 4x4 on the base of each leg, but a 2x4 would work as well, it was just what I had on hand. The base board on each leg I made 48". From there I put two 48" vertical boards. The vertical boards were centered and from the front edge of the first board to the back edge of the second board. Two 16" boards were then used at the top and bottom of the vertical boards to hold them in place. Cap it off with a 30" board on top of the verticals. This is where you'll attach your eye bolts. I put both eye bolts 3 1/2" back from the front (a scrap of 2x4 works well as a guide). To join the two legs, I used two 52" boards on top of the base 4X4 of the verticals (one in front of the legs and one behind).

Teeter Totter

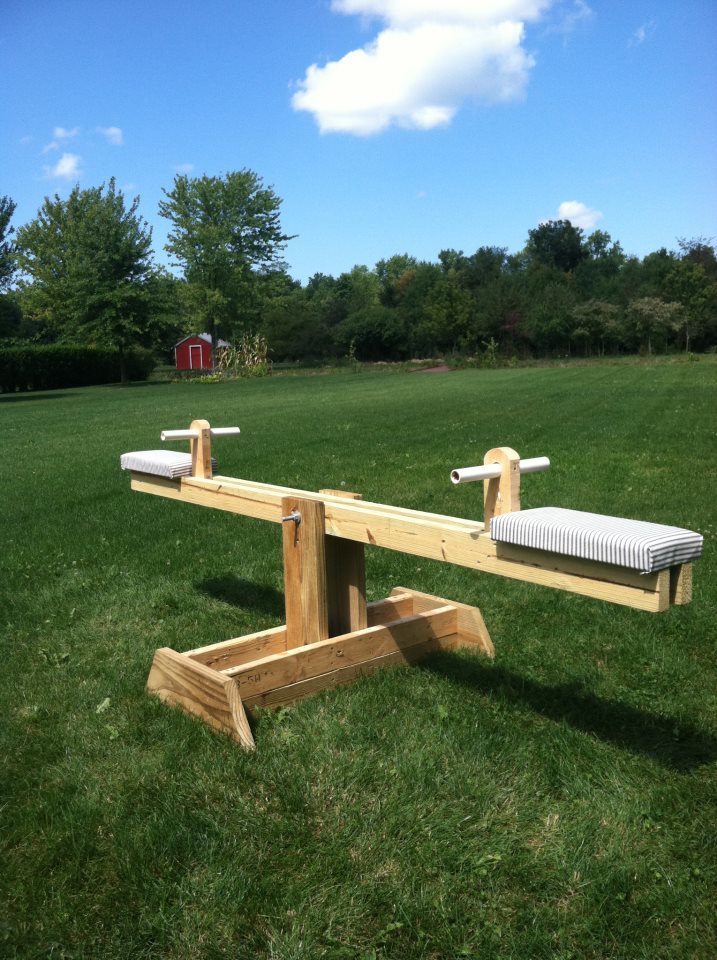
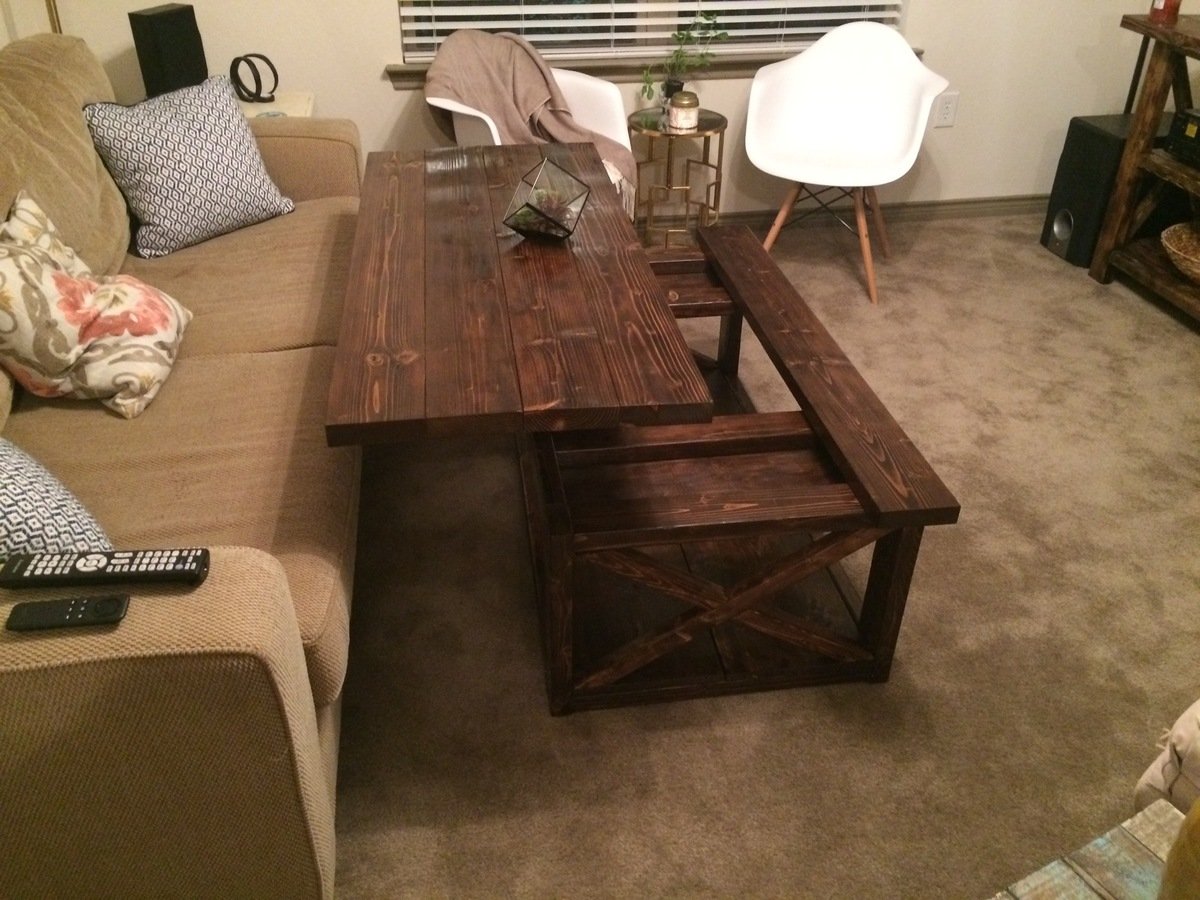
This is one of the cheapest projects for my kids I have ever completed!! And the most rewarding. I think everyone of my neighbors has been on the teeter totter...including adults :) My kids just love it and I am thinking of making a few for my nephews for Christmas. I was able to find all the wood I needed in my scrap pile. I had the PVC pipe and bolt already also so all I had to make a trip to the store for was the foam for the seats. My son helped me build this in an hour. I liked the unfinished look so I just sprayed it with a little Thompson Water Seal. Thank you Ana White!!
Built from Plan(s)
Estimated Cost
$0 Lumber (scrap wood) $5 Foam padding
Estimated Time Investment
An Hour or Two (0-2 Hours)
Finish Used
Thompson Water Seal
Recommended Skill Level
Starter Project

Comments

Seasonal And Holiday

Harriet Outdoor Dining Chair with Cedar Slats

Submitted by kmatt55 on Sun, 06/26/2011 - 16:49

This chair was pretty easy to make with Ana's plans. I plan on making four more just like it (updated: completed). The only modification I made was adding another slat to the back of the chair. I used a miter saw for all cuts which really helped with the speed of the project. The 2x2's are treated pine and the 1x3 slats are cedar that I got from the "orange box store" for about four bucks a stick. I also primed and painted the 2x2's (legs) before I assembled. I could not imagine trying to paint the legs white and not getting at least some on that beautiful cedar. The contrast really pops in person. Thanks ana-white.com! $20 per chair.

Estimated Cost
$20
Estimated Time Investment
Day Project (6-9 Hours)
Finish Used
Semi-gloss exterior white, outdoor seal.
Recommended Skill Level
Intermediate

Comments

sgilly

Thu, 07/14/2011 - 10:35

Love the chairs! and like the painted body with the natural pine slats.

CreativeBaggage

Wed, 08/03/2011 - 08:03

I love that you added the extra slat on the back. Such a simple change that made a big impact. The contrast is also very clever! They look great :)

kmatt55

Wed, 08/03/2011 - 11:29

Thanks CreativeBaggage! I finished the dining table yesterday, I'll have to post that soon. As a couponer myself, I really like the standing can rack you made on your blog. Brilliant!

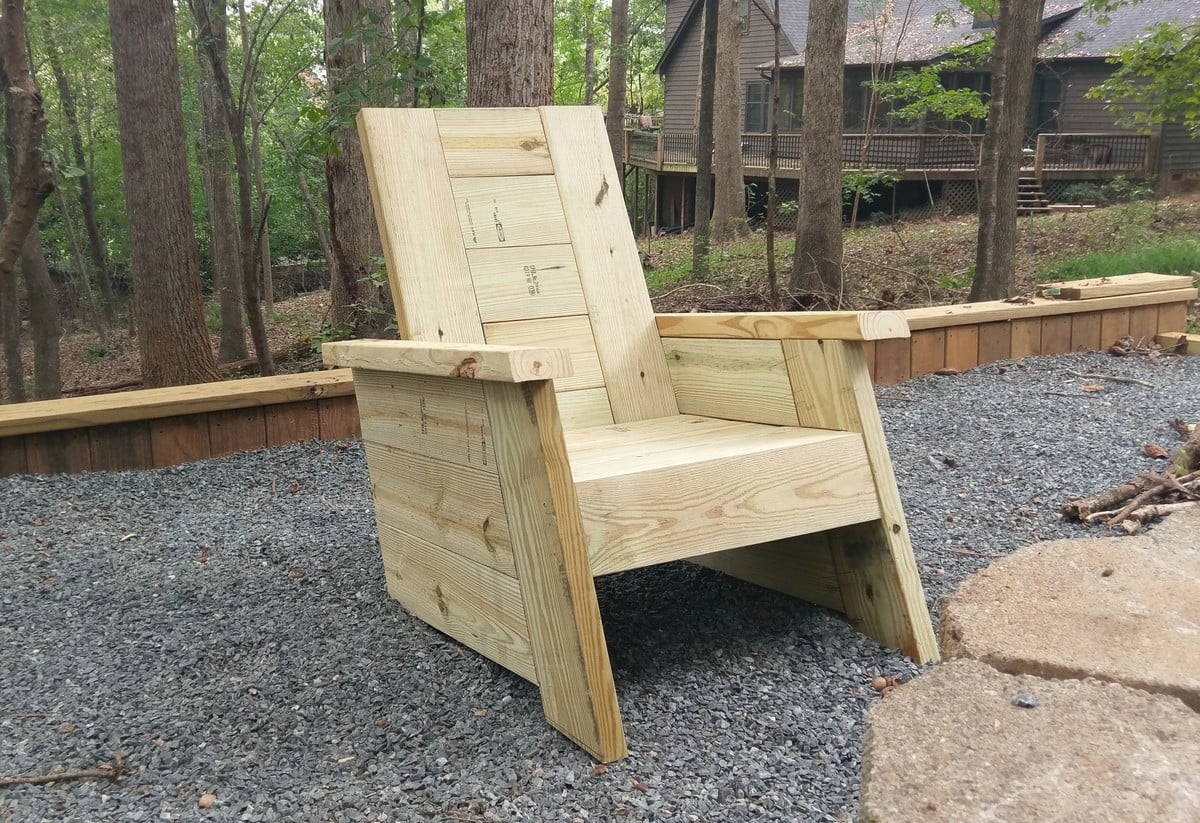
DIY outdoor chairs for our firepit

Here is one of the new chairs I'm building for our new fire pit.  They are made out of four pressure treated 2x6s (and one 2x4), and have a comfortable 18" seat depth, 19" seat width, and 110 degree angle for the backrest.  

More information, and a link to our plans are located on our blog, FamousArtisan.com

Estimated Cost
$50
Estimated Time Investment
Day Project (6-9 Hours)
Finish Used
None yet.
Recommended Skill Level
Intermediate

Comments

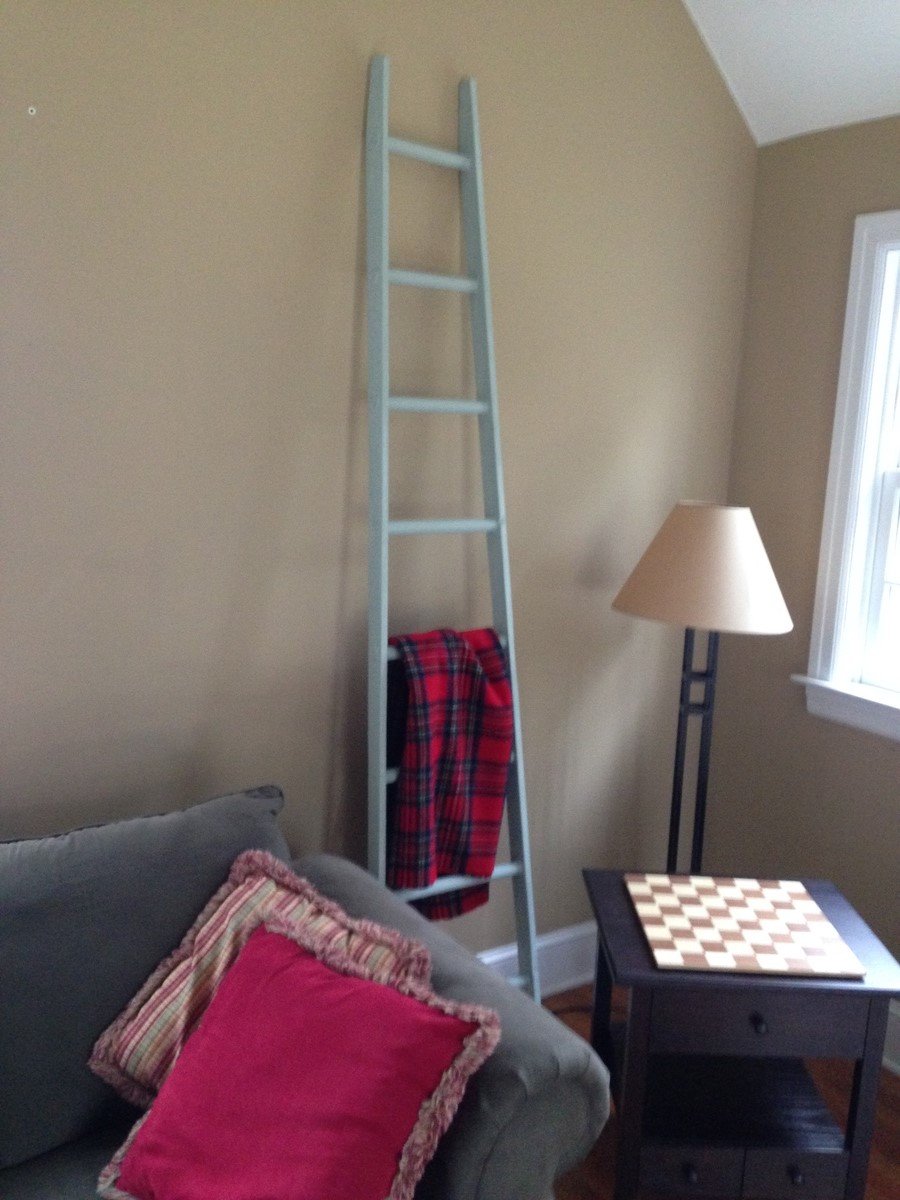
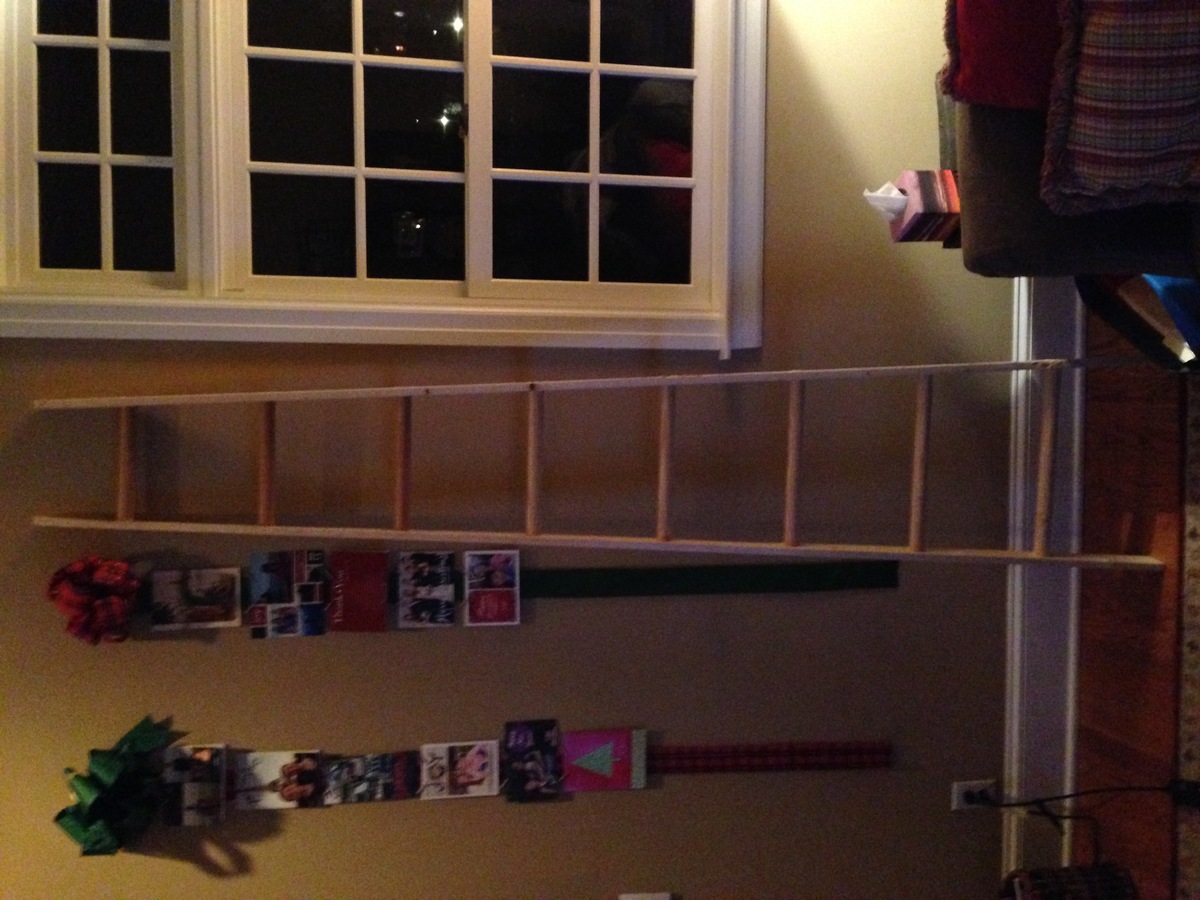
Leaning orchard ladder

Submitted by Anonymous (not verified) on Sat, 01/02/2016 - 04:43

I wanted something quick and easy to display or hold magazines or blankets. I used two 3x5x8, cut the bottom at 5 degrees and the top that leans against the wall at 85 degrees. You don't have to do this, but I liked the look. Last, I drilled 8 holes at 1 1/4" diameter to fit 1 1/4" dowel cut in inch increments: 18, 17, 16, 15, 14, 13, 12, 11. I used a brad nailer to hold the dowels in place from behind.

Estimated Cost
$30.00 - the dowels are the most expensive.
Estimated Time Investment
An Hour or Two (0-2 Hours)
Finish Used
Old flat wall green/blue.
Recommended Skill Level
Starter Project

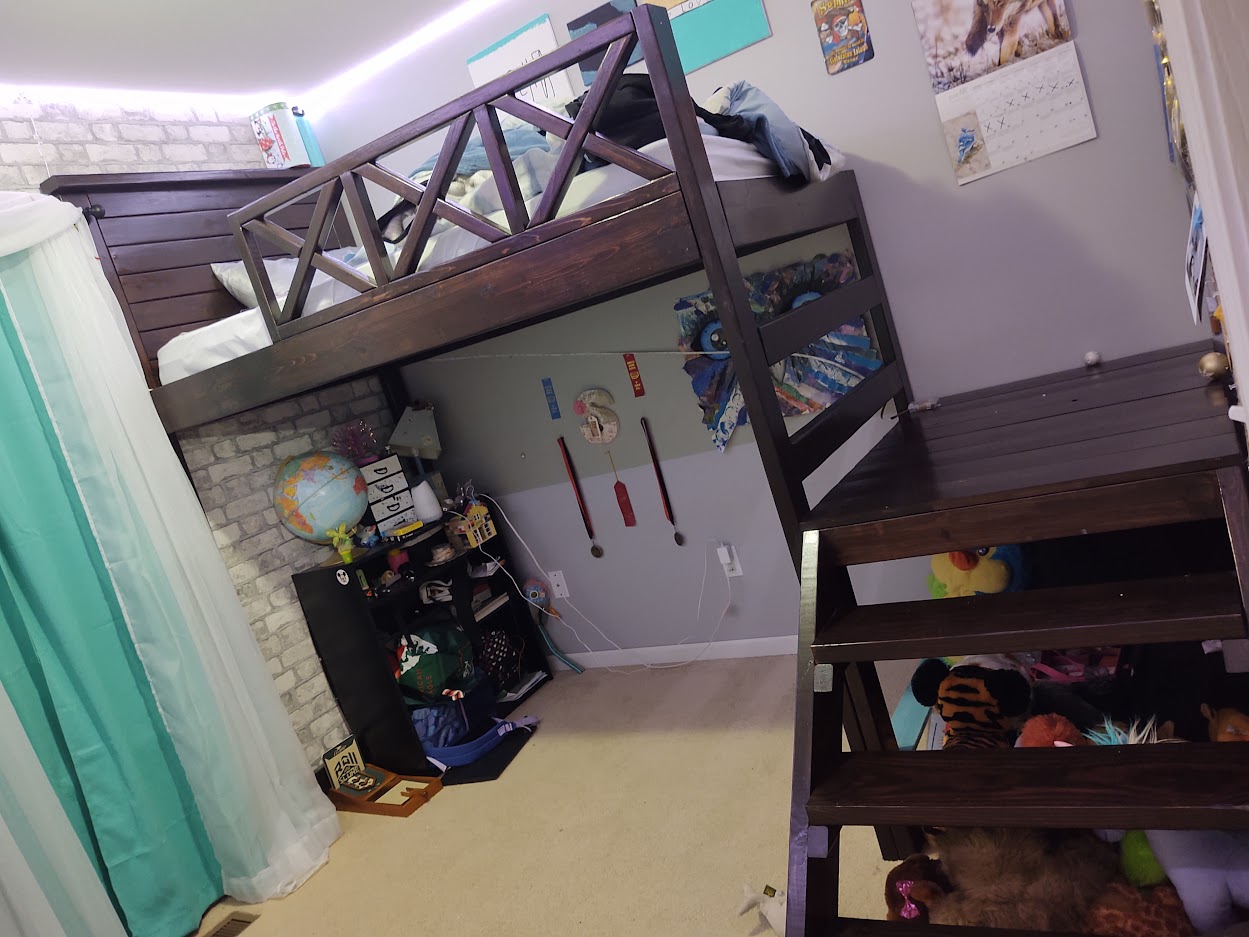
Camp loft bed with a farm house twist

Submitted by Anonymous (not verified) on Tue, 02/14/2023 - 07:58

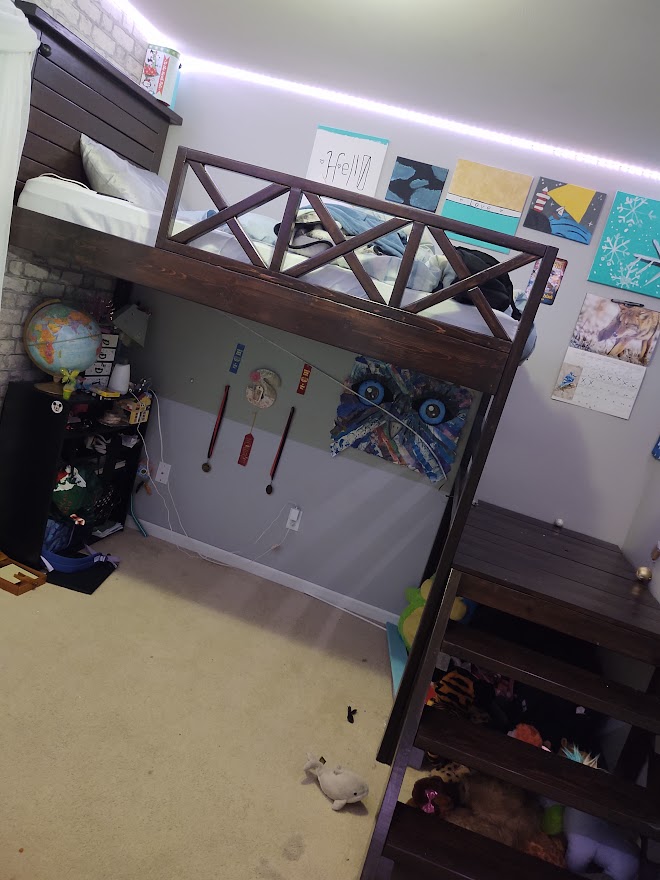
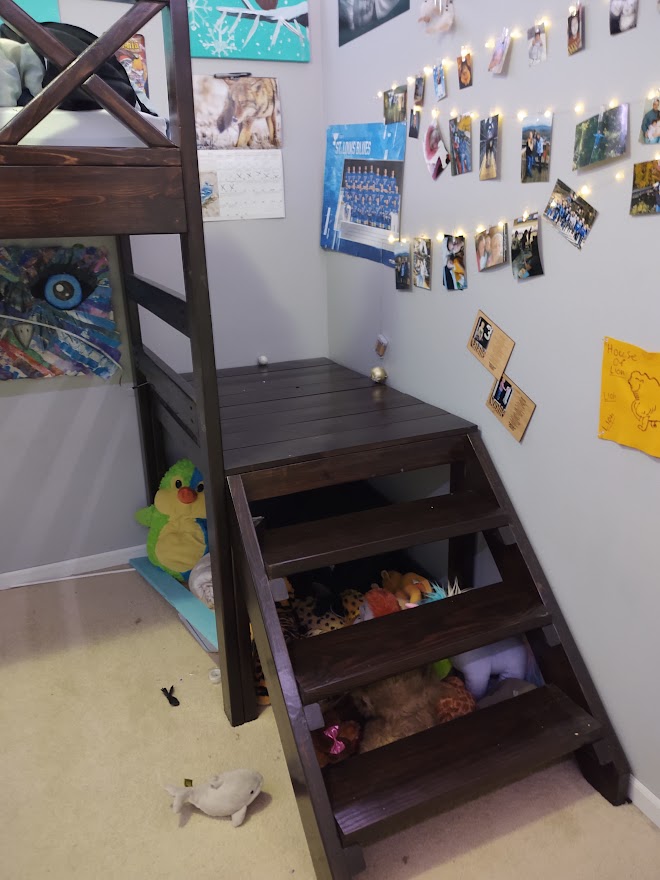
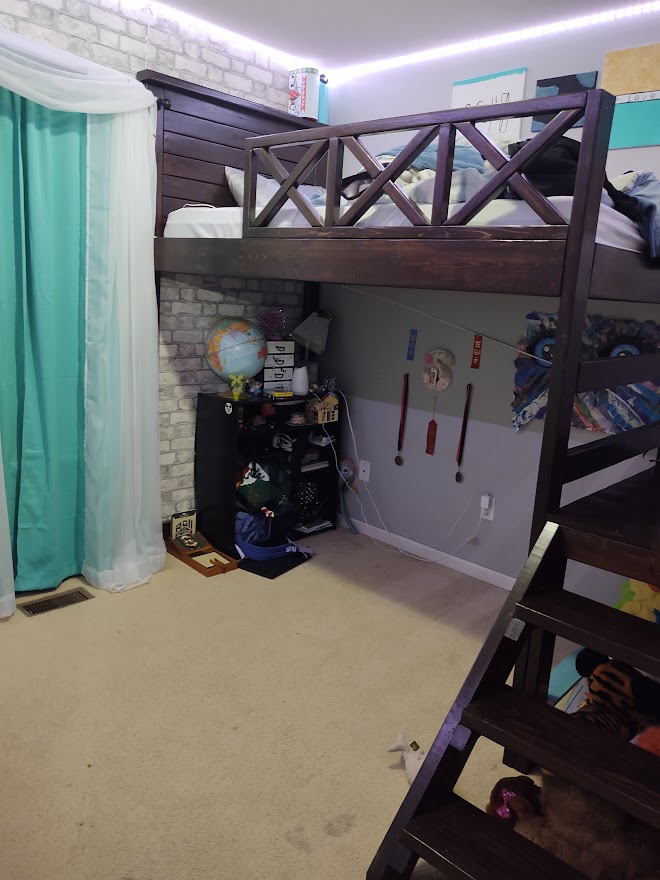
As soon as I saw the plans for the camp loft bed with stairs, I knew it would be perfect for my daughters room. It was my first furniture build. While it is not perfect, I absolutely love it. The plans were easy to read and customize to fit her room. Don't mind the messy room, she's 13 and this is about as good as it gets lol.

Comments

Beachy Storage Sofa

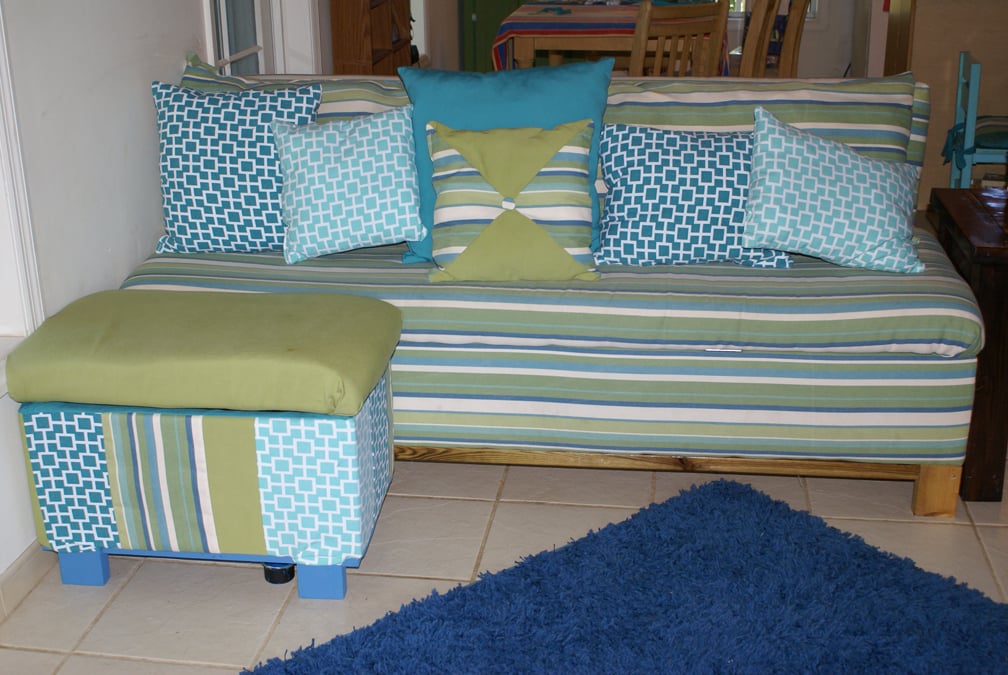
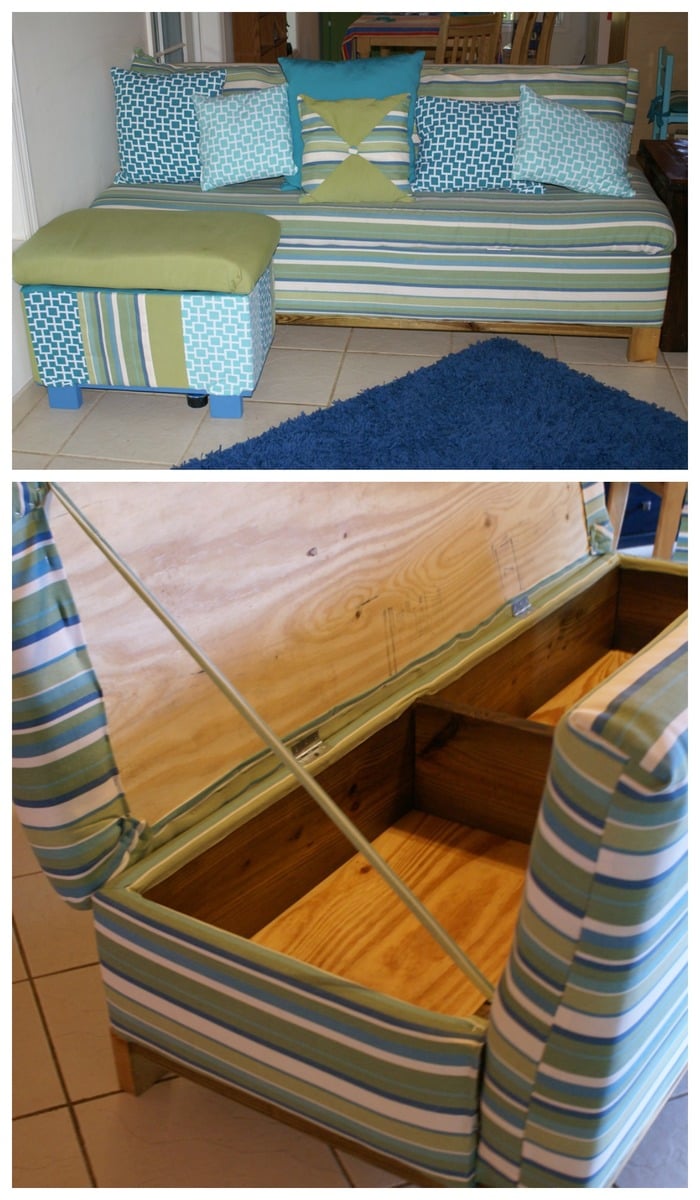
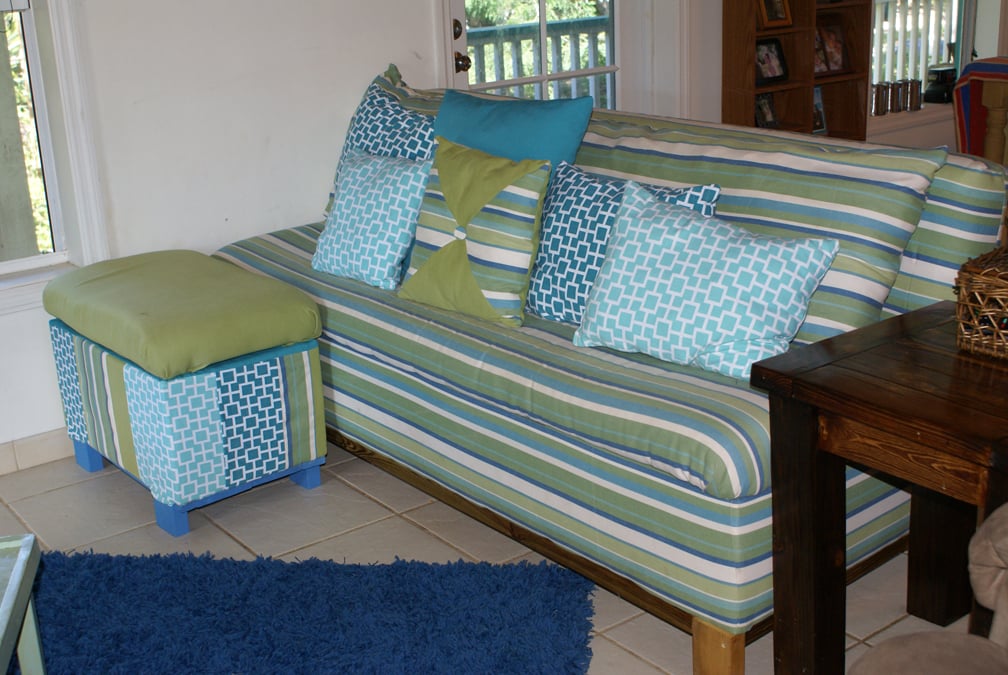
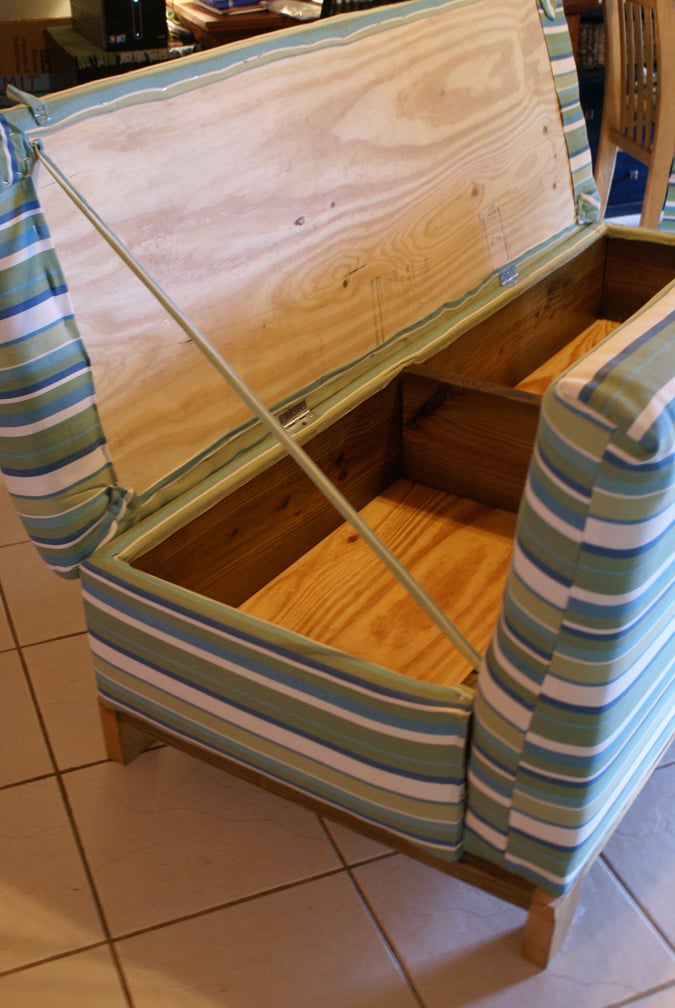
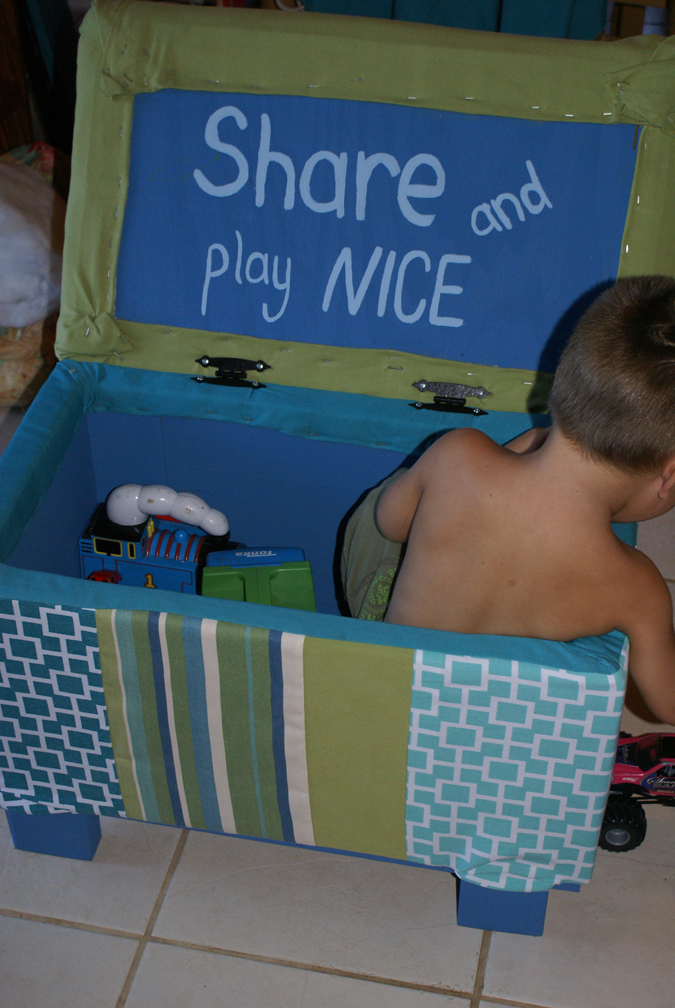
I love my new sofa! It is ten times more comfy than our old one. We live on an island and it was definitely cheaper to build my own sofa than to ship one in and pay duty on it. Thank you Ana for making this possible! Never thought I'd be building my own sofa, but we are so thankful for it. We even threw together our own little ottoman/toy box to go along with it from scraps...added bonus!


Built from Plan(s)
Estimated Cost
Total for everything probably about $500 ( a little higher costs for the wood here on the island, in addition to the other materials)
Estimated Time Investment
Weekend Project (10-20 Hours)
Finish Used
Clear Satin Poly finish on the parts of the wood that are still visible after the fabric goes on.
Recommended Skill Level
Intermediate

Comments

Jan (not verified)

Sat, 07/21/2012 - 09:56

this is so amazing! We go through so many sofas, mainly because we buy used, and you never know if they are going to last. This one looks really sturdy, and it could be recovered if the fabric got old, or you just wanted to update. Definitely considering this before we buy another one. And the storage hidden inside makes it even more desirable!! Love the fabric you chose as well.

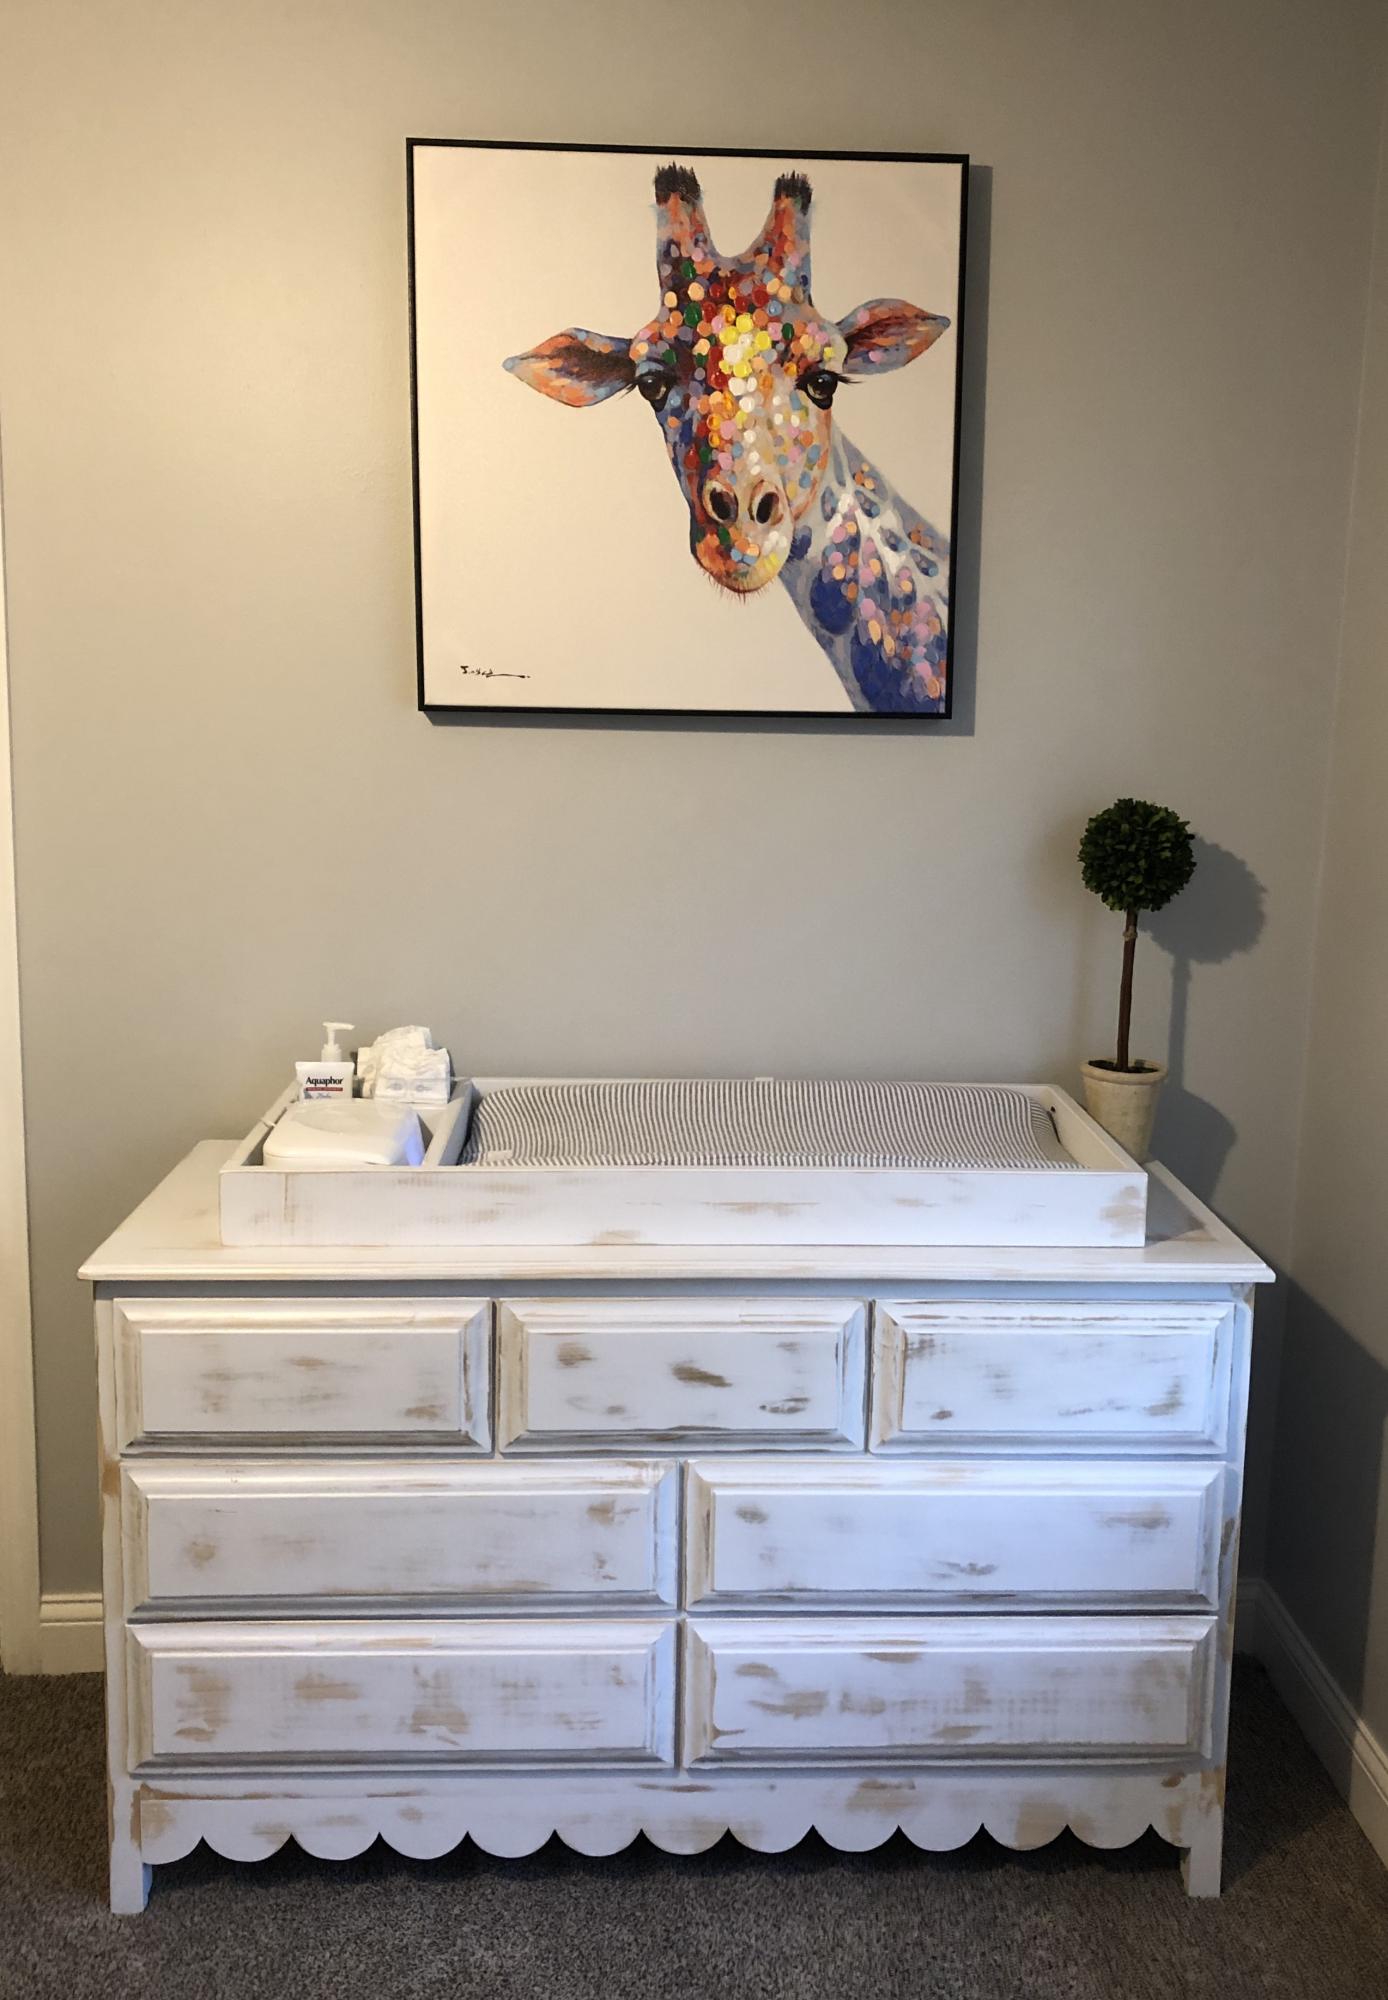
Dresser with changing table top for nursery

Submitted by mjolgren on Thu, 06/13/2019 - 06:44

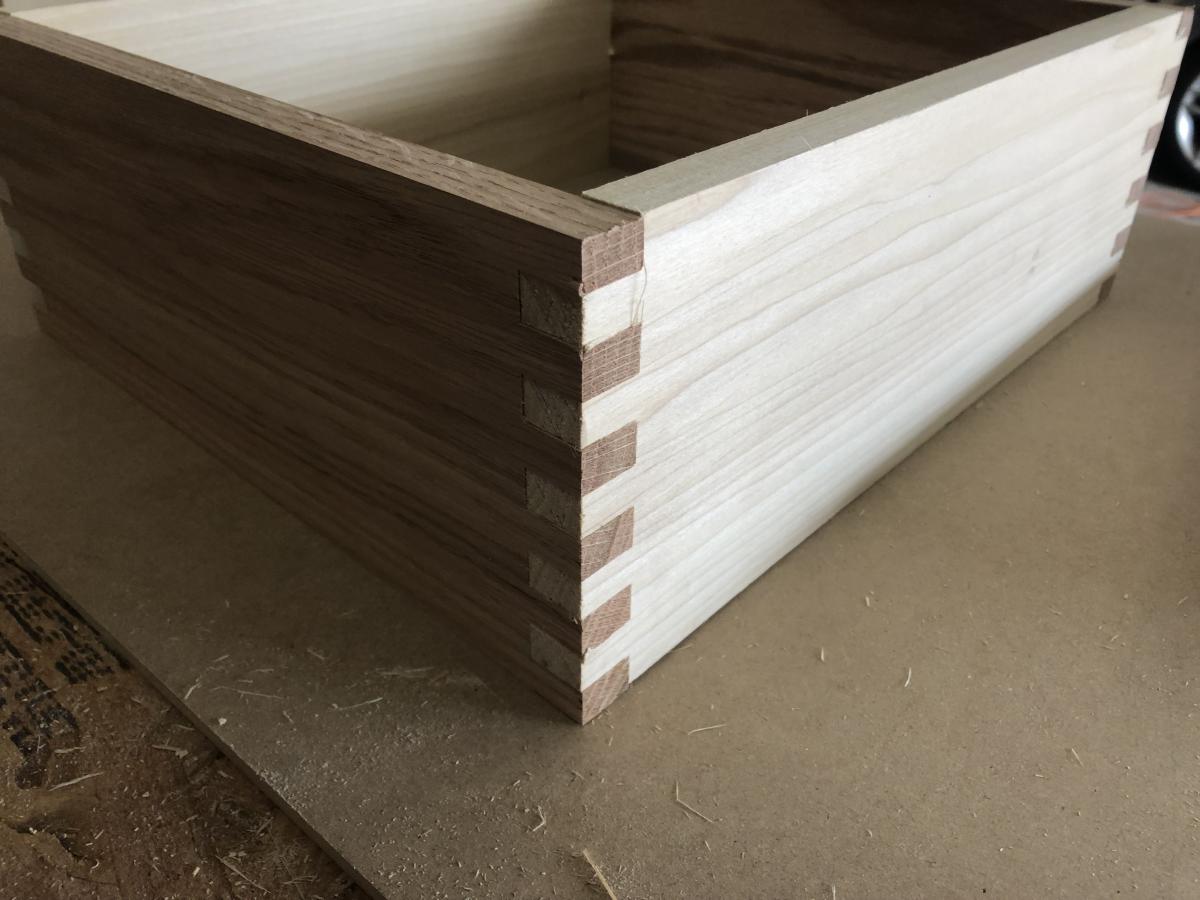
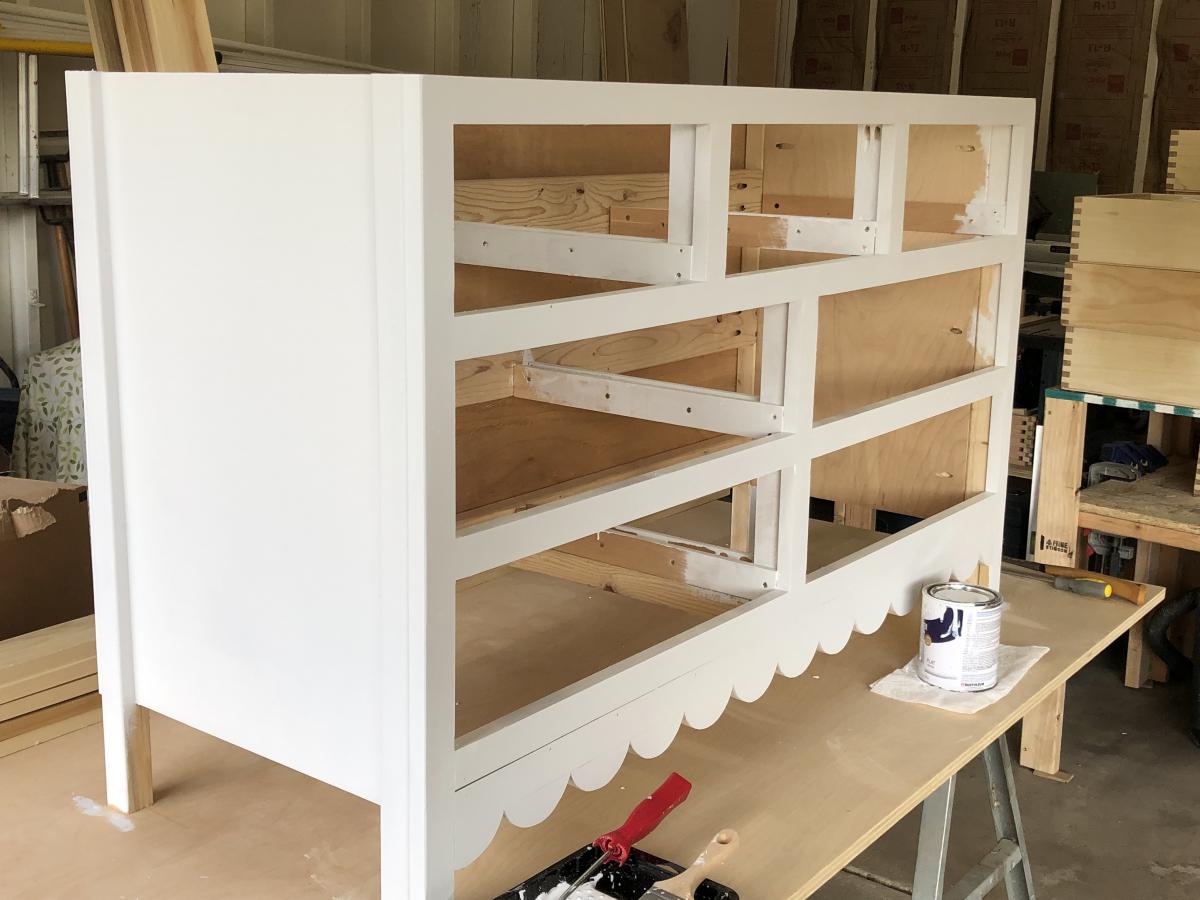
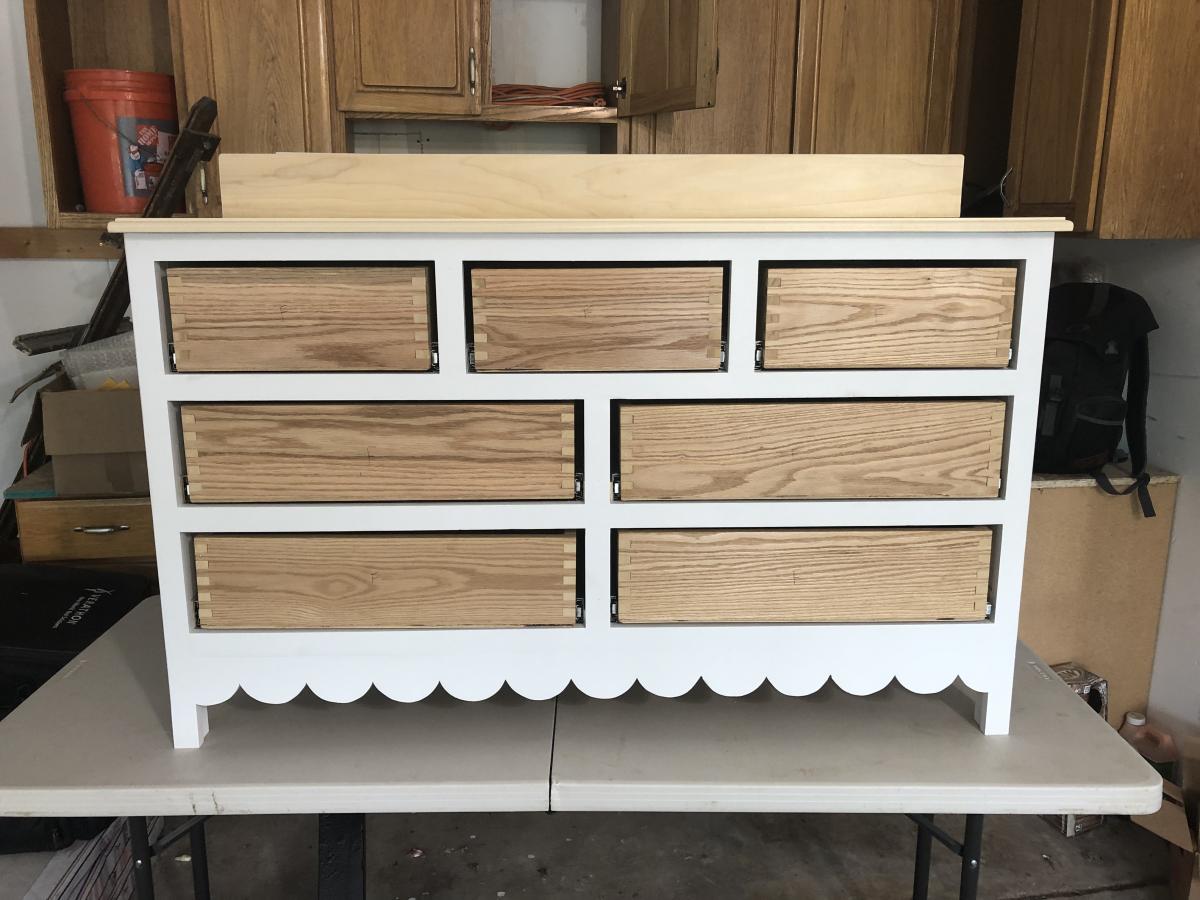
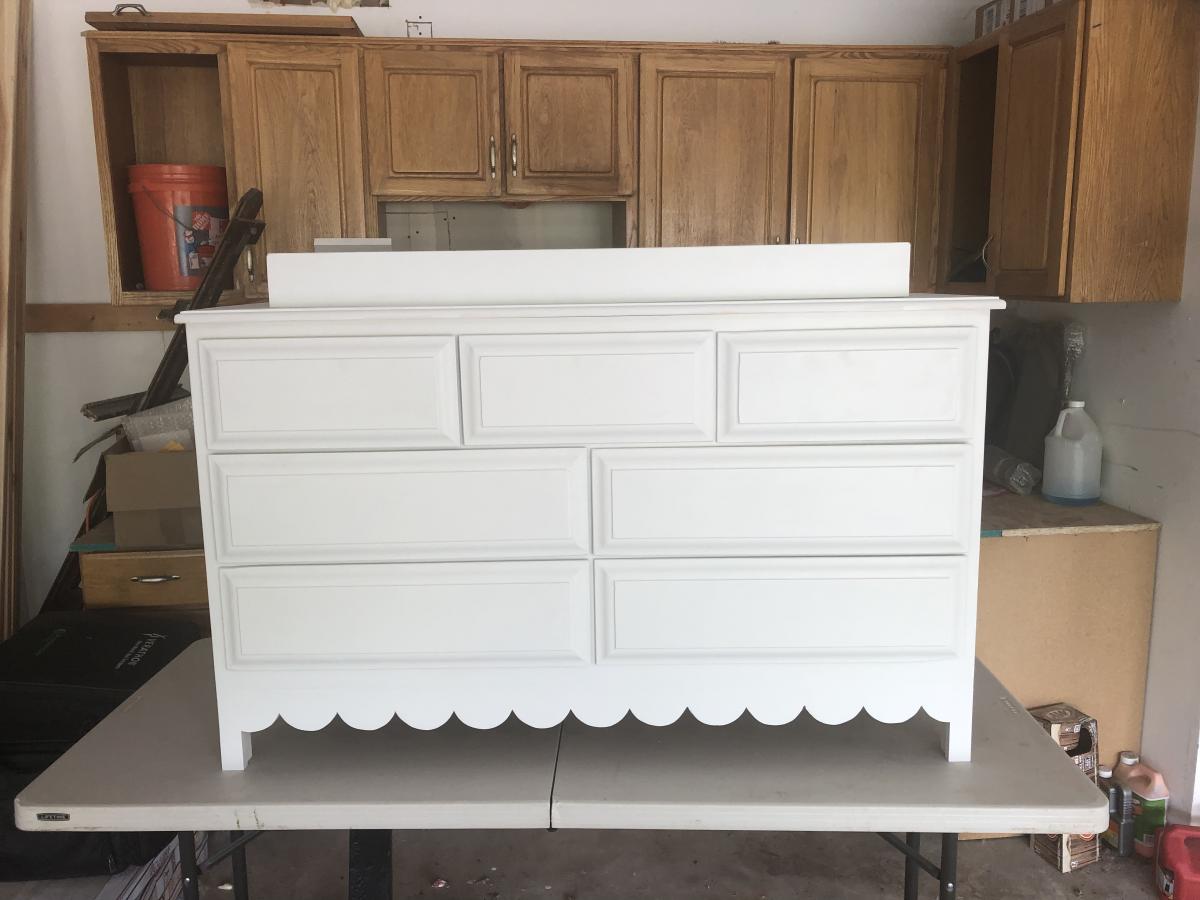
I used the Kendal extra wide dresser plans which were super easy to follow for this project. I wanted to add some of my own touches so I made the drawers with box joints, my first attempt at this. I also changed the drawer fronts and added my own scalloping at the bottom. The changing table frame on the top of the dresser was also added which is removable once we are out of diaper changing! I am using half moon aged brass pulls for the drawers once delivered. Overall I am happy with the way this turned out.

Built from Plan(s)
Estimated Cost
$400-500
Estimated Time Investment
Week Long Project (20 Hours or More)
Finish Used
Flat white furniture paint, sanded and coated with water based poly.
Recommended Skill Level
Intermediate

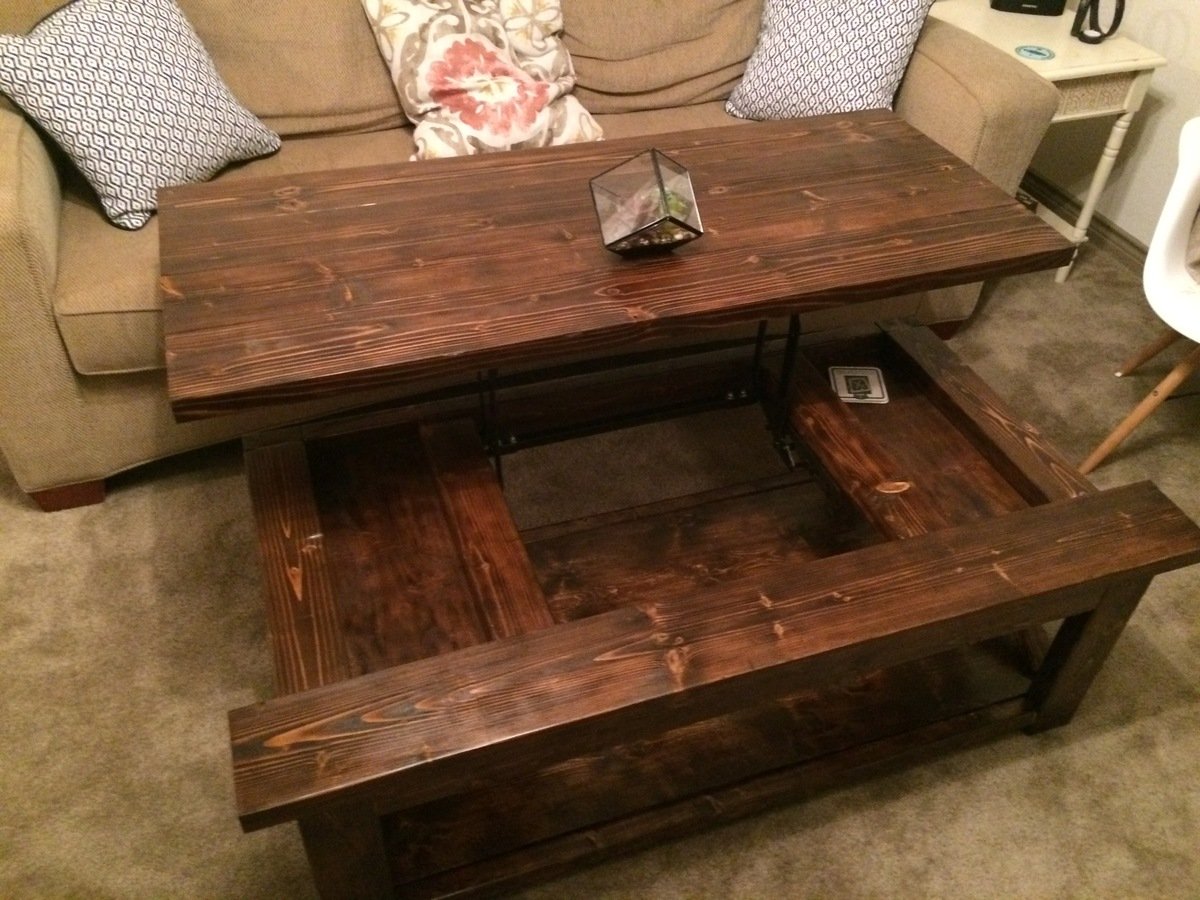
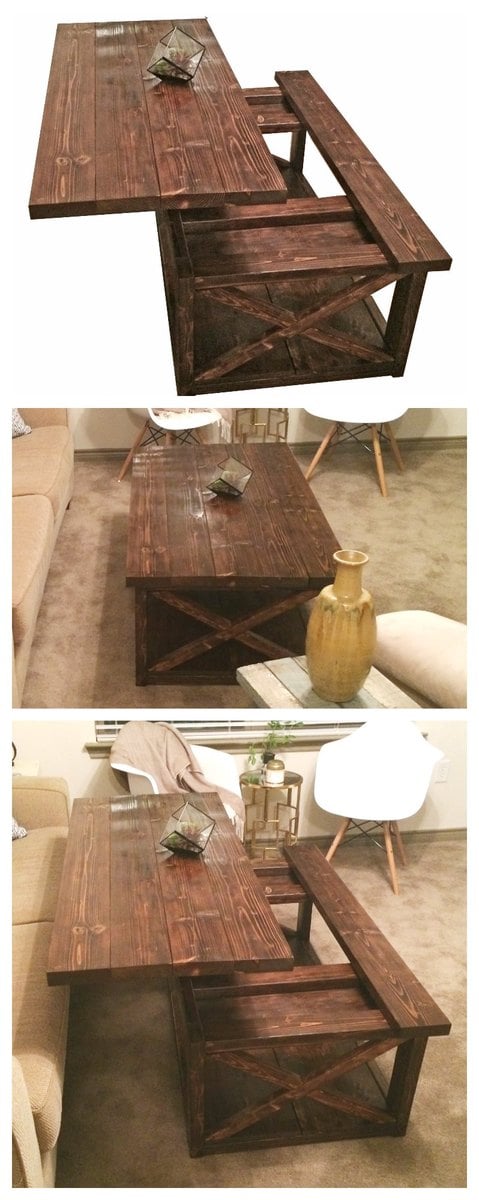
DIY Lift Top Coffee Table - Rustic X Style

Submitted by Anonymous (not verified) on Thu, 02/04/2016 - 18:55

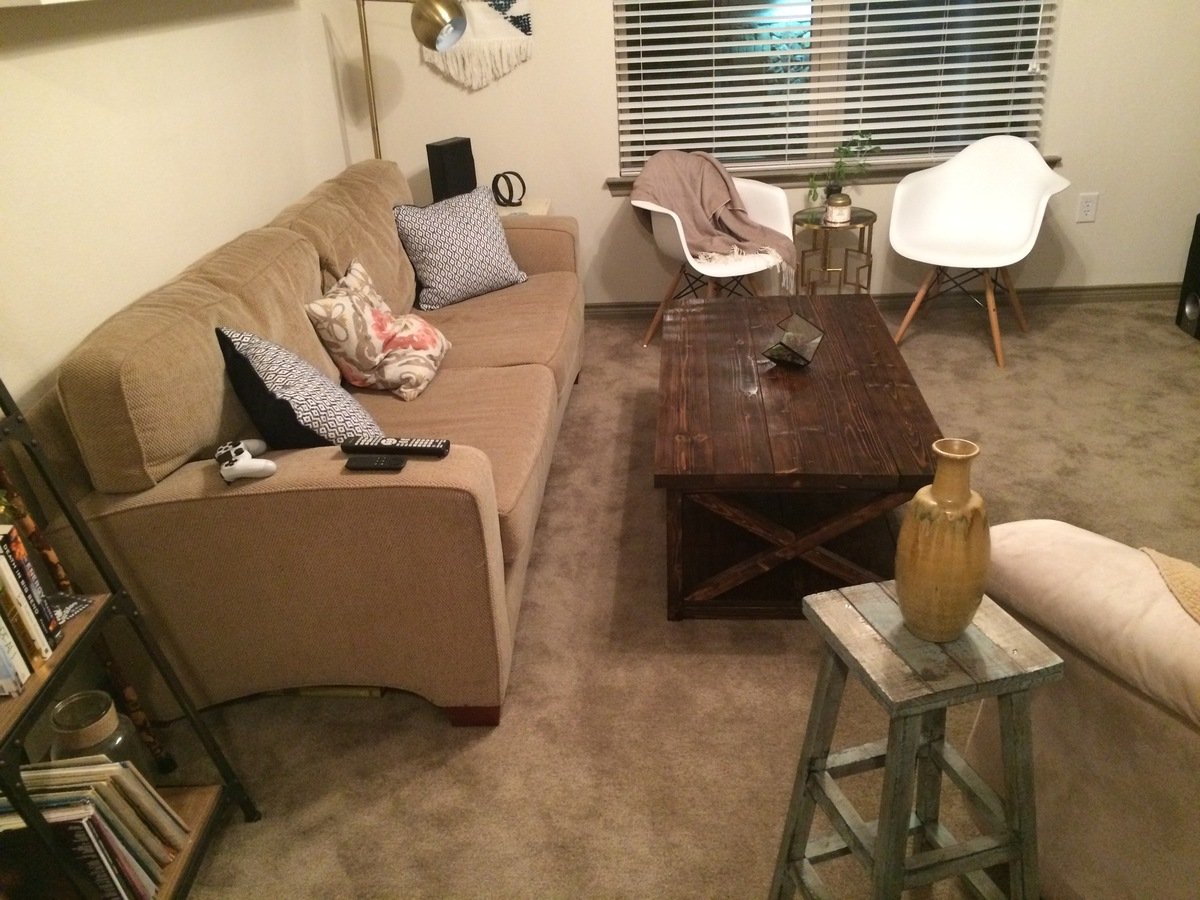
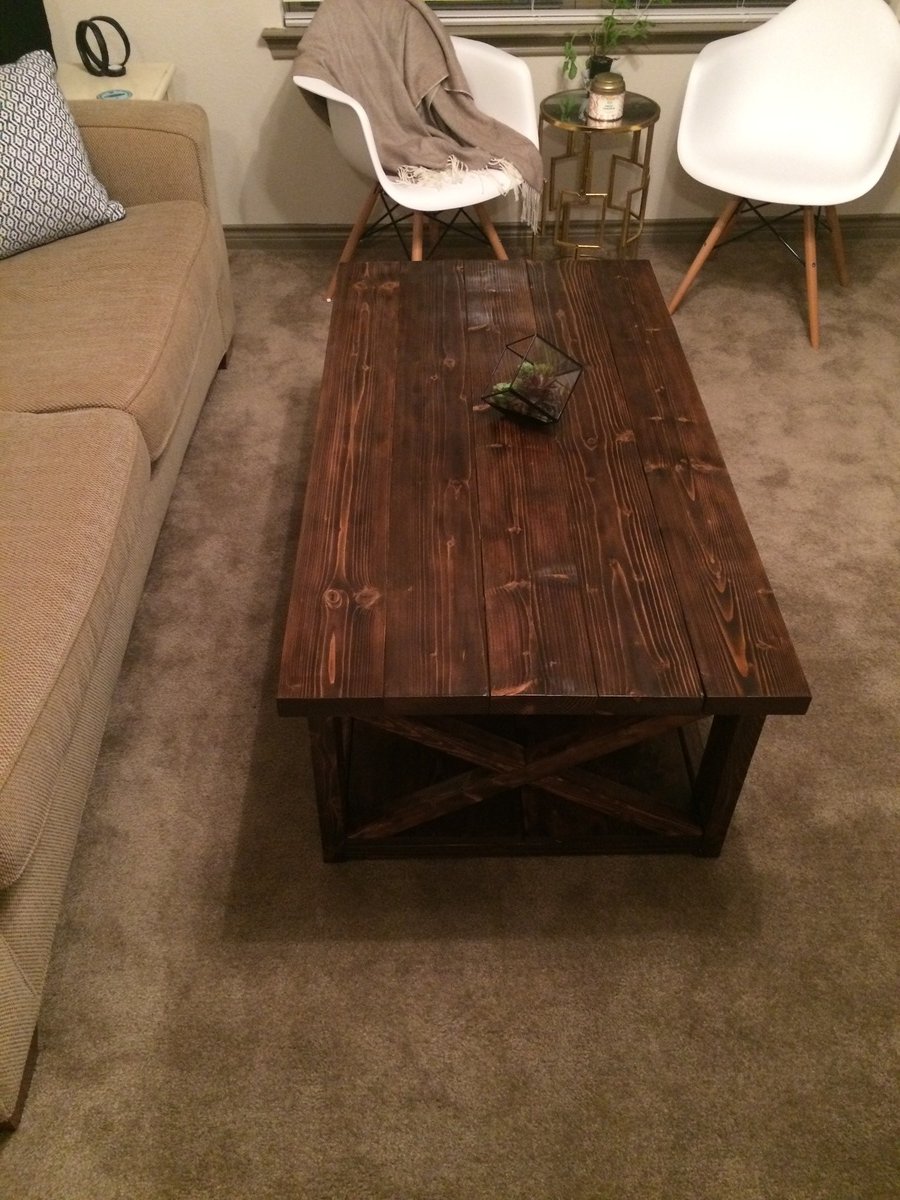
Just wanted to do something a little more original.


Built from Plan(s)
Estimated Cost
$230
Estimated Time Investment
Week Long Project (20 Hours or More)
Recommended Skill Level
Intermediate

Comments

kitteny

Tue, 02/07/2017 - 06:33

Could you please provide the plans for this table? Looks perfect for what I need. Thanks!

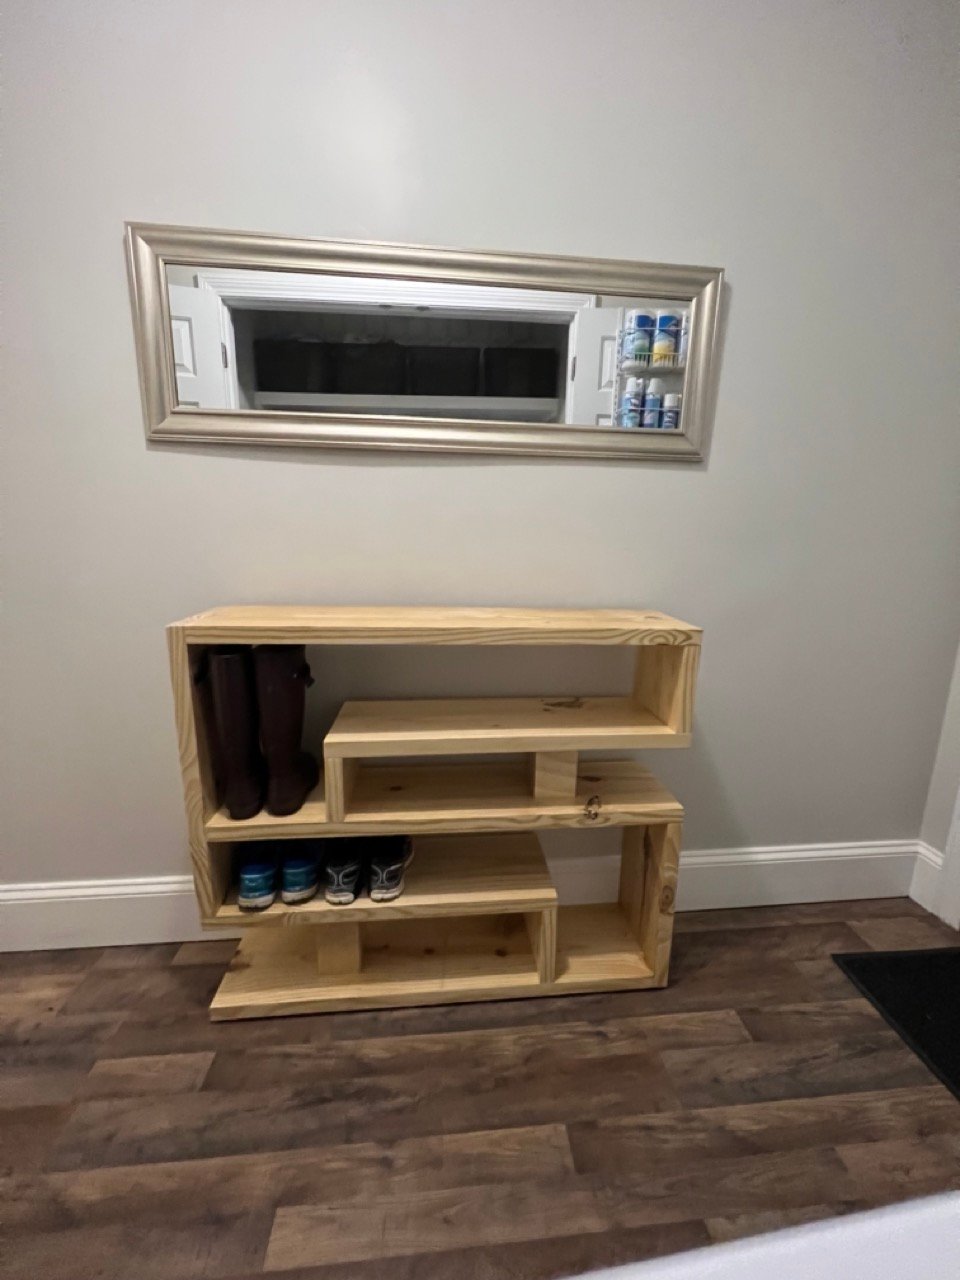
Entryway Table Shoe Rack Bench

Submitted by robinles on Tue, 05/16/2023 - 10:17

I adapted the plan for the Shoe Rack Bench to give it multiple levels and allow it to serve as an entryway table in addition to a shoe rack. I used 2 x 10's for the project.

Built from Plan(s)

Comments

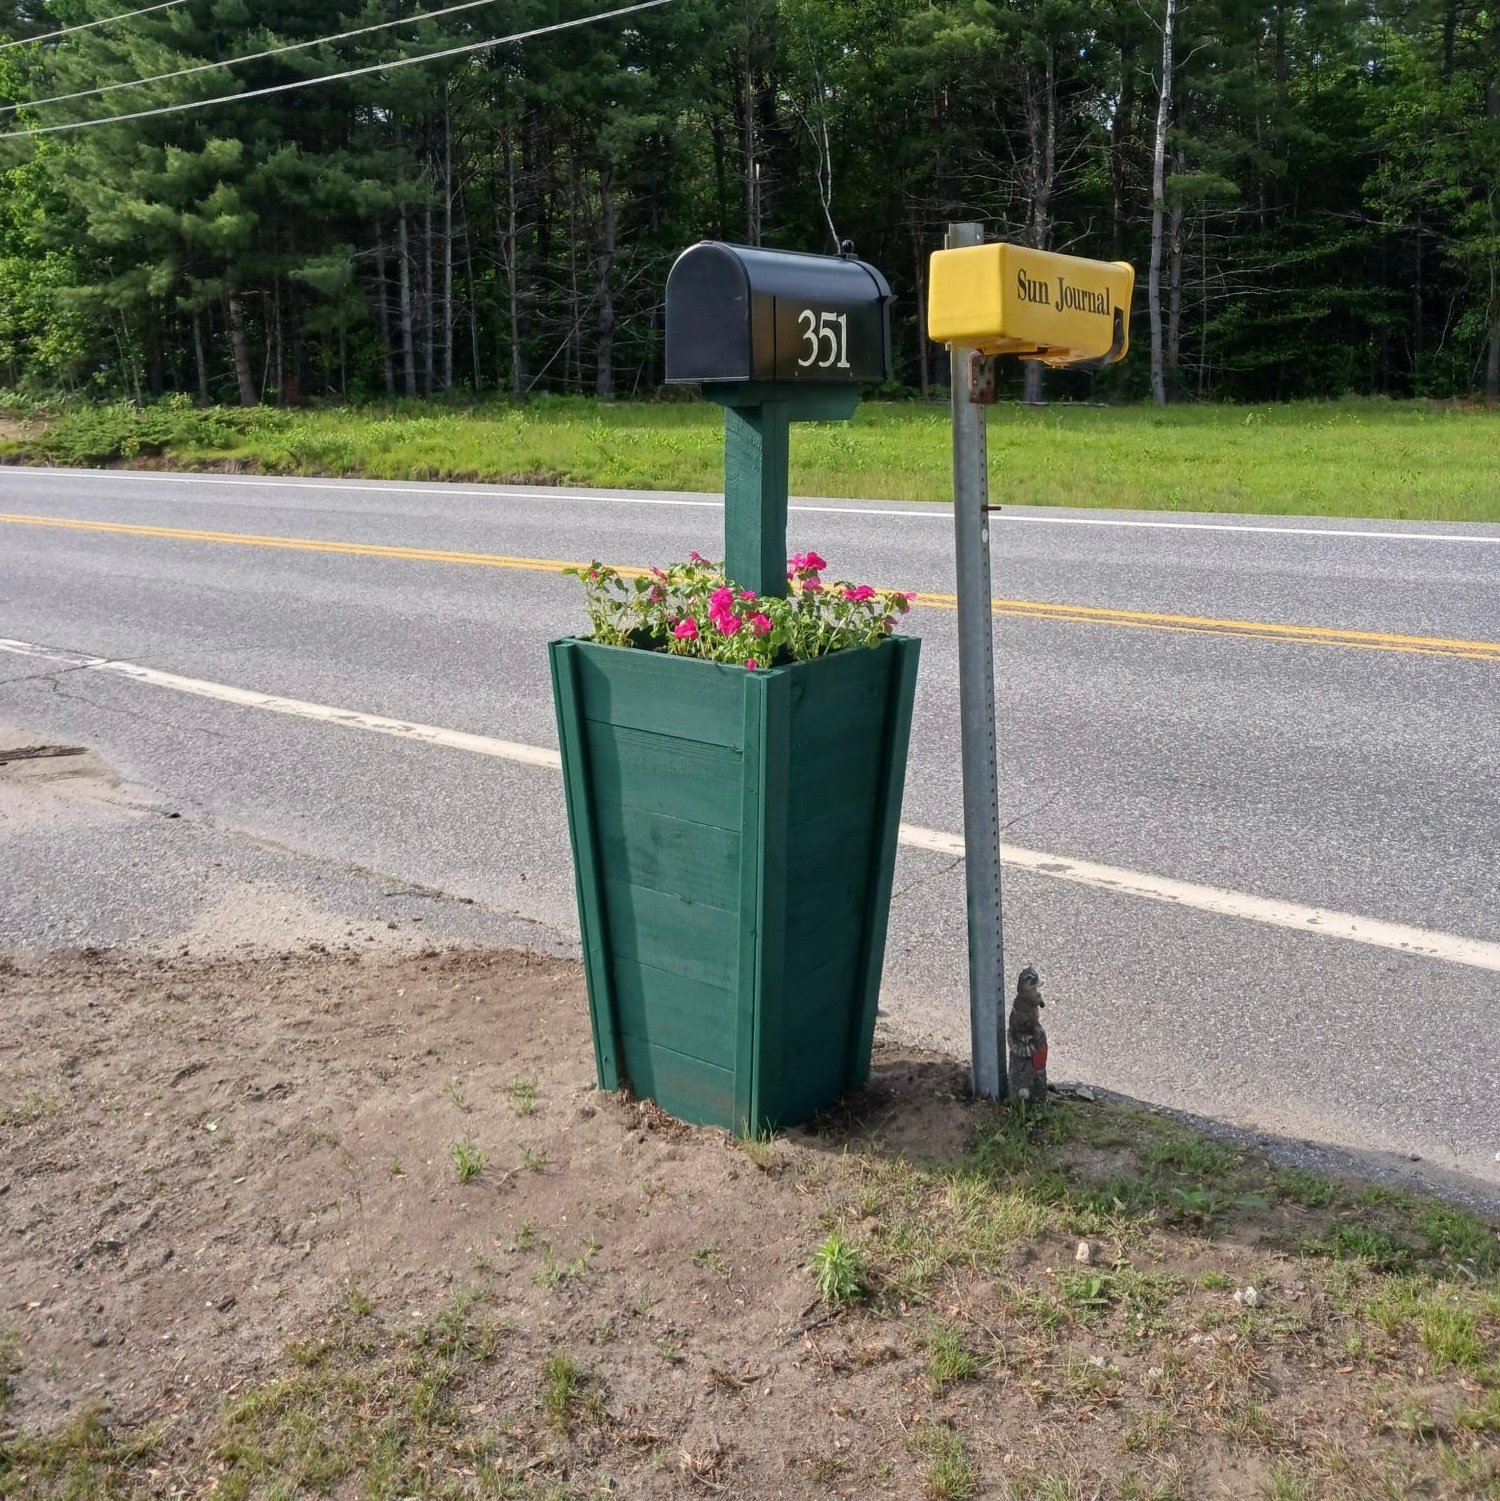
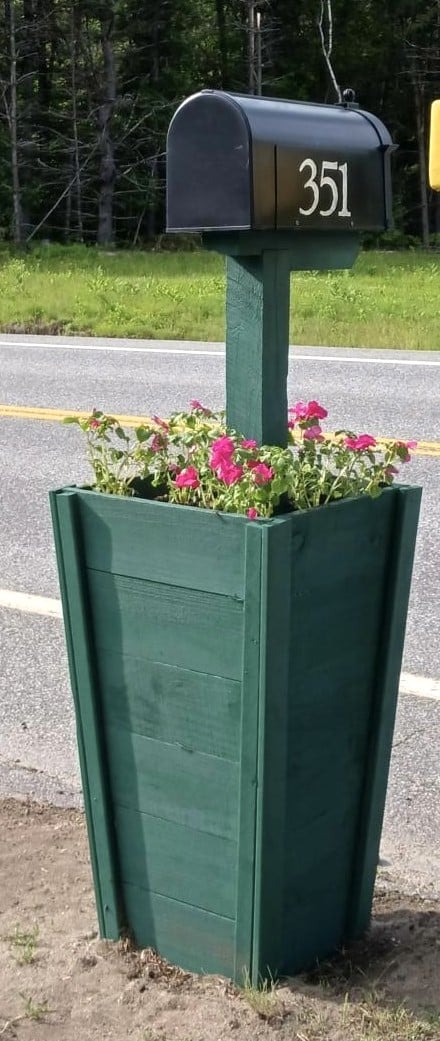
Tall Wood Planter

Submitted by Anonymous (not verified) on Thu, 06/15/2023 - 11:51

Thank you, Ana, for providing such great plans and video so I could accomplish the mailbox planter. It took me a lot longer than it did you, but I got it done! Had a hard time finding cedar pickets in my area, but ended up using the dog-eared ones as that's all I could get. Keep up the phenomenal content on your site...it is very much appreciated!

Built from Plan(s)

Comments

Seasonal And Holiday

Spa Bench

Submitted by Anonymous (not verified) on Wed, 02/24/2016 - 08:45

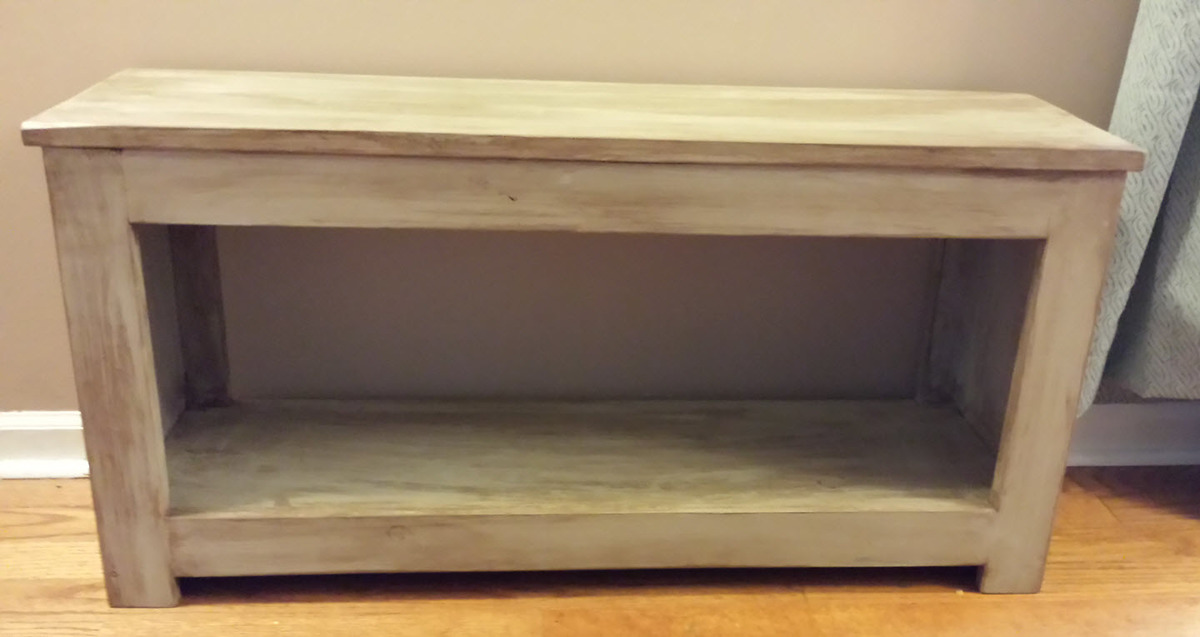
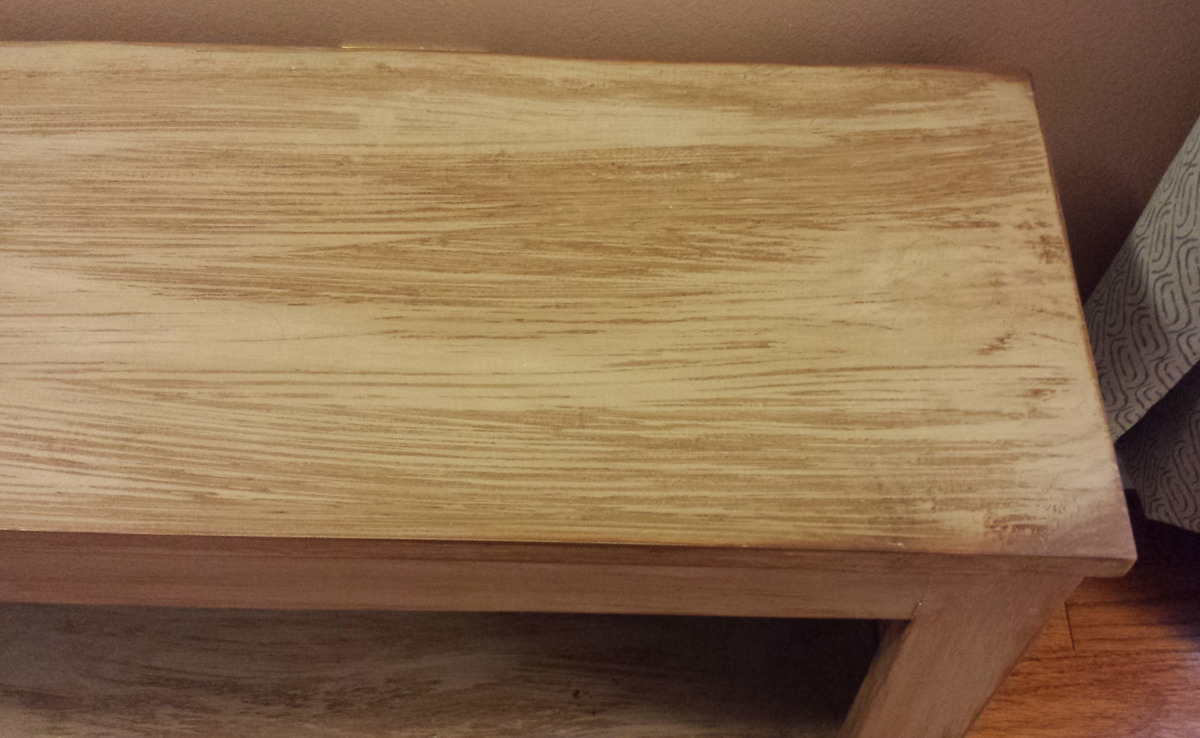
I love this plan! It's so versatile. I made this bench for my daughter's entry. First I painted it with an all in one paint/primer in light grey, then I sanded it down to reveal some of the wood grain and roughed up the edges a bit. Next, I brushed a dark ebony stain over the entire bench, one section at a time, and wiped it away. I thought I would get less stain, but really enjoy the end results. Thanks Ana!

Built from Plan(s)
Estimated Cost
$30
Estimated Time Investment
Afternoon Project (3-6 Hours)
Finish Used
Paint/Primer in one (I had some leftover and mixed it with a black chalk paint to get a light grey)
Ebony stain
Recommended Skill Level
Beginner

Modified Queen Stratton Bed

Submitted by APagano on Tue, 02/07/2012 - 11:57

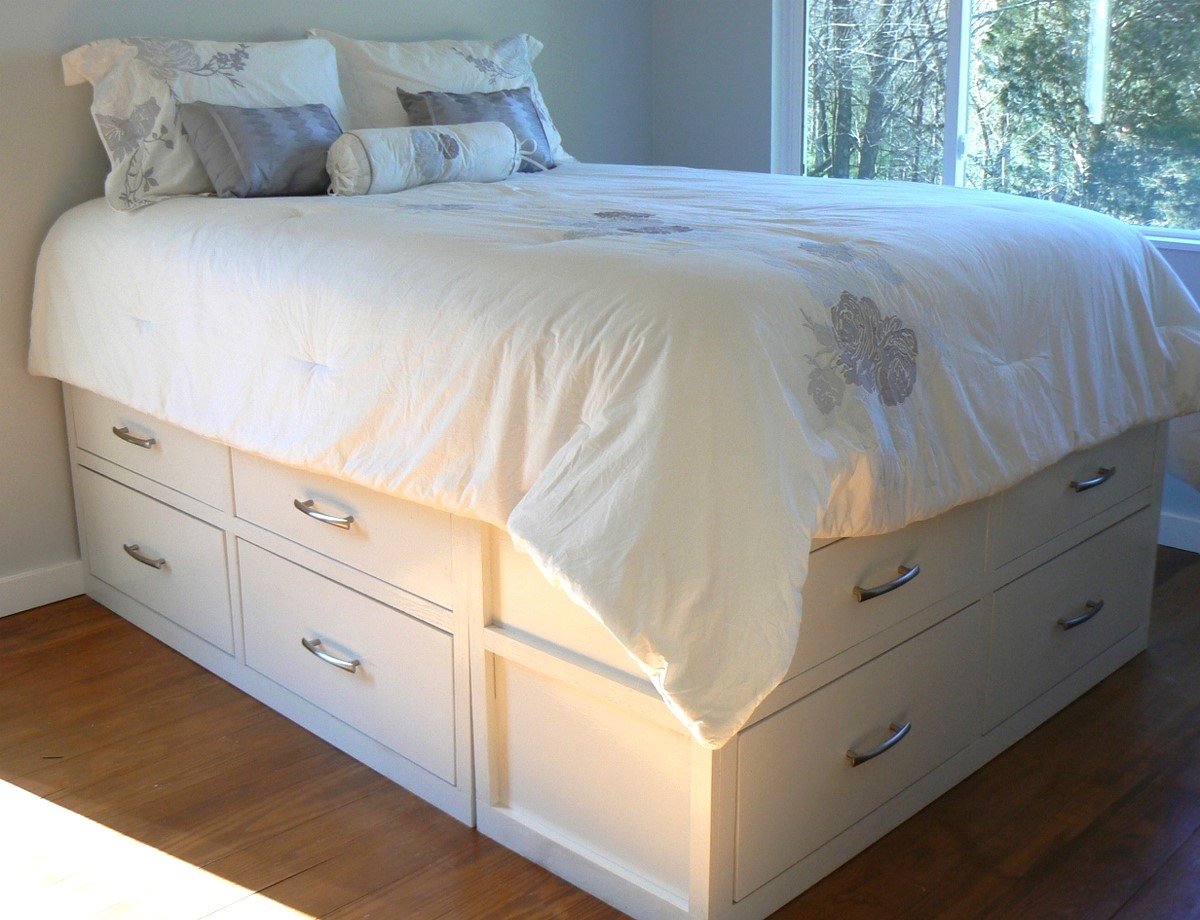
After we built the first level, we decided we didn't like how low to the ground the mattress was going to be, so we made another level. Our master bedroom is very small so this gives us plenty of storage space! The floor throughout the house is wavy, so theboxes do not meet perfectly ( you can see a slight gap at the bottom) which drives me crazy, but I will have to live with it for now. We kept the drawer face simple (less work, and we like the clean lines). Our mattress is quite thick, so I see myself building a step stool in my near future! This was our first project and very easy to follow. Already working on my next project. I am addicted! Thanks for the great site, Ana!

Built from Plan(s)
Estimated Cost
between 500 and 700, taking into account paint, handles, screws, etc
Estimated Time Investment
Weekend Project (10-20 Hours)
Finish Used
Oil based ultra white from Lowes. I think it was Velspar.
Recommended Skill Level
Intermediate

Comments

Guest (not verified)

Tue, 02/14/2012 - 12:54

I too modified this plan with a second rob of drawers and im in the finishing stages of it (hardware and paint). How tall is yours?

APagano

Wed, 02/22/2012 - 13:05

Total height is 25 inches. I love how tall it is, because the dogs cannot jump on the bed! I wish we would have thought about the double drawer height before we started as it would have brought the cost and time down significantly. We live and we learn. Enjoy your new bed!

Marie421 (not verified)

Tue, 07/31/2012 - 19:48

Just wondering how you attached the double drawer layers together... Love the look of it...

APagano

Mon, 06/10/2013 - 17:41

Sorry for the delay in response. I haven't been on the site in awhile and I could not figure out my password! We used the Kreg Jig to attach the top level to the bottom. Looking back on it, we should have just built the walls as one piece, but since the top drawers were an addition, after the fact, we just had to deal. The 1x2 trim piece gave it a finished and less pieced together look. It has been so long since we built this, the details are fading!

In reply to by APagano

diy_lover

Sat, 08/06/2016 - 20:37

I'm new to furniture making and was wondering if you had plans for your work since I like the height, queen and twin size? Also, I was wondering if any drawers are for storage purposes, as I would like them to be?

natasha

Mon, 10/08/2012 - 08:00

Hi this is exactly what I need to do!
we just bought a new bed and I new I'd be making this not thinking I decided not to buy the box spring, now I realize my bed will be on the floor...

I would love it if you could share everything you learned in making it double decker! please
thanks
Natasha

APagano

Mon, 06/10/2013 - 17:48

Better late than never, I hope...
First thing we learned, the bed is a little too high, so we should have made slightly smaller drawers. Still happy our dogs can't get up there, but I have to actually hop up on the bed every night, and still have yet to get around to making my step stool.
Second, cut the side pieces for the height needed for two drawers, then you have a cleaner look with no middle trim piece. I don't mind it, but I would like it more without, I think.
That is really all I would change. The plans were easy to follow and made it easy to alter for our needs.

reneemwhiten

Tue, 05/07/2013 - 23:52

I am flabbergasted by this AMAZING bed you MADE over the WEEKEND! This is simply unbelievable! I absolutely could never do something like this. Are you willing to make a King size one exactly like this and sell it to me??
Oh please?!
Renee

APagano

Mon, 06/10/2013 - 17:53

Thank you for those kind words! I was a little nervous about taking on such a big project, but we had a fun time building it { I can't say the same for sanding and painting :-) } and are very happy with the space it freed up in our very small bedroom! Just take your time, invest in a Kreg Jig, and you can do it too!

Reclaimed wood king bed

Submitted by Anonymous (not verified) on Thu, 10/17/2019 - 20:34

Built for a customer out of reclaimed 2x6 spruce corrral boards. There was a lot of sanding involved in prepping this wood, but I couldn’t be happier with how it turned out!

Built from Plan(s)
Estimated Time Investment
Week Long Project (20 Hours or More)
Recommended Skill Level
Intermediate

20 sec tidy up coffee table with trundle toy box/storage

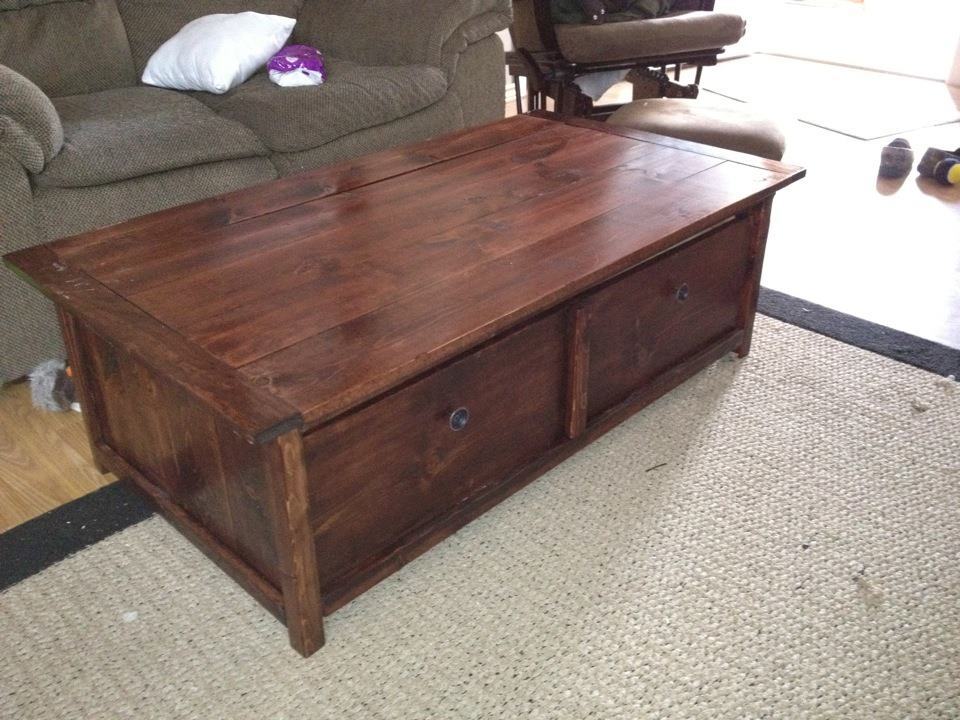
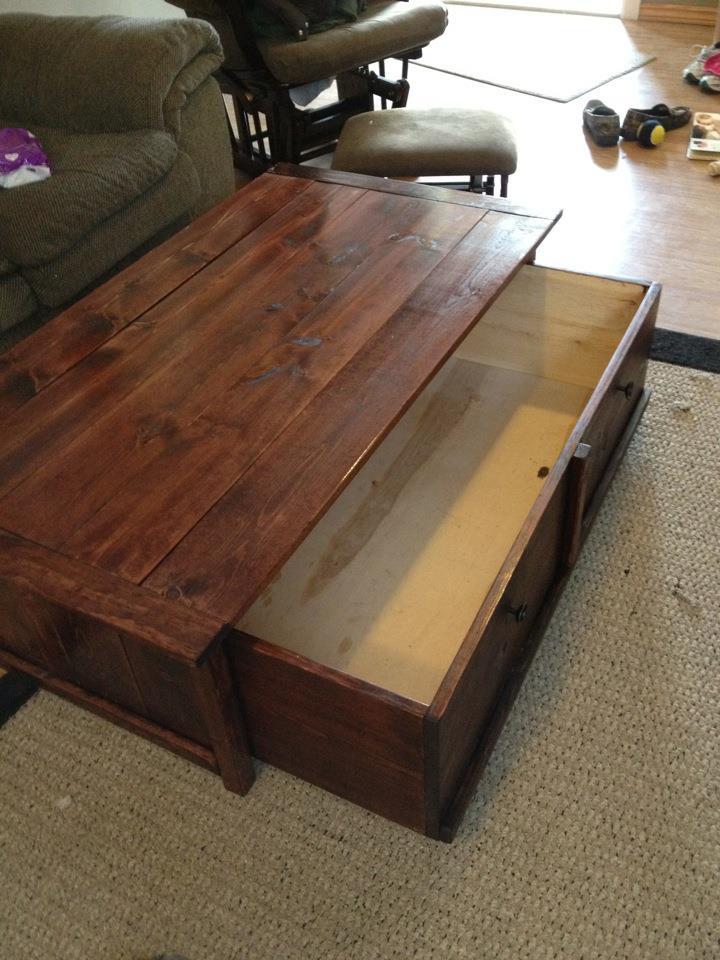
This is a project we built this weekend. My husband and I desperately needed some sophisticated storage space in the living room that is kid friendly, so we accepted the challenge. We together built a coffee table with trundle storage inspired by a plan on ana-white. We are truly inspired by her designs and plans help a LOT! Check out our work!

Estimated Cost
$100
Estimated Time Investment
Day Project (6-9 Hours)
Finish Used
We used one coat of red oak minwax stain with a layer of red mahogony stain over top. We finished with clear polyurethane.
Recommended Skill Level
Beginner

Comments

Bunnie1978

Tue, 03/13/2012 - 07:11

That looks very nice. This is the next project on my list I think.
It's really great to see the project with a different kind of finish also. How do feel about the functionality of it now that you have it "up and running" in your living room?
And... how do your kids feel about it?
Any drawbacks to this design for your needs, or tips that you can give me for building it over the next couple weeks?

In reply to by Bunnie1978

Windycrocodille

Tue, 03/13/2012 - 07:53

Thank you for the compliments! So far we absolutely LOVE the functionality! It really is made for easy clean up, slides back and forth nicely (we used wheels that only go one way, not swivels.) and our one year old seems to enjoy it. The table and storage compartment are just short and sturdy enough that she can pull herself up on them and because the storage compartment is not on swivels it doesn't move when she does. She is the first grand-baby on both sides of the family so she has approximately 175 toys that we have to find a place for and they all fit very nicely. With the large storage we have noticed that she is pulling out and playing with different toys that she could never get to or find before. As far as design is concerned we did have to modify it a little bit to work with the tools that were available to us. We wish the side legs were sturdier, even with 6 screws in each side they are still a bit wobbly. With the storage box underneath it helps to support it from swaying but we are still talking about ways to make it better. A possible support beam on the bottom of the back side? All in all we love the piece it fits perfectly into our space and offers a LOT of storage that we didn't have before. My husband and I had tossed around the idea, before we started, of making the piece smaller but we are glad that we didn't.

Suggestions: if you are going to buy based off of the shopping list provided make sure you also buy 2" screws. They forget to include that in the shopping list but include that in the directions. If you have any other questions feel free to ask. It was a really really fun project for us.

brookifer86

Tue, 03/13/2012 - 09:10

I just finished my Tidy Up Table too (brag post coming!) and I decided to add one L-bracket to each corner because of the wobble. I've also got a baby (7 months) and it's nice to have that added stability just in case. Now the sides are solid as a rock!

Bunnie1978

Tue, 03/13/2012 - 13:08

A little bit of medal support would probably be really good... I was actually thinking of modifying the design a little bit already, which will probably serve the end result to provide better stability. I think I'm going to make the storage trundle a little shallower, and put a row of small square drawers above it on each side. That is of course, much more complex, and then detail the trundle with the small squares so it looks like a cabinet of drawers all the way down...
What do you think of that idea? I mentioned that on the plan post too... still kicking it around a bit.