Community Brag Posts
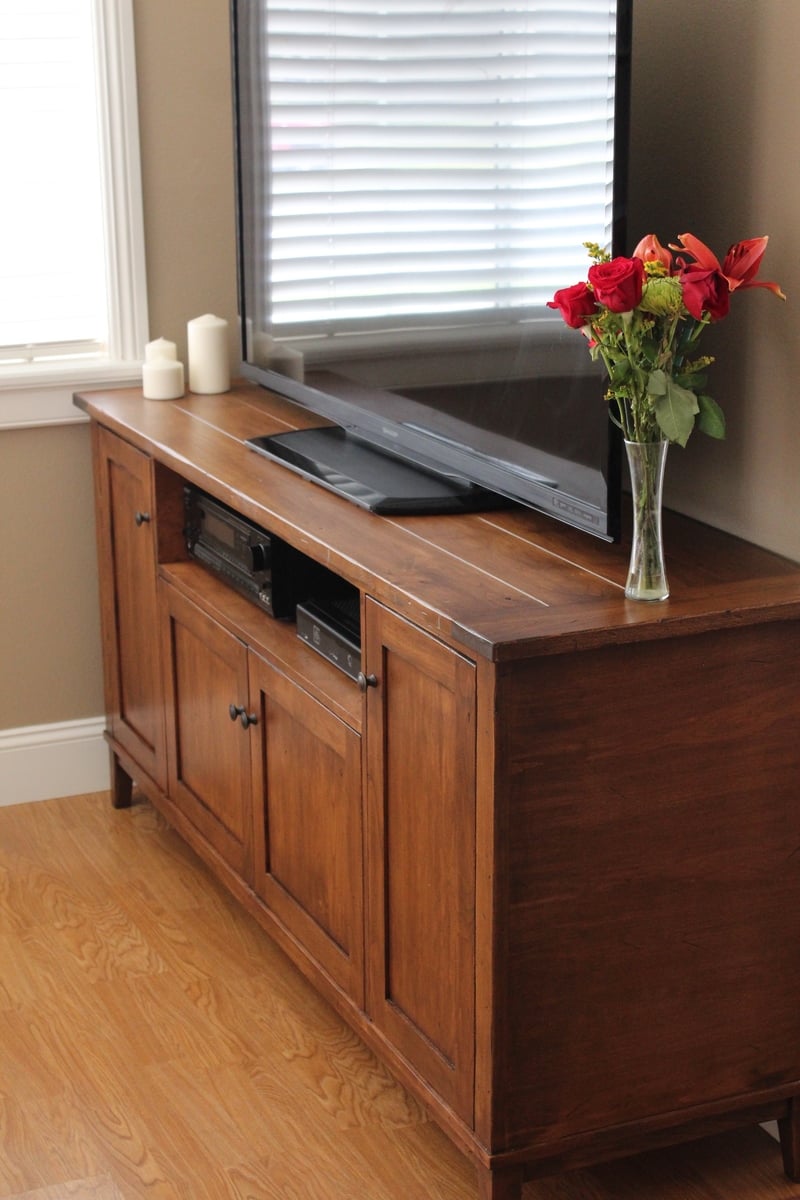
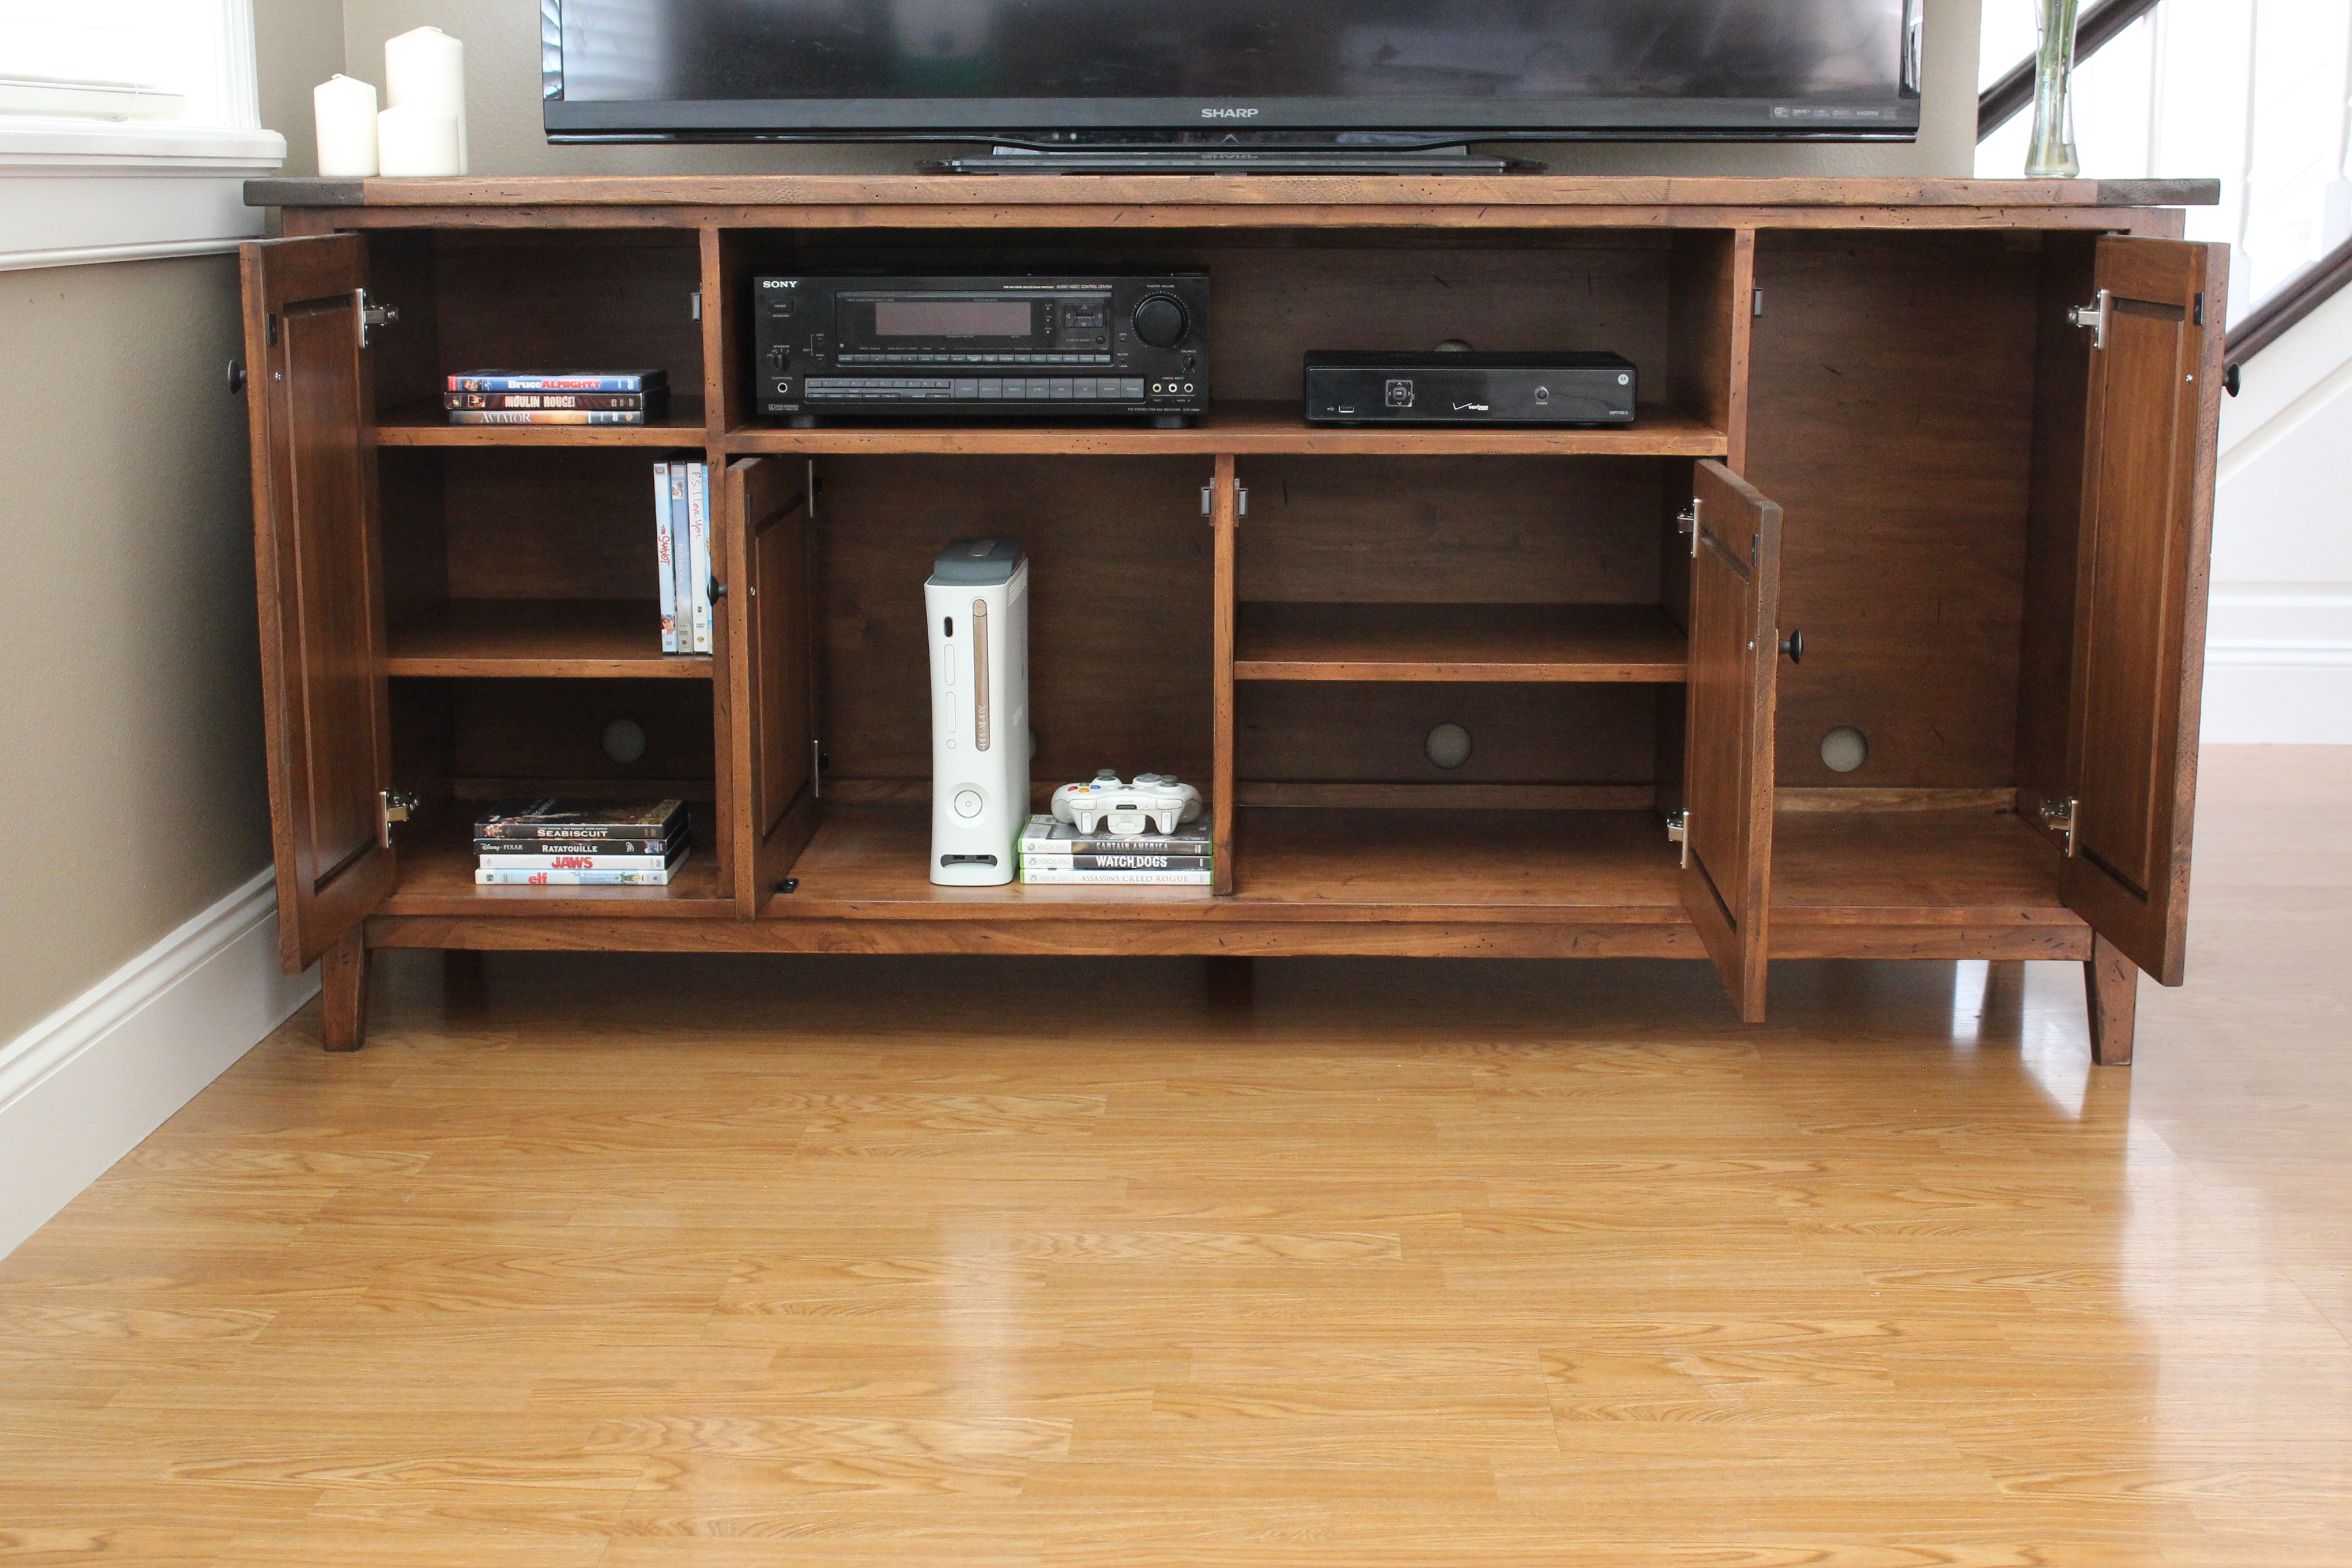
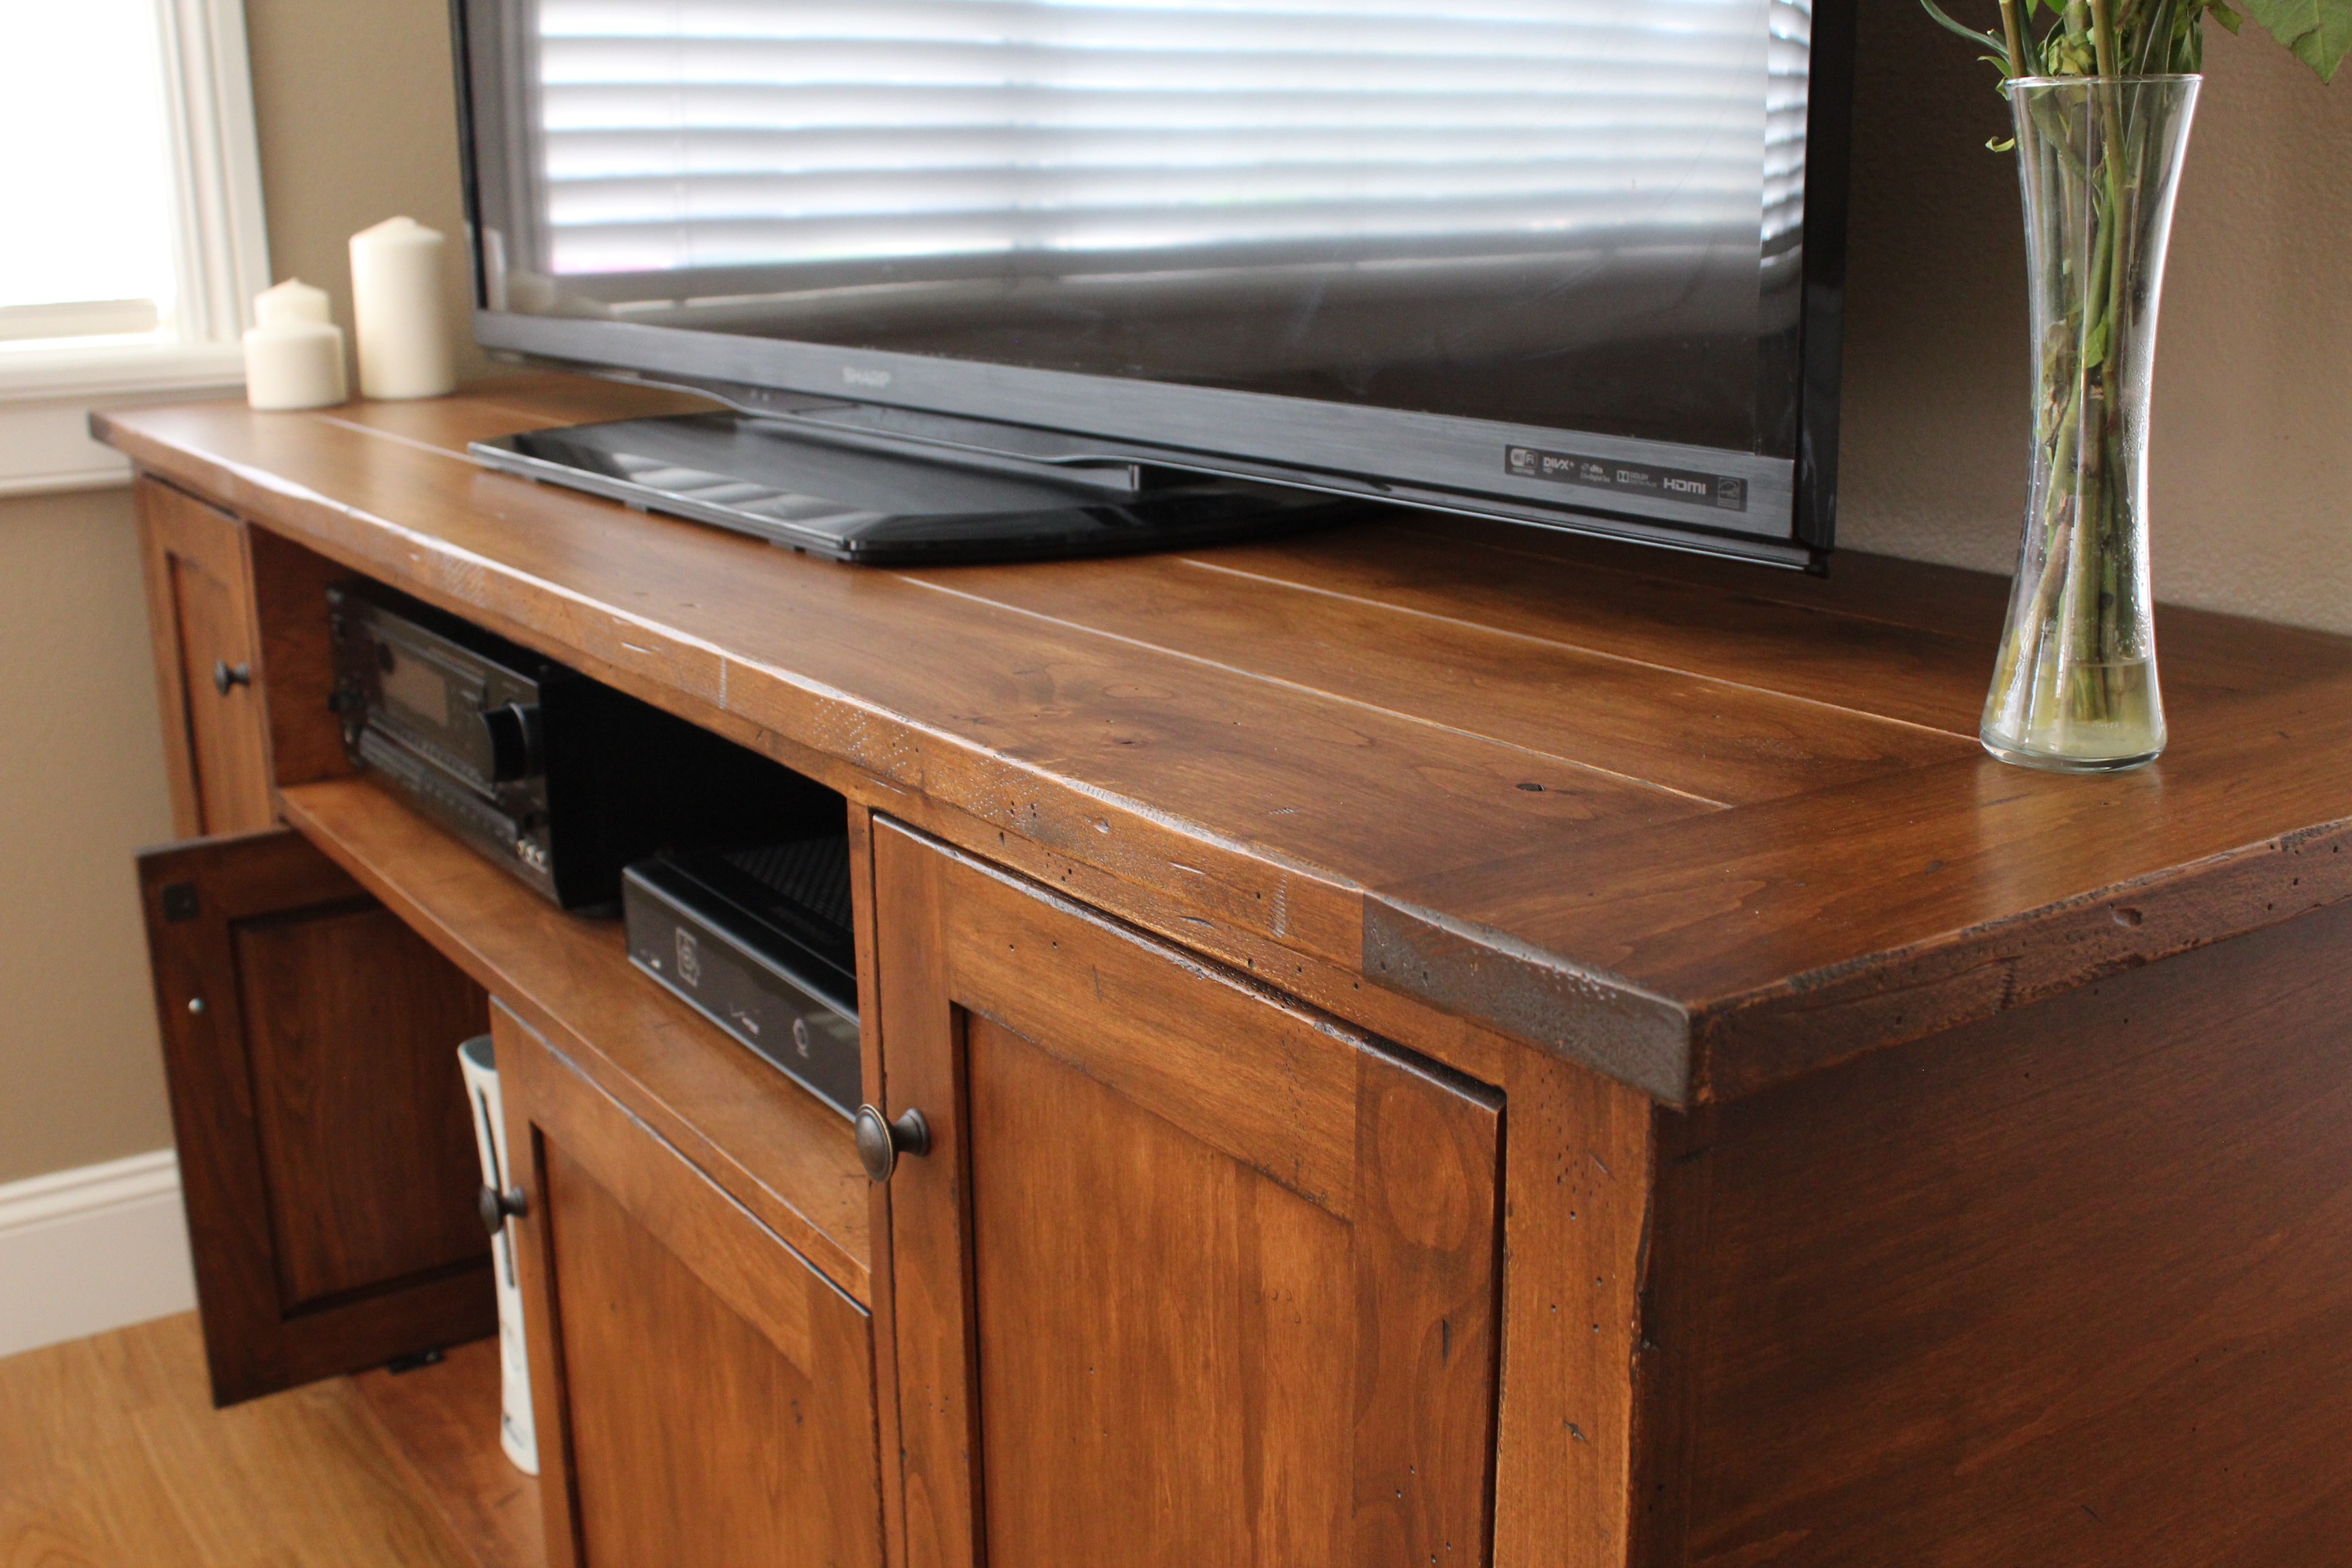
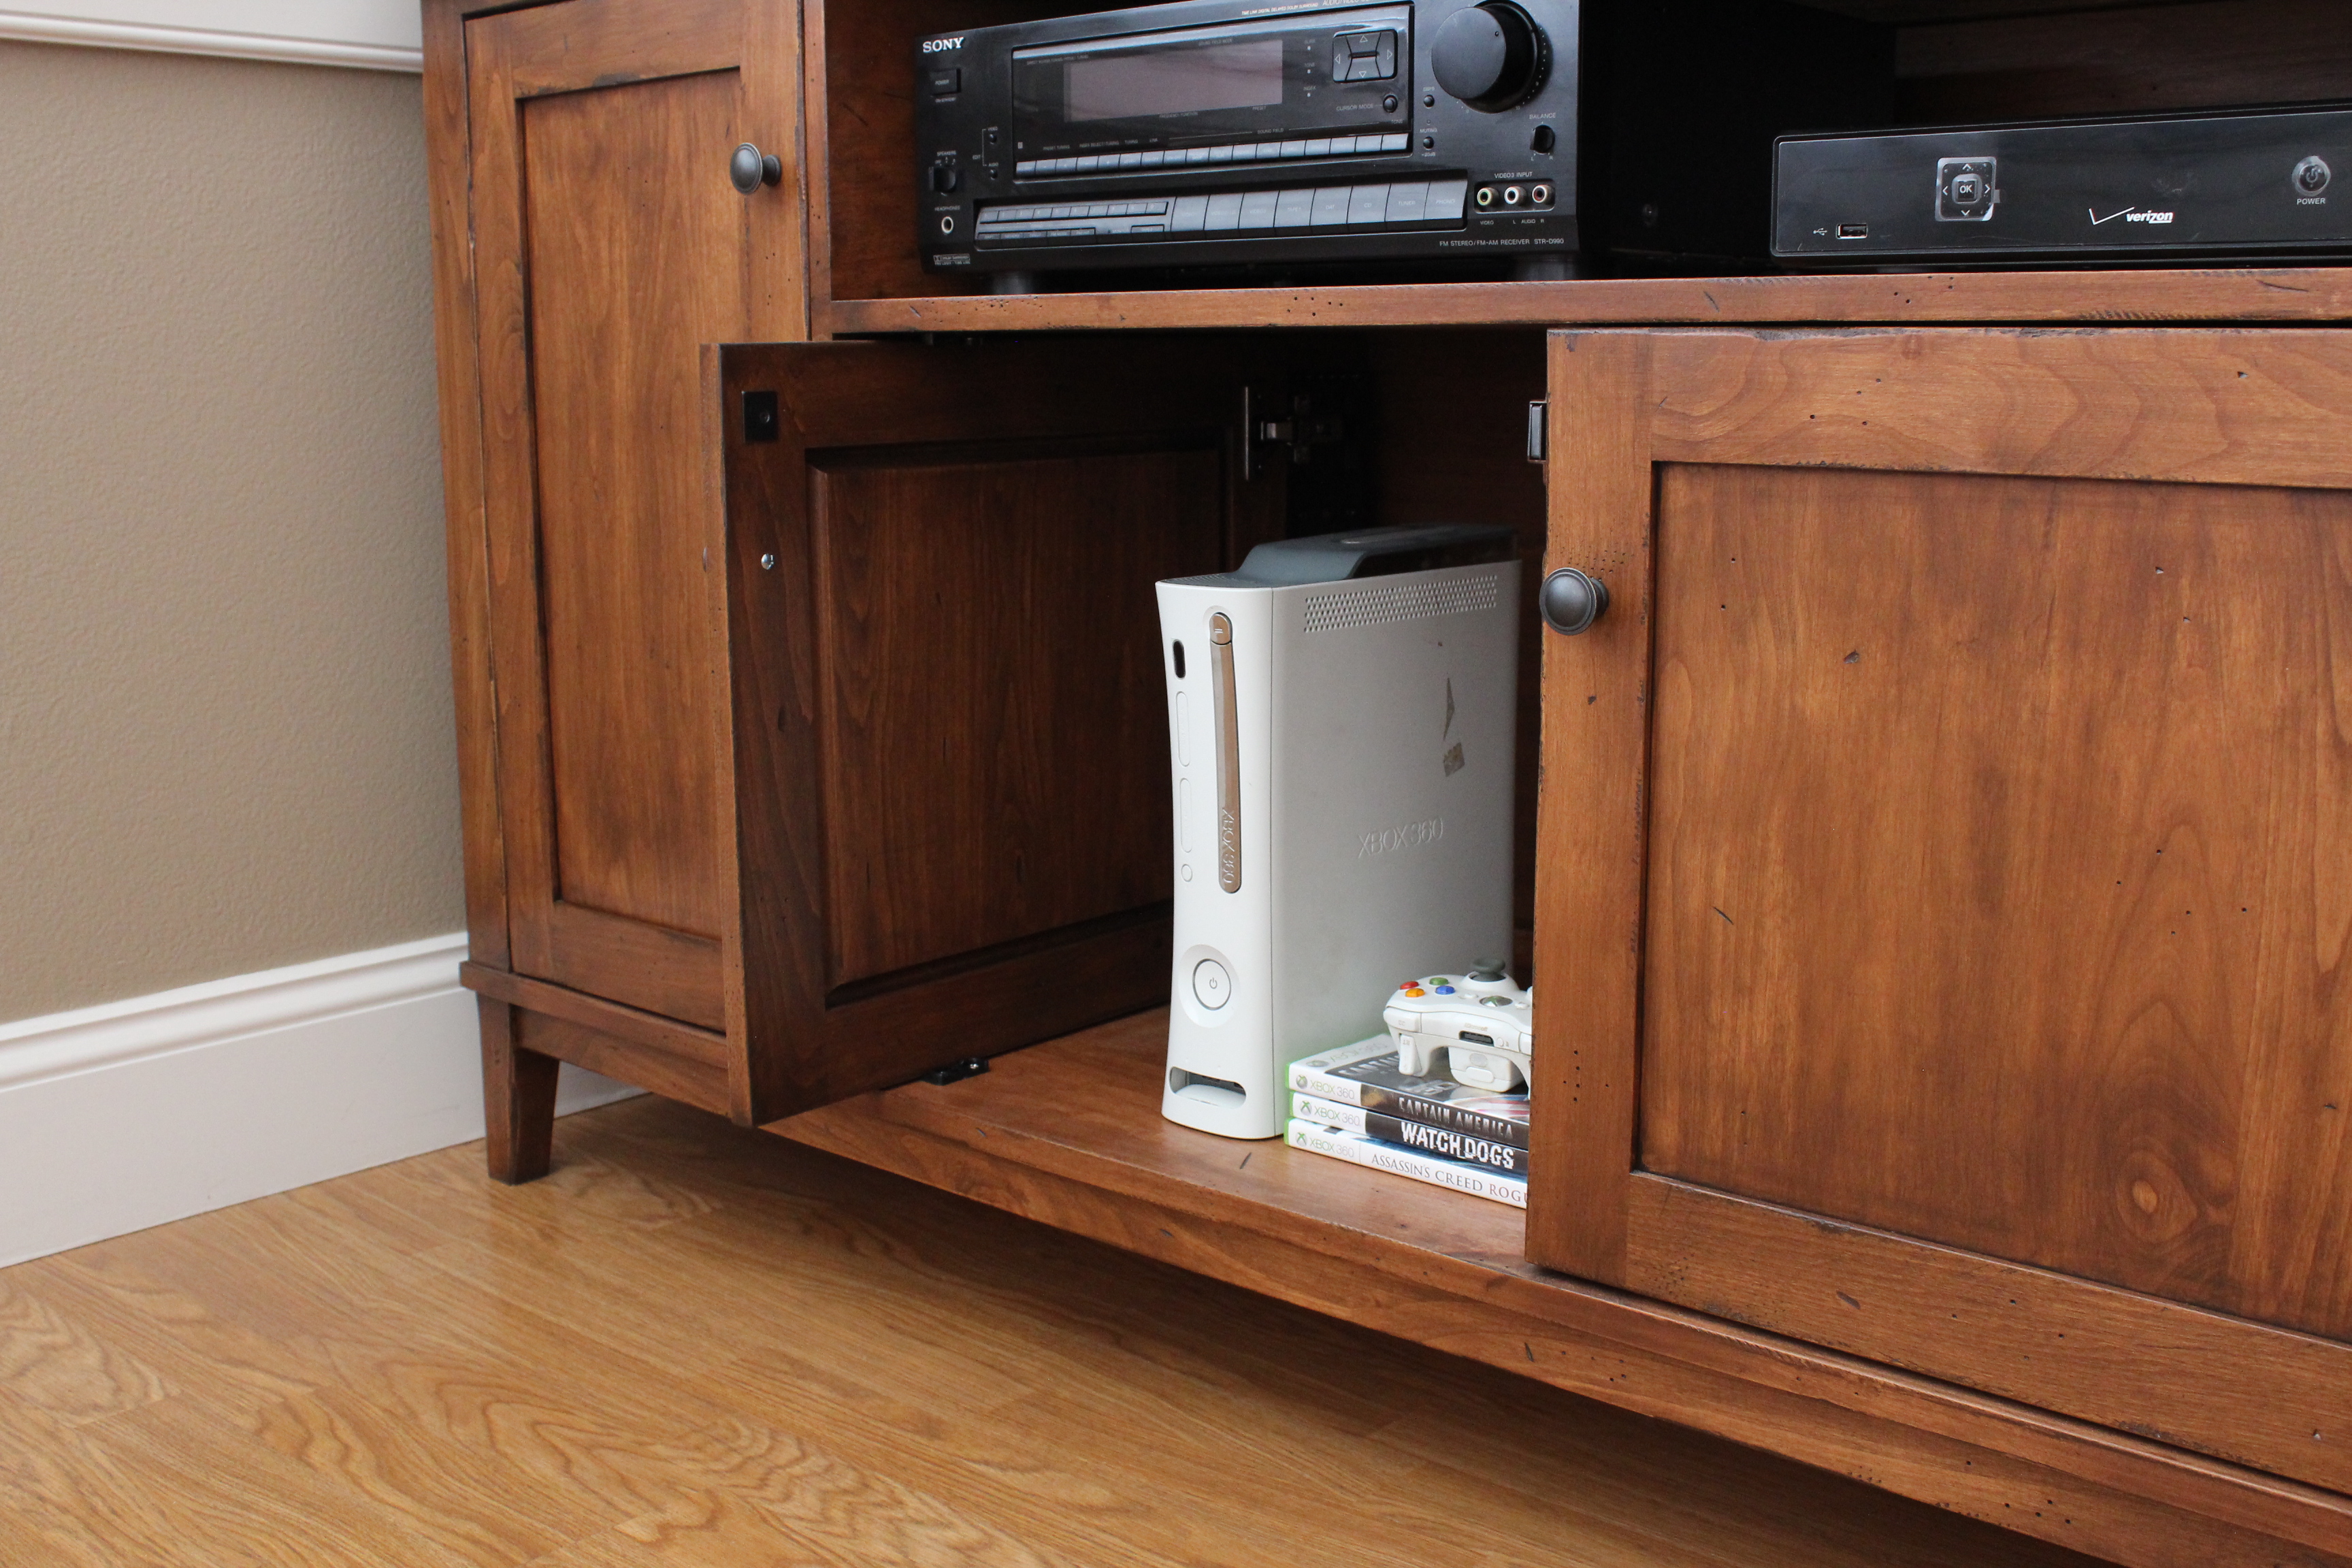
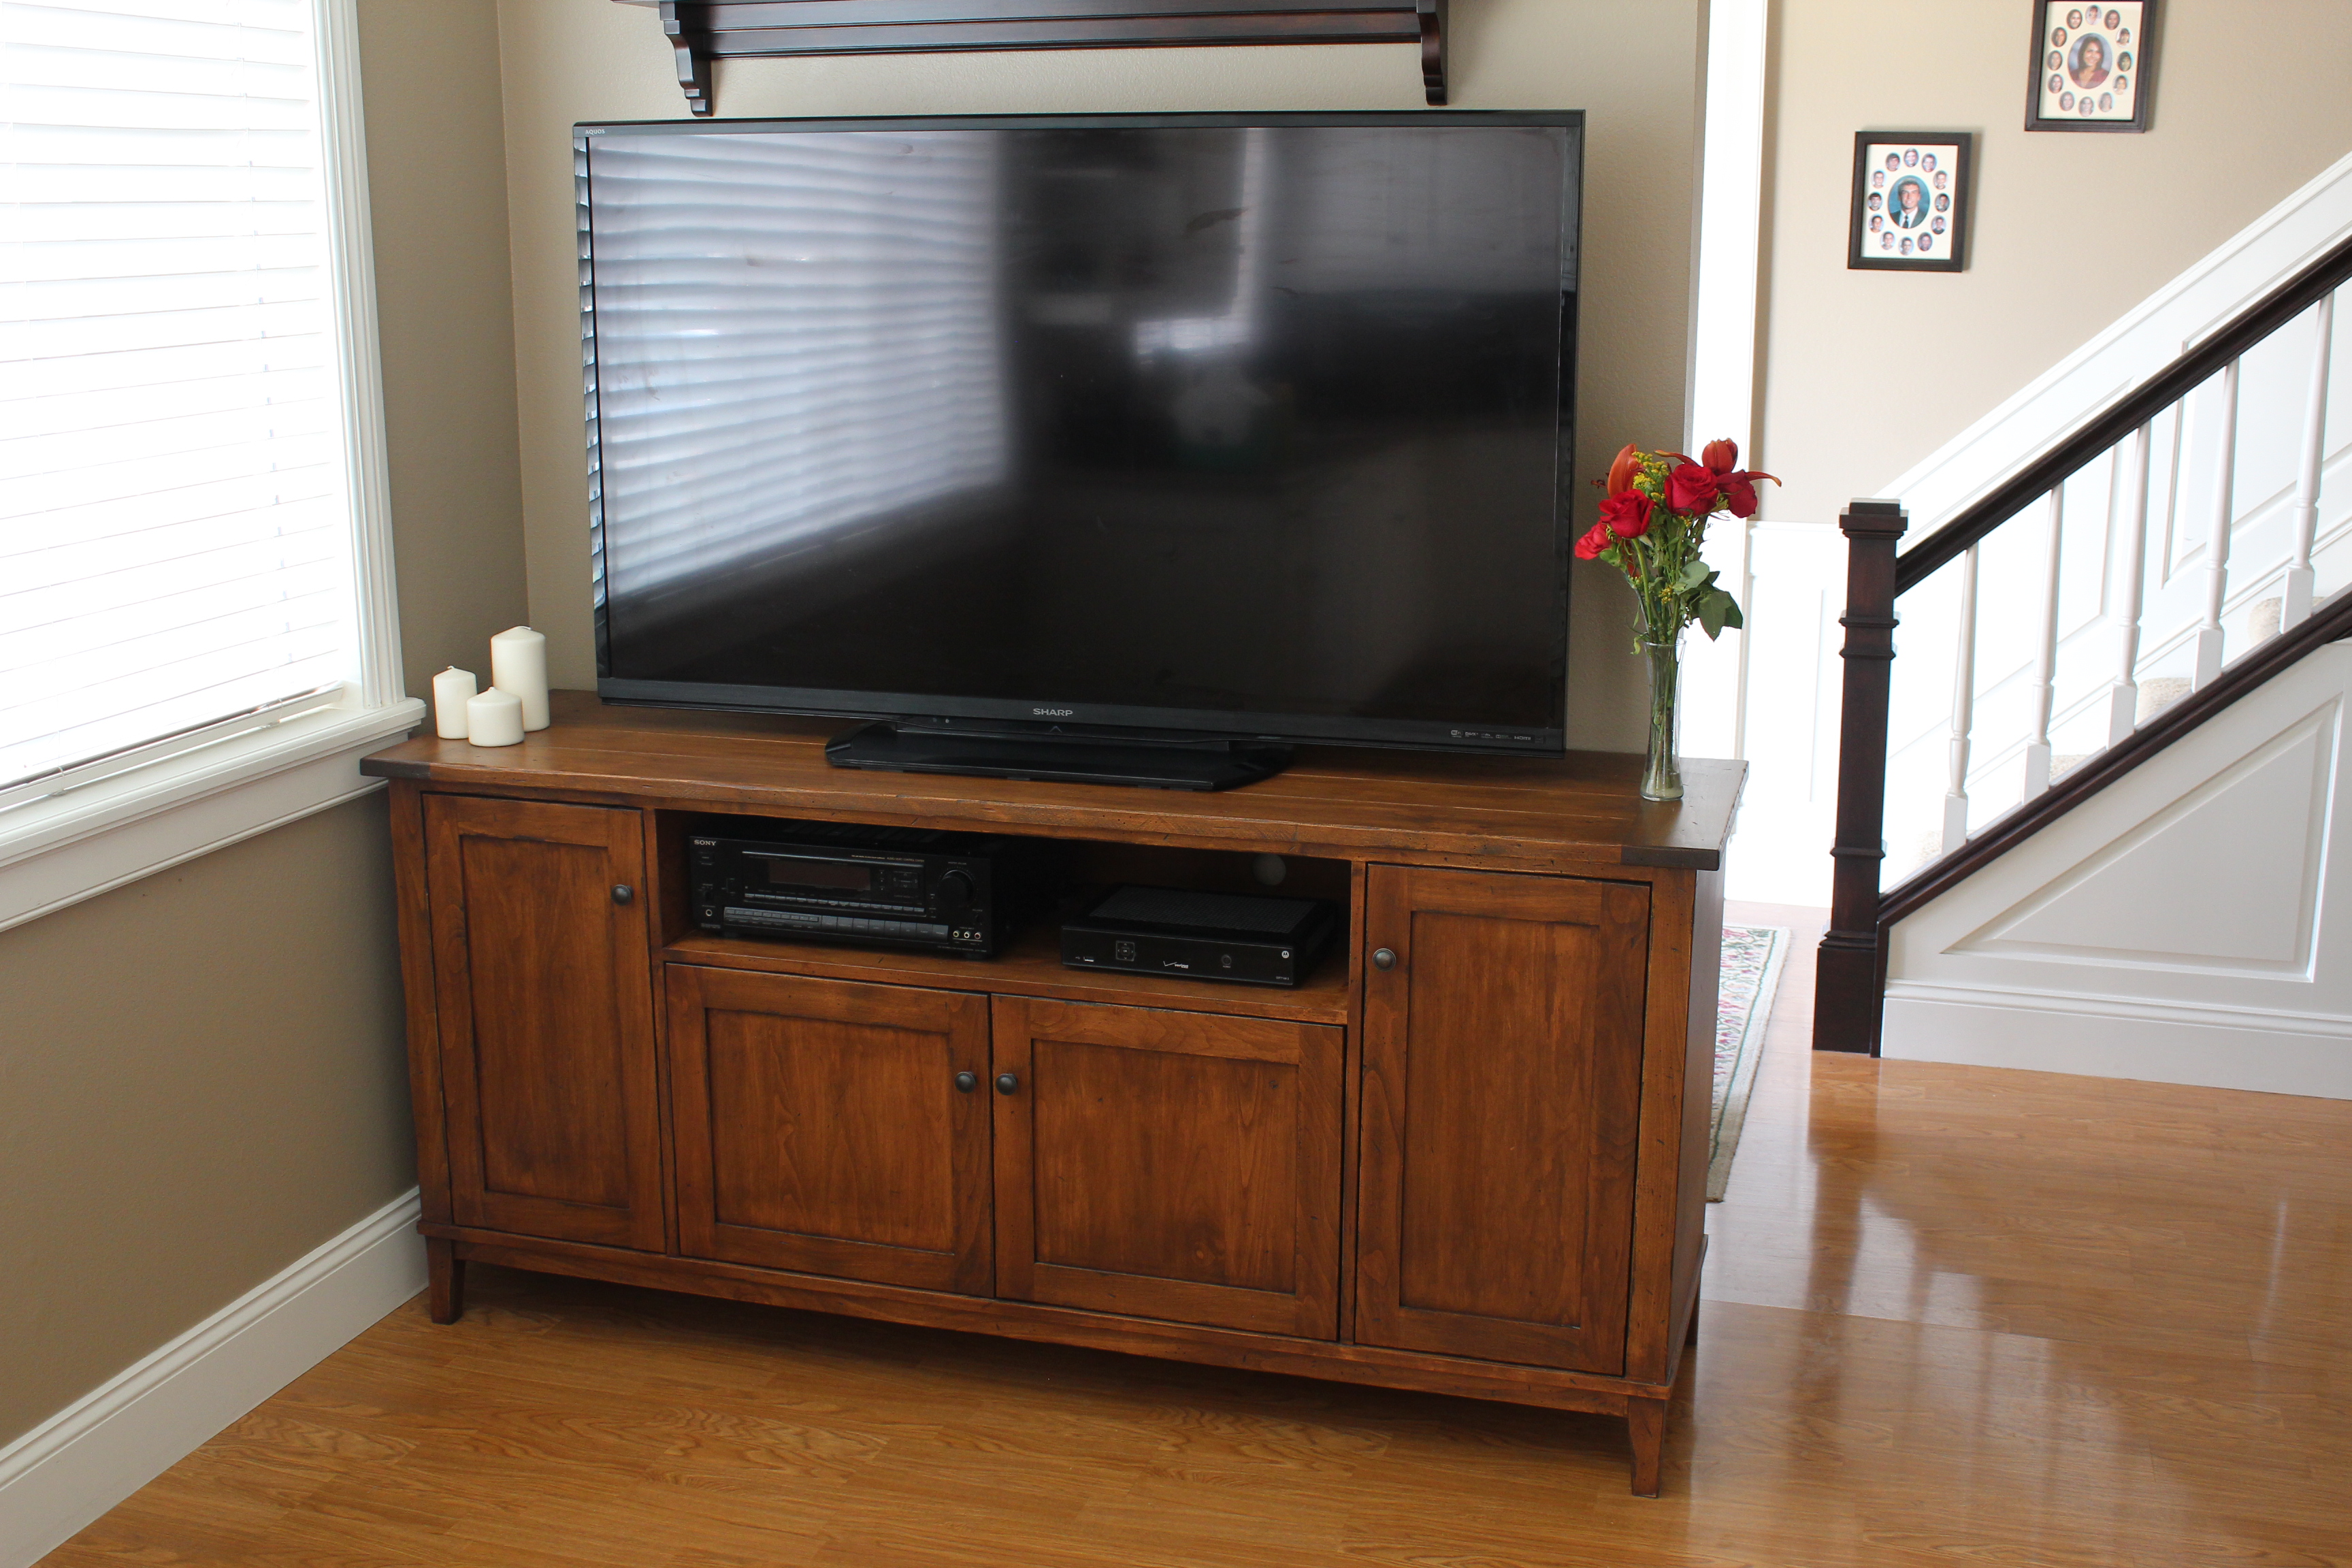
Pottery Barn Media Console
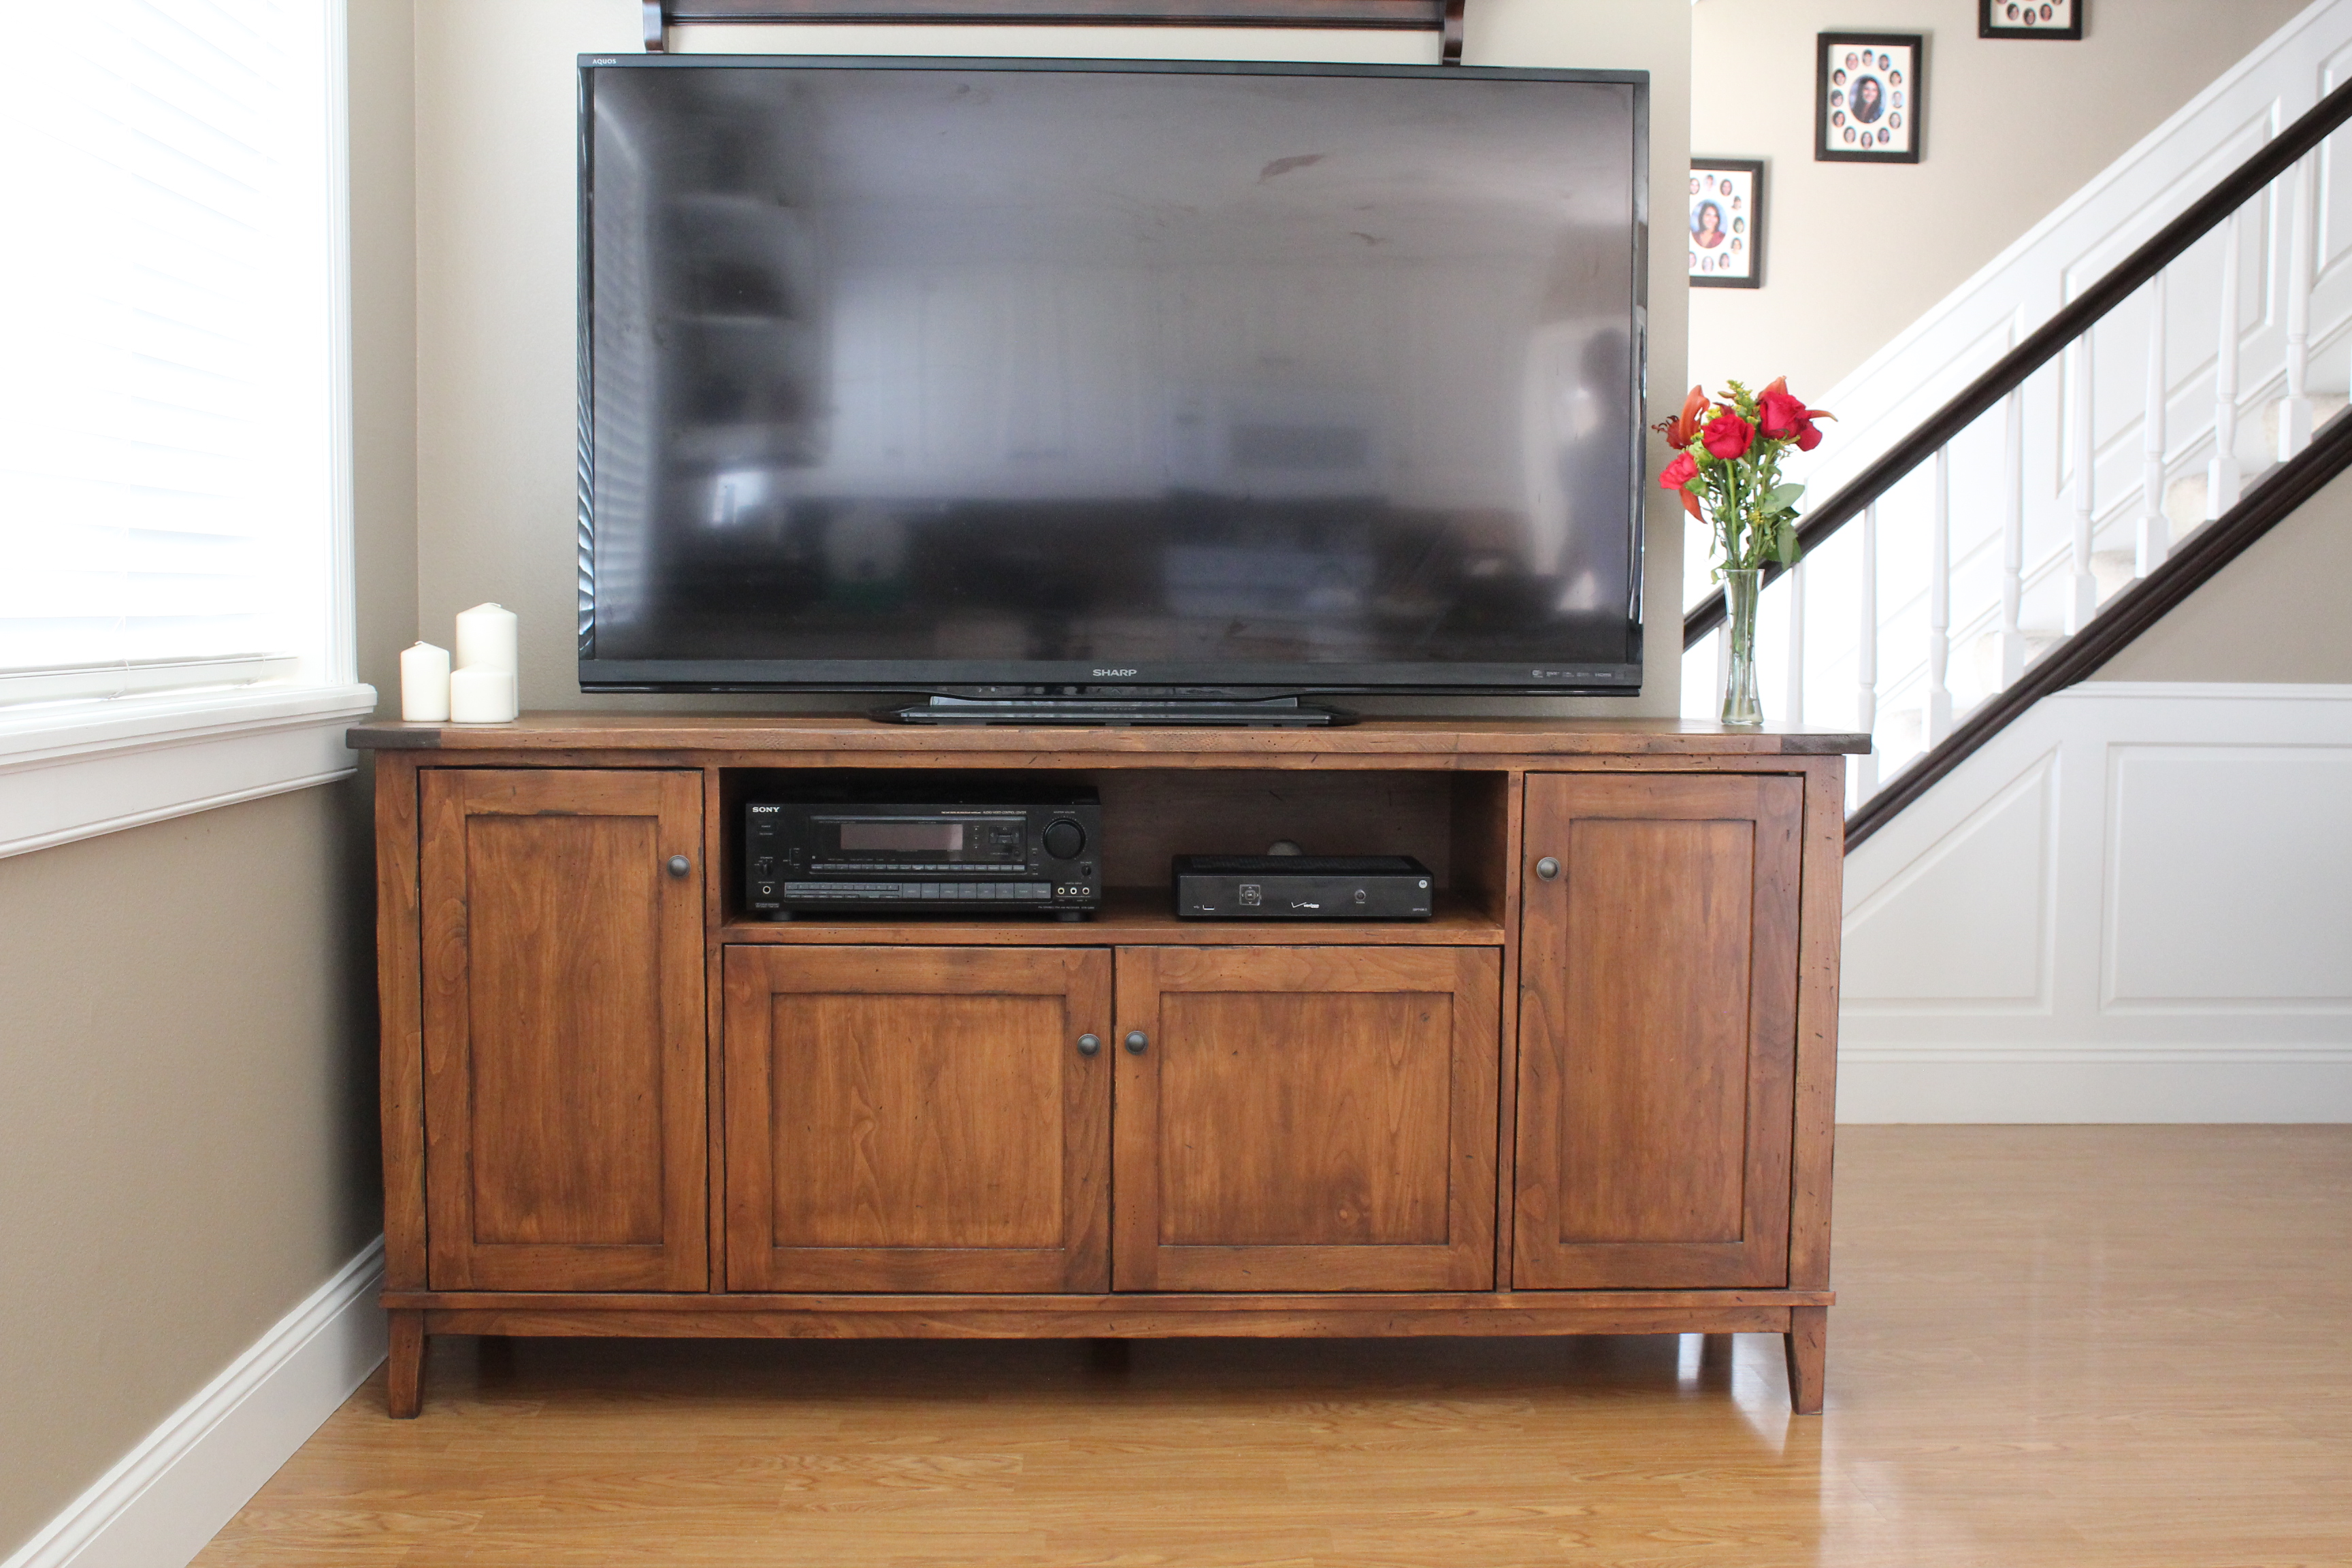
I have been wanting to build this piece for some time now. This is actually a Pottery Barn piece that is now discontinued that I modified here and there. I added a "flipper door" which opens and slides back into the cabinet. Adjustable shelves throughout. I used solid alder and alder plywood for material. - Brad @timberandsoul www.timberandsoul.com
Estimated Cost
$500.00
Estimated Time Investment
Week Long Project (20 Hours or More)
Finish Used
shellac, transtint dye, general finishes gel stain, poly
Recommended Skill Level
Advanced
Comments

Sat, 05/16/2015 - 14:52
that looks great! I love
that looks great! I love seeing your brag posts! You make really great quality furniture. :) Hopefully one day I get to that point :)
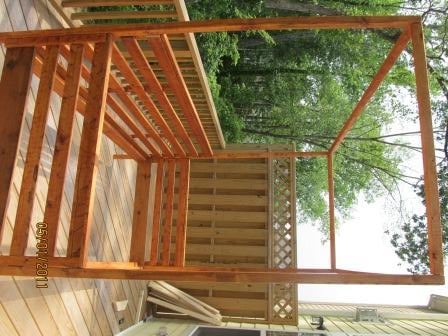
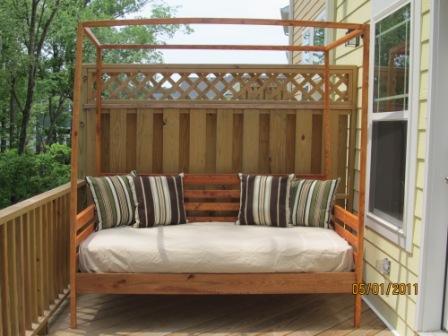
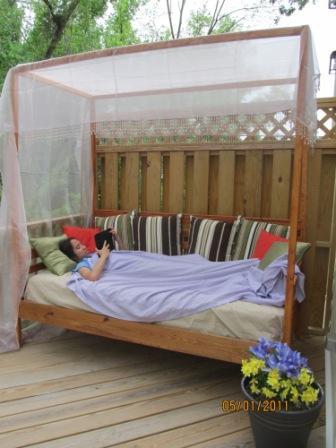
Outdoor Pine Canopy Daybed
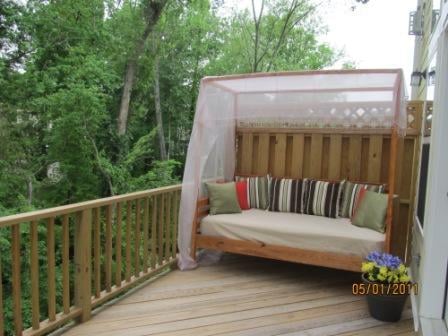
This is my first venture into woodworking/carpentry. Since I did not want to shell out too much money for lumber, I used untreated pine (worst wood they say to use) for the daybed and used an exterior wood stain (with uv protection) to seal the wood. I also did not invest in power tools and used a hammer and wood saw to cut and nail everything together. As I cannot sew, I waterproofed the mattress by sandwiching it between two plastic mattress covers (dollar store) and duct taping the seams. It's not elegant but no one is going to see it. I used a cotton fitted twin sheet (old one) for the cover and found some outdoor pillows for $16 a pair ($8 per pillow and made with solarium fabric). Also as this is placed outside (deck), I'm looking into getting a mosquito net to use over the daybed instead of the bed tent I have on right now.
In hindsight, I should have used pressure treated wood for the posts and canopy beams to prevent bending/twisting (I had to re-do 2 posts). If I get 3 years of use for this furniture. I'm a happy camper. Ana, thank you so much for the plan. Kathy thanks for the advice on painting the lumber first.
You guys can do this!
Estimated Cost
$70 for the lumber, $ 40 for stain, sand paper, nails, wood glue, $4 for mattress cover, duct tape
Estimated Time Investment
Week Long Project (20 Hours or More)
Finish Used
Olympic exterior wood stain with UV protection (oil based).
Recommended Skill Level
Intermediate
Kentwood bed
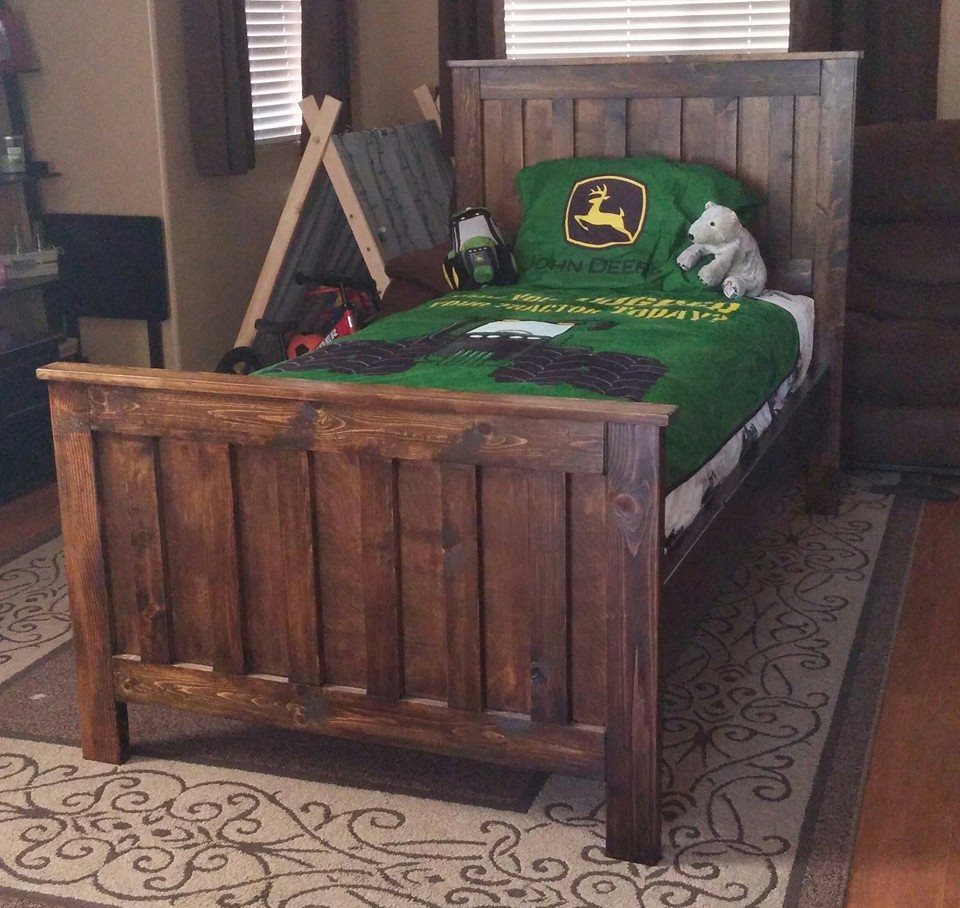
I built this for my four year old son! He even helped me out so that made him love it even more :)
Built from Plan(s)
Estimated Cost
$100-$120
Estimated Time Investment
Day Project (6-9 Hours)
Finish Used
Minwax Oil based stain- Dark walnut
Recommended Skill Level
Beginner
Outdoor Couch with Chaise/Ottoman
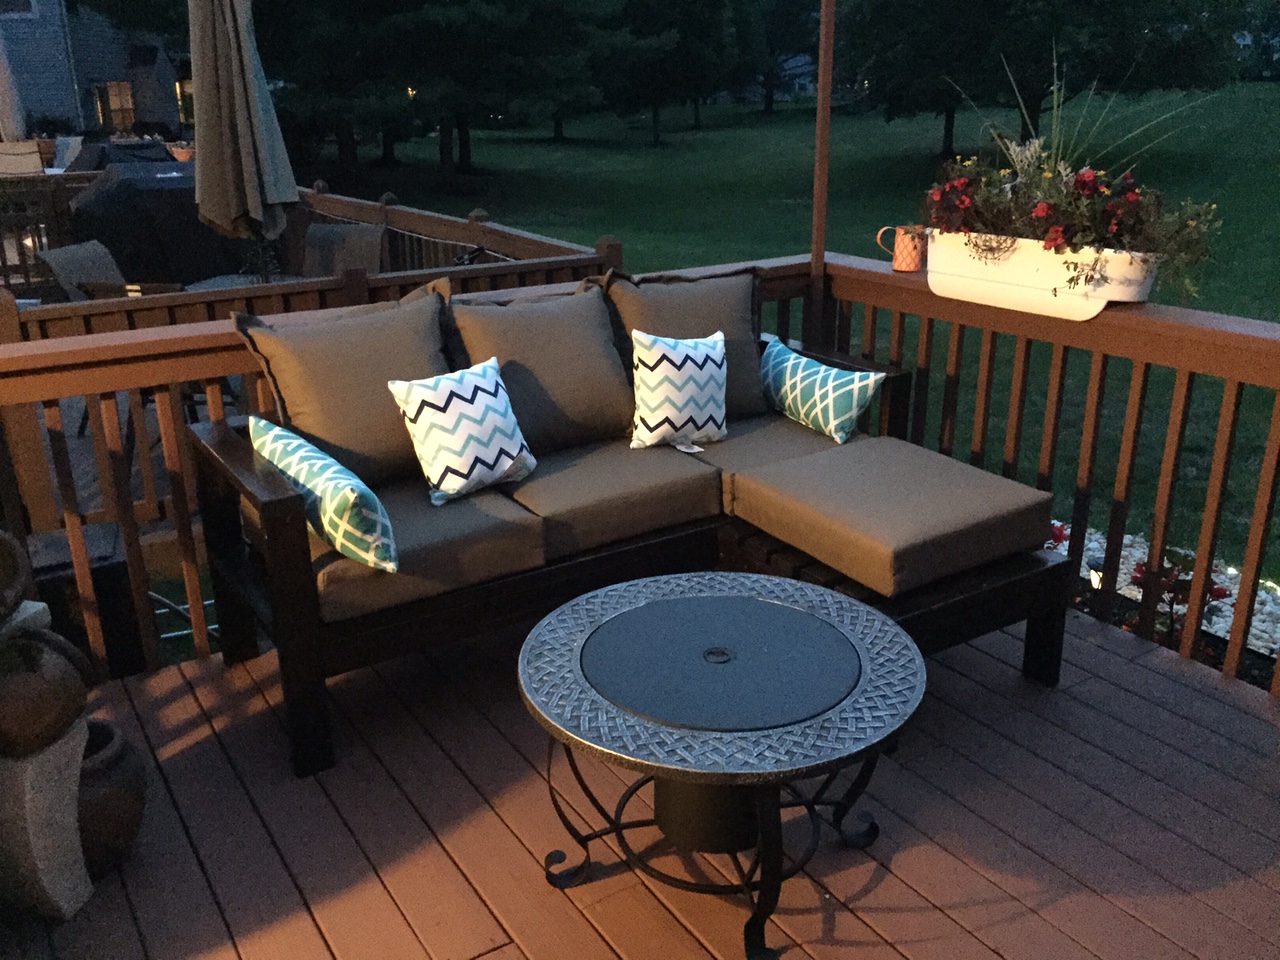
This couch was super easy. The 2x4s cost about $30. The cushions were a little higher at $160 for all, but can't complain when spending so little. I bought the cushions first to assure the size would be adjusted correctly. It took about 30-45 minutes to put together. I say it's a weekend project because of the stain and sealer. Then the wife wanted a chaise also. I decided to make it an ottoman so it's a chaise when she wants and an extra seat when we have extra company. I went with the color Kona for the stain and applied clear satin spar urethane 3 times since it was raw wood initially. Excellent project that really completed my outdoor space!
Estimated Cost
$30 for 2x4s,
$160 for cushions,
$25 for stain and spar urethane,
$160 for cushions,
$25 for stain and spar urethane,
Estimated Time Investment
Weekend Project (10-20 Hours)
Finish Used
Kona stain,
Spar Urethane
Spar Urethane
Recommended Skill Level
Beginner
Comments
Mon, 07/06/2015 - 20:16
They were on sale at Target,
They were on sale at Target, but they were running out. We initially wanted the Navy Blue but when this was the only color available we settled but now we couldn't be happier. Fits in with our backyard perfectly.
The cushions are Threshold Deepseating Outdoor Cushions. They do get soaked in the rain but I suppose they're outdoor cushions because once the sun is out they dry instantly. Let me know if I could help any further!
Mon, 07/06/2015 - 20:15
They were on sale at Target,
They were on sale at Target, but they were running out. We initially wanted the Navy Blue but when this was the only color available we settled but now we couldn't be happier. Fits in with our backyard perfectly.
The cushions are Threshold Deepseating Outdoor Cushions. They do get soaked in the rain but I suppose they're outdoor cushions because once the sun is out they dry instantly. Let me know if I could help any further!
Sat, 10/03/2020 - 23:56
Plans? Attachable ottoman
Are the plans not posted to your website? I built a 90" version of your plans that are for 79" couch and want to use an ottoman as a versatile chaise similar to this layout.
An 'On Steroids' version of your idea
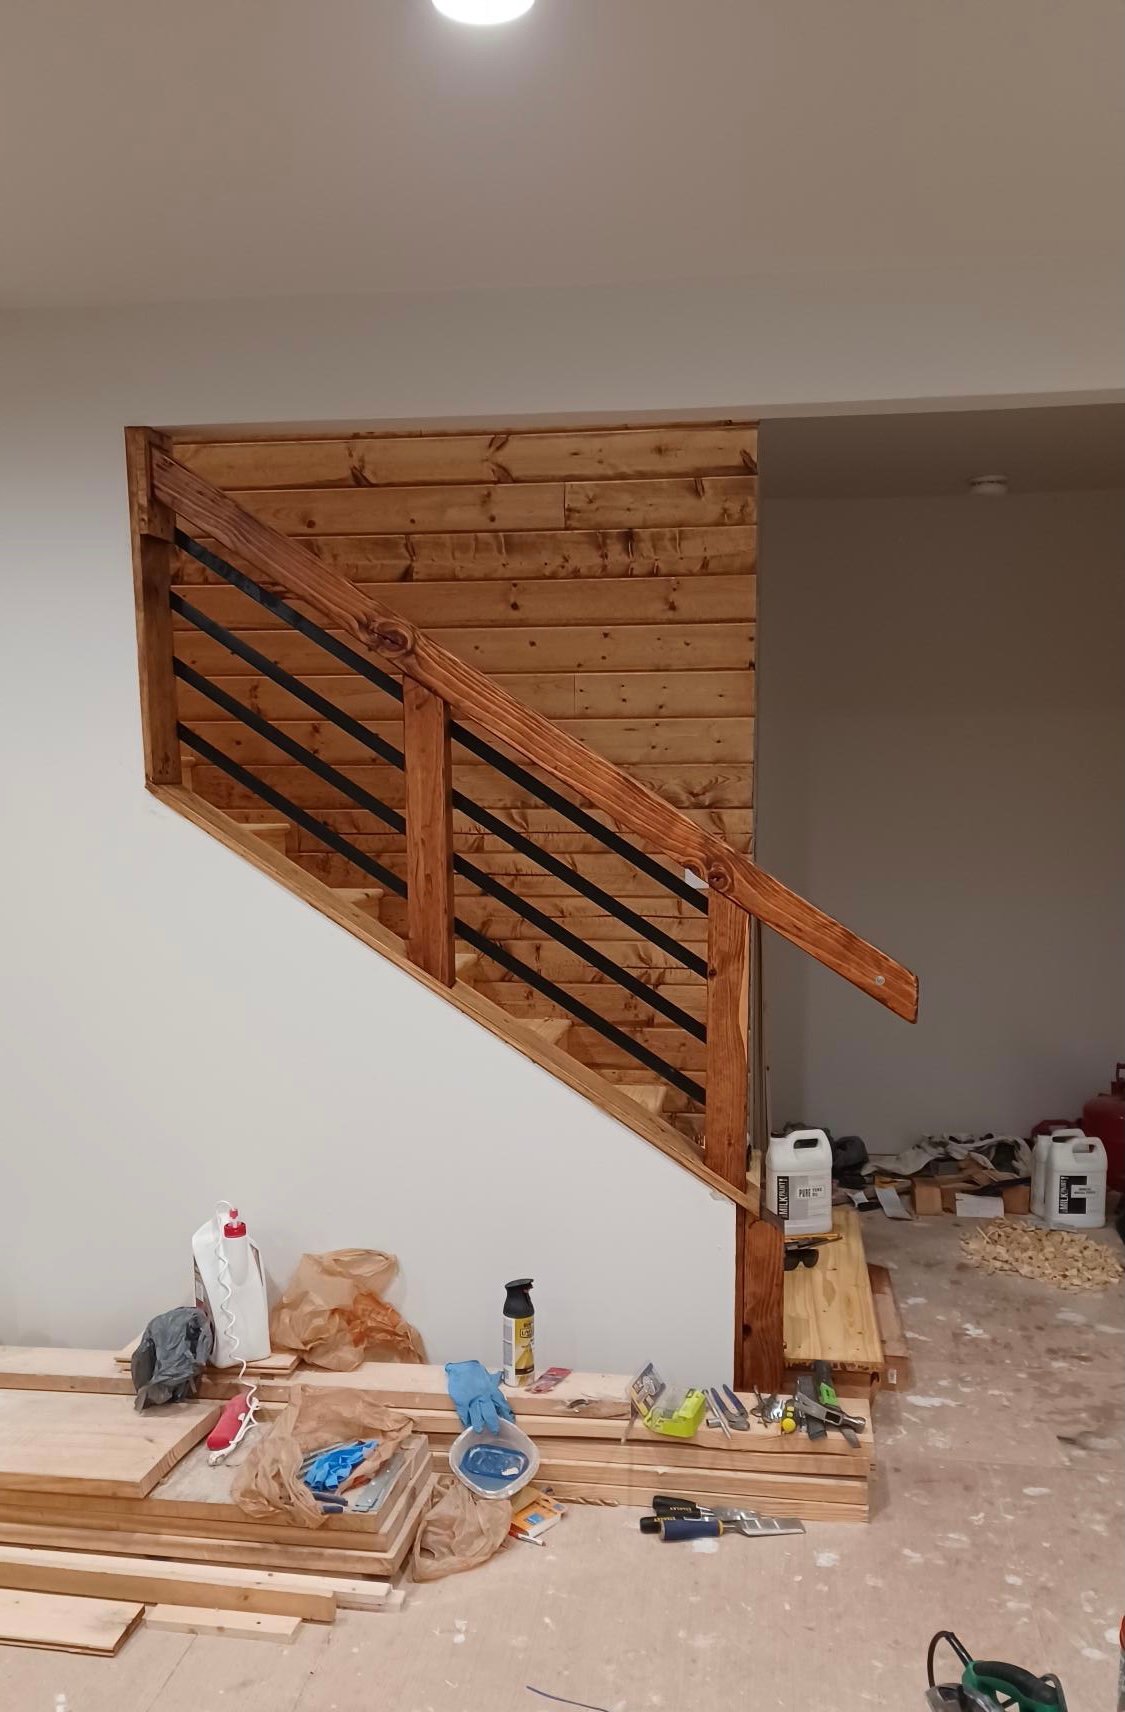
6 years into a complete rebuild of a neglected old farm house built in just 1948. Your website was found after looking for 'Modern Farmhouse' stair rails. The look plays off the original brick chimney stack & the Woodstove it serves. It has turned out to be quite the focal point, which was never it's purpose. Thanks for the inspiration!
Built from Plan(s)
Comments
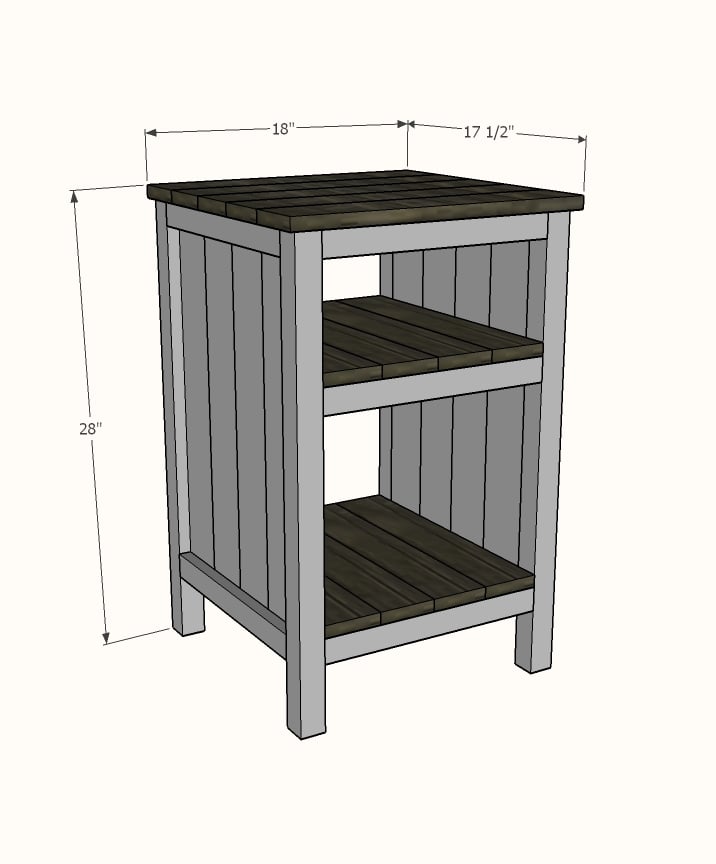
Bedside End Tables
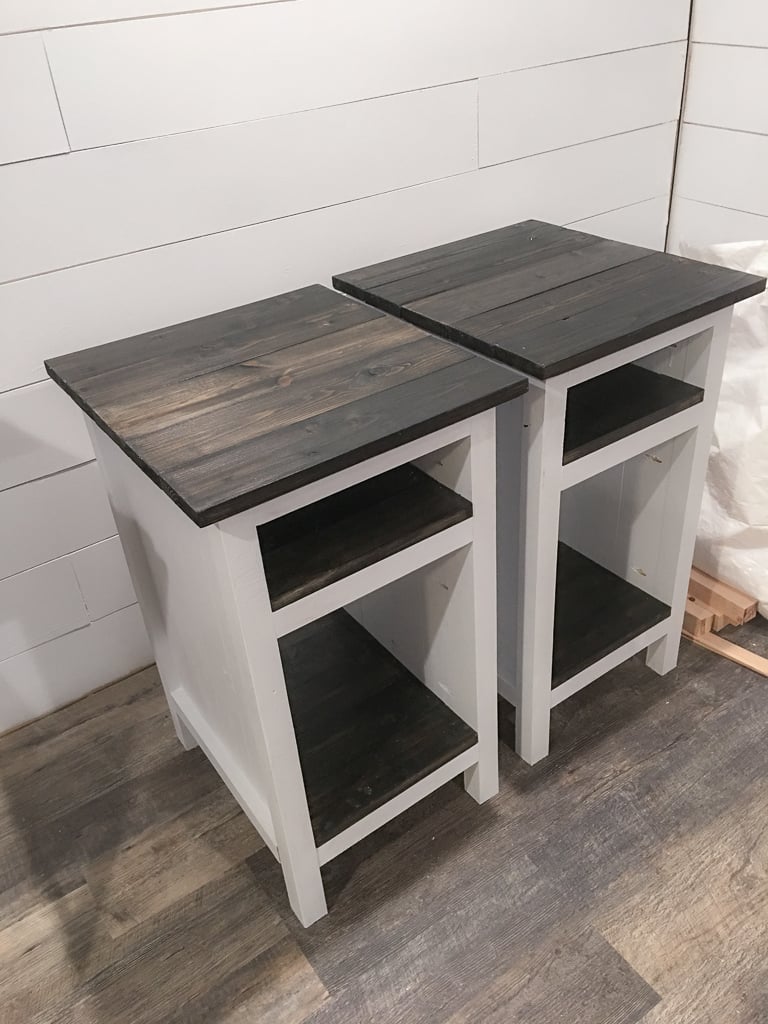
These are made from the three drawer plans but modified the size to meet our needs and used planks for shelves instead of drawers. Painted white and black gel stain.
UPDATE FROM ANA - We have received MANY requests for this plan and have created a plan inspired by this post here.
Shopping List (for ONE bedside table) + Tools
- 1 - 1x2 @ 6 feet long
- 5 - 1x4 @ 8 feet long
- 2 - 2x2 @ 8 feet long
- 1-1/4" and 2-1/2" pocket hole screws
- 1-1/4" brad nails
- wood glue
- Kreg Jig
- Compound Miter saw
- Drill
- Brad Nailer (18 guage)
Cut List (for ONE bedside table)
- 4 - 1x2 @ 14" - Side panel trim
- 8 - 1x4 @ 23-1/4" - Side panels
- 4 - 2x2 @ 27-1/4" - Legs
- 6 - 2x2 @ 14" - Shelf support
- 8 - 1x4 @ 17" - Shelves
- 5 - 1x4 @ 18" - Top
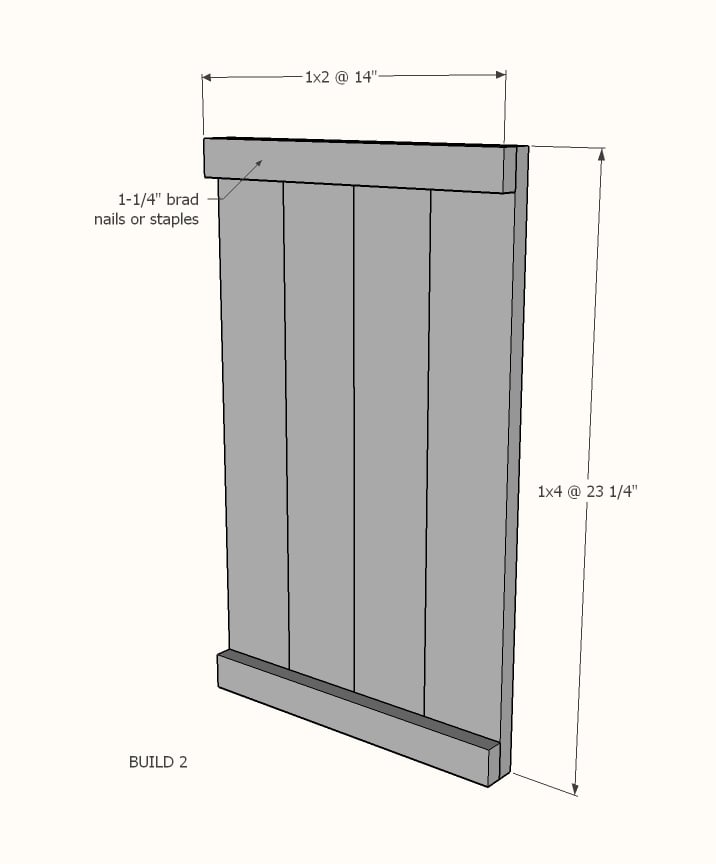
Cut 1x4s and 1x2s with miter saw. Layout side panel 1x4s as shown above. Measure and cut 1x2 to length. Nail the 1x2 to the 1x4s, two nails per overlap with glue. Make sure your side panels are square. Build two.
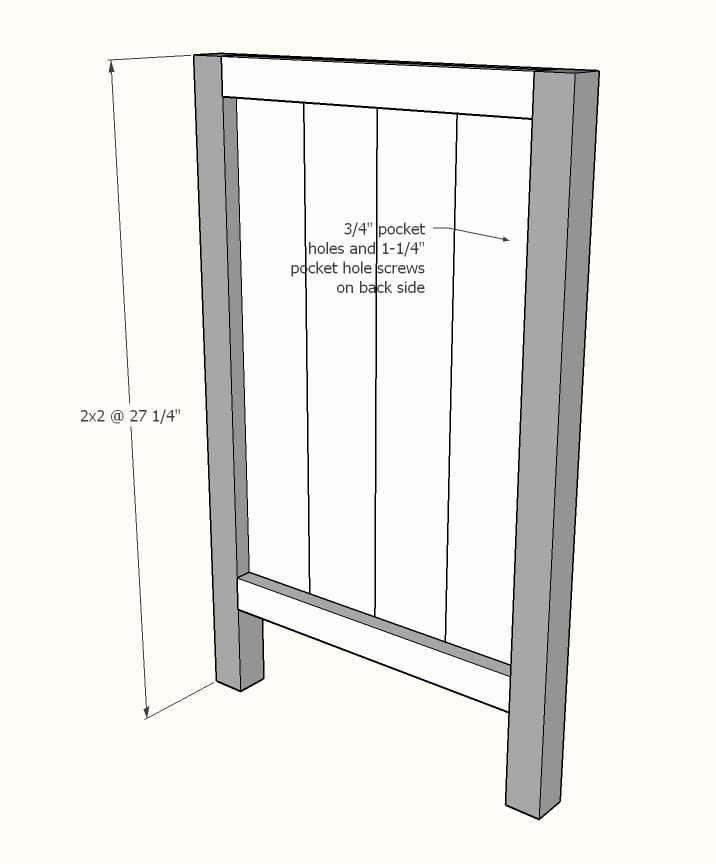
Drill 3/4" pocket holes on inside edge of 1x4 ends as shown above. Cut 2x2s with compound miter saw. Attach to the 2x2 legs with 1-1/4" pocket hole screws.
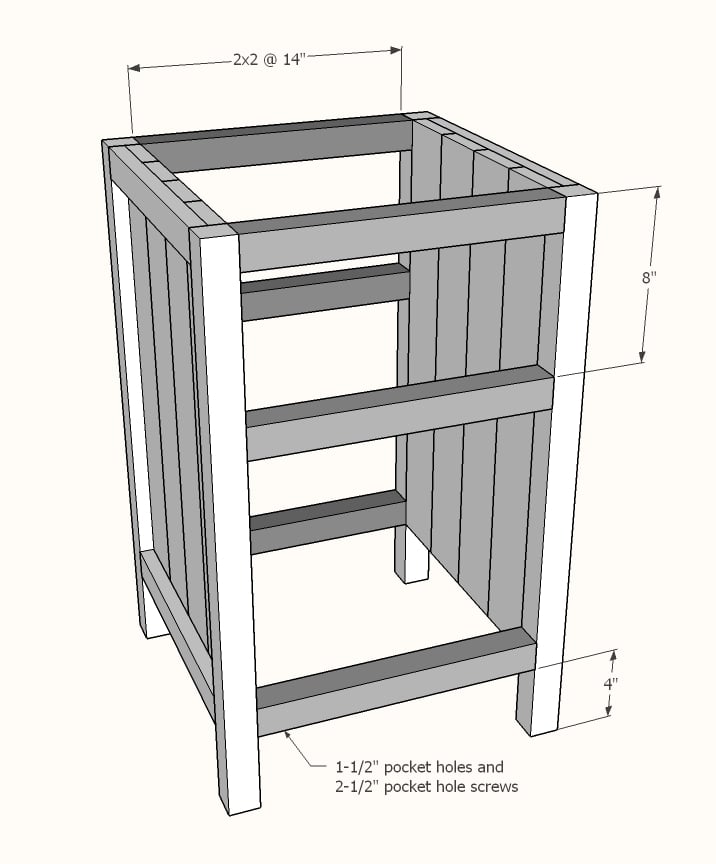
Set Kreg Jig to 1-1/2" setting. Drill 1-1/2" pocket holes on end of each 2x2, one per end. Attach to 2x2s with wood glue as shown above.
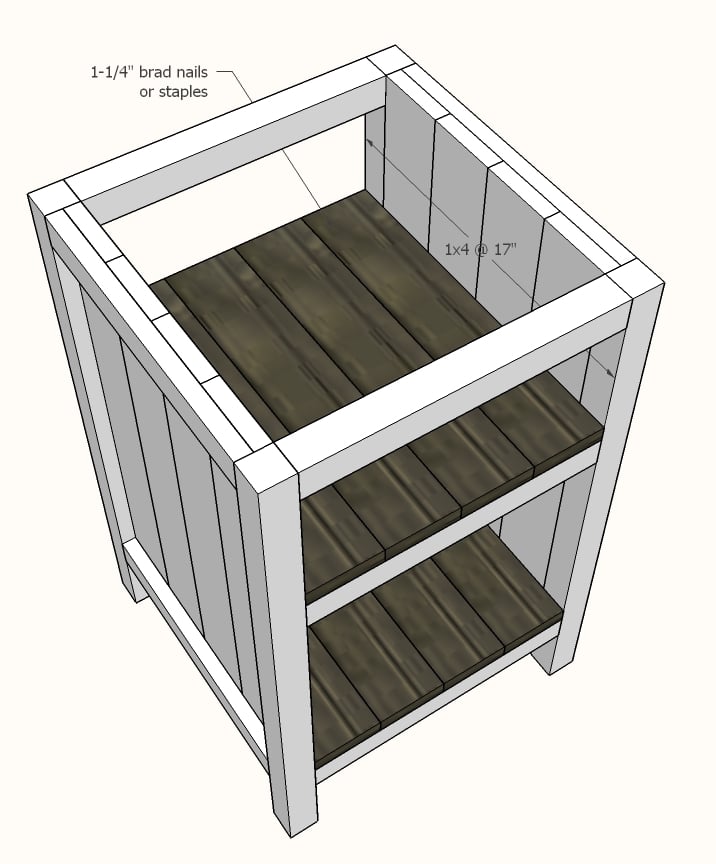
Cut 1x4 shelf boards with compound miter saw. Nail and glue to the inside of the project as shown above.
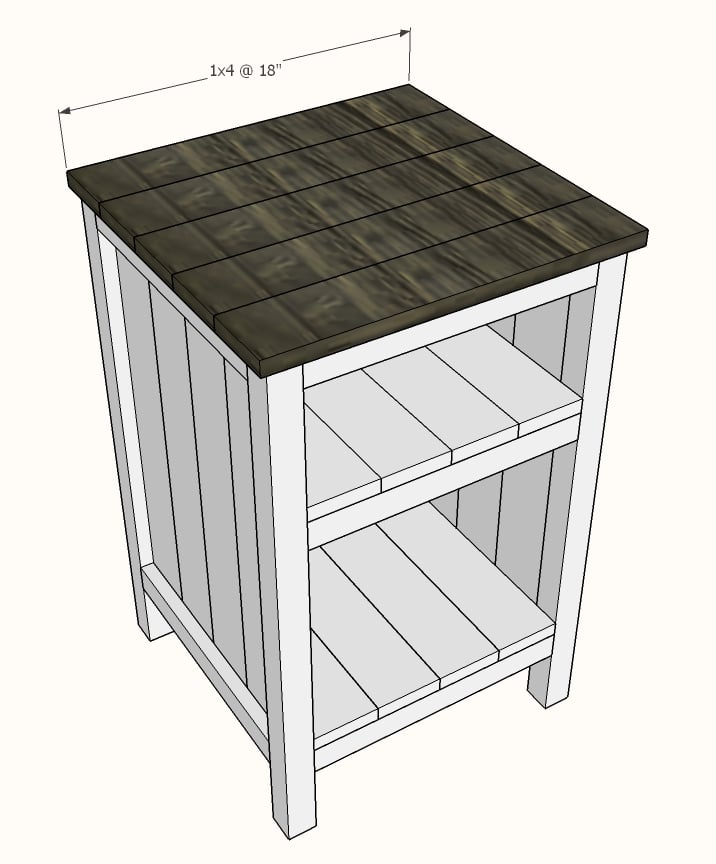
Cut 1x4 top boards with compound miter saw. Nail and glue to top with 1-1/4" nails and wood glue.
If you wish to add a back, measure and cut from 1/4" plywood and attach with 3/4" brad nails.
Built from Plan(s)
Estimated Cost
100.00 for both.
Estimated Time Investment
Weekend Project (10-20 Hours)
Finish Used
One coat of eggshell white PPG
Two coats of ebony gel stain
Two coats of ebony gel stain
Recommended Skill Level
Beginner
Comments
Mon, 02/12/2018 - 16:24
Is there plans for this one?
Is there plans for this one? Its gorgeous and I'd love to build it!

In reply to Is there plans for this one? by laurahamer07
Thu, 06/07/2018 - 15:37
Nightstand plans
Hello, this nightstand was built using these plans http://www.ana-white.com/2011/06/reclaimed-wood-look-bedside-table instead of adding drawers the builder added shelves. The shelves can be 3/4" plywood or 1x boards.
In reply to bedside end tables by karenlouder
Thu, 06/07/2018 - 15:40
Nightstand plans
Hello, this nightstand was built using this plan, but instead of drawers, simply measure and cut shelves to fit from 3/4" plywood. http://www.ana-white.com/2011/06/reclaimed-wood-look-bedside-table

Wed, 07/24/2019 - 09:24
Bedside Tables
It's taken us a couple of weekends, but we finished our bedside table. We made two, but one still needs painting.
Thank you for the plans. We had a great deal of fun and learning experience making these.
Want to see it? https://www.facebook.com/photo.php?fbid=2830583376957272&set=pcb.283058…
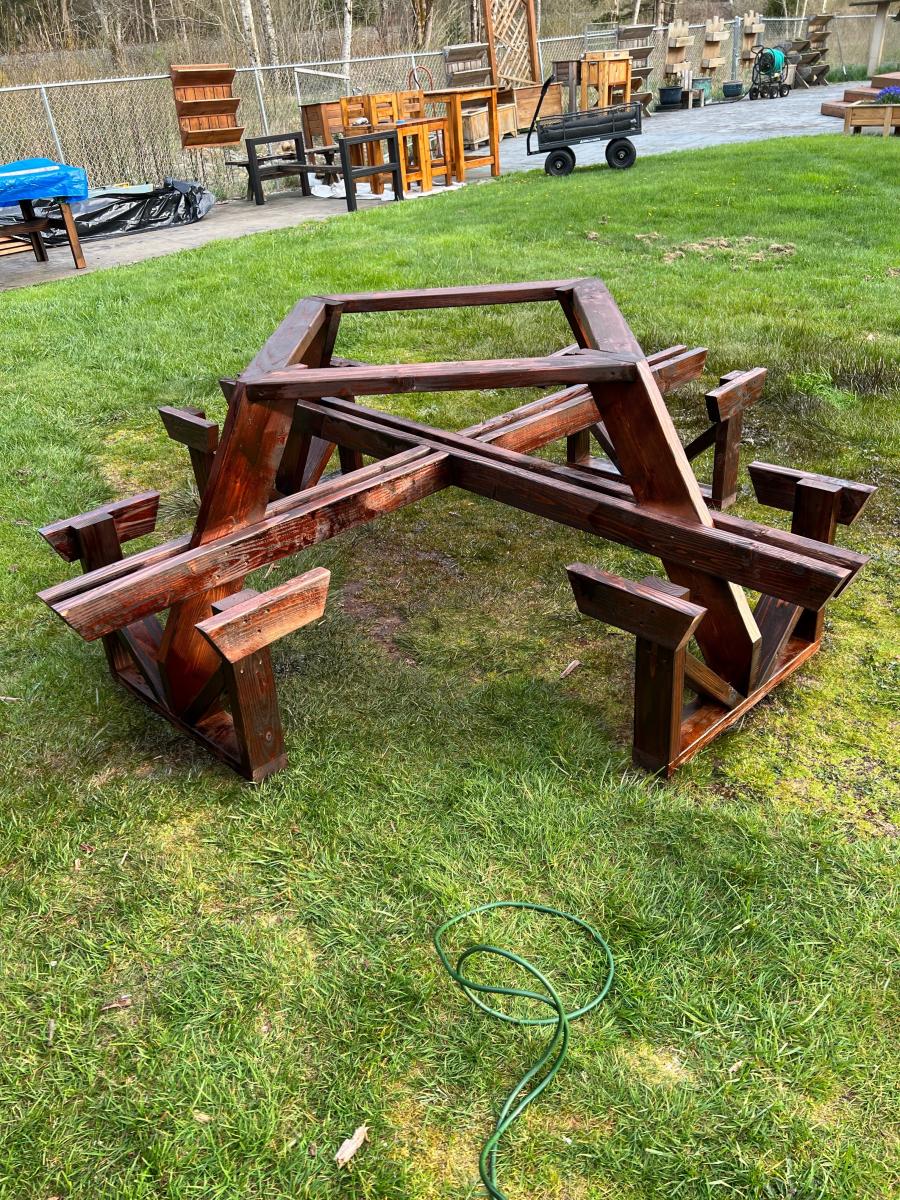
Octagon Picnic Table
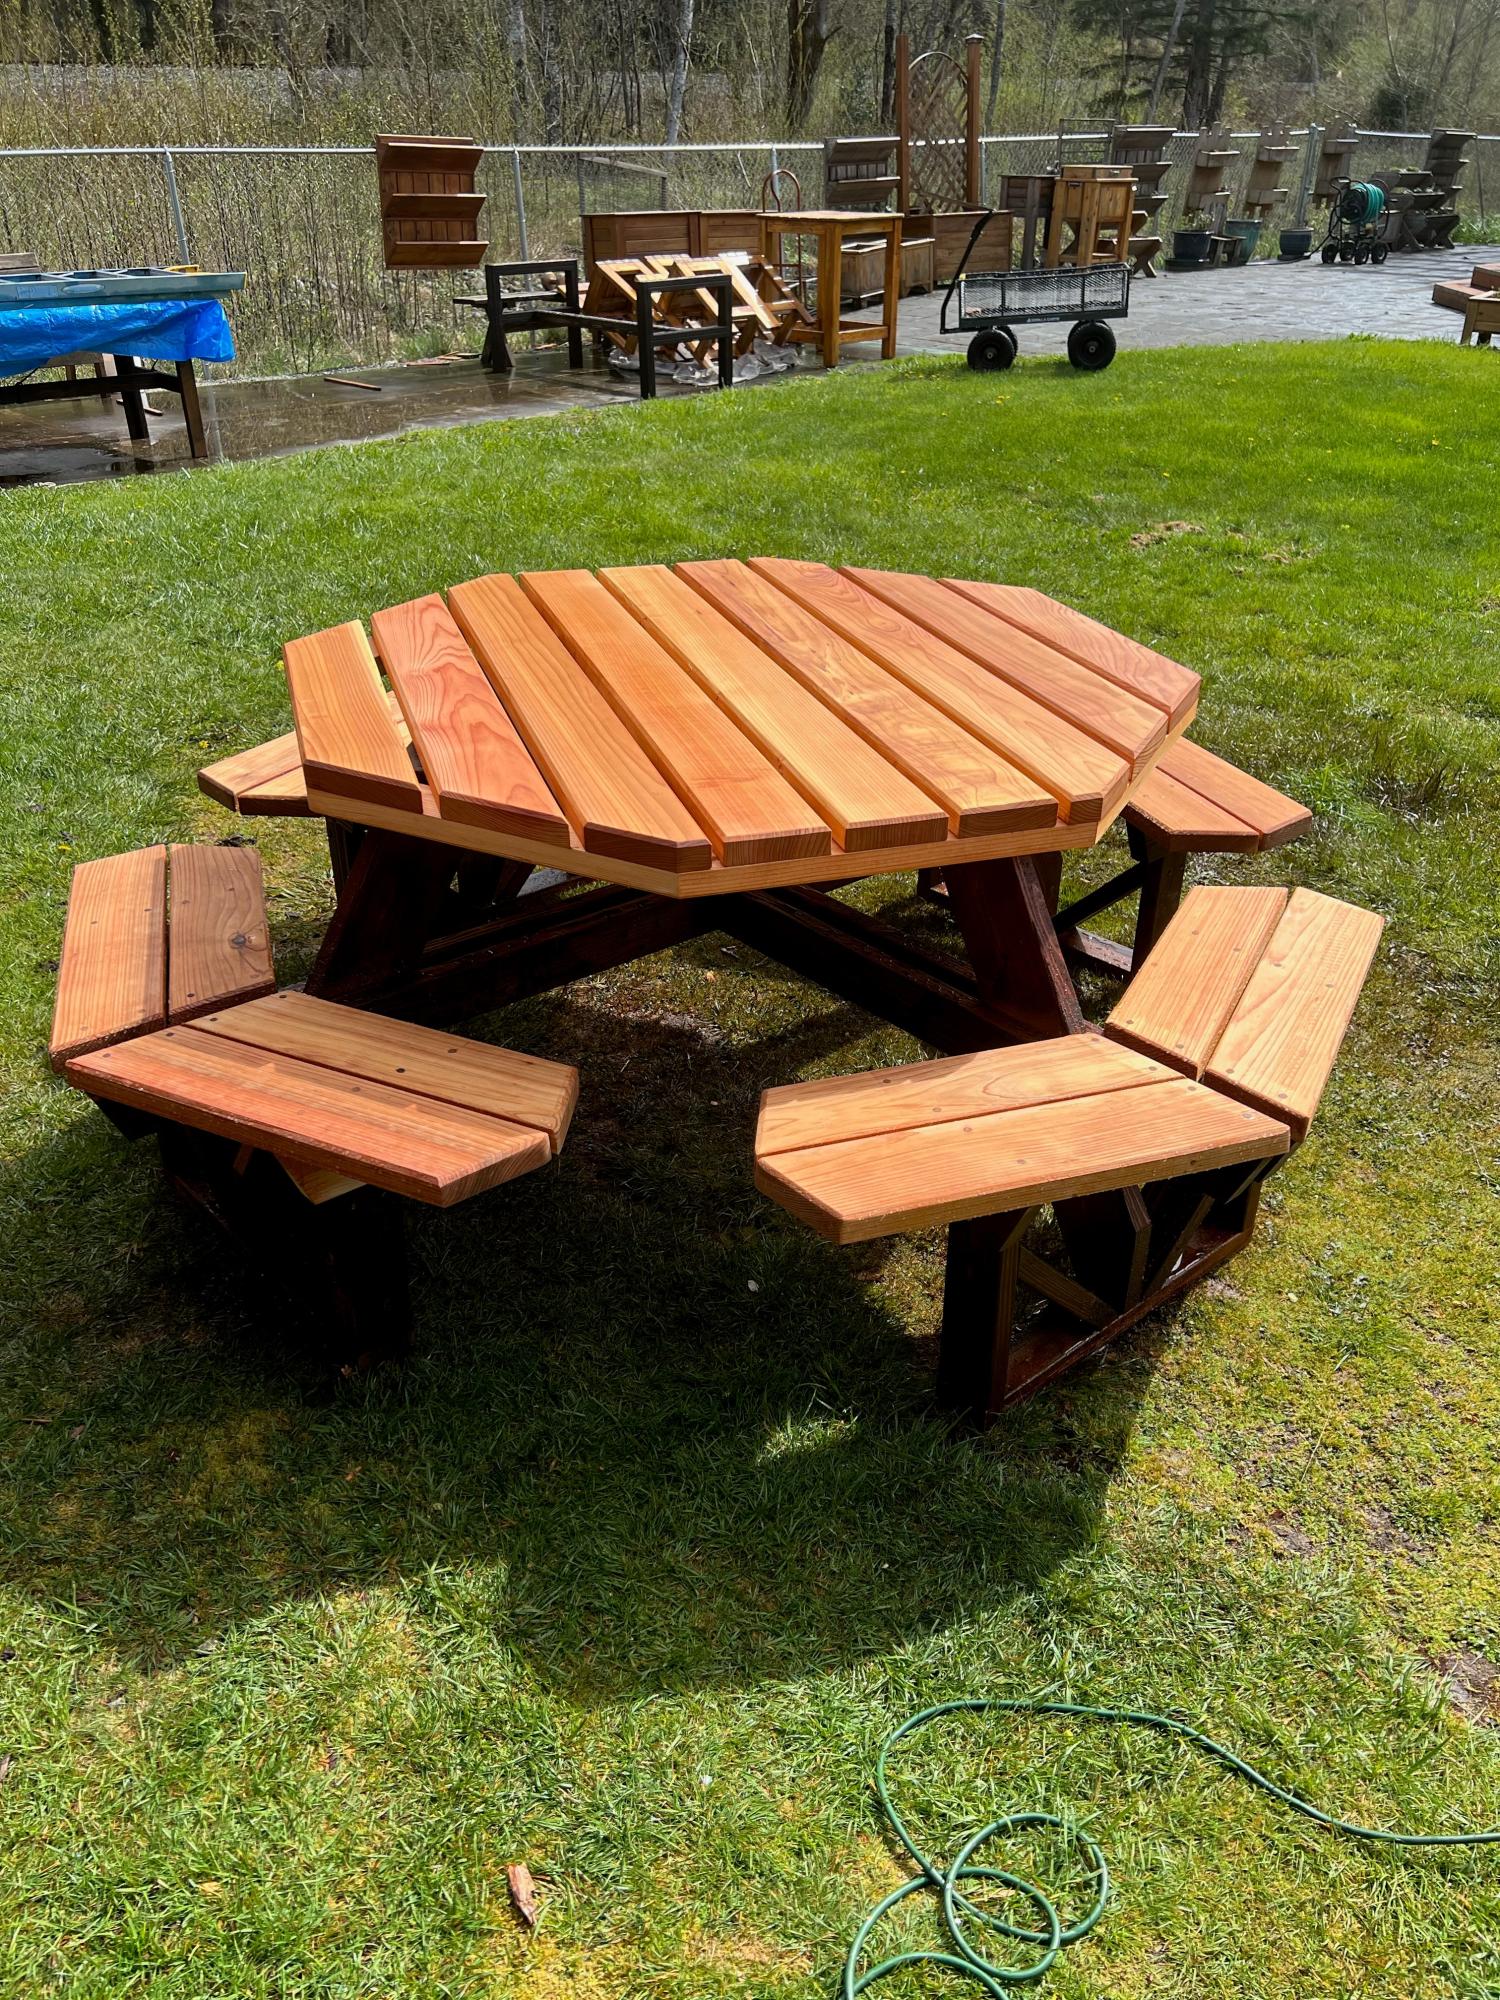
I just finished this octagon picnic table as per your plans
the 2x6 are all clear Western Red Cedar and the skeleton is
Douglas Fir. I think it turned out astonishingly excellent.
Thanks for the inspiration Ana.
Built from Plan(s)
DIY Wooden bench
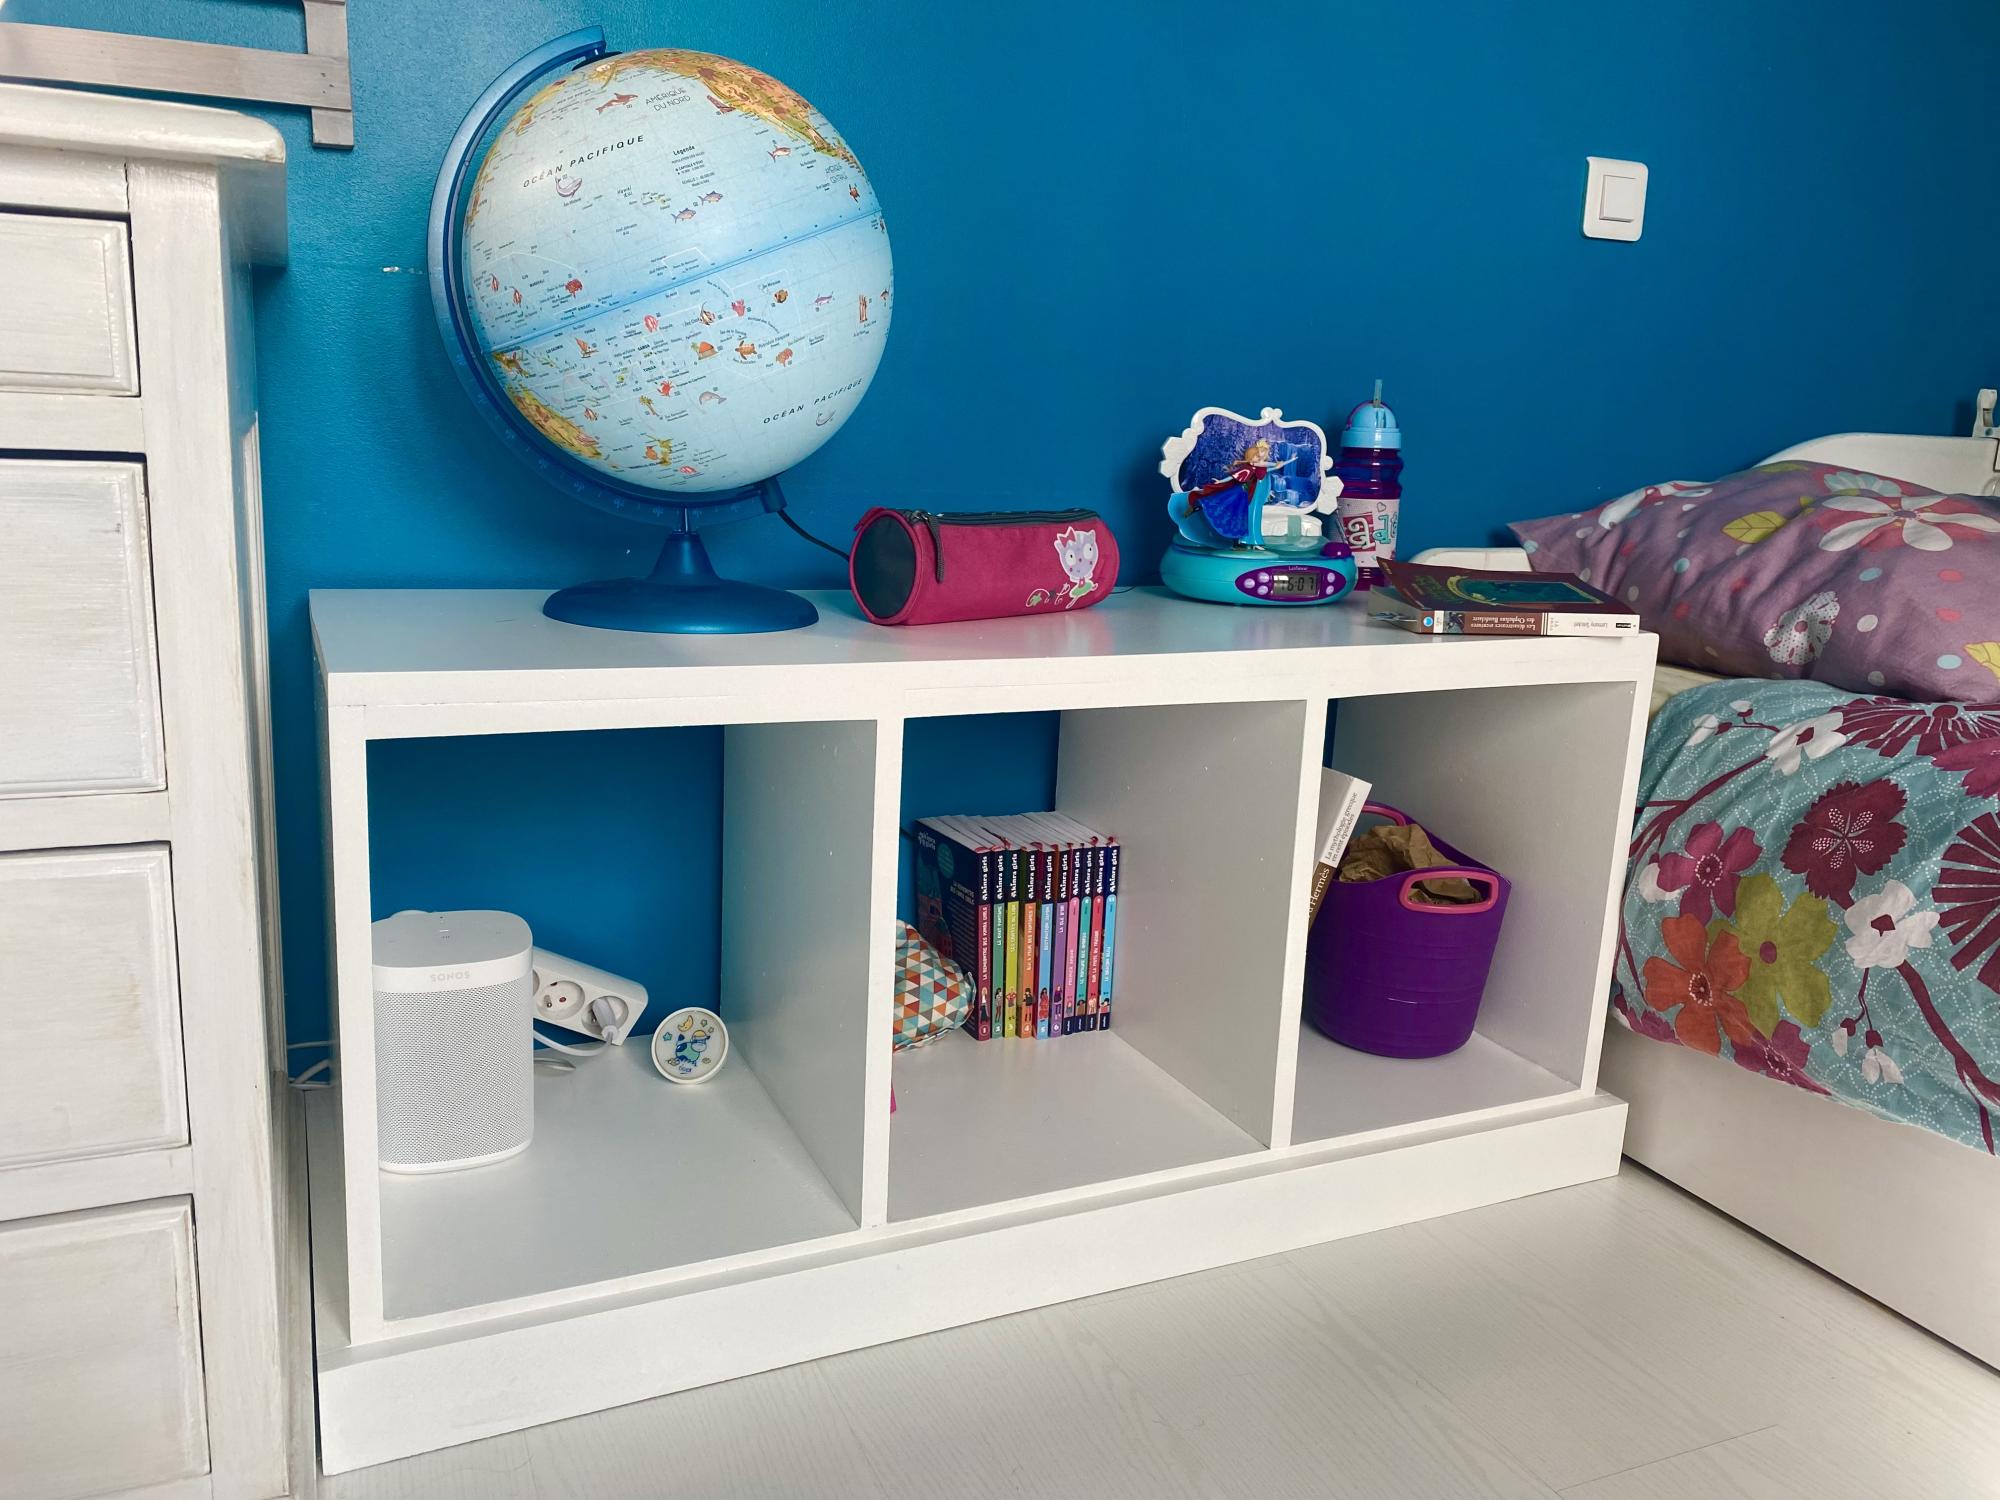
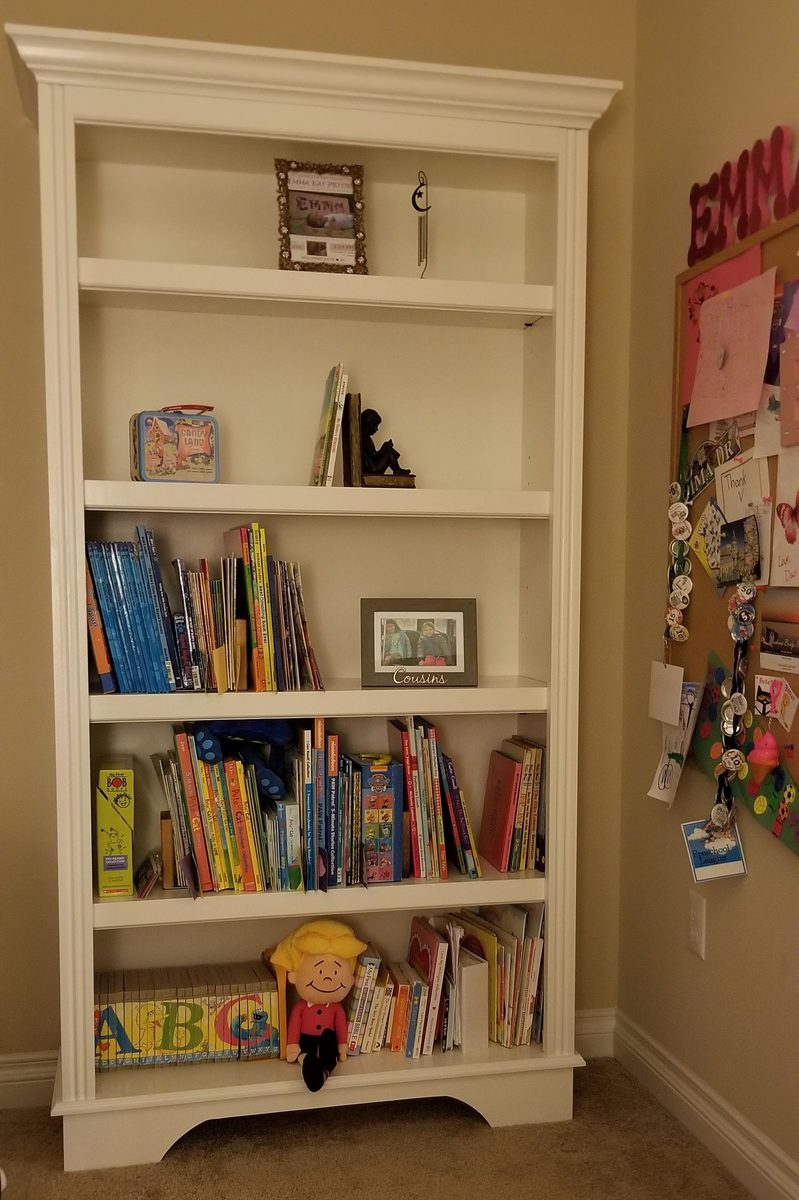
Thanks Ana for the plans. A new bench / bookshelves for our daughter's bedroom.
Built from Plan(s)
Comments
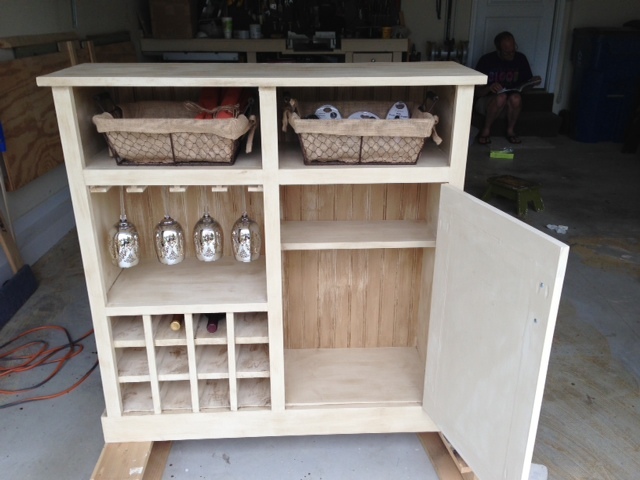
Shanty Console turns Wine Cabinet
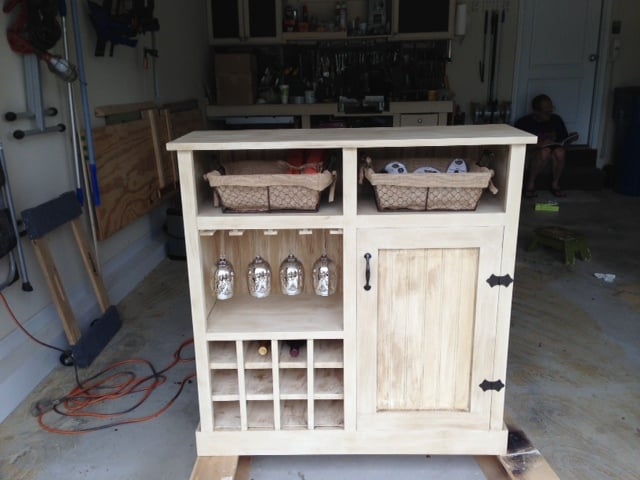
Happy Tuesday everyone! Today I am going to share a project with you that I built with the help of some plans from Ana-White.com.In a weekend we carved out a custom wine cabinet we will be donating to a local children’s charity here in St Peter’s, MO. This lovely cabinet was created from the SHANTY OPEN SHELF CONSOLE, which was designed for the Shanty sisters at Shanty-2-Chic blog site. We altered the plan to make it a wine cabinet which came out spectacular! Ana, thank's again for providing your free plans. I will be happy to upload the altered plans in a couple days so you can all enjoy them! Happy wood working!
Built from Plan(s)
Estimated Cost
$175.00
Estimated Time Investment
Weekend Project (10-20 Hours)
Finish Used
Anne Sloan Old Ocher chalk pain and wax set clear/brown
Recommended Skill Level
Intermediate
Comments
Wed, 08/07/2013 - 14:43
Great Gift Idea
Thinking this would make a great Christmas Gift idea for quite a few of my friends! Can't wait for the altered plans!
Thu, 08/08/2013 - 17:55
Altered Plans!
The plans are in process - Hope to have them posted this weekend to your Ana's site!
Sun, 08/18/2013 - 08:46
Altered plans
Looks great! Any idea when the altered plans will be available? Itching to get this built for my SO.
Tue, 08/27/2013 - 13:51
Looks Great!
I'm adding this to the top of my build list as soon as the modified plans are uploaded! Thanks for taking the time to add them.
Wed, 08/28/2013 - 17:10
Plans for Wine Console
Wine Console Altered Plans
Sorry it took me so long, our blog over at Hello...I Live Here has kept us busy with all our new visitors. But as promised here are the altered plans to help you make the wine bottle holder and stemware holder.
MAKING THE WINE BOTTLE HOLDER:
Start your project with Ana White's plans. Finish the whole thing, but only make one door. Leave the other side open and alter as follows to get your wine holders:
1. First cut 3 additional shelves 17 5/8" wide. Make sure you Kreg 3/4" holes on the right and left side of the shelves, connect to the sides with 1 1/4" PH (pocket hole screws - Kreg).
2. We spaced each of our shelves 3 1/2" apart, allowing 12 bottles to be stored in the wine case.
3. Cut in half length wise a 1x2 board. This will give you a horizontal stringer about .75" wide.
4. We customized the top shelf board to fit the distance - we did not want the board to hang down interfering with the wine storage. We trimmed this board to 3/4" to match the shelf thickness. Then glued and nailed into place.
5. Once the top board is in place, measure the distance from the bottom shelf to the top shelf to just under the top shelf board from step 4. With a pencil mark the stringer and cut to size, and install with glue and nails. This step needs to be completed 3 times 3 1/2" apart from each other. You should now have 12 square boxes making your wine storage.
6. On each shelf behind the three stringers, we placed a divider to keep the bottles from hitting one another. Each divider is 1/2" square, and 11 1/4 long, to match the shelf depth.
MAKING THE WINE STEM HOLDERS:
Now that you are done building the box for the wine holder, we can move on to the stemware holder.
1. We purchased .25 x 1.5" x 36" poplar flat wood. This will make the bottom of the T's and L's stem ware holders.
2. Then we used 1/2" square pieces of poplar to make the L and T mounts. Mount the flat poplar to the 1/2" squares making 2 L shaped pieces for the Right and Left side of the unit, then make 3 T's for the centers. You will use glue, and clamp them down tight, then nail together.
3. Hang each L shape on the Left and Right Side of the unit with finish nails. The next part is kind of trick and depends on the size of the stem bottom you will be hanging not all base bottoms are the same. Once your L's are hung, take the stem wear you will be hanging and rest it into the L shape holding the glass (do not let go of the glass it will break if dropped). Then position the T shaped molding to accommodate your stemware. Move the glass in and out of the L and T until you get your desired width for your stemware. Mark the T you are holding with a pencil , carefully sit down the stemware and mount the T shaped holder. Continue until all 3 of the T's are hung ( we used glue and nails to complete this process).
We used a bead-board backer instead of plywood to give it that French country feel.
We hope these plans help you build a piece you love! This piece of furniture brought the charity we donated it to $500 extra dollars to help their children. We at Hello...I Live Here were very proud of the job we did and that we got to help some wonderful children!
Visit us at www.helloilivehere.com or stop by our Facebook page and give us a big like once you complete your project!
Happy building ;-)
- LC
Thu, 08/29/2013 - 13:01
Thanks so much for posting
Thanks so much for posting the plans! My sister has been asking me to make this for her since she saw the pics a couple of weeks ago.
Side note: I'm from St. Louis, MO, so seeing you were from St. Charles caught my eye!
In reply to Thanks so much for posting by Joeboxer1013
Thu, 08/29/2013 - 16:06
Happy to help
No problem - we are actually in Ballwin MO - stop past our page and see the other things we do - helloilivehere.com
LC
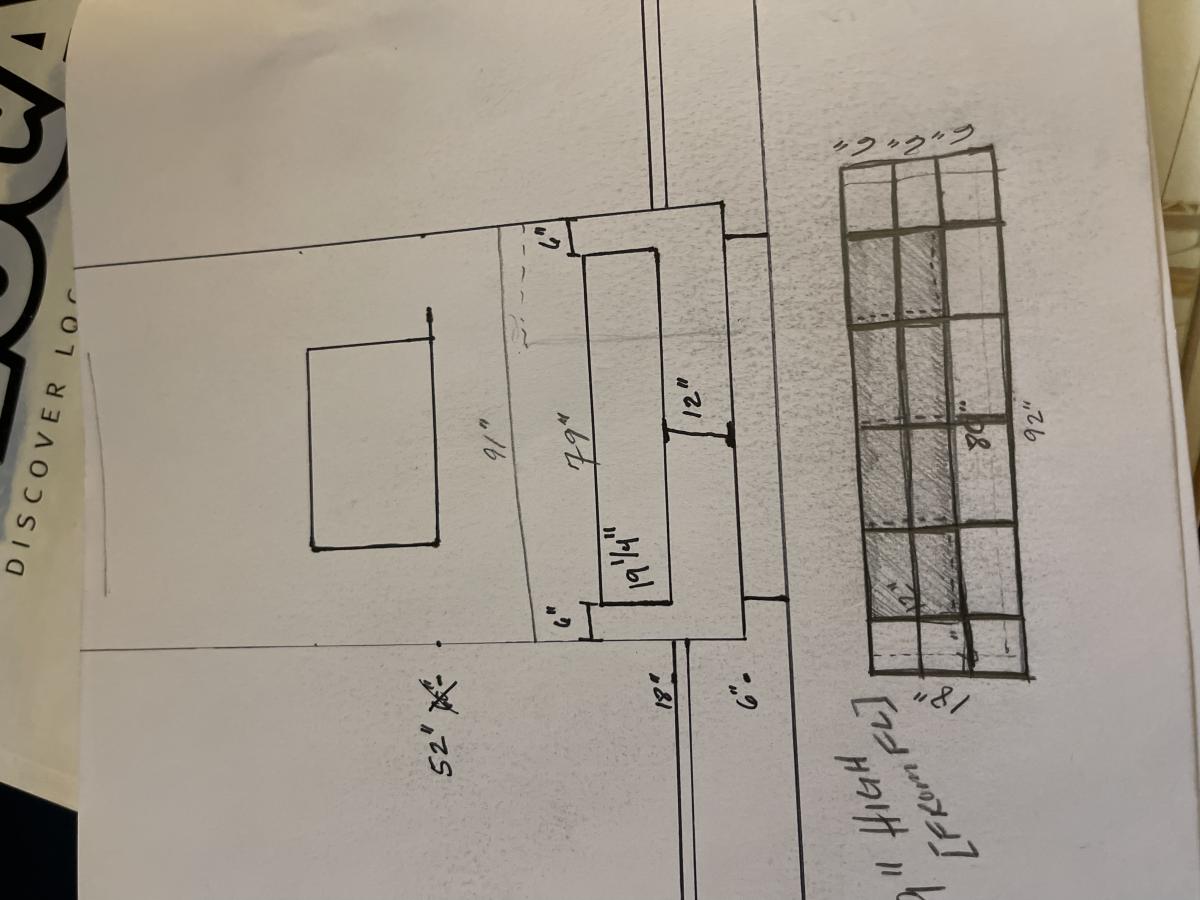
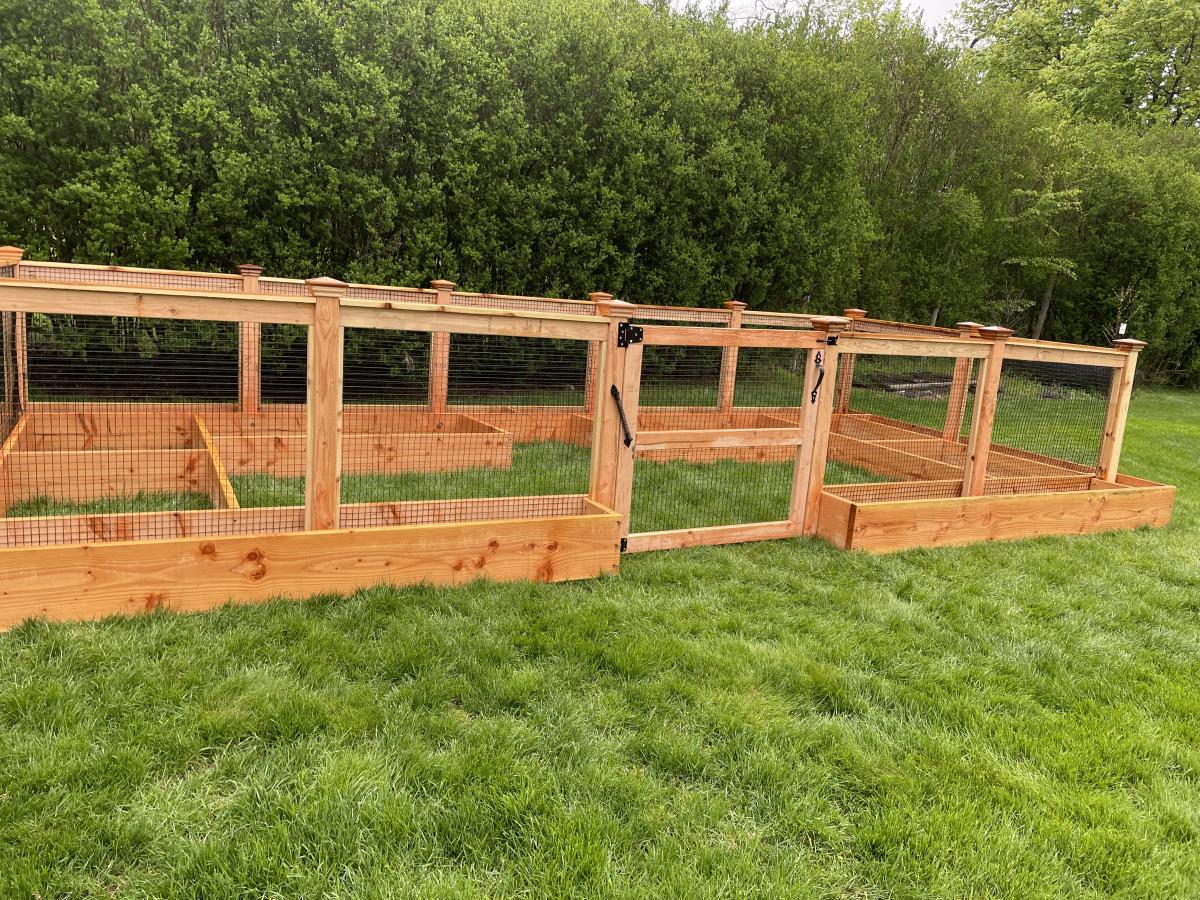
Nicole’s Garden
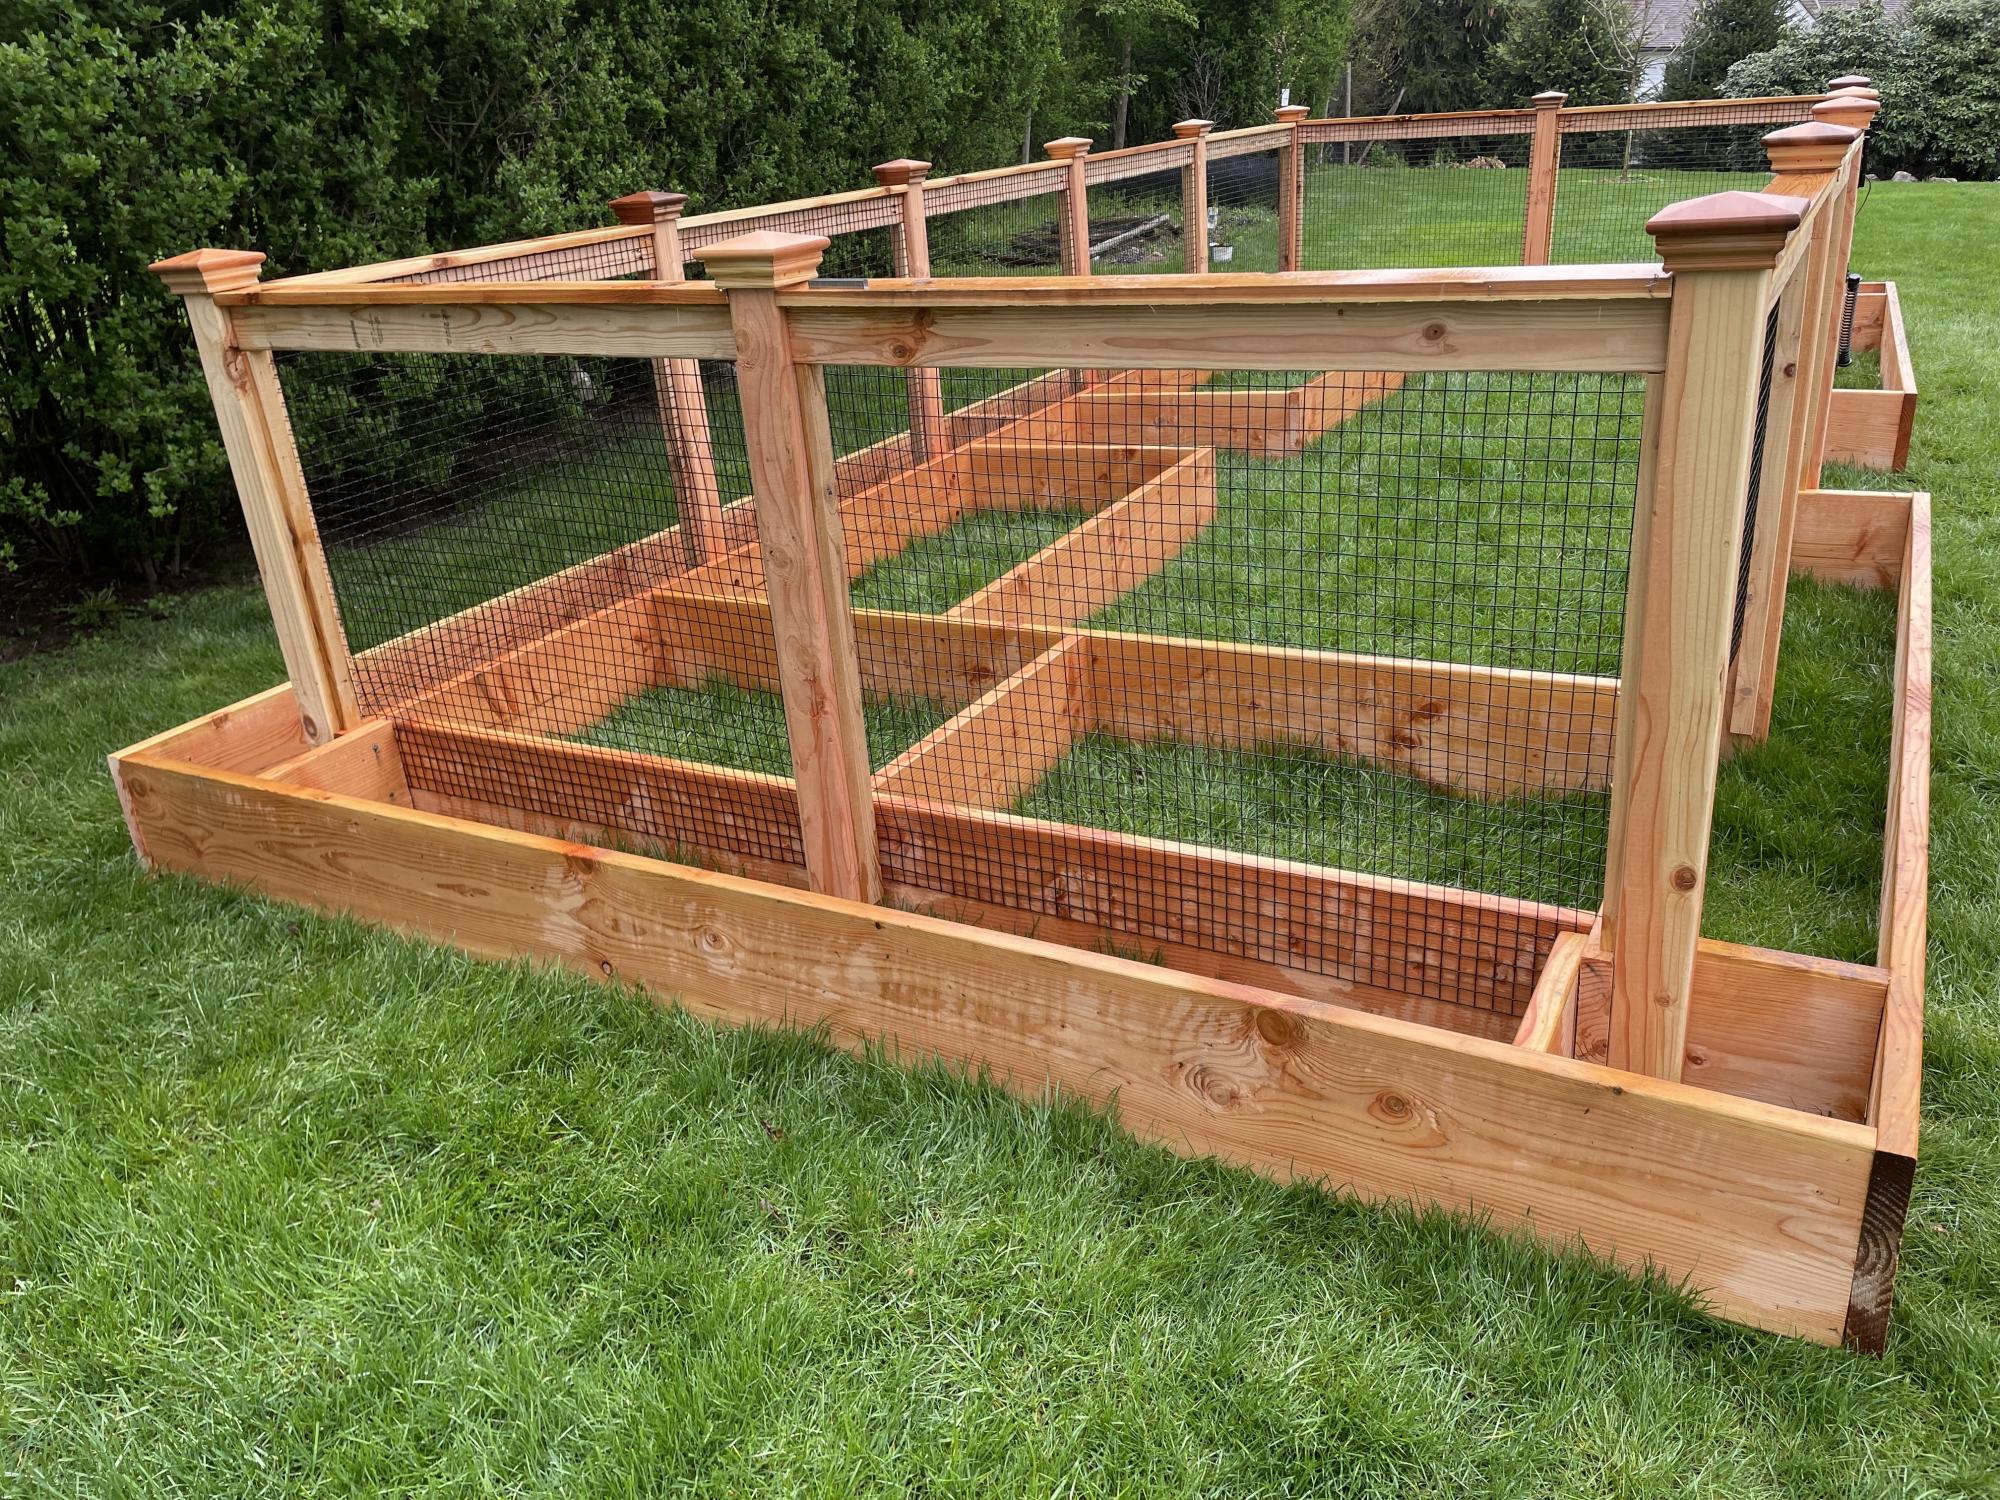
A vegetable garden with an outside ring to plant marigolds to keep deer away.

Built from Plan(s)
Comments
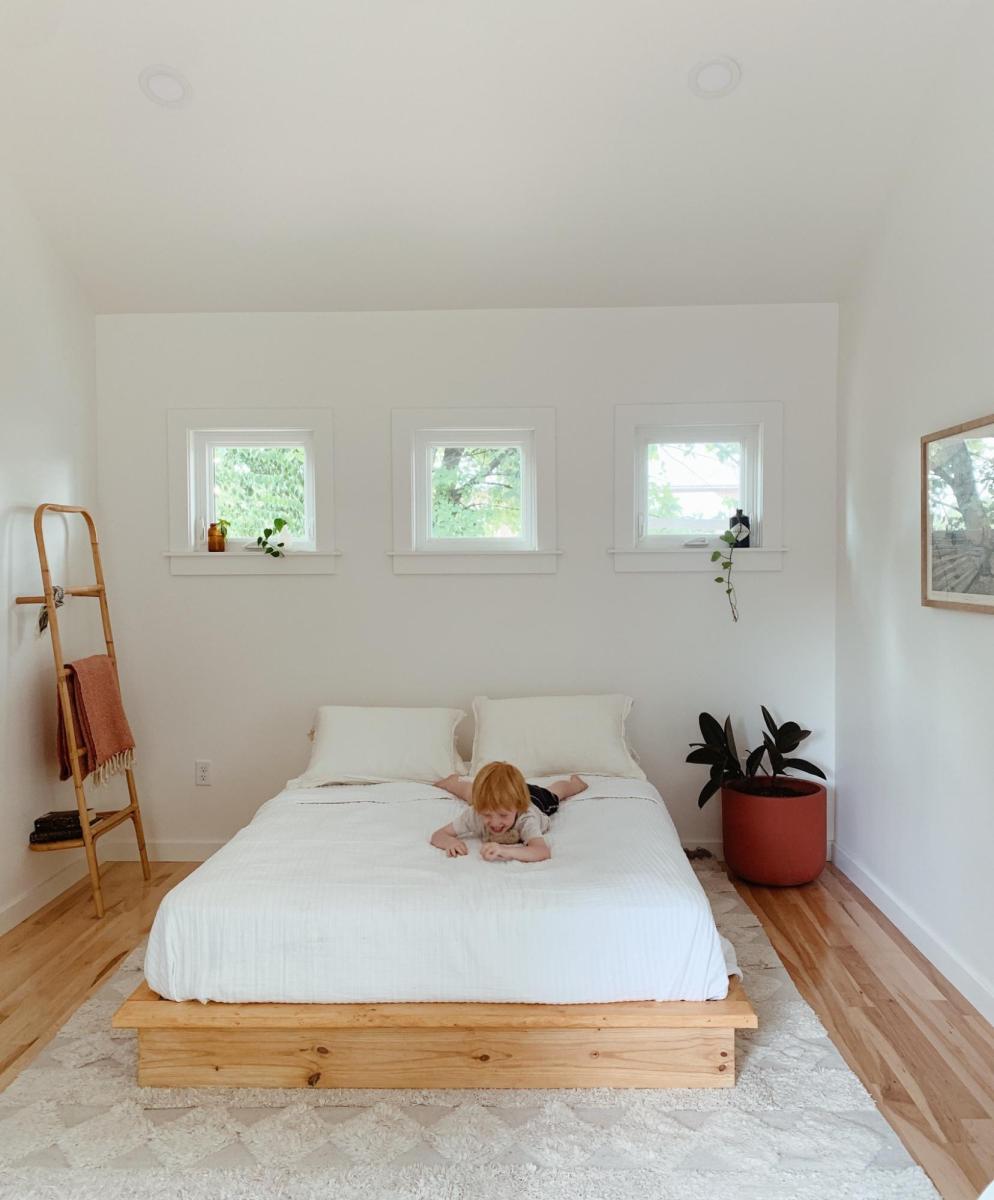
Finally Built a Platform Bed!
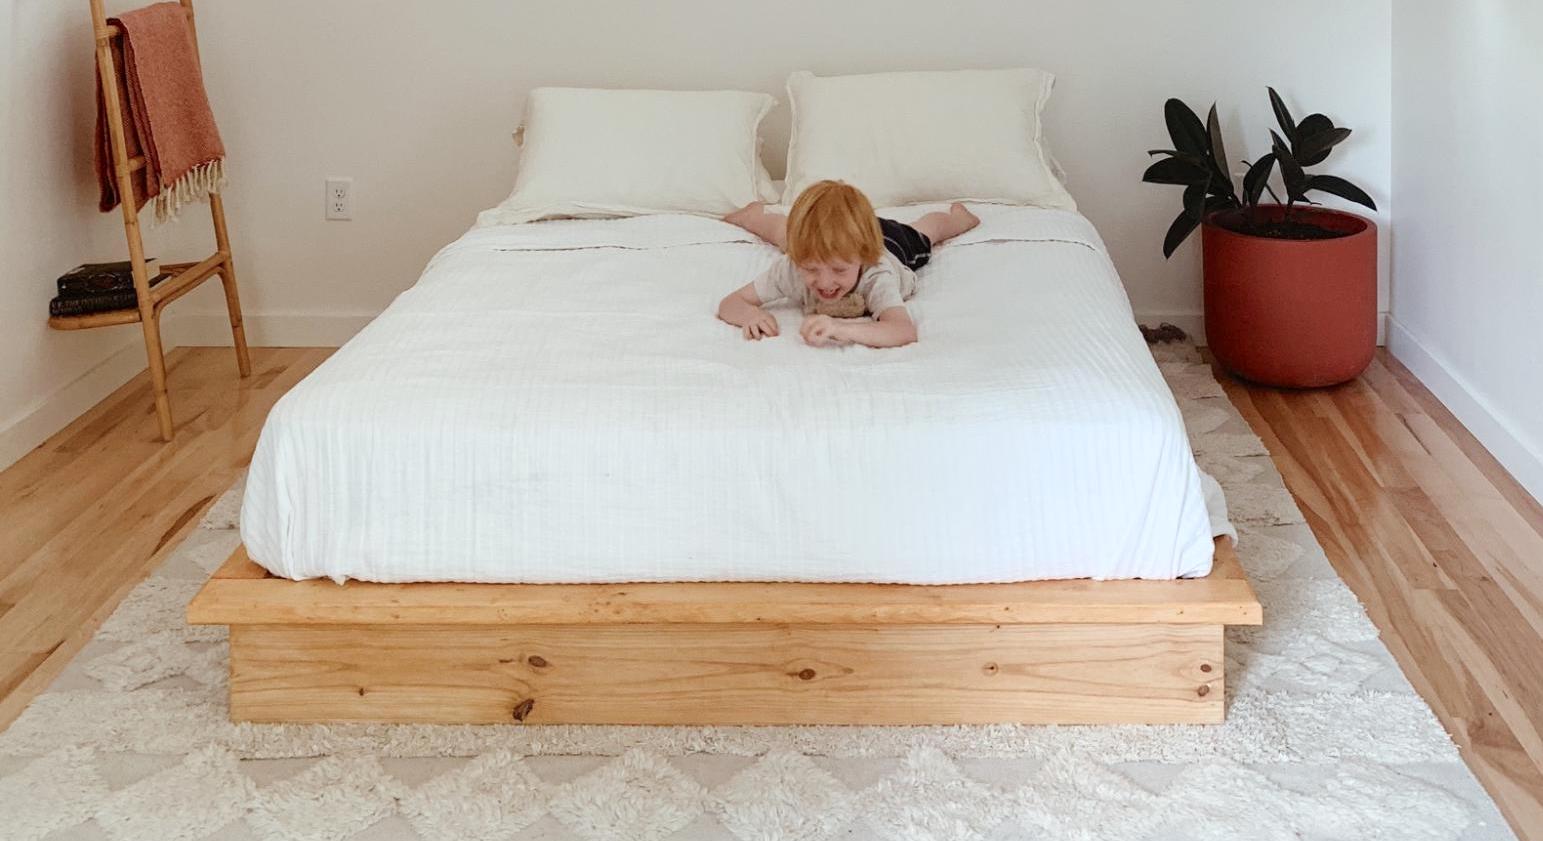
I've been wanting to build this bed for awhile and finally got around to it. I made a few small changes to the plans:
-I used 2x8's instead of 2x6s, so it wouldn't be so low to the ground.
-I ripped 3/8" off of the 2x8 supports in the middle so the mattress would nest inside the frame and not slide around
-I didn't add the headboard because it seemed a bit chunky/rustic for my taste. I will come back and do something else for the headboard. Maybe a cool paneled wall with built in sconces? We'll see!
Love these plans though, appreciate it!
Built from Plan(s)
Comments
Mon, 07/25/2022 - 21:44
Great bed!
Love the look and your mods, well done! Thank you so much for sharing.
Indoor Dog Kennel
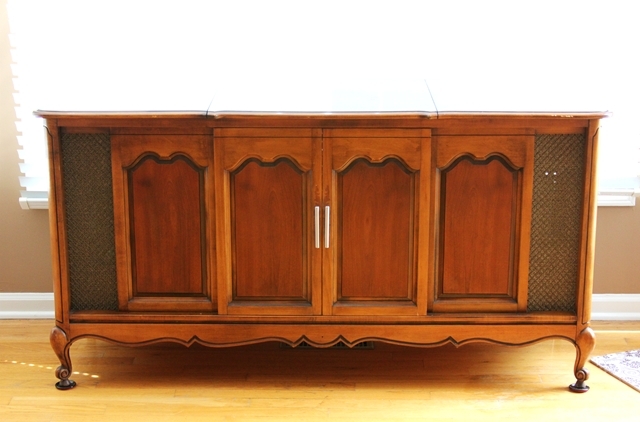
I love my dogs, but their wire kennels were an eyesore. Removing them completely was not an option, but I was tired of looking at them. I went back to my first-ever rehab project, and took it one step further to create a one-of-a-kind castle for my pups.
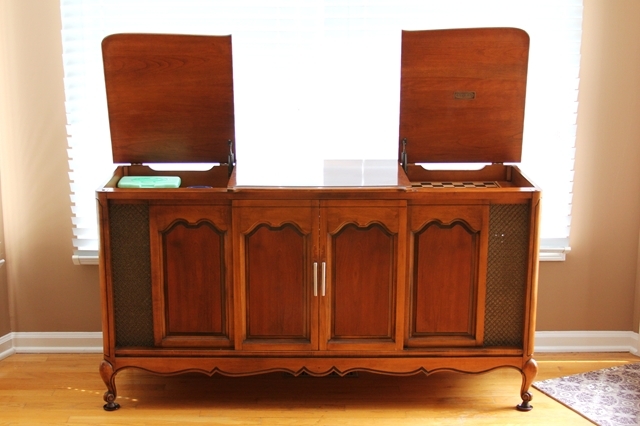
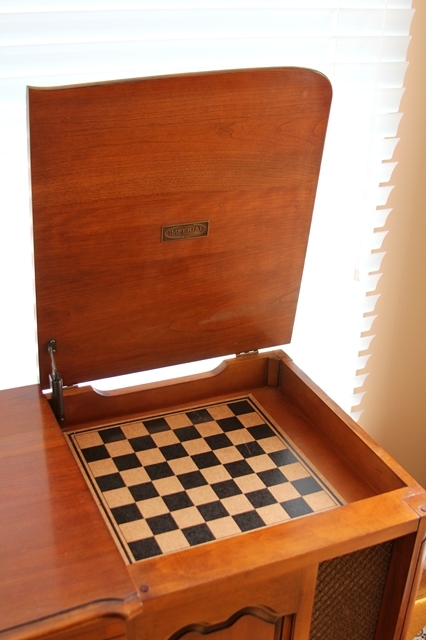
The original piece of furniture was an old console-style TV cabinet. Sliding doors on the front revealed the TV, and two lids on top contained the tuner and a turn-table.
Armed with screwdrivers, hammers and a dremmel, all components were removed form the cabinet, leaving just the shell. (PLEASE be sure you remove all sharp, potentially dangerous, screws, staples and what-not’s from the inside of the cabinets, to avoid injuring your pet! The dremmel allowed me to cut off and grind down stubborn screws.)
To cover the holes in the top cabinets, I used old checker boards. The cubbies are now a great place to store dog treats and leashes.
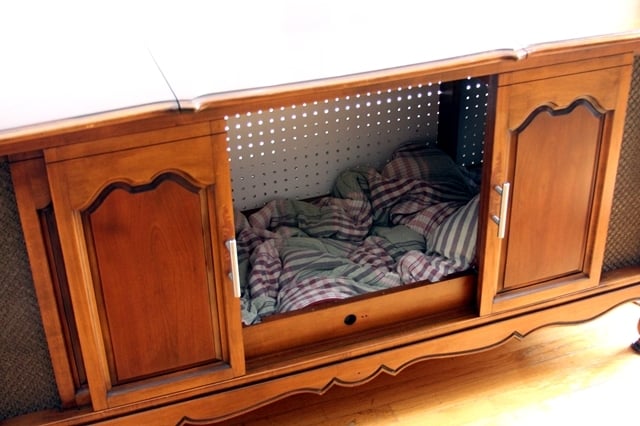
OPTIONAL: The back panel of the cabinet I used had holes from the TV components. I elected to replace the back board with a new sheet of peg board. (The peg board allows for much-needed ventilation.) In order to get the size perfect, I traced the old back onto the new and marked the original screw holes.
I vacuumed the inside to remove all construction debris and polished the exterior with Pledge. Then, I inserted an old comforter into the kennel, and stood back as my two pups launched themselves into their new abode.
The doors can stay open during the day for them to enter at their own will, and close for bedtime. And my eyes no longer hurt.
Estimated Cost
Cost of Cabinet (will vary)
Estimated Time Investment
Afternoon Project (3-6 Hours)
Finish Used
I did not elect to change the finish, but it could be painted to match any decor if you want.
Recommended Skill Level
Beginner
Comments
Thu, 08/11/2011 - 18:41
Dog kennel
This was such a great idea. I love the old console. I love to build but I love it so much more when I can use old wood or repurpose parts of old furniture and industrial pieces. I feel creative. The checker boards are great. Do you have a blog?
X based pedestal table
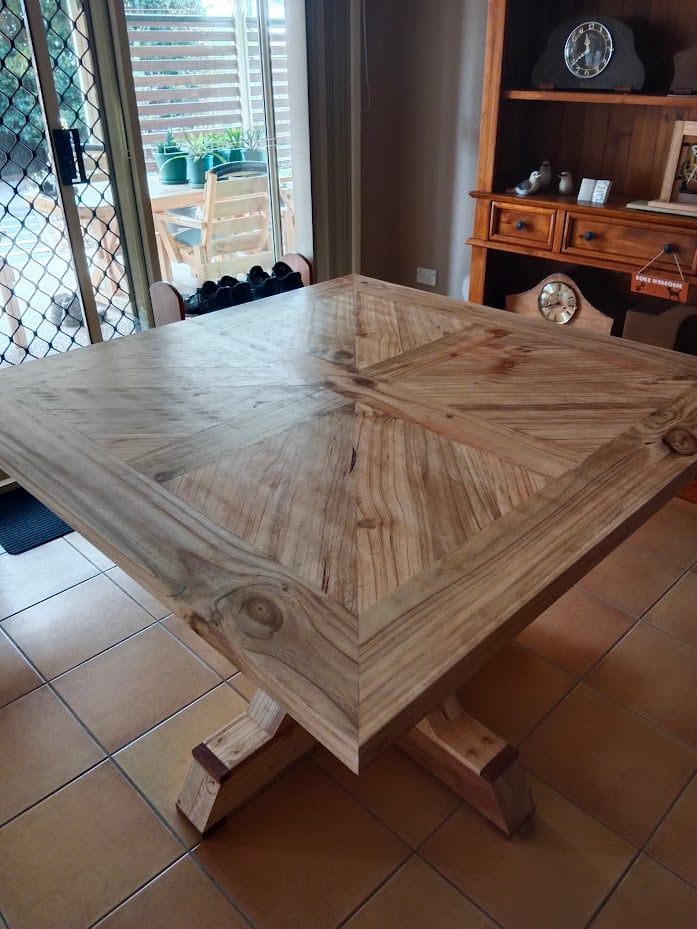
The entire table was made from 200mm x 50mm x 2400mm pine landscaping sleepers. Finished with Cabots benchtop clear
Built from Plan(s)
Comments
Beadboard Cabinet

Since we don't have a garage or any really good place to keep our tools, they end up all over the house while we're working on a project. So, we decided to build a cabinet that would look nice in our house, and also house our tools. We chose the armoire plan because it has plenty of space.
This project took us forever, so it's hard to really estimate the actual working time. We began working on it back in June, then we were evacuated because of a forest fire.... By the time we got back into our house and we were organized again it was the end of July.... and now finally the end of August it's finished. It took us a while, but it's a great addition to our house!
We modified this cabinet by using 1/4 inch beadboard backed with 1/4 plywood for the doors. We also modified the size of the armoire to make it deeper.


Built from Plan(s)
Estimated Cost
$125 approximately?
Estimated Time Investment
Weekend Project (10-20 Hours)
Finish Used
Sanded, then painted the outside with a quart of "creamed coffee" oops paint, and painted the inside with a sage green paint from Habitat for Humanity Restore.
Recommended Skill Level
Beginner
Comments
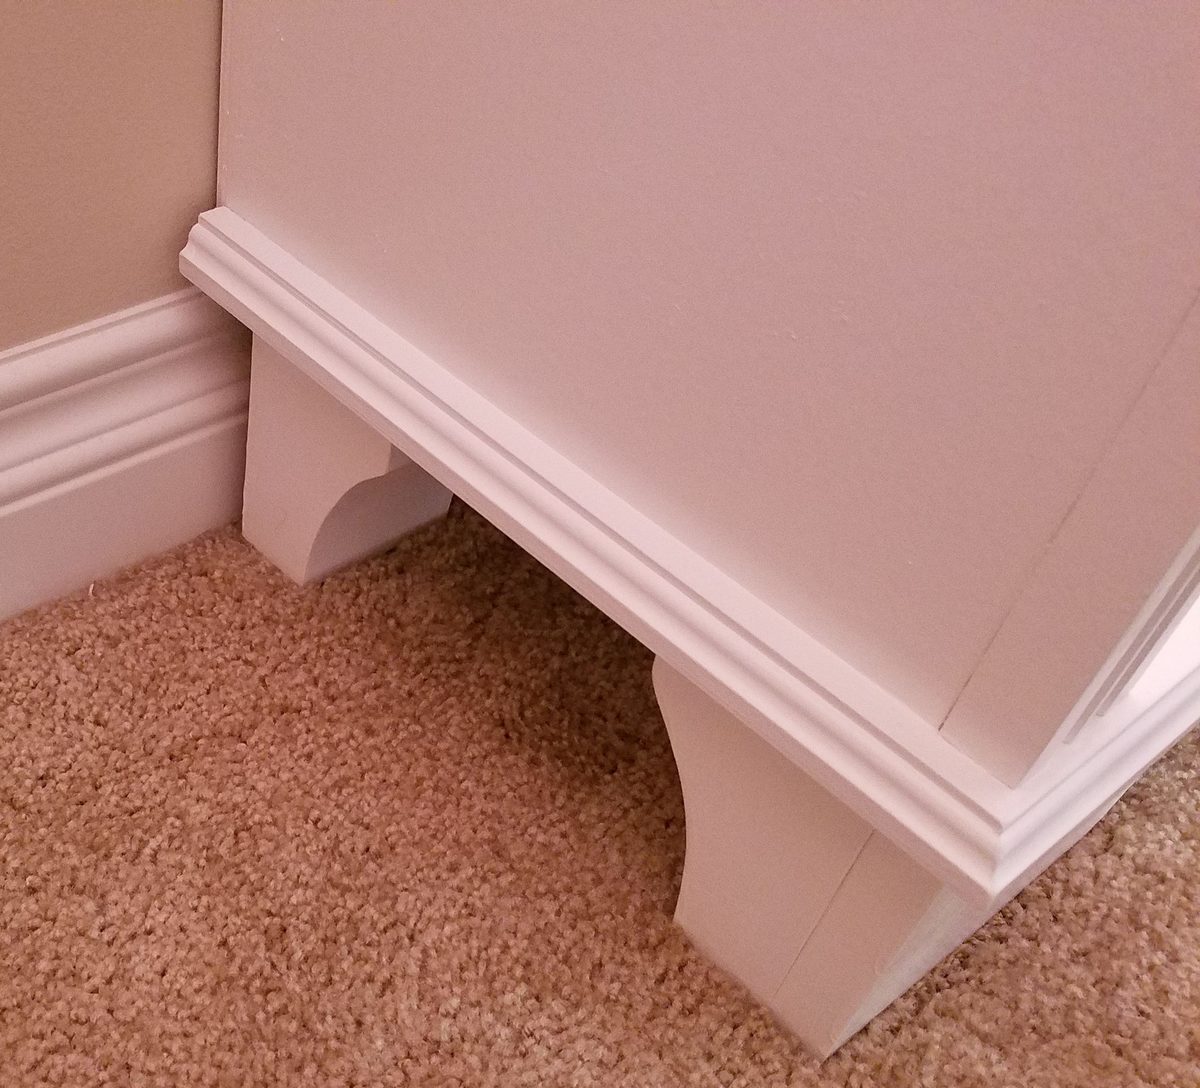
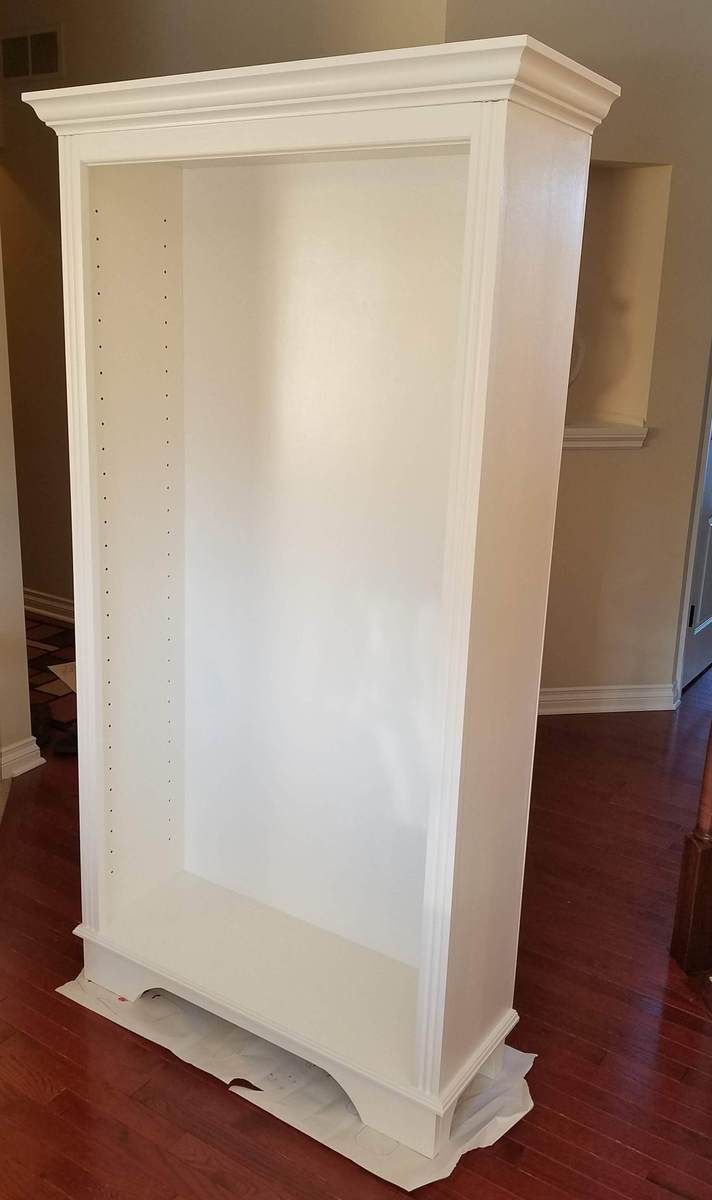
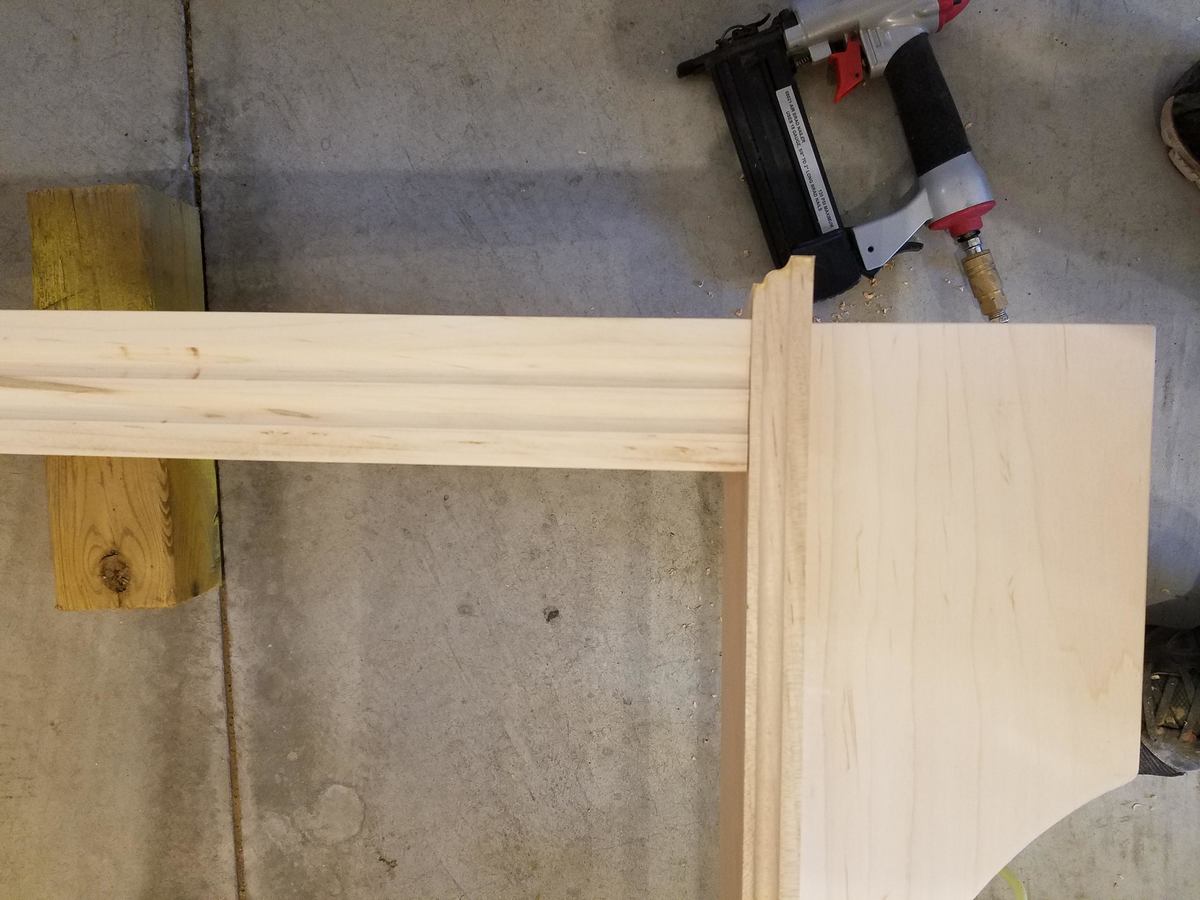
Maple Bookcase with Fluted Trim
Just finished this maple bookcase with fluted trim for my daughter's room. I chose all maple trim even though it's painted because I wanted a good hardwood with low grain that would look good for decades to come. Full build details are on my website. Router bits used were a roman ogee and a core box bit.
Estimated Cost
100
Estimated Time Investment
Weekend Project (10-20 Hours)
Finish Used
White Paint - Behr Premium Plus Semi-gloss
Recommended Skill Level
Intermediate
Comments
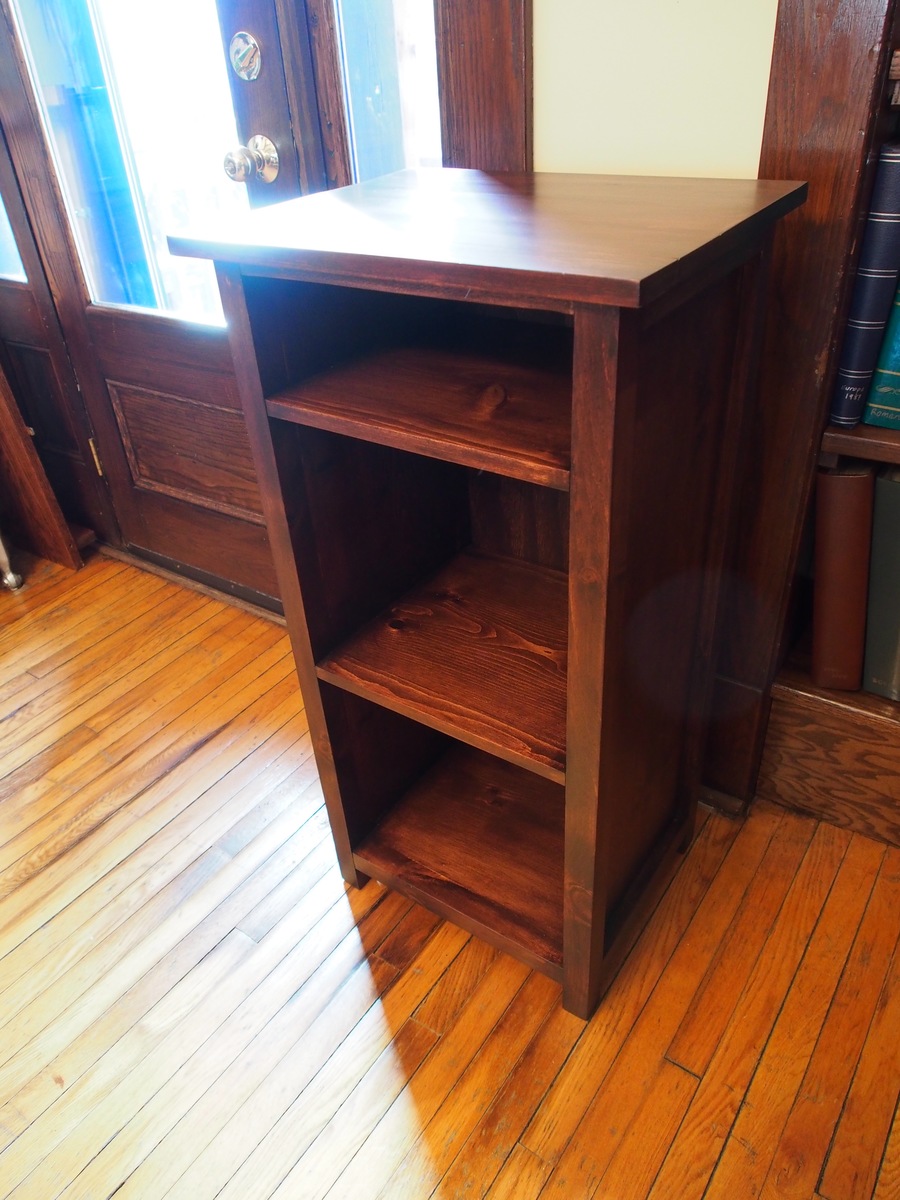
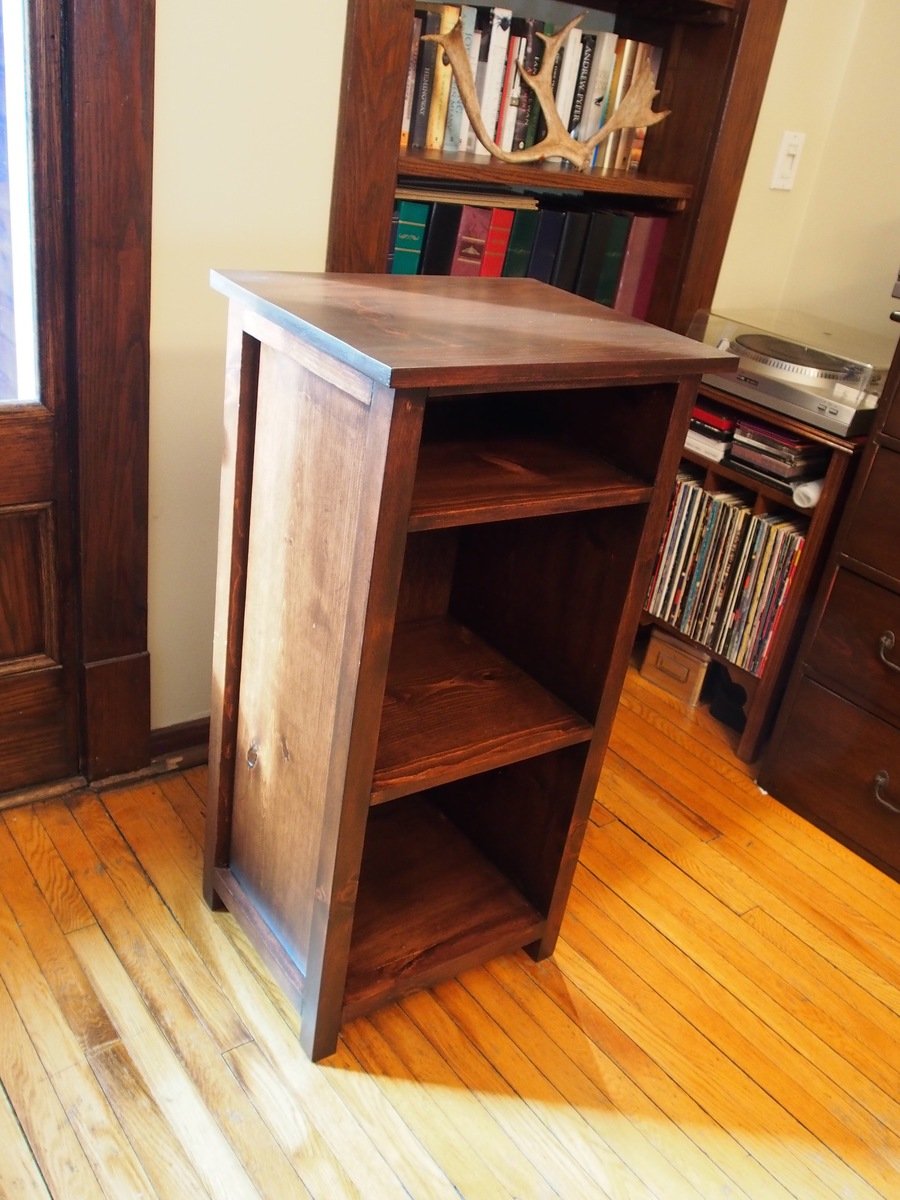
Turntable/Vinyl Stand
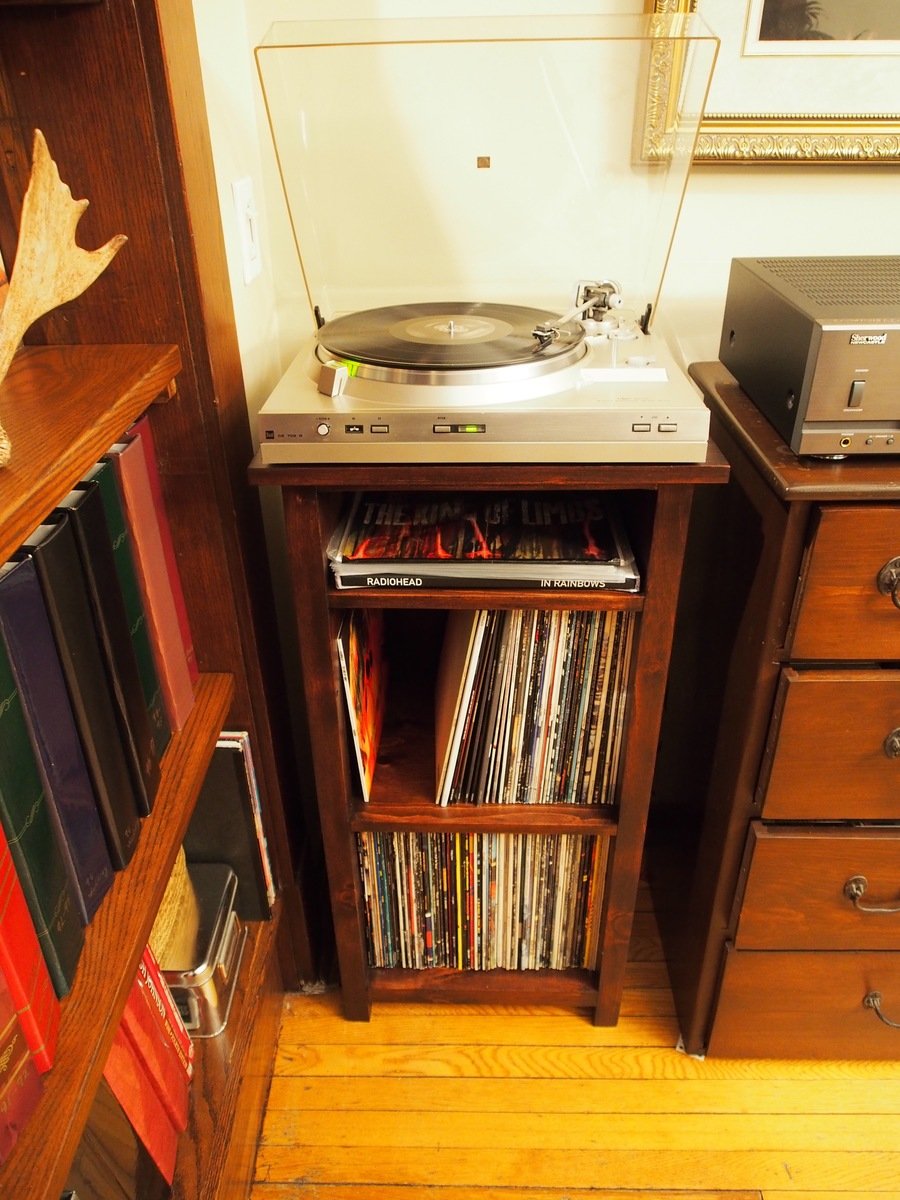
This was a Christmas gift for my husband, who has resurrected his old turntable. I wanted the stand to be the same height as the chest I had previously refinished to house our stereo and cds. I also wanted to have two shelves for vinyl, so I modified the Channing bookcase to fit.
Built from Plan(s)
Estimated Cost
$80
Estimated Time Investment
Weekend Project (10-20 Hours)
Finish Used
Goudey stain in Rosewood, shellac wash coat, Goudey glaze in Van Dyke Brown, shellac again, then Deft satin polyurethane.
Recommended Skill Level
Beginner
Comments
Mon, 02/26/2018 - 20:53
Adjusted measurements?
My husband has been looking for a stand for his turn table and this one looks perfect! Do you mind my asking for the adjusted measurements? I’d love to see if we could make one for him, if you don’t mind sharing. It looks fantastic!
Sat, 12/01/2018 - 12:11
measurements
Apologies, I have not checked the site in almost a year. The height of the unit is 37,3/4' tall, the shelf widths are 14" inner width, and the spacing between shelves is 13" between the lower 2 shelves for vinyl, and 5" for the top shelf (for brushes or an occasional CD. Hope that helps.
Small Chicken Coop with Planter
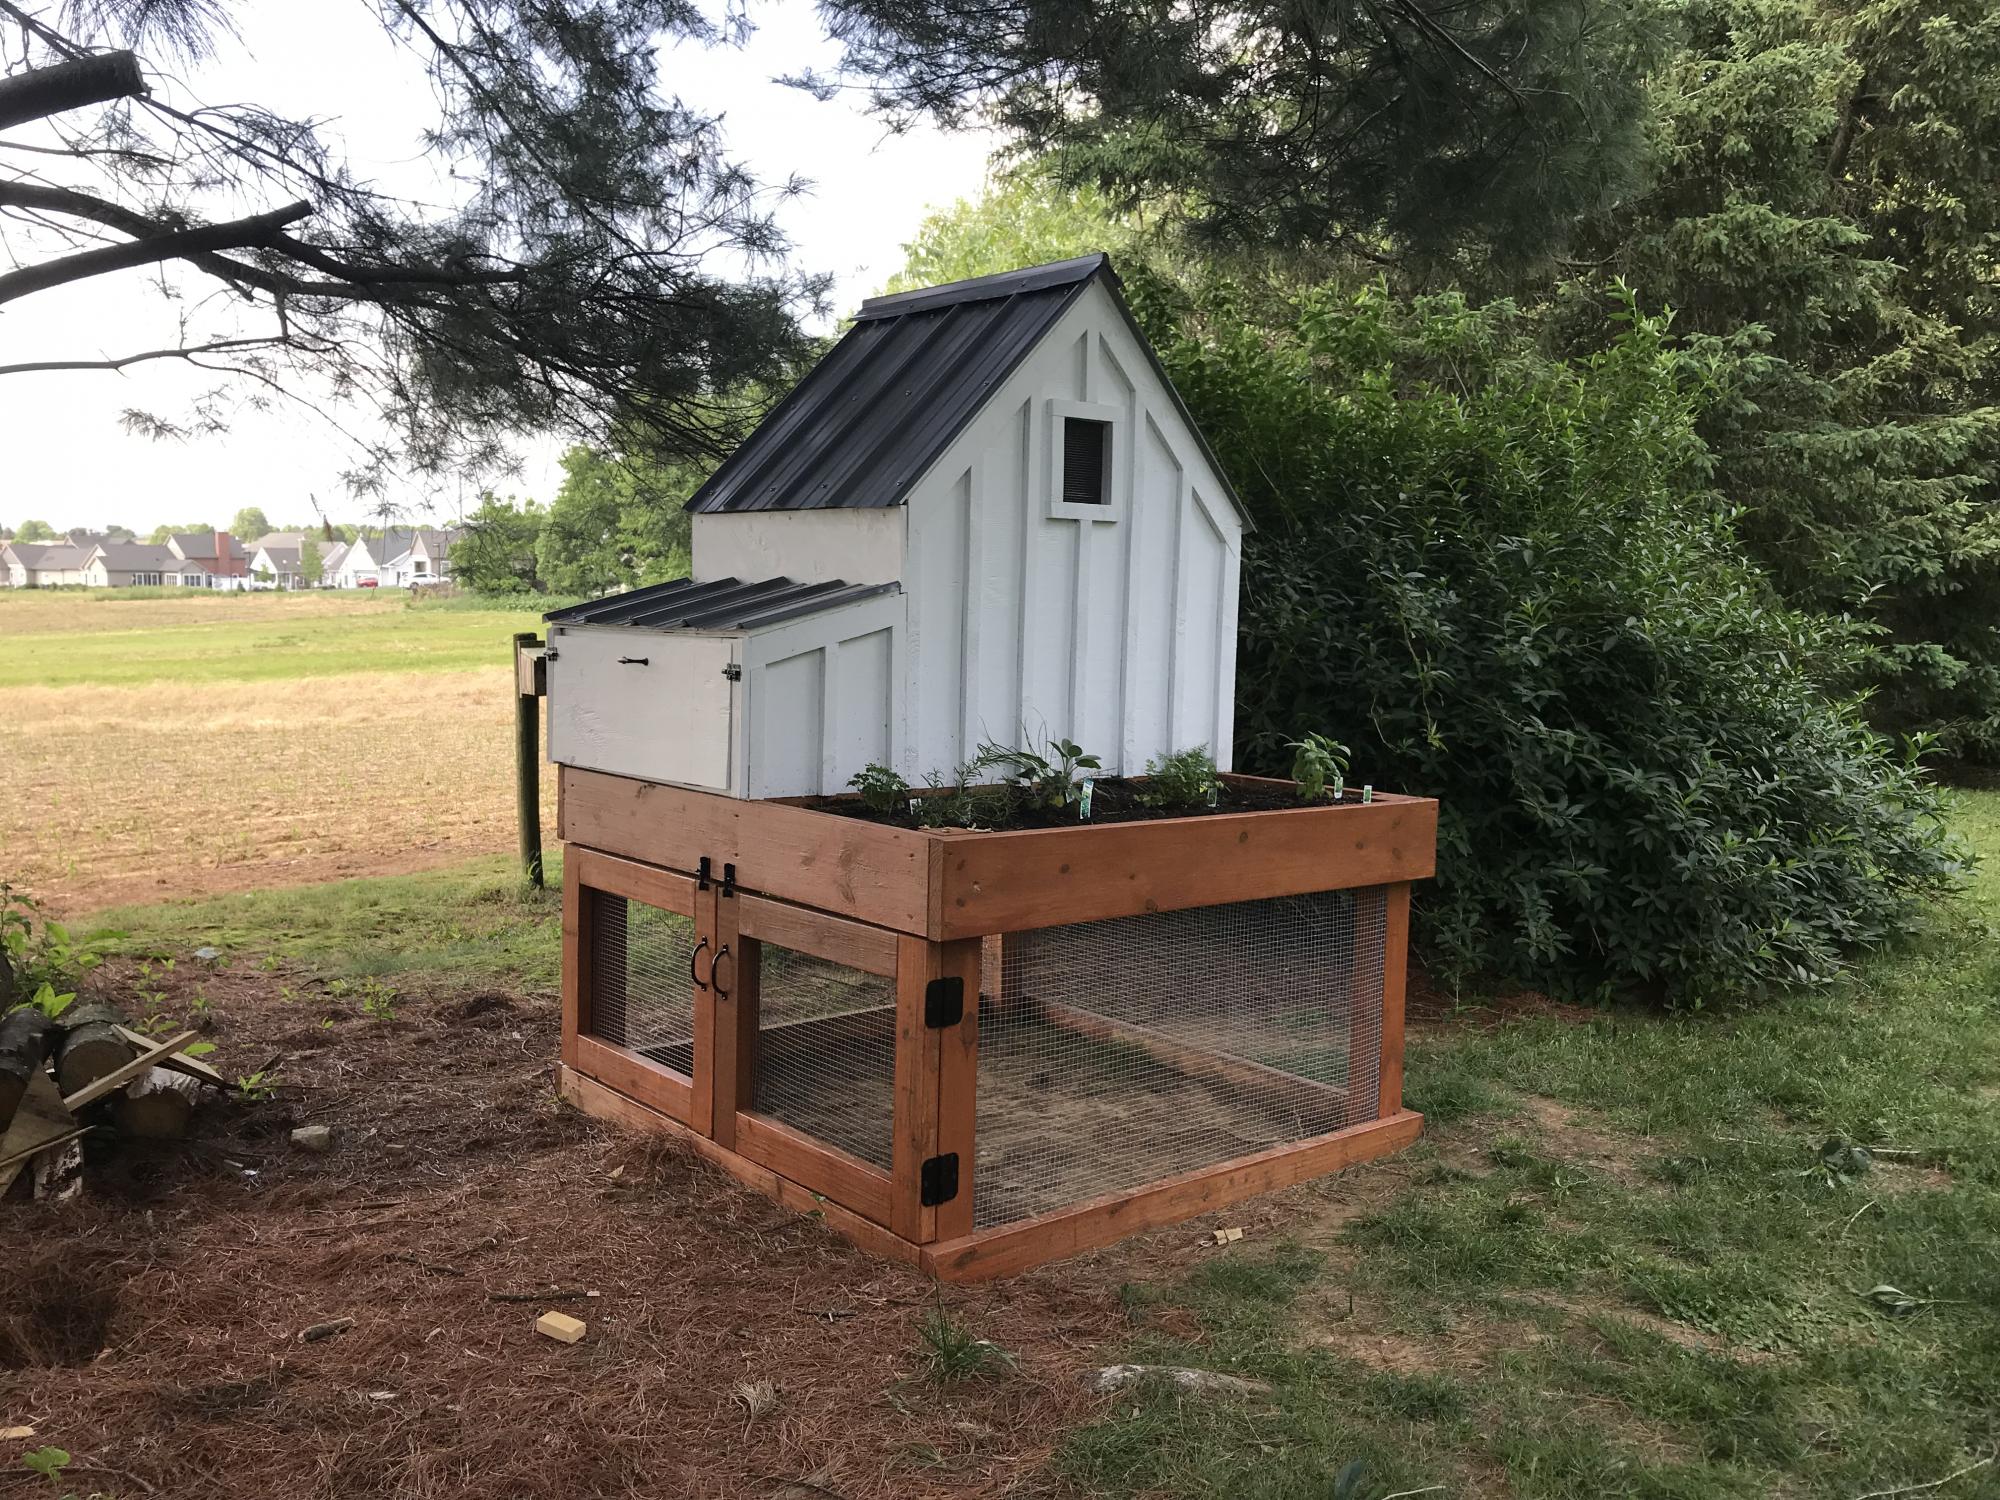
Great plans! Fun project
Built from Plan(s)
Estimated Time Investment
Weekend Project (10-20 Hours)
Recommended Skill Level
Advanced
Comments
Sat, 05/25/2019 - 19:34
Farmhouse Chicken Coop
Your chicken coop is beautiful! I love the farmhouse feel of it! Thank you so much for sharing a picture! Ana
Wood pallet wine rack
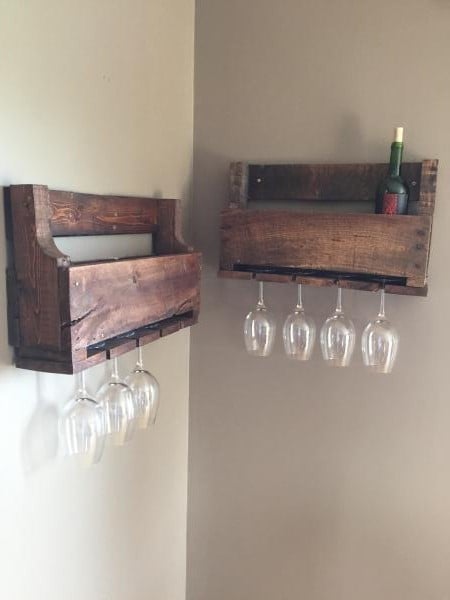
My wife showed me this wine rack on a you tube video so I checked it out. She really wanted one so I made her two of them. I also made a longer one for liquor bottles as well, ill post it as soon as I hang it on the wall.
Built from Plan(s)
Estimated Cost
$10 for the stain
Estimated Time Investment
Afternoon Project (3-6 Hours)
Finish Used
The stain was English chestnut
Recommended Skill Level
Intermediate
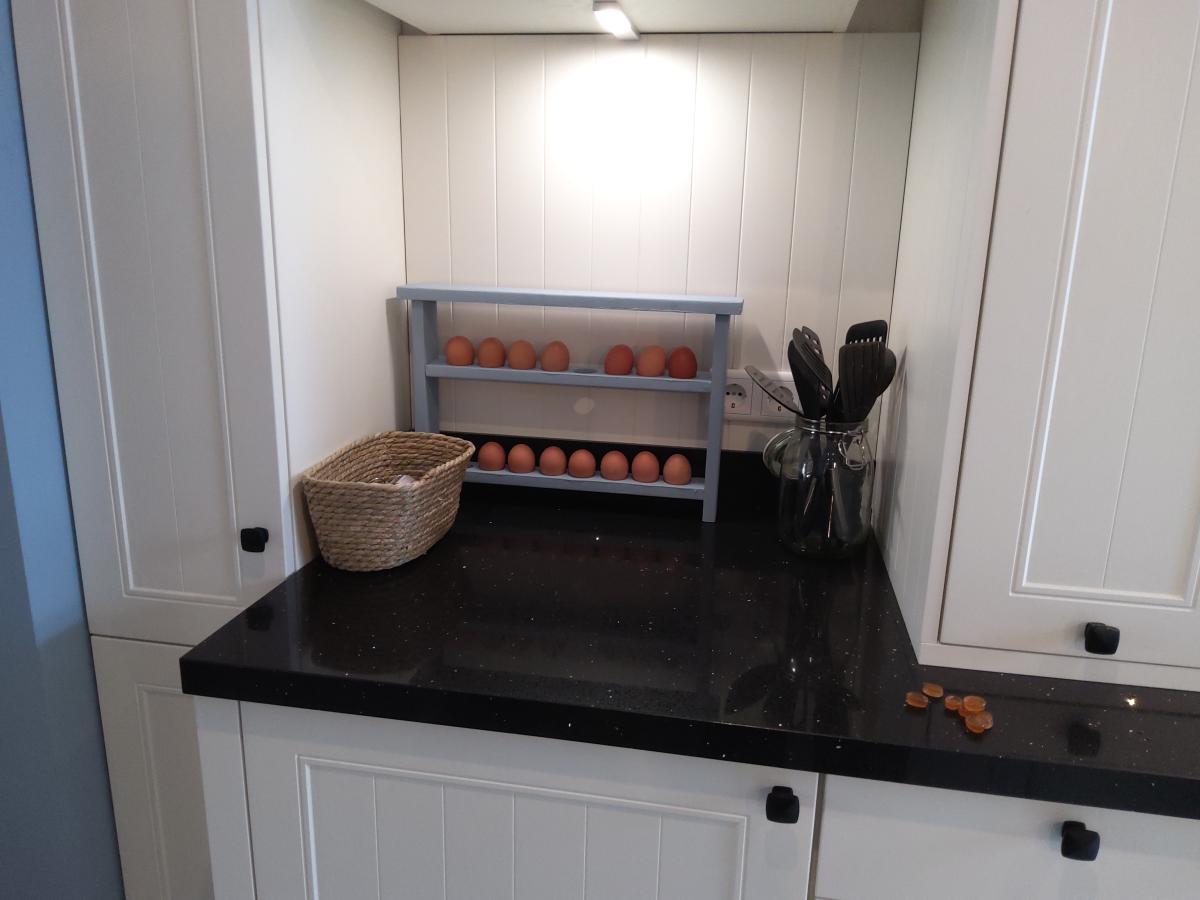
Blue egg holder

Hi all,
I made the wooden egg holder for our brand new kitchen. I altered the size because there's just the two of us here since our son moved out. It was a very easy beginner project and lots of fun to build by myself. If you're a beginner like me it can be overwhelming to start, but if I can do it you can do it too! Just go for it. I'm looking forward to build a next project with one of Ana's plans.
Built from Plan(s)
Comments
Wed, 04/12/2023 - 15:56
Great countertop egg holder!
Way to go and love the color choice! Happy building.
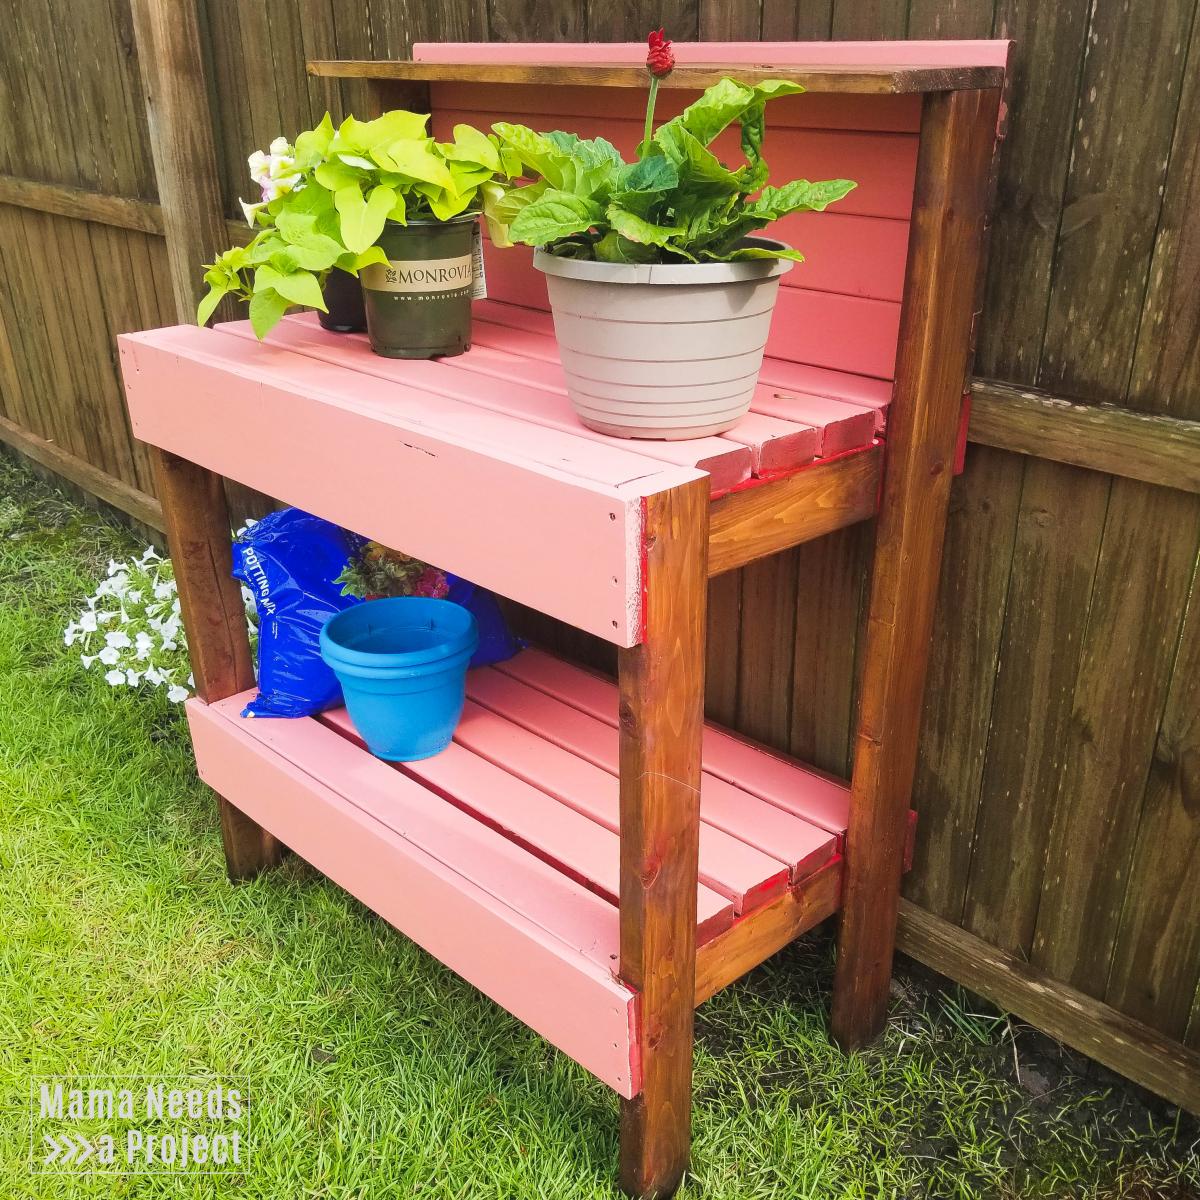
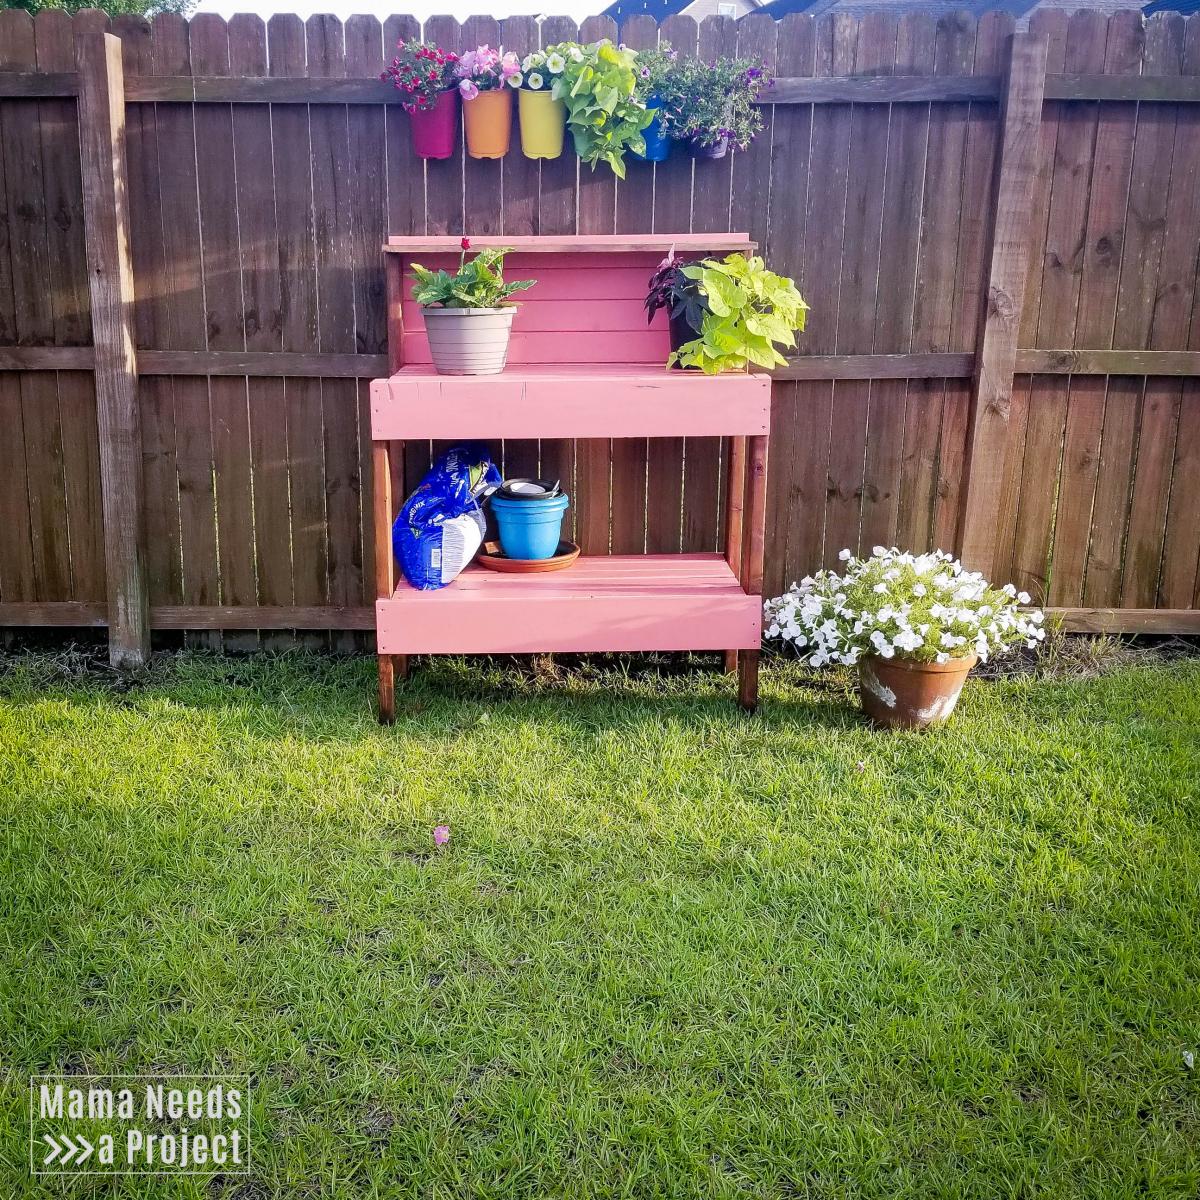
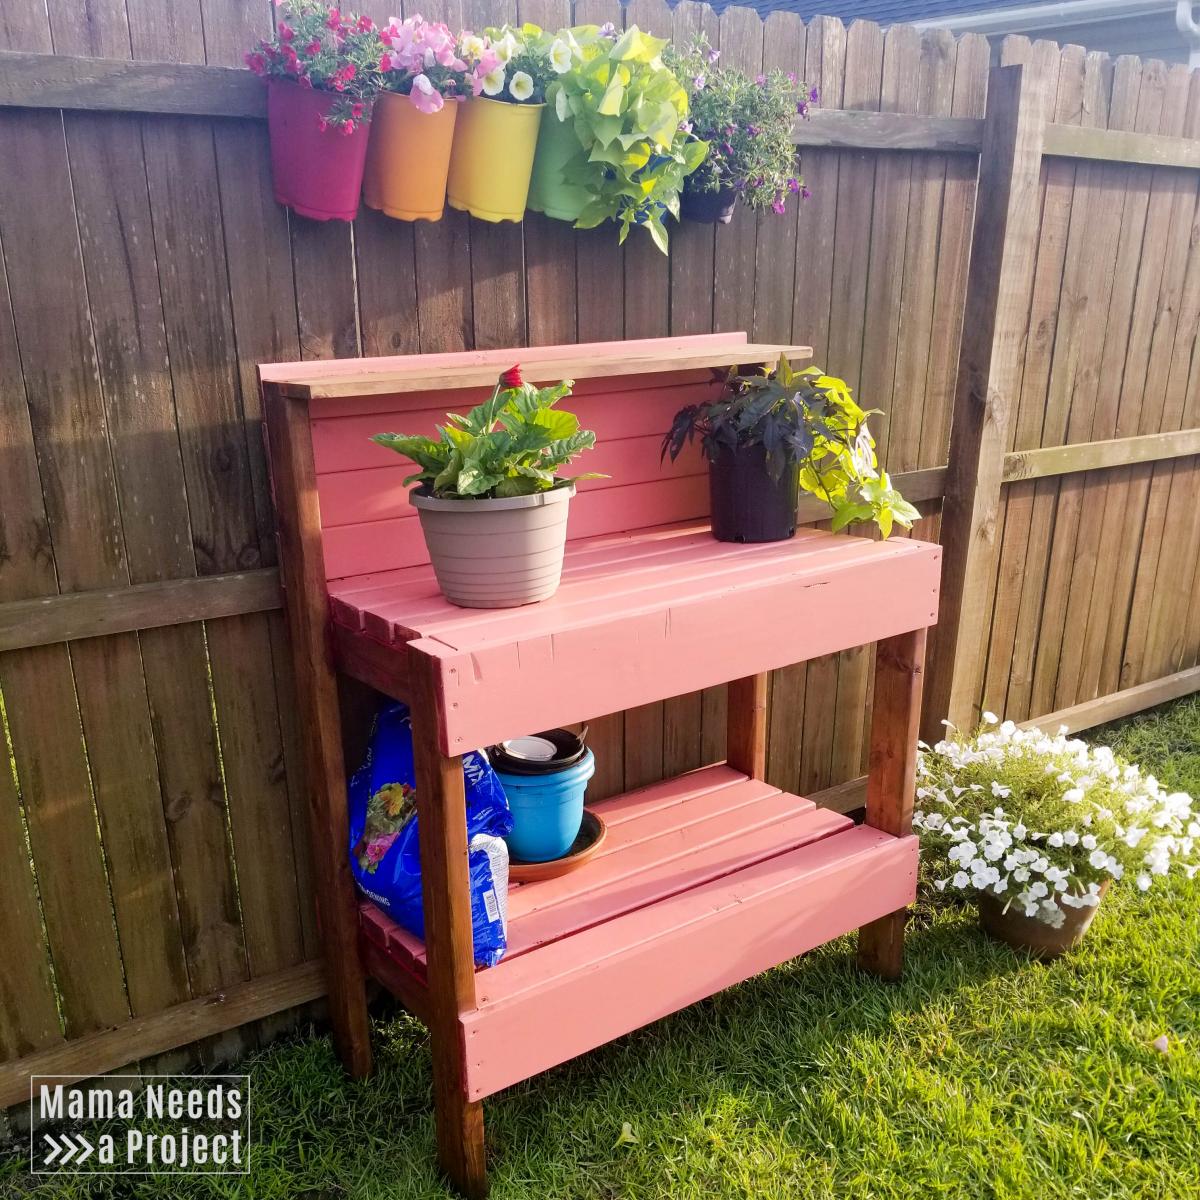
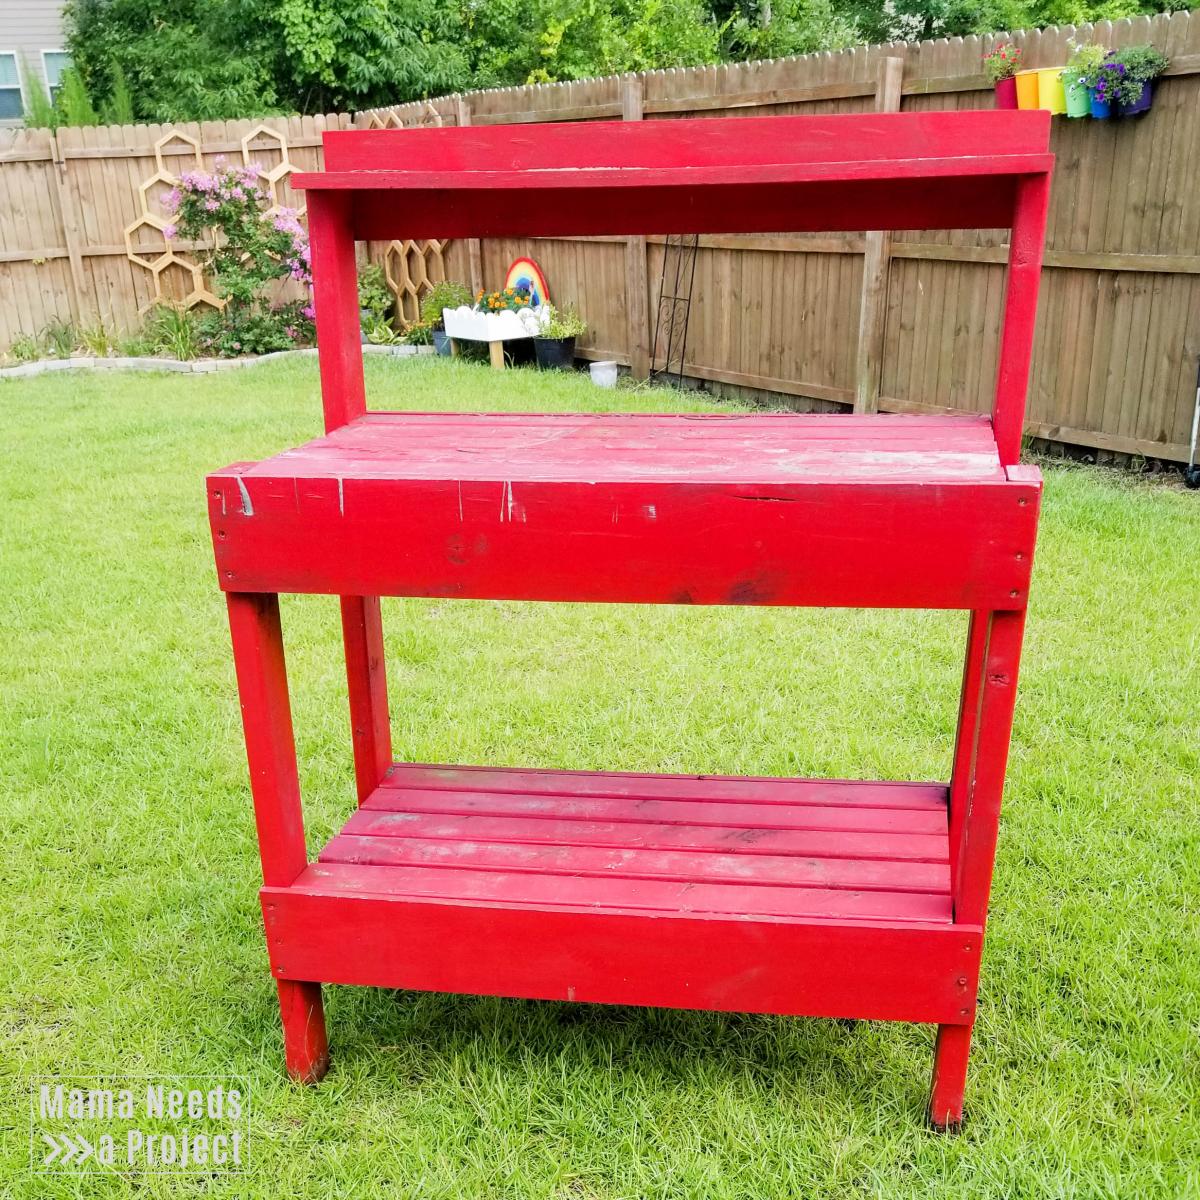
Simple Potting Bench
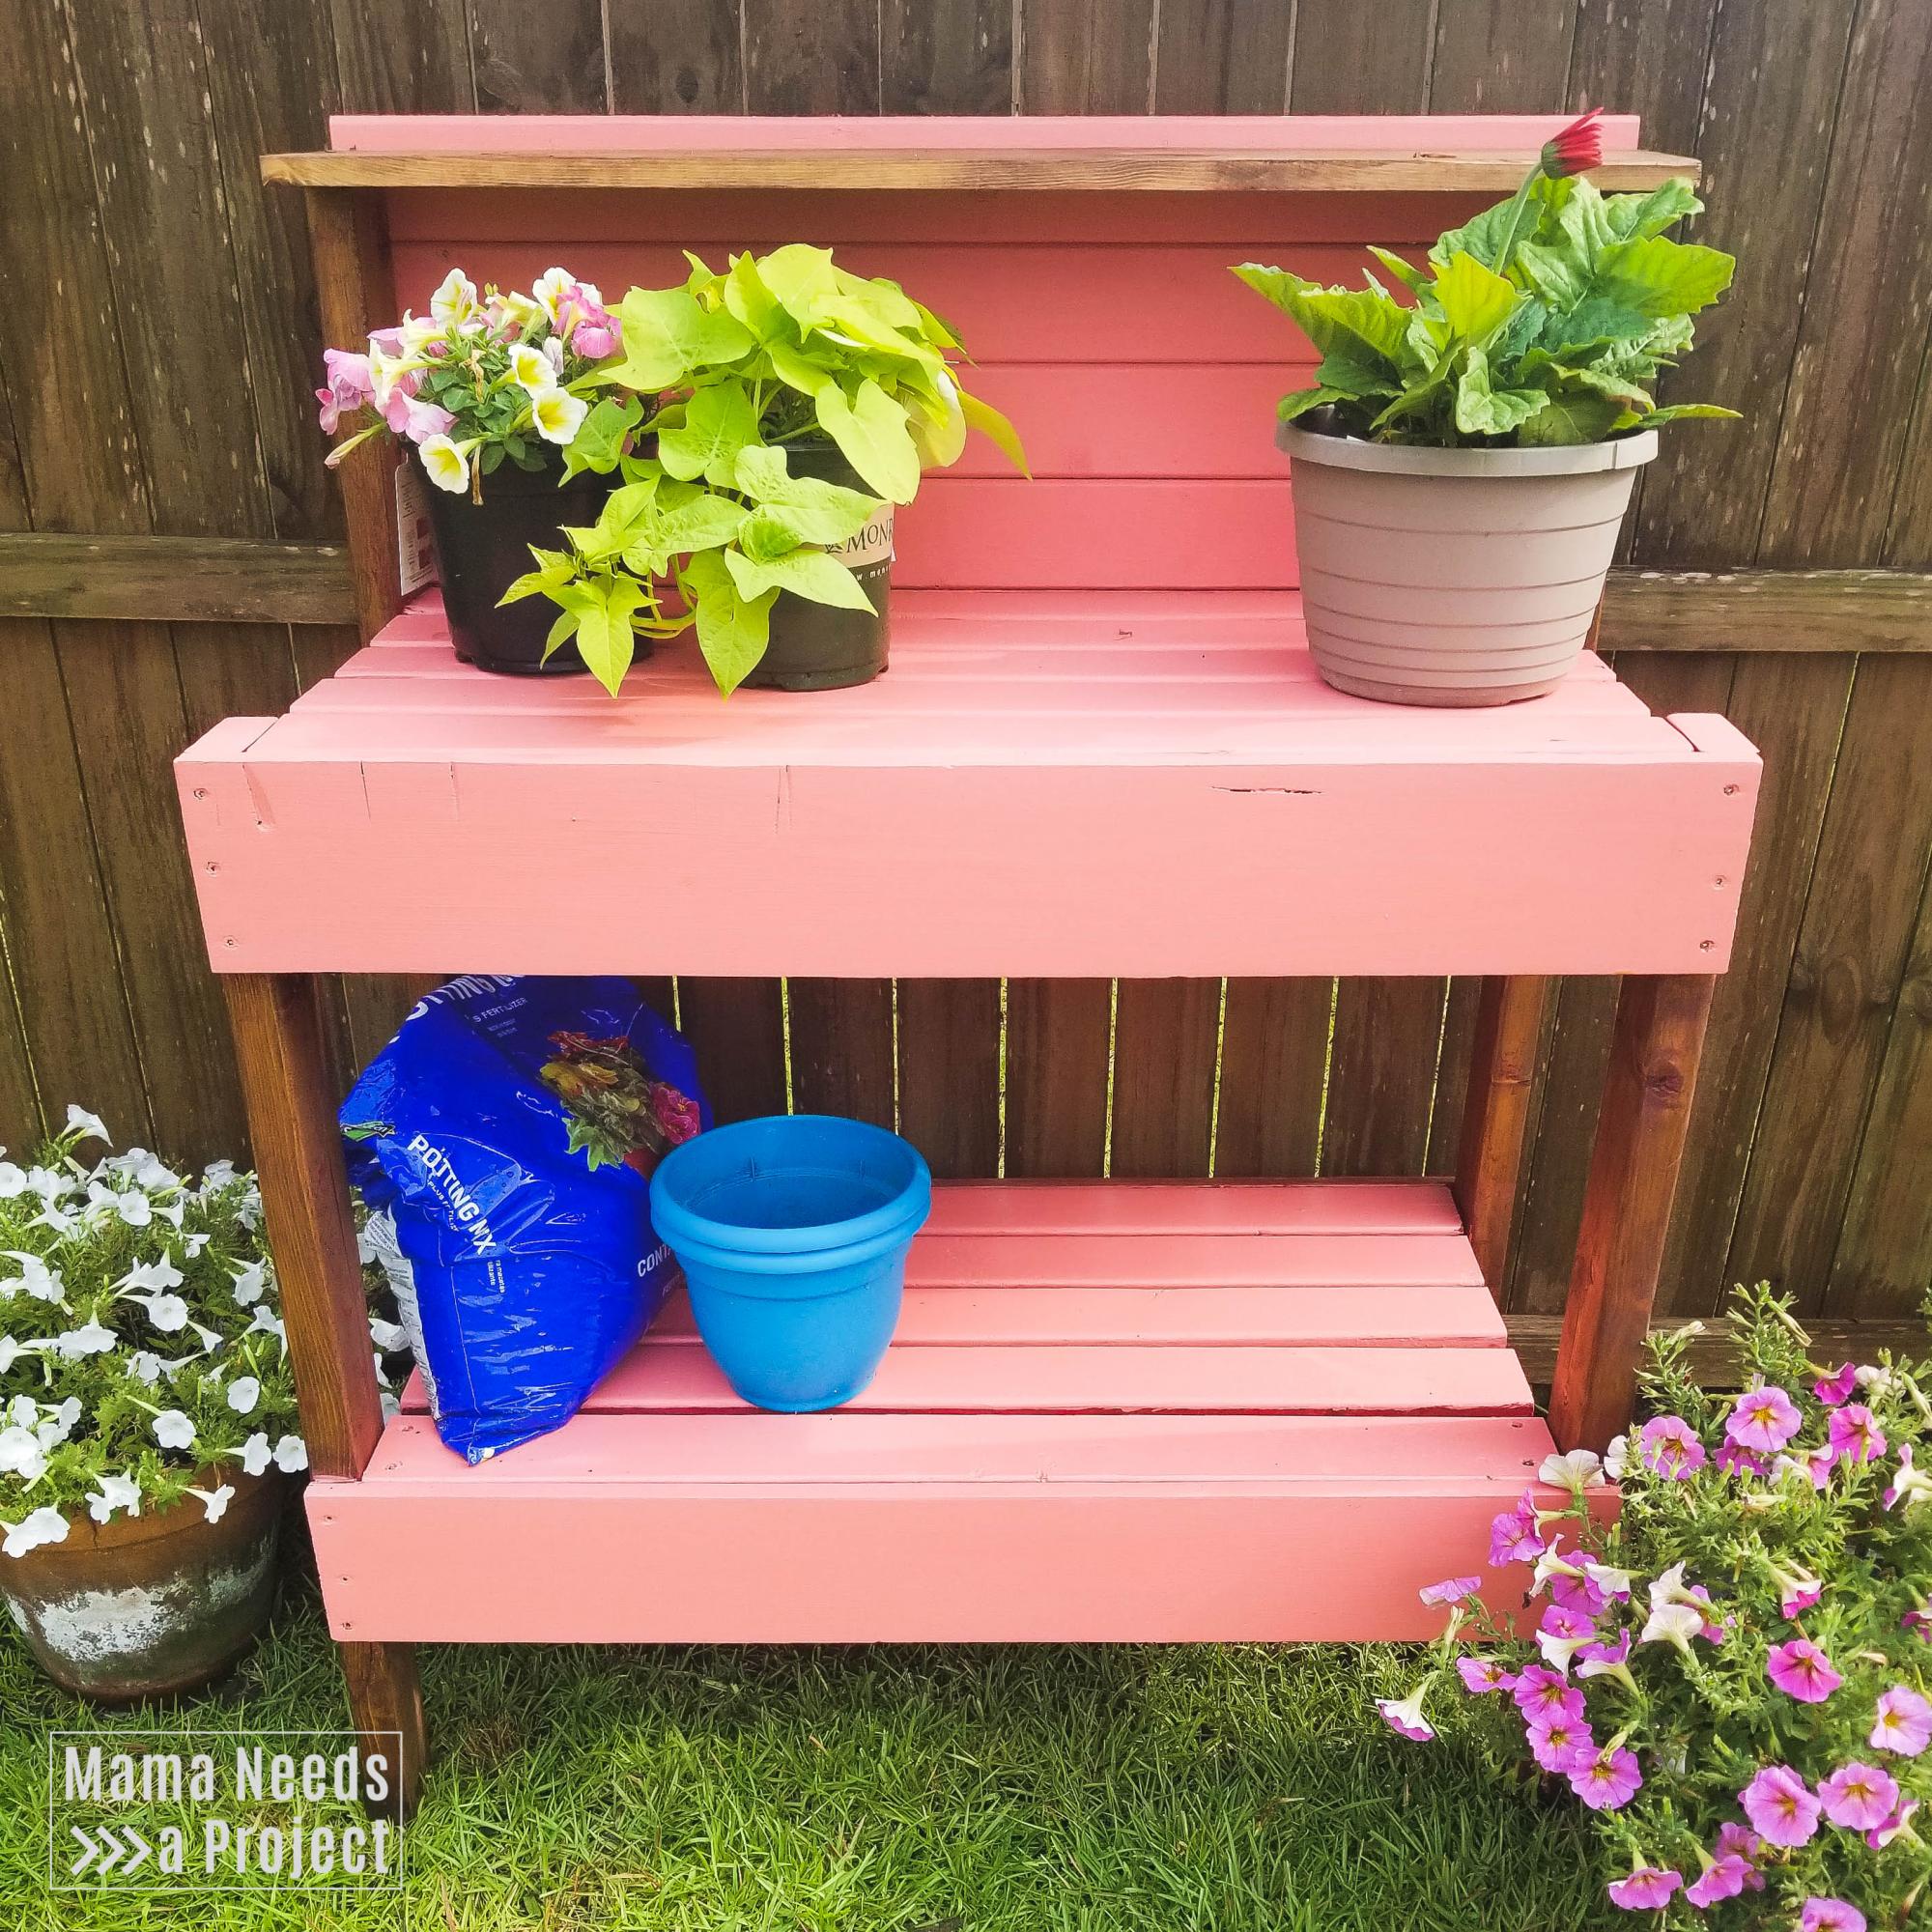
I originally built this potting bench in 2014. It was the very first project I built completely on my own! After 5 years of being outside it needed a little makeover. I sanded and refinished it, and made a couple modifications.
The last picture is the before :)
You can read about the whole building process here: https://mamaneedsaproject.com/2x4-potting-bench-makeover/
Built from Plan(s)
Estimated Time Investment
Afternoon Project (3-6 Hours)
Recommended Skill Level
Beginner
Comments
lmckinney
Thu, 06/06/2013 - 19:44
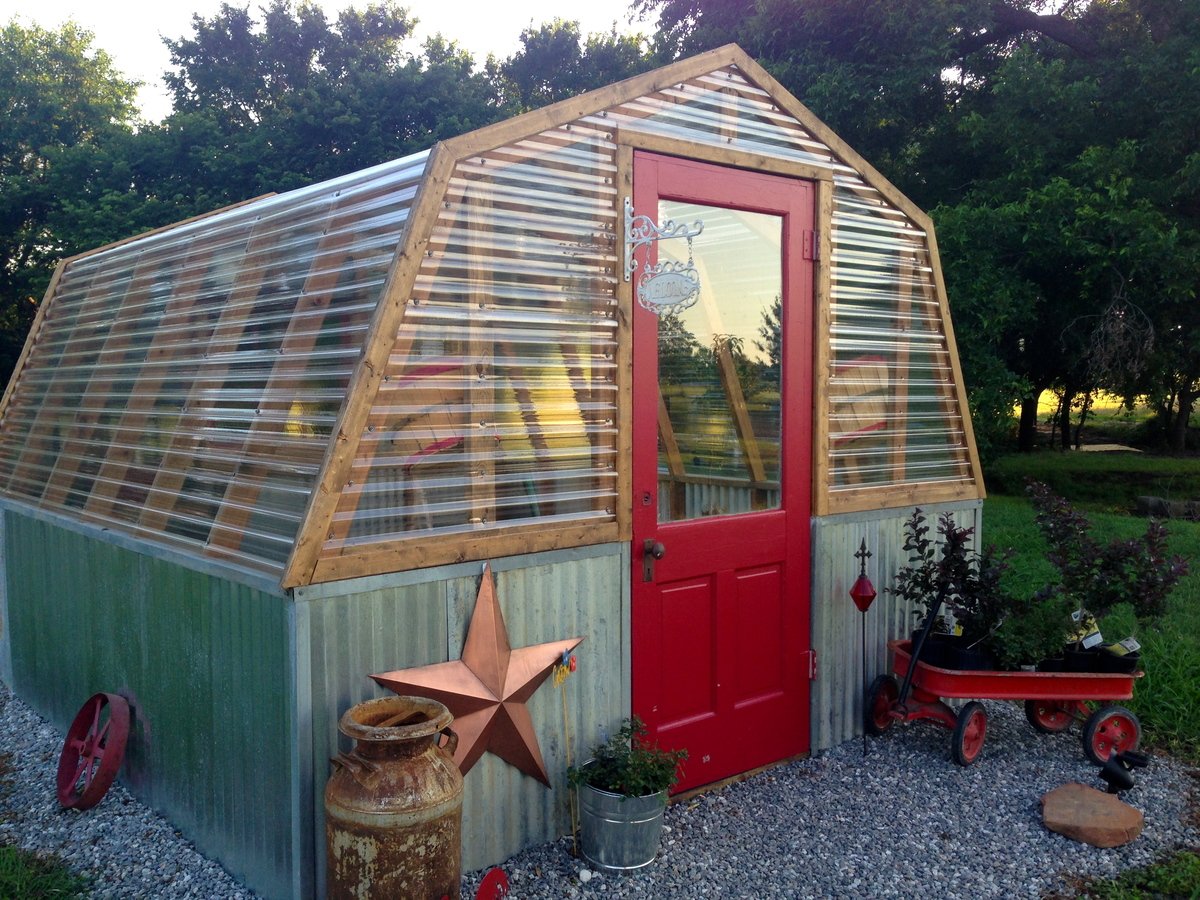
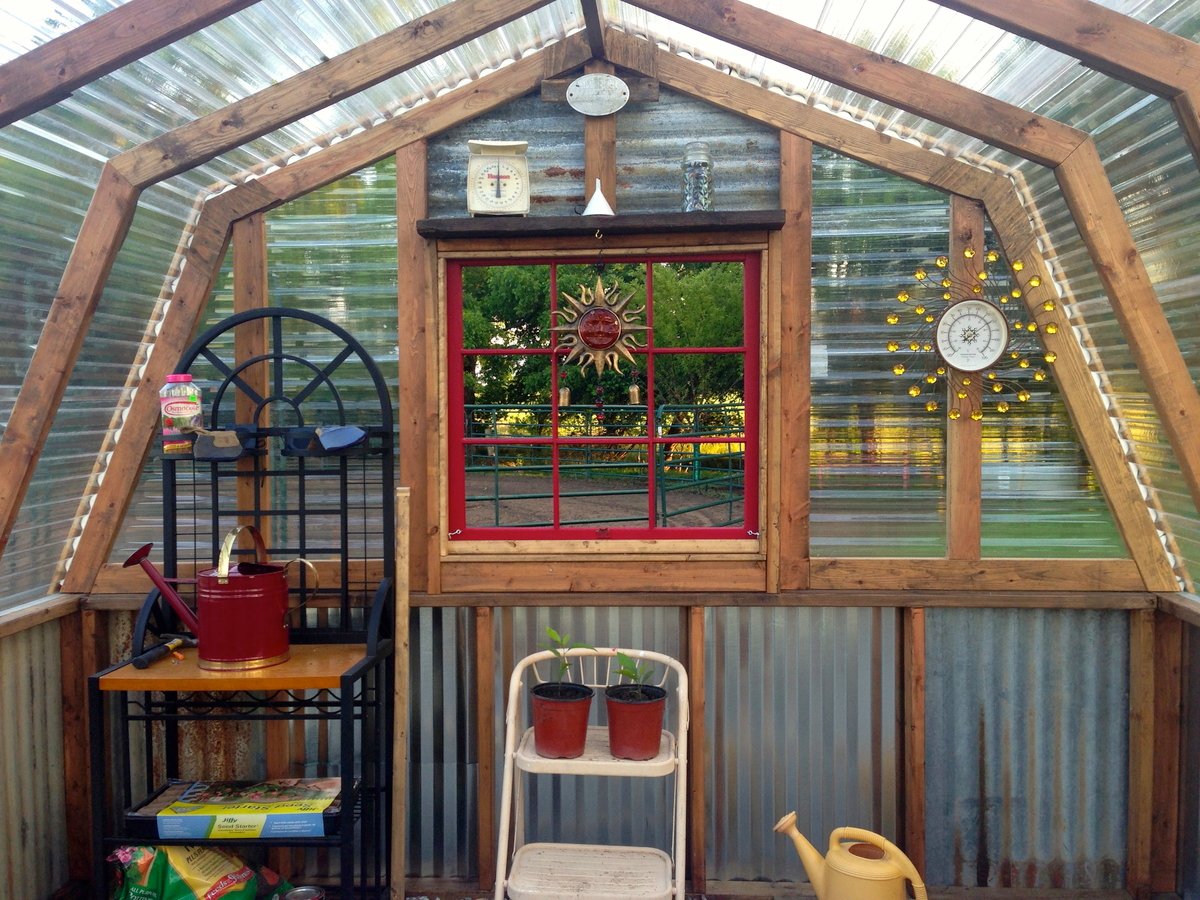
Greenhouse
Thanks for the plans!
Joni
Fri, 06/07/2013 - 12:42
Amazing!
This is amazing! All of your finishing touches make this really special. I love every detail.
Kirsten.dehart
Sun, 05/01/2016 - 17:43
Snowload
Do the gable style roofs and greenhouse panels hold up in a climate for heavy snow loads??
Thanks!
MartiB8
Fri, 06/12/2020 - 11:05
Beautiful job!
LOVE the attention to decorating details! This is beautiful. Thank you for sharing!