Community Brag Posts

Outdoor Sectional
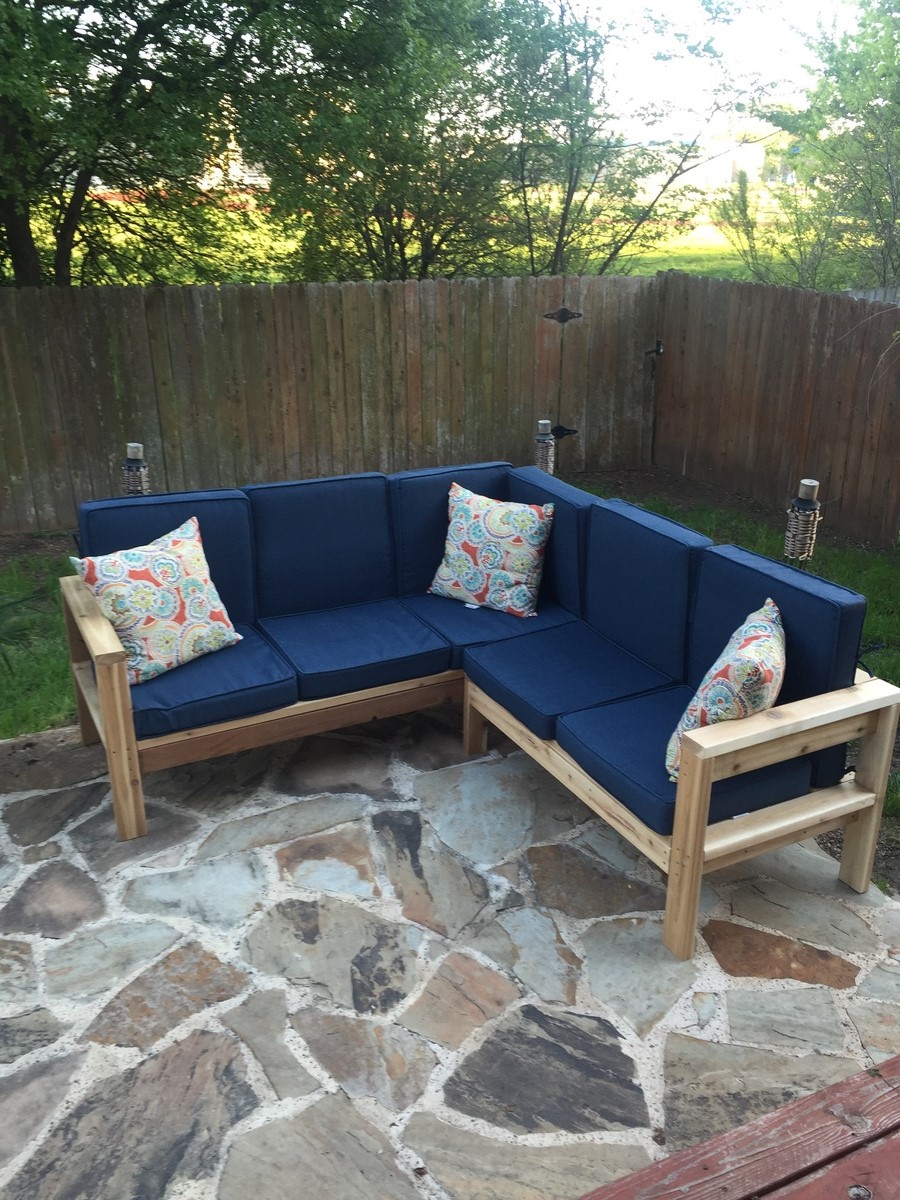
Outdoor sectional. Modified the sectional piece to be 48" rather than 72" as in plans.
Built from Plan(s)
Estimated Cost
$250 for lumber
$400 for cushions and pillows
$400 for cushions and pillows
Estimated Time Investment
Day Project (6-9 Hours)
Finish Used
None
Recommended Skill Level
Intermediate
Dr. Seuss Bookshelf
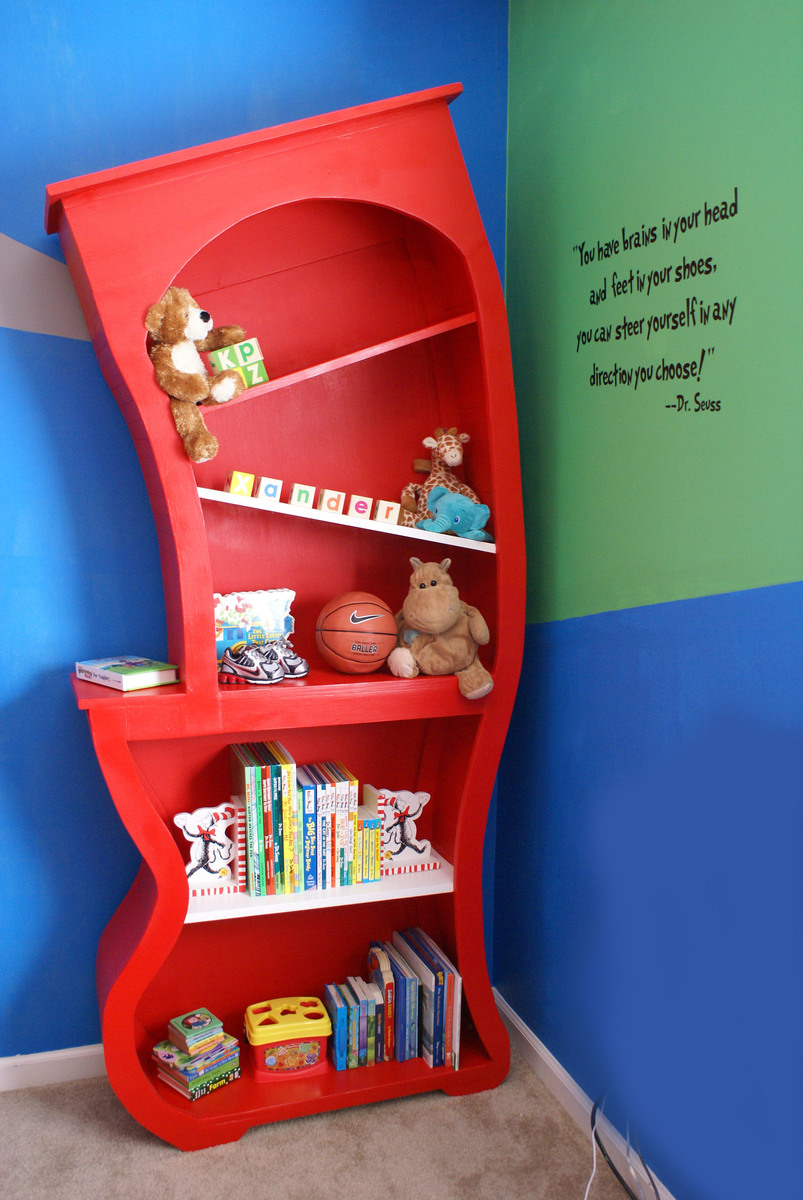
This was a Baby Gift for my sister and her little boy, Xander who was born just a couple weeks ago. I wanted to do something special that would last for my sweet nephew. She found a bookshelf similar to this on cool-rooms.com and we decided to try to make our own version. I've posted about it on my blog if you're interested in the process.
Estimated Cost
$100 (my costs are higher due to where I live)
Estimated Time Investment
Weekend Project (10-20 Hours)
Finish Used
2 coats of red semi gloss and 2 coats of white on the shelves. Then after I had to make repairs after shipment I sanded it all and had to apply two more coats of red paint in a flat finish and sprayed 2 coats of a clear top coat.
Recommended Skill Level
Intermediate
Comments


Sun, 03/18/2012 - 16:03
Plans for the project
The best 'plans' I could come up for this are described here on my blog post for this... not too specific, but hopefully gives you a good idea of the process: http://alabahamians.blogspot.com/2012/03/dr-seuss-bookshelf-for-sweet-b…
Thanks for the sweet comments!!!
Mon, 01/22/2018 - 17:52
Instructions for building bookshelf
I would love to see the instructions you have in your blog, but it says you must be invited to see the blog. May I have access? Thanks! Brooke
Mon, 01/22/2018 - 17:52
Instructions for building bookshelf
I would love to see the instructions you have in your blog, but it says you must be invited to see the blog. May I have access? Thanks! Brooke
Sun, 03/18/2012 - 19:22
WOW Great Job
Clever cute creative. Cant stop looking at it. I love it. Thank you so much for posting.
Sun, 03/18/2012 - 19:52
Creative cute clever
Thank you so much for posting .You did a beautiful job. Your a good sister and a Terrific aunt.
Sun, 03/18/2012 - 22:16
WOW!!!!!! Wow wow wow wow!!!
WOW!!!!!! Wow wow wow wow!!! This is just beyond cool.
Sun, 03/18/2012 - 23:30
Great Job!!! I love the Crazyness of this Project!
I love how you have taken a typical shelf and gave it a spark that is SO ONE of a KIND! WOW! This gives me ideas! There is just not enough time in the day thought.
Thank you for sharing your Awesome creativity. Your Family is SO lucky to have someone as talented as you! Keep up the good JOB!!!
Again AMAZING!!!
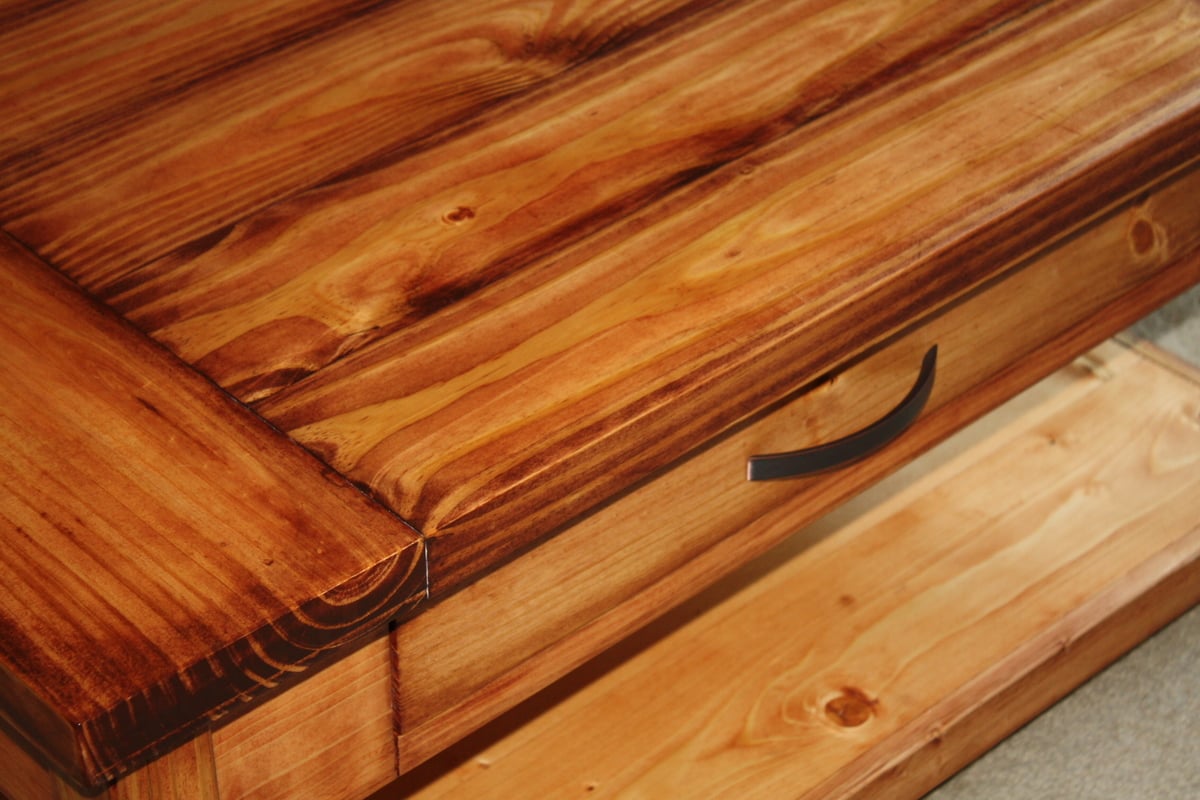
Coffee Table
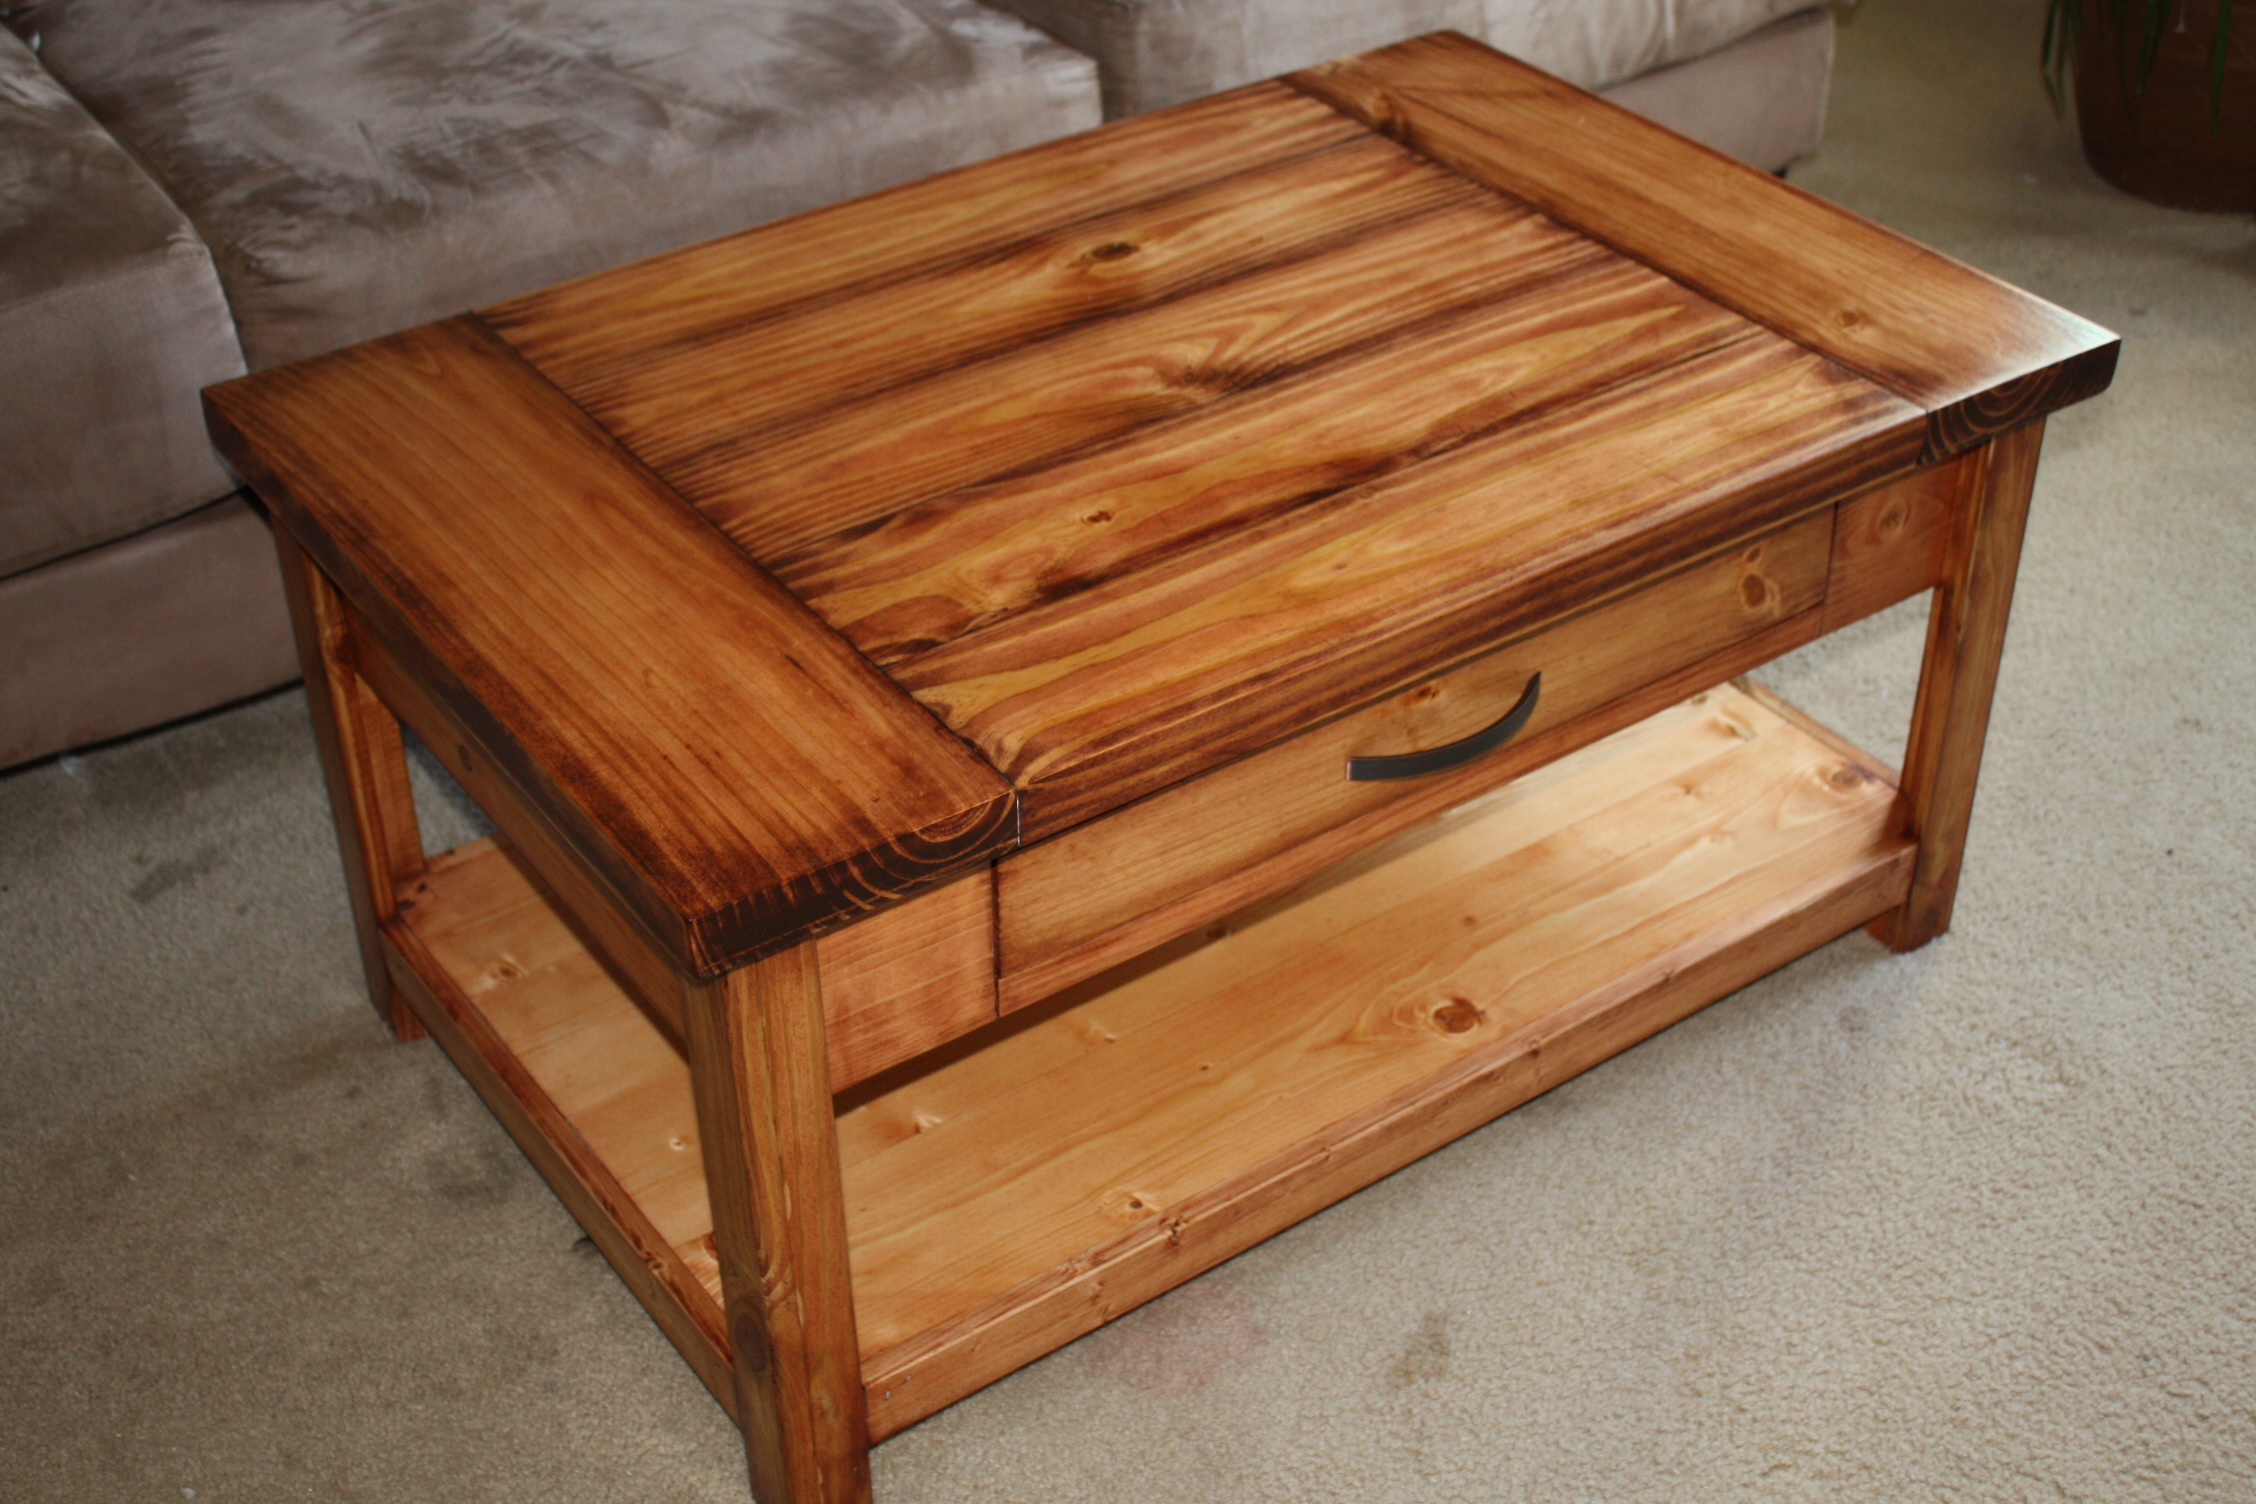
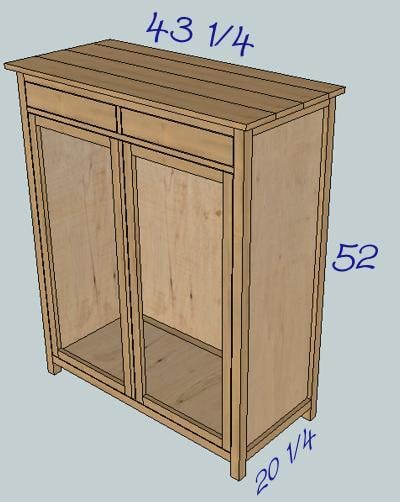
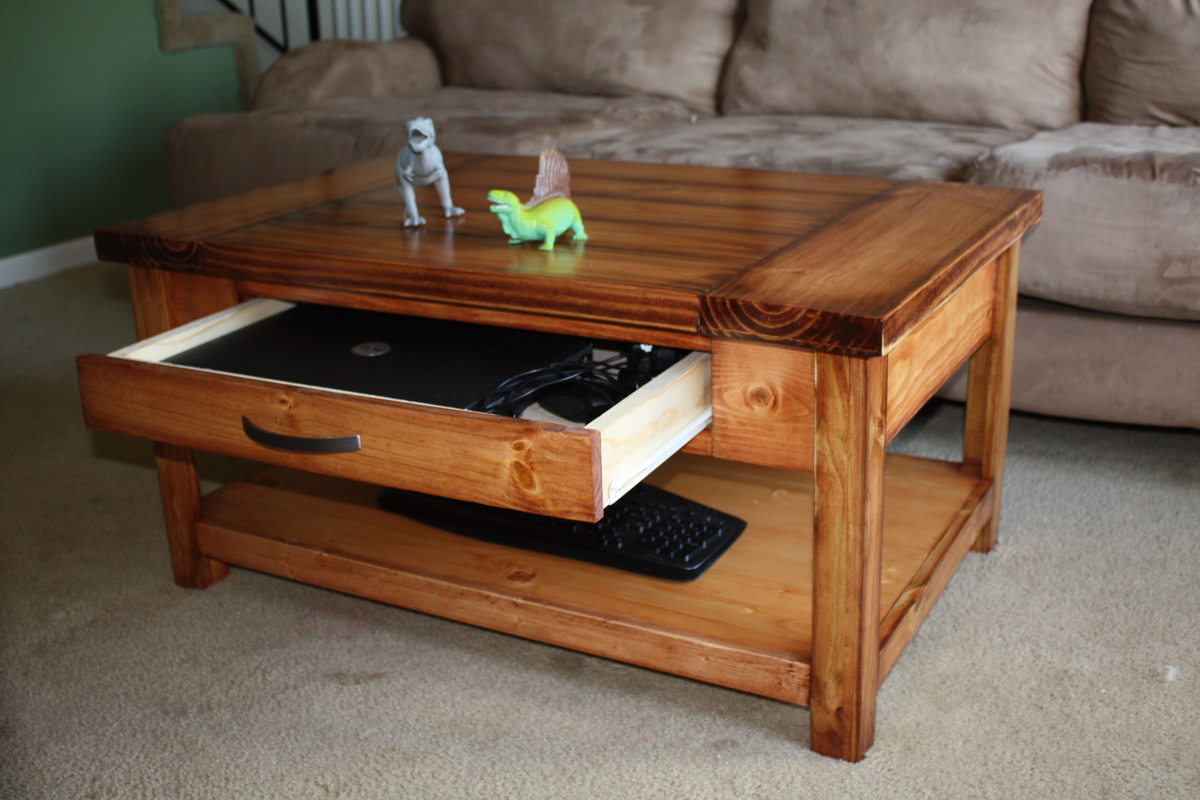
This is my second build. I used the Benchright plan but had to modify it for one drawer. The Dimensions are 39 long, 25 wide, and 19 tall. I have heard others comment on how difficult drawers are. I thought I would just jump in head first with the kind of drawer that closes flush with the rest of the table - really had some trouble with making it square. I ended up shimming the face onto to the drawer because even though it opens and closes smoothly, it isn't square with the rest of the table...
I had originally planned to make the 20 second tidy up table for my living room and begun purchasing materials. However, I was let go from my job last Sunday, so changed my plans. I took inventory of all the supplies and materials I had on hand and tried to find a plan that would not require any more spending to build... to sell... to pay rent.... and thus the new table was born. And I love it. And I hate to sell it.
I tried to copy the finish on the 20 second tidy up table, and this is how it ended up. I used Minwax Golden Pecan for the base color and Red Oak for the accent color. The colors got a little blended together through the staining process. I really love how it turned out though because it's a nice warm color. The only thing I don't like is the grain in the pine didn't take much if any color, so it's still a bit yellow, which seems slightly out of place when I look at it. I think it will darken with age and look a little better. Otherwise, this was a super fun project!!

Built from Plan(s)
Estimated Time Investment
Week Long Project (20 Hours or More)
Finish Used
Minwax Golden Pecan, and Red Oak. Followed by several coats of semi-gloss poly. Final coat was spray on.
Recommended Skill Level
Advanced
Comments
Tue, 03/27/2012 - 04:43
Stain it all! You will get
Stain it all! You will get more money for it stained than painted or unfinished.
Tue, 03/27/2012 - 06:09
Thanks
I will try to do that this weekend... if I can find some money to get stain with. Hehe. I think it would look really great stained with the same method that Ana used on the 20 second tidy up table... rubbing the edges with a darker color... I love that look.
Tue, 04/10/2012 - 04:58
Construciton
This is awesome! I love it. You did a great job. Do you by any chance have the construction process on this? I would love to try it for my "first" project!! thank you.
Mon, 05/14/2012 - 15:30
Thank you! I borrowed the idea from you.
I love the 20 second tidy up table and have plans to make 1 but I've been so busy with work that I've been commissioned to build. Nothing for me for a while.... So goes unemployed life. No complaints!!!
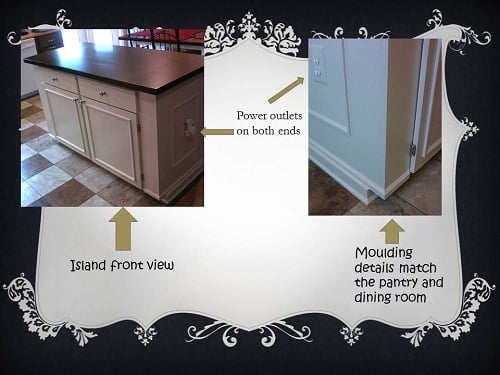
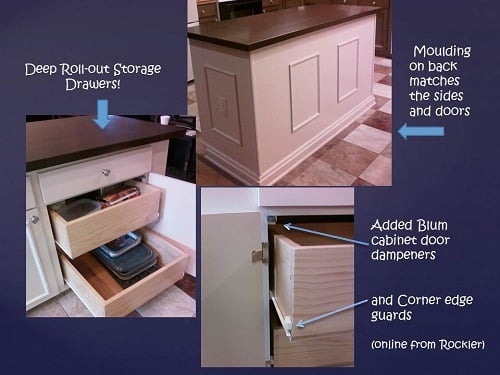
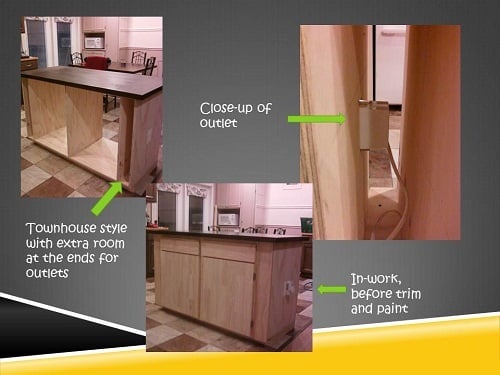
Kitchen Island with Farmhouse Table Top
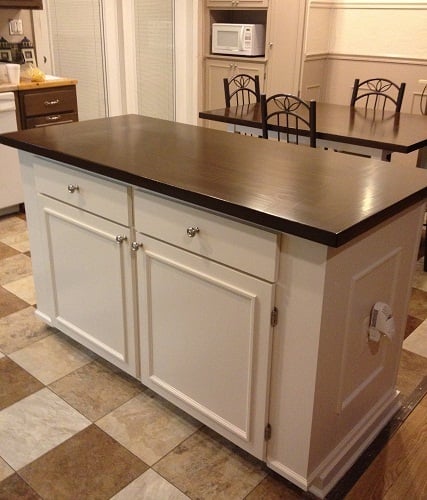
I’ve wanted a new island for awhile but wasn’t quite sure what I wanted it to look like, until I saw Ana’s cabinet plans for the Momplex kitchen! We wanted a fairly large island, so we did two 24” base cabinets “townhouse style” (from Ana’s Kitchen Cabinet Base 101 post) plus we added a little extra space at both ends, so Hubby could install some electrical outlets and we’d still have plenty of room for the drawers. The old island had power already, so he got the outlets wired pretty fast. Behind the doors are some deep pull-out drawers to hold all the stuff you’d usually have to bend down and reach for. Now it’s so convenient! I built a Farmhouse Table top for it and love it! We built flat doors and trimmed them up to match the island sides and back (also matches our pantry and dining room). This project took us about 40 hours to build and finish, and it was so worth it! Ana, you are a rockstar in our house! We now have a real showpiece for our kitchen, thanks to Ana White!

Built from Plan(s)
Estimated Cost
$550
Estimated Time Investment
Week Long Project (20 Hours or More)
Finish Used
Cabinet: 3 coats of Ace Royal semi gloss in Crushed Peanut, sanded between coats. Top: 2 coats Minwax Color Express in Walnut (1st coat brushed on, 2nd coat rubbed on), plus 3 coats of Minwax Oil Modified Water Based Polyurethane in Satin (sanded between coats); and on the drawer boxes, 2 coats of Minwax Polycrylic in clear satin (the clear water base poly doesn’t add any color to the natural pine)
Recommended Skill Level
Intermediate
Comments
Fri, 03/30/2012 - 21:14
Absolutely stunning! I'm in
Absolutely stunning! I'm in the process (sooo sooo close to being done) of making a banquette seating area with the creamy colored drawer base and the top stained in walnut. I put the same half round trim on my drawer fronts too. I saw a vanity on display at Lowes with this detail and had to copy it. I love the look! I am also building a trestle table from plans from www.thisoldhouse.com to match. I bought some beautiful matching chairs from Target.com. I can't wait to get it finished. I'm about to go paint the drawers right now. The table components were just primed 15 minutes ago. :-)


Sat, 03/31/2012 - 08:04
Thank you!
Brigitte and Pam, thank you very much for the nice comments! :) I'm having a ball building projects from this site. This is our favorite one so far (we say that every time haha). I have to smile and run my hand across the top whenever I walk past it - I guess when the novelty wears off I'll stop doing that :) Now I'm ready to add those door dampeners to all the cabinet doors in my house (so cool not hearing a slam when you shut them). Brigitte, your project sounds beautiful, can't wait to see the pictures of it!
Sat, 03/31/2012 - 18:57
This is beautiful!
Absolutely gorgeous! I really love the colors. I've never tried the color express stain - and I have to try it now! The top is so seamless. Love it!
Sun, 04/01/2012 - 05:33
Thank you!
Mebohn, thanks very much for the nice comment! You'll love the color express when you try it. Walnut is my favorite and I've used it for lots of projects. I like brushing it on to get a nice dark first coat, and then on this one, rubbed on a 2nd coat (needed to wait an extra hour for the first coat to dry). I used lots of wood glue and Kreg screws to assemble this top (it's 5 pieces of 1x10, 3 across and 1 at each end) and then added 1x4 underneath (around the edges and across the center for attaching) to make it 1 1/2 inches thick. Then a whole lot of sanding :)

Sat, 05/26/2012 - 06:46
Thank you!
Mariah, Thanks very much for the nice comment! I'm really happy with how this turned out. Now I want to re-do all my kitchen cabinets with Ana's plans. :) PS -- I saw your jugsaw puzzle table this morning on the brag board -- super creative!!
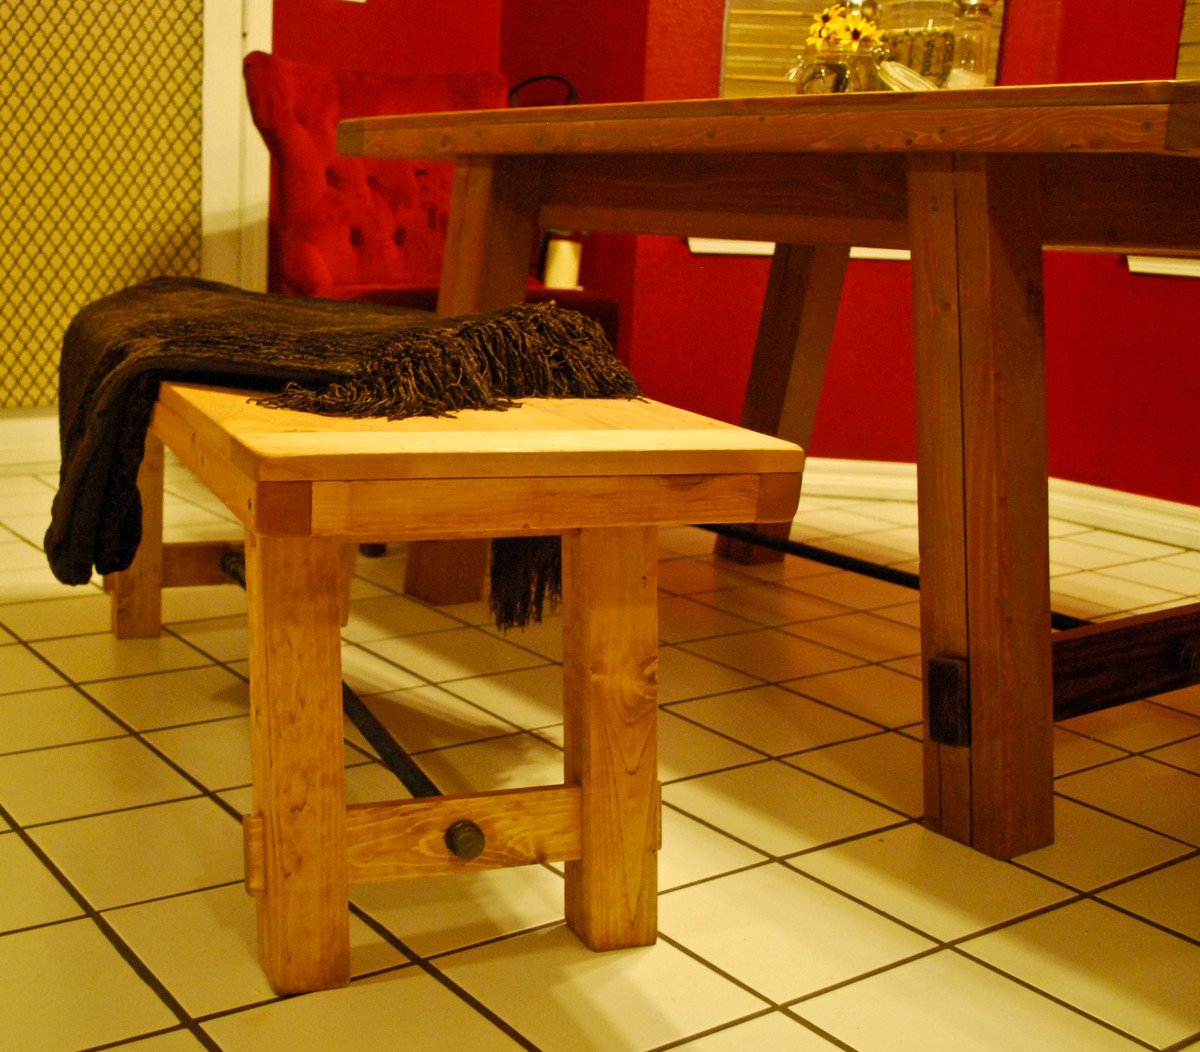
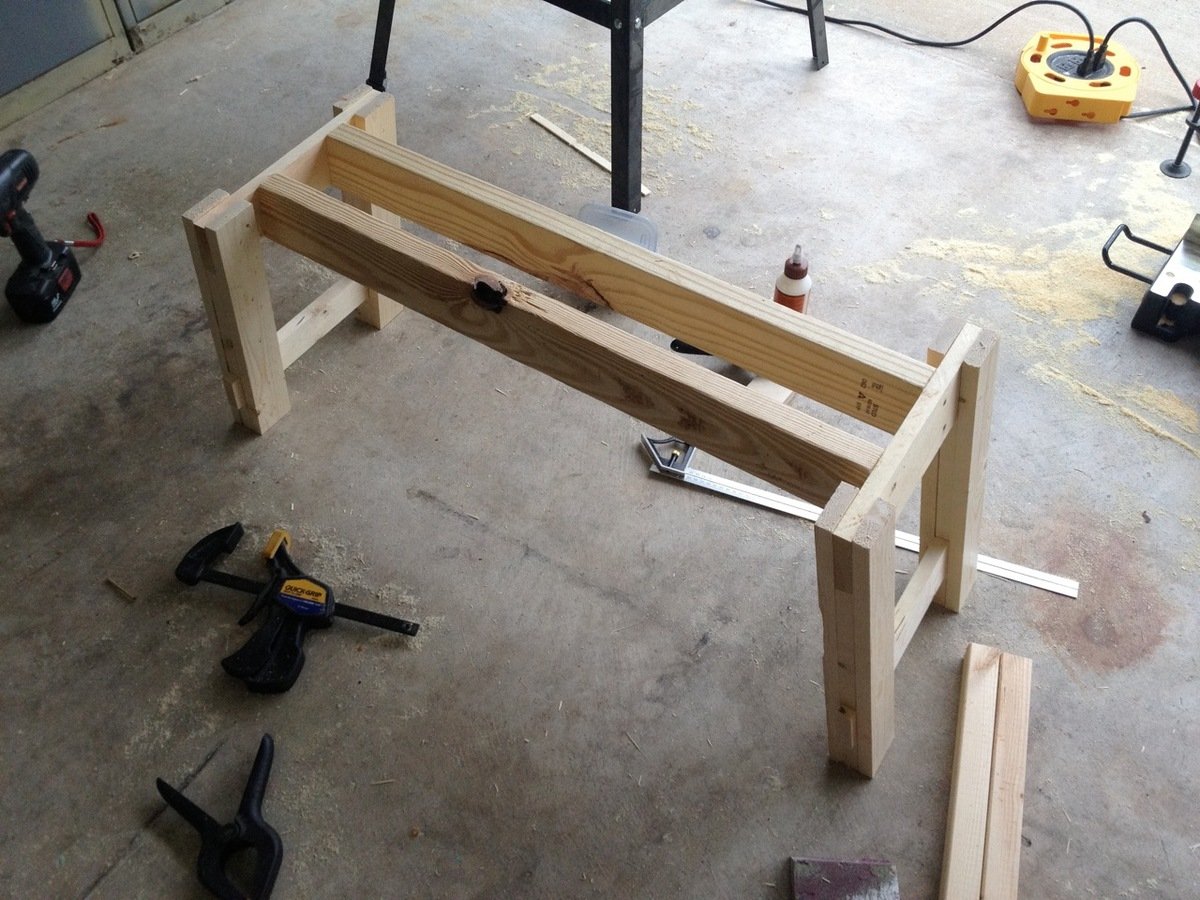
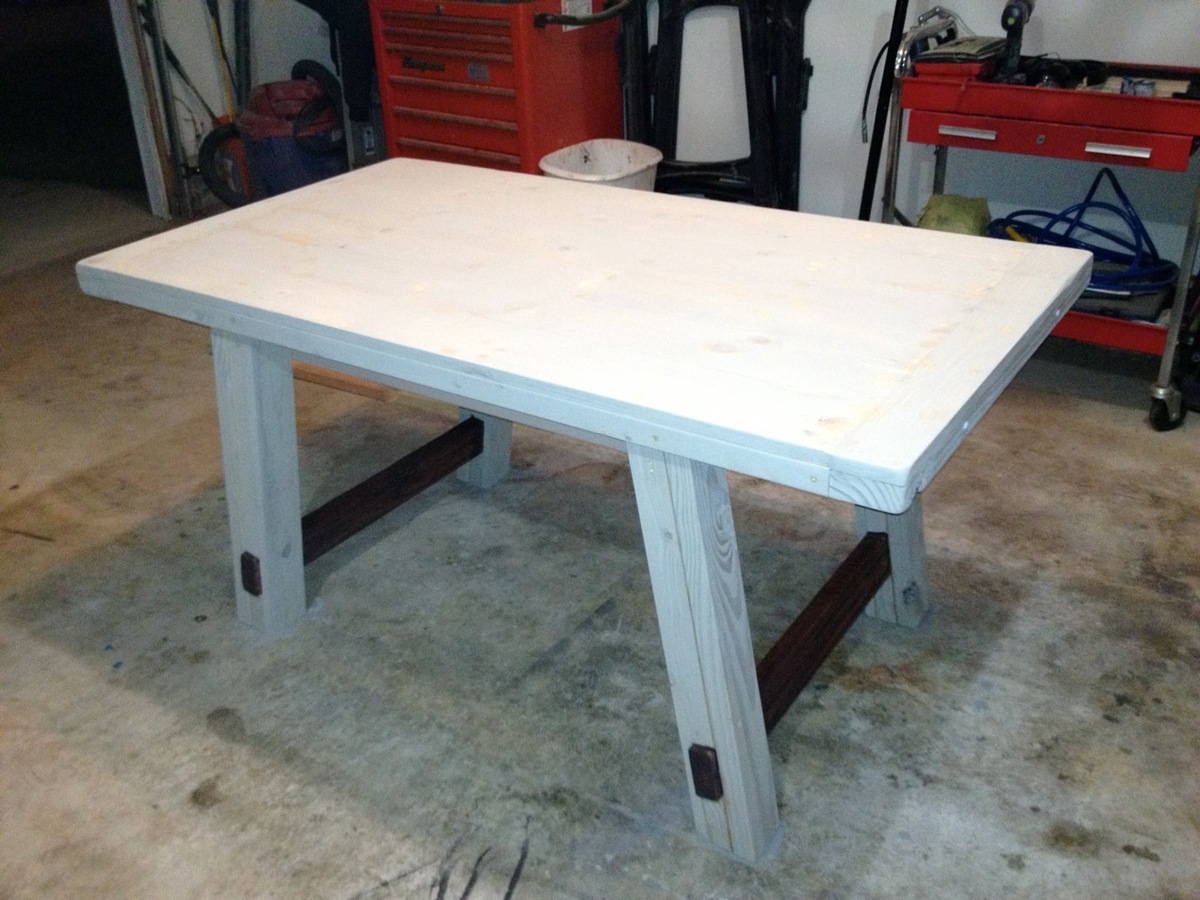
Benchwright Farmhouse table and bench
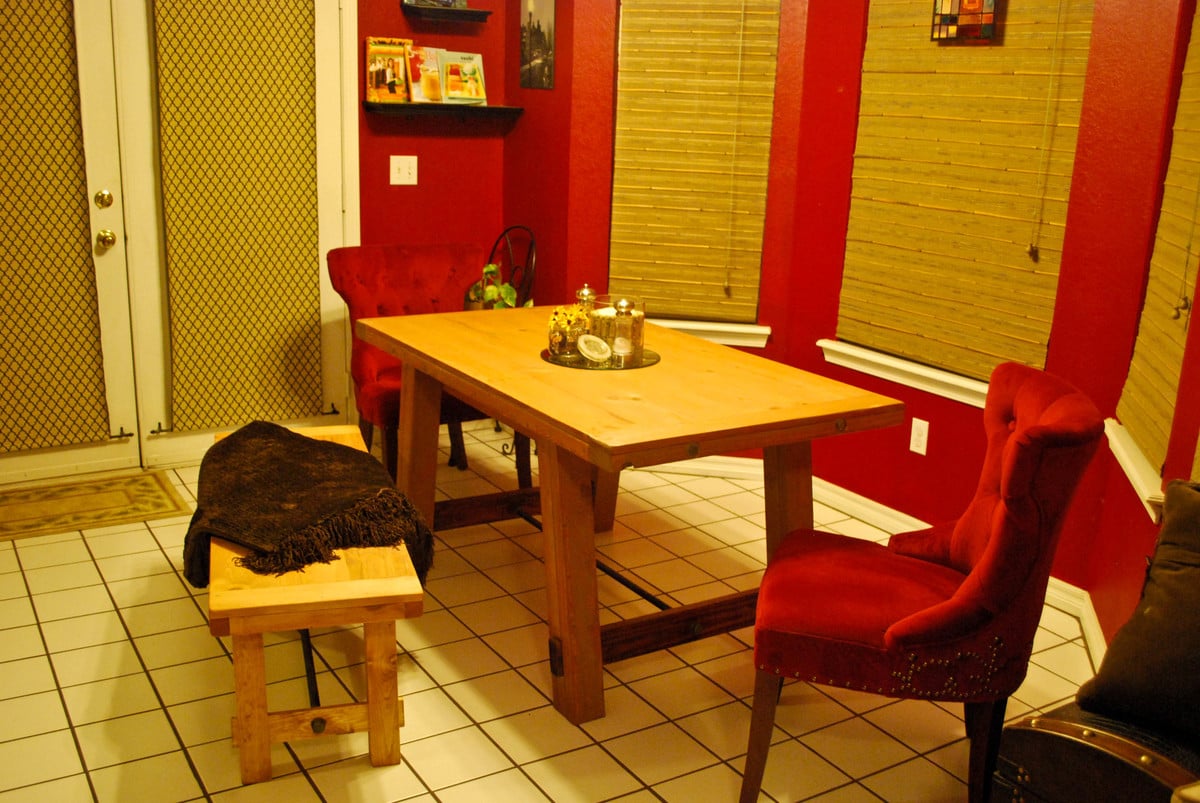
I started this Table and bench because, we have a one year old and we had a bar height table. Something a little shorter was needed, so I picked the Benchwright plans since they were most like our style. I used all white wood from Lowes and some pine 2x4's. Since the original plans made the table a little too large for our house I shortened the length on the table and bench by 15". This was the largest project I have done so far, but the plans are so easy to use, that the major time spent for me was getting the wood, and sanding and staining. I submitted the last picture here, because I originally picked out a Rust-oleum Sunbleached stain, or so it said. As you can see from the photo it just made everything grey, and was not the look I or my wife were looking for. I recommend very carefully picking a stain color out and testing it on similar wood before using it on your finished project. I spent two hours after this mistake sanding off the stain, and since it was grey it still shows through a lighter color. In the end we are both happy with the final product, and you don't learn until you try and mess-up a few times. I really had a lot of fun with this project, and can't wait for the next thing to build.

Built from Plan(s)
Estimated Cost
$200
Estimated Time Investment
Day Project (6-9 Hours)
Finish Used
Minwax-Ipswich Pine 221(two coats on table)(One coat on bench), Minwax-Bombay Mahogany Satin 380 (one coat left on for 15 mins on cross members)
Recommended Skill Level
Intermediate
Comments
Wed, 04/18/2012 - 11:43
Wow! Your table looks
Wow! Your table looks spectacular! Great job! I especially love that bench. I would like to build a bench to go with my benchright table. How did you do it?
In reply to Wow! Your table looks by Britterz (not verified)
Wed, 06/06/2012 - 19:48
Bench wright bench
There are plans on Ana-white associated with the table. I shortened it some from the plans to fit my table and fit a standard 36" piece of pipe.
Wed, 05/30/2012 - 11:25
Table surface
I dont see any screws on the ends of the planks into the top of the table.
Did you only screw up from the bottom? Did you do that on the plank ends
also?
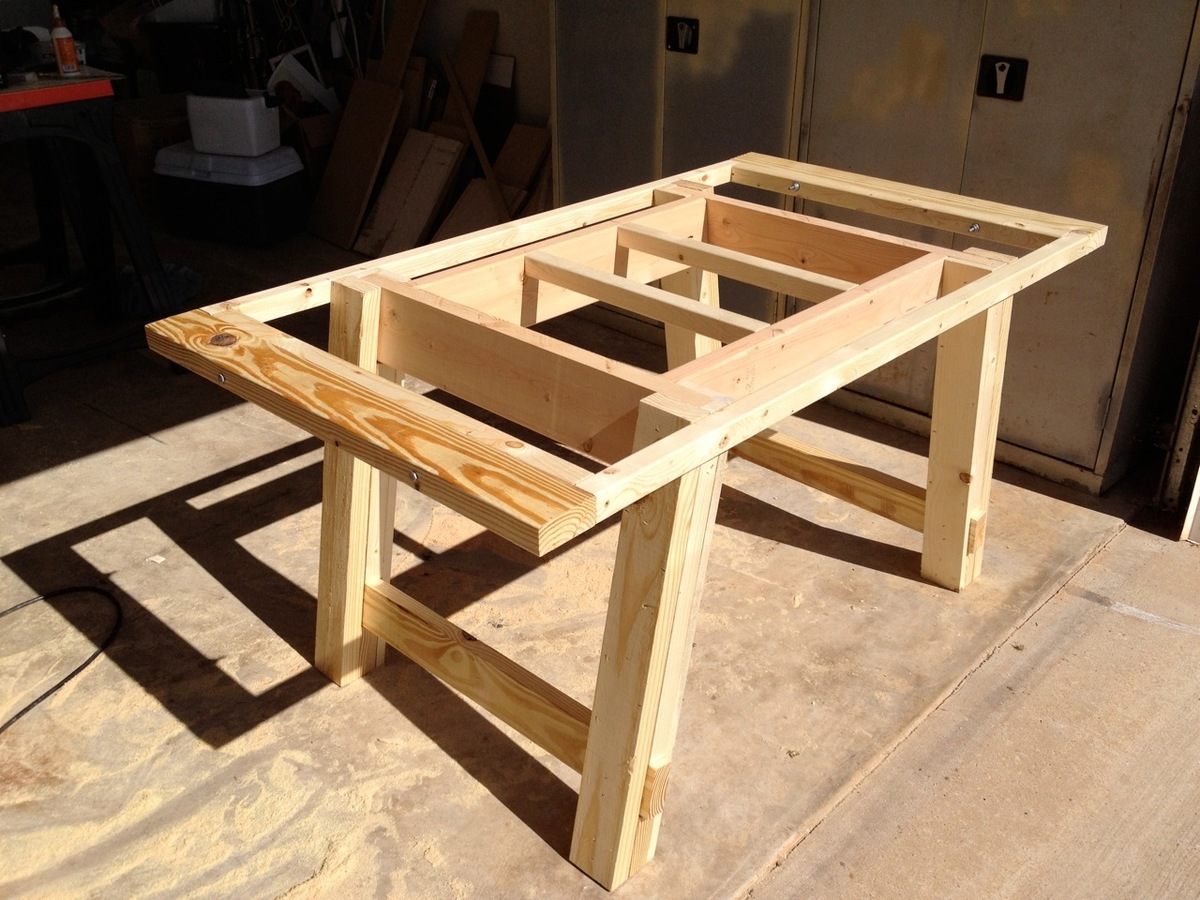
Thank you for the in process photos too. It really helps alot. Also helps to
see that everything doesnt have to match up perfect seam-wise. I get too used
to manufactured stuff...and forget how beautiful hand made items can be
simply because of their imperfections in the woods.
In reply to Table surface by dklunde
Wed, 06/06/2012 - 19:59
Table Surface
I used finish nails from the top into the structure, and then used wood filler to
Fill in the holes. The ends are only held on by the two bolts on the ends.
I appreciate the handmade quality of real wood furniture as well. Even when small mistakes are made here and there, the end result is something to be proud of.
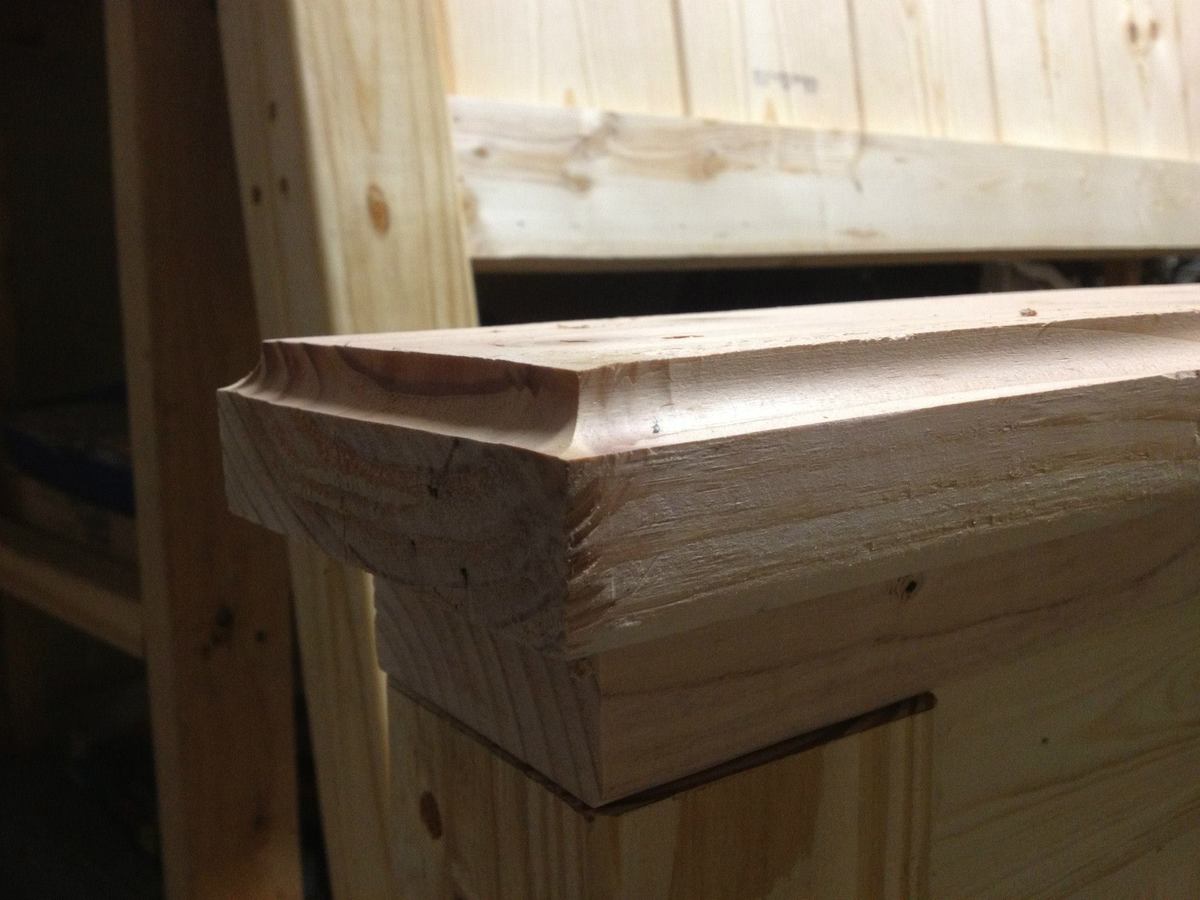
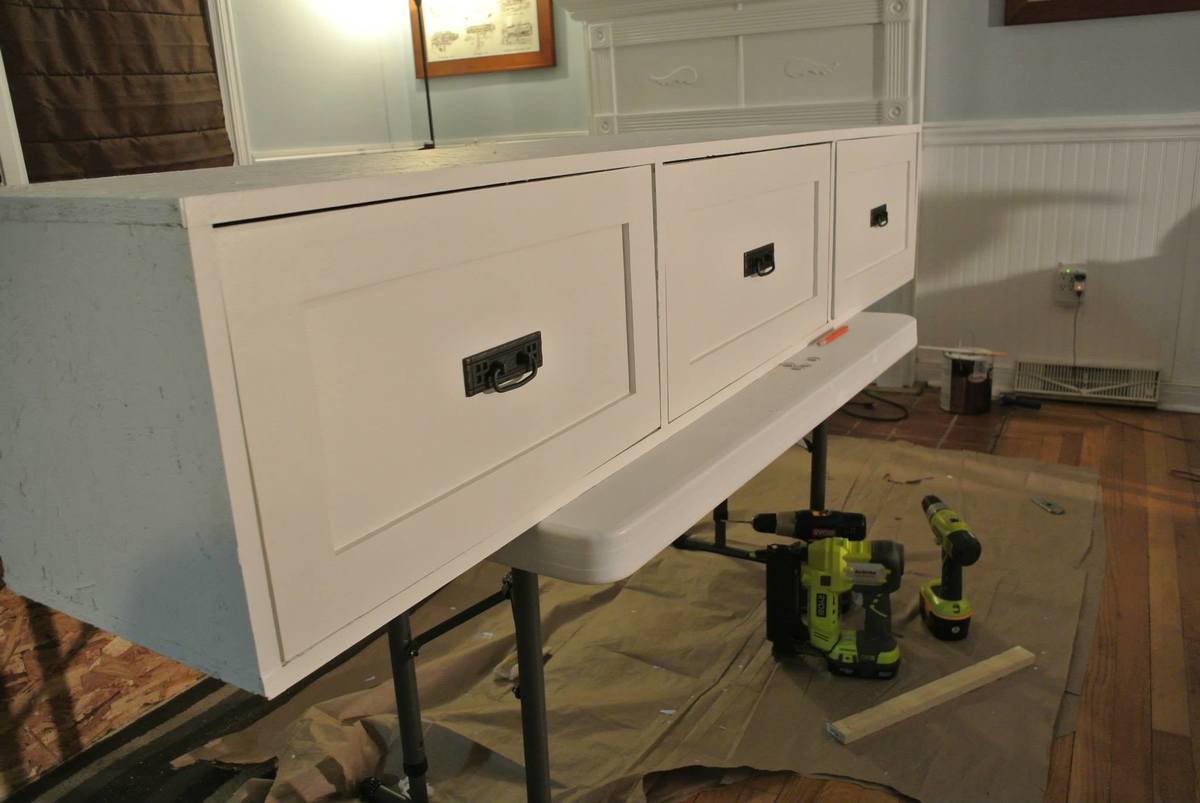
Combo of Farmhouse Bed with Farmhouse Storage Bed
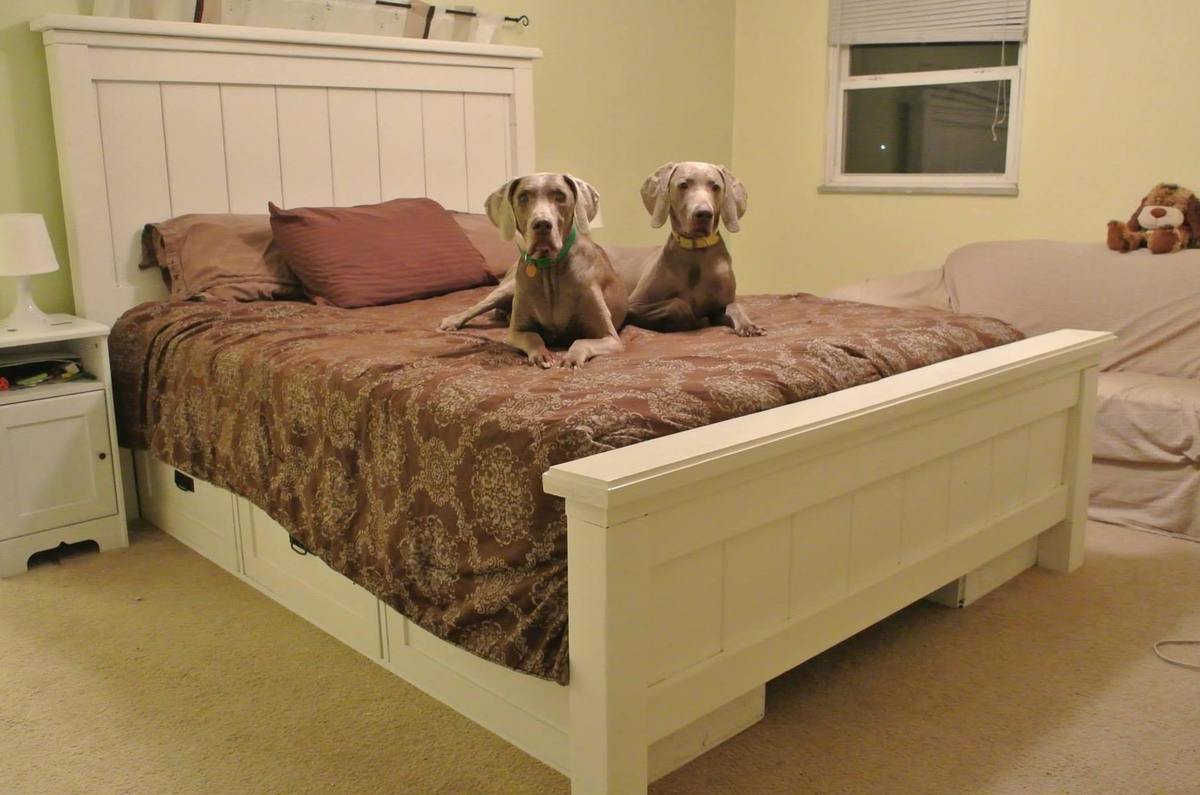
I meshed the Farmhouse Bed with the Farmhouse Storage Bed with Storage Drawers and this is the final product. Let me know if you have any questions. I learned along the way.
A few things I modified -
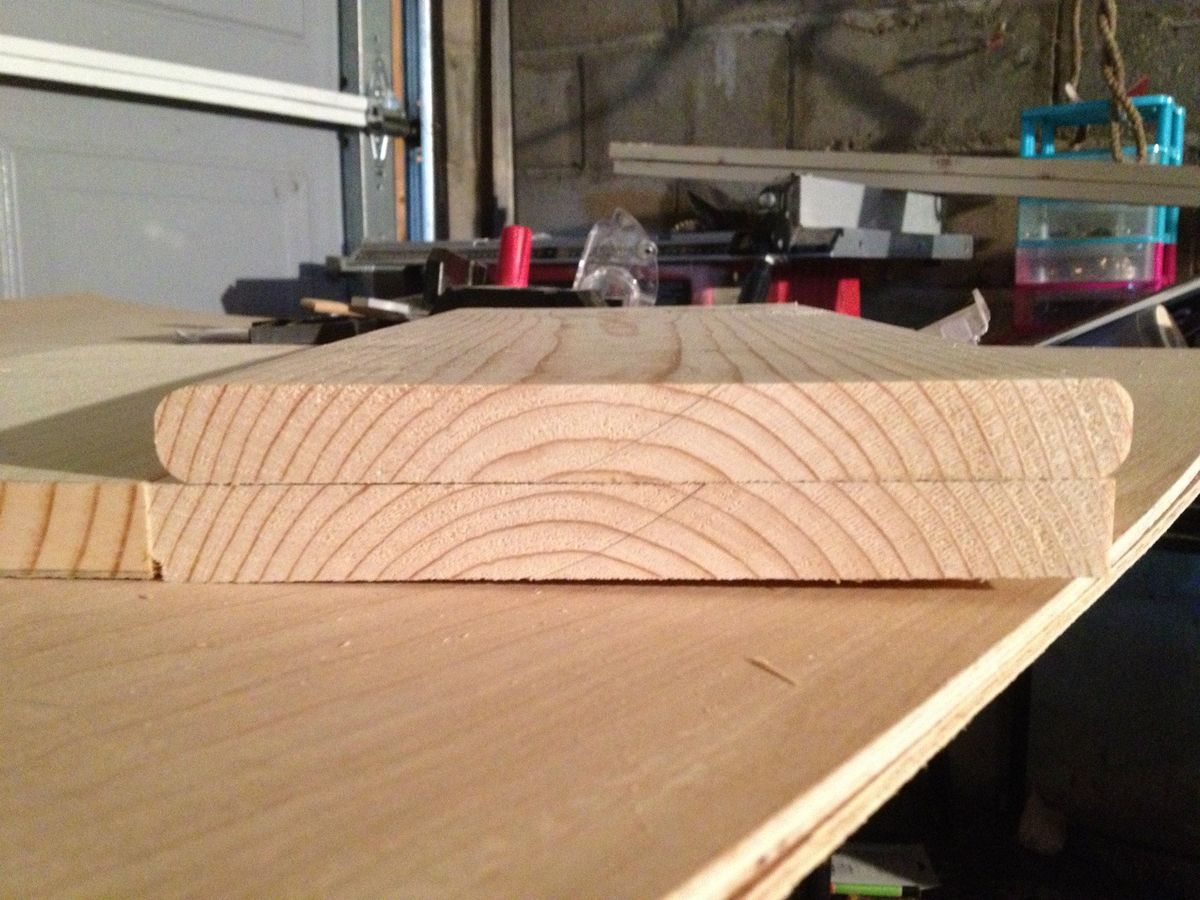
I knocked off the corners of the 1x8's used in the footboard and headboard as I wasn't a fan with how they butted up straight. I liked the rounded edges of the routered boards instead.
I cove routered the tops of 2x6's and loved how they turned out
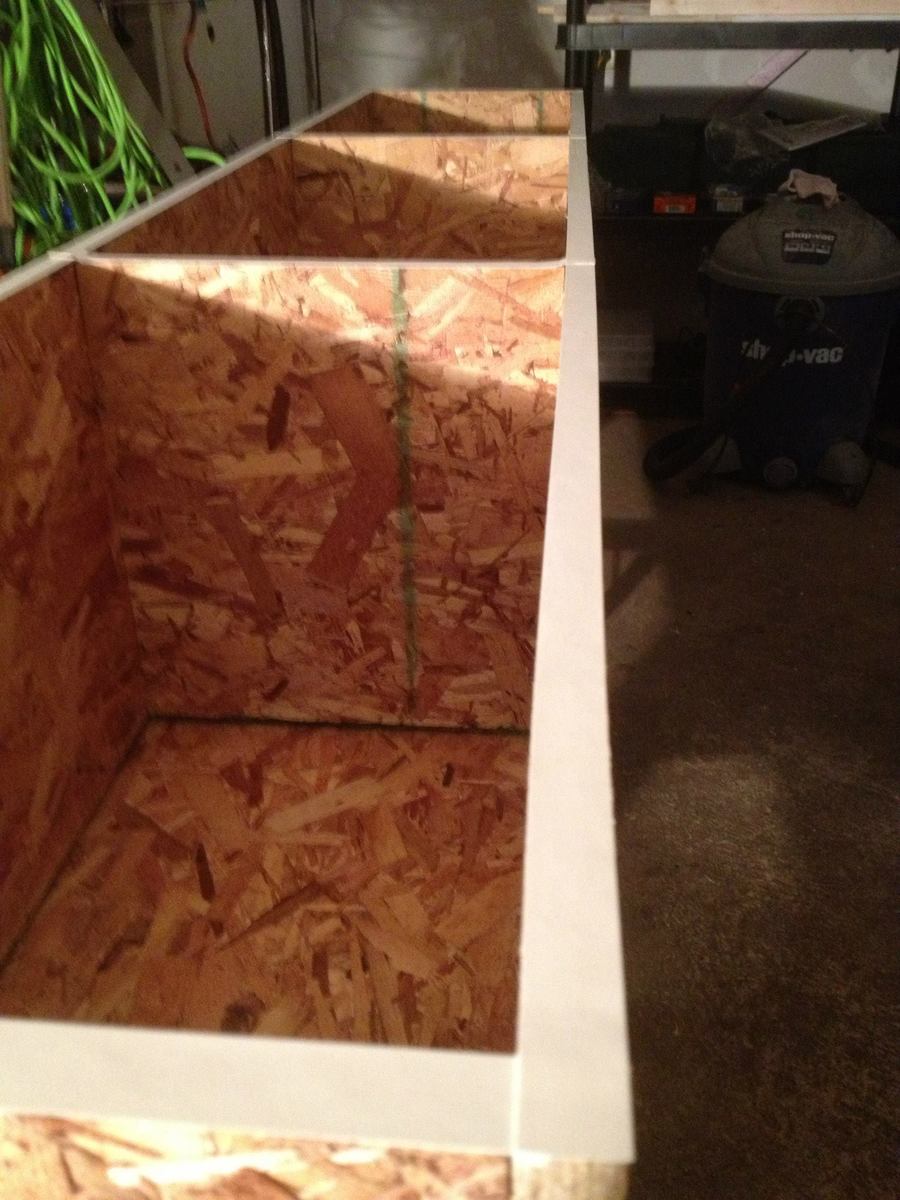
When I handed my cutlist to the kid at the big orange store, he pulled OSB instead of plywood for the storage cabinets. I realized it halfway through the cutting as I was shopping for other things and didn't have the heart to tell him halfway through the job. I had to edge band (first time) the edges and the OSB soaked up a lot of primer.

Built from Plan(s)
Estimated Cost
$400
Estimated Time Investment
Week Long Project (20 Hours or More)
Finish Used
Glidden Antique White
Recommended Skill Level
Beginner
Comments
Jim's Corner Cupboard
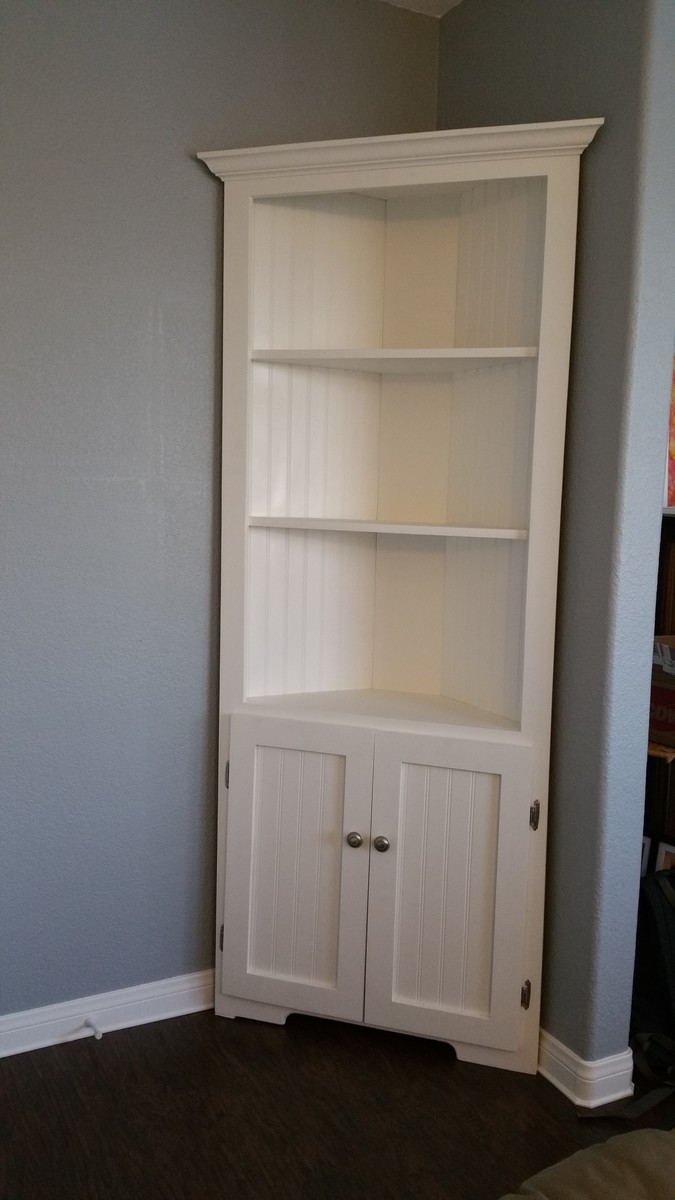
This was my first large build, and it went fairly well. A few little issues here and there, but I'm the only one who will notice most of them.
Built from Plan(s)
Finish Used
White Latex paint finished with Minwax Polycrylic (spray paint can - not recommended. Next time I'll brush or wipe on the poly).
Recommended Skill Level
Beginner
Cedar Top Modification
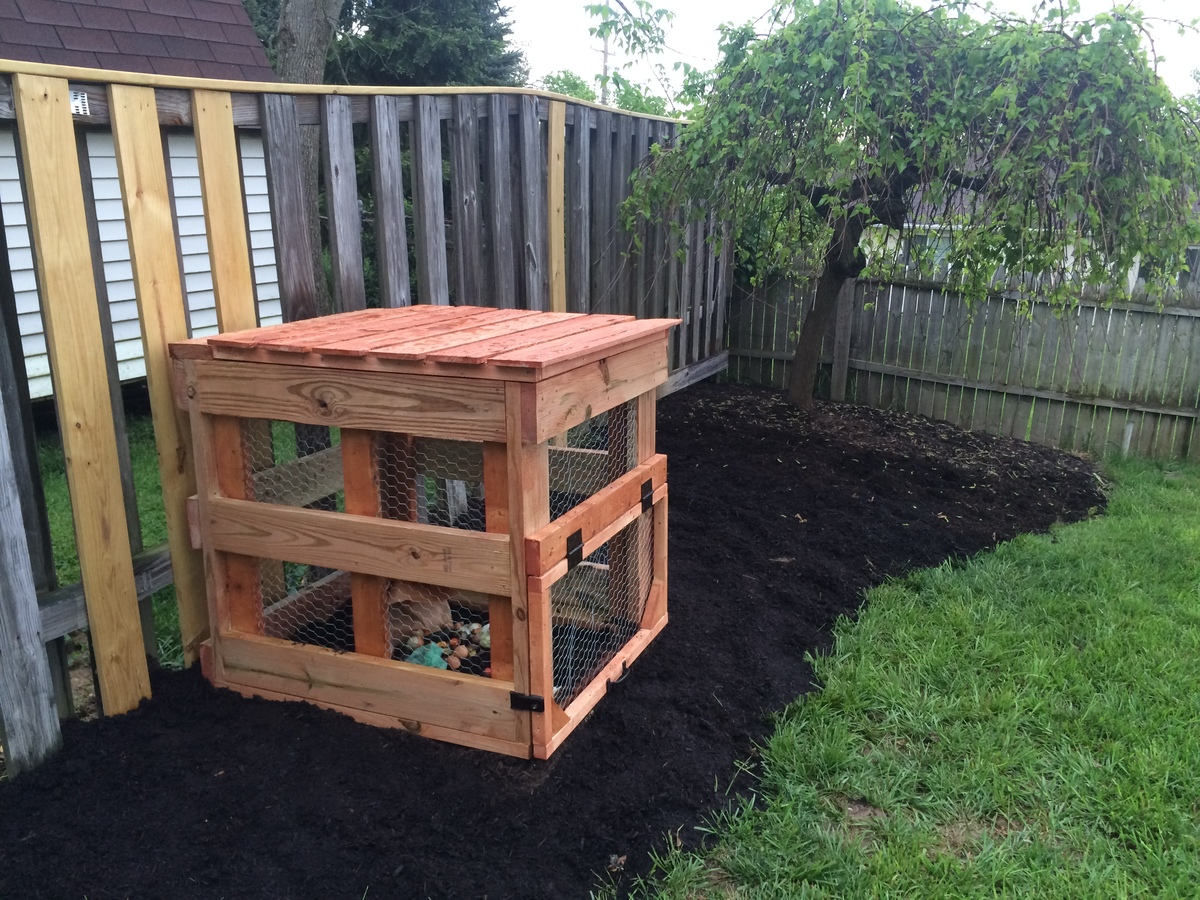
We needed a compost bin to replace the pile forming in a corner of the yard. We referred to it as "The Buffet" to reflect how much our new puppy enjoyed digging through the scraps.
I I substituted cedar fencing to top the bin instead of the plastic sheeting. I just liked the way it looked and it was more cost effective. The most difficult part of the project really is wrangling the chicken wire. It's sharp!
Built from Plan(s)
Estimated Cost
I spent about $75 on materials for the project. I spent about another $75 on things like screws, a new staple gun, some waterproofing stain, etc all of which I have left overs and can use again.
I used treated lumber and a waterproofing deck stain. This is not for an edibles garden. I'm just using the soil to fill in low spots around the yard. If I was building it for a veggie garden I would have used all cedar wood with no stain or a natural shellac.
I used treated lumber and a waterproofing deck stain. This is not for an edibles garden. I'm just using the soil to fill in low spots around the yard. If I was building it for a veggie garden I would have used all cedar wood with no stain or a natural shellac.
Estimated Time Investment
Day Project (6-9 Hours)
Finish Used
Thompson waterproofing deck stain. Brushed on.
Recommended Skill Level
Intermediate
A First Planter Project
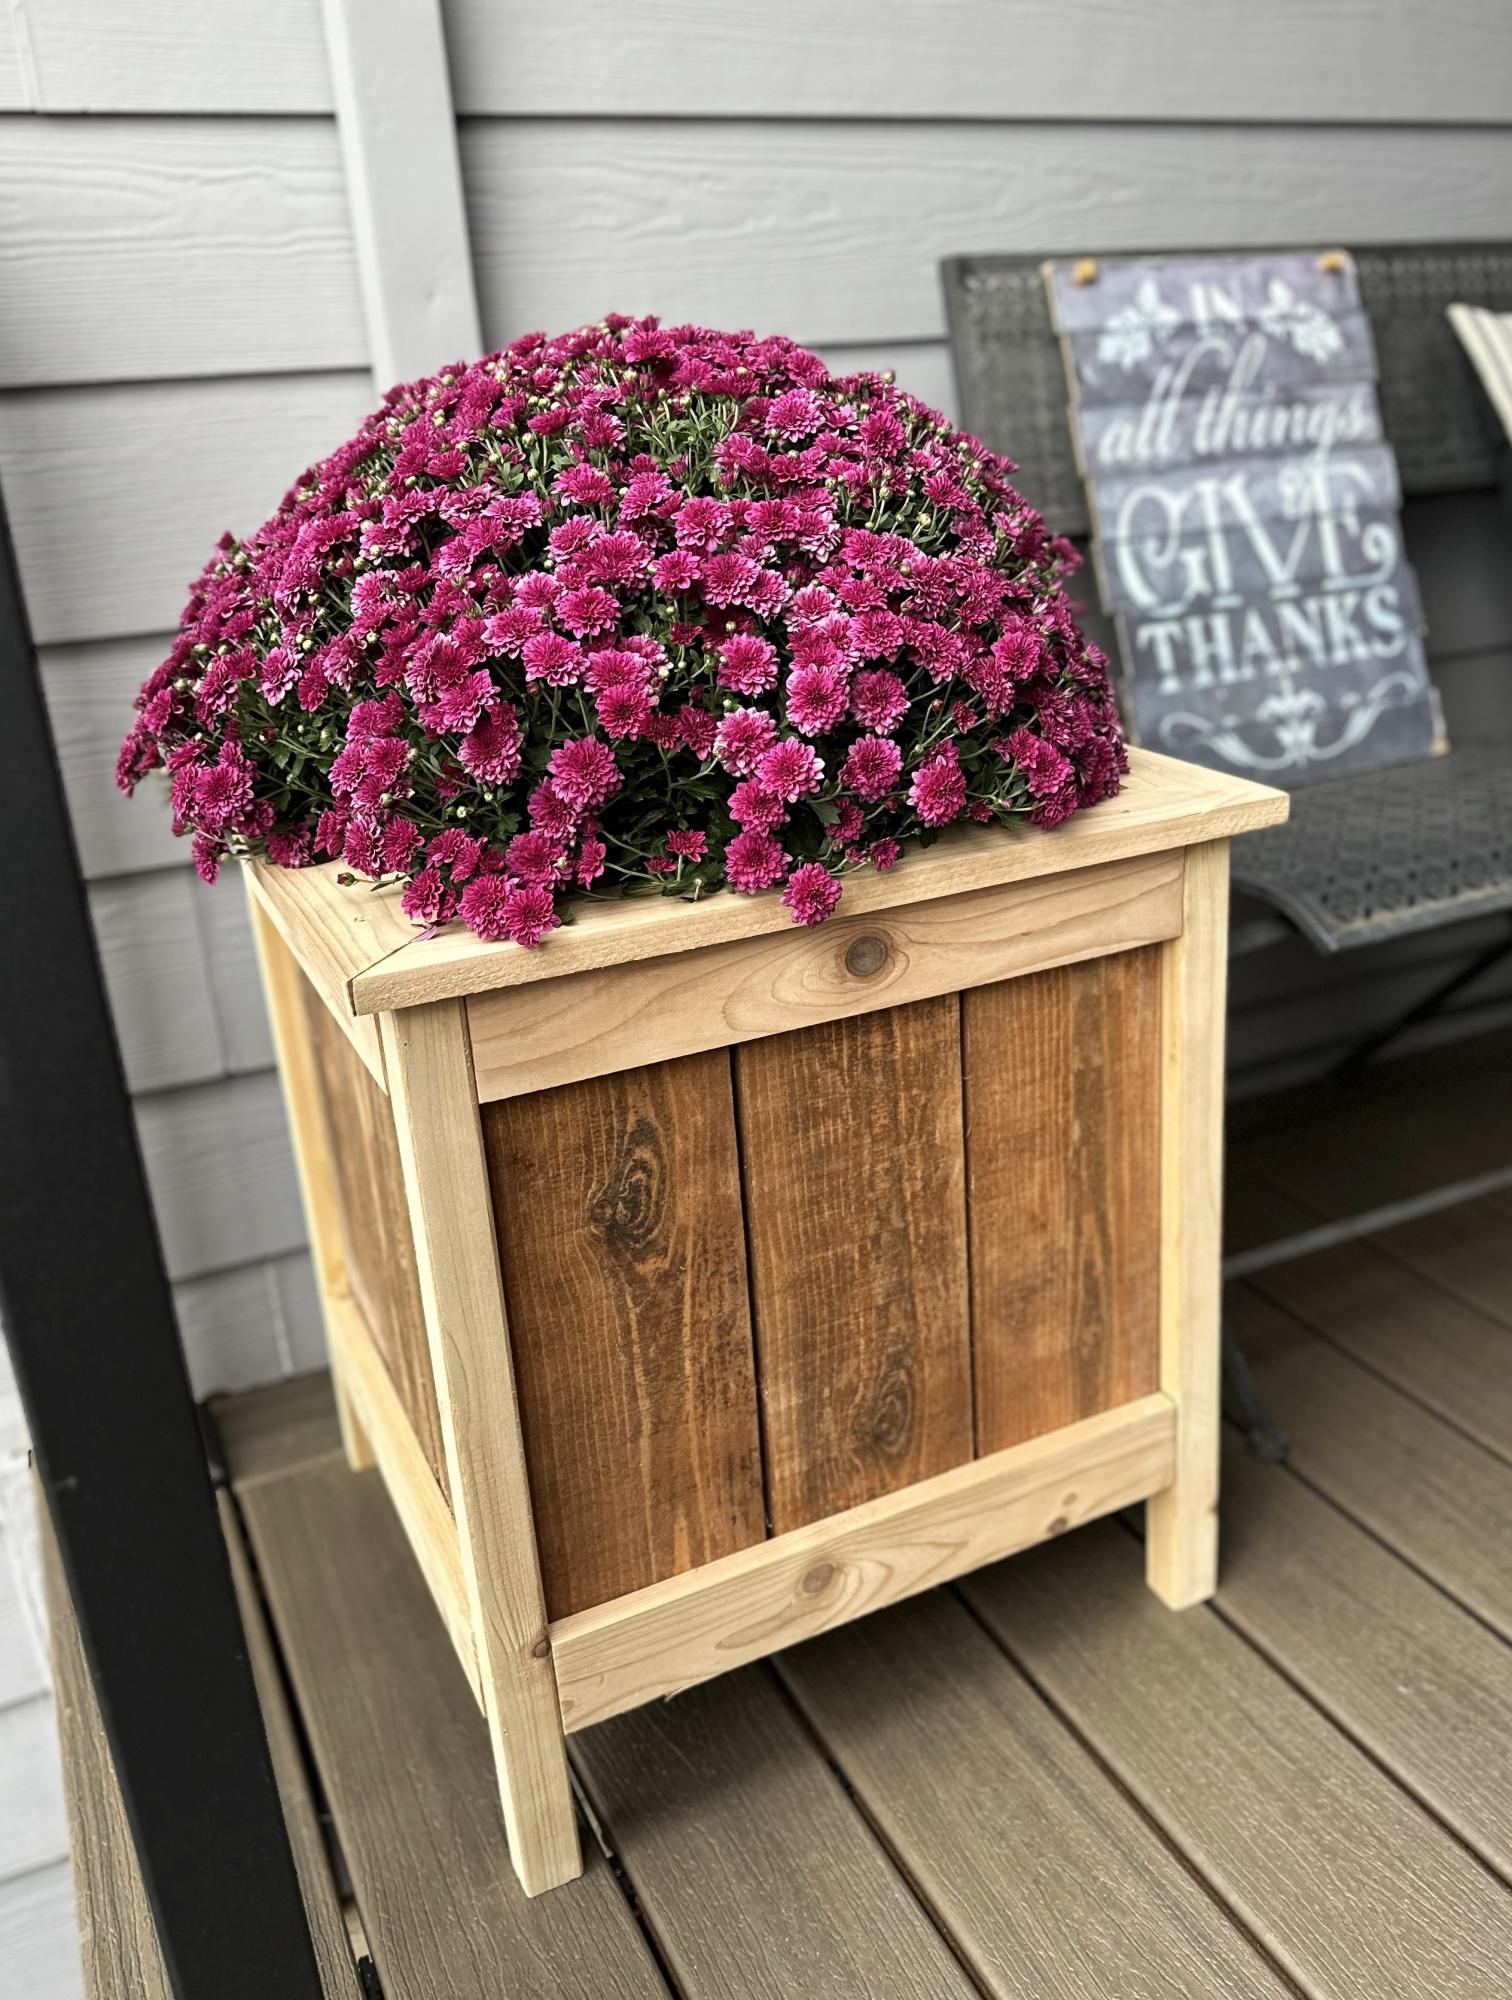
Cedar Planters, my first planter. Thanks Ana!
Caleb
Built from Plan(s)
Comments
Mon, 09/18/2023 - 15:50
First Project!!!
Great first project, can't wait to see what else you build!
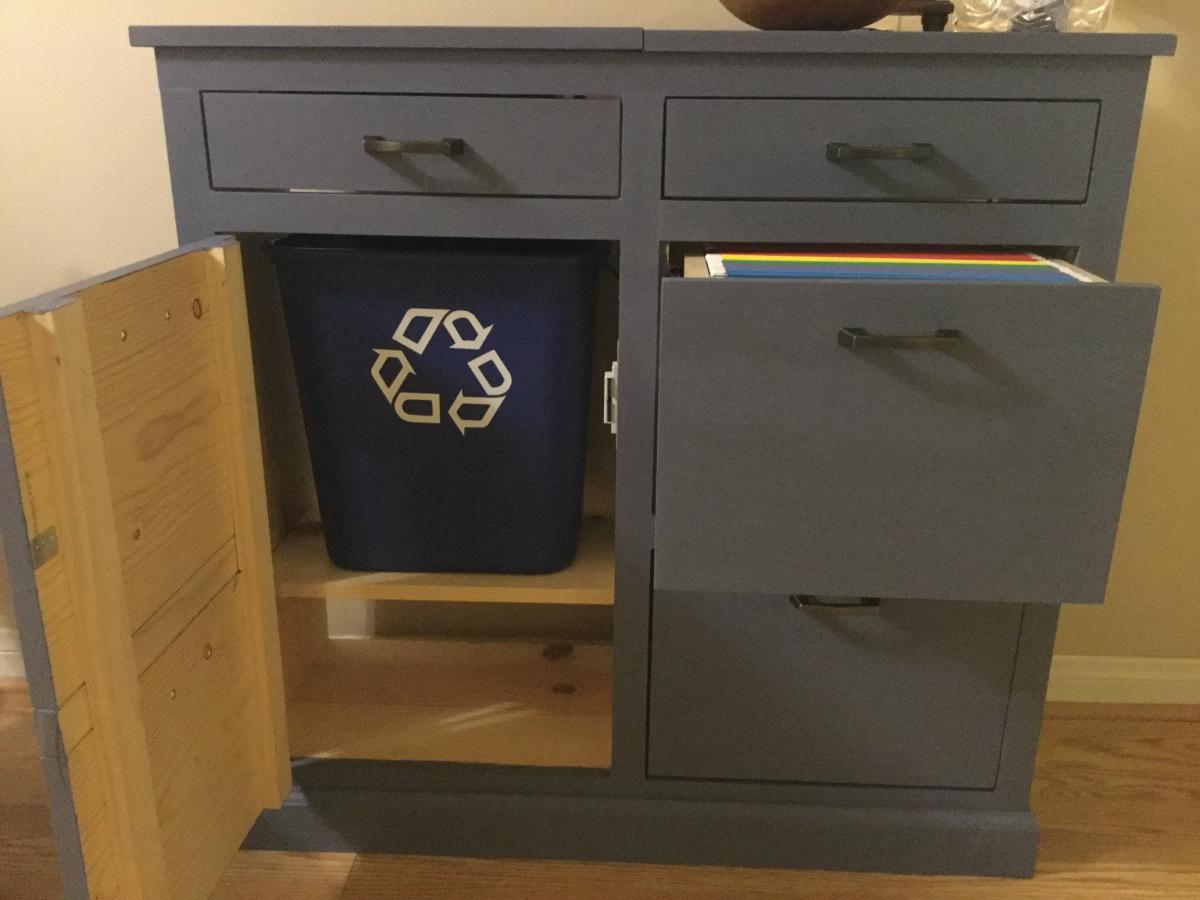
The Mail Boss is ready
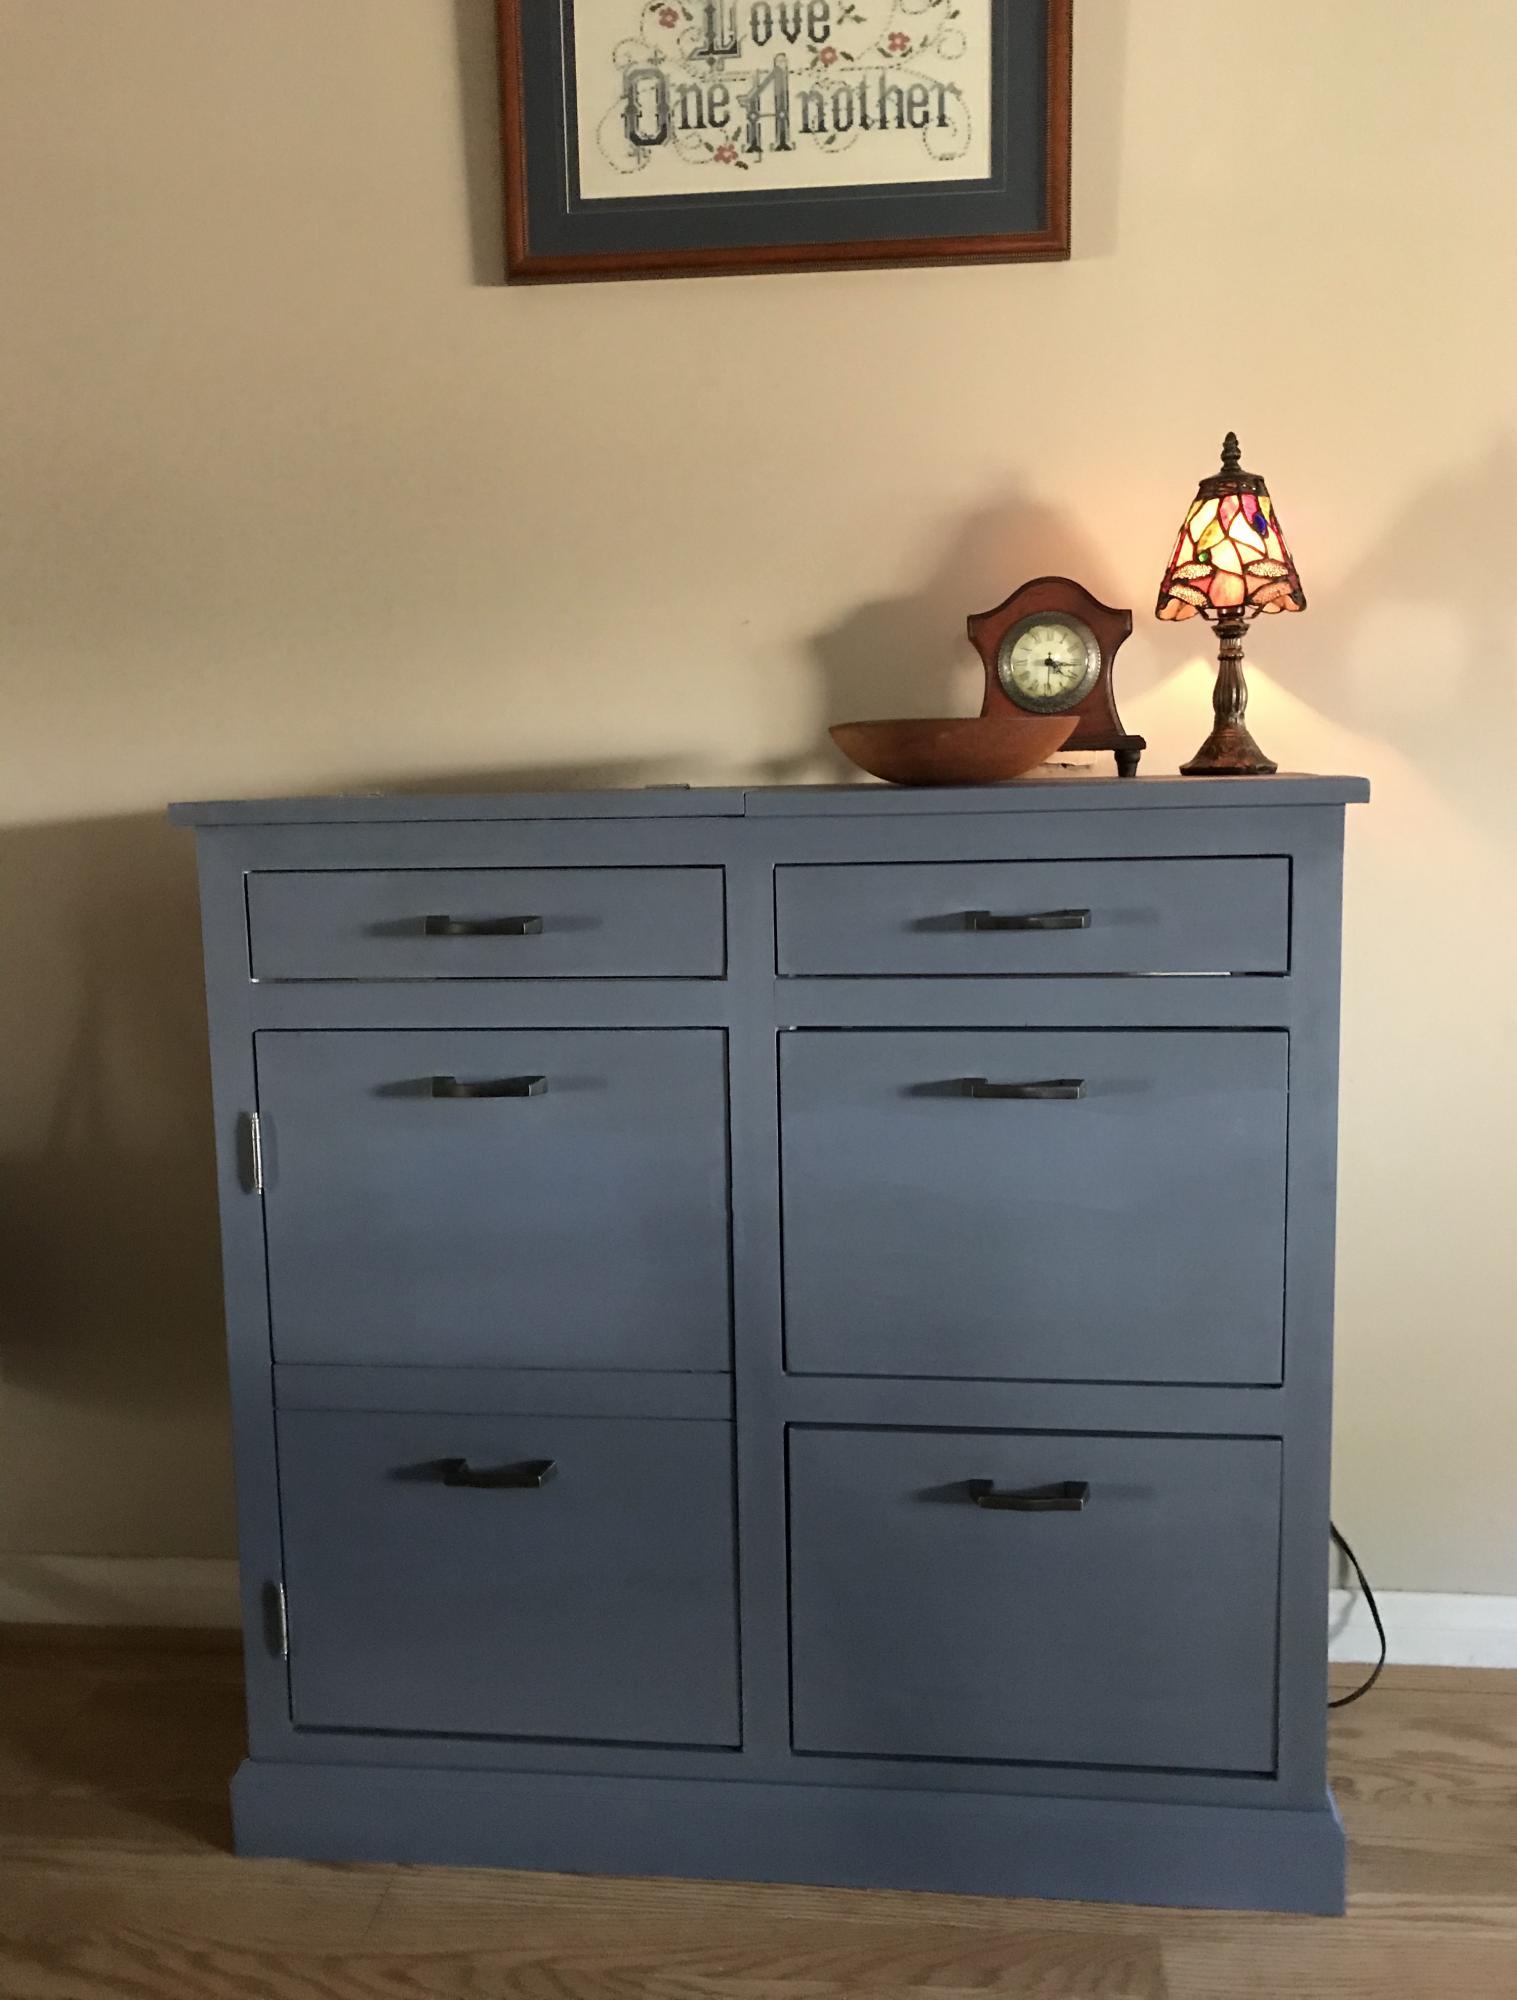
The Mail Boss cabinet with chalk paint and wax finish. Ana White plans.
I worked on this project off and on for two days. I love it! Thank you Ana
Built from Plan(s)
Estimated Time Investment
Weekend Project (10-20 Hours)
Finish Used
Blue chalk paint and clear wax
Recommended Skill Level
Advanced
Comments

Wed, 02/05/2020 - 20:46
Project Costs?
Love this & we would like to make it! Want a “command center” to get organized. We have all needed tools. Can you estimate the supply costs for the building materials?
Shiplap Fireplace
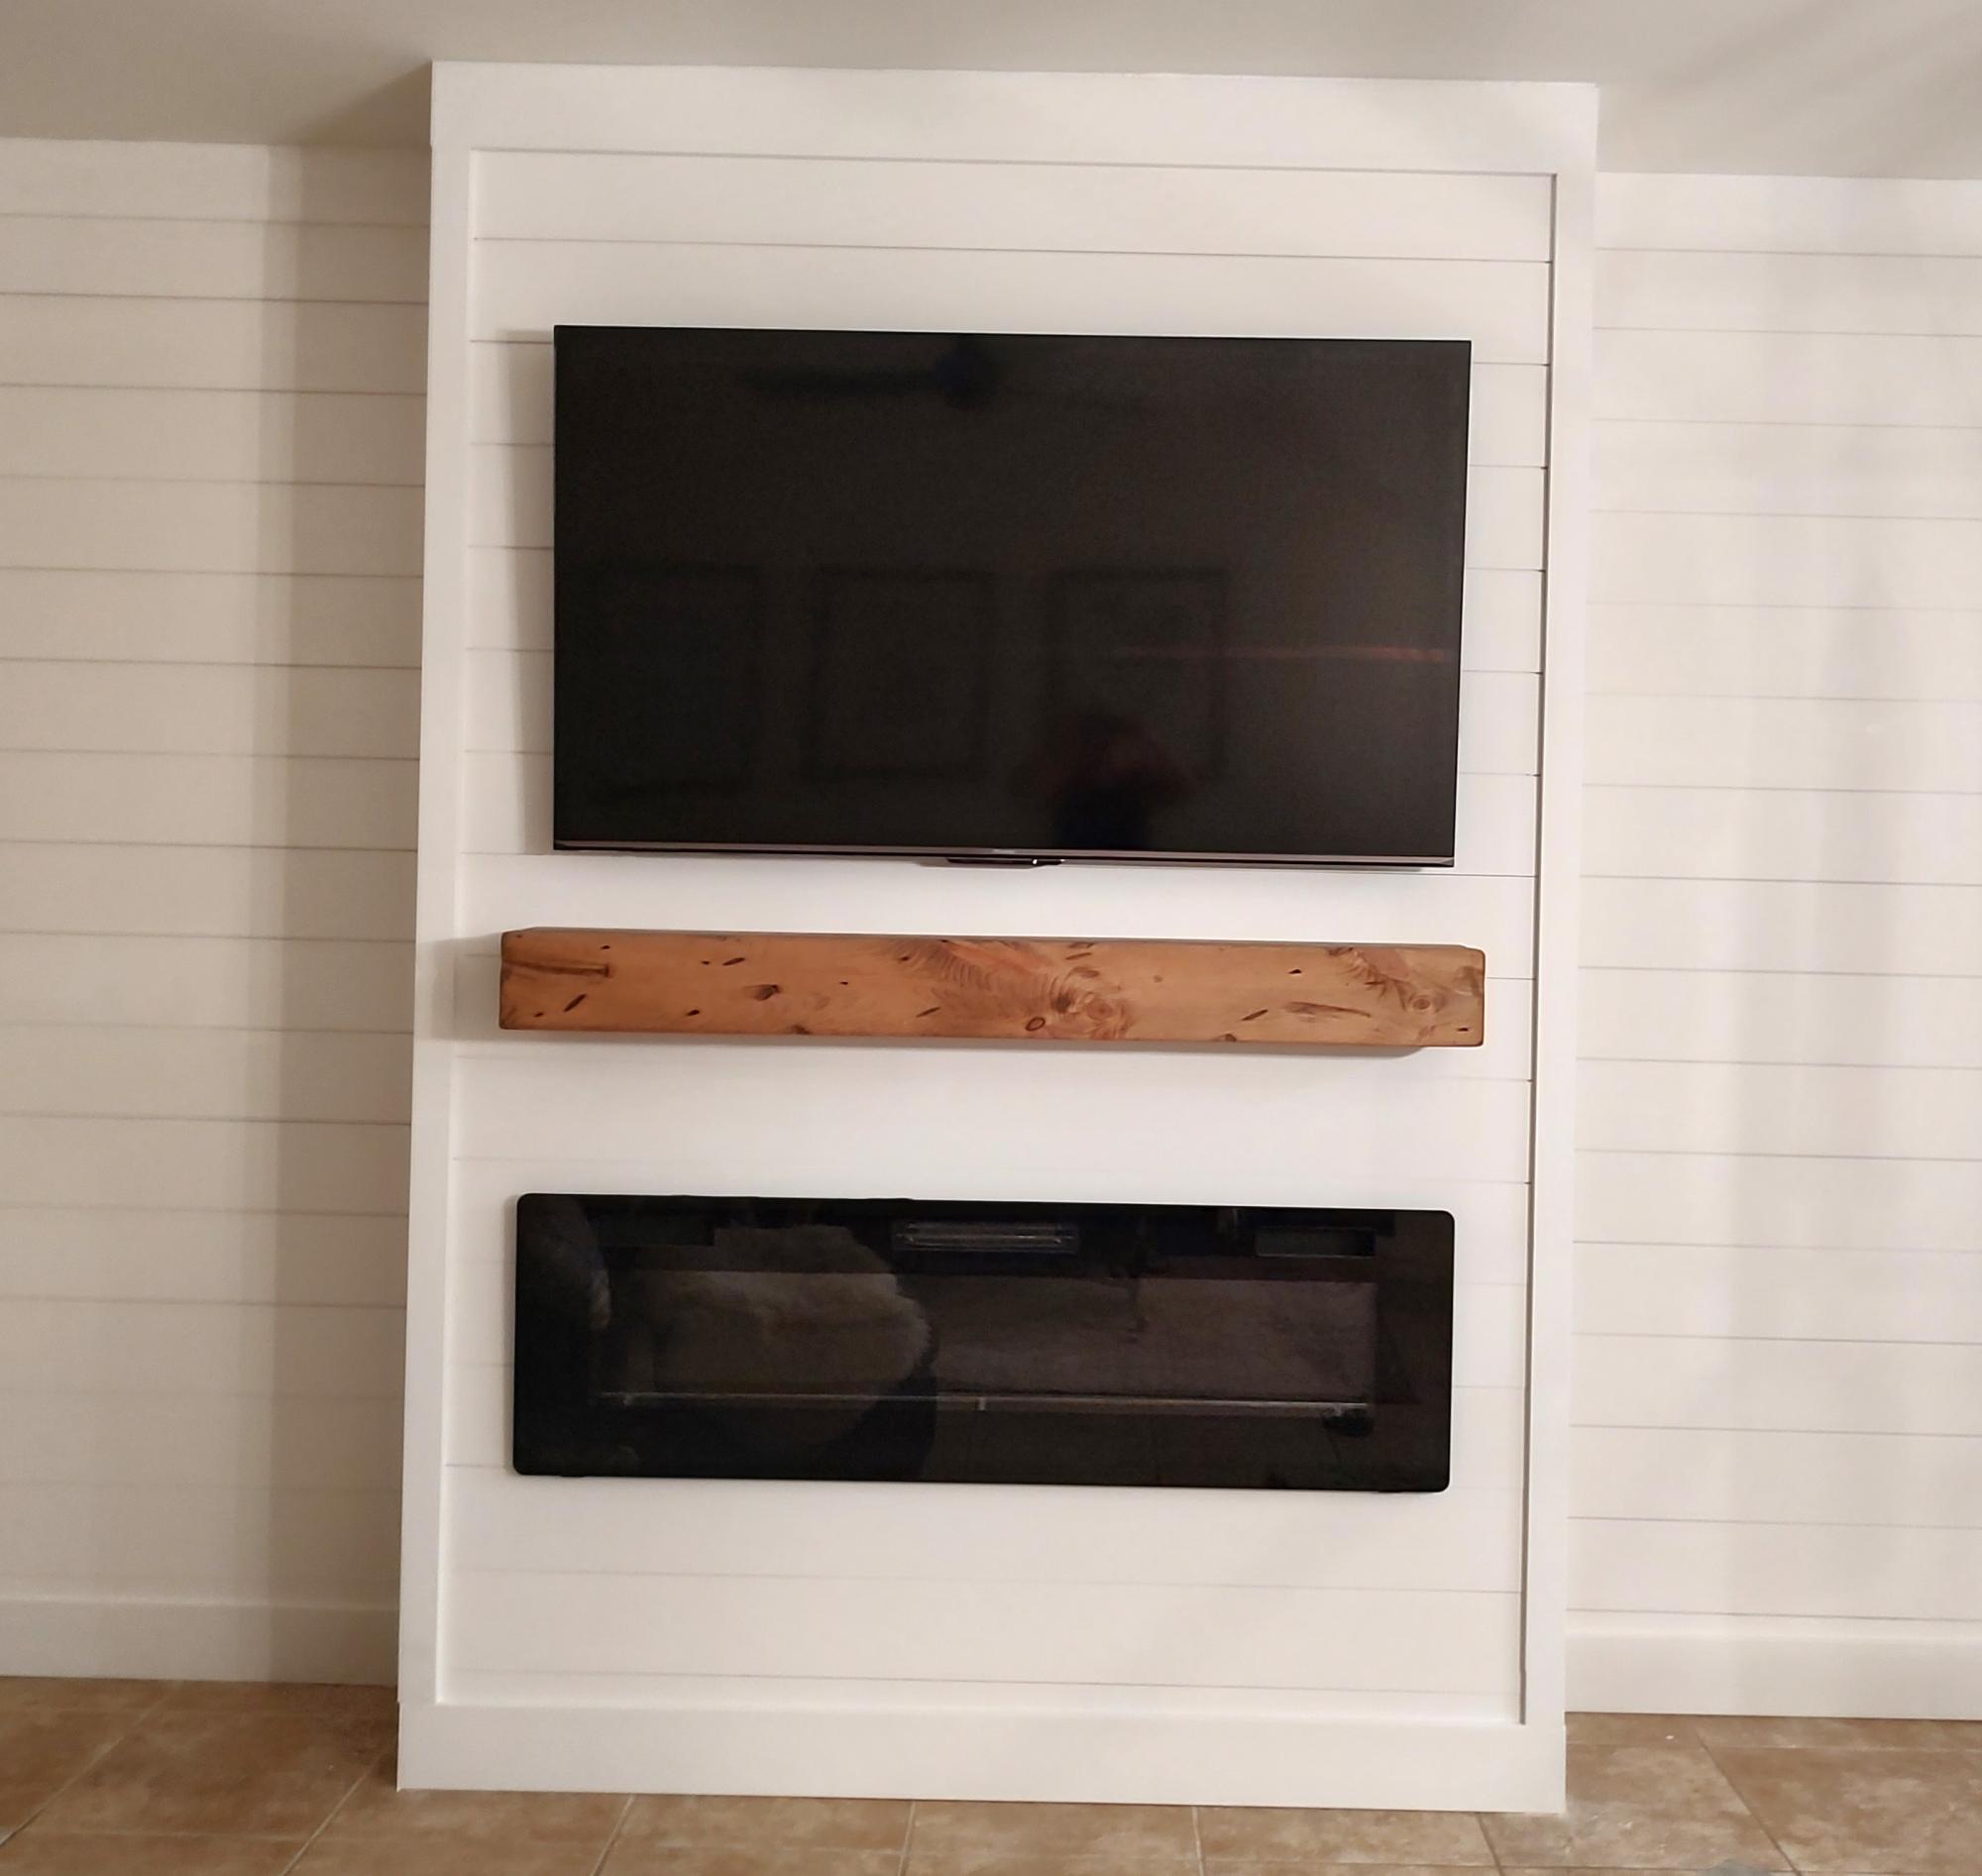
So excited for my new living room space thank you for your great tips!
Kandis white DeCarlo
Built from Plan(s)
Comments
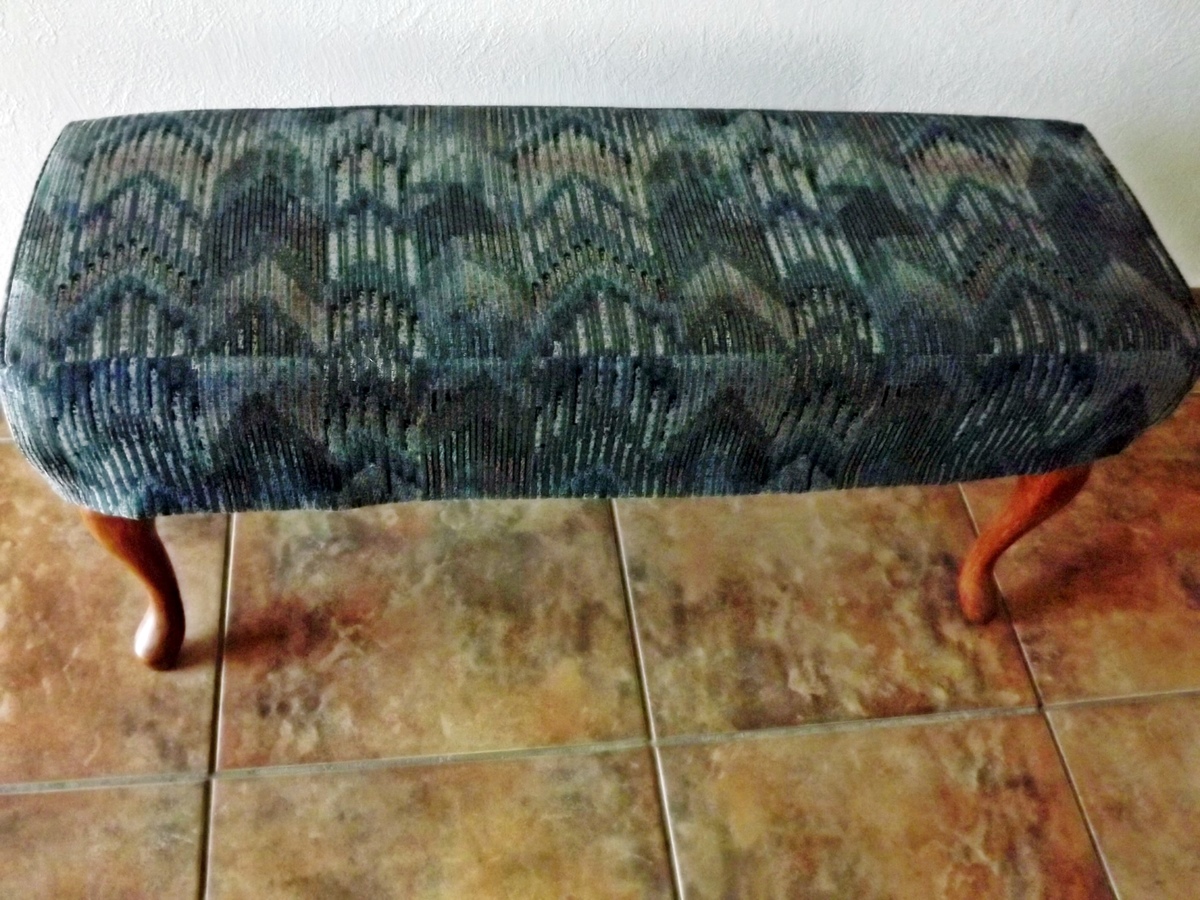
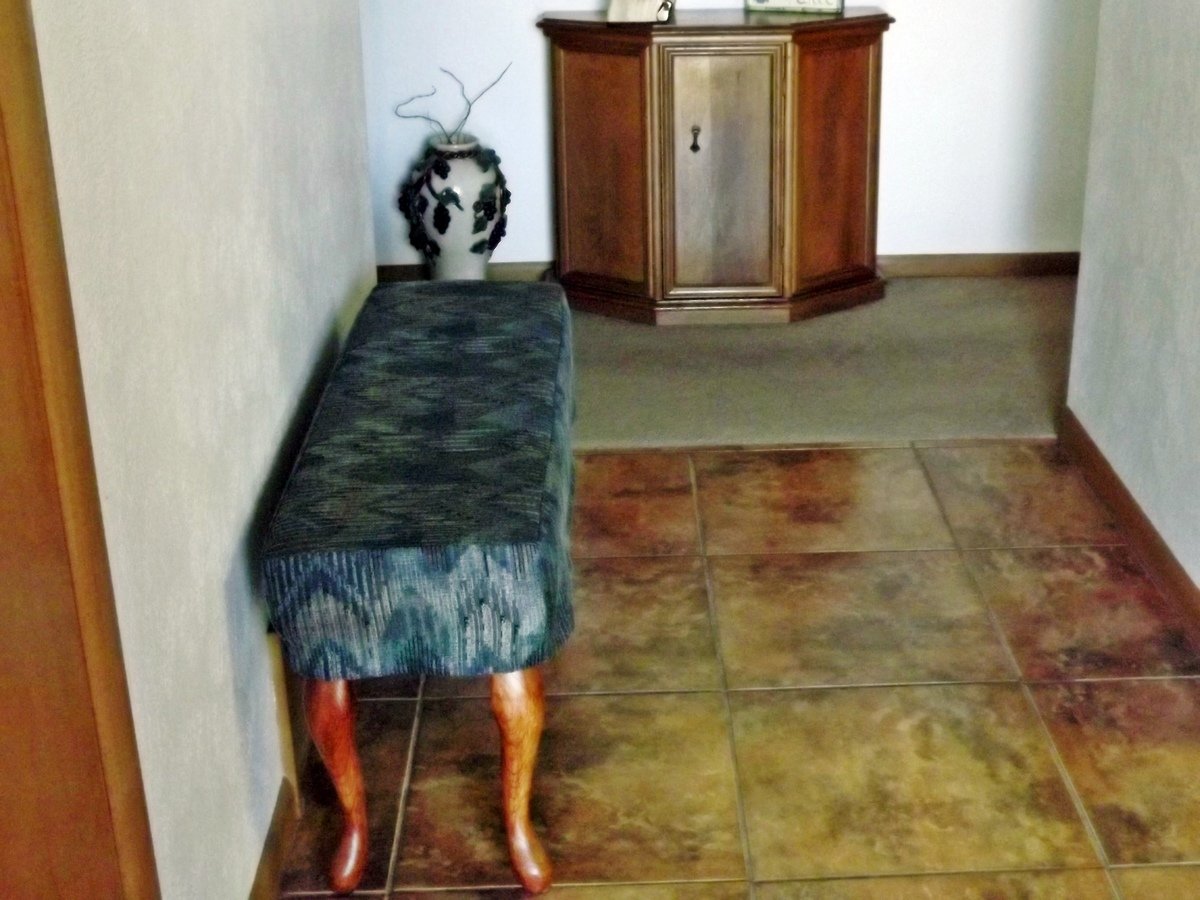
Slipcovered Bench
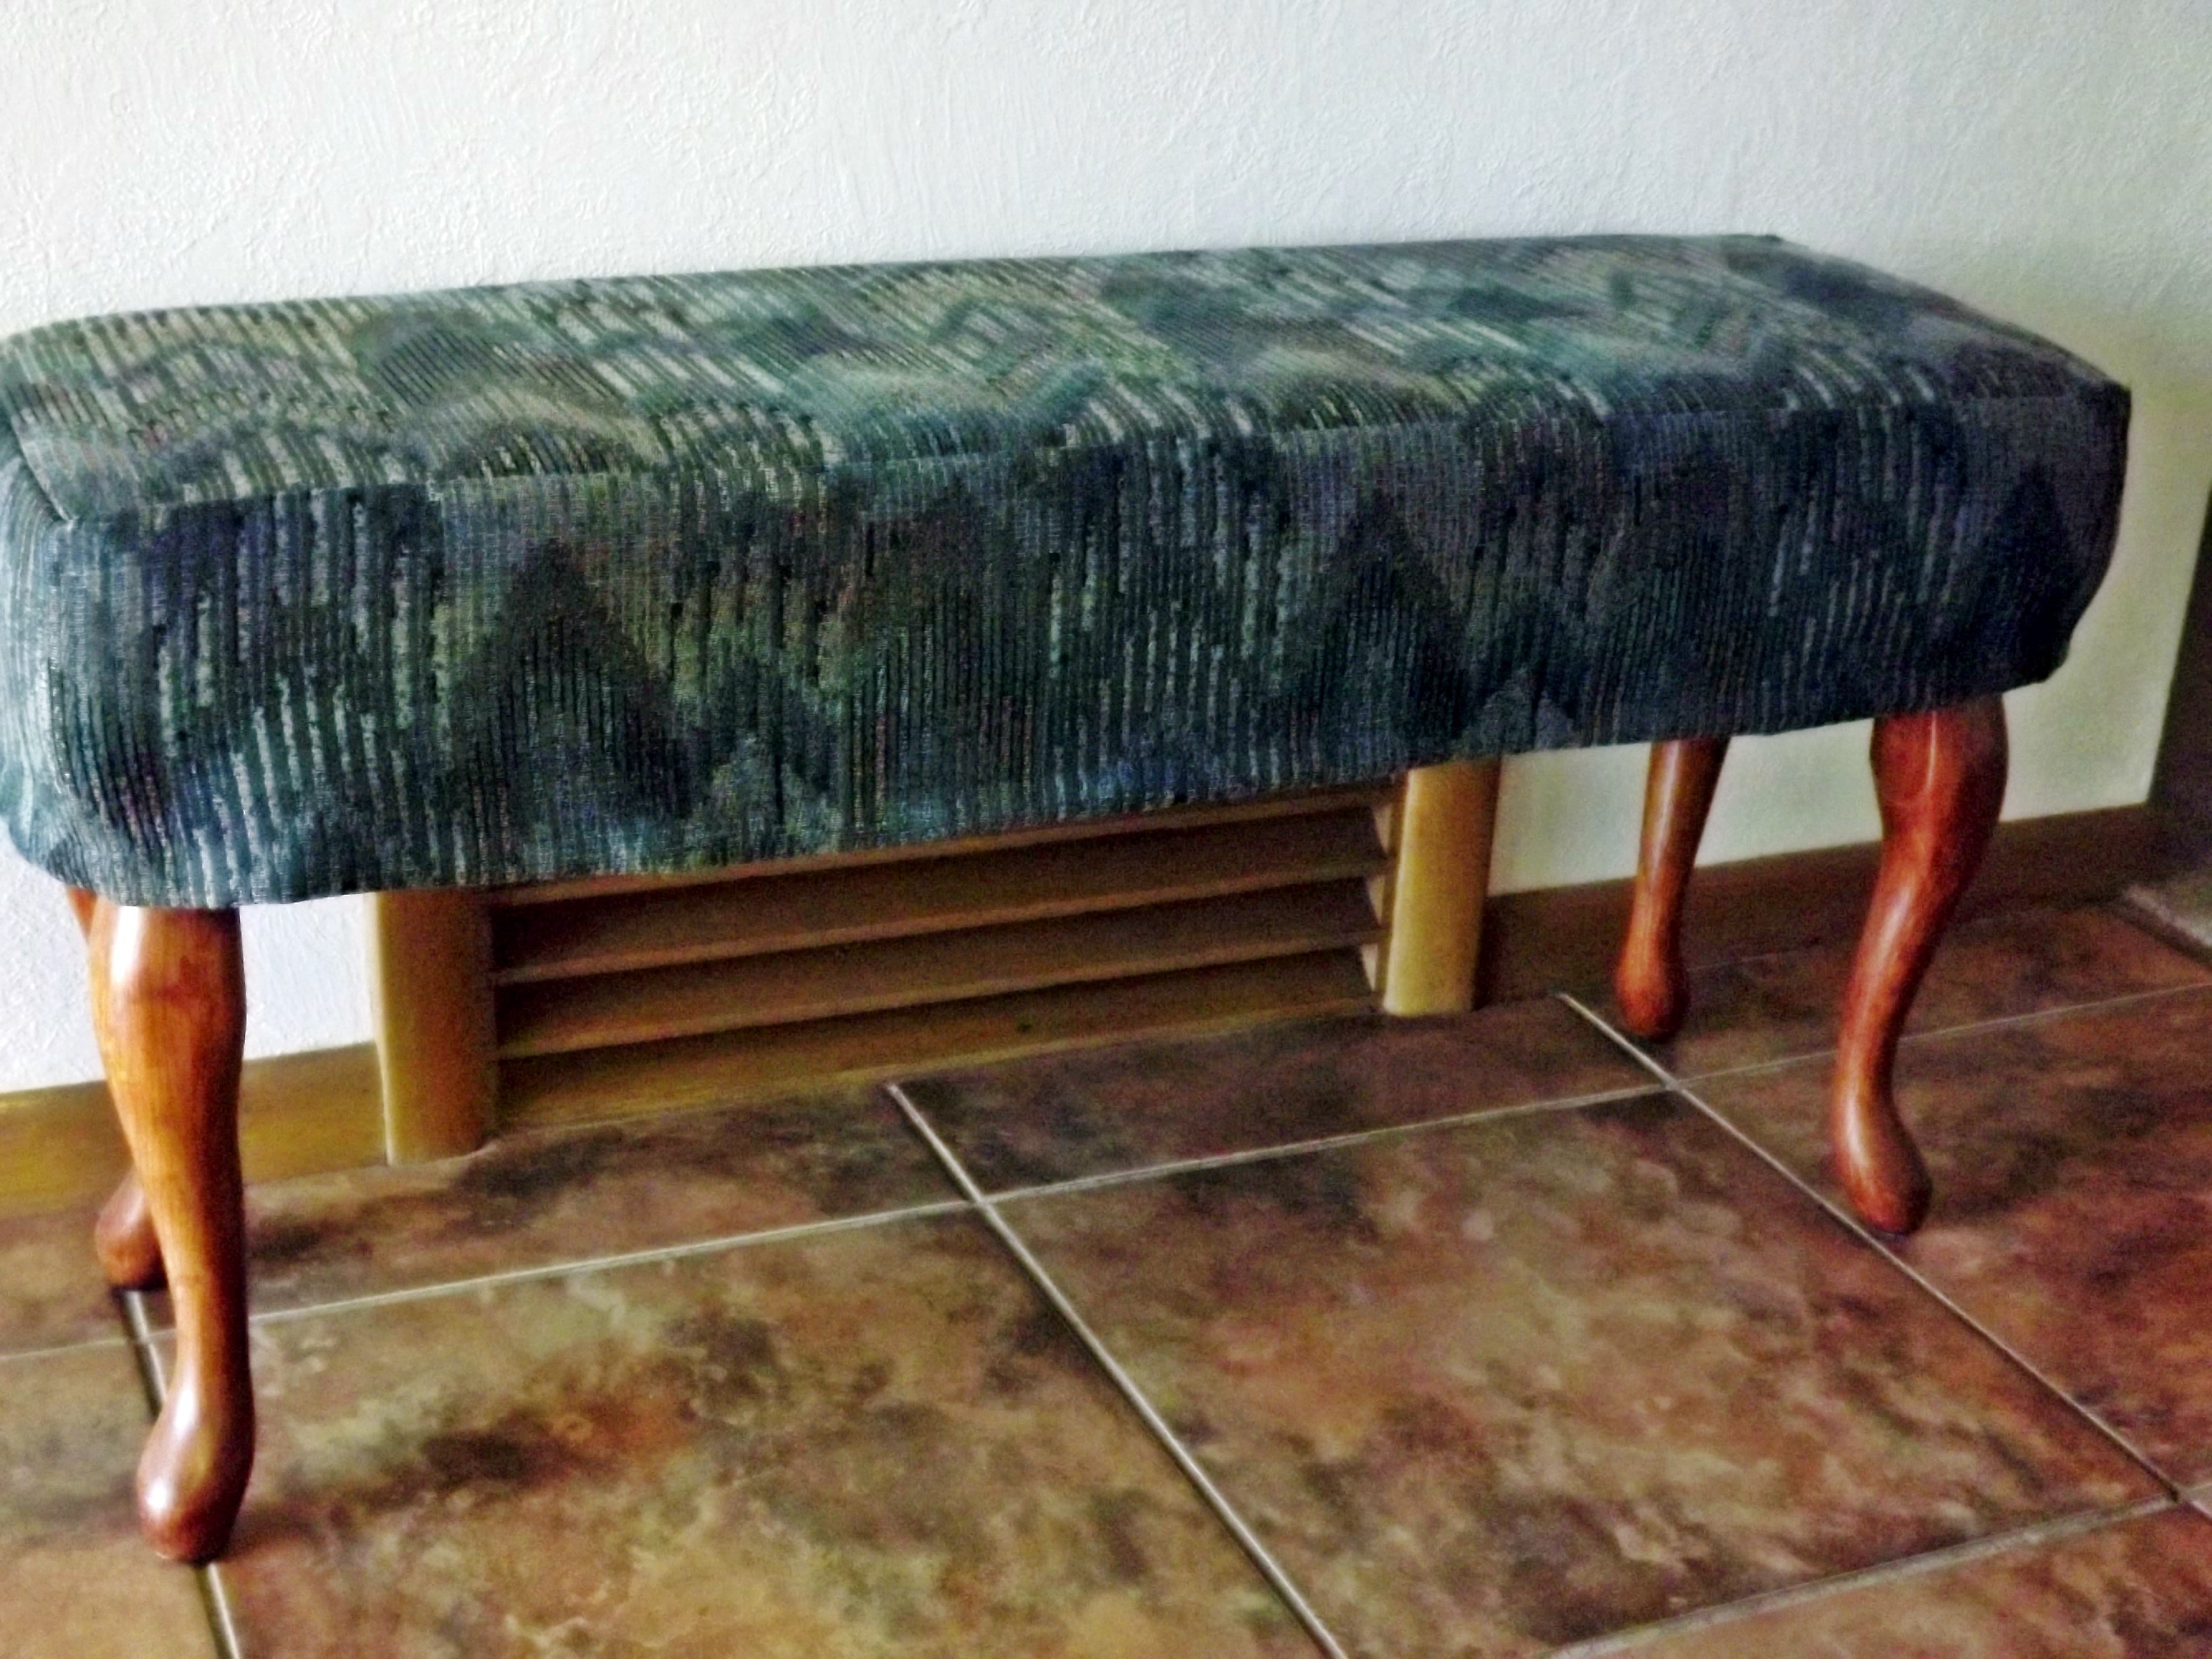
My mother needed a bench in her small entryway. She had definite dimensions in mind and we looked everywhere. None fit the bill. Then I saw these plans and we went from there. She had leftover fabric from recovering her dining room chairs, and I had the plywood. She wanted the Queen Anne legs to go with her traditional furniture; we put felt floor protectors on the bottom of the feet of the legs, which helps keep the bench from moving so easily on the tile floor. The plans were easy to follow, including the tutorial on how to sew the slipcover. The bench worked out just like she had hoped. Thanks Ana, for the great plans.

Built from Plan(s)
Estimated Cost
$60.00; about $40 for the legs, foam, and finish
Estimated Time Investment
Day Project (6-9 Hours)
Finish Used
Minwax Polyshades in walnut; two or three coats. This acts more like paint, but you can re-coat in just an hour or so. I then used minwax poly in satin three coats for protection.
Recommended Skill Level
Beginner
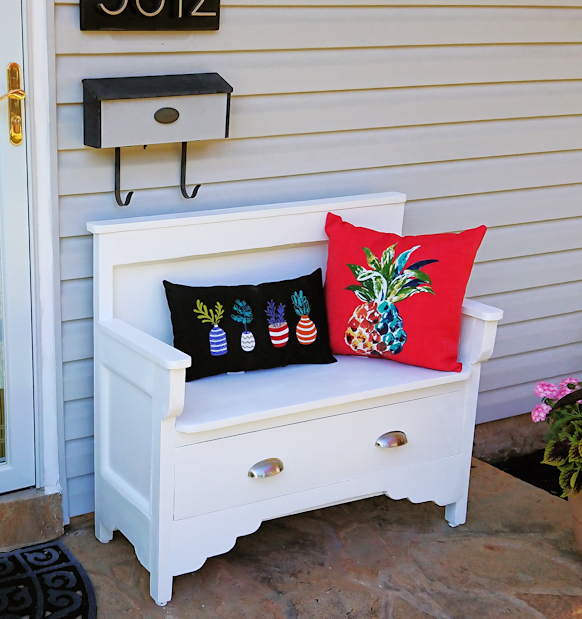
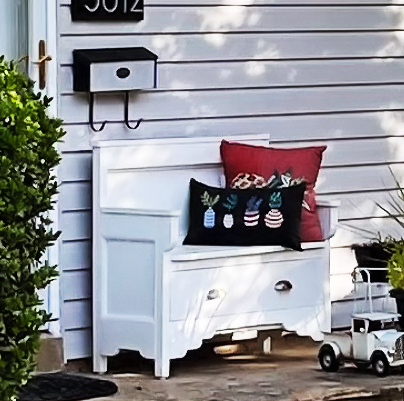
Front Door Storage Bench
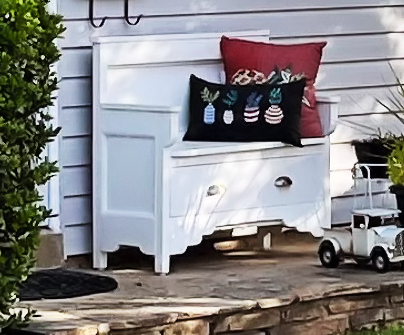
My bench sits outside my front door to welcome visitors and provide a place to set your packages while unlocking the door! I made it two years ago, and it's weathered three Baltimore winters with out repainting. I'll probably sand t and repaint it this spring. Folks are always asking where I bought it, and I give all the credit to Ana White, your site and your wonderful furniture ideas!
Jim Dupree
Built from Plan(s)
Seasonal And Holiday
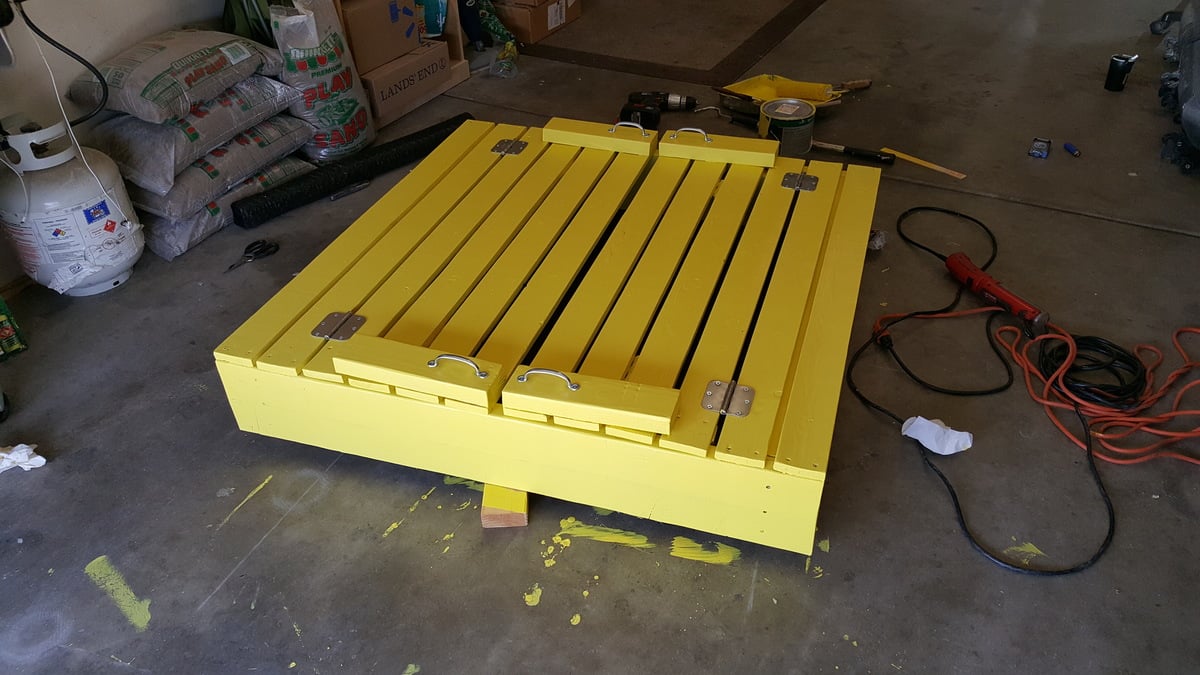
Sandbox with bench
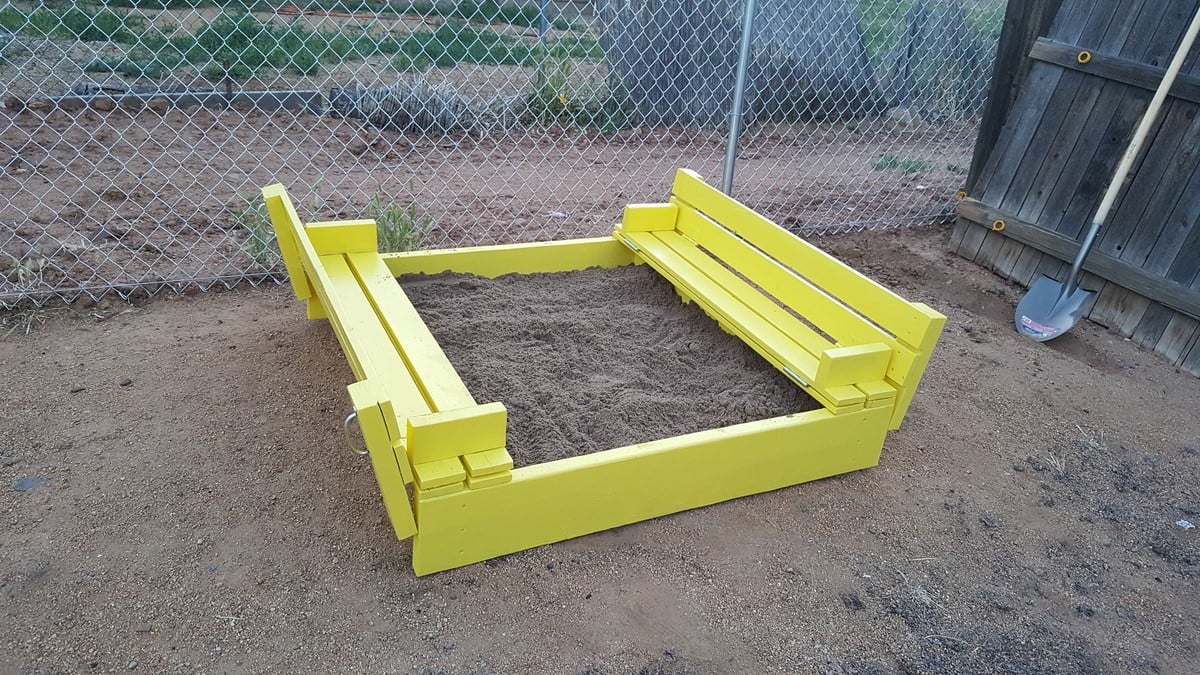
Daughters friend has a store bought plastic sandbox and my daughter asked if I could build one. This is what I built.
Built from Plan(s)
Estimated Time Investment
Afternoon Project (3-6 Hours)
Recommended Skill Level
Starter Project
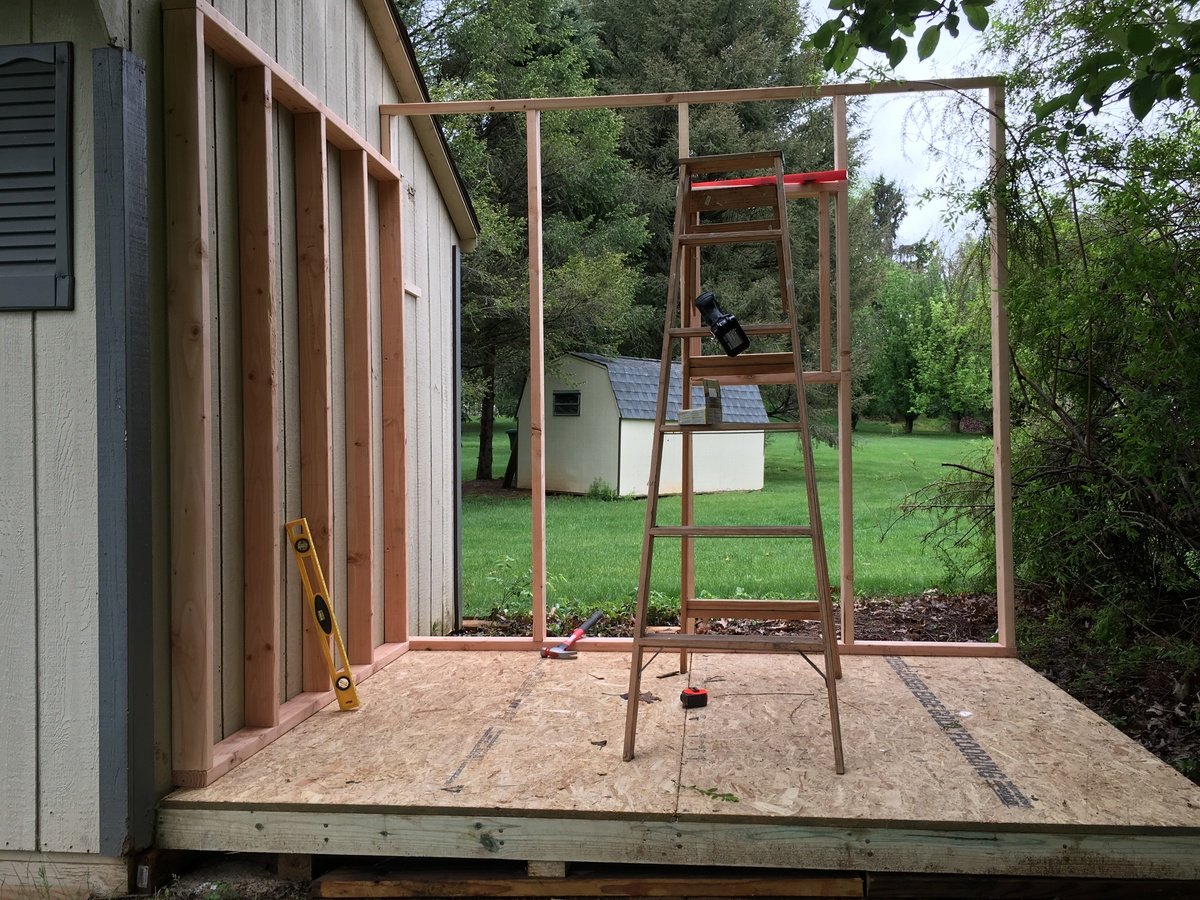
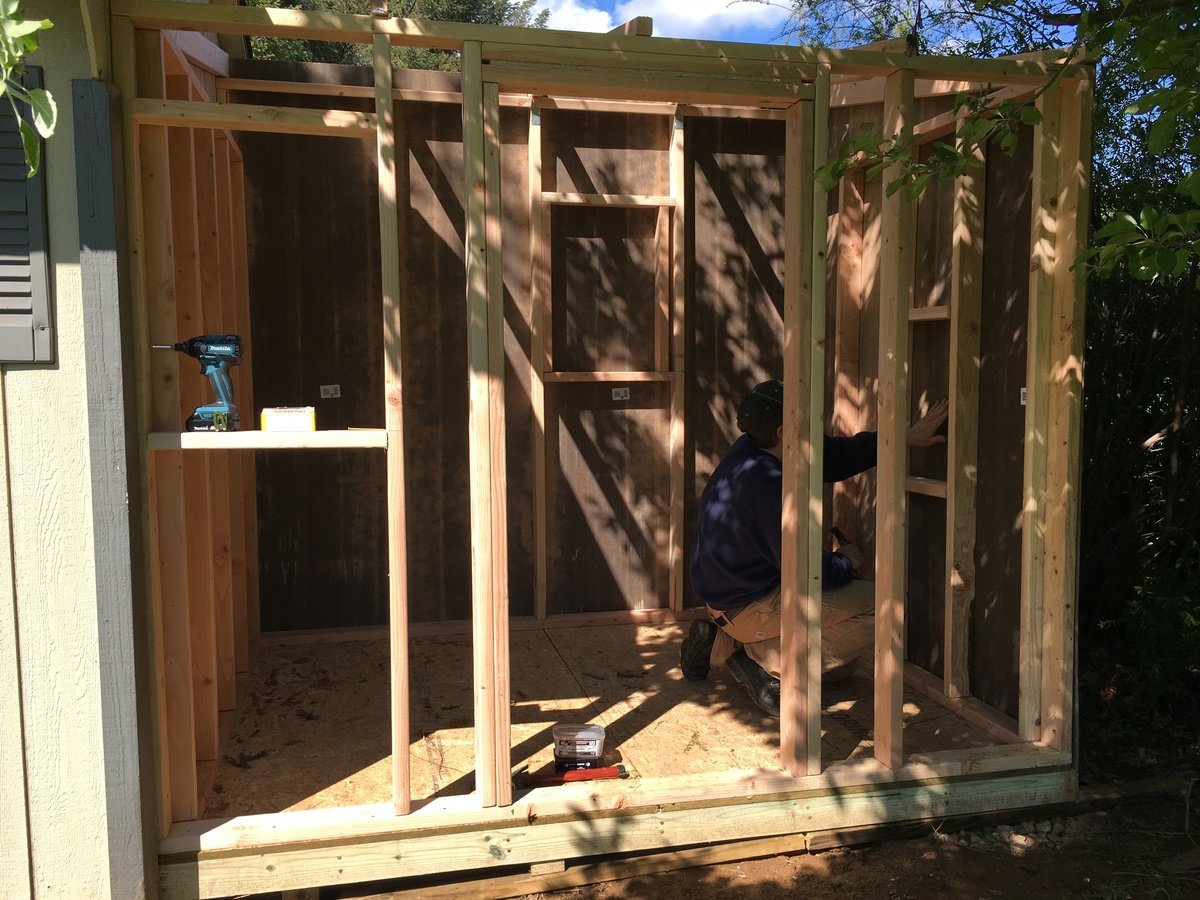
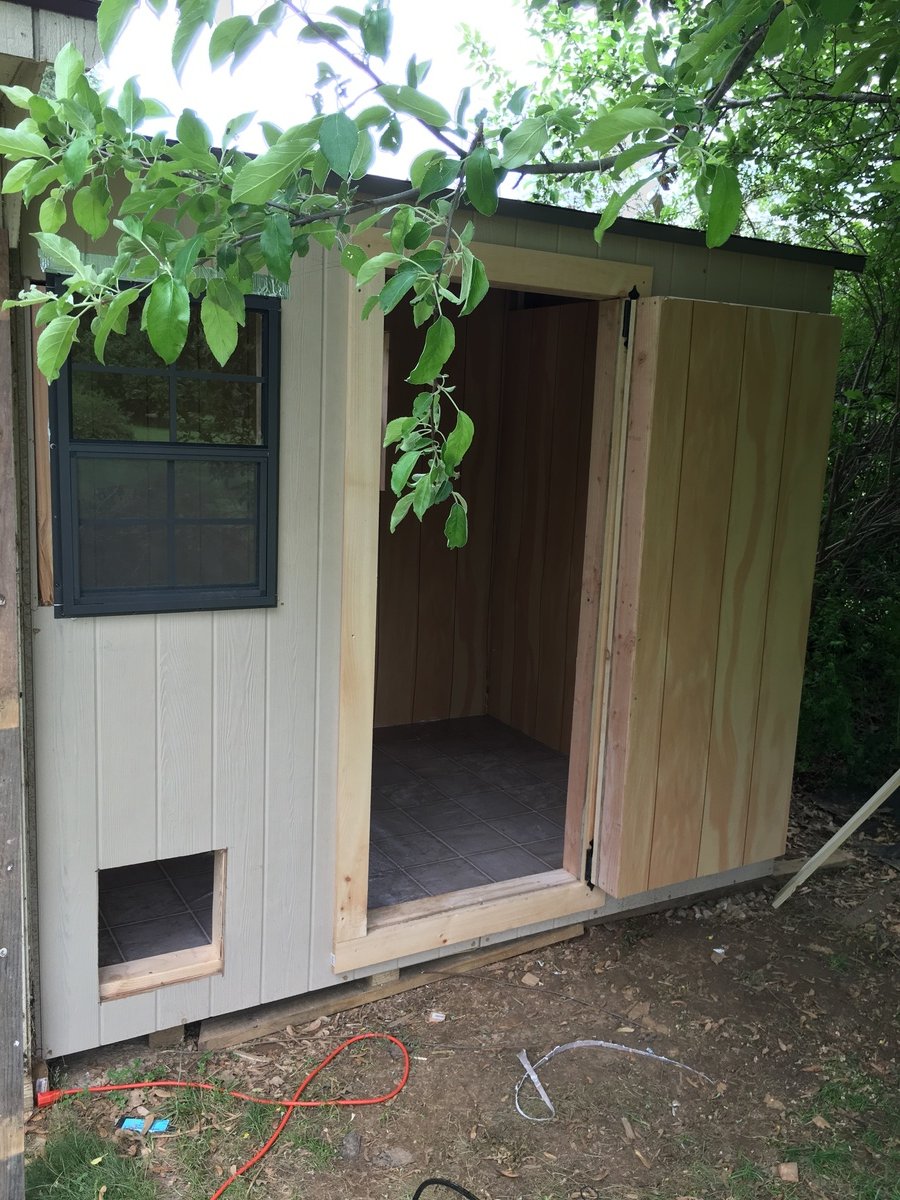
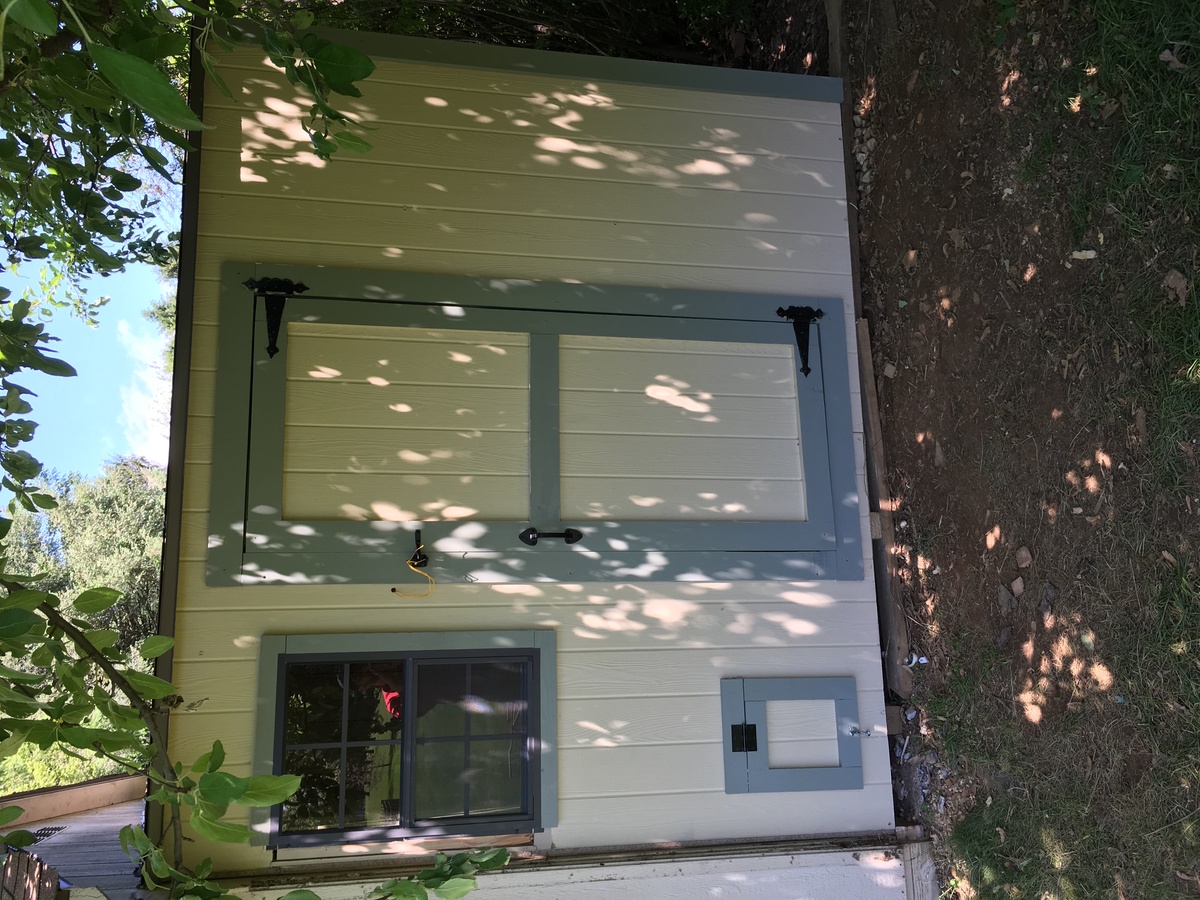
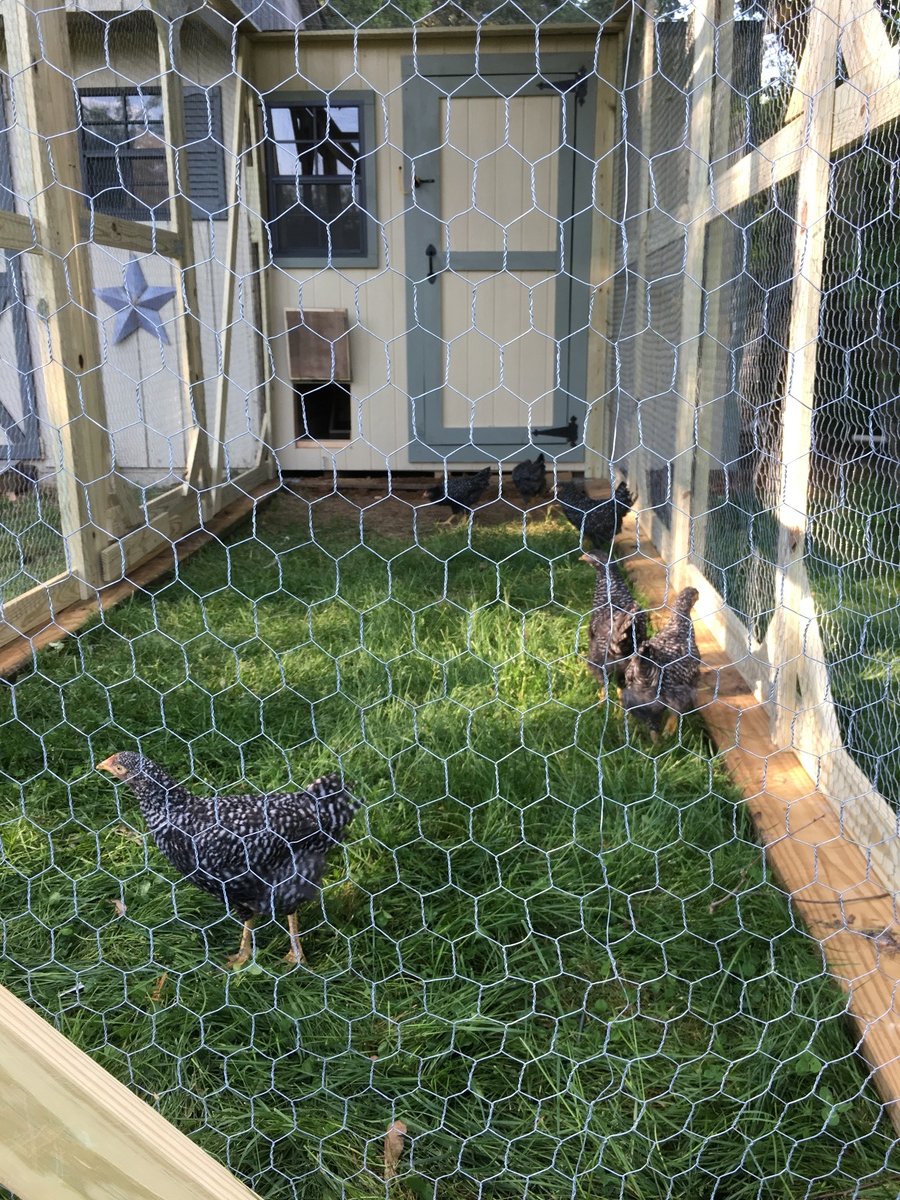
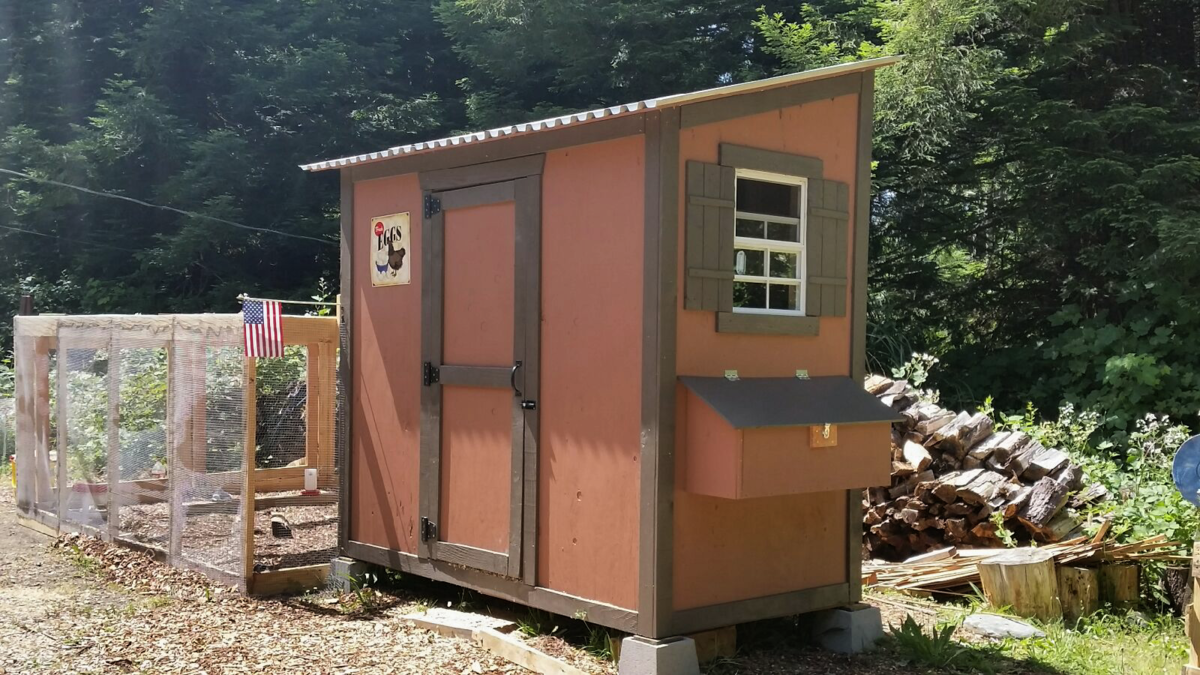
DIY Shed Chicken Coop 6x8
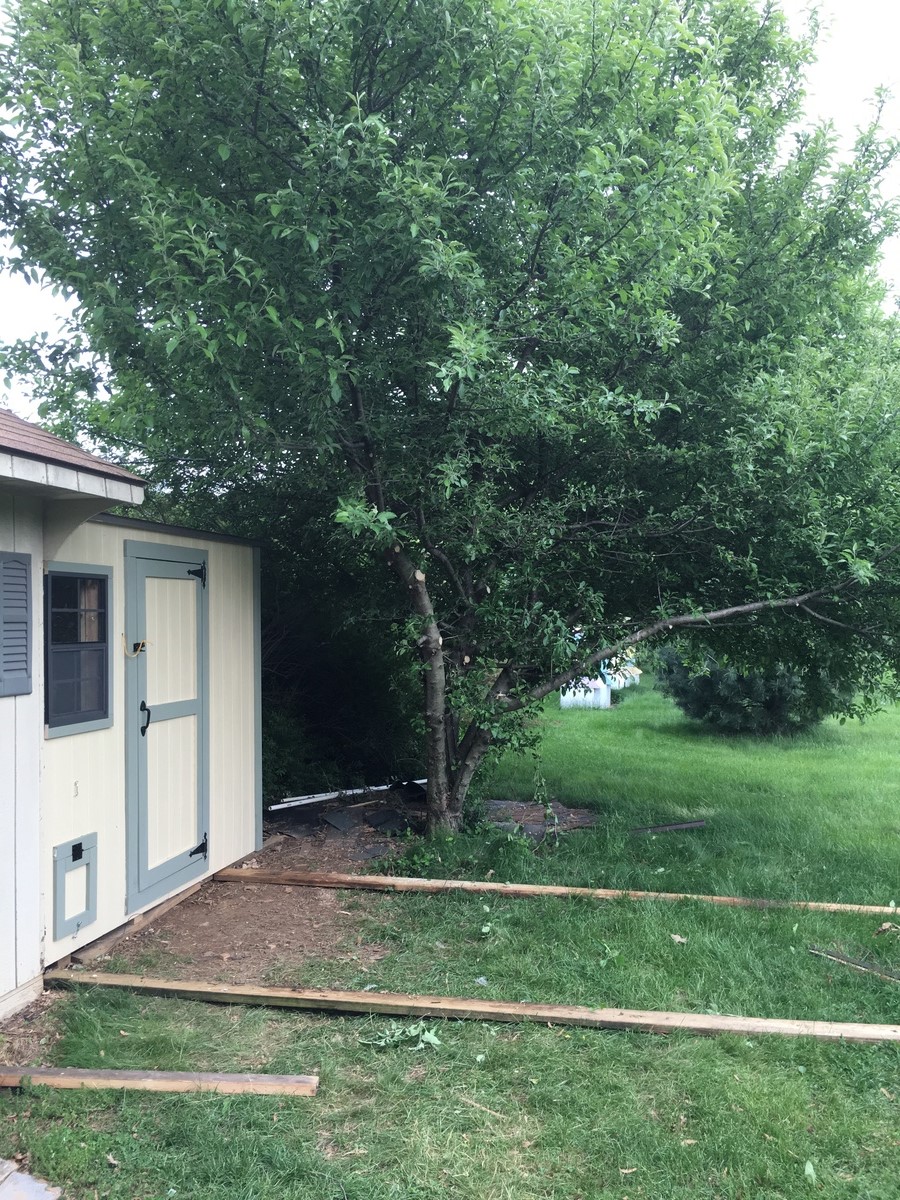
The project was used using the same plans but I extended the floor to be 6 feet wide vice 4 feet the additional 2 feet provided the perfect amount space I wanted. I also added an extra windows to get cross ventilation. I also insulated the coop and put paneling on the walls and lenolium on the floors. I dropped the back wall sheeting 1.5 inches for additional airflow since the shed doesn't have a ridge vent. The plans are easy to follow and easily adaptable.
Built from Plan(s)
Estimated Cost
$700. You may think that is a lot but you will learn a lot. Coops we were looking at were $1,200. This coop was less expensive and bigger and better plus you can say you built that.
Estimated Time Investment
Week Long Project (20 Hours or More)
Finish Used
T1-11 with home depot behr exterior paint.
Recommended Skill Level
Beginner
Comments

Thu, 07/02/2020 - 11:29
Great Coop!
Great job! We are getting ready to build a coop for our chickens which arrive in 3 weeks!
Modern Kid's Picnic Table and is two X Benches
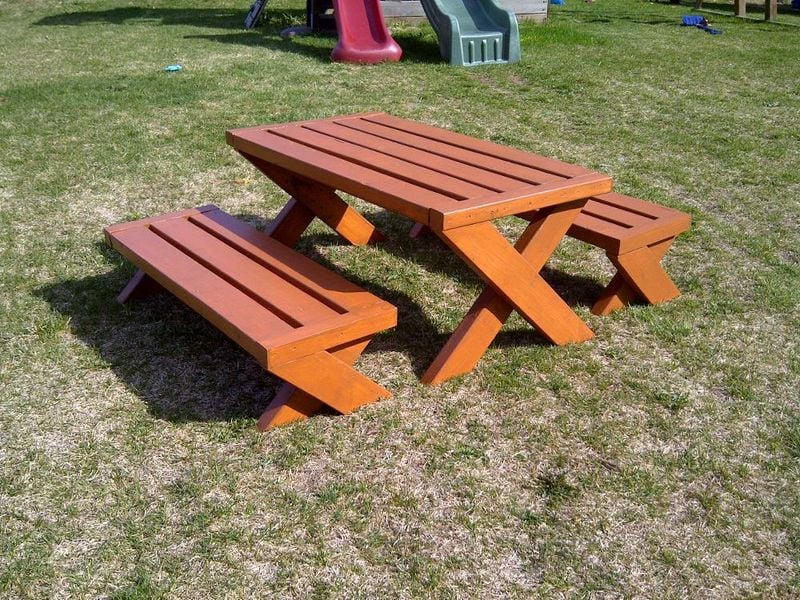
My first project on my own!
Built from Plan(s)
Recommended Skill Level
Intermediate
Comments
Wed, 05/14/2014 - 00:46
For the end pieces at either
For the end pieces at either end of the top of the bench and table, how did you secure them to the legs? It doesn't look like you cut the extra pieces to fill in the legs so that they are level with each other to make the base. I like how this version looks but it seems like half the 2x2 is barely attached to the legs. I'd love to hear how you did that so I can copy, thanks!
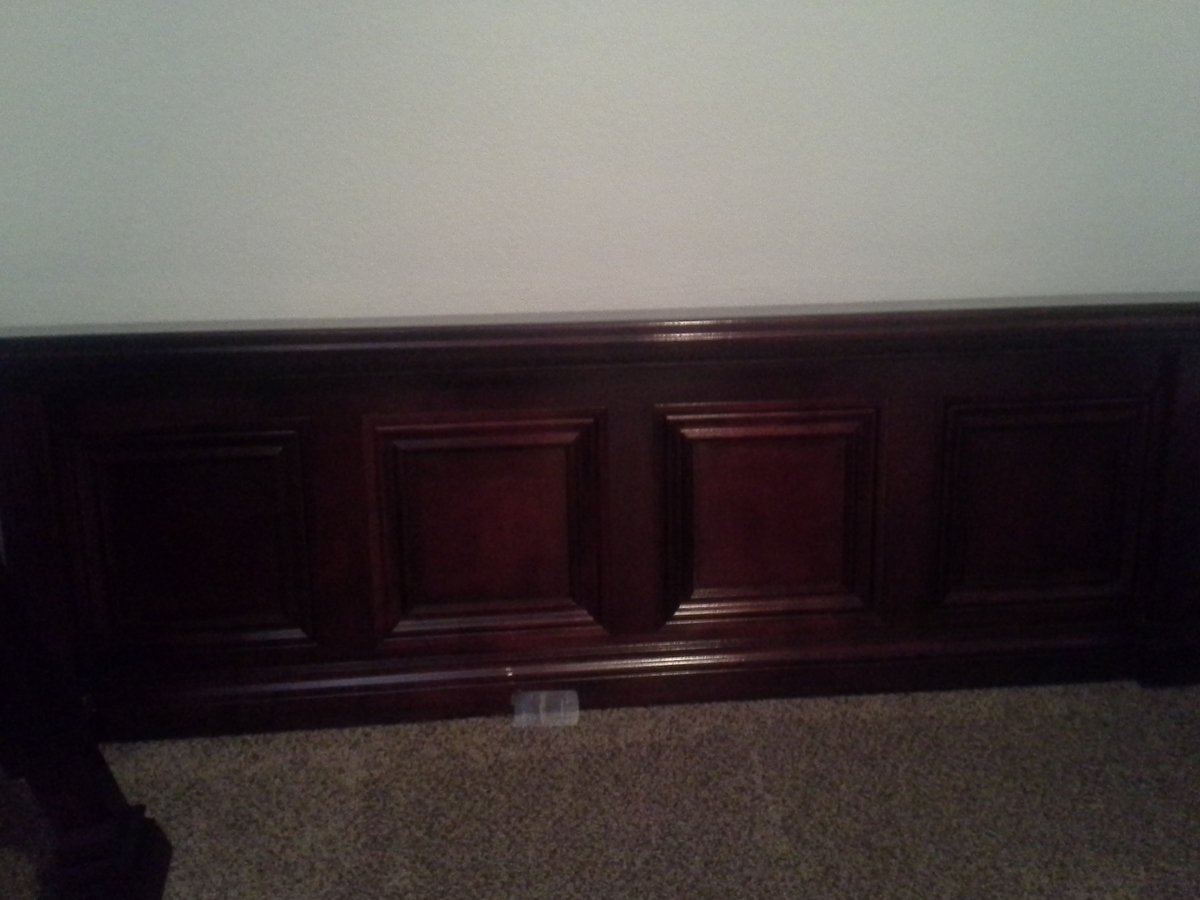
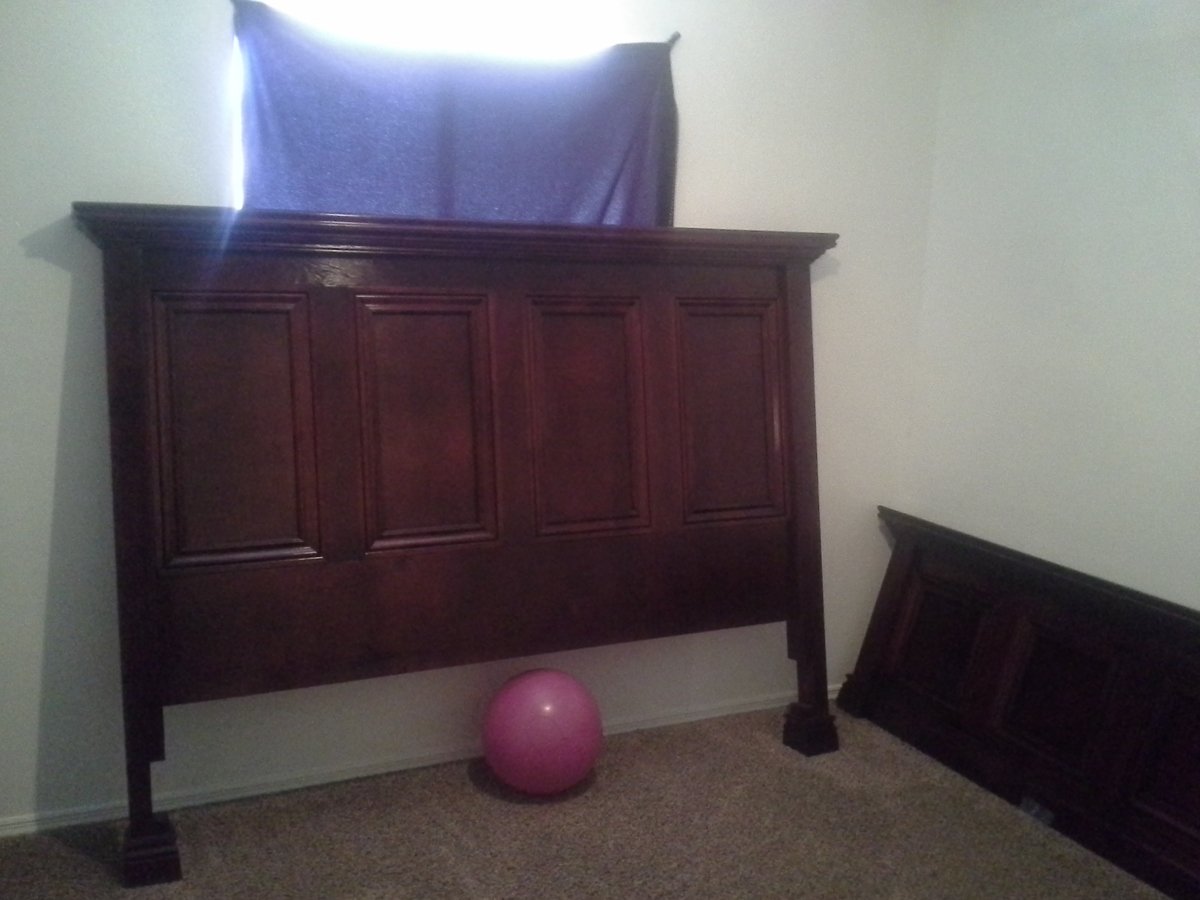
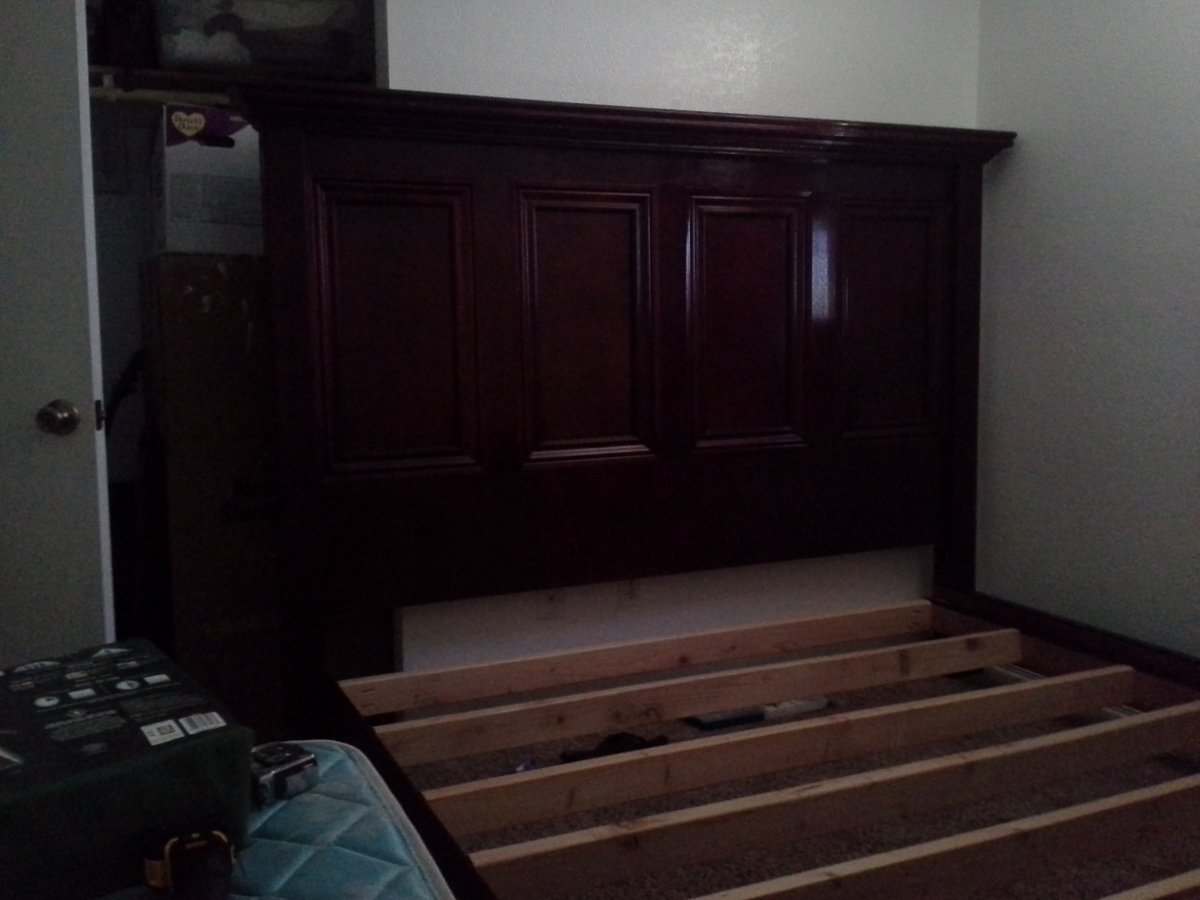
Modified farmhouse California king
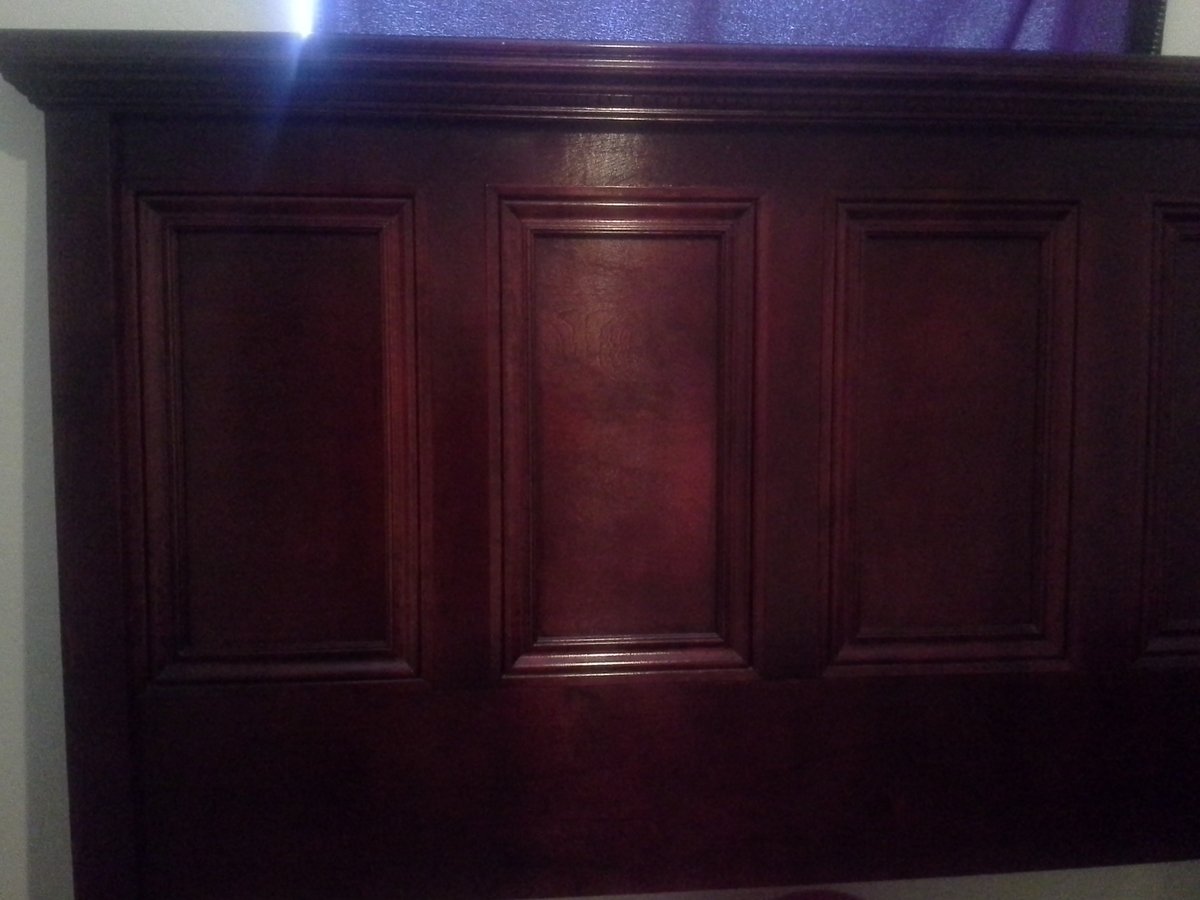
Sorry the the photos were taken from my phone so the lighting is making it look darker than it really is.
Basically I followed the plans to a T other than the poplar trim and crown molding.
For the head board I Used 3/4" red birch ply and made some stiles with excess from the sheet and then just trimmed it with poplar molding. instead of stacking 2 2x4 for the sides i just used a solid 4x4 and cut the spot out to old the rails on. I was afraid how the stain would react or how it would look since 2x4 have rounded edges. Thats pretty much it. The finish was a tricky process. since I used red birch and white poplar I had to find a way to get everything to stain evenly. So basically I
Dyed all the wood then sealed then stained then toner then glaze then a little more toner then when i got the color i wanted i put 2 layers of top coat.

Built from Plan(s)
Estimated Cost
400
Estimated Time Investment
Week Long Project (20 Hours or More)
Finish Used
Ml campbell stain and dye
Recommended Skill Level
Intermediate
Comments
Wed, 05/16/2012 - 06:11
Really beautiful!
That's simply stunning. That WAS a tricky finishing process, but obviously well worth the effort.

Thu, 05/17/2012 - 03:41
That is one of the most
That is one of the most beautiful finishes I have ever seen on this site.
Thu, 05/17/2012 - 11:38
Wow!
I'm doing a bed very similar to this... but i'm only doing 2 larger panels rather than 4 like you have. How do you the insides of the panels? Quarter round and then crown molding? I was thinking I would attach the trim on top of the plywood and then just attach some quarter round on the inside to round it and make it stand out a little more.
Thu, 05/17/2012 - 17:00
I didn't use any round(but
I didn't use any round(but that is the idea to hide the ugly plywood layers that are exposed when cut). Its just 2 3/4 x3/4" whitewood/poplar casing that I had left over from a project i was working on. the frame of the squares was 3/4" birch ply so the casing laid nice and flush with it so it looked nice. the trick is to get the stiles(the frame of the squares to lay flat against the plywood backing other wise the casing won't lay even all the way around.
heres a link to the casing i used
http://www.lowes.com/pd_105664-81562-OML14-7FTWHW_4294801993_4294937087…
heres the link to the crown that i used on the top
http://www.lowes.com/pd_105626-81562-1069-8FTWHW_4294801991_4294937087_…
the trim stuff at the box places are considered paint grade and don't take stain very well. its easiest to paint if you don't have the right setup to finish things. and if you are going to stain I recommend a product called timbermate its stainable wood filler its hard to get but its amazing stuff it blows the minwax stuff out of the water.
Happy ladies~ Great EGGS!
My 7 week old chicks love thier new home
Built from Plan(s)
Estimated Time Investment
Week Long Project (20 Hours or More)
Recommended Skill Level
Intermediate
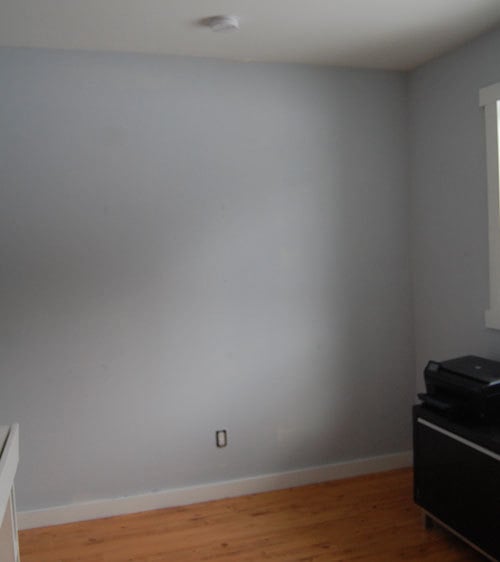
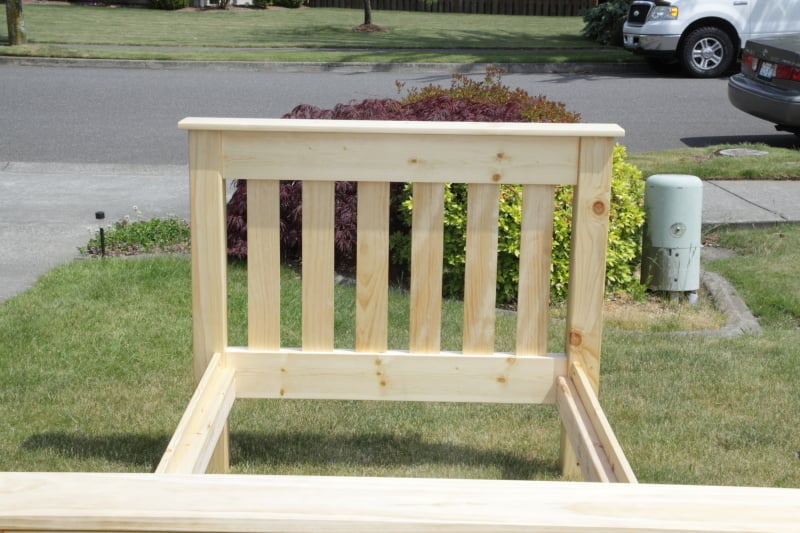
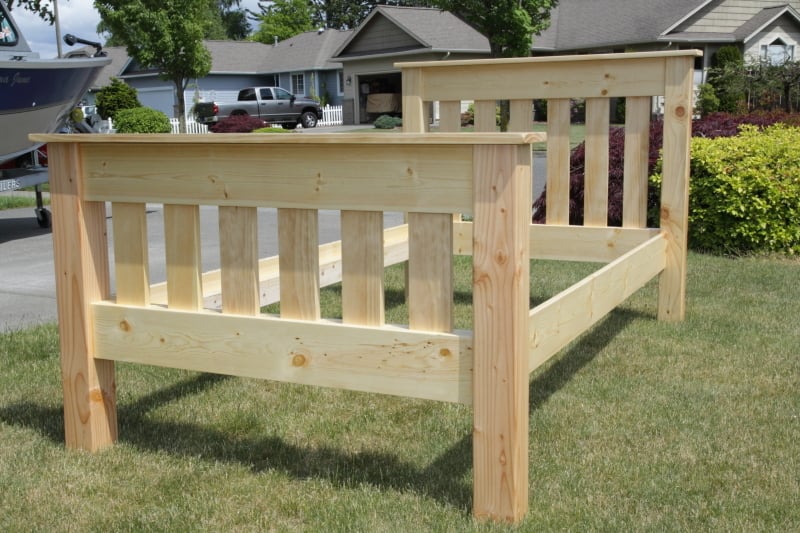
Simple Bed Twin
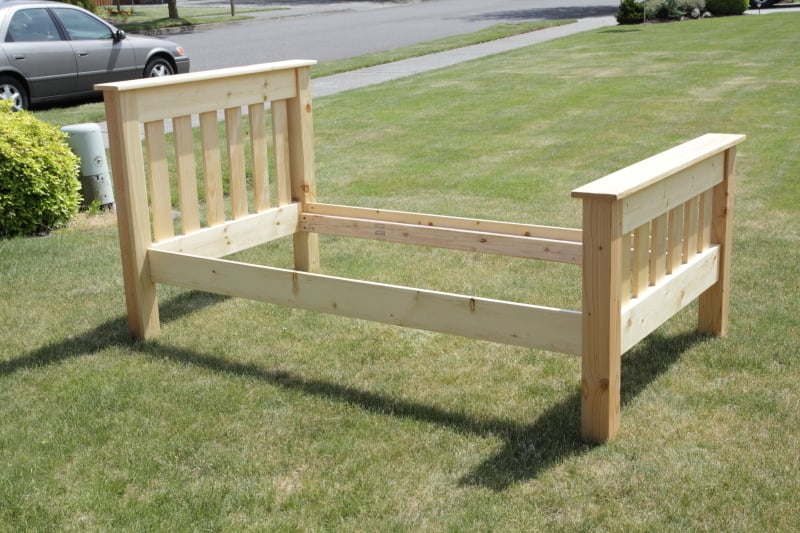
Total cost was under $200. The wood was a combination of select pine, Douglas fir. I used Minwax clear finish. Instead of slats I used plywood. This is going into the spare bedroom. We are quite pleased.
Built from Plan(s)
Estimated Cost
$200.
Estimated Time Investment
Weekend Project (10-20 Hours)
Finish Used
Minwax wood conditioner and Minwax clear Polyurethane fast drying.
Recommended Skill Level
Intermediate
Comments
Mon, 05/28/2012 - 19:51
We chose to go with a 1 x 6
We chose to go with a 1 x 6 instead of a 2 x 4 for the top of the head and foot boards.
Tue, 05/29/2012 - 16:29
Take it Apart?
Can you take the bed apart in case you move? You did a great job.
Fri, 06/01/2012 - 20:45
Yes it comes apart. A total
Yes it comes apart. A total of four pieces. Headboard, footboard, and the two sides. Also a fith piece if you count the plywood base for the mattress. The sides are screwed in at each of the corners of the head and footboards.
Mon, 05/12/2014 - 19:01
Nice!
Thinking of building this for my son as we move from crib to bed. Just curious how sturdy and strong the bed is? From the pictures it doesn't look like there's much wood where the rails attach to the head and footboard. Did you use pocket holes and screws? Any comments on how it's held up, what you might do differently? Also any idea if it'll hold a kid and parent for nightly story time?
Thanks...nice work!
Wed, 05/14/2014 - 15:22
It is in our guest room and
It is in our guest room and does not get much use. However, it is screwed in at the corners not with pocket screws because the rails were too close to the edges. I chose to screw them in starting farther back and at a 45 degree angle to send the screw deeper towards the center of the four posts. It is very strong. Another suggestion would to purchase bed hardware. Hardware can be found online or in a hardware stores for attaching rails to bed posts. I've used such hardware for fixing commercial beds I've purchased.
Hope this helps.

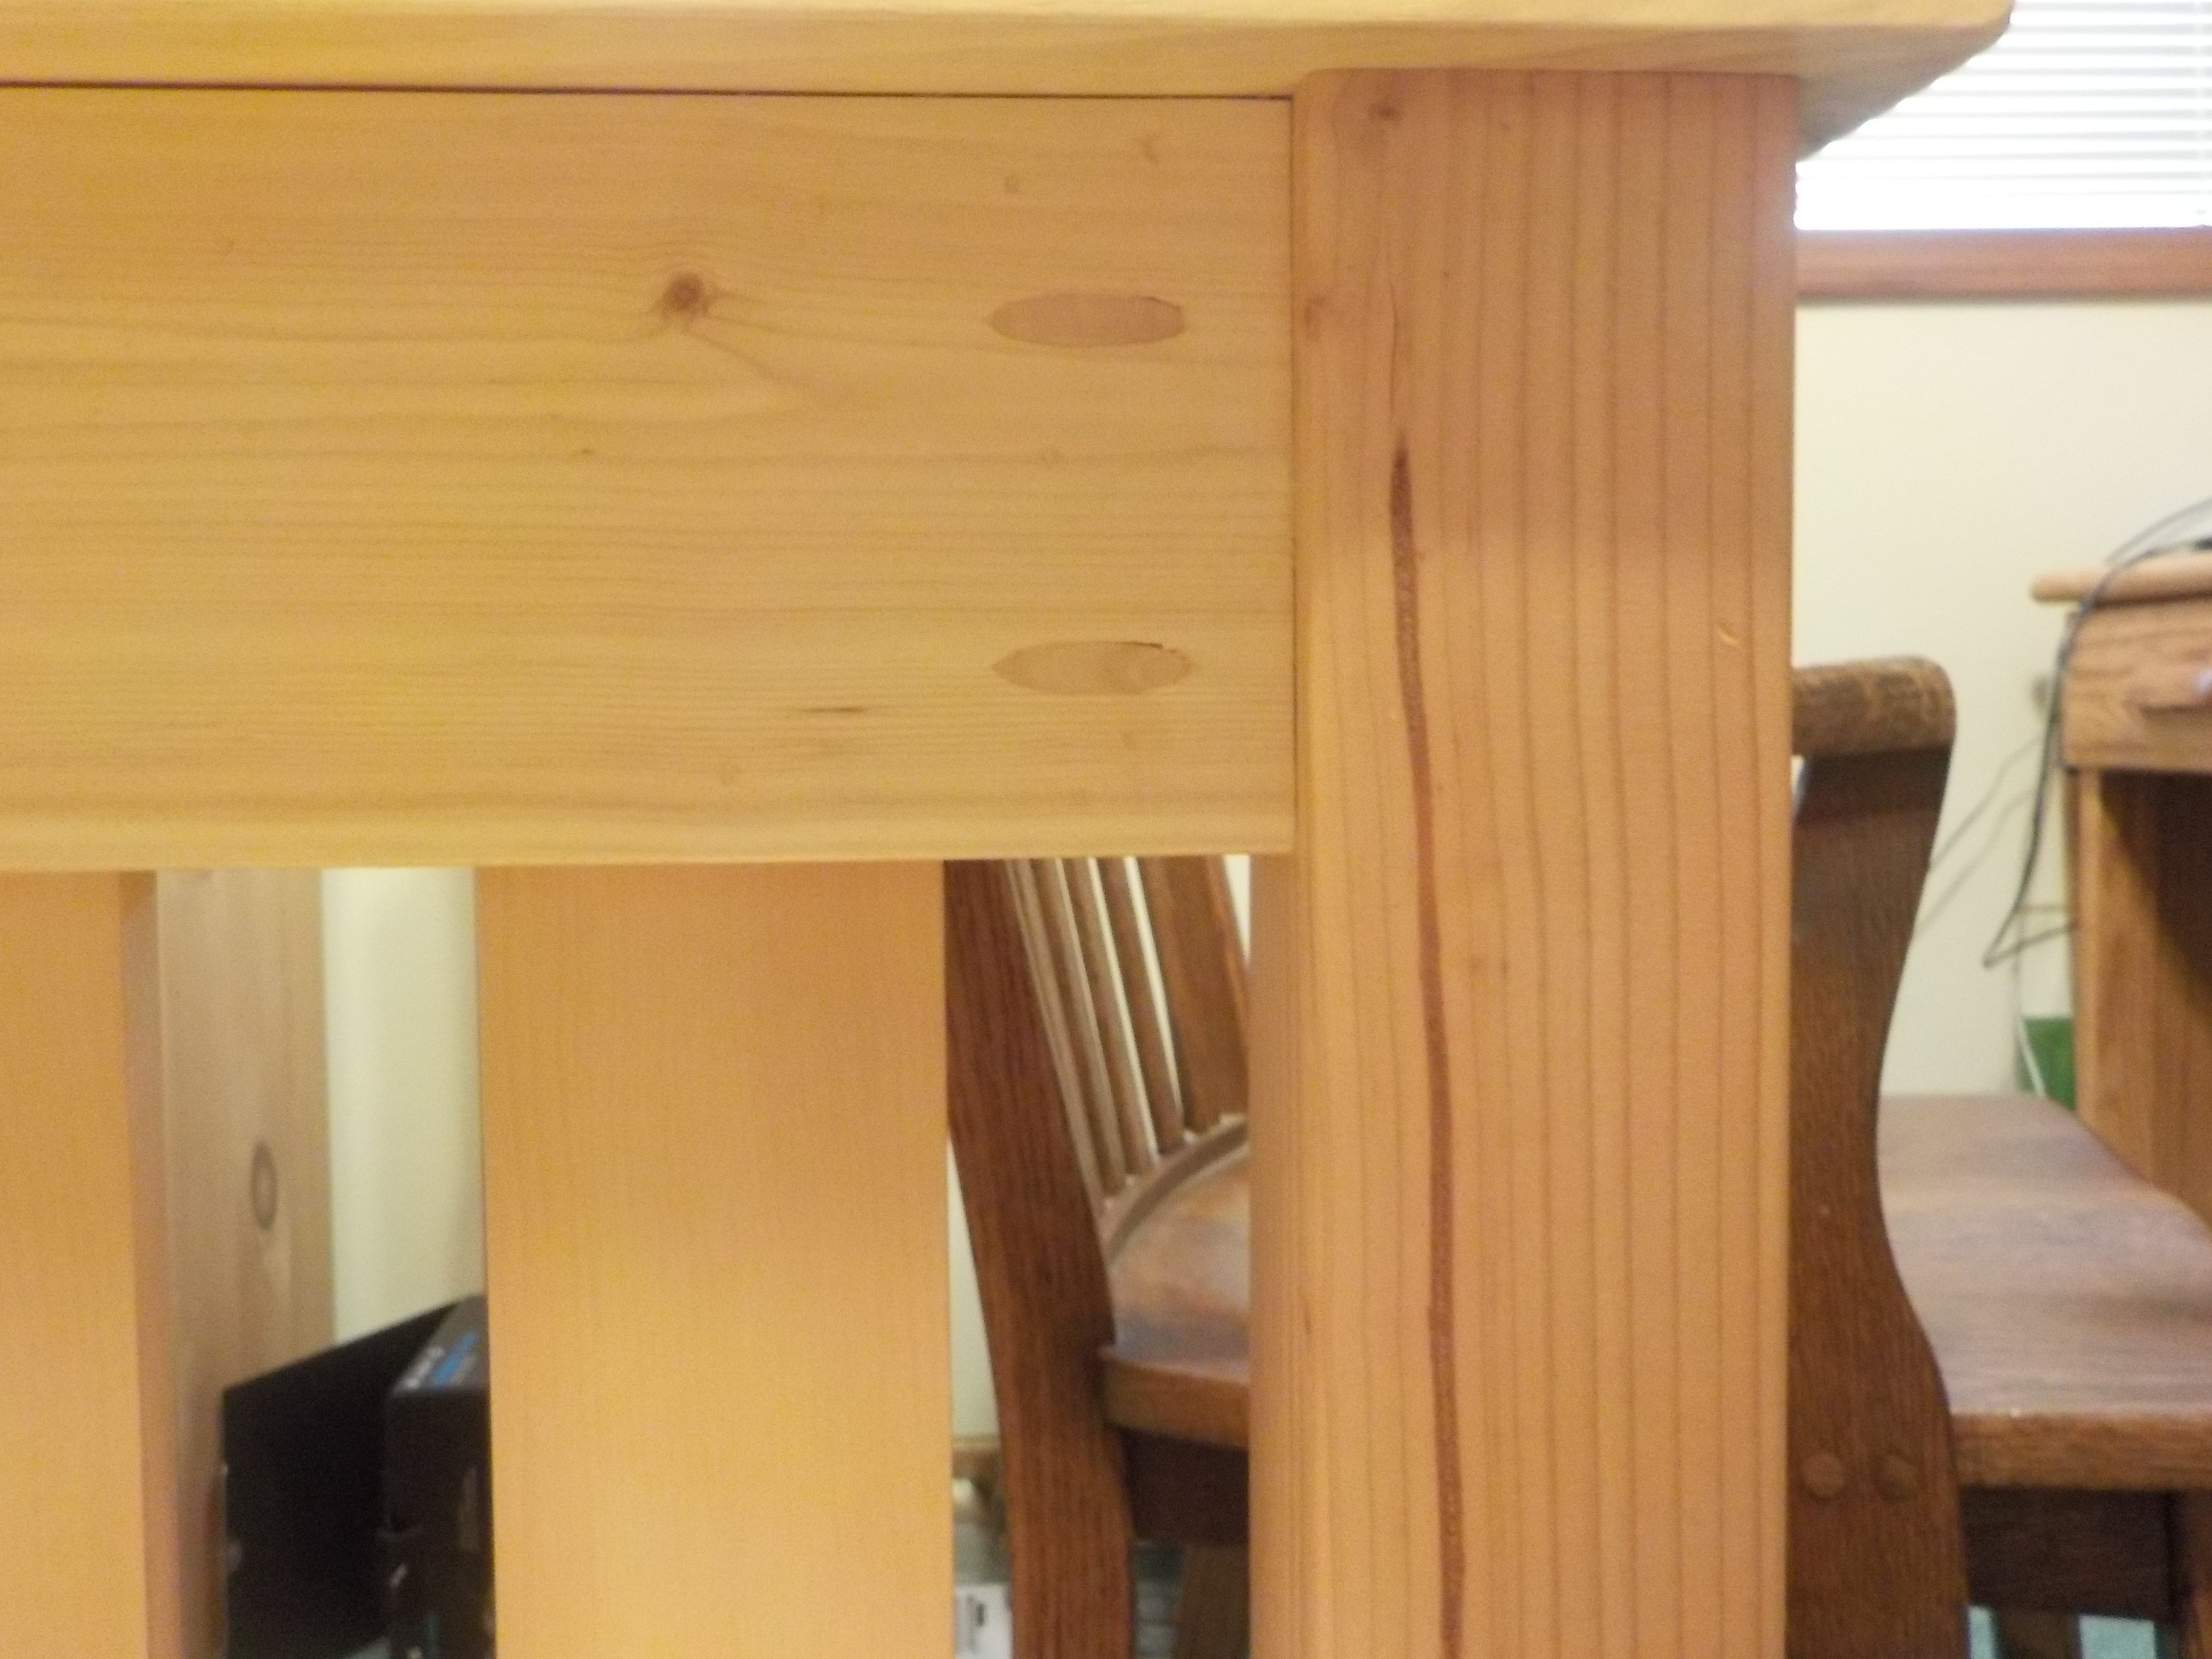
Tue, 01/20/2015 - 15:25
Sorry it took so long to
Sorry it took so long to answer. Where I put the screws depended on how the bed was going to be placed in the room. In our case, the headboard was going to up against a wall. Therefore the screws were on the wall side of the headboard. The footboard of the bed had the screws on the mattress side. Kreg sells pocket hole plugs that work very well. Glue them in after you screw the head and foot boards together and sand them before finishing.
The sides of the bed that are attached to the head and foot boards and screwed in too. I had to screw them in at a sharper angle to get enough sideboard material but deep enough into the head and foot boards in. Use the longest screws possible for strength without going all the way through the four corner posts.
Tue, 01/20/2015 - 15:50
Either way described above
Either way described above will work. See added photos of plugged finished pocket holes and underside attachment to foot-board.
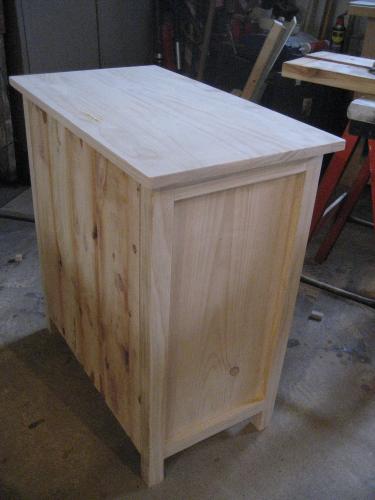
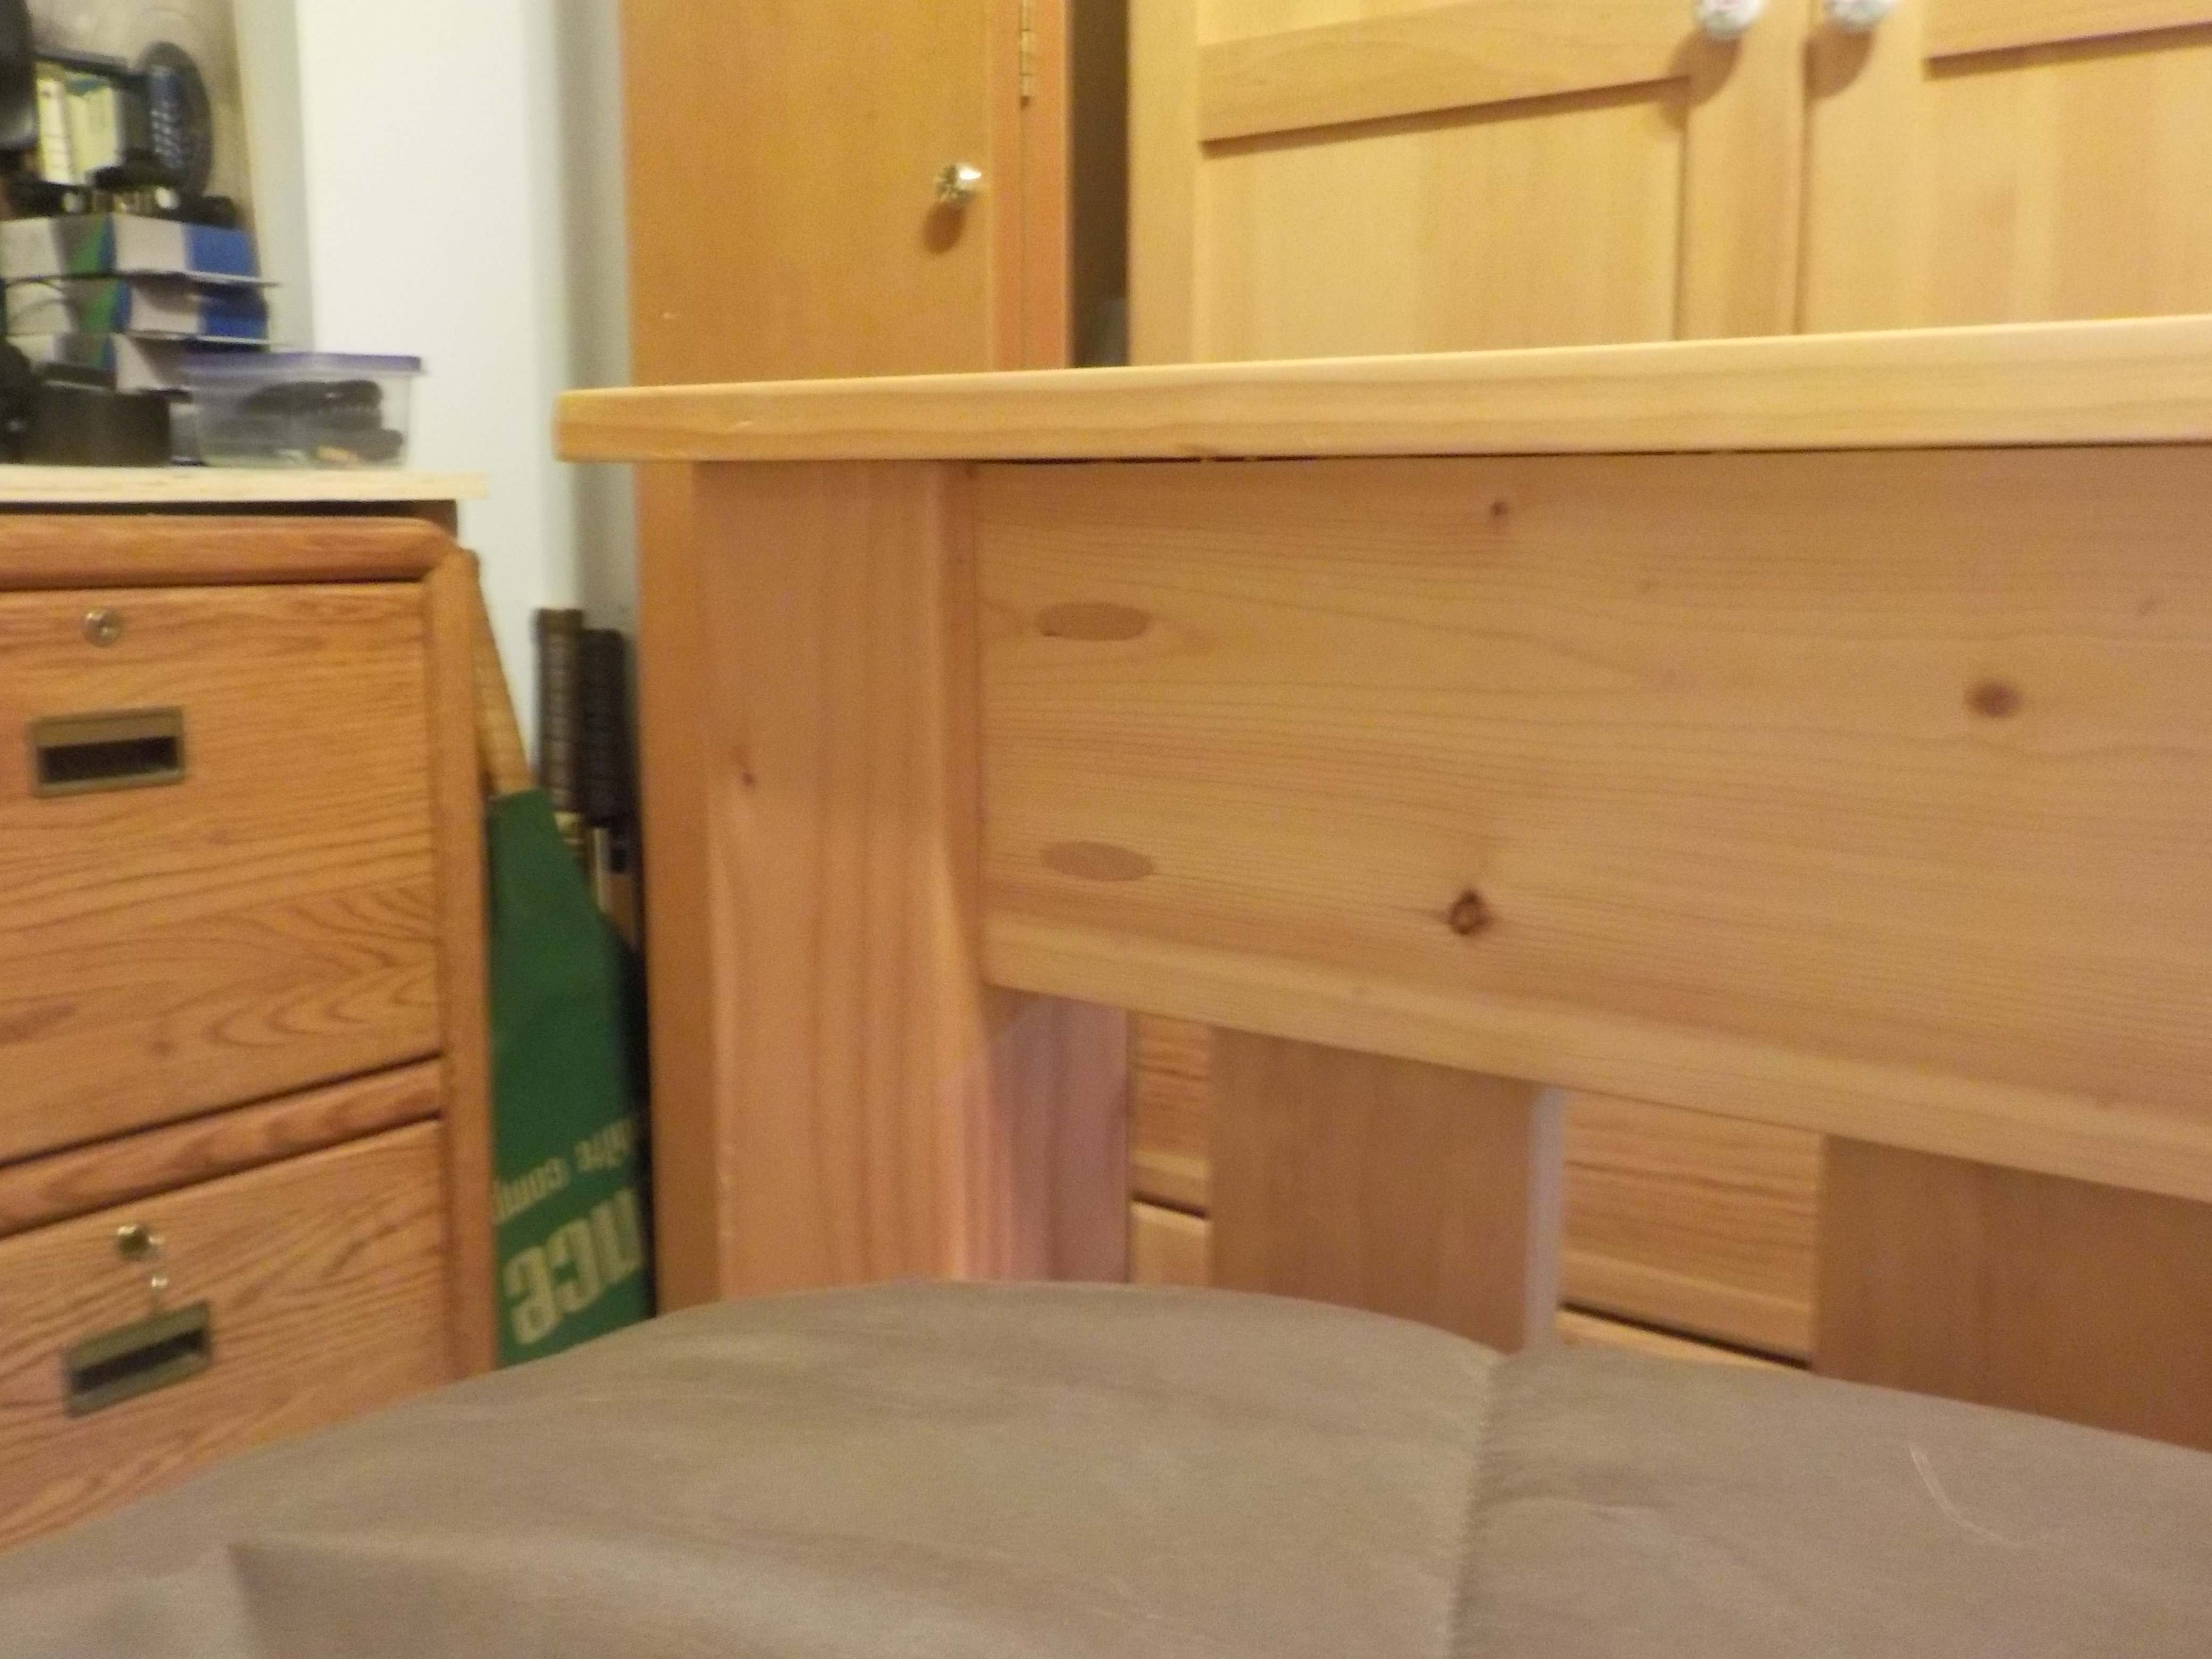
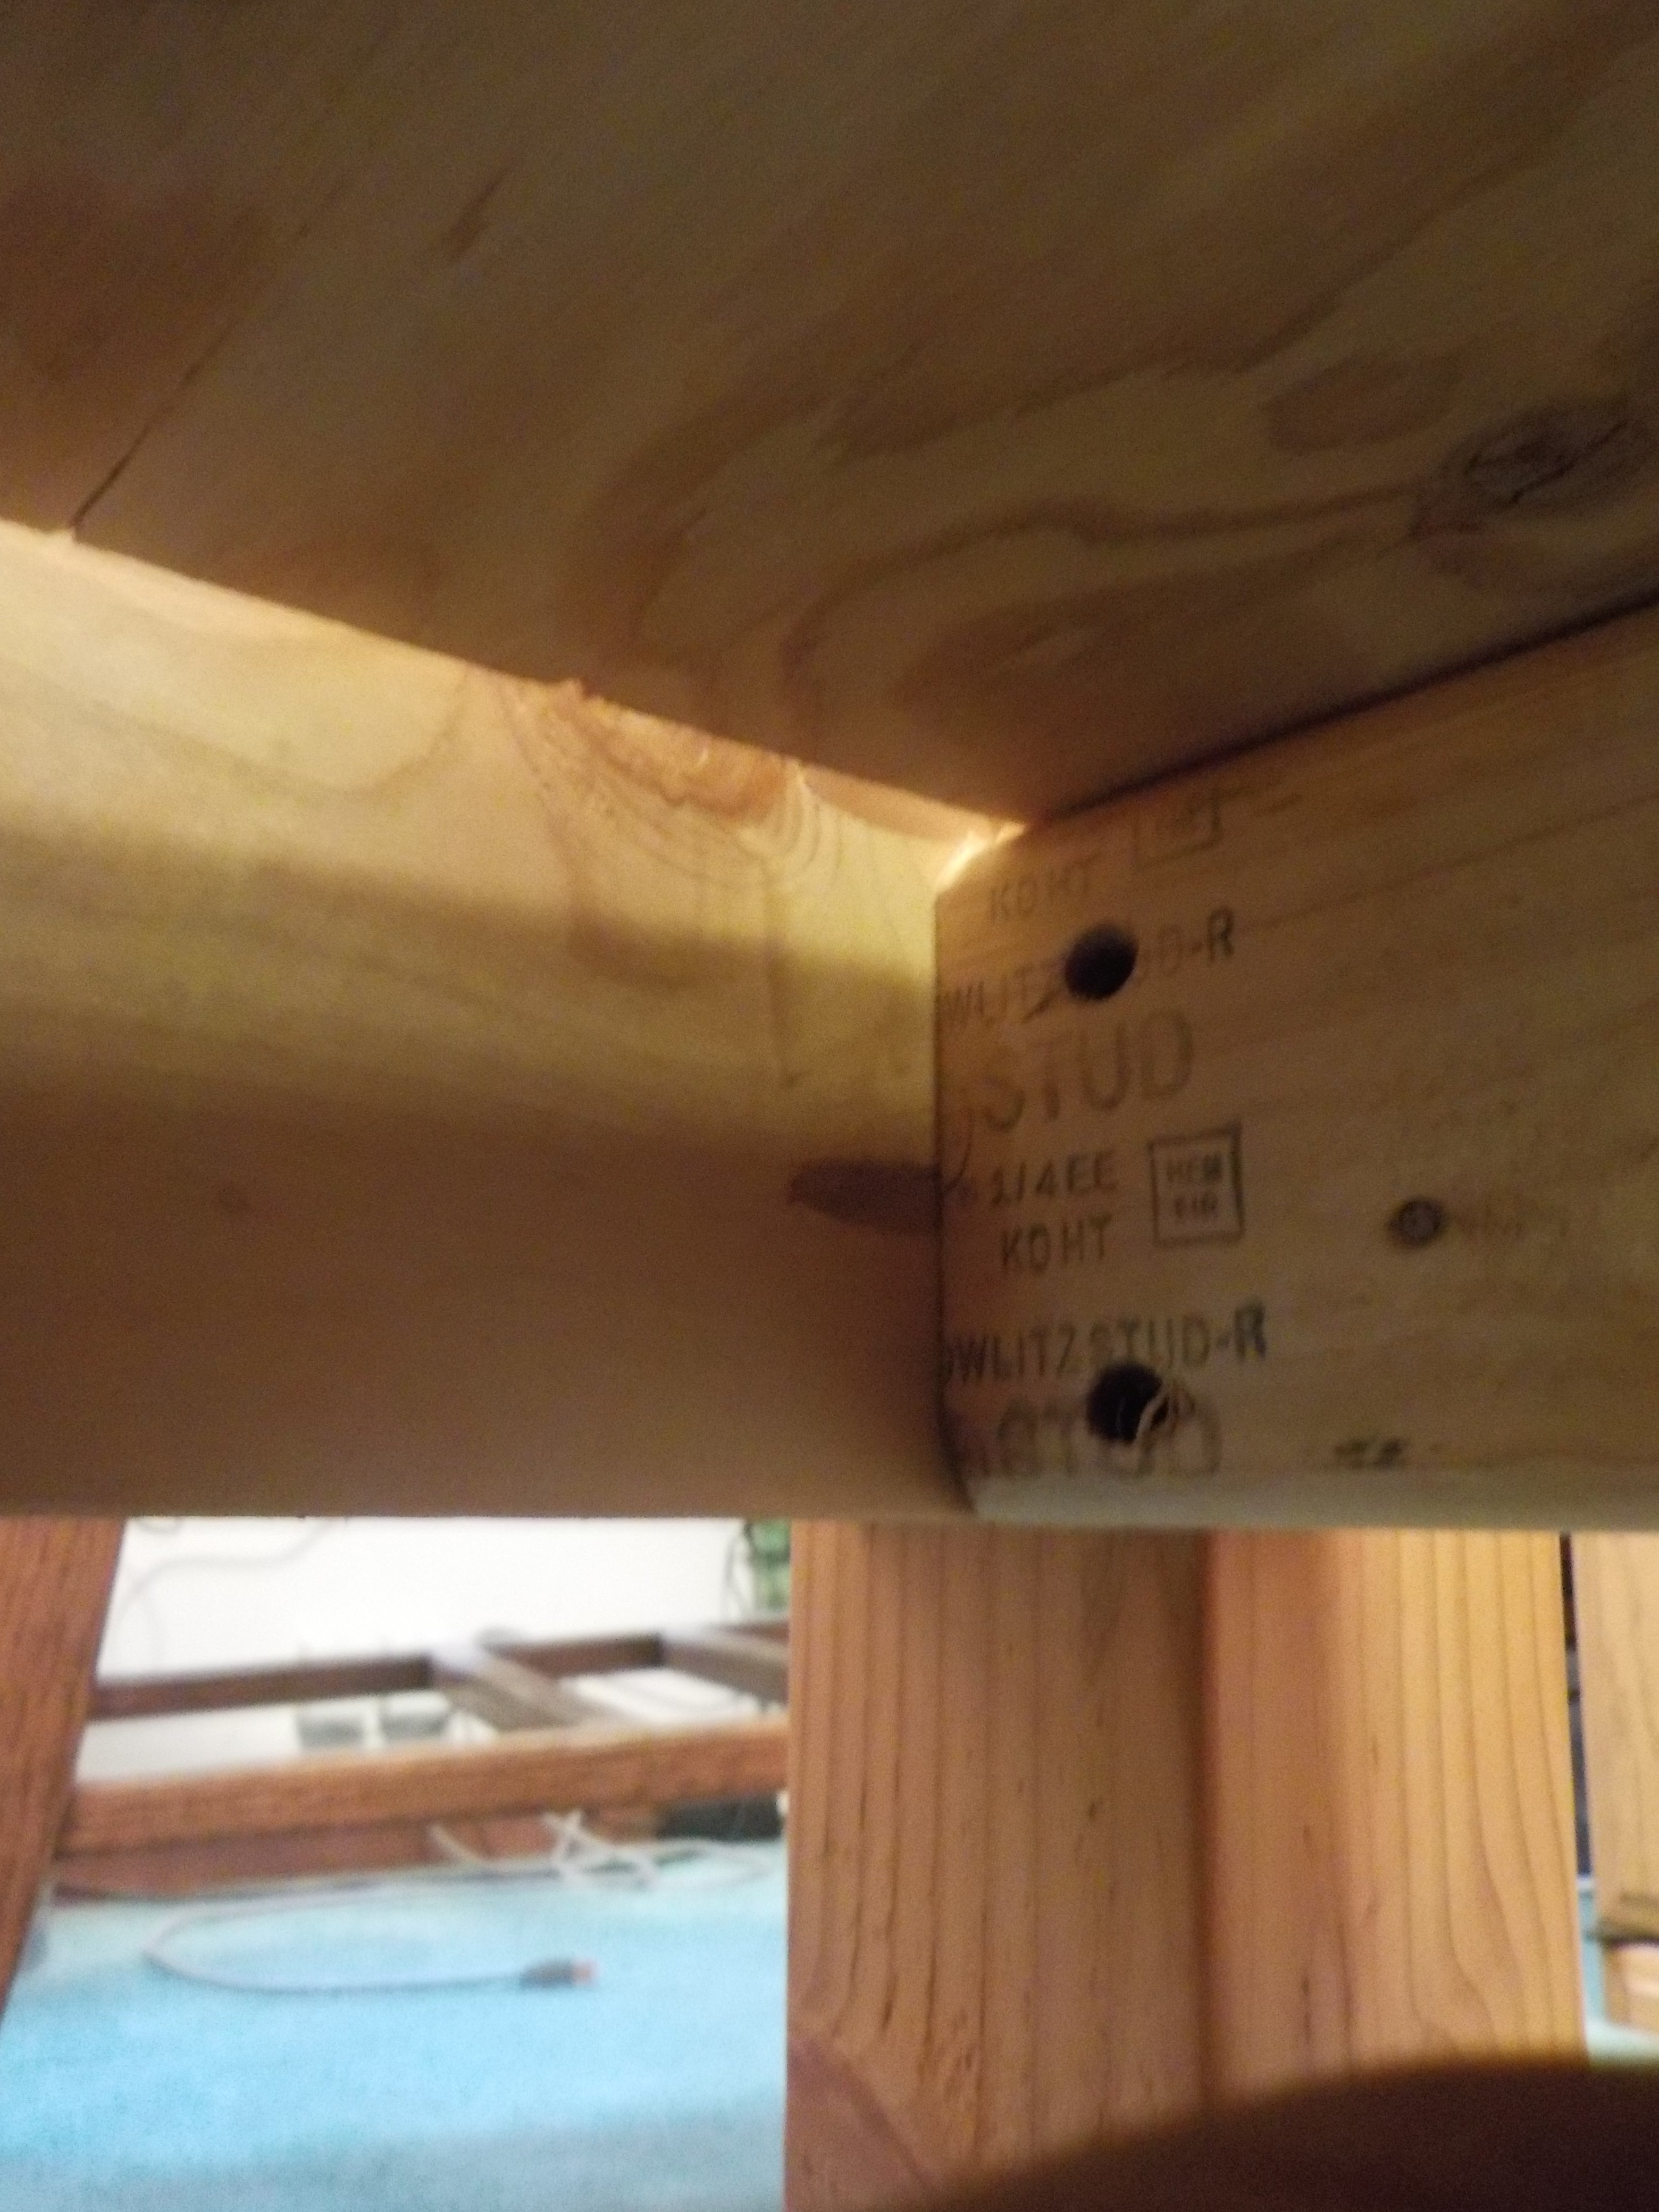
Kitchen Island
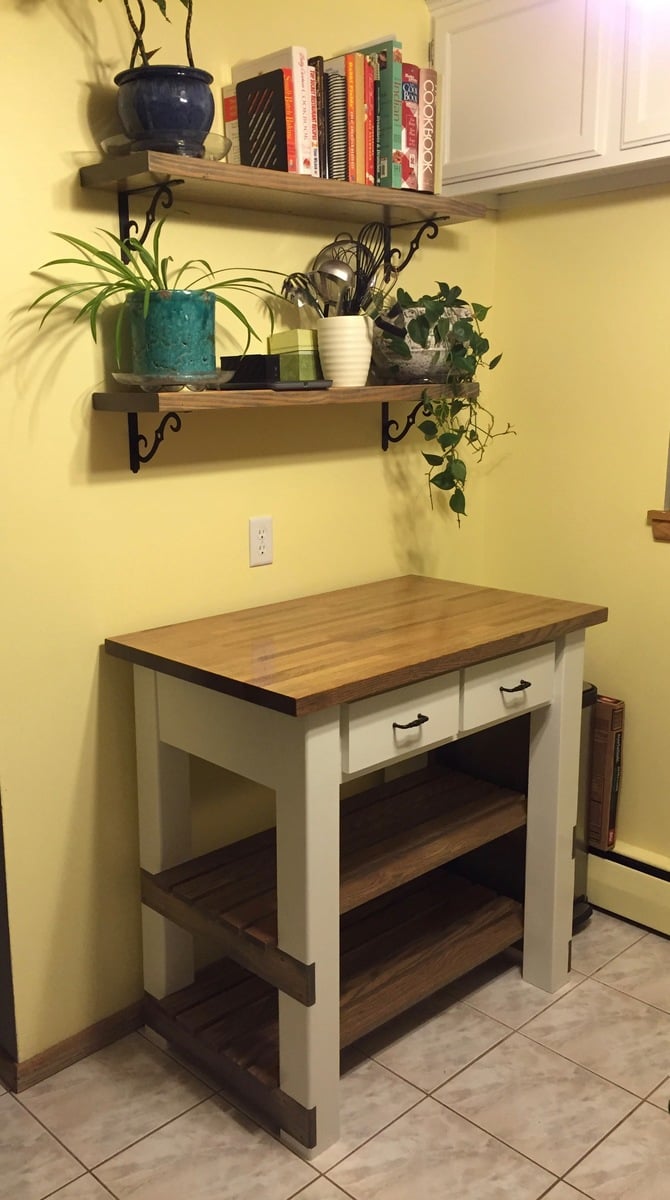
My wife and I wanted to replace an ugly metal wire shelf in our kitchen, fortunately Ana had plans for a nice-looking kitchen island! The two new challenges for me with this project were the notches for the shelf supports, and the drawers. I was able to figure both out and am glad to now have those skills in my toolbelt. The top was a pre-made red oak board from Menards. The other shelves are red oak, the rest of the frame is pine.
Built from Plan(s)
Estimated Cost
$200 on lumber (half of that for the top alone, 1 3/8" oak @ 2' x 5')
$40 for drawer slides (soft-close) and hardware
$30 for finish
$40 for drawer slides (soft-close) and hardware
$30 for finish
Estimated Time Investment
Week Long Project (20 Hours or More)
Finish Used
Waterlox Original
5 coats, 2 days drying time between coats. Applied with foam brush.
White cabinet paint used on the frame
5 coats, 2 days drying time between coats. Applied with foam brush.
White cabinet paint used on the frame
Recommended Skill Level
Advanced