Community Brag Posts

Five Dollar Ledges for Doll Display

Submitted by angiemicn on Wed, 02/08/2012 - 02:32

These shelves are great because you can make them any size you want! As you can see, these were made to hold my daughter's monster high collection, took advantage of dead space between the wall and the window. I put these together with my Kreg Jig so they're very sturdy. I couldn't buy shelves as nice as these, TWO OF THEM! for under 10 dollars. If you're thinking of building these, stop thinking, start doing, they're well worth your time and effort.

Built from Plan(s)
Estimated Cost
5.00, used leftover stain and poly, screws left over from other projects
Estimated Time Investment
Day Project (6-9 Hours)
Finish Used
Sanded smooth, stained with 3 coats, light sanding in between each coat, of China Red Minwaxs, with 25% Black Onyx mixed in. Top coat is Polyurethane x2 coats. My daughter's favorite color
Recommended Skill Level
Beginner

Almost wall to wall garage storage

Submitted by sraper2 on Wed, 12/18/2013 - 14:20

I didn't use one of your plans for these shelves but wanted to share it here since I learned how to build because of you! These were really easy to put together and only cost $100!!! I have the step by step plans on my blog.

Stephanie

Estimated Time Investment
Afternoon Project (3-6 Hours)
Recommended Skill Level
Beginner

Comments

My version

Submitted by ltgprg on Sun, 02/28/2016 - 21:00

My version of this project using so advanced joinery and under mount self closing draw guides

Estimated Cost
$350 for the Poplar and hardware plus lots of tools!
Estimated Time Investment
Week Long Project (20 Hours or More)
Finish Used
Sherman Williams Pro Classic, polycrylic, and general finishes glaze
Recommended Skill Level
Advanced

Simple Step Stool

Submitted by bblanchard on Mon, 10/07/2019 - 16:06

This step stool is my first project made from Ana White plans. It is perfect for my almost 2 year old daughter and it's become her new favorite toy! She likes to turn it upside down and ride in it like a boat :)

I love how simple and sturdy it is. It easily holds my weight (180 lbs), and I look forward to many years of useful fun from this great project. This was also my first project that incorporated beveled and angled cuts, but once I got started, it wasn't as intimidating as I initially thought. 

I had some leftover pieces of 1x10 and 1x3 pine boards from building a sidecar crib, so this was a perfect was to use the scraps. I used a table saw for cutting the 1x10s. My miter saw isn't large enough to accommodate 10 inch wide boards, but it was perfect for the 1x3s.

After assembling the stool the first time, I took it back apart and ripped the top down to 8 inches wide. I thought the stool had a tendency to tip with the full width of the 1x10. 

Can't wait to build more of these! For the next one, I'd like to try cutting half circles out of the bottom of the legs with the jigsaw instead of straight cuts and trying some decorative  cutout handles on the sides as well. 

Thanks, Ana!

Estimated Cost
10.00
Estimated Time Investment
An Hour or Two (0-2 Hours)
Finish Used
Honey stain by Minwax
Covered with one coat of triple thick polyurethane by Minwax
Recommended Skill Level
Beginner

Arts and Crafts Table for My Daughter

Submitted by jpiller on Sat, 02/11/2012 - 07:32

This project was my first from Ana White's plans and my first wood working project on my own. I spent quite a bit of time w/ my dad as a young boy helping him w/ woodworking projects and have been looking forward to doing one on my own.

My daughter is a crazy artist of four years old and she makes more art in a month than we know what to do with. Along with that comes piles of crayons, markers, paper, and so on all over her room, so this table was for her to try and keep organized.

The only real modification from Ana's original plans was that I used plywood for the cover instead of a clear piece of plastic b/c I figured the wood would hold up better under a four year old's abuse.

Built from Plan(s)
Estimated Cost
40
Estimated Time Investment
Day Project (6-9 Hours)
Finish Used
Regular wall paint - same used to paint my daughter's room.
Recommended Skill Level
Starter Project

Comments

jpiller

Sat, 08/02/2014 - 09:46

Yes, i actually had to put two pieces glued together in order to get the correct height to fill it in. It's a little heavy, but my daughter really loves the table and it doesn't seem to be too much of a problem.

Storage Basket Shelves

Submitted by Debbie440 on Sat, 12/21/2013 - 13:24

I built this and then ordered storage baskets that fit to the size. I built it exactly to the plan except I did not make the top flush to a back wall and I added decorative trim. I think adding trim really adds a nice look to this project.

The tower was super easy to build and took hardly any time. The most time was spent on the finishing work (sanding and painting).

Built from Plan(s)
Estimated Cost
Unknown/used leftover wood
Estimated Time Investment
Afternoon Project (3-6 Hours)
Finish Used
Sherwin Williams sample paint color matched to an antique white.
Recommended Skill Level
Beginner

Chalkboard Wood workers planning desk

I needed a new desk for my office workspace in the garage. I wanted something inspired, and that would BE inspiring to me as I sit at it. So, I made this chalkboard surface woodworking planning desk with mismatched legs. I love that the legs are mis-matched. LOVE IT. IT would make type a people squirm, but me. Nope, I love it. I quick made some set of sawhorse legs, and a box leg. Attached a 3/4 piece of plywood cut the the size I wanted. Stained the legs dark brown, and rolled on 3 coats of chalkboard paint on the top. Boom!! And the best part of this design, when it gets messy, I just sand it down. And clean it up again with chalkboard spray paint.

Built from Plan(s)
Estimated Cost
$15-$20
Estimated Time Investment
An Hour or Two (0-2 Hours)
Finish Used
brown stain and chalkboard paint
Recommended Skill Level
Beginner

Classic X Picnic Table

Submitted by WolffA on Fri, 10/11/2019 - 08:11

Build exactly from the plans. Stained in dark walnut. 

Built from Plan(s)
Estimated Cost
120
Estimated Time Investment
Weekend Project (10-20 Hours)
Finish Used
Dark Walnut Stain
Recommended Skill Level
Beginner

Our first project

Submitted by Delilah on Tue, 02/14/2012 - 18:53

I was looking for plans to build a table like this and found Ana's site.

Estimated Cost
100
Estimated Time Investment
Weekend Project (10-20 Hours)
Finish Used
Minwax Early American and Satin Poly
Recommended Skill Level
Starter Project

Comments

Delilah

Fri, 02/17/2012 - 19:26

I would make the bench first if I could do it again--good practice. You can't fit a lot of people around it but it is good for a small space.

anandereson (not verified)

Mon, 04/30/2012 - 04:55

How did you fasten the tabletop to the base? Did you screw it from under and attach along every cross beam? Or screw from the top and fill the holes with putty? All the way across or just on the ends...this step in the directions is very vague...

Dog Bed

Submitted by big mike on Sat, 03/05/2016 - 00:19

Dog bed for our German Shepherd. I will post plans a little later. 

Estimated Time Investment
Afternoon Project (3-6 Hours)
Recommended Skill Level
Beginner

Mimi’s Entryway Storage Bench&NarrowHall Tree Hutch

Submitted by Anonymous (not verified) on Tue, 07/04/2023 - 20:37

This was a two week project. The width was modified smaller than the plans. The panels on the bench were fitted into dado joints rather than inserting an entire panel on the inside. Also used pocket hole joints where some nails were suggested.
This was my first attempt at a project like this and turned out amazing. My wife loves it too.

Farmhouse bed king modified

Submitted by susanr on Tue, 02/21/2012 - 06:40

This is a modification of the Farmhouse bed with a panel headboard and footboard rather than individual boards. It currently fits around the mattress/boxspring/metal frame. When we buy a new mattress, we will then add the joists, etc.

The headboard and footboard are both 72" wide. We had the guys at blue do a rip cut at 72" which ensures that both pieces are exactly the same measurement (for square.) Then, they turned the plywood a quarter turn and cut at 15" for the footboard. This left a 33" high headboard. It is 3 inches larger than the original plan, but it doesn't require a second cut and you don't see it anyway. The trim is just a 1x3 with a 1" overhang. (I might make it just a 3/4" if doing it again.)

The side boards are 1x12 cut at 80 1/4", but you may want to add a little if your comforter is really thick or if your mattress is much longer than ours at 79 1/2". We used non-mortised (no cutting into the wood) bed rail hardware from Woodcraft, so we could easily take it apart. These were placed 1 1/8" in from the inside edge of the 4x4 post. They were placed on the very edge of the side rail so it would butt up against the post. The 1 1/8" gives us plenty of room to shove the bedding down inside the side rail.

We glued and nailed 1x2s from the back for the trim on each piece.

Estimated Cost
about $190, but you could save $17 by not spilling an entire can of dye/stain on yourself when you foolishly open your completely full pressurized sprayer
Estimated Time Investment
Weekend Project (10-20 Hours)
Finish Used
General Finishes dye stain in Dark Brown; polycrylic - 3 coats; prefinished all the wood before assembling.
Recommended Skill Level
Beginner

Comments

Kate (not verified)

Wed, 02/22/2012 - 05:18

Looks beautiful! We are currently making this bed with the exact samce change to use panels instead of boards and then one board down the middle, except we made our footboard and headboard higher.

susanr

Wed, 02/22/2012 - 07:32

I would love to have the footboard higher, but my husband is 6'4" with large feet, and he asked that I make sure that he could sleep on his stomach with his feet dangling down without touching the footboard! We actually measured it. Make sure you post yours when it is done.

C.Lang

Wed, 02/22/2012 - 20:40

This is a beautiful bed. It is actually pretty much the exact bed i want to build for me and my wife.

sandrabees

Sun, 04/29/2012 - 16:47

I am wanting a king... love the farmhouse plan and I think that hardware is the way ij want to go. Is that where you can slip the side rails in and out of the headboard and foot board?

Rustic Kitchen Island with Maple Cutting Board Top!

Submitted by bcanoel on Thu, 12/26/2013 - 14:54

We constructed the Rustic Kitchen Island with a few modifications. My dad, president of the Norm Abrams fan club, built fantastic drawers using rabbet joints and fashioned a maple cutting board top. We also chamferred the edge of the top and the leg ends, very easy and adds a beautiful touch. We finished the cutting board top with "Salad Bowl Finish" which facilitates food prep.

This was a Christmas present for my boyfriend, he is in love with it! I watched him play with it like a little kid for hours after opening it. Thank you, Ana, for your great plans! (Also, Santa brought me your book for Christmas so I will be sharing many more completed projects!)

This was my very first project in the workshop. I was able to complete most of it on my own, which is why I rated it a "beginner" project. However, construction of the drawers using rabbet joints and prepping the maple for the top were considerably more difficult.

Estimated Time Investment
Week Long Project (20 Hours or More)
Finish Used
Bottom & Drawers: Golden Pecan, Minwax (2 coats on pine)
Top: Salad Bowl Finish, General Finishers (3 coats)
Recommended Skill Level
Beginner

56x34

Submitted by Anonymous (not verified) on Mon, 03/07/2016 - 08:43

Love it. 

Estimated Time Investment
Weekend Project (10-20 Hours)
Finish Used
Minwax dark walnut stain and polycrylic.
Recommended Skill Level
Beginner

Modern Storage Desk

Submitted by Anonymous (not verified) on Fri, 07/07/2023 - 11:19

I used these plans as inspiration and made some changes per my son's request. I made the base out of maple and changed the board dimensions to 1x2" I also used half lap joints instead of pocket hole screws (personal preference). The top is MDF and I edged plywood and MDF in Maple. Fun Project

Zen

Farmhouse Doll Bed X 3

Submitted by brigitep72 on Sat, 02/25/2012 - 03:12

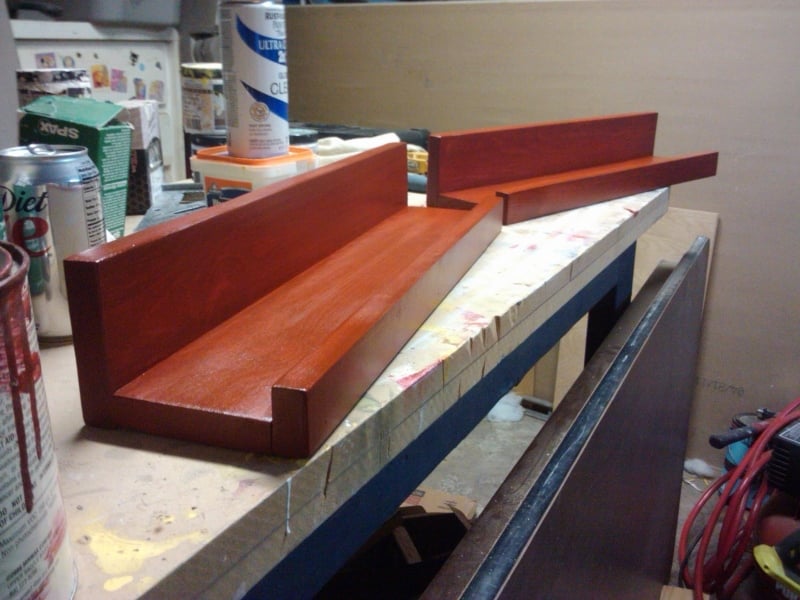
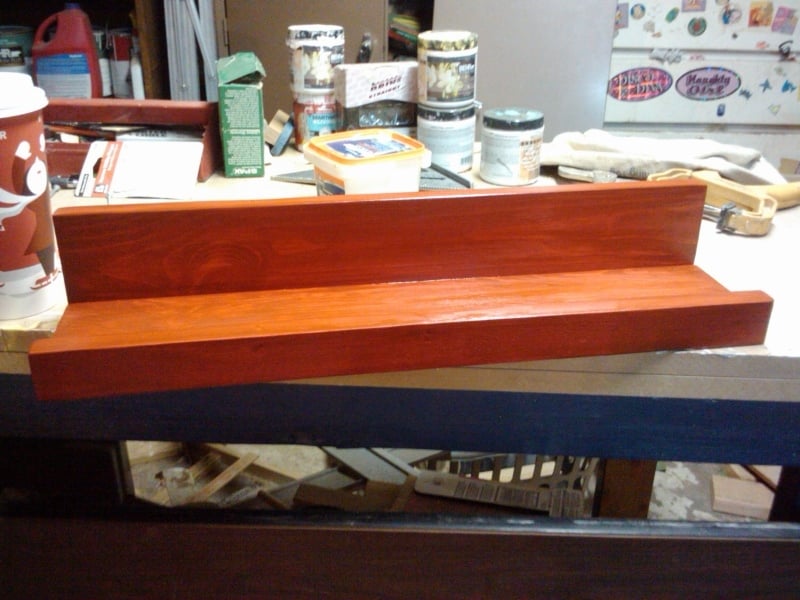
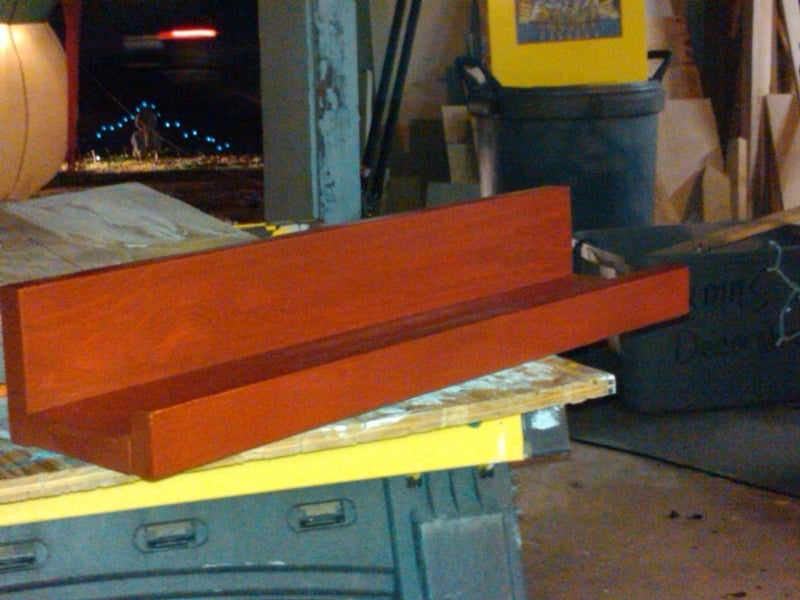
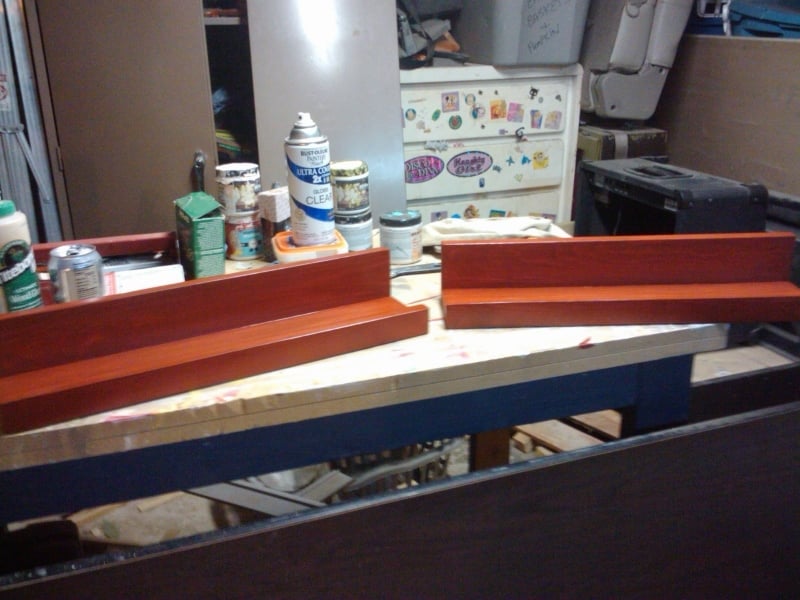
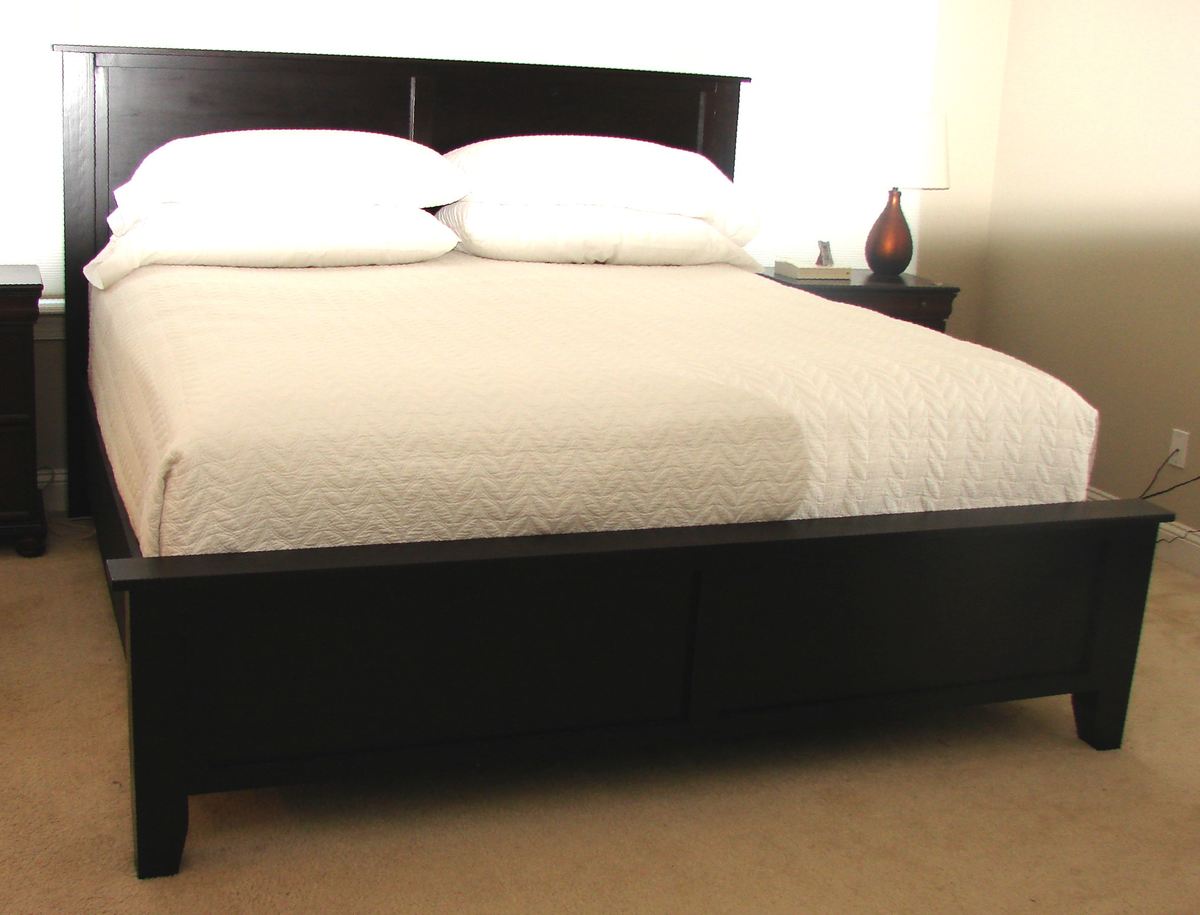
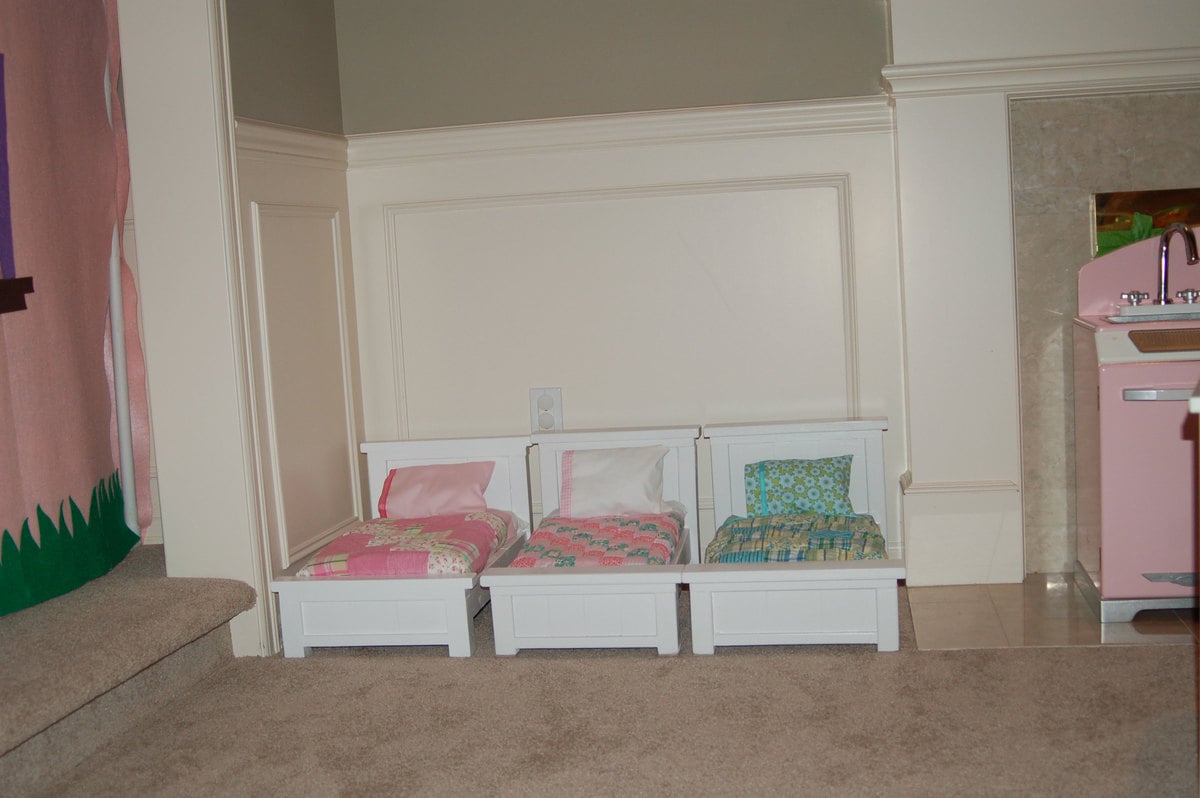
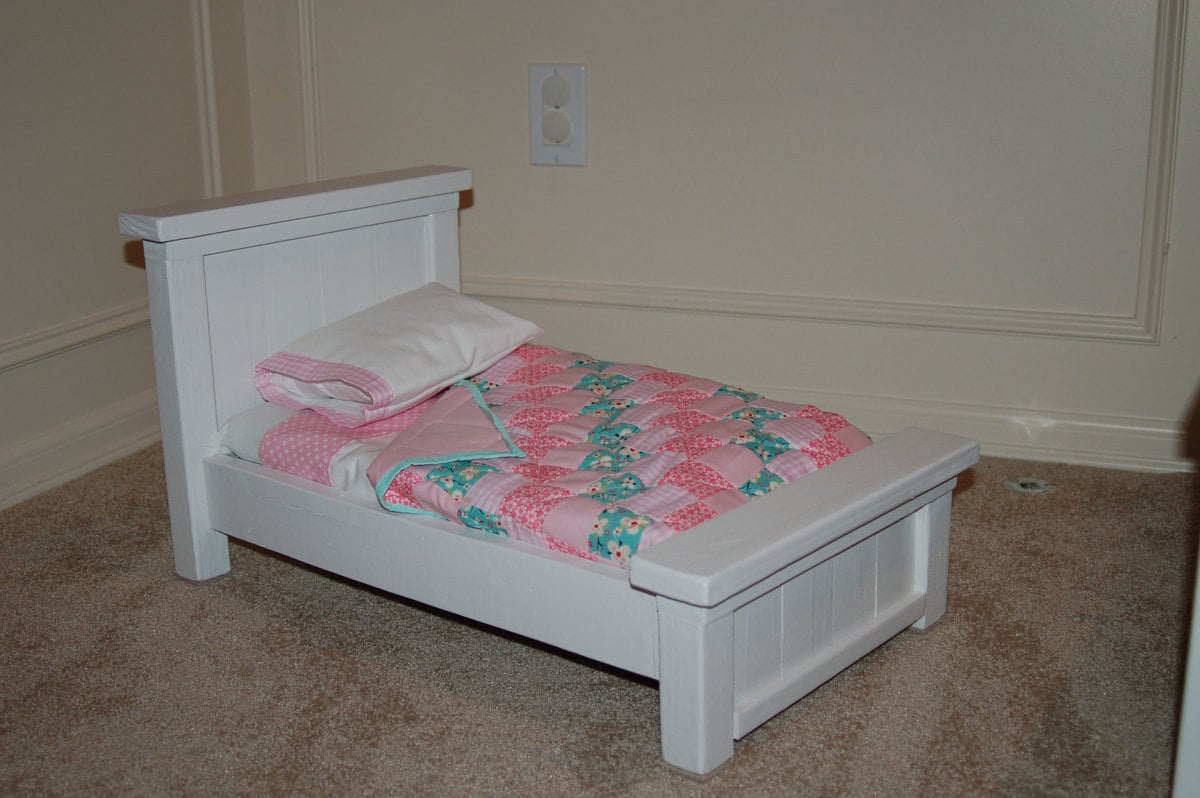
I made these three farmhouse doll beds for my daughters. Initially, I made two beds following the plan as written but started feeling like they would take up too much space. My girls are close in age (4 and 2 yo twins) so waiting for one to outgrow something and passing it on isn't an option.

I gave the first two regular sized beds away as gifts and made three narrow versions that I saw on another blog http://thatsmyletter.blogspot.com/2011/02/b-is-for-bed-5.html Her bedding is still the gold standard in my eyes. LOVE IT!

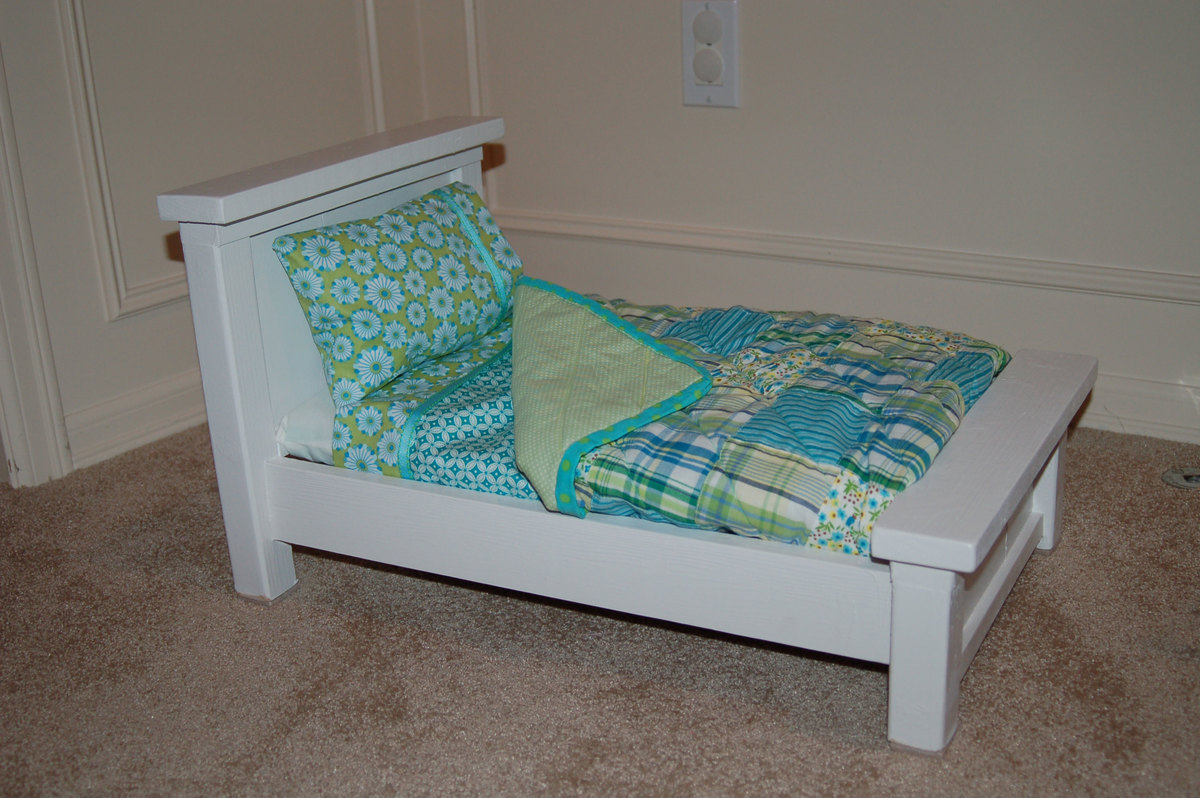
On two of my beds, I left off one 1x2 slat, and on the other I used 3-1x3's. The width of the 3 beds are slightly different. Heck, I think I am incapable of making two things exactly the same. lol The girls love them so that's all that matters. For the bed that used 3-1x3s, I didn't write down the width of the top boards. I measured and cut as I assembled.

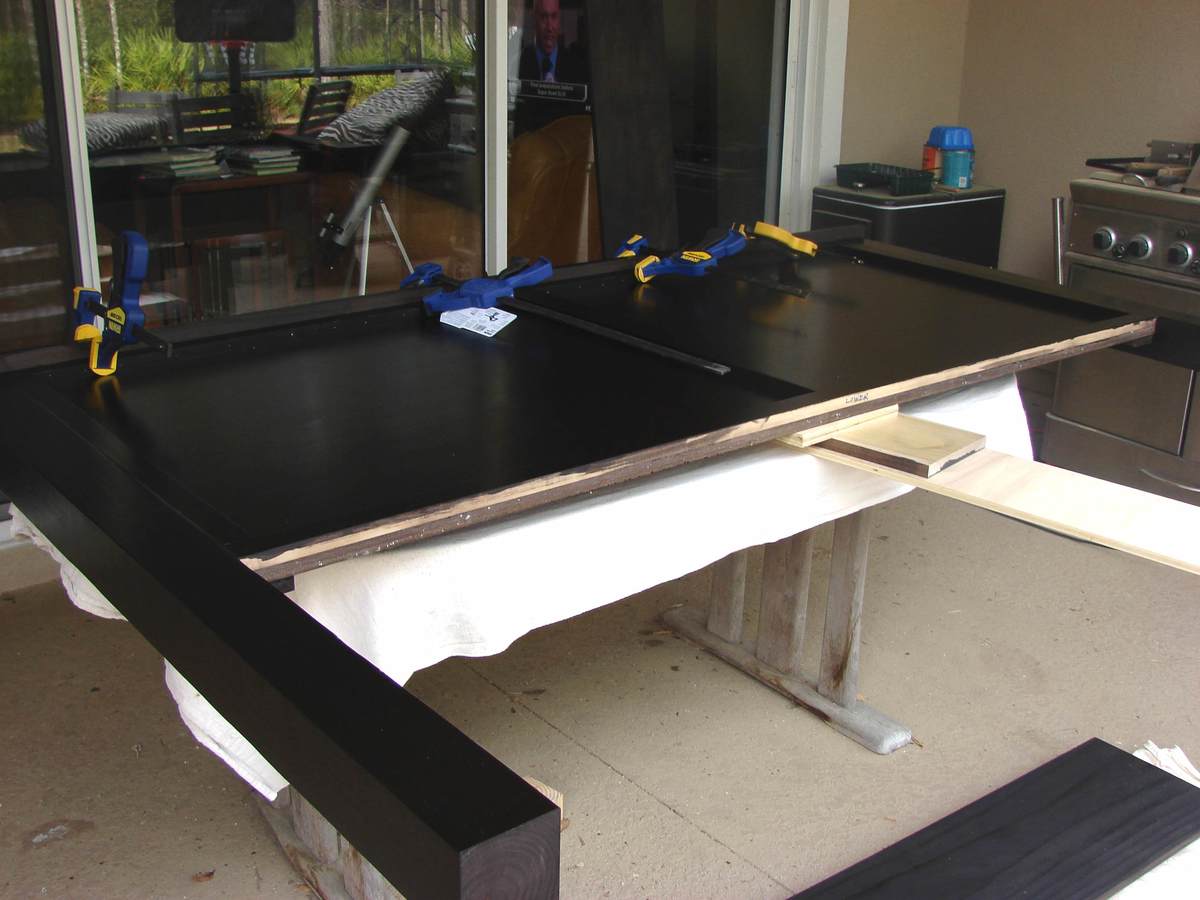
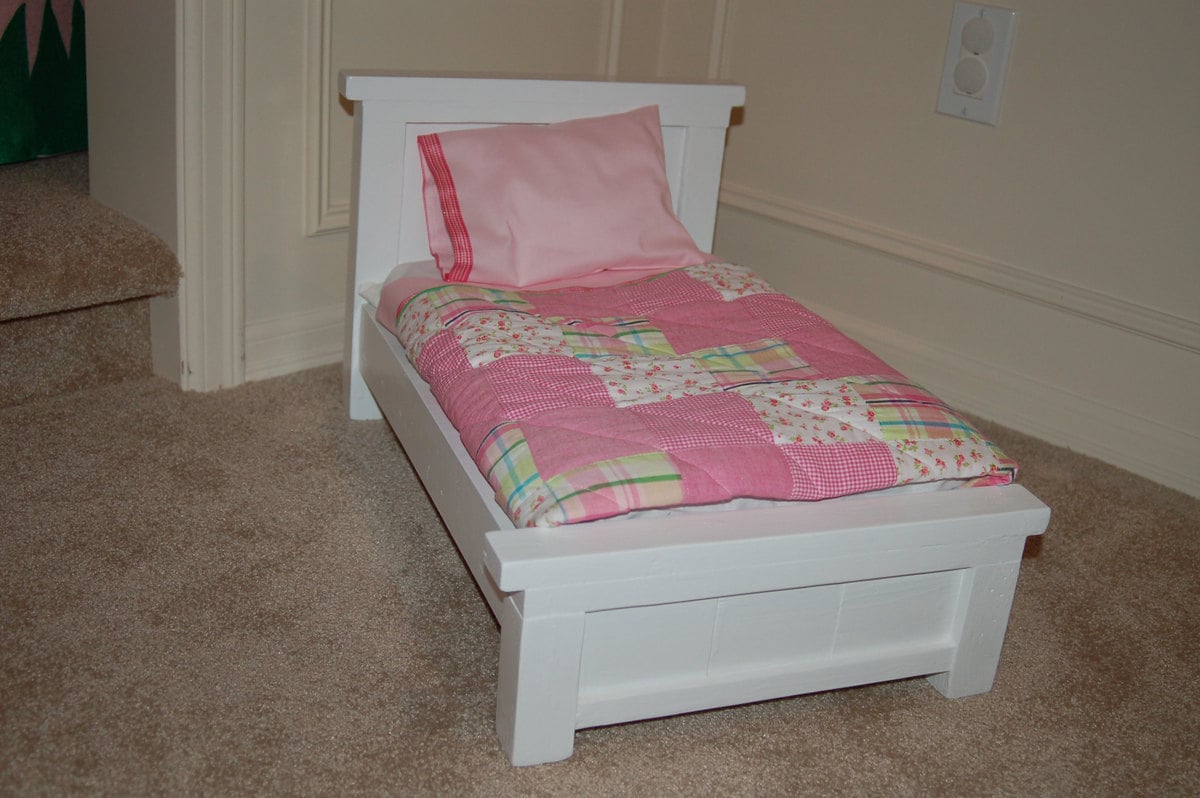
I put an extra 1x2 mattress support in the middle because I knew they would sit on them and used masonite to hold the mattress. Seems strong enough so far.

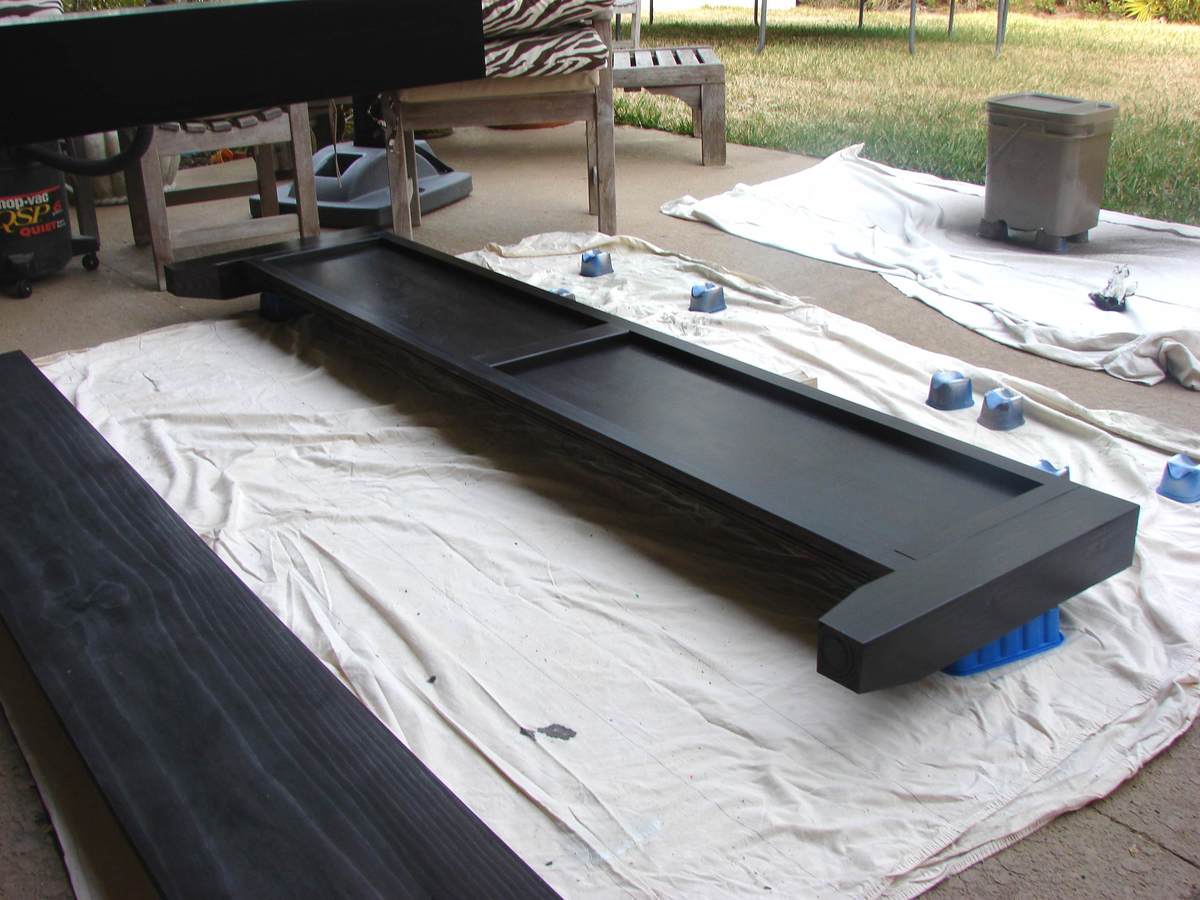
Before painting, I used lots of wood filler and caulk to hide some flaws. By the way, I feel like painting the beds is the hardest part. So many little grooves, nooks, and crannies. I recently bought a Graco 3900 HVLP paint sprayer. Painted a half wall and 6 long pieces of trim in 30 minutes today---love it! If I make another bed (or anything for that matter), I'm totally going to spray it.

Oh and I have to confess that after the first two beds, I got too impatient to use just screws so I used the nailer, glue, and used a few screws at key points. It made things go so much quicker, and the beds still feel quite sturdy. If my kids manage to break them, I'll make them new ones. :-)

I used 1" foam and muslin for the mattress & cover and fabric that I obsessively buy and hoard for everything else. The middle quilt is an actual quilt. I cut the squares and all---first time for that too. The other two are made of pre-made patchwork fabric from Joann's.

Thank you to everyone for sharing your creations, and thank you, Ana, for the plans. I am so inspired!

Estimated Cost
$20 (best guess - for all three)
Estimated Time Investment
Afternoon Project (3-6 Hours)
Finish Used
Sherwin-Williams ProClassic Alkyd Interior Enamel in white and primed beforehand with the recommended primer. I had both on hand from another project.
Recommended Skill Level
Beginner

American Girl Doll Horse Stable

My two dauirlghters wanted a stable to protect their beloved American Girl Doll Horses.

Estimated Time Investment
Weekend Project (10-20 Hours)
Finish Used
None
Recommended Skill Level
Intermediate

Comments

tazmama

Sun, 10/18/2015 - 19:55

Hello Scott, 

The links provided for the AG horse stable does not work or exist. I probablly cannot create one like you did because I don't have wood working tools but if you have the pics available somewhere I may be able to do a rough version for my daughter. It pains me to buy a horse she wants knowing she won't use it much but it's on her xmas list! :) 

Christina

Bathroom Cabinet

Submitted by Anonymous (not verified) on Sat, 03/12/2016 - 06:31

My niece had an area in her master bathroom that she wanted to make into a closet.   Since she is very interested in woodworking I was happy to assist her on her first project.  It was a challenge as one wall was out of plum by 1.5 inches but we managed to successfully address the problem. 

The project turned out very nice and now my niece has a large closet with lots of storage space.  But we also created a monster as she has definitely caught the woodworking bug!  Her birthday is coming up soon and all she wants are tools!

Estimated Cost
350.00
Estimated Time Investment
Week Long Project (20 Hours or More)
Finish Used
Interior white paint ... to be applied.
Recommended Skill Level
Intermediate

Comments

Farmhouse table

Submitted by Jorge Gari on Tue, 10/22/2019 - 15:15

I just finished this table for our new house at the beach; I did a small modification  at the moment of fixing the breadboards;  besides the pocket holes I also used dowels for extra strength. If someone sits on the front of the table it could be a problem.

Another detail I included,is a simple way to clamp the diagonal pieces, much more firmly than with tape.

I am quite happy with the results, I will now finish the table with lacquer.

Estimated Time Investment
Week Long Project (20 Hours or More)
Finish Used
Lacquer

Outdoor TV Lift with Electric Fireplace

Submitted by Anonymous (not verified) on Sat, 07/08/2023 - 10:27

I built a TV lift with an electric fireplace cabinet. It’s 5x2 with casters for easy mobility. It goes perfect out in my bar area. I used siding all around in and the top is pinewood with a lacquer coating for long lasting.

Back