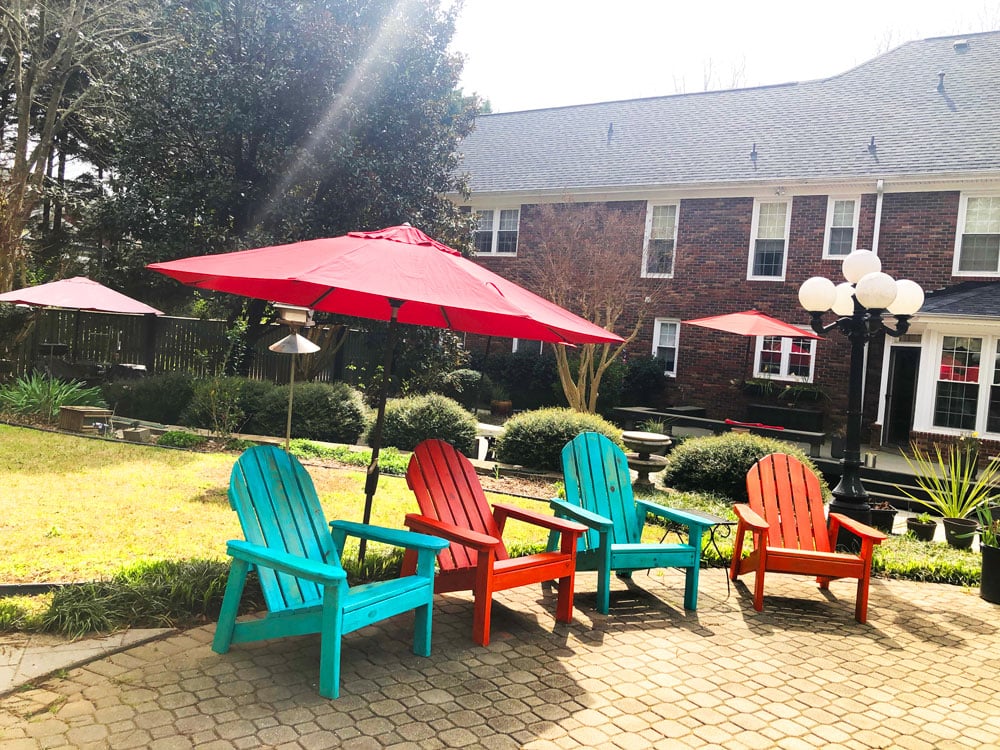
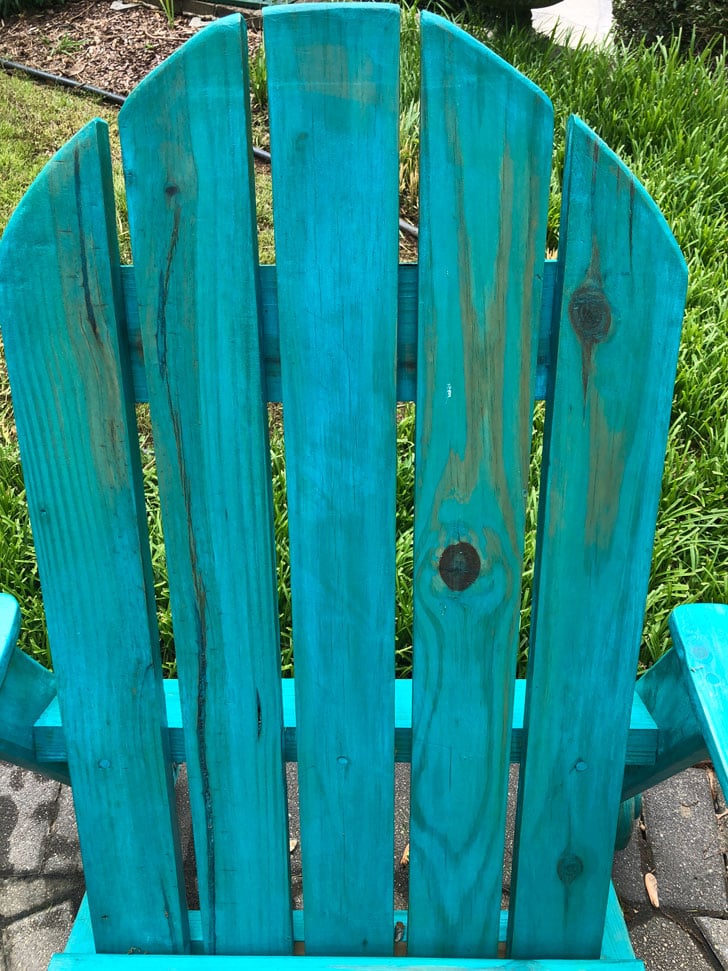
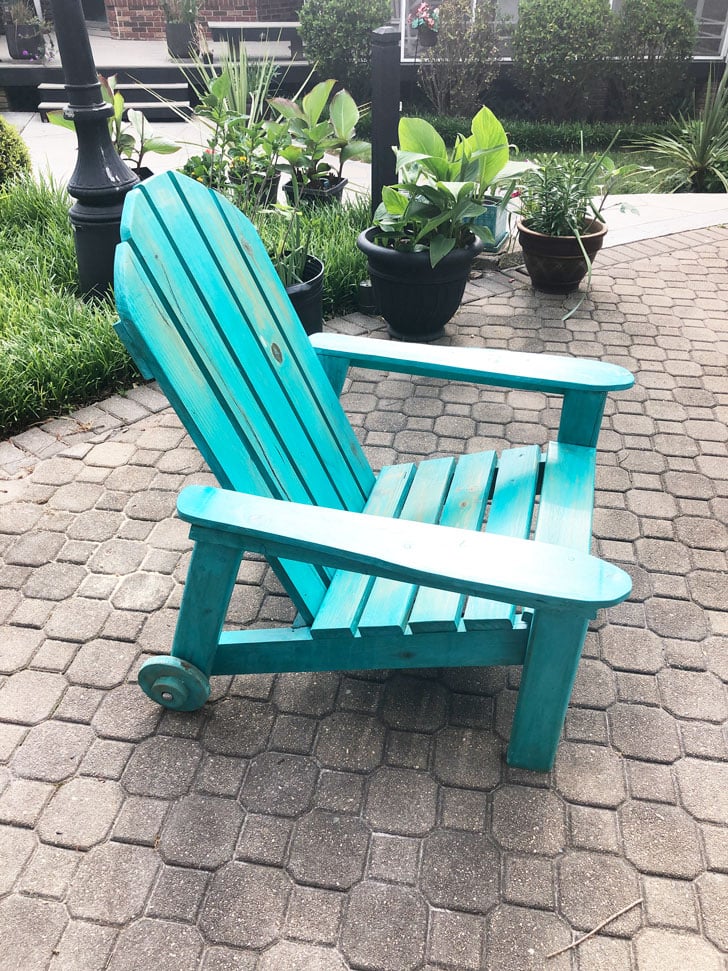
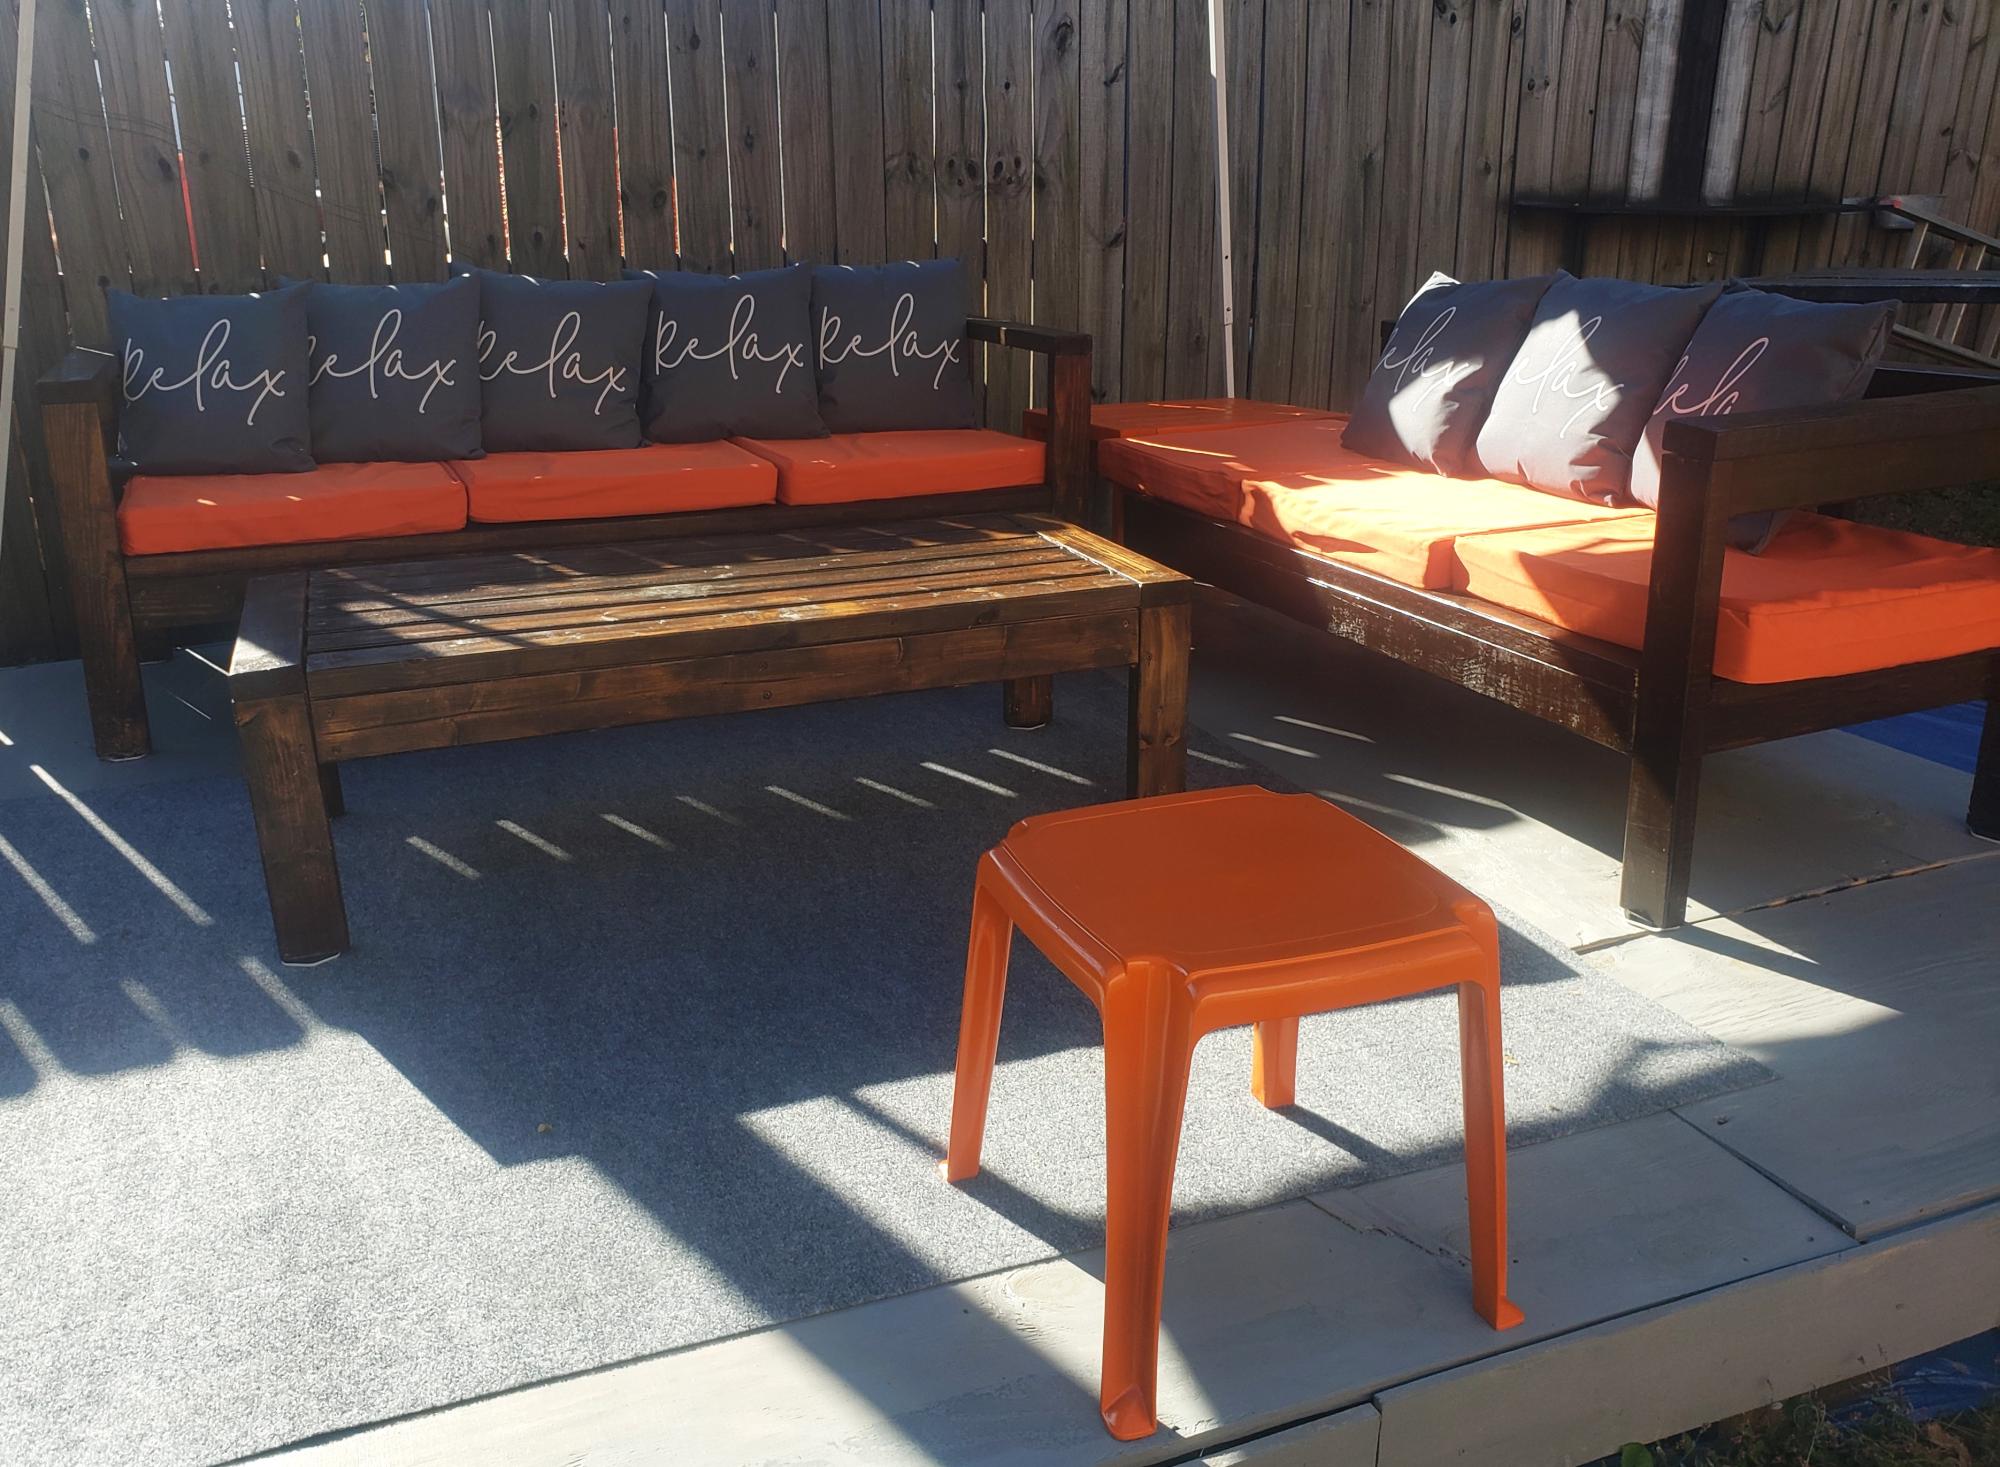
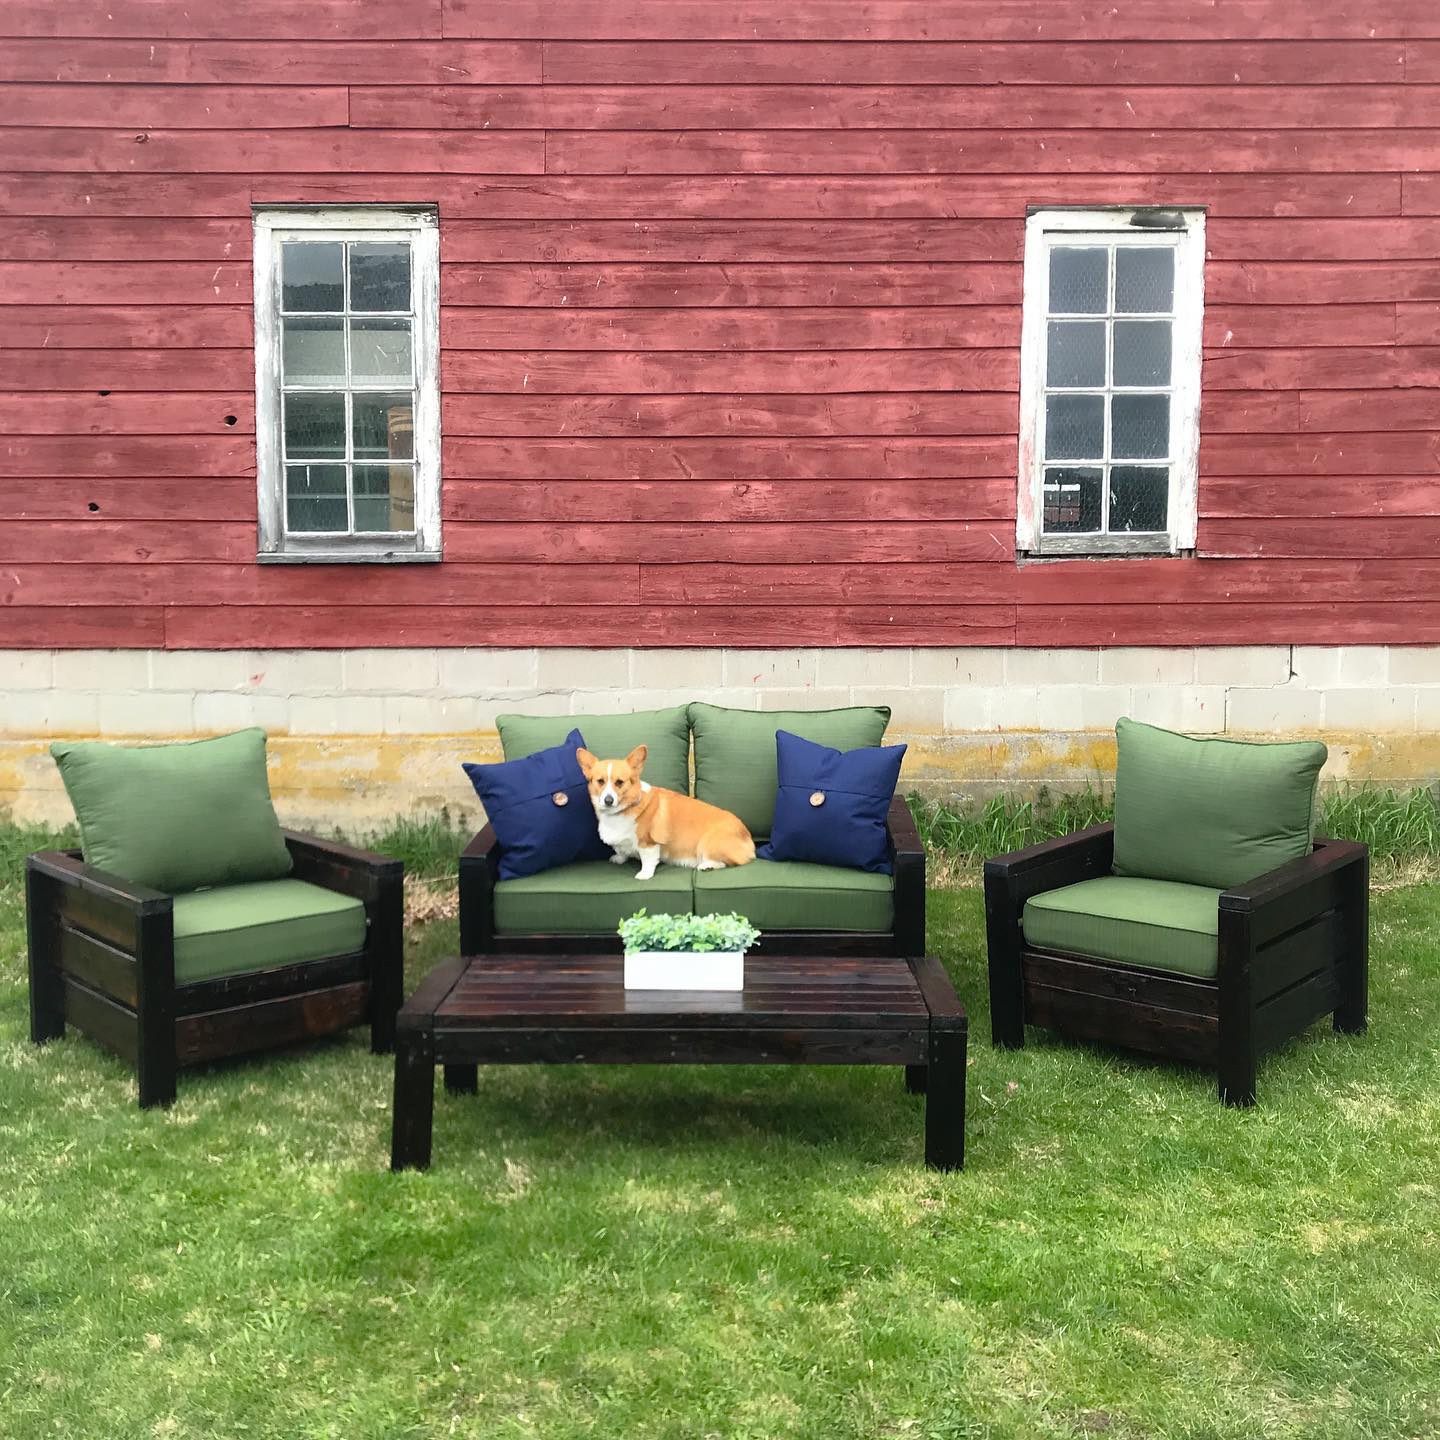
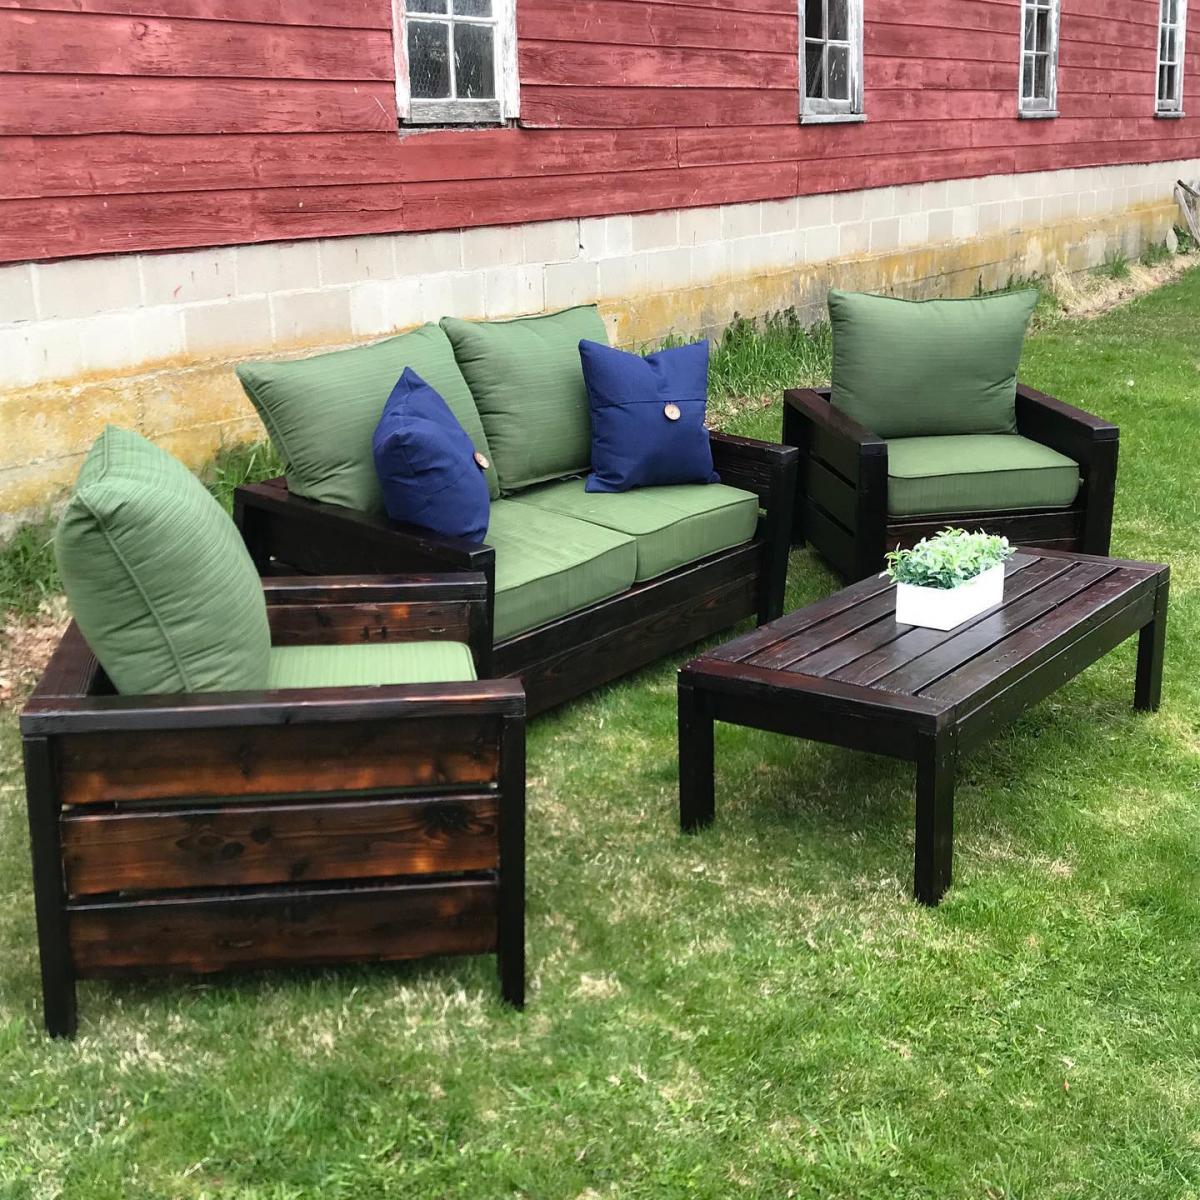
Community Brag Posts

Adirondack chairs

Submitted by elfi on Sun, 05/05/2019 - 08:04

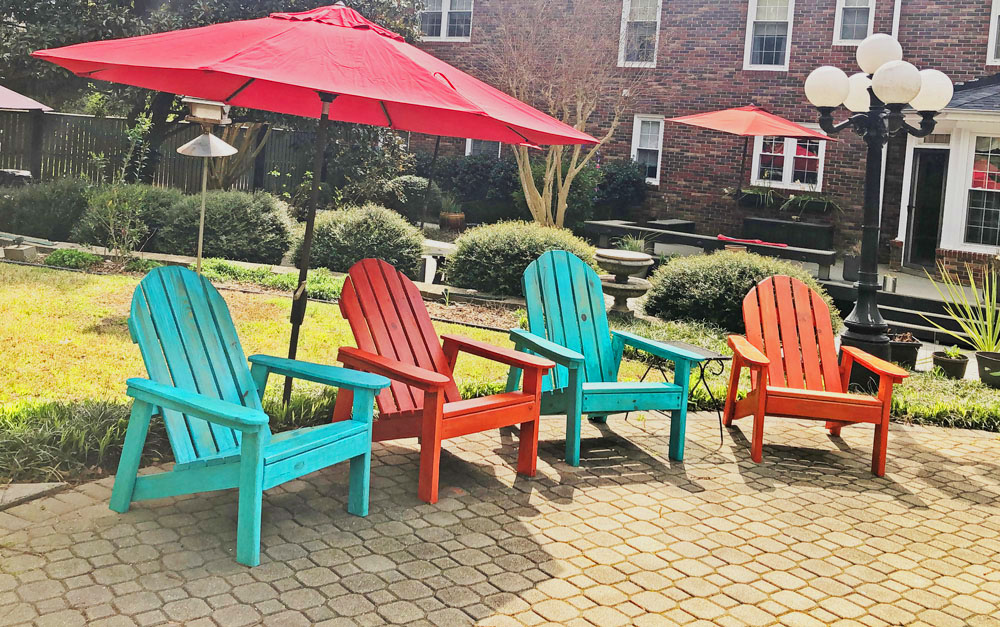
Adirondack chairs from your plans. My husband added some rounding on the arms and back. We wanted them to look like well weathered beach chairs. To get that effect we used milk paint which lets the grain show through.

The best addition are the two wooden wheels on the back leg of the chairs, I can now easily move them around my patio.

Estimated Cost
$ 30 per chair
Estimated Time Investment
Weekend Project (10-20 Hours)
Finish Used
Milk paint
Recommended Skill Level
Intermediate

Comments

Seasonal And Holiday

Modified Simple Cheap Console Table

This was my first project from Ana's web site. I modified the table by expanding the trim of the stretcher to the outsides and adding a shelf. I also added an additional shelf in the middle. I cut the apron for the top down to two inches, and an inch a half for the lower two shelves. I distressed each piece of wood individually by hitting it with a bag of nails and various other things.

Estimated Cost
$40.00 - I had the stain and sand paper and polyurethane.
Estimated Time Investment
Afternoon Project (3-6 Hours)
Finish Used
I used two coats of dark walnut minwax and two coats of satin polyurethane. If anyone has any tips for their "best" finishing techniques, I'm all ears.
Recommended Skill Level
Beginner

Comments

shea chappell

Sat, 11/12/2011 - 07:31

I am literally I the middle of buildig the sectional and all of a sudden it says I
am not authorized to get into that page. Any information?

beckiedecker

Sat, 11/12/2011 - 20:03

And what a fun project, whacking it with nails and such to distress. Did you feel de-stressed afterward?

It looks great.

T-Town DIYer

Tue, 11/15/2011 - 09:25

I could have given the table a little bit more of my stress. Unfortunately I couldnt swing the bag too hard, because the nails would rip right through it and fly all over the place. Maybe next time i'll use a pillow cause and swing a little harder.

T-Town DIYer

Thu, 11/17/2011 - 10:14

This has become me new favorite site to visit. My to do list is a mile long and covers almost every room in the house. My wife thanks you!

Kids Play Kitchen

Submitted by julievic on Wed, 12/14/2011 - 11:28

Christmas 2010 my husband and I made our little girls a kitchen using Ana's plans. We used the materials on her cut list, and used paint for the finish. Used fabric scraps to sew the sink skirt, found the knobs at hobby lobby and habitat for humanity, and small bar faucet at Home Depot. It turned out amazing!

Estimated Cost
$100
Estimated Time Investment
Weekend Project (10-20 Hours)
Finish Used
Paint
Recommended Skill Level
Beginner

Comments

julievic

Tue, 12/20/2011 - 16:04

Thanks so much for the compliment! Means SO much coming from you! I love your site and your plans, Ana you are amazing! Thank you for making me your featured builder this month, I had no clue until someone saw my face on your blog! I feel like a rock star now ;)

Easy Upholstered bench

Wonderful project! Very fun. Built a bench from scrap 2x4s (left in the garage by our home's previous owner, so they were free!) and a piece of MDF shelving. Perfect for our entryway. The bench itself was incredibly easy to build. The hard part, in my opinion, was finishing it. So many pretty things to choose from! I used a piece of 2-inch foam plus a double layer of batting for the top, some striped upholstery fabric, and 160 nailheads to finish it off. Love it.

Built from Plan(s)
Estimated Time Investment
Day Project (6-9 Hours)
Finish Used
Minwax stain in cognac, and then two coats of minwax poly.
Recommended Skill Level
Beginner

Comments

Guest (not verified)

Sun, 02/19/2012 - 12:54

Love it! Wondering if I could build it and have some type of slipcover on it. (house with three kids under 5 years old does not go well with permanent upholstery! haha)

Guest (not verified)

Fri, 03/09/2012 - 09:06

If you check out Ana's original plans for the Easiest Upholstered Bench, you'll see that she DID use slipcovers! You could make different ones for each season, or for holidays like Christmas or birthdays...

ehahn1

Wed, 10/30/2013 - 08:36

Hi Katie, I am having a difficult time finding fabric (hard to believe)! did you get yours online? How wide are the stripes? most fabric I am finding is not wide enough to cover the top and sides. Thanks for the help! Great build!

Computer Armoire aka my new office

From these plans: http://ana-white.com/2013/05/plans/toy-or-tv-armoire

For my quilting business, I needed an office for the paperwork, etc. that comes with running a business. With no spare room for an office, I built this armoire to hold my computer, business papers, and the bags that contain my quilting samples, forms, etc.

On the inside, I used pegboard for the backing so the electrical equipment would have ventilation. I also thought I might be able to hang stuff from the pegboard as well. If I had to do it again, I would set up the keyboard slide and side drawers a little differently. I used scrap wood for that part. I should have just gotten another piece of 3/4 inch plywood and fixed it right, with pocket holes. I'd intended to put drawer pulls on the drawers, but the doors hit the drawers when they close. So, I will need to cut some holes in the drawers to use as pulls.

Estimated Time Investment
Week Long Project (20 Hours or More)
Finish Used
Black Rustoleum Painter's Touch Flat Black, distressed and finished with Briwax clear and Mahogany
Recommended Skill Level
Intermediate

Propane Tank Storage Table

Submitted by Anonymous (not verified) on Fri, 07/07/2023 - 11:12

I had inquire on your Facebook about you making a new plan... i had wanted a side table to hide my propane tank. I used the planter plans as an inspiration for this table. It is regiment rough looking as I managed to build it using only scrap on hand. I did have one cedar board in my pile that was leftover from another project that I used for the top... pretty happy but know it would have been better with new wood that was the right size and not warped! The space at the top is on purpose to be able to teach in and turn the gas on and off.

Debbie Hertz

Our master closet from this plan!

Submitted by jec on Sat, 01/11/2014 - 07:18

We built this master closet using the simple closet plan. It looks wonderful and wasn't too difficult to do once we determined the measurements we needed to use to fit our closet. My husband does not have much building experience at all, but he was able to do this with Ana's fabulous plans. Thank you so much for saving us hundreds of dollars! We have real wood in our closet and we love it!

We used plywood and painted all surfaces with indoor latex trim paint.

Built from Plan(s)
Estimated Cost
$100
Estimated Time Investment
Weekend Project (10-20 Hours)
Finish Used
Painted with interior latex trim paint from Porter Paint. Used 2 coats.
Recommended Skill Level
Beginner

Comments

imortison

Sun, 01/12/2014 - 19:02

It looks very nice. May I ask what dimension of the plywood you used?
They look more than 3/4'' thick to me, right? My husband and I are planning our very first project!! Any info /advice would be highly appreciated.

Kids Modern Picnic Table

Submitted by abbpim on Mon, 04/16/2012 - 09:52

This is my very first wood working project! I know its not perfect and I learned from my mistakes. I found a miter saw at a garage sale and after three hours of plugging it in and unplugging it, I finally worked up the courage to make it make a noise! Then I eventually worked up the courage to cut wood lol! I'm pretty proud of myself for building something and I am going to continue practicing until I can make really cool stuff!

Estimated Cost
$20
Estimated Time Investment
Afternoon Project (3-6 Hours)
Finish Used
Valspar, Quart Size, LA218, Fuchsia, Duramax, Exterior Semigloss, Base 4 214-4.75, 113-31.75, 105-3.63, 115-2Y7

I used 2 coats
Recommended Skill Level
Starter Project

Workbench

Submitted by Sheri-L on Thu, 02/20/2020 - 10:54

This was my first build and experience with power tools. The size of the workbench table is absolutely the perfect length and height. I ended up adding wheels that lock in place. I’m hooked! Thank you Ana White for providing the plans for a workbench. 

Built from Plan(s)
Estimated Cost
$70.00
Estimated Time Investment
Day Project (6-9 Hours)
Finish Used
Walnut stain
Recommended Skill Level
Beginner

Comments

Sheri-L

Thu, 02/20/2020 - 11:04

This project is perfect for the beginner. The plans are very simple to follow especially for one that’s never picked up a power tool. I am absolutely hooked. 

My pallet coop and Ana White run

Submitted by Anonymous (not verified) on Mon, 05/30/2016 - 09:44

My husband bulky this coop from pallets and used Ana White's chicken run plans. Took us a weekend to build the run.  

Built from Plan(s)
Estimated Cost
$200
Estimated Time Investment
Weekend Project (10-20 Hours)
Recommended Skill Level
Intermediate

Workbench

Easy to build! Took about 3 hours!

Built from Plan(s)
Estimated Cost
$75
Estimated Time Investment
Afternoon Project (3-6 Hours)
Finish Used
Floor Verathane
Recommended Skill Level
Beginner

Comments

deannaf

Sat, 05/19/2012 - 05:15

This is fantastic, just what I need to build. Would you mind sharing some measurements such as height, width and depth.

Modular Desk System

desk
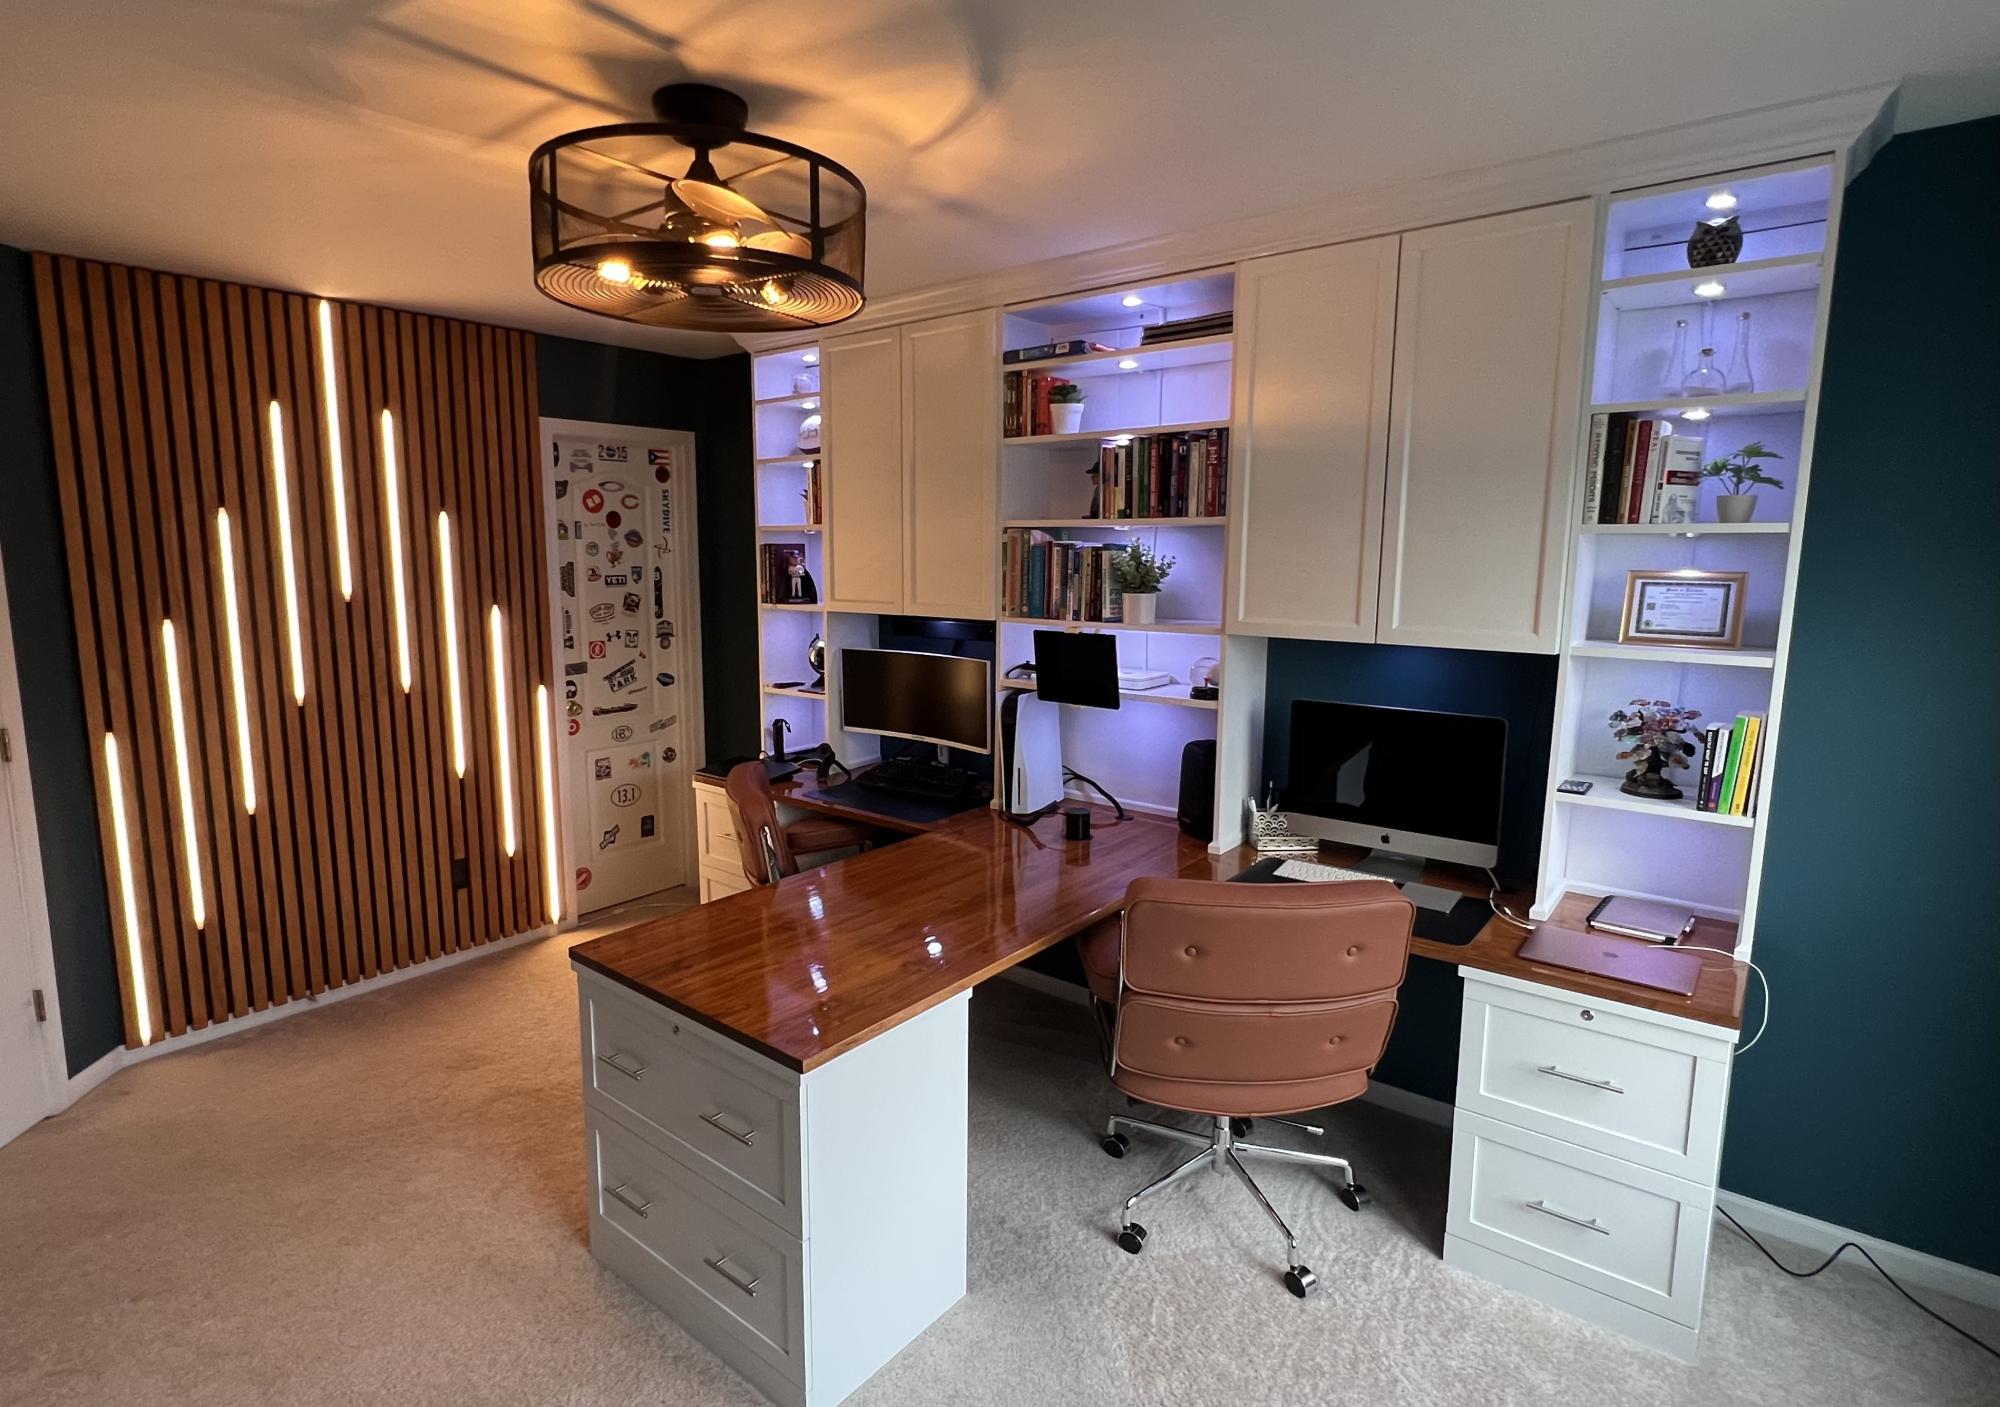
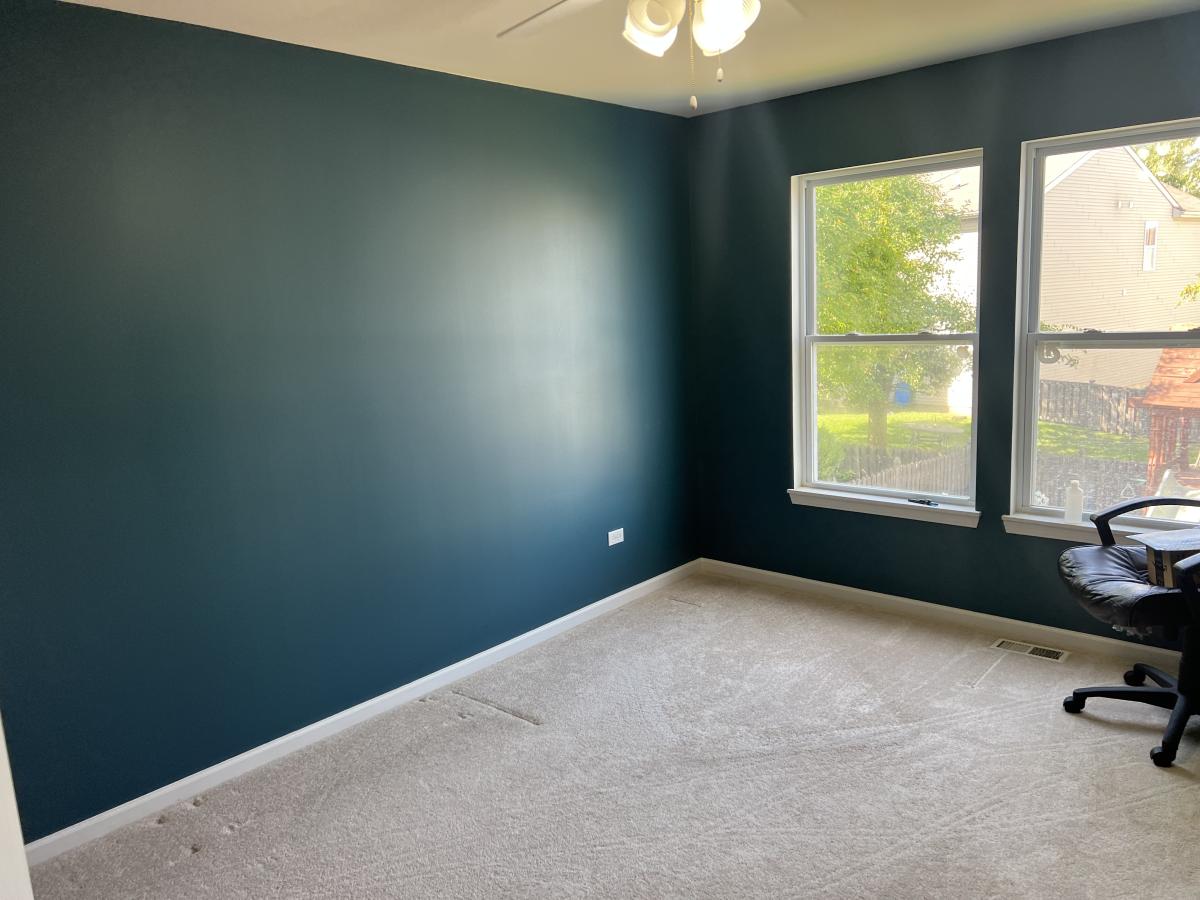
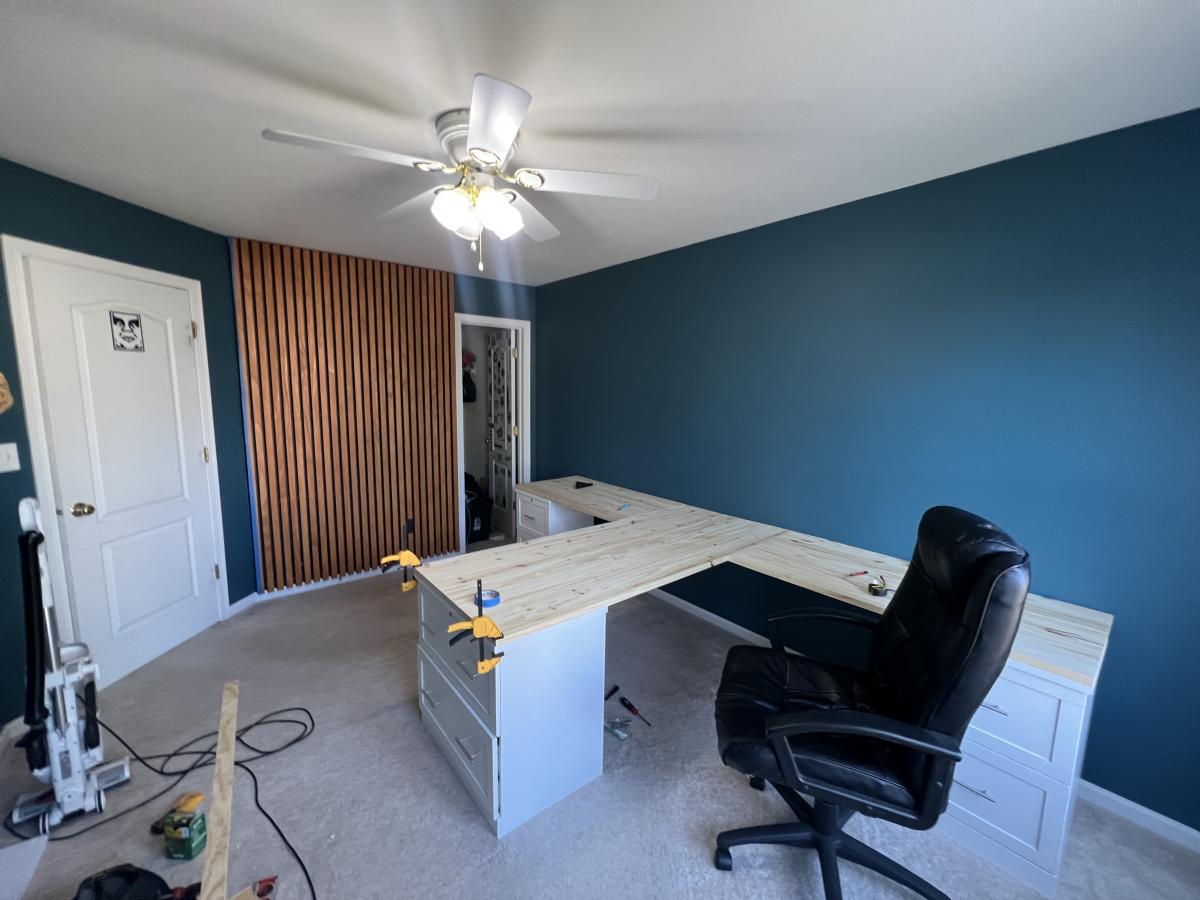
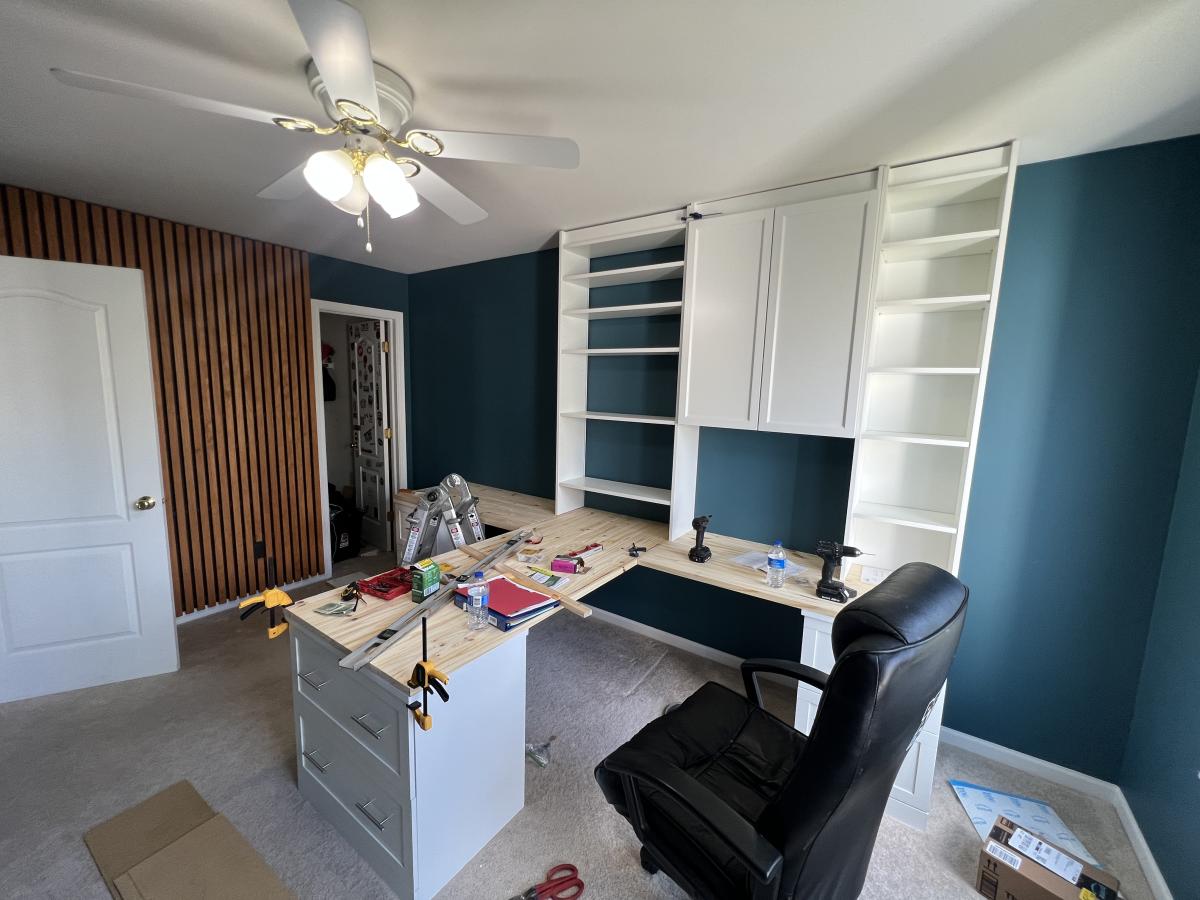
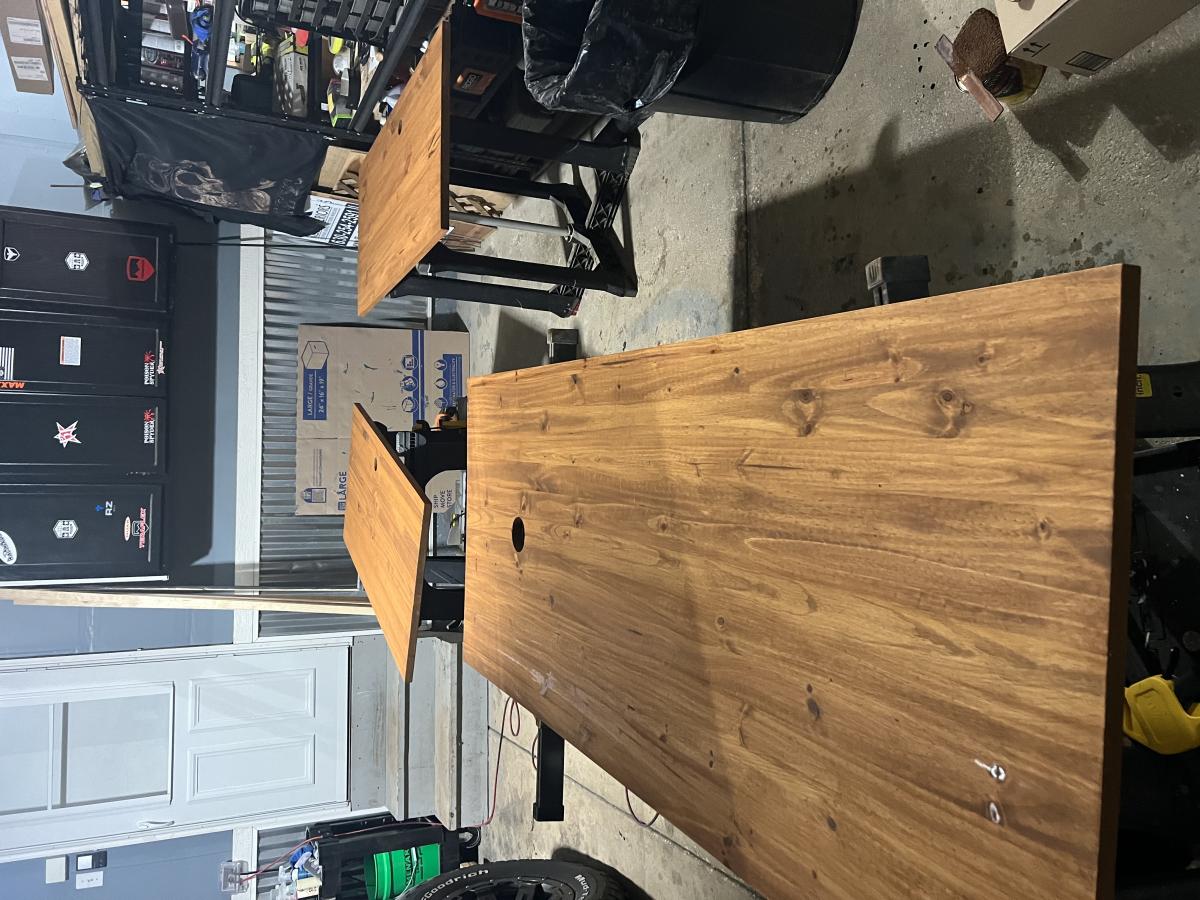
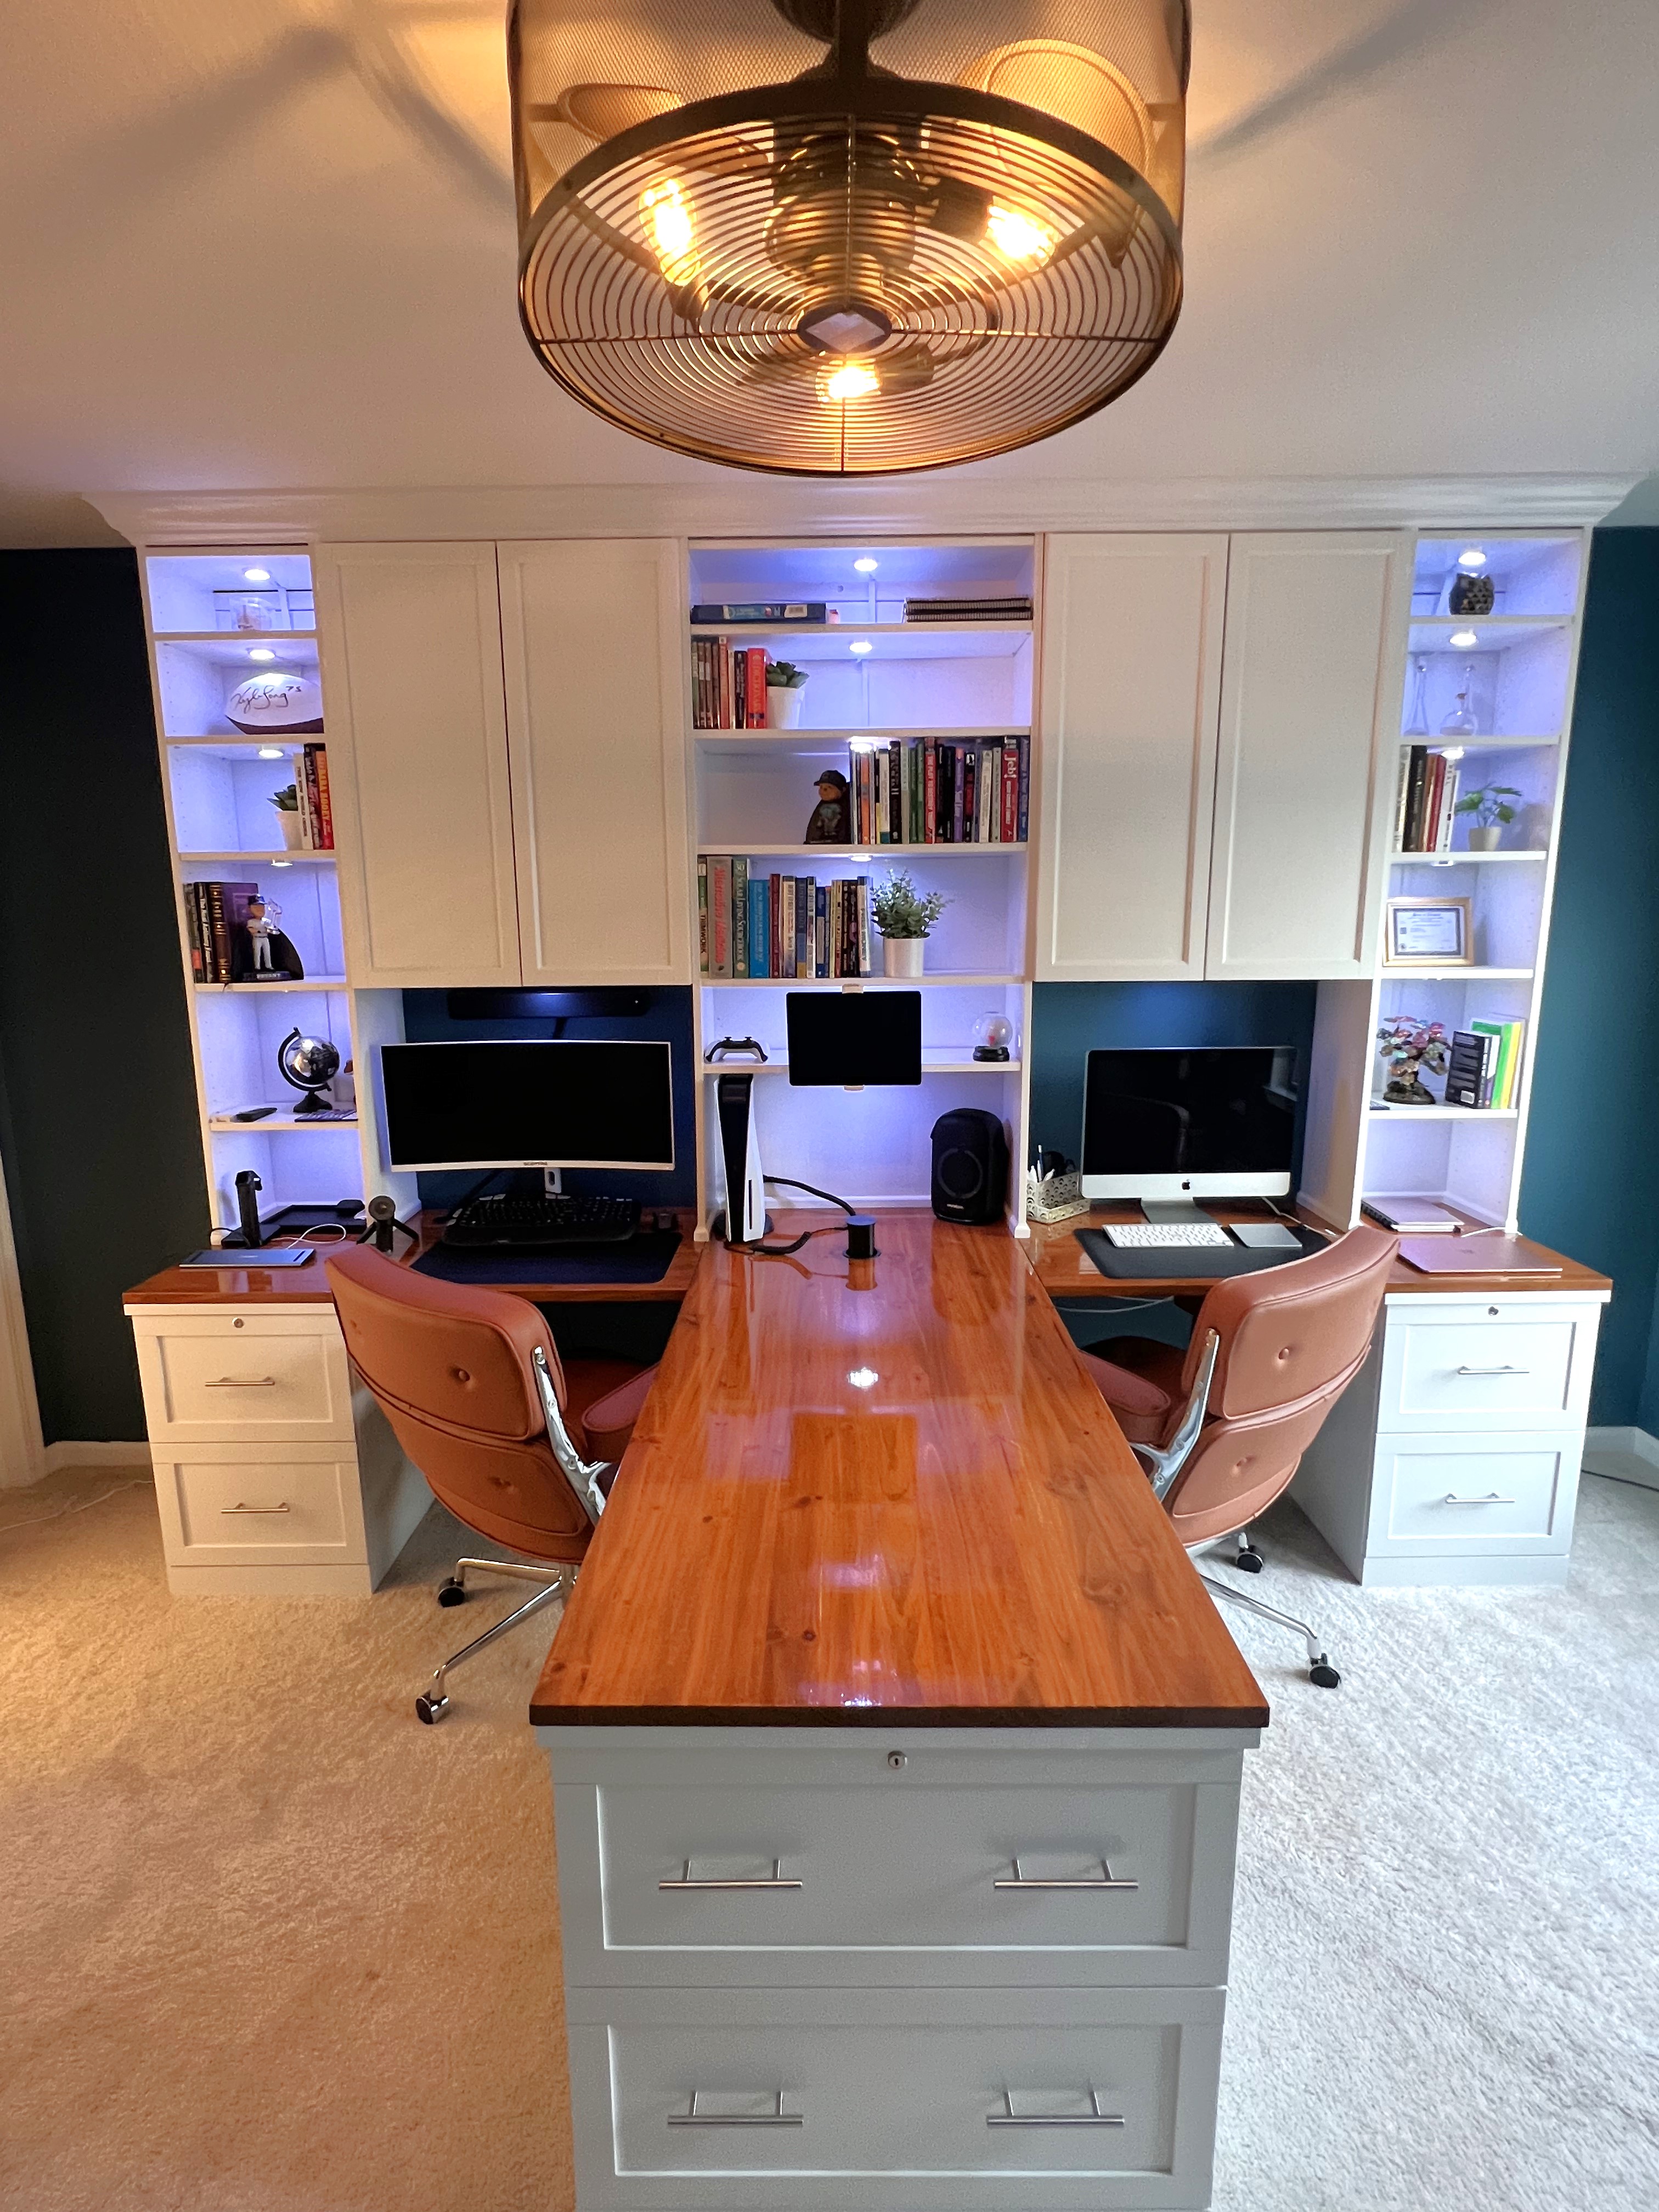
My home office remodel was inspired by a post from Ana White a few years ago. For this project I ended up using IKEA bookshelves and cutting the tops off and flipping them upside down. I used some crown mounding to cover the base of the cabinets on the tops. The desk top bases are file cabinets I found at the office supply store and the desk tops are edge glue pine. Overall I think I only had to make 8 cuts for the entire project. Saving me a ton of time and money. Thank you Ana for all of the wonderful post!
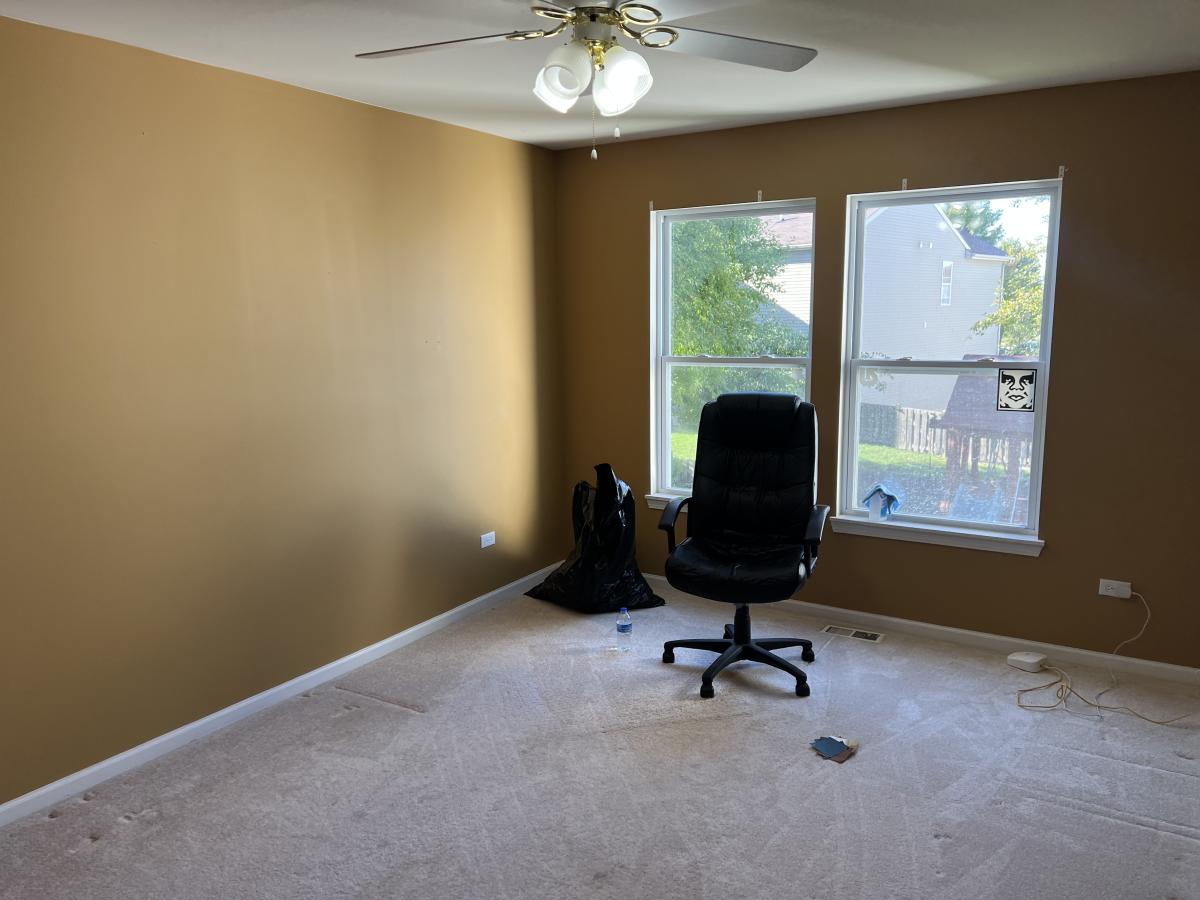
Mark Danreiter on Facebook

Red Chicken Coop

Submitted by Anonymous (not verified) on Tue, 12/19/2023 - 16:59

Ana, I want to say how inspirational you have been to me over some years. I think my first project found on your website was a chicken coop. More recently I have built the large garage workbench system with 2 rollout workbench/storage units (still in progress). In the past few weeks I have built the Adirondack chairs. The Adirondack chairs spurred me to continue building a “park like” setting in my small backyard. This includes a park bench (to match the Adirondack chairs), a park style grill, and a water fall. The waterfall is fairly simple (now that I have done it once - ha).

Ken Moody - Babcock Ranch, Florida

Modern Chairs, Modern Loveseat, and the 2x4 Outdoor Coffee Table

Submitted by Anonymous (not verified) on Wed, 04/29/2020 - 19:58

I took this opportunity while quarantined to make this set. I think it came out really beautifully!

Finish Used
Shou sugi ban, Simple Finish by Maker Brand, and Total Boat Halcyon Clear.

I used a blow torch to burn each board. Then I used a wire brush to remove soot, and washed with water and allowed to dry completely. I opted for pocket holes for the chairs and love seat. After assembling, I finished with Simple Finish by Maker Brand ($40/qt), and top coated with Total Boat Clear Halcyon ($32)

Easy 2x4 potting bench

Submitted by Randall on Mon, 05/04/2020 - 11:20

Great easy to follow plans, I cut both front and back legs from one 2x4x8’ by having the back leg 1” shorter than plan. Also bought 1x4x39” slats at less cost than buying the 8’ ones.
Great unit would be perfect for near the BBQ and any place needing storage and work bench

Estimated Cost
$80
Estimated Time Investment
Afternoon Project (3-6 Hours)
Finish Used
Olympia Outdoor wood sealer
Recommended Skill Level
Beginner

Hexagon Picnic Table

Submitted by JohnNH on Tue, 08/02/2016 - 06:20

Thanks for the plans.  My little brother from Big Brothers Big Sisters and I made this table and had lots of fun doing so.  We made a few modifications which might be useful to others:

1.  We modified the center joints (at the lower and table level) so that one 2x4 could continue across the entire diameter of the table for greater strength (see pictures for details).

2.  As recommended we extended the seats out 4".  This made it very comfortable to get in and out.

3.  We started the center with 2 pieces of 2x6 rather than 6 with the thought being that this would help strengthen the center of the table.  (see pictures for details).

4.  We added a stiffener at the center 6-way joint on the lower level to help really strengthen that center joint.  This was made out of 2 pieces of 2x6 as shown in the pictures.


Thanks,

John


Built from Plan(s)
Estimated Cost
$80
Estimated Time Investment
Weekend Project (10-20 Hours)
Finish Used
Semi-transparent Redwood Stain
Recommended Skill Level
Intermediate

Kids Tree Fort

Submitted by Anonymous (not verified) on Sun, 05/31/2020 - 09:27

Built a fort for the boys with two climbing walls, a spot for their toys, and added some hammock swings

Estimated Cost
~$600
Estimated Time Investment
Week Long Project (20 Hours or More)
Finish Used
No stain, left natural
Recommended Skill Level
Advanced
Back