Community Brag Posts
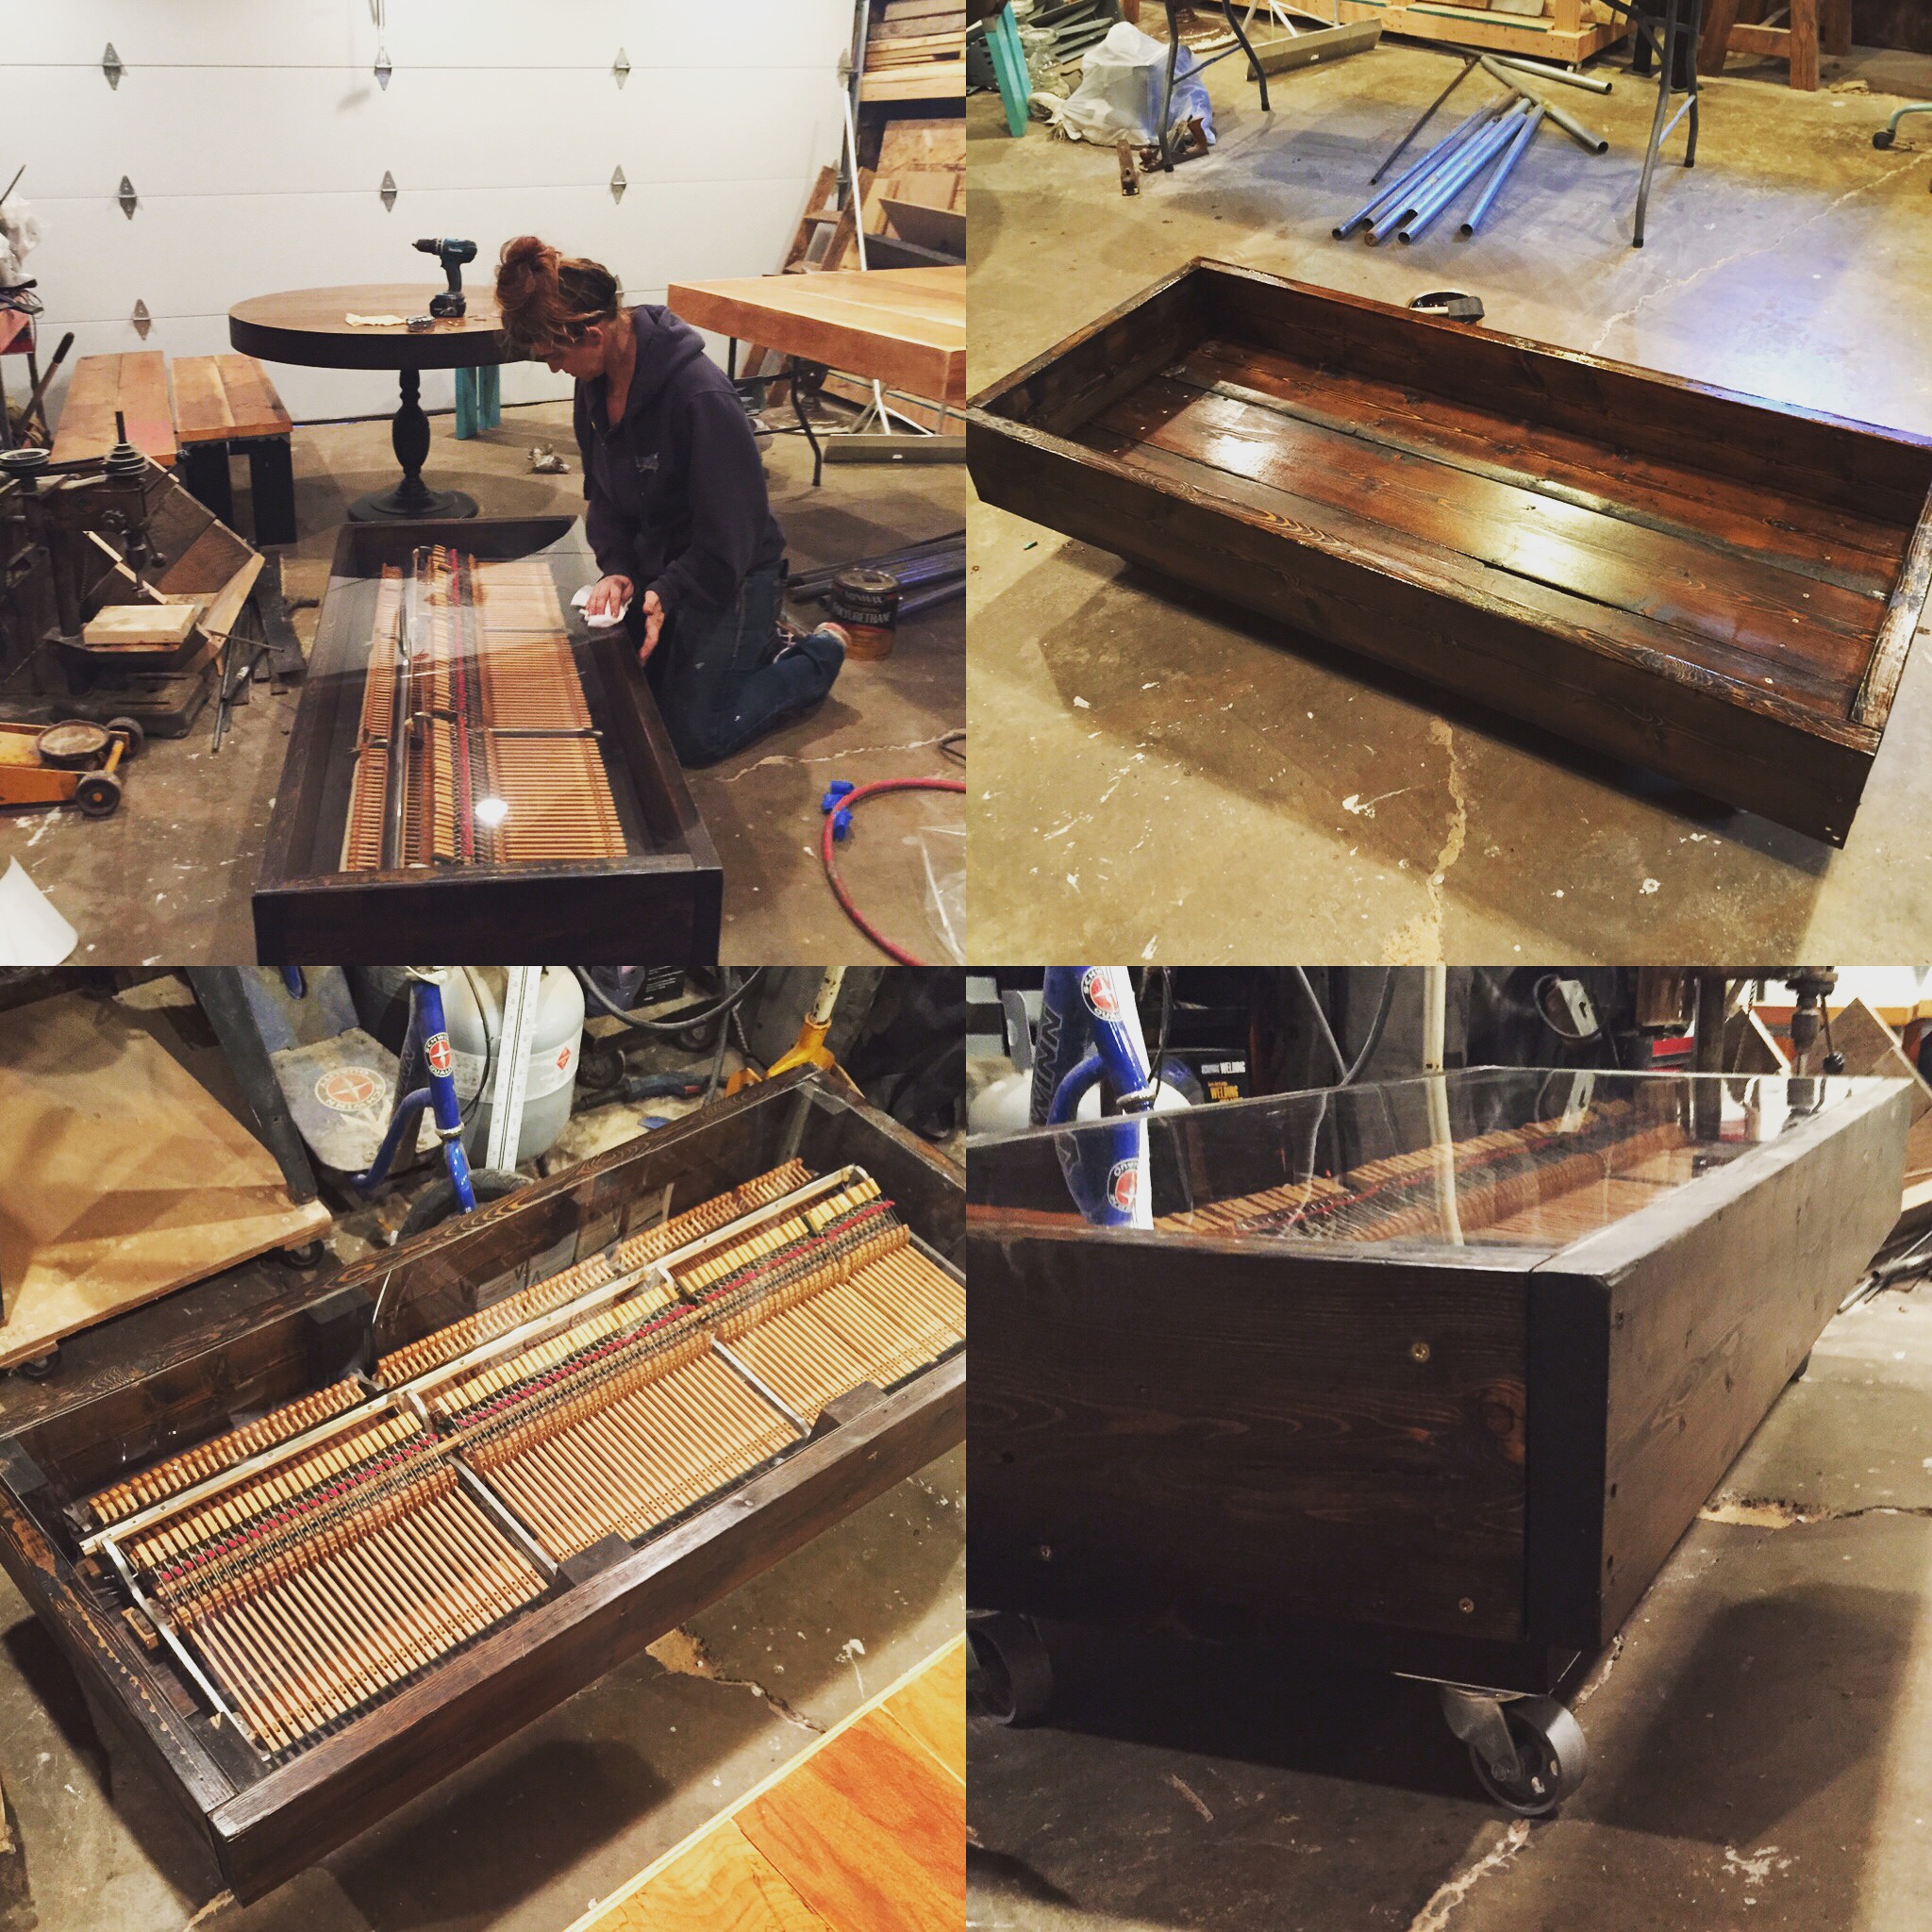
Re-purposed Piano Coffee Table
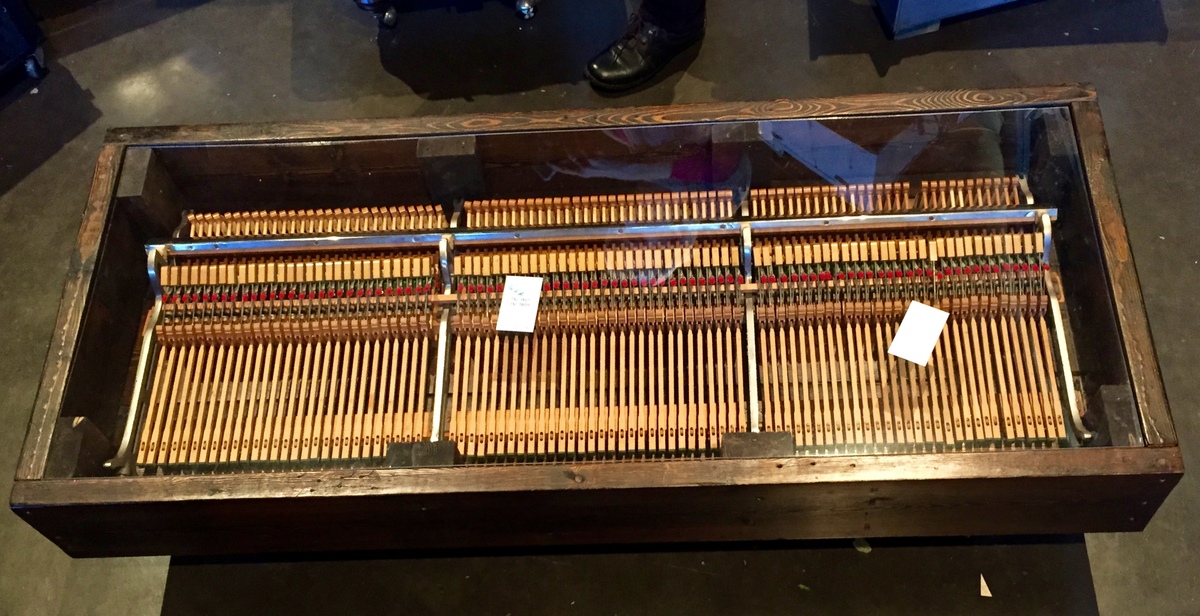
I inherited the guts of a piano, and just had to make them into something funtional. I am a musician, and these piano hammers were great inspiration for my next build. I made a box out of 2x8s, braced them with 4x4's (which also added height) and attached some metal 2 1/2 in casters. I set the hammers inside the box, and topped it off with plexiglass. A functional work of art to be enjoyed for generations!
Built from Plan(s)
Estimated Cost
$150
Estimated Time Investment
Day Project (6-9 Hours)
Finish Used
Stain and Poly
Recommended Skill Level
Intermediate
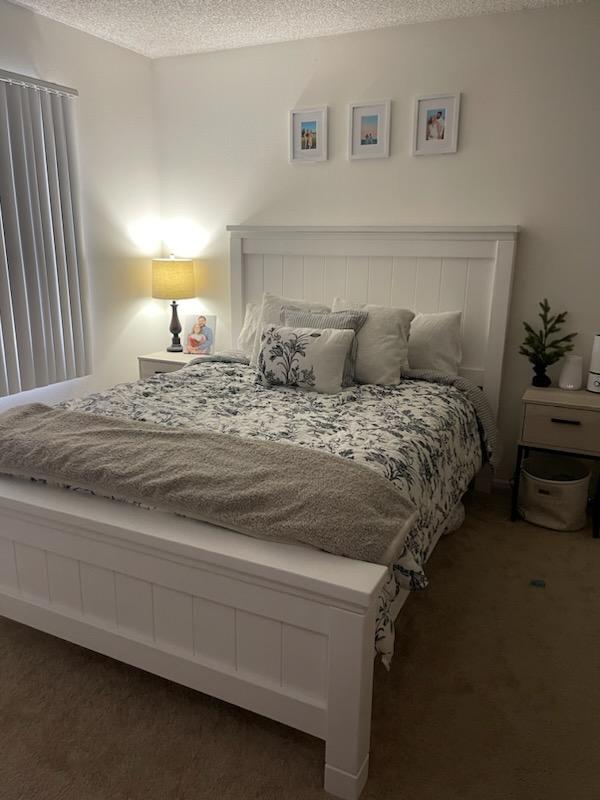
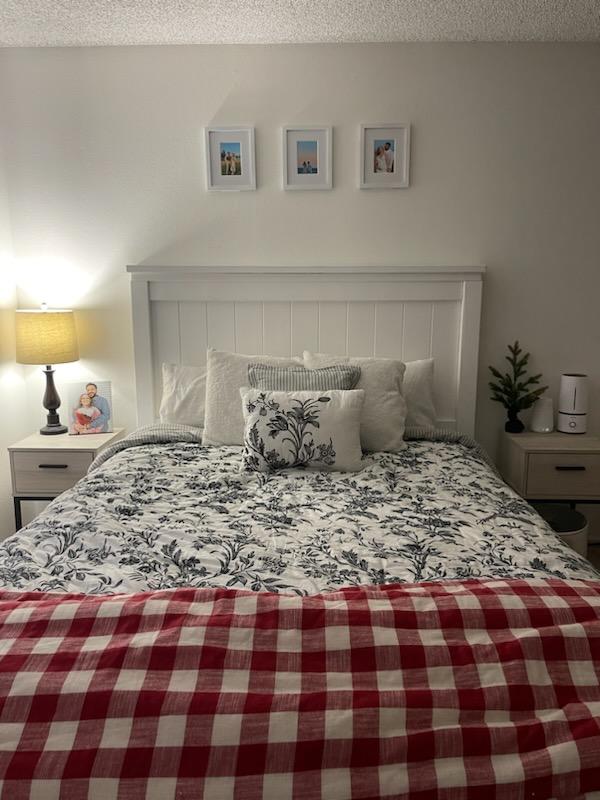
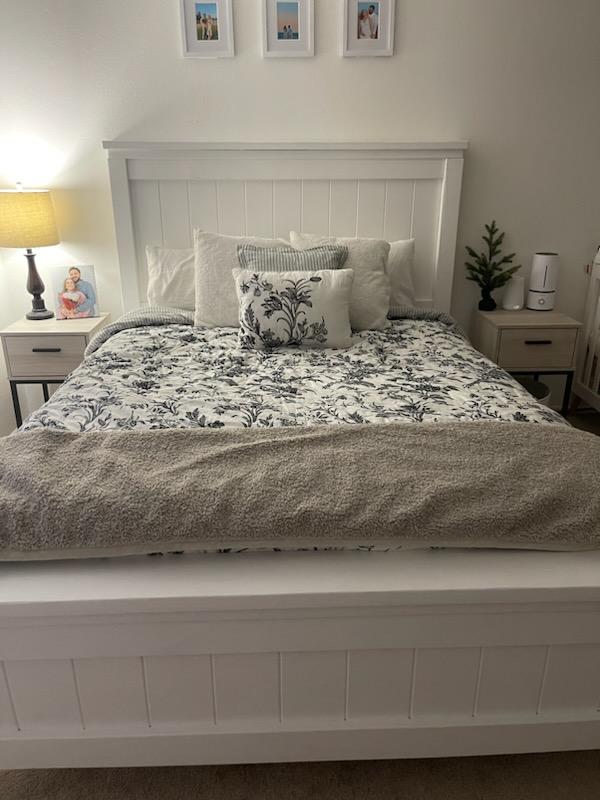
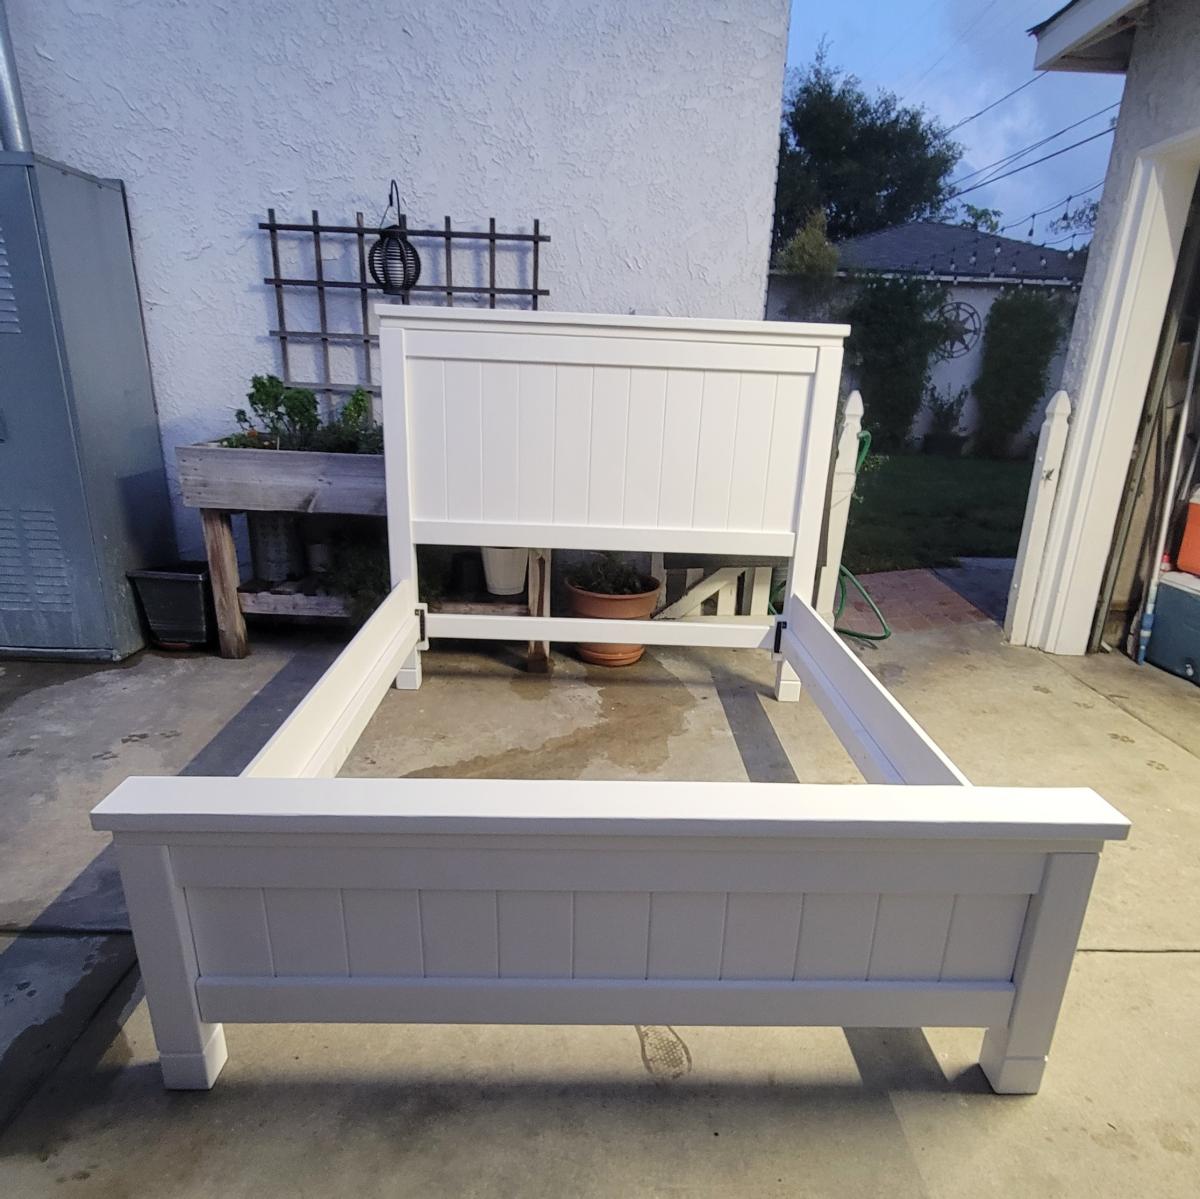
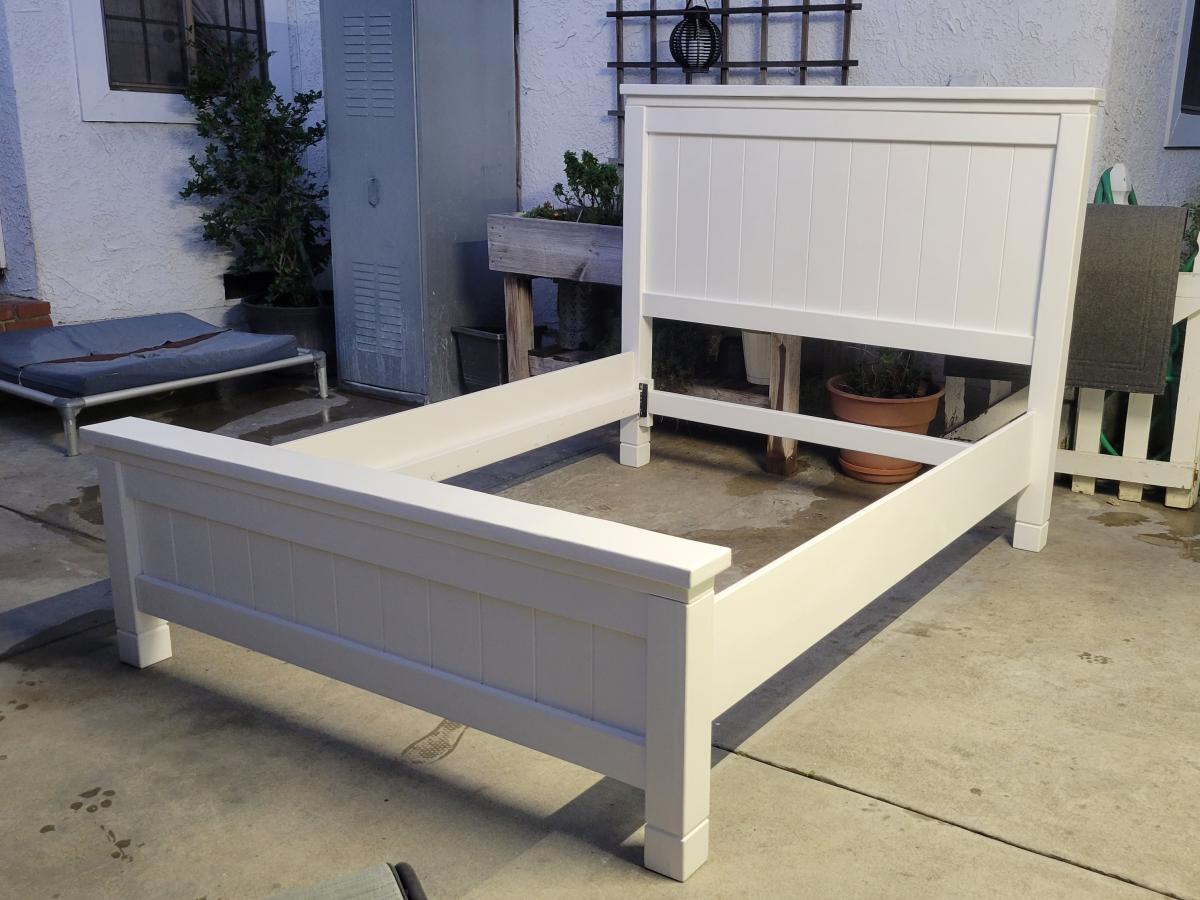
King Farmhouse Bed
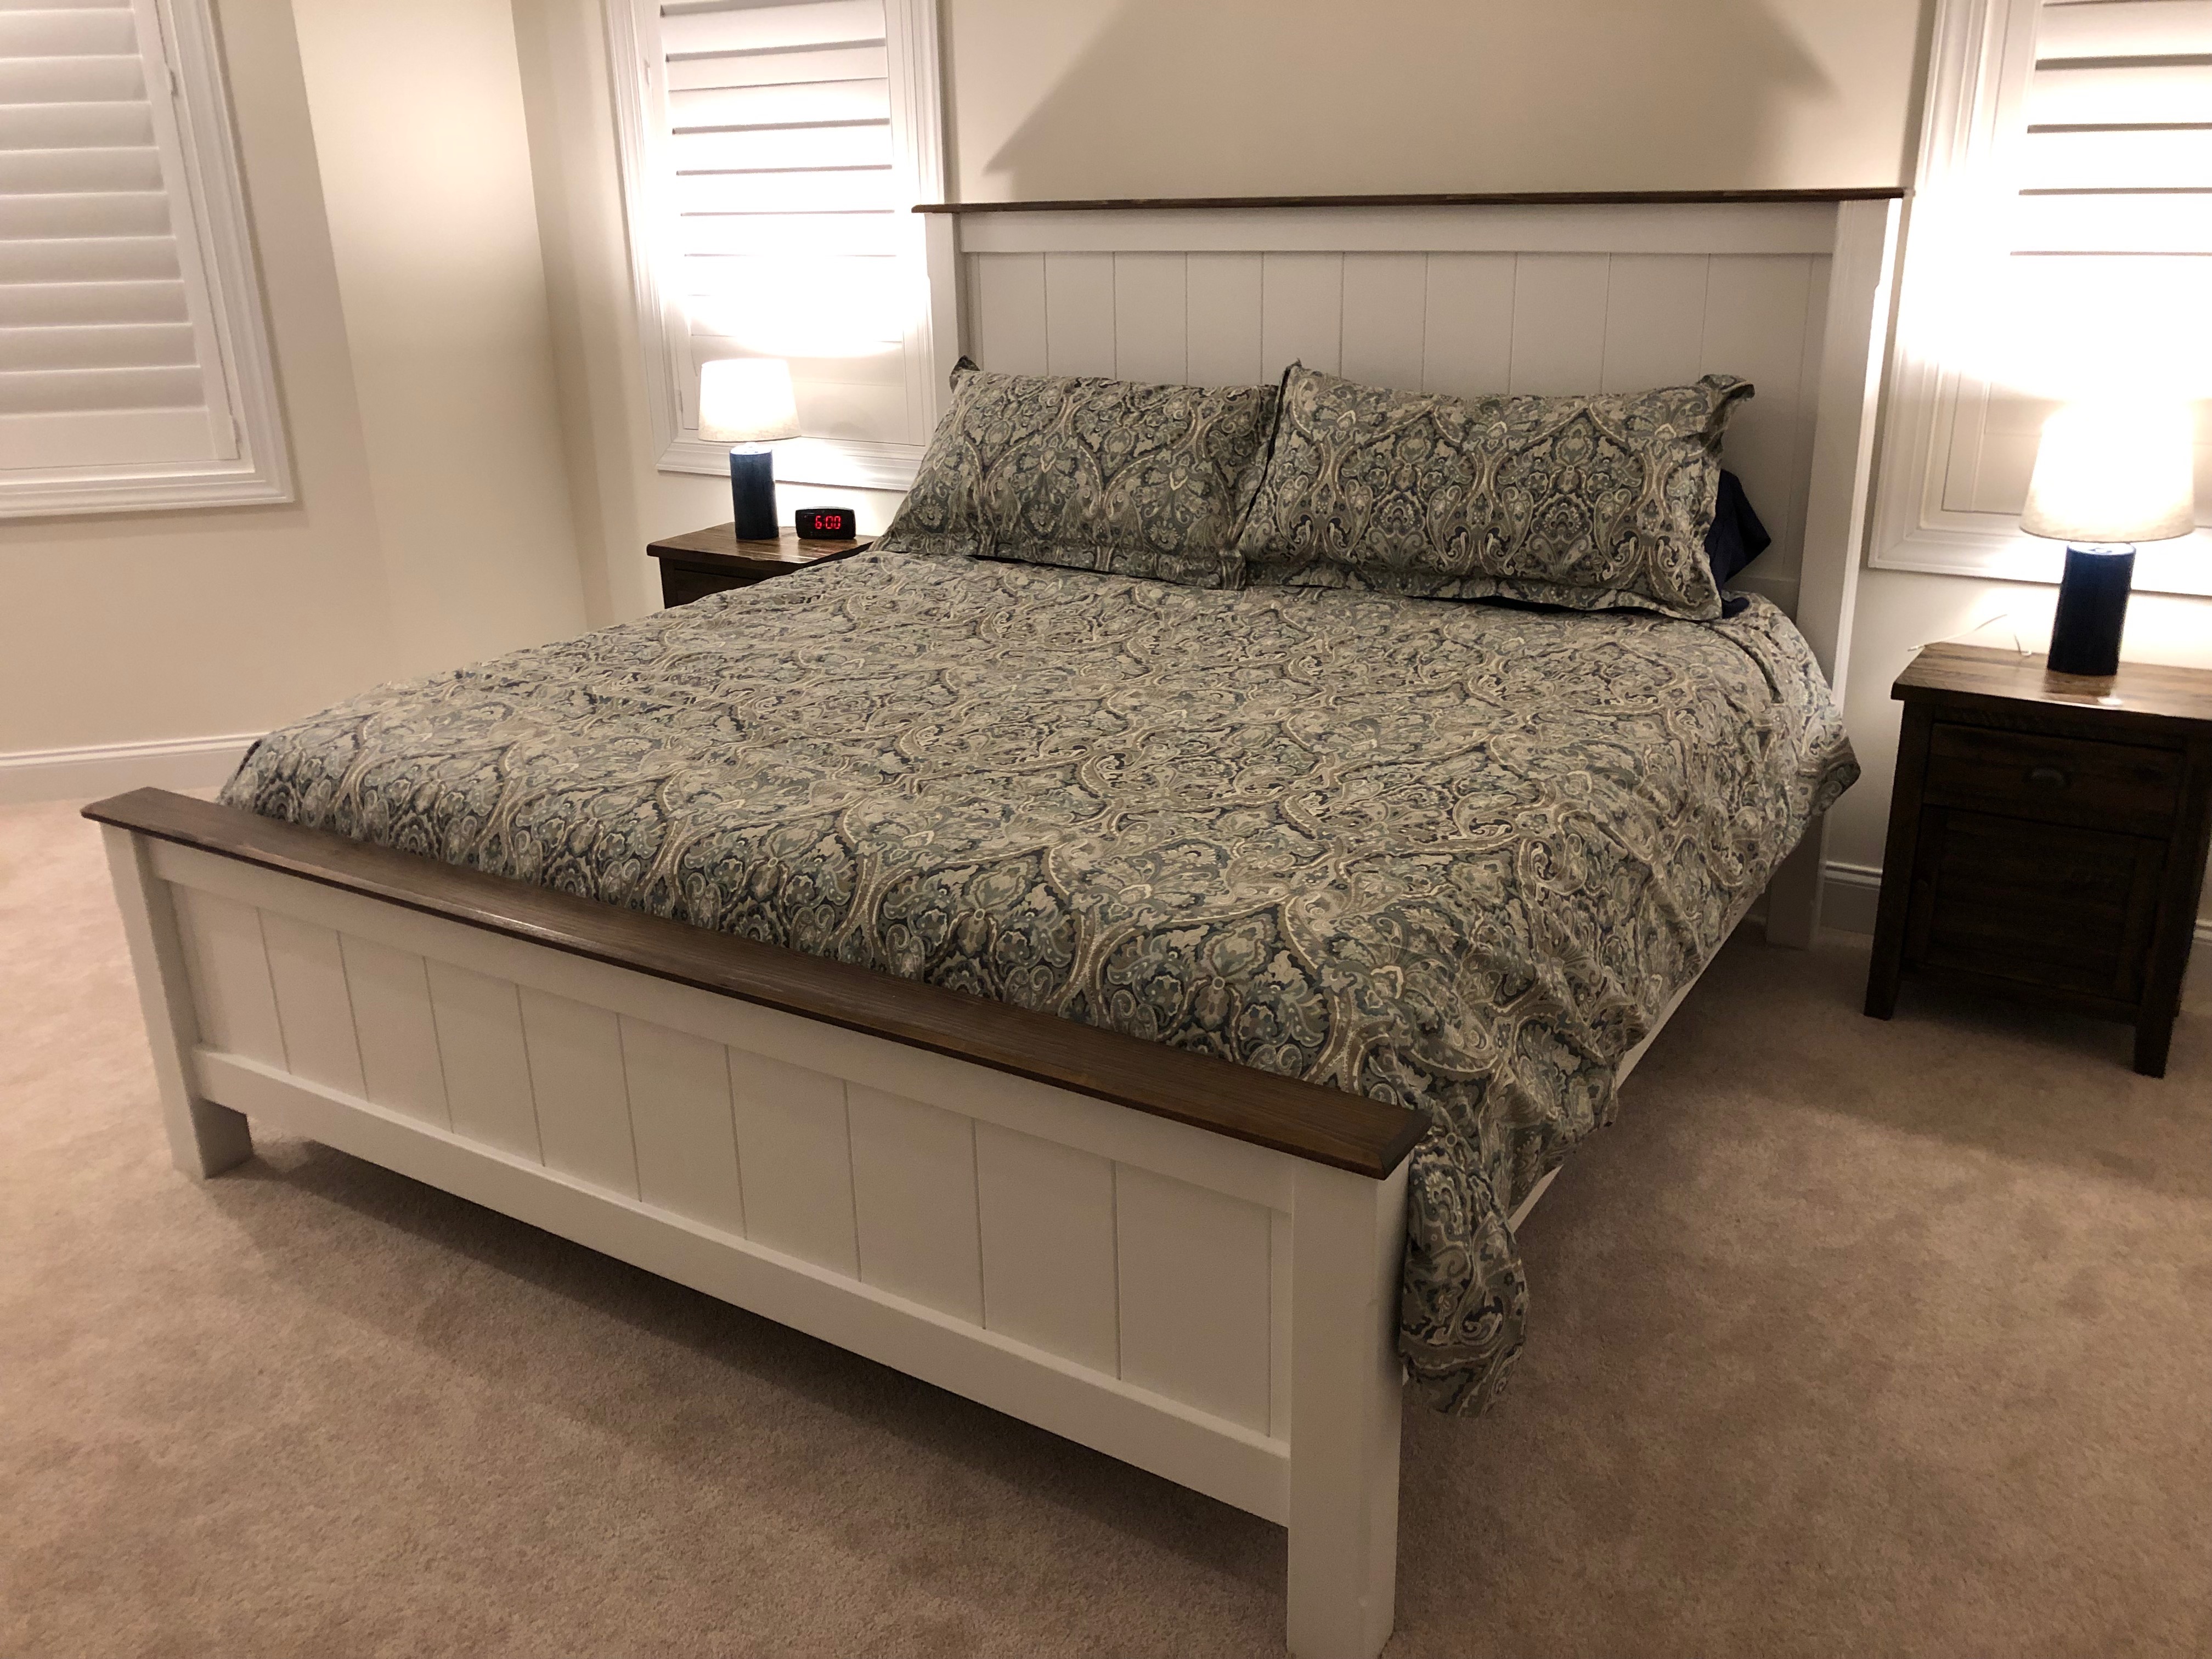
I pretty much followed the original plans. I added a chamfer on the outside corners of the posts and on the top boards on the head and foot boards. I also stained these to match the nightstands. Since I used a foam mattress, i built a platform by gluing/screwing a 2x4 inside the side rails. Then I set 1x6s on the 2x4 to support the mattress.
I use the free version of Sketchup to design the bed and estimate materials needed.
Lessons learned
- Take extra time to figure out how to connect the side rails to the head and foot boards. I thought i could use a sliding lock but this wouldn't work for my design. I improvised using 3x7 tie plates and screwed the two components together. For the headboard, I lined the 2x4 with the inside headboard post. For the footboard, I bent the tie plate 90 degrees and screwed the 2x4 to the footboard. It worked very well.
- I would recommend chamfering the outside top of the side rails. I didn't and my wife complains that she bumps her shins on it.
- Top boards are 1x5s, which in my are are only sold at home depot. The other wood is readily available.
It's not that difficult of a project. It is time consuming, though.
Estimated Cost
About $150
Estimated Time Investment
Week Long Project (20 Hours or More)
Finish Used
Latex semi-gloss enamel for everything except the top boards which were stained and polyurethaned.
Recommended Skill Level
Beginner
Comments
Fri, 10/16/2020 - 13:48
Love this look.
I love the look of your version. Do you have the SketchUp file anywhere that I can download? I would really like to make this version as I love your proportions and the color scheme.
Under Bed Train Table
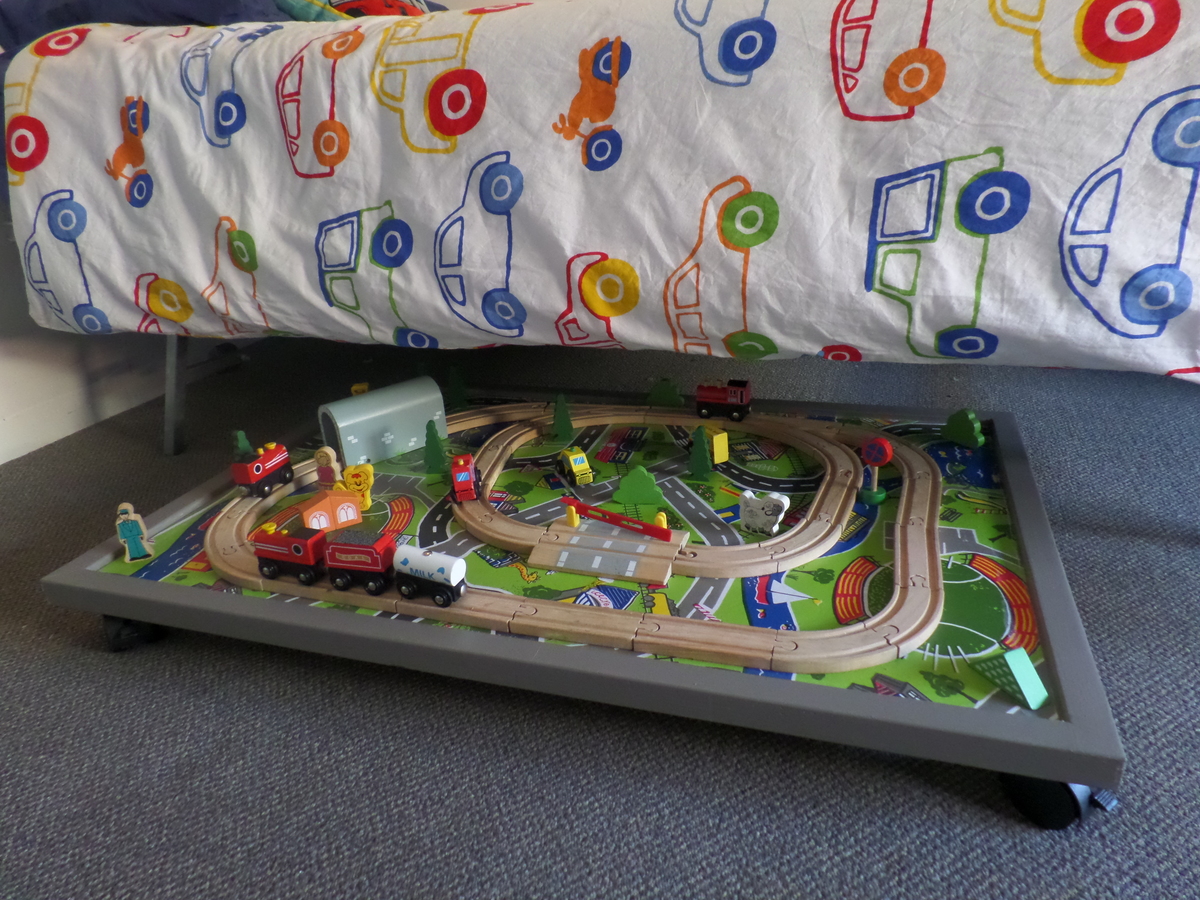
I actually made this before I came across your plans! My son loves it and i love that he can 'play and roll away!'

Built from Plan(s)
Estimated Time Investment
An Hour or Two (0-2 Hours)
Finish Used
paint, pvc road map, caster wheels
Recommended Skill Level
Starter Project
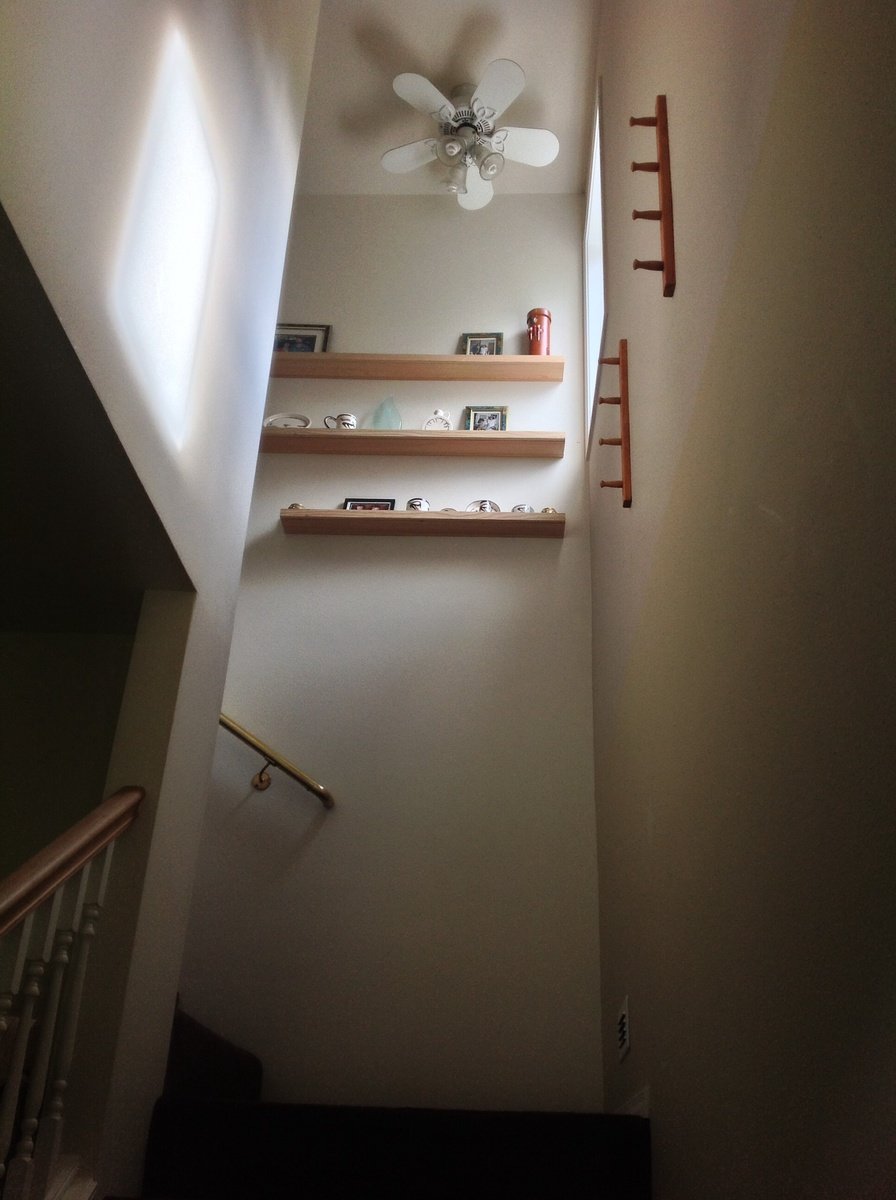
Ten dollar ledges
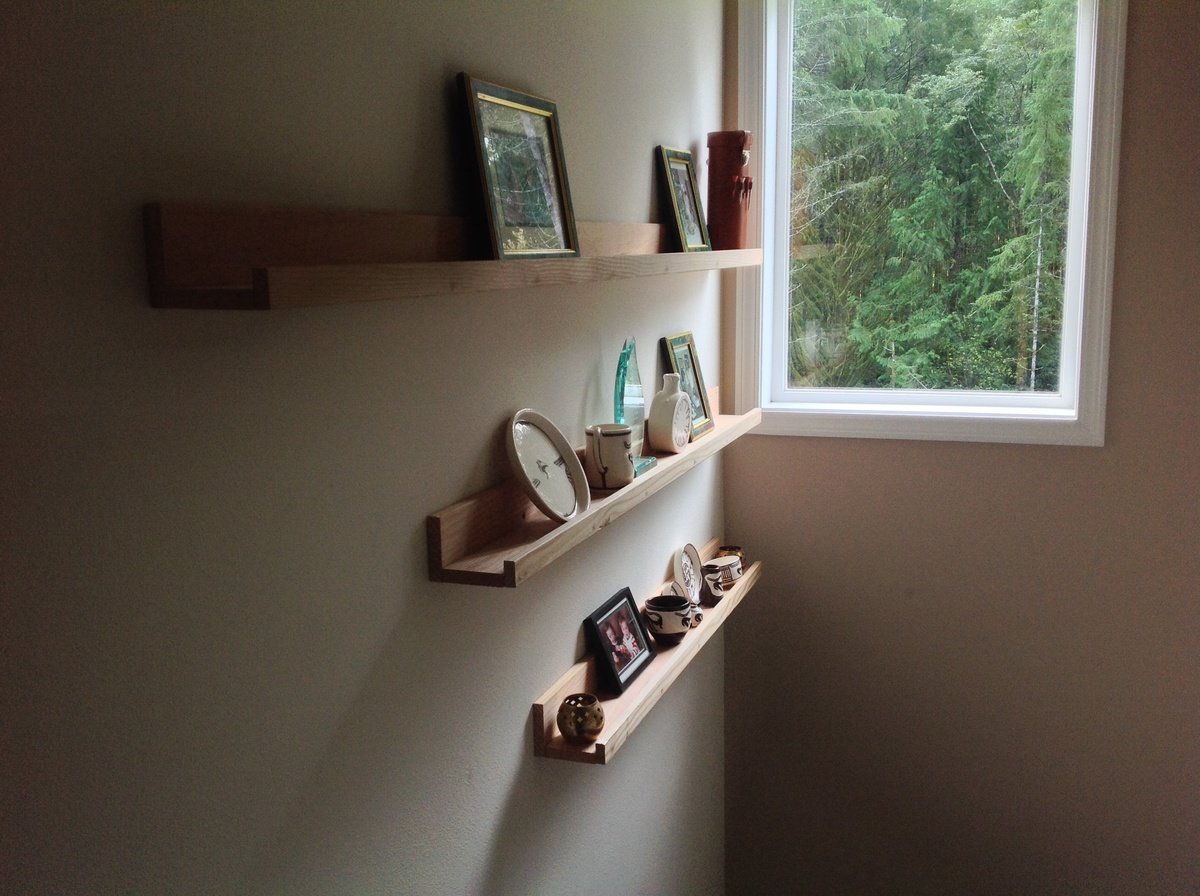
Built three 10 dollar ledges of fir for a tall, awkward area over our stairs. 3.5, 4.5, and 6 feet long. Looks great and finally can make use of that space. I initially bought red oak but decided it was too heavy (and too expensive at $90). Still need to putty the screw holes.

Built from Plan(s)
Estimated Time Investment
Afternoon Project (3-6 Hours)
Finish Used
None. I like bare wood.
Recommended Skill Level
Starter Project
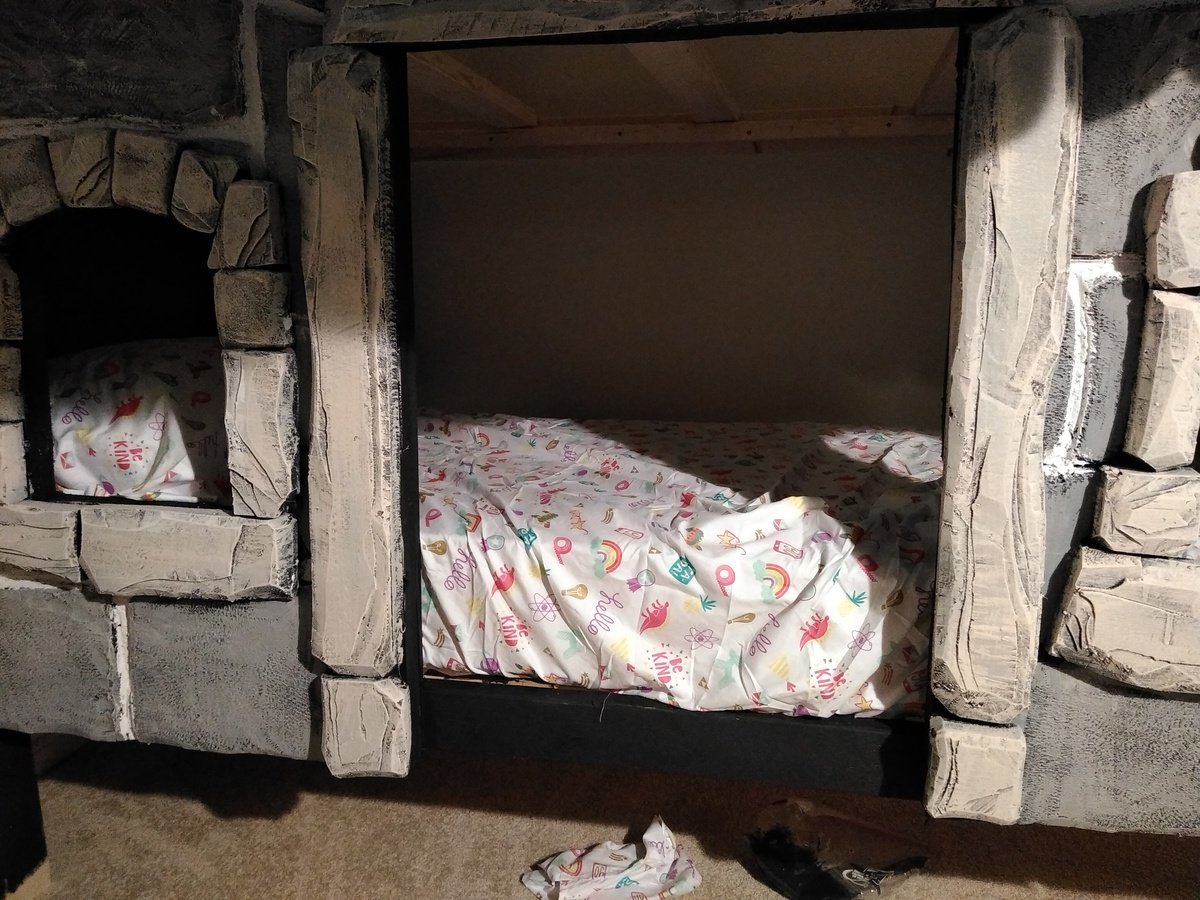
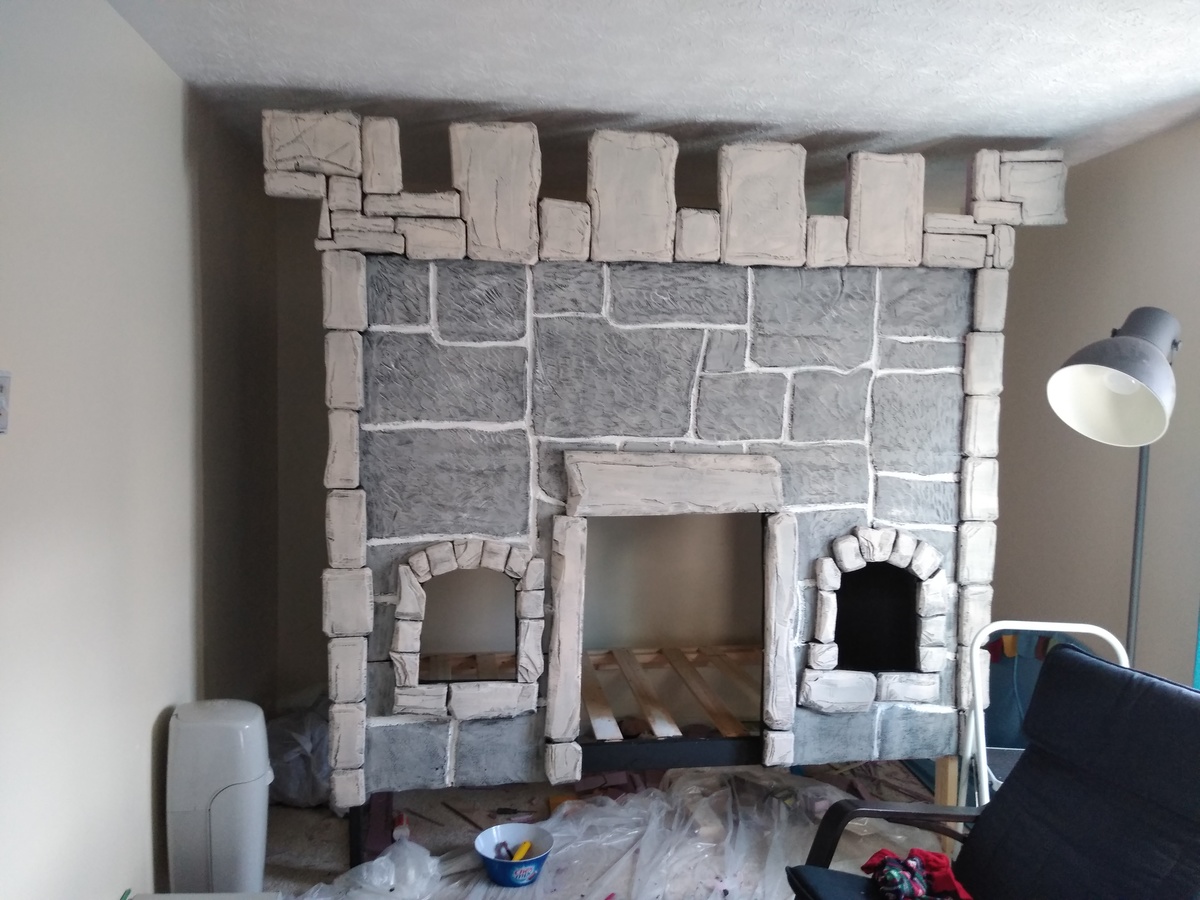
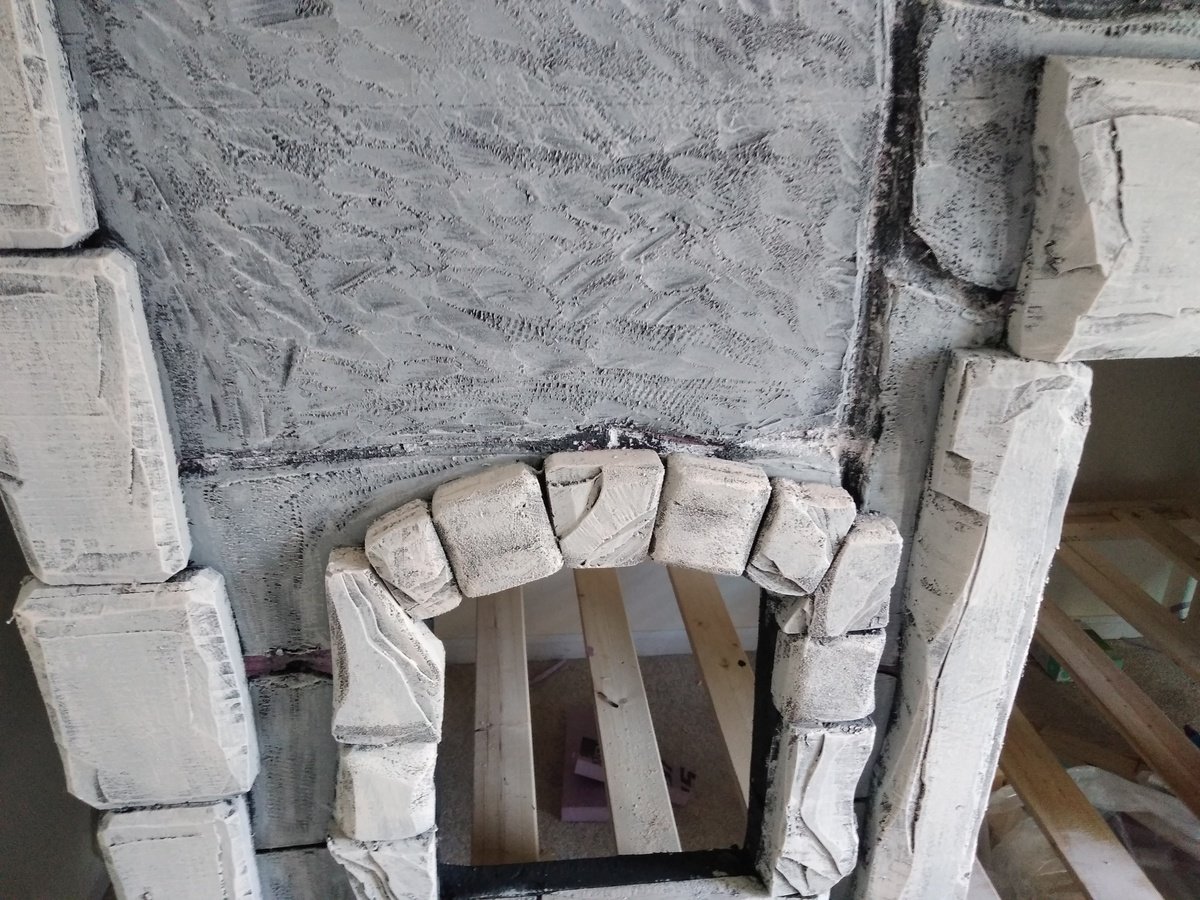
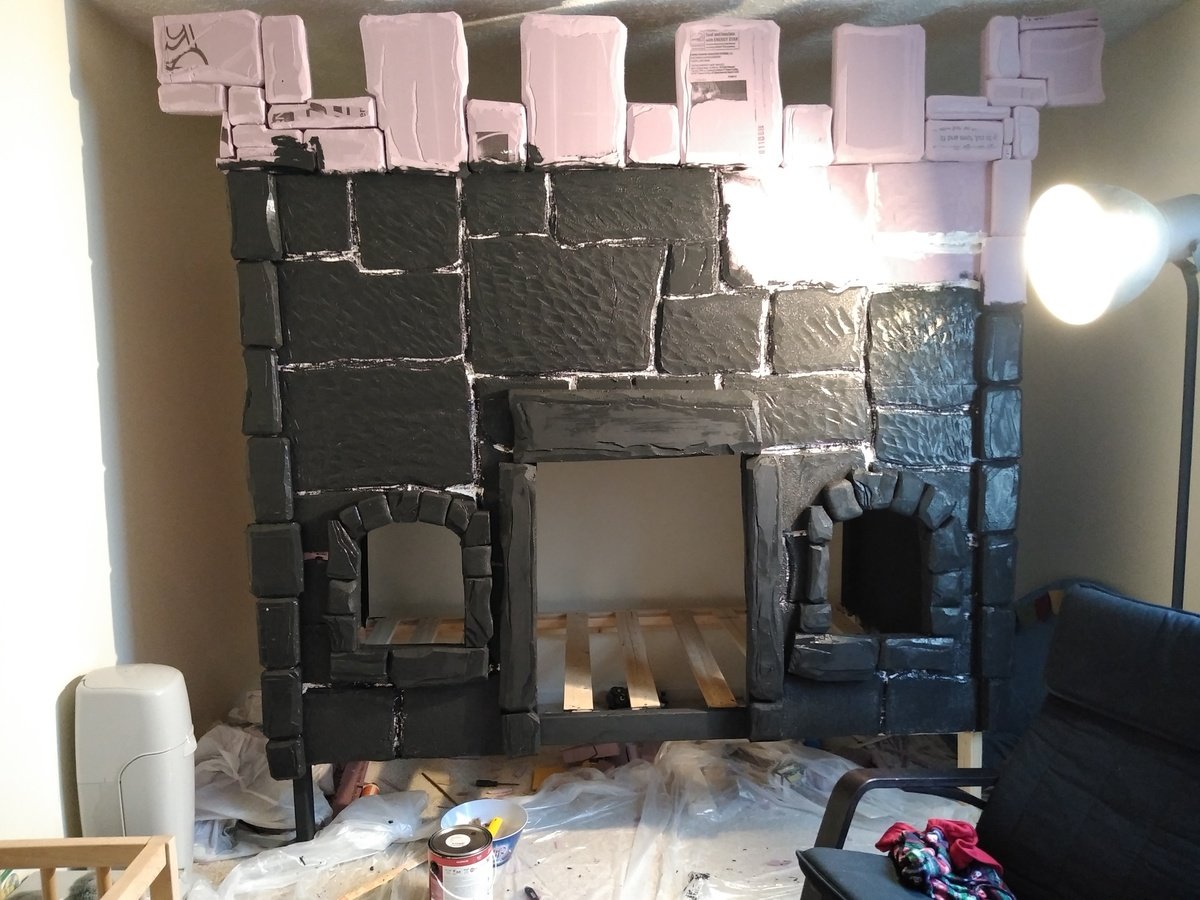
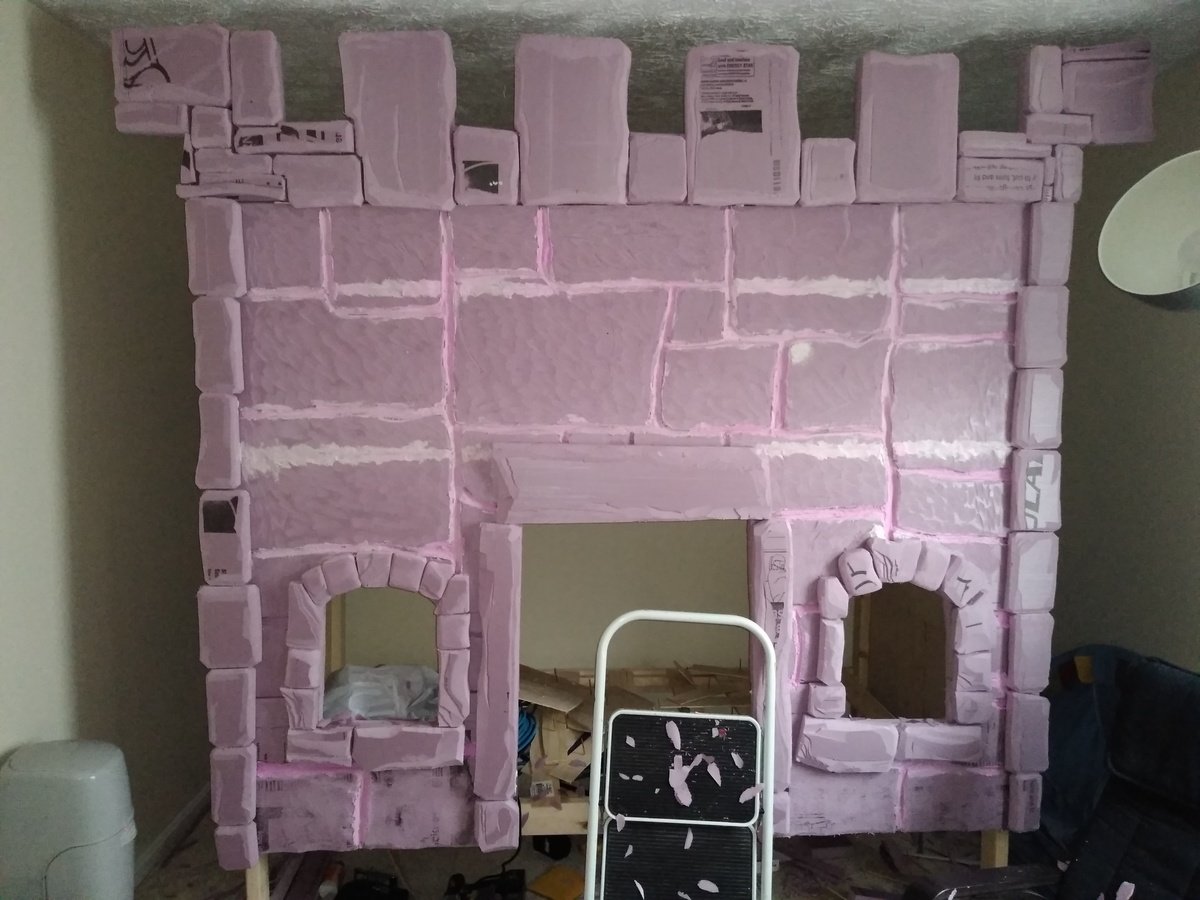
Sweet Pea Bunk Bed turned Castle Bunk Bed
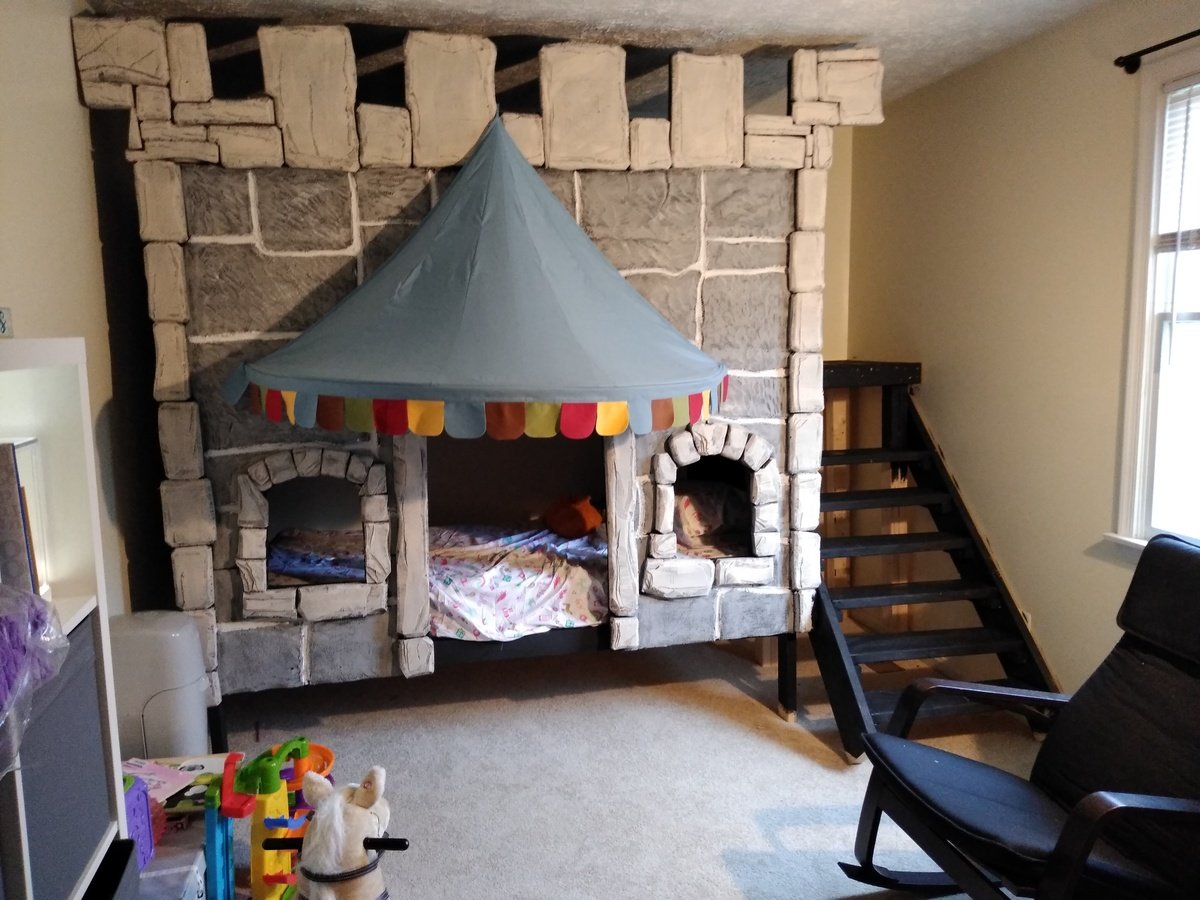
Used the frame portion of the plans and the window/door layout, skinned in plywood, then skinned in insulating foam board, carved and sculpted to look like stone. Then painted with a combo of 5 different colors. My daughter loves it.
Built from Plan(s)
Estimated Cost
$500
Estimated Time Investment
Week Long Project (20 Hours or More)
Finish Used
Dry brushed laytex paint on foam board
Recommended Skill Level
Advanced
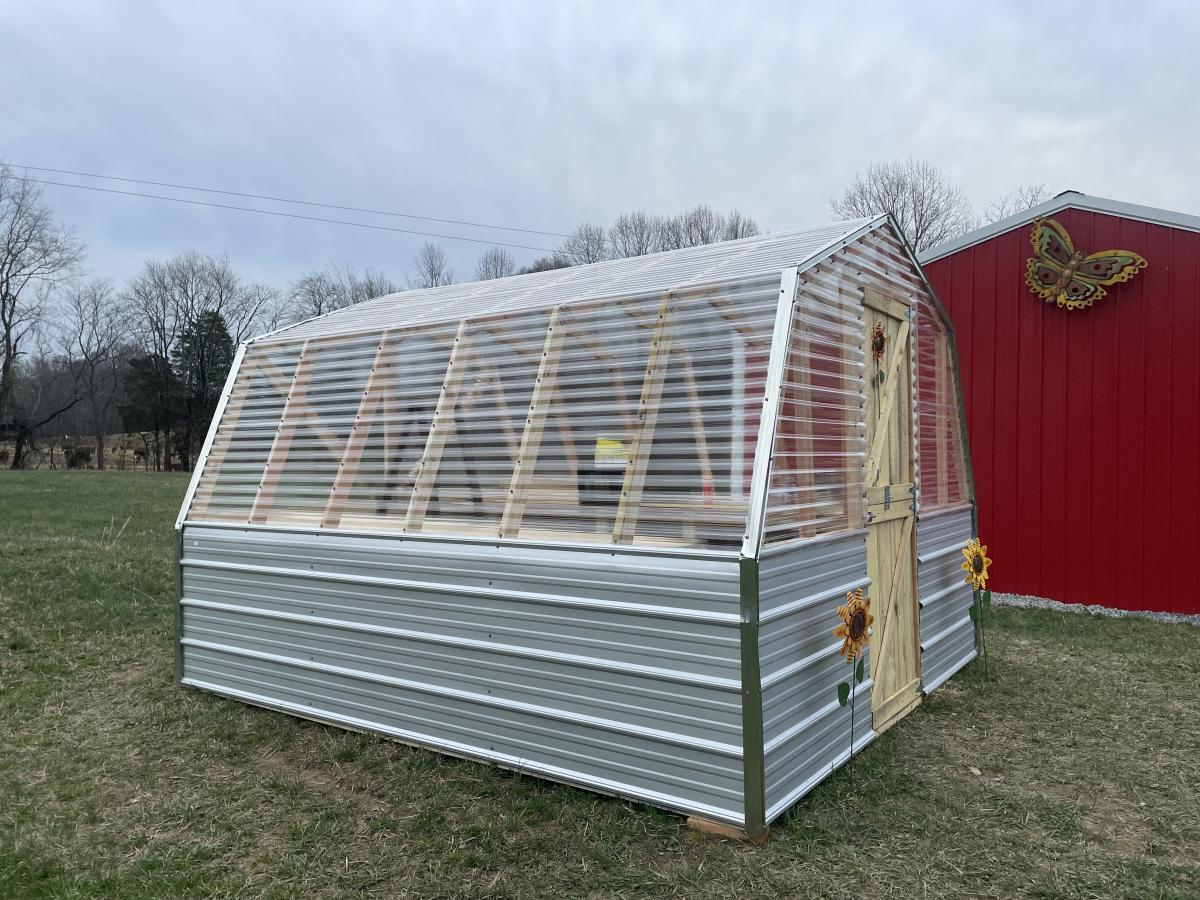
DIY Greenhouse
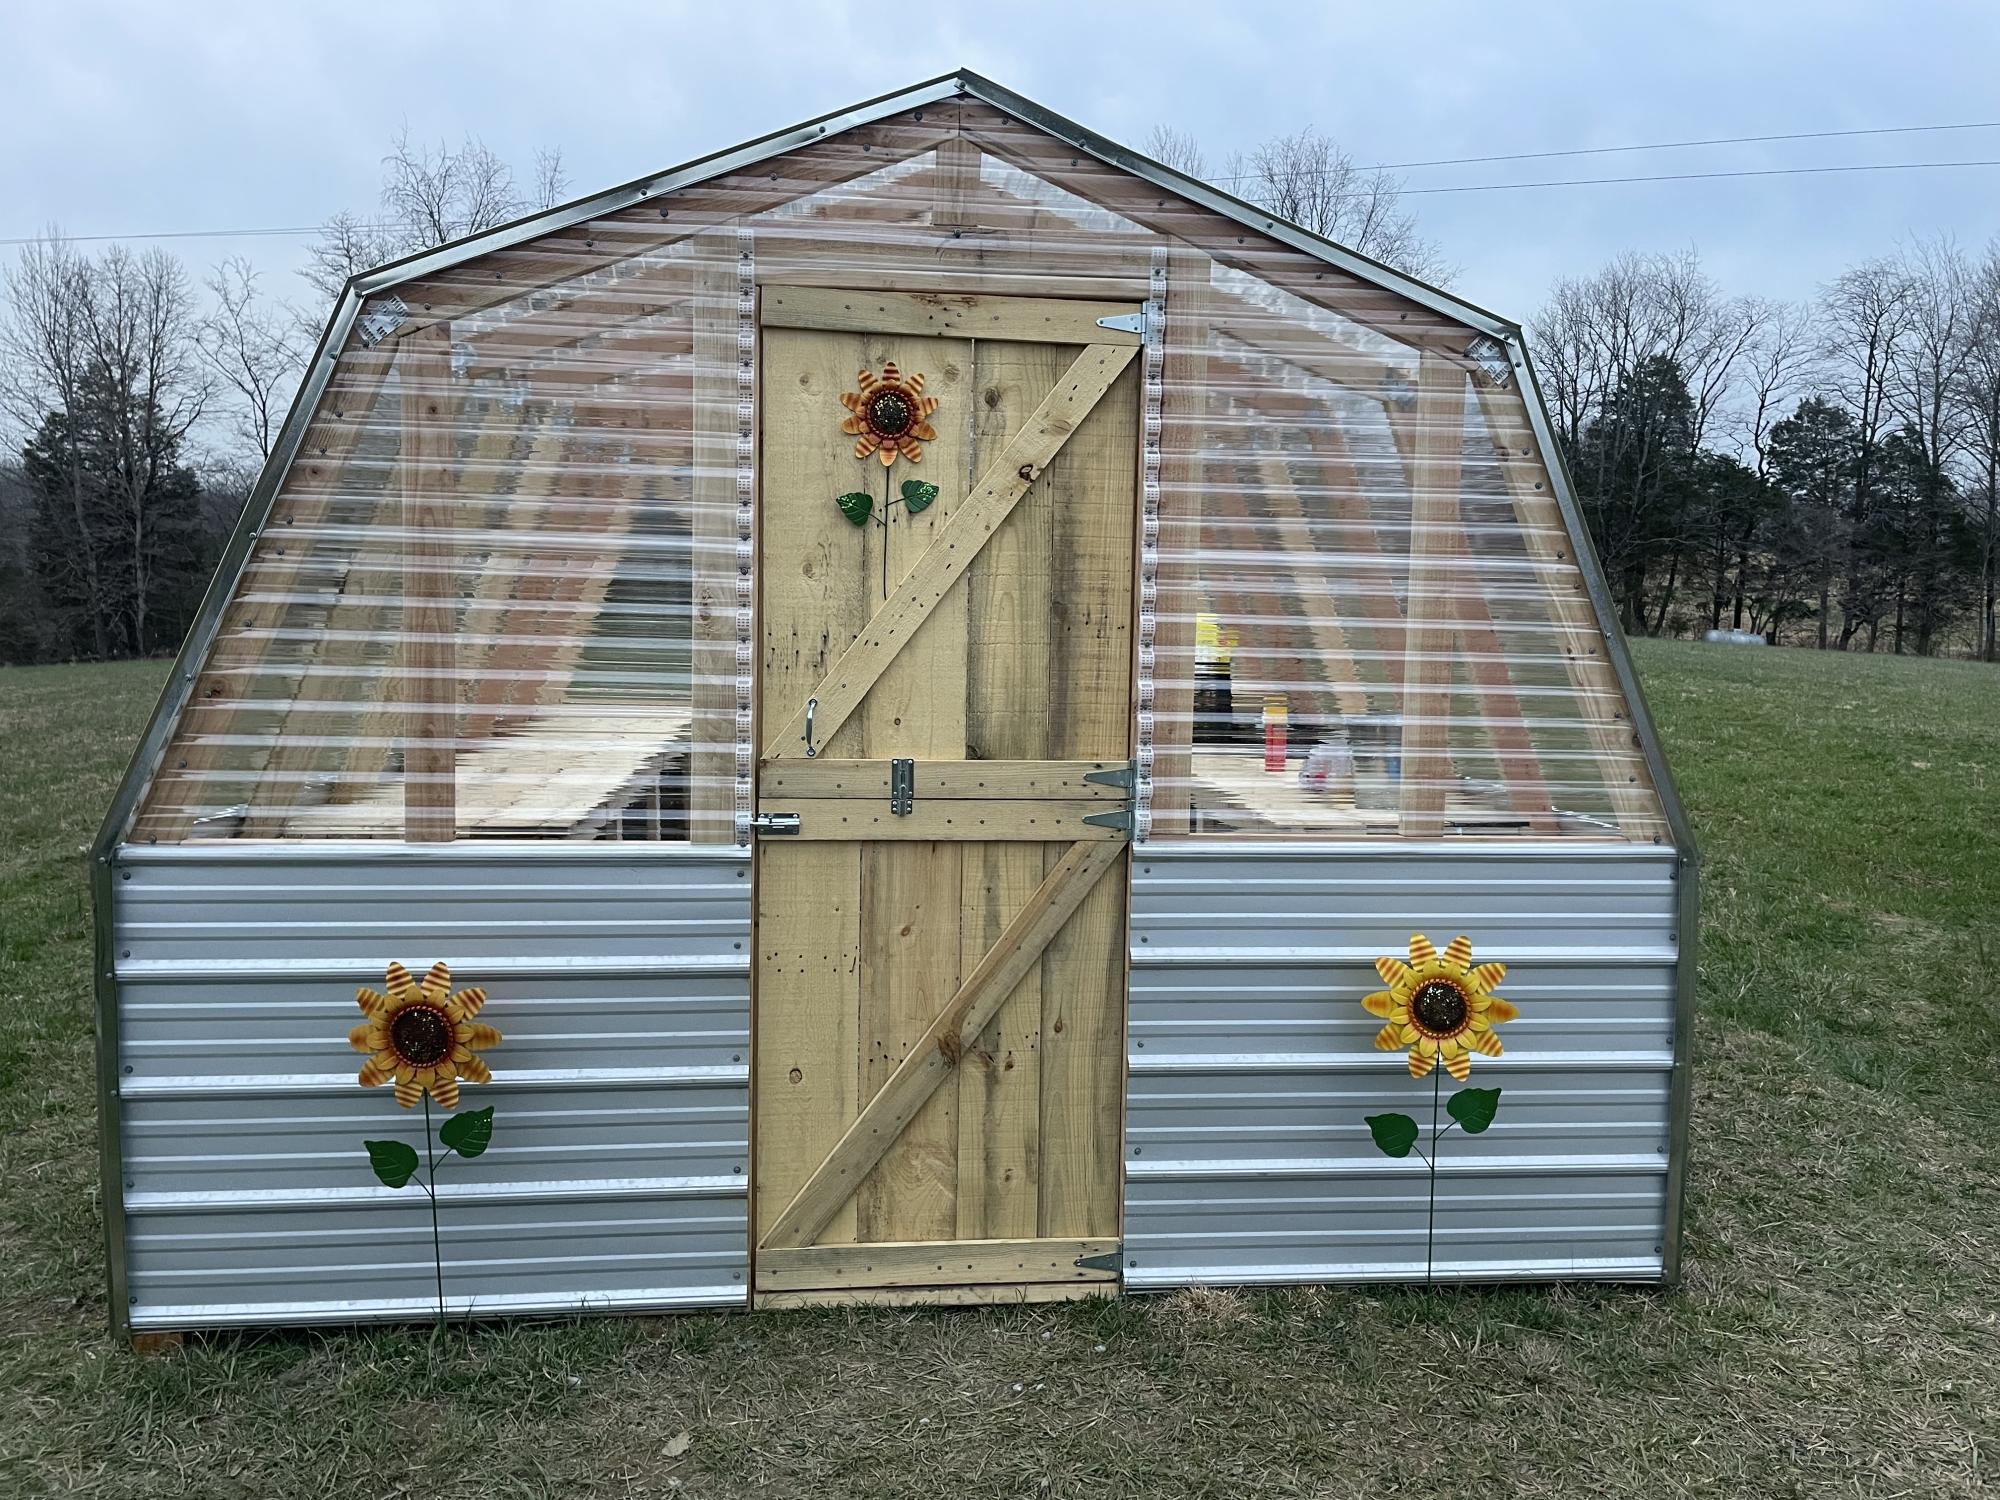
Thank you so much for the plans. We enjoyed building it. We love it!!!
Built from Plan(s)
Comments
Queen Farmhouse Bed Frame
I am a newbie to wood working and was inspired by Ana's Farmhouse bed frame. I built this for my newly married daughter and she is so happy with it. It's very sturdy and has plenty of storage underneath. The instructions, buy & cut lists were super easy to follow. I can't wait to build the Extra Wide Dresser next.
Built from Plan(s)
Comments
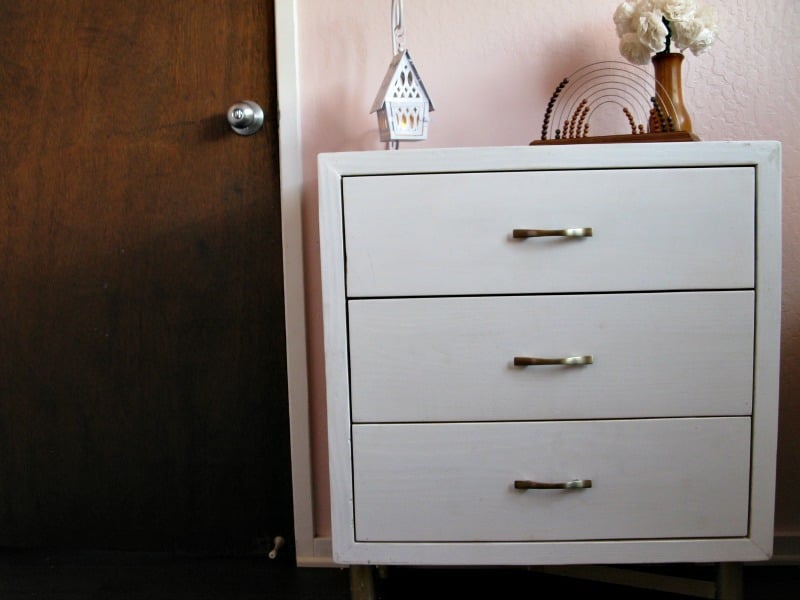
Mid-Century Dresser
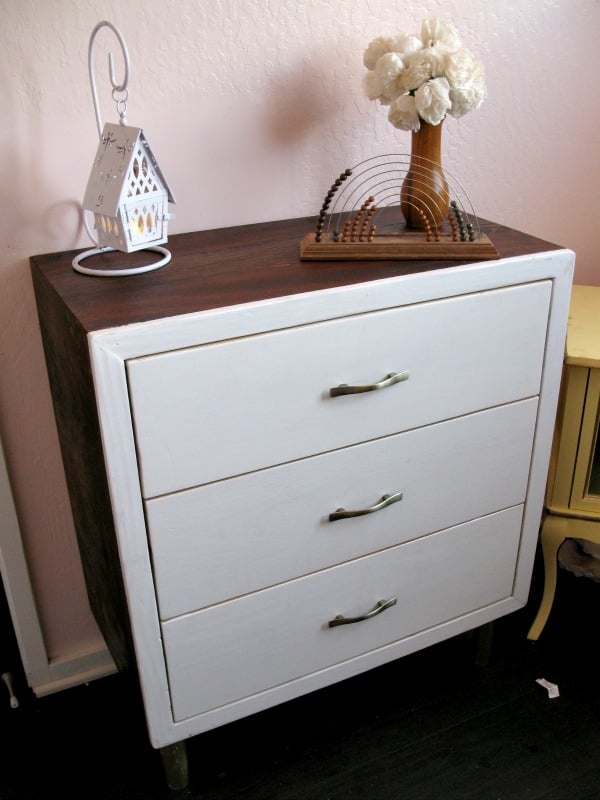
Inspired by Dwell Studio's Mid Century Dresser, I built a smaller version for my daughter's small room. Working on showing photos of the building process on my little blog this weekend. =D
Estimated Cost
$47
Estimated Time Investment
Week Long Project (20 Hours or More)
Finish Used
Watco Danish Oil - Dark Walnut stain
Olympic Semi-Gloss White (No VOC)
Rustoleum Gold Spray paint (for legs and x-feature)
Olympic Semi-Gloss White (No VOC)
Rustoleum Gold Spray paint (for legs and x-feature)
Recommended Skill Level
Intermediate
Comments

Fri, 11/15/2013 - 19:00
Gorgeous dresser!
This looks fab! It's beautifully done and finished. I like it better than the inspiration piece! A perfect dresser for a little girl's room. :)

In reply to Gorgeous dresser! by JoanneS
Sat, 11/16/2013 - 08:45
Thank you, Joanne!
I am pleased with how it turned out and I learned new techniques making it! Your support and tips along the way helped me immensely!
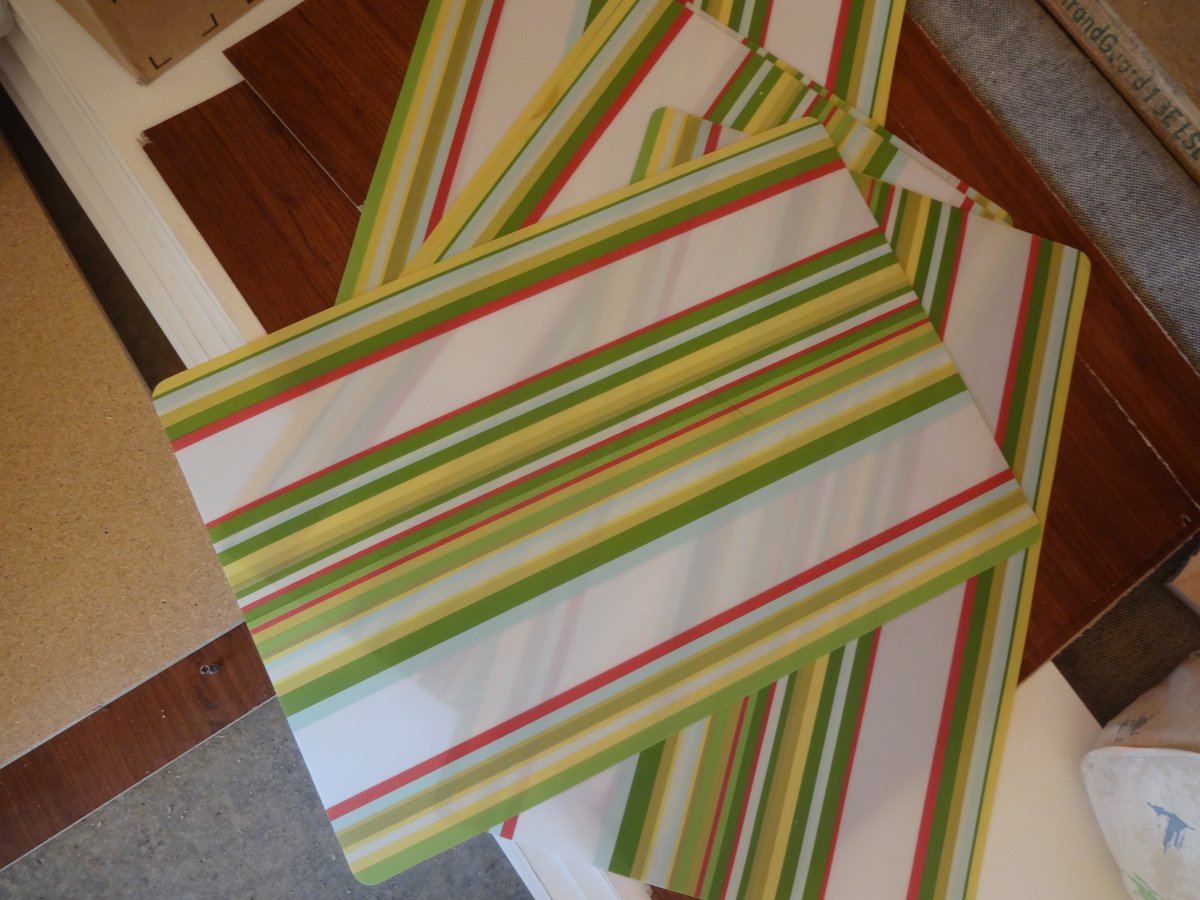
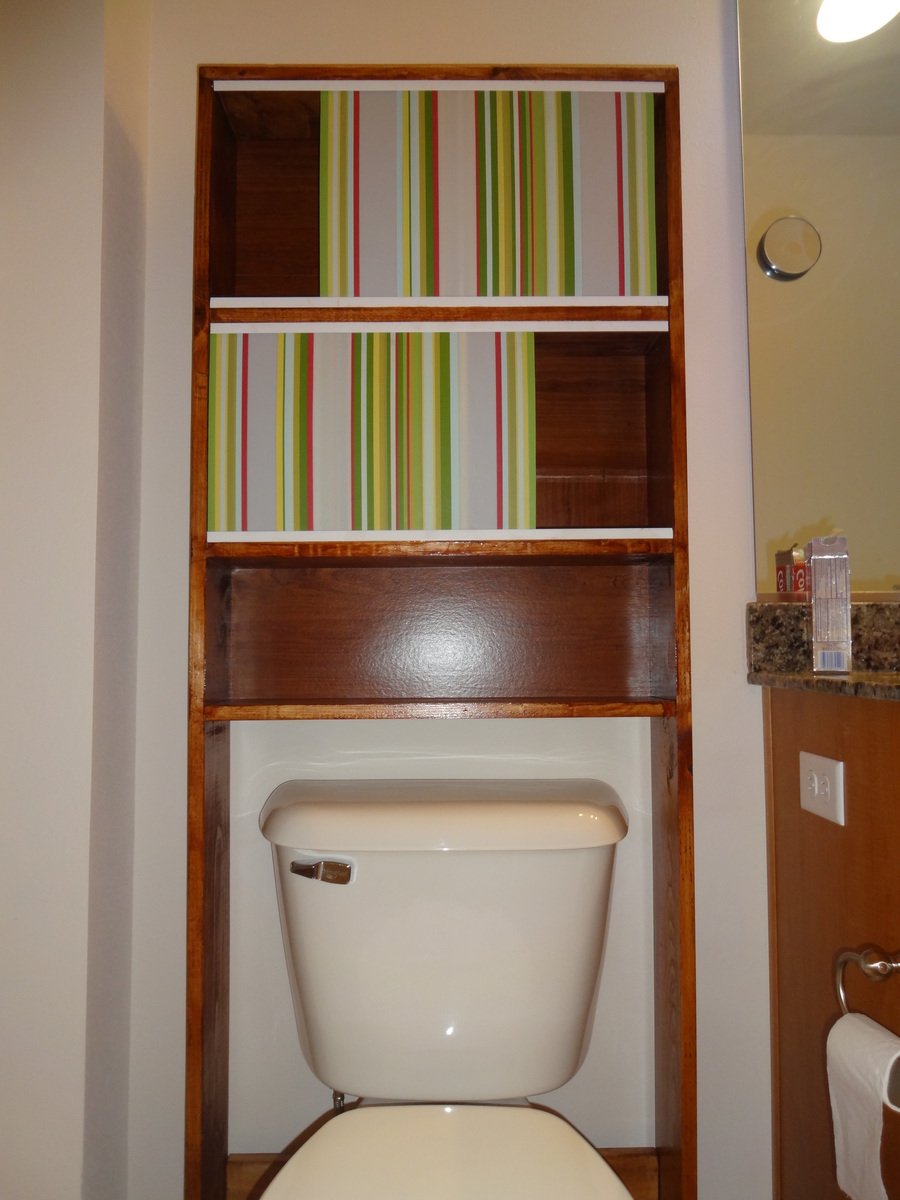
Over the toilet medicine cabinet / storage

I recently discovered your blog and got really inspired. After building a couple of beginner projects following your plans, i started to think about making something that can be used as medicine cabinet and does not take much space. Came up with the idea for this over the toilet storage rack.
My goal was to recycle/reuse some of the stuff that was sitting in my garage.
Started with building a frame using 1x6s (24 inch for shelves and 72 inch height). Used plastic table mats were used as sliding windows. Found a PVC trim (8 ft) for $2 at lowes that has been used as the rails/track for the windows. The back is piece of cardbord that was scrap from an old broken ikea bookshelf.
I am pretty happy that i recycled some stuff and made this in less than $15.


Estimated Cost
$15
Estimated Time Investment
Afternoon Project (3-6 Hours)
Finish Used
Minwax Bombay Mahogany Satin
Recommended Skill Level
Beginner
Comments
Tue, 12/01/2020 - 14:20
Did you do anything to the…
Did you do anything to the bottoms of the legs to prevent wet floors from wicking into the wood? I am wanting to build something similar to replace a particle board cabinet-in-a-box because the particle board did soak up water and get ruined. What I'd REALLY like are metal end caps with an adjustable foot (like you put at the bottom of a table leg) but I can't find a combination of the two anywhere.
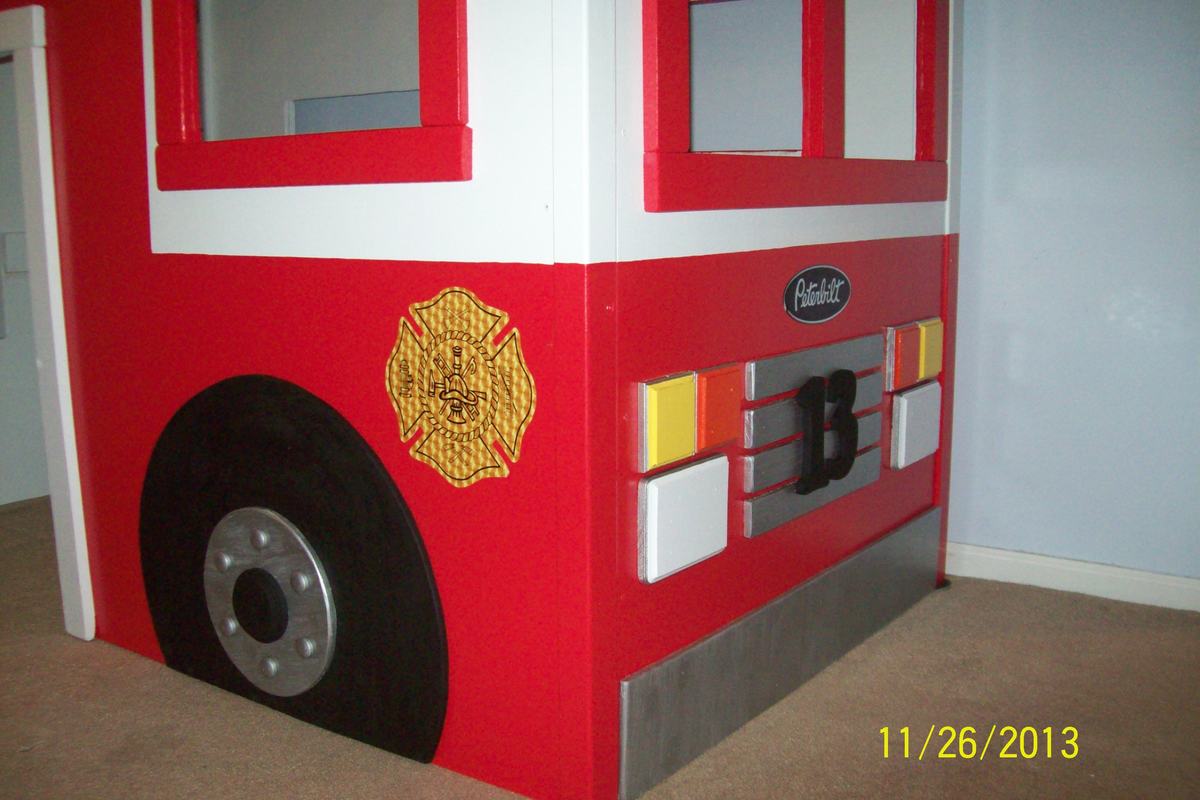
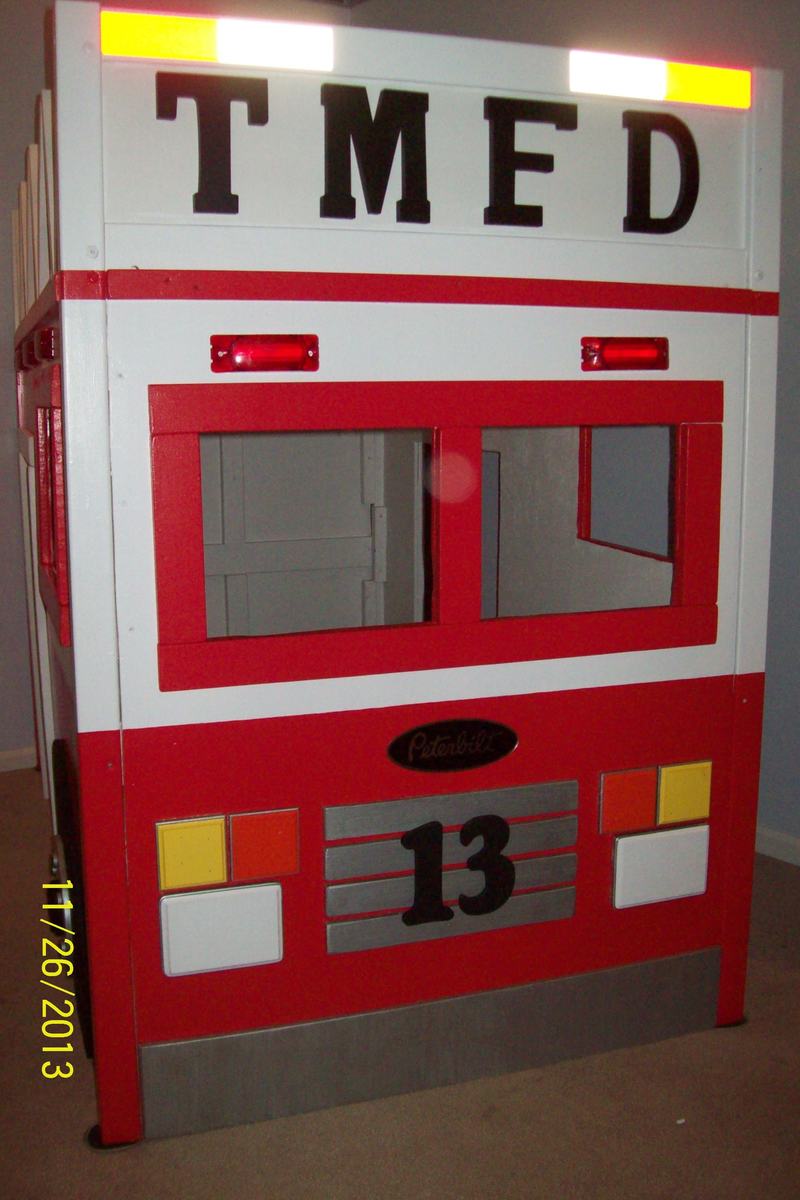
Firetruck Loft Bed
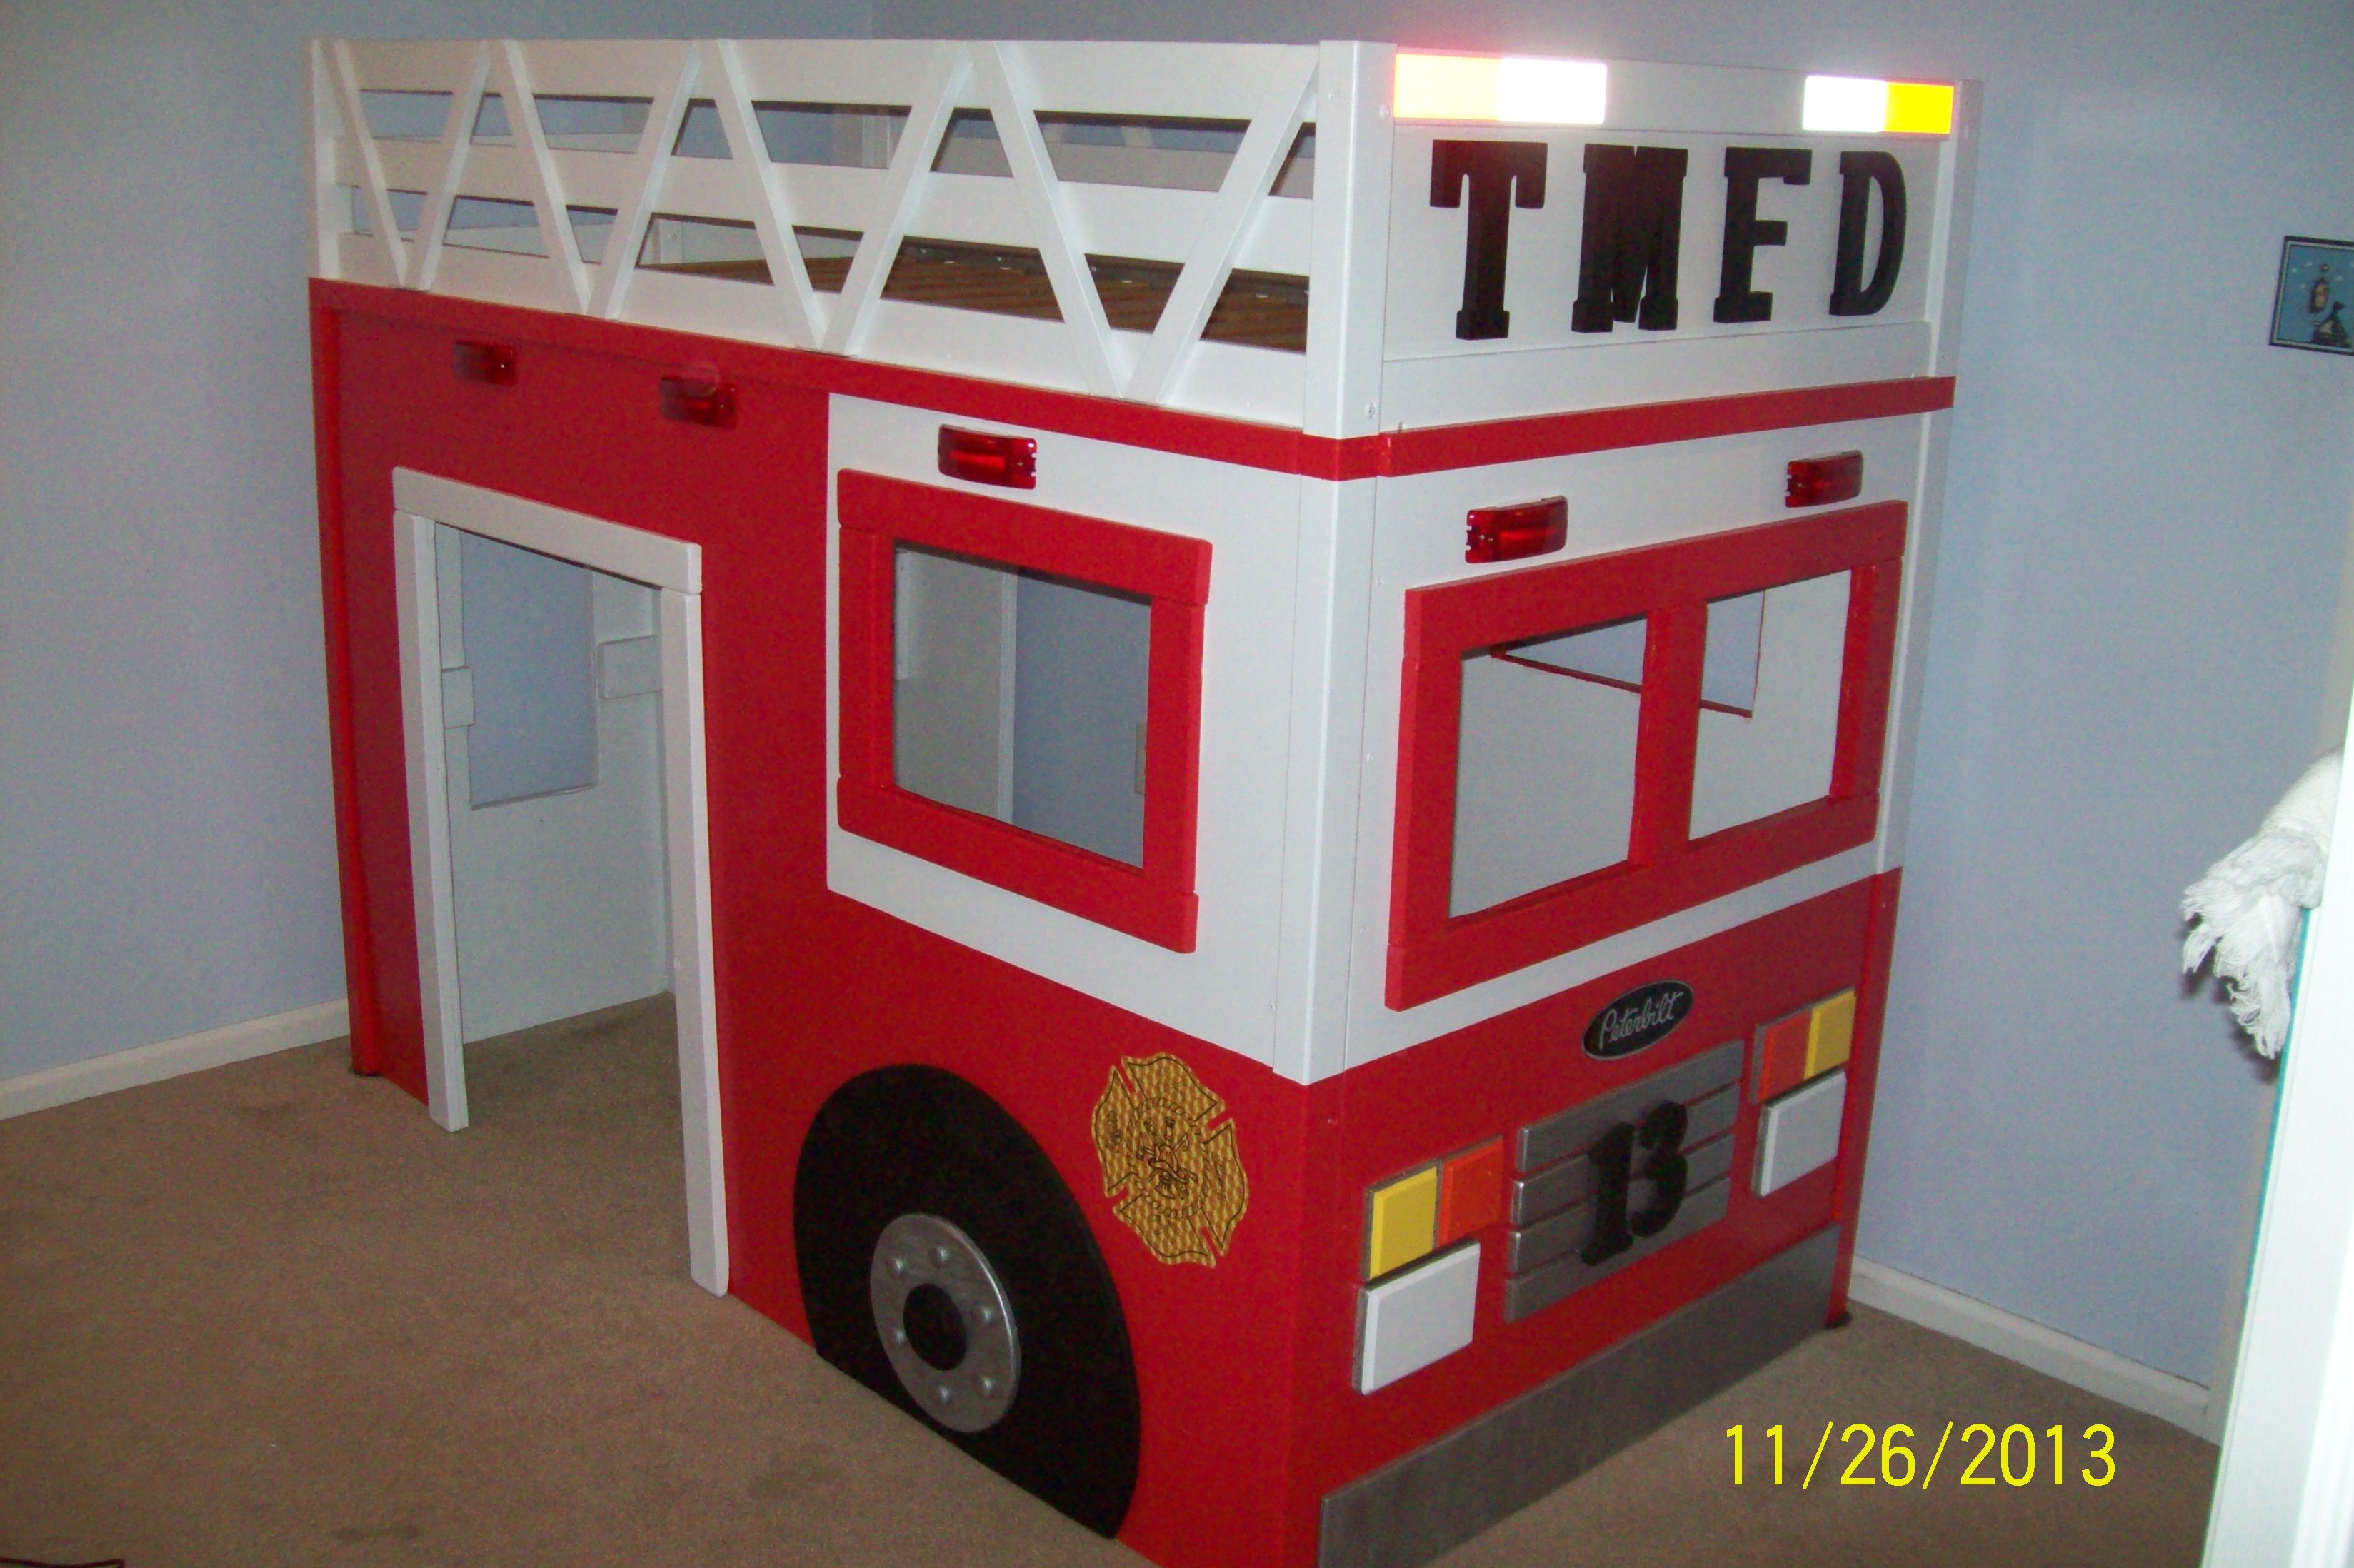
I knew I had to build this bed when I saw the images on a Google search. Thank you so much for such great plans. And FREE no less. Due to the small size of my son's bedroom I couldn't add the front bucket. He's so excited now to go to bed. Thanks again.
Built from Plan(s)
Estimated Cost
$275.00
Estimated Time Investment
Week Long Project (20 Hours or More)
Finish Used
Olympic One paint.
Recommended Skill Level
Beginner
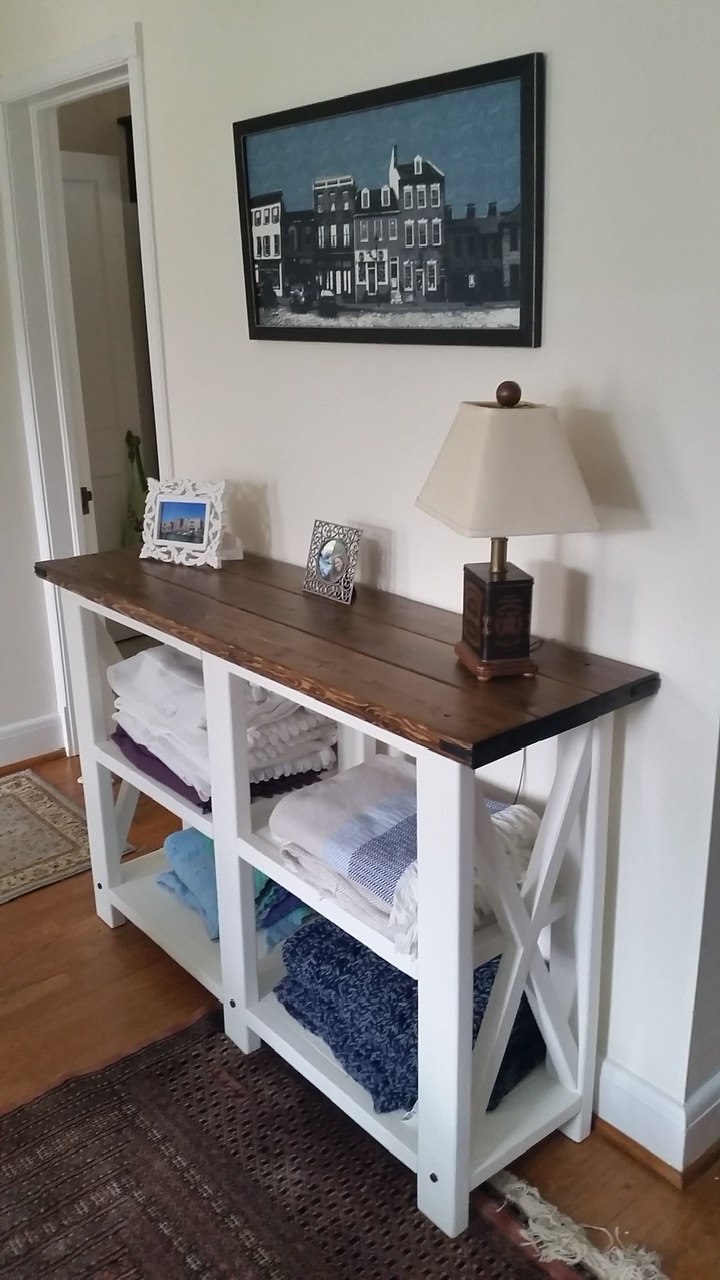
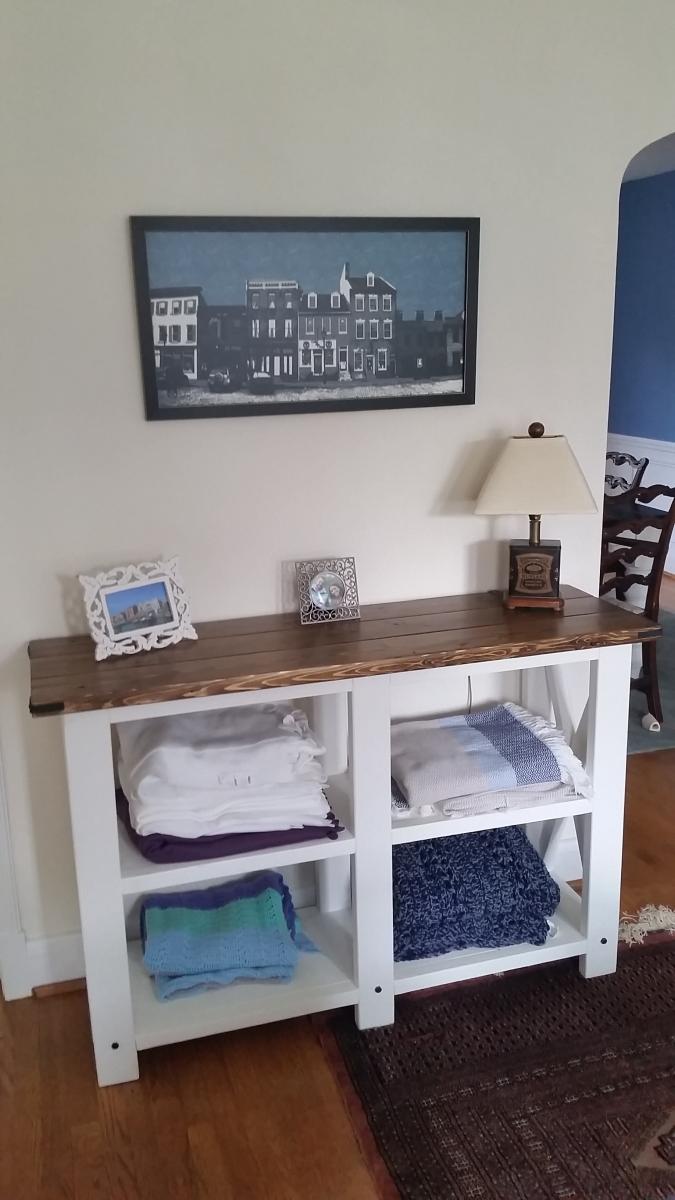
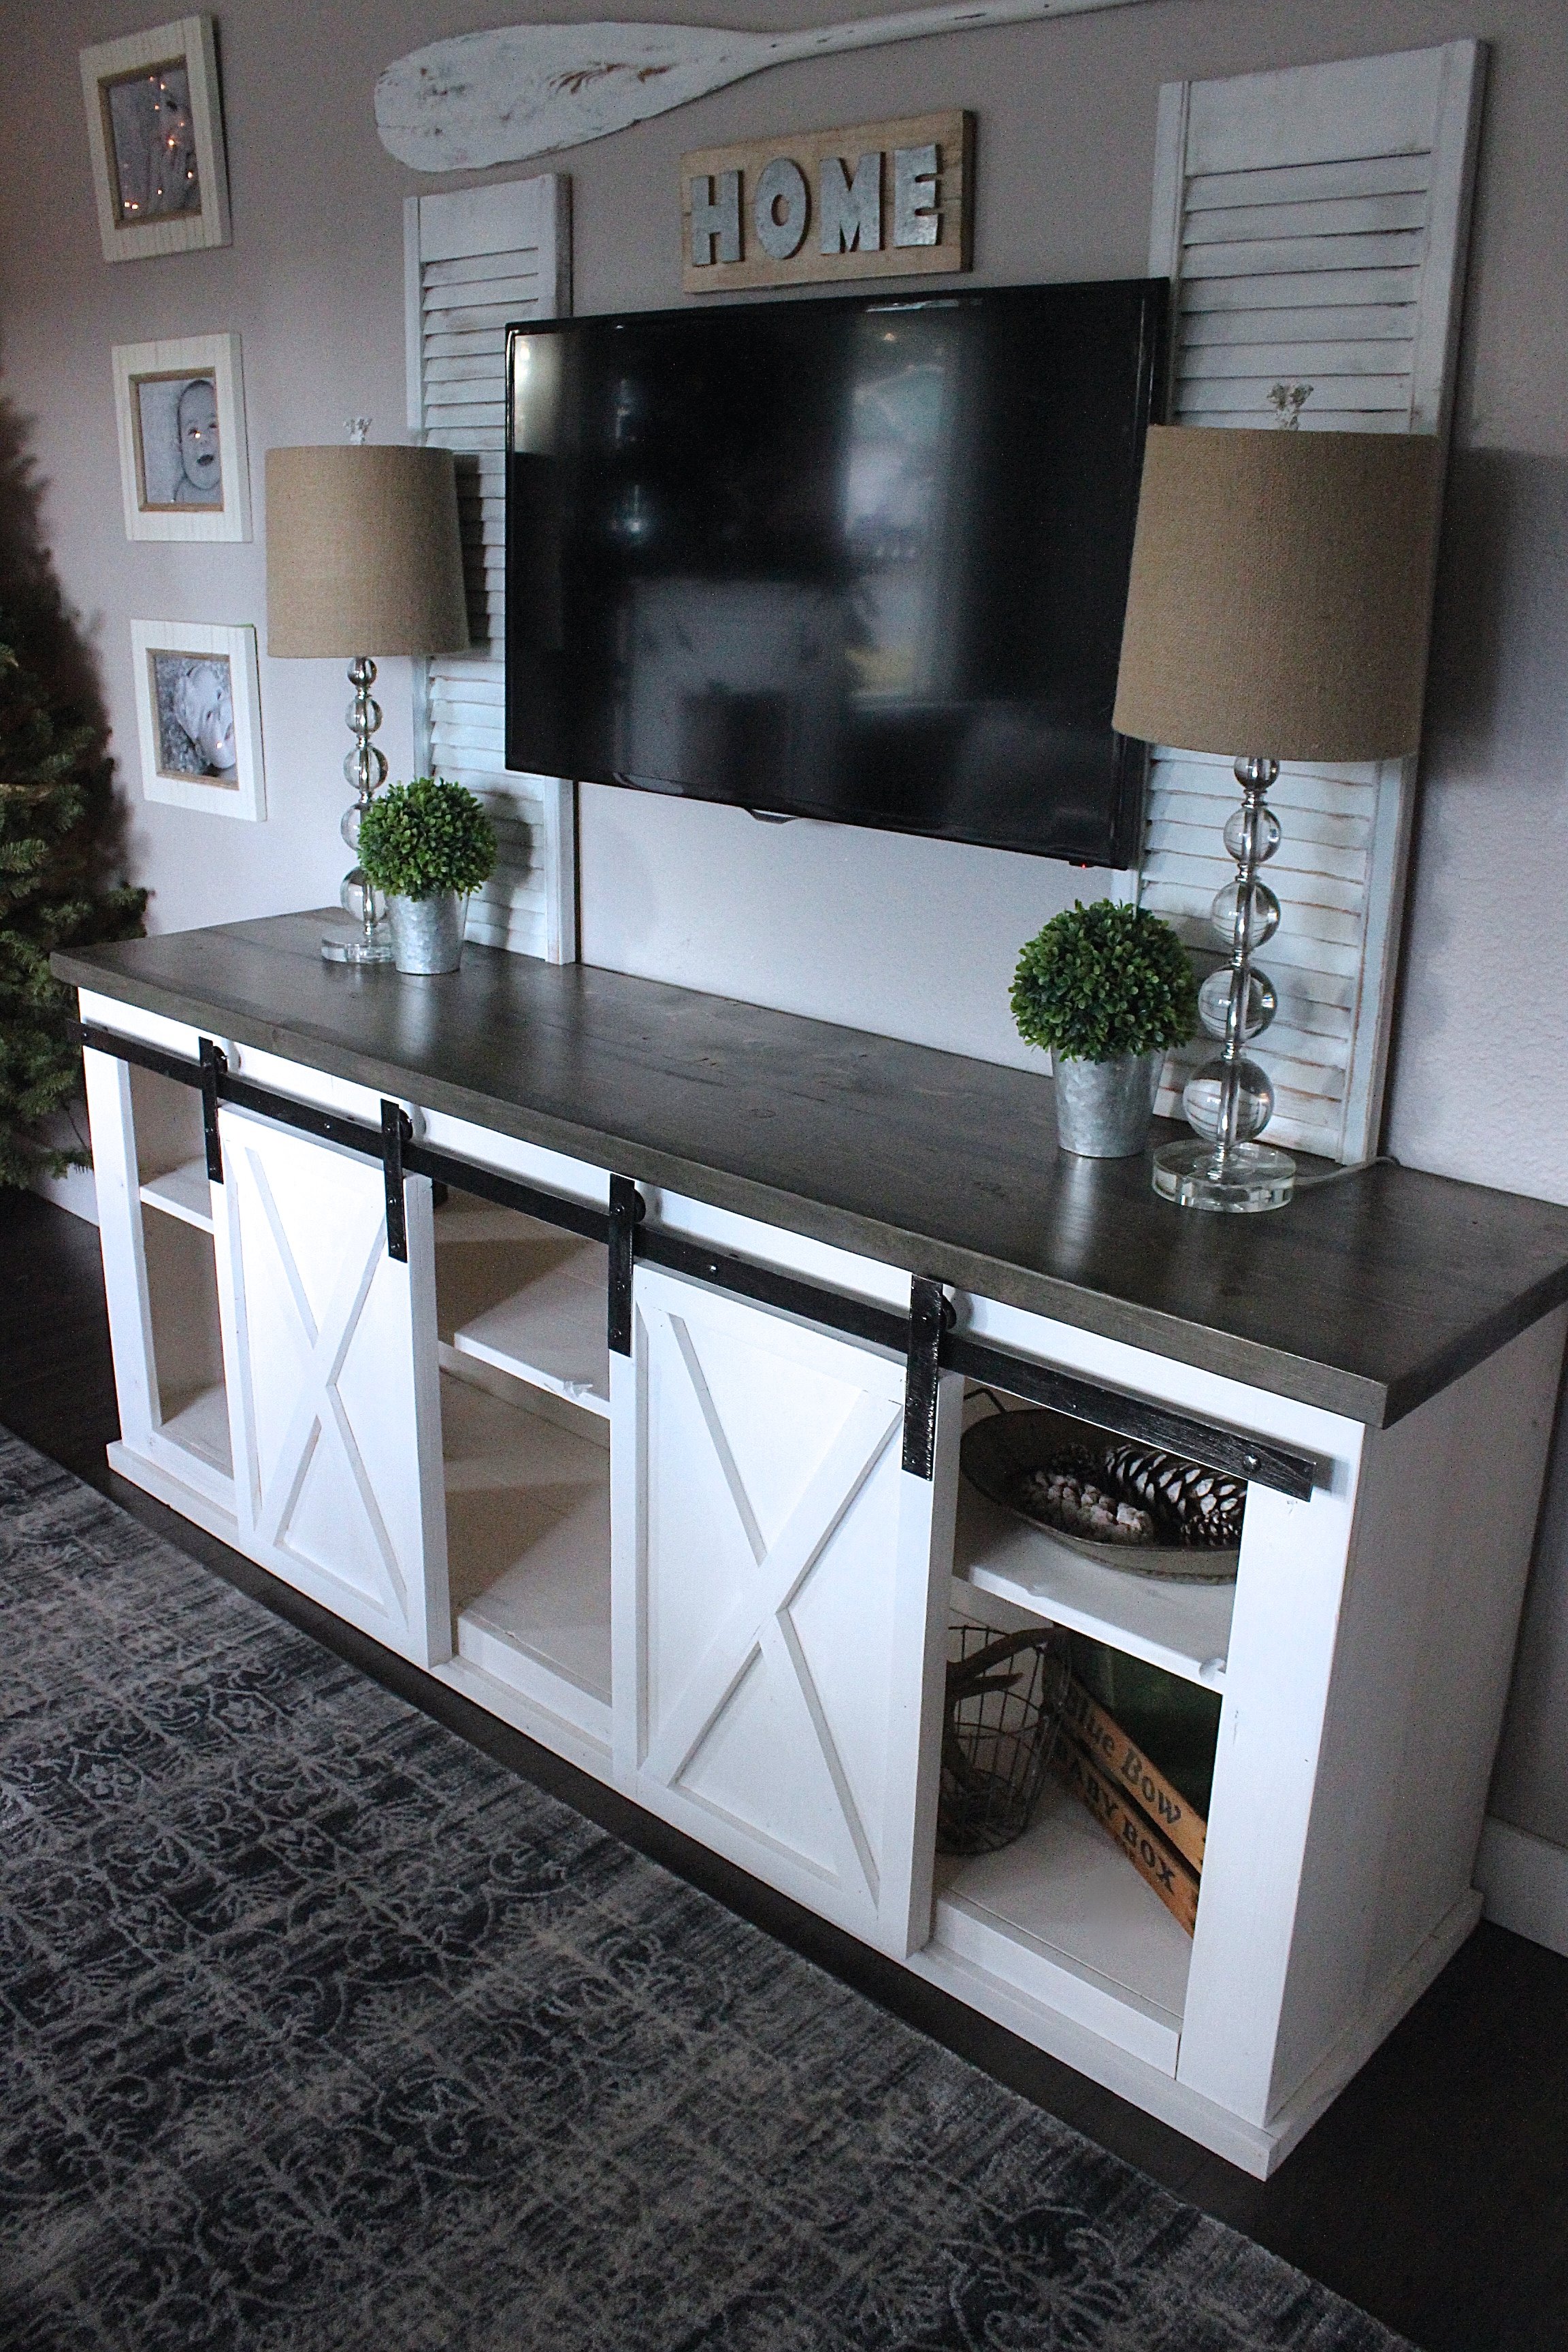
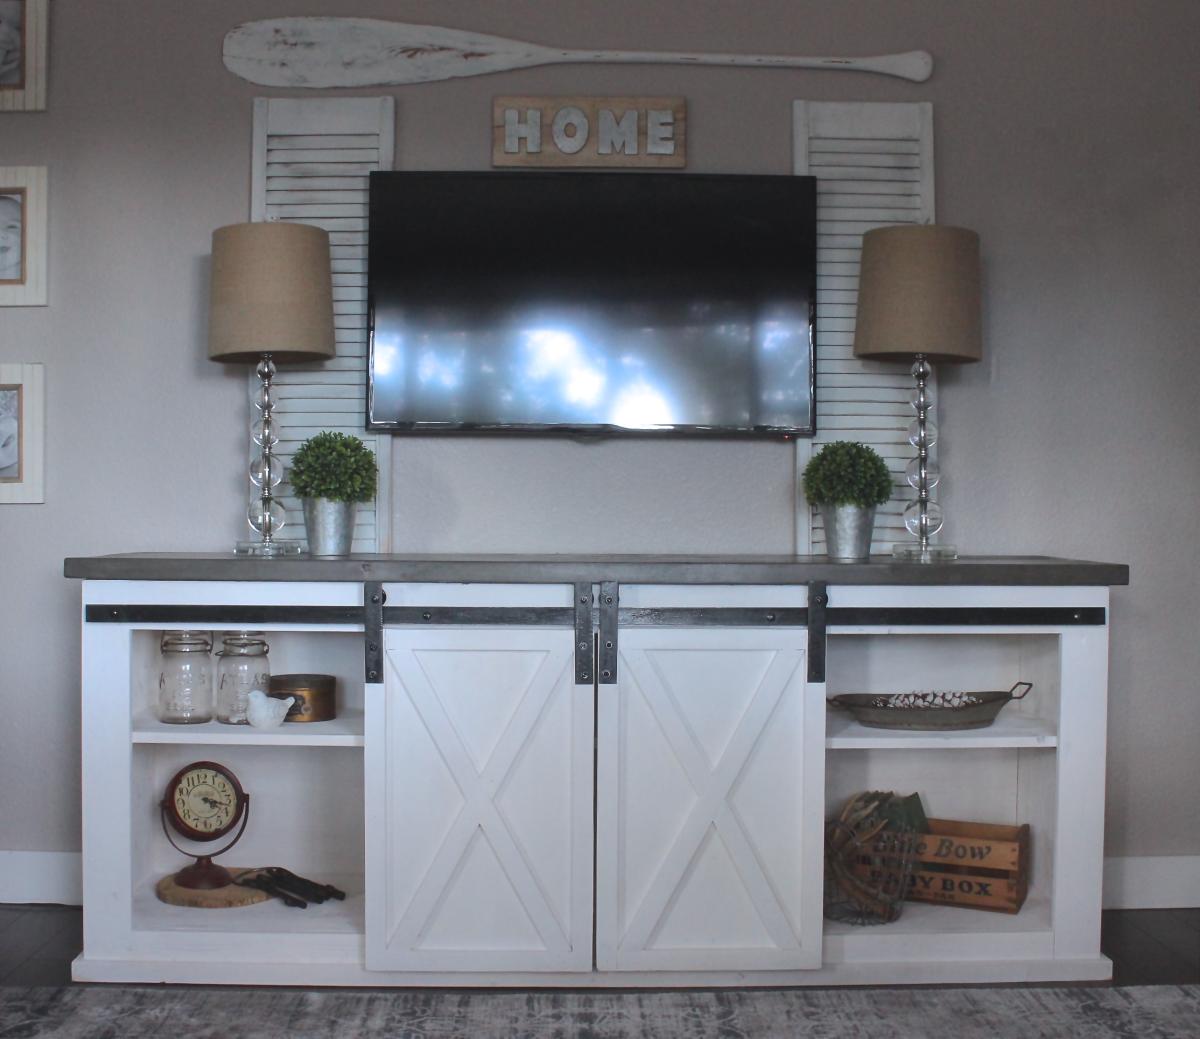
Sliding Barn Door Console
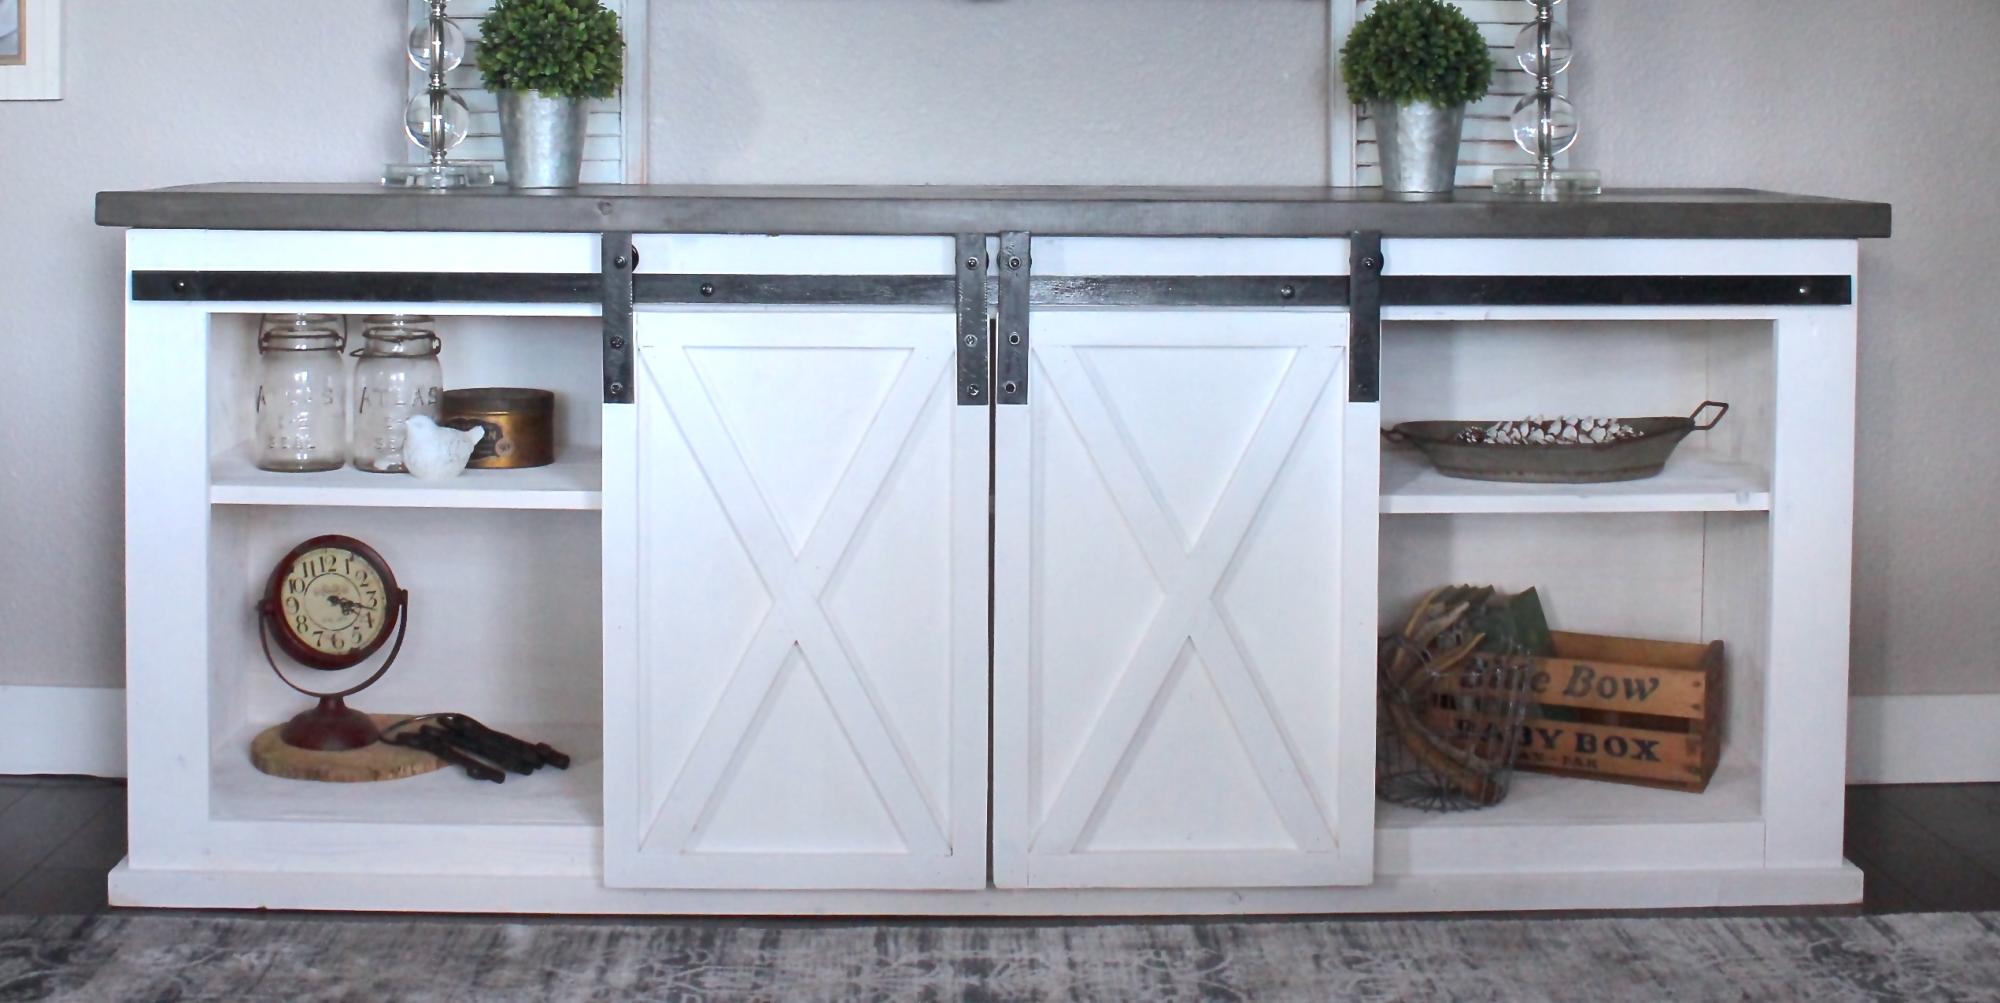
We wanted to build this piece for so long, but couldn't find 1/2" metal anywhere. Mind you, we live in a pretty small town. We finally just decided to use 1/8" Metal, which works just fine in my opinion. We followed the rest of the tutorial, but I find that they don't go over how to install the metal at all. That needs a tutorial all on its own. We improvised with what we had here in our small town. We ideally wanted to find old metal, but that didn't happen. So we bought new steel, spray painted it & then beat it up so it looked more vintage.
I'd say hanging the barn doors & the track is the longest part for sure.
Built from Plan(s)
Estimated Cost
300 ( We live in Canada, so everything is much more expensive here )
Estimated Time Investment
Day Project (6-9 Hours)
Finish Used
Top is stained in our Beachwood ( colors mixed from the Minwax stains ) Bottom is painted in pure white. Hardware is black & beaten up
Matte Polyurethane finish.
Matte Polyurethane finish.
Recommended Skill Level
Intermediate
Comments
Fri, 11/04/2016 - 10:08
Very nice! Love the top!
Very nice! Love the top!
Can you give some details as to your magical mix of stain for "Beachwood" ?
Thank you!
Sat, 09/02/2017 - 12:16
Beachwood mixture?
Does anyone know what minwax mixture was used for the Beachwood on the top piece?
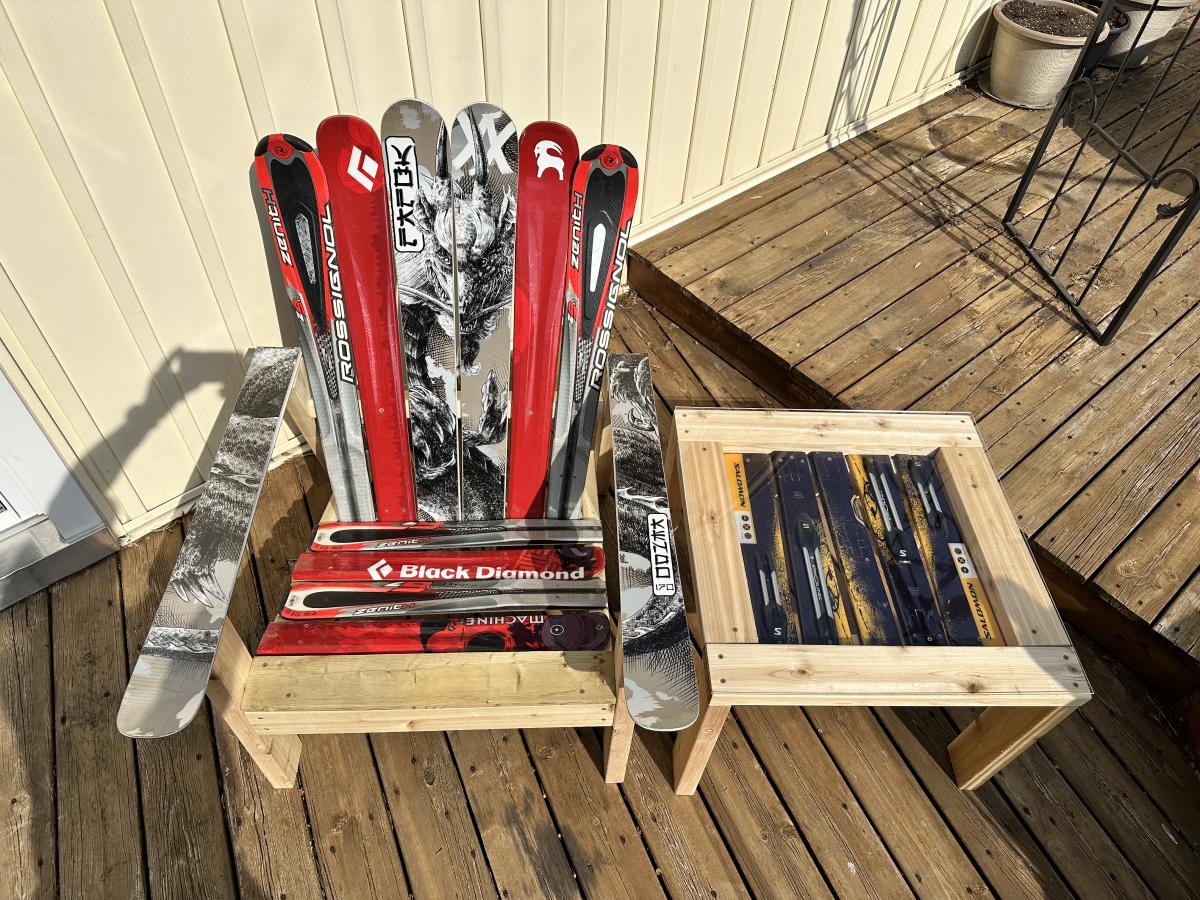
2 X 4 Adirondack Chairs and Tables with a Twist
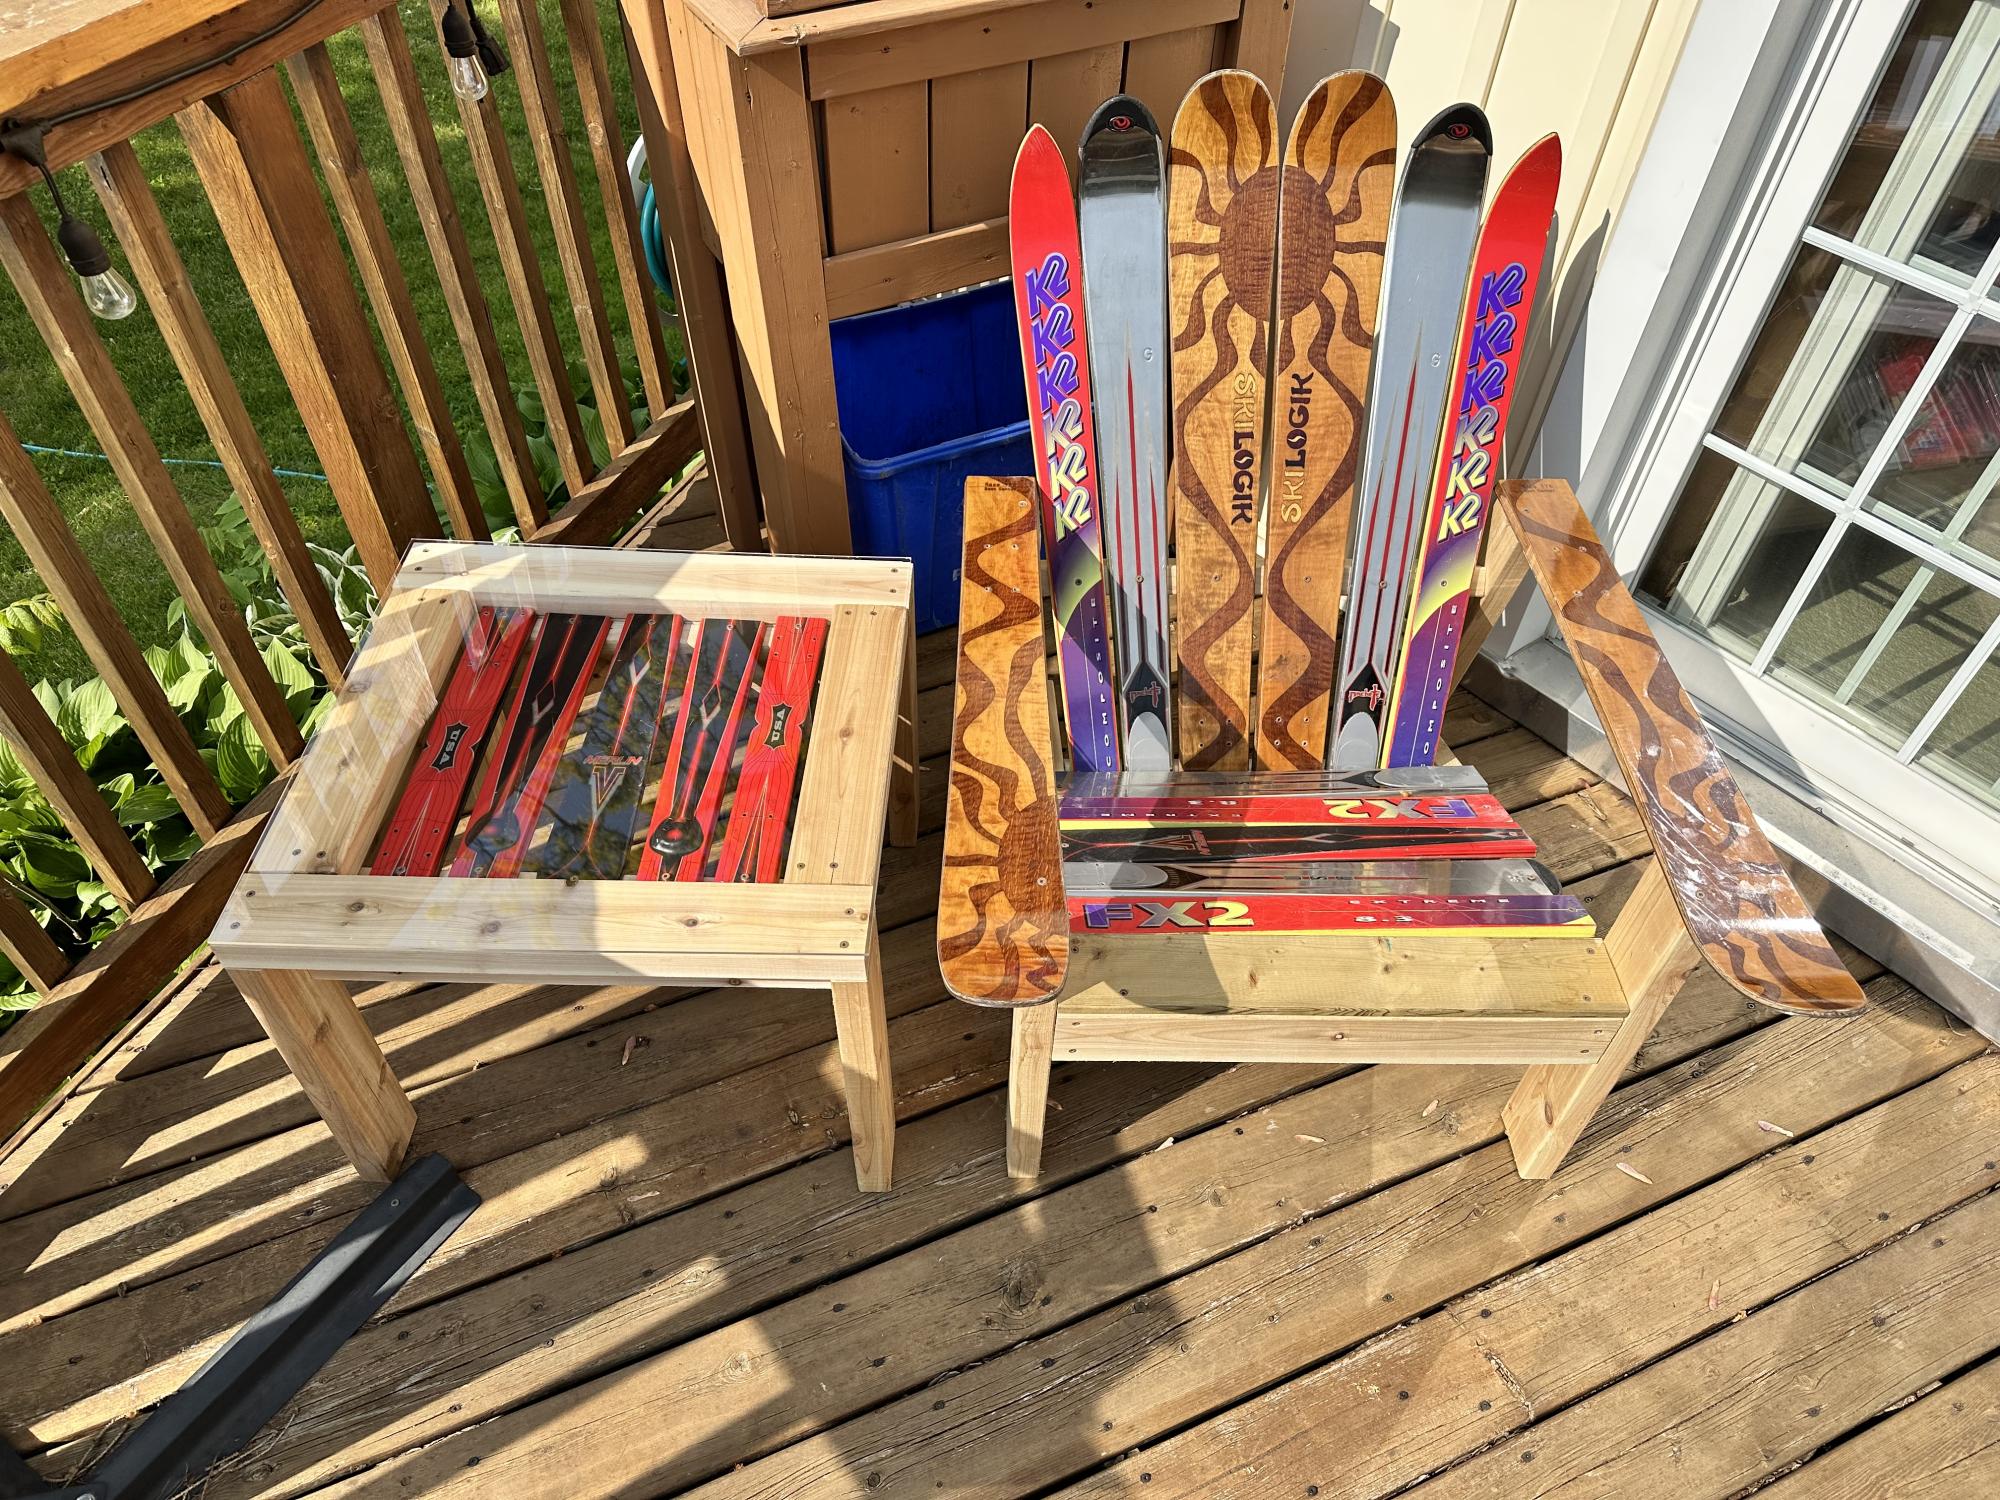
I had a bunch of my old skis that I had used as a display wall in my chalet that I needed to do something with, and this was a perfect solution!
Comments
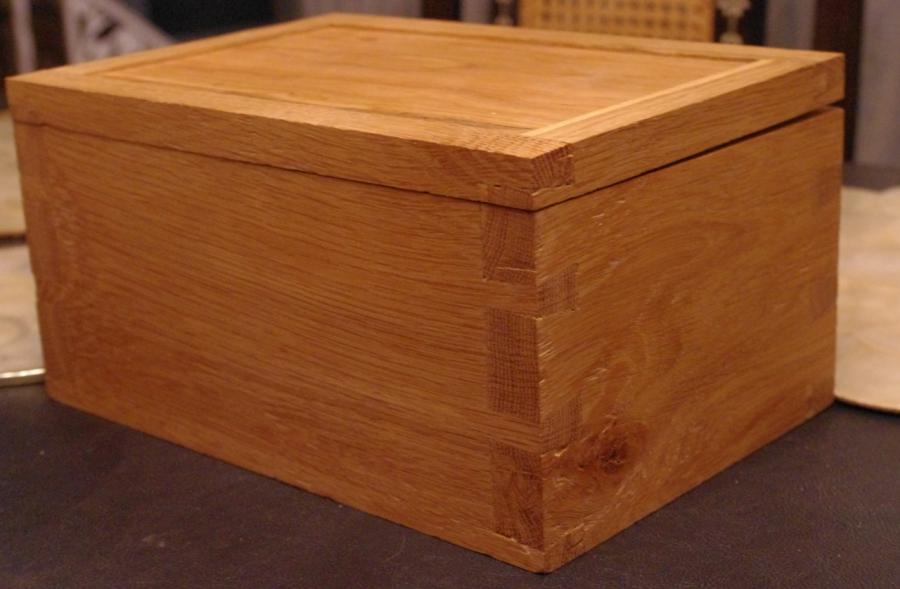
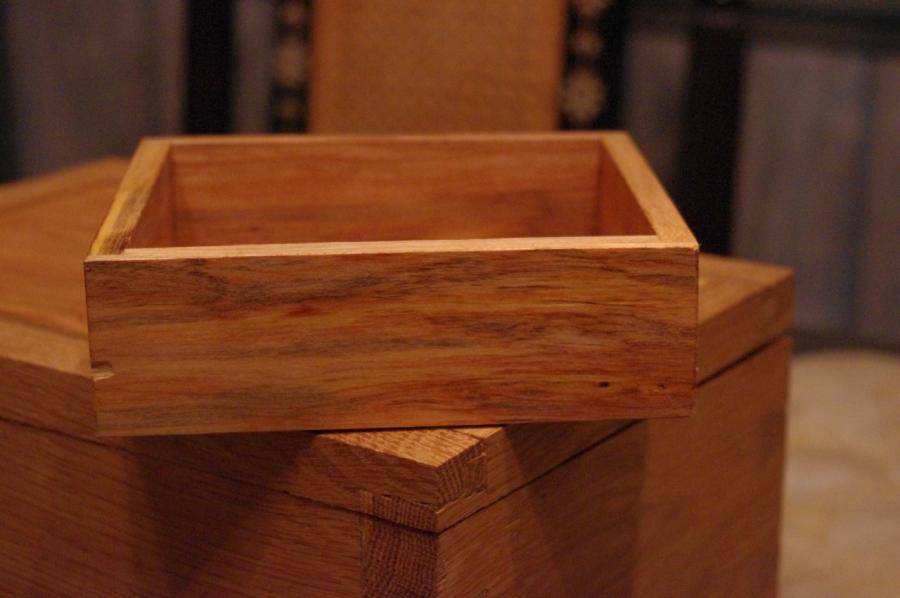
Gentleman's Valet
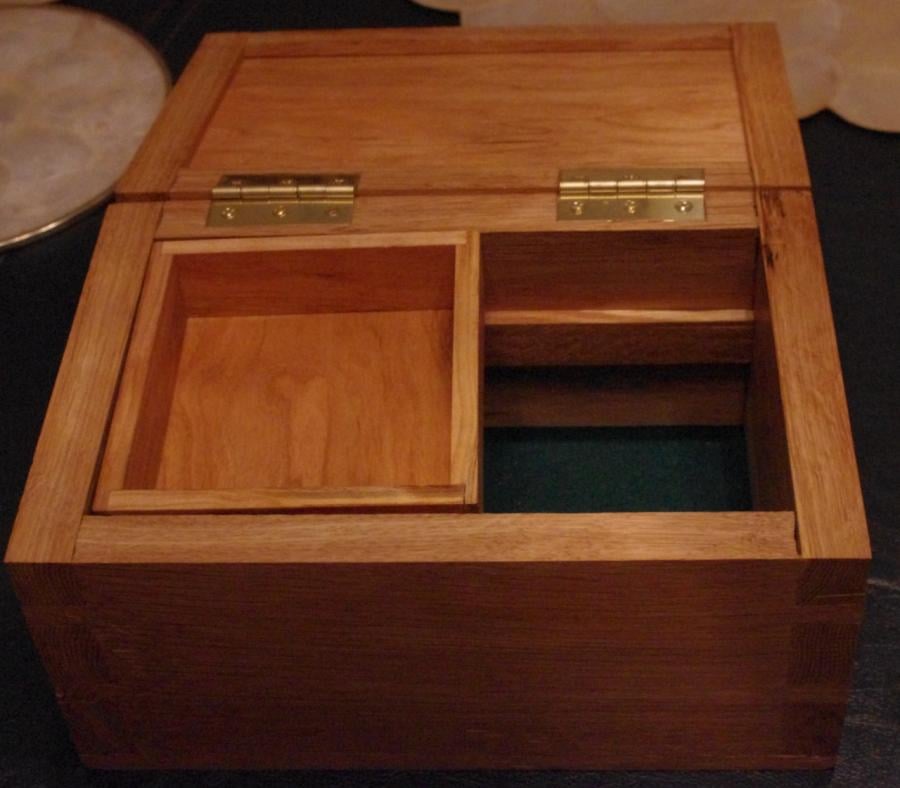
This is a gentleman's valet that I build for my sister in law's boyfriend as a Christmas present. It was also a good opportunity to try out my hand tool skills, since I cut all of the joinery by hand.
Estimated Cost
20
Estimated Time Investment
Day Project (6-9 Hours)
Finish Used
Boiled linseeed oil
Recommended Skill Level
Intermediate
Comments
Sun, 02/05/2012 - 09:20
Beautiful!
Wow, this is gorgeous! Love the rich finish and the dove tail details, and the sliding top tray is so neat. Everyone in the family is going to want one! :) Joanne
Sun, 02/05/2012 - 12:25
Great gift
This would make a great gift for my husband and all the men in my family...

Sun, 02/05/2012 - 19:12
Hand Tool Joinery
Kristen you should try it yourself. You'd need to buy a joinery saw, but I just picked up a decent dovetail saw for $13, and a set of good chisels, but for $26 you can get a good set of 4.
My joinery isn't brilliant, but it's functional and doesn't look terrible. I'm pretty sure you could start knocking out some strong joints pretty quickly.
The upside is that it's faster than setting up power tools to make these joints. Hand cut dovetails will always be faster than machine cut, unless you're building a dozen boxes.
In reply to Hand Tool Joinery by claydowling
Mon, 02/06/2012 - 10:48
You don't give yourself enough credit!
From here, your dovetail joints look great! I've always just skimmed past instructions for dovetails thinking I'd never put the time into constructing them. Perhaps I will investigate for future projects. The glue and nail option just goes quicker right now, with the list that looks like it just might take forever in this house!

Mon, 02/06/2012 - 07:29
Very nice, Clay
You may not think your joinery is brilliant, but those are some tight joints. Looks beautiful. I love the top!
Mon, 02/06/2012 - 08:35
Tight joints
Those are very tight joints. Slightly too tight in fact. There was a small amount of hairline splitting on the side I didn't show, that I had to fill with glue and sawdust to keep from spreading.
My dovetails aren't bad, just slow for me to cut right now, especially cleaning out the waste. I bought parts for a small bow saw that should make that easier, once I get the thing built.
Tue, 02/07/2012 - 07:49
What a great present!
This Gentlemen's Valet looks amazing! How did you do it? This would be a great Valentine's present for my husband!
Tue, 02/07/2012 - 08:35
How To?
The short answer is that I built a box, then built another box to go inside of it. A plan with dimensions wouldn't be a very good idea, because I sized this to match the $7 board I'd found at the hardwood dealer. Your lumber dealer almost certainly carries differently sized boards.
I'll think about a tutorial or video though. Box making is fun, rewarding, and can be profitable. Especially since most cabinets are just different variations on the box.
Tue, 02/07/2012 - 09:21
Thank you!
Alright, I will give it a try this weekend. Will let you know how it went! Thank you so much
Thu, 02/09/2012 - 19:17
A Must-Steal
Your work is gorgeous! I'm definitely stealing this idea for my husband's birthday as well as all the men in my family, who all have birthdays this spring. :) Only thing is, I'm using tools, my hand tool skills are no where near as good as yours.
Also, I appreciate the tips you've posted on other project plans, they really help clarify some of the smaller details overlooked by the designers for beginners like me.
Hope to see some more projects from you soon!
Thu, 02/09/2012 - 20:06
Hand Tool Skills
Hand tool skills actually develop pretty quickly, and one of the reasons it's gaining popularity. You can use scrap wood to learn how to make joints. The first ones will be rough but with even a little bit of practice they'll improve.
The tools are also getting cheaper. I just bought a decent dovetail saw for $13 from Tools For Working Wood, and $26 will buy you a decent set of chisels from Narex.
Christopher Schwarz and Logan Cabinet Shoppe are two good sources for hand tools articles, including videos. There are also good books on the subject. My first text was Hand Tool Essentials, but I'm told there are others worth looking into for first books.
In reply to Hand Tool Skills by claydowling
Fri, 02/10/2012 - 07:30
The Book I was thinking of
The Essential Woodworker is the alternate starting text I was thinking of. I haven't read it yet, but heard it recommended by a few sources as a good place to learn about hand tool woodworking. I just ordered a copy for myself. Amazon sells it too, but for considerably more, and I've heard unpleasant things about the binding on the copies available on Amazon.
If the book turns out to be any good I'll post a review on my blog.
Fri, 04/20/2012 - 21:48
Please do! Thank you for the
Please do!
Thank you for the tips and information, I'll definitely be starting on hand woodworking soon. I love the results of hand vs. machine woodworking, it's just sleeker and has more of a homemade quality.
In reply to The Book I was thinking of by claydowling
Sat, 04/21/2012 - 04:56
The Book
I did finally buy the book, and I've reviewed it at http://claydowling.com/articles/02242012-1350/getting-started-woodworki…
There's also a new video coming out (or maybe it is out), that I wrote about: http://claydowling.com/articles/04022012-0947/learning-use-hand-tools I've ordered my copy, but I won't have it in hand until next month. I grabbed is specifically for the information on block planes. I own them, but I've had the least consistent results from them of all my tools.
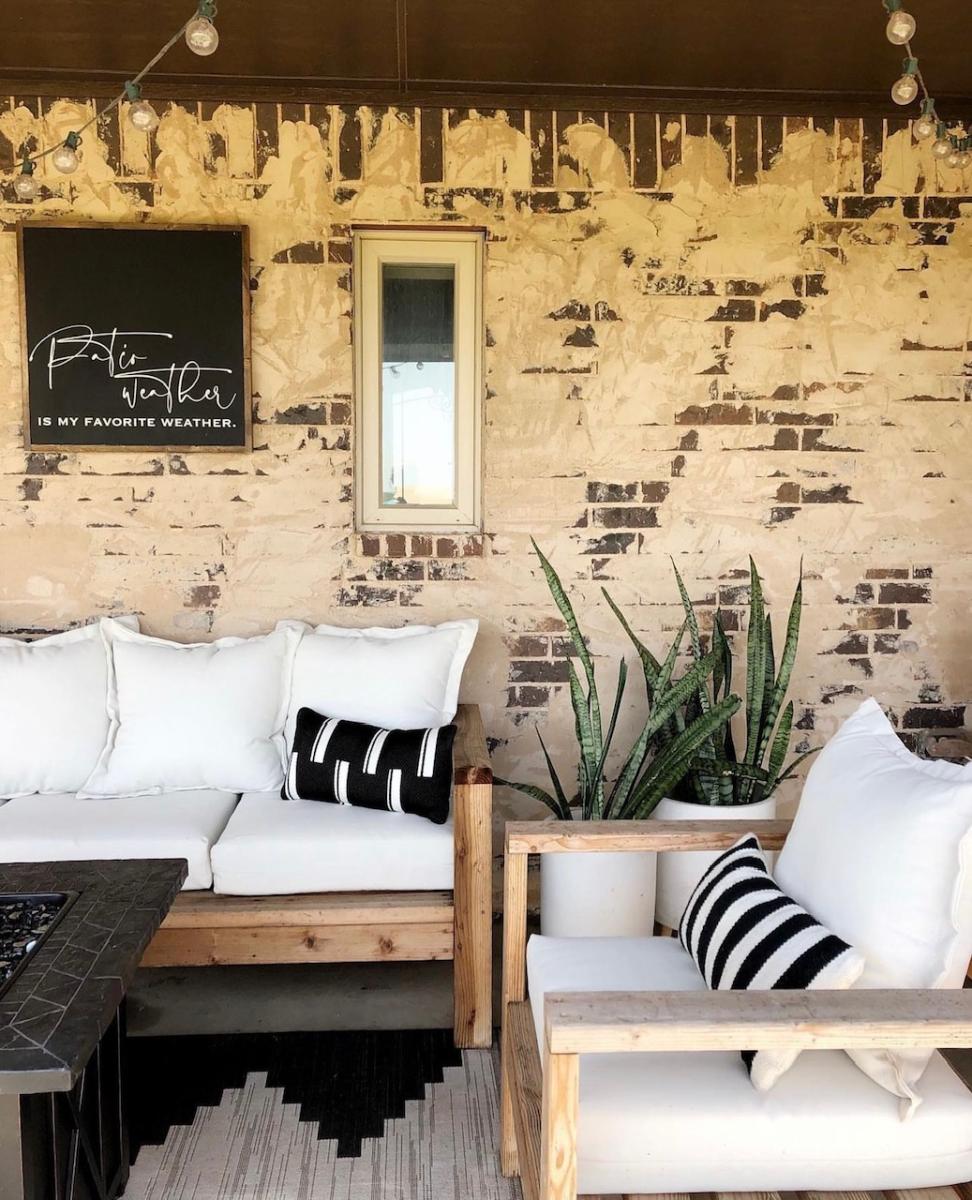
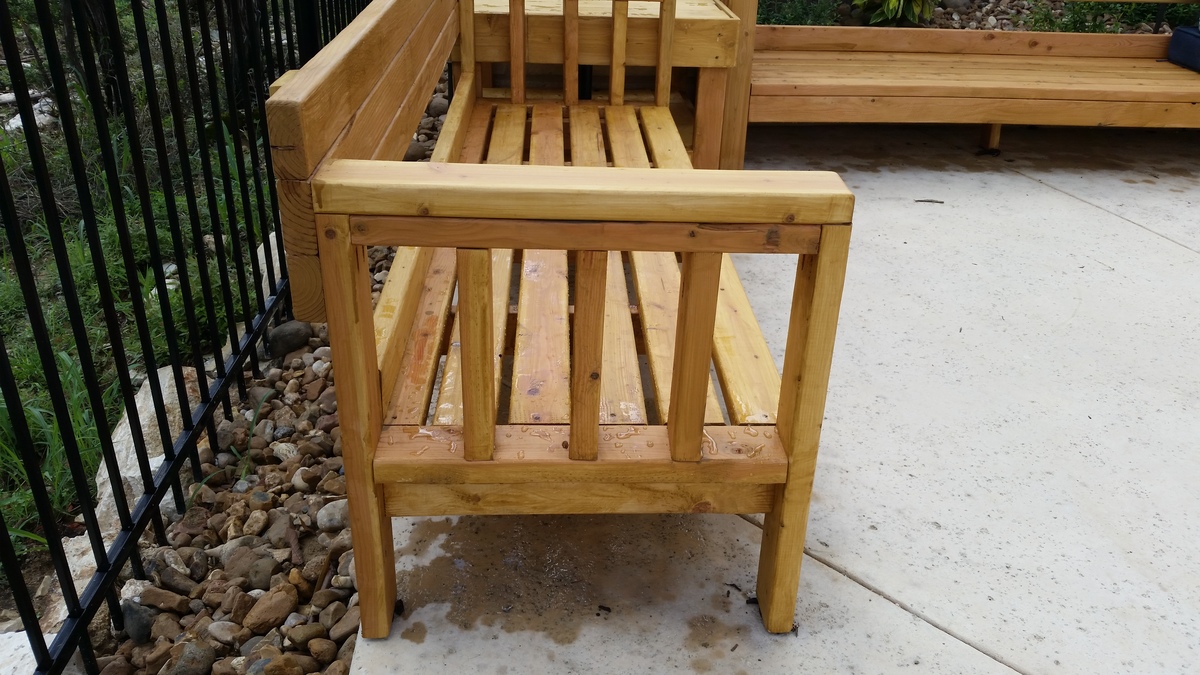
DIY 2x4 Outdoor Sofa
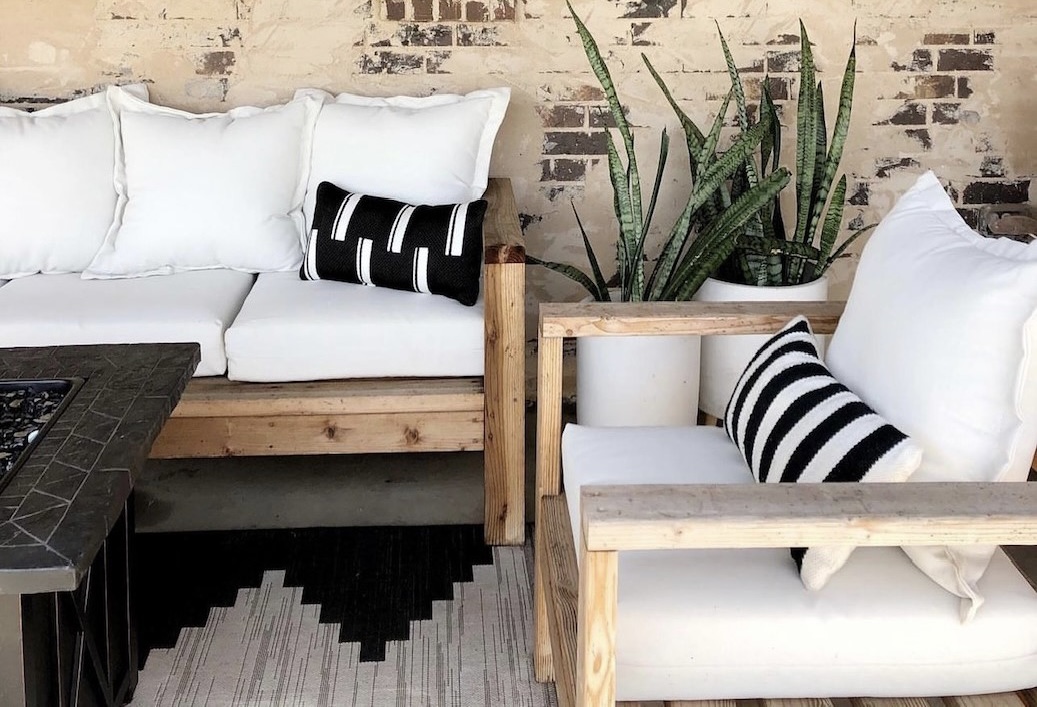
How cute is this new patio sofa I made out of 2x4s??? I used Ana White's plans and tweaked it just a little. I could not be happier with how it turned out and proud that I did it myself.
Built from Plan(s)
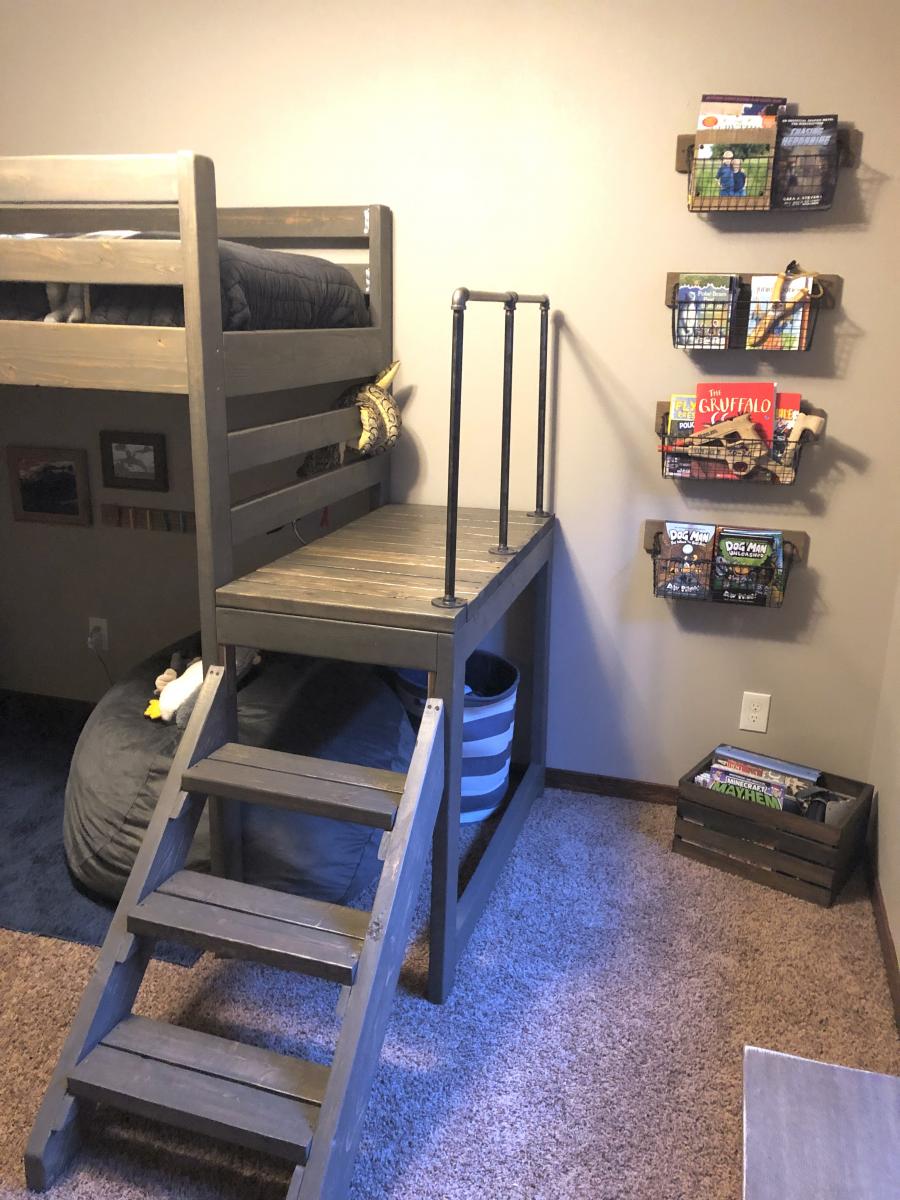
Camp Loft Bed
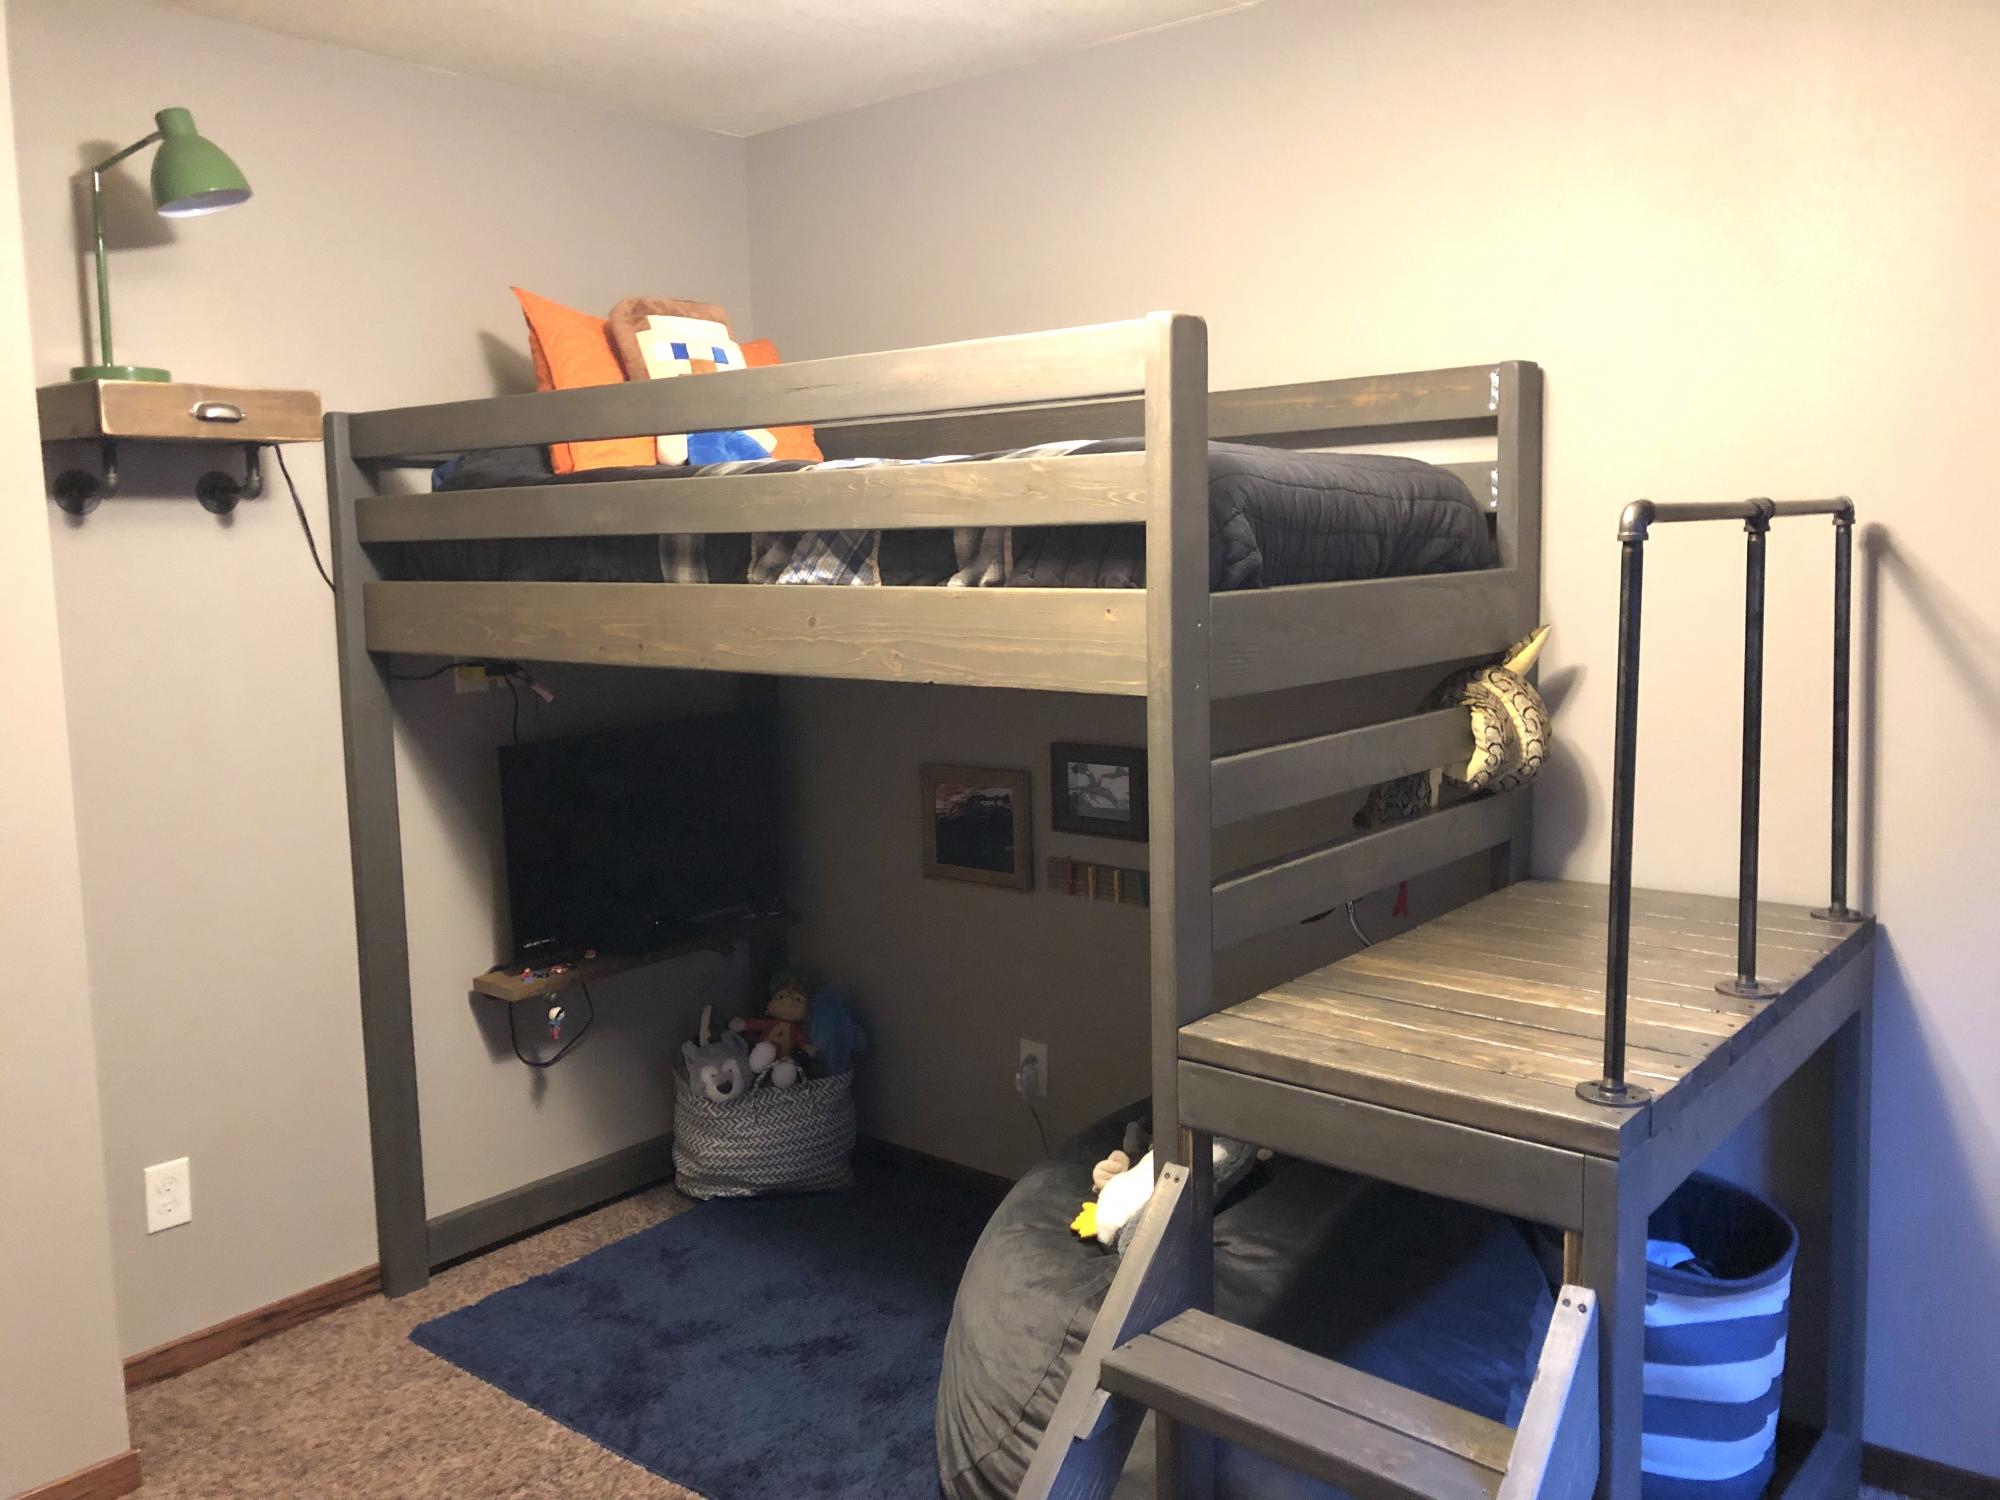
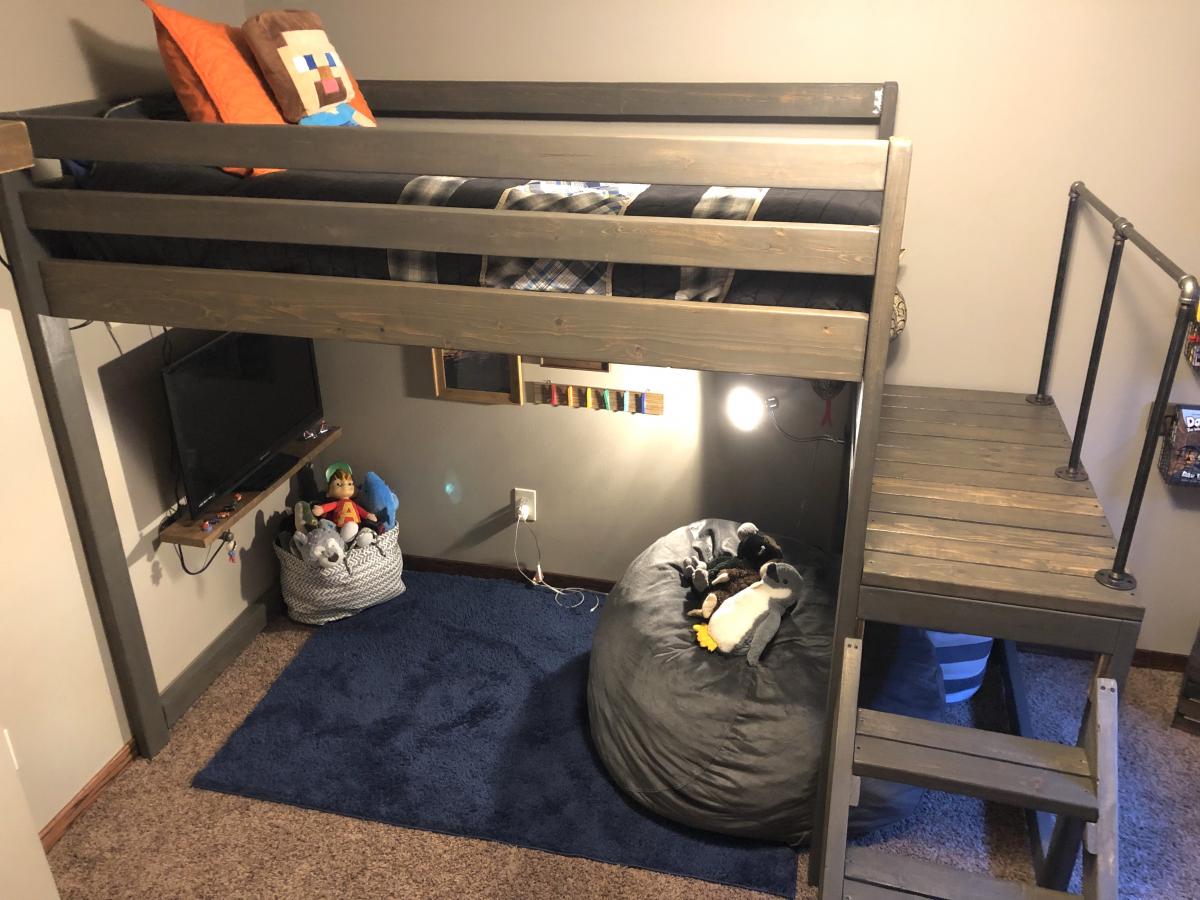
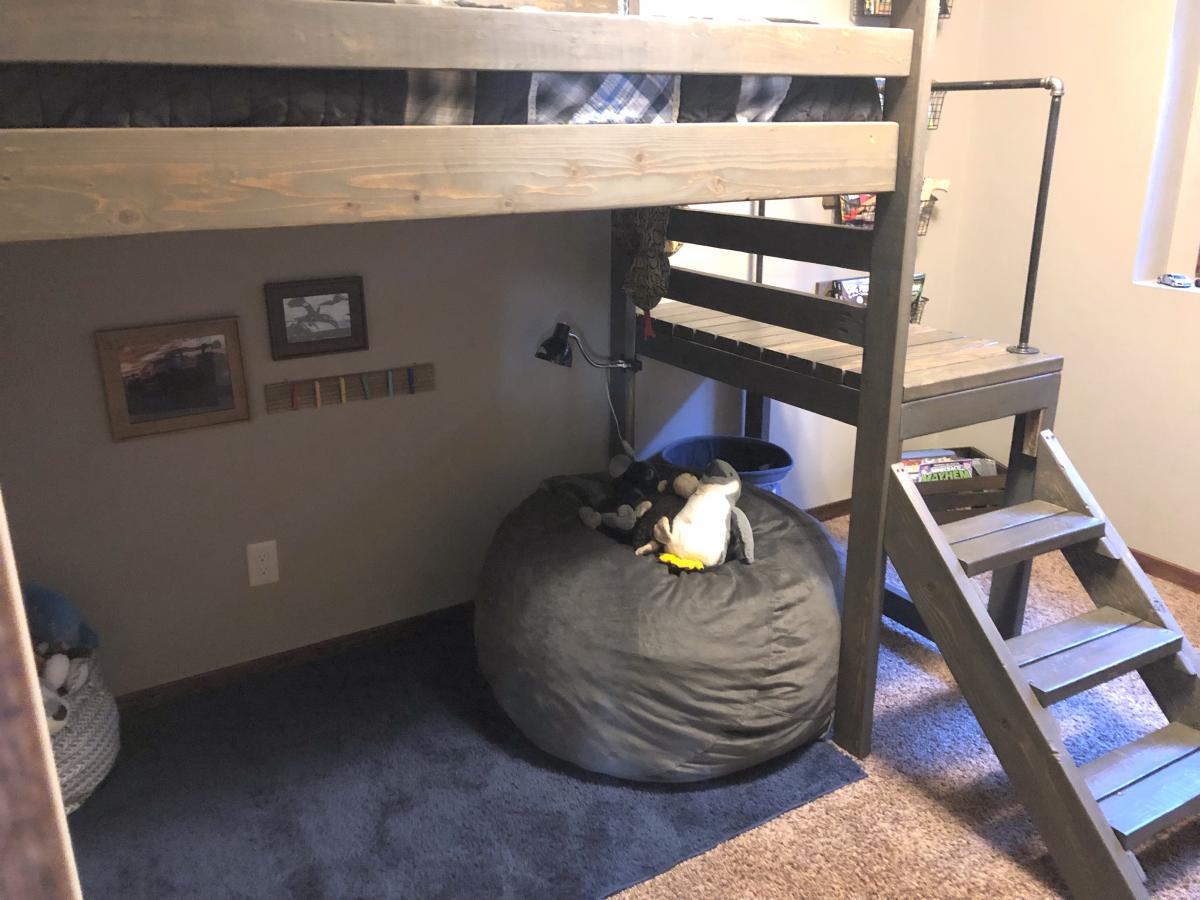
I built this bed for my 8 year old son's room "face lift." His only request was to have a place to hang out, but being his room was so small, that was a struggle! The loft bed allowed us to make a cozy little hangout - the poor guy can't get rid of his siblings now!
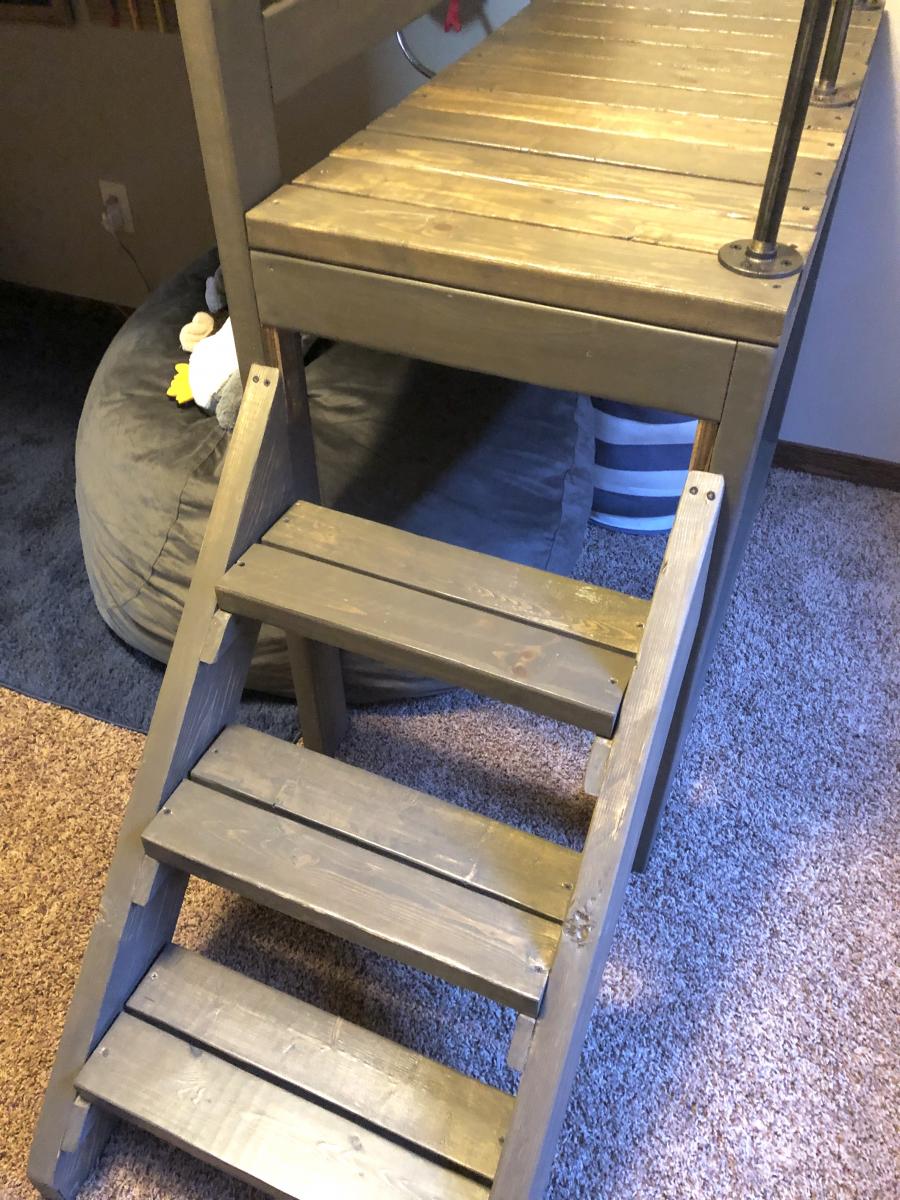
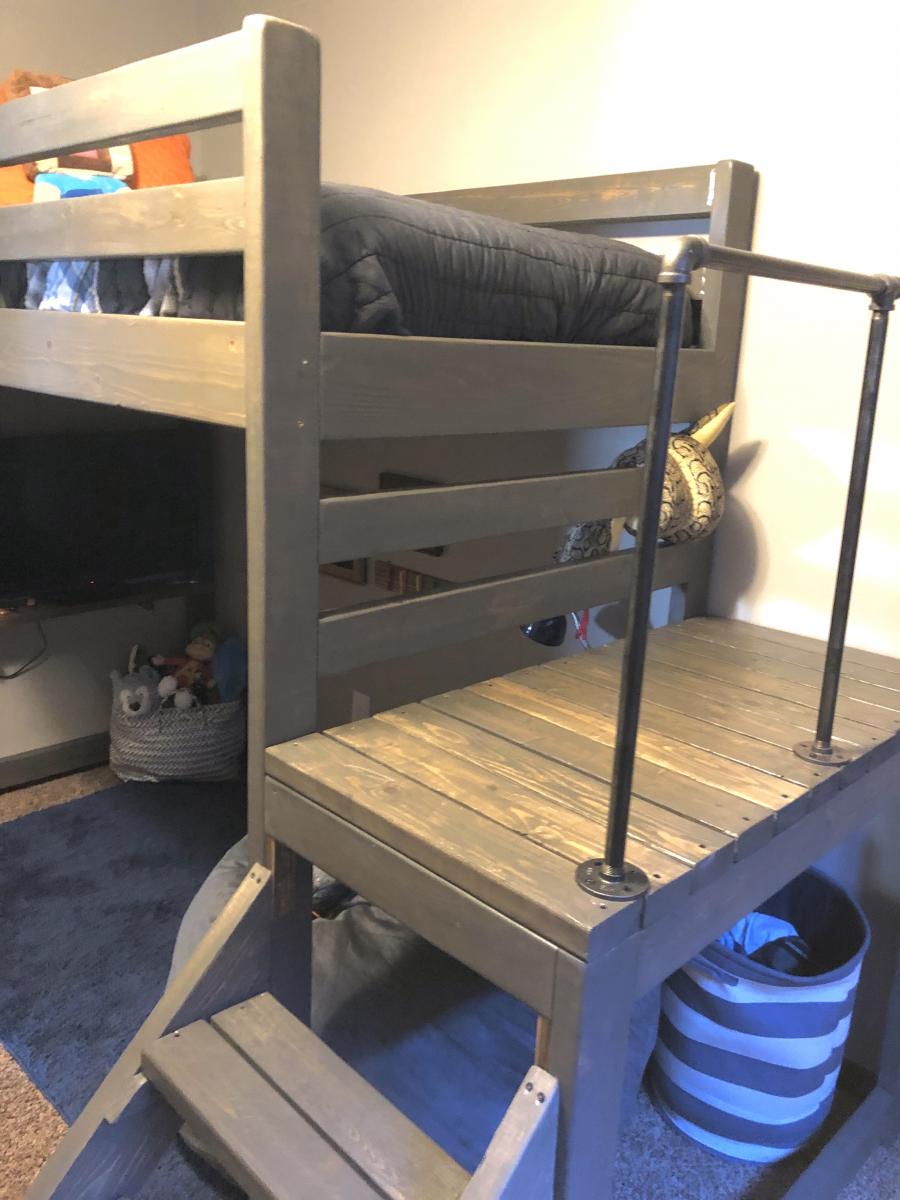
I added a few extra inches to the height of the Camp Loft plan, I also added the pipe hand rail for additional safety and give his room a little older boy vibe! It was a very easy build, the staining/sealing took the longest. The stairs make it much easier to change sheets and getting up and down for those of us who aren't 8 year olds :).
Built from Plan(s)
Estimated Time Investment
Day Project (6-9 Hours)
Finish Used
I used a mixture of Varathane Weathered Gray and Minwax Special Walnut. It is about 3/4 Gray and 1/4 Walnut.
Recommended Skill Level
Beginner
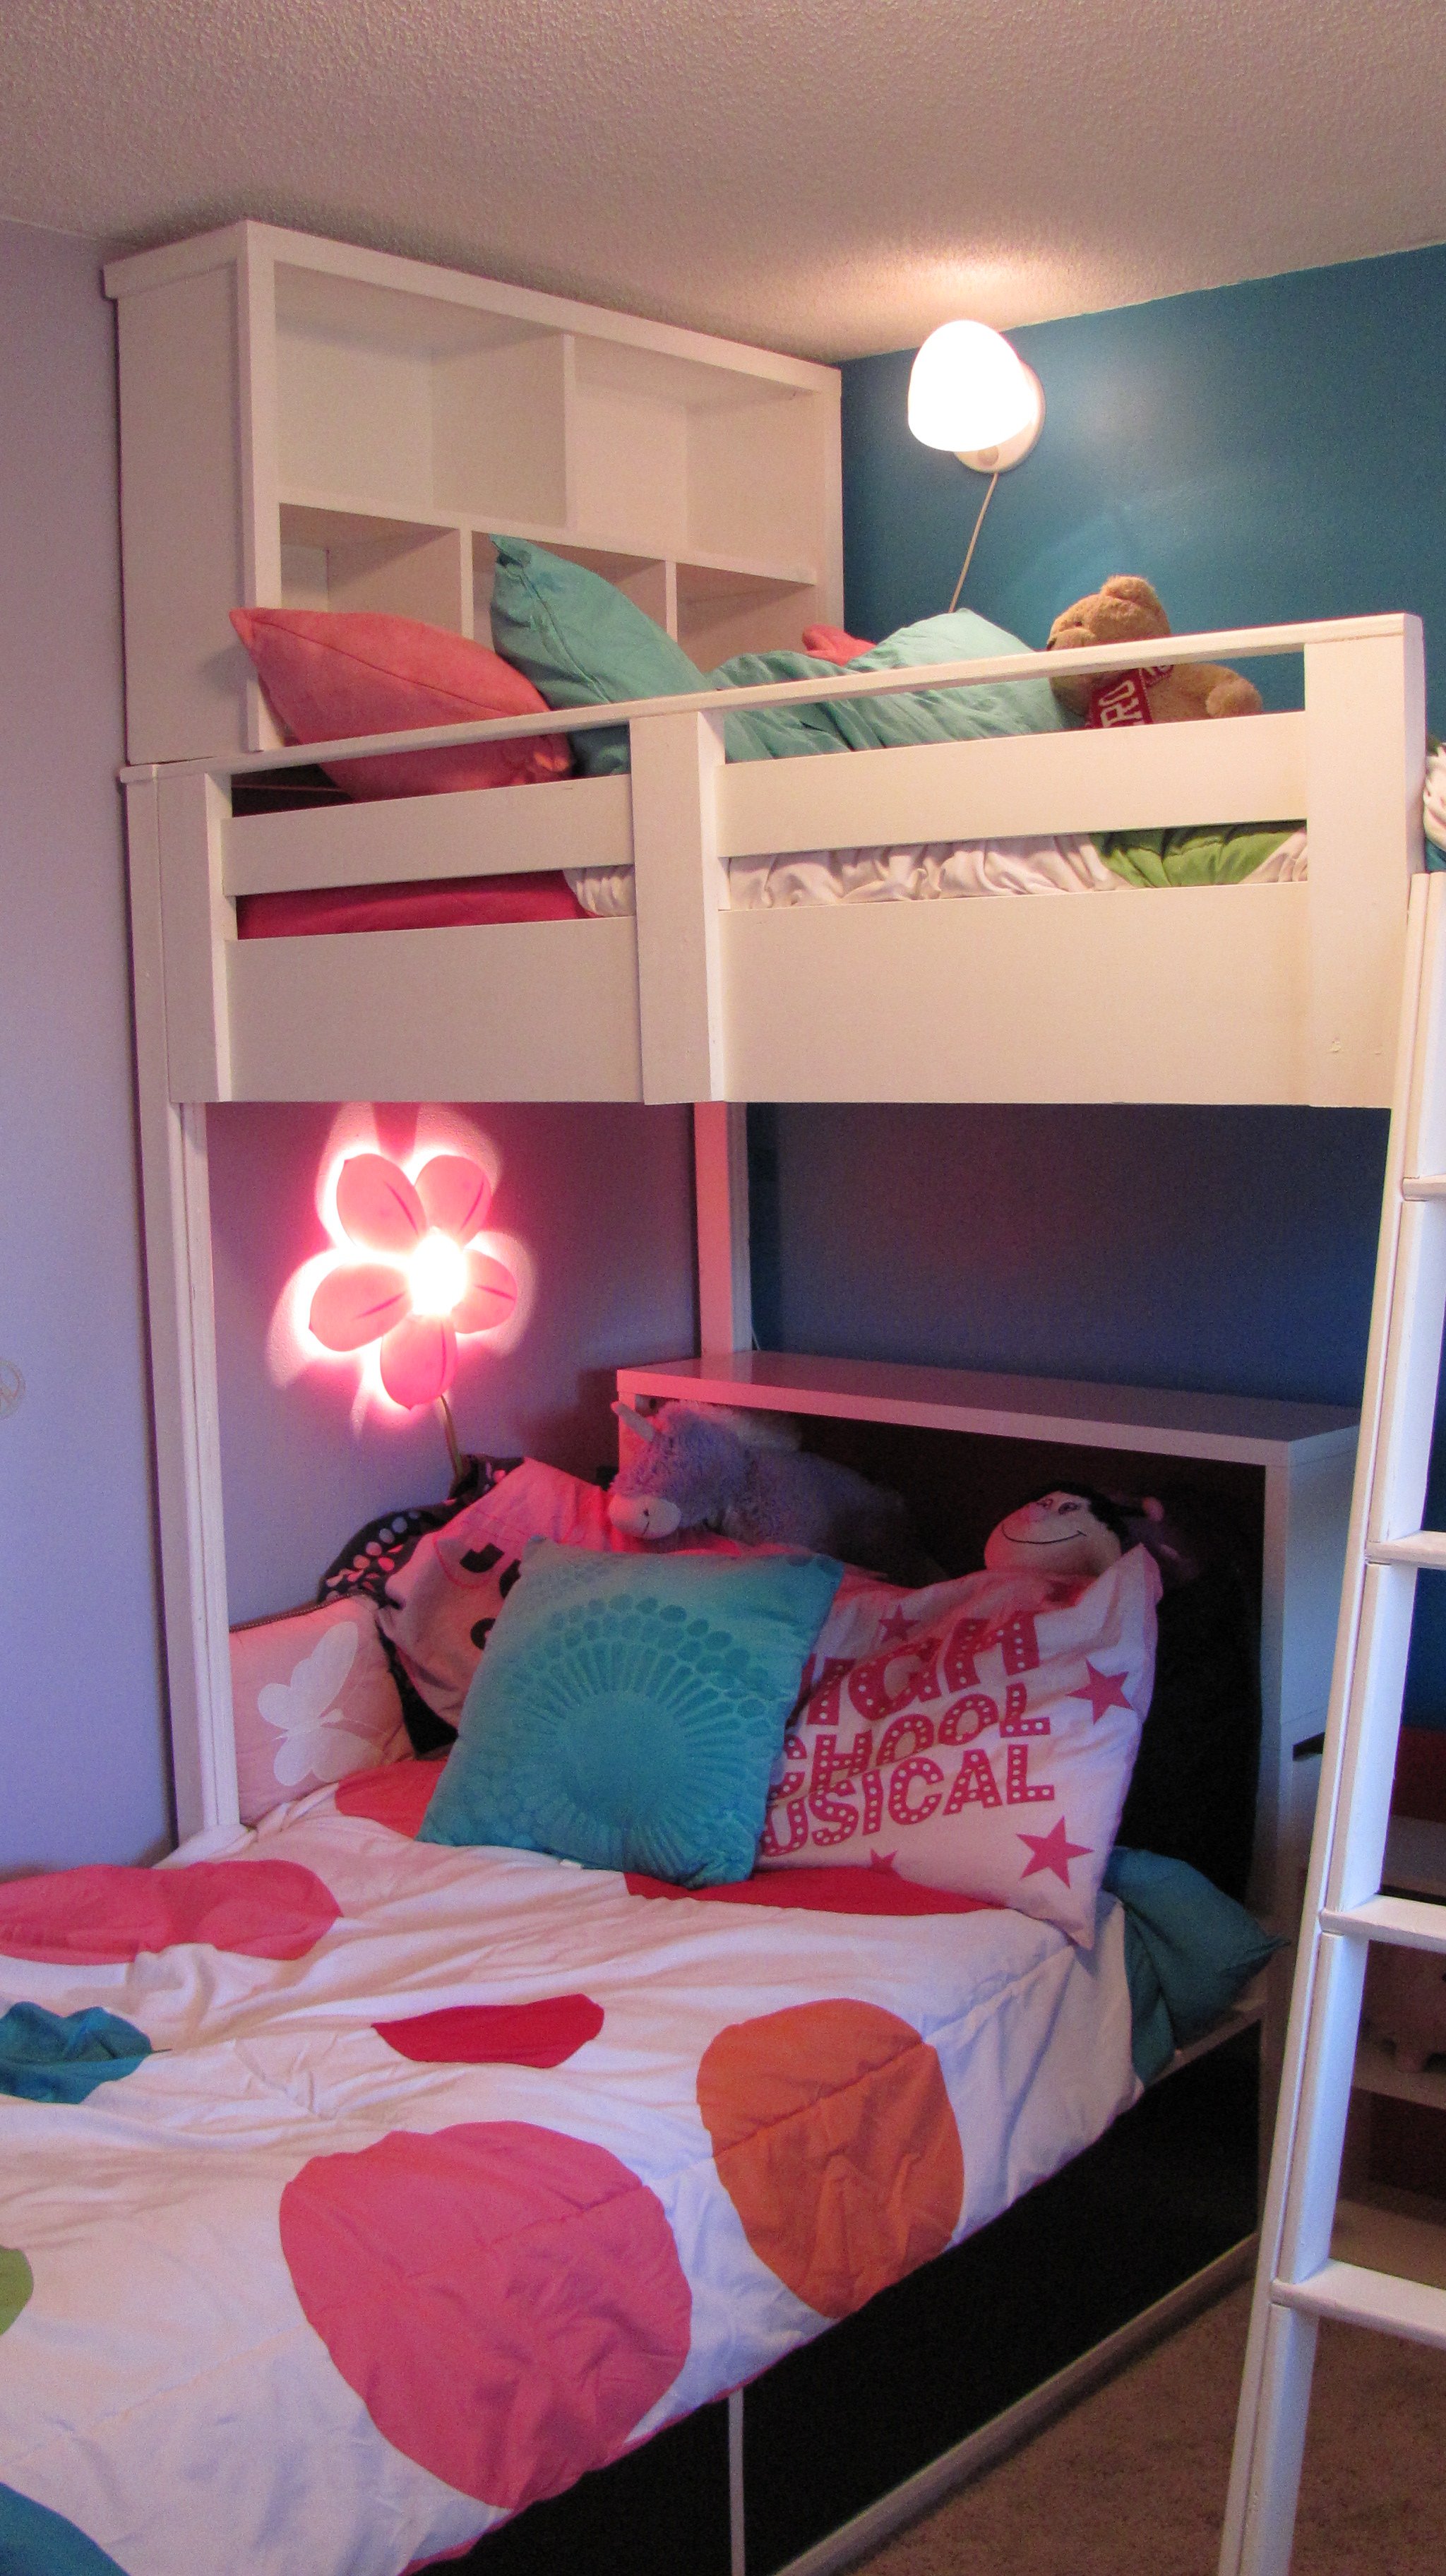
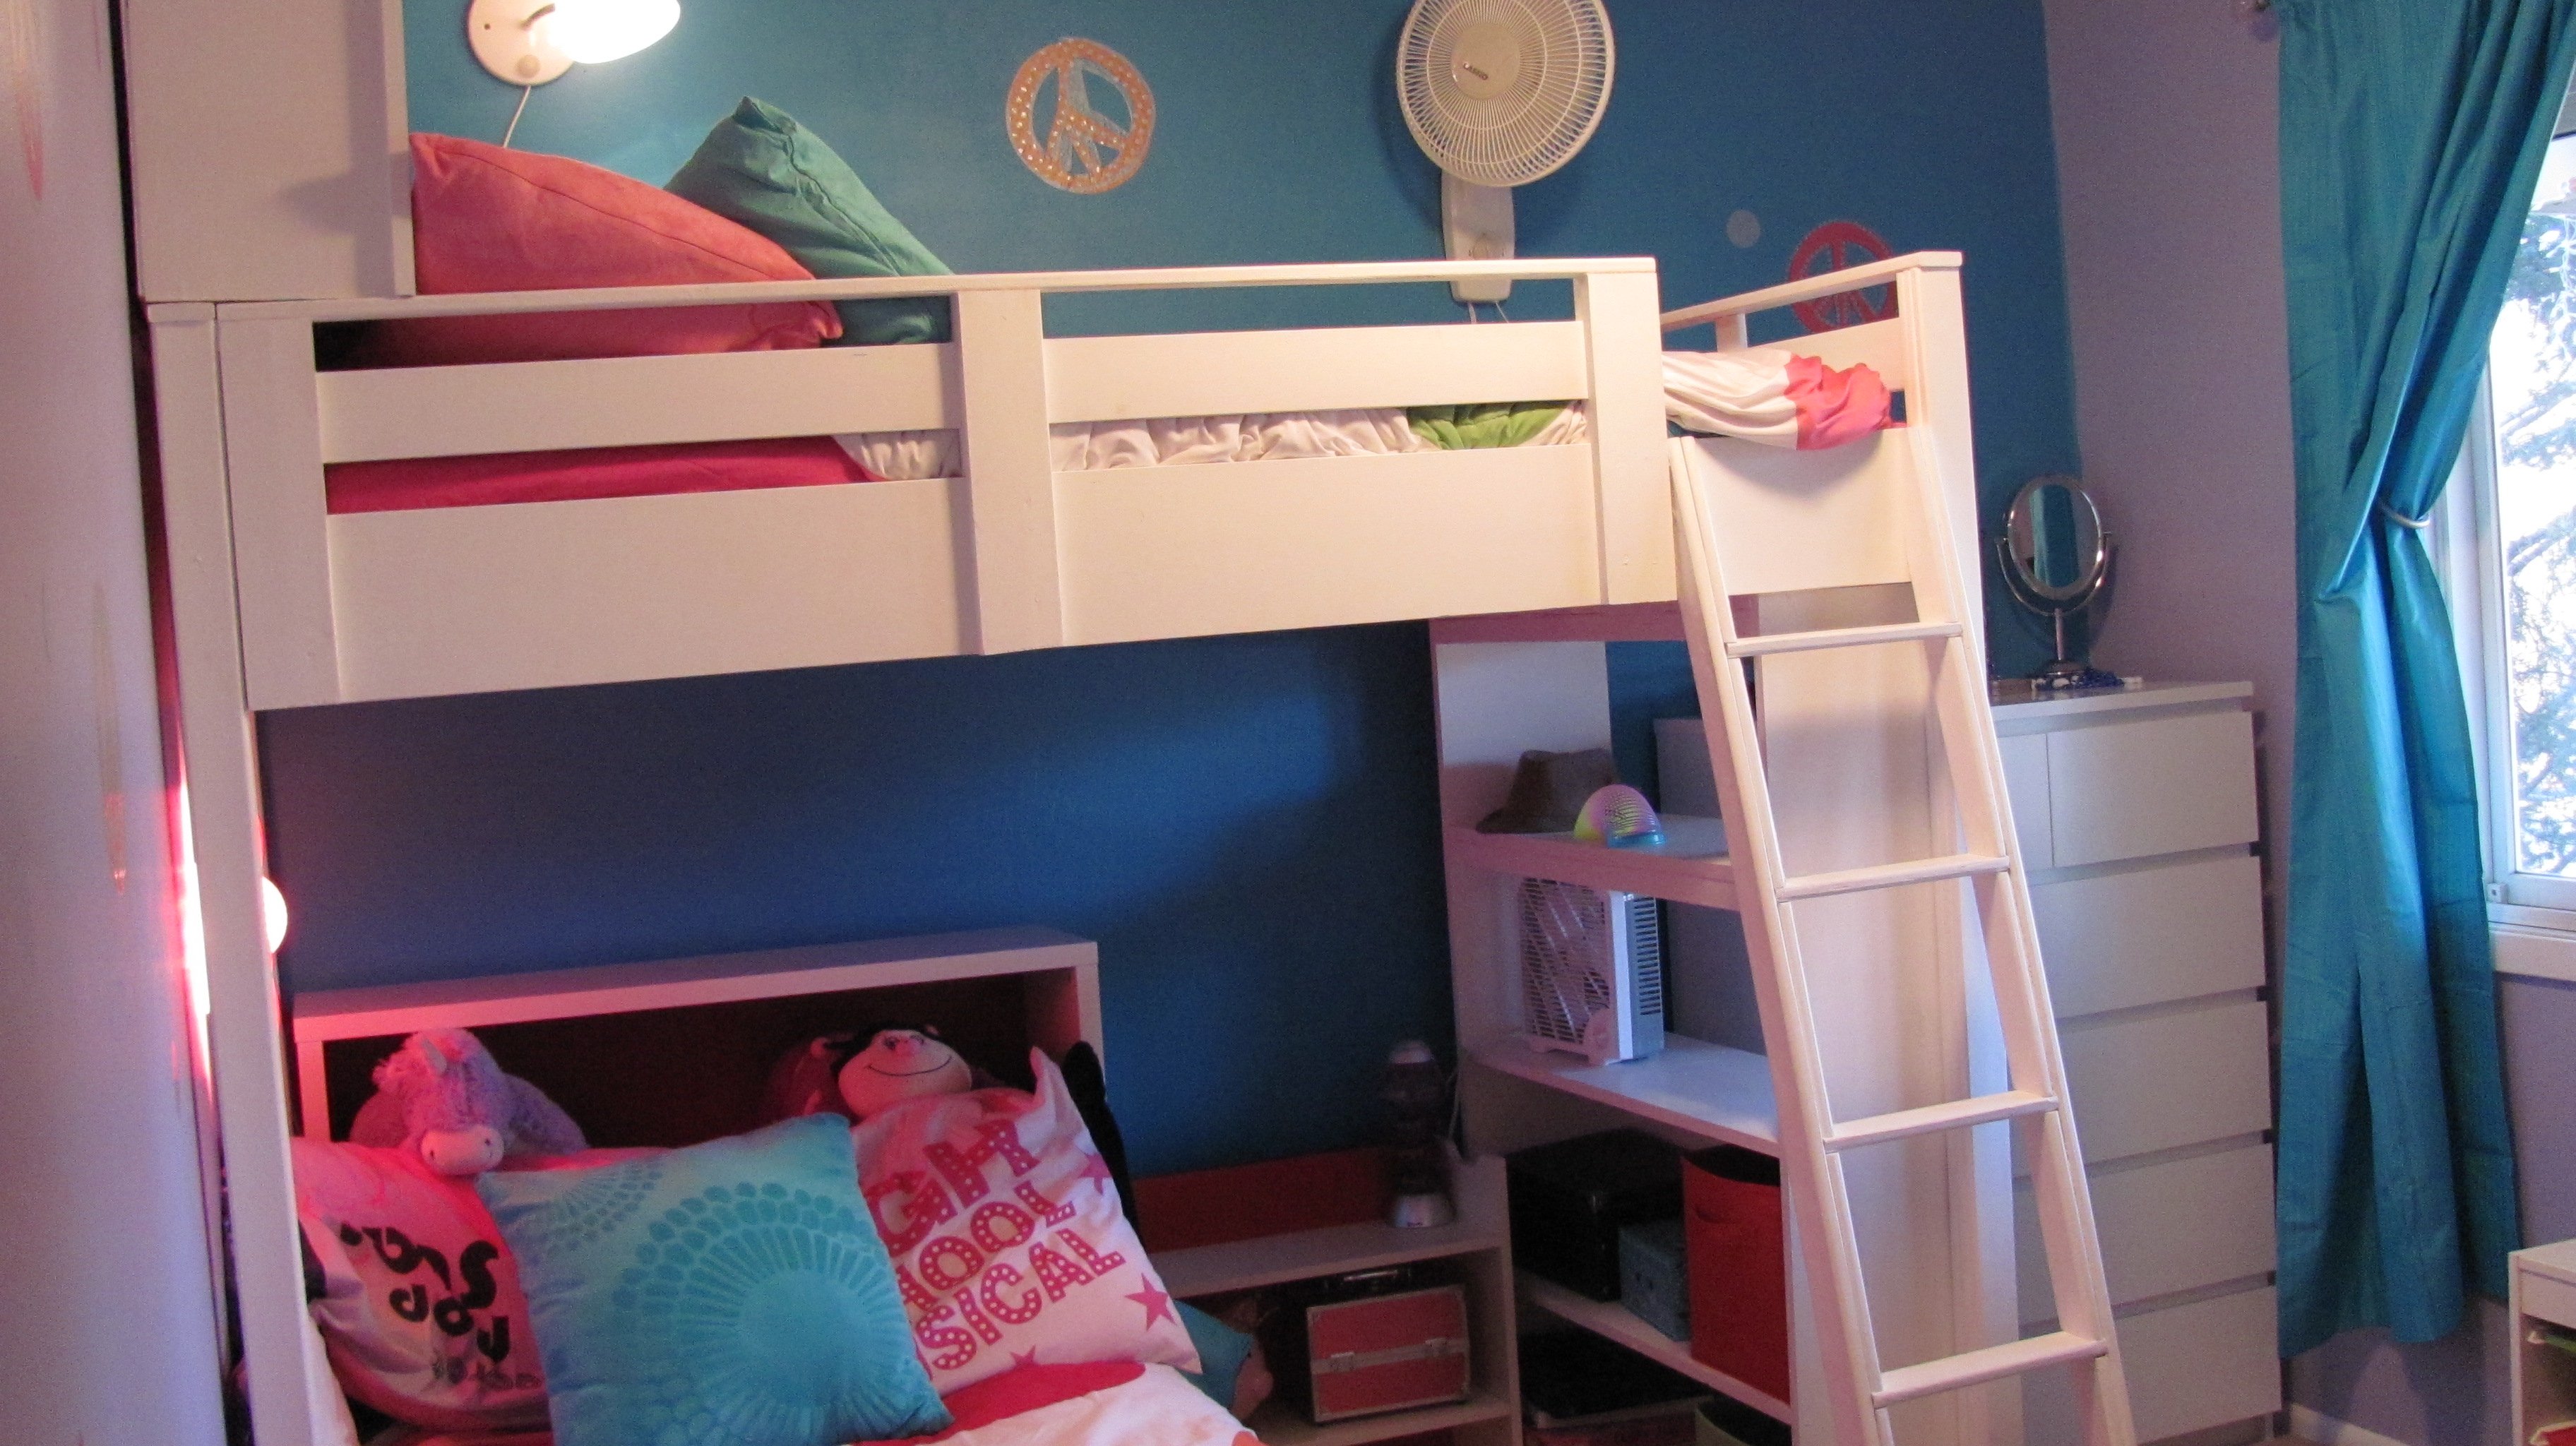
Loft Bed w/ Bookcase and Headboard
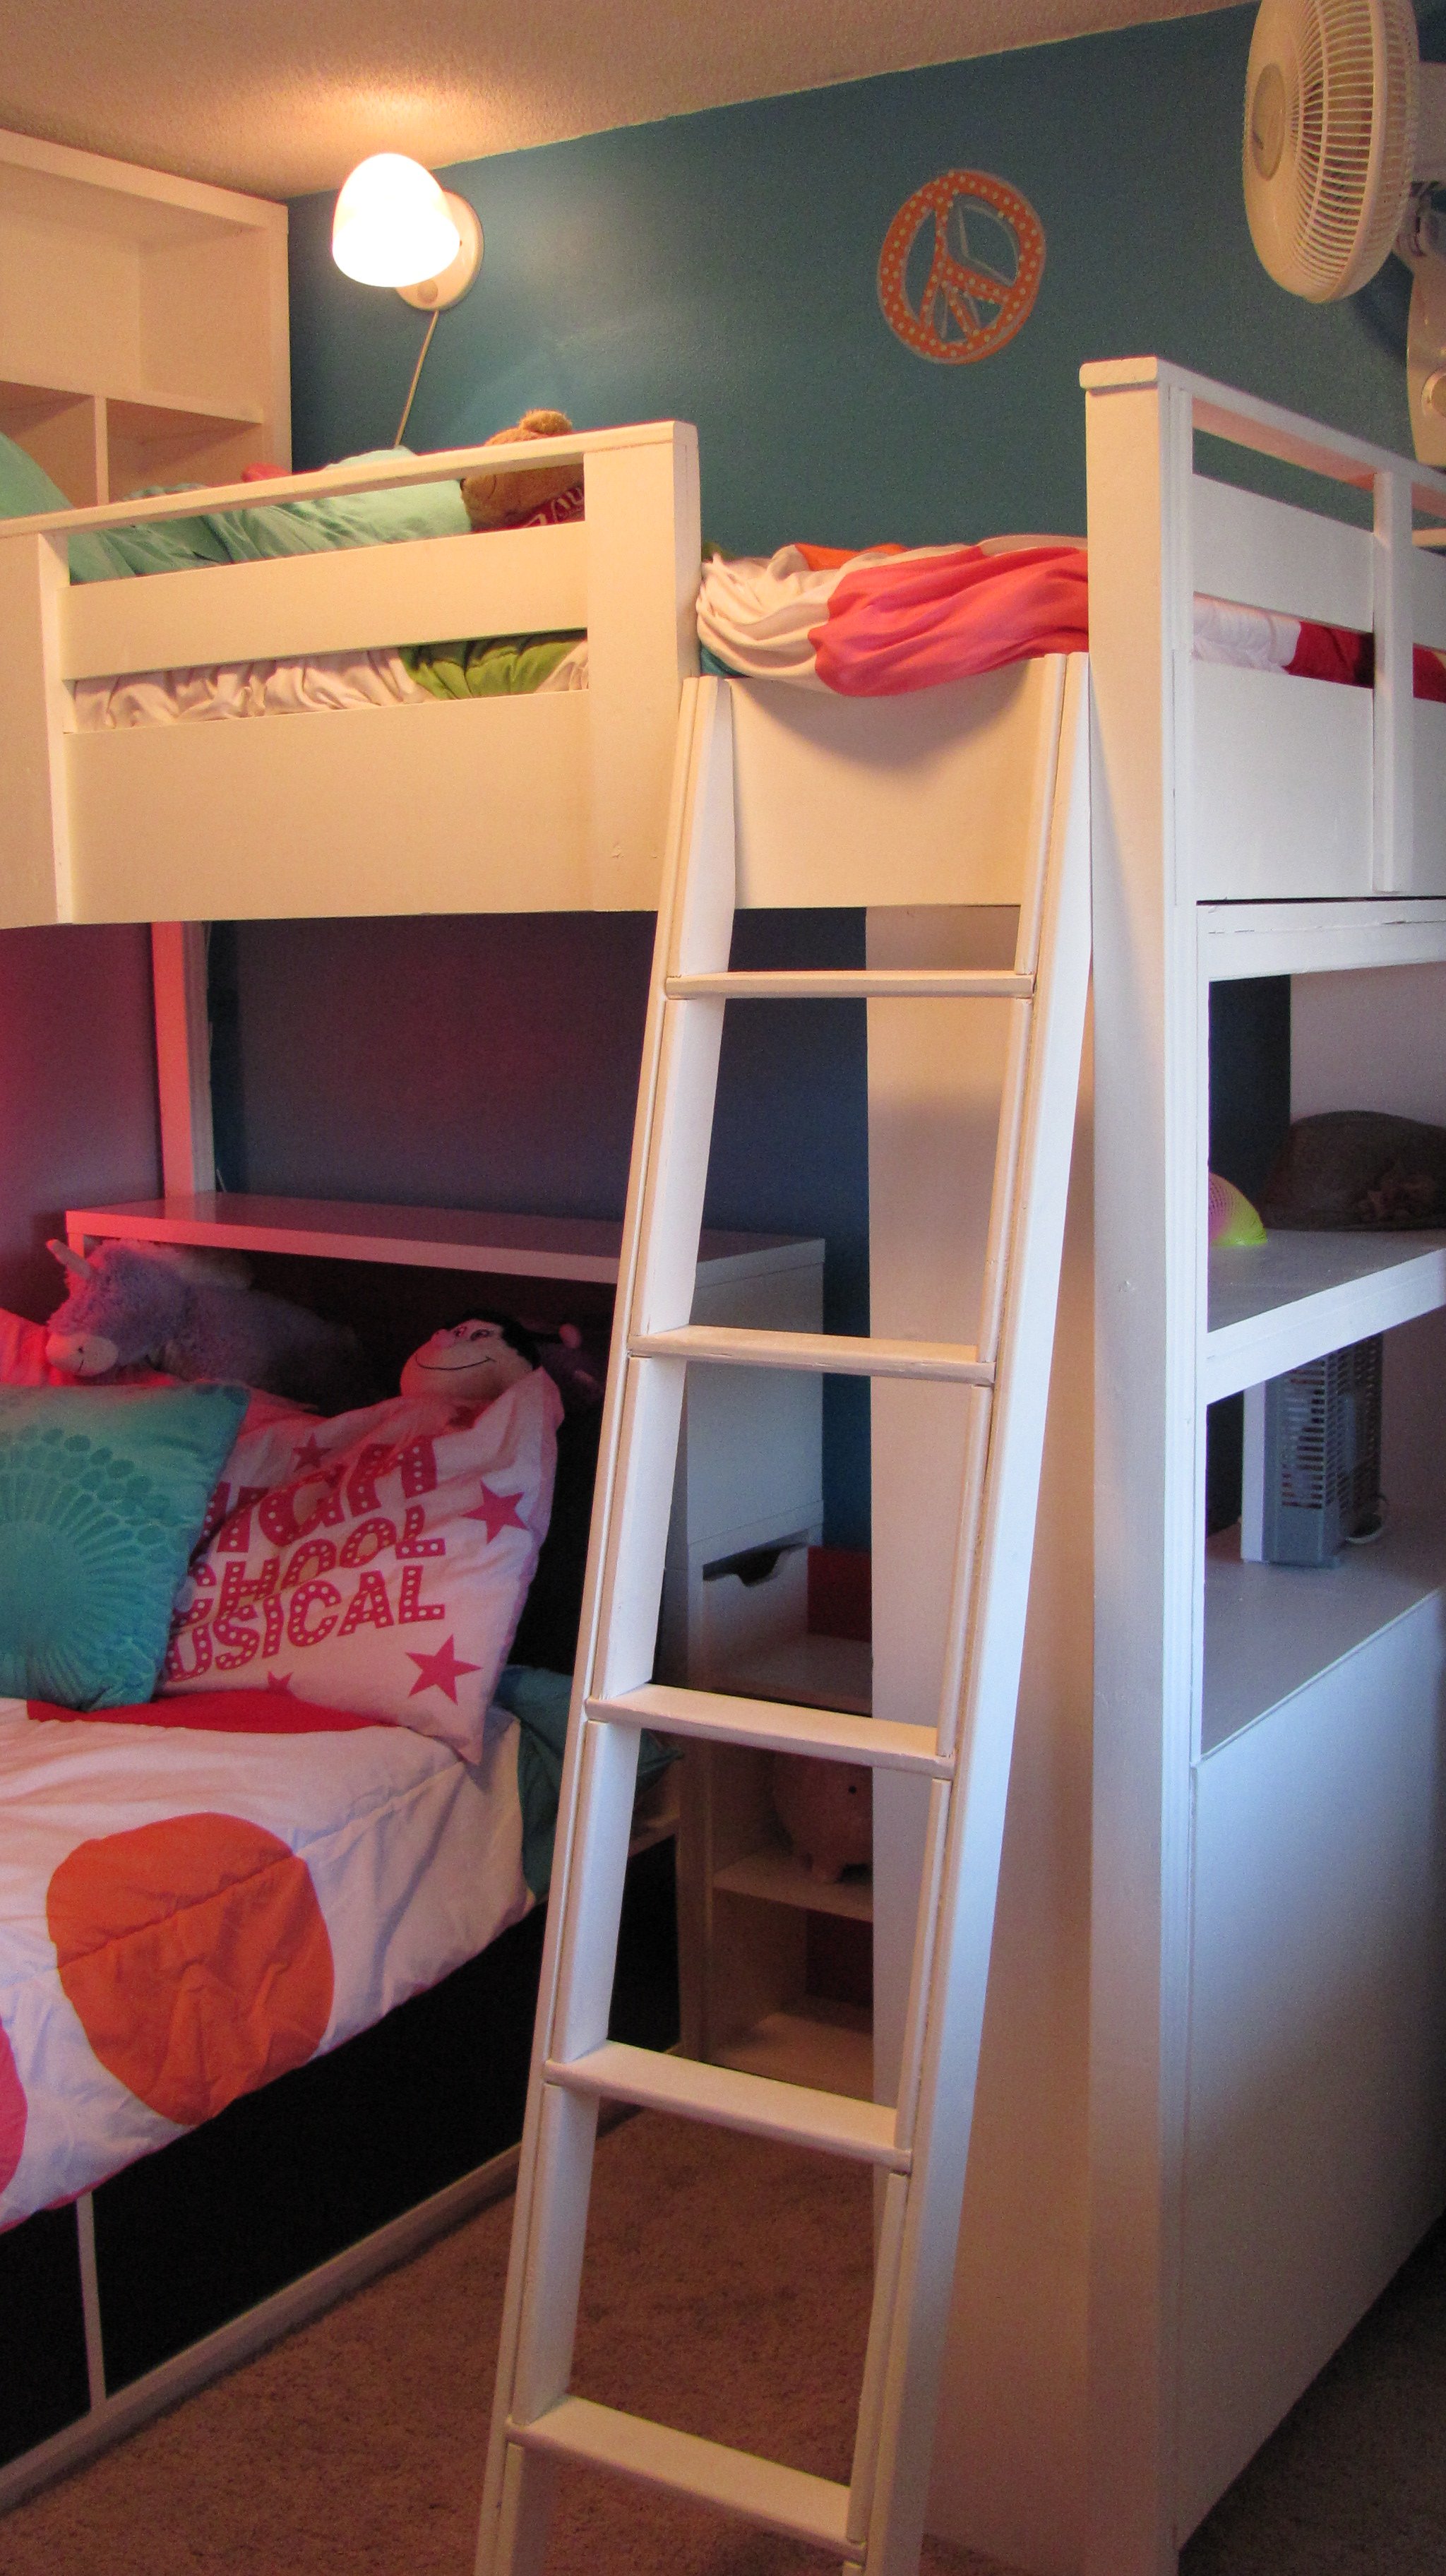
We used the loftbed plans, http://ana-white.com/2010/05/furniture-plans-loft-bed.html and the bookshelf plans, http://ana-white.com/2010/06/plans/what-goes-under-loft-bed-how-about-b…- then designed our own headboard. The girls love their new room and we're going to build another one for the boys! We just put a platform bed from Ikea underneath!

Built from Plan(s)
Estimated Time Investment
Weekend Project (10-20 Hours)
Recommended Skill Level
Beginner
Comments

Sun, 12/30/2012 - 06:39
big bookcase under loft bed
i want to build this project for my daughter, but the link for the bookcase is a dead link. where can i find the bookshelf plans? i plan on making the loft be a full size, so will be adding 15" to my project. thank you!
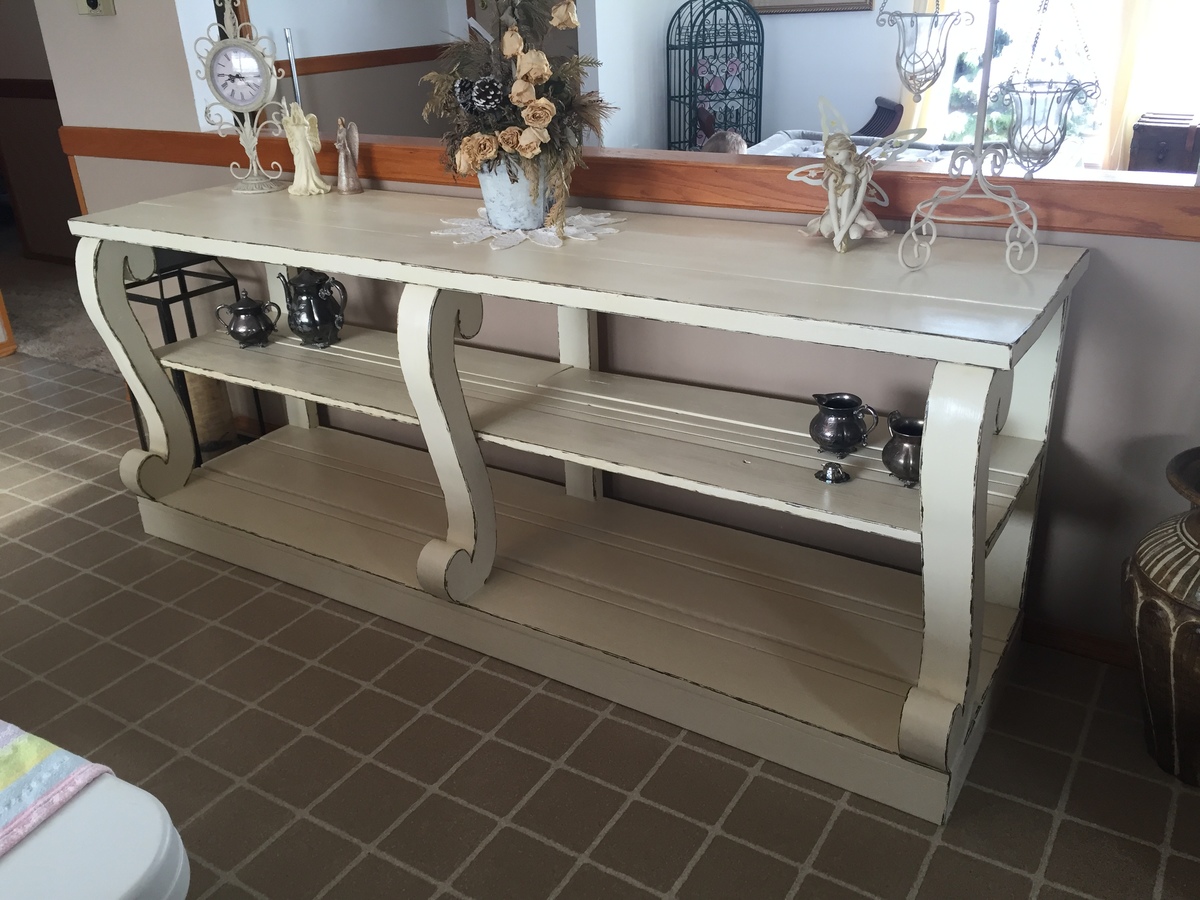
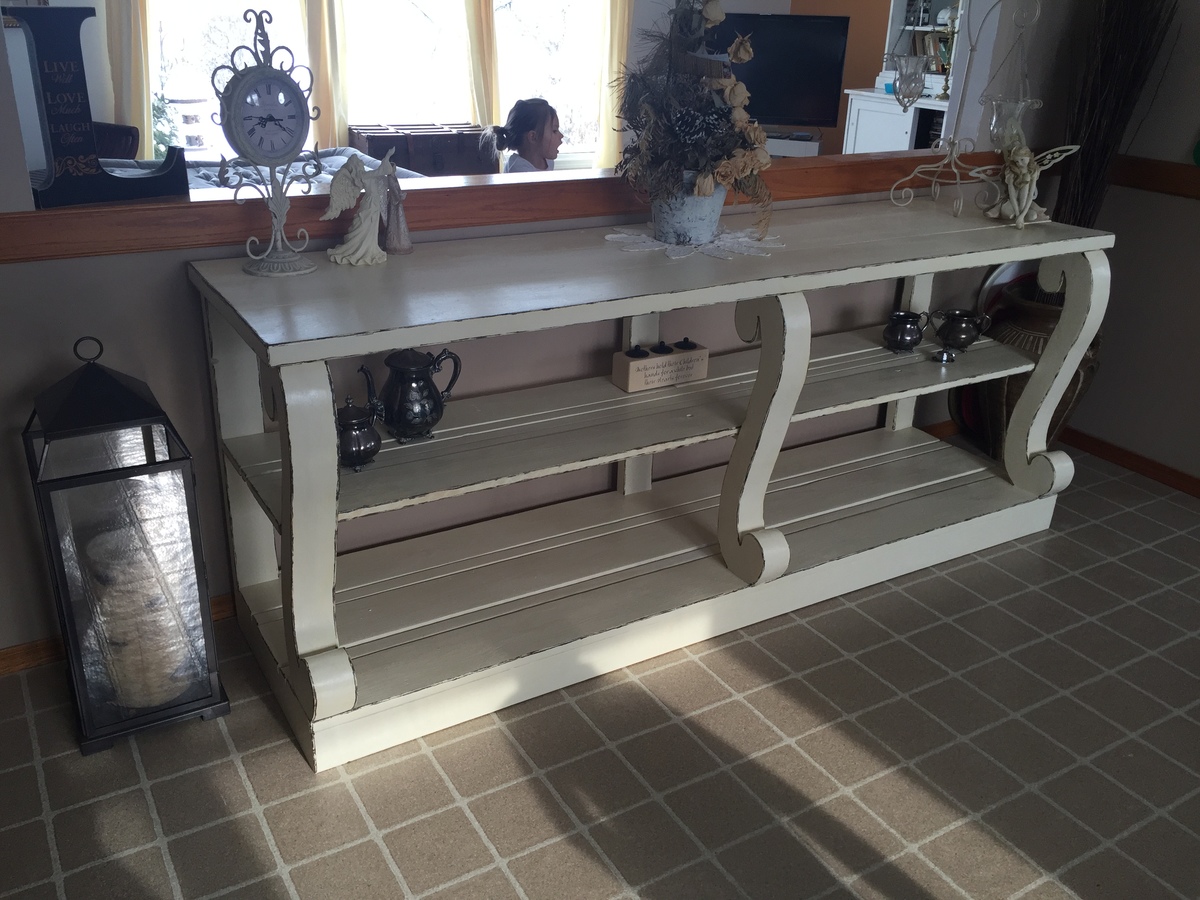
Scroll Legged Console made by RW Creations
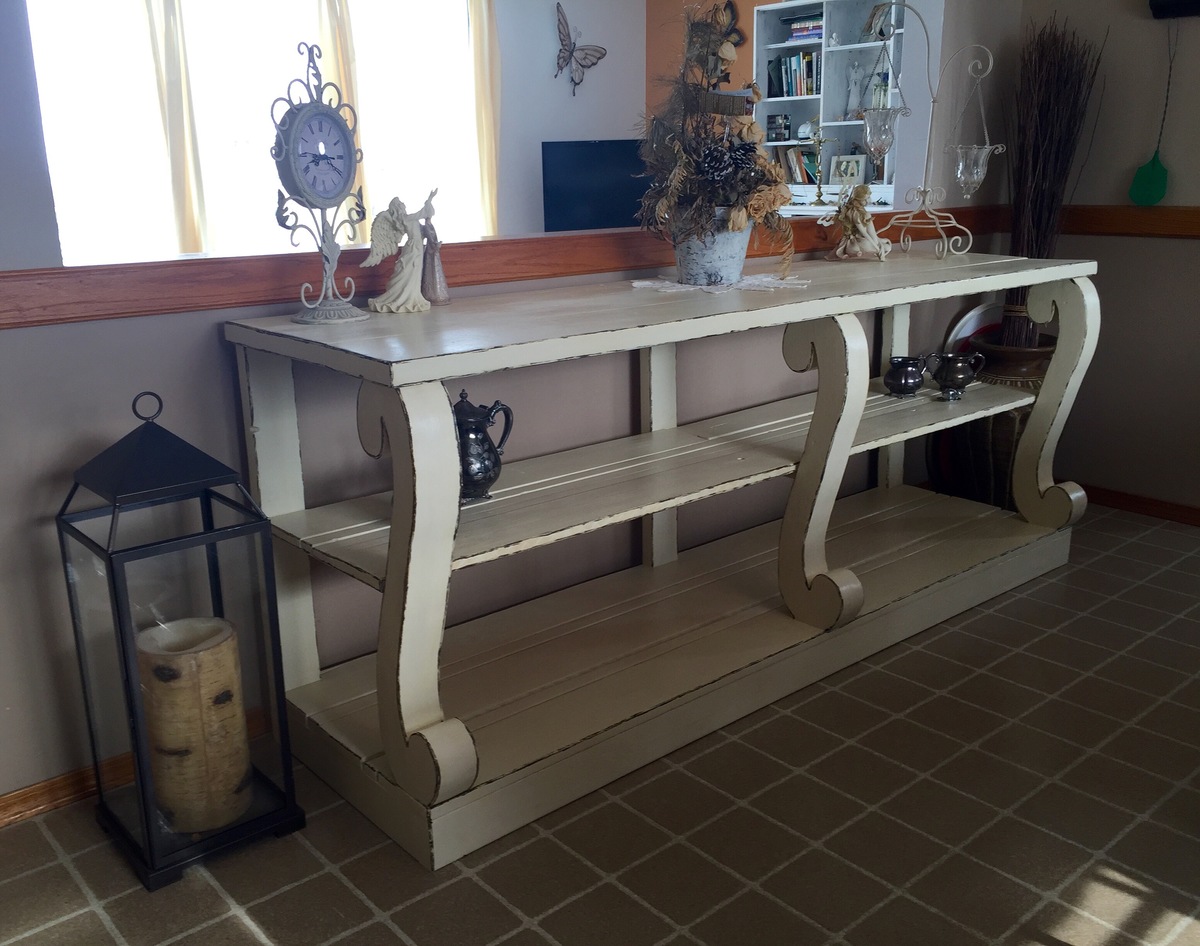
I found these amazing plans from Ana's website here. Couldn't be easier! I modified mine a bit to fit the space and used recycled pine wood for my project! The Scroll legs I used my jig saw to cut them out with the great stencil provided in these plans. I was really happy with the result, as I only had minor sanding to do to make them match up when I glued them together. Since I was painting this piece I used dry wall mud over the seams on the legs to hide the joints (a lot less expensive than wood filler). Since it was all recycled wood I had to do a lot of sanding but it saved me a lot of money! So very happy with this project! Thanks for again for the amazing plans!!!
Randi Wolf
RW Creations
Built from Plan(s)
Estimated Cost
$150-$200.
Estimated Time Investment
Weekend Project (10-20 Hours)
Finish Used
I stained the piece with a dark walnut stain. I then painted it a Chalked Ivory. Sanded the edges to bring the dark weathered look through and then sealed it with Varathane Triple thick polyurethane.
Recommended Skill Level
Intermediate
Comments

Wed, 03/02/2016 - 17:12
this looks really beautiful!
this looks really beautiful! I love the distressed look!

Square Picnic Table using Deck Boards
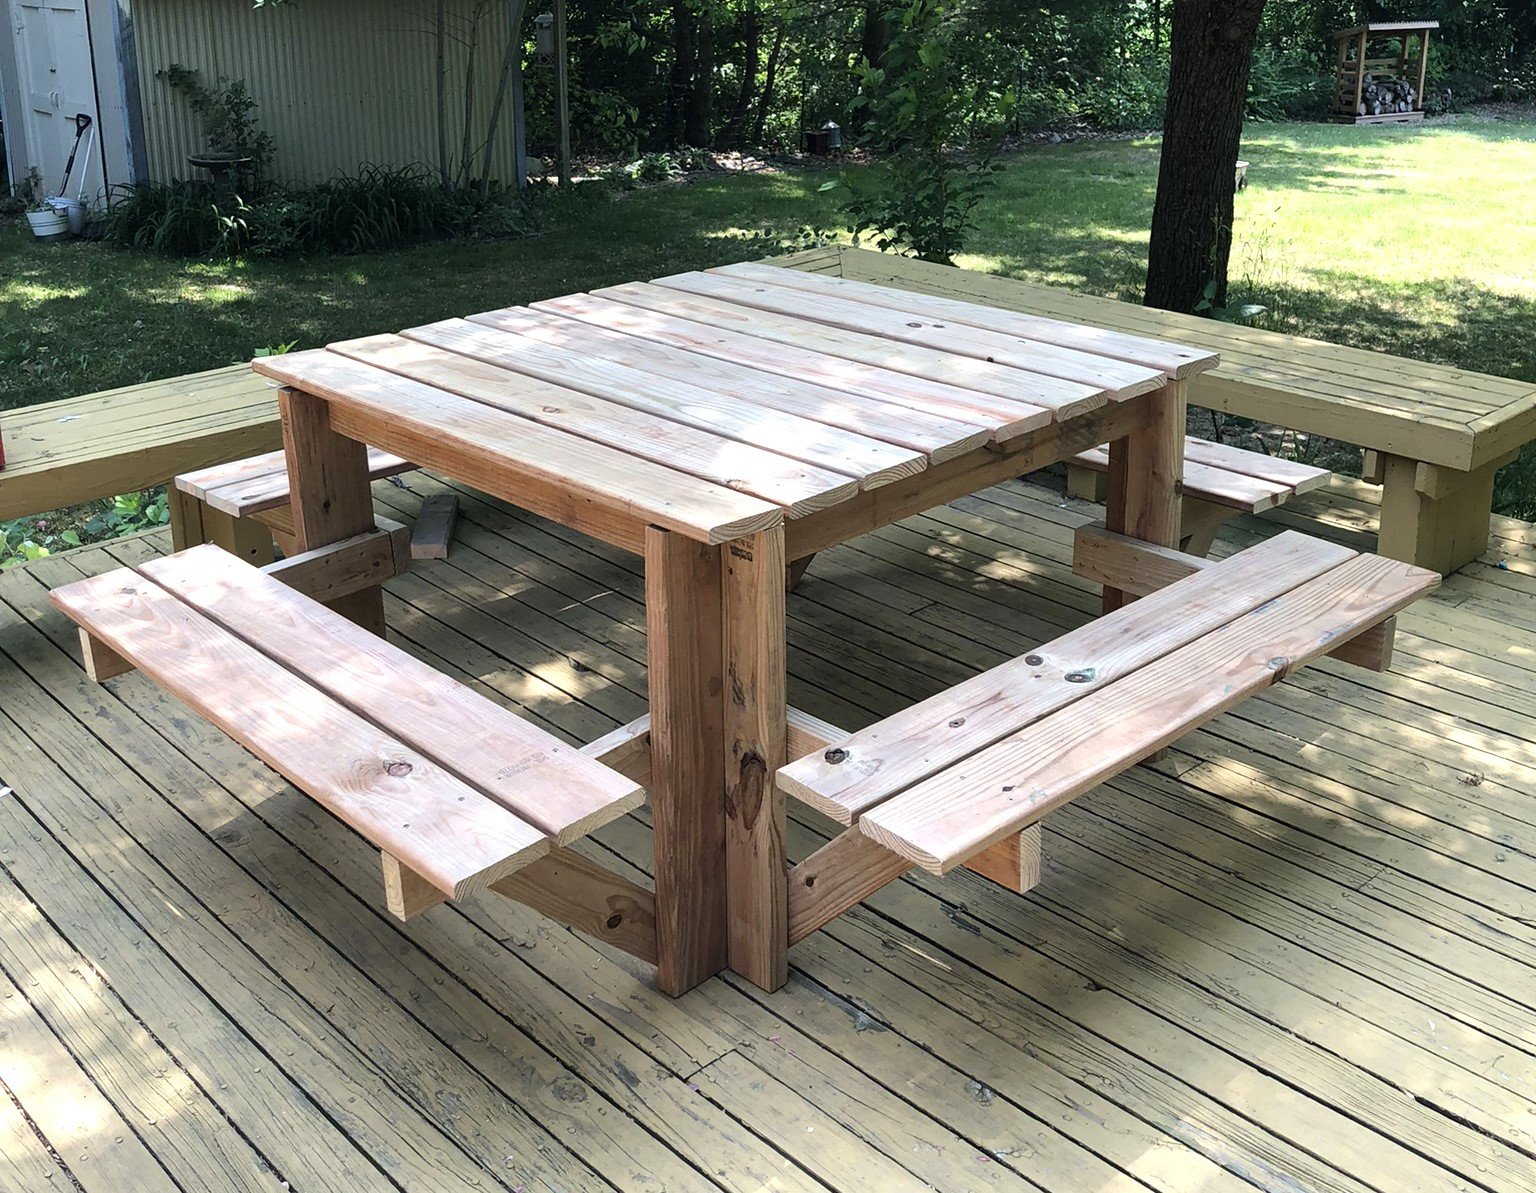
I used deck boards instead of 2x6 for the top and seats; this lightened the table overall while negating the need to sand and finish the boards.
I also used a cedar-tone treated board so staining wasn't necessary.
Kelly S.
Built from Plan(s)
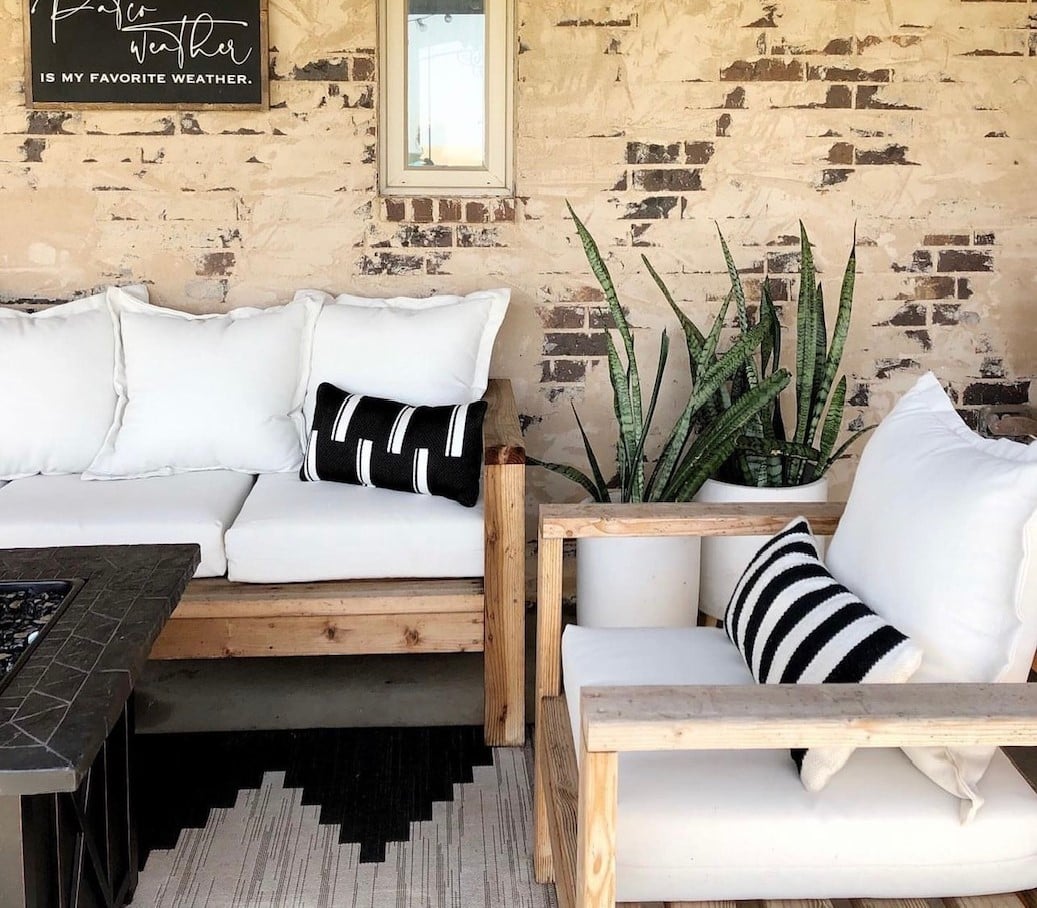
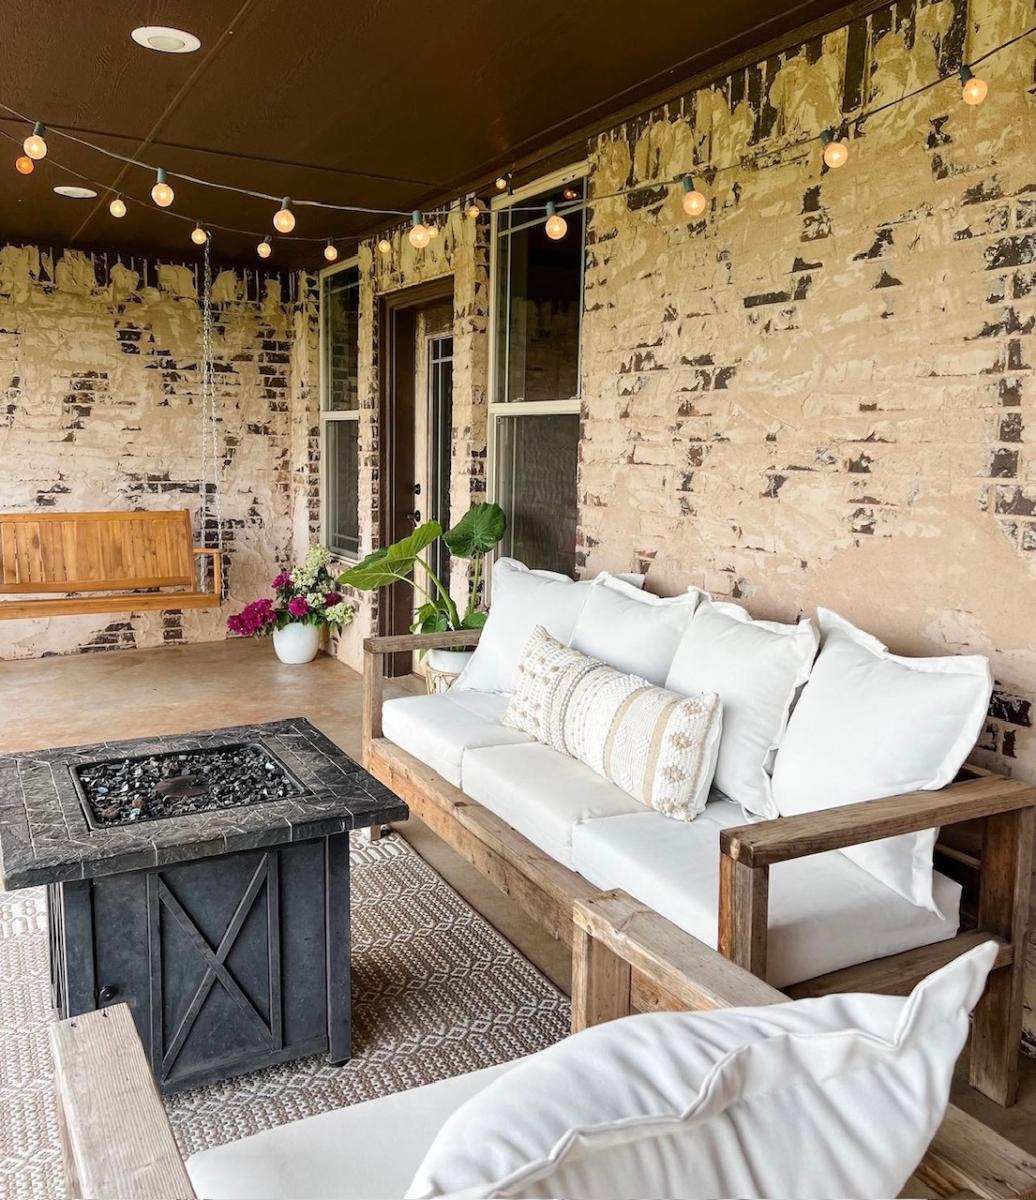
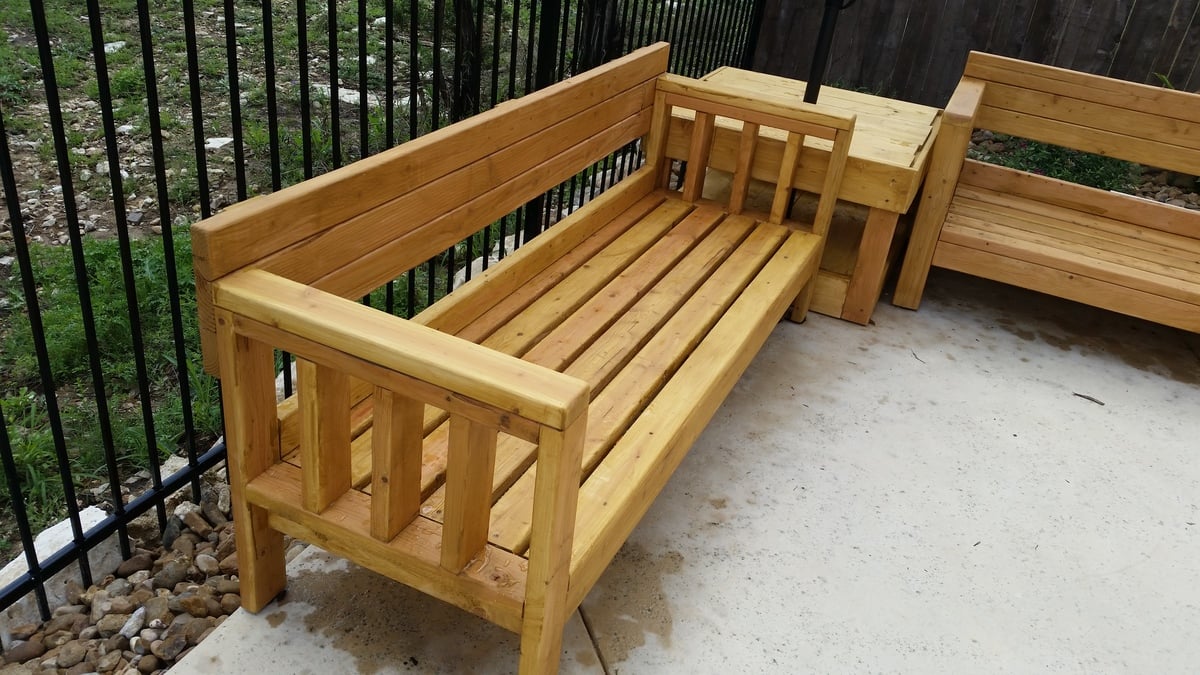
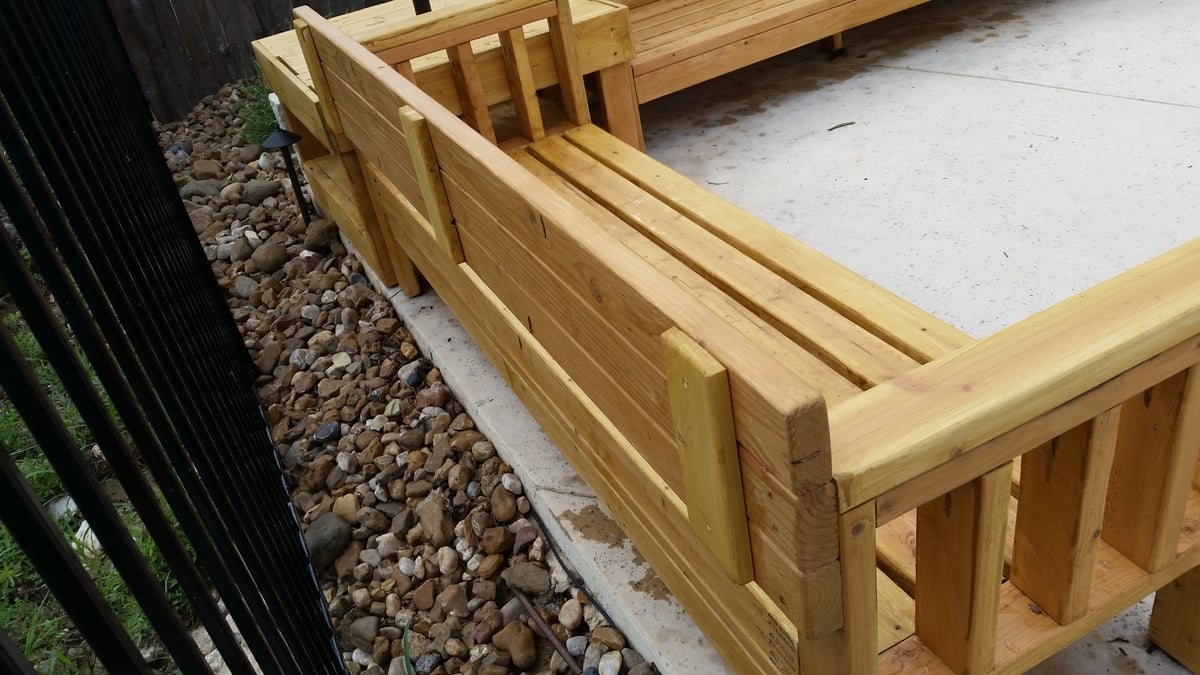
Sofa and Long Couch
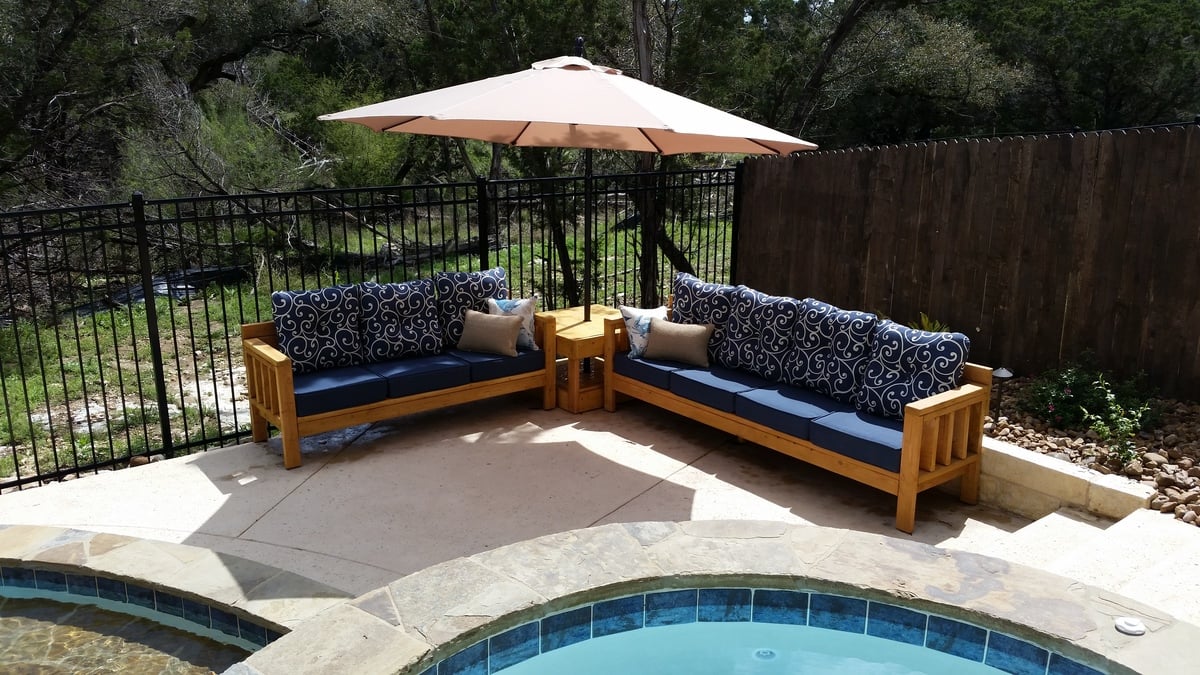
So, we basically took the pans for the 2x4 outdoor sofa and extended it for one of the sofas because we wanted 4-across seating. We also finished up the look by adding vertical beams in the arms and a second 2x4 across the top (see photos). Because of the really long couch, I added extra bracing foot to make sure it won't sag.
Once complete, we determined the pillows across the back were a bit too tall, so we adjusted the plans by adding a couple beams and then lengthening it to attach to the back of the arms rather then between the arms. We pocket drilled the beams together and then braced it with 1x4 slats across the back. I also used a 1/4 router bit to soften all the edges. Anna we took your advice and pocket drilled all attachments except the seat slats for a real finished store-bought look. Cost of wood was under $100 because we went with pine. Pillows and seats from At Home put us at about $600 total for the project.
Built from Plan(s)
Estimated Cost
All in with umbrella and stand, wood for stand, two couches, pillows, and sand to add weight for the umbrella was under $700.
Estimated Time Investment
Weekend Project (10-20 Hours)
Finish Used
Thompson Water Sealer
Recommended Skill Level
Beginner
Coffee table
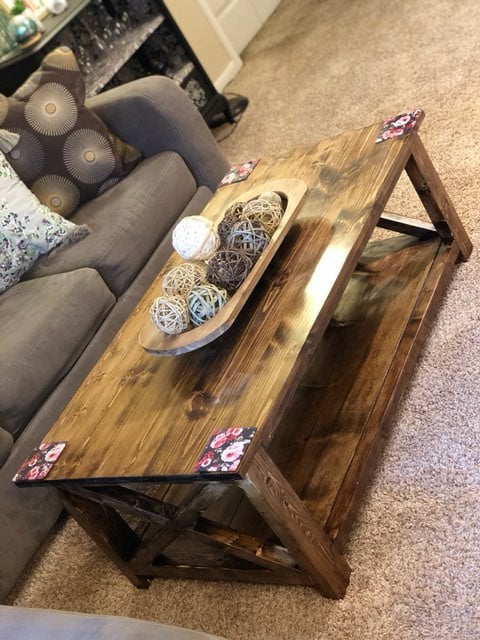
Love this coffee table. I built it for my daughter and she was very happy.
Built from Plan(s)
Finish Used
Dark walnut
Recommended Skill Level
Intermediate
Comments
Ana White Admin
Wed, 10/19/2022 - 08:30
Perfection!
Love this as blanket storage!