Community Brag Posts
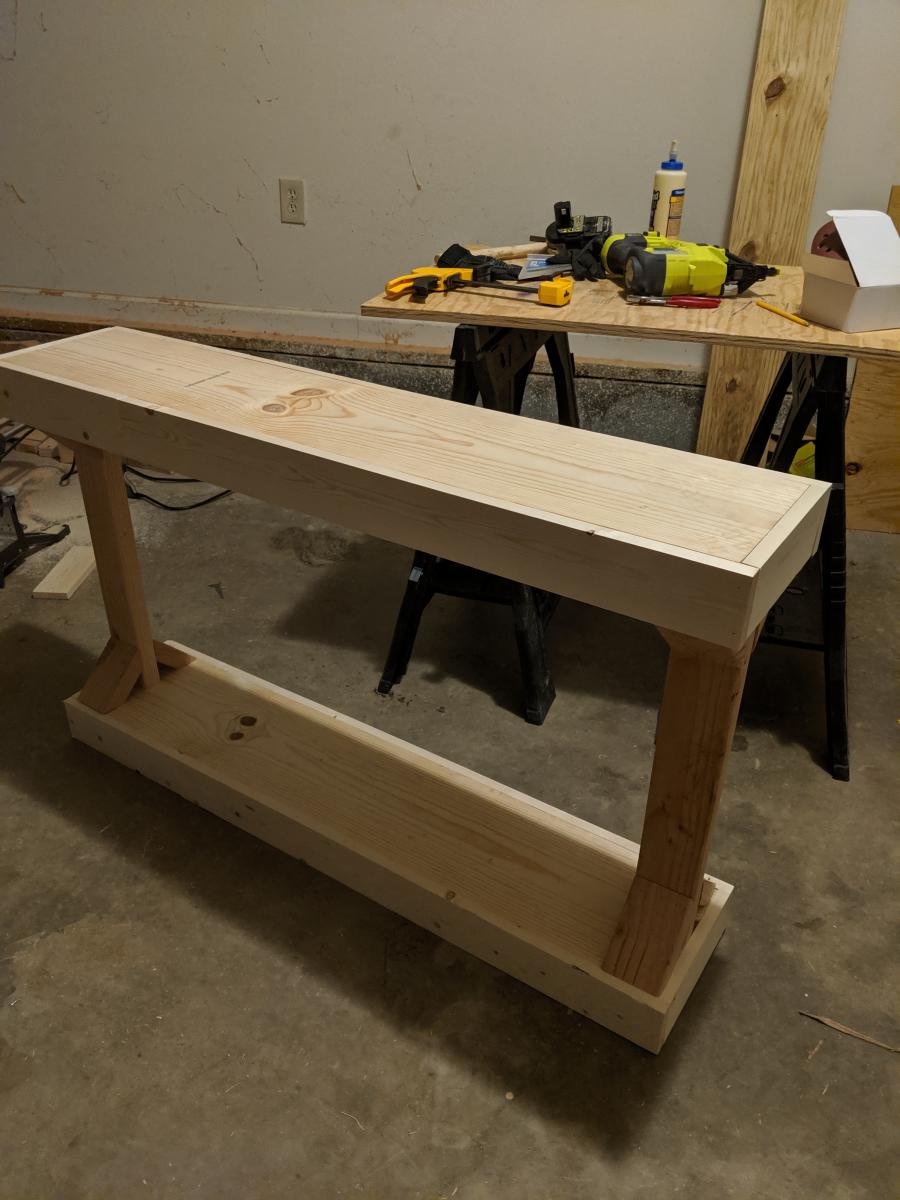
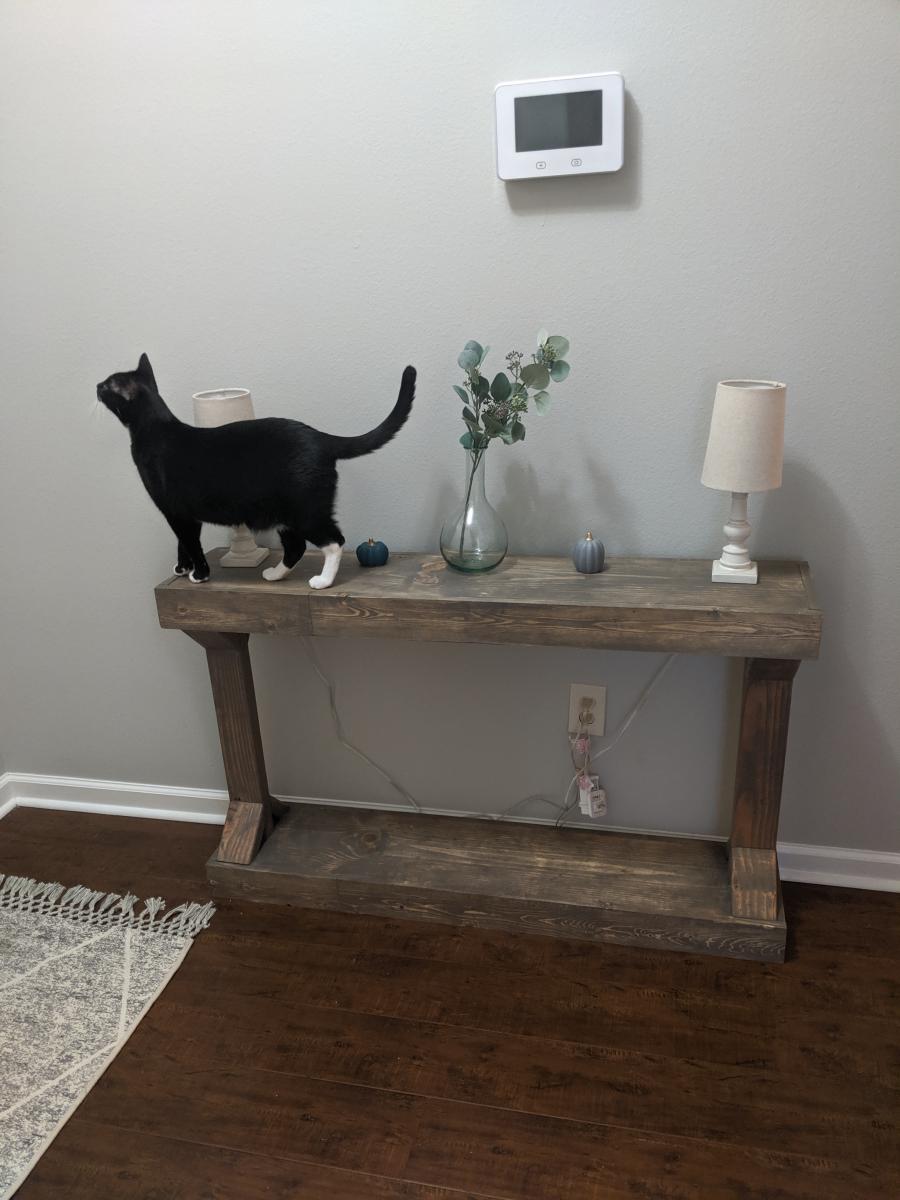
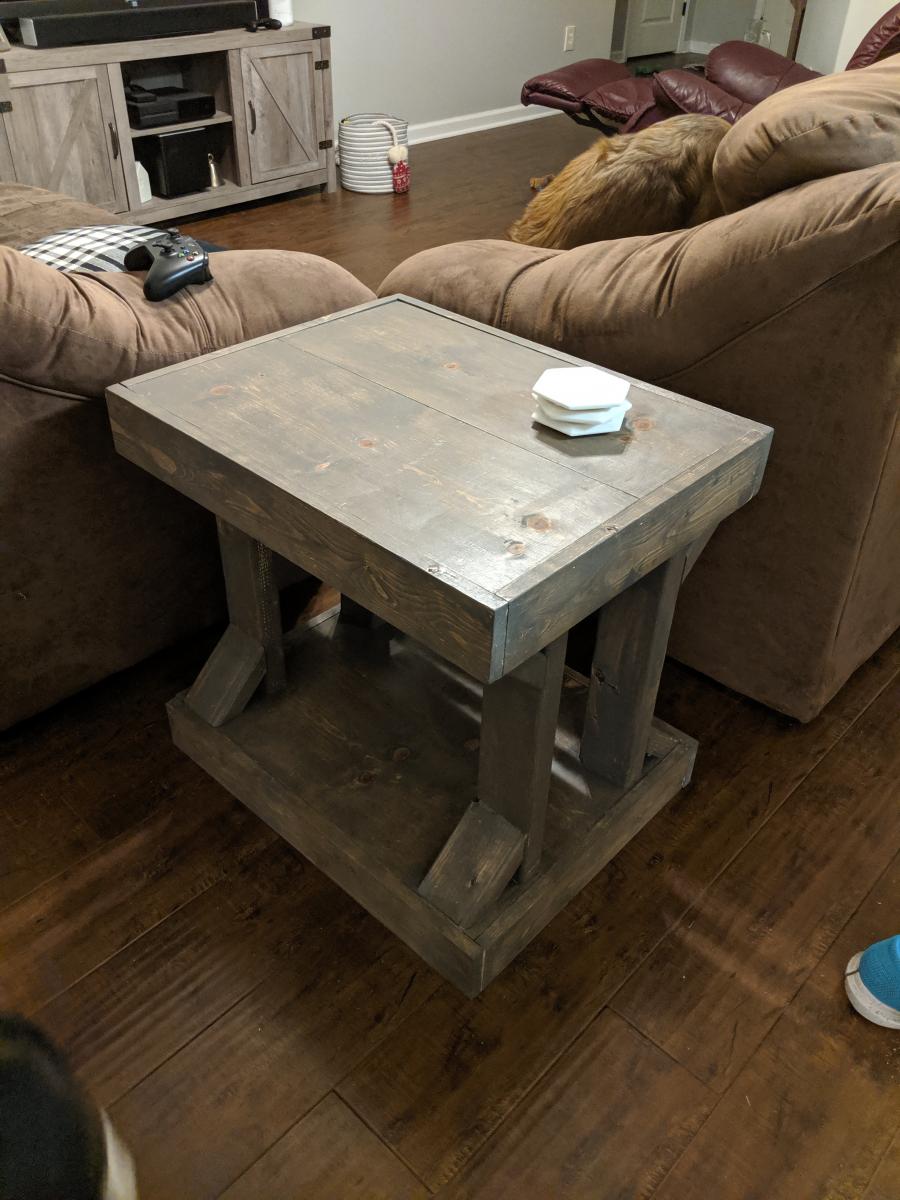
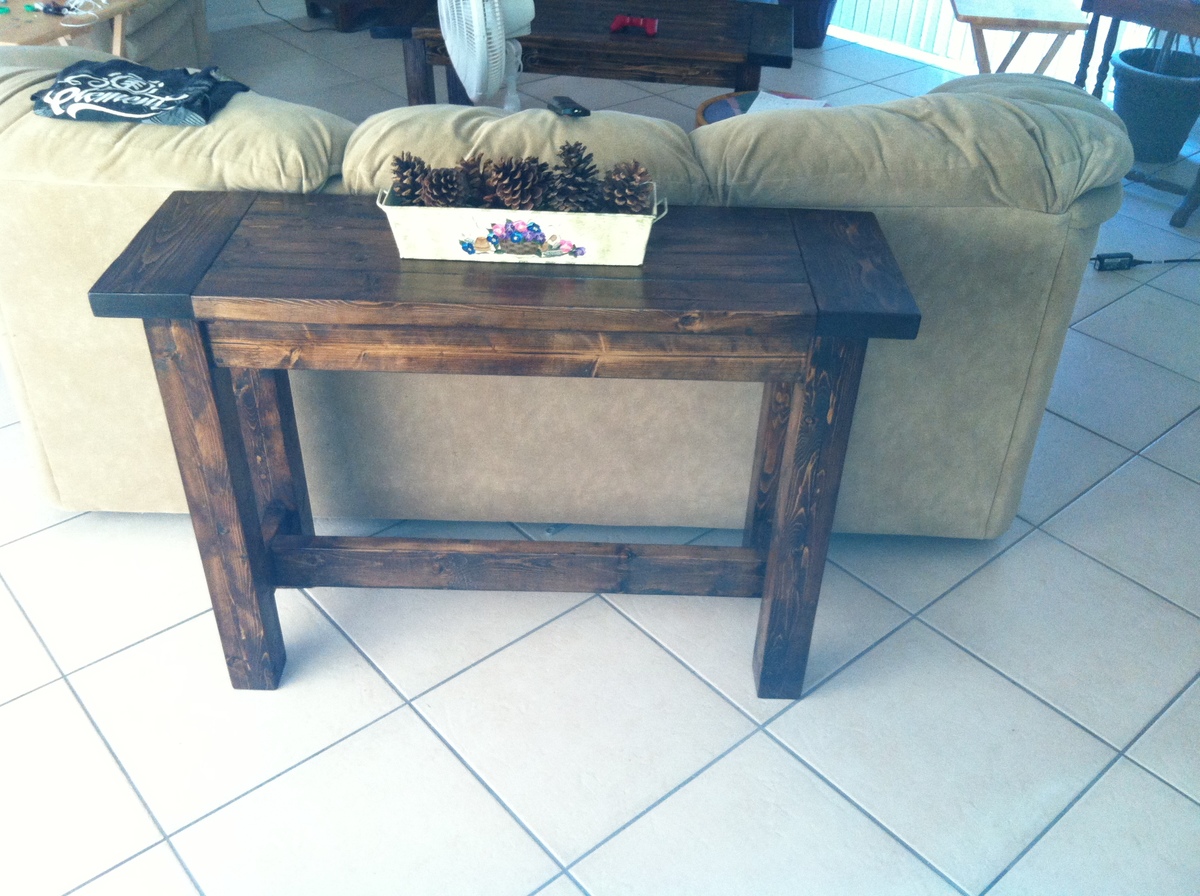
Modern Console Table
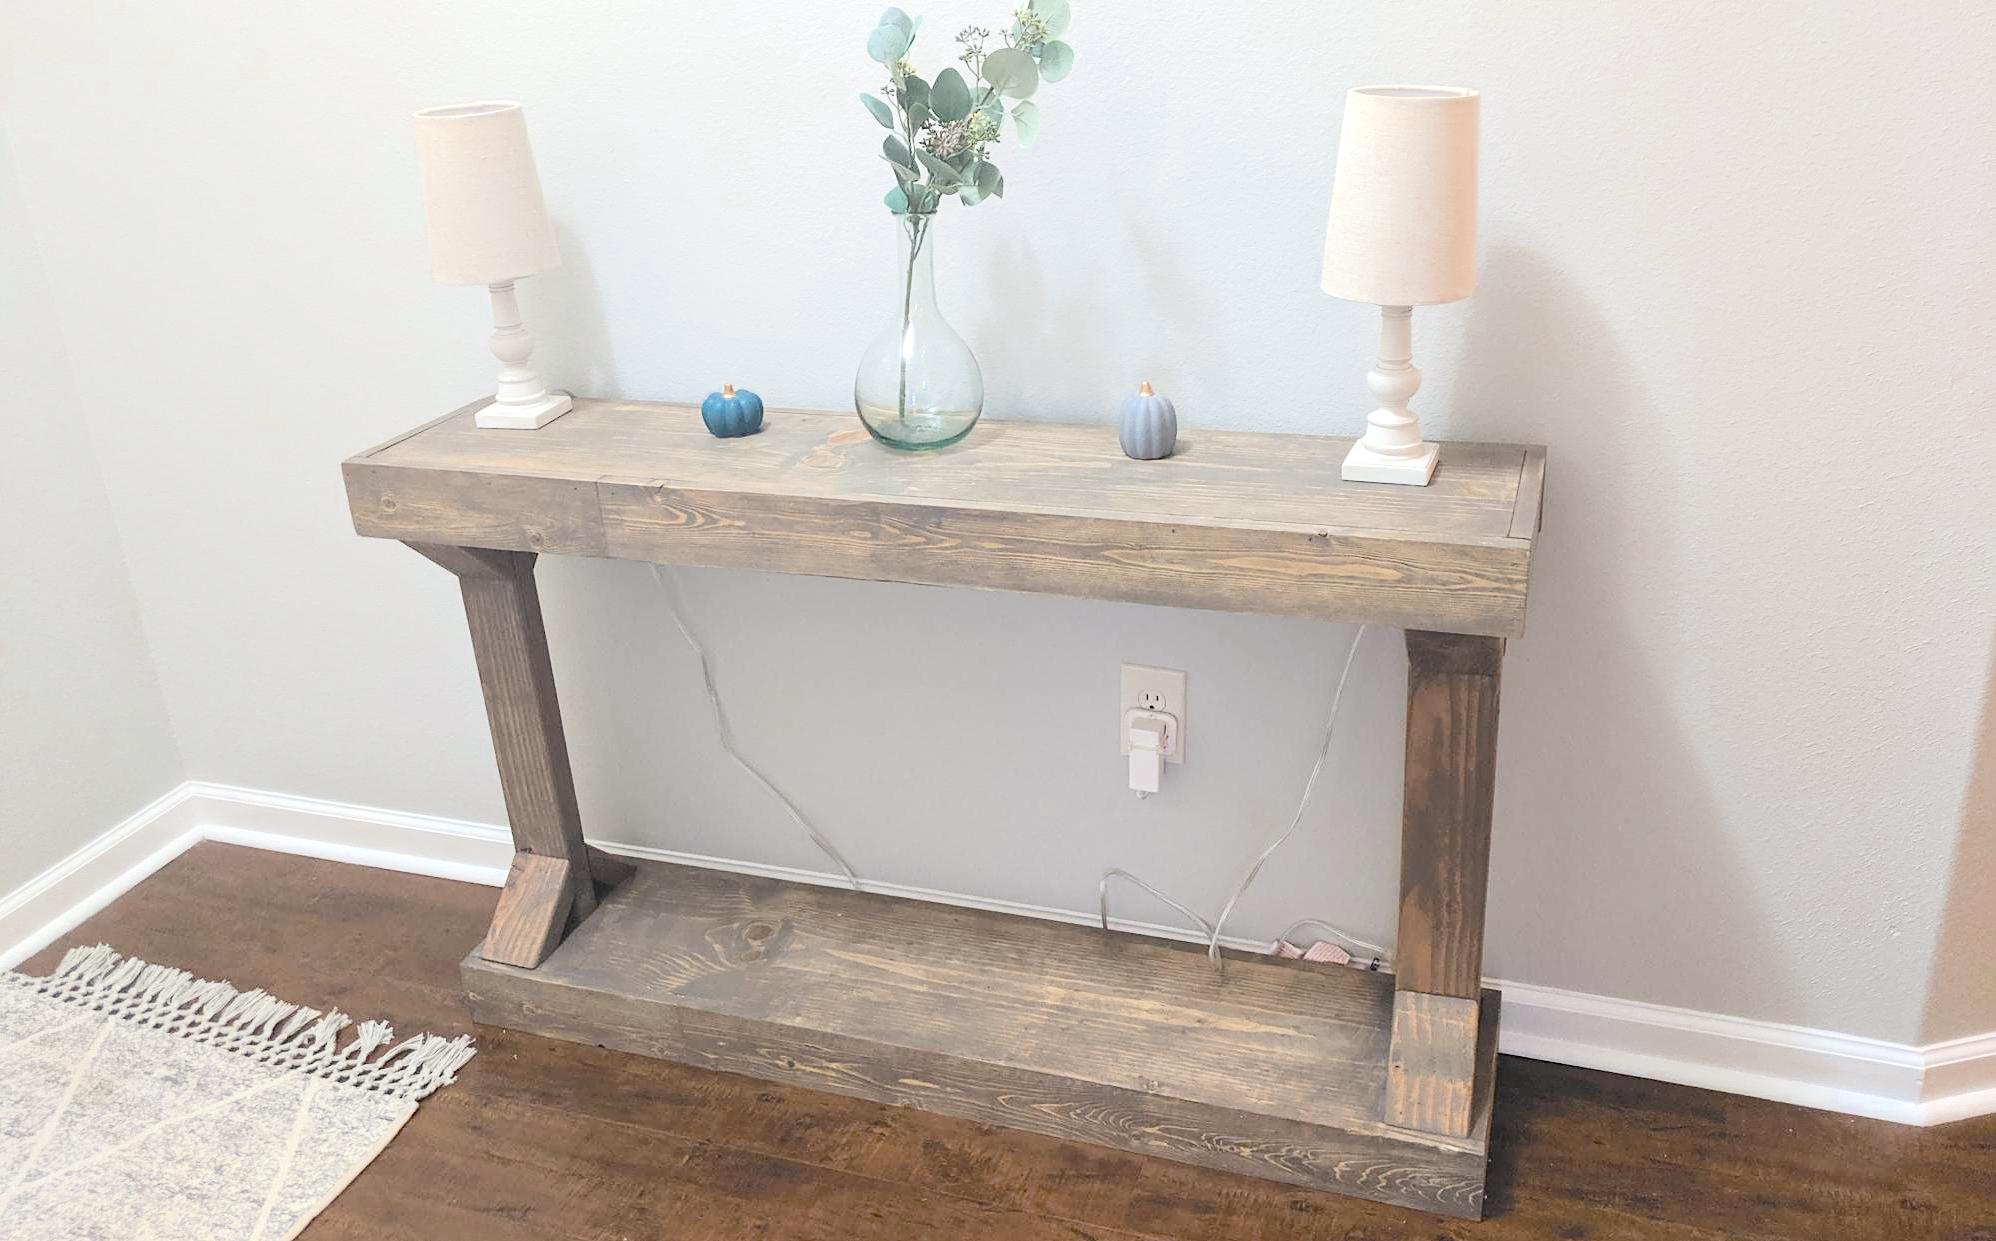
Made my table 4 feet on accident (forgot to cut the 1x10 boards down to 36" before attaching everything) but I kinda like the extra length. I also ended up making the matching side table.
Built from Plan(s)
Estimated Cost
$40
Estimated Time Investment
Afternoon Project (3-6 Hours)
Finish Used
Briarsmoke
Recommended Skill Level
Beginner
Comments
Fri, 04/10/2020 - 21:07
ATTENTION I NEED THIS ASAP
If I wanted to make this taller like 3×6ft what size wood would do I need? I want to make this stand for my daughters urn area. She passed away last month and I'm trying to make this perfect. The sooner the better.. Thanks! Love all your work..
DIY Play Mud Kitchen
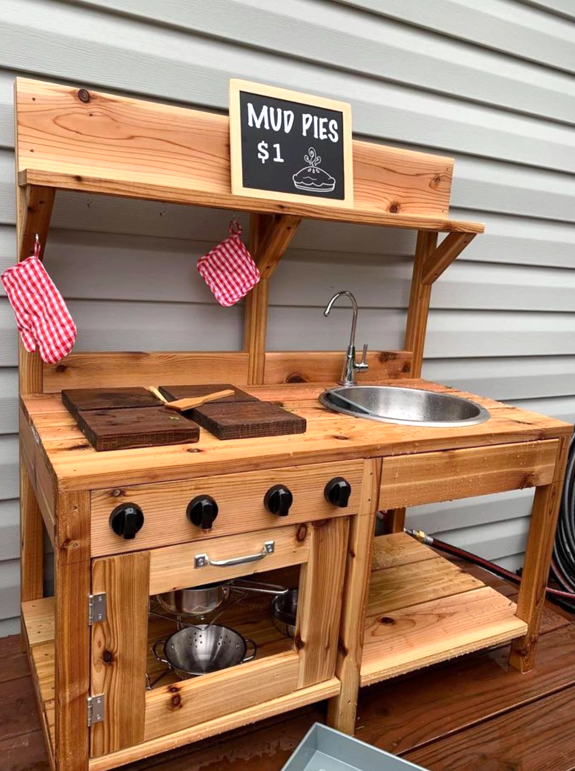
Thank you! My favorite & first is from your mud kitchen! I put in running water!😂 For the GrandLuvs!”
@penny.vanderlugt
Built from Plan(s)
Seasonal And Holiday
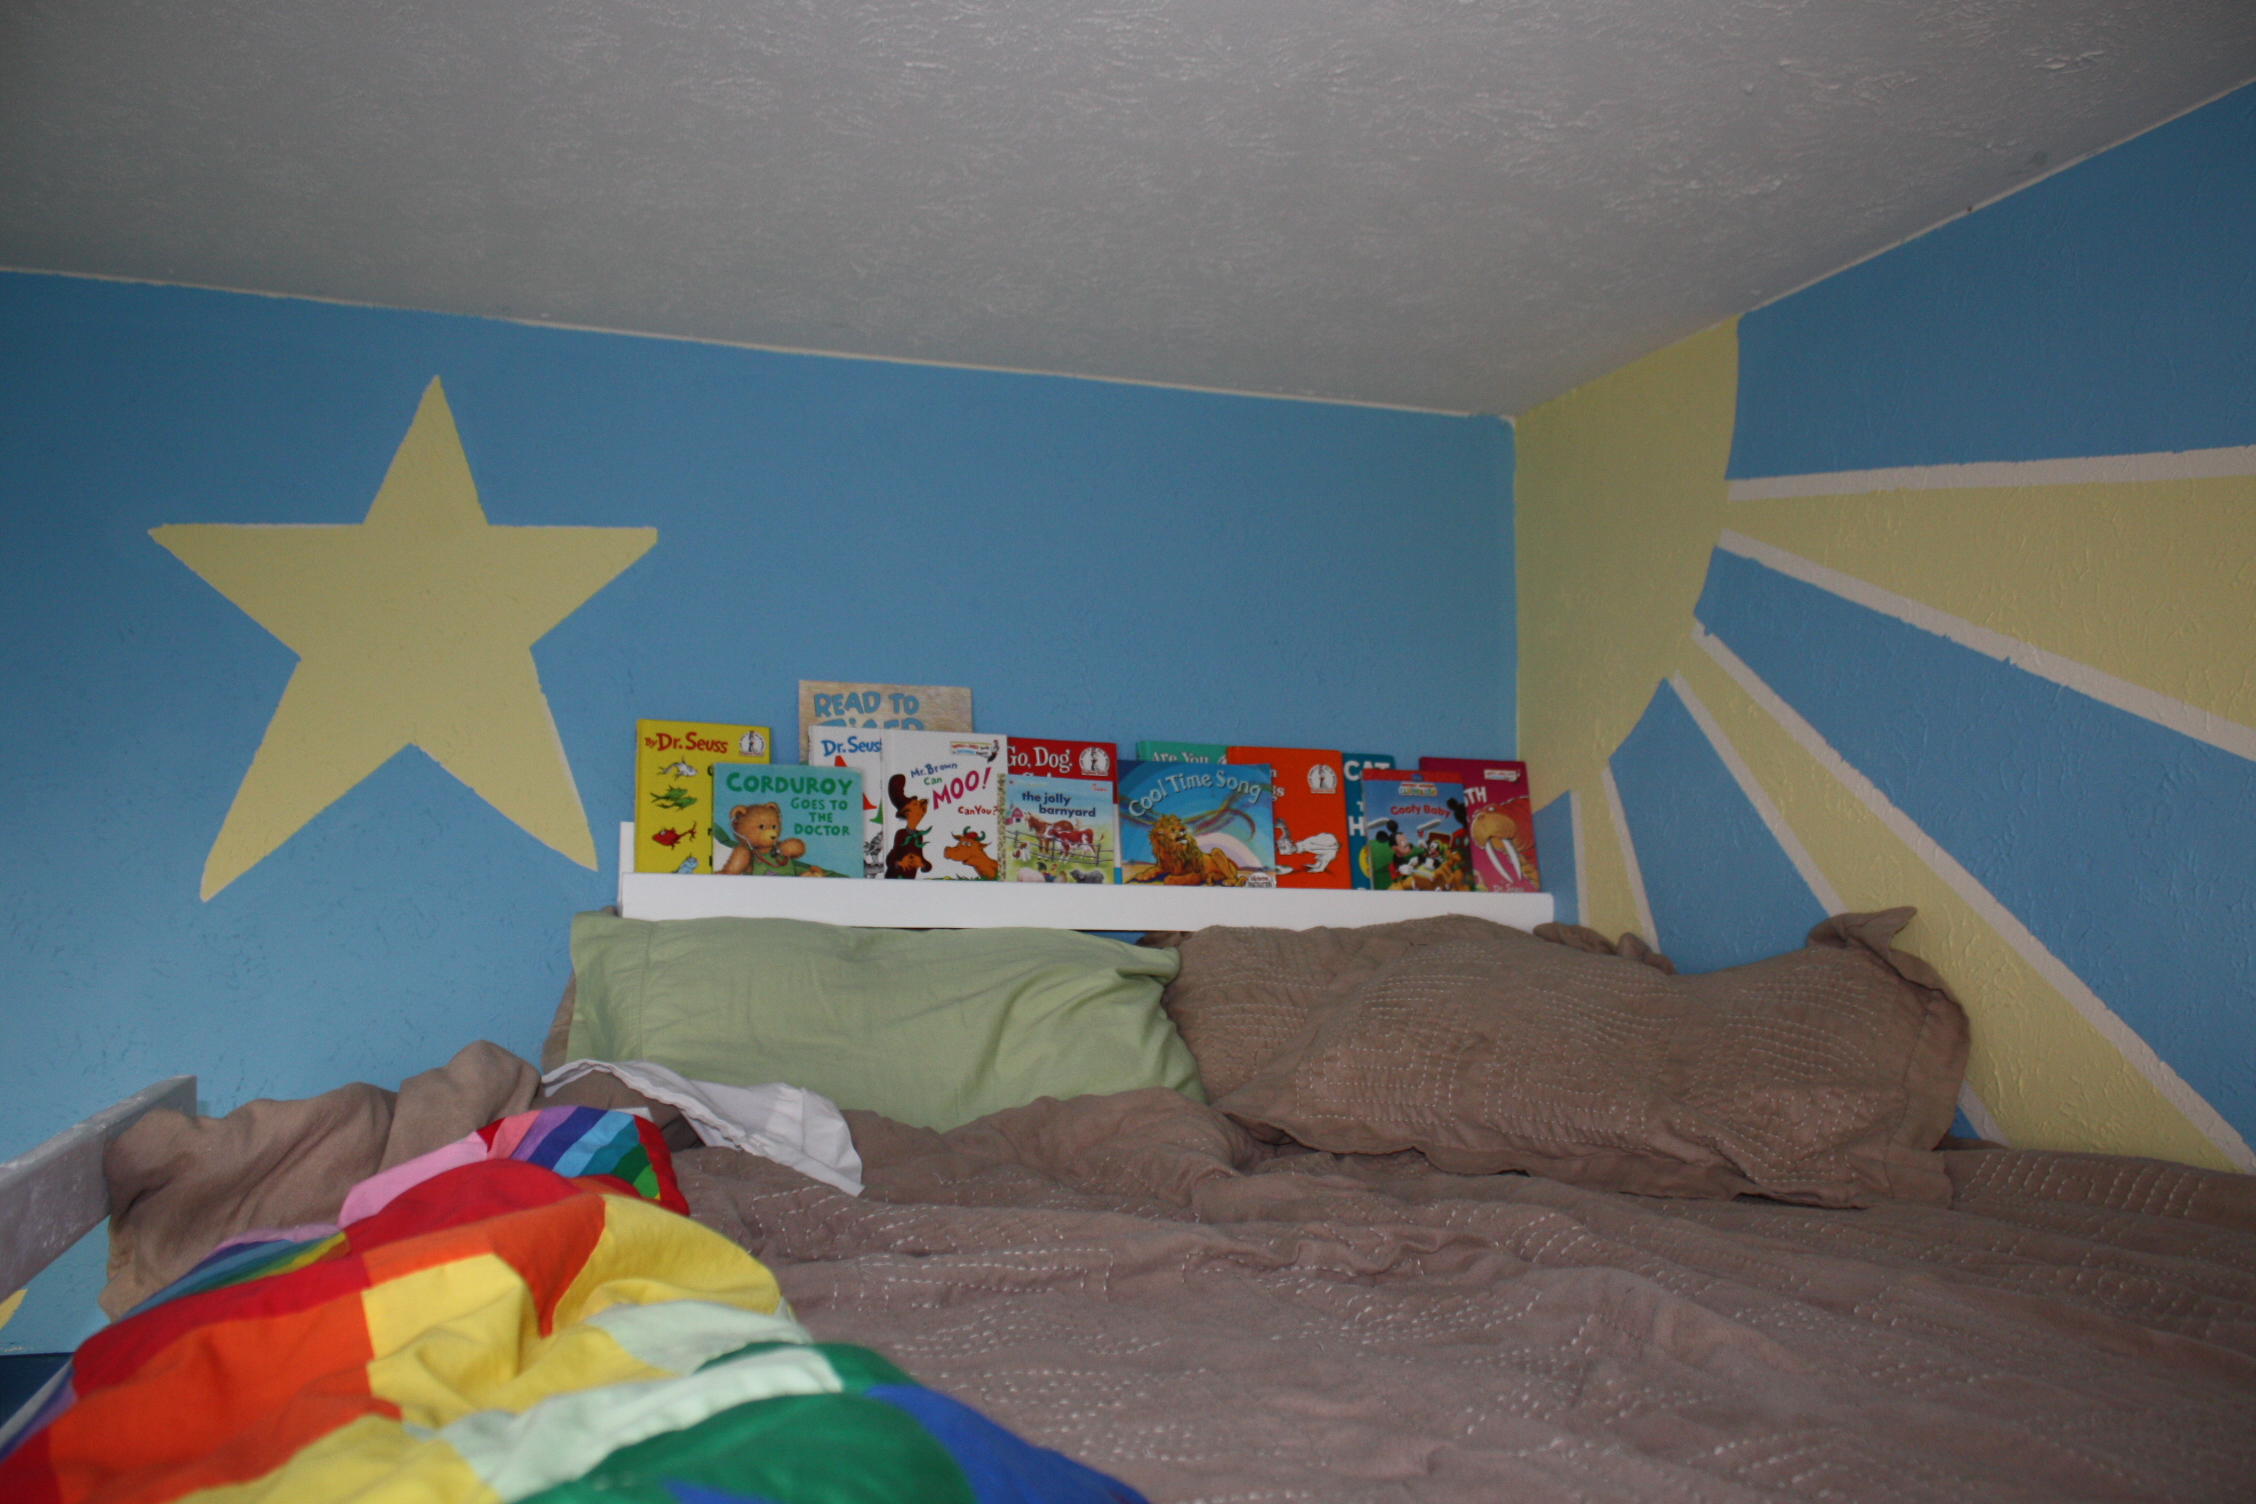
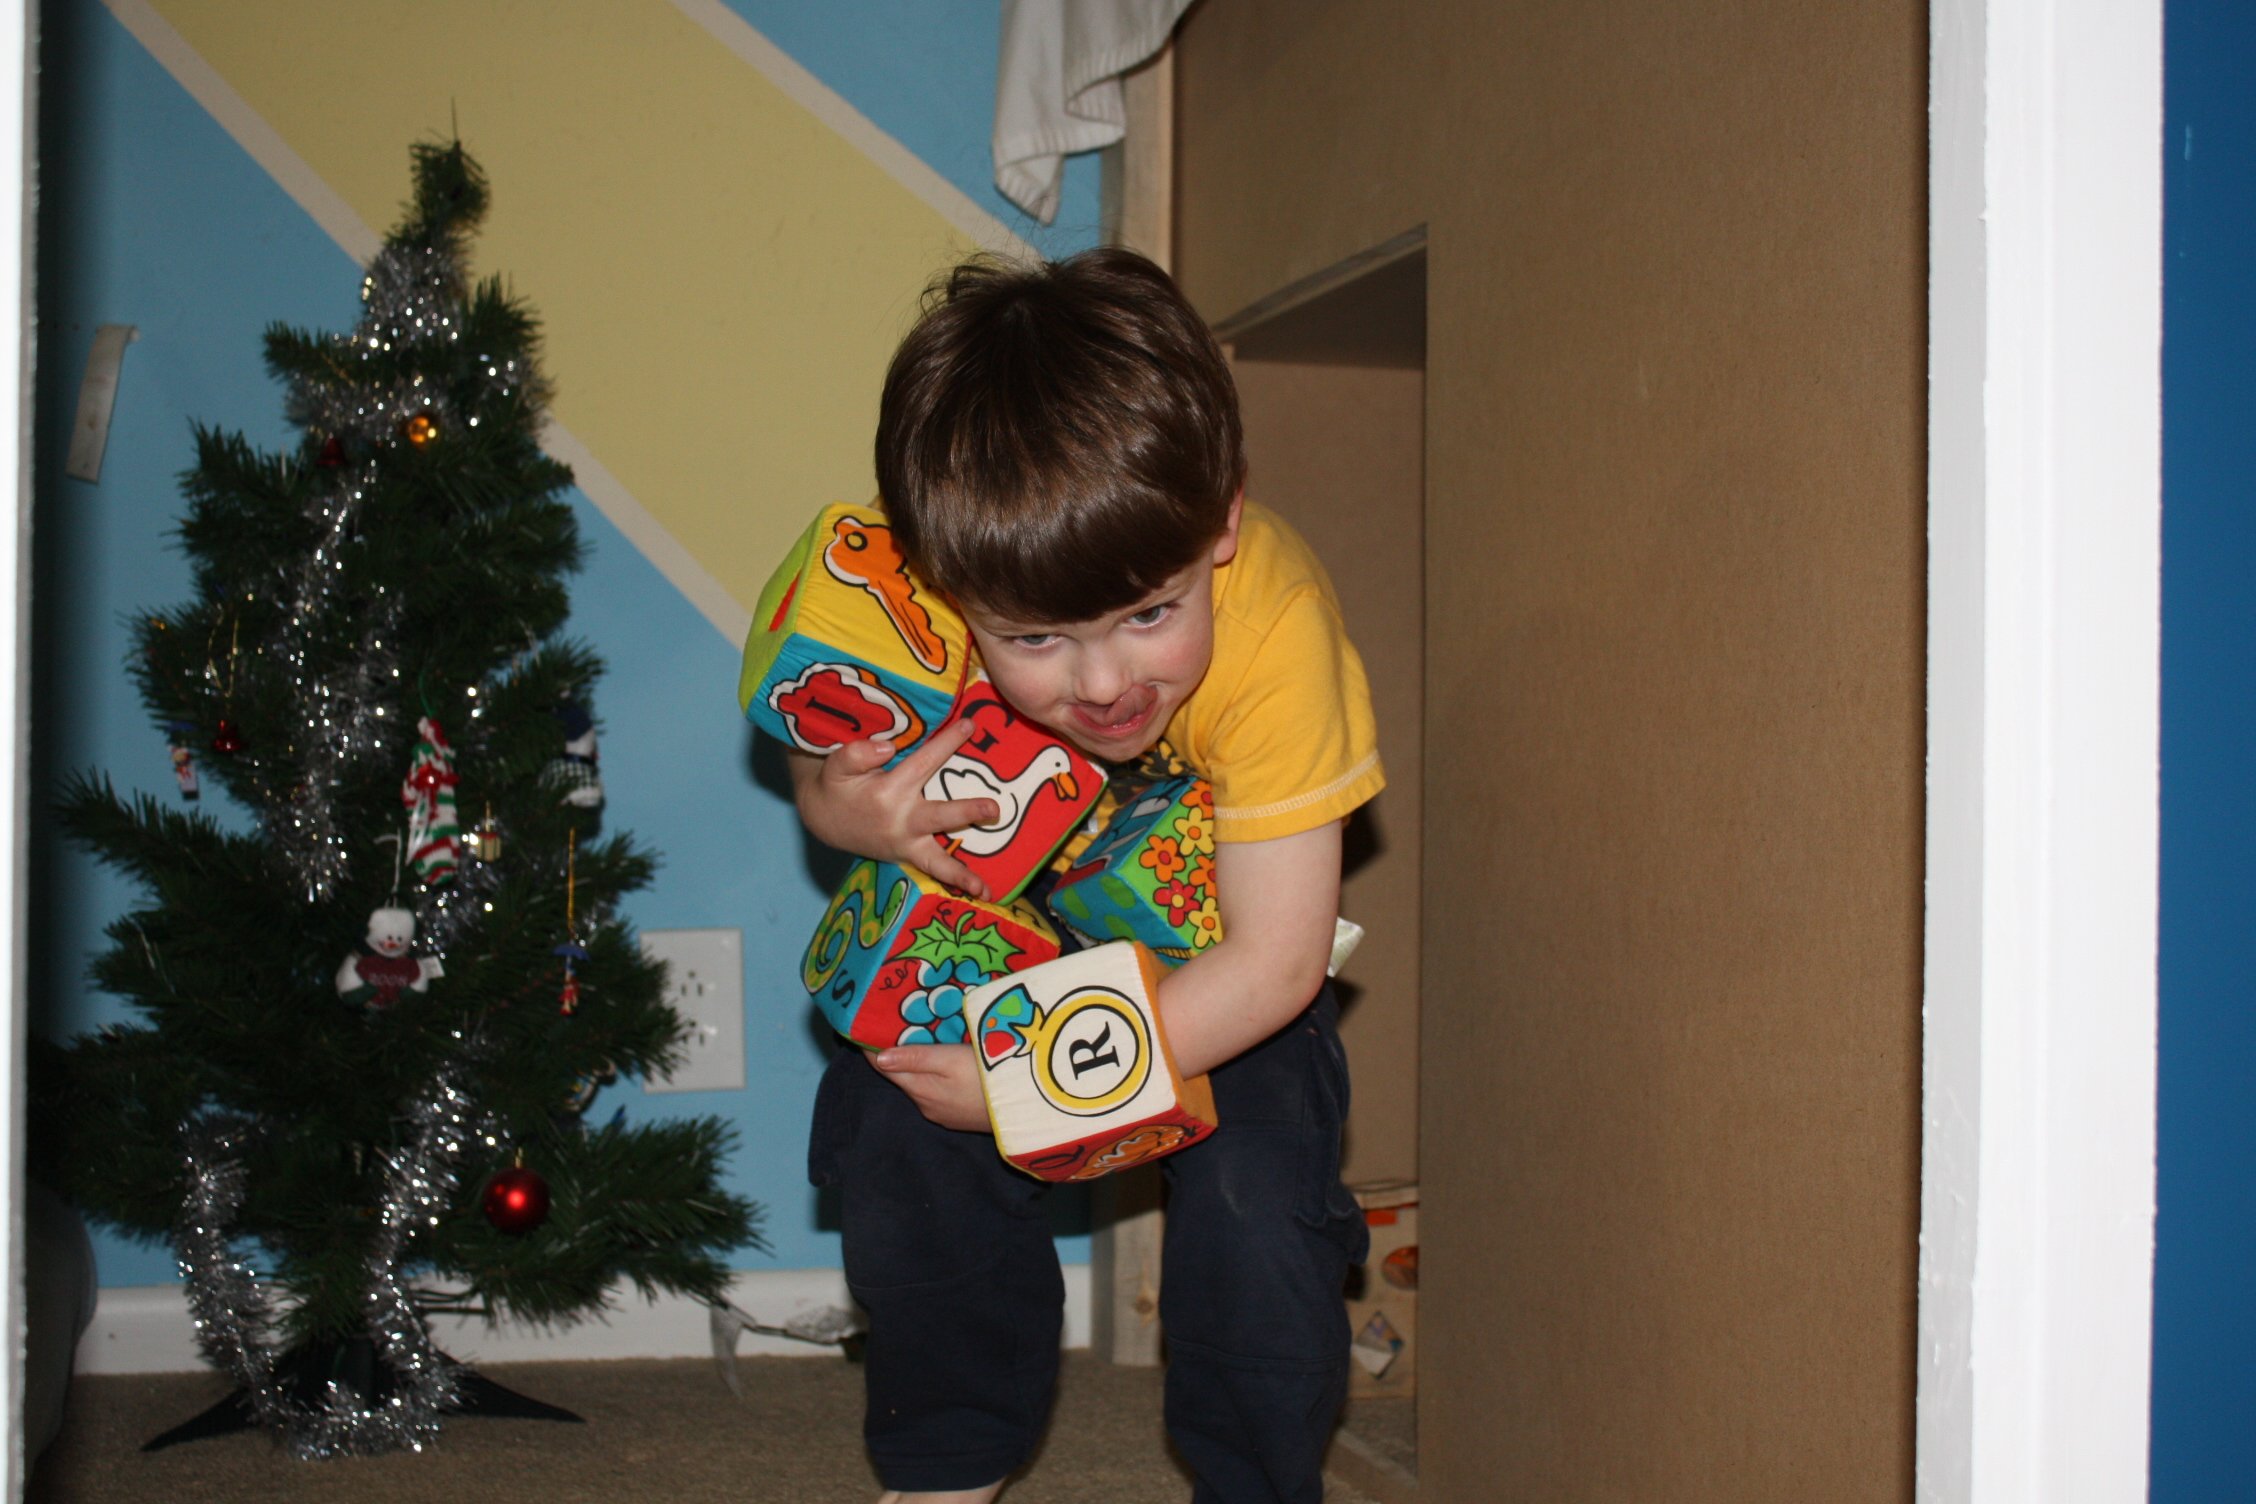
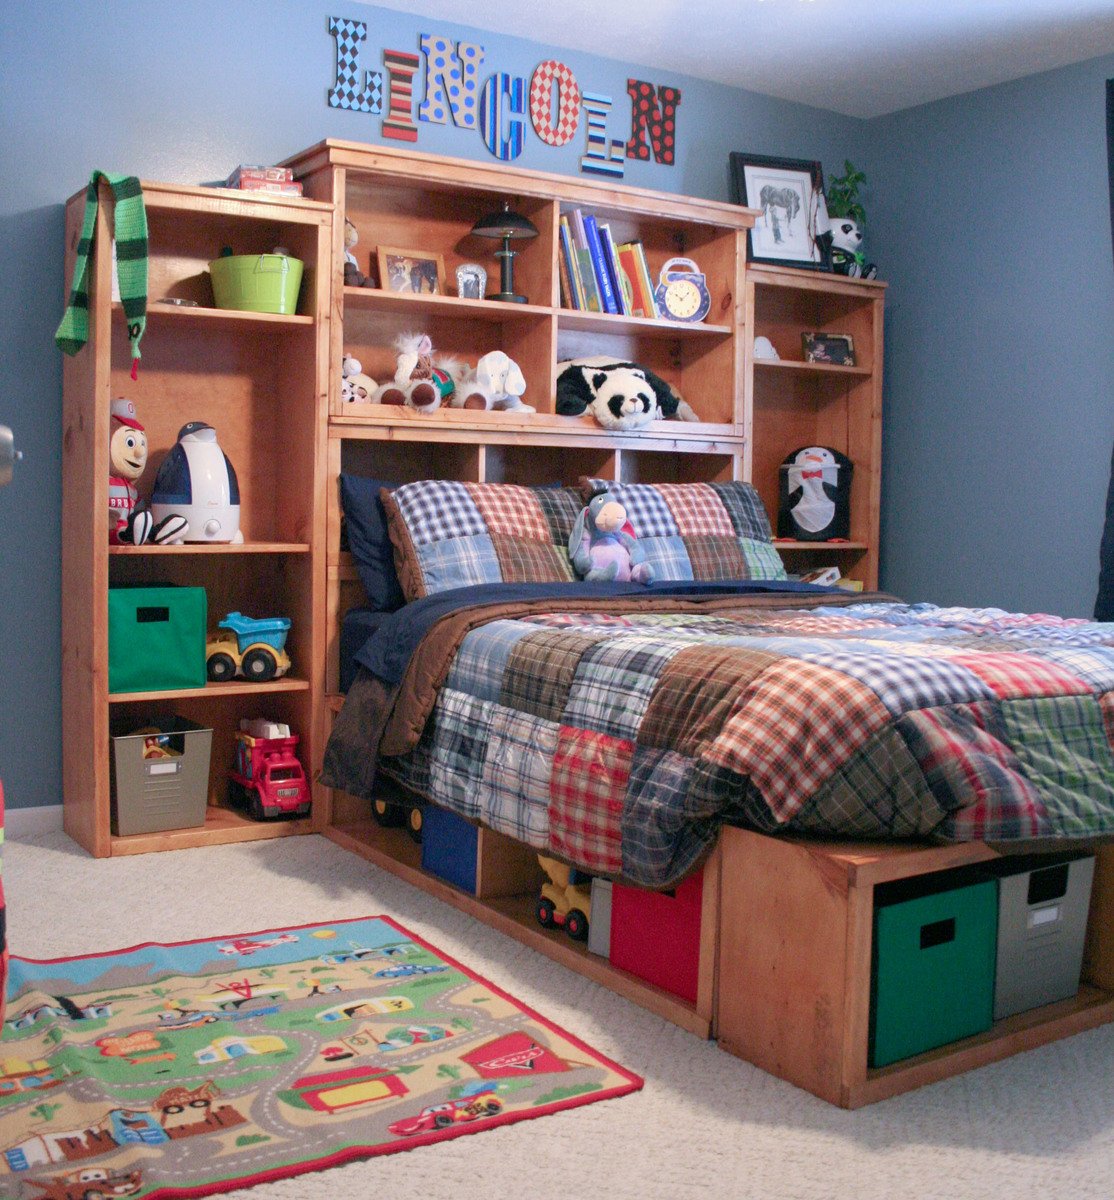
My first build. Queen size playhouse loft bed.
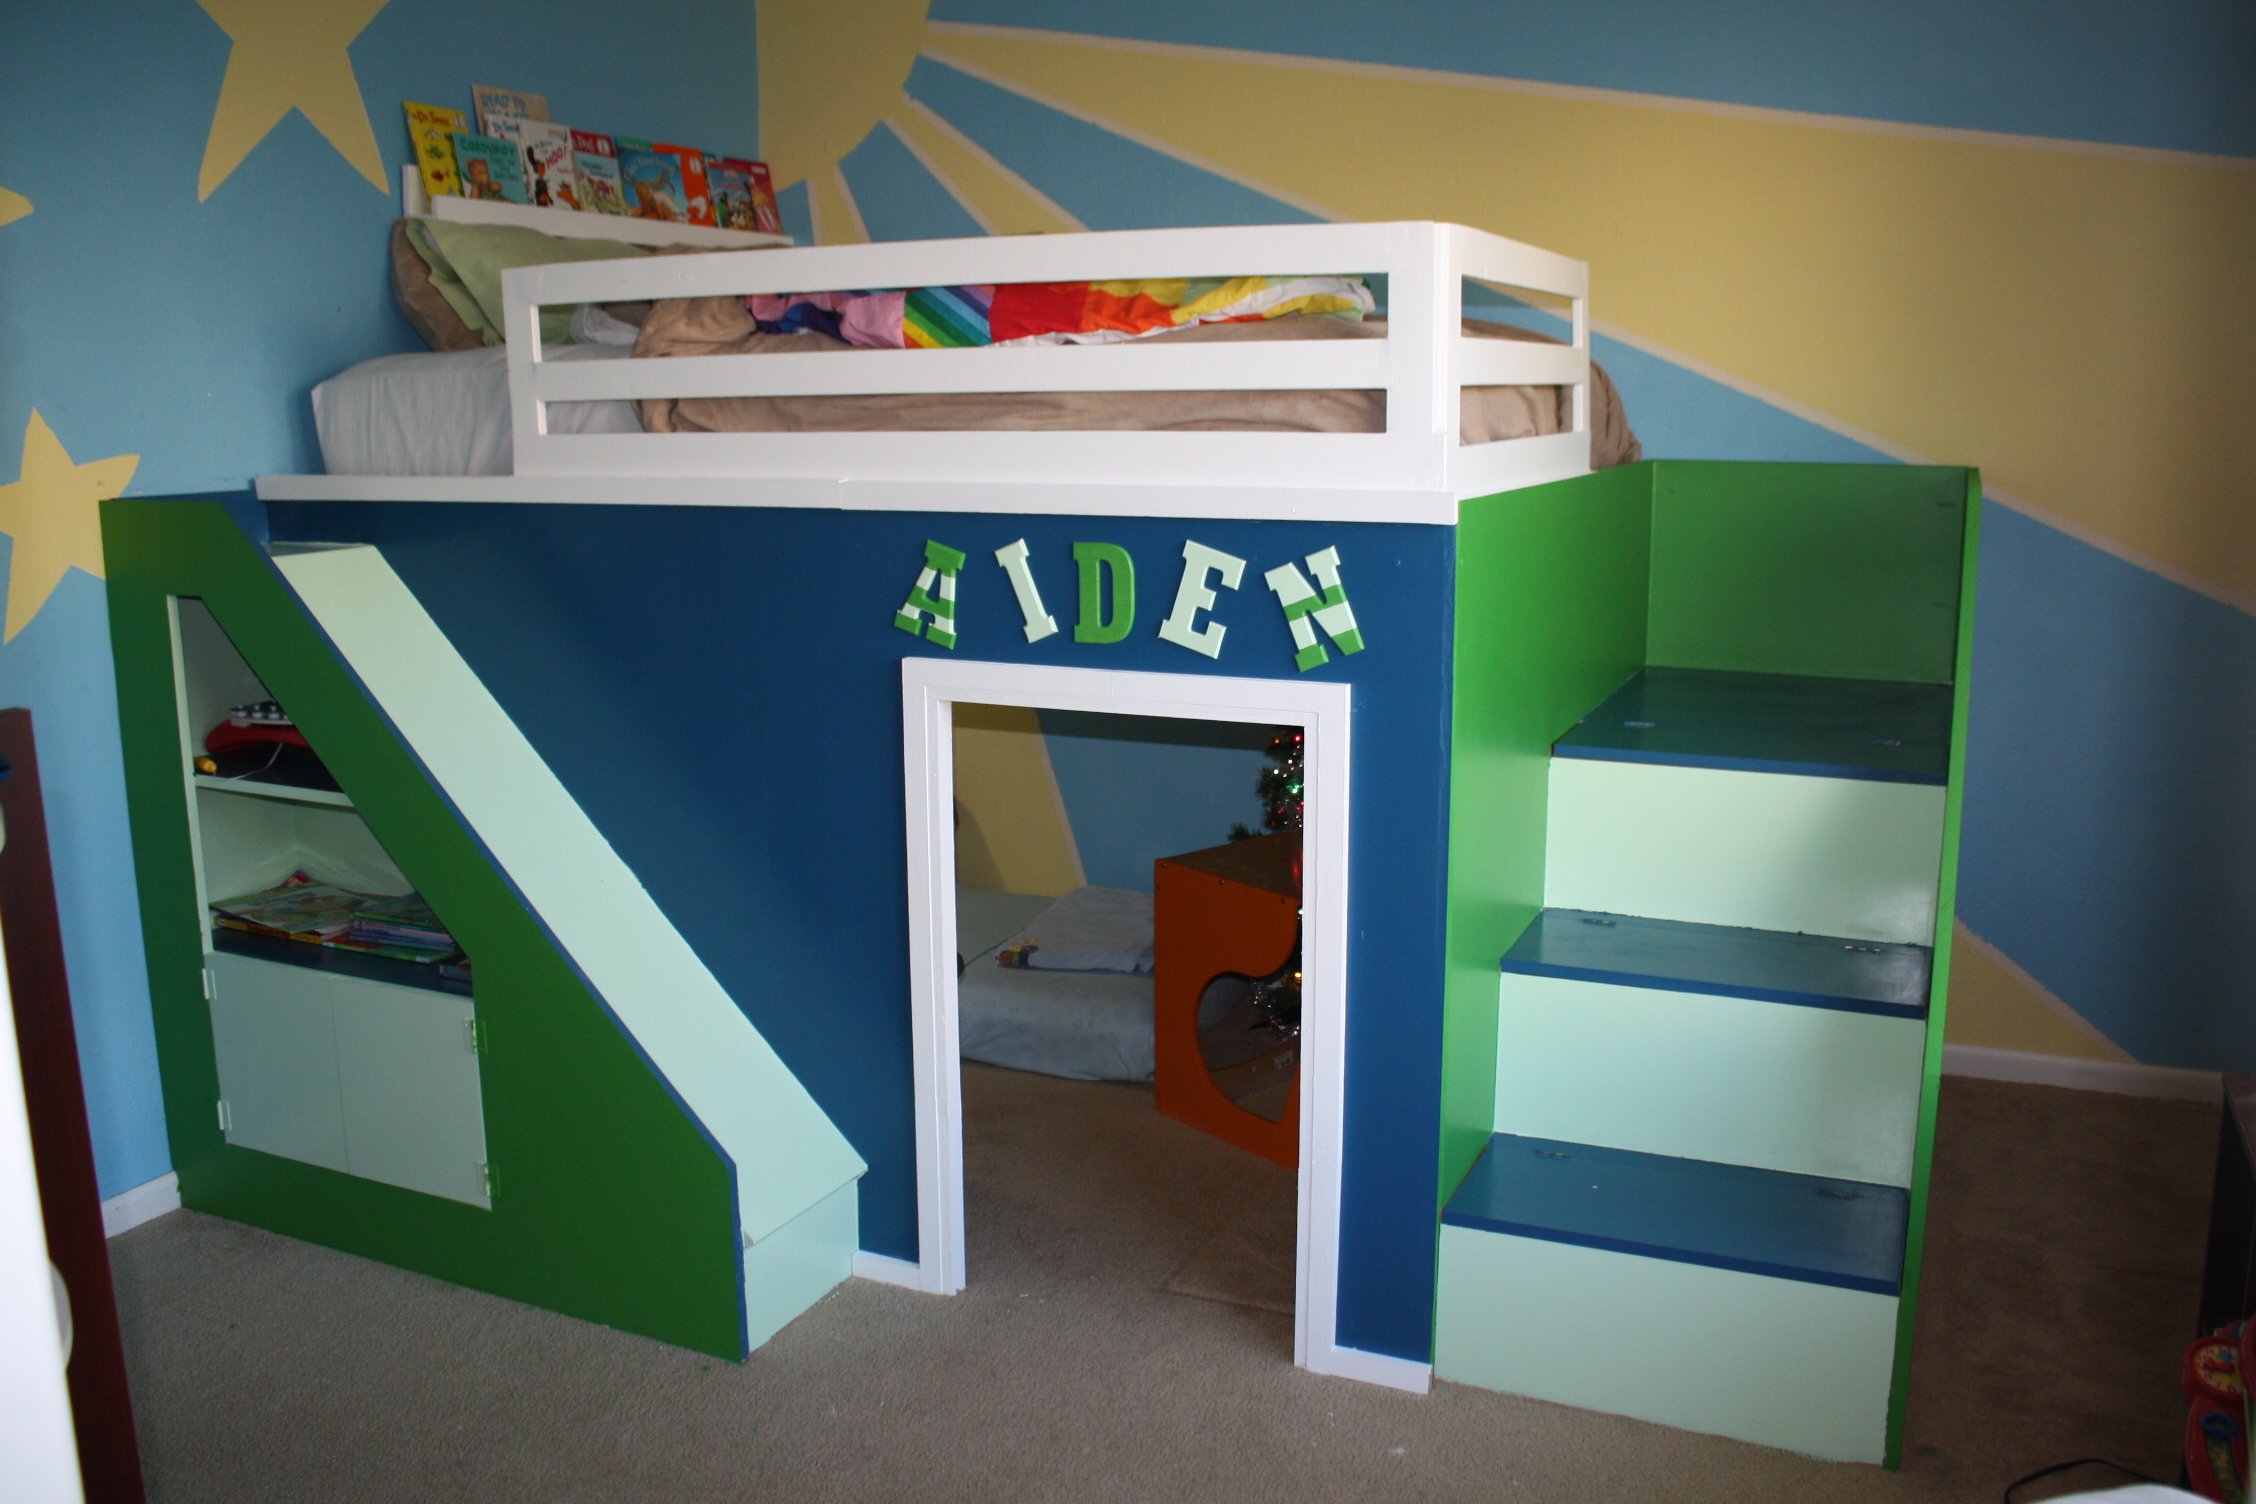
Aiden's Clubhouse.
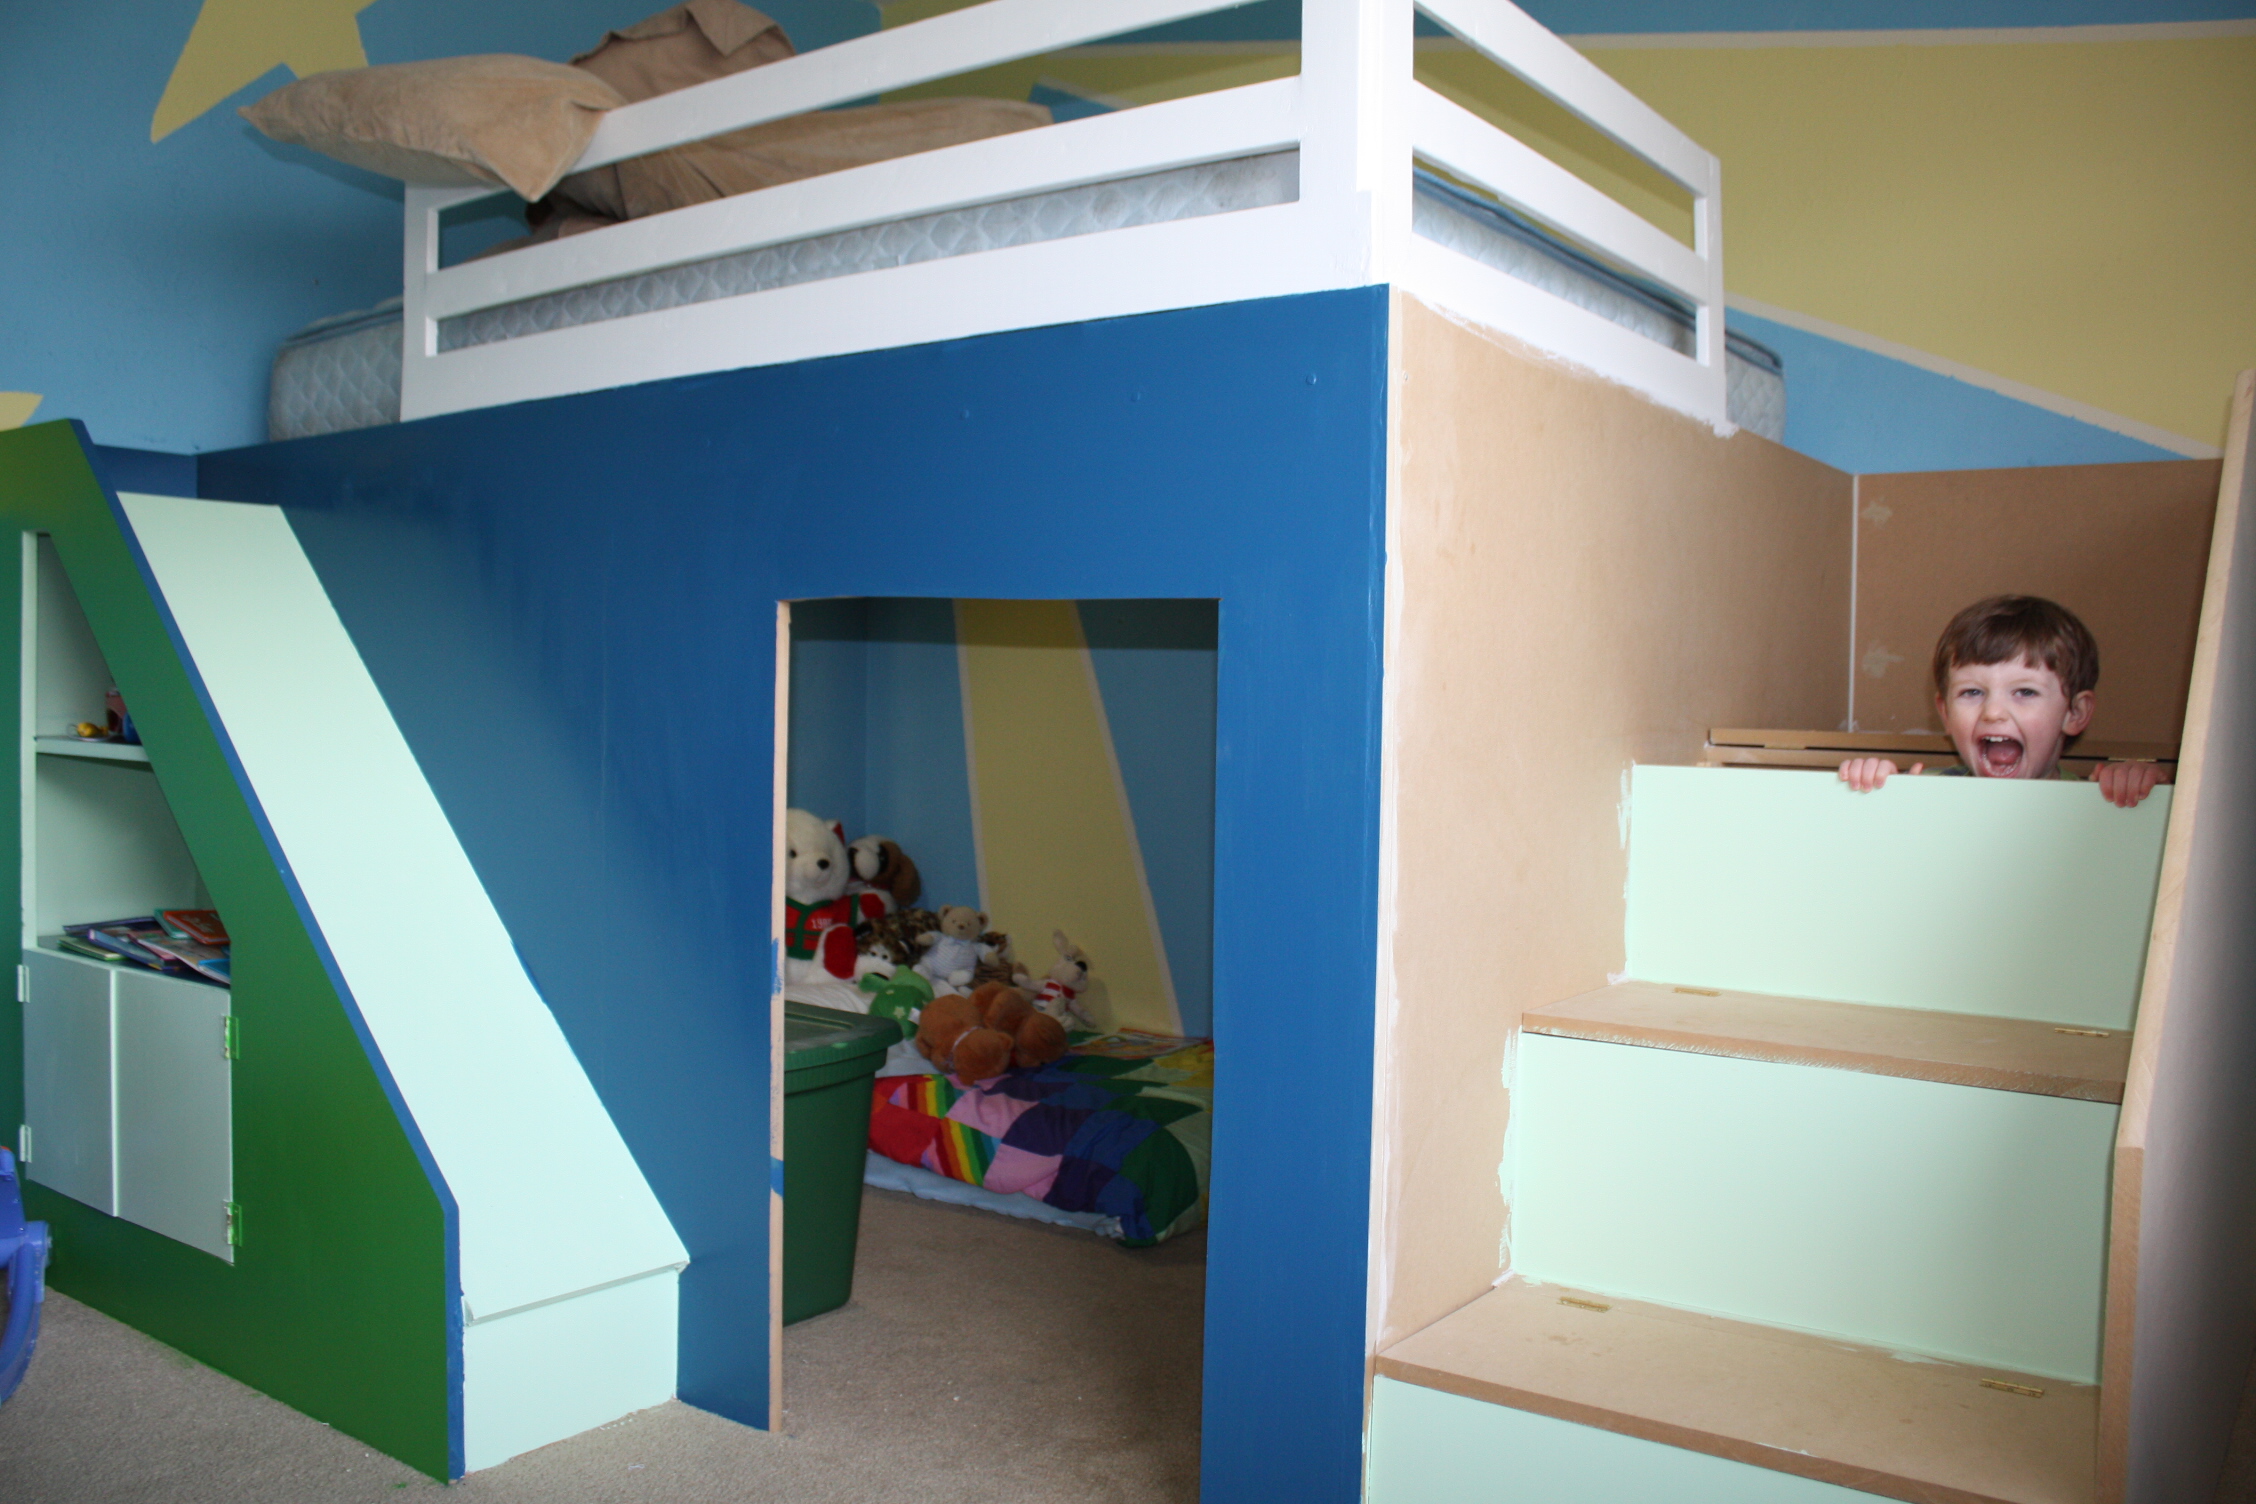
I can't even believe I was able to build this! Everyone thought I was crazy for undertaking such a huge project. I made it a queen size because my son would always sleep in my bed anyways... so I just gave it to him. The bed took 4 weeks because I could only work on it on Saturday afternoons. The first week, I made a frame with cleats on the wall. The second week I built the house and stairs. The third week I built the slide and did some of the painting. Today, I finished painting and trim.
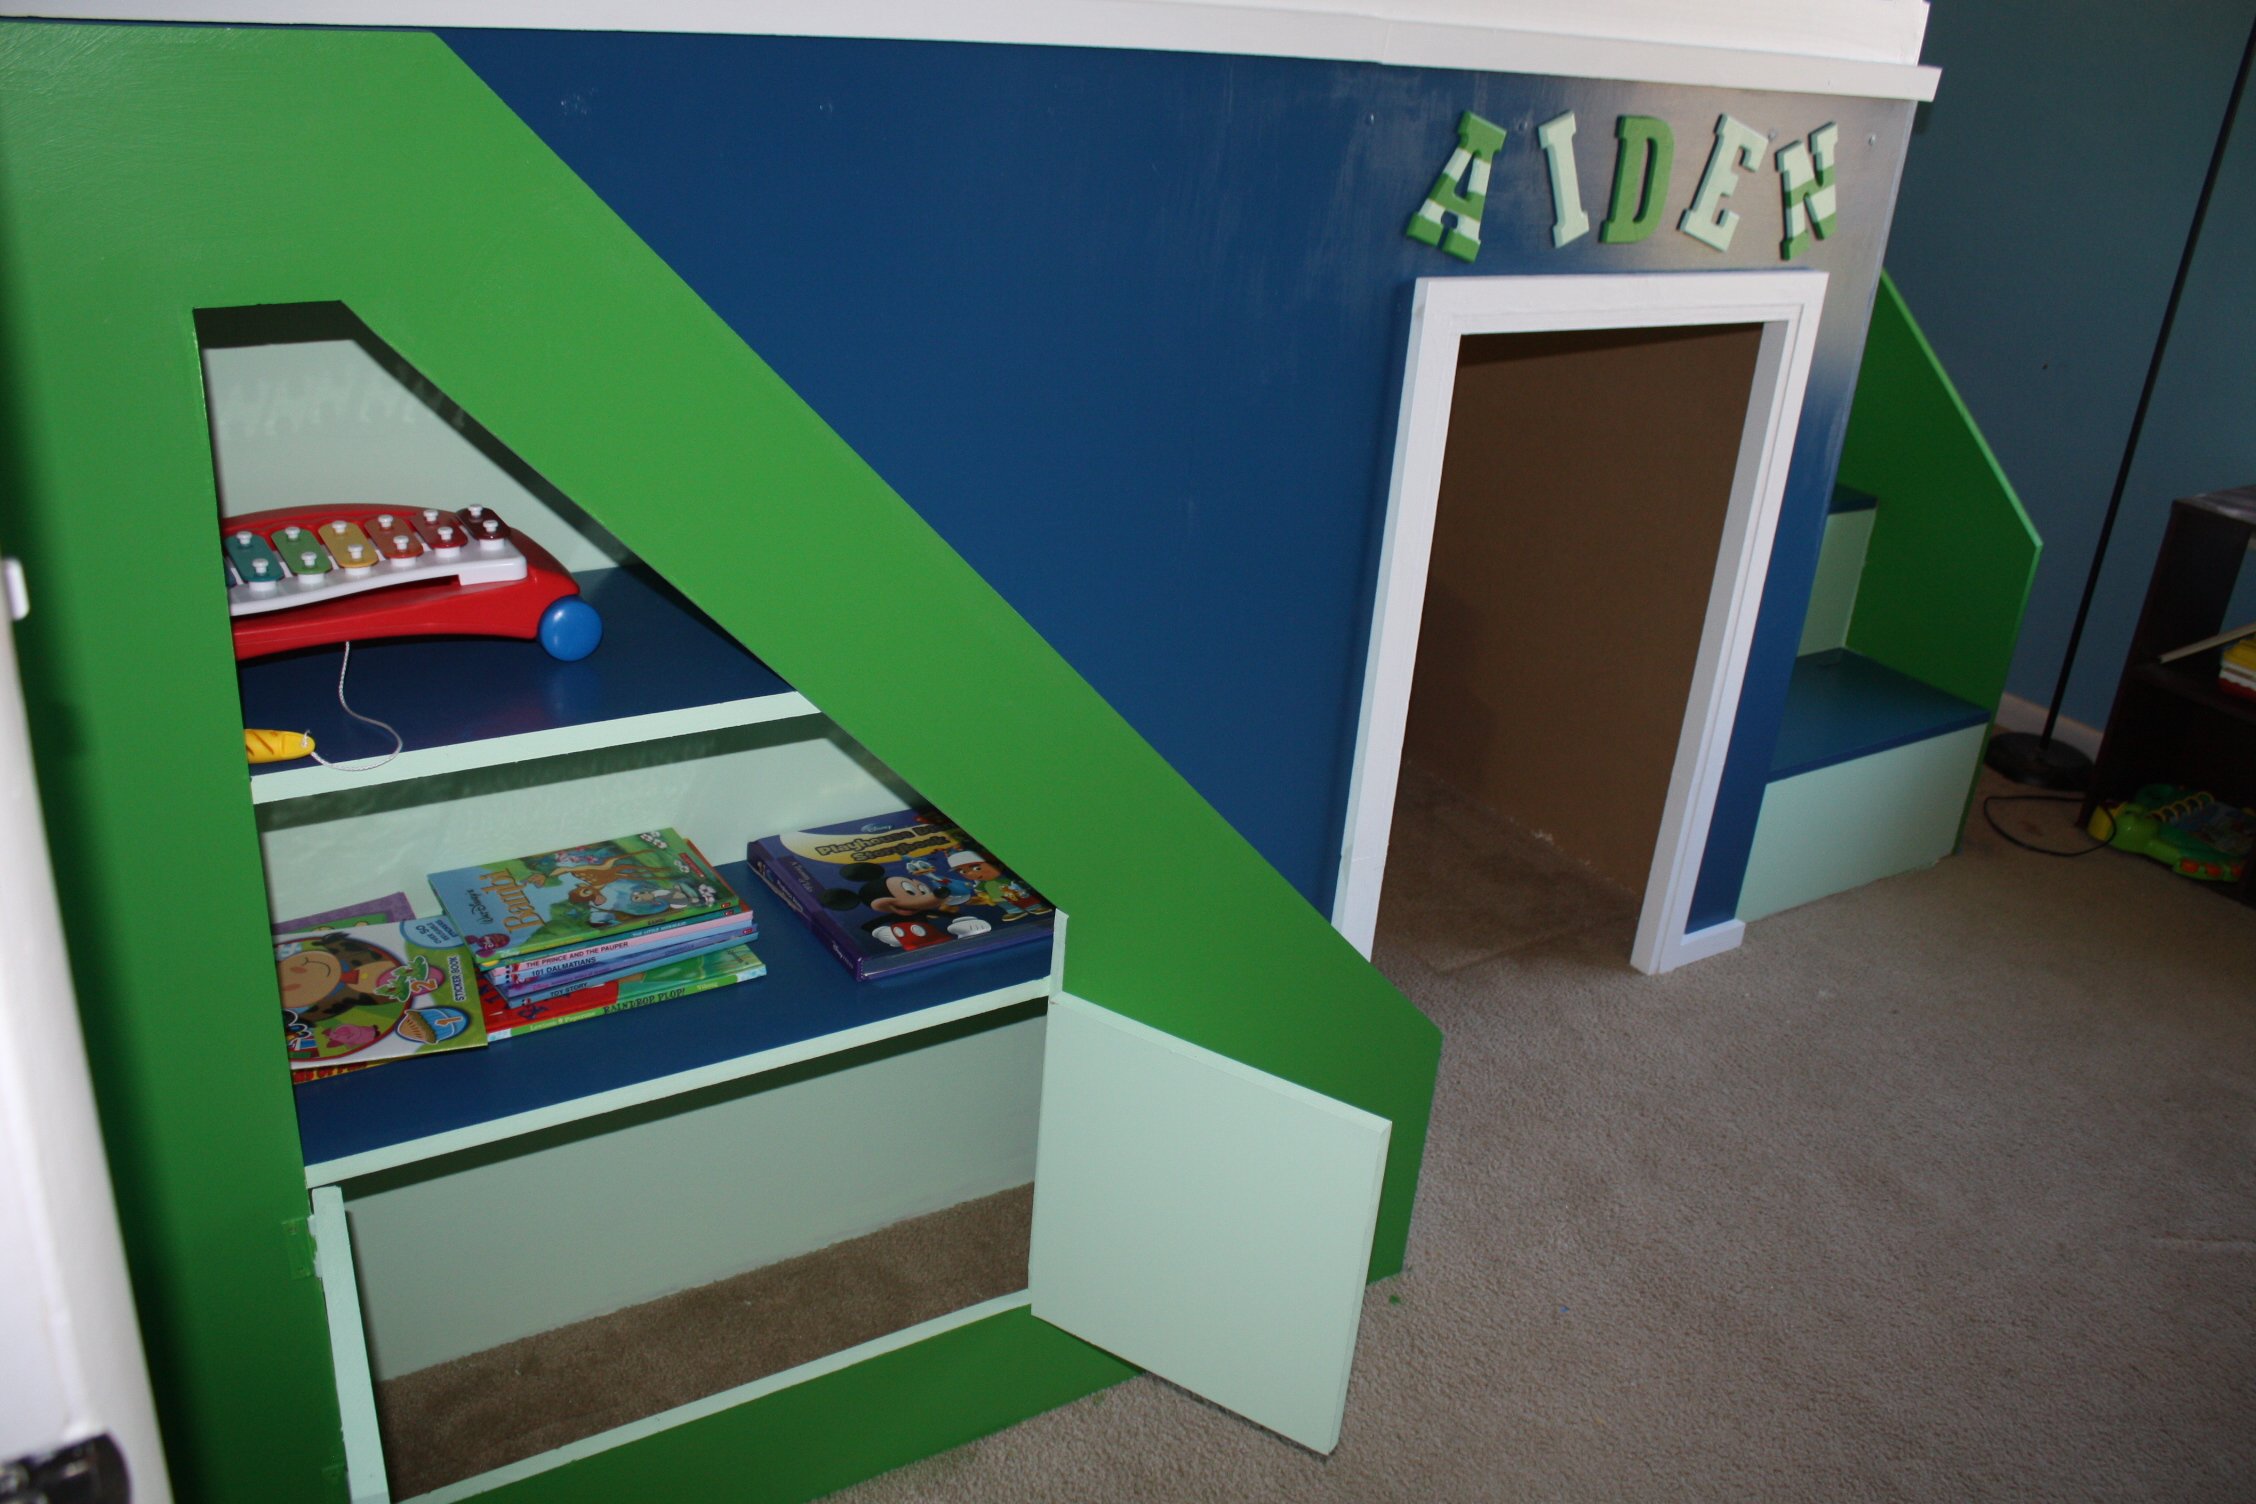
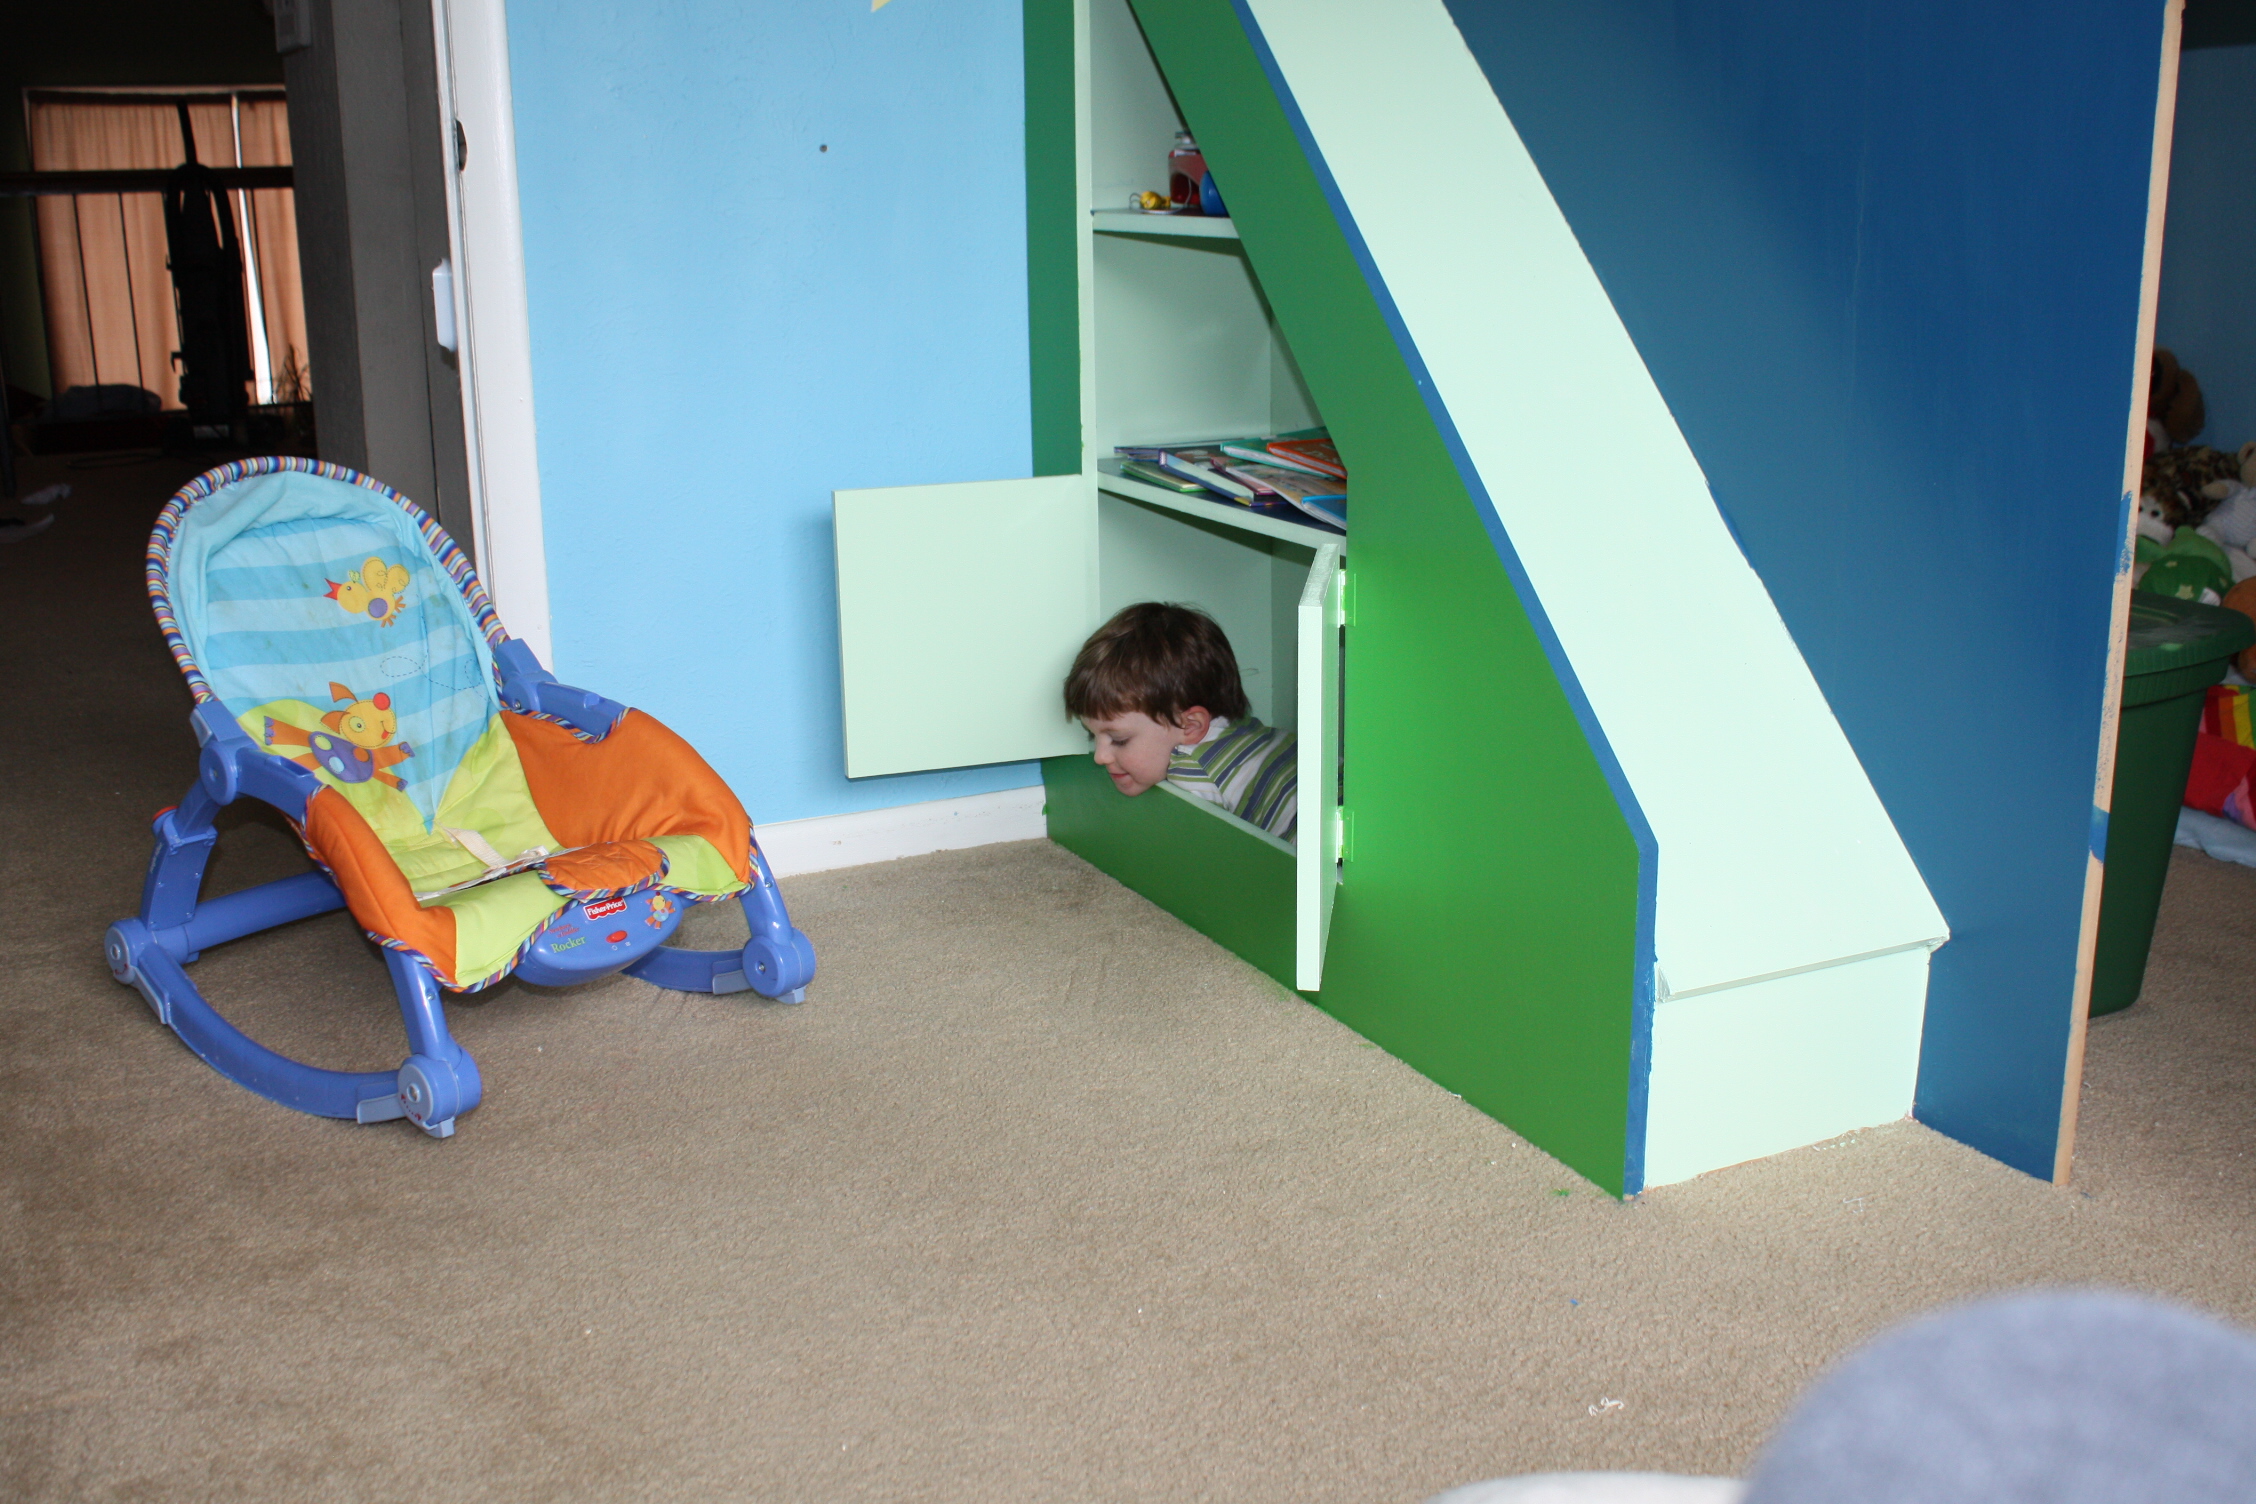
I did modify the plans and merged the plan for the slide into my plan, which was a last minute addition. As such, I had to "measure-and-cut-as-you-go" build this bed. I would highly recommend to anyone considering such a task, don't do that. Make a plan, cut all your wood, paint before assembly, and stick to the plan. My stairs all lift up, and under the top landing there is also a cut out inside Aiden's clubhouse-you can see it behind him in the picture below. Also under the slide is a cut out for storage. I have not done anything with the inside of the clubhouse yet. Someday...
I designed the bed specifically so that I could take it apart if we ever move... we live in an apartment. The stairs/stairwell are only connected to the rest of the bed with a single screw. The other wall is a bit more difficult to remove, but not impossible.
I learned a few things doing this, that I want to share with you all..
1. The Kreg-Jig is the best thing ever.
2. I LOVE LOVE LOVE power tools.
3. 4x4 sheets of MDF are difficult to carry upstairs by myself.
4. I can do anything.
I hope you all like it. This was my son's 4th birthday present and he really loves it.
It isn't finished yet though. The far wall in the room is about 2 ft away from the bed, and I haven't decided what to do with that side of the bed, so it's still plain. I would love some ideas! What do you think?
Built from Plan(s)
Estimated Cost
$800 including the new tools.. table saw, nailer, kreg, new drill
Estimated Time Investment
Week Long Project (20 Hours or More)
Finish Used
Behr paint. I coordinated the colors on the Behr website to try and match the colors already on the wall.
Recommended Skill Level
Intermediate
Comments

Sat, 03/10/2012 - 21:56
This is awesome. I love the
This is awesome. I love the way the slide goes across the front. It looks so compact and functional.
Sun, 03/11/2012 - 06:30
Thank you!!
I did make a couple mistakes with the slide. I made it too narrow. Right now it is 1 foot wide. Next time I would do 1 1/2 feet wide. I also would make the landing at the top bigger. I like the angle of the slide now at 45 degrees, but my son did have to learn how to slide down it without falling foward at the bottom. So, a more well designed slide would be less steep, wider, and with a bigger landing at the top. Another tip... for the top of the stairs, take extra care to make sure they swing straight and are about 1/2 inch less wide than the space so they don't scrape the side of the stairwell walls.

Sun, 03/11/2012 - 06:32
Thank you.
Technically, I did finish the ten dollar ledge above his bed earlier this week, before I completed the bed, but it was all part of the same project! :) The only other thing I've built is 2x4s slapped together to hold aquariums. My other hobby is breeding fish. :)
Mon, 03/12/2012 - 11:29
Thank you.
Yes I actually made a whole frame. Basically just studs - on the walls they are just screwed into studs in the wall, then the other two sides are supported by the walls of the house and a vertical frame piece also. There are two stud slats connected to that, so that bed isn't going anywhere. This is the same method I use for supporting 1500 pound aquariums. I have a bunch of 1x3 slats in there as well...
So, if I want to move the bed, I would remove the side with the stairs (~62 inches)- that whole side is one unit, secured to the frame with one screw, and secured to the other wall by about 5 finish nails and one screw. The longer wall (~85 inches) is secured to the frame by 6 screws.
Queen mattresses are HEAVY. :) I learned that too.
Sun, 01/06/2013 - 08:21
queen plans
we're making the Playhouse Loft Bed for a queen bed as well. Maybe you can answer a question for me. Are the dimensions to fit a queen size bed as written, or do we need to convert them. A queen mattress is 75 x 80 and it looks like that's what this is made to fit, but I don't wanna find out i'm wrong after I already have that thing hoisted up over my head :) Thanks for any advice you can offer!
Faux Christmas Mantle
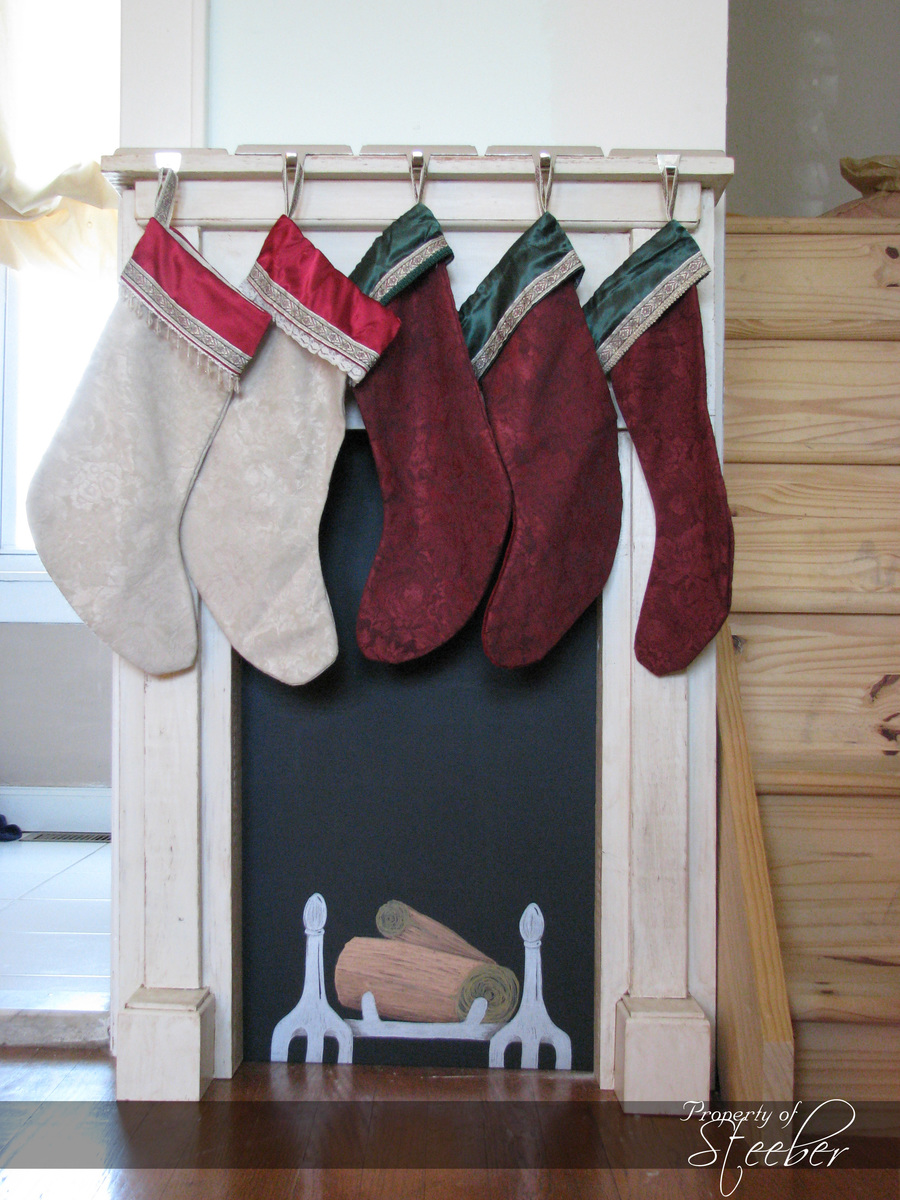
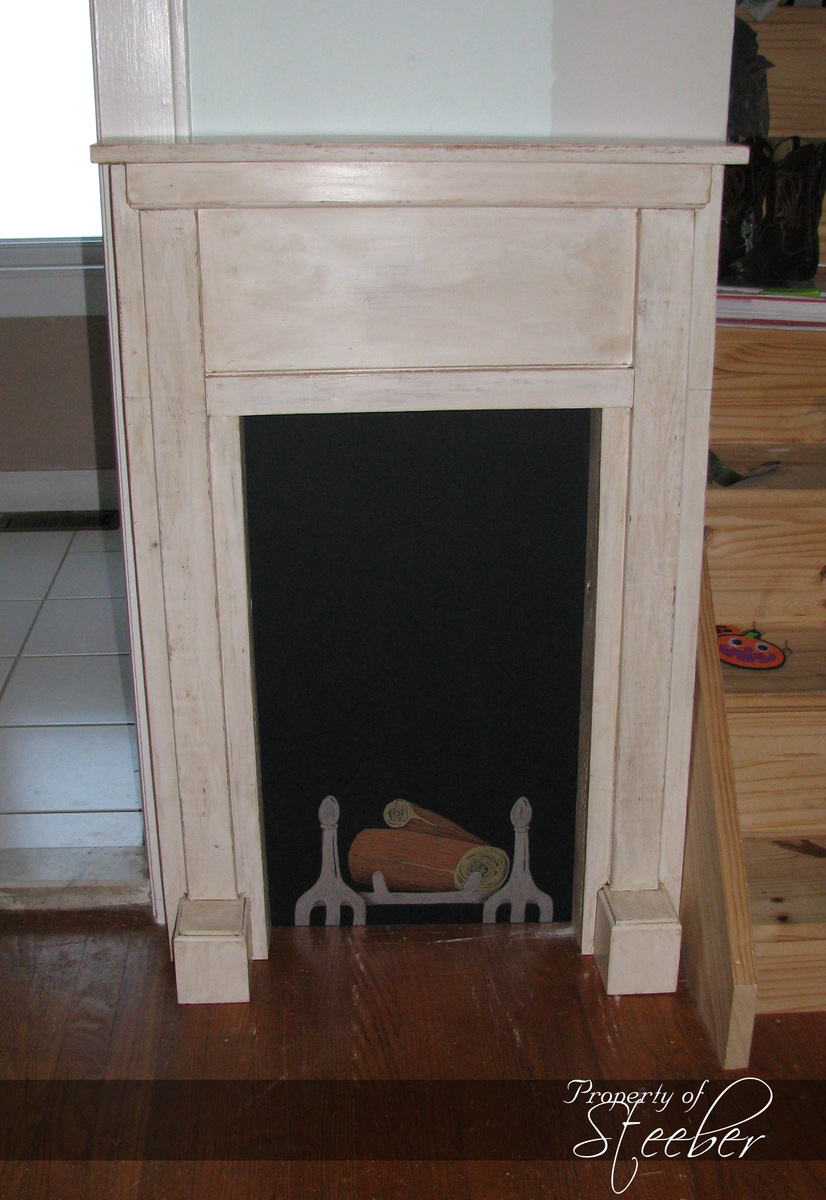
With all our changes and renovations, we no longer had a place to put up Christmas stockings. When I saw the idea for a fake mantle I knew this would be a good solution. The wall area I had was only 30 inches wide, but we made it work! The mantle itself was made almost entirely out of wood scraps. We also painted a thin piece of wood with chalkboard paint and used metallic Sharpies to create the grate and logs. That attached to the back of the mantle to serve as the "inside" of the fireplace. The kids added their own version of flames with some colored chalk on Christmas Eve night. Best part is I can store it in the attic until next year!

Built from Plan(s)
Estimated Time Investment
Day Project (6-9 Hours)
Finish Used
We painted the mantle with a milk colored latex paint, then roughed it up with some sandpaper and finished off with Minwax Dark paste finishing wax.
The inside of the fireplace was a piece of 1/8 inch plywood painted in chalkboard paint, and decorated with metallic Sharpies to create the grate and logs.
The inside of the fireplace was a piece of 1/8 inch plywood painted in chalkboard paint, and decorated with metallic Sharpies to create the grate and logs.
Recommended Skill Level
Intermediate
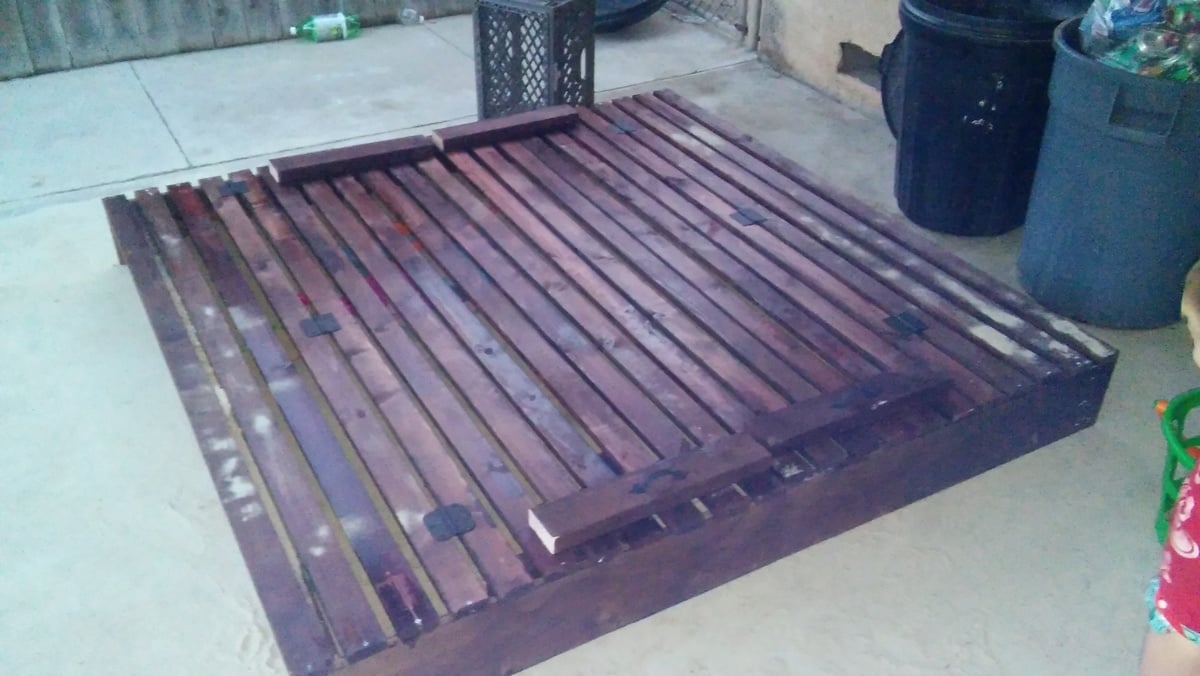
6 x 6 Sandbox
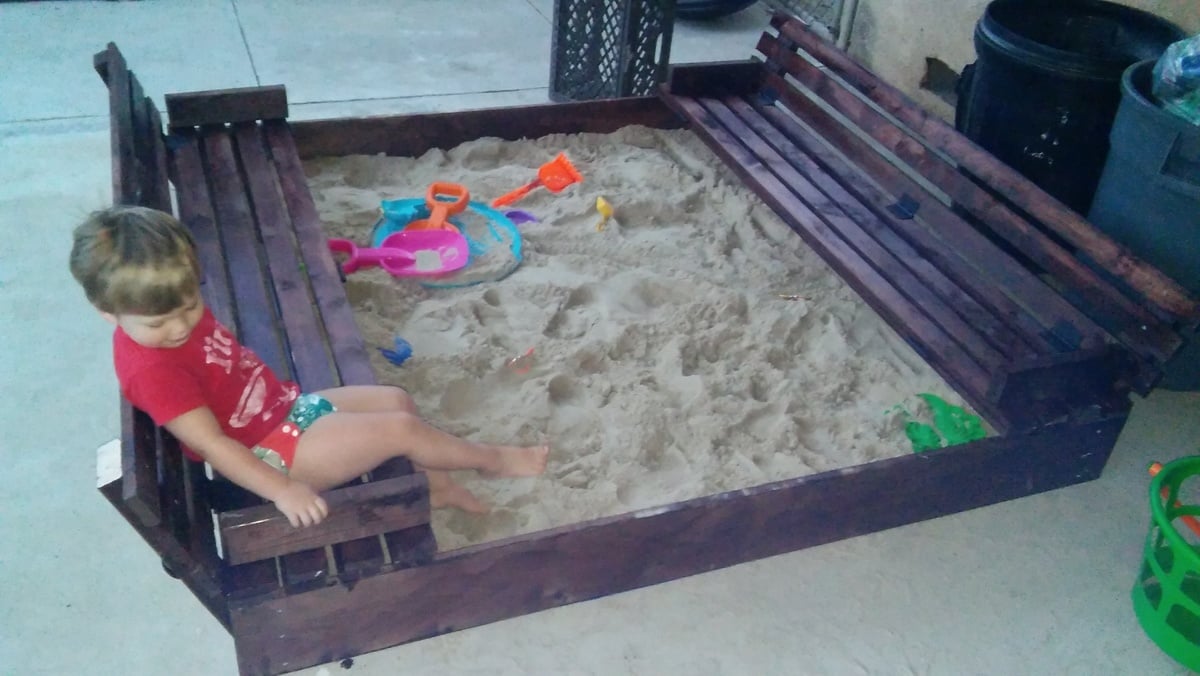
This was our first attempt at making a woodworking project but knew it had to be done to save our plants from our son digging in them. It took us all weekend (mostly because of the staining) but we completed the project in 2 days. We went a little bigger (made a 6 x 6 box) to give our son some room and allow for friends. I loved putting the project together and look forward to many years of use from this box. Thank you for such simple plans!
Built from Plan(s)
Estimated Time Investment
Weekend Project (10-20 Hours)
Recommended Skill Level
Beginner

Jack's Play Kitchen
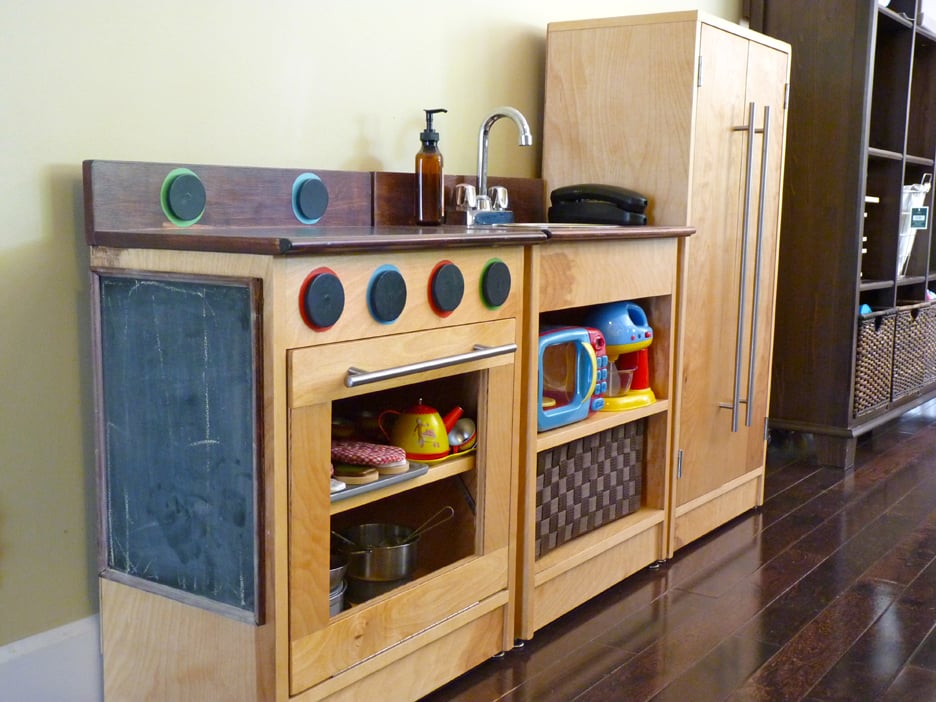
My husband and I built this kitchen for my son's 2nd birthday and it continues to be a huge hit. We scaled the dimensions up a bit so he can use it longer, and used 3/4" birch plywood with veneer on the ends. The oven knobs spin on dowels, the stove burners are just painted on and we added moulding to the edge of the countertops to give it a nice rounded edge. We used a cheap bar faucet from ebay, hardware from IKEA, and a stainless steel bowl with a rim for the sink. I highly recommend using a flap stay on the stove door to keep it from slamming open, and magnetic catches on the oven and fridge doors. We also used anti-tip furniture straps because these suckers are heavy.
Built from Plan(s)
Estimated Time Investment
Weekend Project (10-20 Hours)
Finish Used
clear stain on bases,
red mahogany stain on countertops,
many many coats of poly (this thing will survive the apocalypse)
red mahogany stain on countertops,
many many coats of poly (this thing will survive the apocalypse)
Recommended Skill Level
Beginner
Comments
Sun, 07/08/2012 - 22:00
Dimensions
Thanks Tiffonie!
We added three inches to the width and height. It was a bit large for him at two years old. Now that he is 3.5 it still gets played with every day, and the size works well. Good luck- your son will love it!
Little Cottage Loft Bed Animal House
I spent time over my winter break from work to build this for my nine year-old. She absolutely loves it. It is much sturdier than the basic wooden loft I had in college. Now my 6YO wants one! I bought a Kreg Jig, which was a great investment to build something like this. I used a circular saw but next time around would borrow or purchase a miter/table saw for the large number of cuts required. I spent $475 in lumber, screws, nails, paint, etc which was more than I had planned, but we are happy with the result! It took me about 40 hours to build this in my basement. Great project for daddy/daughter time while school was out; she made the majority of the measurements for me! There were very slight issues with the plans but overall it was not too difficult.
Built from Plan(s)
Estimated Cost
475
Estimated Time Investment
Week Long Project (20 Hours or More)
Finish Used
Olympic One paint with primer
Recommended Skill Level
Intermediate
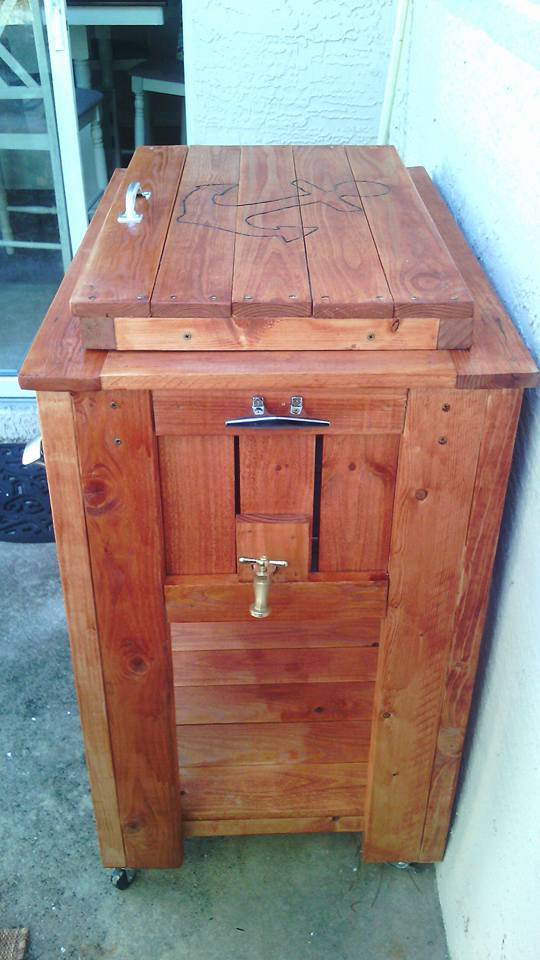
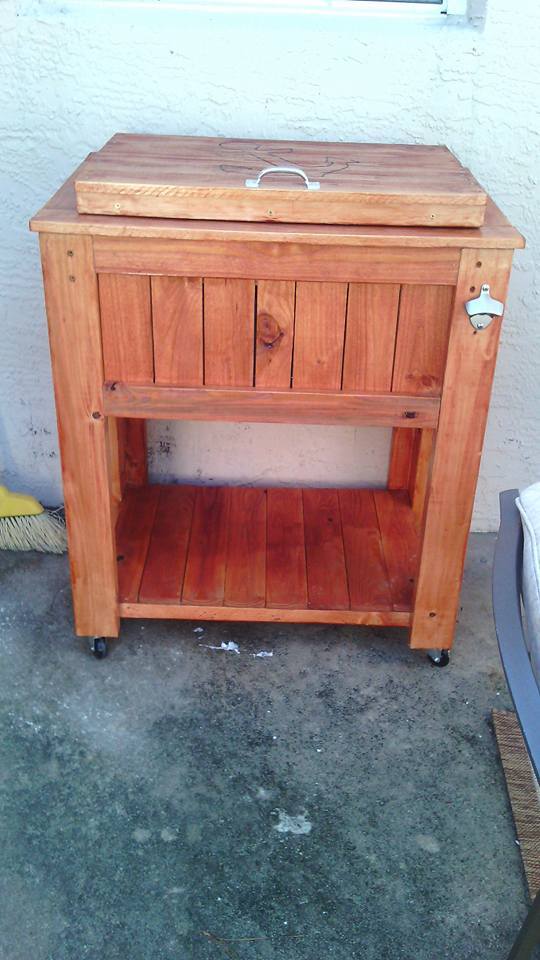
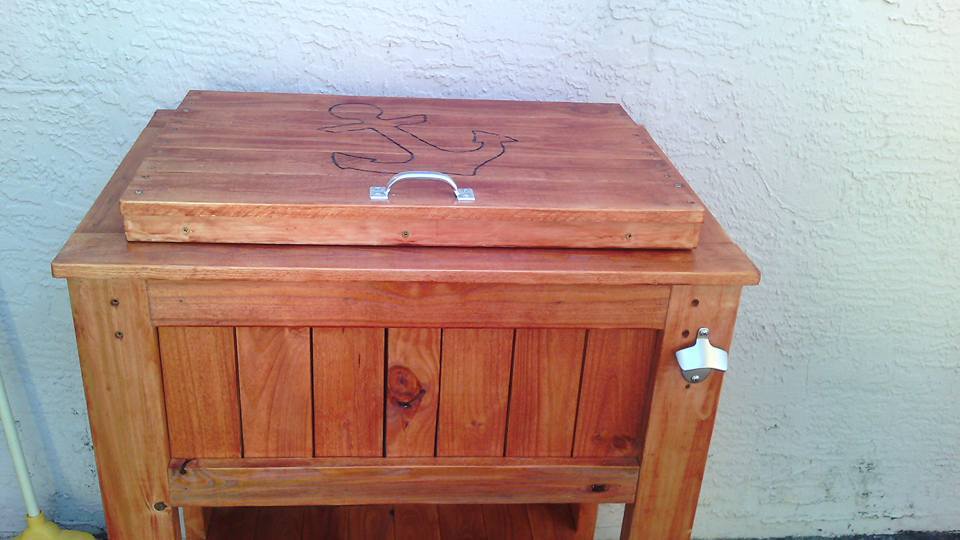
Wooden patio Cooler by DIY Pete
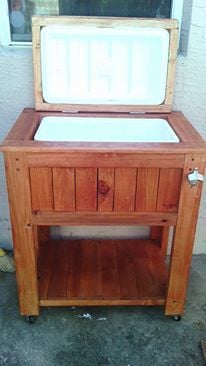
This was my very first project I did. Very proud of how this turned out. Now my sister has one and I am building another one with Mickey Mouse on it for my other sister. I build it in a day with lots of breaks due to 4 teenagers.
Built from Plan(s)
Estimated Time Investment
Day Project (6-9 Hours)
Recommended Skill Level
Beginner
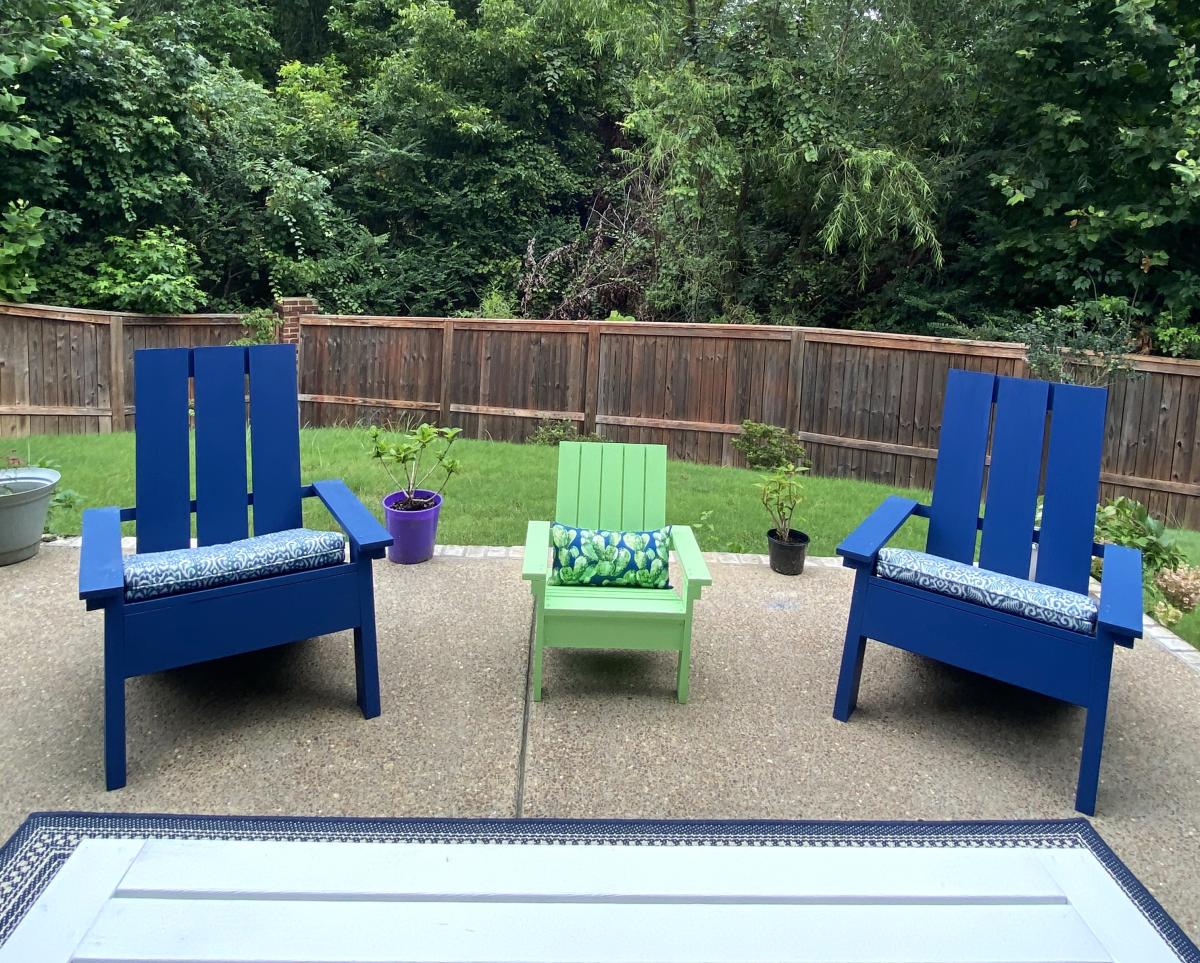
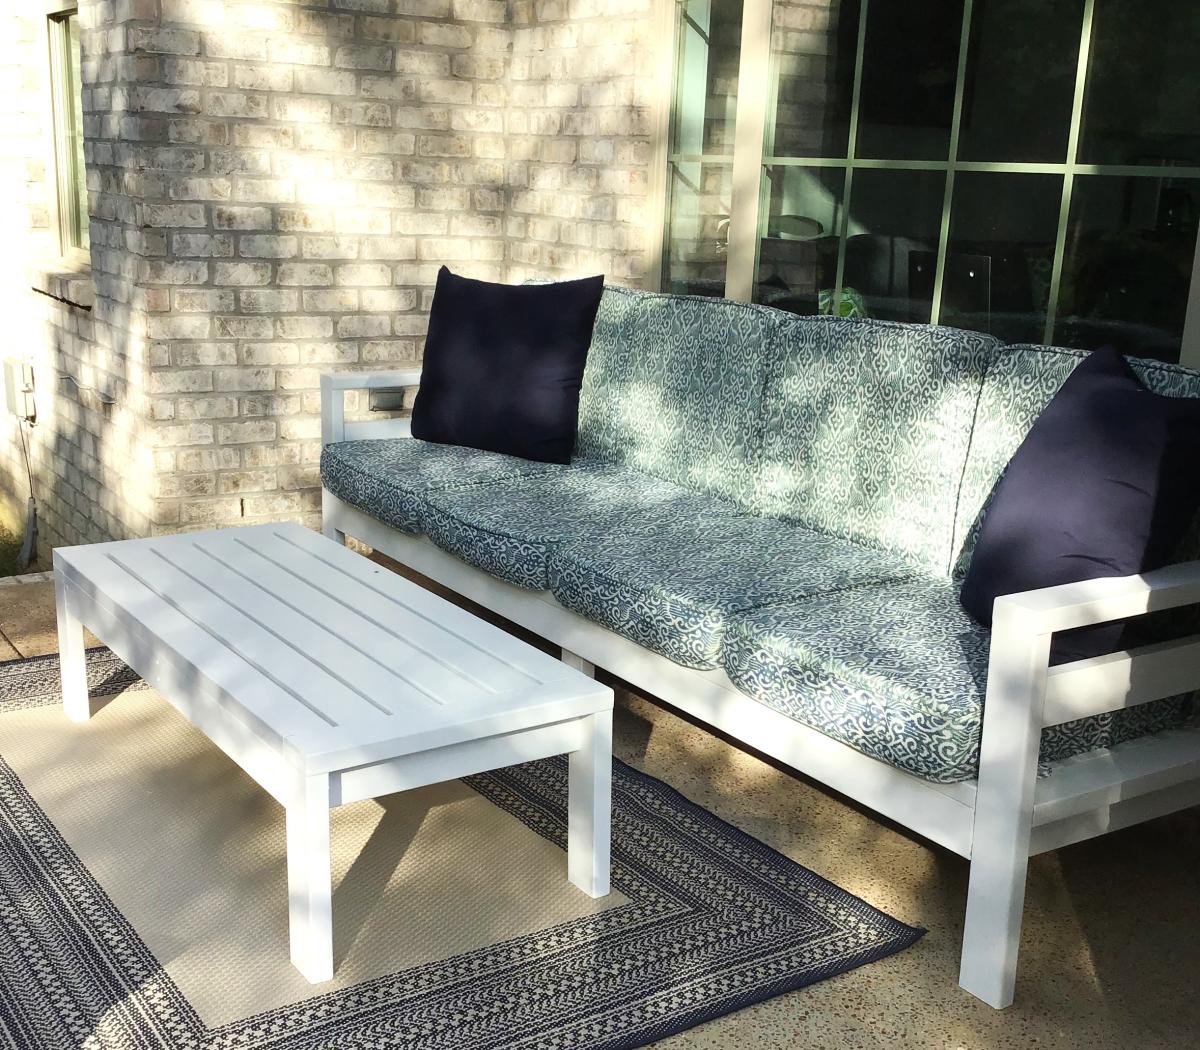
DIY Outdoor Sofa, Chairs and Coffee Table
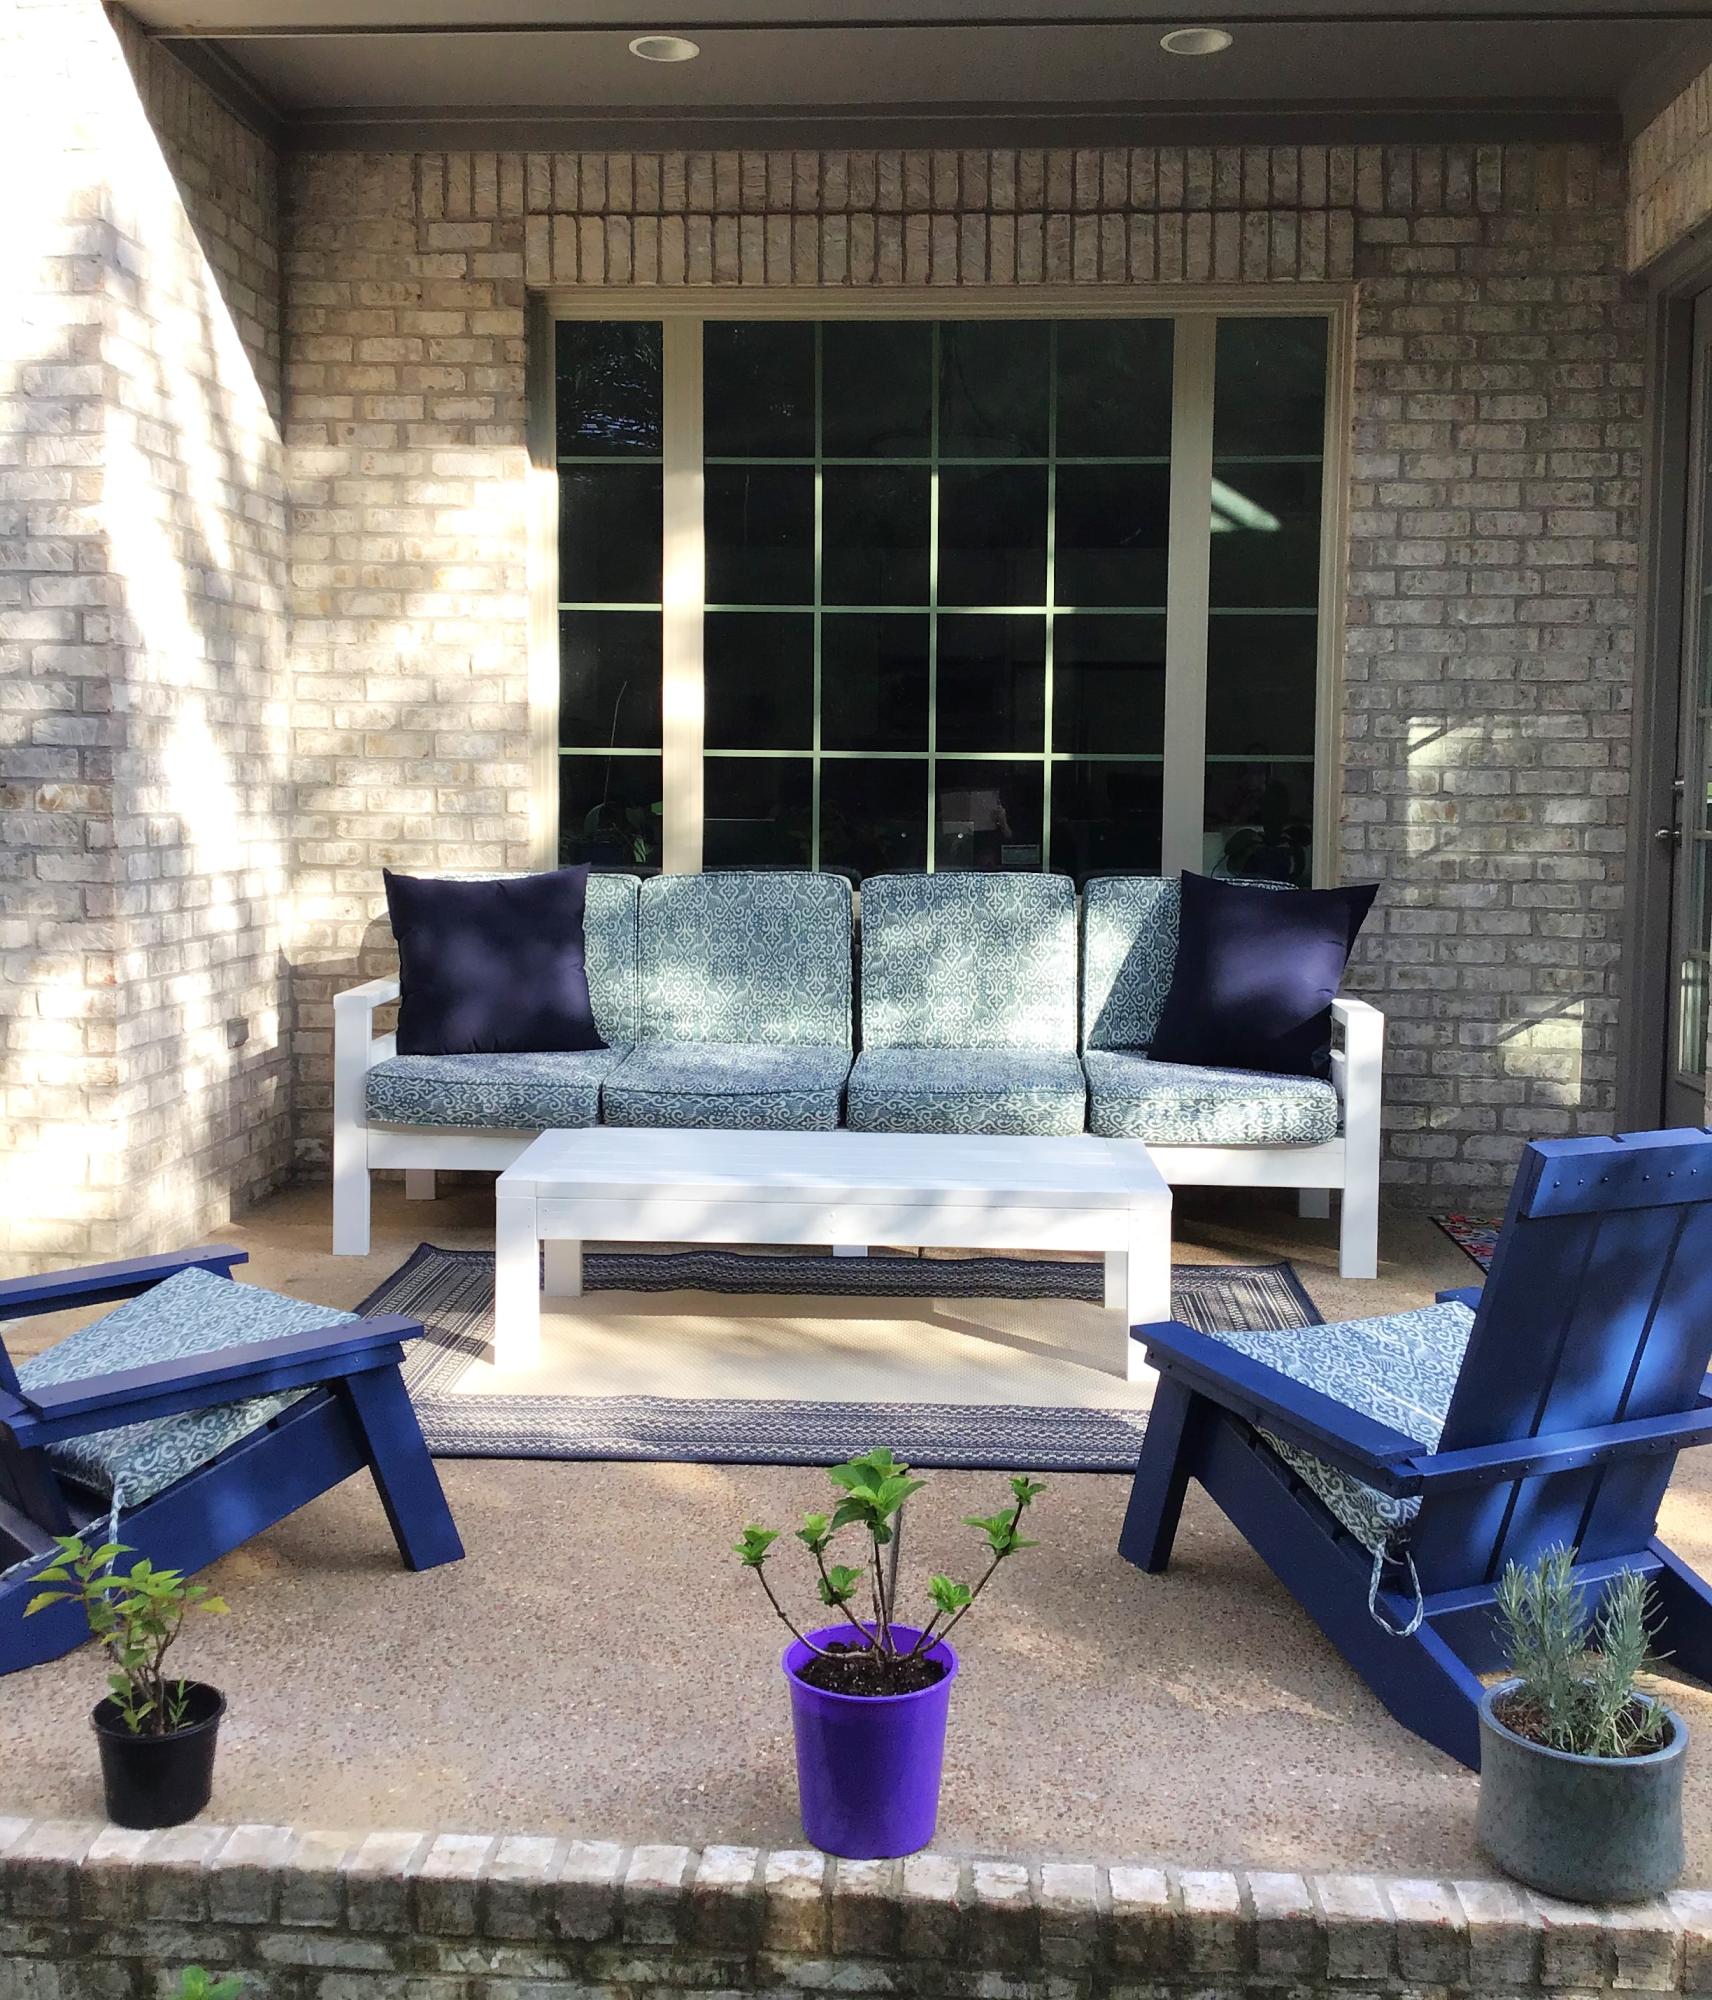
I decided to build my patio furniture and built a couch, with cushions, coffee table, 2 Adirondack adult chairs and one child’s Adirondack chair. It was so much fun to plan and build all of the furniture and so enjoy going out there on cool days! Thanks to Ana White for all of the plans! This is my 20th Ana White project! On to my next project! Plans were outdoor modern sofa, modern Adirondack chair, kids Adirondack chair, 2x4 outdoor coffee table.
JoAnne
Built from Plan(s)
Tryde Console Table
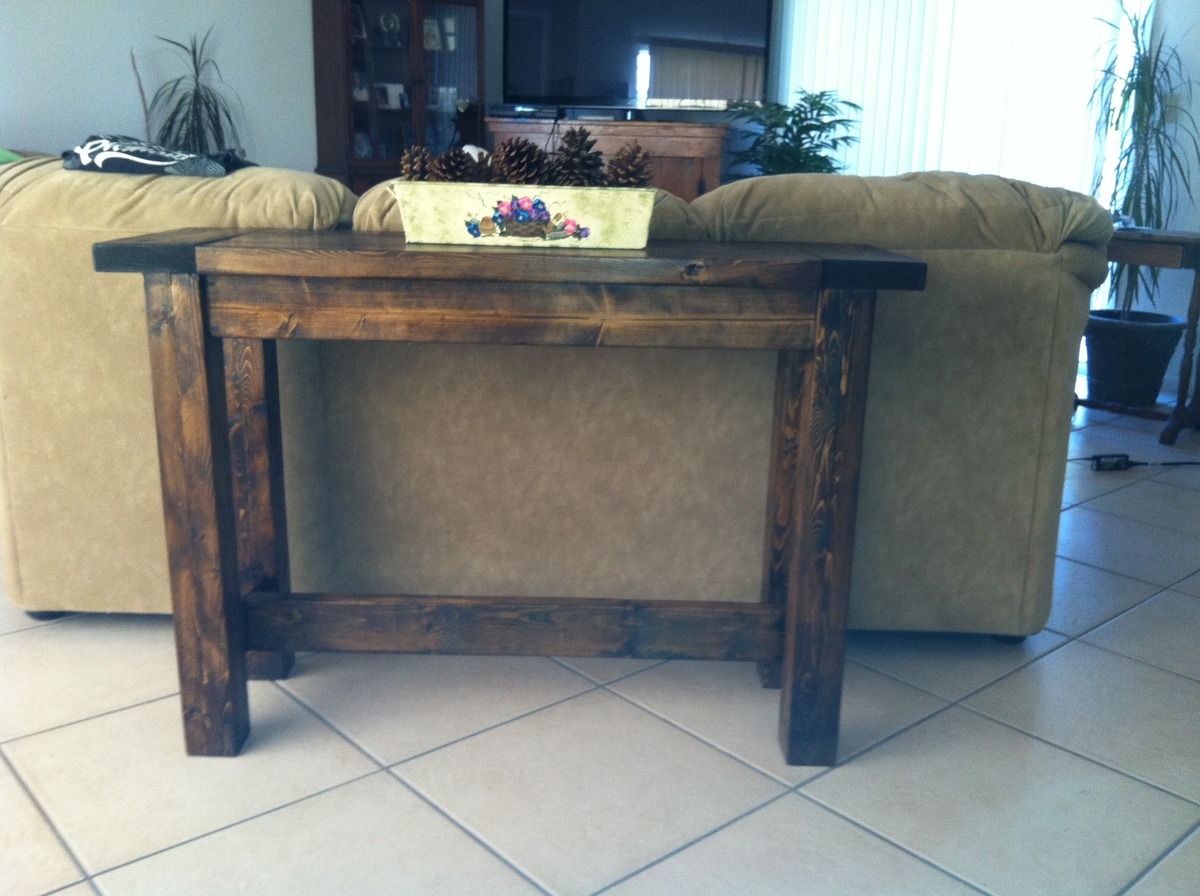
Untreated 4x4s are so hard to find around me so I used 2x4s for the legs. To get the legs truly square, I used my table saw to rip about a 1/4" off from each side of 2x4s (making the legs 3" by 3"). This also helped the legs appear to be one solid piece. After sanding with palm sander I applied Dark Walnut Minwax Stain. After the first coat set, I applied more stain to random places on the table to give it a somewhat "worn" look I guess. I finished with two generous coats of Minwax Semi-gloss poly. I like the way it came out. I also built the tryde coffee table, and after doing so I realized that the 2x6 breadboards had a slight angle to them. To fix this on the console table I attached the breadboards more inward toward the center of the table. The level look is just more appealing to me, but it's no biggie. Now I'm working on finish two tryde end tables, and soon I'll be starting a tv stand. Love the plans and the site in general! Thanks!
Built from Plan(s)
Estimated Cost
About $25-30
Estimated Time Investment
Afternoon Project (3-6 Hours)
Finish Used
Stain: Minwax Dark Walnut
Clear Coat: Minwax Semi-gloss Poly
Clear Coat: Minwax Semi-gloss Poly
Recommended Skill Level
Beginner
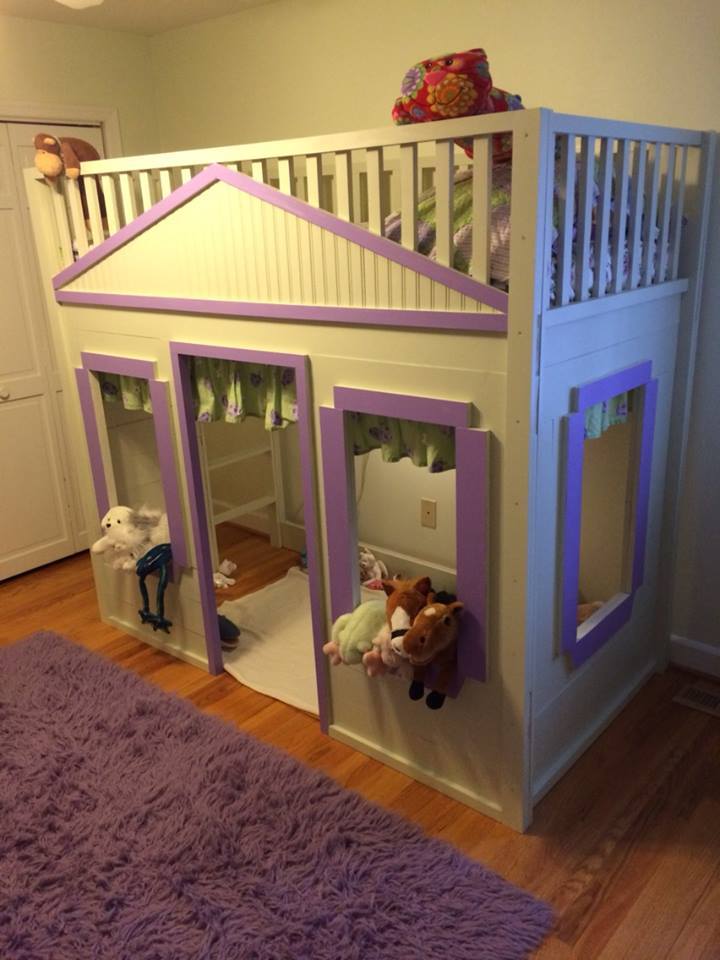
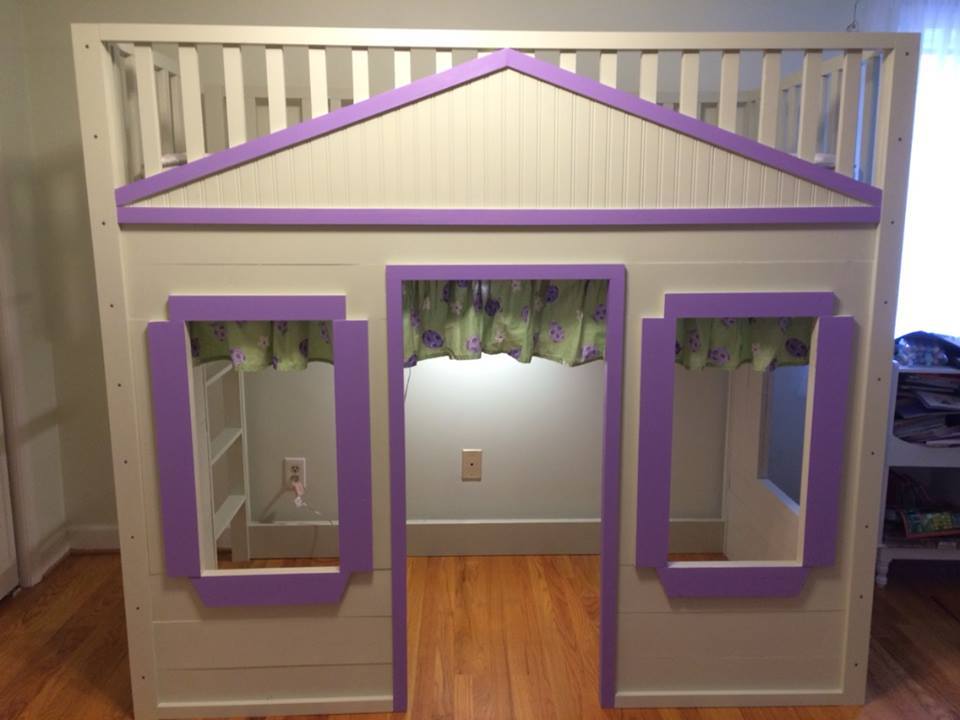
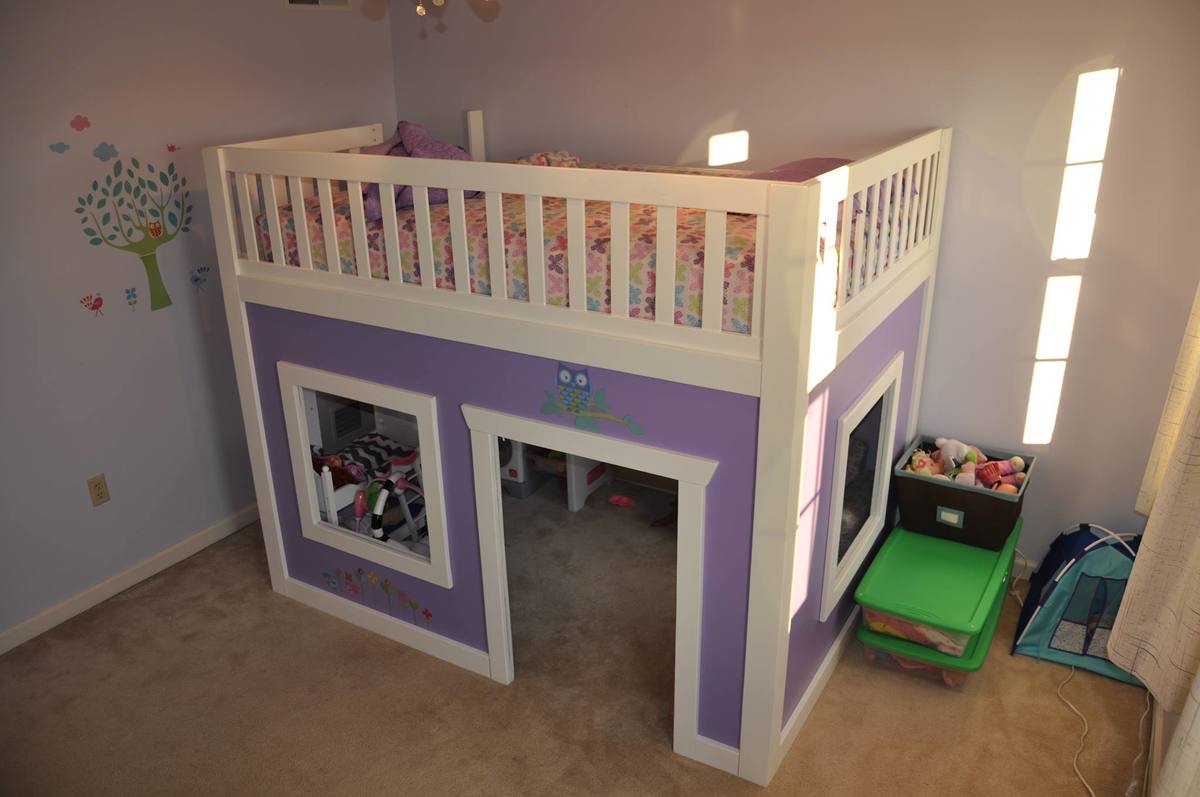
Playhouse Loft bed... Full size
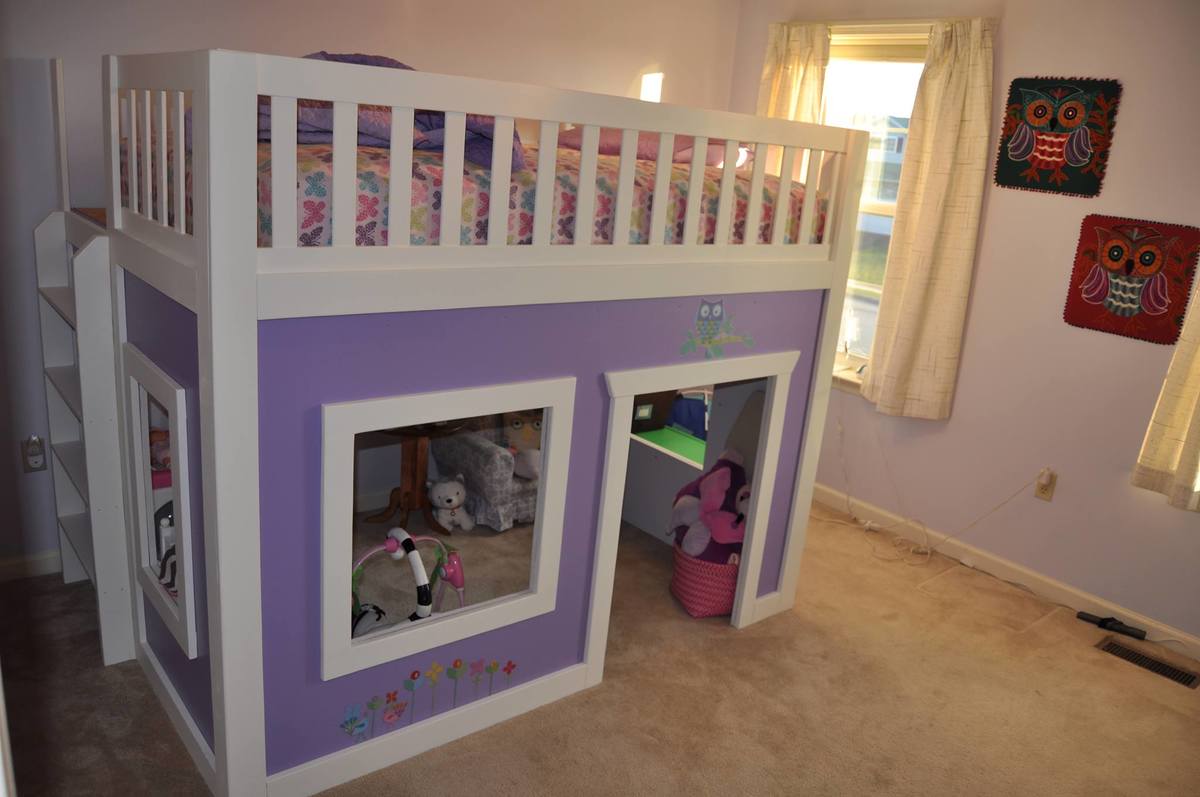
Using the original plans, I modified them to fit a full size mattress.
Estimated Cost
$175 + mattress
Estimated Time Investment
Weekend Project (10-20 Hours)
Finish Used
Quite Lilac and White Paint
Recommended Skill Level
Intermediate
Comments
Sat, 05/17/2014 - 09:01
adorable- can you share your plans?
Would you mind sharing your modified plans? This is adorable! :) my email is [email protected].
Sun, 07/13/2014 - 11:33
full size plans??
would you share modified plans I want to make this asap for my daughter! [email protected] Thanks!
Wed, 04/01/2015 - 13:11
Loft playhouse plans
Can you please send your plans for the full size? My email is [email protected]
Thank you so much
Sun, 05/17/2015 - 18:02
Plans for full size
Where can we find the plans for the full size version? Thank You! My email is [email protected]
Mon, 08/10/2015 - 09:04
PLANS FOR TWIN BED
Could I get the plans for a twin bed please. My granddaughter will love this. Recntly got custody and want her room looking great!! Thanks, Paula
Mon, 08/10/2015 - 09:54
PLANS FOR TWIN BED
Could you email me the plans for the twin size bed version of this. My email is [email protected]. Thank you very much!!
Wed, 09/02/2015 - 11:15
full size plan
Can someone please send me the full size plan. I wanted to get started this weekend.
Thanks!
Tue, 11/17/2015 - 12:37
I would love to have the
I would love to have the plans for the full size version. My email is [email protected].
Mon, 12/18/2017 - 23:02
I love this project, I would
I love this project, I would need full size plans though are there any printable plans available?
Fri, 05/14/2021 - 09:13
Playhouse Loft bed... Full size Plans
Could I please get a copy of the plans for the full size bed as well to [email protected]. I love your projects and plans and I already built the twin size version for my daughter and this one will be for my son. Thank you!
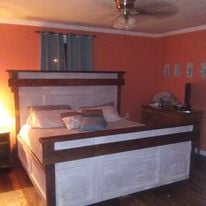
Farmhouse Bed
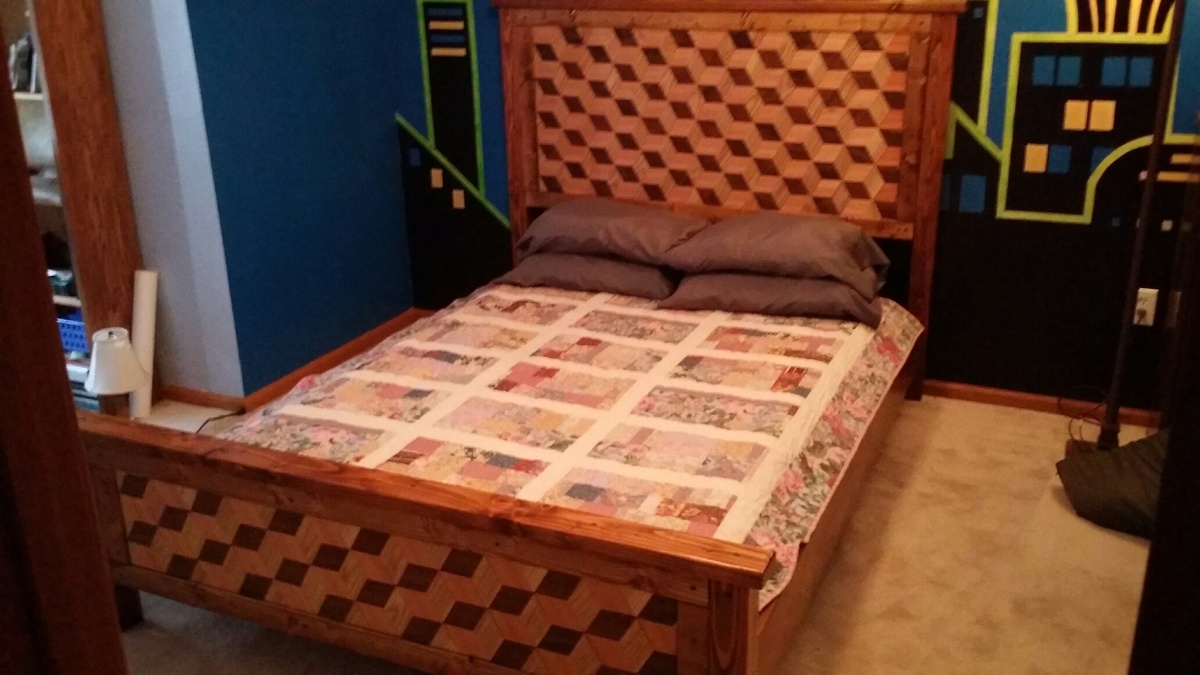
My wife is an avid quilter and I've just begun woodworking, so when we needed a bed for our spare bedroom, we combined my love of woodworking with her love of quilts to come up with this bed, modified from your plans. We couldn't be happier with the way that it turned out!
Built from Plan(s)
Estimated Cost
$150
Estimated Time Investment
Week Long Project (20 Hours or More)
Finish Used
Provincial Stain covered by polyurethane (3 coats).
Recommended Skill Level
Intermediate
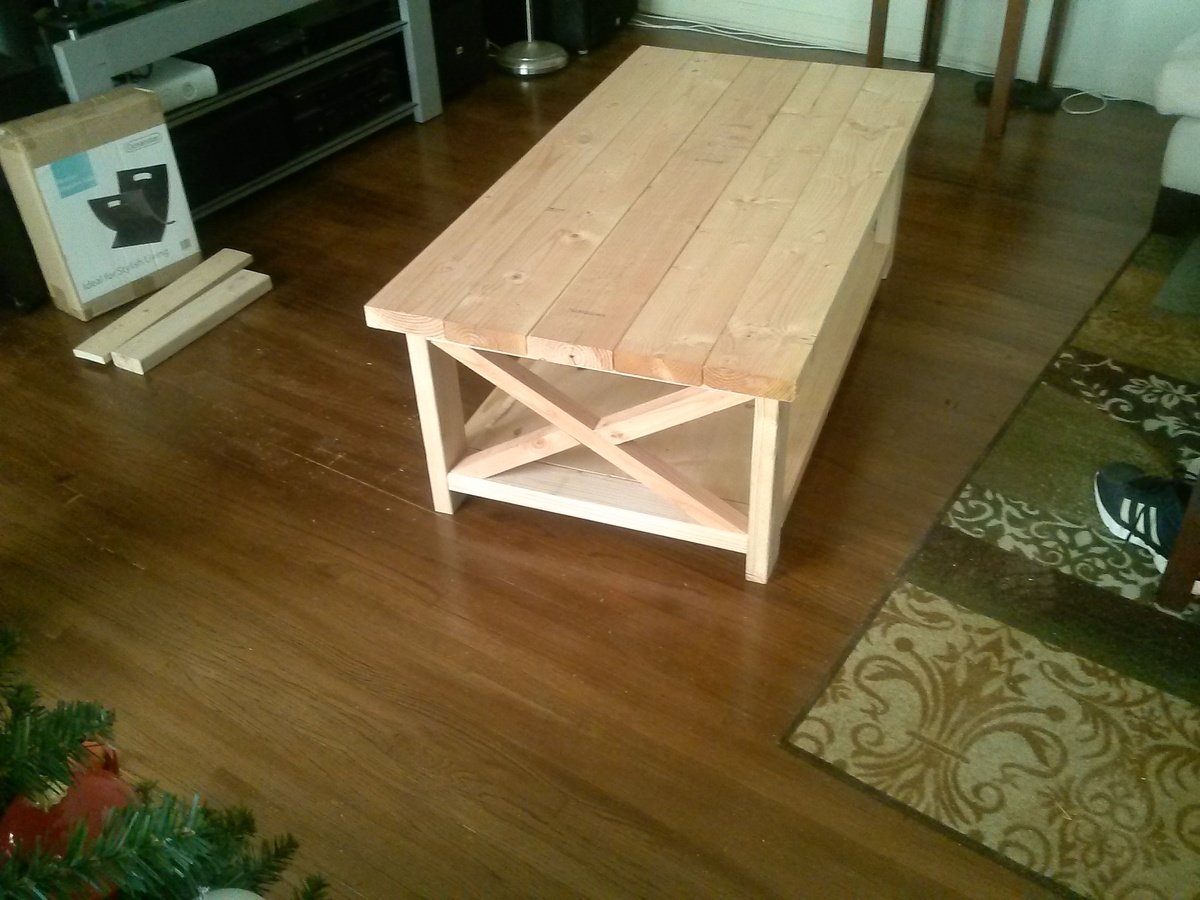
Modified Rustic X
Pondering how to finish it. I did modify the ends using 2 uprights rather than the X. It was a fun weekend project. Thank you for you inspiration!
Built from Plan(s)
Estimated Cost
$50
Estimated Time Investment
Day Project (6-9 Hours)
Finish Used
Will probably paint it white.
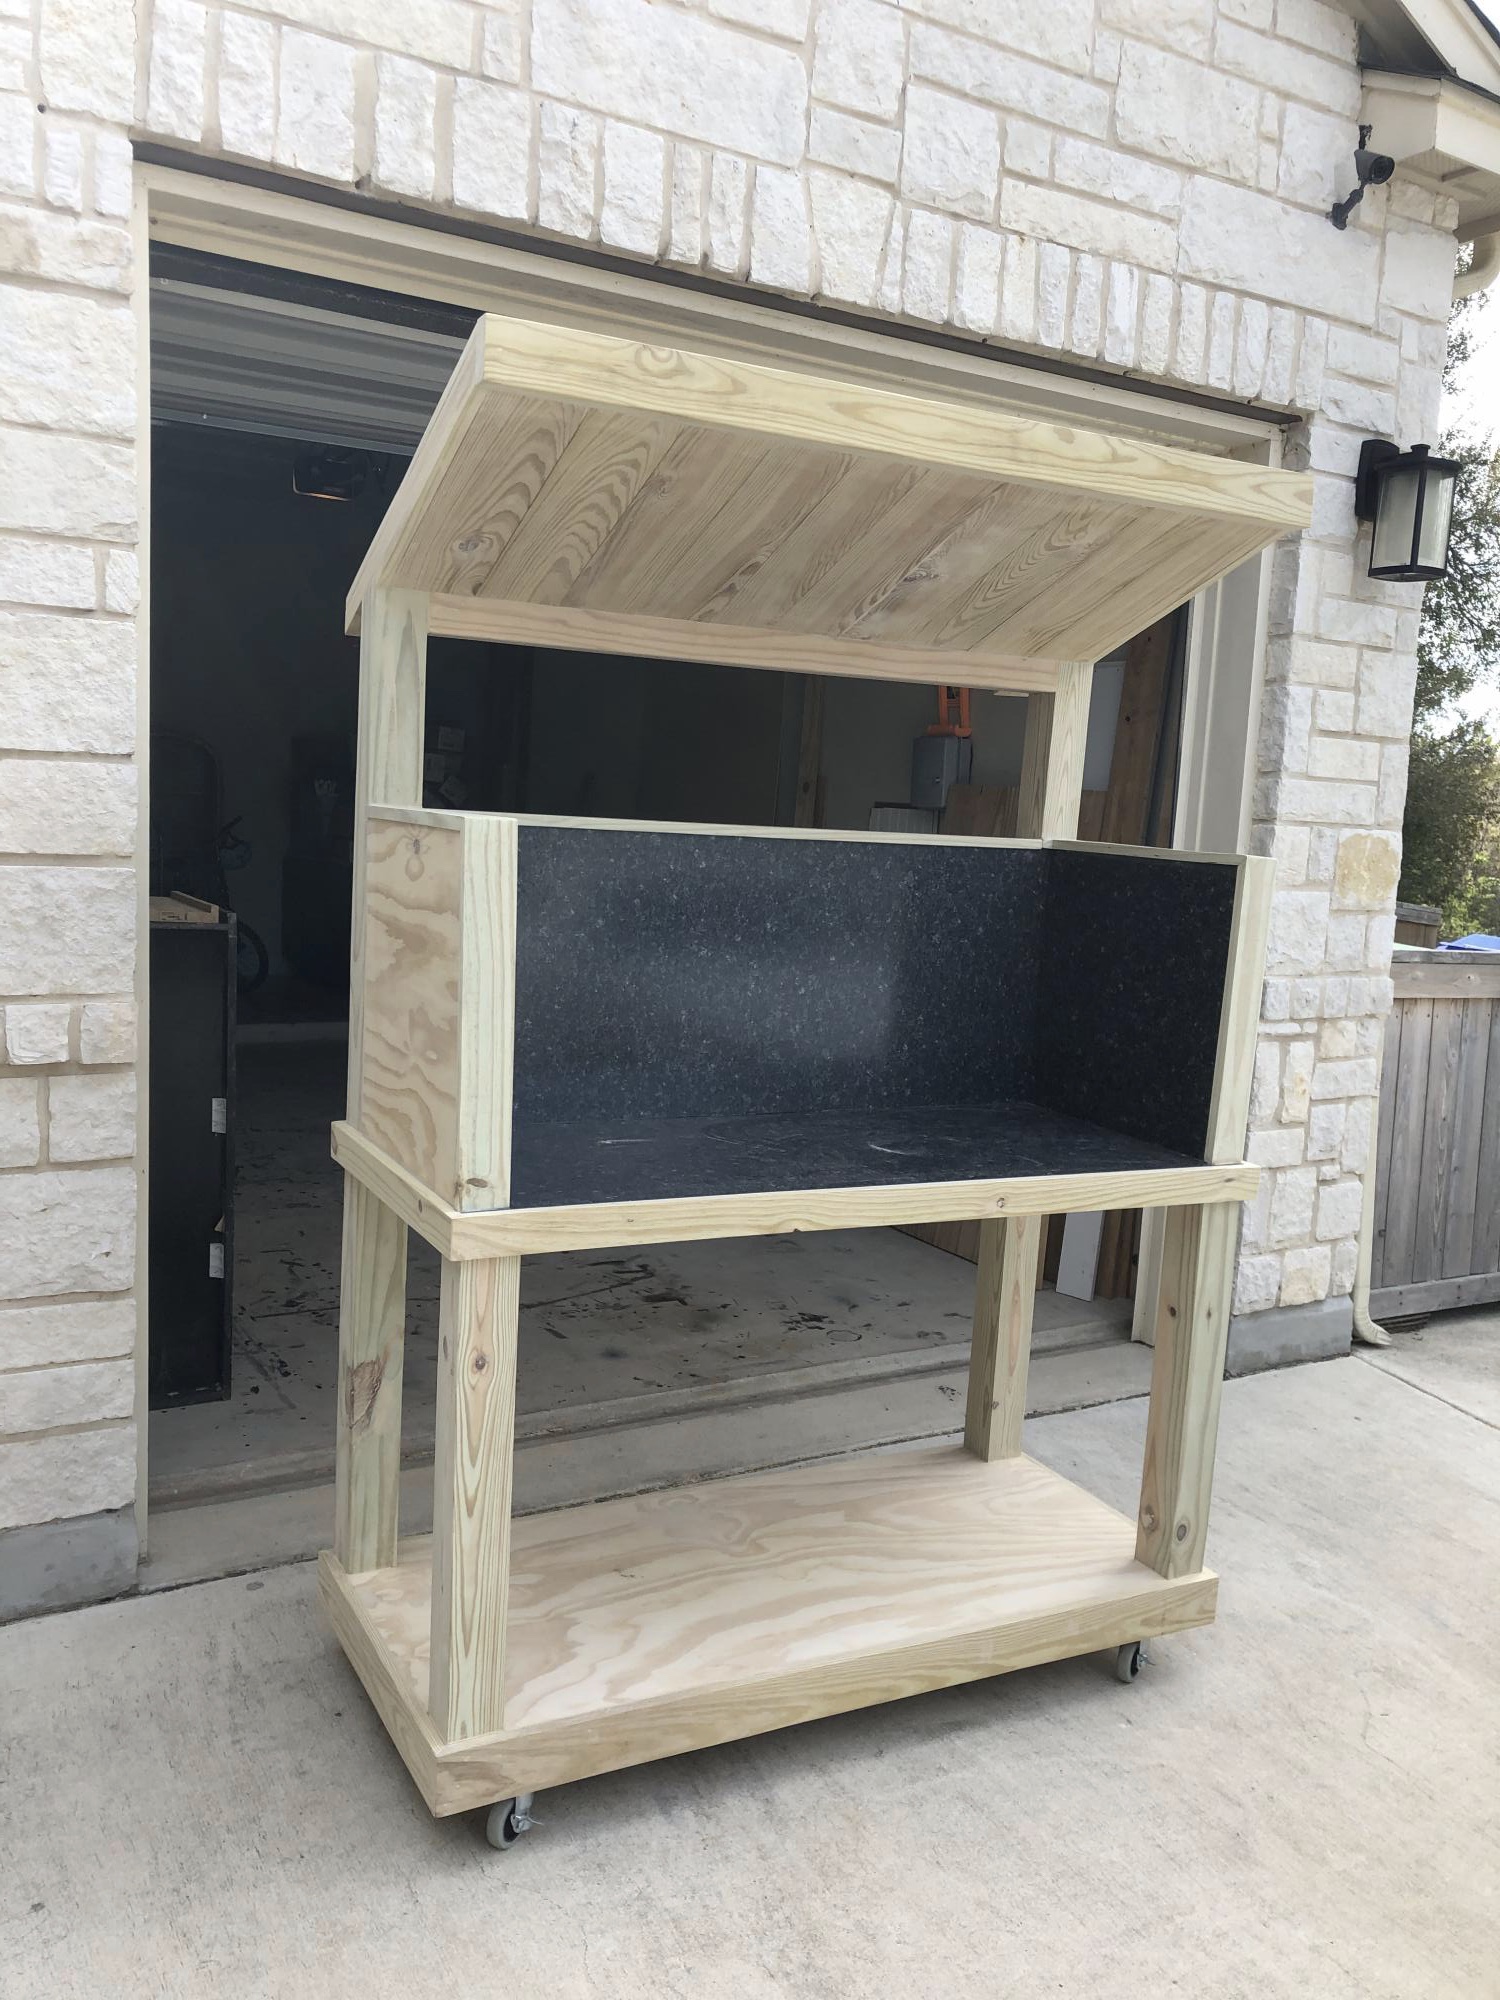
DIY Brew Station
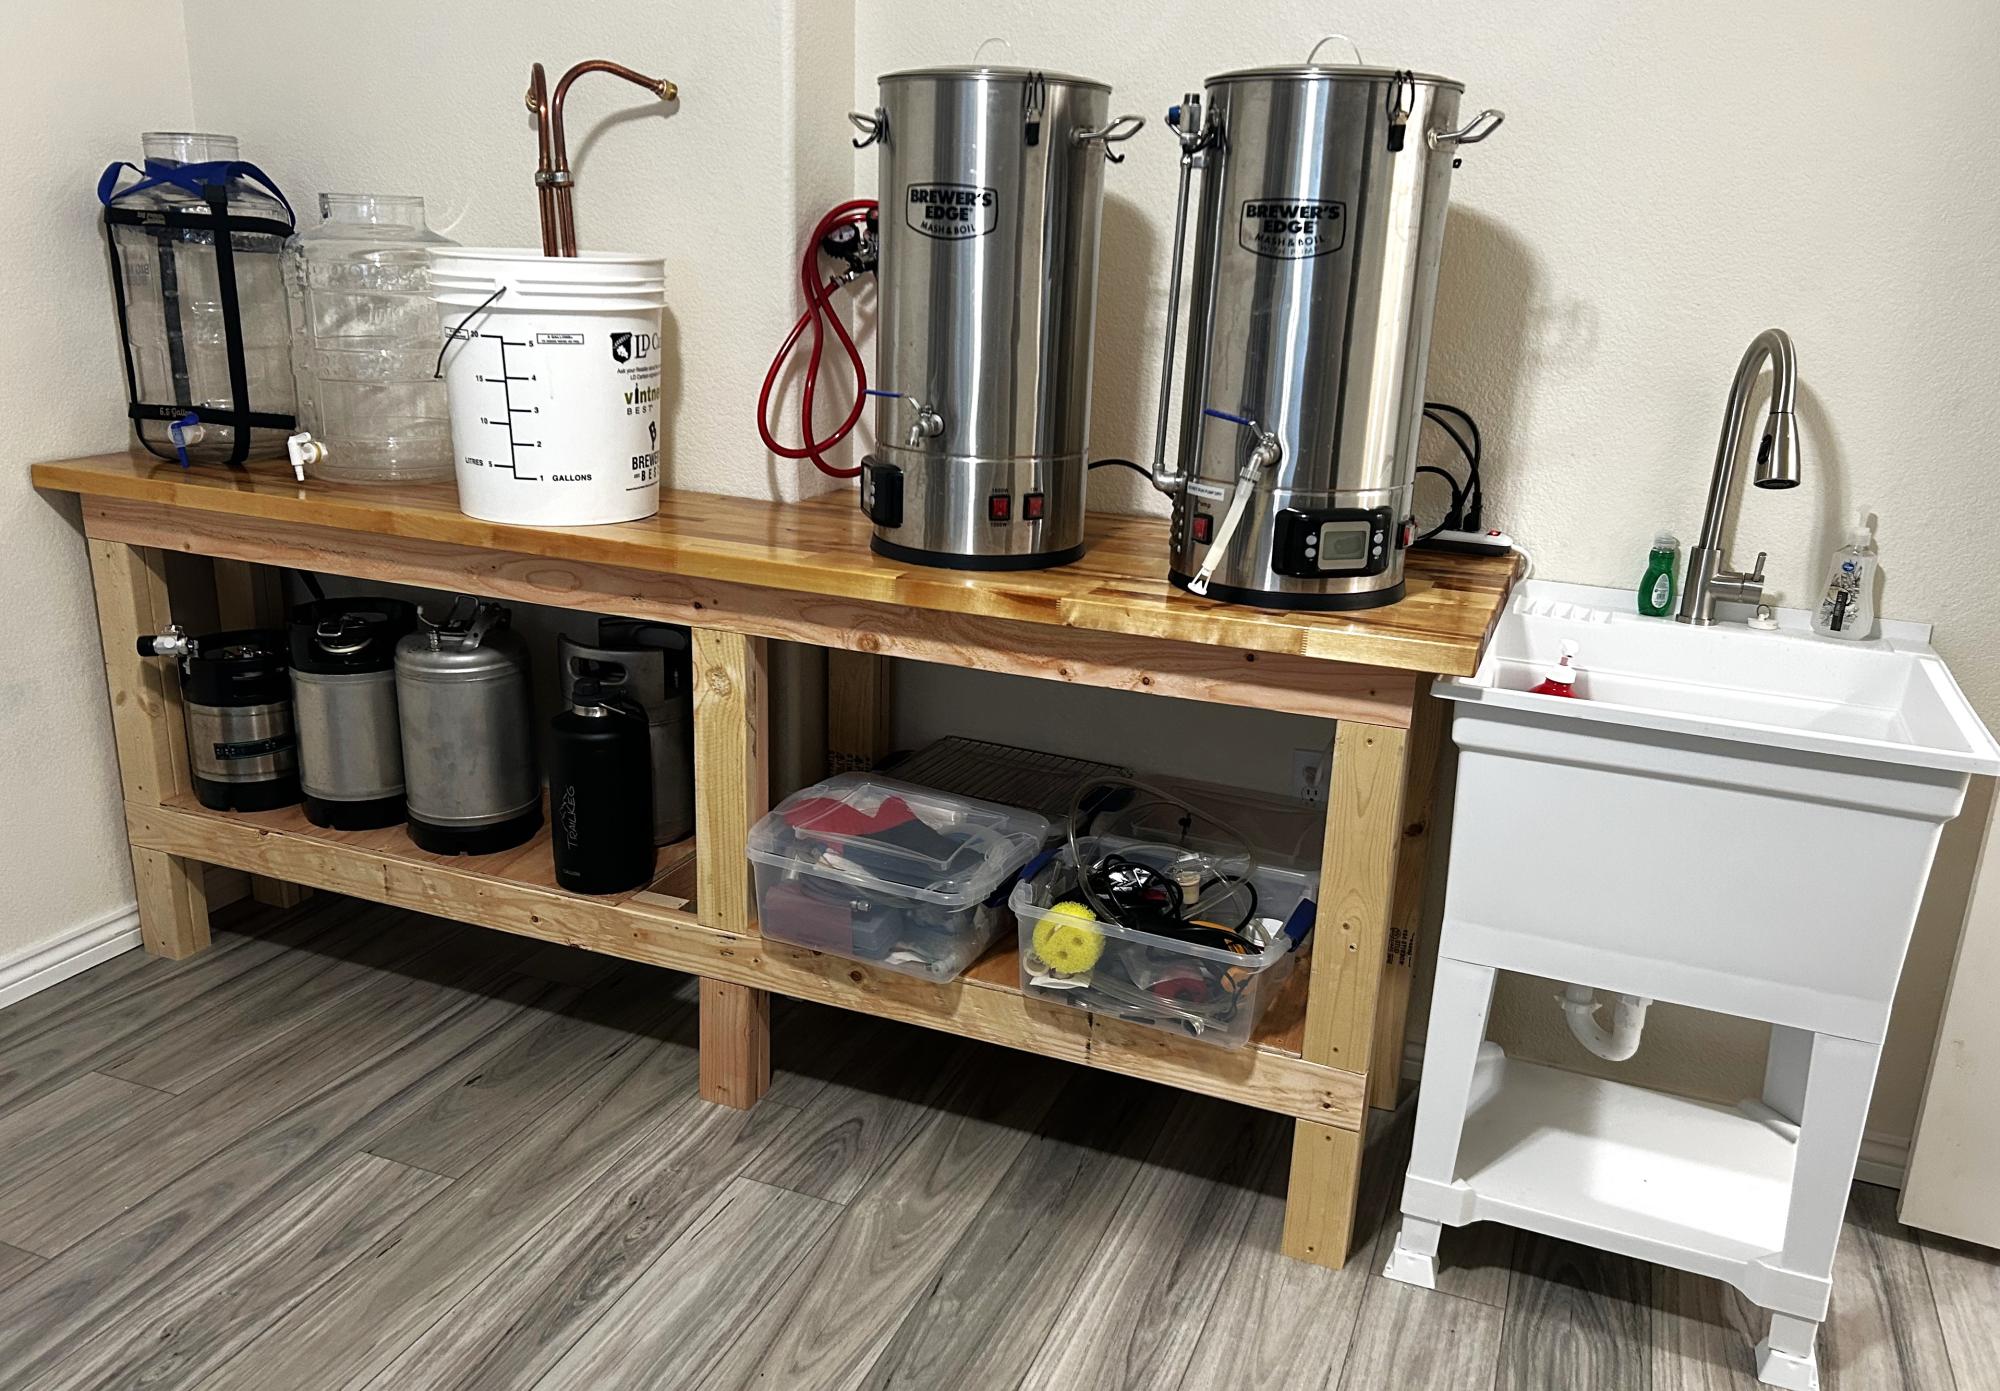
I used your workbench plan to build my Brew Bench. I changed the measurements to fit my space and used a butcher block for the countertop. Very sturdy and pretty easy project. Took one day to build.
Scott R
Built from Plan(s)
Comments
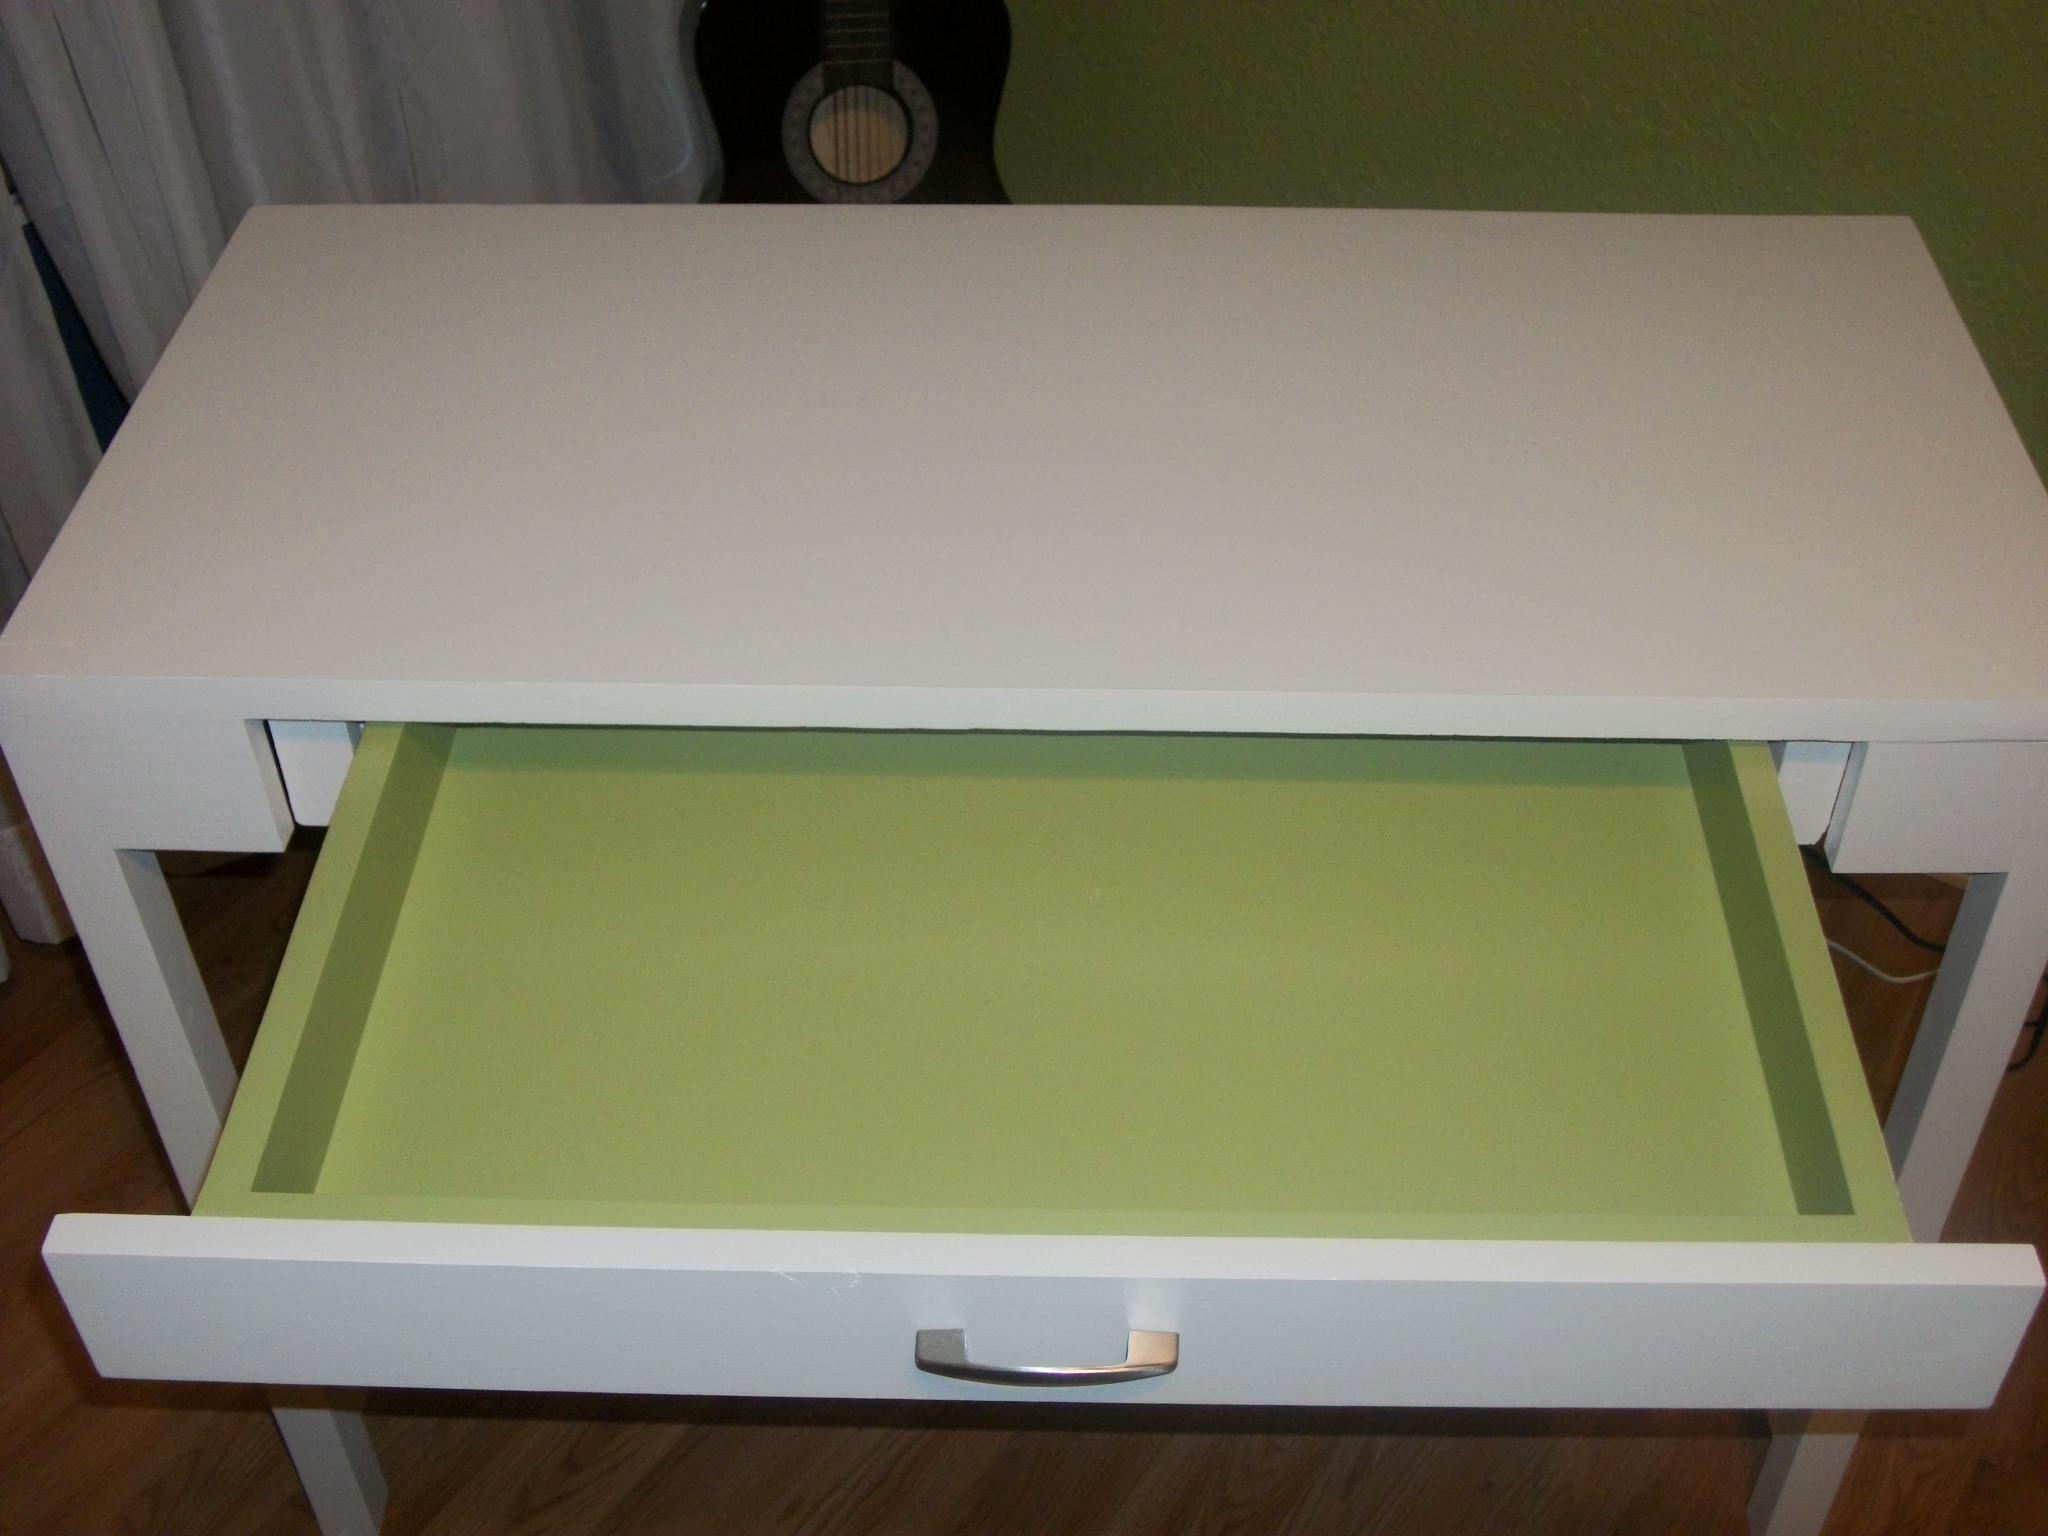
Perfect Teenage Desk!

I built this desk for my 15 year old daughter. We needed to size it so that a neat yard sale find seat could fit under it. I also added supports for the legs at the bottom. It just didn't feel sturdy enough for me. Large, single drawer was painted on the inside to match the color of her walls, pulling the whole look together! Lots of fun to build!
Built from Plan(s)
Estimated Cost
FREE
Estimated Time Investment
Afternoon Project (3-6 Hours)
Finish Used
I used Glidden Cappuccino White for the main body of the desk and in the drawer, I used Glidden Spanish Olive. Both are in a satin finish.
Recommended Skill Level
Starter Project
Comments
Tue, 03/20/2012 - 16:48
Turned out great!
Love your daughter's desk! And I also love that it was FREE. The Hubs always wants me to throw out the scraps and I just can't, especially after seeing projects like yours :)

In reply to Turned out great! by kristen
Tue, 03/20/2012 - 22:05
Thank you Kristen!!! I love
Thank you Kristen!!! I love dipping into the ole scrap bins... of course, I have three of them..LOL I also use the stuff that I can't make into a project out in the Ghetto Fire Pit so we enjoy it any way we can!!! Someday I'll have to take a pic and post it on Ana's site somewhere.. I doubt anyone will want one but it works for us!

Tue, 03/20/2012 - 23:07
Me love!!! It so well named
Me love!!! It so well named - perfect is many ways!
In reply to Me love!!! It so well named by Ana White
Wed, 03/21/2012 - 08:38
Thanks Ana! I always love
Thanks Ana! I always love getting compliments from you on the projects I've done. Actually, I love getting compliments period, but thank you very much! Couldn't have done it without you! :-)
Mon, 12/21/2015 - 15:08
Great Job, can you help me!?
I love how you changed the design alittle on this, I am trying to build something very similar to what you did for my vanity/dressing table! I noticed on yours the front aprons are not noticable how did you do that? I want your exact design, and my dimensions are 29" w X 16" d. Thank you in advance!
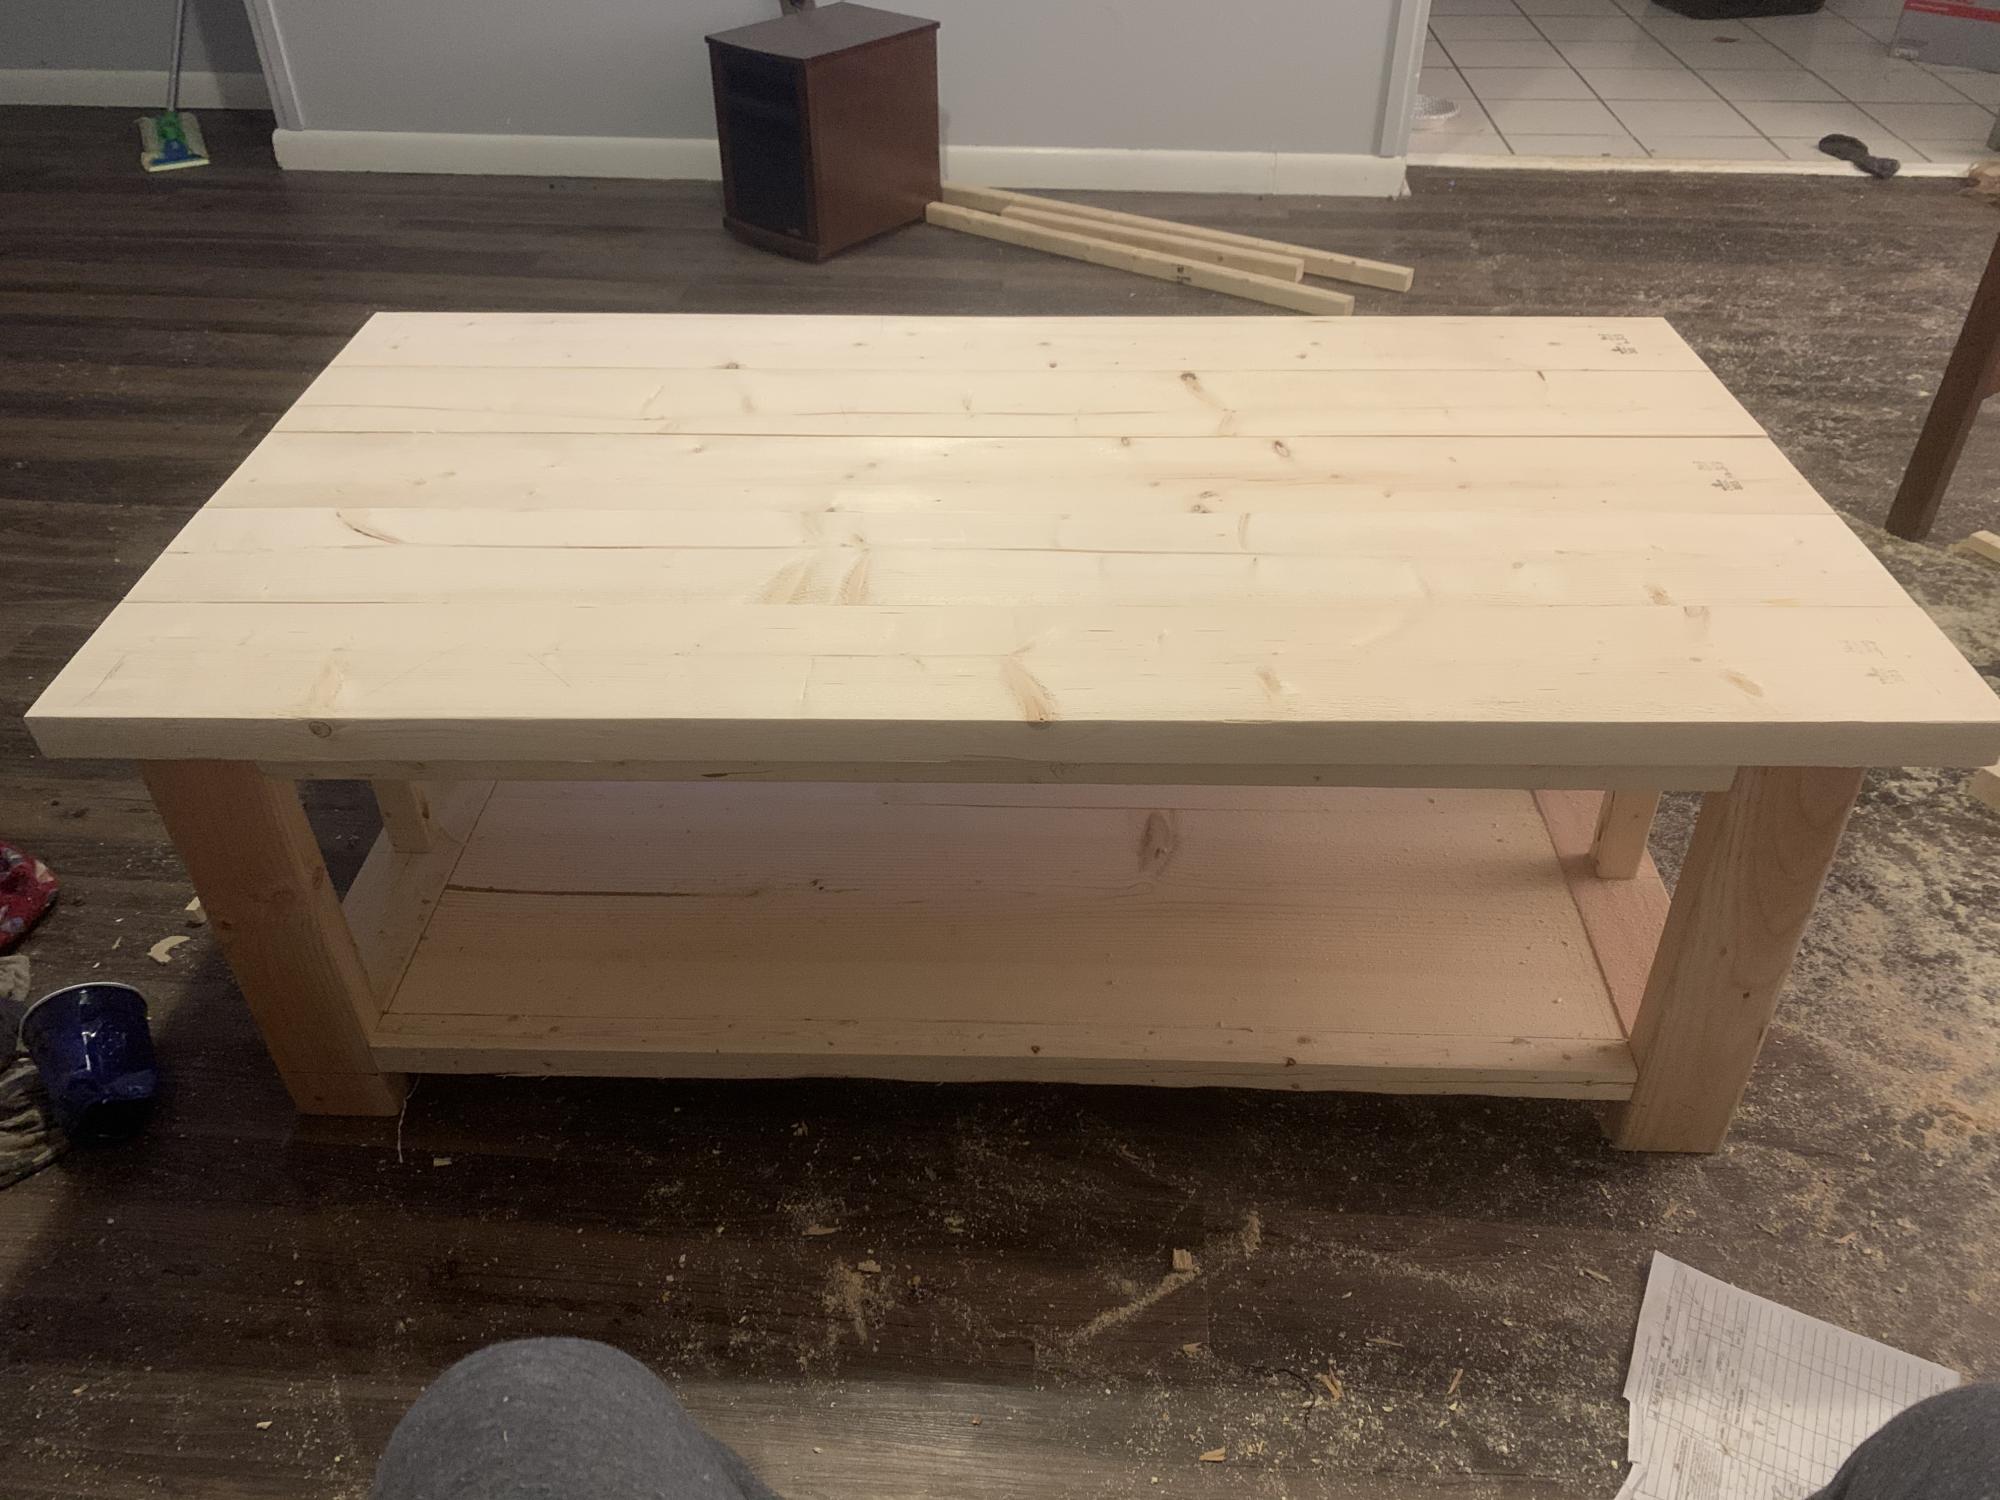
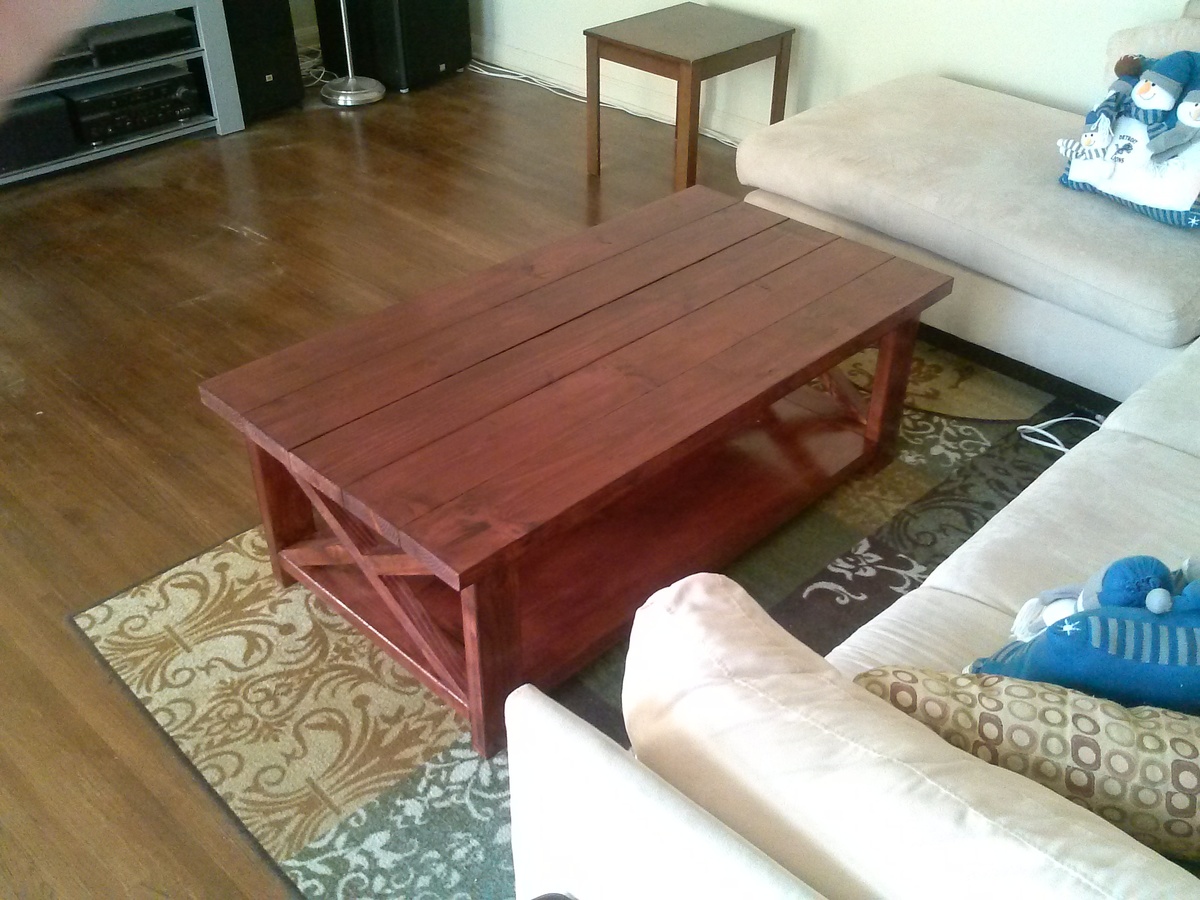
Rustic X Table
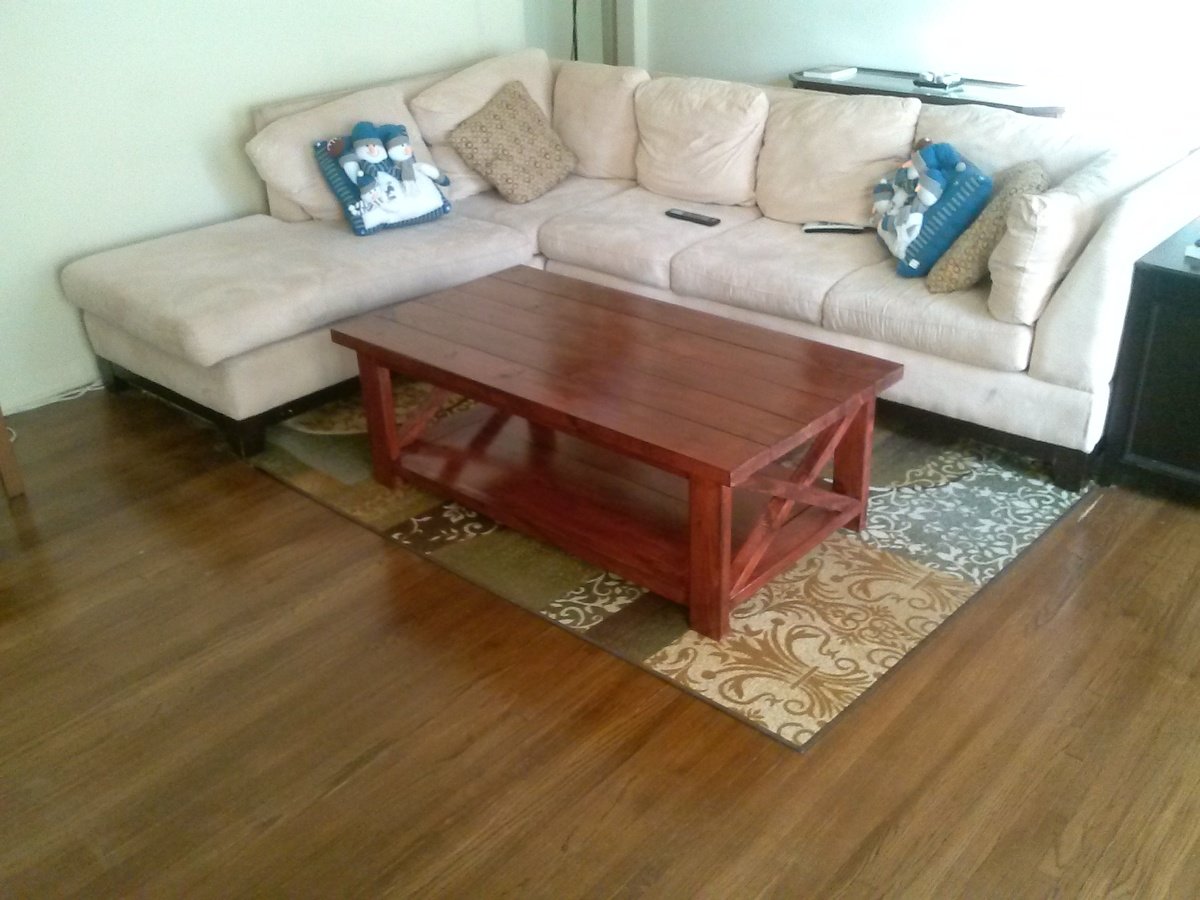
I hated my old flimsy coffee table and I decided that I needed another one. After searching online for tables that I could build, my wife and I came across this one. Its large, sturdy and has the underneath shelf for additional storage. Plus the styling was cool too.
Built from Plan(s)
Estimated Cost
About 80 dollars.
Estimated Time Investment
Weekend Project (10-20 Hours)
Finish Used
To finish this table the first thing I did was coat the table with Minwax Pre-Stain Wood Conditioner. I did a double coat of that before I used Varathane Stain+Poly in Cabernet. I chose the semi-gloss. It took several coats before I got the color that I was happy with.
Recommended Skill Level
Intermediate
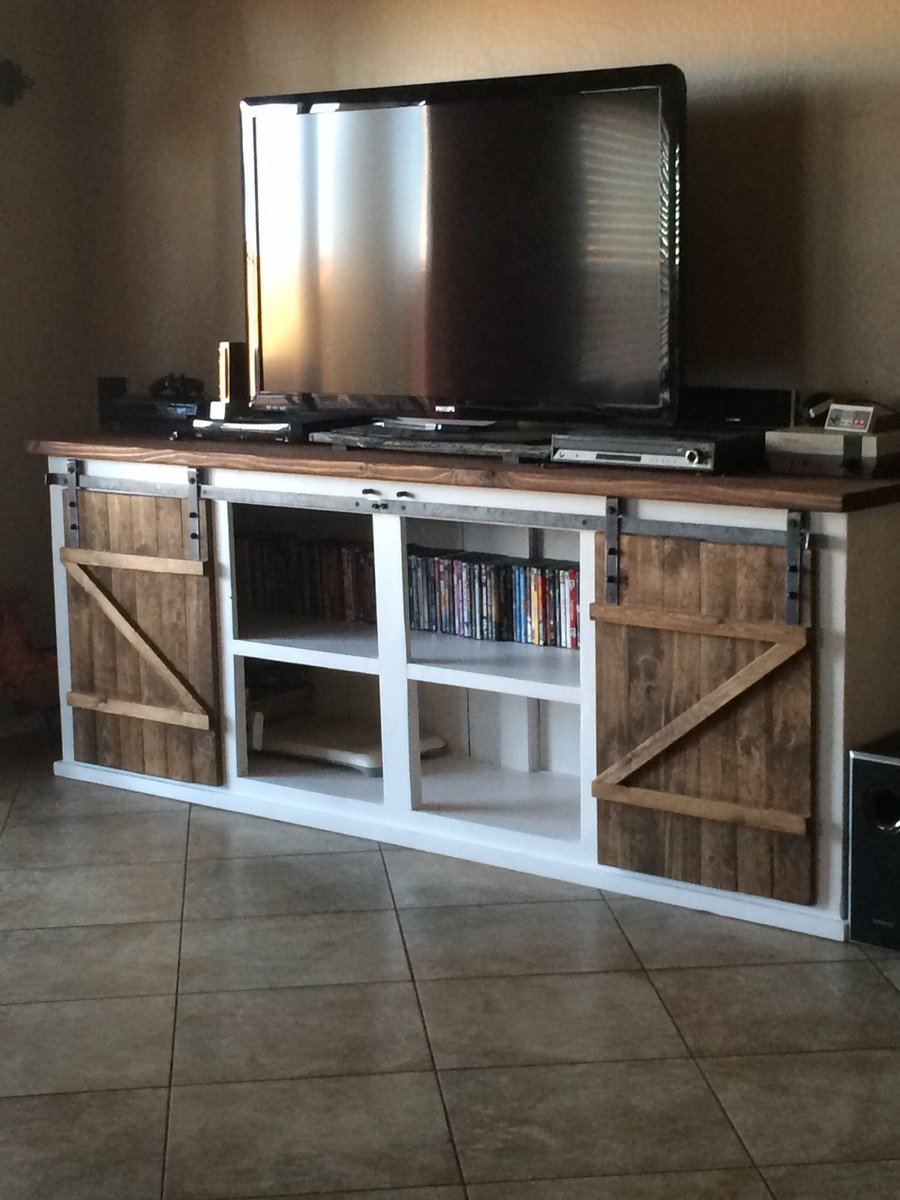
Media Console
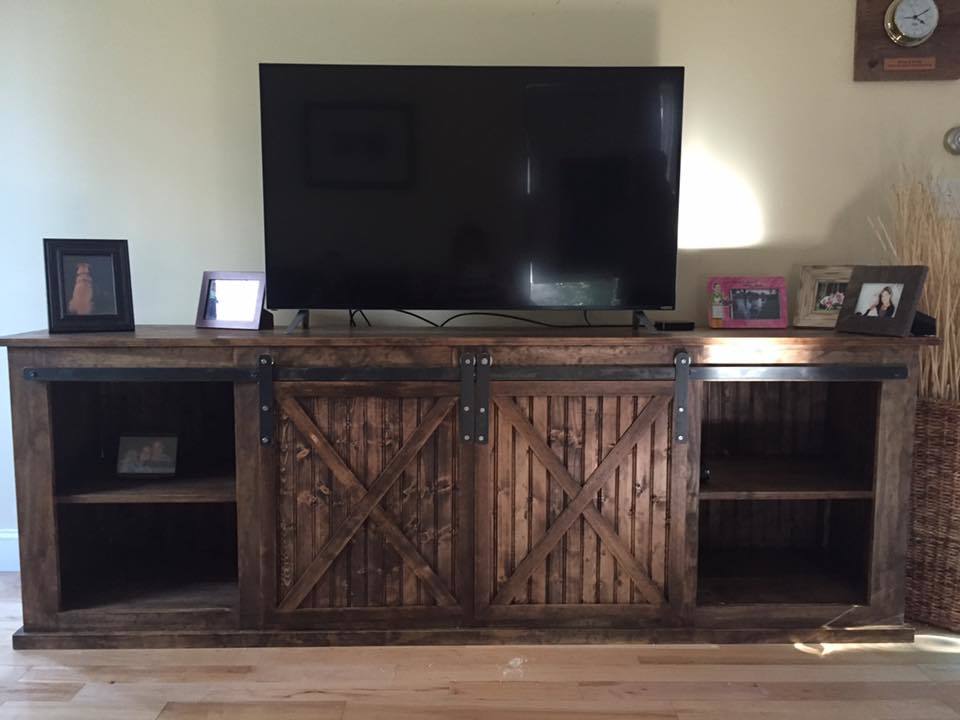
I built this console from the Grandy Sliding Door Console. I modified the plan slightly and lowered it to about 30 inches high, and have since hung the TV on the wall. I made the sliding door hardware at a local metal fabrication shop, and used patio door wheels for the hardware. It is stained with Rustoleum Dark Walnut stain wiped on with a cloth to ensure a non-uniform stain for a distressed look. I used the Kreg jig for most of the connections, and added support of the mid shelf in the back of the piece.
Built from Plan(s)
Estimated Cost
$500
Estimated Time Investment
Weekend Project (10-20 Hours)
Finish Used
Rustolium Dark Walnut with satin wipe on poly.
Recommended Skill Level
Intermediate
Comments
amichella
Mon, 03/21/2016 - 09:46
door hardware
may I ask where you got the sliding door hardware? Thanks in advance!