Community Brag Posts
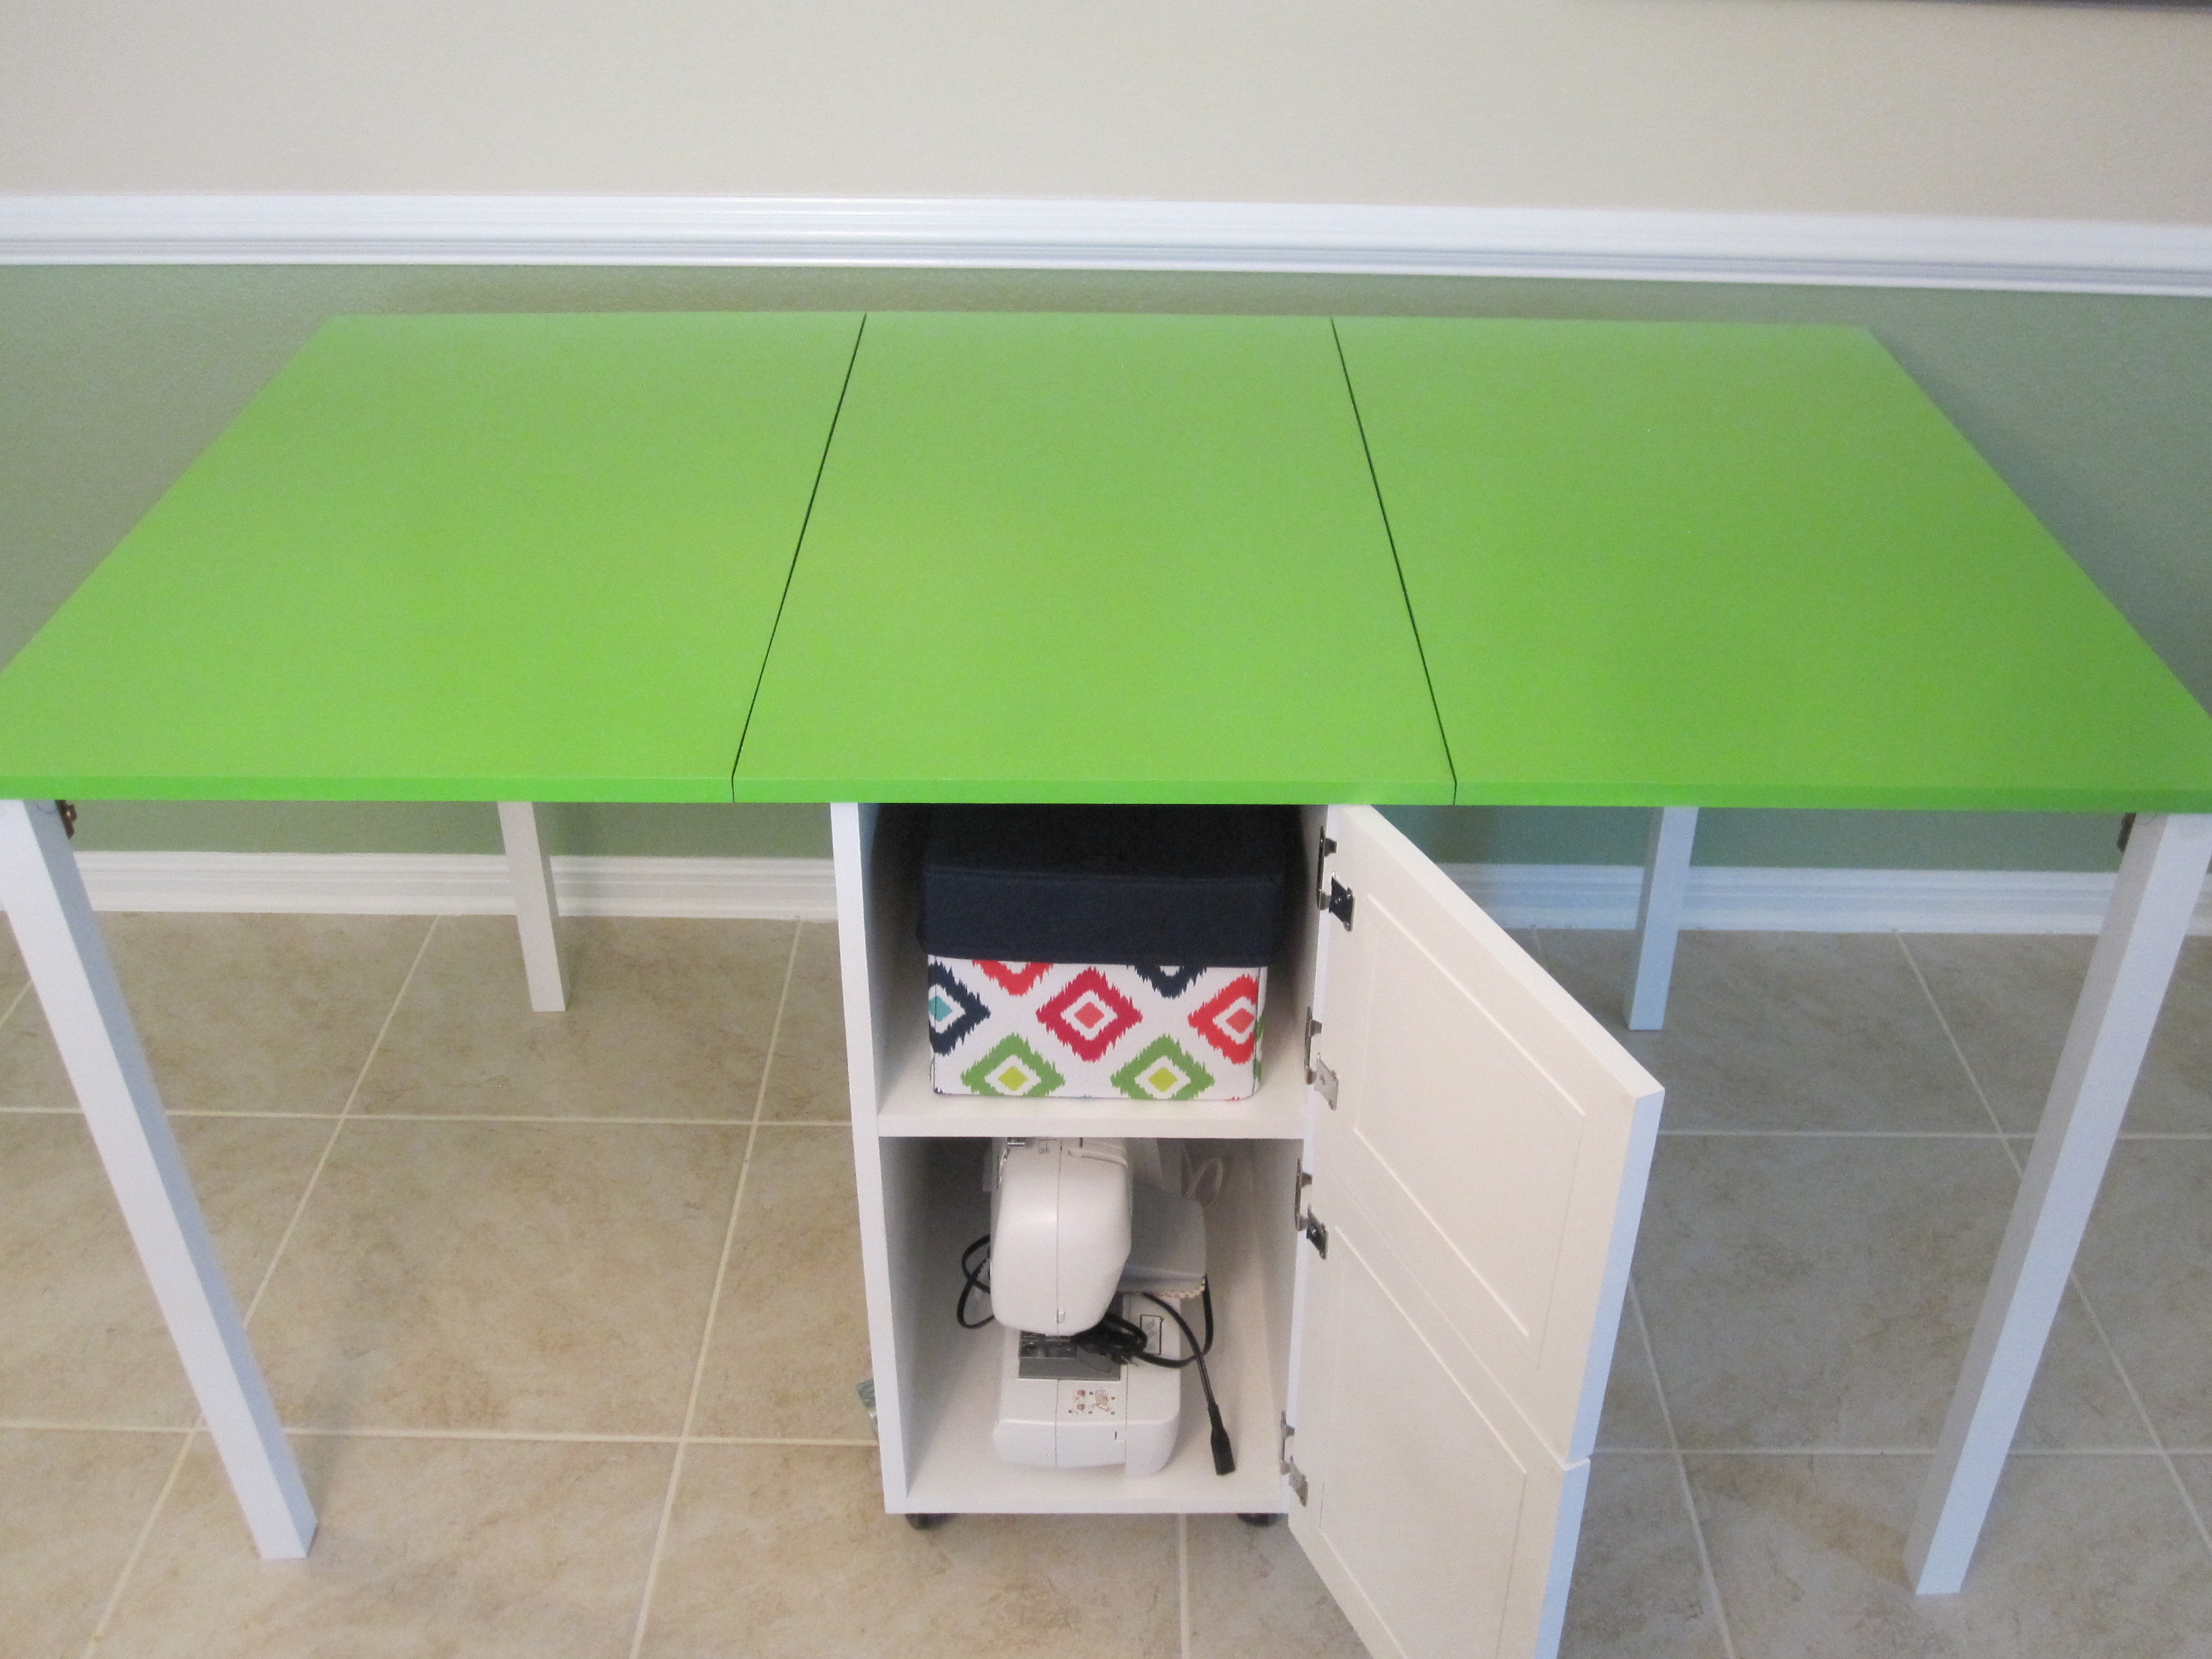
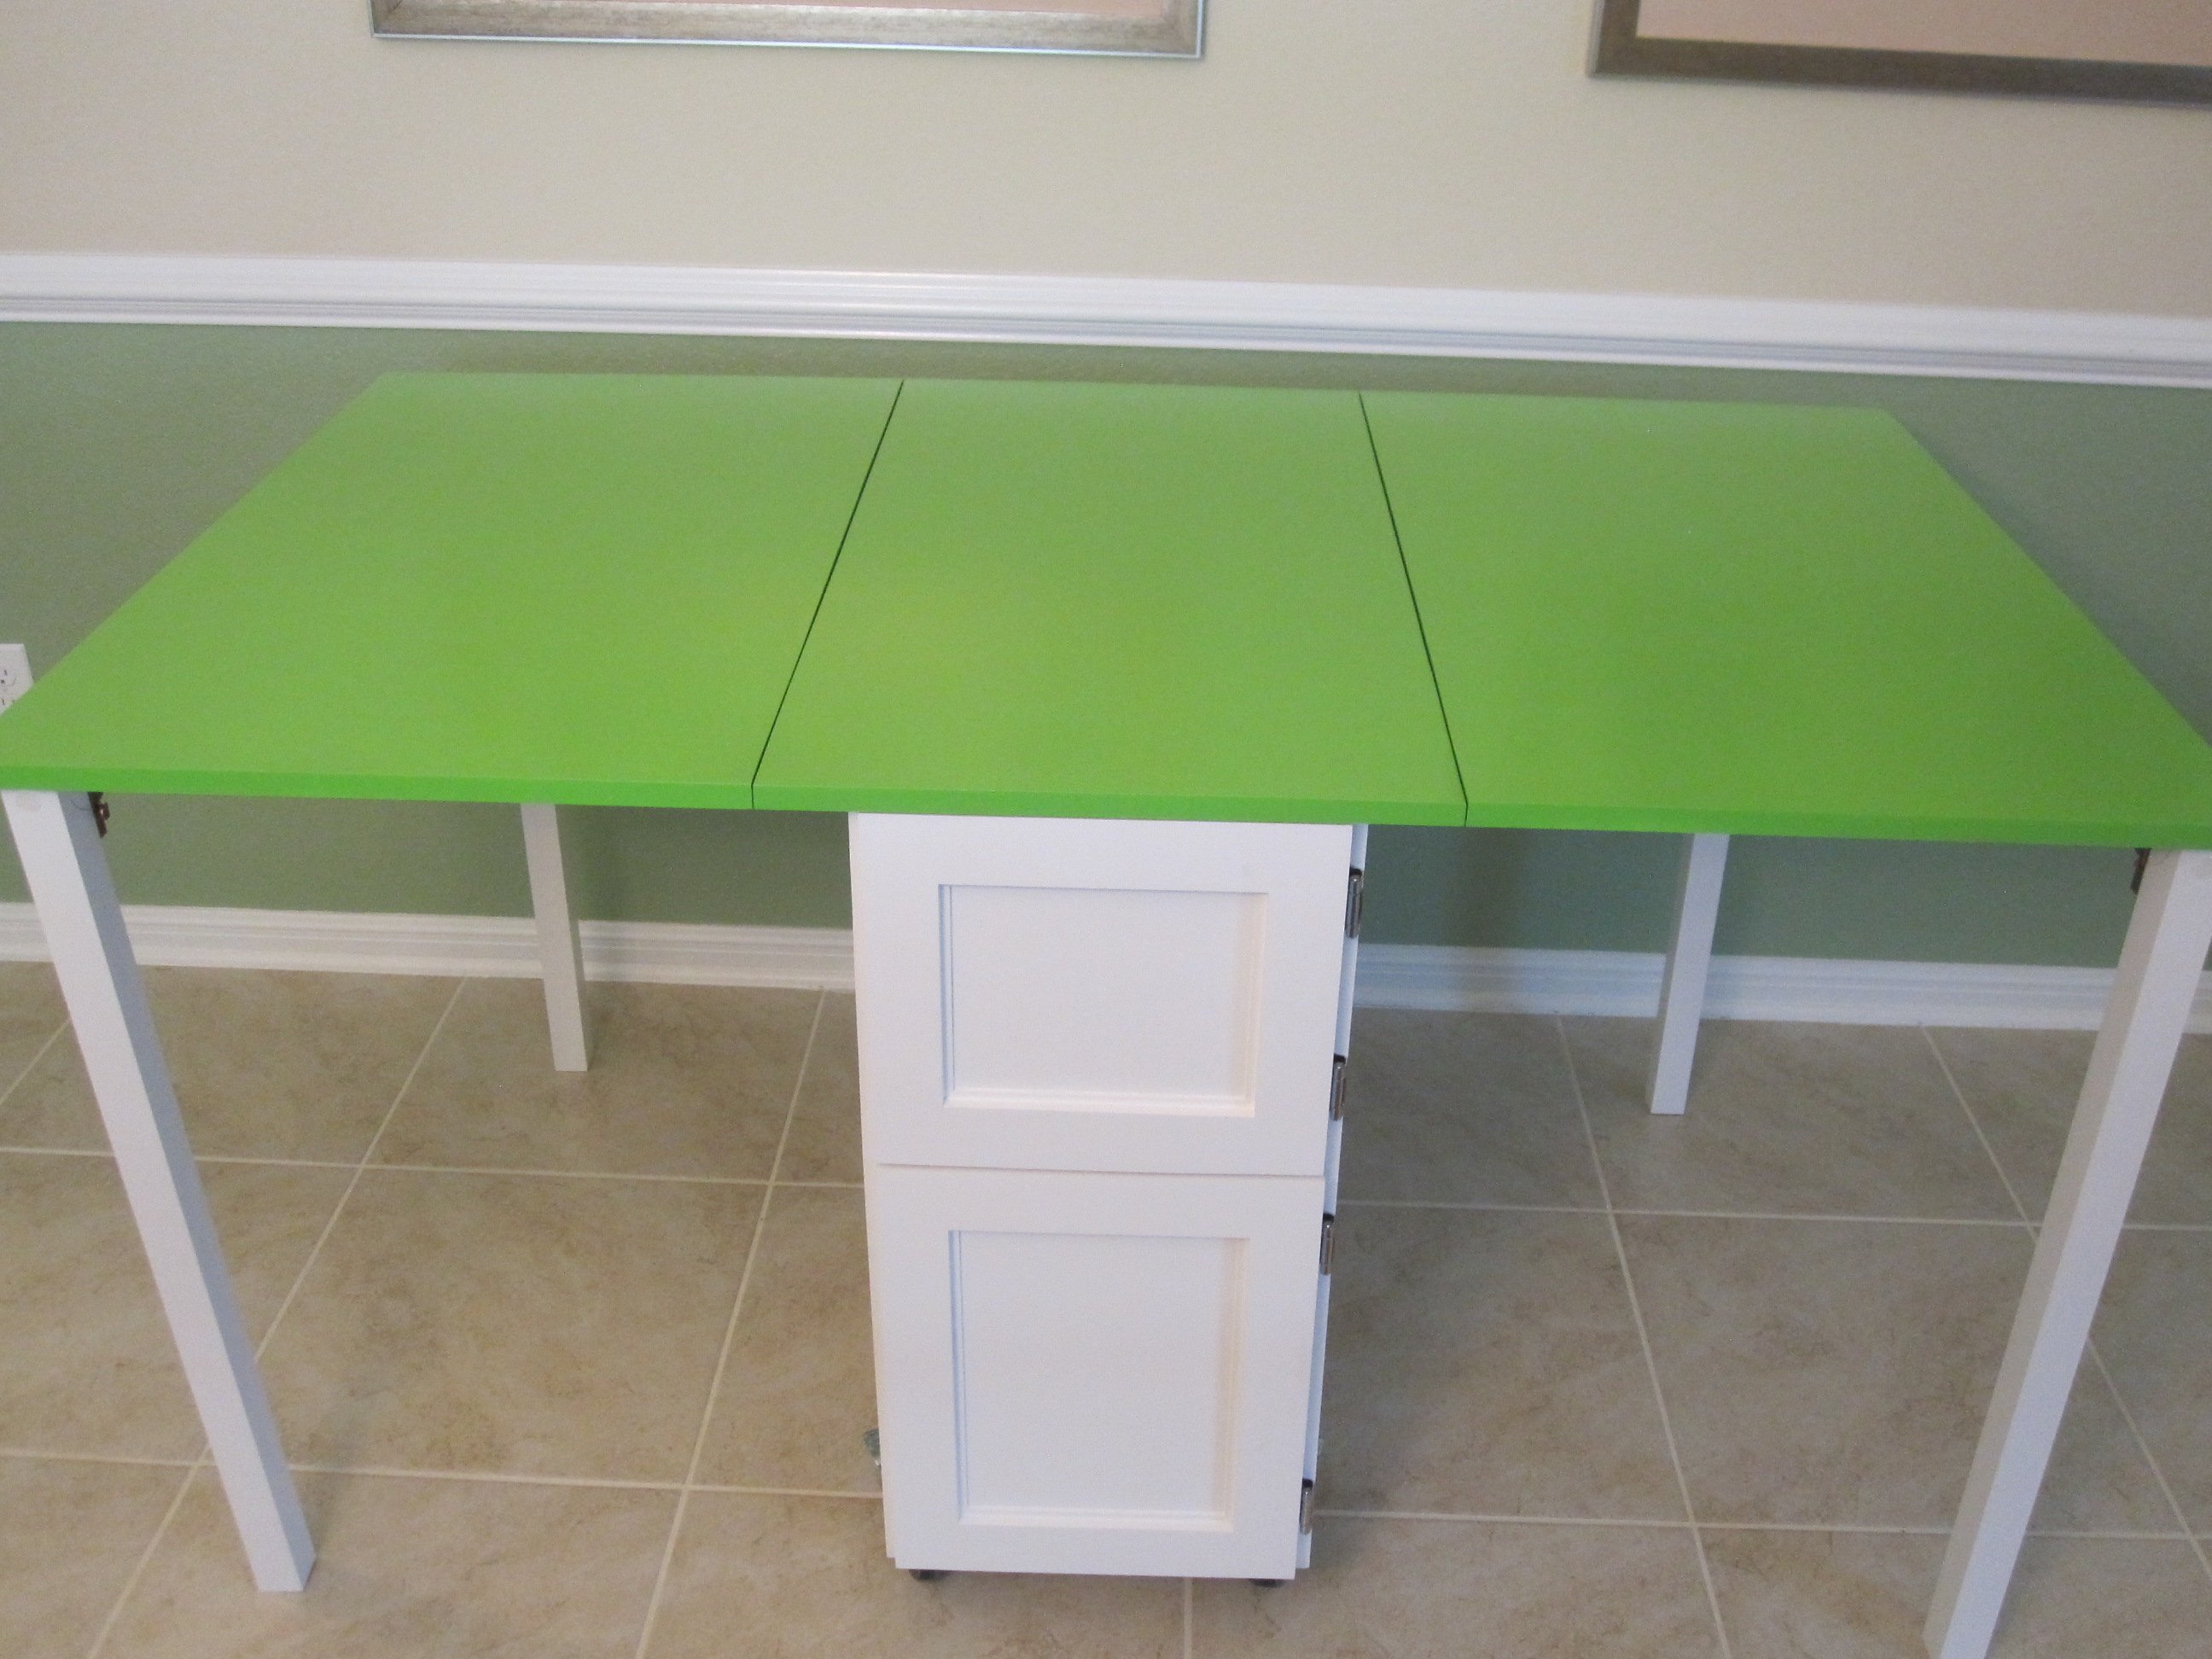
Penney's Sewing Table
Built the sewing table for my wife Penney. It has a work surface that is 36" x 60" and is 32" high.
Used 3/4" Baltic Birch and used premium pine to add edge banding. Used 1/4" plywood for a back to the sewing table to add strength and I think helps the look of the table. My Kreg Jig was used everywhere possible when assembling the case. Used full length piano hinges with #6 x 5/8" screws to attach the leaves to the table. Made the doors using premium pine with a plywood panel. For the legs, I used folding, locking leg brackets from Lee Valley to attach the 1-1/2" square poplar legs. The casters are 3" double-locking from Woodcraft.
Went a little over budget, but it turned out very nice and she loves it.
Thank you for the easy to follow plans.
Built from Plan(s)
Estimated Cost
$275
Estimated Time Investment
Week Long Project (20 Hours or More)
Finish Used
Benjamin Moore Advance Paint semi-gloss. Sprayed 3 coats using HVLP sprayer of both white and green. Used Benjamin Moore Fresh Start Primer - 2 coats sanding between the coats.
Recommended Skill Level
Intermediate
Comments
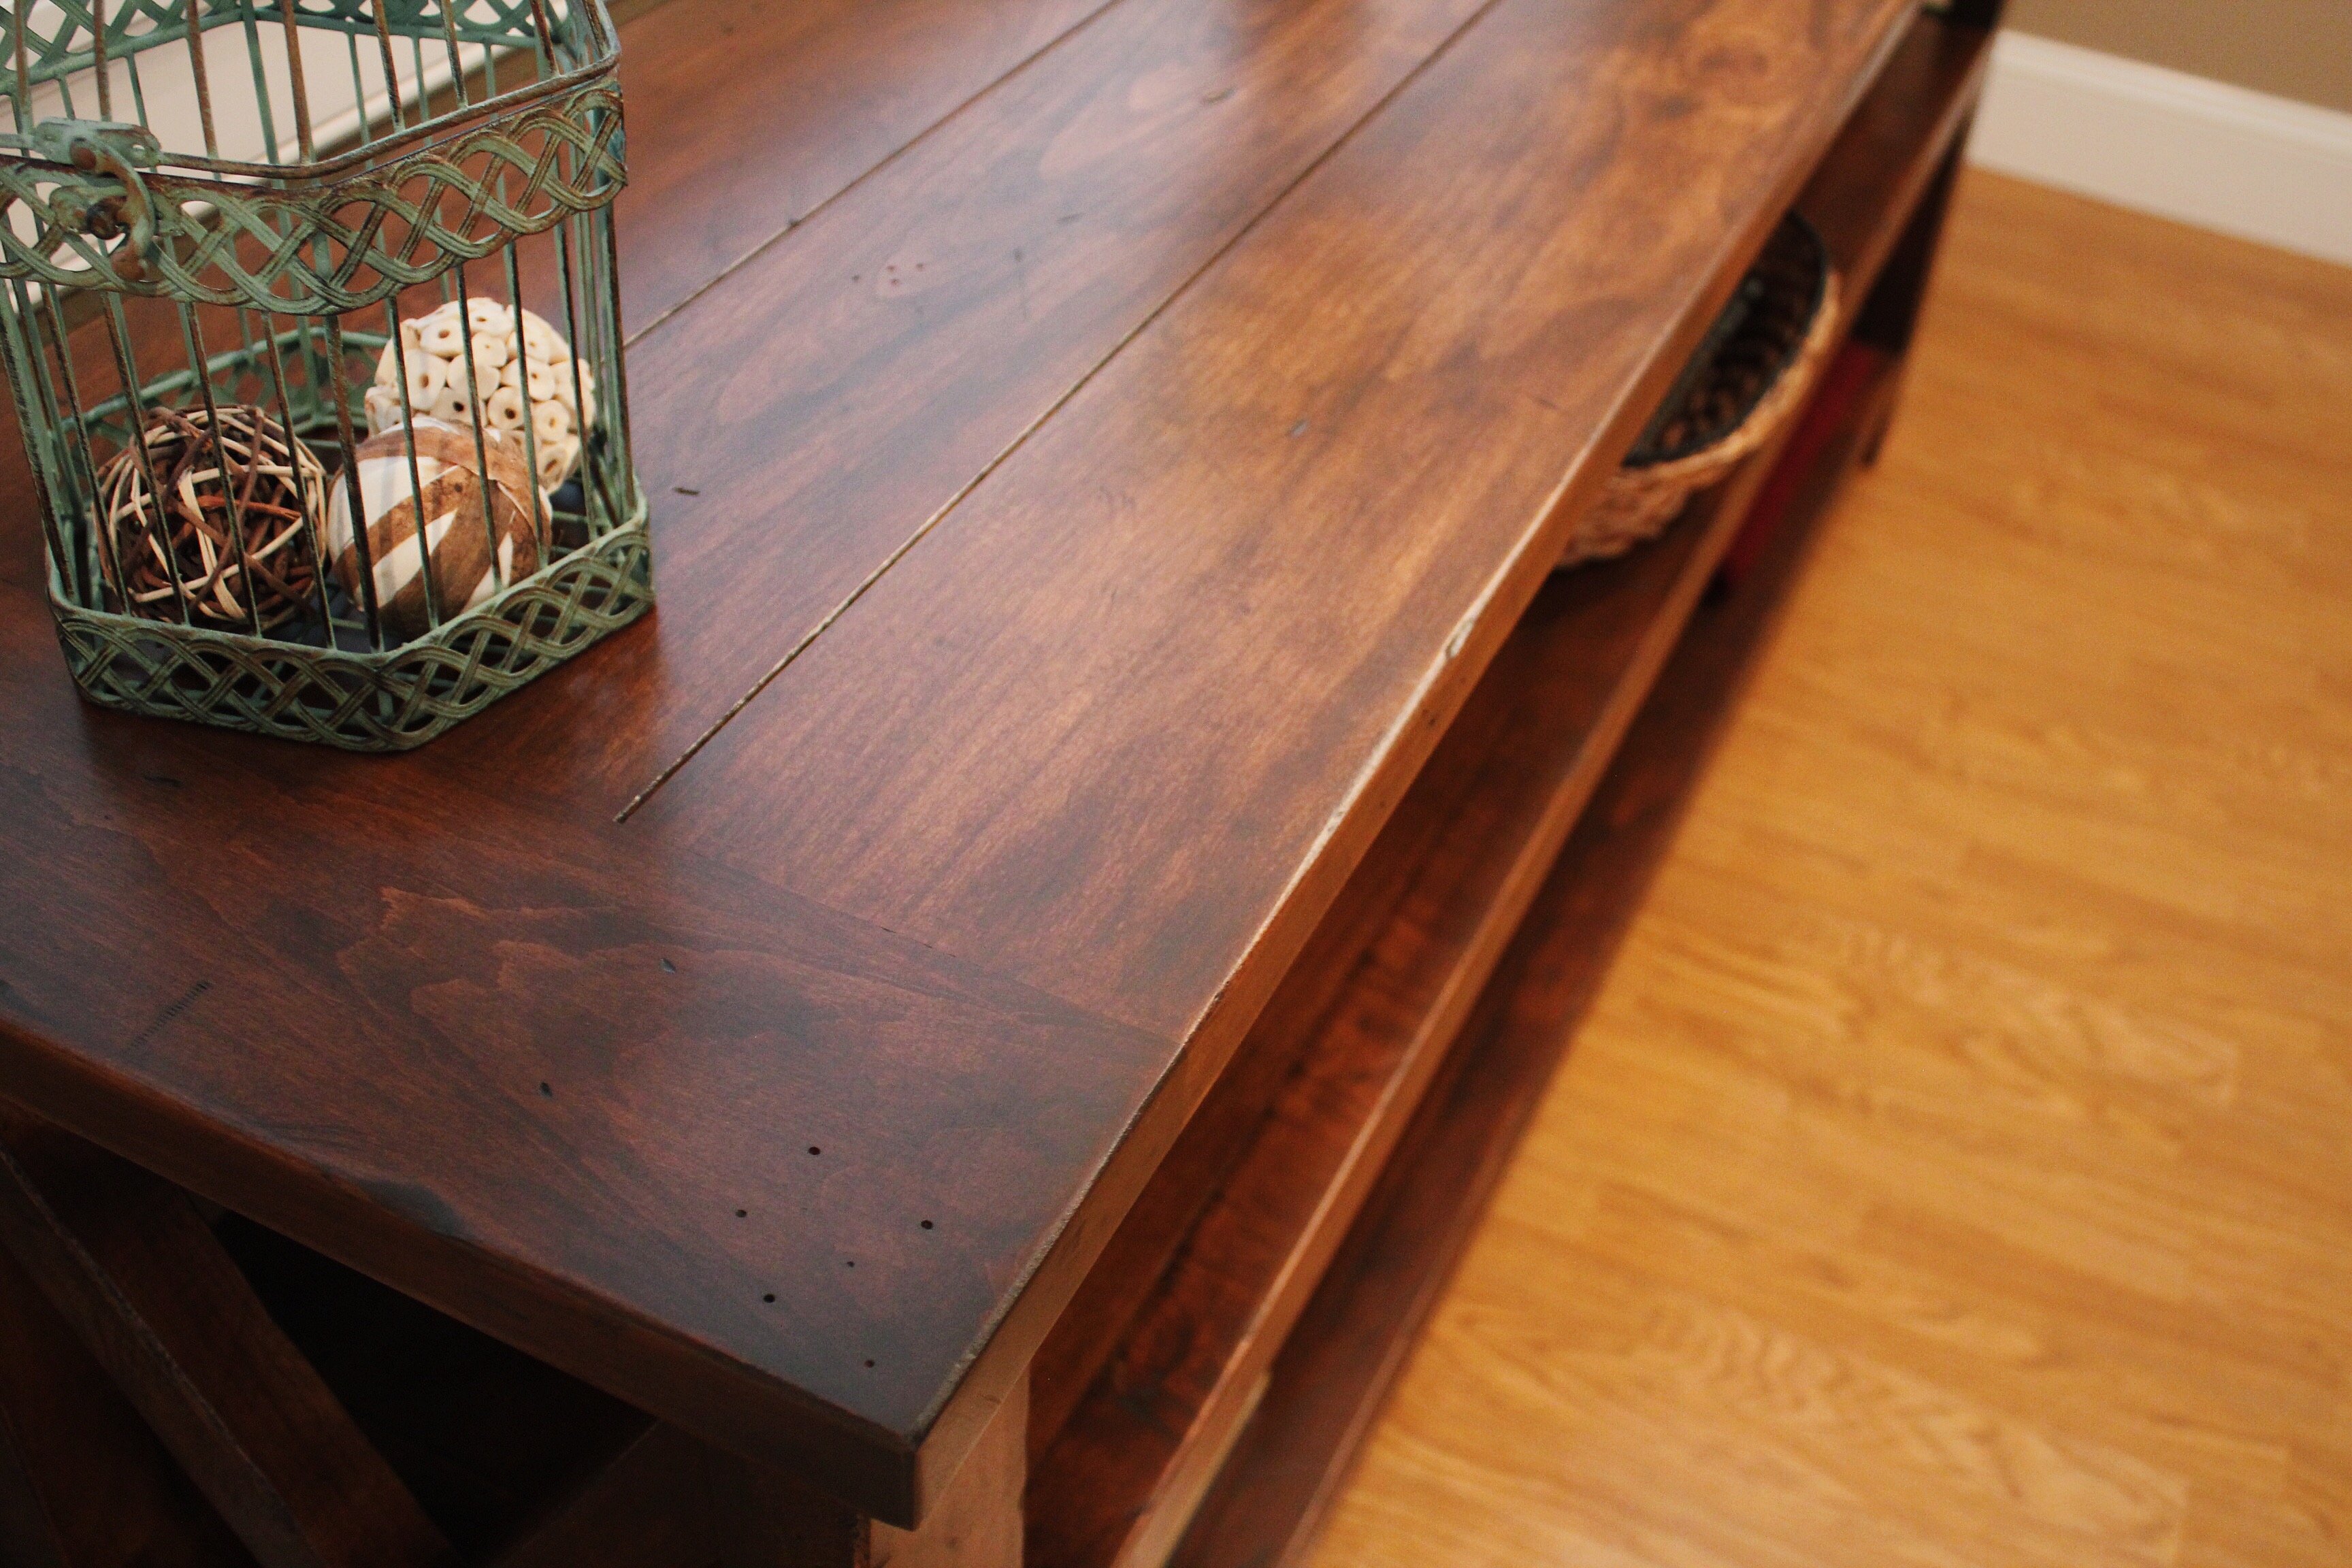
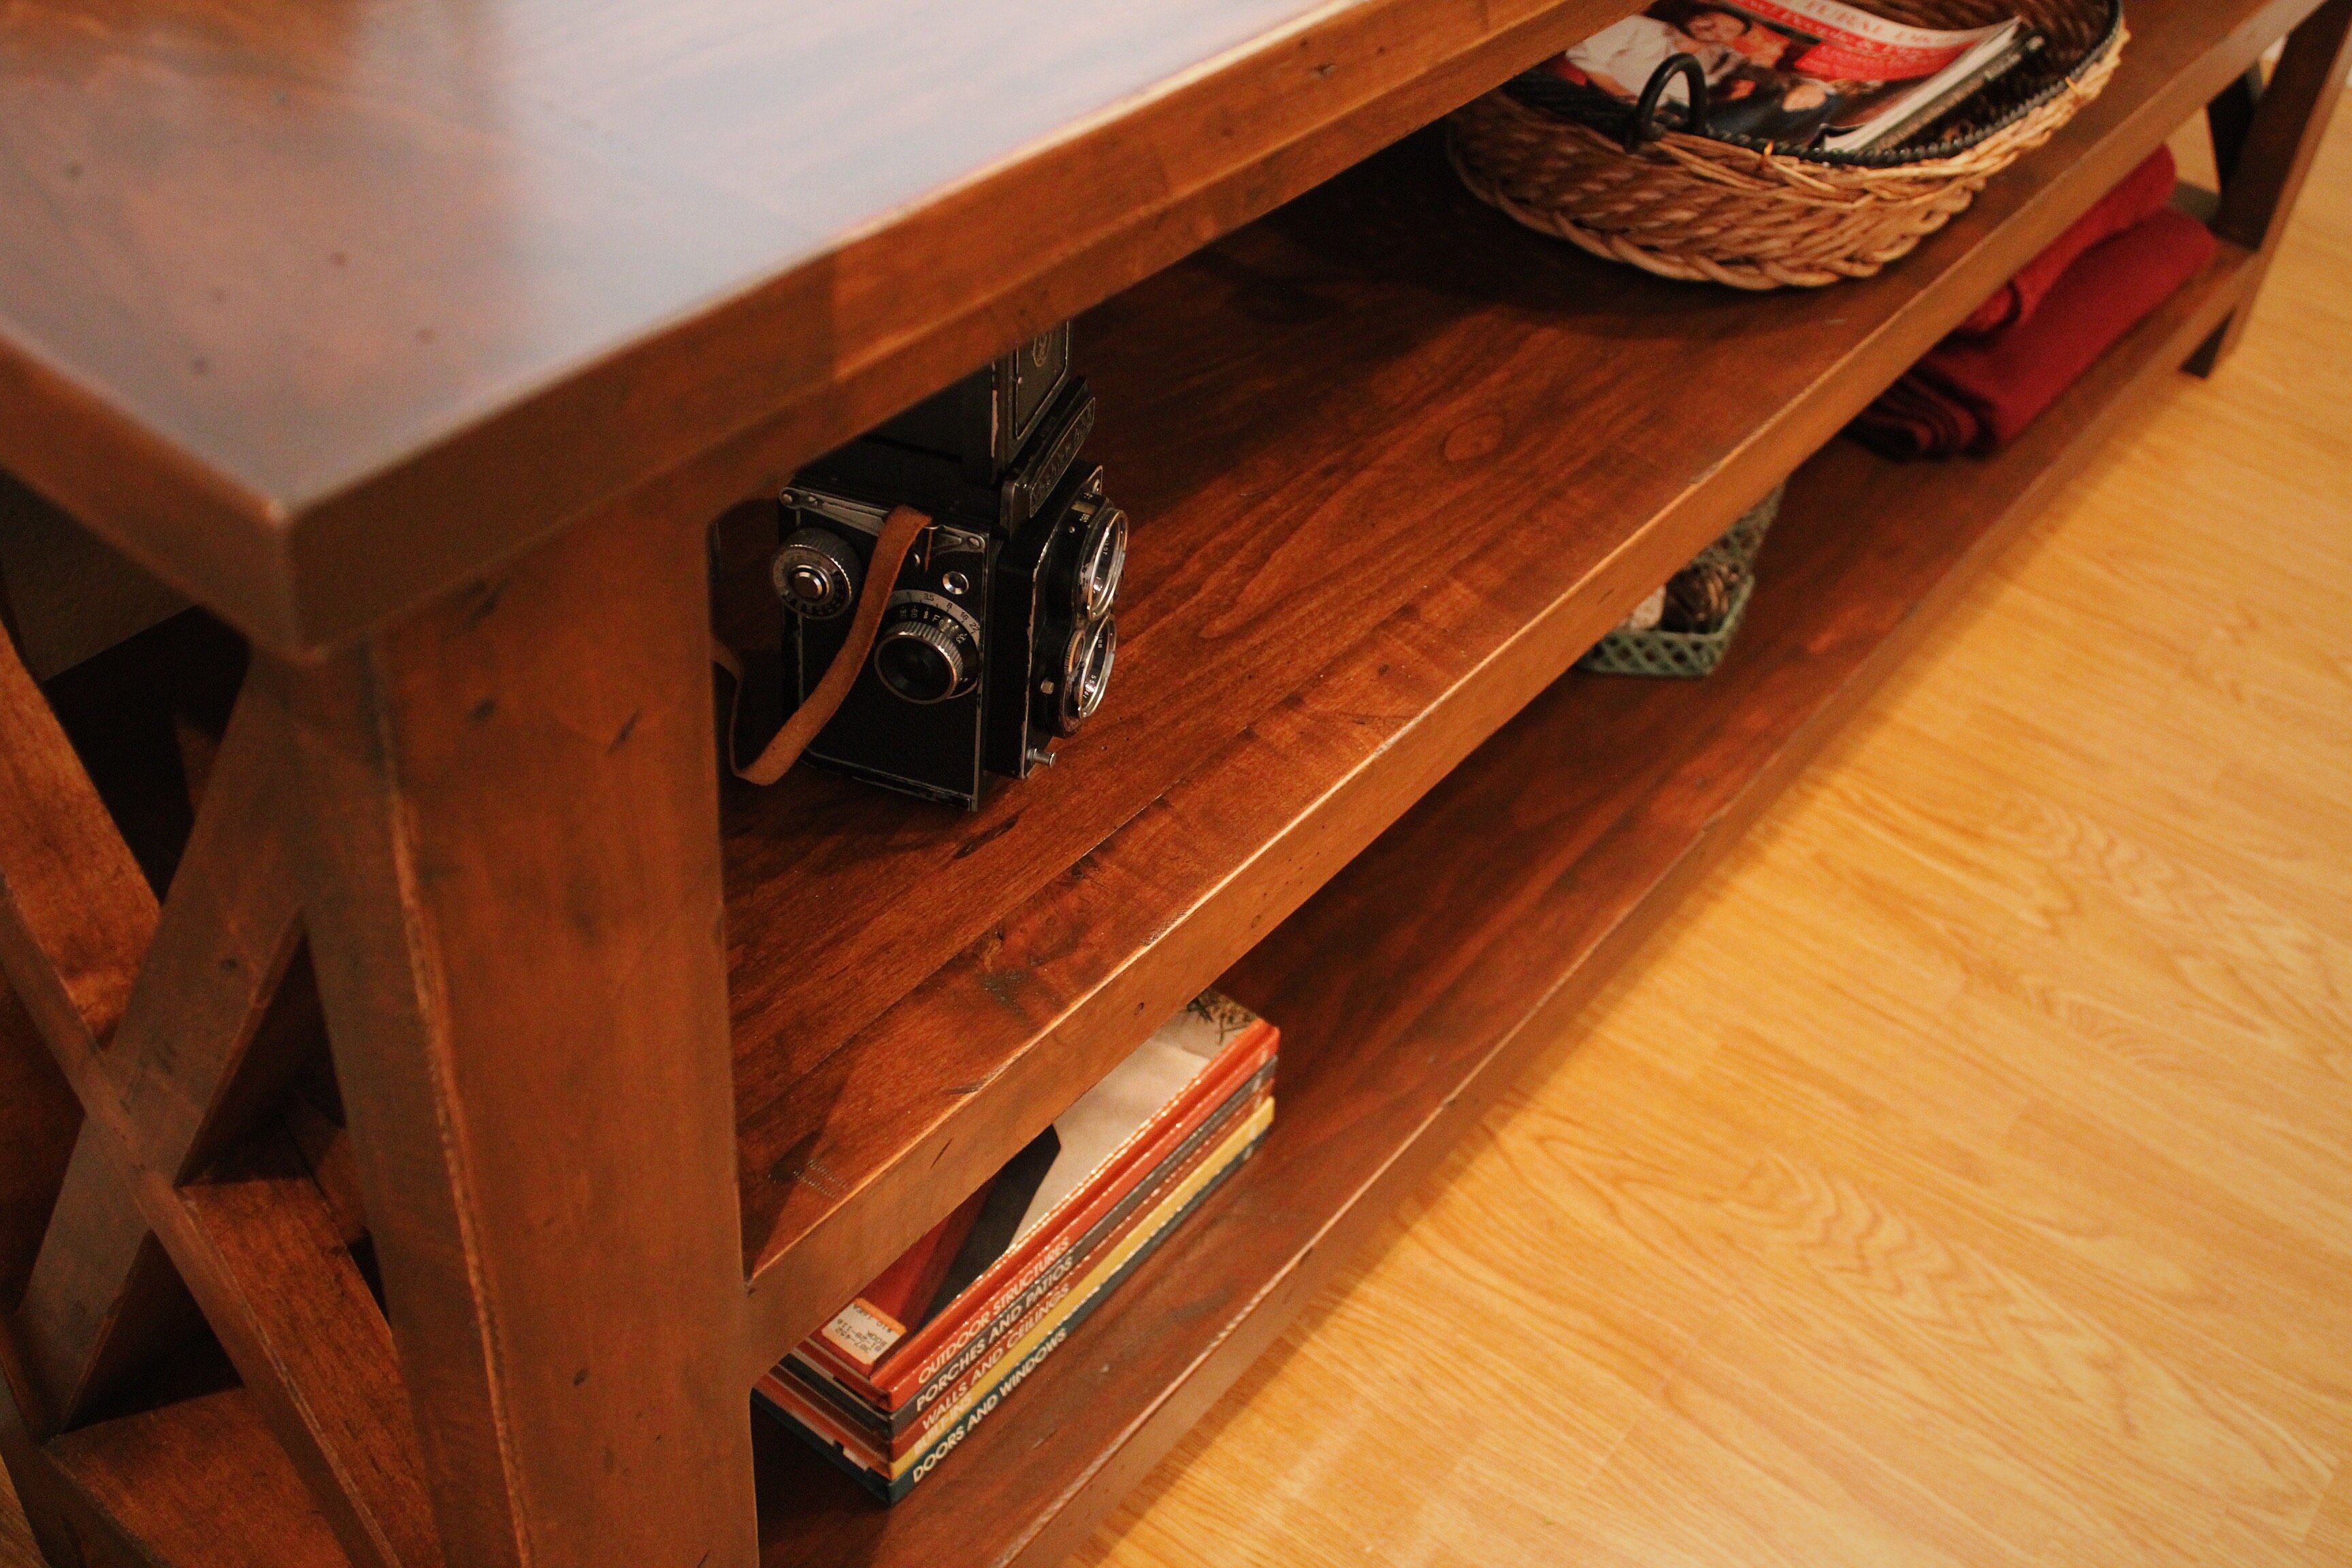
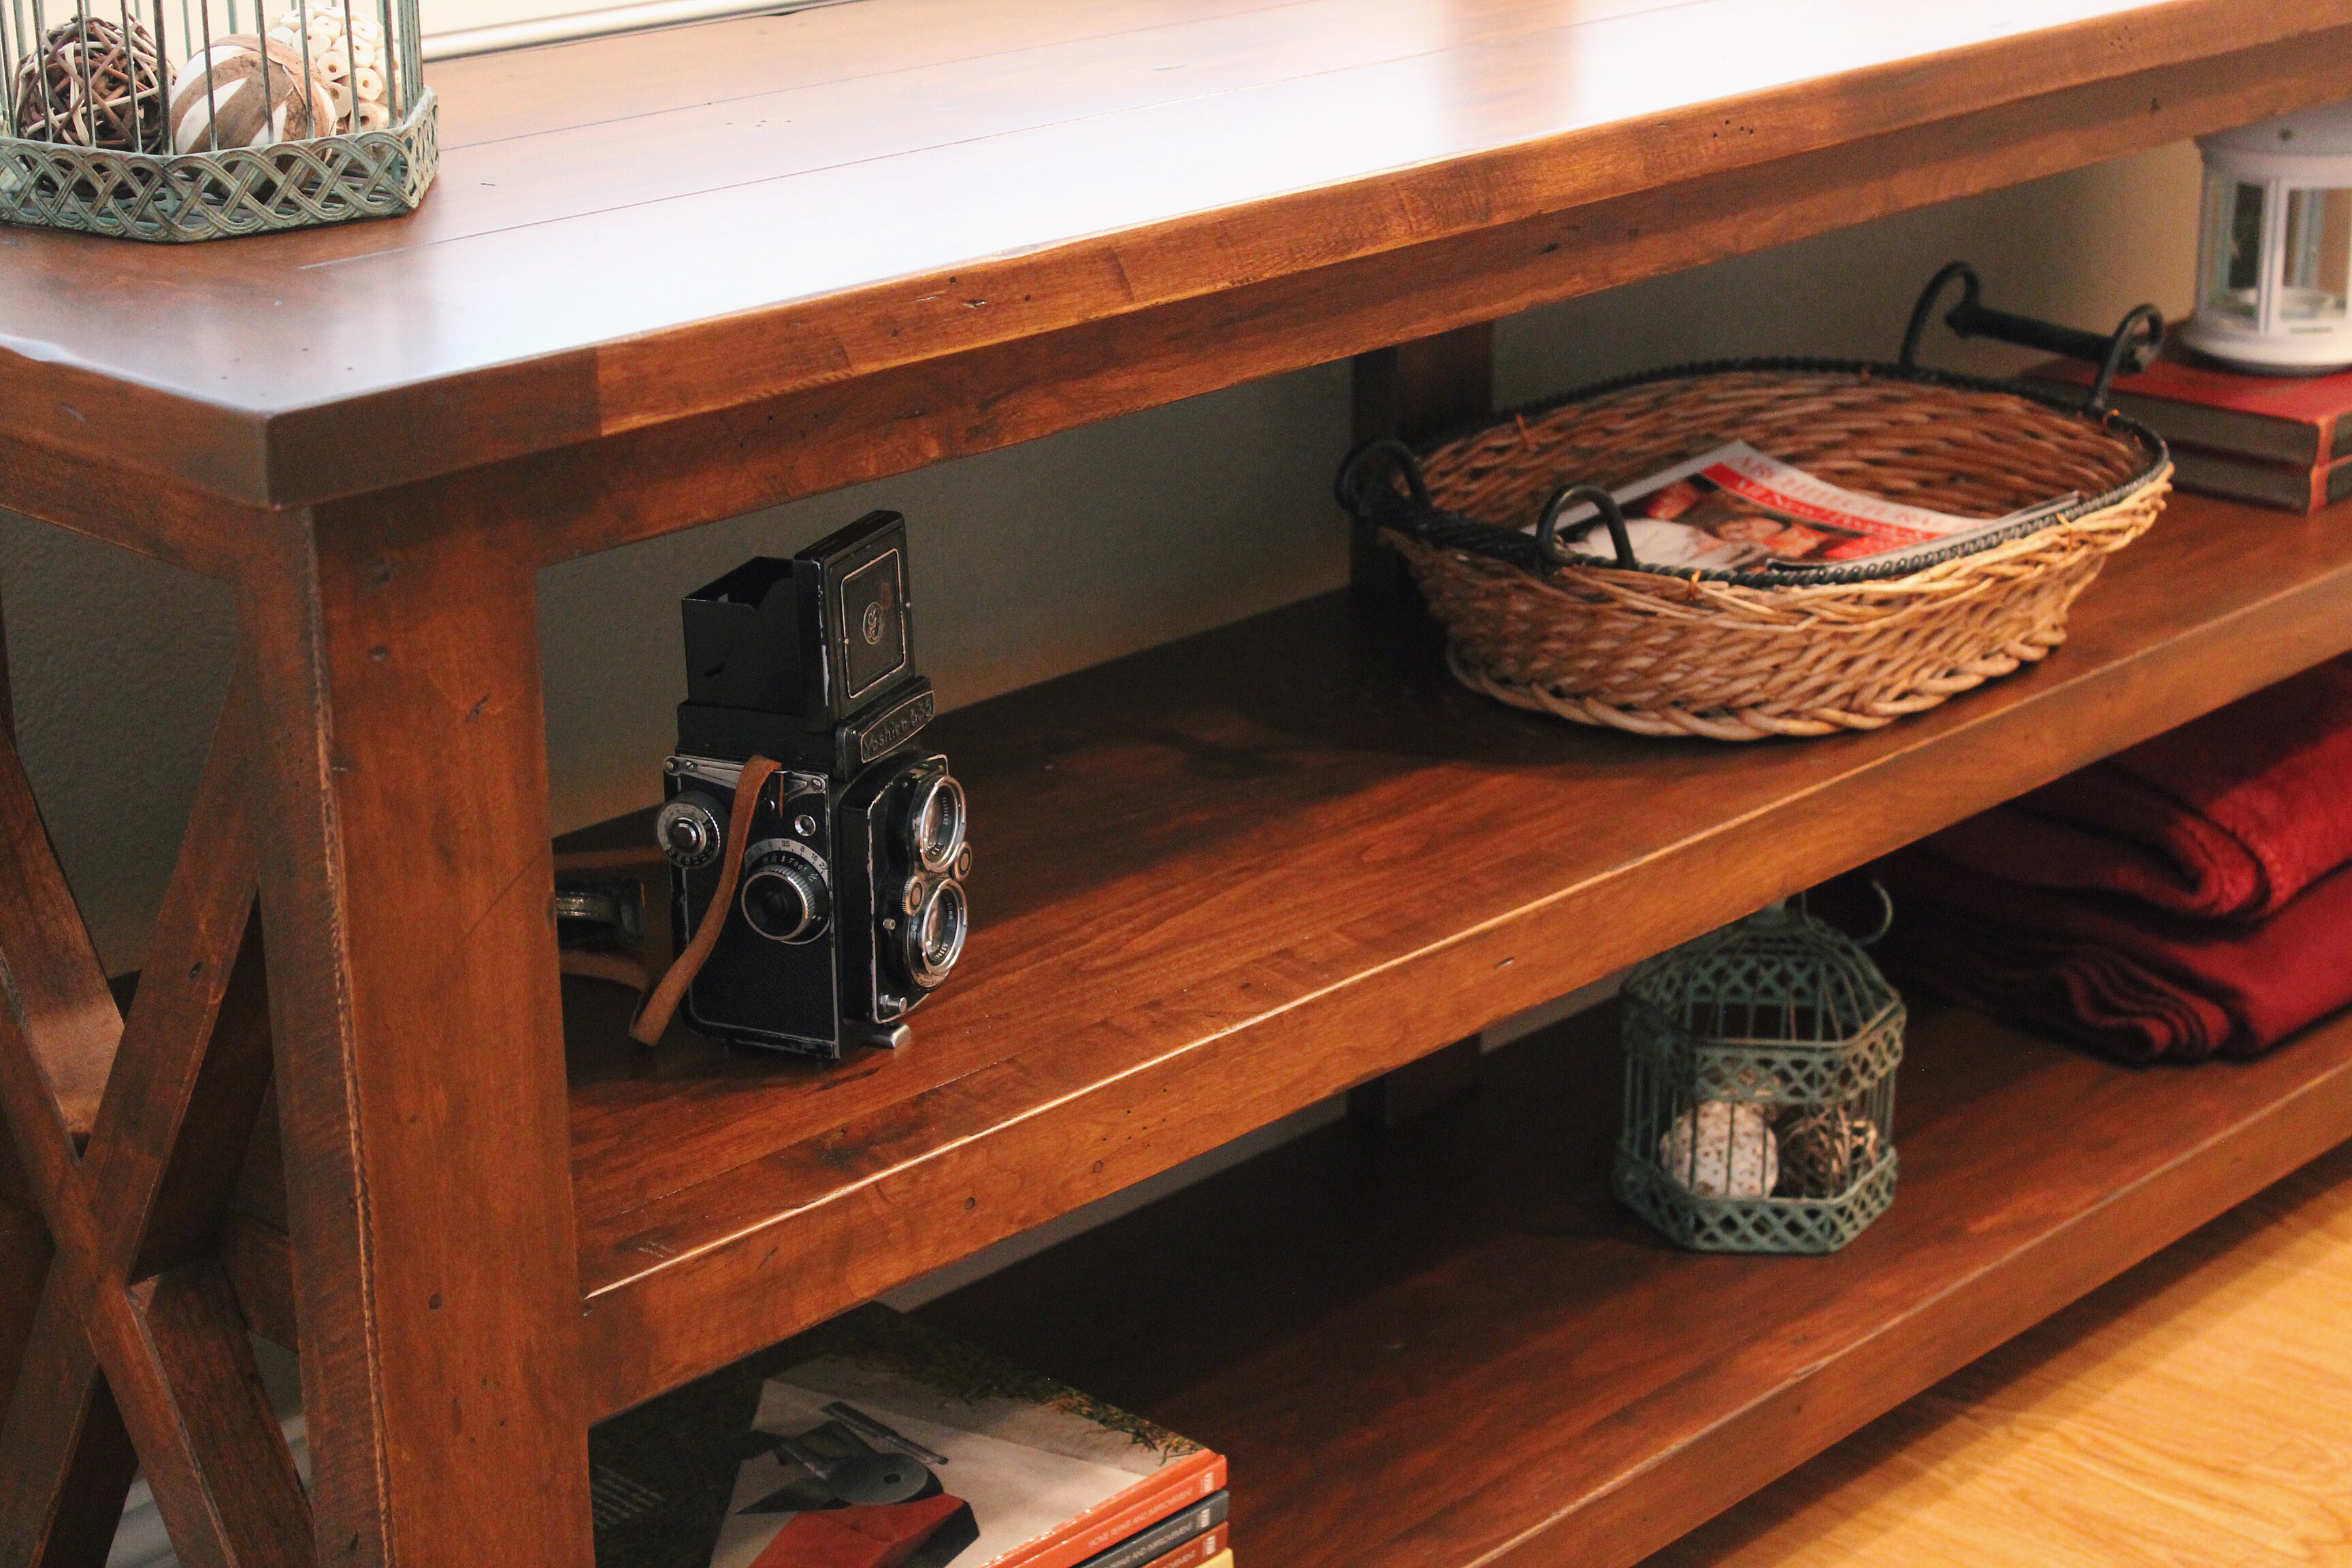
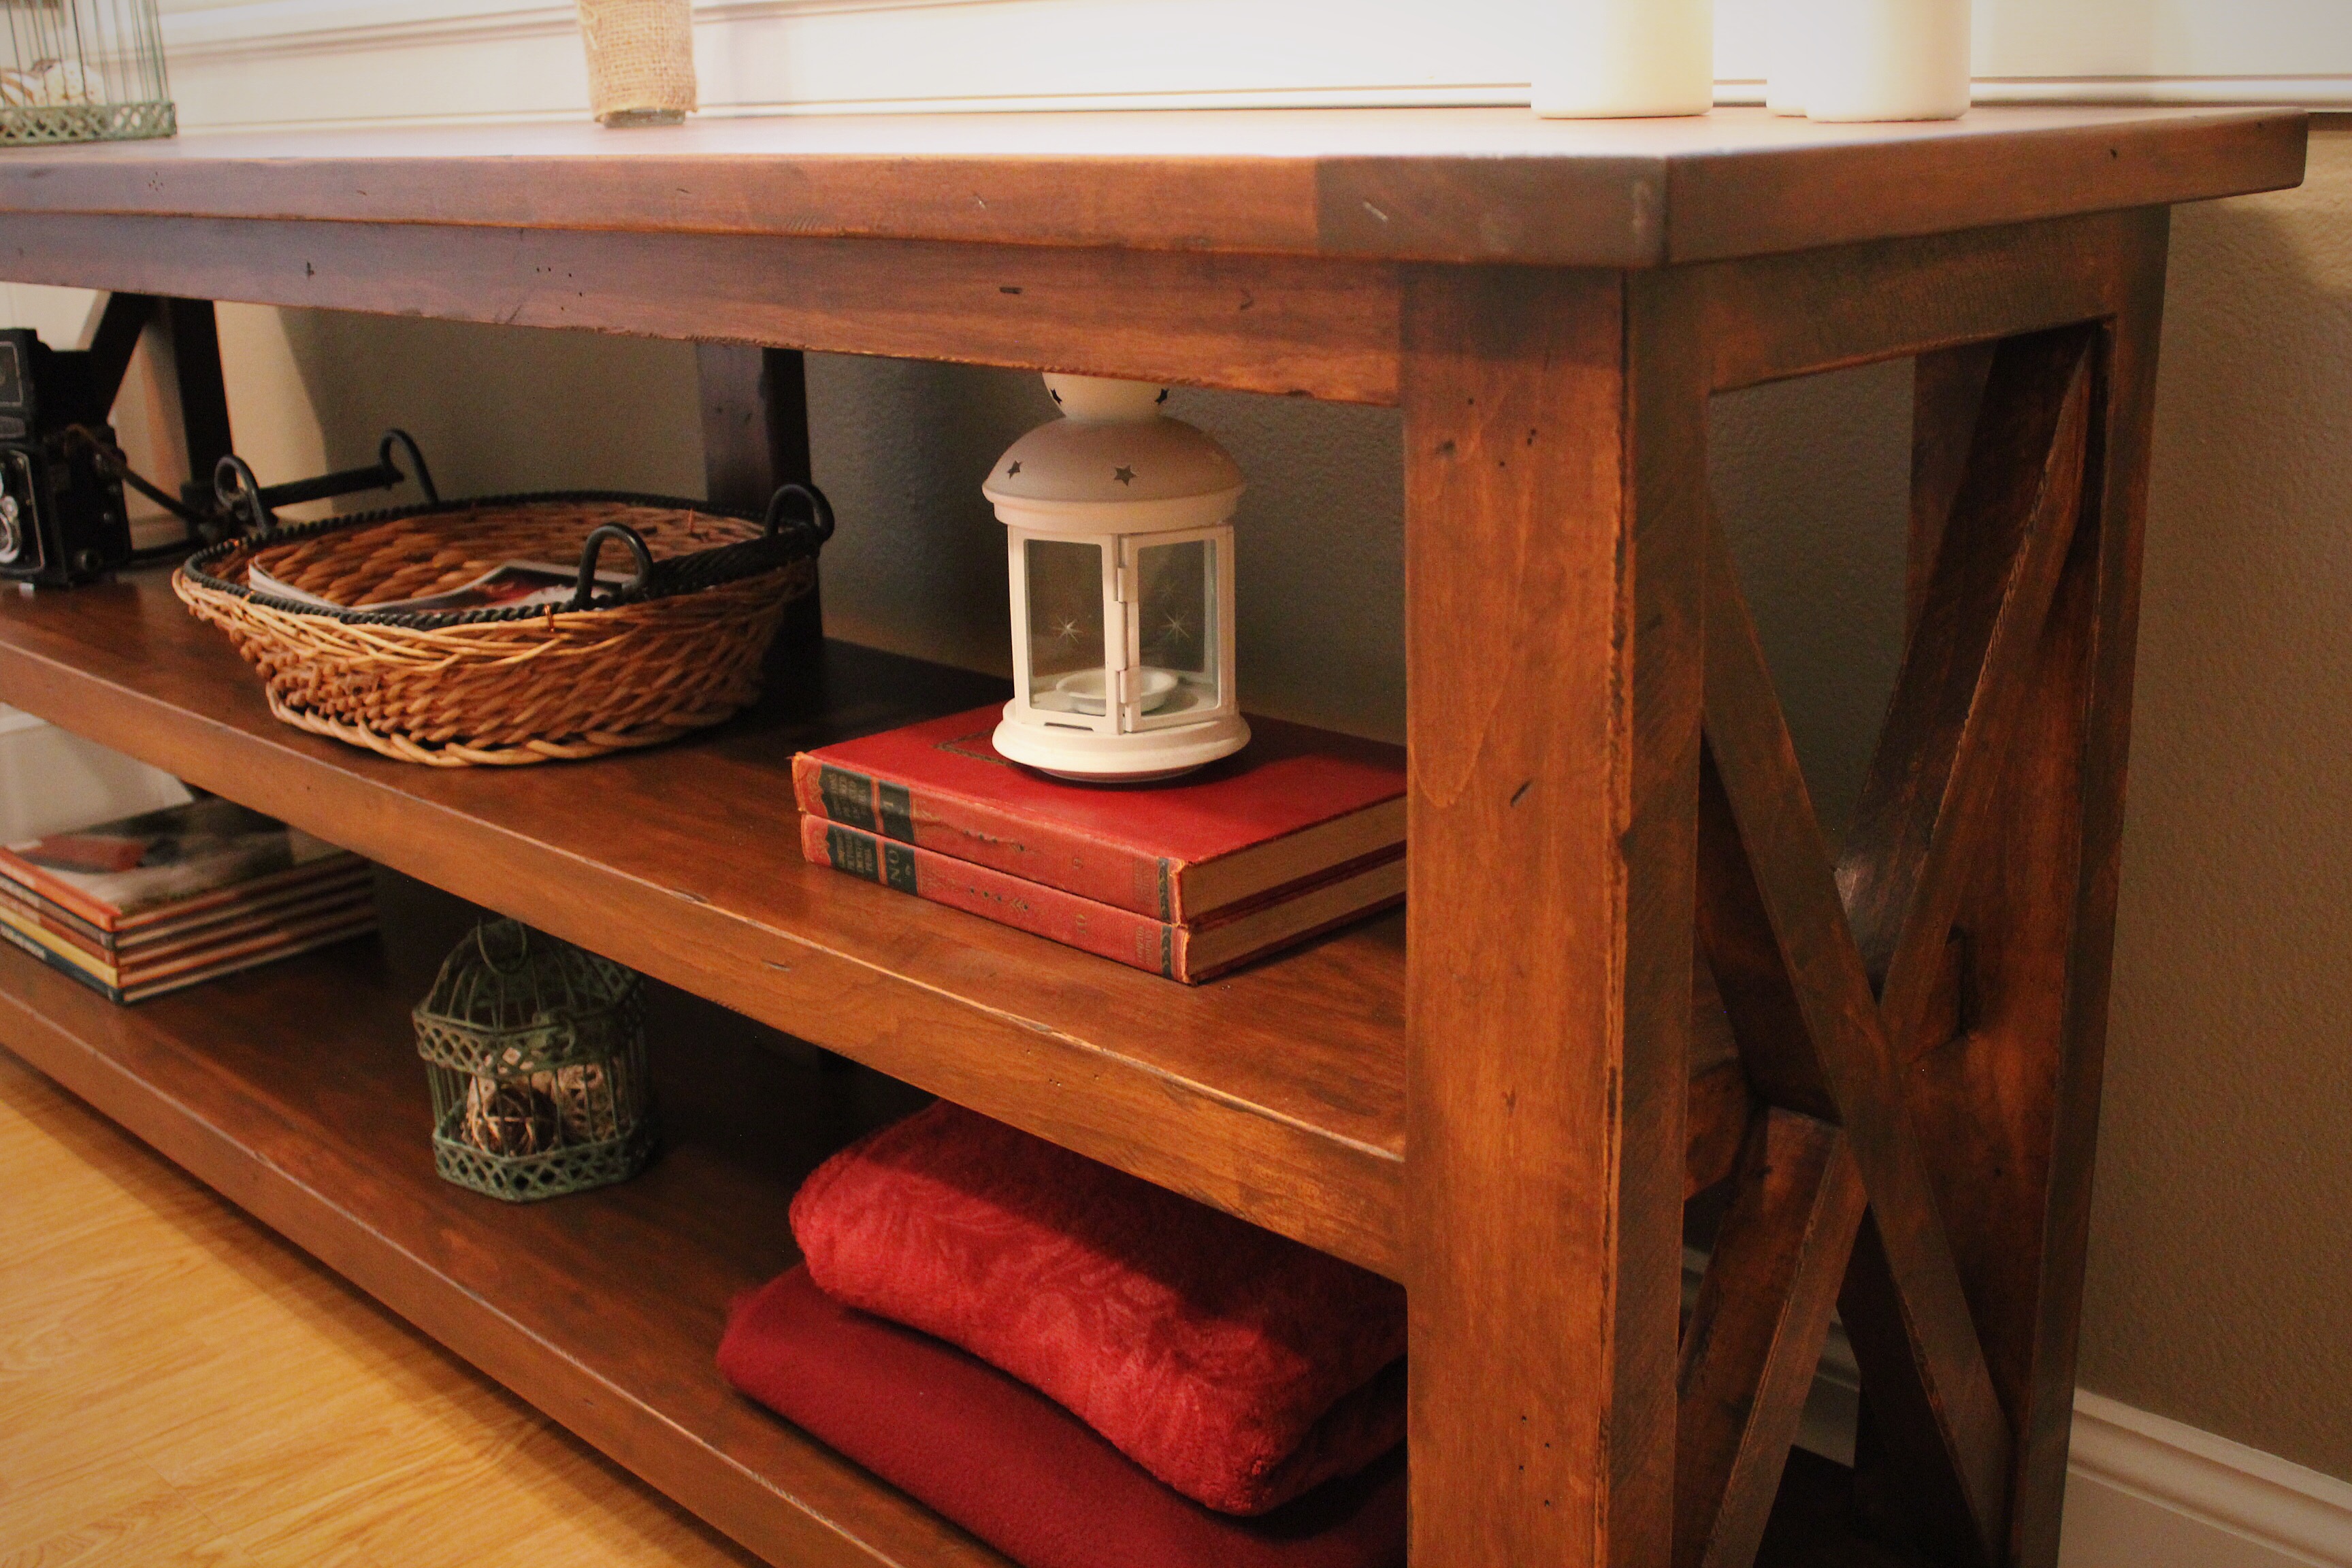
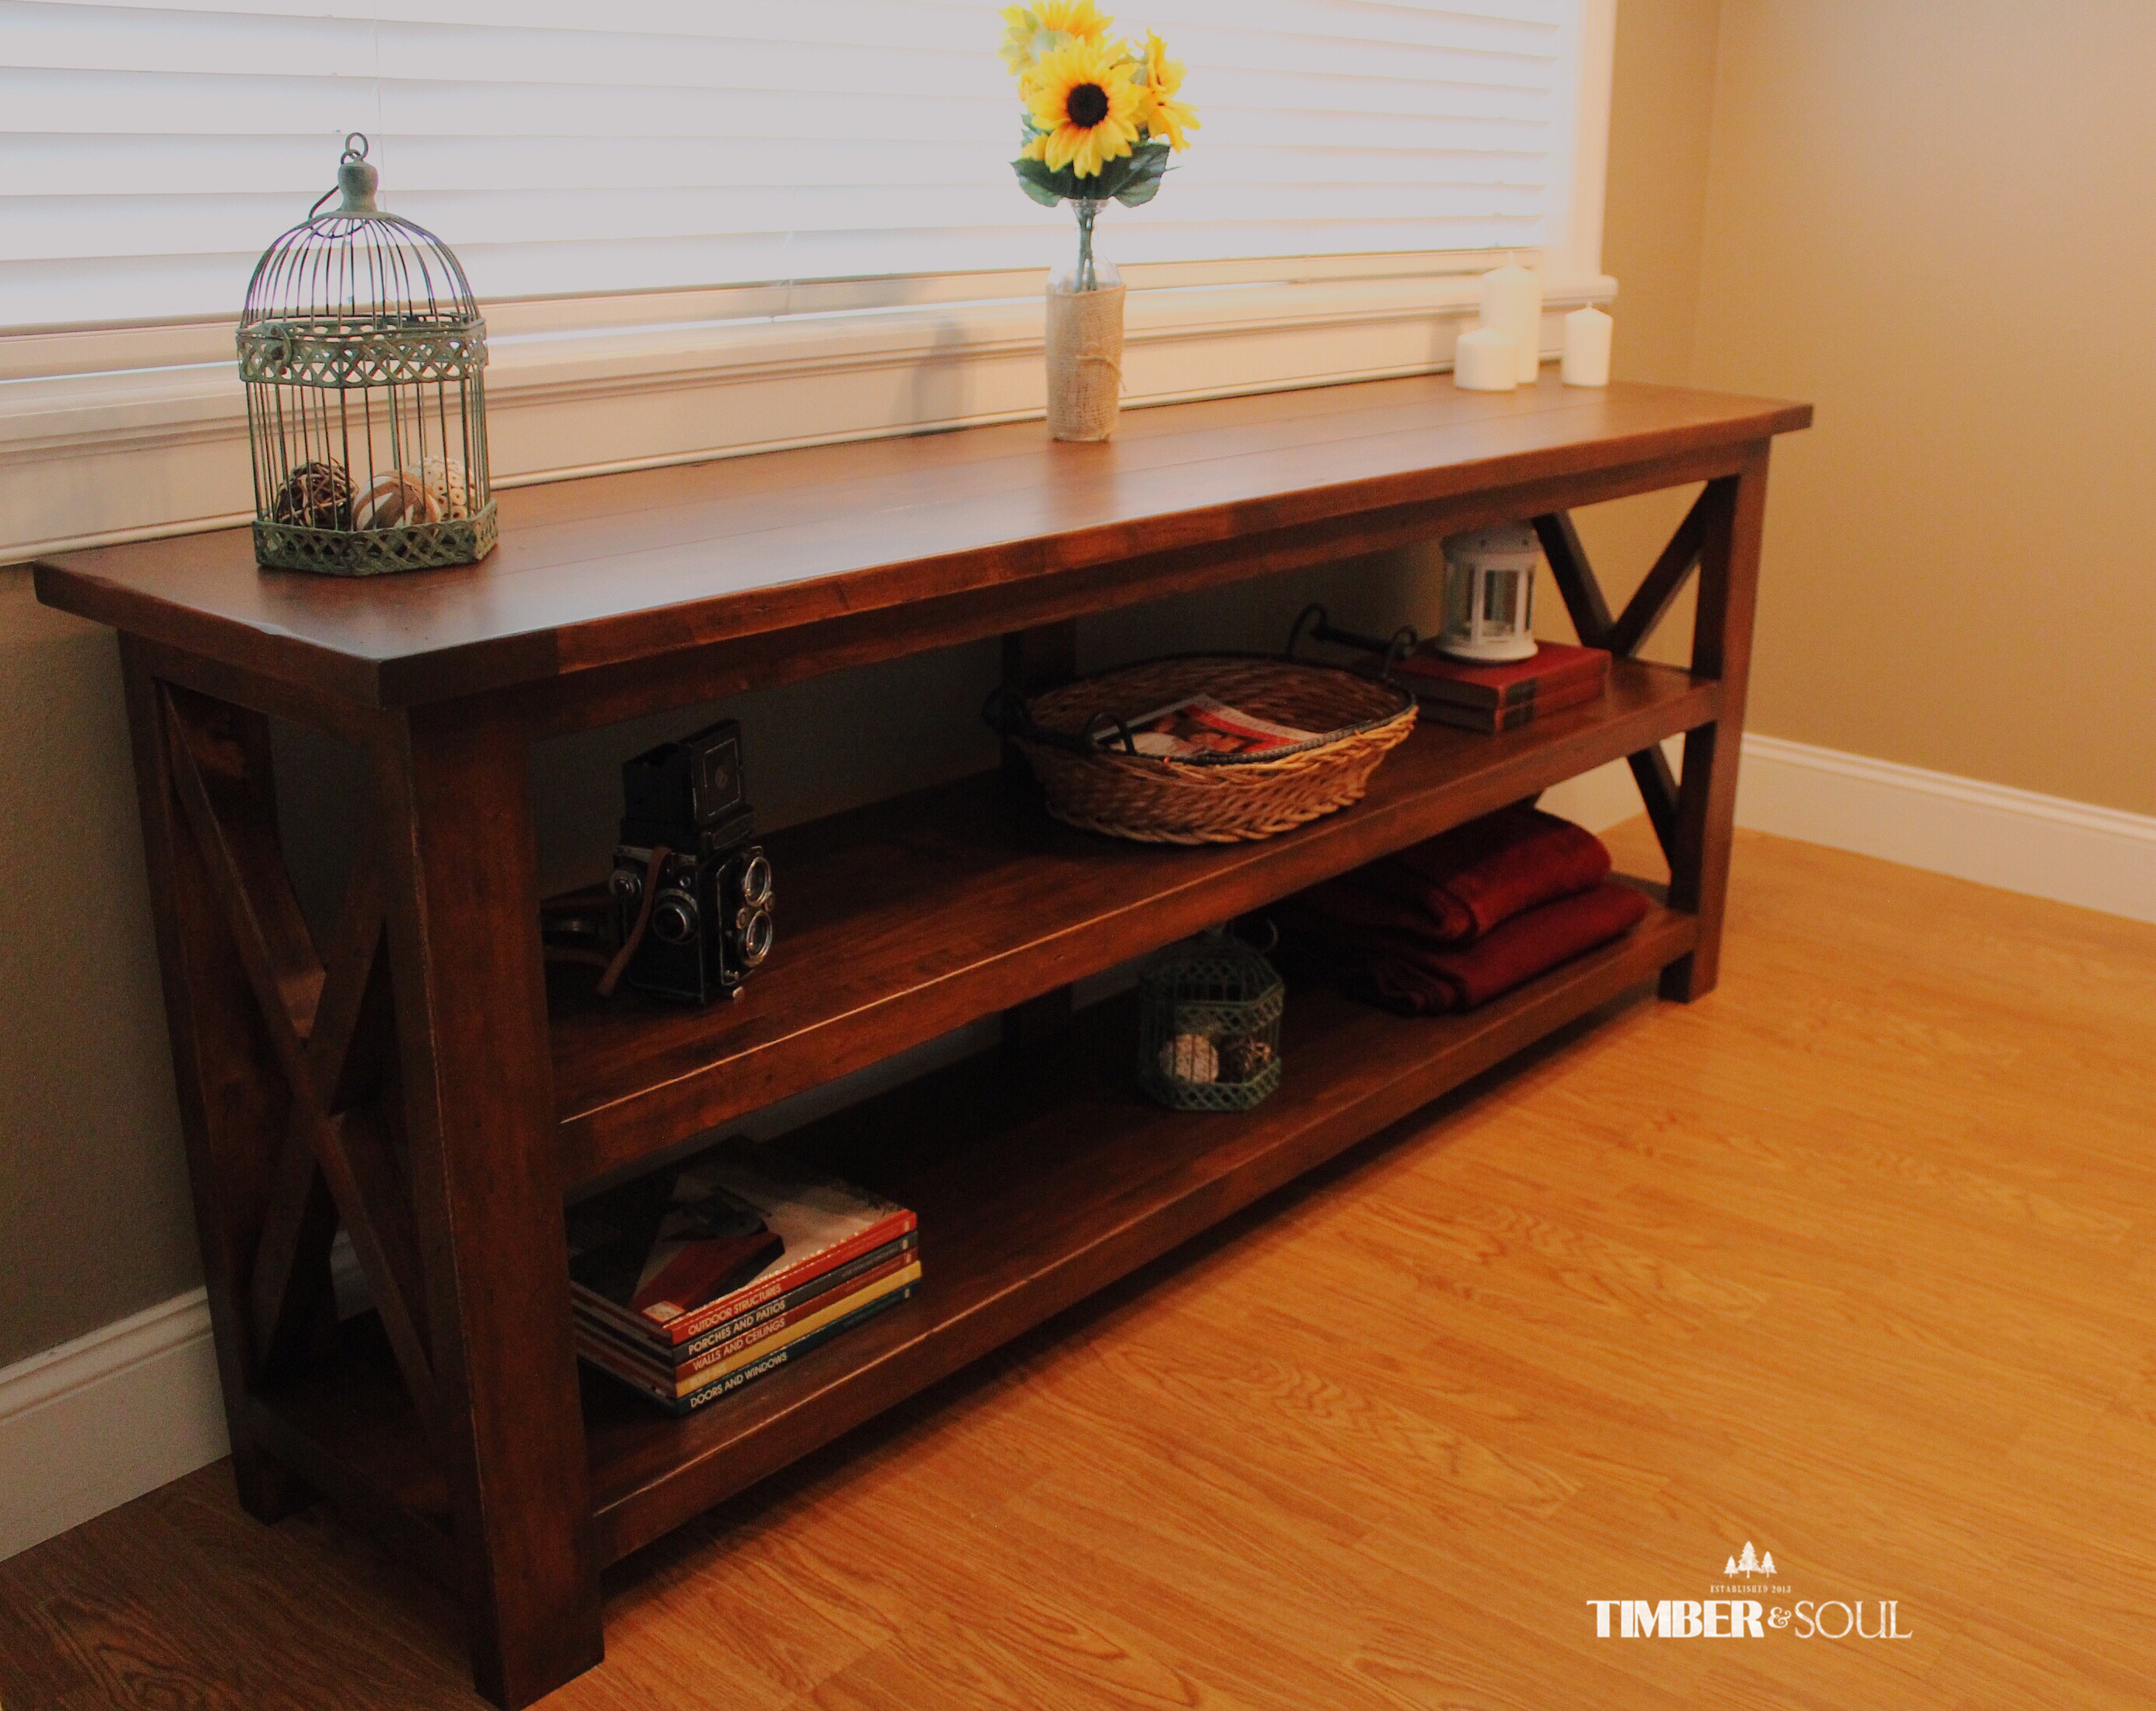
Console table
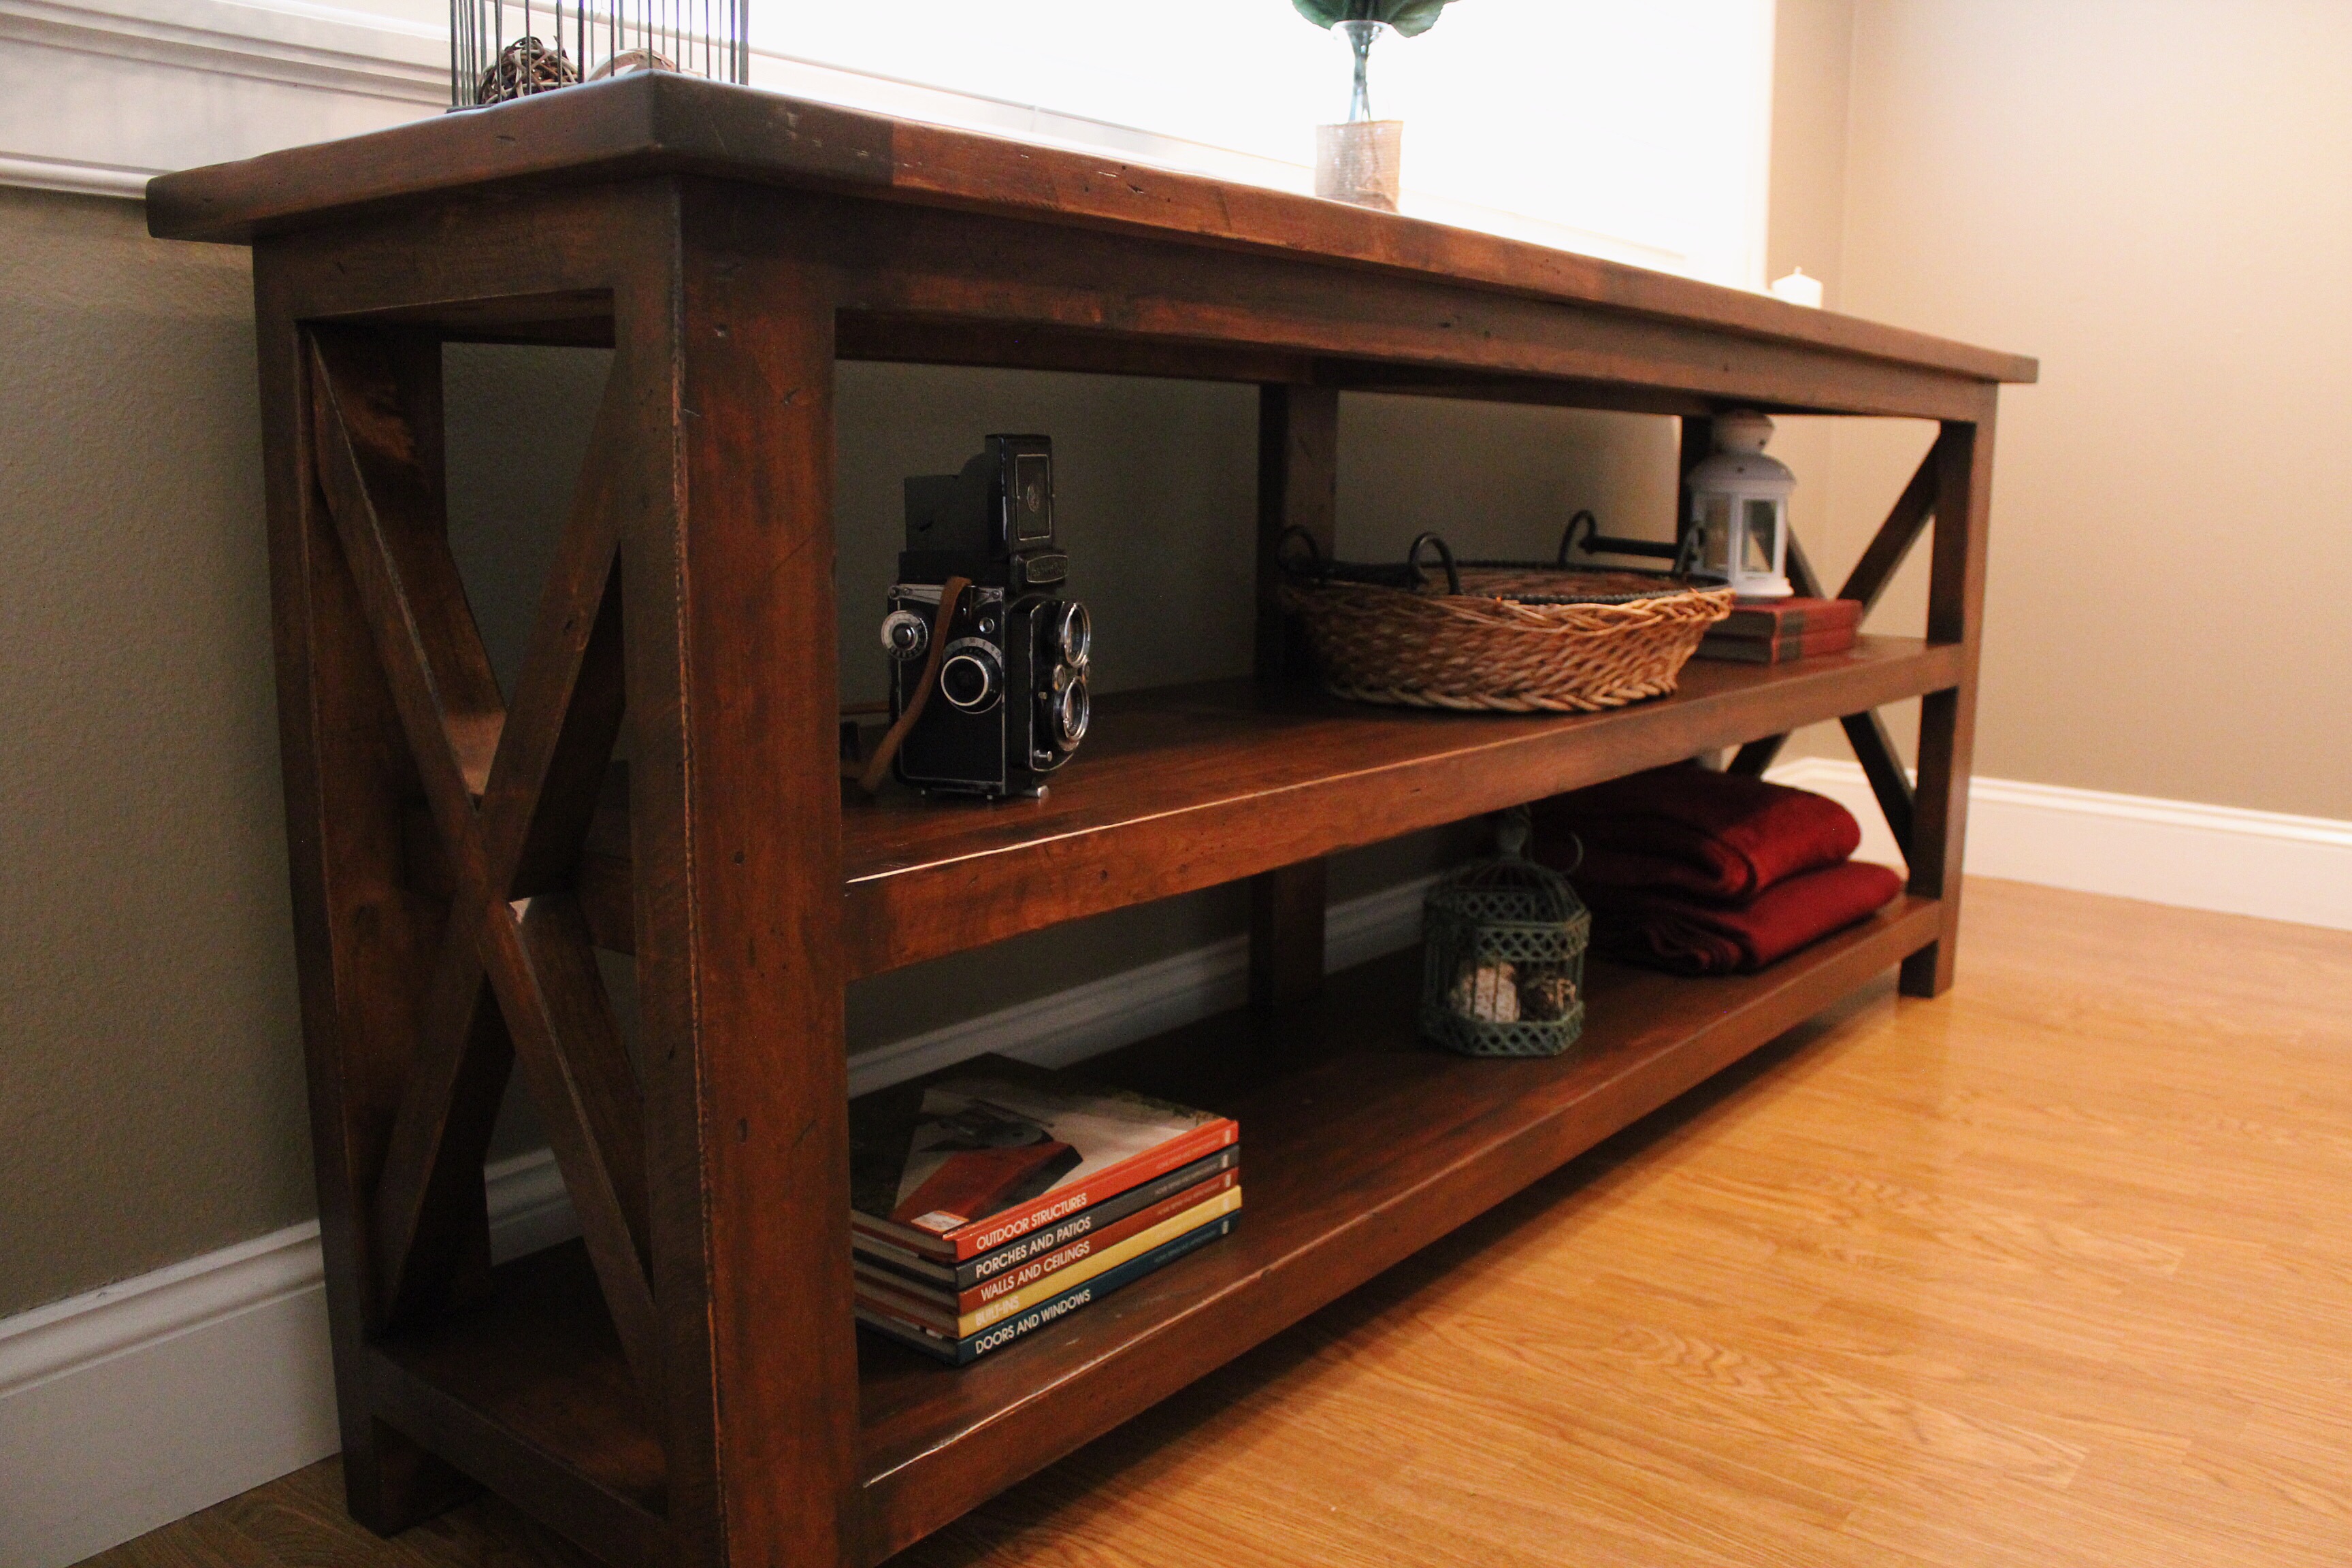
This console table was built using Alder lumber. I modified Ana's plans slighly by removing the center, vertical brace, and changing the thickness of the top. I also altered the top by making it a "breadboard" style top. The finish I created was unique in that fact that it was a 5 layer process. Because Alder wood is a "blotchy" prone wood, I sealed it with shellac first, applied 1 coat of antique walnut gel stain, sprayed a toner (dye mixed in shellac) to darken the wood, and then applied 2 coats of poly.
Built from Plan(s)
Estimated Cost
$300.00
Estimated Time Investment
Weekend Project (10-20 Hours)
Finish Used
shellac, gel stain, transfast dye, poly
Recommended Skill Level
Intermediate
Comments

Wed, 01/21/2015 - 12:00
I love the color of your
I love the color of your piece. I also like the center support delete as I feel like it helps lighten the piece. Well done.
Industrial Bookshelves
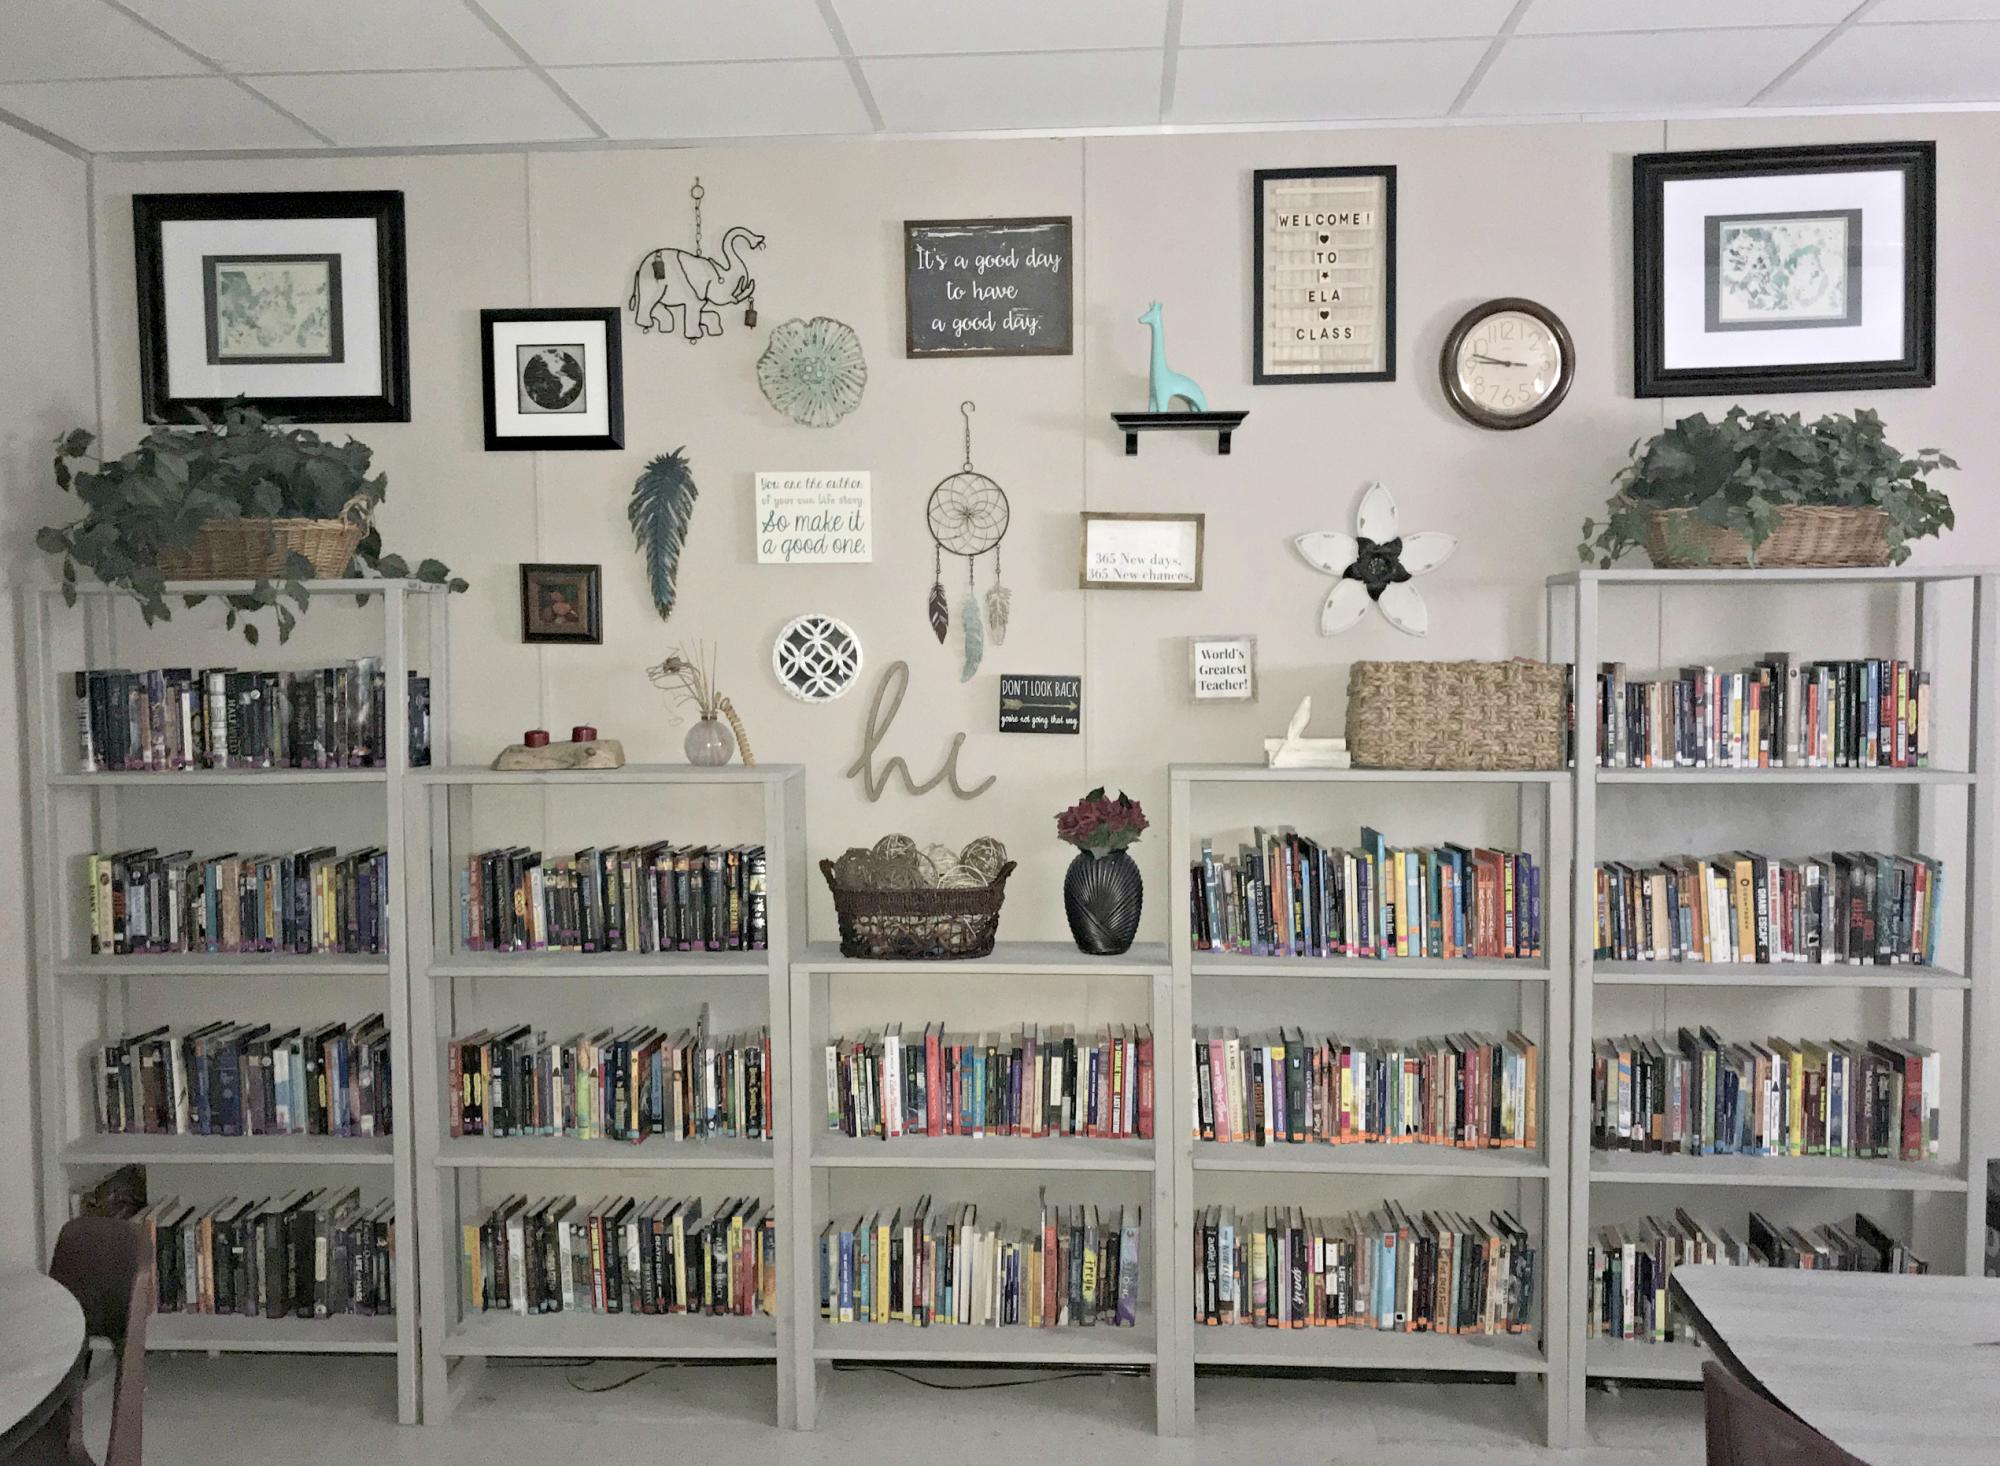
My husband made these gorgeous, inexpensive bookshelves for my classroom. We modified the plans to create a couple of different sizes. I love them, and they work perfectly for the classroom library.
https://www.ana-white.com/woodworking-projects/30-industrial-bookshelf
Built from Plan(s)
Estimated Cost
$75
Estimated Time Investment
Afternoon Project (3-6 Hours)
Finish Used
Varathane Woodstain- Sunbleached
Recommended Skill Level
Beginner
Comments
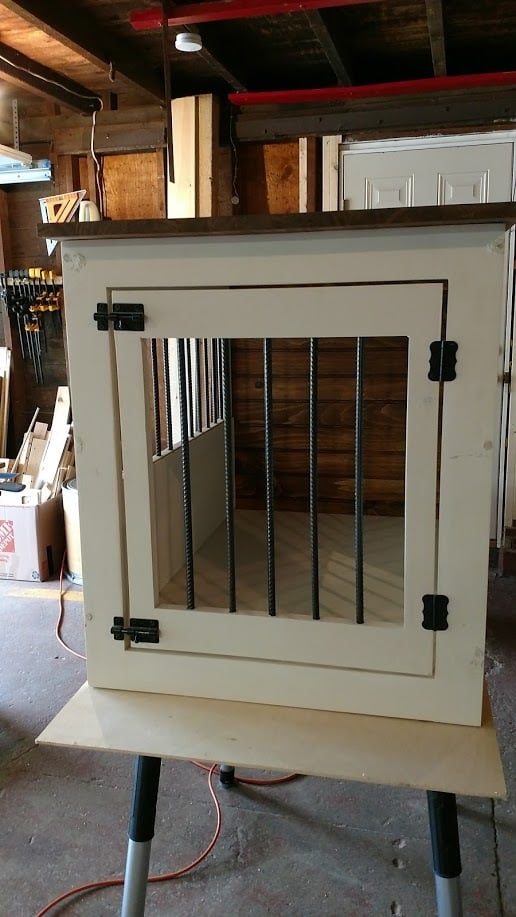
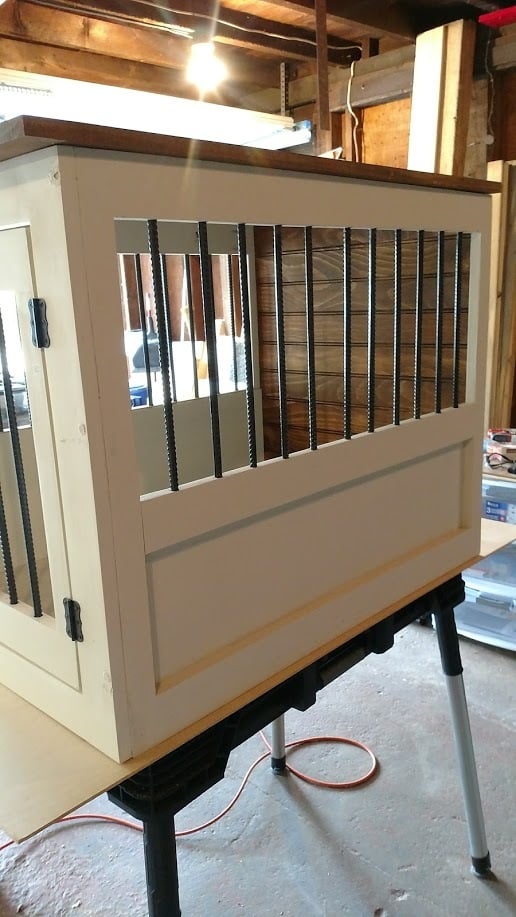
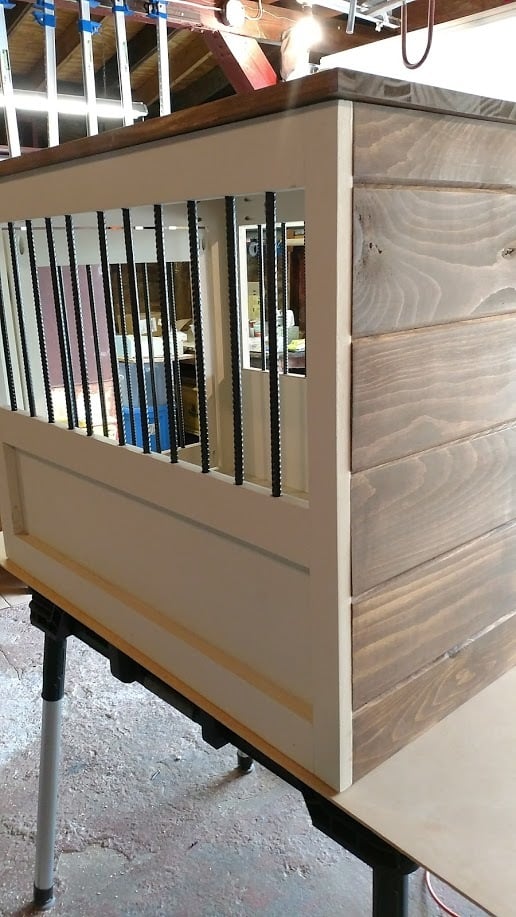
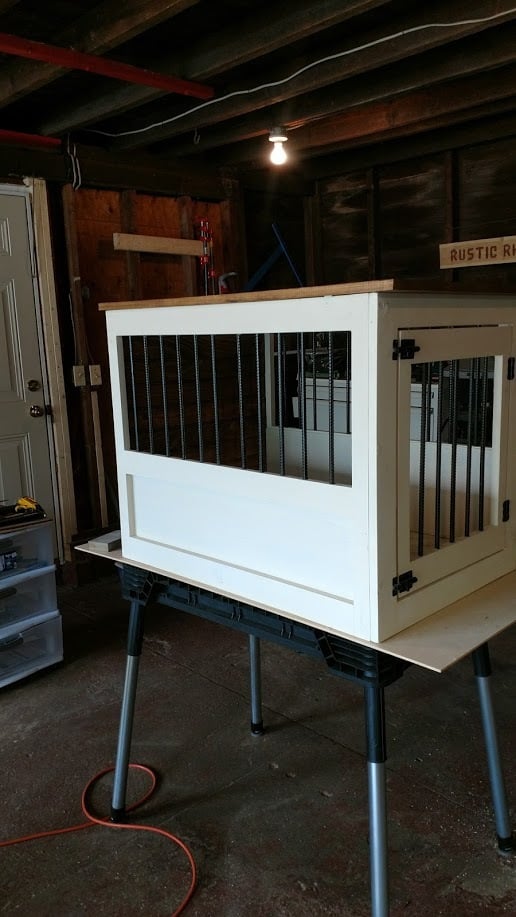
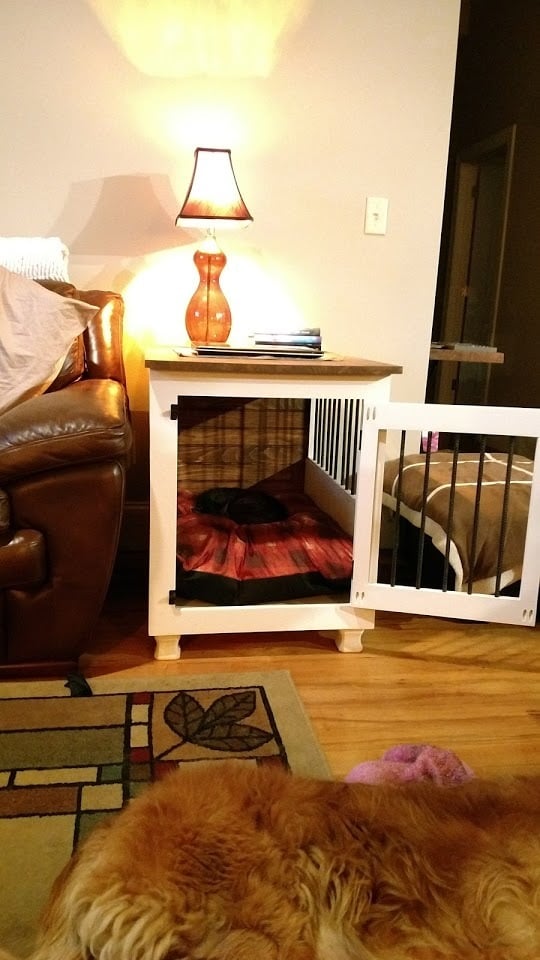
Dog Crate with a twist...
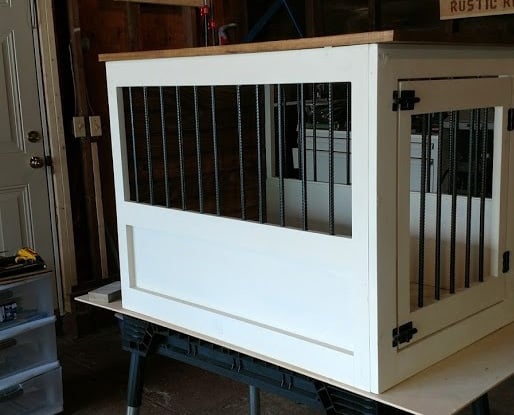
I really liked the Large Wooden Dog crate but wanted the sides to be lower and wanted to make sure there was no easy chew escape. Not sure if you can see from the photo but the cats have taken over... Will need to make a larger one for the dog!
I followed the plan pretty much other than lowering the panel on the side and replacing the wooden bars with rebar. The rebar was a bit of a learning curve getting the holes lined up perfectly but I figured it out and I think it came out pretty good!
Used all pine 1x3 and 1x2s. Picked up a pine panel for the top and the bottom is a 3/4 plywood. Made our own chalk paint for the finish and sealed it with wax.
Oh, forgot, added tongue and groove pine for the back and finished it and the top with Antiguing wax.
Lots of fun and I think I will make a double one next!
Built from Plan(s)
Estimated Cost
Around $100 if you don't count all the practice pieces for the rebar!
Estimated Time Investment
Week Long Project (20 Hours or More)
Finish Used
Chalk paint and antiquing wax
Recommended Skill Level
Intermediate
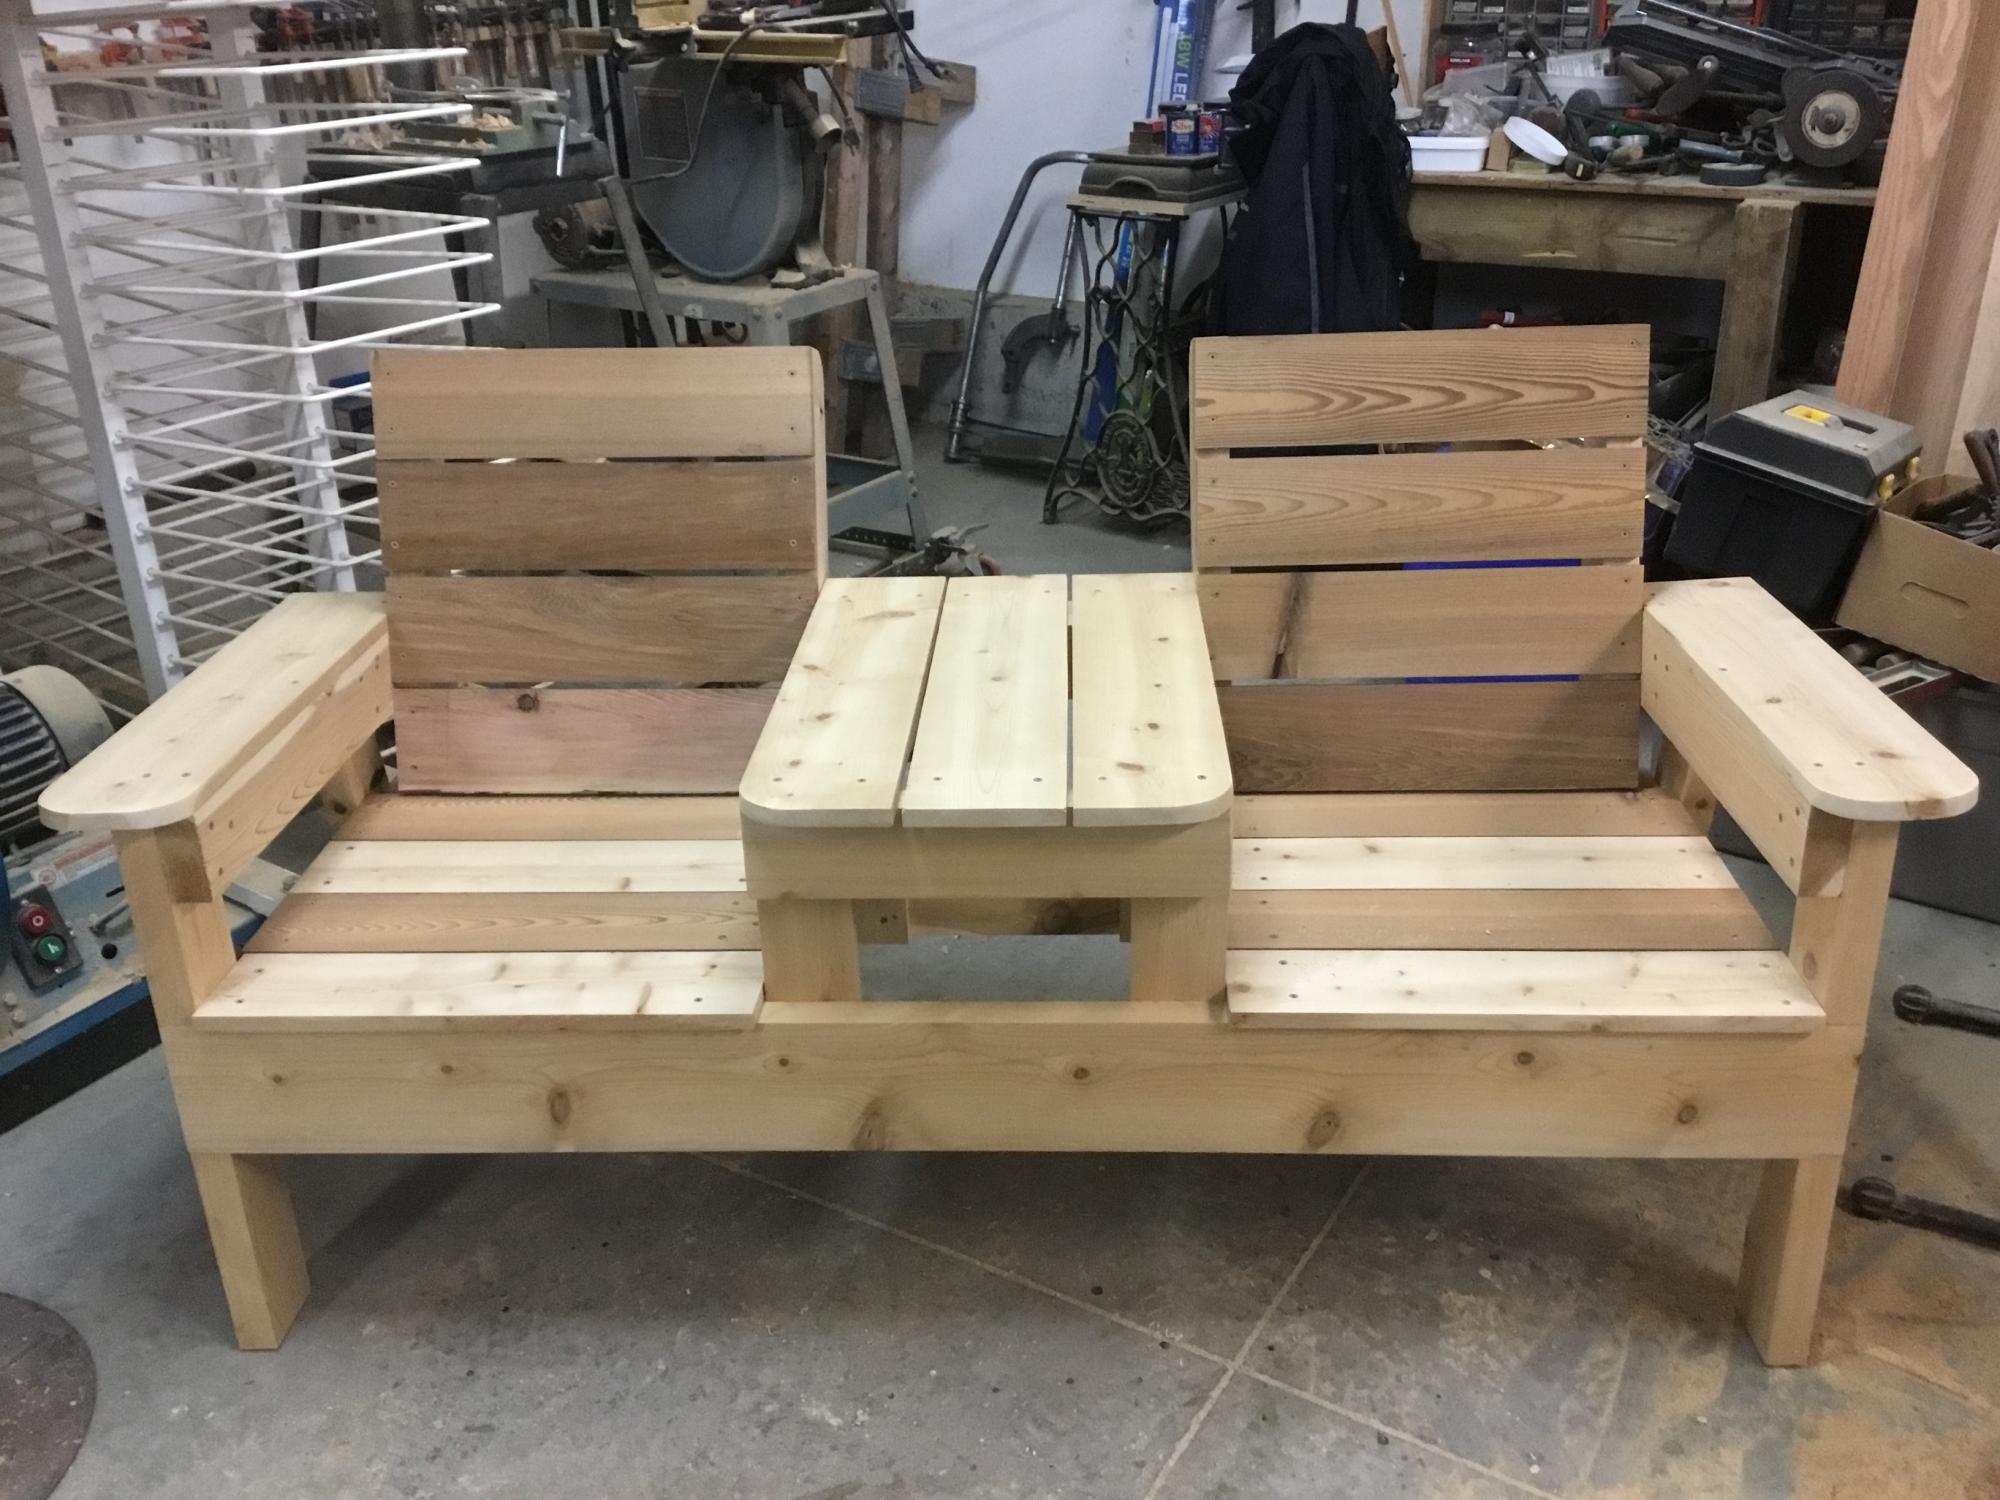
Backyard Patio Set
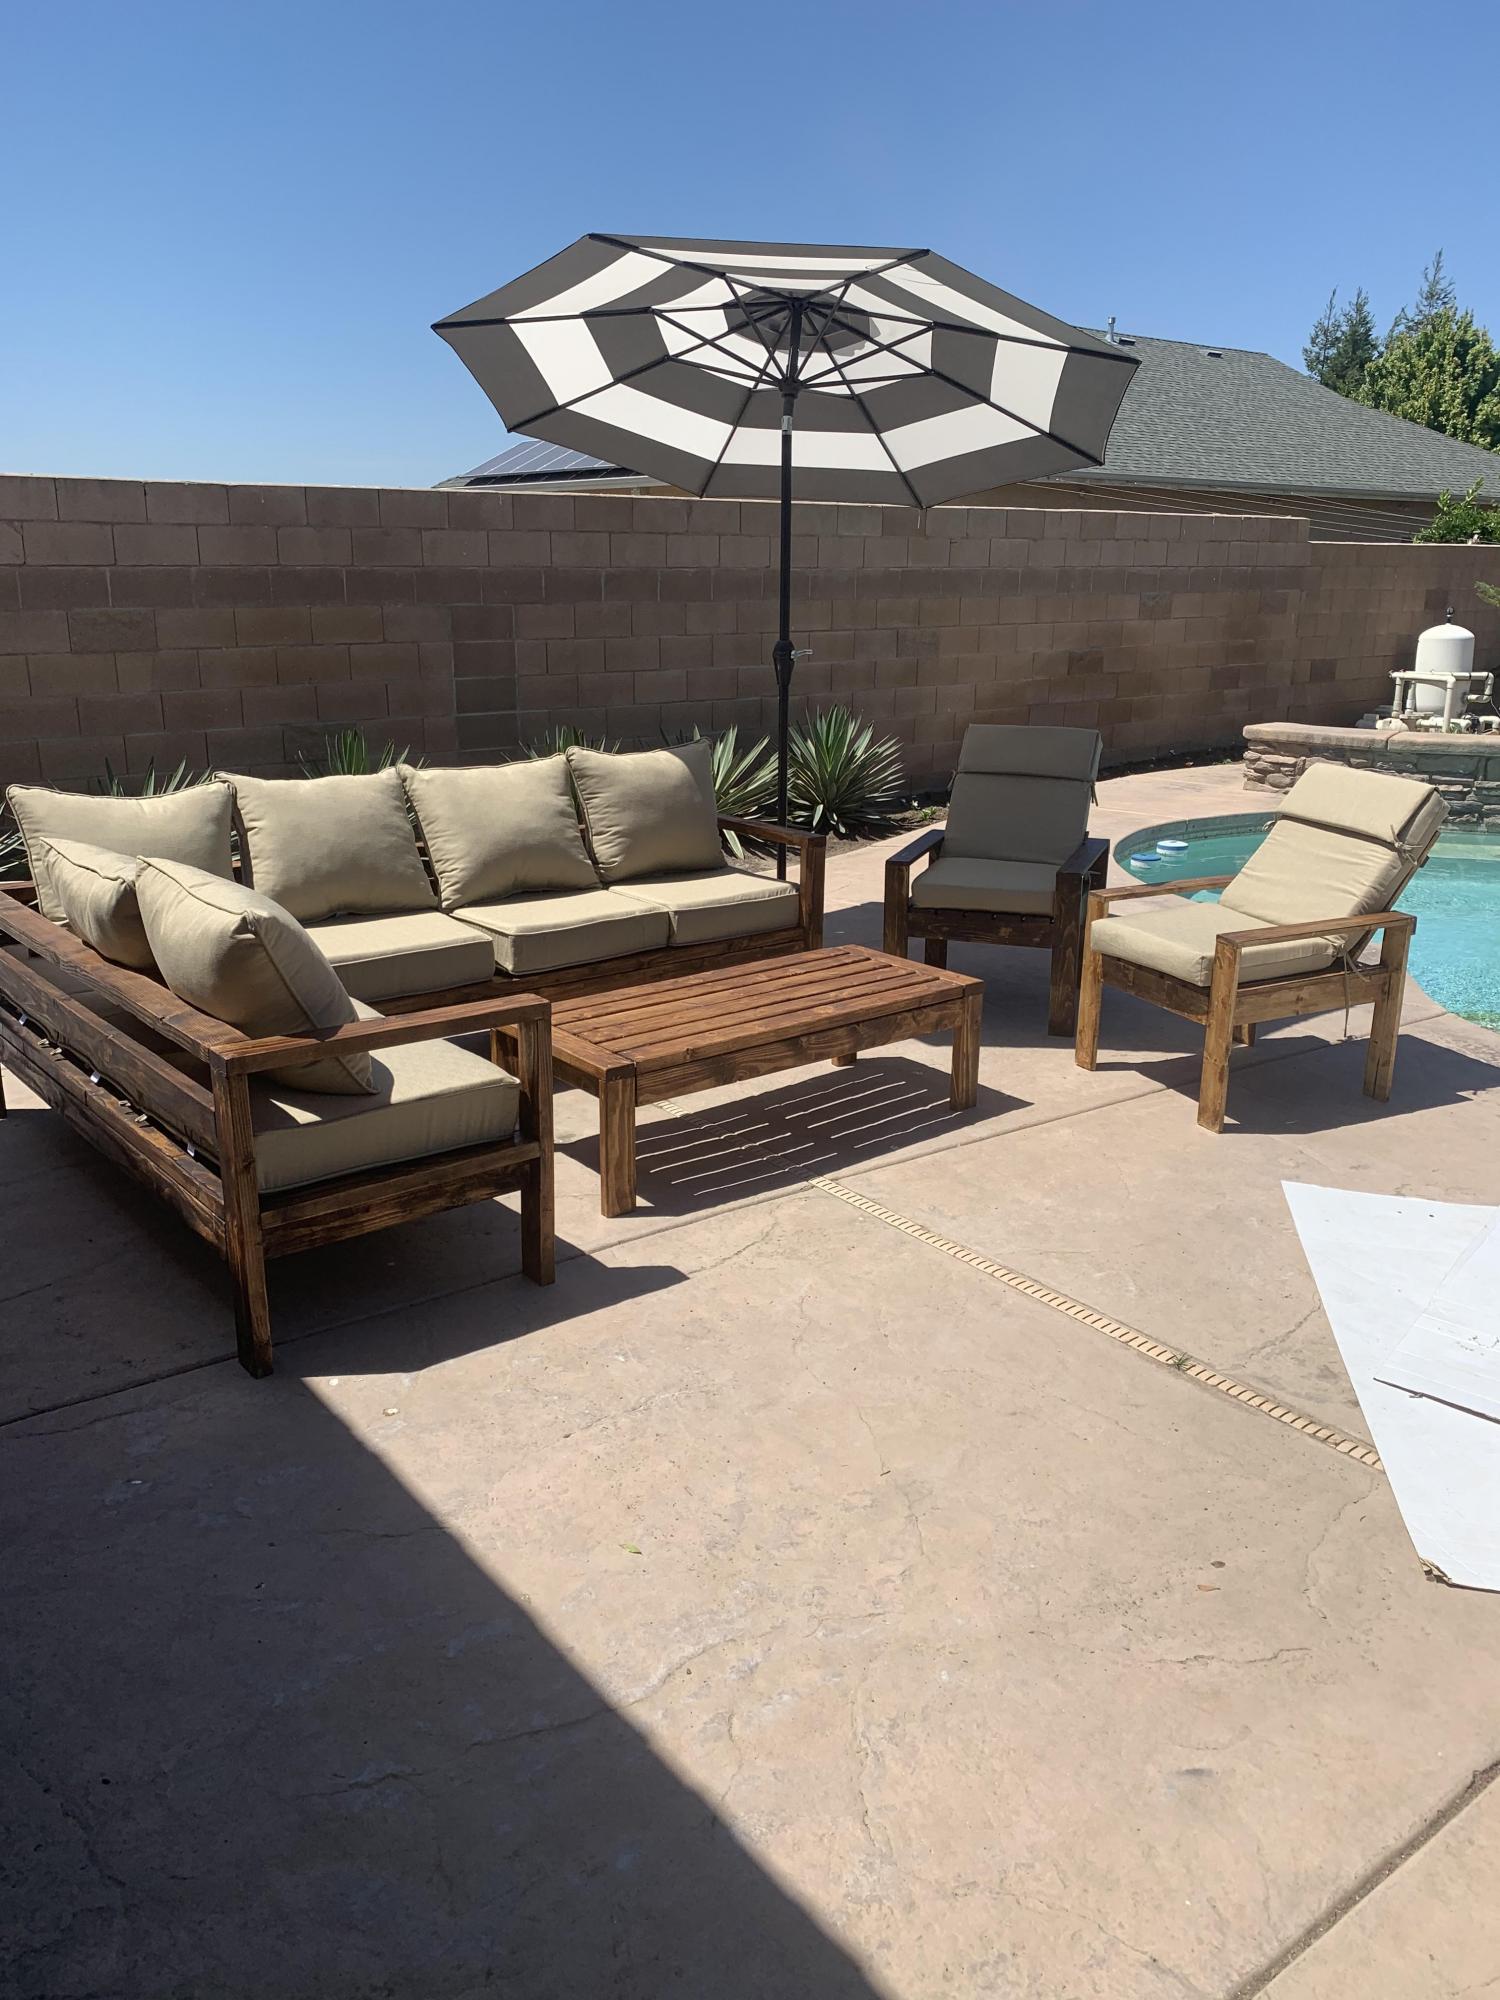
Used Ana's plan for chairs, coffee table, sofa and lounger. Stained and clear coated. Wife is happy. What can be better!
Built from Plan(s)
Estimated Time Investment
Week Long Project (20 Hours or More)
Finish Used
SPAR Urethane
Recommended Skill Level
Intermediate
Comments
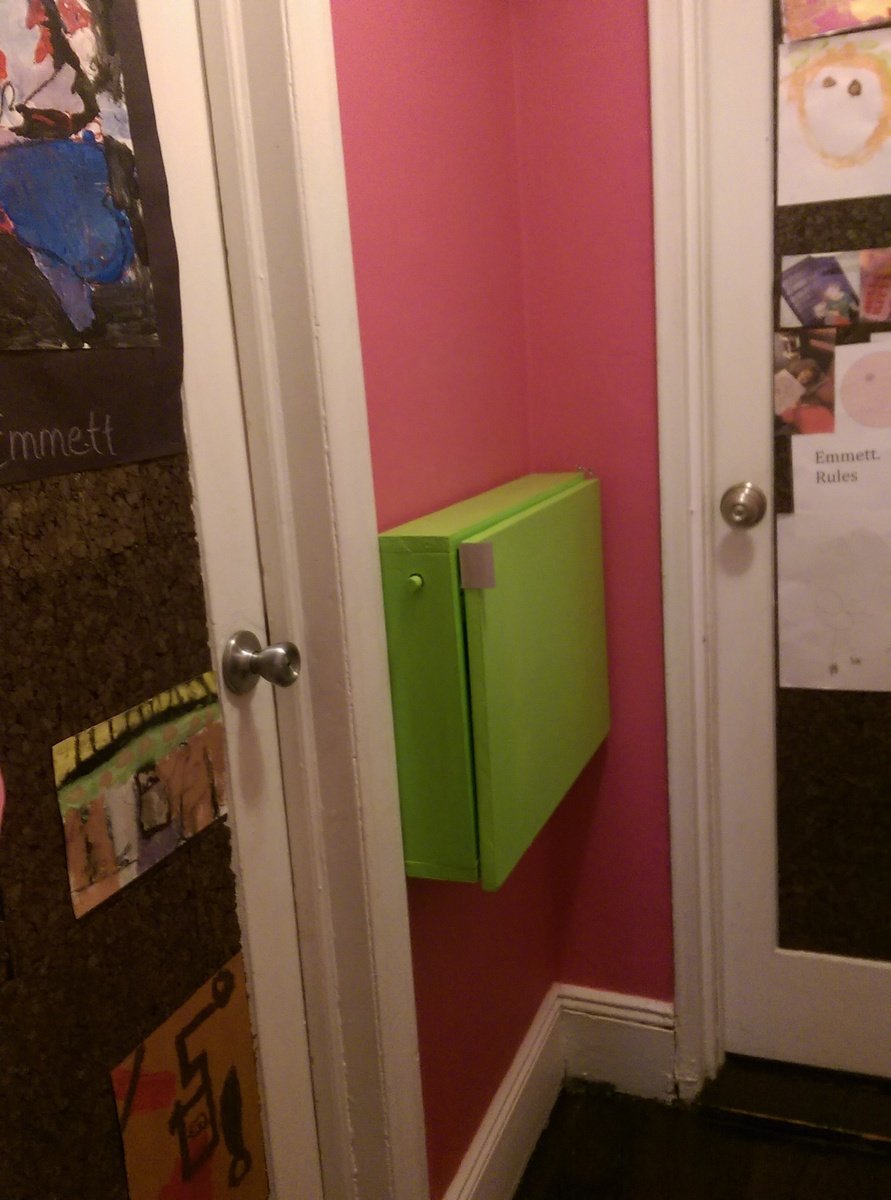
Emmett & Luka's Hallway Murphy Desk
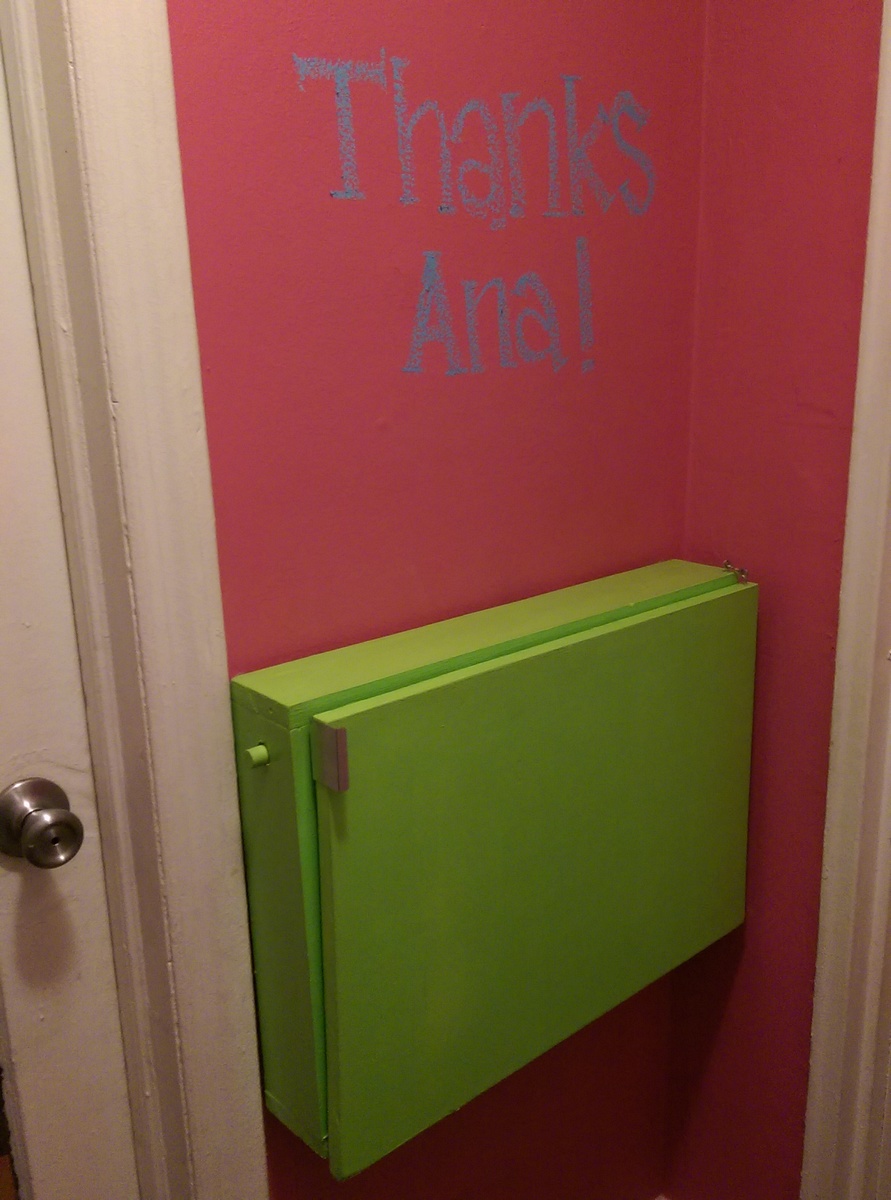
My wife and I live in a 575 sq ft Manhattan apartment with two young boys so space is extremely limited! Last year when our older son was 6 he had the idea to turn our tiny bathroom hallway area into a work space for his growing homework assignments. It took me a year, but it all fell into place when I found this design. Luckily we live in a quirky old 1844 brick row house and I've been lucky enough to craft a small space in the basement where I can keep my tools and work on projects. Even a small desk like this takes more space than you think!
I had to make it a bit smaller to fit the wall space we have. Then I realized the exterior hinges wouldn't have enough clearance because of the door frame. I found a neat set of interior hinges made by Pojjo but they attached to the sides as well as the bottom so the craft paper section was in the way. Then my wife said, "Can you flip it upside-down?" Absolutely. The only other hack I added was adjustable peg slots for the shelf on the left.
I did a twist on the chalkboard theme by painting the desk in a semi-gloss but the entire hallway in hot pink chalkboard paint--pink is my son's fave color =:-) Hudson Paints has an amazing range of chalkboard paint colors.
We love, love, love this design--thanks, Ana!

Estimated Cost
$50
Estimated Time Investment
Weekend Project (10-20 Hours)
Finish Used
Benjamin Moore Natura "Margarita Green" in semi-gloss; walls Hudson Paints "Sweet 13" pink chalkboard paint.
Recommended Skill Level
Beginner
Comments

Wed, 03/11/2015 - 16:03
This is soooooo cute! I just
This is soooooo cute! I just love the vibrant colors! And thank you for building and sharing!
Ukrainian Sand box with built-in seats
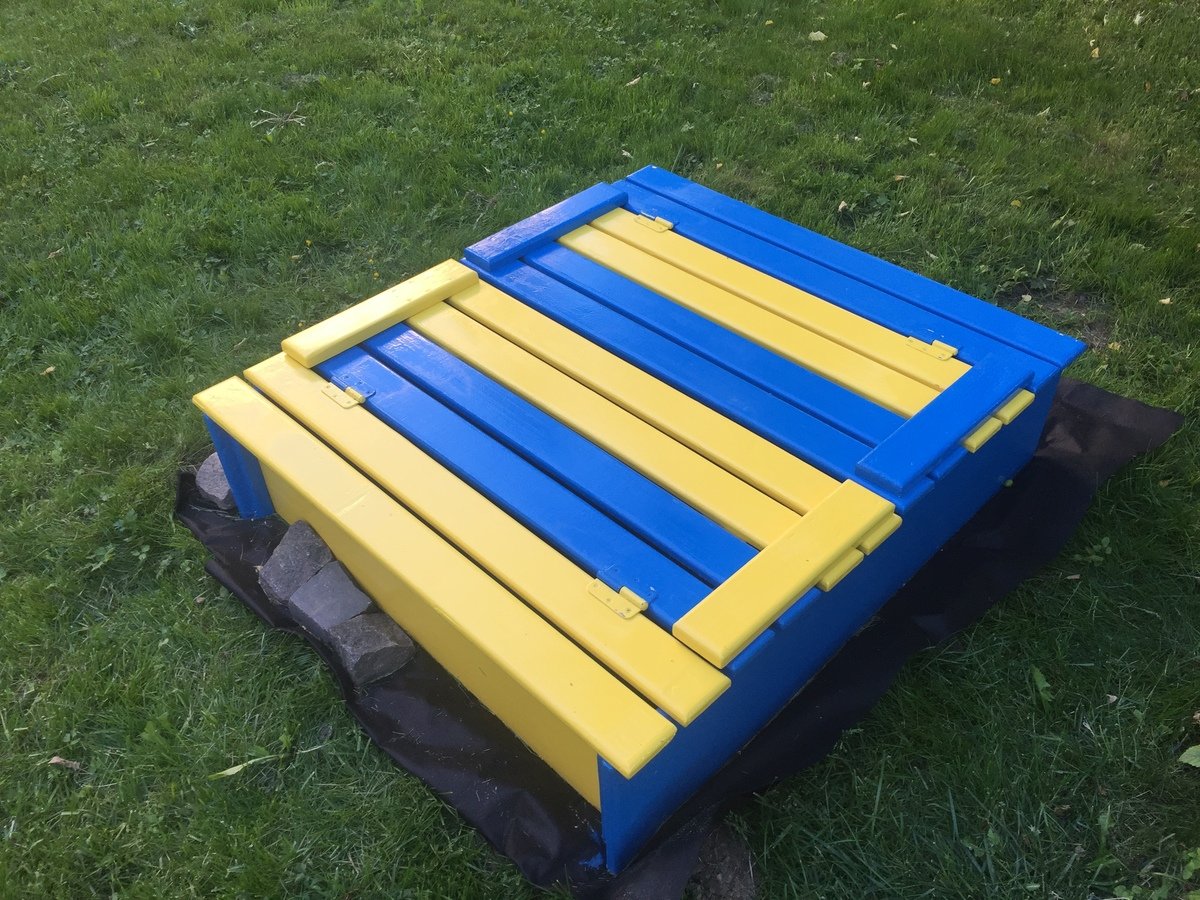
I live in Lviv Ukraine and painted it in he national colors of Ukraine.
The wood came from a old pallet.
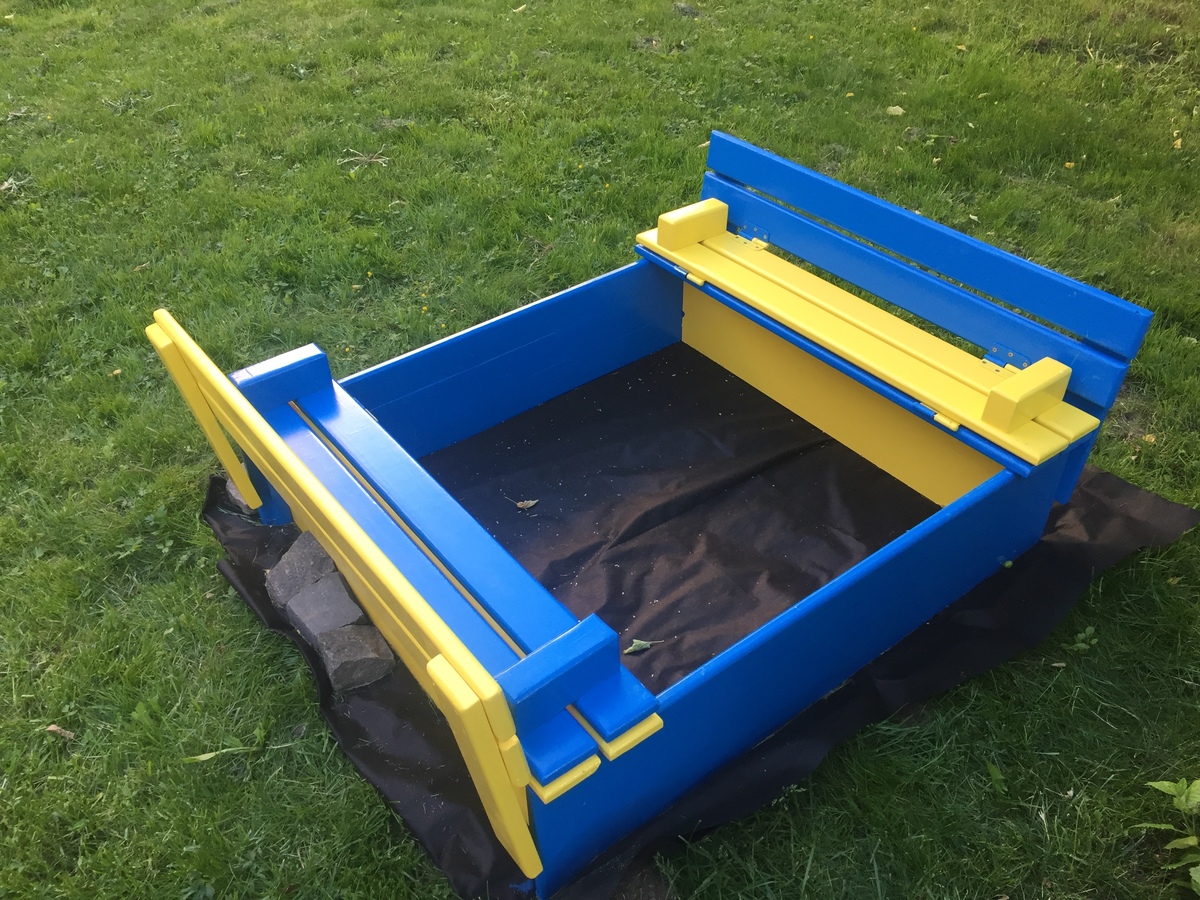
Built from Plan(s)
Estimated Time Investment
Weekend Project (10-20 Hours)
Finish Used
Outdoor enamel paint
Recommended Skill Level
Intermediate
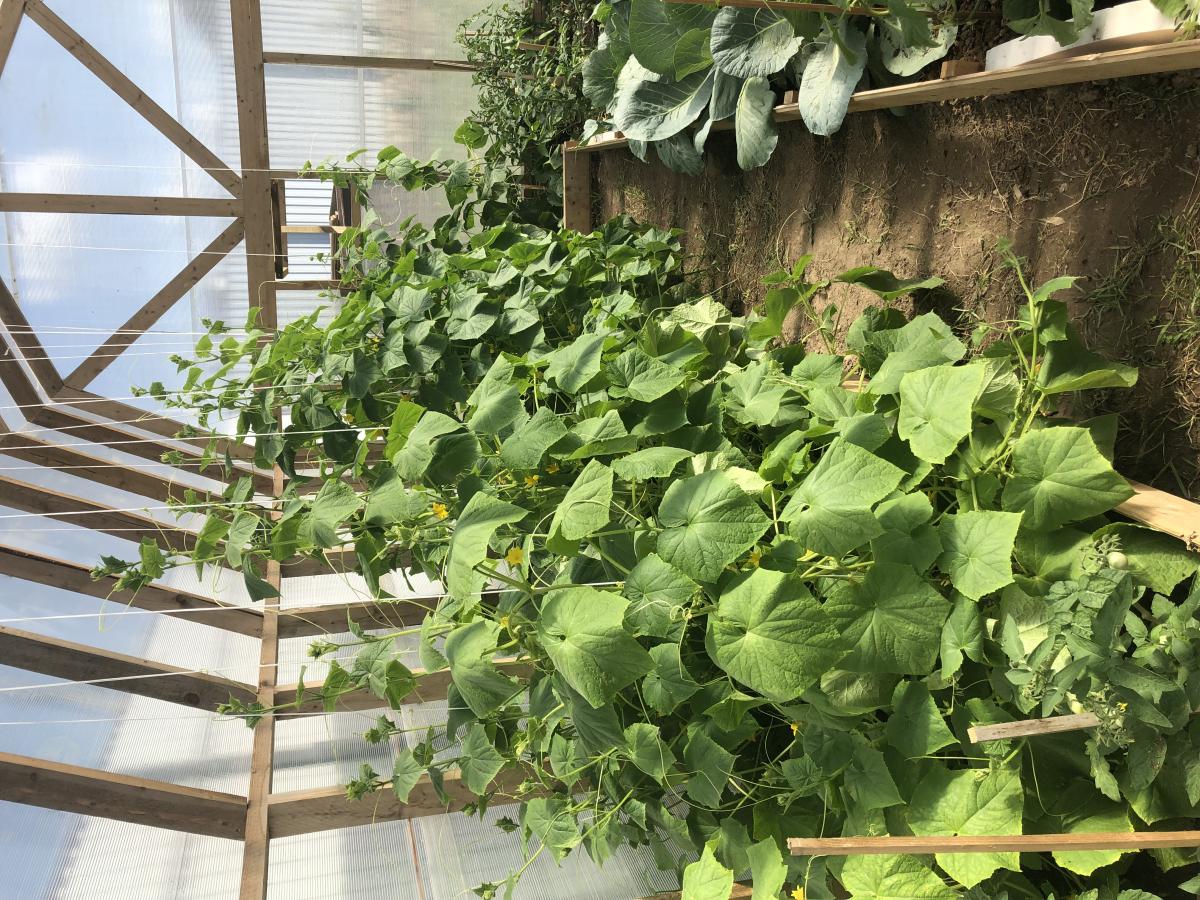
My First Greenhouse
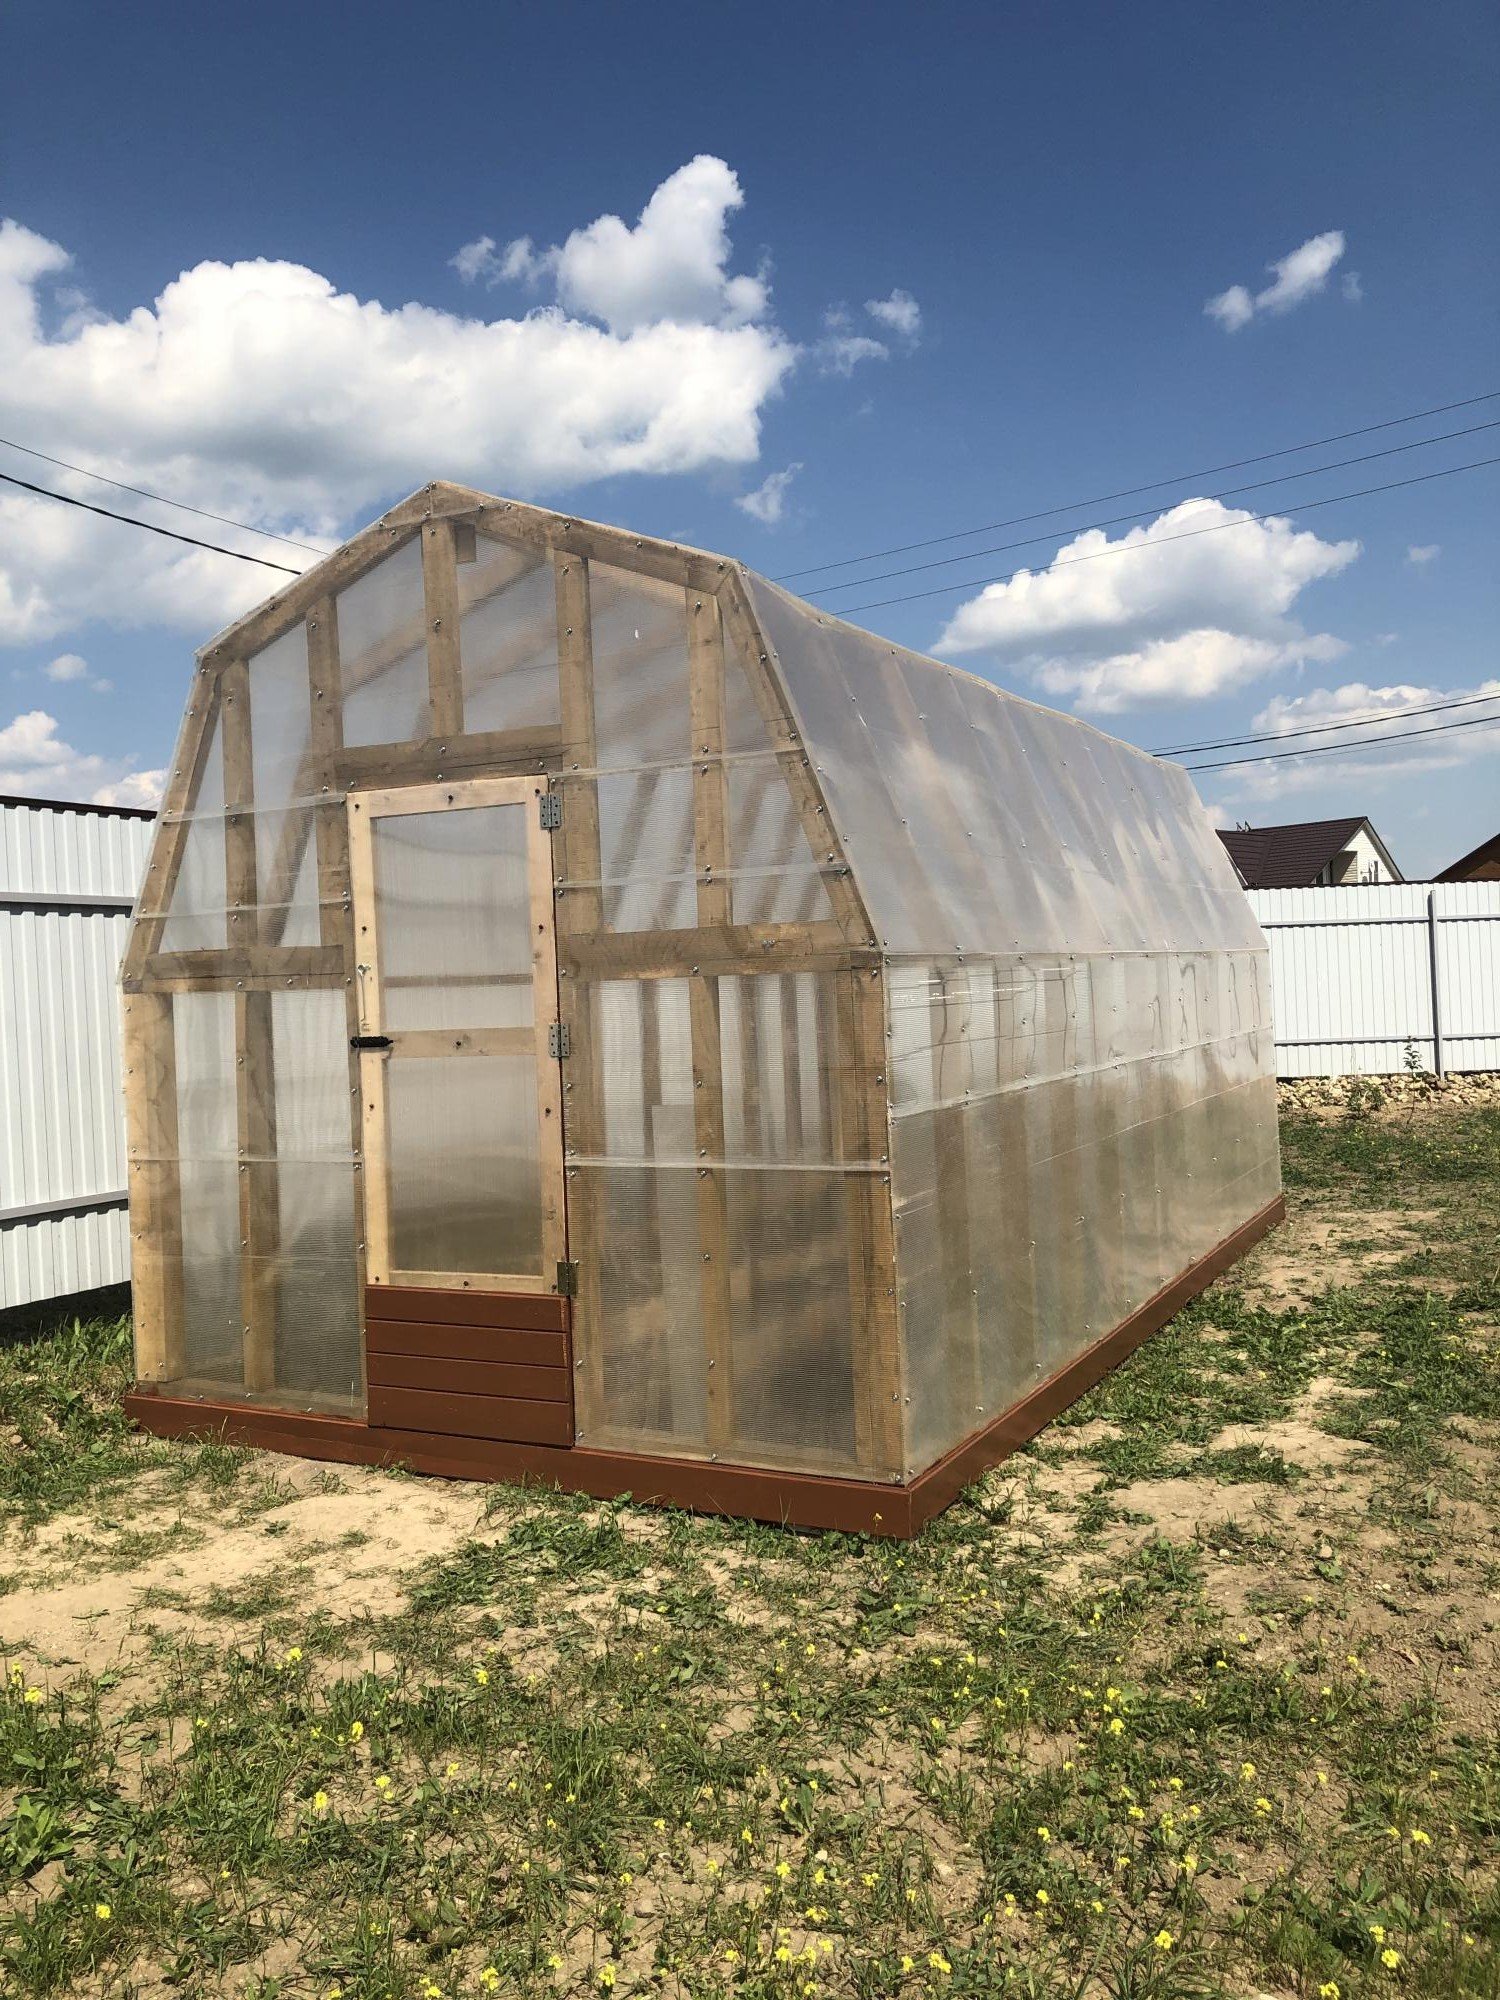
This was my first attempt at building a greenhouse. I wanted my cucumbers to be able t climb high so I made the house higher than the plans showed. It's also a little larger too. Since I am in Europe my dimensions are in meters. The overall size is 3 x 6 meters. I also built it on top of 100mm x 100mm lumber (the equivalent of 4x4's). It took 5 sheets of 6mm thick polycarbonate in 2 x 6 meters.
Built from Plan(s)
Estimated Time Investment
Week Long Project (20 Hours or More)
Recommended Skill Level
Intermediate
Comments
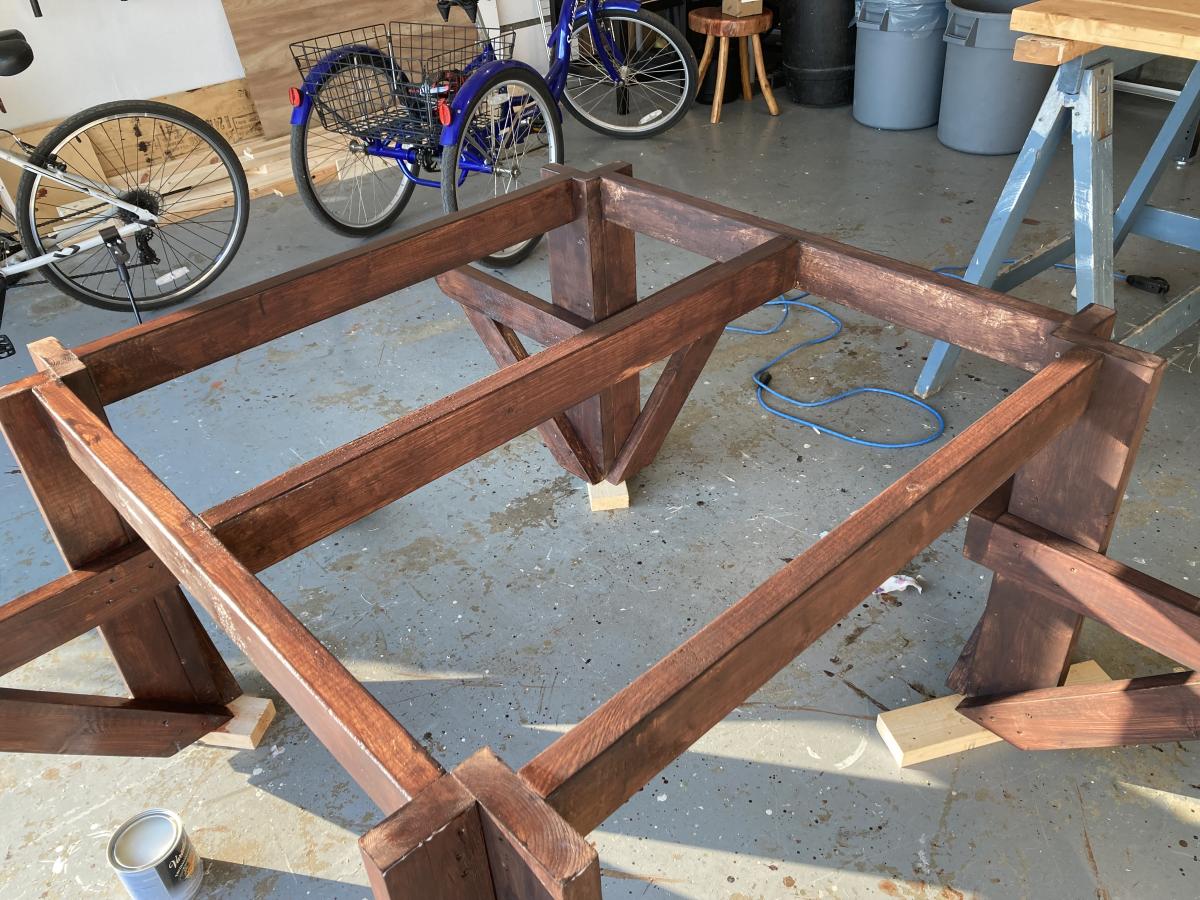
Square Picnic Table
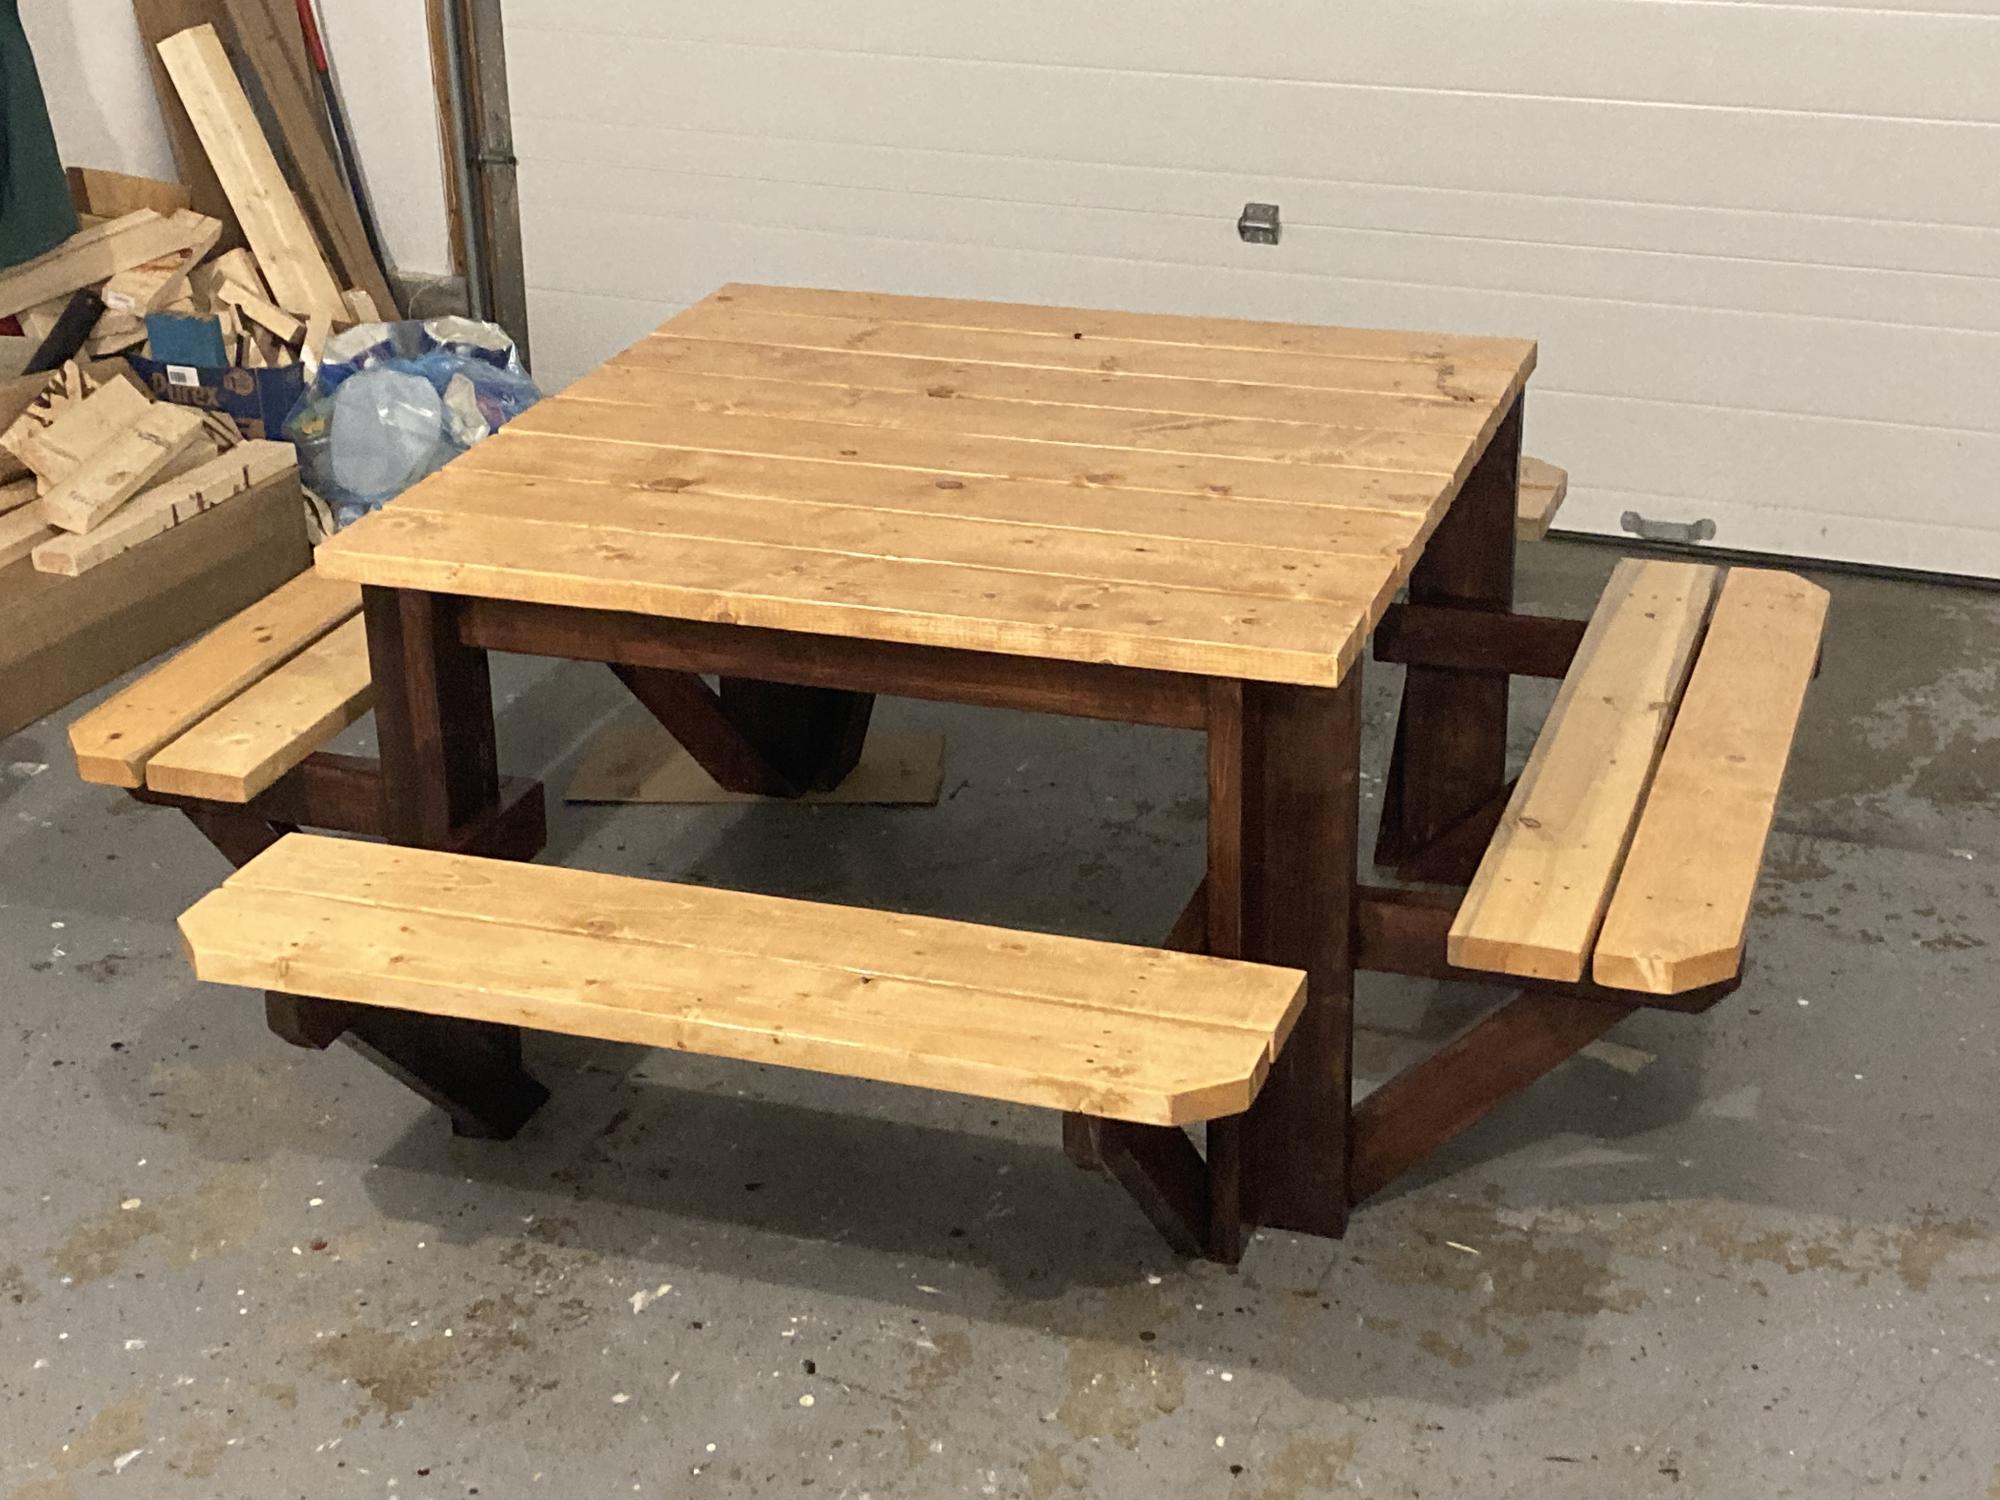
Enjoyed this project although with the price of lumber it was a little expensive to build. The only modification I made was to put a cross brace in the centre of the table top. That allowed me to attach the top boards a little more securely as some of them were a little bowed. I'll add a better photograph once I get it out of my garage and on to the back deck. It is a little heavy.
Built from Plan(s)
Estimated Cost
$240
Estimated Time Investment
Weekend Project (10-20 Hours)
Finish Used
I stained the dark part of the table with Behr water based English Chestnut and the seat and top with Minwax Ipswich Pine followed by four coats of Varathane Exterior Gloss.
Recommended Skill Level
Intermediate
Comments
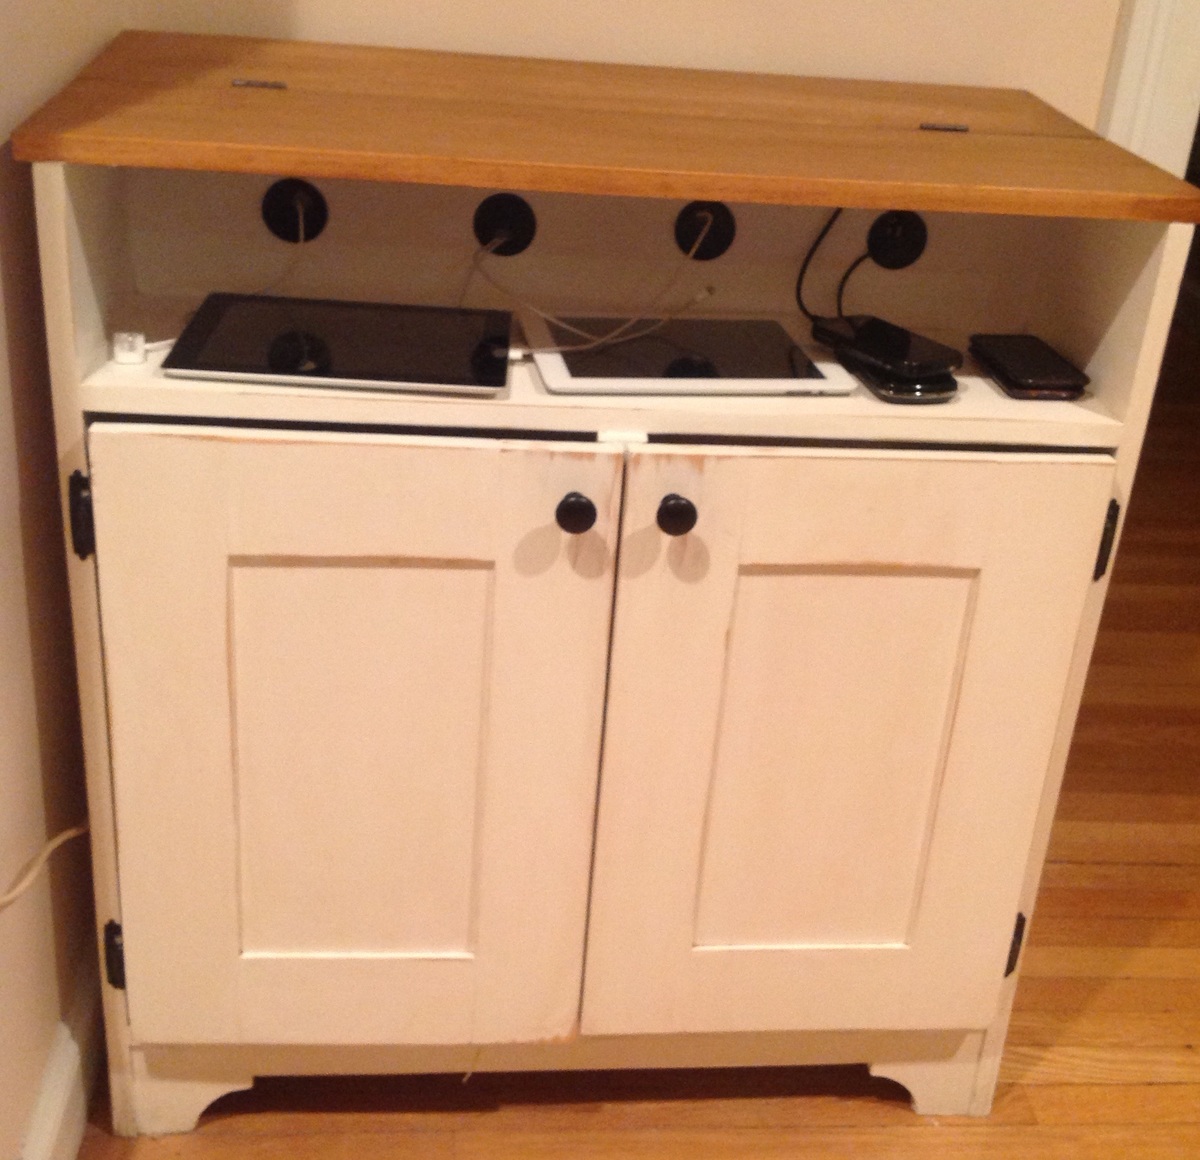
Charging table litter box
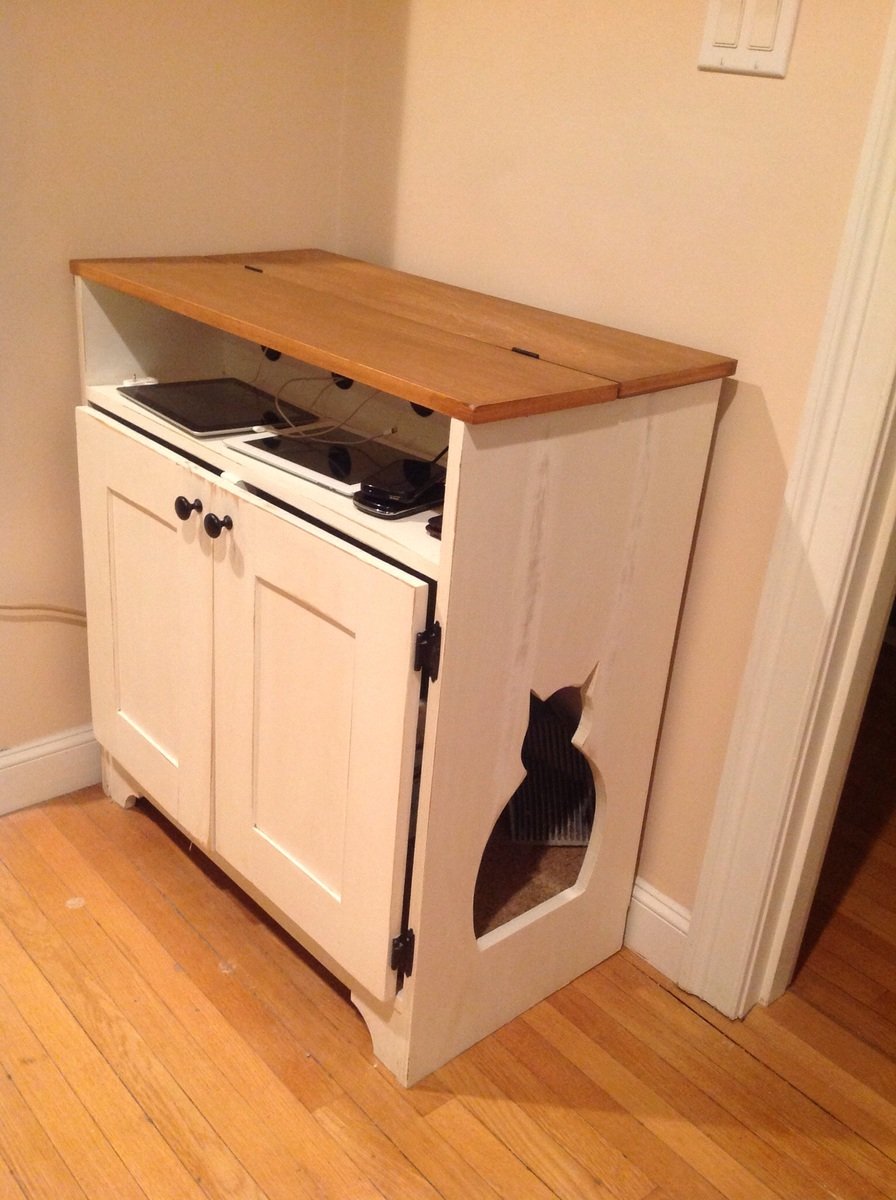
Adapted from plans for Bedside charging table. Made it taller and wider to accommodate a hidden litter box inside. Cut out a cat silhouette for entry through the side. Cabinet is big enough for litter box and extra litter and scoop. Antique painted white finish distressed by sanding and used a coffee glaze over it.
Built from Plan(s)
Estimated Cost
$100
Estimated Time Investment
Weekend Project (10-20 Hours)
Finish Used
White paint distressed the a coffee glaze to antique it.
Recommended Skill Level
Beginner
Comments

Mon, 03/23/2015 - 05:27
I love this! I especially
I love this! I especially love the little cat cut out :)

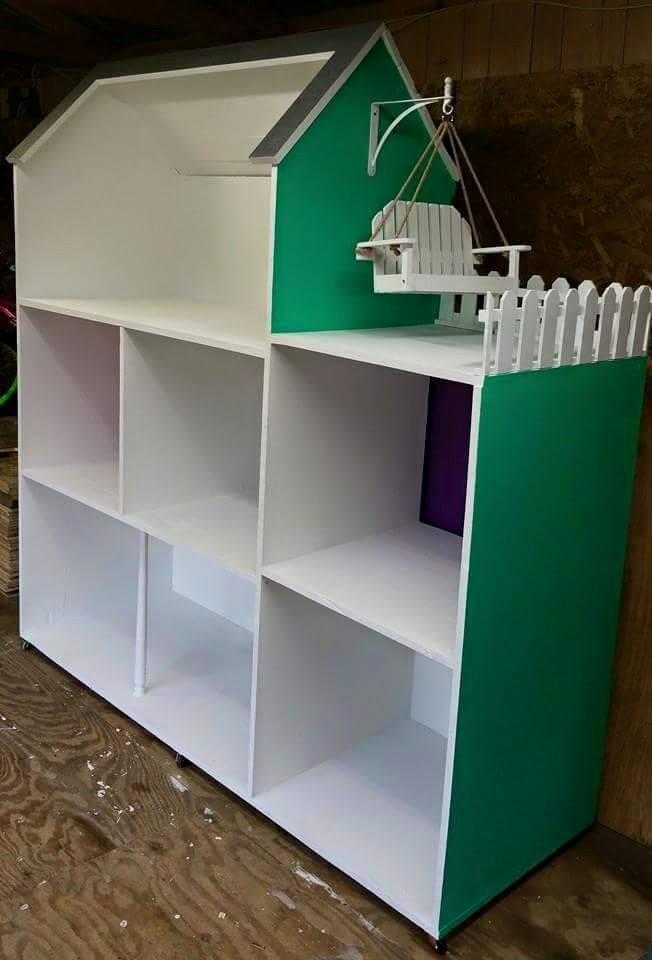
Three Story American Girl or 18" Dollhouse
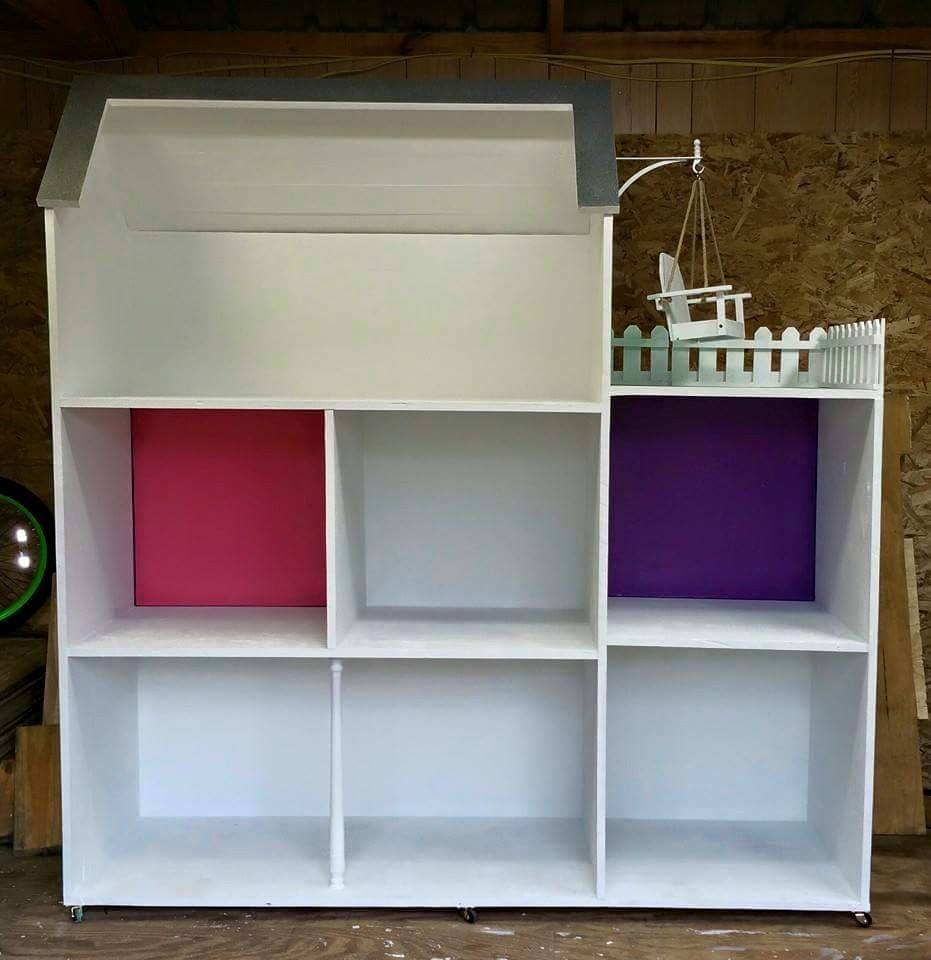
This was a blast to make, we added 2 roooms and a swing but every thing else was the same!
Finish Used
Paint/Primer
Recommended Skill Level
Beginner
Comments
Tue, 02/07/2017 - 08:07
Love your American girl
Love your American girl dollhouse, the swing on the side is so fun!!!
Fri, 04/17/2020 - 16:59
Love your house!! I can’t…
Love your house!! I can’t find the actual PLANS, though.):
Fri, 12/04/2020 - 10:07
3 story american girl Dollhouse
Do you make this & the exact replica with possibly a garage? I'm looking to buy 1 for my daughter for christmas?
Reading Fort
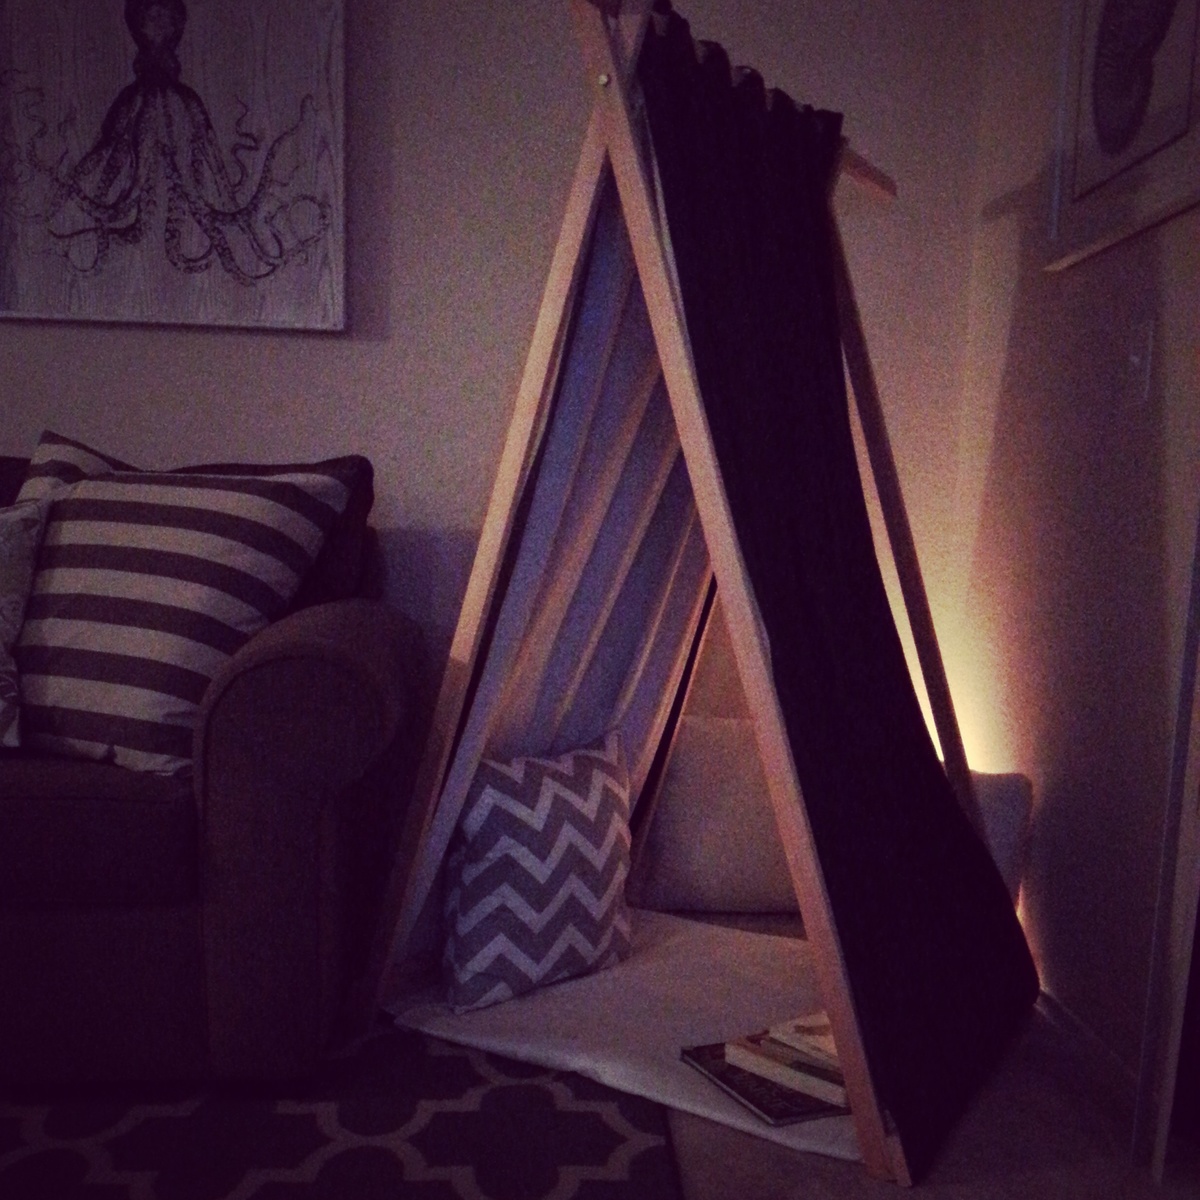
Super easy. Done in less than one hour. Used Target's Black-Out curtains.
Built from Plan(s)
Estimated Cost
$20
Estimated Time Investment
An Hour or Two (0-2 Hours)
Recommended Skill Level
Starter Project
Comments
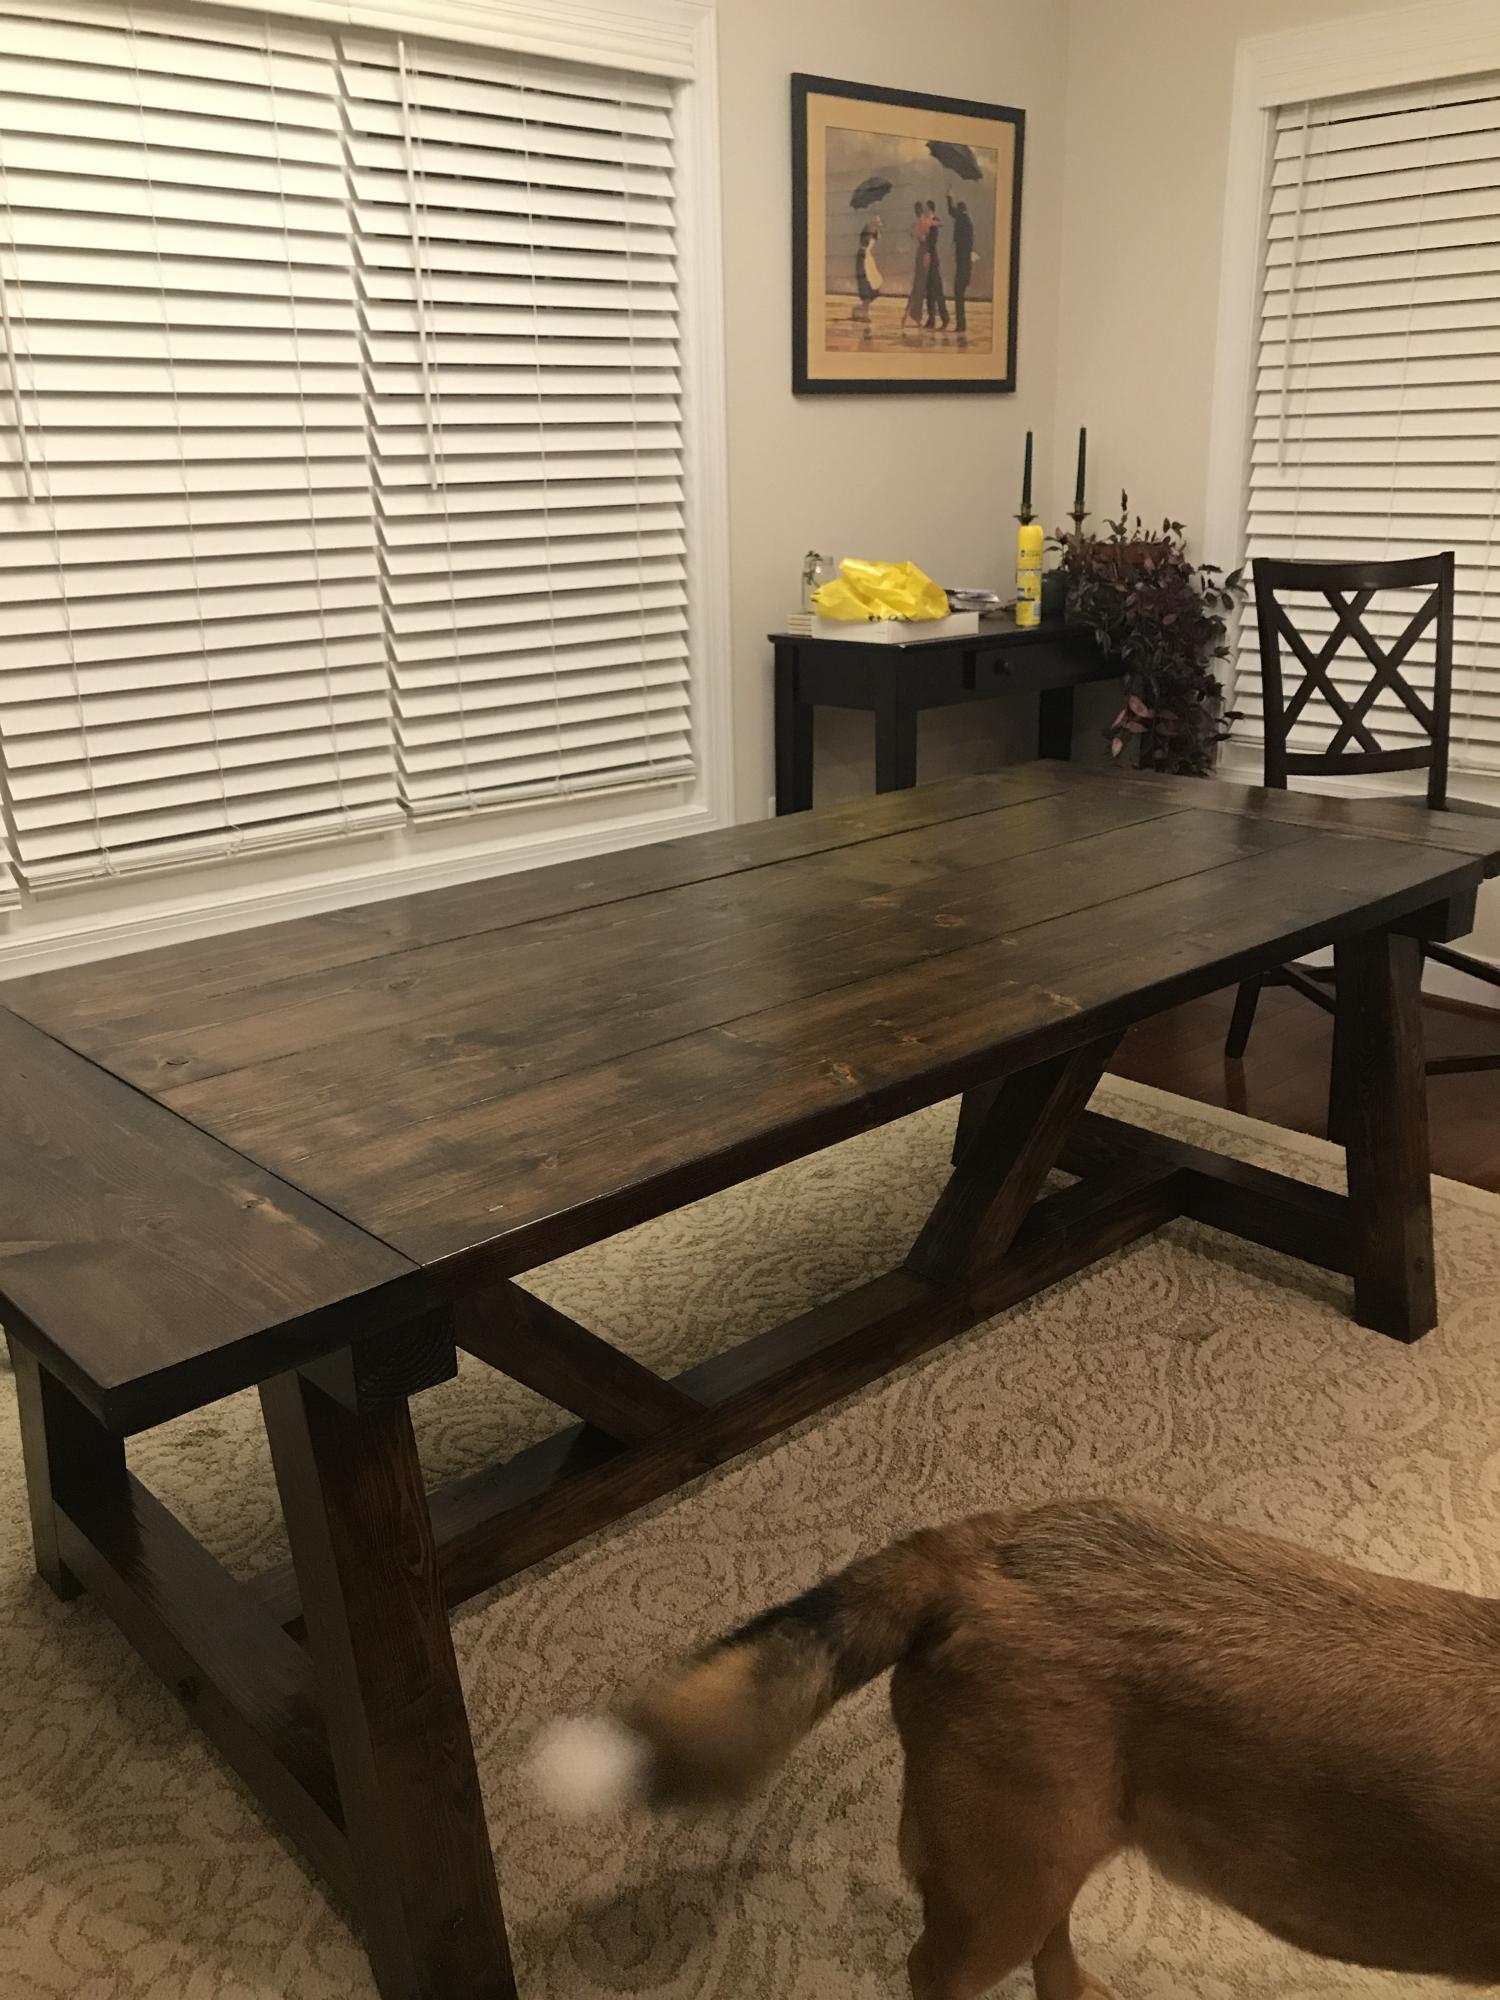
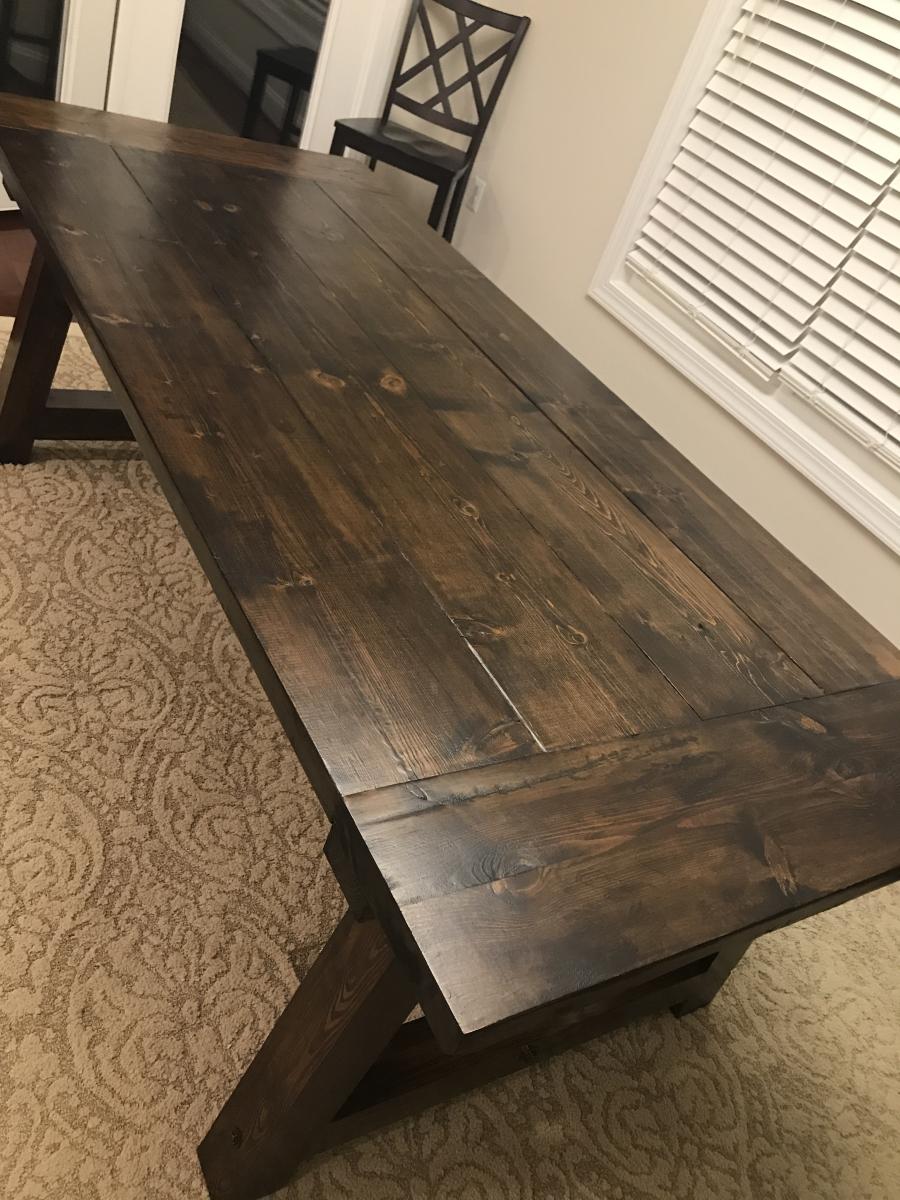
Farmhouse Table & Bench

I'm a novice furniture builder and felt I could tackle the Farmhouse Dining Room table and matching Farmhouse bench. With a lot of diligent detail work--especially sanding-my first two projects came out great. Because I was afraid to try the notching part of the plans, I decided to tweek the projects by attaching the stretcher boards with black cabinet screws. I achieved the rustic look I was looking for with both the table and bench!


Built from Plan(s)
Estimated Cost
$200.00
Estimated Time Investment
Week Long Project (20 Hours or More)
Finish Used
MinWax "Golden Oak Stain" and Rustoleum's no sand Satin polyurethane were great products!
I used a foam brush to apply the stain & immediately wiped off excess with a clean dry cloth as I was looking for a light oak color. I loved working with Rustoleum's polyurethane because there is no sanding required between coats. I used a good grade synthetic bristle brush to apply the polyurethane. Because I had never used a Kreg pocket hole jig (the $40 one)) before, I made sure to practice a lot before attempting. I also made sure each board was clamped down securely and used the fast speed on my Makita drill for doing the pocket holes. I used the slow speed setting when screwing in the pocket hole screws. I used the plans for the 84-inch long table and long bench and made sure to ask my husband for help with the circular saw. I also watched a lot of videos on how to use a circular saw safely. Both my husband's help and the videos assisted me in feeling more comfortable with the circular saw. The 2x8 boards were super heavy for me (I'm 5'5" and 62 years old) and once I had all the boards securely put together & the frame was attached, I needed help to turn the table upright. Most importantly, I worked slowly and carefully.
I used a foam brush to apply the stain & immediately wiped off excess with a clean dry cloth as I was looking for a light oak color. I loved working with Rustoleum's polyurethane because there is no sanding required between coats. I used a good grade synthetic bristle brush to apply the polyurethane. Because I had never used a Kreg pocket hole jig (the $40 one)) before, I made sure to practice a lot before attempting. I also made sure each board was clamped down securely and used the fast speed on my Makita drill for doing the pocket holes. I used the slow speed setting when screwing in the pocket hole screws. I used the plans for the 84-inch long table and long bench and made sure to ask my husband for help with the circular saw. I also watched a lot of videos on how to use a circular saw safely. Both my husband's help and the videos assisted me in feeling more comfortable with the circular saw. The 2x8 boards were super heavy for me (I'm 5'5" and 62 years old) and once I had all the boards securely put together & the frame was attached, I needed help to turn the table upright. Most importantly, I worked slowly and carefully.
Recommended Skill Level
Starter Project
4x4 Truss Table
Took us about a week but have two young toddlers... love the table. Awaiting Chairs from wayfair and my husband is starting the bench this week!
Built from Plan(s)
Estimated Cost
$200
Estimated Time Investment
Week Long Project (20 Hours or More)
Finish Used
Dark walnut
Recommended Skill Level
Beginner
Adirondack Chairs for fire pit
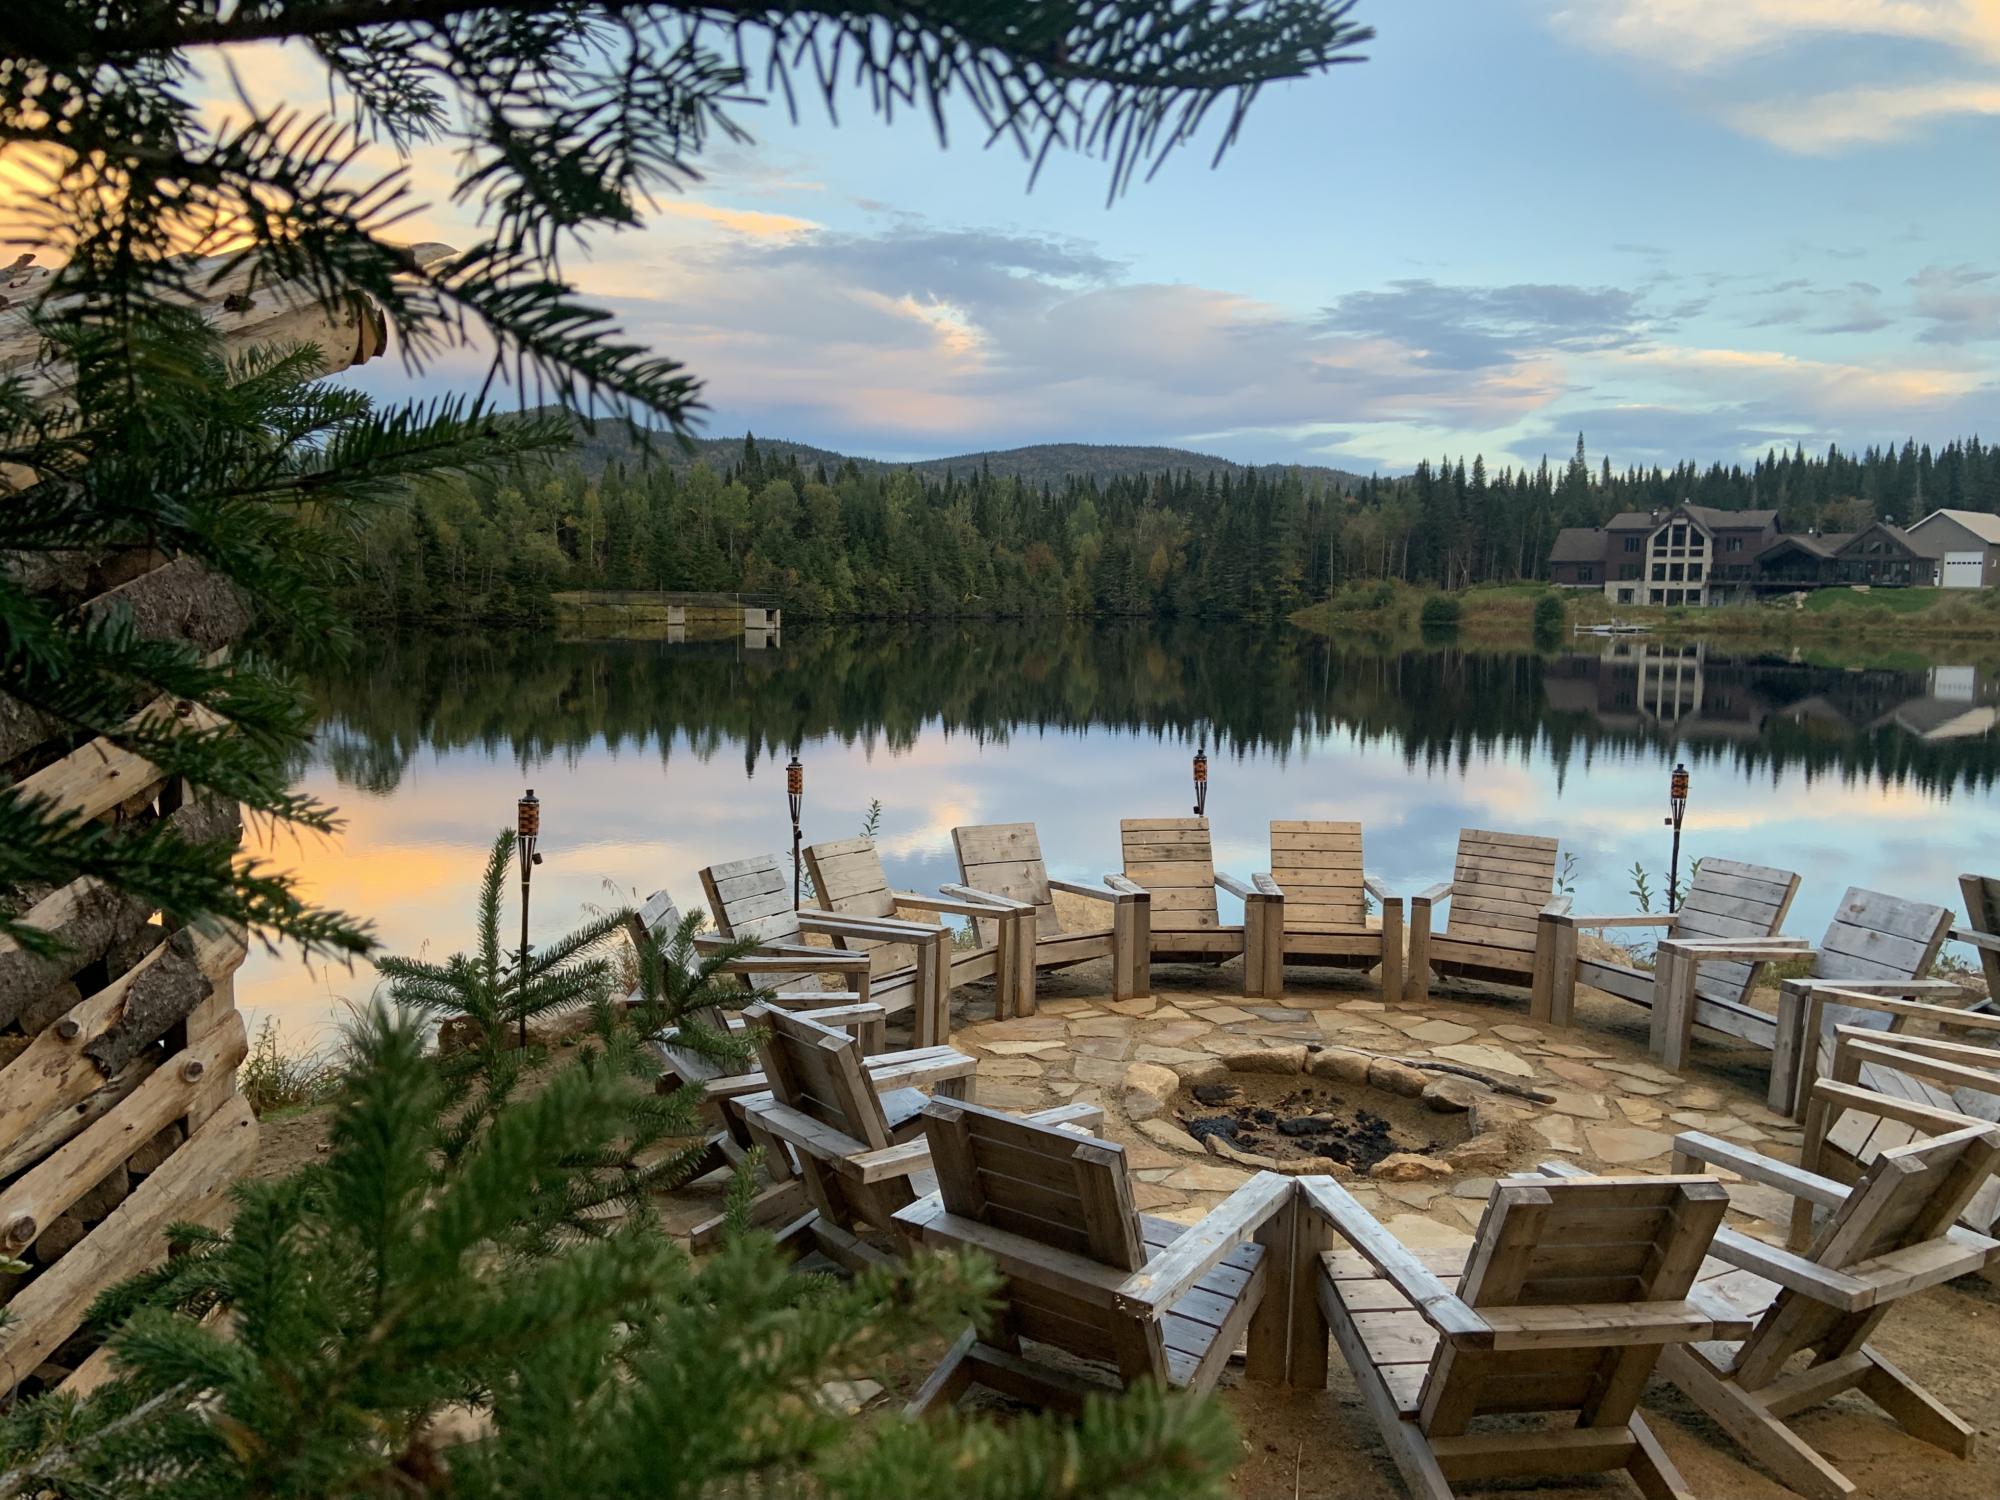
We have a contemporary house on a lake and the standard Adirondack chairs were not fitting in this setup. However, Anna’s modern Adirondack chair plan was just perfect for what we were looking for. The chairs are comfortable and the result is amazing! Thanks!!
Built from Plan(s)
Comments
Dining Table

Used the pub table plans, but went regular dining table height so as to make matching dining chairs. Painted in Rustoleum Latex Ultra White, and Stained in Minwax Espresso. Built using Douglas Fir lumber. Table top and chair seats are 2x4's and 2x6's that were biscuit joined. Table has adjustable leg levelers drilled into bottom of legs.
Built from Plan(s)
Estimated Cost
$200 for Table and 4 matched chairs
Estimated Time Investment
Weekend Project (10-20 Hours)
Finish Used
Rustoleum Ultra White paint, Minwax Espresso stain, Minwax Gloss Fastdry poly
Recommended Skill Level
Intermediate
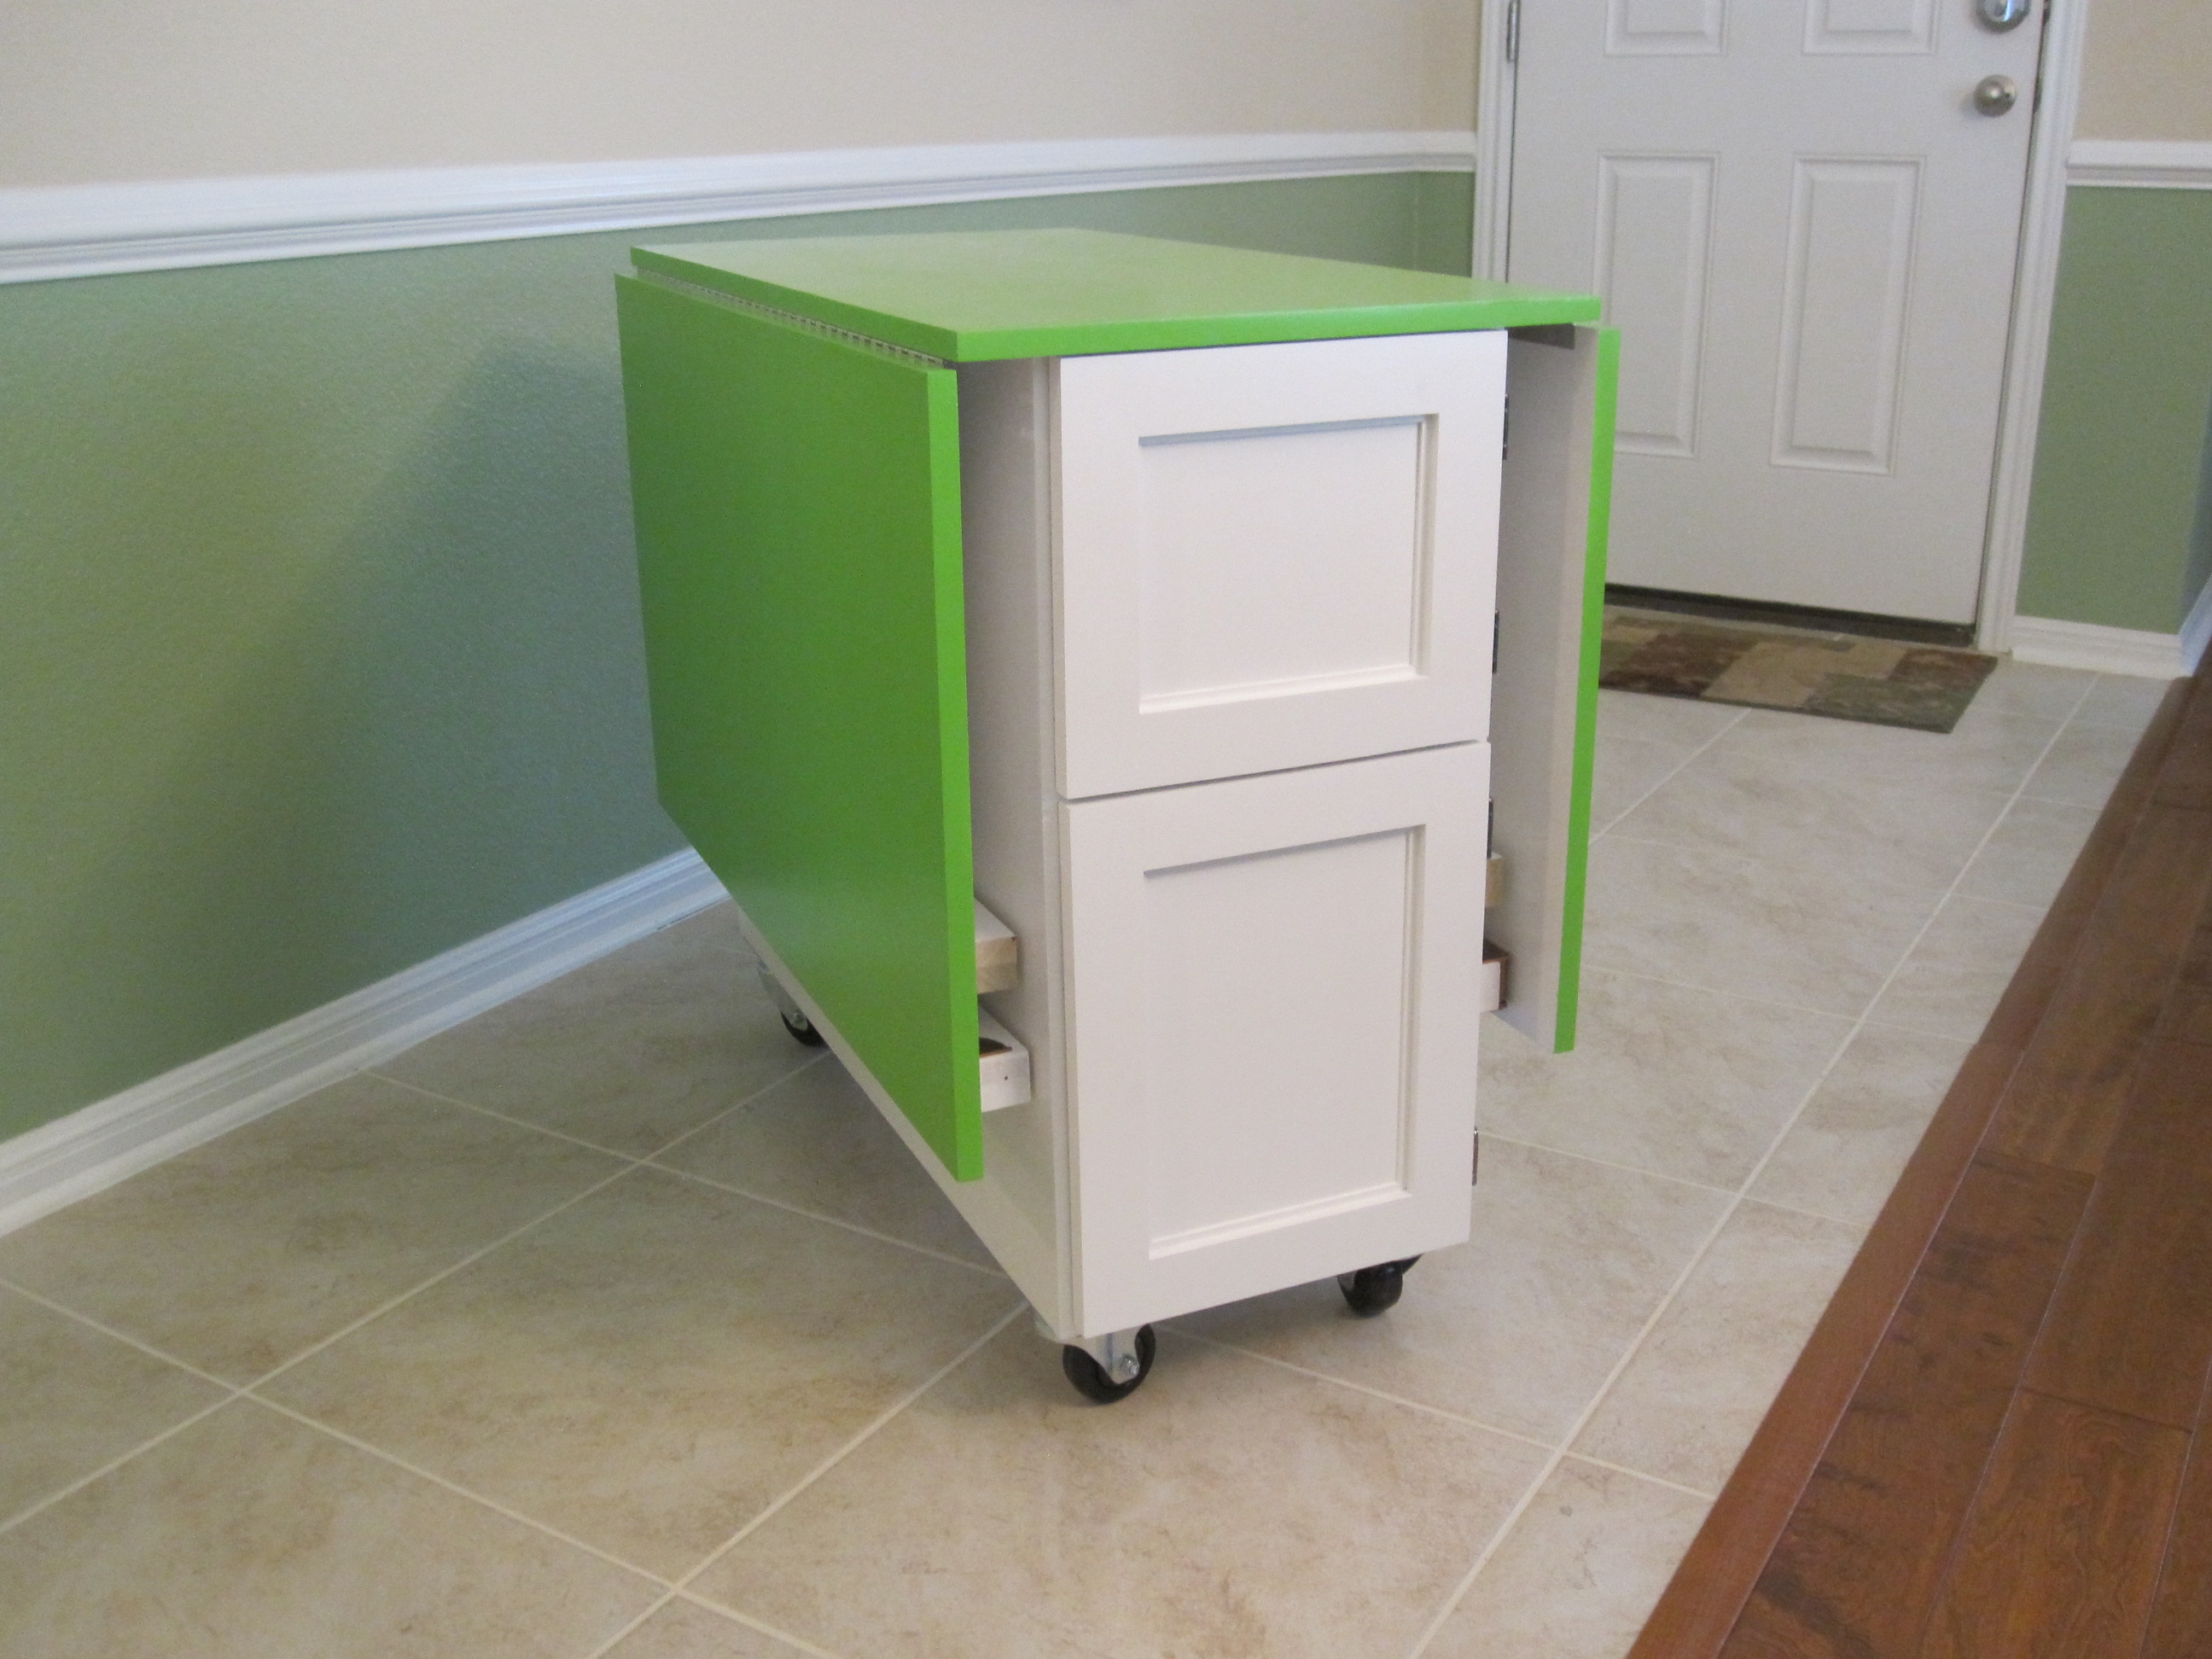
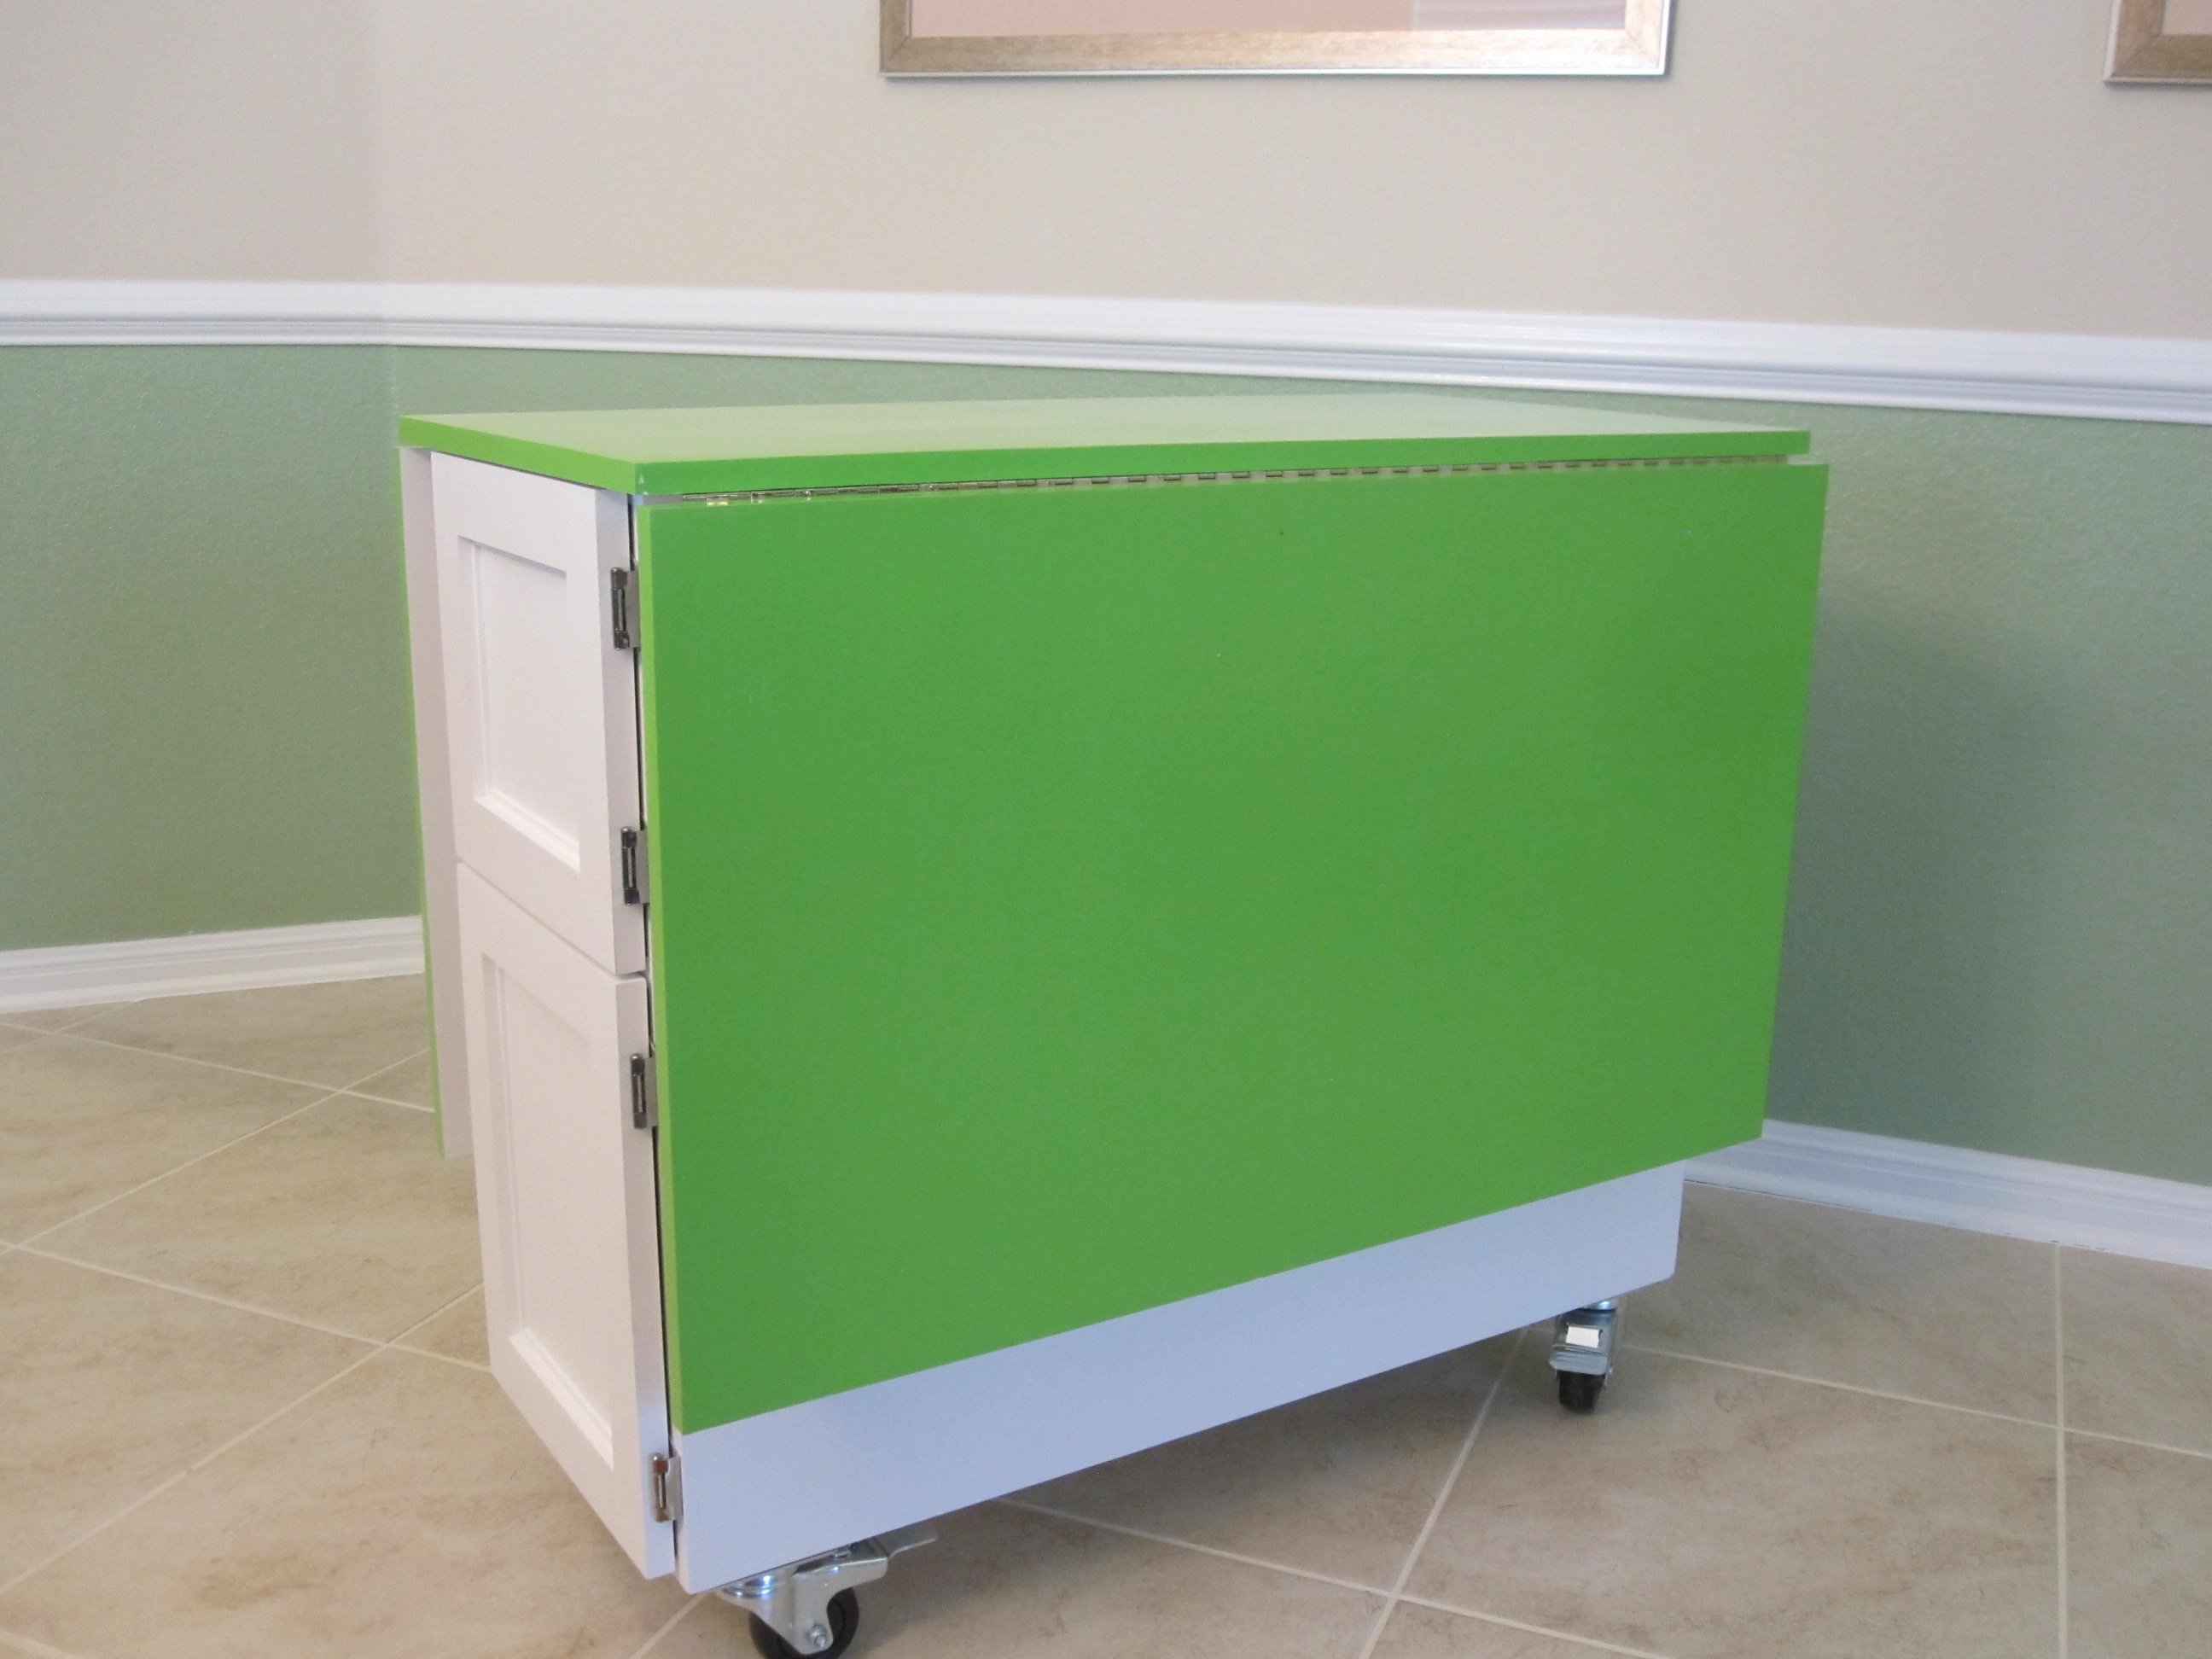
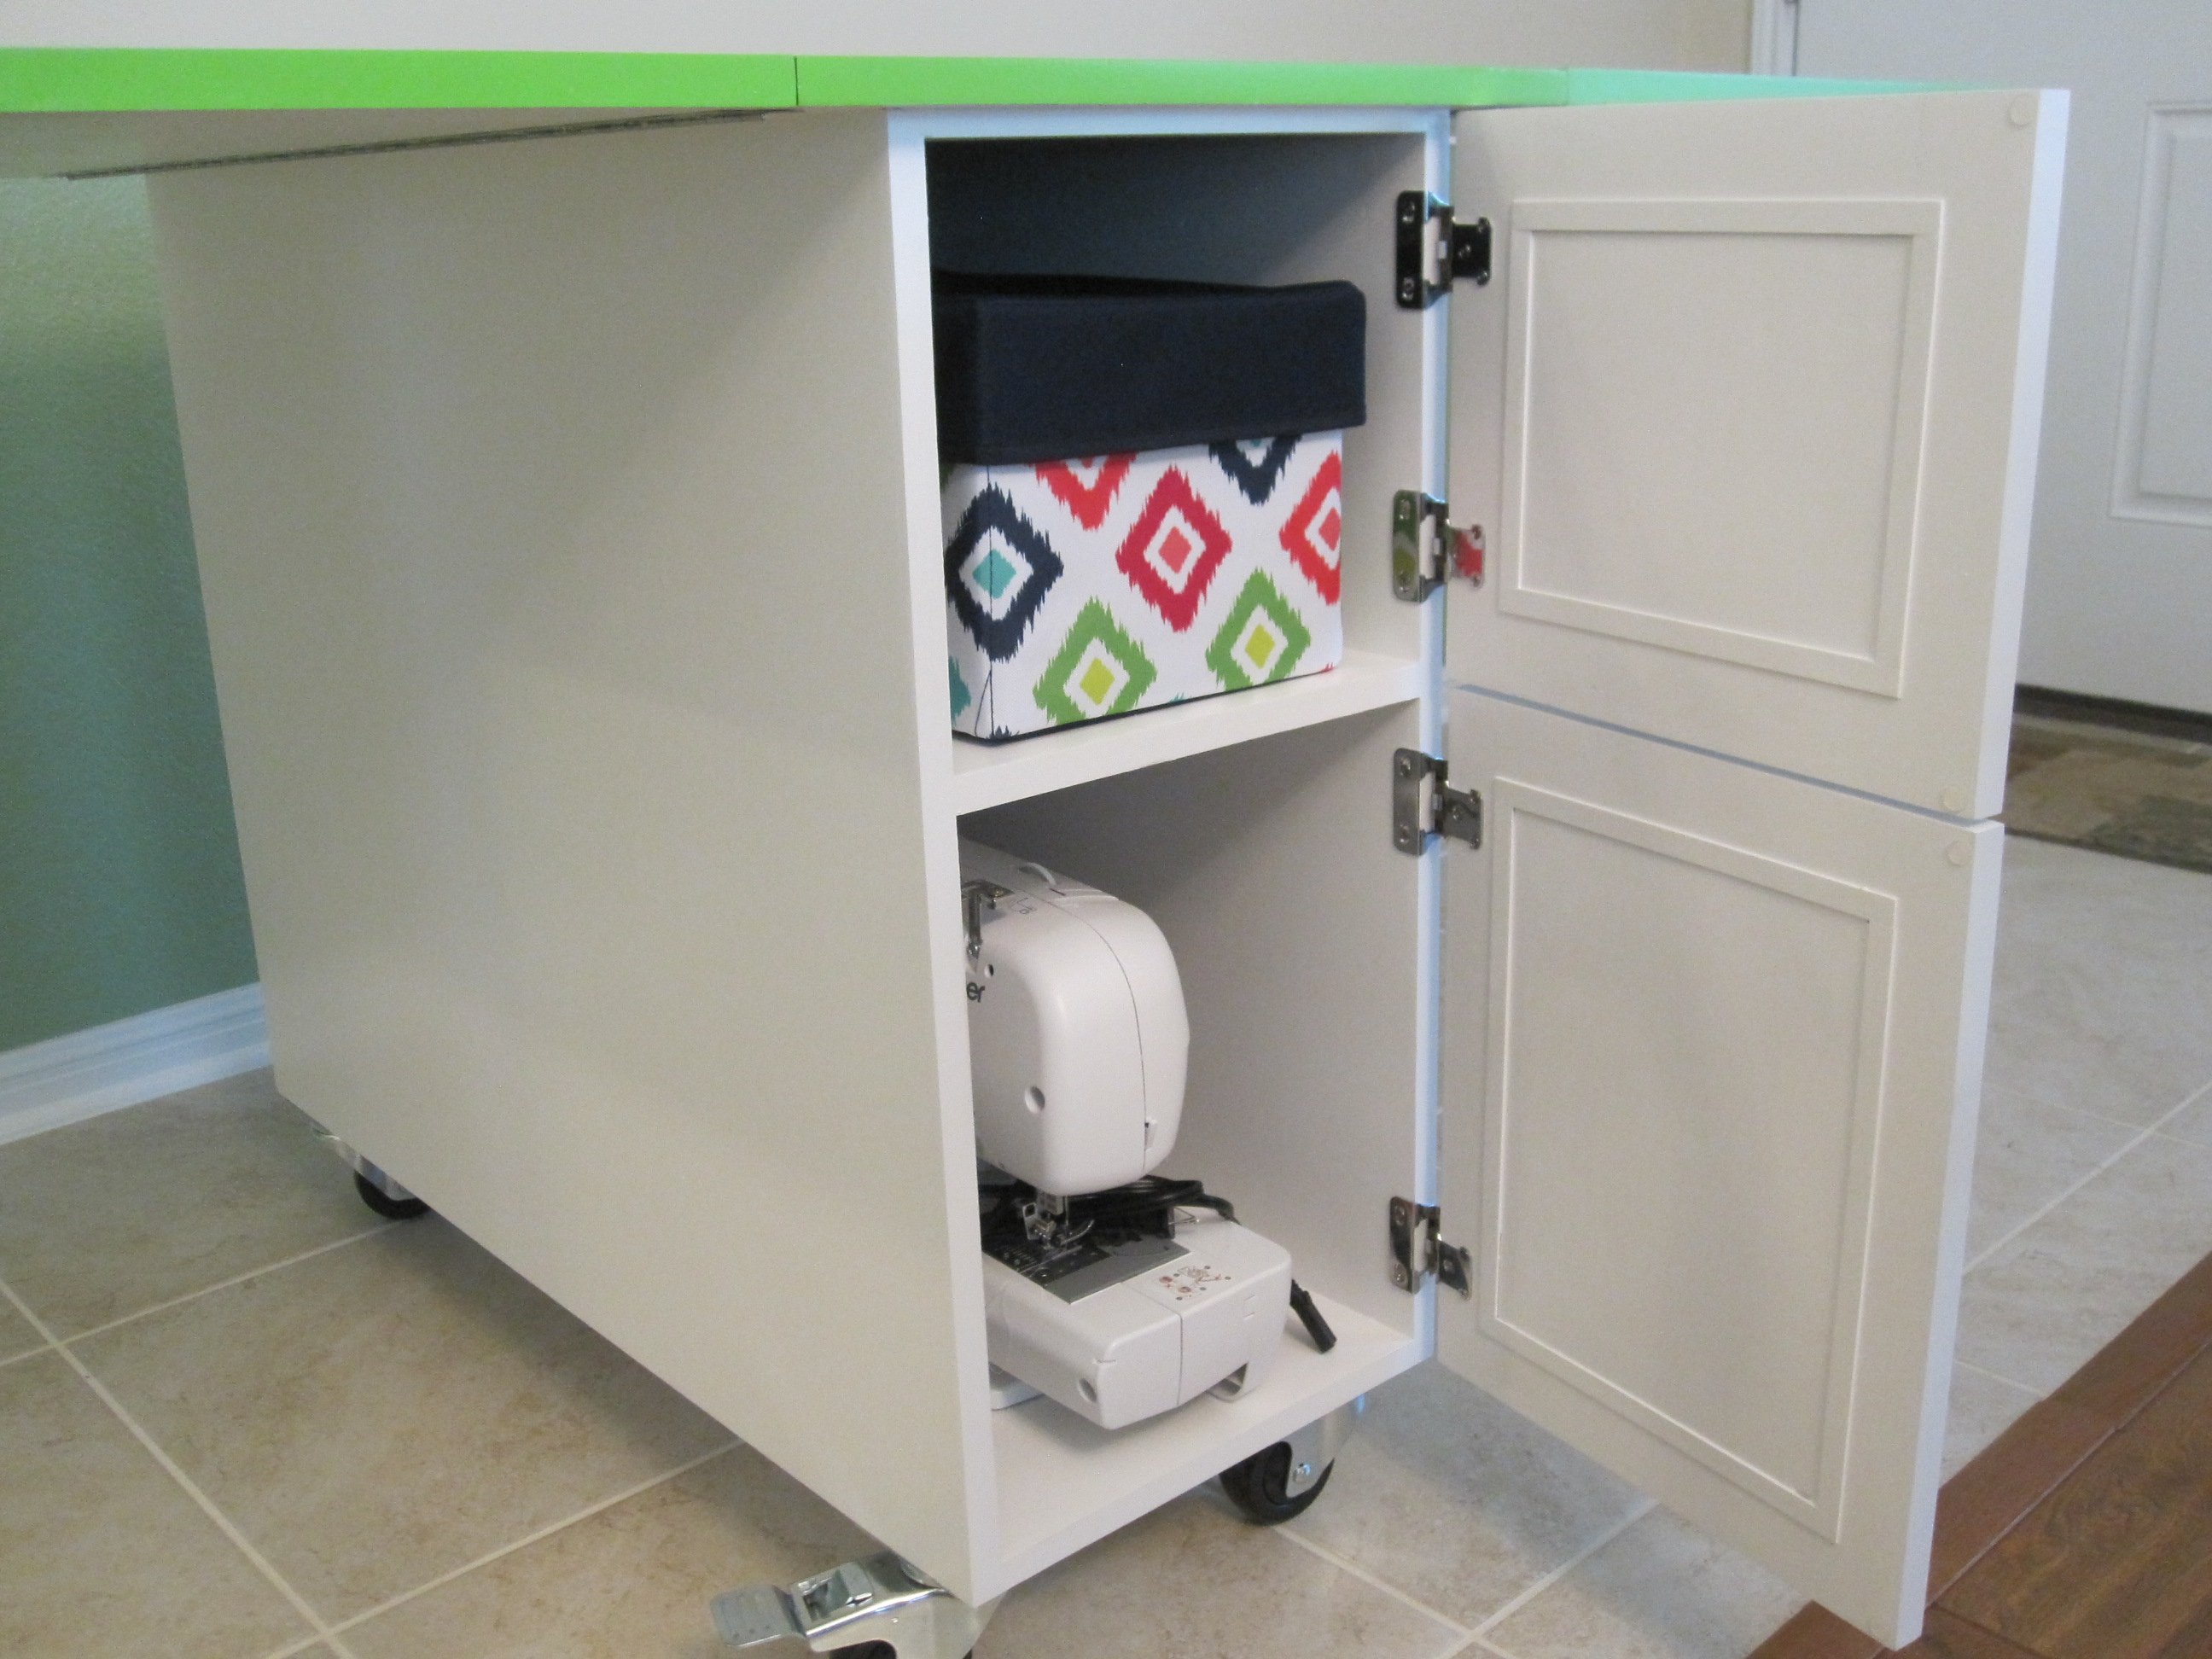
DIY Folding Workbench
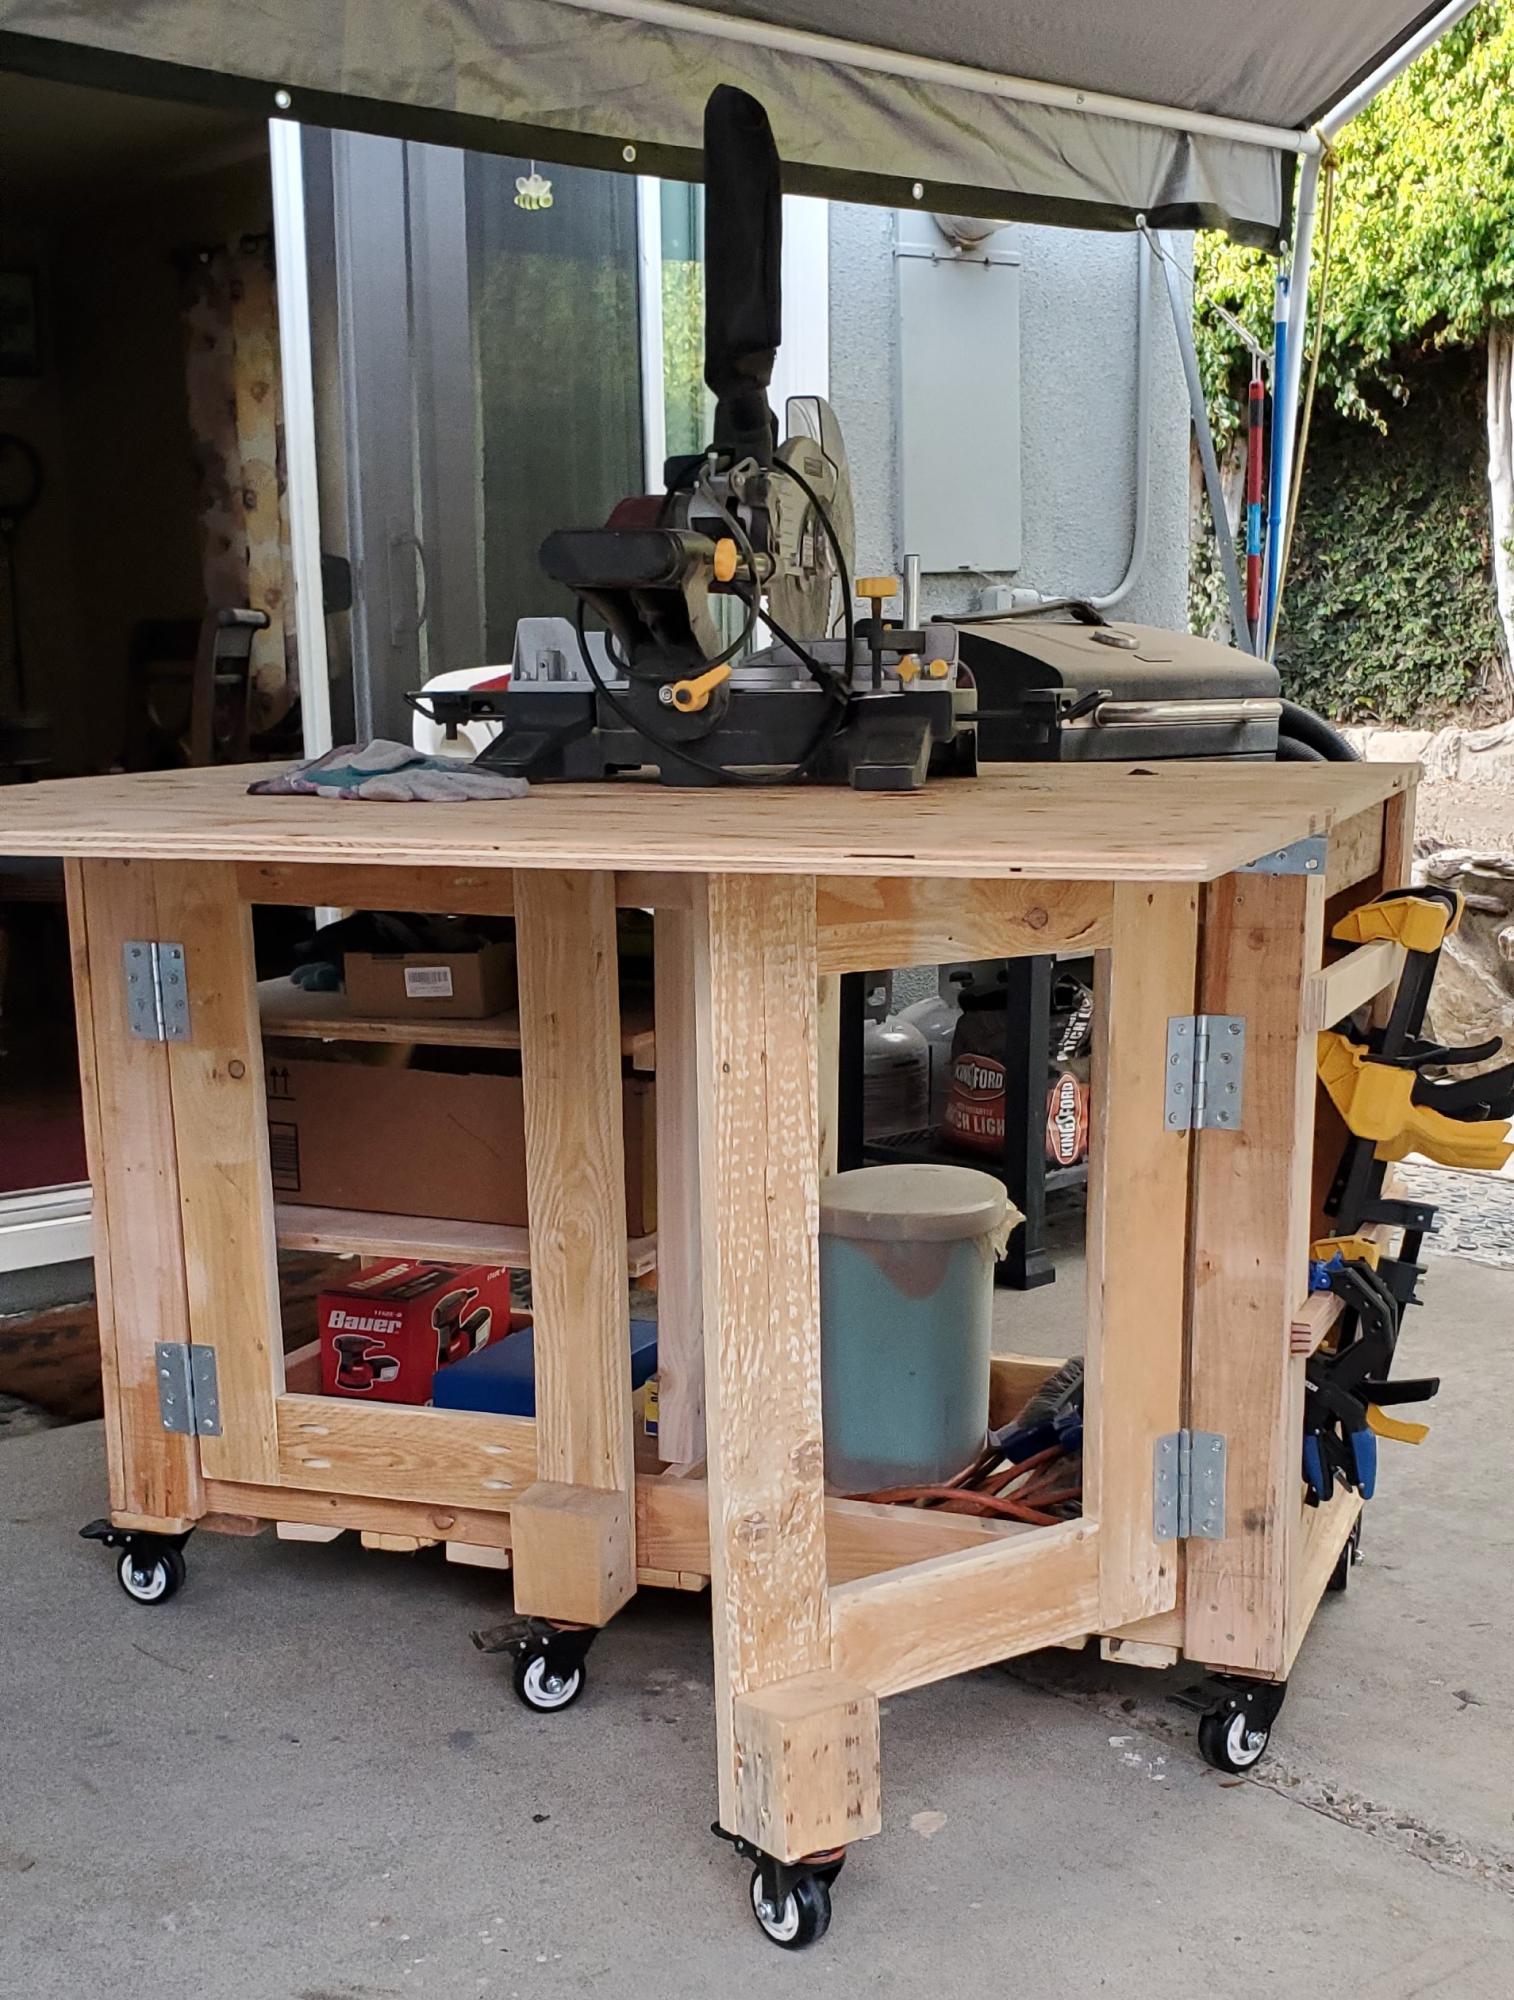
I'm a beginner DIYer and I knew one day I was going to have to make a workbench. I made mine 24x48 so I wanted a little more support to hold up the drop down leaf. I searched your site and found another plan with these gatelegs and knew this is what I wanted. I love the way it came out. What do you think?
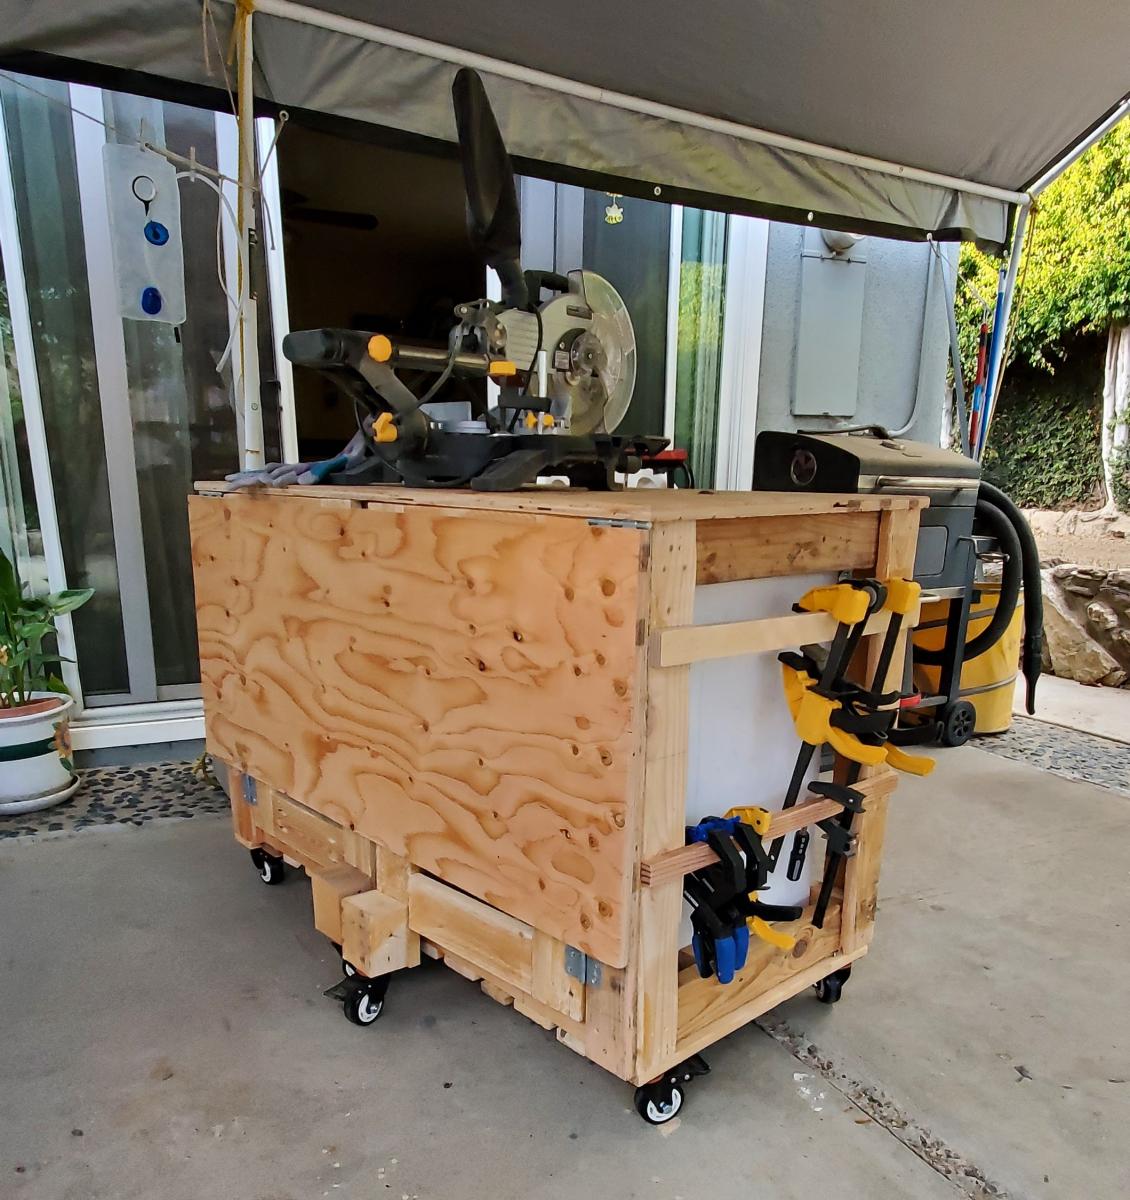
Built from Plan(s)
Comments
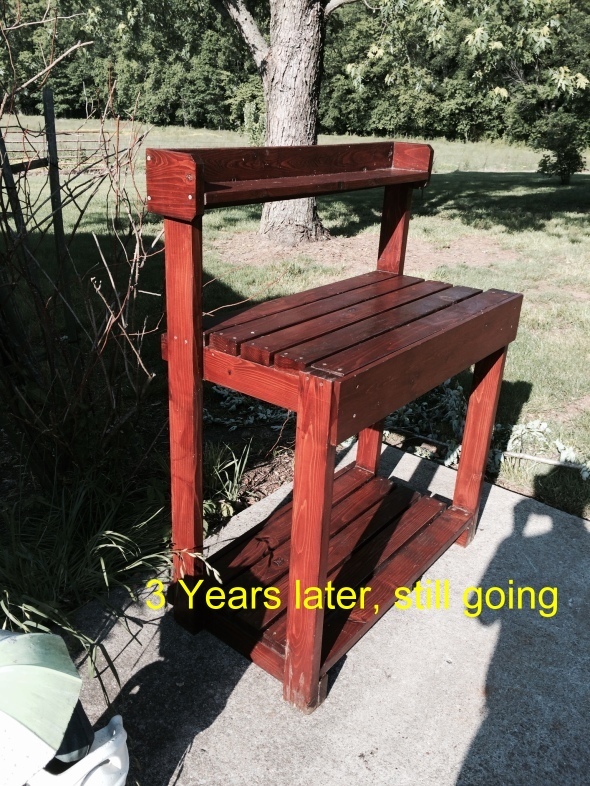
Potting Bench
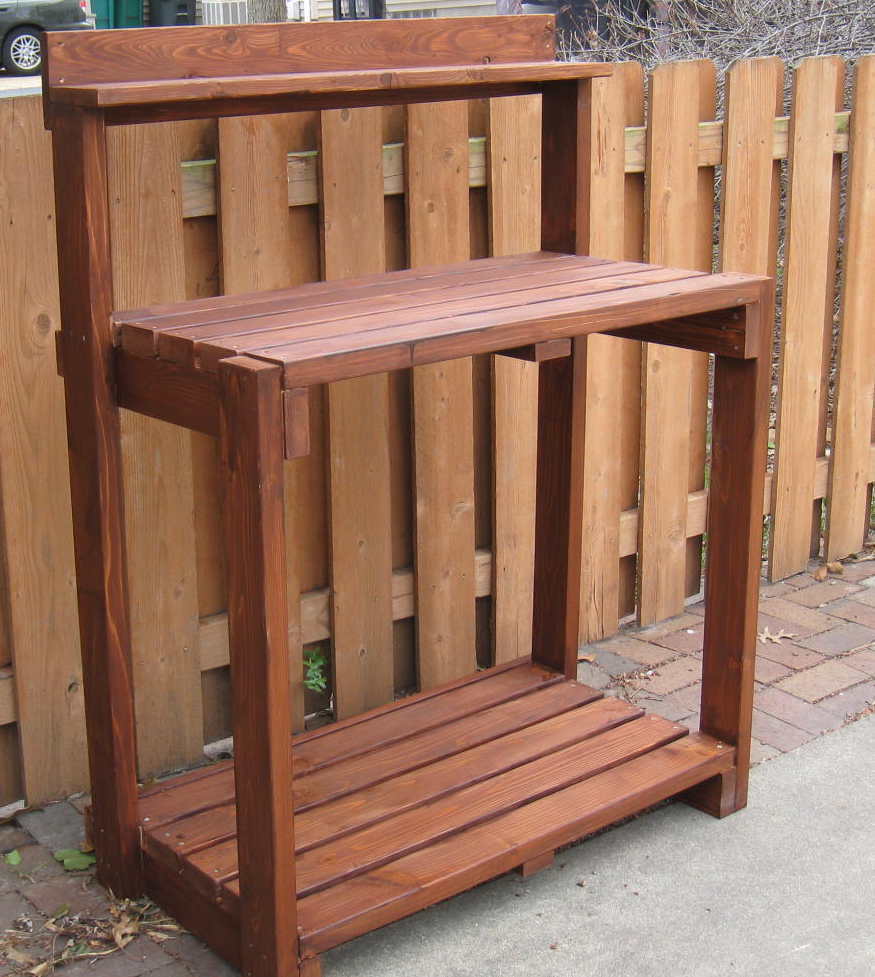
The plans are great. This went together really fast. I am cheating a little here, it is not quite complete; I need to add the side blocks on top and my wife would like a another panel added to the front at work height level, just for looks. But the overall look won't be changed. I struggled some with finishing (I usually do). A couple spots have runs I didn't see. One will be covered by the front panel I'll add,but another needs sanding.
Just for fun I added a picture of the bench 3 years later. Its held up well to a lot of use and a lot of sitting out in the elements.
Built from Plan(s)
Estimated Cost
$100
Estimated Time Investment
Weekend Project (10-20 Hours)
Finish Used
General Finishes Cedar Exterior 450 Water based stain. I was going to add a spar varnish to extend the life. I decided against that because while it likely would extend the life, I would have to strip it to re-stain. After a couple years, I can simply re-stain without stripping if I don't varnish.
Recommended Skill Level
Beginner
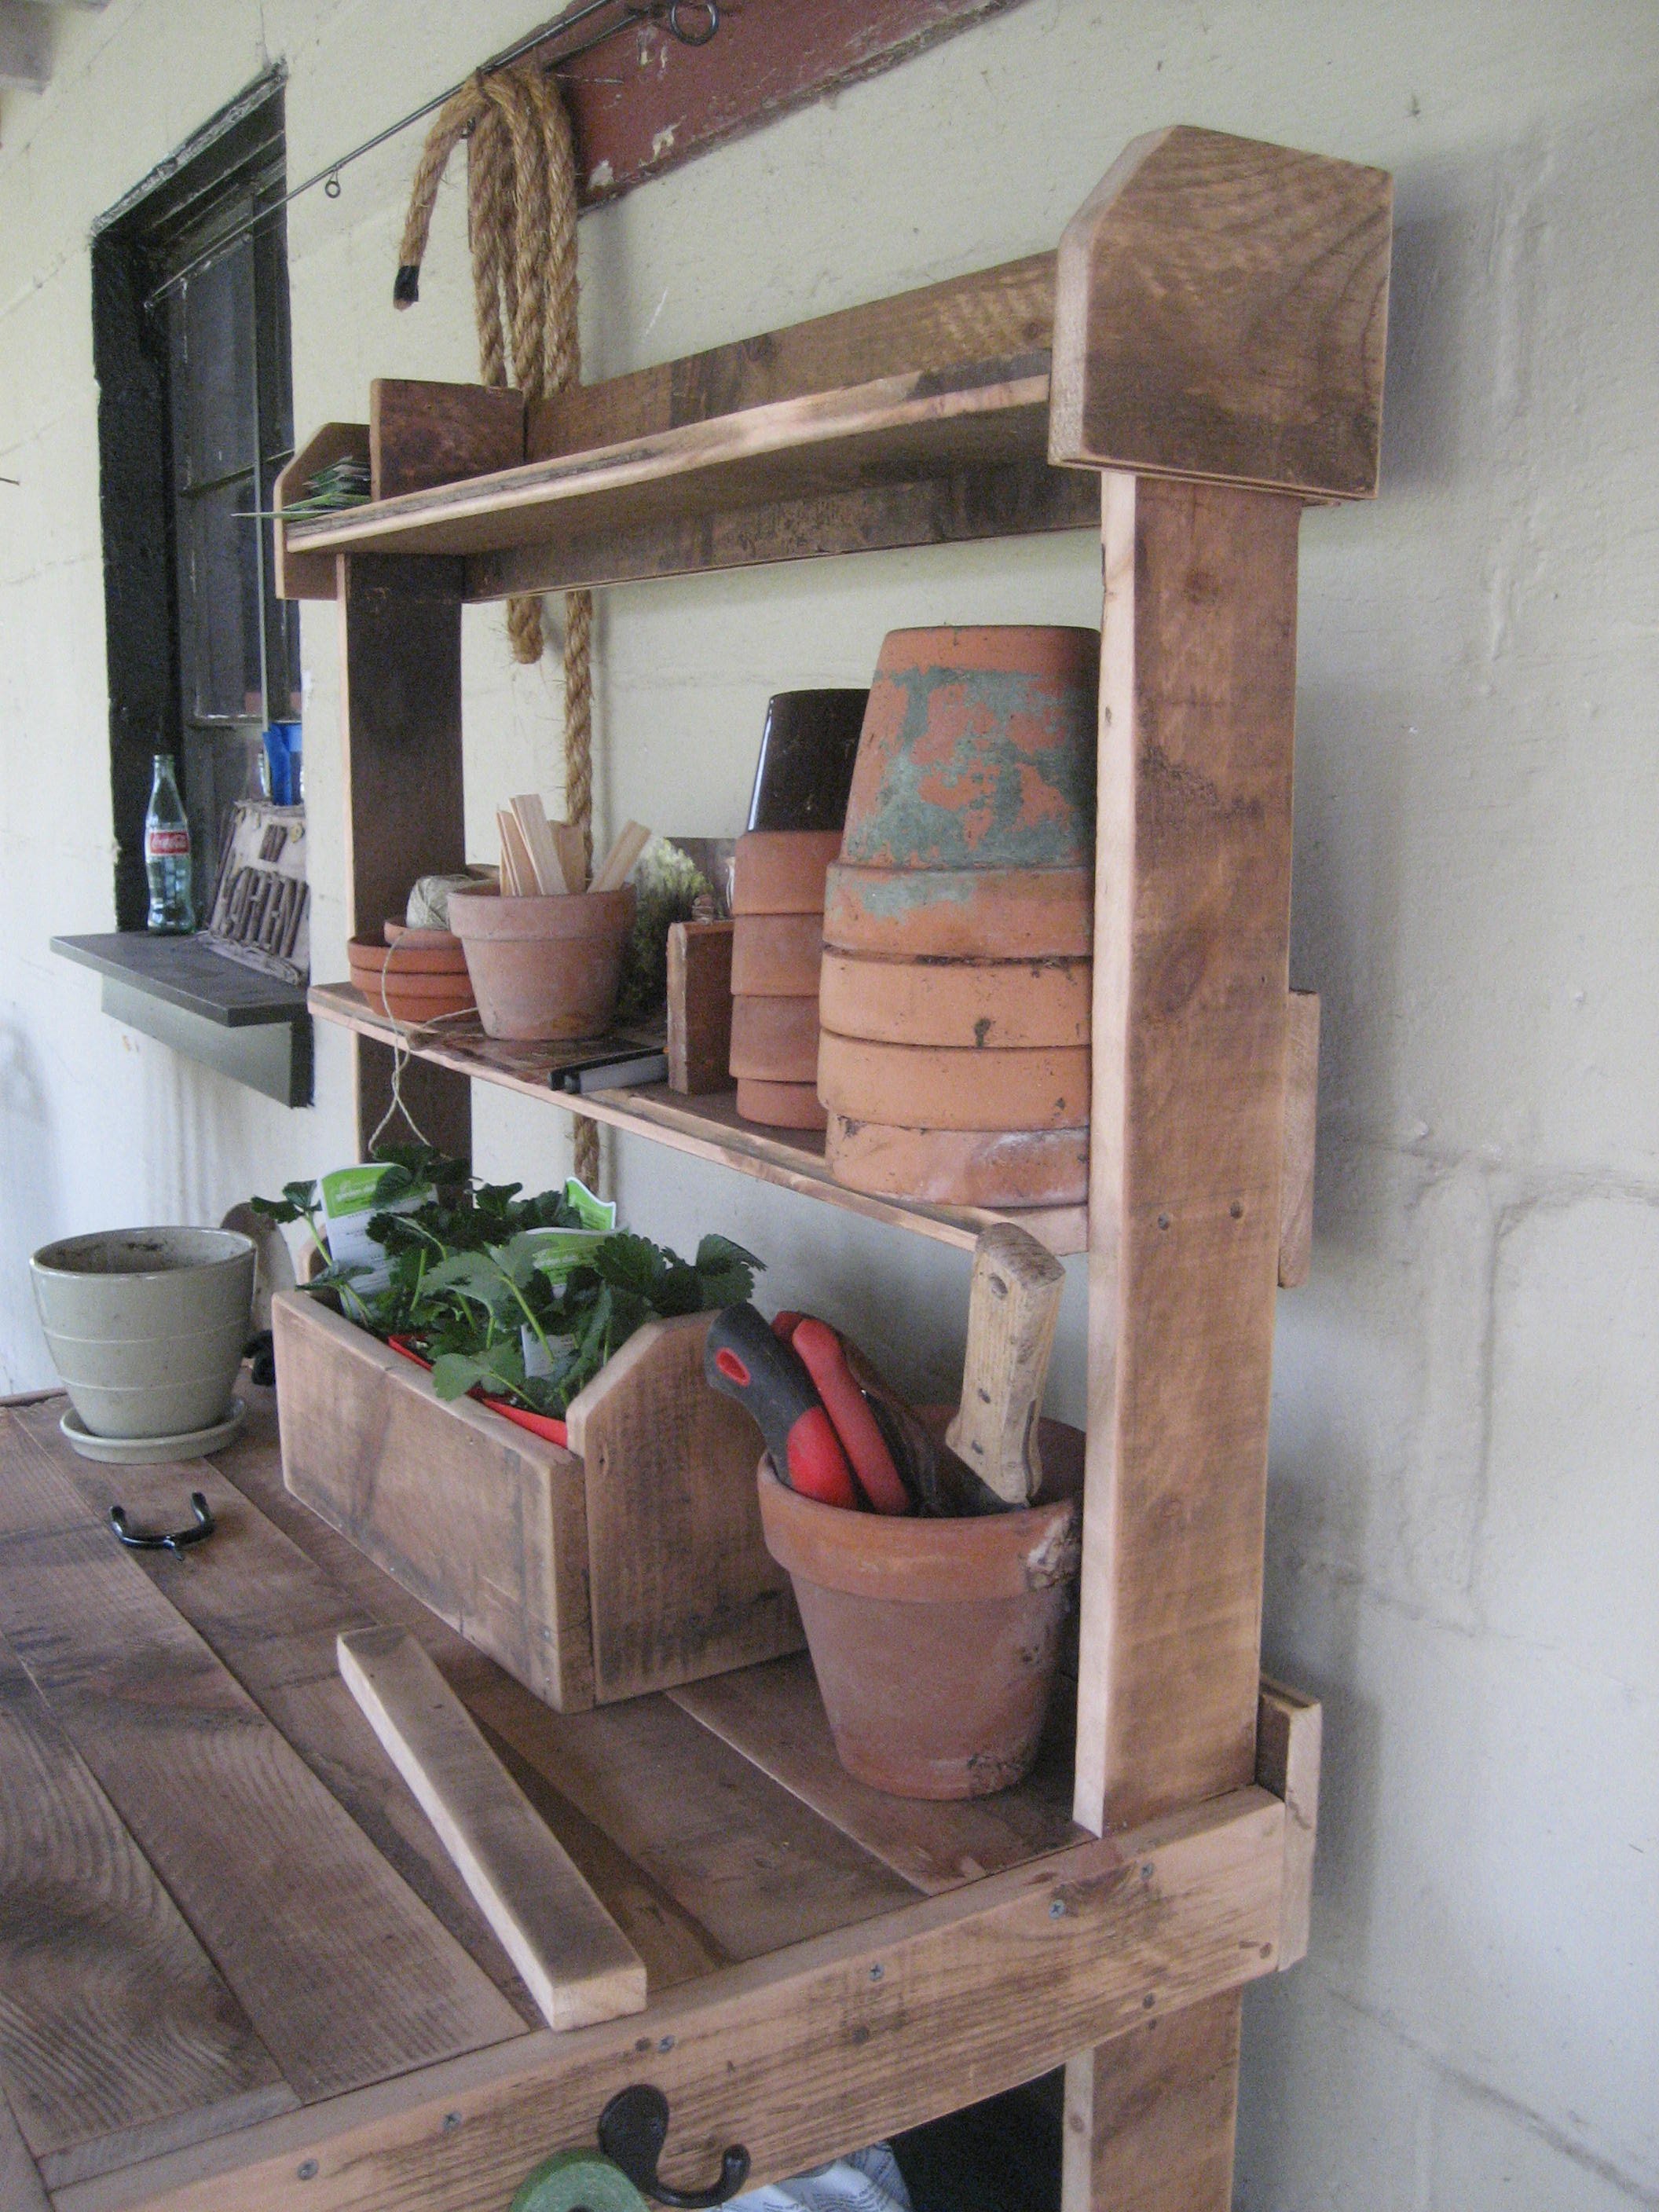
Potting bench
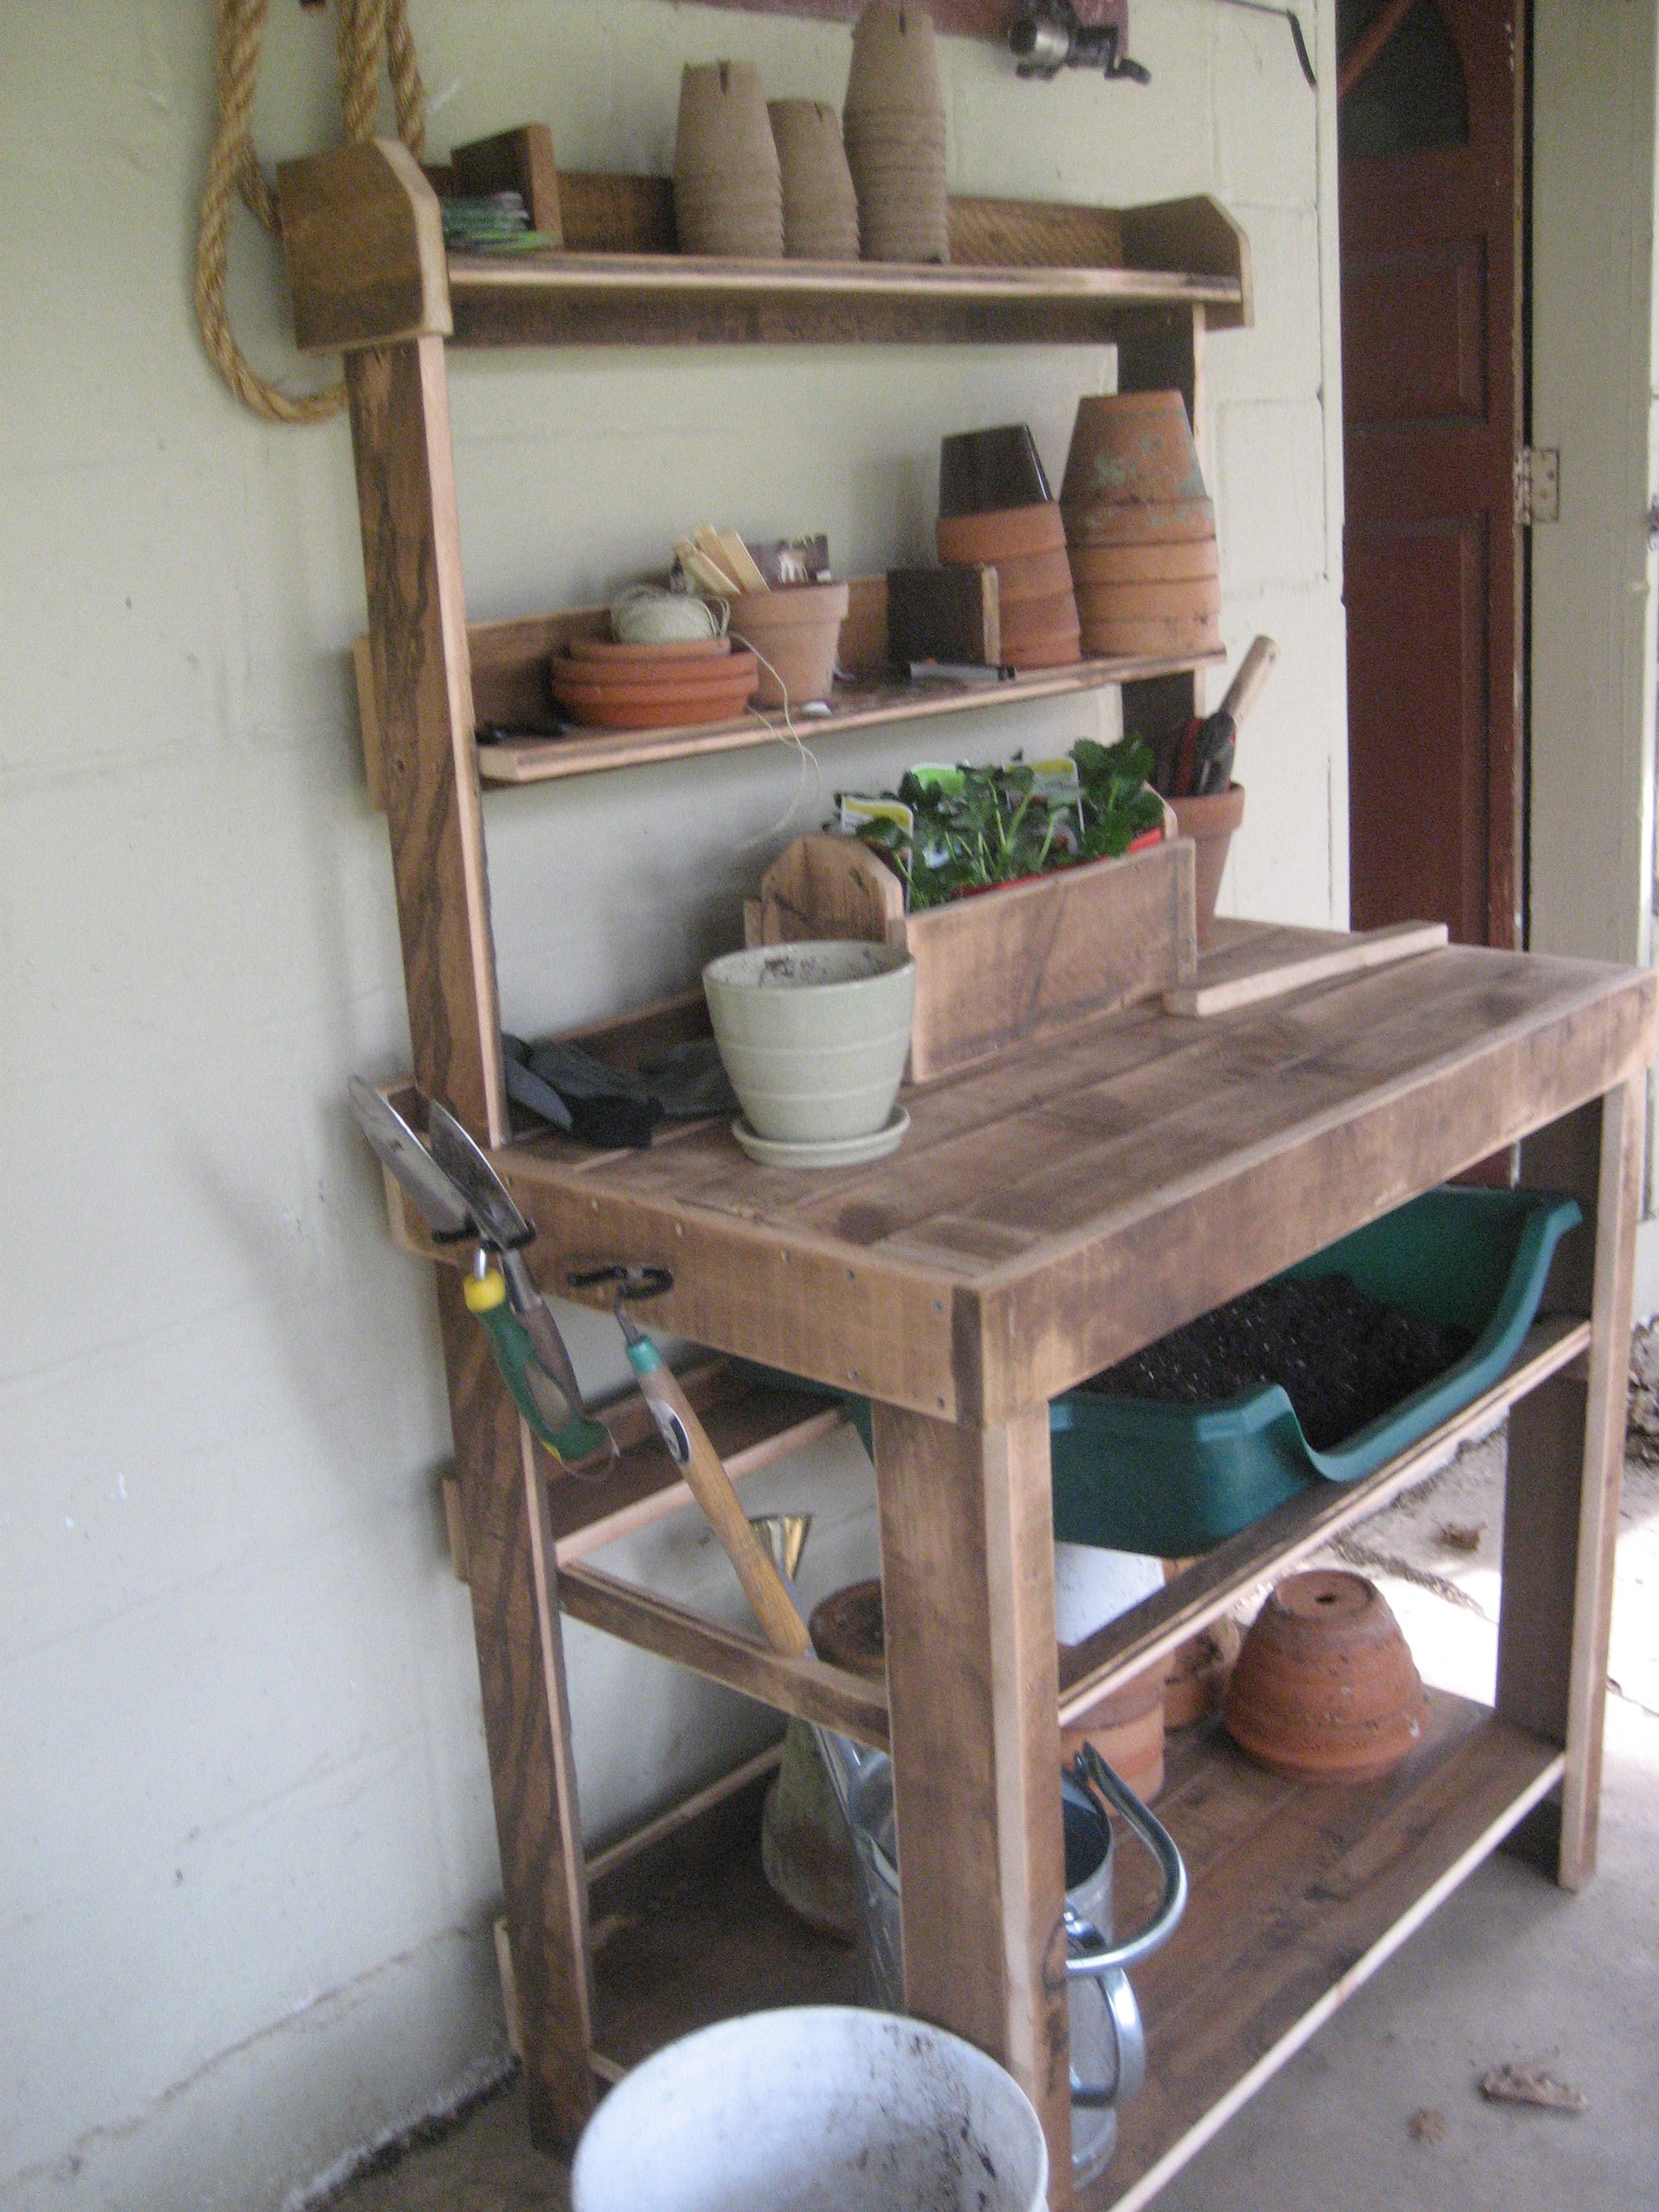
I used the plan for the simple potting bench, but because I had a lot of reclaimed wood, I used well supported 1x4's instead of 2x4's, simply because I had an abundance.

Built from Plan(s)
Estimated Cost
10.00 for screws and the potting bin
Estimated Time Investment
Day Project (6-9 Hours)
Finish Used
just sanded a lot.
Recommended Skill Level
Beginner
Comments
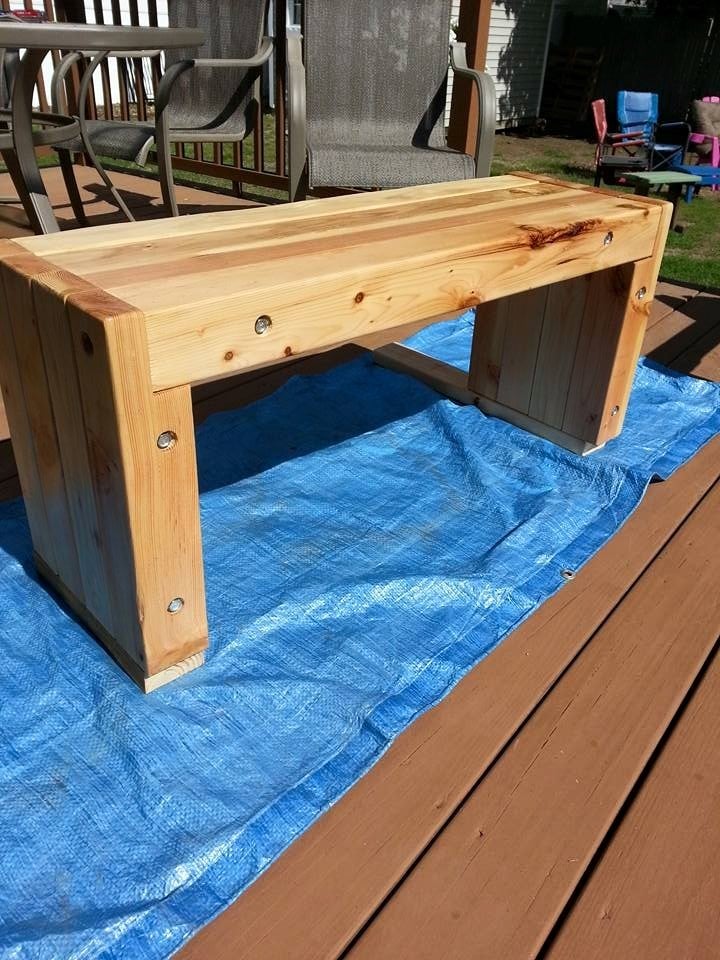
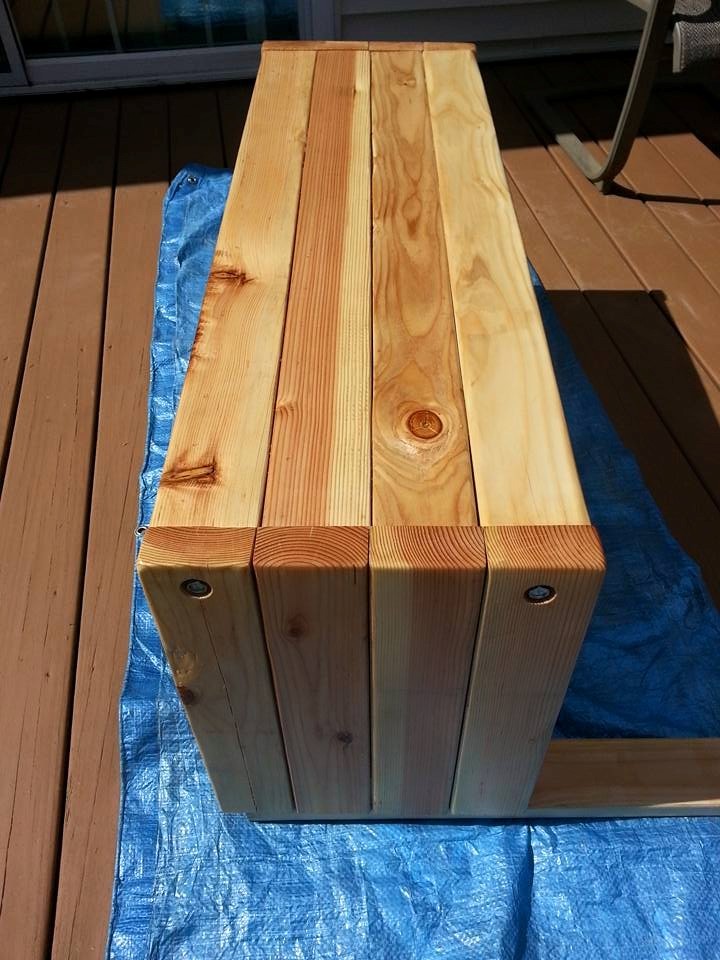
Rustic 4x4 Bench
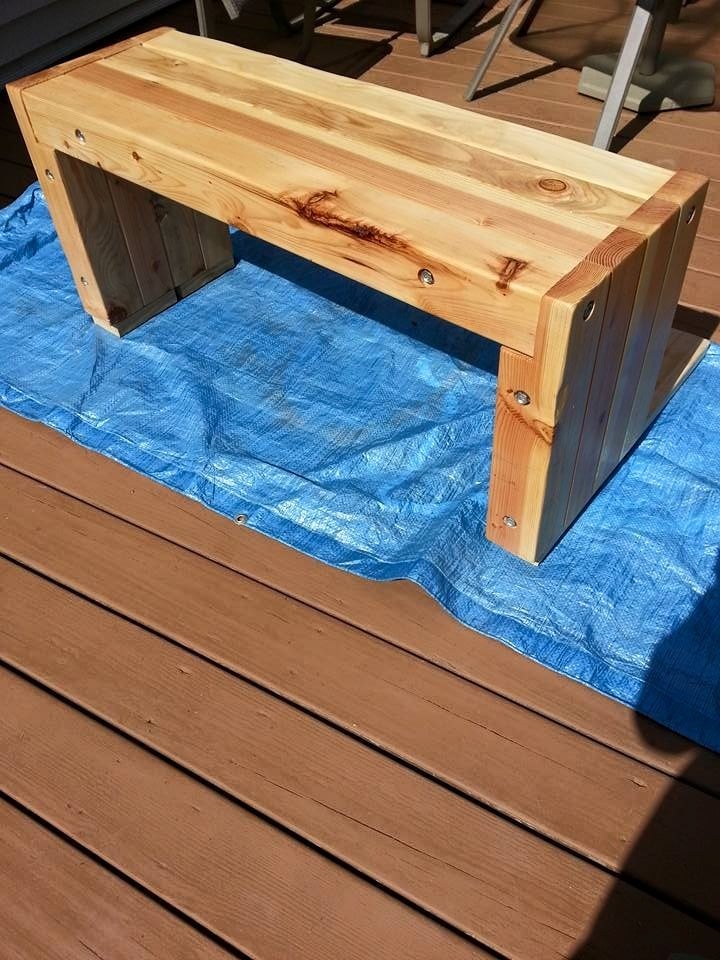
Modified the Cherished Bliss plan a bit to include Carriage bolts instead of pocket holes and I notched the top of the legs to make a shelf for the top.
Legs were cut at 18" and the top is 40". The two center 4x4's are connected with two internal (and smaller diameter) carriage bolts and glued together. The end 4x4's are glued and then a 1/2 x 6" carriage bolt with a pre-drilled "Head" hole (using 1" paddle bit).
Very easy to make but this baby is heavy!!!
Estimated Cost
$50-$75
Estimated Time Investment
Afternoon Project (3-6 Hours)
Finish Used
Clear Watco Dutch Oil and Varathane 3x Poly.
Recommended Skill Level
Beginner
Comments
Ana White Admin
Mon, 01/11/2021 - 09:30
Fantastic!
Love this build, thanks for sharing!