Community Brag Posts

Murphy Bed

Submitted by Newfey on Fri, 07/19/2013 - 14:59

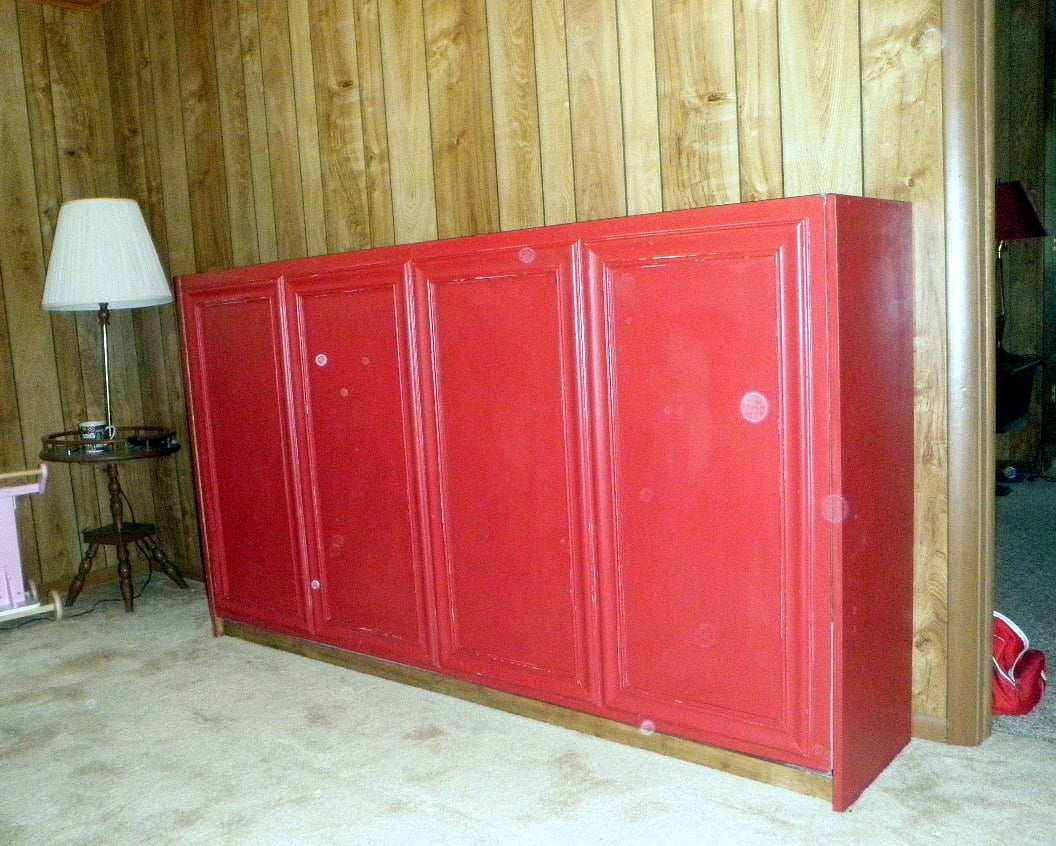
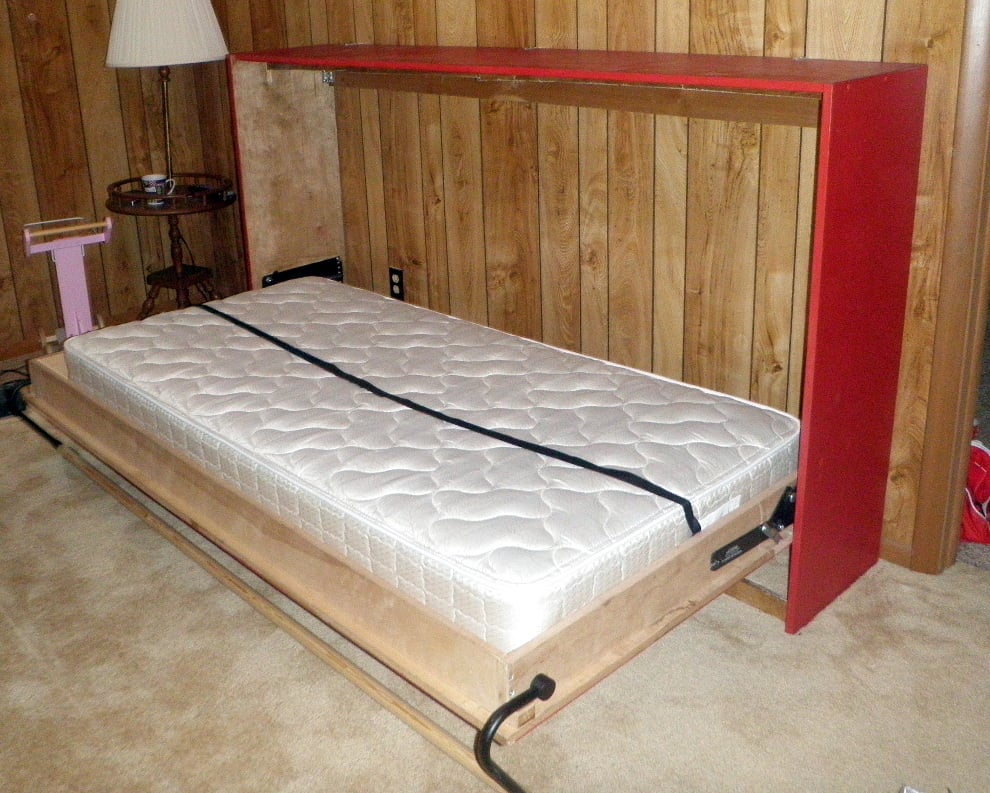
This is a Murphy Bed that I made for my daughter Alicia for their getaway home at Canadian Lakes, MI. Due to limited space i had to make it horizontal instead of the normal way of being vertical. It really comes in handy and takes up very little space.

Finish Used
Red paint mixed with Baking Soda
Recommended Skill Level
Intermediate

Comments

JoanneS

Fri, 07/19/2013 - 15:17

Looks great! Love the color and the trims you used. Where did you find your hinge hardware? PS- How did you like the baking soda paint? I've tried ASCP which was good but very pricey, and last time made my own with some plaster of paris. Your finish is lovely.

Newfey

Sat, 07/20/2013 - 18:47

I bought the spring hardware on line. I can't take the credit for the paint as my daughter did that part. She loves the way that the baking soda and paint covers everything and it is a whole lot less expensive than buying the commercial stuff.

Super Simple Bedframe/Hailey Planked Headboard

Submitted by Anonymous (not verified) on Sun, 05/22/2022 - 21:57

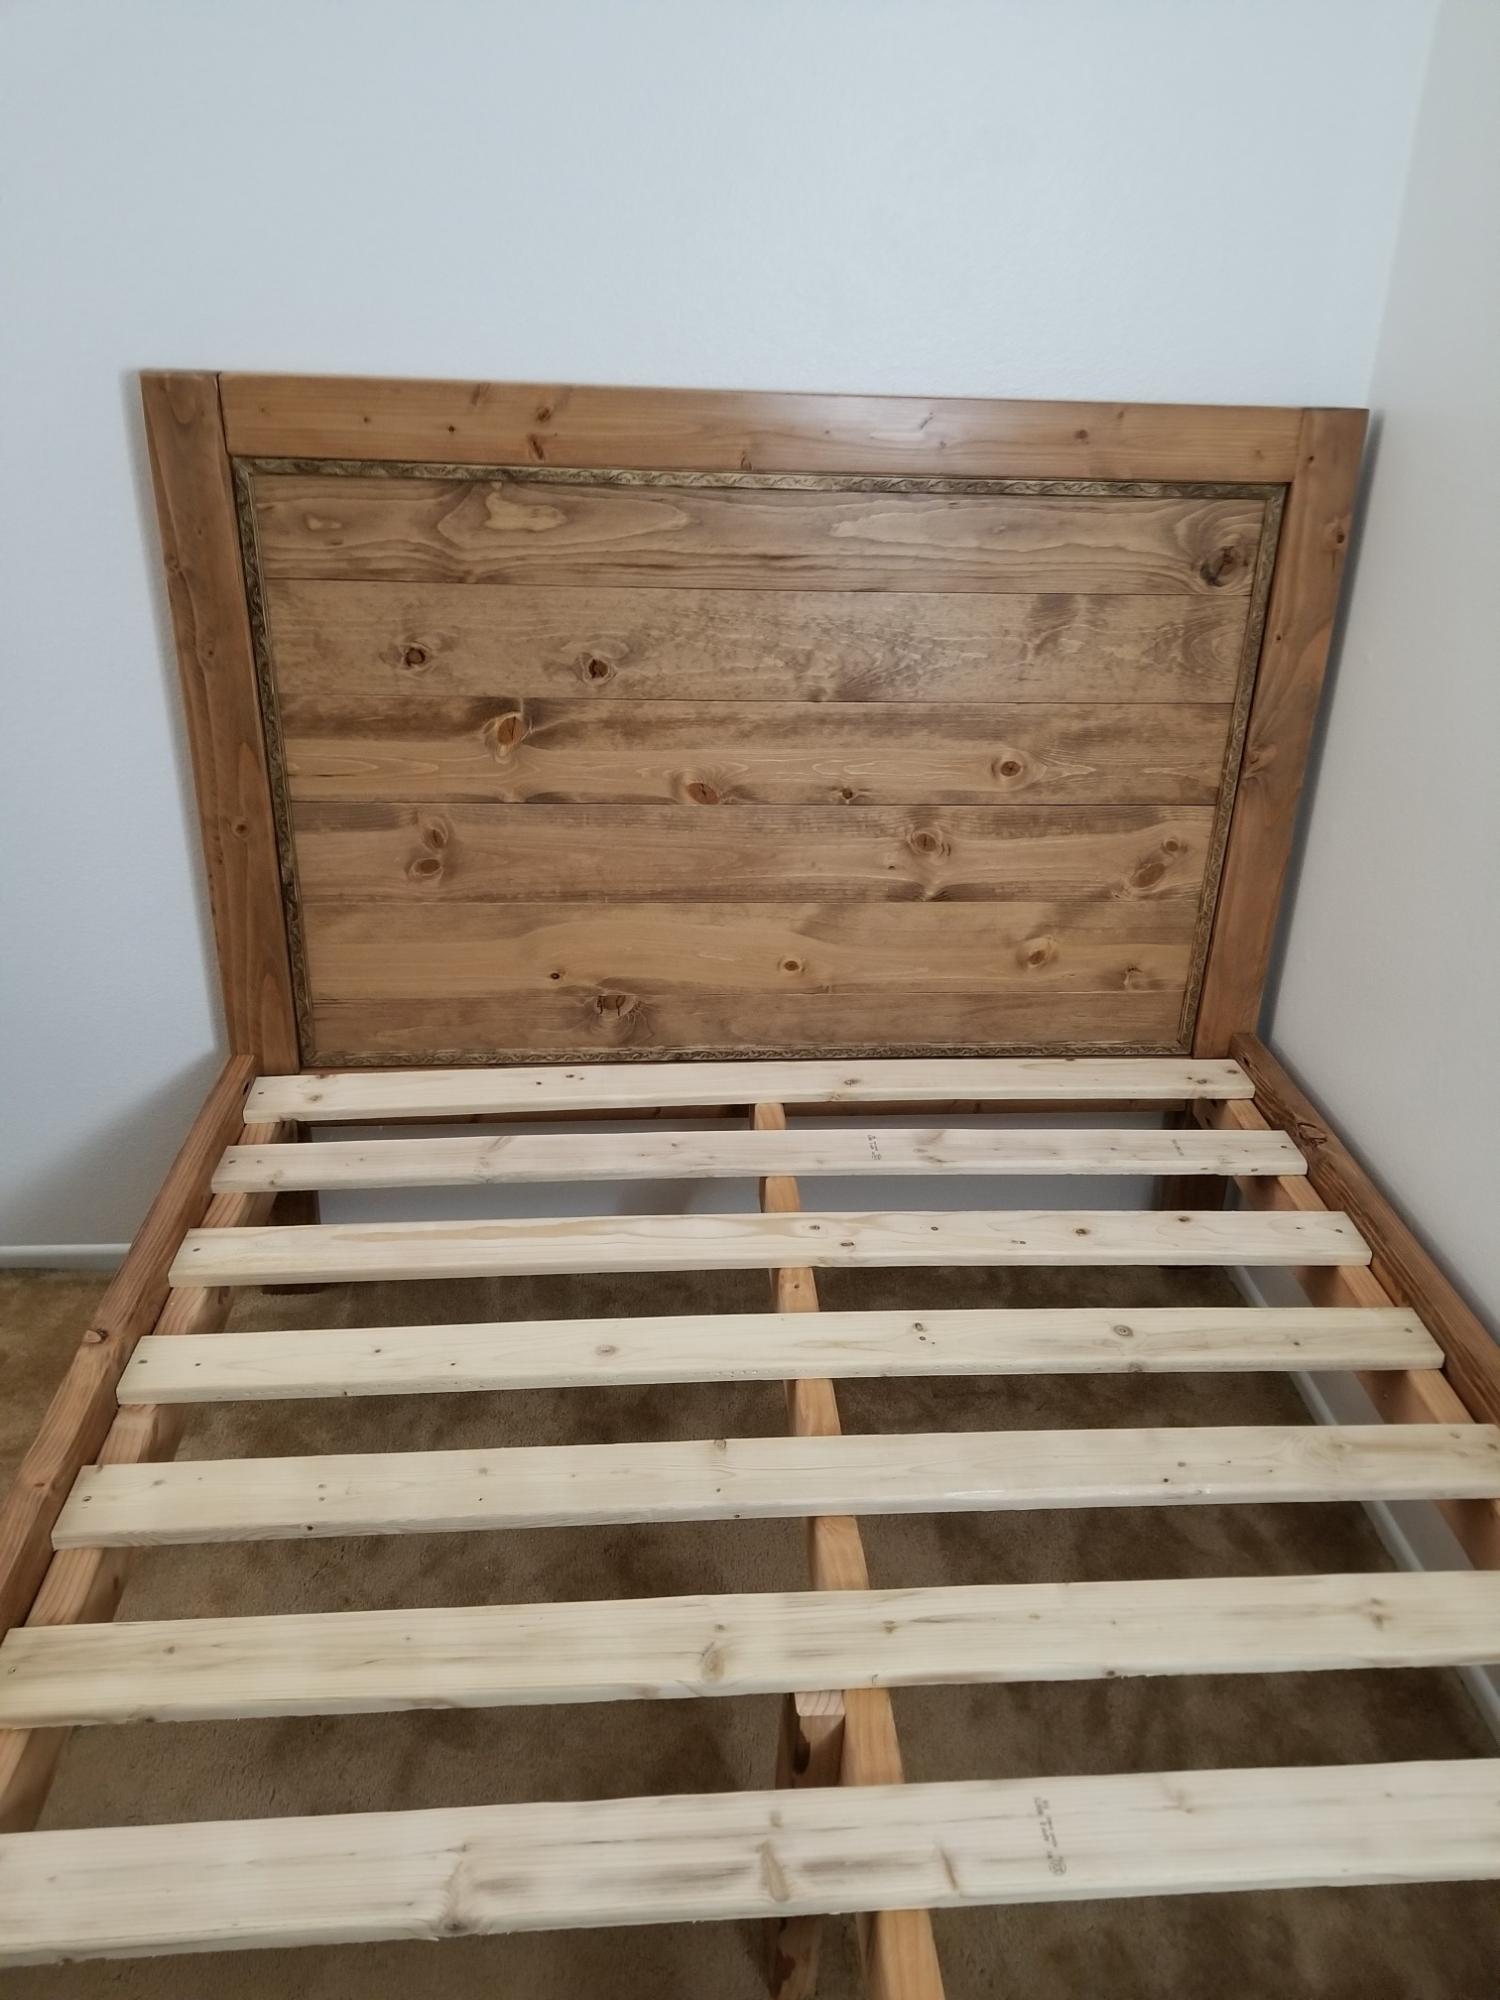
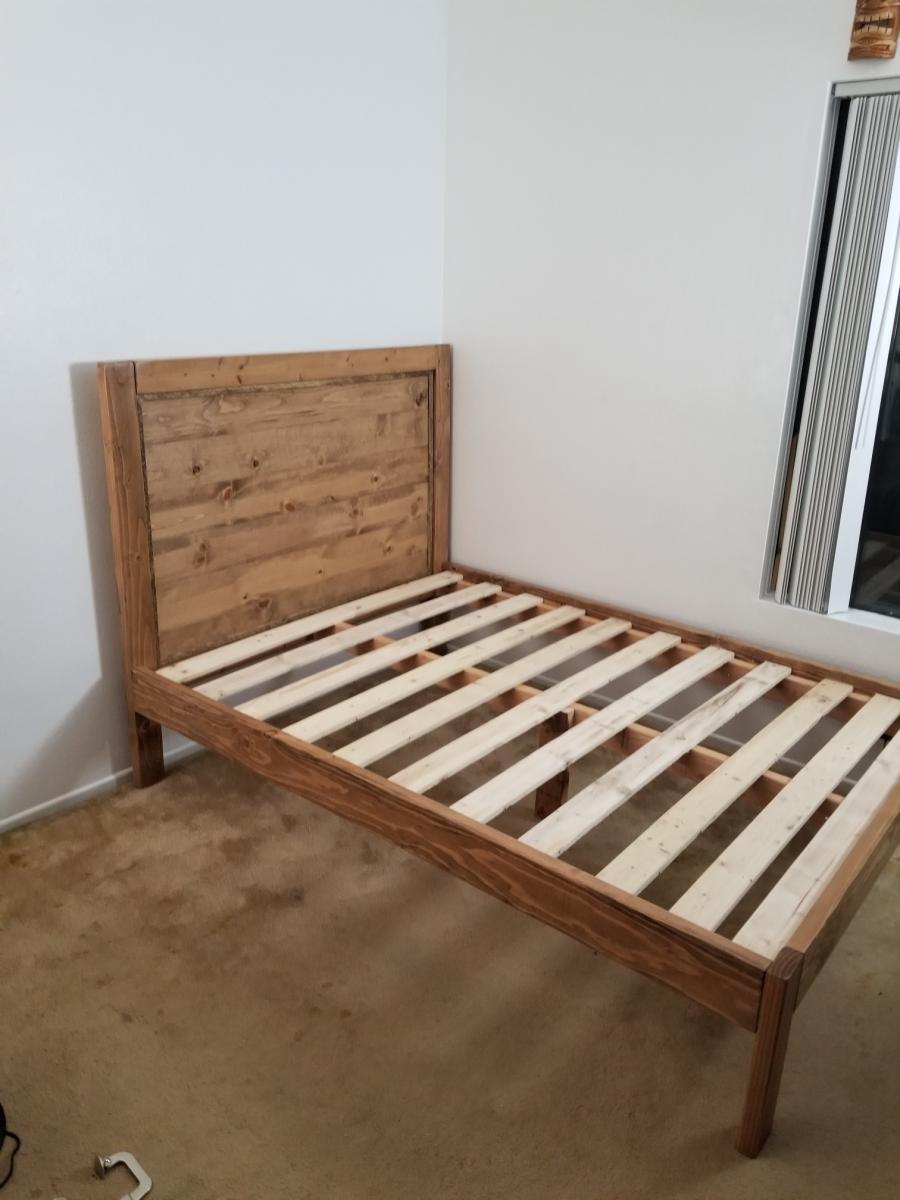
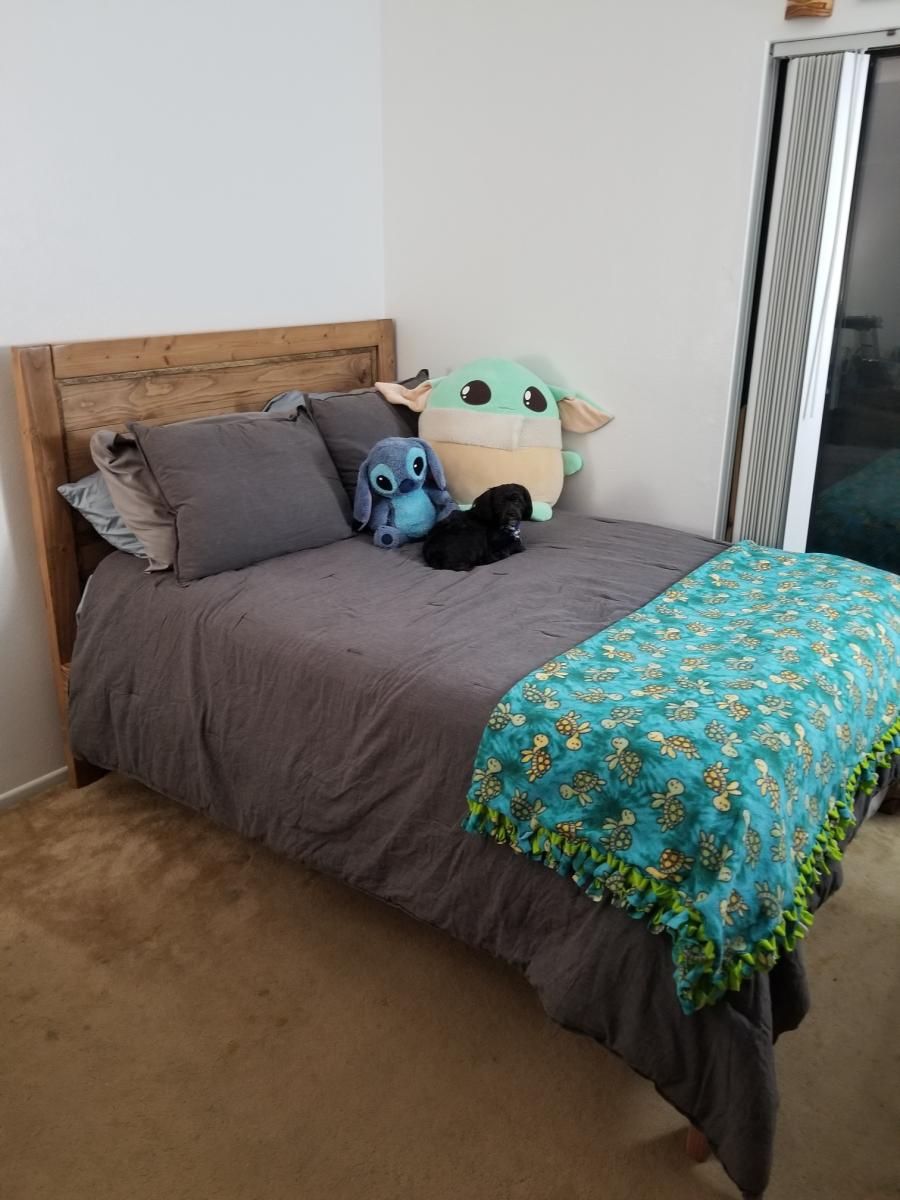
My grandaughter and I built the super simple bed and modified the Hailey planked headboard. We used common douglas fir from Home Depot. The finish is equal parts Minwax cherry and early american with 3 coats of Minwax wipe on poly with a light sanding with 220 grit between coats. Total cost was about 250.00.

Comments

L-Shaped Triple Bunk

Submitted by mommy to 3 on Sat, 09/01/2018 - 20:21

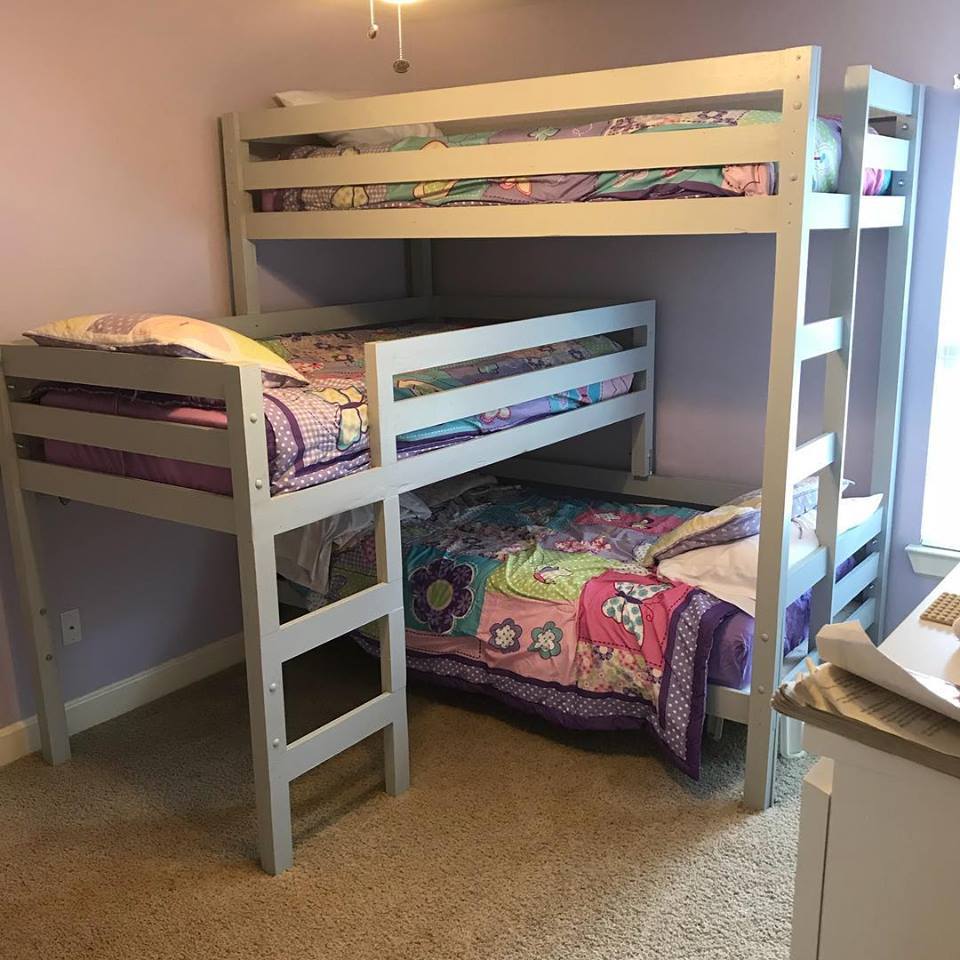
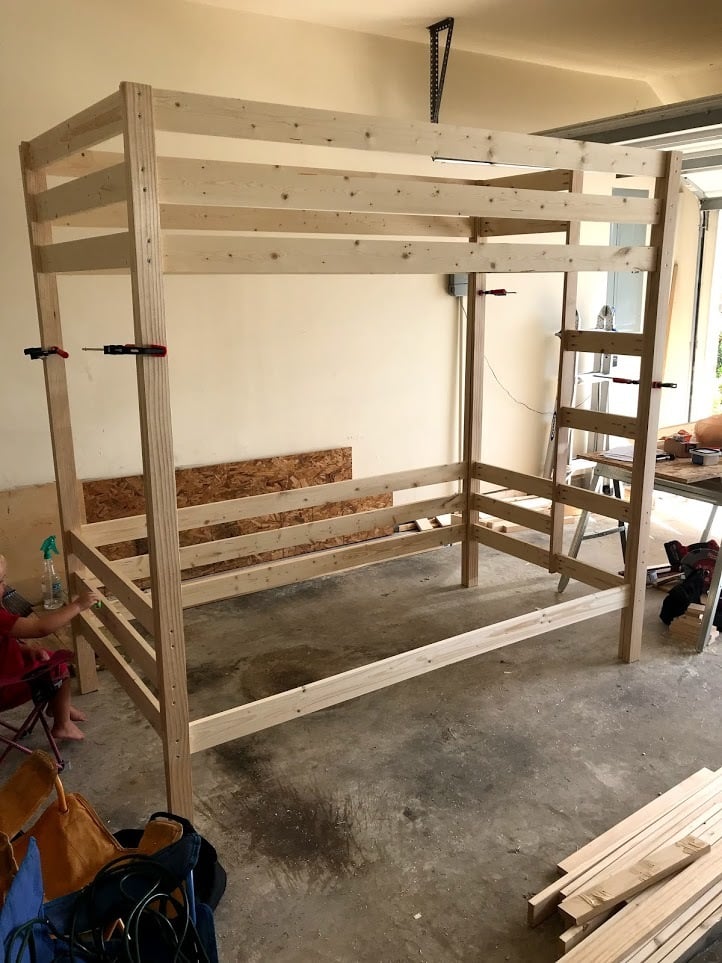
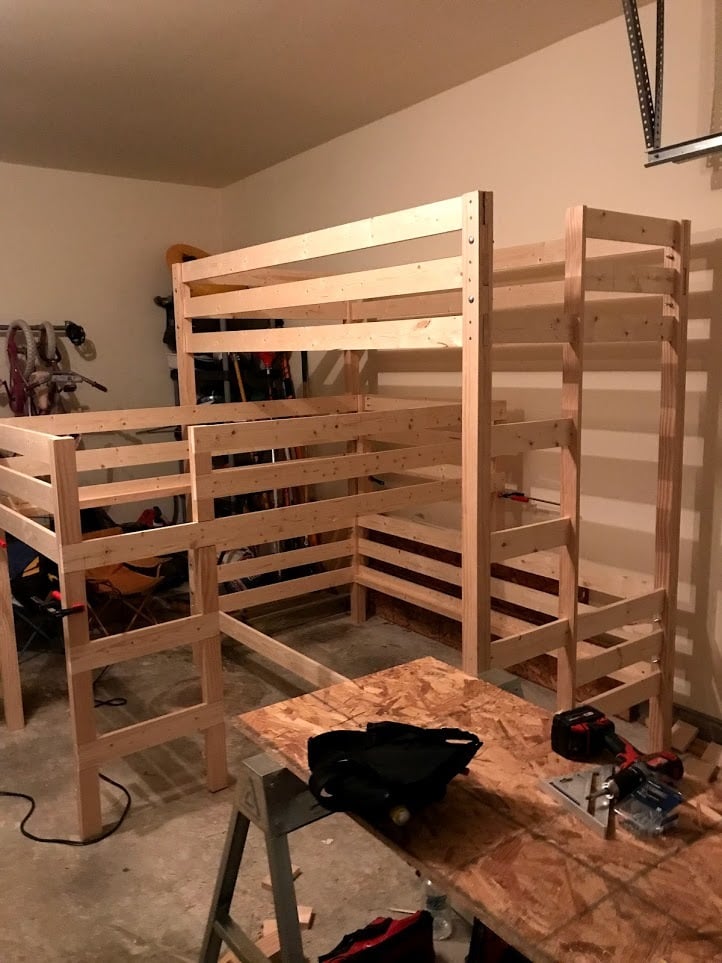
We recently had our 6th child and needed to rearrange our kids' rooms.  We decided to put our 3 oldest girls together and wanted a triple bunk.  We used the classic bunk plans, but increased the height to allow for a middle bunk.  We wanted L-shaped to give each child some headroom.  We used pine wood, common board and select pine.  We finished it off with two coats of Behr interior latex paint/primer in one, satin finish.  Finished dimensions--height from floor to base of bottom bunk, 10 in.  from floor to top of top rail, 79.5 in.

Built from Plan(s)
Estimated Cost
$350 for wood/screws
$40 for paint
~$500 for tools--this was only our second build and our last build only required a drill.
Estimated Time Investment
Week Long Project (20 Hours or More)
Finish Used
Behr interior latex paint/primer in one, satin finish. Color is "classic silver"
Recommended Skill Level
Intermediate

Comments

bcheese06

Tue, 02/18/2020 - 20:41

This is exactly what my boys need in their room. I'm having a hard time grasping how you did the middle bunk. Is it just the top bunk chopped right before the horizontal slats of the bottom bunk? tia

Modern Adirondack Benches

Submitted by Anonymous (not verified) on Thu, 06/02/2022 - 15:36

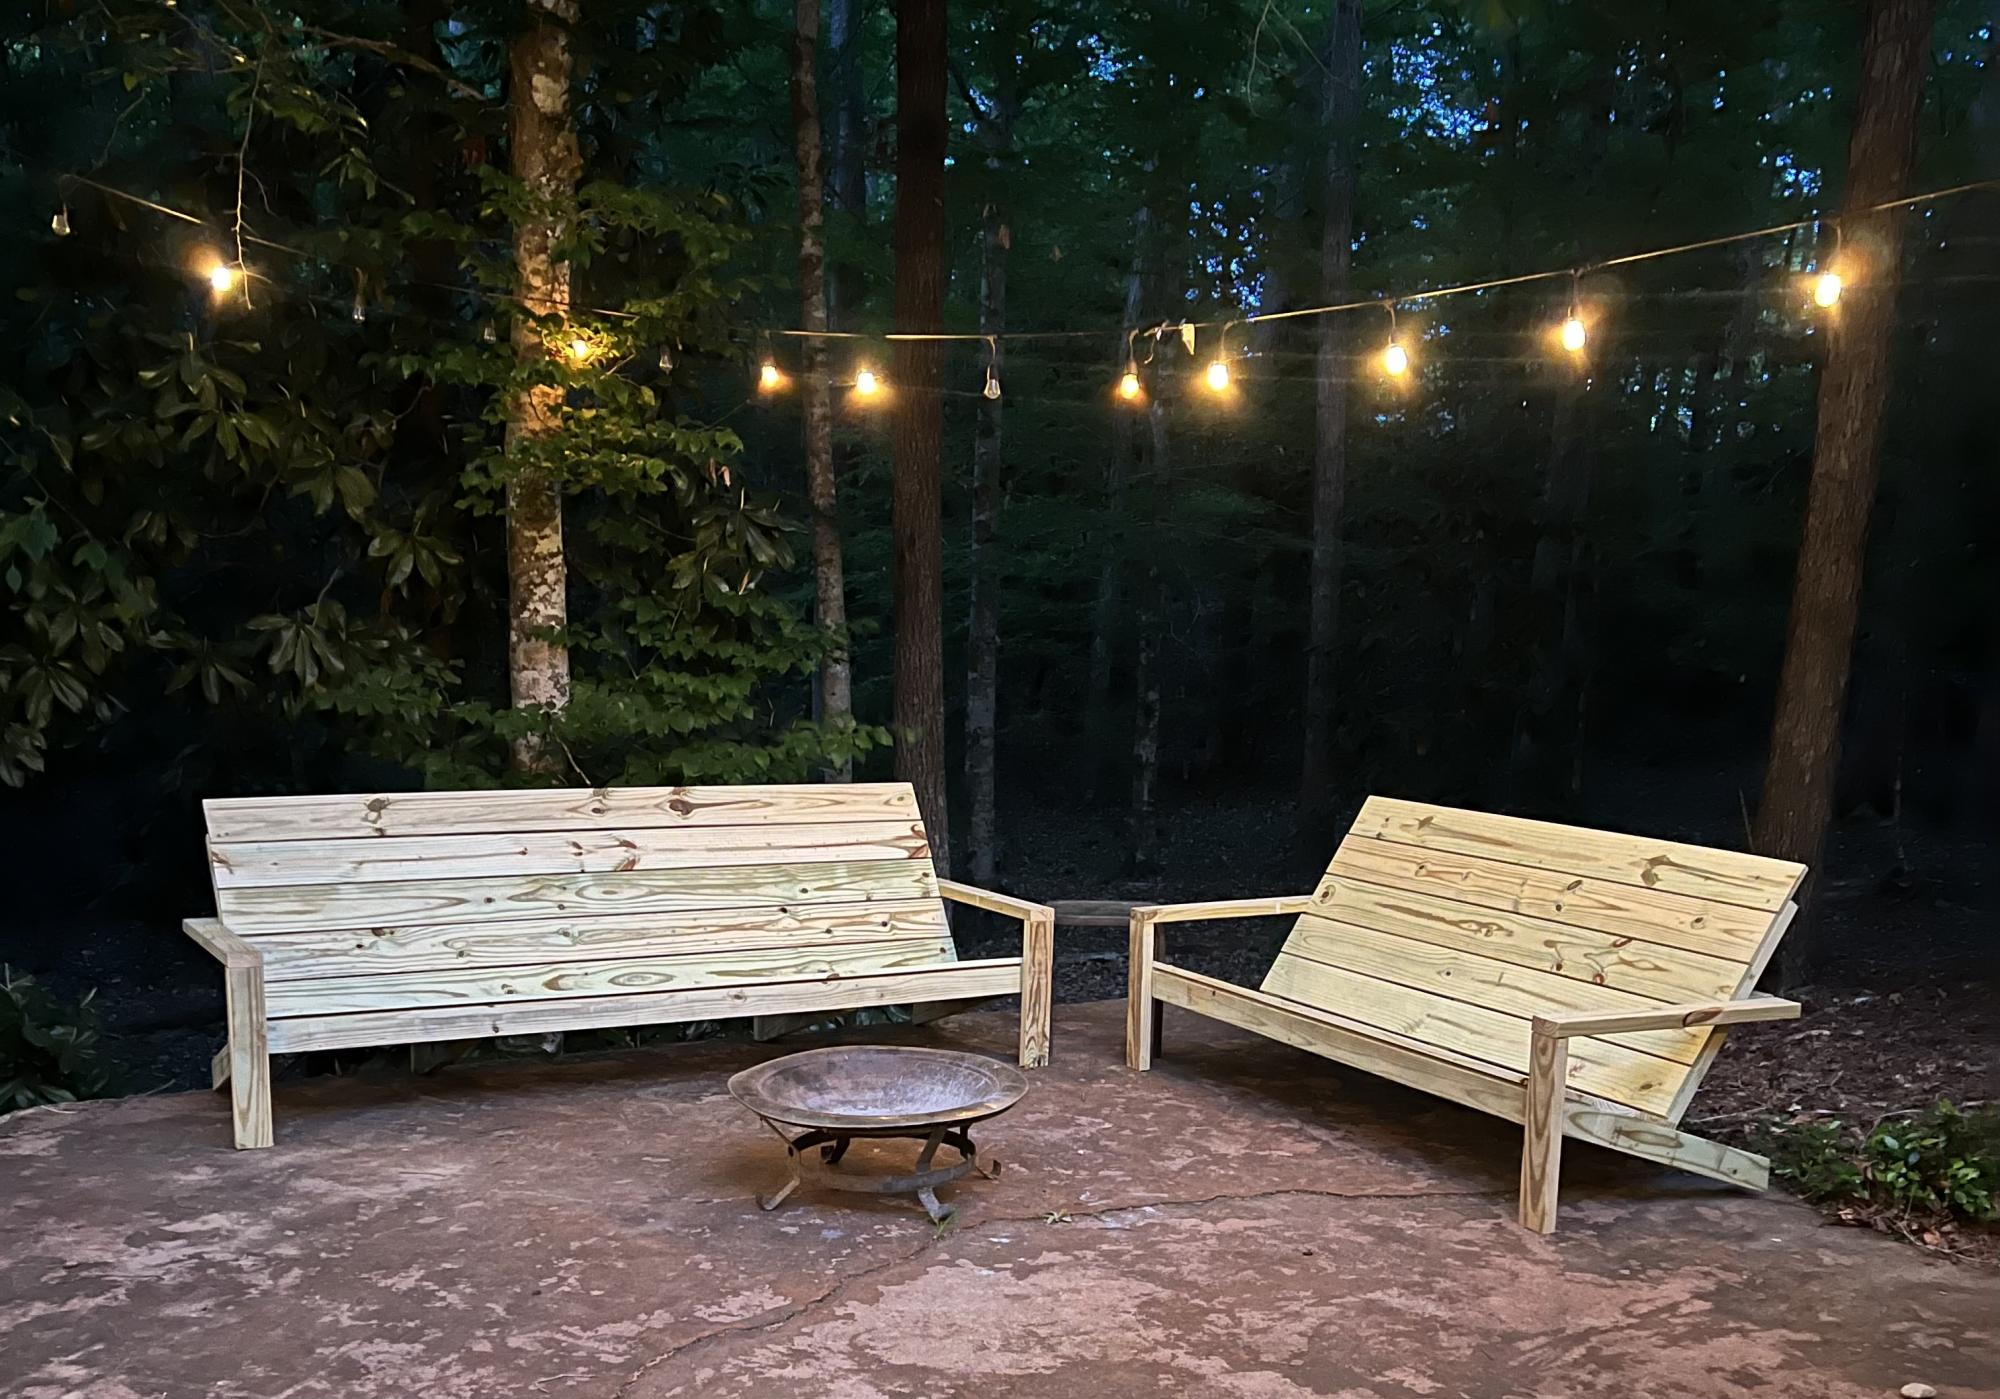
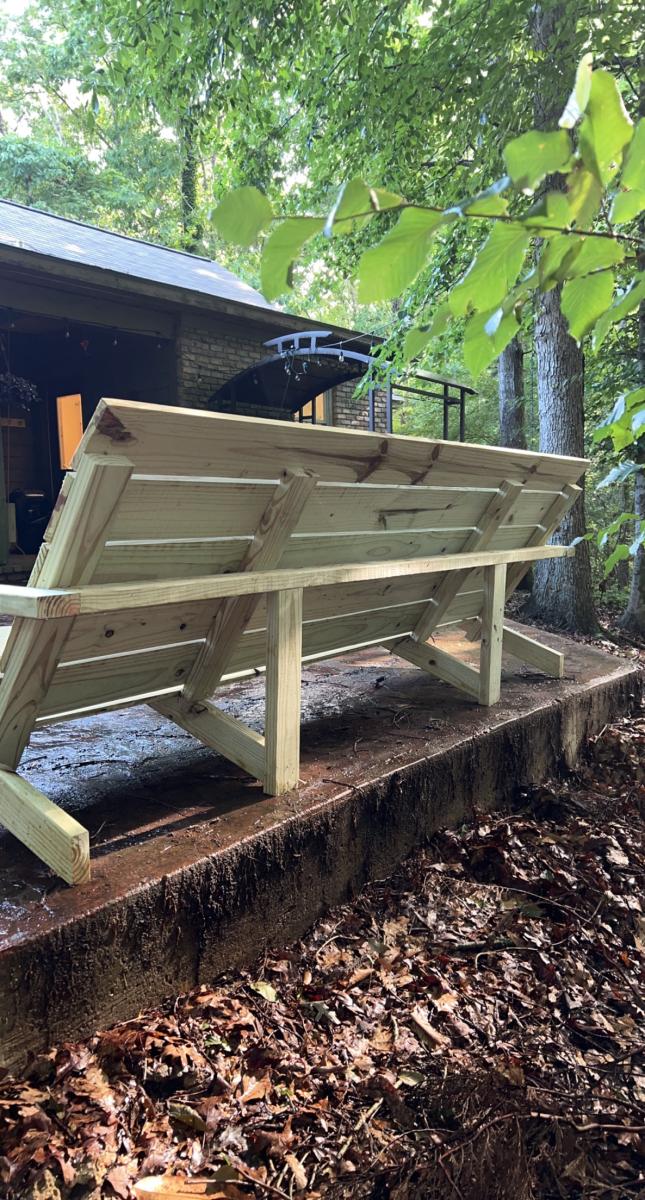
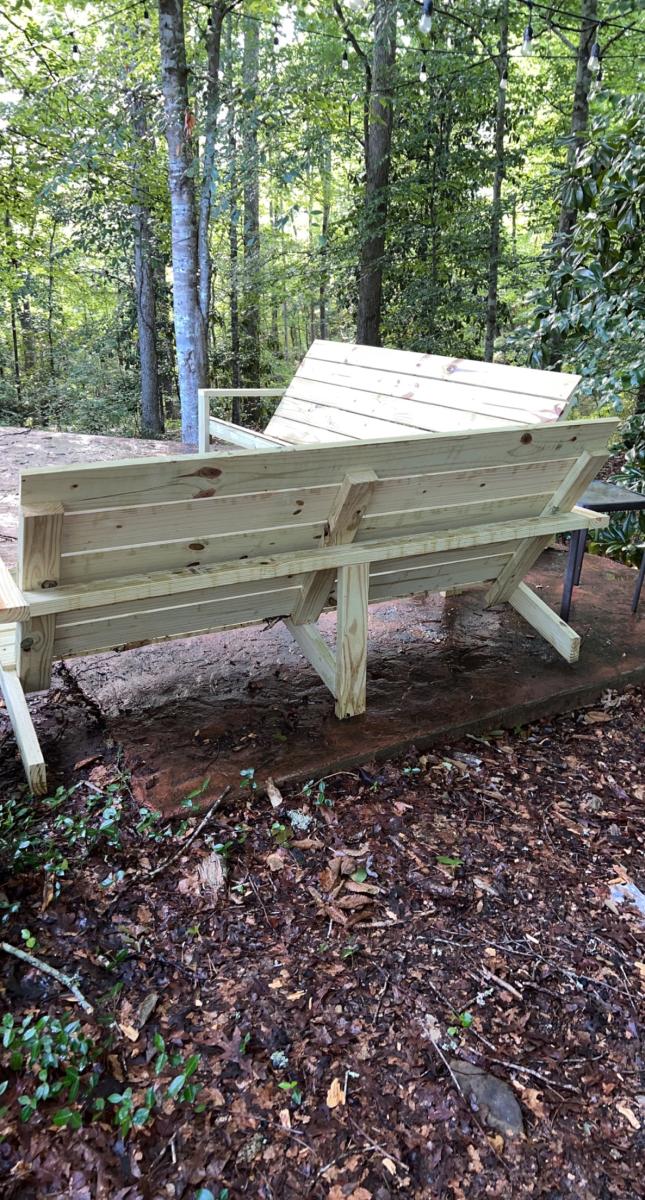
I fell in love with the modern Adirondack chairs, I love how comfortable and simple they are. But I wanted benches to go around my fire pit area. So I decided to modify the modern Adirondack chairs to make 6ft and 8ft benches. I added in extra supports (of course) but it was an easy mod with a gorgeous outcome!

Seasonal And Holiday

Rustic X Console

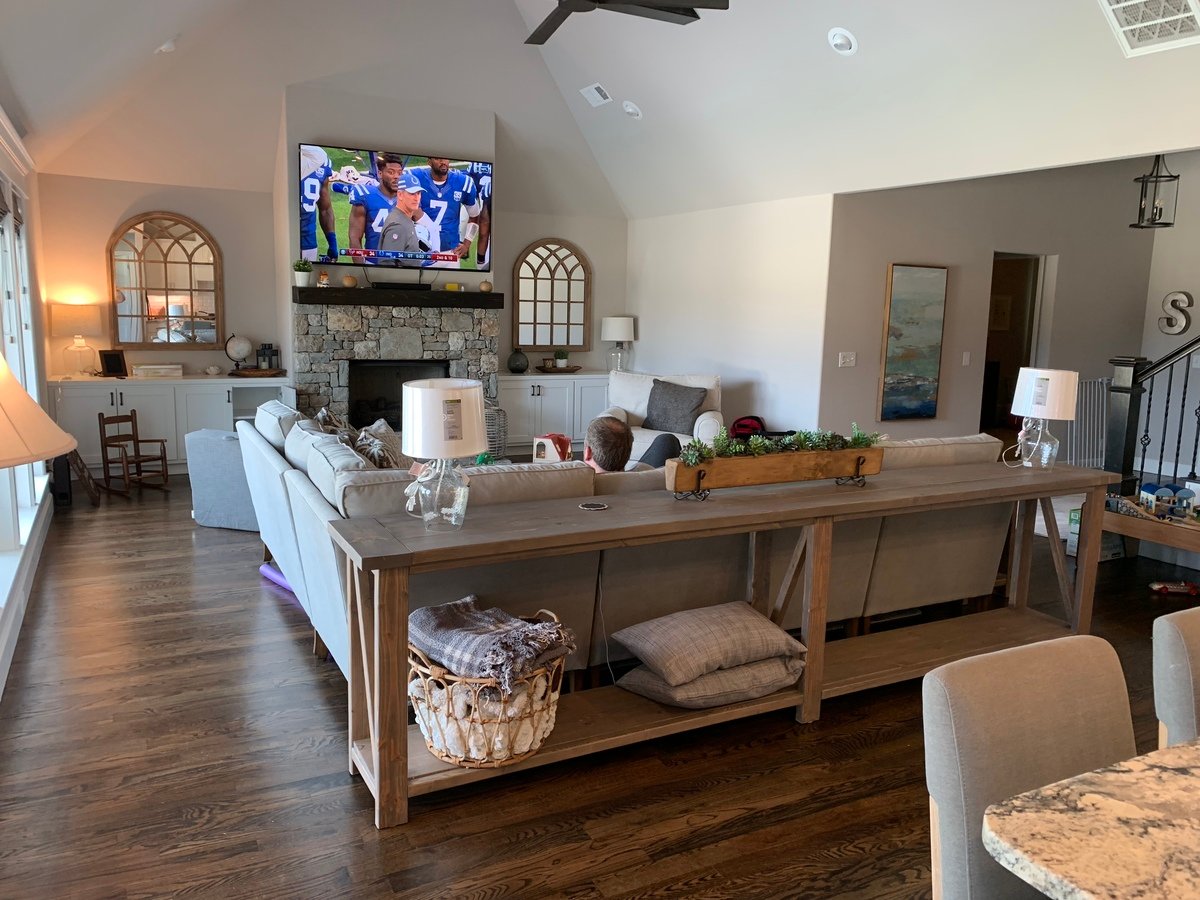
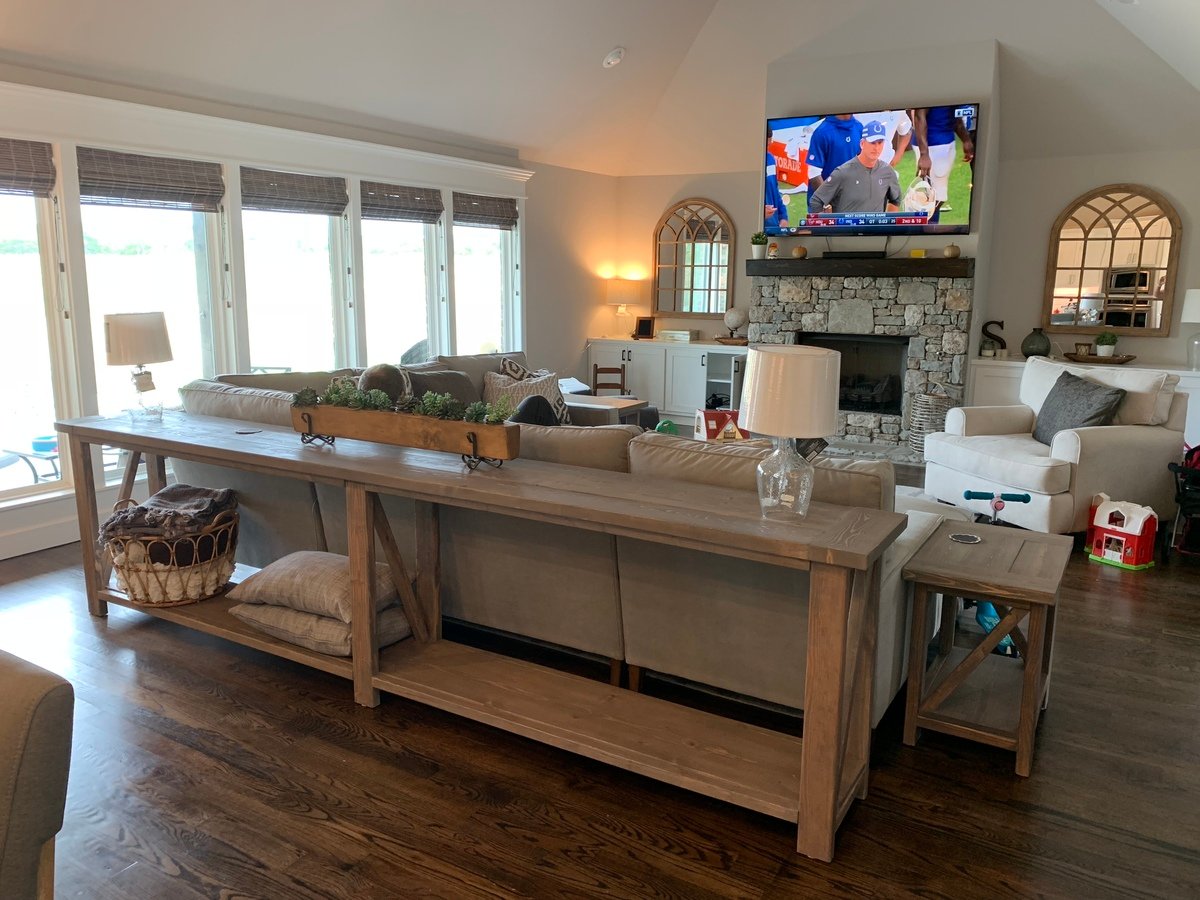
Modified to have more of a modern style. Removed shelf and half the X. Also, lengthened it to 11ft. Love!

Built from Plan(s)
Estimated Time Investment
Weekend Project (10-20 Hours)
Recommended Skill Level
Intermediate

Comments

Mudroom bench

Submitted by Anonymous (not verified) on Thu, 12/01/2022 - 17:16

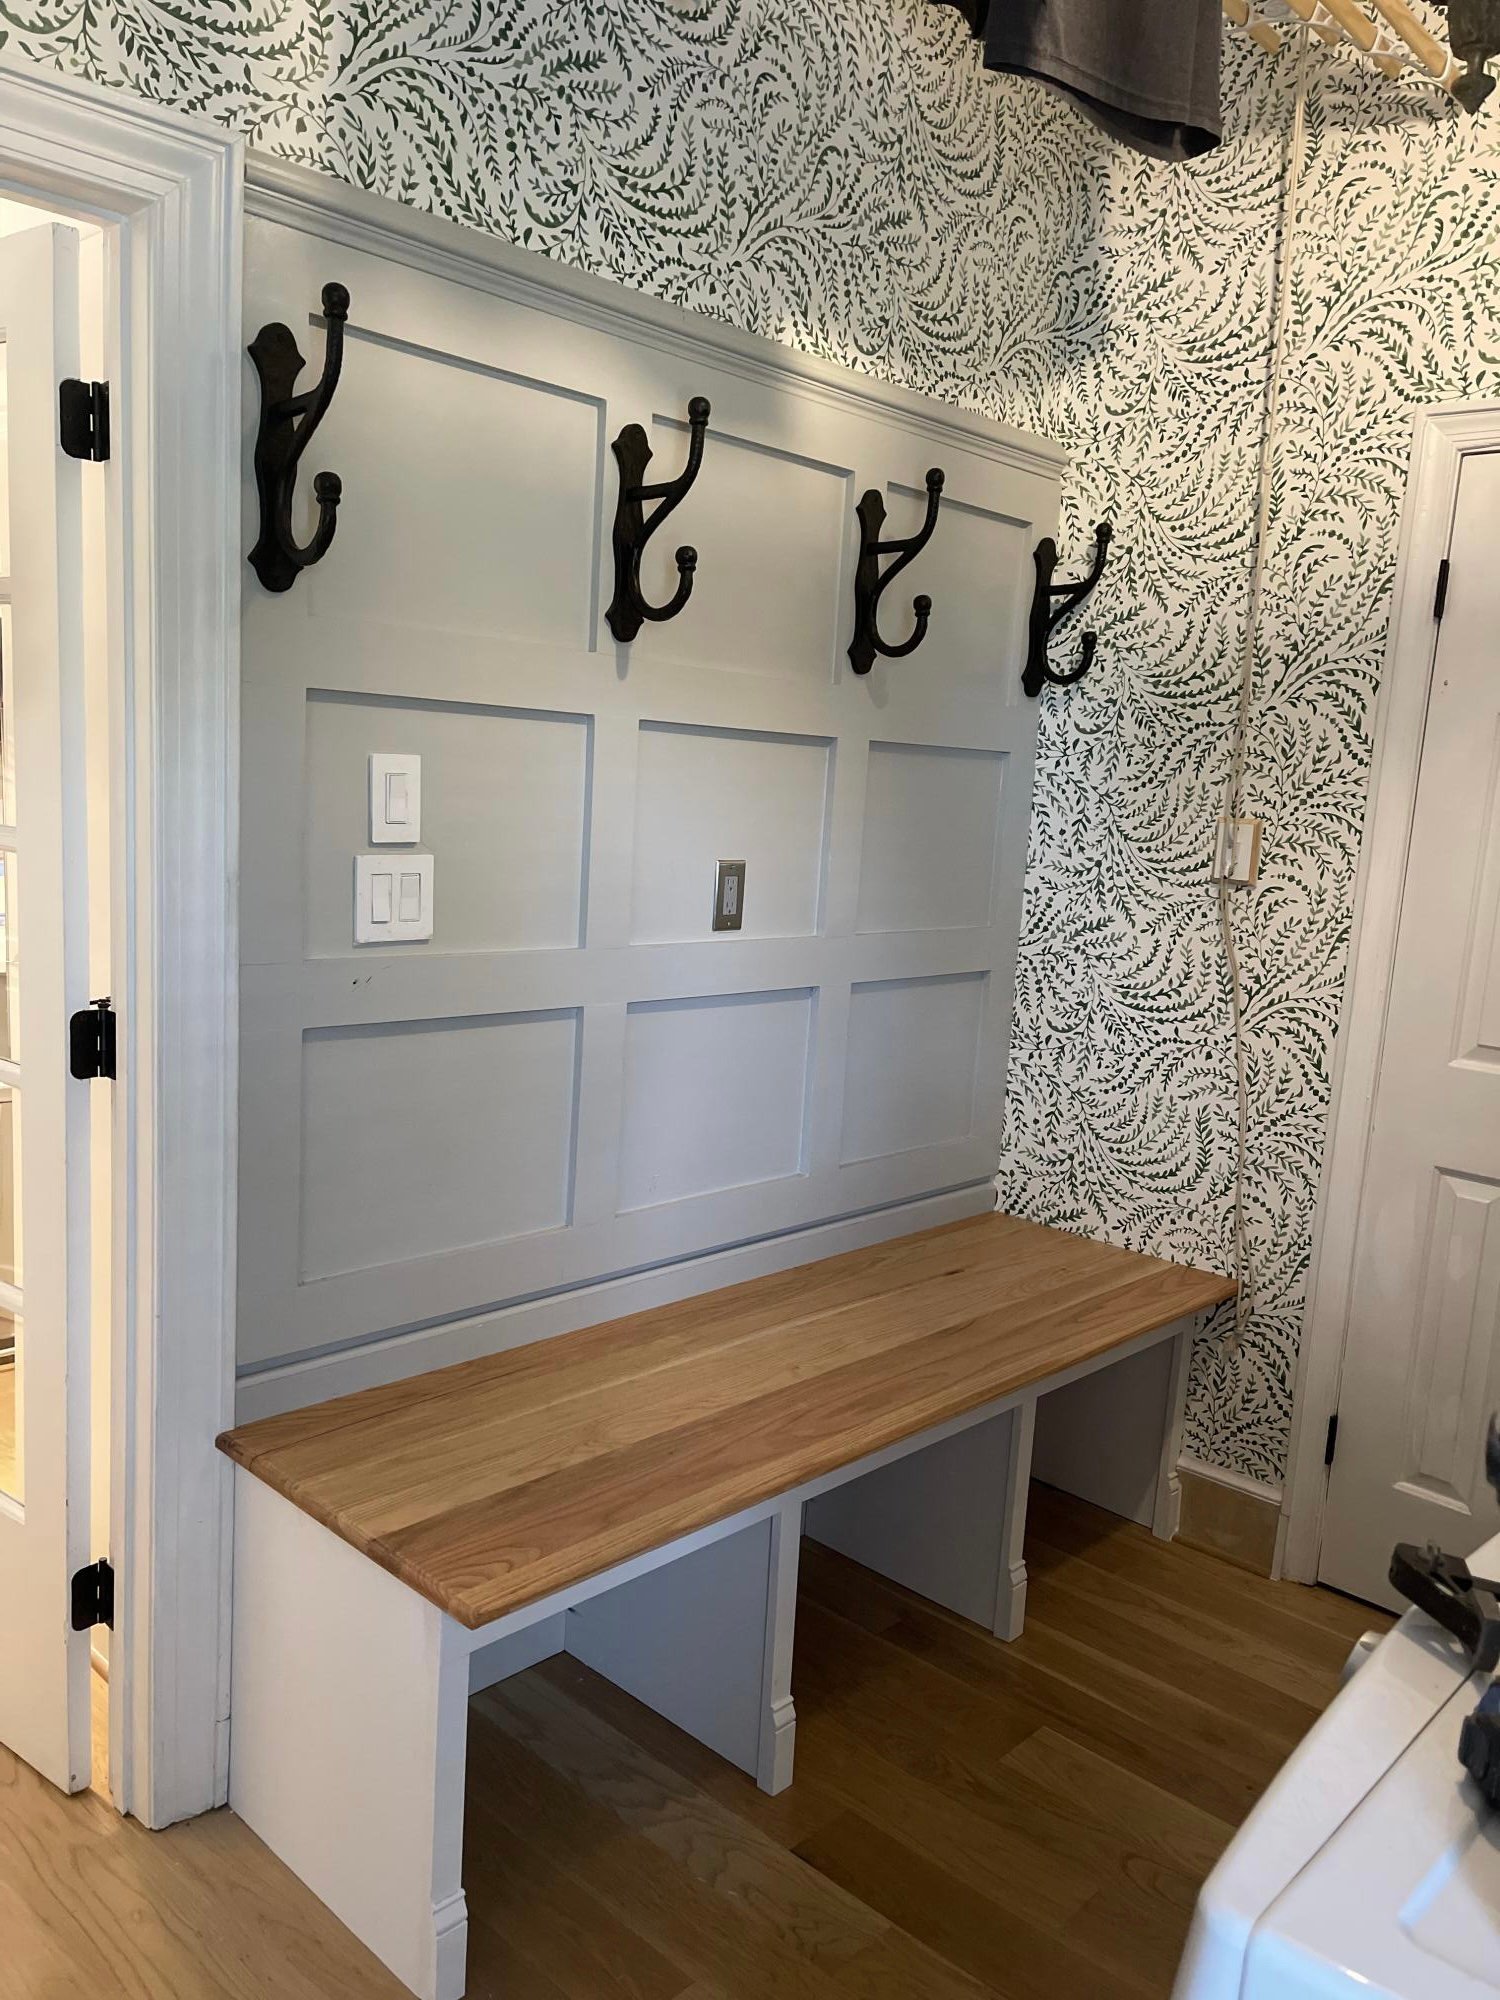
Ana I came across your open bottom garage bench design and really liked the concept. Inspired by your design I put this together in our laundry/mudroom and am really pleased with the result. As you described, being able to clean under it is a huge benefit and the whole bench was less than $200 even with the solid oak boards I joined and edge routed for the top. Thanks for the inspiration and all of your project posts.

Comments

Trofast Toy Storage Solution

Submitted by CassieD on Fri, 09/30/2011 - 17:27

I had been asked a few times for these plans, but as someone else posted a similar one, I'll just stick to a blog post for now and describe my differences. I made this shelving unit January 2010, just after I found out of I was pregnant with my third child, and it's been a lifesaver since then. I desperately needed a toy storage solution (and purging), as shown in the 'eek' kids closet below. I didn't like the shape of triangular Ikea ones, as they spanned more floor space than I cared to give up. Plus, I wanted a place to put *almost* all of my kids toys, so I wanted it to be tall. I'm so glad we did, since we've moved twice (also, 'eek') since than, and it's made packing and unpacking the kids toys super (SUPER) easy. At first, I was afraid that the kids would go crazy and just tear down every bin at once, but it hasn't happened yet. Unlike the other plan that was posted, I used white sliders that ikea sold. I'm not sure if they still sell, as I don't see them online. It cost an additional $24 (they were $1/2), but seemed worth the extra money. I didn't have a router and wasn't particularly confident with our table saw skills. Plus the Ikea version had some really thin areas that made me nervous that it would break easily. I tried to keep it easy and just had to line up and screw the sliders in. Now that I'm a little more confident with a table saw, I'd give the router style a-go. I used two sheets of cabinet grade plywood, each costing about $30. I ripped down some pine boards to cover the front edges, which made the unit look loads nicer. However, I wish I would have used maple, instead of pine as they got dented almost immediately. Not a big deal though. The three shelves were sort of an afterthought, but turned out to be great for puzzles and other type toys. I didn't use backing or cross supports initially, but put some in after we moved. You can see them in the last picture below. The heater in our temporary house caused the slightly-bent sides to become very bent sides. That caused the drawers would spontaneously fall out, which was always quite the shock and disappointment. I put in some supports in the back, which I wish I did initially as it would have made manufacturing easier. Also, If I were to go back, I would put one cross support in the front-middle, as the boards are so tall, it needs something to help maintain the shape in the front. I've found that even in a perfect fitting slider, really heavy buckets would bend just enough to flex out of them to crash... so don't plan on filling one of the large buckets with matchbox cars and sticking it on the top. Regardless, we've learned our lessons, made it work better, and has been a huge success in our house for a while now.
Estimated Time Investment
Weekend Project (10-20 Hours)
Recommended Skill Level
Intermediate

Comments

Supermom77 (not verified)

Sat, 10/01/2011 - 14:22

Great work. Love the colors. Do you have directions on training the kids to put the toys back?
In reply to by Supermom77 (not verified)

CassieD

Tue, 10/04/2011 - 19:42

Haha, I guess a little. Picking up when they aren't motivated is an ongoing battle. However, I did find having a specific place to put items with labels helped a lot, albeit with screaming. Actually the labels would probably be the best motivation of all of it.

The ideal is to have the kids only play with one bin at the time, but with more than one kid, that theory very quickly gets muddled... One child wants to play with one toy and one wants play with another, then "lego houses can't be broken down" and "polly pocket is using those blocks for the house" and so on. So it's more of a end-of-the-day(week/month/year haha) pick-up routine.

However, there seems to be a light at the end of the tunnel. My oldest (almost 6) seems to have caught on that the faster she picks up, the sooner she can move onto other activities besides playing (coloring, playdough, etc.), and is starting to pick up as soon as she's done without us even asking. I think getting an allowance has also helped with that.

That was way more than I thought I was going to comment, but I guess it goes to show you should never ask a Mom her opinion on something, unless your ready for a lecture :)

birdsandsoap

Thu, 10/13/2011 - 21:44

I love that your labels have pictures on them! I thought I should have done that way back when since my children are too young to read. Easy to find and easy to put away. Good job, Mom!

Butcherblock Farmhouse Table and Benches

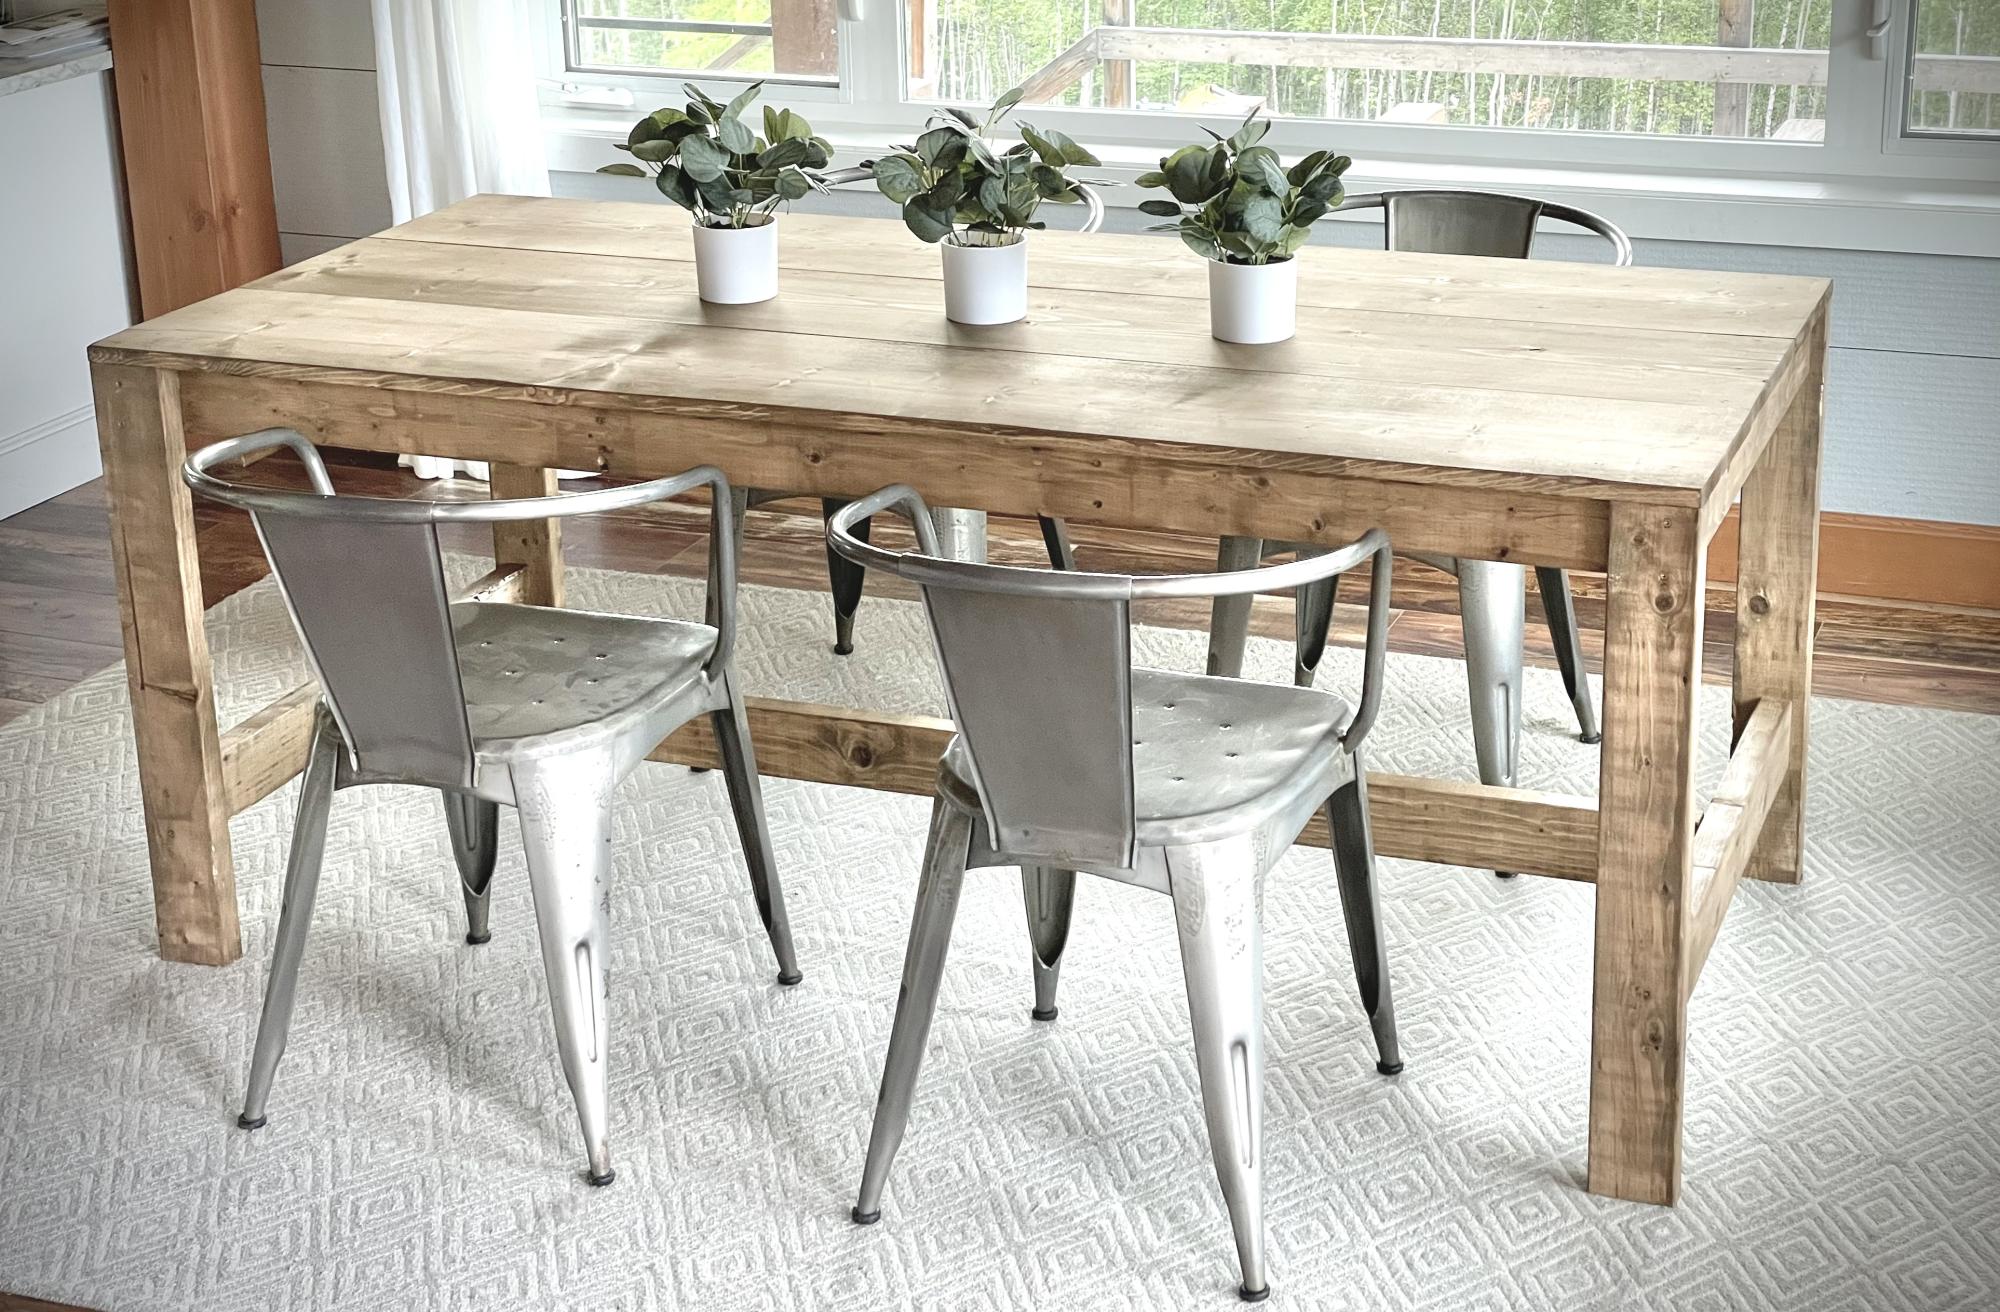
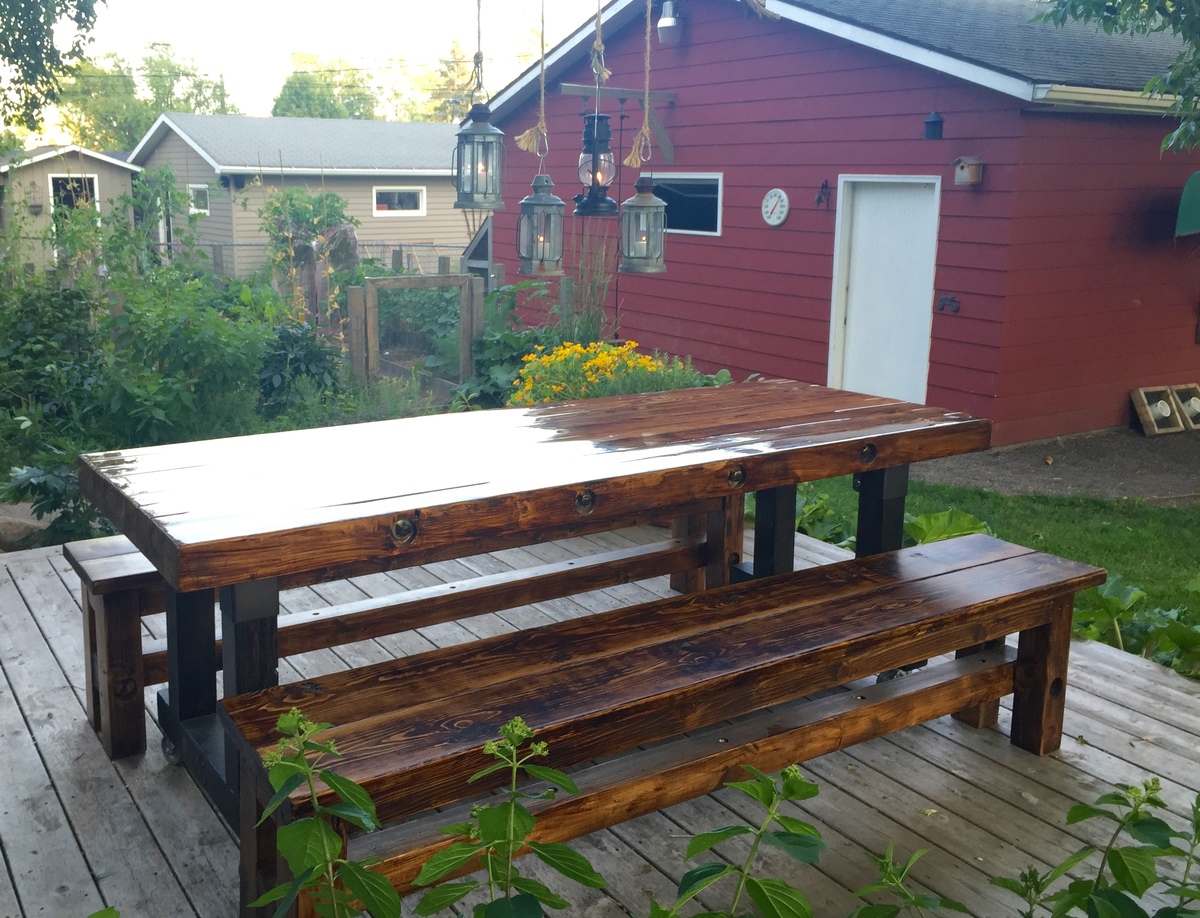
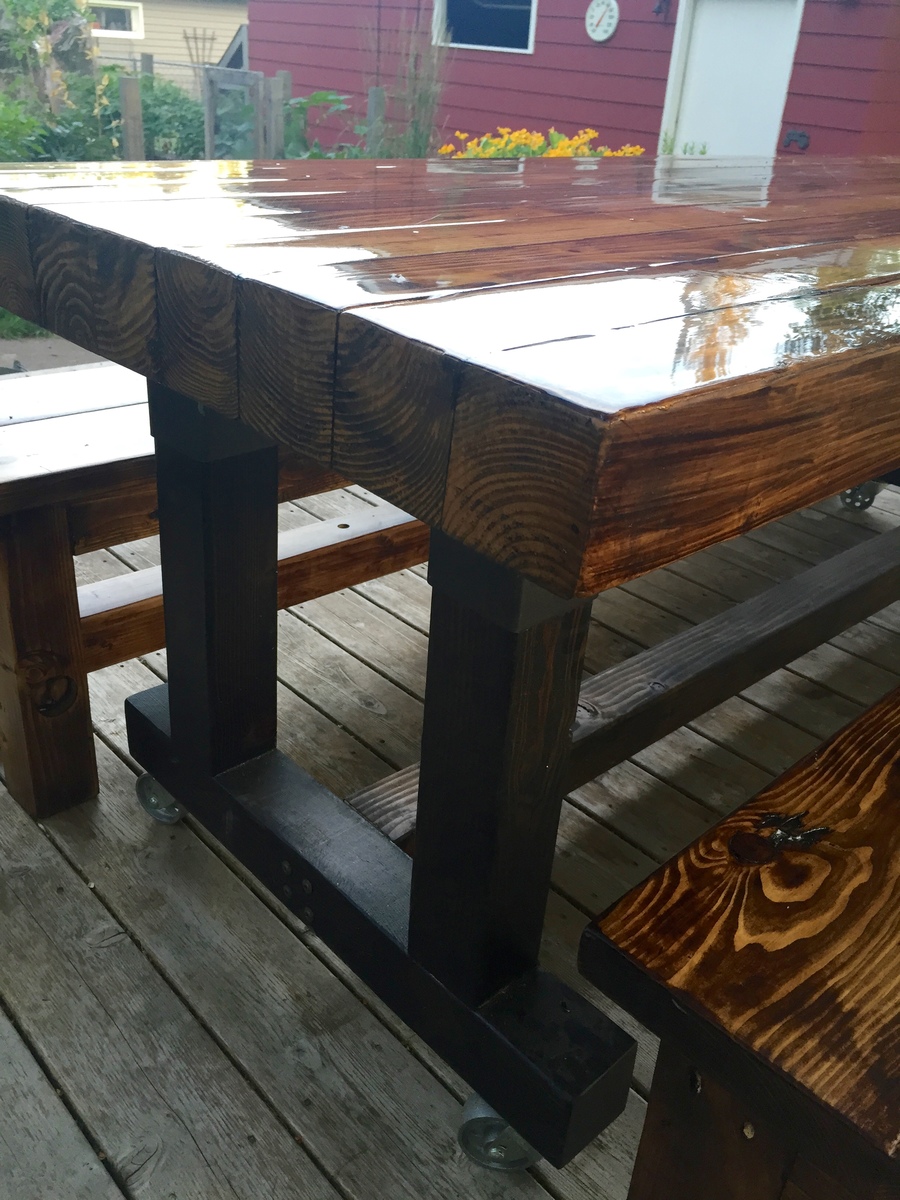
My parents needed a table for their newly expanded dining room at our cabin. I love the look of butcher-block, and wondered how I could design a table with the thick chunky look. I decided on using 4x4's for the majority of the build. This project took me a while to complete because in the middle of it, I twisted my ankle while lifting the table! Ha, building can cause some damage. Although, the ankle did slow me down, I was still able to deliver the table and benches to the cabin in time to give it to them for their anniversary present.

Estimated Cost
$400
Estimated Time Investment
Week Long Project (20 Hours or More)
Finish Used
Mixwax: Aged Oak stain for table top and benches, Jacobean for legs
Famowood glass poured on top
Poly on Benches
Recommended Skill Level
Intermediate

Dining chairs for X based pedestal table

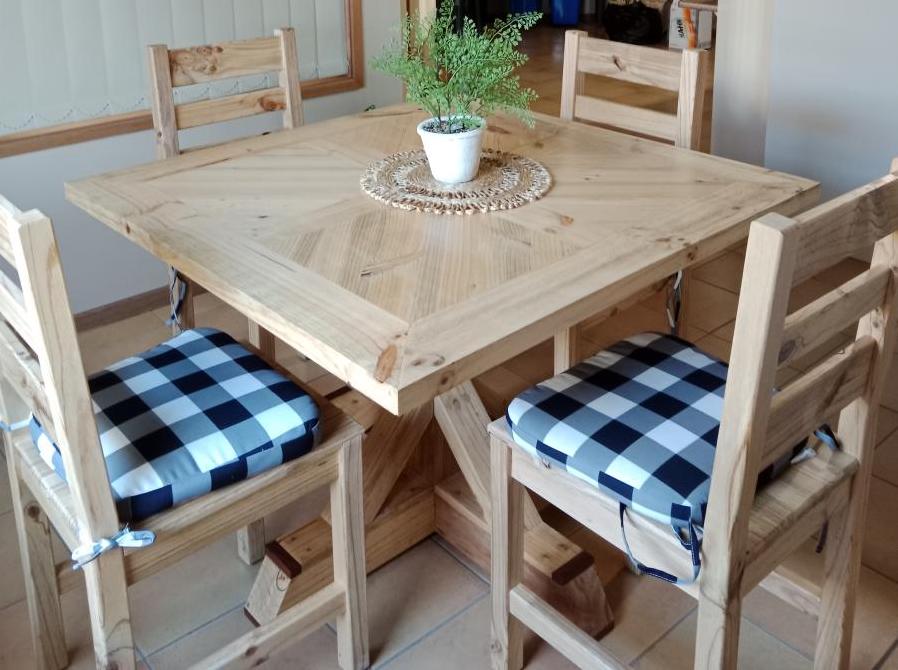
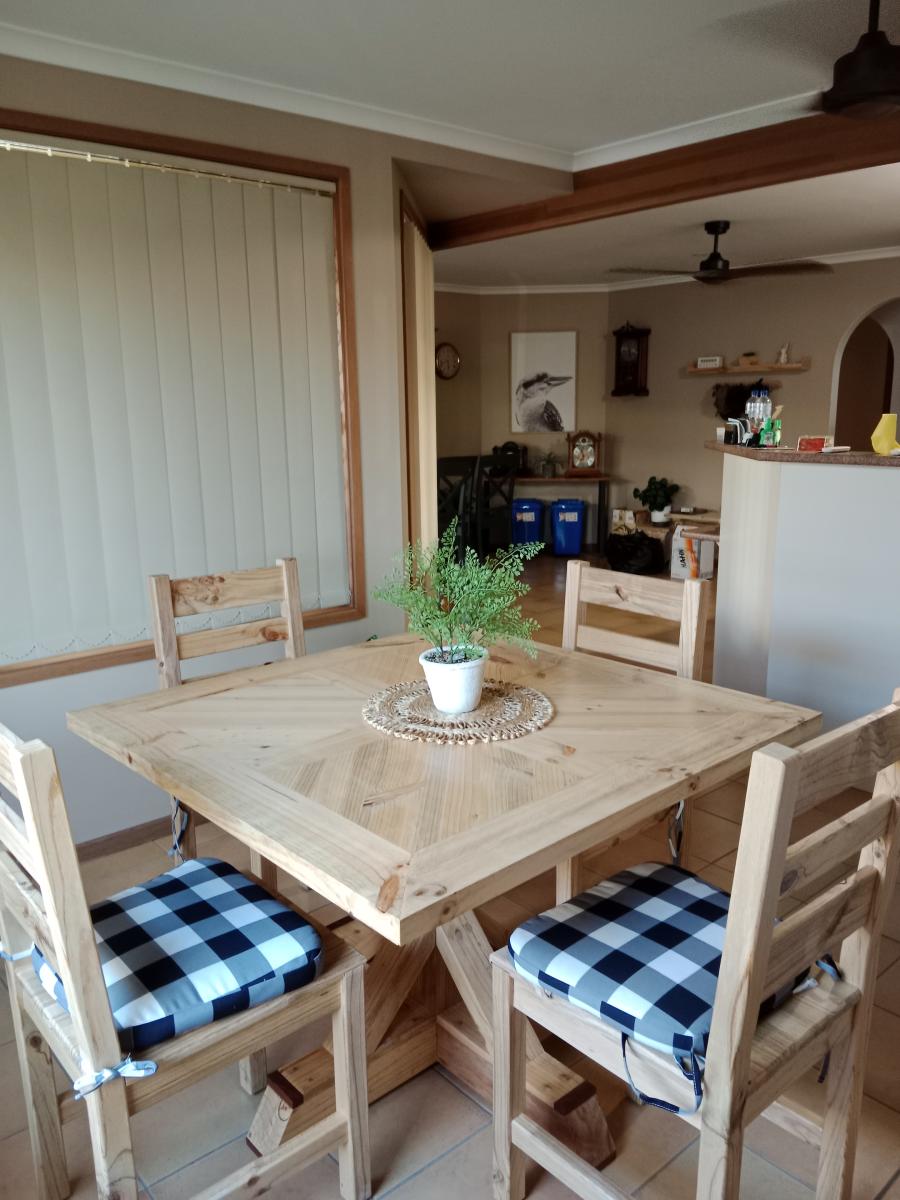
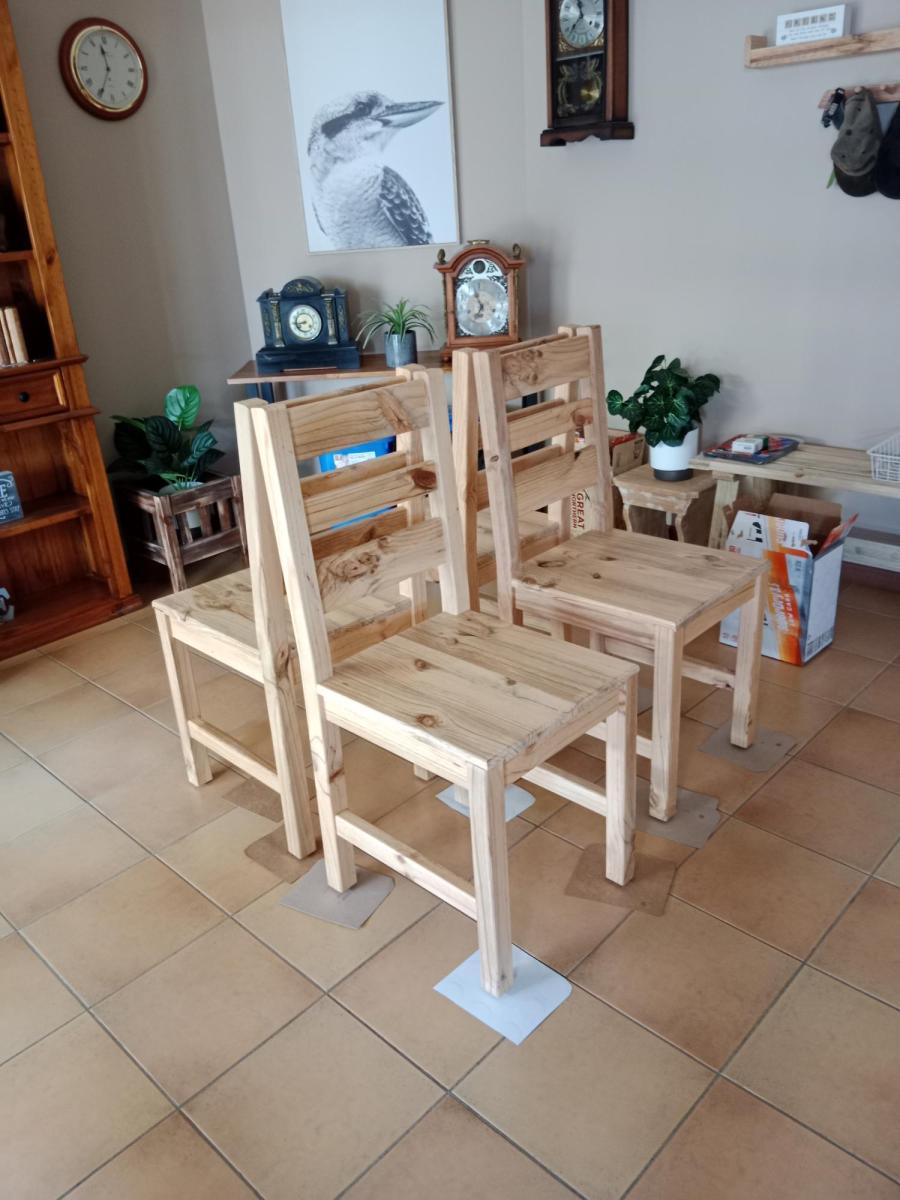
Submitted by Anonymous (not verified) on Mon, 03/06/2023 - 10:15

I made the 4 chairs to complete the dining suite. The table was made from the X based pedestal table plan.

The timber was all cut from 200mm x 50mm pine sleepers and finished with Cabots clear finish.

Comments

Weatherly Sofa

Submitted by astcgirl on Mon, 11/11/2013 - 14:25

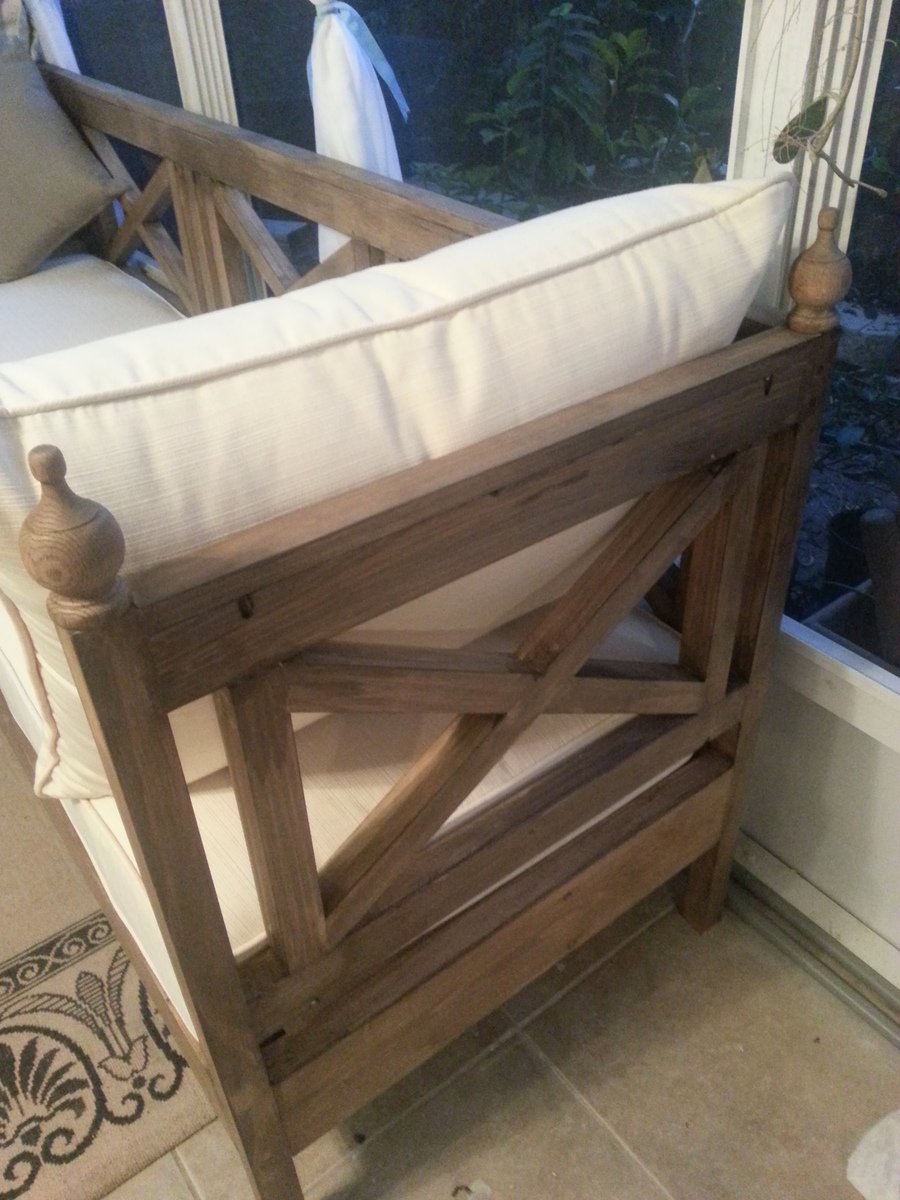
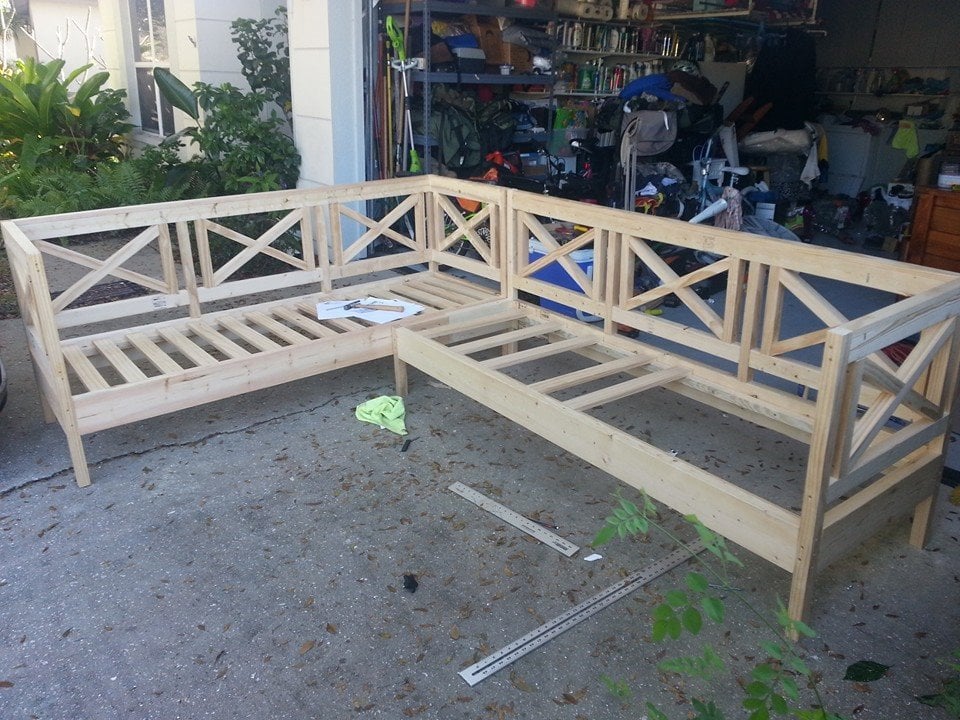
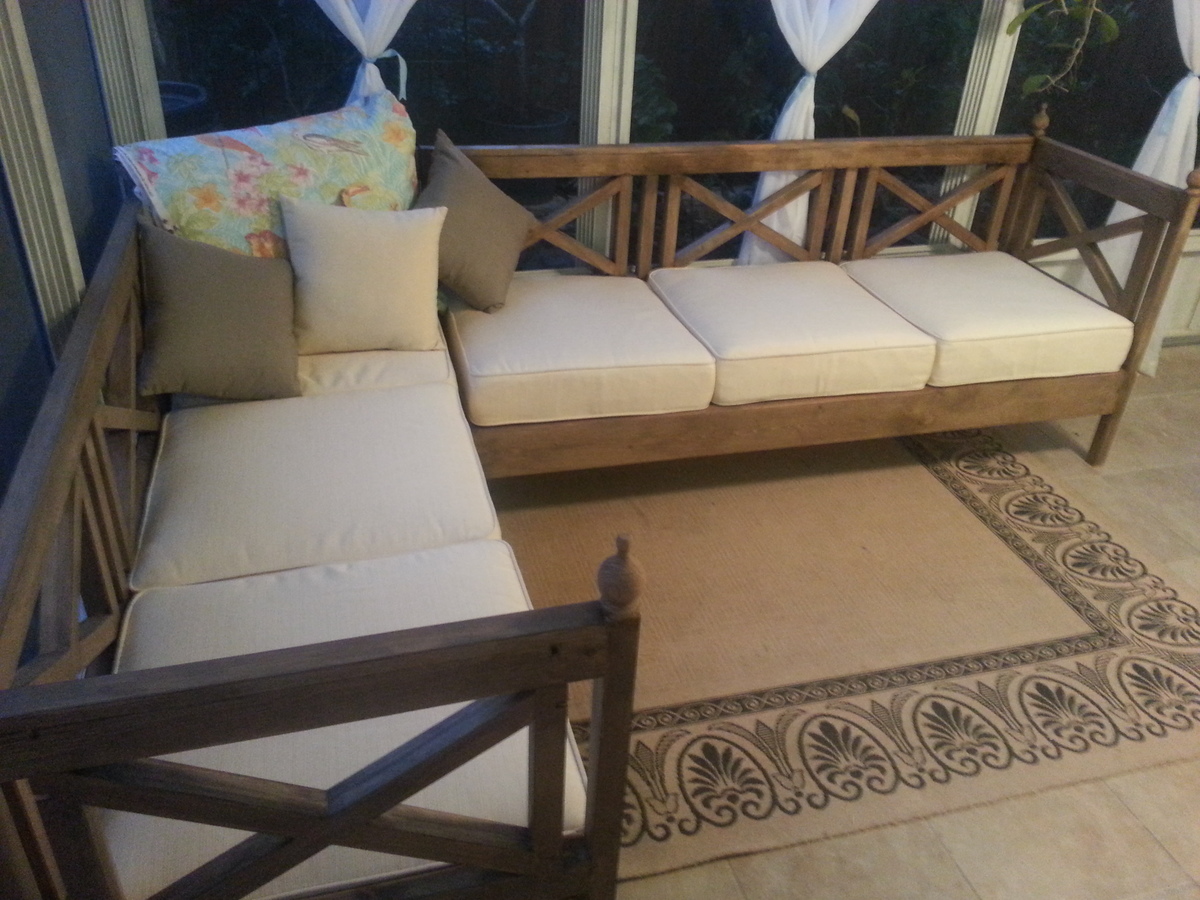
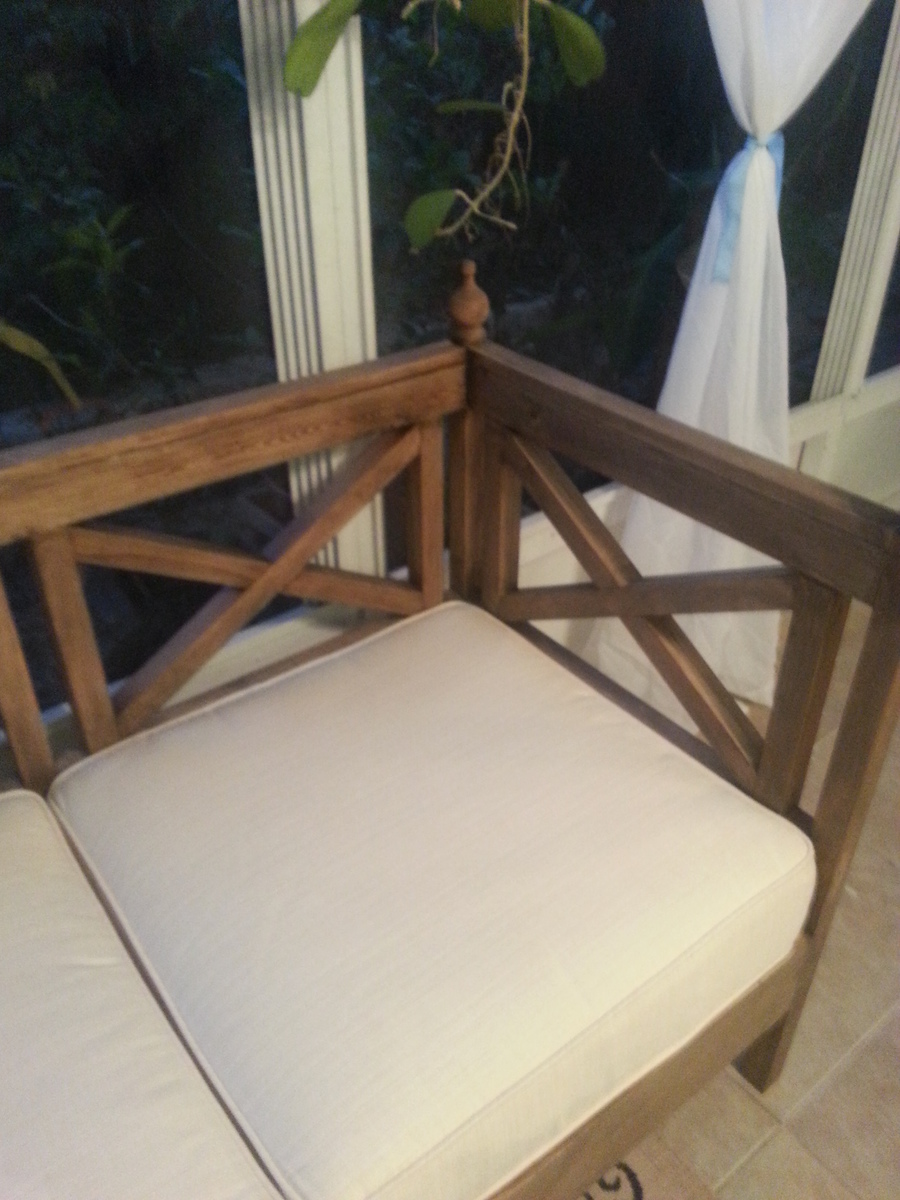
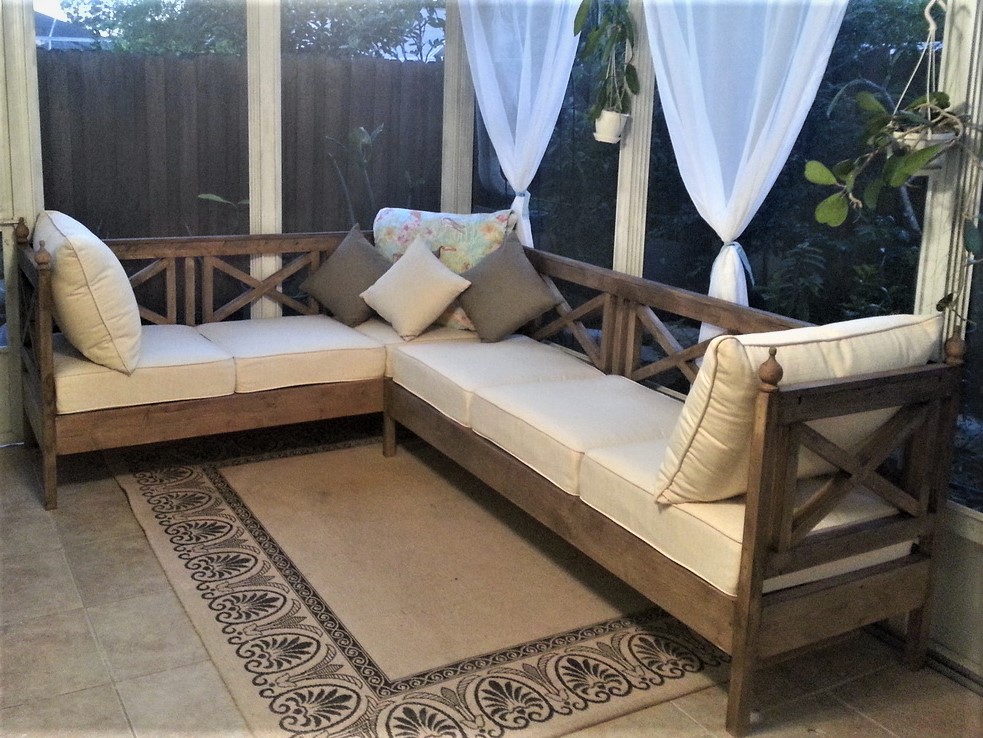
Just wanted to show my Weatherly Sofa (Sectional) that I built recently. I've been drooling over Ana's plans for months now, I waited patiently until I could get a good deal on a Kreg Jig since so many of Ana's plans use it. I purchased my cushions first, I really wanted Sunbrella fabric since they will be outside in my Lanai so they need to stand up to the Florida elements, I was so excited when I found the seat and back cushions for $40 a set discounted from $98, however I kept watching them after I purchased them and they eventually dropped down to $20 a set (called Lowes and they refunded me the difference), so total for all 8 seat and back cushions was only around $170...the problem with them however was that they were 25 x 25 and not the 24 x 24 that Ana recommends in the plans. I just modified the length of the sofa's by adding 3" and With by 1" which did increase my cost of wood since I was short certain pieces however I really wanted them to fit and not look squashed in there. The extra 3" made them fit perfectly. I also have 8 matching back cushions but they are a little too puffy to keep on there so I just use 2 on the ends and stored the rest. The small cushions I also purchased were on sale for $4 a set of 2. This was a relatively easy project. I was a little intimidated to use a compound miter saw to do my cuts so instead I just purchased a Stanley Clamping Miter box that was able to do the 30 degree cuts to make the x's. Total cost was $470 with all the cushions. I used Behr Weather Proofing Wood Stain & Sealer Semi-permanent in COFFEE which gave it a driftwood beachy look. It is so comfortable and sturdy. I love it and considering it was my first build from Ana's site I'm now hooked....Thank you Ana

Built from Plan(s)
Estimated Time Investment
Week Long Project (20 Hours or More)
Finish Used
Behr Weather Proofing Stain and Sealer Semi-permanent (Coffee) they didn't have quarts so I just got 4 sample cans and only ended up using 3.
Recommended Skill Level
Beginner

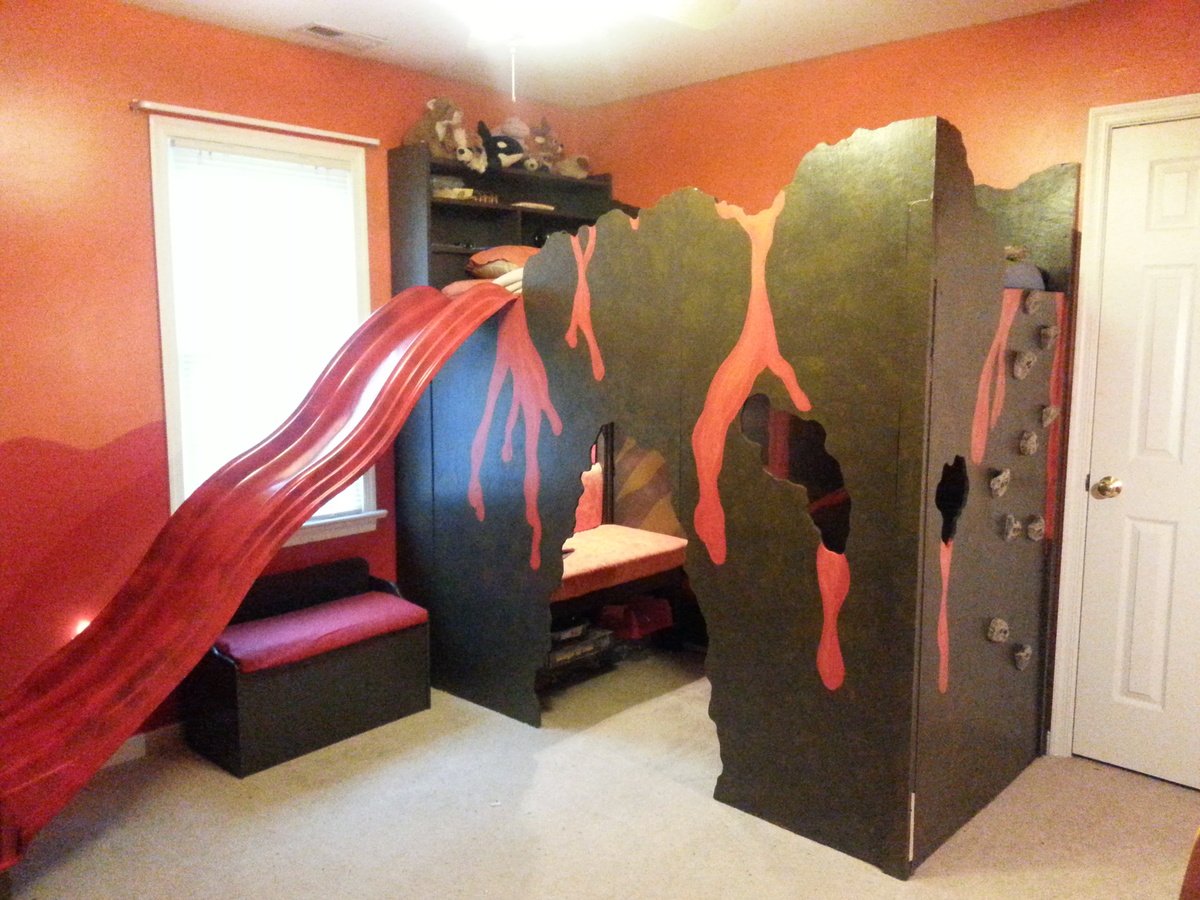
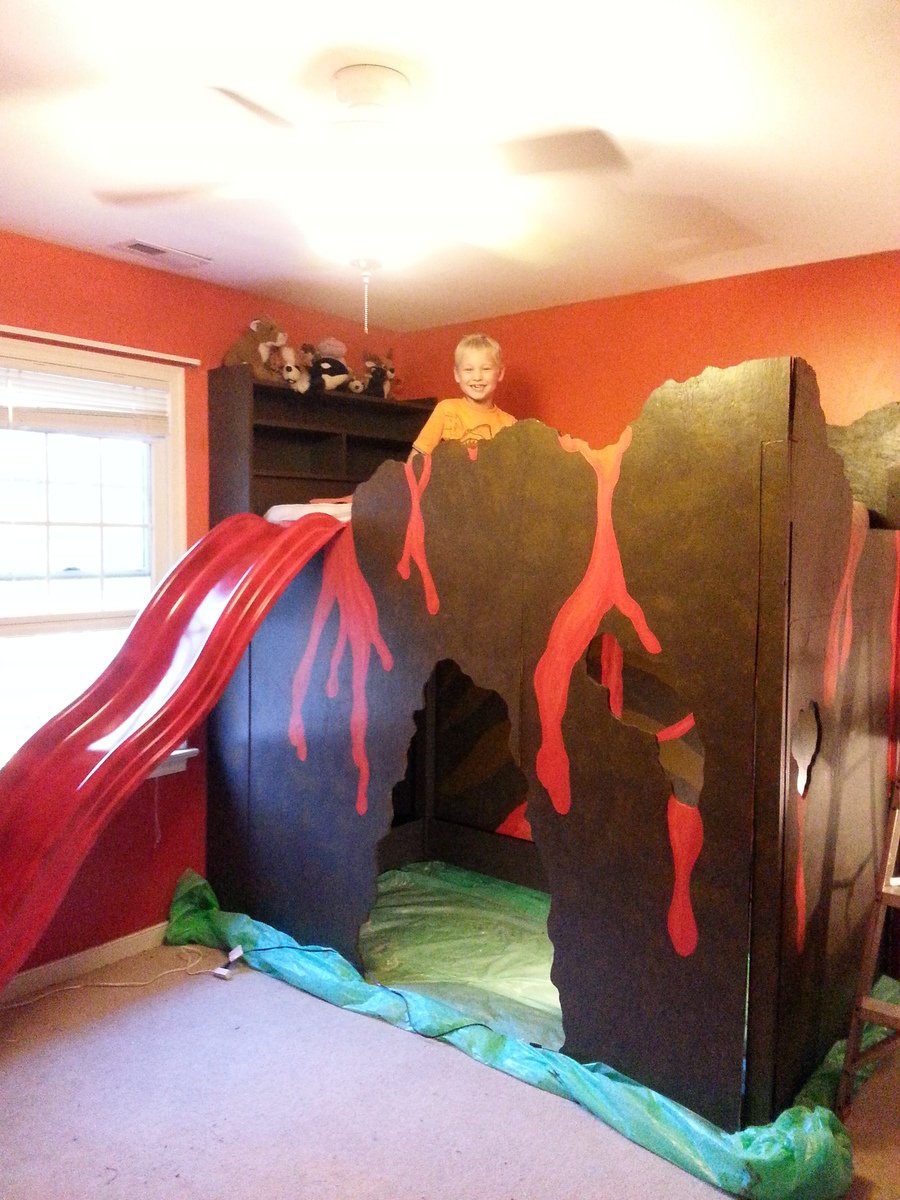
Volcano Loft Bed

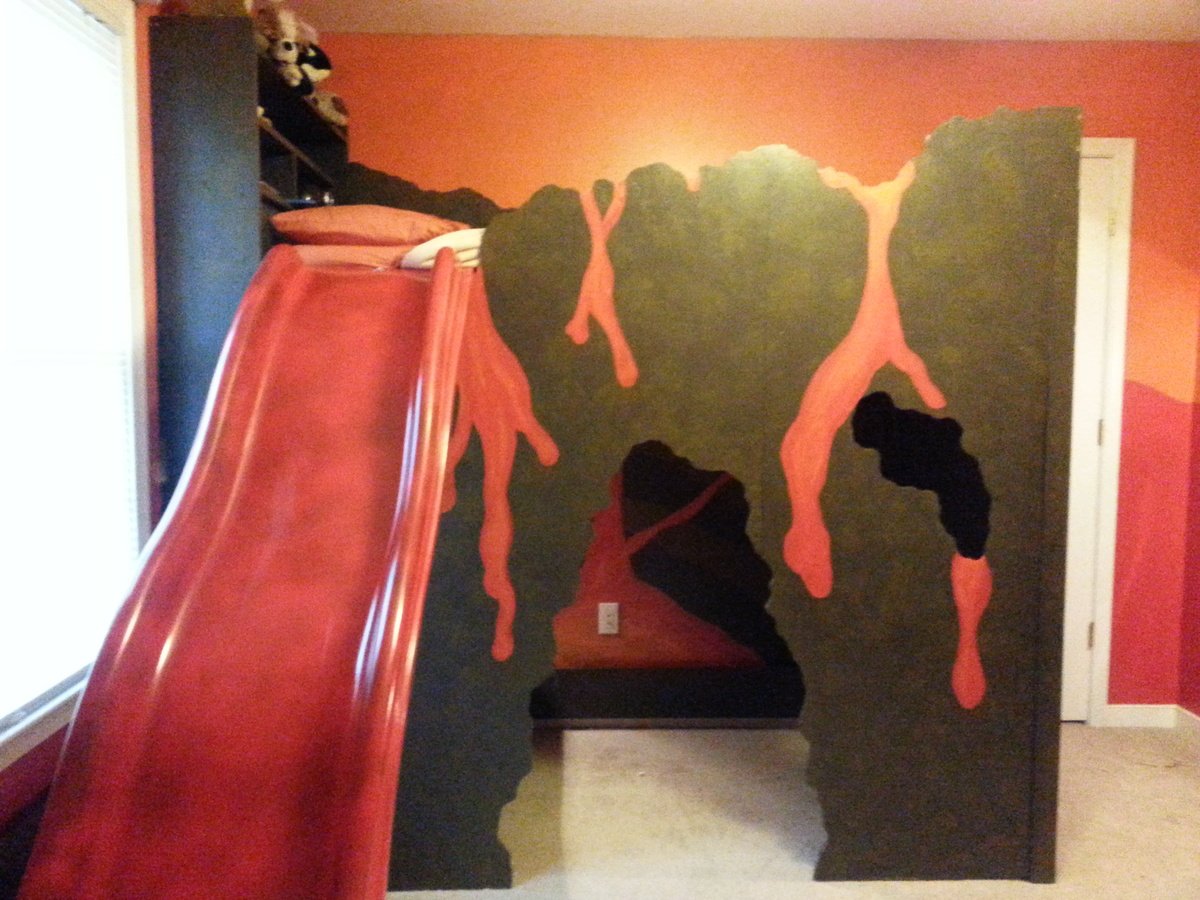
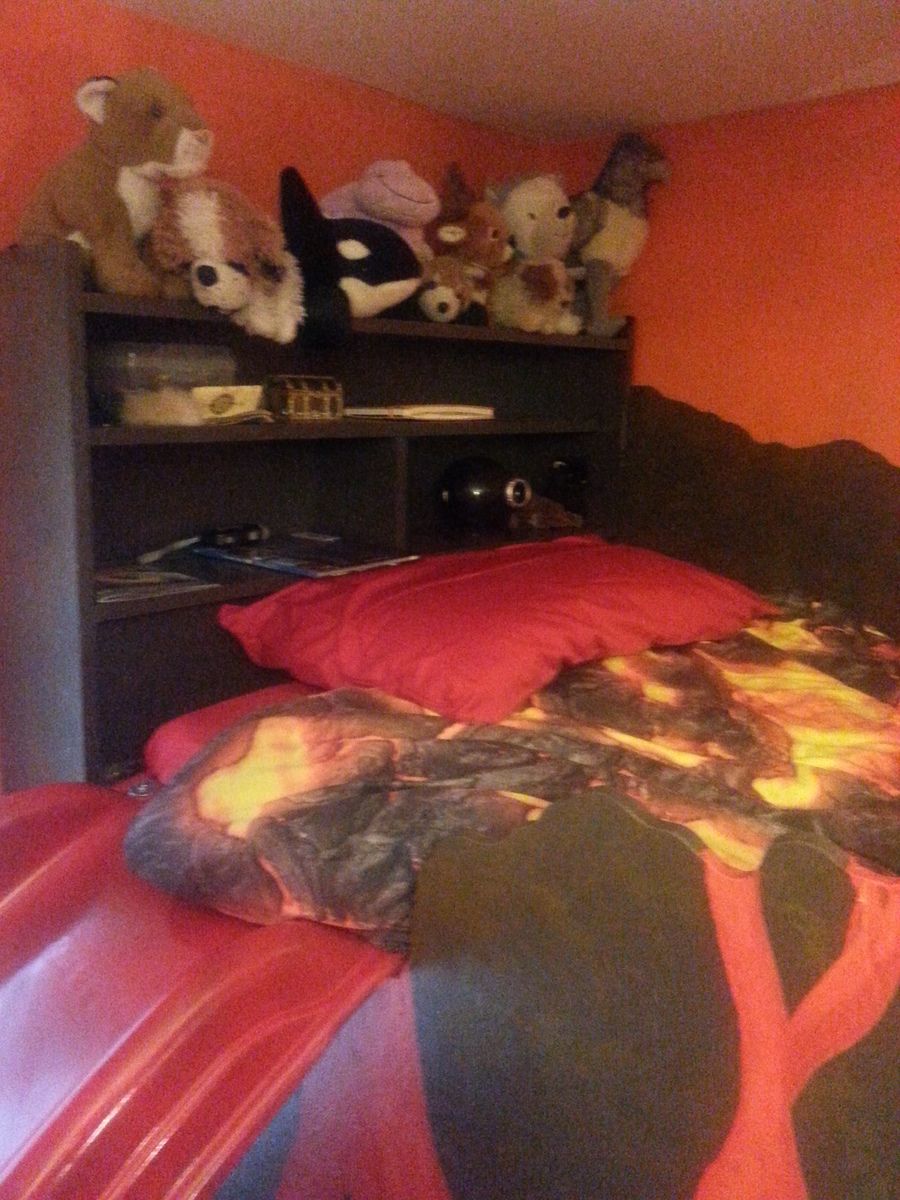
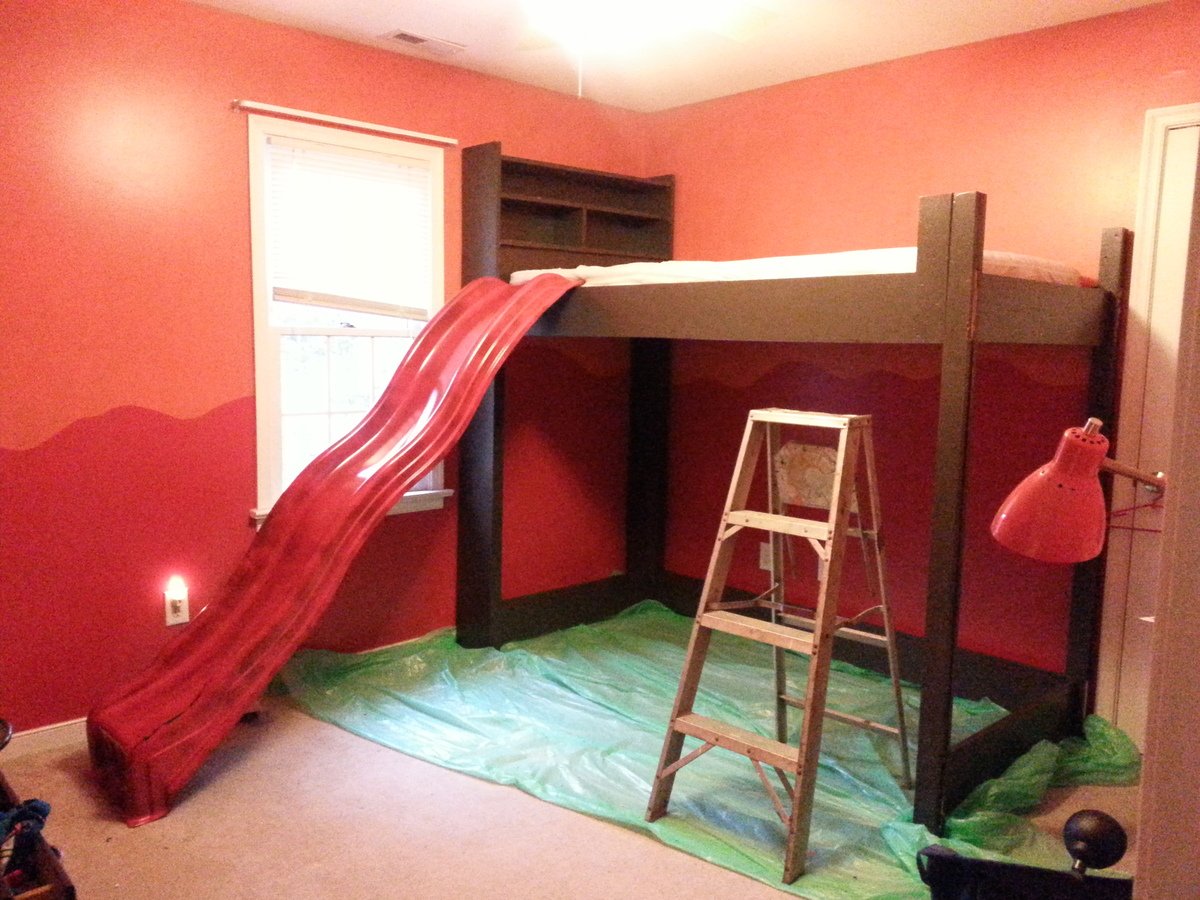
When it was time to re-do my son's bedroom (past time, really), I decided to build him a loft bed to help maximize space in his small room. A quick search to the internet brought me to Ana's site, saving me lots of hassle on trying to design my own loft bed for him from scratch. My son, who loves everything science and is especially fond of volcanoes, wanted a volcano themed room, and I had the bright idea to make the bed itself into a volcano.

I modified the loft plans slightly to create a bookcase headboard - because I always wonder when looking at loft/bunk beds where the kids put all their STUFF (books, reading lights, glasses, special treasures, etc) - but other than that its just the plans from this site minus the rails and with plywood tacked on to the exterior (the plywood takes the place of the rails). The plywood was cut with a jigsaw after it was put up so I could get all the ridges and holes in just the right spot and height.

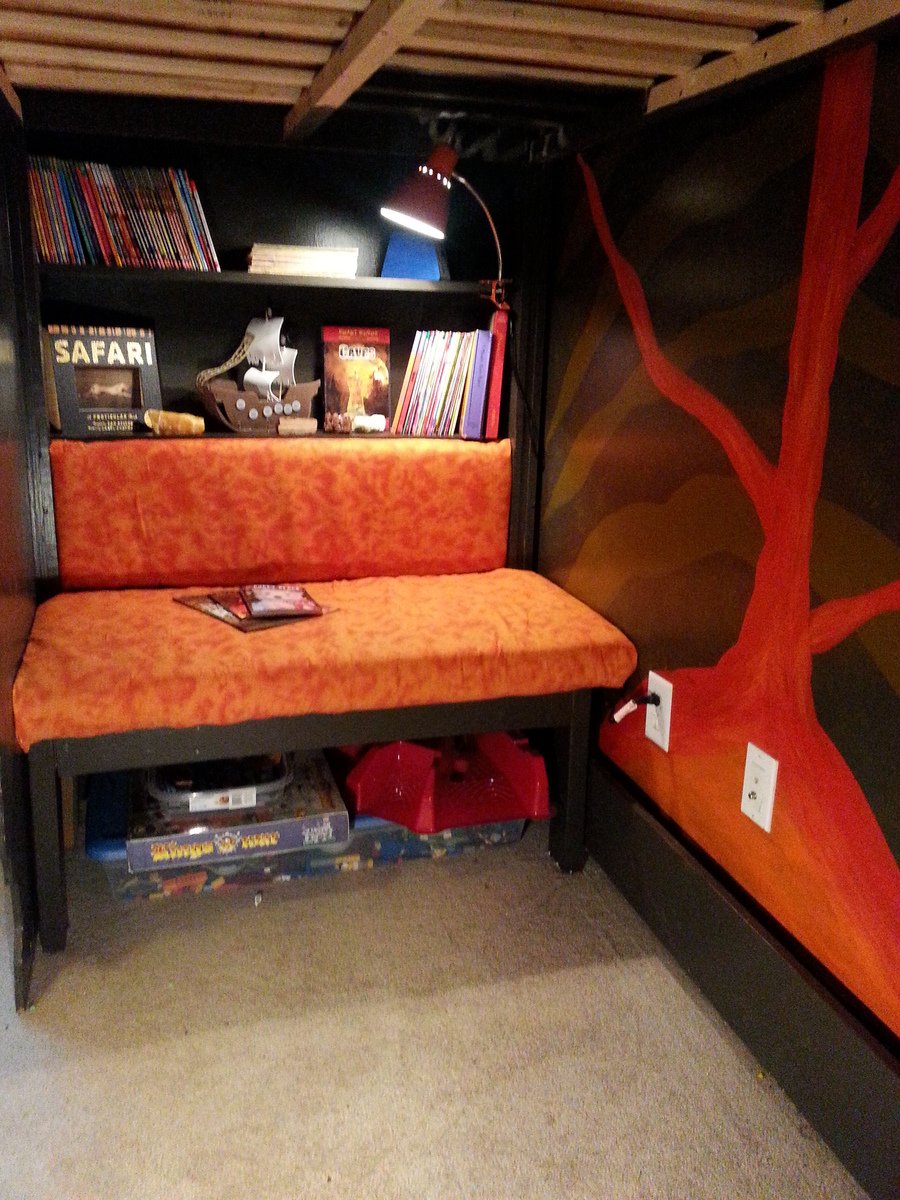
Honestly, the painting took much MUCH longer than cutting and assembling the bed did, but I think it really turned out well. The inside of the volcano on the cave's back wall is my favorite part. There's still a few things left to do, but no project of mine is ever really completely finished anyway! On on end inside the "cave" under the loft I built a cushioned reading bench and bookshelf, but the other end of the cave is still empty. Eventually it will house a built-in desk that looks out of the lava holes in the walls.

The cave under the bed is so cozy, I've found myself sitting on the reading bench more than once while working on the project, enjoying some me-time when the kids are at school!

Built from Plan(s)
Estimated Time Investment
Weekend Project (10-20 Hours)
Finish Used
paint
Recommended Skill Level
Intermediate

Comments

Ccpie77

Sat, 03/22/2014 - 10:49

Hi -

Great job!! I'm planning on adding a slide too for my son. Did you do anything extra to support the slide?

Thanks!

Ccpie77

Sat, 03/22/2014 - 10:49

Hi -

Great job!! I'm planning on adding a slide too for my son. Did you do anything extra to support the slide?

Thanks!

Back Yard

Submitted by Anonymous (not verified) on Mon, 05/15/2023 - 08:32

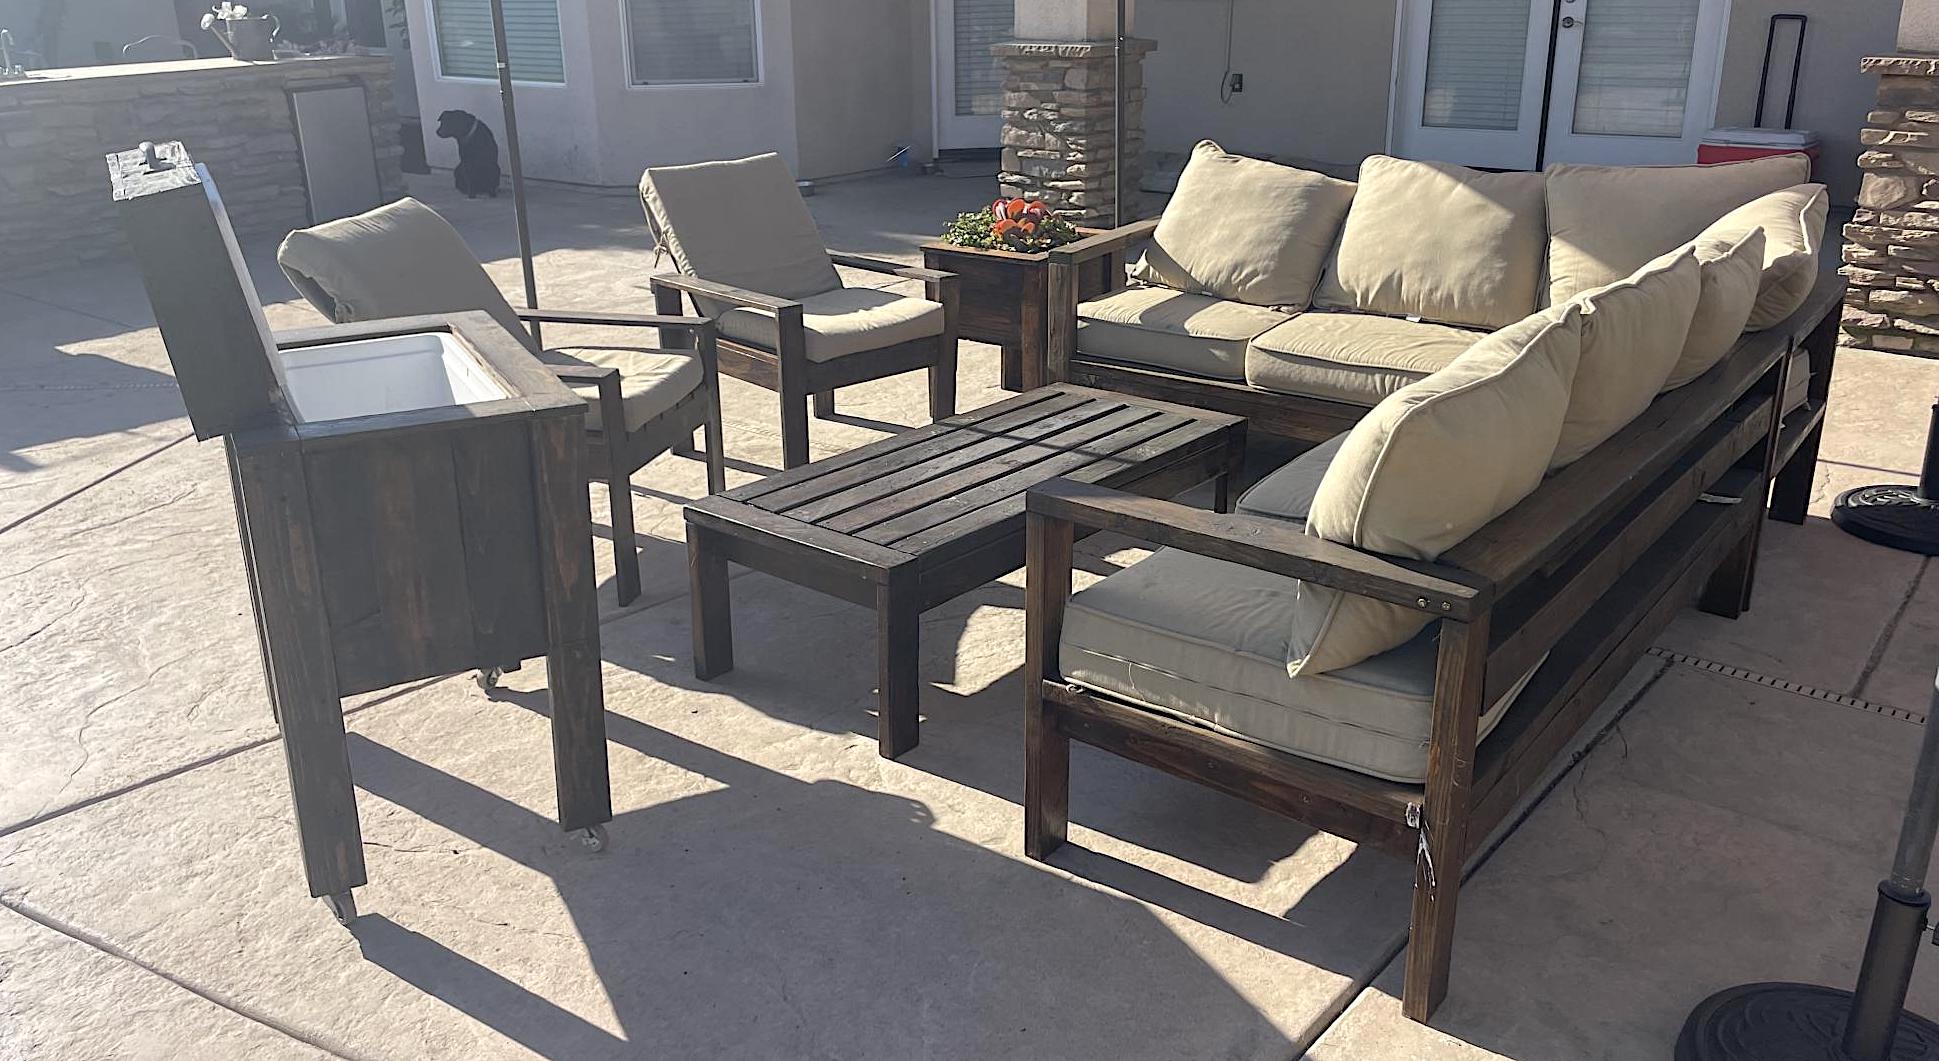
This is my homemade backyard inspired by plans from Ana. Used Ana's previous post to build all pieces. Stained in Mission Oak and bought pillows from Lowe's. Succulents from a local nursery.

Coffee Table
2 piece lounge
2 chairs
Ice chest
Planter Box

Comments

Industrial Coffee Table

Submitted by Anonymous (not verified) on Tue, 02/16/2016 - 12:24

I was seeing this coffee table everywhere so I knew we had to make it. It's the easiest build ever. I think the only tricky part is the painting near the edge. We like a more sanded/finished top. We tried spray painting the base and then attaching the top, but then we sanded the top and the spray paint on the base near the top came off, so I had to cut in and I'm not good at that.

So we're still working on a way to do this properly. We tried making the top on the ground and then sanding & attaching it. But the top needs to be completely exact/square in order to do this. We live in a old farmhouse, so we prefer to attach it as we go - then sand. We also plane the top for a more exact and modern look. 

Estimated Cost
Under 50.00
Estimated Time Investment
Afternoon Project (3-6 Hours)
Finish Used
Top stained in our custom beachwood mix. A mixture of Minwax stains, Bottom spray painted in Oil Rubbed Bronze & semi-gloss polyurethane ( two coats )
Recommended Skill Level
Beginner

Comments

Camp Loft Bed with Stair, Junior Height

Submitted by Anonymous (not verified) on Sat, 02/27/2016 - 12:23

This was a fun project for my husband and I! My 4 year old absolutely loves her bed. We have plans to add a curtain to the bottom to let her open and close it for her reading nook (or as curtains for her "stage")! :) 

Estimated Time Investment
Weekend Project (10-20 Hours)
Recommended Skill Level
Beginner

Easy Kitchen Island

Submitted by Anonymous (not verified) on Thu, 06/29/2023 - 09:21

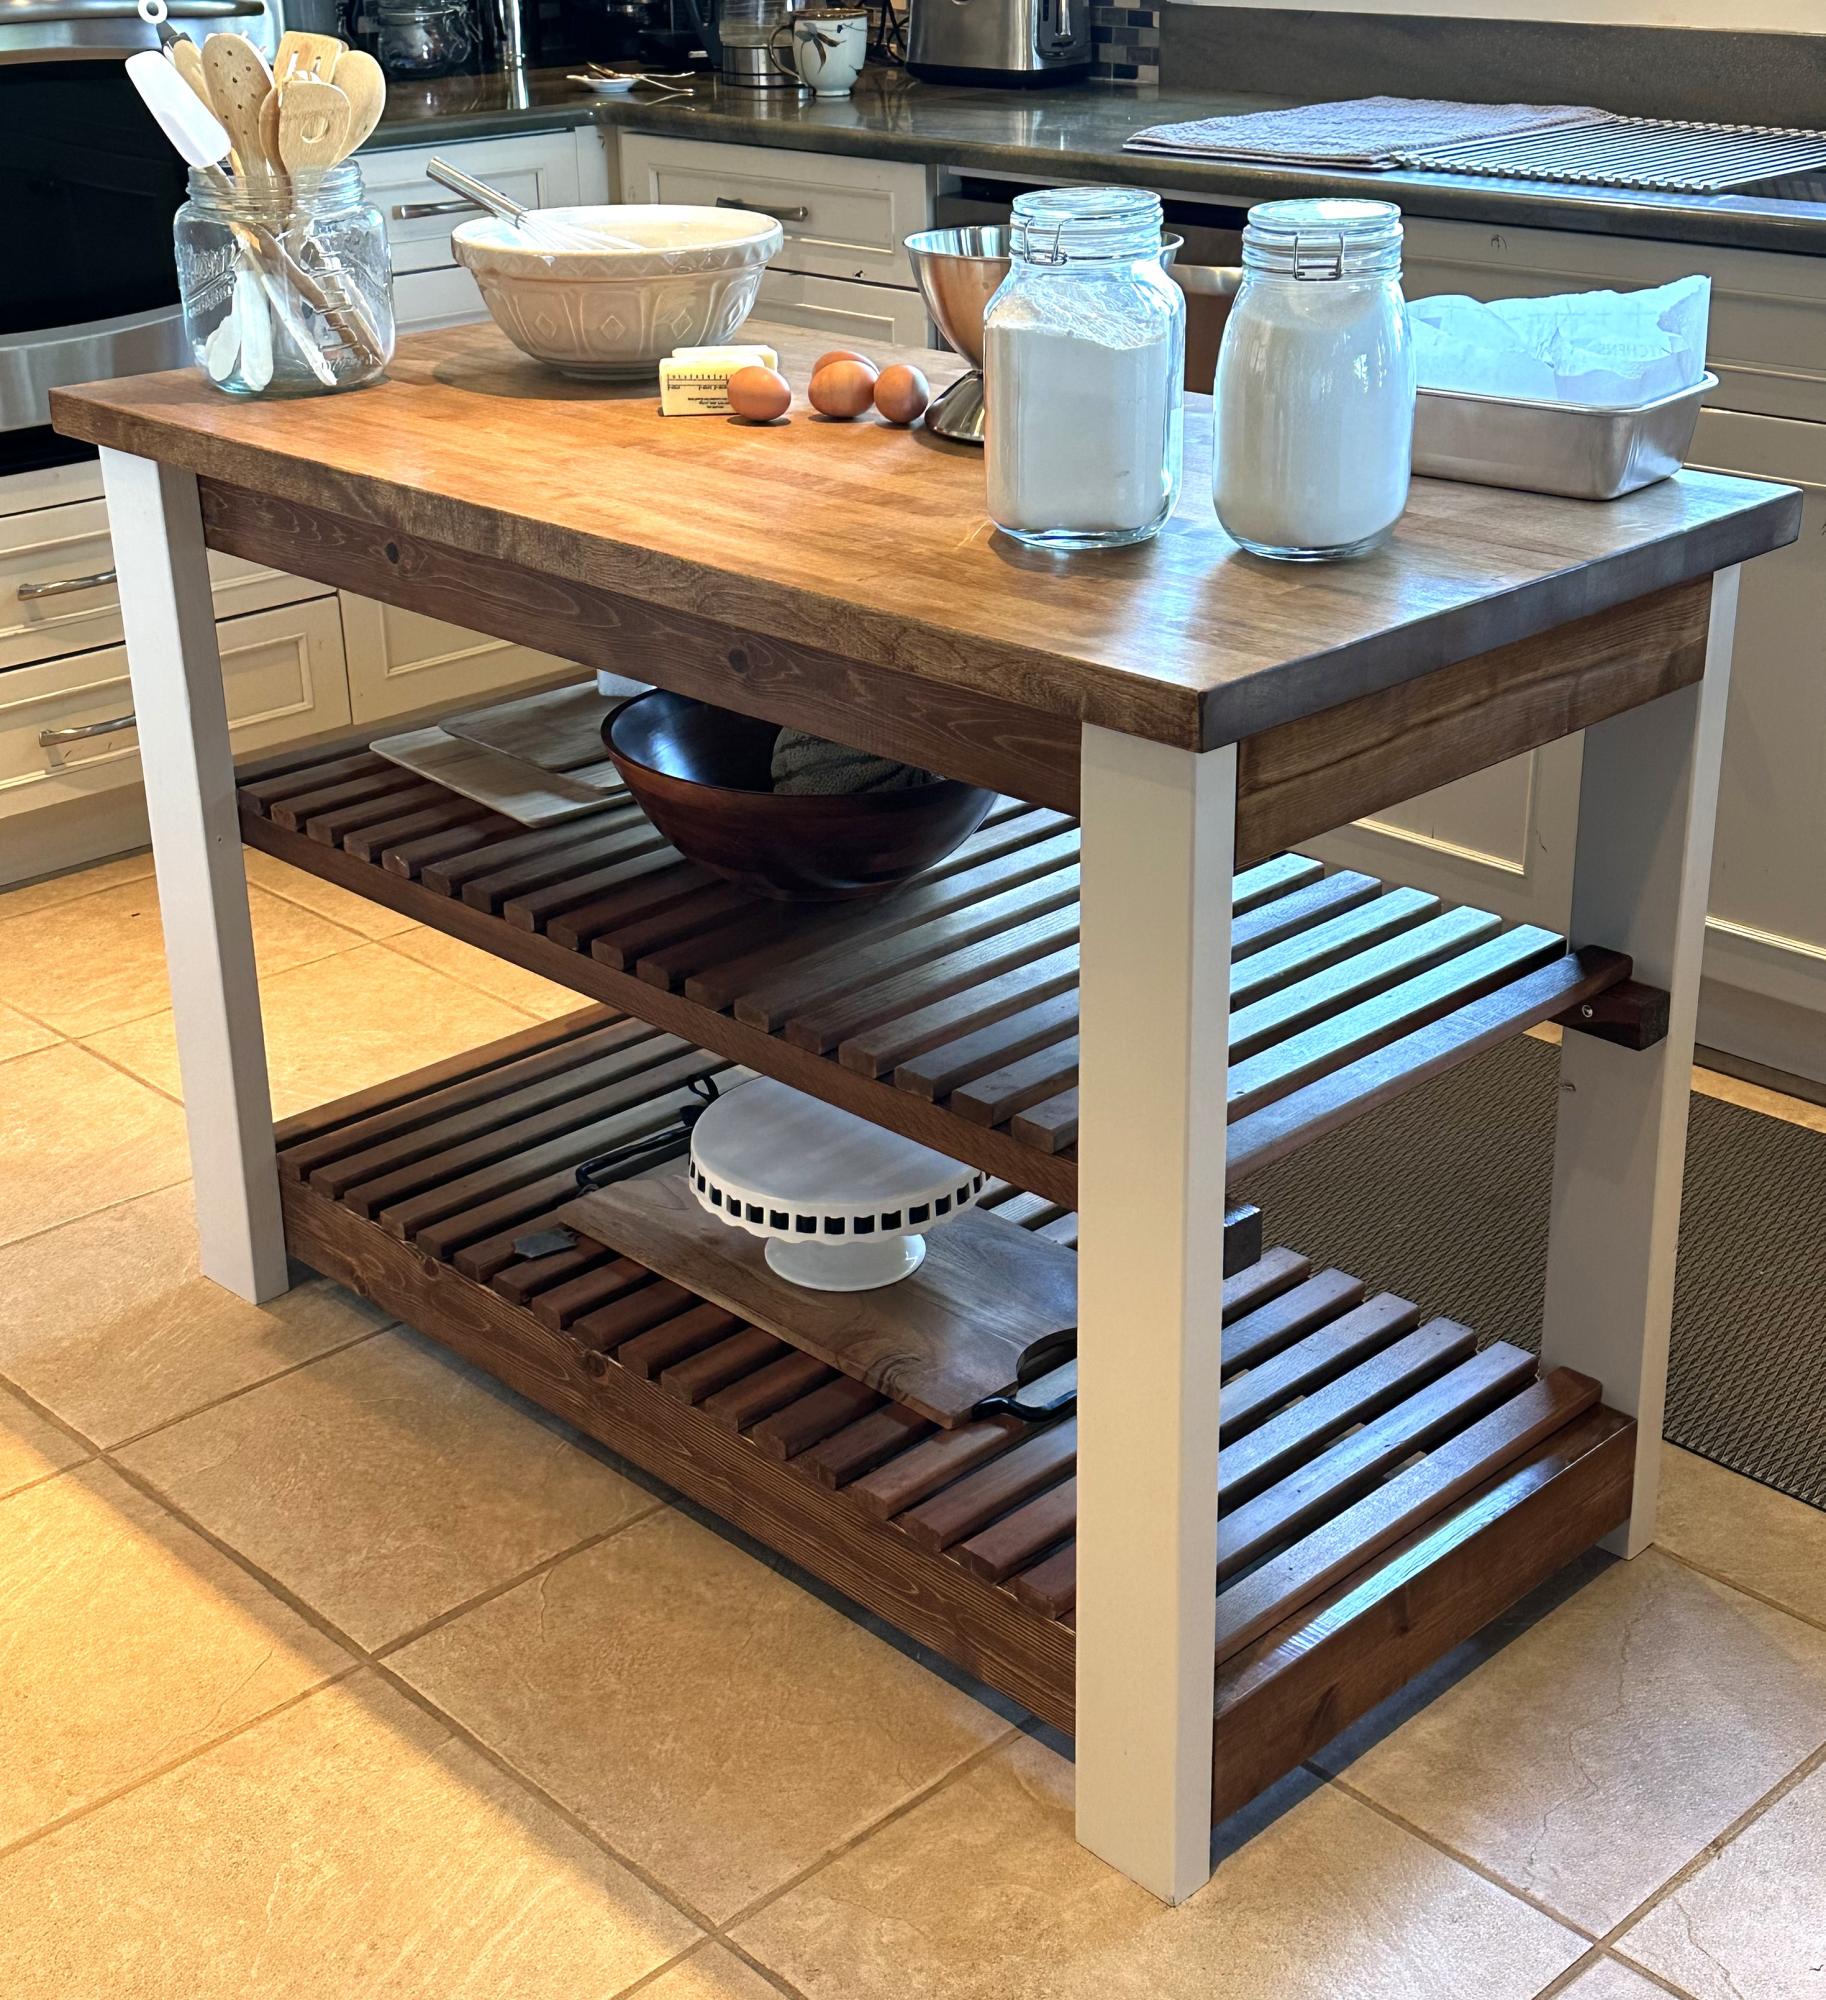
Easy Kitchen Island. This was my first big woodworking project so I bought the top and recycled some old wood. I learnt a lot, it took me about 20hrs to complete including painting and staining. I found the plans easy to follow and I’m super happy with the results.

Anji B

Built from Plan(s)

Bed and night stands from plans on this site

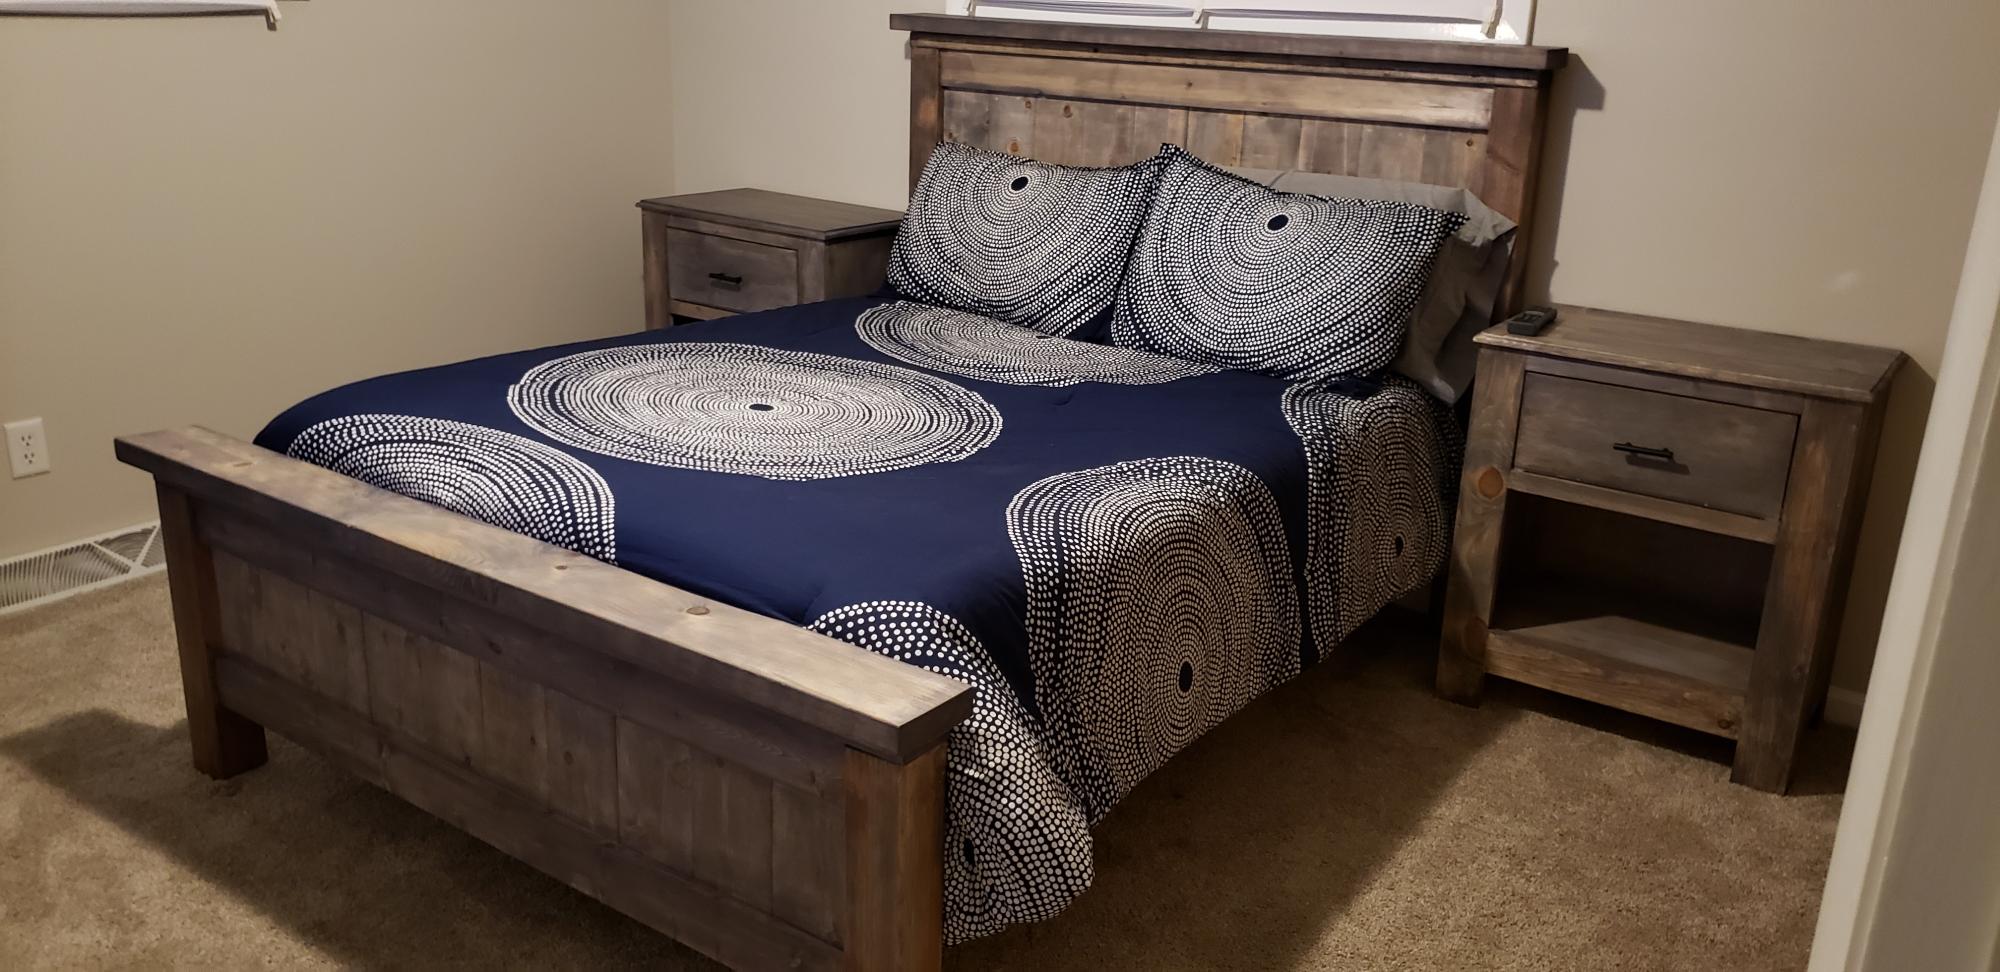
Submitted by Anonymous (not verified) on Sun, 10/20/2019 - 18:02

Bed and night stands build with plans from Ana White. Both projects were finished using age accelerator and weathered gray stain. Time and coat estimations include both night stands and the full sized bed.

Estimated Cost
300
Estimated Time Investment
Weekend Project (10-20 Hours)
Finish Used
Age accelerator and weathered gray stain.
Recommended Skill Level
Intermediate

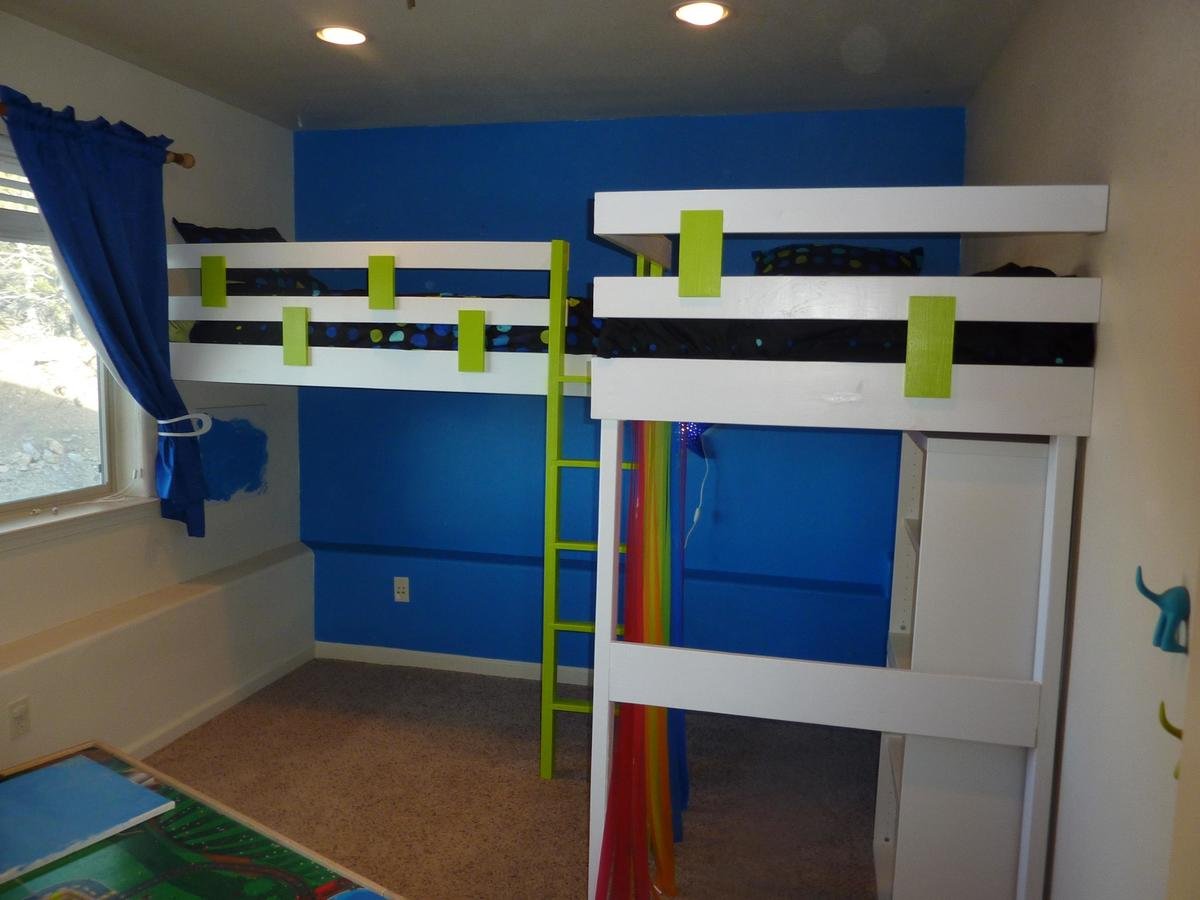
double loft bed

Submitted by smckeand on Fri, 03/23/2012 - 13:01

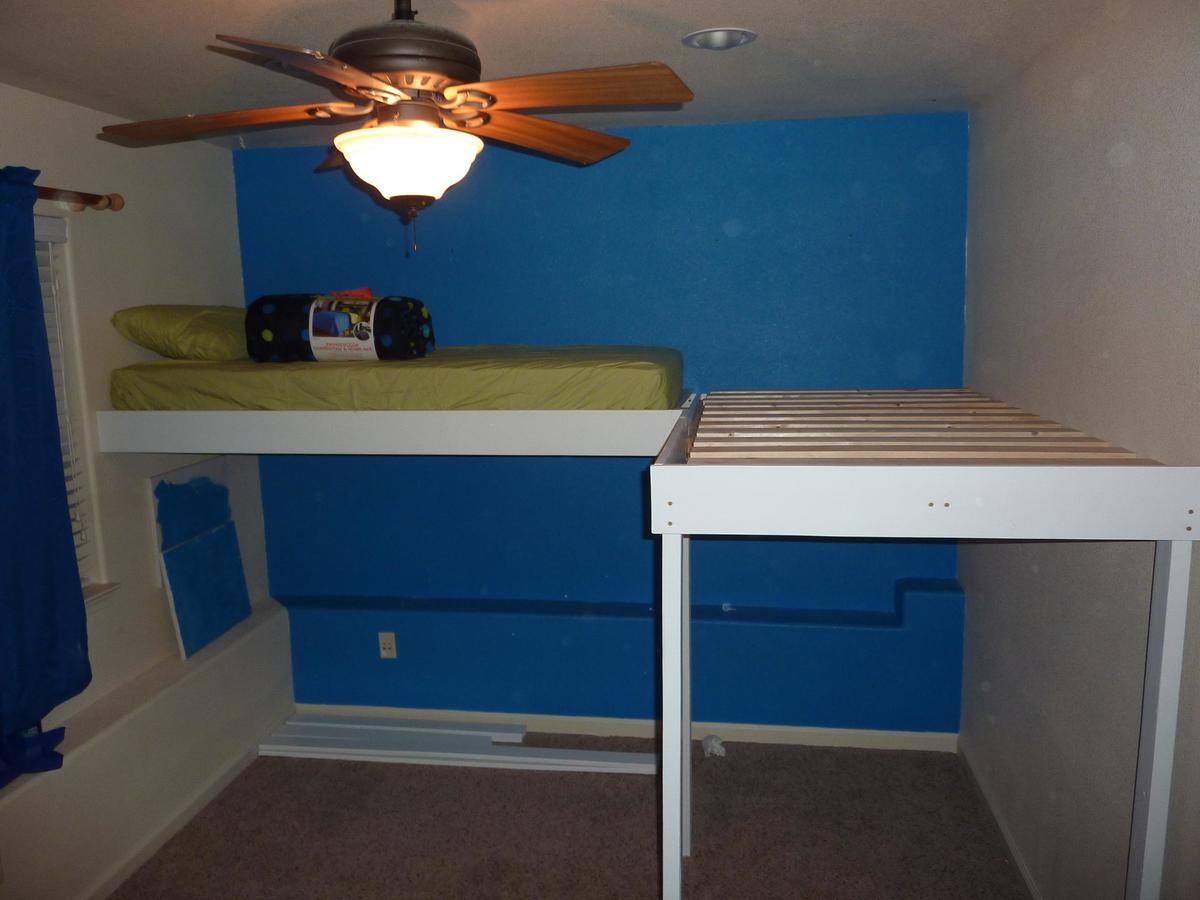
This is my extremely altered double loft bed. My sister needed a custom sized double loft bed, I figured I could use this plan and make two beds in an L shape, but the space I had to work with was smaller than these plans so I had to re-design most of the bed all together, I ended up attaching two sides of each bed to the wall with legs only on the outer pieces. She wanted a "fun" looking bed so I added a splash of color, just simple enough for me to make.

Built from Plan(s)
Estimated Time Investment
Week Long Project (20 Hours or More)
Finish Used
sanded with 220 grit, primed, painted with sherwin williams pro classic
Recommended Skill Level
Intermediate

Comments

taslytoo

Wed, 08/01/2012 - 18:04

Might incorporate this idea into my girls room bed. Thanks for sharing.

Back