Community Brag Posts

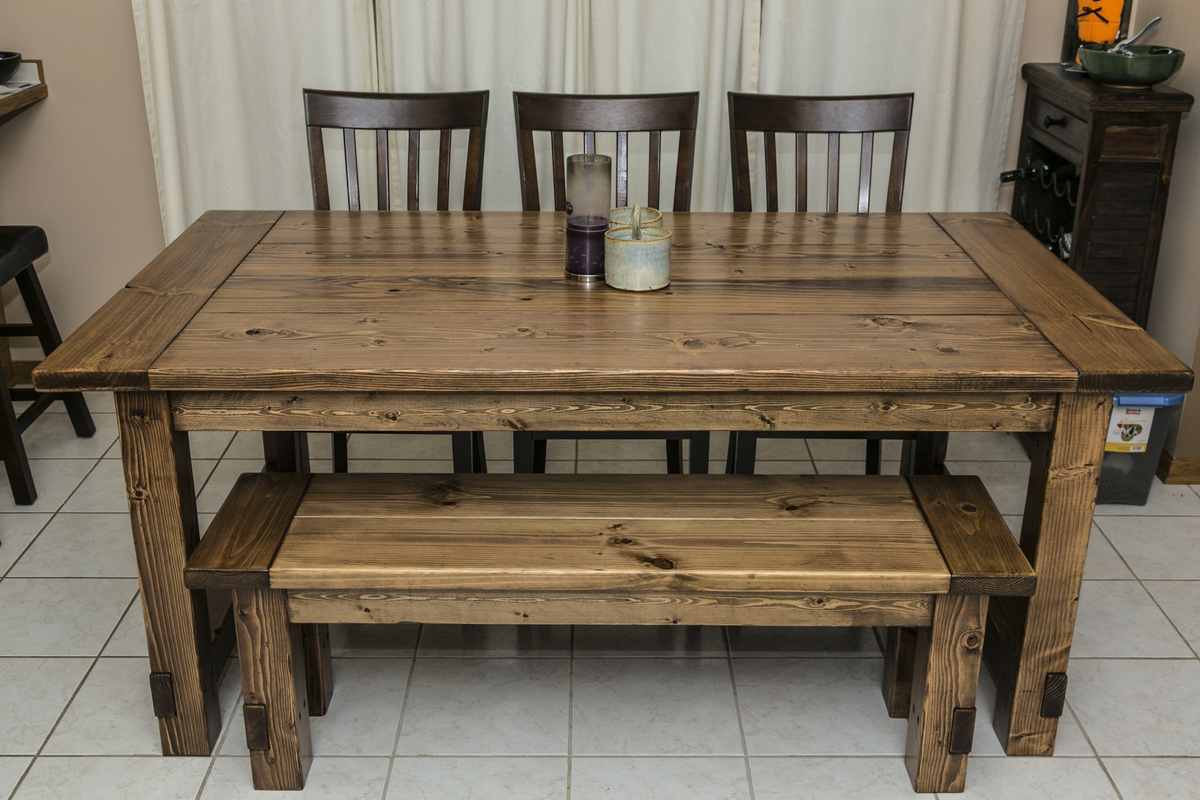
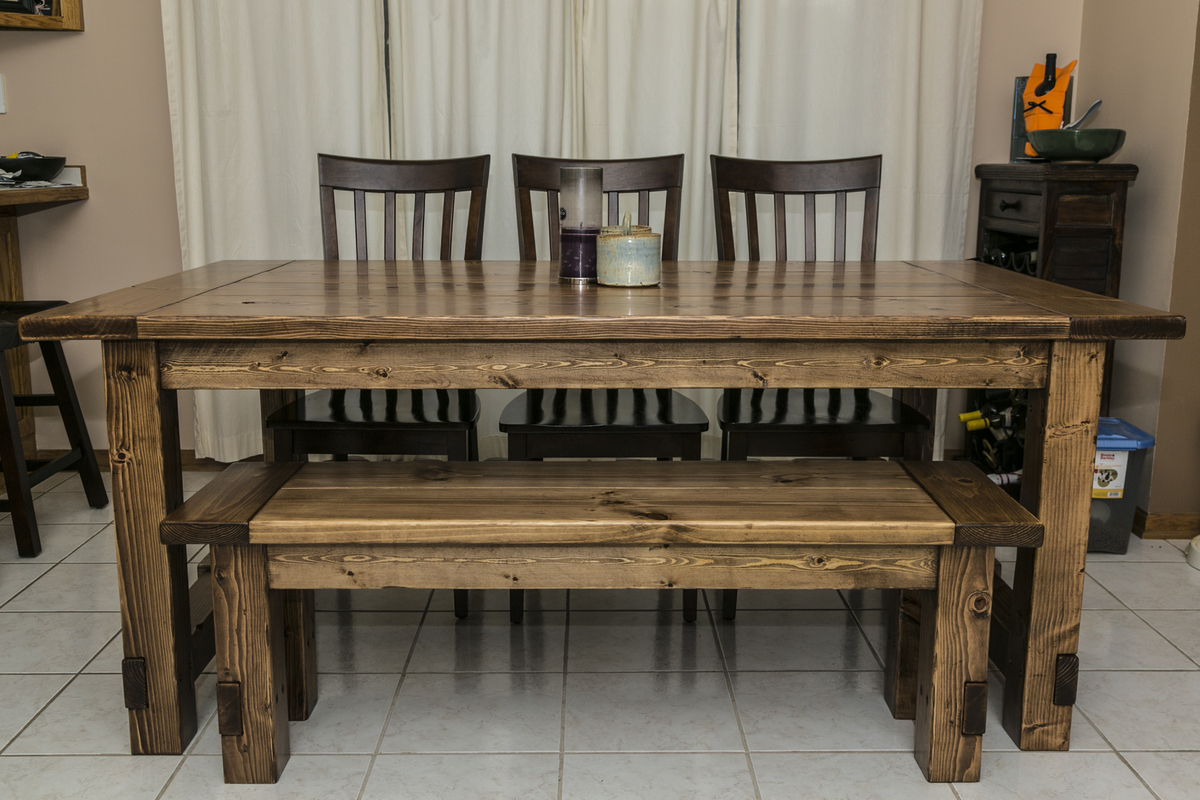
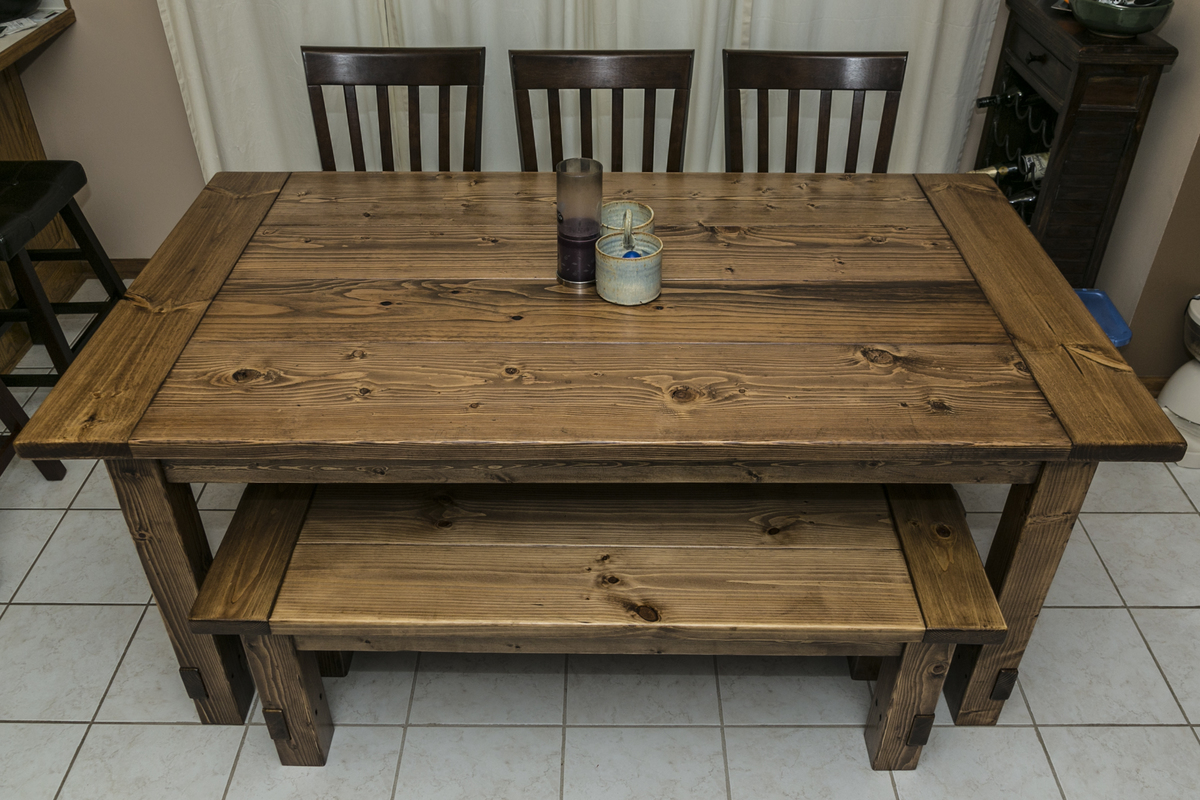
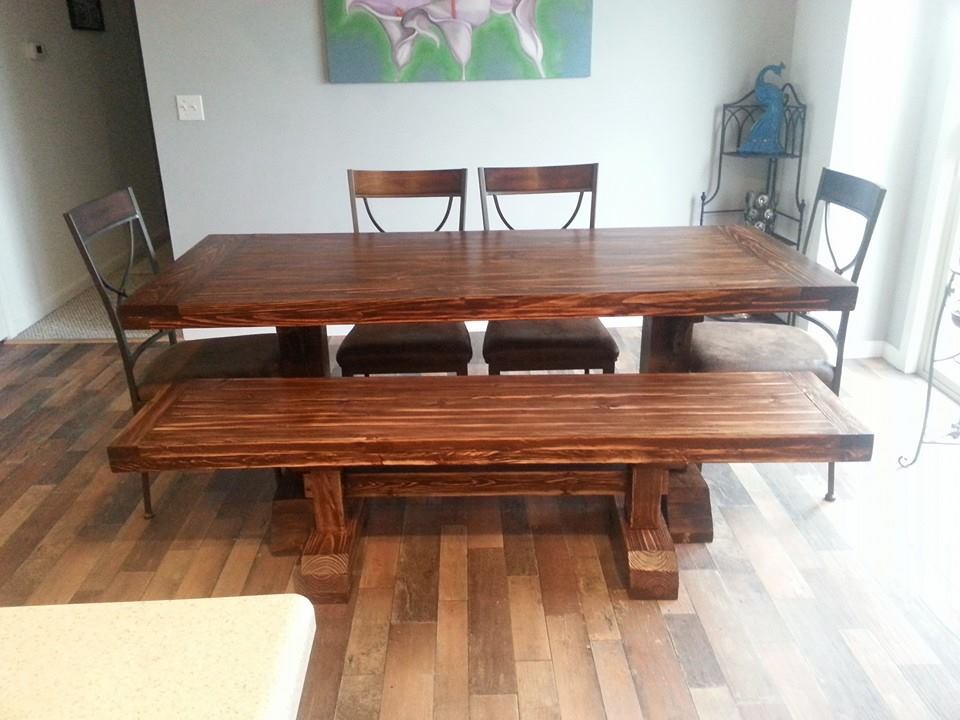
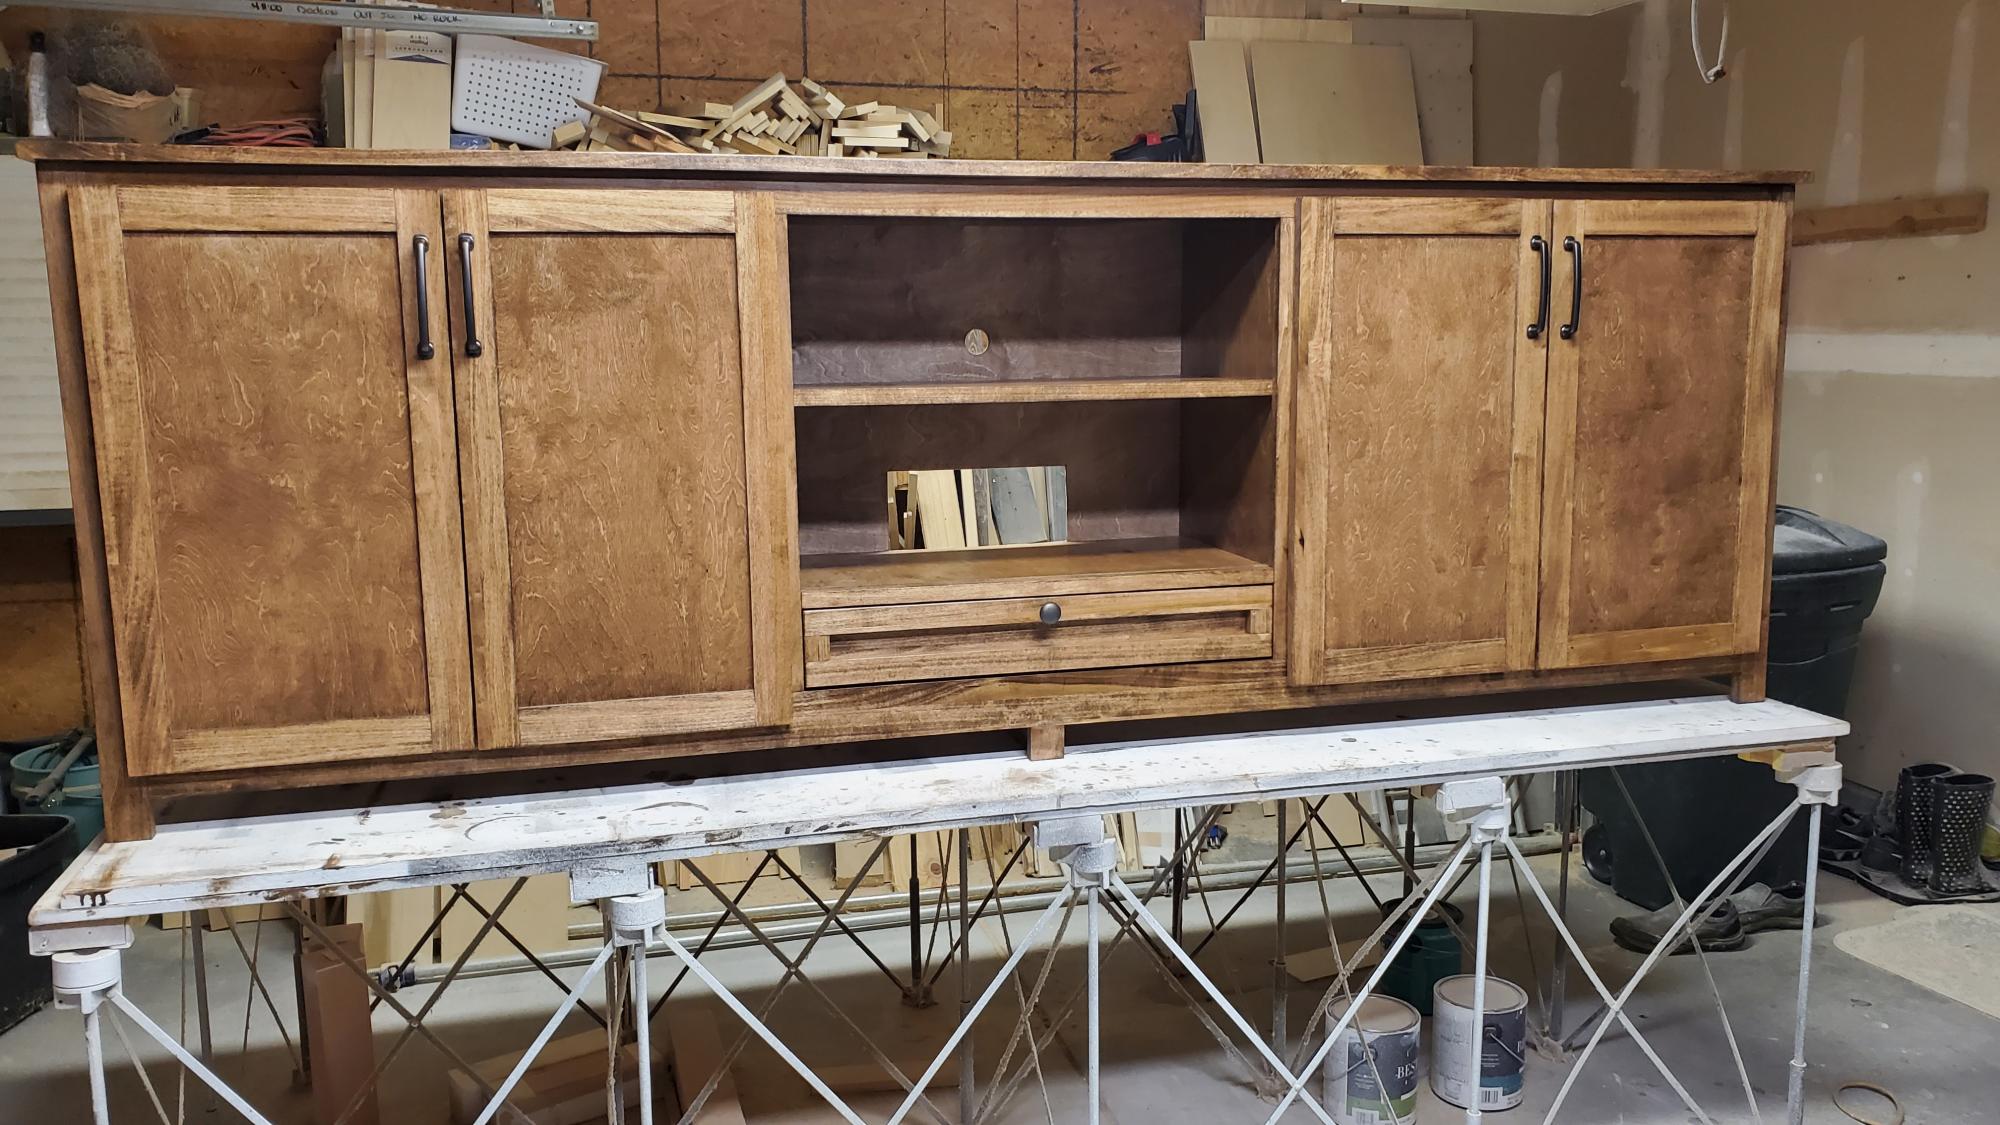
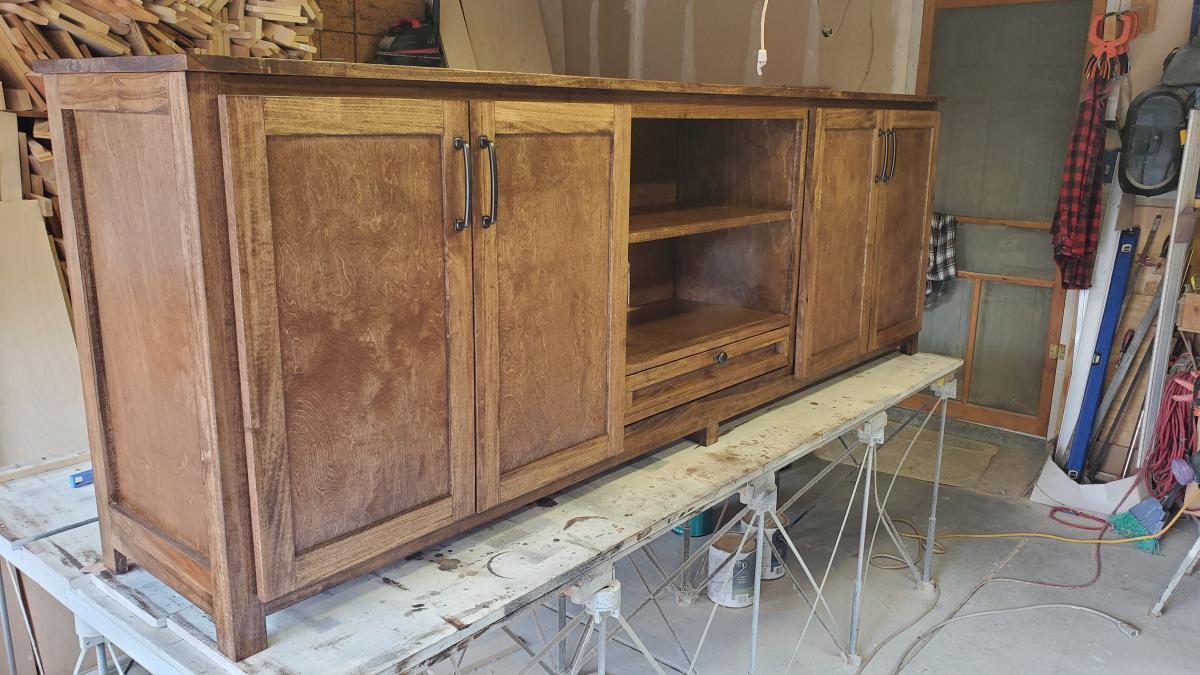
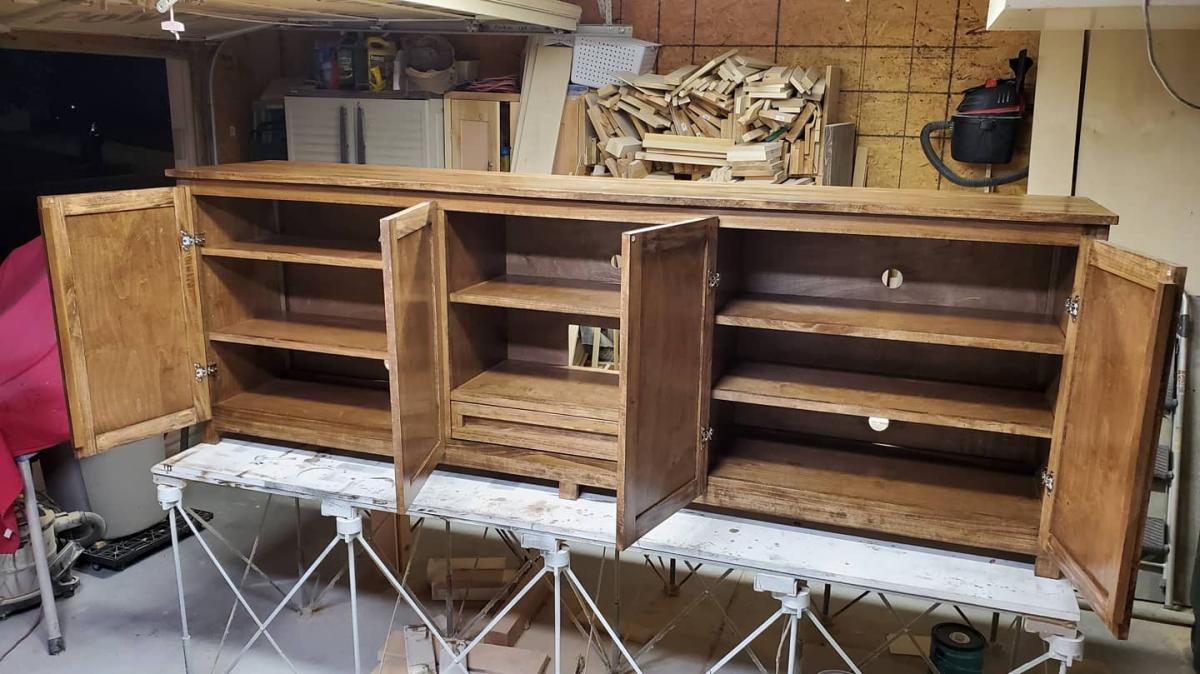
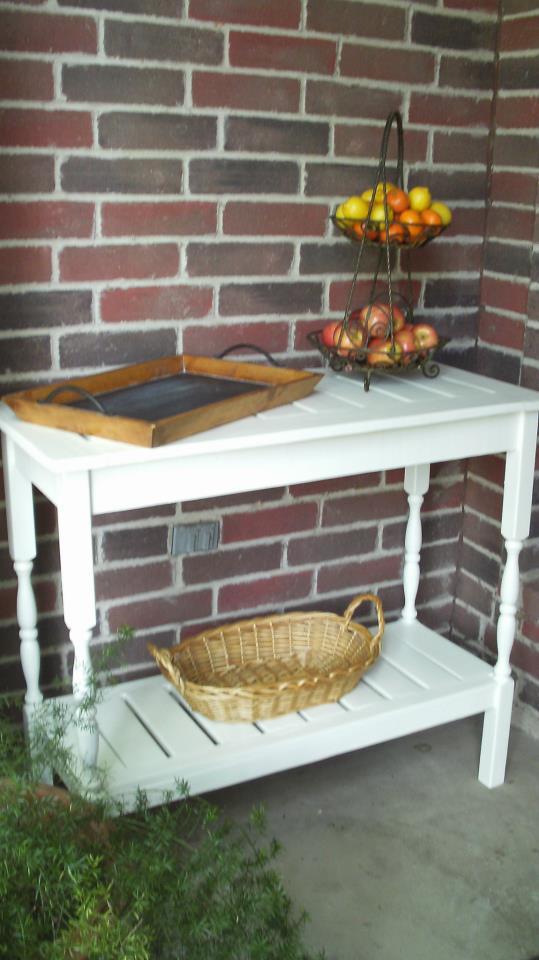
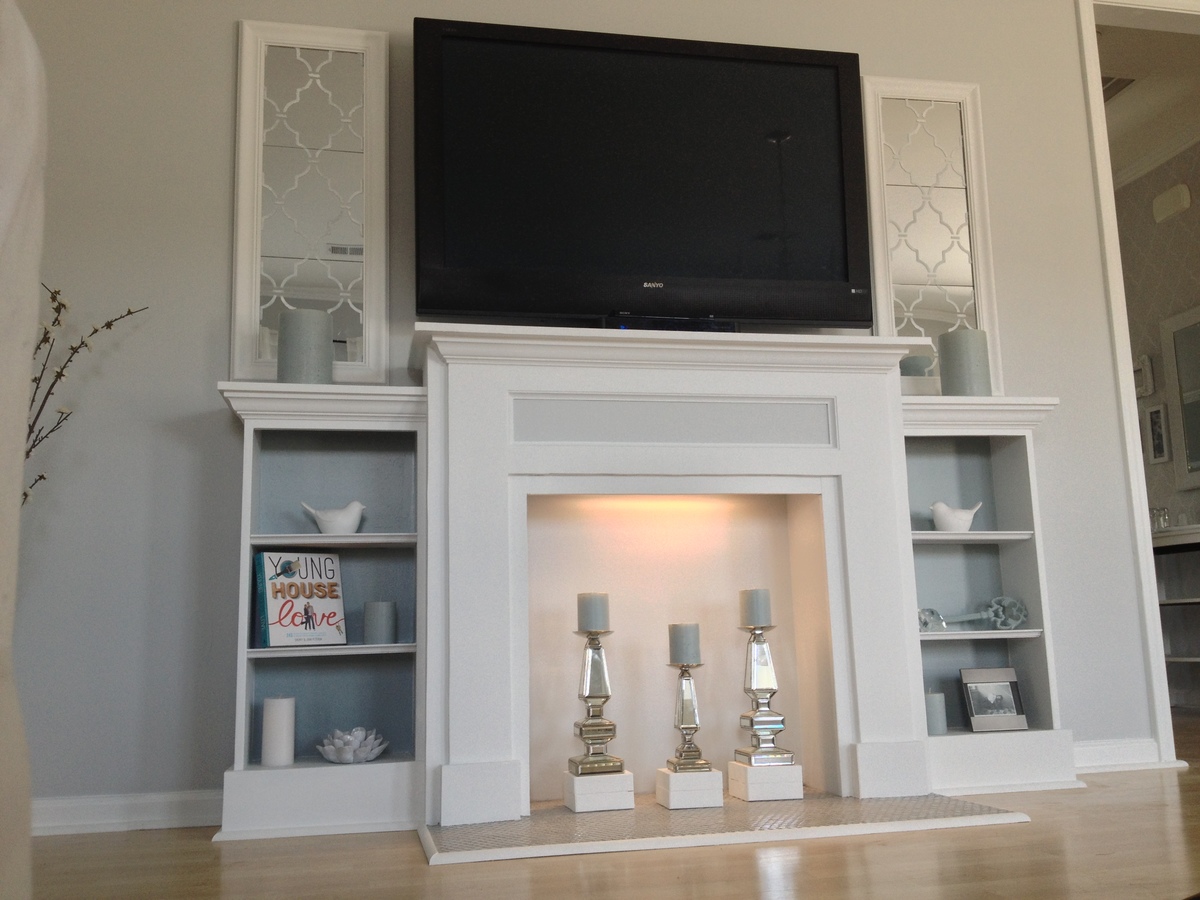
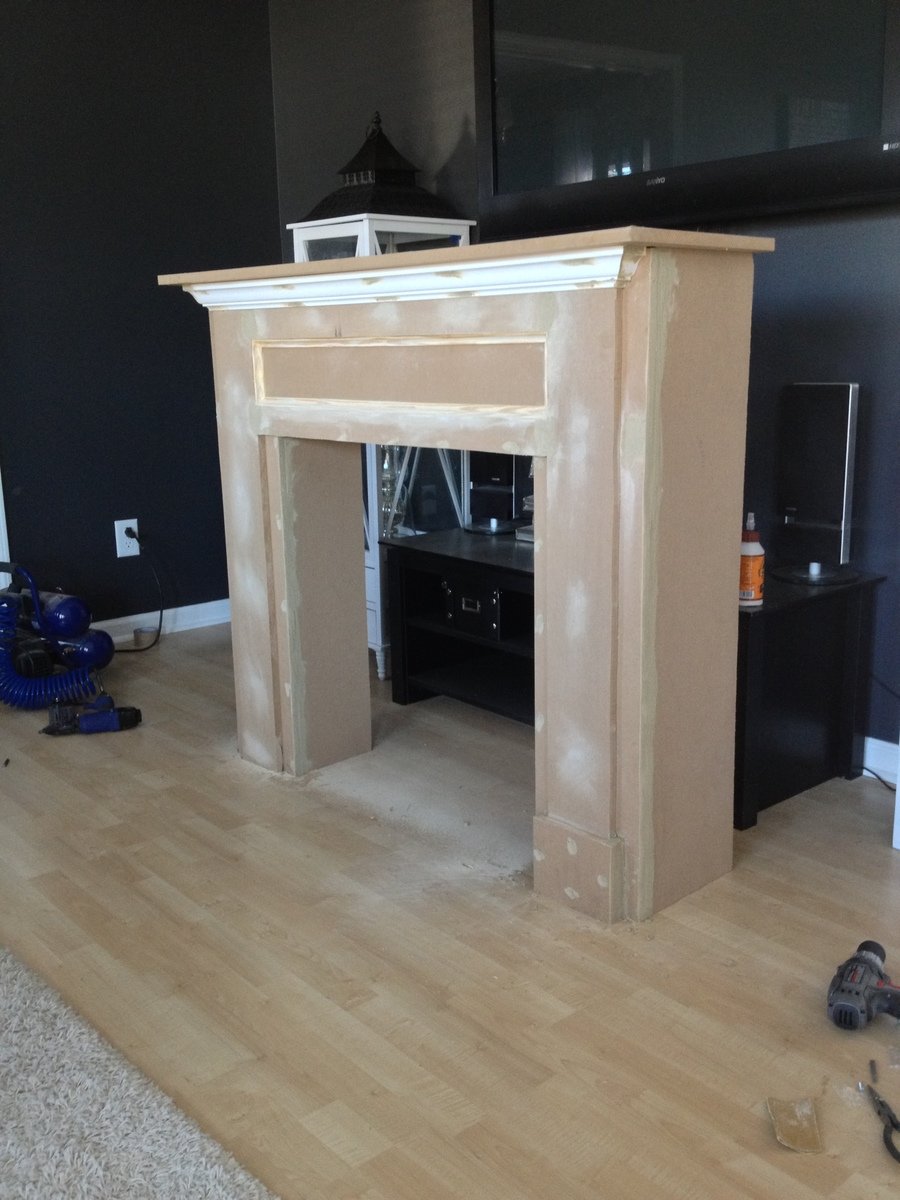
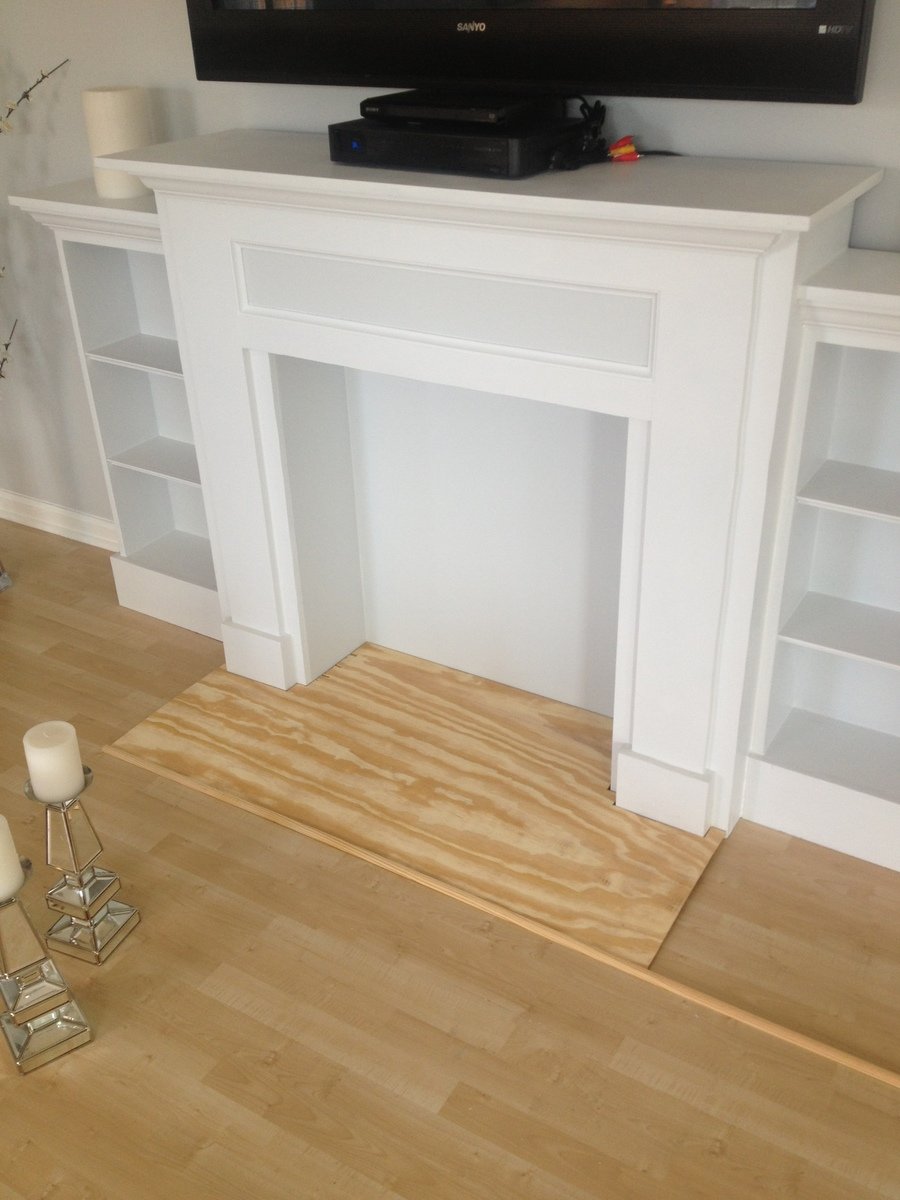
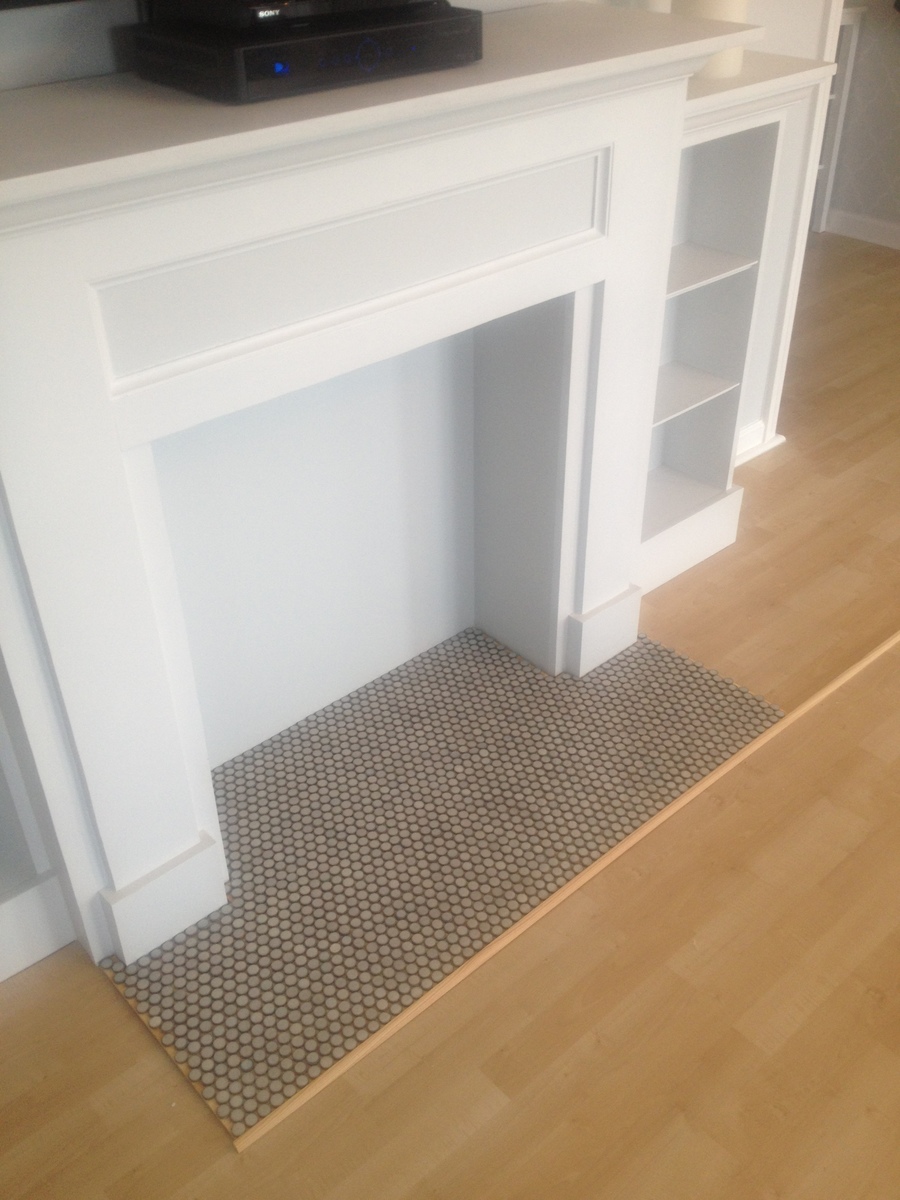
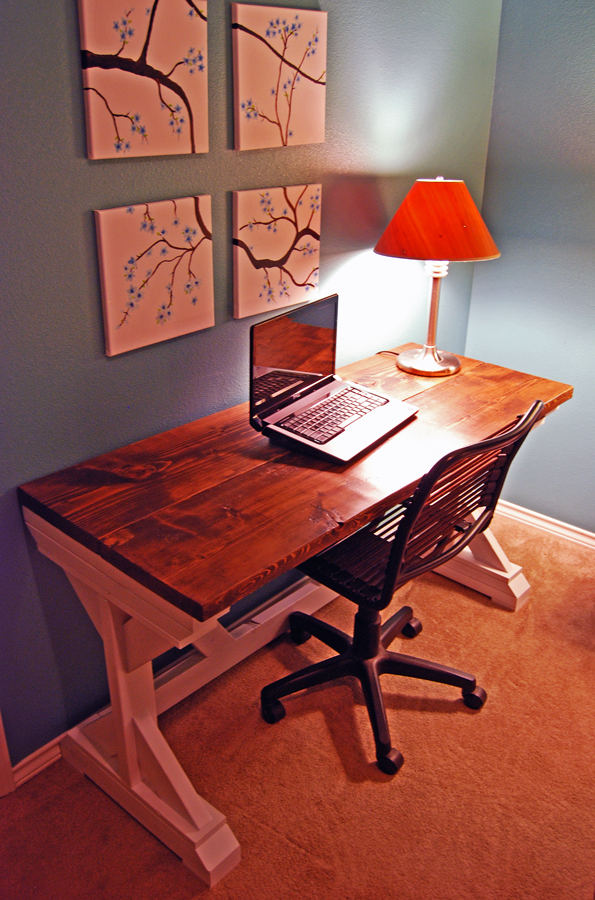
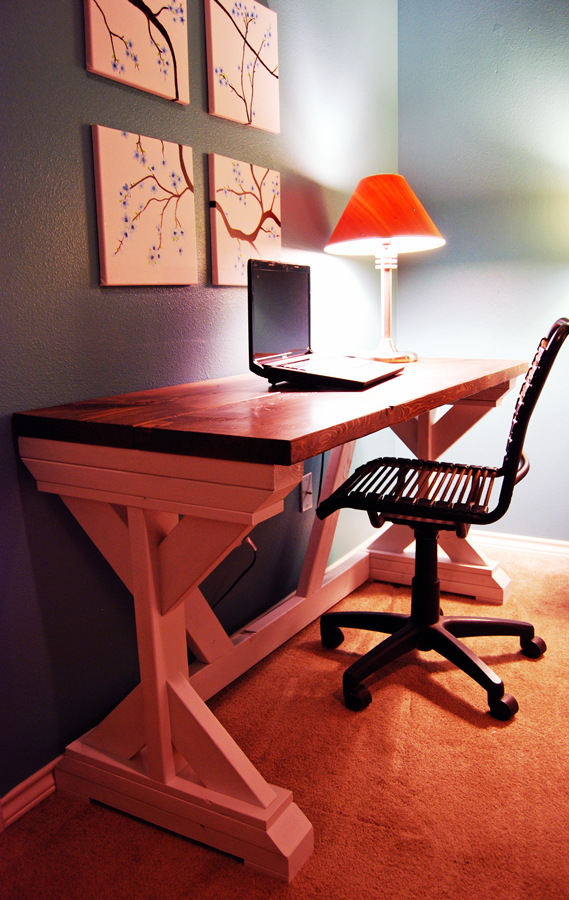
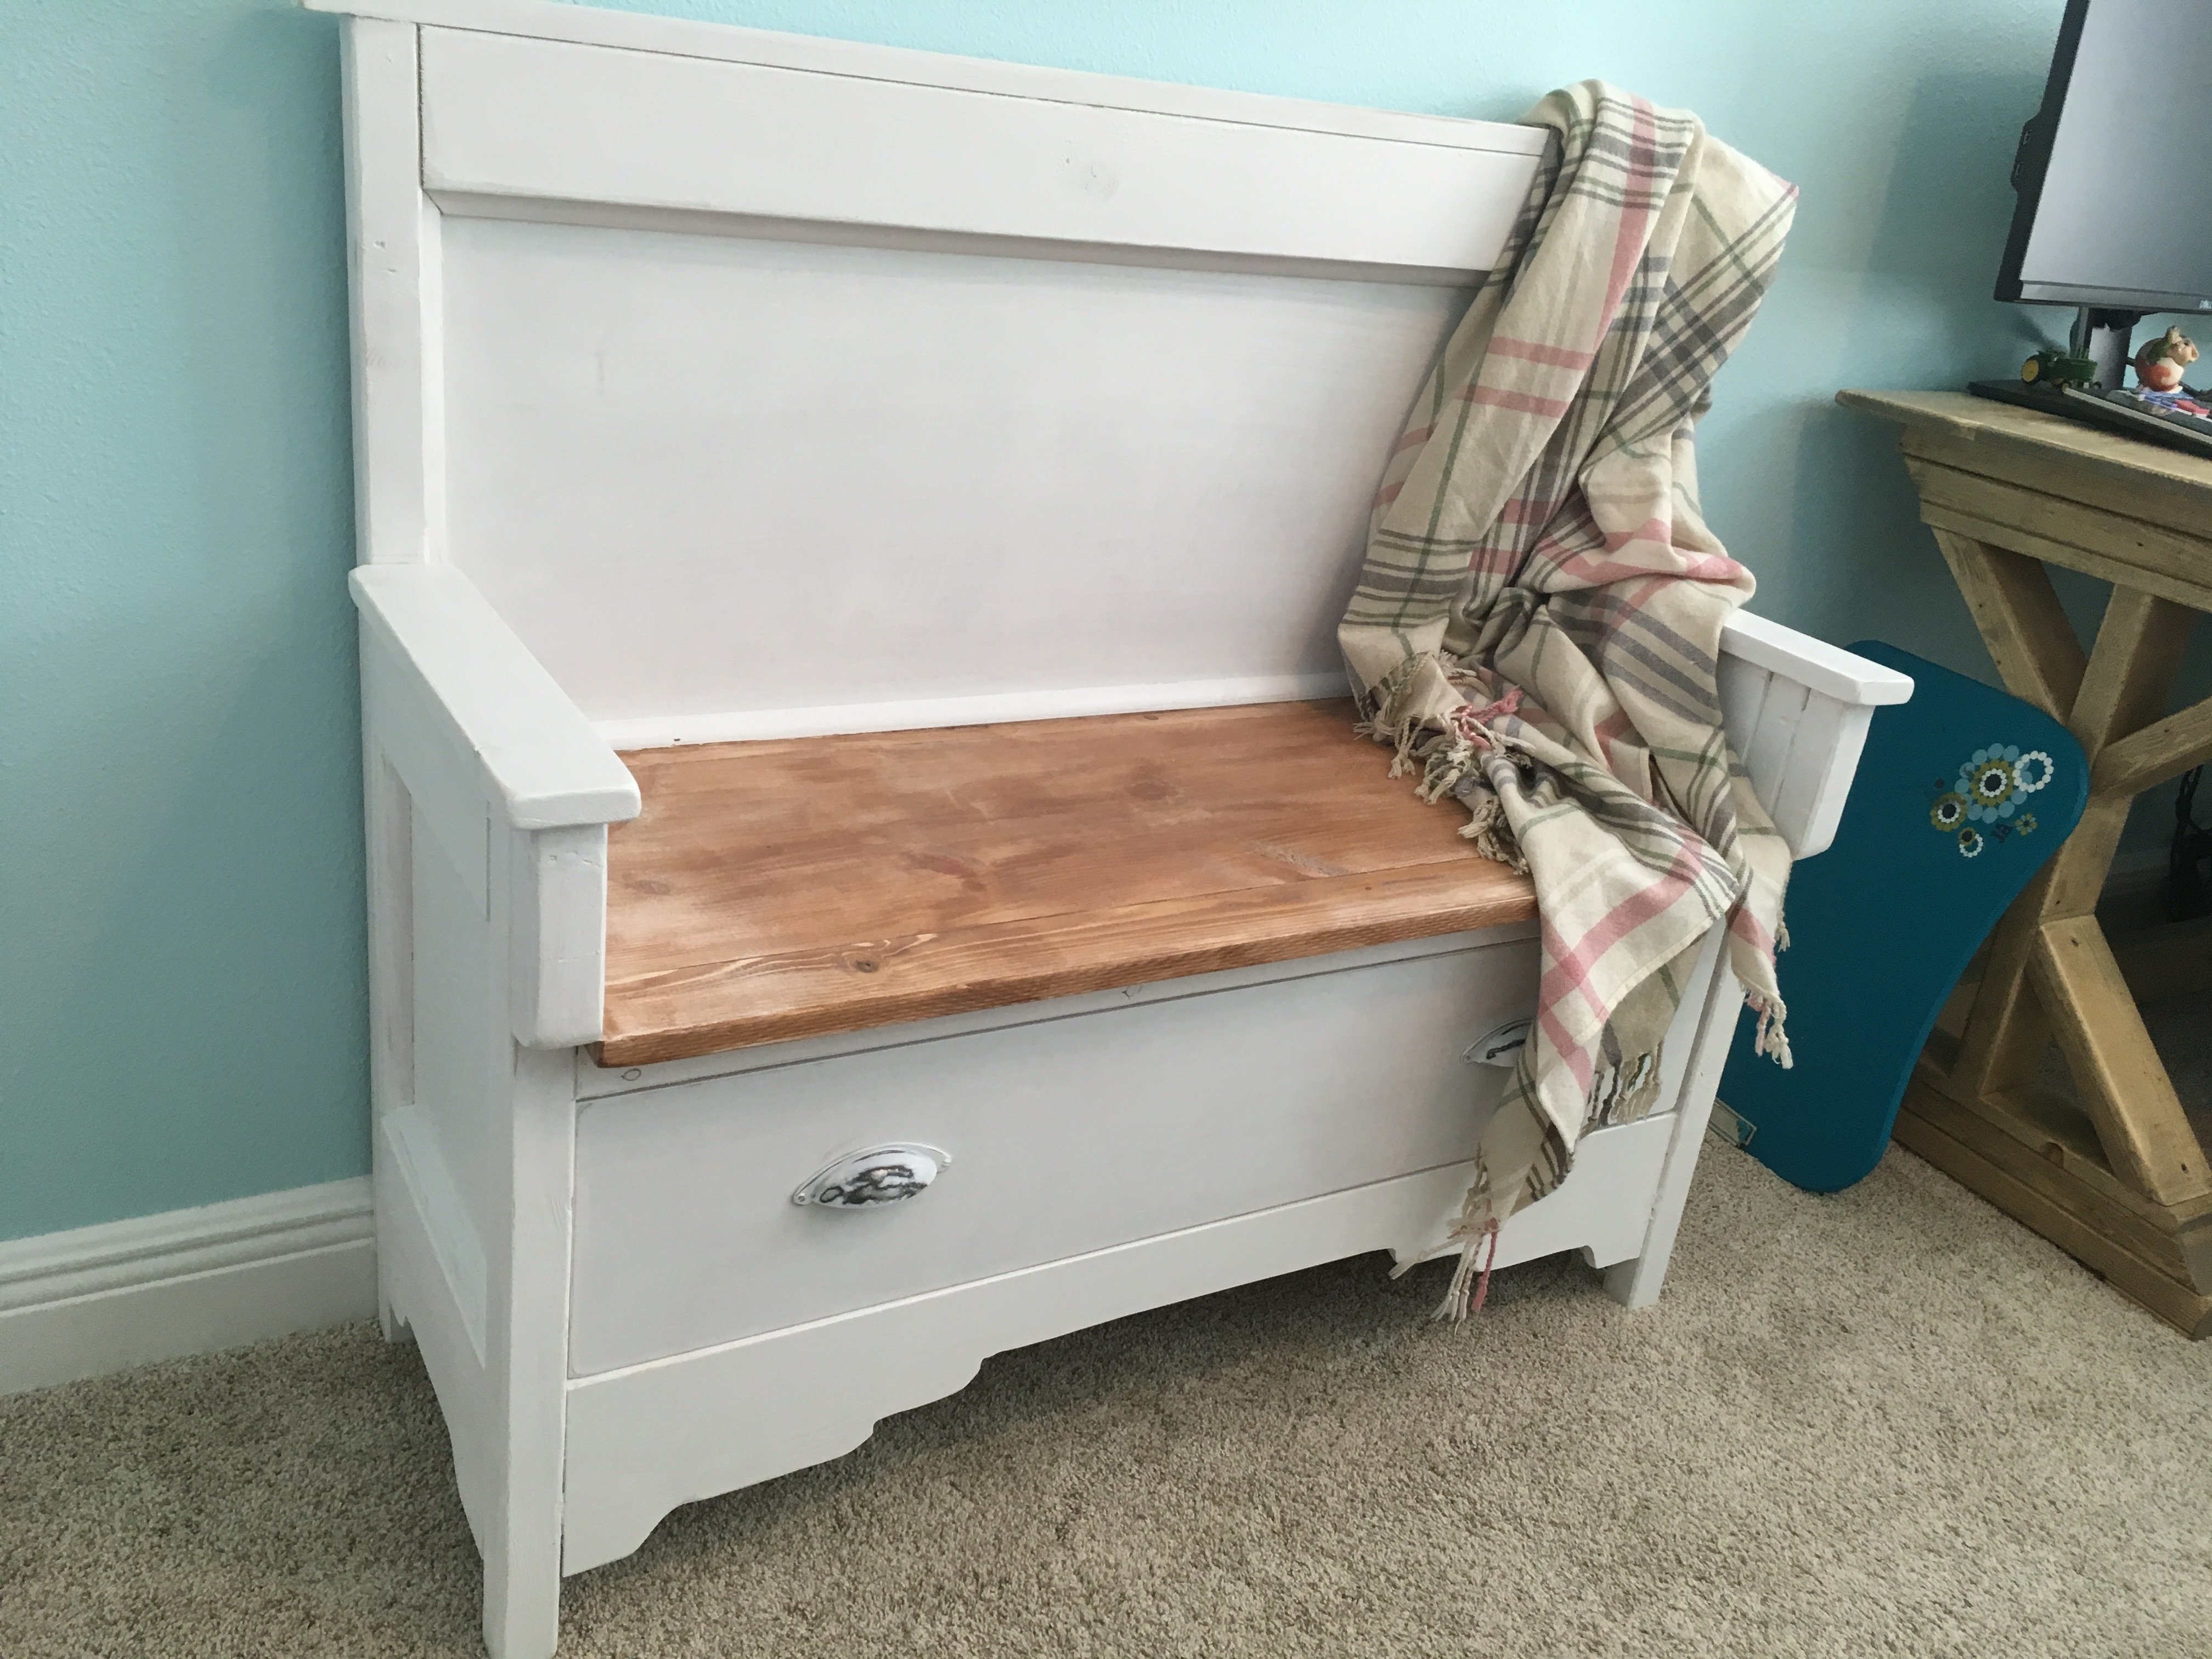
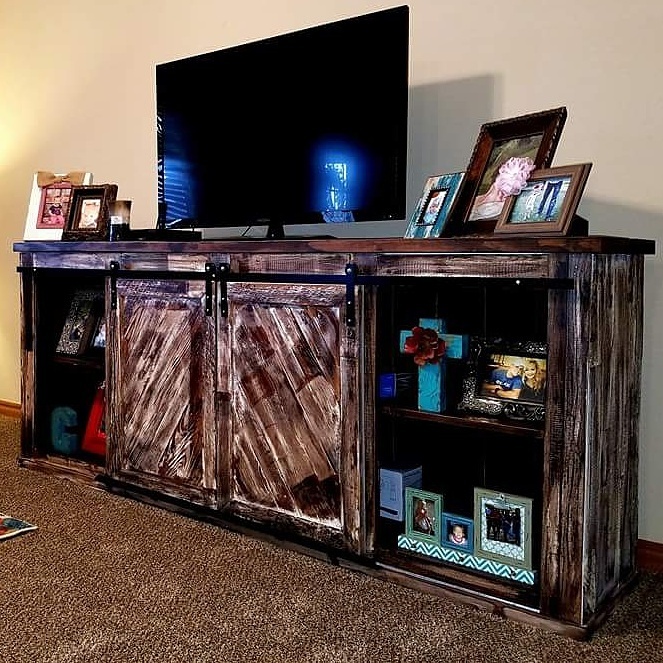
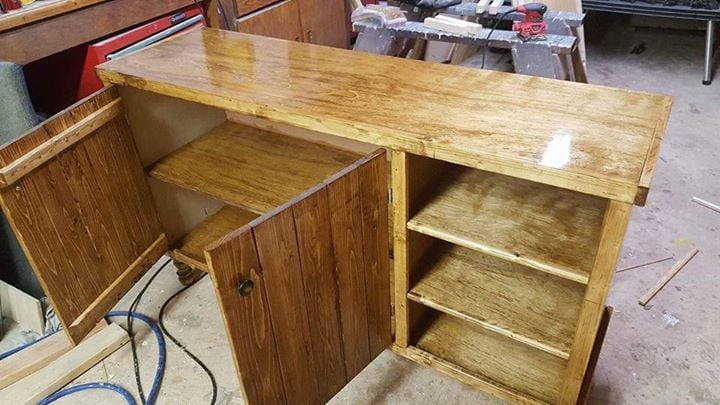
Emersen Buffet-First Brag

Submitted by Anonymous (not verified) on Thu, 06/15/2017 - 19:14

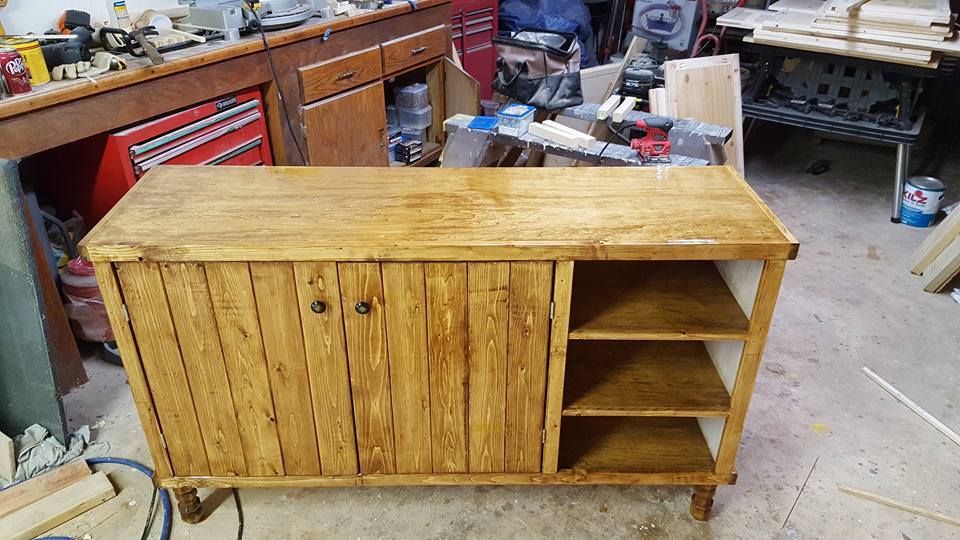
I've built several things from the page but this is the first that I have posted about.  I love this site.  Everything I have built has been so easy because of the way the plans are laid out.  I added my own little touches to the buffet but for the most part I followed the plans as they were.

Estimated Cost
$100
Estimated Time Investment
Day Project (6-9 Hours)
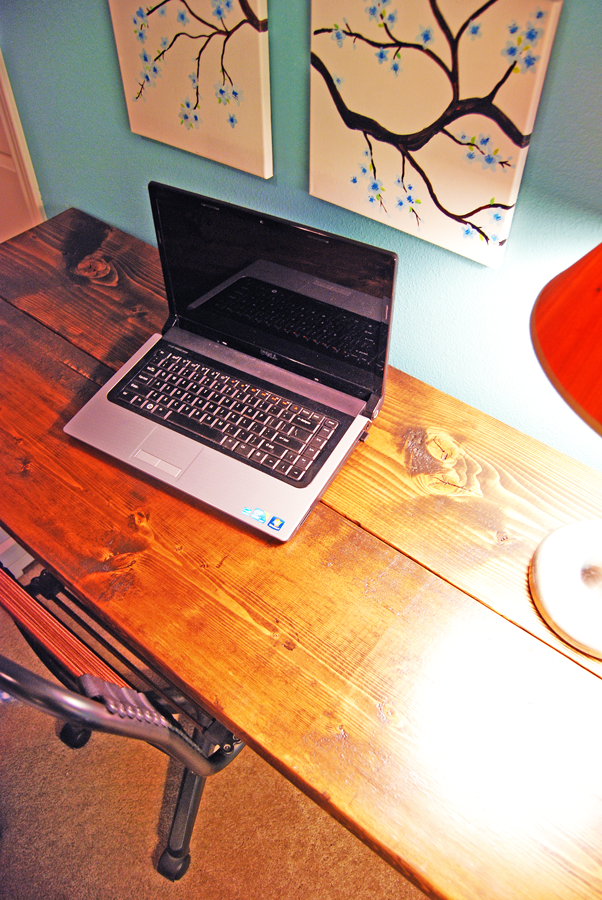
Finish Used
Minwax Early American stain and clear gloss poly.
Recommended Skill Level
Intermediate

We love the skylights in our version of your greenhouse!

Submitted by Anonymous (not verified) on Tue, 08/31/2021 - 08:23

This was the perfect post-retirement project for me. It was a lot of work, but very rewarding.
I documented most of it on my blog.

We sure love this greenhouse!

Built from Plan(s)

Comments

rick1956

Wed, 09/01/2021 - 05:37

Thank you! They definitely added a LOT more work, but we've already used them a lot. The plants are sure glad for them. I'll post pictures of the finished greenhouse when it's finally there.

1st project

Submitted by Nick K on Mon, 04/29/2013 - 18:28

I found the table here, but ended up using the modified plans for the 72" table from this site - http://tommyandellie.com/index.php/2012/01/13/new-and-improved-farmhous…

I haven't built anything out of wood for 20 years and I had no problems building this table. I also built the bench and two 15" extensions.

Estimated Cost
$200
Estimated Time Investment
Week Long Project (20 Hours or More)
Finish Used
Minwax Pre Stain, Minwax Special Walnut (1 coat), Minwax fast dry Satin Poly
Recommended Skill Level
Intermediate

Table and bench

Submitted by jasondk on Fri, 03/20/2015 - 09:03

Tried to replicate the Double Pedestal table that has no plans provided. I had to modify a bit to the specifications i wanted. Table top bowed up a bit at the ends after i glued it up and when i tried to attach it to the base, it pulled one side of the base up. To fix this, i added a couple of cross beams at the top of the base, to stablilize the base a bit.

I finished with a minwax gel stain, i forget the color. It was a bit too dark for my liking, so when it dried, i took a cabinet scraper (or card scraper) and scraped off some of the finish. Pretty pleased with how it turned out. then i added 3 coats of lacquer. 


Estimated Cost
$150
Estimated Time Investment
Week Long Project (20 Hours or More)
Finish Used
minwax gel stain. Minwax Lacquer
Recommended Skill Level
Intermediate

Comments

Weekend Woodhacks

Fri, 03/20/2015 - 15:06

We will be beginning building our 2 pedestal table in the next month or so and anticipate that outs will be similar in size / style and weight. OUTCH! We know it is going to be heavy. Pleased to see how well yours turned out.

Little Cottage Loft Bed - Revised :)

Submitted by Anonymous (not verified) on Tue, 06/20/2017 - 08:05

My 2 grand girls wanted a cottage bunk bed.  Not wanting to disappoint, I took the plans from the cottage loft bed and modified them, adding a lower bunk.  I also added the steps, with storage on the side instead of the ladder, and made a drawer for the front step for the little one.

I made the wreath from Pom-Poms purchased from Jo-Ann's and battery operated string lights.  

I opted for a cedar shake roof, which was purchased from Home Depot, then painted.

Needless to say, they love it!

Built from Plan(s)
Estimated Cost
Maple T & G - left over from remodeling project
Additional wood and hardware - $275
Estimated Time Investment
Week Long Project (20 Hours or More)
Finish Used
Painted using One of Pottery Barn's grays from Sherwin Williams
Recommended Skill Level
Advanced

Comments

Entertainment Console

Submitted by Anonymous (not verified) on Fri, 09/10/2021 - 18:29

8ft Entertainment Console using Birch Ply and Poplar. Minwax Special Walnut stain

Comments

Outdoor Console Table

Submitted by scokenour on Wed, 05/01/2013 - 16:32

I have a small booth at a local Outdoor Market & a client asked if I had any outdoor tables - she needed some for an upcoming party. I tried convincing her that a potting bench would be perfect (since Ana already had plans for that), but she wanted something a little different. She shared a picture of a "Faraday" console table by Pottery Barn, so I used that as my inspiration. I opted for a counter-height table vs. a table height, but both can be easily achieved using the same size balusters, just cut accordingly. I did have a hard time finding "chunky" balusters with a "flat" section on both the top and bottom. I didn't want to use pre-made legs because they are too pricey. At both Orange and Blue they had "skinny" balusters, but at the Orange near my home I found 1 thicker baluster. I had to go to another store to find more in stock, so supplies may vary in your area. The balusters were less than $3 each. Ana was so kind to create plans and I hope you enjoy your table as much as my client enjoyed hers!

Estimated Cost
$40
Estimated Time Investment
Afternoon Project (3-6 Hours)
Finish Used
exterior grade semi-gloss
Recommended Skill Level
Intermediate

Comments

spiceylg

Thu, 05/02/2013 - 07:31

Really like this and love how you used balusters for legs for added detail.

Rustic End Table

Submitted by mtairymd on Sun, 03/22/2015 - 09:04

This End Table matches the shelf from a few weeks ago which is my attempt of matching the $55 Fancy Desk from Ana White.  As with the shelf, the design is simple, easy to make and is relatively low cost (under $25).   

Estimated Cost
$25
Estimated Time Investment
Afternoon Project (3-6 Hours)
Finish Used
PolyShades Classic Black Satin Stain and Polyurethane from Minwax
Recommended Skill Level
Beginner

Comments

Brayden and Harper's Playhouse

Submitted by Anonymous (not verified) on Fri, 06/23/2017 - 07:51

Built by my son and I. Followed the awesome plans for that most part. 

Recommended Skill Level
Intermediate

Comments

kingsize frame

Submitted by Anonymous (not verified) on Sun, 09/26/2021 - 08:59

built this to go around our adjustable bed. for the posts i took 2 select pine 5/4 (2x4) and 1 - 1x4 and glued them together and left a gap to slide the side rails (2 - 1x8's) into the post approx 2-3"s and then ran 2 screws from the side to anchor the side rails to the head/footboards

Comments

My first DIY project!

Submitted by Celeste808 on Sun, 05/05/2013 - 10:30

Finally Completed!!! Thank you rainy Saturday! So I wanted a new entertainment center of sorts... couldn't find one that was just what I wanted..... so why not just build what I want! Just DIY it. ;)

I used the faux fireplace plan and modified it to have attached shelves on the sides. I also added an extra strip at the top of the fireplace opening so I could mount an LED bar light.

I used 1/4 plywood to make a tile base, penny tile, and 1/2 quarter round to finish out around the entire bottom.

Total project cost was less than $200 including the tile and light!

Best part is the whole thing is movable!

Thanks Anna White for such an awesome plan to start with!

Estimated Time Investment
Week Long Project (20 Hours or More)
Finish Used
MDF & plywood
Recommended Skill Level
Beginner

Comments

spkramer

Wed, 07/03/2013 - 10:24

This whole unit is great. My wife LOVES it, which means I will be building it! Did you purchase the two shelf units or build them yourself? Did you use a pattern or plan? Thanks!

Alisonwunderland

Wed, 07/31/2013 - 13:09

This is amazing! Exactly what I'm looking for! Did you change the depth of the mantel to make sure the shelves would be deep enough to hold things?

Celeste808

Sat, 08/03/2013 - 18:25

I did make the depth of the fireplace deeper so I could have room for the halves on the side. I just sketched out the dimensions I wanted the side shelves and built them along the same lines as the fireplace. Wasn't hard to figure out and just made it to fit the size I needed. The inset of the fireplace does not go all the way back to the wall either, that way the power strip can fit on the floor behind it. Glad you like it and thanks for the compliments!

EAnne

Wed, 07/23/2014 - 14:54

Hi Celeste 808, What a wonderful faux fireplace WITH the bookcases, especially. I'm hoping I can try this in our space challenged bedroom. Did you by any change reply to the chap who asked if you had some kind of dimensions or plans you could pass along to us? I would love to see if we can make it work in the space we have available.
Thanks again for the inspiration,
e

jrybolt26

Mon, 10/28/2013 - 18:25

I absolutely love what you did with this. I am going to have my fiance help me make this for our house. If you still have the dimensions and details of how you built the whole unit I would greatly appreciate it if you could post it.

mommyof2cuties

Sun, 04/13/2014 - 13:00

This is gorgeous & I can't believe it's your 1st project. I would love to build this too. Did you use any particular plans for the side units? If you have any tips or information to share, that would be great! I've actually been trying to make up my own plans using Sketch Up, but that's not working too good, lol. Again, great job & thank you.
Lynda

emswave

Sun, 02/08/2015 - 12:31

I'm dying to know the dimensions you added to the width. Also, the dimensions of the book shelf. I have been trying to draw up plans for the last week and I'm stuck with trying to figure it out by looking at your pictures.

PLEASE HELP!

Thanks!!

mrittgers1

Mon, 07/27/2015 - 09:15

Do you have the blue print of how you built the mantel and side book shelves? I am wanting to go buy supplies to build this tonight!!!


Thank you!

X Desk

Submitted by blenz on Tue, 03/24/2015 - 12:34

Pretty straightforward build, fun to use and build!
 

Built from Plan(s)
Estimated Cost
$70 ish
Estimated Time Investment
Afternoon Project (3-6 Hours)
Recommended Skill Level
Beginner

Comments

Potting Table

Submitted by Anonymous (not verified) on Sun, 06/25/2017 - 17:11

Thanks Ana, built it out of pressure treated wood for South Florida. Had the Home Depot cut most of the wood from your plans.


Estimated Cost
$80
Estimated Time Investment
Afternoon Project (3-6 Hours)
Recommended Skill Level
Intermediate

Toy box

Submitted by Anonymous (not verified) on Mon, 10/04/2021 - 12:24

Had the hubby make this! Nice project. Thanks for sharing the plans

Built from Plan(s)

Comments

Flip Top Storage Bench

Submitted by DMax2010 on Tue, 05/07/2013 - 05:56

I made the entryway cubby from the book and finally couldn't stand the pile of shoes (3 year old) in the front entryway any longer! So I made the bench and my son is thrilled that he can open and close it and put things in it. I have a few touch-ups to do yet from the pocketholes and countersink holes, but I love it! It was really easy to do. I did modify the plans to fit my entryway, so it's about 36 inches long.

I love it!

Estimated Cost
40.00
Estimated Time Investment
Weekend Project (10-20 Hours)
Finish Used
Minwax Pre-Stain Wood Conditioner (1 coat)
Rustoleum Dark Walnut Stain (3 coats)
Rustoleum Soft-touch matte polyurethane (2 coats)

I sanded in between coats of finish and in between polyurethane coats
Recommended Skill Level
Beginner

Adjusted Pew Bench

Submitted by Anonymous (not verified) on Tue, 06/27/2017 - 21:13

I liked the other brag post with shorter arms

Really helps add storage to my office.  Thanks Ana and Shanty 2 Chic

Recommended Skill Level
Beginner

17” square, 2x4 side tables / stools

Submitted by Anonymous (not verified) on Mon, 10/04/2021 - 12:33

Well my wife bought 2 x 17” square seat cushions the problem was we didn’t have any stools to put them on so decided to enhance our front seating patio area with 2 solid 2x4 side tables that would double up as stools.
I based the design on Ana’s table design but decided to counter sink all the screws & cut plugs to suit so no screw heads could be seen, they turned out perfect & very robust, perfect for the U.K. weather, my wife finished them in grey outdoor paint to match the furniture, all in all they took only around 6hrs to make & paint.

Built from Plan(s)

Comments

Cedar Planter - Mother's Day Gift

Submitted by MMTruncale on Thu, 05/09/2013 - 08:09

We made this for my husband's Granny who has a bright green thumb, campared to my slightly black one. It turned out great.

This is also the project I learned how to use a Kreg Jig. Amazing. My husband is hooked.

Built from Plan(s)
Estimated Cost
$25
Estimated Time Investment
Afternoon Project (3-6 Hours)
Finish Used
We used what was left of our SPRAY stain. I think it turned out well. Still has a bit of that cedar to it. We really did it so the Pine wouldn't stick out tremendously.
Recommended Skill Level
Beginner

Benchmark Storage or Media Tower

I built this Benchmark Storage or Media Tower as I was looking for some thing to put beside our fire place.  I wanted to build some thing that would be about the same height as our fire place so it stands 40 1/4" tall.  Also, this month was a the contest to build things from scrap lumber so I took 2 x's that I had laying aorund and cut them down to 1 1/4", then glued together and planed down to make butcher block for the door and top.  The sides were actually built from 1 x 6.  I also ended up purchasing a Kreg shelving jig so that I could change the shelving.  A tool that I highly recommend if you are going to build alot of these projects with shelving.  One down and one to go! 

Estimated Cost
$30
Estimated Time Investment
Week Long Project (20 Hours or More)
Finish Used
Old Masters Stain with Minwax Helmsmans Spar Erethane
Recommended Skill Level
Intermediate

Comments

Farmhouse bed

Submitted by Anonymous (not verified) on Mon, 10/04/2021 - 13:11

This was a fairly easy build following the plans. We changed the headboard slightly though.

Built from Plan(s)

Comments