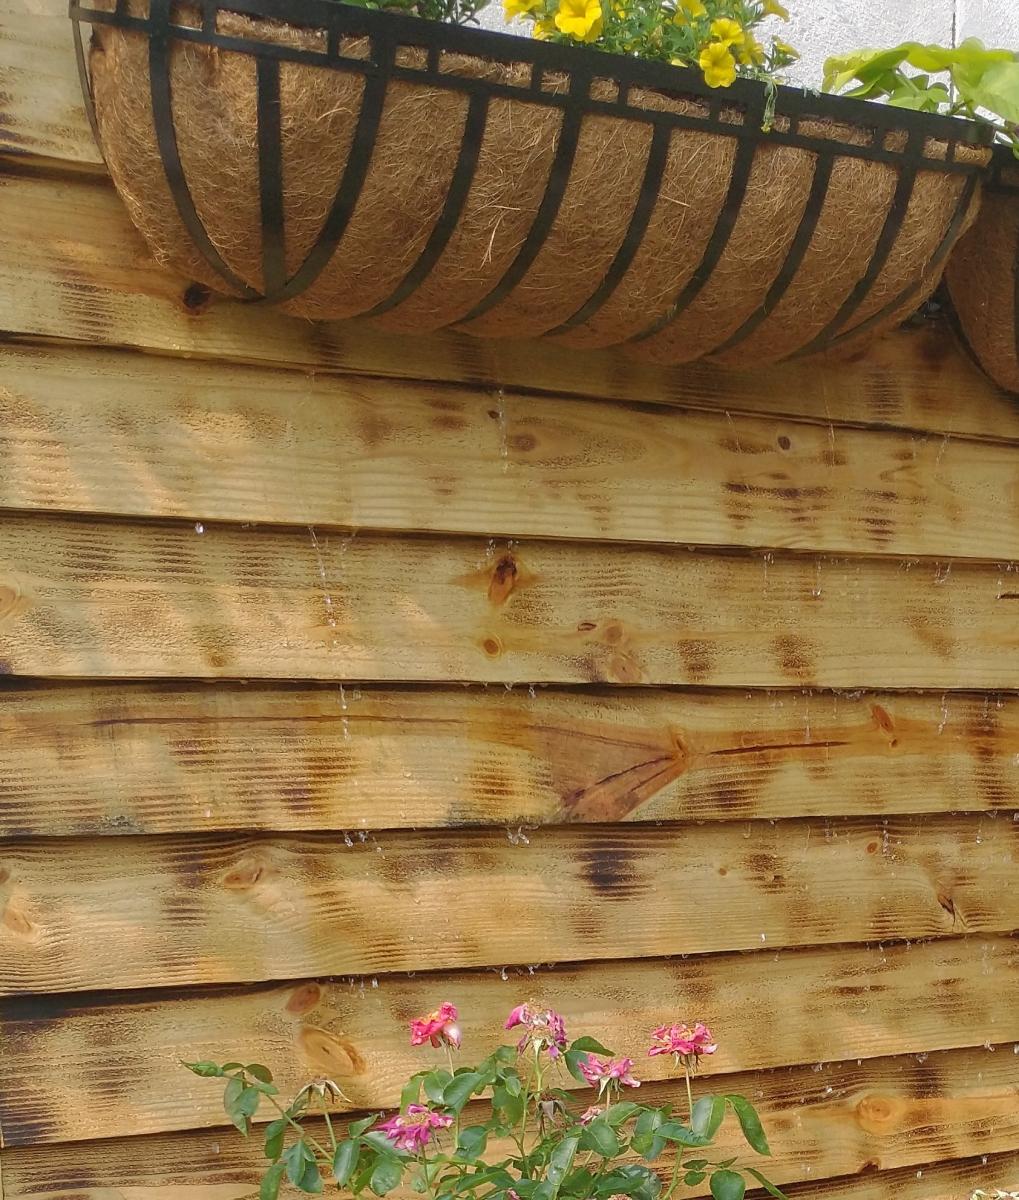
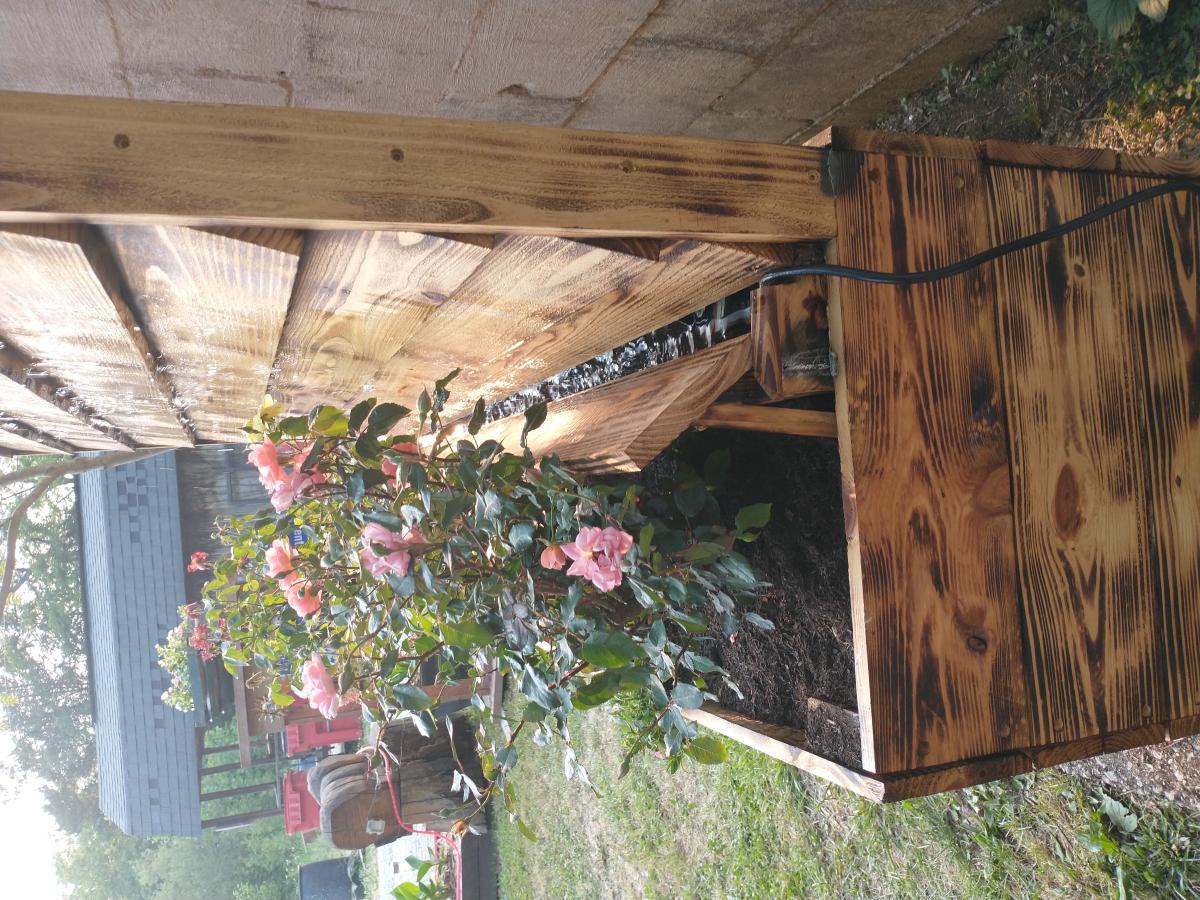
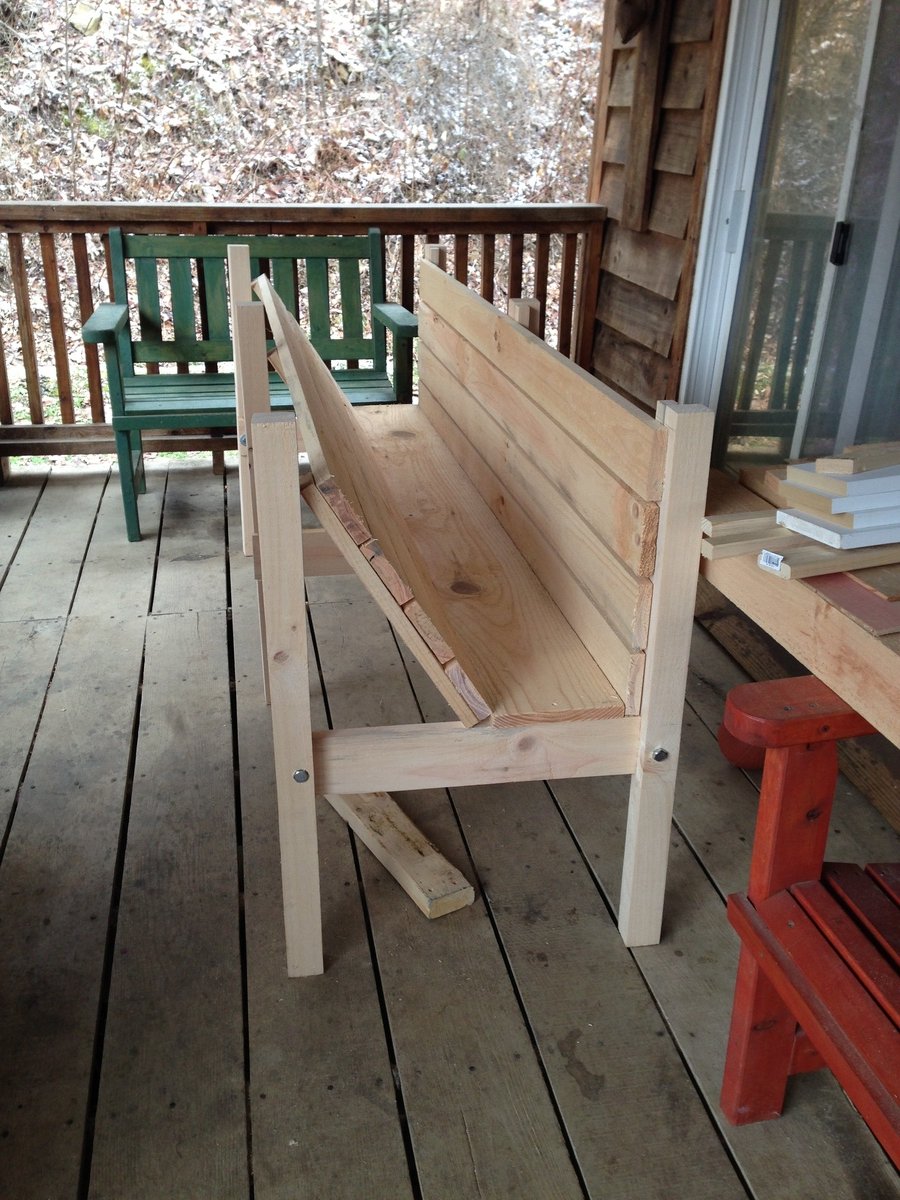
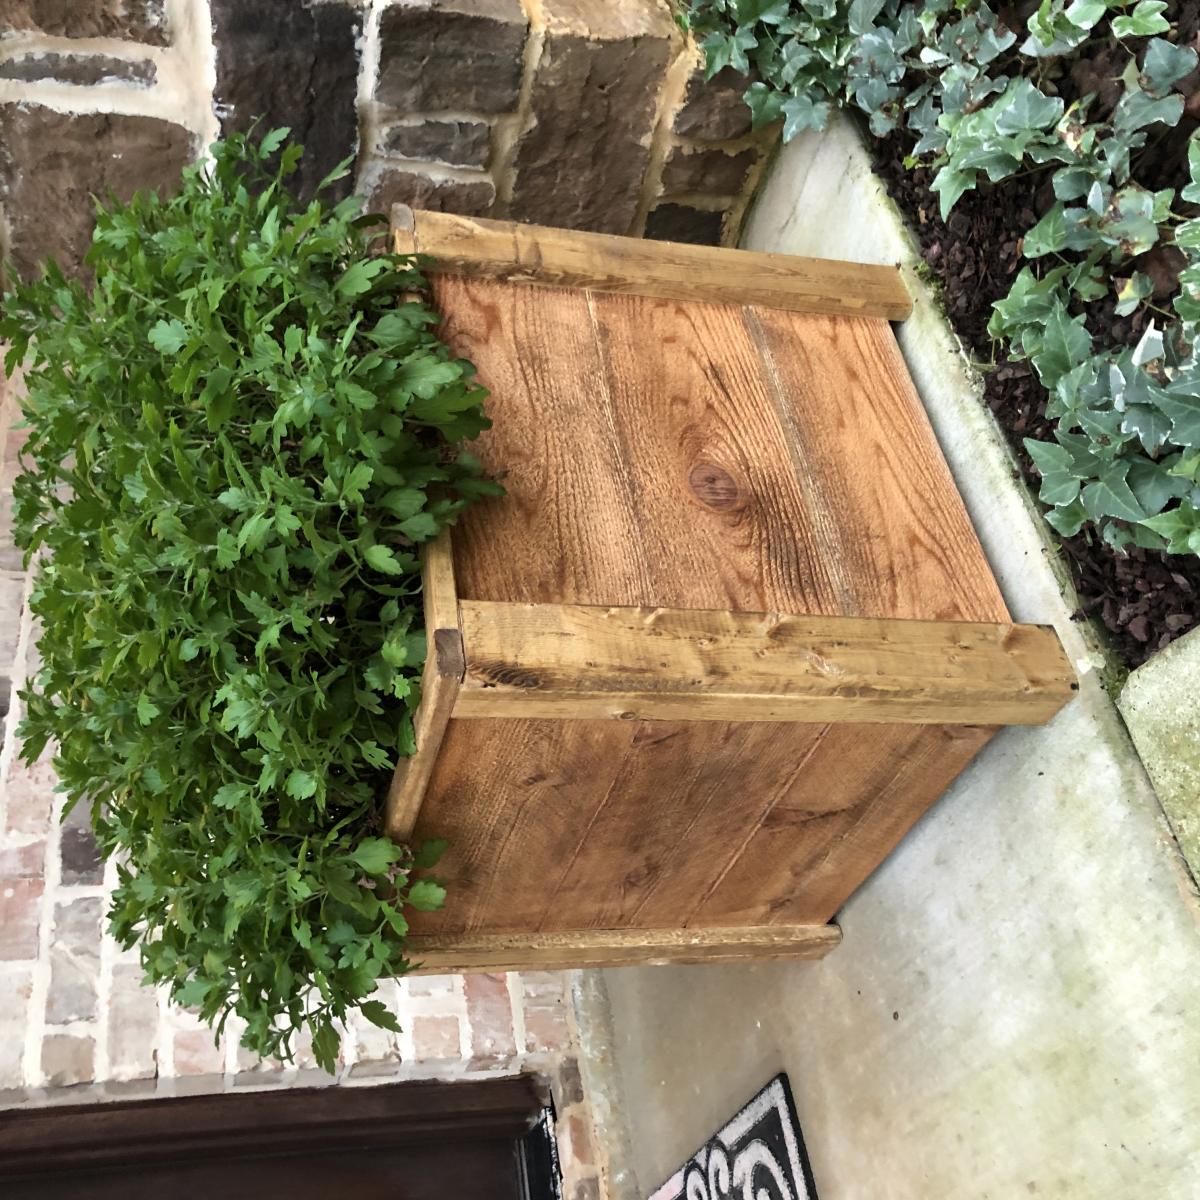
Privacy planter
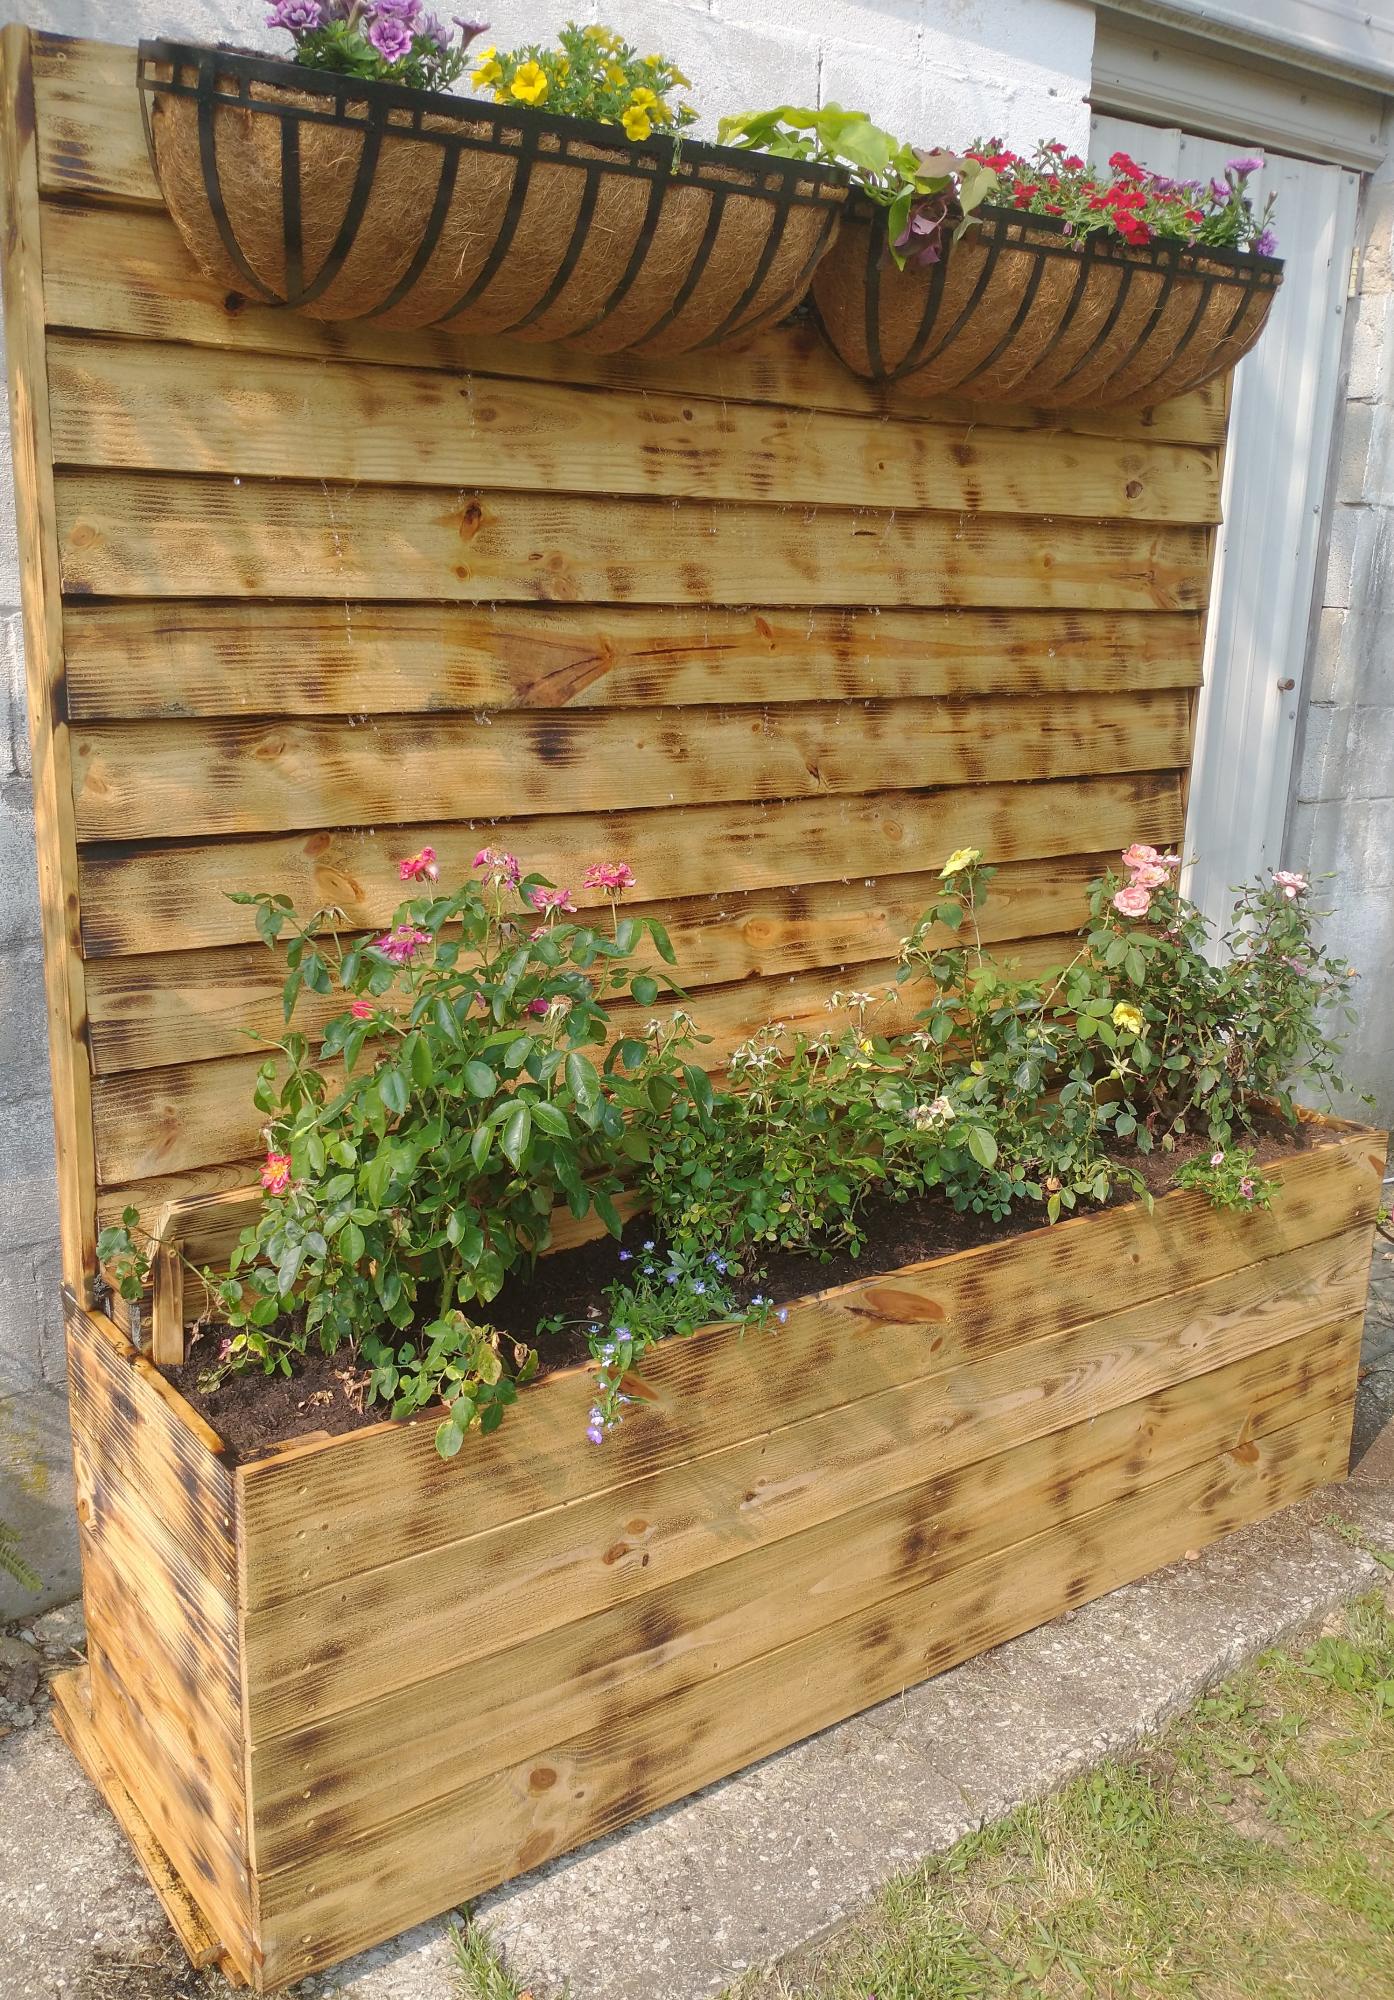
It's a take off of your privacy fence planter. But I added water to make it a water wall also.
Built from Plan(s)
It's a take off of your privacy fence planter. But I added water to make it a water wall also.

Greenhouse Project - Built to Plans Exactly
Christy LaChapelle
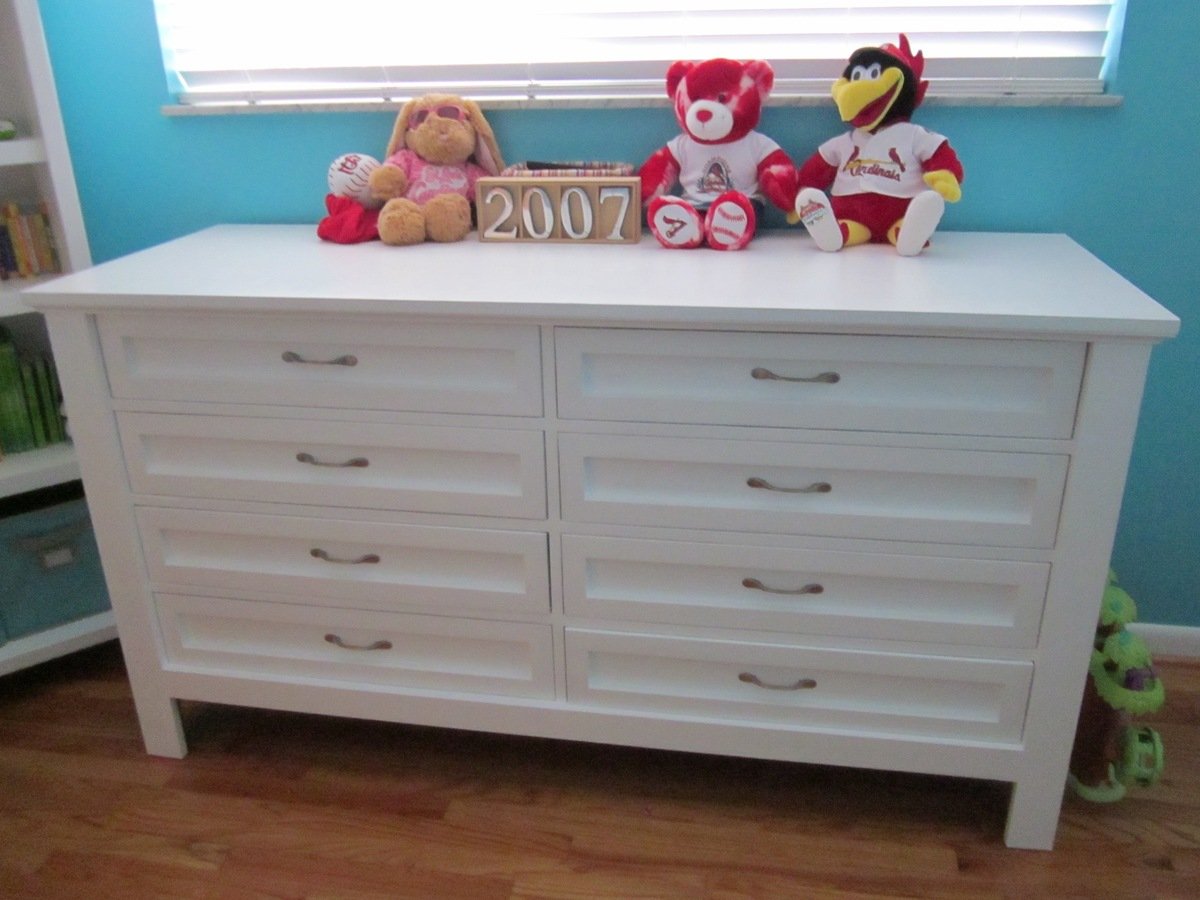
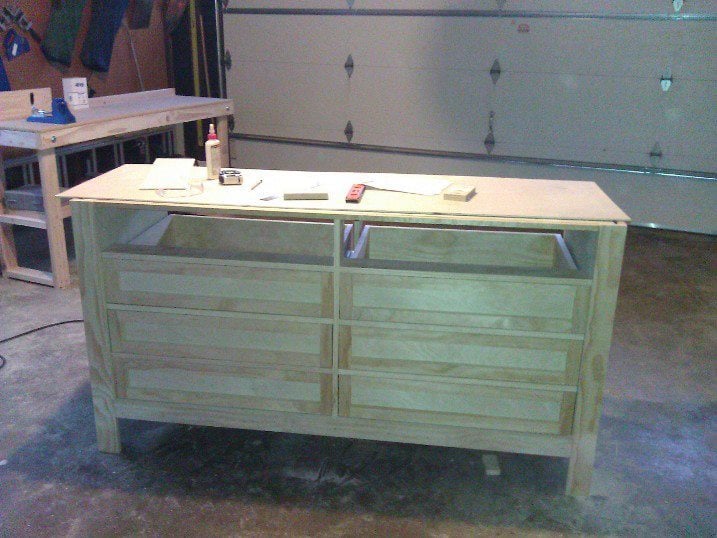
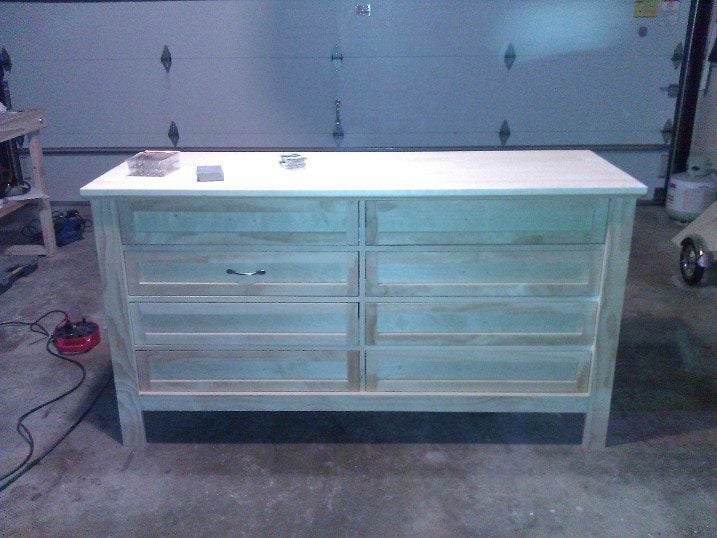
Took us about three weeks mostly working on weekends. We could only work when our child was sleeping. A worth while project if you have the time, space and tools needed. It weighs a ton when done. Our higher cost is due to using a higher wood quality and $125 for the eight ball bearing drawer slides. All the plywood is birch, the top is an Aspen panel and the rest is select pine.
Thu, 10/25/2012 - 11:44
I'm about to start building this and I was wondering how you installed the drawer slides.
Thanks!

This build was also a lot of fun! I made an extra brace to hold the wait of two sitting on the bench. Thanks again Ana for your plans!
David Marks
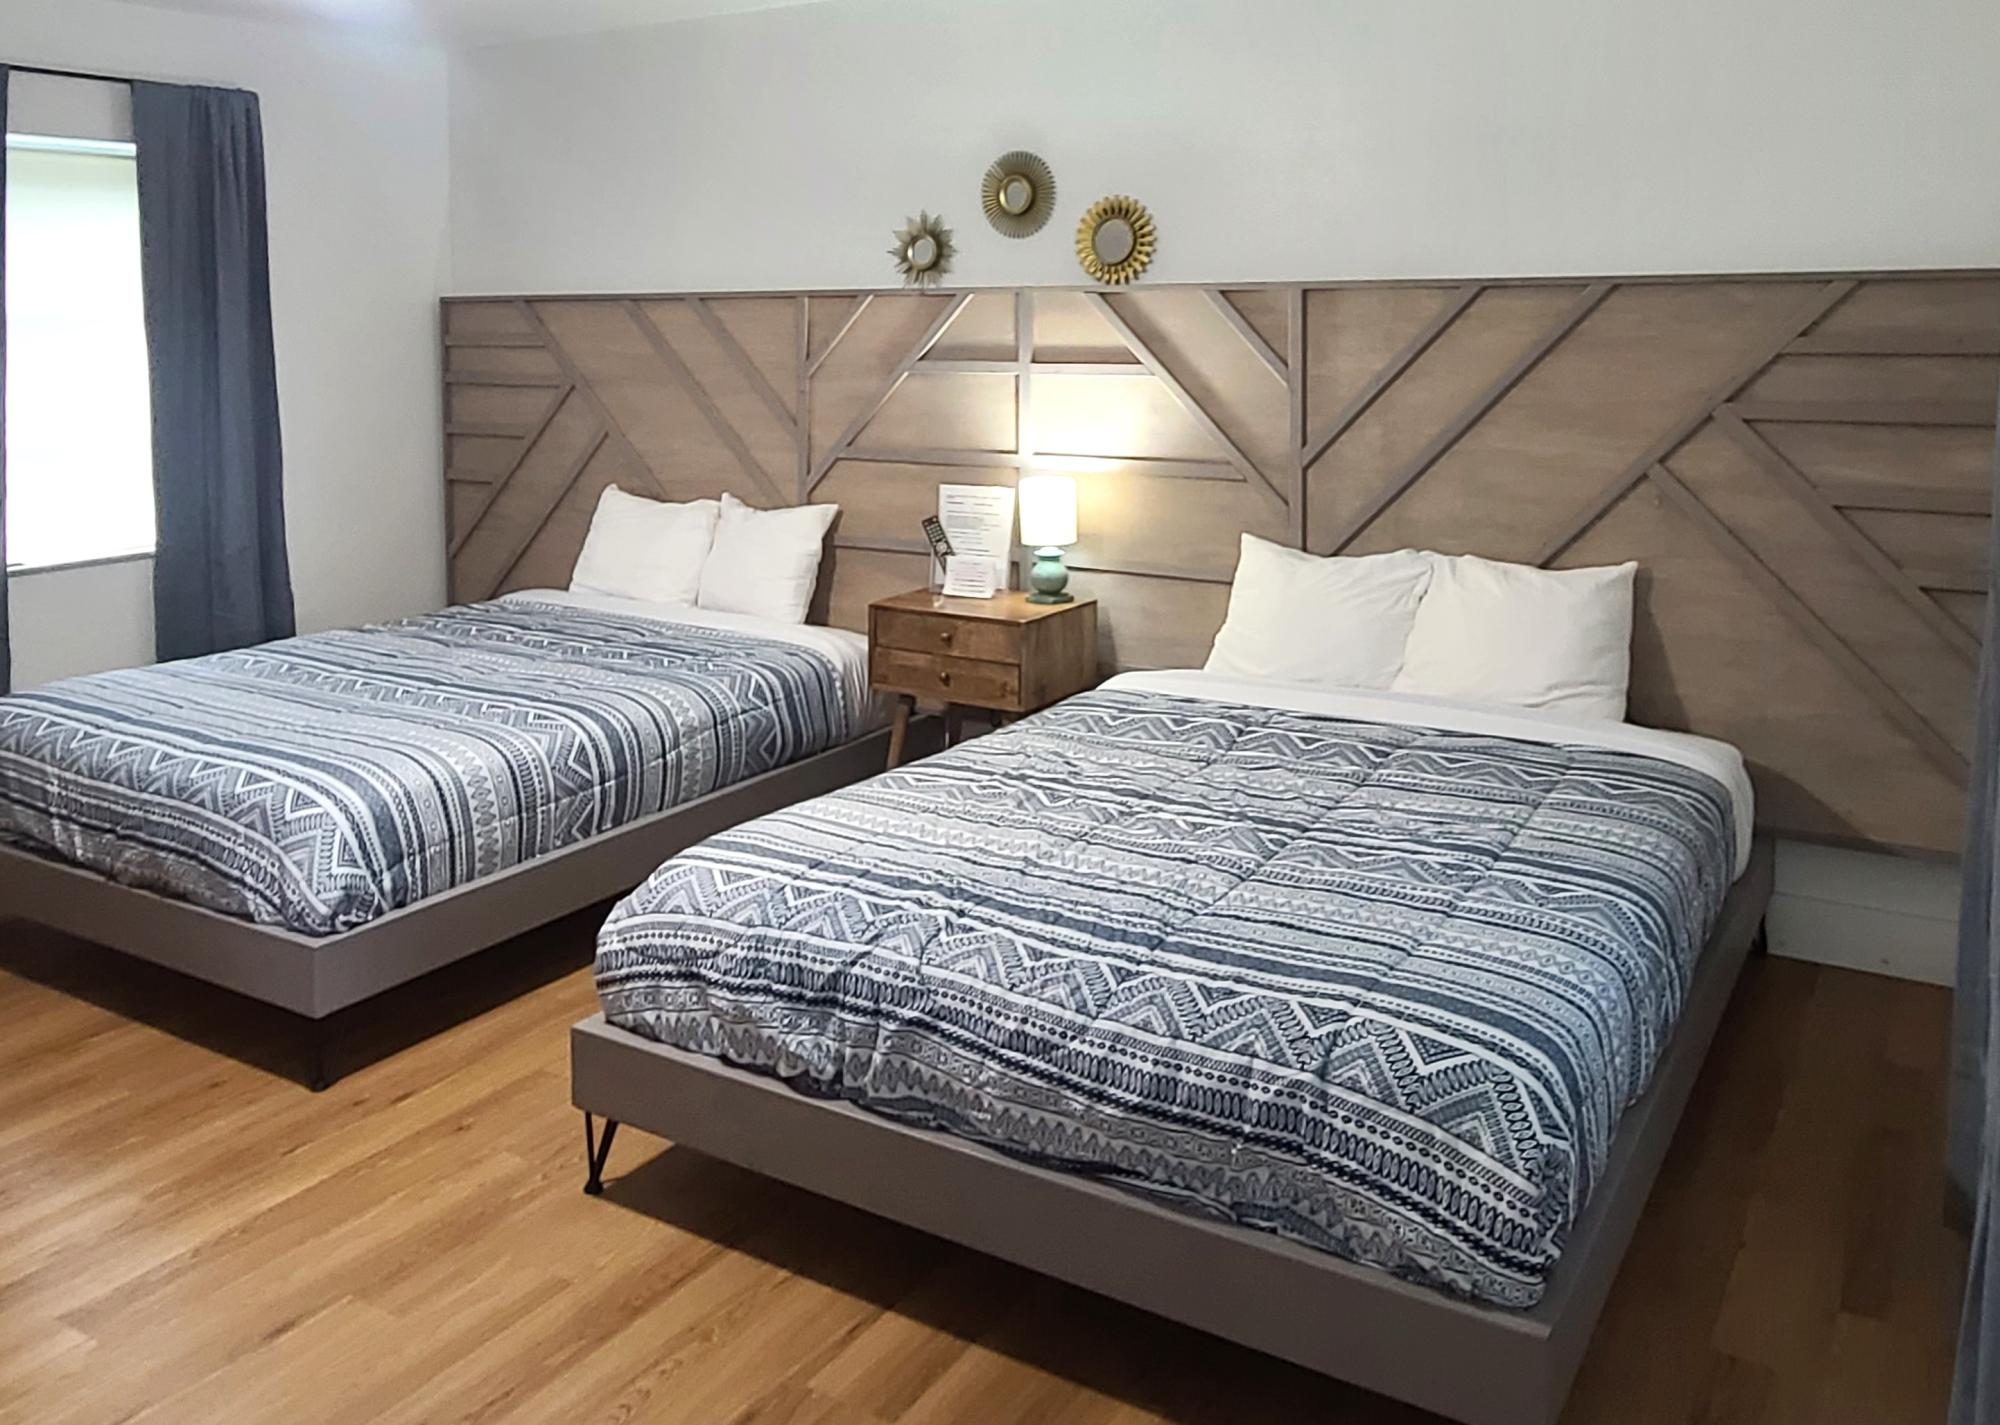
Built these bedframes and headboards for a local motel
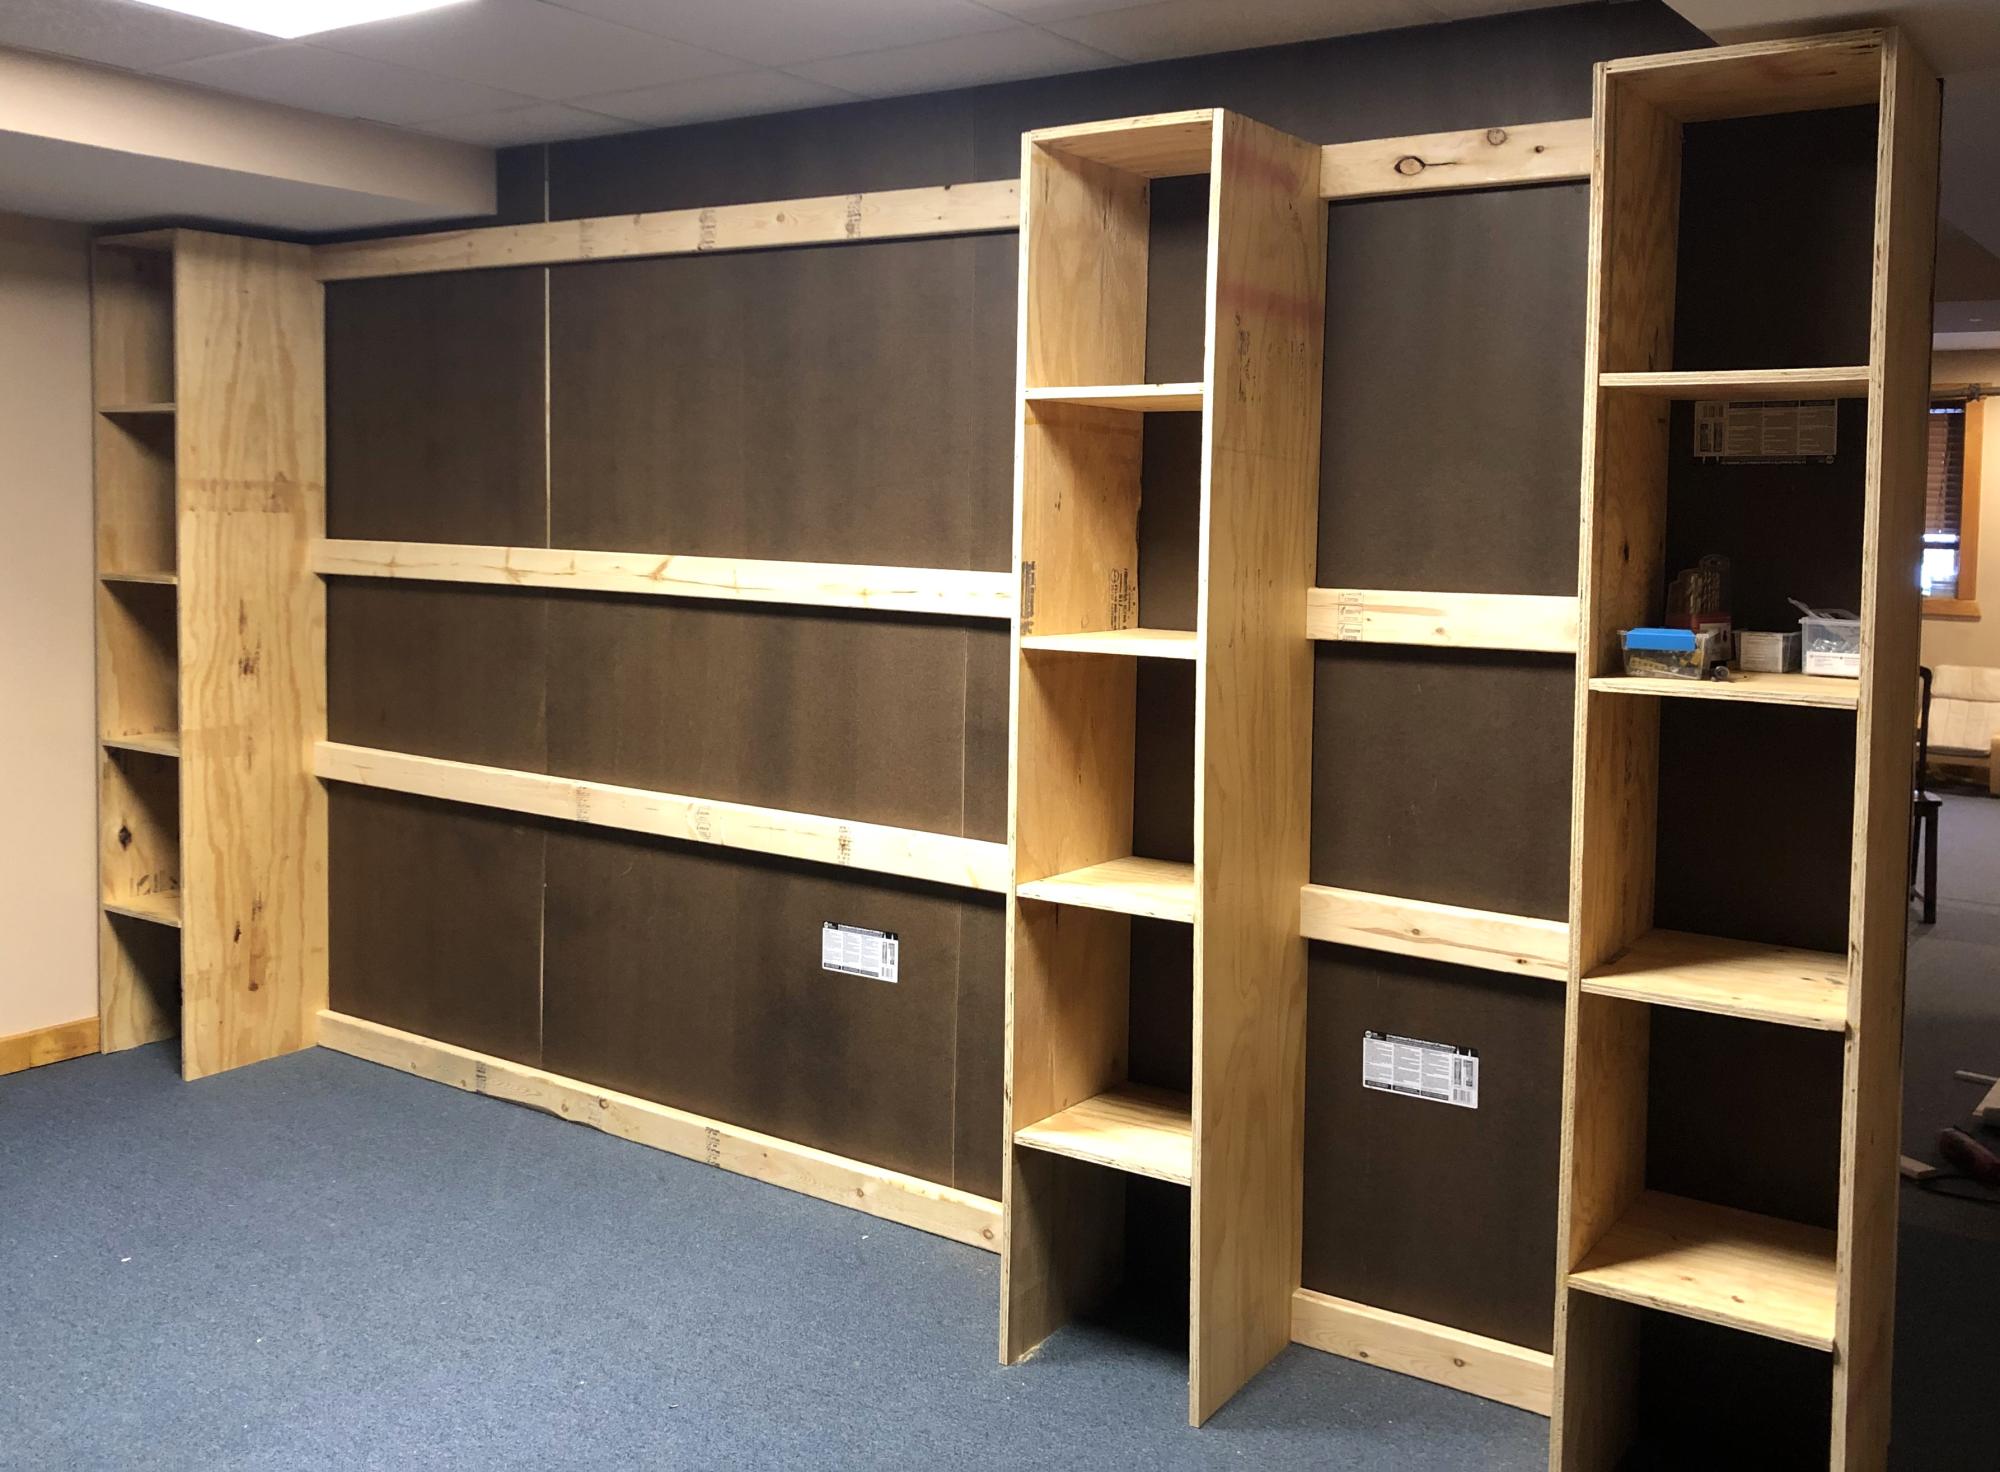
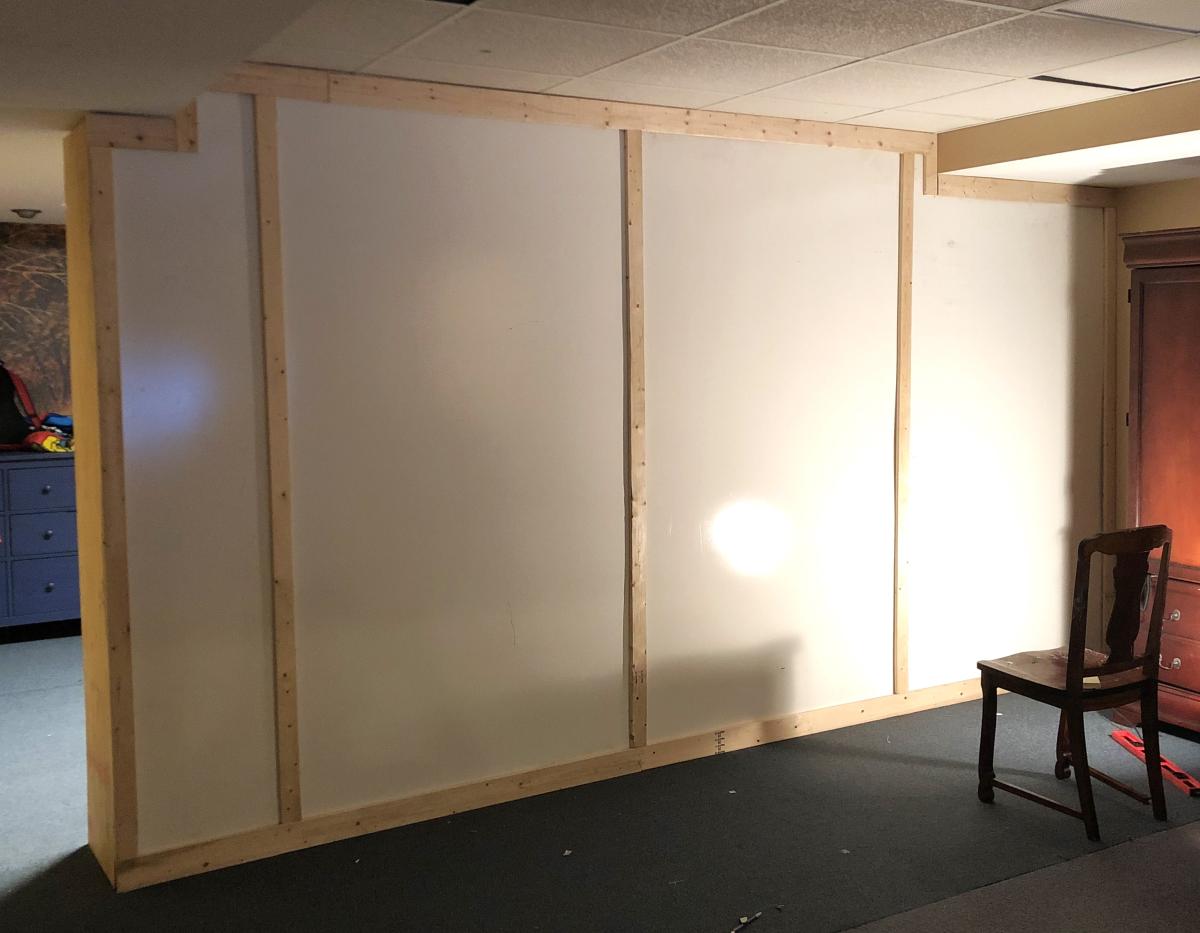
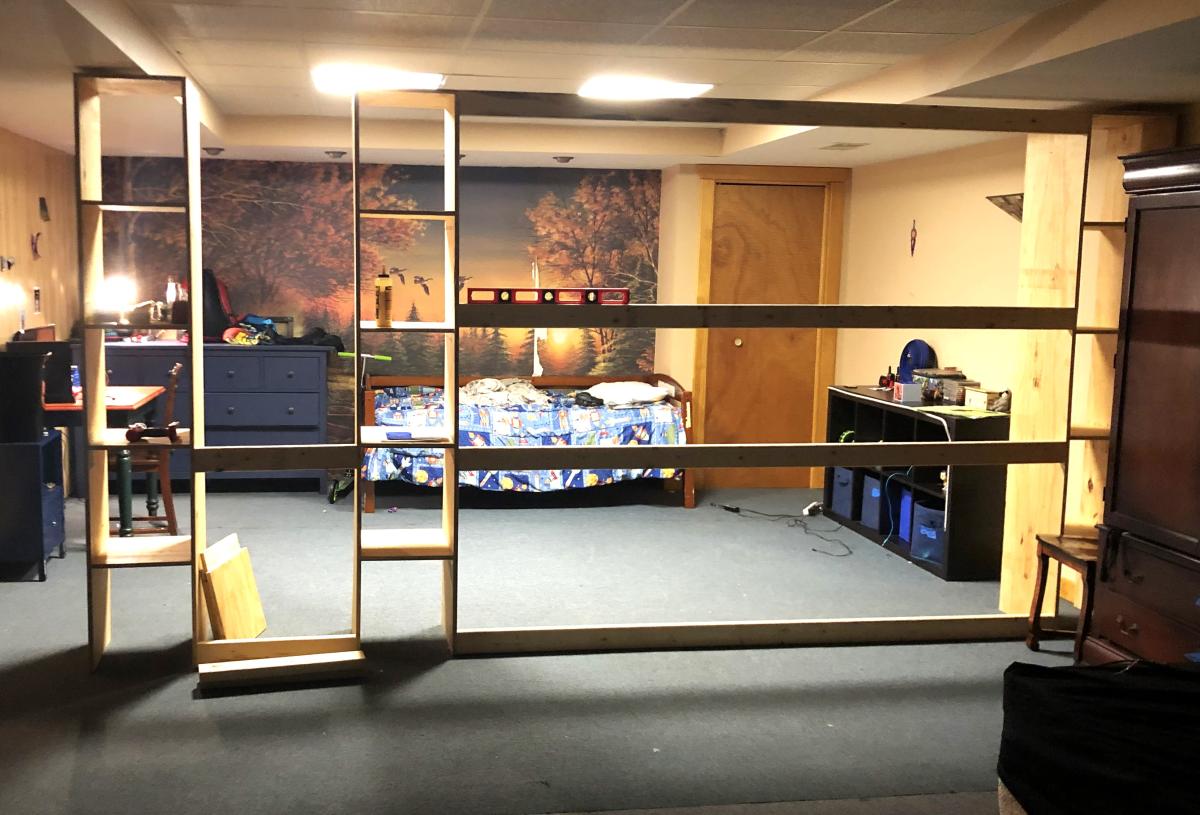
Modified the wall divider closet plan into a wall to serve as an extra bedroom in my basement. The inner wall was subsequently painted.
Grace LeBlanc
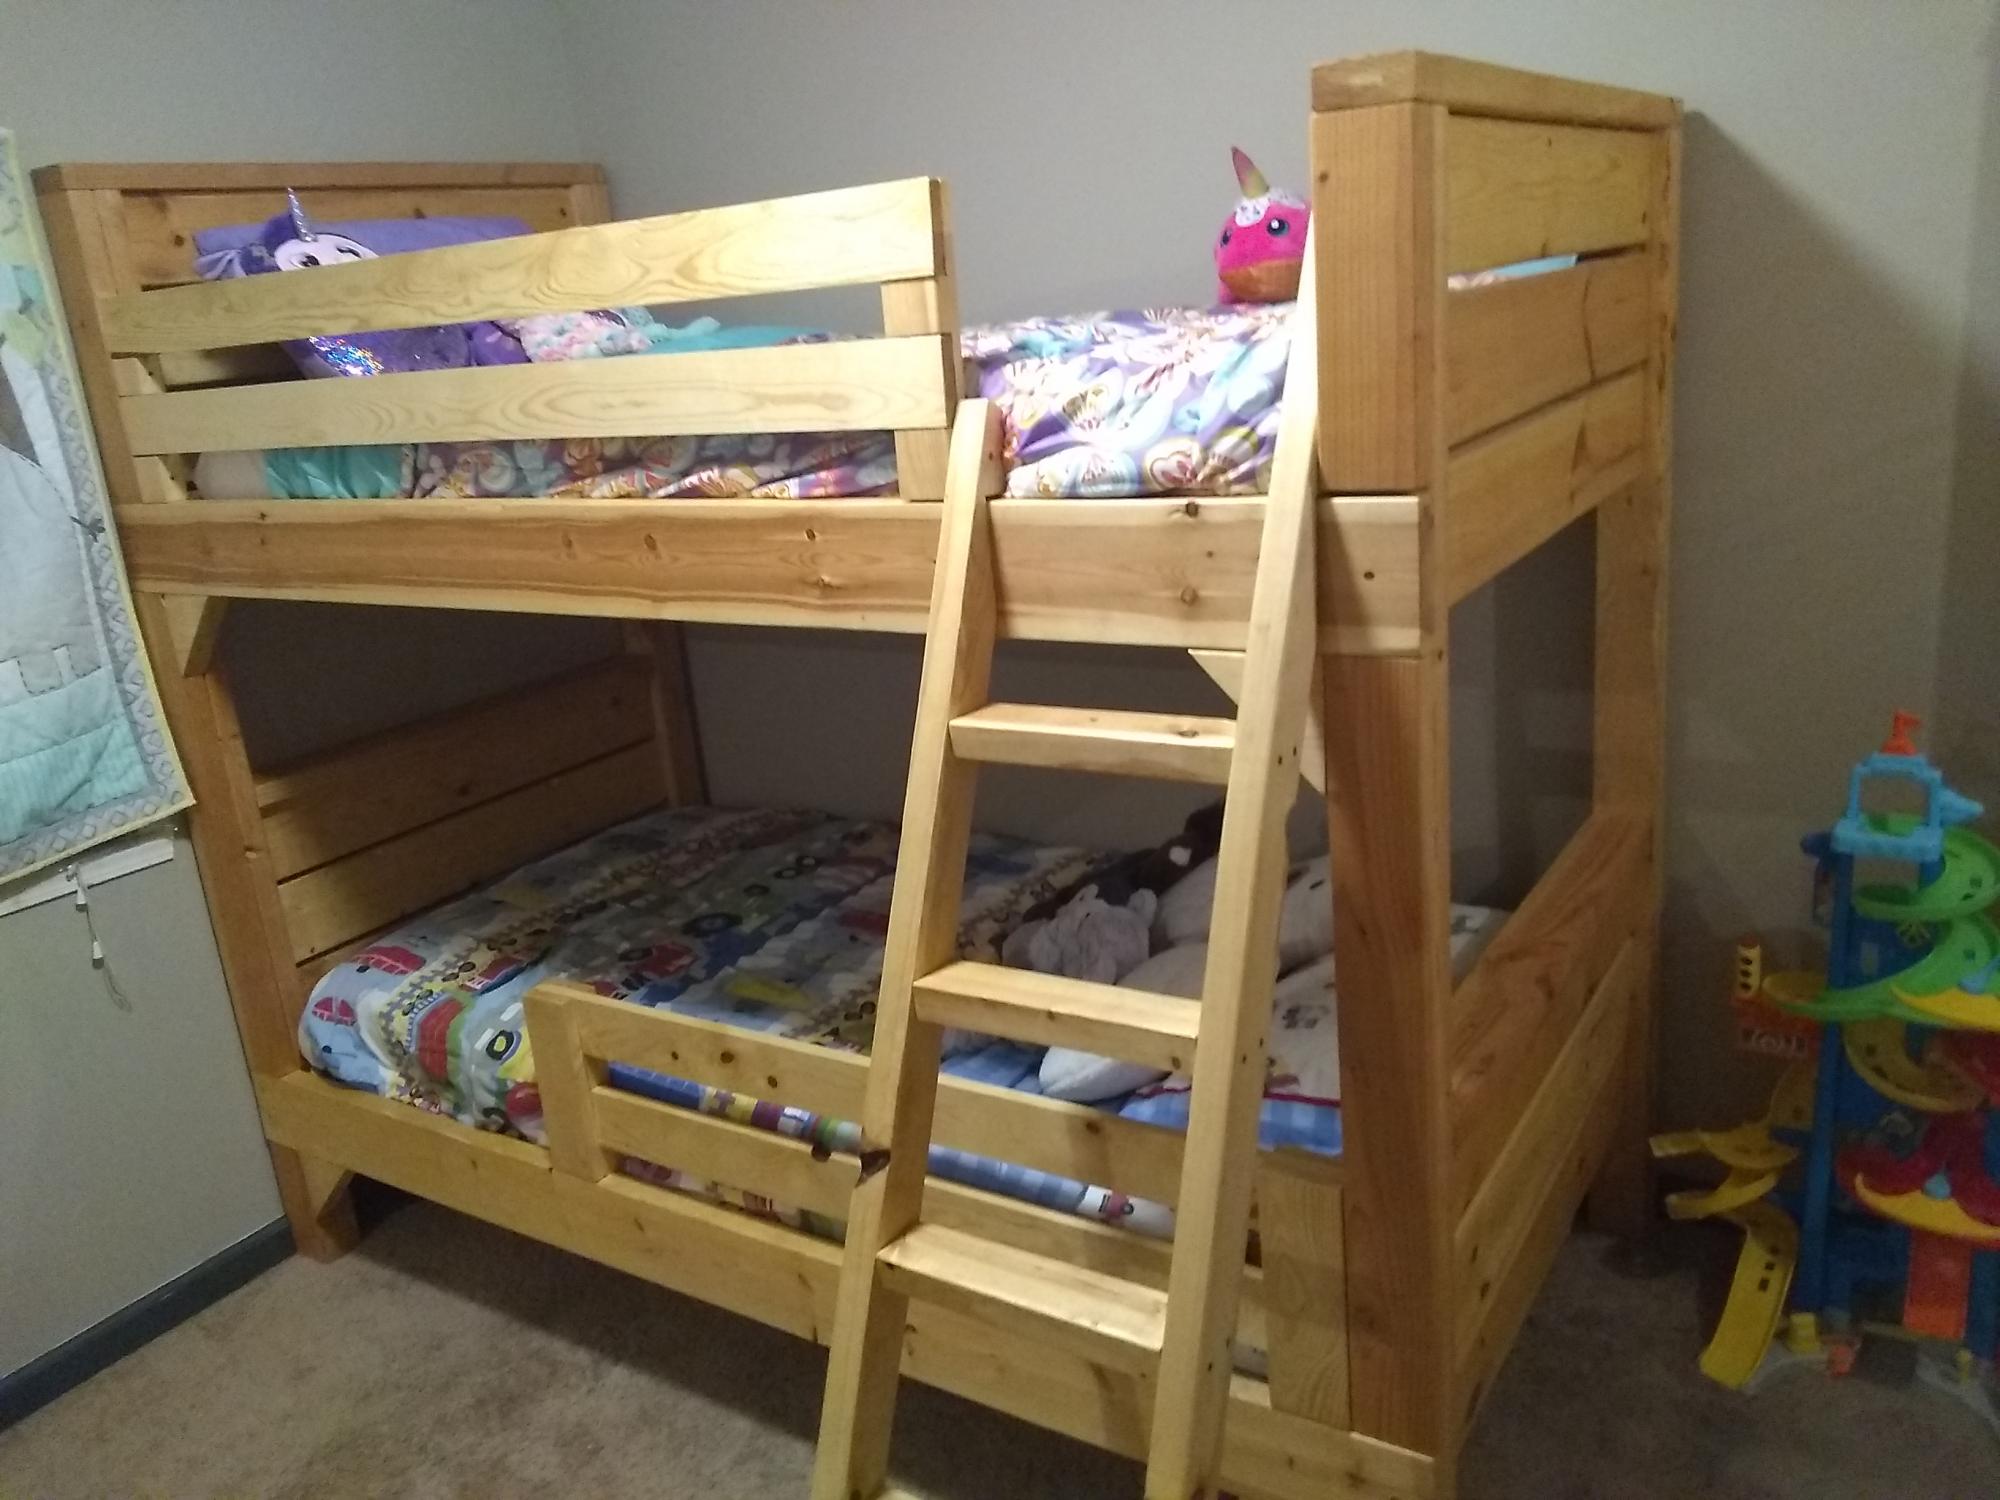
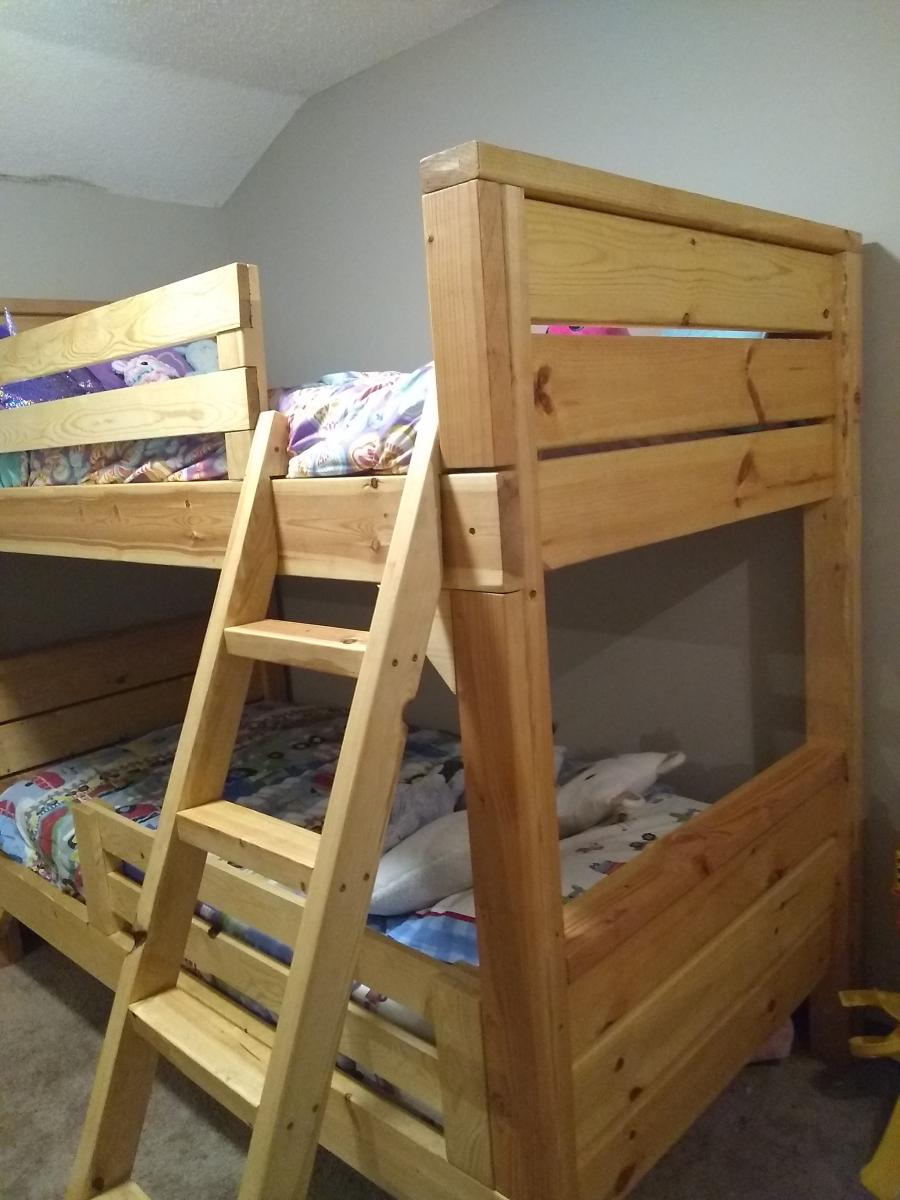
I built this bunk bed from the plans here on Anna white, I love this site. I think it came out really good. It took a little longer than expected because I sanded every piece down, every corner, every side, every end, because it's for my kids.
I devised the ladder myself for my situation and modified the rails I found as well.

A friend needed a raised garden bed for her husband who is in a wheel chair. I searched and found the VegTrug's. It took a lot of trial and error. I based it off Williams Sonoma's pictures. I wouldn't of attempted this with out a plan if it weren't for Ana's website.

Tue, 03/11/2014 - 09:57
Dear CaronGirls, Are plans available for this?
Tue, 05/19/2015 - 06:54
This looks great - I would love to try this...are there plans available?
Sun, 04/24/2016 - 06:25
All the responses say to go to the plan catalog. Link does not work. I looked for an hour. Please help, I really want this plan!,
Wed, 05/18/2016 - 21:45
Not sure what the story is here, Maybe she got in trouble for saying Vegtrug? I would like plans for a DIY Raised planter bed like the above.
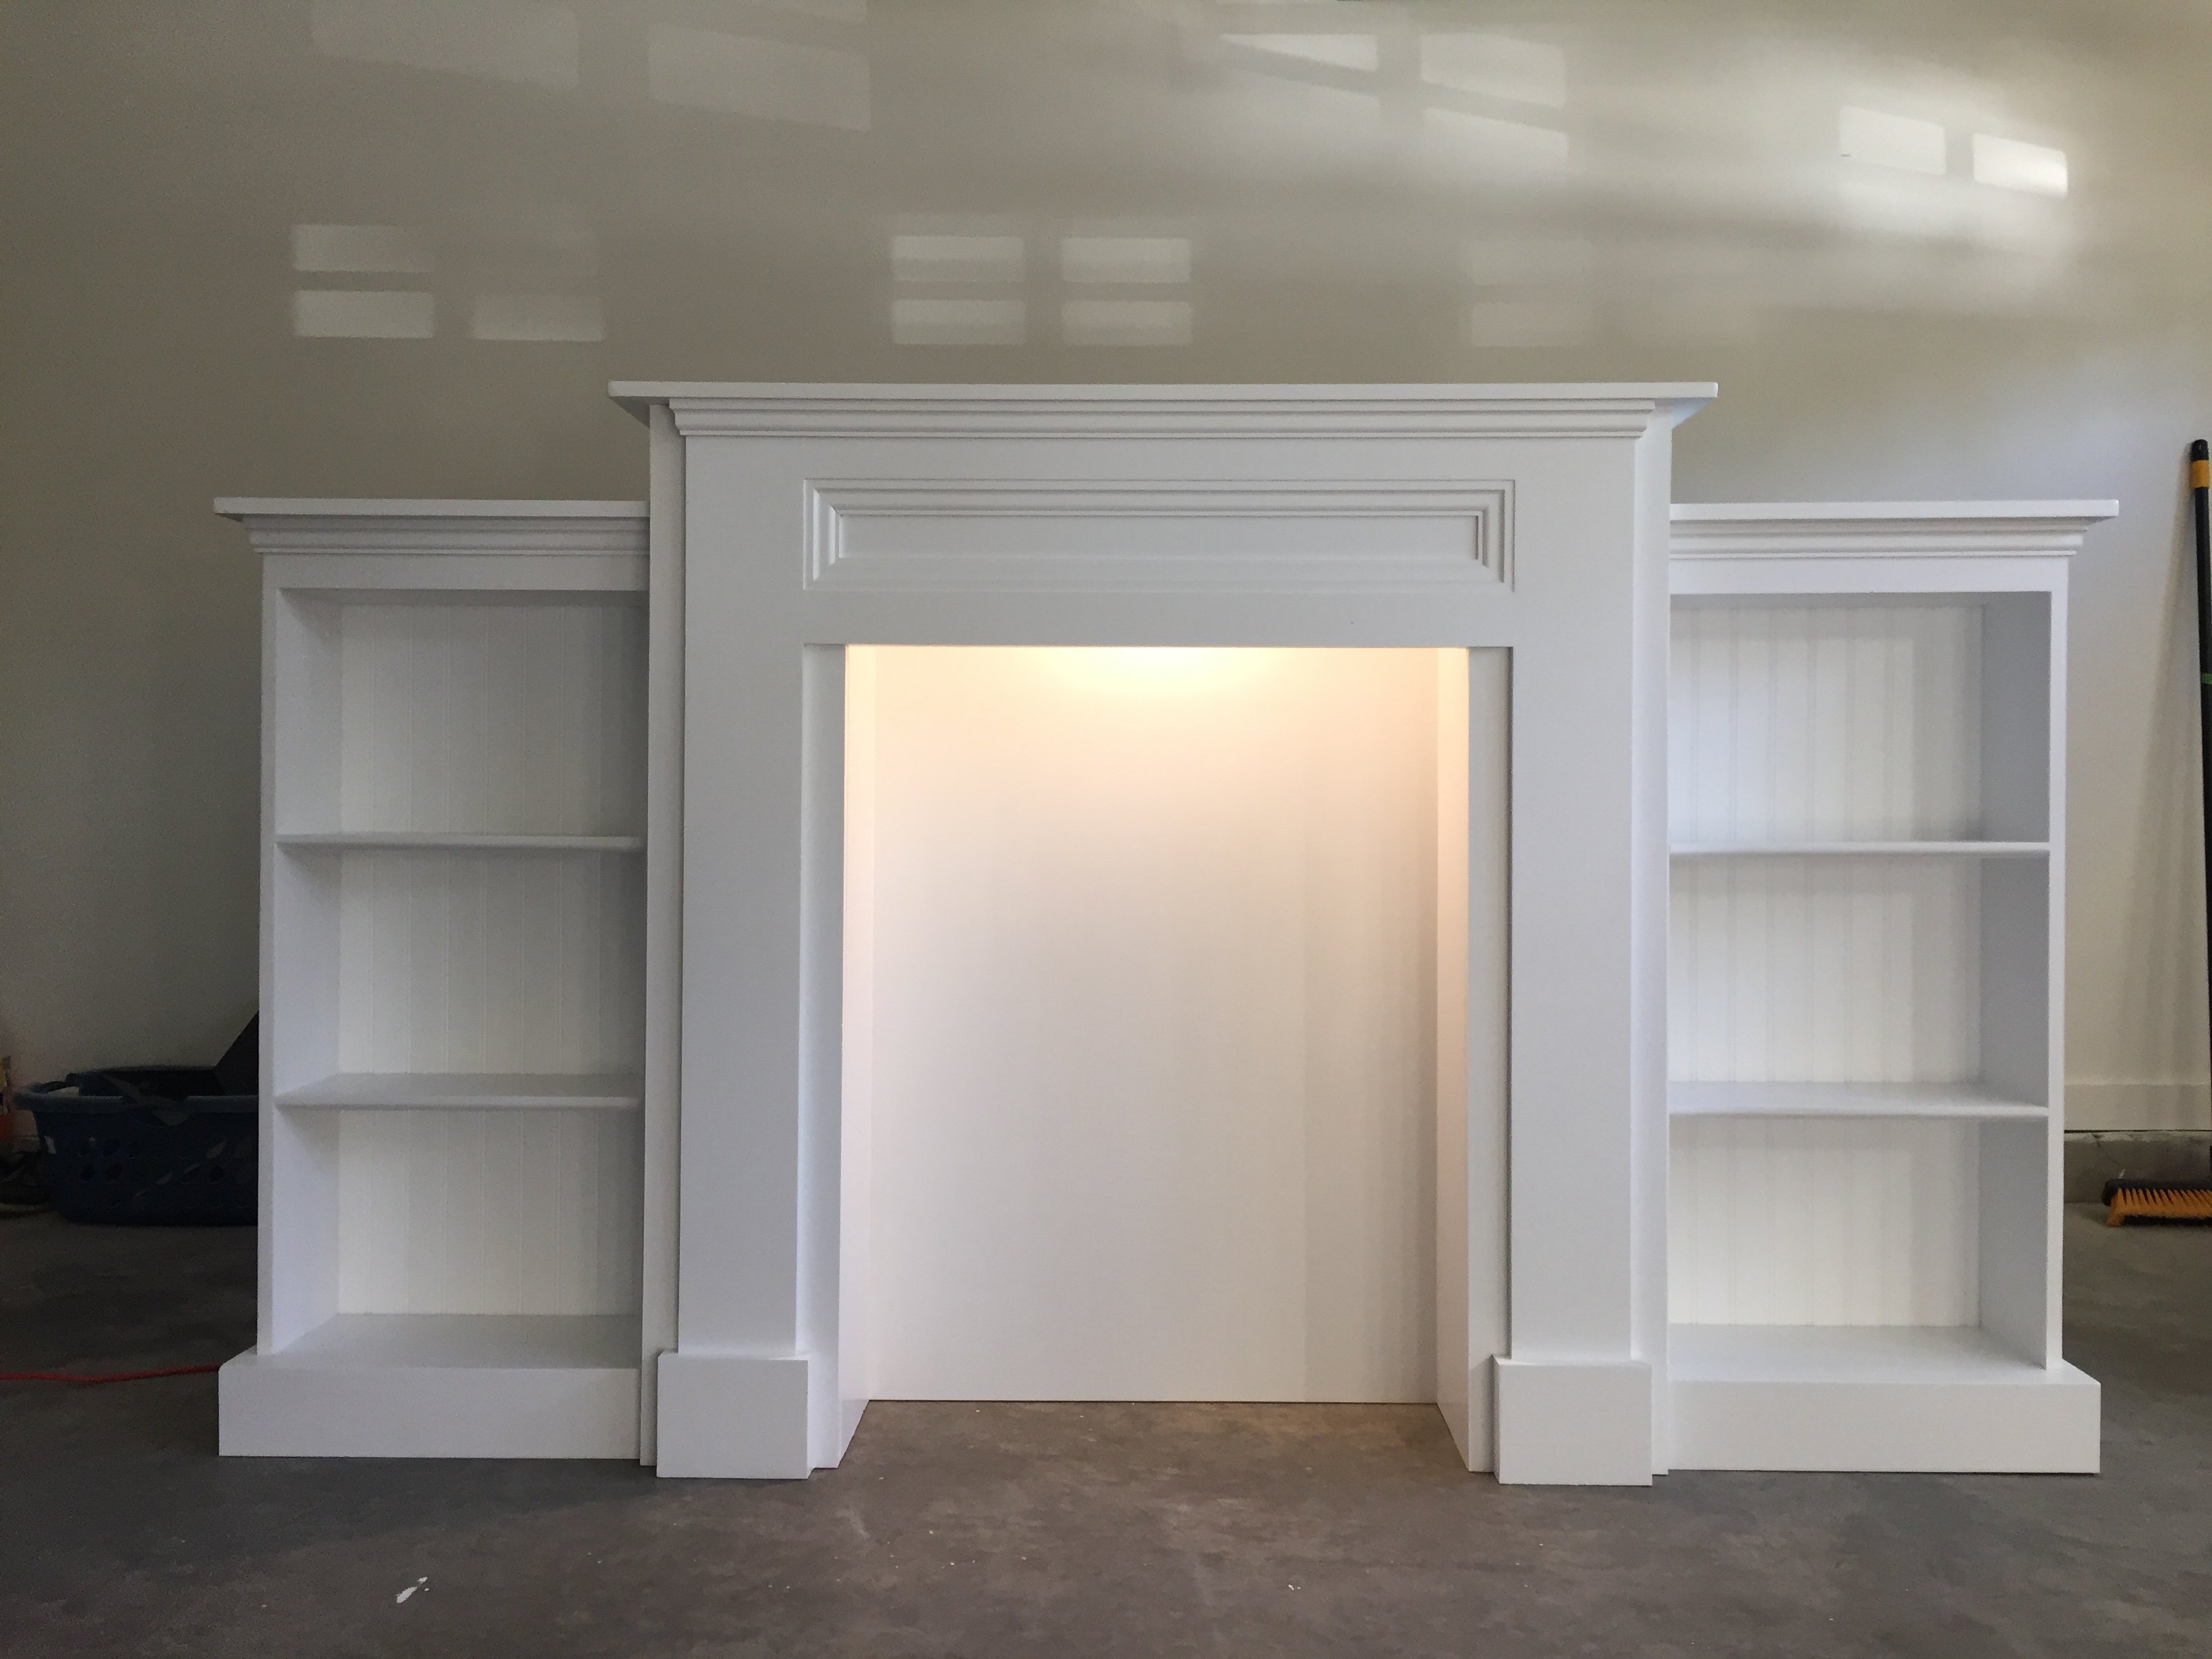
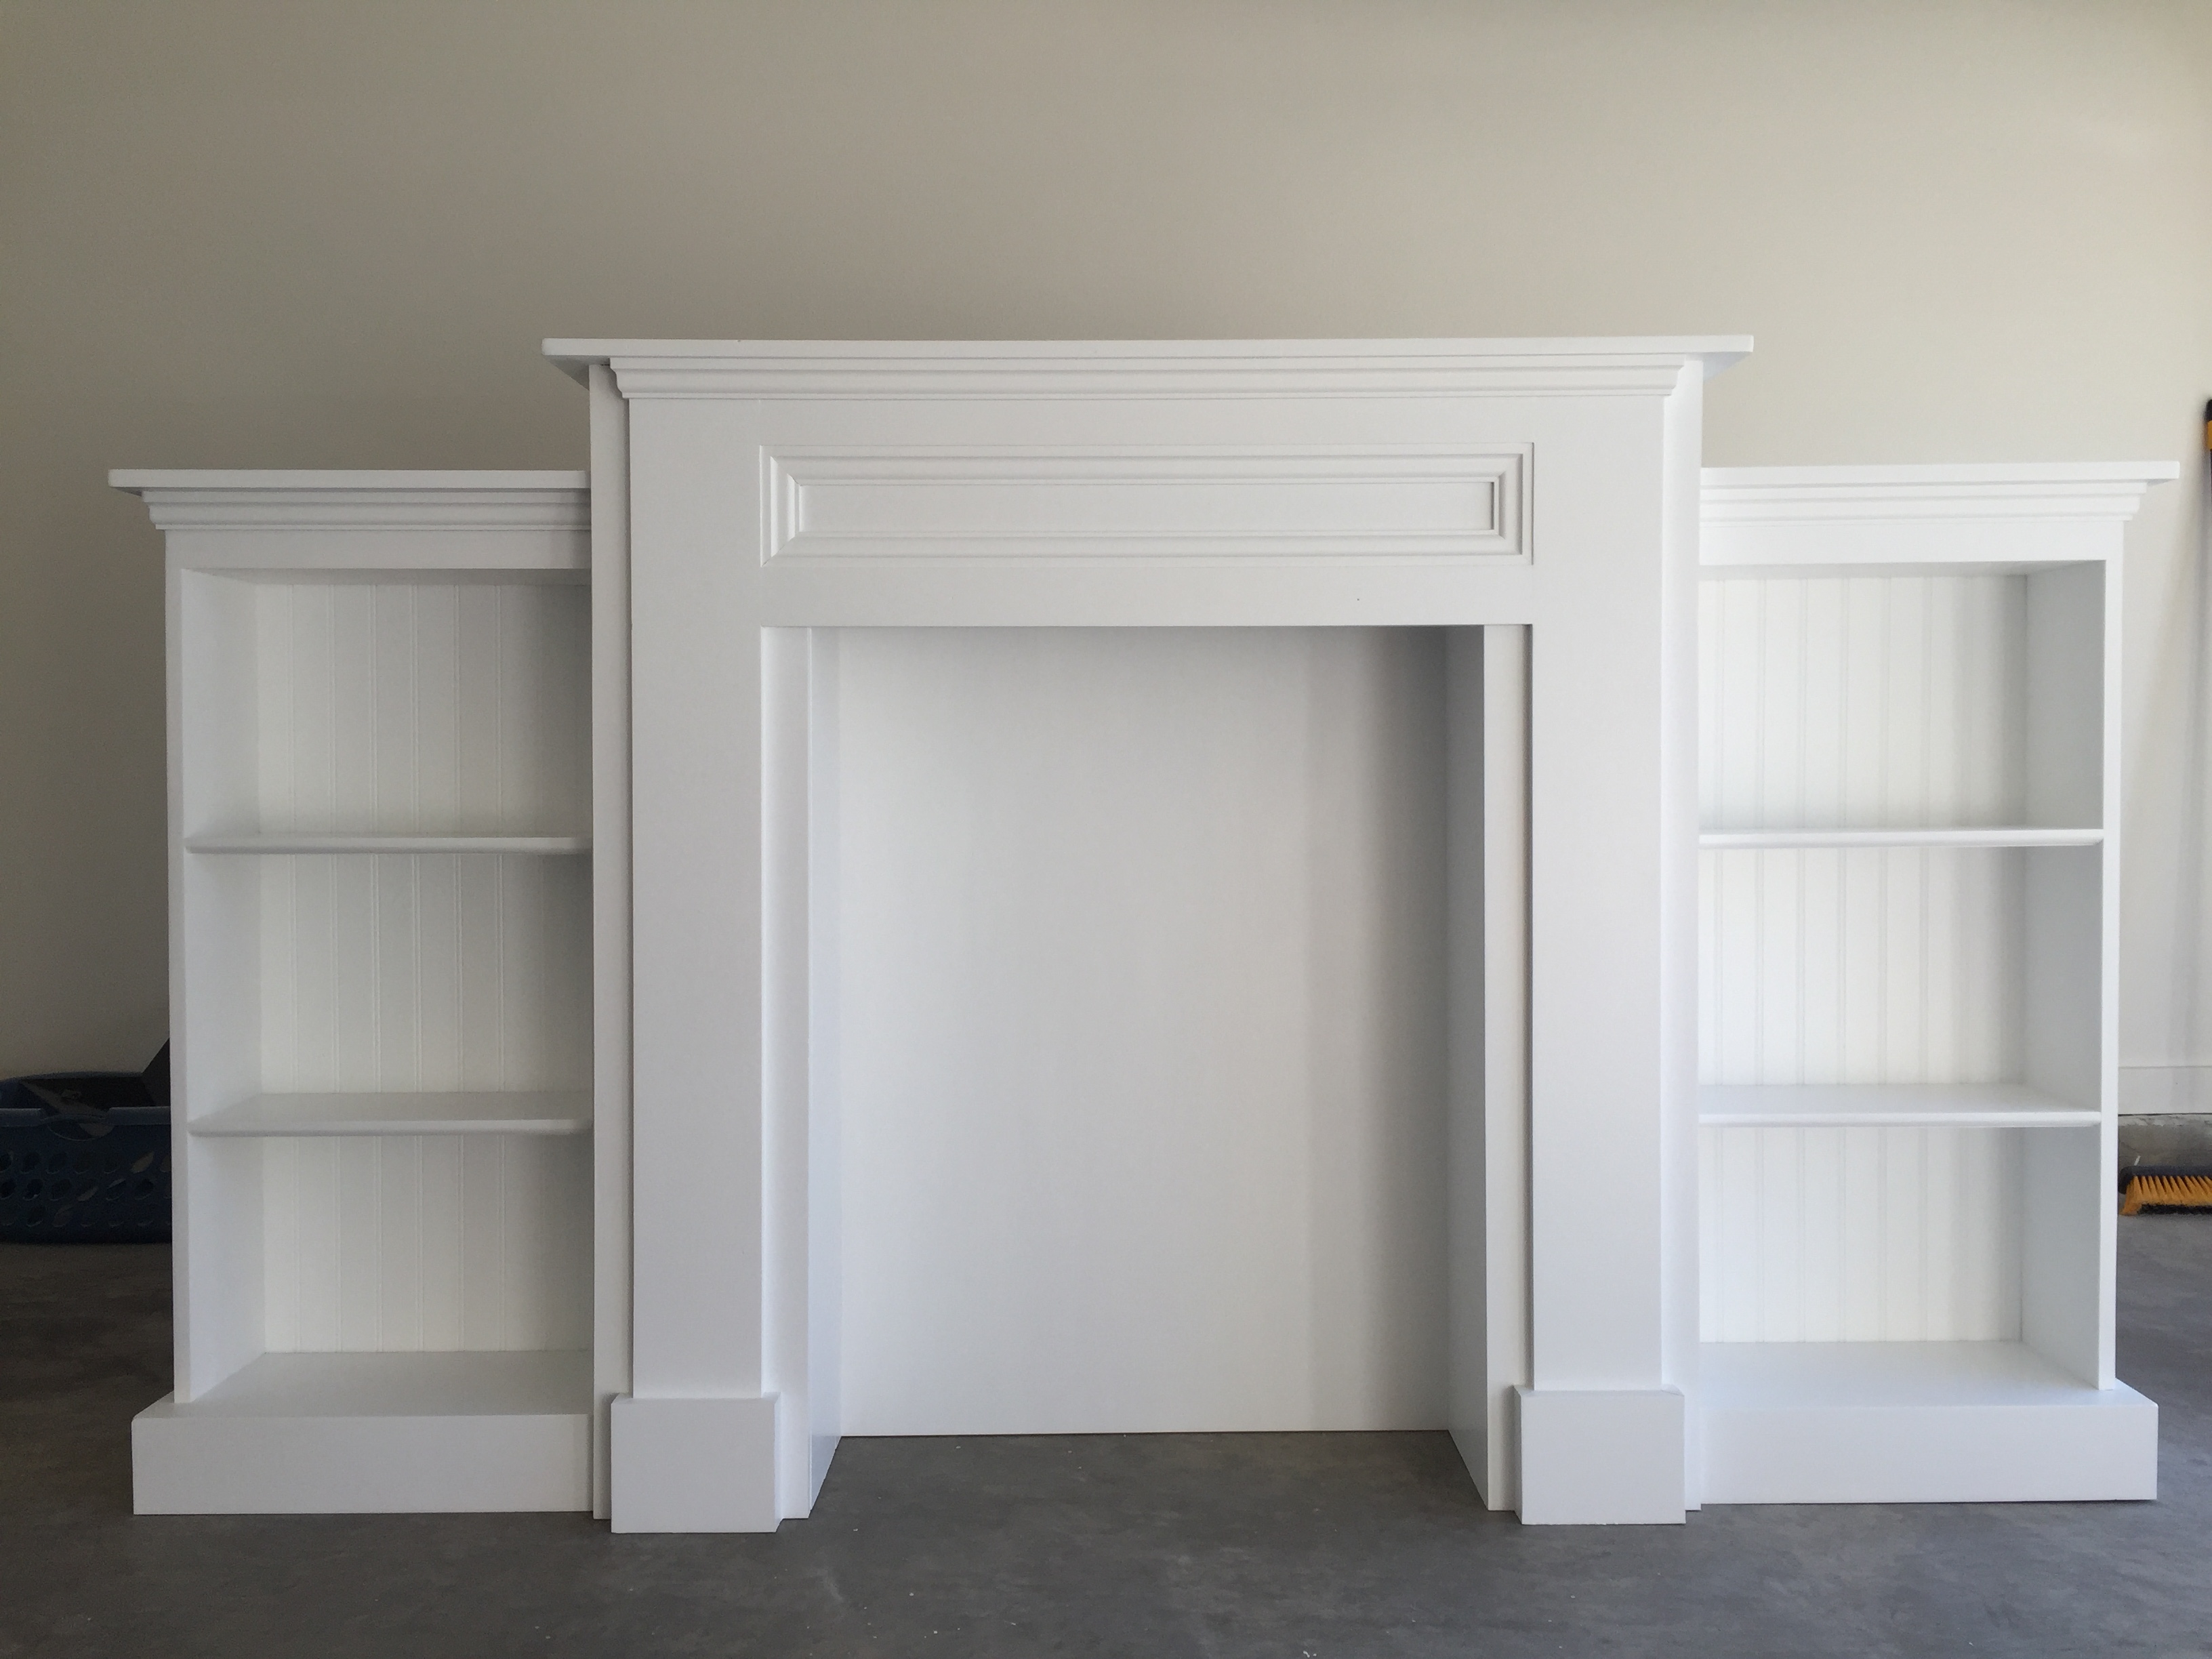
Made from the modified Mimi's Faux Mantle design from another brag post.
Tue, 12/19/2017 - 22:01
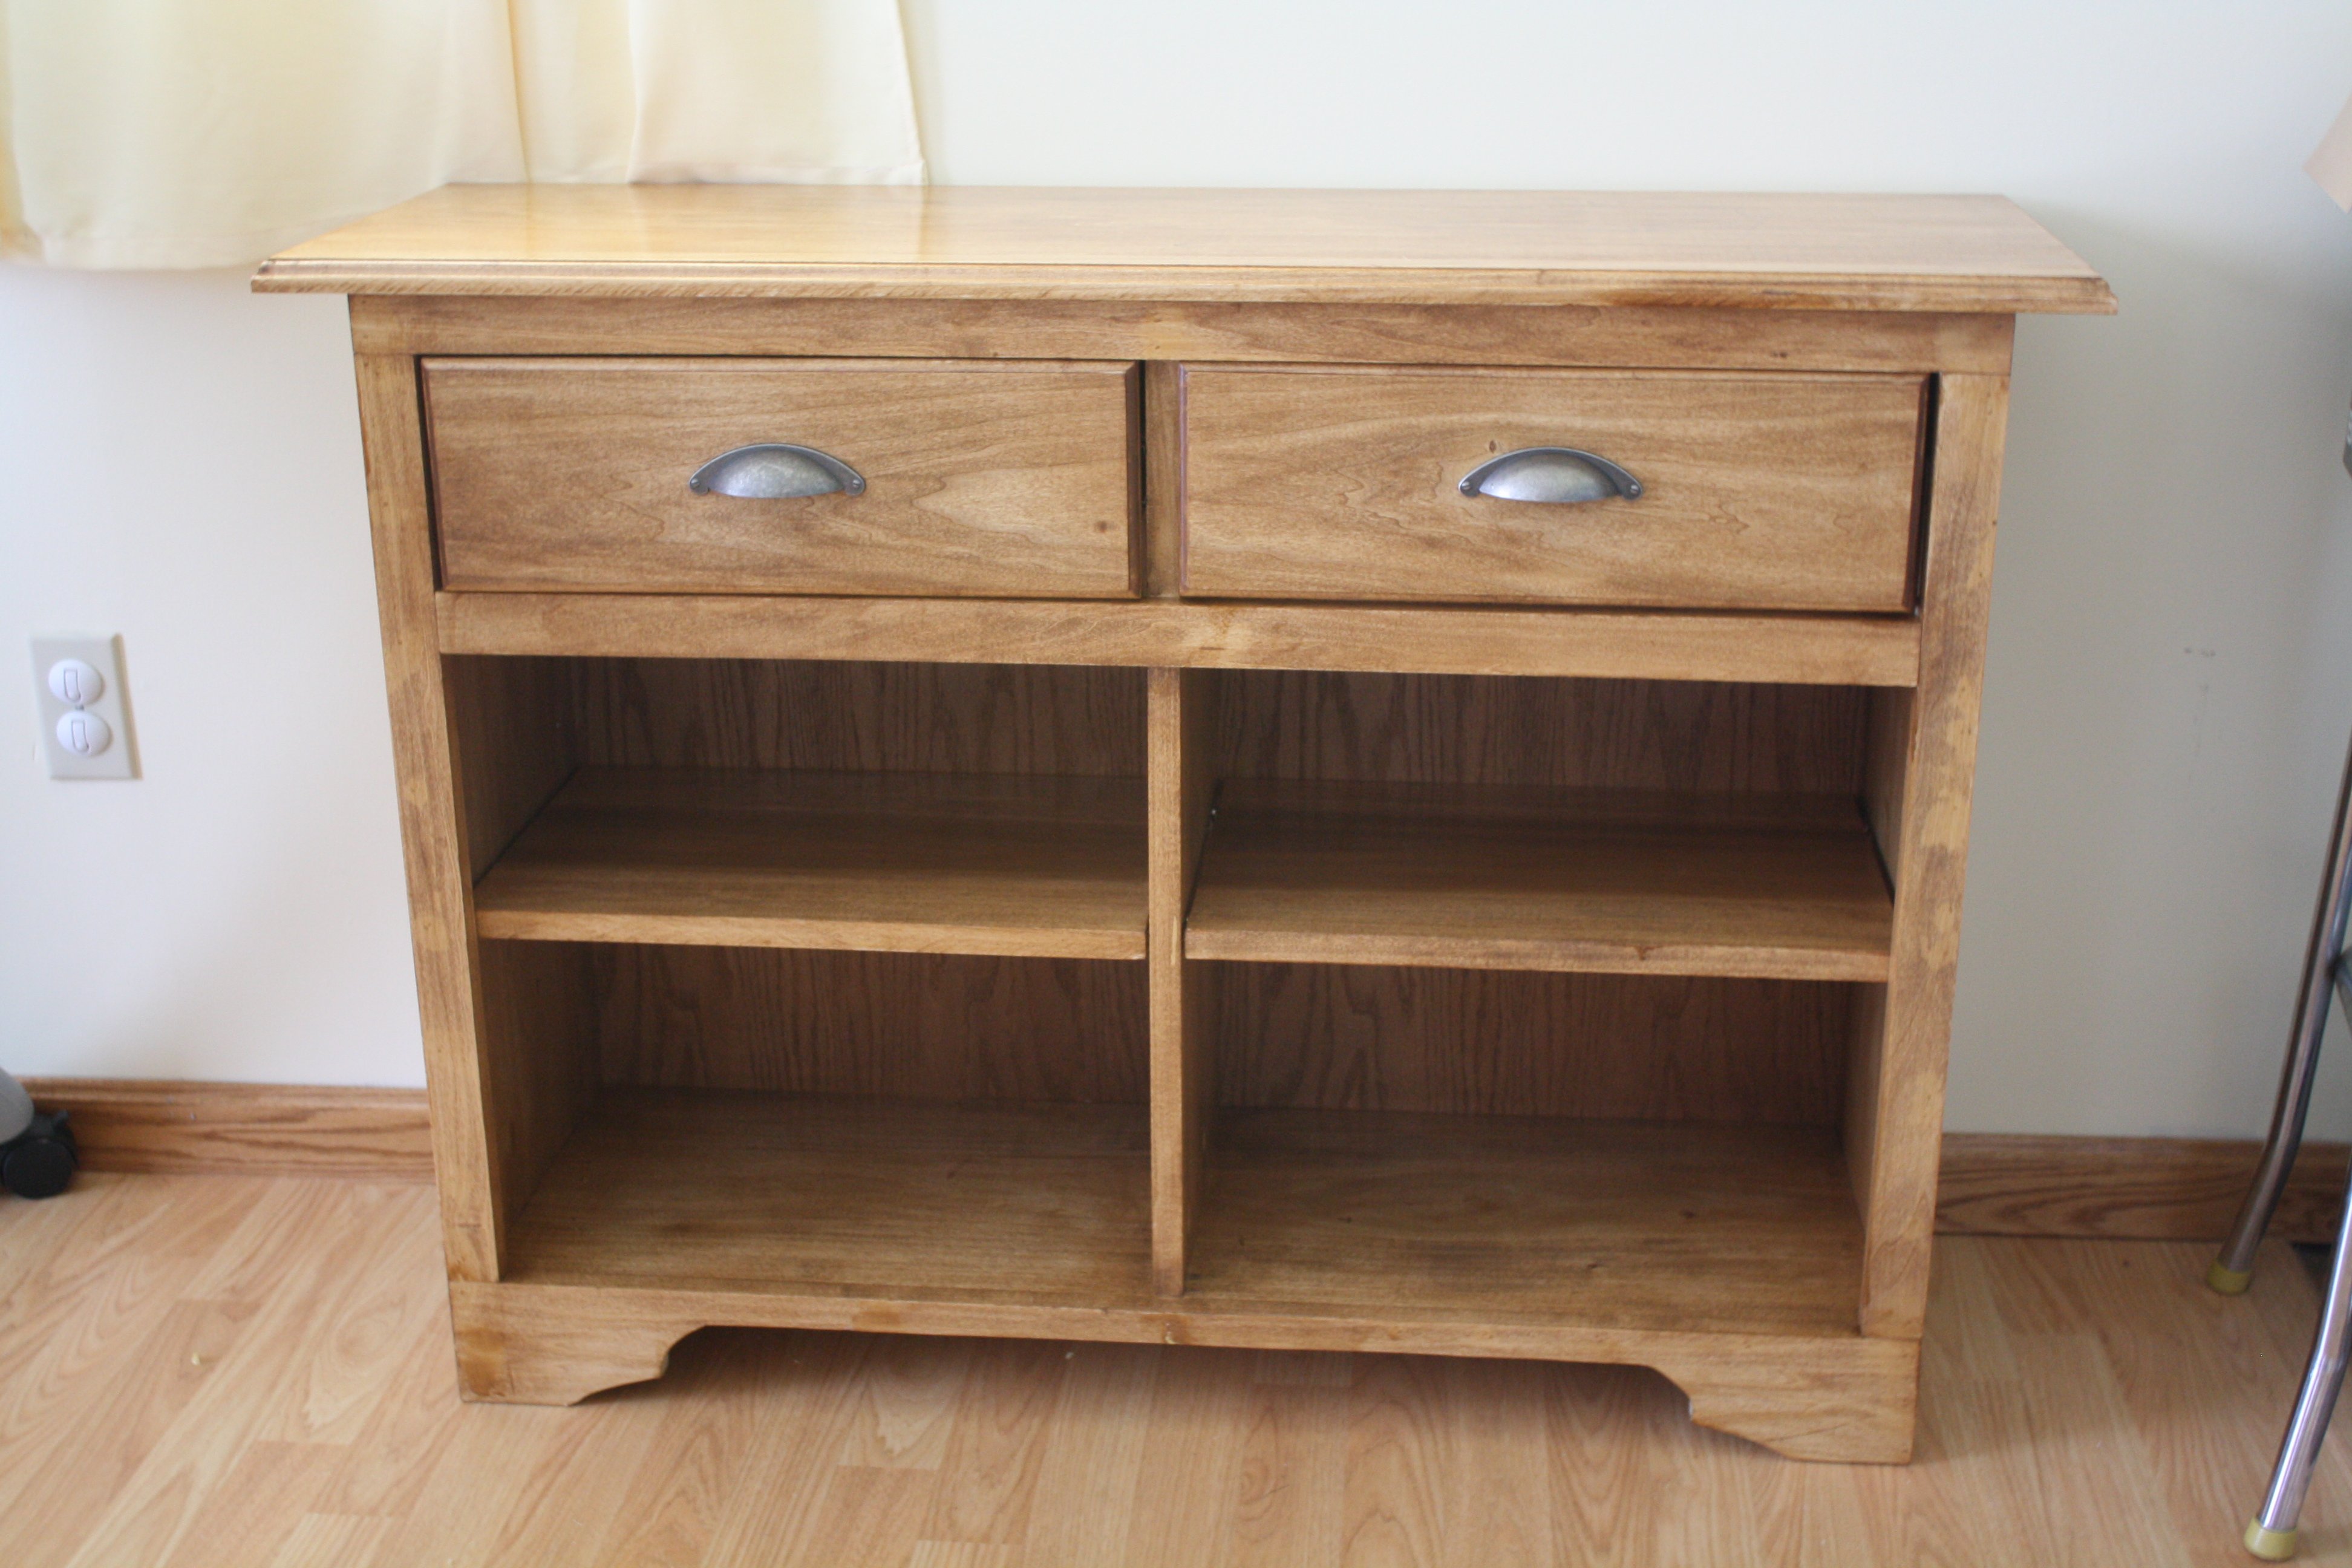
Are you able to tell me how wide this is from the end of one bookcase to the other? I'm trying to find out if it will fit in my living room. Thanks!
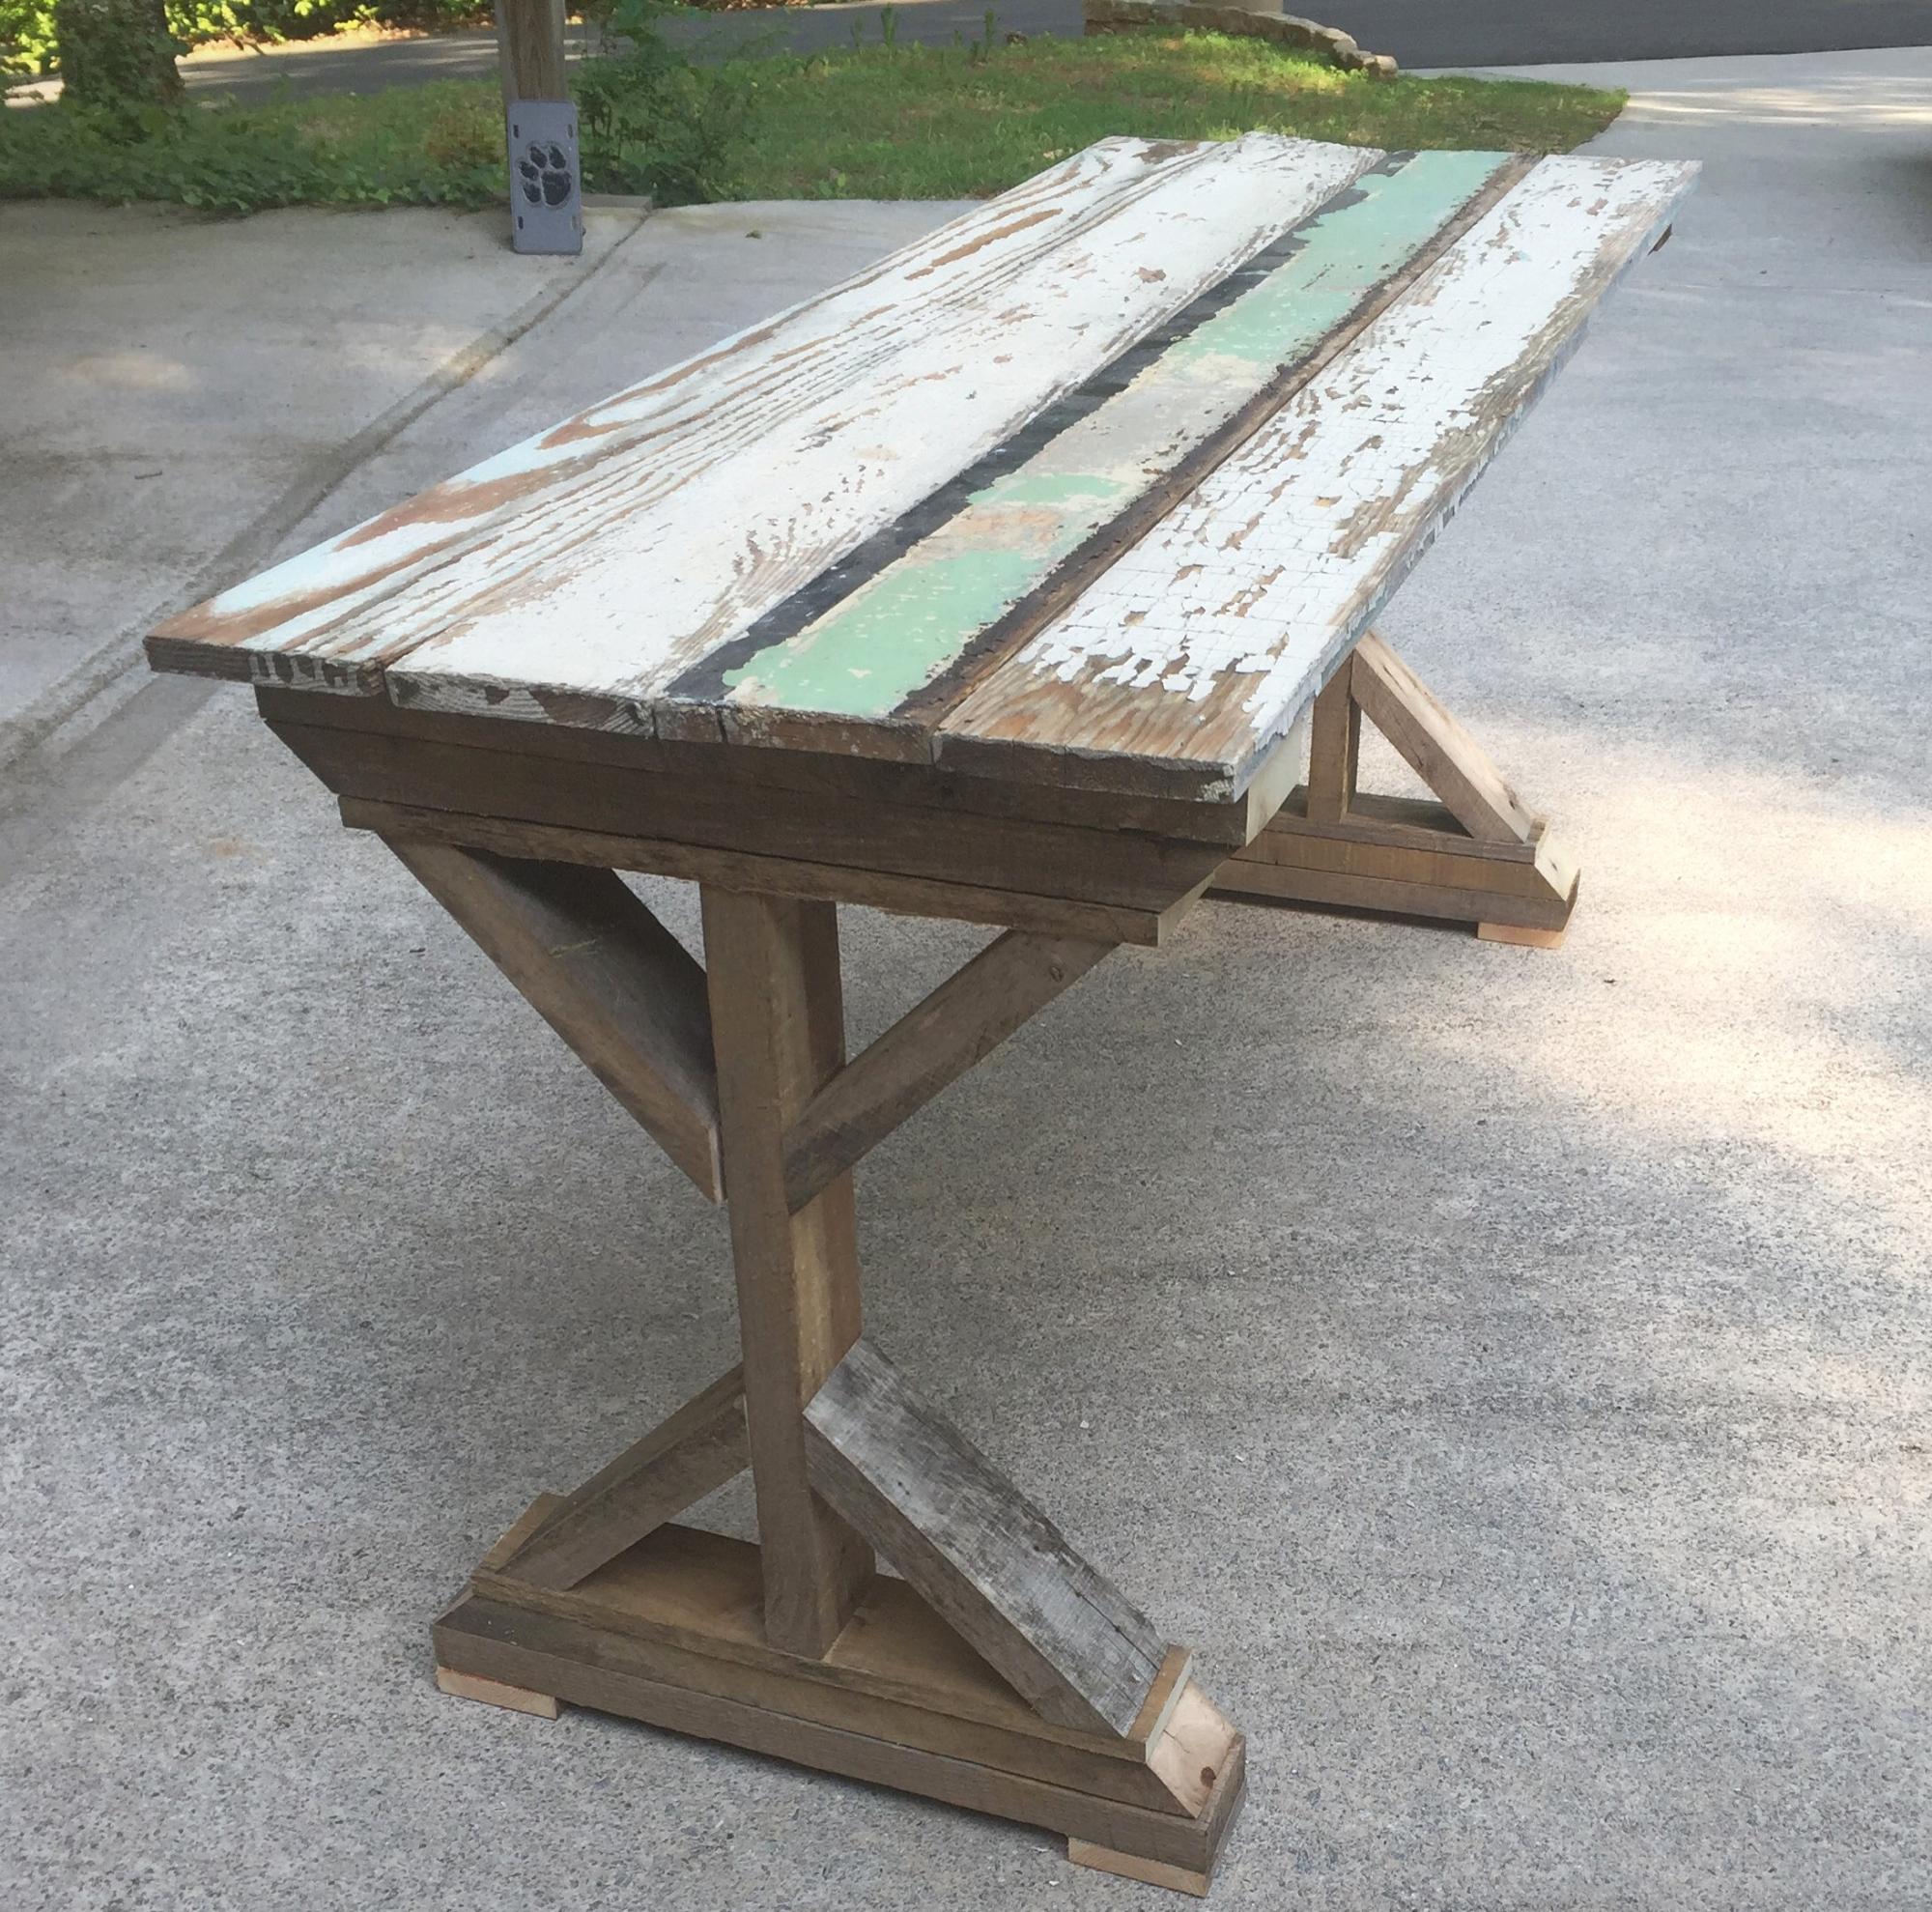
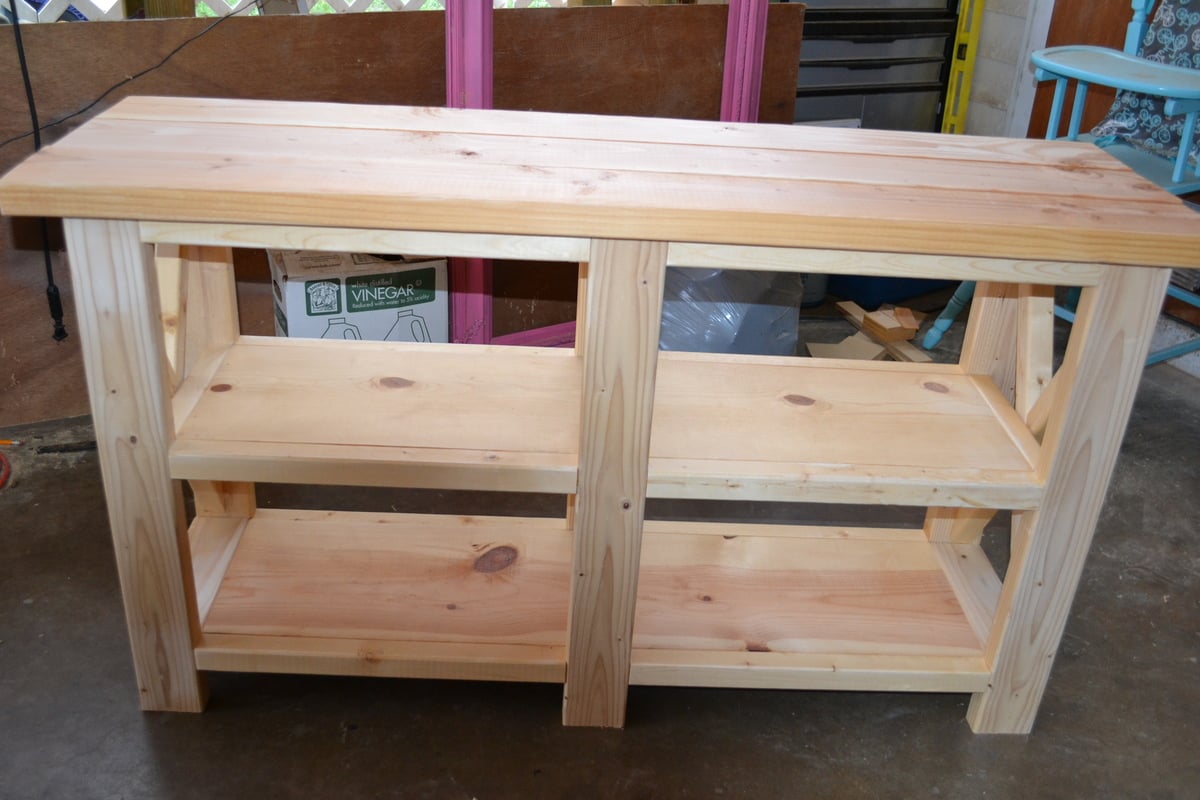
Started this project out of boredom. I had some time and some extra wood laying around. Some was from pallets I took apart, some from a salvage house, and some from an old barn. I built the table in a few hours and worked through any misshaped boards as best as possible. It was a relativley easy project and fun to see the legs turn out with each step. I plan to use cables and turnbuckles for the cross braces on the back and will update the pic when I do. I just need to find a home for it now.
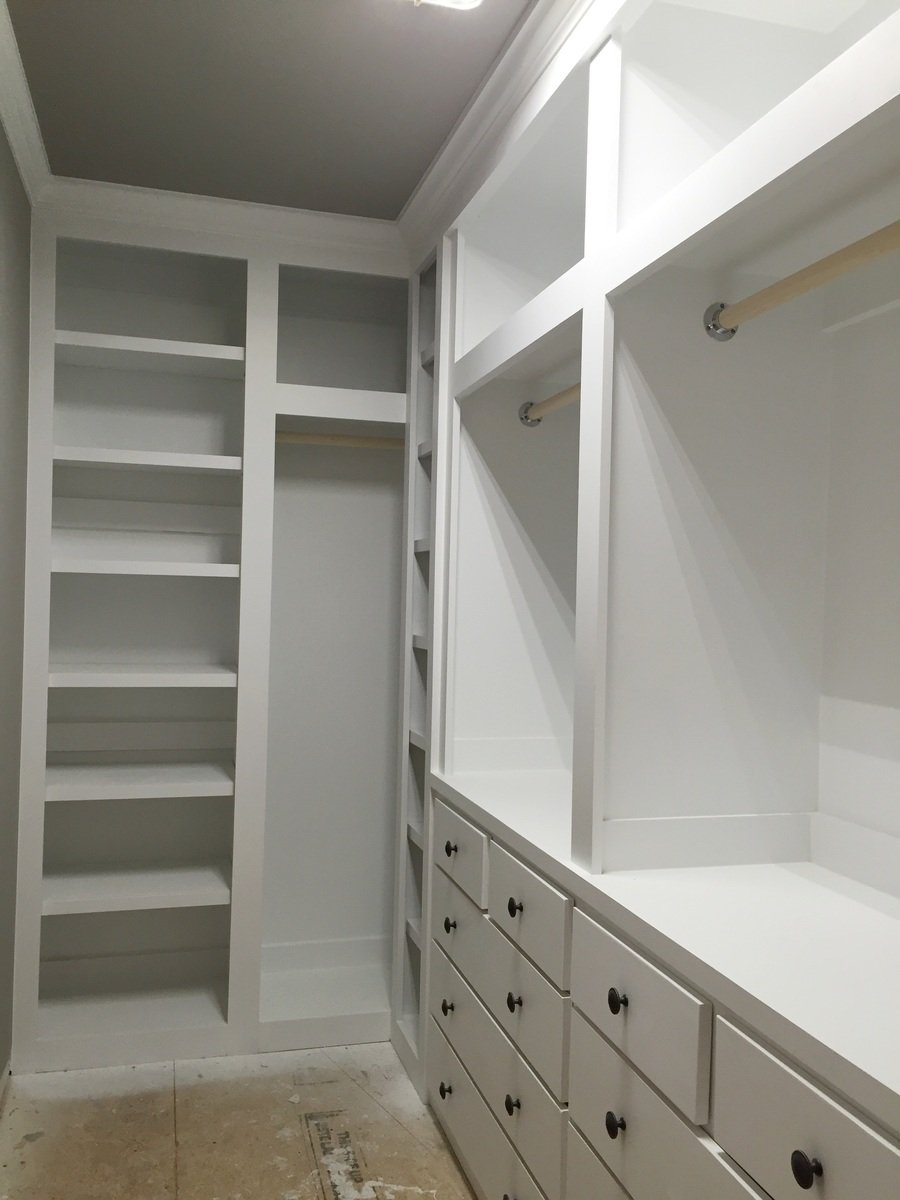
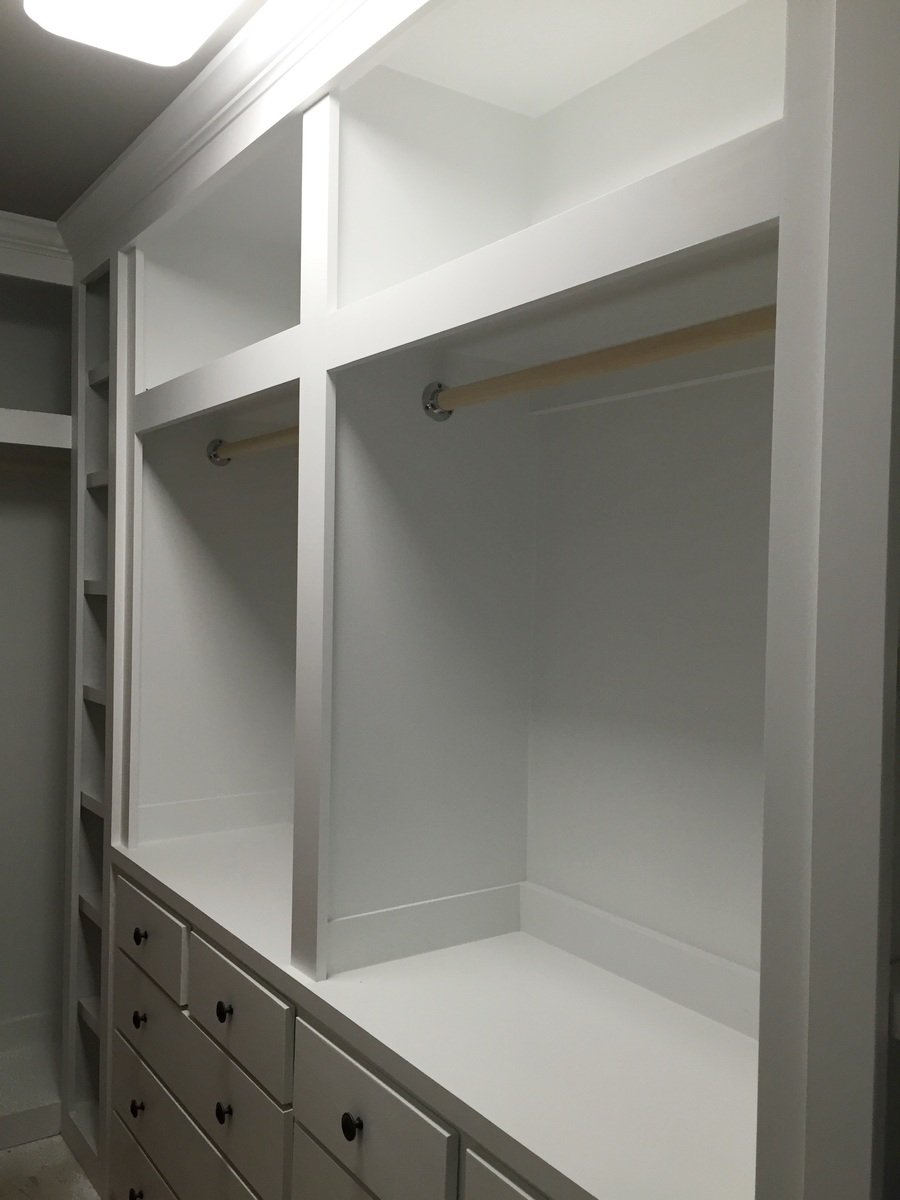
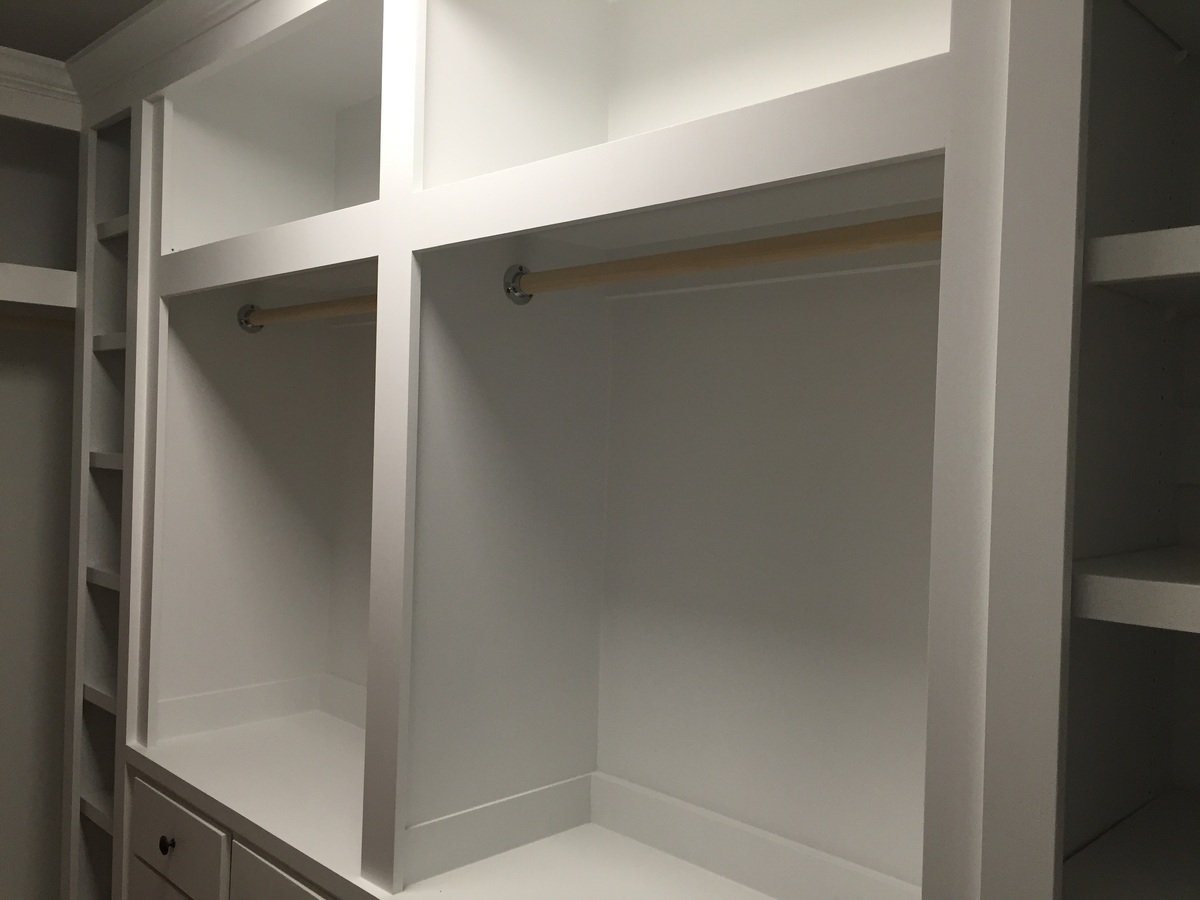
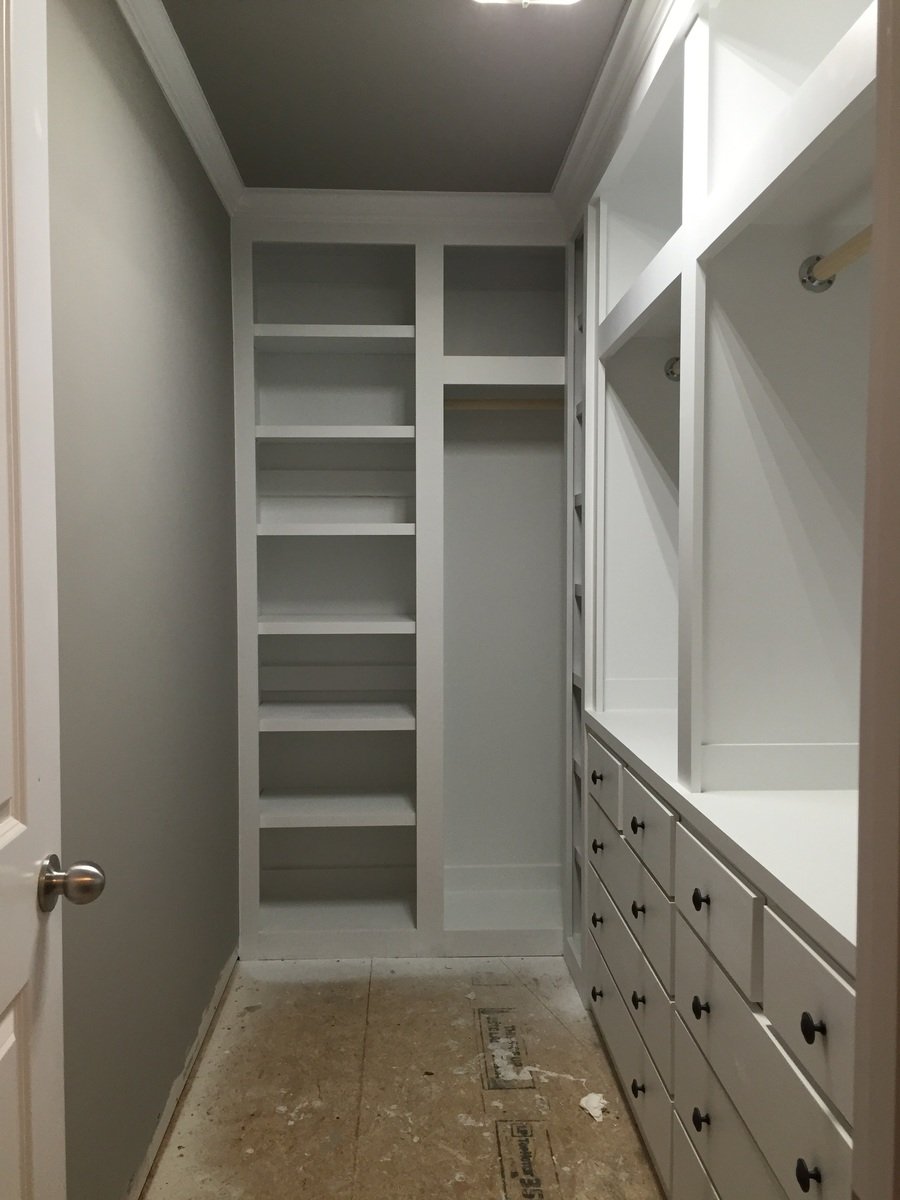
Built in closet to replace builder grade wire wracking. Closet is approximately 11 feet by 5 feet. consists of two shoe racks with 7 shelves each. 6 large drawers and 4 small drawers. Two hanger sections with storage above them. End wall has hanger for longer items and storage above and a cabinet with shelves.
Yet to finish the floor.

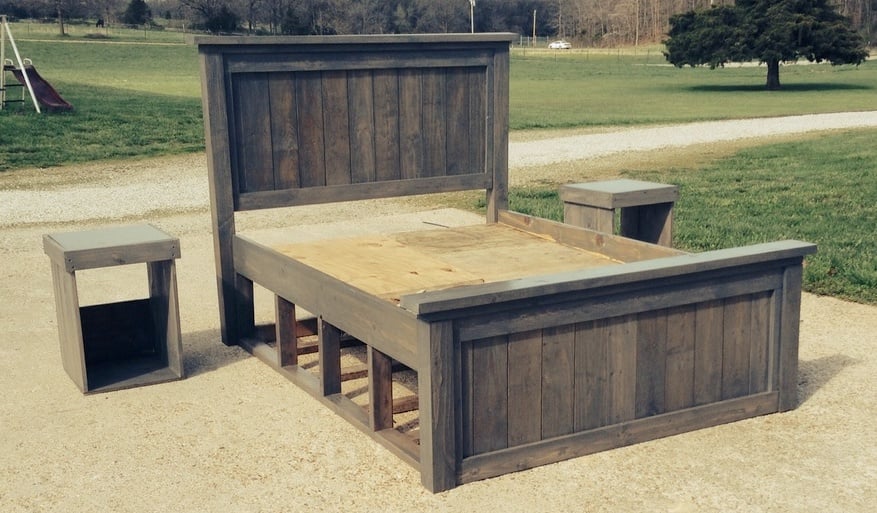
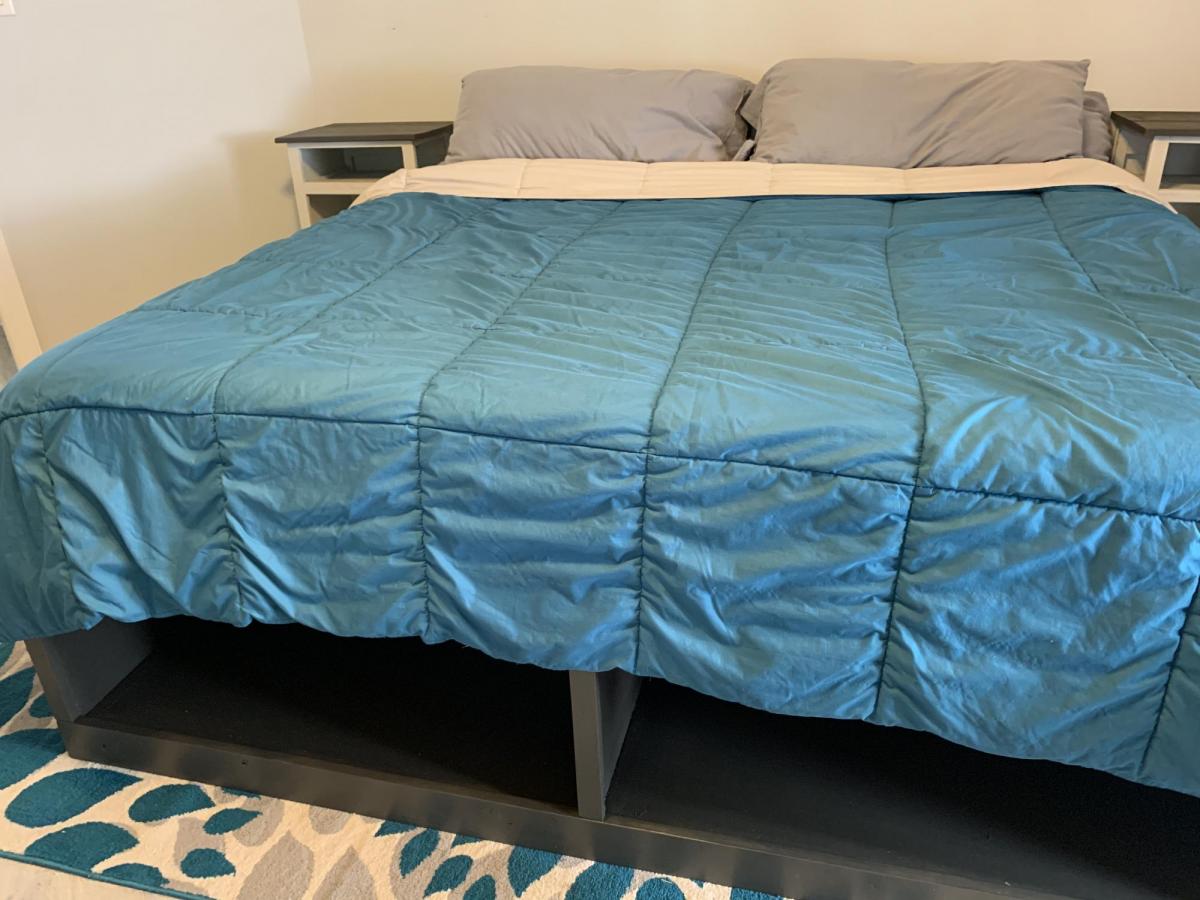
Started with the farm house queen bed and changed the plans. I made the head/footboards 3 inches taller and took the panelling on the footboard all the way to the floor. I made storage underneath the bed and night stands. I'm using old apple crates for the storage. I made the night stands with the crate in it too to match the bed. I used a single piece of 18x18 ceramic tile for the top of the nightstand. The set is stained Minwax classic grey. I used a mixture of wood. Oak and pine, surprisingly it stained good and matched up. The crates aren't in the pictures yet. We have an older house with small rooms so the storage is perfect. The grey finish looks good for the old wood look with newer wood used
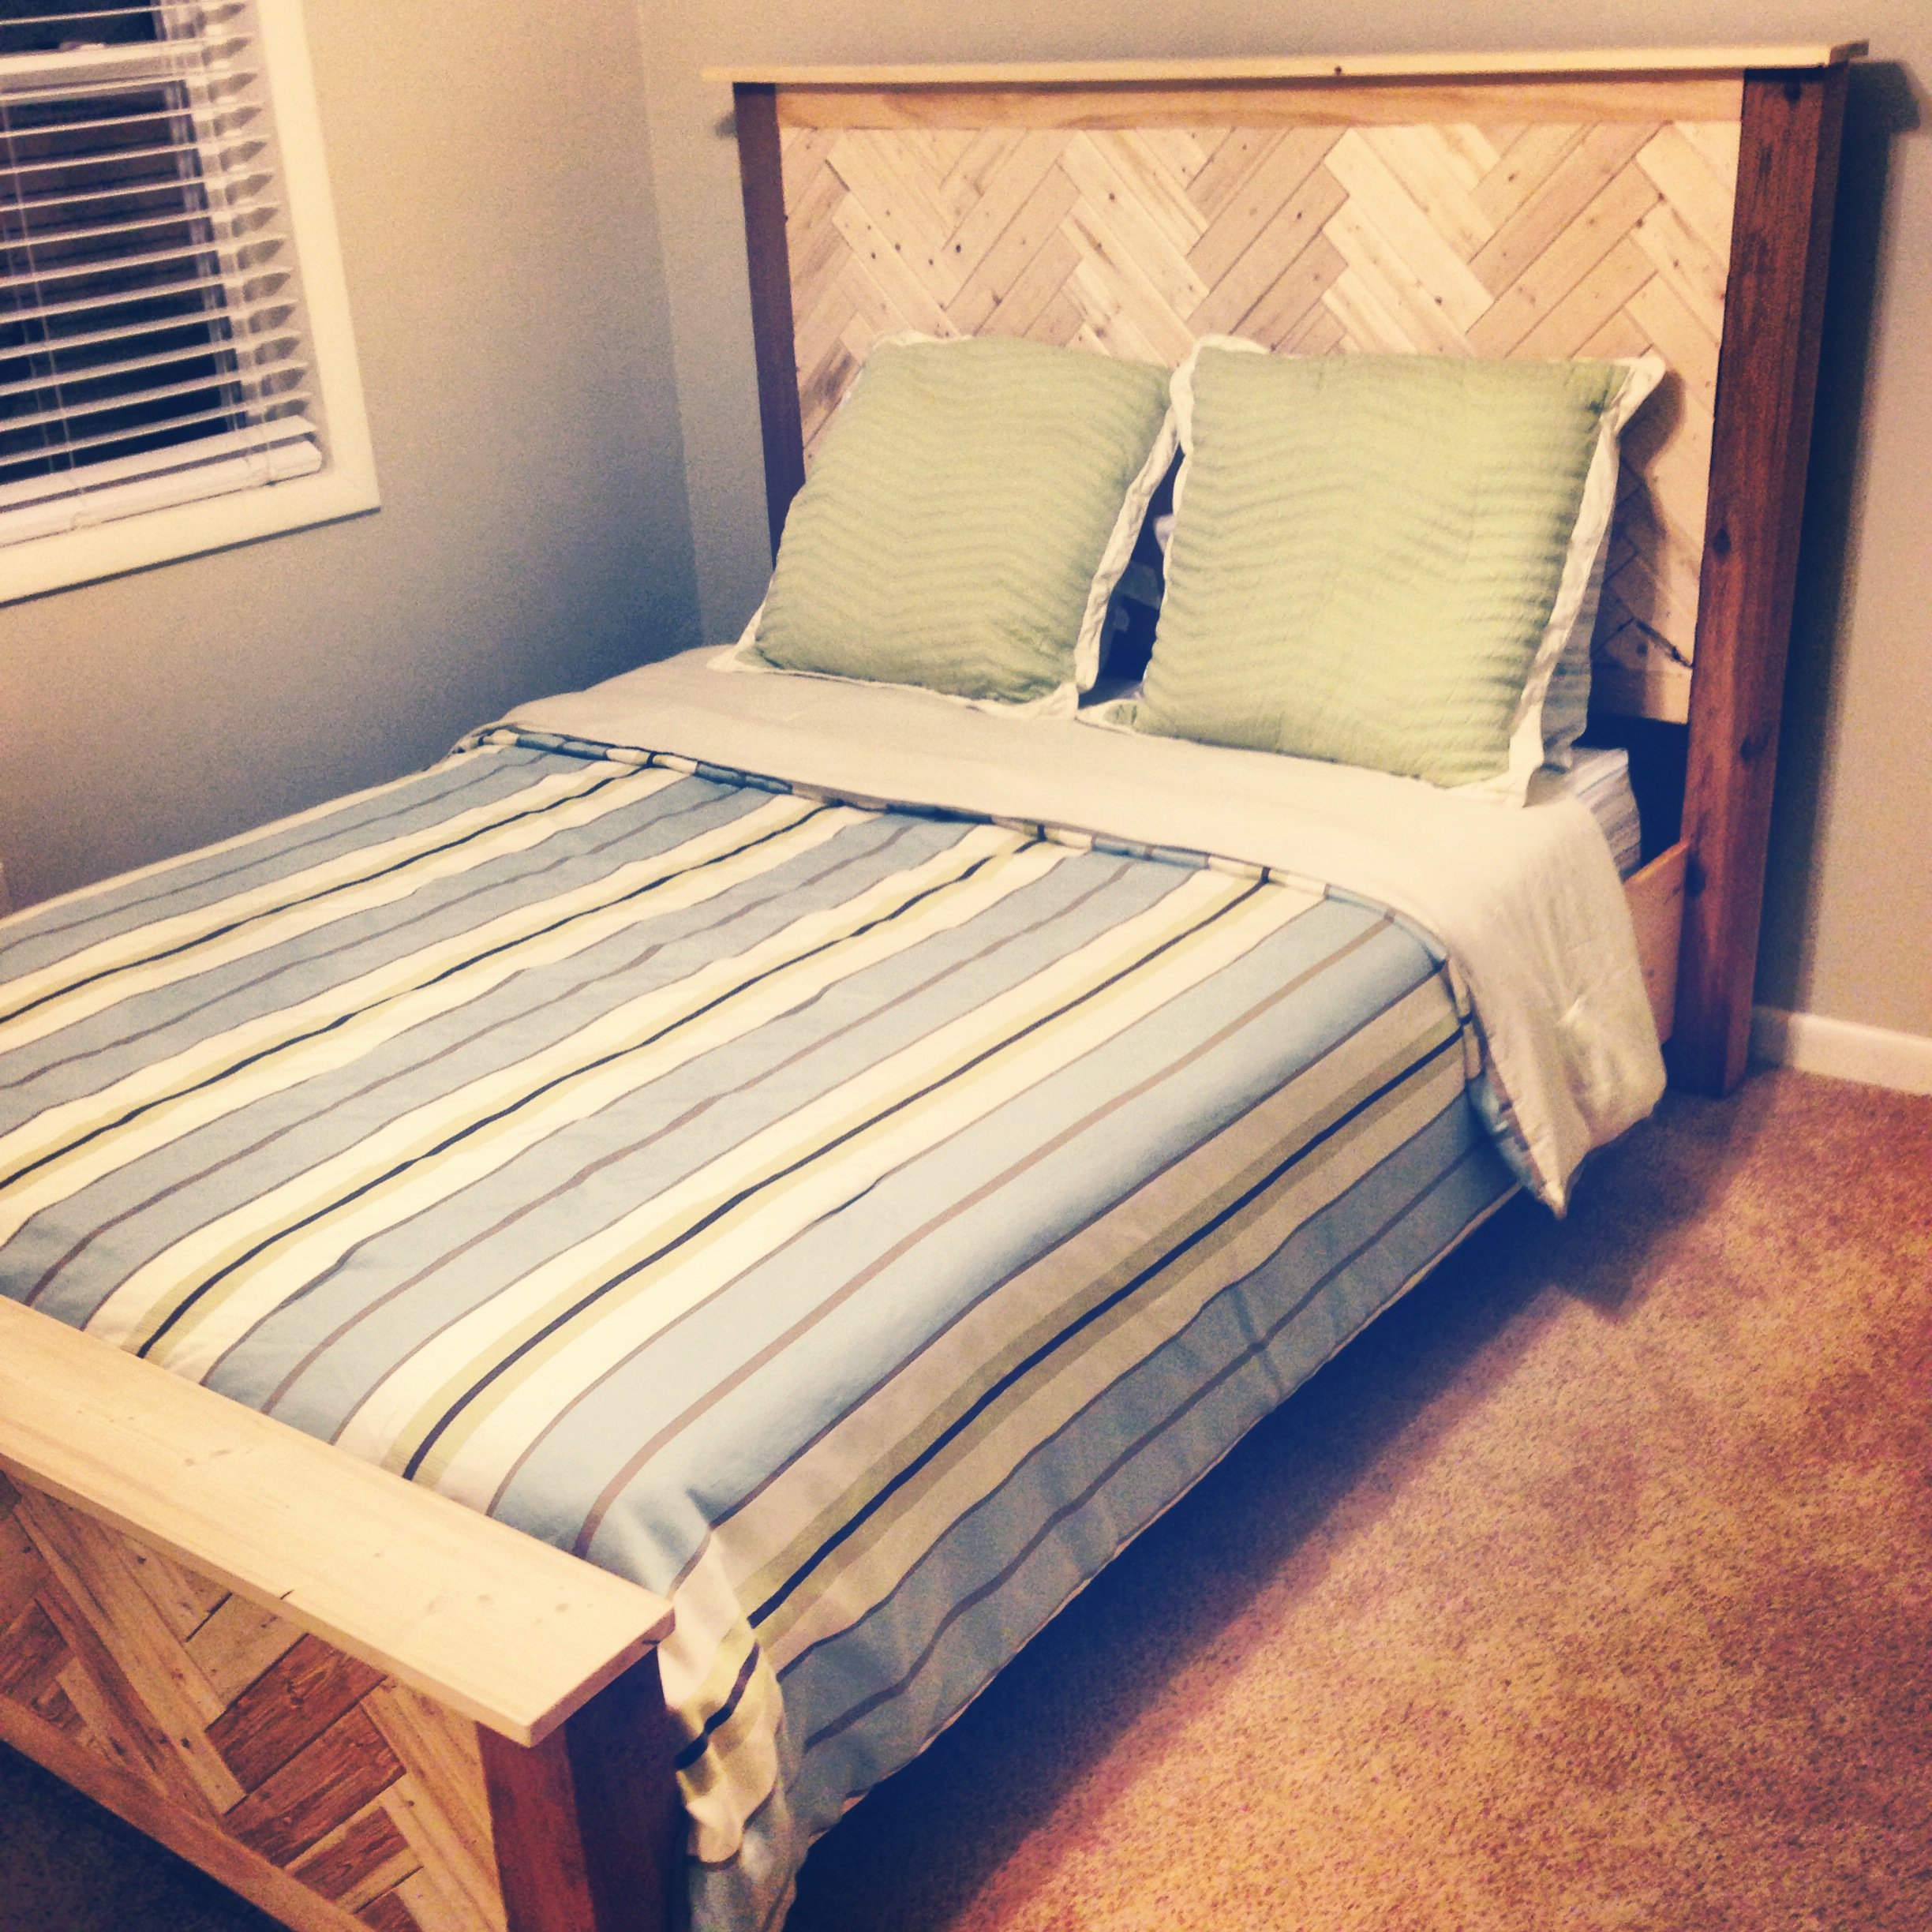
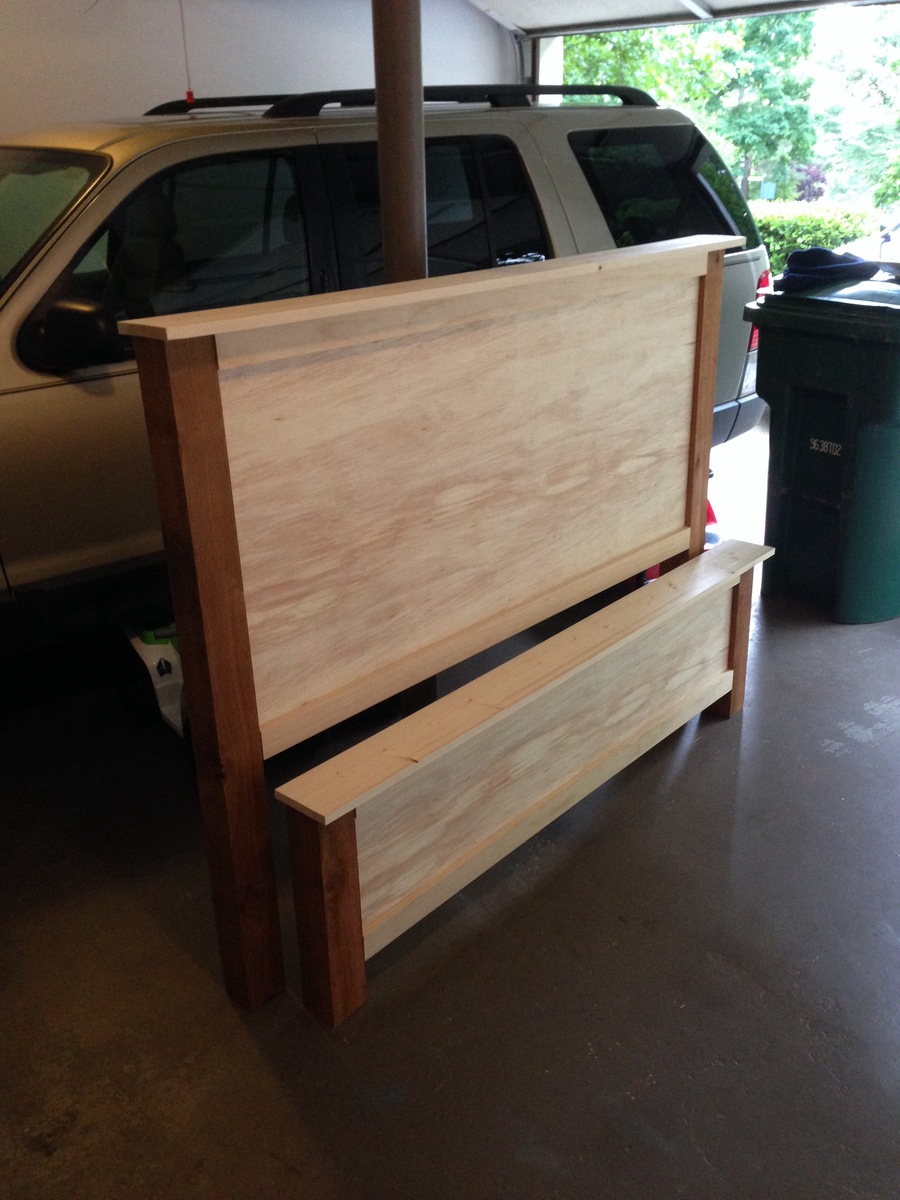
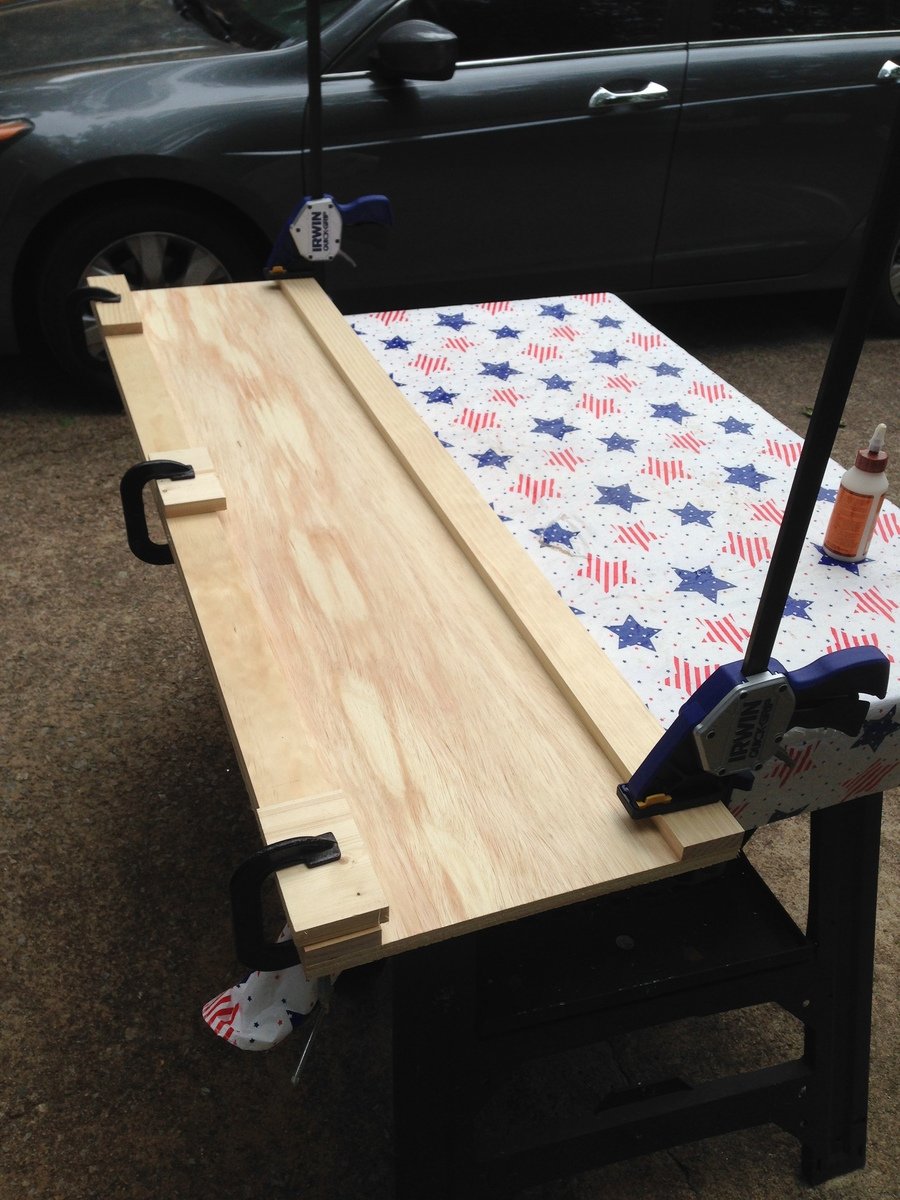
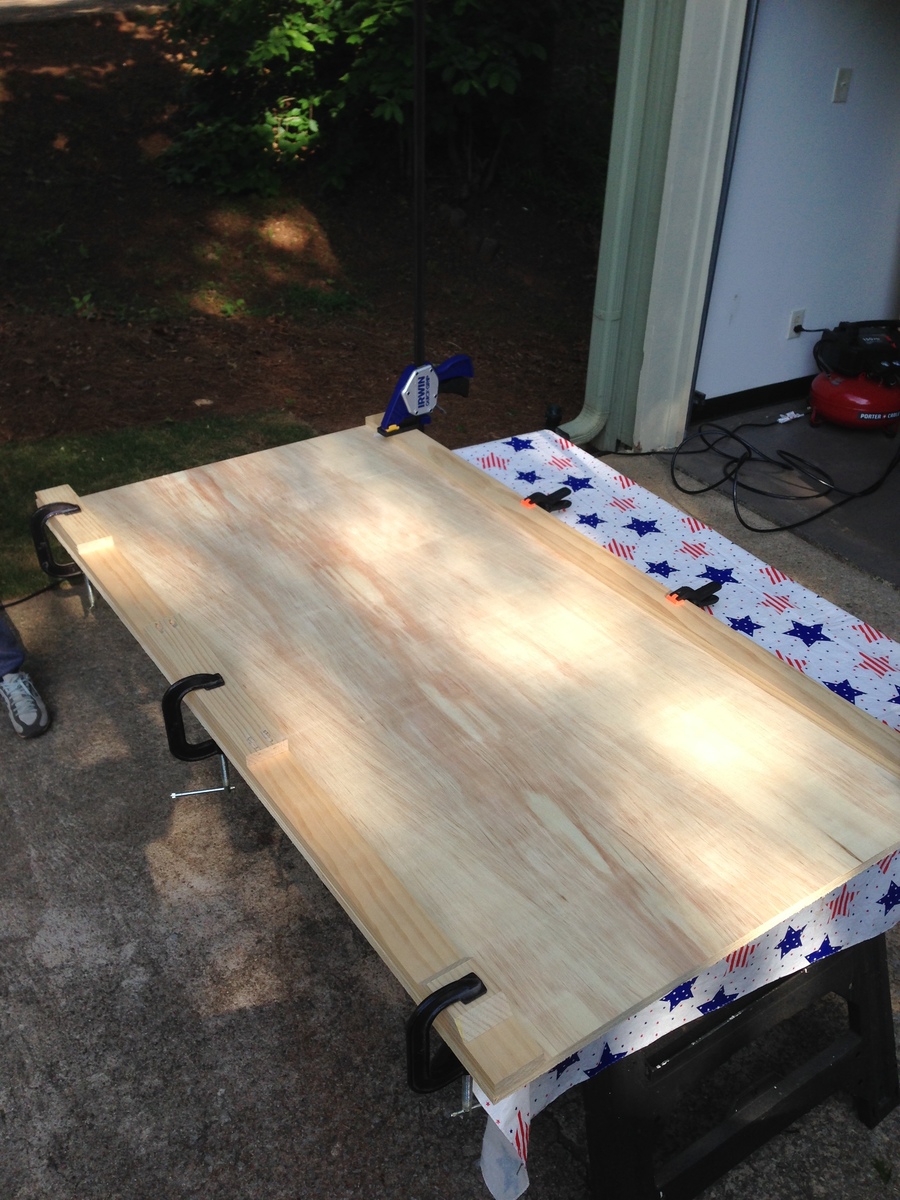
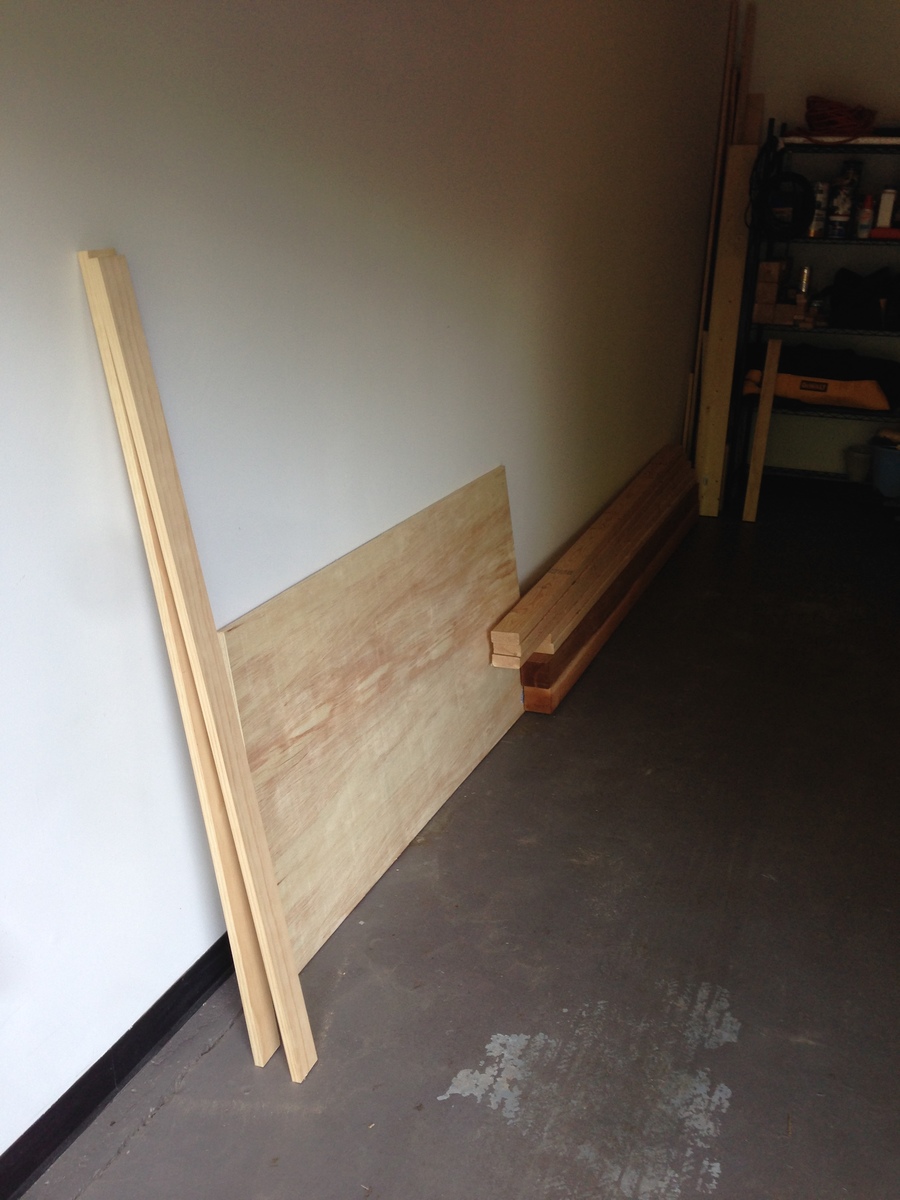
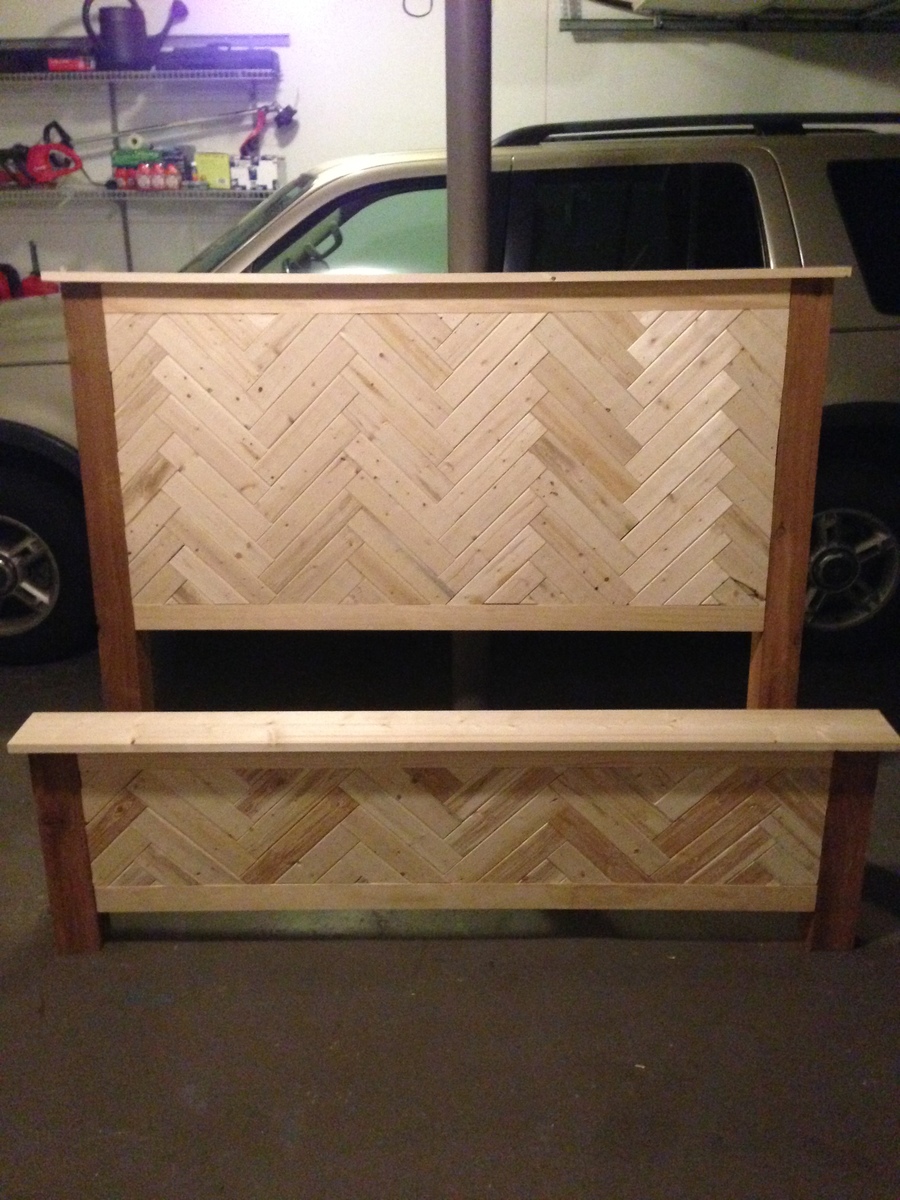
I cannot be happier with the final look of my new bed. I decided to take on this task with intentions to make small changes in the plans based on my needs and preferences. The process was easy and original plans were definitely easy to follow. I had the head or foot boards completed in about 3 hours (without the herringbone pattern). I saw where someone else decided to add a herringbone design and I liked it so I did the same. It was a little tedious but overall not hard at all. Building the frame was easy as well and didn't take long at all. I started running into problems when transporting the footboard. I dropped it from about 2 ft and the leg post snapped off. I thought the pocket holes were not that strong from the beginning. This was not a problem though because I just followed the special note in the instructions and added a 2x2 to the back of each side and attached them with 3 inch wood screws. I did this for the head and foot board and it made me feel more comfortable with the stability overall. I was going for longevity for the bed so I wanted to make it easier to disassemble and move around (screwing the frame in would wear out with a few moves). I went to a woodworking shop and picked up some 5/8 inch insert nuts and bolts to match. I added one to each corner and tightened accordingly. This was by far the biggest headache for me. If I could do it over again there are a few things I would change.
1. I would have sanded my cedar post before attaching them
2. I would have attached my cedar post with the 2x2 and not used pocket holes (I l like pocket holes but not for such a heavy load)
3. I would have drilled and placed my insert nuts on the post before attaching anything to them (this would have helped to ensure a level hole).
My wife and I love the natural look of the wood but it doesn't really go well with the modern contemporary look in our home so we are having a hard time deciding on paint or stain. We are leaning toward stain because we love the grains throughout the bed.
Mon, 05/19/2014 - 11:08
I used the pine 1x3's from my local home improvement store. They were $1.39 each for a 1x3x8. I used about 15 total. I decide not to go with the select wood for the herringbone and glad I didn't. I feel the less perfect, rounded edges add character.
Wed, 05/21/2014 - 10:30
omg, I love that you made one cause you liked mine! I feel so.... special..lol
Yours looks awesome!! Great job:)
Thu, 05/22/2014 - 10:35
I like it so much, I am planning to add a box spring to mine. I really like how high yours sits. I also like the color of yours. We are experimenting with stains now and I will post new pics once it has been done. Don't be surprised if it looks very close to yours :). I used cedar for my post so I think it will be hard to match the colors.
Thu, 05/22/2014 - 19:00
I love that you like it so much. Between this and getting picked for Anas brag post of the day on Facebook yesterday, I was walking in the clouds...lol
I used Minwax 1 coat of espresso and 1 coat of jacobean for all the larger pieces. I used Cedar as well for the posts. And it does come out a little redder. Just mess with it till u get something you like. It may not match the rest of your pieces exact, but it will look great once its all together.
I also messed around with the herringbone pieces. I used the same colors of stain but did some with one coat some with 2, some for 30 secs some for as long as 15. It kept the colors along the same line, but gave some variation.
I finished with paste was
As for the mattress. I love how mine sits. Feels very regal being up so high..lol. Its such an awesome bed plan. I cant wait to see yours finished.
Thanks for making my day. That was my very first project. So very cool!
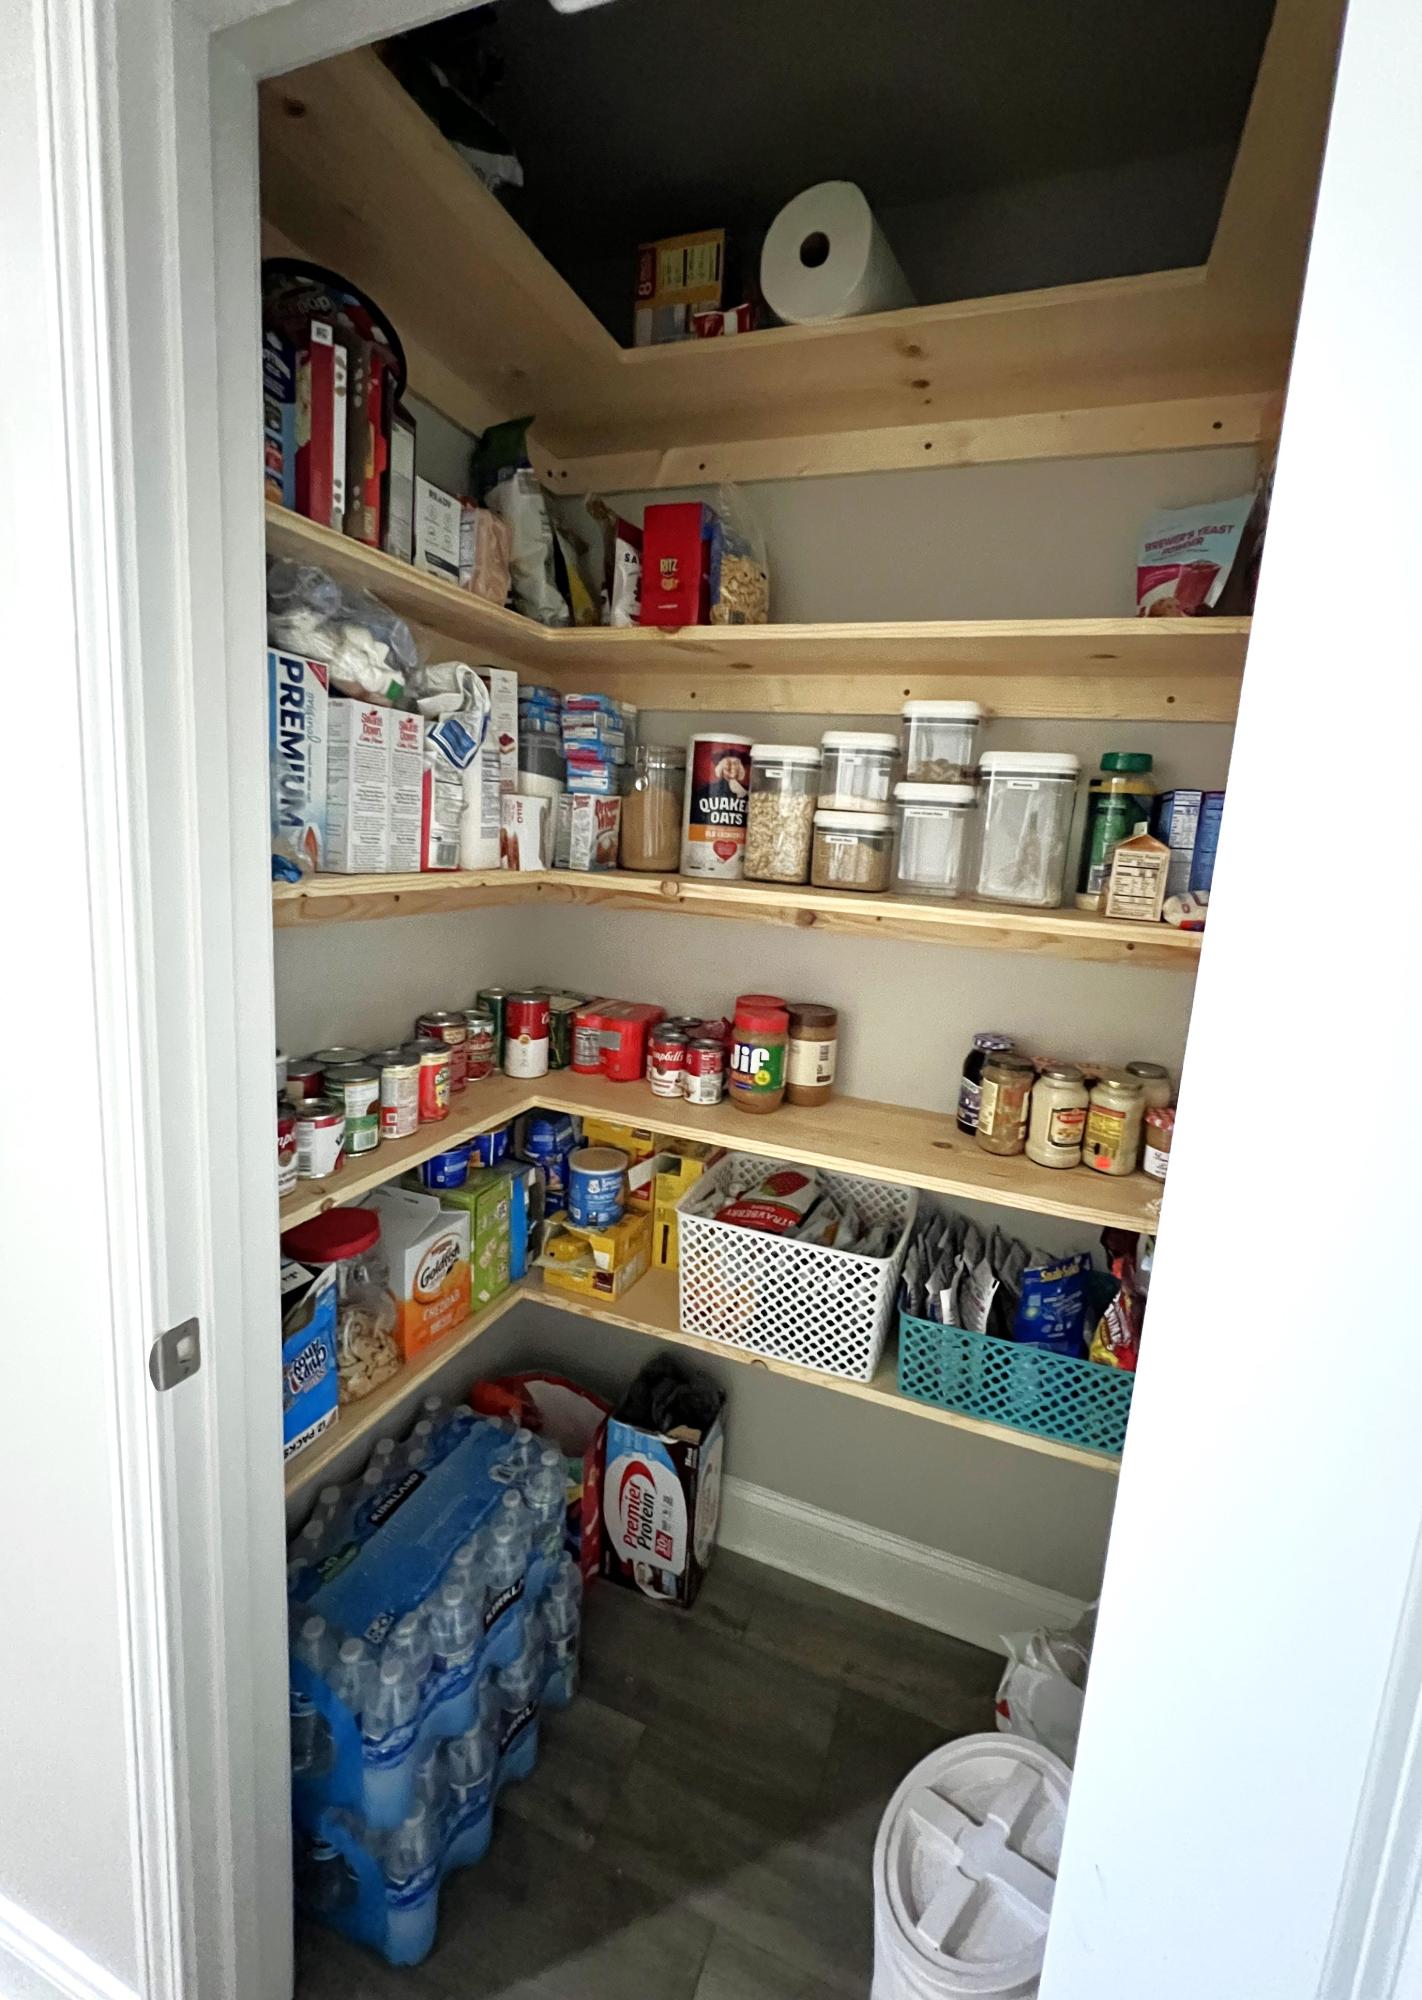
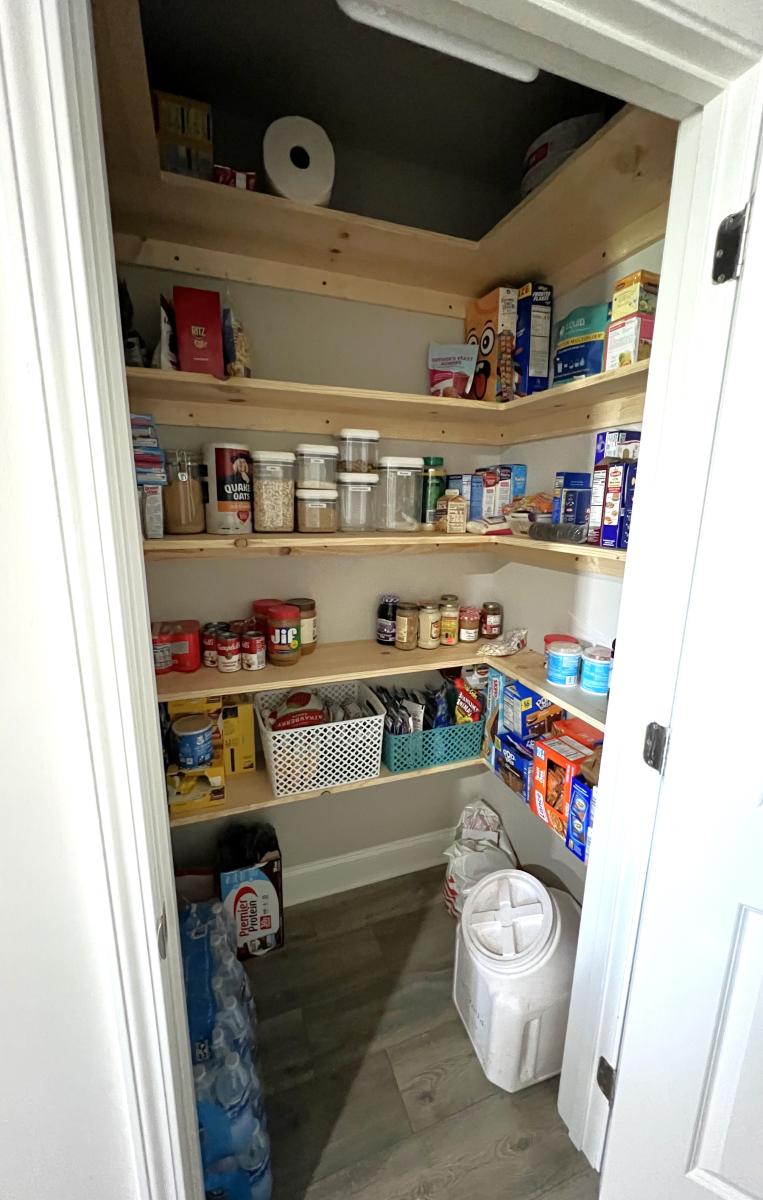
The wire shelves that the builder placed were not cutting it for storage. This setup from your plan helped garner so much more space for organizing. The pantry is roughly 54”x 35” and we were able to place five shelves instead of the four. Thank you so much for your assistance!
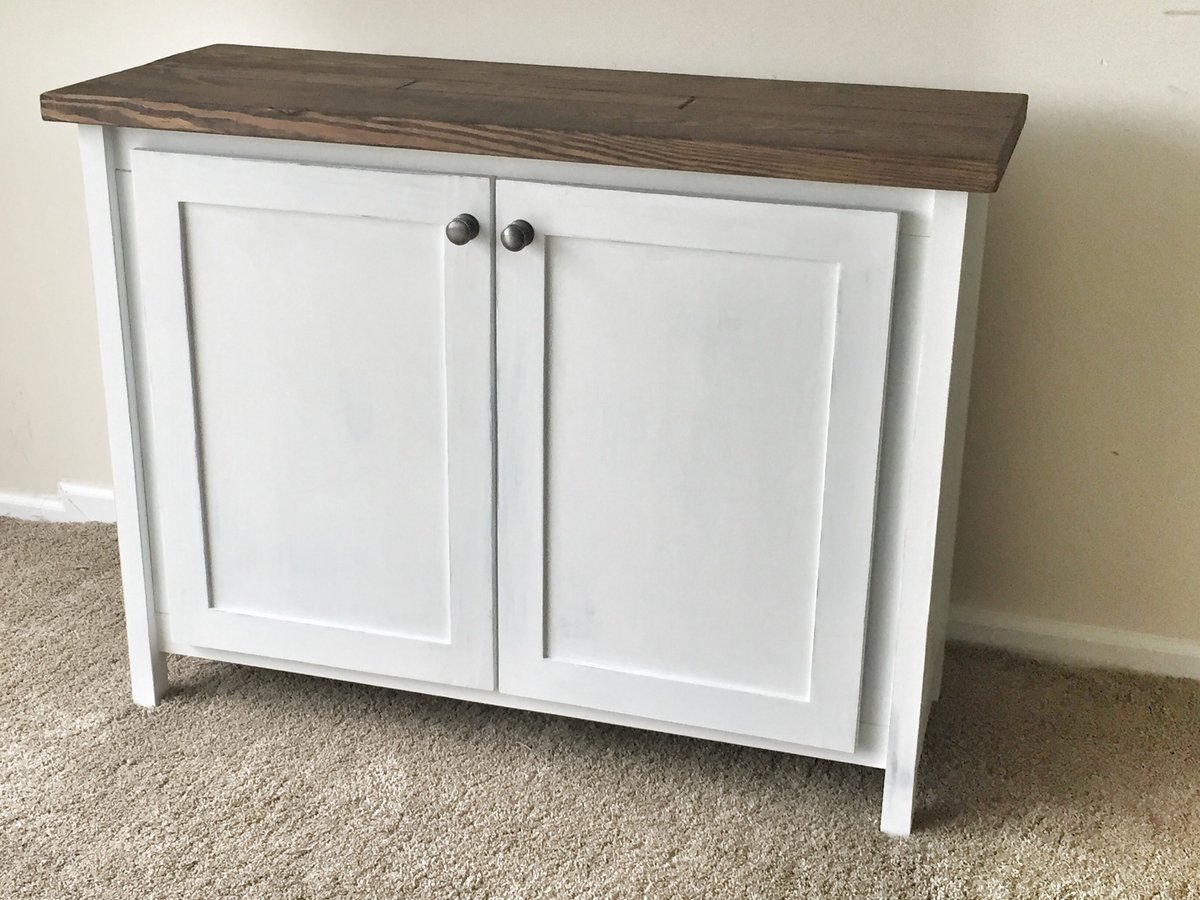
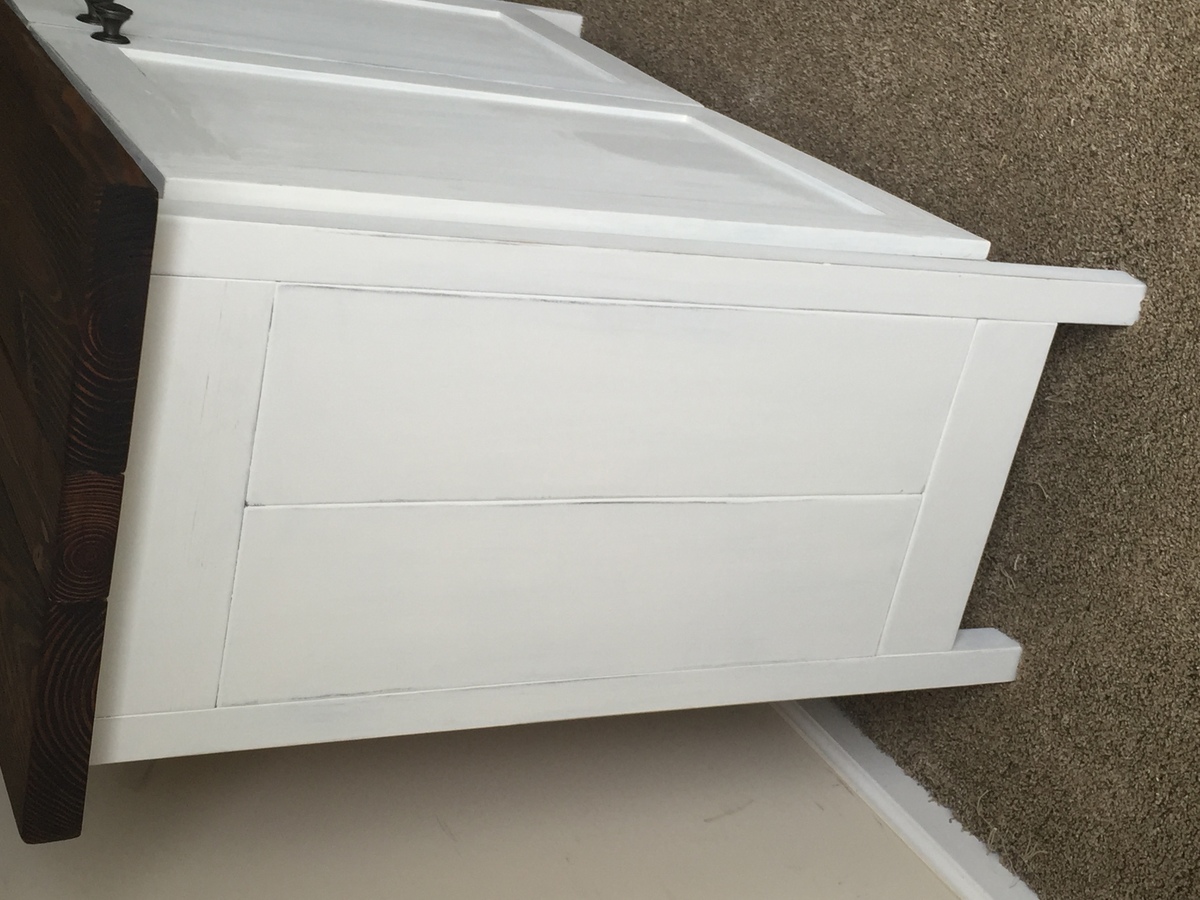
White cabinet made from some doors and hardware left over from my built in book case project and other wood left over from the book case and closet projects. All I bought was the wood for the top and the legs.
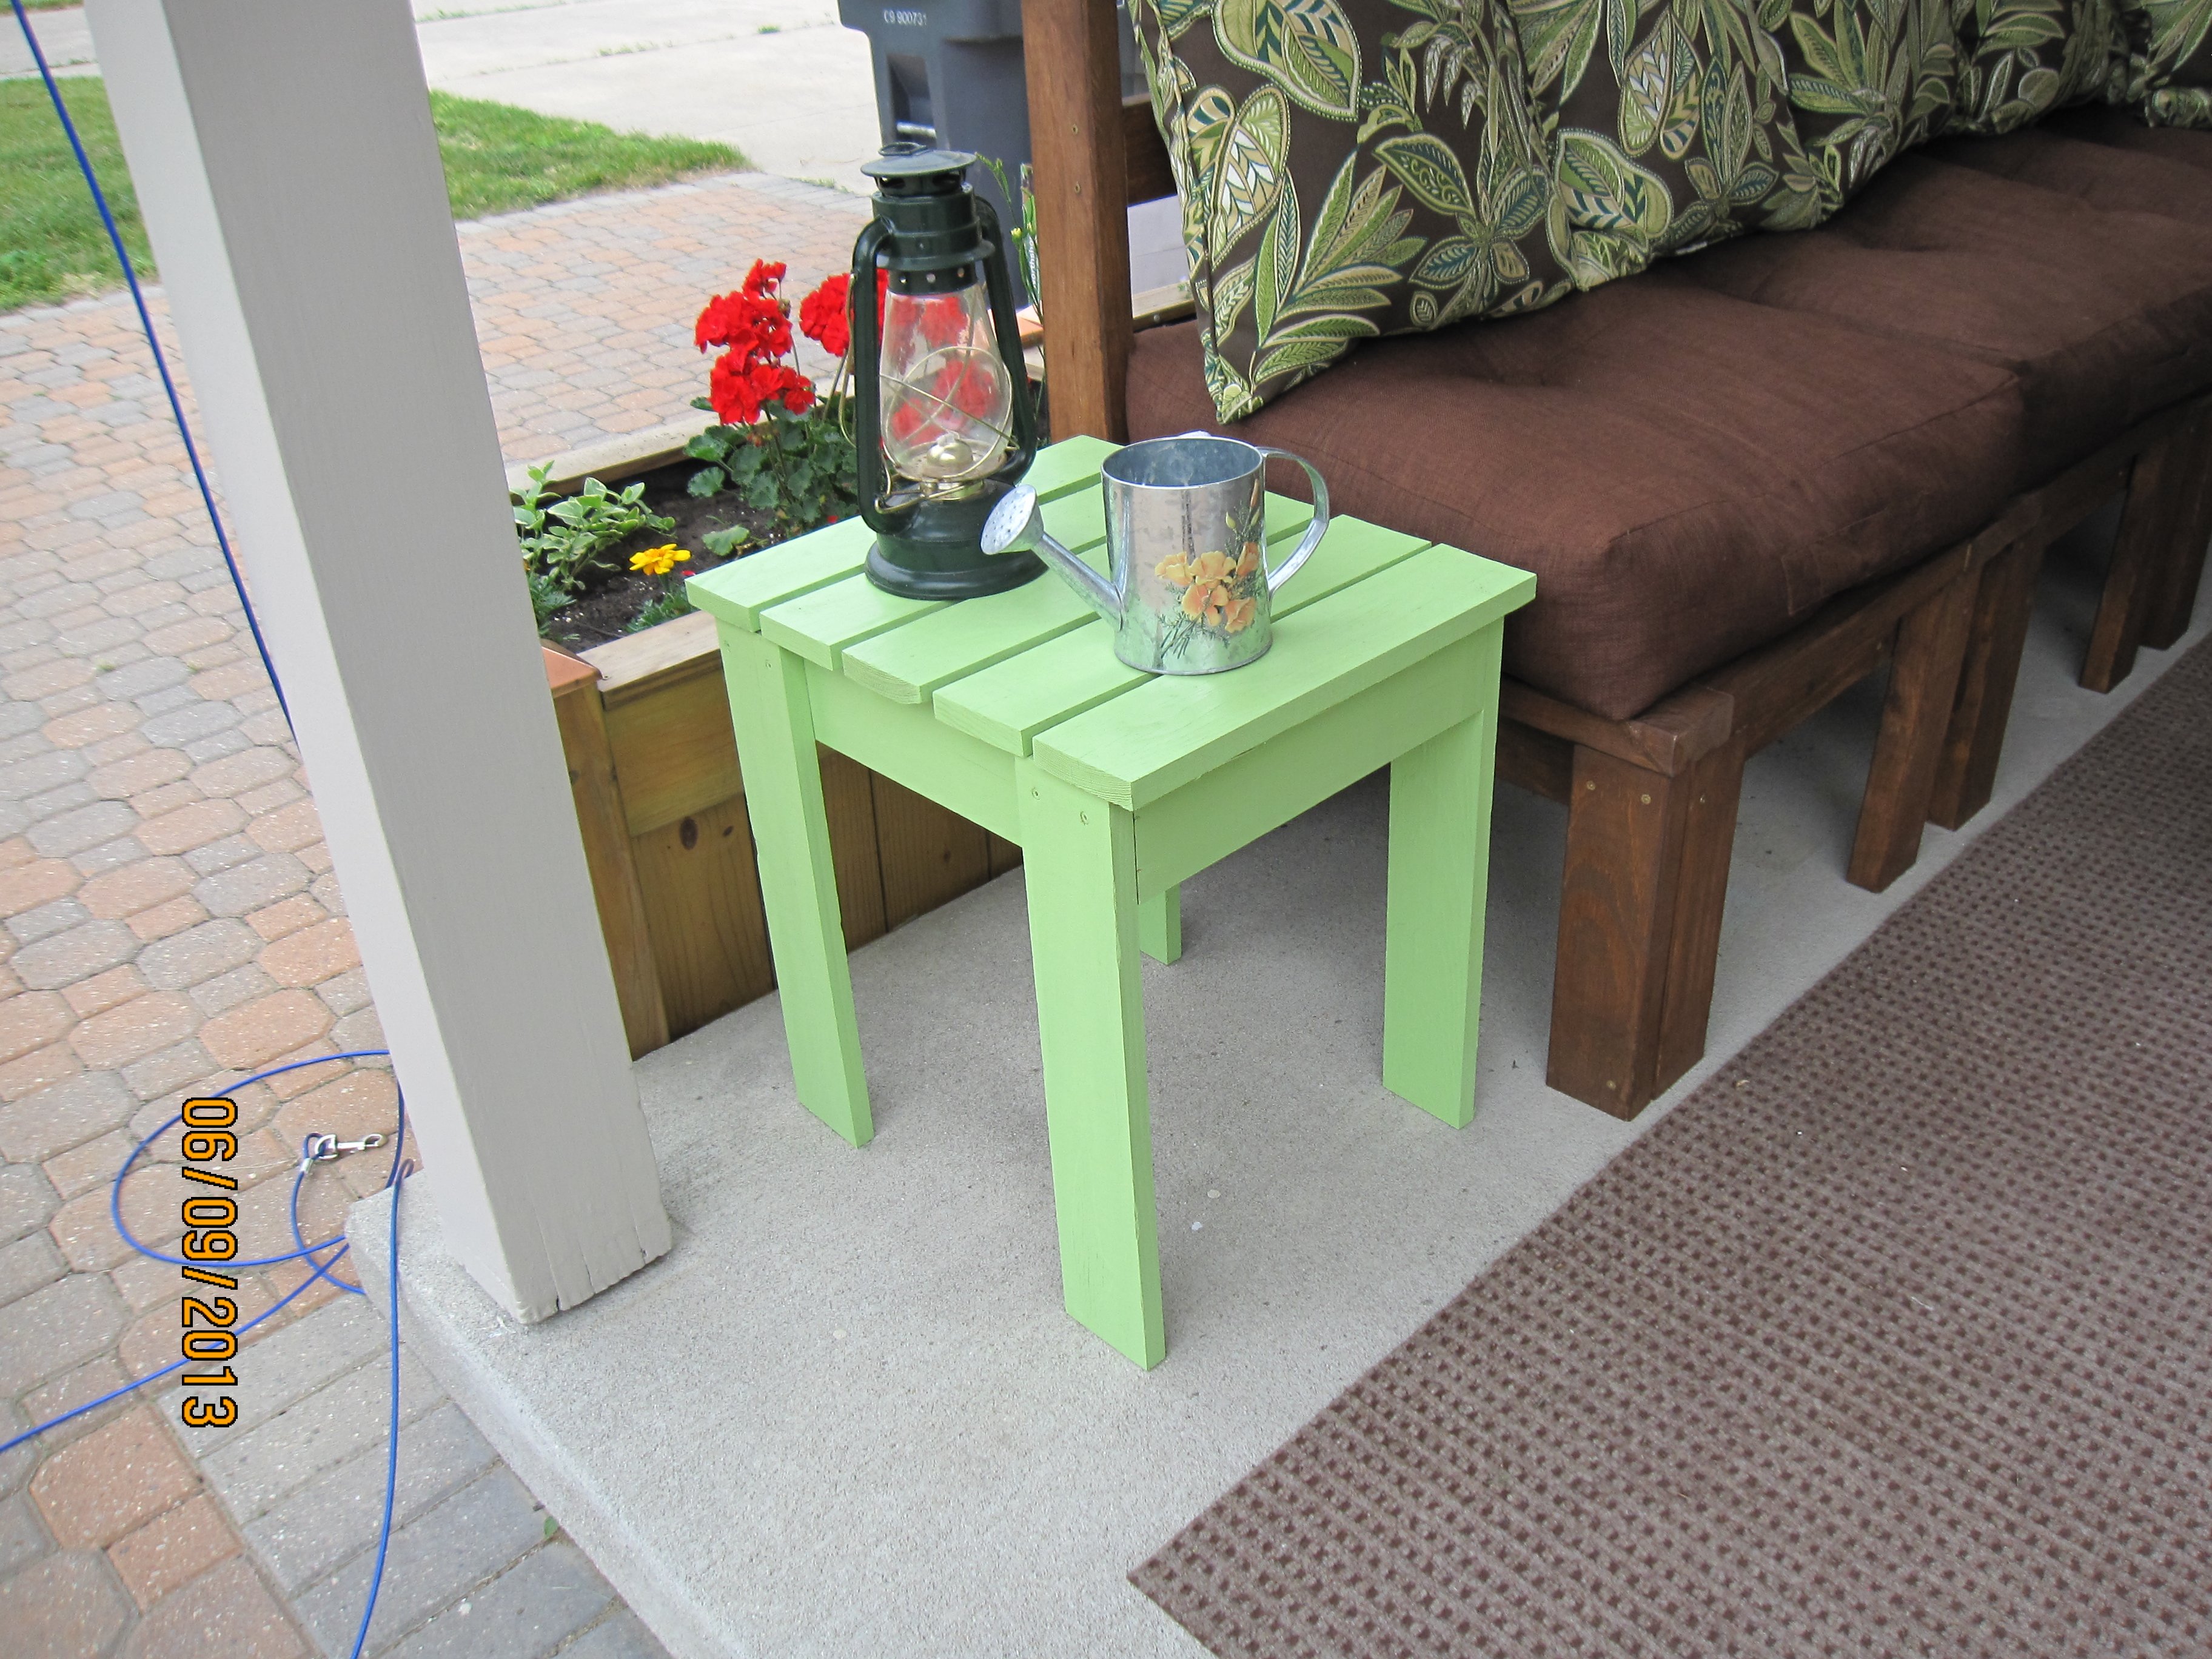
I didn't use any plans but the Outdoor Ottoman comes really close. Needed an end table to go with our Outdoor Sectional that my husband and I built. While he was at a ballgame I whipped this up. Still have to sand and stain this as well as the sectional, but will probably do it as a winter project. We bought the 1x4s a while ago when we bought the 2x4s for the sectional so I wasn't exactly sure of the cost. I think I used 2 1/2 pieces of 8' lengths. Who would have thought a couple of years ago that so many of us would have attempted to build furniture and then even without a plan now and then?! Ana rocks! :)

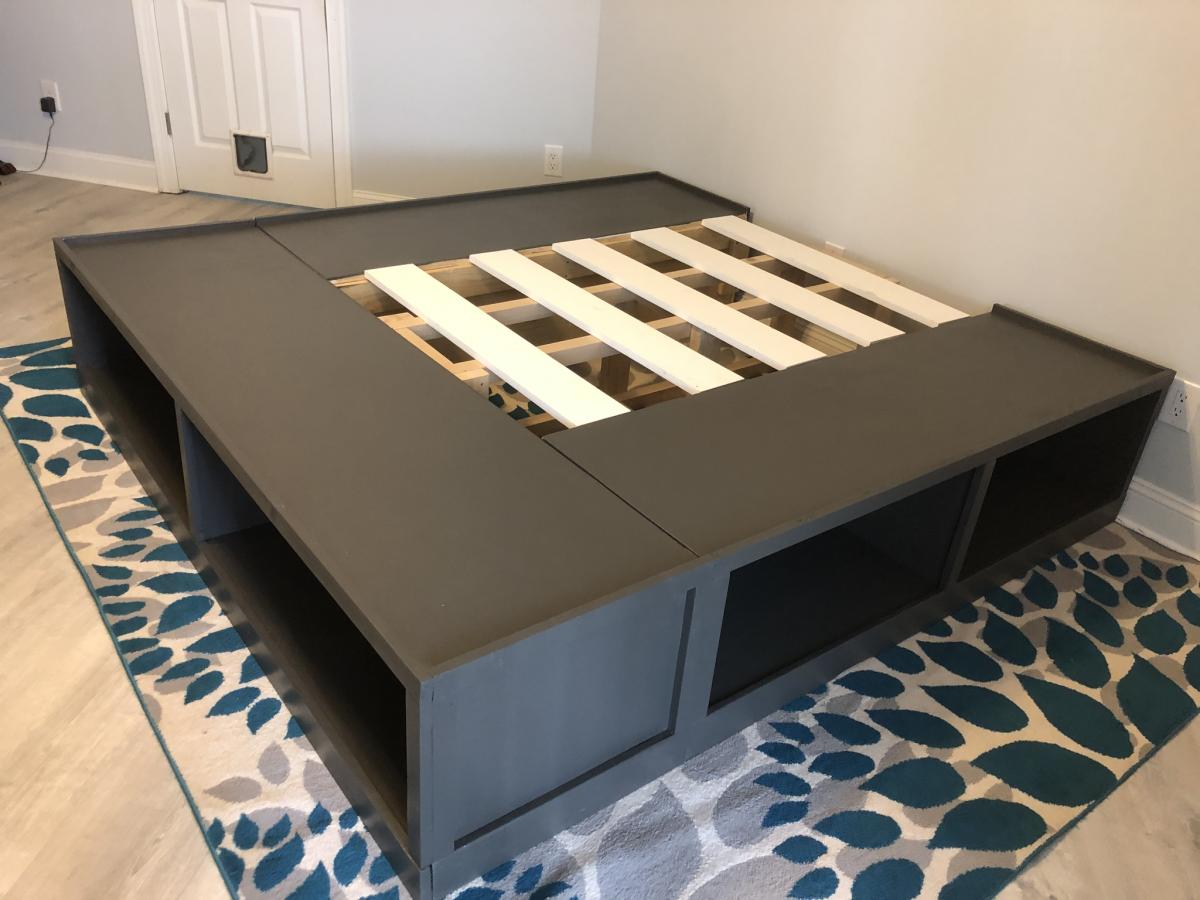
Built fairly close to original plans. Though we did modify slightly to create a slightly taller bed.
We placed a simple - but sturdy 2x4 frame between the sides. The span seemed a bit wide and we did not want any sagging.
We skipped the optional drawers, instead we will be building lightweight wooden storage crates to fit the storage spaces specifically.
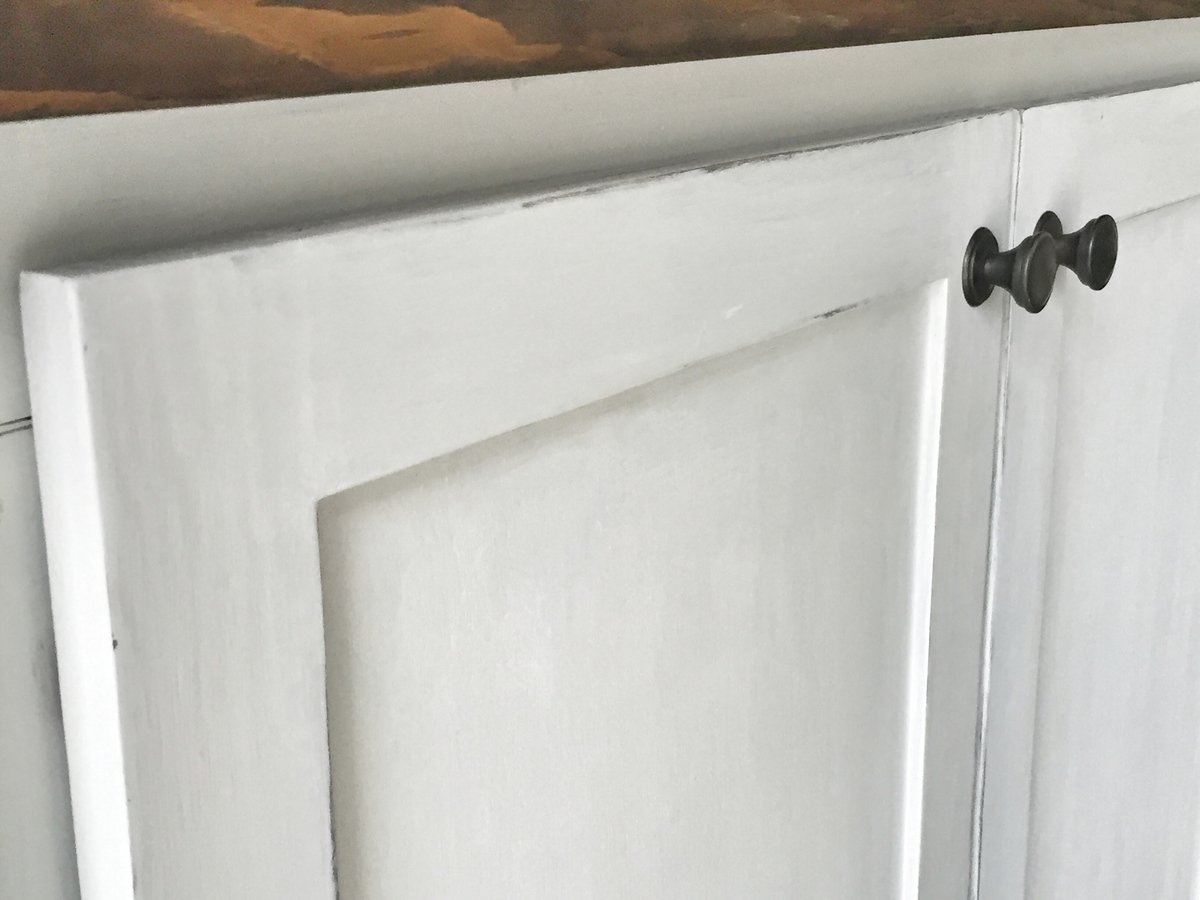
Not a hard project. Though be sure to measure twice before you cut. 🤣

This was my first project. It was relatively easy but I did make some mistakes that are now design features


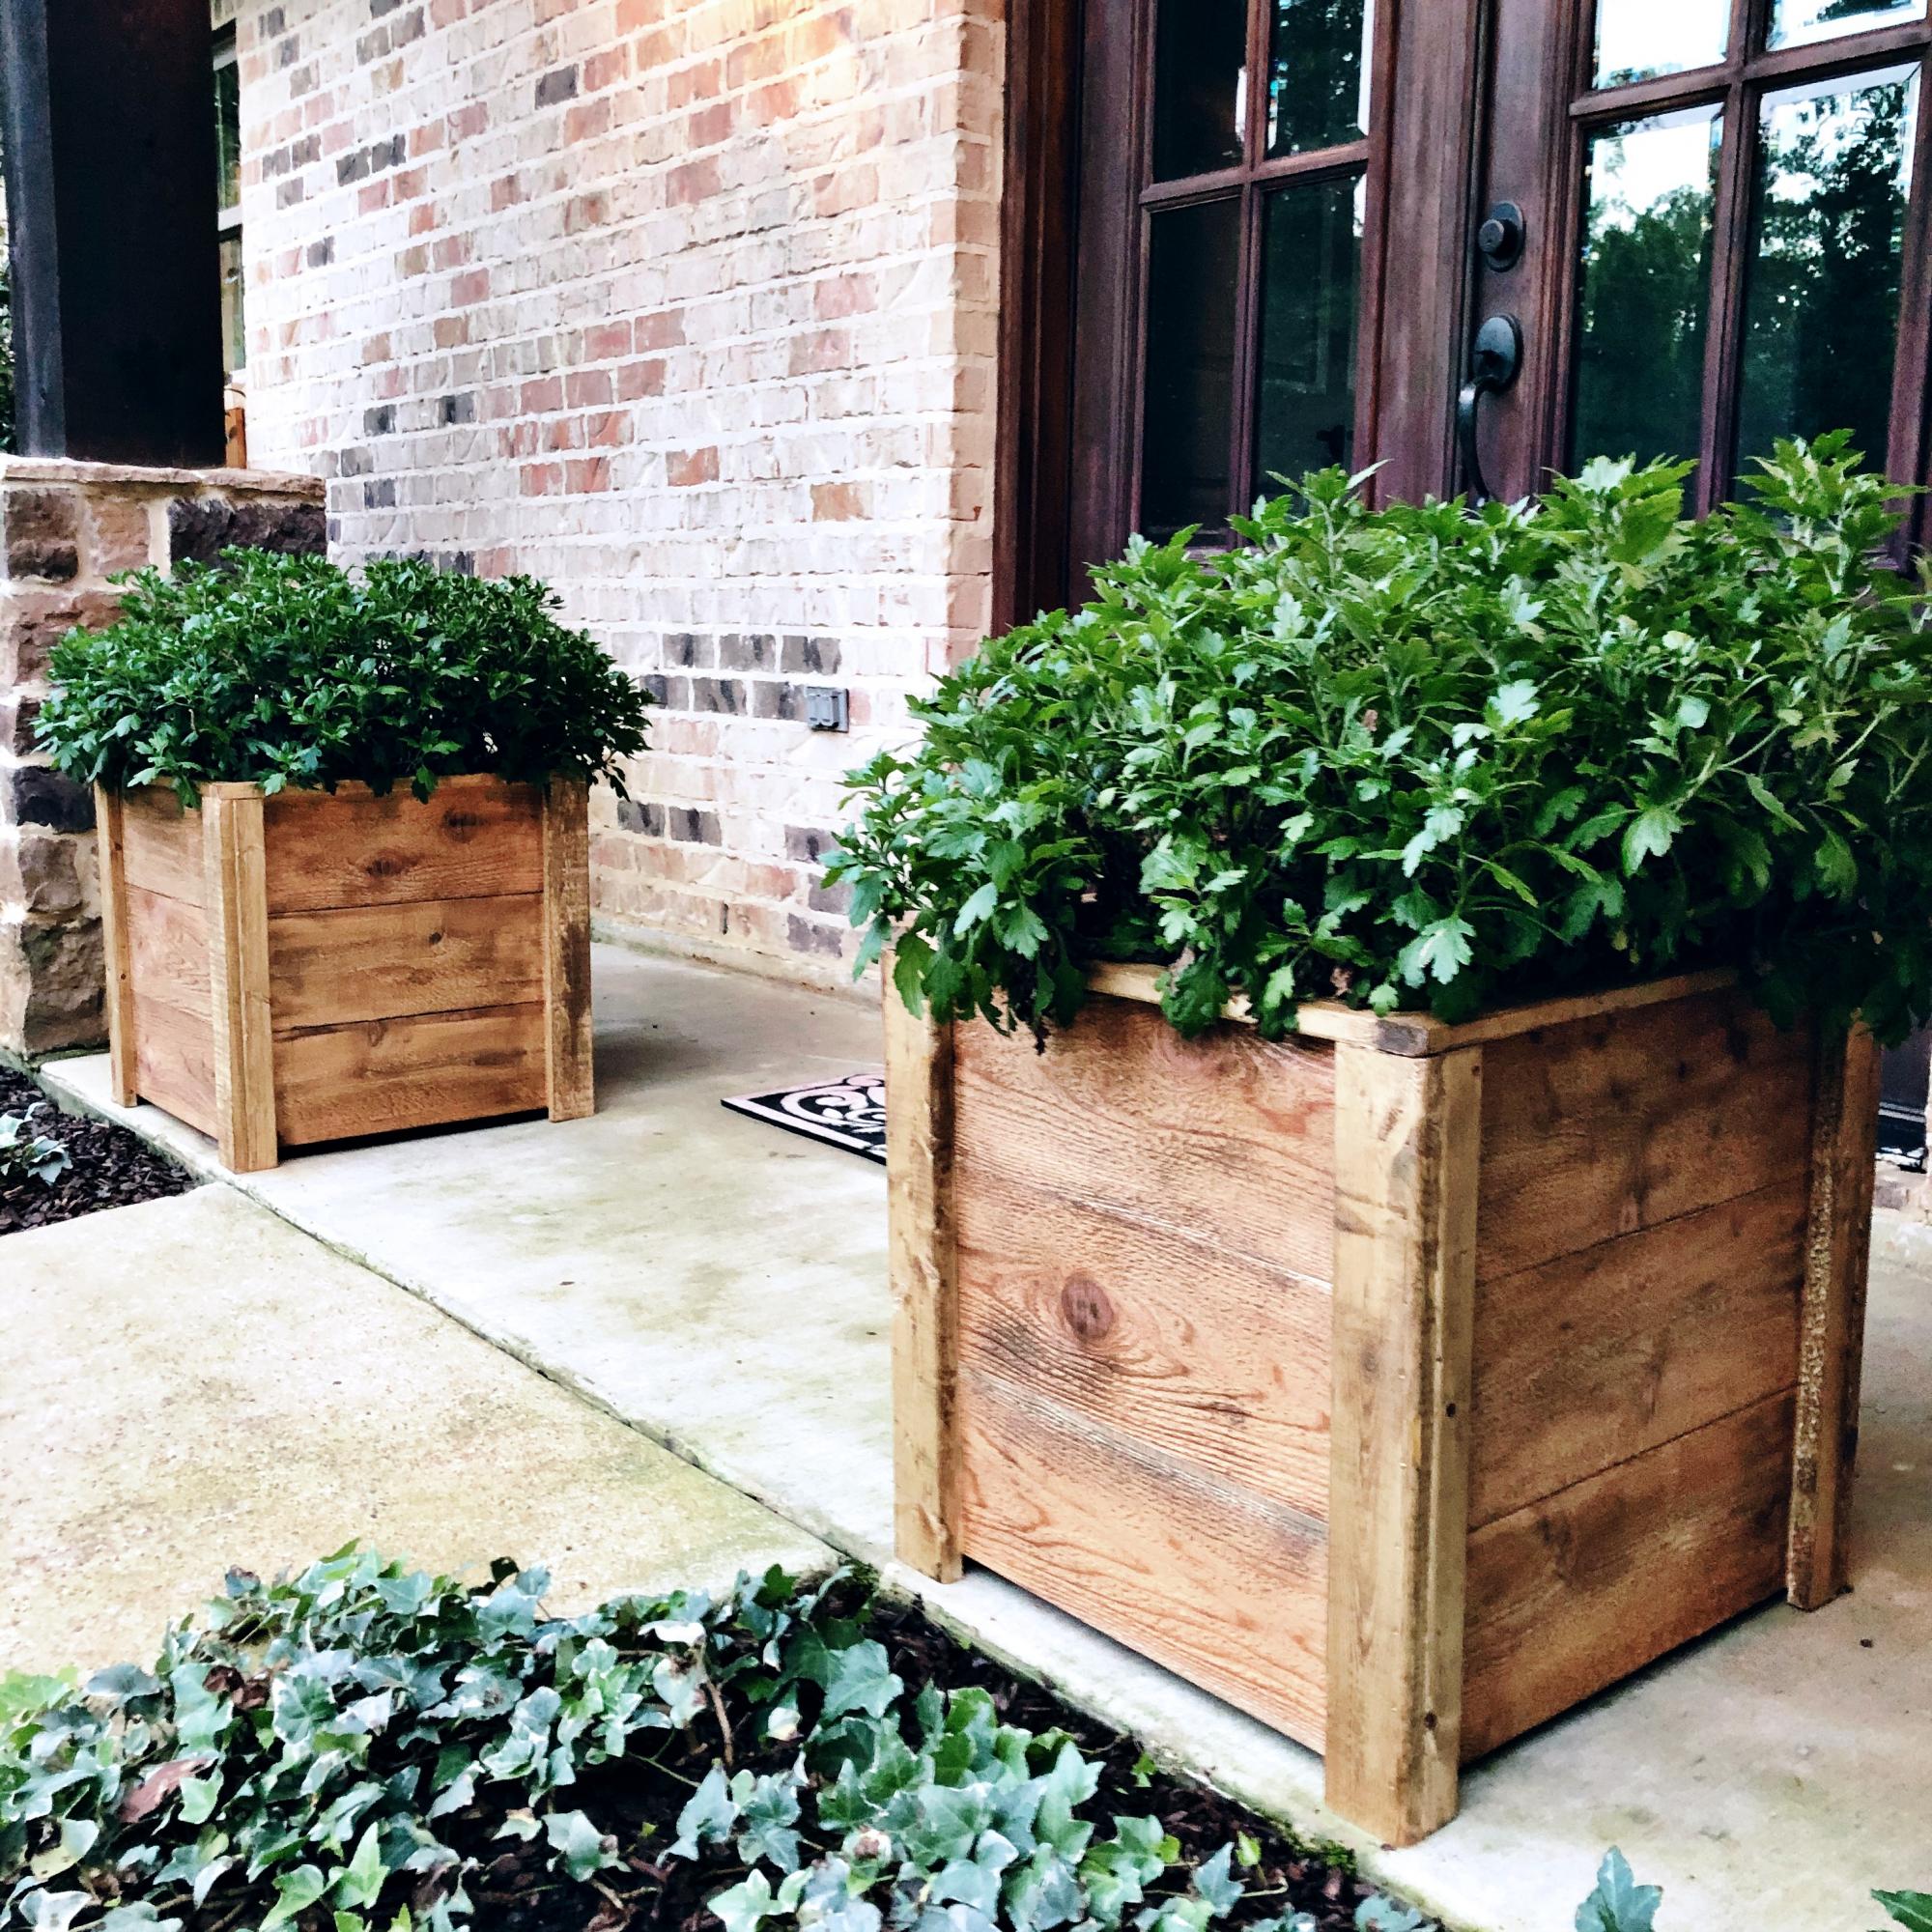
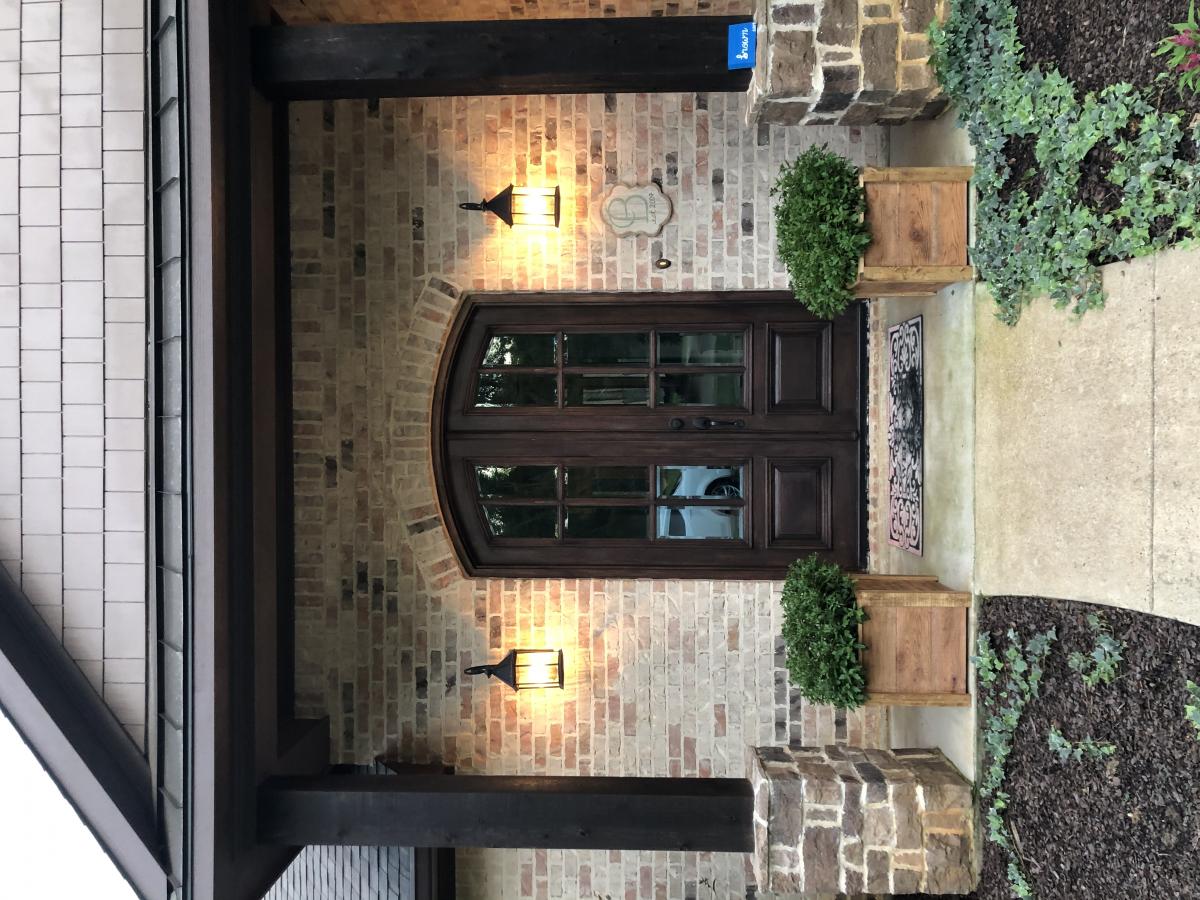
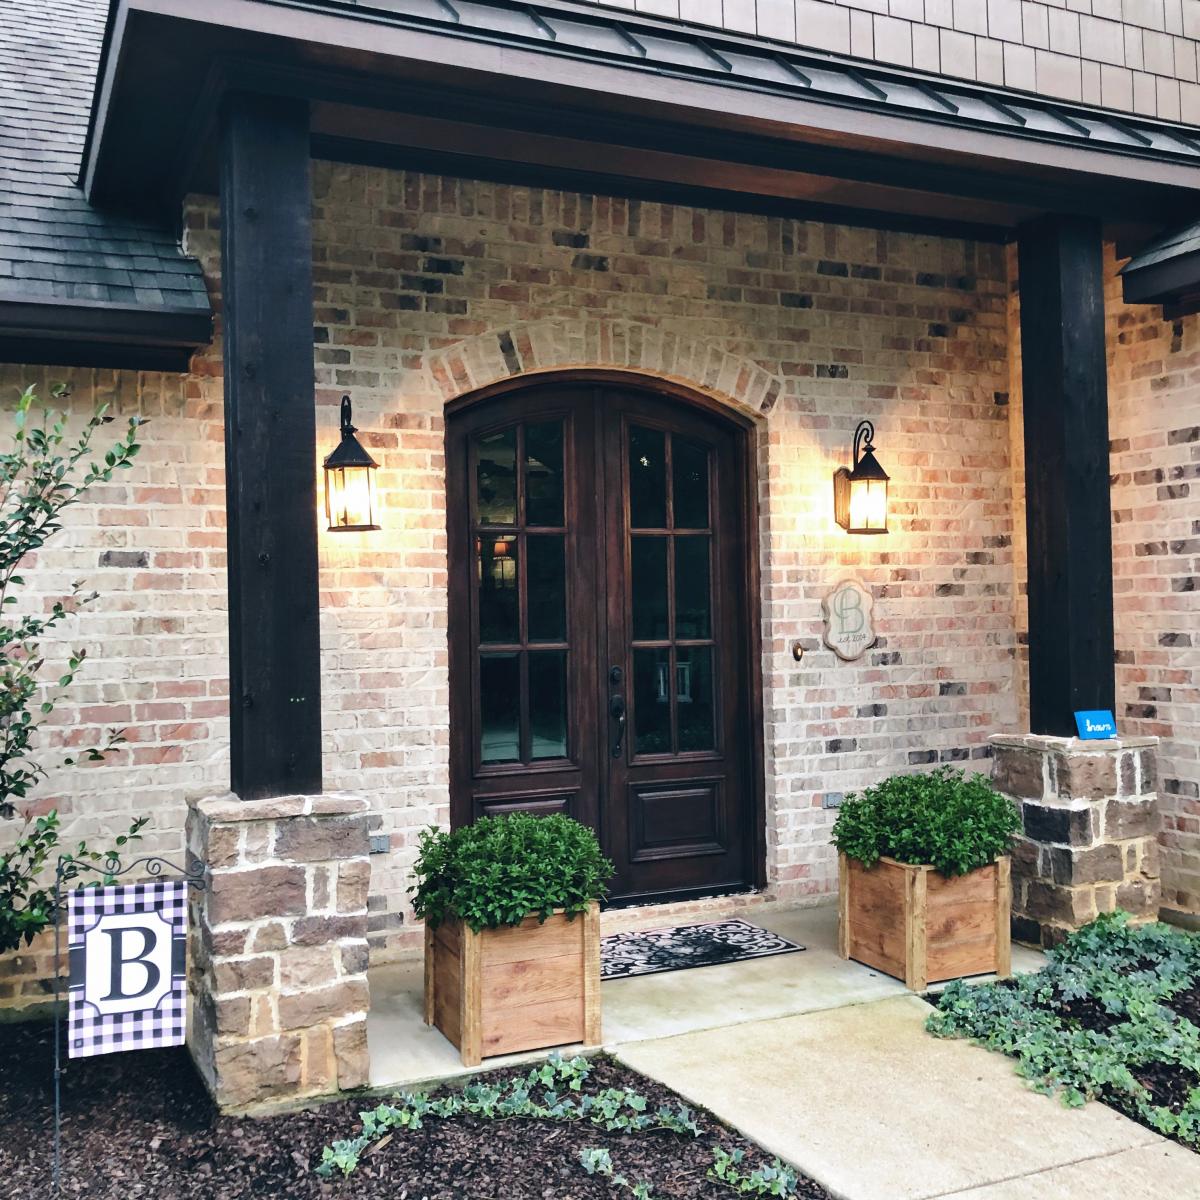
These were a quick weeknight build! And.... My very first “all by myself” build! I’m really proud of how they turned out and love how much style they add to my front porch!

Here is my version of the Cyndi Console Table. Made from poplar with oak backing. Took me about a week working on it in the evenings.
Wed, 02/11/2015 - 08:37
Love the look of this. Great job. What did you use for the drawer faces? 1 x 6?

I built this a couple feet shorter than in the plans because it is for my neighbor's fish tank! It was fun to build and I'm in love with the finished product. She's going to paint or stain it herself. The pics were taken in my messy, projects-everywhere carport right before the neighbor hauled it off! Her son-in-law wants one now, and I will be building one for MYSELF right away as well! Thank you Ana!!!
Tue, 09/08/2020 - 16:56
looks great I'm hoping to build one myself this week =)


Comments
Ana White Admin
Mon, 06/05/2023 - 07:52
Smart!
Love the added water wall feature! Thank you for sharing, it looks fantastic.