Community Brag Posts

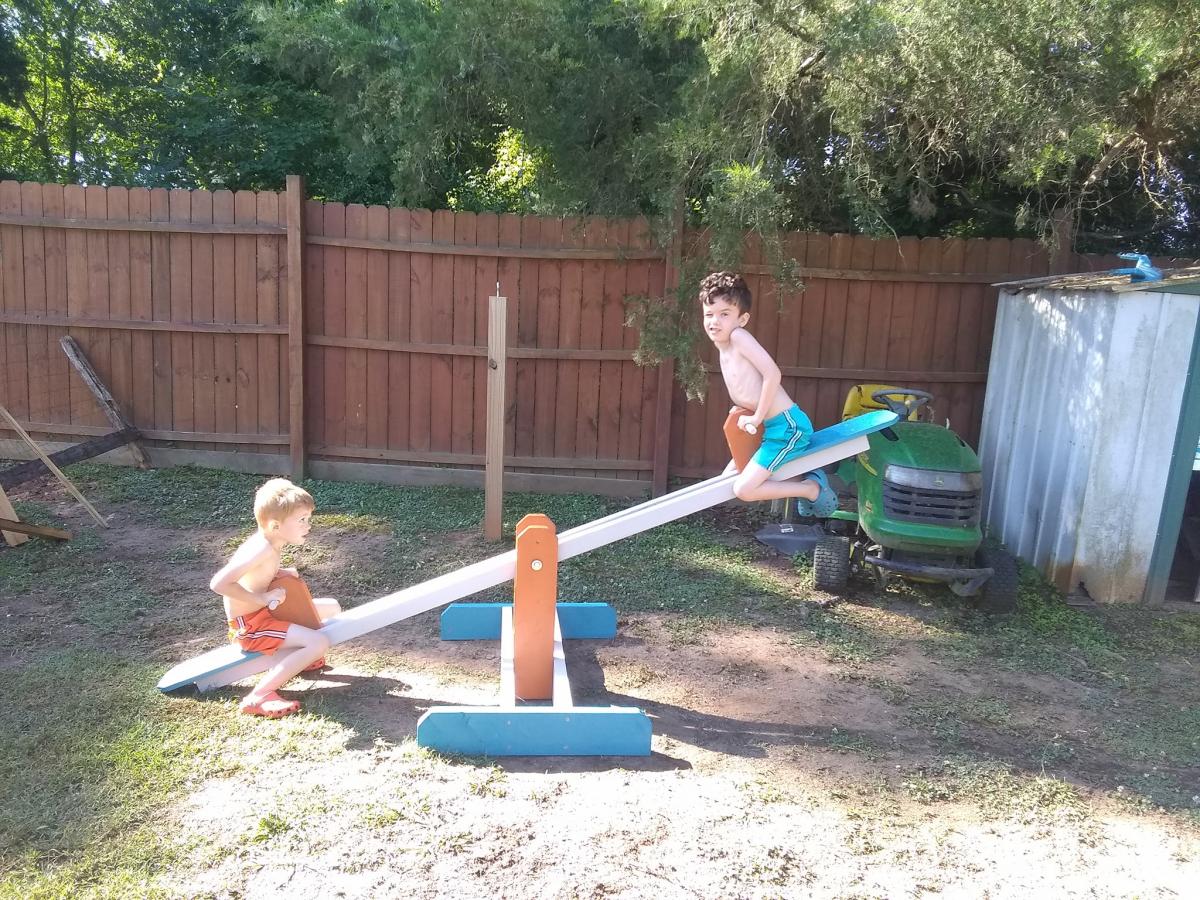
Seesaw aka "Blue Blade"

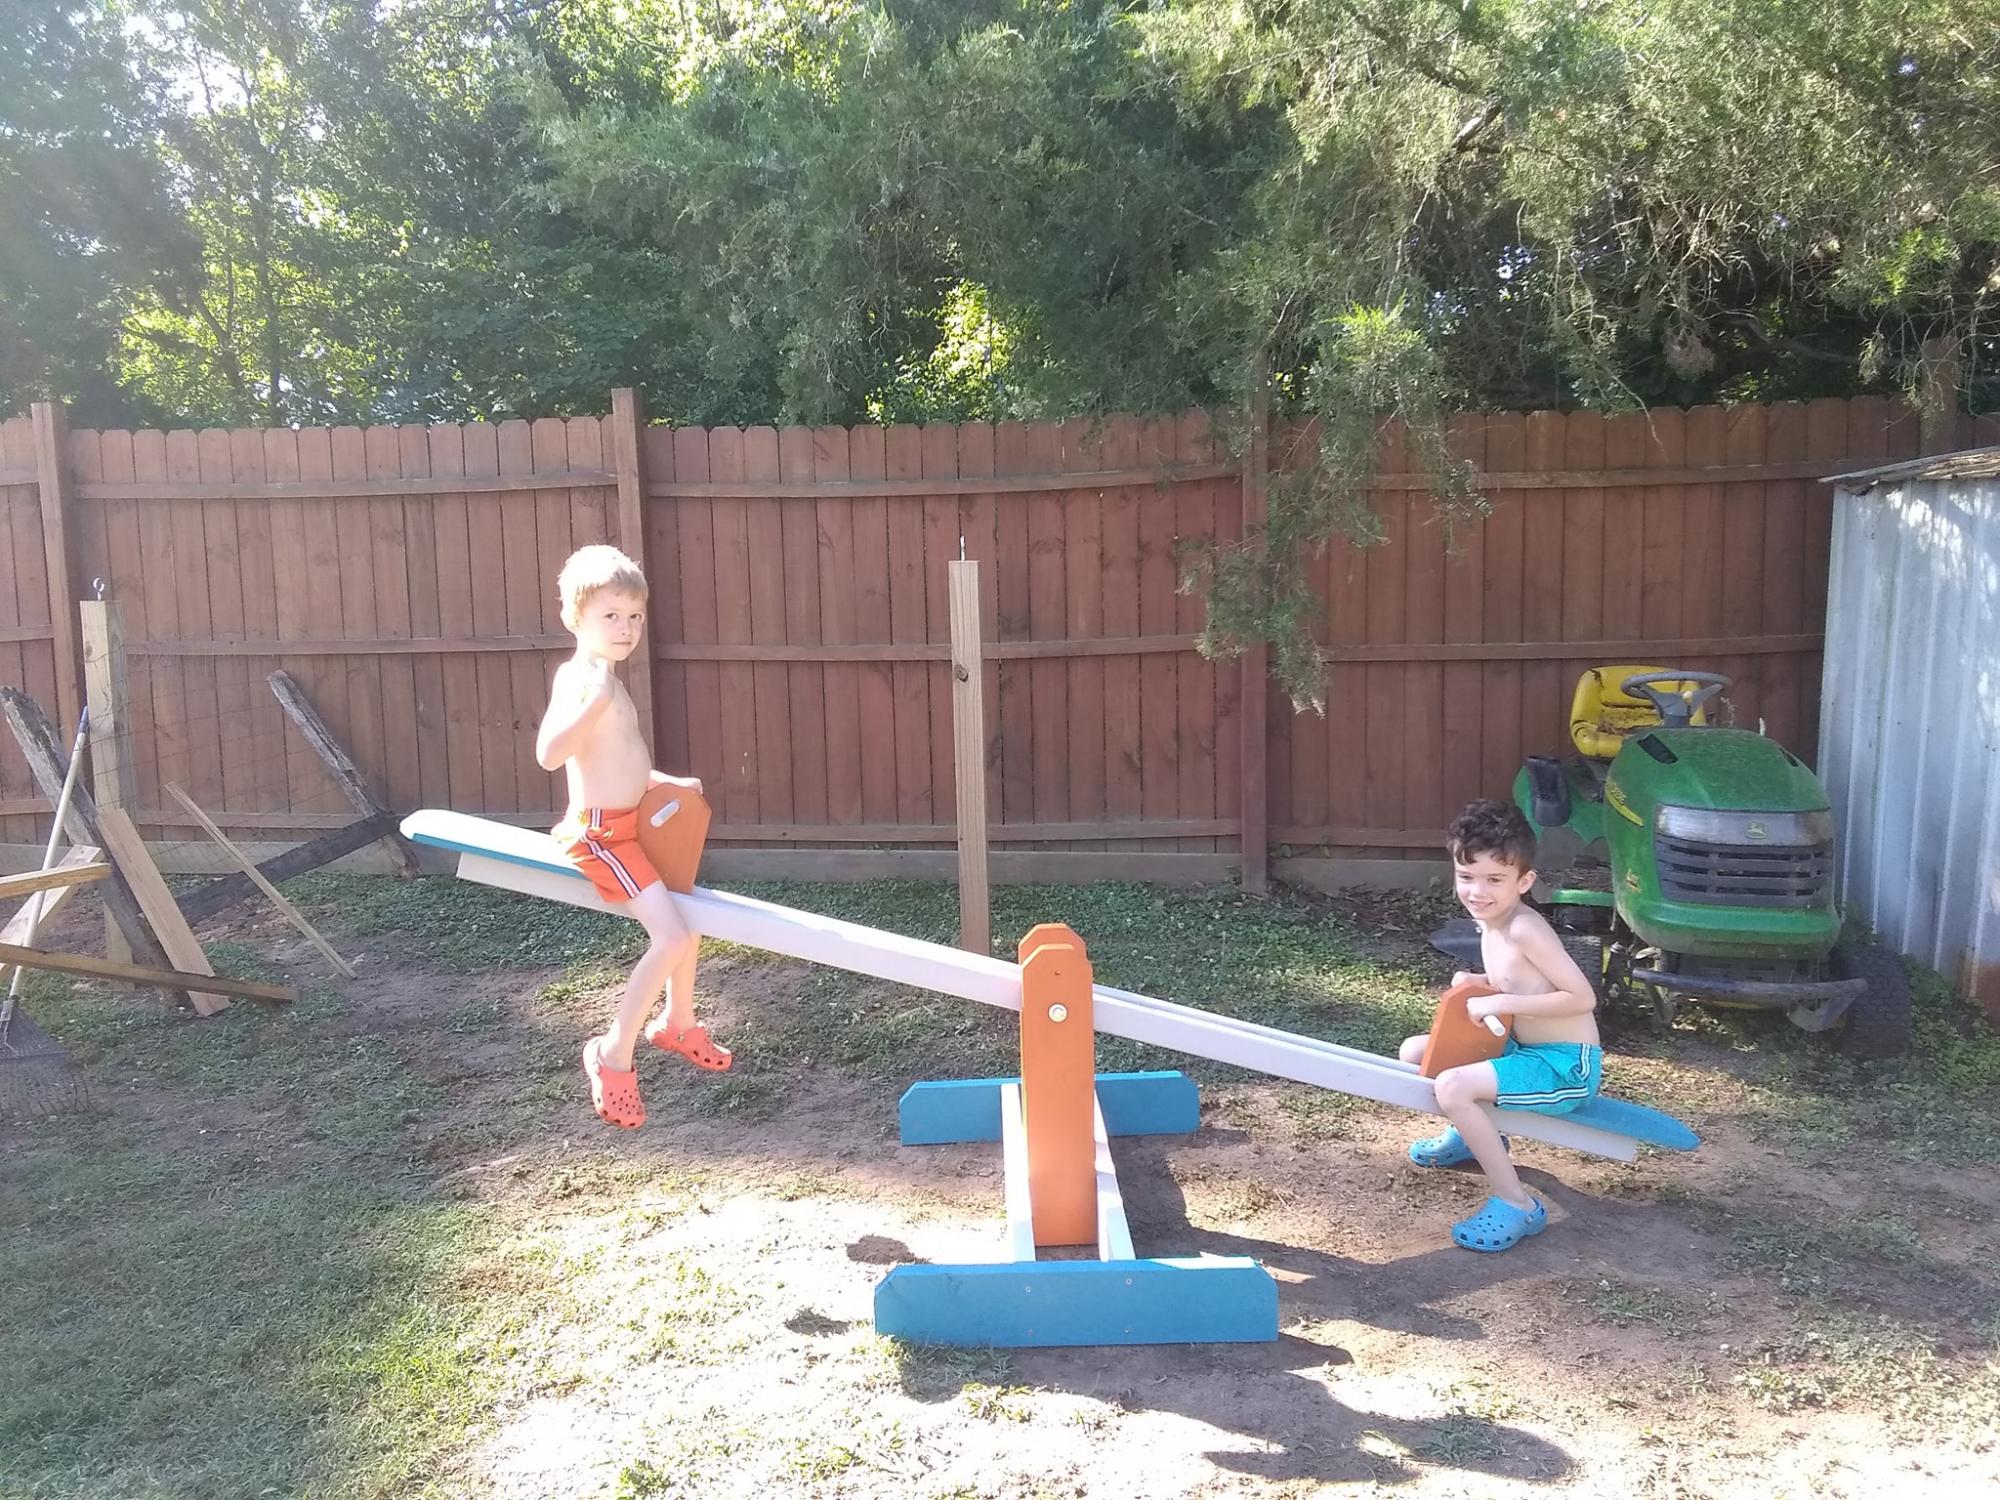
My husband and I made the boys a seesaw a few months ago. We had been spending a lot of time working on our chicken coop and I snuck around to make something for the boys as a surprise. They named it Blue Blade and it has been a fun new addition to their playground. It was straightforward to make. I used 2x3s instead of 2x4s since they were so much cheaper, and it worked really well. I love how it has the extra hole so we can make it taller as they grow.

Built from Plan(s)
Estimated Cost
$30
Estimated Time Investment
Afternoon Project (3-6 Hours)
Recommended Skill Level
Beginner

No-Sew Upholstered Bed

Submitted by a_wolfe on Sun, 12/30/2012 - 16:34

Ok, so I was looking for a new headboard and stumbled on the plans for this Upholstered Bed.

Being without my full compliment of work this winter, I figured, what the heck. I'll try it.

Off I went to Home Depot, bought the supplies and got started.

I should mention that this was my first time doing any sort of carpentry, I have never used a jigsaw, and I had to borrow all the tools.

I found this SUPER easy! I had the headboard support finished in under an hour. Then I took my time cutting the plywood, just to make sure I didn't make any mistakes.

**I should mention right now, if you are planning on using a heavy upholstery fabric like I did, when you cut out the headboard insert, make 2 cuts! I wasn't able to get the insert to lay flush because the fabric was so thick! (I have since taking the picture added decorative trim to hide the little gaps)***

Once I had my plywood cut, I had no problem attaching it to the frame. The upholstery was a 2 person job that took a little time and a lot of staples, but not difficult.

I chose to tuft the headboard insert, and am so happy I did. It was time consuming, but worth it in the end.

All said and done, this took me a little over a week to complete. I had the construction done within a day or two, but the upholstery was very time consuming.

I love my new bed!

Estimated Cost
$275.00
Estimated Time Investment
Weekend Project (10-20 Hours)
Finish Used
Heavy Upholstery Fabric:

DAWSON: OATMEAL

WIDTH: 55"

FIBER CONTENT: 43% Olefin, 42% Cotton, 10% Eco Cloth, 5% Acrylic


Painted legs with Annie Sloan Chalk Paint
Recommended Skill Level
Intermediate

Vintage step stool

Submitted by jaderae on Mon, 10/13/2014 - 17:59

This project was wonderfully easy to build and it is a sturdy step stool I feel will last for a long time.  I was able to build it very quickly, with minimal assistance. Painting and finishing adds to the time but it's beautiful.

Built from Plan(s)
Estimated Cost
$25 including paint, and primer, and there are scraps left over
Estimated Time Investment
Afternoon Project (3-6 Hours)
Finish Used
This is in my kitchen for my 2.5 year old to "help" me
Recommended Skill Level
Beginner

Sliding Door Console

Submitted by Anonymous (not verified) on Tue, 01/24/2017 - 07:16

My take on the Grandy Sliding Door Console. I adjusted the size to fit under our 70inch TV and used old wooden windows as my door. I also added wooden furniture feet. Approximate dimensions are 66LX38HX23D.

Built from Plan(s)
Estimated Cost
$350
Estimated Time Investment
Week Long Project (20 Hours or More)
Finish Used
Rustoleum chaulk paint in Linen White, Dark antiquing glaze, Minwax gel stain in walnut, Minwax wipe on poly.
Recommended Skill Level
Intermediate

Fancy X Farmhouse Table

Submitted by Hartke22 on Mon, 10/12/2020 - 22:33

Just a few of our Fancy X farmhouse tables. Along the way, we where able to put our own spin on the original plans by Ana White.

Estimated Cost
100
Estimated Time Investment
Weekend Project (10-20 Hours)
Finish Used
Minwax Dark Walnut
Minwax Satin clear Polly

Comments

Outdoor bar and stools

Submitted by stevendaun on Tue, 01/01/2013 - 09:34

I built a 15" wide by 8' long outdoor patio bar with locking casters. I modified the stool design on Ana's website and stained both to match. I finished the top with stone tile and grout. This area has become the main gathering point in our backyard when entertaining.

Estimated Cost
$250
Estimated Time Investment
Weekend Project (10-20 Hours)
Finish Used
Baer outdoor brown stain
Recommended Skill Level
Intermediate

Comments

My first furniture project

Submitted by BenjiRPX on Sat, 10/18/2014 - 04:08

My first project using Ana-white drawings, and also my first project of furniture. I am really happy with the results ! Thanks Ana !


Built from Plan(s)
Estimated Cost
About 30 euros (including recuperation items). Unfortunately lumber seems to be more expensive in Europe !
Estimated Time Investment
Weekend Project (10-20 Hours)
Finish Used
Primer (1 layer)
Paint (2 layers)
Varnish (2 layers)
Recommended Skill Level
Beginner

Shoe cabinet!

Submitted by JMasters on Thu, 01/26/2017 - 13:43

Created my own version out this plan. 

Built from Plan(s)
Estimated Cost
$80
Estimated Time Investment
Weekend Project (10-20 Hours)
Recommended Skill Level
Intermediate

How fun was that?!

Submitted by lmoranti on Sat, 10/17/2020 - 16:43

This is Ana’s beginner farmhouse coffee table. Was a blast to make and really enjoyed my first project

Estimated Cost
65.00
Estimated Time Investment
Afternoon Project (3-6 Hours)
Finish Used
Burned with a torch and the golden oak stain. Finished of with a clear coat sealer
Recommended Skill Level
Beginner

Twin Over Full Simple Bunk-Bed

Submitted by Ksavtech on Wed, 01/02/2013 - 10:16

The twin beds that my boys were using took up way too much space in their small room so after much looking I found the Ana White site and this plan. The bed I made is per plan except for the addition of the side rails that slip fit onto the sides. When we change the sheets on the top bunk we just slip off the rail and stand on the lower bunk. We've had my two boys and three nephews all on the bed playing Xbox and it is rock solid!

Estimated Cost
$150
Estimated Time Investment
Week Long Project (20 Hours or More)
Finish Used
Minwax Classic Grey and matte polyurethane
Recommended Skill Level
Intermediate

Camp Loft Bed

Submitted by JenMack on Mon, 01/30/2017 - 06:39

Love this bed plan and design! Spend Friday evening cutting wood (about an hour) and most of Saturday sanding, adding pocket holes and assembling. It looks HUGE when you put it in the room, my hubby was like....ummmm..... ;-) but once everything was put away its perfect. My 4 year old I think said "its so amazing mom" about a dozen times. She ASKED to sleep in. HA! Parent win.

Estimated Cost
$65 for lumber
Estimated Time Investment
Weekend Project (10-20 Hours)
Finish Used
None
Recommended Skill Level
Beginner

Americana Coffee Table

Submitted by artguy34 on Wed, 10/21/2020 - 08:41

Using Ana's plans, I built this coffee table for my Uncle. Now I just have to find the old pics of the process.

Estimated Time Investment
Weekend Project (10-20 Hours)
Recommended Skill Level
Starter Project

Bunk Bed From a Loft Bed

This bunk bed was made out the Camp Loft bed plans. With my daughter out growing her toddler bed, we really needed a "big girl" bed without giving up too much space. This was perfect. It was really easy to add an extra set of 2x6's around the bottom of the loft, and poof, it’s a bunk bed. The kids really love it and it is really strong. I weigh about 250 lbs and it doesn't even move when I get on the top bunk. To accommodate for the lower bunk, I raised it to 72” high. As you can see, I also added extra vertical supports on the top rails. I did this so all the weight on the top bunk wasn’t only supported by the 2x6s, but also the 2x4s as well.

I also painted it white becuase that matched the other furnature in the room better than staining it. To keep the wood from seeping sap all over the paint, I sealed it with BIN primer before painting it with latex paint.

I don’t have much experience building furniture, but this was extremely easy. The wood cost us around $100. Slightly more than the post said, but I added a few extra 2x4s and since comparable bunk beds are being sold for about $800, this was a steal. The plans were great and my son and I had a great time building it. Thanks for posting it

Estimated Cost
$100
Estimated Time Investment
Week Long Project (20 Hours or More)
Finish Used
BIN primer (2 coats), latex flat paint, a lot of sanding
Recommended Skill Level
Beginner

Farmhouse Table

Submitted by Djsaffer on Thu, 10/23/2014 - 21:23

I built this table for our kitchen.  Slightly modified the top for 3 - 2x8 and 2- 2x10 ripped down on each side to make the planks sit flush.  Breadboard ends are 2x10 to give more room on the ends and the stretcher supports are on the inside to give more room as well.  Notching was difficult, not the cleanest but they worked.

Final dimensions are 84.5 x 37 x 31

Estimated Cost
Lumber $70
Finishes $30
Kreg Screws $18
Estimated Time Investment
Weekend Project (10-20 Hours)
Finish Used
Rustoleum flat black spray paint for base.
Minwax Ipswitch Pine for the top.
Finished with Minwax Helmsman Spar Uerethane 3 coats on top 1 coat on base.
Recommended Skill Level
Intermediate

Butcher block

Submitted by Medickep on Wed, 02/01/2017 - 18:15

I decided to add this island to my kitchen as I had a lot of open space in my kitchen.   It gave a lot more counter space and when I adjust the pot rack, it will open up an entire cabinet too! The body is painted the color my cabinets are about to become and the stain matches some other woodwork in the house. I applied polyurethane to the stained pieces and plan on using cutting boards to avoid the look of a beat up butcher block as well as the maintenance that goes with them!  Wherever I could hide the edges, I used plywood instead of 1x8's as I had leftovers from a bench I made.  

Built from Plan(s)
Estimated Cost
100.00??
Estimated Time Investment
Weekend Project (10-20 Hours)
Finish Used
Alkd pain, minwax Ebony 2718, wipe on polyurethane.
Recommended Skill Level
Intermediate

Comments

I used old fence panels

Submitted by Anonymous (not verified) on Mon, 10/26/2020 - 10:12

I love these chairs. I have made about 10 of them. I have several orders for 16 more. I use old fence planks for the seat and back. I also changed the back supports to 35 in. My husband is 6ft and he wanted to be able to rest his head back when he sits. Cutting the legs is the hardest part. I also changed the arms to jig holes so the Screws would not show.

Estimated Cost
$20
Estimated Time Investment
An Hour or Two (0-2 Hours)
Finish Used
If you are going to leave outside in the weather you should apply some sort of sealant.
Recommended Skill Level
Beginner

2x4 Banquette Seat

Submitted by boyledover on Sat, 01/05/2013 - 16:47

I have been wanting a banquette for years and when I spied Ana's version in the post about Grace's birthday party, I knew I could do it. I waited for the plans, and yesterday, I got out the tools and in 6 hours (real time - including cooking meals for kids, potty breaks, and life in general) I had my bench done.

I am so pleased with it. I had all the fabric on hand already, and was able to buy batting, foam and pillow forms all 50% off at Joann's, plus 2 zippers for the blue cushions. The woman who was cutting my foam asked me what I was making, and I told her I was building an upholstered bench for my dining room. She said "wouldn't it be less trouble to just buy one already made?" Clearly she has no idea how much this would have cost me. As it stands, I had the lumber and fabric on hand, so my total purchase price was just over $95.00. I would estimate the cost to build to be about $200.00 for everything, depending on how expensive your fabric is.

I love to sew, so I had no problem with the fabric portion of the project, though I did as Ana did and did not upholster the back of the bench. Instead of adding a piece of fabric across the back of the frame, I extended the side fabric by about 6 inches on each side and stapled it to the back. I hope that makes sense. I used a metal cleat to hold the seat back in place. I also used 3 L-brackets to attach the bottom to the frame. I think people will slide into their seat and I didn't want the seat cushion to move.

Not bad for a few hours work!

This project would be an easy starter project for building, though it is a little more advanced when you factor in the sewing. Here is the tutorial I used for the toss pillow cushions: http://sewmamasew.com/blog2/2011/02/add-a-zipper-to-your-pillow/, and here is another from the same blogger for boxed cushion covers (just leave the bottom off of yours for this project, since it will be stapled to the plywood, skip the zipper and handle, and add piping if you want to fancy your cushion up): http://sewmamasew.com/blog2/2008/07/summer-sewing-perfectly-portable-cu…

Thanks Ana for the constant inspiration!

Built from Plan(s)
Estimated Cost
$200.00
Estimated Time Investment
Afternoon Project (3-6 Hours)
Recommended Skill Level
Beginner

My Sister and I Made The Platform Bed For My Daughter

Submitted by Cee Palmer on Sun, 10/26/2014 - 13:52

I decided on the Fillman Platform bed, for my daughter. It was a basic and simple style, the plans were well thought out, and the shopping list was a godsend. My daughter picked out a dark stain as well, which made the wood look really pretty. We broke up the platform and the headboard into two different days (so the stain would dry).

Love the bed!

Estimated Cost
$100.00 for platform and headboard. It was a little extra from the original estimated plans, because of the stain.
Estimated Time Investment
Afternoon Project (3-6 Hours)
Recommended Skill Level
Beginner

Stackable dollhouse

Submitted by Anonymous (not verified) on Sun, 02/05/2017 - 12:21

We love the outcome! Took us a while to get the roof angles and glue everything together, but enjoyed the process.

Estimated Time Investment
Weekend Project (10-20 Hours)
Finish Used
Craft store acrylic paint.
Recommended Skill Level
Beginner

Barn Door Bookcase

Submitted by Anonymous (not verified) on Sat, 10/31/2020 - 06:28

My wife decided she needed a piece of furniture to contain the kids craft supplies. I found the ‘Ana White’ page with the Barn Door Bookcase design. We already make custom art pieces and I challenged my wife that we could make this bookcase with our own custom twist of art. Piece turned out great and we are both very pleased. Thank you for the plans! #AccindentallyArtisticDesigns

Estimated Cost
$200
Estimated Time Investment
Week Long Project (20 Hours or More)
Finish Used
Mix of stains, poured acrylic paint, burns and polyurethane
Recommended Skill Level
Intermediate

Comments