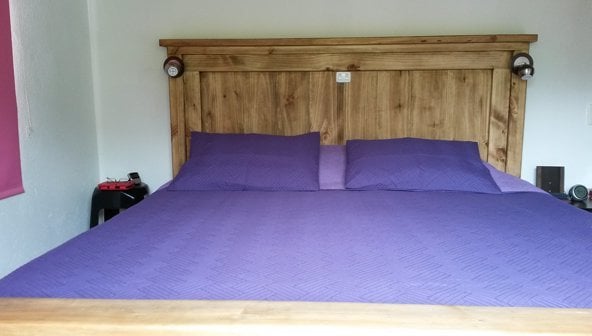
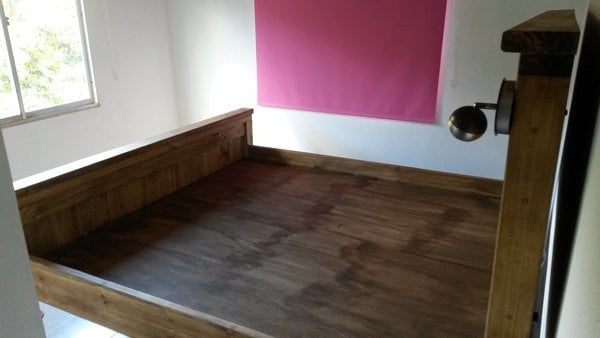
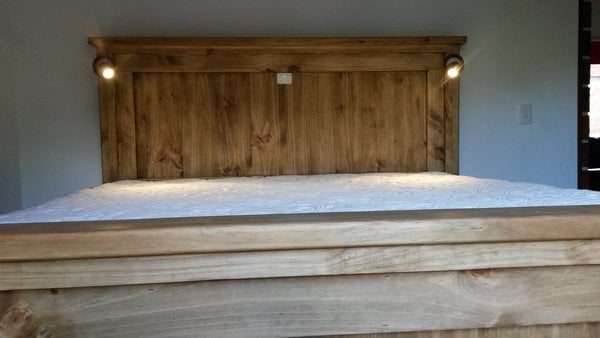
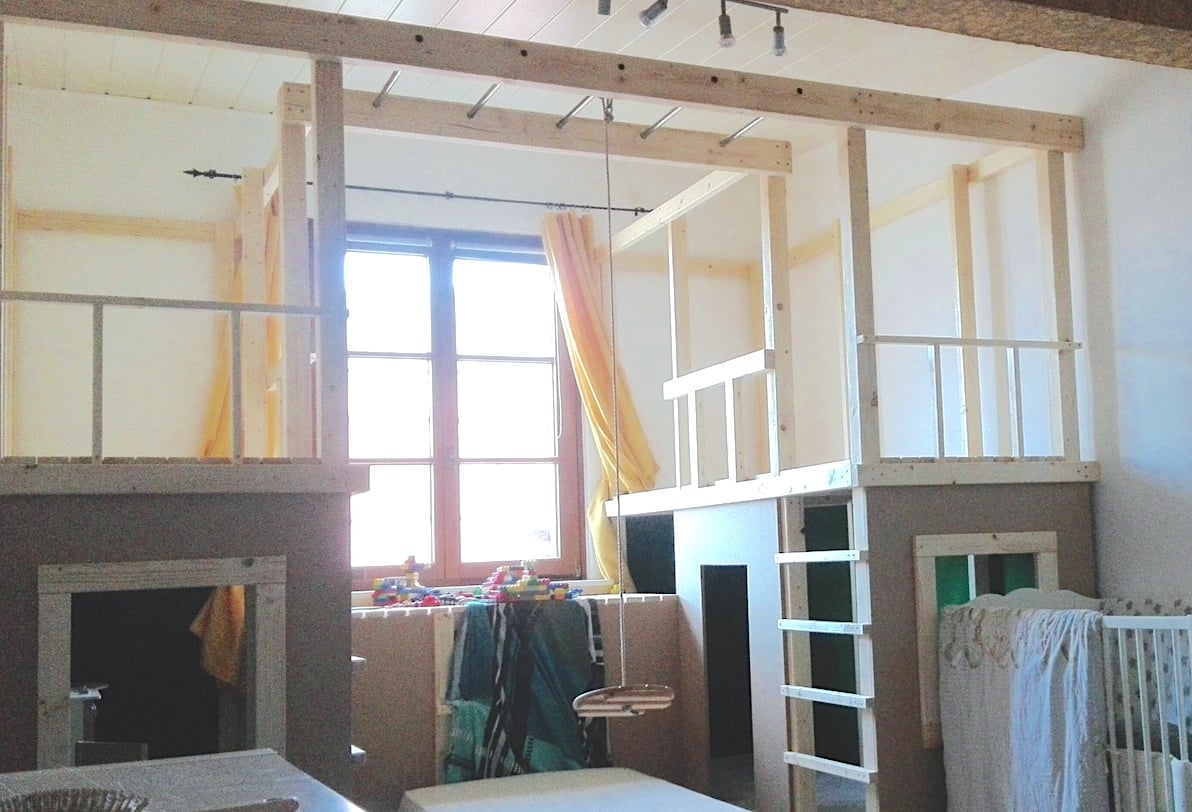
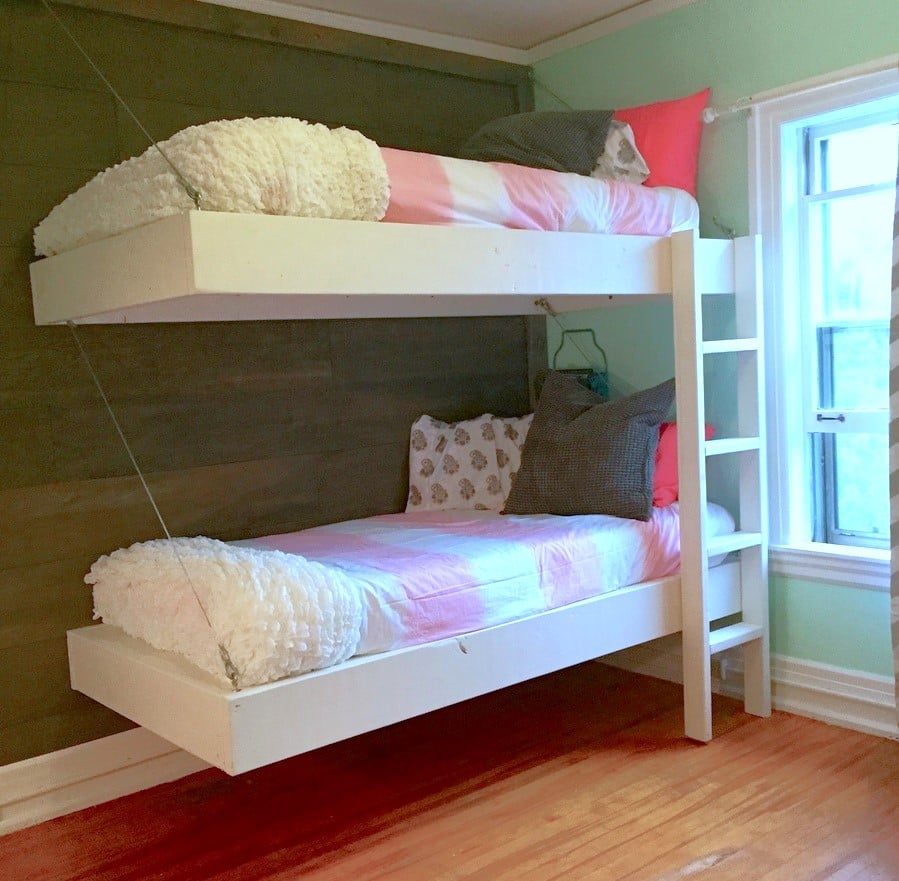
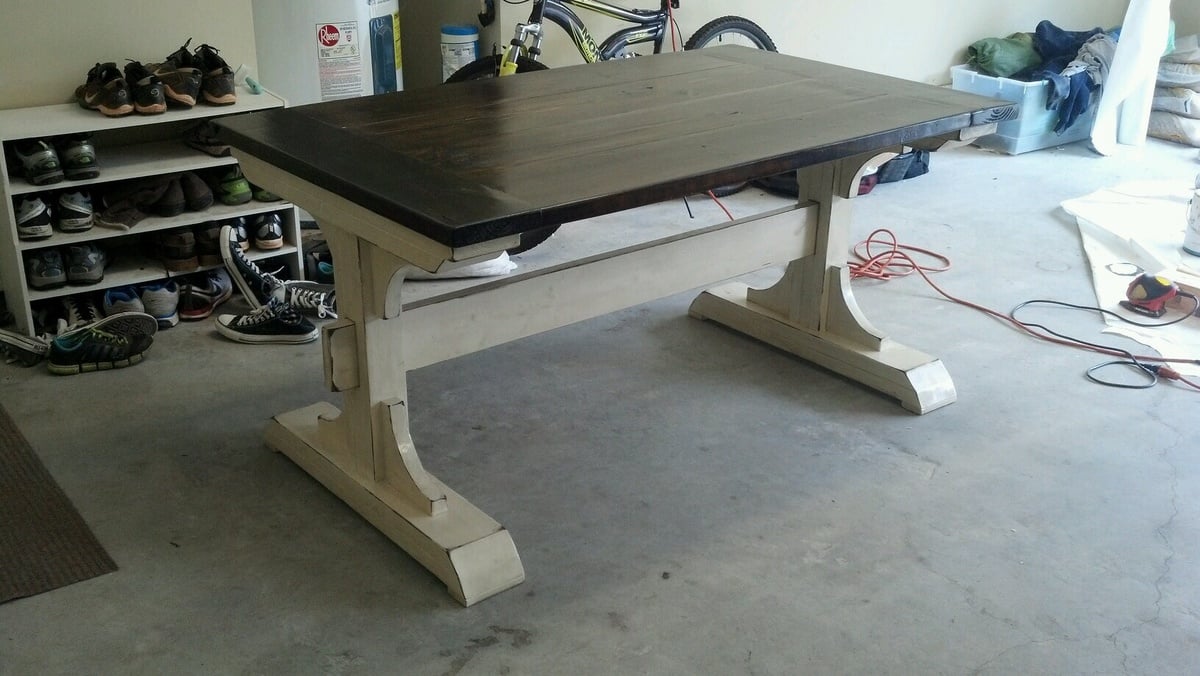
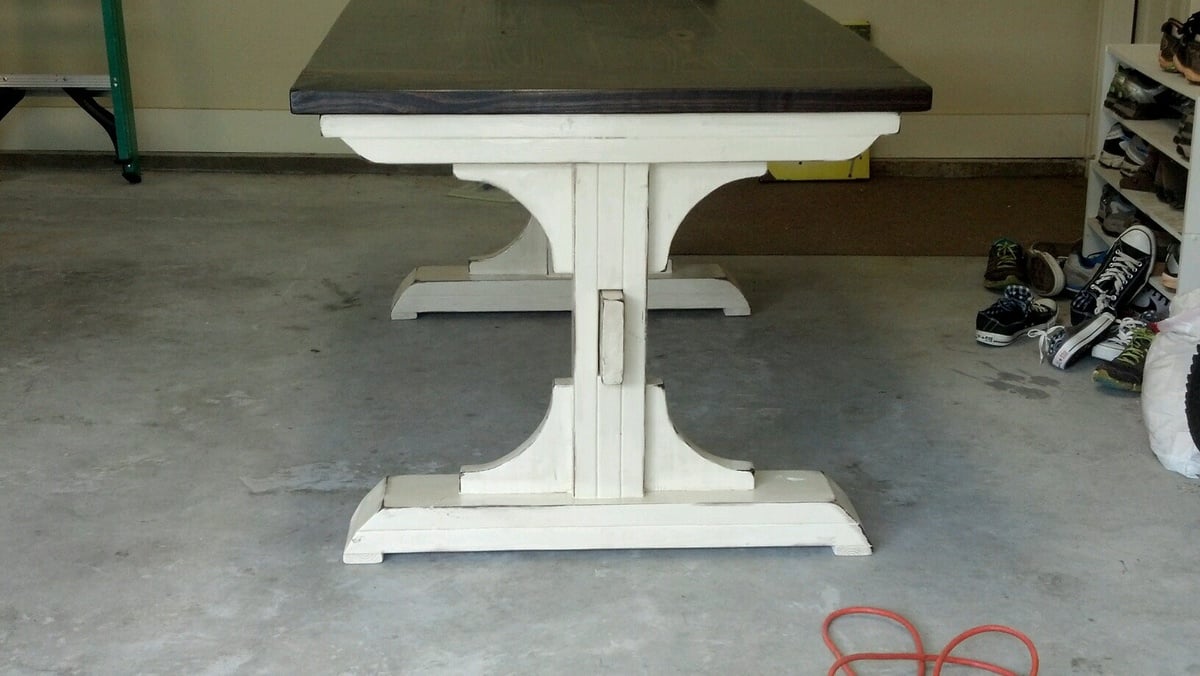
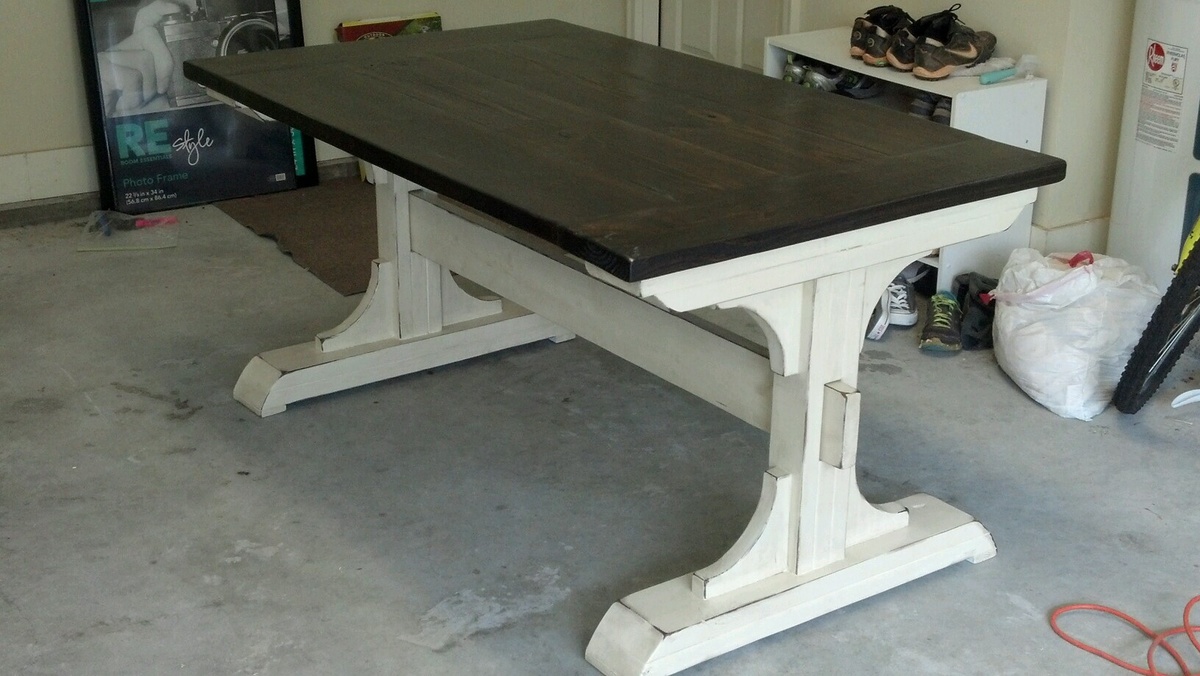
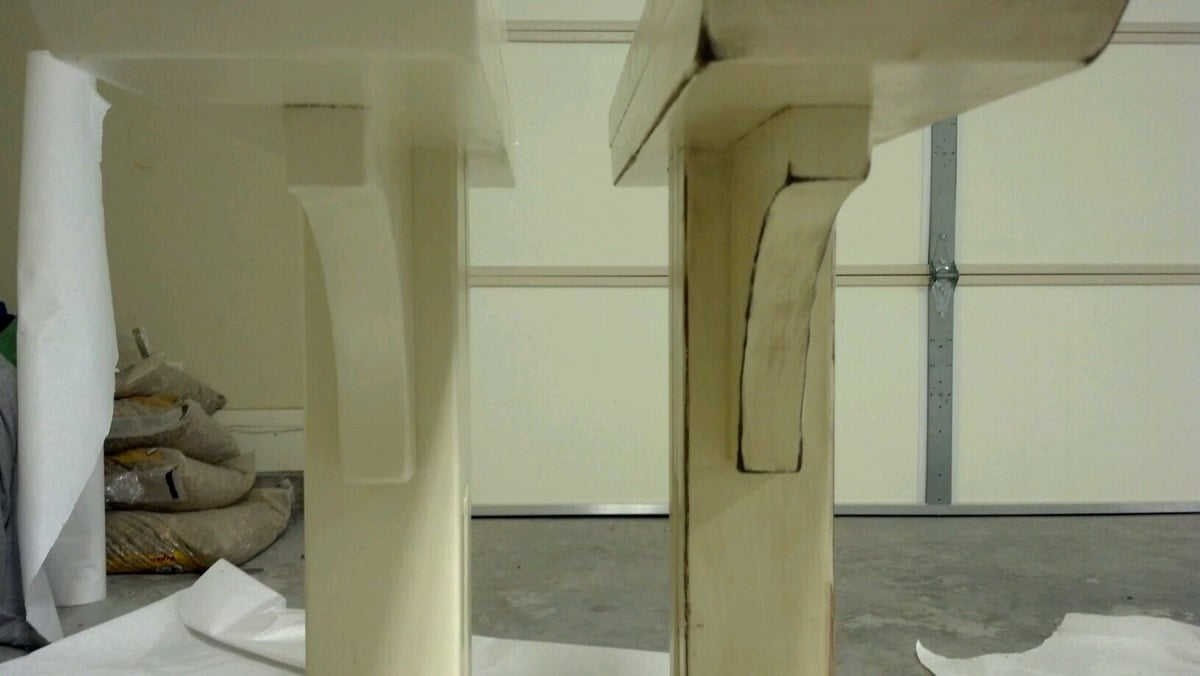
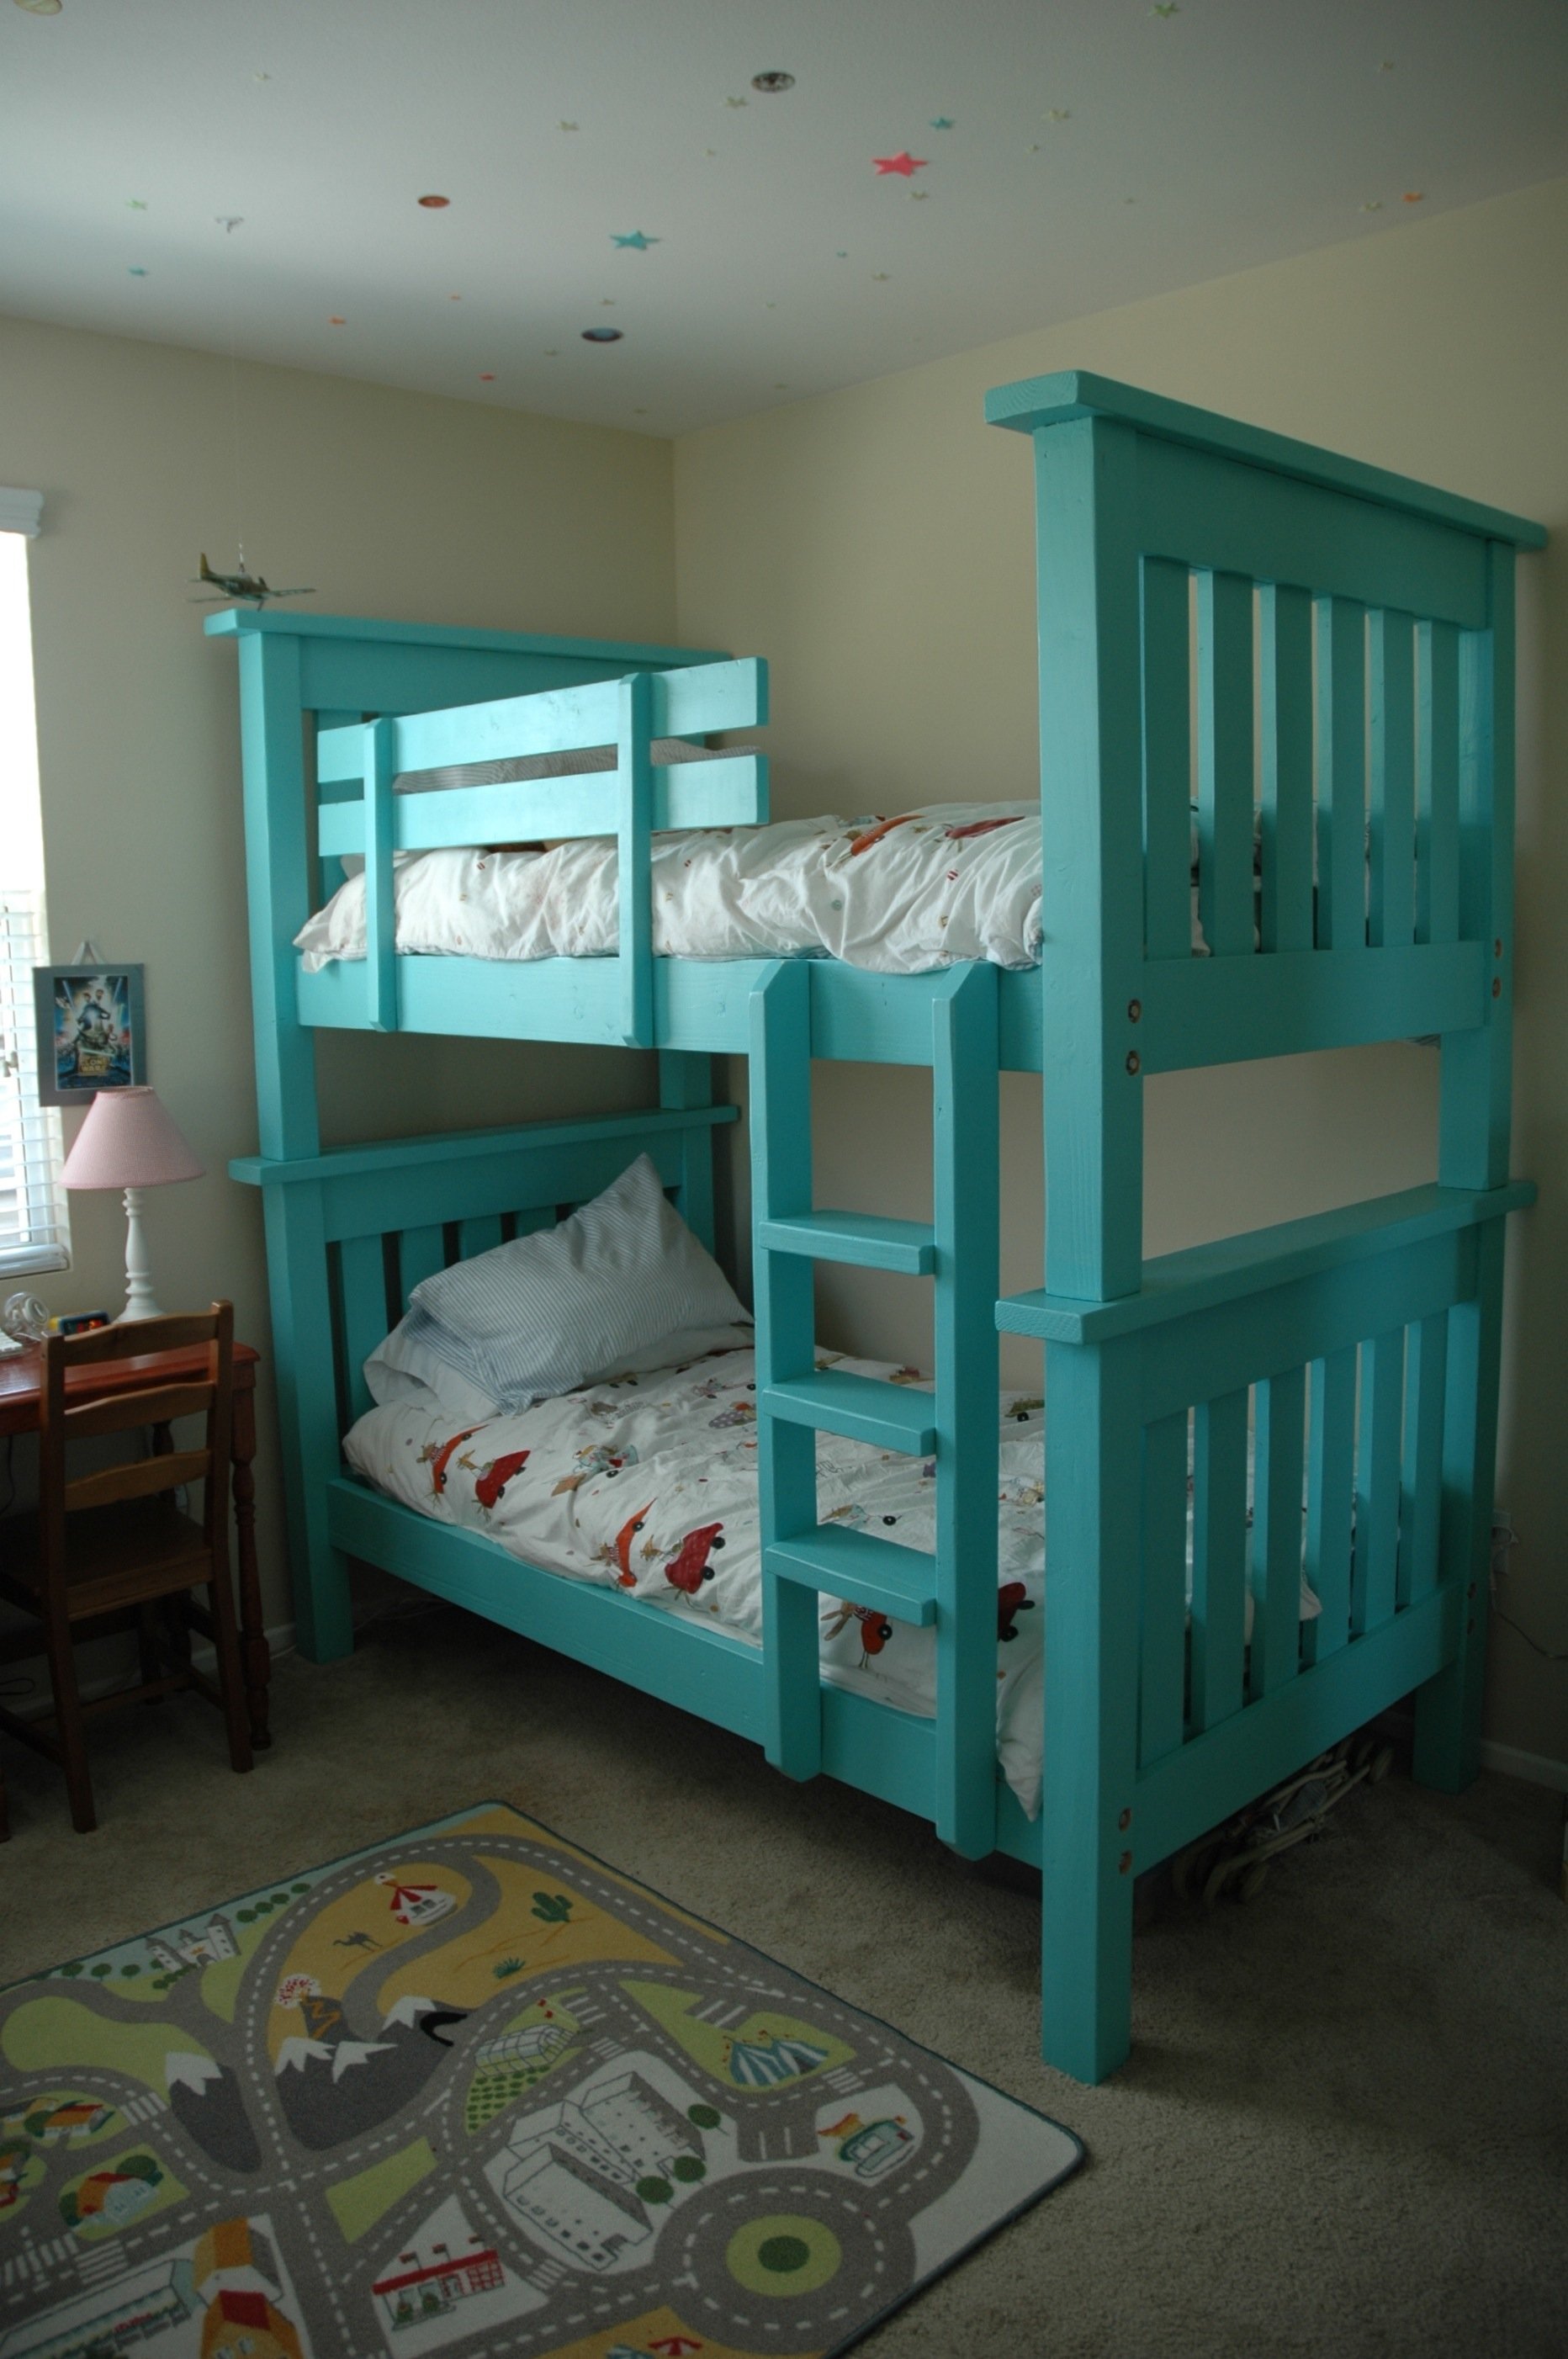
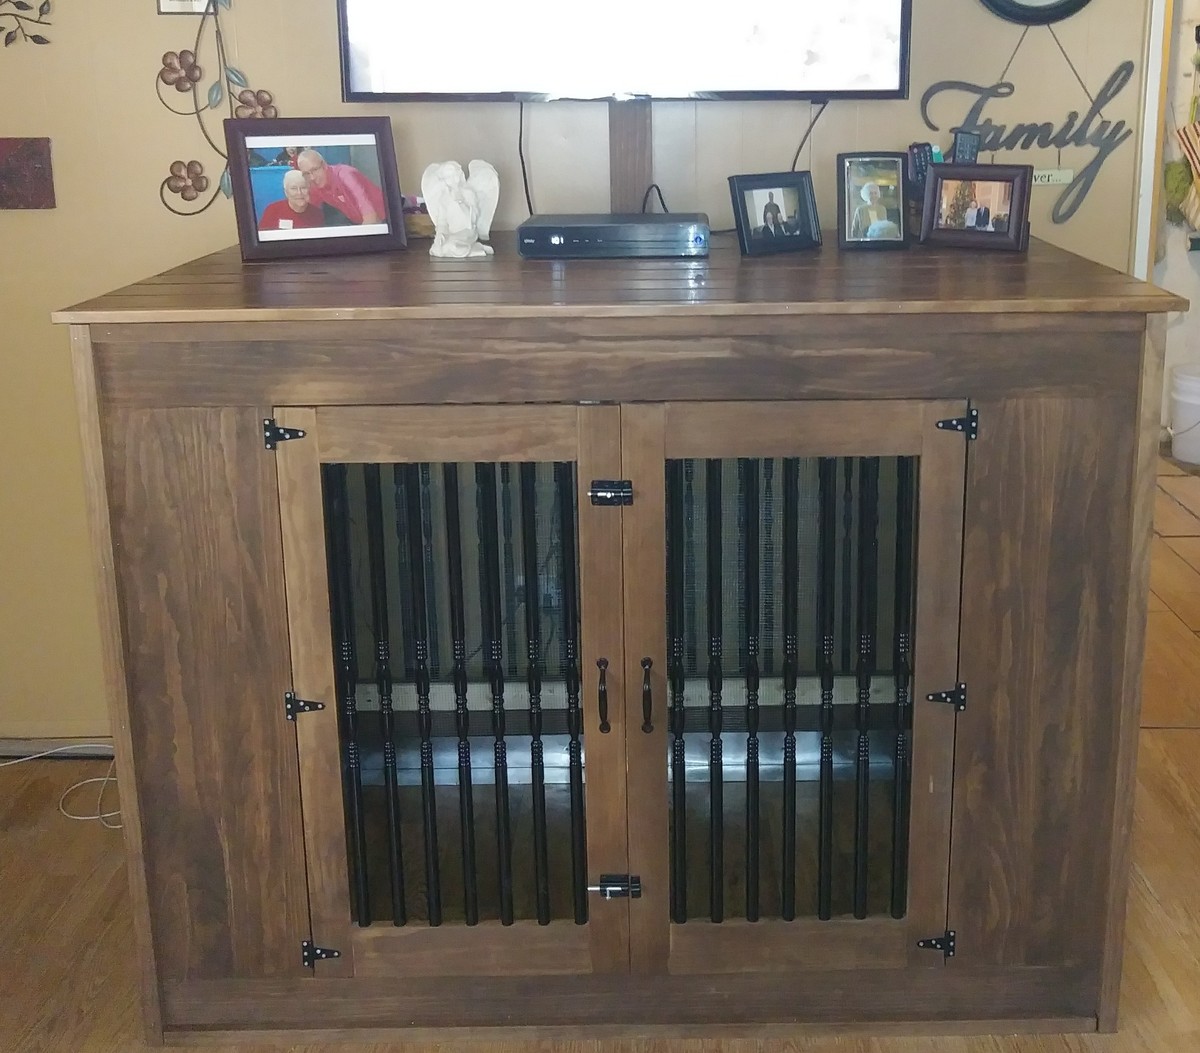
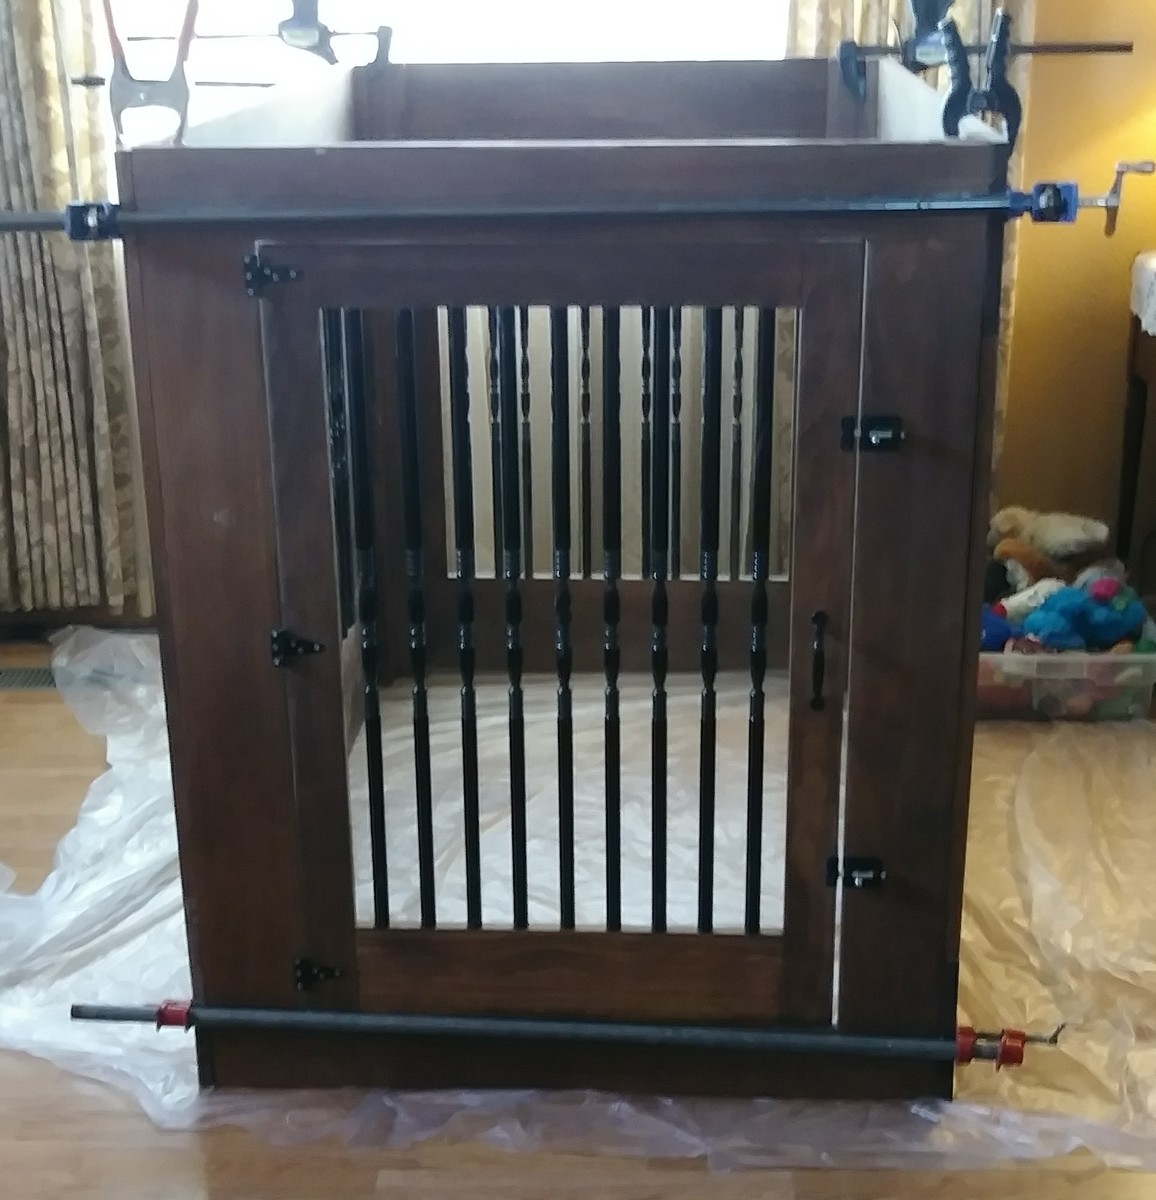
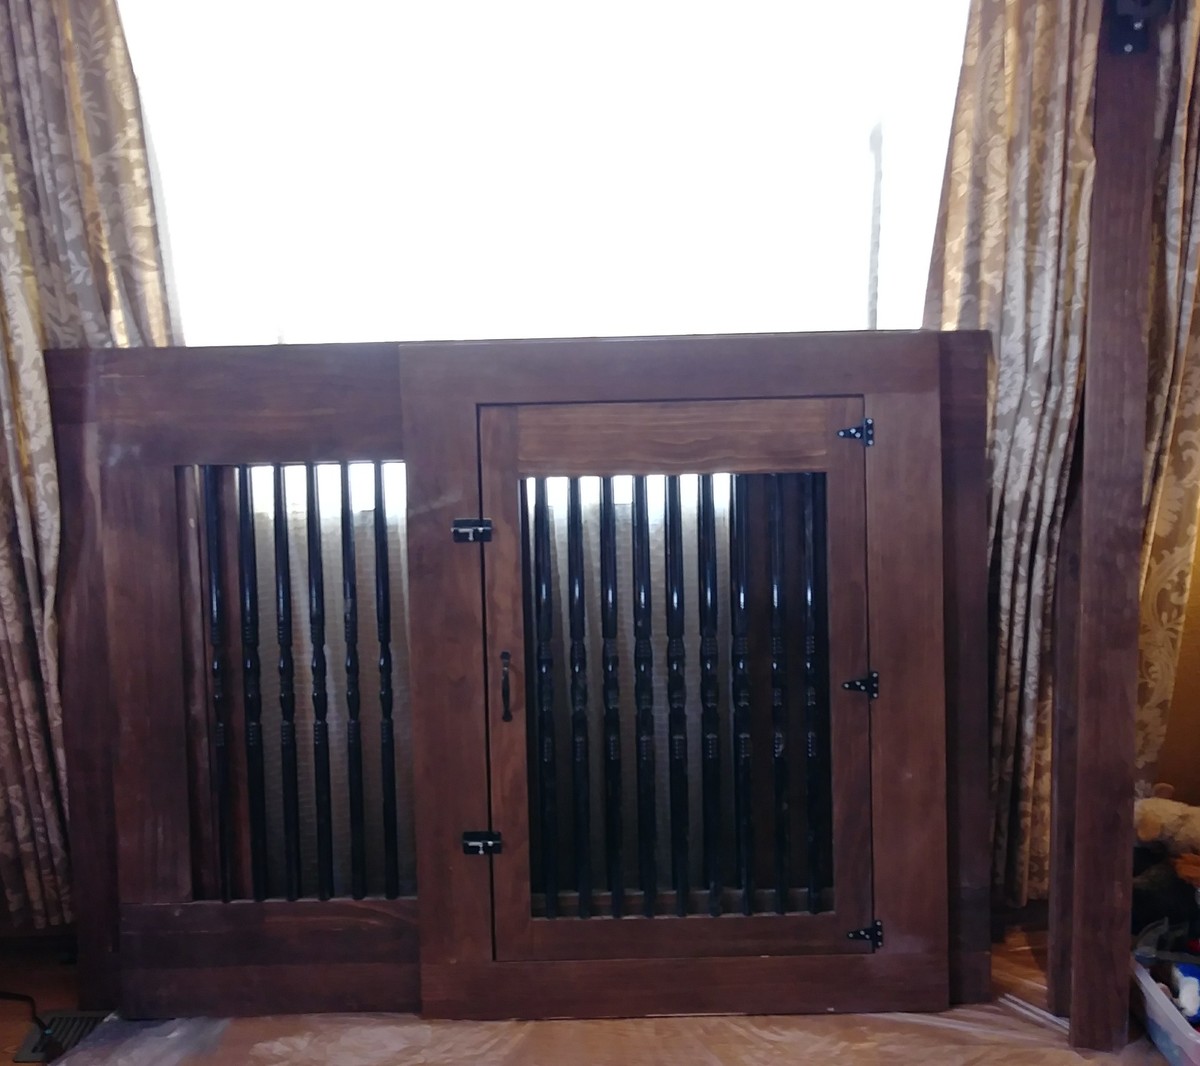
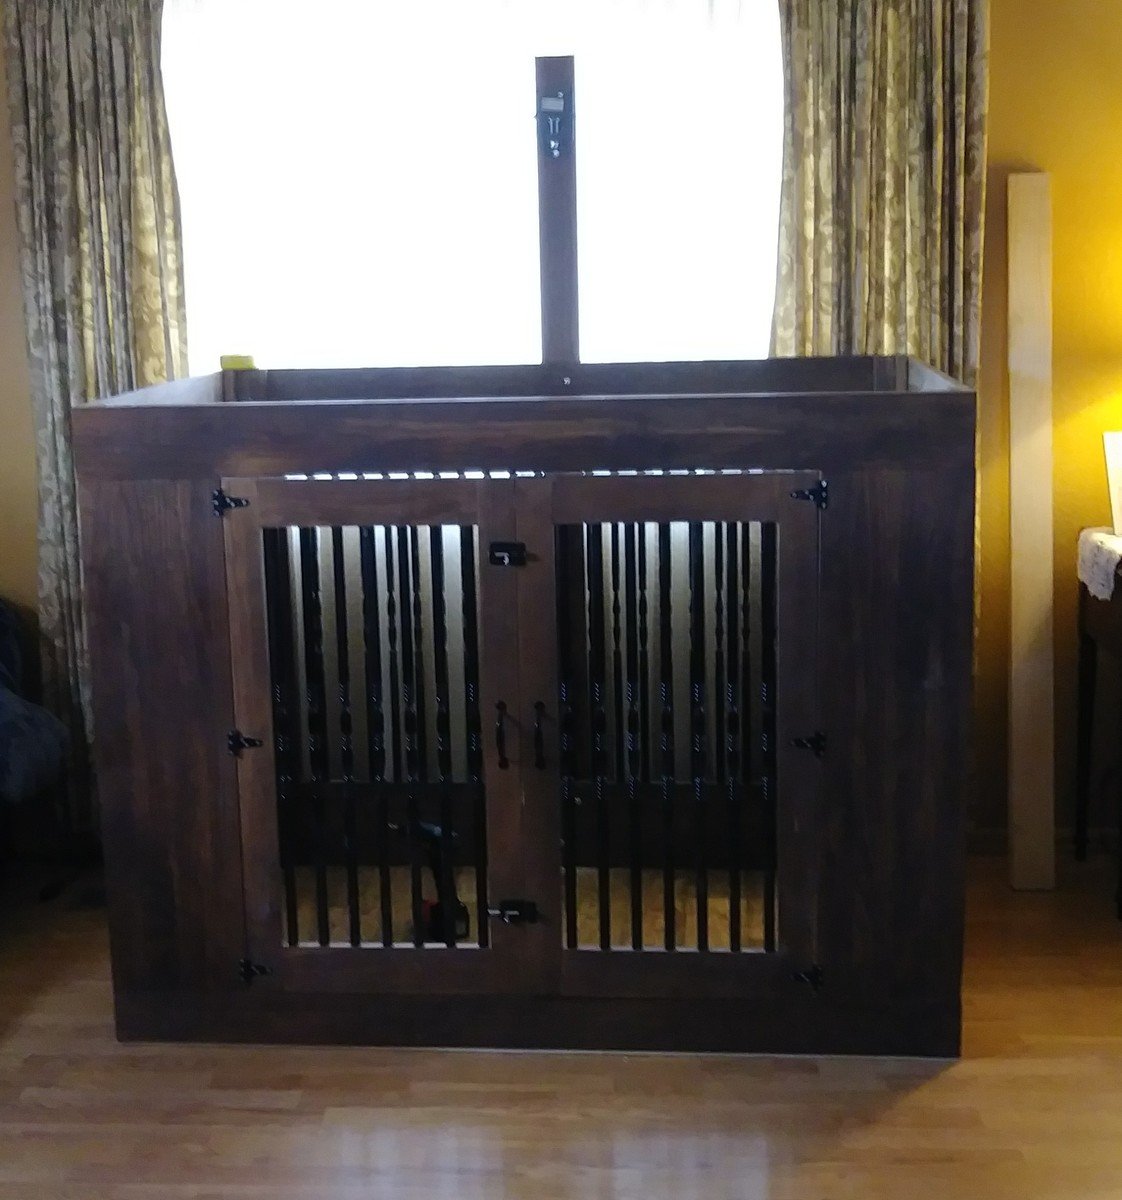
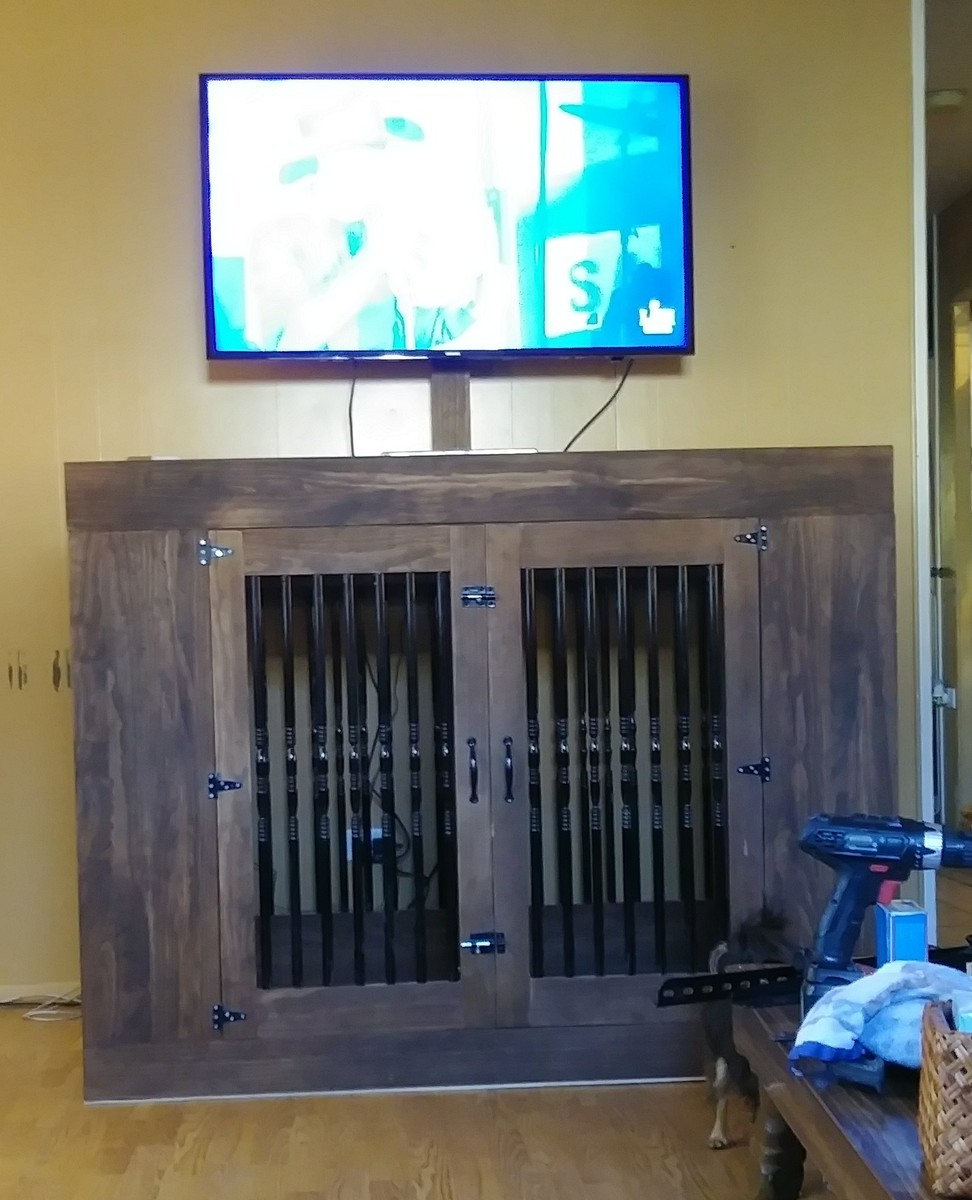
Community Brag Posts

Izzy's Bed

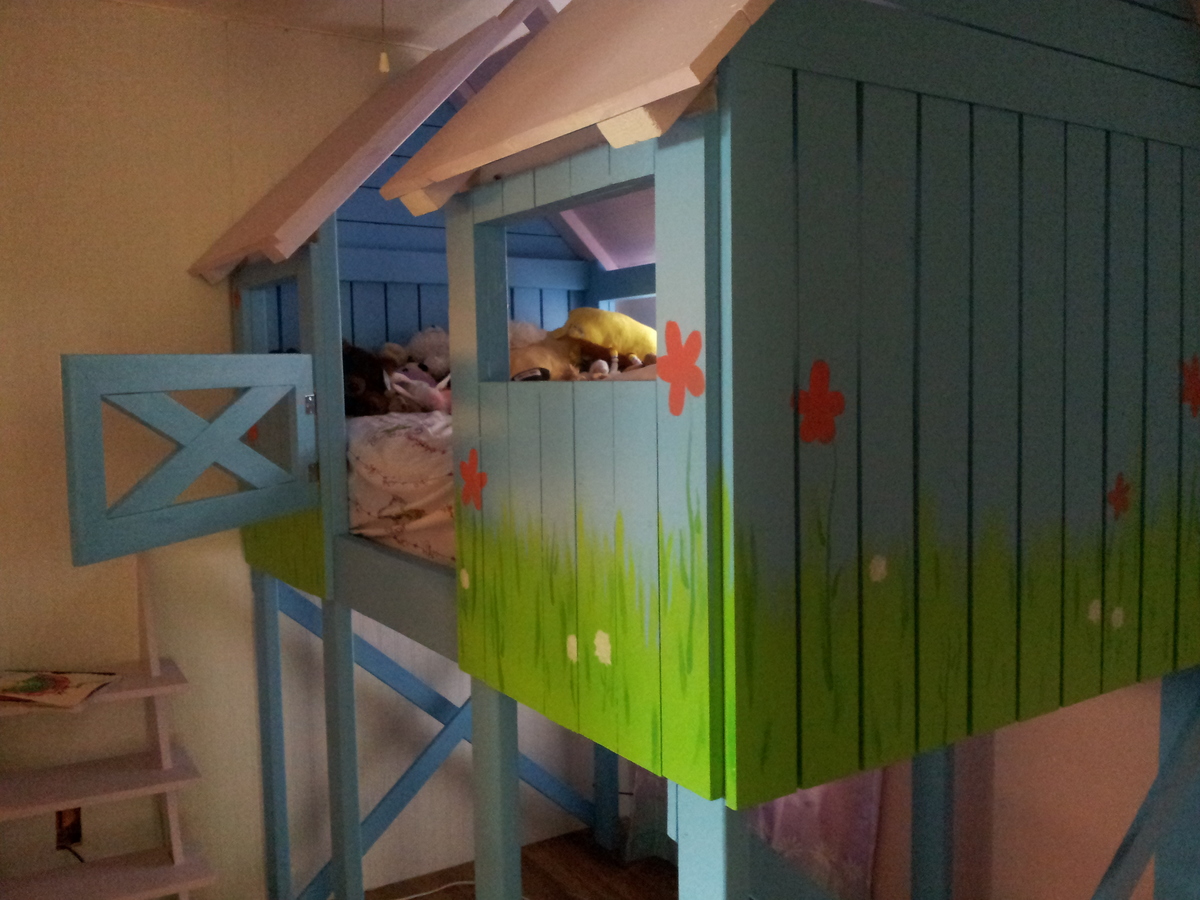
This took a little longer than a weekend and it helps to have some help because it is so big. I would cut the legs about an inch shorter if you have 9 foot ceilings, other wise it will scratch your ceiling when you tilt it up. I put the door on because I was worried about my 3 year old falling out. She loves it and it was fun to build.

Built from Plan(s)
Estimated Time Investment
Week Long Project (20 Hours or More)
Recommended Skill Level
Beginner

Comments

Whitewashed Cubby Media Wall

My husband and I built this for our son's bedroom using all five of Ana’s series of plans for the cubby wall system. We did pretty well, especially considering that it was our very first building project. We made the media component of the wall unit the same width as the two sides since we didn’t need it to fit a wide screen TV. My hubby was thrilled that the drawers went together beautifully. The doors turned out a little “off” -- luckily the room has a beach theme so this piece fits right in with the beach shack look!

Estimated Cost
Approx. $475
Estimated Time Investment
Week Long Project (20 Hours or More)
Finish Used
1) Minwax Water-Based Pre-Stain Wood Conditioner
2) Mixwax Water-Based Wood Stain in White Wash Pickling
3) Minwax Water-Based Polycrylic in Clear Satin
Recommended Skill Level
Intermediate

Comments

Guest (not verified)

Thu, 08/04/2011 - 01:55

Congratulations! It's gorgeous and an awesome organizational tool for the room...

Nicole Seaman (not verified)

Tue, 01/15/2013 - 17:20

Love your version of this! Very nice, especially with the white wash!
We've got our wood cut... now between unpacking, and caring for a newborn and his three siblings, I've gotta find the time to assemble!

My stainless steel kitchen island

Submitted by LRSinCA on Sat, 10/24/2015 - 22:36

I really do enjoy my island. It has great storage and the added prep space has been wonderful. With the added counter space It has aloud me to make breads and pizzas and with the stainless steel top it is a breeze to clean. I really have enjoyed Ana's website with all the great plans and tips. 

Built from Plan(s)
Estimated Cost
It was a bit more expensive because of the top. In total it was around $400.00
Estimated Time Investment
Week Long Project (20 Hours or More)
Finish Used
I used a primer and then the Red paint on all the wood except the inside of the drawers along with the stainless steel top which I love. I used a spray primer to seal all the wood and then I used my Paint sprayer for the Red. I then used a gloss poly spay for the top coat to give it a nice shine.The stainless steel top I had made here in the Oakland, CA area. It works great to prep on and roll out pizza rounds.
Recommended Skill Level
Intermediate

California King Farmhouse bed

Submitted by PhilCo on Wed, 11/11/2015 - 07:24

I had to make some adjustments to the size, because our new mattress is 180 x 190cm, and I had a couple of problems with the plan, it was probably me rather than the plan, but nothing that I couldn't overcome. The bed is pino (pine) purely because I couldn't get any other dry timber in Colombia, unless I won the lottery. 

The boards on the headboard panel, I pocket holed (using ordinary wood screws) as well as glued, to ensure they will not part in the future, and I used lag bolts to attach the base to the footboard.

The bed is a few inches taller than the plan, purely because my Wife wanted one of our dogs to be able to continue sleeping under the bed!

Unfortunately due to the small size of the room, the photos do not show the bed that well. The full build is on my Blog.


Now to make the night stands! 

Estimated Cost
1256956 COP / $430 US / £282
Estimated Time Investment
Week Long Project (20 Hours or More)
Finish Used
Matt Oak Varnish, I only used one coat, because we didn't want the colour to go any darker, I used sponge 'brushes' to apply the varnish on all the visible timber, the base and MDF was just roughly brushed on.
Recommended Skill Level
Intermediate

Now Germany has the Ana White Playhouse too

Submitted by Anonymous (not verified) on Tue, 01/01/2019 - 02:00

Thanks for the Plans Ana. Though we had to convert every number the plans helped us a lot. Our playhouse turned out really big: 8x8 foot. We had to include our heater under the window, so our tunnel is much bigger. It took us (three people) a half day shopping and two days and one night building and cost 600-700€. The kids where amazed when they opened the door a few days after Christmas.  We still think about adding some features like a slight or a bed...

Recommended Skill Level
Beginner

Modified shoe bench

Submitted by mdj1281 on Mon, 11/16/2015 - 05:06

In our new home there was a 46" wide coat closet at the entrance. My wife wanted a place to sit down, take off shoes and put our coats and backpacks when we were home. I found Ana White's plans for this shoe bench and modified it to fit our space. The project took 3 days to complete due to the painting, staining and polyurethane, construction of the bench itself was quick. Previously I added a light switch and two 3" LED recessed lights in the ceiling. The project came out wonderful and I am very pleased. Thank you for the inspiration!


-Mike

Estimated Time Investment
Weekend Project (10-20 Hours)
Finish Used
White semigloss paint (2 coats), Minwax Red Mahogany 225, Varathane Polyurethane semi-gloss (3 coats)
Recommended Skill Level
Beginner

Comments

Wooden Egg holder

Submitted by Lukilla on Fri, 09/30/2022 - 15:31

We've got a friend that basically supplies us with unlimited farm fresh eggs. The instant my wife saw this on ana-white she started asking me for one. Rounded over the holes with the router and rounded the corners of the sides. Took us about an hour total.

Combo of varathane special walnut and weathered oak stain on the finish.

Built from Plan(s)

Comments

Farmhouse Writing Desk with Turned Legs

Submitted by kwildman on Mon, 01/07/2019 - 08:53

I modified the Small Old English Style Farmhouse Dining Table plan to build a writing desk.   I used five 1x6 boards for the top for a width of 27.5 inches.   I made my desk 56 inches in length.  I put the drawer on the long side like a pencil drawer.   I did use the legs that Ana recommended in the plan.   I love how it turned out.  I used dark walnut danish oil and dark wax for the finish.  

Estimated Cost
225
Estimated Time Investment
Day Project (6-9 Hours)
Finish Used
I used Watco dark walnut danish oil and Minwax dark paste wax.
Recommended Skill Level
Intermediate

Comments

kwildman

Fri, 10/04/2019 - 21:46

Thank you!  I used Watco Danish oil and I used Minwax dark wax.  I've tried alot of different wax brands and I always come back to Minwax.  It dries the hardest in my opinion.

Floating Bunk Beds and Desk

This little girls room needed a little happy birthday!  I planked the wall with birch veneer, made simple box frames for the beds and desk, and attached them to walls with heavy duty cable.  Then my friend added her designer touch, and made it cozy and  girl CHIC!

Built from Plan(s)
Estimated Cost
$500
Estimated Time Investment
Week Long Project (20 Hours or More)
Finish Used
white paint
Recommended Skill Level
Intermediate

Double pedestal breakfast table and bench

Submitted by Lschnell19 on Sat, 09/21/2013 - 09:24

Thank you Ana for yout amazing plans for the triple pedestal table and bench! I modified it to work for the dimensions that I needed which brought it down to a double pedestal table and bench. It ended up as a 3'x5' table. I attempted the antique coffee stain technique but it wasn't taking so I just used the stain that I used on the table top instead of the coffee. I LOVE how it turned out!

Leah

Estimated Cost
$150
Estimated Time Investment
Weekend Project (10-20 Hours)
Finish Used
Primed the legs and then added two coats of latex paint. Sanded the edges and corners and then applied dark walnut minwax stain over the entire surface wiping it off quickly! For the top, I did two coats of dark walnut minmax stain. I finished everything off with two coats of polycrylic.
Recommended Skill Level
Beginner

Bunk Bed from Simple Bed, modified

My husband modified the Simple Bunk Bed plan by Margjack and built this bed on weekends over the last month. He first built the four head boards and then went on to design his own railing and ladder. I liked how Margjack created more height and identical beds, especially if/when we use them as individual beds instead of a bunk bed.

After priming and painting all pieces, we assembled the bed in our sons' bedroom. A slide show of the assembly can be found at:

http://vimeo.com/27997563

Estimated Cost
$300.00
Estimated Time Investment
Week Long Project (20 Hours or More)
Finish Used
Primed and then painted.
Recommended Skill Level
Intermediate

Comments

river4250

Sun, 09/04/2011 - 09:13

Looks amazing, and I'm totally in love with that color! Great choice.

Tregg Istre (not verified)

Wed, 02/15/2012 - 06:11

I was wanting to know if you could get me the plans to this particular bunk bed? We really like it very much!

Tregg

Wed, 02/15/2012 - 06:24

We are interested in building this bunk bed for our girls is there any way we can get the plans?

Margaret Kubiszyn (not verified)

Wed, 03/14/2012 - 06:22

Tregg - I just used the Simple Bunk Beds plan from Ana (http://ana-white.com/2010/01/plans-how-to-modify-the-simple-bed-to-a-bu…) which is a modification of her Simple bed plan (http://ana-white.com/2009/11/plan-by-request-simple-bed-twin-sized.html)
I further modified it by making 4 headboards instead of 2 headboards and 2 footboards. I fashioned a ladder attached perpendicularly to the side instead of an angled one.
If you look at Ana's plans it should make sense.

Guest (not verified)

Fri, 03/30/2012 - 20:07

I love this, and like others I particularly like the extra height created by doing 4 headboards instead of 2 footboards for the top bunk...my question, though, is how high are your ceilings? I am afraid that if I do this there won't be enough room for the person in the top bunk in our house! Yours looks like it fits just fine, though! :)

Patricia Mandli (not verified)

Sat, 07/21/2012 - 12:49

I LOVE this color! Do you remember (or could look at the can) the name of it and where you bought it? Thanks so much!

wotto

Mon, 03/17/2014 - 08:59

link from vimeo isn't working. Is it still available?

Recycling and Garbage Cabinet

Submitted by DIYMomof4 on Wed, 01/23/2019 - 15:16

We needed a place for our garbage/recycling bins that would look nice and was inaccessible to our dogs.  I decided to make two drawers for the bins and two drawers for storage.  I found a set of 10 drawer slides on Amazon for around $50.  They are heavy duty and full extension.  I measured our garbage bins and built to size.  The total height of the cabinet is 36" including the countertop.  The cabinet width is 35.5" and the depth is 20".  The butcher block countertop(25" by 48") was purchased from Home Depot for $98.  I only had to do a light sanding, router the edge, and apply a finish.  The cabinet will be located along a wall and have room for a counter height chair.  This will allow my youngest to have a snack while I work in the kitchen.  Although I didn't use a specific plan, I used ideas from several of Ana's designs.  Thank you for the inspiration Ana!        

Estimated Cost
$300, but I have leftover wood and drawer slides
Estimated Time Investment
Weekend Project (10-20 Hours)
Finish Used
The stain is a mixture of Varathane Traditional Cherry 3X and Minwax English Chestnut.
I used Waterlox sealer/finish VOC compliant on the whole cabinet. For the countertop, I only used the Waterlox. Waterlox is really beautiful, but you will need a respirator mask and plenty of ventilation.
Recommended Skill Level
Intermediate

Comments

Flip Top Storage Bench

Submitted by Linda7 on Tue, 10/01/2013 - 15:40

So my sister's house is on a rural, sandy lot. Did I mention sand...lots of sand. Her tile doesn't react well to sand-covered shoes , so they needed a place for guests to take off street shoes to replace them with spa booties. I offered to build them a storage bench for that purpose.
I modified the bench to make it shorter as per my sister's request. She also wanted the lower shelf modified to place a boot tray on it to catch the sand. I suggested replacing the lower shelf with rails to place the shoes on so the sand could fall off onto the boot tray. We nailed finish nails into the legs under the rails and slid the tray onto them. Now she can remove the tray easily to dispose of the...sand.
The finish on the body matches the mirror, which hangs above it. The lid of the bench was stained to match the finish on the doors, posts, etc. I used wrap around inset hinges from here: http://www.rocklerpro.com/product.cfm?page=5135&rrt=1
I checked this as a weekend project because of dry time for stain and poly.
Thank you, ANA for the awesome plans.

Estimated Cost
About $65
Estimated Time Investment
Weekend Project (10-20 Hours)
Finish Used
Minwax Express Color "Crimson" for body; Minwax "Ipswich Pine" water-based stain, followed by three coats of gloss poly for the top.
Recommended Skill Level
Beginner

XXL Dog Crate

When we made the decision to get a Great Dane puppy, we knew she would need to be crate trained.  The idea of a metal XXL crate wasn't terribly appealing so my wife suggested I build a piece of furniture.  My skills are above beginner level but I had never built a piece of furniture.  I started with the dimensions for the metal crates (54"L x 37"W x 45"T) and put pencil to paper.  We agreed we wanted somewhat of a rustic look for the finished crate.  I decided to use pine 1×4's, 1x3s and 1x2s, pinned and edge glued together.  For ventilation I chose the black metal banister rails.  The bottom of the crate is a sheet of sub floor covered with sheet vinyl.  I lined the inside of the crate with hardware cloth to deter chewing on the wood.  The top is made of tongue and groove carsiding, I had left over from another project.  The 4 sides are finished in Dark Walnut Stain.  The top has the same stain plus 3 coats of Satin Urethane.

Estimated Time Investment
Week Long Project (20 Hours or More)
Finish Used
Sand sealer ( 2 coats), Dark Walnut Stain ( 1 coat brushed on using foam brush and wiped off with a rag) Satin Urethane on Top only ( foam brush applied, let dry overnight, light hand sanding with 220 grit wet/dry, repeated then 3rd and final coat was applied.)
Recommended Skill Level
Intermediate

Twin Storage Beds with corner unit

When we moved into our new house, I figured it was time to replace my girls's mattresses on the floor with actual beds. so I set about making the twin storage beds with corner unit. I primed all the wood prior to cutting and assembling, and that made things go much faster. Assembling the corner unit was tricky, since i really didn't want to have sanding and much paint in their bedroom. (i loaded in the beds first and the corner unit a week later). I added trim that wasn't on the plan, and also used the magnetic paint on the center area, although it makes a weak magnetic surface. All in all, I LOVE the way it turns out and no one can believe that I built it and didn't buy it... (although it seems obvious to me when you look closely LOL)

Built from Plan(s)
Estimated Cost
~$500?
Estimated Time Investment
Week Long Project (20 Hours or More)
Finish Used
paint
Recommended Skill Level
Intermediate

Comments

tannisg

Fri, 11/04/2011 - 11:42

It looks great, and I love what you did with the walls! Free hand with paint, or decals? Either way, its darling and clearly gives each girl her own space.

We have the same lamps - quite popular :)

I am trying to figure out a clever way to put three girls in a (huge) room and I think something like this or a bunkbed combo would make it fun and new for them..

Guest (not verified)

Sun, 01/08/2012 - 18:36

Where can I find the plans for the top half of the corner unit.? Your beds are exactly what I want for my girls. Thanks for sharing.

2x4 sectional

Submitted by Anonymous (not verified) on Sun, 02/26/2023 - 05:49

After building my workbench and some shelves to organize my makeshift wood shop, I went online to find practical first projects. Stumbled upon the Ana White site and really liked the simplicity of the pieces and the thoroughness of the plans (cut list, pictures, etc). Had the wood dimensioned at a local lumber yard and started building. Upon completing the first bench - sealed with a tinted Thompson’s water seal - found a local upholster to make the cushions. Now to find a place to put them that the wife approves. Build already approved by the pup (see last photo).

Comments

Seasonal And Holiday

Community Garden Farm Stand

This spring, my neighborhood started a community garden.  Five families came together to break ground, sow, tend, and give away our produce.  The local church close by allowed us to use their front lawn for the "Lakeside Community Garden," located in Duluth, MN.   Every Saturday during harvest season, we gave away our produce to the community.  I took on the project of building a farm stand.  One of our neighborhood families donated re-claimed lumber to the cause, and I started building.  I had research many farm stands on-line, and knew I needed two large boxes to hold the veggies, as well as a sign to indicate what produce we were giving away.  

Estimated Cost
$free!!! Use what you can re-claim, and design your own stand.
Estimated Time Investment
Day Project (6-9 Hours)
Finish Used
none
Recommended Skill Level
Beginner

Board & Batten Banquette

My family needed a seating area for our tiny kitchen and a built-in banquette solved our spatial design problem perfectly! I basically built it like a short and wide freestanding wall with a board & batten design and plywood top for seating. More details on my website post...

Estimated Time Investment
Weekend Project (10-20 Hours)
Finish Used
board & batten with latex paint
Recommended Skill Level
Intermediate

Comments

Deck Furniture with only 2x4s

Submitted by Anonymous (not verified) on Fri, 05/05/2023 - 16:45

We have gone through several sets of deck furniture at our home in Monument, Colorado. We like wicker, but so do the squirrels! Inspired by an article in the Wall Street Journal where the author used his wood shop experience to make outdoor furniture and avoid "astronomical prices," I found this site. I thought, "Even I can build something out of 2x4s." I borrowed my neighbor's high-end chop saw and made two chairs, a love seat (by cutting the dimensions of the 79" sofa - three cushions - down to 55" - two cushions, and the coffee table, cut down from 55" to 47". Construction took less than two weeks from purchasing the wood to finishing. Everyone who has seen the finished set loves it.

Comments

Ana White Admin

Sat, 05/06/2023 - 07:41

Love your spirit and attitude to do it yourself! Thanks for sharing, it looks amazing and should last and last.

Seasonal And Holiday

Zebra shelf

Submitted by Lady Goats on Tue, 01/10/2012 - 11:11

When I saw Ana post this shelf to Facebook, I stopped what I was doing and got to building it. I think it was about 3 hours after she'd posted it that I had this thing built and ready for the first coat of paint (and I cooked dinner during that time). It's perfect for the big kid's jackets/backpack/shoes when she comes home from school (I hung it at kid's console table height so she can hang her stuff and access the top). So far it's worked perfectly, and she just LOVES it.

Built from Plan(s)
Estimated Cost
$3.20 for the hooks
Estimated Time Investment
An Hour or Two (0-2 Hours)
Finish Used
Lowe's super cheap-o spray paint (like $0.98 per bottle) left over from another project, and zebra pattern painted on with acrylic paints/sealed with poly.
Recommended Skill Level
Beginner

X Base Farmhouse Table and Benches

modeled after the Restoration Hardware Salvage Wood X Base Table which at this 8' table listed for $3395 just for the table. LOL

Used the Fancy x farm table plans and used all 4 x 4 on table, and followed plans for benches with 2x4

Estimated Cost
350
Estimated Time Investment
Week Long Project (20 Hours or More)
Finish Used
First stained with special walnut let dry, and then coated with weather grey, poly finish
Recommended Skill Level
Intermediate

Comments