Community Brag Posts

Farmhouse End Tables from Ana's Book!

Submitted by ksmith311 on Fri, 04/25/2014 - 10:48

I made two of these farmhouse end tables for a friend/client. She wanted them to be very light gray when painted. I went to the blue store to get some paint mixed and waited... and waited.. and waited... and couldn't find anyone for the paint section. So I eventually just mixed it myself. It does have a bit of a bluish hint to it but I think they are very pretty.

These were a fun build and probably the best drawers we have ever made but we did have to use wooden guides on the inside to be sure it will close perfectly.

I hope she loves them!

Built from Plan(s)
Estimated Cost
100 for two
Estimated Time Investment
Weekend Project (10-20 Hours)
Finish Used
light gray paint
Recommended Skill Level
Intermediate

Chaise Lounge Chair

Submitted by dsipe on Mon, 05/18/2020 - 13:34

This took way longer than anticipated. I didn’t account for how much time would go into sanding, priming and painting the wood. Also, the plans were changed to use 2x6’s but didn’t take that into account for the stop block. Still trying to figure that part out when fully reclined. Other than that, it turned out really good.

Estimated Cost
$65
Estimated Time Investment
Weekend Project (10-20 Hours)
Recommended Skill Level
Intermediate

Farmhouse storage platform bed

Submitted by Anonymous (not verified) on Sat, 05/23/2020 - 20:01

Fellow Alaskan here!
Wood and screw Materials costed $320
The metal storage buckets are outdoor drink buckets from Home Depot $200 for 8 of them!

There are 4 storage buckets on each side! We took this from your farmhouse plan and altered it for king size. And in after thought he made a baby co-sleeper to match, 30$ to make!

Estimated Cost
$550
Estimated Time Investment
Weekend Project (10-20 Hours)
Finish Used
Weather gray stain
Watered down white paint
Poly on top!
Corrugated rusted metal is restored from a local barn that was getting torn down.
Recommended Skill Level
Intermediate

Comments

Pony wall work bench

Submitted by Anonymous (not verified) on Wed, 06/10/2020 - 09:22

Had to shorten plan due to garage size. Added drawer under miter station. Pined weather wash.

Built from Plan(s)
Estimated Cost
$450
Estimated Time Investment
Weekend Project (10-20 Hours)
Finish Used
Pined
Recommended Skill Level
Intermediate

Garden Shed

Submitted by Deborah on Sat, 08/18/2012 - 23:01

I have been dreaming about building so many things featured on this website, and I finally buckled down and built something. I figured that an outside garden shed would be a bit more forgiving than a project requiring a bit more precision, and from the picture, you can see that it's not perfect! I'm still working on trimming the shingles and I still have to stain/seal it. I've got to admit, when I first picked up the wood for the project at the store, I wondered what I had gotten myself into. But I just jumped in, and here it is.

Built from Plan(s)
Estimated Cost
$300
Estimated Time Investment
Weekend Project (10-20 Hours)
Finish Used
Plan to stain it with some sort of deck stain.
Recommended Skill Level
Beginner

Comments

Double dog coffee table crate

I LOVE the way this turned out! I used truck bed liner for the floor and the sides because one of the dogs is still a puppy and truck bed liner is TOUGH and waterproof (in case of accidents)! I made one side of the crate huge and one side small to match the size of our dogs. The really nice thing is that you can't tell by looking at it that it is two different sizes inside. This looks so much better than those ugly wire or plastic crates.

Built from Plan(s)
Estimated Cost
$85
Estimated Time Investment
Weekend Project (10-20 Hours)
Finish Used
I primed all of the wood except the lid. On the interior I sprayed truck bed liner over the primer. On the outside I used Beyer high gloss "parchment paper" color. (I used high gloss so dog dirt, dander and fur would be easy to wipe off). I used Minwax wood prep first and then I stained the top with Minwax espresso. It took about 3 coats of stain to get the color I wanted and 2 coats of paint after the primer.
Recommended Skill Level
Beginner

Comments

Laundry Sorter

I was tired of having my laundry piled on my garage floor. These plans were the perfect solution. It fits great in the small space I had next to my washer. And it was so easy. I was able to do it all by myself. My husband just had to catch the plywood for me when I ripped it. I was able to find the baskets on the plans at Target and used left over paint from my sons' playroom. My laundry is now always sorted, making it much easier and faster to clean.

Estimated Cost
$60
Estimated Time Investment
Day Project (6-9 Hours)
Finish Used
Water based paint in eggshell finish. Since this was going to be in the garage I just used leftover paint. If it would have been used anywhere else, I would have used a semi-gloss.
Recommended Skill Level
Beginner

Outdoor Umbrella Stand

This was such and easy project. It went together in a few hours. The hardest (and most time consuming) part was finishing it. I detailed the build process on my blog if you'd like more info.

Built from Plan(s)
Estimated Cost
$30
Estimated Time Investment
Day Project (6-9 Hours)
Recommended Skill Level
Beginner
Seasonal And Holiday

Perfect End Table

Submitted by coolove on Sun, 06/29/2014 - 20:46

Just a little something to go in the dining room. I like the look of it. If I find another need for one I would definitely make this again accept use a different stain and paint the base white and use a semi-gloss or gloss protective finish.

Built from Plan(s)
Estimated Cost
$26
Estimated Time Investment
Afternoon Project (3-6 Hours)
Finish Used
Varathane Dark Walnut (2 coats) and Minwax Polycrylic Satin Clear Finish. 3 coats for the top and bottom shelf and 1 coat all over.
Recommended Skill Level
Beginner

Kitchen Island

Submitted by bbomer on Tue, 09/04/2012 - 18:41

I built this island using Ana's base cabinet plans. I simply added a face frame to all the sides because they are all visible. My wife drew up the plan that includes open storage at one end and an overhang at the other to provide room for a stool. We bought the butcher block top online. It comes unfinished, so we had to sand it down smooth and treat it with mineral oil.

Estimated Cost
Approx. $500
Estimated Time Investment
Week Long Project (20 Hours or More)
Finish Used
Danish Oil + Shellac + Latex + Minwax Polycrylic
Recommended Skill Level
Intermediate

Comments

Kathy in Pittsburgh (not verified)

Wed, 09/05/2012 - 09:55

I'm in love....this is gorgeous! You both should be very proud of how it turned out. Now, if only my kitchen weren't so small that I can touch both opposite countertops with my arms spread out.....I would build this in a heartbeat! :P

Blinky114

Thu, 11/06/2014 - 09:25

As Kathy in Pittsburgh said, .."this is gorgeous!" I too would be building this if my kitchen were nearly large enough to accommodate it.

Thanks for posting this, it gives me inspiration.

Mark in Portland, OR

mpullan

Sat, 11/25/2023 - 14:23

Pretty much what my daughter wants. I’ll have to be looking at yours a bit to figure out the open shelves. Thanks for posting!

DIY #1 Shelf

Submitted by katie0910 on Thu, 07/03/2014 - 08:53

I built this PB Teen-inspired #1 shelf for my oldest son's bedroom. He has an all-star theme going on in there, so I knew this would be perfect for him. I modified the plans a bit and used standard 1" boards, rather than plywood. I am planning to hang it on his wall and I wanted to be able to have a sturdier shelf to do so.

Built from Plan(s)
Estimated Time Investment
Afternoon Project (3-6 Hours)
Finish Used
Glidden paint in Onyx Black
Glidden paint in Sunflower
Recommended Skill Level
Beginner

Master Closet For My Wife

Submitted by Indy69 on Mon, 10/17/2016 - 17:10

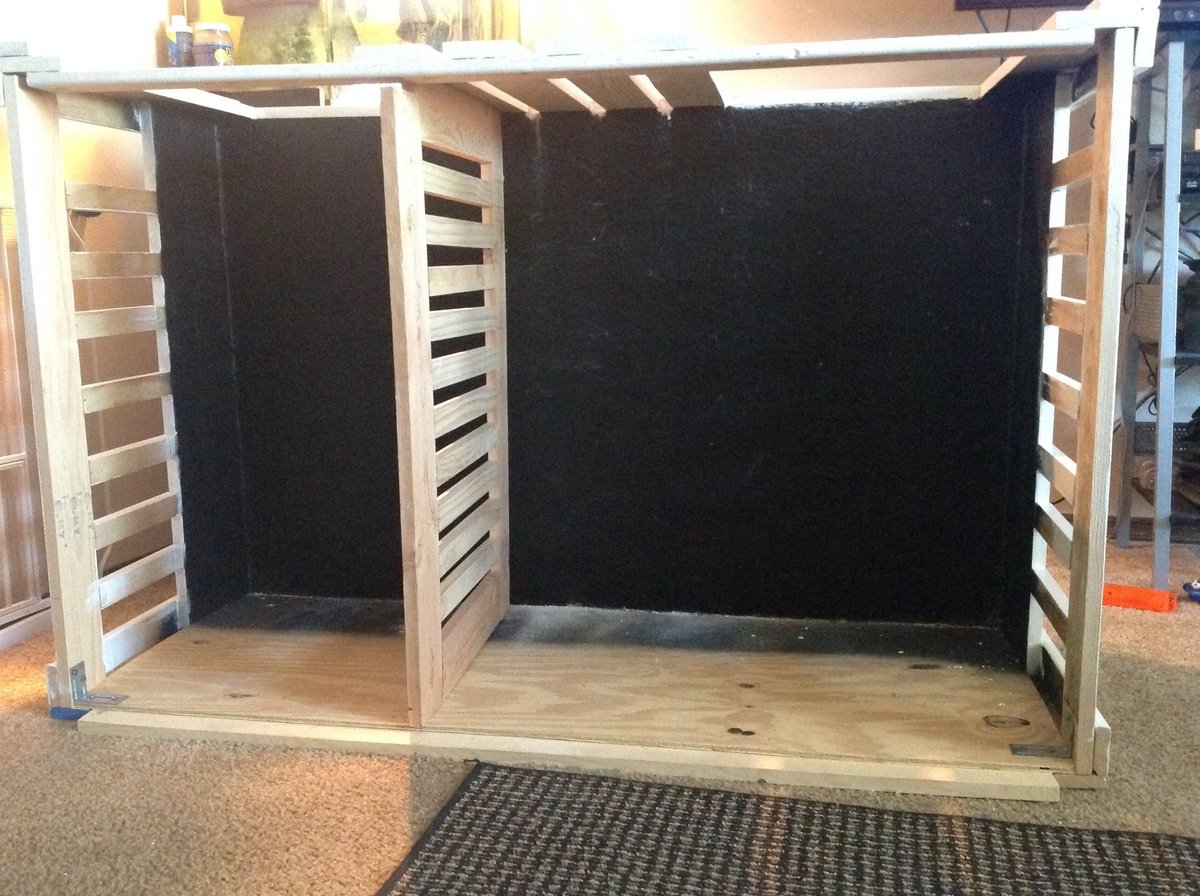
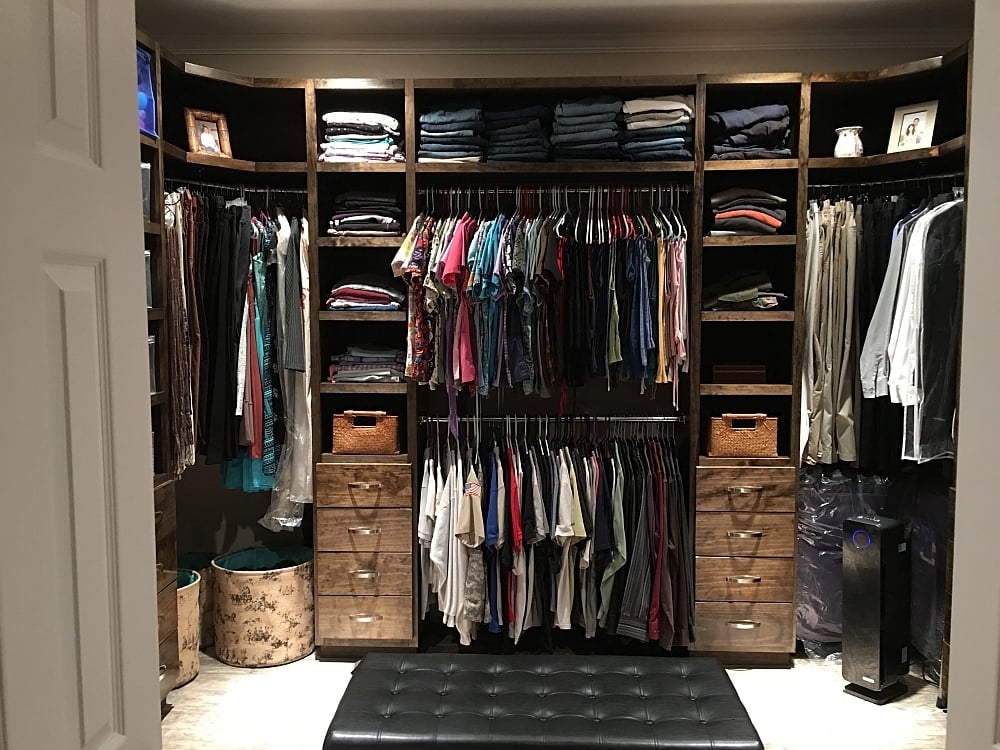
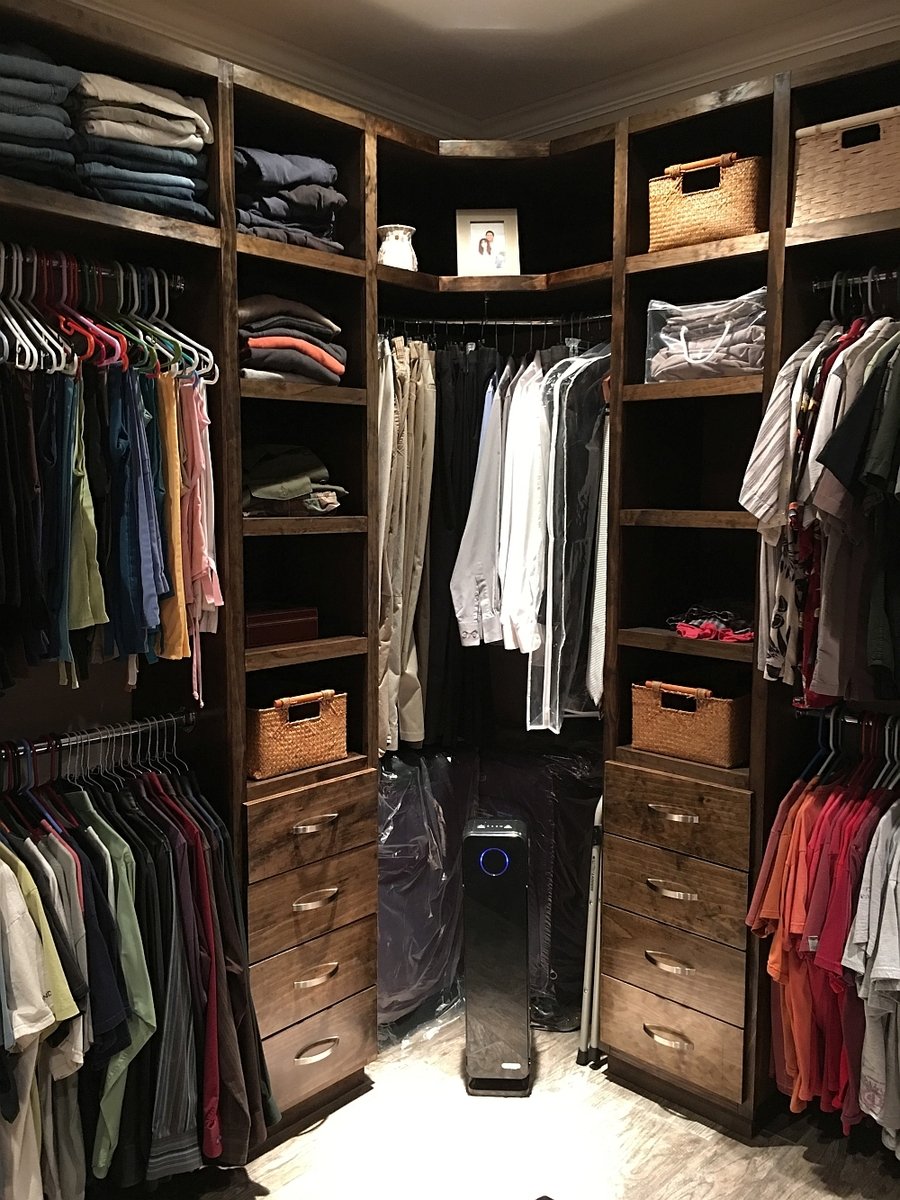
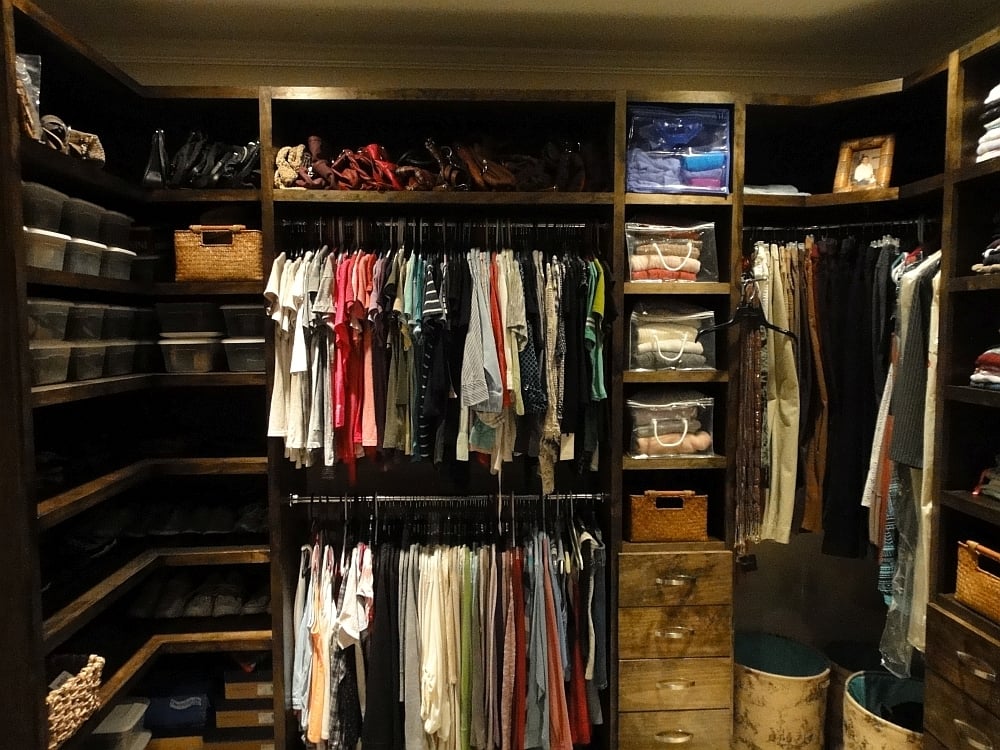
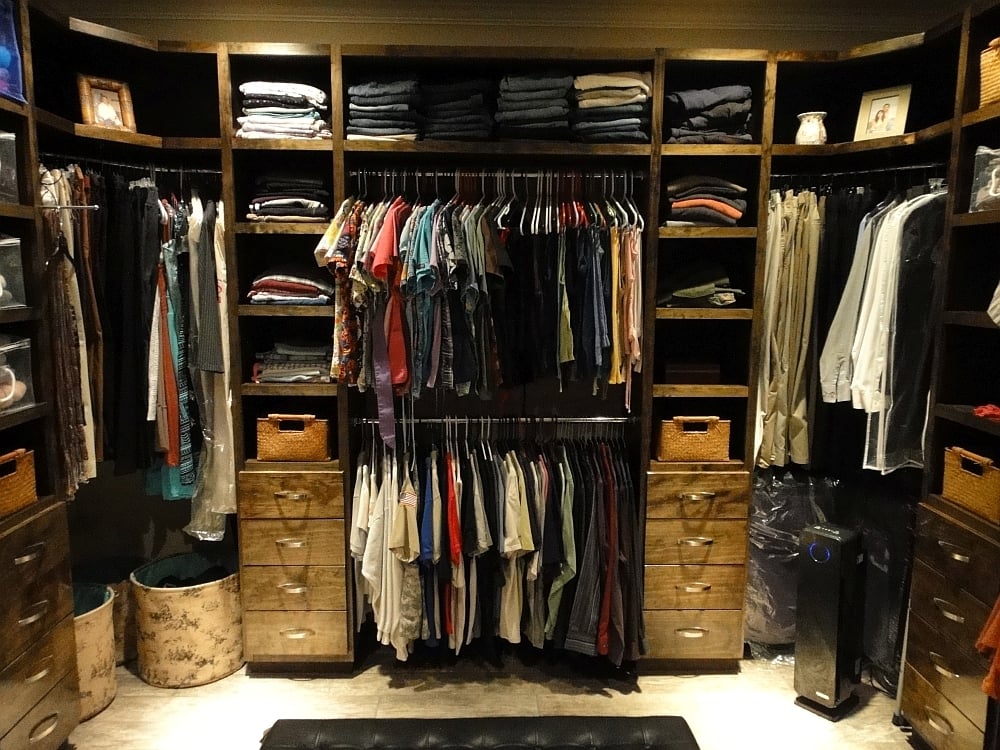
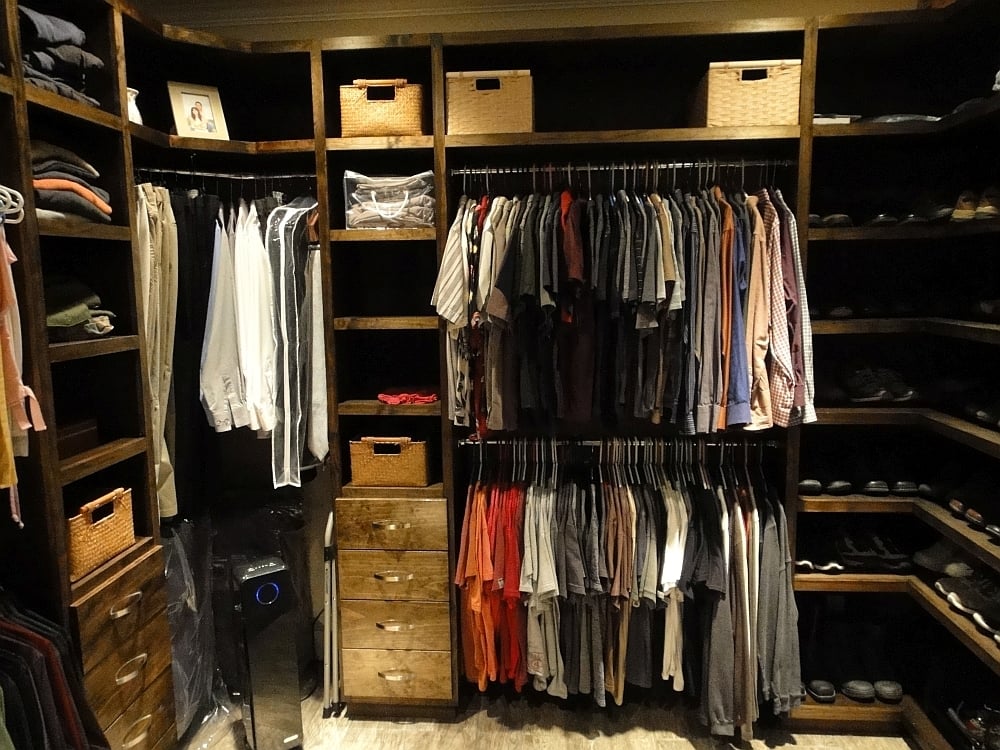
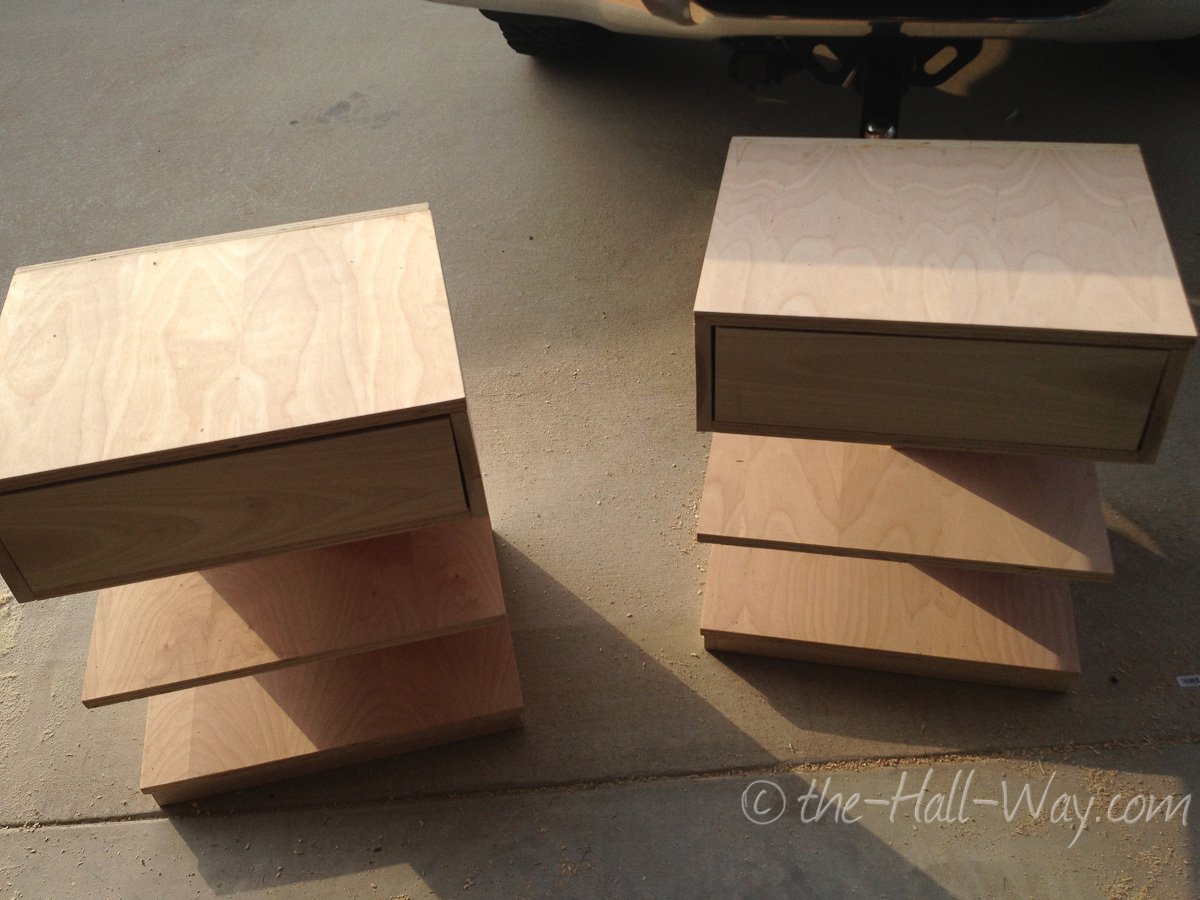
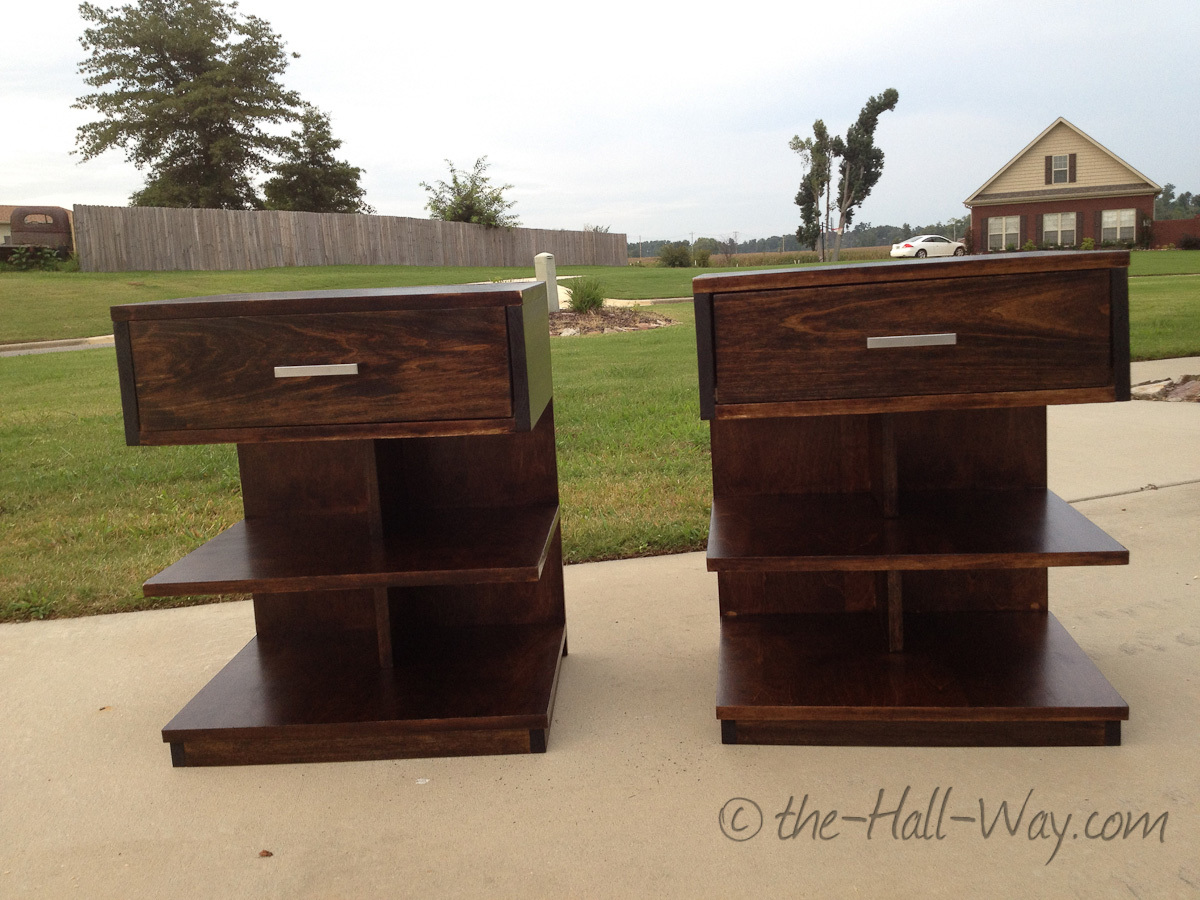
I expanded on the plans I found at Ana White and made this closet.  They are 8' high, and made from Birch plywood and 1x2's from my local Home Depot.  I ended up using 12 sheets of plywood and 18 1x2's.  Sanded and stained with Minwax Jacobean and Satin clear on the unit and semi-gloss on the drawers.  I intalled soft-close drawer slides that I found on Amazon for $120 for 15 pairs which included the rear mounting brackets, which I highly recommend using as they save you a ton of labor and make it much easier to install the slides. 


What I like most about my work, is that I found regular hanging rods that were too expensive or just plain did not fit the end sockets.  I used galvanized fence rod typically used for the top of chain link fences, and simply brushed them with 0000 steel wool and then polished them on my buffing wheel.  If you want the brushed look, simply don't buff them.  What was best about using fencing rods, was that it cost about a dollar a foot and was much stronger than buying the actual chrome rods which were over three times more money.


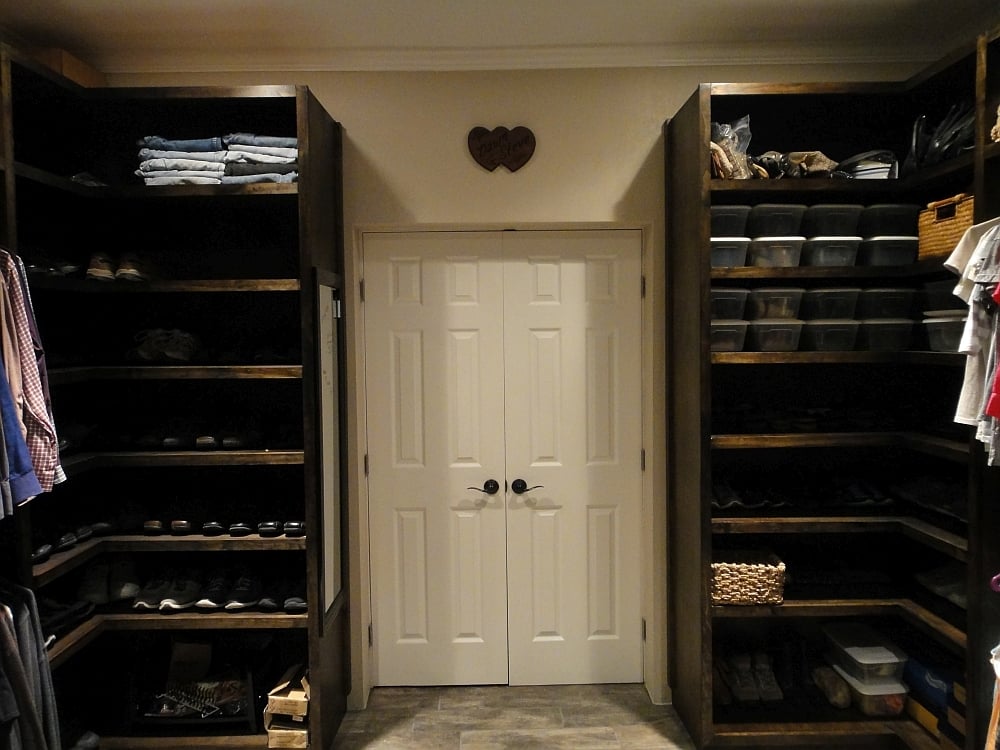
For the corners, you will see that they are three angled rods, which you can not buy anywhere.  So, I purchased 1" galvanized electrical conduit. and bent it with a tubing bender.  I simply measured what I needed, and put two 45 degree bends in the rod, installed 1" sockets on each end, and a center rod support for the middle.  These two were polished with 0000 steel wool and then polished to a chrome finish.  They look amazing, and the best part is that it cost $6 for a ten foot piece, which was more than enough to do both corners.  You cannot beat the cost of using fence rods and electrical conduit for closet rods. 


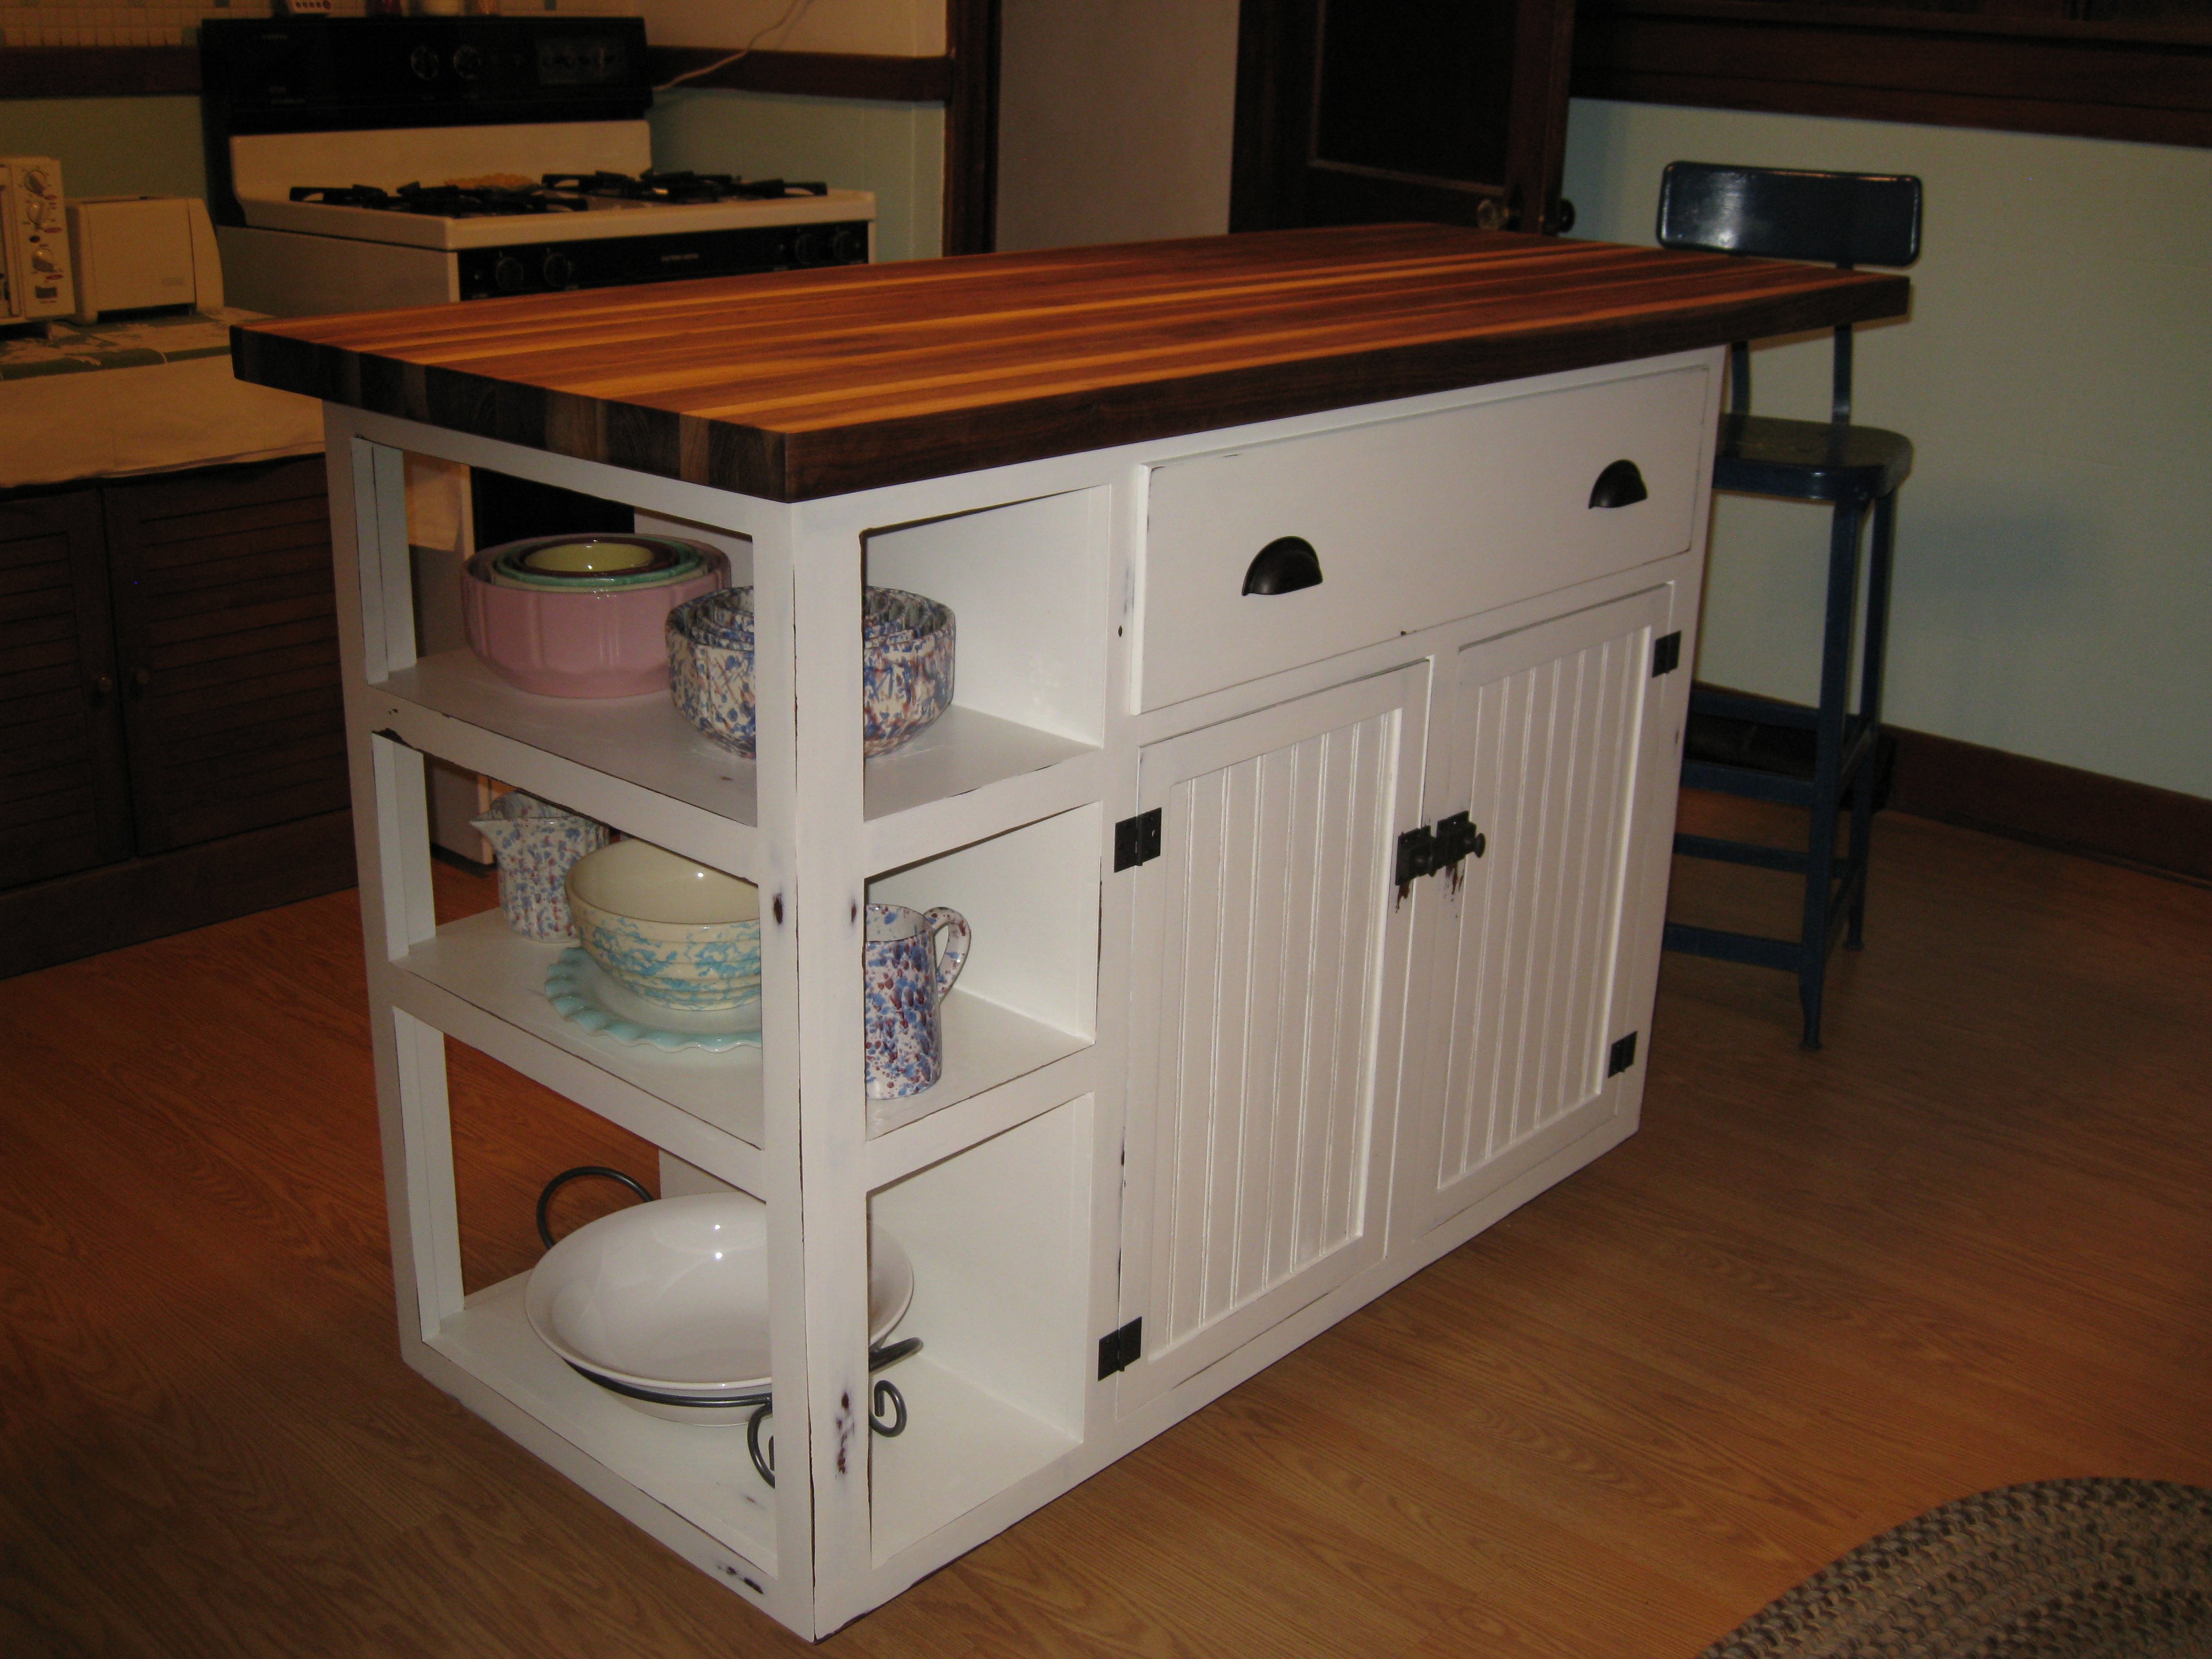
I plan to install a small drawer island in the middle later as I require a need for more drawere space. 


Thanks to Ana White for the help.  I already have a few more next projects lined up using her ideas here.

Estimated Cost
Under $1000 for everything
Estimated Time Investment
Week Long Project (20 Hours or More)
Finish Used
Minwax Jacobean with satin and semi-gloss
Recommended Skill Level
Intermediate

Comments

Rustic X Coffee Table

Submitted by Anonymous (not verified) on Tue, 10/25/2016 - 19:11

I had already built the Rustic X End Tables, and 3 years later I finally built the Rustic X Coffee Table to match!  I shorted the length by 8" and coated the whole piece in a steel wool and vinegar solution.  I then went back and used White Adirondack chalk paint by Folk Art for the base.  I sanded the edges lightly for the distressing and put 3 coats of Minwax Matte Polyurethane over the entire piece for the top coat.  I ended up putting 2 large wicker baskets underneath for extra storage and it is perfect!

Built from Plan(s)
Estimated Cost
$60-$100
Estimated Time Investment
Weekend Project (10-20 Hours)
Finish Used
Steel wood & Vinegar, White Adirondack chalk paint by Folk Art, Minwax Matt Polyurethane
Recommended Skill Level
Beginner

Coffee Bar

Submitted by eddingsr on Mon, 10/31/2016 - 10:56

I modified this plan to fit a 27"x 25" chunk of butcher block that my mother-in-law gave me. The finished height is 36 & 1/2". I didn't have any special tools to make the notches for the shelves. I simply lowered the blade-stop on my 7&1/4" miter saw and fastened the screw with hair ties (or in other words, I jimmy-rigged it ;)). I practiced on scrap wood until I reached the depth I needed. There is a 9&1/4" clearance between both shelves, and the shelves have a 1" overhang off the sides. I mainly used pocket holes to connect the pieces. The shelves (3-2x6s each) were fastened together with wood glue and pocket holes, then I slid them into place and screwed them into the side aprons/supports from the top, then filled with wood filler. For the top, I added support from underneathe (2x2s that I had on-hand), then used 2&1/2" screws from underneathe through the 2x2s into the butcher block. At first I used zinc wood screws, but learned quickly that they strip extremely easily, so I switched to sheet rock screws. Fun project!!

Built from Plan(s)
Estimated Cost
$35 in lumber, not counting the butcher block top which I got for free from my mother-in-law.
Estimated Time Investment
Weekend Project (10-20 Hours)
Finish Used
For the butcher block, I decided to stain it since it would not be coming into contact with food. I sanded the butcher block with 220 grit sandpaper with my orbital sander. For the rest of my project I first used 80 grit, then 220 grit. Then I applied pre-stain wood conditioners overall, then Minwax provencial stain (I left it on for about 3 minutes then wiped it off). Then I used two coats of polyeurethene, sanding with 400 grit between the coats.
Recommended Skill Level
Intermediate

Folding Work Bench

Submitted by Anonymous (not verified) on Tue, 08/11/2020 - 16:03

First build.

The plans and cut list were a tad off but I made a saw guide a cut it down from 36 to 24 after assembled.

I had HD do all my cuts but have since done my own!

Built from Plan(s)
Estimated Cost
Not sure bought tools, wood and hardware at same time ($160)
Estimated Time Investment
Afternoon Project (3-6 Hours)
Finish Used
None
Recommended Skill Level
Beginner

Argie Bedside Table (Nightstand)

Submitted by thehallway on Sat, 10/27/2012 - 07:56

I built this bed for the guest room at our previous house. The room was small, so I made floating shelves for the nightstands to save space. We have since moved and are now renting, so we didn't want to put holes in the walls to hang the shelves. I took the opportunity to build these nightstands instead. The original design was a little too tall and wide, so I reduced those dimensions by 3". This was my first time building drawers, but they went together surprisingly well. I had used a combination of stain on the bed and was worried about matching it, but 2 coats of Minwax Dark Walnut ended up being a pretty close match.

Built from Plan(s)
Estimated Cost
$75
Estimated Time Investment
Day Project (6-9 Hours)
Finish Used
2 coats of Minwax Dark Walnut & Poly
Recommended Skill Level
Intermediate

Comments

Gray Farmhouse Console Table

Submitted by boneill on Mon, 08/17/2020 - 18:56

Happy Fall Y’all. Love the Gray / White Farmhouse Colors. I can share the plans I modified for this build if anyone wants to build their own .

Built from Plan(s)
Estimated Cost
$50
Estimated Time Investment
Day Project (6-9 Hours)
Finish Used
Gray Stain, White Paint
Recommended Skill Level
Beginner

Comments

dheald

Sun, 09/06/2020 - 07:05

Hello! This looks great and it’s exactly what I’m looking for in an alternative build. Would you be willing to share the plans with me?

Thanks!

Seasonal And Holiday
Back