Community Brag Posts

Counter height planter

Submitted by h.abbott on Sat, 05/11/2013 - 18:40

We needed extra garden space this year and I thought adding one of these planters would be a great addition. So far it has. It allows me to easily weed, which is my most despised gardening job. Added bonus that the dog can't dig it up, and bunnies can't nibble on my plants. It also makes a great art canvas for my son's chalk drawings.

Estimated Time Investment
An Hour or Two (0-2 Hours)
Recommended Skill Level
Starter Project

Comments

Janettx

Fri, 05/31/2013 - 04:25

Great job, glad you were able to follow my lame attempt at giving instruction! beautiful job!

pattyf50

Wed, 04/20/2016 - 12:55

Hi I live in north Dakota we get about 10 ft of snow every January, I am planning on making the counter height garden boxes, but how do I keep the snow in winter from crushing them. Patty

pattyf50

Wed, 04/20/2016 - 12:55

Hi I live in north Dakota we get about 10 ft of snow every January, I am planning on making the counter height garden boxes, but how do I keep the snow in winter from crushing them. Patty

Mini Farmhouse Bedside Table

Submitted by danicarby on Tue, 05/14/2013 - 06:59

I built these side tables with a friend. We under estimated the time it would take by a long shot! We estimated that with the both of us it took 15+ hours to complete. We spent $120 on all the wood, paint and hardware for both. It was a lot of work and the most time consuming part was the finish (sanding, painting, sanding, painting, clear coat, sanding, clear coat, sanding, clear coat). In the end, it was worth it! They turned out so cute!

Estimated Time Investment
Weekend Project (10-20 Hours)
Finish Used
Creme Spray Paint, Ebony Minwax Stain for top and shelf, and Spray Polyurethane. We sanded in between all the layers for a smooth finish.
Recommended Skill Level
Intermediate

Comments

Dog food storage bench

Submitted by DianeS on Wed, 03/09/2011 - 13:30

This project came from a plan I recieved when I bought my kreg jig, not sure of it origins, it was awhile ago. I needed a place to hide dog food, biscuits are on the left and food on the right!

Estimated Cost
75.00
Estimated Time Investment
Weekend Project (10-20 Hours)
Finish Used
I used the minwax goldon oak with a poly clear satin.
Recommended Skill Level
Intermediate

Red Hen Home's Narrow Cabin Dresser

This was my first project with drawers, and I learned through sad experience how important it is to have ULTRA straight boards to begin with! I am grateful for things like itty-bitty washers to help correct things that aren't quite straight enough. More info on my blog!

Estimated Cost
100
Estimated Time Investment
Weekend Project (10-20 Hours)
Finish Used
Top and shelf are a custom mix gray-brown stain. Red Valspar paint for the body, glazed with ebony stain.
Recommended Skill Level
Intermediate

Comments

IraqTANKER4thID

Mon, 10/21/2013 - 10:47

I had to use Full Extension slides instead of regular euros because of the seam for the drawer bottom being right in the middle of the mounting holes. Now my drawers are not quite mounting the correct way. I have learned a lot of painful lessons on this one. Man.

Very first project - planter boxes

Submitted by Howegirl on Sun, 05/26/2013 - 09:25

My very first woodworking project. I learned a lot. Most importantly, to watch my cuts more carefully. Also, a good stain and stencil dress up anything. I used braided jute for handles and love them!

Estimated Time Investment
An Hour or Two (0-2 Hours)
Recommended Skill Level
Starter Project

Comments

Kids Adirondack chairs

Submitted by Anonymous (not verified) on Tue, 10/05/2021 - 04:46

This was my first time building a chair. The plans were so easy to follow. The kids size fits an average child up to about age 5 or 6. If I were to build again I would add a bit of height to the backs so they could fit them even longer. My granddaughters aged 3 & 5 just loved them.

Built from Plan(s)

Outdoor Storage Bench/ Coffee Table

I love this storage bench!  I modified the cut sizes to make it a coffee table also.  I made it shorter and thinner.  Now I can put my feet up on it, put a drink on it, and store some toys or garden tools in it!  You can check out modifications by clicking here.  Thank you Ana for the great plans!

Estimated Cost
$45
Estimated Time Investment
Afternoon Project (3-6 Hours)
Finish Used
Spray paint and spar urethane spray
Recommended Skill Level
Beginner

Potting bench

Submitted by DianeS on Wed, 04/06/2011 - 14:04

I used the plan for the simple potting bench, but because I had  a lot of reclaimed wood, I used well supported 1x4's instead of 2x4's, simply because I had an abundance.

Built from Plan(s)
Estimated Cost
10.00 for screws and the potting bin
Estimated Time Investment
Day Project (6-9 Hours)
Finish Used
just sanded a lot.
Recommended Skill Level
Beginner

Comments

Octagon table

Took about 1 week to finish the project. I like the overall result.

Instead of using pocket hole to join the top, I use dowel and glue to join the board together. Clamp the top in sections then combine 2 large piece together. 

using the speed squre to create the 45 degree angle and use the circular saw to cut out the angled section. 

I used the table saw to cut off the round edge on 2x2 to create smooth Table apron.

Use wood filer to fill all the crack and hole from brad nail/joint. 

apply 2 layer of stain. allow it to dry overnight. Then Thin out poly with minaral Spirit to wipe on 4-5 layers.

sand finish in between with 330 grit paper

Estimated Cost
300
Estimated Time Investment
Weekend Project (10-20 Hours)
Finish Used
Min-wax Red Mahogany with 4 layer of Min-wax polyurethane
Recommended Skill Level
Intermediate

Full size Murphy Bed

Submitted by Hartung26 on Wed, 06/26/2013 - 20:07

Used the plans for the twin bed, just added the difference in mattress size to the measurements. Pretty simple really. Used a cam lock centered above the door and a sawtooth picture hanger on the inside as a locking mechanism.

Estimated Cost
$275
Estimated Time Investment
Week Long Project (20 Hours or More)
Finish Used
WinMax English Chestnut
Recommended Skill Level
Intermediate

Comments

spiceylg

Thu, 06/27/2013 - 12:16

Been thinking of building one of these. Yours looks beautiful, nice job!

campbelllsara

Tue, 09/30/2014 - 14:16

Hello,

I have been scowering the internet... I too would like to have my murphy bed raised off of the ground and be a full size murphy bed.  But everytime I try to do "adjustments" and get "creative" it ends in disaster.  I am better at following instructions.  Is there anyway that you could give me the exact measurements for your fullsize bed and let me know how it is that you propped the bed up at the end?

[email protected]


Thank you.

Hall Tree and House Number Plantr

Submitted by tpsully225 on Sun, 12/26/2021 - 17:52

Hi Ana, I recently made two of your posts. First, the 2”x4” hall tree and then the house number planter. We found some unique hooks at Hobby Lobby for the hall tree. This is great to keep the kids’ backpacks off of the floor. On the house number planter I stained it with Antique Beige, but is more gray than beige. I then put 3 coats of spar urethane on it to protect from the TX sun.

Comments

DIY LP Vinyl Record Storage Box with Wheels

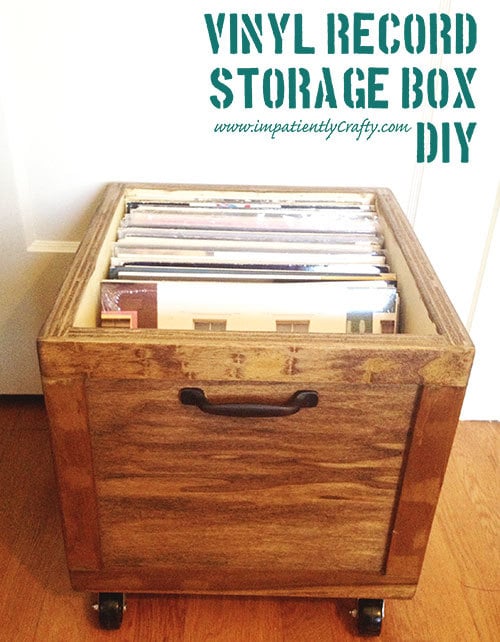
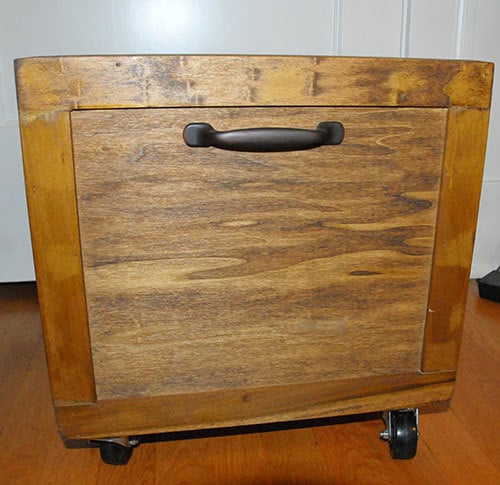
I have to say, there is something about listening to music on vinyl that just gives me the warm fuzzies! A little bit of crackle, fuzz and hum.. physically having to flip over the record to get to the next side, & listening to an album start to finish just has a nostalgic feel to me and I love it.

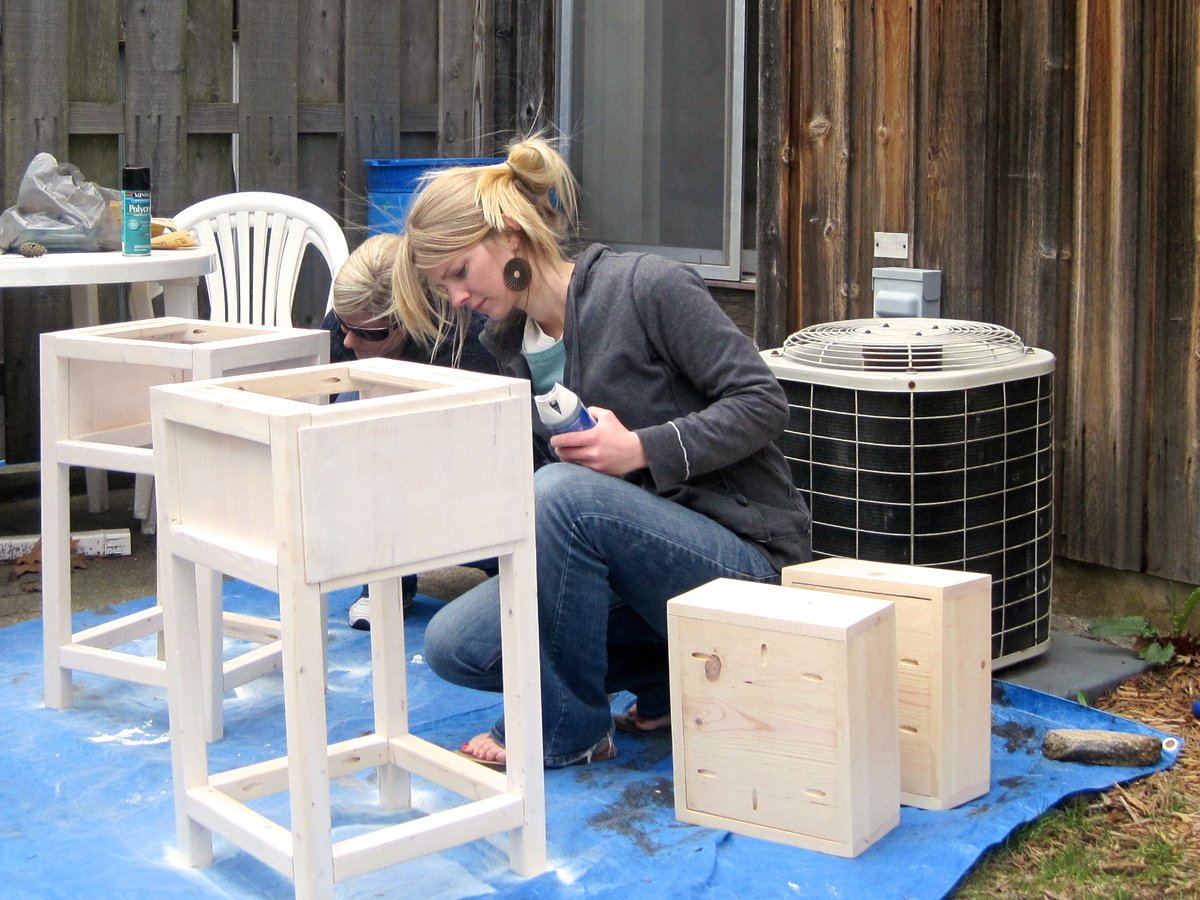
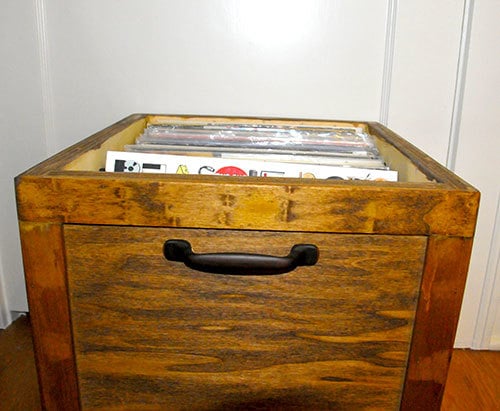
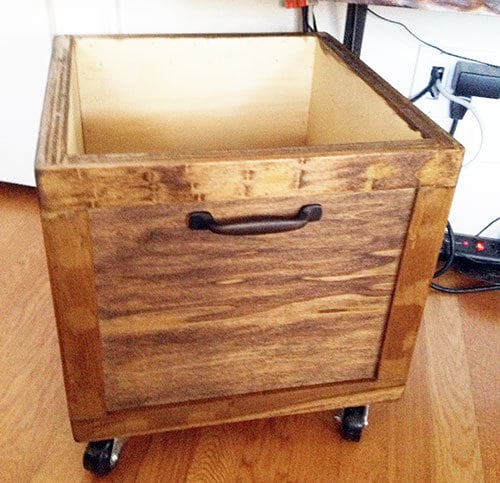
We’ve started quite the collection of LP’s and quickly found we needed some good storage for them. Since vinyl isn’t exactly the most popular form for listening to music, I just had to make my own.

I knew it had to have 3 things.. size to fit, wheels and easy of searching through records.

I had some scrap poplar plywood lying around, and just had to purchase some casters and furring strips to frame out the box. I even had an extra cabinet handle laying around to use.

I made it 12 inches wide by 16 inches deep, framed it out shaker style with furring strips and then stained it.. added casters and a handle ;)

Estimated Cost
$18
Estimated Time Investment
Afternoon Project (3-6 Hours)
Finish Used
minwax dark walnut stain and 2 coats of matte finish polycrylic
Recommended Skill Level
Intermediate

Comments

yurra-bazain

Tue, 07/09/2013 - 10:59

I love how you appreciate vinyls and gives things you have on hand new purpose. This storage box is nicely done.

I looked at your blog and went straight to the Upcycle tab, since that's where my interest lies too. I love seeing a "pile of useless" restored to use. =D

The playhouse project!

We started this project a few months ago. My husband made most of the construction, and I decorated the inside. We added many little details, including a clothesline, windows with plexiglass, a BBQ, a little kitchen, a doorbell, a solar light, a slide, shelves, a table, a bench, etc. The kids loooooove their new house. The whole project took many many hours, but I am really happy with the results. Thank you so much Ana for the plans!!

Estimated Cost
900 $
Estimated Time Investment
Week Long Project (20 Hours or More)
Finish Used
primer and extorior paint
Recommended Skill Level
Intermediate

Comments

Theresa W

Sun, 07/14/2013 - 17:24

It is beautiful. I can only imagine how excited your kids are to play in this gorgeous space made just for them. Well Done!

LadyBird

Sun, 07/14/2013 - 21:10

Looks like your child has everything they need. Including a phone! I love the bench seat and the pillows with the window. So cool. You put a lot of work into this. Well done.

denaschance2

Thu, 04/03/2014 - 08:23

Love, love it! Couple of questions... how did you attach the walls to the decking and how far apart? How tall is the railing? I'm curious to know the sturdiness of the project overall and my SIL has concerns about the 3/4 roof sheeting over 1/4 walls. Comments please. My son-in-law and I have just started this project.

Workshop Now in Session!

Submitted by Ahlinn3 on Thu, 01/25/2018 - 18:46

Easy instructions and simple design. One cart houses table saw, and the other I plan to make a router table. I did make a slight modification in design by adding T-nuts and 5/16” bolts for feet. (My shop floor is crowned). I also used 3/4” melamine white panels for table tops. Difficult to work with but cheaper and has a smooth surface. (Be careful using for structural parts due to glue not impregnating through melamine) 

Estimated Cost
$250
Estimated Time Investment
Weekend Project (10-20 Hours)
Recommended Skill Level
Starter Project

Comments

My Boys Playhouse!

Submitted by Anonymous (not verified) on Fri, 01/28/2022 - 03:18

We made a few changes to fit our needs but love the design. Way better than any kit you can buy!

Comments

Super Simple Bedframe/Hailey Planked Headboard

Submitted by Anonymous (not verified) on Sun, 05/22/2022 - 21:57

My grandaughter and I built the super simple bed and modified the Hailey planked headboard. We used common douglas fir from Home Depot. The finish is equal parts Minwax cherry and early american with 3 coats of Minwax wipe on poly with a light sanding with 220 grit between coats. Total cost was about 250.00.

Comments

L-Shaped Triple Bunk

Submitted by mommy to 3 on Sat, 09/01/2018 - 20:21

We recently had our 6th child and needed to rearrange our kids' rooms.  We decided to put our 3 oldest girls together and wanted a triple bunk.  We used the classic bunk plans, but increased the height to allow for a middle bunk.  We wanted L-shaped to give each child some headroom.  We used pine wood, common board and select pine.  We finished it off with two coats of Behr interior latex paint/primer in one, satin finish.  Finished dimensions--height from floor to base of bottom bunk, 10 in.  from floor to top of top rail, 79.5 in.

Built from Plan(s)
Estimated Cost
$350 for wood/screws
$40 for paint
~$500 for tools--this was only our second build and our last build only required a drill.
Estimated Time Investment
Week Long Project (20 Hours or More)
Finish Used
Behr interior latex paint/primer in one, satin finish. Color is "classic silver"
Recommended Skill Level
Intermediate

Comments

bcheese06

Tue, 02/18/2020 - 20:41

This is exactly what my boys need in their room. I'm having a hard time grasping how you did the middle bunk. Is it just the top bunk chopped right before the horizontal slats of the bottom bunk? tia

Modern Adirondack Benches

Submitted by Anonymous (not verified) on Thu, 06/02/2022 - 15:36

I fell in love with the modern Adirondack chairs, I love how comfortable and simple they are. But I wanted benches to go around my fire pit area. So I decided to modify the modern Adirondack chairs to make 6ft and 8ft benches. I added in extra supports (of course) but it was an easy mod with a gorgeous outcome!

Seasonal And Holiday

Baby Doll Crib and High Chair

Submitted by Anonymous (not verified) on Tue, 12/25/2018 - 20:06

Love getting to watch my daughter play with stuff that i made her.

Recommended Skill Level
Intermediate

Comments

First Build - Redwood Adirondack Chairs

Love the results of my first building project.....a pair of redwood adirondack chairs. Angled cuts were a great way for a beginner to learn to use the miter saw.

Estimated Cost
$75 for redwood per chair
Estimated Time Investment
Weekend Project (10-20 Hours)
Finish Used
Discovered a non-toxic, non-flammable, water-based, environmentally friendly product called Seal-Once. Quick and easy two coat application in natural clear to protect wood outdoors for up to 10 years. Soaked right into redwood without leaving a shiny finish or residue.
Recommended Skill Level
Beginner

Comments

JoanneS

Sat, 09/07/2013 - 19:59

Love these gorgeous redwood chairs! The color and grain on that wood is awesome, and the clear coat is perfect for it. You did a great job on this build! I popped over to your blog and I enjoyed your post on this build very much. Well done!

Seasonal And Holiday