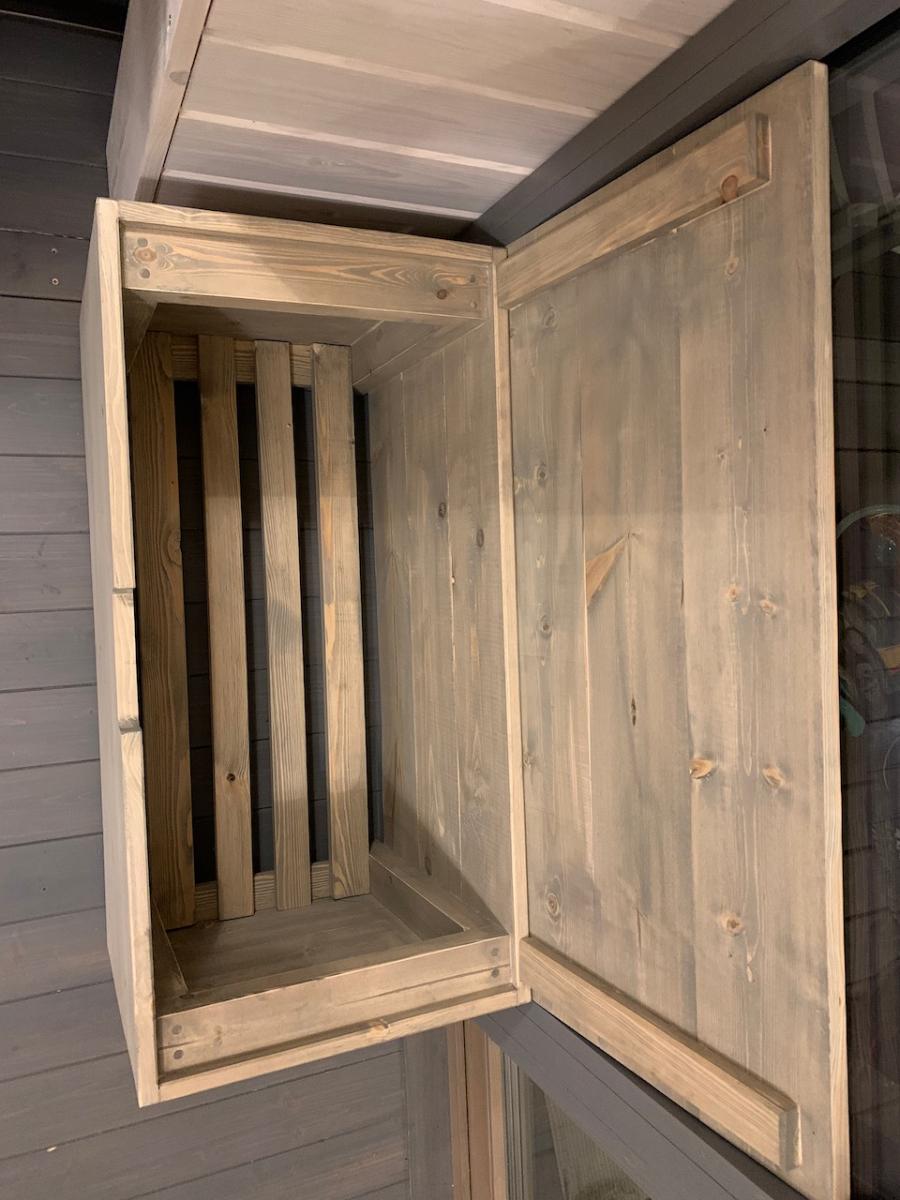
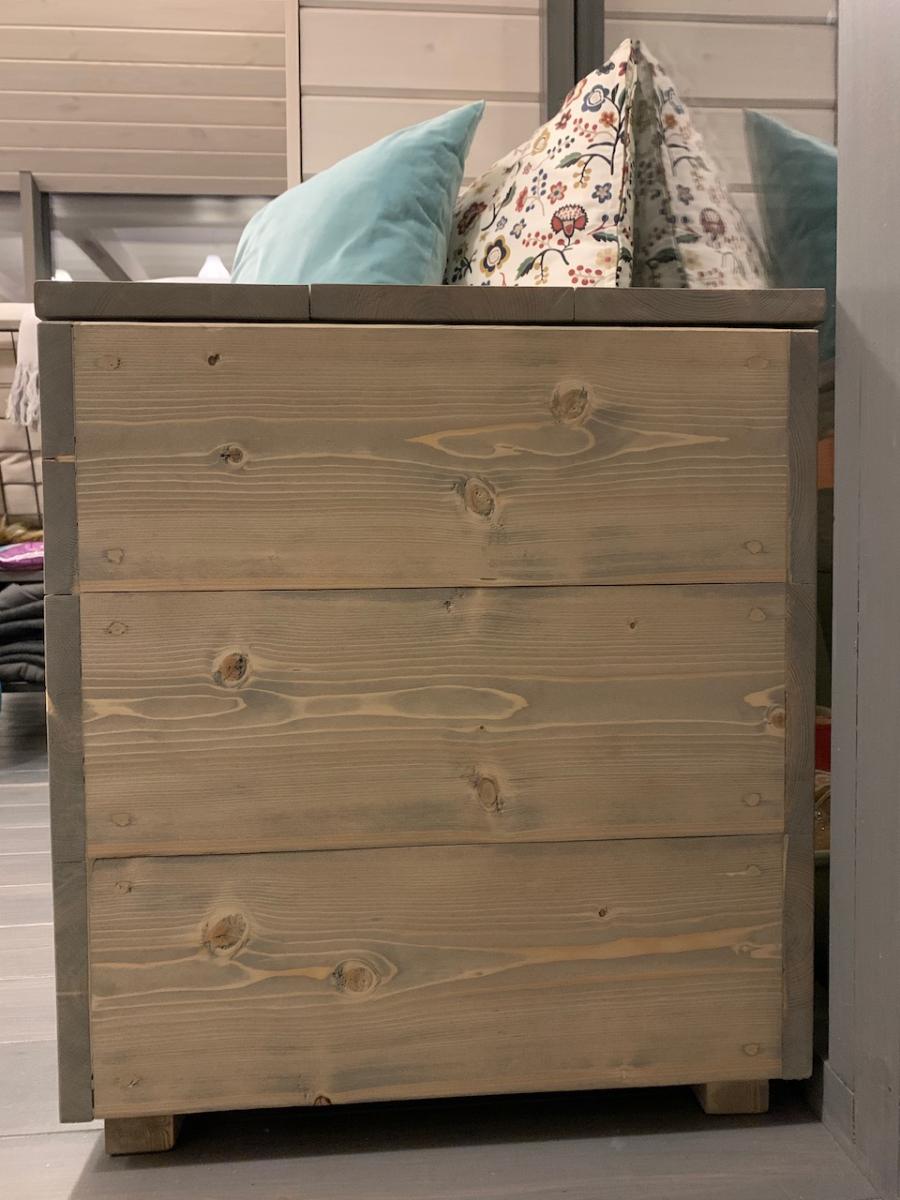
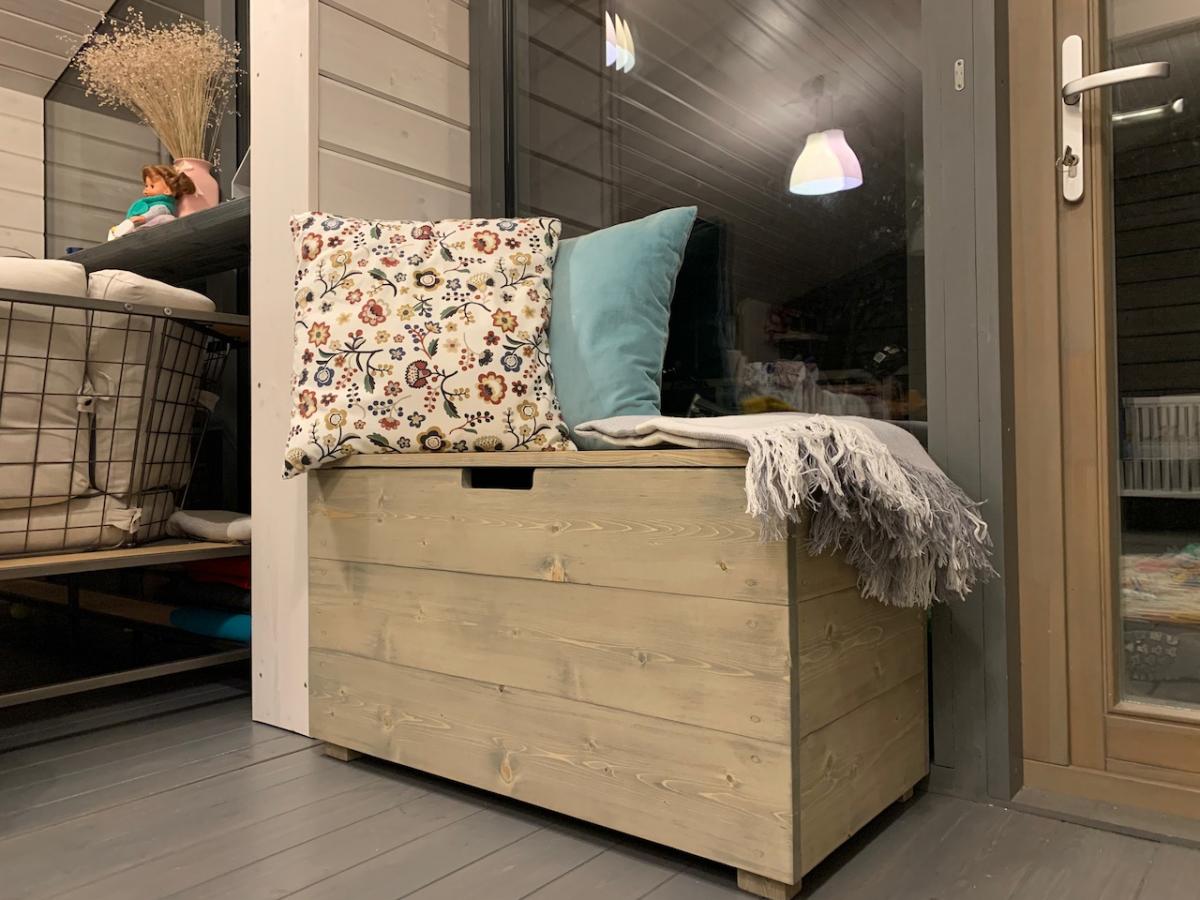
Storage Bench
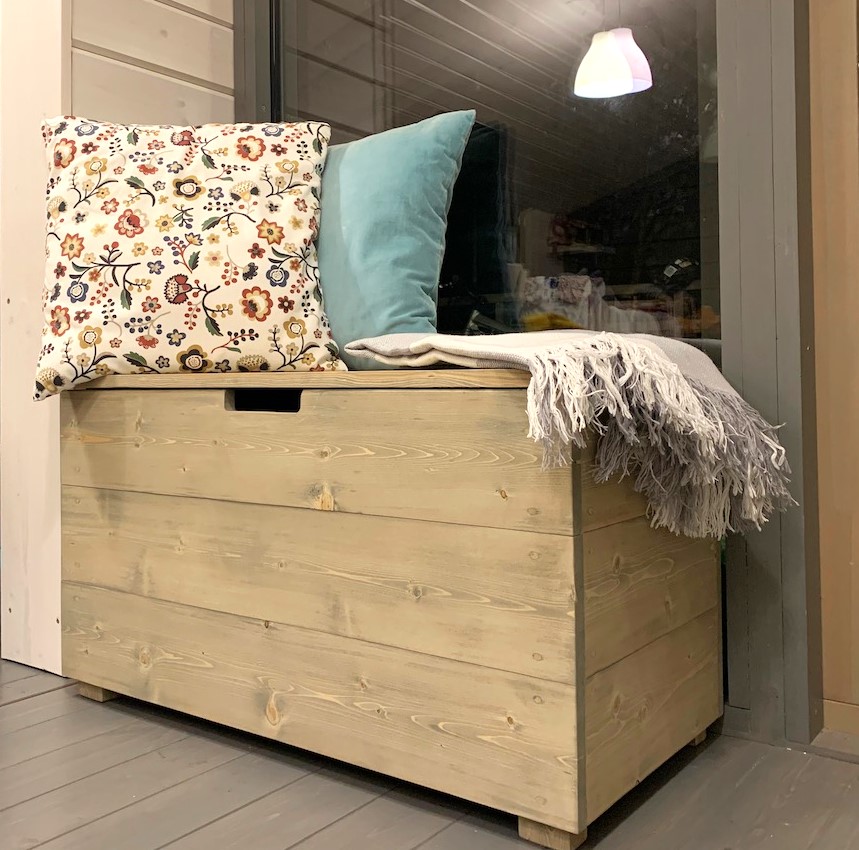
Super useful chest for winter clothes ! Sand it for perfect smooth indoor use, hide all screws. Thank you for plans.
Built from Plan(s)
Super useful chest for winter clothes ! Sand it for perfect smooth indoor use, hide all screws. Thank you for plans.

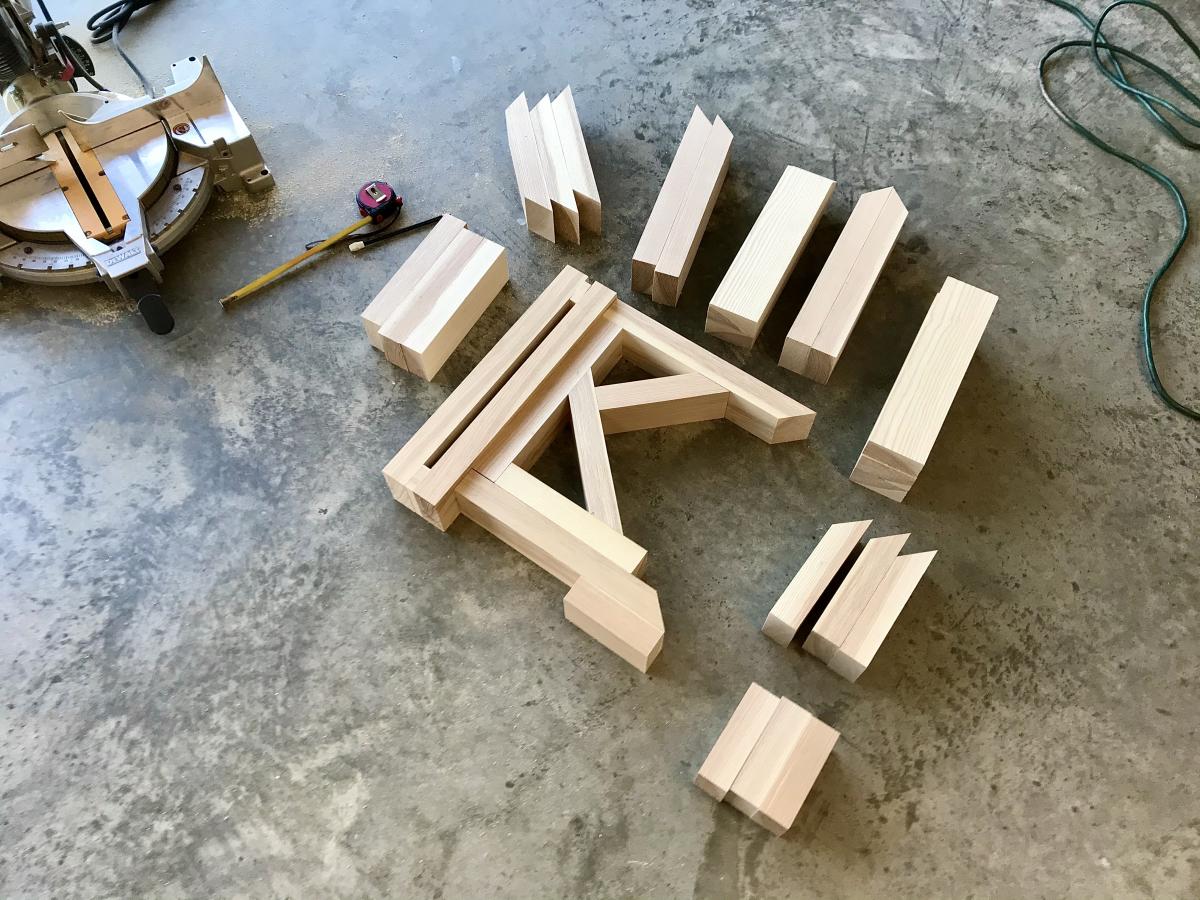
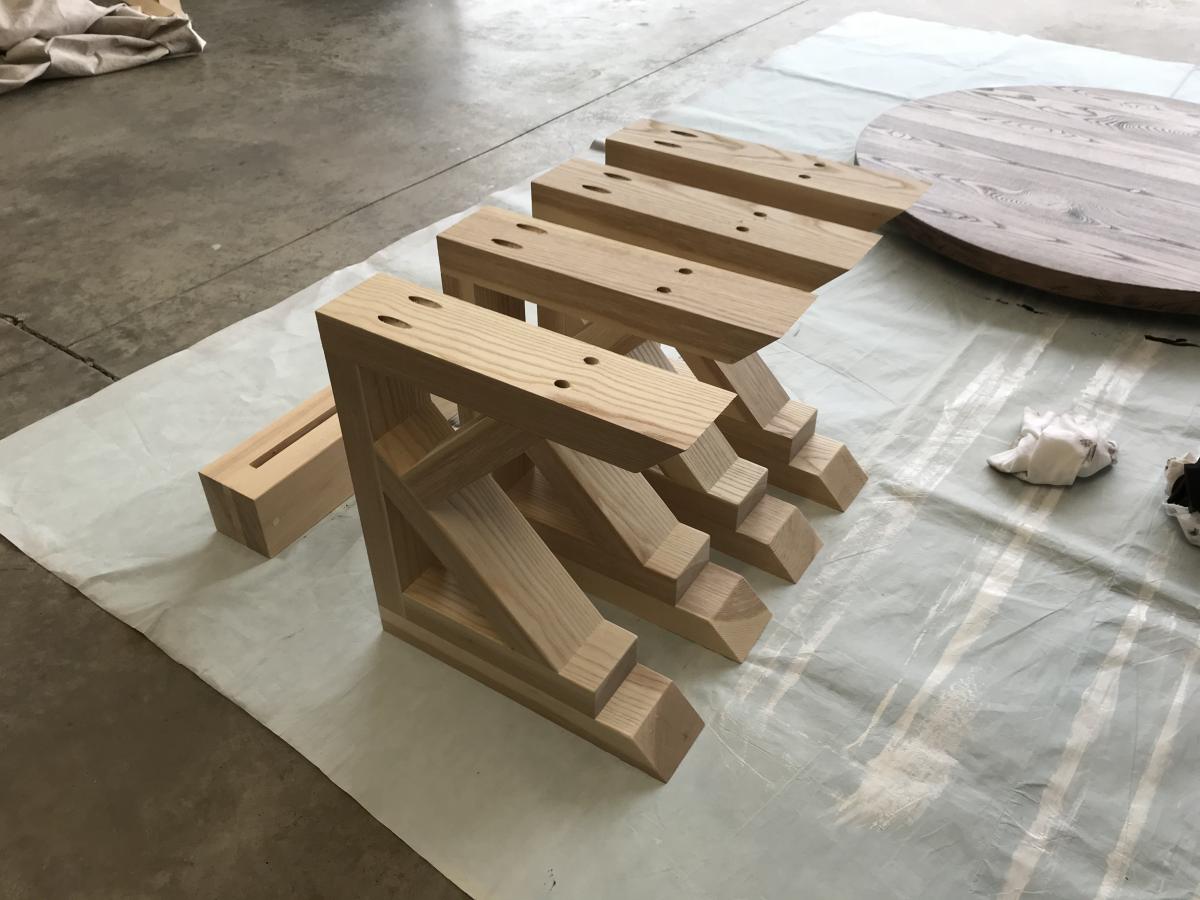
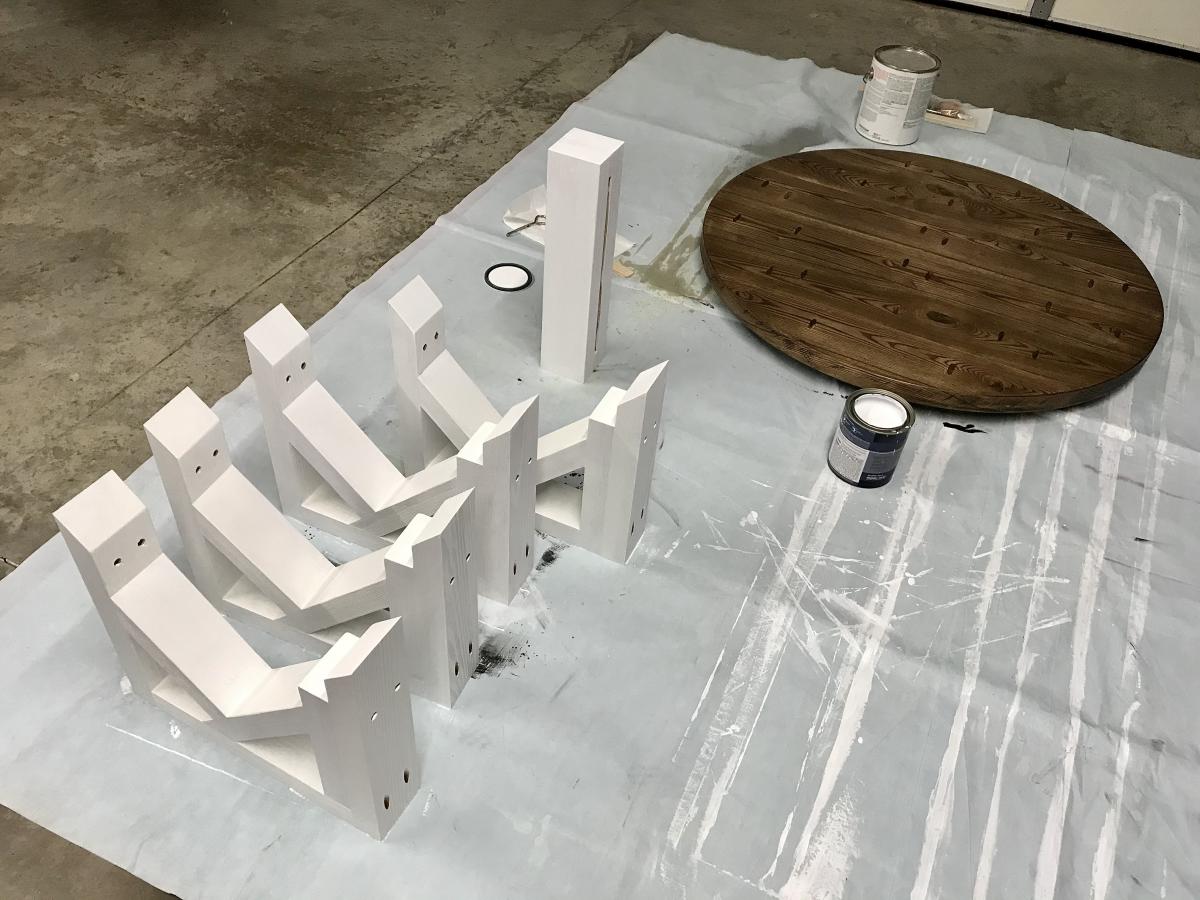
Here is Ana White’s round farmhouse table miniaturized into a coffee table measuring 18” in height and 36” in diameter using hardwood Ash.
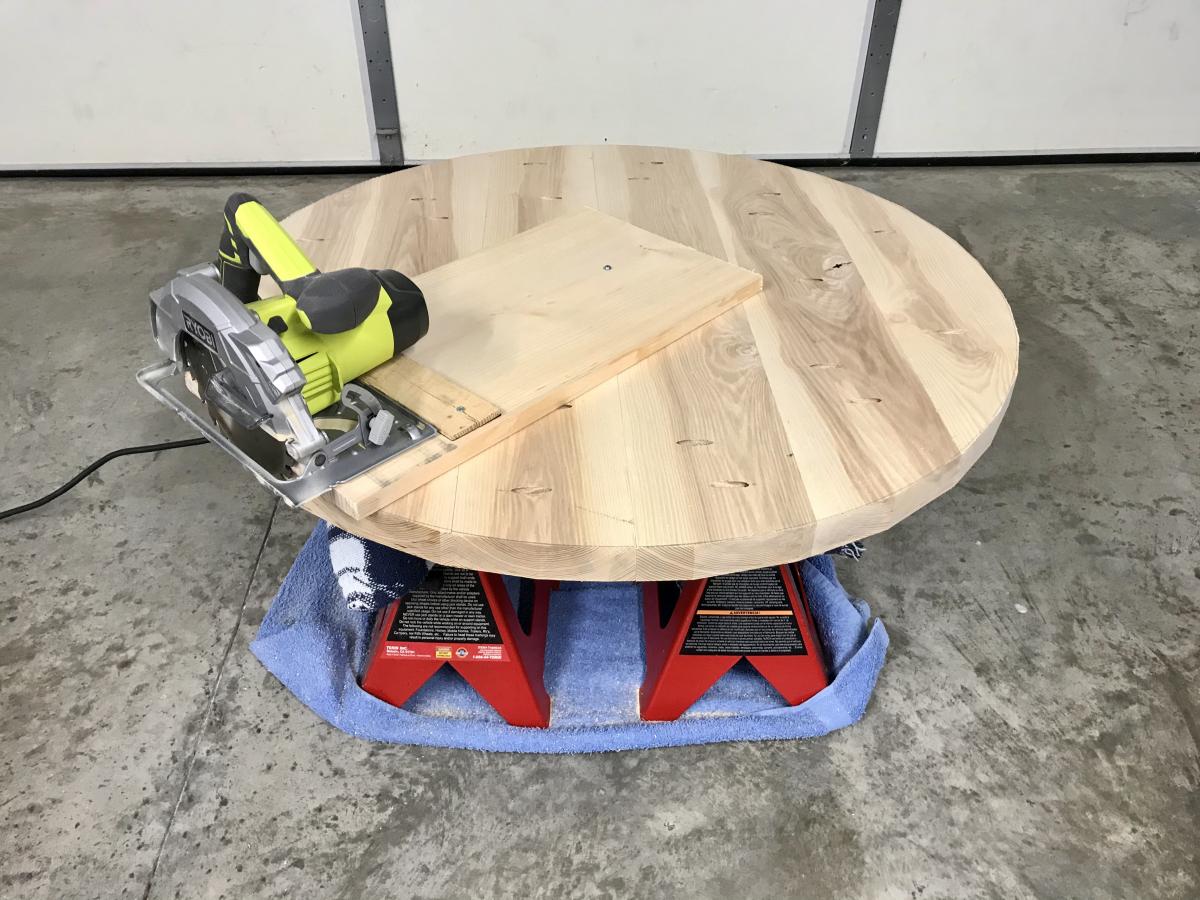
The table top construction was slightly simplified by screwing six (1.5” x 6” x 36”) panels together. The circular saw jig setup worked out well.
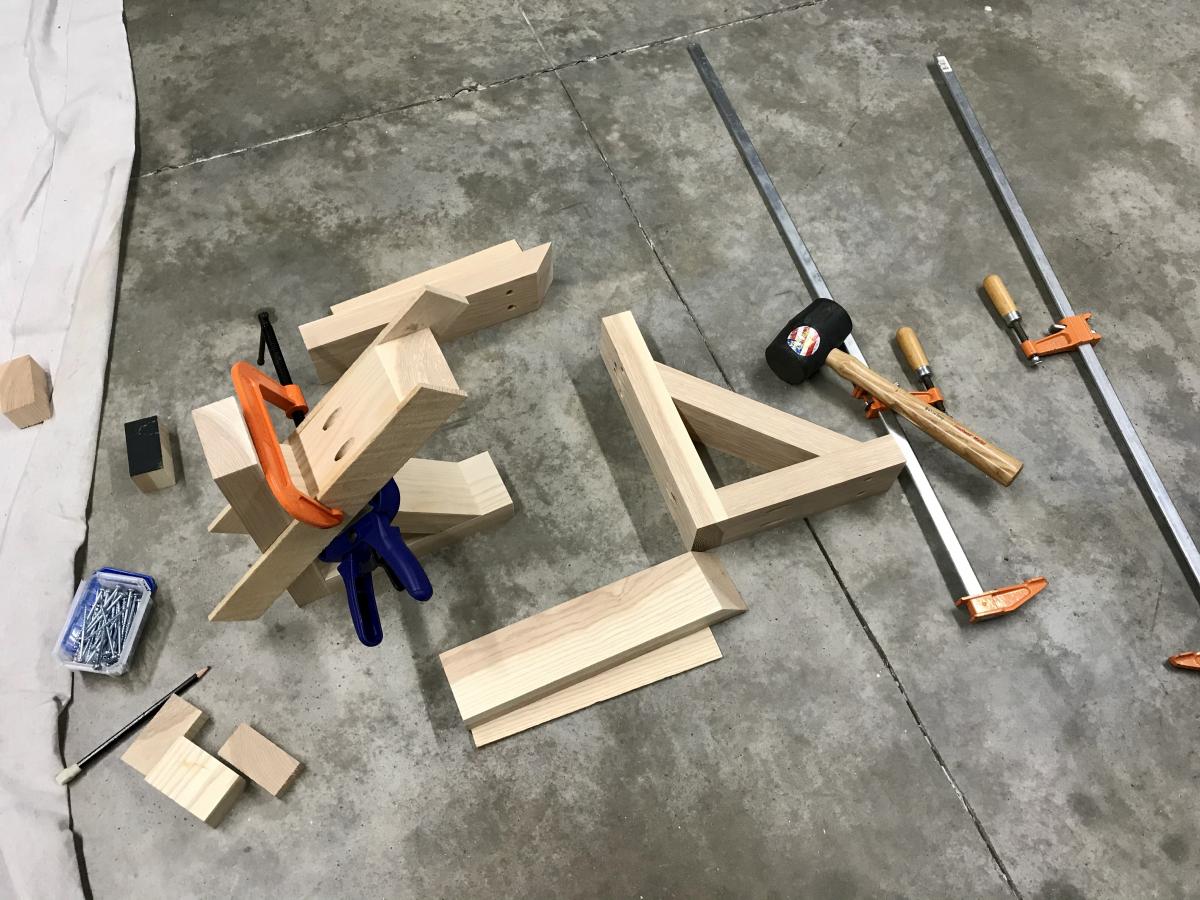
A Kreg jig and a variety of clamps were instrumental in securing clean, tight joints for the base.
Thanks for the inspiration and useful tips on your site!
Tue, 12/08/2020 - 11:25
Stunning mini version, love this coffee table!
Sun, 01/10/2021 - 19:59
Hi, would you be willing to share what measurements you used to make the smaller base? TIA!
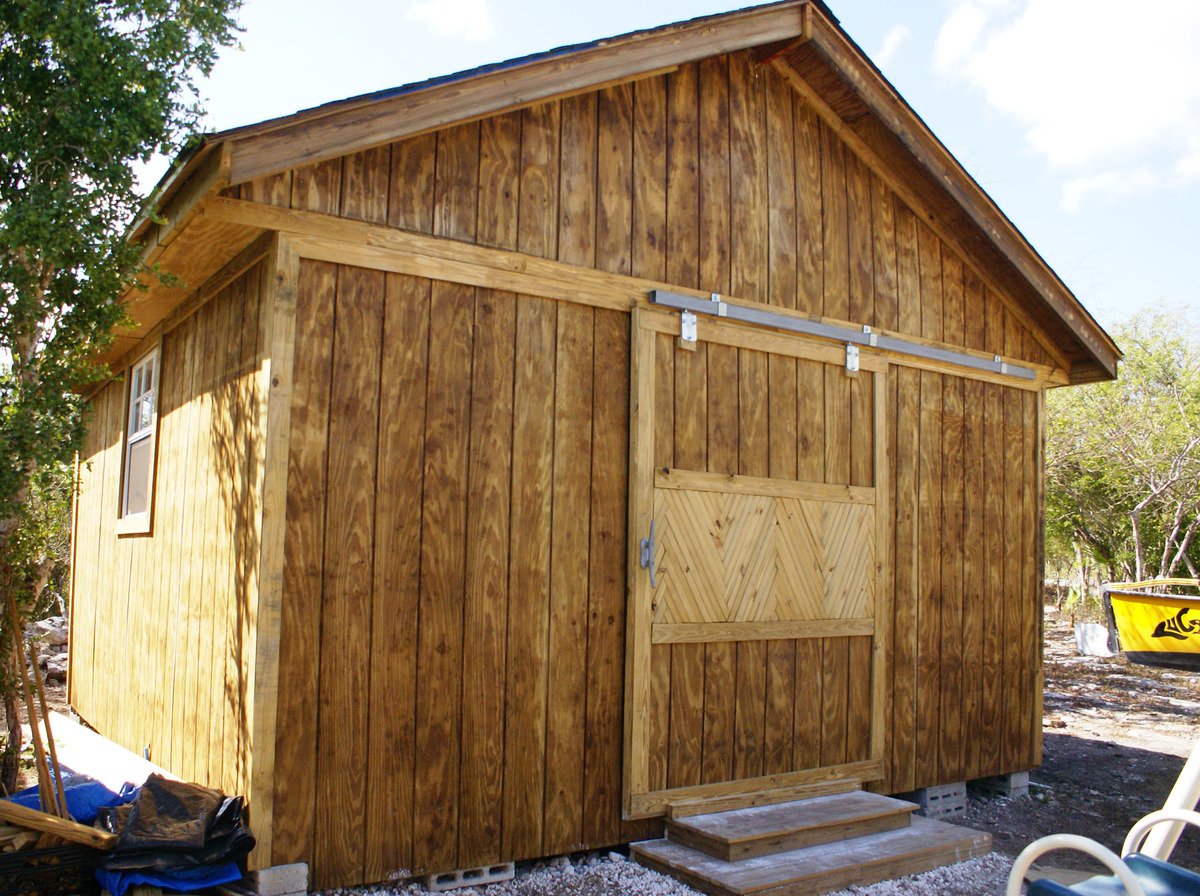
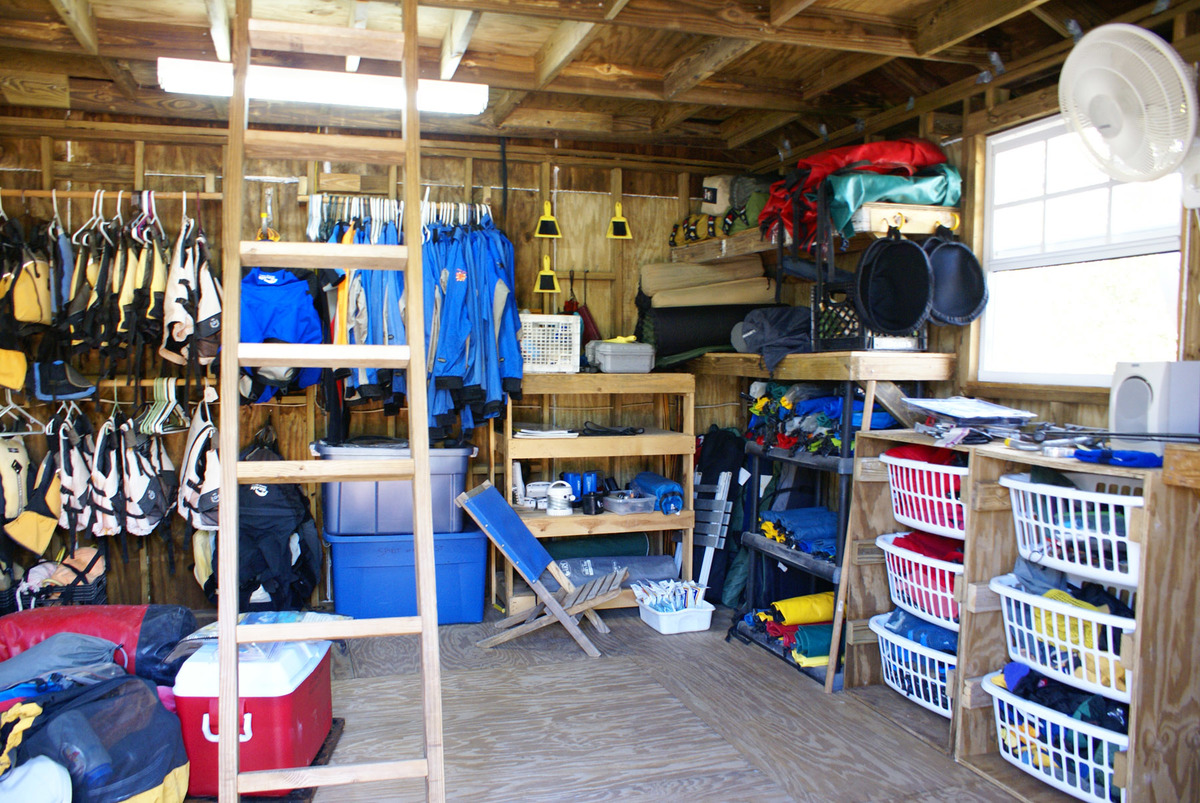
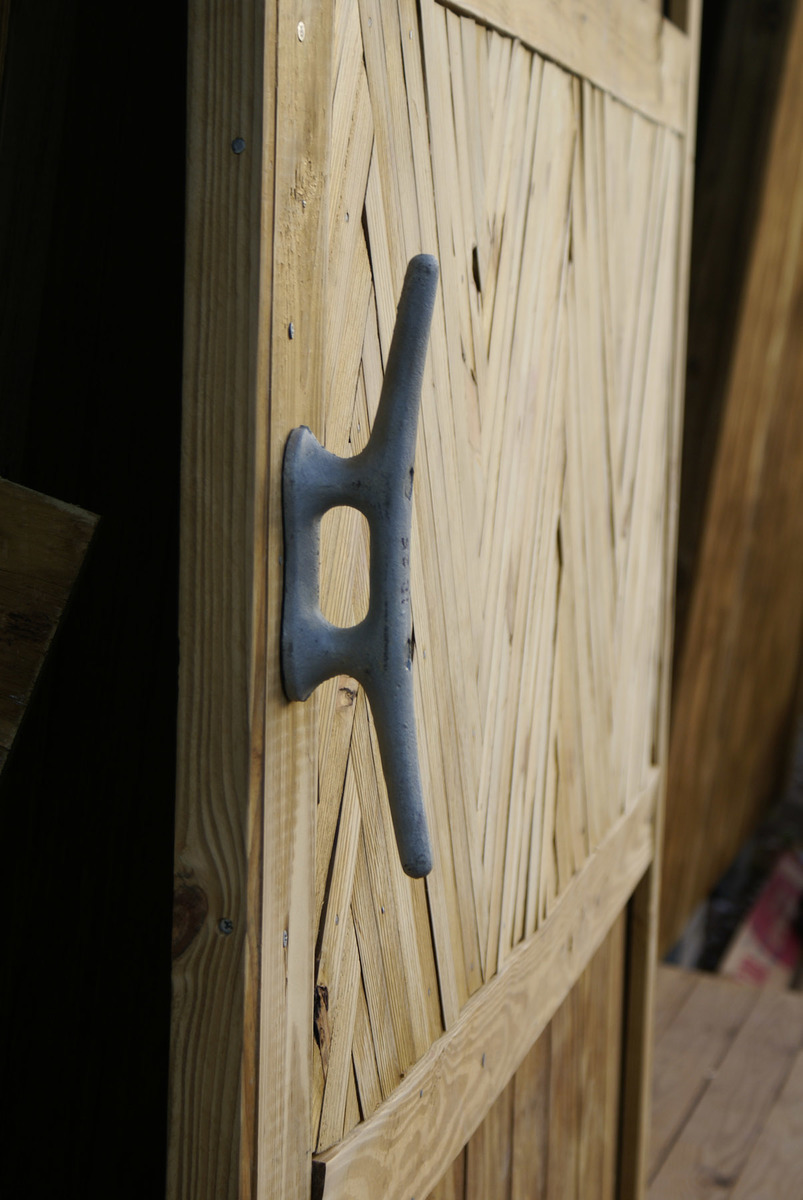
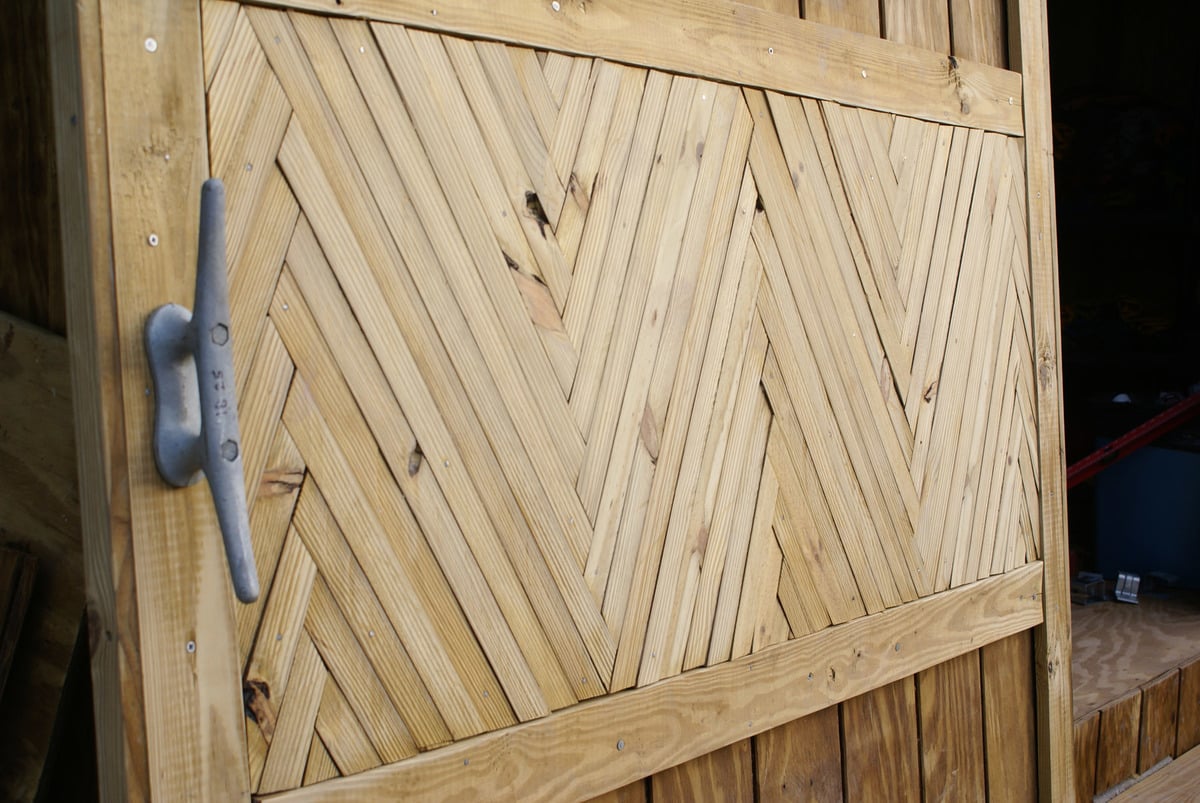
Thanks to the tips and tricks we picked up from Ana here, we were able to build our very own storage shed. We use it for storing our kayaking, sailing and camping gear for our company down here in the Bahamas (which is still a bit unorganized in the photo). It works so much better than what we had before in multiple kit sheds. We even have a loft up top for extra storage, electricity in there with a fan, fridge and lights... MAJOR UPGRADE :) We still need to paint it and finish a few things, but we are very thankful to have it up and being used.
My favorite thing is the door handle (a boat cleat) sliding barn door and the herringbone design for 'eye candy' :)
Thanks go out to Ana and her wonderful site! I would have never attempted this without the foundation I built here!

Sun, 04/14/2013 - 20:37
What did you use to make the sliding door? Can you upload pics? I really want to make one for my bathroom but all the hardware I find is really expensive.

In reply to Sliding door by jbayer80
Mon, 04/15/2013 - 11:29
I've read on some blogs people have found theirs at Lowes or Tractor Supply.
Mon, 04/15/2013 - 06:05
We built the door out of some T1-11 Siding, 1x4's and various scrap pieces. The hardware we used is this Stanley set here: http://www.stanleyhardware.com/default.asp?CATEGORY=HDW+BARN+BOX+TRACK&… Then we bought the steel track separately. This door is super heavy, but it rolls like a charm on the track. Does this help any? Good luck!
Mon, 04/15/2013 - 11:42
And they work perfectly for our camping gear and kayaking gear too :)
Sun, 05/05/2013 - 13:58
Not really any plans that would help. We just drew some rough sketches up some paper and kind of went from there. Between Ana's site here and this book: http://www.amazon.co.uk/Building-Shed-Build-Like-Pro/dp/1561586196 we just pieced things together with the space and money we had. The book just helped me a lot to plan it out, and then all of the building techniques Ana has taught me on here came in handy. It's a group effort :) Hope this helps!

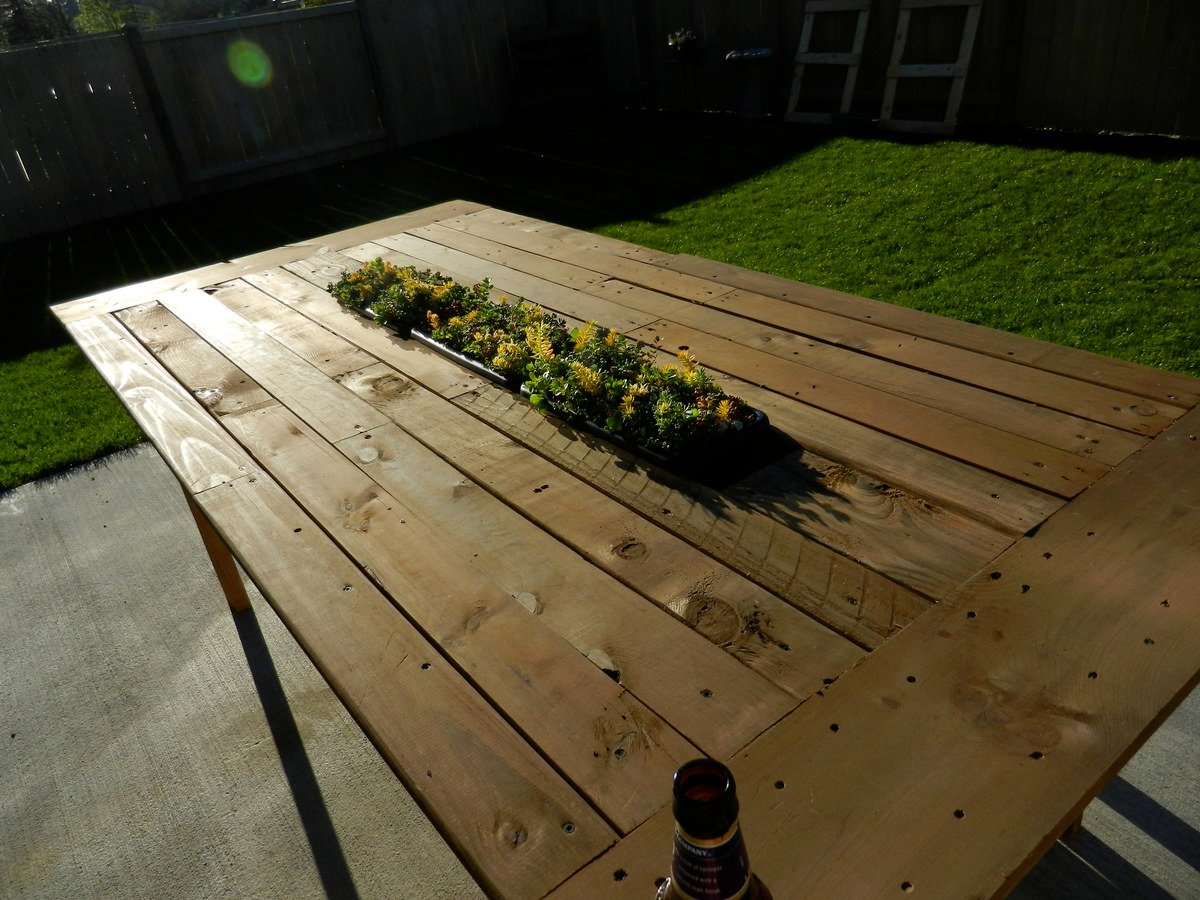
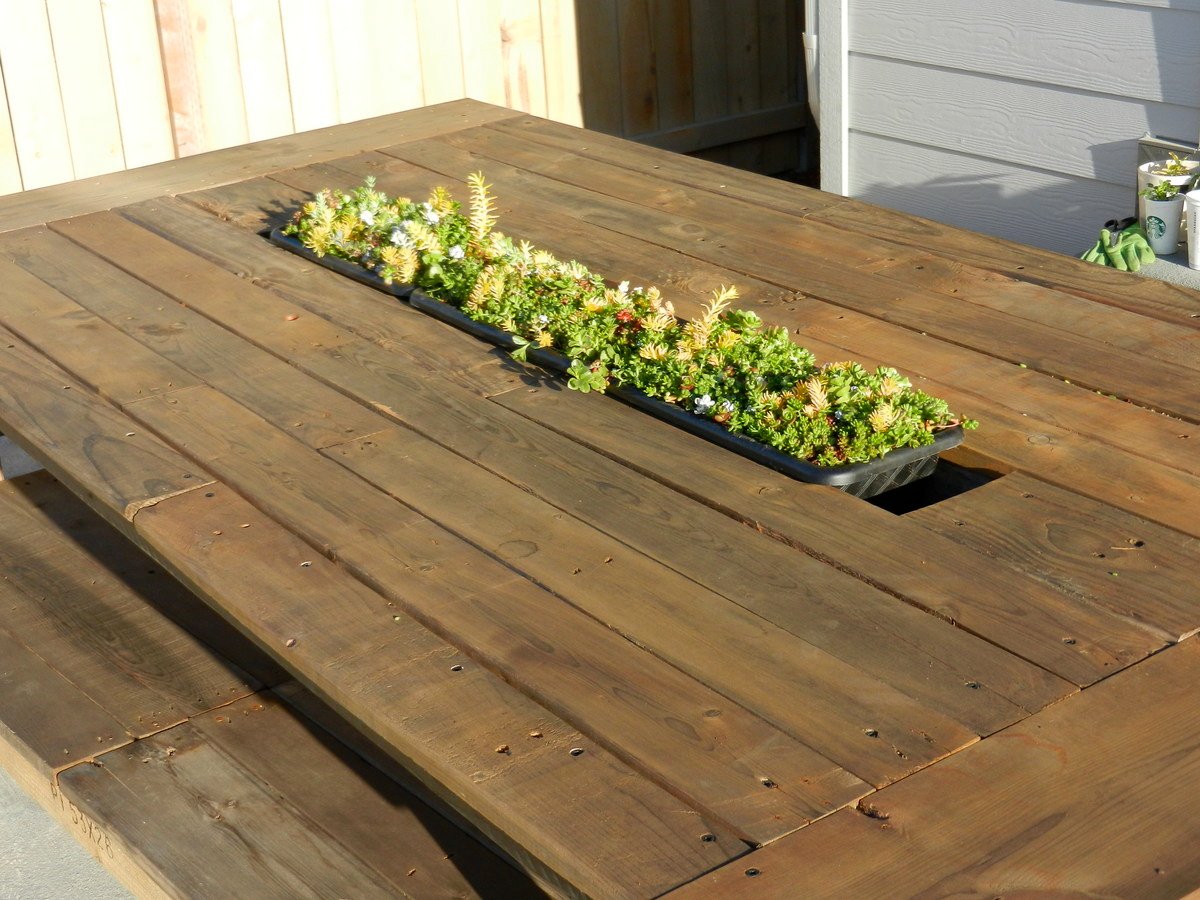
I bought a house and couldn't stomach buying something I could probably build myself. This is my first project and first furniture build. Besides buying the drill and screws the table was free. Didn't even buy a skill saw, just used a hand saw. The dimensions were dictated by the length of the pallet boards and width by the two end caps, so there were very few cuts to make.
Found plastic planter boxes for succulents (3 in picture) @ dollar store. I wanted to be able to switch out the center pieces and plan to rotate in herbs, ice, other flowers.
This project was totally made possible and inspired by others posting projects so I thought I should say thanks and post my own creation.

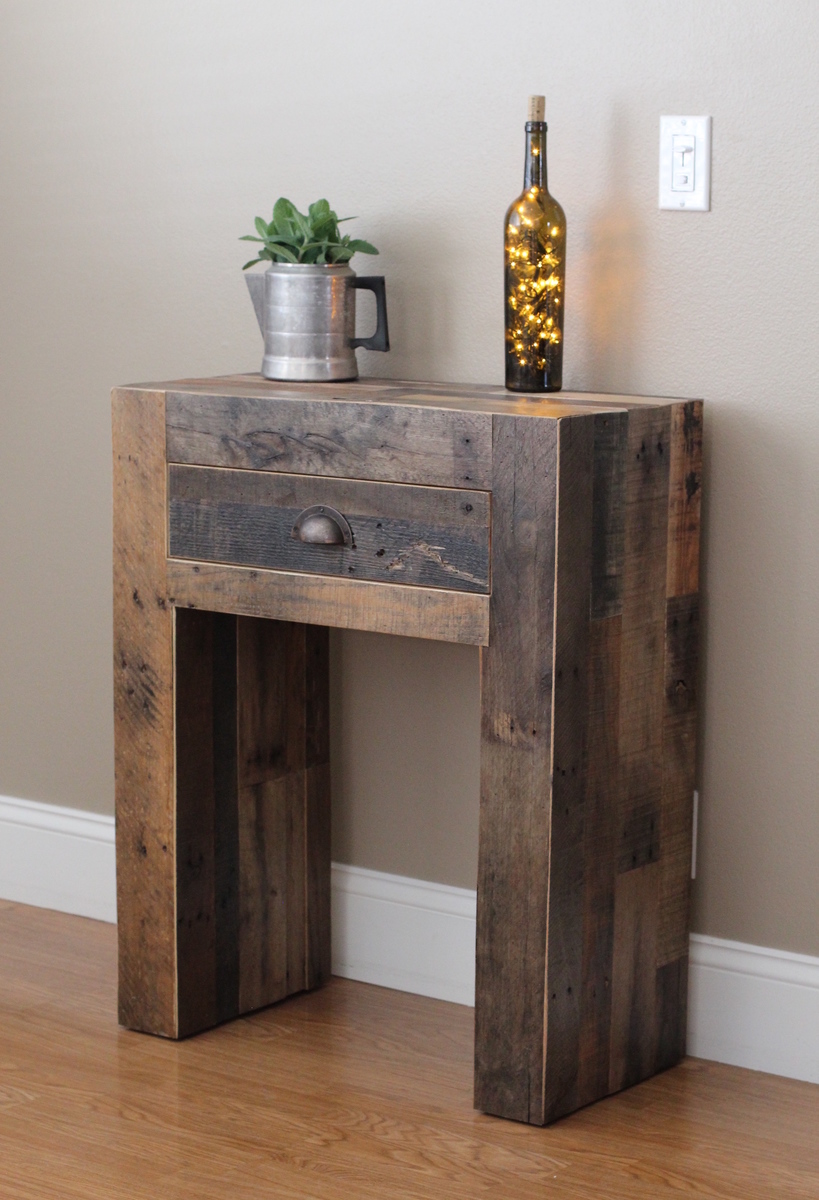
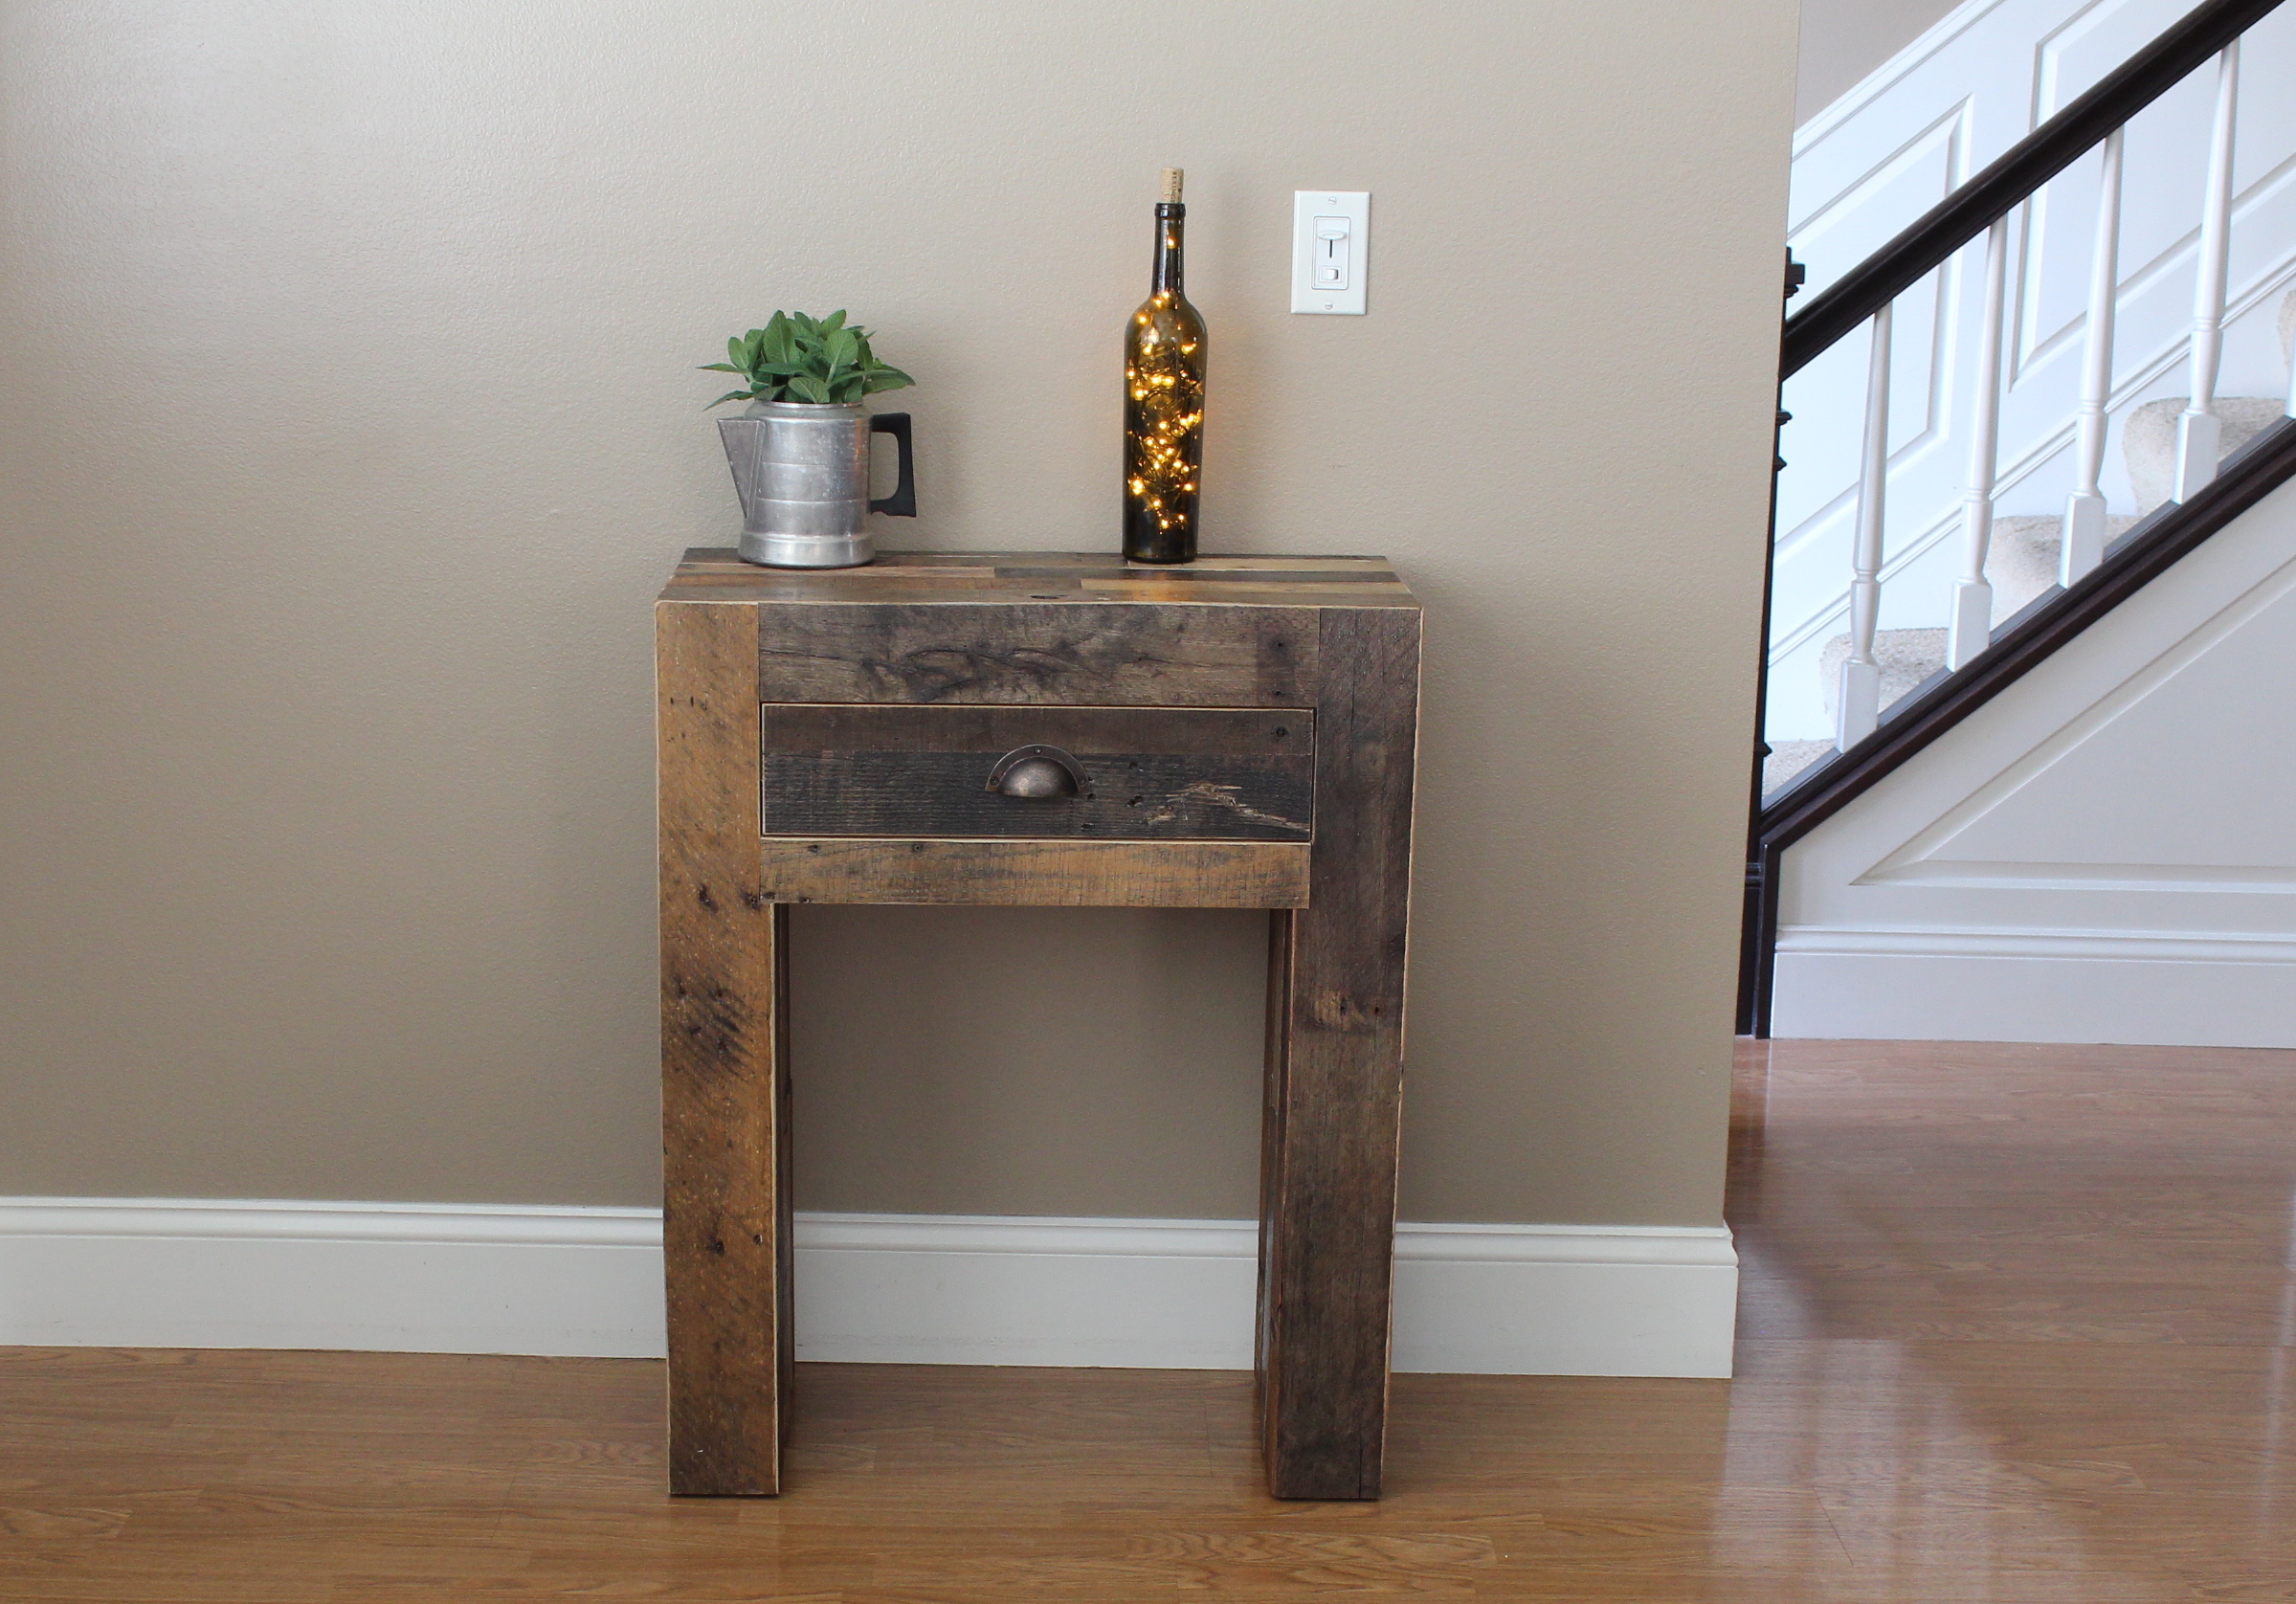
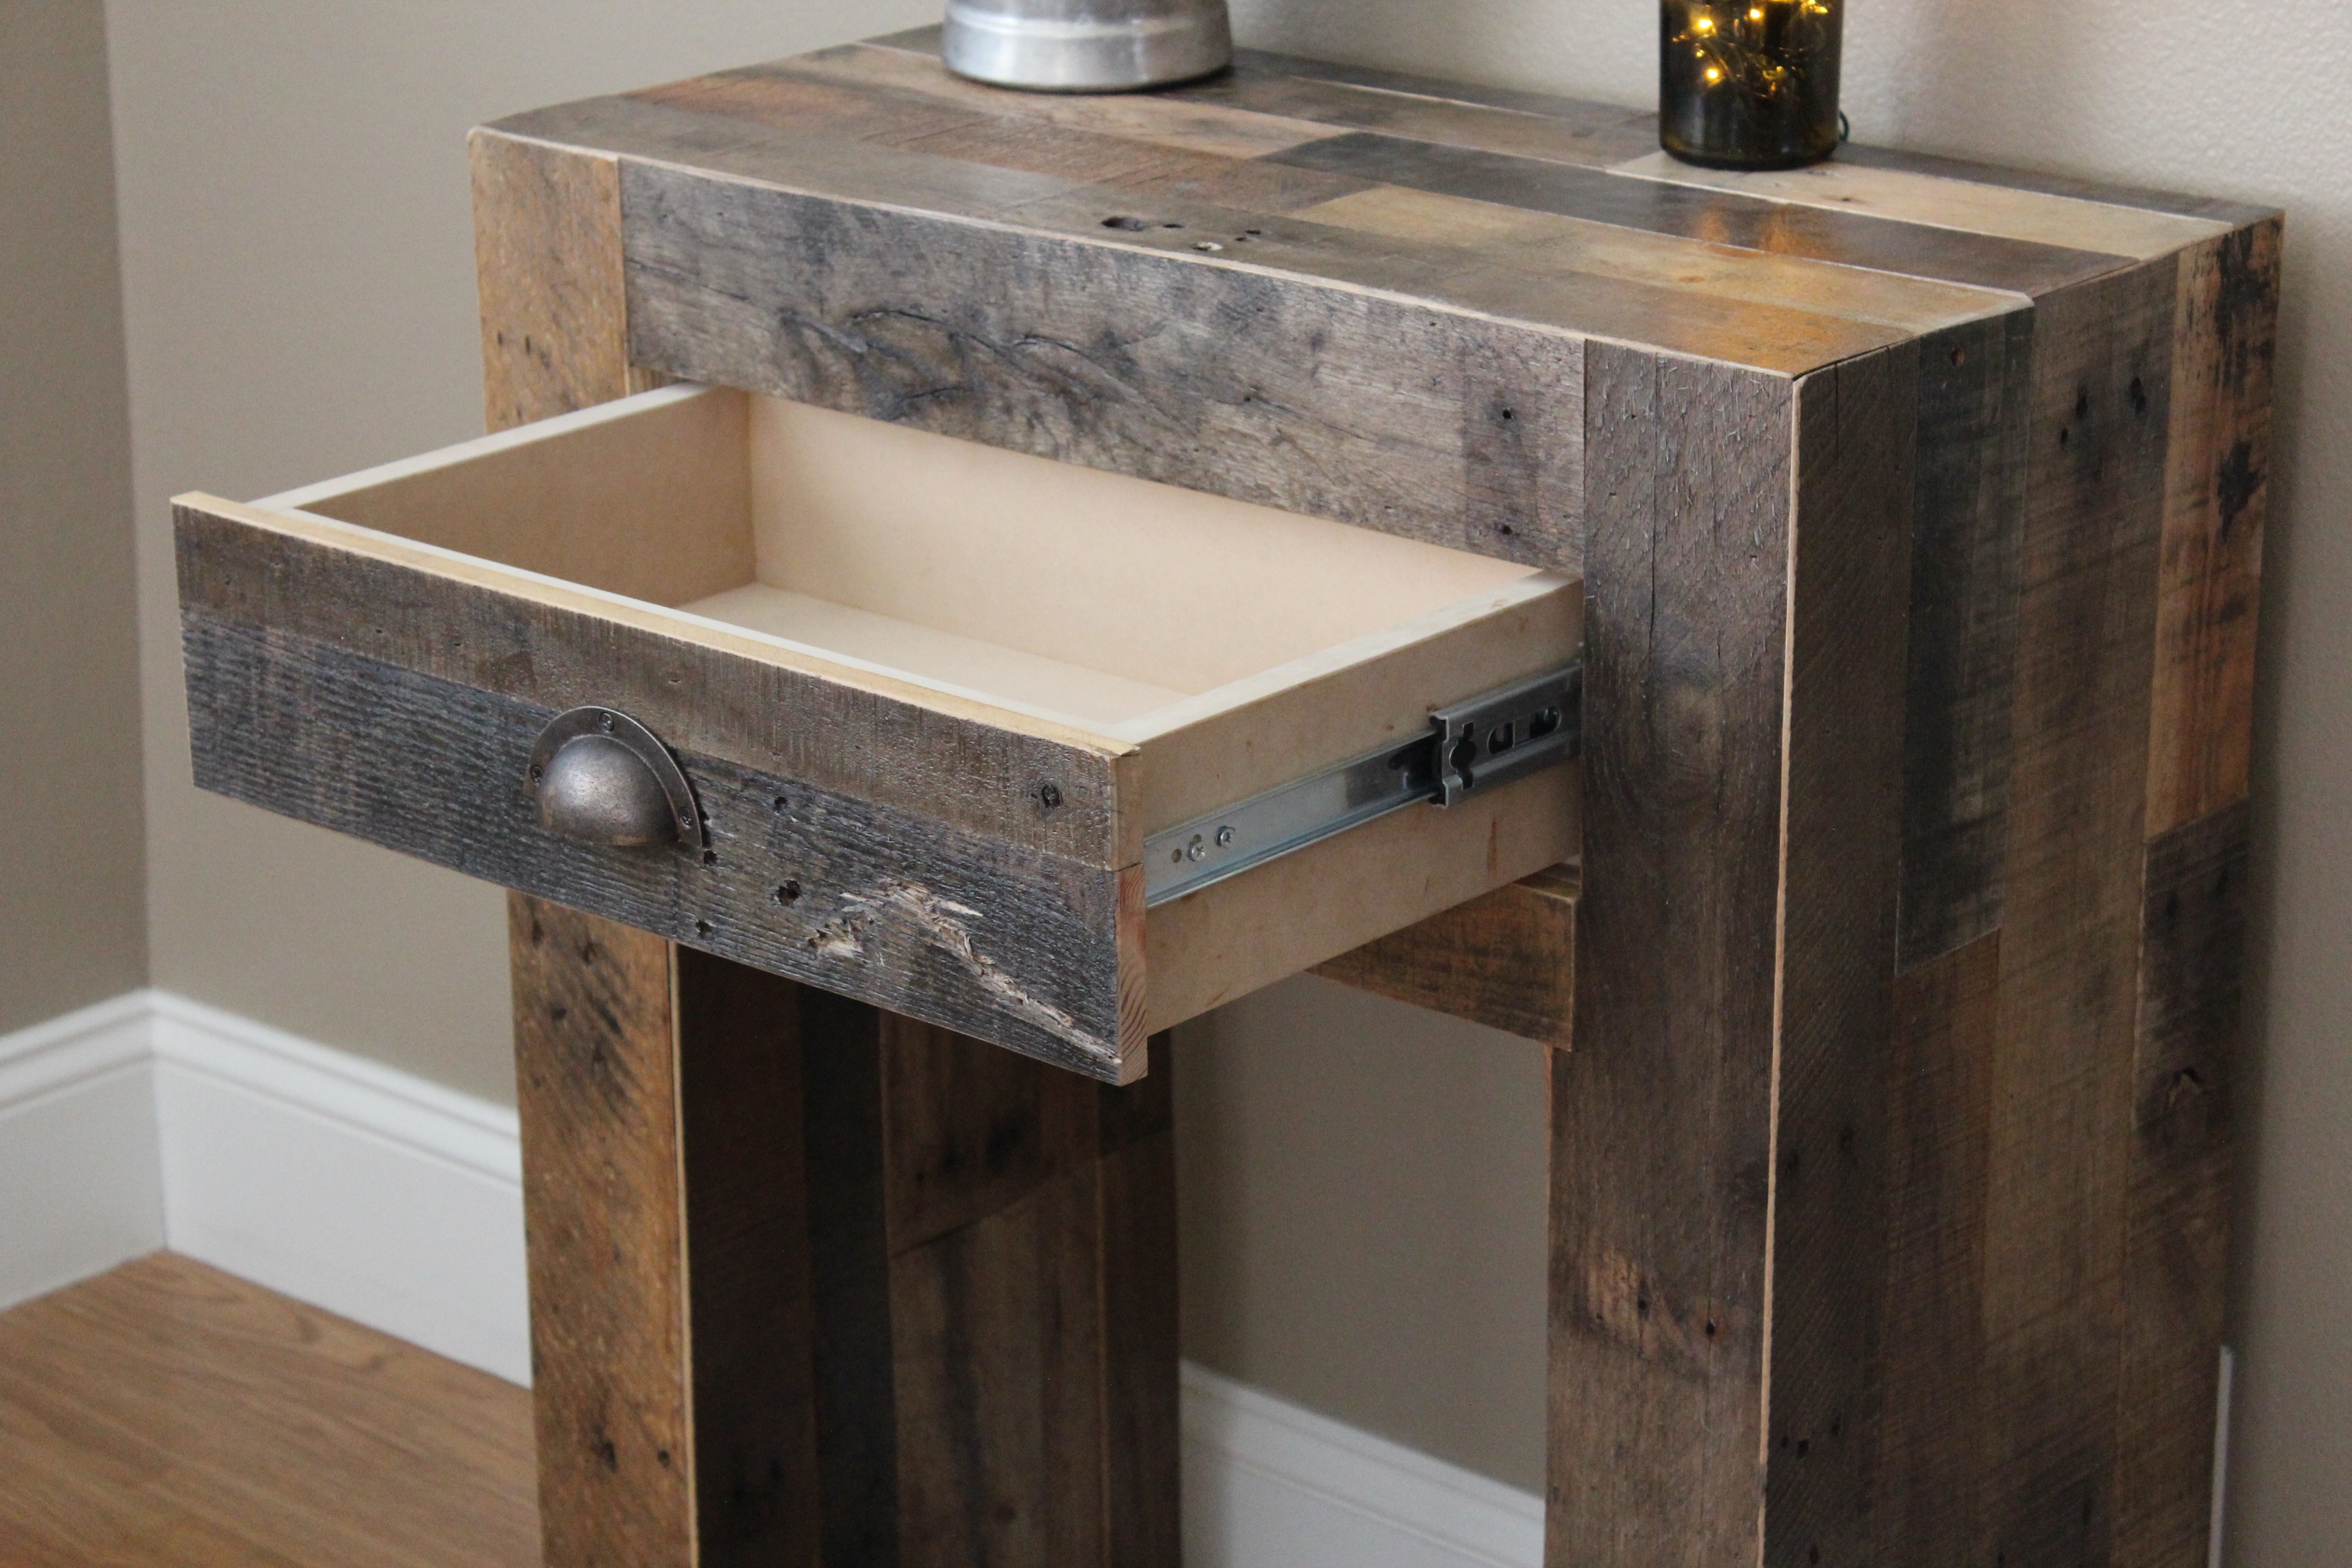
This reclaimed console was not build from one of Ana's plan but I did want to share it to inspire others to work with reclaimed wood. I used reclaimed pallet wood for this build, except for the drawer, I used MDF. For the finish I used an oil based poly.
In reply to Love it! by tracygator
Wed, 04/08/2015 - 15:43
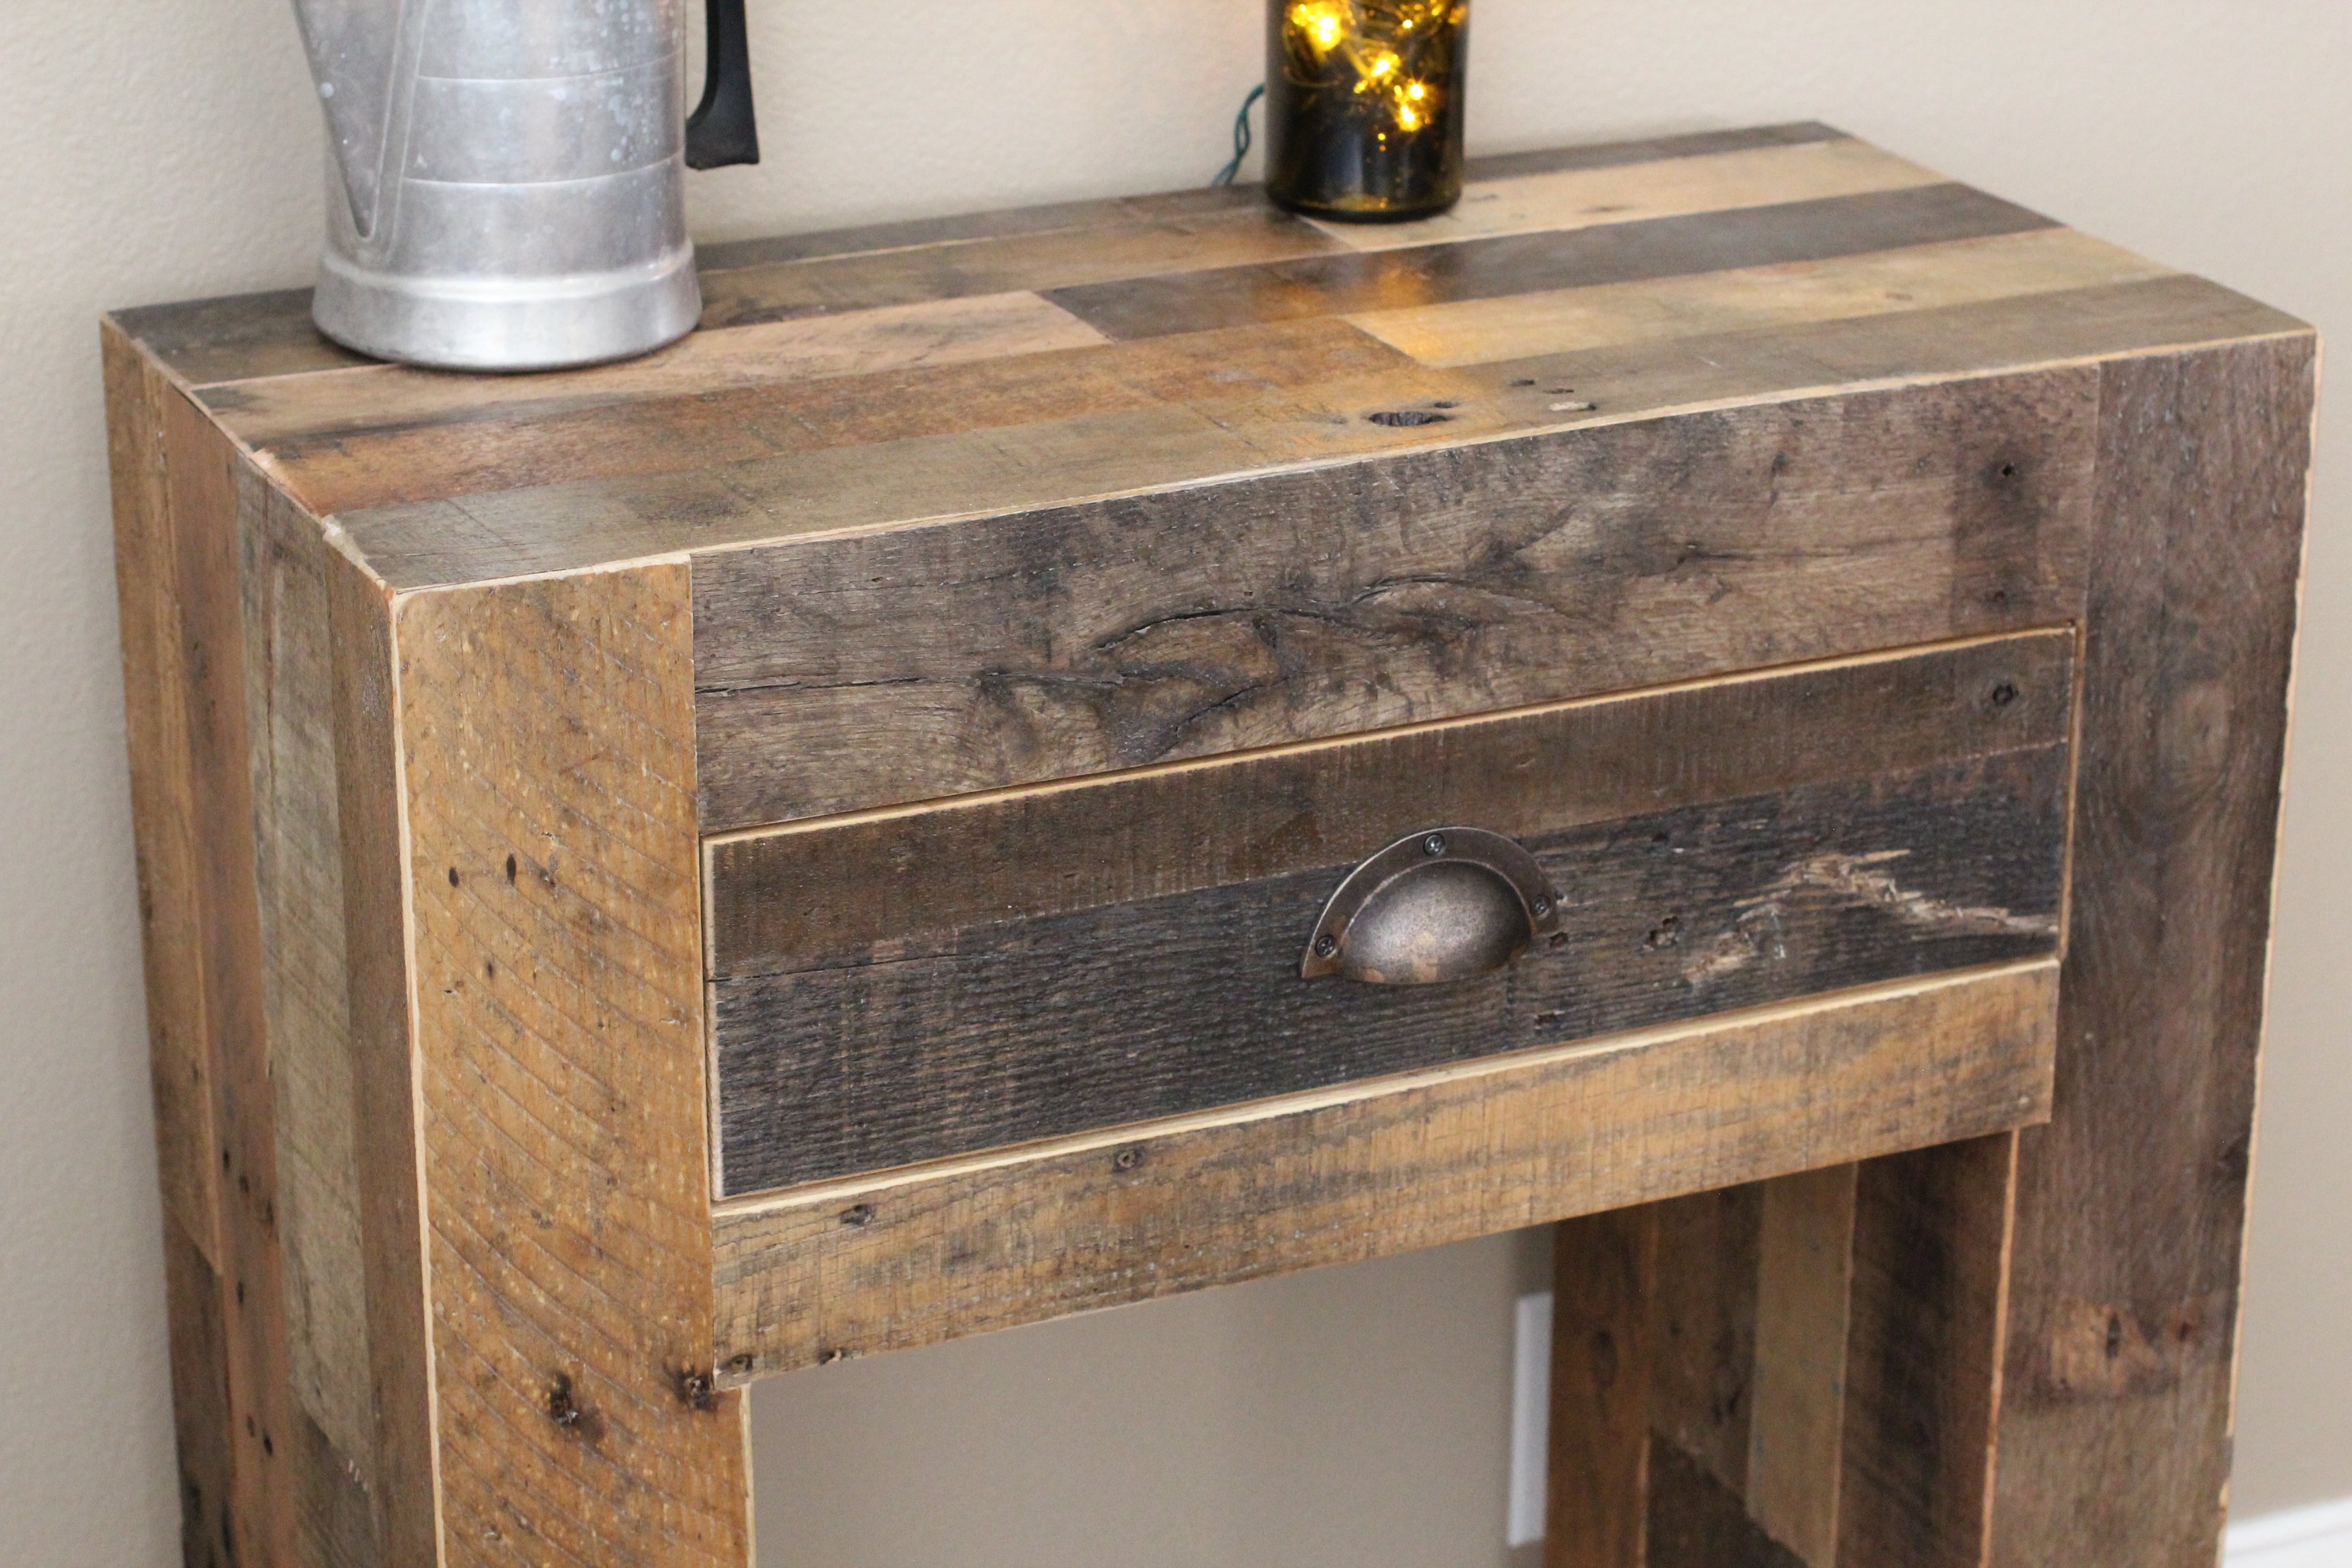
Hi Tracy. Everywhere there is a joint or seam, I cut each reclaimed plank on a 45 degree angle to hide the exposed raw wood after being cut.

Wed, 04/08/2015 - 19:38
It looks just like west elm. Did you lay the boards on plywood first? It looks like there are a few pieces per row on the side if that makes sense. Seriously I love this
In reply to Thank you! by tracygator
Wed, 04/08/2015 - 21:11
You are correct, I build a plywood box basically with a face frame. I rip down all the reclaimed pallet to 1/2" thickness and then nail it to the plywood. The pallet wood is basically a veneer.
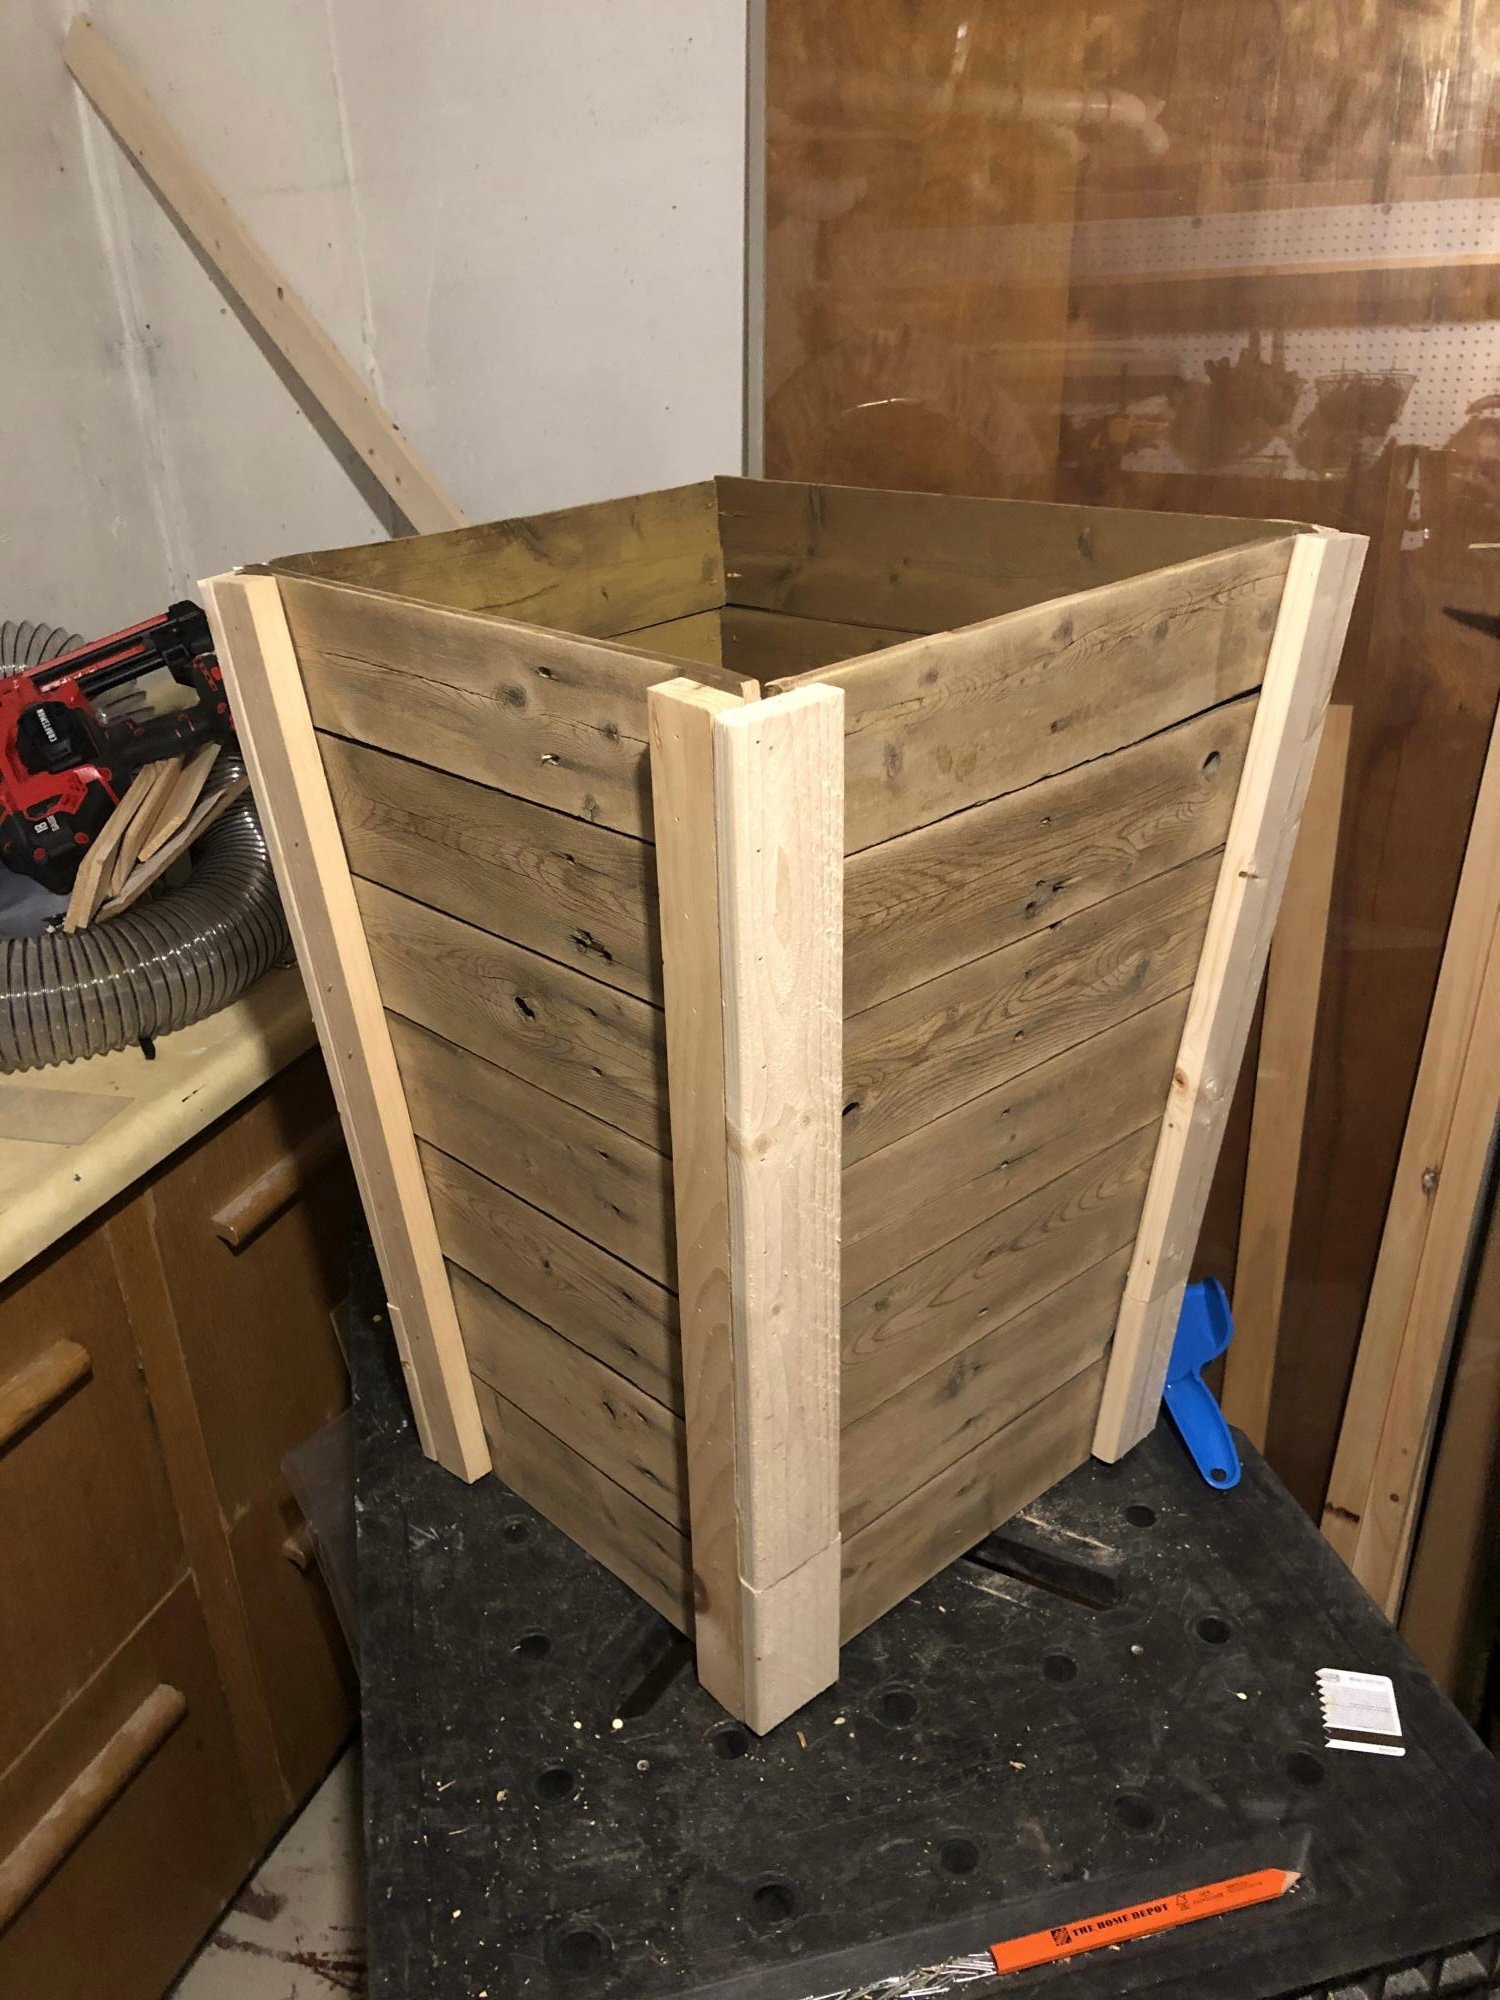
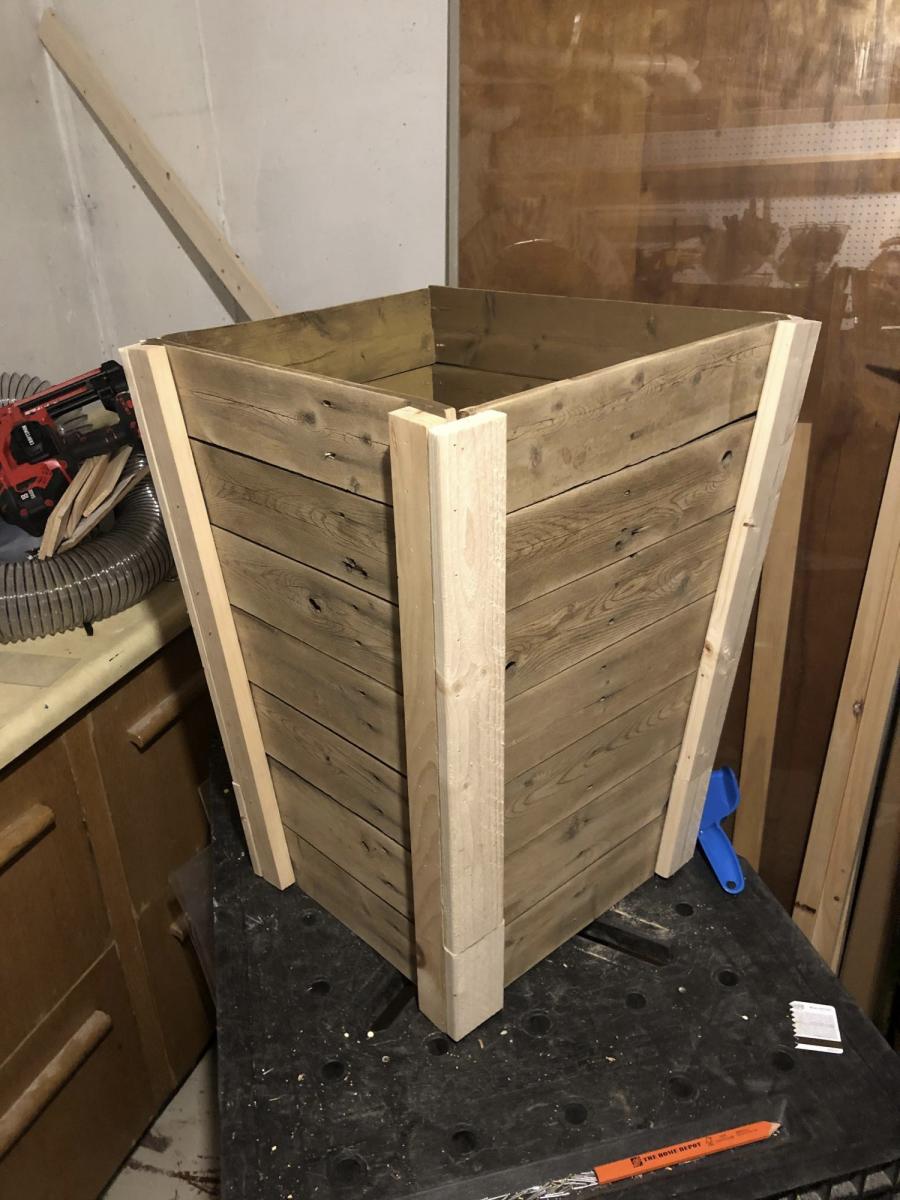
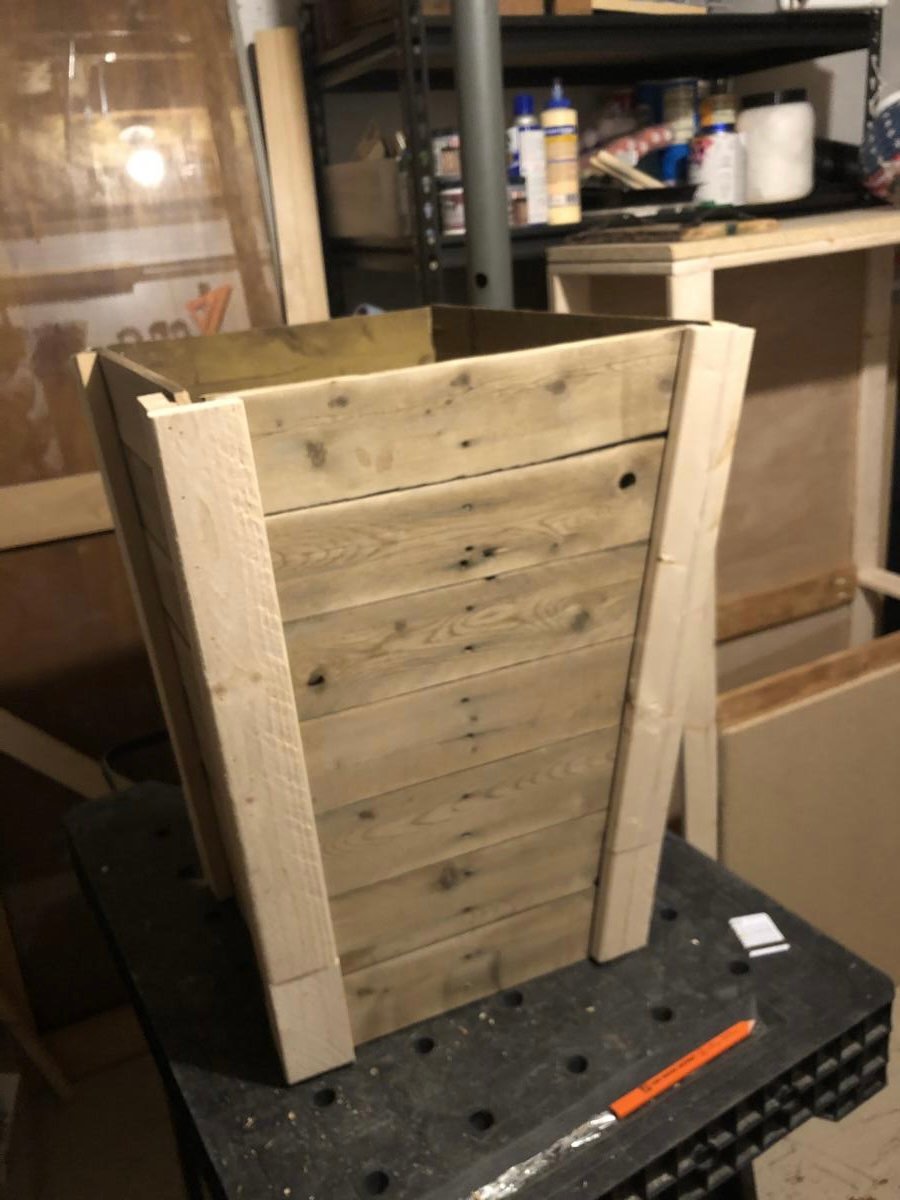
I was looking for an inexpensive way to dress up my deck and when I saw your tapered plant boxes I knew that was the gem I needed. I used pickets from a fence we took down and some 1 inch wood strips. I am planning on making more to line the new fence.
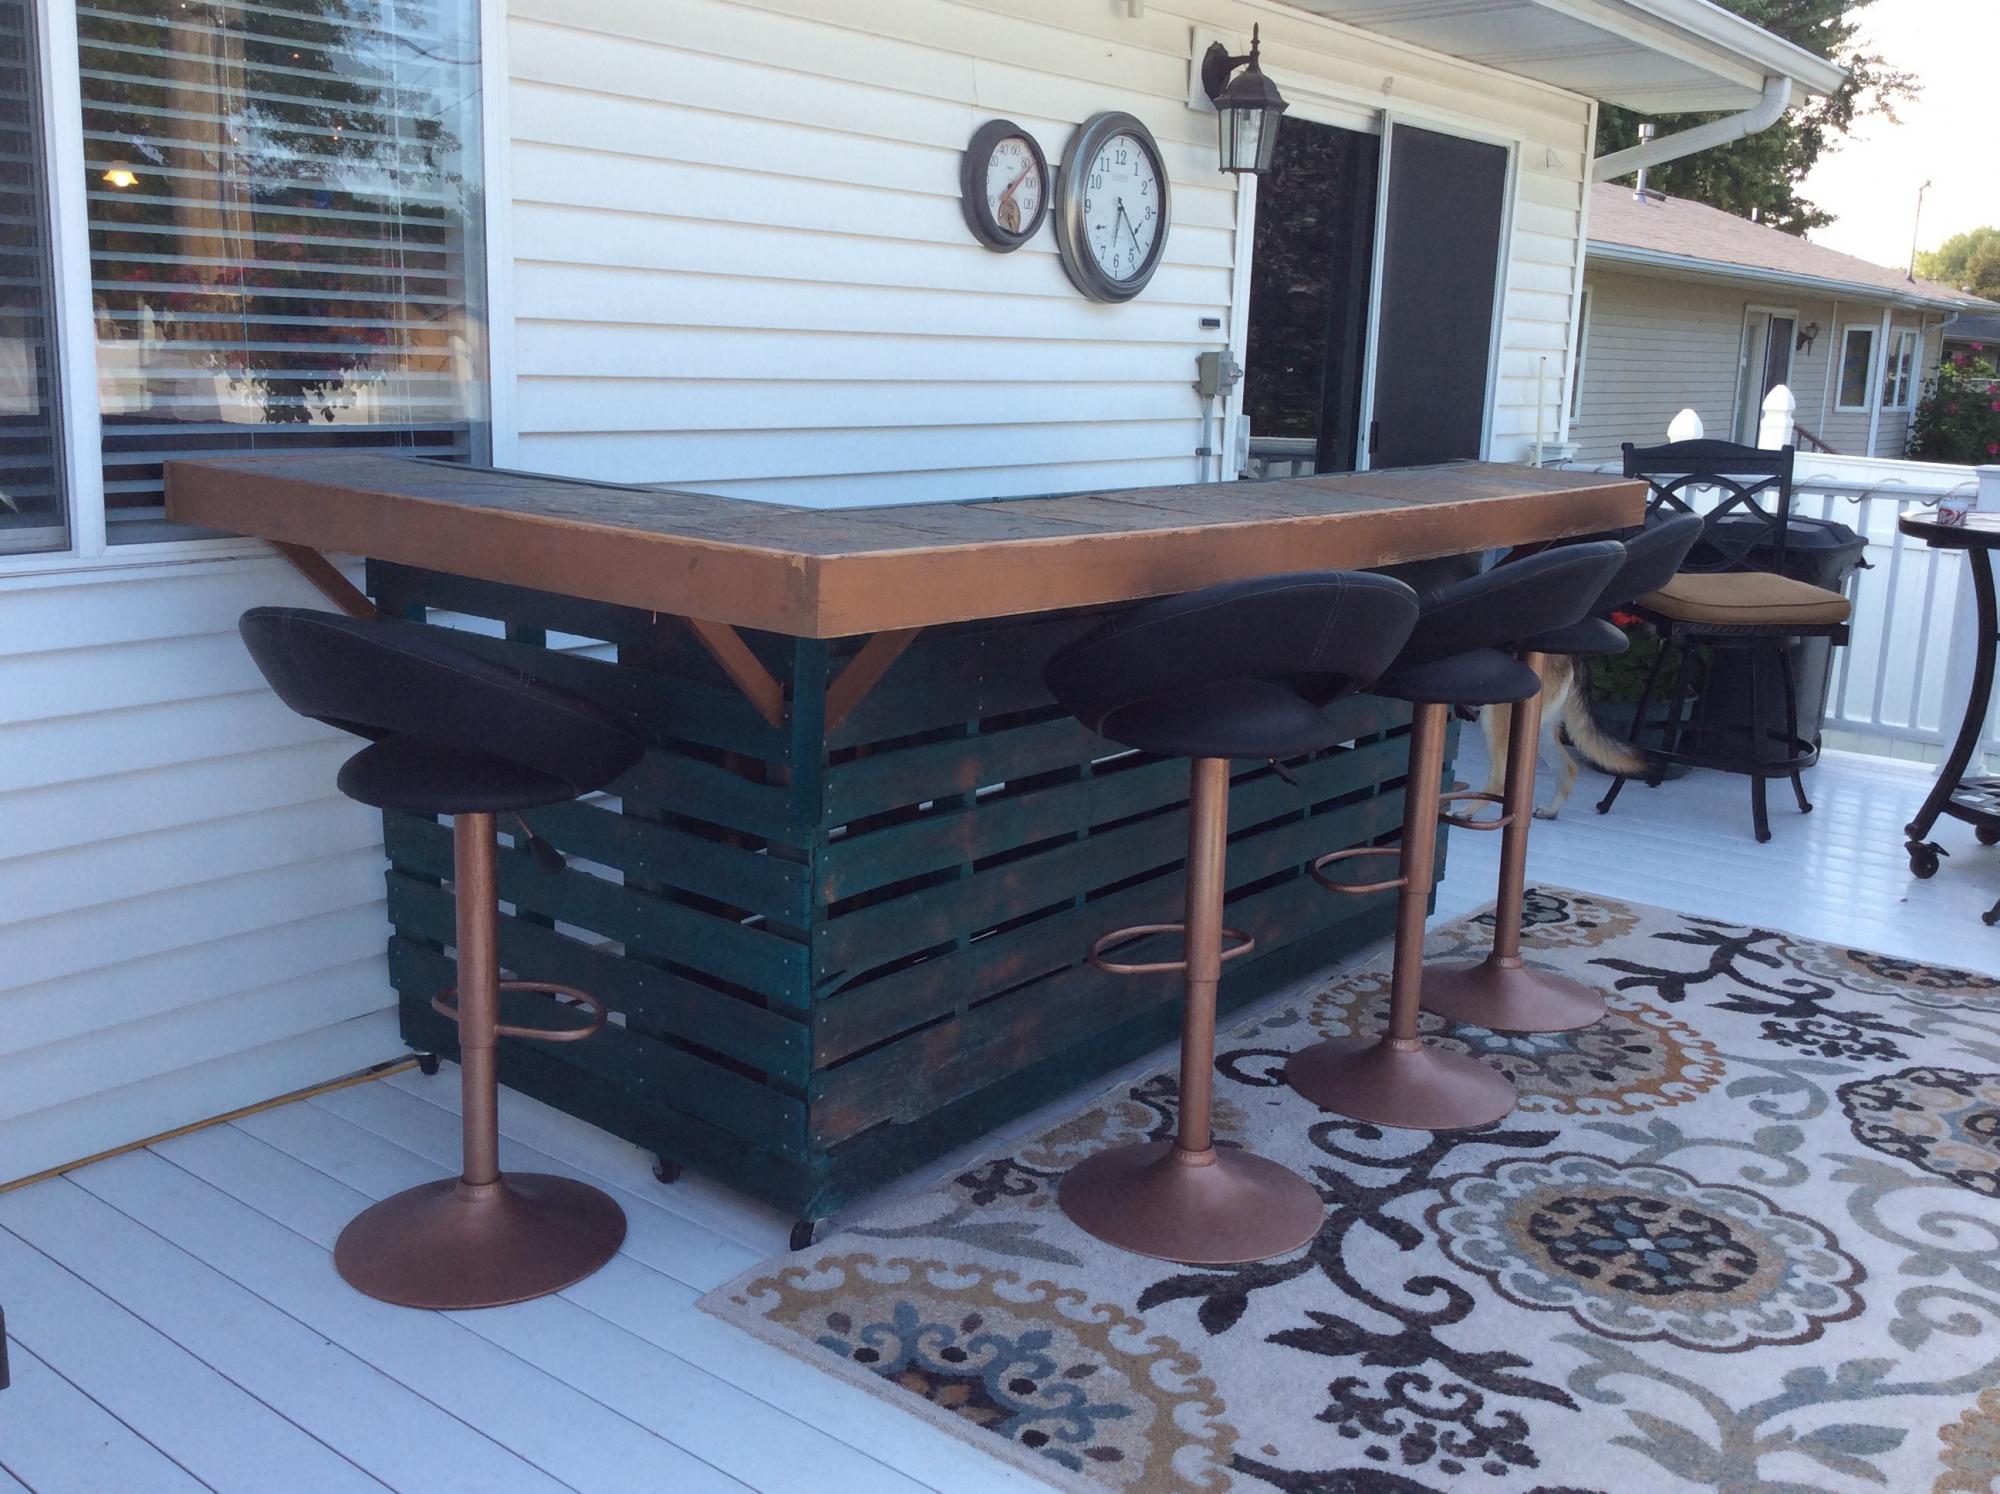
Outdoor pallet bar with sink I found in the garage. Just a dumping sink under cabinet,not hooked up to plumbing.
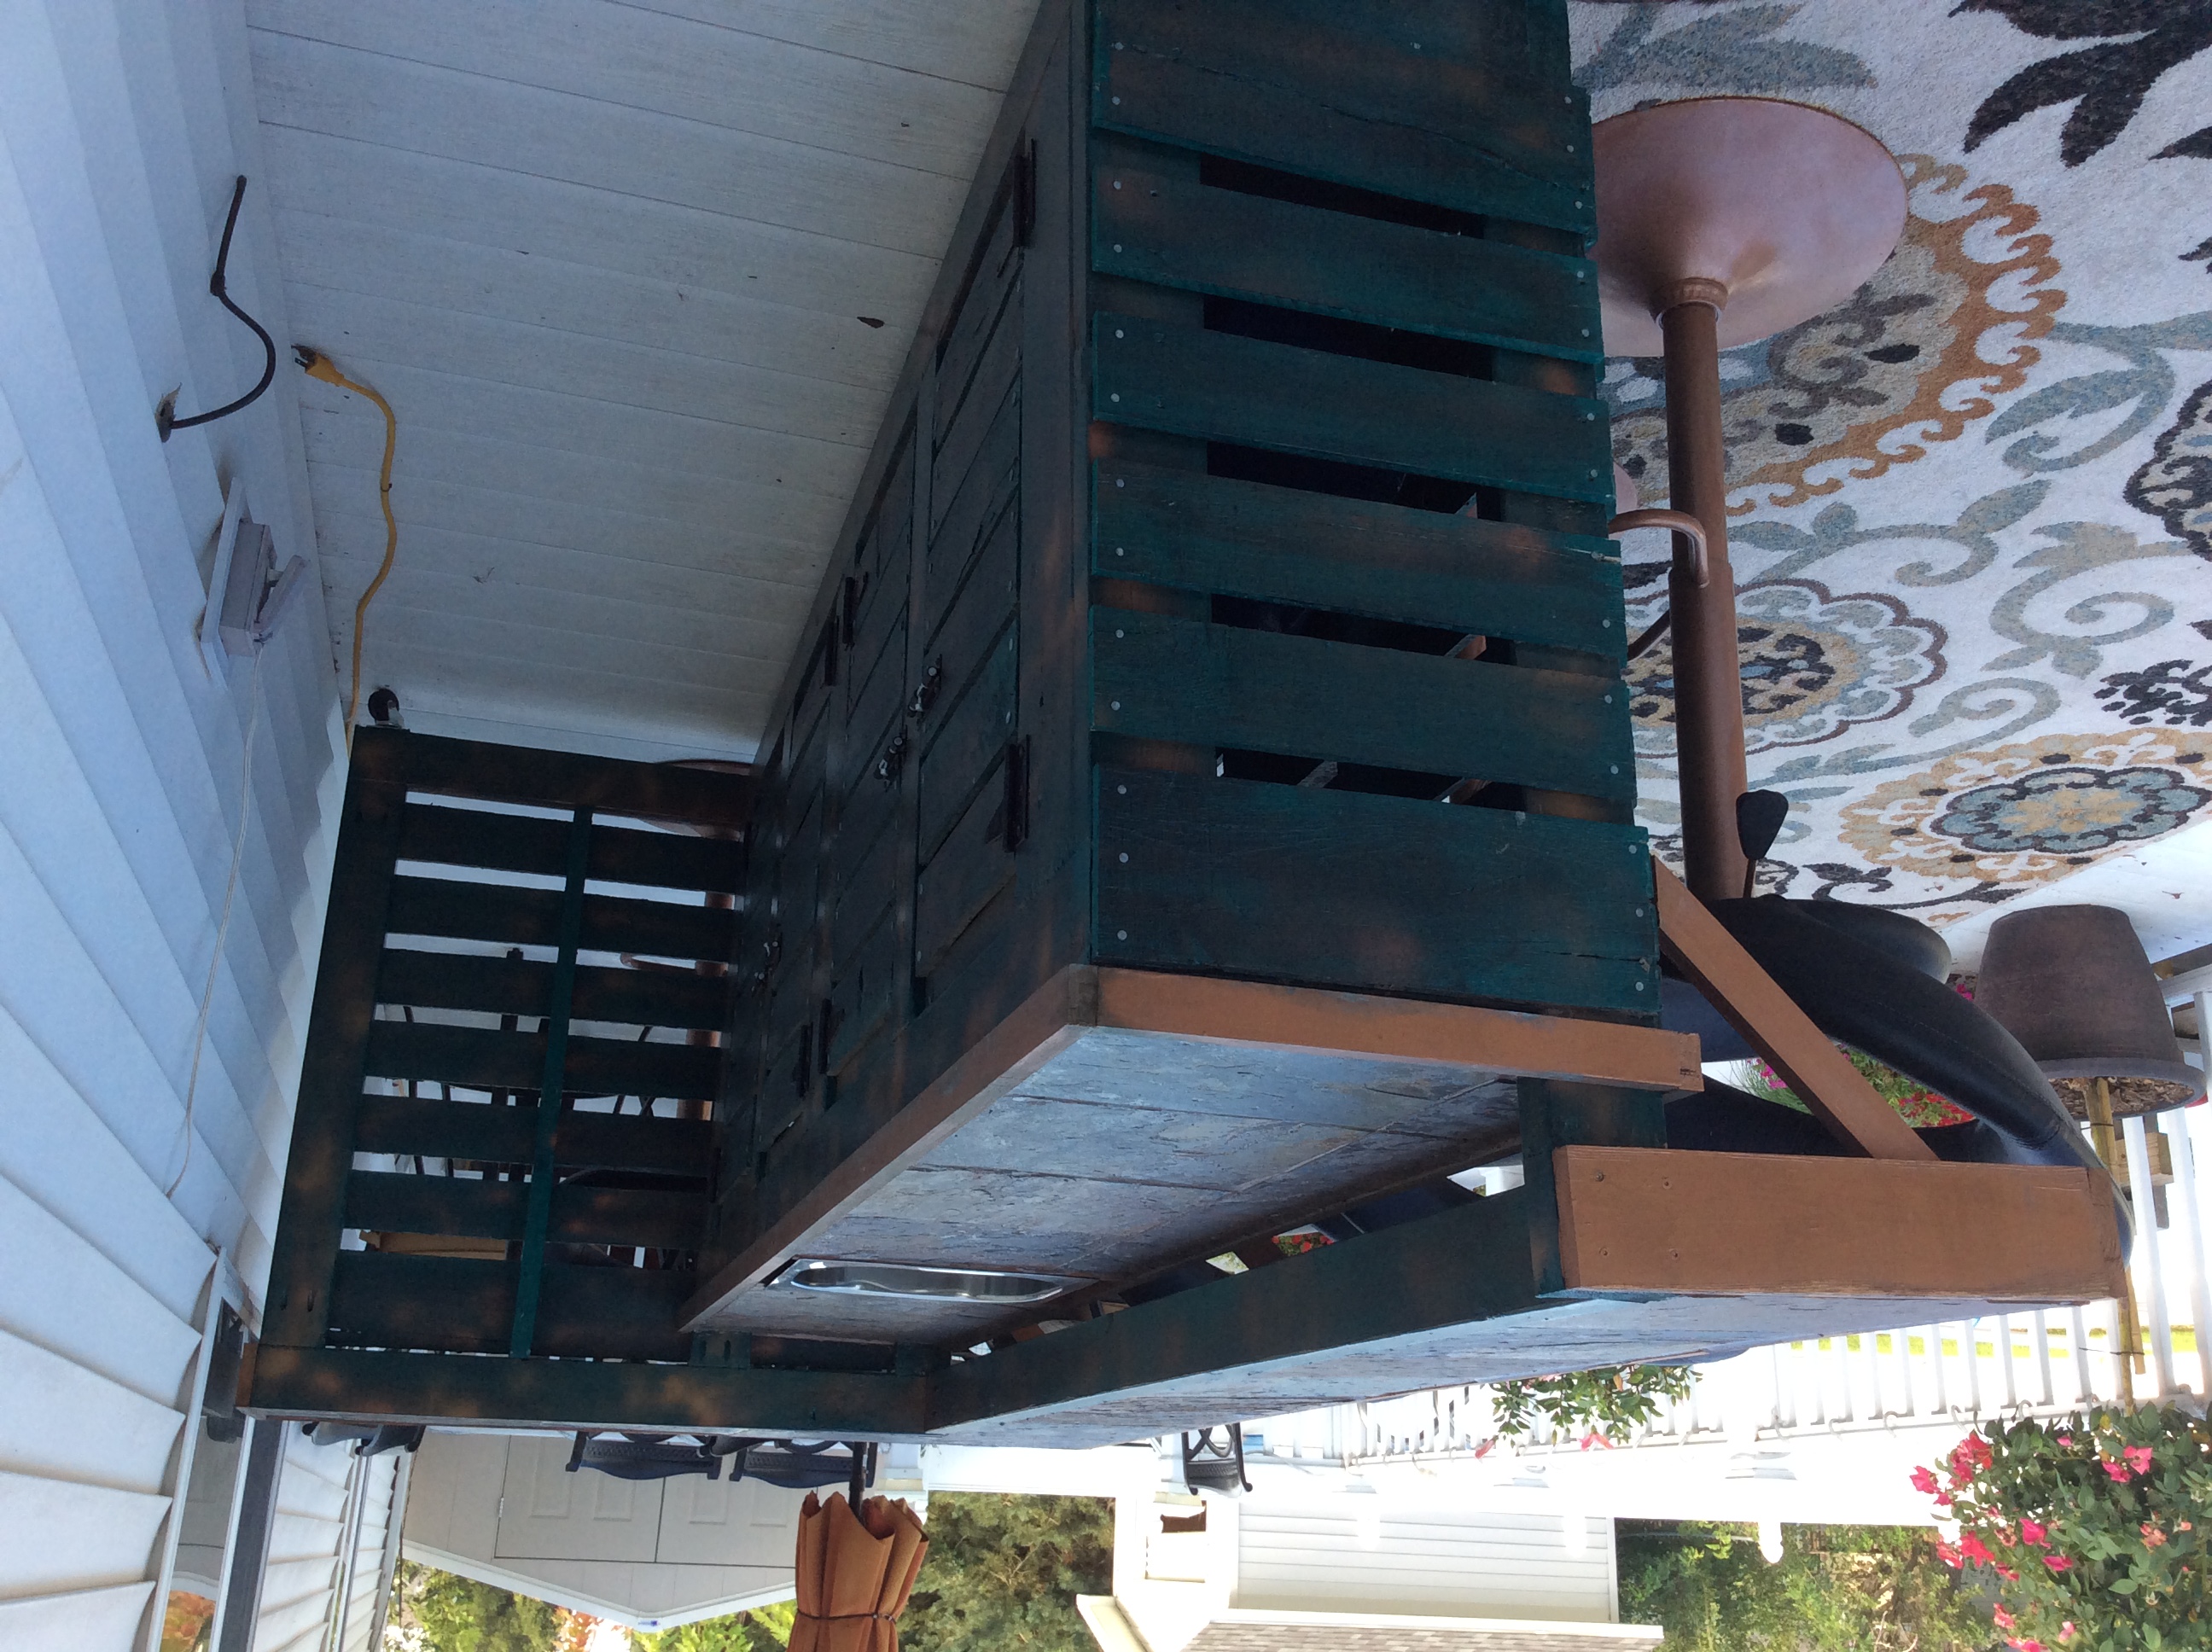
fun to make!
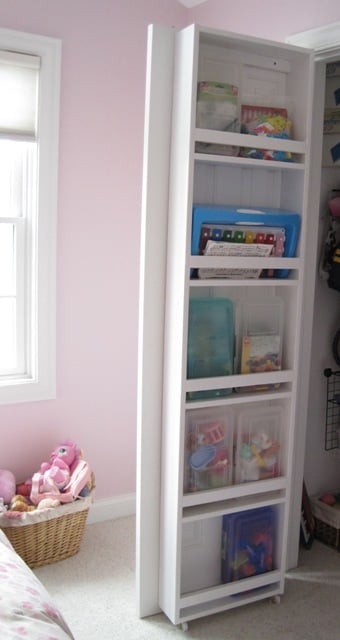
This was my first Ana White project, and I learned a lot from making it since I was also a novice woodworker. I am very happy with the end result, but it was probably a good thing that this went on the inside of a closet :) It gave me the confidence to go on and build something more difficult with the skills I built along with the storage.
The $30 estimate is only for the wood. Wood putty, sandpaper, screws, paint, etc. will make this more expensive, but you will use all of the extras on other projects since this one won't use those up.
The time involved is a guess--it has been a few months since I completed this. Someone with experience could probably do it faster and someone brand new to building might go slower. So I chose 3-6 hours, a nice in-between number.
Watch your caster size with carpet. That was my only snag with the instructions. Ana has hardwood floors that the casters roll on. I have carpet so I wanted larger wheels in order for smoother rolling. That added height to the caster also, so you want to modify the length of the sides of the storage unit to reflect the larger casters on carpet.
All in all a great plan and useful end result!
**UPDATE--January 30, 2012** We removed the casters from the bottom of this just yesterday and the door opens SO much easier. I would invest in some high quality casters and not the cheap ones I bought if you are going to use these. Without the casters I am only putting light things (stuffed animals) in this. If you are using it for heavier items, I would use the casters but make sure they readily turn. The casters I had did not want to turn as the door moved and they dragged on the carpet instead. Also, the overall height of your unit will depend on the height of your casters, so buy them first if you are going to use them. I still love this though!
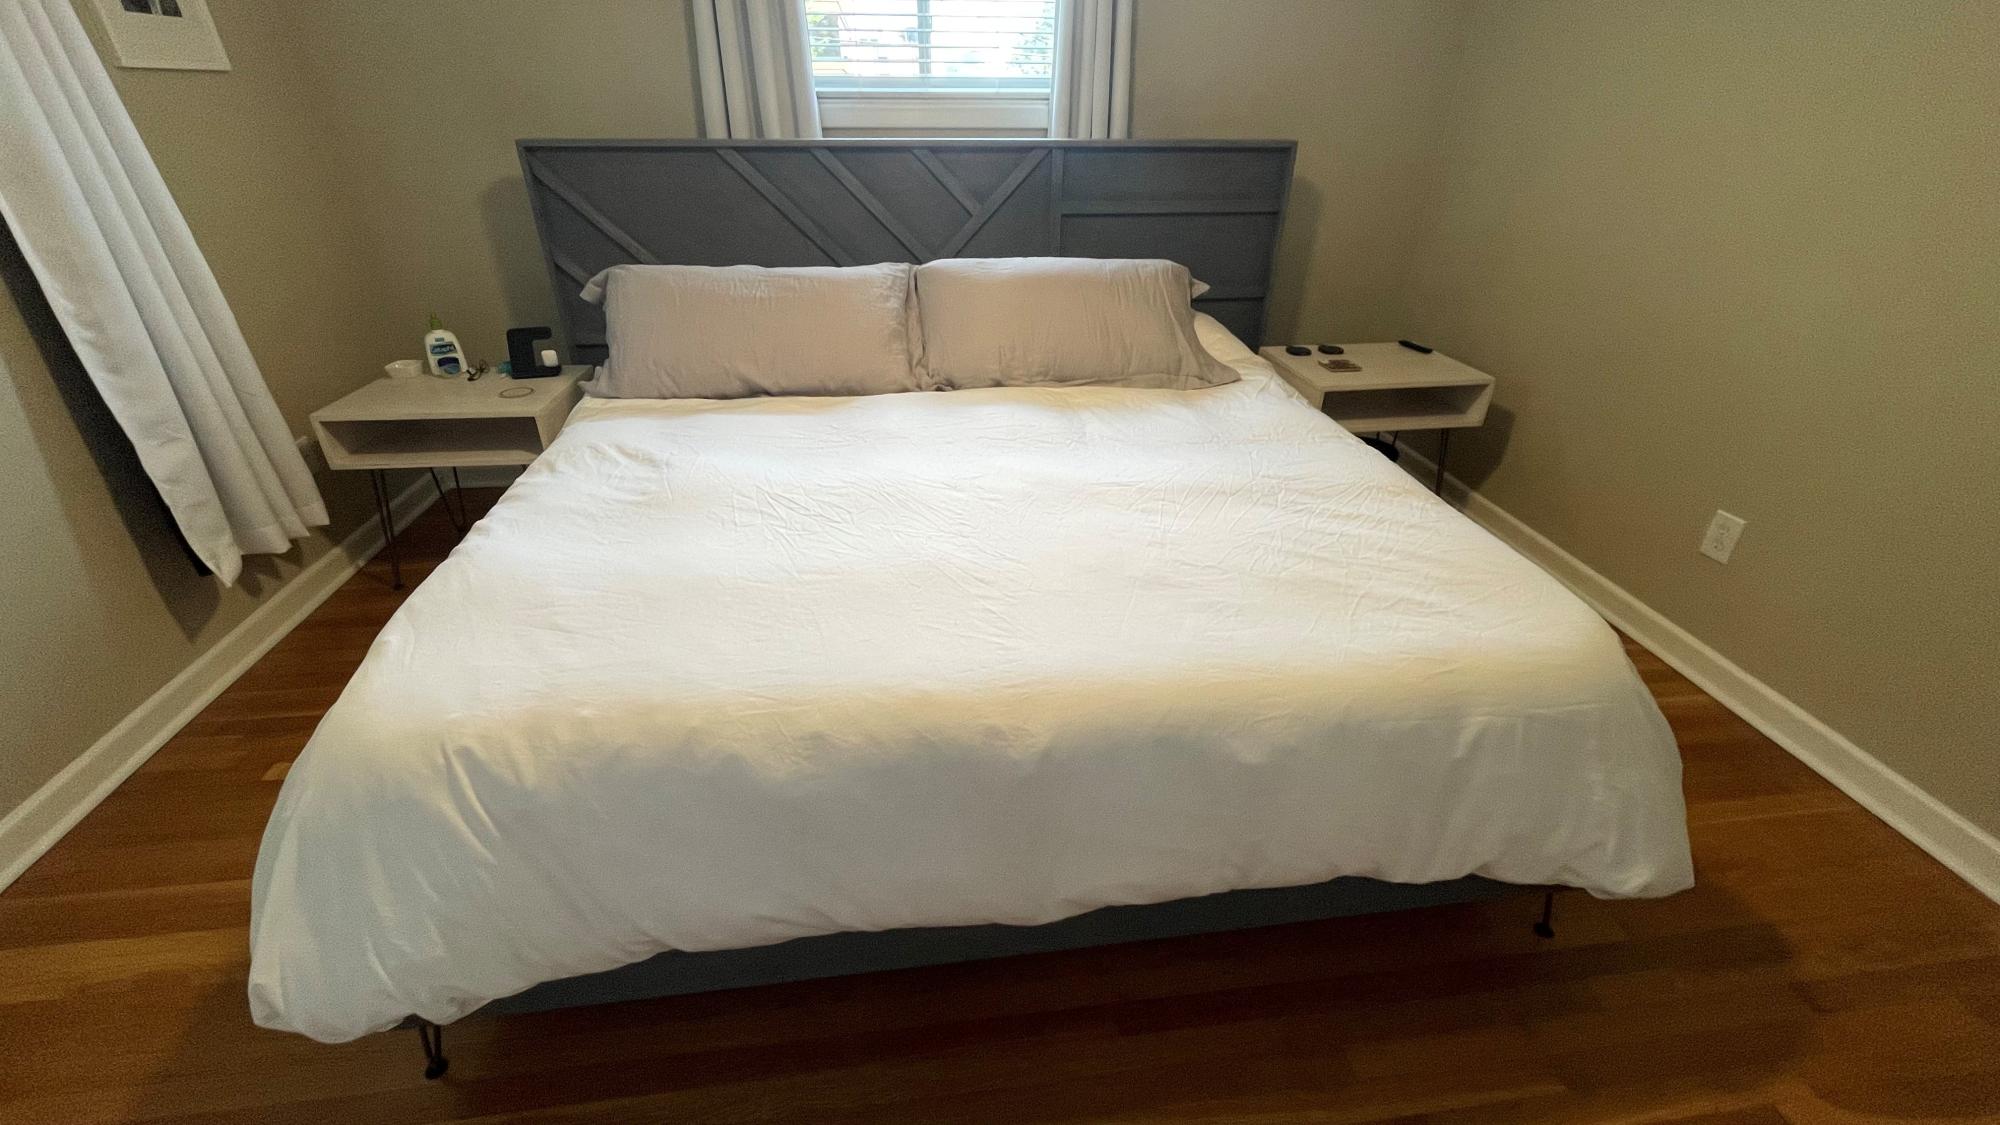
Bed Frame and Headboard made from Ana's plans. Frame is very simple. Headboard is fairly simple but a lot more cuts, measuring and attaching. I stained both with Varathane Weathered Gray. I also attached sideboards and internal support 2x4s with bed-frame brackets rather than screwing directly in to allow for easier deconstruction and reconstruction. Used an insert nut on the sideboards to attach hairpin legs (screwed directly into top/bottom boards).
Side tables are just 3/4 birch plywood glued and nailed into a rectangular box. 24x18" Top/Bottom and 18 x 6" sides. Hairpin legs are longer versions (16") of Ana's Amazon suggestions for bed frame. Stained with Varathane Antique White.. turned out ok, but would use a different white stain or just paint them white if I had to do it again, and paint the insides before you build!
Tue, 11/16/2021 - 15:27
That is beautiful, well done, thank you for sharing!
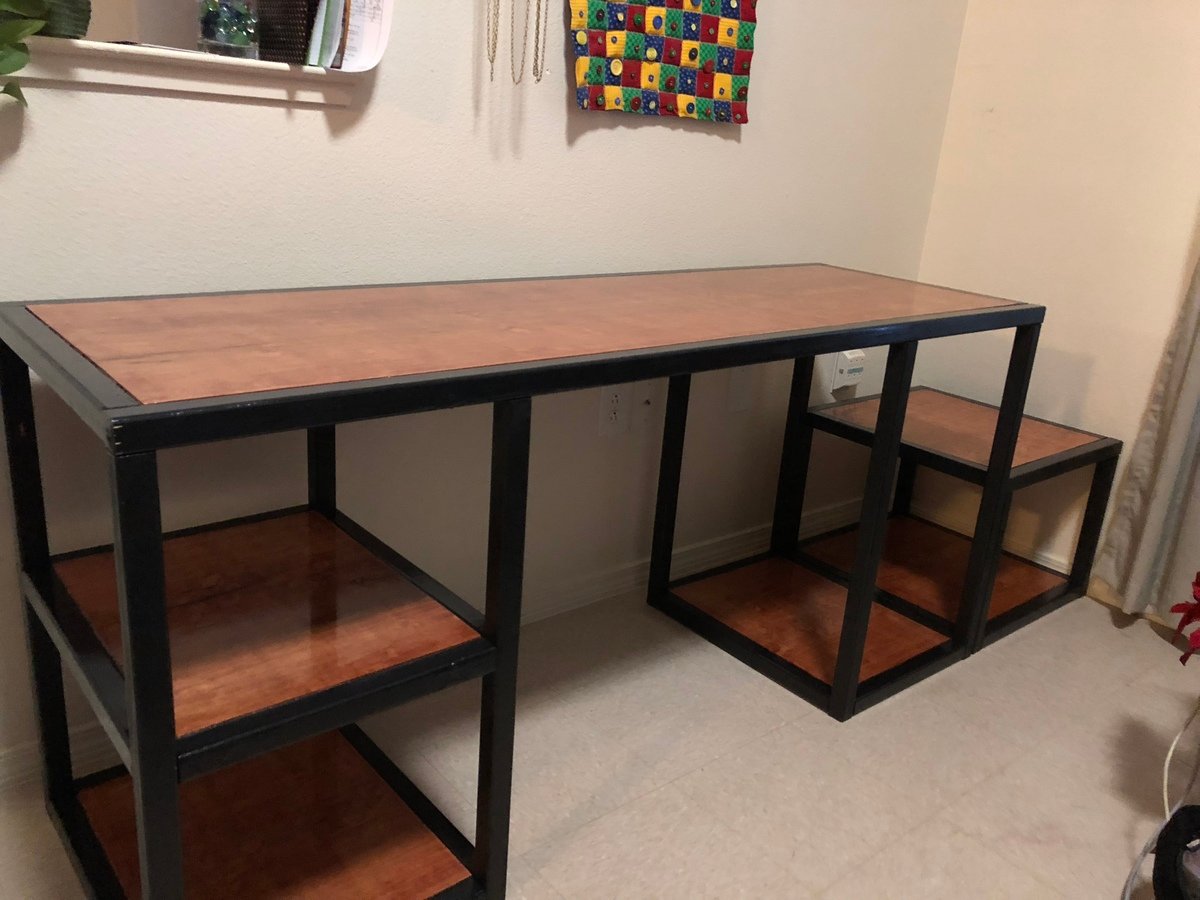
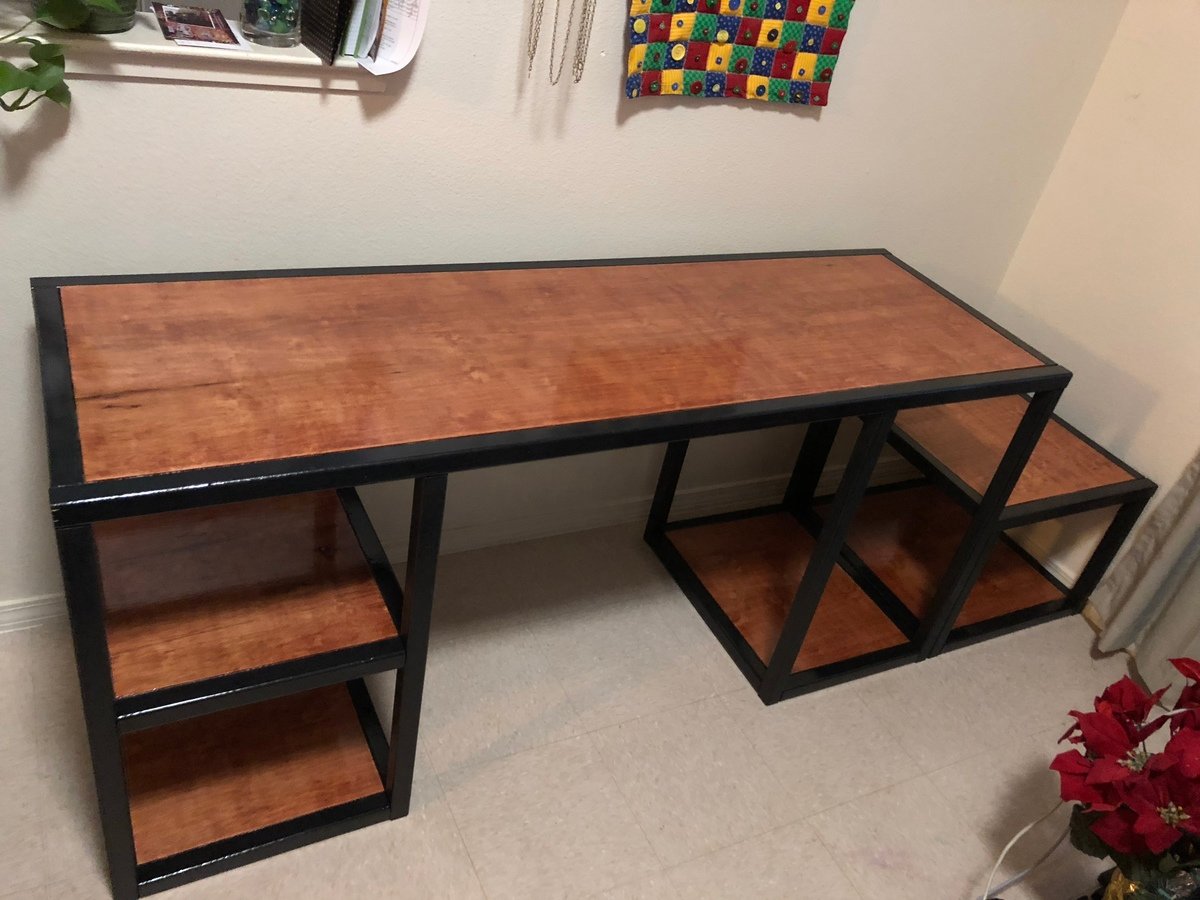
I added an additional detached shelf so we can change the setup anytime. I also increased the space between the two main shelves to 30 inches and extended the depth to 22 inches overall. I left one shelf off to make room for the computer tower. The top is made from maple with a gunstock stain. This desk will mainly be for my kids gaming station.
Built this for my daughter in law for Christmas. Turned out awesome. Plans and directions were great!
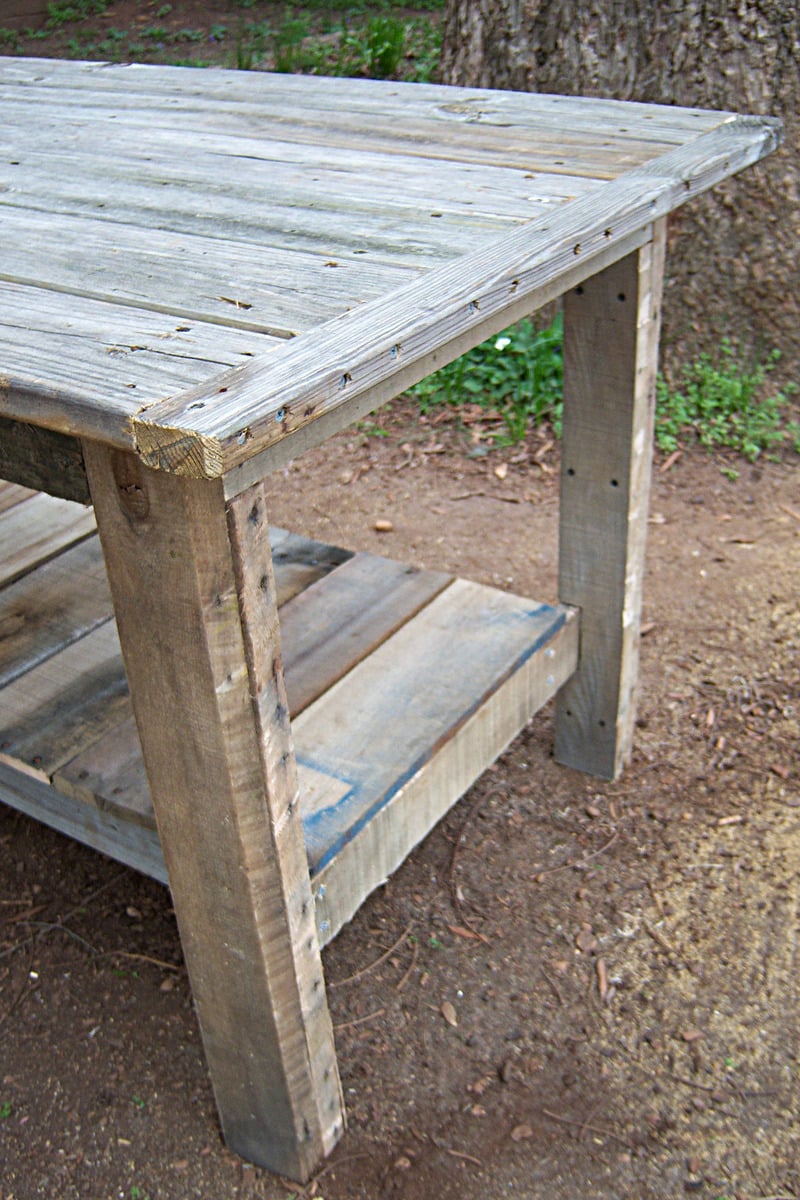
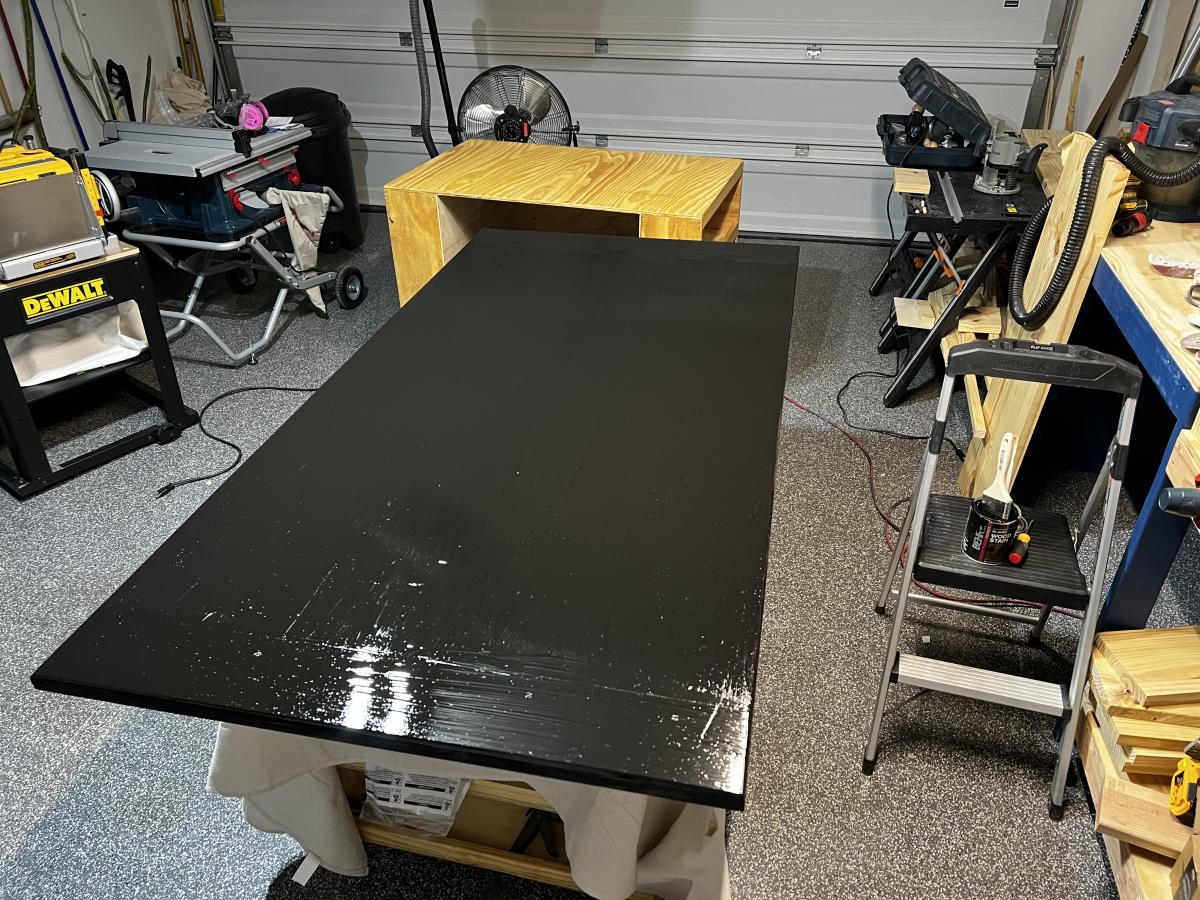
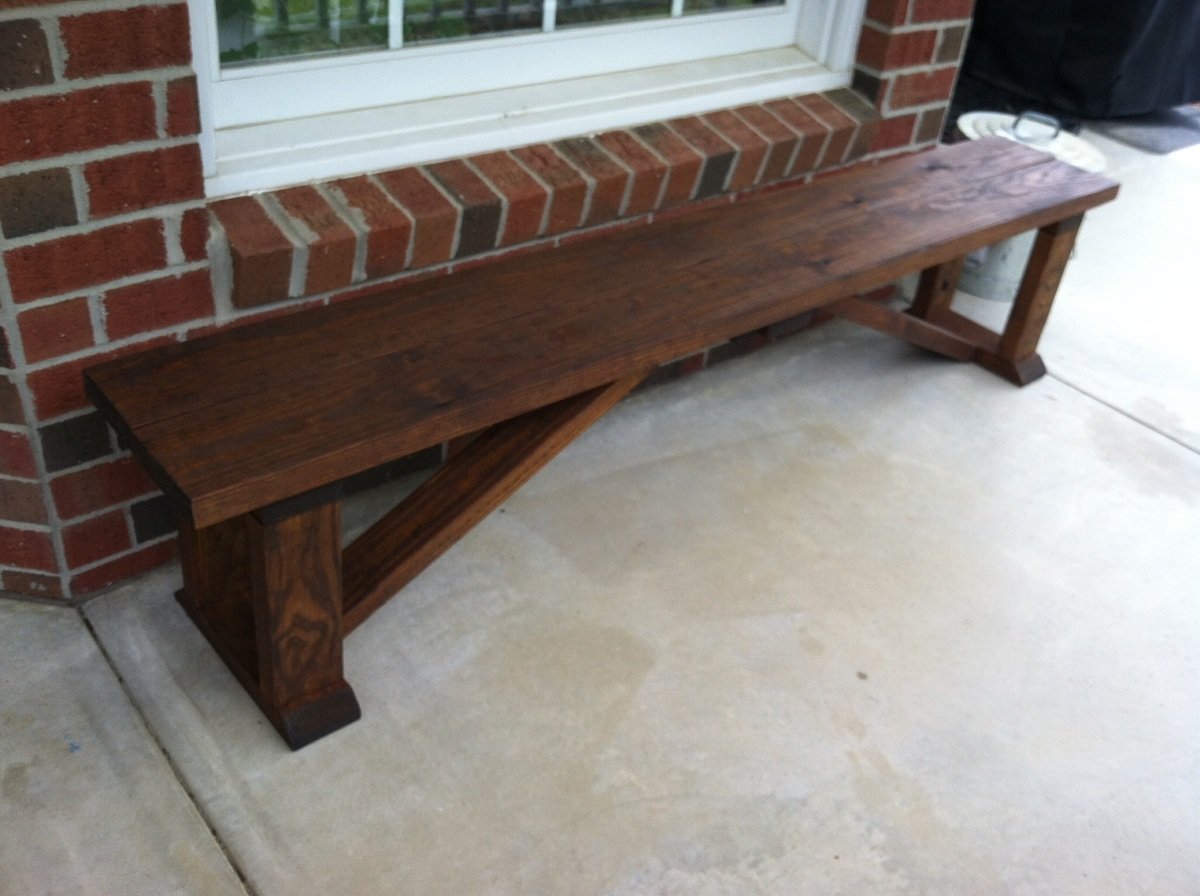
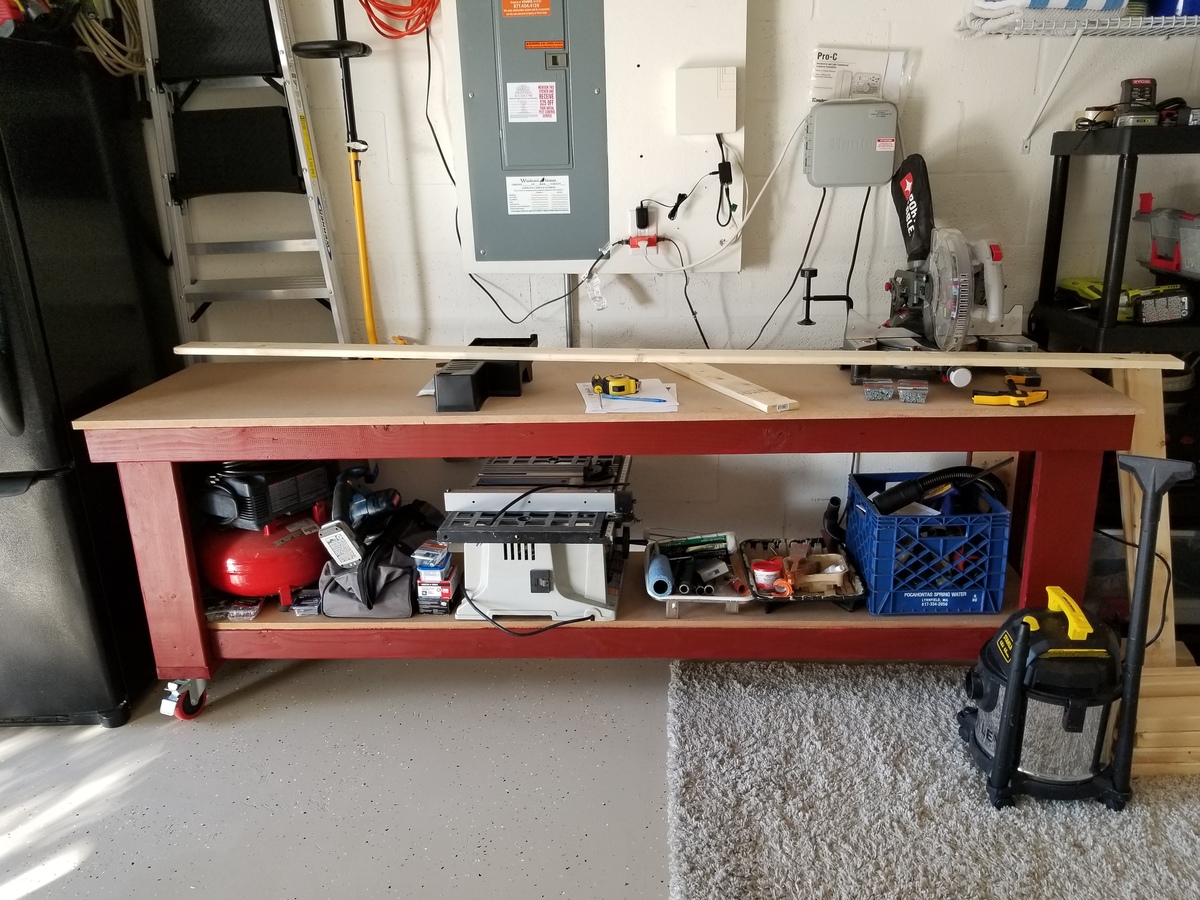
I am starting to work on more and more projects and I'm limited with space. I needed a worktable that could double as a backyard dining table (should the occasion arise). We have been planning to build the farmhouse table for a while now, so this was a great opportunity to build a prototype. I did some repair work for a friends deck and she gave me the leftover decking material. This became my table top. I purchased 4 2x4's at our local Habitat for Humanity ReStore for 50 cents each (this was the only money spent on this project). While I was at the ReStore I also picked up 4 pallets (they are free). After cutting them apart, the 2x4s from the pallets became the table legs and the 1x4's & 1x5's from the pallets became the shelf underneath. The shelf has been great for holding extra tools while I'm working on projects. My daughter likes to stack her toys on it too! This was a super quick and easy build. My wife even suggested we just refinish it and bring this one inside!
As always, I have to give thanks to Ana for such great plans!

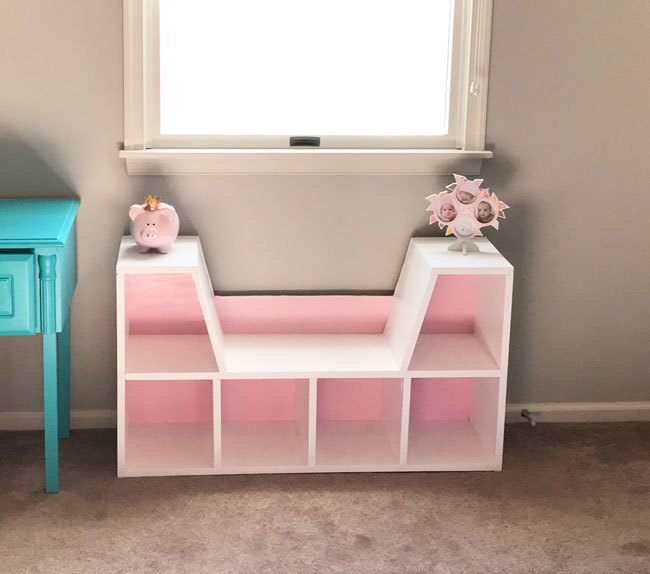
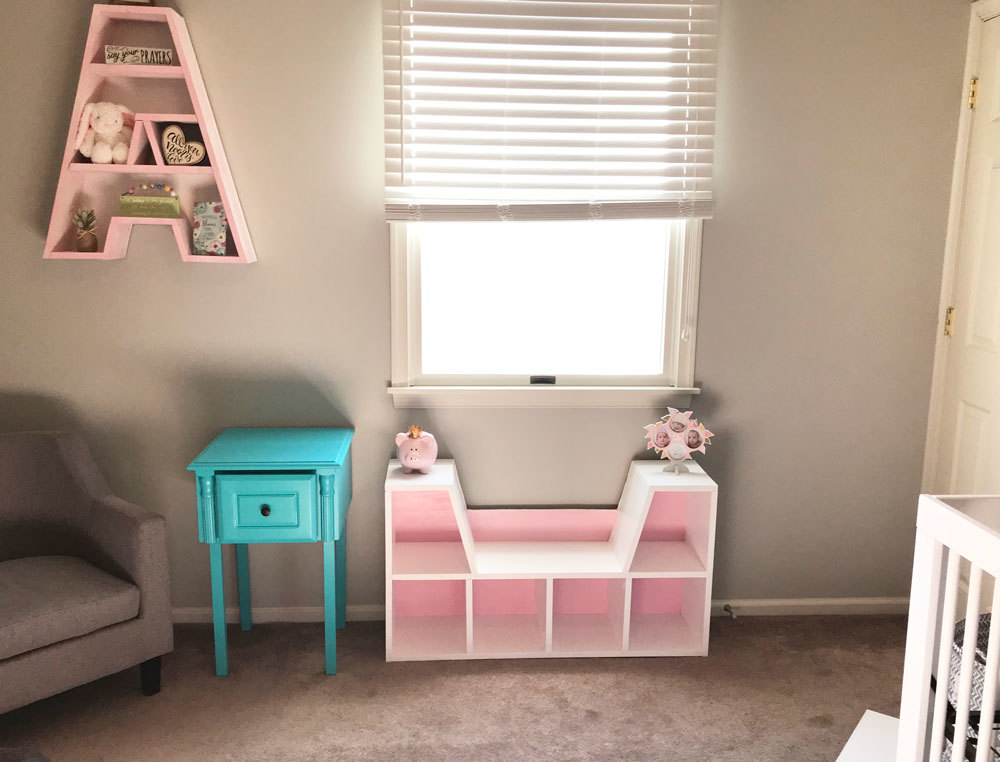
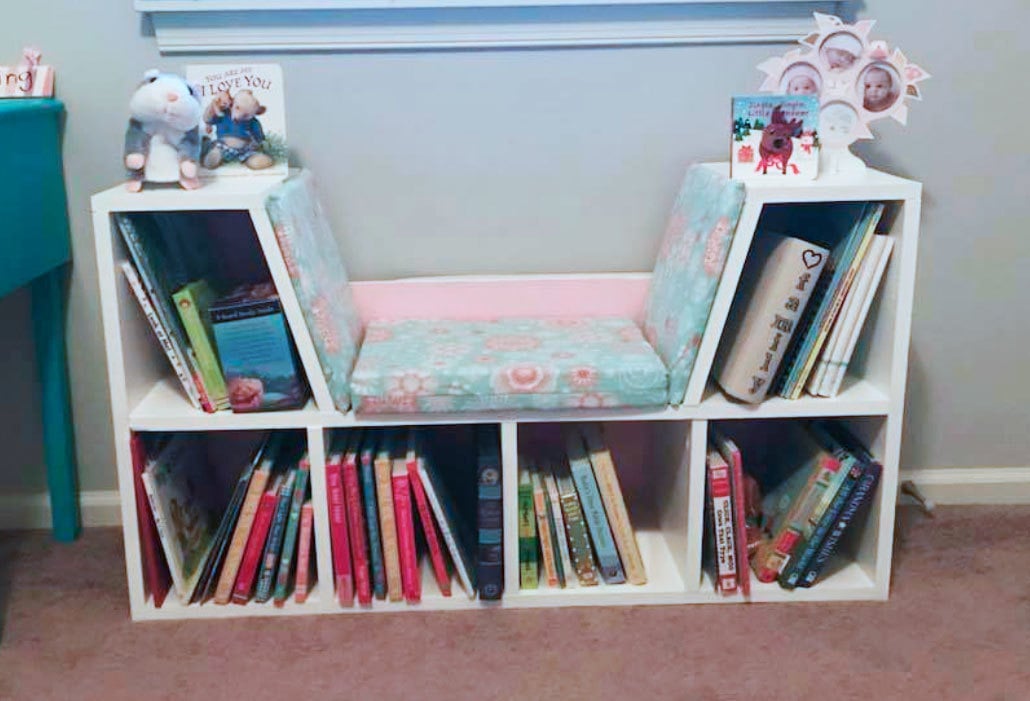
I made this book shelf with a reading nook for my daughters nursery. I found one you can buy online for $250 and decided I could make it for much less. I used 1 x12’s and the cushions were made by my mother and grandmother. All together it cost about $65 to make.

Sat, 01/06/2018 - 11:41
This is adorable! I love the entire room!
We've had a couple of people ask for plans. If there aren't any available, would you be willing to let us draw some plans up from your photos? Thanks! Ana
Sat, 01/06/2018 - 17:19
Absolutely! Sorry I didn’t have plans to post. It was an off the cusp kind of build and I just figured it out as I went along.
In reply to Absolutely! Sorry I didn’t by Knathu121
Sat, 01/06/2018 - 20:20
Thank you you are too kind! Do you happen to have your cut list? Or just rough dimensions?
Sun, 01/07/2018 - 09:11
I don’t have my cut list anymore but rough dimensions are as follows;
height - 23.5”
width 44.5
depth- 12”
I tried accounting for the width of the wood in order to make each square on the bottom 10x10 and the 2 middle shelves to be 12 inches high and the bottom on the middle shelves to be 10” wide. I wanted to have at least 20” for the seat while also having 2 wide enough shelves at the top to be able to put things. Sorry but I don’t have the angles of the 2 side walls for the sitting area. I know that’s a pretty rough explanation but with the things I’ve seen you make I’m sure you can make do!
Sun, 01/07/2018 - 15:43
I don’t have my cut list anymore but rough dimensions are as follows;
Height - 23.5”
width 43.75”
Depth - 12”
I tried making dimensions to account for each box on the lower level to be 10x10 and the boxes in the middle to be 12” high and 10 inches wide. I wanted the seat to be at least 20” but I miss calculated the angle cut length and my seat is less then 20”. I can’t remeber the angle I used for the walls (sorry!) but I wanted to make sure that the top shelf was wide enough to put stuff on it. I know this is a rough explanation but based on the incredible stuff you make I’m sure you can work it out and make some pretty awesome plans!
Thu, 11/26/2020 - 20:31
Hi Ana! I’ve been searching for plans for this. Did you happen to draw any up? If not, I’ll go off the OP’s dimensions and wing it! Thanks!!
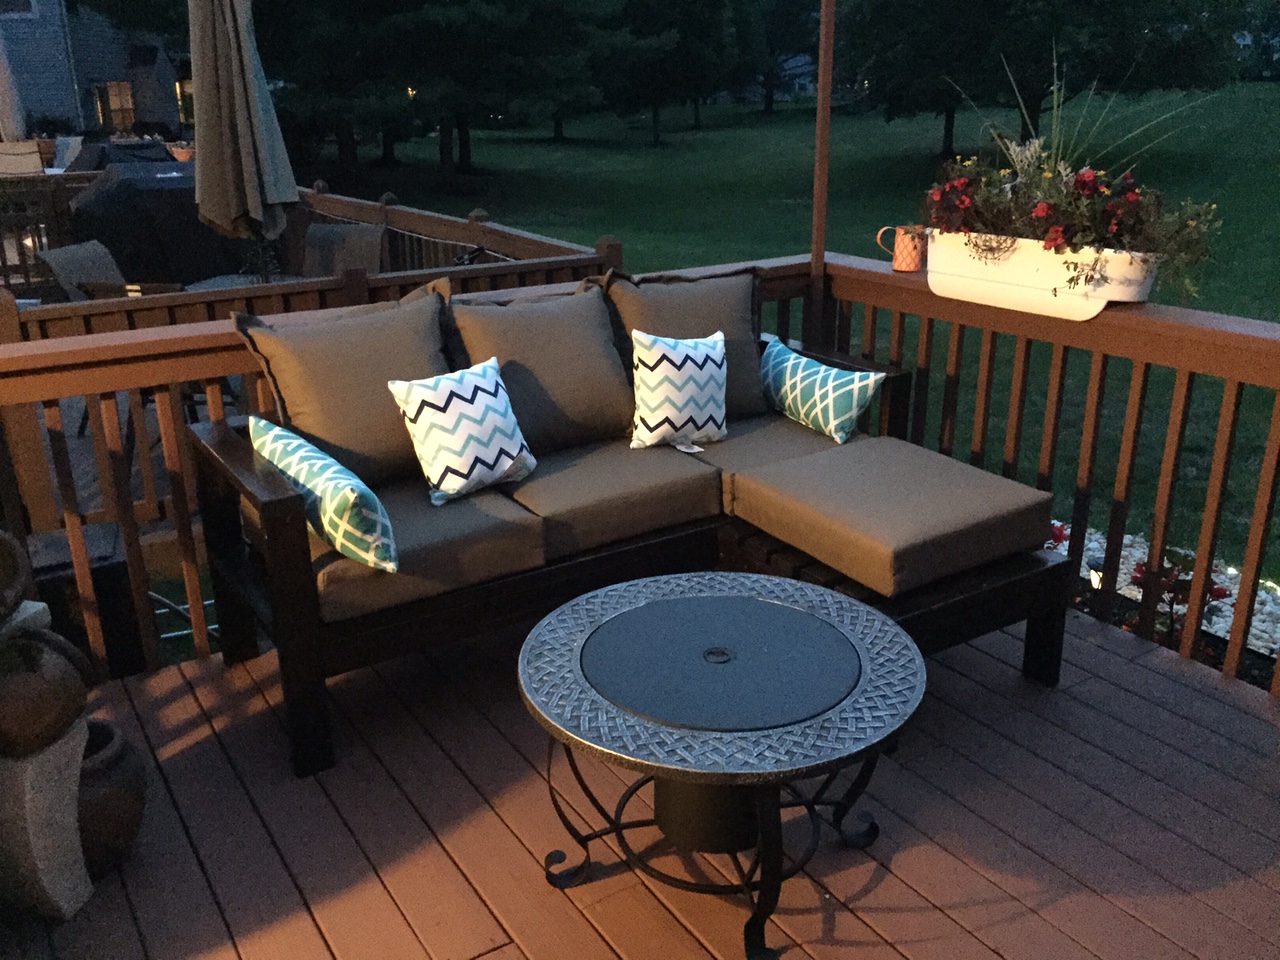
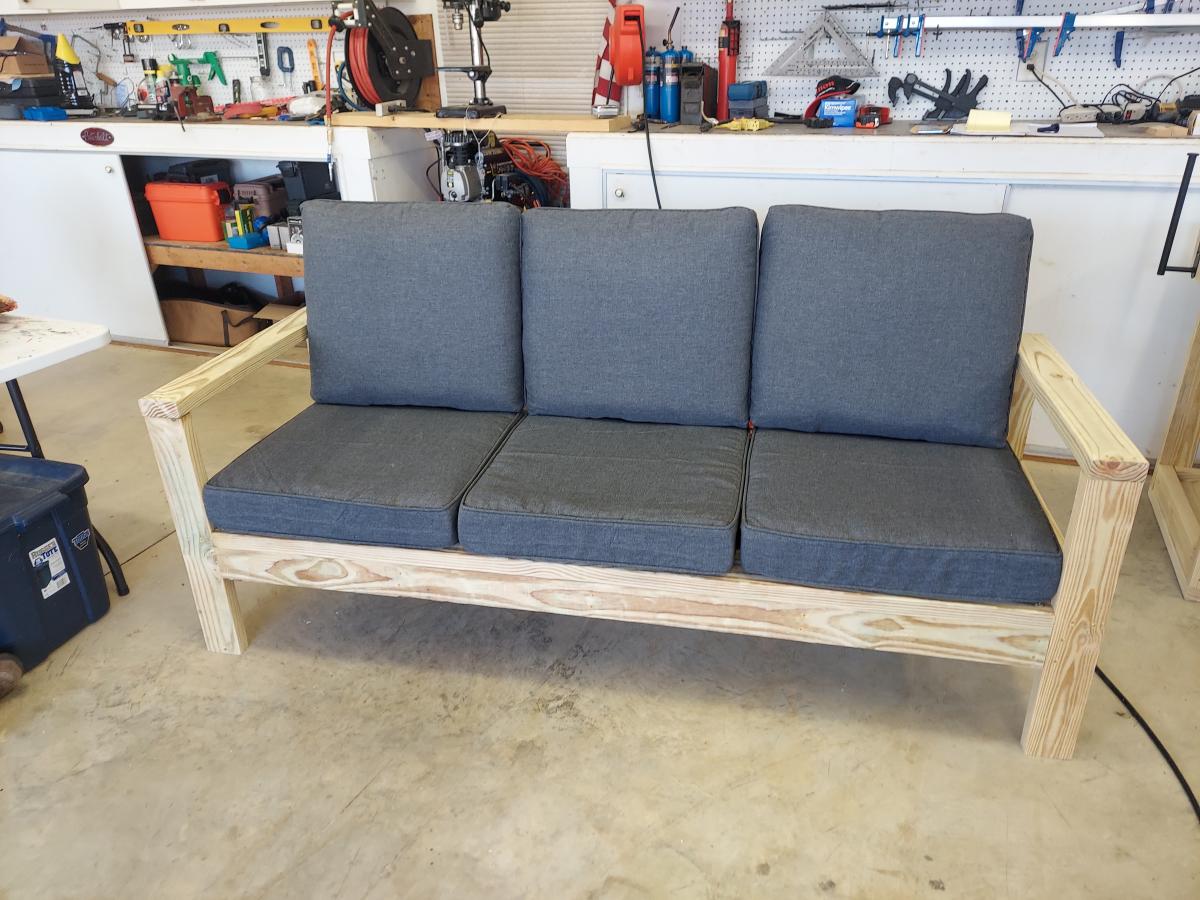
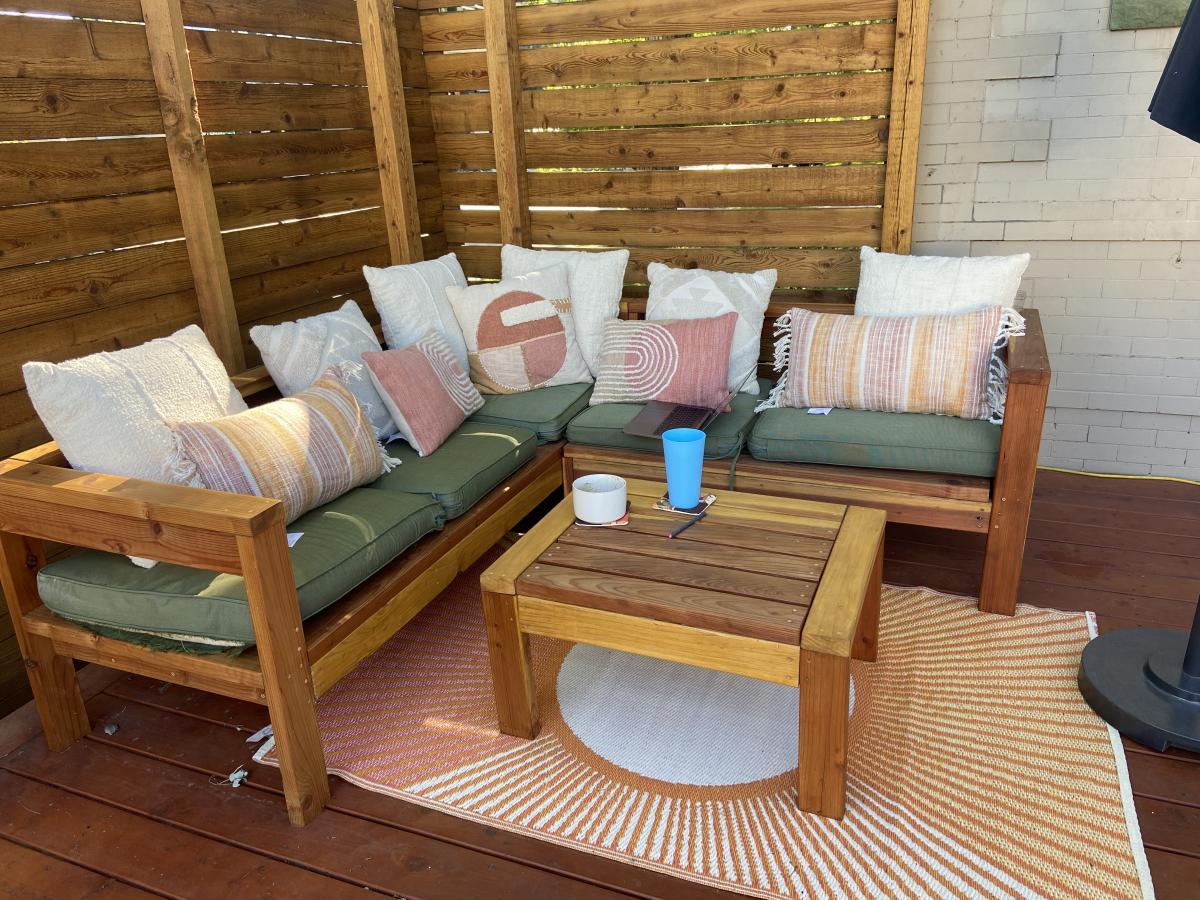
This couch was super easy. The 2x4s cost about $30. The cushions were a little higher at $160 for all, but can't complain when spending so little. I bought the cushions first to assure the size would be adjusted correctly. It took about 30-45 minutes to put together. I say it's a weekend project because of the stain and sealer. Then the wife wanted a chaise also. I decided to make it an ottoman so it's a chaise when she wants and an extra seat when we have extra company. I went with the color Kona for the stain and applied clear satin spar urethane 3 times since it was raw wood initially. Excellent project that really completed my outdoor space!
Mon, 07/06/2015 - 20:16
They were on sale at Target, but they were running out. We initially wanted the Navy Blue but when this was the only color available we settled but now we couldn't be happier. Fits in with our backyard perfectly.
The cushions are Threshold Deepseating Outdoor Cushions. They do get soaked in the rain but I suppose they're outdoor cushions because once the sun is out they dry instantly. Let me know if I could help any further!
Mon, 07/06/2015 - 20:15
They were on sale at Target, but they were running out. We initially wanted the Navy Blue but when this was the only color available we settled but now we couldn't be happier. Fits in with our backyard perfectly.
The cushions are Threshold Deepseating Outdoor Cushions. They do get soaked in the rain but I suppose they're outdoor cushions because once the sun is out they dry instantly. Let me know if I could help any further!
Sat, 10/03/2020 - 23:56
Are the plans not posted to your website? I built a 90" version of your plans that are for 79" couch and want to use an ottoman as a versatile chaise similar to this layout.

Work bench with casters came out great and already using it on my kitchen console.

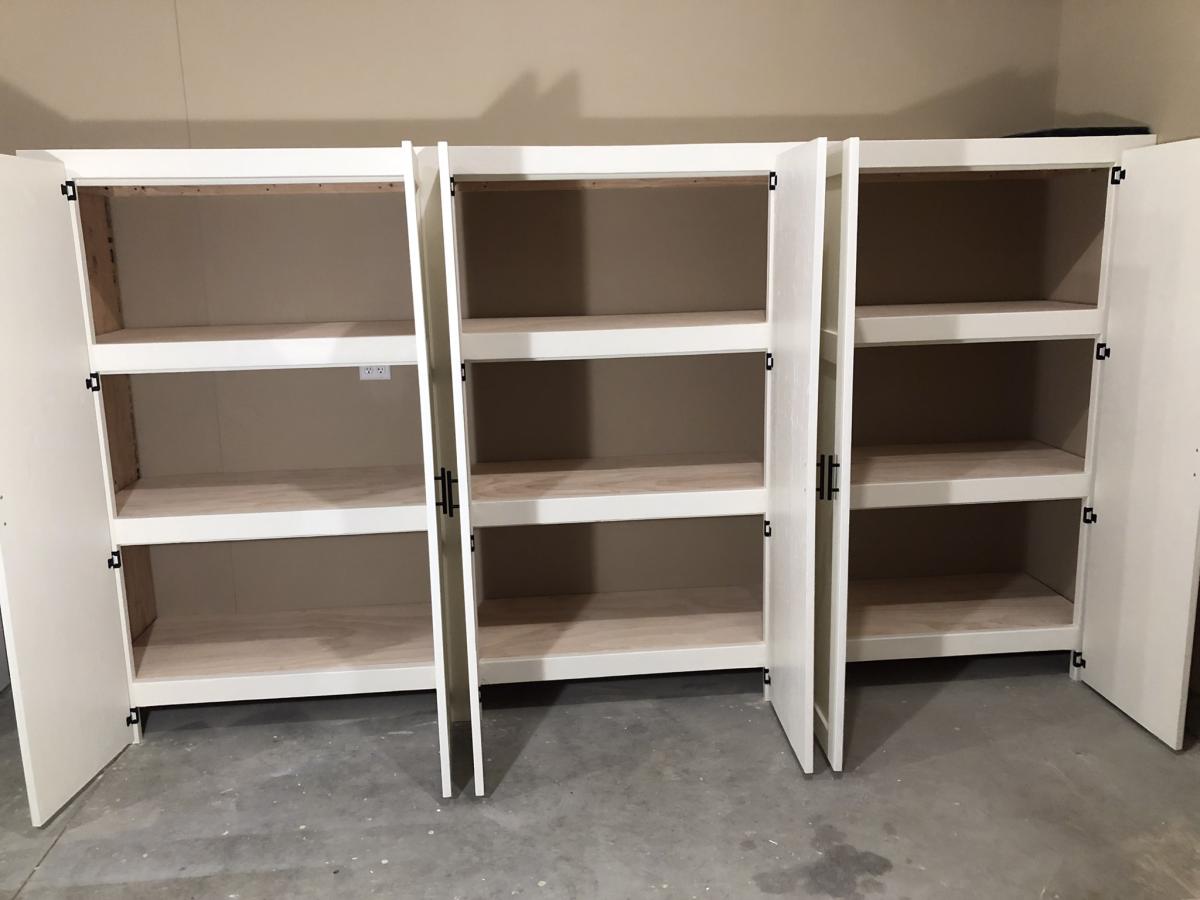
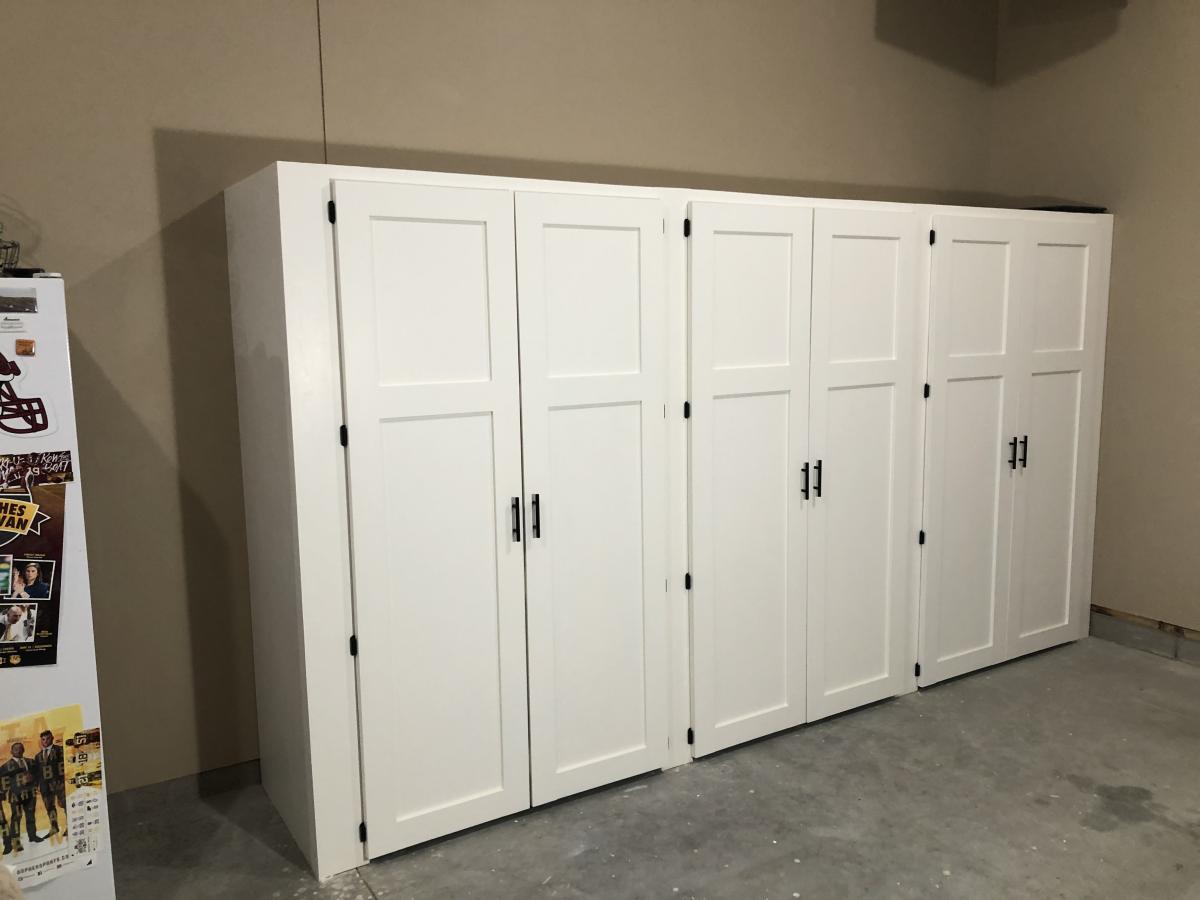
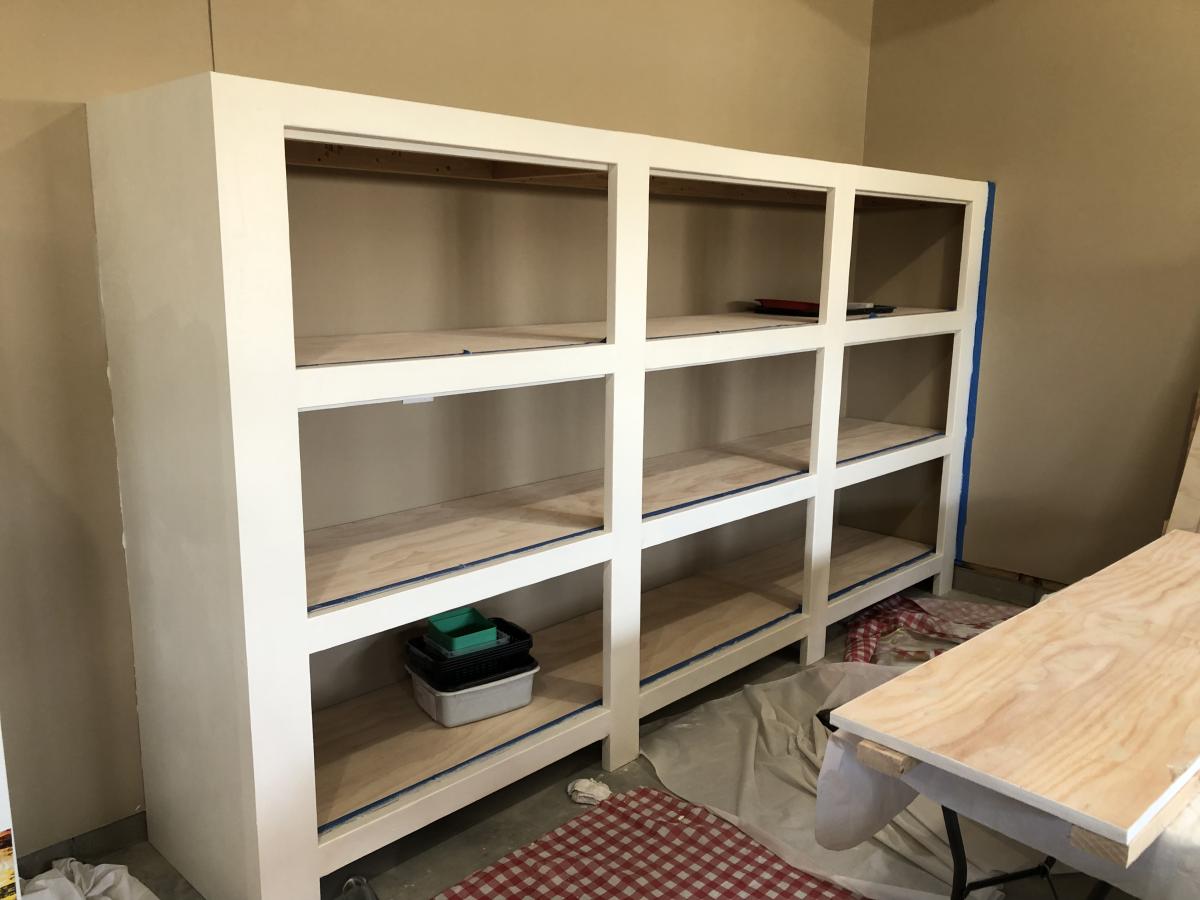
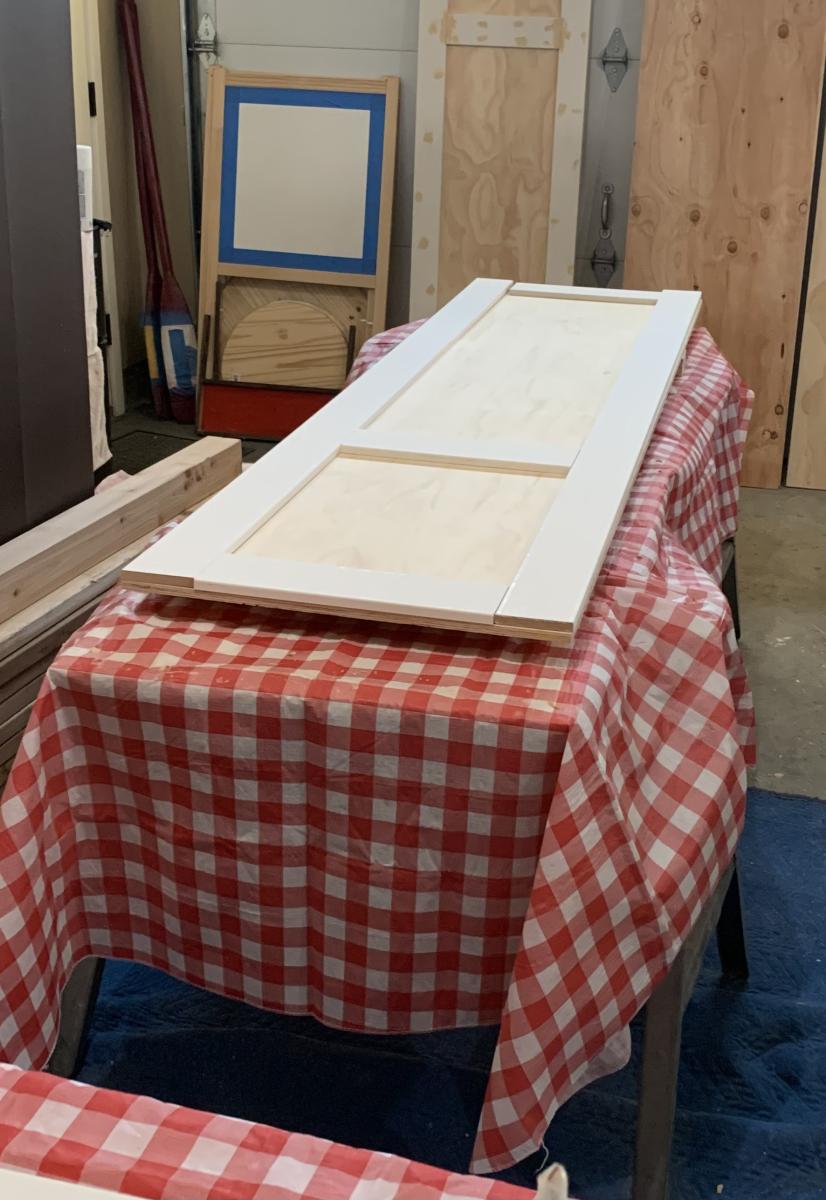
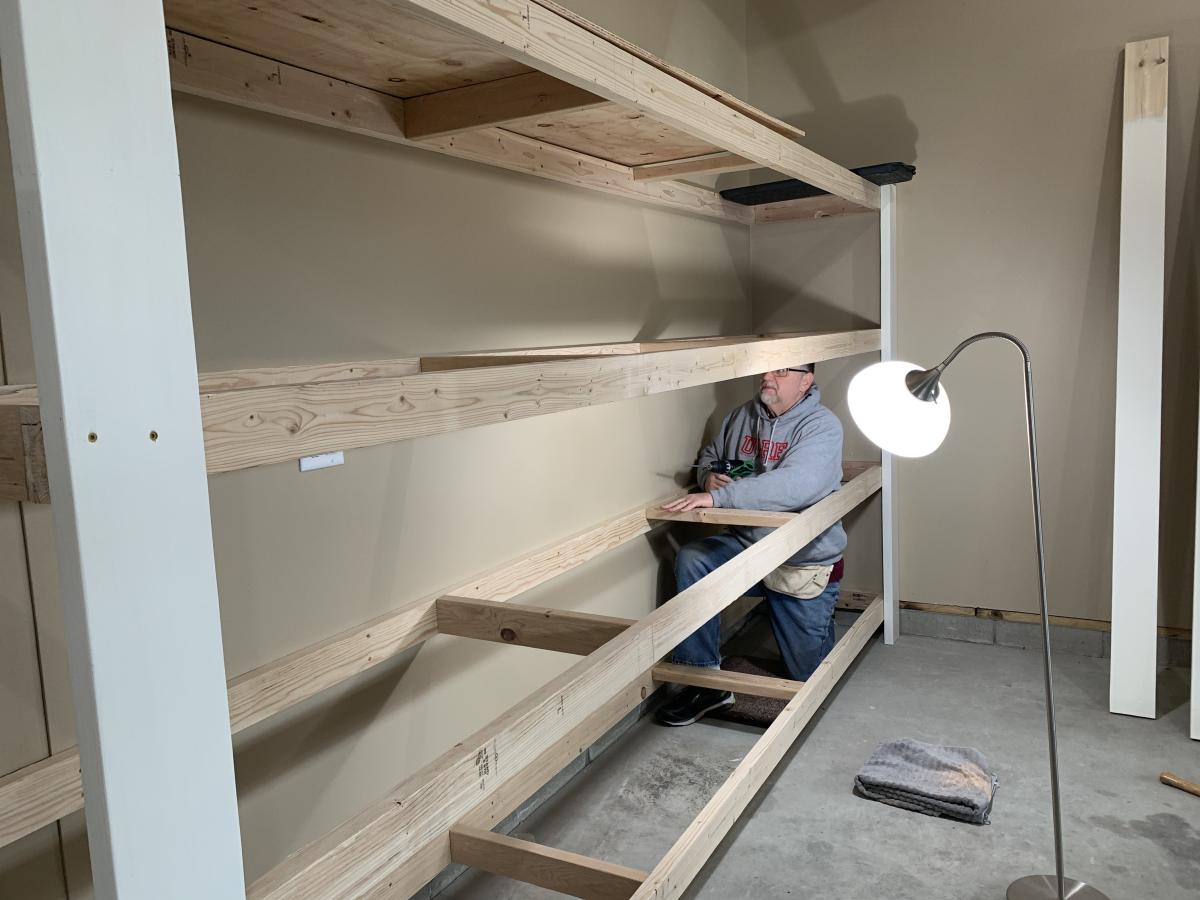
Thank you so much for the two videos we watched of you and your husband explaining and demonstrating how to build garage shelves. We used your plans as a guide. We chose to add shaker style doors to create cabinet shelves. We absolutely love them. We are not handy as you can see we had a living room lamp for a work light and a lifetime table as a work bench. Thank you!
The Paulsons
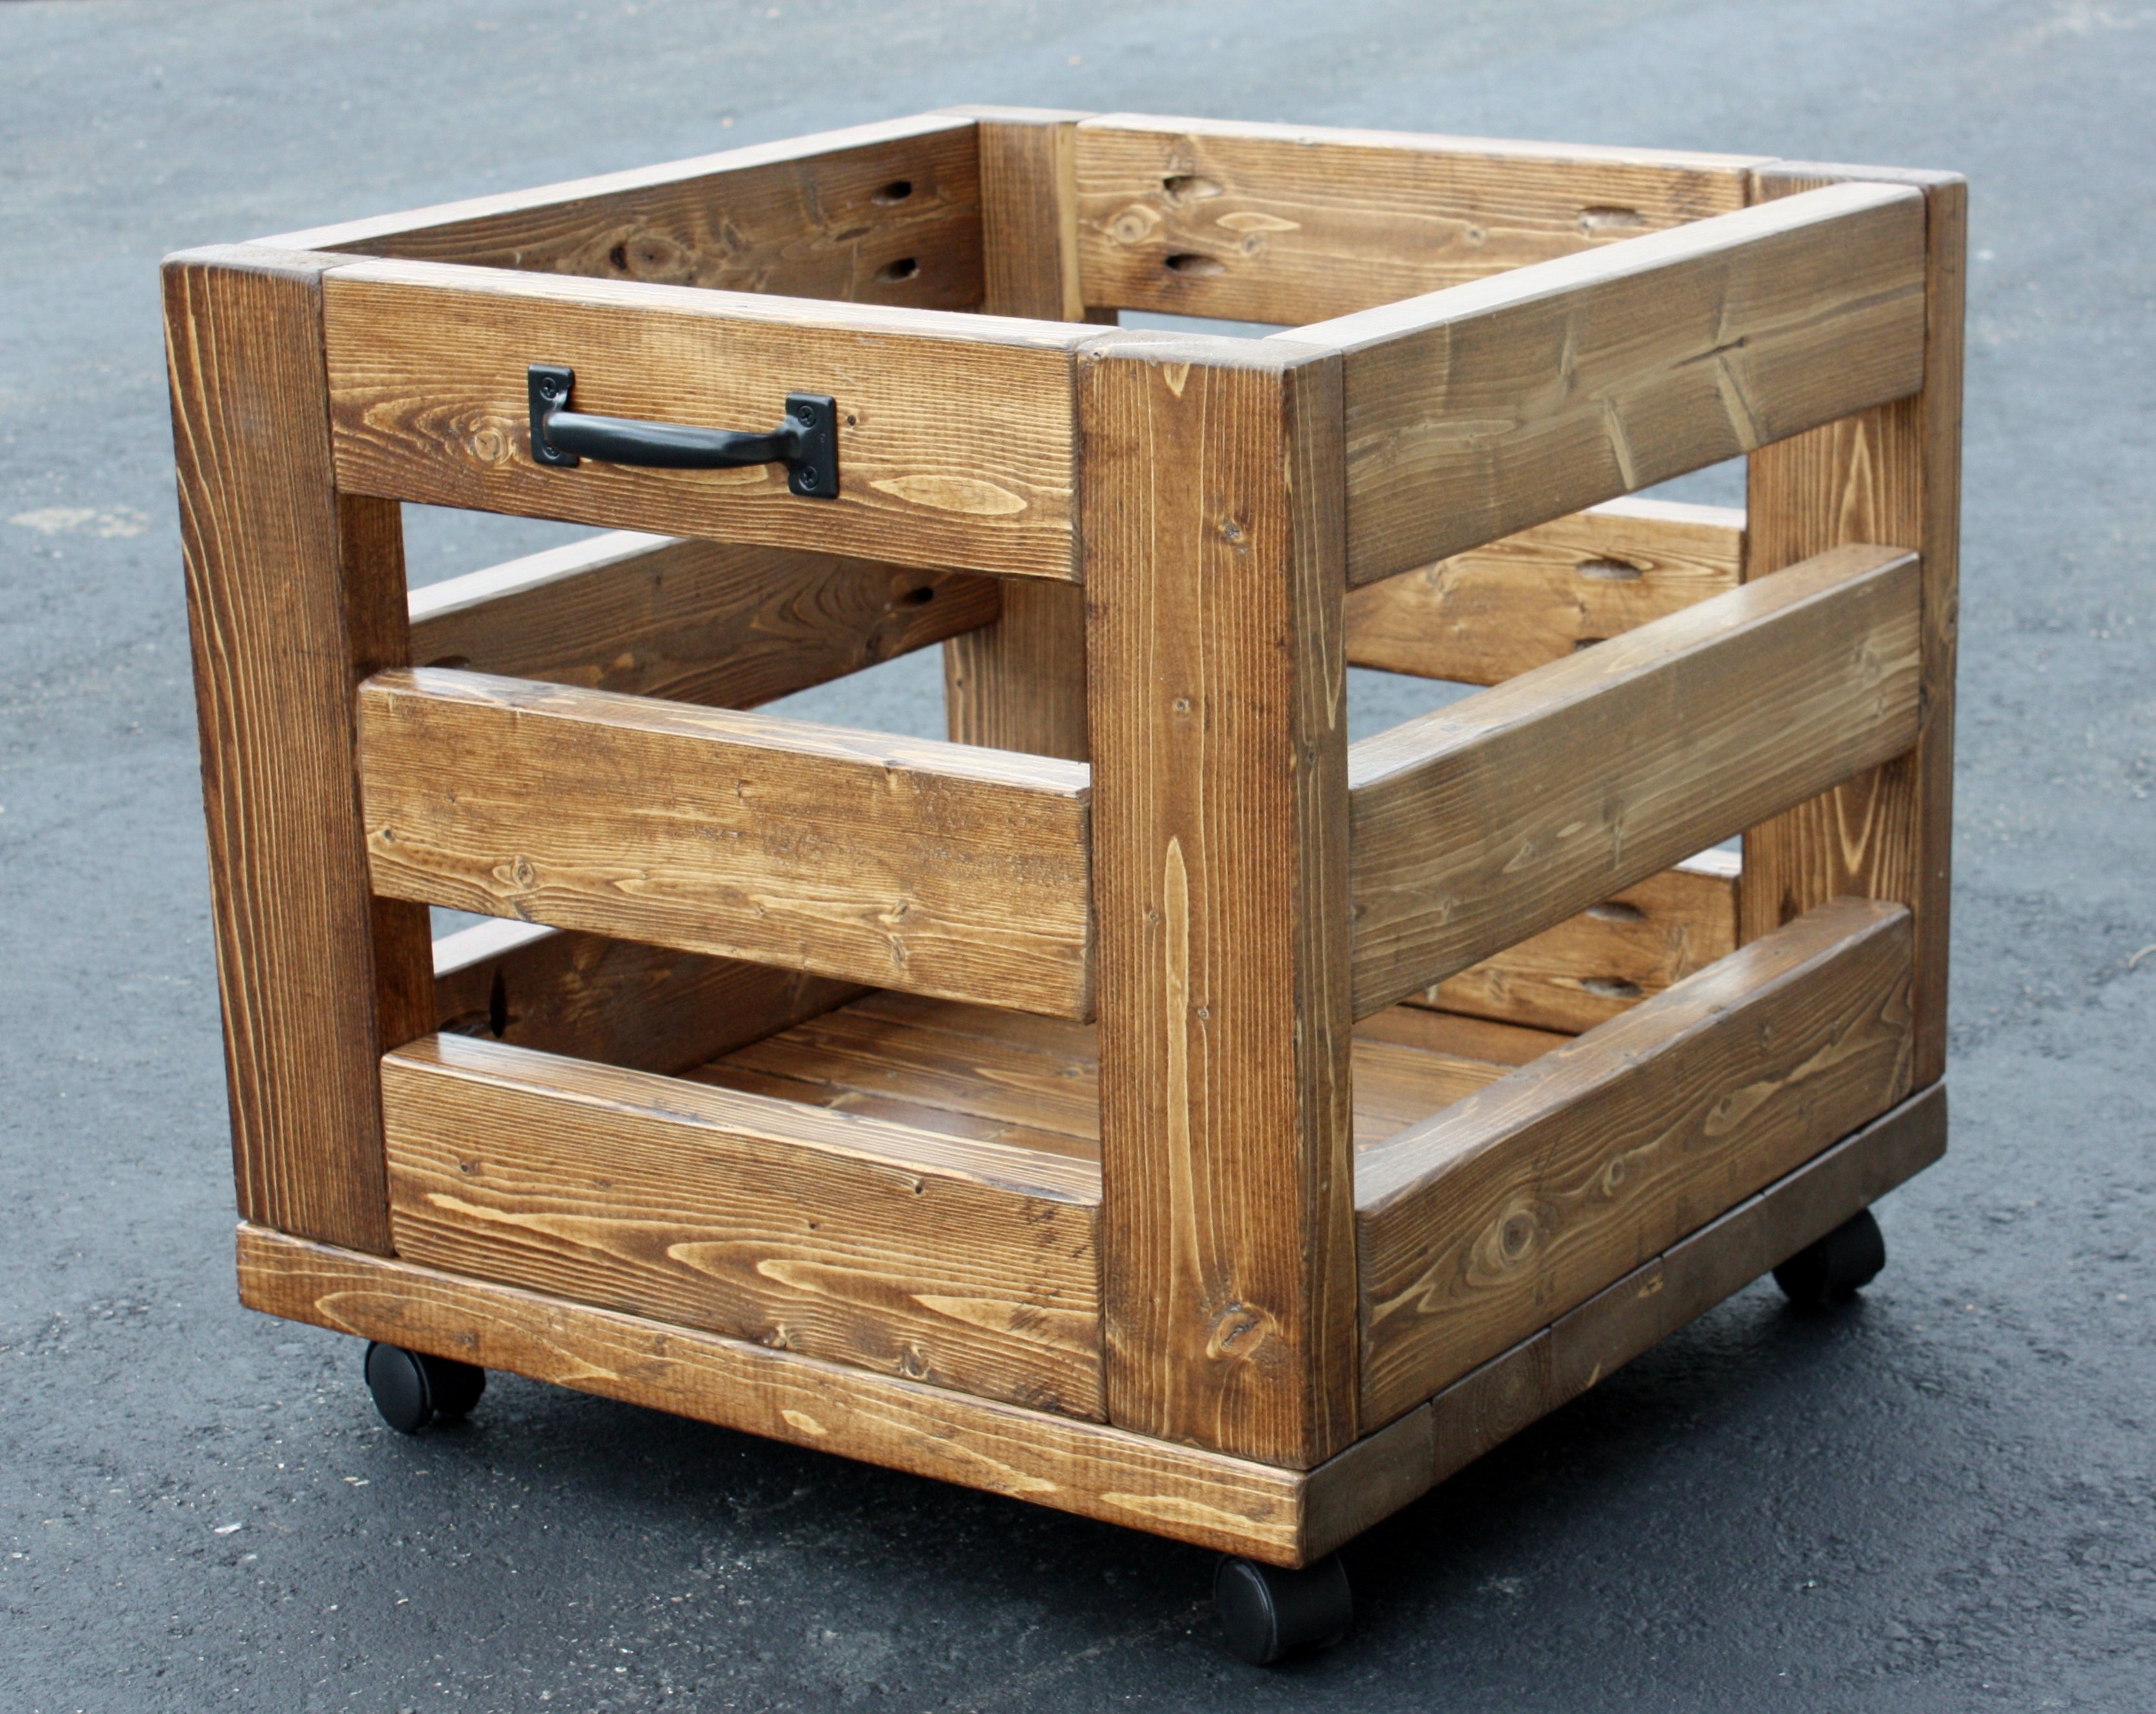
I love this storage bin from plans at morelikehome.net, and it was easy to build, too! It's nice and big, about 21"W x 21"D x 18"H. I selected 3-6 hours as the time spent, but to say closer to six would be about right. I need a large work surface in my sewing room (I'll be building the storage table as well),and a place to store my "stuff".This should be a pretty good start!
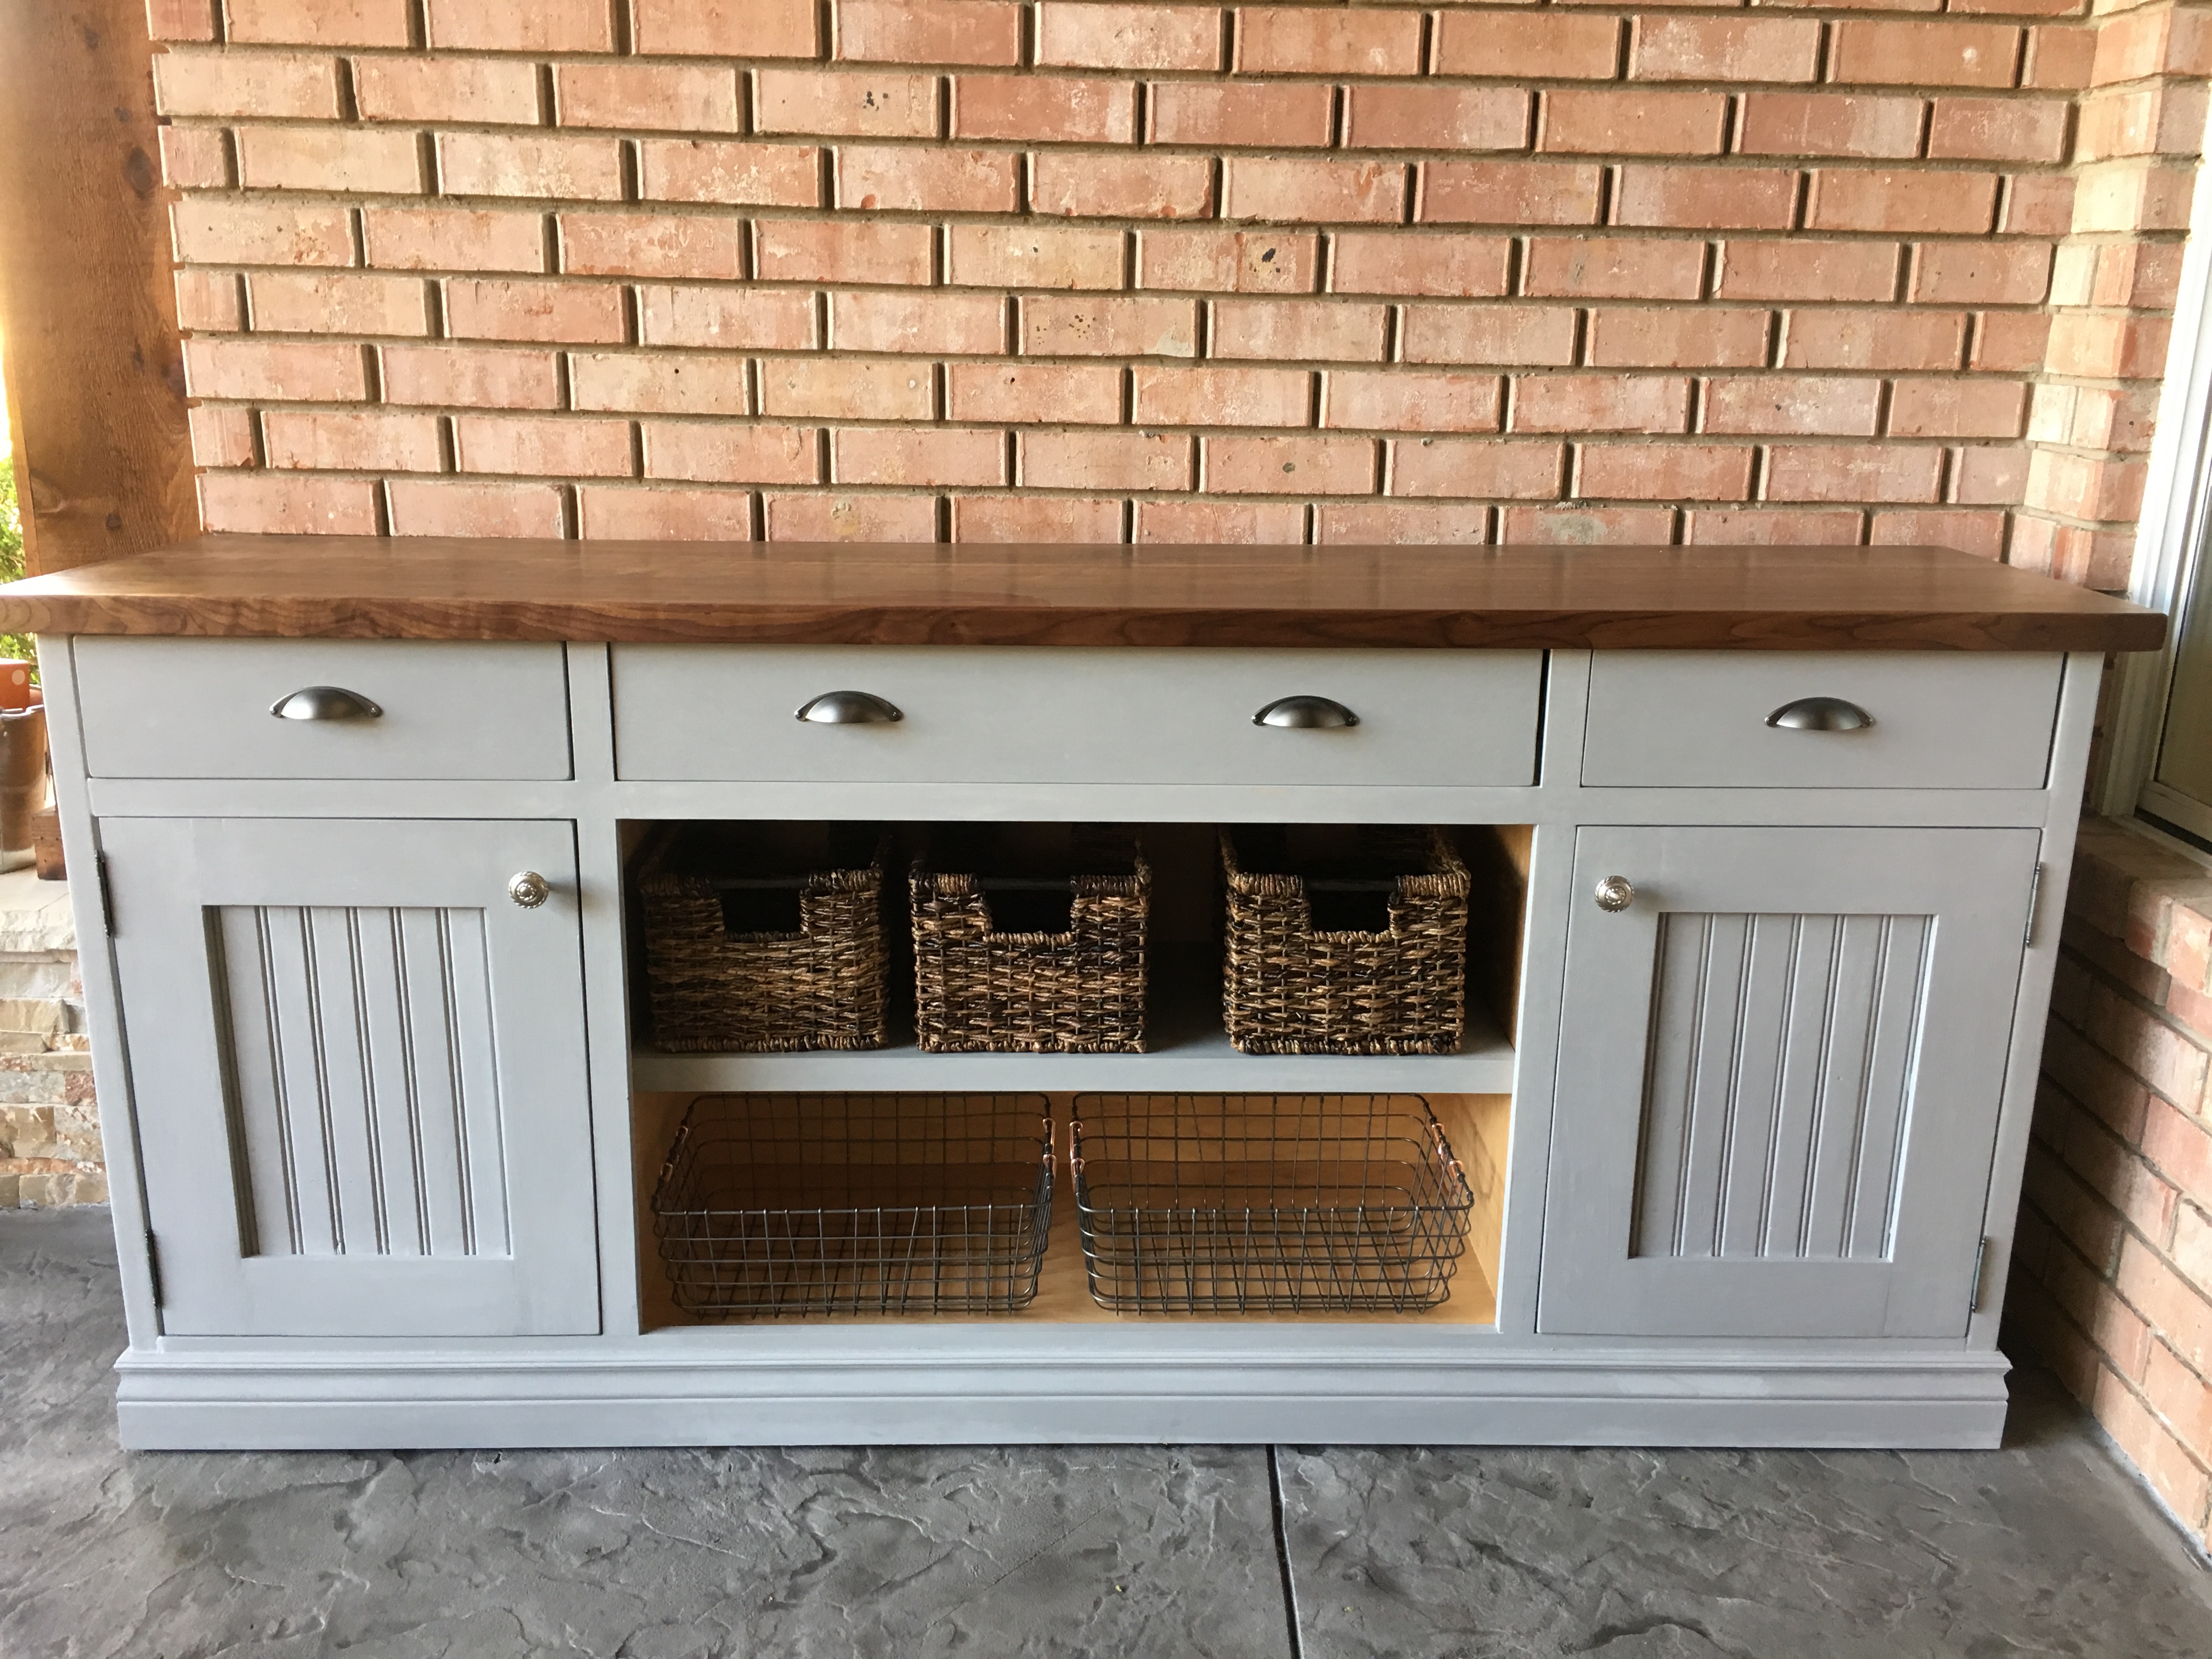
This was a piece made by my husband for our outdoor living/patio area! Love how it turned out--and the walnut top was worth the extra money. Same wood that he used to make a fireplace mantle in the same outdoor area. The plank doors were leftover pieces we used to cover a ceiling, and created a great result. Found the Annie Sloan paint (Parisian Grey, I believe) and wax on a Buy/Sell Facebook site in our neighborhood and saved a little money.
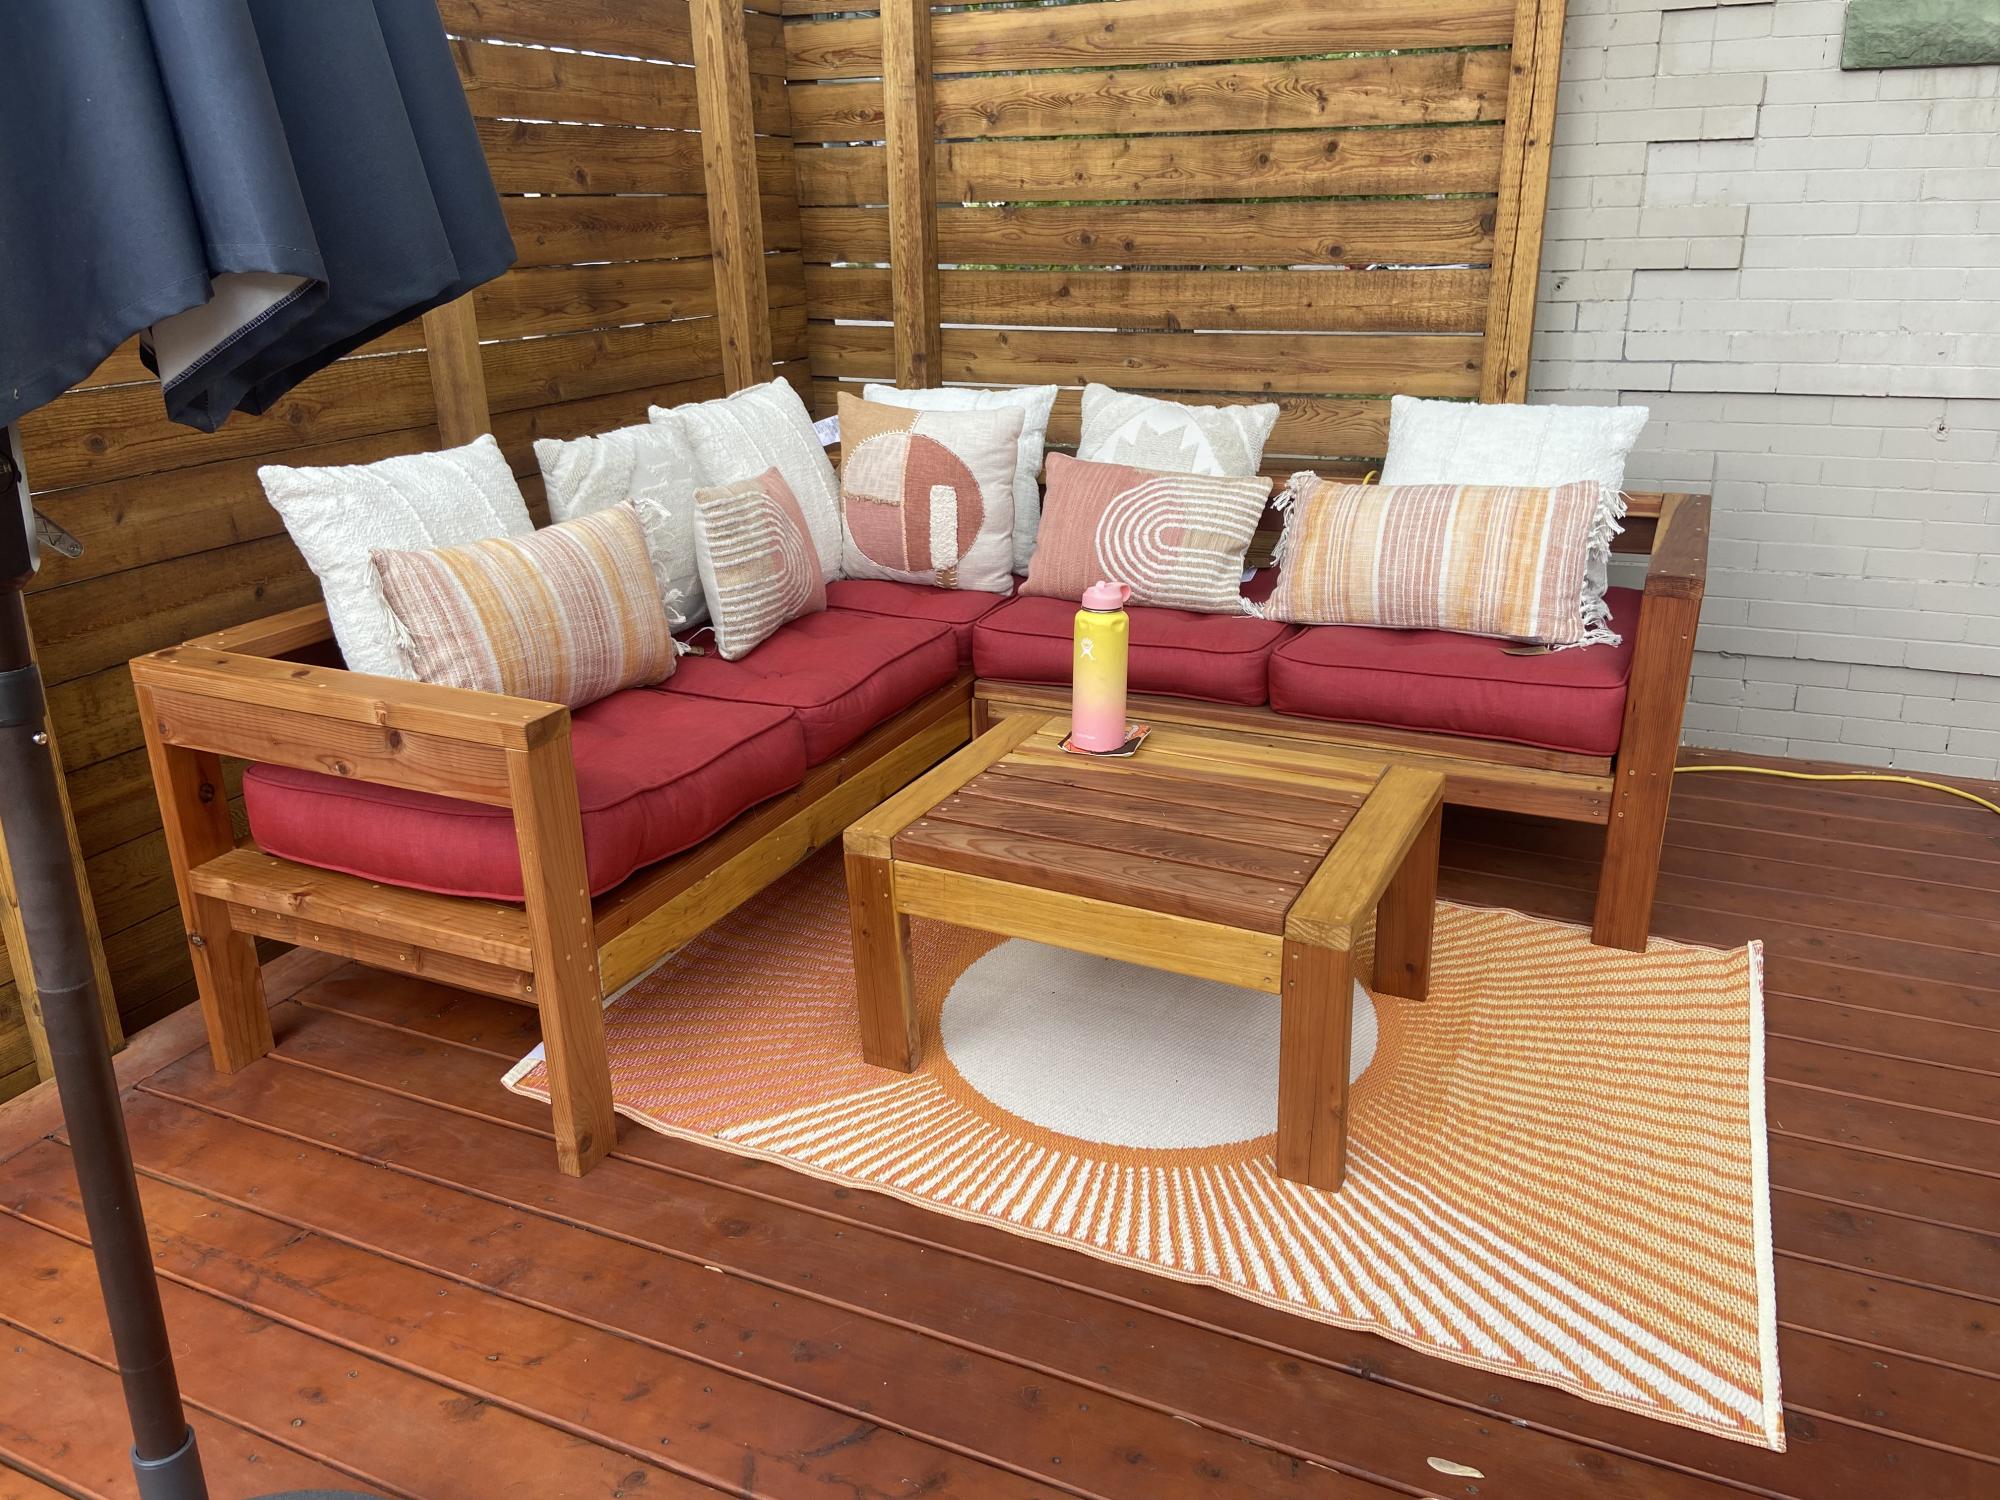
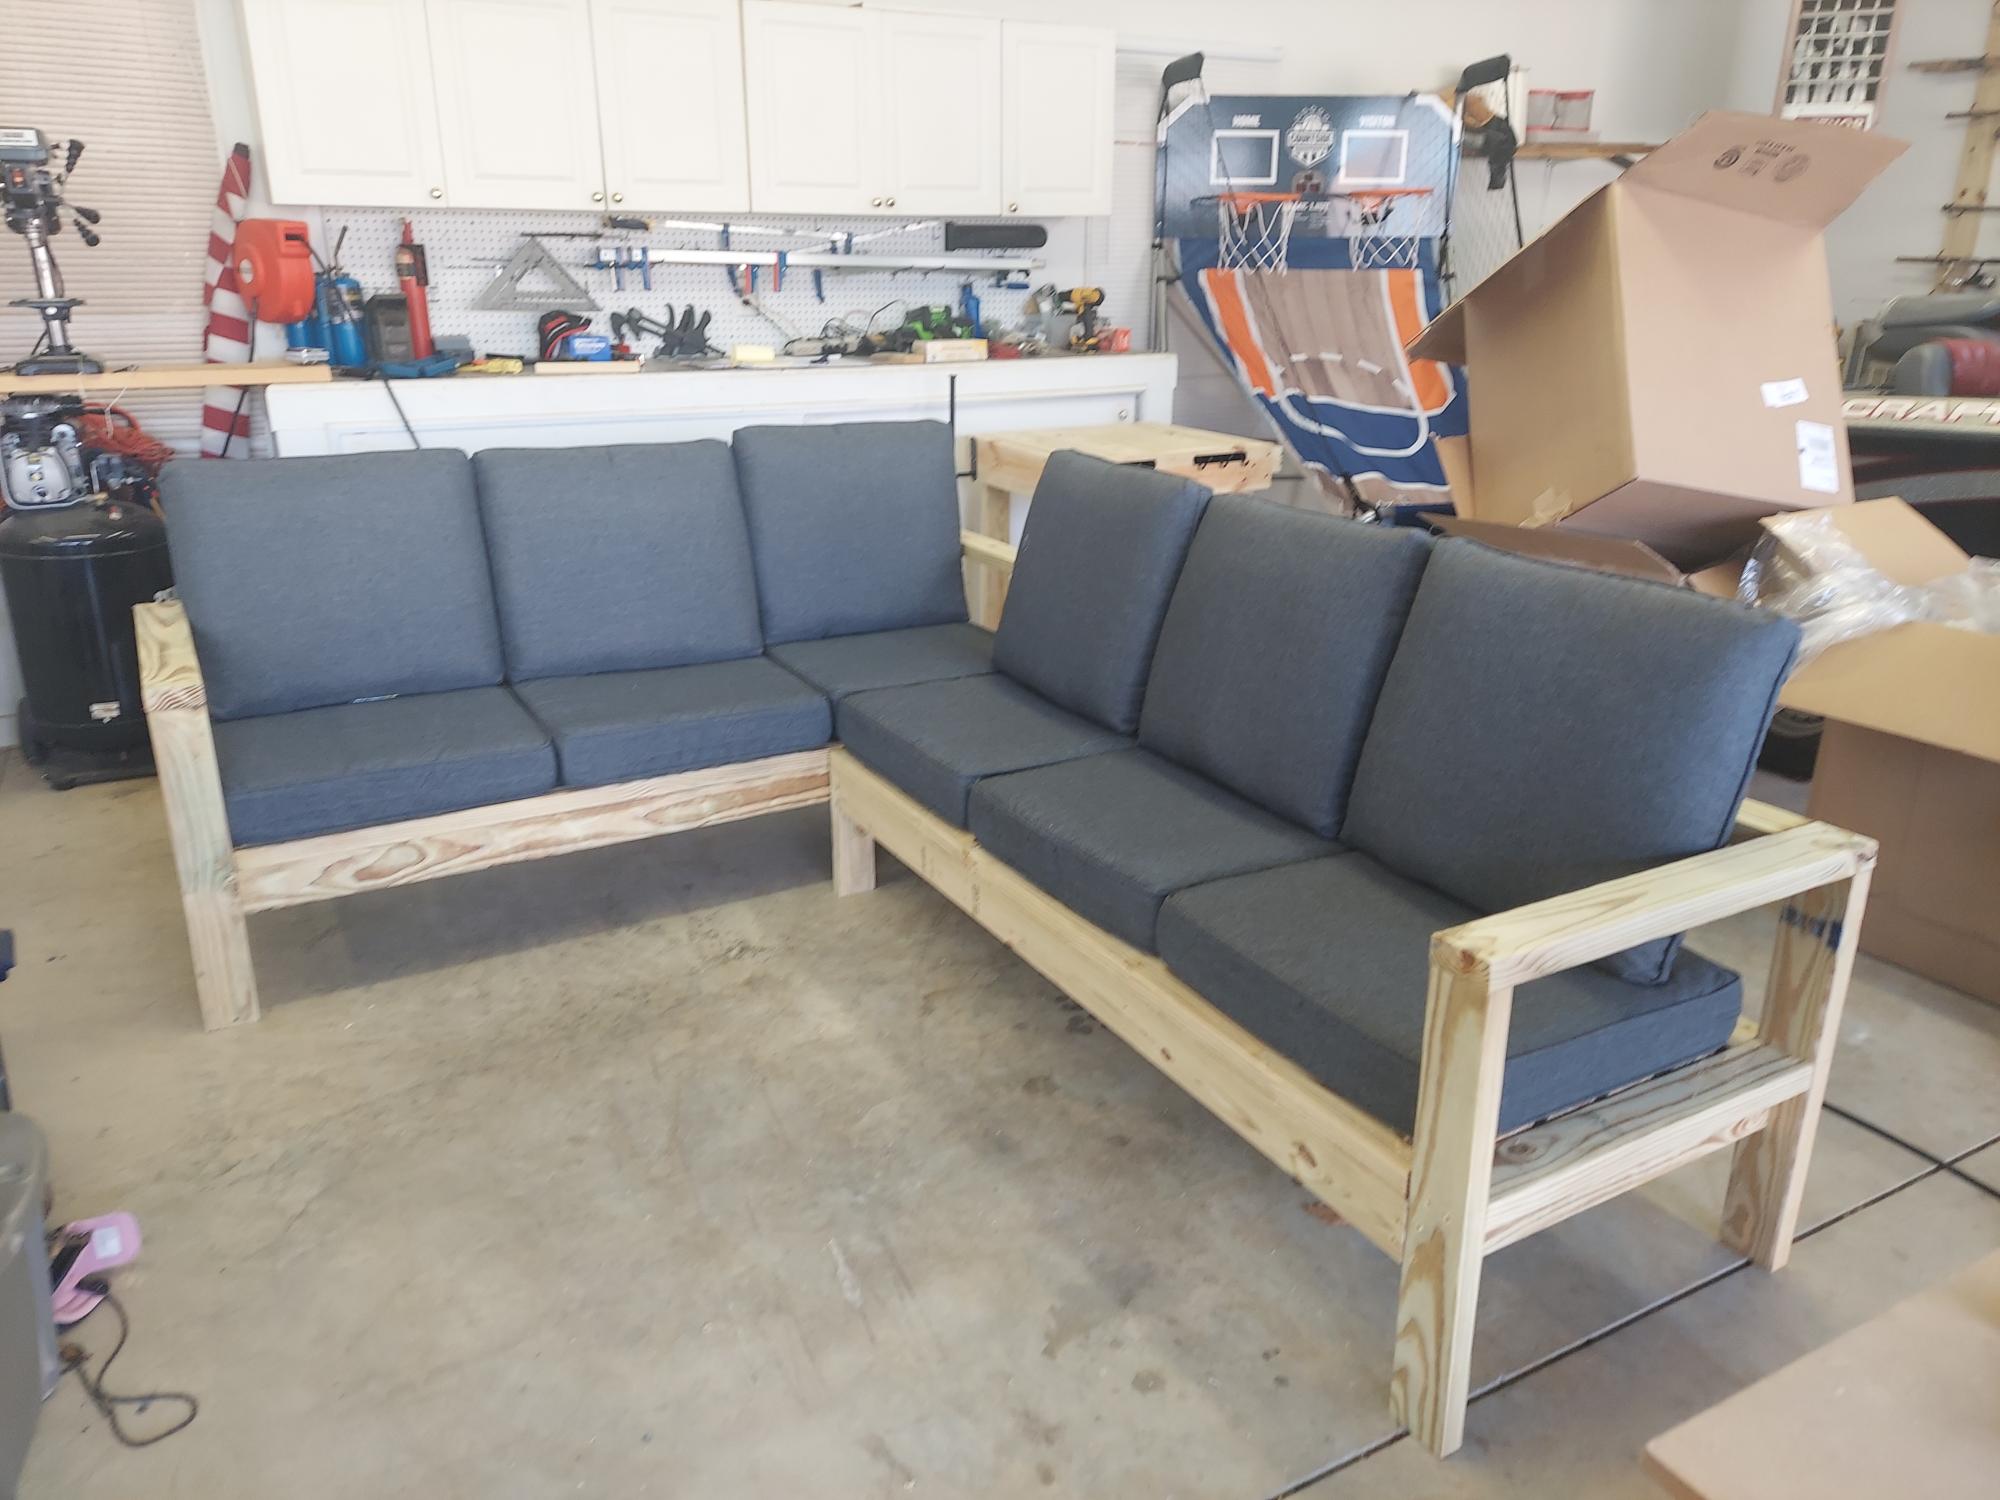
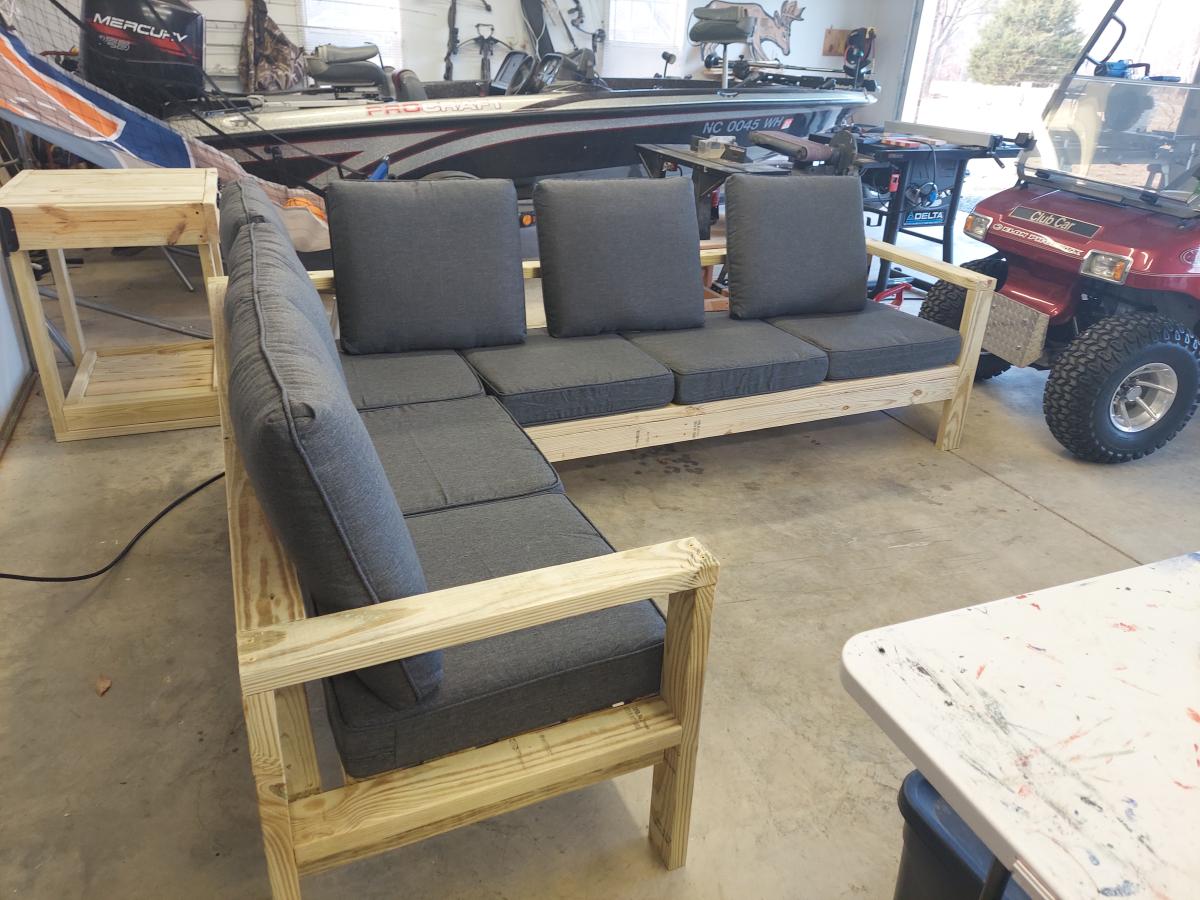
I built the two piece sectional + table and adjusted the sizing so the lengths of the sectionals pieces are the same.
Turned out amazing. So much fun building this and I can’t wait for my next project!
Built this from the plans and customized so it was a finer finish. No pocket holes, went with dowels and glue. Some screws in base for added strength.