Community Brag Posts

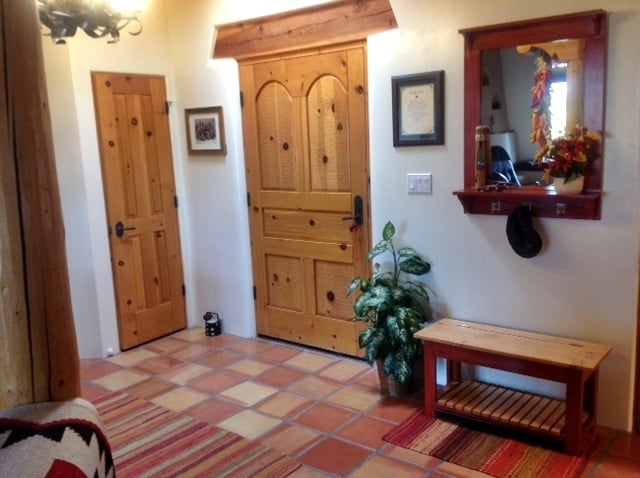
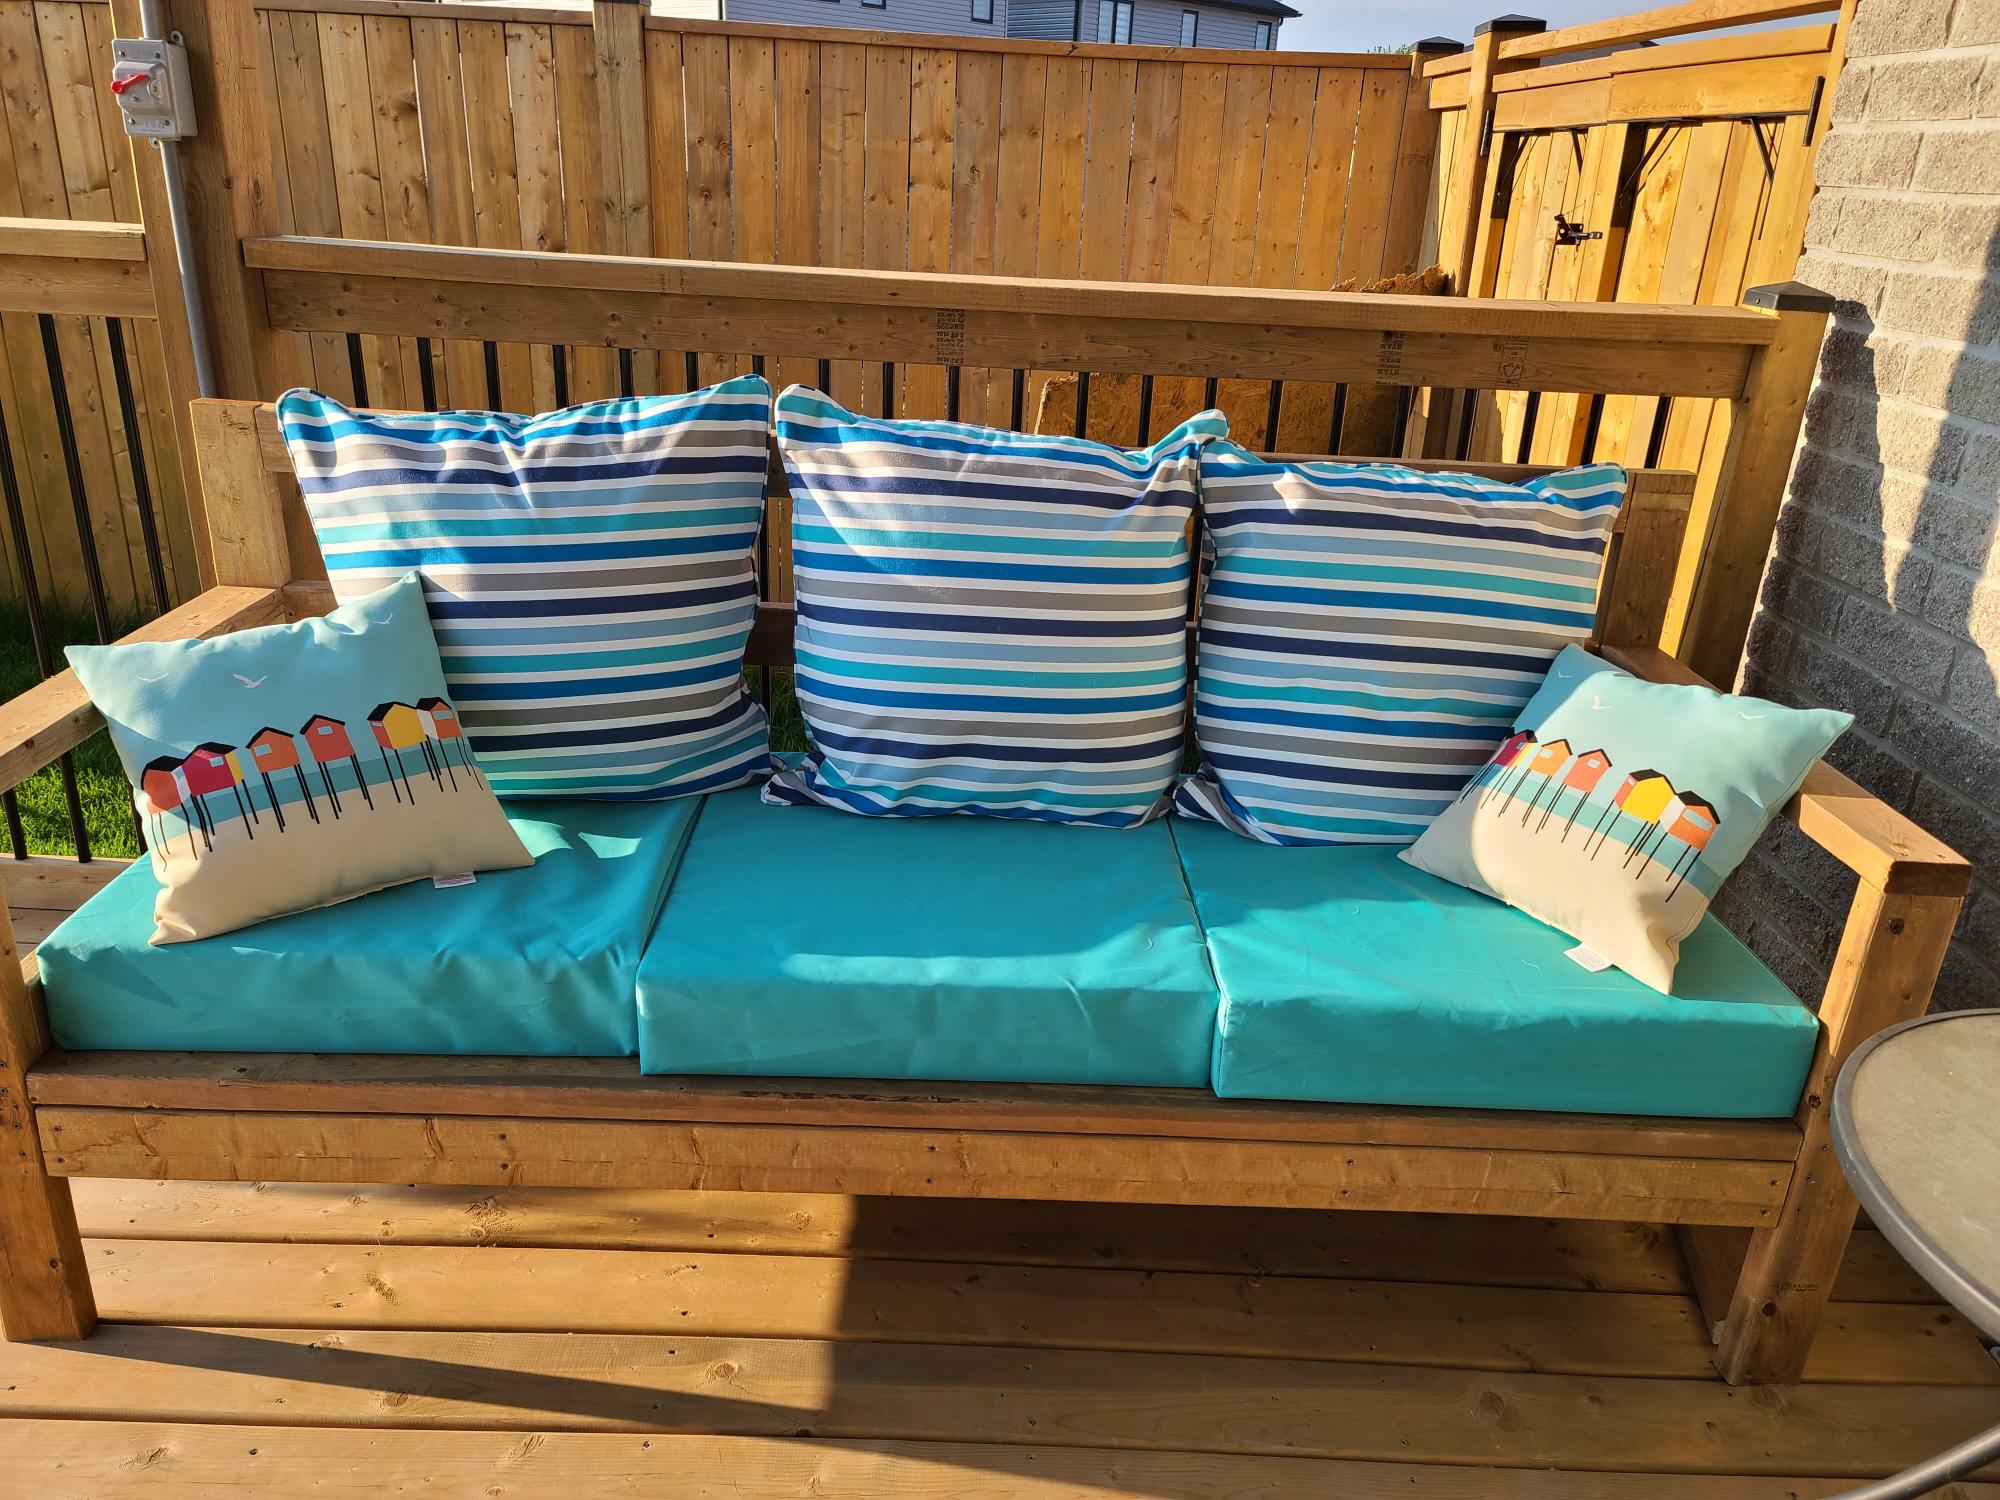
Class/School Auction Projects

Submitted by jendon on Tue, 05/03/2022 - 15:32

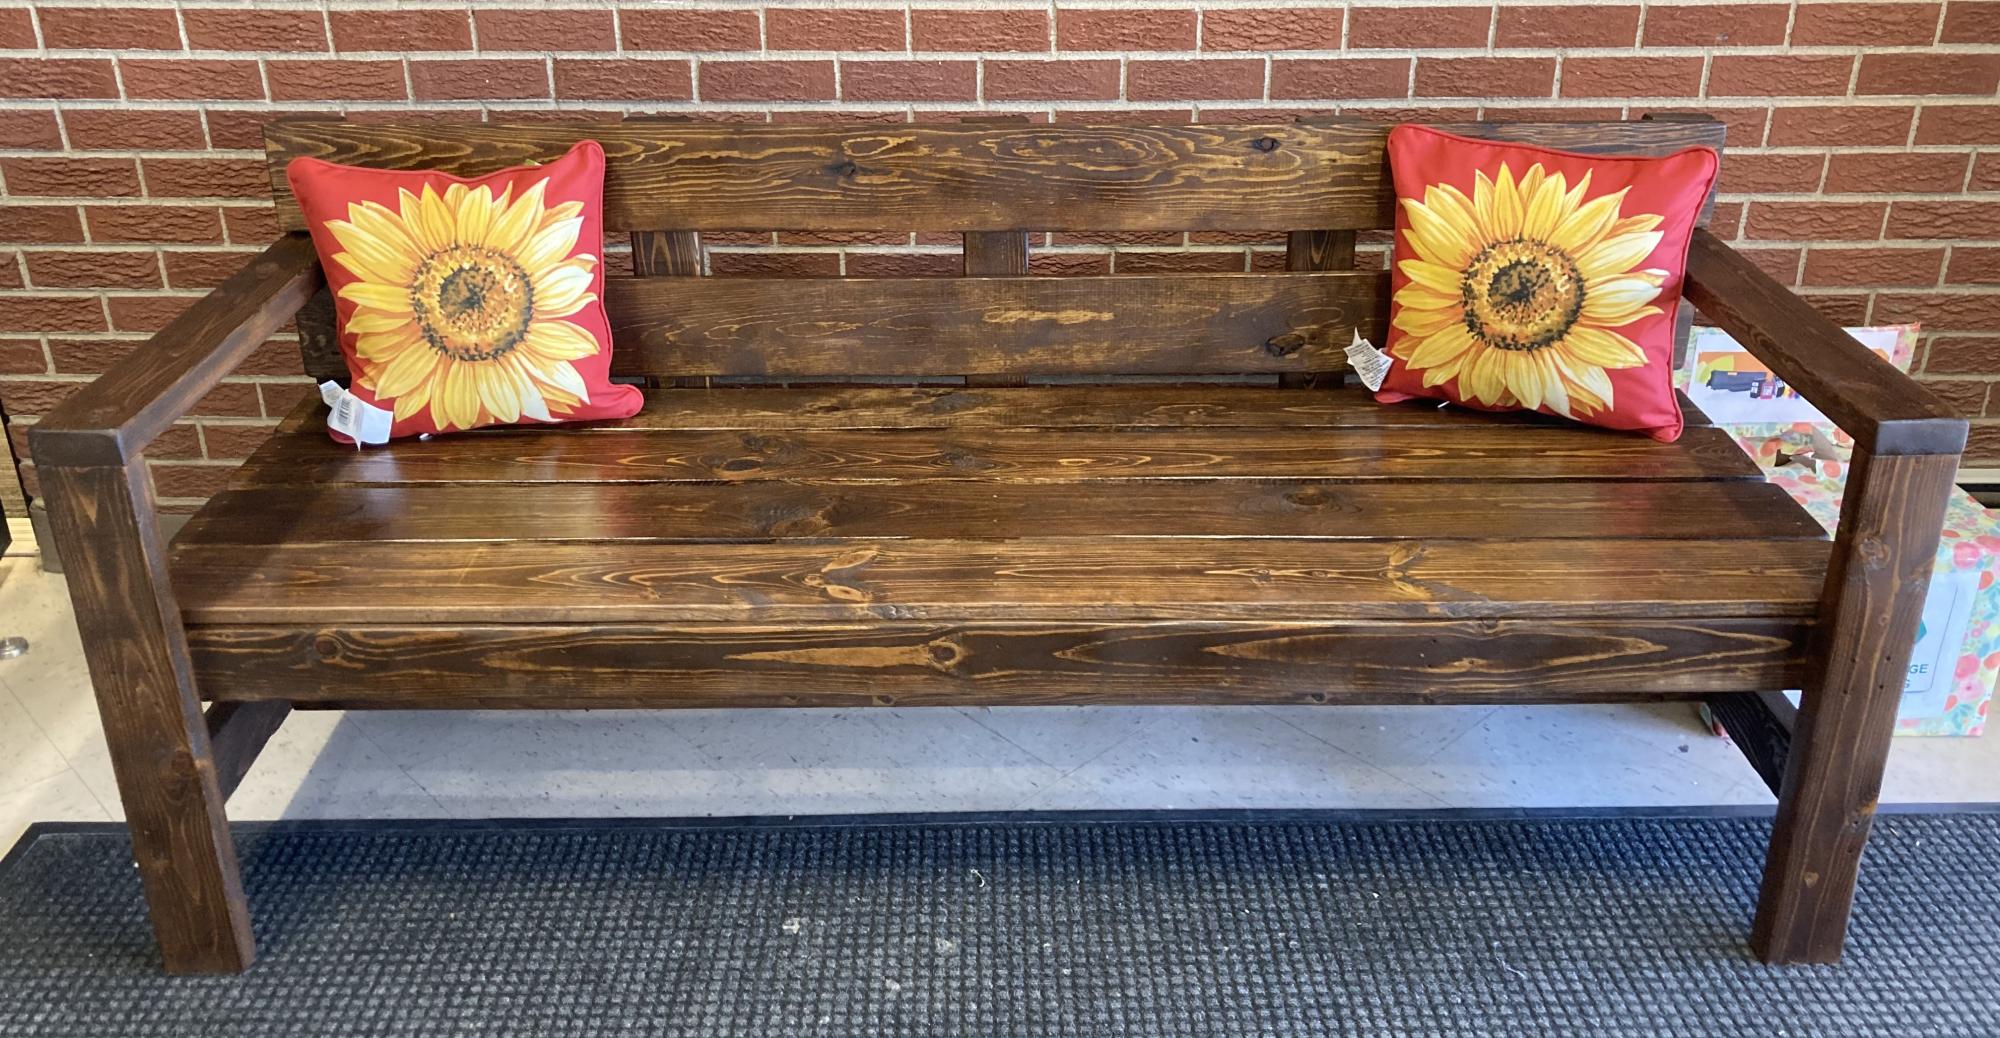
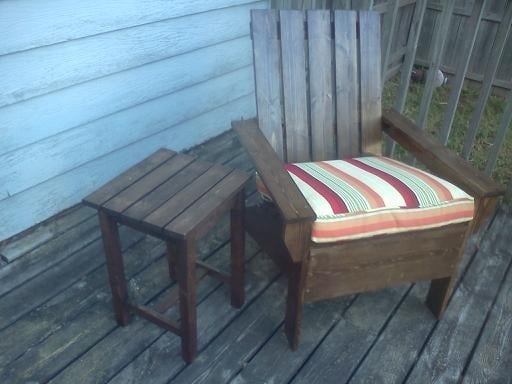
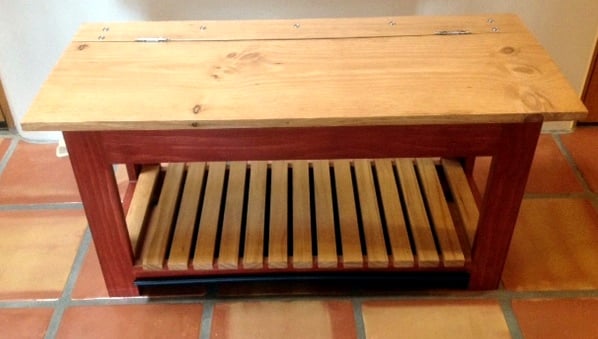
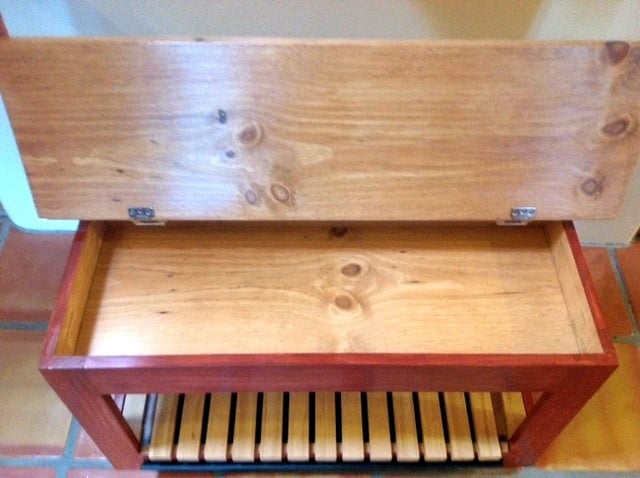
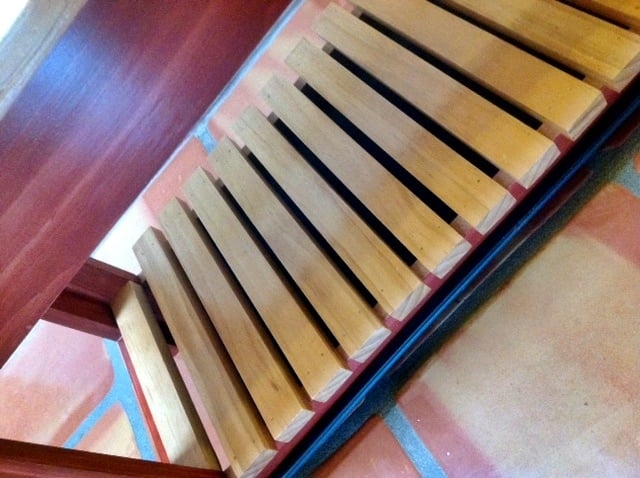
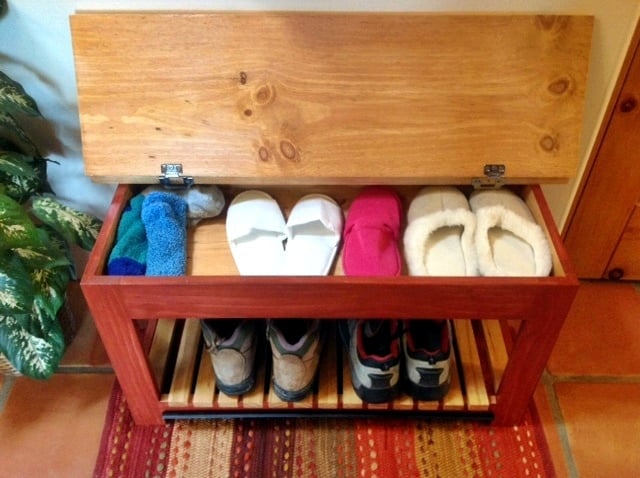
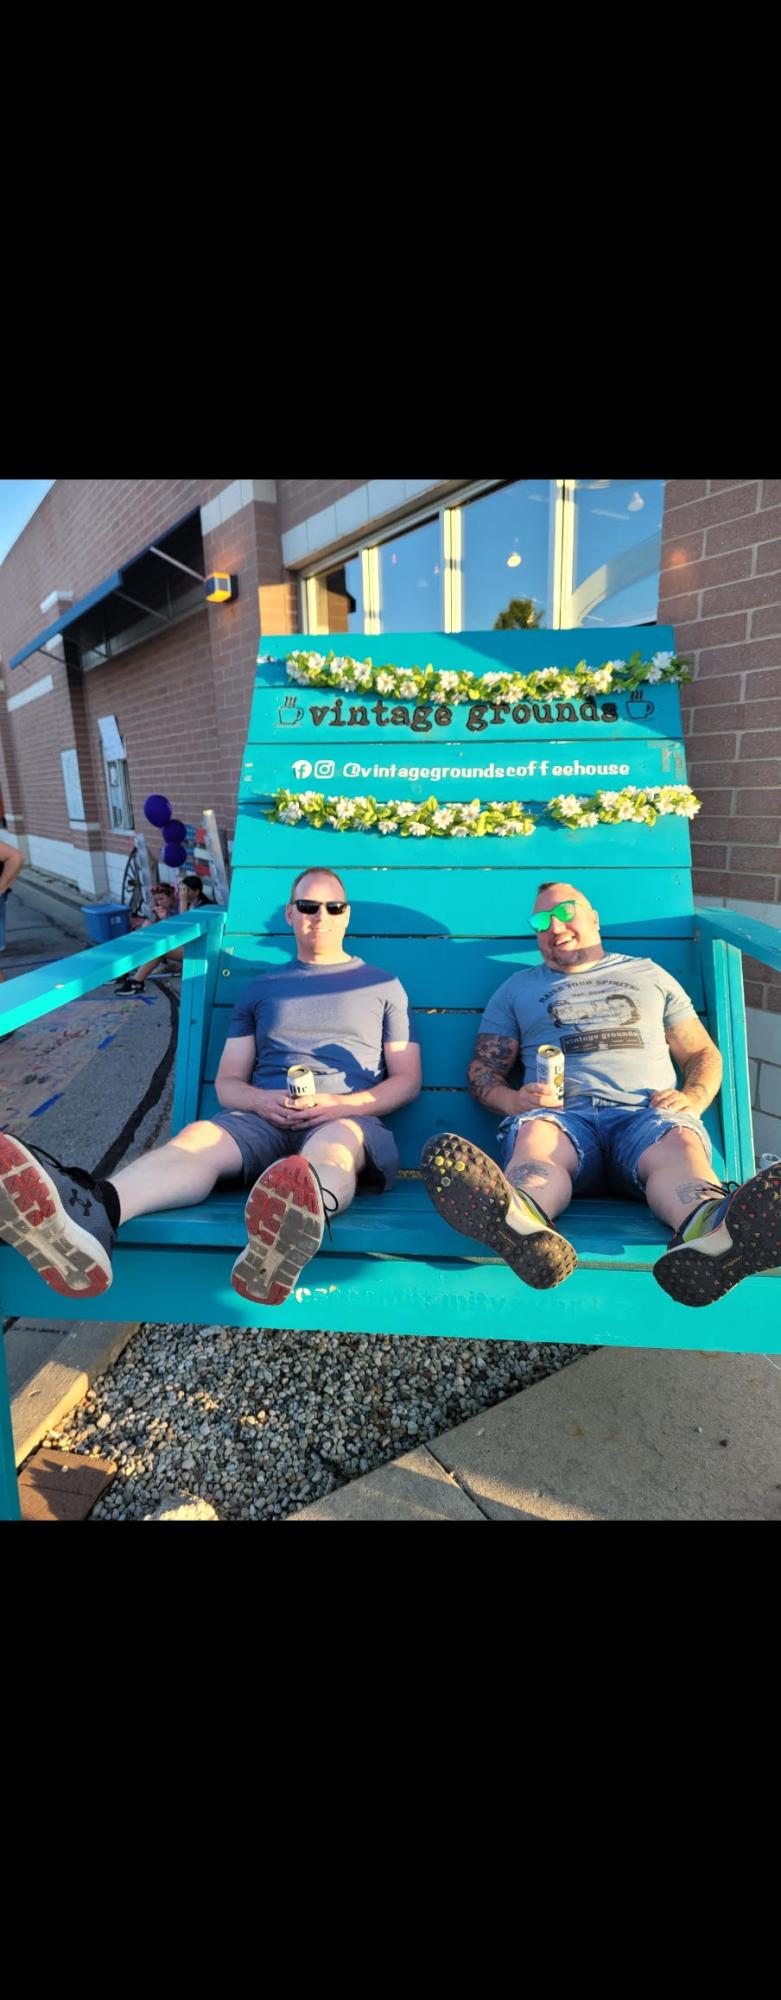
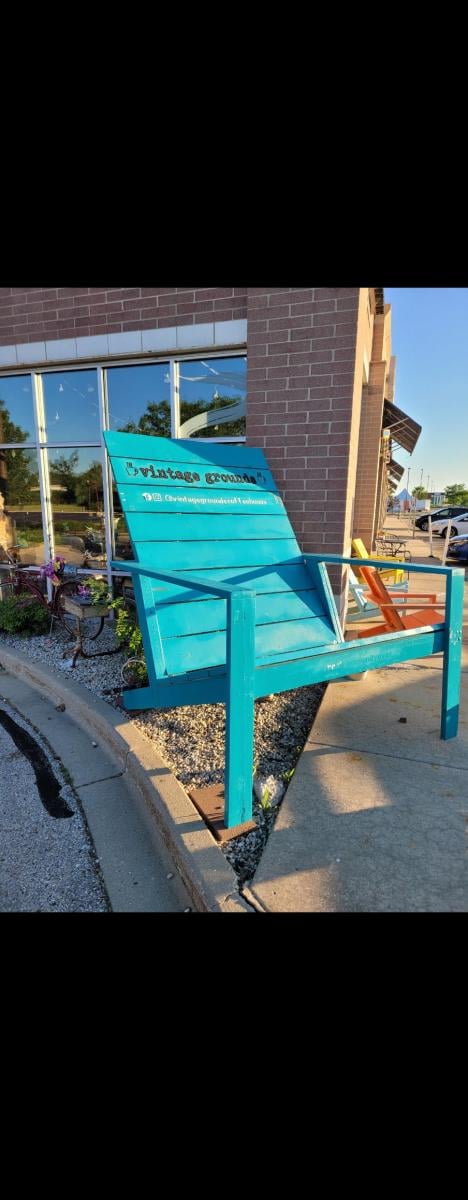
This year my 2nd-3rd class built the Modern Park bench for the school auction. They sanded, stained, and set the screw for the seat and back.
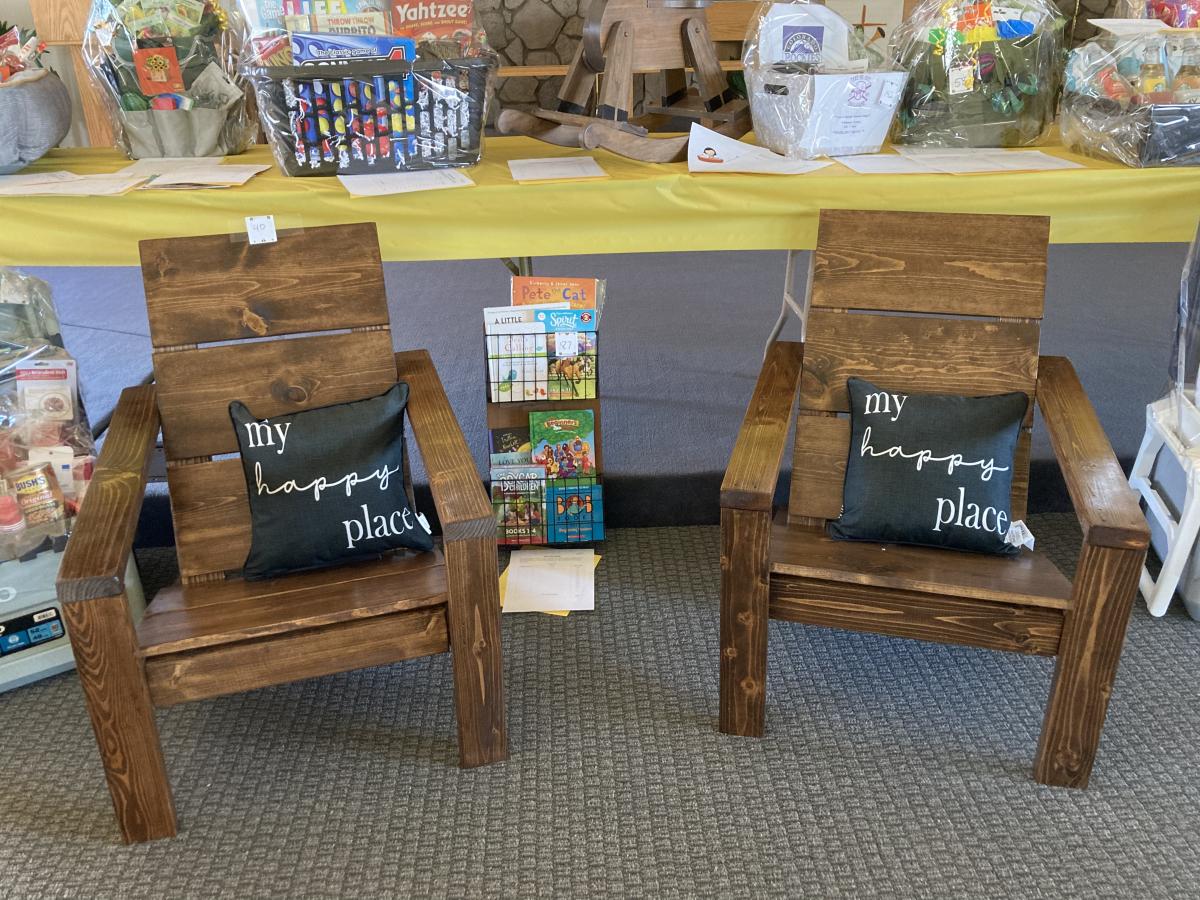
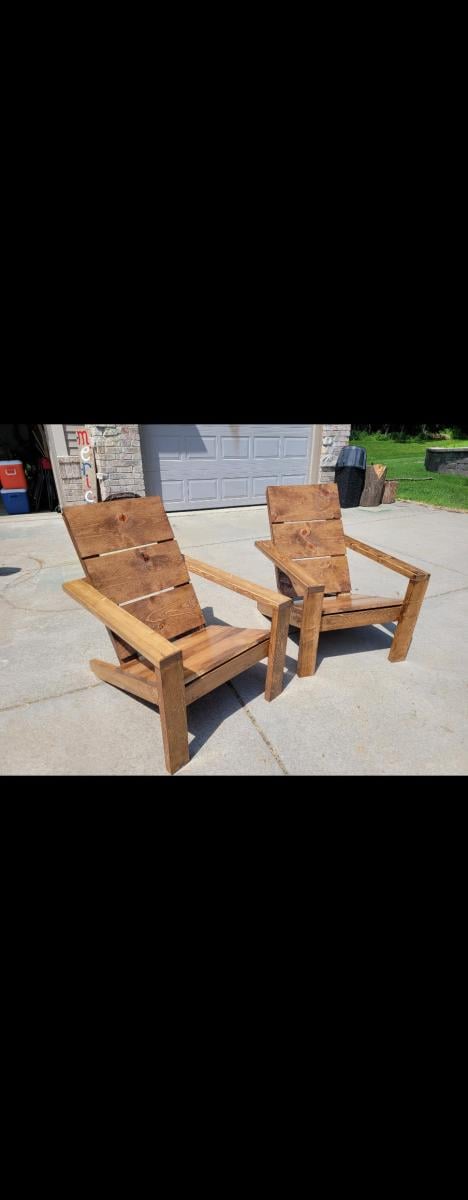
I also made two Adirondack chairs with matching stain.
Both projects had two coats of poly and really shined. They were a hit at the auction and the kids and families really appreciated the experience and final products.
Thank you Ana for making plans simple to follow and new skills learned each time.
Blessings,
Jennifer

Comments

jendon

Mon, 05/16/2022 - 18:33

My students really enjoyed it and many picked up a tool for the first time. I like planting seeds in their heart and mind for the future!! Blessings, Jennifer

jendon

Mon, 05/16/2022 - 18:33

My students really enjoyed it and many picked up a tool for the first time. I like planting seeds in their heart and mind for the future!! Blessings, Jennifer

Monika

Sun, 03/31/2024 - 14:30

I've been helping with our class auction project, and it's been a fun experience. But balancing schoolwork and project deadlines can be tough. That's why I found this article finance.yahoo.com/news/pay-essay-top-5-safe-105019899.html on safe essay services helpful. It saved me time and stress, allowing me to focus on both my studies and the auction project.

Colorado Backyard Gable Greenhouse

Submitted by Anonymous (not verified) on Tue, 05/24/2022 - 20:17

We started this project last fall with the goal of creating a multi use hobby greenhouse with plenty of space for the kids to get their hands dirty. We purchased the Small Gable Roof Greenhouse plans and made our first (of many) trips to the hardware store. Since becoming homeowners in 2015, we've done countless projects but nothing as big as this. We are still very much learning the nuances of greenhouse growing in Colorado, but that has become a fun experience for our entire family. Since completing the structure, I've found that I'm more interested in making the space more functional than I am in actually gardening. I added a shelf built almost entirely from old pallets, a raised cedar bed and solar powered exhaust fan/lights. Luckily, my wife loves spending time in there tending to the plants! As the summer heat sets in, we will face new challenges of how to keep the space cool. Maybe by adding a shade cloth and misters? Regardless of what the "output" looks like we are loving this new hobby and are looking forward to learning new skills!

Comments

Rustic X Console

Modified to have more of a modern style. Removed shelf and half the X. Also, lengthened it to 11ft. Love!

Built from Plan(s)
Estimated Time Investment
Weekend Project (10-20 Hours)
Recommended Skill Level
Intermediate

Comments

Baby Doll Crib and High Chair

Submitted by Anonymous (not verified) on Tue, 12/25/2018 - 20:06

Love getting to watch my daughter play with stuff that i made her.

Recommended Skill Level
Intermediate

Comments

Yellow Sewing Table for Small Spaces

Submitted by kjshaw on Thu, 08/18/2011 - 12:25

We used MDF, drop-leaf lockable hinges for the leaves, and piano hinges. I wouldn't recommend MDF because it wasn't strong enough for the screws and we ended up having to add bits of plywood to reinforce the areas for the hinges. We also put pegboard on the back to avoid things popping out the other end, and I'm planning on getting some hooks to hang crafty things like scissors and glue guns.

Despite the modifications we had to make, I love my little sewing table! It fits perfectly under our dining room table and but has tons of workspace when it's folded out. Perfect for a small, cramped house! The finished project isn't quite as bright yellow as the flash made it seem, but it is still bright and happy!

Estimated Cost
$55
Estimated Time Investment
Weekend Project (10-20 Hours)
Finish Used
Sanding, primer and spray paint. I ended up needed four cans of each - that MDF really soaked up the paint!
Recommended Skill Level
Beginner

Comments

rapunzel

Thu, 08/18/2011 - 20:23

Looks great! I agree that plywood just holds together better.

I noticed that there's room to add 2.5" of length (when hanging down) or width (when in table configuration) to the side pieces. If you do, then when you fully open the table, you can open up even 60" fabric completely and cut pieces such as chair backs easily.
I think it might be a modification worth making.

sarydon

Thu, 01/21/2021 - 12:21

Great idea!!!!! If you did this it would require more than 1 piece of plywood though.... I think that's why it's the dimensions it is. I plan on making one soon. So excited!

kjshaw

Wed, 09/05/2012 - 21:24

It is sturdy enough to sew on - I usually put it on a rug we have, which may stabilize it. The table did shake a bit, but it didn't affect the sewing very much. I'm not sure how it would do on the tile - the sewing machine might move it a bit because of the wheels. But, I also don't use it much for my sewing machine and use it more for my cutting mat and measuring since I don't have a large flat table at my house.

Rapunzel - I agree, there is room to make the table bigger. I think if/when we make another, we'll do that. It's surprisingly big now, but there's always room for more table sewing space!

Farmhouse Writing Desk with Turned Legs

Submitted by kwildman on Mon, 01/07/2019 - 08:53

I modified the Small Old English Style Farmhouse Dining Table plan to build a writing desk.   I used five 1x6 boards for the top for a width of 27.5 inches.   I made my desk 56 inches in length.  I put the drawer on the long side like a pencil drawer.   I did use the legs that Ana recommended in the plan.   I love how it turned out.  I used dark walnut danish oil and dark wax for the finish.  

Estimated Cost
225
Estimated Time Investment
Day Project (6-9 Hours)
Finish Used
I used Watco dark walnut danish oil and Minwax dark paste wax.
Recommended Skill Level
Intermediate

Comments

kwildman

Fri, 10/04/2019 - 21:46

Thank you!  I used Watco Danish oil and I used Minwax dark wax.  I've tried alot of different wax brands and I always come back to Minwax.  It dries the hardest in my opinion.

Garage / Basement Shelving + Bonus Wine/Liquor Under Stairs Storage

Submitted by MJC2DIY on Wed, 10/12/2022 - 21:35

Using the guidelines for the “BEST DIY Garage Shelves (Attached to Walls), I added this to our unfinished basement area for additional storage. I plan to replicate it in our actual garage as well and build the freestanding shelves also!

As a bonus, I used this plan as inspiration and built directly beside it, which is an unused space under stairs, a wine/liquor storage shelving replacing the plywood with cut 2x4s for added weight capacity/stability.

Couldn’t have been easier!

Comments

MJC2DIY

Wed, 10/19/2022 - 09:14

Thank you!! I am so thankful for Ana White and team! These projects are helping me build a lot of confidence to continue endeavoring more challenging projects each step of the way :-)

Adirondack stool or table

Submitted by takahler on Wed, 08/31/2011 - 11:20

This was my first project to tackle alone. It twisted a little on me not having another set of hands to hold things square, but it stands straight and doesn't wobble! Good enough for me. Plus it is an outdoor piece of furniture. The plans were easy to follow and I added 3" to the height of the legs so it was the same height as my arm rests on my chair.

Built from Plan(s)
Estimated Cost
Scraps from adirondack chairs ($0)
Estimated Time Investment
Afternoon Project (3-6 Hours)
Finish Used
Dark walnut and polyurethane
Recommended Skill Level
Beginner

King-size stratton storage bed

Submitted by melanieann on Sat, 09/03/2011 - 14:53

This was our first time building furniture. We built our new bed over the course of four days. We don't own any power saws so opted to give the cut list to our local hardware store who only charged us about $50 for all the cuts.

Day one consisted of picking up all the lumber, sorting into the three sections and labeling all the pieces. Day two was the longest day, lots of drilling and measuring and screwing and gluing and even the first two coats of shellac. On the third day we built the drawers, and finished coating everything with shellac. The last day was the installation of the drawer hardware, including the slides.

We're quite happy with the quality of our work, and appreciate the directions and plans. Though we aren't fine furniture makers, and probably none of our corners are 100% square, we finished in the time we thought, pretty close to budget, and with the satisfaction of doing it ourselves.

Built from Plan(s)
Estimated Cost
$600
Estimated Time Investment
Weekend Project (10-20 Hours)
Finish Used
shellac dyed a bright, happy blue.
Recommended Skill Level
Starter Project

Christmas card frame

Modified Ana's plans to omit the chalkboard and make larger.  Measures 75"h x 36"wide.  All 1x2s, cuts are 2 @ 75", 2 @ 34 1/2", 2 @ 73 1/2", 2 @ 31 1/2".

Estimated Cost
$20 (4 - 1x2x10)
Estimated Time Investment
An Hour or Two (0-2 Hours)
Finish Used
The Real Milk Paint Co. flag red, dark wax
Recommended Skill Level
Starter Project

Craftsman Style Toy Shelves

Submitted by Anonymous (not verified) on Mon, 02/04/2019 - 19:41

These were such a gratifying project to build! Used a 1x4” for the top front frame and cut a curve in it to give a Craftsman vibe. I really like the look of the retired IKEA Norna bookcase and that inspired the 2x2” framed base painted in a contrasting color. I also finished the top with a full 1x2” frame with mitered corners to make it look more “finished.” If I were to do it again, I’d cut the top plywood shorter to create less overhang on the sides. Eventually I’d like to paint a design in white paint on the top!

Built from Plan(s)
Estimated Cost
$100
Estimated Time Investment
Weekend Project (10-20 Hours)
Finish Used
Pretreated with strong black tea, steel wool & vinegar stain
Recommended Skill Level
Beginner

Farmhouse King Bed

Submitted by Adam W on Fri, 12/18/2015 - 13:26

This is the first time I have ever built anything and I'm very pleased with the results. The stain is water based 'charcoal gray'. It took 2 - 3 rounds of sanding, one coat of pre-stain, two coats of stain, and 3 coats of polyurathane. Total investment was about $350. It took me 3 months (I didn't have but an hour here and an hour there to work on it). My main concern was that I make it so that the screws were not visible. So I drilled a hole the size of the head of the screw about 1/4 in deep (then the typical pre-drill for the actual screw), screwed it together, then glued a wooden 'plug' in the hole. I'm very happy with the result of that. I also struggled a bit with how to attach the side rails - I ended up using 2 door hinges at each corner. The bed frame is completely separate from the mattress. I have a metal frame that is working fine, so the wooden frame actually does not touch the metal mattress frame. It is just built around it. Tools I used: Hammer, Paint Brush, Electric palm sander, Miter saw and a drill. The miter saw was huge for this project. 

Estimated Cost
$350
Estimated Time Investment
Week Long Project (20 Hours or More)
Finish Used
Minwax water based pre-stain, One 32oz can Minwax water based wood stain white tint base (charcoal grey), Verathane Polyurethane (satin - interior)
Recommended Skill Level
Beginner

Pallet Inspired Coat Rack

Submitted by thehallway on Sat, 02/09/2019 - 15:33

I built the coat rack along with the mail sorter and rustic bench for the long hallway to the garage since our new house doesn't have a mud room. I modified it to a length of 6'.  All but a couple pieces are made from poplar.  I burnt the stained pieces with a torch, then put a quick coat of Special Walnut on them.  The painted pieces are Rustoleum Weathered Wood.  Hooks are from Home Depot.

Estimated Cost
<$100 due to already have wood on hand
Estimated Time Investment
Weekend Project (10-20 Hours)
Finish Used
I burnt the stained pieces with a propane torch, then put a quick coat of Special Walnut on them.  The painted pieces are Rustoleum Weathered Wood. The mail sorter has Chalkboard Paint on the front pieces.
Recommended Skill Level
Beginner

Comments

Flip Top Storage Bench

Submitted by Linda7 on Tue, 10/01/2013 - 15:40

So my sister's house is on a rural, sandy lot. Did I mention sand...lots of sand. Her tile doesn't react well to sand-covered shoes , so they needed a place for guests to take off street shoes to replace them with spa booties. I offered to build them a storage bench for that purpose.
I modified the bench to make it shorter as per my sister's request. She also wanted the lower shelf modified to place a boot tray on it to catch the sand. I suggested replacing the lower shelf with rails to place the shoes on so the sand could fall off onto the boot tray. We nailed finish nails into the legs under the rails and slid the tray onto them. Now she can remove the tray easily to dispose of the...sand.
The finish on the body matches the mirror, which hangs above it. The lid of the bench was stained to match the finish on the doors, posts, etc. I used wrap around inset hinges from here: http://www.rocklerpro.com/product.cfm?page=5135&rrt=1
I checked this as a weekend project because of dry time for stain and poly.
Thank you, ANA for the awesome plans.

Estimated Cost
About $65
Estimated Time Investment
Weekend Project (10-20 Hours)
Finish Used
Minwax Express Color "Crimson" for body; Minwax "Ipswich Pine" water-based stain, followed by three coats of gloss poly for the top.
Recommended Skill Level
Beginner

Lisa's 2x4 couch

Submitted by Anonymous (not verified) on Wed, 01/11/2023 - 19:29

This was the first time I made a piece of furniture since I was in grade 8 shop class and it won't be the last. It was so kuch fun. I modified the plans slightly to have the back a bit higher. Love it!

Built from Plan(s)

Kitchen Island (or Cactus Table!)

Submitted by Joni on Sun, 10/09/2011 - 10:56

I absolutely loved Michaela's Kitchen Island (http://ana-white.com/2010/03/plans-michaelas-kitchen-island.html), so I modified it to suit my needs of having a table to place my cacti in the winter months. I modified the size, removed one of the shelves, and left the drawers out so that I could put my Texas stars.

Built from Plan(s)
Estimated Time Investment
Week Long Project (20 Hours or More)
Finish Used
Tabletops: Mixture of Minwax water-based stains using Antique Walnut & Onyx, topped with 4 coats of General Finish Satin EnduroVar.

Table: 2 coats of General Finish Milkpaint in Millstone, followed by 4 coats of General Finish Glaze in Van Dyke Brown, followed by 1 coat of General Finish Satin EnduroVar.
Recommended Skill Level
Beginner

Comments

BlueSky73

Sat, 05/17/2014 - 11:09

Love your version of this project! we are using your version for a bathroom vanity...any input as to the modifications you made would be appreciated!

Modern Farmhouse Bed

Submitted by Anonymous (not verified) on Fri, 02/24/2023 - 05:32

Super easy plans to follow. I modified a bit.

Built from Plan(s)

Comments

Community Garden Farm Stand

This spring, my neighborhood started a community garden.  Five families came together to break ground, sow, tend, and give away our produce.  The local church close by allowed us to use their front lawn for the "Lakeside Community Garden," located in Duluth, MN.   Every Saturday during harvest season, we gave away our produce to the community.  I took on the project of building a farm stand.  One of our neighborhood families donated re-claimed lumber to the cause, and I started building.  I had research many farm stands on-line, and knew I needed two large boxes to hold the veggies, as well as a sign to indicate what produce we were giving away.  

Estimated Cost
$free!!! Use what you can re-claim, and design your own stand.
Estimated Time Investment
Day Project (6-9 Hours)
Finish Used
none
Recommended Skill Level
Beginner