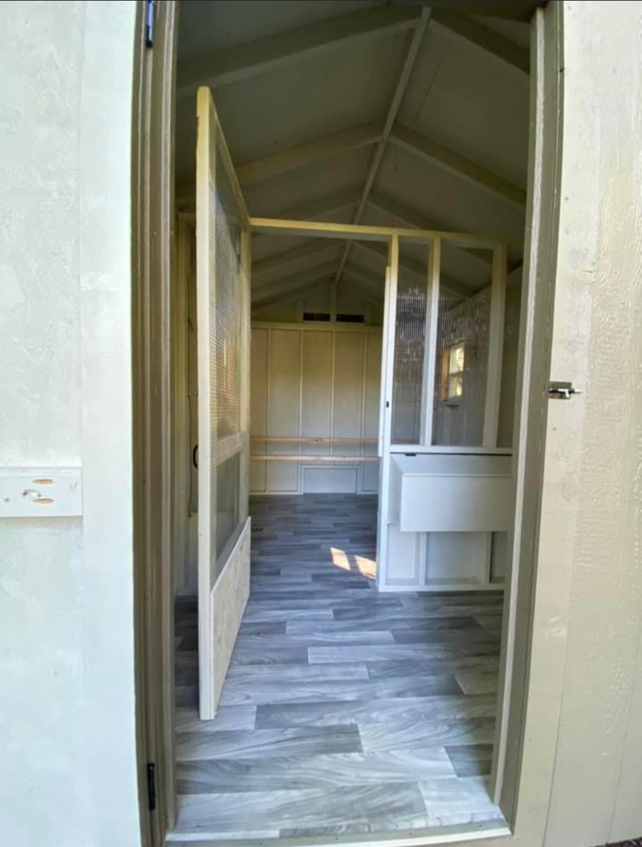
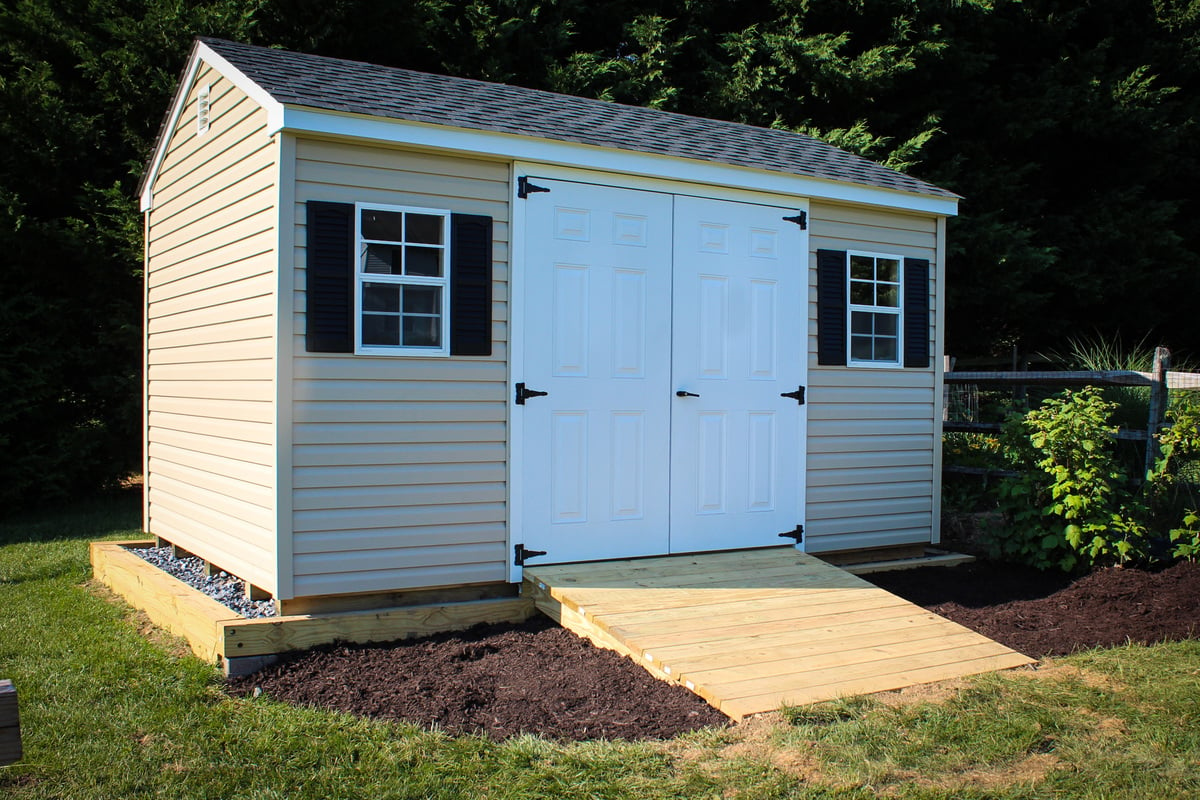
DIY Shed Chicken Coop
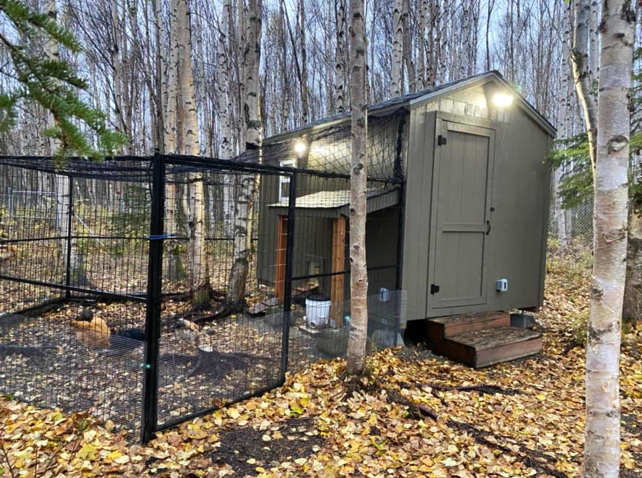
8x12 coop modified from your classic shed plans. 2/3 for the chickens, 1/3 for storage.
by Harmony Munson
Built from Plan(s)
8x12 coop modified from your classic shed plans. 2/3 for the chickens, 1/3 for storage.
by Harmony Munson
Have a long wall and this was perfect! I love everything about it! I enjoyed working with miters for the 1st time! FUN!!!!
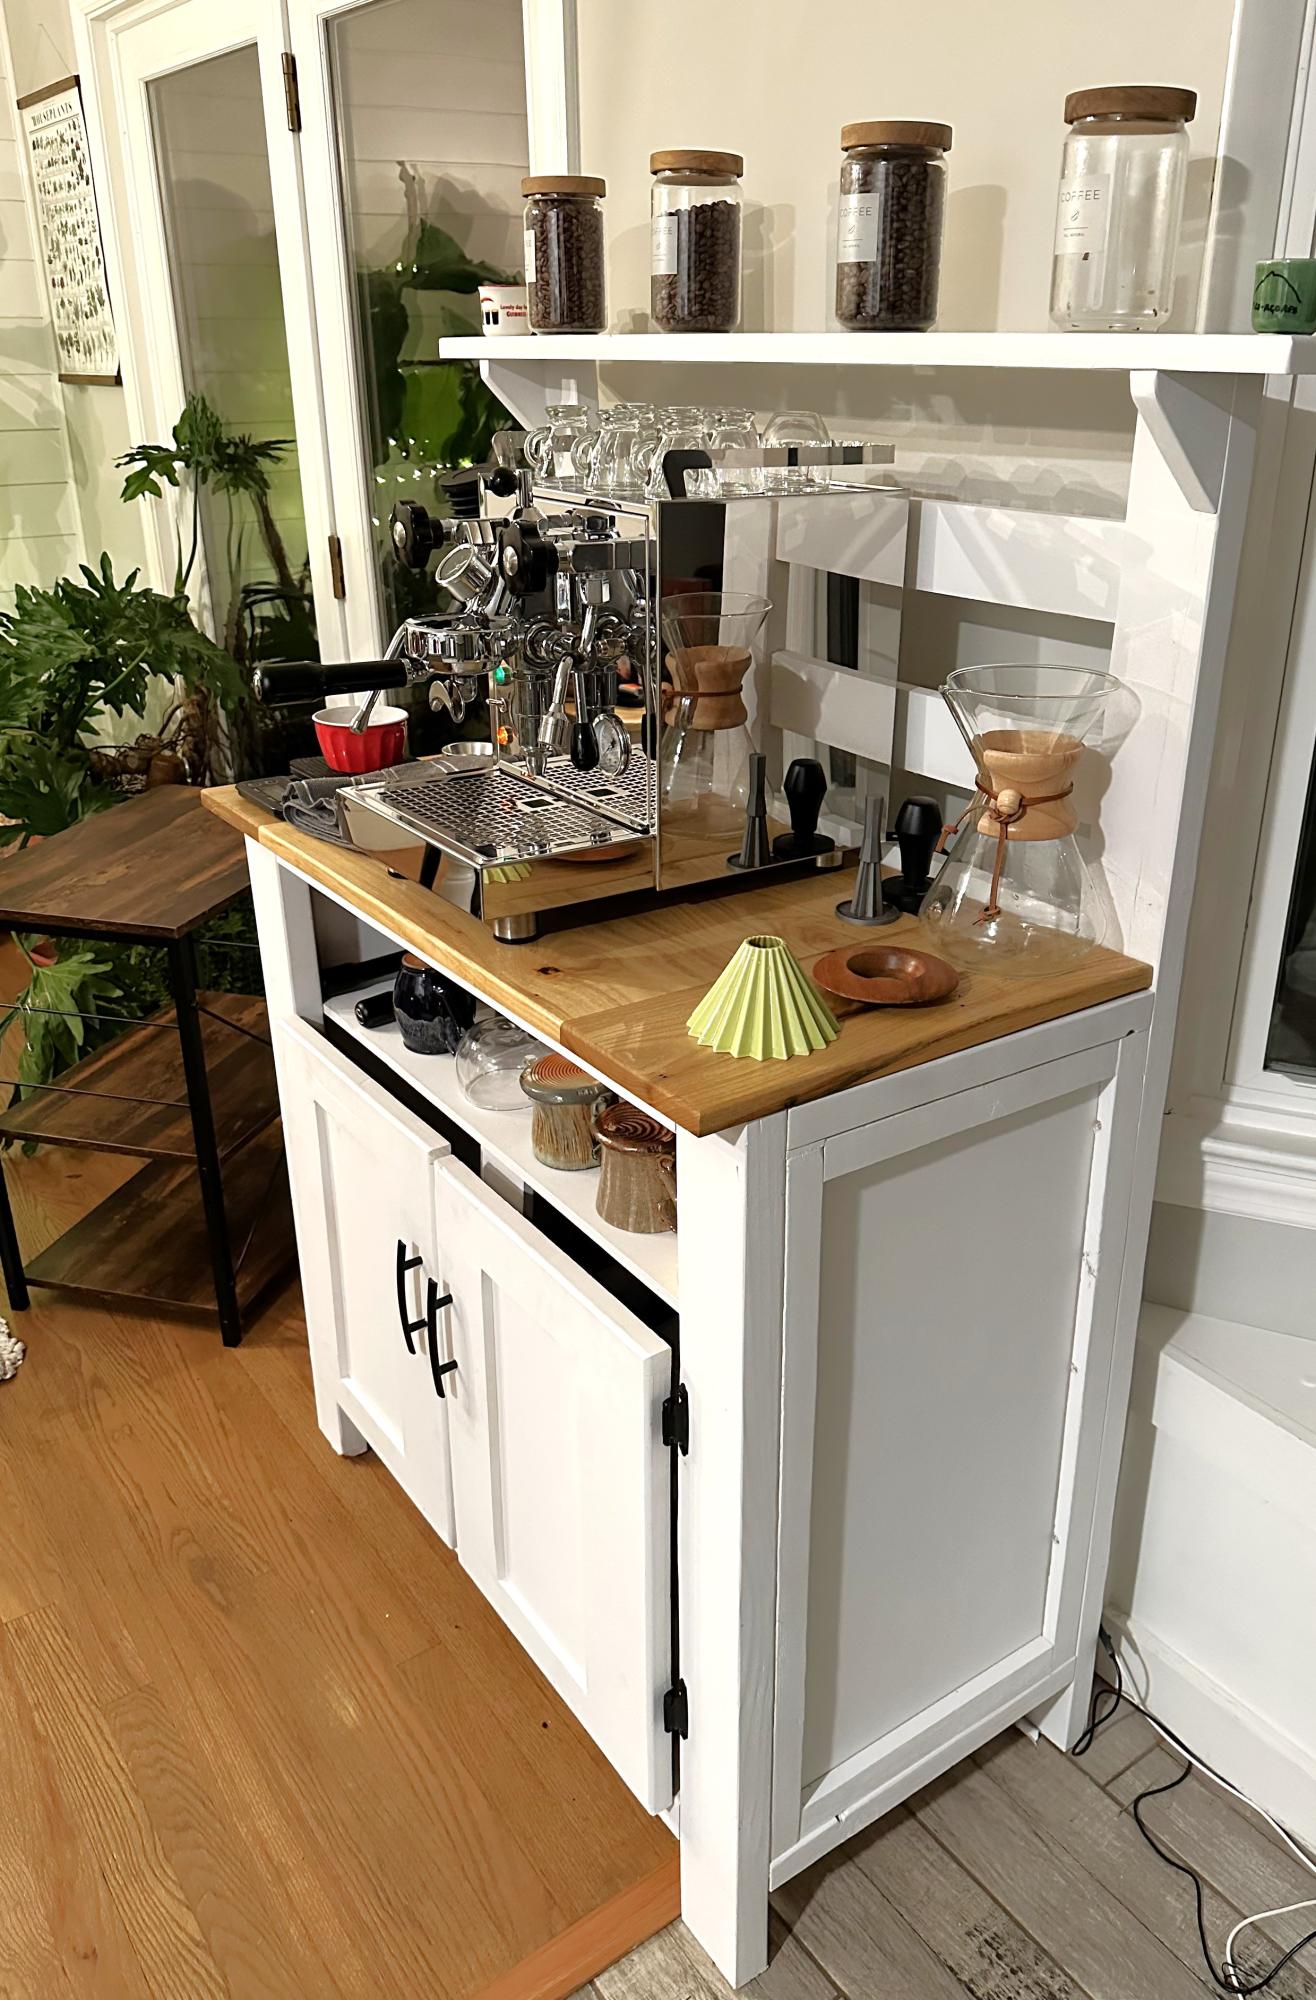
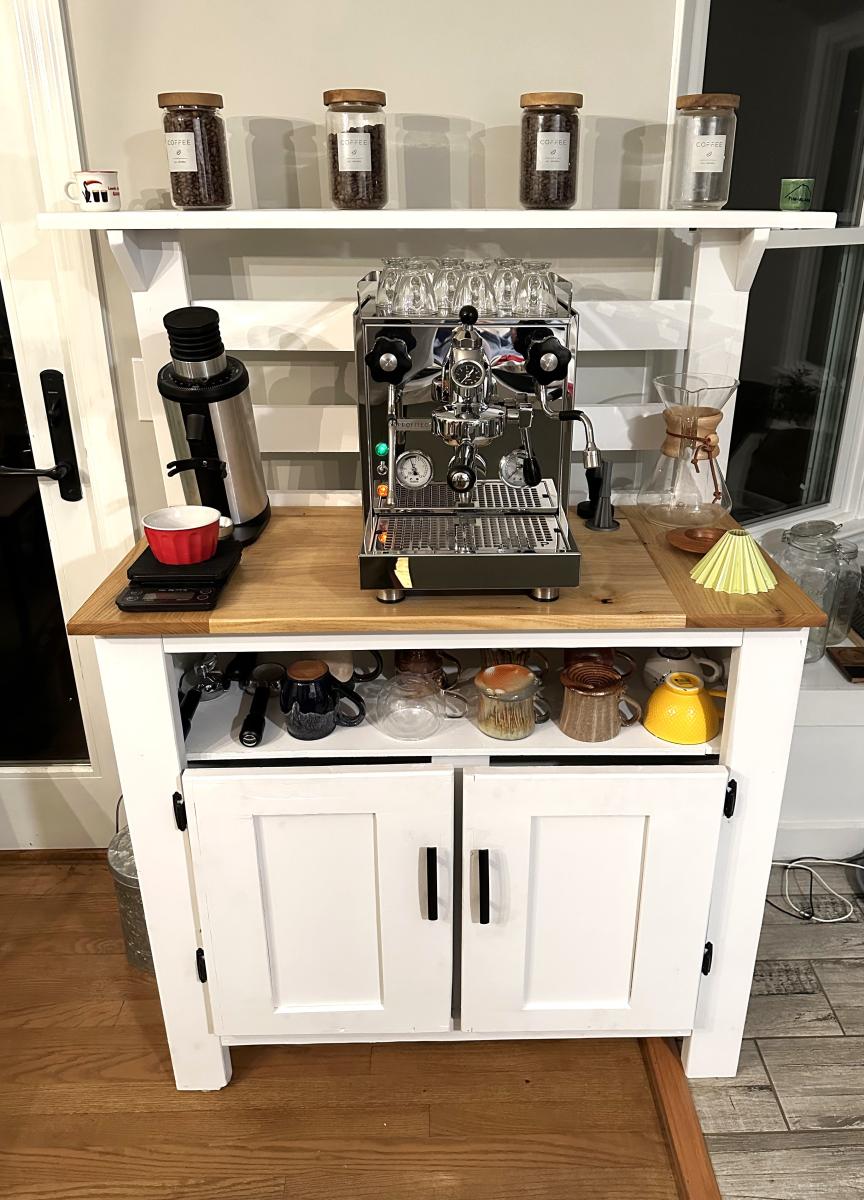
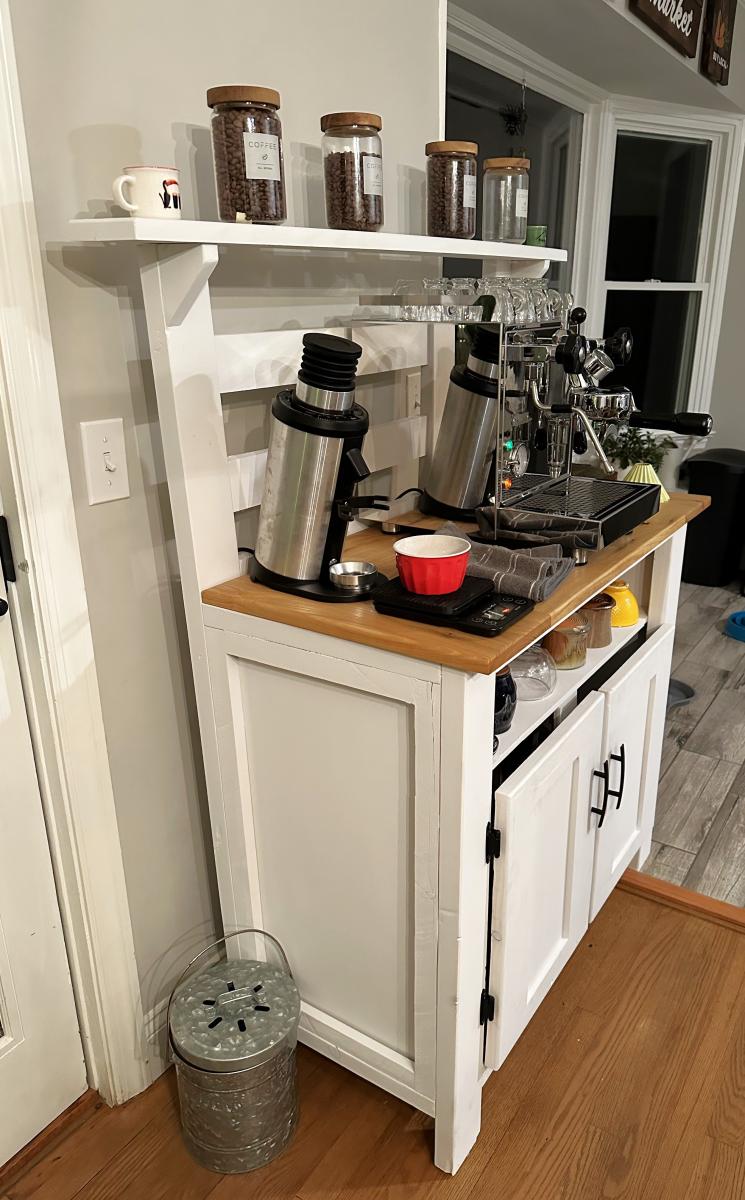
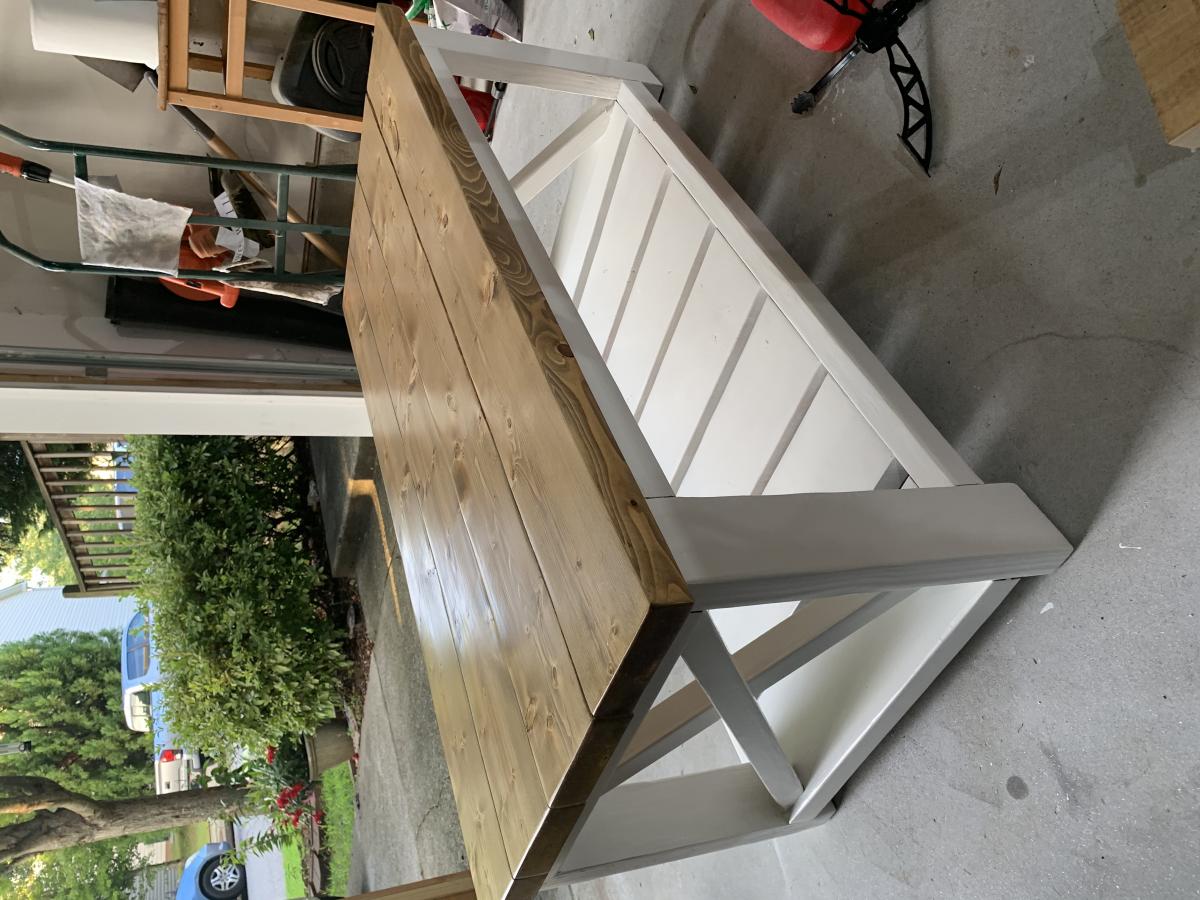
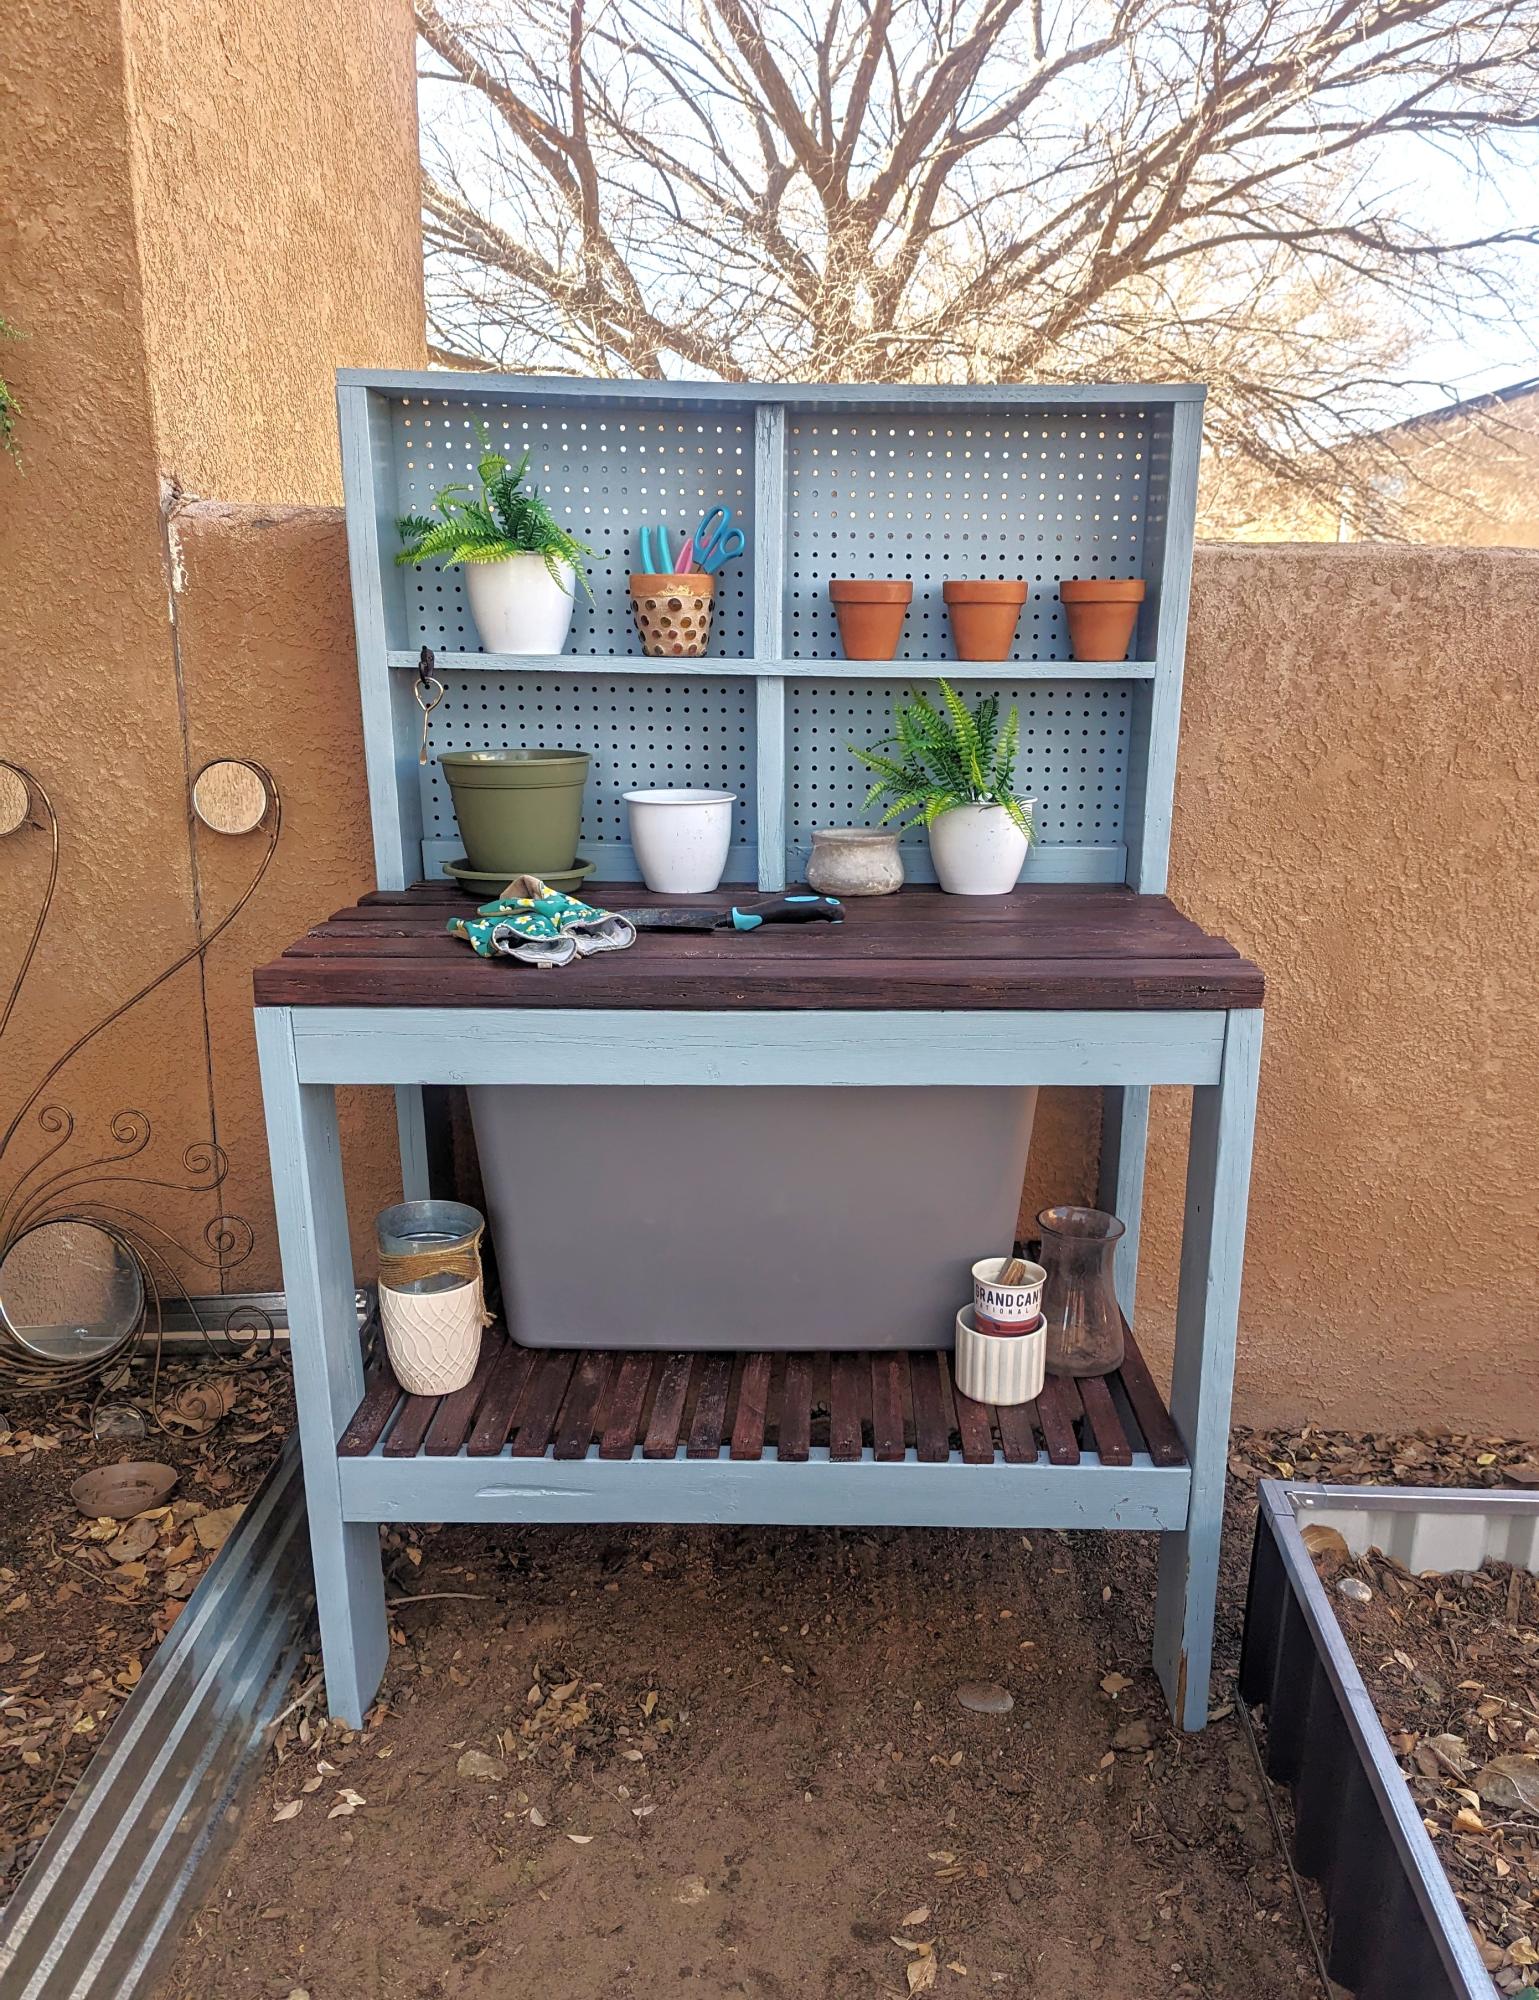
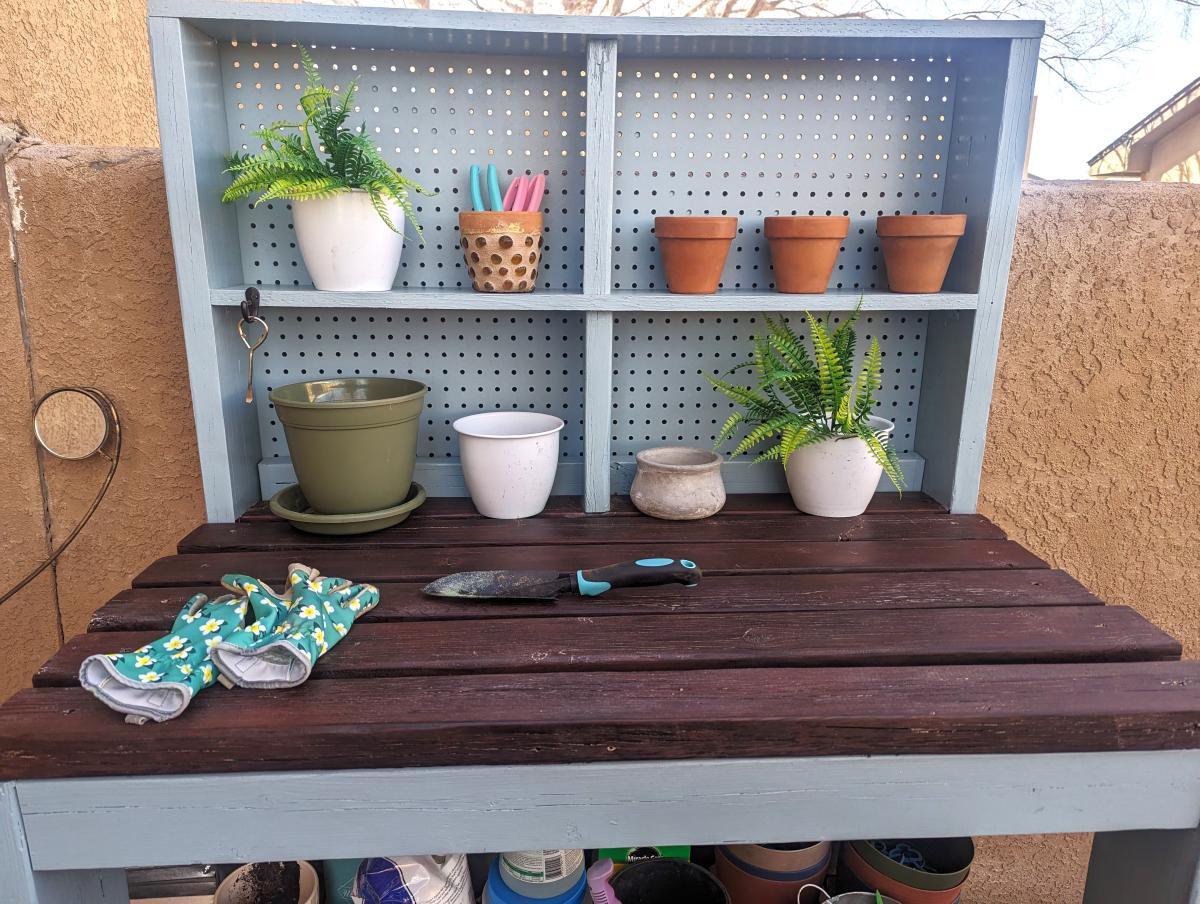
Had a bunch of scrap wood from other projects and random pieces we found in our barn after we moved into our new house so decided to make a new coffee bar to use it up. Modified the Potting Bench plans and pretty happy with how it turned out!
Nate B
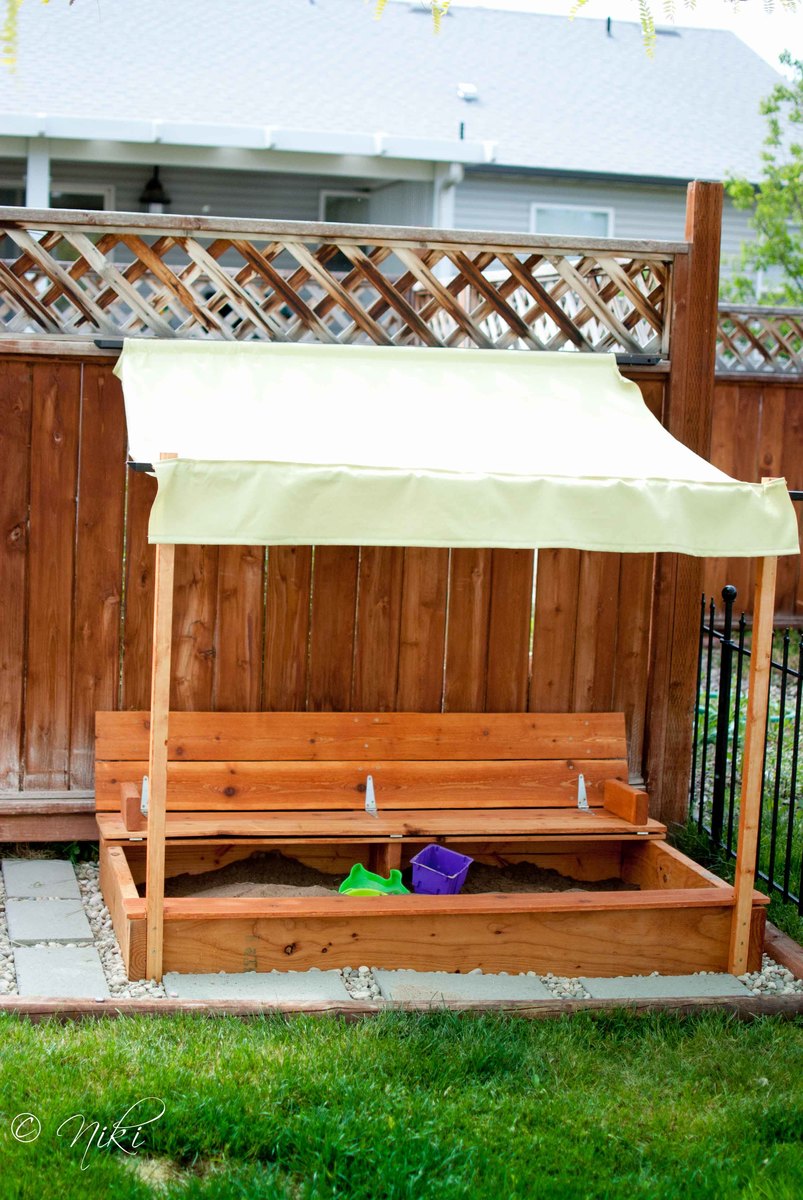
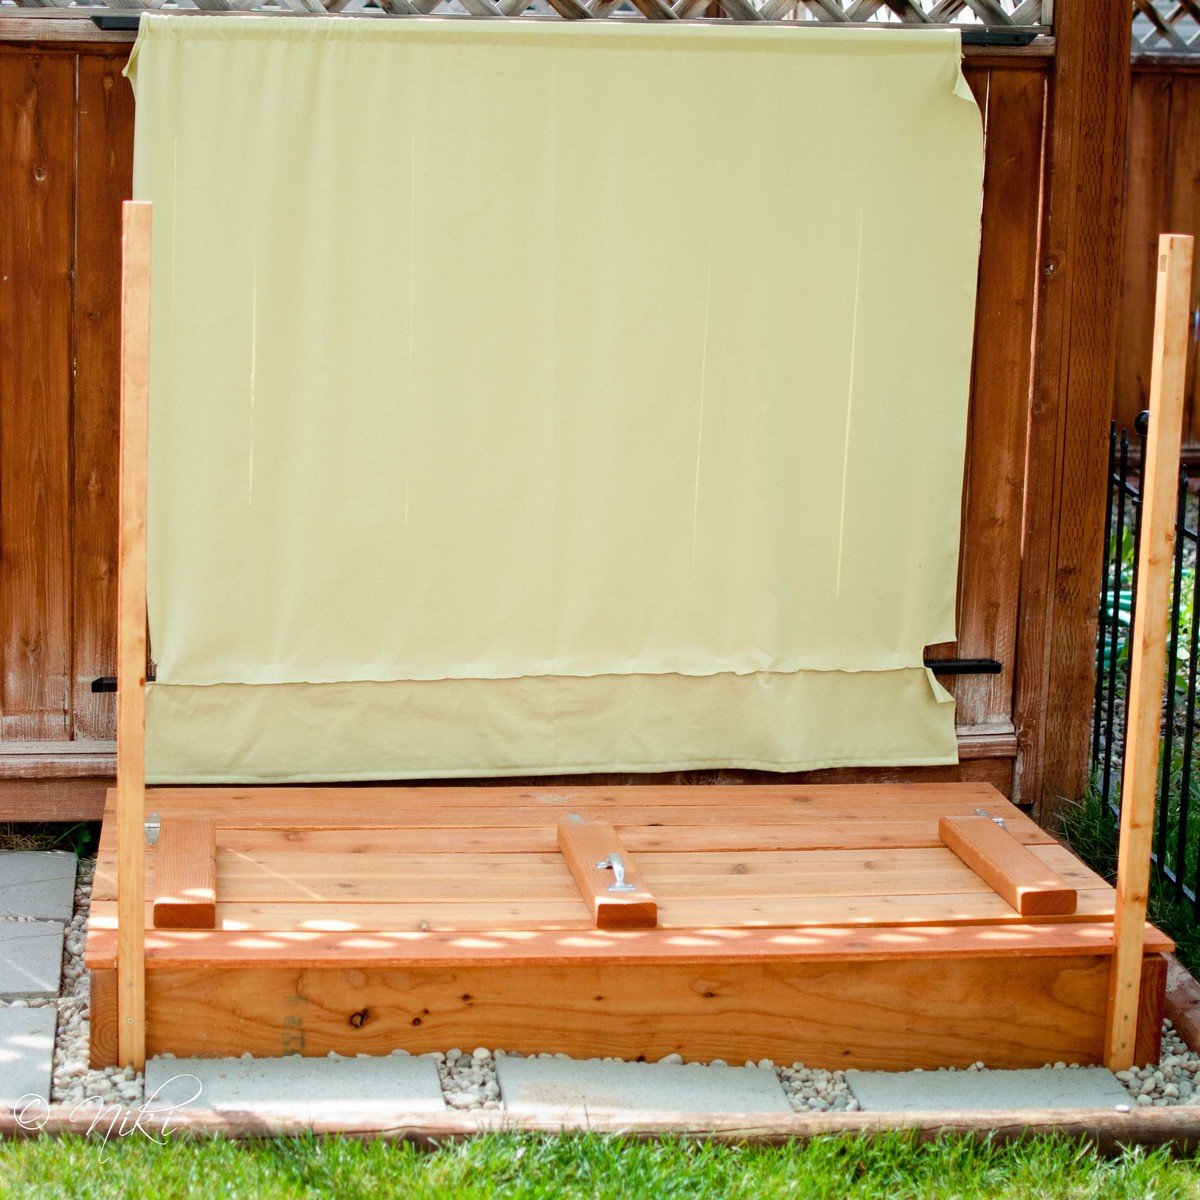
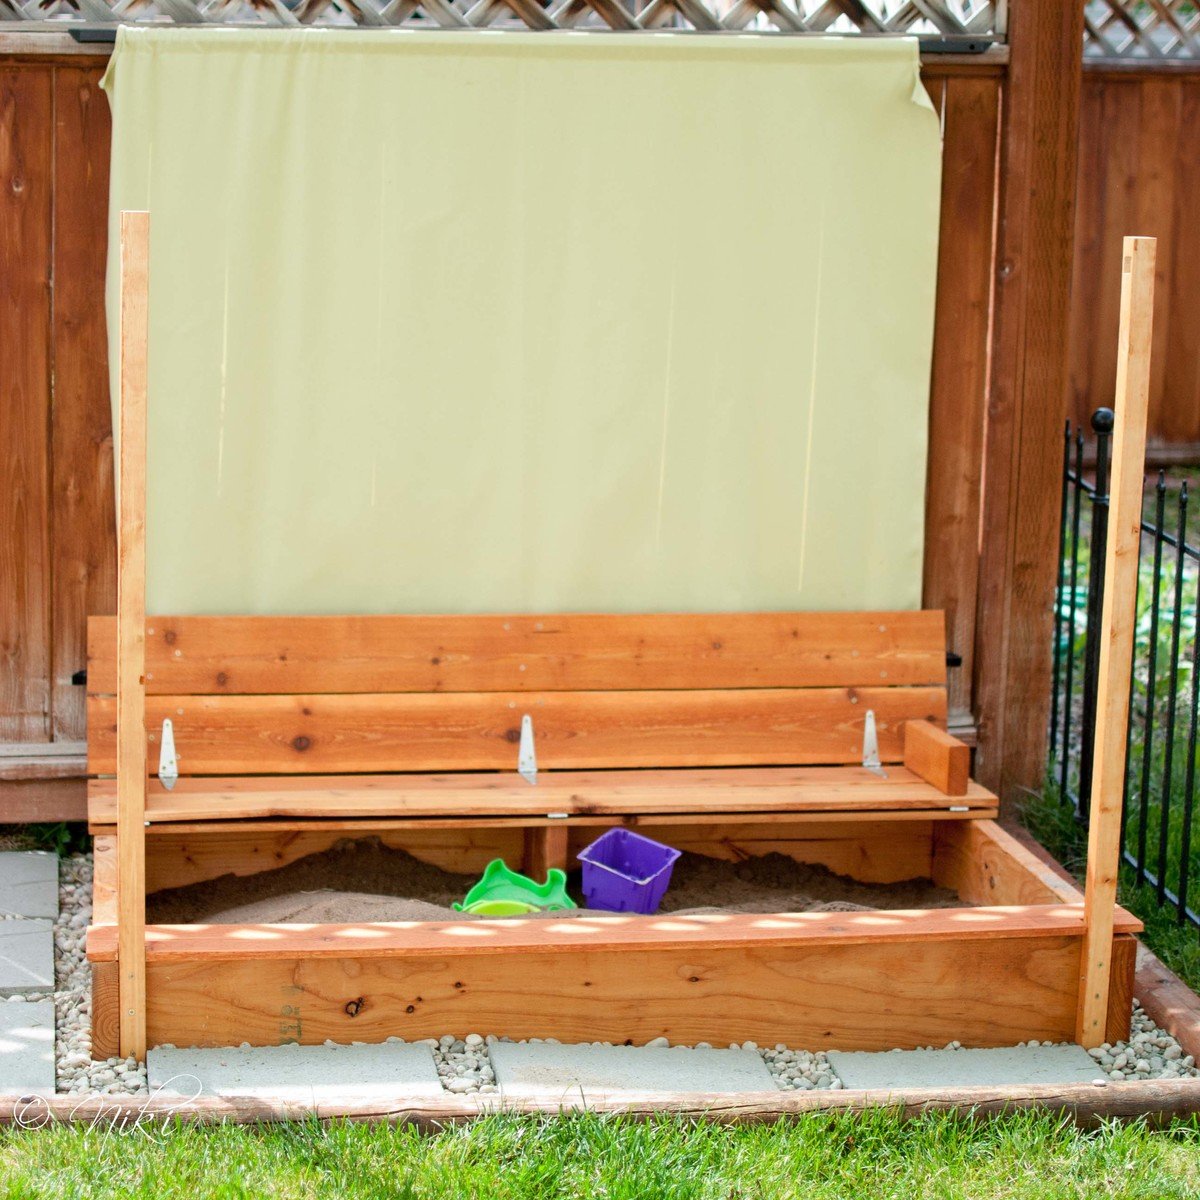
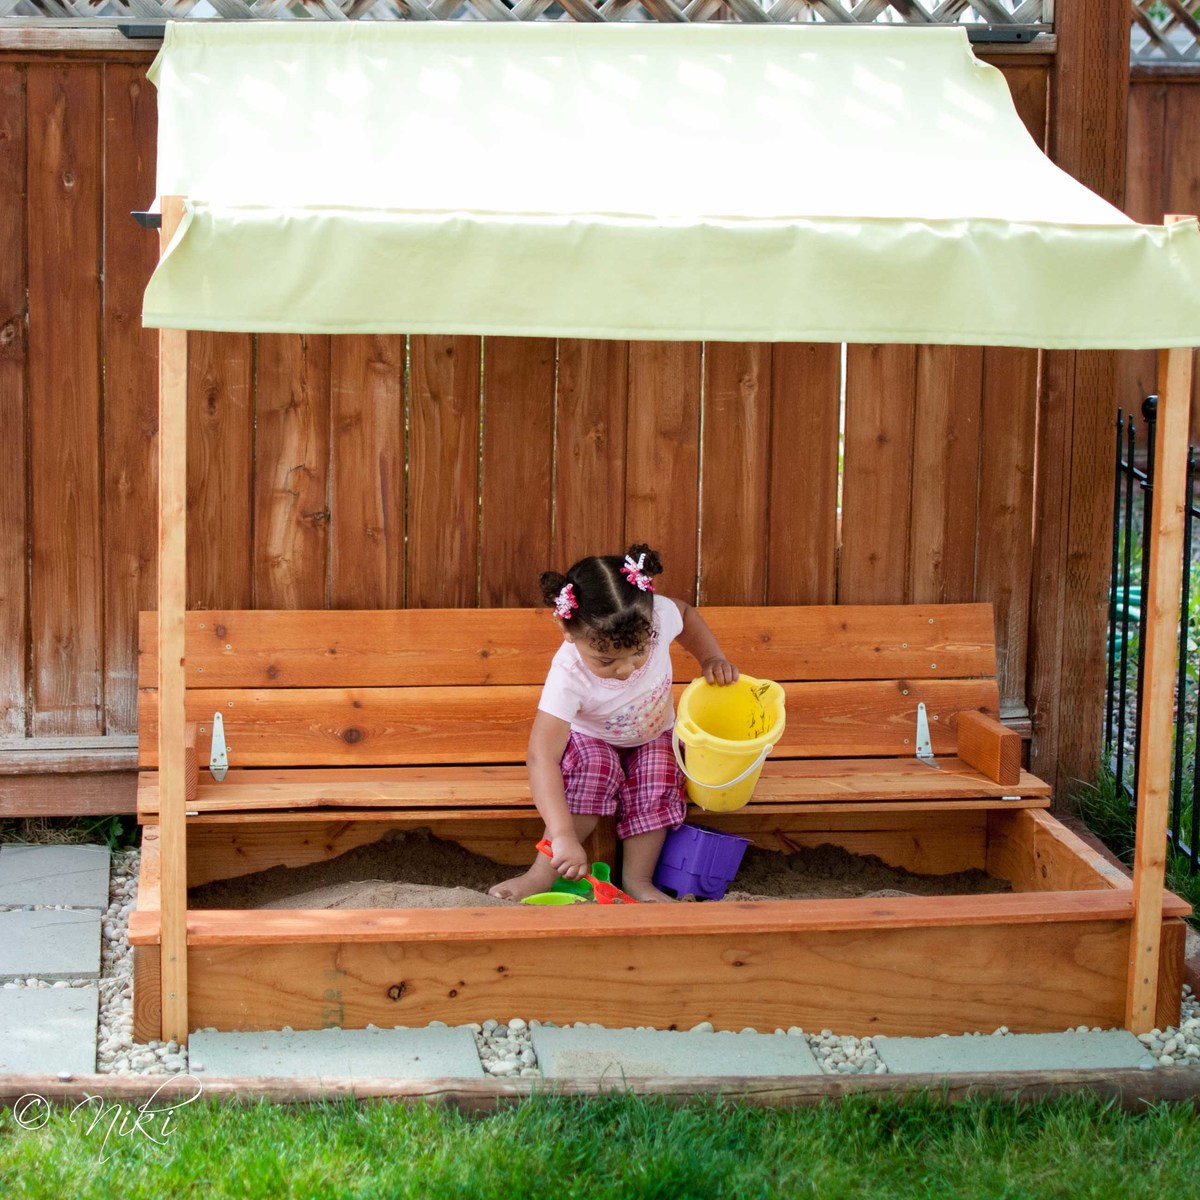
"Cellar? What cellar? We don't have a cellar... Oh, you mean the new sand box! Here, let me get some shade too."
I'm not sure why, but I can never seem to follow plans exactly. I guess that's not entirely true. I CAN follow plans exactly, but I almost never do. Maybe it's some sort of passive rebellion or something, but I usually have to put my own spin on the things that I build. Sometimes it works out in my favor. Sometimes not. This build was a little of both.
I decided to only build one bench in our sand box. This cut down on a lot of supplies. By making it longer a single bench and making it longer, it covers about the same amount of square feet, just in a rectangle instead of a square. When pricing lumber, I noticed that 2x8's were cheaper than 1x8's. So I went with those instead. It can't hurt to beef up the sides a little, right? This required some easy calculations on the cut list. I also decided to use 1x6 fence planks instead of 1x4 whitewood or pine. The fence planks were cheap, and I figured they would look nice in the back yard. They are also naturally pest and rot resistant. They required extra sanding to take the rough off. However, this is one place that I'm thinking the modification didn't work in my favor. The fence planks are not as thick as the whitewood. This combined with the increased length makes the the top pieces feel pretty weak. I put a little support piece under the bench. I'm quite sure the bench would not have held up well without the support.
Because this is an outdoor piece, I dry fit everything, and then stained everything before assembling it, to make sure all of the edges were well protected.
Cost breakdown (not including canopy)
Fence planks $14
2x8x8 $11
hinges $9
handle $2
stain $10


Thu, 03/07/2013 - 08:49
I just love the changes you made to this sandbox! Can you tell me what you used for the construction of the canopy? Thanks!
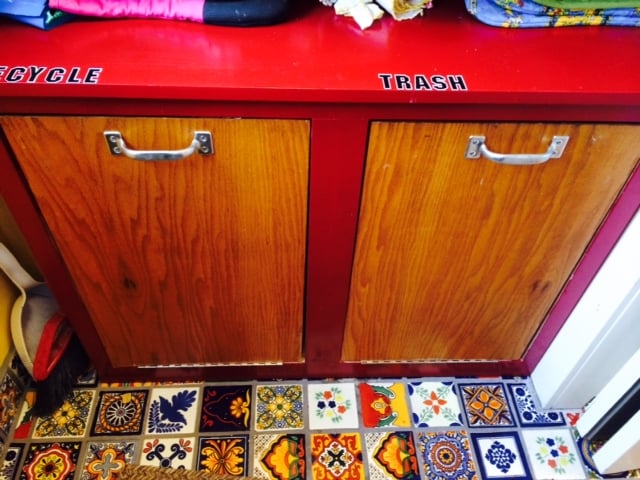
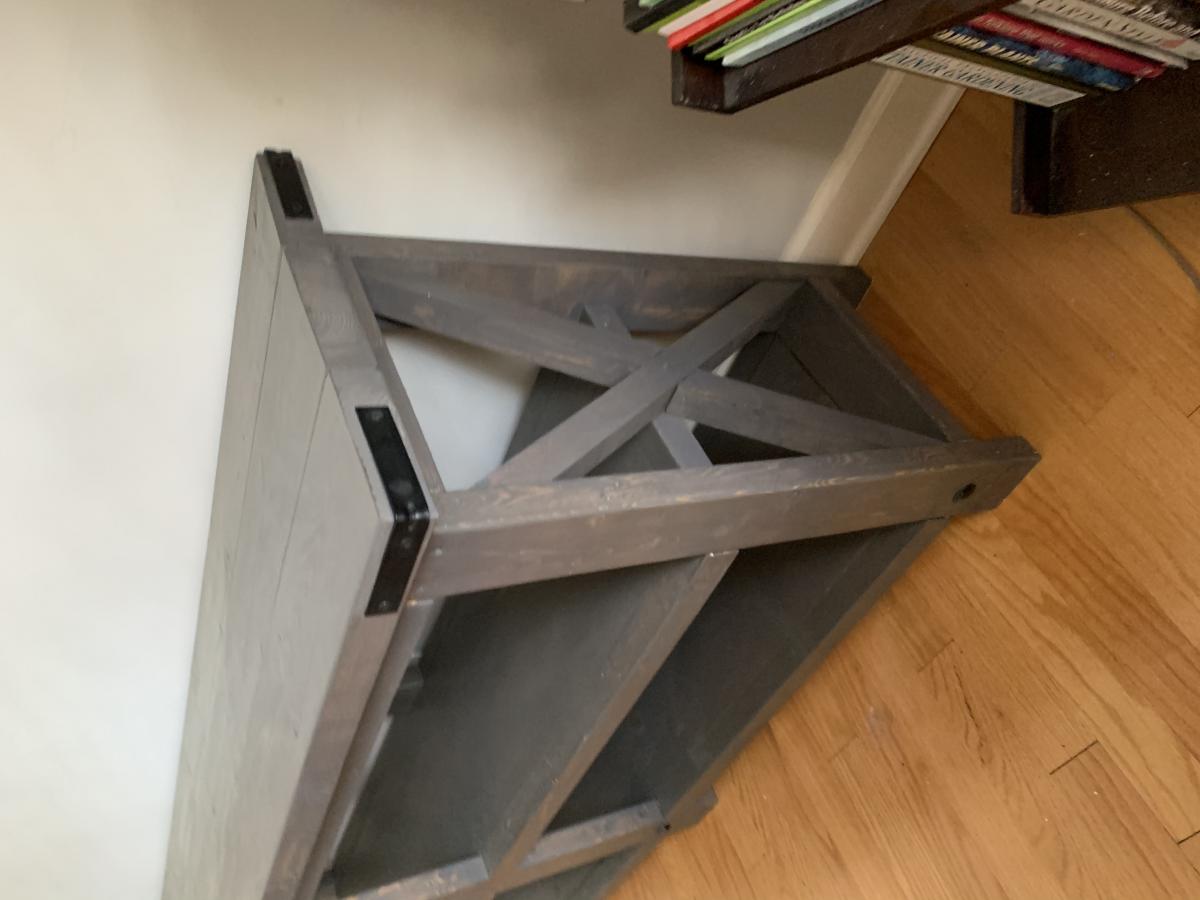
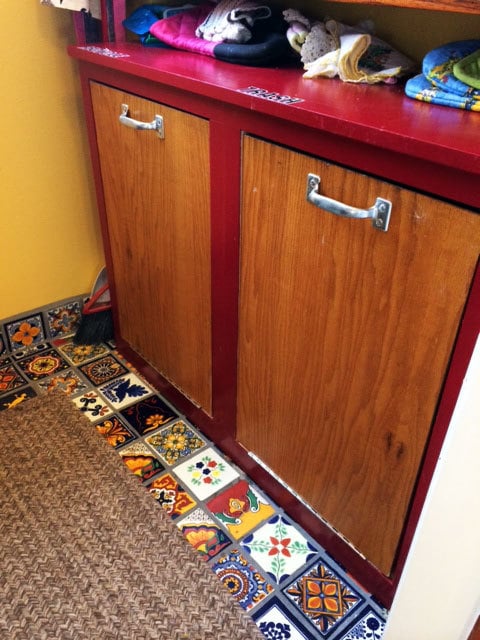
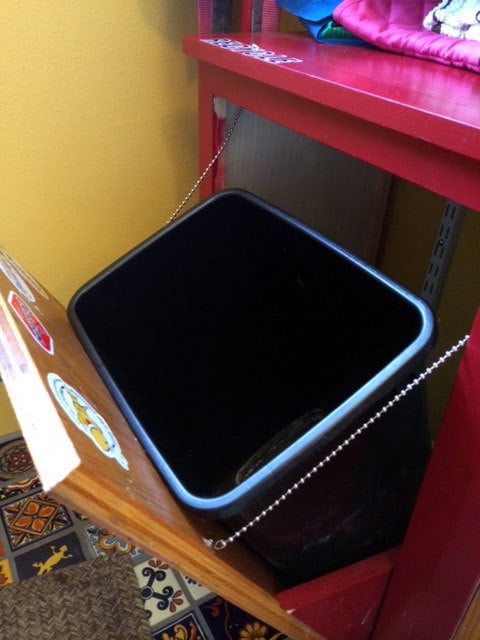
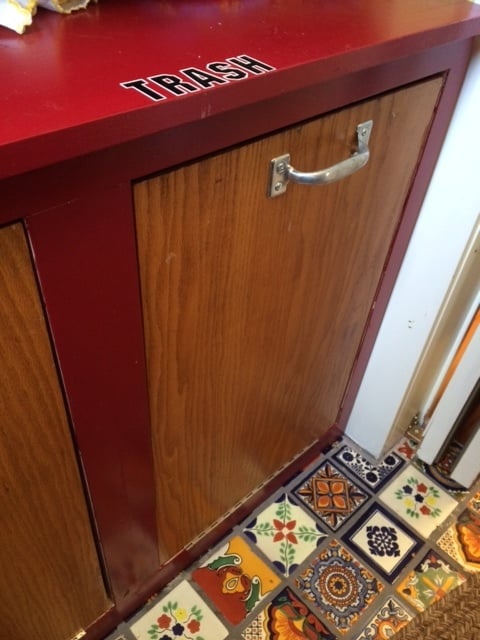
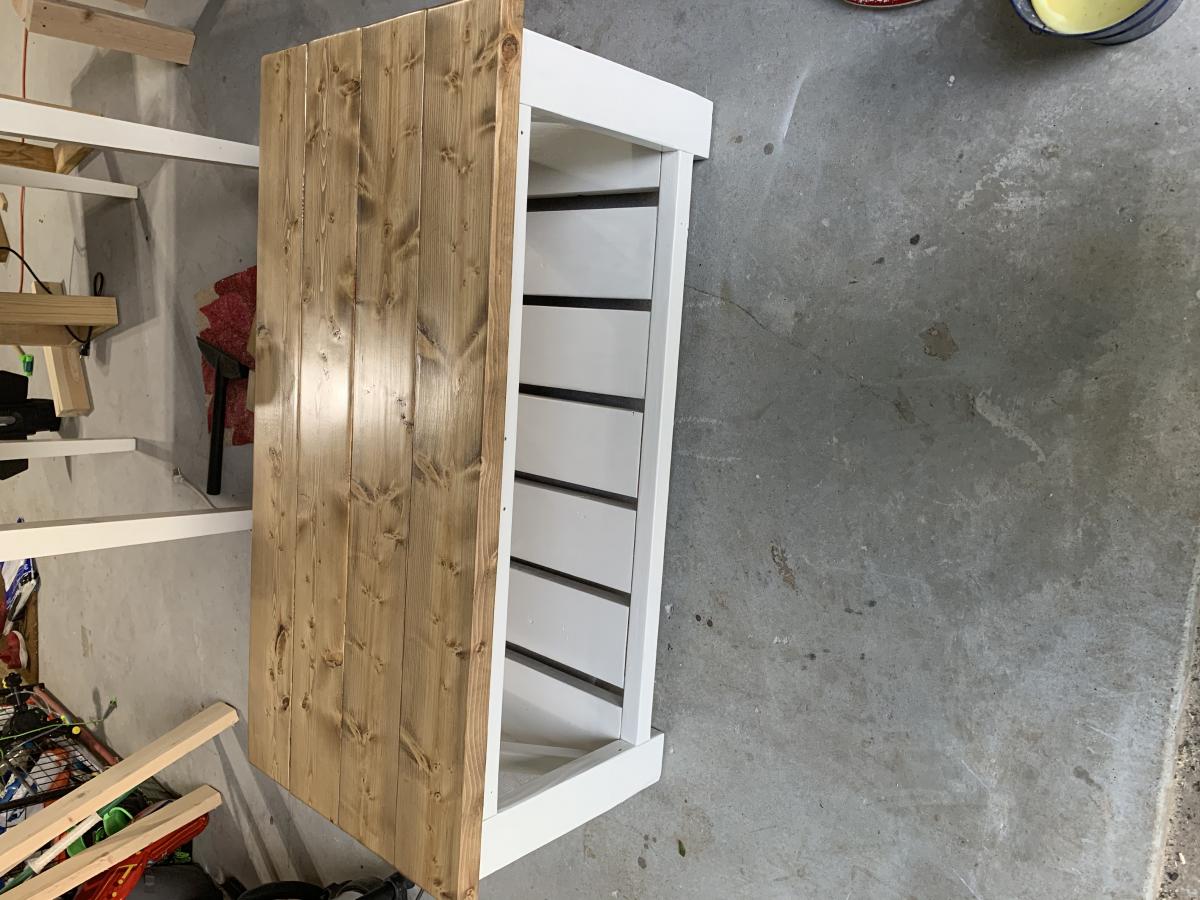
When we built our small mudroom and pantry addition, I new I needed a tilt out trash bin, nothing on the market fit the space the way I wanted. So I of course came here to Ana-white.com :) the "wood tilt out trash can or recycling cabinet plans" were perfect with a bit of hacking I made it fit exactly!
I made 2 cabinets into 1 unit,
used salvage/old cabinet door fronts I cut to size
Painted the box red and kept the oak cabinets all wood grain
Added handles
Added ball chain to keep the doors from falling over.
LOVE this! fits perfect in our mudroom and it was a pretty quick project too!
Build Instructions:
http://www.instructables.com/id/Shed-Ramp/
Video:
My garage was starting to get cramped so I decided I needed a shed for the lawn/garden equipment. I thought about building one but bailed and decided to purchase a 10’ x 14’ shed with 6’ wide doors from the nearby Amish community. To not be a total slacker, I decided I could at least build the foundation and ramp. I’ve never built a ramp so I did a little research online and found that there are an abundance of styles, both good and bad. Anyway, this is my attempt at ramp design. Hope someone finds it useful.
Great design and project! I am working on the second one in my wife's school colors. Thanks!
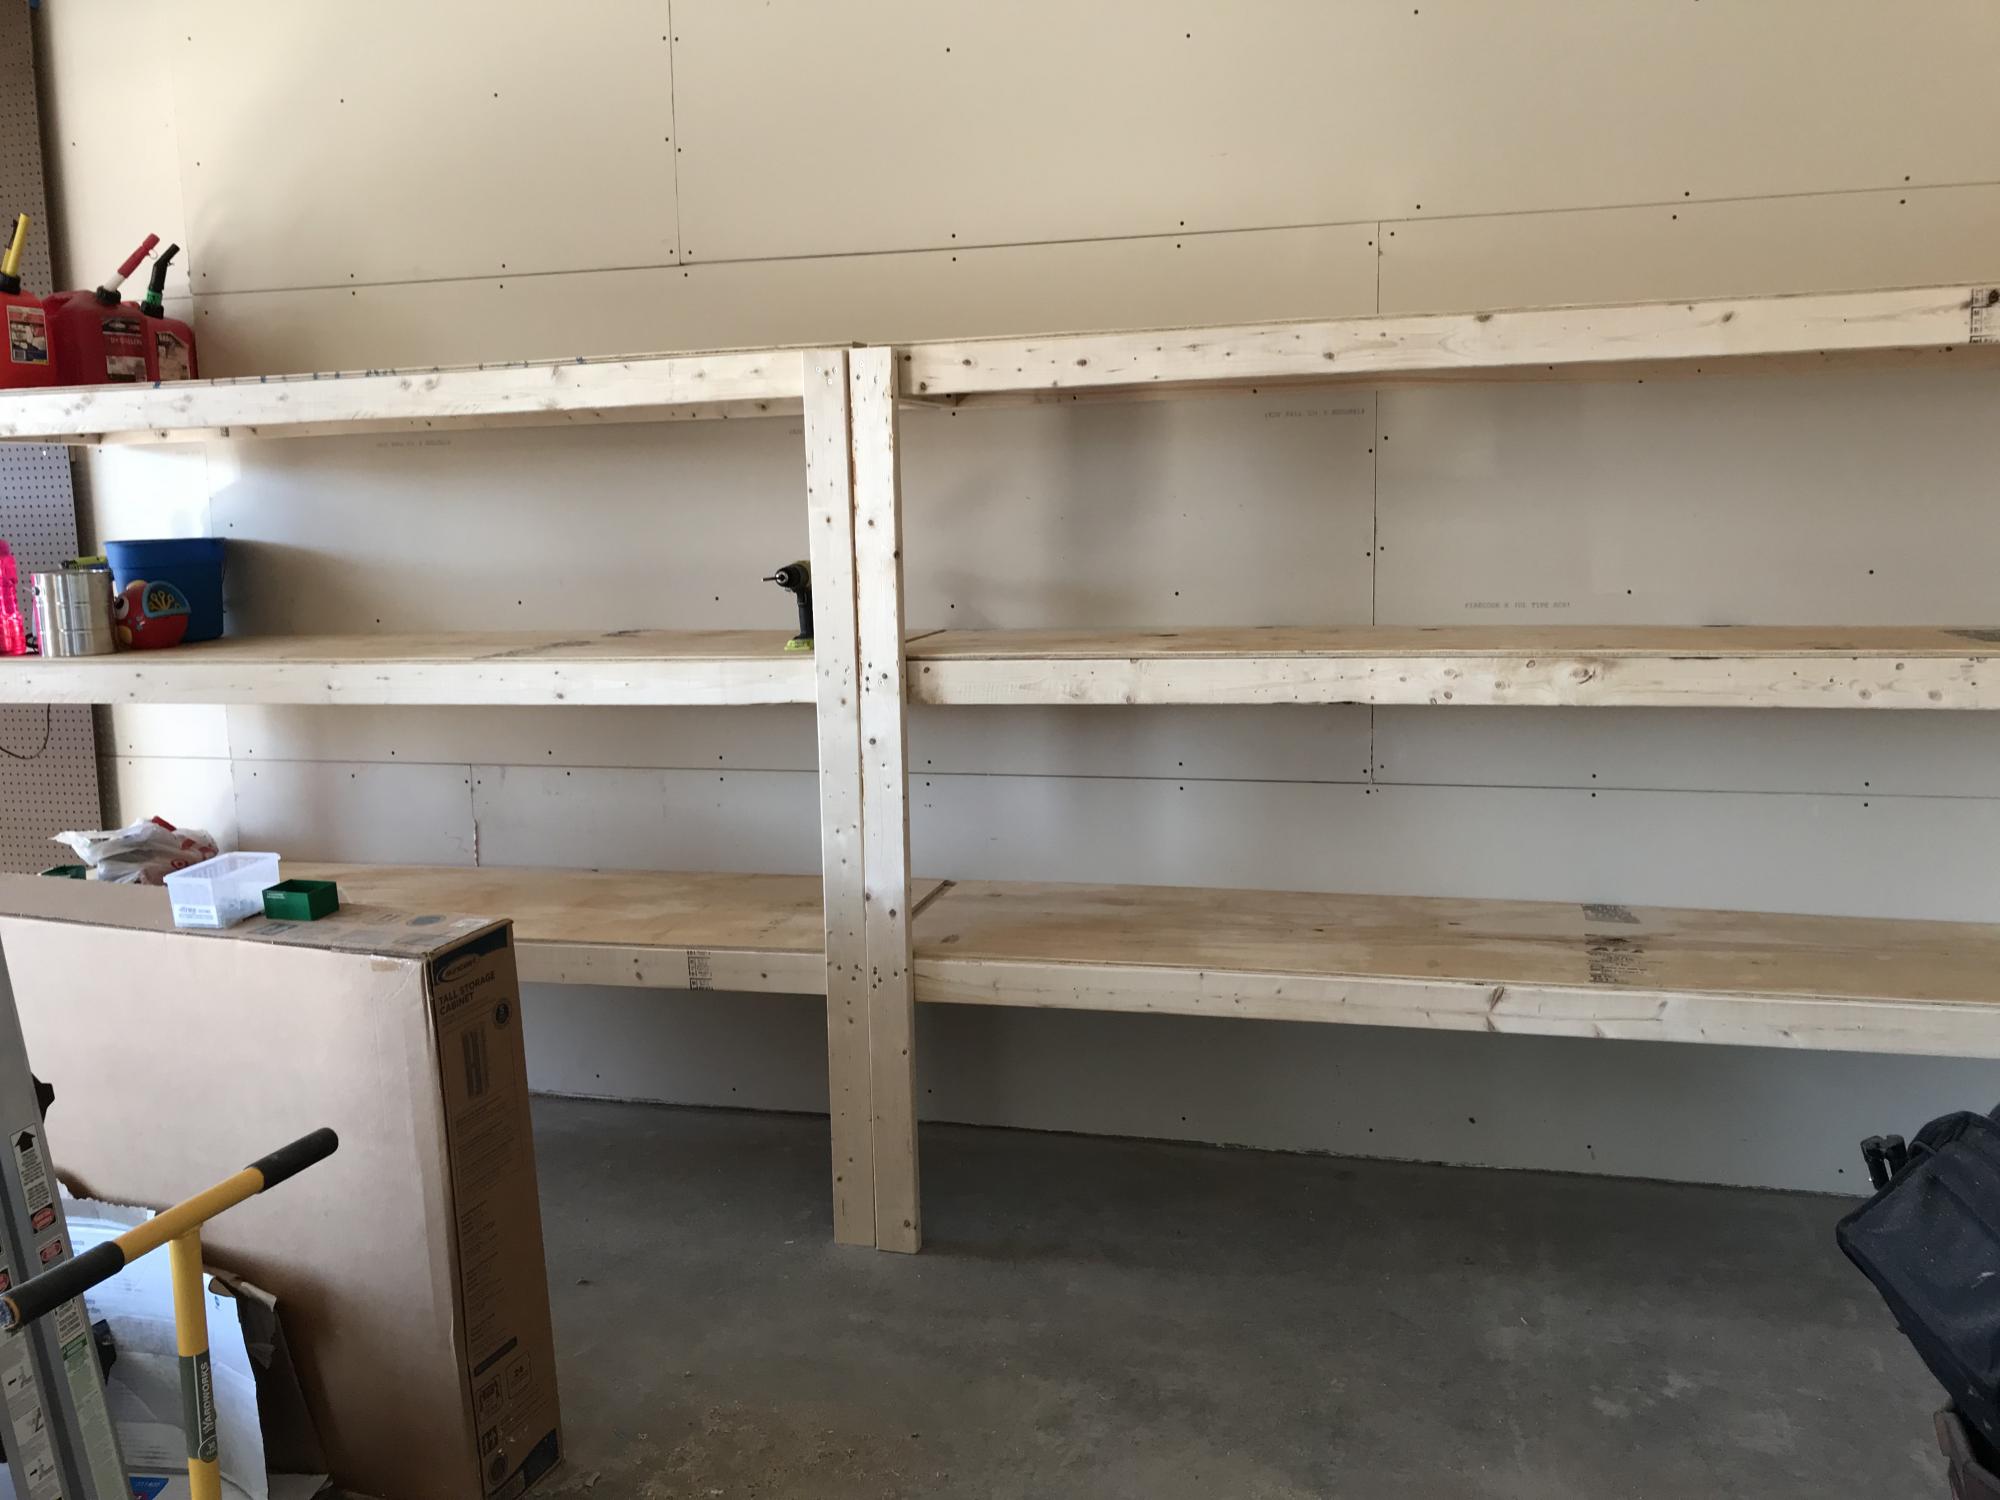
Easy, quick garage shelves!
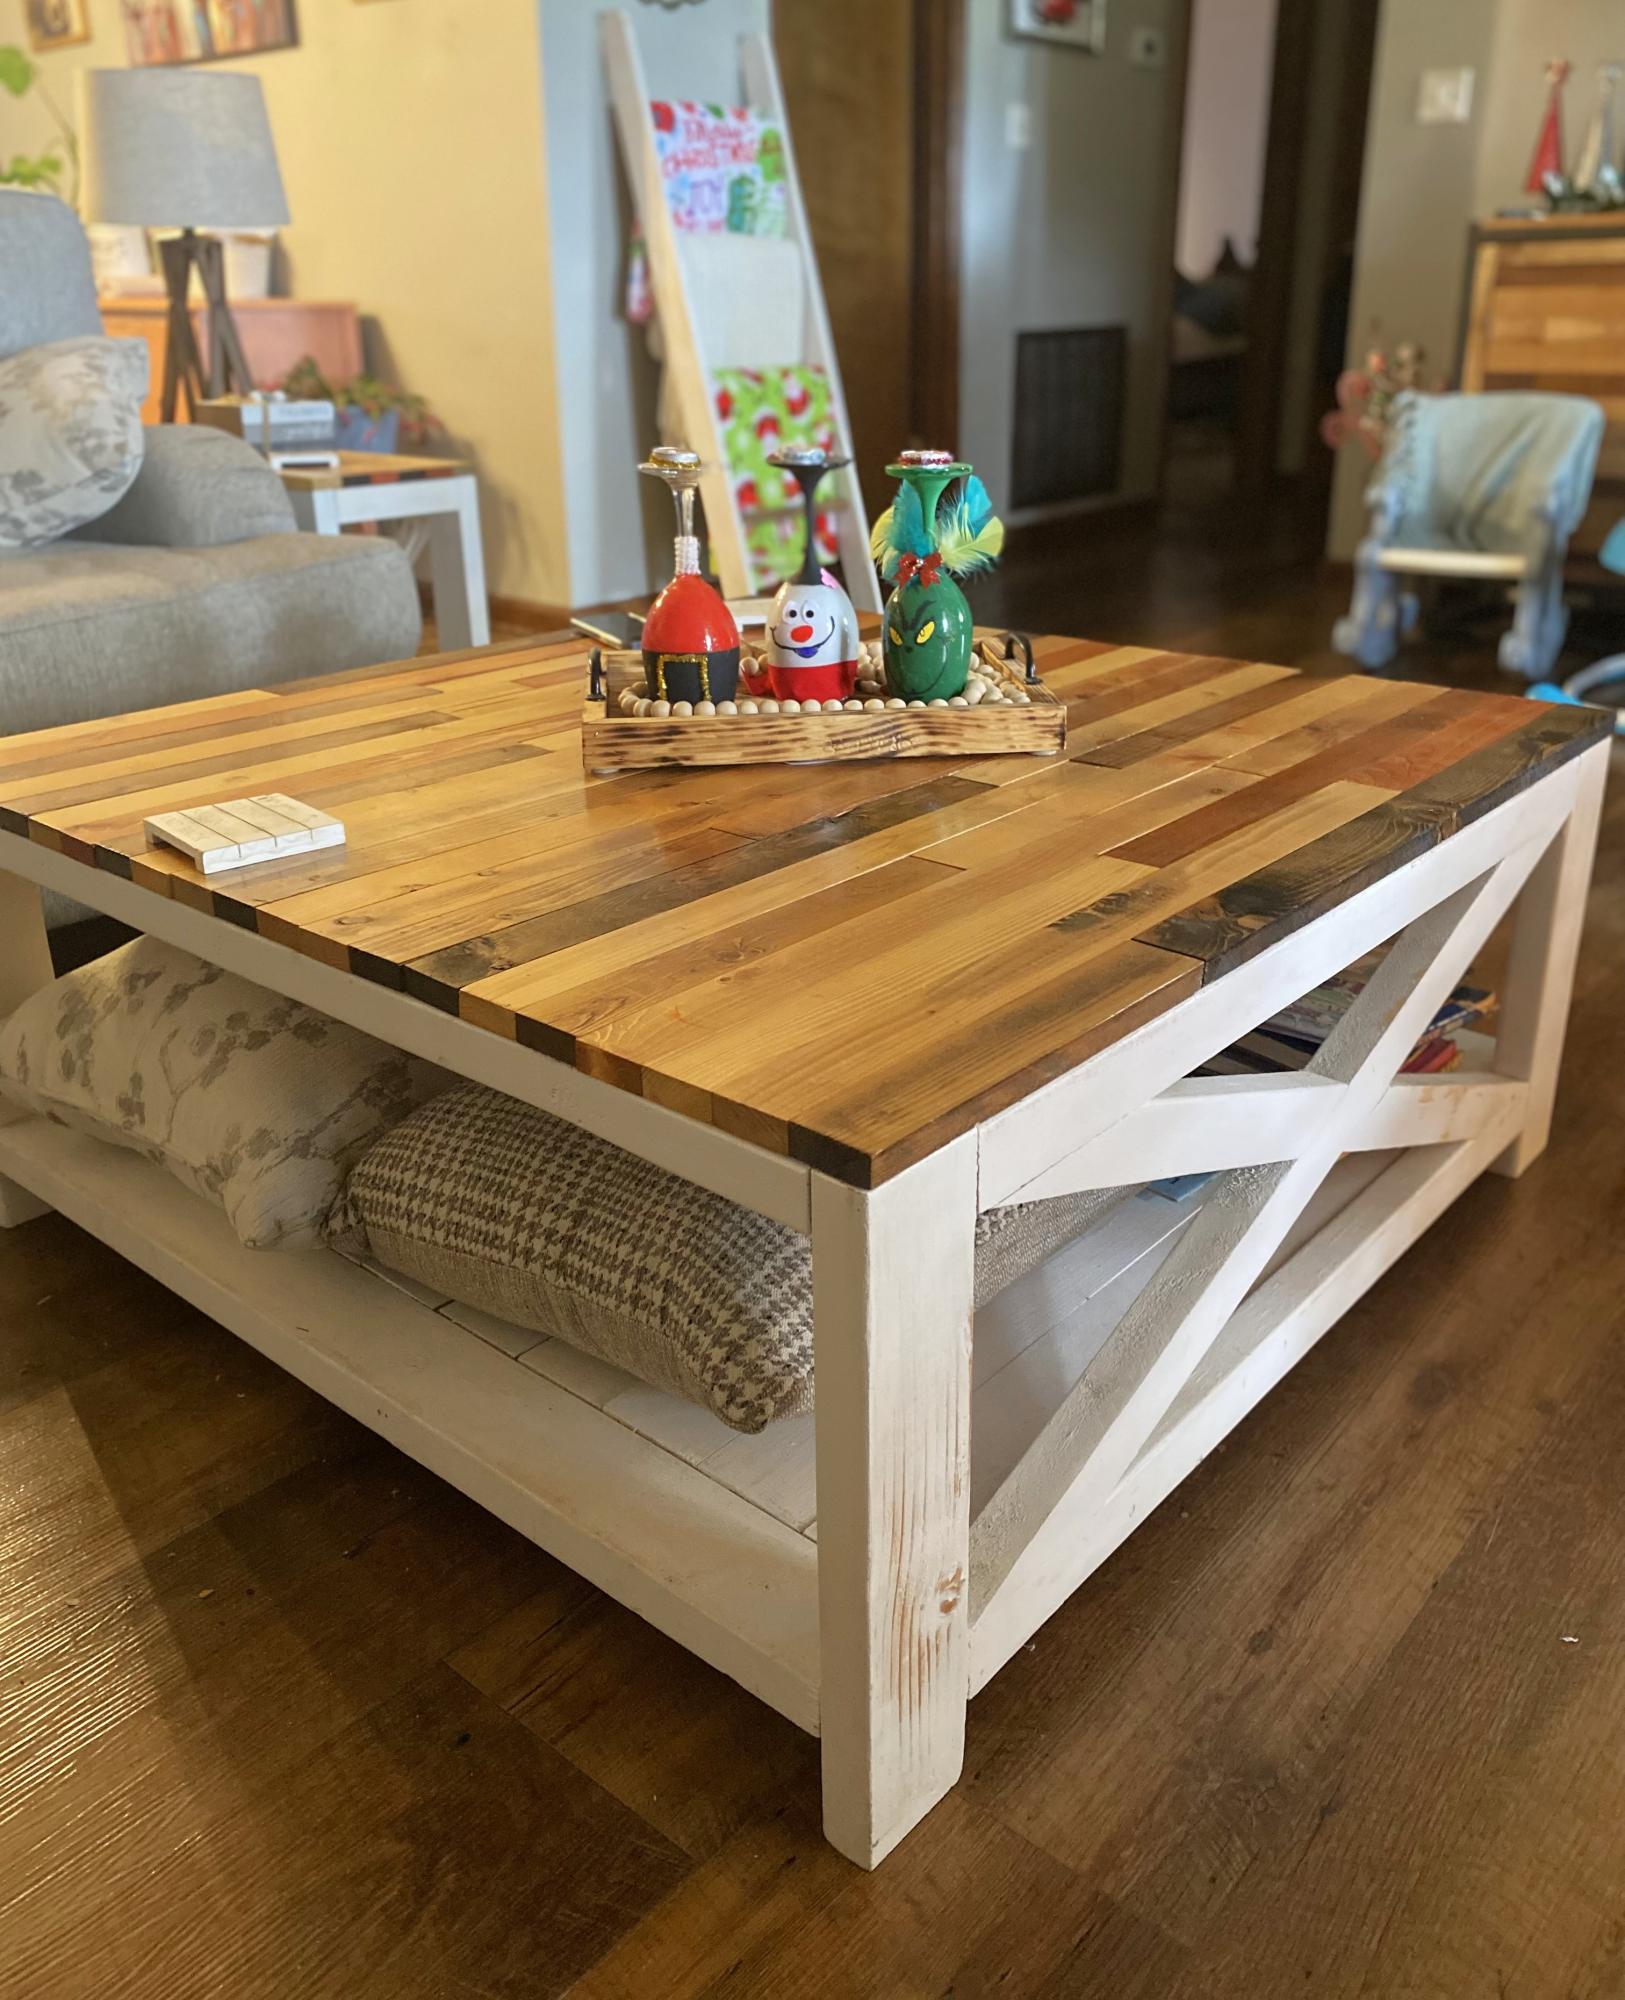
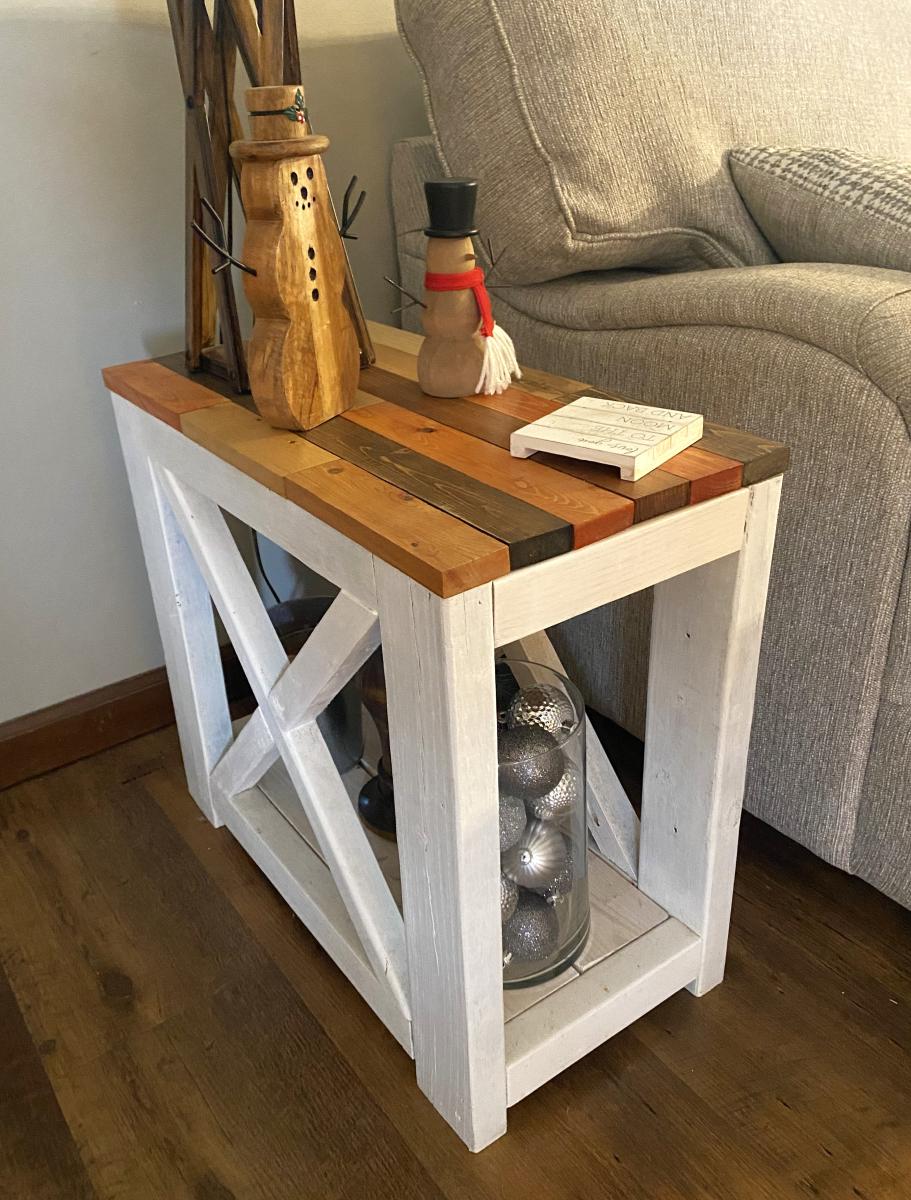
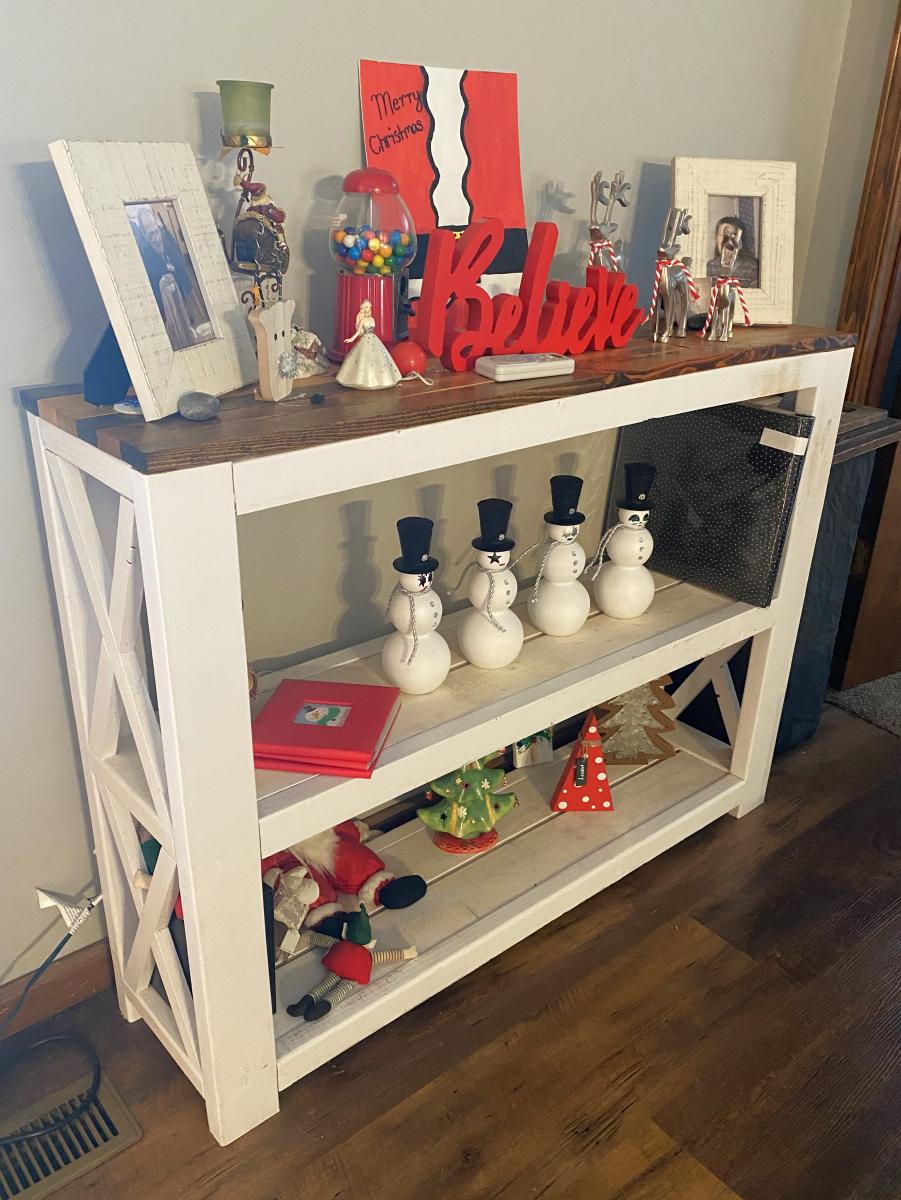
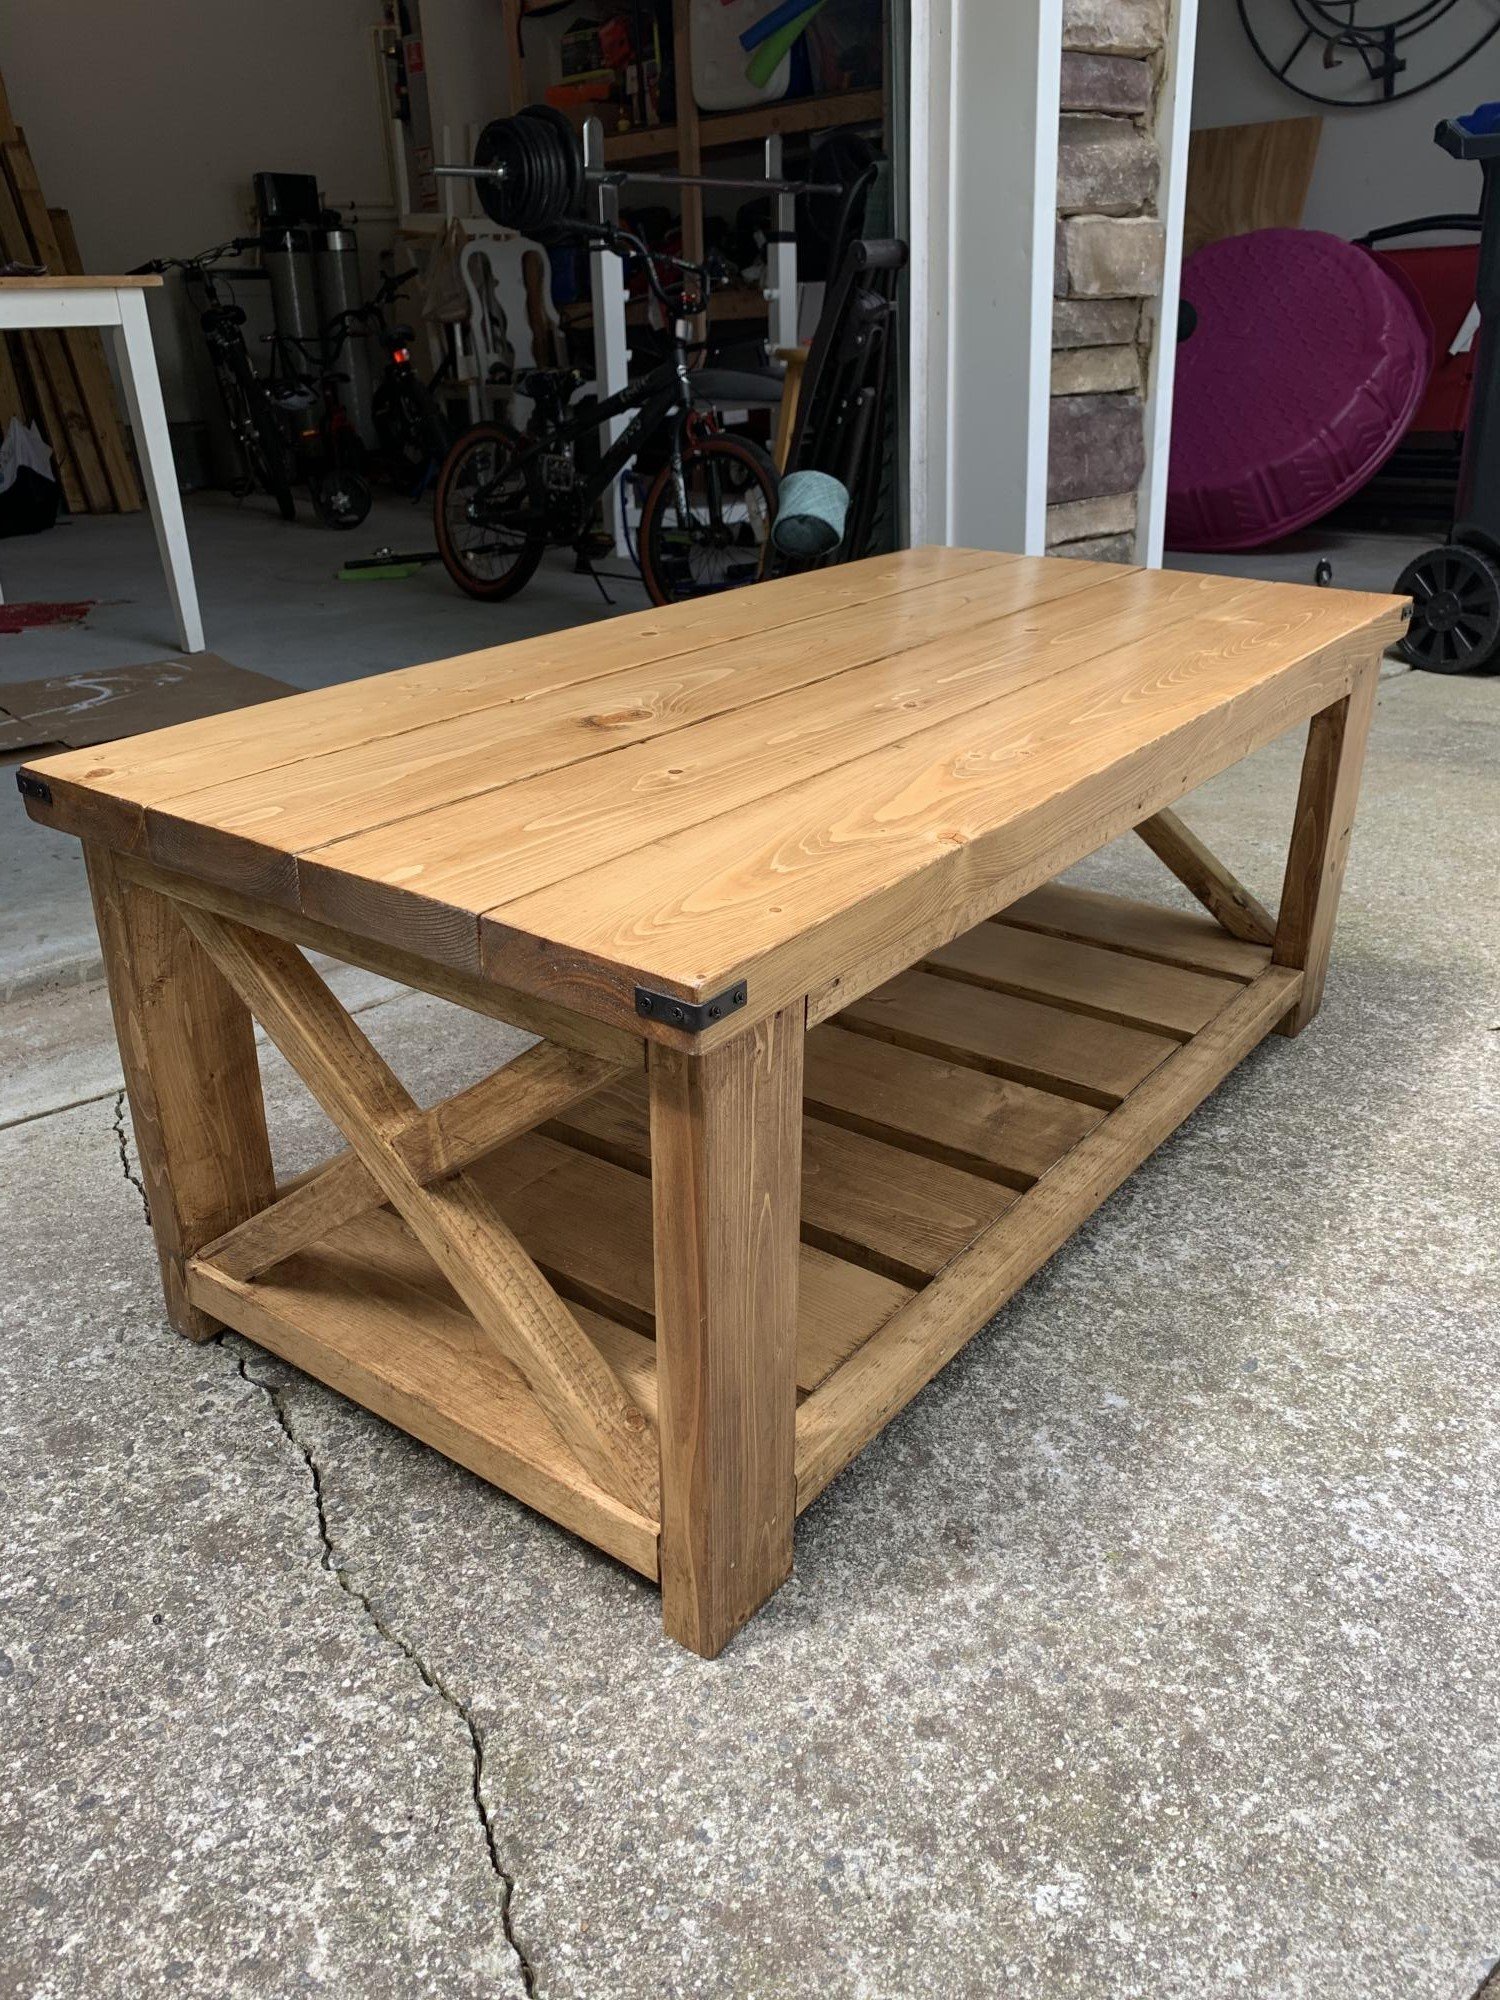
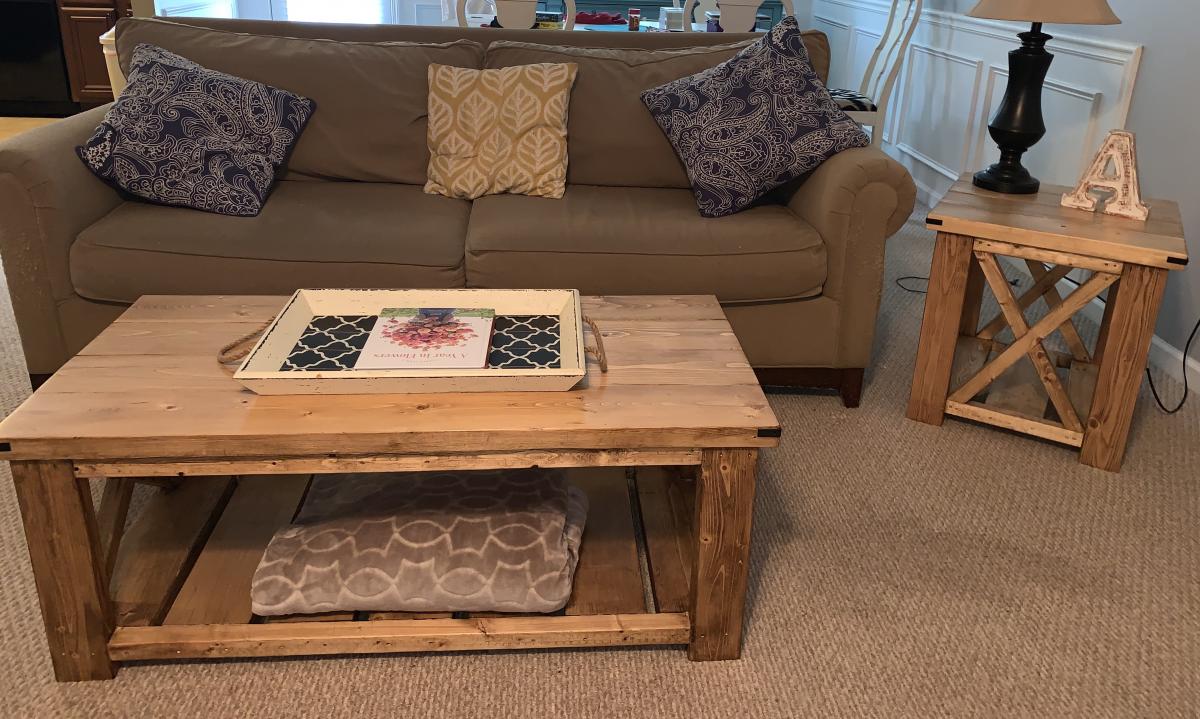
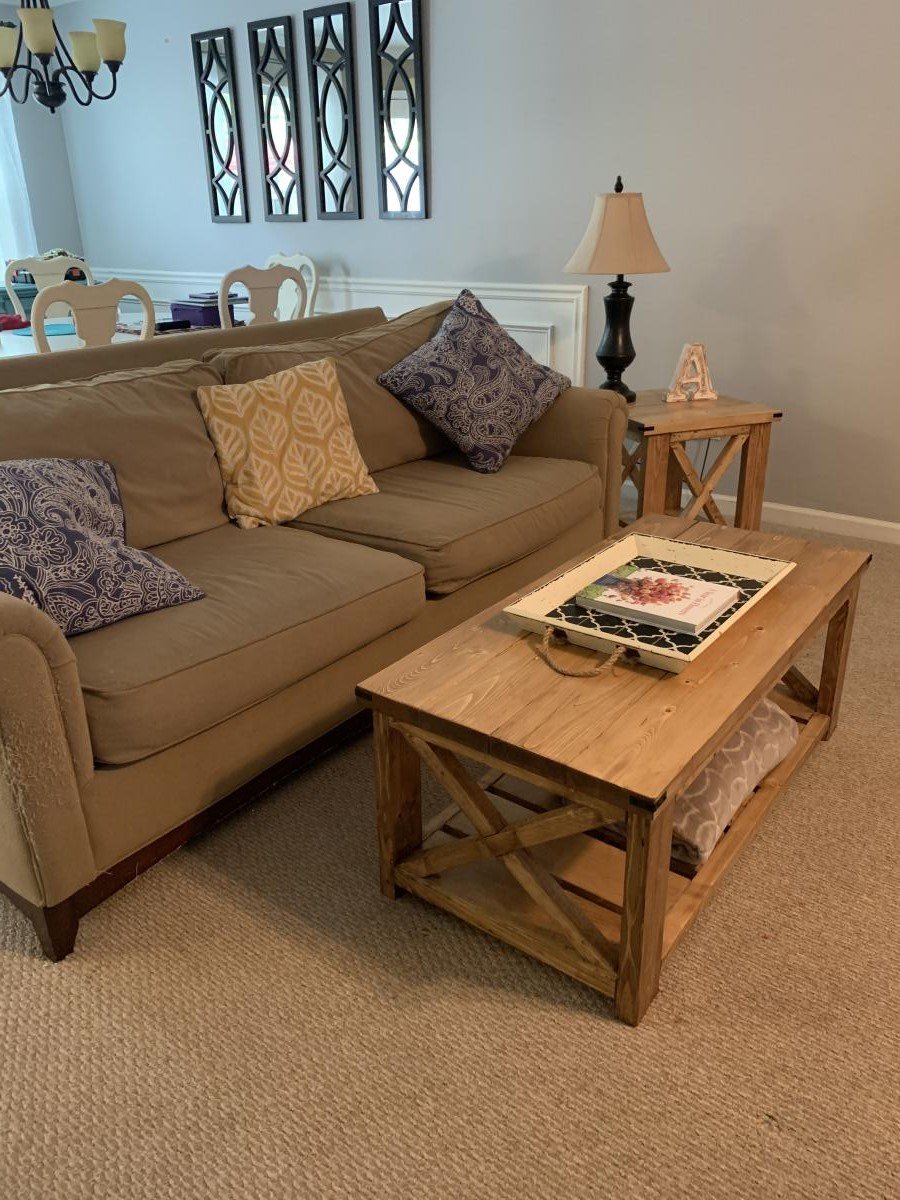
Farmhouse end tables, sofa table, and coffee table from farmhouse table plans, made tops flush with the sides no overhangs, tops made with scrap split 1x4’s in the scrap piles from Lowe’s and Home Depot, cut down to 2” wide strips, 5 different color stains.
Dale & Connie Putman
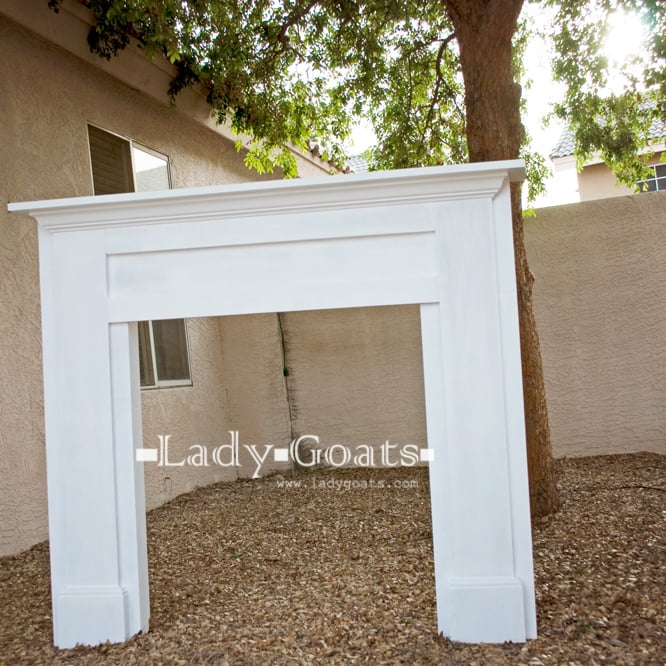
Built a fireplace using Mimi's Faux Mantle plans - I think it turned out great!
Built from Purebond plywood because I can't find straight boards in bigger sizes in my area (EVER!) and used fir 1x's for everything else.
Finished with three coats of Behr paint/primer in ultra white. I will not buy Behr again. Personal preference.
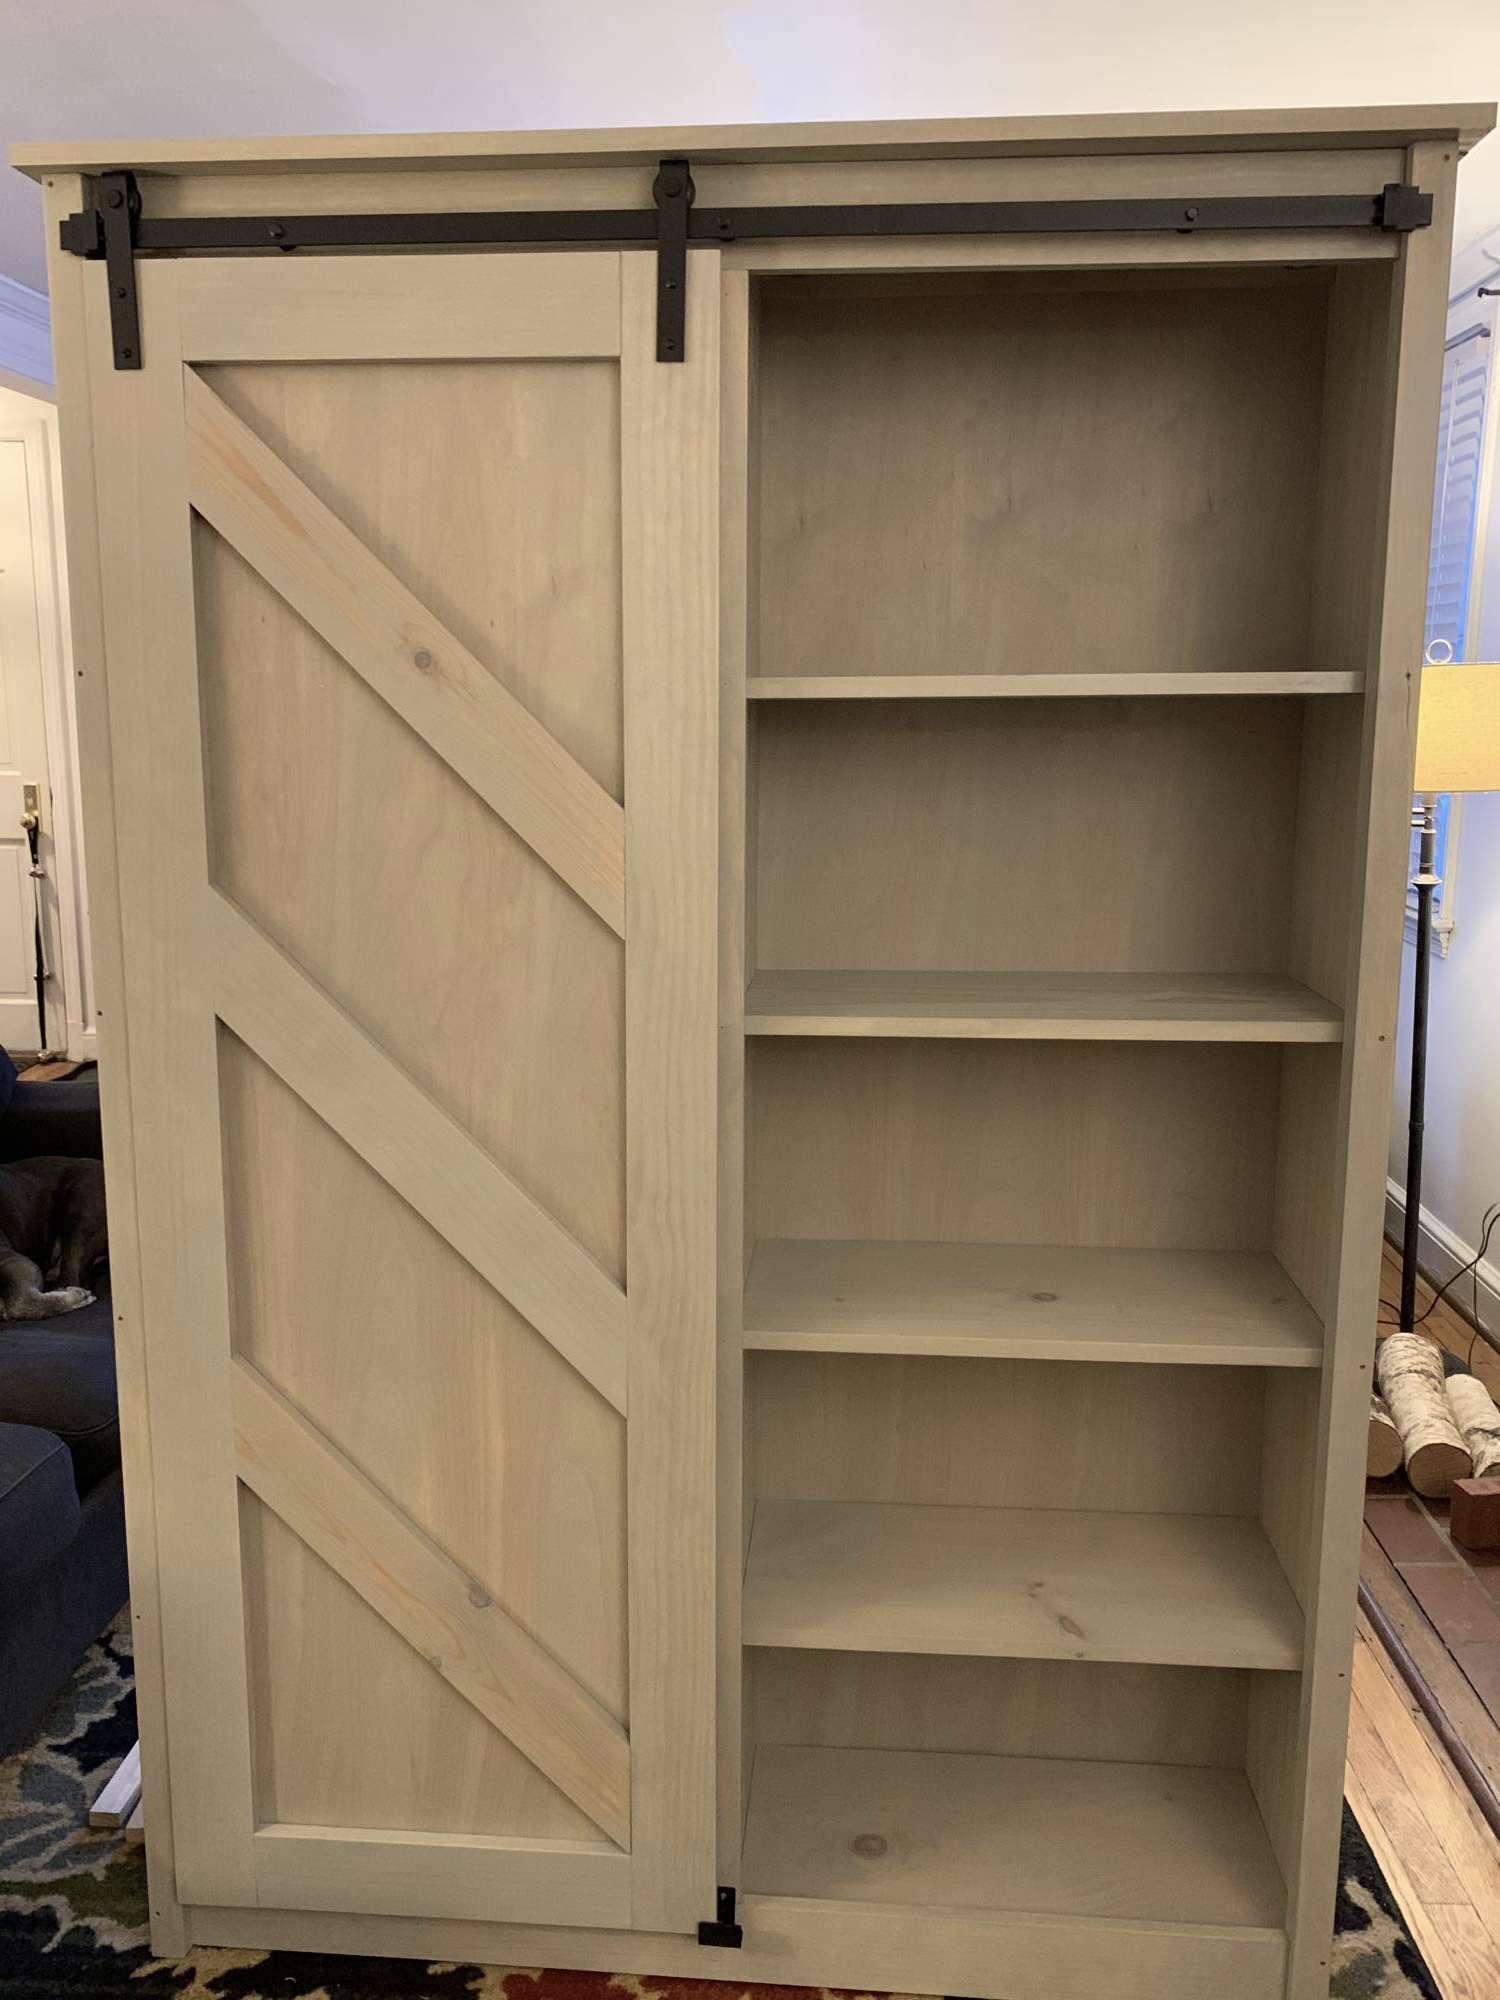
This took a lot of time and money but I like the way it looks. We have 4 kitchen cabinets and one drawer and no room for more so storage is tight.

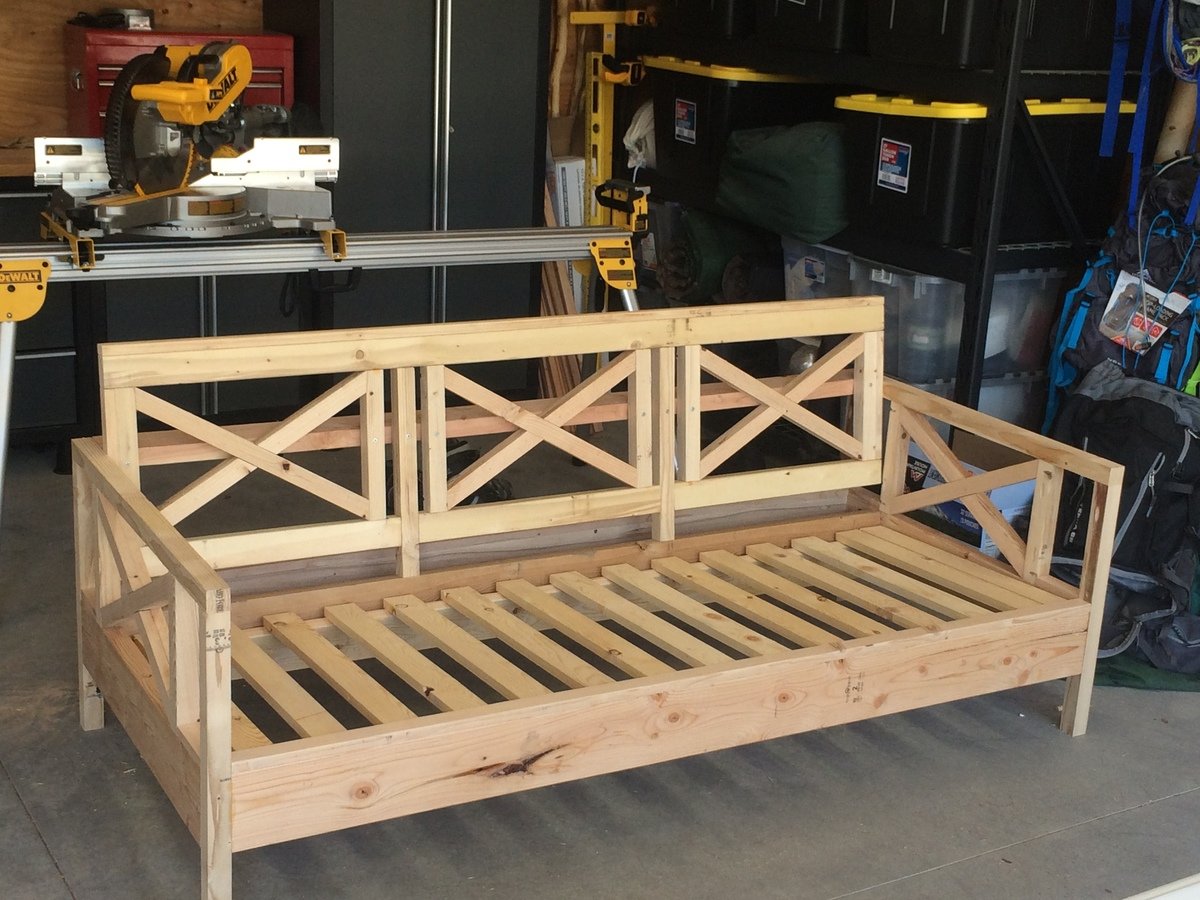
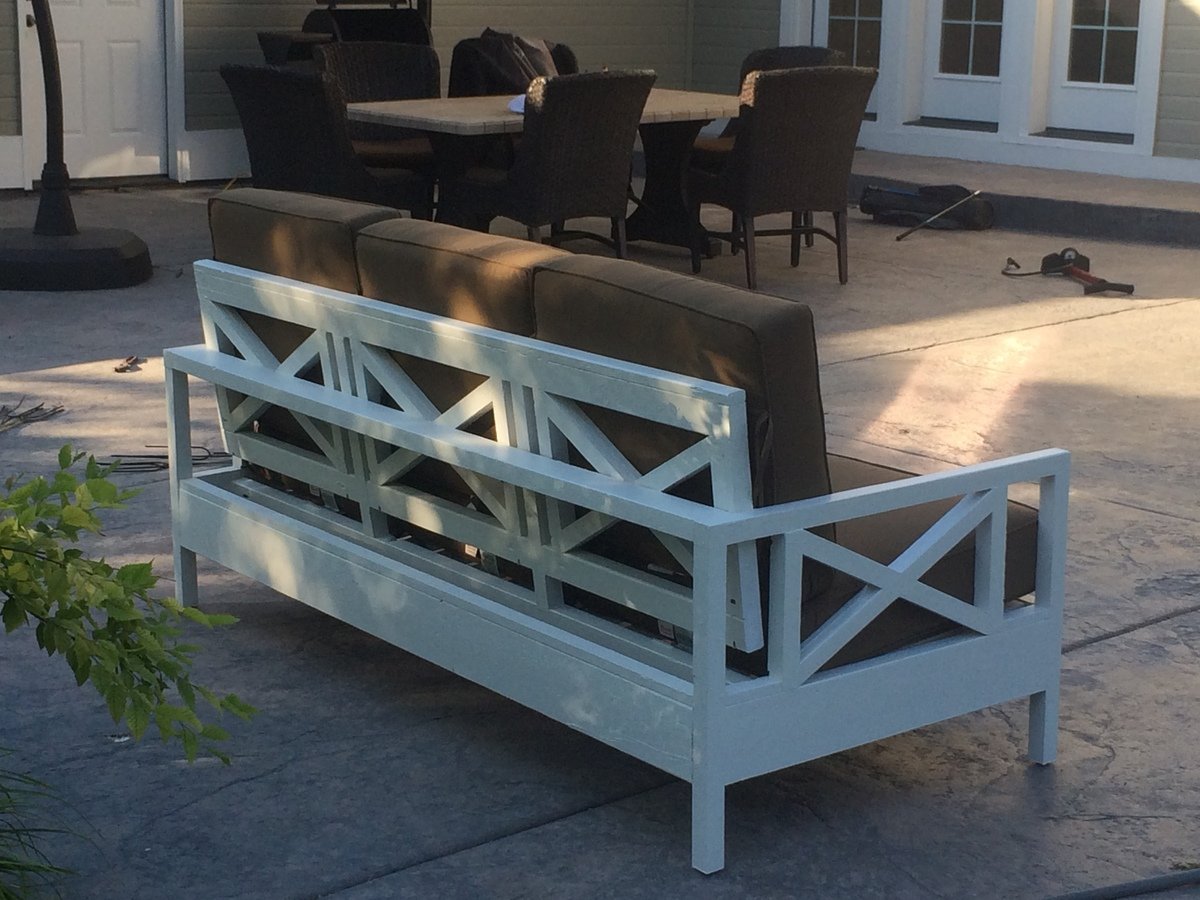
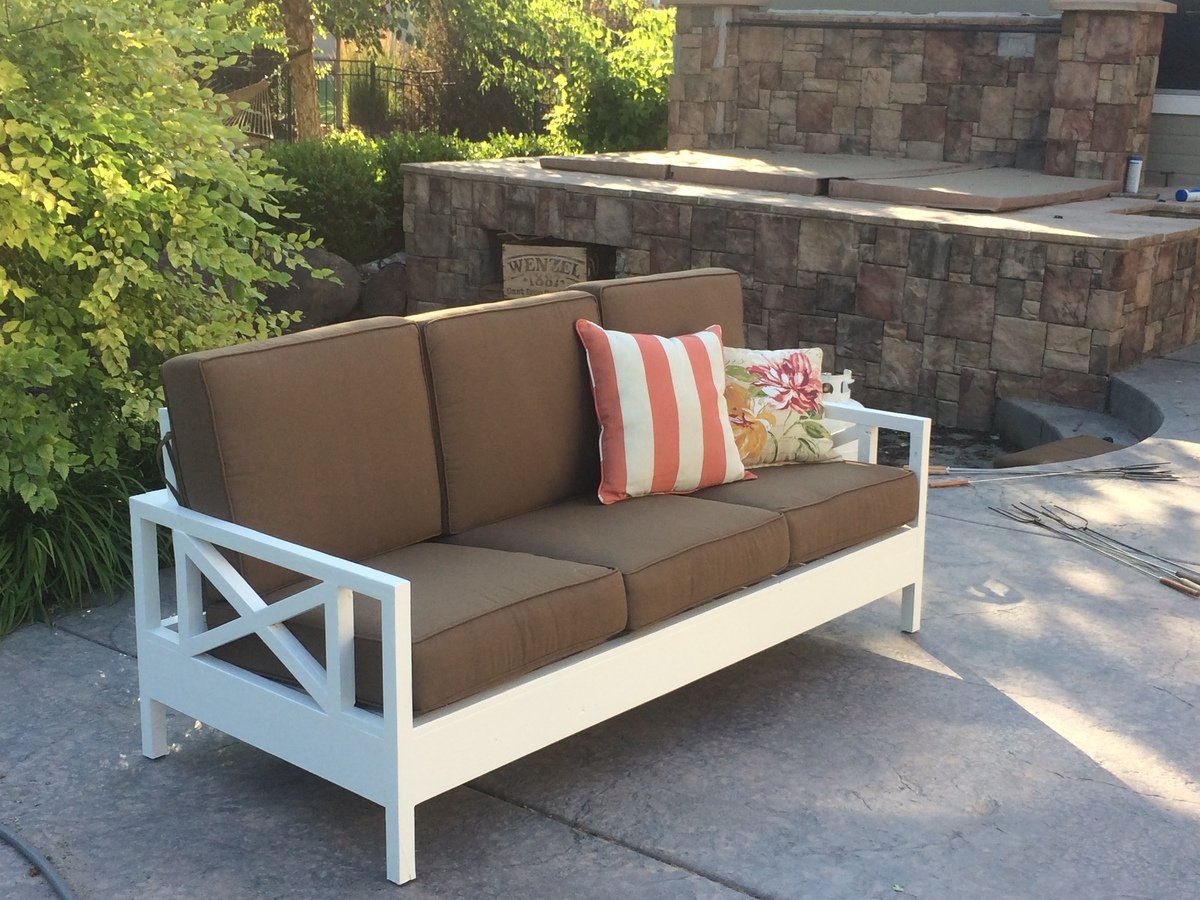
My wife loves the X pattern of the Weatherly Sofa, but wanted the tilted back from the Simple White Outdoor Sofa. This was our best of both worlds effort!
Tue, 06/11/2019 - 05:25
Can you share where you got your cushions please?

I decided to go with a live edge mantel. I feel it really compliments my new hardwood floors.
thomasamayberry.com
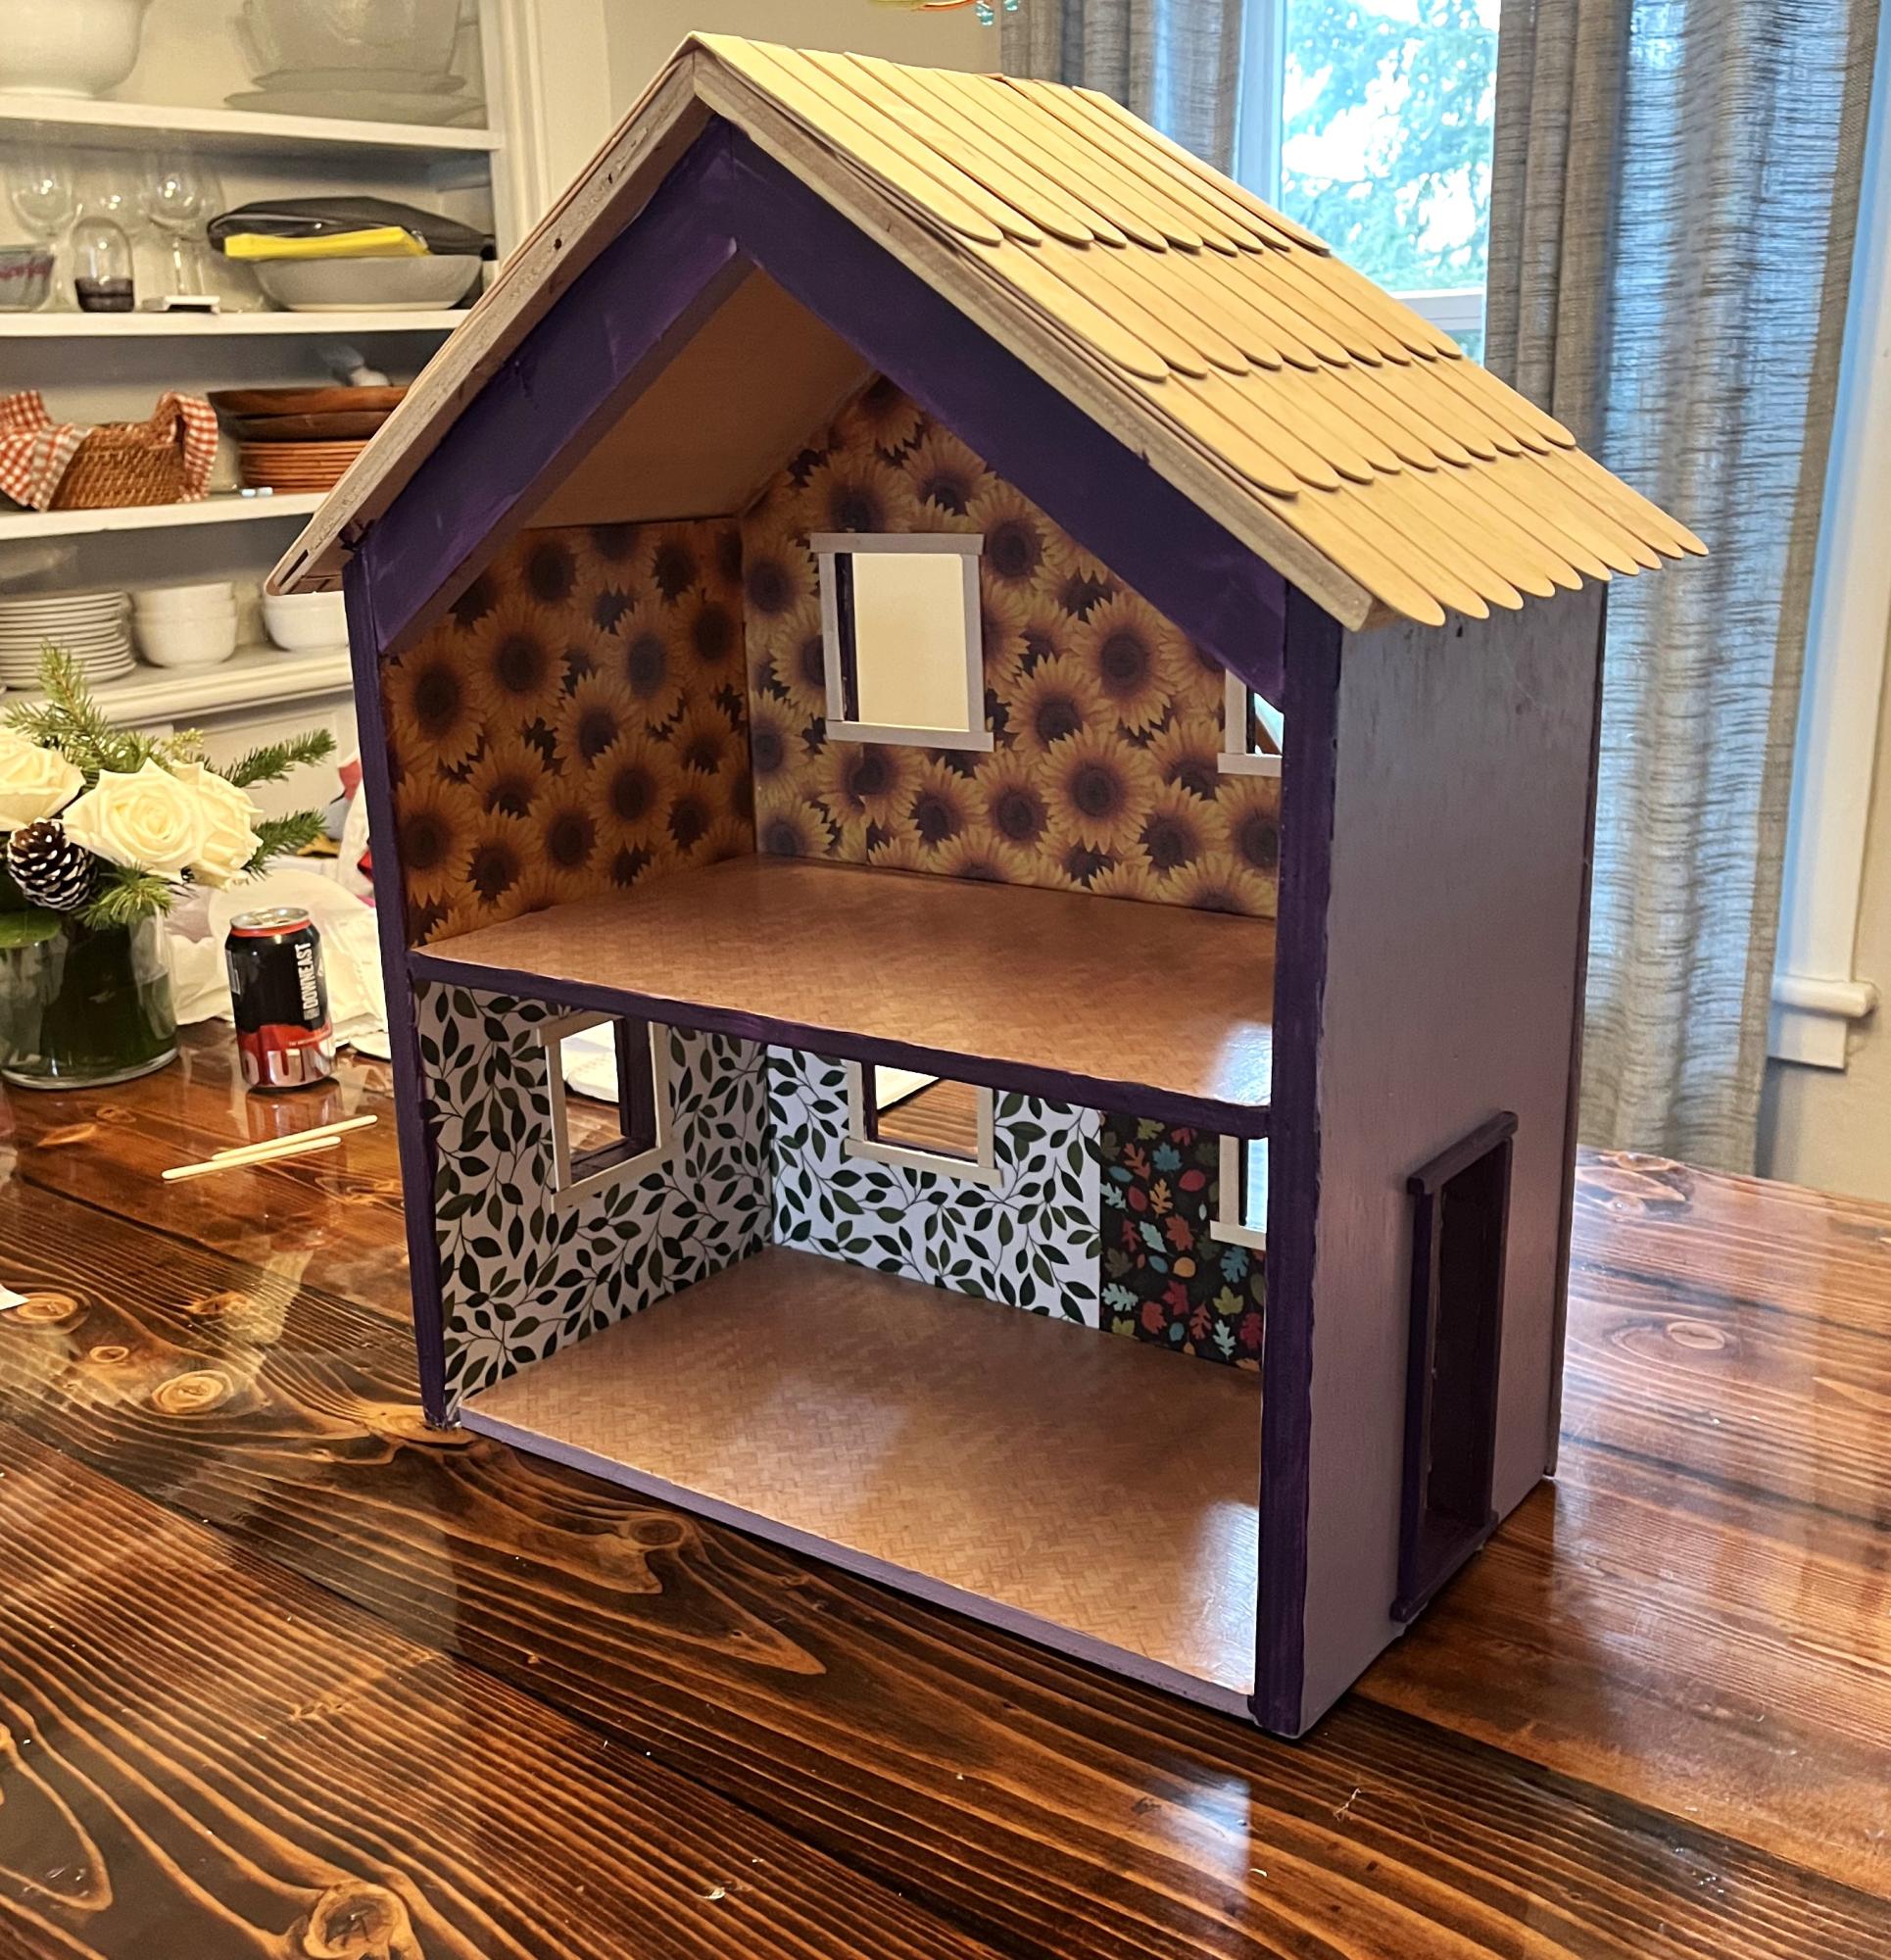
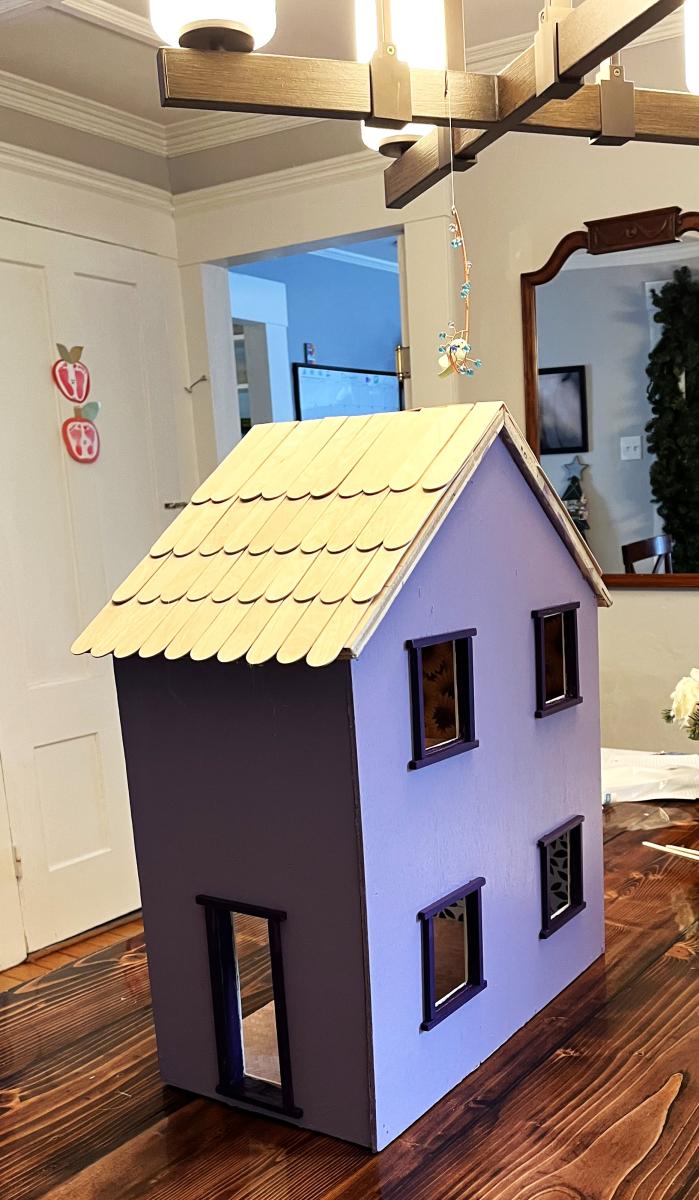
This is for my daughter’s 3rd birthday. I decopaged the walls and floor with patterned paper before assembling. I thought it would be easier.
I also didn’t bother with the middle ‘front’ door. The dollhouse in the example photos look beautiful from the outside, but kids don’t really play with the outside of the houses. So I made the windows a little bit bigger.
The windows and doors both looked terrible. My first time using a jigsaw was not a success. So I used tiny dowels for the trim around the door and craft sticks on the inside.
The last thing I need to do is put some lights in it. I ordered some fairy lights on amazon. I plan to use another dowel that I’m hoping I can wrap with the fairy lights and then wedge in the back on the ‘ceiling’ on the first floor and then Velcro the switch to the side of the house. It won’t look professional or anything, but being able to turn the lights on and off will be very fun.
Casey
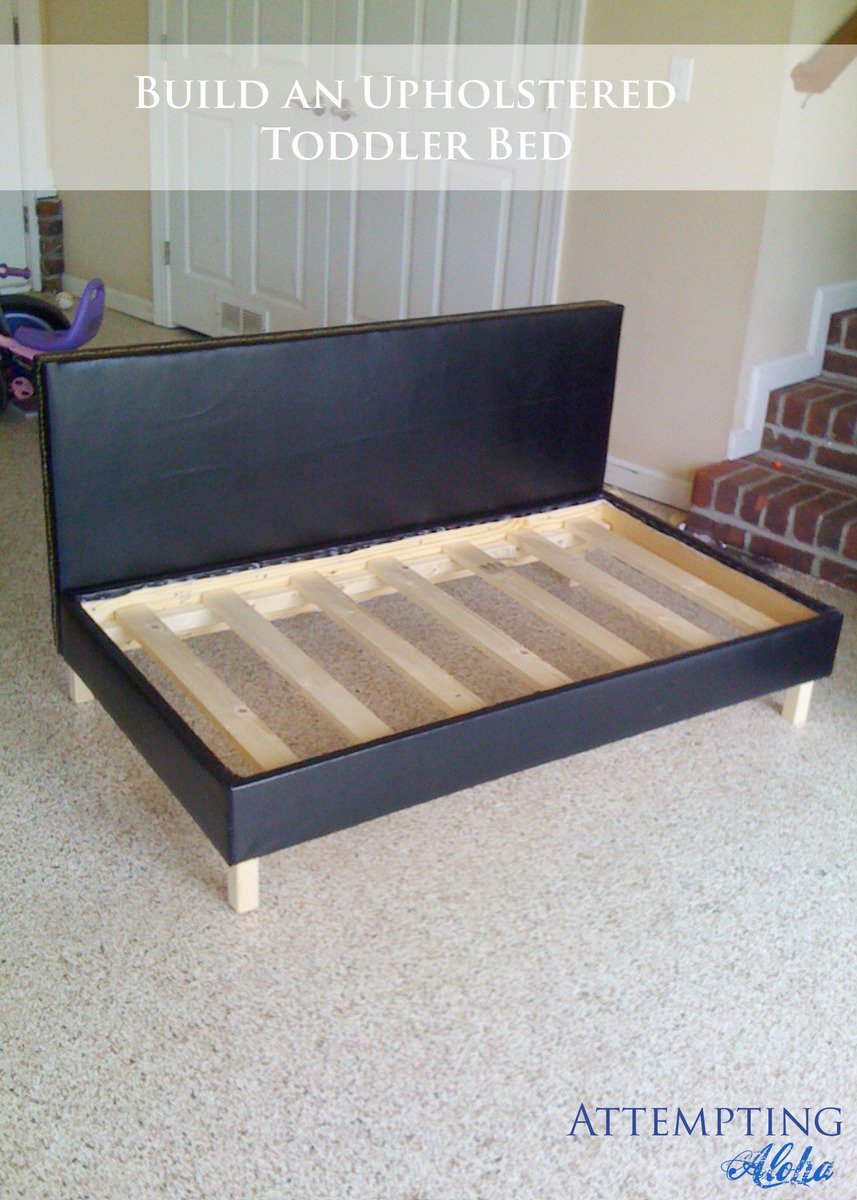
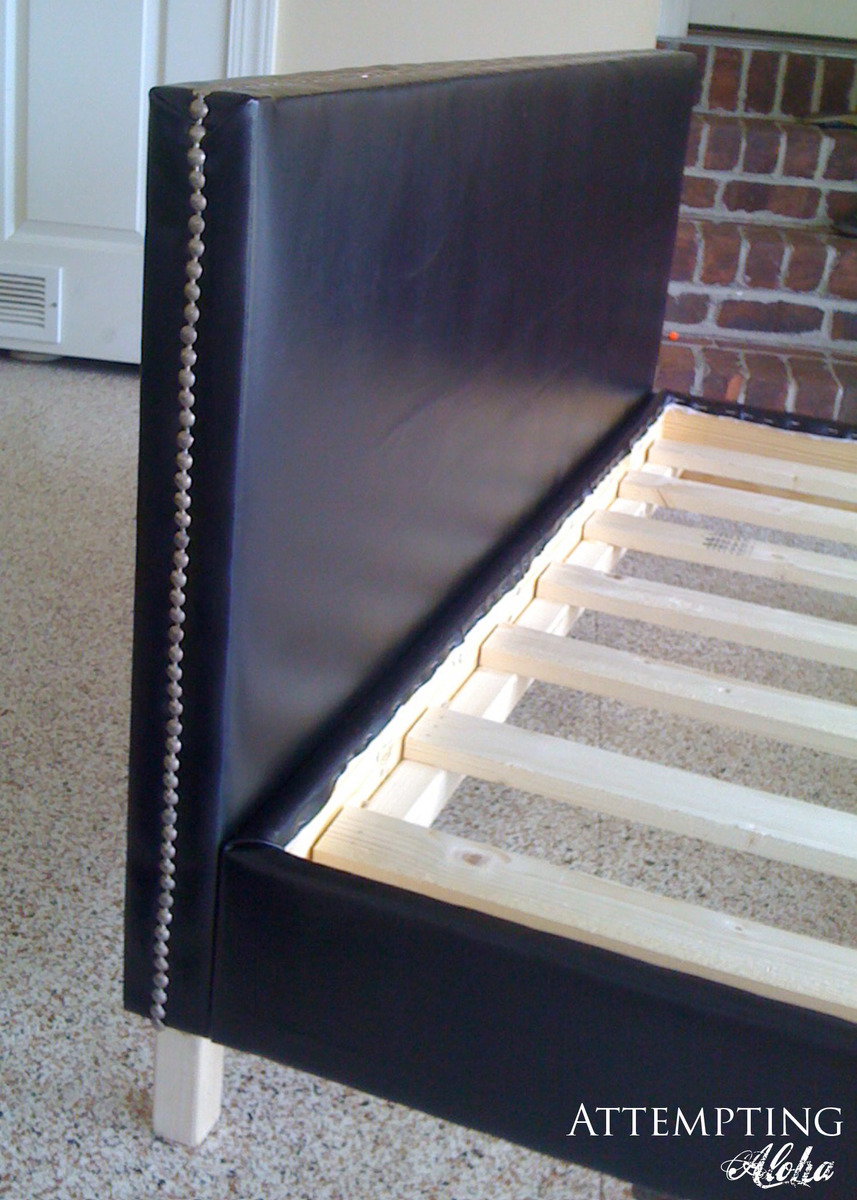
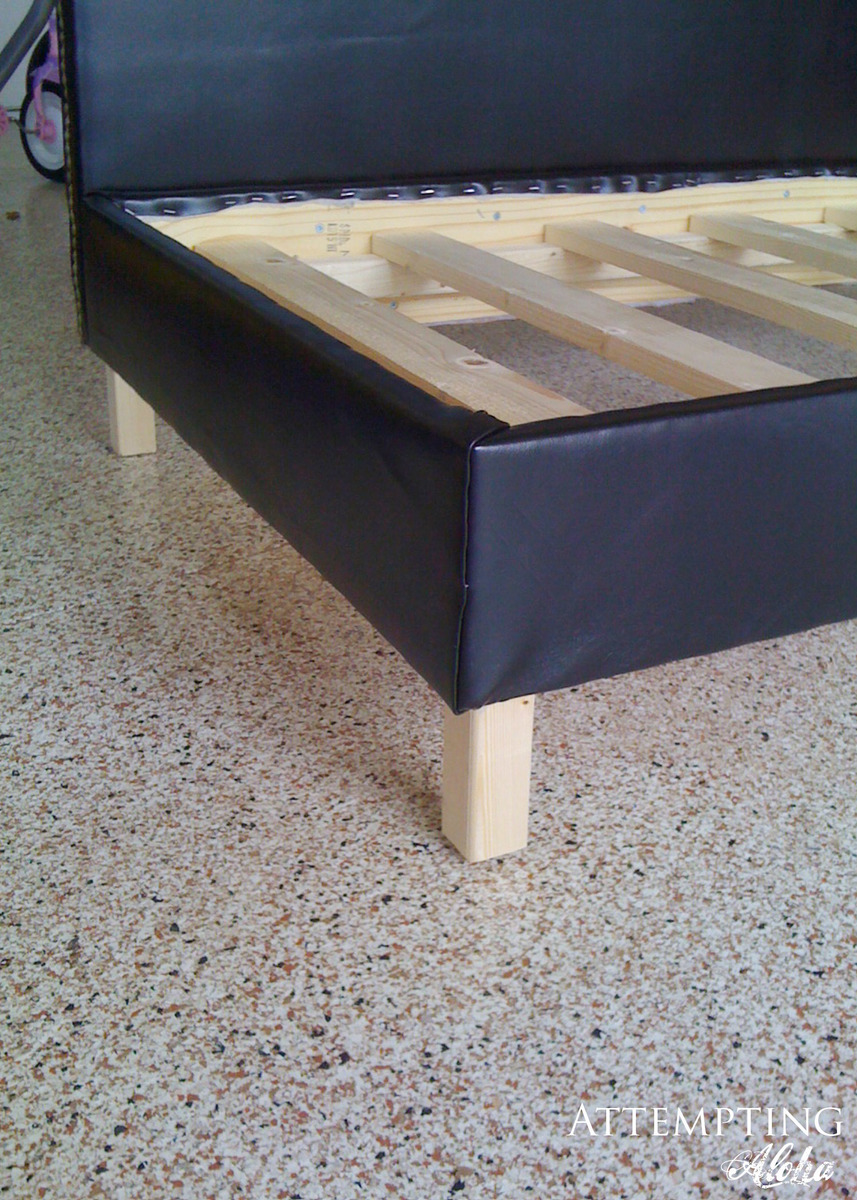
Such a darling bed and plans. I'm so glad I found it! I built it with a friend for her little boy, so he could use it as a couch later on, and it is just darling with the black pleather and nailhead trim she picked out.
I marked it as an intermediate project more for the upholstery part of it. I'd call it a beginner building project, though. :)
Thanks, Ana!!

Wed, 07/04/2012 - 04:34
That looks great! I never would have thought of doing it with pleather. I've been trying to decide what seating to make for my son who lives in a one bedroom apartment and needs a place for his sister or friends to crash when they come to visit. I'm going to show him this and see what he thinks.
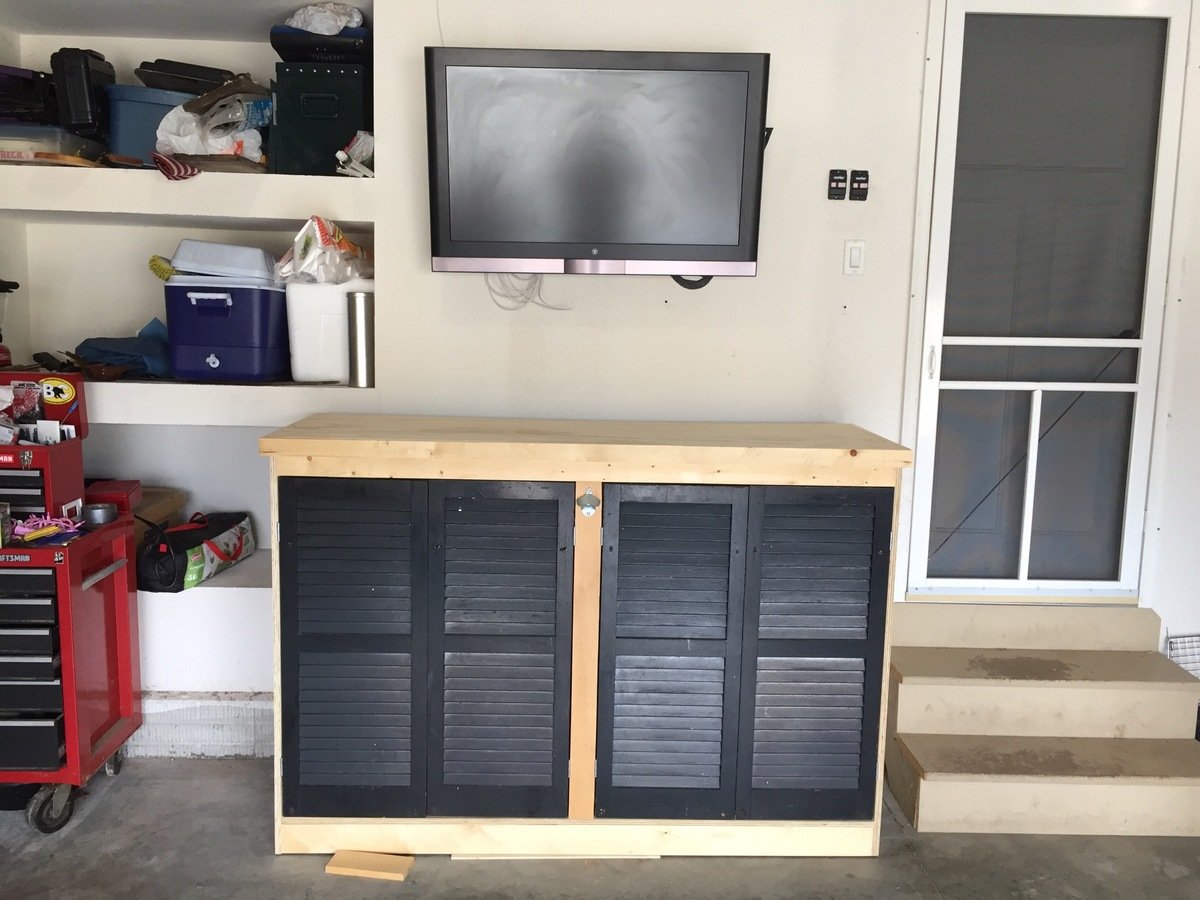
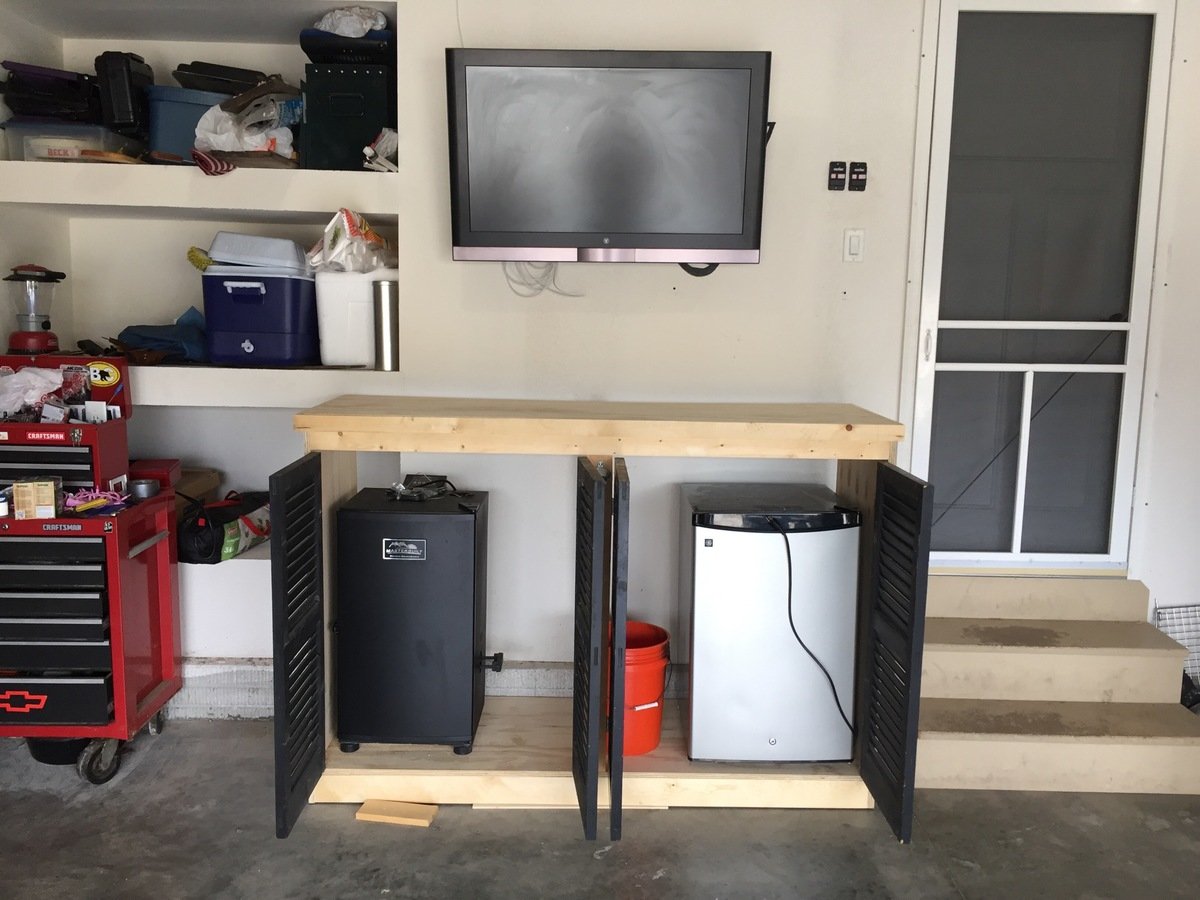
Some armoires look good in a bedroom. This one looks good in my garage storing my beer fridge and smoker. This took two pairs of repurposed shutters from the in-laws, two sheets of 3/4" plywood and some scrap lumber from around the garage. The best thing is with the Kreg tool, there are zero visible screw heads.
So Fun!! My first ever wood build!! I’m completely addicted now ha! Thank you so much! I’m learning so much from watching your videos.
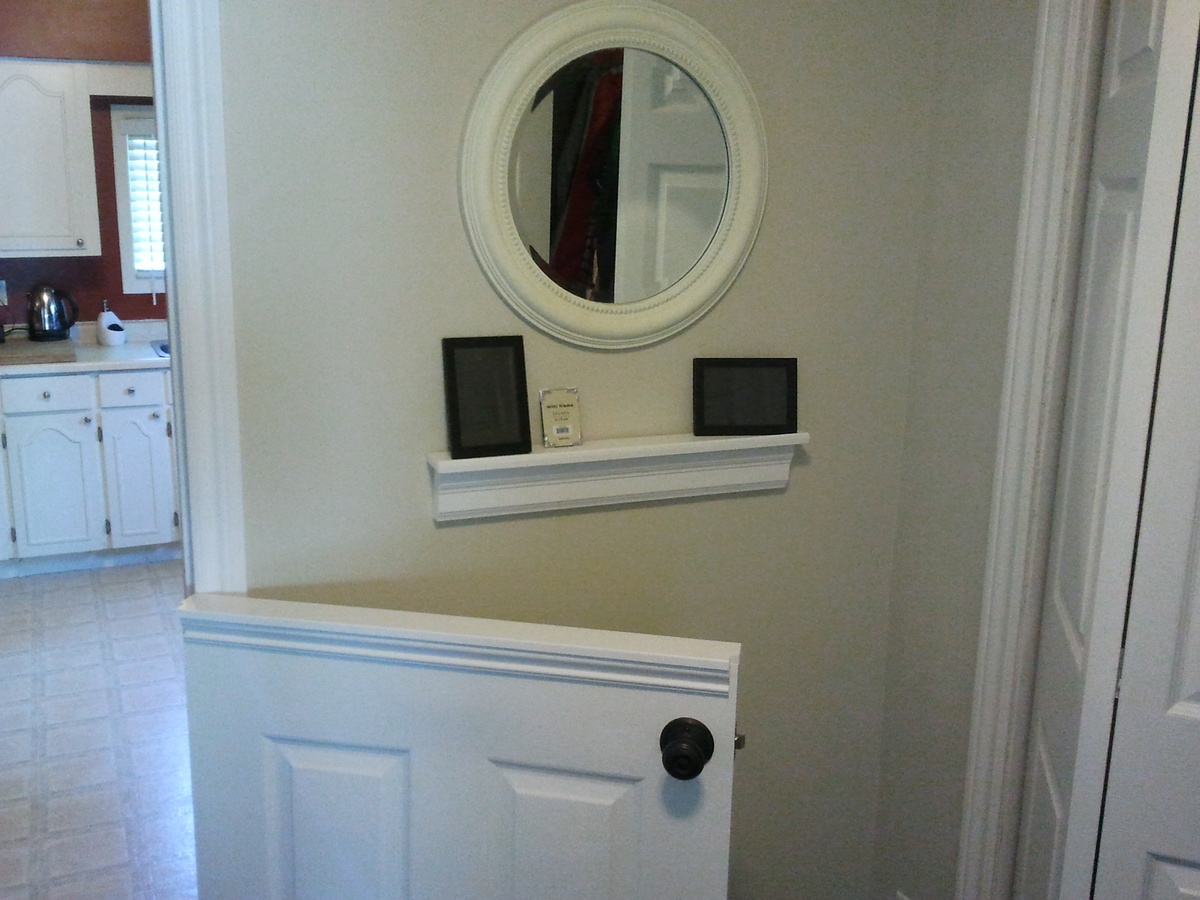
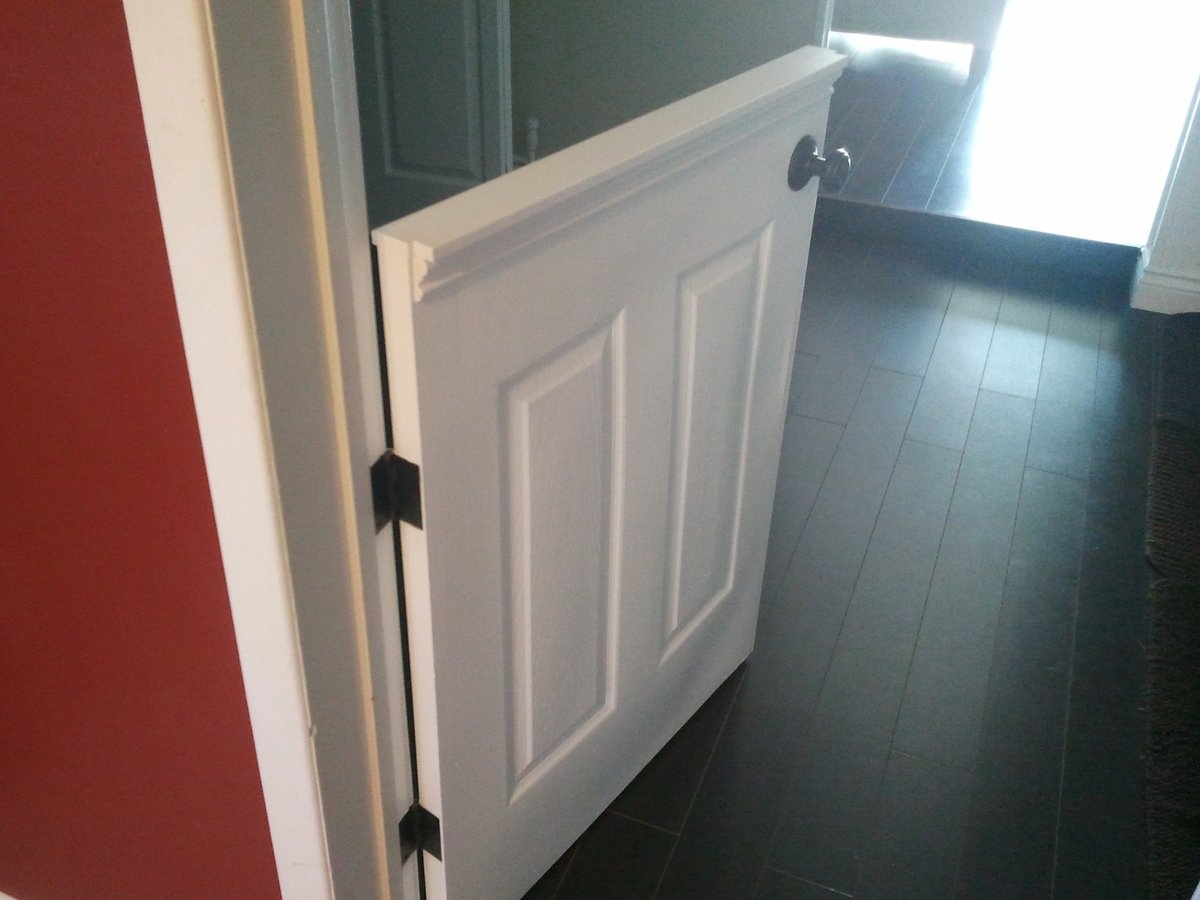
I installed a half door to isolate our dog from the laminate flooring when he sleeps at night.
It was only $25 for the hollow core 6 panel door from HD, which got cut in half.
$25 for the passage knob.
$10 for top plate and trim
Less than $5 for the hinges.
Not having to replace the laminate flooring priceless!
Some Tips:
The $25 door is not prehung. Buy the $14 dollar irwin door jig to install the door "http://www.homedepot.ca/product/door-lock-installation-kit-carbon/904157" It will come in handy if you are remodeling and installing new doors to replace those old flat panel doors. You will also have to chisel out the hinges.
When installing and marking the hinge locations in the door frame shim the door a 1/4" off the floor.
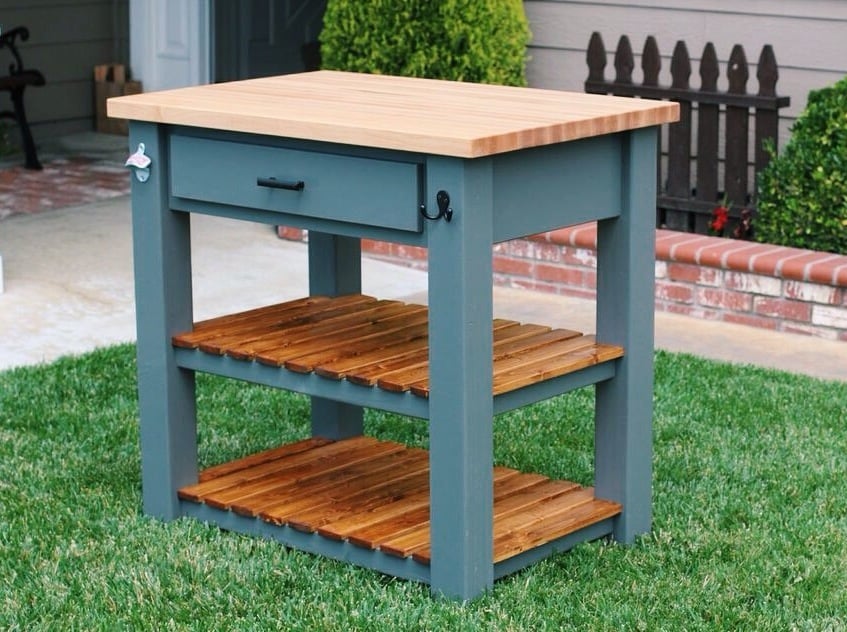
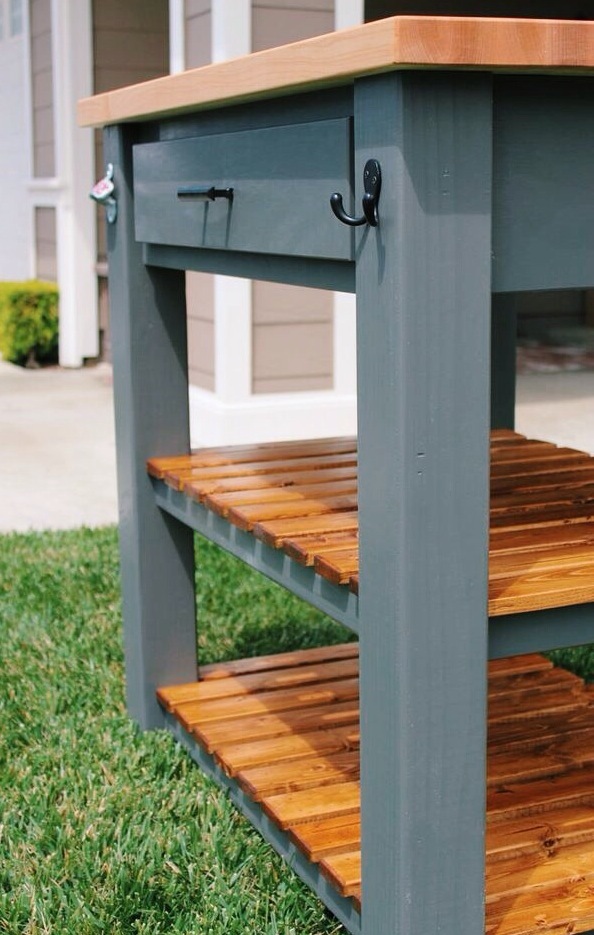
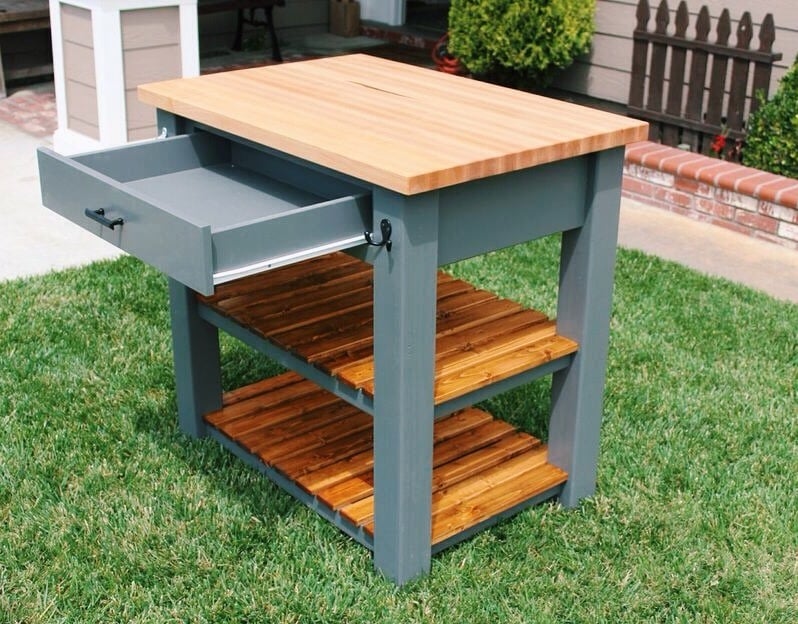
This is a modified butcher block kitchen island built from ana white's plan. Instead of using doug fir (2x4) material for the top, I used hard maple to build an edge grain butcher block top that if knife friendly and food safe. I also altered the dimensions to fit my space.
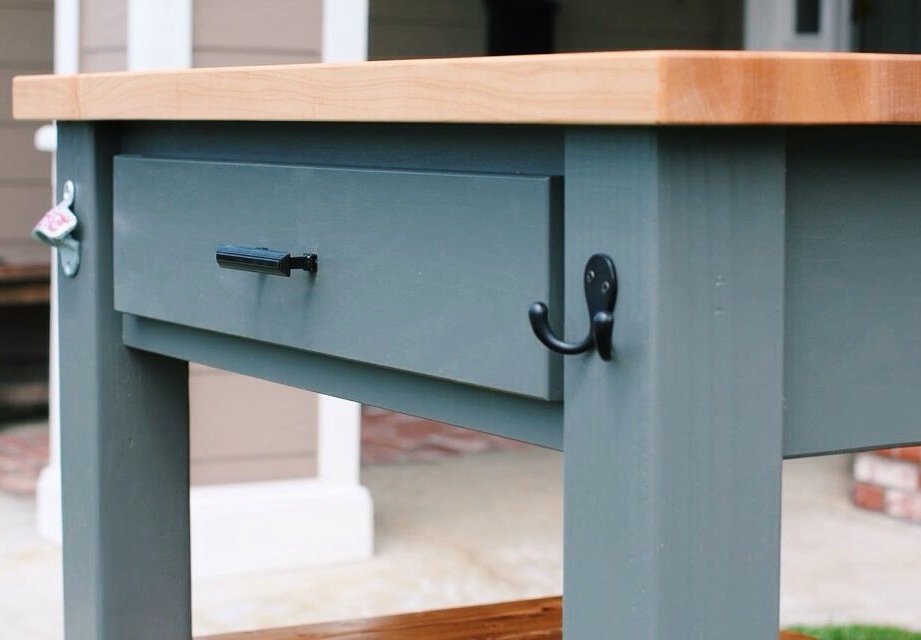
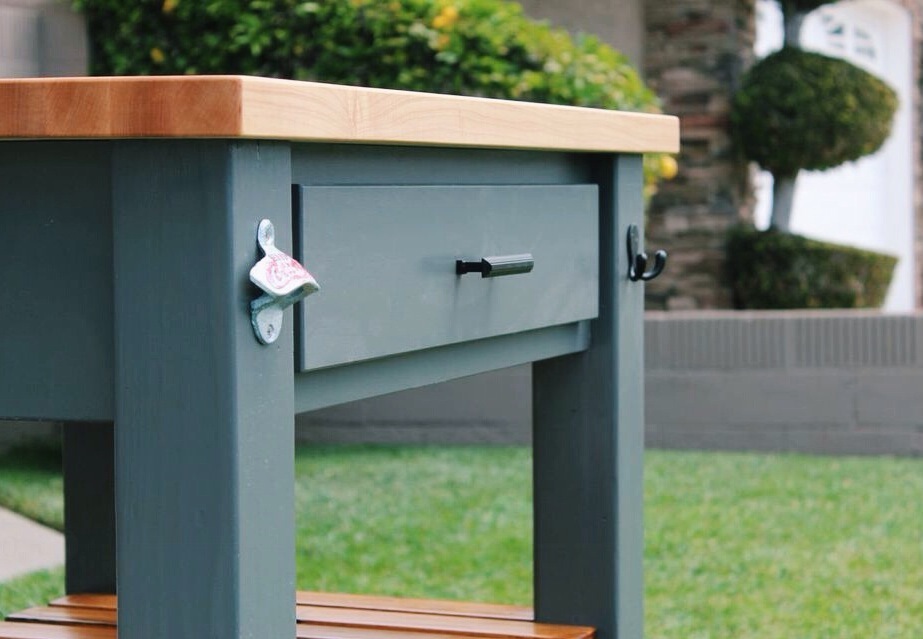

Sat, 05/10/2014 - 11:05
Yet another beautiful kitchen island. Love the finish and butcher block top on this one! Thanks for sharing!
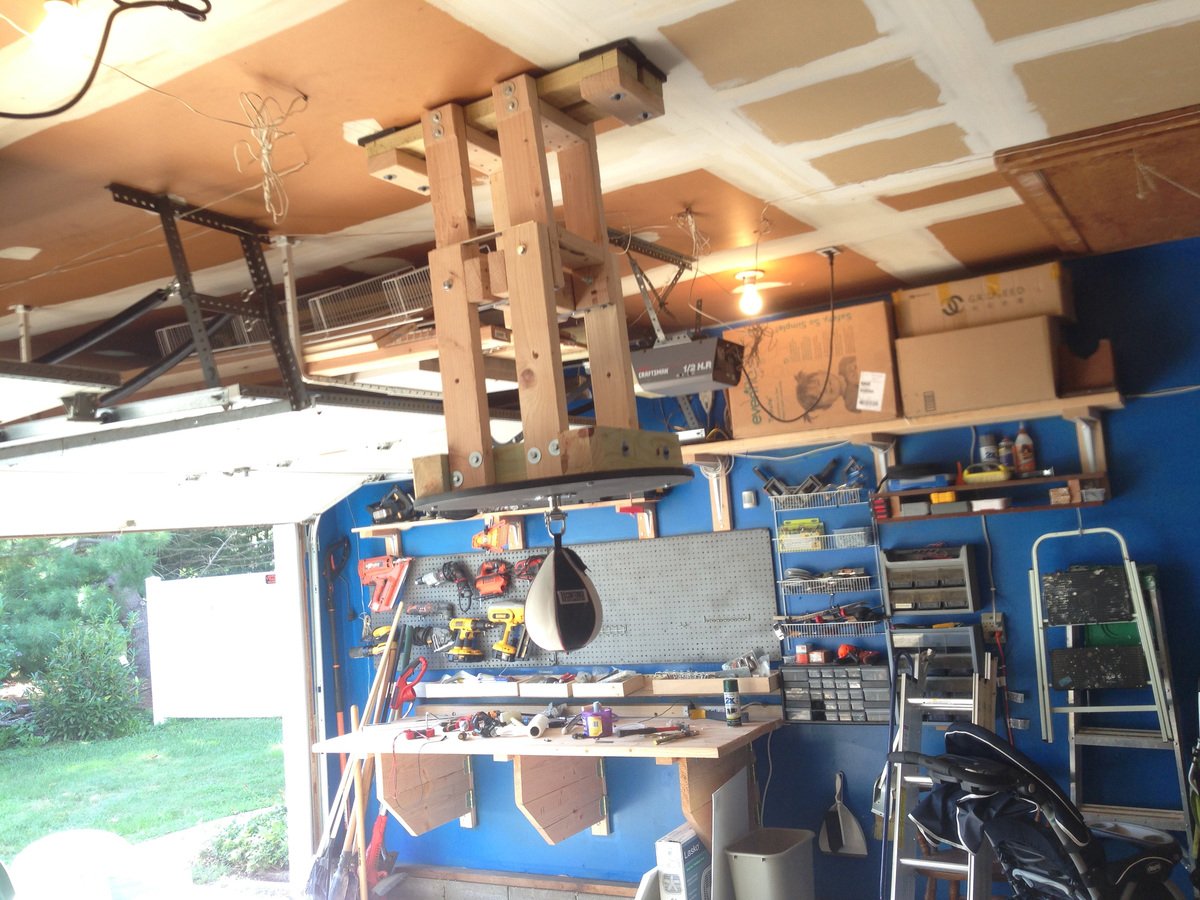
I’m an avid boxer and wanted to be able to work out in the convenience of my garage without making too much noise, and still make it easy to carry out normal garage functions (workshop and parking the car). I came up with an original design of a speed bag platform that locks away in a raised position, completely out of the way for normal garage usage. Then it unbolts and slides down when ready to engage. I also used rubber dampeners where I mounted it to the ceiling rafters to reduce vibrations and cut down on noise travelling through the house.
I documented the whole project in my blog post at http://www.justmeasuringup.com/blog/diy-boxing-speed-bag-station-that-stows
I work on a lot of projects in the garage, and having a speed bag right in the middle is a great way to take a short break in the middle of it all - or when I bang my thumb with the hammer and want to release some anger :)
This is the first thing I have ever built and I love it!


Comments
Ana White Admin
Mon, 10/16/2023 - 10:48
Great Coop!
Fabulous job on this project, love the color choice and functionality!
hayley3
Fri, 10/27/2023 - 11:54
Look really roomy plus a…
Look really roomy plus a place for storage in front for feed.