Community Brag Posts

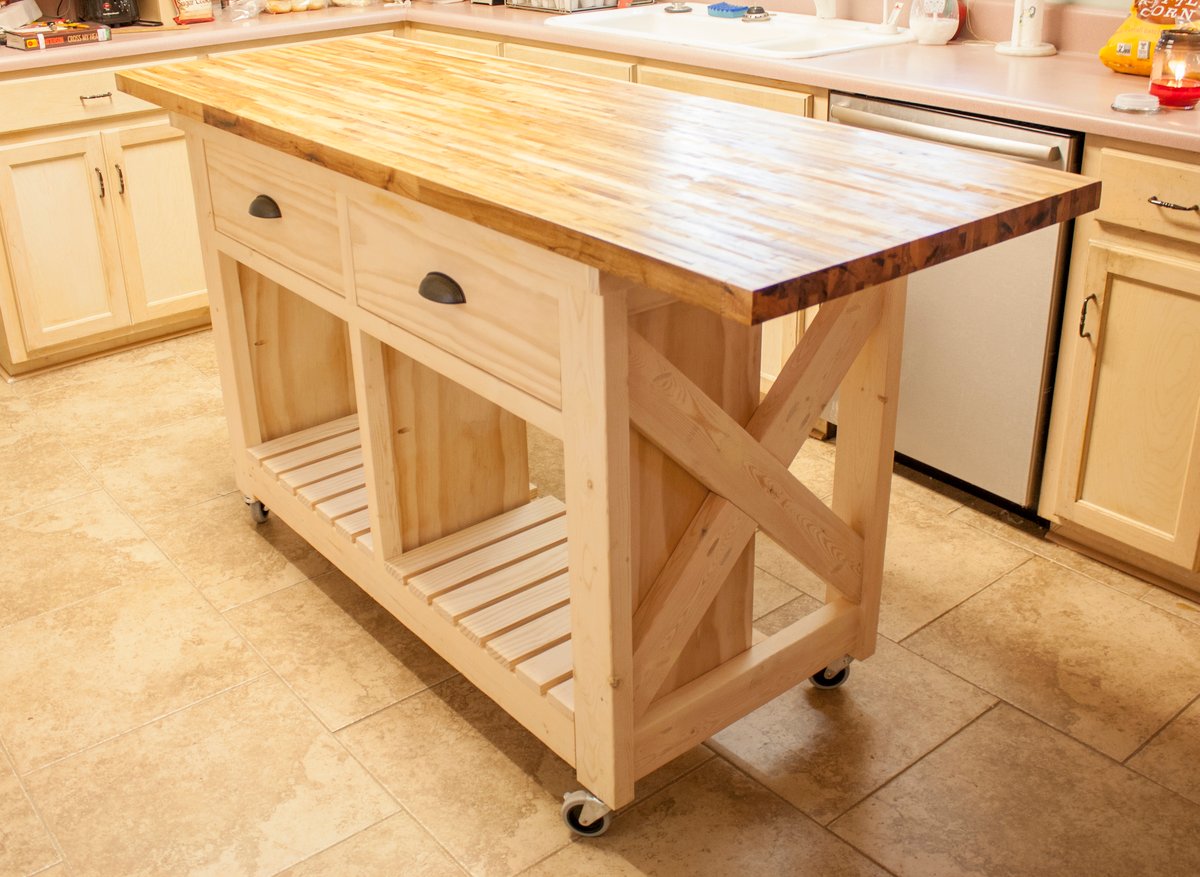
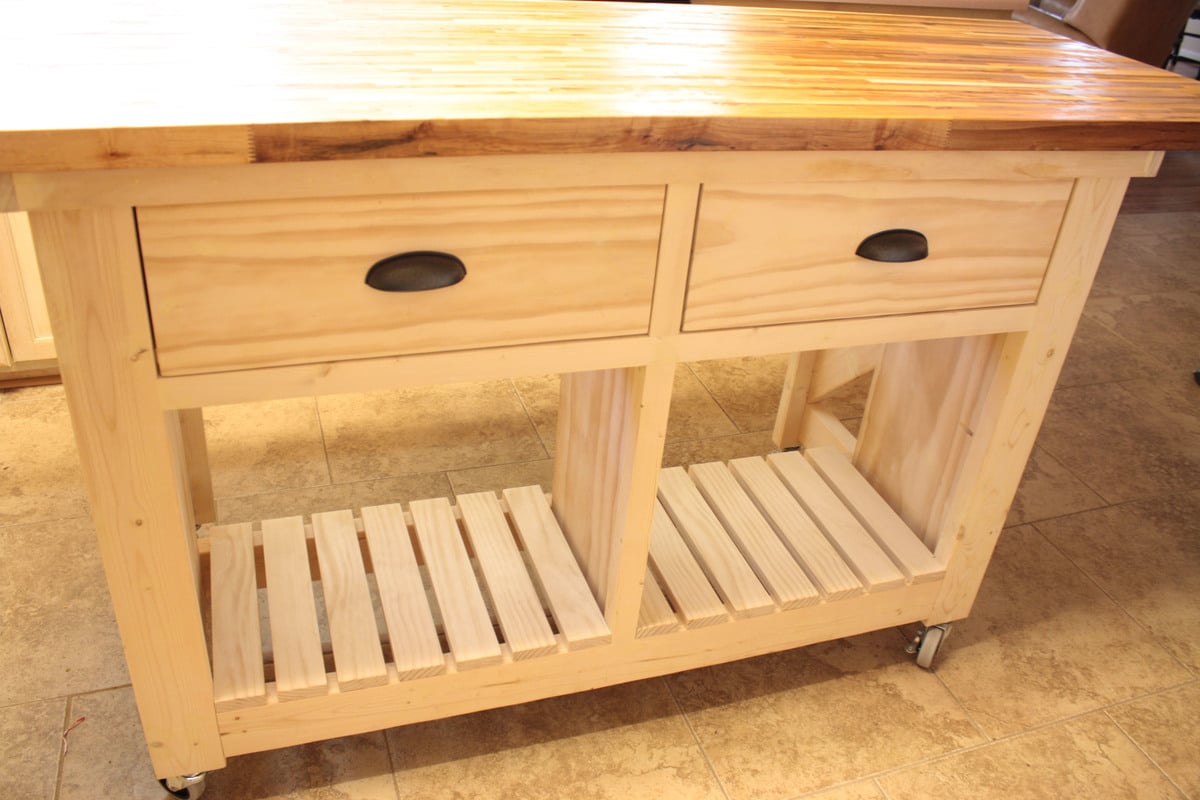
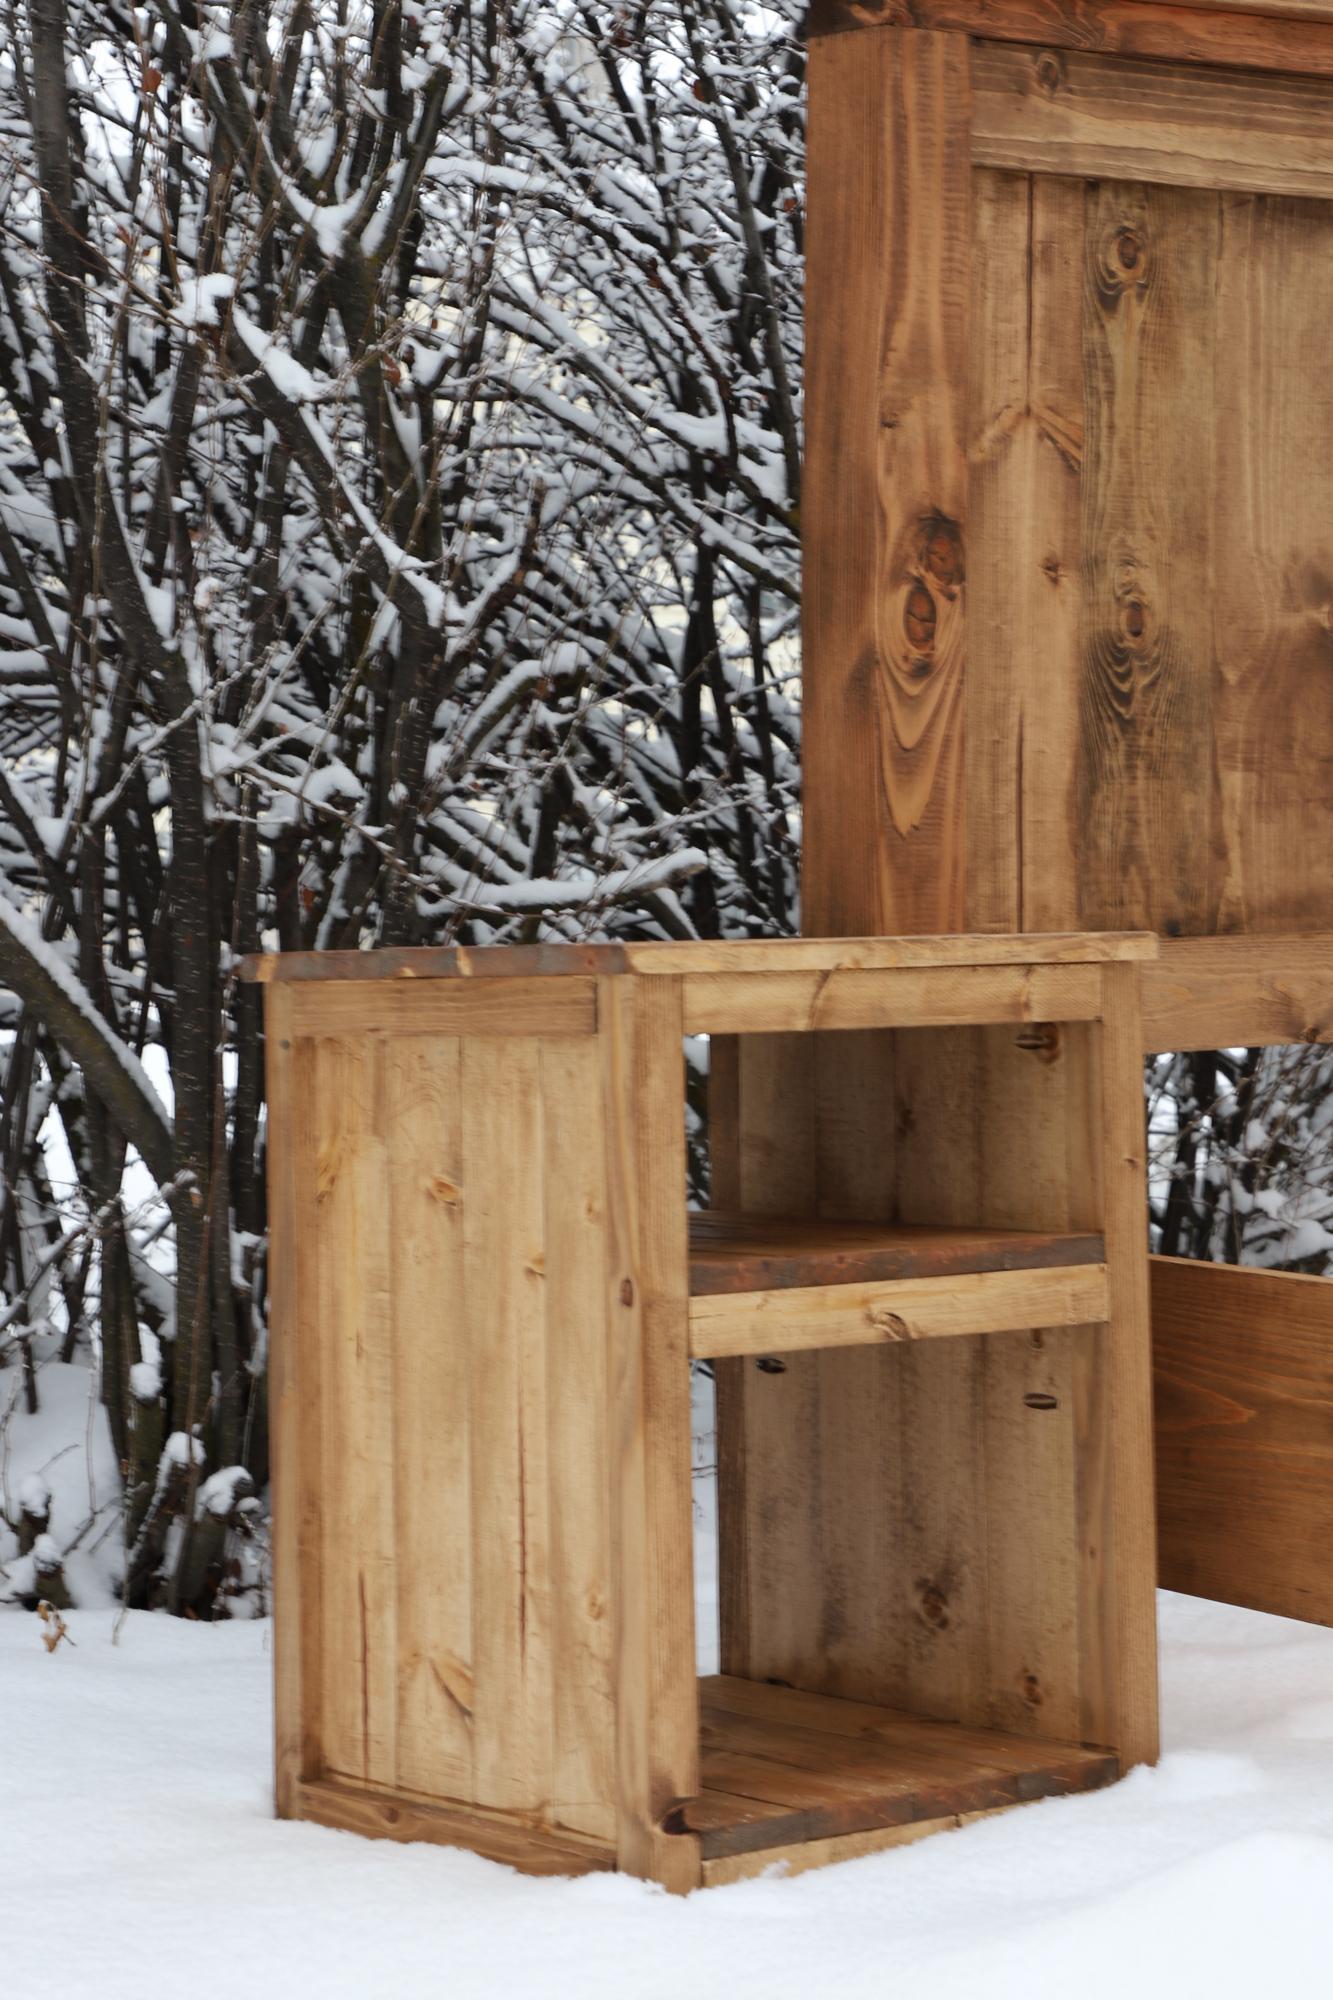
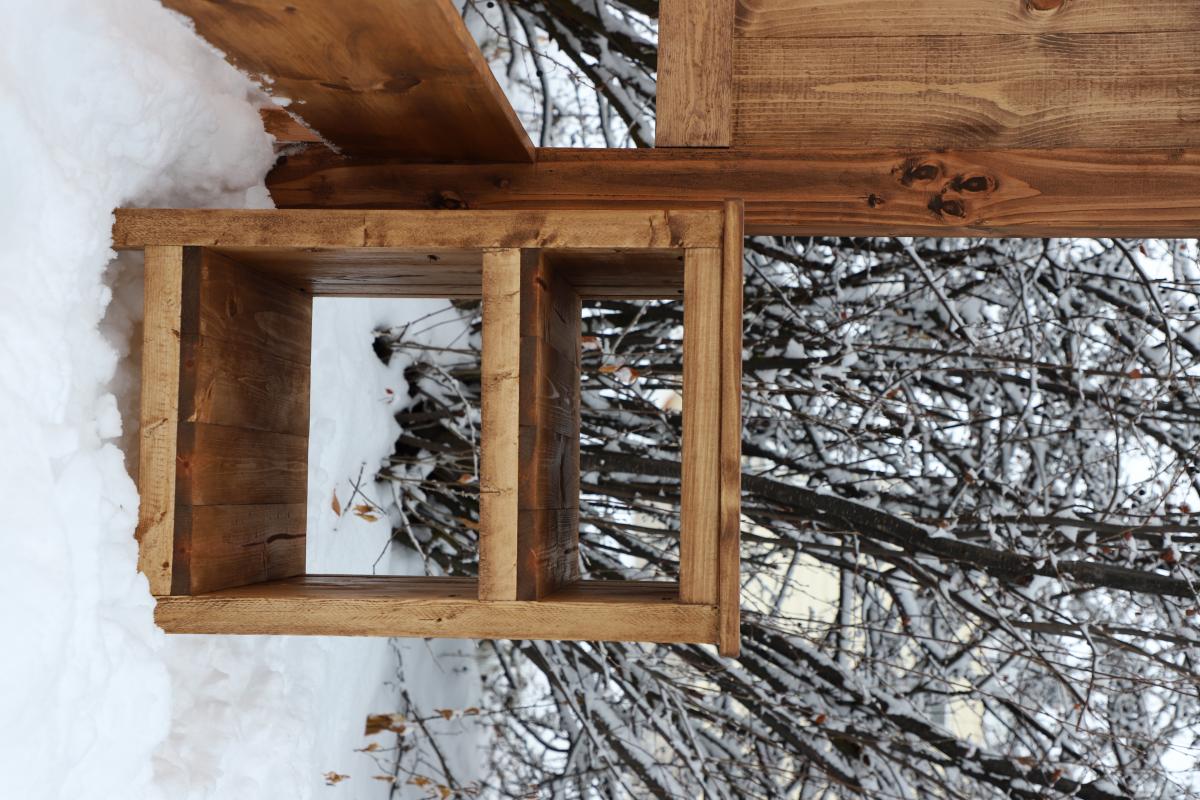
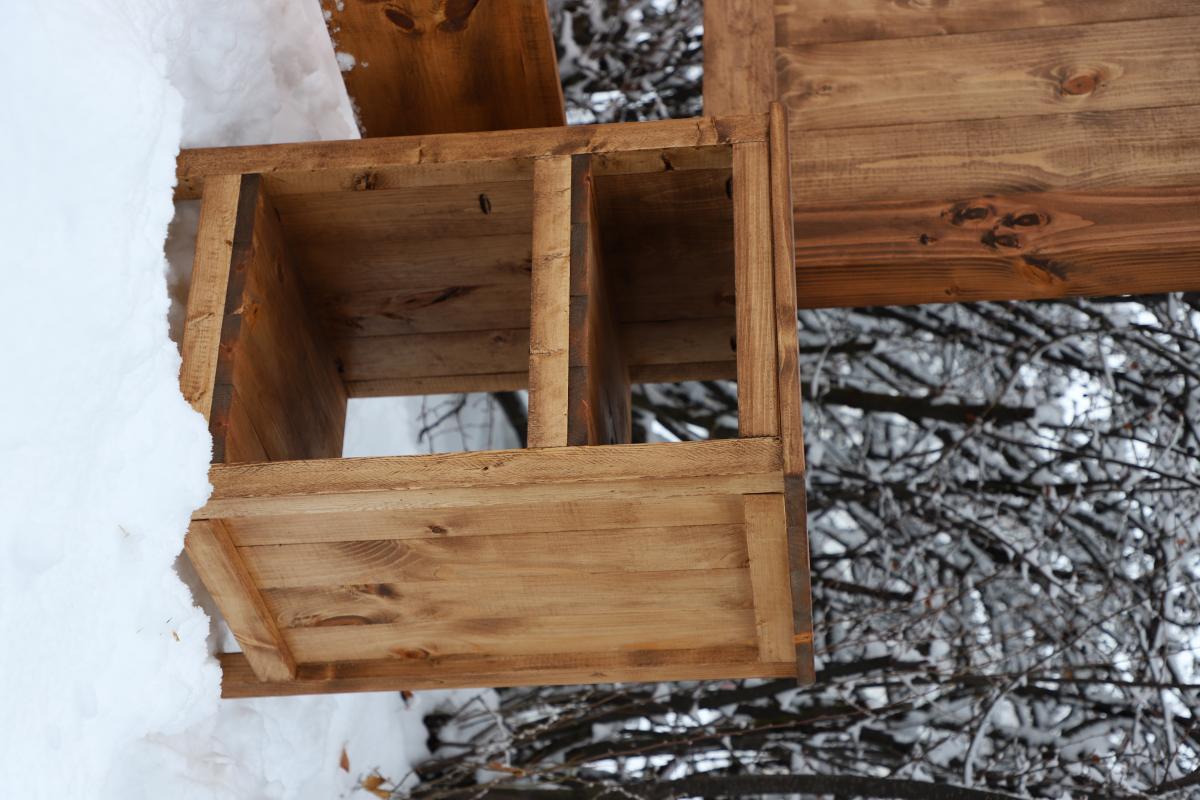
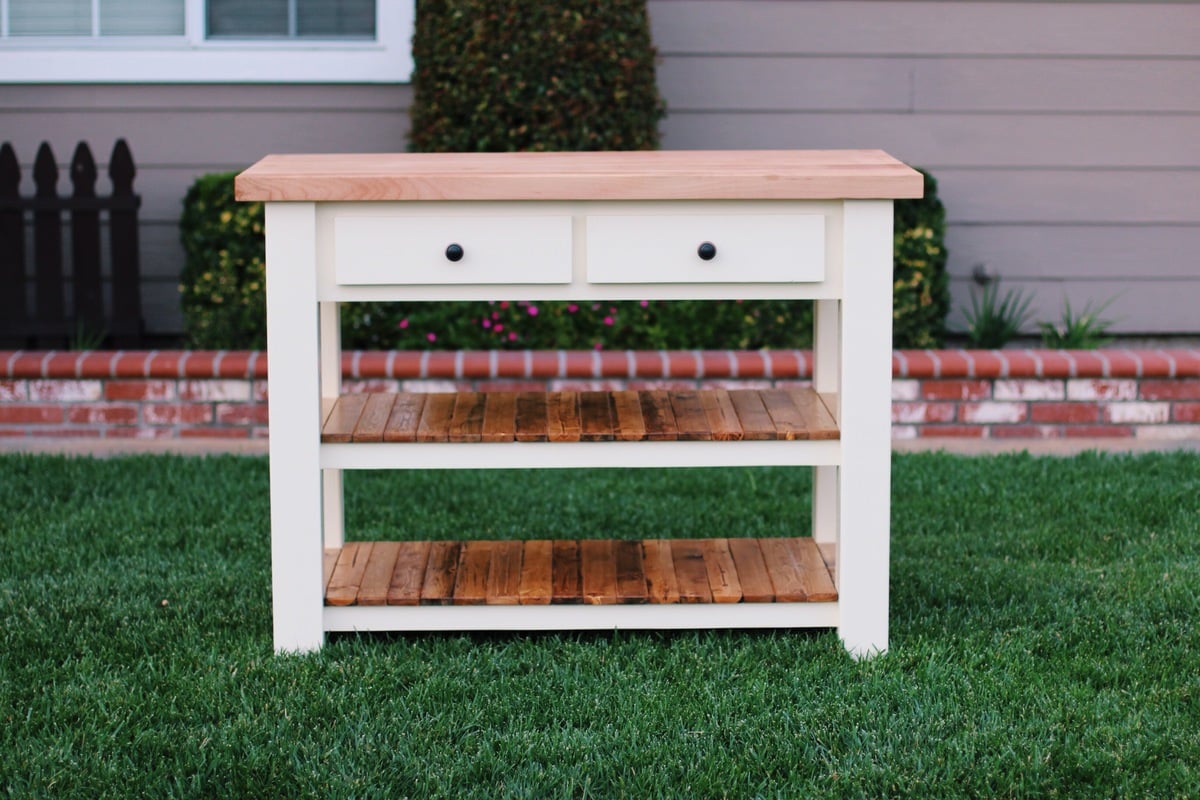
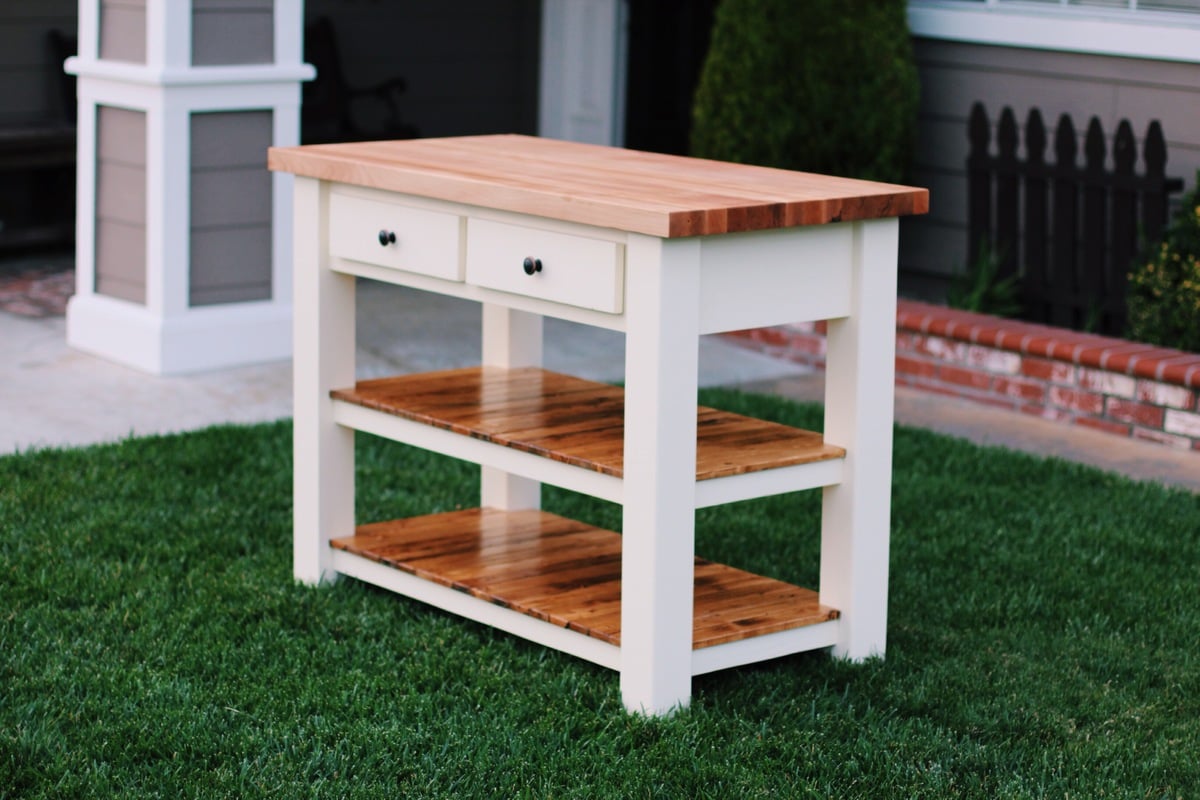
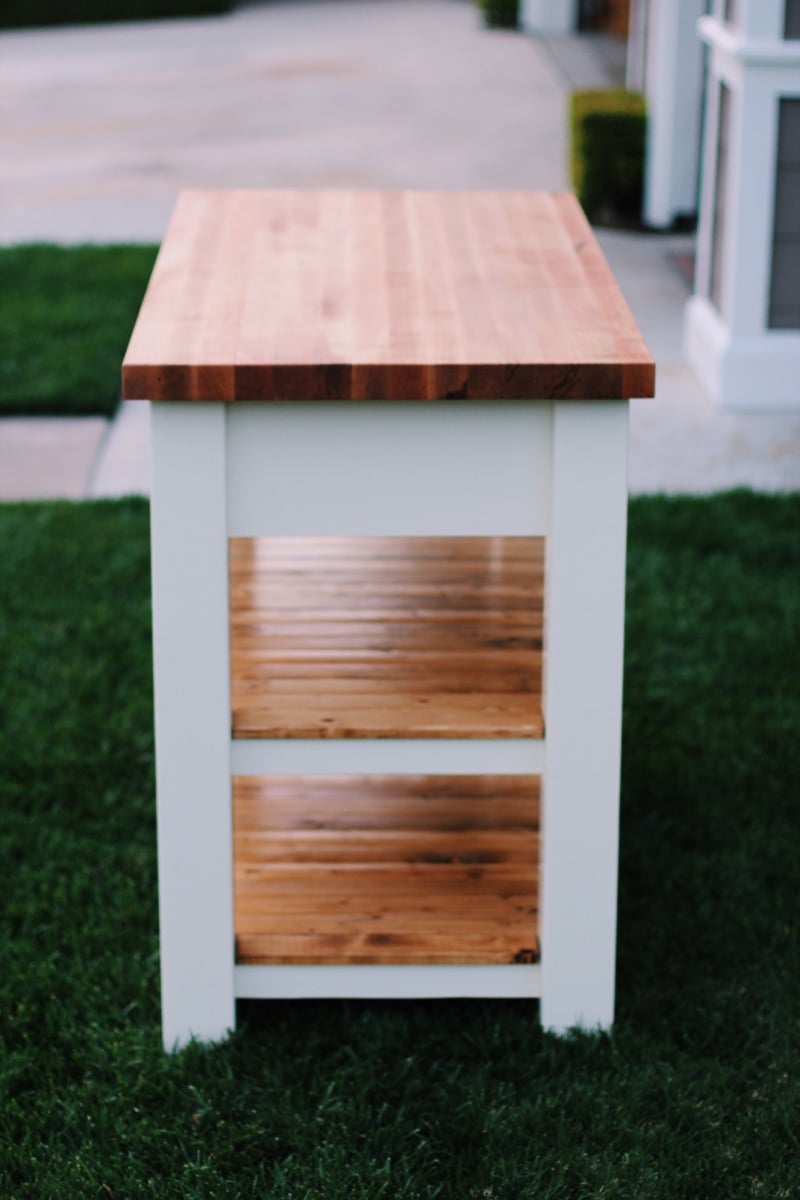
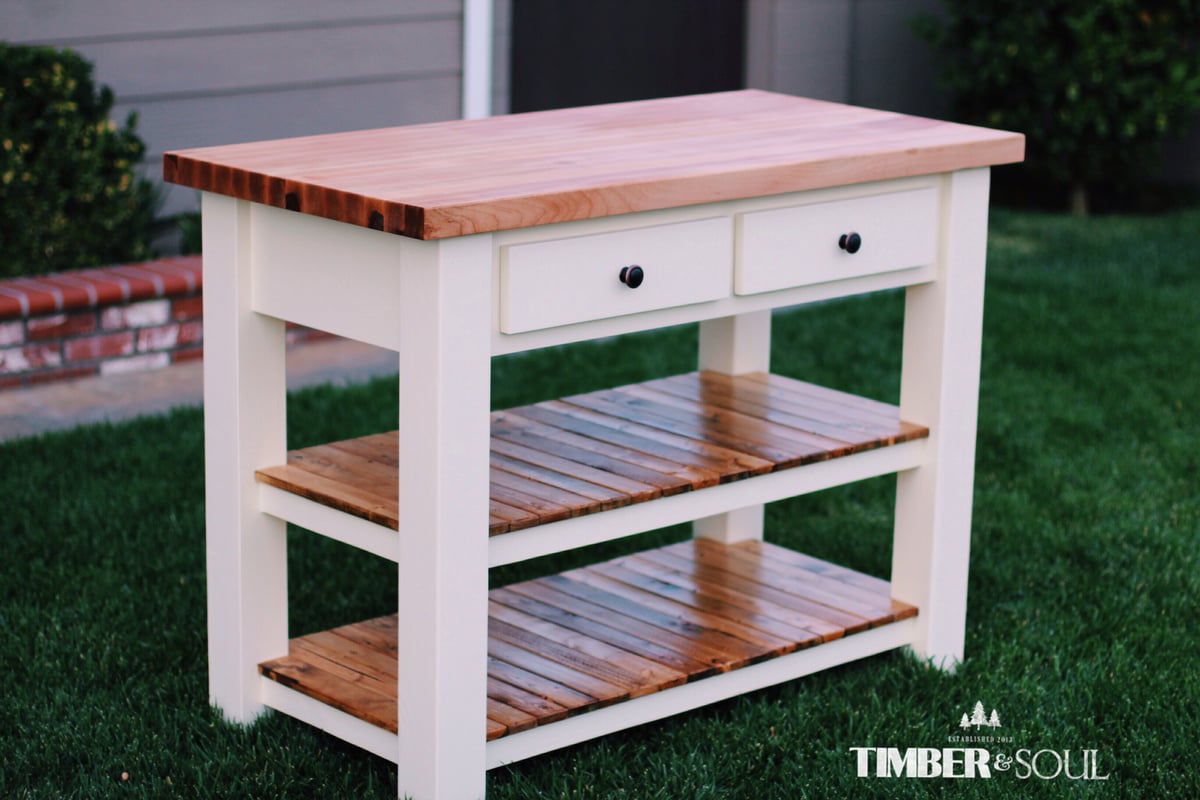
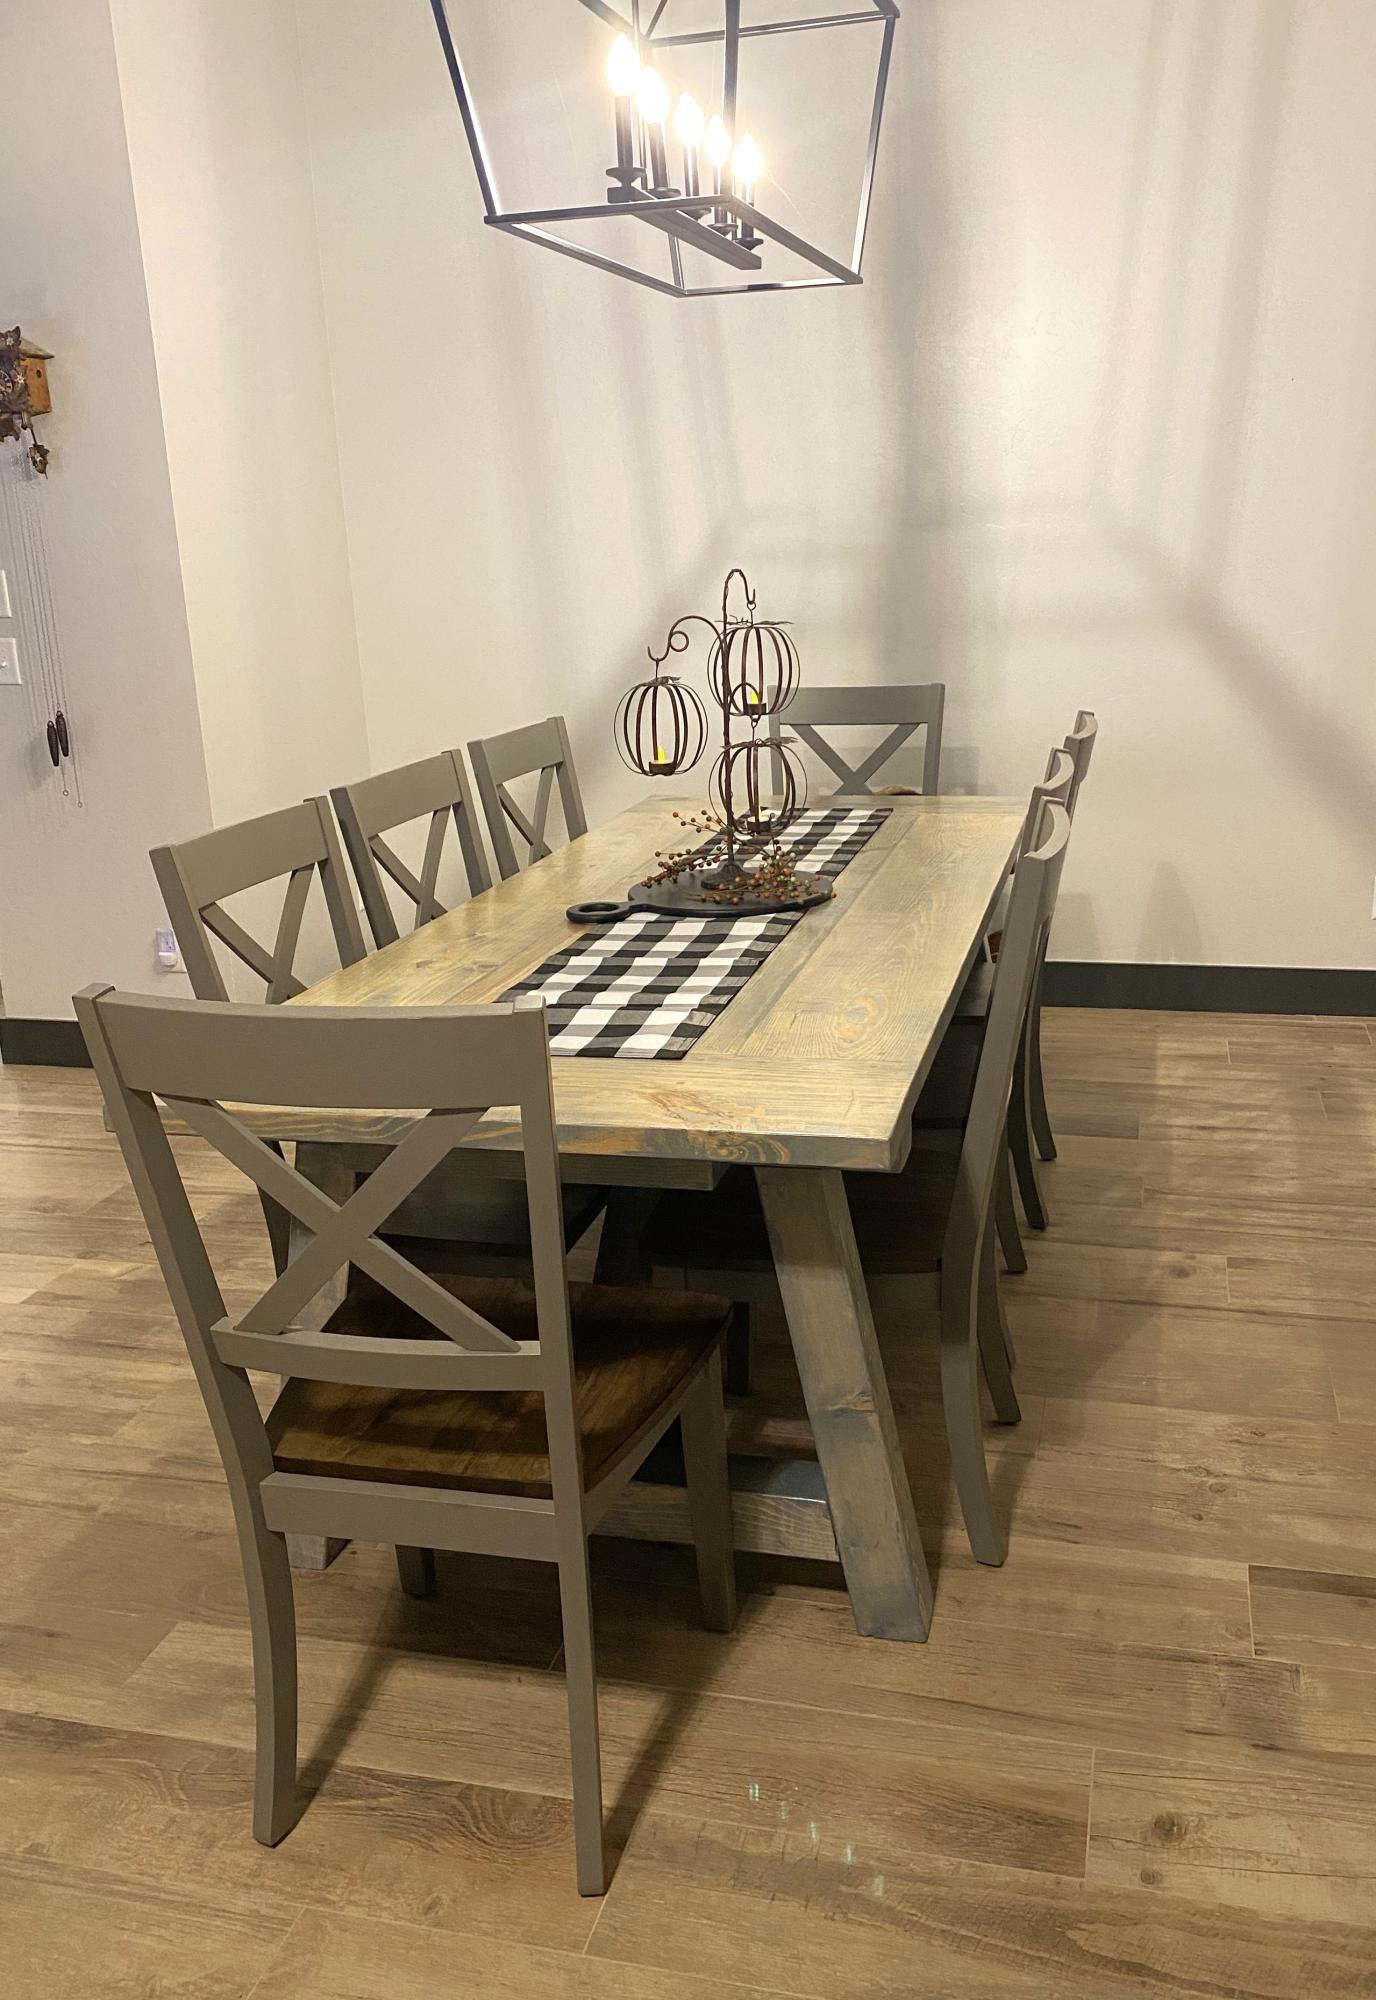
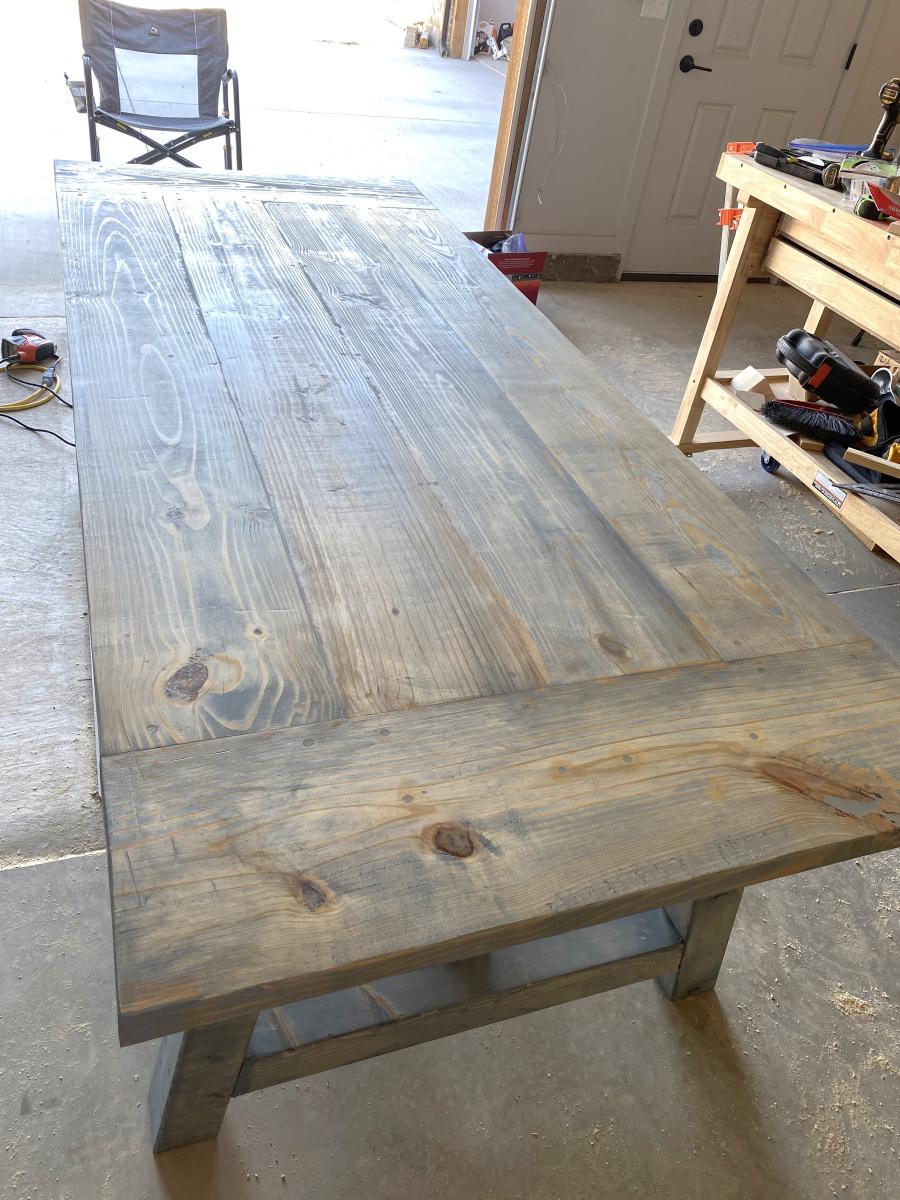
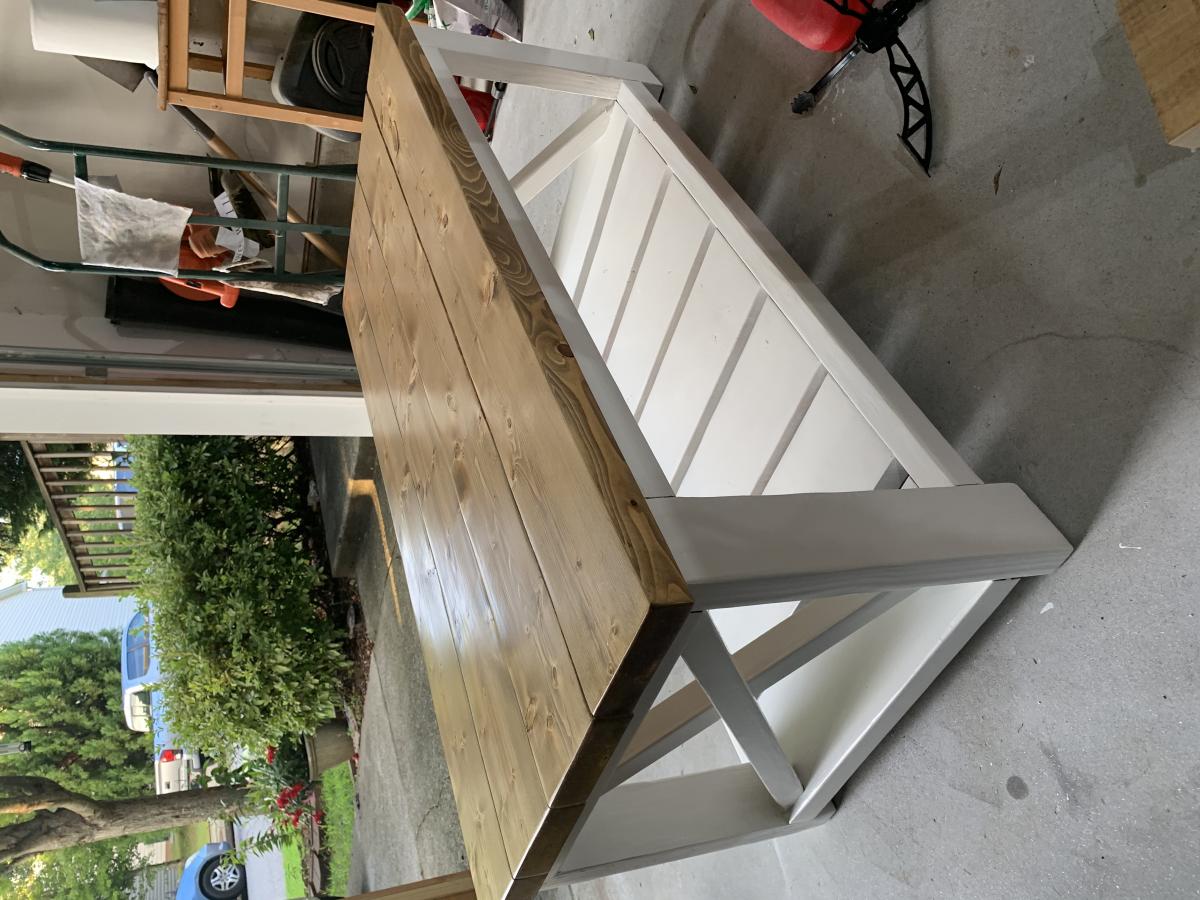
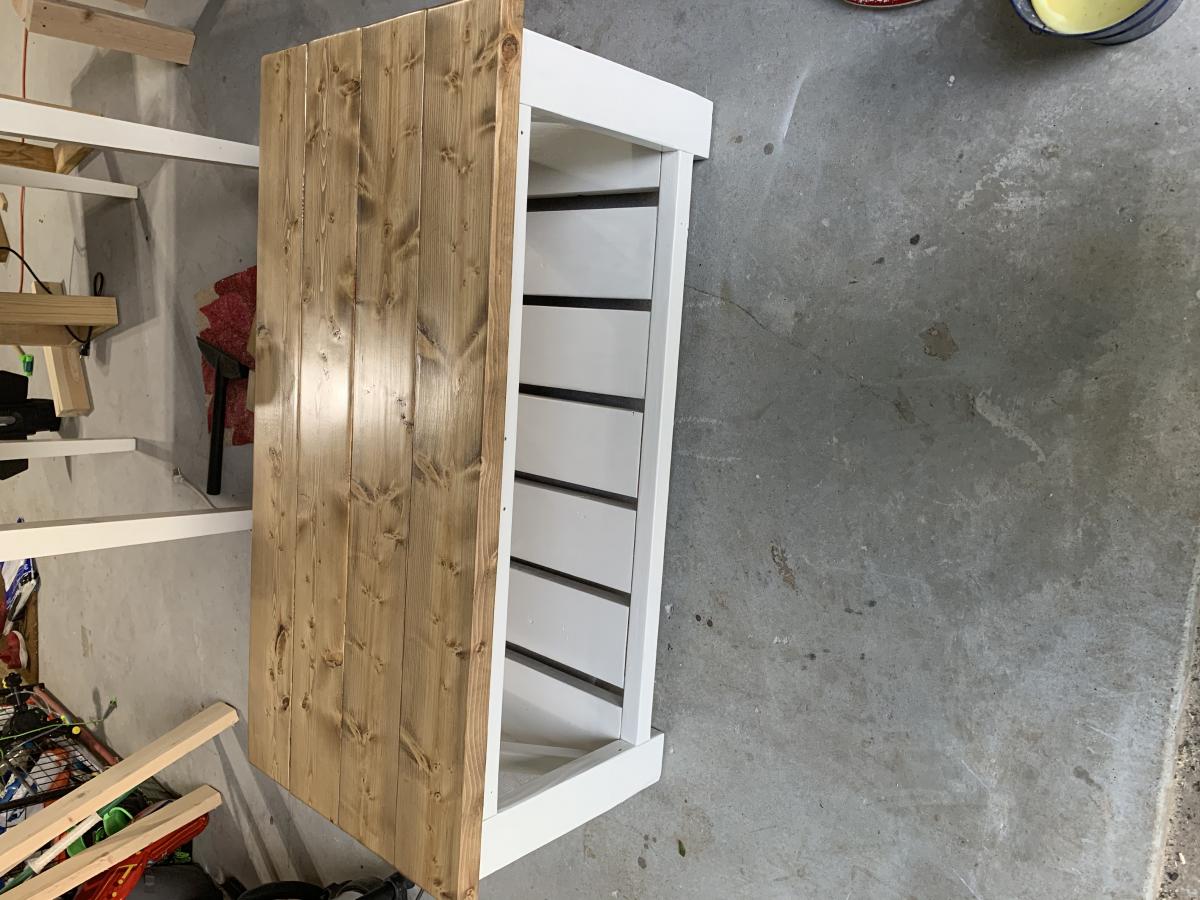
Double kitchen island with butcher block top

Submitted by bhoppy on Wed, 01/01/2014 - 11:58

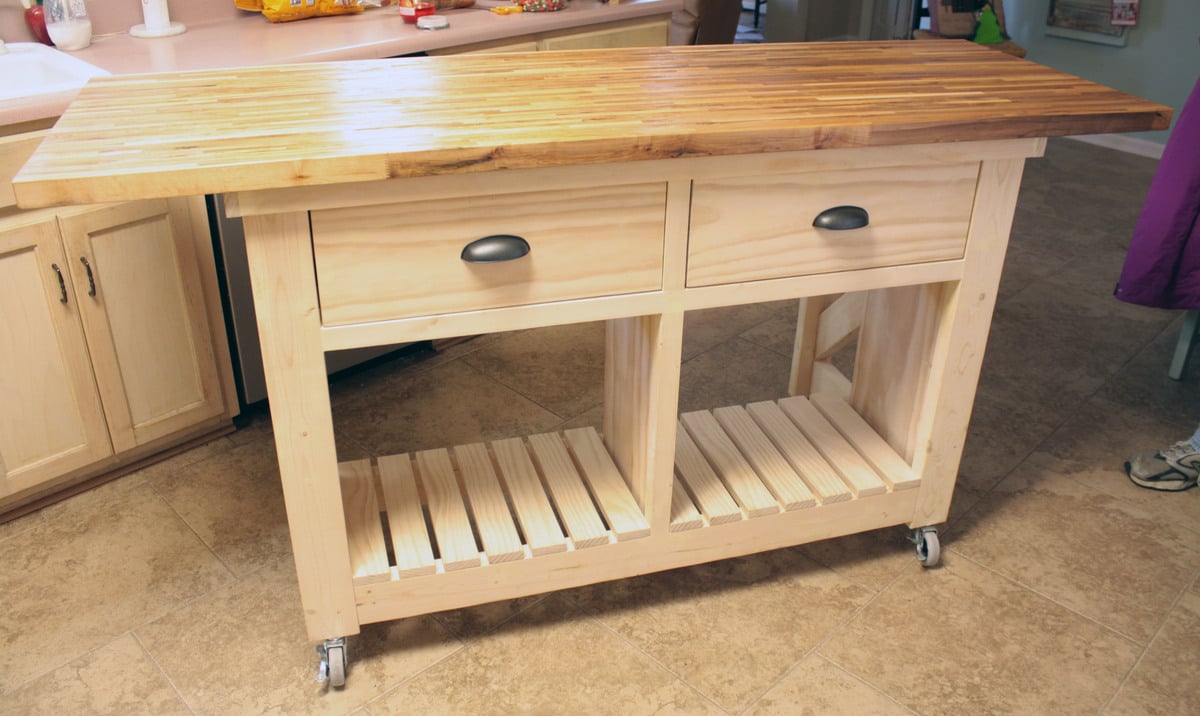
I started on the project when I went home for Thanksgiving and finished up the drawers when I was home for Christmas. I live about 7 hours from my family. I took a few tools with me (kreg jig and drill) but borrowed a circular saw and miter saw for all the cuts. It was difficult working on it because it was fairly cold and my dad only has a carport. Which is why it took longer. My step-mom says she wants to paint it maybe with some milk paint. She also did not want the center shelf as she wanted a place for taller items.

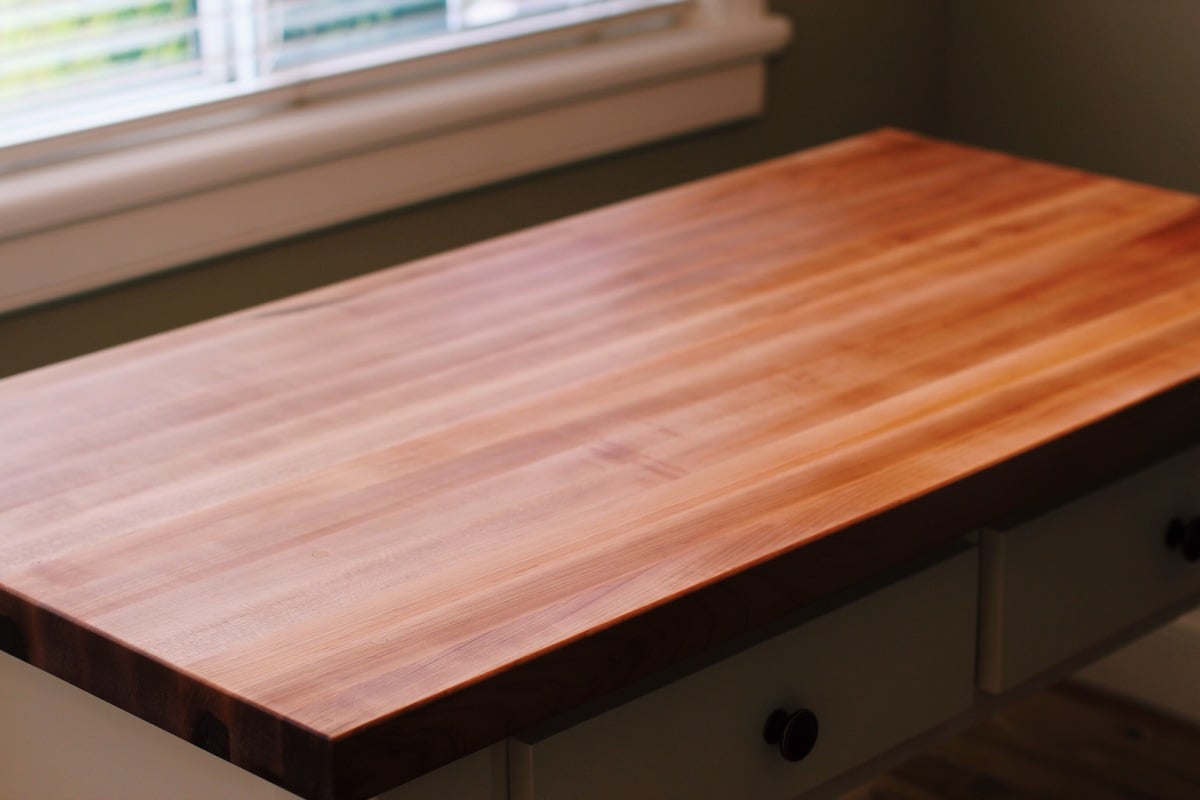
The butcher block top was $299. It comes from lumber liquidators in 25" by 96". My dad had about 2 feet cut off the length. Ikea also sells butcher block tops for roughly half the price I think, but they were out of stock in both Atlanta and Charlotte.

I also made the small kitchen island before and this one went much more smoothly. Having the extra set of hands was awesome and made for a wonderful memory as I built it with my father:-)

Built from Plan(s)
Estimated Cost
$400
Estimated Time Investment
Week Long Project (20 Hours or More)
Finish Used
None yet
Recommended Skill Level
Intermediate

Comments

Ana White

Thu, 08/15/2019 - 12:14

This is amazing Stephanie!!!!  I can't believe I didn't see this sooner.  

We are going to feature your photo with the plans - thank you so much for sharing a brag post!  Hope you are well!

DIY Outdoor Furniture Set

Submitted by Anonymous (not verified) on Fri, 08/04/2023 - 11:32

Loving this furniture! We modified it slightly by raising the height of the couches. Added some height and a slight tilt in the back. The chairs are super comfortable as the plans are done. We used 6” 25x25 cushions. We plan on staining soon.

Jaime Sallis


Seasonal And Holiday

Simple Farmhouse Nightstands

I built these matching nightstands to go with a king bed frame I built for a couple whose rebuilding their home that burned down. They were pretty simple to put together, but despite their simplicity, they are gorgeous. 

Estimated Cost
$20
Estimated Time Investment
Afternoon Project (3-6 Hours)
Finish Used
I used minwax pre-stain to prepare the wood. I then stained it using special walnut by Varathane (got it from The Home Depot). Finally, I finished it using a clear satin polyurethane by Minwax.
Recommended Skill Level
Beginner

Simple Outdoor Chairs

Submitted by Anonymous (not verified) on Sun, 08/27/2023 - 12:22

I made two of the chairs using cedar 2x4's and then stained them cedar color. The cushions were on clearance at Lowes for 6.97 each. Super excited about that as well. For the back I did the three board suggestion versus just the two for more back support and I also added an extra board for the bottom seating. Project was pretty easy and the instructions were easy to follow.

Carrie

Butcher Block Kitchen Island

I built this piece from ana white's plans. I modified the shelf design and also the dimensions to meet my needs. Instead of using 2x6 douglas fir for the top, I built the top out of hard maple. The top is built by ripping down several strips of hard maple 1.75 inches wide, turn the strips on there edge and gluing all the strip together. This is what is known as a edge grain cutting board. I finished the top with mineral oil and bees wax. The top is food safe and knife friendly. If you have any questions please don't hesitate to ask. - Brad

Built from Plan(s)
Estimated Time Investment
Week Long Project (20 Hours or More)
Finish Used
Cream brulee paint by behr
early american stain by minwax
mineral oil and bees wax
Recommended Skill Level
Advanced

Comments

romanweel

Tue, 01/28/2014 - 18:42

Did you use a planer to level your top and bottom surfaces here, or just lots of sanding? I've been told not to attempt butcher block construction without a planer...but I'm thinking of maybe going for it!

timberandsoul

Fri, 01/31/2014 - 23:01

I did use a planer for this top. But because my planer is only 12 inches wide I had to glue three individual boards together leaving two seams that I could not plane but instead had to sand out. Just sanding those two seams took a long time, I cannot imagine sanding 20 seams. I would not suggest attempting without a planer.

Calmly

Mon, 04/10/2017 - 18:45

is it possible for you to share your measurements.  I need a smaller island. Thank you.

Biff Loman

Wed, 02/05/2014 - 17:25

I'm curious how you joined the stretchers to the legs. The construction appears different from the plans. Did you use pocket screws or something more advanced like mortise and tenon?

timberandsoul

Fri, 02/07/2014 - 16:58

I am not sure exactly what you mean by stretchers. If you are referring to the shelf frame, yes it is different than the plans, I modified it. I felt the shelf design on the plans was not enough for the weigh that was going to be place on top. I used simple pocket holes to joint the frame to the legs. Hope this helps, have a great day.

voorheisb

Fri, 08/12/2016 - 10:41

Thank you Brad.  This is a really nice piece.  I recently picked up an old table from a college.  I discarded the base and plan to use the heavy butcher-block-style top to build something similar to this.  Do you have plans you could share?   Thanks again, Brian

Children's corner storage bed

Based on a combination of storage bed plans on this site and bit of imagination, we built this wonderful corner bed for our daughter. It took some time to get the measurements right (we had to convert everything to the metric system since we live in Europe) but it turned out great.

Although the bed is in the corner right now, we made the cubby holes on the side facing the wall anyway, just in case we want to move it to the middle of the room at a later date. For now, we just placed the corner board in front of those.

Thanks everybody for the wonderful plans!

Estimated Cost
$ 450
Estimated Time Investment
Week Long Project (20 Hours or More)
Finish Used
Water based full gloss, colour 'White Tie' from Farrow & Ball
Recommended Skill Level
Intermediate

Comments

KinderKrazy

Wed, 03/13/2013 - 09:14

Cannot wait to try to build this for my son's room! Cute and creative. Love it...great job!

ctmkgw03

Fri, 03/15/2013 - 04:37

I love this and so going to get hubby to make this for my sons room we are currently in the works of doing a remodel.

KimberBee

Wed, 03/20/2013 - 01:00

This is almost just what we're looking for. I love the use of space beneath the headboard shelves. I'm going to build my daughter's for a full size matress and make a twin trundle beneath it. Great job on this one.

Sunridge Middle School Woodshop

Submitted by Anonymous (not verified) on Sun, 01/26/2020 - 18:53

At Sunridge Middle School, we design and build our own projects at the end of second semester. As class sizes have grown ( the class is quite popular) helping design up to 60 projects becomes quite difficult. That’s where you come in! You have designed some awesome projects and the kids are able to find a perfect fit, with your variety. Some doubt the ability of 14 year olds, but given the space, opportunity, support, and your plans, we can do anything!

Estimated Cost
0.00
Estimated Time Investment
Week Long Project (20 Hours or More)
Finish Used
Stain
Paint
Recommended Skill Level
Intermediate

Comments

Monika

Tue, 10/20/2020 - 17:29

Talent always manifests itself in childhood, so do not underestimate the capabilities of 14 year olds, especially if they love what they do. Such creative activities in the workshop seem to me very interesting and can lay the foundation for the work of a lifetime. This is a much more rewarding activity than the constant essay writing. Such tasks should be delegated to specialists. For example https://www.nursingpaper.com/ a very useful rewrite service. And working with your hands is interesting and promising.

Garden Box

Submitted by Medickep on Tue, 03/04/2014 - 13:38

With Spring near I decided it's time to finally make some vegetable boxes. These plans were super easy, and easy to add a few little features.

I live in Oregon and even though cedar is tough, with all the rain we get, the color fades fast!! I was also worried about the inside rotting away from the solid like you see at the bottom of a fence!

I was surprised there weren't a million different stains that were "Organic" with that be so popular. I new my kiddos would eat most of the stuff before it made it into our house, so I decided to leave the inside natural and line it with heavy duty visqueen.

I stained the outside to protect the wood, using some Australian Timber oil I had left over from another project!!

Estimated Cost
20.00 for two
Estimated Time Investment
Afternoon Project (3-6 Hours)
Finish Used
Austrian Timber oil on the pout side, natural on the inside.
Recommended Skill Level
Starter Project

Barn Door Bookcase/ Side Pantry

Submitted by BmoreITguy on Wed, 04/22/2020 - 05:57

This took a lot of time and money but I like the way it looks. We have 4 kitchen cabinets and one drawer and no room for more so storage is tight.

Built from Plan(s)
Estimated Cost
400
Estimated Time Investment
Week Long Project (20 Hours or More)
Finish Used
Same as Ana’s
Recommended Skill Level
Advanced

Comments

BmoreITguy

Wed, 04/22/2020 - 06:00

Why is my picture sideways? Ana, one of the most frustrating things with this build was the mobile version of your site. Very laggy, typing lags, pages crash in the middle of typing or viewing and persistent ads are a nightmare

Outdoor Sofa Mash-up

Submitted by Anonymous (not verified) on Thu, 06/30/2016 - 19:51

My wife loves the X pattern of the Weatherly Sofa, but wanted the tilted back from the Simple White Outdoor Sofa. This was our best of both worlds effort!

Estimated Cost
$85 for lumber and materials without cushions.
Estimated Time Investment
Afternoon Project (3-6 Hours)
Finish Used
Primer and outdoor paint.
Recommended Skill Level
Beginner

Comments

Katie.Belmont88

Wed, 07/06/2016 - 19:18

I love this! I was so excited until I realized that this was a brag and didn't have plans. I don't know if I'm as talented at modifying as you are. :)

Seasonal And Holiday

Garden cutie

Submitted by Anonymous (not verified) on Sun, 04/26/2020 - 16:18

My honey built this farmhouse potting bench in a few hours. I needed it to store all the junk that was laying on the ground. It's so cute!

Built from Plan(s)
Estimated Cost
$100
Estimated Time Investment
Afternoon Project (3-6 Hours)
Finish Used
Early American minwax
Recommended Skill Level
Beginner

Tall Dresser

Submitted by Anonymous (not verified) on Wed, 12/13/2023 - 16:41

A Christmas gift for my G- kid!!!!

Built from Plan(s)

Comments

A Closet system for my basement bedroom

Submitted by Anonymous (not verified) on Mon, 07/04/2016 - 07:00

I Created this closet system because I have a basement bedroom with no closets. The bar I bought from target was falling over from the weight of all my clothes so I needed something more sturdy. I found this plan and it was perfect. I got shelves and clothing bars out of one build. I modified the plan a bit to fit the room. I also wanted it to have a bar that could hold dresses so I eliminated one of the lower shelves. I also made it a tad wider because I am rather tall and wanted it to comfortably fit folded sweatshirts.

Built from Plan(s)
Estimated Cost
350
Estimated Time Investment
Weekend Project (10-20 Hours)
Recommended Skill Level
Beginner

Beginner Farm Table & Benches

This was my first time building anything! The plans were so easy to follow along! Once I master some things like this, I can work on fine tuning things a bit more so I can build some more intricate plans. Thanks so much for your website! My kids are loving the BBQ's outside at the table!

Estimated Time Investment
Afternoon Project (3-6 Hours)
Finish Used
I haven't added a finish yet but will be soon.
Recommended Skill Level
Starter Project

Comments

Beryl

Tue, 06/02/2020 - 15:09

re the farm table. your cut list calls for 8 2 x 4 at 28 1/2 inches but the plan actually only needs 4 of them. The pics do not show you doubling the 2 x 4s for legs. Am I missing something.

Changing table

Submitted by markmart74 on Thu, 07/07/2016 - 03:40

With the arrival of our first baby in 10 days,  the wife wanted a changing table. My only vision of a changing table was the ones in public restrooms. With the help of Google, I came across all the great diy ideas on this site. I combined 3 plans into 1 and came up with this. The project took 2 days to build. Next step is to prime and paint. 

Estimated Cost
90 - 100
Estimated Time Investment
Weekend Project (10-20 Hours)
Finish Used
Primer and paint
Recommended Skill Level
Intermediate

Comments

Reclaimed-Wood Farmhouse style Headboard, Queen Size

Submitted by lia0821 on Wed, 06/20/2012 - 14:43

This was my first project and I had SO MUCH FUN doing it! Can't wait to make nightstands to match. The only reason it took me so long and that I'm not sure of the final cost is because it took me a while to finish it due to work/life getting in the way. Plus we have no garage, basement or any indoor work space so were dependent on the weather to behave. I went back and forth to the store so many times for little incidentals I really couldn't tell you what the final cost was however, I can tell you that the wood came out to be about $50.

Estimated Cost
Hard to say, but if I had to guess I'd say around $60-75 (maybe more I went back and forth to store several times)
Estimated Time Investment
Week Long Project (20 Hours or More)
Finish Used
distressed the wood before assembling by hitting it with hammers, screwdrivers, nails other pieces of wood and cement blocks I had lying around behind out shed (they made for GREAT distressing tools--I just hit the wood with them and got these cool indents that I just loved). Then sanded the edges to make for a more worn look.

Staining: 1 coat of Minwax Provincial that I wiped off very soon after applying (about 5-10 min). I didn't wait for it to set in. Basically I started at the top and worked my way down...then began wiping off from the top. (applied stain with rags and wiped off with clean ones). I finished a week later with water-based polyurethane (2 VERY THIN coats, sanding in between). I didn't want any yellowing affect with the oil-based but you have to wait a few days to coat a water-based poly over an oil-based stain.
Recommended Skill Level
Starter Project

Comments

Garage Shelving

Submitted by Anonymous (not verified) on Sat, 07/16/2016 - 17:17

I am a beginner diy'er and this was one of my first projects.  Also it was my first time using the Kreg jig and I loved it!  My shelving system was around 8 feet tall, 12 feet wide and 30 inches deep.  I added some extra cleats to support my deeper shelves (30") and also used thicker (5/8") plywood.  This was a fun and easy project to do!  Thanks so much!

Estimated Cost
$150
Estimated Time Investment
Day Project (6-9 Hours)
Finish Used
none
Recommended Skill Level
Beginner

Truss Table

Submitted by Anonymous (not verified) on Mon, 01/08/2024 - 10:12

Our 4x4 Truss Beam Table made by my husband for our new house. Stain is Minwax slate gel stain.


Built from Plan(s)

Comments

Farmhouse Beginner coffee Table

Submitted by mpjacob08 on Mon, 05/25/2020 - 09:23

So Fun!! My first ever wood build!! I’m completely addicted now ha! Thank you so much! I’m learning so much from watching your videos.

Estimated Cost
$50
Estimated Time Investment
Weekend Project (10-20 Hours)
Finish Used
Varathane Golden Oak with one coat of shellac spray and Varathane oil based polyurethane to protect from liquids
Recommended Skill Level
Beginner
Back