Community Brag Posts

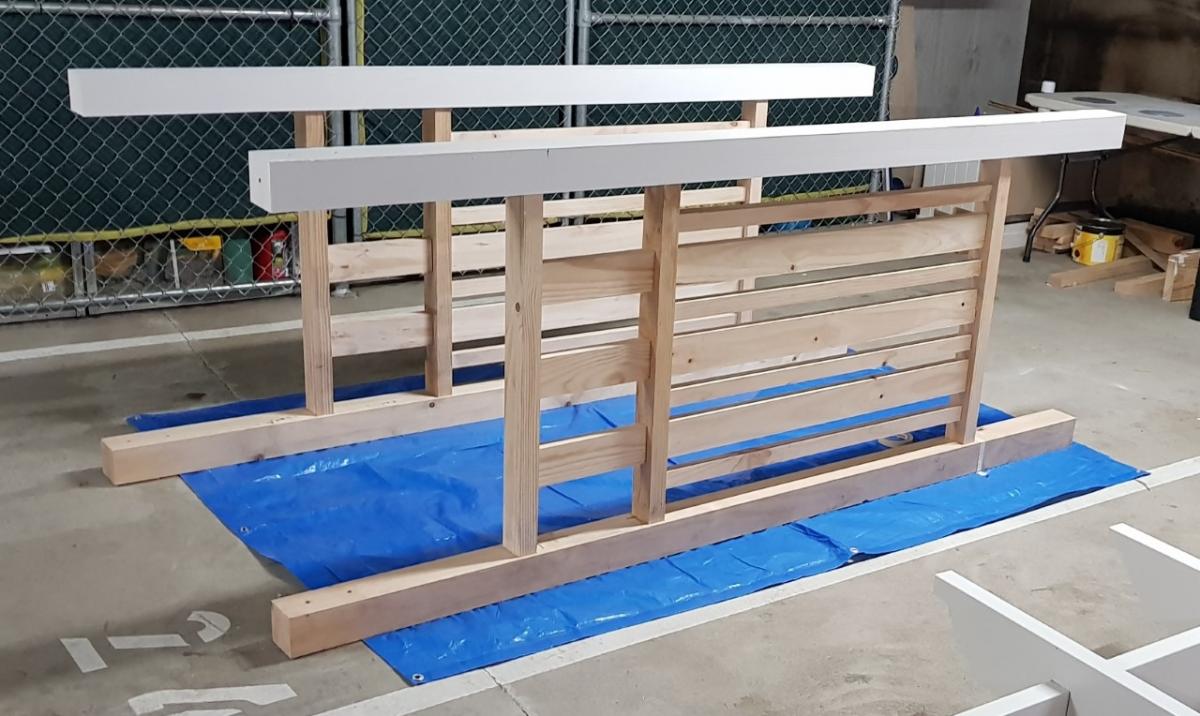
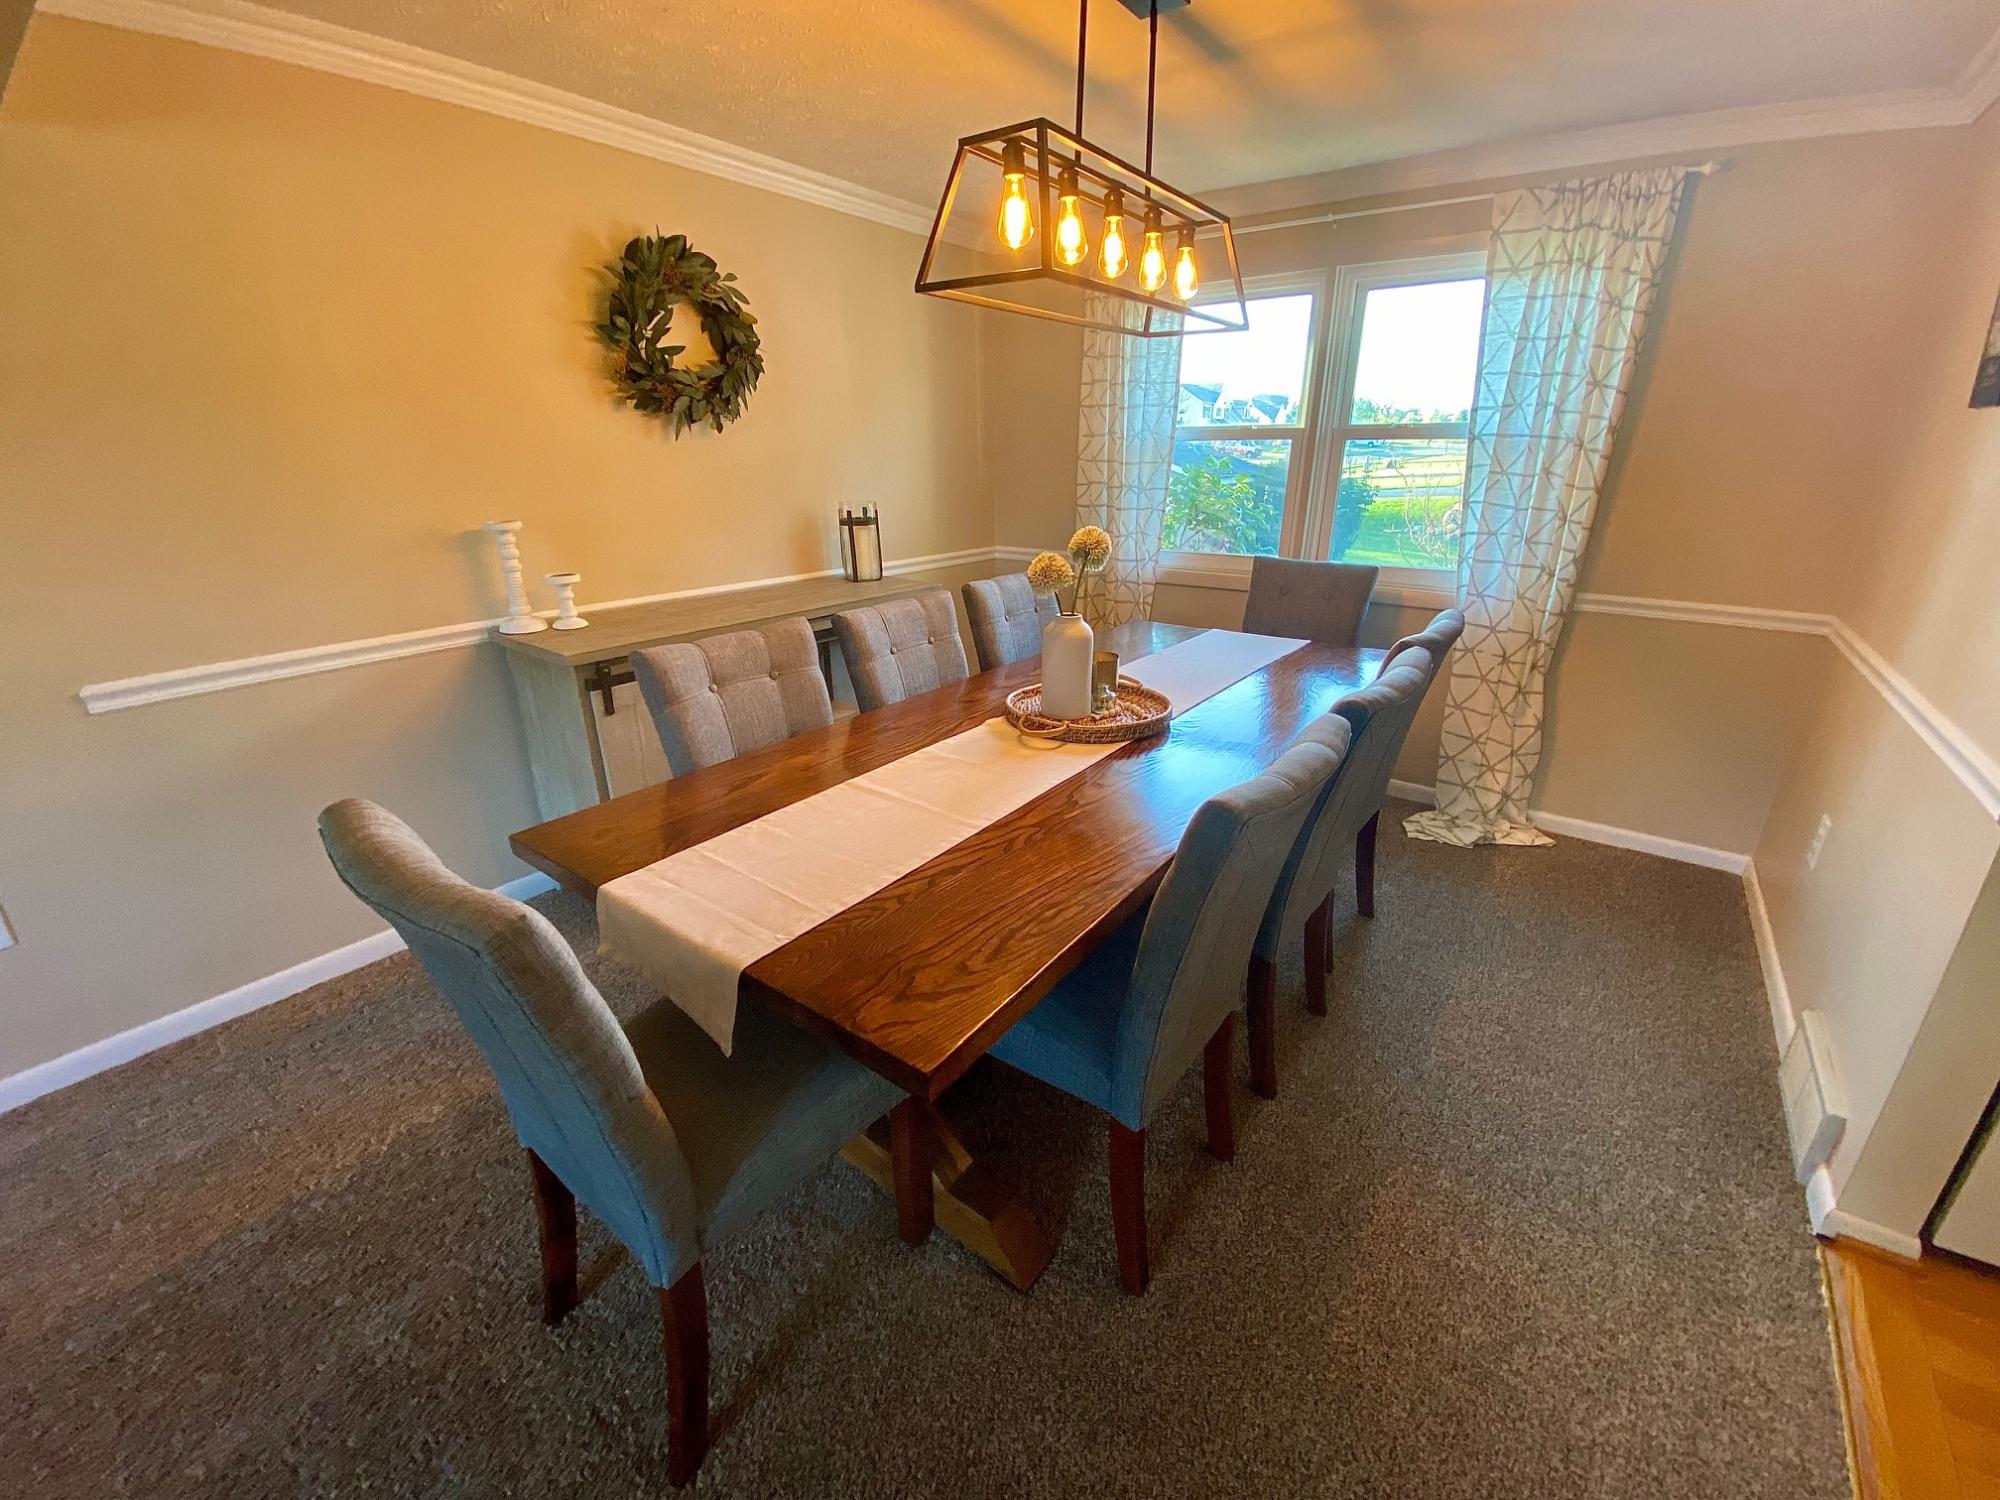
Fancy X Farmhouse Table

Submitted by classywolf on Mon, 09/13/2021 - 09:13

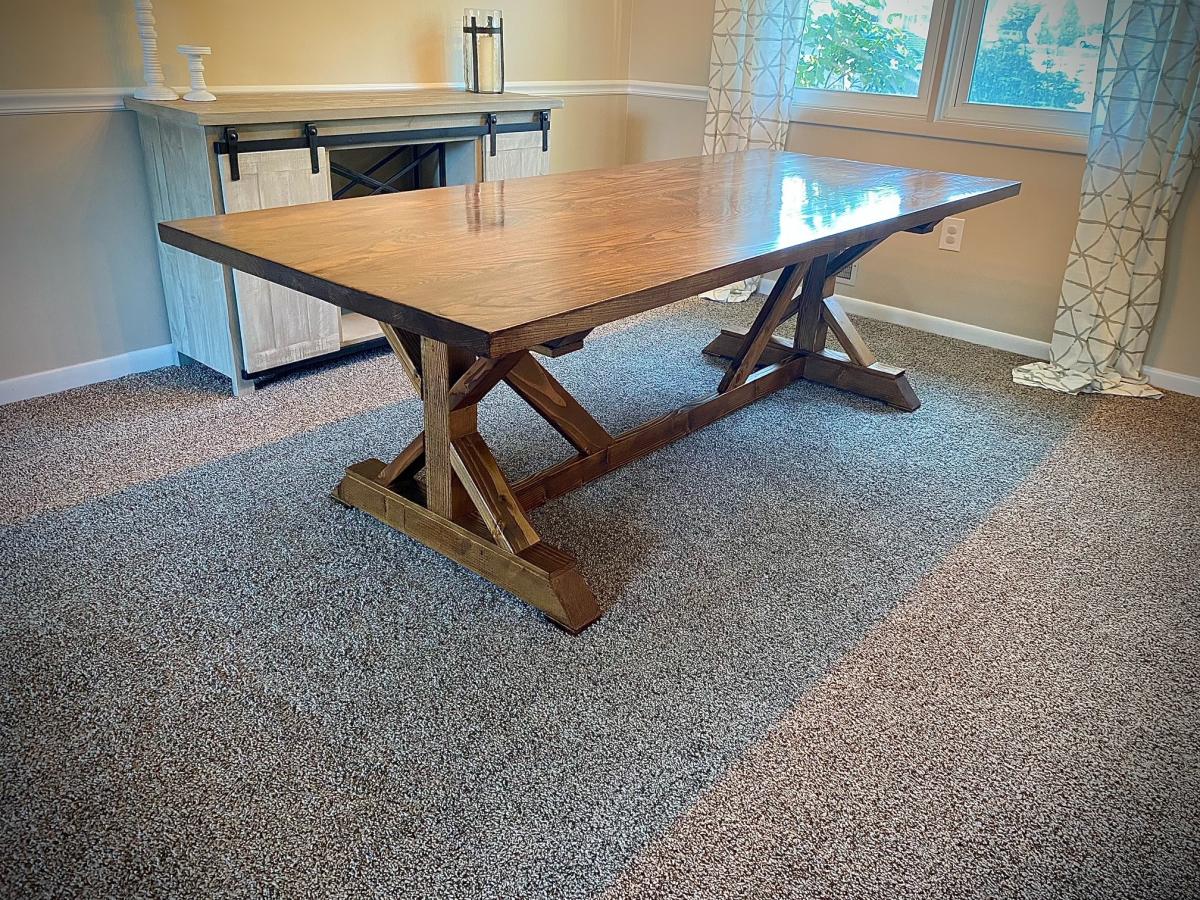
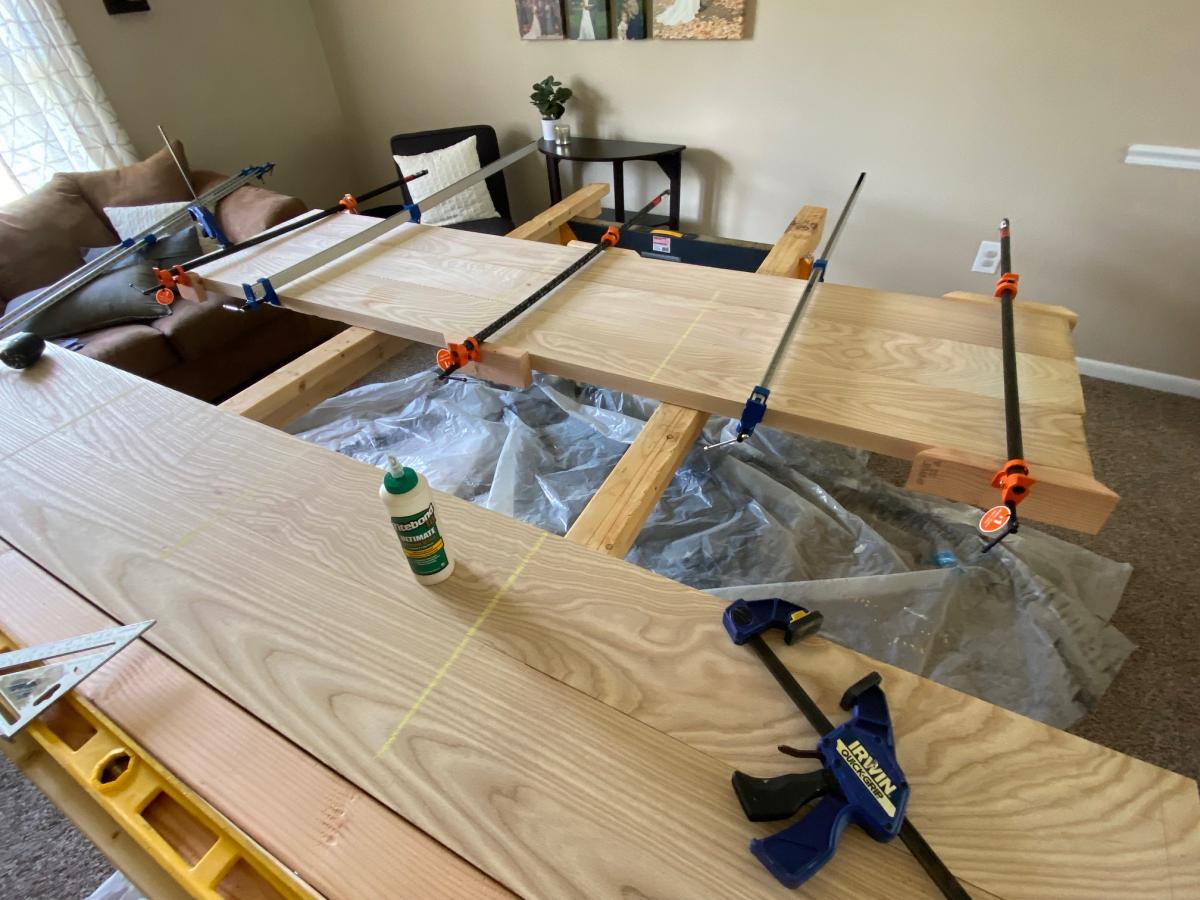
First AW project - very easy to follow with the plans, comments, and some basic problem solving. We like others did substitute some 4x4s for her stacked 2x4s.

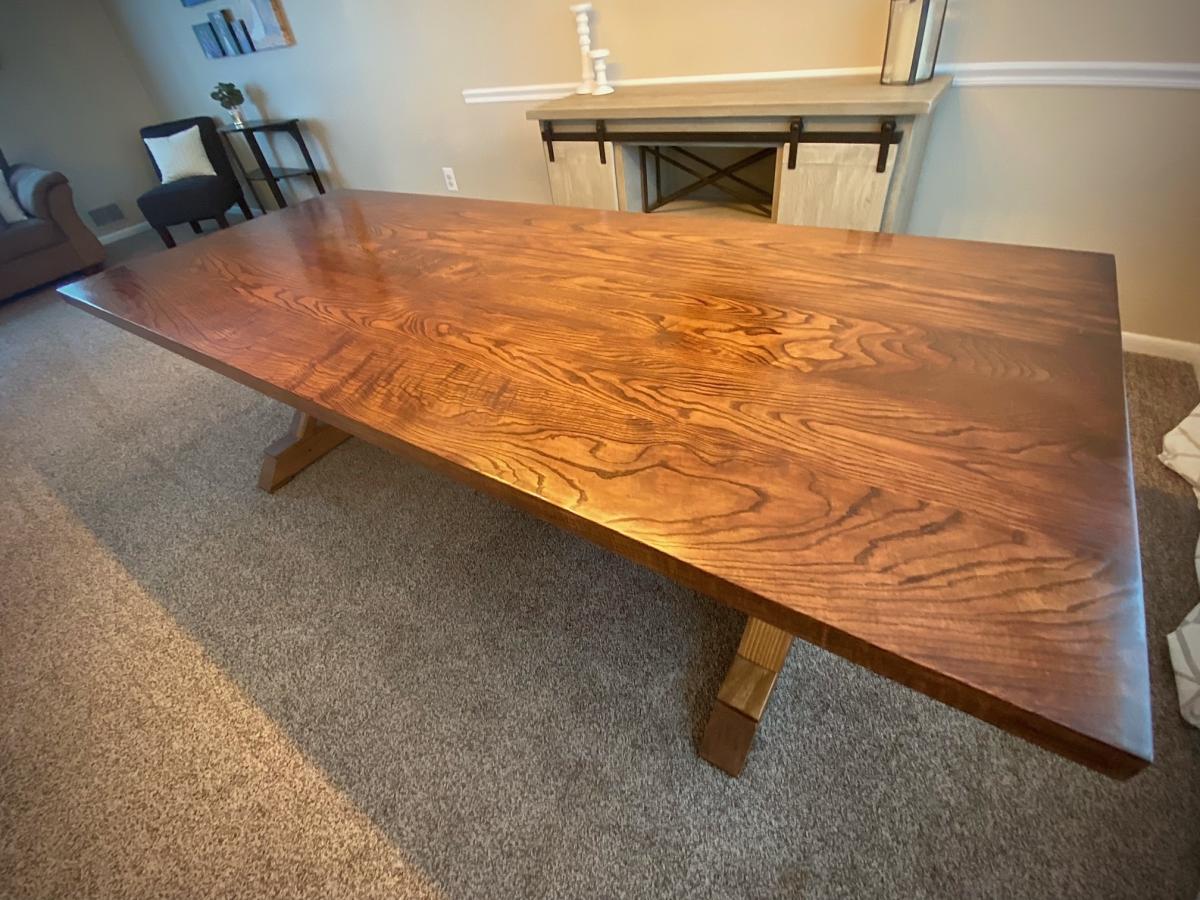
We used 2x8 Ash boards for the top, rough milled down at a local hardwood depot. ($600...Ouch). The lumber was glued up with Titebond iii and clamped with pipe clamps. Then used a combination of electric planer and belt sander to make sure it was completely flat and even after the glue up. Finish sanding was done with a 6" orbital, and the ends were cut flush with a circ saw.

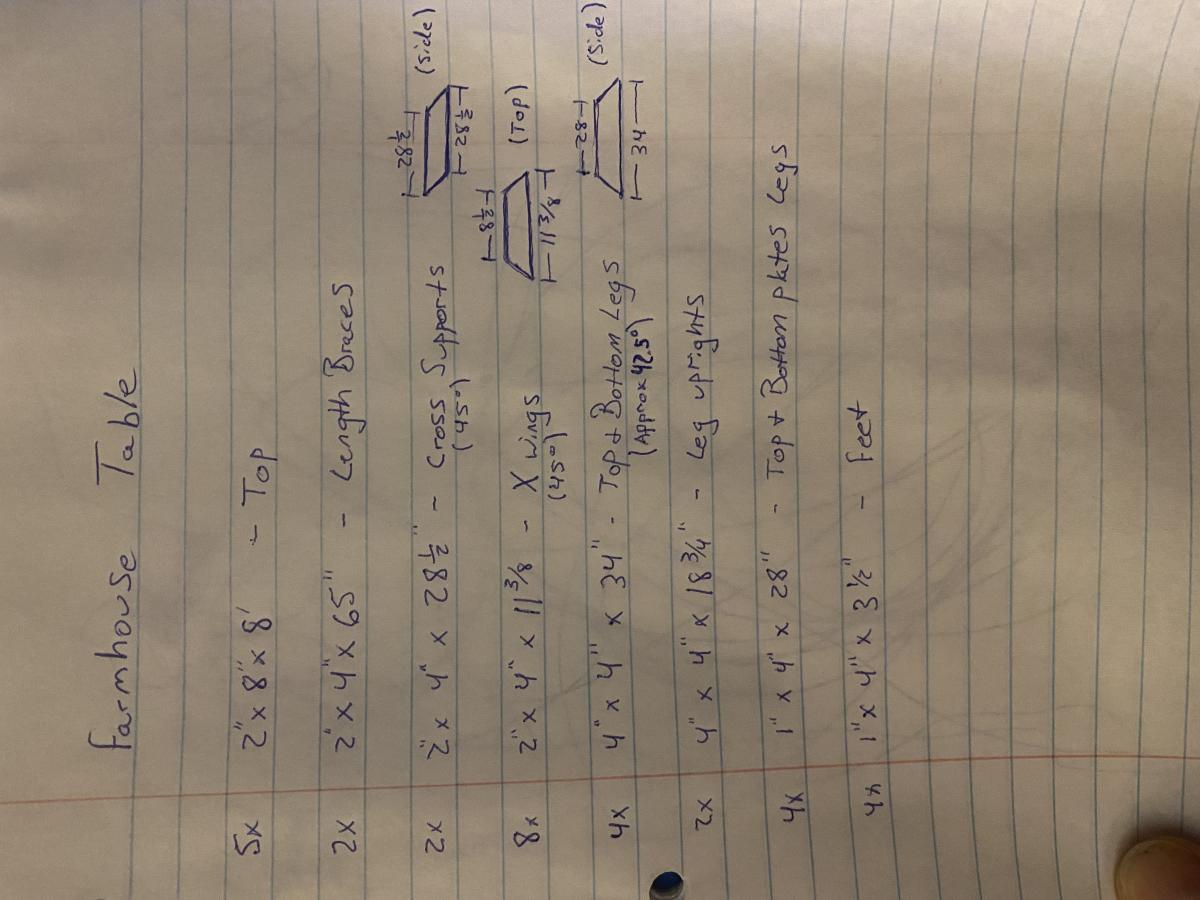
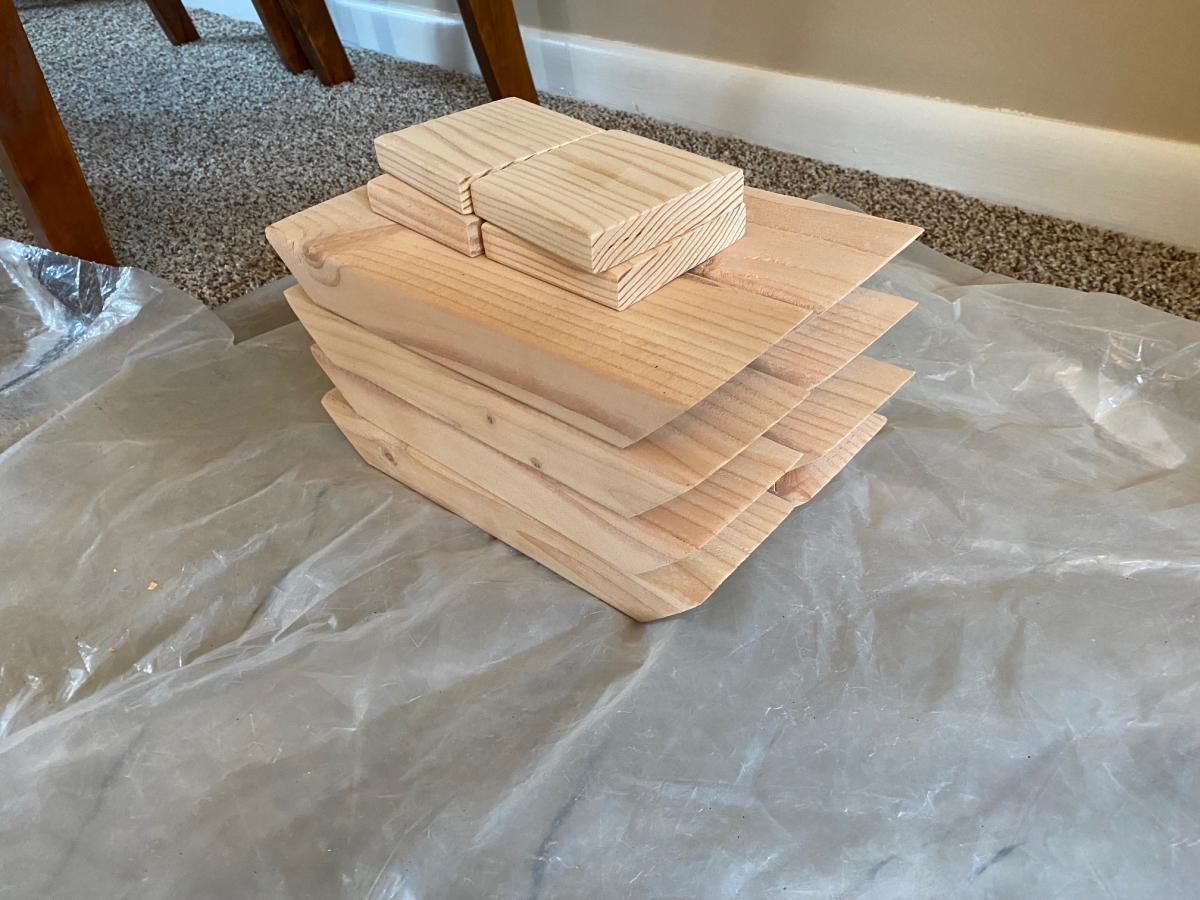
The base of the table was the easiest (and cheapest). It is made of kiln dried Doug Fir from the blue big box store. A photo of the cut list we used is attached. Used a chop saw for everything. This video helped visualize everything even though ours were not exactly the same. We used similar screw selection as this video as well:

https://www.youtube.com/watch?v=qg_hwoekV80

We used a kreg bit to predrill/counter sink our screws. Then purchased Douglas fir wood plugs from this etsy user. Didnt feel like cutting our own. This user has a lot of other species as well.

https://www.etsy.com/listing/991000659/douglas-fir-clear-tapered-wood-p…

A lot of people had questions about how to connect the top to the base. We routed a groove on the top of the base on each side and connected the two with Z clips. We used this method:

https://www.youtube.com/watch?v=J7Z69COtzzw

And these clips:

https://www.amazon.com/Table-Fasteners-Connectors-Screws-Brackets14/dp/…

Finishing was the most stressful part. Our first staining attempt was very blotchy despite being sanded very well and using a preconditioner. Since we spent so much money on the top and wanted this to be a perfect heirloom piece, we ended up re-planing and sanding the whole top (Kill me). We then used this method to precondition the wood by The Wood Whisperer - which worked great:

https://youtu.be/rjPX1byriM8

The table final coat was finished using these methods by PMK Woodworking. 3:2:1 ratio of
Mineral Spirits: Oil Based Poly: Boiled Linseed Oil:

https://www.youtube.com/watch?v=MxP5YuTHyic
https://www.youtube.com/watch?v=J_6g4oGEJ5s

Overall very happy. Took way longer and cost way more than expected. But hopefully will be our forever table that our kids will fight over one day. If you wanted to do this cheap and have it look rustic with imperfections, that would also be great and very doable.

Thanks to Ana, all the links above, and all your comments!
Good luck

Built from Plan(s)

Comments

Wedding Arbour

Submitted by Anonymous (not verified) on Mon, 10/04/2021 - 13:43

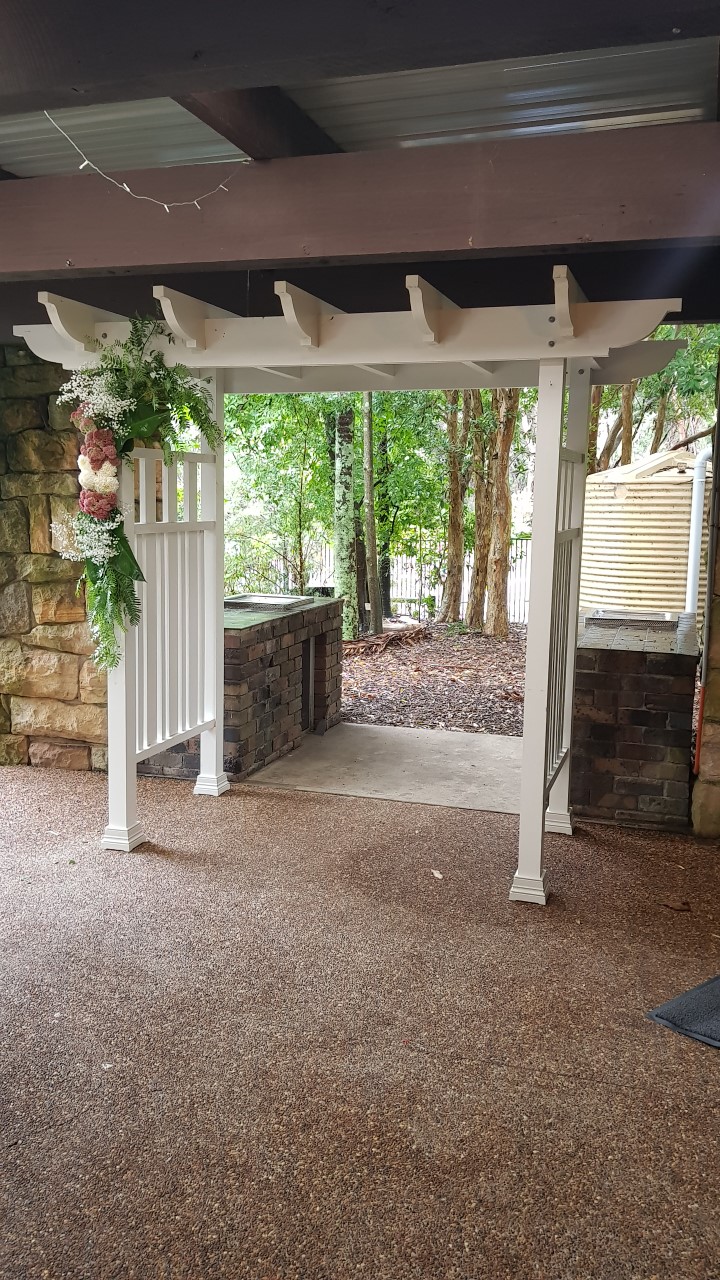
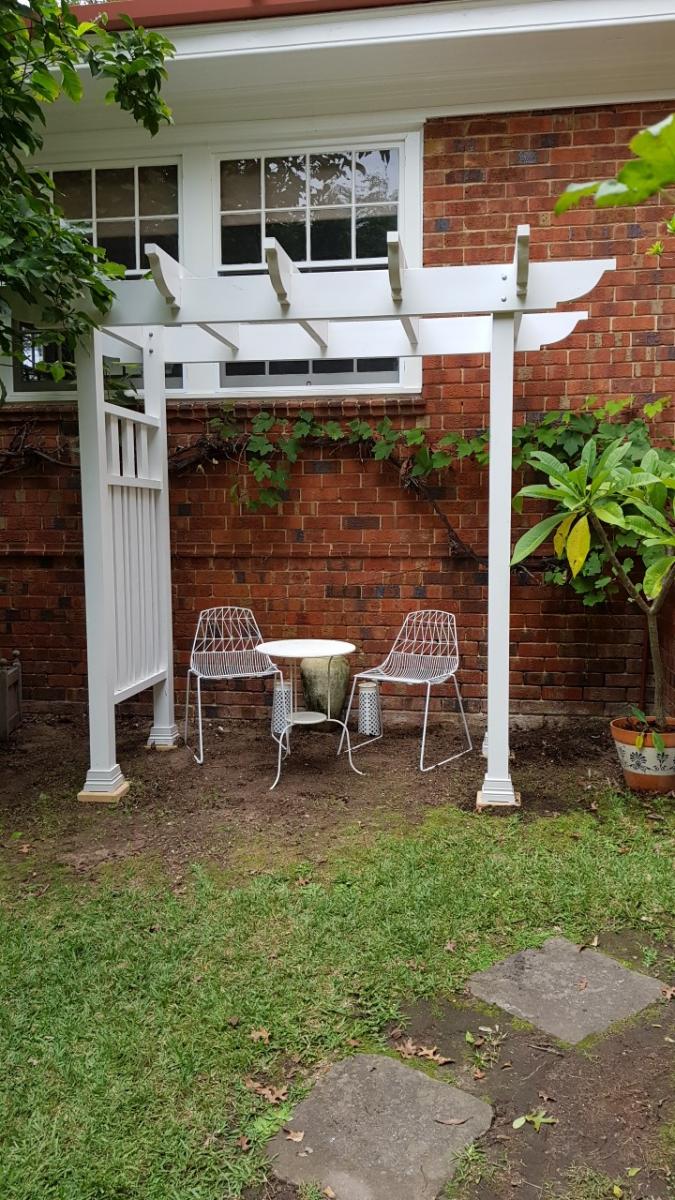
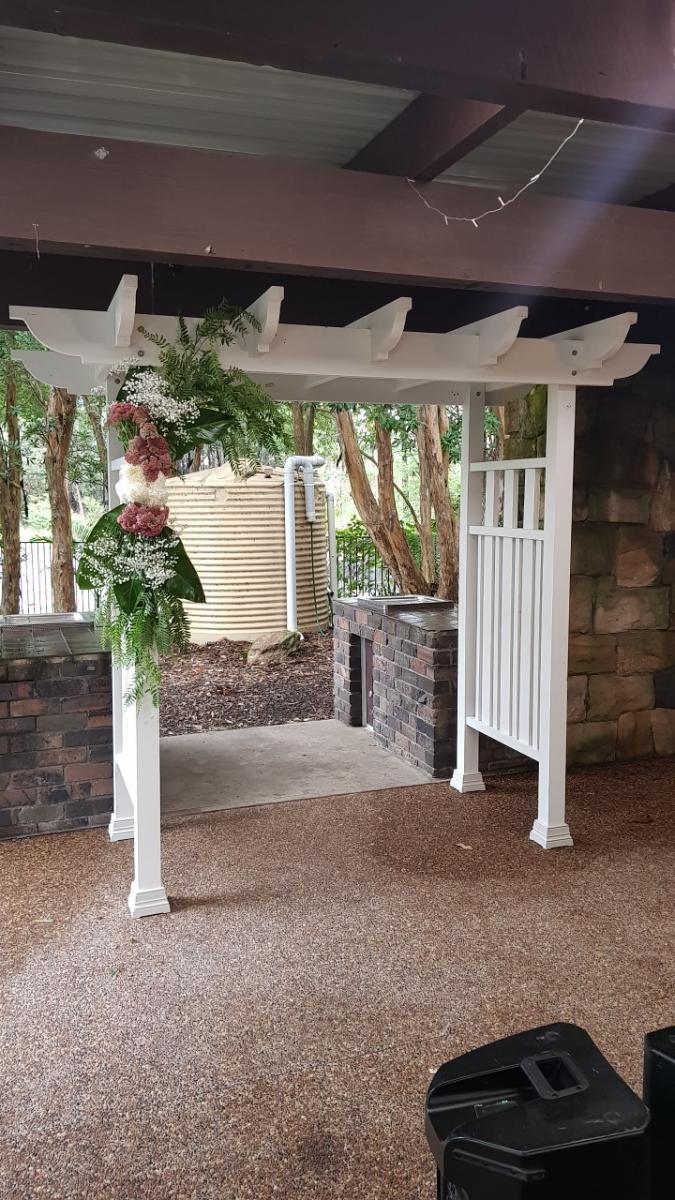
Hi, I built this wedding Arbour for my daughters wedding a while ago and unfortunately, I have no plans as I built from my head. It now sits in pride of place within thier garden as arch for thier garden.
I built this with a drop saw, hand saw, router, drill and hammer only.
I follow Ana's plans every release and save her plans for when I retire in two years to build for our house as well as try to run a small business from my shed.
Thank you Ana for you continued plans and wonderful advice.

Built from Plan(s)

Comments

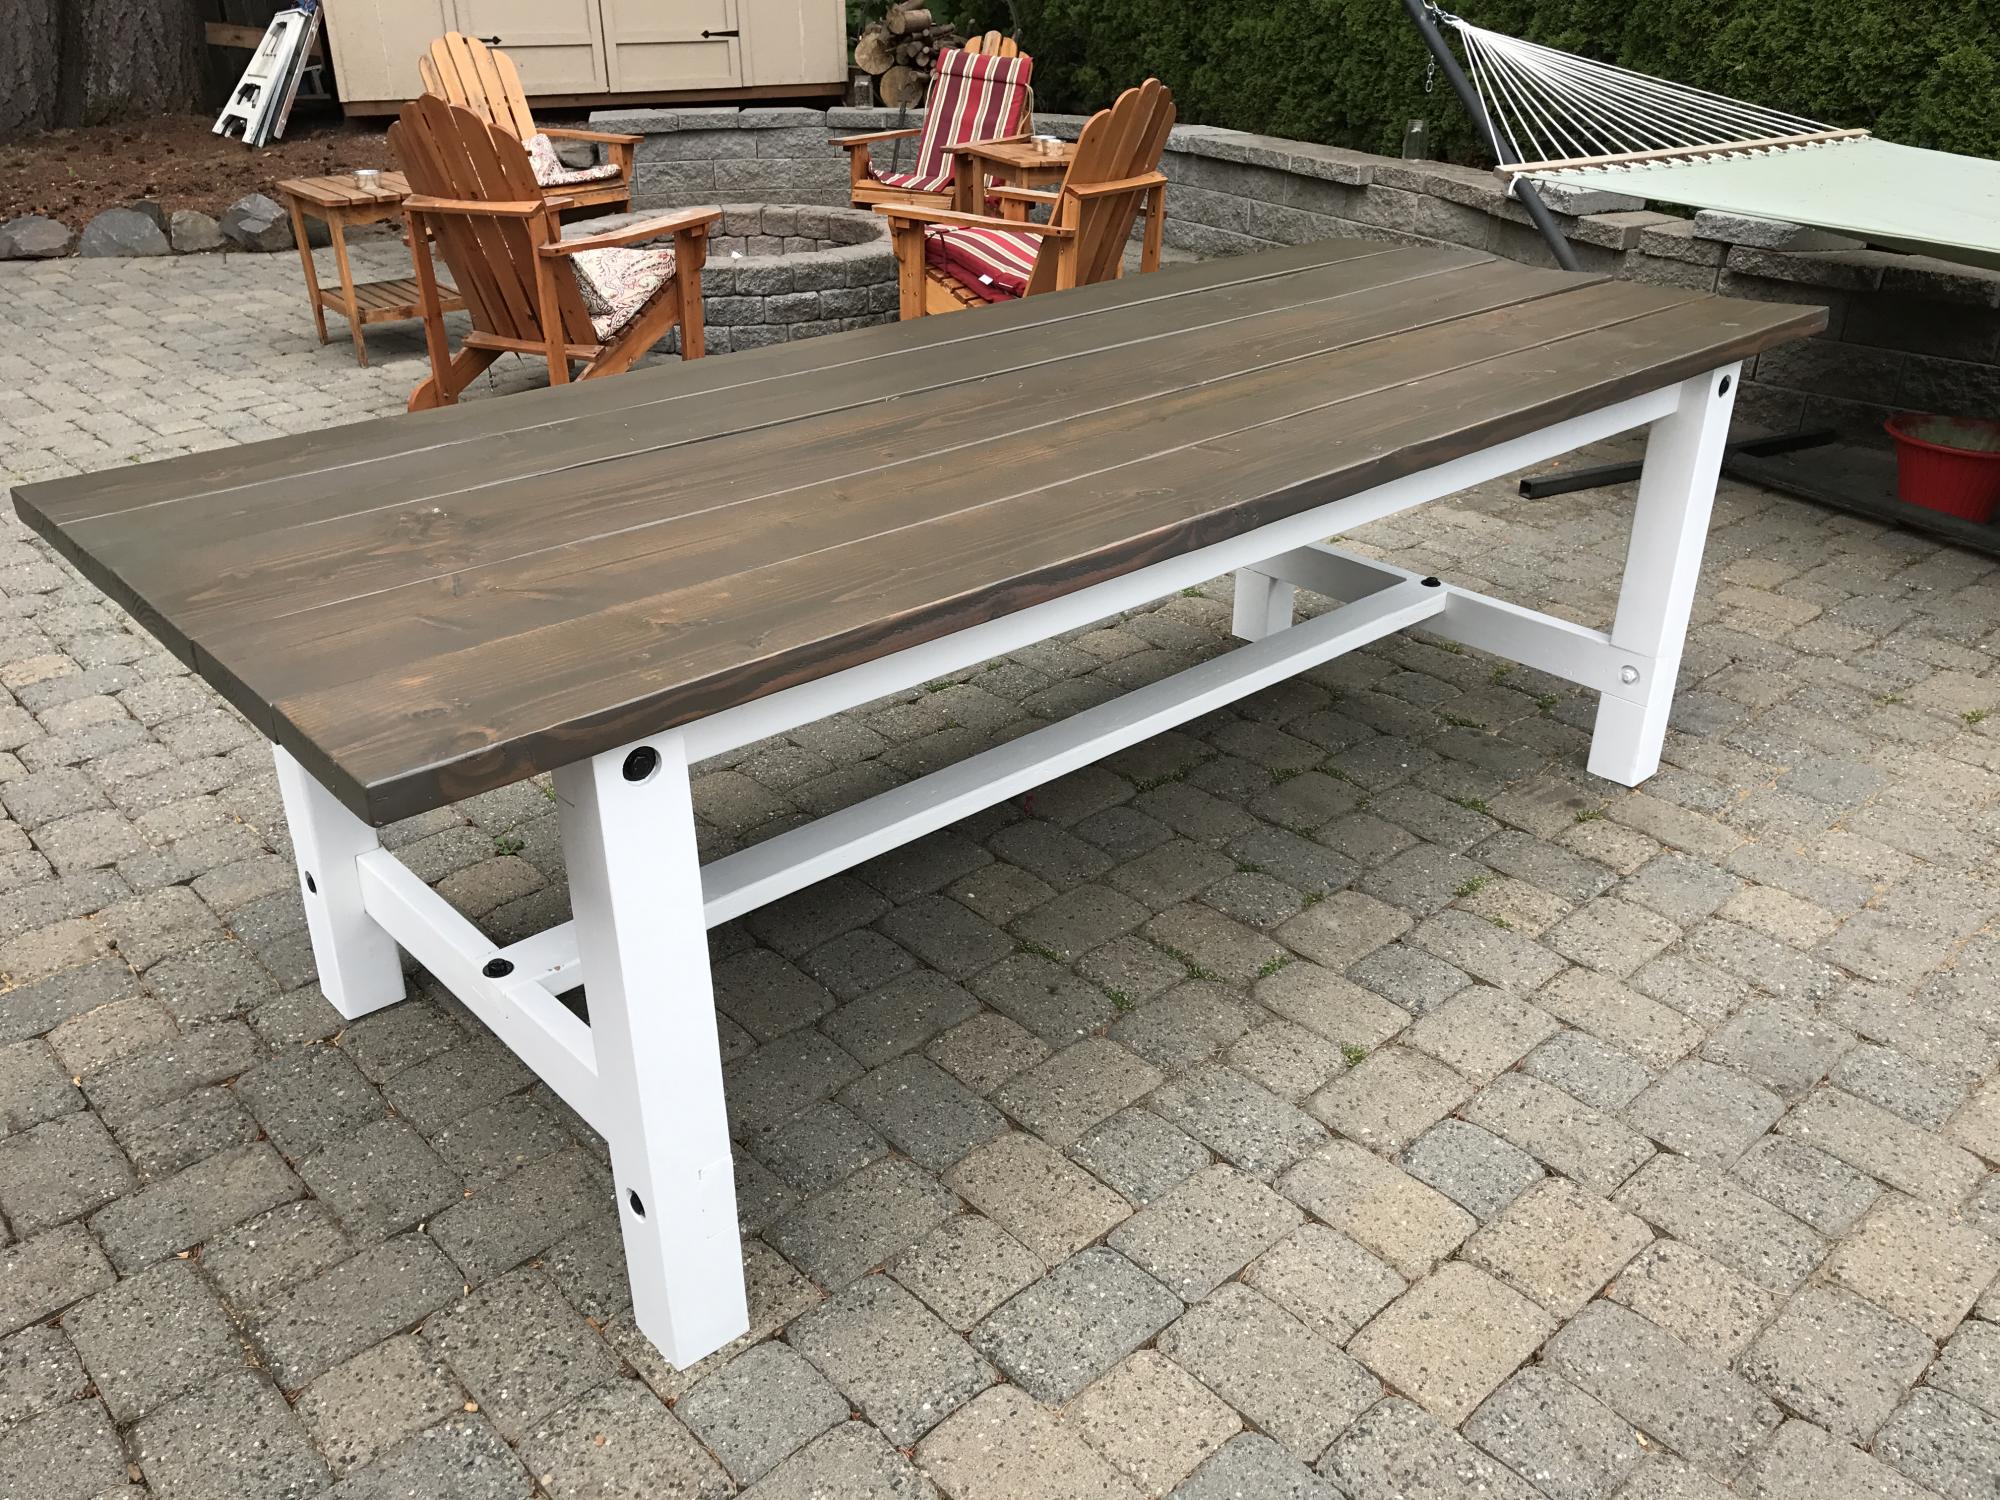
Farmhouse Table for 10(ish)

Submitted by Anonymous (not verified) on Thu, 07/13/2017 - 12:43

We wanted a patio table to fit up to 10.  Done with a mix of pocket holes & 1/2" hex bolts. Made small changes to the stretchers. Moved them inside because we liked that aestetic better.  We made the top longer because we didnt want to do the breadboard ends. Used big 4" hex bolts & washers and painted them with "hammered steel" paint to give them a more vintage look.

Will be making the matching benches next. We wanted the benches to fit perfectly underneath the table for storage, so Ill be cutting the bench seats to fit under table leg to leg. 

Estimated Cost
Wood materials including paint, stain & varnish, bolts & deck screws ~<$200.
(i didnt have a kreig jig, so that was another $40 at HomeDepot)
Estimated Time Investment
Weekend Project (10-20 Hours)
Finish Used
- Behr Paint & Primer - Ultra White exterior 2 quarts
- Varathane Briar Smoke
- Varathane Spar Exterior - satin (i shoulda used natural/matte, to reduce shine, but its gonna hold up well outside)
Recommended Skill Level
Intermediate

Porch Swing - I LOVE IT!

Submitted by MelanieG on Sat, 04/11/2015 - 15:38

I've been wanting to build this swing for a year now, and finally it's completed.  I LOVE it!  The modern design is perfect for our front porch as our home is more of a contemporary style.  It was the first project I've done using the Kreg Jig Kit, which is AWE-SOME!    

I modified the plan a bit:  I made the swing 52" long, and used 1x4's for the back support instead of 2x4's.  I also upgraded the top and back 1x4's and 1x6's to poplar wood so the grain would be finer.  The plan was simple to build.  Thank you for your blog and providing plans!  There are other things on your site that I look forward to making.


Built from Plan(s)
Estimated Cost
$150
Estimated Time Investment
Weekend Project (10-20 Hours)
Finish Used
Stain and polyurethane
Recommended Skill Level
Beginner

Comments

Michael K

Sun, 04/12/2015 - 06:29

That porch swing looks great! I have to say that its a great addition to an already sweet looking porch area you have there.

Washer/Dryer Platform Pedestal

Submitted by Dimarc67 on Fri, 04/17/2015 - 10:45


THE MOTIVATION
After a recent washer outage (that I was ultimately able to repair myself), my wife and I talked about eventually replacing our front-loading washer/dryer set.  One of the bullets I hate biting is paying the exhorbitant prices for the matching pedestals for new washer/dryer sets.

Having just bought a good set of cordless powertools, and having watched my father when I was a kid build countless household fixtures, window dressings, furniture pieces, etc., I decided to try my hand and construct a permanent platform for our current washer/dryer set, thereby eliminating the need to ever buy manufacturer pedestals again.

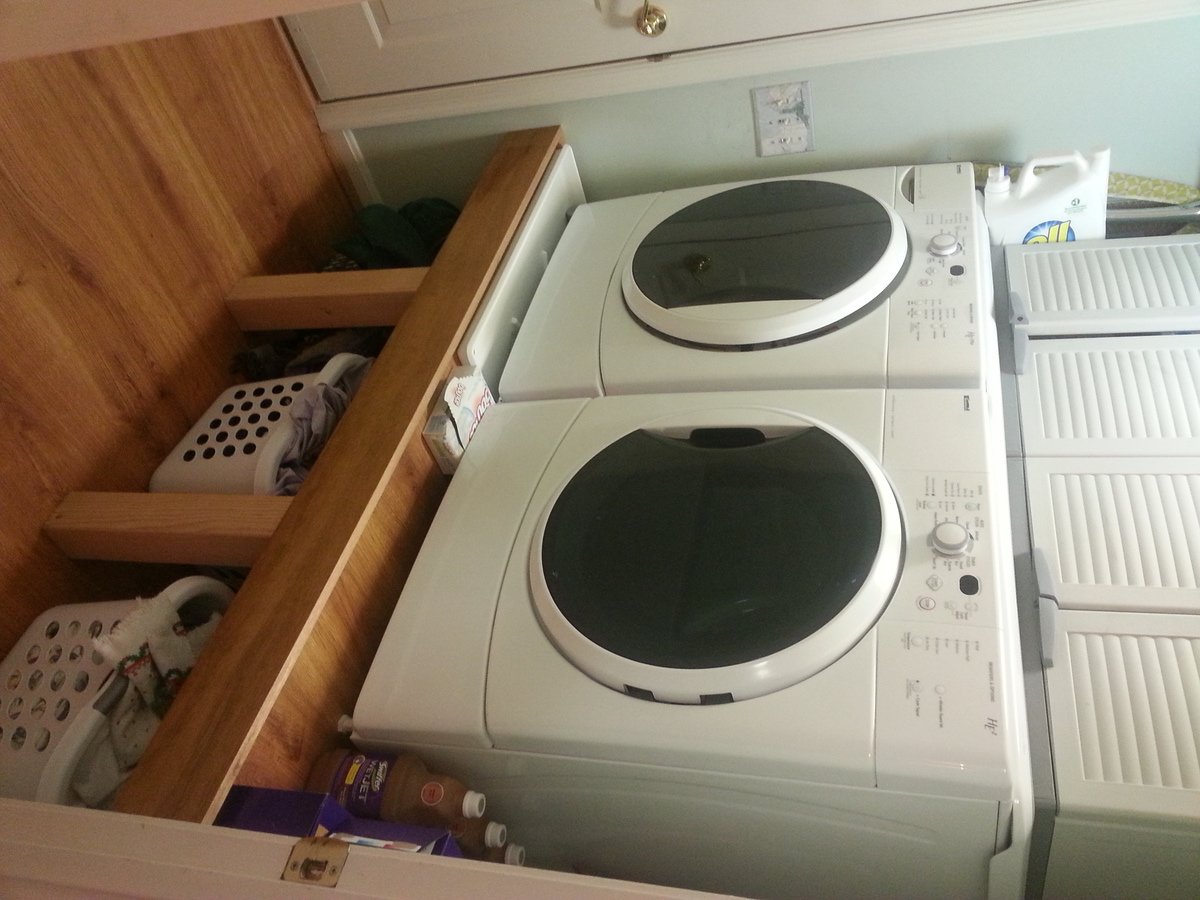
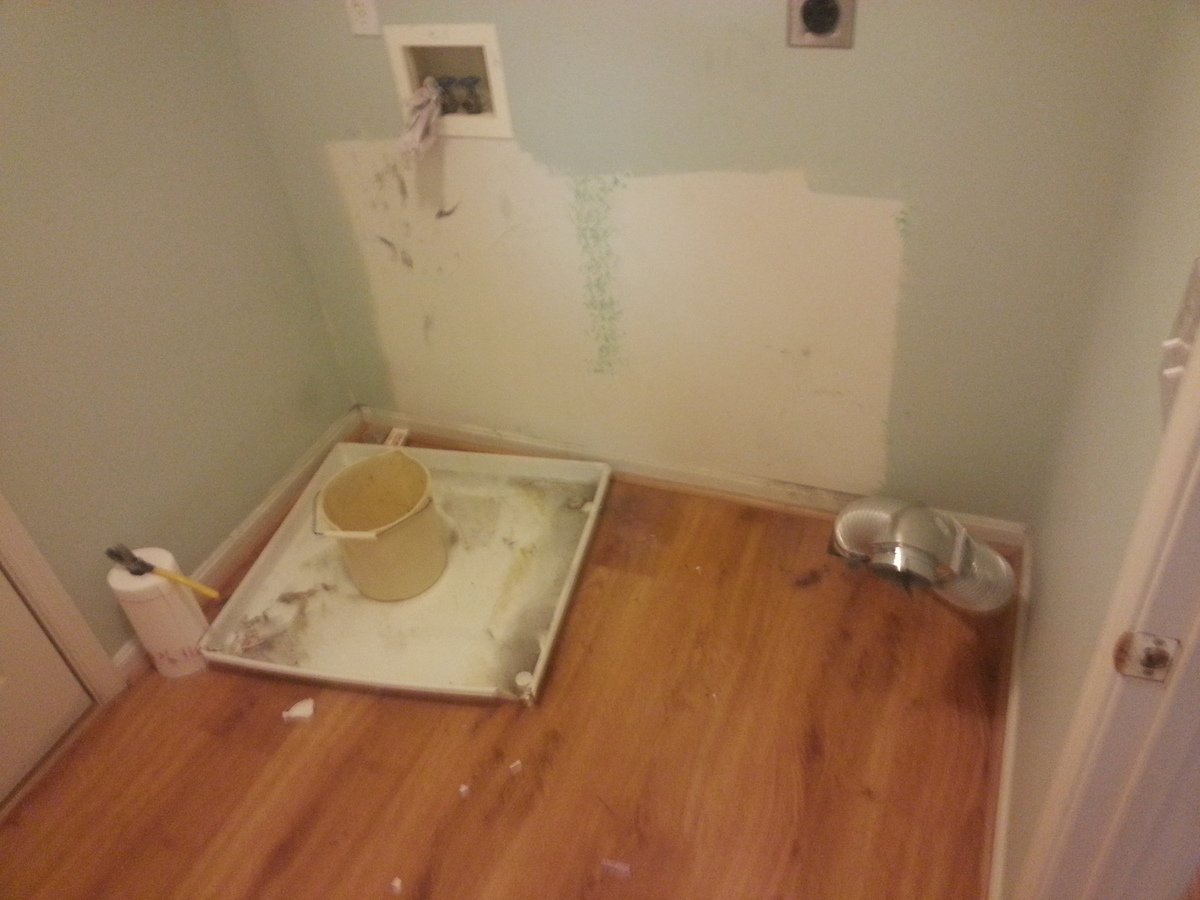
The existing pedestals were a standard 15" high, with a storage drawer, which we felt was still not high enough for comfort.  And, the washer pedestal drawer was entirely inaccessibl due to the 2" walls on the washer drain pan, so its drawer was totally useless, wasted space.

And, lastly, we really wanted more space for clothes baskets full of laundry, which we generally stacked (full and haphazardly) on top of the machines.


THE CHALLENGES
The largest challenges were mainly logistics, and gravity.  The washer/dryer would have to be unavailable for at least 2-3 days while they sat disconnected in the next room waiting for their new home.  So I coordinated with the family so they'd know when they needed to have their laundry done, or tough it out until I was done.

There was no way to know for sure what the drain connection for the washer pan looked like until I got the washer out.  So it was a small gamble that I'd be able to get the parts needed to extend the drain pipe up to the new platform right when I was ready for them.  Fortunately, this was no issue at all.

The biggest challenge turned out to be toward the end when it came time to lift our 230-lb. washer onto the new platform.  I seriously considered disassembling the washer to the point that I could remove its molded concrete counter-weights, but instead (and arguably stupidly) elected to use a large hydraulic car jack to raise the washer.  This ultimately worked, but I have to STRONGLY ADVISE AGAINST trying this.


THE SPACE
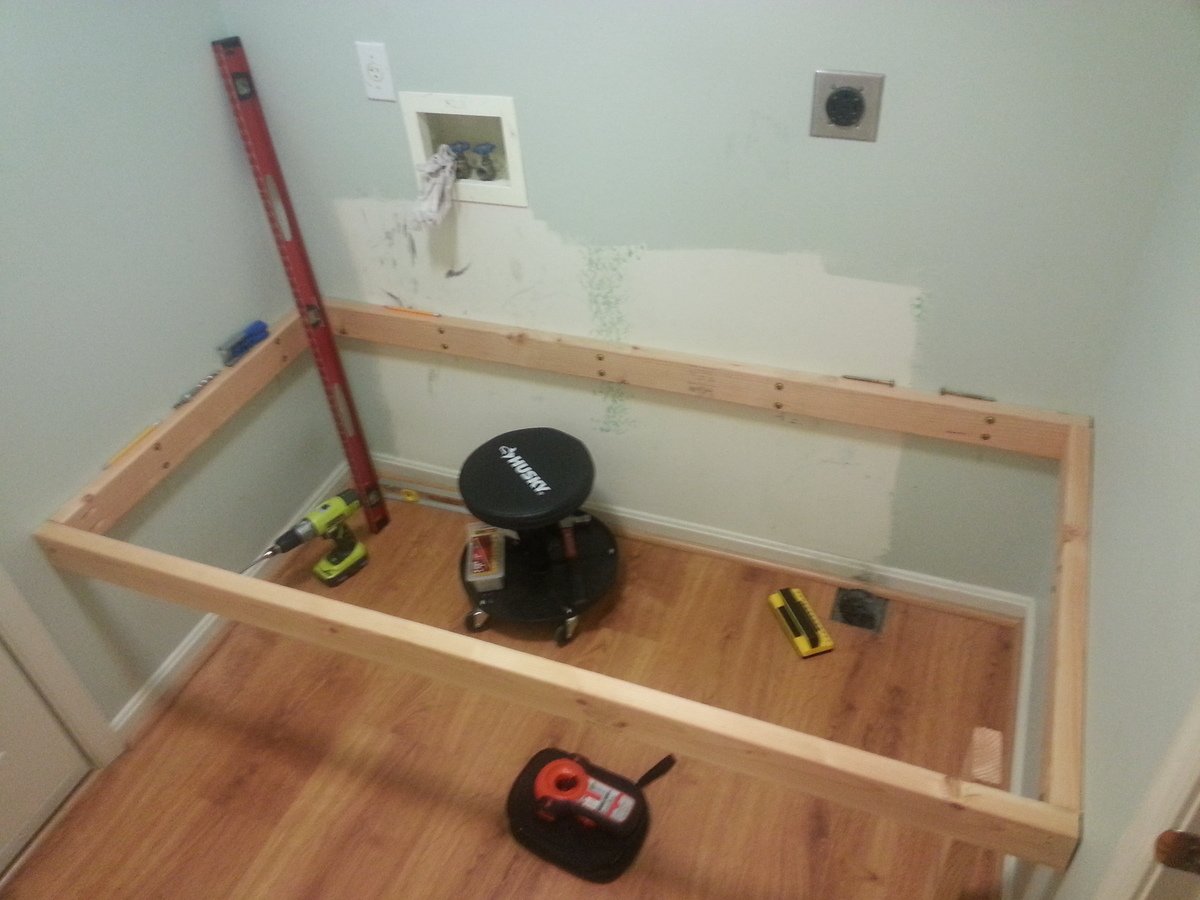
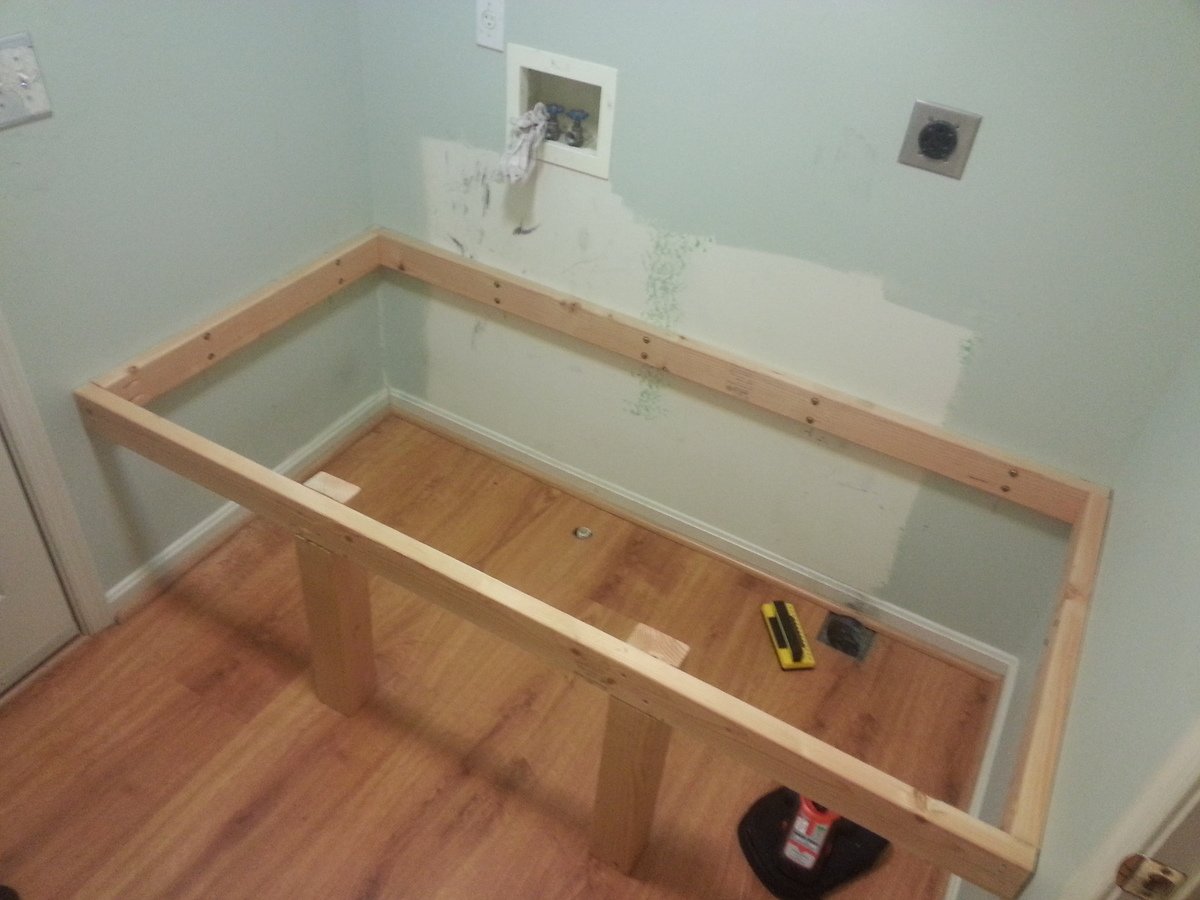
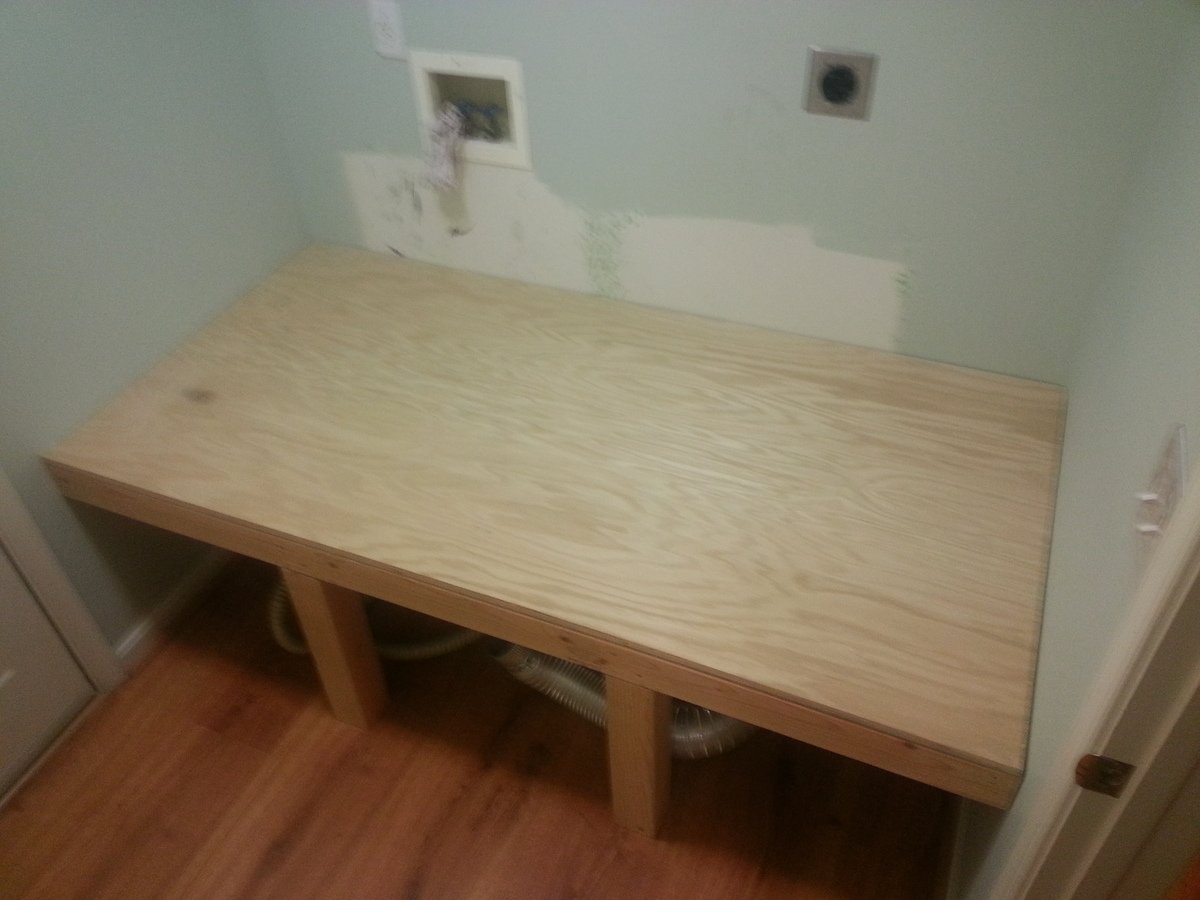
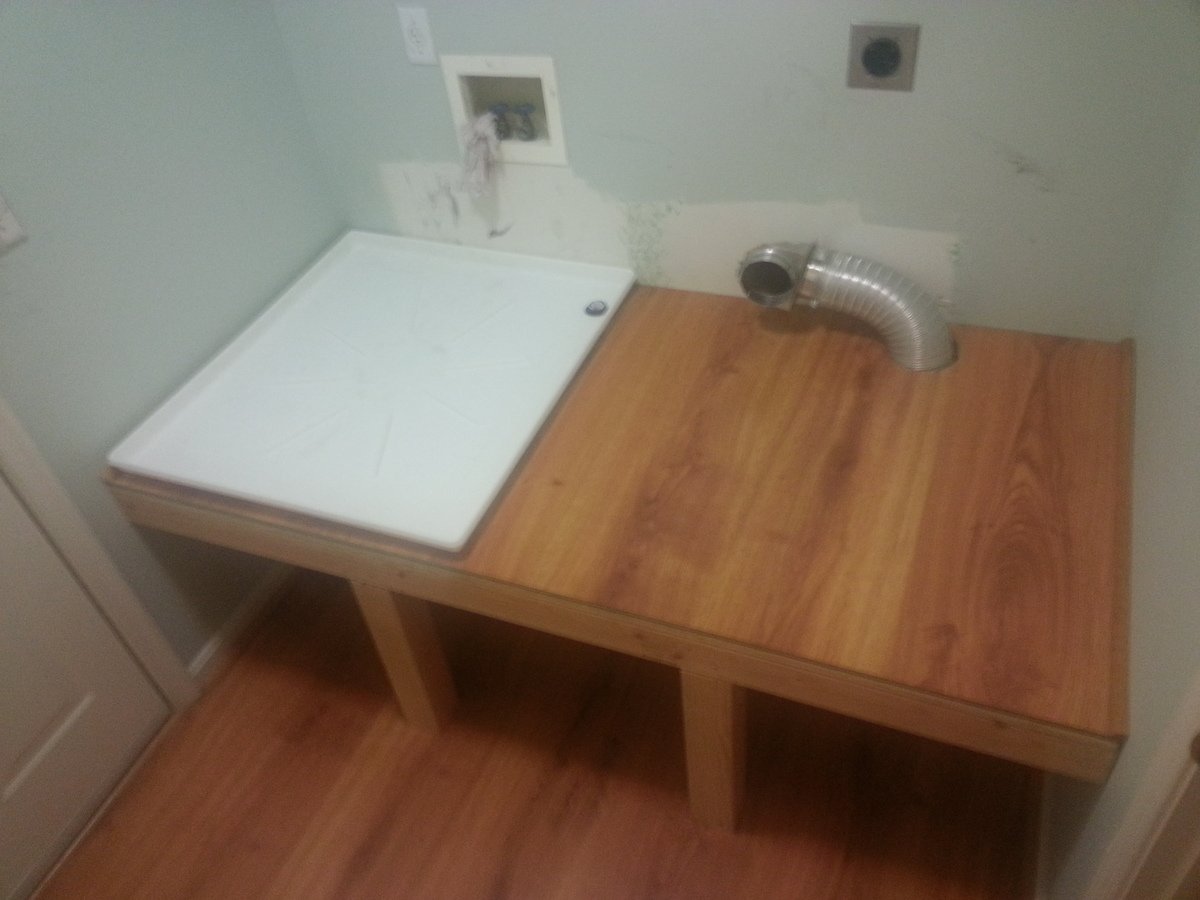
Our laundry room is also the "mud room" between our kitchen and the garage.  It is only large enough for the two machines, and the walk way between the two doors--in total, about 70.5" square.  Building the platform from wall-to-wall made the most sense, and minimized framing by fastening edge framing directly to the wall studs. 


THE PLAN
Pretty basic:  2x4's all around for the edge framing--back and sides fastened directly to the wall studs, and front 2x4 supported by two, notched 4x4 legs.  3/4" plywood for the subsurface, and 1/4" laminate faux-wood flooring on top (left over from reflooring, so it matches the floor below).  Bore holes for the washer pan drain and the dryer vent.  1" quarter-round molding on the sides, and 5.5" face piece flush with the top of the molding across the front (spare lauan I had looks perfect).  I also made a point of putting the machines on the platform before the face piece since it might have been in the way or damaged.

Anyone will tell you that it's best to at least sketch out what you want to do so you can minimize surprises, forgotten parts, etc.  I, of course, did virtually none of that, and made several course changes and corrections along the way.  For this project, I was lucky that I didn't need to backtrack at any point, and probably won't learn this lesson any time soon anyway.  However, you SHOULD.


TAKE-AWAYS
The main mistake I made was while gathering the platform dimensions for cutting the plywood.  It was only blind luck that kept me from having to do it more than once (and having to buy more than one 4x8 sheet).  I know that it's actually very unlikely that two adjacent walls are perfectly square, so I made a point to measure the width between the walls at the back and at the front--and, sure enough, found a 1/8" difference--wider at the front.  But when I measured and marked the plywood for cutting, I measured both distances from the precut edge, and then cut.  By doing this, I inadvertently assumed that one of the back corners was perfectly square. 

What I should have done was used a carpenter's square in each back corner to extend a square line from the back edge to the front, and then measured from the square lines to their respective side wall.  This would have accounted for neither back corner being square.

Fortunately, my mistake wasn't big enough to keep the plywood from fitting, but it was very, VERY close.


GIDDY
I honestly couldn't be happier with the finished project (or more smug).  We've raised the washer/dryer 9" higher than they were (24" off the floor), and we now have basket storage underneath all the way across.  I placed two 24" plastic cabinets on top, which still leaves room for the detergent right over the soap inlet on the washer.

And, most importantly, I got to use every powertool I own.  Kinda beats "the quick brown fox jumped over the lazy dog" thing, huh?
 

Estimated Cost
Most of my project made use of spare lumber and materials I've had on hand forever. The 4x8 sheet of plywood was about $30 at Home Depot.
Estimated Time Investment
Weekend Project (10-20 Hours)
Finish Used
Natural. No finishing, staining, or painting. Lauan has a natural stained oak coloring, so it was perfect for the facing. (A soft wood, Lauan--"lao-AHN", also sometimes called "Philippine Mahogany" simply for the darker color--used to be as readily available as pine, but I haven't seen it in stores for many years.)
Recommended Skill Level
Intermediate

Comments

Kids Storage Bookshelf

Submitted by Malka on Wed, 09/13/2017 - 00:29

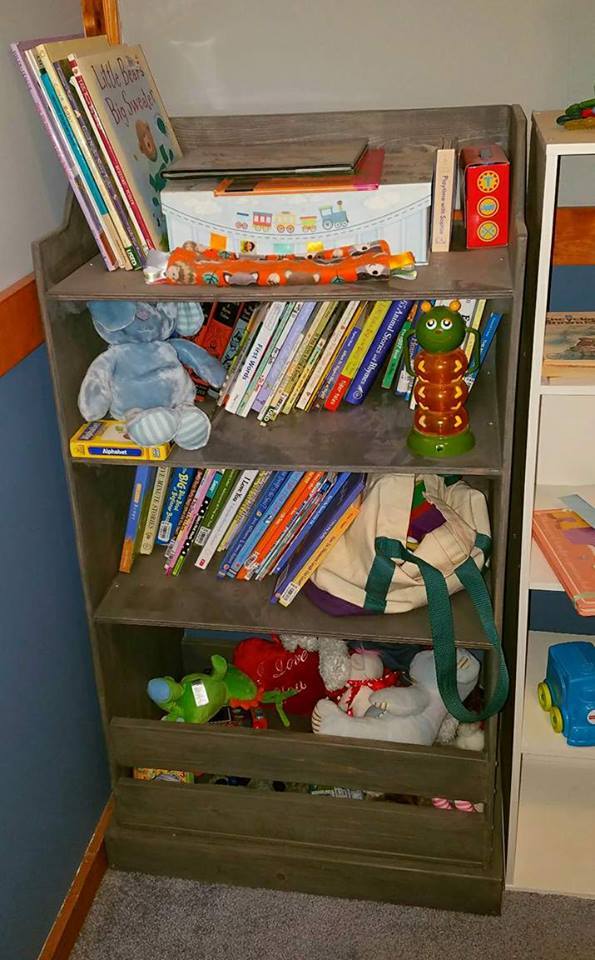
Project was super easy to build, and fits a TON of books and toys. Perfect for our nursery. Stained in Minwax Classic Grey with a satin poly finish.

Built from Plan(s)
Estimated Cost
$100 +/-
Estimated Time Investment
Weekend Project (10-20 Hours)
Finish Used
Minwax Satin Polyurethane
Recommended Skill Level
Beginner

Funky Step Stool

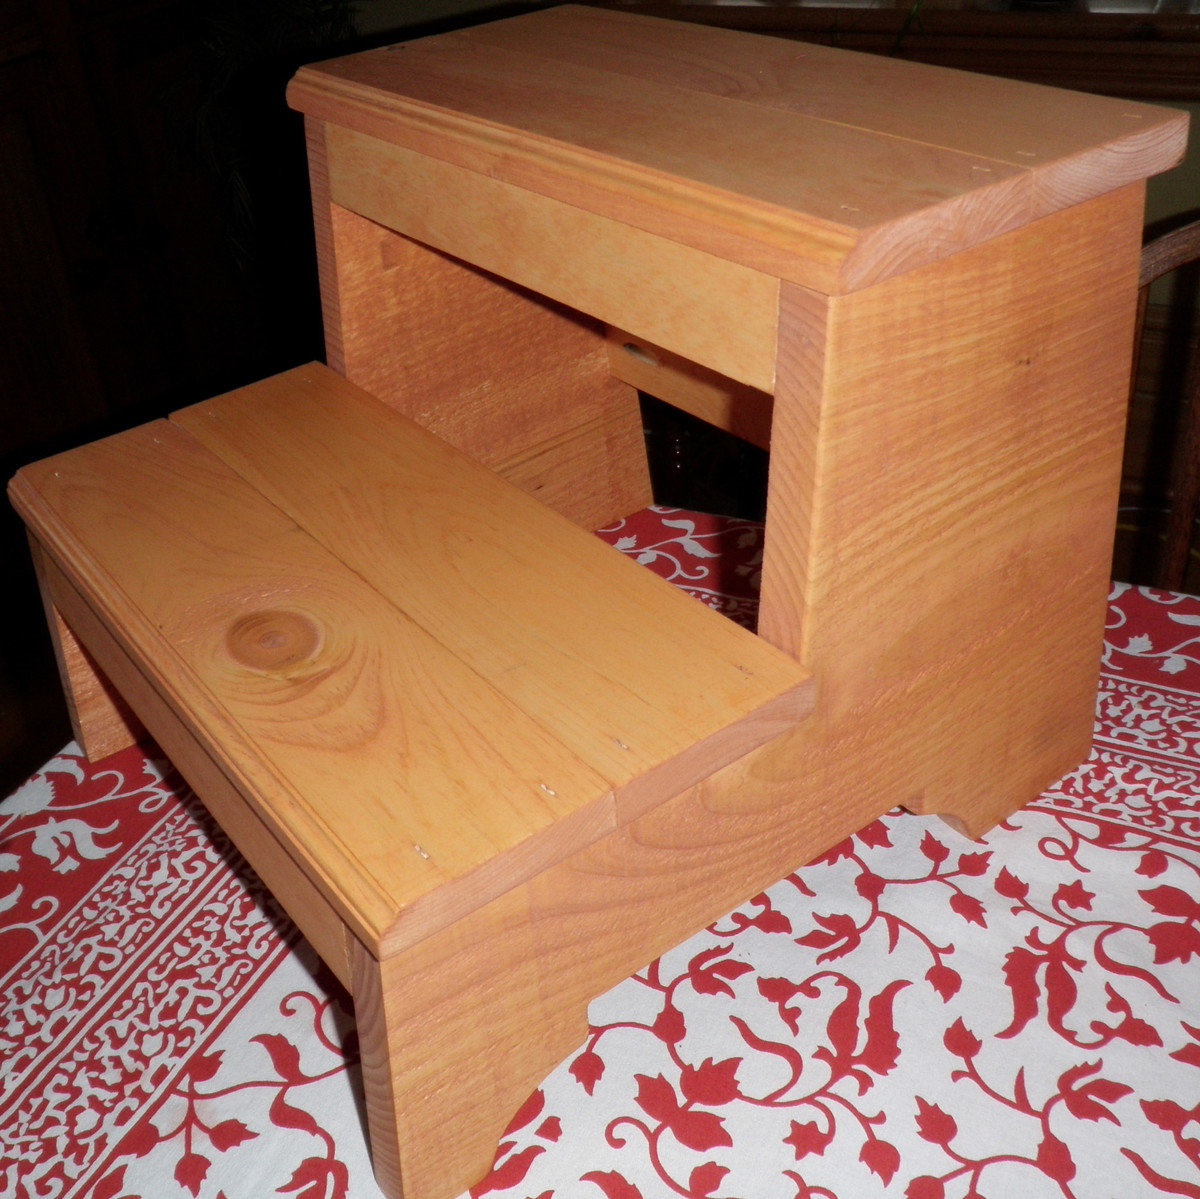
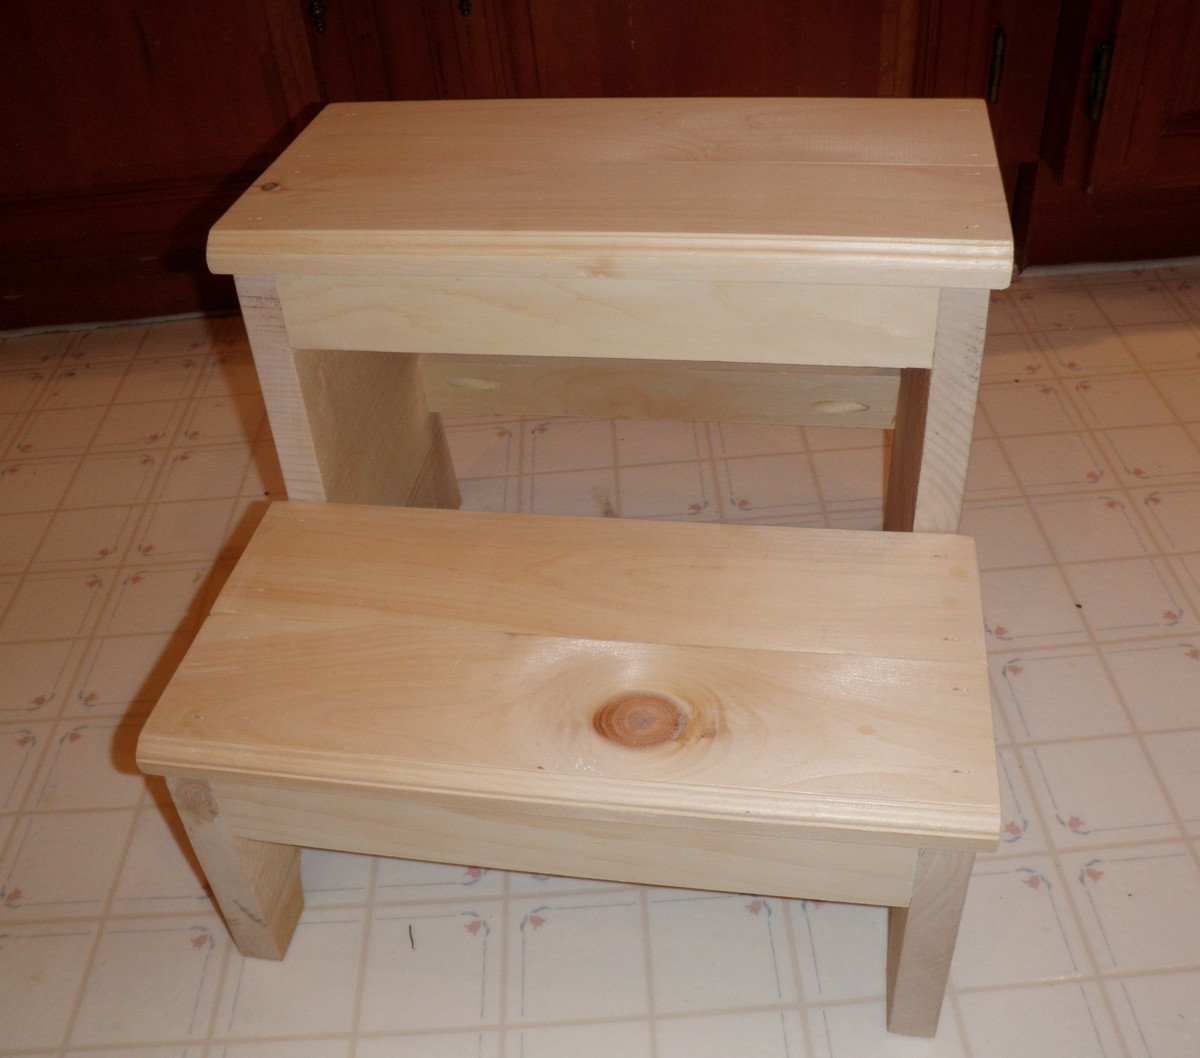
I kept coming across photos of this step stool plan in the brag pages and felt very envious that I hadn't seen it before I built the other set of steps!  So I decided I likely had enough scrap wood lying around I could make one for our upstairs bathroom too!
I used two pieces of pine rough barn board for the sides and for the treads I used 1x4 scraps I had, two pieces that already had an edge routered in them from some trim I did for my sons World Map Mural. 
I used my Kreg Jig for everything except the treads which are nailed.

I'm thrilled with it!  It's nice and light and easy to move around and holds up my little guy with no trouble!

Estimated Cost
Free! I used leftovers!
Estimated Time Investment
An Hour or Two (0-2 Hours)
Finish Used
miniwax colonial maple rubbed on with a rag, no topcoat. (we'll see how it wears... didn't want a slippery finish.)
Recommended Skill Level
Beginner

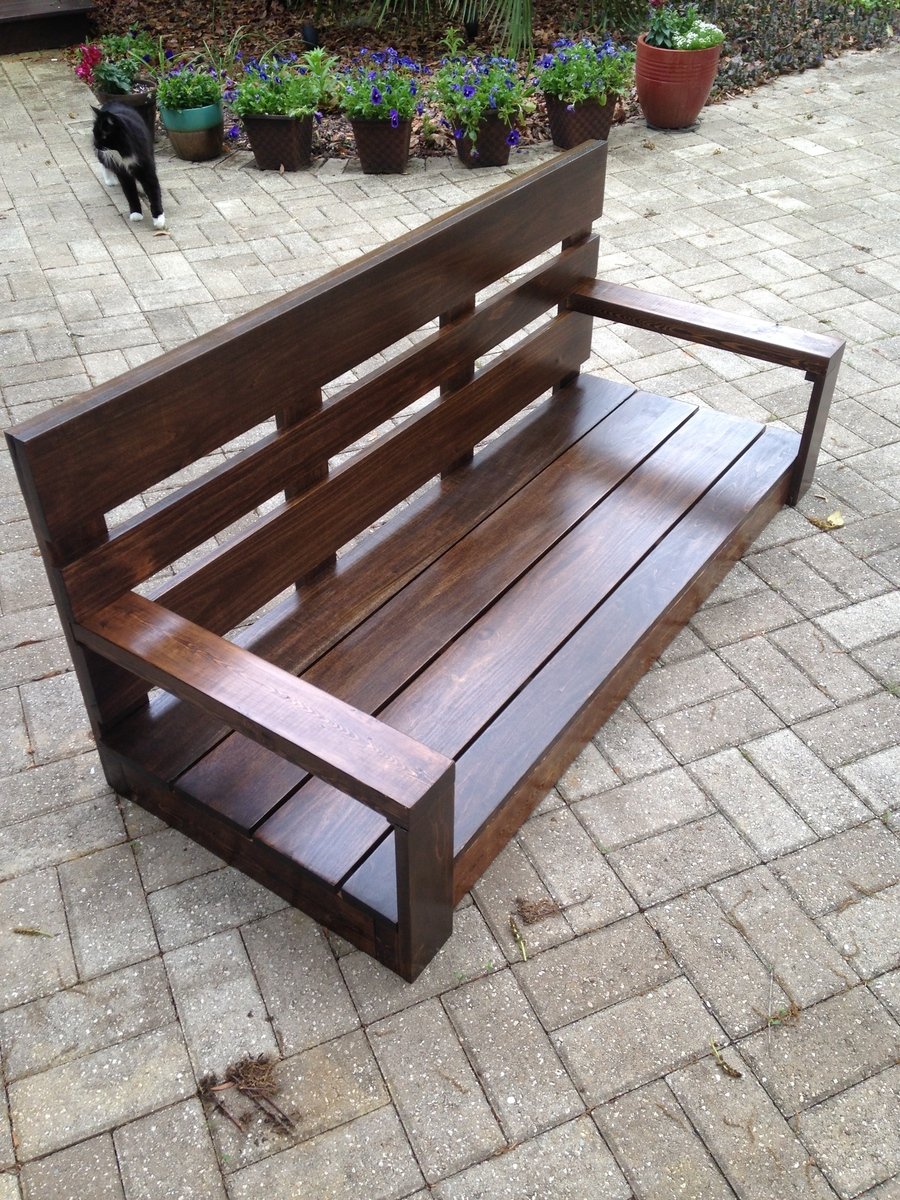
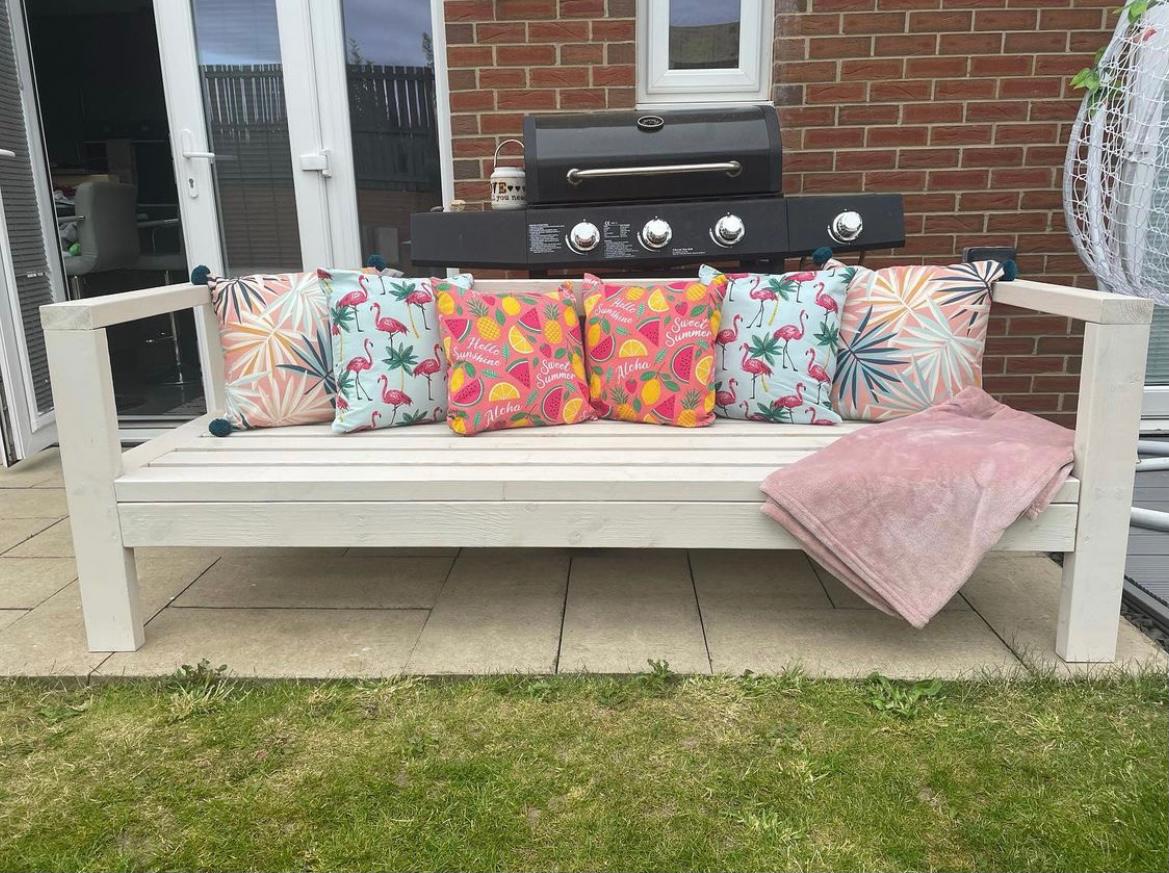
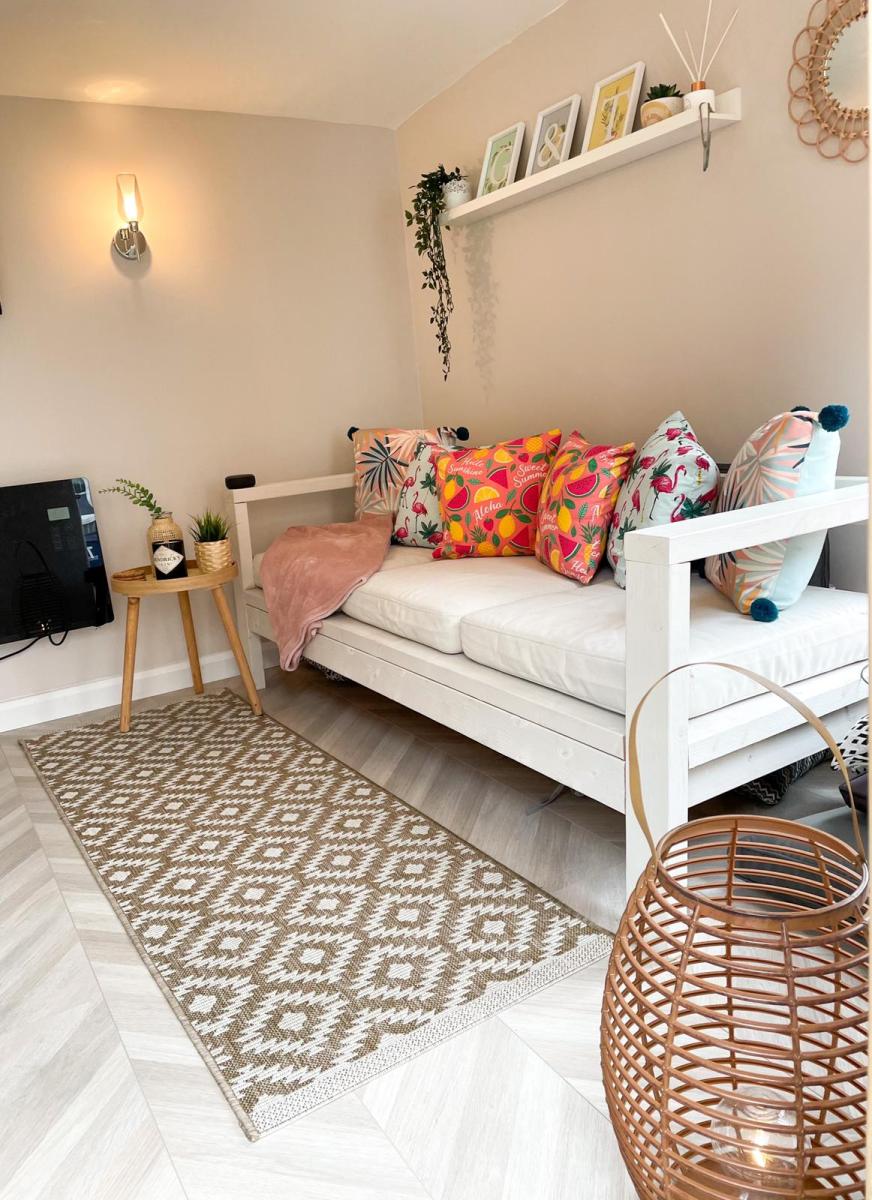
Outdoor Sofa

Submitted by Anonymous (not verified) on Fri, 11/05/2021 - 14:13

Perfect seating for our new summerhouse, loved how easy it was to build. Thanks so much for the free plans and making the easy to follow videos

Built from Plan(s)

Comments

Cubby Storage System

Submitted by beckysnest on Fri, 04/01/2011 - 11:04

This was my first building project ever! Even though it took longer than I expected to complete (I have four tiny kids and snagged an hour here and there during nap time over the course of many months), it was absolutely worth the time investment (and wait)! Hanging the doors was tricky (my awesome husband tackled that part), but other than that it was easy to put together. Finishing it was the hardest part by far. If I were to do it again, I'd probably do some preliminary sanding of the boards before putting them together and I would most certainly not use oak (I was talked into it by the HD guys) especially since I ended up painting it. I think it would have turned out just as great if I'd used a cheaper wood or MDF. Thanks for the plans Ana!

Estimated Time Investment
Week Long Project (20 Hours or More)
Finish Used
Started with two coats of Behr Ultra Interior Satin (paint w/primer) color matched to Martha Stewart Barn Red (sanded between coats). After one final (light) sanding to distress, I finished with one coat of Ralph Lauren Glaze in Tobacco that I had on hand (brush on one side of surface and then quickly wipe away excess with an old rag--moving the rag in the direction of the wood grain). The glaze brought out the wood grain more and helped tone down the exposed wood.
Recommended Skill Level
Beginner

Outdoor Sofa Finished!

My first furniture building project!

Built from Plan(s)
Estimated Cost
$800NZ (including cushions)
Estimated Time Investment
Weekend Project (10-20 Hours)
Finish Used
Stain
Recommended Skill Level
Starter Project

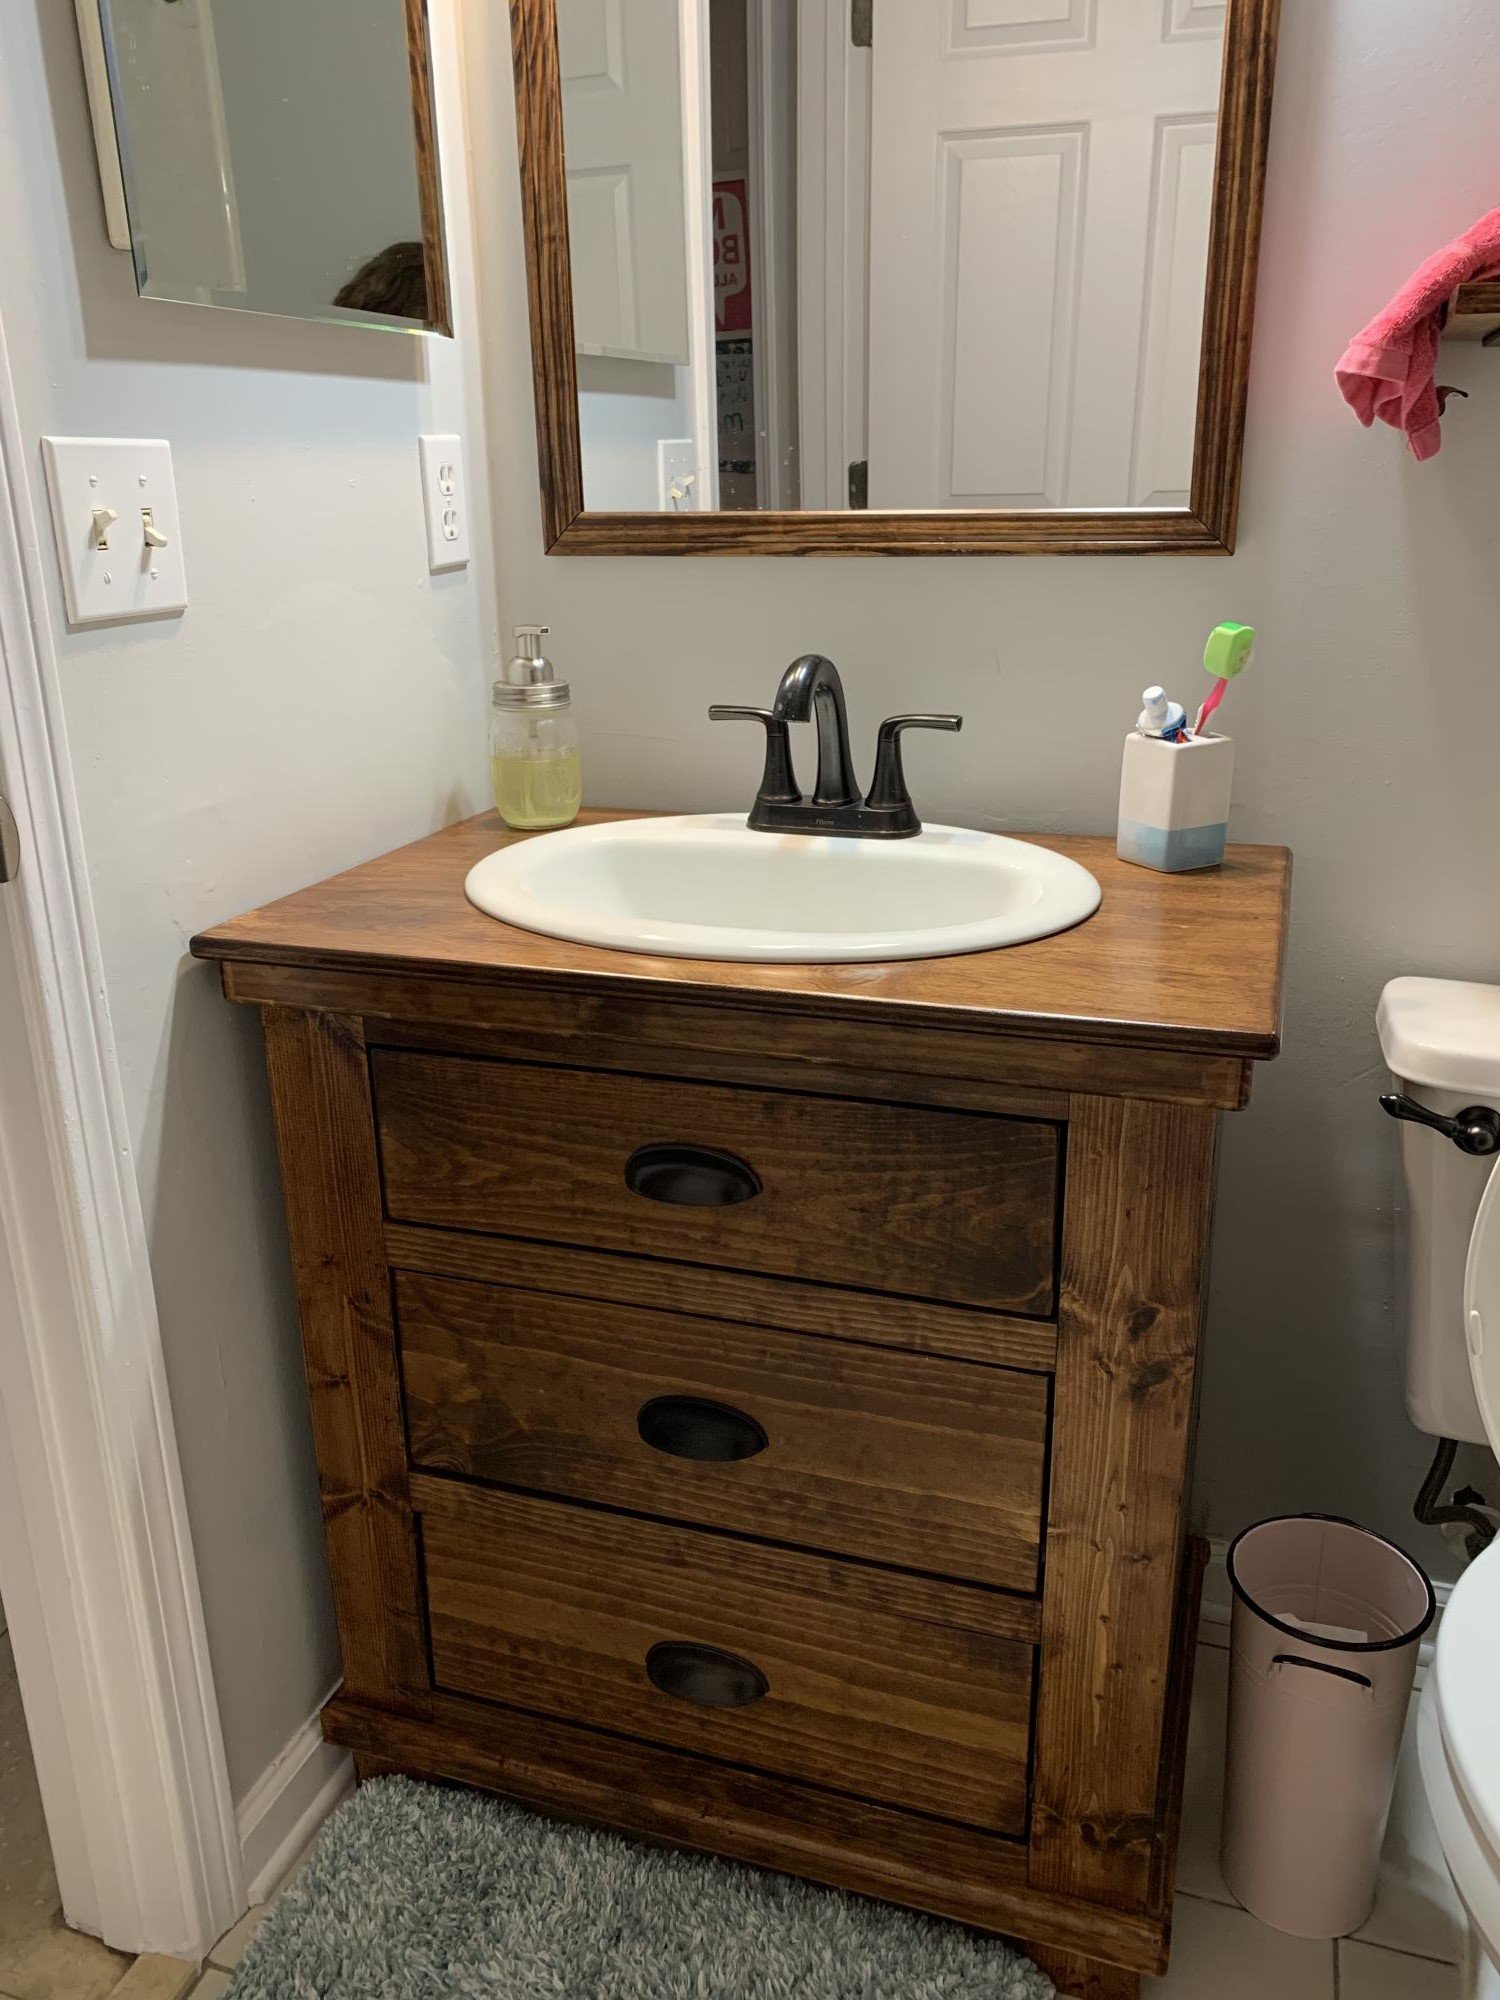
Rustic Bathroom Vanity

Submitted by ivyfamily5 on Wed, 12/15/2021 - 09:51

I built Ana Whites Bathroom vanity with drawers. I love how easy the plans are to follow and even adjust. I tweaked the measurements to fit the space I had. After supplies, I spent a bit less than a store bough vanity, and it is solid wood rather than the cheap materials the less expensive store bought one. It turned out beautiful! I also built the mirror frame and the shelves to match. Thank you, Ana, for your amazing website, plans, videos, and confidence to tackle the projects myself. My daughter chose the mahogany stain because she loved the way it sounds..."It's Mahogany!"

Built from Plan(s)

Comments

Christmas Gift

I built this as a Christmas gift. The overall length was shortened to 6' long, I only used two legs, however I built the bench with three legs overall length 6'.  Finished to match chairs purchased from overstock.com

Estimated Cost
$275.00
Estimated Time Investment
Weekend Project (10-20 Hours)
Finish Used
Custom with four coats of Simi gloss polyurethane.
Recommended Skill Level
Beginner

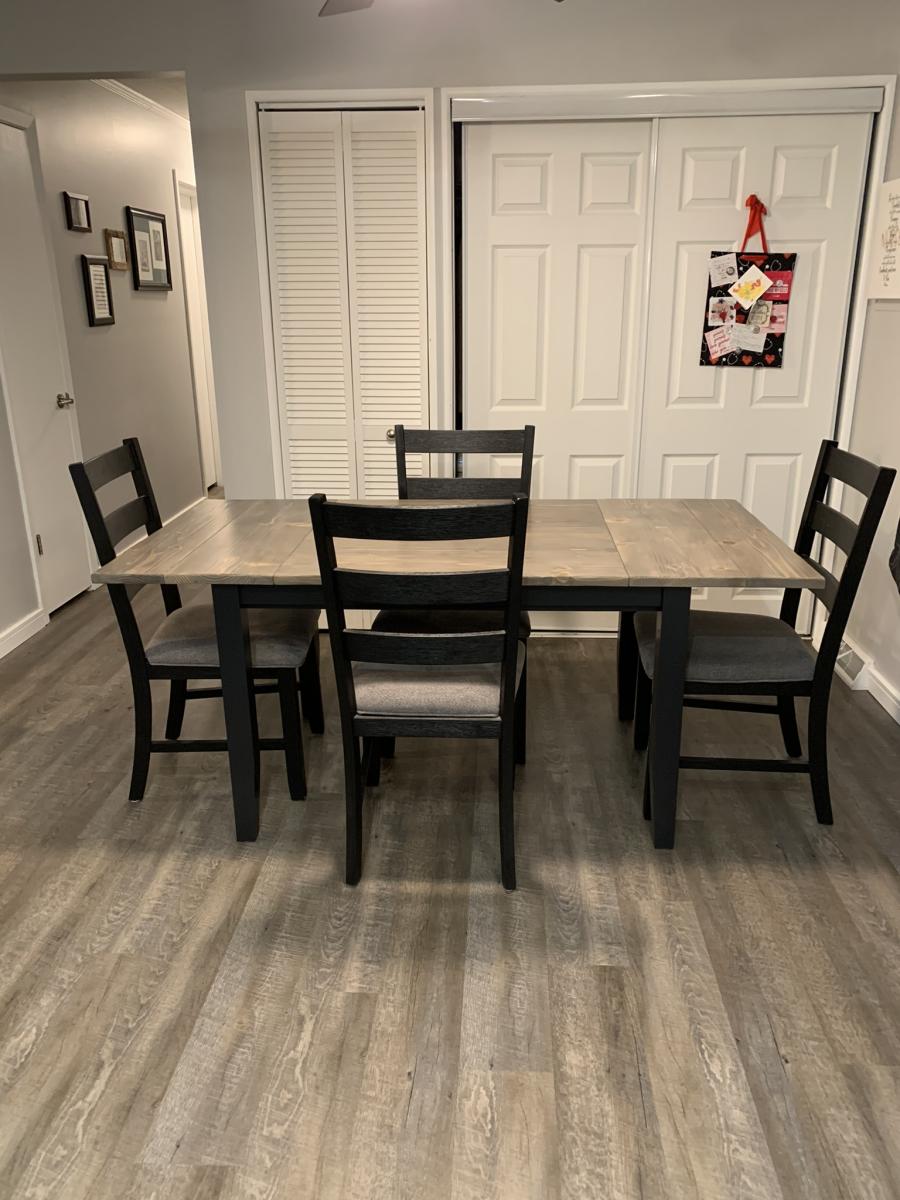
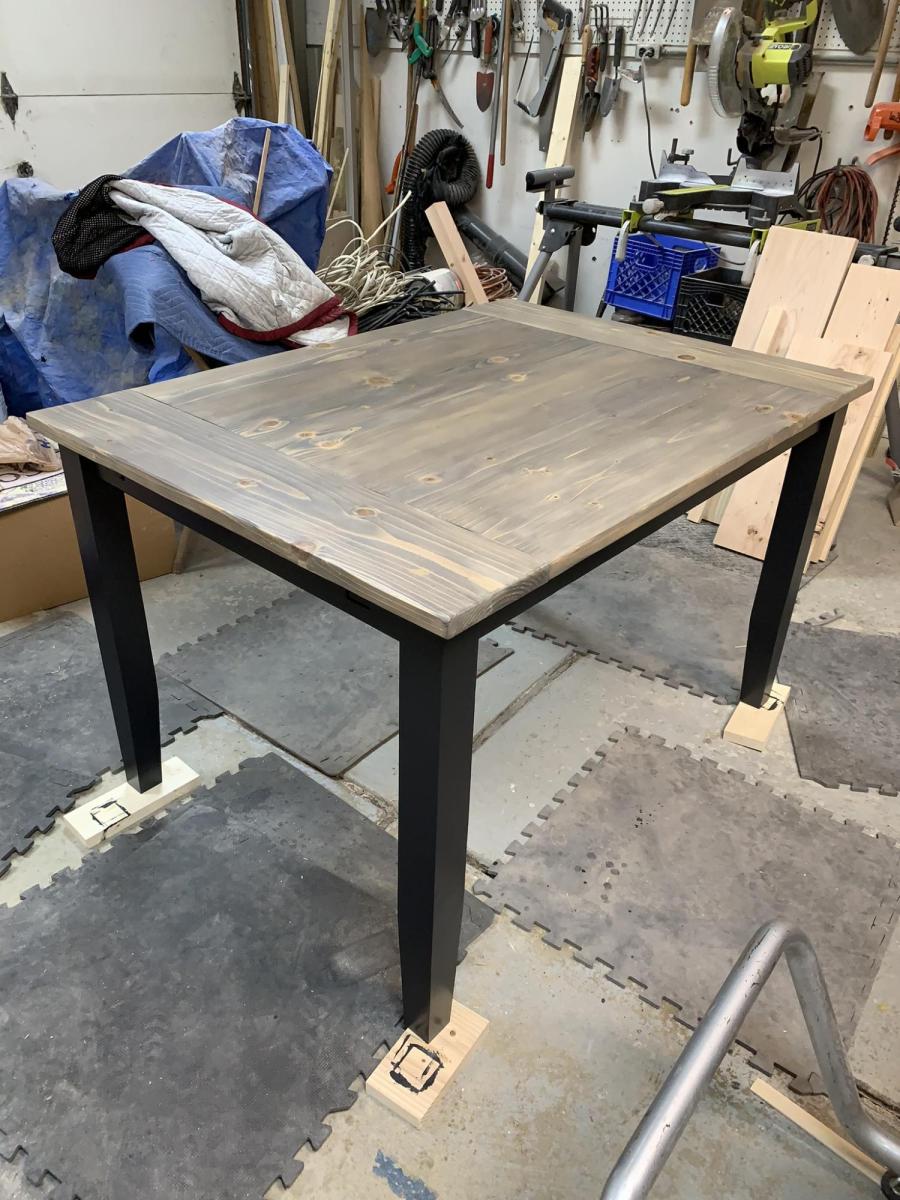
Farmhouse table with Leaves

Submitted by Anonymous (not verified) on Mon, 12/27/2021 - 06:02

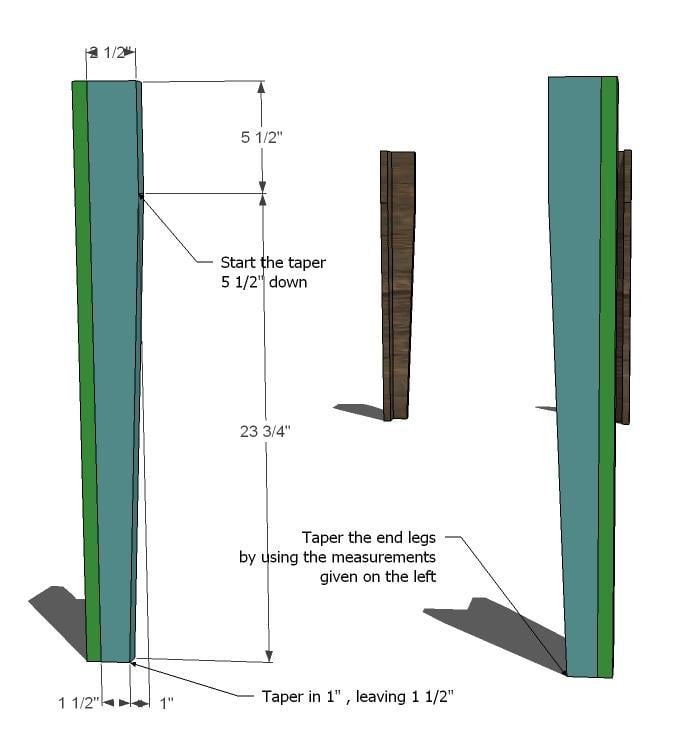
I built this farmhouse table with leaves for my daughter. I wanted a farmhouse look but with a modern twist, and I also wanted breadboard ends that would pull out so she could insert leaves on each end to increase the size of the table for company. I used the plans for concept, and actually used the updated farmhouse table plans with pocket holes but couldn't find the plan link again for this post but made several modifications to achieve what I wanted. I planed all the lumber down to a true 1 inch for the top and also the trim to reduce the weight and chunky feel. I planed 4 x 4 untreated lumber for the legs to 2 1/2 inches and then tapered the bottoms as well to reduce weight and chunkiness and create a more modern feel. I built actual channels on the base for the extension bars which attach to the breadboard ends and I attached table aligners to the table, breadboard ends and the leaves so things would stay straight and even. I also glued together 2 x 4 and 2 x 3 pieces that had been planed down to a true 1 inch for the skirting and treated them as one piece when attaching to the legs so I didn't have so many screws going into the legs. I painted the base black with furniture paint and then put 2 coats of polyurethane over that and stained the top gray, then used a and 'wash' of watered down black paint over that and then 5 coats of polyurethane on the top. The table is 36 x 48 without the leaves and extends to 70 inches when both leaves are in place. I'm quite pleased with how it turned out.

Comments

Convertible Classic Bunk Bed

Submitted by sharonw on Mon, 06/22/2015 - 22:24

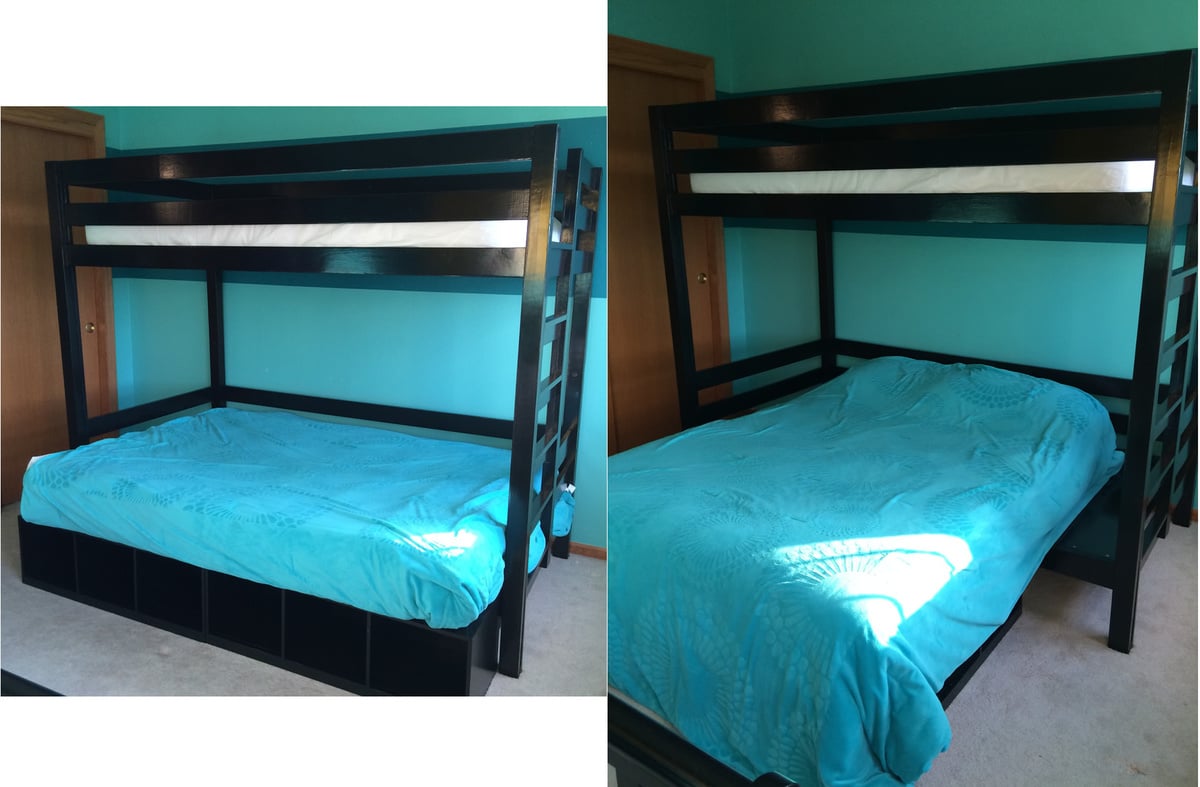
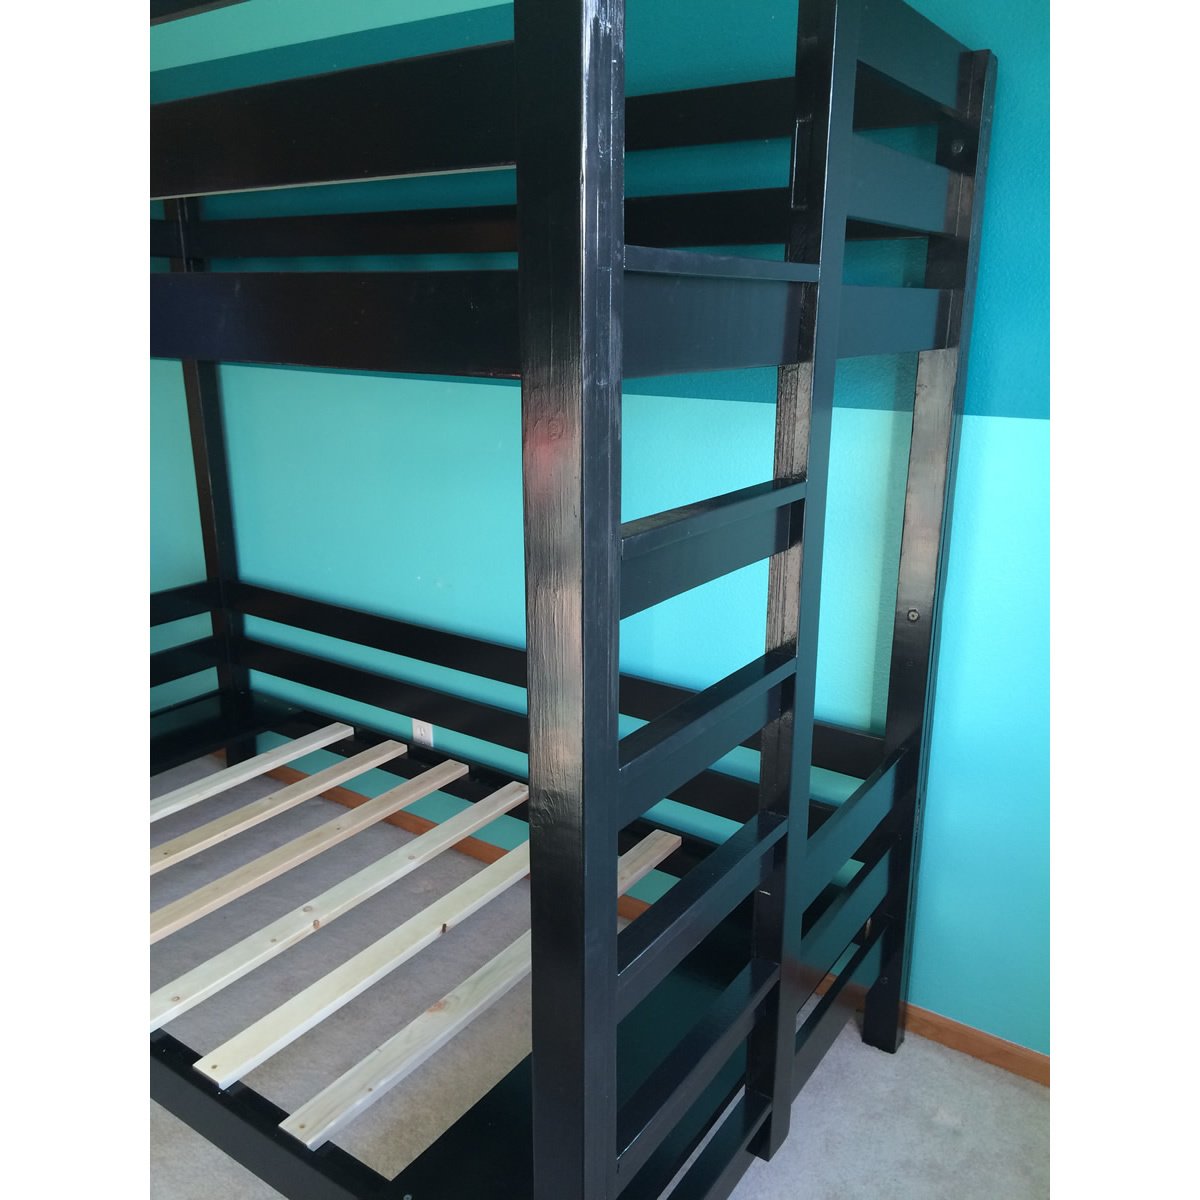
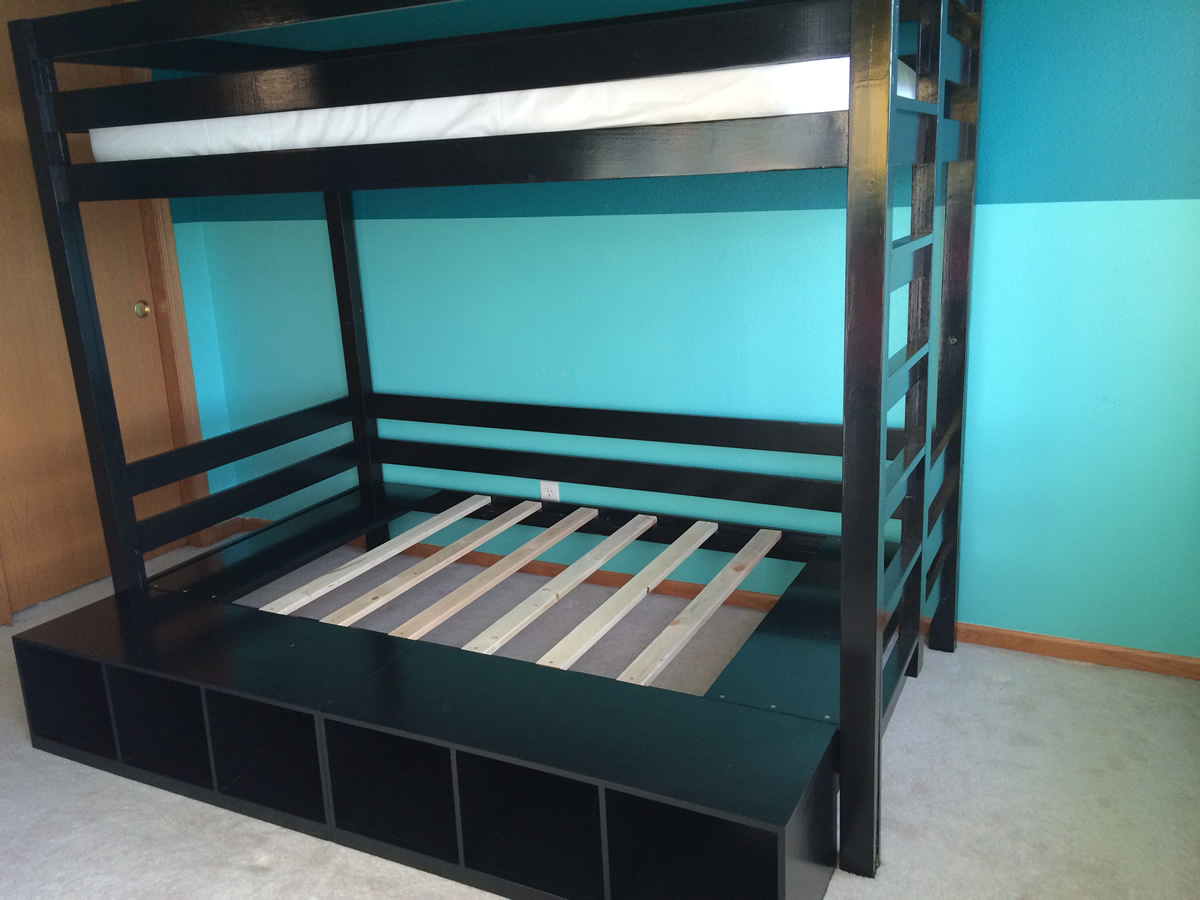
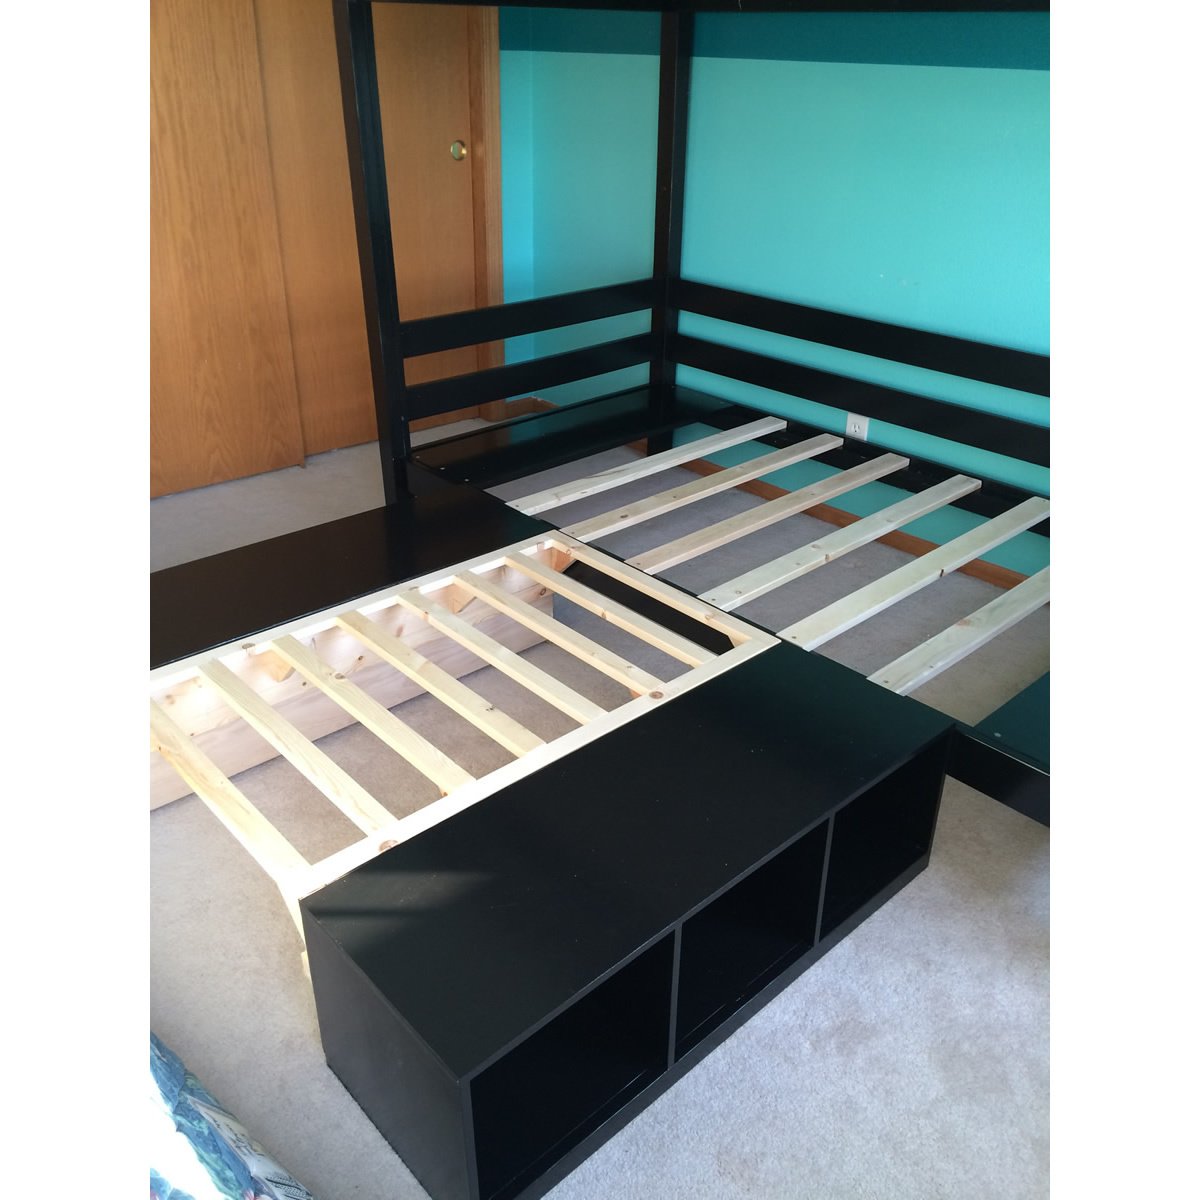
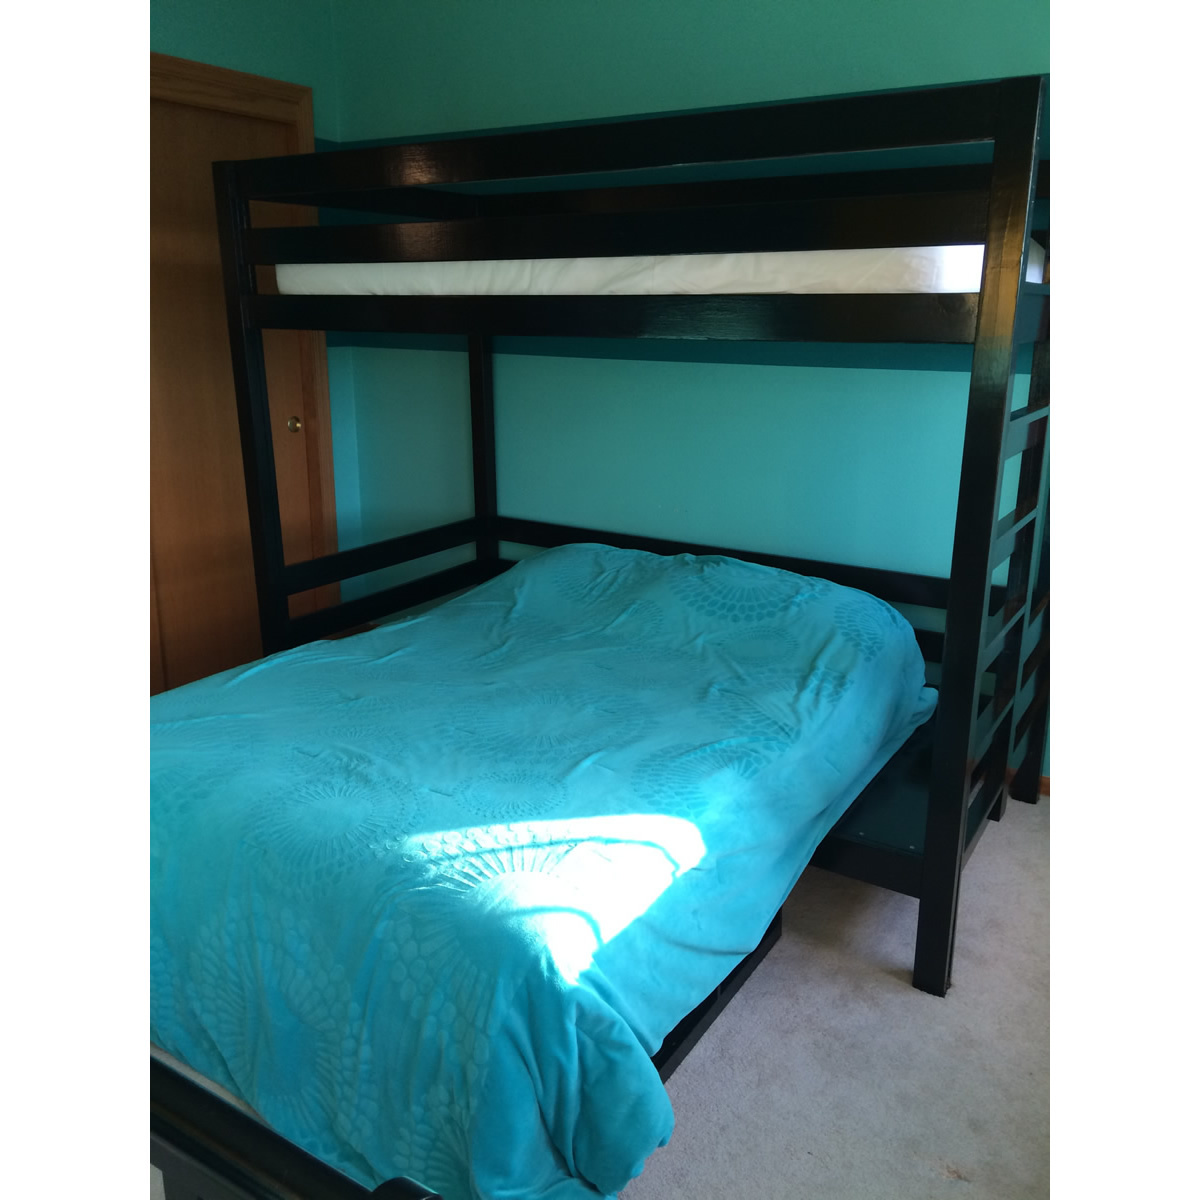
I modifed the Classic Bunk Bed and Cubby designs to create a convertible twin over full bunk bed. The bottom full-sized bunk can be rotated to be parallel to the wall (when my son sleeps there) or perpendicular to the wall (for when we have guests so they don't have to climb over one another). Changes I made were:

- I moved the ladder to the end of the bed to make room for the full-sized mattress.
- I added 1x2 treads to the ladder to make it easier on the feet.
- I raised the height of the top bunk. Finished height of the bed is 68" to add head room on the bottom bunk for taller people.
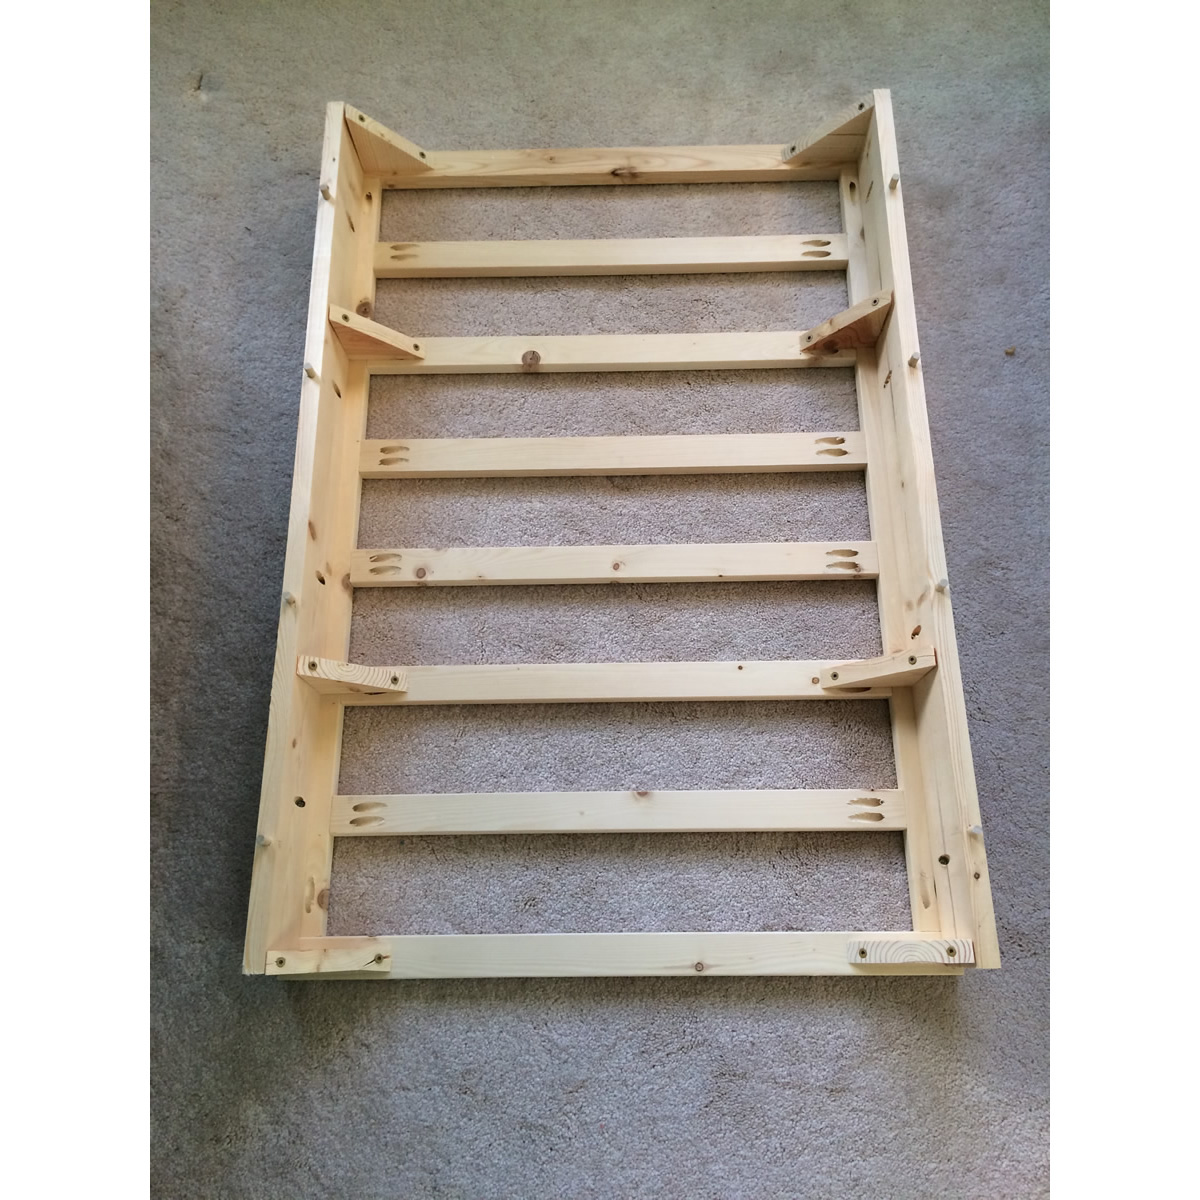
- I built 2 custom cubbies (full dimensions of each 37.5" x ~13.5" x 11.5") to support the added width of the full-sized bottom bunk. These cubbies can also be rotated to support the mattress in the perpendicular position for use as a guest bed (see pictures).
- I built an additional support that fits onto the back of each of the cubbies when they are turned to support the perpendicular guest bed (see pictures).
- I changed the end support rails for the bottom bunk to 1x12s that I painted to match the bed to be used as night stands when the bed is rotated to be a guest bed (see pictures).
- I used wood thread inserts and 1/4"-20 connector bolts (from Fastenal) to assemble the bed, so it would be easy to disassemble and reassemble.

Funny story - When we went to move it to the second story bedroom from the garage where I had finished it, the long sides wouldn't fit up our stairs!!! Our stairs have a tight 90 degree turn partway up. After all the hours I put in building and finishing it, I almost cried! Fortunately after using a straight edge blade to carefully cut through the paint, we unscrewed the upper most rail and were able to just barely get it up our stairs. I was so thankful I hadn't glued those boards on!

Estimated Cost
$200
Estimated Time Investment
Week Long Project (20 Hours or More)
Finish Used
1 coat primer, 2 coats Olympic ONE in their standard Black (satin), 2 coats Minwax polycrylic (satin - although I thought it looked shinier than I expected). All applied with a Purdy 3" angled brush.
Recommended Skill Level
Intermediate

Jelly cupboard

Submitted by Anonymous (not verified) on Mon, 12/27/2021 - 19:11

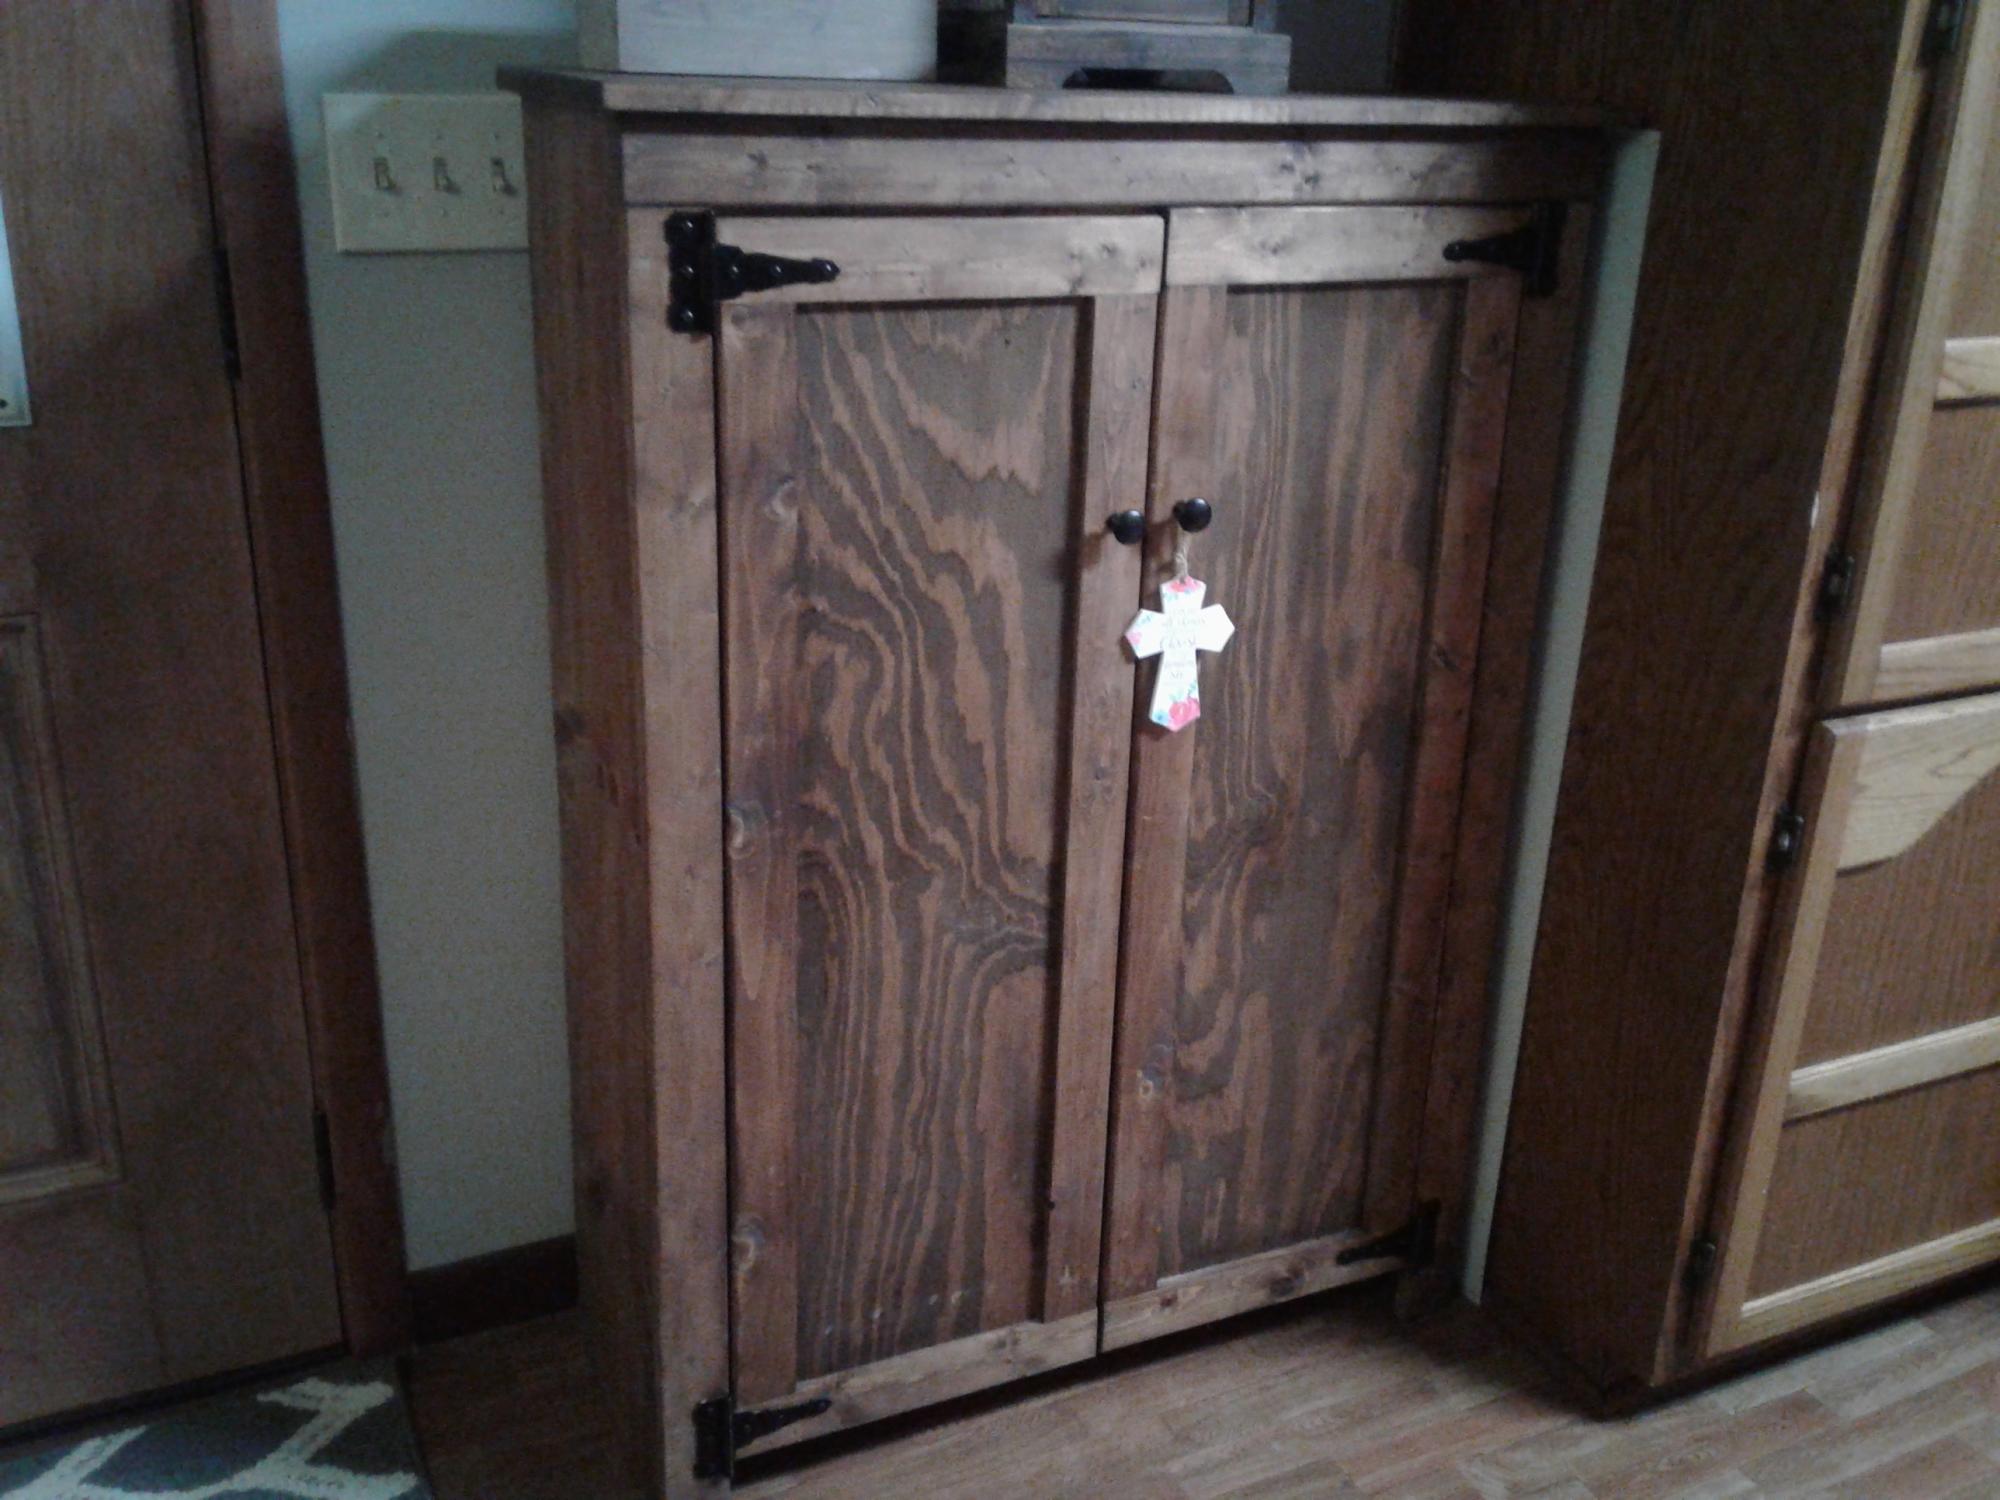
Made from Ana White `s plan. Thanks for the help.

Built from Plan(s)

Comments

Barn Door Console

Submitted by KKGaskin90 on Sun, 01/14/2018 - 14:58

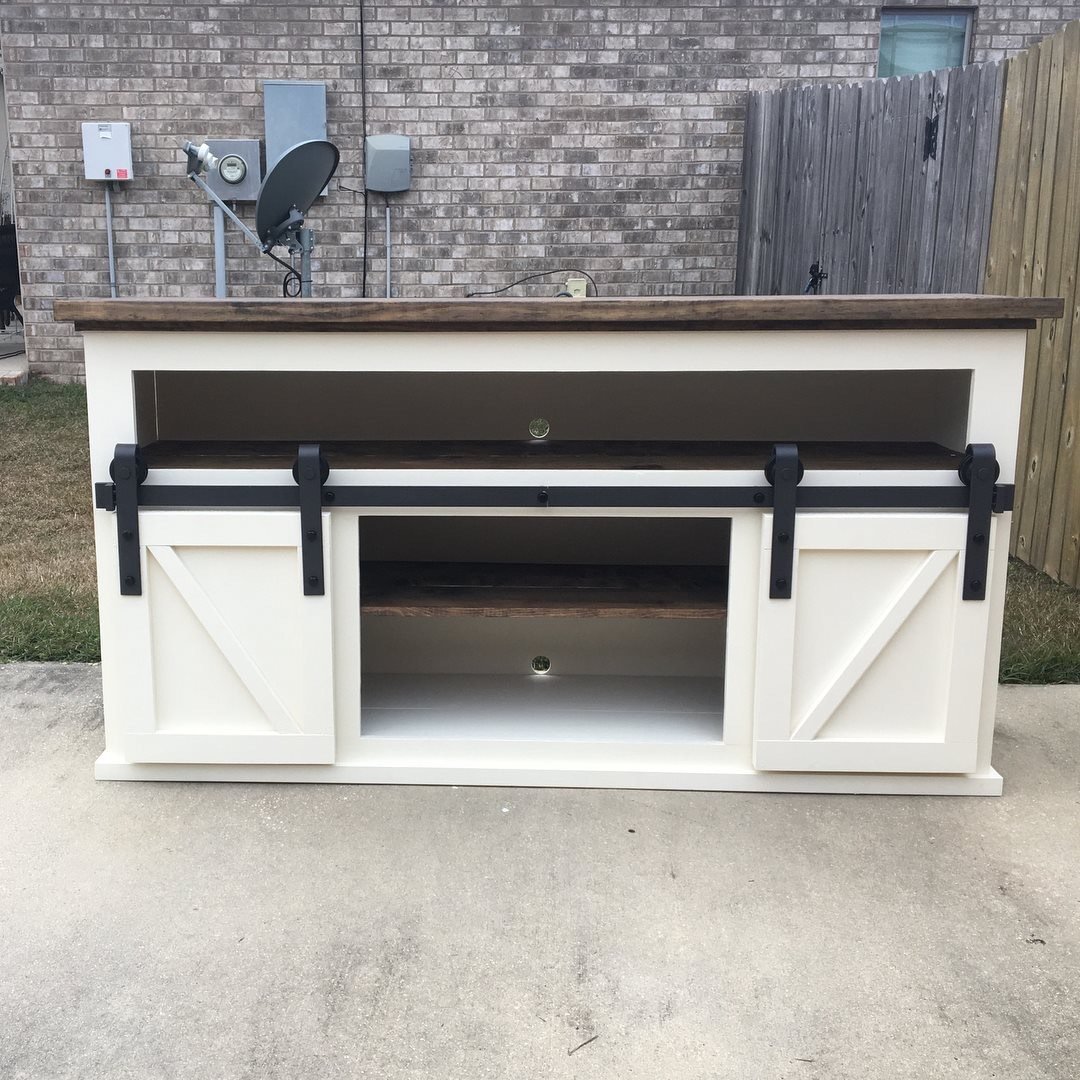
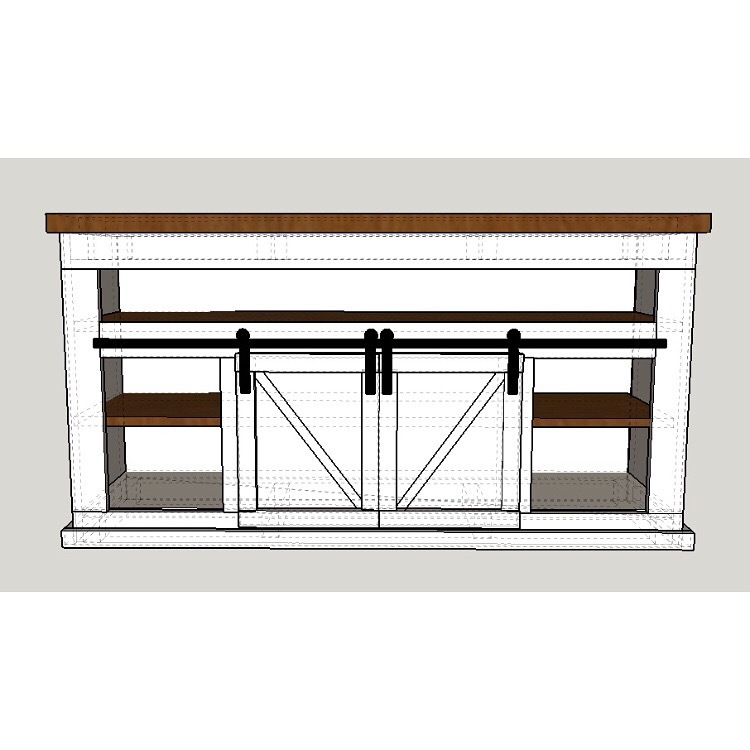
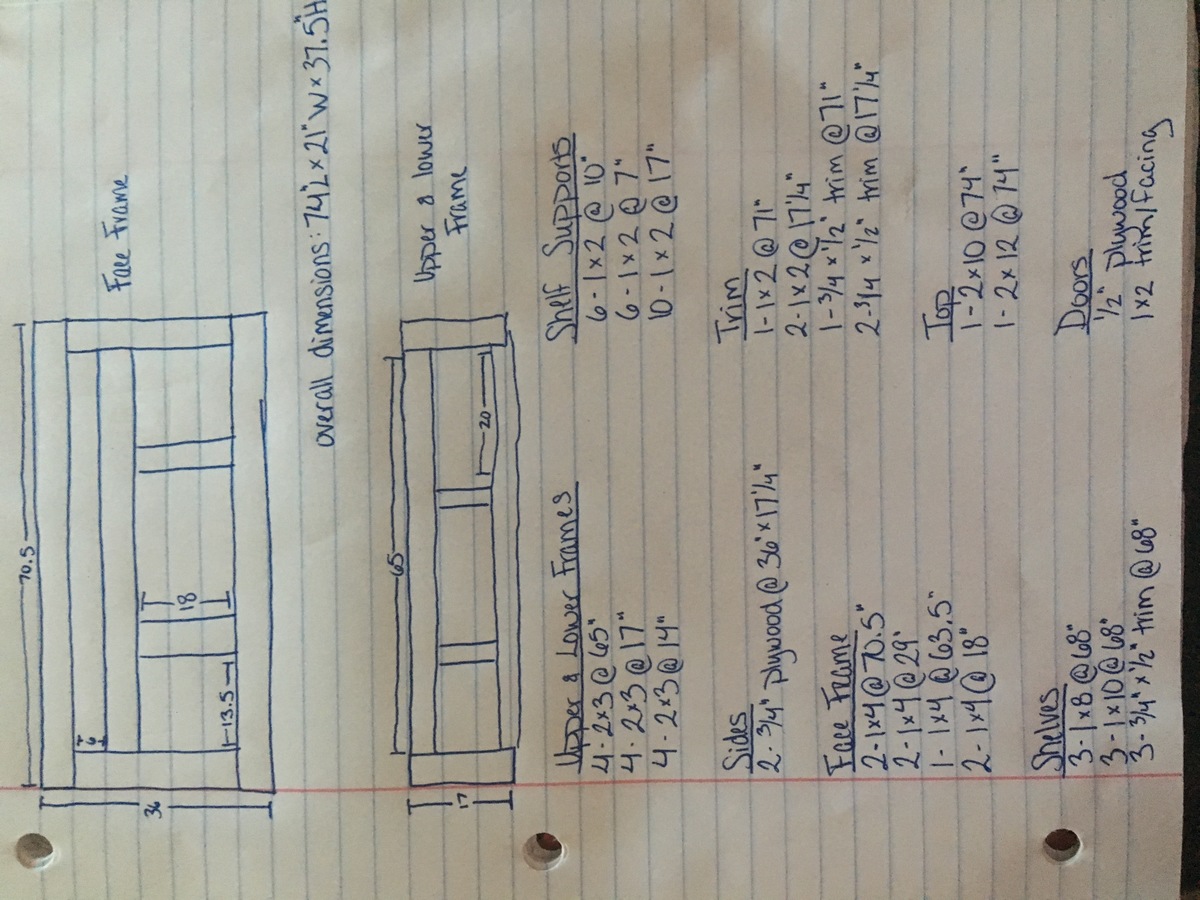
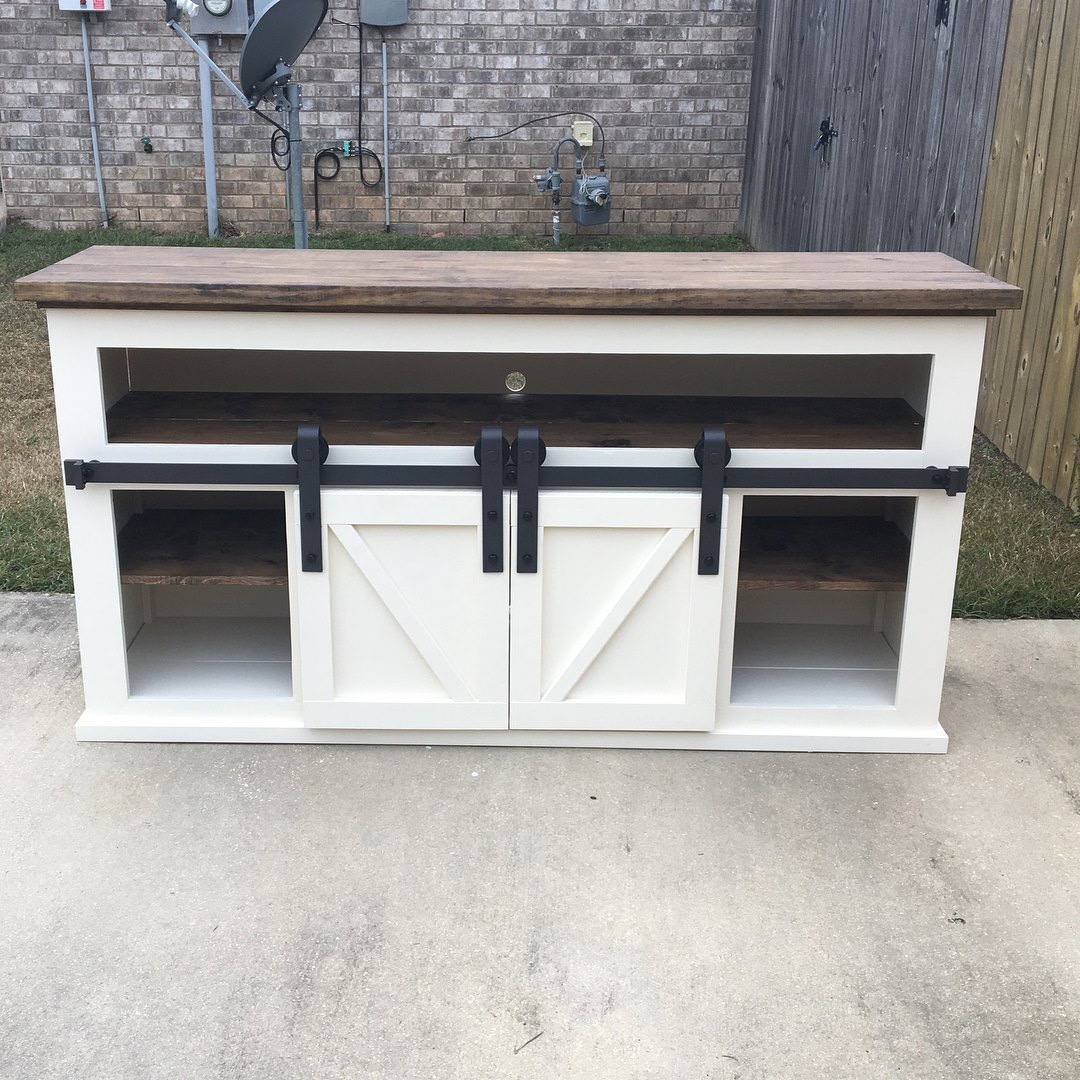
I modified these plans to be a bit smaller and also added an upper shelf area. Overall dimensions for my finished product are 74” long by 21” wide by 37.5” tall. I stained the top, upper trim pieces, and shelves dark walnut. The rest of the project is painted in “Summer White” by Sherwin Williams. To complete this project you will need barn door hardware *plus* an extra door set. I did my best to provide sketches and dimensions, but all wood was cut to size by measuring its space first, so “cut list” may not be exact. In this project it is key to measure as you go and maintain a level workspace so that the furniture remains level. I also added 3/4” by 1/2” trim pieces to the shelves because I did not like the gap in the shelving pieces. I also drilled 1.5” holes in the back in order to accommodate electrical cords.


Upper and lower frames:

4 - 2x3 @ 65”

4 - 2x3 @ 17”

4 - 2x3 @ 14”


Sides:

2 - 3/4” plywood @ 36”x17 1/4”


Face Frame:

2 - 1x4 @ 70.5”

2 - 1x4 @ 29”

1 - 1x4 @ 63.5”

2 - 1x4 @ 18”


Shelves:

3 - 1x8 @68”

3 - 1x10 @ 68”

3 - 3/4”x1/2” trim @ 68”


Shelf Supports:

6 - 1x2 @ 10”

6 - 1x2 @ 7”

10 - 1x2 @ 17”


Trim:

1 - 1x2 @ 71.5”

2 - 1x2 @ 17 1/4”

1 - 3/4”x1/2” trim @ 71.5”

2 - 3/4”x1/2” trim @ 17 1/4”


Top:

1 - 2x10 @ 74”

1 - 2x12 @ 74”


Doors:

1/2” plywood approx 16”x20”

1x2 creates border and diagonal piece


Back:

1/4” plywood approx 36”x69”


Built from Plan(s)
Estimated Cost
$460
Estimated Time Investment
Weekend Project (10-20 Hours)
Finish Used
“Summer White” by Sherwin Williams
Dark Walnut stain by Minwax
Barn Door Hardware from Amazon (U-Max 6.6 foot basic barn door hardware track kit AND U-Max sliding barn door hardware basic hangers 2 P.C.)
Recommended Skill Level
Intermediate

Picture Frame

Submitted by karahart on Wed, 05/11/2011 - 09:22

This was my first try at making a picture frame. I've used this same principle to make single framed picture frames numerous times since then. Thanks Ana! Such an easy build!

Estimated Cost
$5
Estimated Time Investment
An Hour or Two (0-2 Hours)
Finish Used
I used minwax's water based stain in red.
Recommended Skill Level
Starter Project

Bar cabinet

Submitted by kgclark31 on Thu, 04/21/2022 - 17:53

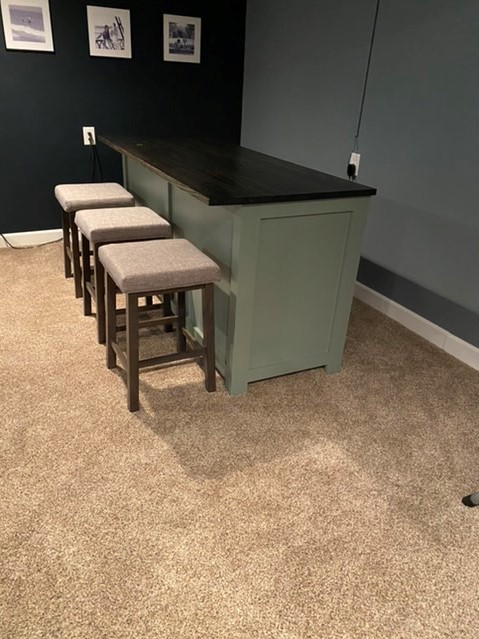
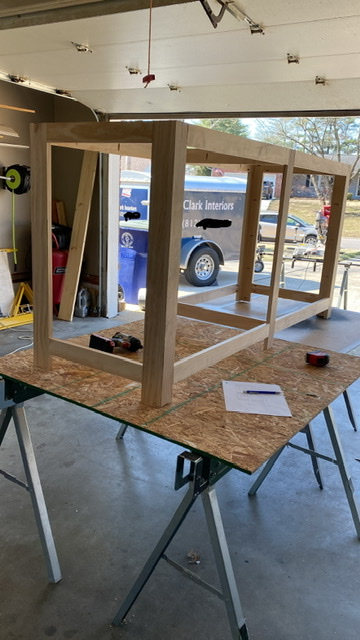
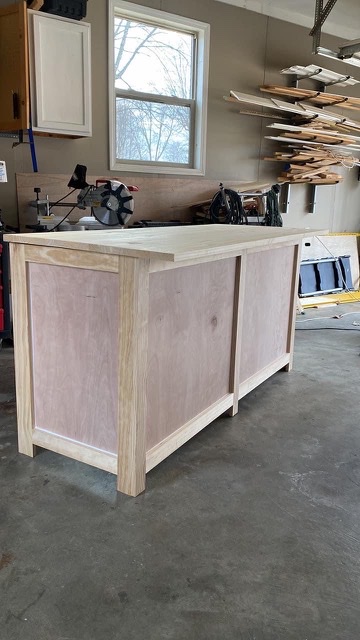
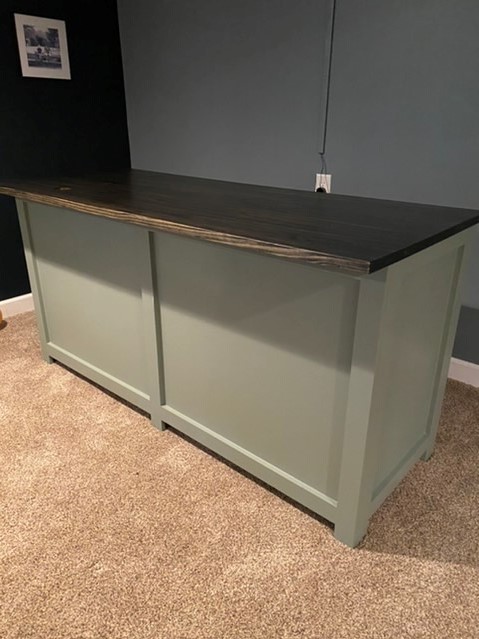
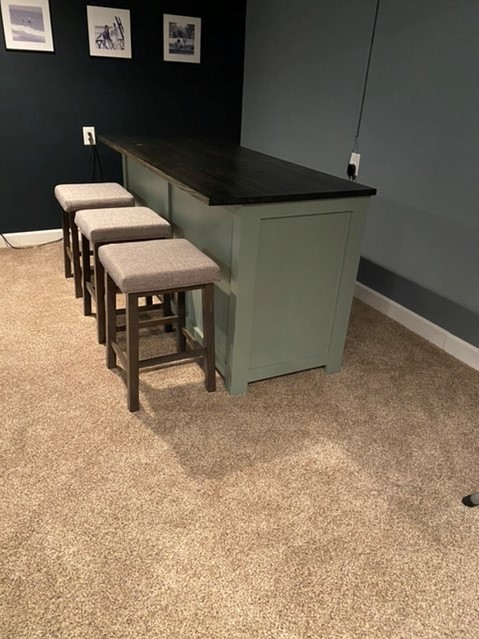
My wife wanted a eat at bar/cabinet for the basement family room. So after several design ideas this is what we come up with. It was a pretty simply build, built the frame using Kreg pocket holes to attach everything together. Love the Kreg pocket hole. Then cut the1/4” panels and attached them to the inside with brad nails. The top is a 1 x 24 glue board from Menards. Then some paint, stain and poly , attach the top and its ready to go. I used a water base poly for the top, it is great if you want to apply several layers quickly. Sand the poly after a couple layers with an 800 grit, then apply a couple more then repeat until you are happy with the finish.

Comments

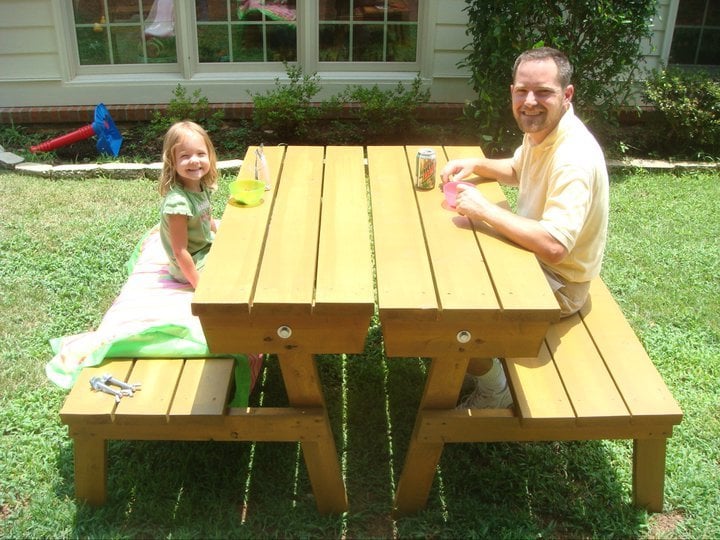
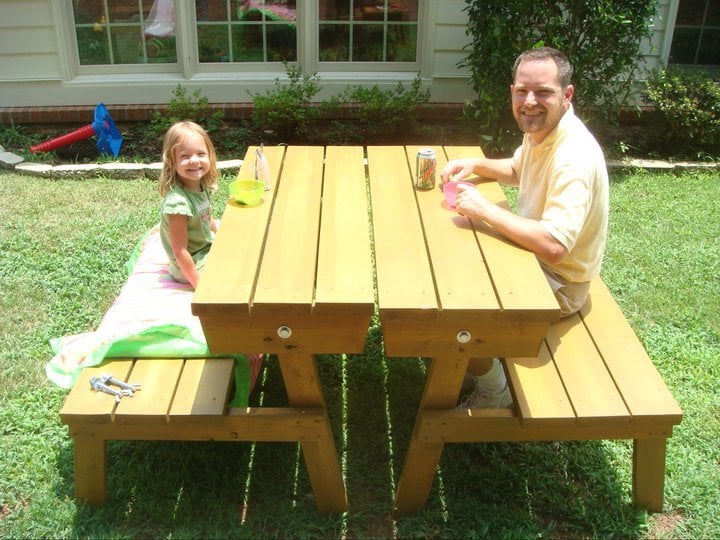
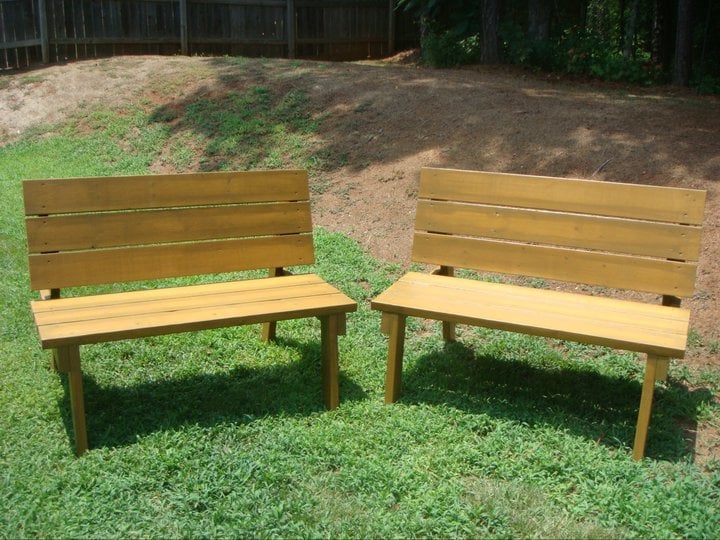
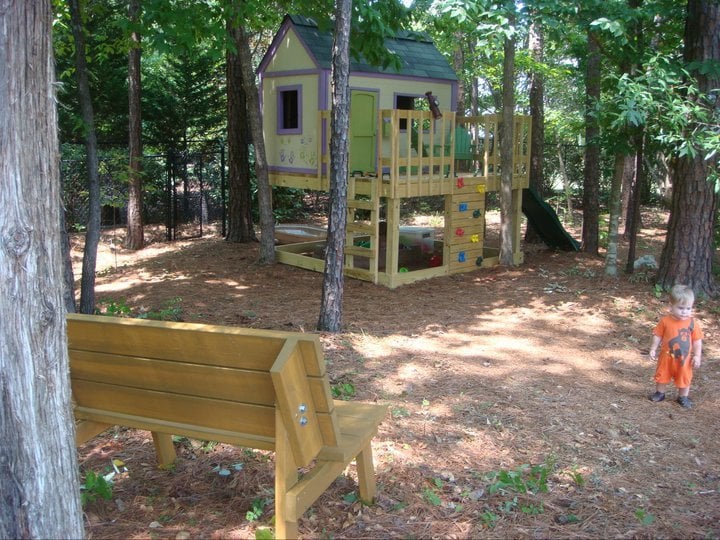
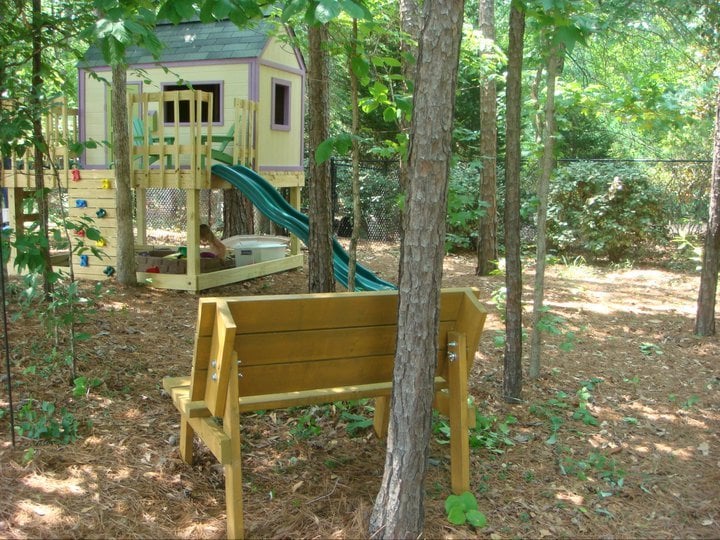
Convertable Picnic Table

Submitted by docfin02 on Fri, 06/17/2011 - 09:59

I love these benches/table. They were easy to make and are comfortable to sit in.

Estimated Cost
$60 for wood and hardware, $60 for stain and stain supplies
Estimated Time Investment
Day Project (6-9 Hours)
Finish Used
Stain
Recommended Skill Level
Beginner

Comments

docfin02

Fri, 09/09/2011 - 10:04

There should be a link at the top of this page. Under "About This Project" it says "From Plan: Picnic Table that Converts to Benches" and the "Picnic Table that Converts to Benches" is the link.

Pantry Spice Rack

Submitted by SaraLodise on Tue, 08/06/2013 - 13:35

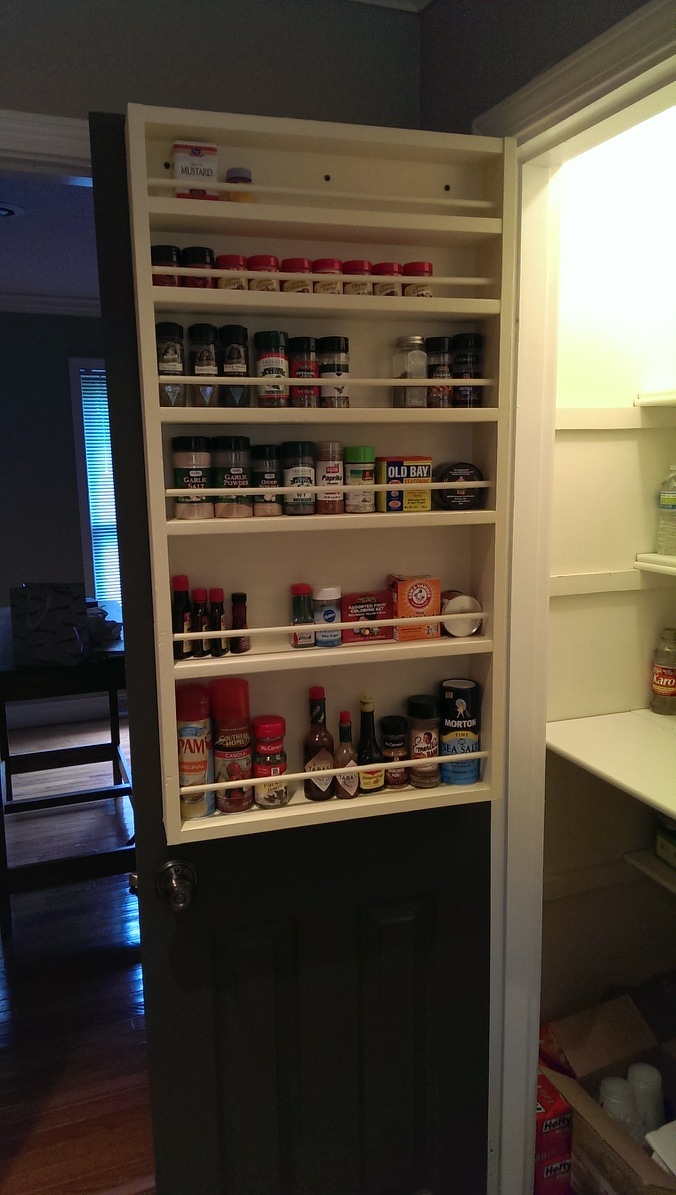
Love this simple plan! I took down a wall in my kitchen and, when cleaning out the cabinets, I found crazy amounts of spices. With this it's so easy to see all of them and find the one you want.

I did shift the shelves to make two 3 1/2" shelves and this made the bottom shelf 9" for some taller things. I found that I could not fit my shorter spice containers in the very top shelf due to the hanging board in the back of it. The hanging board may have been thicker than used in other's builds.

Built from Plan(s)
Estimated Cost
$30
Estimated Time Investment
Afternoon Project (3-6 Hours)
Finish Used
Primer & some left over interior paint from previous house owners.
Recommended Skill Level
Starter Project

Comments

OptimusGoof

Sun, 01/11/2015 - 12:55

I love how you shifted things around to accommodate for the bottom taller items. I need something exactly like this so I can tame the wild animal that is my pantry. Thank you for the inspiration. Great build!

RandyW

Sun, 01/11/2015 - 14:46

Is that a solid door? If not, how did you anchor it?
Class/School Auction Projects

Submitted by jendon on Tue, 05/03/2022 - 15:32

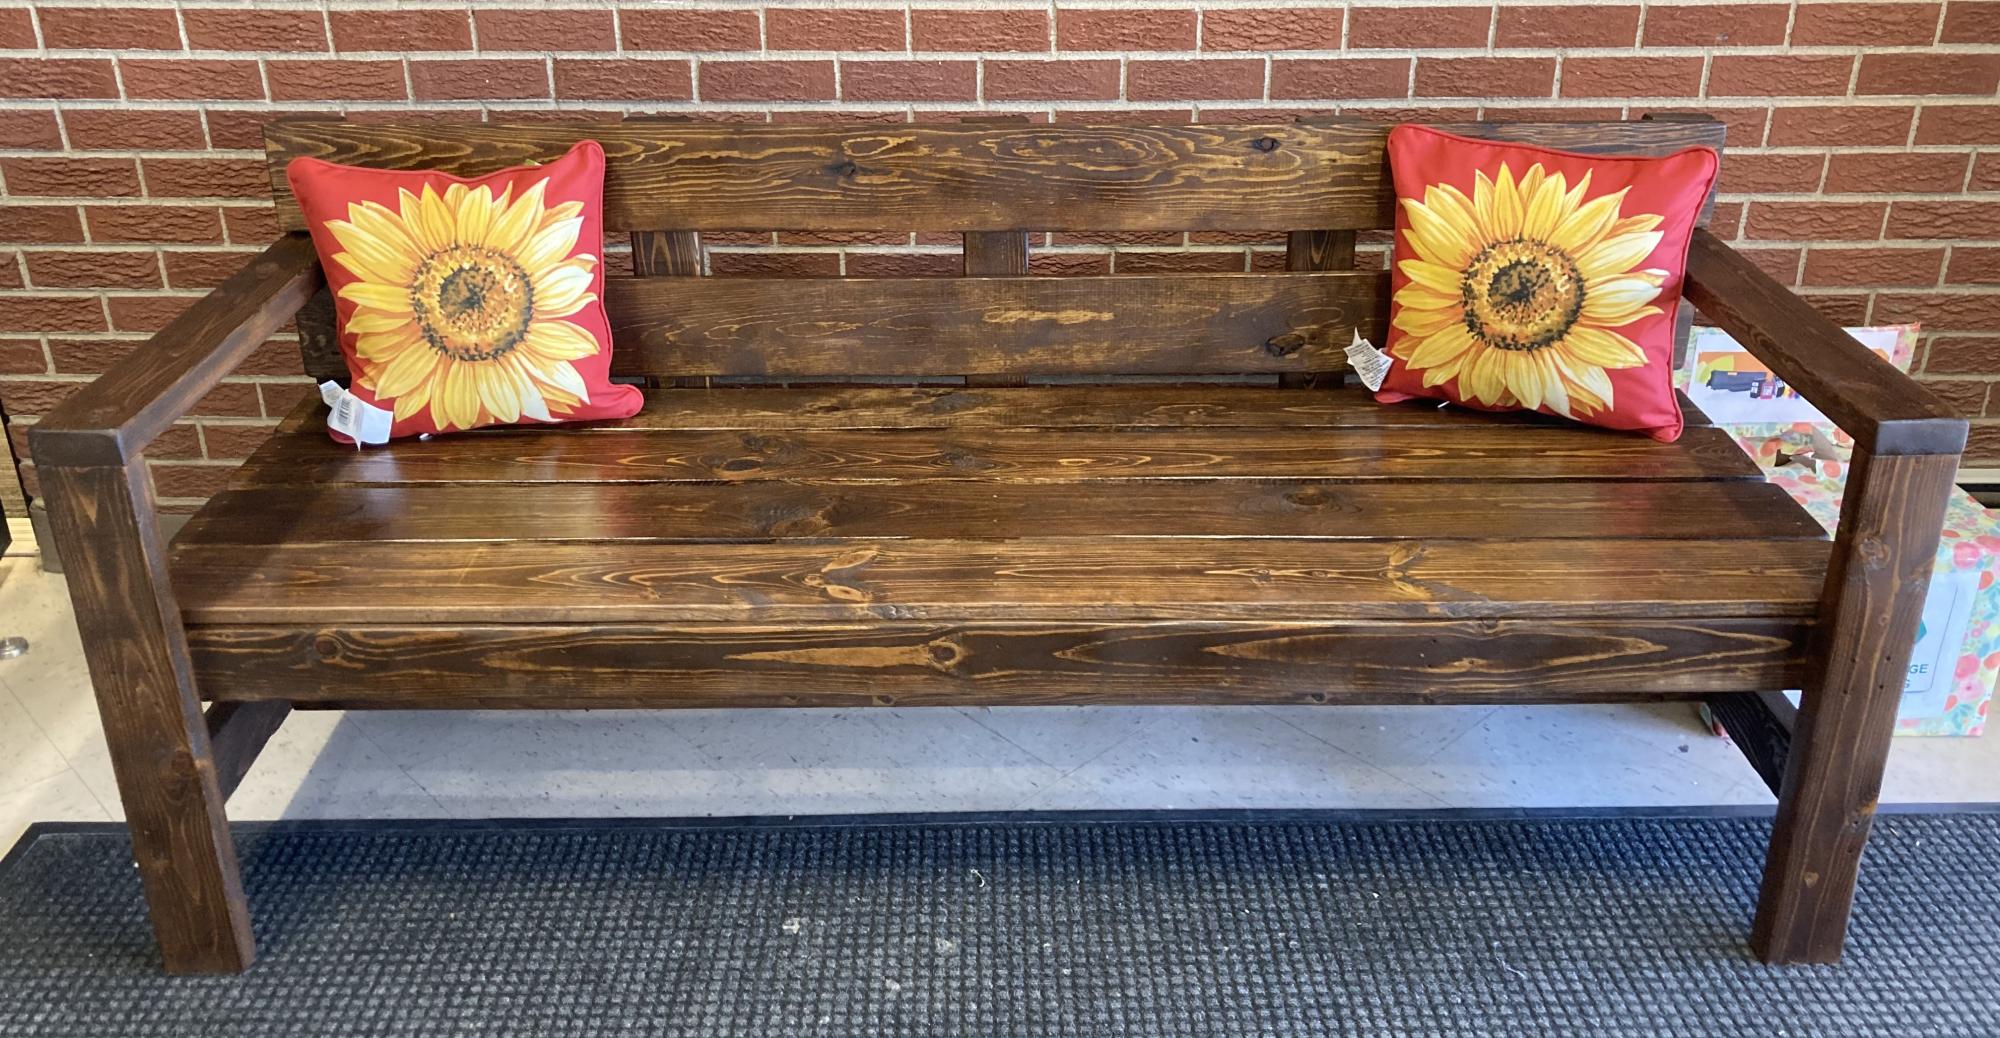
This year my 2nd-3rd class built the Modern Park bench for the school auction. They sanded, stained, and set the screw for the seat and back.
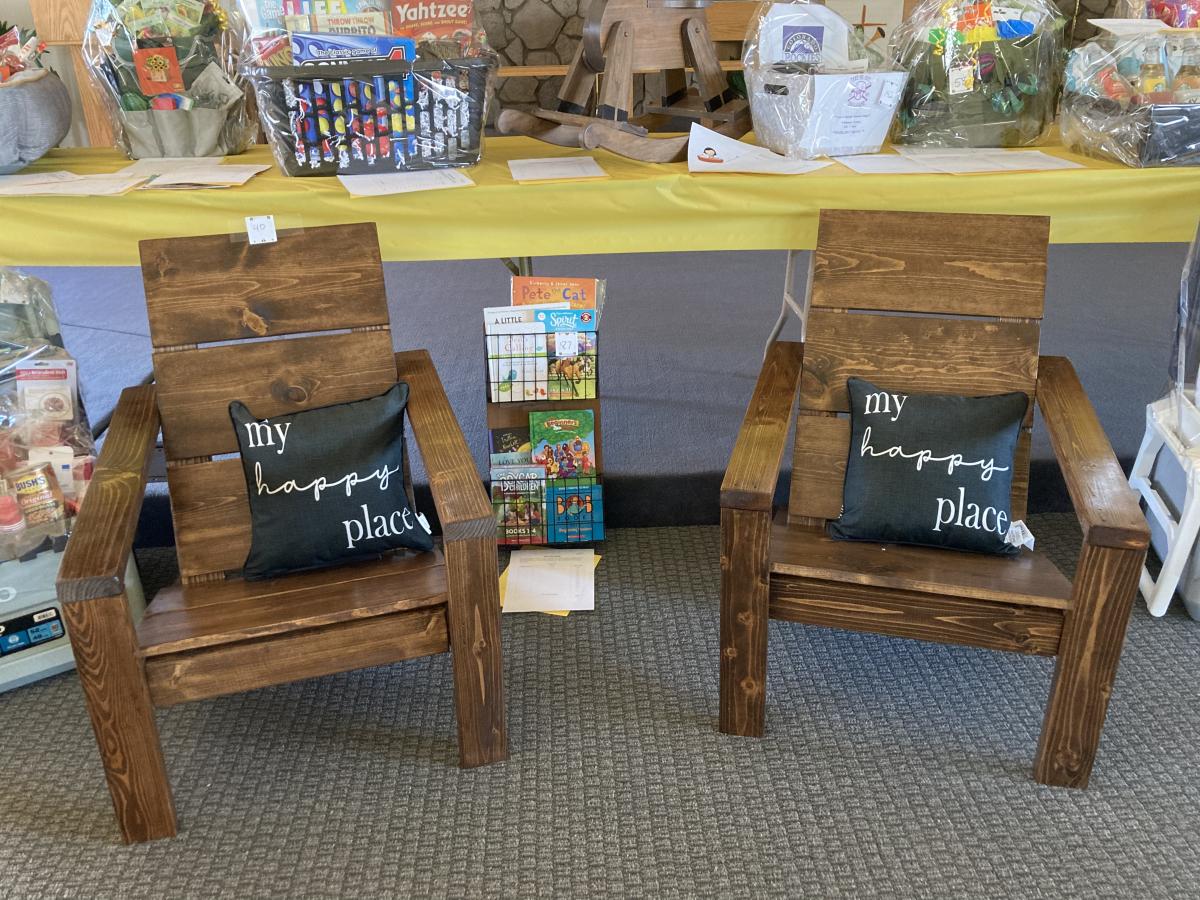
I also made two Adirondack chairs with matching stain.
Both projects had two coats of poly and really shined. They were a hit at the auction and the kids and families really appreciated the experience and final products.
Thank you Ana for making plans simple to follow and new skills learned each time.
Blessings,
Jennifer

Comments

jendon

Mon, 05/16/2022 - 18:33

My students really enjoyed it and many picked up a tool for the first time. I like planting seeds in their heart and mind for the future!! Blessings, Jennifer

jendon

Mon, 05/16/2022 - 18:33

My students really enjoyed it and many picked up a tool for the first time. I like planting seeds in their heart and mind for the future!! Blessings, Jennifer

Monika

Sun, 03/31/2024 - 14:30

I've been helping with our class auction project, and it's been a fun experience. But balancing schoolwork and project deadlines can be tough. That's why I found this article finance.yahoo.com/news/pay-essay-top-5-safe-105019899.html on safe essay services helpful. It saved me time and stress, allowing me to focus on both my studies and the auction project.