Christmas Kitchen Set
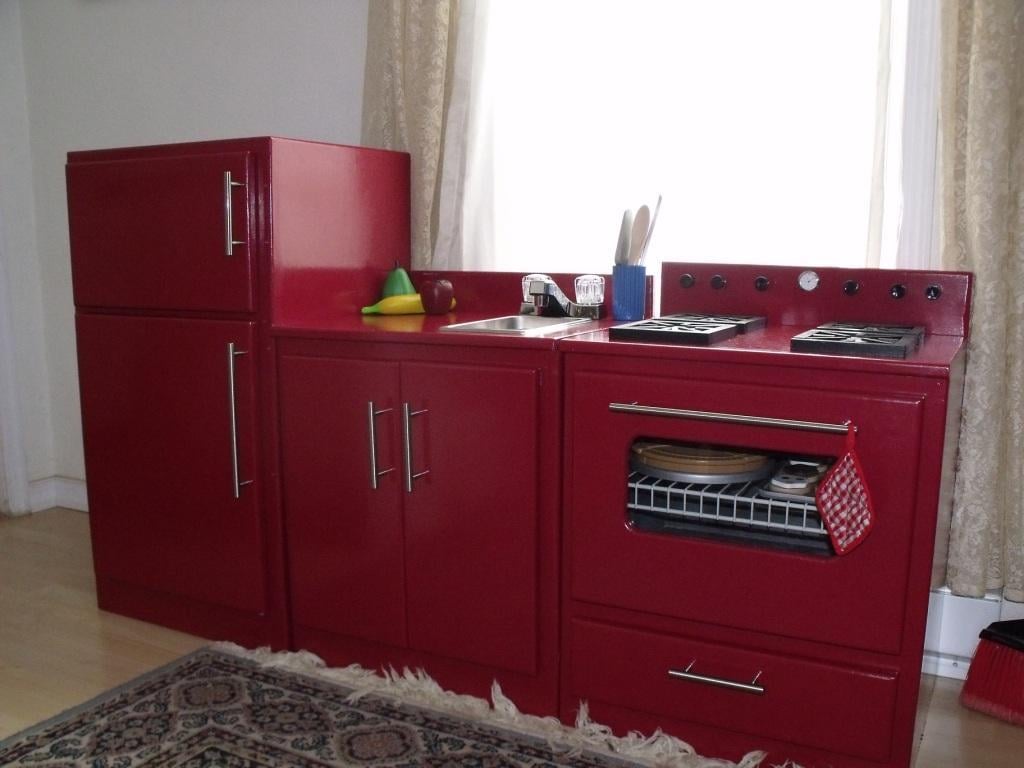
My father in law and I built this kitchen set for my two daughters, ages 3 yrs and 9 months. It was so fun to work with my father in law. I have built a few things before (table, chairs, doll bed, etc.) but nothing of this quality or magnitude. He is a great woodworker and knows how to do all the neat finishing touches that just make the project look really professional. I learned a ton working with him and had a blast!
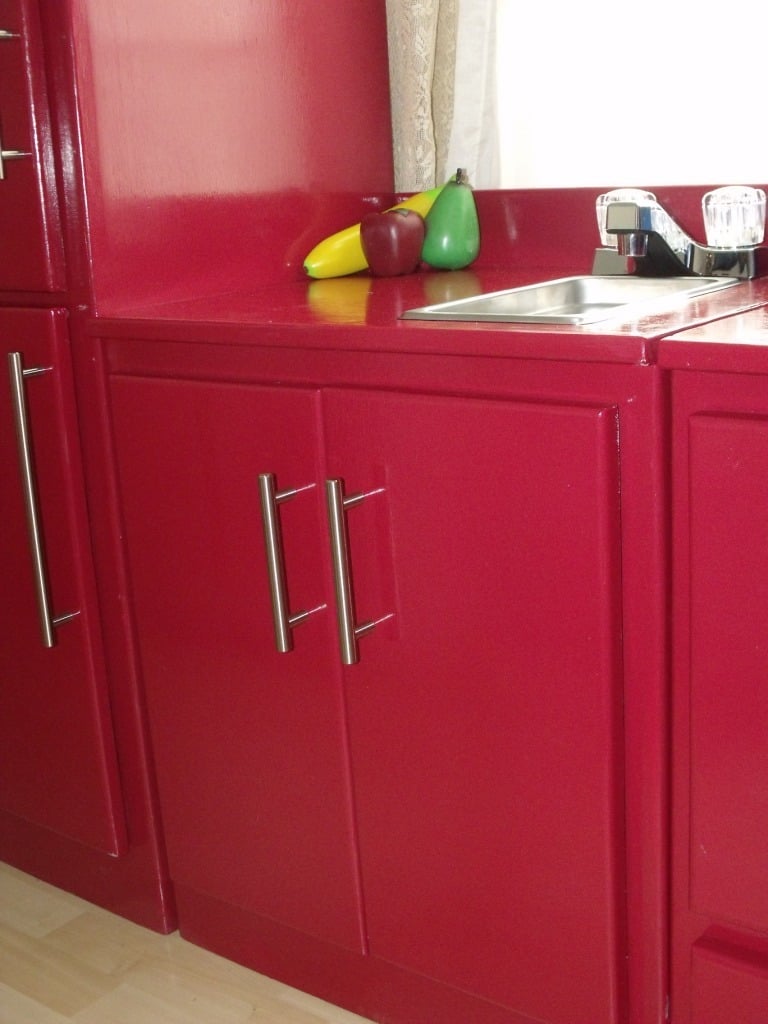
I was inspired by Ana's kitchen sets and used a combo of then and the Lowes plans and I was very happy with how it turned out. I changed a few things: put two doors under the sink, made "gas" burners instead of "electric", used half the sink cabinet top for the sink and left the other half for counter space, added a clock to the stove, made the oven door open down.
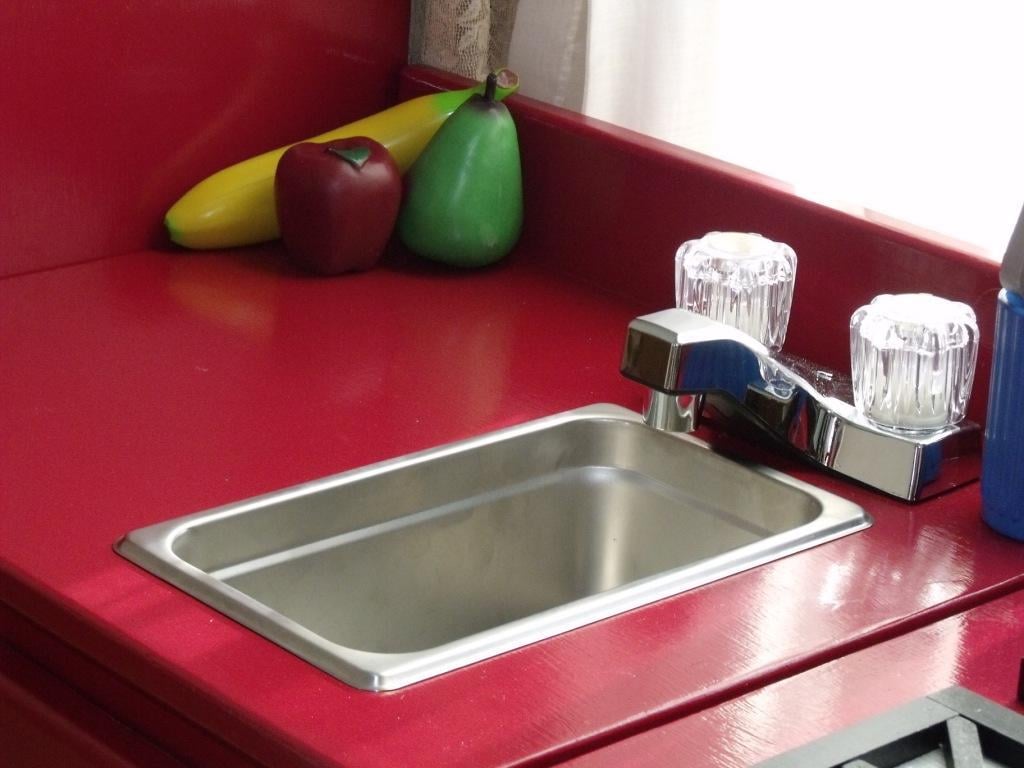
The sink is a food service warming pan 1/4 size and the faucet came from Wal-Mart for $10. I will probably replace it with a nicer one from the ReStore when I get a chance
Break down of costs:
Lumber: $100
Hinges and pulls: $40
Paint and primer: $45
Burners: $20
Sink: $24
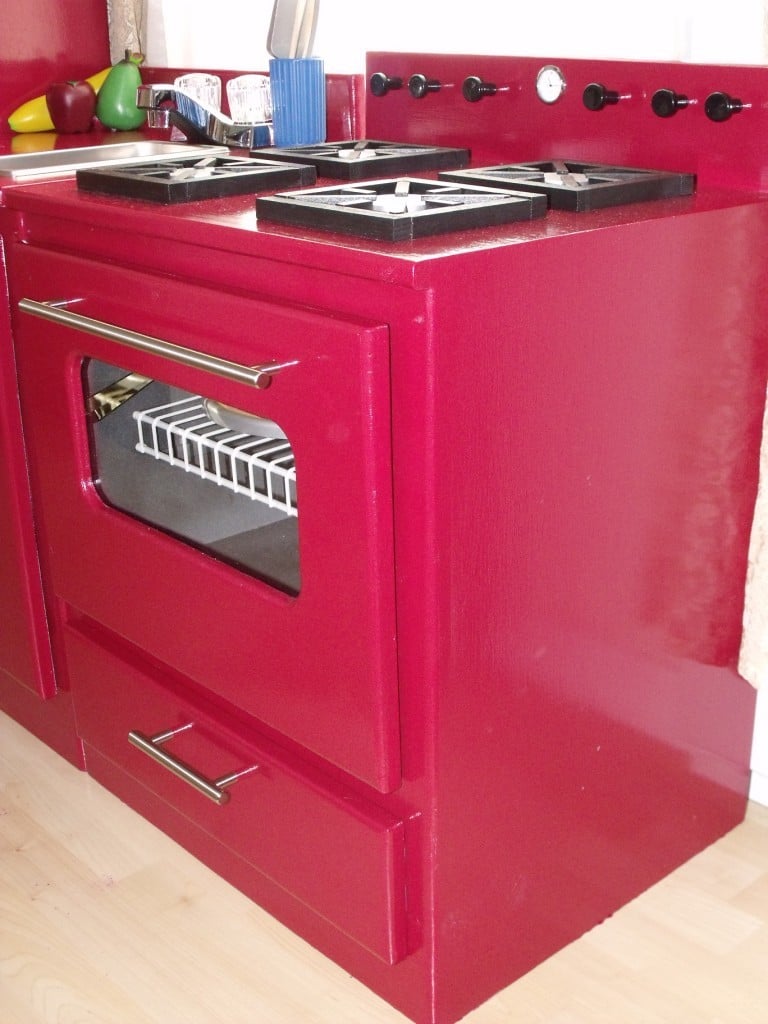


Interior: White
Oven: grey stone textured spray paint


Comments
EmuJane
Mon, 12/26/2011 - 12:01
I love the warming drawer!
I love the warming drawer!
Ana White
Mon, 12/26/2011 - 12:33
What a beautiful kitchen! I
What a beautiful kitchen! I love the burners! And the warming drawer! Thank you for sharing.
Cindy from Indiana (not verified)
Mon, 12/26/2011 - 13:09
Fantastic job!
Holy cow! Fantastic job! You guys really pulled it together and I really love the creative use of hardware, etc.
Aisha
Tue, 12/27/2011 - 20:48
Beautiful!
Beautiful!
Fuchsia
Wed, 12/28/2011 - 07:50
Thanks guys! Only problem is
Thanks guys! Only problem is that my girls use it so much, I only get a chance to play with it when they go to bed! :)
ajcajj
Mon, 01/02/2012 - 06:27
Great job! Where did you get
Great job! Where did you get those burners?!
Fuchsia
Wed, 02/29/2012 - 10:03
Sorry I didn't see you
Sorry I didn't see your comment sooner - I made the burners with craft wood circles and squares and 1/2 inch pieces of wood. I notched the ends over the circle with a chisel.