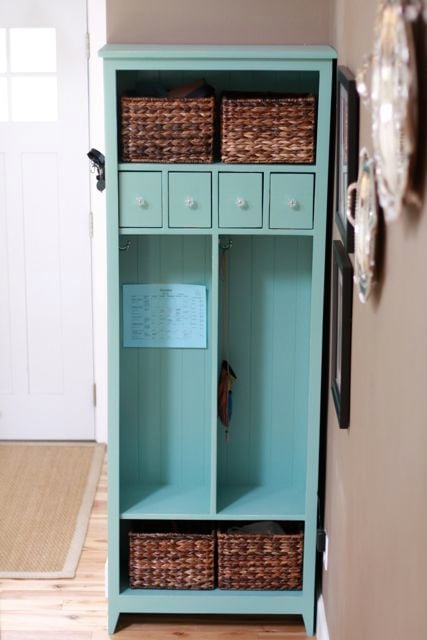
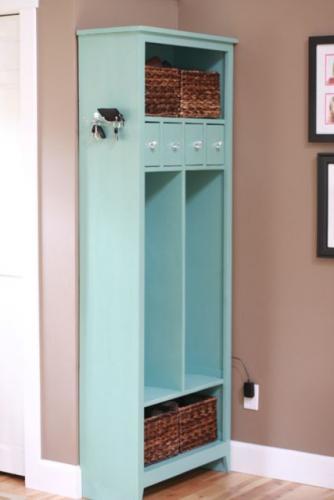
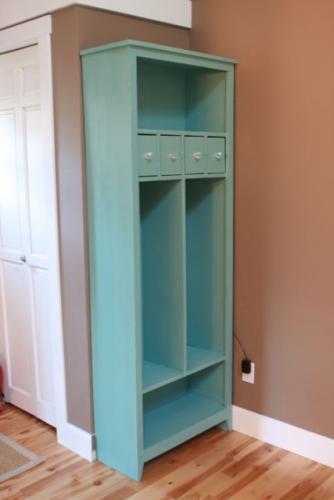
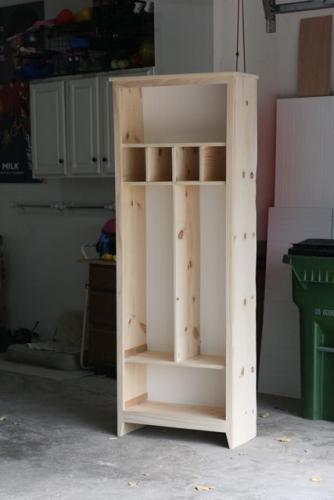
Community Brag Posts

Barn Door Bookcase

Submitted by Anonymous (not verified) on Mon, 11/02/2020 - 06:29

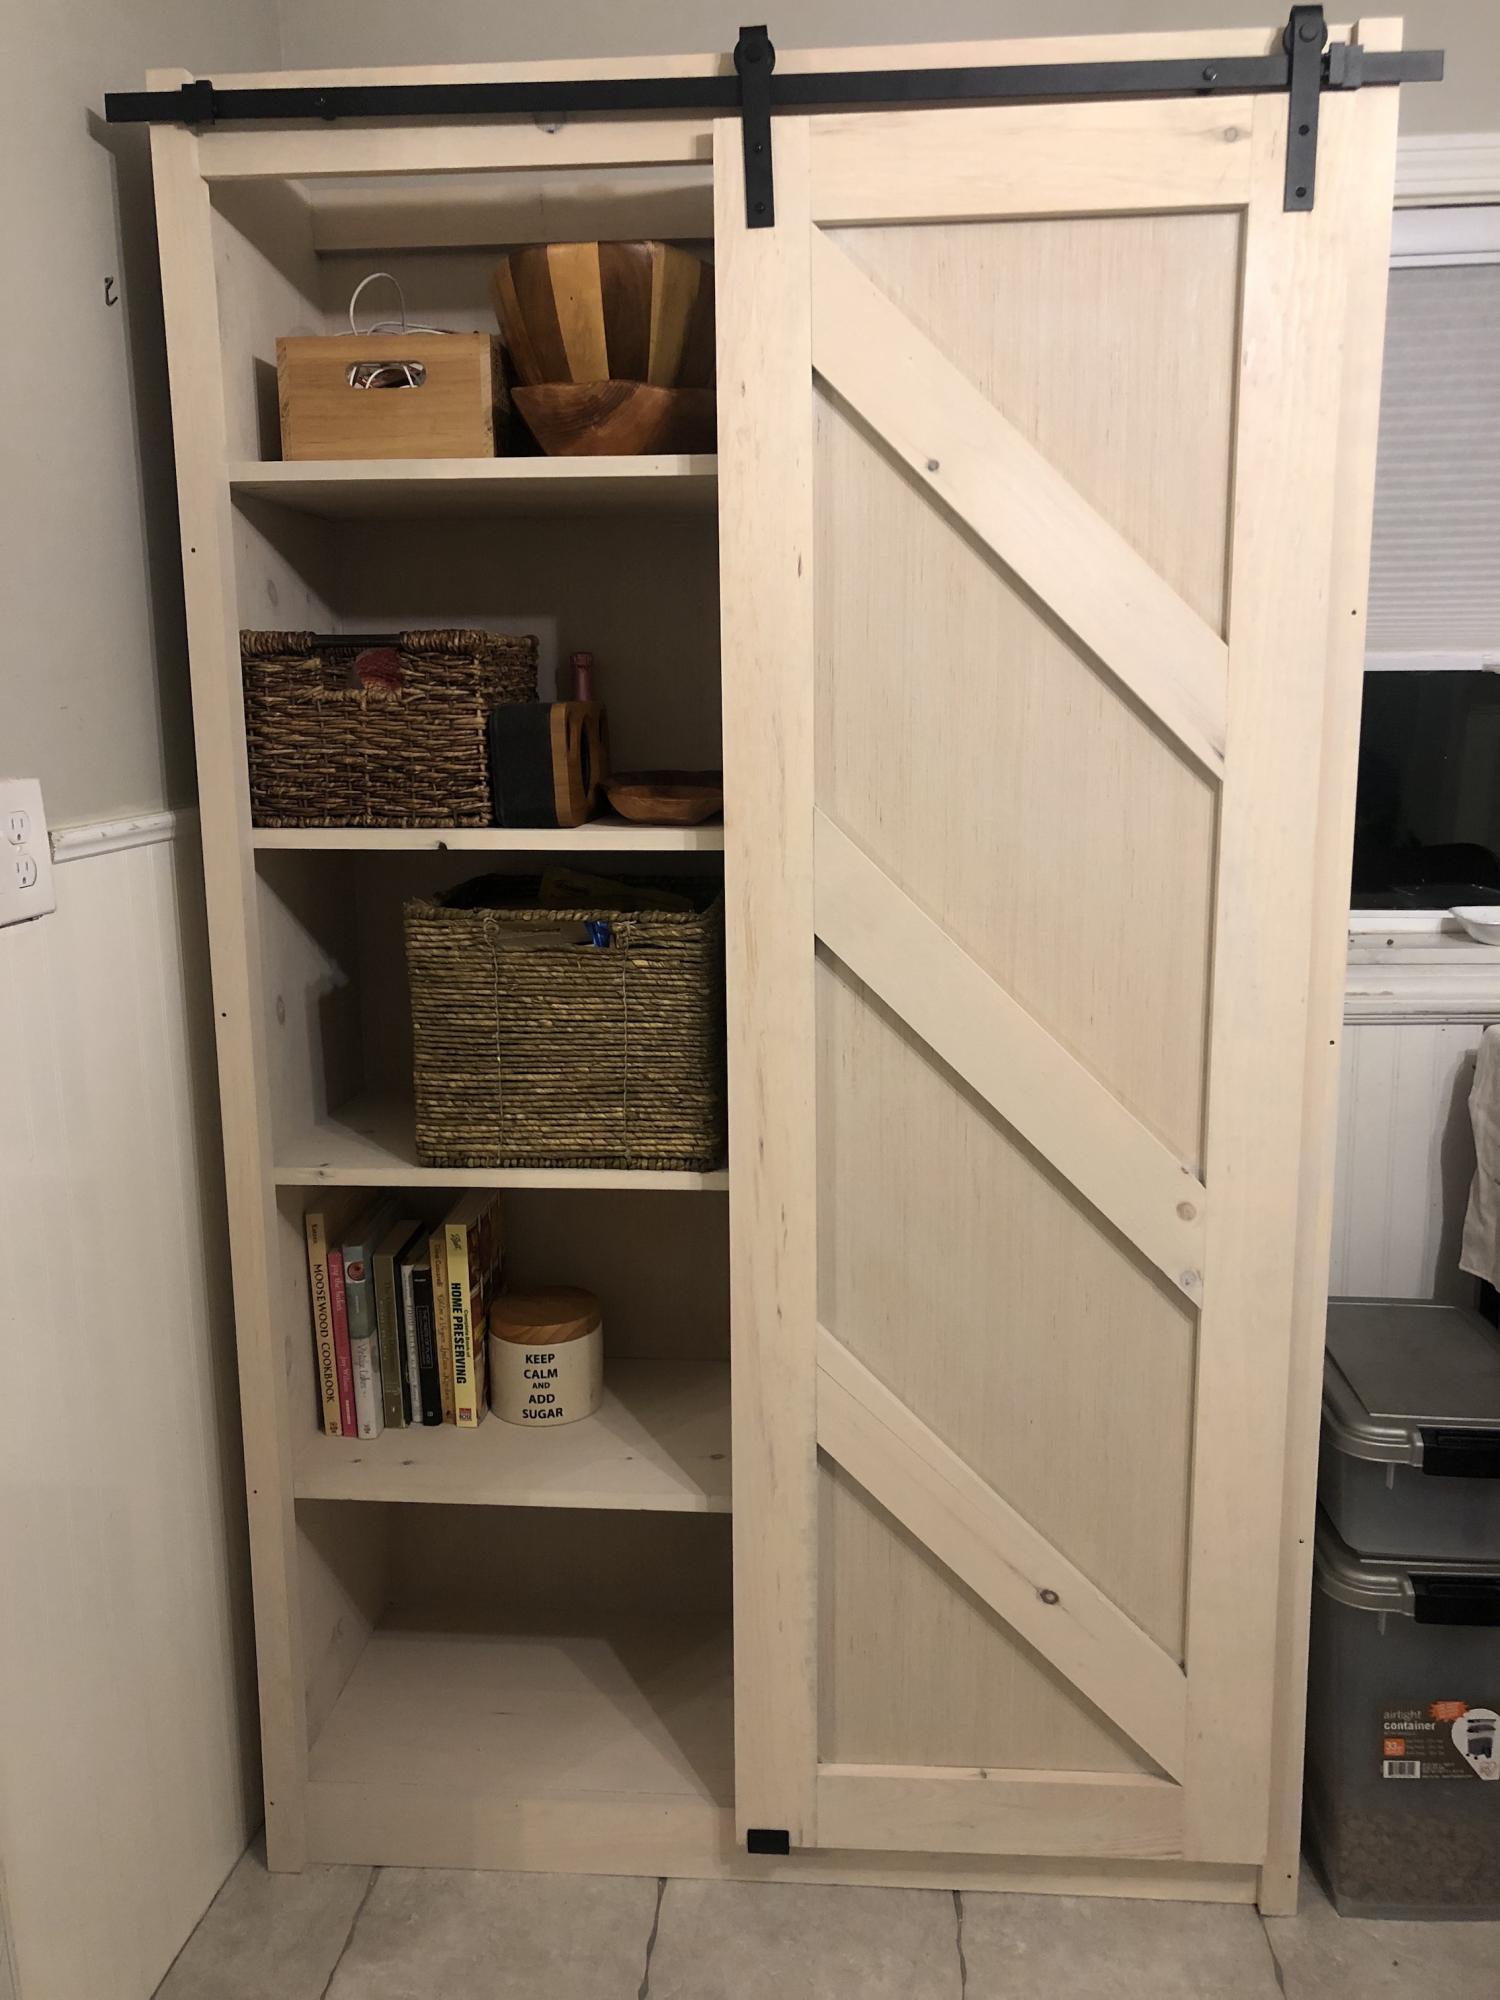
This project cost us about $430, but we modified Ana's plans, a Lot! We made it deeper, narrower, and taller to fit out space. The best part of this project was creating a hidden litter box area in the bottom shelf. We cut a hole through the bottom center board, and put the litter on the side with the door so it was hidden yet easy to clean!

Built from Plan(s)
Estimated Cost
430
Finish Used
tinsmith gray
Recommended Skill Level
Advanced

Comments

Triple Doll Bunk Bed

Submitted by dananryan on Sun, 01/13/2013 - 21:18

My friend's 7 year old daughter custom ordered this bunk bed! She asked for a bunk bed for her 3 dolls and she even picked the color! I had a lot of fun building it and learned a lot in the process. As usual, finishing took longest. Lucky for me, my hubby likes spray painting :-)

Estimated Time Investment
Weekend Project (10-20 Hours)
Finish Used
3 coats of Rustoleum Berry Pink spray paint, sanding btw. coats.
Recommended Skill Level
Beginner

Comments

Raised Planter Box

Submitted by ang312 on Fri, 01/25/2013 - 12:24

Living in Tempe, Arizona, I am always in need of creative planter boxes so that I can garden with more ease. I loved this tutorial and recommend it to anyone, even beginners! A full tutorial can be seen here: http://www.barerootgirl.com/homemade/2012/11/5/homemade-diy-raised-gard…


Estimated Cost
$30
Estimated Time Investment
Weekend Project (10-20 Hours)
Finish Used
Minwax Stain in Provincial
Recommended Skill Level
Beginner
Seasonal And Holiday

Circular saw guide/sled

Submitted by Veronica P on Thu, 01/22/2015 - 17:46

Until now I've been doing the majority of my project cuts with my $30 jigsaw. Yes, it took about ten times as long as yes it was not quite as accurate so I ended up putting more time into sanding to clean things up after but I just didn't feel comfortable using the circular saw.

Well, I've got a list a mile long of things I'd like to build so it's time to  put on my big girl panties and get comfortable with the circular saw. So...I read a ton of tips and tricks online and saw a number of different guides.

Taking a little from a few different pictures of guides and using the scrap wood from an old dresser, I put this together. I clamp it to the top of my work table and go to town. I love it and now feel comfortable using the circular saw. I'm sure it's helped me make more accurate, straighter cuts than I would otherwise have made too. 

Estimated Cost
Scrap
Estimated Time Investment
An Hour or Two (0-2 Hours)
Recommended Skill Level
Starter Project

Comments

Tony

Fri, 01/23/2015 - 07:12

By using this jig, you are losing the full potential of your blade depth. A speed square would work just as well as this system and provide you with a full blade depth worth of cuts. I've seen systems like this before but really only useful for ripping long lengths of plywood/MDF/etc and not for cross cuts. I'm not trying to knock the way you do wood work, simply providing others with an alternative and easier way.

Veronica P

Fri, 01/23/2015 - 12:39

You're absolutely right that by using this I'm limiting the depth of my cuts to some degree. I have used the speed square as well and it's definitely a great tool that I'll use more in the future. The jig just offers me a little control until I grow more comfortable with the circular saw. Just an option for other newbies like me who might be apprehensive about using the circular saw.

DIY Greenhouse

Submitted by aww92 on Mon, 05/31/2021 - 17:42

i followed the instructions for the DIY Greenhouse and even though there are a few warts and freckles neither the wife nor the flowers are complaining

Built from Plan(s)
Estimated Cost
$1200.00
Estimated Time Investment
Week Long Project (20 Hours or More)

Comments

School Room Bookshelf

Very quick and easy project. Used the plans but adjusted the width and used pocket hole screws. We made ours 54" wide. After building the entire box and horizontal shelves with pocket holes you can secure the vertical pieces with brad nails. Start with the top row first and you can secure all of those with brad nails. Then use pocket holes on the top of the bottom vertical pieces because it won't really show. You won't be able to nail it since the top vertical piece will be in the way. 

I put some extra 1x2 scrap pieces on the bottom of the shelves for extra support but it would probably be fine without it. We just knew we were going to be loading this thing up and wanted it to last forever and it's not visible anyways.


Built from Plan(s)
Estimated Cost
$85 - We only needed three 8 foot 1x2 pieces because we weren't putting it on wheels and the back we didn't trim since it was going to be against the wall. 1x12 common boards were about $18 each and 1x2 select pieces are $5 Adds up quick but it is some much better than cheap particle board shelves.
Estimated Time Investment
Afternoon Project (3-6 Hours)
Finish Used
White paint
Recommended Skill Level
Beginner

Comments

2 x 4 Garage Shelves Built into Basement Storage!

Hello Everyone! This is my FIRST brag post here on Ana-White.com - but not the first project that we've built from her awesome plans. :) 

We have an unfinished basement that desperately needed some shelving because 1. It's our workshop in the Winter and 2. We don't have an official 'storage' room in the basement of our split level home. When I saw these plans I immediately thought they could be modified to fit our space and get my stuff off the floor! 

I modified the plans just enough to fit our space. After reading through them completely, I realized for an 8 ft wide space (beside the stairs) I only needed three supports for the shelves. Easy! The only trick was fitting the shelf into the space AFTER installing the shelves. Because I had walls on two sides (unlike the tutorial) I couldn't do the shelves as the last step. 

I LOVE how these turned out! They are a strong as a ladder (we tested them... :)) and they hold everything I need them to, and a little bit more. It's a definite improvement on my previously messy, cluttered, saw-dust covered space ... :) 

Estimated Cost
Our space was 8ft tall by 8ft wide, so we ended up purchasing about $60 worth of 2x4s to complete the project. We also used 2.5" screws, which are around $4 per box of 75.
Estimated Time Investment
Afternoon Project (3-6 Hours)
Finish Used
None - we left the wood bare and natural because it's just for storage - not for looks. :)
Recommended Skill Level
Beginner

My Master Closet

Submitted by Anonymous (not verified) on Sat, 05/27/2017 - 08:00

I modified the plans slightly to fit our walk in closet.

(made the towers taller, placement, shelving etc.)

We just love how it turned out!

Estimated Time Investment
Week Long Project (20 Hours or More)
Finish Used
Bright White Semi-Gloss Paint (with primer)
Recommended Skill Level
Beginner

Outdoor Kitchen Island using remnant Granite

Submitted by gerrell on Wed, 06/23/2021 - 18:07

I've had these granite pieces that I got incredibly cheap from a remnant place last year for another project. A few weeks ago, I put them on some spare IKEA desk legs to make a workspace on my deck. I hated the look AND they were a little wobbly.
I spent some time searching the web and thankfully stumbled upon these plans. I modified the dimensions to fit the granite tops, used fewer pickets on the shelves and painted the whole thing black.

I think it looks great and adds awesome outdoor counterspace on the grilling deck!

Estimated Cost
$100
Estimated Time Investment
Weekend Project (10-20 Hours)
Recommended Skill Level
Beginner

Comments

Kids double trustle table

Submitted by Anonymous (not verified) on Fri, 07/16/2021 - 08:46

I loved this project!!! And am so happy with how it turned out!! I have 4 kids and this has so much space for everyone!
We paired the double trustle table with the farm table benches ( which I adjusted the length and height of the legs to make it kids size.)
The table top instead of a solid top we used 2 1x12 boards. And for the beaches we used 1x10 board for the seat.
Thank you for the amazing plans!

Estimated Time Investment
Weekend Project (10-20 Hours)
Finish Used
Tops are finished with a walnut gel stain and than coated with a few coats of varathane. Legs and bottom we wood burned with propane tiger torch and finished with linseed oil.
Recommended Skill Level
Beginner

Kids Birdhouse Project

Submitted by gzarate on Tue, 04/30/2013 - 19:36

My two daughters really enjoyed helping daddy make these birdhouses but most of the loved painting them.

Estimated Cost
$3 to make two
Estimated Time Investment
An Hour or Two (0-2 Hours)
Finish Used
Kid safe paint and I sealed it with exterior clear finish.
Recommended Skill Level
Starter Project

Comments

Eva_15

Tue, 04/30/2013 - 22:33

Hey I was looking through brags and here you are!! I just posted my Cedar Planter on here!

My first build!

This locker cabinet was my first build and I learned a ton. For example:

1. Use the Kreg face clamps while drilling into the Kreg Jr.
2. Buy straight wood.
3. Buy wood that is not warped.
4. Do not try to buy wood with grouchy kids in tow.

Are you seeing a theme? Yep, your project will only be as square and perfect as the wood you buy.

I modified the locker plan to include apothecary-style drawers for our cell phones, sunglasses and chapstick. I also drilled through the back of one of the drawers to turn it into a charging station for our cell phones.

The locker has been super useful so far and is such a great way to keep my kids' backpacks and lunchboxes organized. The baskets are designated for my purse, stuff I need to return to stores, the dog's leashes, and library books. It's so nice to have all this stuff near the front door and never wonder where any of it is!

Estimated Cost
$100
Estimated Time Investment
Weekend Project (10-20 Hours)
Finish Used
Ralph Lauren "Aged Mint" in flat. Distressed and coated with Minwax Polycrylic in satin.
Recommended Skill Level
Beginner

Grillin' and Chillin' - Outdoor Grill Food Prep Station

Needed a table for food prep with my grill and found your plans! I used treated lumber for the base and nice cedar planks for the top. The treated lumber had a whiter than usual color which made the base really pop out. I put a nice pecan stain on top and a few coats of poly so the BBQ sauce wouldn't stain it! This was so easy, literally took 2-3 hours to build, stain and poly was done over the next few days. Ready for my next ana-white project. Thanks for posting these plans.

Built from Plan(s)
Estimated Time Investment
Afternoon Project (3-6 Hours)
Finish Used
Simple pecan stain and minwax poly. Brushed on the stain and kept brushing until I got the darkness I wanted
Recommended Skill Level
Starter Project

Comments

tr7dul

Wed, 07/09/2014 - 16:24

I was looking on Pinterest and found this table. It was exactly what I was looking for. You inspired me to go out and buy a miter saw and some wood and make the table. It turned out wonderful. It now has a permanent place on my patio and gets used when I grill mostly. I was hoping to be able to upload a photo but don't see the option to do so. Anyway, I want to say thanks for the great plans/instructions.

Platform bed

My first build!!!! I live in an apartment, so I was nervous to undertake any project... luckily I was able to borrow a garage one weekend to build it, and then moved it in and finished it. It took more than just the weekend to complete.  It probably took me a lot longer than if I had more experience and knew what I was doing...I stopped every two minutes to double check myself and reread the directions lol. I'm so happy with how it turned out. I used the IKEA center beam from my old bed for the center support, and cut wood slats for my mattress to rest on so I don't have to use a box spring. It looks so much more expensive than it was. my  next project is a headboard...as soon as I have a space to build it in :)

Estimated Time Investment
Weekend Project (10-20 Hours)
Finish Used
Minwax polyshades- satin honey. I used minwax wood conditioner as well.
Recommended Skill Level
Beginner

First Project- reclaimed wood look Queen headboard!

Submitted by jamie_C on Tue, 03/22/2011 - 12:02


Pin For Later! 

First Project- reclaimed wood look Queen headboard!

Estimated Cost
around $75
Estimated Time Investment
Afternoon Project (3-6 Hours)
Finish Used
Used only one coat of Minwax Dark Walnut (really liked the rustic look), and finished with Minwax polyueruthane.

This was a quick build- did all of the cutting, & got it mostly assembled while my toddler was napping! One thing to note- we had to add some wood braces on the back in order to straighten our boards out. They looked ok at the store, but we got them home & realized they were quite warped! Sanding, staining and polyurethaning took additional time that was spread out over a few days (didn't include that in total time). This was great for a first project. I've got lots more on my to-do list now!
Recommended Skill Level
Beginner
Seasonal And Holiday

Leaning Hall Tree

Submitted by vendo on Wed, 10/20/2021 - 12:33

I had a small piece of 2x10 left over from this plan's original post, as well as some 2x4's and a scrap 1x2 laying around, so added the top key hook and stained instead of painted. Love how it turned out. I did the top angle a little different too, so it sits a bit closer to the wall, making it awesome for a narrow entryway or space. Easy to modify for whatever the need.

Built from Plan(s)

Farmhouse potting bench by Rocky Acres Woodworks

Submitted by Anonymous (not verified) on Sat, 11/06/2021 - 07:17

I used 1x4 for the top and stained with dark walnut danish oil

Built from Plan(s)

Comments

Kids Adirondack chairs

Submitted by redhead_61 on Fri, 04/08/2011 - 13:39

This was admittedly a little harder than I thought.  The first one turned out short of perfection trying to get things looking great.  The second one was better using a level and being more careful.  However, the fact that my nail gun totally went out halfway through made the project a long one.  But my kids LOVE them and they look so cute and luxurious out in my grass.  I love it. 

Built from Plan(s)
Estimated Cost
$10
Estimated Time Investment
Afternoon Project (3-6 Hours)
Finish Used
off white paint and poly
Recommended Skill Level
Beginner

2x4 garage shelving

Submitted by mjberger85 on Sat, 05/23/2015 - 15:07

I built this to fit inside a closet that I have in my garage to store all my camping stuff. I built it 5 feet long so I only had to buy 2x4s that were 10 feet long. I also built the bottom shelf closer to the ground to allow just a little bit more space between the first and second shelf. All in all it was a very easy and fulfilling project. I was a little worried about how sturdy the shelves would be but they are very solid. Thanks Ana!

Estimated Cost
$60
Estimated Time Investment
An Hour or Two (0-2 Hours)
Recommended Skill Level
Beginner

Comments

Faux fireplace with hidden storage

Submitted by Amymesser on Mon, 12/18/2017 - 05:59

I saw this project on the Ana-white website DIY. Luckily I have a friend that has all the tools so we used the cut list & built this faux media cabinet fireplace. I wanted it to store all my media stuff & have my TV set on top instead of the boring & expensive hanging the tv on the wall route not to mention the damage to my rented apt wall. We made a few modifications we extended the top & moved the center hidden shelf up. 

Estimated Cost
$400
Estimated Time Investment
Week Long Project (20 Hours or More)
Finish Used
Painted white
Recommended Skill Level
Starter Project