Community Brag Posts

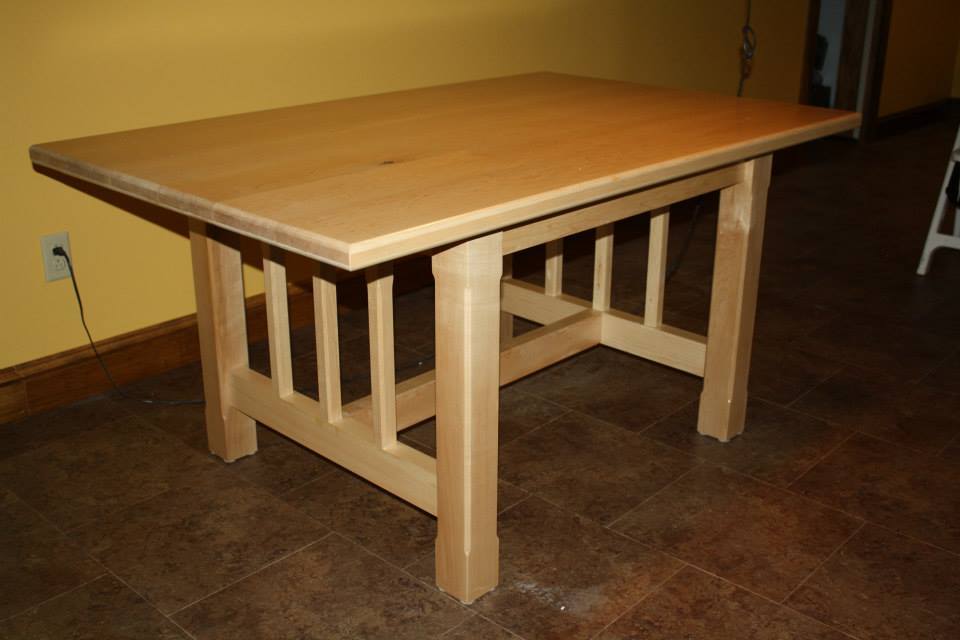
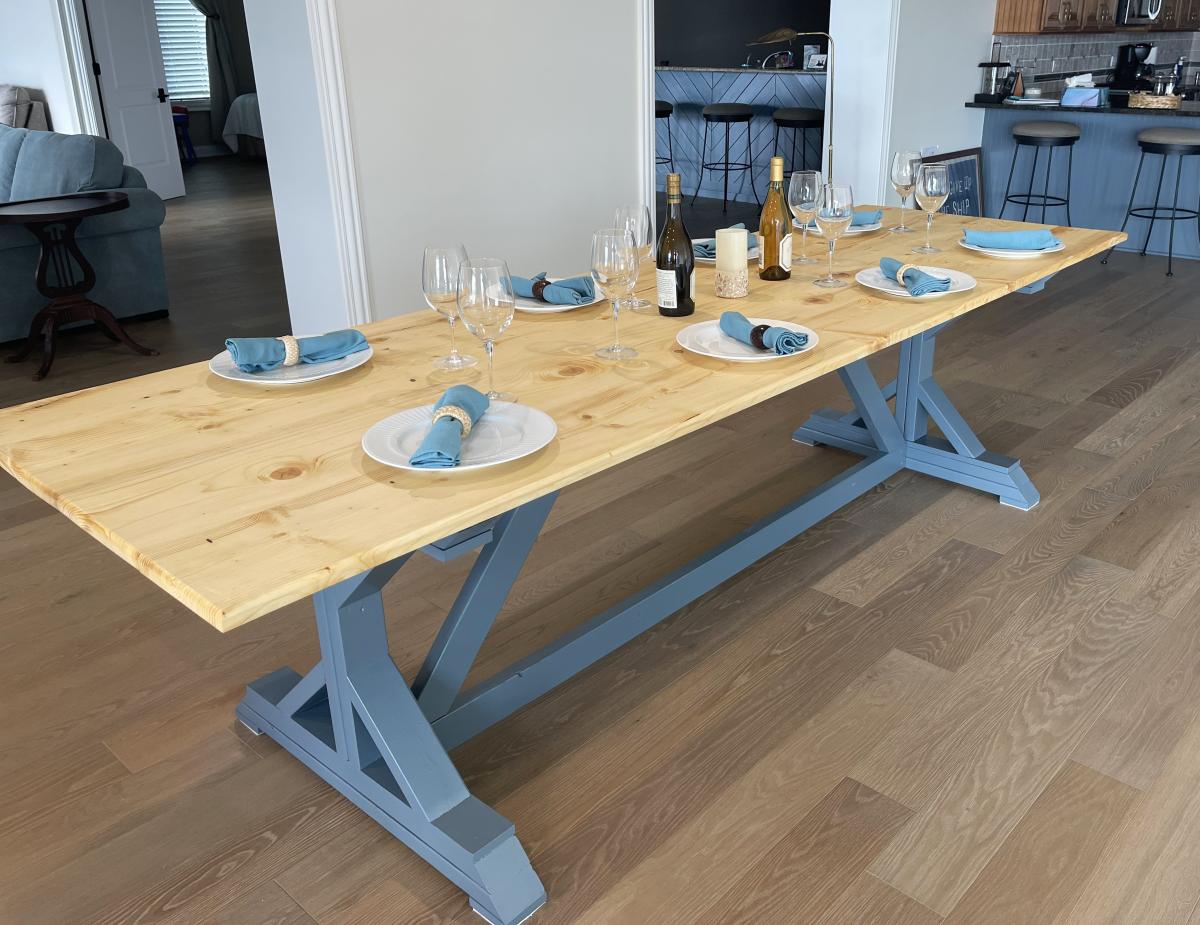
Rough Sawn Spruce Dining Table!

Submitted by Anonymous (not verified) on Mon, 09/18/2023 - 09:01

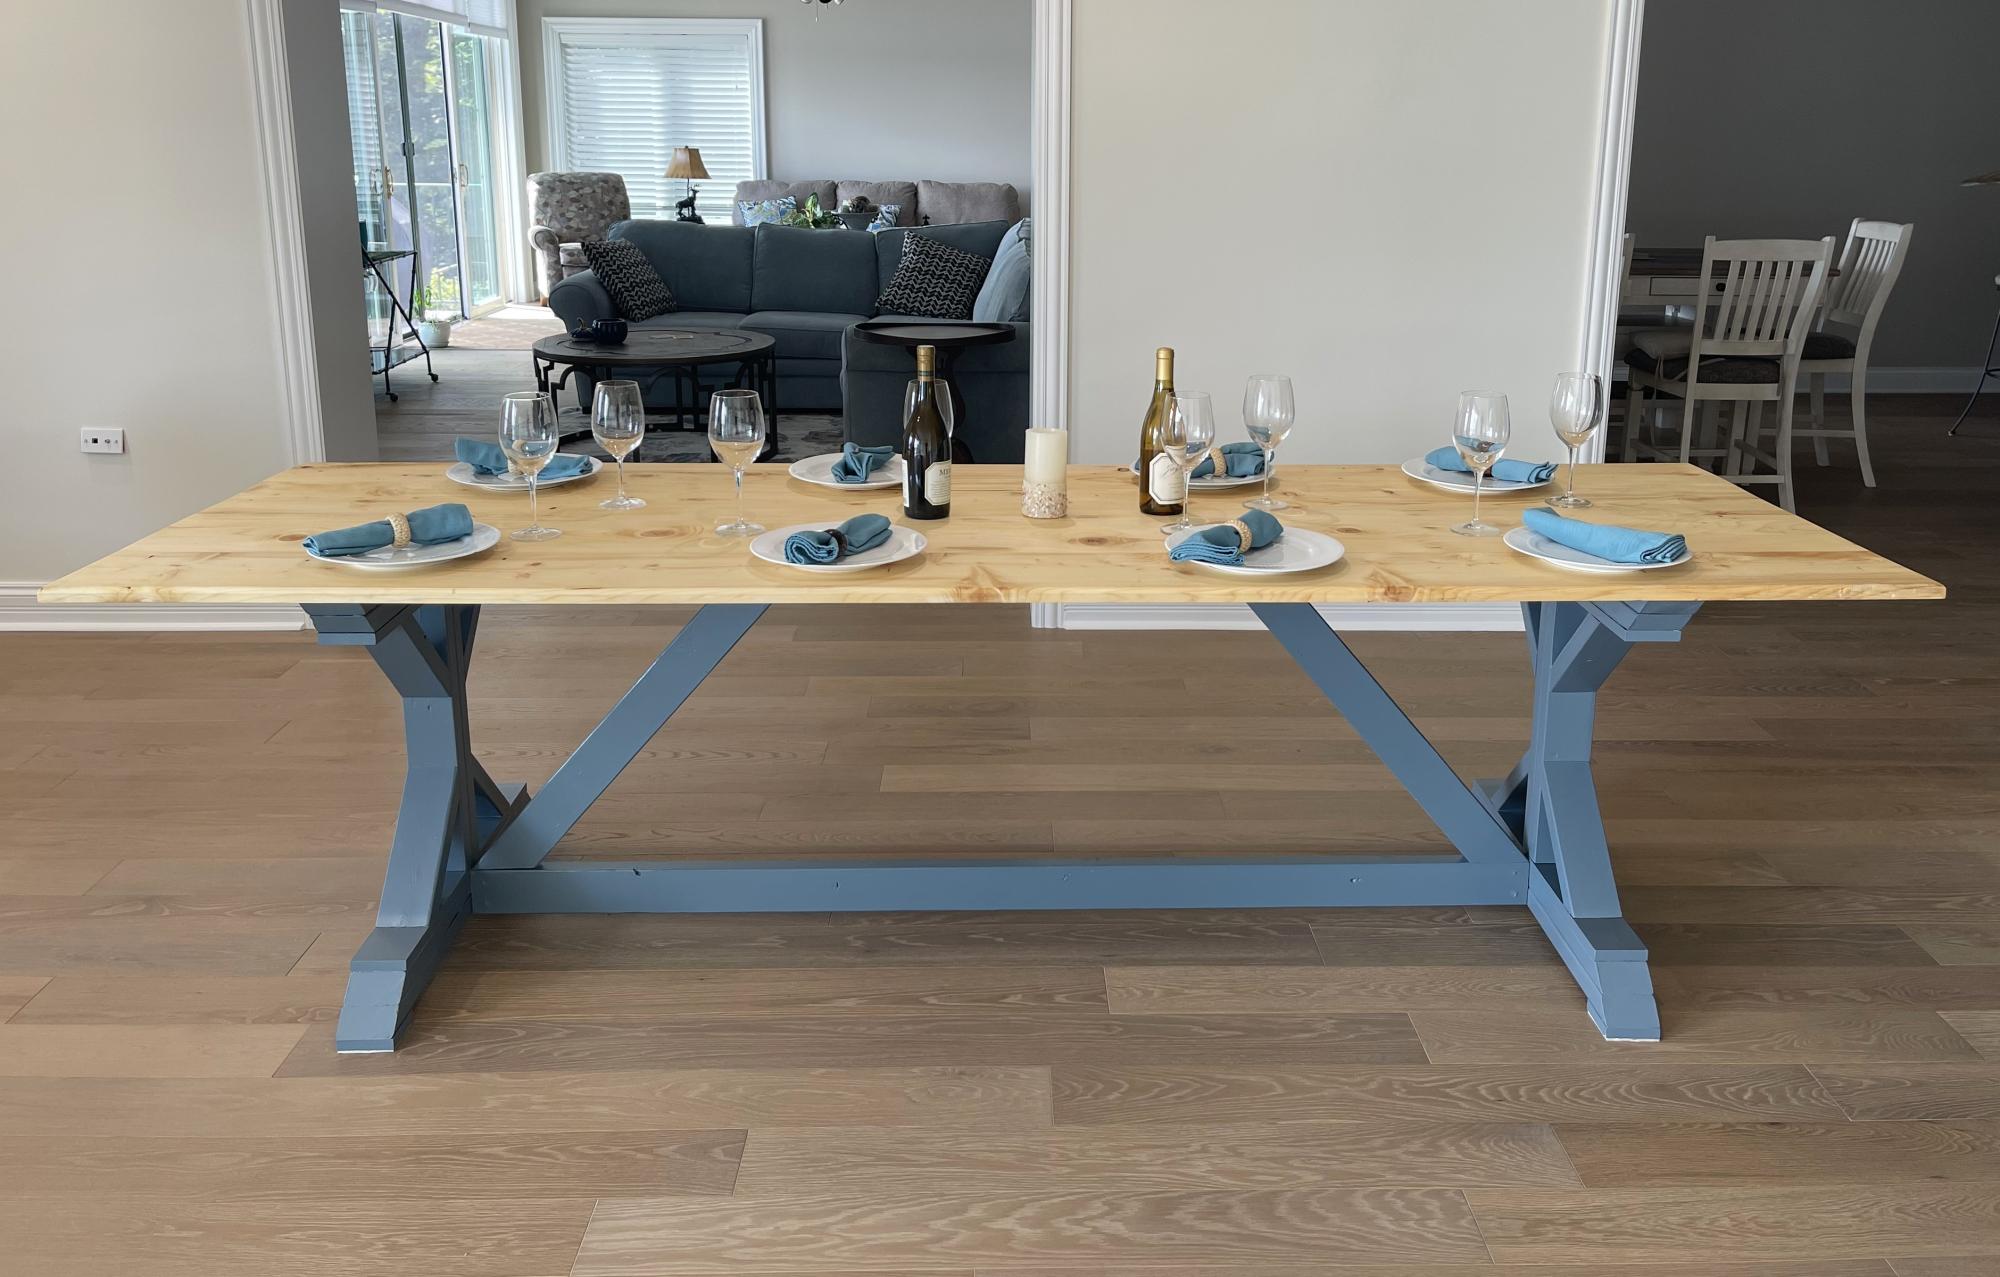
This was really fun! Actually used Spruce from a tree on my property that I had cut down and taken to a Saw Mill 6 Years ago. Been in the barn drying. The rough sawn boards were only 1.25 thick after the planer I could only maintain 1.00”. Extended the length of the table to 10’. Decided to reverse the underneath support angled boards to add support to the center of the table due to the added length and only 1” thick boards. Used biscuit joints to add strength and alignment. We love it at the lake home!


Matt Menges

Built from Plan(s)

Shed

Submitted by frankb03 on Sat, 05/07/2016 - 18:56

I couldn't find cedar shakes locally. For the front I used pine fence shakes from Lowes. They cost $1.56 each. For the sides I used Smartside 38 series primed engineered treated wood siding panel. They cost $32/panel. I had to buy two panels. On the back I used 1/2 plywood. I made the roof 76x46. All the materials were purchased from Lowes except the shingles. I used GAF Timberline HD Barkwood shingles.

Built from Plan(s)
Estimated Cost
$286 including gate hardware kit, gate pulls, shingles and stain.
Estimated Time Investment
Weekend Project (10-20 Hours)
Finish Used
Thompson's WaterSeal Stain and Sealer Nature Cedar. A great product. A stain and sealer in one product.
Recommended Skill Level
Intermediate

Slipcovered Bench

Submitted by Linda7 on Tue, 02/11/2014 - 16:55

My mother needed a bench in her small entryway. She had definite dimensions in mind and we looked everywhere. None fit the bill. Then I saw these plans and we went from there. She had leftover fabric from recovering her dining room chairs, and I had the plywood. She wanted the Queen Anne legs to go with her traditional furniture; we put felt floor protectors on the bottom of the feet of the legs, which helps keep the bench from moving so easily on the tile floor. The plans were easy to follow, including the tutorial on how to sew the slipcover. The bench worked out just like she had hoped. Thanks Ana, for the great plans.

Built from Plan(s)
Estimated Cost
$60.00; about $40 for the legs, foam, and finish
Estimated Time Investment
Day Project (6-9 Hours)
Finish Used
Minwax Polyshades in walnut; two or three coats. This acts more like paint, but you can re-coat in just an hour or so. I then used minwax poly in satin three coats for protection.
Recommended Skill Level
Beginner

Green House

Great little project from your site!

I put PVC to the ground vs the metal siding and added a heat sink in the middle with some old computer fans.

Built from Plan(s)
Estimated Cost
$1,300
Estimated Time Investment
Weekend Project (10-20 Hours)
Finish Used
PVC
Recommended Skill Level
Intermediate

Comments

Niccador

Sat, 05/23/2020 - 17:23

That PVC heat pipe intrigues me. Can you share a little more about it? I'm assuming it pulls hot air from the upper vent, and cools it down via the section of pipe below ground, sort of like a natural A/C. Keeps things from gettting too hot during the summer months?
Kinda looks like you'd frequently trip over it though. I'd probably have run the lower exhaust right up by the edge of the door frame, or a corner.

Custom Bookcase Wall

Submitted by Anonymous (not verified) on Thu, 11/16/2023 - 09:19

These bookshelves are modified from the Extra Wide Console Bookcase Plans from your website. They were constructed using 3/4 inch plywood for the bookcases, 6” MDF boards for the cup cubbies, and 1/2 inch plywood for the shelves. Purchased a jig from Rockler to drill the 1,000+ shelf holes and built the rolling ladder from oak using the plans and parts from Rockler. What began as a plan for a simple bookcase morphed into selling the dining room furniture and converting the room (which we had only used once in over 2years) into a library that we enjoy every day!

Built from Plan(s)

Kitchen Island

My wife and I wanted to replace an ugly metal wire shelf in our kitchen, fortunately Ana had plans for a nice-looking kitchen island!  The two new challenges for me with this project were the notches for the shelf supports, and the drawers.  I was able to figure both out and am glad to now have those skills in my toolbelt.  The top was a pre-made red oak board from Menards.  The other shelves are red oak, the rest of the frame is pine.

Built from Plan(s)
Estimated Cost
$200 on lumber (half of that for the top alone, 1 3/8" oak @ 2' x 5')
$40 for drawer slides (soft-close) and hardware
$30 for finish
Estimated Time Investment
Week Long Project (20 Hours or More)
Finish Used
Waterlox Original
5 coats, 2 days drying time between coats. Applied with foam brush.

White cabinet paint used on the frame
Recommended Skill Level
Advanced

A-Frame Chicken coop

I built this chicken coop/tractor a few years ago, for my cousin. I loved the ease of the plans and the build, and she loved the hens in her backyard!

Built from Plan(s)
Estimated Cost
$150 CAD
Estimated Time Investment
Day Project (6-9 Hours)
Recommended Skill Level
Beginner

Maple Mission-Style Farmhouse Table

Submitted by Tinia on Mon, 03/24/2014 - 09:44

Using the Farmhouse Table plans I just modified them to the dimensions I thought would be best for my space. Tried mortise/tenon joinery on the legs and that took a lot of time since it was my first time. The table top is put together with pocket hole joinery. I love my Kreg Jig.

Recommended Skill Level
Intermediate

Extra Large Shoe Shelf

Submitted by Booooozle on Tue, 06/05/2012 - 20:10

Like just about every woman, I have LOTS of shoes! Well I couldn’t find an attractive enough shoe rack to fit in with our “Closet” furniture. We use an entire bedroom that our bedroom is connected to because the closet in that bedroom is minuscule. Anyway the closest I came was a simple design from the particleboard stacking closet unit line, you all know what I’m talking about. Well the problem was that they were $10 each & I would have needed like 6 of them & they didn’t come in black, which I tend to like because it doesn’t show dirt & that way all the furniture in the house is interchangeable if I feel like moving things around. I had plywood left over from my bed project so I just copied the design but made it a bigger single unit.

Estimated Time Investment
Afternoon Project (3-6 Hours)
Finish Used
Valspar Flat Black Indoor/Outdoor Enamel
Recommended Skill Level
Beginner

Barstools

Submitted by lazyLiz on Sat, 06/09/2012 - 21:22

A 30" tall bar stools inspired by the plan simplest stool.

Built from Plan(s)
Estimated Cost
$ 40- $60
Estimated Time Investment
Afternoon Project (3-6 Hours)
Finish Used
valspar white paint
Recommended Skill Level
Beginner

Comments

Handygirl

Sat, 07/07/2012 - 18:47

I love these stools! I love the curve in the top. Are yours square on top or rectangle?
Also, what size of board is the top (seat)?

Rusty Cottage

Fri, 07/20/2012 - 05:32

I like your design. Finally made an account and will be making matching ones. Thanks for the inspiration. If the better half doesn't like the first one I will have a new stool for my workbench

MrsPowers

Fri, 08/31/2012 - 20:27

Hi! You're stools came out wonderful. I was wondering how you got the seat to be curved that way.
Thanks!

Outdoor Chair

Submitted by Chanda_B on Tue, 04/28/2020 - 10:49

Adjusted the height of the back to better support back cushion.

Angled back and seat boards for relaxed fit.

Used pine boards for side of chair.

Estimated Cost
$50
Estimated Time Investment
Day Project (6-9 Hours)
Finish Used
Varathane Stain + Poly (Red Mahogany)

To be added: Spar Urethane (Satin)
Recommended Skill Level
Beginner

$18 Star Shaped Clothes Drying Rack

Submitted by Anonymous (not verified) on Fri, 07/15/2016 - 19:54

Make a beautiful star shaped clothes drying rack that magically expands, using very simple tools and materials! Detailed tutorial and free building plans.

Estimated Cost
$18
Estimated Time Investment
Afternoon Project (3-6 Hours)
Recommended Skill Level
Beginner

Our garden enclosure!

We decided that we wanted a raised garden and found the plans here on Ana's site that we really liked. The plans were really easy to follow and it only took about a day and half for our kids and myself to build for my wife. Only issue I had was the door... that is getting it square but I figured it our later after looking at it long enough. The two 2 x 4's the door sits in between were not level. So I have got to adjust them and the door in the coming days to correct it. Other than that we absolutely love it! Thank you for providing the plans to all these projects. This is the second thing that I have made from this site. I will be making another post later on regarding the other project! I might add I have never done anything like this ever and honestly I think it turned out great :-)

Built from Plan(s)
Estimated Cost
$250
Estimated Time Investment
Day Project (6-9 Hours)
Recommended Skill Level
Intermediate

Modern Park Bench

Submitted by Tim PIZZ on Sat, 05/16/2020 - 06:17

This was one of my first projects. I just used a circular saw but a mitre saw would be better. I’ll look for one soon. It was rewarding, fun and we love how it looks on our back patio.

Built from Plan(s)
Estimated Cost
$200
Estimated Time Investment
Weekend Project (10-20 Hours)
Finish Used
I primed the pieces with Sherwin-Williams exterior latex primer before assembly then painted with Sherwin-Williams Resiliance exterior latex. We chose “Retreat” as our color.
Recommended Skill Level
Beginner

Scrapwood wooden houses

Submitted by Kate_14 on Mon, 05/18/2020 - 13:49

I built these cute little houses with scrap wood. They are easy to customize!

I used 1x6 boards for the house and 1x2 boards for the roof. I attached the roof with bradnails.

Estimated Cost
0$
Estimated Time Investment
Afternoon Project (3-6 Hours)
Finish Used
Paint and stain
Recommended Skill Level
Starter Project

Beer Wall for Wedding

My cousin recently got married and wanted a beer wall at her wedding. I quickly searched Ana's site for the perfect plan and chose the Tall Panel Headboard for my starting point. With a few modifications it became a beer wall in no time at all. I love how Ana's plans can be easily modified to make a totally different project.

No fancy wood was used here. Just regular wood from the big box store. A jockey box was attached to the back side of the wall. It worked awesome!

Since I discovered this site in January, I've made close to 30 items from her plans. I'm ridiculously addicted and not just with Ana's site but also with her blog friends. For Valentine's Day I asked for a Air Strike gun and got it. It was better than jewelry and chocolates! I'm well on my way to collecting my own tools and learning how to save money by making it myself. Oh, and I can't even begin to tell you how impressed everyone is with my finished products.

Built from Plan(s)
Estimated Cost
roughly $200.00
Estimated Time Investment
Weekend Project (10-20 Hours)
Finish Used
Valspar paint from Lowes
Recommended Skill Level
Intermediate

Playhouse Loft Bed

Submitted by BethStew5 on Wed, 07/18/2012 - 22:12

This is my first build from this site! I used 6" boards to give the siding a plank look rather than using plywood. To make the height work, I used 8" boards for both the top and bottom planks. I also made the door a little taller. Other than that, I followed this plan step-by-step. It was very easy to follow and I really enjoyed making this bed. My daughter (and my sons) really enjoy it!

Built from Plan(s)
Estimated Time Investment
Week Long Project (20 Hours or More)
Recommended Skill Level
Intermediate

Outdoor Sectional

We have been looking for a deal on an outdoor sectional for a whole year. Nothing. The cheapest we could find was $899 for one that was much smaller than this one and with thinner cushions. So we upped and drove to the lumber yard and purchased the lumber on the list and got to building. The total cost of lumber was $200, the Spax screws we already had on hand. We used pocket holes for the joints. The wife made the cushions herself. She had most of the fabric on hand, we just had to buy 3 yards for the back cushions, which are made of standard size pillows. They have been sprayed with fabric protectant for outdoor use (I think she used the Scotch brand). The seat cushions are 5 inches thick (they are wrapped in silk film to protect them from getting soaked when it rains or when someone who just got out of the pool sits on them), around $100 for both. It took her a couple of days to sew the box cushion covers.

Estimated Cost
$400
Estimated Time Investment
Weekend Project (10-20 Hours)
Recommended Skill Level
Beginner
Seasonal And Holiday

Farmhouse Nightstand

Submitted by rendall28 on Sun, 05/31/2020 - 14:10

This was my first furniture piece that I have made. I made two night stands, one for each side of the bed in our master bedroom. I chose to modify the plan so I could have ball bearing drawer slides.

Built from Plan(s)
Estimated Time Investment
Week Long Project (20 Hours or More)
Finish Used
Briarsmoke Stain for table top...Special order white paint to match the white woodwork in our home.
Back