Community Brag Posts

Simple Nightstands

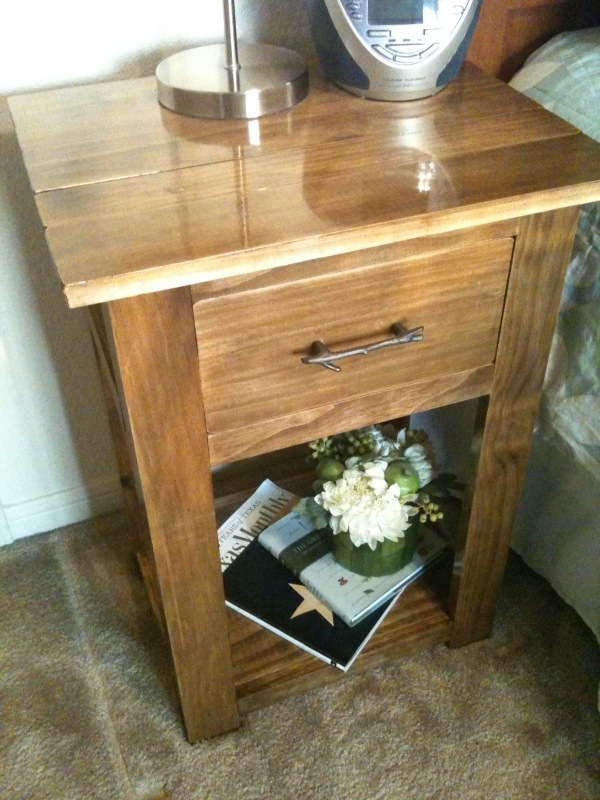
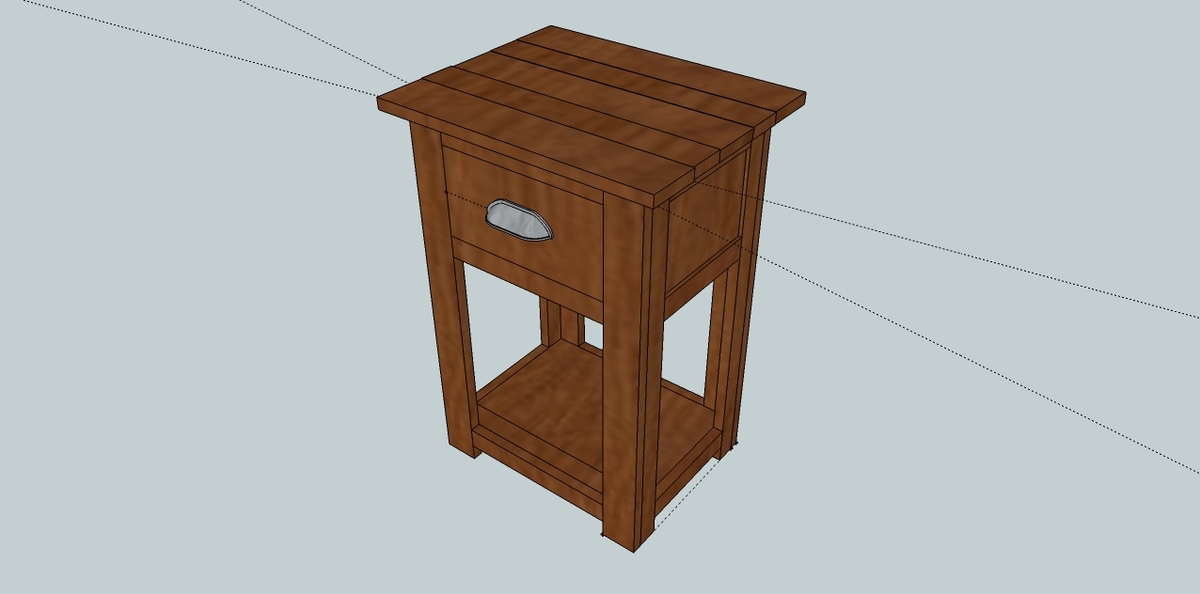
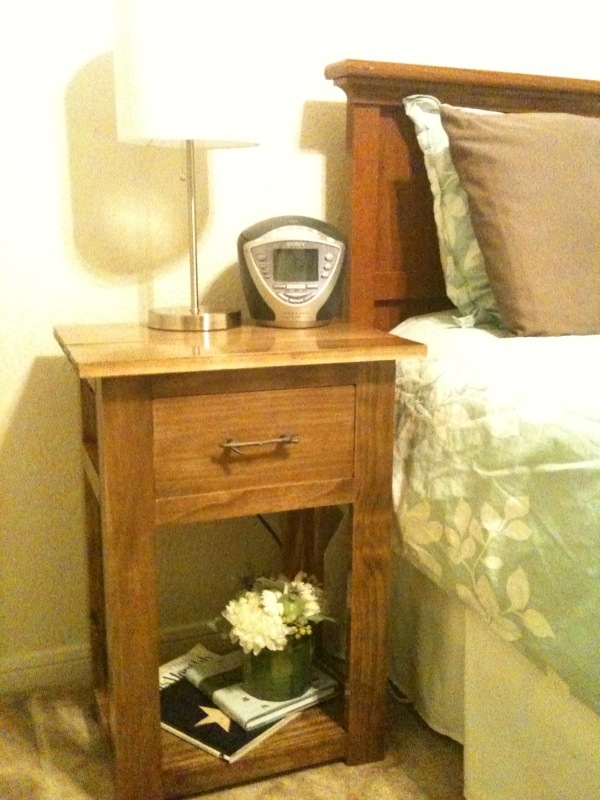
I absolutely love the way these turned out! I drew up an example in Sketch-up using Ana's plans for the Simple Nightstand as a starting point. 

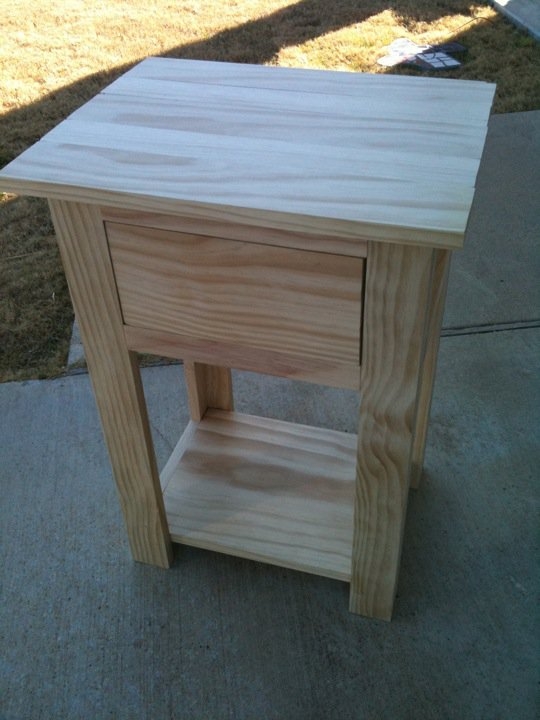
The top is made from 5 boards, 19 inches in length, joined together underneath with a kreg jig. I made two of these, identical. Each nightstand took exactly 50 kreg screws, not intentional, it just worked out that way. I used a brad nailer to attach the trim along the bottom shelf (which I could have avoided with a a little more planning in the beginning), also to attach the side panels that you see on the sides and back, and to assemble the majority of the drawer, using kreg screws to attach the front.
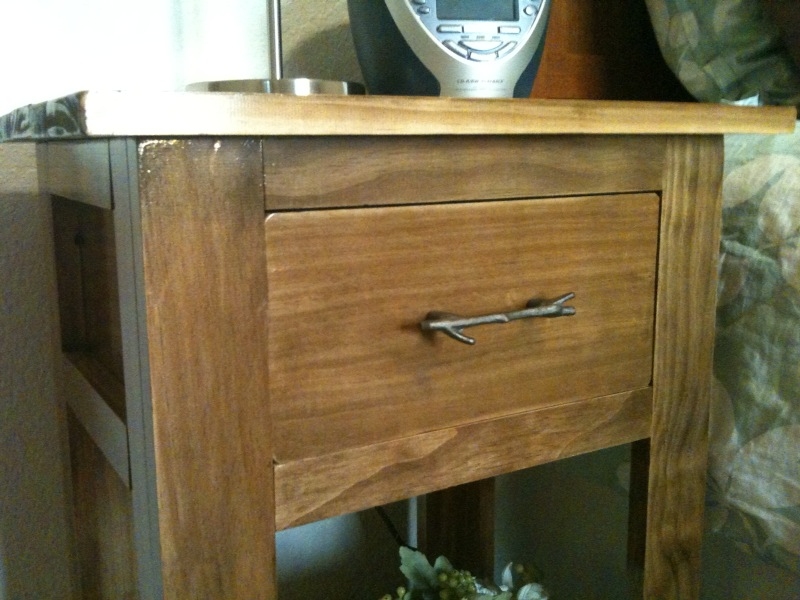
I'm in love with the drawer pulls, a metal twig shape bought at blue! I'm debating whether or not I want to paint them with some brown paint and distress them a little bit, but not sure if it would just end up looking hokey since they are obviously not real twigs.
It took me several hours to build these, mostly because I had to kind of work out a few details as I went, but I'm confident I could do it quicker if I had to do it again. The finishing is what takes the longest!
Built from Plan(s)
Estimated Cost
$110 includes enough Select Pine, kreg jig screws, and drawer pulls to make two nightstands
Estimated Time Investment
Day Project (6-9 Hours)
Finish Used
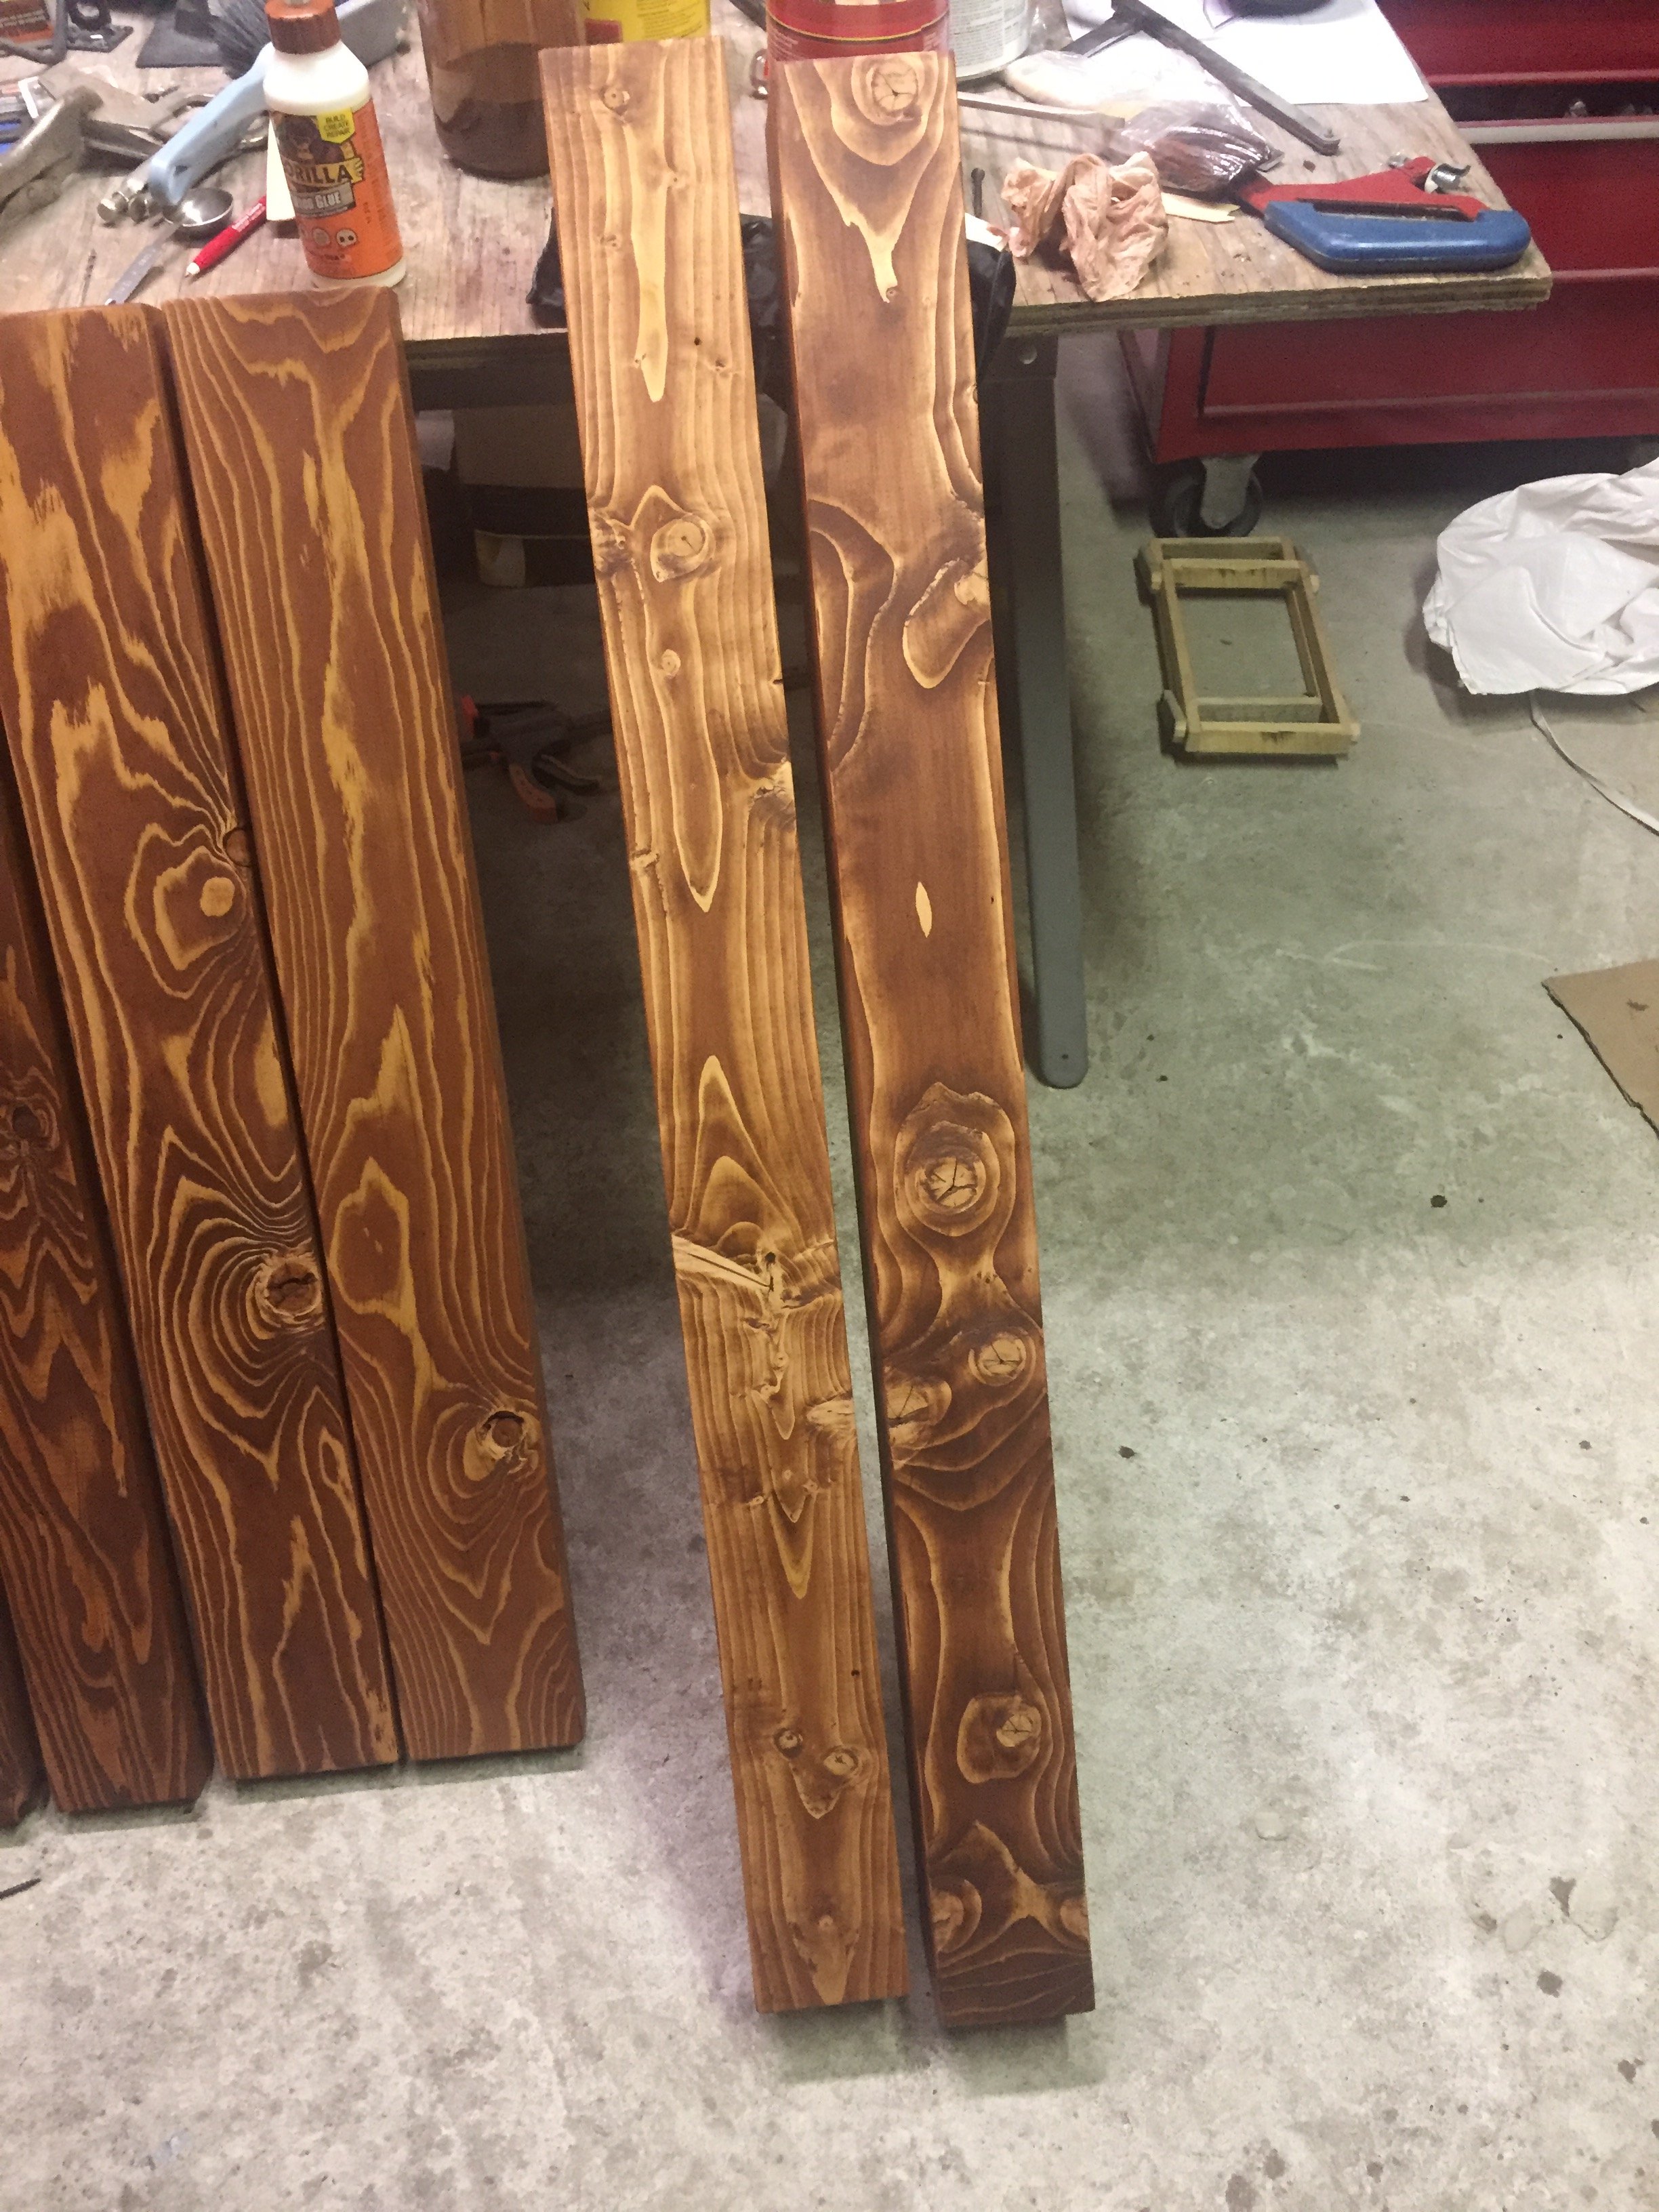
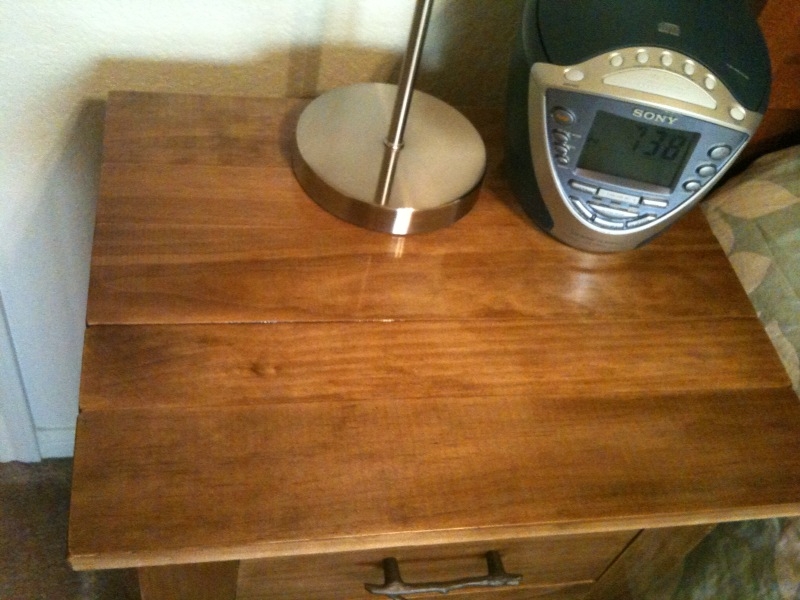
Two coats of Cabot stain, Pecan color. Three coats of satin polyurethane, with a light sanding between each coat.
Recommended Skill Level
Intermediate

Garage Shelving

Submitted by NLough on Thu, 12/16/2021 - 08:42

I made these shelves - following the plans on the site - with my kids who helped with the painting. What a straight forward way to organize the garage and have fun introducing kids to building. The shelves are deep enough for storage tubs, access items easily and are very sturdy. I would fully recommend this plan to get things sorted in your garage and have more room for other projects!

Comments

Outdoor Sectional

I scaled back the length of the sofa by a few inches and I made the sectional only one seat to fit my space on the deck. This was my first woodworking project that I did by myself. I got the cushions for more than 1/2 off at Ikea so the whole project cost about $150 ($80 for the cushions). It took me about a week to complete but the total time was less than 10 hours to build and stain. I'm pretty happy with how it turned out.

Estimated Cost
$150
Estimated Time Investment
Weekend Project (10-20 Hours)
Finish Used
Pittsburgh Paints Stain & Sealant in One for Decks, Fences, & Siding in Walnut. I brushed on the exterior stain just like a paint. I did the top part of the sofa first, then flipped it over and stained the bottom. Read instructions on the label.
Recommended Skill Level
Beginner

Comments

Farmhouse Bed

Submitted by mwg10 on Mon, 01/15/2018 - 07:57

I made a few modifications. 

I used shiplap instead of tongue and groove, raised the footboard by adding an extra 2 x 6 & used jacobean stain.

Thanks Ana for putting the plans and video on your site.


Built from Plan(s)
Estimated Time Investment
Weekend Project (10-20 Hours)
Finish Used
minwax jacobean
Recommended Skill Level
Beginner

She Shed - Guest Room, Craft Room, Office

Submitted by Chriss45 on Tue, 01/23/2018 - 08:18

I needed an office and also a guest room so i built a she shed and all the furniture.

Recommended Skill Level
Advanced

Comments

junesummer21

Thu, 01/25/2018 - 06:27

I love your murphy bed idea and would love to have plans for it. I too am looking for a guest bedroom and craft area and I know this would work in my space.

Chriss45

Mon, 02/05/2018 - 16:20

I didnt really have a plan when I was building my Murphy bed, I can do a sketchup plan for you if you would like. I used boat chair swivels instead of hinges and there is a YouTube video on how to do this. 

Chris

Nurserene62

Thu, 06/24/2021 - 23:11

Hi Chris! I would love to have a copy of the sketch up of this. I have a small she shed/guest cottage I would live to duplicate this in. Thanks in advance.

cgself12

Mon, 11/08/2021 - 14:18

Hi Chris!
I know I'm coming late to this party but I just found your shed and I adore it. You did an amazing job and I cannot express how impressed I am! I would also like a sketchup plan of both the murphy bed and the adjoining side cabinets. Great job!

Kim Daigle

Thu, 06/06/2019 - 10:59

I absolutely love everything about this she shed!!  I would be interested in a sketch up of the murphy bed as well as the cabinets next to it.  I would at least like to know what the dimensions of it all is.  You did an amazing job!  It's so beautiful!

mcocooper11

Tue, 06/25/2019 - 15:14

Me too!! I built a horizontal Murphy bed so I have that part done but I would like to see the plans for the cabinets on either side with the pull out desk!

so very cute!

Custom Reclaimed Barn Wood Dog Crate

Here is a custom rustic barn wood dog crate we built for our friends – with the majority of the barn wood reclaimed from their own barn.  The piece is approximately 36″ high, 60″ wide, and 29″ deep; with interior dimensions of 30″ x 56″ x 26″ – plenty of room for a large dog to move around and stretch out.  Of course, it is on locking casters too so it can be easily moved around.

The frame of this piece is made from the reclaimed barn wood, which was 2 x 6 stock resawn down to 2 x 3.  The sliding barn door also started as 2 x 6 material which we cut down to 1 x 2 stock.  The barn door was the only piece of this where we used a Kreg jig and pocket hole screws.  The rest of this custom rustic barn wood dog crate used miter joints for the front corner, while the back and bottom were attached in rabbets we cut in the outer frame.

The spindles are standard 1/2″ rebar, cut to the appropriate length and painted with a hammered black spray paint.  They are are recessed about 1″ into the wooden frame to ensure the dog can’t push them out or crack the wood while leaning on them.

This custom rustic barn wood dog crate also includes custom, hand made barn door hardware we made ourselves.  Yes, we do some metal work too!  We made this barn door hardware from standard flat bar steel and pulley wheels.  We even made custom clevis pins from 5/8″ steel rod to hold the wheels in place.  

There are more pictures here.

Estimated Time Investment
Weekend Project (10-20 Hours)
Finish Used
none. it's all natural
Recommended Skill Level
Intermediate

Balin Console Table by More Like Home

Submitted by Georgia M on Wed, 06/15/2011 - 15:57

This was the first project I tackled by myself. I think I spent about $70 and used pine.

Built from Plan(s)
Estimated Cost
$70
Estimated Time Investment
Day Project (6-9 Hours)
Finish Used
Espresso stain & polyurethane.
Recommended Skill Level
Beginner

Comments

chanice (not verified)

Wed, 05/02/2012 - 06:00

Hello,
You are AMAZING! and it's a very nice table. Saw one at Pottery, but couldn't
afford the price tag and all other charges. Are you willing to share your plans or
do you have one already?

Thank you.

chanice (not verified)

Wed, 05/02/2012 - 06:03

Hello,

Don't know if the first email was sent.

Just want to say you're AWESOME and the table is beautiful.

Saw one at Pottery, but couldn't afford the price and all other charges.

Do you have a plan that you're willing to share or post?

Thank you.

StaceyMc

Sun, 09/28/2014 - 14:22

Can someone please be more specific on the drawers, I made the cuts exactly as it says and i have a gap on top??? Or are their any pictures like there was for the rest of the table??? I'm so close and I love the look but these drawers are going to be the end of me lol 

Stephen Peters

Sun, 09/28/2014 - 15:25

Hi StaceyMc,

First of all you made your drawers correctly. Here is a old furniture maker trick to solve your drawer problems.

Looking at the plans they ask for a 1/8" gap all around. The problem with that is that a drawer sits in the opening with the bottom of the drawer tight to the bottom of the opening it sits in. When the drawer does that it makes the gap at the top a 1/4". ...Much to wide compared to the other sides....

The solution is to raise the drawer up in the "opening". Use two thumb tacks on the "bottom rails" of the console ...where the drawer sides slide in and out. Do this for each drawer. If that isn't high enough you could put a small washer under the tack to raise it higher.

Now if that isn't high enough I do have other ideas to make your drawer work. Just let me know.

Then only after you have put the finish on your master piece. Apply wax or a candle works, to the bottom edge of the drawer side to make it glide in and out easer. Just rub the wax back and forth quickly, "to make heat" and it will adhere to the wood.

I hope you enjoy your adventures in woodworking! :)

Crib for new baby!

Submitted by ry12345guy on Tue, 03/13/2018 - 13:01

From a pine tree in the back yard to a great looking crib that will hopefully stay in the family for generations.

We had to take down a pine in the back yard to make room for a barn so I had it milled into lumber for future projects. I was able to get the majority of the lumber I needed from that tree, everything except for the 4x4's and 2x6's. I got what I thought was pine but after staining it I quickly realized that it was not (maybe hemlock?). The grain didnt match at all so I had to track down some new wood and remake the pieces. Boy was that frustrating! I also bothered myself to hide as many fasteners from (finished) view as possible. It made the project a bit more involved but the finished product made it all worth it. 

Estimated Cost
$80
Estimated Time Investment
Week Long Project (20 Hours or More)
Finish Used
Minwax Stain- 1/2 Red Chestnut 1/2 English Chestnut mixed (to match dry sink converted into changing table).
Minwax Polyurethane- Clear Satin (2 coats with a light sanding with a scotch pad between coats).
Recommended Skill Level
Intermediate

Farmhouse Doggie Daybed

Submitted by jkjackson on Sun, 04/24/2022 - 18:42

This was adapted from the Farmhouse bed plans to match our king size farmhouse bed.

Comments

Garage Shelves

Submitted by Anonymous (not verified) on Wed, 10/24/2018 - 08:43

This was a pretty easy project, but I had to adjust the vertical legs to accommodate the sloping garage floor. I drew a  horizontal line for the top edge then measured to the floor at the spacing I wanted the vertical legs. I used these measurements to cut the three vertical legs. It’s level and straight, even though my garage is sloped. 

Estimated Cost
$300
Estimated Time Investment
Week Long Project (20 Hours or More)
Finish Used
Garage shelving
Recommended Skill Level
Beginner

Extra Large Canopy Bed

Submitted by Anonymous (not verified) on Sat, 07/23/2022 - 08:34

I followed the plans on the site but made the rear posts the full size of an 8 foot 4X4. For the front posts I had to cut down to fit around the fan/light. For the headboard I simply put 2X6's spaced out 3 1/2 inch between, I used scrap 2X4 for spacing. To attach all the piece I use those newer large Kreg screws for large lumber, way bigger and stronger screws. The bed platform is 1/2 plywood, added a 2X4 for support and skipped the support in the middle. Extra screws and metal L brackets hidden and added for support. Used a router to round out all edges and multi-tool to sand the rest.

Comments

Comfortable Easy-Build Chair

Submitted by Sue Hill on Fri, 08/12/2022 - 14:43

This was a great project! If a 70 year old woman can build it, so can you. I had an old bench that used 2x4's and those plastic ends. I took it apart and salvaged most of the boards after sanding them down. So my cost was zero dollars to build this, but I'm sure it wouldn't last as long as using new wood.
I found the instructions easy to follow. I used 2 1/2" exterior star screws, and finished the wood with solid exterior stain in a sage green. The wood wasn't in great shape, so a transparent stain would not be a good choice for me.
I bought a $16 chair cushion and I'm tempted to make another chair!

Comments

Building Built In Bookshelves

I decided to build bookshelves on either side of the fireplace, where it was just drywall. I wanted them to be flush with the wall, and the garage is behind the wall. So, I built them into the garage.
I put headers above where the bookshelves would be, and framed the back side in the garage with just 2x4's. I used full sheets of bead board to cover the backs and sides, and tops. Then I bought pre made shelves and put them up using quarter round to support the shelves on all three sides.
I then bought a door frame kit that I liked, that came with fluted pieces for the sides and top with decorative squares to put at the corners. I caulked and painted it all once it was built. I used a circular saw, framing nail gun, compressor, trim nail gun, chop saw and a hammer total. It was a pretty simple project but has made the space much more useable and pretty. My next project is to build a mantle and surround that matches the bookshelves.

Estimated Cost
$200
Estimated Time Investment
Weekend Project (10-20 Hours)
Finish Used
glossy white paint, Behr Polar Bear white.
Recommended Skill Level
Intermediate

Antiqued TV frame

Submitted by kbdesigns on Tue, 11/17/2015 - 15:03

Me: Hey can we get a new TV?

Wife: No, there is nothing wrong with ours.

Me: Darn, ok. Hey what if I build this cool frame around it?

Wife: <3 <3 <3 OK! <3 <3 <3

Me: Win.


So this is a project from quite a while back, one of my first builds that got me hooked on woodworking actually. I made a few modifications (obviously) since our TV was super thin it just wasn't going to work the way I wanted. I decided to go with more of a tapered look instead. It was my first experience with the "antiquing" technique, after lots of trial and error I ended up getting the look we were going for. It was overall a fun and fairly easy build, with a few learning moments along the way. The only time any of these projects seem "complicated," is when you over think everything, like I do :)

Estimated Cost
$75 (I used the fancier 1x4s from Home Depot)
Estimated Time Investment
Day Project (6-9 Hours)
Finish Used
White paint, antiqued with dark walnut stain.
Recommended Skill Level
Beginner

Comments

Ashlin

Sat, 03/26/2016 - 08:42

This looks beautiful! Was wondering where you purchased the barn door hardware? Been looking everywhere to find some that won't break the bank.

Low Loft Bed for Toddler

Submitted by Anonymous (not verified) on Sat, 11/12/2022 - 17:08

I built this low loft bed following Ana’s plan as soon as I found out that I was pregnant with baby #2. We needed a “big boy” bed for our 3 year old, and I couldn’t find a loft bed on the market that was priced reasonably or looked sturdy. This the biggest challenge I have taken on to date, and I was certainly sore after building. I don’t have a workbench, so I worked on the floor of my garage and used a couple of saw horses that my dad had next door. I am so proud of this and can’t wait to build more after baby boy comes!

Comments

Treehouse/Playhouse

Submitted by Bigbill99 on Sun, 01/10/2016 - 00:07

Thank you! You've helped me look like a true carpenter who knows what he's doing! My whole family is impressed with my woodwork lately, and now I'm addicted. I've done your seesaw, bar table and stools plus the treehouse in 2 weeks. Thank you for sharing your plans!

Estimated Cost
$500.00
Estimated Time Investment
Week Long Project (20 Hours or More)
Finish Used
Spar urethane
Recommended Skill Level
Beginner

Blue egg holder

Hi all,

I made the wooden egg holder for our brand new kitchen. I altered the size because there's just the two of us here since our son moved out. It was a very easy beginner project and lots of fun to build by myself. If you're a beginner like me it can be overwhelming to start, but if I can do it you can do it too! Just go for it. I'm looking forward to build a next project with one of Ana's plans.

Built from Plan(s)

Comments

Simple Potting Bench

I originally built this potting bench in 2014. It was the very first project I built completely on my own! After 5 years of being outside it needed a little makeover. I sanded and refinished it, and made a couple modifications.

The last picture is the before :) 

You can read about the whole building process here: https://mamaneedsaproject.com/2x4-potting-bench-makeover/

Built from Plan(s)
Estimated Time Investment
Afternoon Project (3-6 Hours)
Recommended Skill Level
Beginner

Comments

Kitchen Storage Shelf

Thanks to you we were able to build my mom a shelf for her kitchen with a combination of two of your plans! My mom loved the top of the “Farmhouse Potting Bench” but also wanted shelves like the “Rustic X Console Table”. We combined the two and adjusted measurements to fit our wall space. We didn’t do a complete X on the side because we wanted it with one slant, but loved how it turned out over all! 

Kayla

6 seater L shaped sofa,

Submitted by Anonymous (not verified) on Fri, 06/09/2023 - 14:37

Made this about 7 years ago from Ana's plans. Very easy to follow. I actually extended it to be a 4 and 2 seater set. Still a perfect today. Love it
Wicklow
Ireland.

Comments