Community Brag Posts

Basement Storage

Submitted by Anonymous (not verified) on Tue, 12/27/2016 - 11:44

Thanks for the instructions! Here's my version. I haven't built much of anything before, but I needed it in my basement to handle kids' stuff. My version is 18 feet long. I combined a 12-foot and 6-foot 2x4 to get that length, which meant less cutting, which I had done at Lowe's (for free). I used the 6-foot 2x4s throughout the shelf to ensure it was strong (in other words, I didn't want a 12-foot "section" and a weaker 6-foot "section" added on).


I was able to get everything in my car but the ride home was slow. I also had to use my egress window to get the 12-foot boards in the basement.


Total cost for me was about $170 including a couple boxes of screws and wood glue. I could've easily spent double the cost on store-bought shelving. Thanks for the plans!

Estimated Cost
$170
Estimated Time Investment
Day Project (6-9 Hours)
Finish Used
None
Recommended Skill Level
Starter Project

Ana White chicken coop with modifications

We started with the basic chicken shed coop plans and modified it some. We wanted the peak to be in the front for ease of access and to allow leaves from tree overhead and rain and snow to fall to the back away from the entrance. The windows raise from the inside using 1/8" wire secured on the inside with a rope cleat hook.

We added Dutch doors. We added latches for the pop door to keep it iopen or closed as needed. Dutch doors also have decorative latches and eyehook latches to secure them when they are fully open. I rested the shed on 12 in. x 8 in. x 12 in. concrete patio pier blocks to allow drainage. we extended the roof about 6 " to allow for extra protection and avoid dripping whe  it rains.

On the inside I have a roost and a poop deck. Hanging from the poopdeck I have their feed to keep it off the floor and keep shavings, etc. from getting into the food. The poop deck  and the floor are covered with comercial grade tile to facilitate easier cleaning.

Built from Plan(s)
Estimated Cost
$1,000 including tools (Keg Jig) decorative hinges, wood, sheathing, shingles.
Estimated Time Investment
Week Long Project (20 Hours or More)
Finish Used
White KILZ primer, Glidden Kenya for walls of coop and basic Glidden white. and Glidden red for Dutch Doors, for 1X6 under roof Glidden dark brown
Recommended Skill Level
Advanced

Comments

anxo-a

Sat, 03/14/2015 - 02:50

Hi!

I love your coop and the modifications you made - I was planning on doing the same thing with the placement of the door. I was wondering if you could post a couple of photo of the inside of the coop? I'm especially interested in where you placed the roost.

Thank you so much for sharing!

Large Cubby Bookshelf With Adjustable Shelves

This was my second project that I completed to go along with the Daybed With Three Trundle Drawers For Storage that I made for my son.

The original plans for this bed state that you need three 1 x 12 x 8's, but you actually need 4. The two middle 42 3/4" boards on the inside are missing from the cut list, but you can see them in the diagram.

I am so happy with the way this turned out! It was a little more challenging with the wider width boards--I had to force them on the line because they weren't perfectly straight. But overall, I am very happy with this.

When I drilled the holes for the shelf pins using the Kreg shelf pin jig, I used the 1" inset on the outside 2 columns, and the 2" inset on the center column. This way I avoided have holes that were drilled all the way through the board.

Between this and the storage daybed, I have really freed up so much space in my son's small bedroom! Happy building!

Built from Plan(s)
Estimated Cost
$70
Estimated Time Investment
Weekend Project (10-20 Hours)
Finish Used
First, I used Minwax's water-based pre-stain wood conditioner. After waiting about 15 minutes, I sanded the wood again using 220 grit sandpaper. Then I used about four coats of Minwax's water-based "Sangria," to get the darkest color with that particular stain that I could possibly get. You have to allow 2 hours drying time between coats, and 3 hours after the final coat. Finally, I used 3 coats of Minwax's water-based polycrylic, again allowing to dry two hours between coats. I also lightly sanded with 220 grit sandpaper between coats of the polycrylic.
Recommended Skill Level
Intermediate

Comments

Jake

Tue, 01/01/2013 - 18:13

Your first two projects are very professionally done. KUDOS for such a great job. Keep it up and your kids will soon be in the shop with you and it will become a family affair.

Modified kitchen island off Michaela's kitchen island

Submitted by Jessjeeper on Mon, 12/31/2012 - 22:51

My husband and I built this counter height with specs of 351/2" high x 25" wide x 48" long. We are using it in our kitchen as a prep island.

Estimated Time Investment
Weekend Project (10-20 Hours)
Finish Used
We made our own stain with vinegar and steel wool for the top and shelf, painted the body with Valspar Mermaid's Song. Poly over the stain to protect it from water and heat.
Recommended Skill Level
Beginner

Comments

Jake

Tue, 01/01/2013 - 05:09

I think you guys did a wonderful job on the kitchen island. I like the fat legs and the 1x4 aprons. Did you consider adding a drawer since you have deep aprons? Is the top a butcher block or did you construct the top yourself? If you did build the top is it suitable for use as a cutting board?

American Girl Doll House-tweeked

Submitted by Anonymous (not verified) on Thu, 11/19/2020 - 21:09

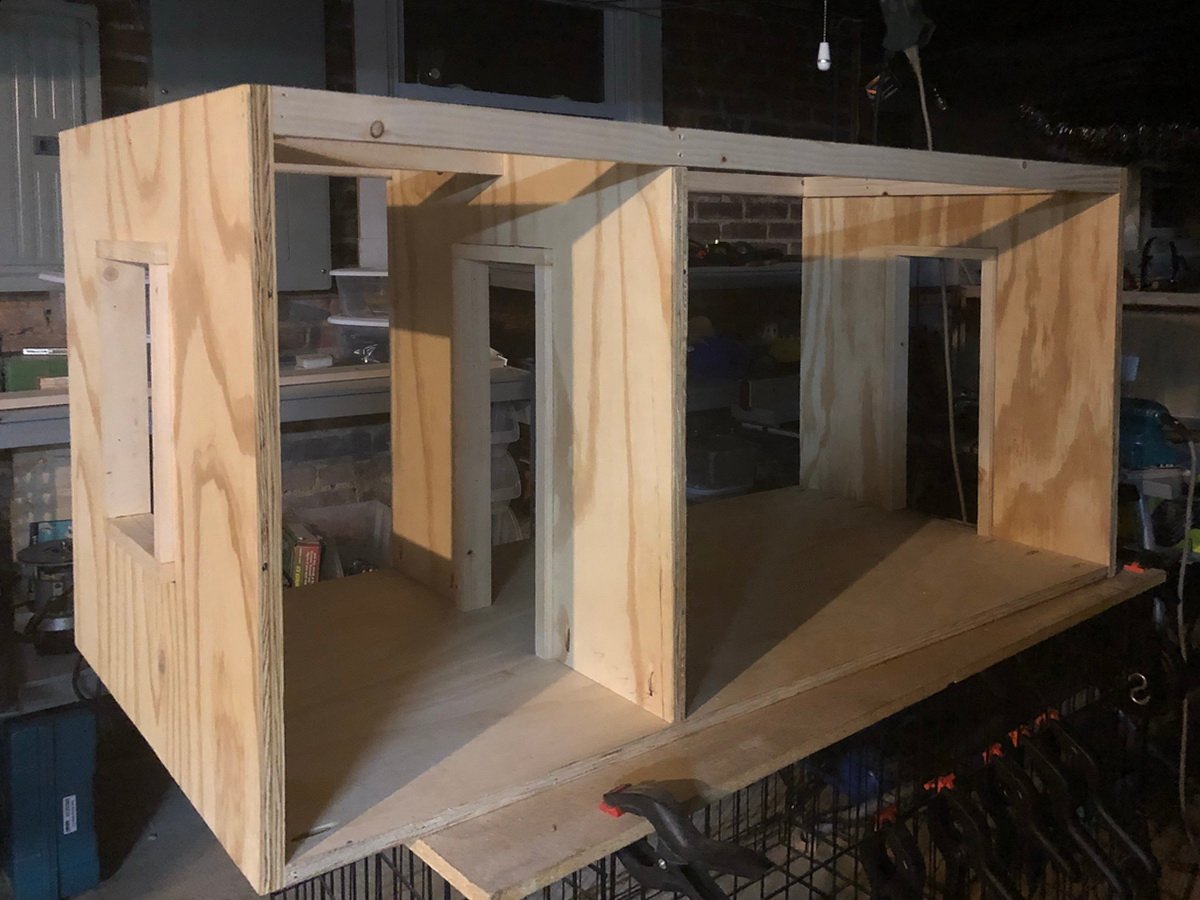
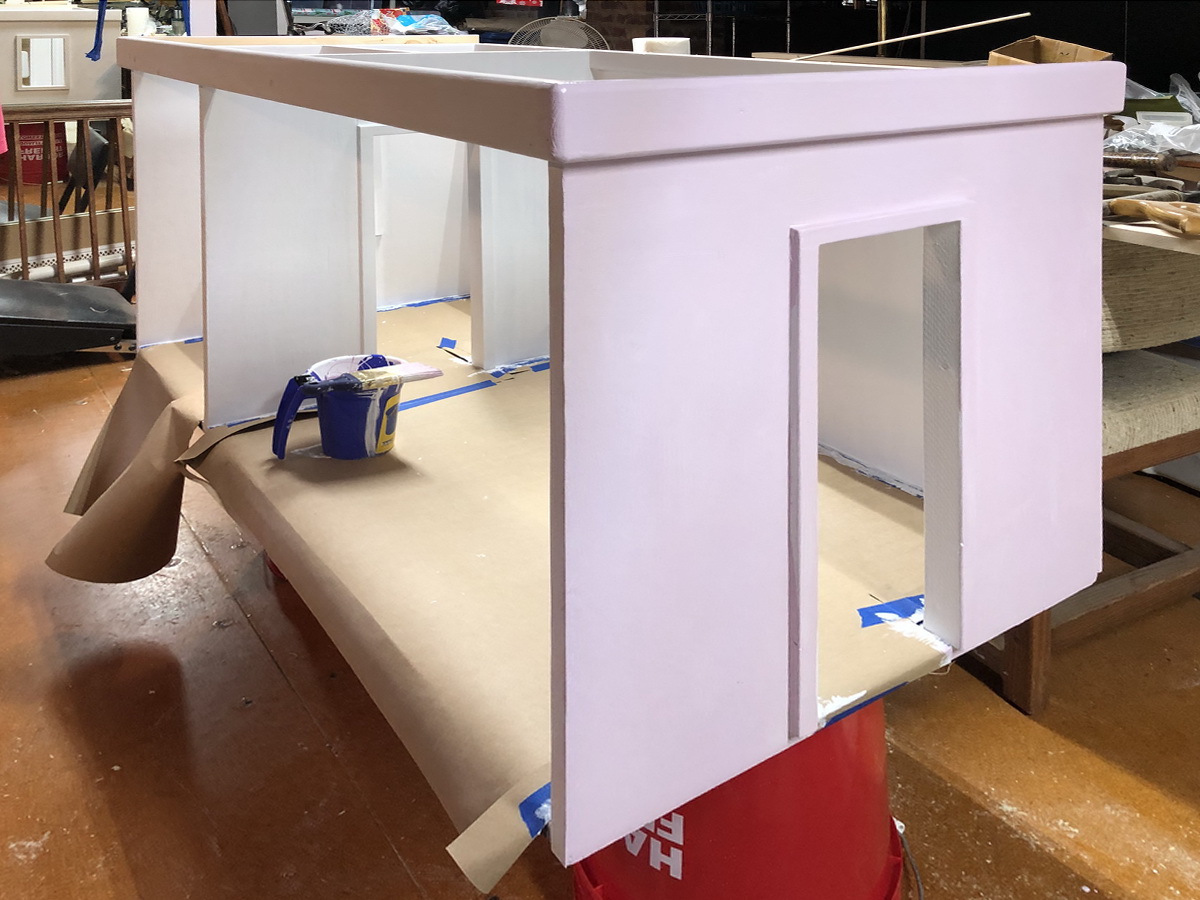
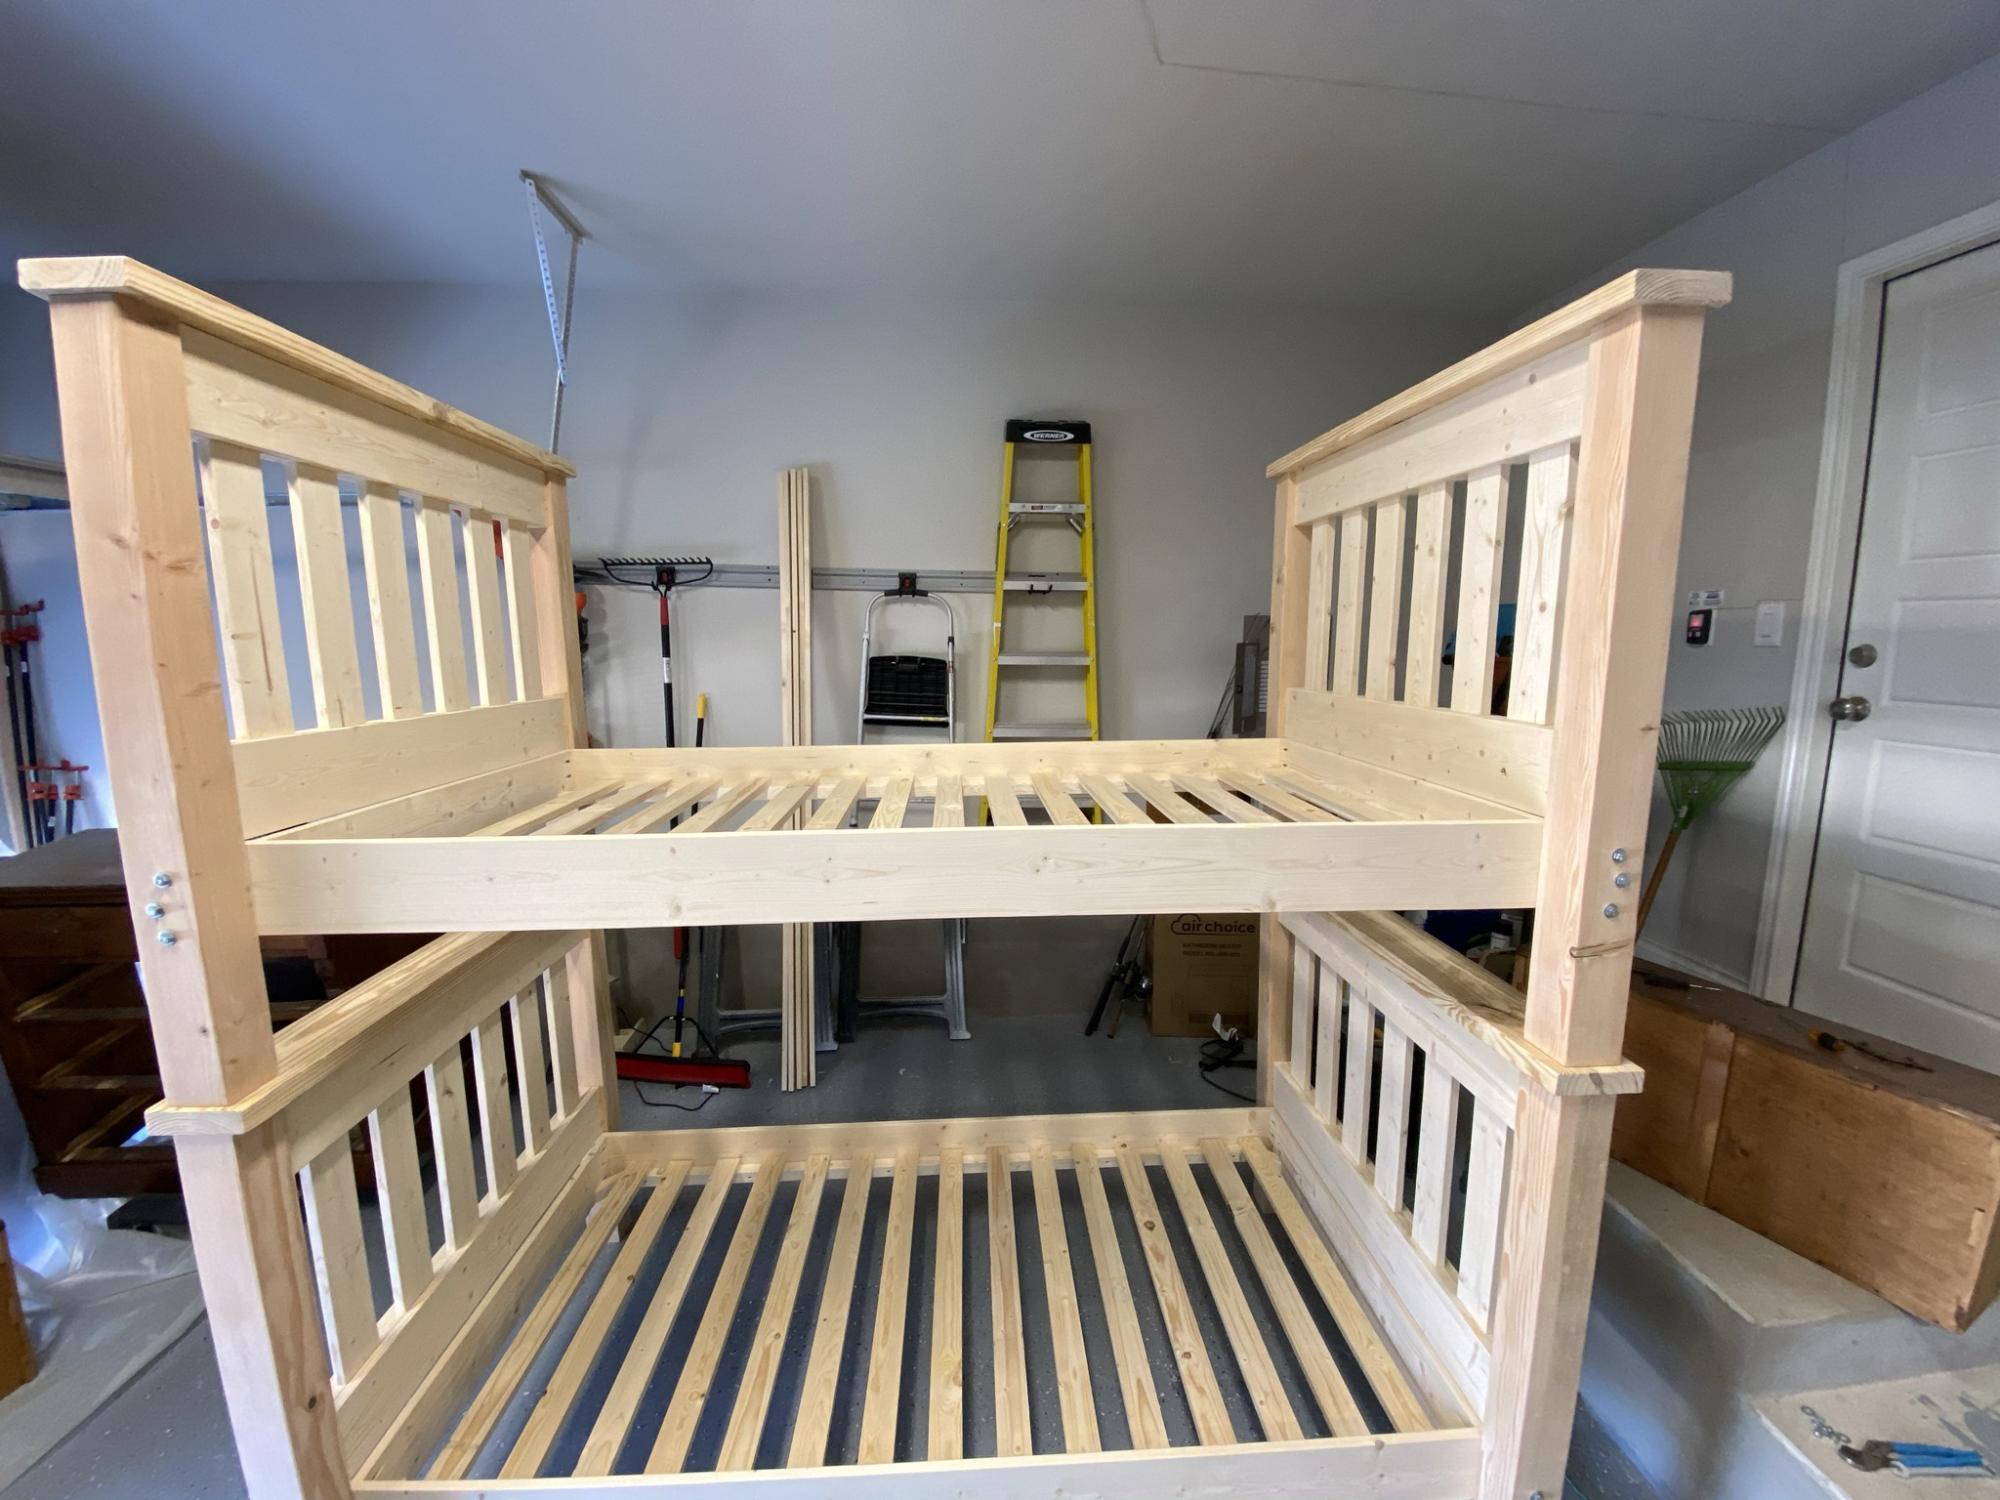
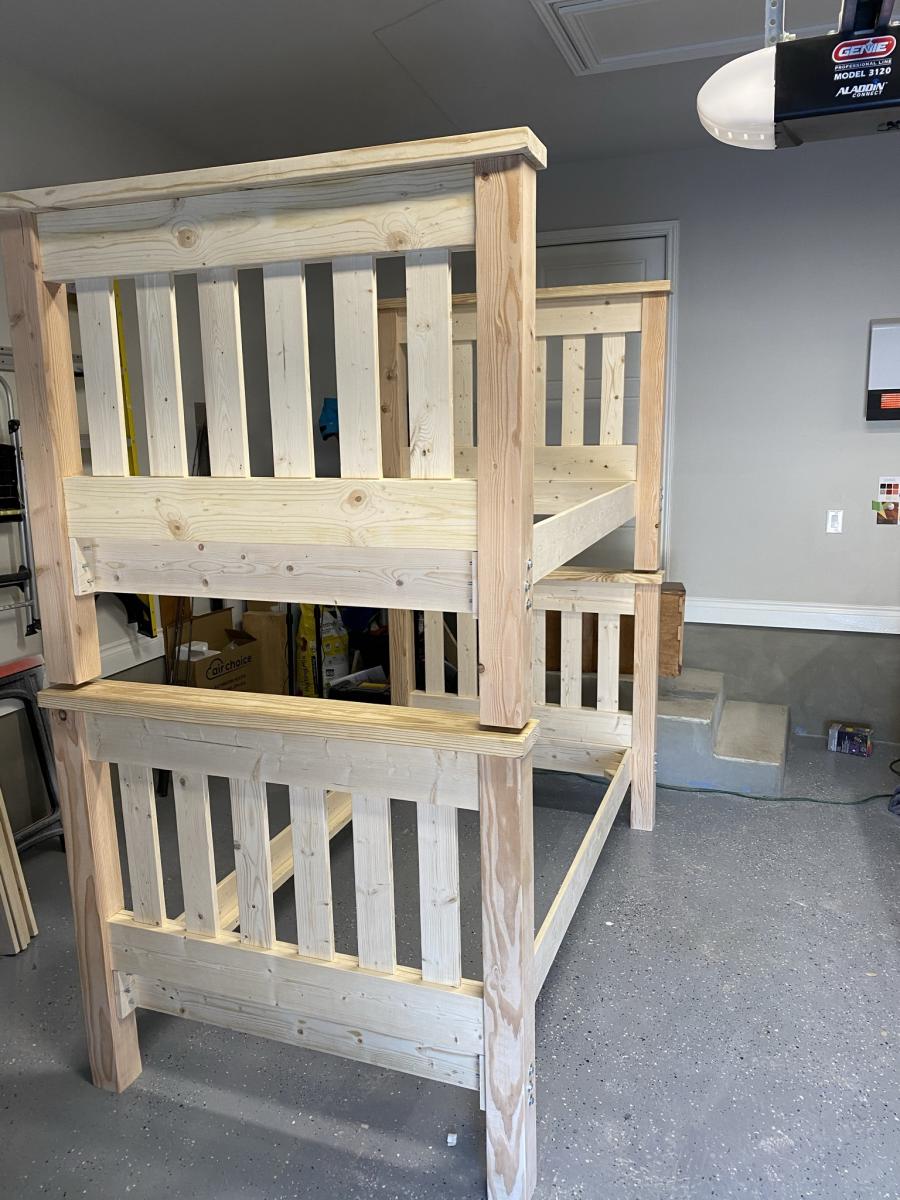
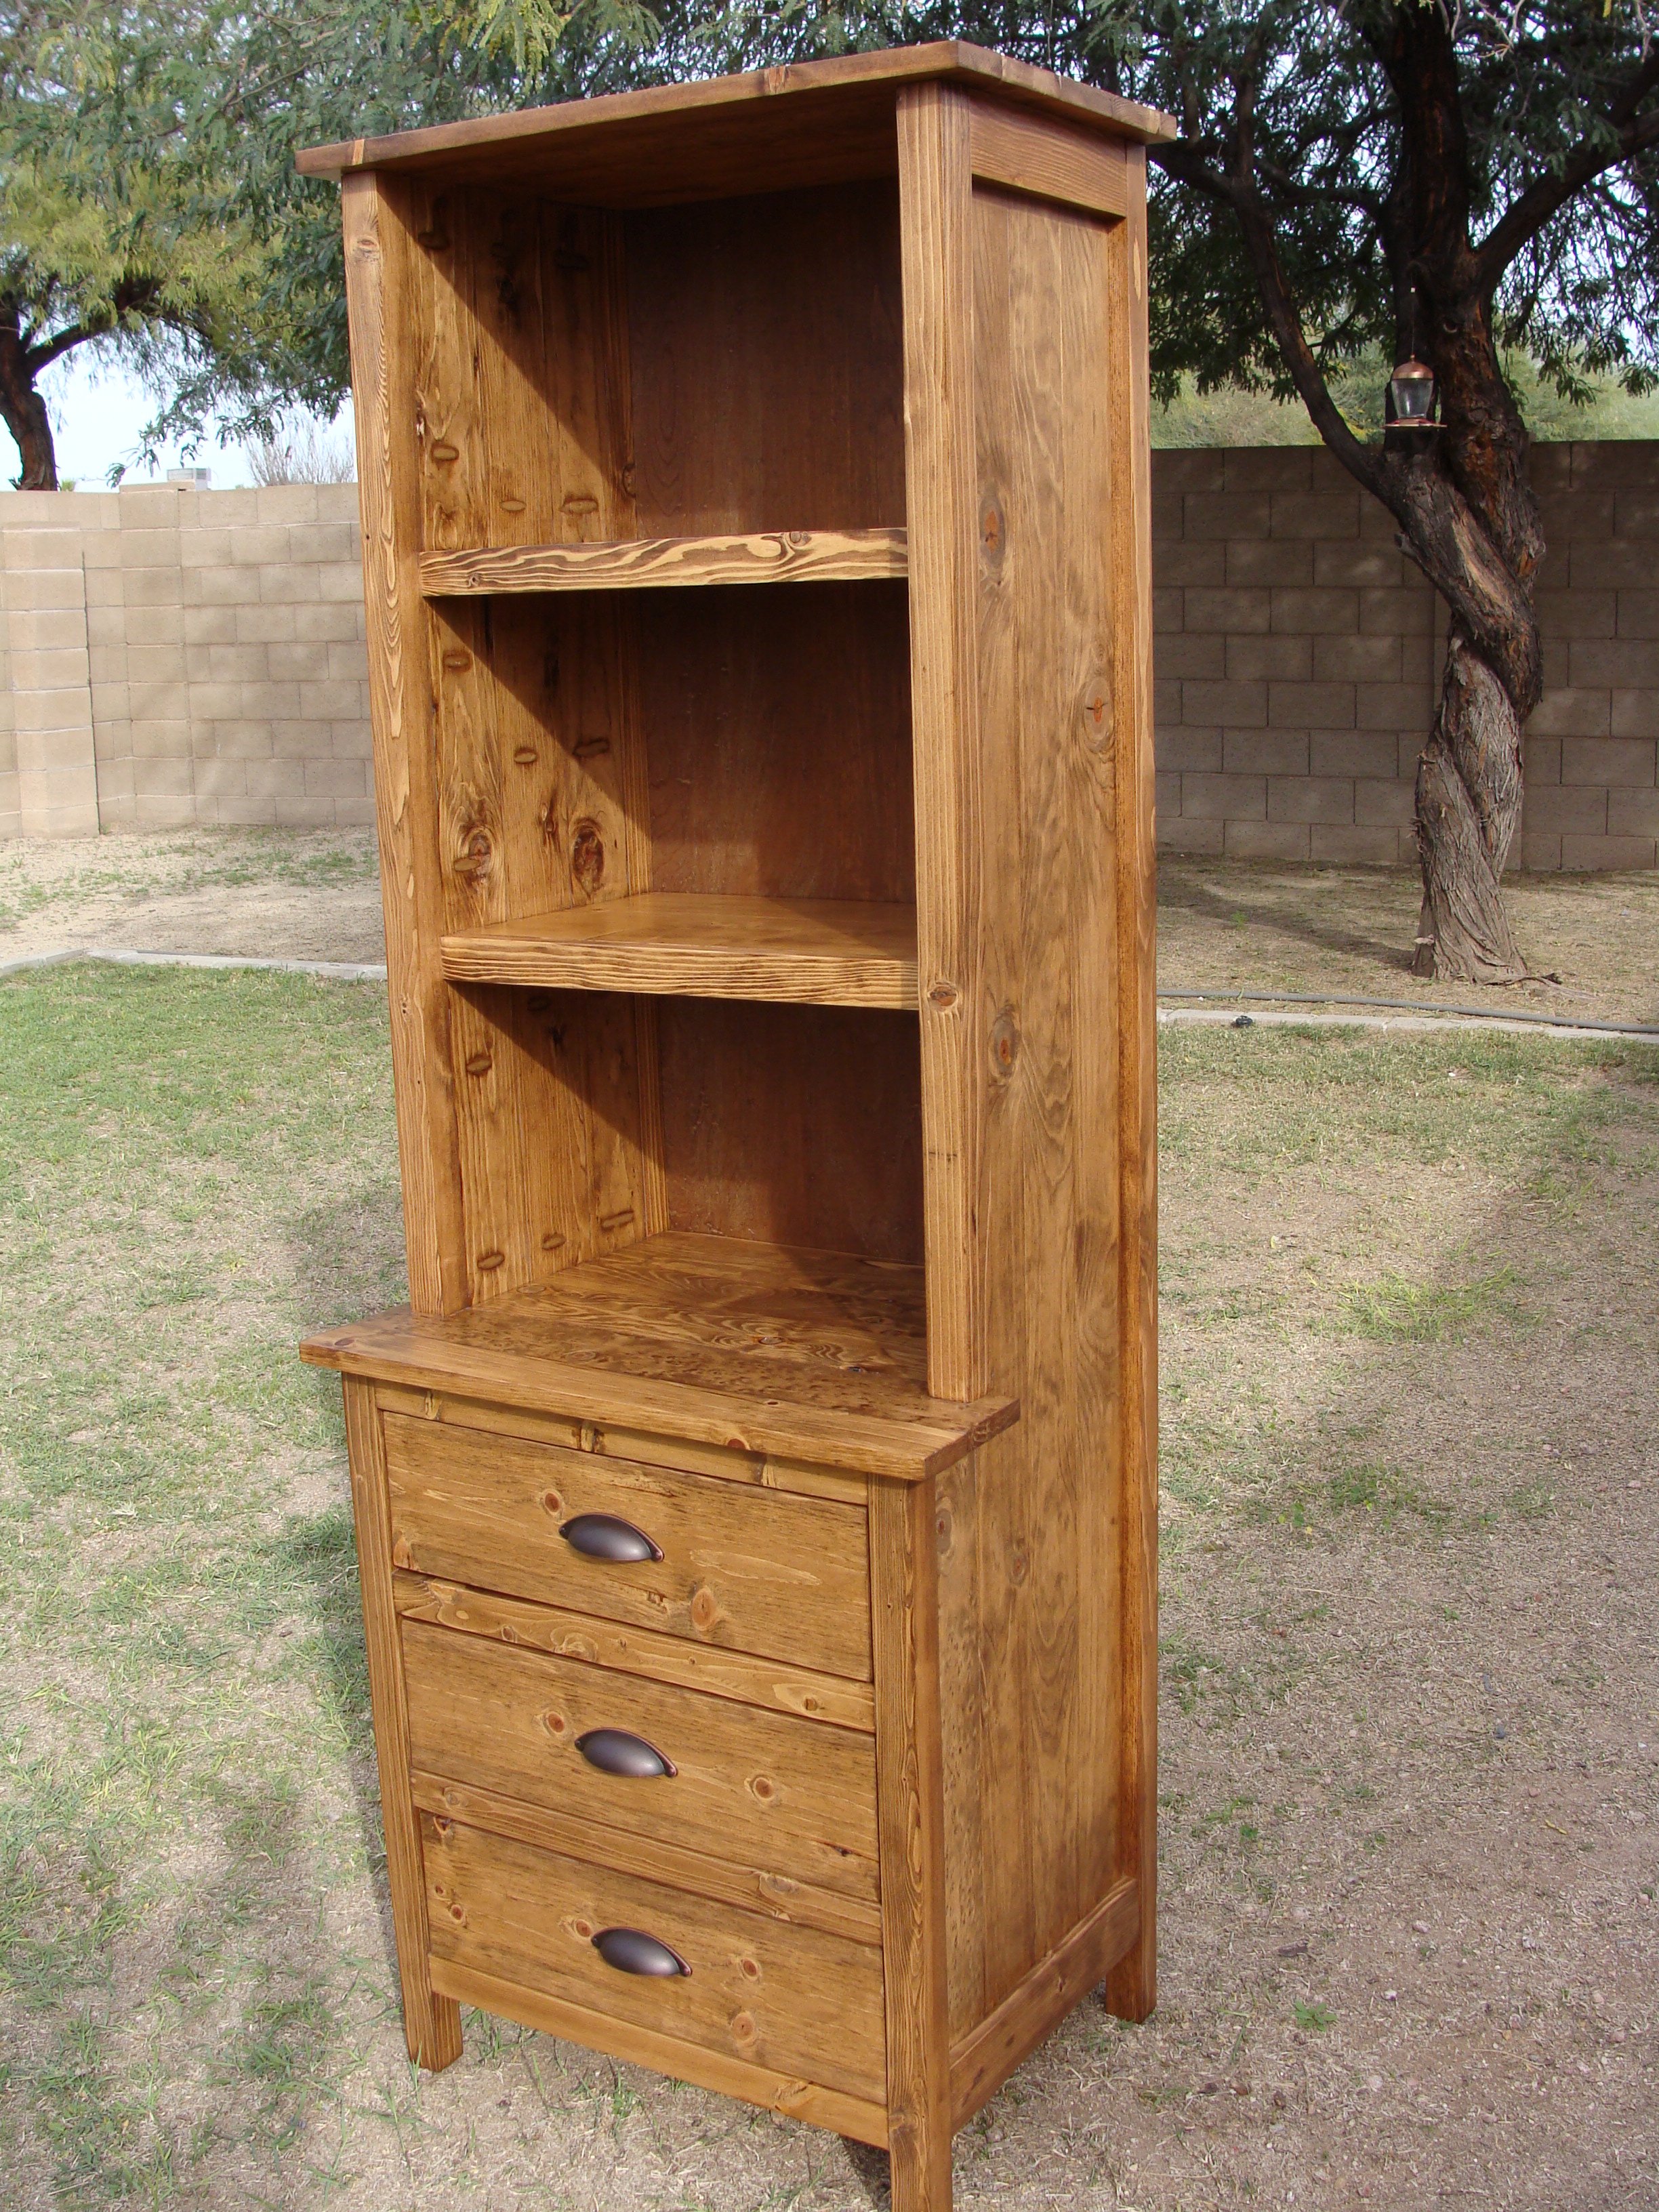
I loved the AG Doll House plans you designed and when my granddaughters asked me to make one for them.... how could I resist. Unfortunately my 7' basement ceiling and steps created a challenge. As a 72 year old female, there was no way I could man-handle a 6' x 4' x 2' - 3/4" plywood project in addition to the challenges of my work space. I was not going to disappoint my granddaughters so I had to come up with a plan. Instead of making the doll house in one piece, I decided to make it as 3 individual boxes (the floors) and stack them on top of each other. Not only would I be able to handle them mostly by myself, but I would be able to work around the low ceiling and transport them up the steps. With only a few modifications to the original plans, I believe I came up with a workable solution.

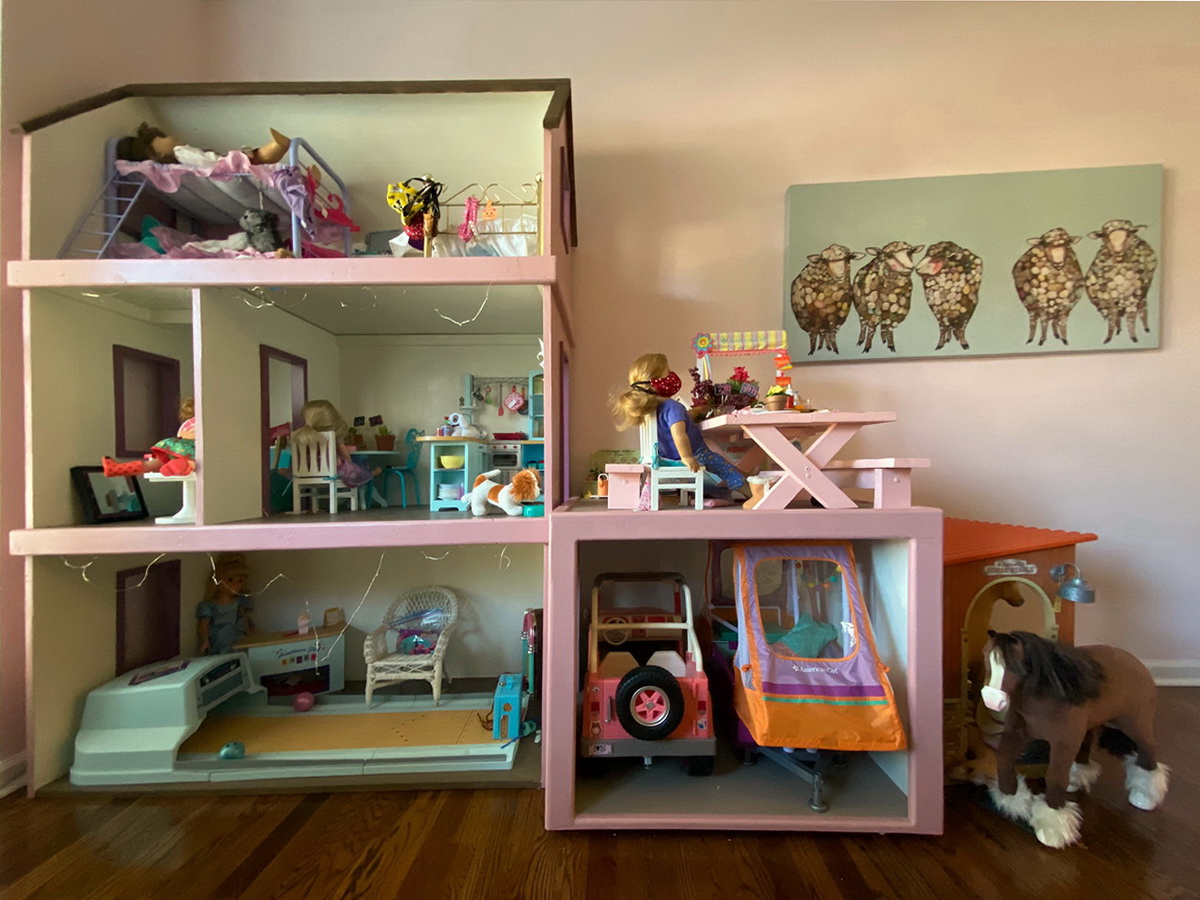
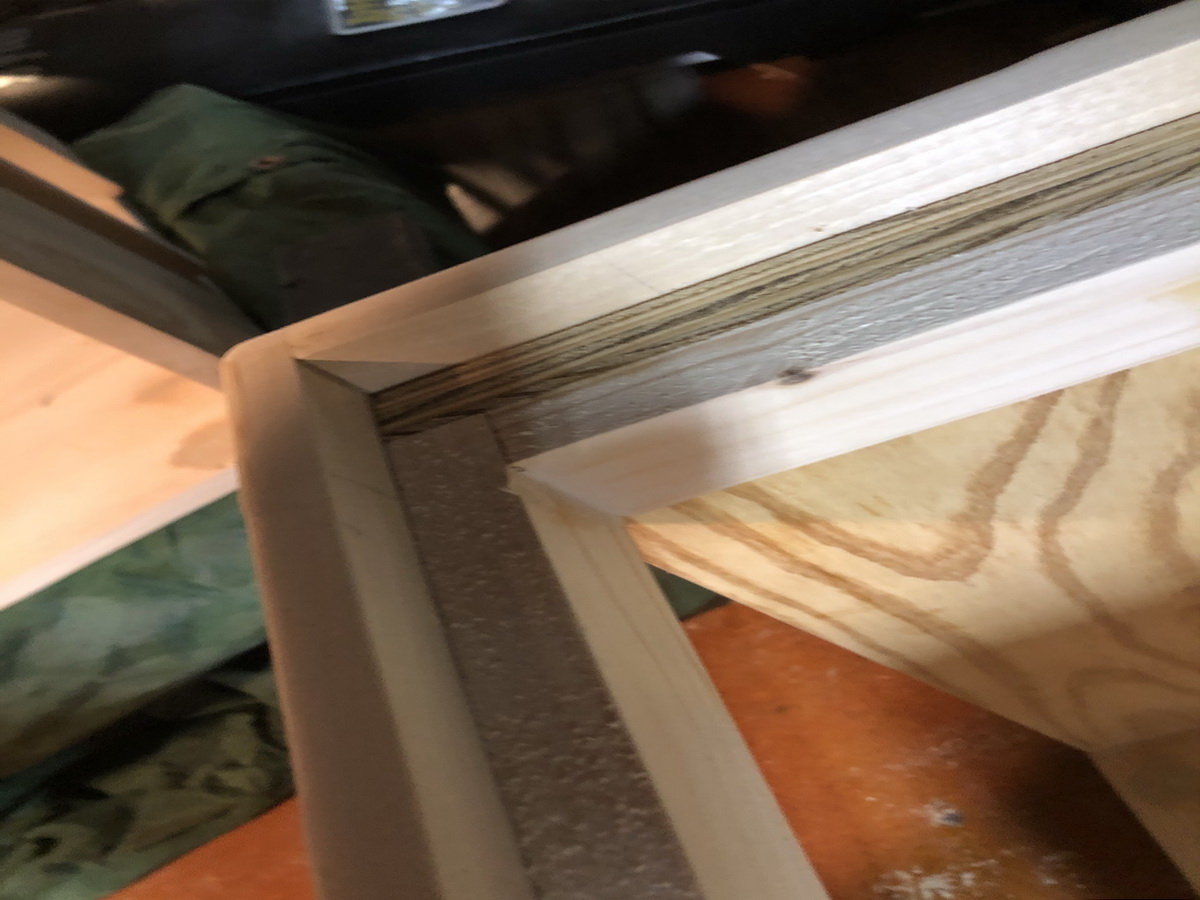
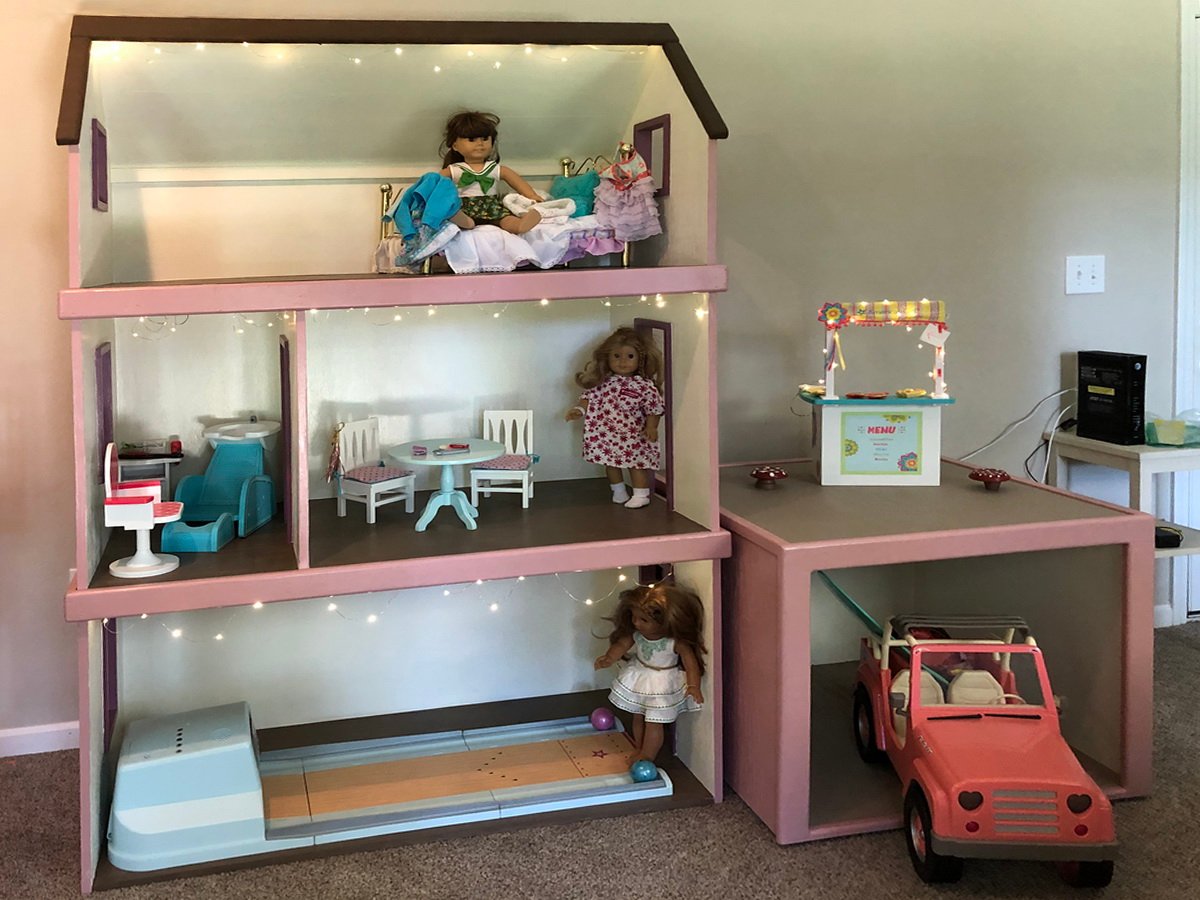
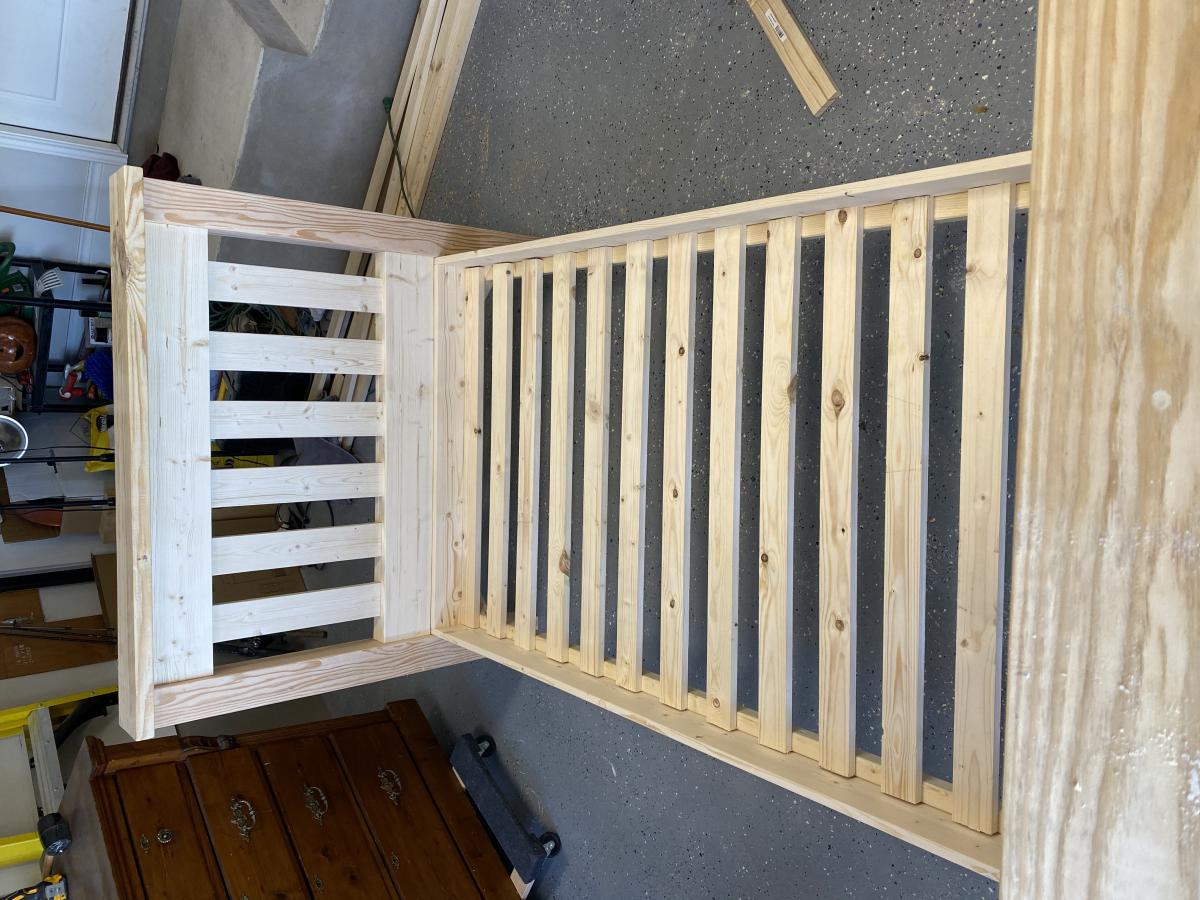
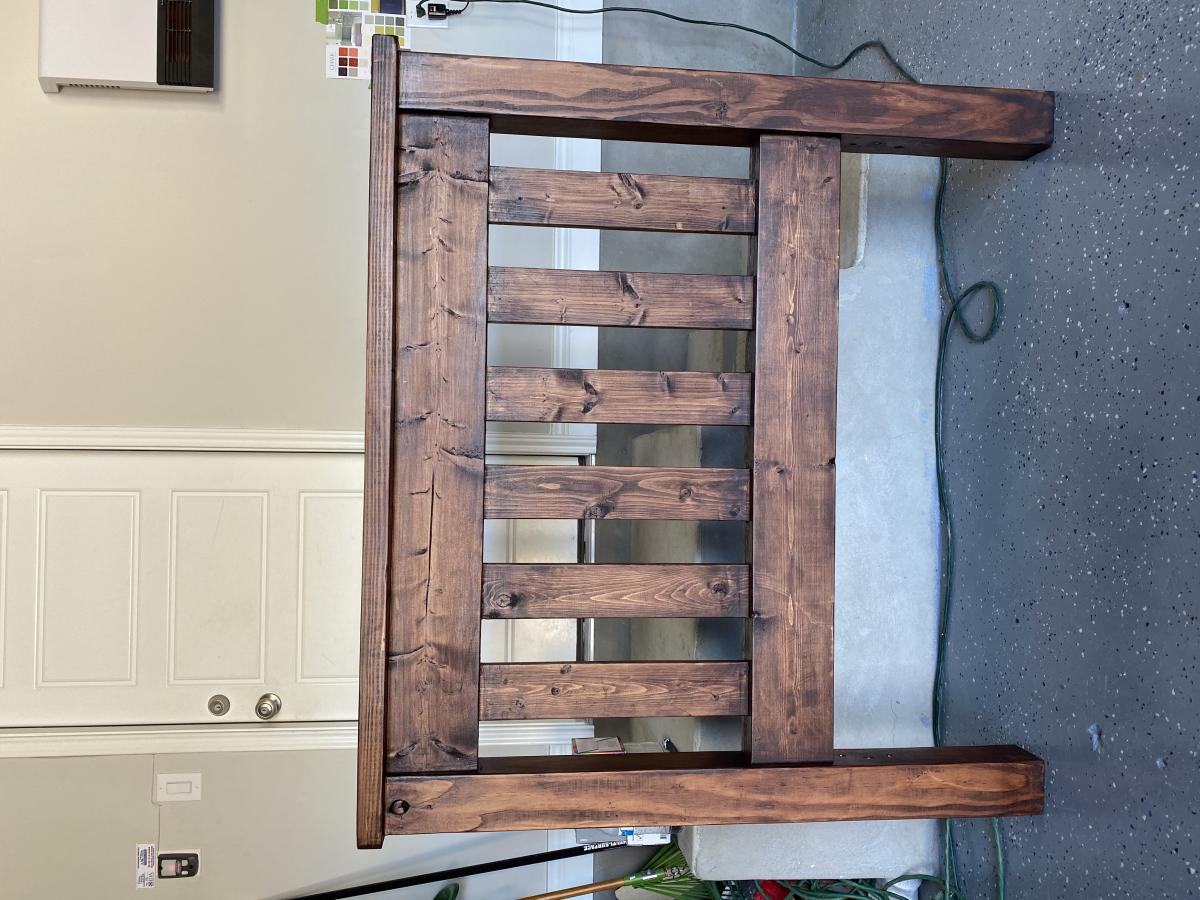
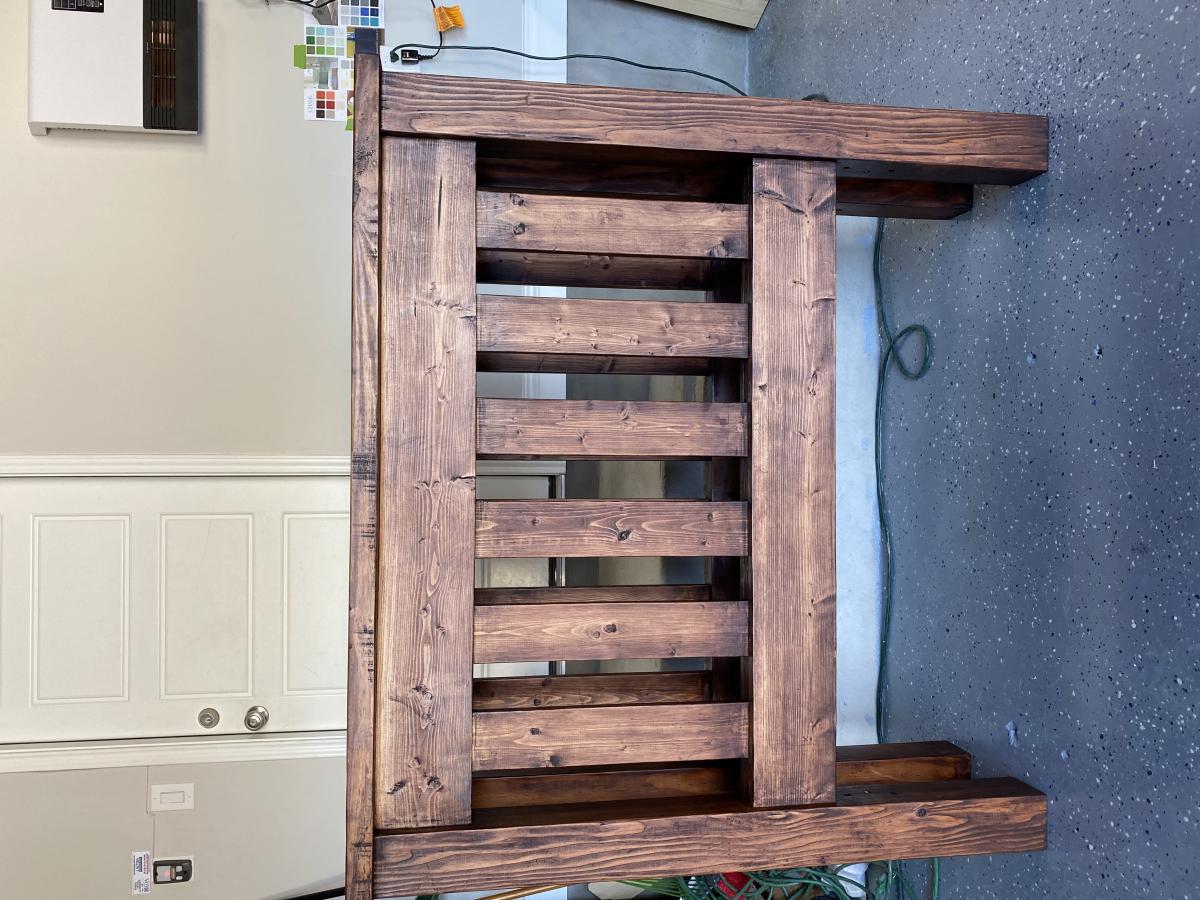
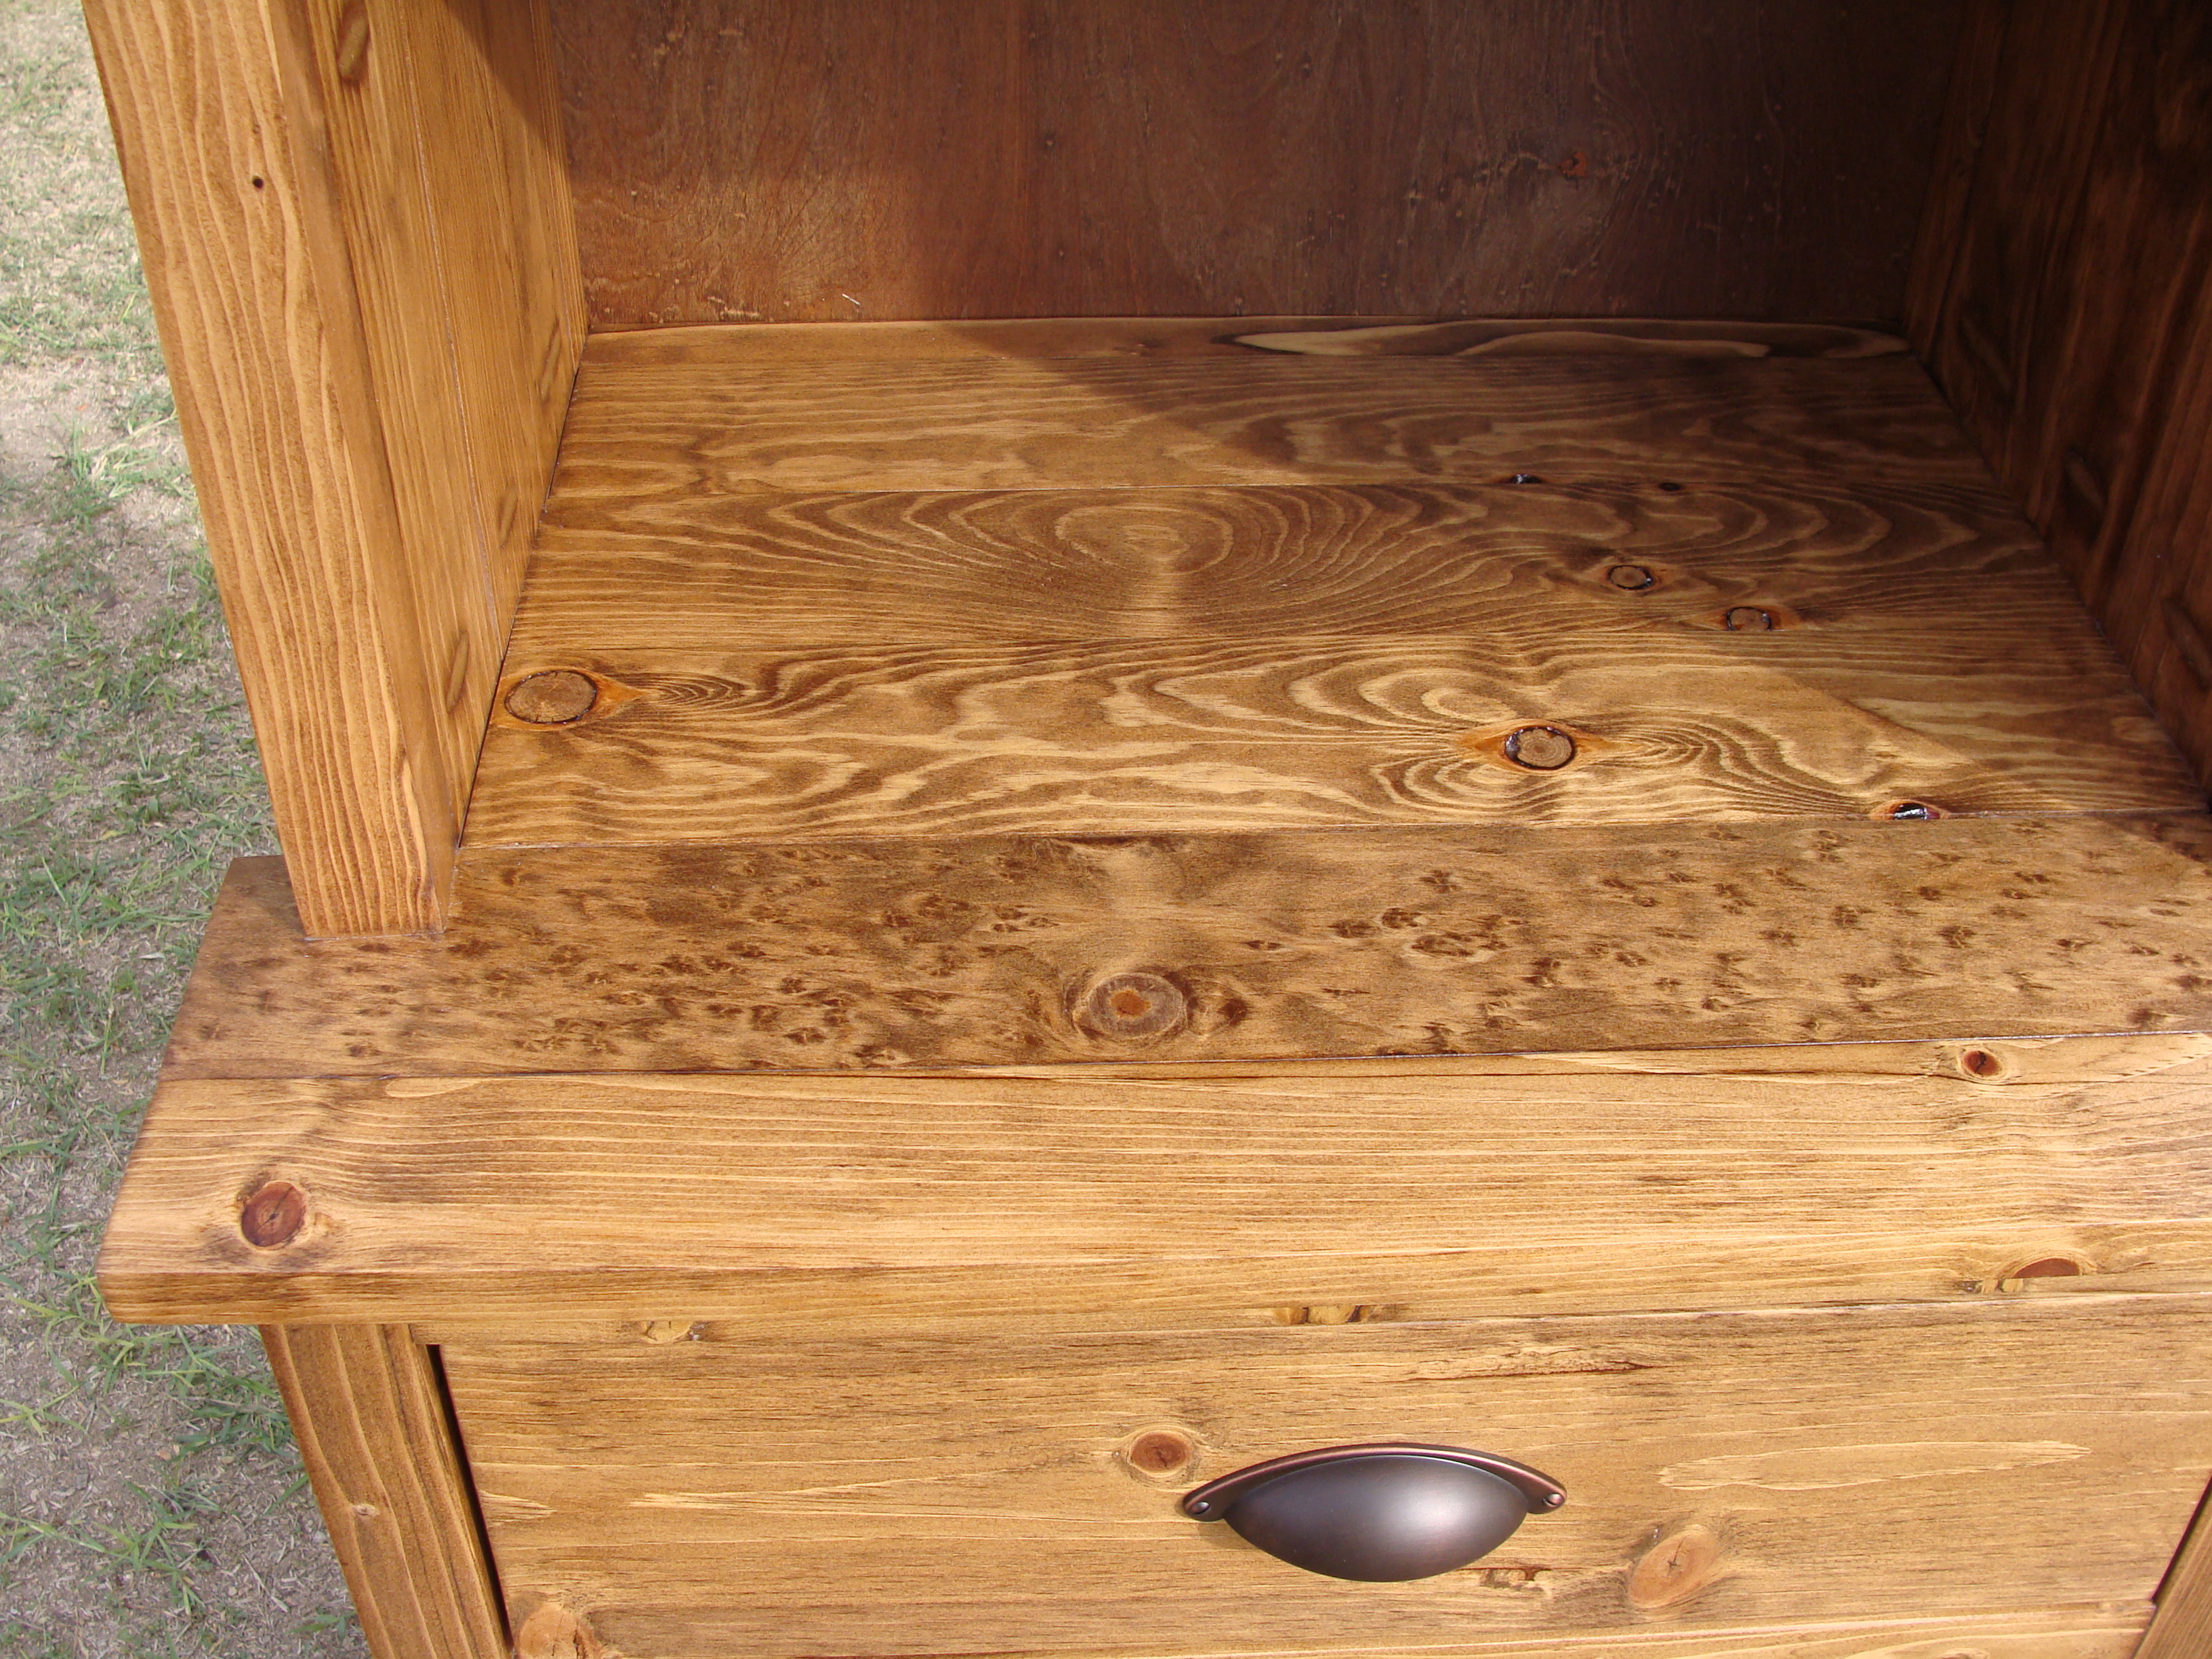
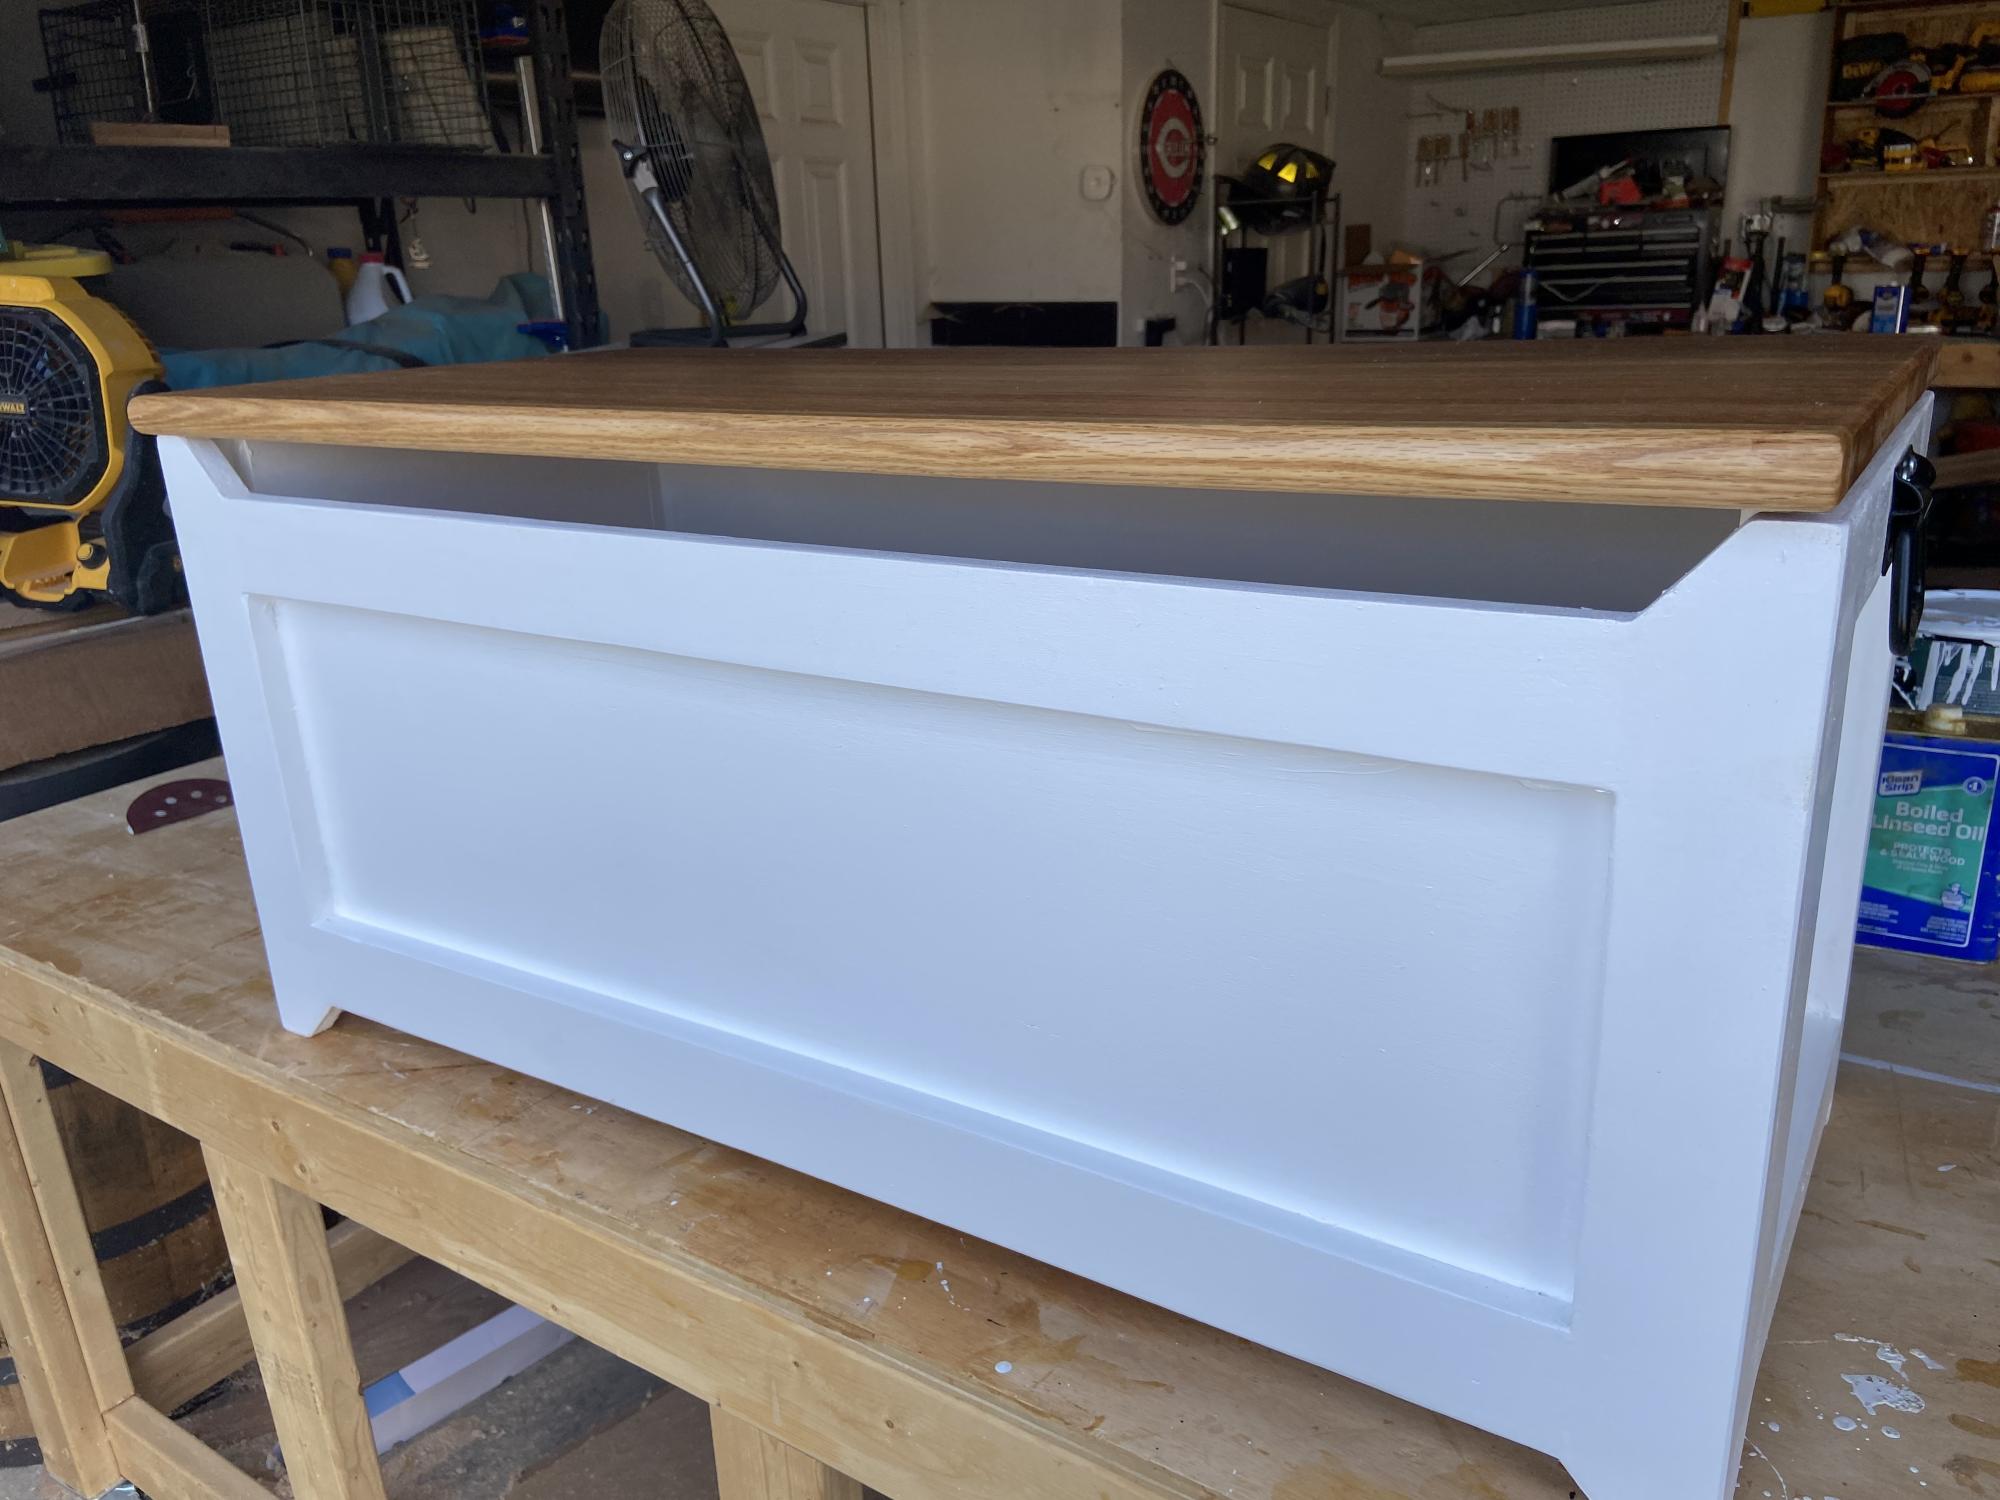
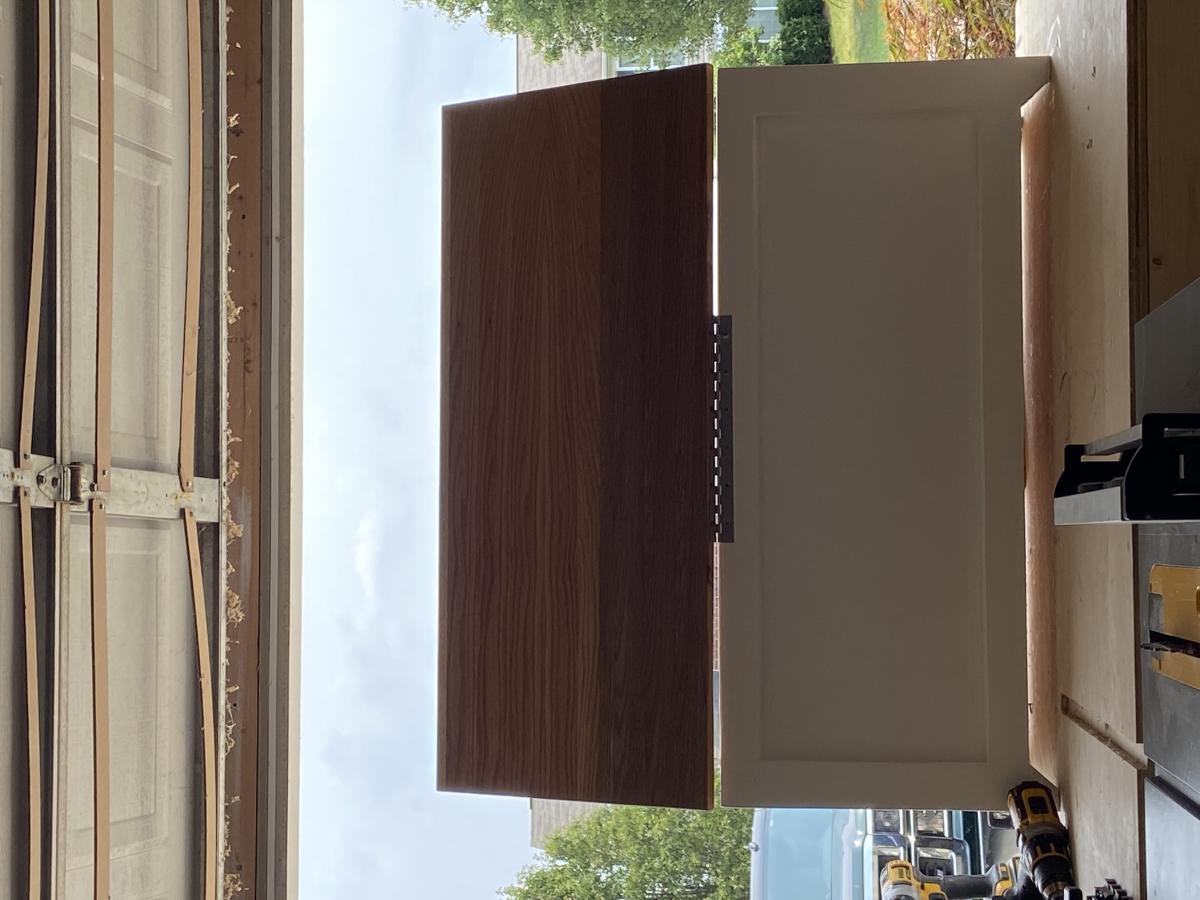
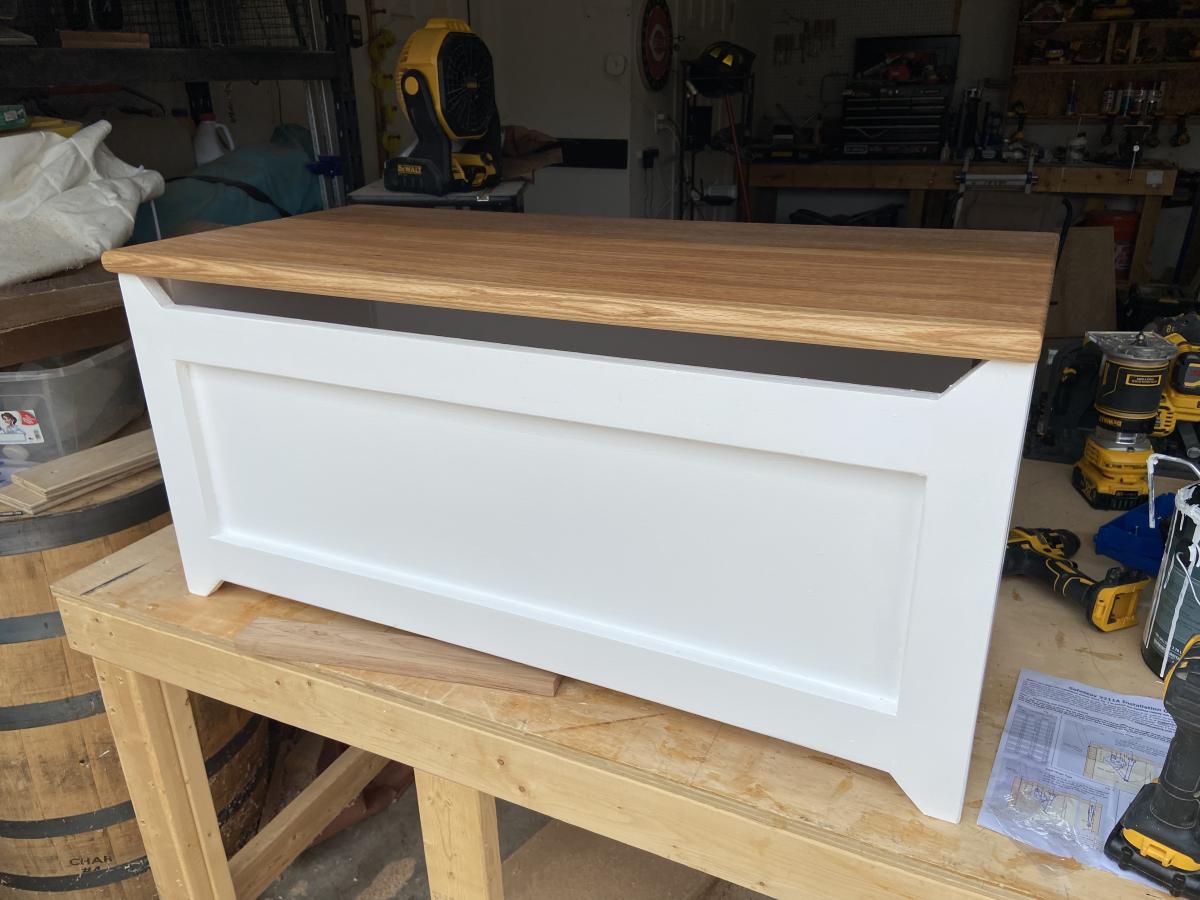
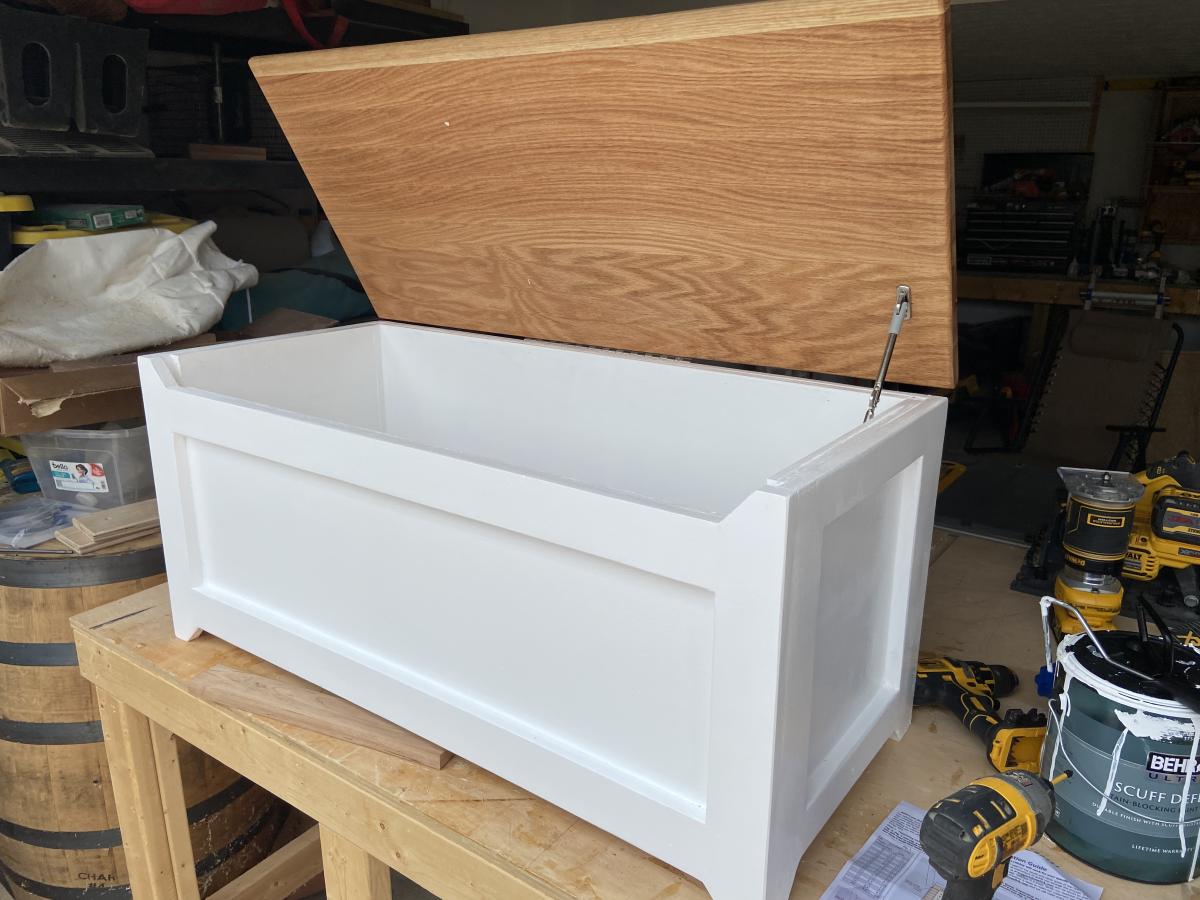
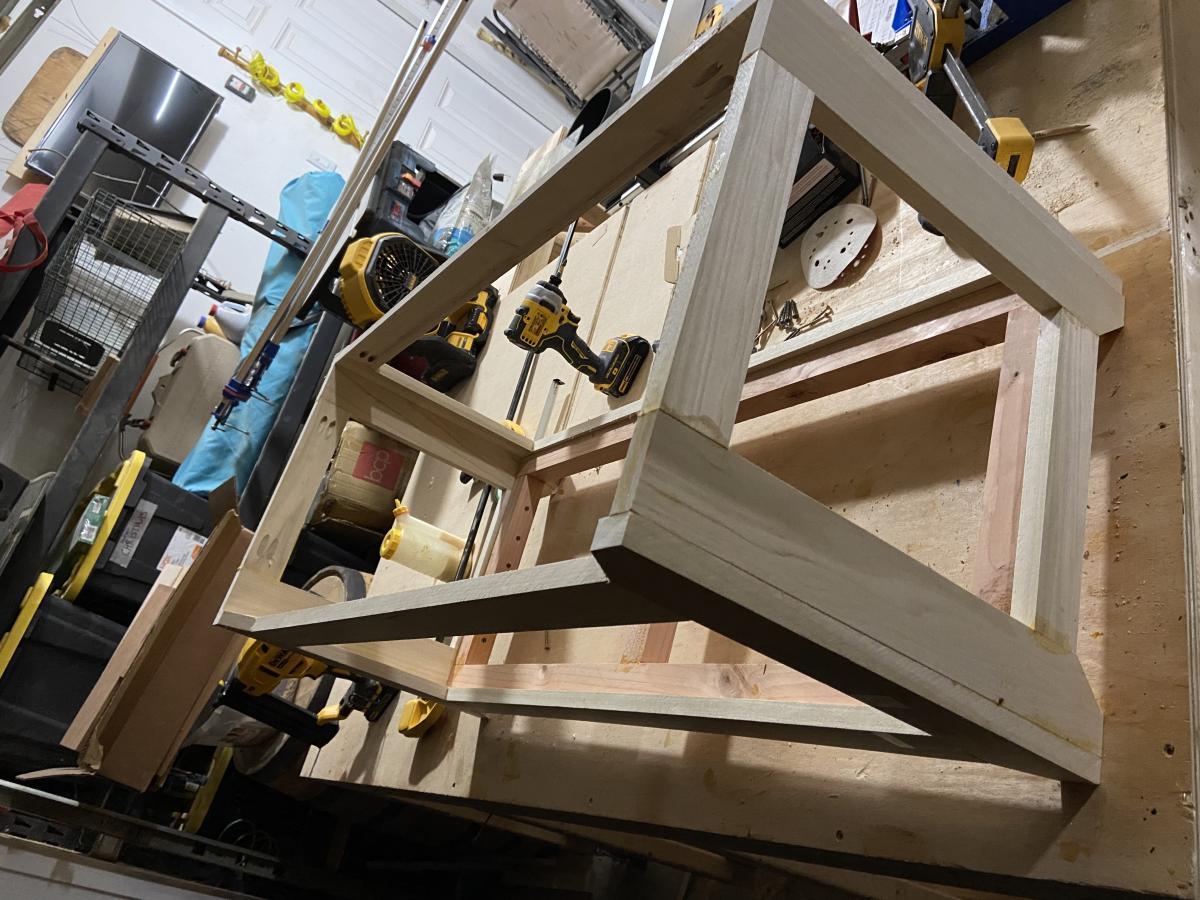
Instead of the sides resting on top of the doll house floor, I extended the sides 3/4" longer to run past the floor for more stability. I also used 1x 2s to frame the inside at the top of each unit for more support and to help in keeping the box square. This may not have been necessary, but I just wanted to make sure it would be sturdy. The main change to the original plan was to add 1" x 3" routed trim to the outside top of each box having it extend 3/4" above the sides. This created a pocket that allowed the next floor to nestle in place and protect it from sliding off in case any little ones decided to climb on it. I also made a 2 car (30" x 30" x 24") detached garage for the AG vehicles. I did fill the holes, plugs, and errors with wood putty, sand numerous times, prime and paint. It was a real help to add some of the paint to the primer because plywood really soaks it up. I think this kept us from having to paint a 3rd coat. The floor was painted a med dark brown, but wiped with the grain before it dried to give a wood grain look.

I finished it in time for the birthday party even though it took 3 vehicles to transport it to the destination. It was a joy to see their faces when it was unveiled and to watch them climb on it of course.

Estimated Cost
$200 (+/-)
Estimated Time Investment
Week Long Project (20 Hours or More)
Finish Used
PPG Acri-Shield (Exterior Semi-Gloss 100% Acrylic Paint and Primer in one.
Recommended Skill Level
Beginner

Outdoor To Indoor Wine Caddy

Submitted by calcowoods on Tue, 12/29/2020 - 08:30

Built a number of wine caddies with/without the stake. Stake useful for an outdoor environment, yet not useful for an indoor table top setting. Provided a simple alteration by inserting a t-nut into the bottom of the caddy & a hanger bolt screwed into top of stake. Simply screw in stake as needed.

Estimated Cost
$4
Estimated Time Investment
Afternoon Project (3-6 Hours)
Finish Used
Minwax Cherry and Minwax Satin Polyurethane
Recommended Skill Level
Beginner

Buffet

Submitted by Anonymous (not verified) on Wed, 03/29/2017 - 10:01

My first Ana project!  Different dimension and no drawers but still based off the original plans. Love it!

Built from Plan(s)
Estimated Cost
$285
Estimated Time Investment
Week Long Project (20 Hours or More)
Finish Used
minwax stain with satin poly
Recommended Skill Level
Intermediate

Twin Bunk Beds

I made these for a special order. Used the Simple Twin bed plans but modified them because they want to use the beds as separate twins first, then convert to a bunk bed. In order to make the beds look uniform when separated, the head and foot boards are identical. One bed fits directly on top of the other, secured with 1/2” dowels.

Estimated Cost
365.00
Estimated Time Investment
Week Long Project (20 Hours or More)
Finish Used
Carrington Stain and a satin finish poly.
Recommended Skill Level
Beginner

Modified Reclaimed Wood Look Bedside Table-Now With Hutch

I couldn't find a kitchen hutch to fit my space/needs so I modified this bedside table plan. I widened it 3 inches then extended it up! Now I have room for all my cook books! I love it!

Estimated Time Investment
Weekend Project (10-20 Hours)
Finish Used
Minwax early american stain with Minwax water based oil-modified polyurethane in clear satin.
Recommended Skill Level
Intermediate

Workbench

Submitted by Binda B on Thu, 04/11/2013 - 10:34

I needed a workbench to be able to create all of these wonderful plans. I used one of Ana's table plans and modified a little. I followed exactly, then I added a second top made out of birch pure bond plywood. I then put 1x2 edging to hide the edges. I used some pretty heavy duty casters with the double locking feature, I had to buy this off the internet.
This was my second build, the first being a 10 dollar ledge.
The plan is from Ana's book, the kitchen island. I can't seem to find it online.
This took me a long time due to limited time, because of work and kids. About 4-6 hours per week, for 2 1/2 months.

Estimated Cost
$ 250, this includes expensive casters, stain and extra plywood. $100 dollars for the wood if doing the table from the plan
Estimated Time Investment
Week Long Project (20 Hours or More)
Finish Used
I needed experience in staining and wanted some protection, so that is why I stained this workbench. I used Minwax pre stain, Rust-oleum early American on the base, and left the top raw (I figured it would get scratched up). Then I used Tung oil 5 coats on the bottom and 6 for the top. Finished with one coat of furniture wax. It is a bit slick, I should not have had so many coats of Tung oil, but I was experimenting :)
Recommended Skill Level
Intermediate

Comments

Simple Modern Outdoor Patio/Deck Collection

Submitted by frmoody on Mon, 07/26/2021 - 14:48

This was a simple yet very time consuming building. Lots of pieces and lots of sanding. I am really pleased with how it turned out. I stained the edges of all the 1 x 4's prior to assembly just to make things easier. I also increased the sides of the chair from 24" to 26" and set the seat height to 18" to match the bench.

Estimated Cost
$255
Estimated Time Investment
Week Long Project (20 Hours or More)
Finish Used
I stained everything with Minwax Gunstock and then finished with three coats of Helmsman Spar Urethane exterior semigloss. I sanded with 600 grit paper between coats.
Recommended Skill Level
Intermediate

Comments

Simple coat rack

Submitted by Medickep on Mon, 05/06/2013 - 08:23

This was a simple coat rack I decided to make with some random scraps of wood I had from previous projects. The only out of pocket costs for me was the hooks!

***update****

I decided to make a kid friendly version as my kids were creating quit the pile of courts and backpacks when they got home from school, mostly because they couldn't reach the adult one! With some left overs, problem solved!!

Estimated Cost
10-30 (depends on hooks you choose and scraps of wood you have!)
Estimated Time Investment
Afternoon Project (3-6 Hours)
Finish Used
I used a primer and latex paint!
Recommended Skill Level
Starter Project

Comments

carrmatt02

Tue, 05/07/2013 - 08:16

Exactly what I was looking to make without getting a router involved! What kind of moulding is that?

Medickep

Sun, 05/12/2013 - 12:17

It's exterior header for a window you see on some homes. Common at a lot of lumber stores. The best part is that it's solid, so no need for complex crown-molding cuts

Hockey 'lockers'

Submitted by Anonymous (not verified) on Thu, 06/29/2017 - 19:56

I needed something to organize our hockey gear so I customized this mudroom idea. It turned out great and makes me feel better when I walk in the garage. Everything must have a place!

Estimated Time Investment
Day Project (6-9 Hours)
Finish Used
Minwax Jacobean Stain
Recommended Skill Level
Beginner

Anna's Low Activity Table for her Dollhouse!

Submitted by ferbit on Wed, 03/09/2011 - 09:52

Anna's (the one on the right) new activity table with rolling carts! Rolling drawers are made of 3/4" MDF with 2" casters underneath. The chalkboard frames (found here) were painted with satin finish pink paint, then two coats of glitter Mod Podge. I love how they turned out!!! We added a piece of 1/8" plexiglass to the top to protect it better. The flat top is made of MDF, sides and frame are made of pine and the legs are poplar. Two coats of primer, three coats of semi-gloss paint and three coats of poly. She is sooooo excited!!! Ana's estimate of $50-$100 on her website is fairly accurate depending on where you live, minus the plexiglass. So adding it all up... 3 - 2" x 2" x 8' stud/strips are $1.29 each at HD (total $3.87) 4 - 1" x 2" x 8' Radiata Pine boards are $4.82 at HD (total $19.28) 1 - 49" x 97" sheet 3/4" MDF was about $40 at HD (they rip cut it for me for free) 8 - 2" casters were about $2.50 each at HD (total $20) That's $83.15 plus tax and doesn't include all of the smaller extras like screws, glue, sandpaper, primer, paint and poly. I had most of those already... but it's items like that would easily push the total over $100. The little extras that I did were pricier poplar legs since I didn't like the look of 2x2 stud/strips and the custom sheet of plexiglass $35 at local plastics company. 2x2 studs/strips are fine, but after using them on my sawhorses and painting them, I wanted something more perfectly square (prettier?) for this table.

Estimated Cost
$85.00
Estimated Time Investment
Weekend Project (10-20 Hours)
Finish Used
Primer, semi-gloss acrylic latex paint, brush-on poly
Recommended Skill Level
Intermediate

Picnic Tables

For my son's 4th birthday party, we were doing it at our house and needed outdoor seating, so I took on the task of building 3 Toddler picnic tables and 1 smaller one. Building them was not that big of a deal, but painting all 4 took some time! After the party, we sent 1 to my parents, 1 to in-laws & 1 to my bro/sis-in-law, so only ended up with 1 left over. FYI-the picture on the plan is one of mine, thanks Ana!

Built from Plan(s)
Estimated Time Investment
Afternoon Project (3-6 Hours)
Finish Used
I primed each table, then painted them with 3 coats of paint and sealed them.
Recommended Skill Level
Beginner

Comments

Seasonal And Holiday

Chicken Run

Submitted by Kdline on Mon, 04/13/2015 - 06:36

We built this coop from an existing playhouse and used Ana's plans to build the run!  So easy and turned out perfectly!

Built from Plan(s)
Estimated Time Investment
Day Project (6-9 Hours)
Recommended Skill Level
Beginner

Comments

Table turned cabinet

I had an old table that was in my basement.  I wanted to re-do my craft room.  I have been thinking and thinking about it.  So when I saw Ana’s link to her drawer organizer – and how to install drawer slides – I thought – ok – now it’s time to do it.


I spent about a week drafting plans, making measurements.  At first I was going to recycle the metal sliders I had left over from the kids dressers…but there wasn’t enough – and to do 12 drawers would be more money than I wanted to spend.


So – a trip to home depot – I was able to take this table that was just collecting junk – literally – to an organized and functional crafting cabinet – with huge deep drawers.  There are 12 drawers in total.  They are all 6 inch in height, 26 inches deep, and then there are 8 that are 16 inches wide, and 4 that are 12 inches wide.


Here are some before and after pictures – I have all the details on the build on my blog.  I wouldn’t have been able to do it without Ana.  Her plans and continual inspiration!

Estimated Cost
Around $80
Estimated Time Investment
Afternoon Project (3-6 Hours)
Finish Used
On the fronts of the drawers only. Sanded, primed and painted with high gloss white.
Recommended Skill Level
Intermediate

Floating Corner Desk

Submitted by dmaidon on Sun, 12/05/2021 - 07:36

I was looking to build a desk for my wife. I searched around on YouTube for ideas and came up with this one: https://youtu.be/IN0j34WDlg4. I made a few modifications and added a few features to come up with this corner desk.

1 sheet 3/4" blond wood plywood.
1/4 sheet of 1/2" plywood for the drawers.
1 box 10mm laminate flooring.
1/4" trim cut from poplar for the edges of the plywood.

It took my wife and I about 2 days to complete the project.

Comments

You chest

Submitted by Anonymous (not verified) on Sun, 12/26/2021 - 12:56

Ana White’s plans are the best I’ve seen. Some are easy and some are challenging builds. She’s so very encouraging in her videos. She makes me feel like I can keep on building. I’m very happy to say I started my business from her inspirations.

Built from Plan(s)

Comments

Single Simple Modern Outdoor Lounger

Submitted by Anonymous (not verified) on Fri, 04/22/2011 - 12:18

Modified the double lounger plans into 2 single loungers. I liked the idea of the boards running the long way rather than from side to side like the single lounger plan. These were pretty easy to build. All assembled with a Kreg for hidden screws. Made with Sanded and super polyurethaned cedar (3 or 4 coats). turned out beautiful with the matching boards running from head to toe!

Estimated Time Investment
Weekend Project (10-20 Hours)
Finish Used
Multiple coats of polyurethane with sanding between each coat.
Recommended Skill Level
Intermediate
Seasonal And Holiday