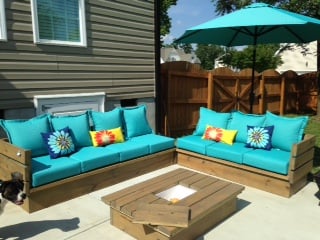
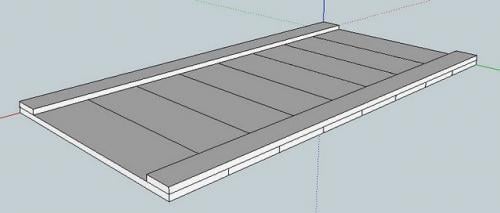
Patio furniture
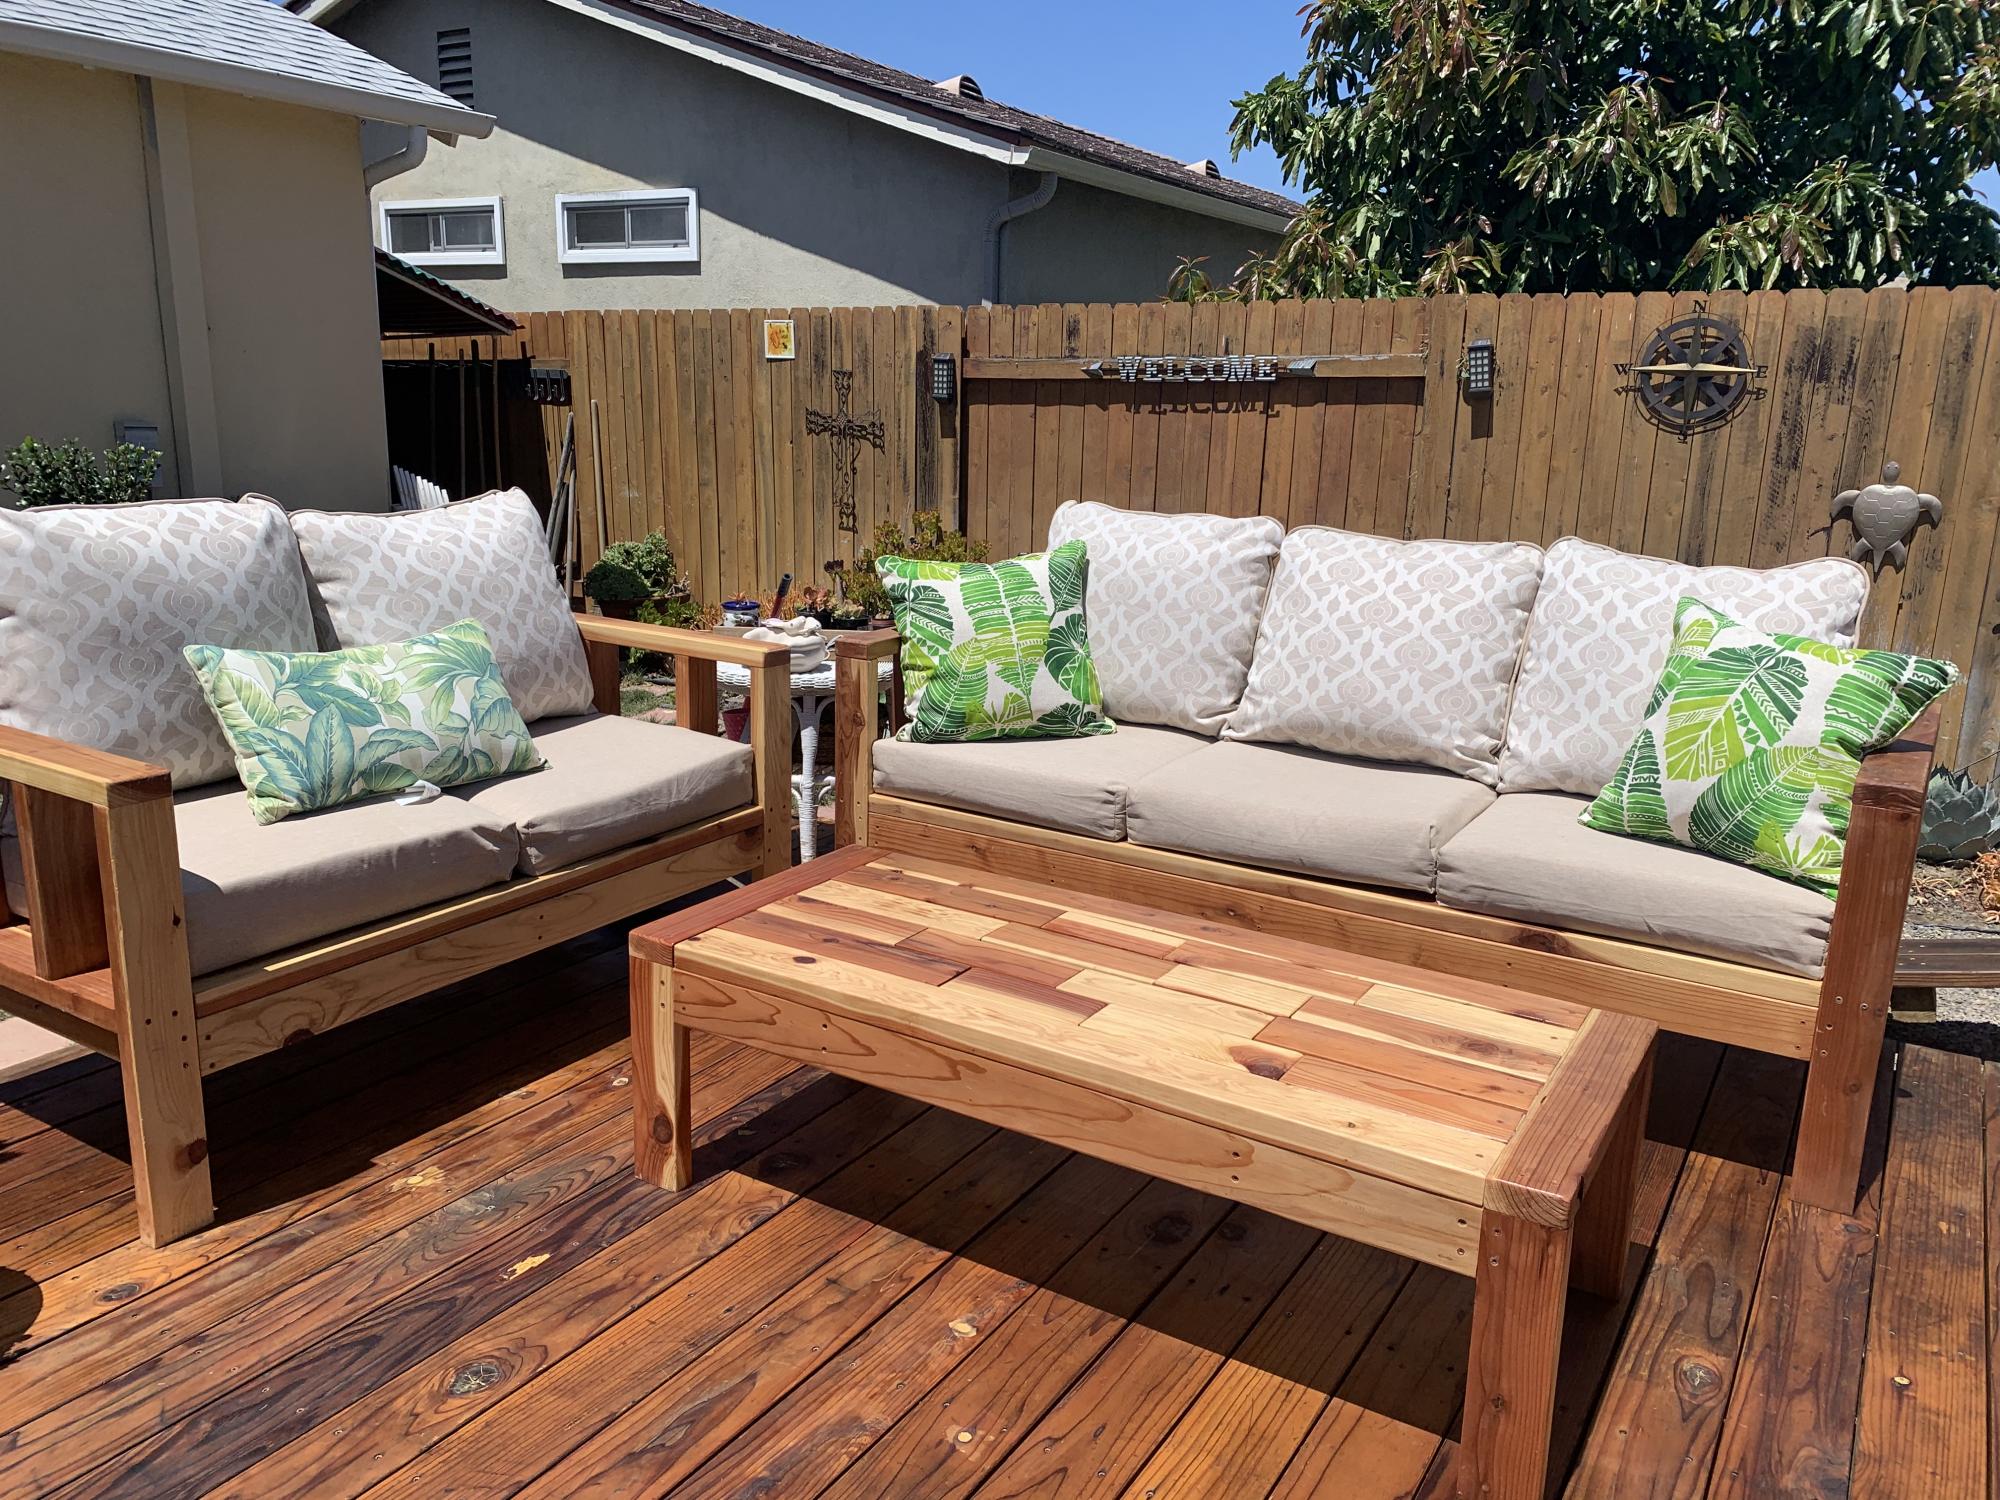
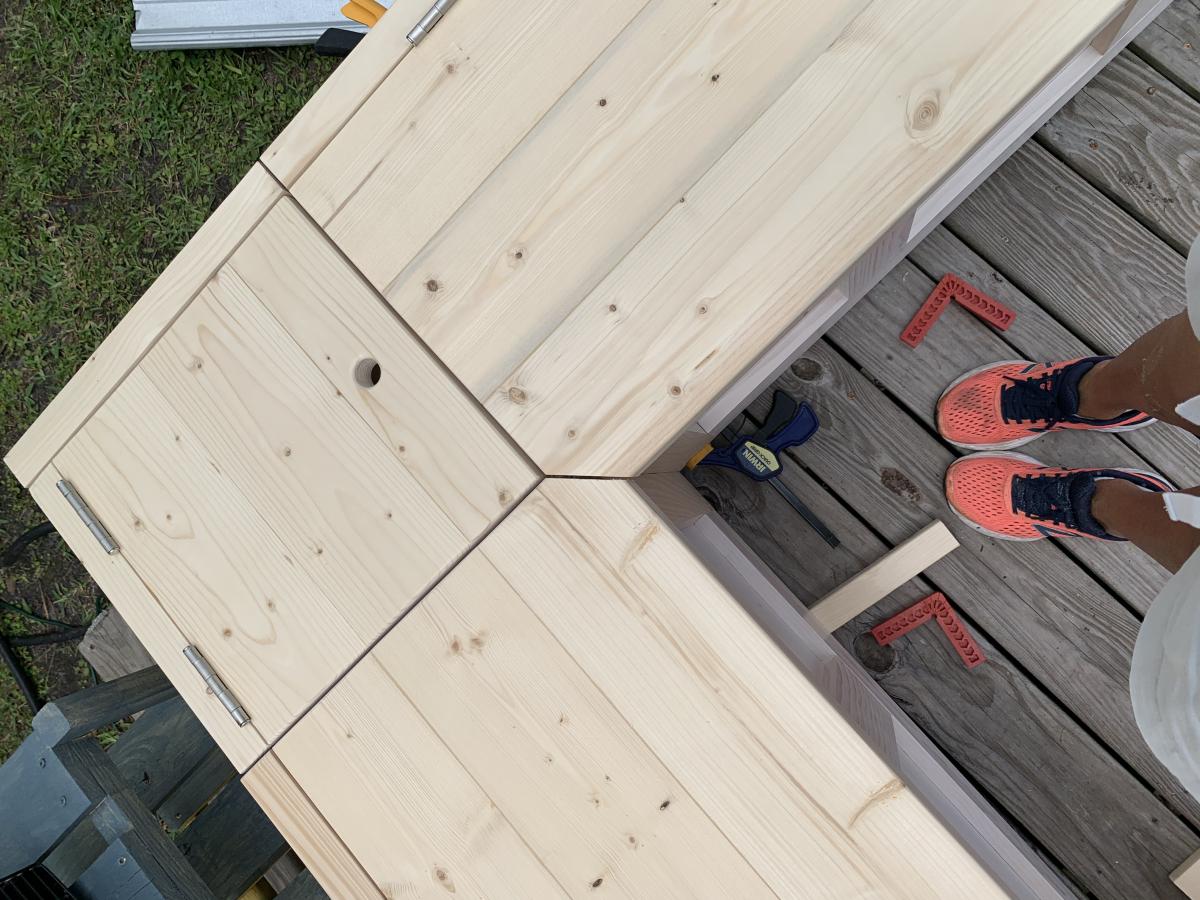
Followed Ana’s plans, very easy to follow. Chose two different sizes, different woods, and different cushions. Very pleased with outcome.
Built from Plan(s)
Followed Ana’s plans, very easy to follow. Chose two different sizes, different woods, and different cushions. Very pleased with outcome.
Easy to make 4x2 Patio Seating with Ikea style cushions.
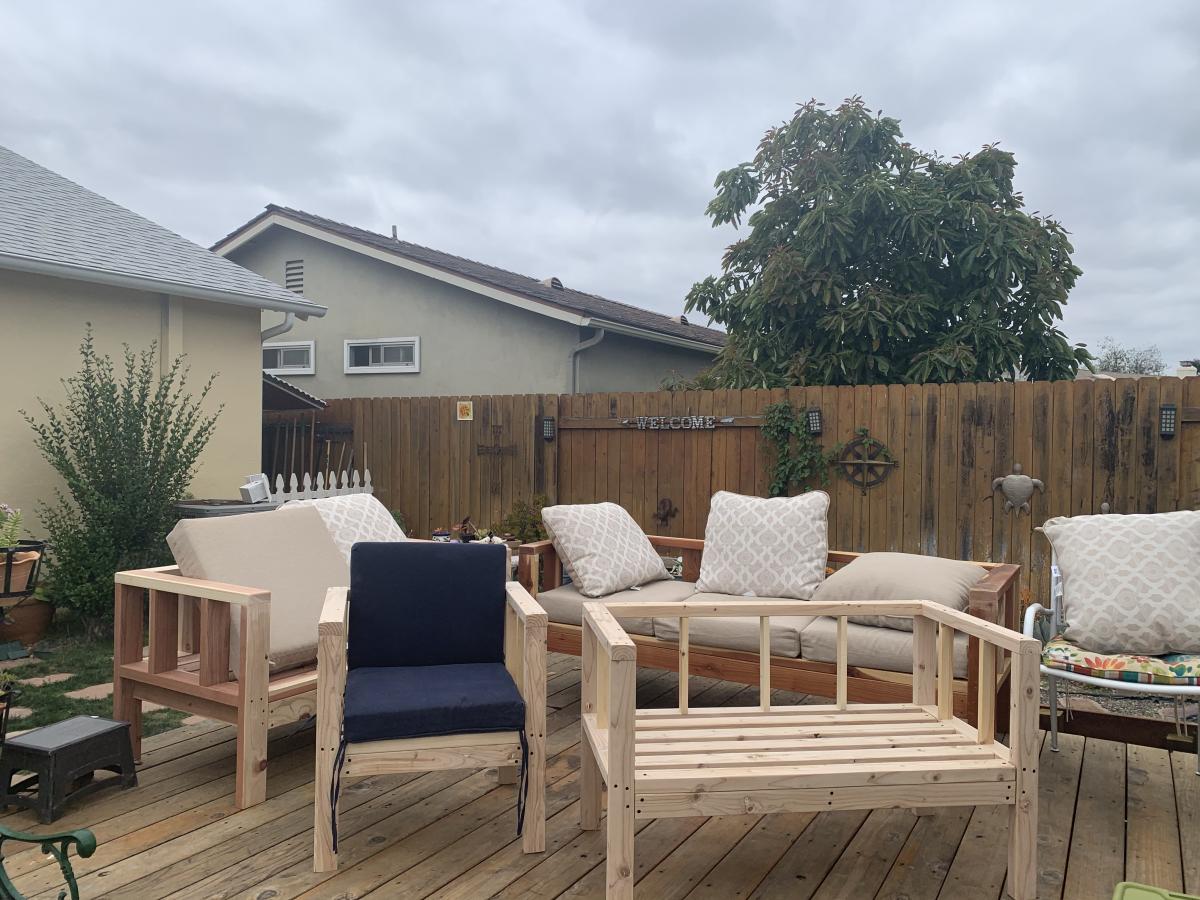
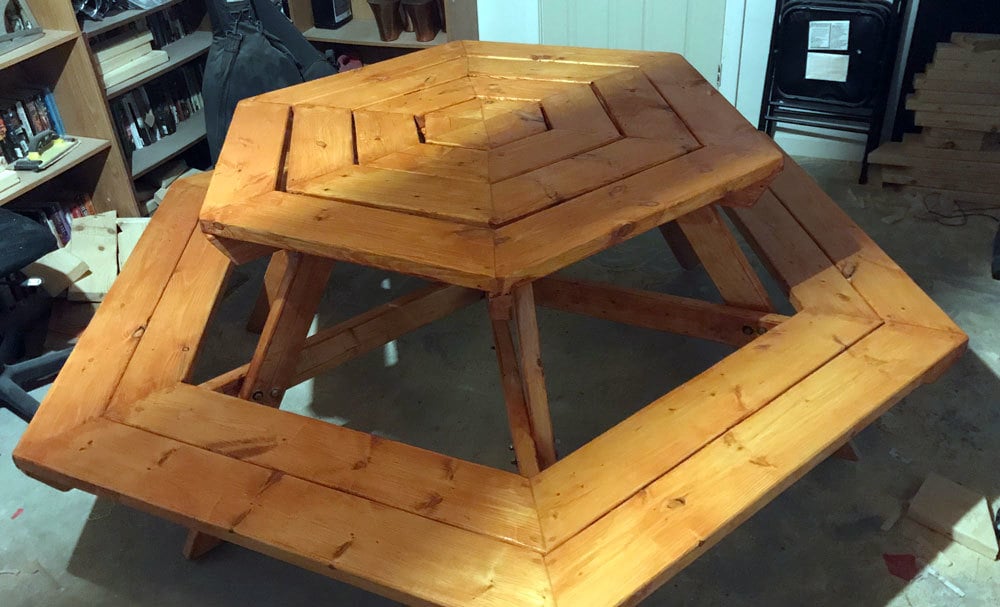
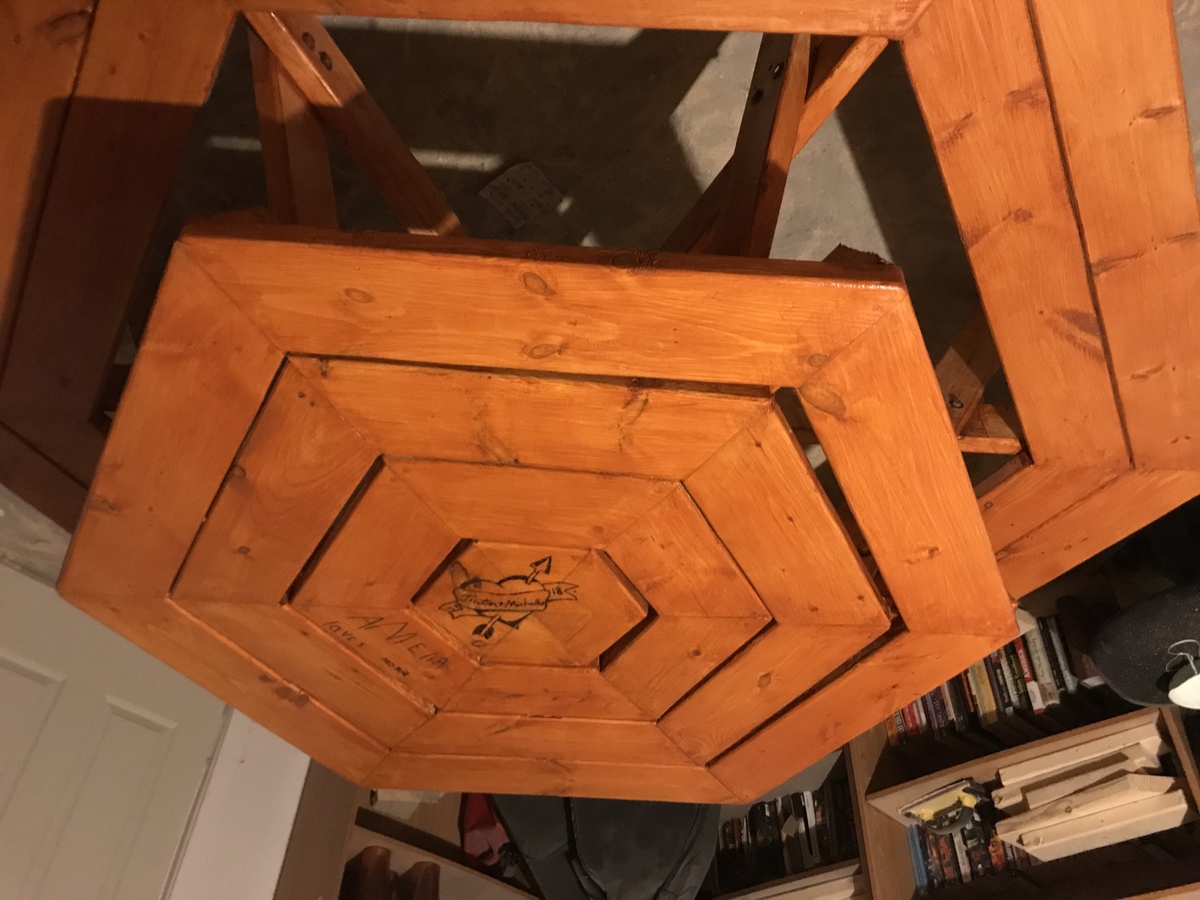
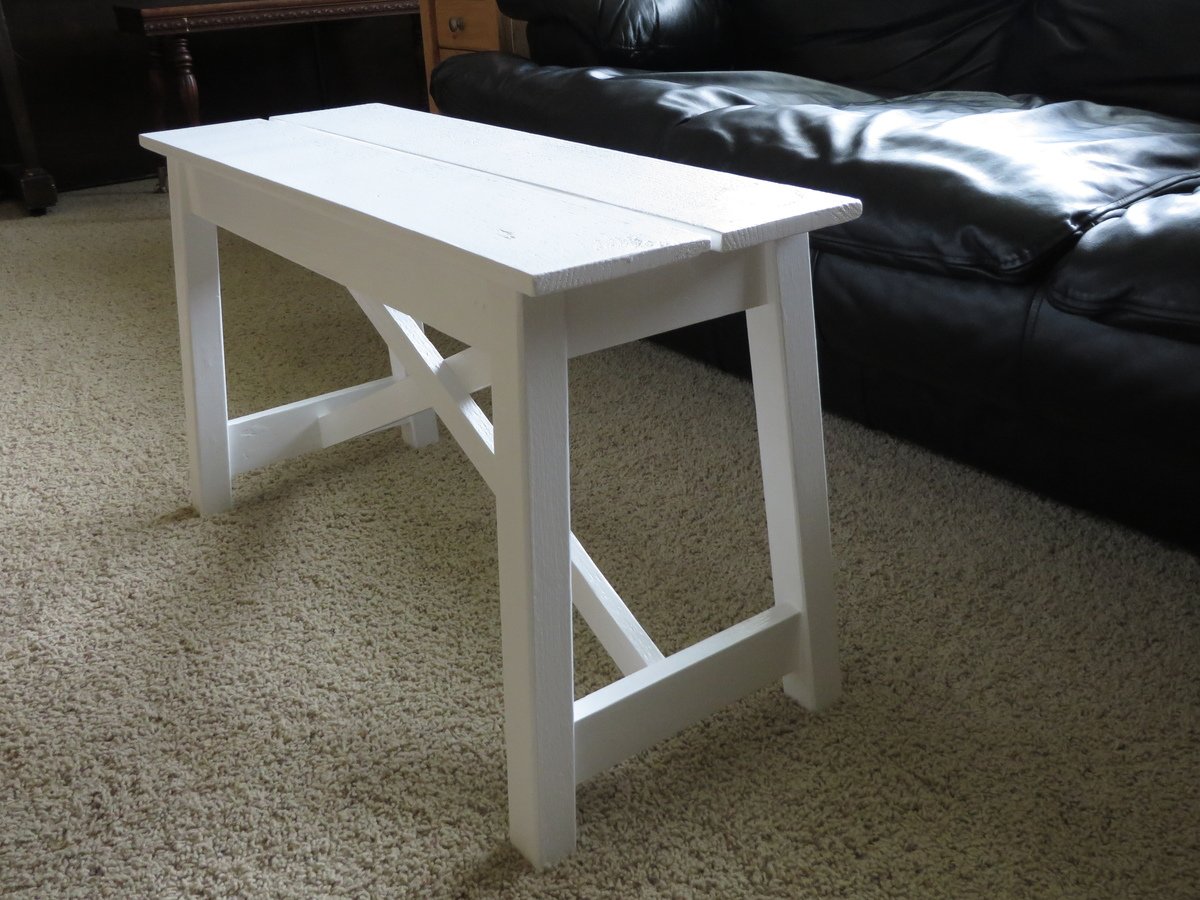
Added the diagonal designs on the back.

Wed, 10/06/2021 - 10:40
Looks great, love the added back design element! Thanks for sharing!

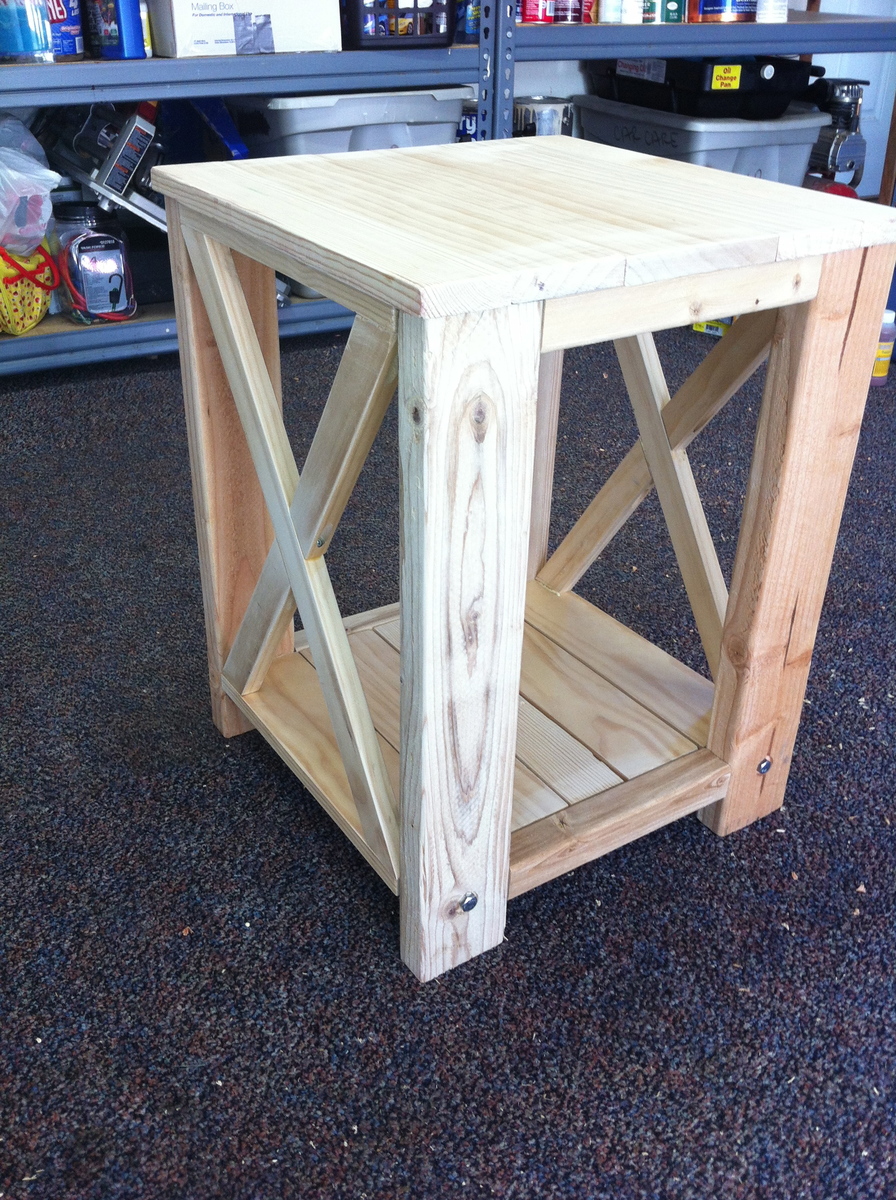
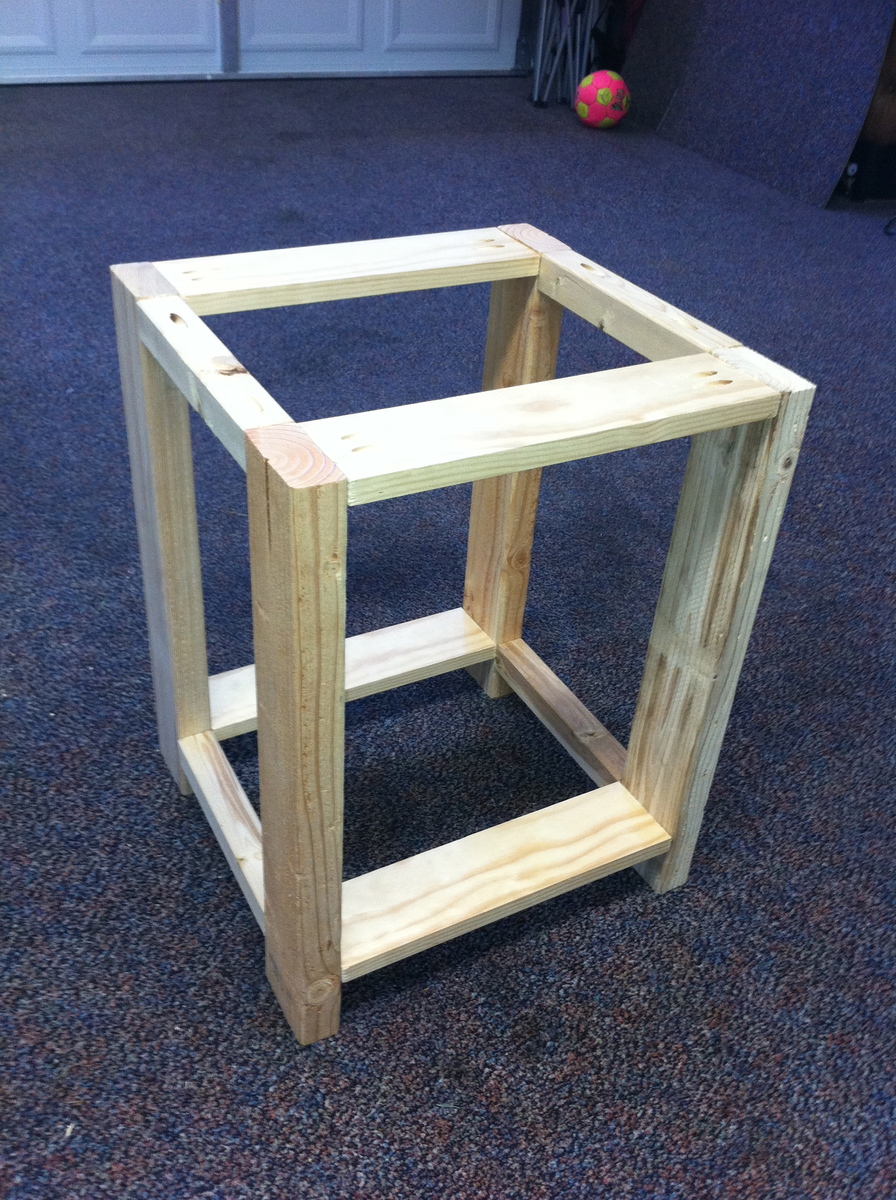
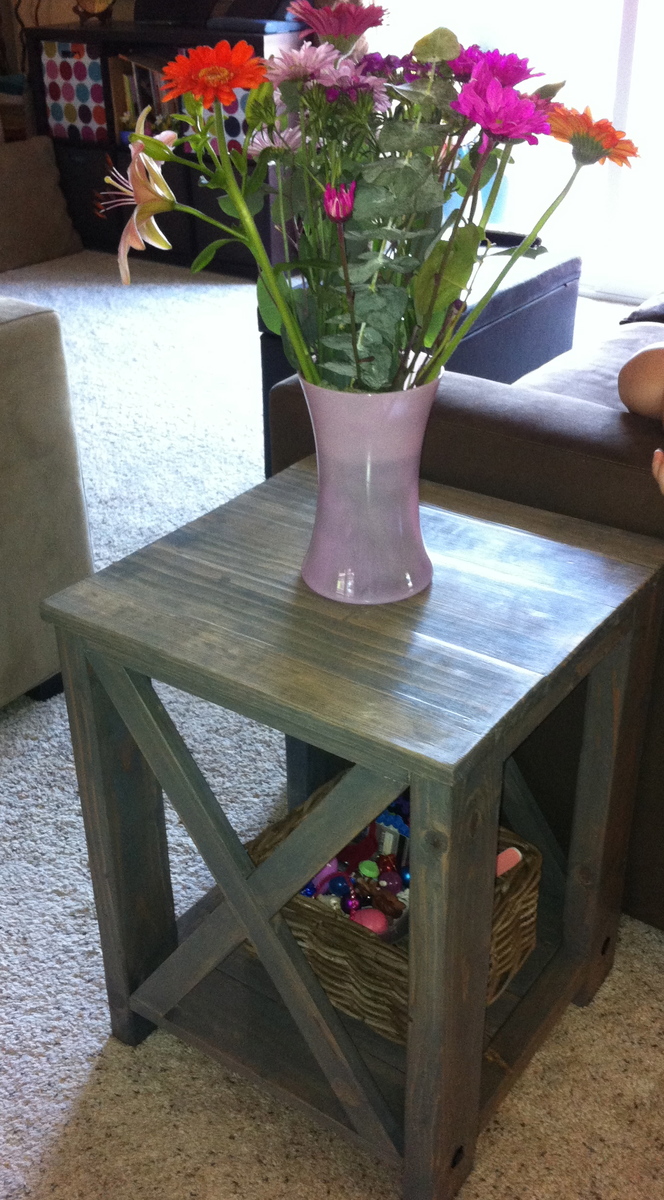
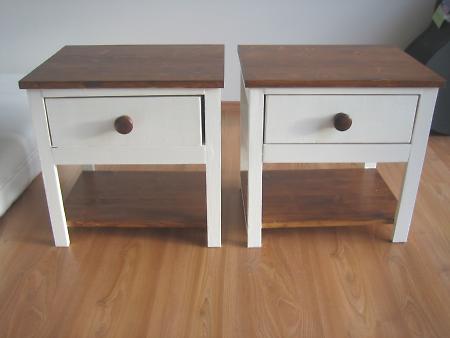
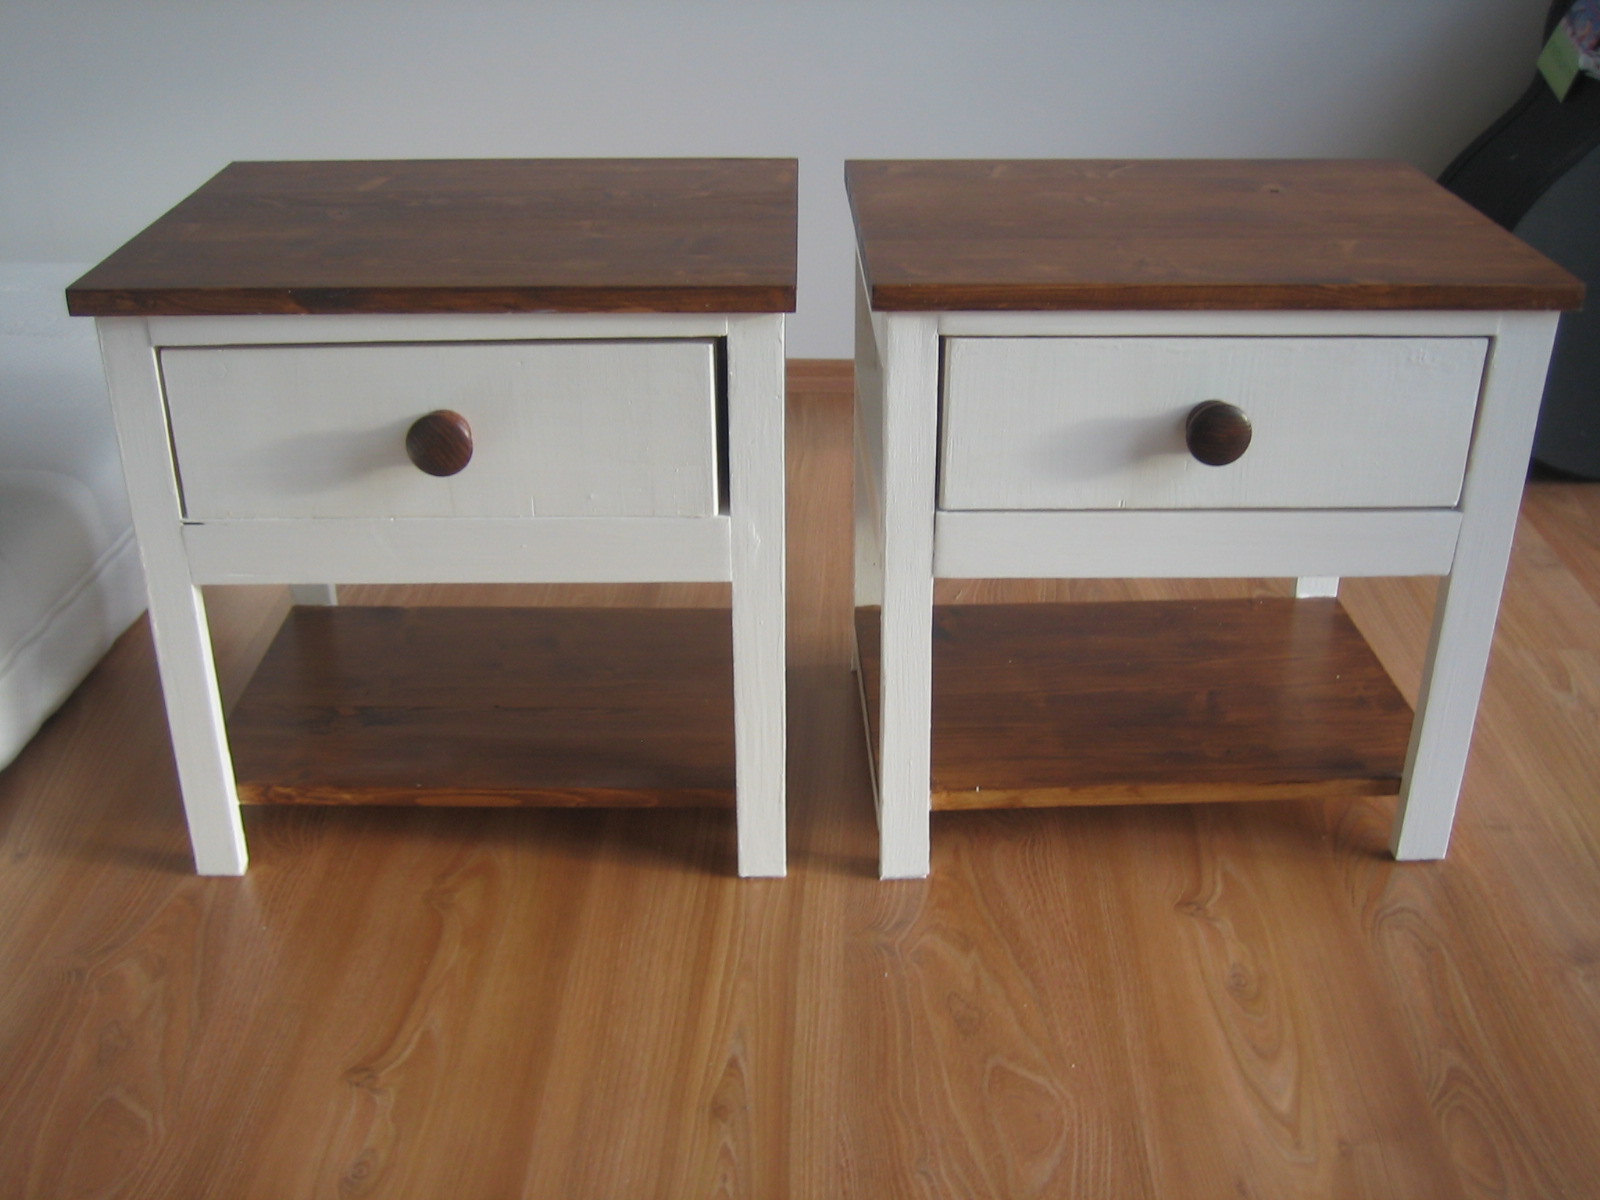
Another project in keeping with my original theme of farmhouse style furniture. I liked the style of this table but wanted to make a smaller end table than the plans. So I scaled down a bit and used 1x4 for the top and bottom shelves and used 1x also for the X. It measures standard height for an end table but its only about 18 inches square. I added some hardware, but not the L brackets on the corners. I have young kids and was a little worried about the edges.
This was my first project and I’m beyond proud. Thank you for the instructions!!!

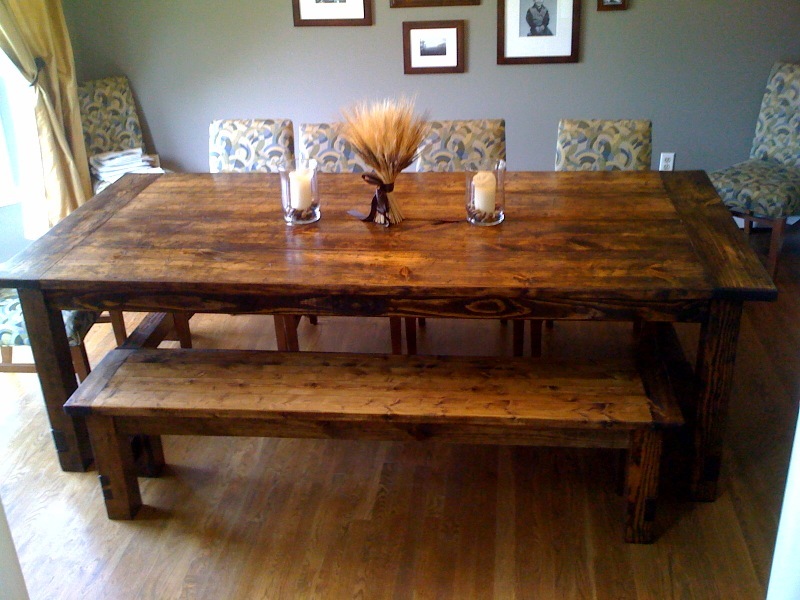
My wife wanted a portable farmhouse style rustic dining table that she could take to photoshoots and other events. I started with a top made with 2x6s and make the legs with 4x4s and the rest with 2x4s. Stain is dark walnut with a clear coat on top.
The legs are attached with door hinges and can fold into the top for more portable use. There is also a board that can be inserted in the bottom slots so that when in use the legs can not fold in.
So far the rustic dining table is working out great, although this table is VERY HEAVY and needs 2-3 strong people to carry it around. I have also made a lighter version using 1x6 tops and all 2x4 frame and legs.
Photos courtesy of Jennifer Blair Photography Designed by Amber Veatch Designs


Wed, 06/12/2013 - 04:15
Oh I really hope that you are able to put these modified plans up!!! A foldable farmhouse table.... what will they think of next!

Sat, 10/22/2016 - 12:25
Stunningly beautiful! Thank you for sharing and inspiring!
Sat, 10/22/2016 - 17:21
I cannot find the plans for the tiny house drawers any where. Can someone please point me in the right direction. Thank you!
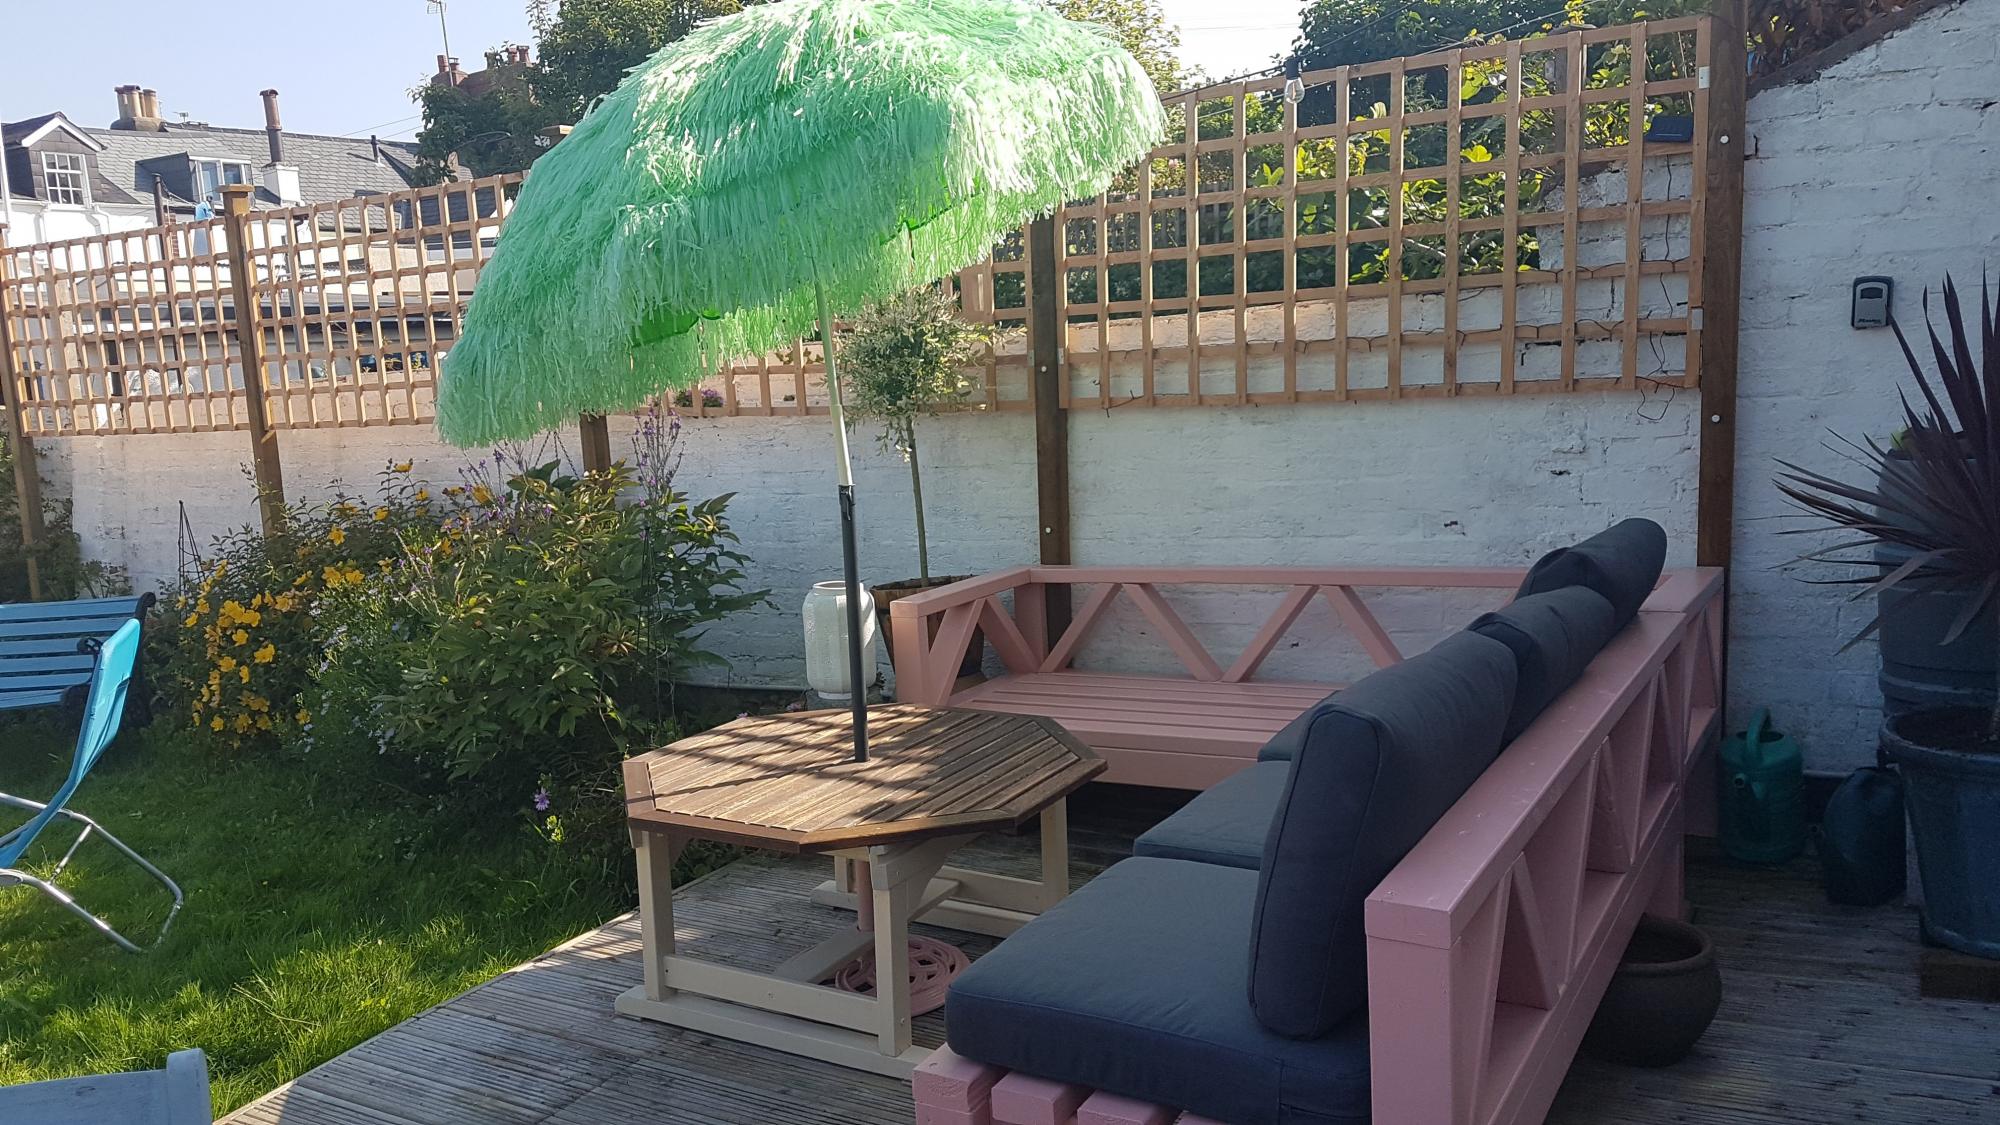
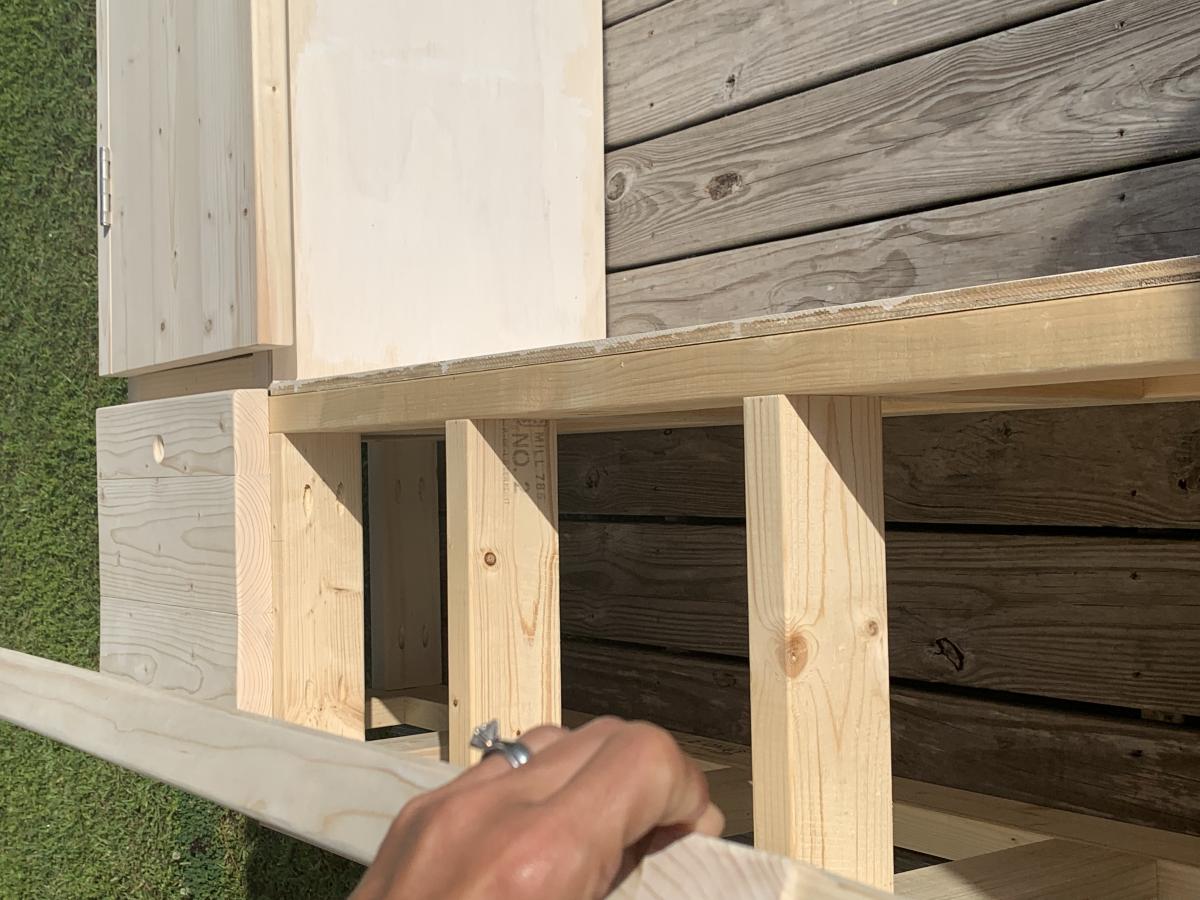
We built this set as a variation of the Platform Outdoor Sectional plan. I read that several individuals had a hard time finding the right size cushions, or inexpensive cushions, so I found some on clearance and built the seating customized to their size. The built-in cooler was a neat little addition we had an easy time with, and we used mainly scrap wood for the coffee table and corner piece. We decided to stain it a translucent grey, as I really loved the natural wood look, but needed to match the cushions a bit more. Still adding a few finishing touches, but already enjoying relaxing on it. It was a fun project, and I love how it came out. Bring on the sun!!
Thu, 01/28/2016 - 08:20
I would love to know how to build the coffee table with built in cooler. I would like to build this asap :)
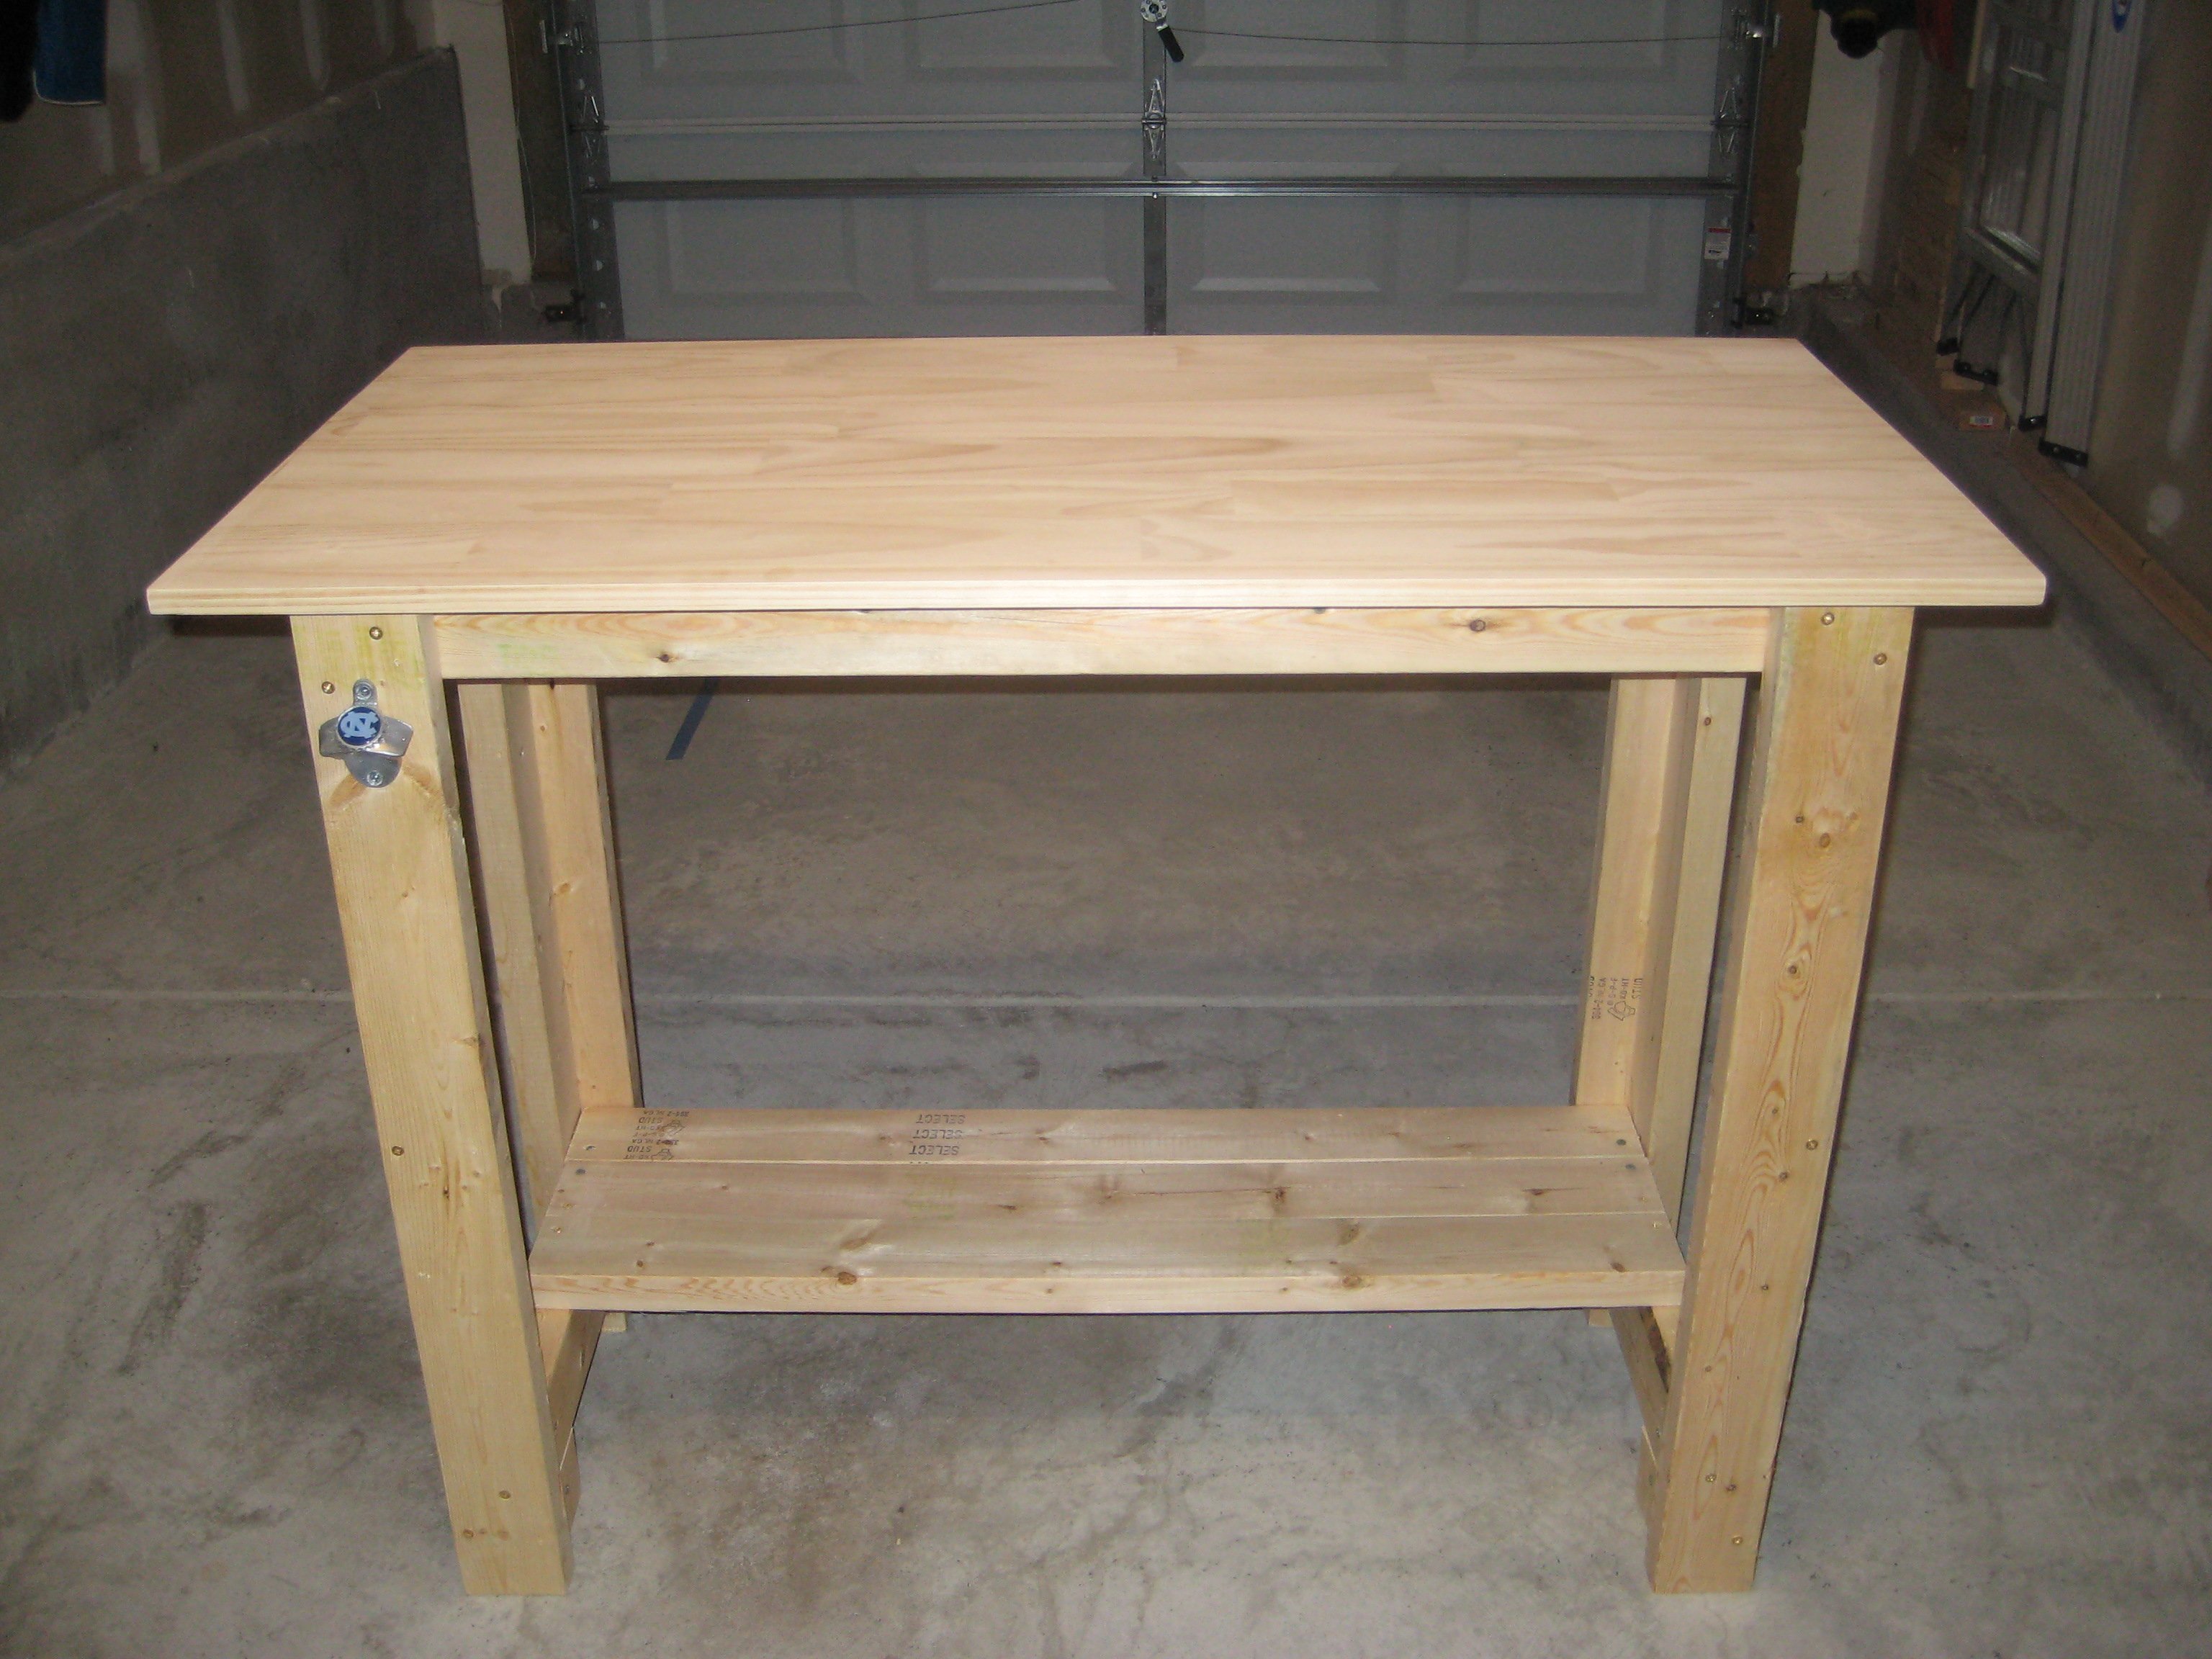
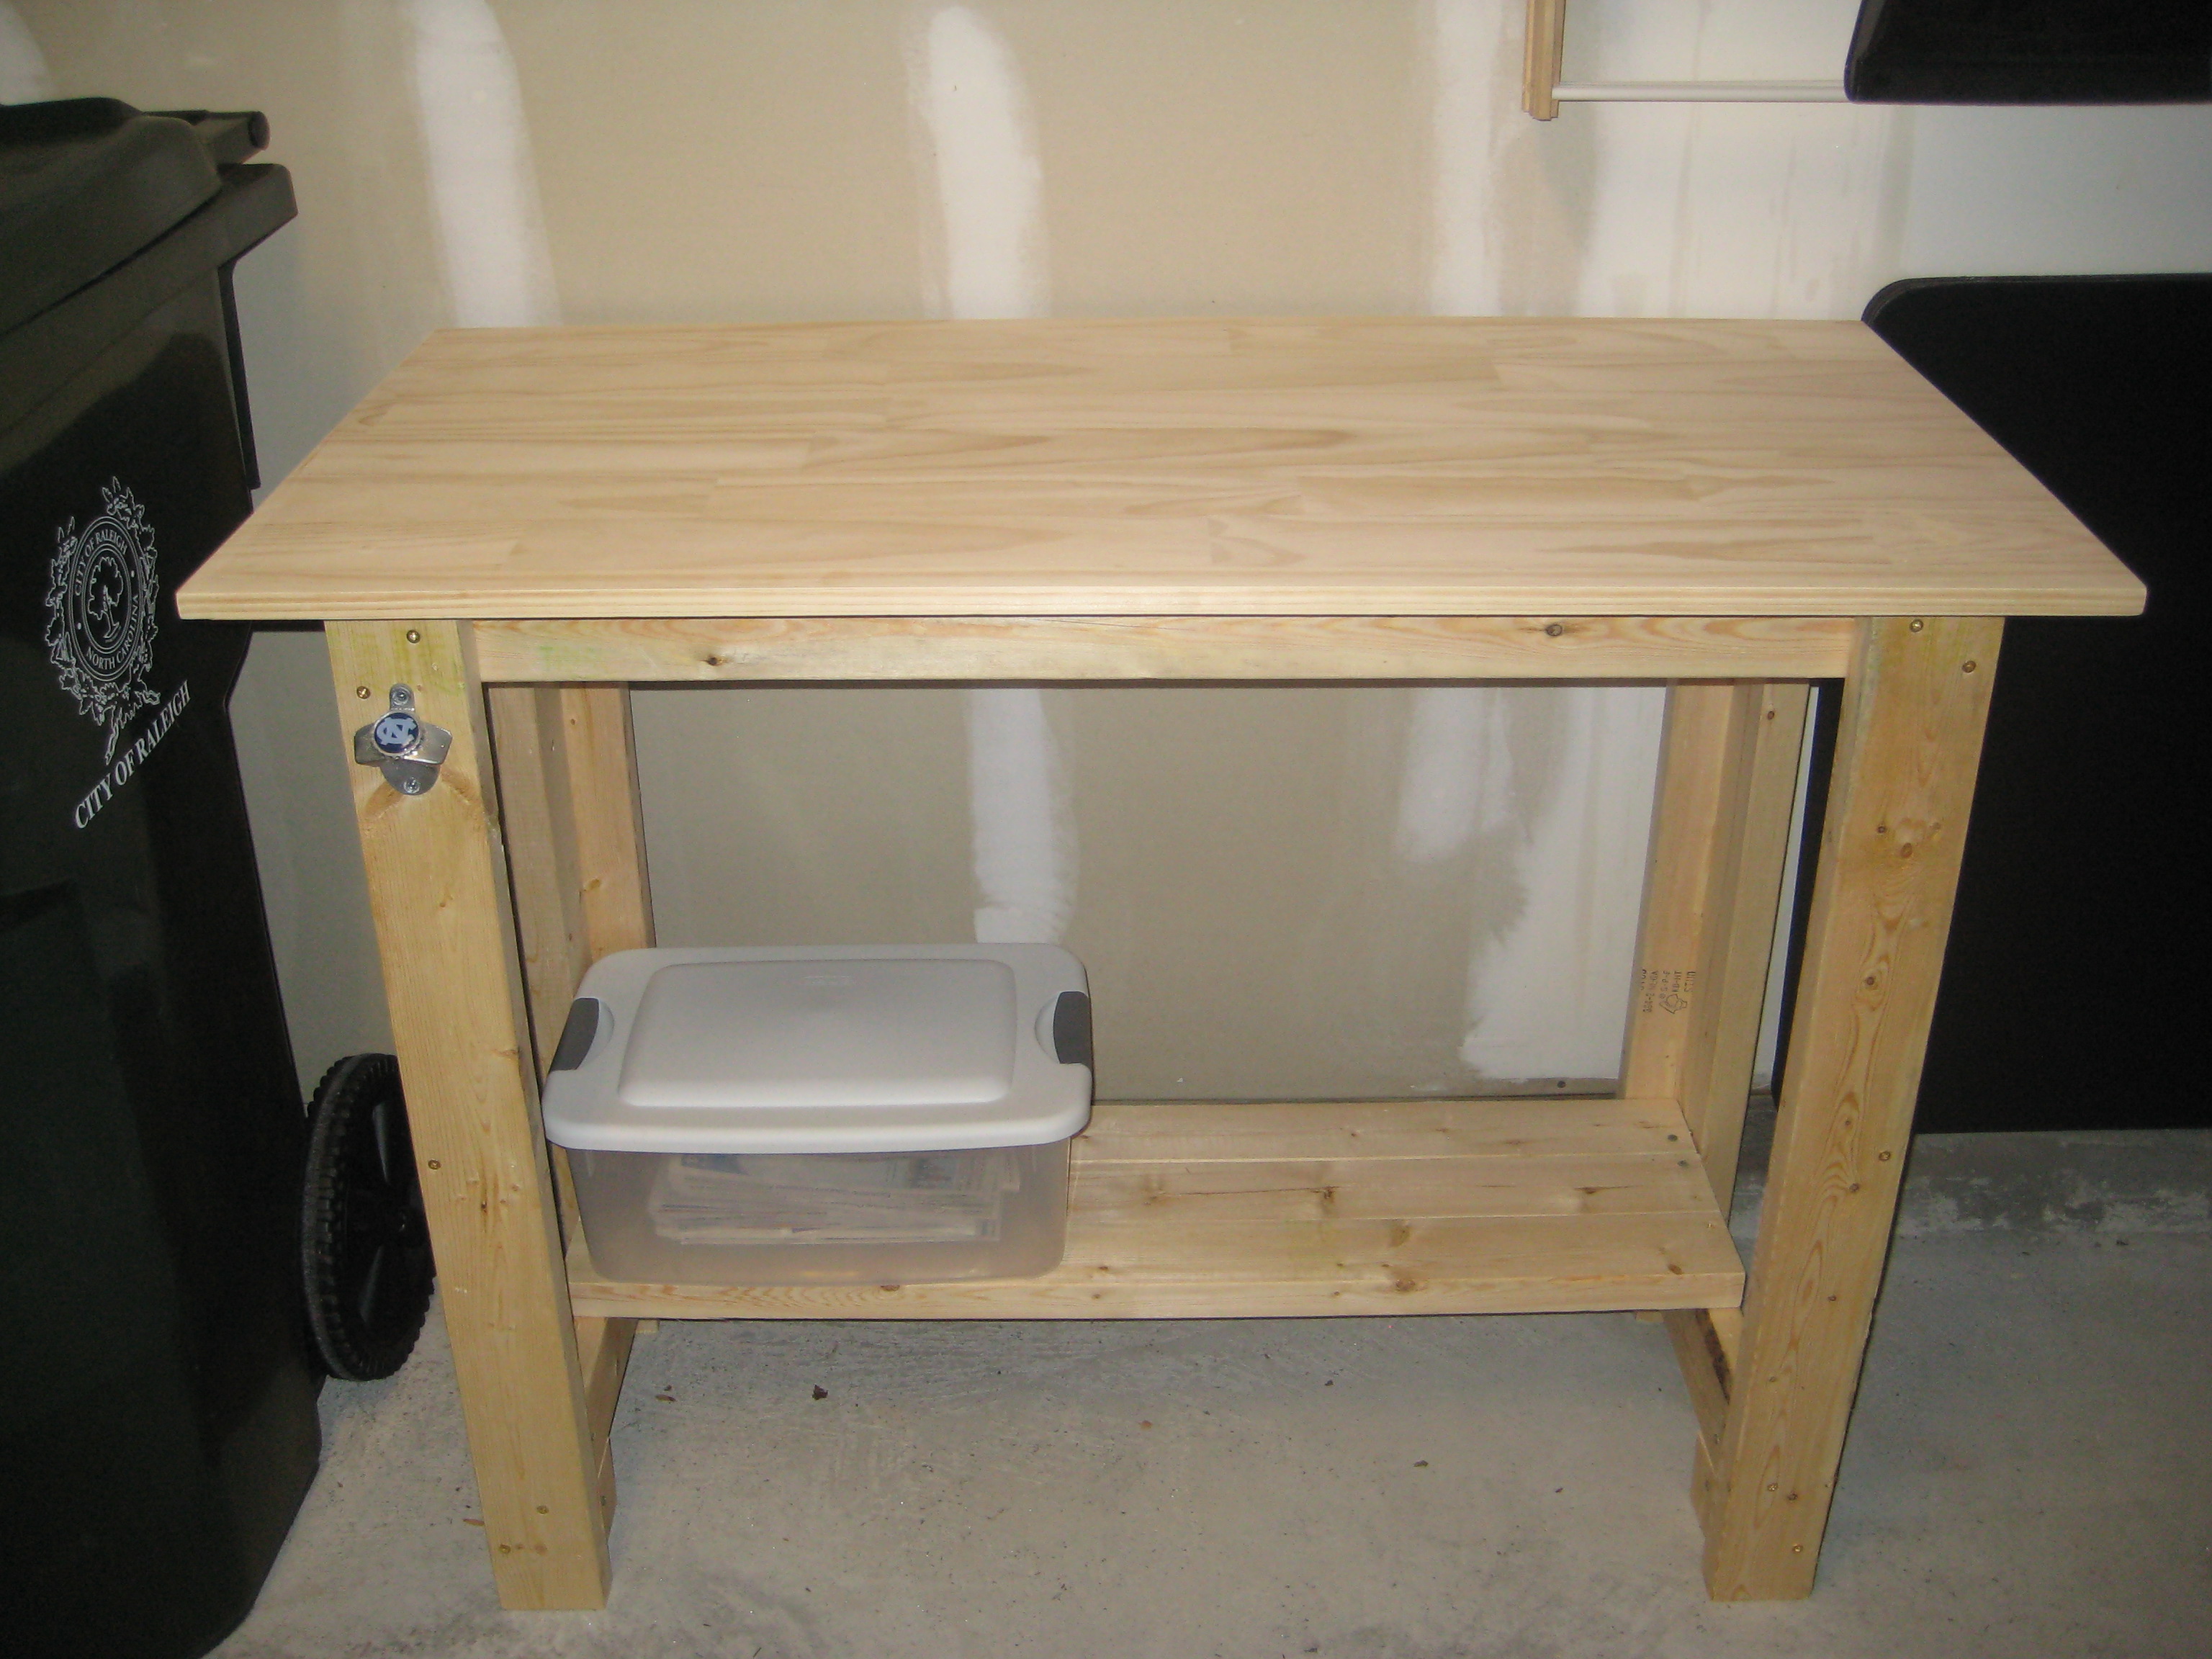
My first project from Ana's website! I figured in order to make more furniture I'm going to need a sturdy work bench to help me along the way. I cut my legs at 36" instead of 33". The 3 added inches brings it to a standard kitchen countertop height (I think, at least mine is). Thanks for the inspiration and plan pericles49!

I've built a few bookshelves and cubbies before, but nothing on this scale. I built this in my basement this past December as a Christmas present for my three-year-old son. The plans were easy to follow. I believe I spent about $150 on lumber. The bed is very sturdy. My kids love it! Now the the other kids want their own special daddy-made bed :)
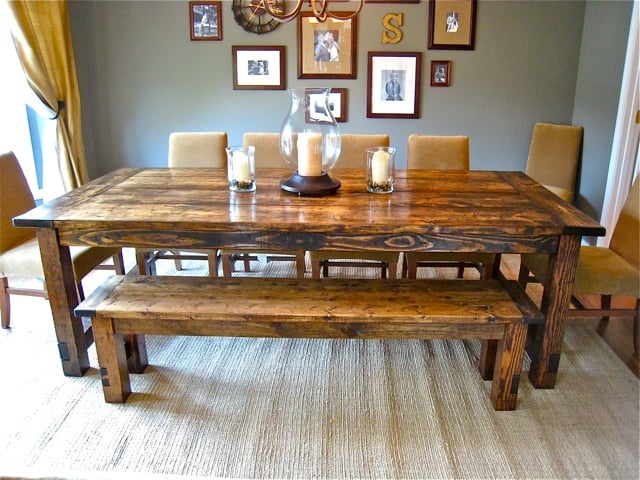
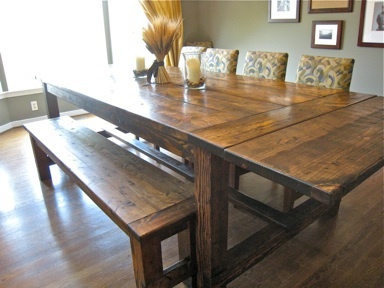
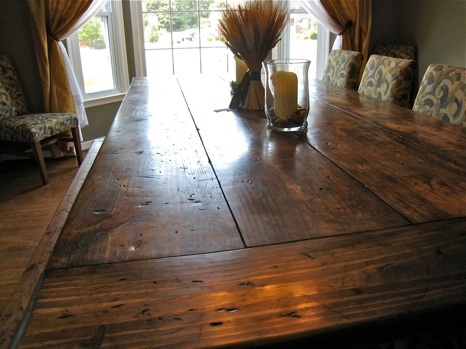
This is the first building project that I've tackled and it's all thanks to Ana-White. I did lots of things different than the building plan but it was definitely my inspiration and extremely useful. I loved the Restoration Hardware table and so I went to the local store to put my eyes on it for myself. Some of the things that I noticed, liked, and included in my design are; I used 4-2x12"s for the tabletop, I used 2x8"s as the breadboards, I used 4x4"s for the legs as well as the side stretcher, I used 2x4"s as the undertable supports, I built two 15" extensions using 2x8"s and 2x2"s, and I attempted to distress the wood yet stain it to match our dining room as best as I could.
I've documented the build and you can check it out yourself at: http://tommyandellie.com/?p=14
I've revised the plans with even more details here; http://tommyandellie.com/index.php/2012/01/13/new-and-improved-farmhous…
Hope it helps.

Mon, 06/20/2011 - 15:06
This is stunning! I'm working on this table right now, but it's no where near as good as yours. I'm jealous. I love your extensions. I'd love to see a tutorial on adding extensions..
Tue, 06/21/2011 - 05:16
It looks beautiful. Did you attatch the 2x2 to the underside of the extensions and then notch out a place on the support for them to slide into? Can you please take a photo of the underside with the extensions on?
Tue, 06/21/2011 - 14:42
That's exactly right. Here's a link to the picture you asked for; http://www.tommyandellie.com/Site/Home/Entries/2011/6/10_Farmhouse_Tabl…
There's some more details and info specifically about the extensions on my blog at; http://www.tommyandellie.com/Site/Home/Entries/2011/6/10_Farmhouse_Tabl…
It's a super simple addition to the design and can take my table from 96" to 126"!!! Or take it from a 8-10 seat table to potentially 16 seats available for those Big thanksgiving meals.
Wed, 06/29/2011 - 15:41
Hello,
I was just wondering that since your table is a bit wider than Ana's table, did you make the support for the stretcher wider? As in, did you increase the length at all (in addition to making it stick out a bit at the ends? If so, what did you extend it to? Thanks and gorgeous job!

Wed, 06/29/2011 - 18:49
Hello,
I followed Ana's example and allowed for a 1" overhang on both sides. So the tabletop is actually 44" wide and the stretchers are approximately 42". The long 2x4" stretcher is approximately 88".
Hope that helps. Thanks for the positive comments.
Thu, 06/30/2011 - 04:43
For the table legs, I set my table saw blade to a height of approximately 1.5". I then made a first cut at 3.5" from the bottom, then made a cut at 7", and then made several subsequent cuts in between those two cuts. After it was all slivered, I used a hammer to knock it all out, and then swirled the opening all around on the table saw (blade still at 1.5" tall) to smooth out all the cuts. I used the same technique for the stretcher as well.
Sat, 08/06/2011 - 21:36
Hi Tommy, I tried clicking on your site and was told the site could not be found. Last week, I saw it fine and showed my hubby our next project, but now it's gone. Help!
Mon, 08/08/2011 - 13:25
It may have been bad timing when was updating the site or I may have changed something.
Try this out and let me know if it works;
http://www.tommyandellie.com/Site/Home/Entries/2011/8/4_Farmhouse_Table…
Or go to our main site www.tommyandellie.com
Mon, 11/14/2011 - 12:31
We've switched over our entire website and have had some issues.
Here's the new updated version; http://tommyandellie.com/?p=14
Here's the old one in case that doesn't work; http://web.me.com/tomsibiga/Site/Home/Entries/2011/8/4_Farmhouse_Table_…
Tue, 01/24/2012 - 03:37
Good job publishing this post. I would like to learn more about this subject.
Thu, 03/01/2012 - 07:17
What inspiring pictures! Apparently everyone agrees, because I just "pinned" one of these pictures to Pinterest and it was immediately repinned 27 times and counting. So nice work! I hope to make mine this weekend.
Sun, 04/29/2012 - 06:29
She and her boyfriend would like to build it using lumber i cut from my mill. They are thinking walnut, hickory or maybe ash but im not sure how that will work out with being distressed. And your extentions, do you have a 2x4 or two that slides out from under the table to help support them on each end ? Are there pics of the under side of the table as well? This is a great table and i think they will have fun as a family assemblimng and finishing it.
Thank you. DesII
Sun, 04/29/2012 - 07:38
Here's a link to how I make the extensions; http://tommyandellie.com/index.php/2012/01/17/farmhouse-table-extension…
And this post has a ton of pictures to see how it all works.
With the harder wood like walnut, hickory, or ash......it'll definitely be harder to distress but I think it makes for a really neat/unique piece.
Hope that helps!
Thu, 10/11/2012 - 12:52
Bench Plans can be found here; http://tommyandellie.com/index.php/2012/03/17/farmhouse-bench-plans/
A spreadsheet for the bench plans can be found here; http://tommyandellie.com/index.php/2012/06/28/cut-list-and-shopping-lis…
Tue, 04/14/2015 - 13:31
Hey Tommy, I saw the Farmhouse table design with extensions, I don't have Excel to open the cut list and need the buy list and cut list to complete the project, I am really short on time and need to start this project tomorrow. Please if you can, do you have a word document or a PDF that shows the page for those?
In reply to No Excel Please help by James Groover
Tue, 04/14/2015 - 16:47
Oh my God! I found the cut list I had misplaced it in my folders, dude, sorry about that. Never mind.
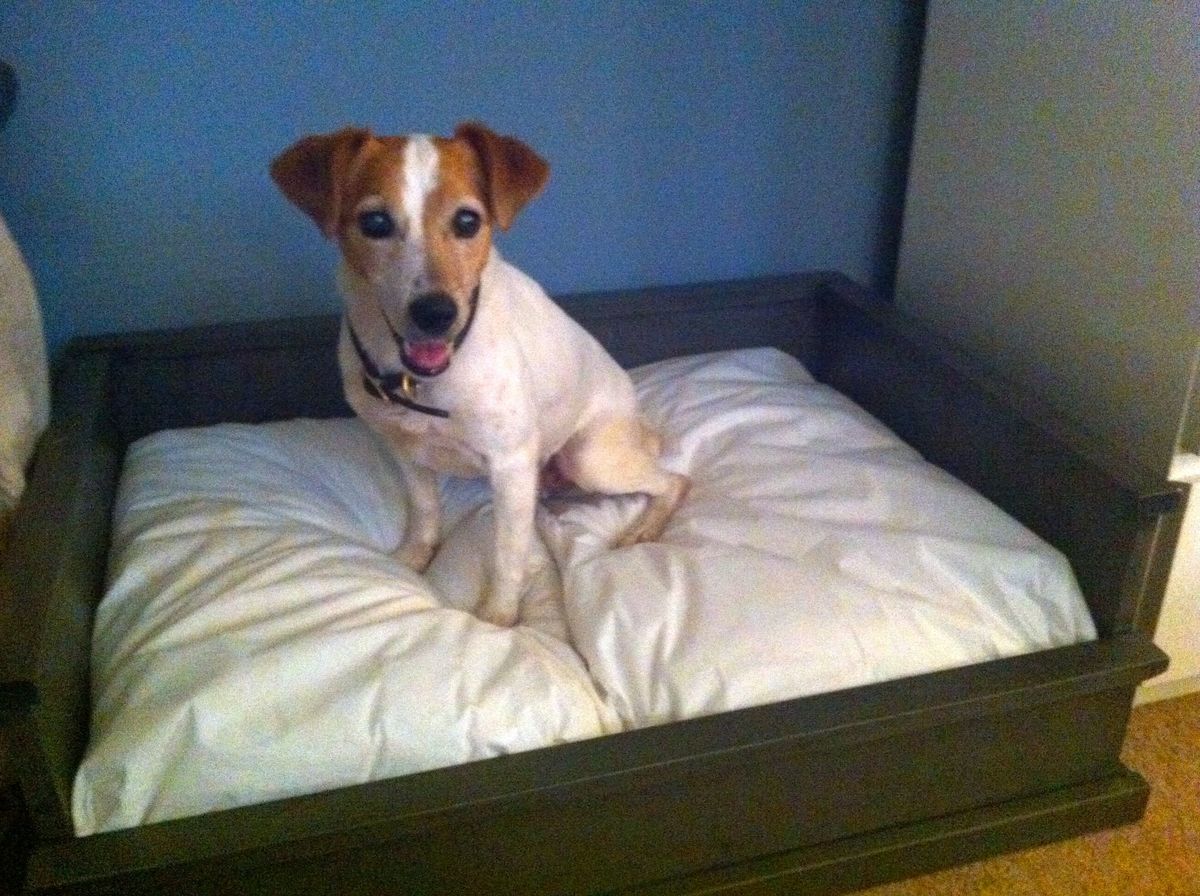
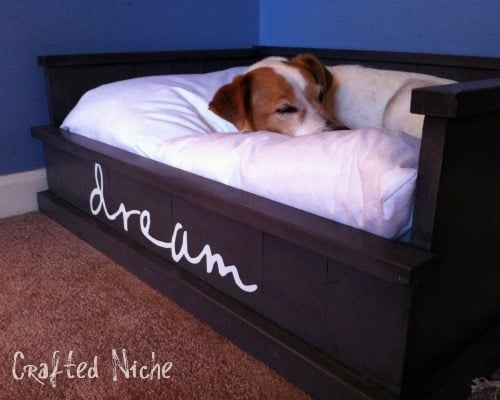
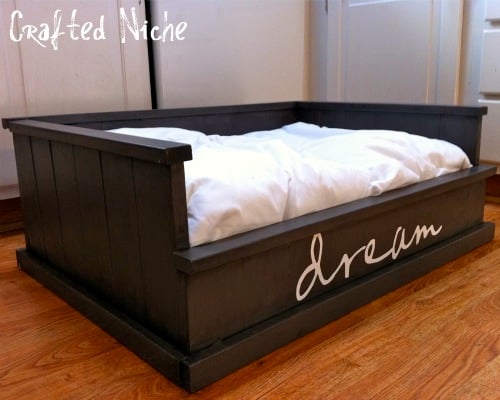
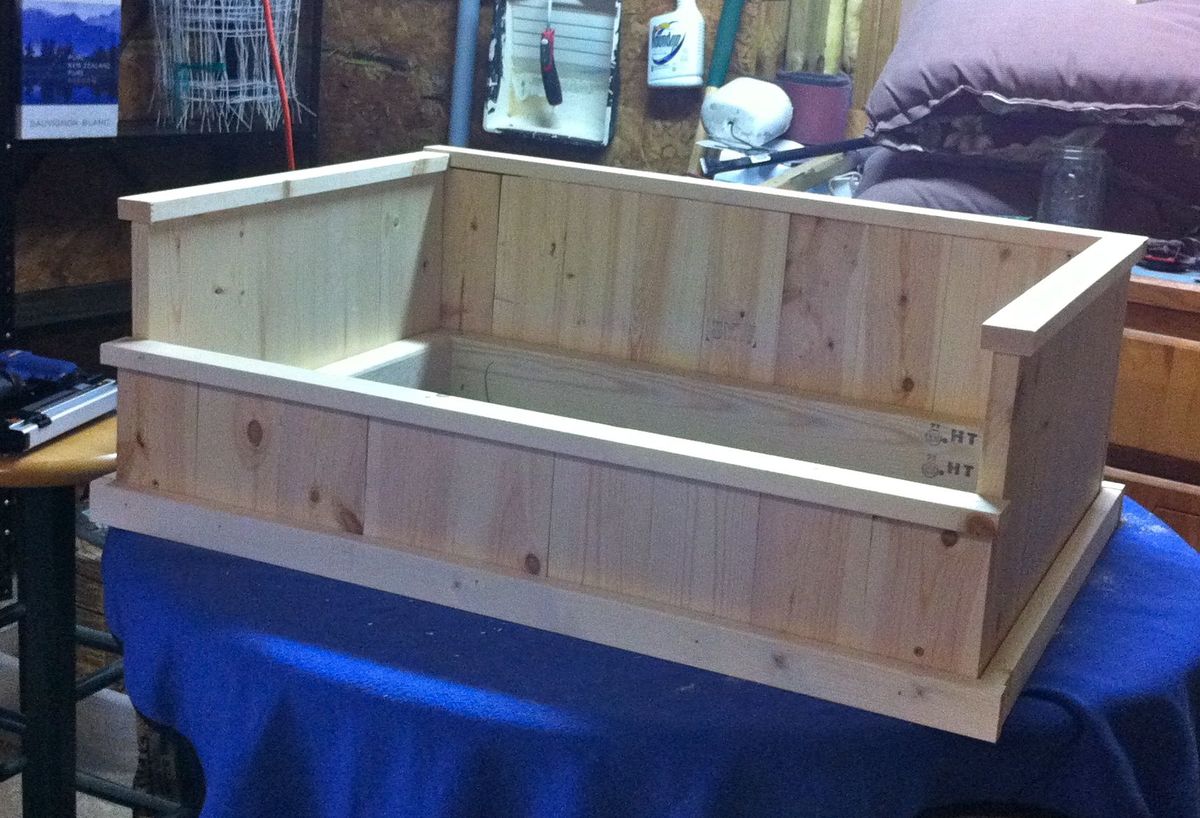
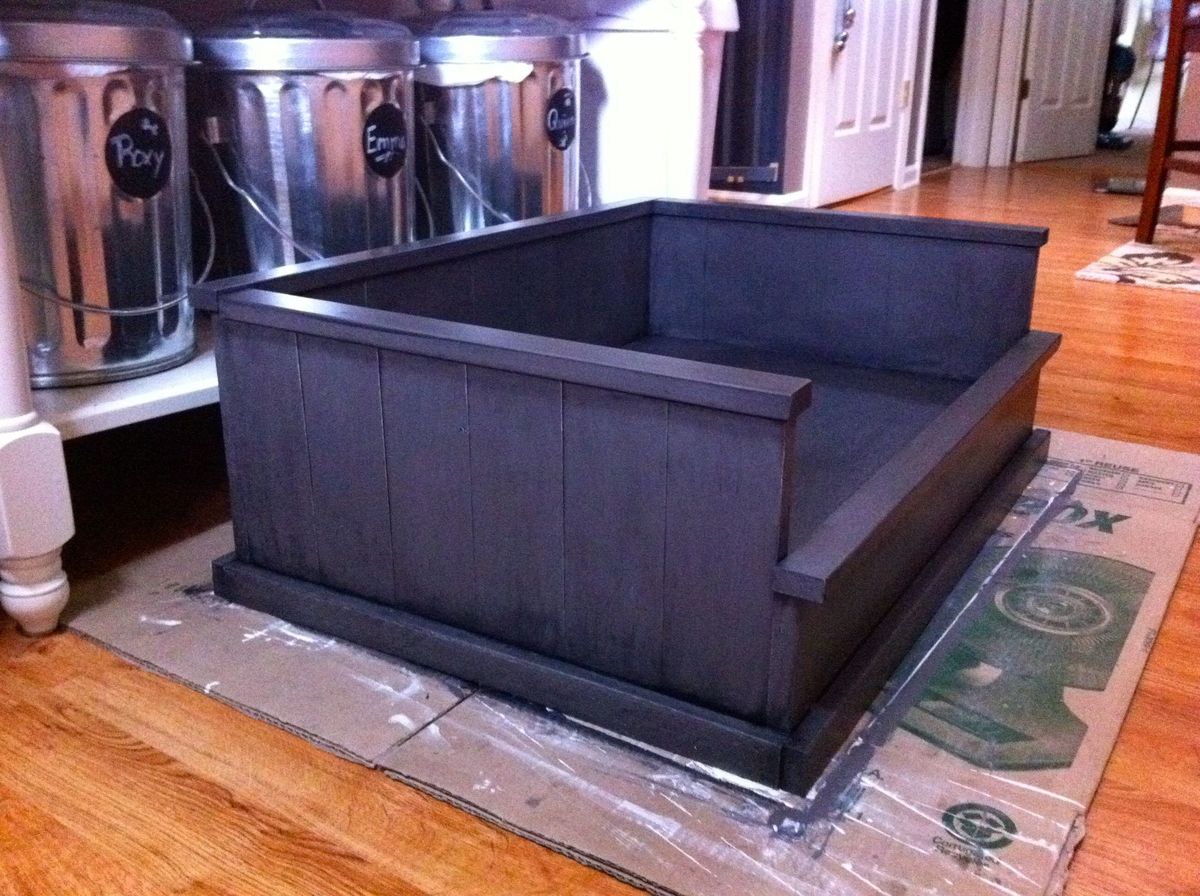
Inspired by Ana's Farmhouse Bed plans, I built this dog bed for my Jack Russell. I measured and planned for it to comfortably fit two standard bed pillows (in waterproof covers of course!). She loves it!

In reply to This is so cute!! You did a by benfoldsfivealive
Thu, 06/23/2011 - 14:20
Thanks! I figured after 14 years she deserved a comfy bed. :-)
You didn’t have plans, so I had to “wing it” without you; however, I couldn’t have done it without all the practice I’ve had from all your plans on this website these past several years!
Tue, 04/26/2022 - 11:34
Job well done, that looks amazing! Thank you for sharing.
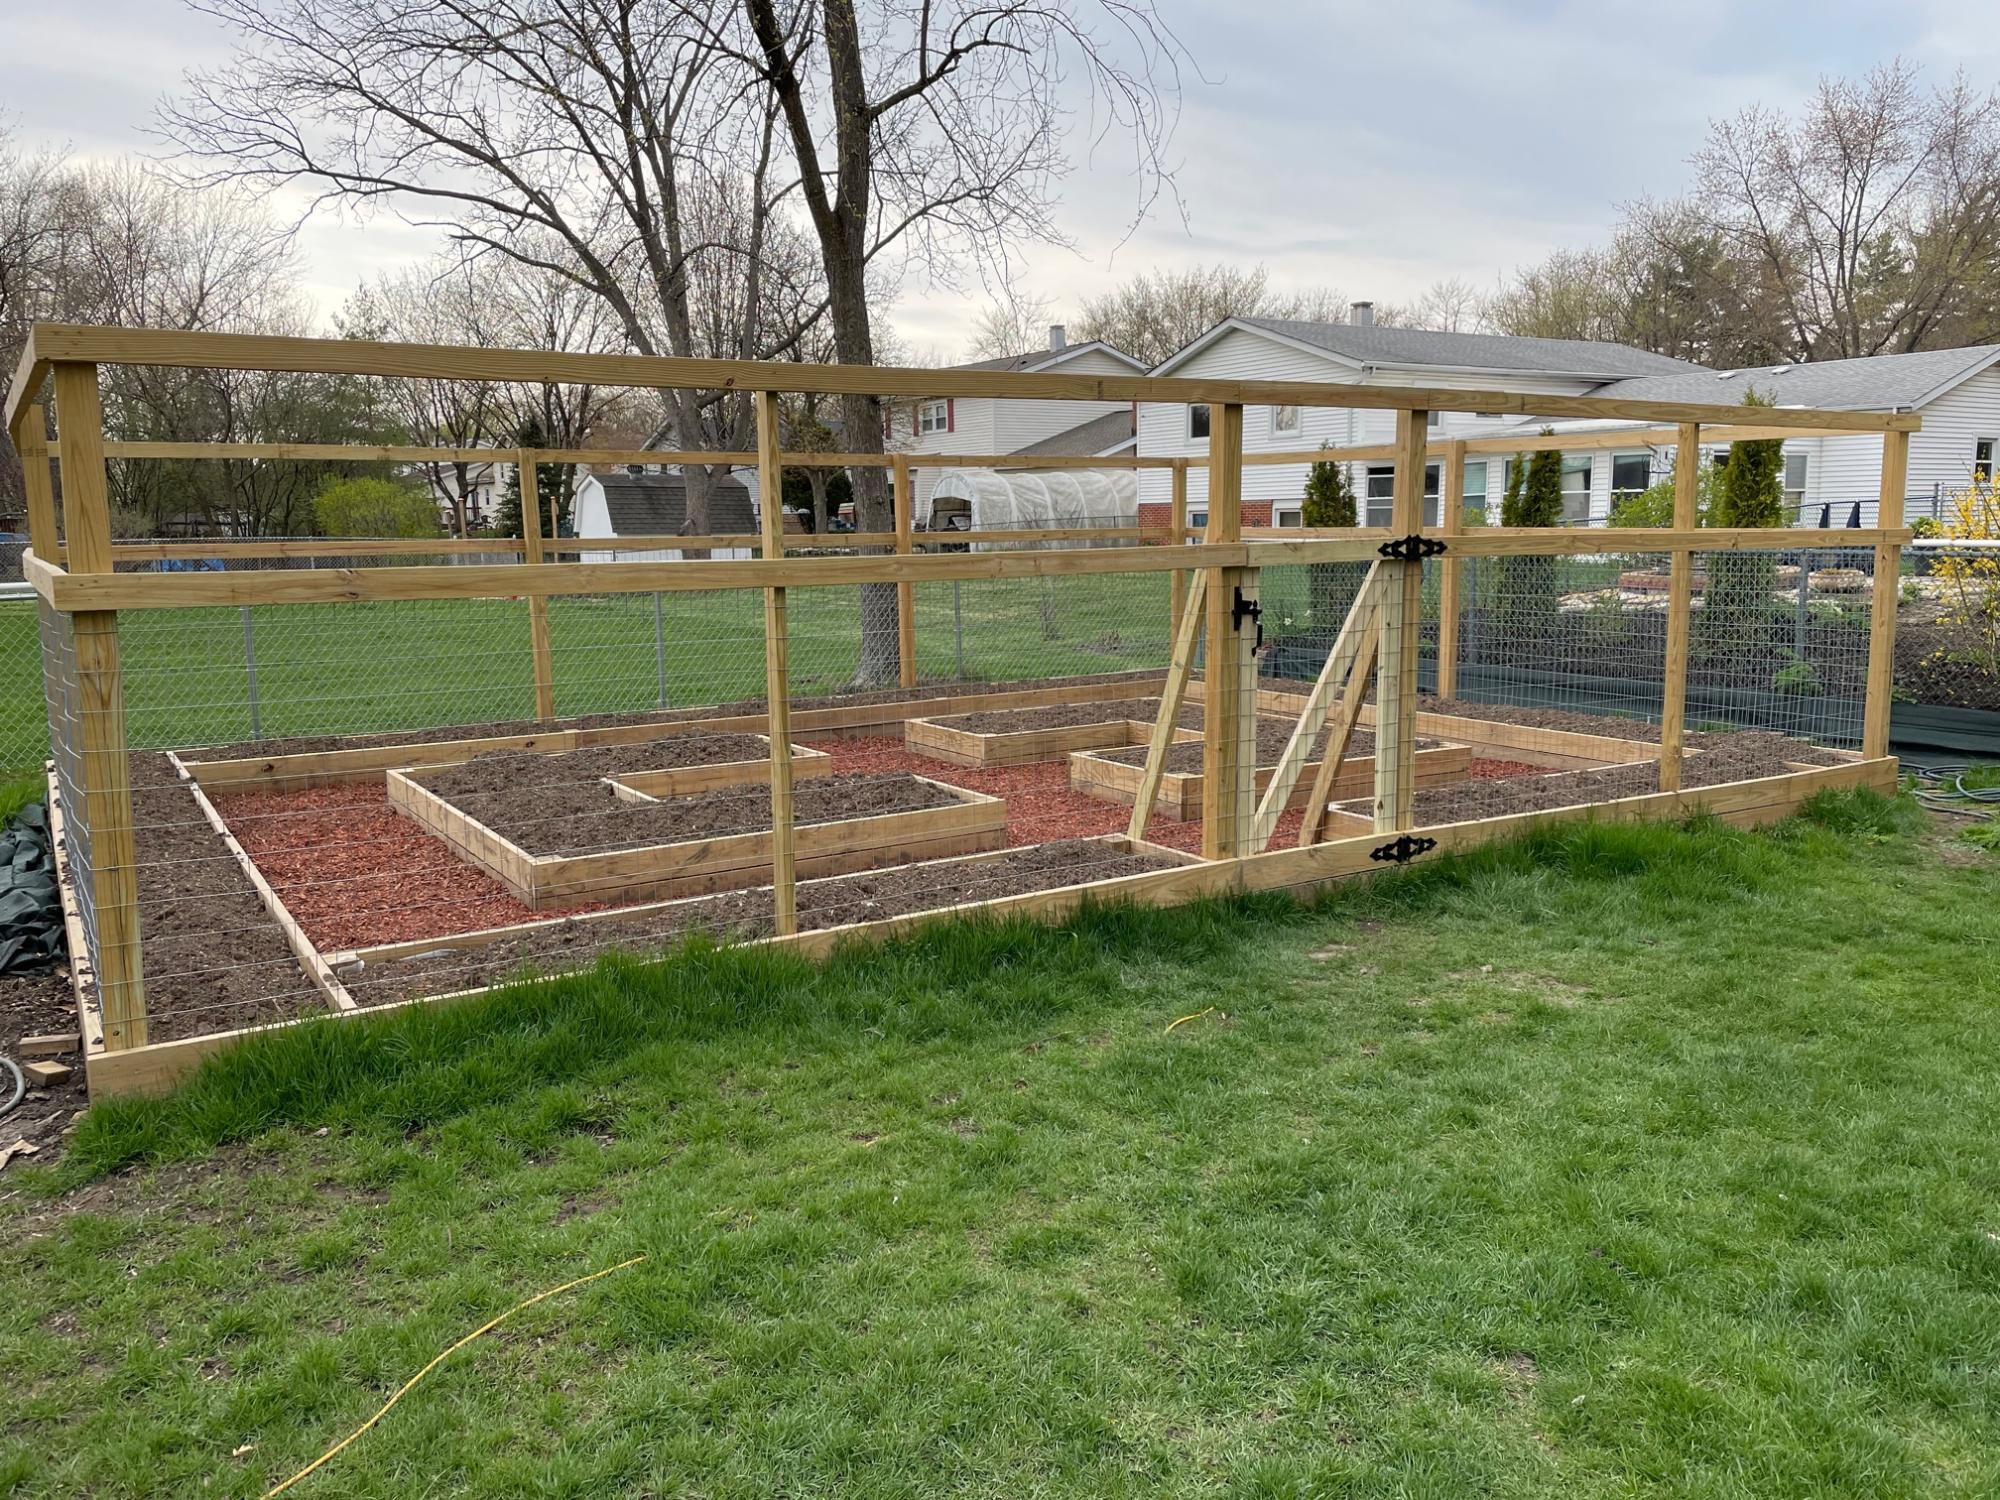
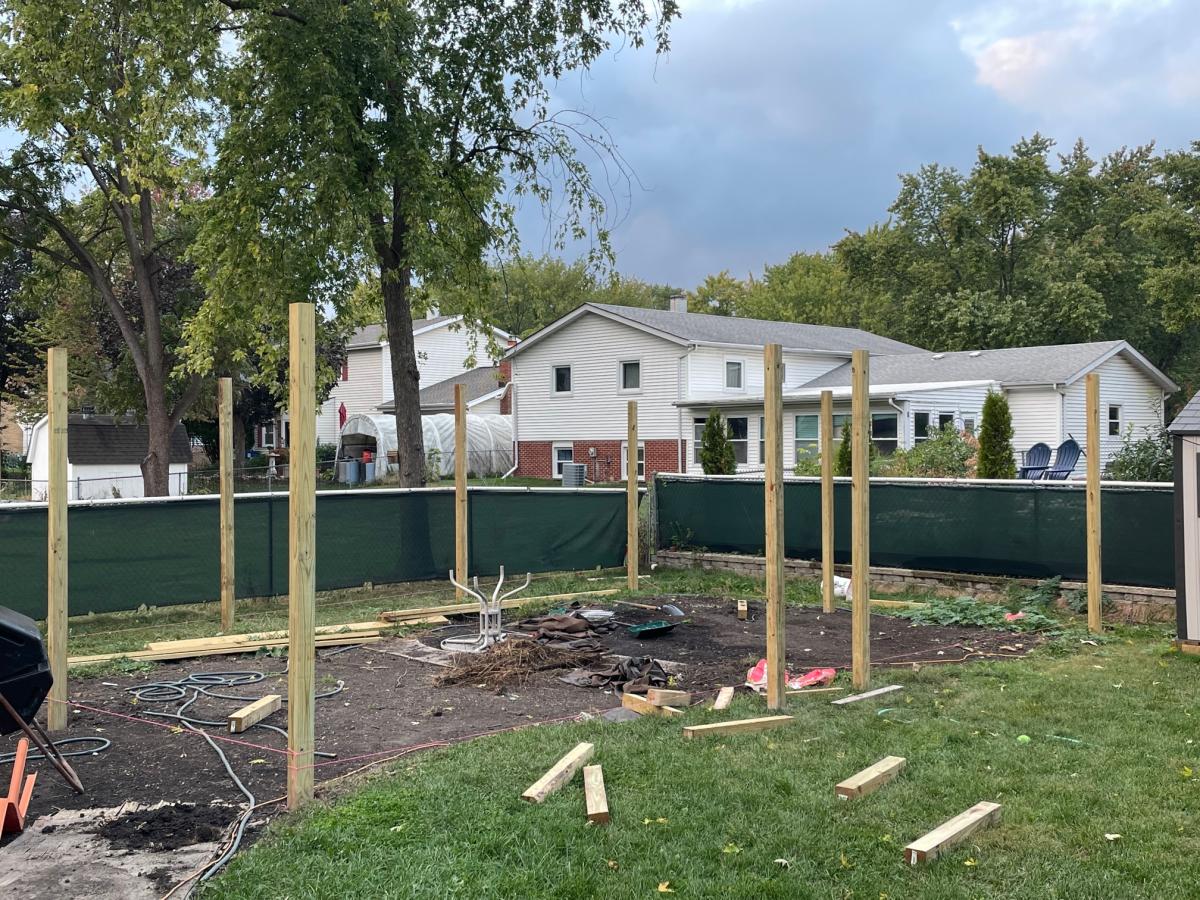
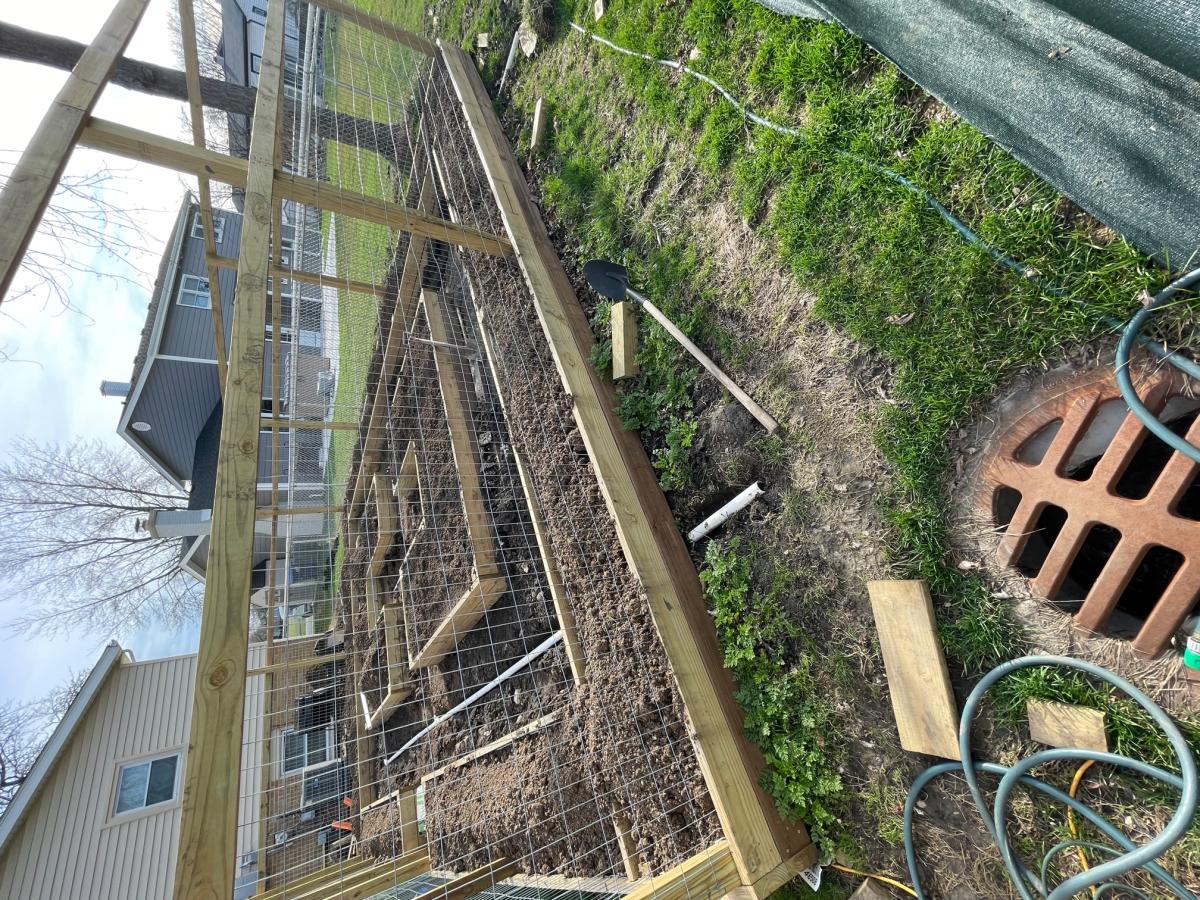
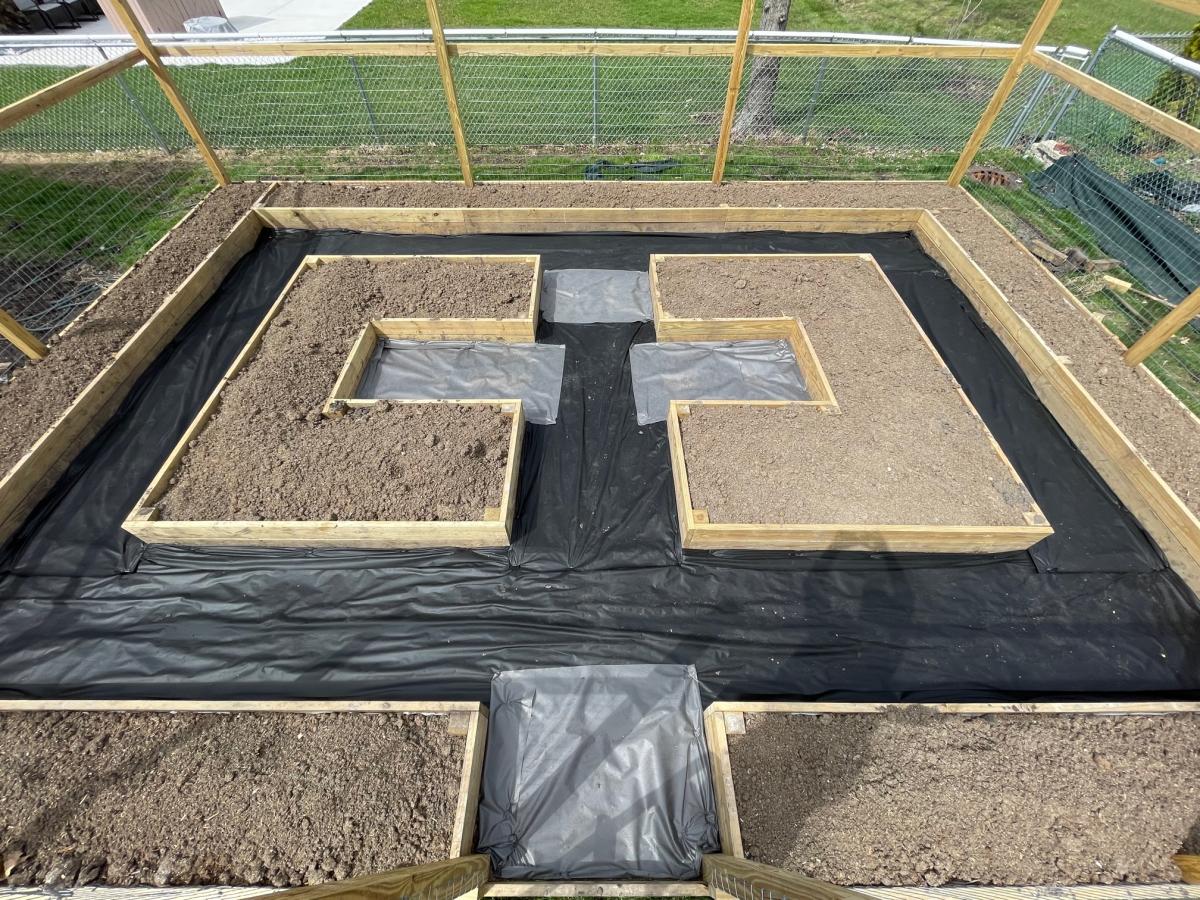
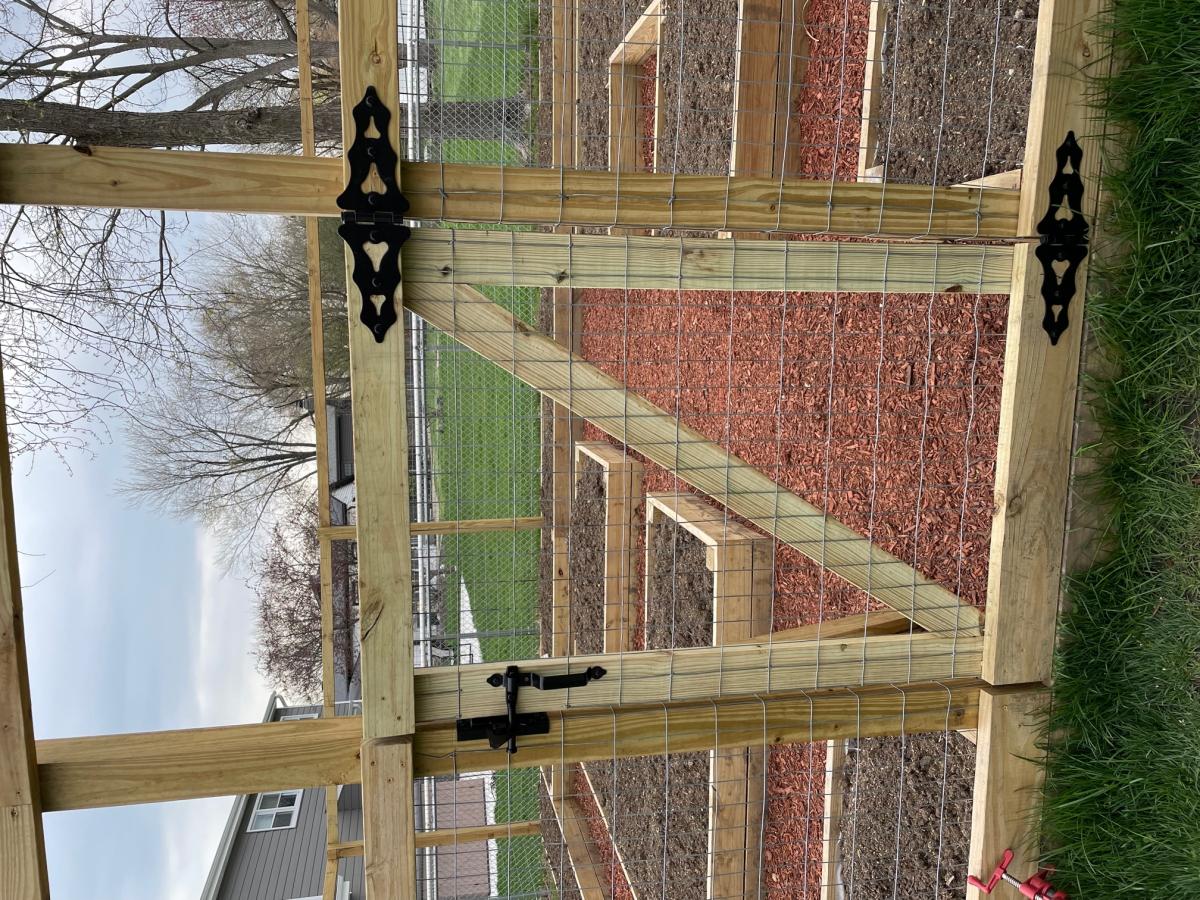
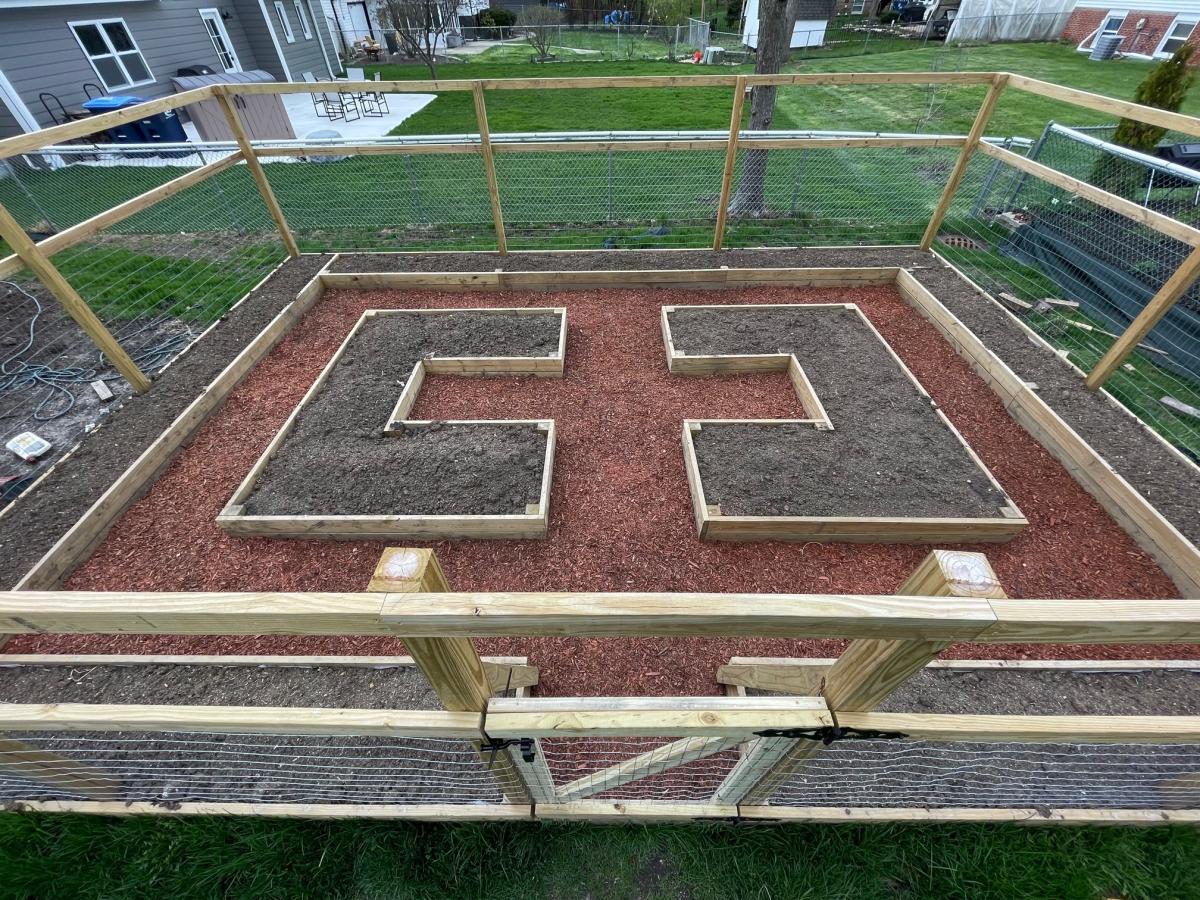
Used the Garden Enclosure plan as a reference, but wanted a much bigger area to walk through and relax in. Dimensions are about 30'x20'. Took a few months with a break for winter because it was just me working in spare time on weekends, would have gone a lot faster with an extra set of hands. Towards the end realized that drainage in the walk path was going to be an issue so I put in a very basic french drain before I weed fabric and mulched.
Really happy with how it turned out. Cost was pretty high, probably about $1500 all told, between wood, garden soil, etc. But we'll be able to enjoy it for many years.
Made for my wife for a Christmas present. Awesome project.
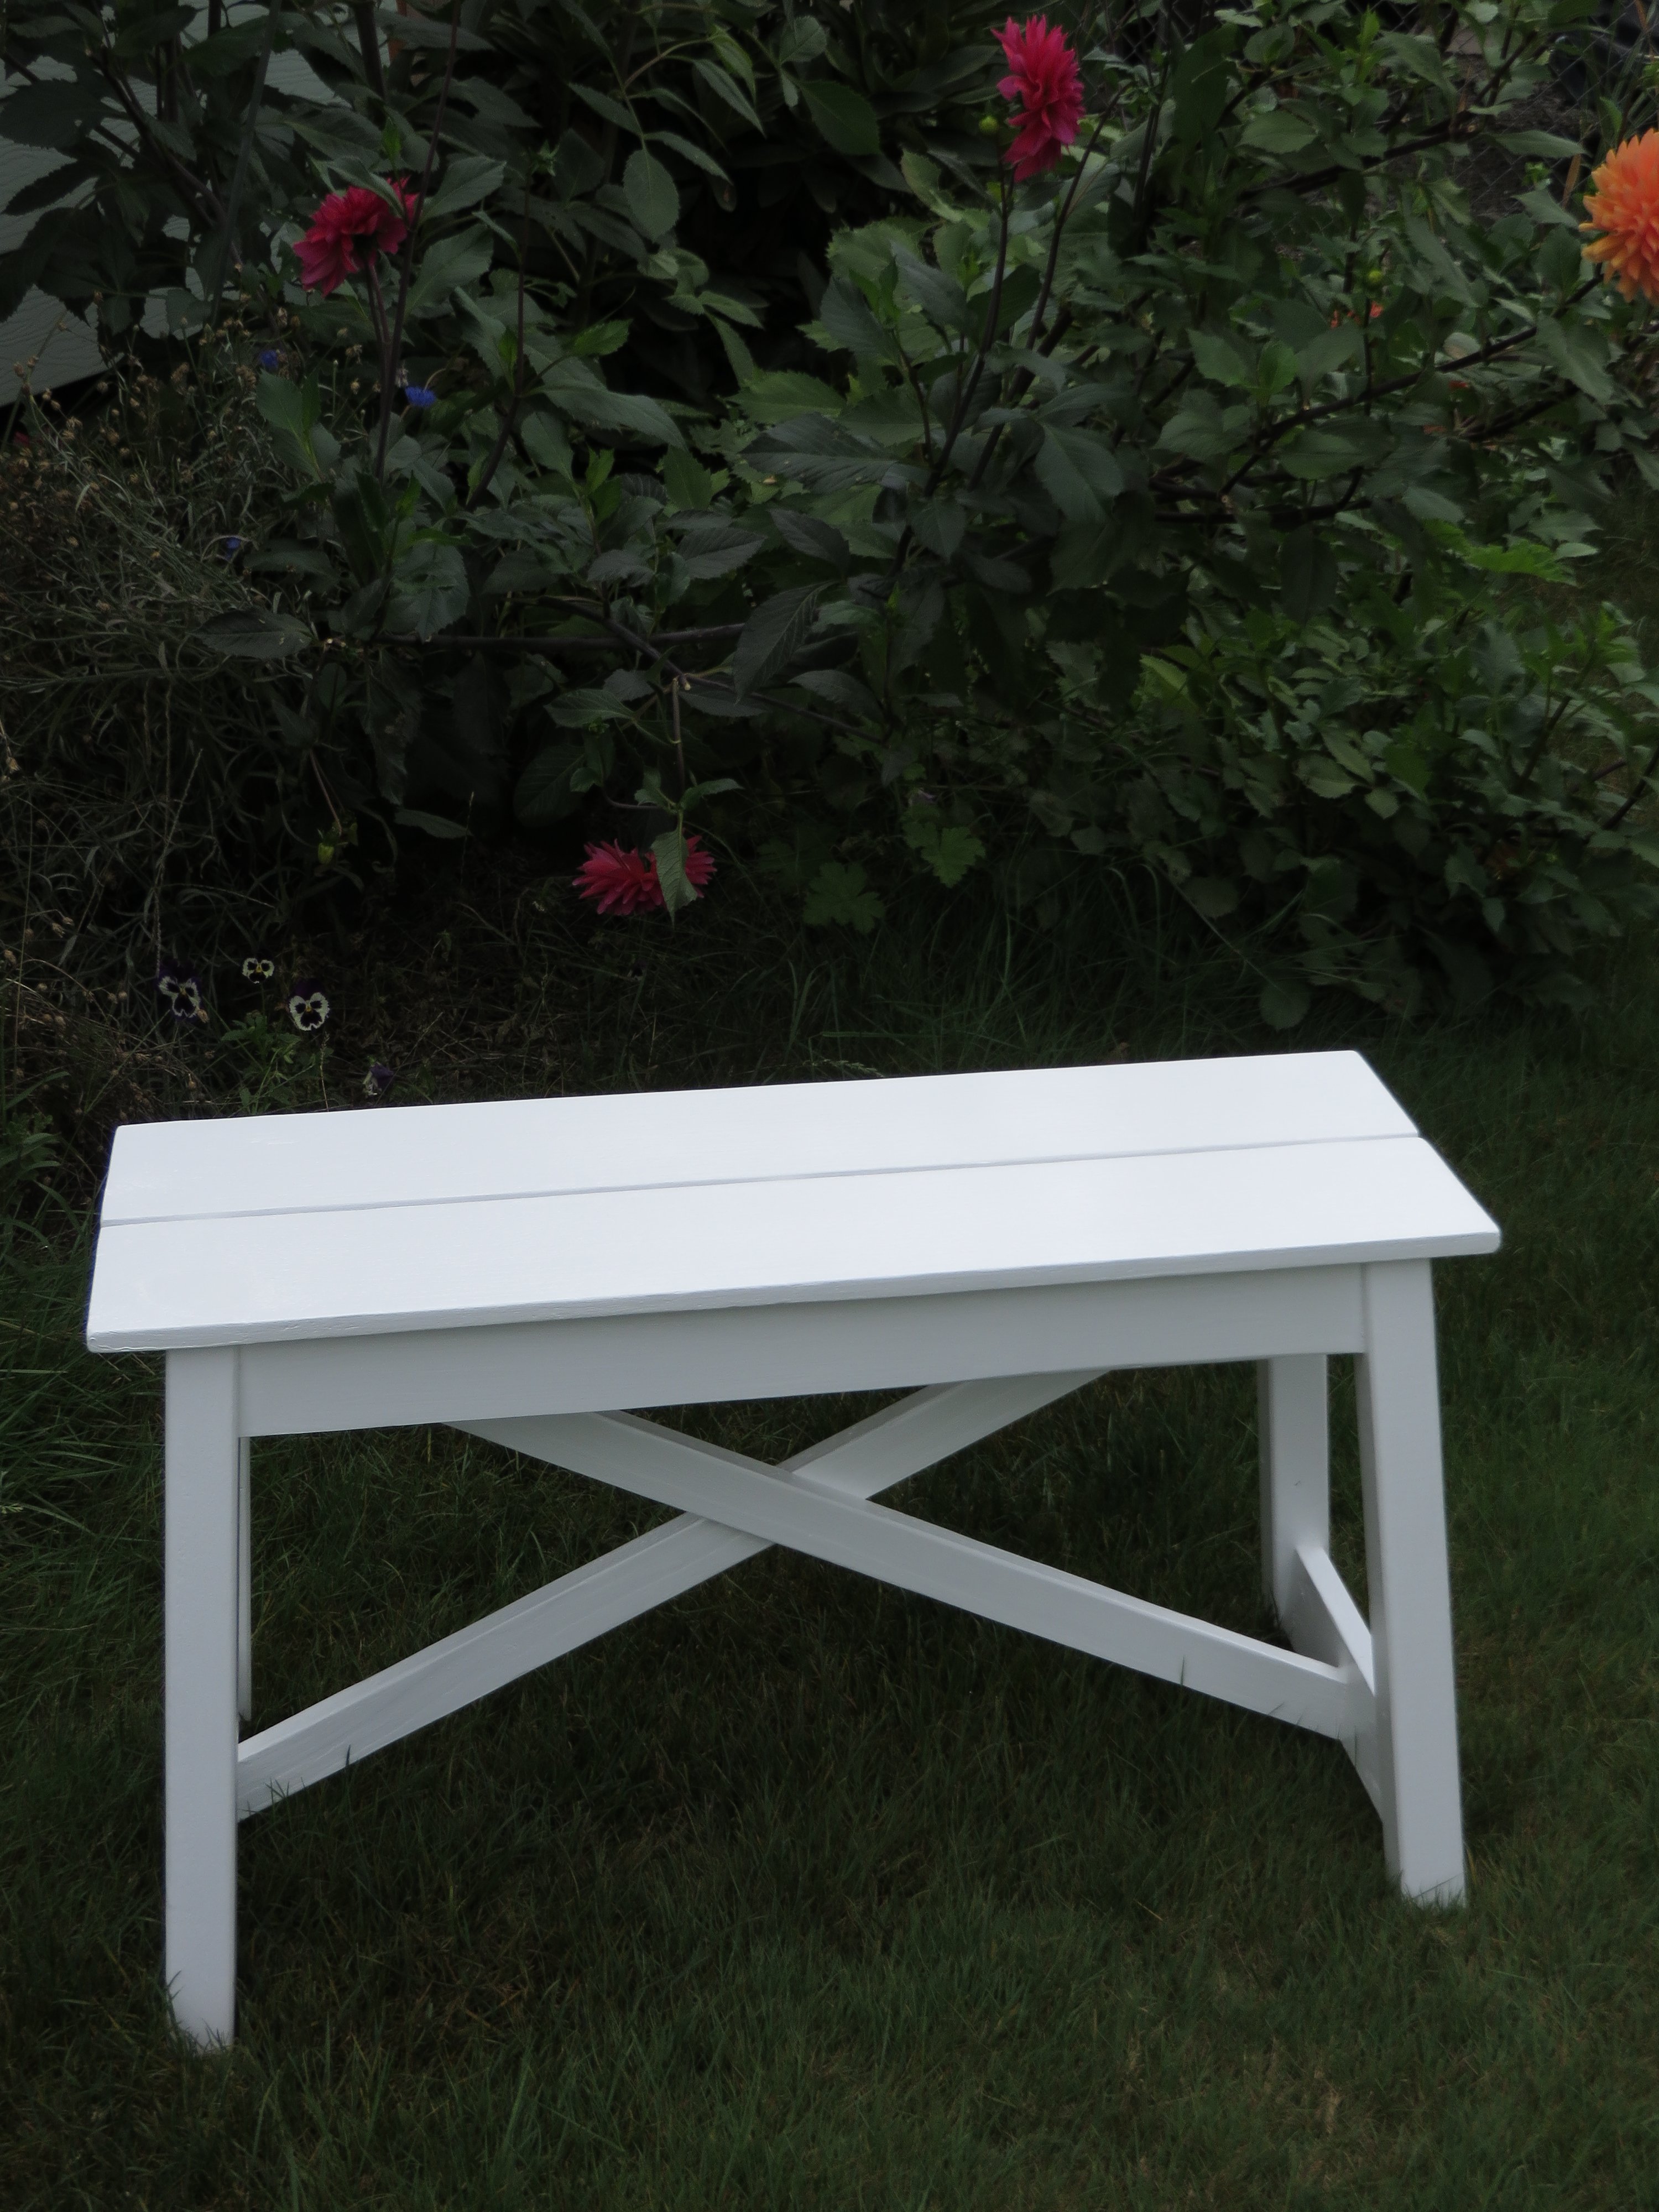
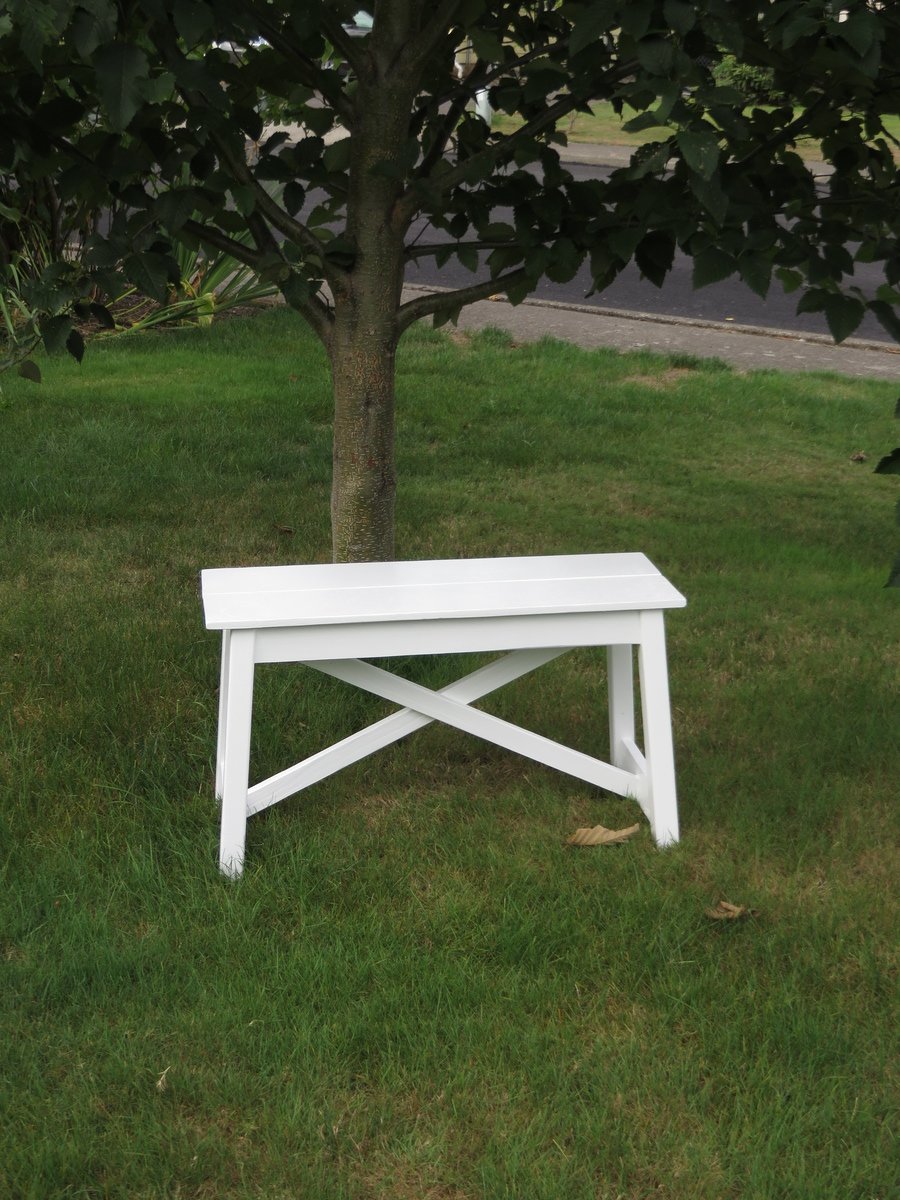
I wanted a simple bench for my yard during the summer. This was a fun, simple build with a little bit of extra style. I used a fence picket for the seat and added a center support underneath, since it was a bit bendy. Sanded the top really well before finishing. Built with Kreg jig.
I built two of these bad boys!
I used the cheapest spruce wood as I knew I was going to paint them.
Not sure how much everything cost in the end - maybe €50. Am making 2 beds to go with them too but they'll be a little longer in the pipeline!
I cut the wood myself using my circular saw and joined the wood with pockethole screws.
I painted the tables white and then used a chestnut brown woodstain on the table tops, shelf and knob.
Hard to say how long it took me as I just did a bit every now and again when I had a bit of time.

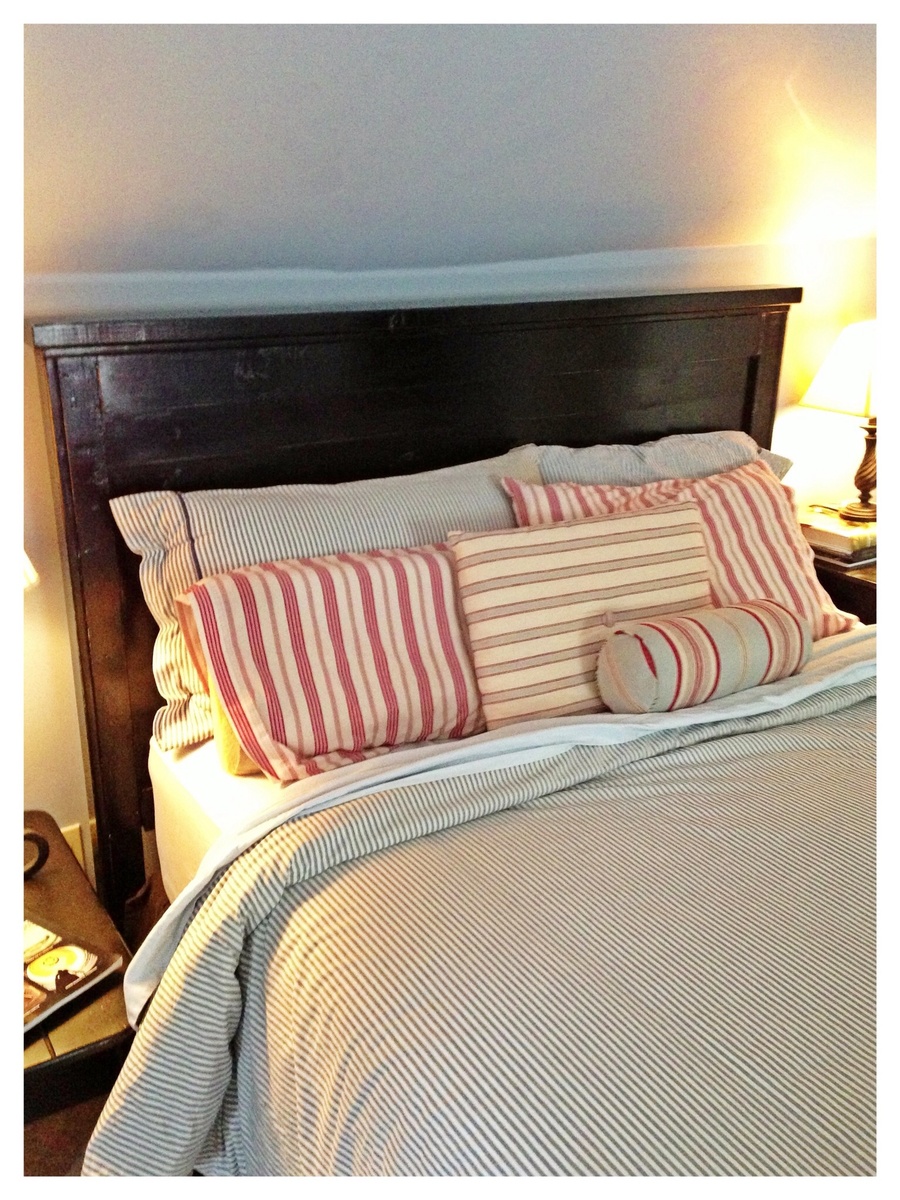
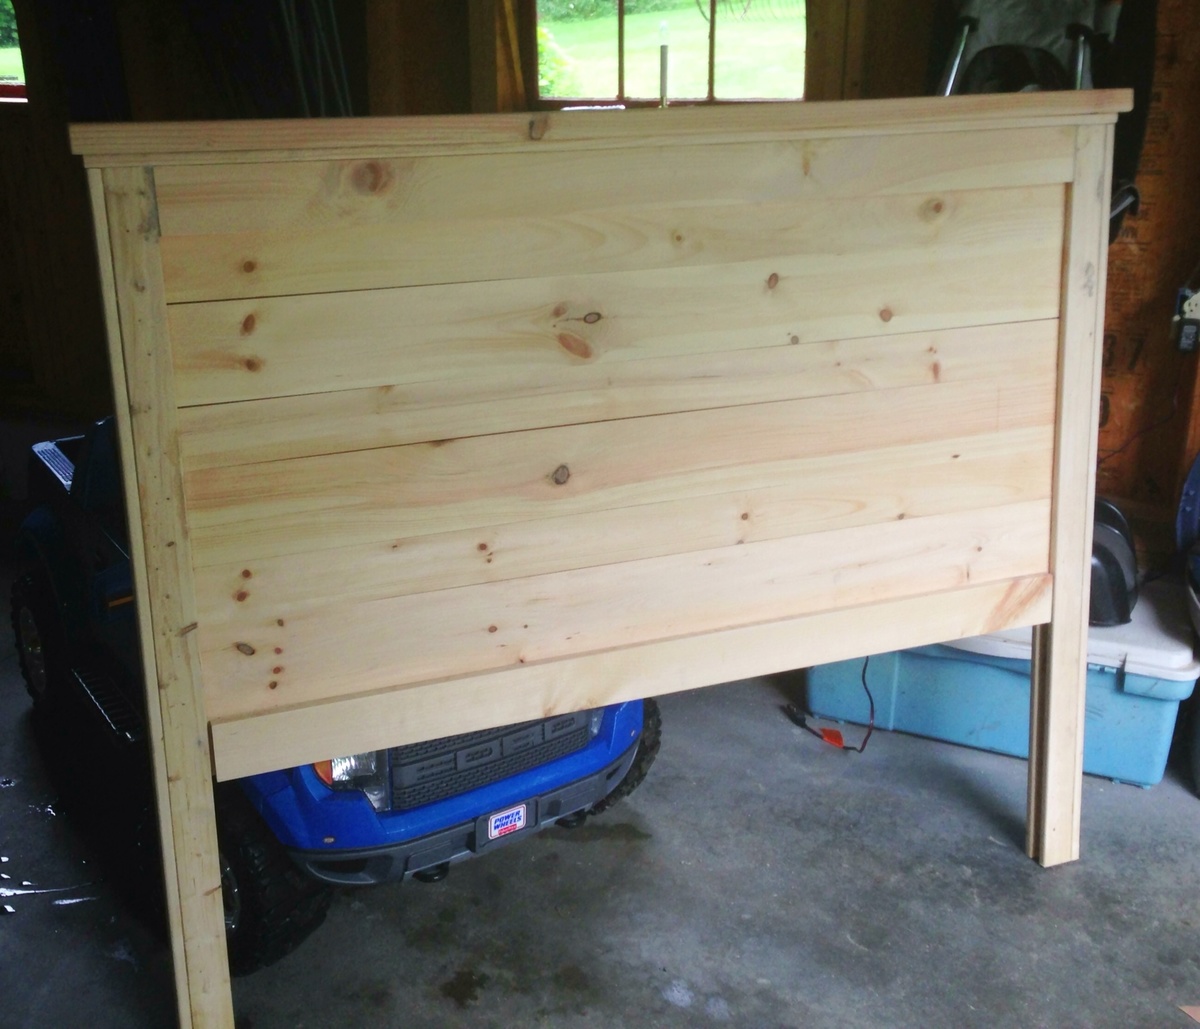
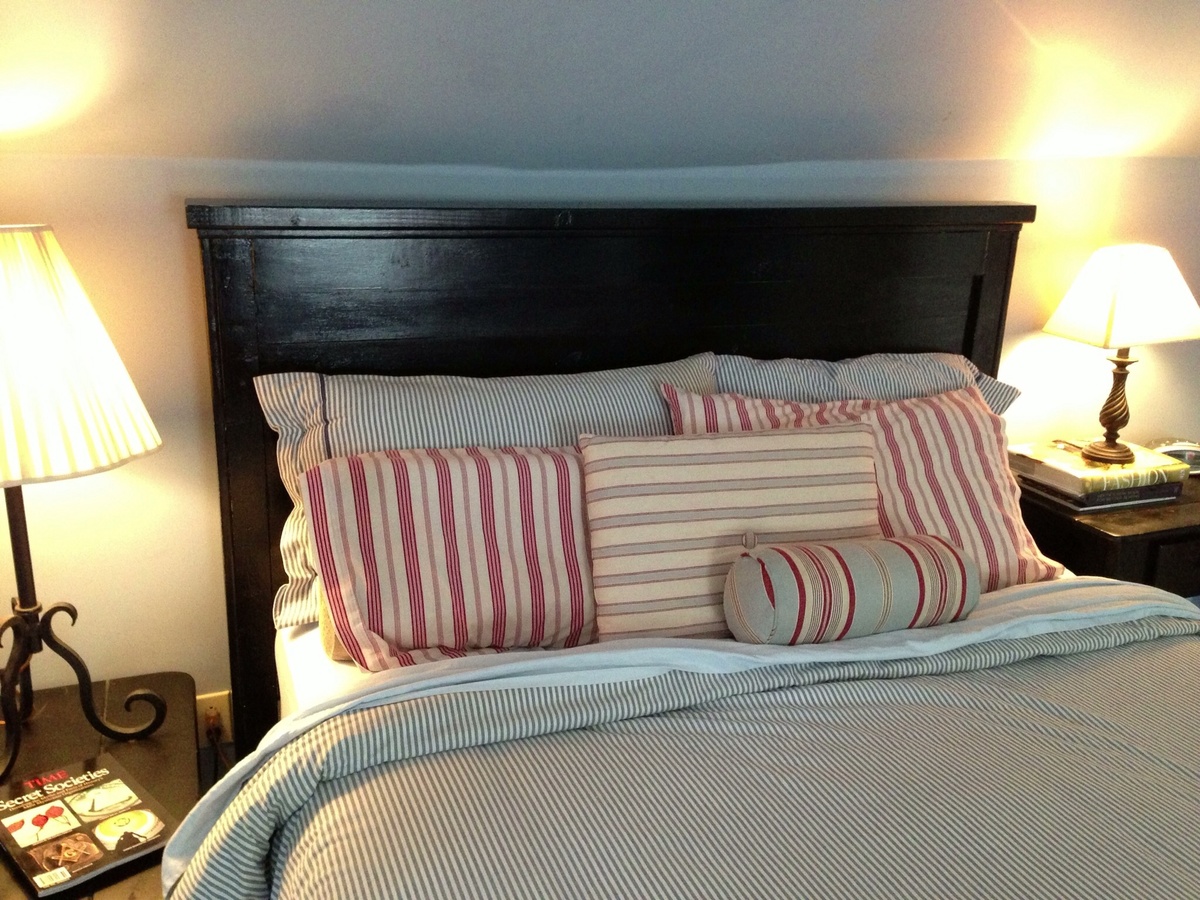
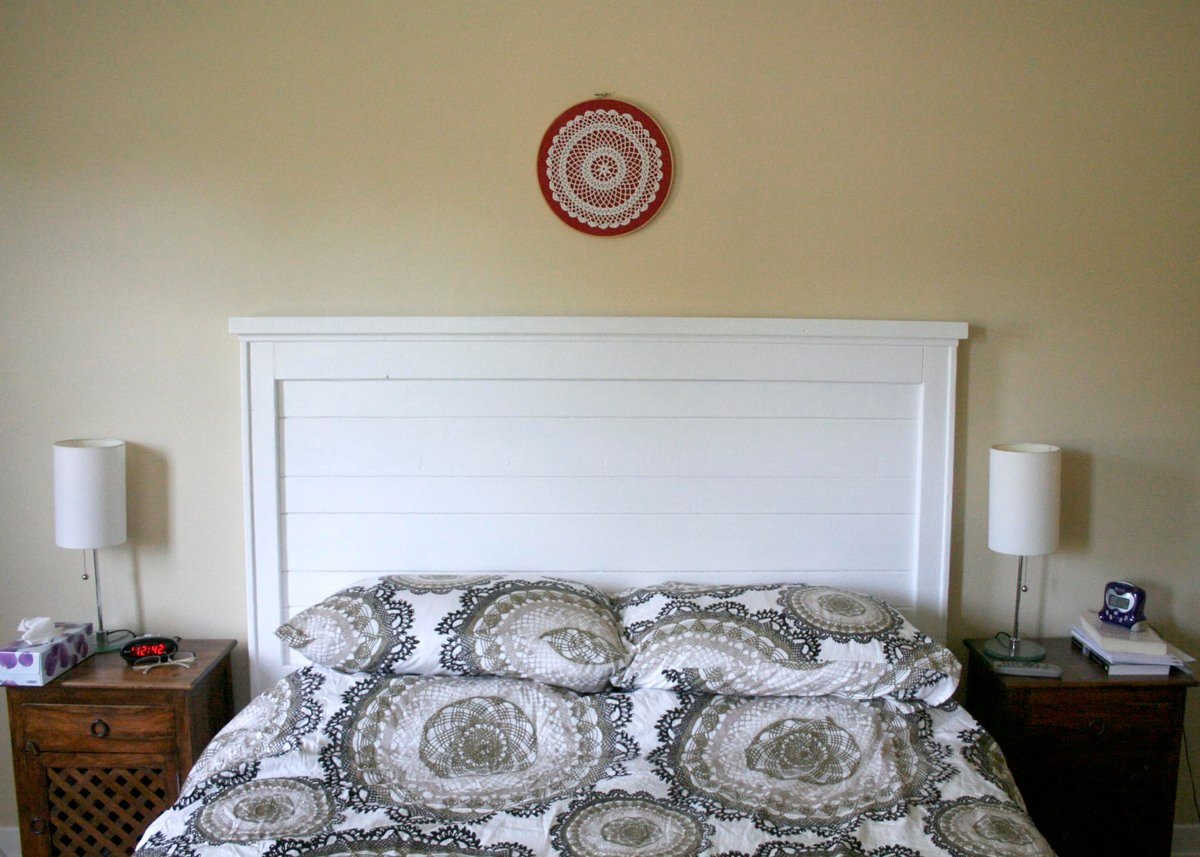
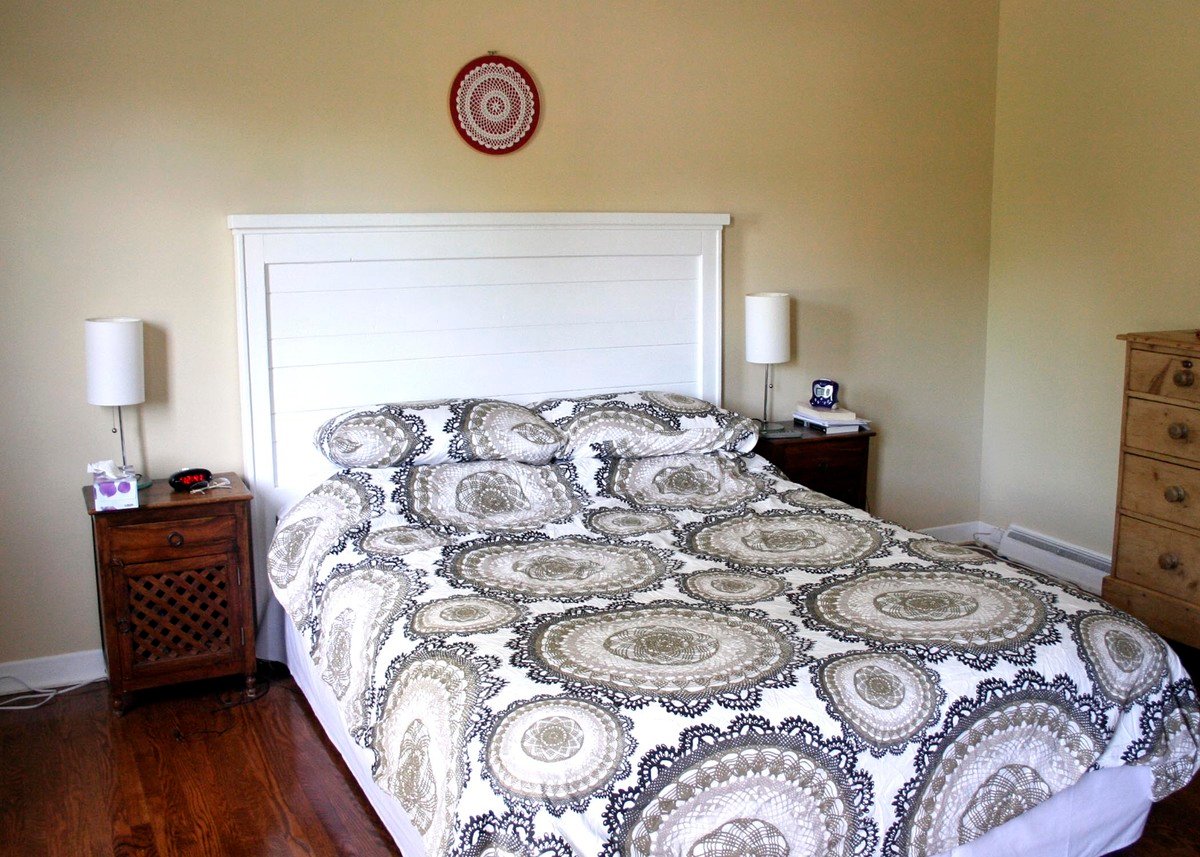
After looking through the Handbuilt Home longingly many times, I took the plunge with this simple headboard. I've never built anything from wood, but my main hobby is sewing so I'm good at following directions. I followed the plans exactly and I love how this came out! I used a nailer and glue for all the construction. I recommend this project for beginners! I chose to paint my headboard black to blend with my other furniture.
Now I'm already onto my next project, with a Kreg Jig in hand, the modern craft table from Ana's book. Thank you, Ana for sharing your plans and inspiring people to try building! I feel my skills and confidence increasing with each project!

Wed, 09/25/2013 - 11:06
I've got the wood in my garage, marked for cutting this project out! Yours looks fantastic. You will love your Kreg Jig! It's one of my all-time favorite tools.
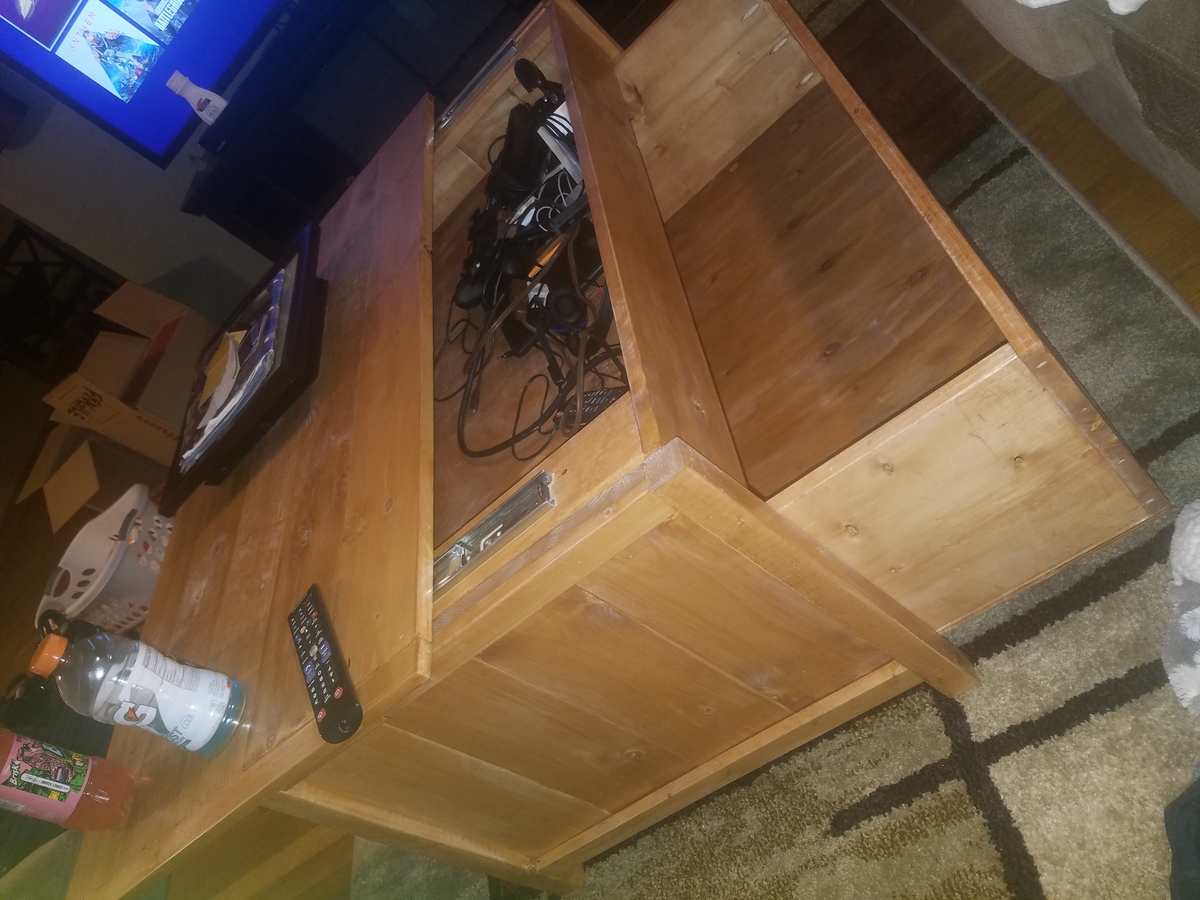
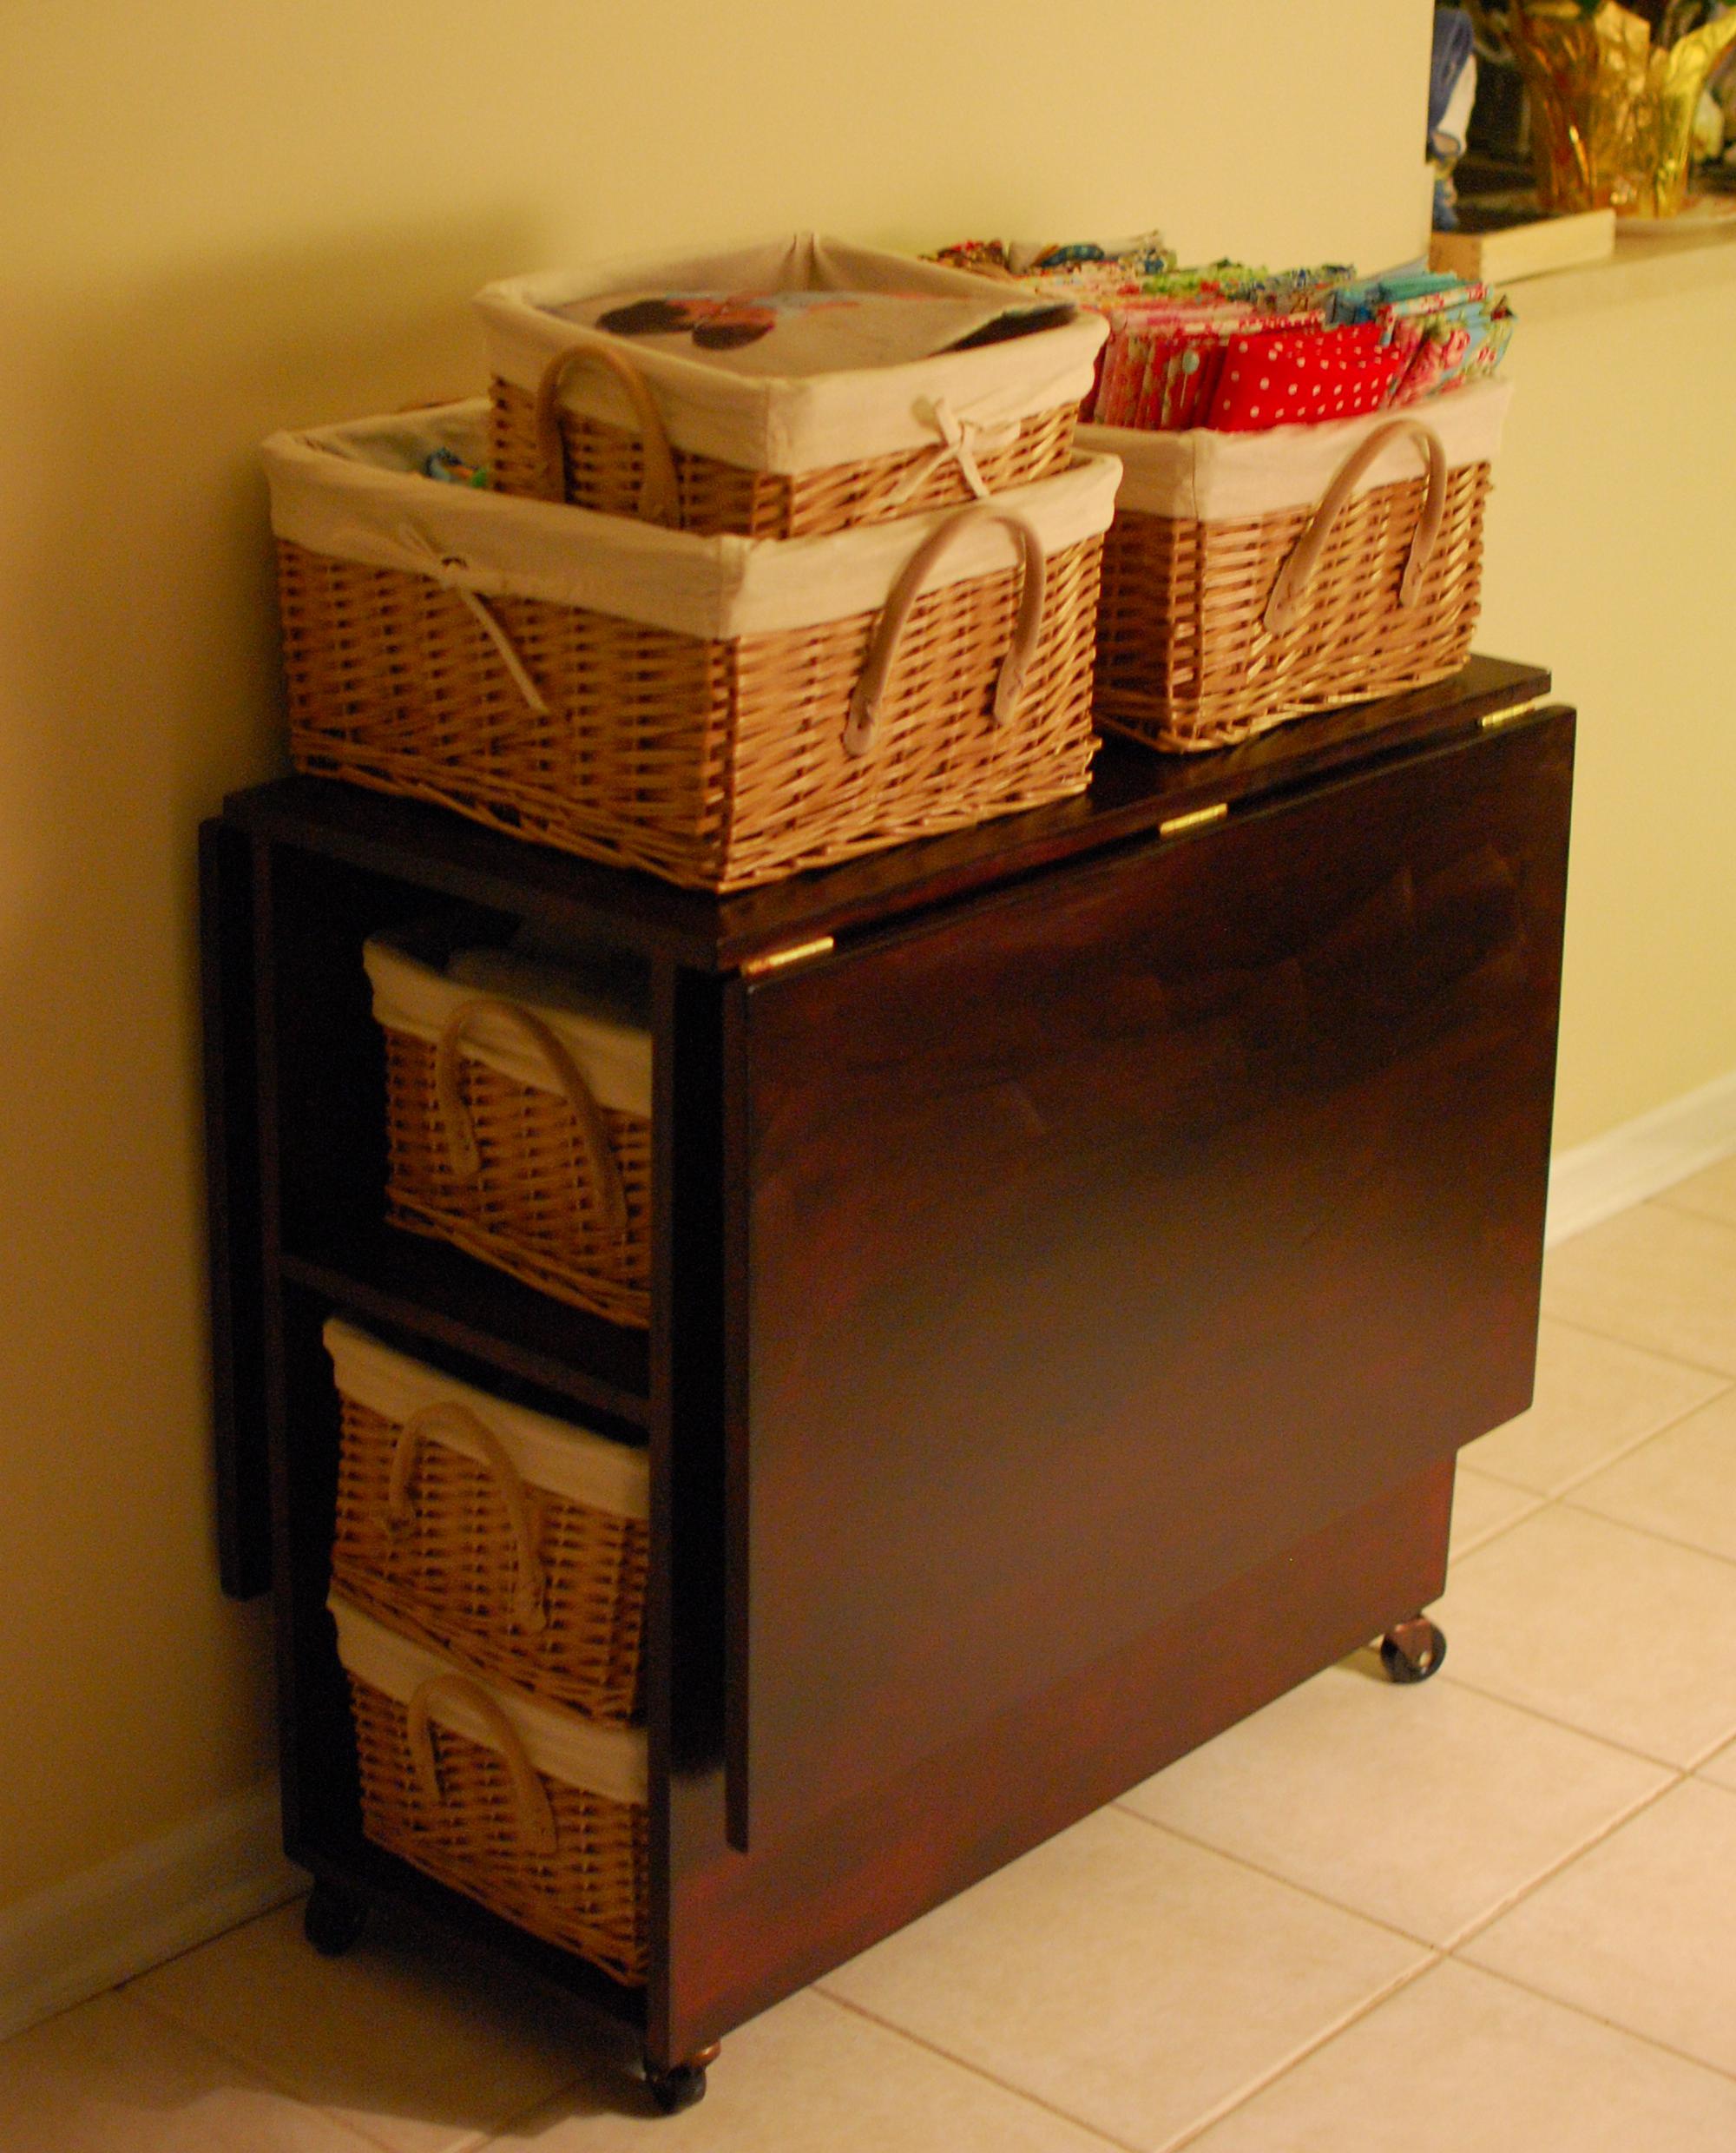
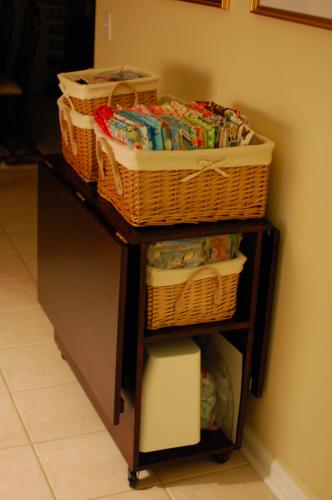
I wanted a add a safe spot to hide all my gaming controllers and remotes from my 1 1/2 yr old nephew. It was pretty simple and I got the idea from tactical designs. They make hidden storage! If you cant tell it is still dusty from sanding! Best wipe it off!
Thanks for the plans. Wife has enjoyed this and makes a great feature to our house.
Made by my husband.
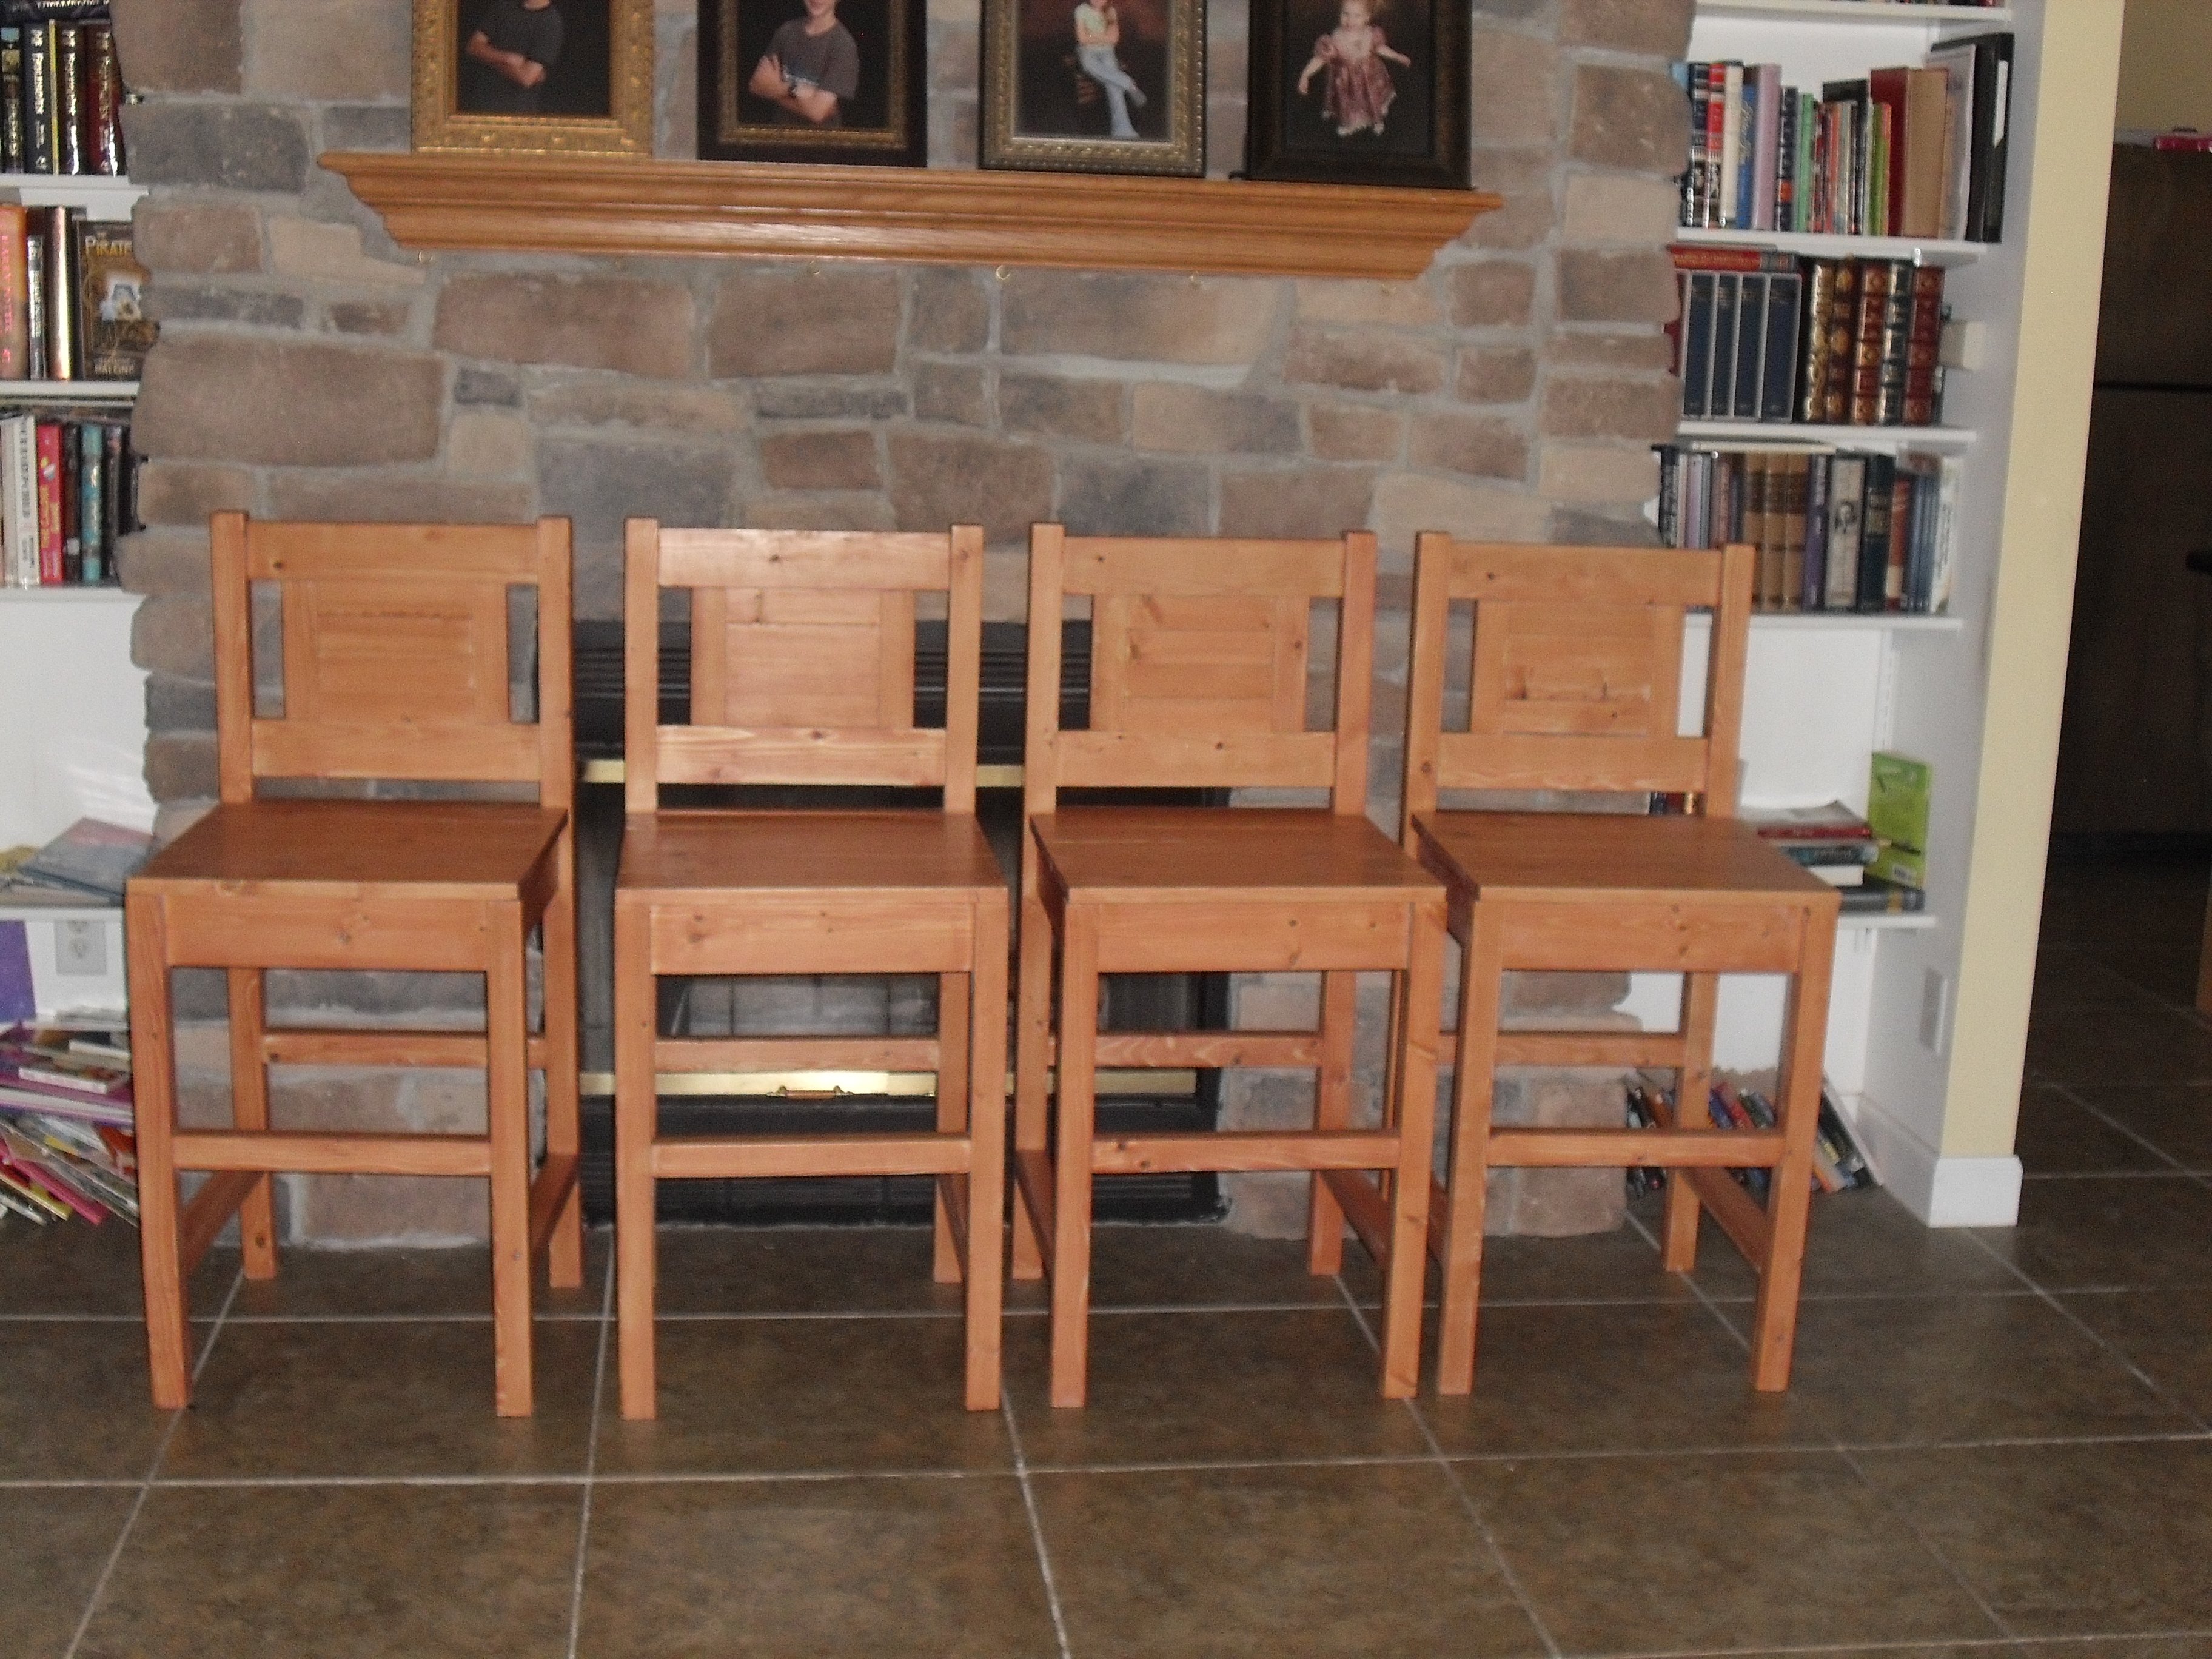
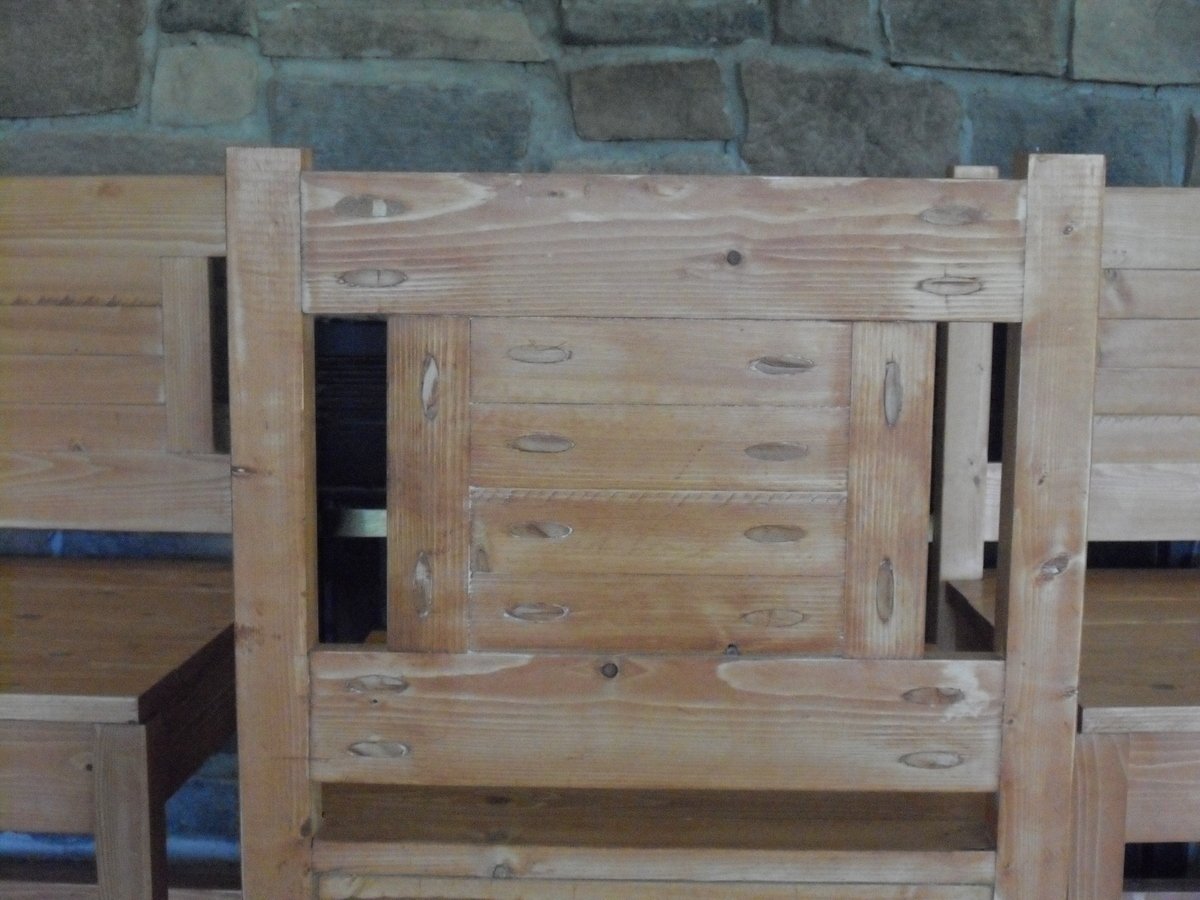
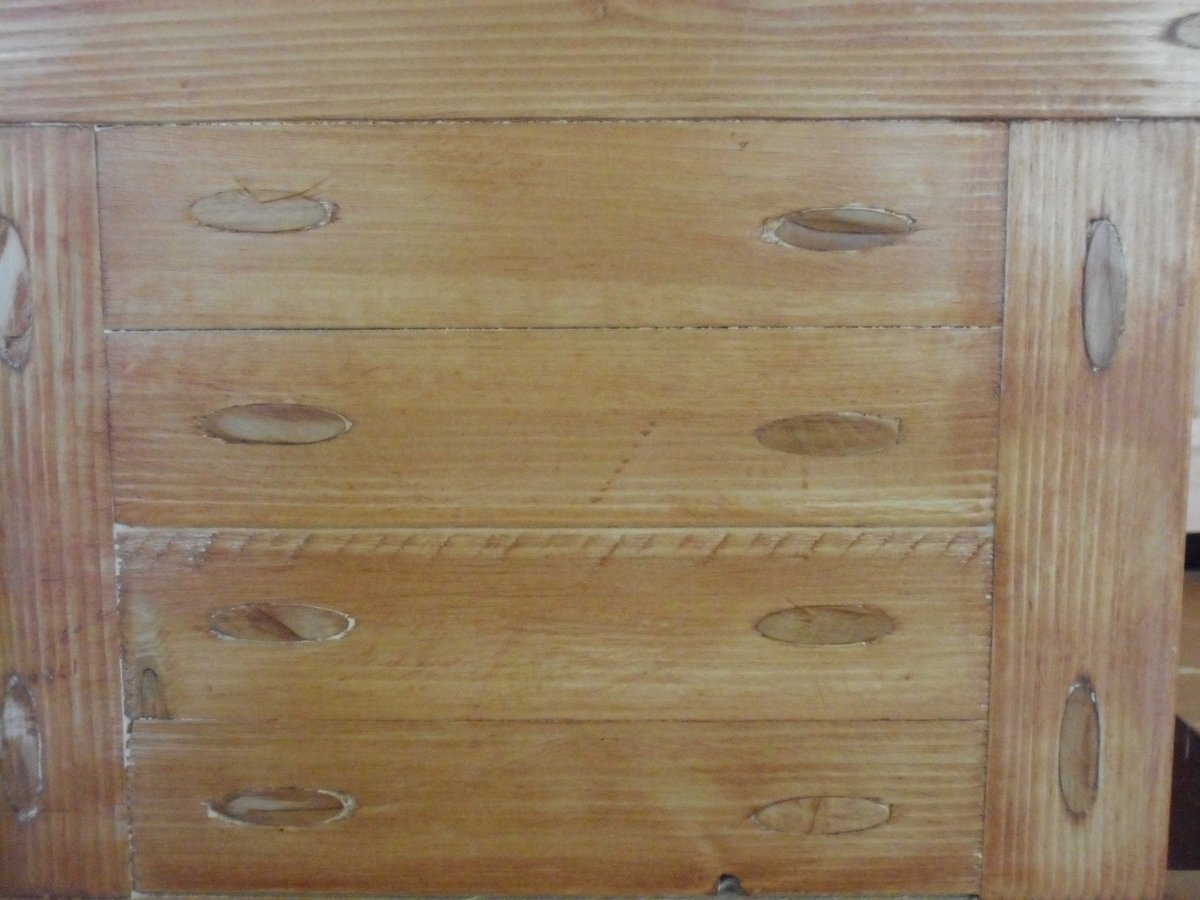
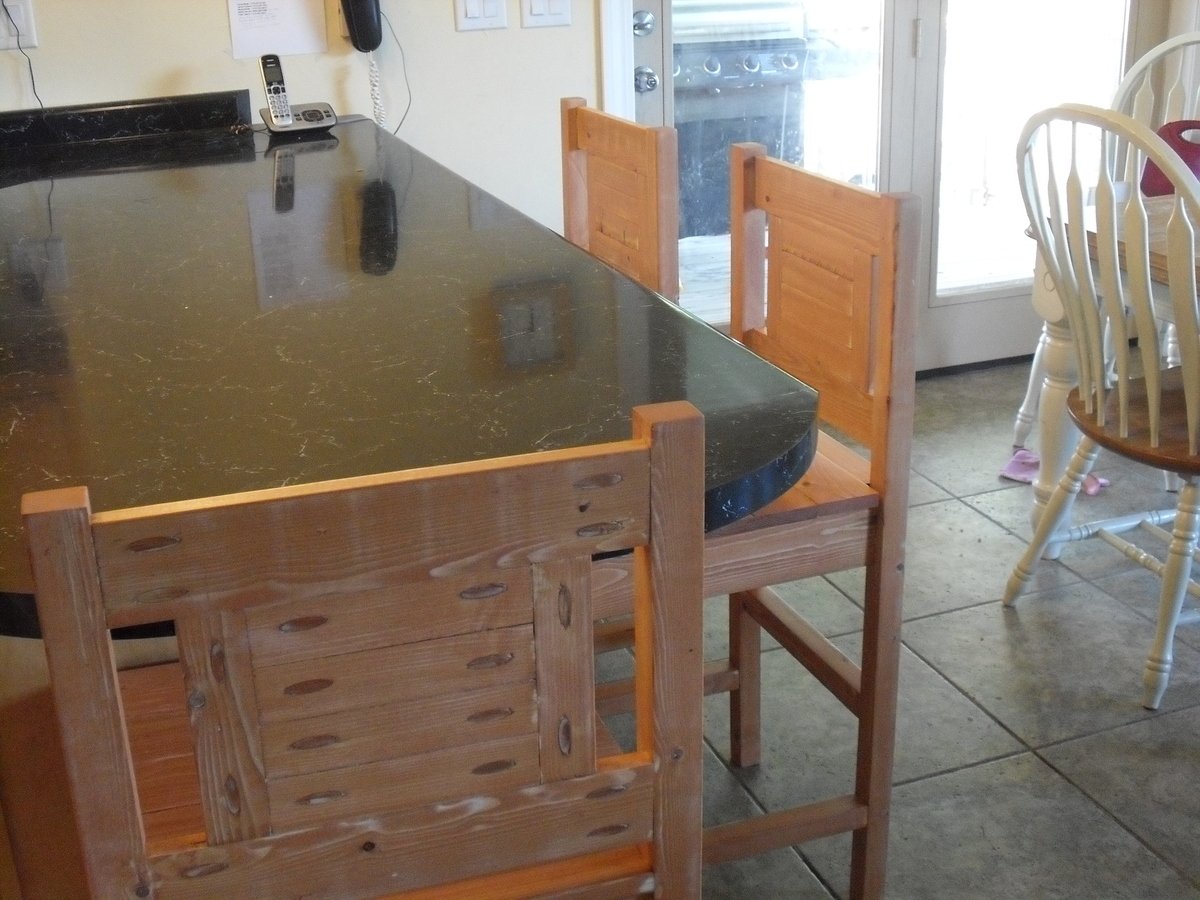
My sixteen-year old son took this on as a summer project and built four bar stools. He did a great job! We lowered them by 4 inches from the plan specs to fit under the counter. He used a Miniwax Colonial Maple finish. This project took a lot of Kreg Jig screws and plugs - almost 100 of each. They are very comfortable and beautiful.
Comments
Ana White Admin
Tue, 10/05/2021 - 09:46
Great set!
Very nice, love the different colors of wood! Thank you for sharing~