Community Brag Posts

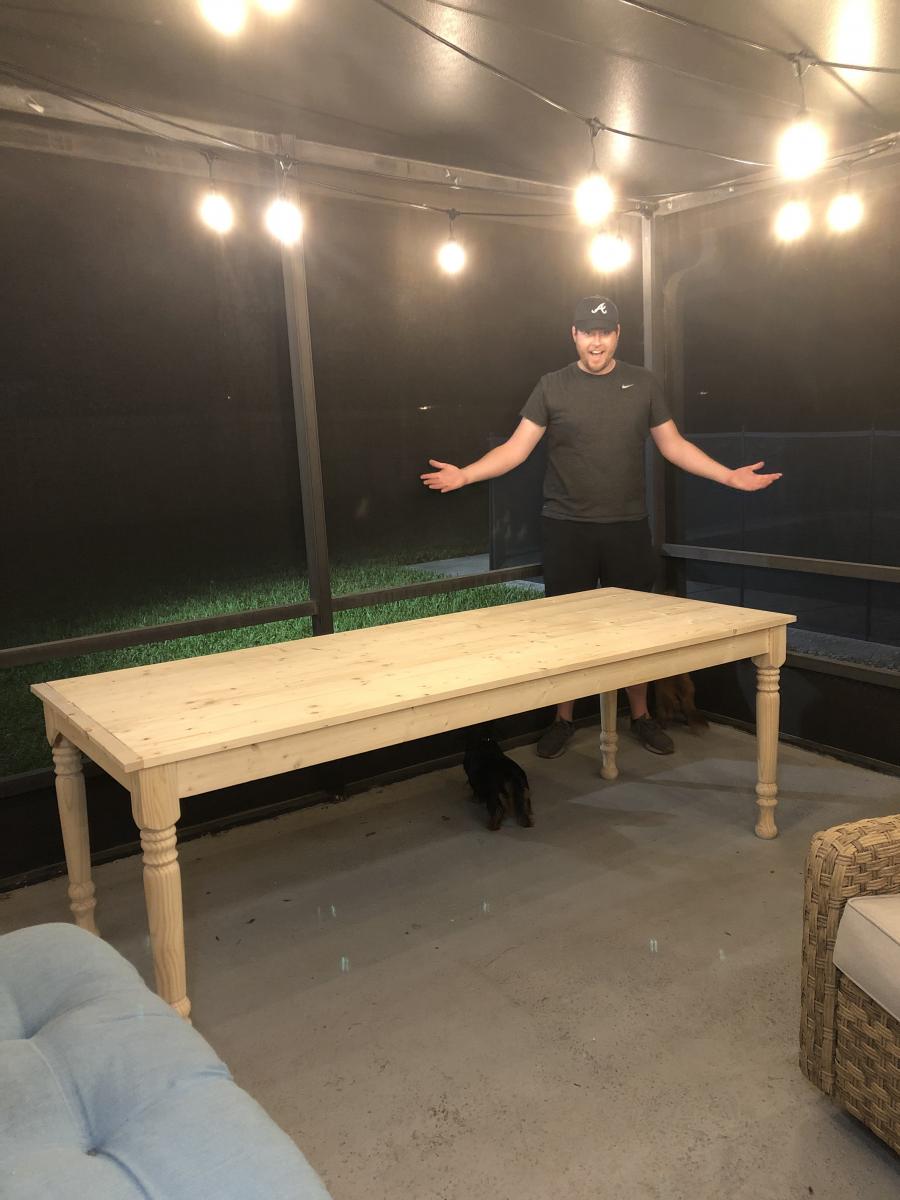
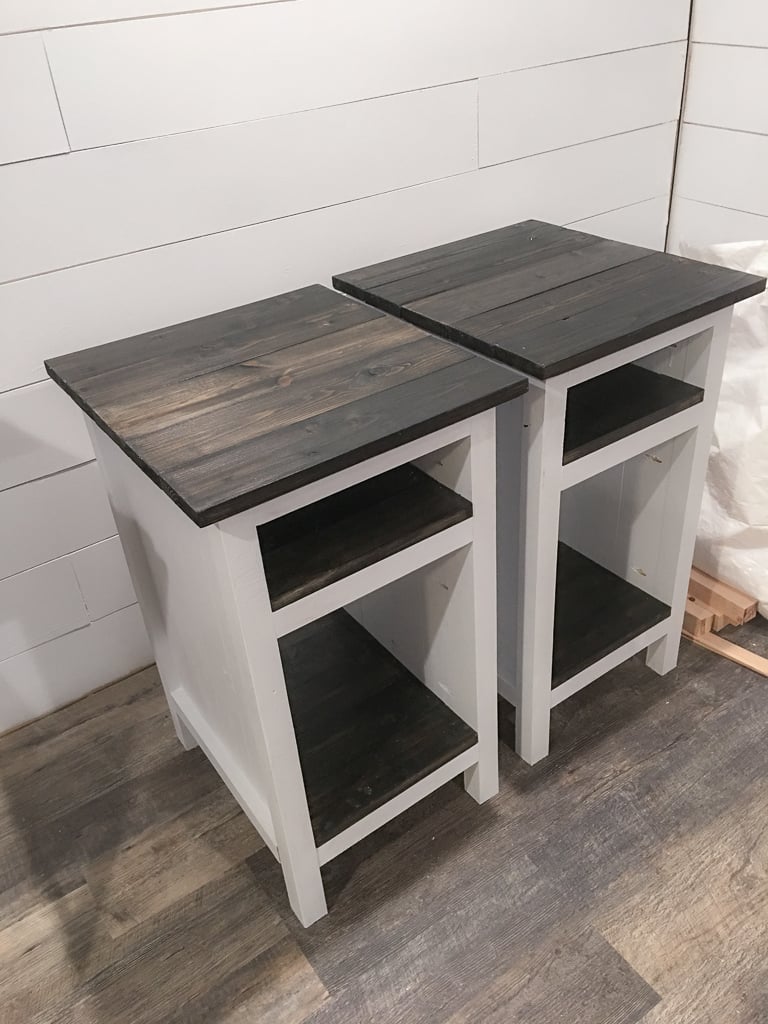
Only my second build since the huge Pottery Barn stic desk!

Submitted by Anonymous (not verified) on Mon, 03/27/2017 - 12:26

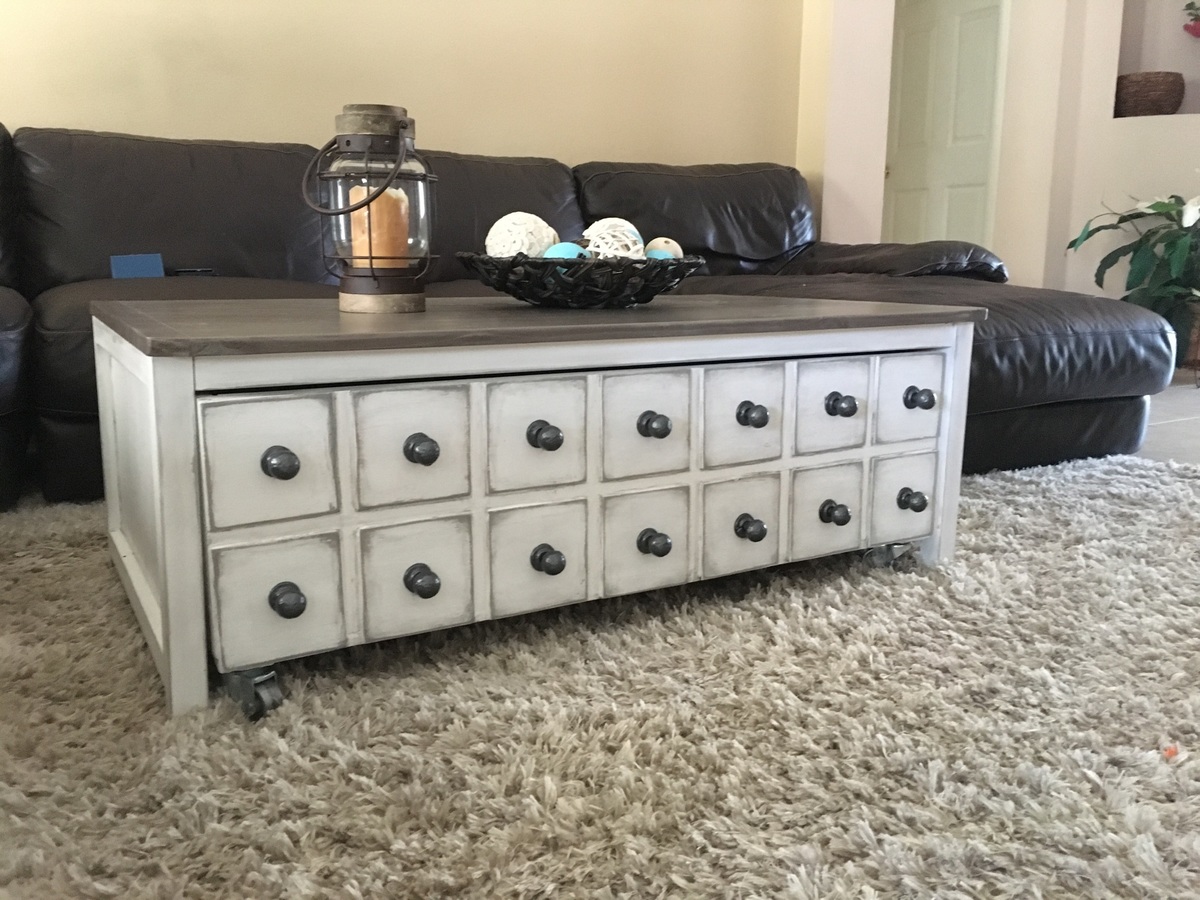
Can't believe I did it myself without hubbys help at all!!  Wasn't expecting to like the outcome, much less LOVE it!!  


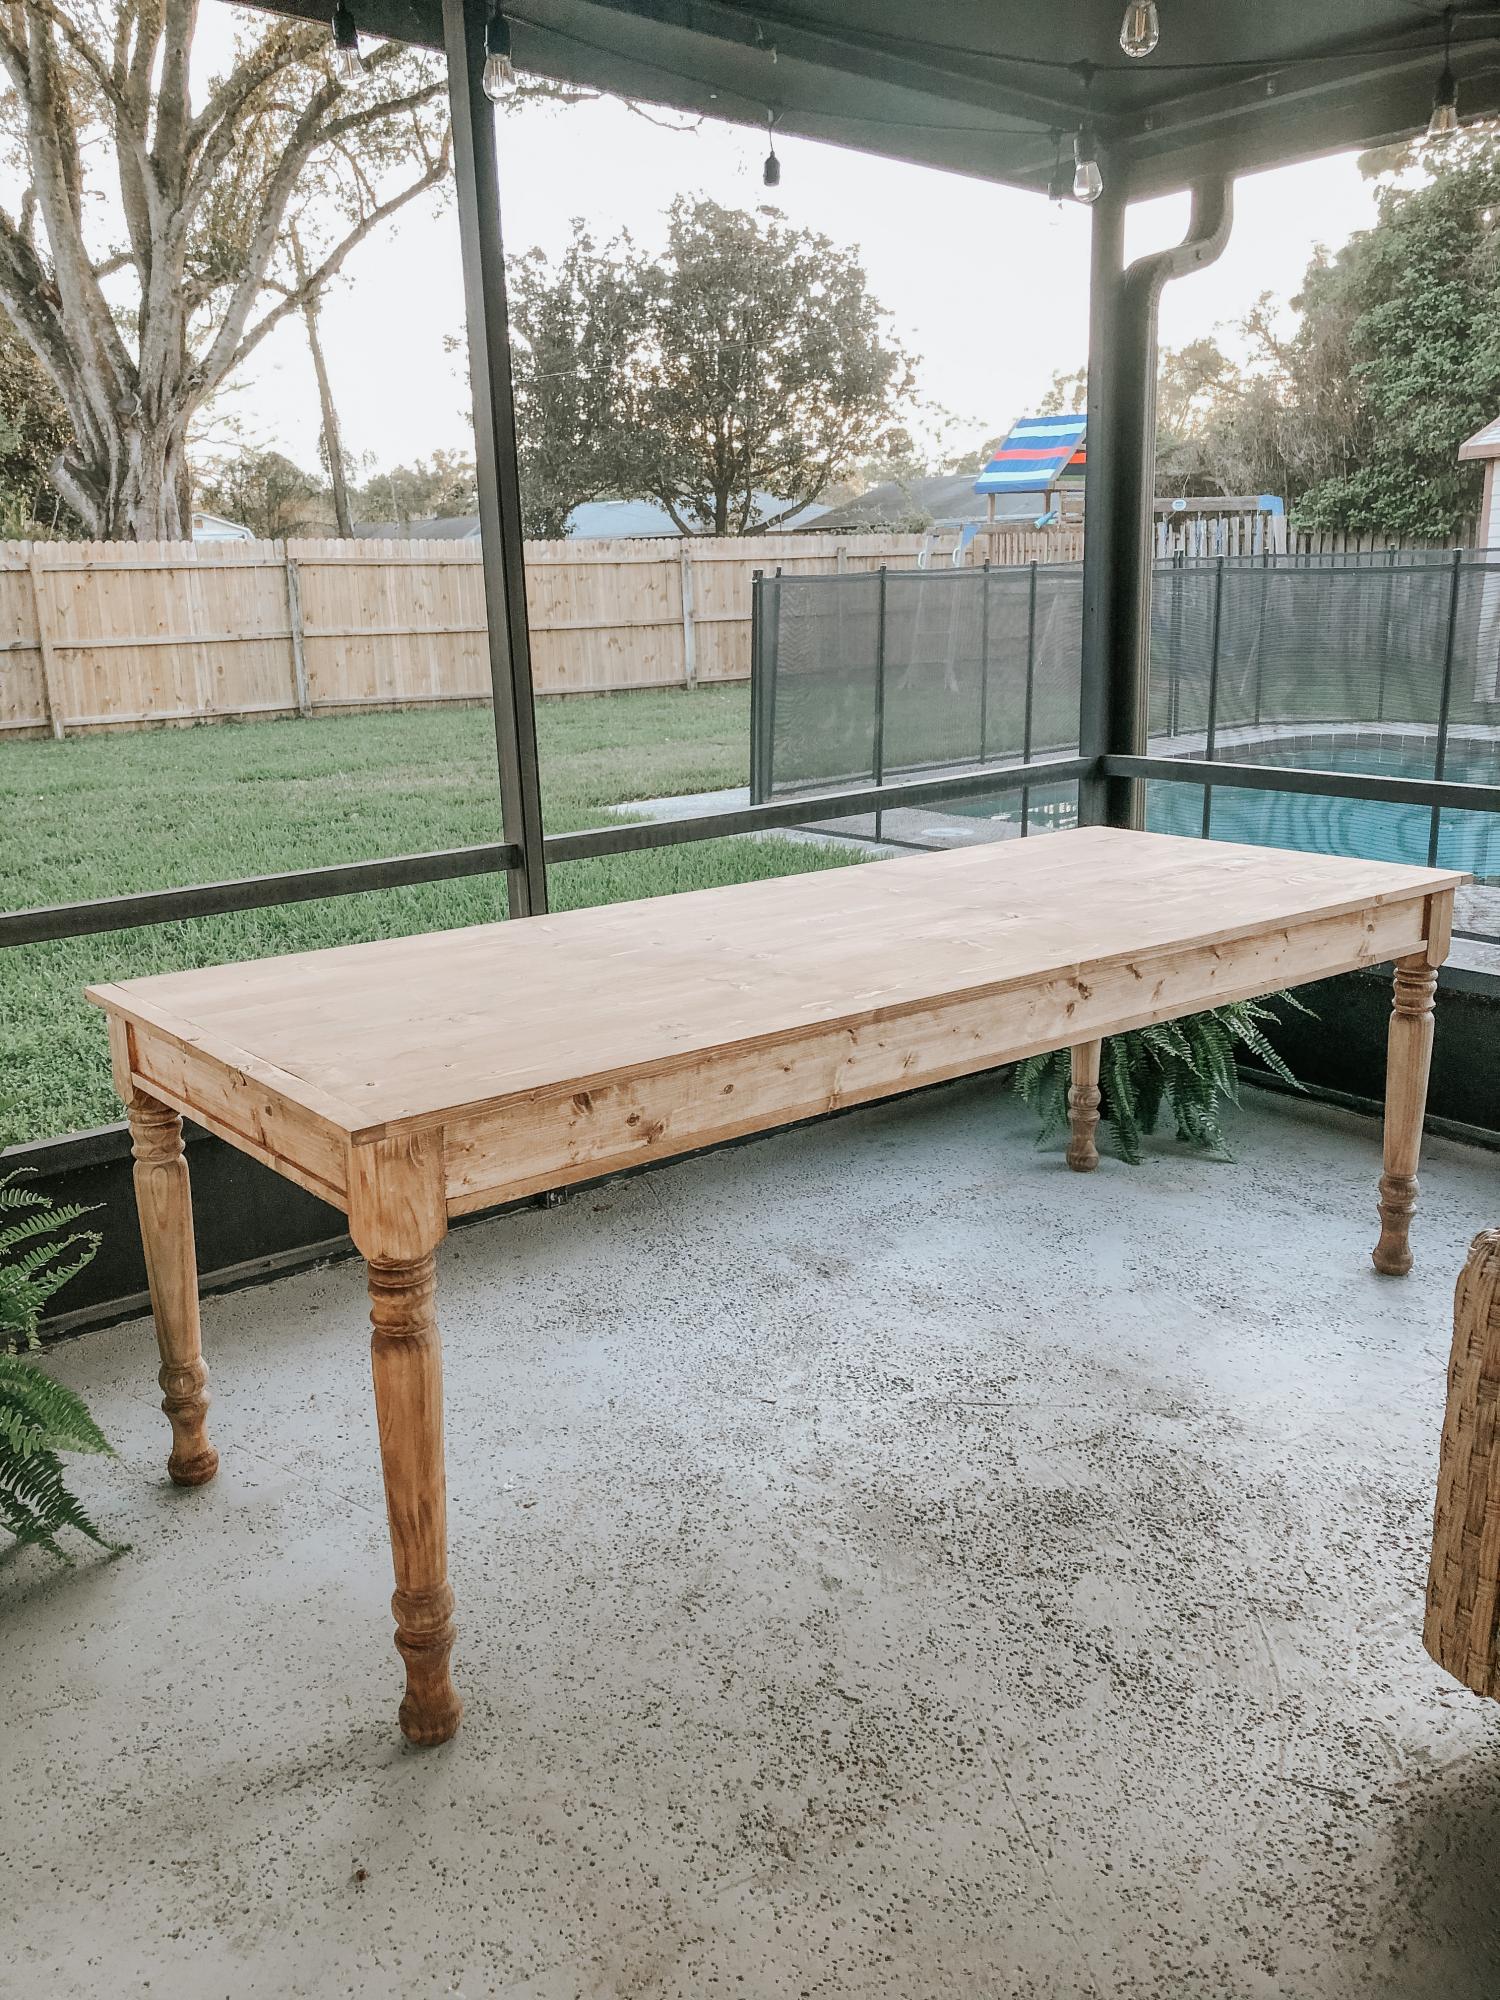
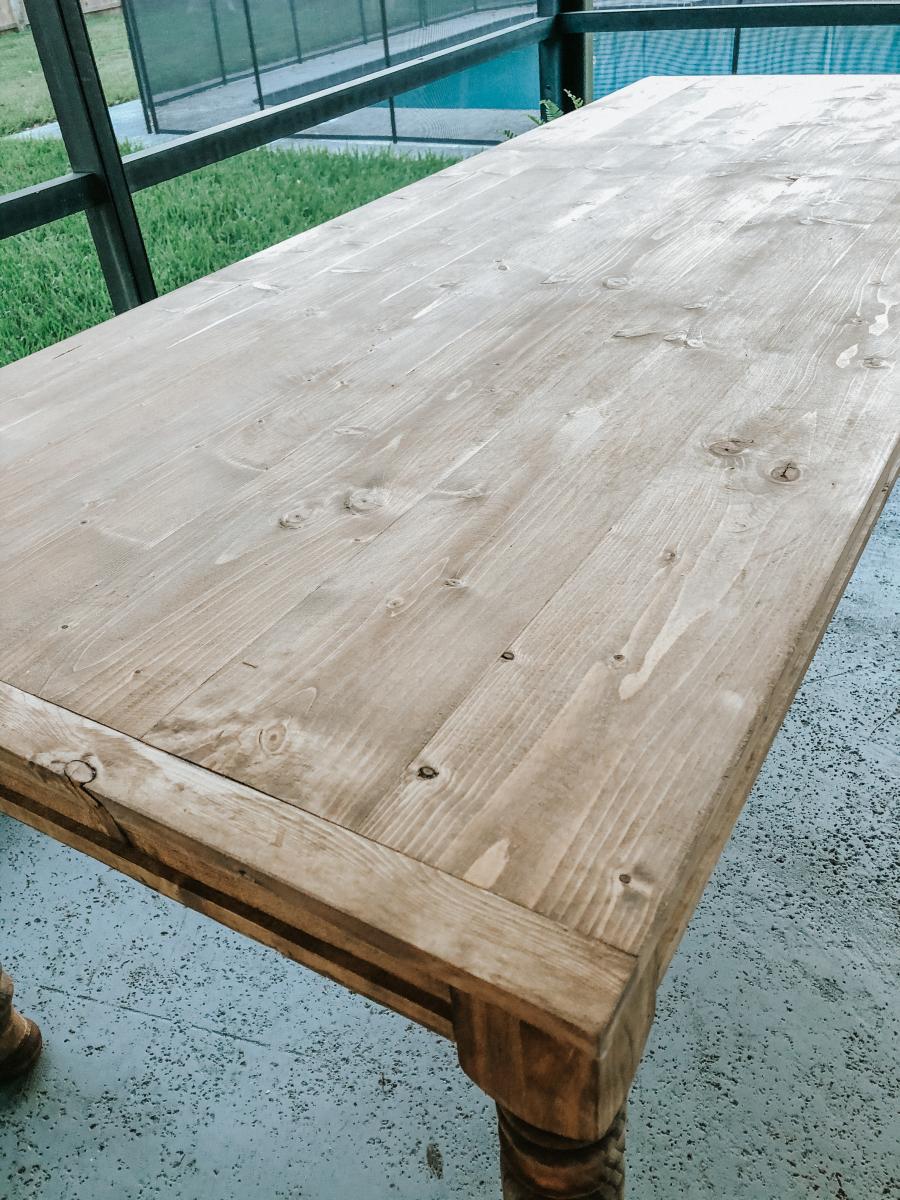
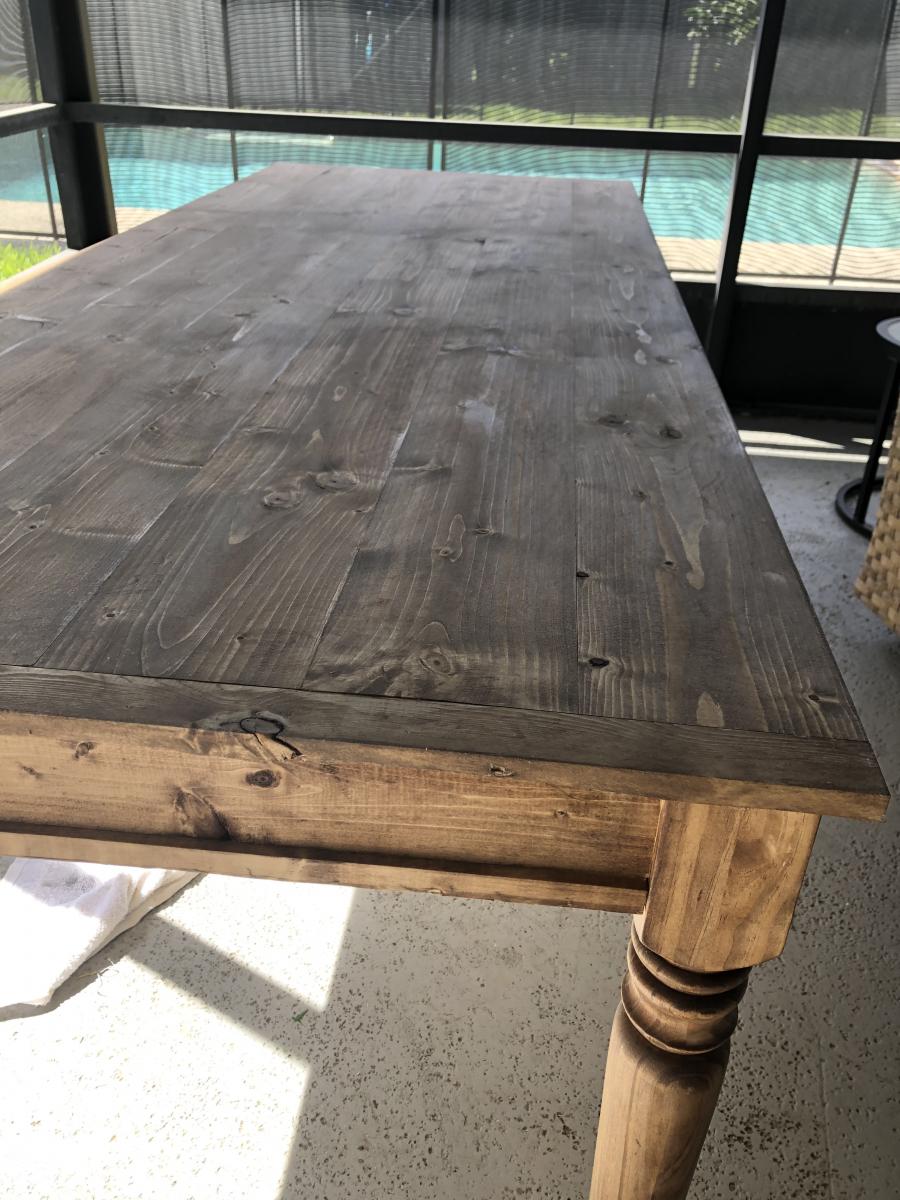
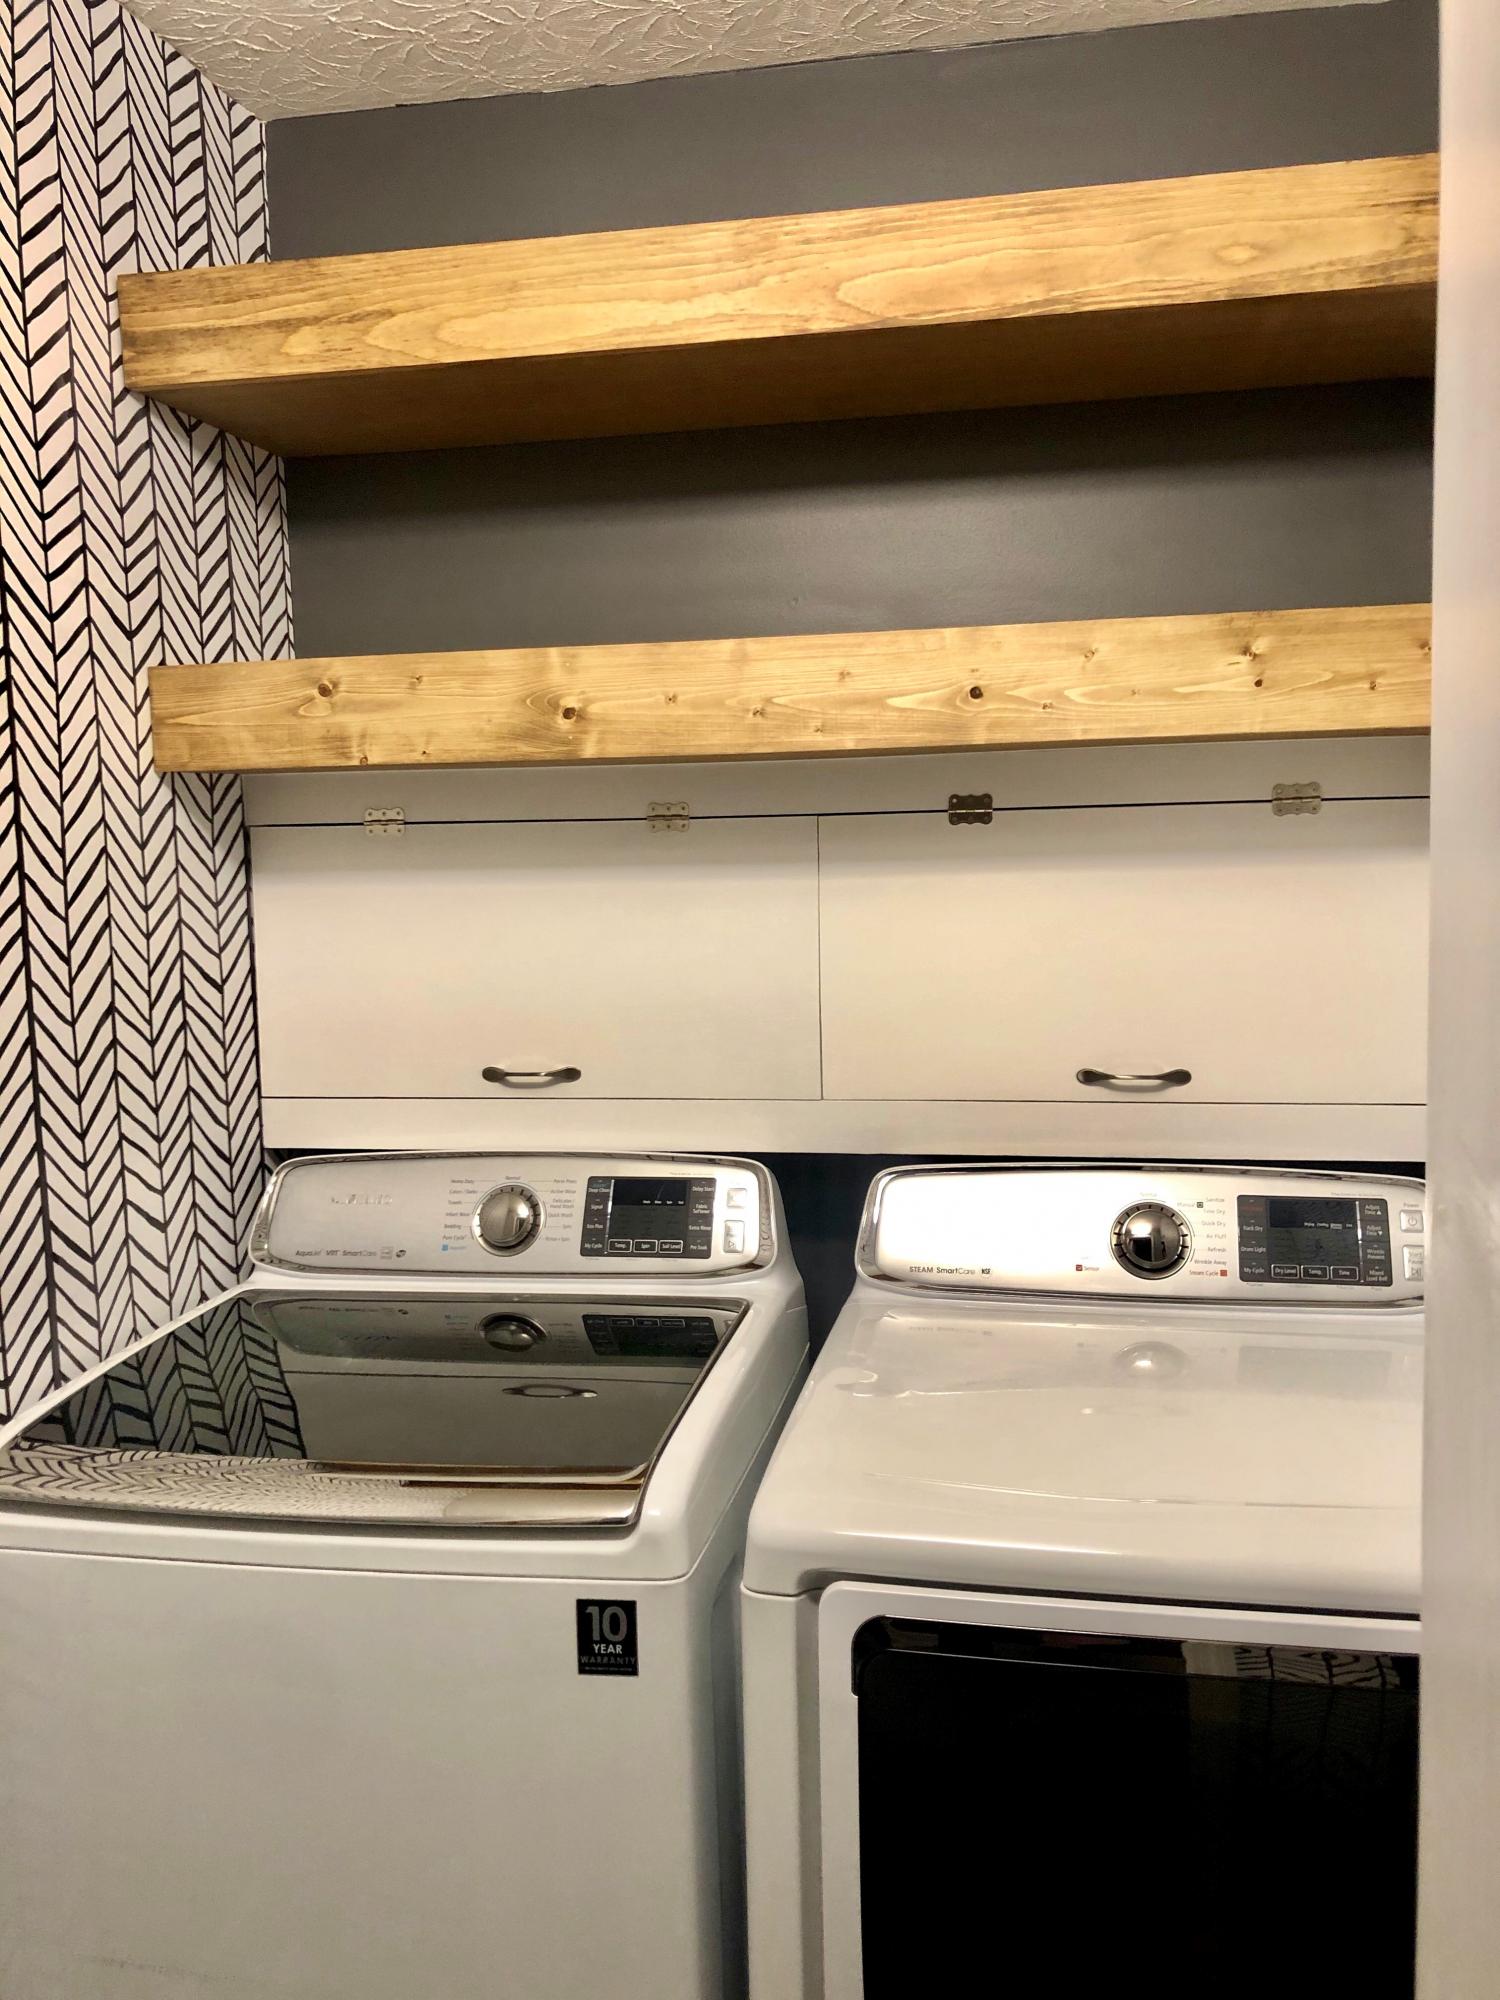
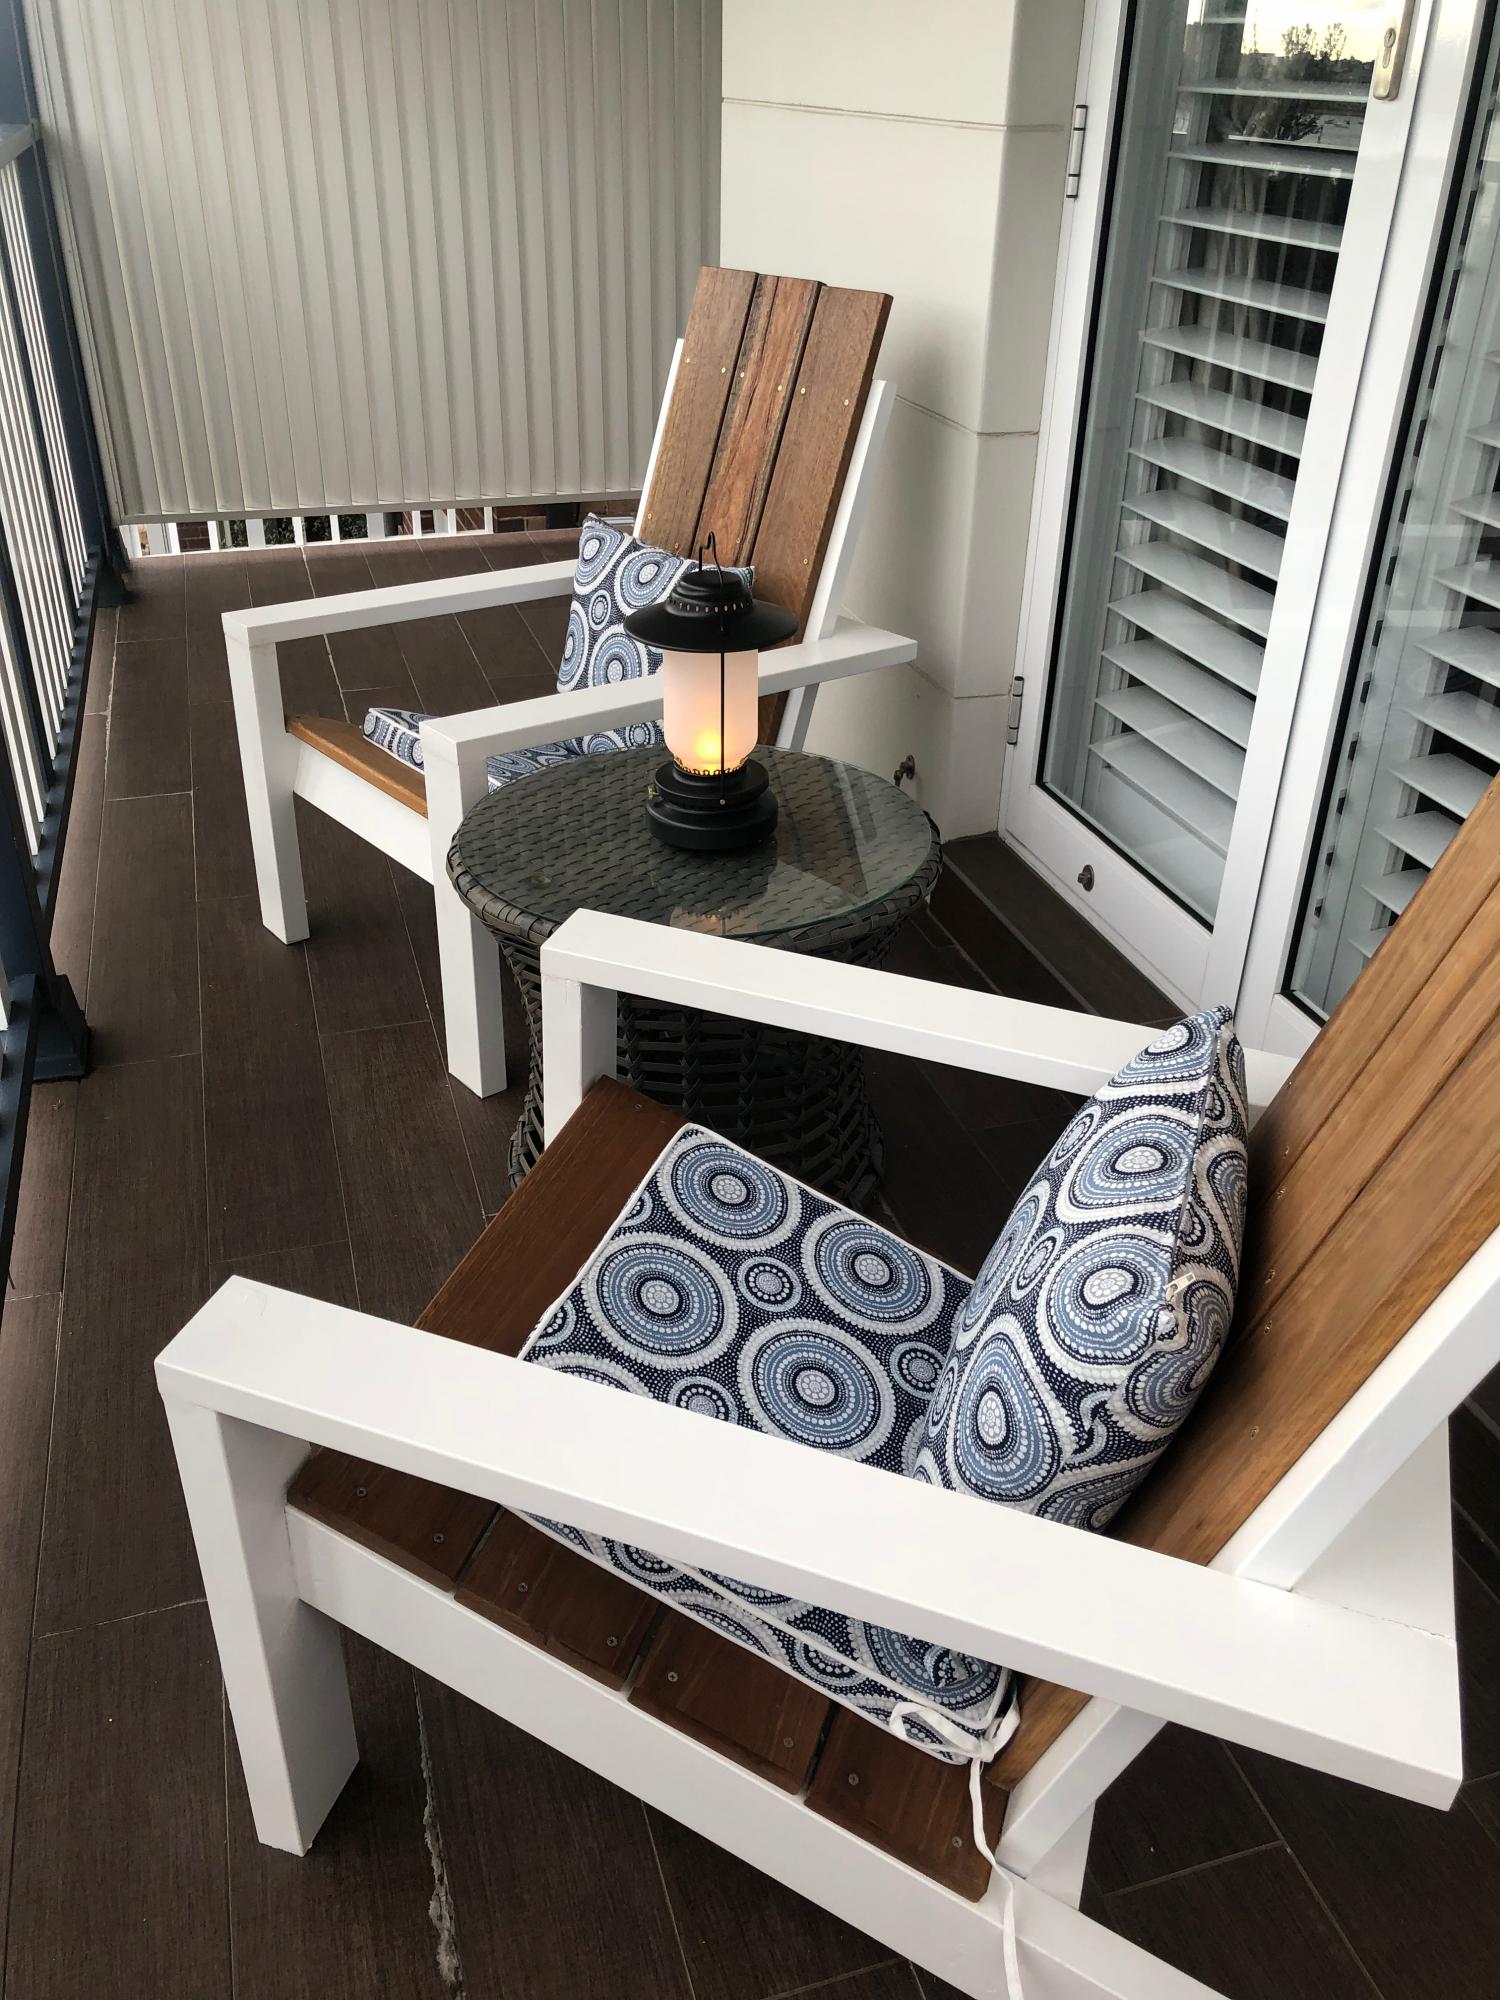
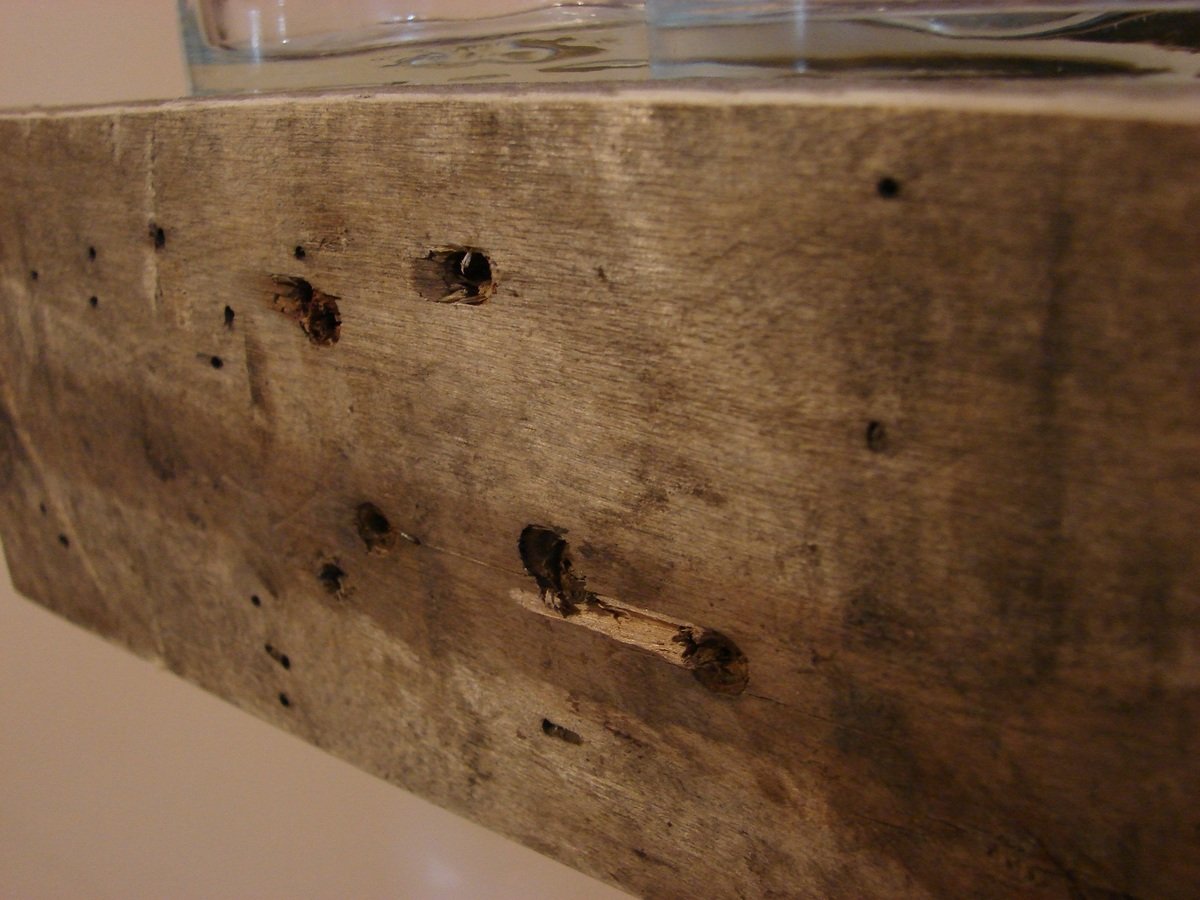
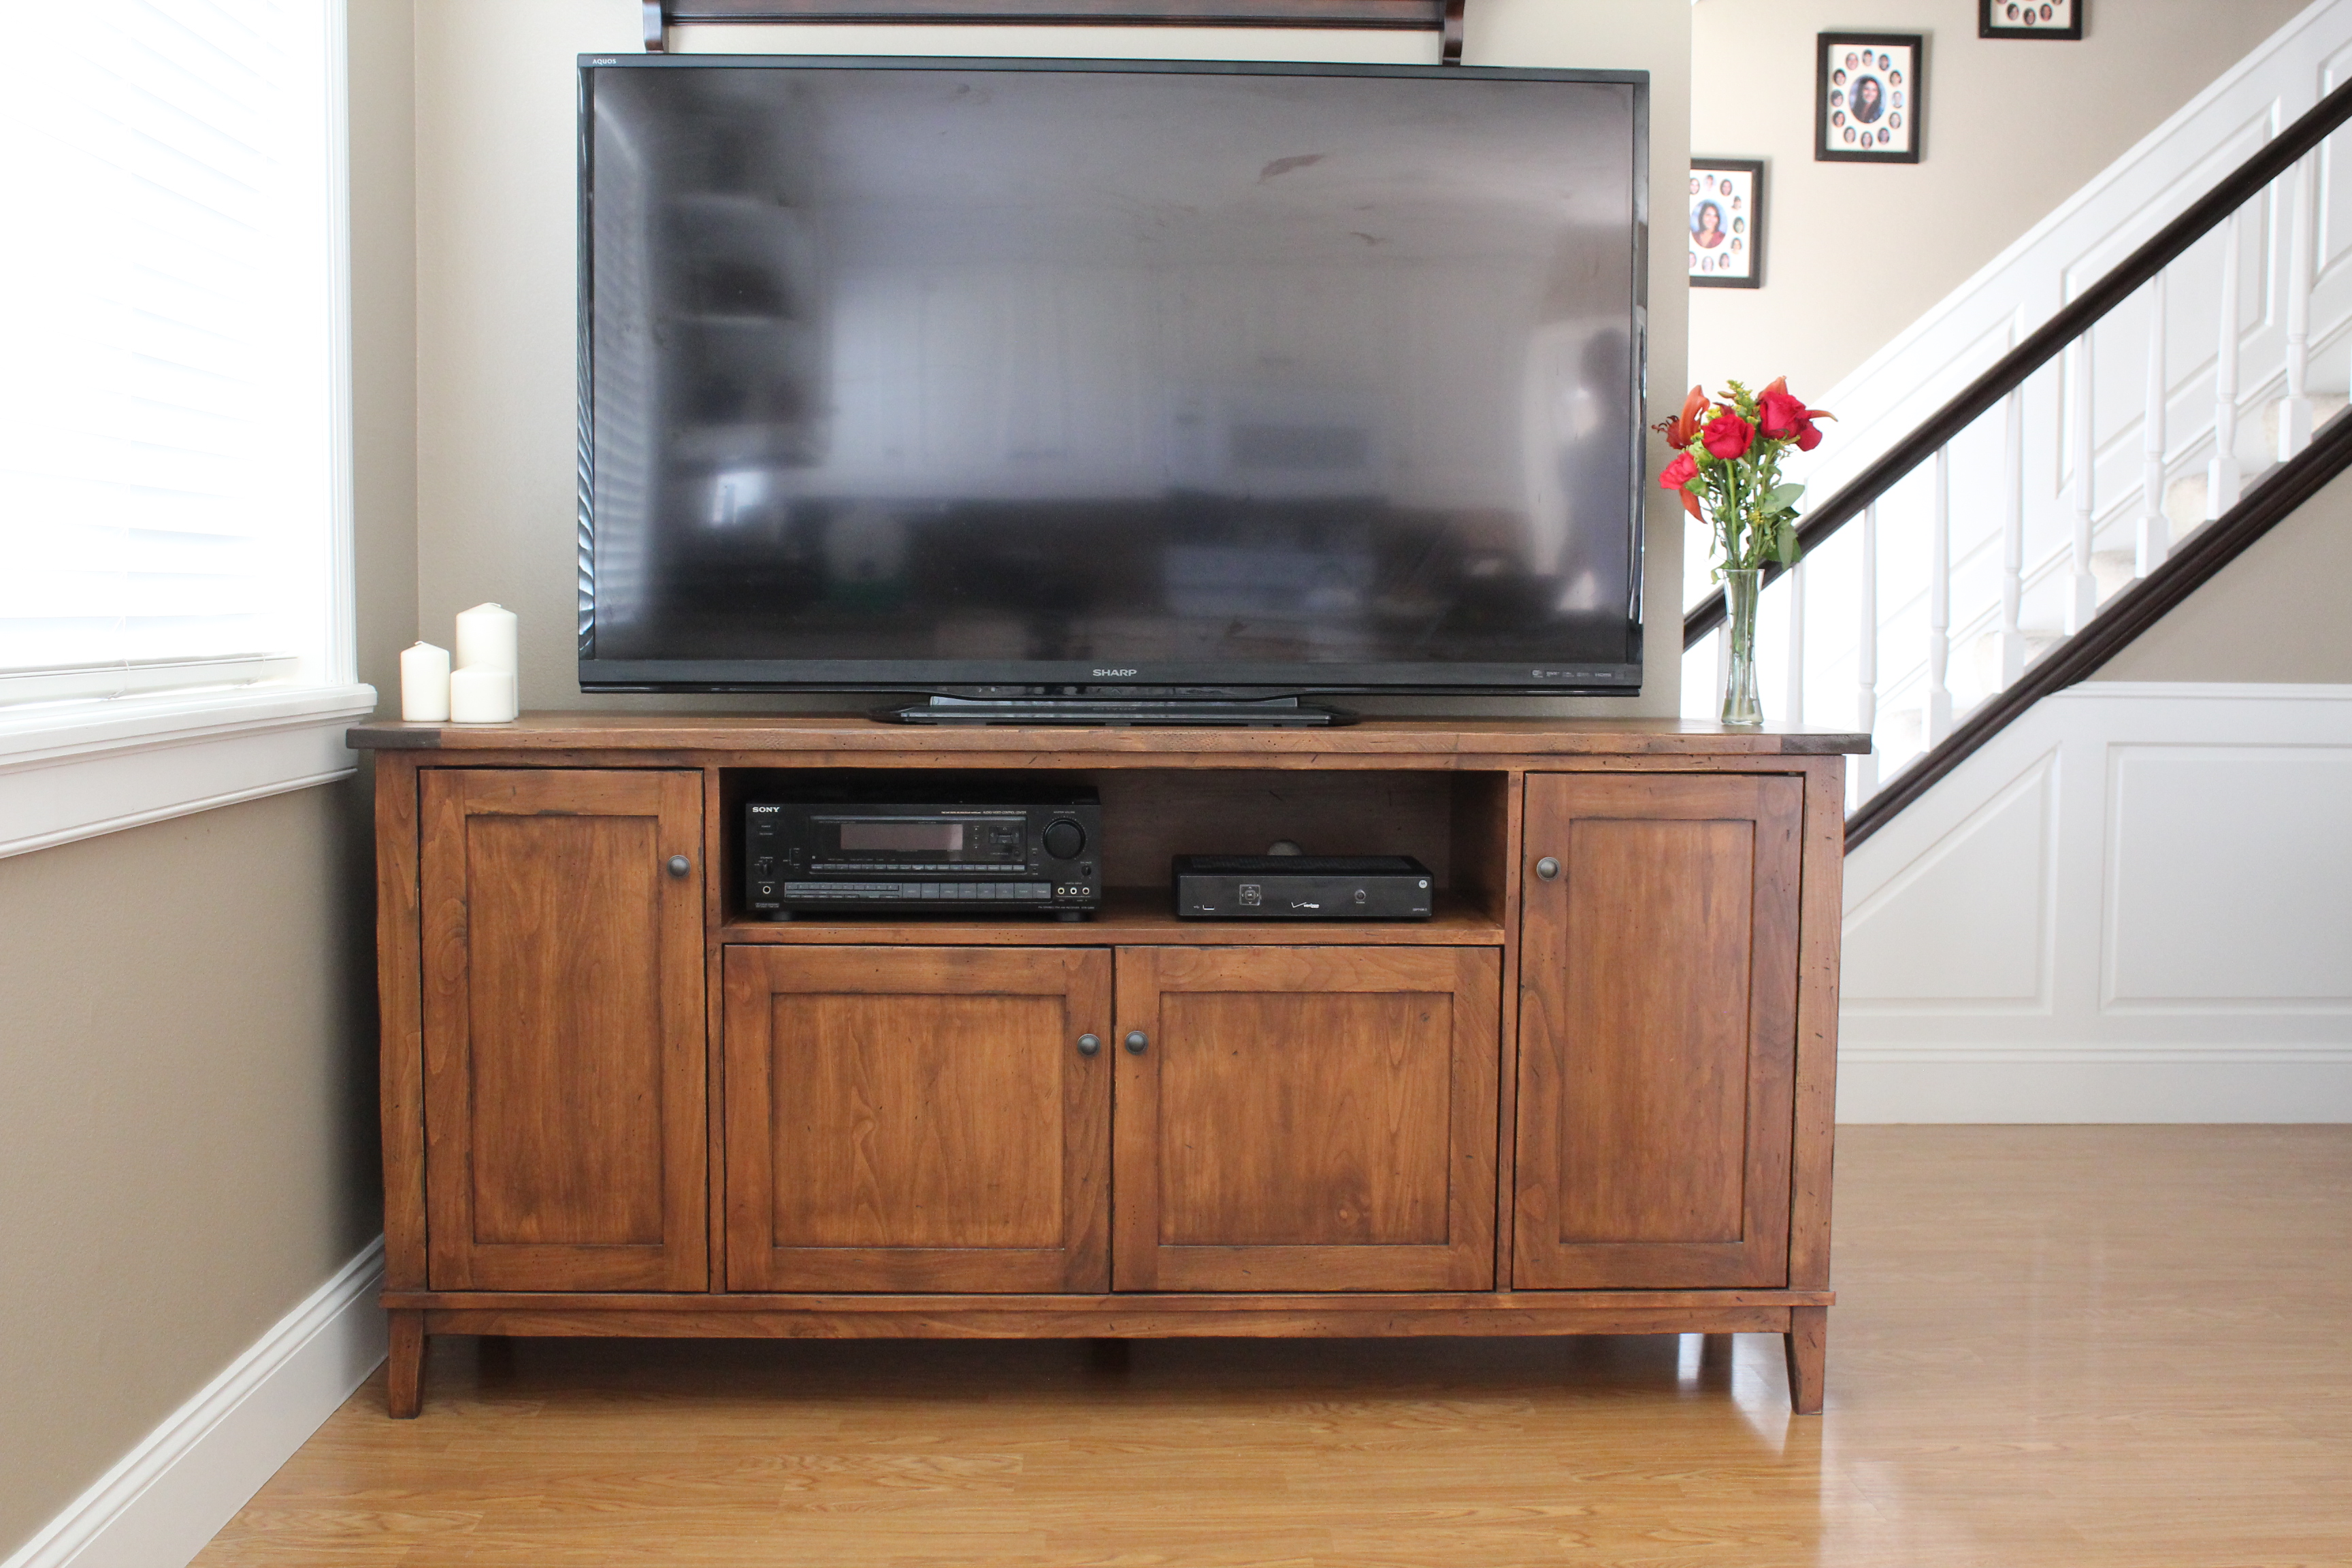
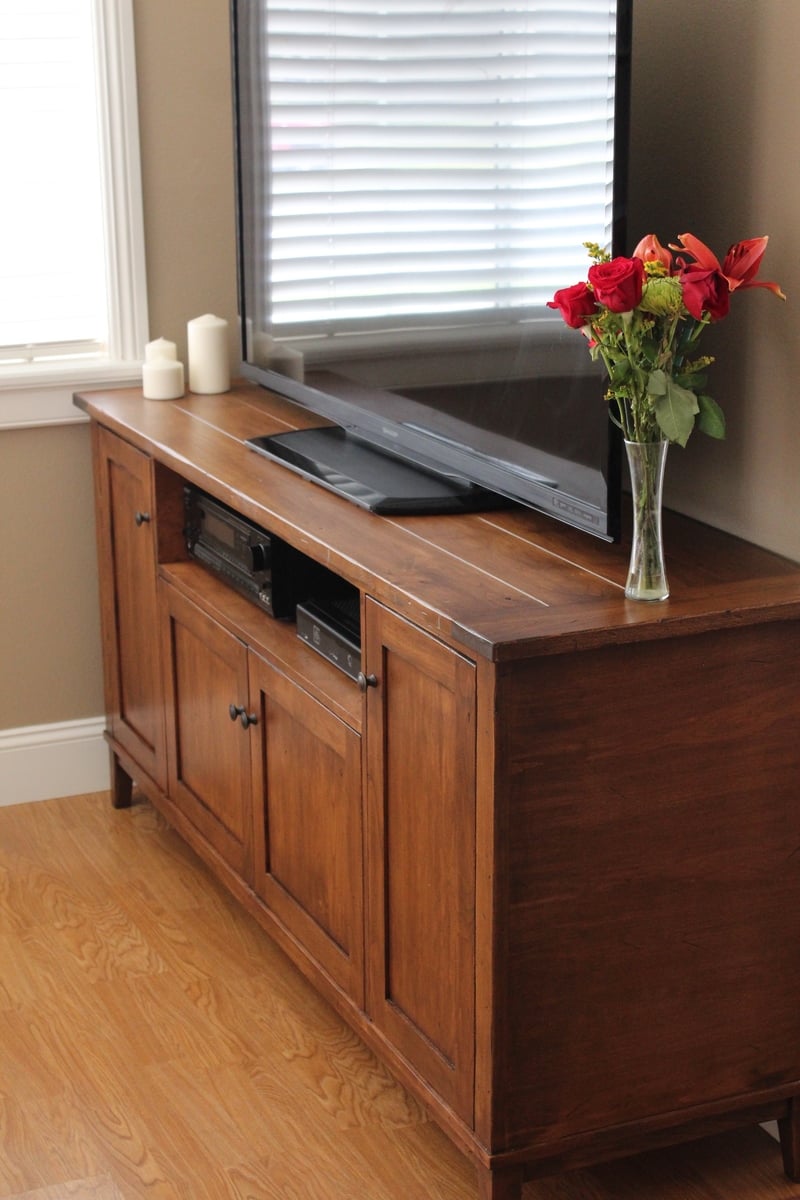
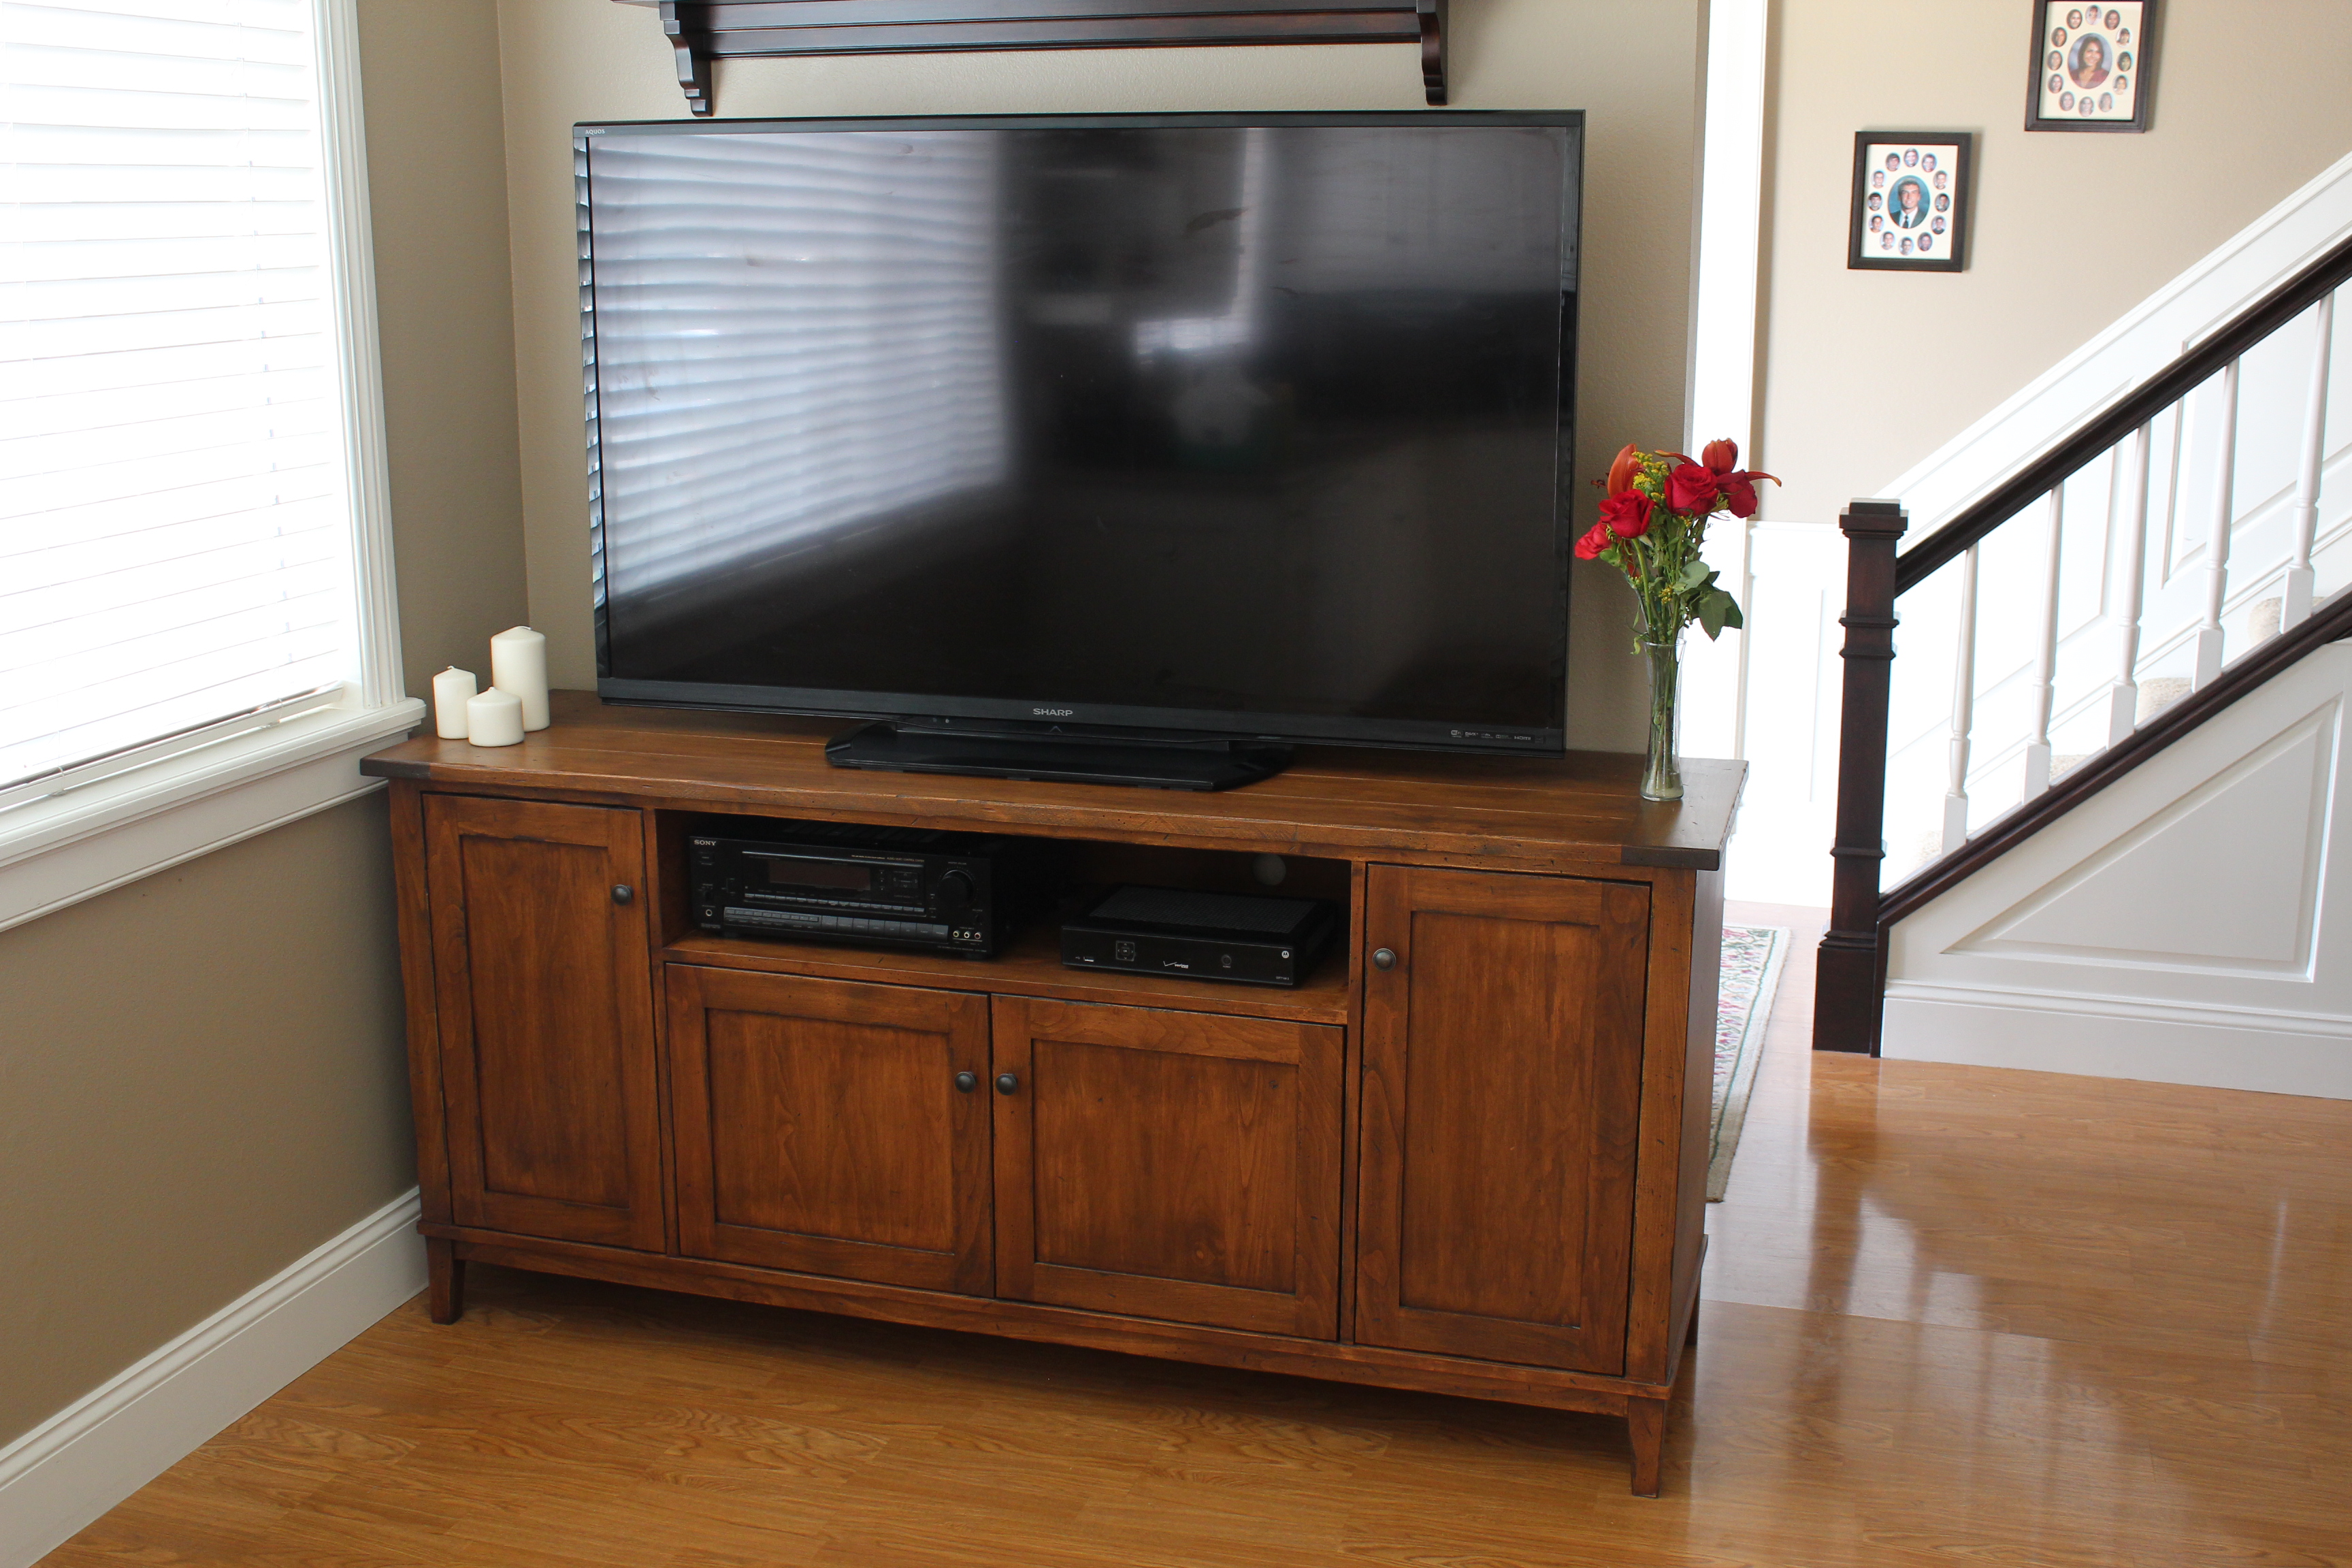
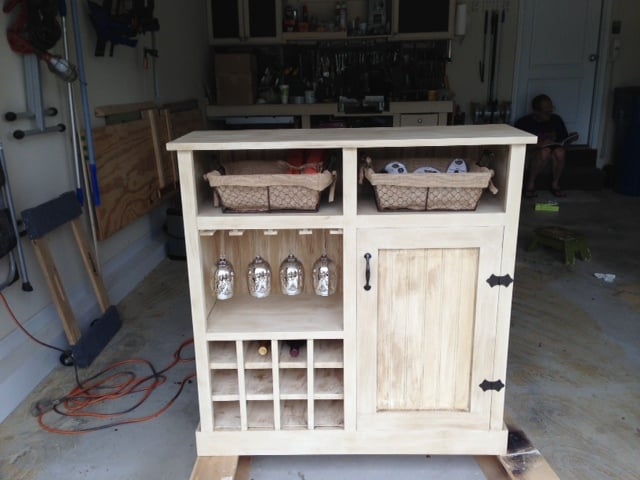
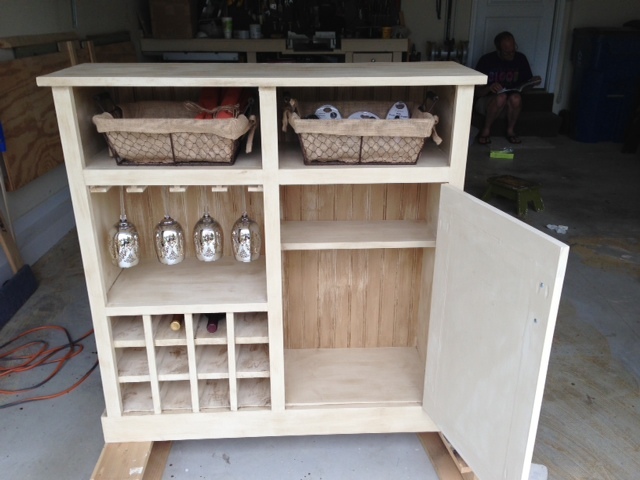
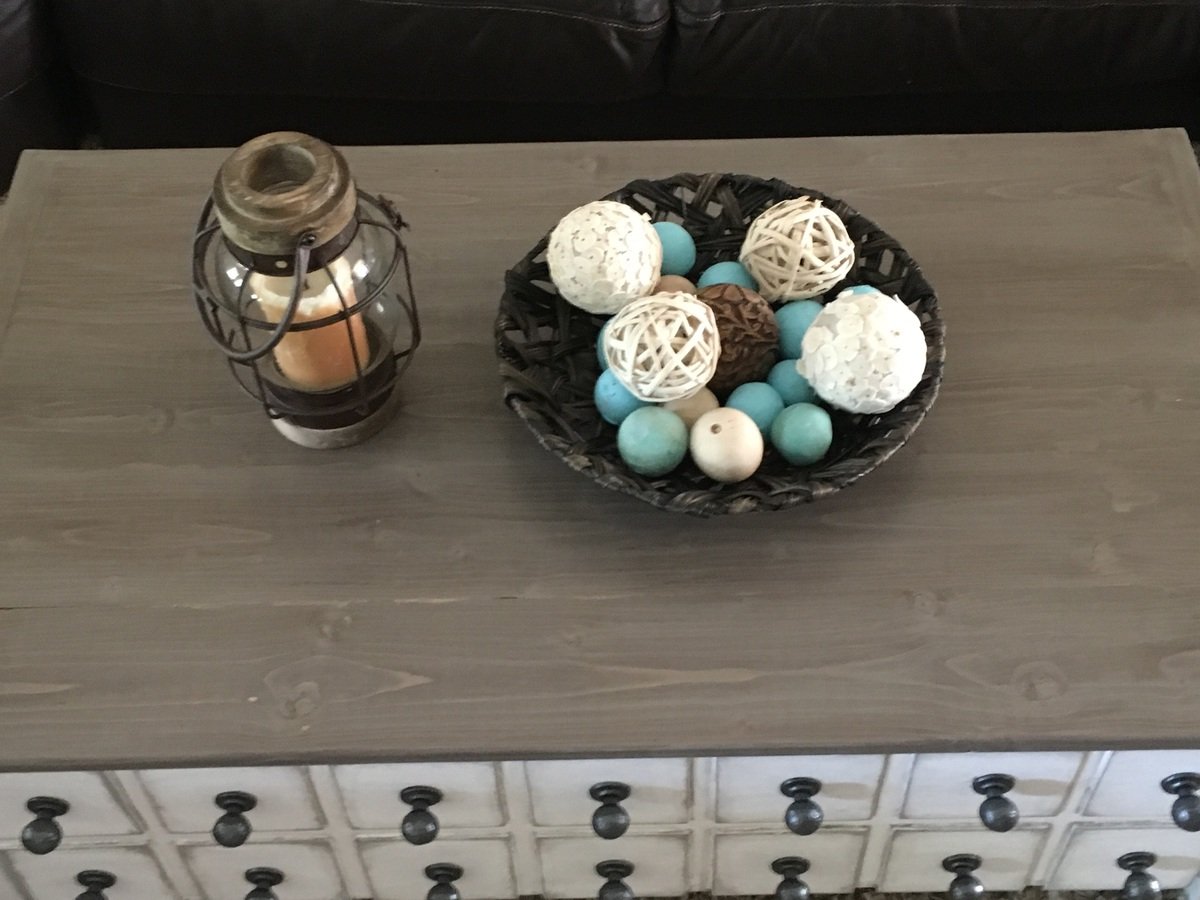
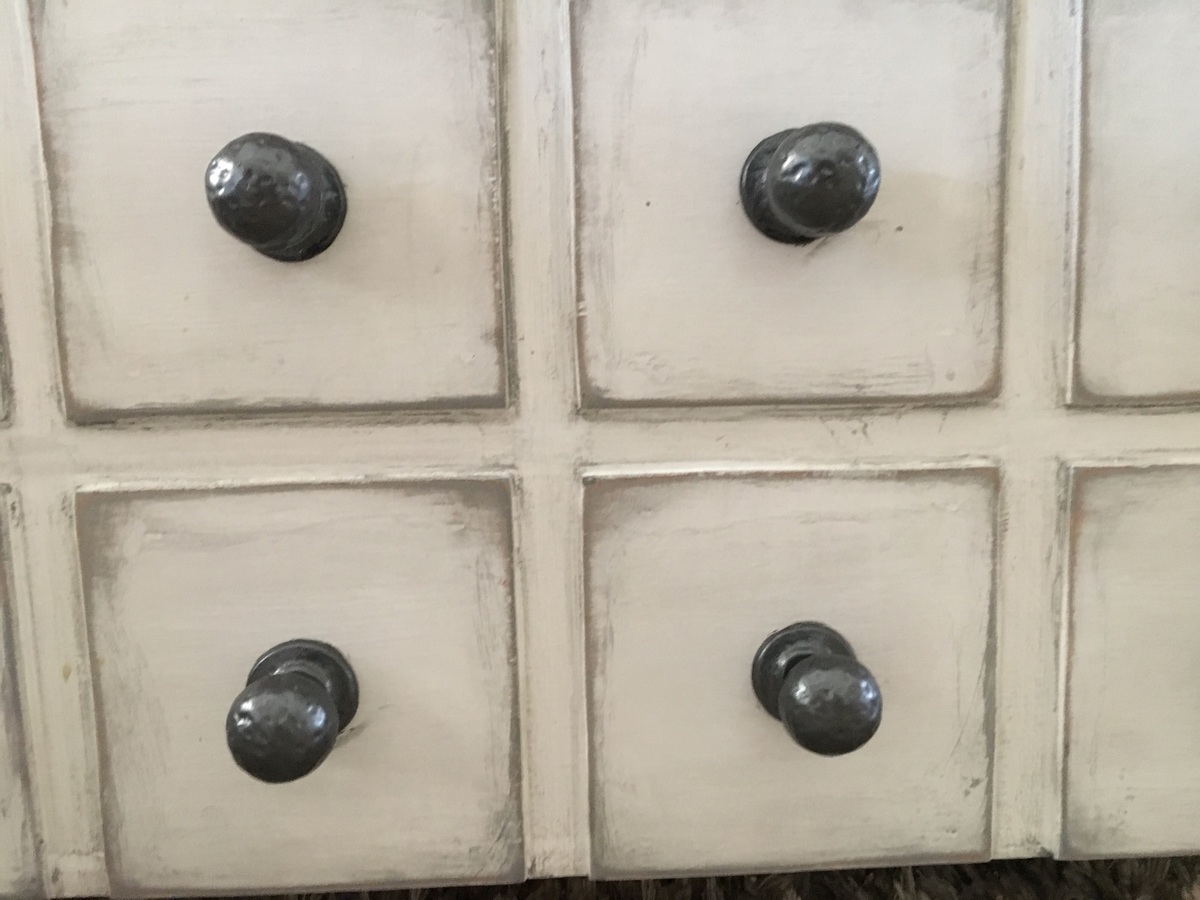
I made my stain with grey paint and special walnut stain...came out beautifully!!  I used Behr white paint on the base and grey paint as the glaze. I got the knobs on sale at Hobby Lobby and painted them a dark silverish color. The inside of the box is the same as the top. 

I will say this is far from perfect...but I learned a lot and know I will do even better on my next project ;)  Thank you for these plans!!  Can't wait to build more!!

Estimated Cost
Around130 with knobs.
Estimated Time Investment
Weekend Project (10-20 Hours)
Recommended Skill Level
Beginner

Jr loft bed

Submitted by Anonymous (not verified) on Mon, 04/03/2017 - 14:17

I loved the junior loft bed plan and it was customizable and much cheaper than at the furniture store.

We ended up buying a thicker mattress than expected and adding an extra 2x2 with wood letters we got on sale at the craft store. Originally their was about a 5 inch rail over the height of the mattress and the letters made it more around 9-10 inches. We attached the letters to the wood first with glue and nails through the bottom and then screwed the board to the bed rail. 

My 3 year old loves it! 

Estimated Cost
With a Kreg jig, kd wood at lowes and materials and the letters we were at $170
Estimated Time Investment
Weekend Project (10-20 Hours)
Finish Used
Polycrylic satin 2 coats
Recommended Skill Level
Beginner

Large Old English Style Farmhouse Dining Table

My wife and I were wanting a large outdoor farmhouse table that looked stylish, and like it could have been bought at Pottery Barn or another high-end furniture store. We found this plan that Ana white had made "Small Old English Style Farmhouse Dining Table". We often host groups from our church and will have 15-20 people on our patio or around our pool area, so we needed a bigger table... I just made some modifications to make it longer (7ft) in length to better fit our space and allow for more people to sit.

To make this plan longer, I simply adjusted the cut-list on the long 1x2s, 1x4s, and 1x6; and added a crossbar to prevent the longer tabletop from sagging. I also added the diagonal corner struts to make the table a little sturdier.

Adjusted Shopping List:
4 - 1x2 @ 8ft
5 - 1x4 @ 8 ft
6 - 1x6 @ 8ft
Waterproof 1 1/4" Kreg screws (for outdoor use)
Minwax Weathered Oak
Minwax Vintage Grey

Adjusted Cut-List
• 2 - 1x2 @ 26.5"
• 2 - 1x2 @ 76.5"
• 2 - 1x2 @ ~33.25"
• 2 - 1x4 @ 26.5"
• 2 - 1x4 @ 76.5"
• 4 - 1x4 @ 7.25" w/ 45º miter (diagonal corner supports)
• 1 - 1x4 @ ~28" (Crossbar - I forget the exact measurement)
• 6 - 1x6 @ 82"

For seating we just bought some inexpensive farmhouse weather resistant chairs from Walmart:
https://www.walmart.com/ip/Yaheetech-Metal-Dinning-Chairs-Stackable-Cof…

Estimated Cost
$170
Estimated Time Investment
Day Project (6-9 Hours)
Finish Used
Minwax Early American (base), Minwax Weathered Grey (2nd coat)
(See more on outdoor use of stains: https://ana-white.com/blog/2019/05/outdoor-wood-furniture-finishing-secrets)
Recommended Skill Level
Beginner

Comments

Laundry Room Floating Shelves and Cubby

I have a tiny laundry room closet, but this remodel made a world of difference. The shelves were too high to reach routinely, so I didn't add Ana's hidden pull outs. But the cubby is a lifesaver and hides all the unsightly cleaning supplies perfectly. Now to decorate!

Estimated Cost
$100 covid wood cost
Estimated Time Investment
Afternoon Project (3-6 Hours)
Finish Used
Minwax Special Walnut
Recommended Skill Level
Beginner

Comments

zannej

Tue, 12/05/2023 - 19:58

These look great! I'm thinking of doing something like this, although I might add a louvered panel on one of the doors since I plan to use an AAV. There is an atmospheric vent not too far away but trying to route a pipe would be too much of a pita. The doors could hide the water supply lines & hose as well as keep stuff from falling behind the machines. I do have to be mindful that I need to be able to open them and not have them obstructed though.

Modern Adirondack Chairs and Adirondack Table

Submitted by jer727 on Mon, 08/30/2021 - 12:18

This is one of my first wood working projects I have accomplished and these two plans were some that I really enjoyed making.

Comments

Seasonal And Holiday

Double Lounger

Submitted by Celeste808 on Sun, 05/19/2013 - 07:47

Super easy project! Love it and made it in a weekend (taking breaks of course). Did paint all the pieces before assembly to make it easier, and added little pieces to the sides to make it resemble the West Elm Double lounger. Total cost for the wood and hinges was $50! Compared to buying it at $549... Im in love with what I made! Thanks again Ana for an amazing plan. Now to work on the cushion <3

Estimated Time Investment
Day Project (6-9 Hours)
Finish Used
Valspar Outdoor White Paint
Recommended Skill Level
Beginner

Comments

spiceylg

Tue, 05/21/2013 - 04:41

Want to build one of these for sure. Question, especially since it's double width.........will those 1" width legs hold all of that weight? They look so thin.

In reply to by spiceylg

Celeste808

Tue, 05/21/2013 - 16:19

I thought so too! But its really solid. Looking at the West Elm version it has the same size legs. I might beef them up though just to give me more piece of mind! But so far so good.

spiceylg

Wed, 05/22/2013 - 03:17

Cool, but then I thought the West Elm version's looked so thin, too, lol! When we built the outdoor sectional, we used 2x4s because several people we know, well let's just say extra support was needed! Be sure to post the pics of it with the cushion. Will you be making it?

In reply to by spiceylg

Celeste808

Wed, 05/22/2013 - 17:49

Ill be making the cushion here soon, I found its really not hard at all and then you can get exactly what you want. I plan on using the same fabric will all of my DIY outdoor furniture. Will post once its done ;)

Seasonal And Holiday

Airondeck Chairs and Bar

Submitted by Anonymous (not verified) on Mon, 10/04/2021 - 16:24

Lockdown here in Sydney has been going for over 100 days now, so in-between home school and quietly going insane, I thought I would make something for the house in the hopes that at some point we may be able to have people back in our home and enjoy entertaining again. The Deck chairs are to replace some horrible plastic ones we had on our balcony. Now my wife and I can enjoy a glass of wine while looking out over our bay in style! The bar was made from leftover timber I had and the deck chairs are made from 2x4 Treated pine (bits painted white) and NSW Spotted gum - which is a hardwood. The bar is also made from 2x4 treated pine and Merbau ( another hardwood) . I have put a few bronze hooks on the front to hold tea towels etc when entertaining. They are both fantastic additions and we love them. Thank you for saving my Sanity Anna!

Comments

Cedar Raised Garden Beds - 3 Tiers

Steps:

1) Cut the boards to the specs below or adjust to your space

2) Kreg Jig the cut boards along each of the sides (length wise and on the ends) for attaching and making a box.  

3) Make 3 separate boxes, don't assemble until you move to location.  I used 4x4 cedar posts in the corners of the base box to add stability.  I used 2x2 pine in the front corners of boxes 2 and 3 for stability.  Install these after the dirt has been added so you can hammer in as a stake, attach with screws on front and sides.  I created 2 stakes for boxes 2 and 3 and added to the front to prevent bowing when the dirt is added.

Box Dimensions:

1) (base) 70.5" L x 46 W x 4 cedar boards high

2) 70.5" L x 32 W x 2 cedar boards high

3) 70.5" L x 16 W x 2 cedar boards high

Estimated Time Investment
Day Project (6-9 Hours)
Recommended Skill Level
Beginner

Changing table for my Baby. First project

Submitted by Jason on Tue, 03/22/2011 - 20:33

This was my first wood working project ever. I followed Ana's plan exactly except for the trim and partitions. I learned a lot from this project such as the correct pre-drilling hole size and the need for countersinks (I had quite a few split boards). I used Pine for the boards and MDF for the shelves but if I had to do it again I think I would go for plywood. All in all it was a rewarding project. The hardest part was the wood putty.

Estimated Cost
$100
Estimated Time Investment
Day Project (6-9 Hours)
Finish Used
I used KILZ primer and High Gloss white paint.
Recommended Skill Level
Beginner

Our Greenhouse:)

Submitted by lmckinney on Thu, 06/06/2013 - 19:43

Your plans made this project so much easier. We love it and have gotten a lot of compliments for it.

Estimated Cost
1000.00
Recommended Skill Level
Intermediate

Comments

Joni

Fri, 06/07/2013 - 12:42

This is amazing! All of your finishing touches make this really special. I love every detail.

Kirsten.dehart

Sun, 05/01/2016 - 17:43

Do the gable style roofs and greenhouse panels hold up in a climate for heavy snow loads??


Thanks!

Pottery Barn Media Console

I have been wanting to build this piece for some time now. This is actually a Pottery Barn piece that is now discontinued that I modified here and there. I added a "flipper door" which opens and slides back into the cabinet. Adjustable shelves throughout. I used solid alder and alder plywood for material. - Brad @timberandsoul www.timberandsoul.com

Estimated Cost
$500.00
Estimated Time Investment
Week Long Project (20 Hours or More)
Finish Used
shellac, transtint dye, general finishes gel stain, poly
Recommended Skill Level
Advanced

Comments

Outdoor Pine Canopy Daybed

Submitted by evilmom on Sun, 05/01/2011 - 14:01

This is my first venture into woodworking/carpentry. Since I did not want to shell out too much money for lumber, I used untreated pine (worst wood they say to use) for the daybed and used an exterior wood stain (with uv protection) to seal the wood. I also did not invest in power tools and used a hammer and wood saw to cut and nail everything together. As I cannot sew, I waterproofed the mattress by sandwiching it between two plastic mattress covers (dollar store) and duct taping the seams. It's not elegant but no one is going to see it. I used a cotton fitted twin sheet (old one) for the cover and found some outdoor pillows for $16 a pair ($8 per pillow and made with solarium fabric). Also as this is placed outside (deck), I'm looking into getting a mosquito net to use over the daybed instead of the bed tent I have on right now.

In hindsight, I should have used pressure treated wood for the posts and canopy beams to prevent bending/twisting (I had to re-do 2 posts). If I get 3 years of use for this furniture. I'm a happy camper. Ana, thank you so much for the plan. Kathy thanks for the advice on painting the lumber first.

You guys can do this!

Estimated Cost
$70 for the lumber, $ 40 for stain, sand paper, nails, wood glue, $4 for mattress cover, duct tape
Estimated Time Investment
Week Long Project (20 Hours or More)
Finish Used
Olympic exterior wood stain with UV protection (oil based).
Recommended Skill Level
Intermediate

Kentwood bed

Submitted by Wiscogrl on Sun, 06/28/2015 - 06:59

I built this for my four year old son! He even helped me out so that made him love it even more :)

Built from Plan(s)
Estimated Cost
$100-$120
Estimated Time Investment
Day Project (6-9 Hours)
Finish Used
Minwax Oil based stain- Dark walnut
Recommended Skill Level
Beginner

Outdoor Couch with Chaise/Ottoman

Submitted by NJ_DIY on Mon, 07/06/2015 - 08:56

This couch was super easy. The 2x4s cost about $30. The cushions were a little higher at $160 for all, but can't complain when spending so little. I bought the cushions first to assure the size would be adjusted correctly. It took about 30-45 minutes to put together. I say it's a weekend project because of the stain and sealer. Then the wife wanted a chaise also. I decided to make it an ottoman so it's a chaise when she wants and an extra seat when we have extra company. I went with the color Kona for the stain and applied clear satin spar urethane 3 times since it was raw wood initially. Excellent project that really completed my outdoor space!

Estimated Cost
$30 for 2x4s,
$160 for cushions,
$25 for stain and spar urethane,
Estimated Time Investment
Weekend Project (10-20 Hours)
Finish Used
Kona stain,
Spar Urethane
Recommended Skill Level
Beginner

Comments

NJ_DIY

Mon, 07/06/2015 - 20:16

They were on sale at Target, but they were running out. We initially wanted the Navy Blue but when this was the only color available we settled but now we couldn't be happier. Fits in with our backyard perfectly.
The cushions are Threshold Deepseating Outdoor Cushions. They do get soaked in the rain but I suppose they're outdoor cushions because once the sun is out they dry instantly. Let me know if I could help any further!

NJ_DIY

Mon, 07/06/2015 - 20:15

They were on sale at Target, but they were running out. We initially wanted the Navy Blue but when this was the only color available we settled but now we couldn't be happier. Fits in with our backyard perfectly.

The cushions are Threshold Deepseating Outdoor Cushions. They do get soaked in the rain but I suppose they're outdoor cushions because once the sun is out they dry instantly. Let me know if I could help any further!

mtnluvnfun

Sat, 10/03/2020 - 23:56

Are the plans not posted to your website? I built a 90" version of your plans that are for 79" couch and want to use an ottoman as a versatile chaise similar to this layout.

An 'On Steroids' version of your idea

Submitted by Anonymous (not verified) on Mon, 01/24/2022 - 17:19

6 years into a complete rebuild of a neglected old farm house built in just 1948. Your website was found after looking for 'Modern Farmhouse' stair rails. The look plays off the original brick chimney stack & the Woodstove it serves. It has turned out to be quite the focal point, which was never it's purpose. Thanks for the inspiration!

Comments

Bedside End Tables

Submitted by Grace734 on Mon, 02/05/2018 - 07:38

These are made from the three drawer plans but modified the size to meet our needs and used planks for shelves instead of drawers. Painted white and black gel stain. 


UPDATE FROM ANA - We have received MANY requests for this plan and have created a plan inspired by this post here.

Shopping List (for ONE bedside table) + Tools

  • 1 - 1x2 @ 6 feet long
  • 5 - 1x4 @ 8 feet long
  • 2 - 2x2 @ 8 feet long
  • 1-1/4" and 2-1/2" pocket hole screws
  • 1-1/4" brad nails
  • wood glue
  • Kreg Jig
  • Compound Miter saw
  • Drill
  • Brad Nailer (18 guage)

Cut List (for ONE bedside table)

  • 4 - 1x2 @ 14" - Side panel trim
  • 8 - 1x4 @ 23-1/4" - Side panels
  • 4 - 2x2 @ 27-1/4" - Legs
  • 6 - 2x2 @ 14" - Shelf support
  • 8 - 1x4 @ 17" - Shelves
  • 5 - 1x4 @ 18" - Top

Cut 1x4s and 1x2s with miter saw. Layout side panel 1x4s as shown above.  Measure and cut 1x2 to length.  Nail the 1x2 to the 1x4s, two nails per overlap with glue.  Make sure your side panels are square.  Build two.

Drill 3/4" pocket holes on inside edge of 1x4 ends as shown above.  Cut 2x2s with compound miter saw. Attach to the 2x2 legs with 1-1/4" pocket hole screws.

Set Kreg Jig to 1-1/2" setting.  Drill 1-1/2" pocket holes on end of each 2x2, one per end.  Attach to 2x2s with wood glue as shown above.

Cut 1x4 shelf boards with compound miter saw.  Nail and glue to the inside of the project as shown above.

Cut 1x4 top boards with compound miter saw.  Nail and glue to top with 1-1/4" nails and wood glue.

If you wish to add a back, measure and cut from 1/4" plywood and attach with 3/4" brad nails.

Estimated Cost
100.00 for both.
Estimated Time Investment
Weekend Project (10-20 Hours)
Finish Used
One coat of eggshell white PPG
Two coats of ebony gel stain
Recommended Skill Level
Beginner

Comments

Octagon Picnic Table

Submitted by Anonymous (not verified) on Sat, 04/09/2022 - 10:23

I just finished this octagon picnic table as per your plans
the 2x6 are all clear Western Red Cedar and the skeleton is
Douglas Fir. I think it turned out astonishingly excellent.

Thanks for the inspiration Ana.

Seasonal And Holiday

DIY Wooden bench

Submitted by Julisib on Tue, 04/19/2022 - 10:13

Thanks Ana for the plans. A new bench / bookshelves for our daughter's bedroom.

Built from Plan(s)

Comments

Shanty Console turns Wine Cabinet

Submitted by lscrandall on Tue, 08/06/2013 - 20:53

Happy Tuesday everyone! Today I am going to share a project with you that I built with the help of some plans from Ana-White.com.In a weekend we carved out a custom wine cabinet we will be donating to a local children’s charity here in St Peter’s, MO. This lovely cabinet was created from the SHANTY OPEN SHELF CONSOLE, which was designed for the Shanty sisters at Shanty-2-Chic blog site. We altered the plan to make it a wine cabinet which came out spectacular! Ana, thank's again for providing your free plans. I will be happy to upload the altered plans in a couple days so you can all enjoy them! Happy wood working!

Built from Plan(s)
Estimated Cost
$175.00
Estimated Time Investment
Weekend Project (10-20 Hours)
Finish Used
Anne Sloan Old Ocher chalk pain and wax set clear/brown
Recommended Skill Level
Intermediate

Comments

JLDunlap

Wed, 08/07/2013 - 14:43

Thinking this would make a great Christmas Gift idea for quite a few of my friends! Can't wait for the altered plans!

Cody9691

Sun, 08/18/2013 - 08:46

Looks great! Any idea when the altered plans will be available? Itching to get this built for my SO.

Joeboxer1013

Tue, 08/27/2013 - 13:51

I'm adding this to the top of my build list as soon as the modified plans are uploaded! Thanks for taking the time to add them.

lscrandall

Wed, 08/28/2013 - 17:10

Wine Console Altered Plans

Sorry it took me so long, our blog over at Hello...I Live Here has kept us busy with all our new visitors. But as promised here are the altered plans to help you make the wine bottle holder and stemware holder.

MAKING THE WINE BOTTLE HOLDER:

Start your project with Ana White's plans. Finish the whole thing, but only make one door. Leave the other side open and alter as follows to get your wine holders:

1. First cut 3 additional shelves 17 5/8" wide. Make sure you Kreg 3/4" holes on the right and left side of the shelves, connect to the sides with 1 1/4" PH (pocket hole screws - Kreg).

2. We spaced each of our shelves 3 1/2" apart, allowing 12 bottles to be stored in the wine case.

3. Cut in half length wise a 1x2 board. This will give you a horizontal stringer about .75" wide.

4. We customized the top shelf board to fit the distance - we did not want the board to hang down interfering with the wine storage. We trimmed this board to 3/4" to match the shelf thickness. Then glued and nailed into place.

5. Once the top board is in place, measure the distance from the bottom shelf to the top shelf to just under the top shelf board from step 4. With a pencil mark the stringer and cut to size, and install with glue and nails. This step needs to be completed 3 times 3 1/2" apart from each other. You should now have 12 square boxes making your wine storage.

6. On each shelf behind the three stringers, we placed a divider to keep the bottles from hitting one another. Each divider is 1/2" square, and 11 1/4 long, to match the shelf depth.

MAKING THE WINE STEM HOLDERS:

Now that you are done building the box for the wine holder, we can move on to the stemware holder.

1. We purchased .25 x 1.5" x 36" poplar flat wood. This will make the bottom of the T's and L's stem ware holders.

2. Then we used 1/2" square pieces of poplar to make the L and T mounts. Mount the flat poplar to the 1/2" squares making 2 L shaped pieces for the Right and Left side of the unit, then make 3 T's for the centers. You will use glue, and clamp them down tight, then nail together.

3. Hang each L shape on the Left and Right Side of the unit with finish nails. The next part is kind of trick and depends on the size of the stem bottom you will be hanging not all base bottoms are the same. Once your L's are hung, take the stem wear you will be hanging and rest it into the L shape holding the glass (do not let go of the glass it will break if dropped). Then position the T shaped molding to accommodate your stemware. Move the glass in and out of the L and T until you get your desired width for your stemware. Mark the T you are holding with a pencil , carefully sit down the stemware and mount the T shaped holder. Continue until all 3 of the T's are hung ( we used glue and nails to complete this process).

We used a bead-board backer instead of plywood to give it that French country feel.

We hope these plans help you build a piece you love! This piece of furniture brought the charity we donated it to $500 extra dollars to help their children. We at Hello...I Live Here were very proud of the job we did and that we got to help some wonderful children!

Visit us at www.helloilivehere.com or stop by our Facebook page and give us a big like once you complete your project!

Happy building ;-)
- LC

Joeboxer1013

Thu, 08/29/2013 - 13:01

Thanks so much for posting the plans! My sister has been asking me to make this for her since she saw the pics a couple of weeks ago.

Side note: I'm from St. Louis, MO, so seeing you were from St. Charles caught my eye!

Nicole’s Garden

Submitted by Anonymous (not verified) on Sat, 05/07/2022 - 14:27

A vegetable garden with an outside ring to plant marigolds to keep deer away.

Built from Plan(s)

Comments

Finally Built a Platform Bed!

Submitted by Anonymous (not verified) on Mon, 07/25/2022 - 10:39

I've been wanting to build this bed for awhile and finally got around to it. I made a few small changes to the plans:

-I used 2x8's instead of 2x6s, so it wouldn't be so low to the ground.
-I ripped 3/8" off of the 2x8 supports in the middle so the mattress would nest inside the frame and not slide around
-I didn't add the headboard because it seemed a bit chunky/rustic for my taste. I will come back and do something else for the headboard. Maybe a cool paneled wall with built in sconces? We'll see!

Love these plans though, appreciate it!

Comments