Community Brag Posts

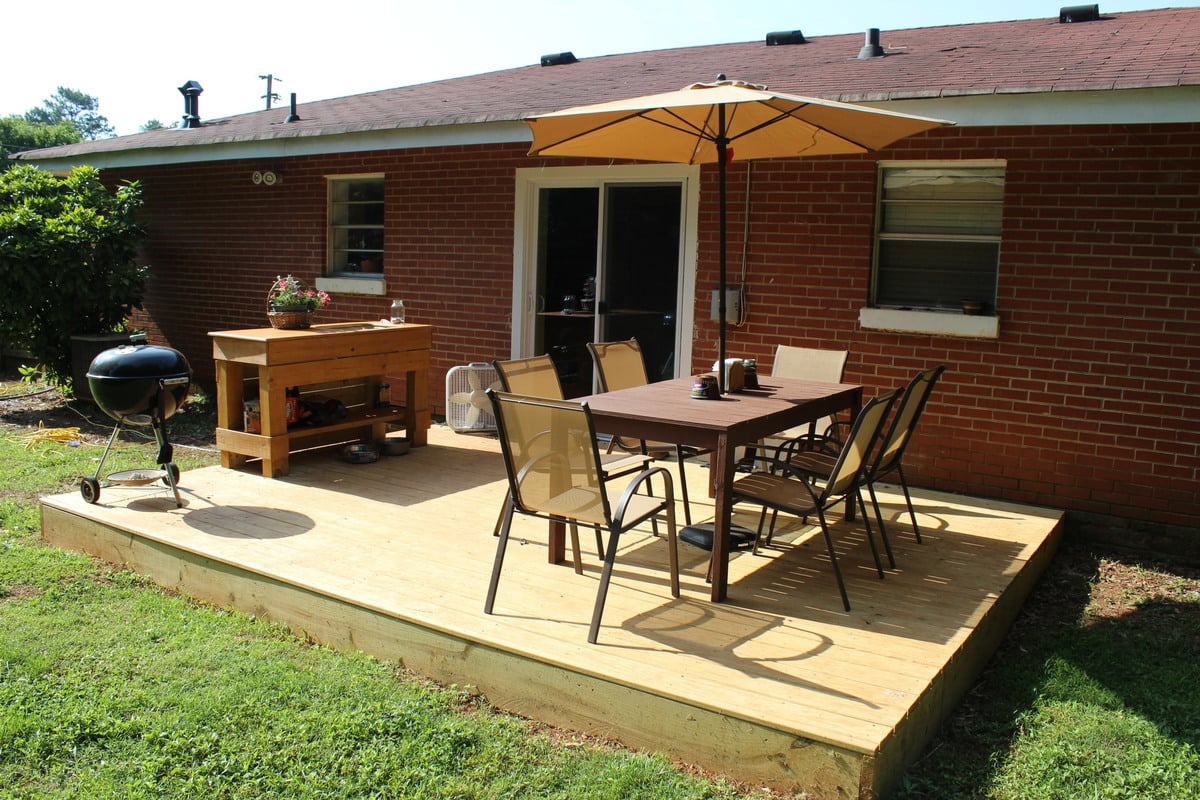
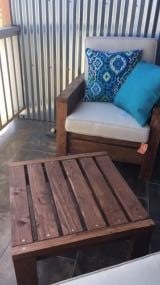
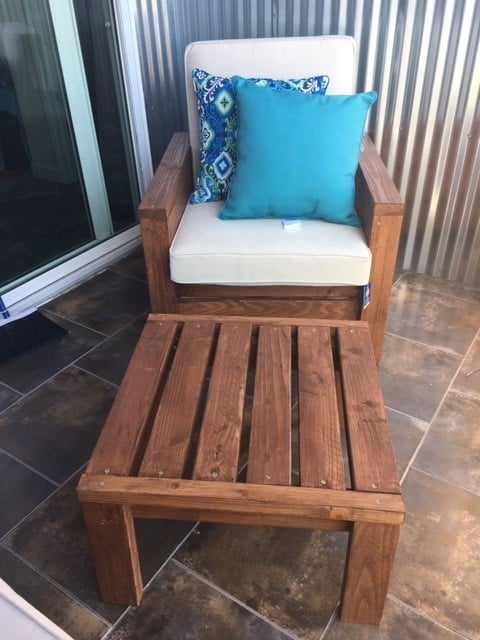
OutDoor dining table

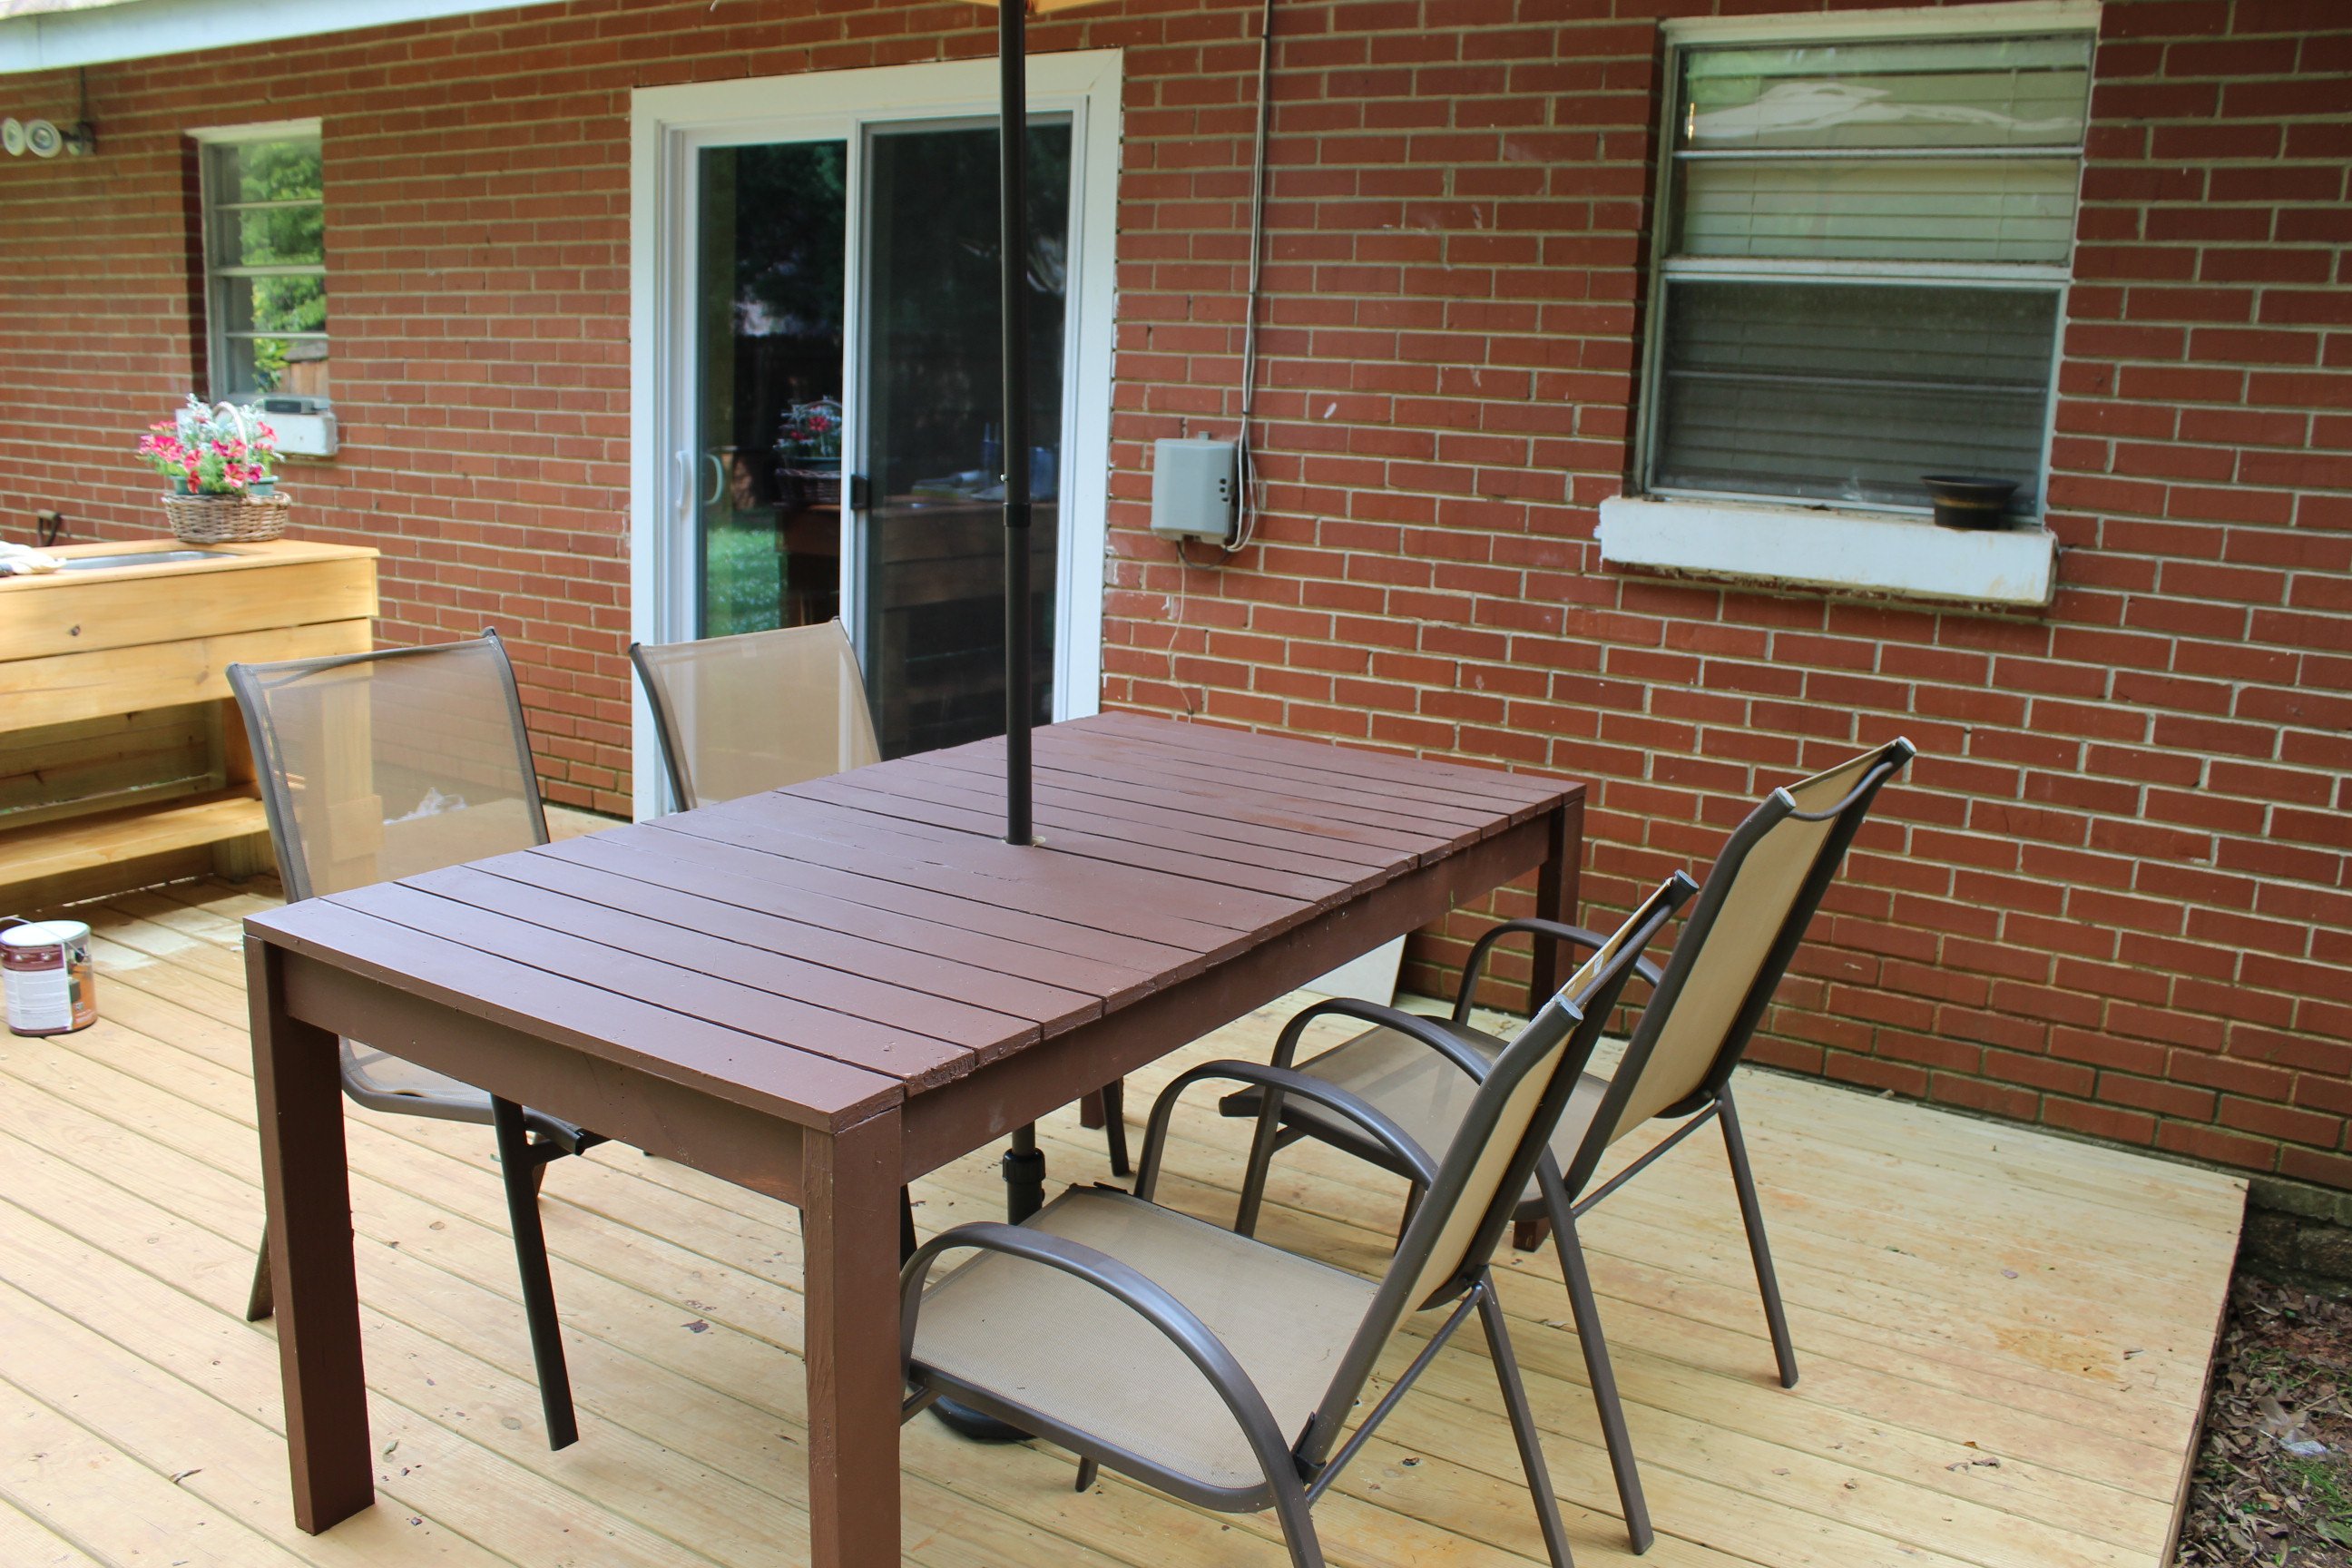
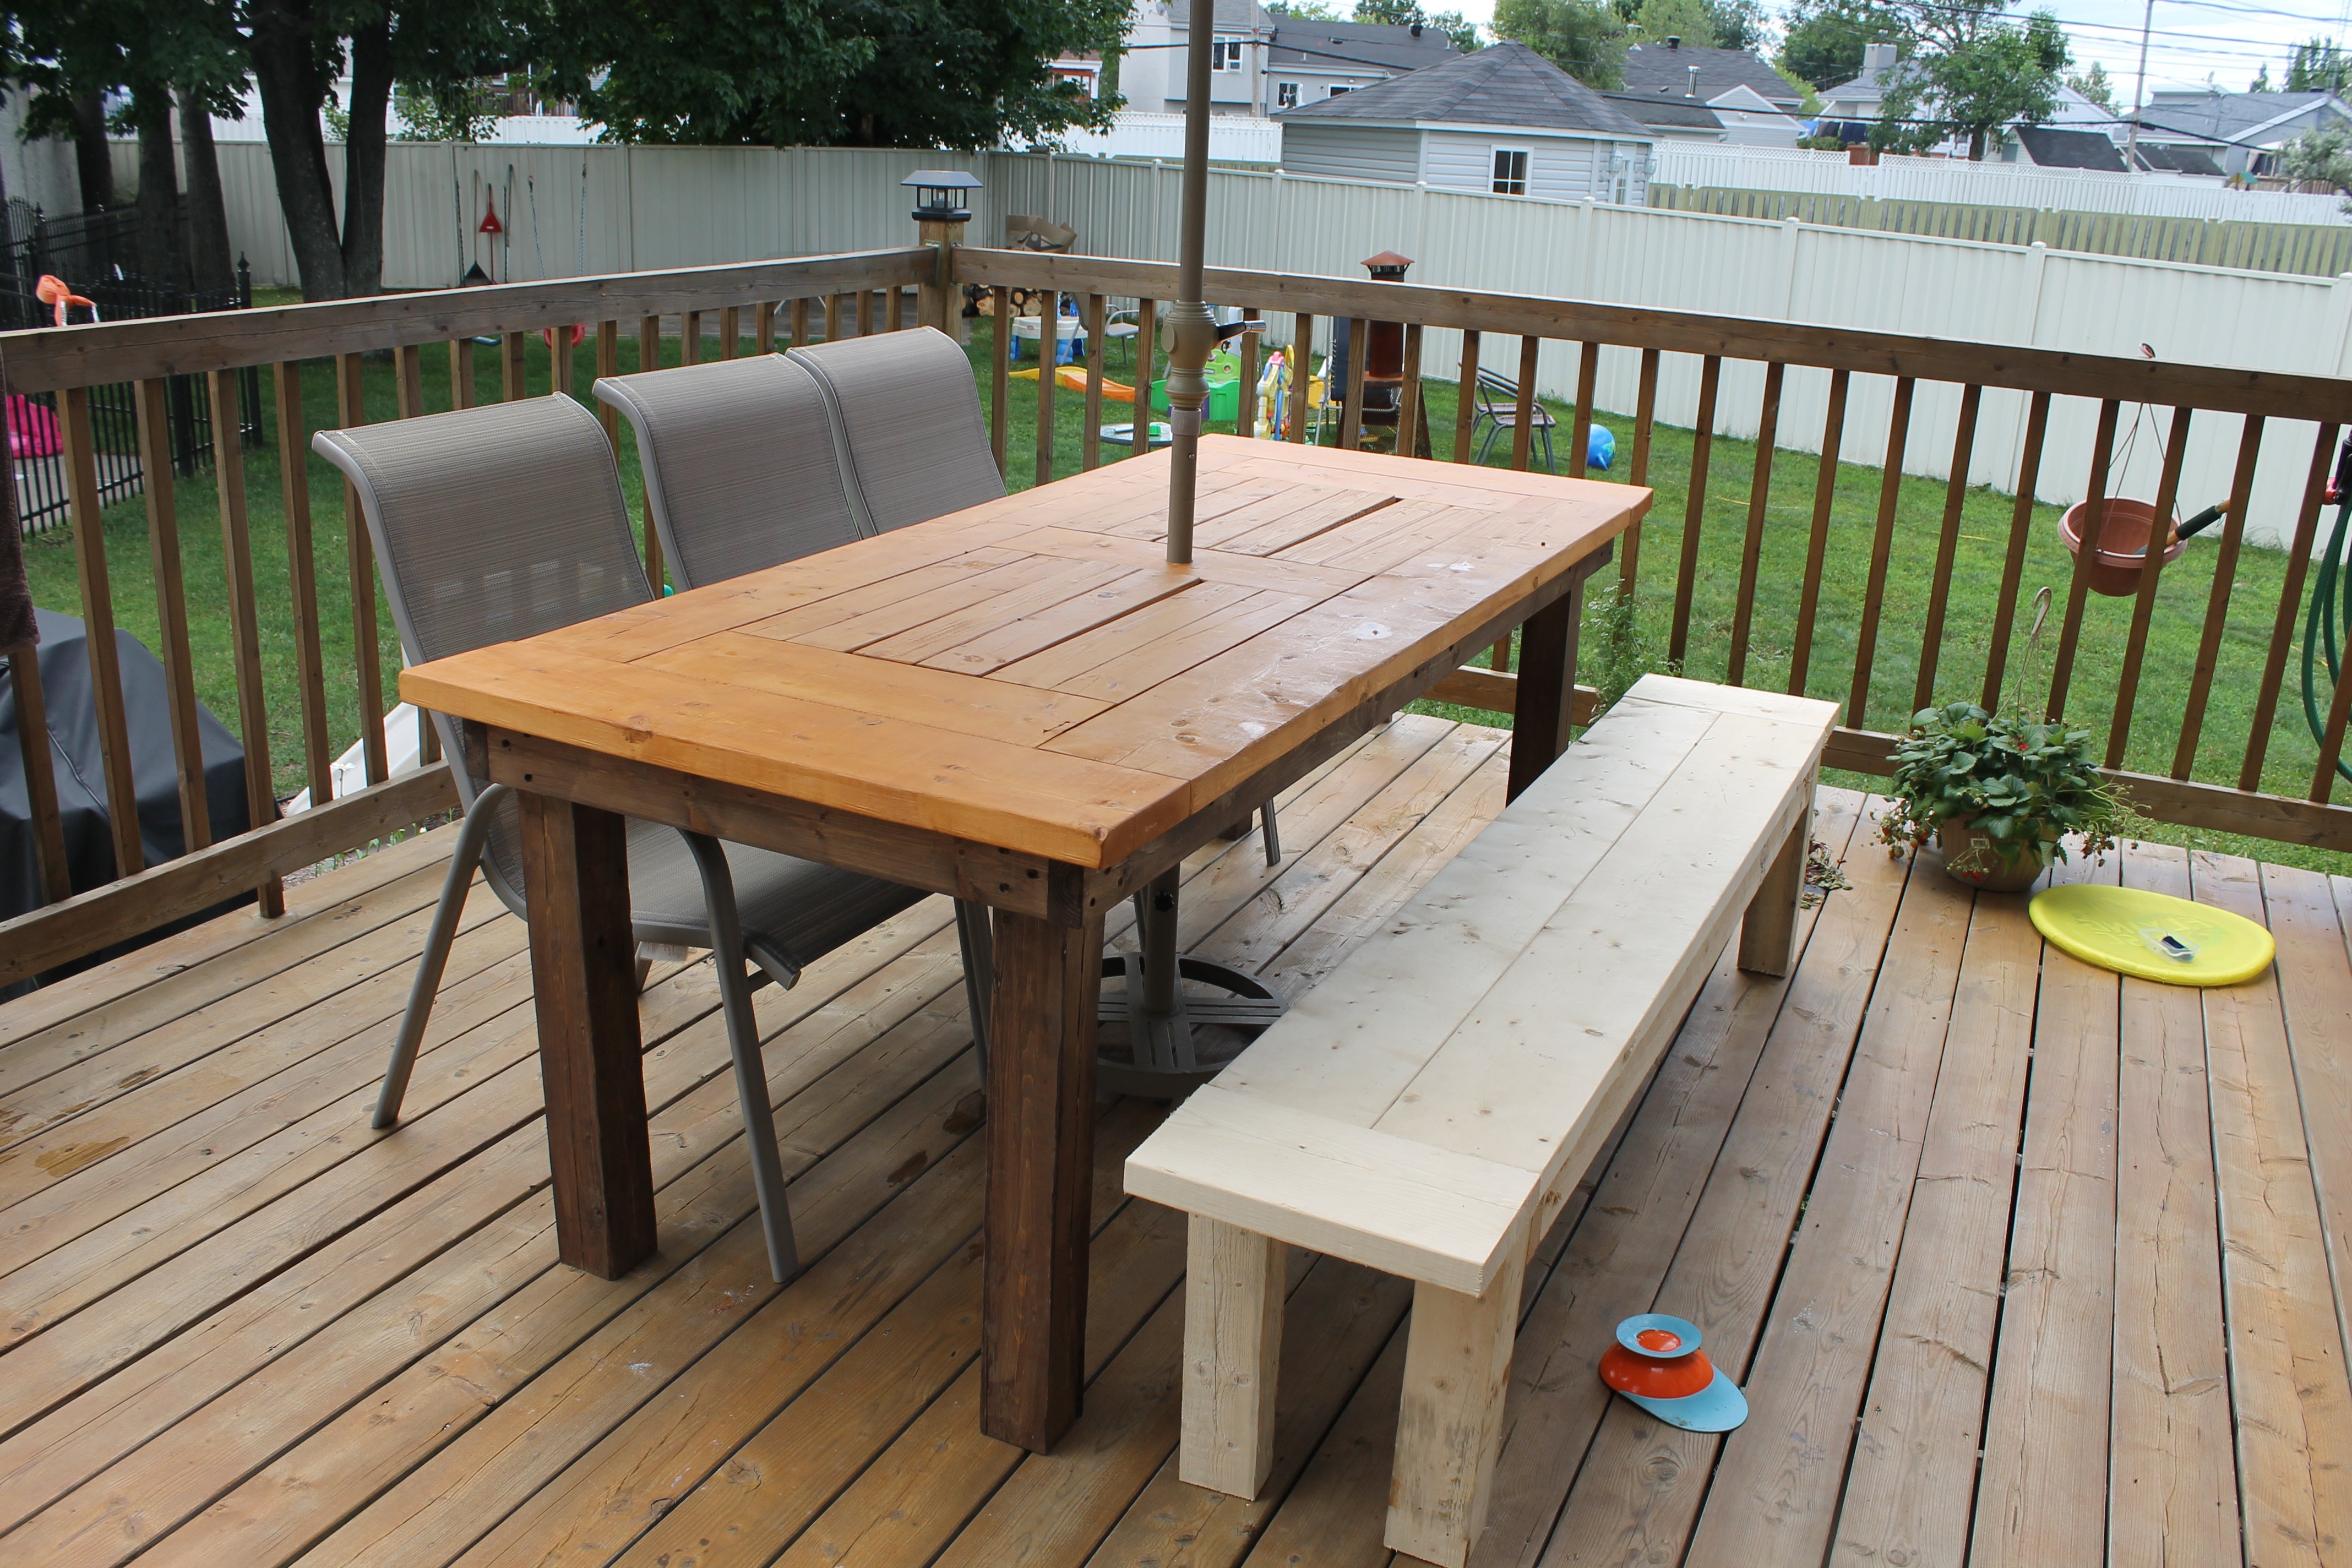
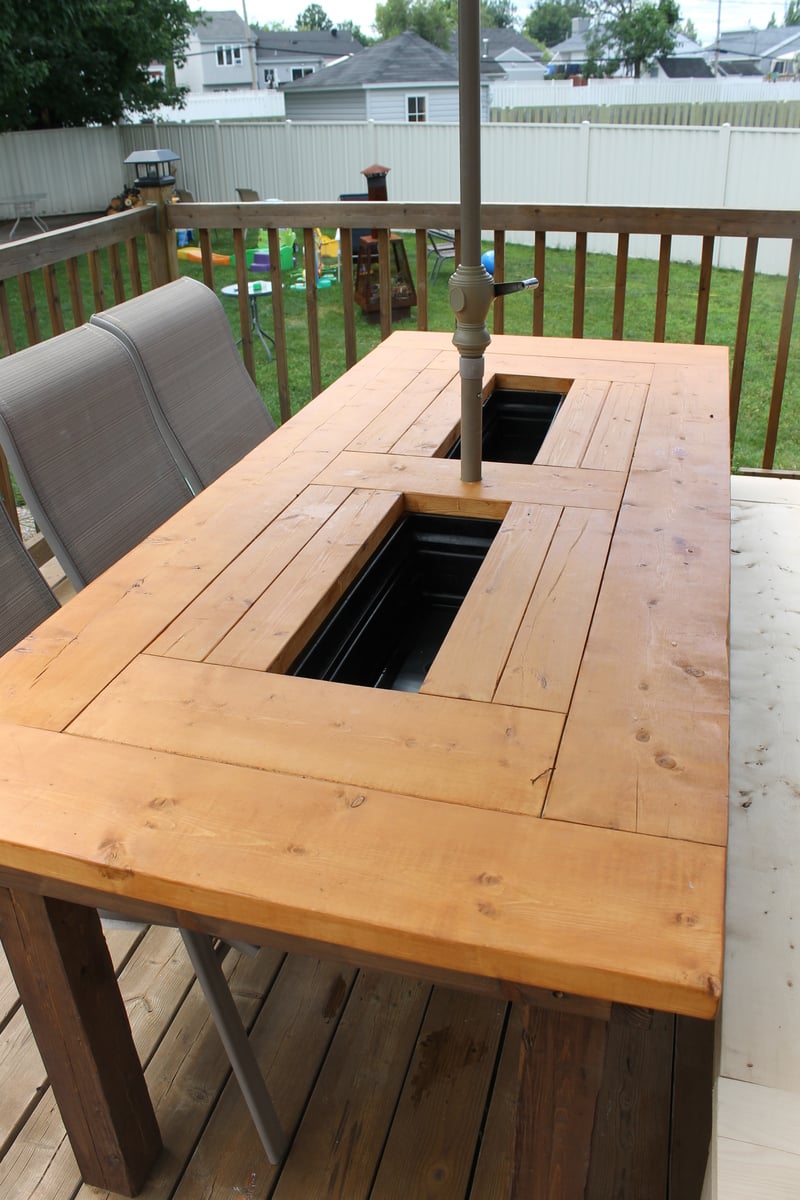
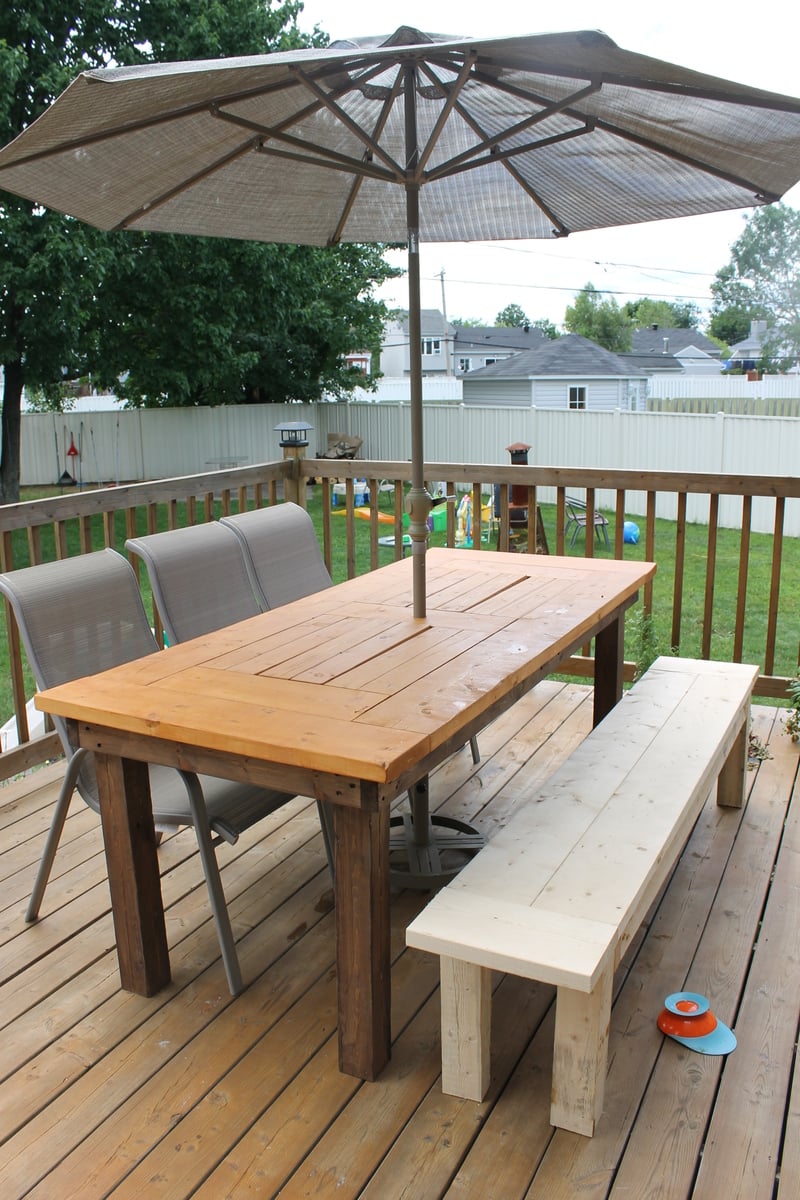
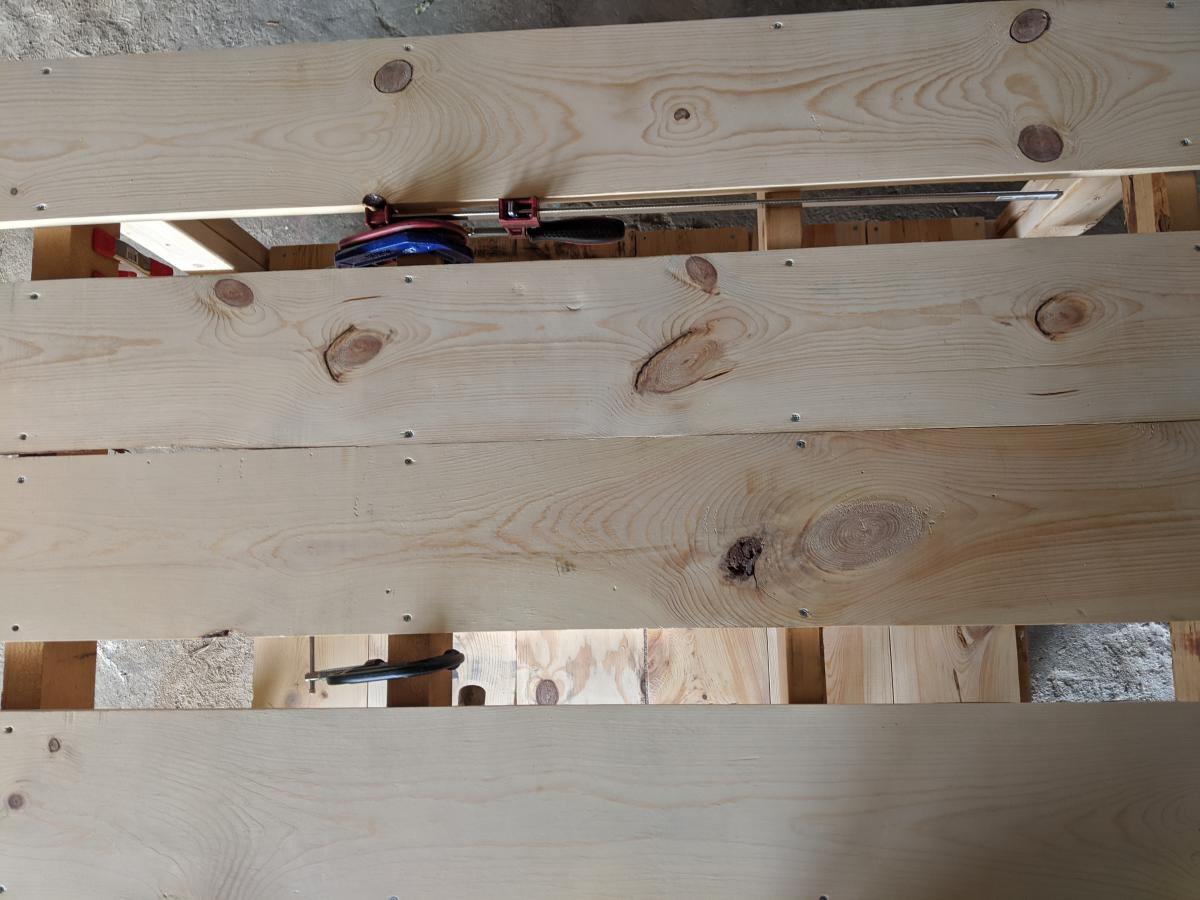
My wife and I were looking for a larger table for our deck and after searching and seeing that everything out there was 300 dollars and up for something decent I decided I would try building something. This table was perfect for our needs and looked easy enough for me to put together. The most time consuming part was staining all of the boards as I went but it was totally worth it in the end. I also deviated from using screws and used my nail gun along with some glue to put the top frame together and the slats on but I did use some 2inch deckmate screws to attach the legs. One problem I did run into was I was about half a board short on the slats which wasn't a big deal just ripped one on the table saw, not sure if I miss measured or what but either way. We love our table and will entertain around it for years to come.

Built from Plan(s)
Estimated Cost
Around 80 Dollars
Estimated Time Investment
Day Project (6-9 Hours)
Finish Used
I used a Behr deck stain that was solid the color is called Russett and I did with a 3inch brush.
Recommended Skill Level
Beginner

Outdoor Daybed with Canopy

This was an awesome, quick, and easy project. The sanding, staining, and drying, took forever for me but the actual cutting and assembly was super quick. I have this on an uncovered patio and my local store didn't carry cedar in the sizes I needed so I went with the cheapest wood I could find and used a high quality oil based outdoor stain. I am hopeful it will hold up to our pacific NW winter because it won't be coming in. Considering I had never made anything before and had never used a miter saw, sander or quick square, I am happy with the time it took to finish this.
 

Built from Plan(s)
Estimated Cost
$150 for lumber, screws, stain, and glue
Estimated Time Investment
Weekend Project (10-20 Hours)
Recommended Skill Level
Starter Project

Umbrella Stand (in PVC)

Submitted by lewg on Tue, 06/10/2014 - 18:29

Great plans, Ana! I swapped out the wood for PVC trim, and used stainless steel screws to hopefully make this thing weatherproof.

Built from Plan(s)
Estimated Cost
$80
Estimated Time Investment
Day Project (6-9 Hours)
Finish Used
None. The PVC comes white, and I wanted a white table!
Recommended Skill Level
Intermediate
Seasonal And Holiday

Channing Bookcase

Submitted by Anonymous (not verified) on Tue, 09/13/2016 - 09:47

Stained with Minwax Jacobean. Thank you for the plans!

Built from Plan(s)
Estimated Cost
$200 per bookcase
Estimated Time Investment
Weekend Project (10-20 Hours)
Finish Used
Minwax Jacobean and Semi-gloss Poly
Recommended Skill Level
Intermediate

Chick Brooding Cabinet for Quail

My family has started raising quail recently and I built their first home while they were still in the incubator. I have never done any wood work before, so this turned out much nicer than I expected! I followed the suggestion of having the brooder part on the top instead of the bottom and omitted the extra shelf. Two 5-gallon buckets fit nicely below the chicks. Since the quail are so small when they hatch, I used 1/4 inch hardware cloth for the "floor" but it wasn't long before that was too small so we had to change it to 1/2 inch. I am going to make a tray with each size of hardware cloth on it to make it easier to change out for next time, because they really do need both sizes.

Built from Plan(s)
Estimated Cost
$75
Estimated Time Investment
Weekend Project (10-20 Hours)
Recommended Skill Level
Intermediate

Surfboard bench

Modified the sofa design and created a surfboard bench

Estimated Cost
£30
Estimated Time Investment
Afternoon Project (3-6 Hours)
Finish Used
Dark Oak woodstain

Reclaimed Wood Look Headboard

Submitted by JenMash on Mon, 09/03/2012 - 12:49

My husband and I had been looking for a great headboard for a bed in our guest room. We found ones we really liked but didn't like the price tag of 800-1500 dollars (not even including shipping!) We stumbled on this site and absolutely fell in love with the reclaimed wood style headboard. It was exactly what we were looking for. Building it just took a few hours. After we distressed the wood using a chain I found at the hardware store (only $1.60), a drill, a creme brulee torch and a hammer, we prepped the wood (sanded and primed), stained and clear coated. I highly suggest not only vacuuming off the wood but also using a tack cloth (so cheap but it makes such a difference) to make sure all of the dust was off. We bolted the headboard into the bed frame. It will be heavy but it is really sturdy and looks great! A good tip is to decide early what you want the front to be - you can chose the best sides of the wood that way!

Estimated Cost
150.00
Estimated Time Investment
Afternoon Project (3-6 Hours)
Finish Used
We prepped the wood using Minwax pre-stain wood conditioner. We then applied Minwax Provincial stain, waited about 10 minutes and wiped it off with a t-shirt. After we let it dry for the allotted time (we rushed it a bit but were so excited about the new headboard) and then put on a clear-coat finisher.
Recommended Skill Level
Beginner
Seasonal And Holiday

Play Kitchen

Submitted by keribeth on Tue, 09/04/2012 - 12:36

I combined the play sink and play stove into a one-piece kitchen by having them share a side. I found a bathroom faucet at my local Habitat ReStore for $15 (and that included a sink I didn't even need!). Time investment does not include painting. Here's my cost breakdown. Lumber: $25 (I used some scraps.) Faucet: $15 Dog bowl: $7 Hardware: $13 Primer and paint: $19 Screws: $4 Sandpaper: $5 Plexiglass: $3 Prepping dinner while my toddler works in his play kitchen beside me: Priceless.

Estimated Cost
~$90
Estimated Time Investment
Day Project (6-9 Hours)
Finish Used
Cheap white paint. It dripped like crazy and took forever to dry. My mantra was "It's a toy, it's a toy, it's a toy."
Recommended Skill Level
Intermediate

Comments

PATIO TABLE WITH BUILT-IN BEER/WINE COOLERS

Submitted by Joagirard on Fri, 07/04/2014 - 21:05

My sister was in love with my 4x4 truss table i made and needed a patio table so we decided to take one day to make 2 tables, one for each. We convinced both daddys to take care of the kids while we made the table by telling them the tables were gonna have beer coolers inside! Attaching the to of the table was a lot a job. If you plan of doing this you really want to have a kreg jig. It works well, we love it. I made a bench to go with it. I made my how plan for it.

Estimated Cost
200$
Estimated Time Investment
Weekend Project (10-20 Hours)
Finish Used
Sico outside wood stain color oak. 3 coats for the top and 3 coat sico chocolate for the bottom. All applied with a brush.
Recommended Skill Level
Intermediate

Beautiful Outdoor chairs and Ottoman from 2x4s and 2x6s (and a 2x2)

The chairs were my first project ever and they came out great! I even made the ottoman/side table because the chairs looked so good. Ana, your plans were fantastic and easy for a beginner. I learned so much from this first project and I'm already working on another project from your site! The cushions were definitely the most expensive part of the chair.

Estimated Cost
$40-$50/chair (without cushions) including screws, wood and stain
Estimated Time Investment
Afternoon Project (3-6 Hours)
Finish Used
Behr semi-transparent stain and sealer (Chocolate) as noted in Ana's project plans.
Recommended Skill Level
Beginner

Bedroom to walkin closet

Submitted by Jonesey on Fri, 11/18/2016 - 21:55

Bedroom conversion to walk in closet.

Inspired by Ana White we turned a spare bedroom into a walk in closet.  We ripped up the old carpet, polished the concrete floors and built over 30 feet of custom closet.  We also added two shoe racks and a linen closet.  The shelves are 90" tall and that enabled us to double up on the hanging pipe.

Thanks to all here on Ana White for the inspiration!


Estimated Cost
$800
Estimated Time Investment
Week Long Project (20 Hours or More)
Finish Used
Clear polyurethane
Recommended Skill Level
Intermediate

Comments

Workbench

Submitted by MaryL220 on Mon, 08/24/2020 - 21:20

I needed a legit workbench and I had a bunch of wood to use up. I got a bunch of 1x8x6s from my local hardware store's scrap pile. There's a reason they were free... But I couldn't just toss them. I used all scrap, from the hardware store, my garage, and my brother-in-law's farm, except 3 2x4s that I bought new.

For this workbench, I used slats on the top and the bottom shelf. The frame is 2x4s. I had some idea I could use the space in between the slats to cut wood, but after adding 2in casters, it appears it might be a bit too tall. Even still, the spaces in between the slats make for excellent clamp storage.

And now I finally have a legit, mobile workbench to keep all my chaos somewhat contained.

Estimated Cost
$50-75
Estimated Time Investment
Afternoon Project (3-6 Hours)
Finish Used
None. I sanded the whole thing down to reduce the splinters but didn't feel that my workbench needed anything else.
Recommended Skill Level
Beginner

Modified Industrial Style Coffee Table w/ Bottom Shelf

Submitted by danandbeth on Wed, 12/28/2016 - 08:36

Our first project!


We used the "Industrial Style Coffee Table as seen on DIY Network" plans and simply added a bottom shelf. This required an extra 2x2 bracer (same cut as top bracer) and 8 more 1x4s, cut slightly smaller than the top 1x4s in order to have them sit flush with the bottom 2x2s. The table is all pine.


We spaced the bottom shelf boards roughly a half inch apart (give or take - it's "rustic"!) and screwed in from the bottom just like the top boards. 


On the top shelf, we used 3 coats of Minwax Natural stain, and followed up with 3 coats of Minwax Satin Poly. We sanded these after attaching to the frame in order to achieve a level surface. We started with 80 grit, then 120, then 150. We then used 220 in between coats of poly. The result is a smooth, but not store-bought smooth surface, which we think works well.


We didn't spend as much time on the bottom shelf since they'll be mostly storing items, giving them just a quick 150 sand prior to 2 coats of stain and 2 coats of poly. Finally, we nailed in some plastic feet to keep it about a half inch off the floor.


All in all, being our first project, and going beyond what the original plans called for, it took us a few weeks to complete, working on it mostly on weekends and here and there in the evenings after work. We love the finished project and it works really well in our living room!


-Dan and Beth

Built from Plan(s)
Estimated Time Investment
Week Long Project (20 Hours or More)
Finish Used
Natural Stain (Minwax)
Satin Poly (Minwax)
Recommended Skill Level
Beginner

Christmas Tree Shelf

Submitted by Anonymous (not verified) on Mon, 01/02/2017 - 05:48

Ana, Thank you so much for the plans for yoru Christmas Tree Shelf. My niece is a huge fan of the Christmas all year round and now that she has her own place it was a perfect fit. I edited the bottom area so it woudl be able to sit on a table, she is currently in an apartment and does not want to attach much to the walls. Added the boards in the back of the two compartments so it can later be hung, and also predrilled holes in the shelf bottoms in order to crew in eye hooks to hang ornaments from if she likes.


CtL

Built from Plan(s)
Estimated Cost
$15
Estimated Time Investment
Weekend Project (10-20 Hours)
Recommended Skill Level
Beginner

Rustic X Console

Submitted by Anonymous (not verified) on Sat, 09/12/2020 - 17:58

I built this to use as a dessert table for my wedding. Stained with Early American and finished with semi-gloss polyurethane. Can’t count how many complements I’ve received!

Built from Plan(s)
Estimated Cost
$100
Estimated Time Investment
Weekend Project (10-20 Hours)
Finish Used
Early American/semi-gloss oil based polyurethane
Recommended Skill Level
Intermediate

Pull-out Shelves

Stationary shelves are such a hassle, especially in a deep pantry cabinet! Now I can actually SEE the contents of my pantry cabinet. Thanks for the inspiration and tutorial to get it done!

Estimated Cost
$50 for 5 shelves & framing, new hinges.
Estimated Time Investment
Day Project (6-9 Hours)

Comments

DIY Bathroom Cabinet with Epoxy Vanity Top

Submitted by thediyplan on Sat, 10/17/2020 - 17:16

When you remodel your bathroom, you are breathing fresh life into your home. There are plenty of ways you can remodel your bathroom. Recently the vanity and cabinets are fast becoming the highlight of bathroom renovations. In this tutorial, I will show you how to make your own DIY Bathroom Cabinet with Epoxy Vanity Top. Check out my website for more details and photos TheDIYPlan

Also, See my other recent projects

Estimated Cost
150
Estimated Time Investment
Weekend Project (10-20 Hours)
Recommended Skill Level
Intermediate

Comments

Back