Community Brag Posts

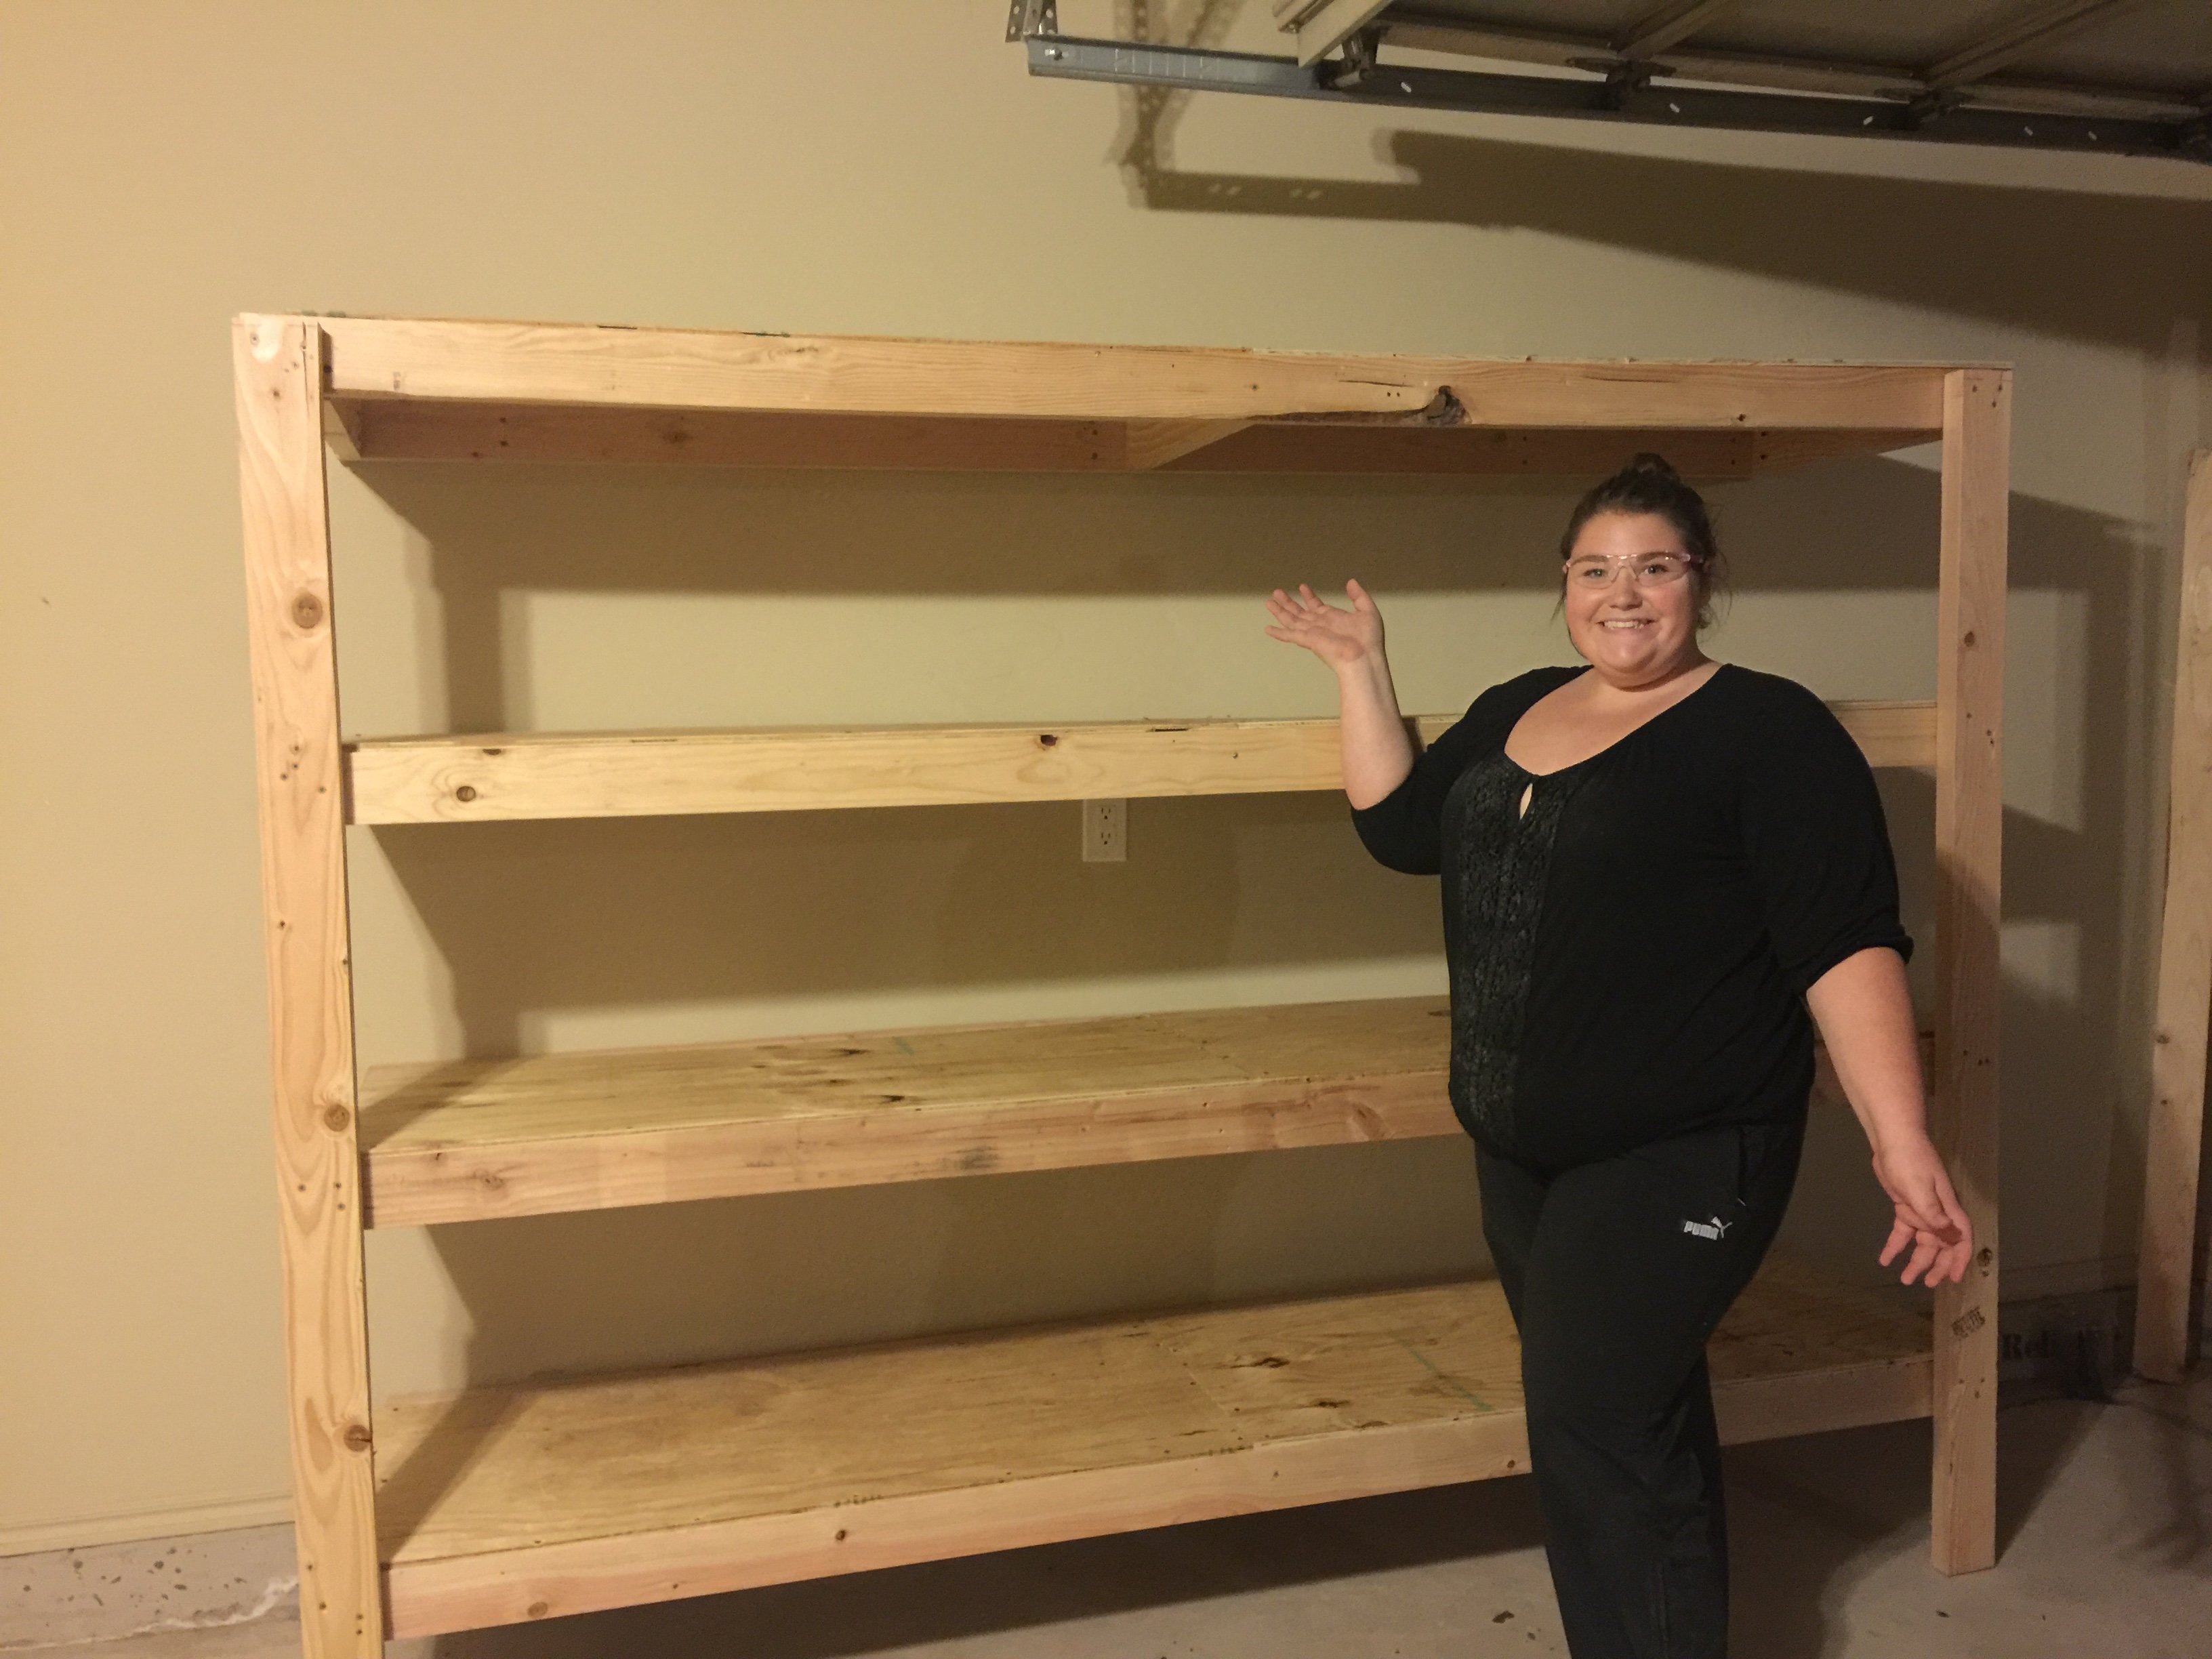
Very easy garage shelving

Submitted by Anonymous (not verified) on Sat, 11/05/2016 - 23:22

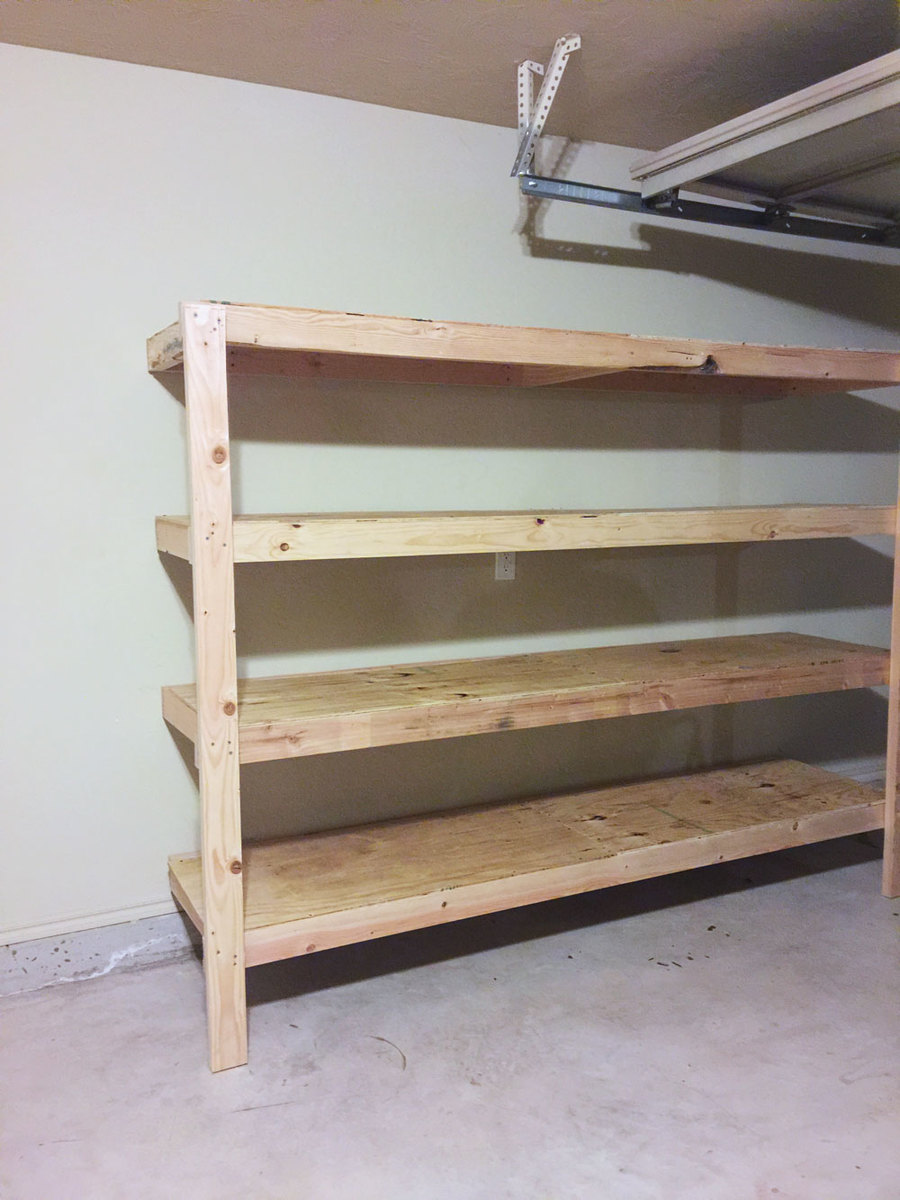
Wanted some easy storage shelving that didn't break the bank.  These were perfect!  $79 is what it cost for ours (which includes the $20 Kreg Jig).  Lumber was only $58.68 and I bought and extra 8 foot 2x4, so it could have been slightly cheaper!  

Estimated Cost
$60 for lumber
Estimated Time Investment
Afternoon Project (3-6 Hours)
Finish Used
Boxes, Totes, camping equiptment
Recommended Skill Level
Beginner

Murphy Bed - queen

Submitted by fielden_m on Mon, 10/08/2012 - 08:15

Taking the plans for the full sized Murphy bed (http://ana-white.com/2010/03/plans-a-murphy-bed-you-can-build-and-affor…) I added a few inches to convert to a queen and raised it off the floor 5 1/2 inches with removable fence post toppers.

The yellow head board lifts up and stores inside the frame when up. If I had it to do over again, I would sand and paint as I built. Thanks to Ana, I now have a guest room!

Estimated Cost
$150
Estimated Time Investment
Week Long Project (20 Hours or More)
Finish Used
wood was sanded, primed and painted
Recommended Skill Level
Intermediate

Comments

Cindy from Indiana (not verified)

Mon, 10/08/2012 - 11:13

Holy smokes! Great job! I just got my early birthday present - a Kreg Jig Master System!!! One of the first things I will be building is a murphy bed, so thank you for the inspiration.

It looks great!

nasrockswell

Wed, 04/24/2013 - 19:55

I love your adaptation of Ana's plans. Would you be willing to share the dimension for the queen murphy? Thank you!

fielden_m

Fri, 07/26/2013 - 18:51

I fudged the plans by adding to the width and height to make up for the change in bedding but also for the hinges and detachable feet. Measures will differ based on your hinges and feet.

vgb777

Mon, 04/29/2013 - 14:32

I am wondering what king of hinges you used for the bed. Did you use continuous (piano) hinges or regular door hinges? How wide are they? I am not sure what the acceptable width for the hinges is to be safe. Thanks.

fielden_m

Fri, 07/26/2013 - 18:47

I used 3 5" gate hinges. They are thick enough to leave a gap of 3/8" between my base and the part of the bed that swings down.

phelan1202

Wed, 06/12/2013 - 16:35

What were the altered measurements and exactly how did you raise it? I really like Anas plan except that the mattress was so close to the ground. I want to make this for my apartment and I'm painting the outside like a tardis. (:

fielden_m

Fri, 07/26/2013 - 18:50

I raised it 5 1/4 " using fence post toppers from home depot. The fence post toppers unscrew for upright storage. You could leave them in for a more dramatic look but I liked the cleaner lines with them out until needed

intrigued89

Sat, 11/02/2013 - 15:33

Would you be willing to share the dimensions you used when building your queen murphy? Even if they aren't exact, it would be such a big help to me!

rfpeterlin

Sat, 12/28/2013 - 03:33

That is definitely an attractive and well finished project. I am interested in how you finished the legs. I see in the second picture (bed in closed positions) where the toppers may have attached. Where do you store them?

fielden_m

Sat, 12/28/2013 - 22:56

In that same picture, if you look at the bottom 6 inches of the closed bed (under the hinge) there is a storage section where I hide the legs when the bed is raised. It is otherwise dead space and made for an easy storage conversion at the last minute.

Ben Childs

Sun, 01/10/2016 - 17:02

Can someone please help me I see this can be adjusted for a queen size bed. I don't know how to adjust the measurement to make it work. 

Ben Childs

Sun, 01/10/2016 - 17:04

Can someone please help me I see this can be adjusted for a queen size bed. I don't know how to adjust the measurement to make it work. 

Simple Modern Outdoor Sectional

This project my husband and I started together. We live in a very damp and rainy area where cushions would just be more of a pain than a comfort outside.
We decided to add slats on the back so the sectional would stand alone without cushions.

Well, after the first corner piece, I got busy and every day my husband would add another piece to it.

I did do much of the sanding and painting. We sanded and painted these before assembly, made life tons easier.

It was white pine with out exterior house paint color. We really love them!
Thank you Ana!!!

Estimated Cost
$170
Estimated Time Investment
Weekend Project (10-20 Hours)
Finish Used
Behr Exterior Paint and primer in one.
Recommended Skill Level
Beginner

Rustic Farmhouse Dining Room Table w/ Benches

Made a vintage/rustic farmhouse dining room table with matching benches. Fairly easy DIY job. The notches were the most difficult. Quite heavy, so I suggest using less 2x2 for under-table supports. Turned out beautifully and very happy with it.

Estimated Cost
200
Estimated Time Investment
Weekend Project (10-20 Hours)
Finish Used
Stain and polyurethane
Recommended Skill Level
Starter Project

Swinging Bench

Submitted by marchand on Sat, 09/13/2014 - 09:16

This bench is great! I was surprised how nicely it swings. I used rope with overhand loop knots to secure onto quick link hooks. Made it for my husband for his birthday but my whole family enjoys it daily!

This is my third project from Ana's website. I absolutely love to build and can't wait to do more! 


Estimated Cost
$100.00
Estimated Time Investment
Weekend Project (10-20 Hours)
Finish Used
Exterior semi-gloss white paint.
Recommended Skill Level
Beginner

A-Frame Chicken Coop

Submitted by winelass on Thu, 09/25/2014 - 07:59

We followed all the original plans and added a few modifications. Chickens seem happy! We dropped the height of the nesting box down a little and made the roof only cover half of the coop. We live in California on the central coast so it doesn't get too cold. We also only made one side of the nesting box able to be opened. We added a little door on the bottom level with left over t 1-11 for easy access to their food and water and in the hopes that eventually we will let them roam our yard supervised during the day.

All in all the project cost us about $150 and took 4.5 hours to complete! Thanks for the great plans!

Built from Plan(s)
Estimated Cost
$150
Estimated Time Investment
Afternoon Project (3-6 Hours)
Finish Used
None
Recommended Skill Level
Starter Project

King Easy Build Bed - Headboard / Footboard

Submitted by imsomark on Wed, 02/08/2017 - 07:26

First of all, thank you to the site for this plan. The headboard specs were spot on. I was interested in making a footboard as well, and you actually will end up with a few scrap pieces that will help you build the footboard (the 1x3's and 1x2's). My footboard ended up being about 23 1/4" high. For reference, the mattress in the photo is 10". I included a picture of the total boards you will need to buy to do the headboard, footboard, and side rails (I used 8 inch boards for the side rails, not 10 inch, but those could be interchanged). One thing to note is the plan calls for pocket hole screws but these are not necessary. I used 2" brad nails, 1 1/4" brad nails, and 2" screws (for the slats and the support rails on the slats. You could use 2 1/2 inch for the slats but the support rails need 2".). Not included in the picture I included is another 2x4x8 that I bought that I placed three scrap 4x4 posts that I had under the middle of the slats for extra support. I also bought steel bed rail fasteners ($11.30 from Amazon) to attach the side rails to the headboard and footboard. They worked great and the bed is extremely sturdy. Can't budge it at all. I used the common whitewood boards from Home Depot, which are all the correct width - the fur boards are cheaper but are not the correct width, you would need to adjust the plans if you were to use those. Overall I am very pleased with the bed. Please ignore the half dozen water bottles in the photo.

Estimated Cost
$190
Estimated Time Investment
Weekend Project (10-20 Hours)
Finish Used
75/25 mixture of Classic Grey and Jacobean.
Recommended Skill Level
Intermediate

Comments

Workbench

Submitted by Anonymous (not verified) on Wed, 02/15/2017 - 10:44

Great beginner project. I needed minimal help from my husband. Everyone in the family now wants a bench like mine. Thanks a bunch for the easy to follow plans. Love your website! 

Estimated Cost
$75.00
Estimated Time Investment
Afternoon Project (3-6 Hours)
Recommended Skill Level
Beginner

Farmhouse Console Table

Submitted by Anonymous (not verified) on Sat, 12/05/2020 - 11:13

I built this console table modeled from other diy plans on the Ana White website. The construction took 1 afternoon, but the project start to finish was 3 days to allow time for finishing. The overall dimensions are 49”W x 16 1/2” D x 30” H.

Built from Plan(s)
Estimated Cost
$70
Estimated Time Investment
Weekend Project (10-20 Hours)
Finish Used
Minwax Pre Stain Conditioner
Verathane Brairsmoke Stain
Mini wax Satin Polyurethane
Behr Farmhouse White Chalk Paint
Behr Clear Finishing Wax
Recommended Skill Level
Intermediate

Comments

Two-Tone Adult Picnic Table

Submitted by Anonymous (not verified) on Sat, 02/25/2017 - 09:30

I wanted to make a black and brown picnic table, this one turned out really nice and it gets a lot of compliments.


I, also, reinforced the 2x6s used for the seats by boxing in 2x4s underneath.  I just cut 4 53" (probably could have been 54" honestly) and mounted them to the bottom of the seats and screwed them into the seat cross members.  This should keep them from flexing.

Estimated Cost
9 2x6 - 8' - $40,
9 2x4 - 8' - $30,
Screws - $25 (headlok and kreg),
8 cans of paint - $35,
(already had sand paper),

Total $130
Estimated Time Investment
Weekend Project (10-20 Hours)
Finish Used
8x valspar project perfect paint + primer Gloss Black (1 coat)
8x valspar color radiance paint + primer Dark Gloss Toast (1 coat)

I will probably also put a clear coat on it to help protect it some
Recommended Skill Level
Beginner

Comments

2 twin sized beds

Submitted by Anonymous (not verified) on Mon, 12/14/2020 - 12:35

I submitted this build under anonymous on accident. Please assign it to my profile when posting if possible. Thank you.

Comments

Basement Play Gym

Submitted by Anonymous (not verified) on Fri, 01/08/2021 - 05:51

With Christmas approaching and the realization that my three young boys had way too much “stuff”, I enrolled the help of my dad to build this amazing basement play area. When I found Ana’s plans for the play gym with monkey bars, I knew we were in business. I modified the design to fit our space and we were off. Such a fun build and my boys absolutely love spending time down there. Thanks so much for your continued inspiration and the confidence you give us mamas to build with the big boys, Ana!!

Estimated Cost
$1000
Estimated Time Investment
Week Long Project (20 Hours or More)
Recommended Skill Level
Intermediate

Comments

Kitchen Island with pallet wood

Submitted by Anonymous (not verified) on Sat, 01/23/2021 - 19:35

After following Ana Whit and other bloggers for a long time i figured my skills were at a level to try an advanced build like the Kitchen Island.. But i also wanted to challenge myself even more and was determined to make it from as much reclaimed wood as i could, mainly pallet wood.
With a lot of modifications to make it work i think I got a good result from these plans.

While i used as much reclaimed wood as i could, i still needed some clean 2x4's , 2x2's

Built from Plan(s)
Estimated Cost
$50
Estimated Time Investment
Week Long Project (20 Hours or More)
Finish Used
I burned the top and used a cup wire brush on an angle grinder to get the effect of barn wood. then a couple coats of lacquer on the top. And a spray finish of polyacrylic for everything else.
chalk pain ( linin) to do the White wash
Recommended Skill Level
Advanced

Rustic X Console Table

This console table was exactly what I wanted! We changed the measurements and made it a little smaller to fit in the corner of the room. My brother built this table for me and he was able to build it in 2 hours. The directions were easy and informative. Thank you so much Ana! I love your furniture!!!

Built from Plan(s)
Estimated Cost
The total cost including lumber and stain was $160.00.
Estimated Time Investment
Afternoon Project (3-6 Hours)
Finish Used
I used Milk Paint in the color "Curo" but watered it down to use as a stain.
Recommended Skill Level
Beginner
Seasonal And Holiday

Mudroom Lockers

Submitted by suzanx on Tue, 03/19/2013 - 17:45

I saw a brag posted by jaimecostiglio (mudroom locker and bench unit) and really wanted to build one for my mudroom! I didn't extend the bench out as far out as her original plan but there is still plenty of room to sit and put shoes on. We are a family of 4 but I built 5 lockers. Kind of wish I had built 6 because my husband is occupying 2 (one for his regular coat/jacket and the other for his motorcycle gear - so not fair).

Anyway, we love it and everyone who visits are amazed that we built it from scratch! This was our very first building project and it took a while because we wanted to make sure it was perfect. It's actually screwed into the wall so it will most likely stay with the house if we ever move.

Estimated Time Investment
Week Long Project (20 Hours or More)
Recommended Skill Level
Intermediate

Comments

LisaMarie

Sat, 03/30/2013 - 14:29

I am looking forward to building one of these, too. Yours looks great! I would definitely unscrew it and bring it with me with a move!:)

arausch

Sun, 06/23/2013 - 17:50

can you help direct me to the plans for this locker unit? I see the username of an original poster but can't seem to find the post. A URL would be much appreciated. Thanks in advance and nice work!

Lisa0820

Thu, 12/03/2015 - 09:55

Can someone please send or direct me to the plans for this unit?

Thanks

Lisa

Beautiful planters!

Submitted by Anonymous (not verified) on Wed, 05/17/2017 - 17:32

I made 2 for my bare front patio

Built from Plan(s)
Estimated Cost
$38 for 2
Estimated Time Investment
Afternoon Project (3-6 Hours)
Finish Used
None yet
Recommended Skill Level
Beginner

Zach's new desk

Submitted by dinifam on Sat, 04/13/2013 - 13:28

I built this desk so my son would have a place for his old school tv and to do his homework! It was super easy and I love how the finish came out! His room is a huge work in progress but this is the first step:)

Built from Plan(s)
Estimated Cost
20.00 as I had scraps and finish supplies
Estimated Time Investment
Afternoon Project (3-6 Hours)
Finish Used
I sprayed the bottom with satin black paint The top I painted white then sanded it down with 80 grit and rubbed on then rubbed and wiped minwax poly espresso stain until I got the look desired. Easy!!!
Recommended Skill Level
Beginner

Oversized X end tables

Submitted by Anonymous (not verified) on Thu, 06/01/2017 - 13:12

From the rustic X end table plan, I made mine slightly taller and a little more narrow to fit my space.  Also decided to do a chevron top

Built from Plan(s)
Estimated Time Investment
Weekend Project (10-20 Hours)
Finish Used
grey paint (Anonymous from Behr) on the bottom, fruitwood stain on the wood top
Recommended Skill Level
Intermediate

“American Girl Dollhouse”

Let me start by saying all of the credit for building this beauty goes to my husbands super talented 90 year grandfather!! I found your plans a few years ago & instantly fell in love but sadly did not have the skills or confidence at the time to tackle such a project. Luckily “Pal” (aka hubby’s grandfather) so graciously jumped at the task & built this for my girls as their gift from “santa”! I recently gave the interior a complete DIY budget makeover & my girls are in love! With all of the wonderful memories they’ve created & will continue to partnered with the fact that I can eventually tell them their GREAT grandfather handmade this for them makes this that much more special! ❤️

Estimated Cost
$150
Finish Used
Painted White!

Comments

Outdoor Chairs

Submitted by Anonymous (not verified) on Wed, 07/12/2017 - 09:04

These were a fun build and pretty easy to put together.  Certainly need to pre-drill pilot holes or risk splitting your boards.

I contemplated putting a back rest on the chairs but didn't end up needing them due to close proximity to the walls.  Having the cut-list on hand was super handy as I just set a stop on my miter saw and was able to cruise through the cuts quickly.  

Estimated Cost
60 dollars for materials, not counting cushions and pillows.
Estimated Time Investment
Day Project (6-9 Hours)
Finish Used
Olympic Deck Stain (709 in color) semi-transparent. Likely will seal with a clear coat later.
Recommended Skill Level
Beginner