Norma's house
Almost done :)
Almost done :)
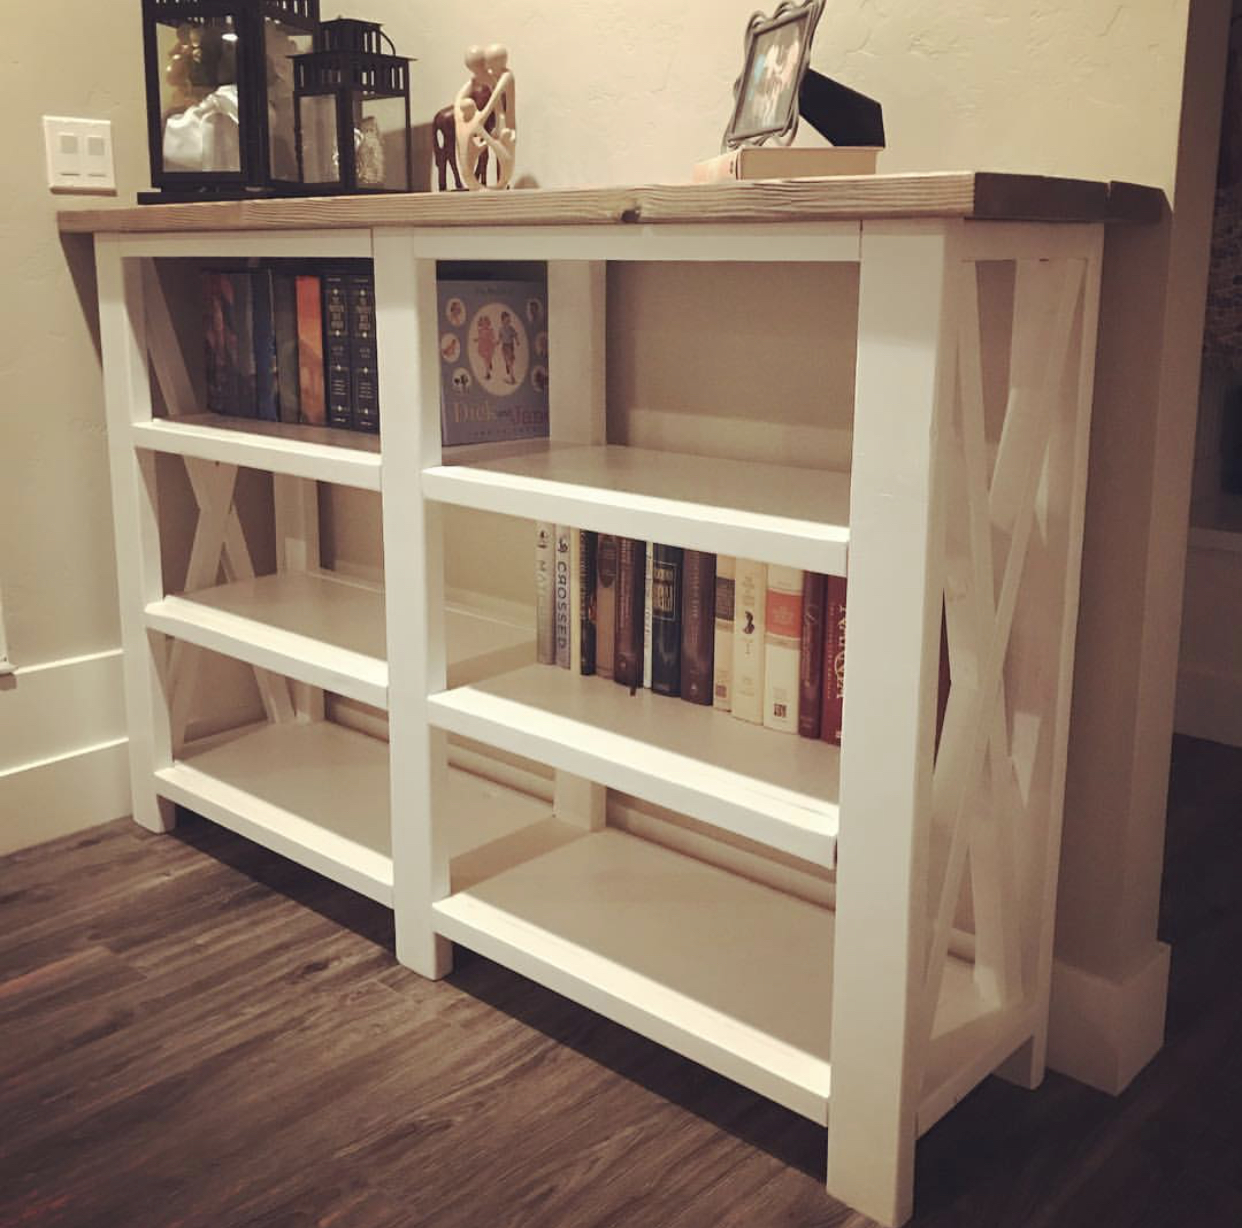
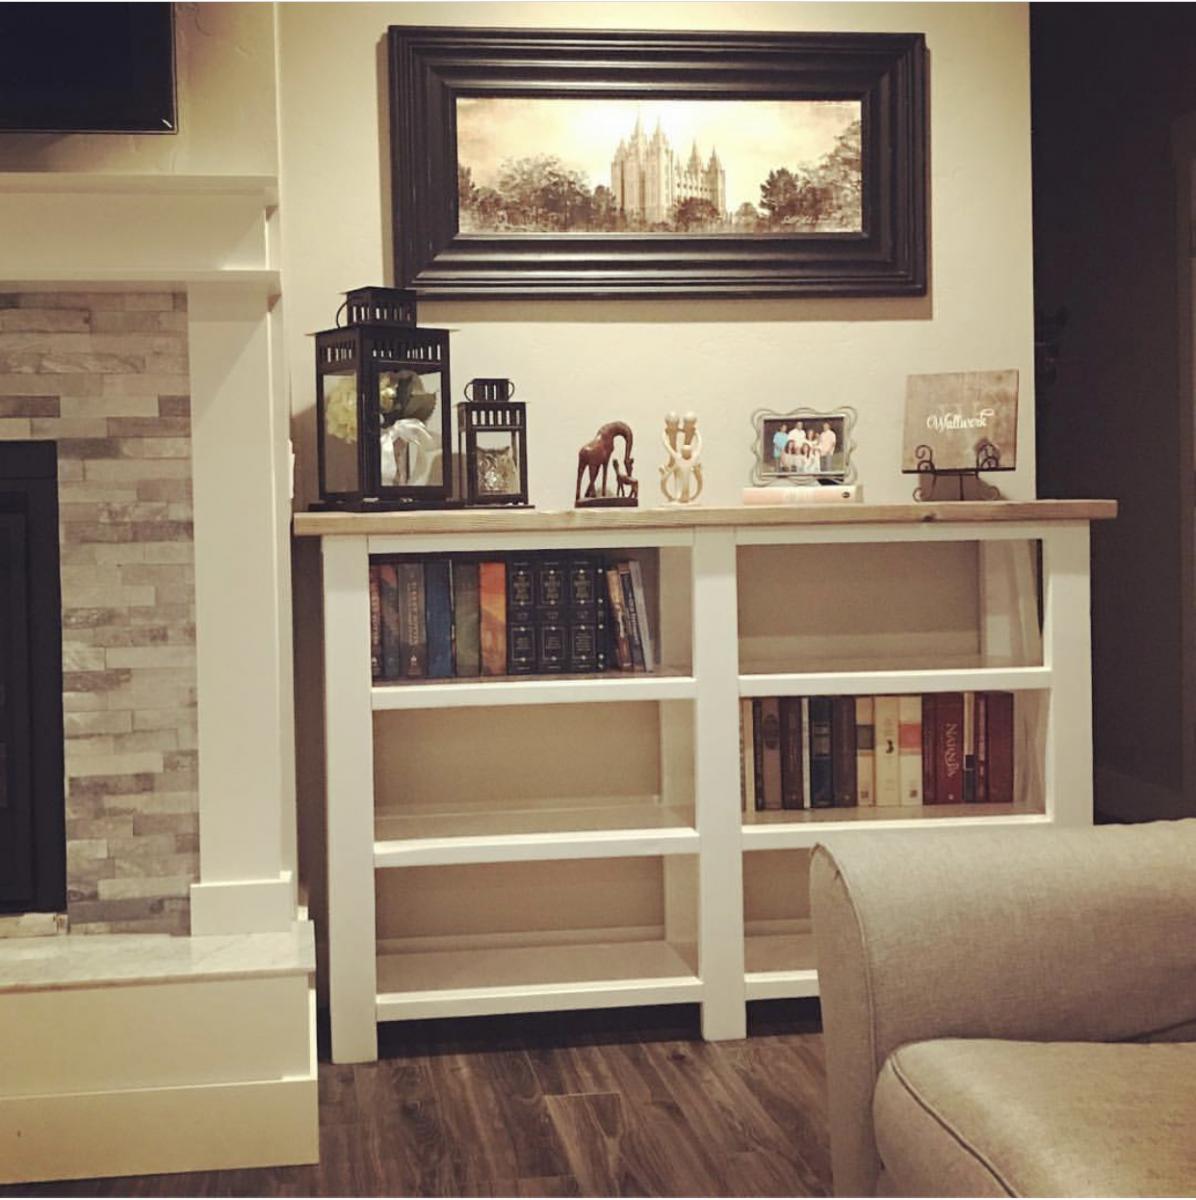
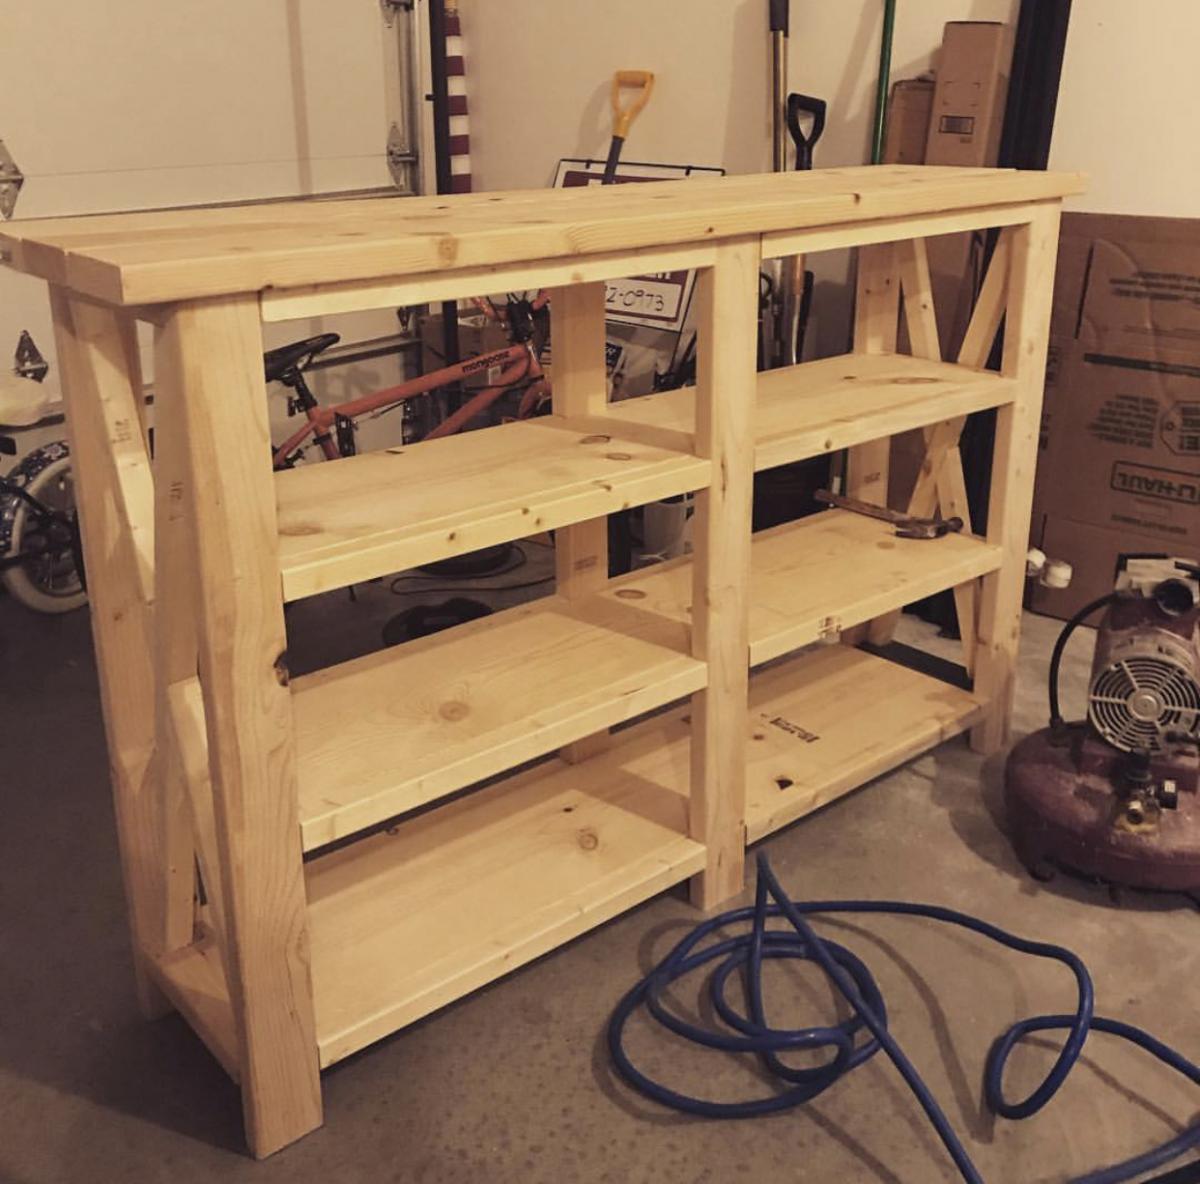
Wanted to make shelves to put on both sides of our fireplace but had to alter the dimensions. So I added another shelf and made it shorter in length. I was a bit nervous because I’ve always just built per the instructions. It turned out perfect! Just don’t look too closely at the X’s!
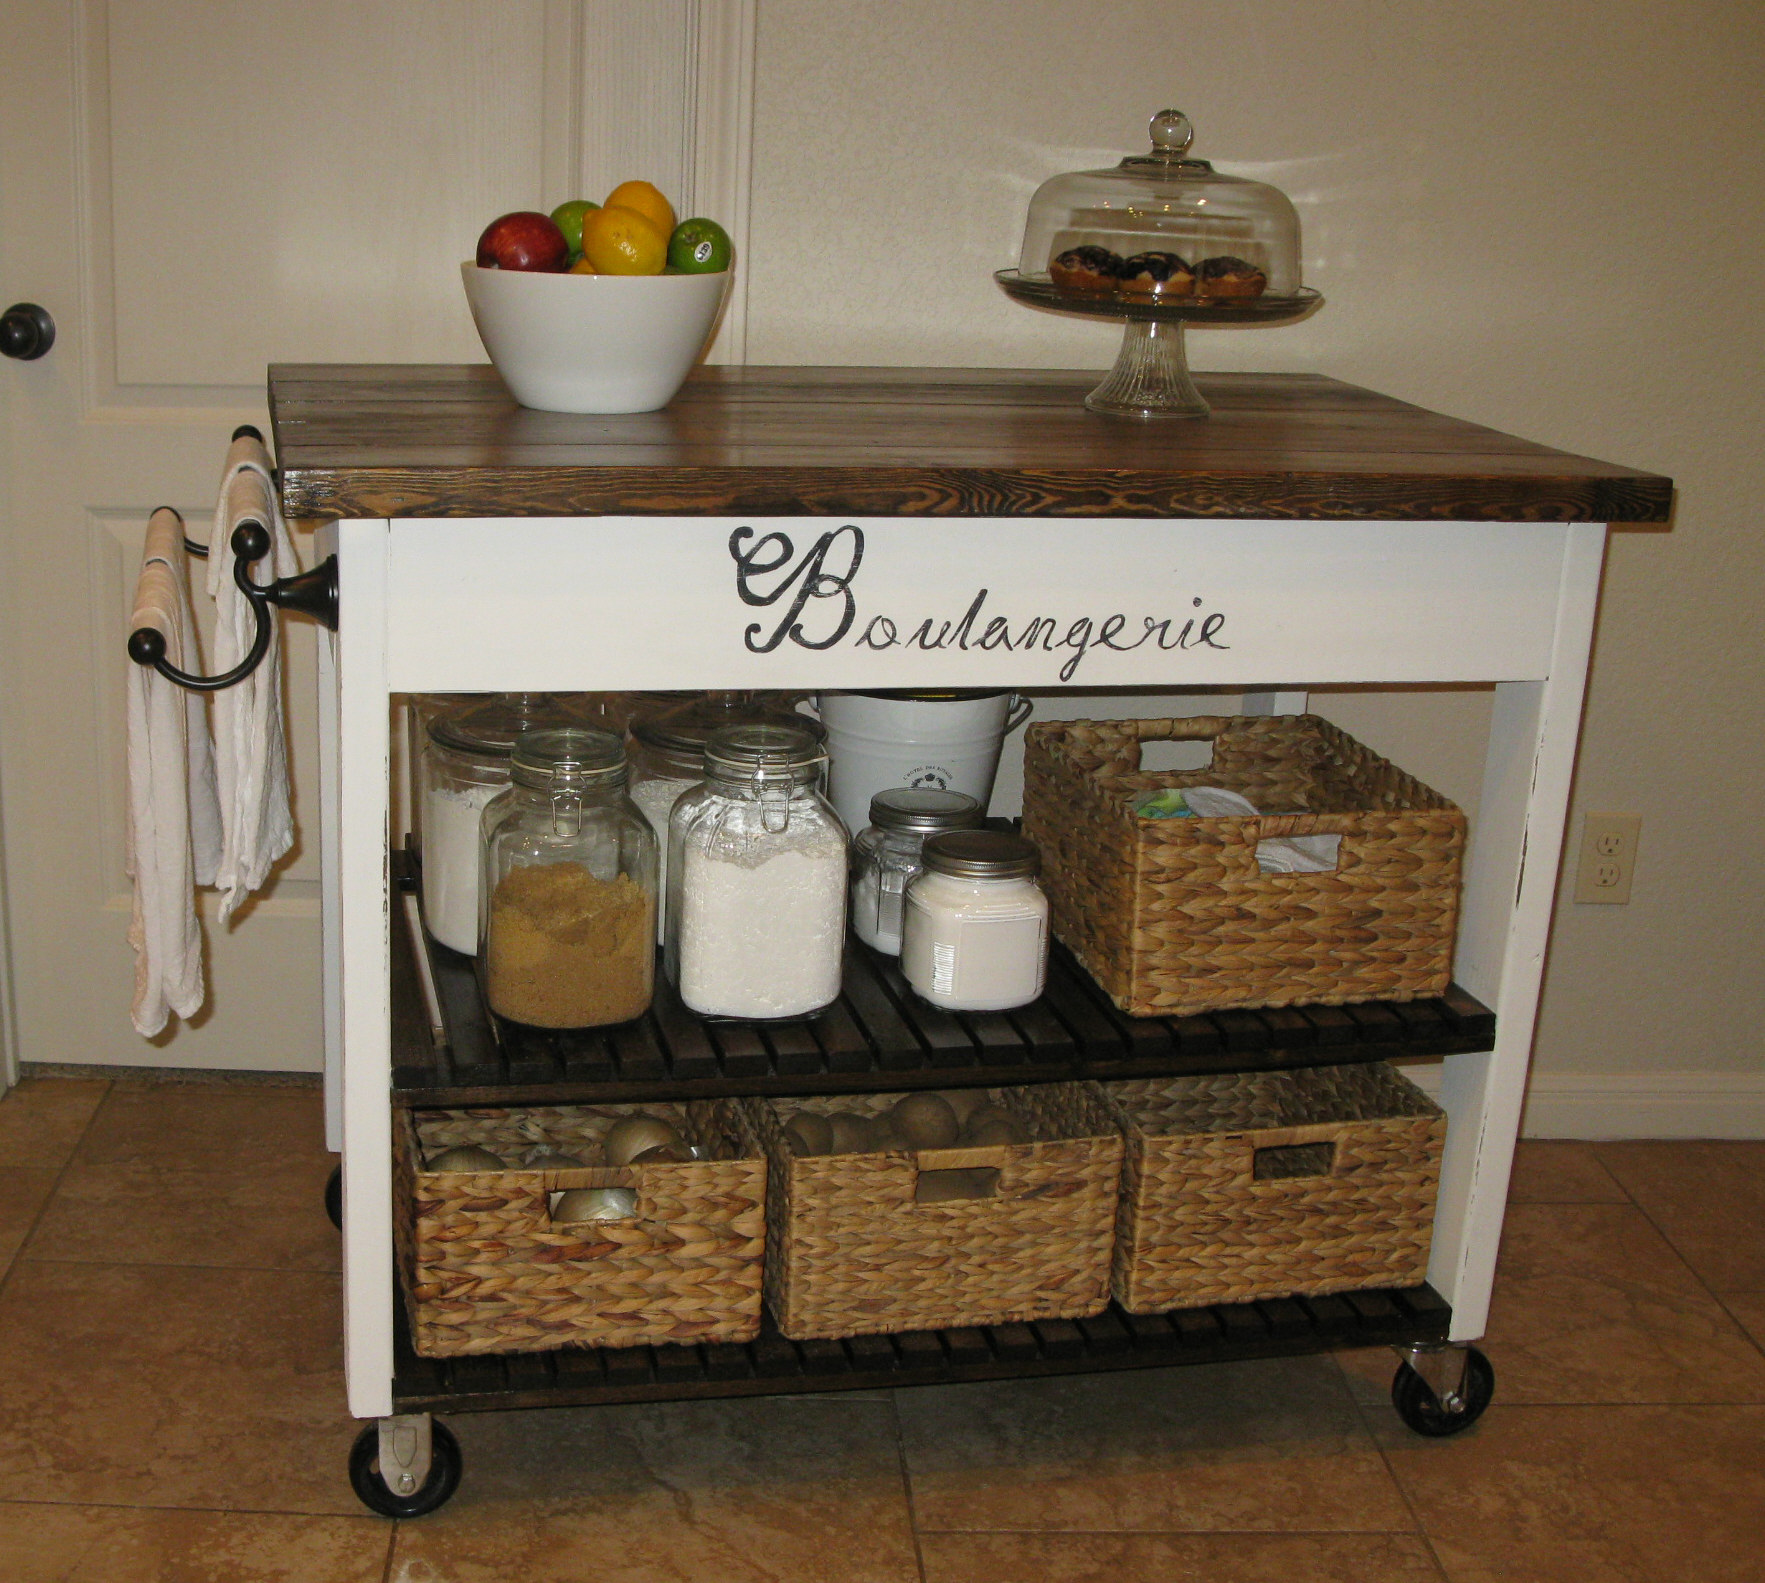
I needed mine to move so I added some castors to the bottom. It is my bakery cart! I also had hubby put a double towel rack on it for my flour clothes. Thanks so much for the plans! This is my first project and I loved doing it! Hubby got me the Kreg Jig and it was a breeze. I even used that for the top!!
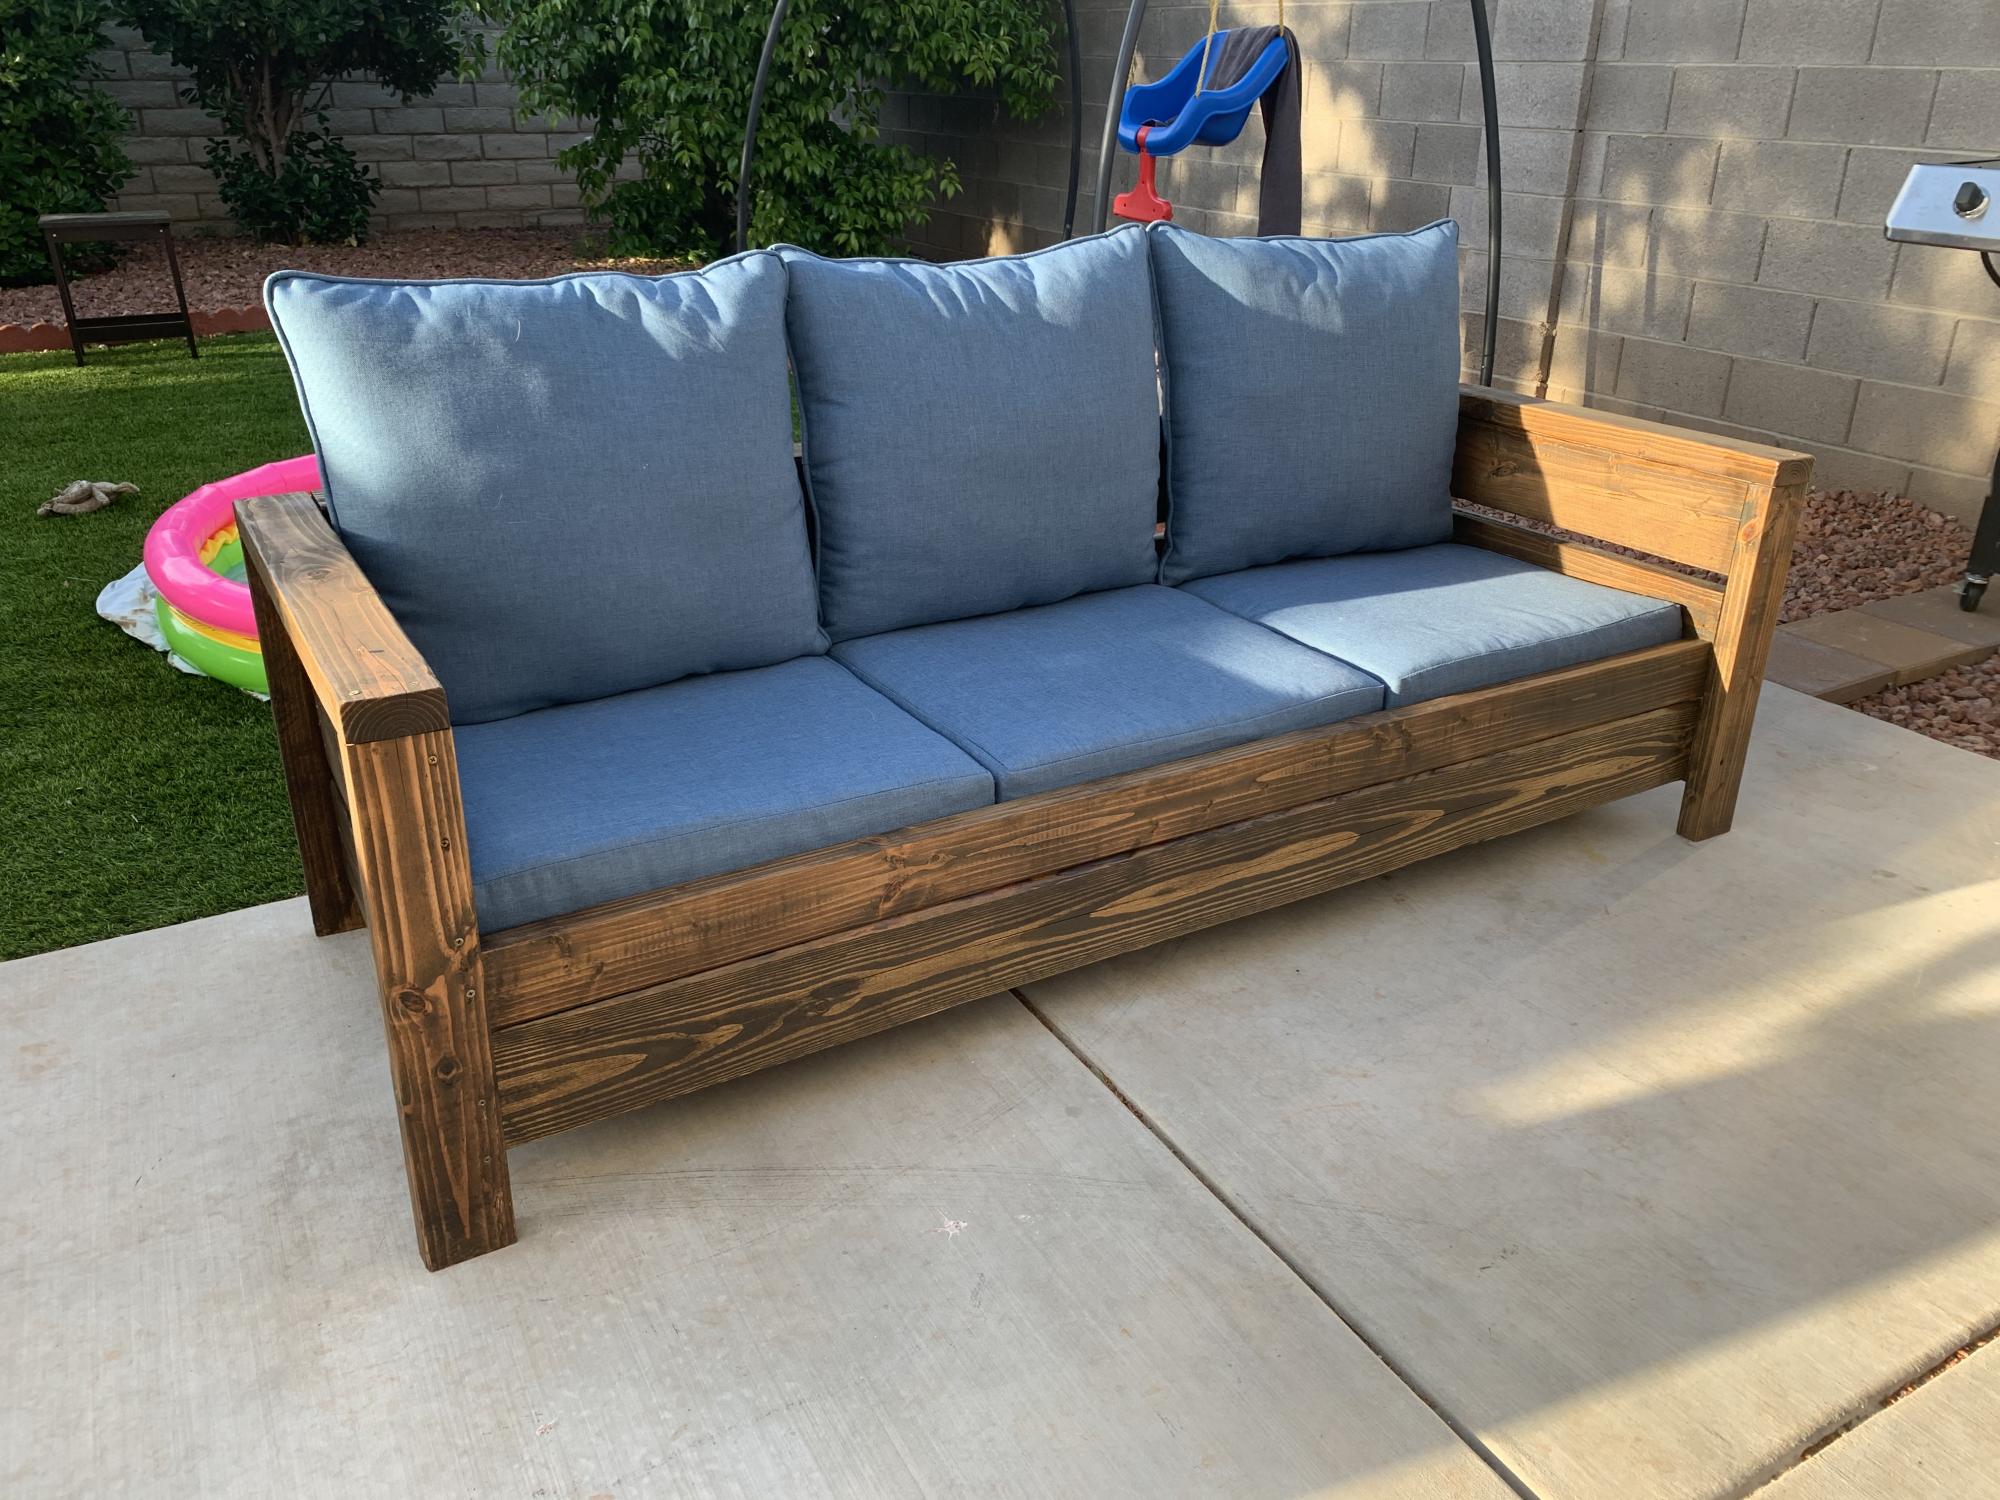
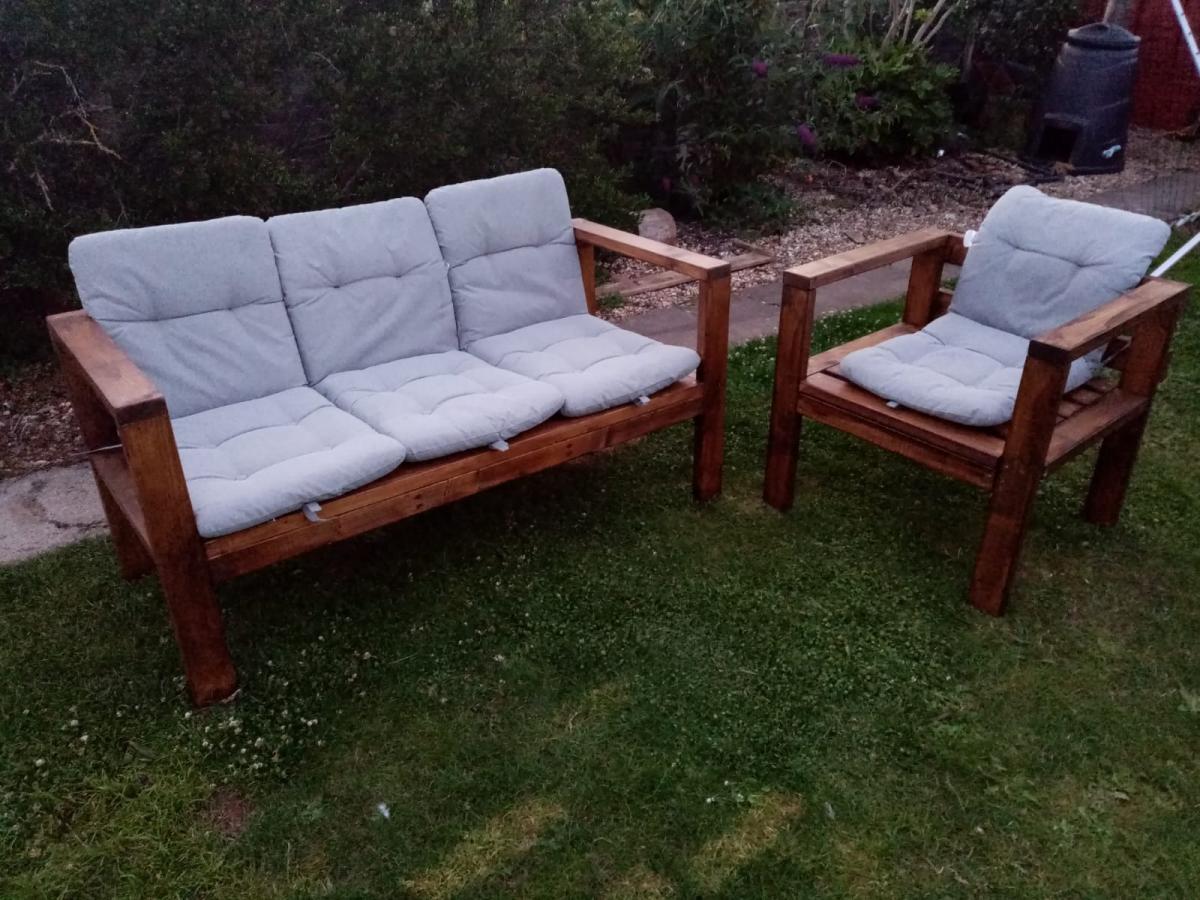
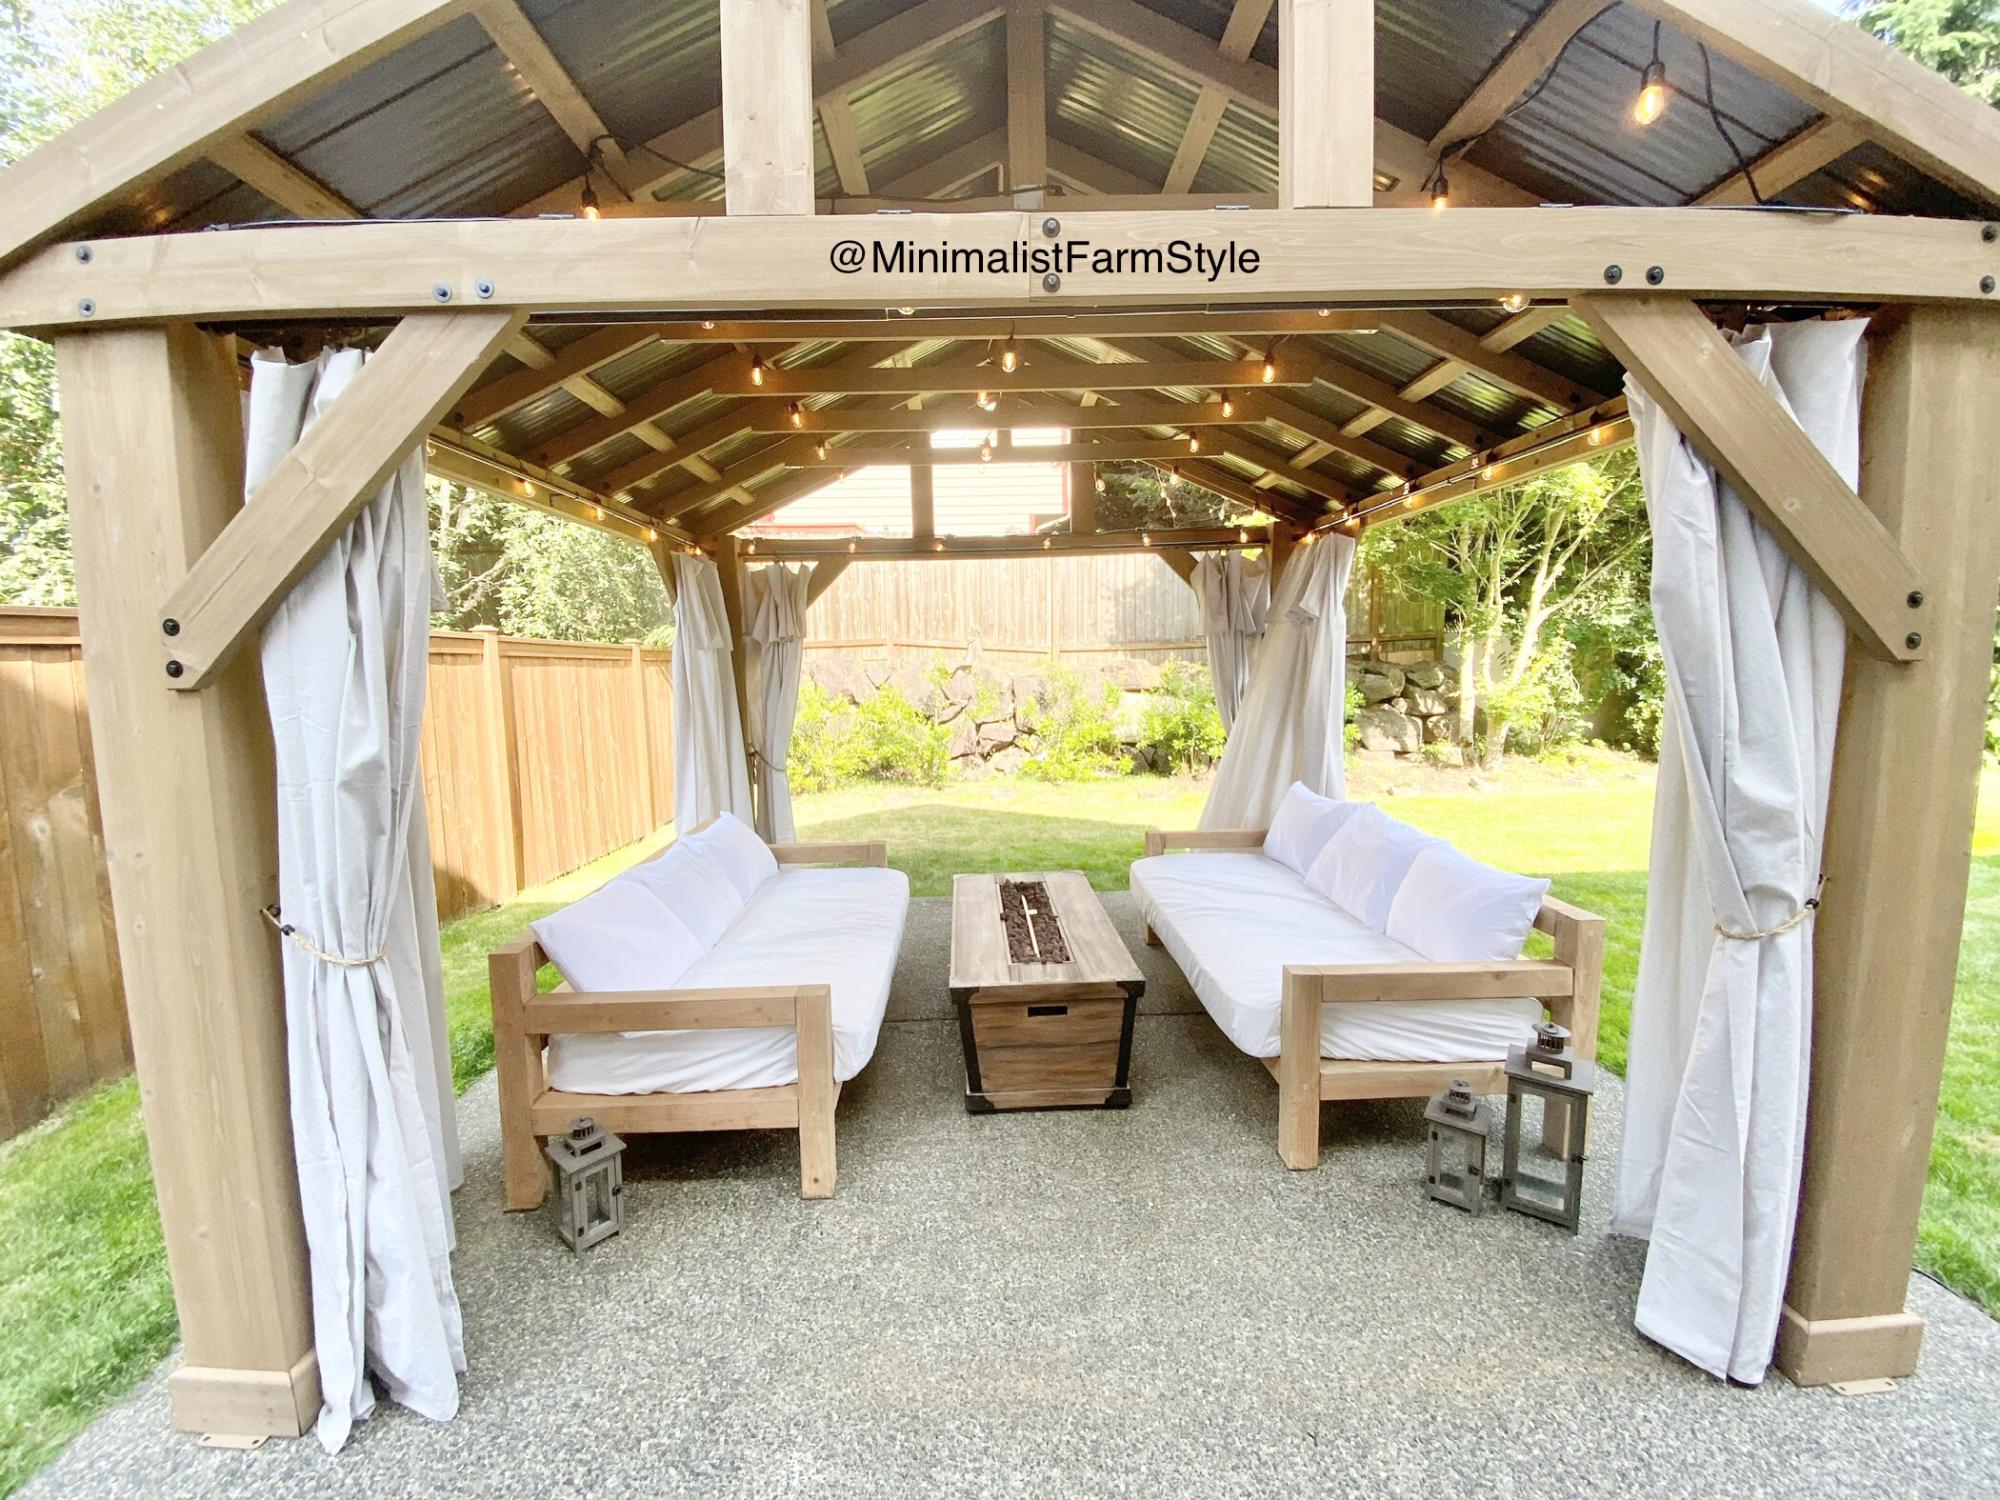
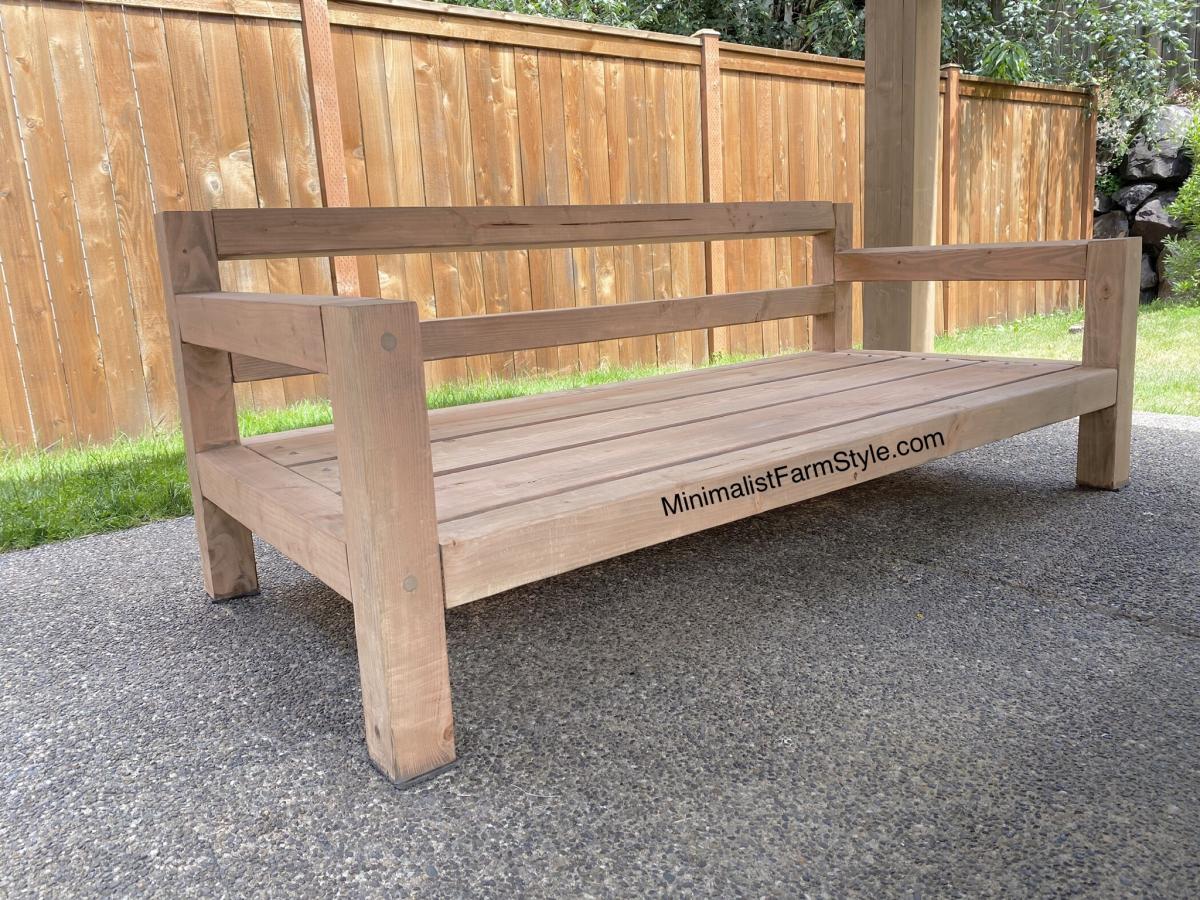
I used the Modern Outdoor Chair from 2x4s and 2x6s plans and slightly modified then to make a 3 seater couch. My cushions(most expensive part) were 24 in x 24 in and purchased from Lowes for $40 per seat. The couch is 79 inches in total length. I also dropped the seat down to the lower level to allow more room for my cushion backs to sit further down into the seat.


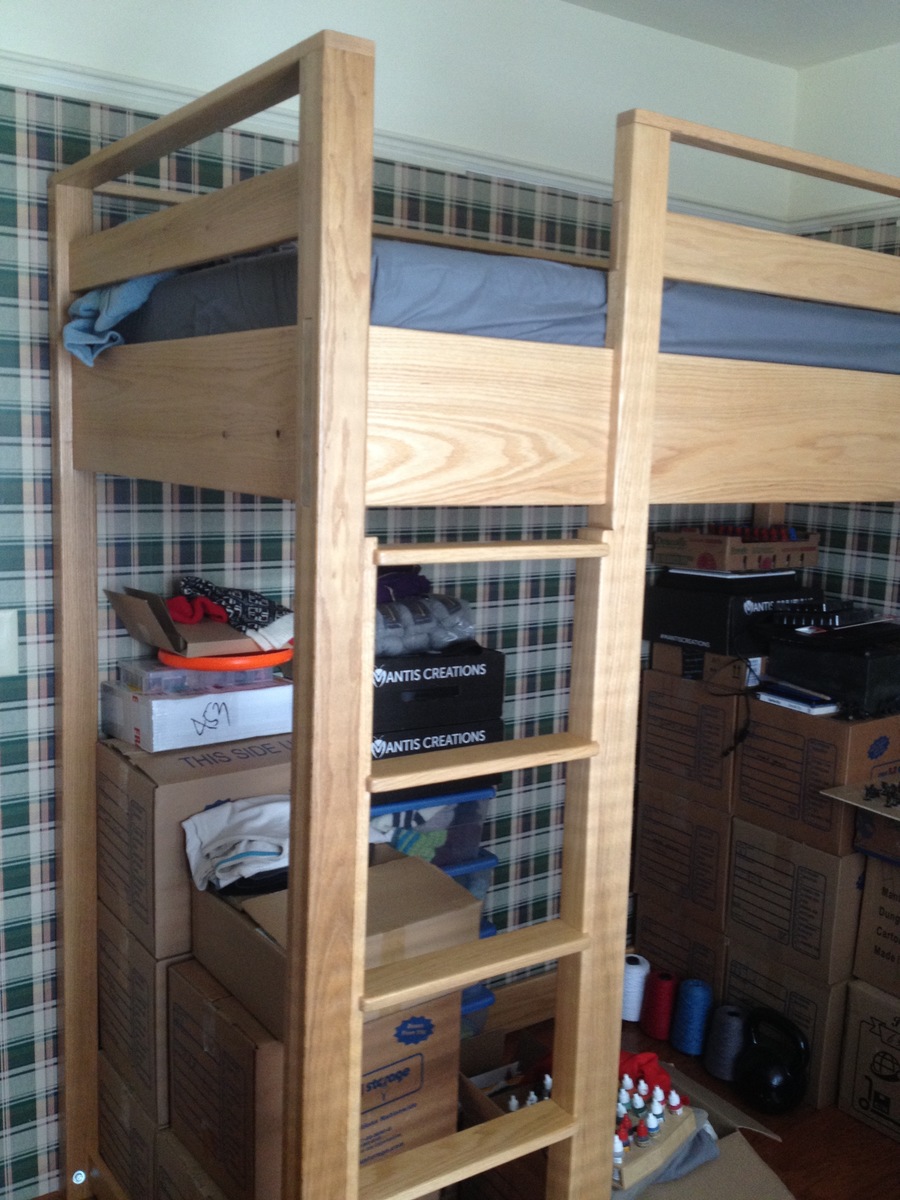
I needed to build a loft bed for a small room that has a nine foot ceiling, I wanted to have ample storage room below, but was concerned about a ladder that would stick out at an angle taking up a little too much precious real estate in the small room. Using Ana's great Sketch Up plans, I modified the design by incorporating a fifth leg as a permant addition to attach the ladder to. Part of the appeal of Ana's design was the ability to take apart the bed if it ever needed to be taken out of the room it is installed in, and the ladder became a part of the foot board end, perhaps a little unwieldy, but still able for two people to lift and move.
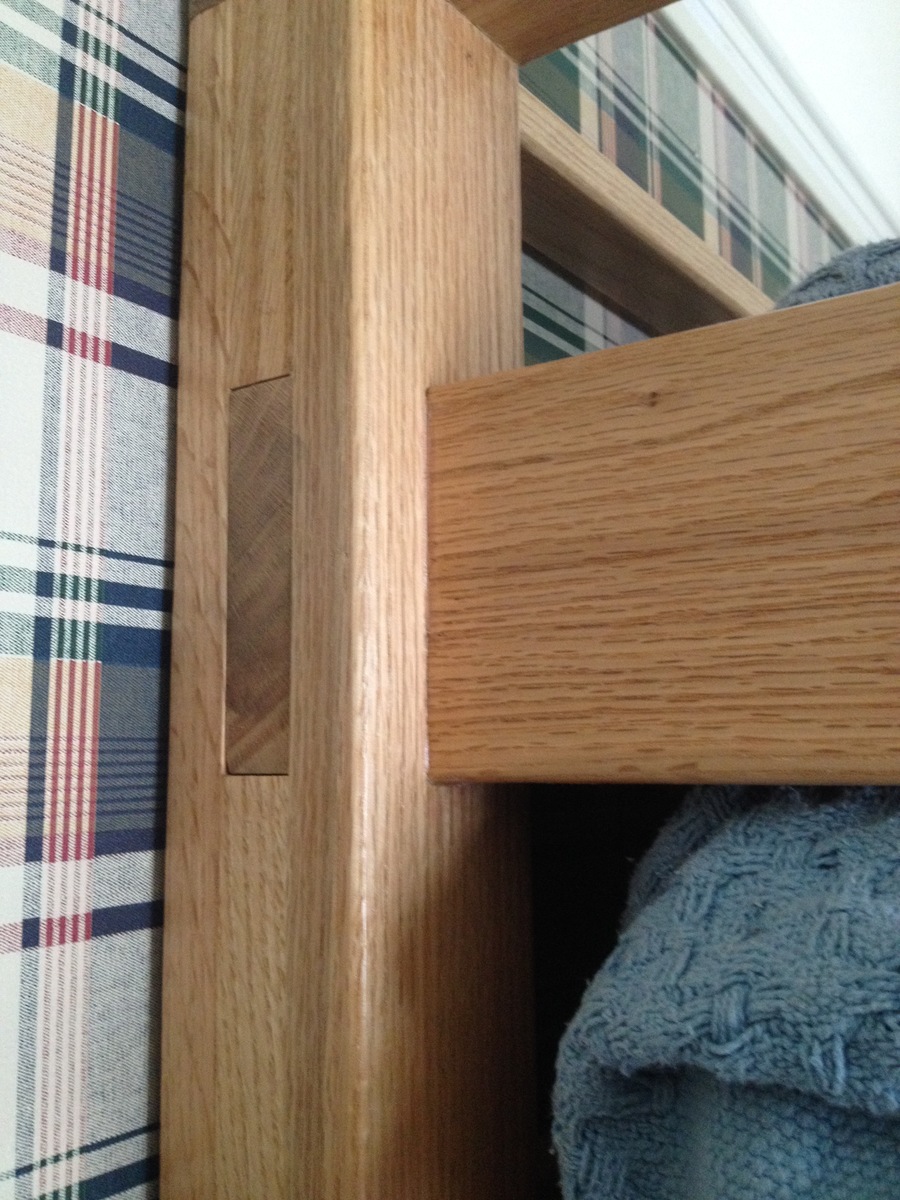
As a self-taught woodworker, I wanted something a little nicer than standard pine boards, and since we have a nice local hardwood supplier in our town, I was able to buy some nice red oak in a 13/16" thickness. This project gave me the opportunity to use the planer that I bought some time ago but hadn't really used very much, so I ended up milling all of the wood to bring all to a uniform thickness. In gluing up the legs, I used a spreader and a lot of clamps so that there are no screws, staples or nails joining the boards, just a lot of Titebond II.
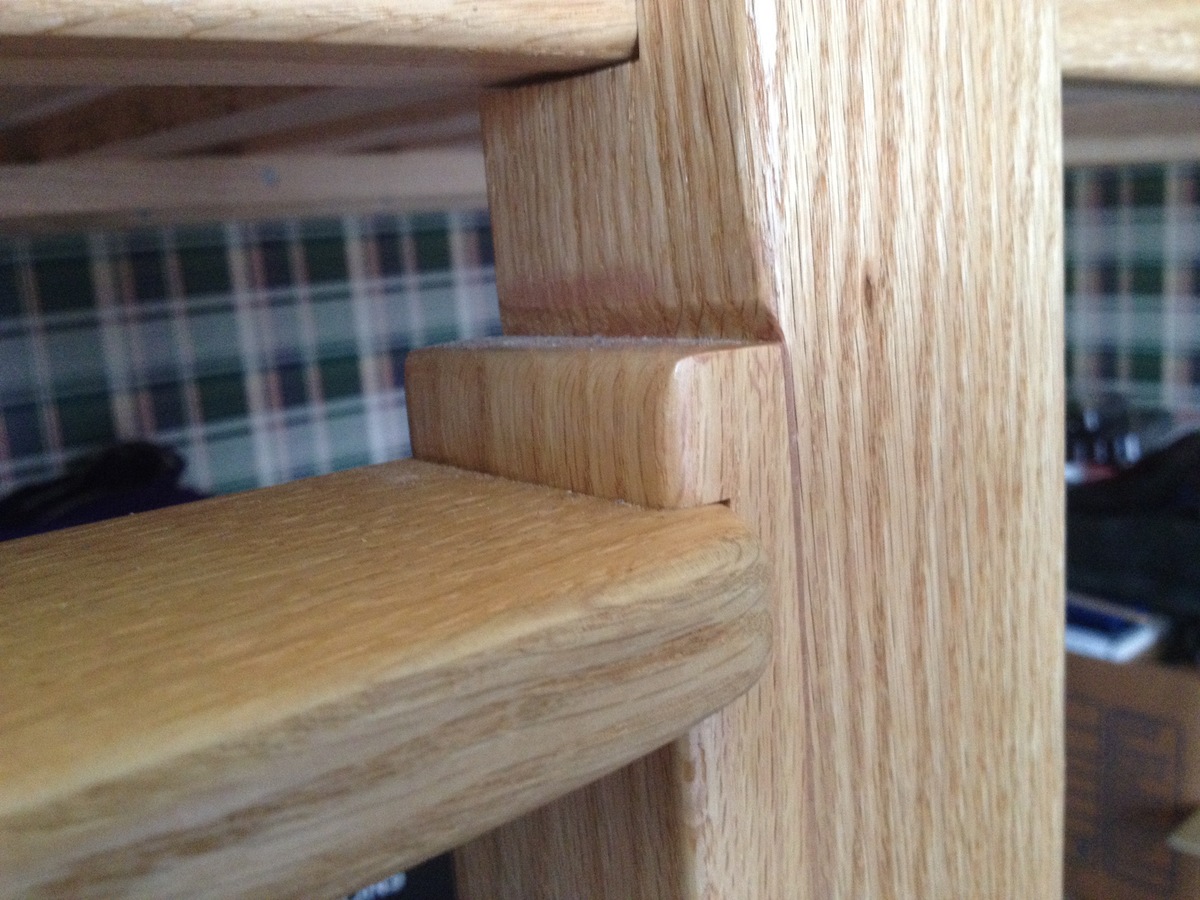
For the ladder itself, I cut dados in the upright edges of the ladder and attached the treads with 2" wood screws along with a liberal amount of glue. I had a slight miscaculation on the width of the ladder, so in order for it to fit in between the two legs, I had to plane away a small amount of wood, which you can see the end of in the last picture, the close up of the ladder.
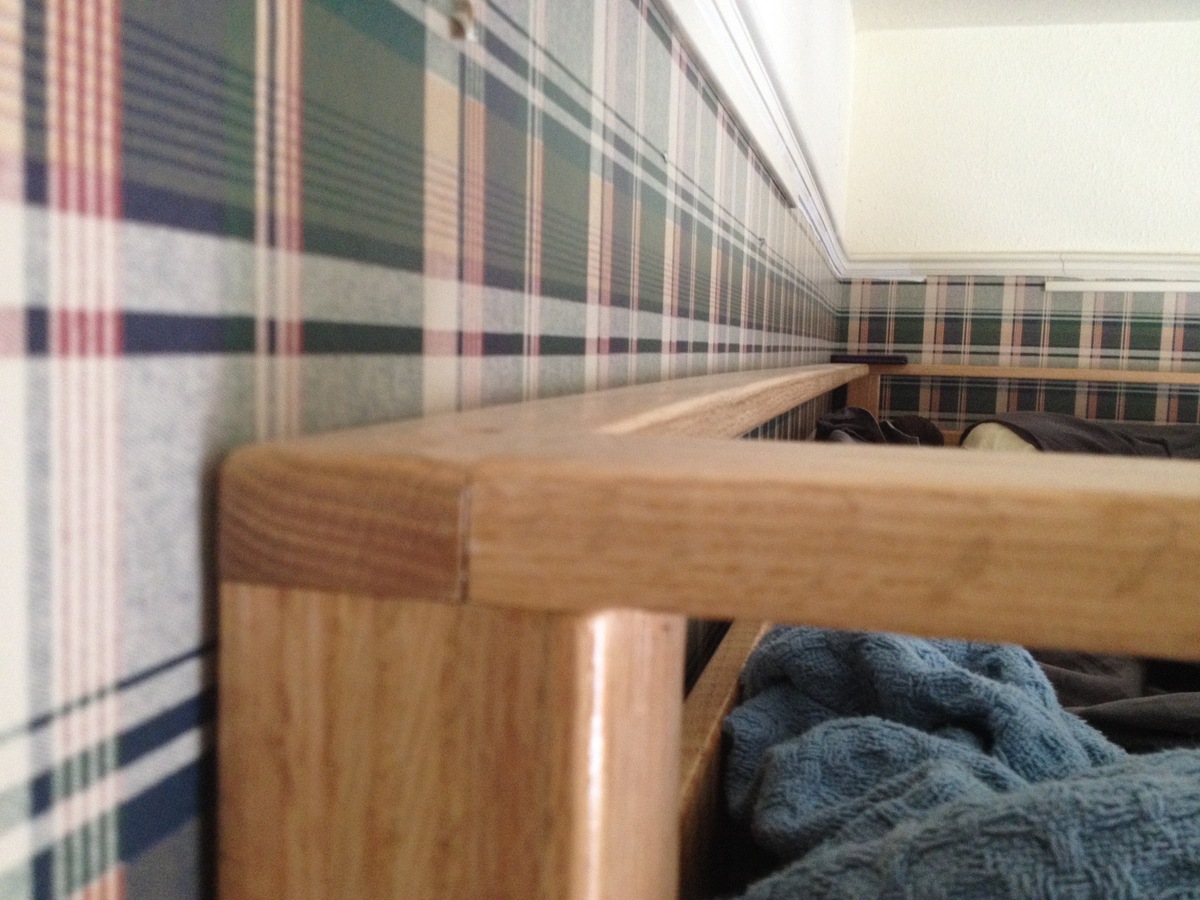
After a fair amount of sanding and a round over bit in my palm router to break all the exposed edges, I finished with three coats of polyurethene. The bed was assembled in the room using 2" wood screws which I had pre-drilled when I dry-fitted the bed out on my driveway. There are three screws in each corner of the mattress board and two screws in each corner of the railing. The short section of the front rail is also attached with screws so it can be removed as well if the bed is ever moved. I finished the installation with three, six inch lag bolts, two higher up going into wall studs, one near the bottom bolting into the wall plate on the floor. The bed was very solid, but has been made even more so with the addition of a bookshelf spanning the width of the footboard, and it is as deep as the ladder is wide. I offset the side of the bookshelf on the ladder side to allow for a two inch gap so your toes can overhand the ladder treads when climbing up or down.
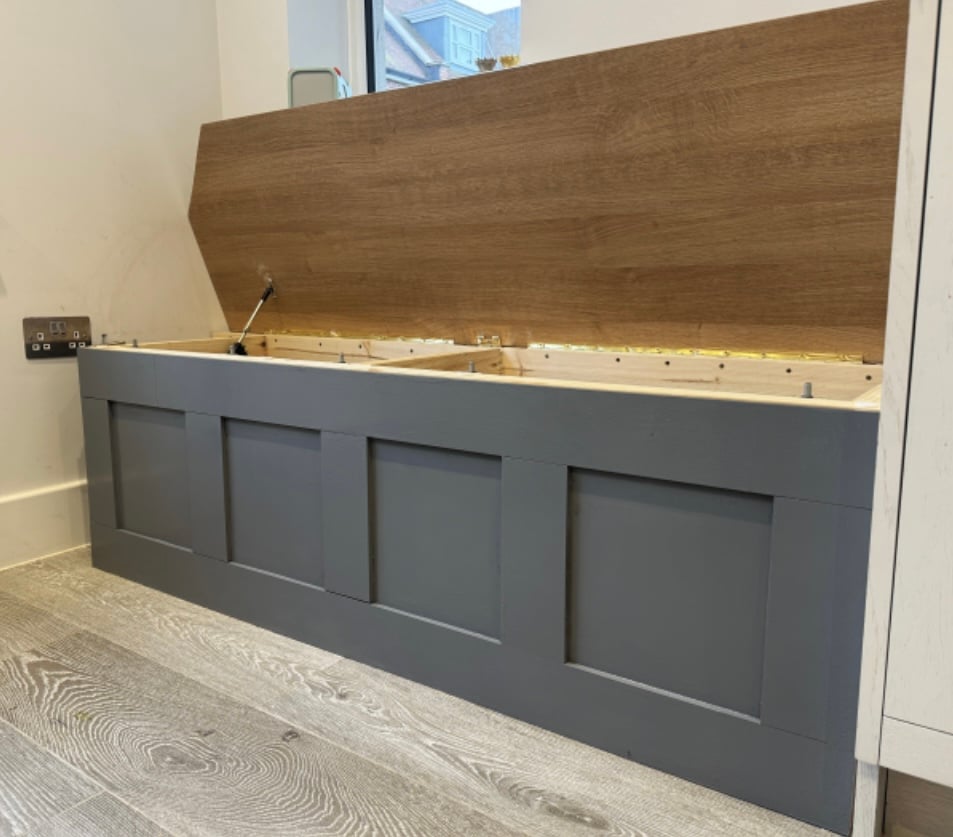
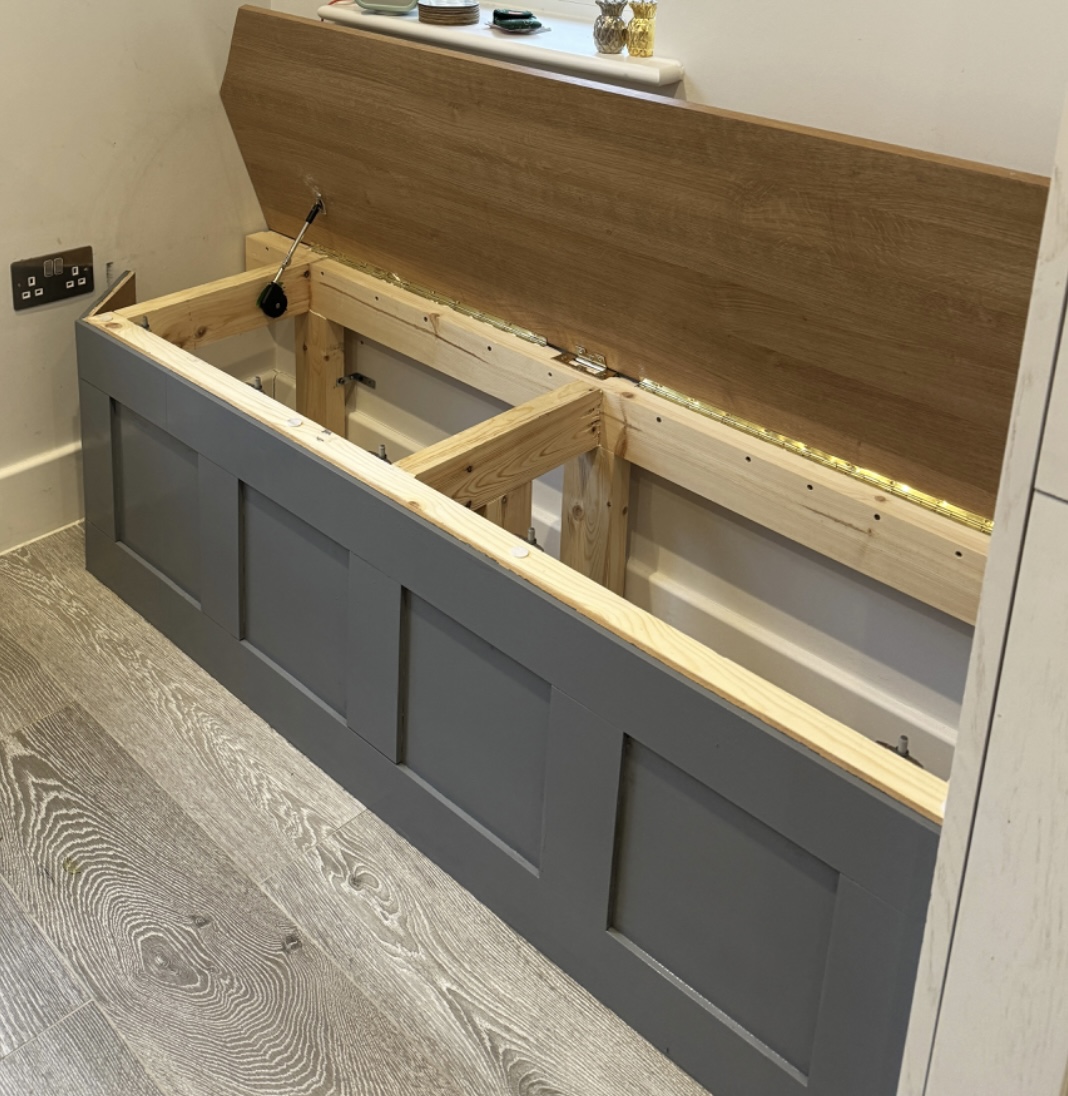
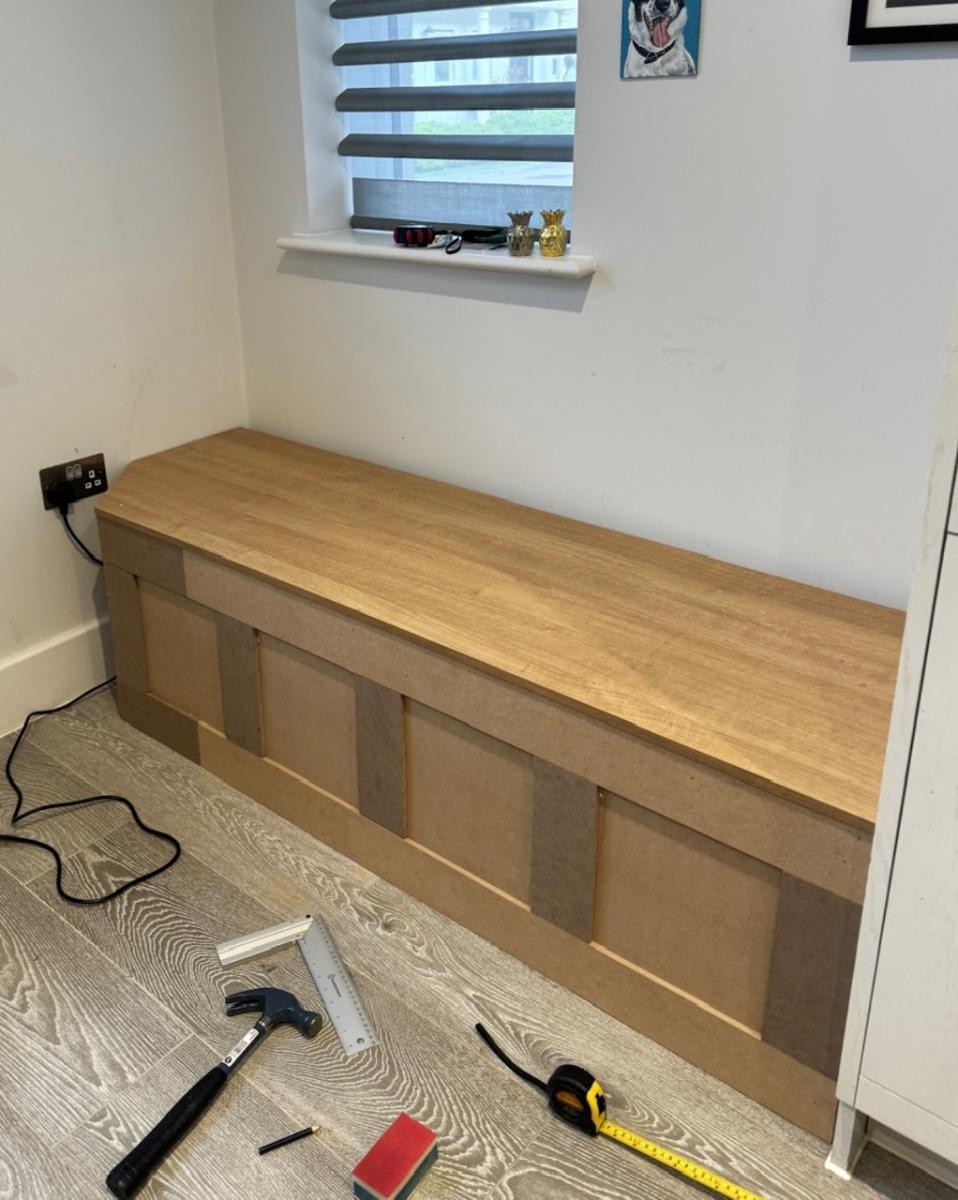
Kitchen dining bench with storage. Due to the plugs being in an awkward position, I opted to build this bench with a facade as opposed to adding a back and sides. This also meant it had to be panelled in situ which was a fun challenge! It has piano hinges as well as soft close pistons making for a great storage bench that is in keeping with the rest of our kitchen.
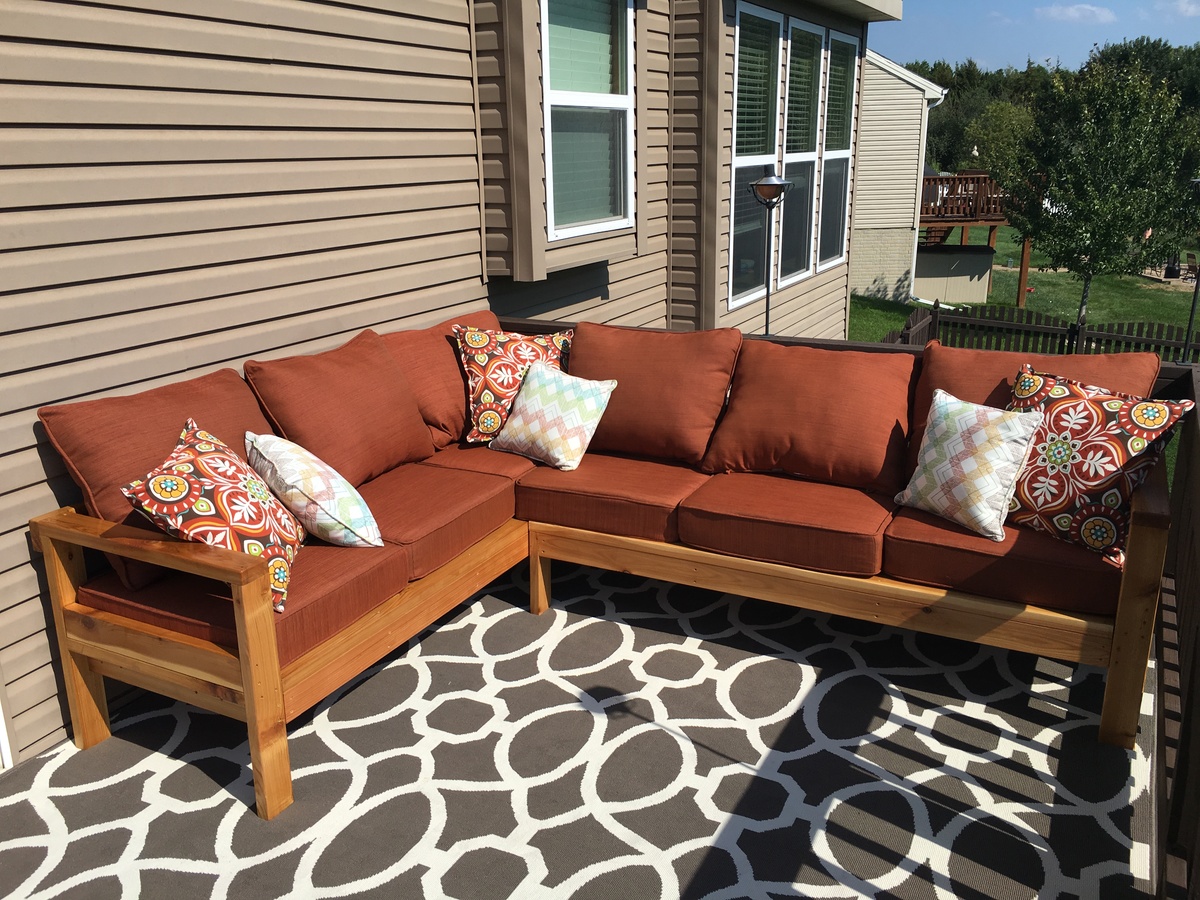
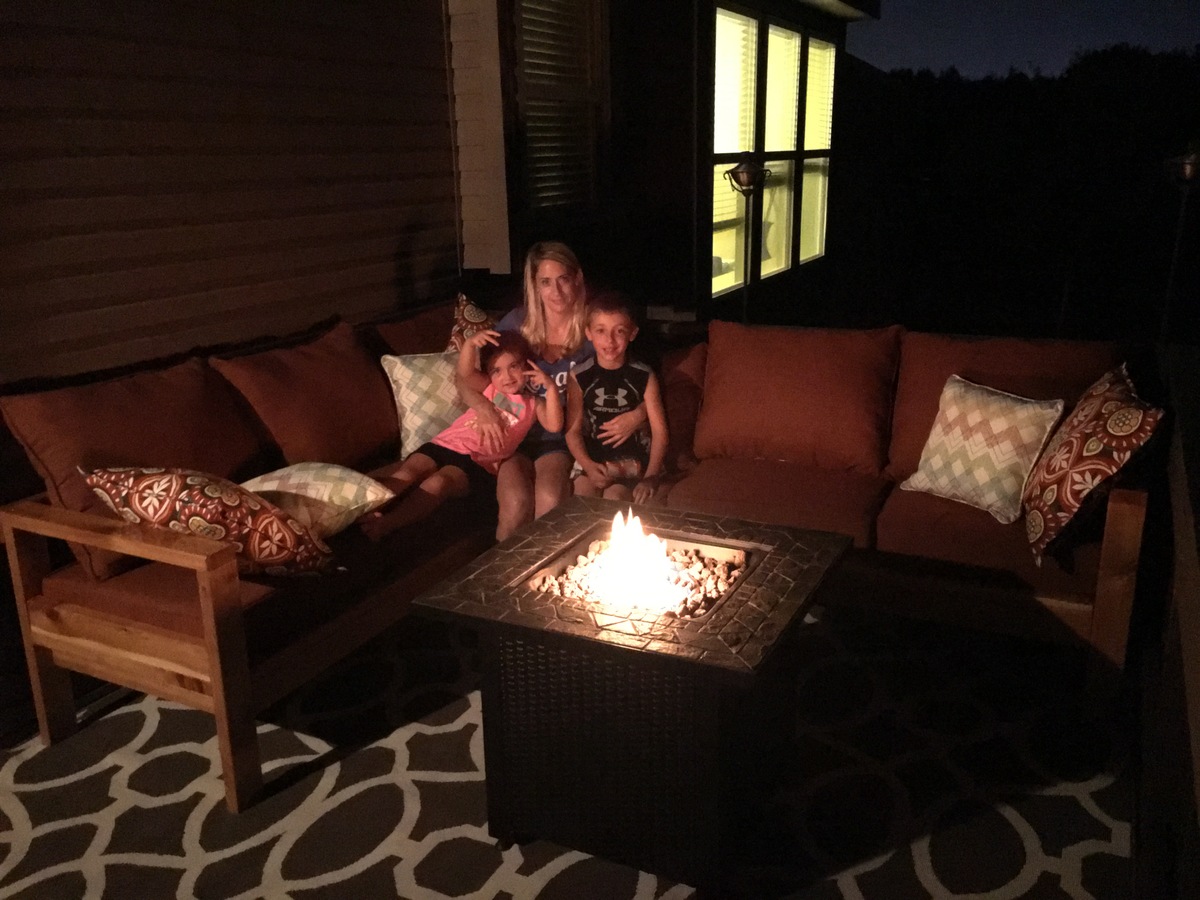
My wife sent me your YouTube video of making the sectional. She asked me if I would make her one. It was perfect timing because our 9 year anniversary was just around the corner. So my 5 yr old daughter and I went to Lowes and purchased the supplies on a Friday night. Her 8 year old brother and her helped me measure, and assemble (I did all the cutting;). We enjoyed the project as a family and were very proud to present to mommy for a gift...
thank you!
Jack Christensen
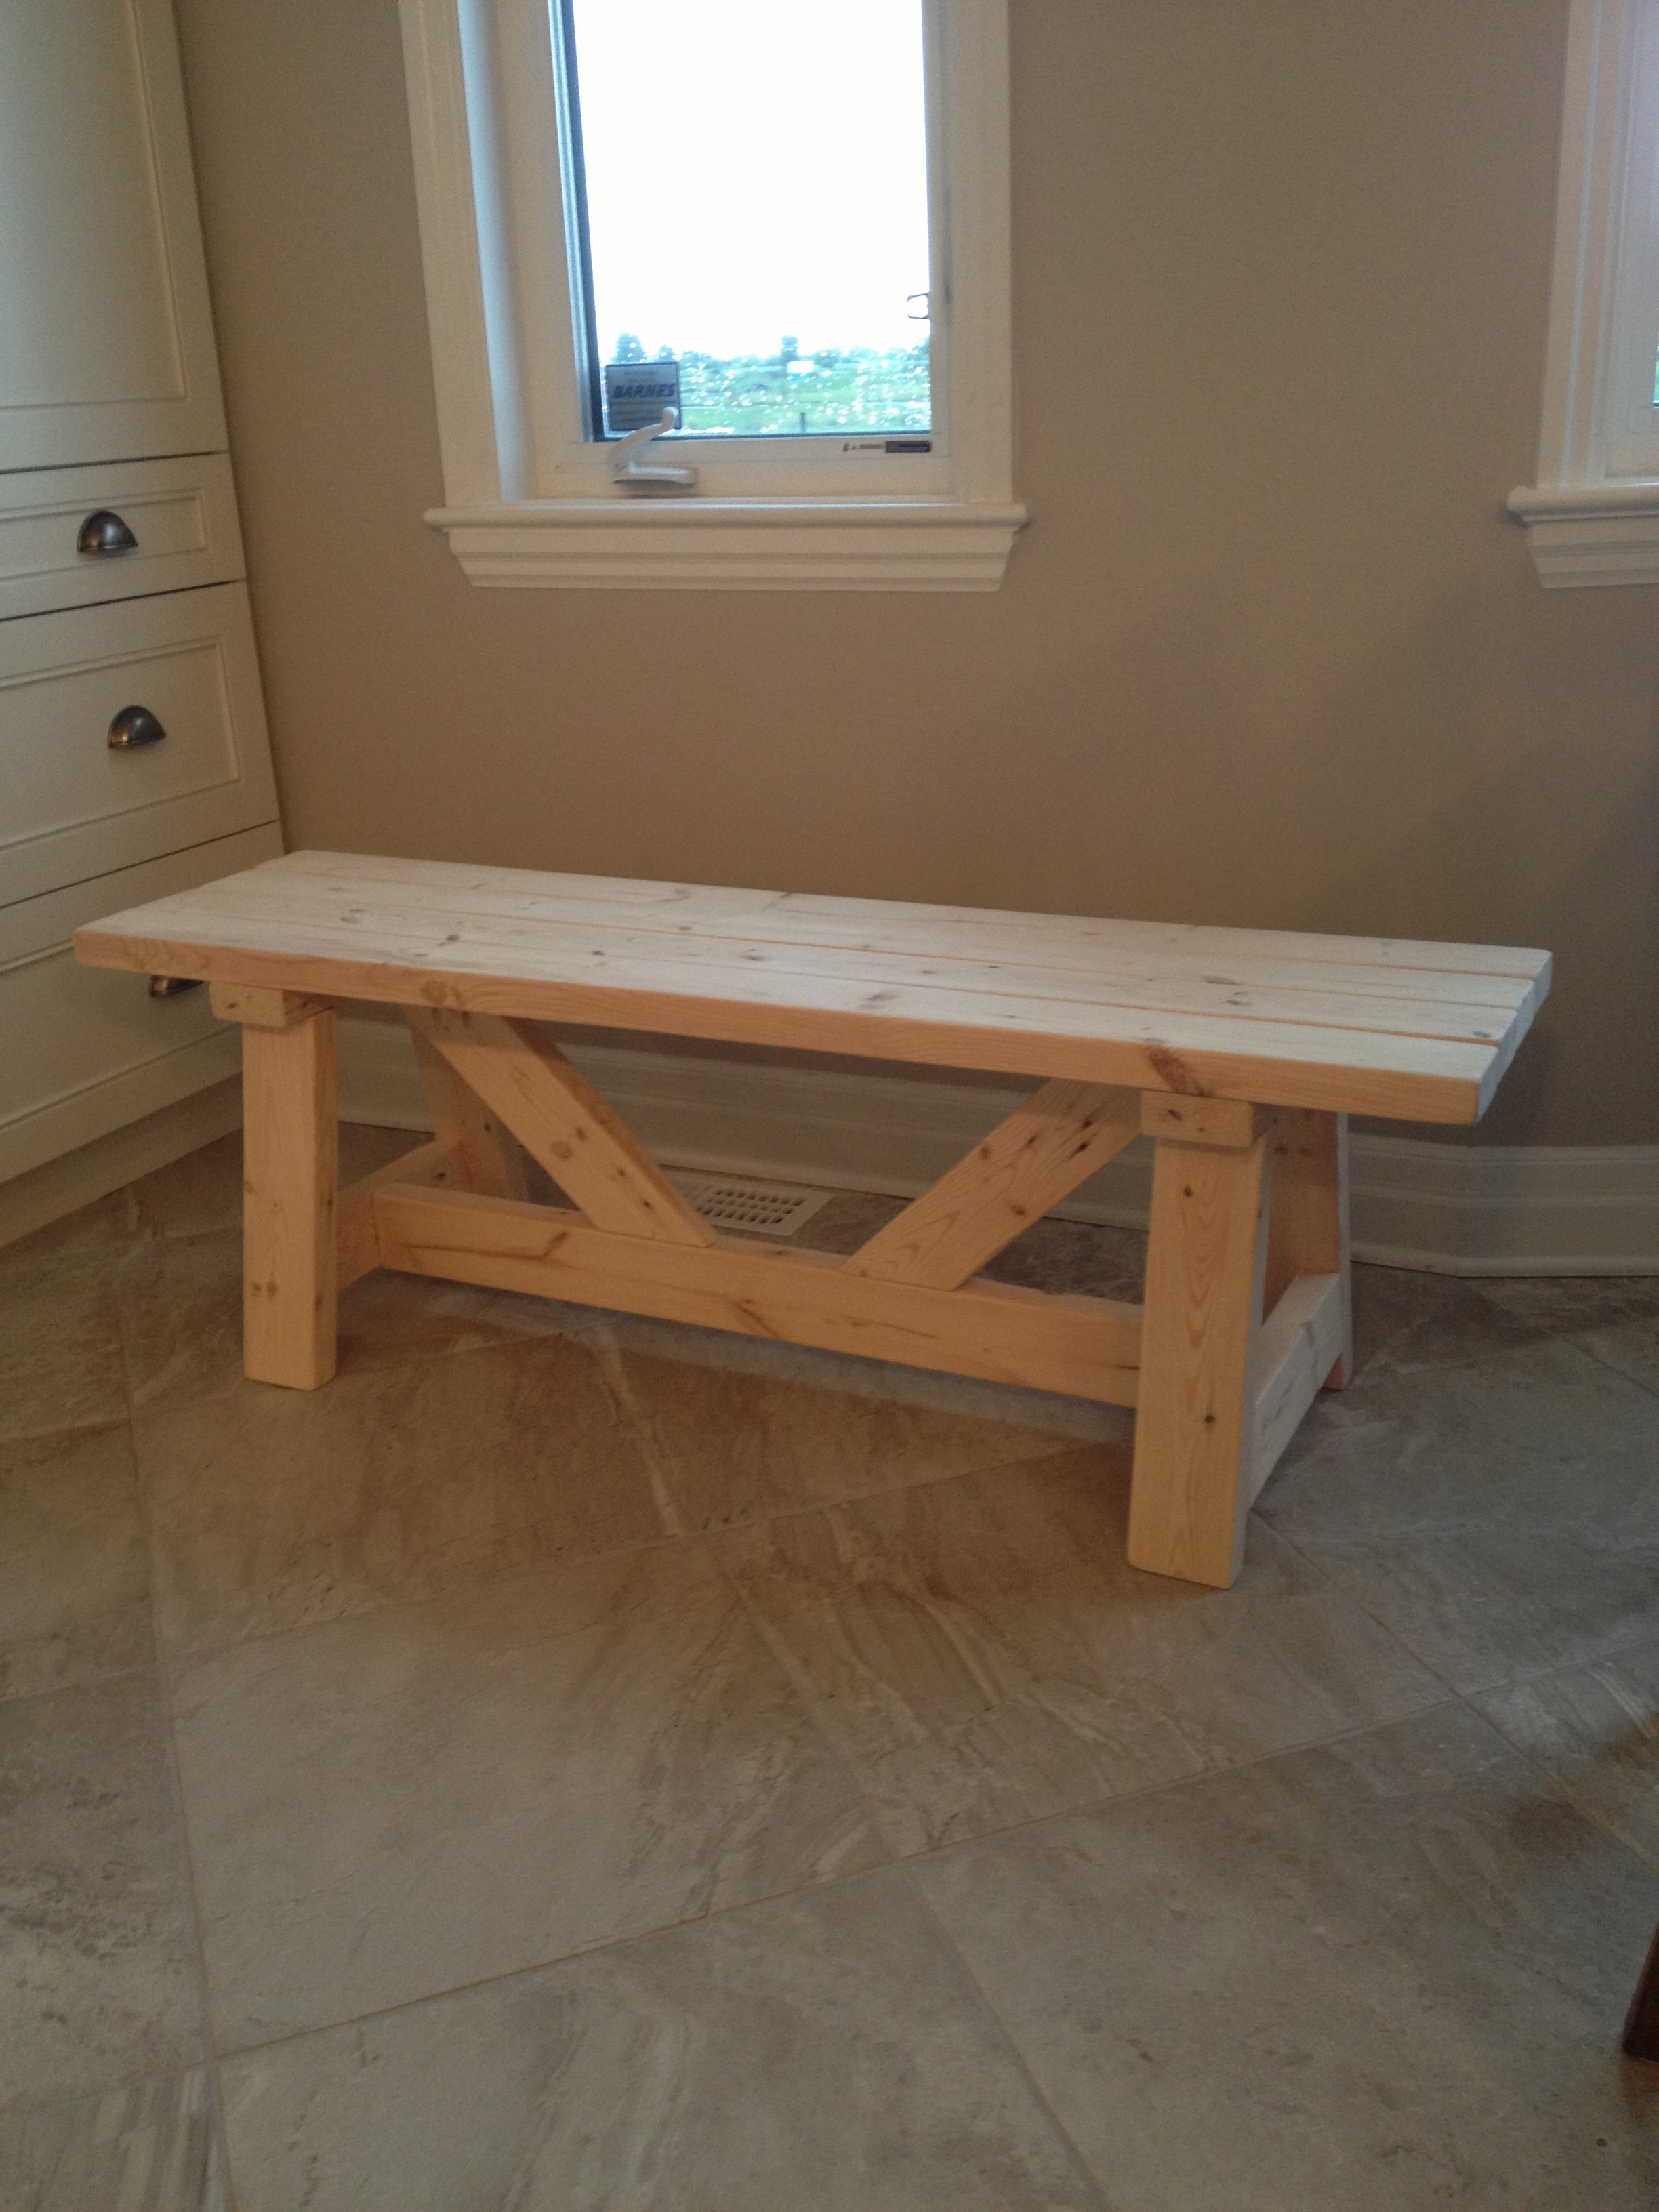
This was my first build from your site! Farmhouse bench.
I was a little confused with the miter saw instructions "bevel cut at a 10 degree angle off center". I had to google to figure out what you meant. In the end the bench looks awsome and I feel very empowered with my tools.
(still need to stain the finished project, bought all the wood and built in 1 day)
Thank you Ana for sharing your plans!! I love your site and I love my Kreg Jig!
Vicki
(Canada)
Wed, 04/15/2020 - 11:38
It looks great and rock solid. I can't find a plan for it. Could you please help me?
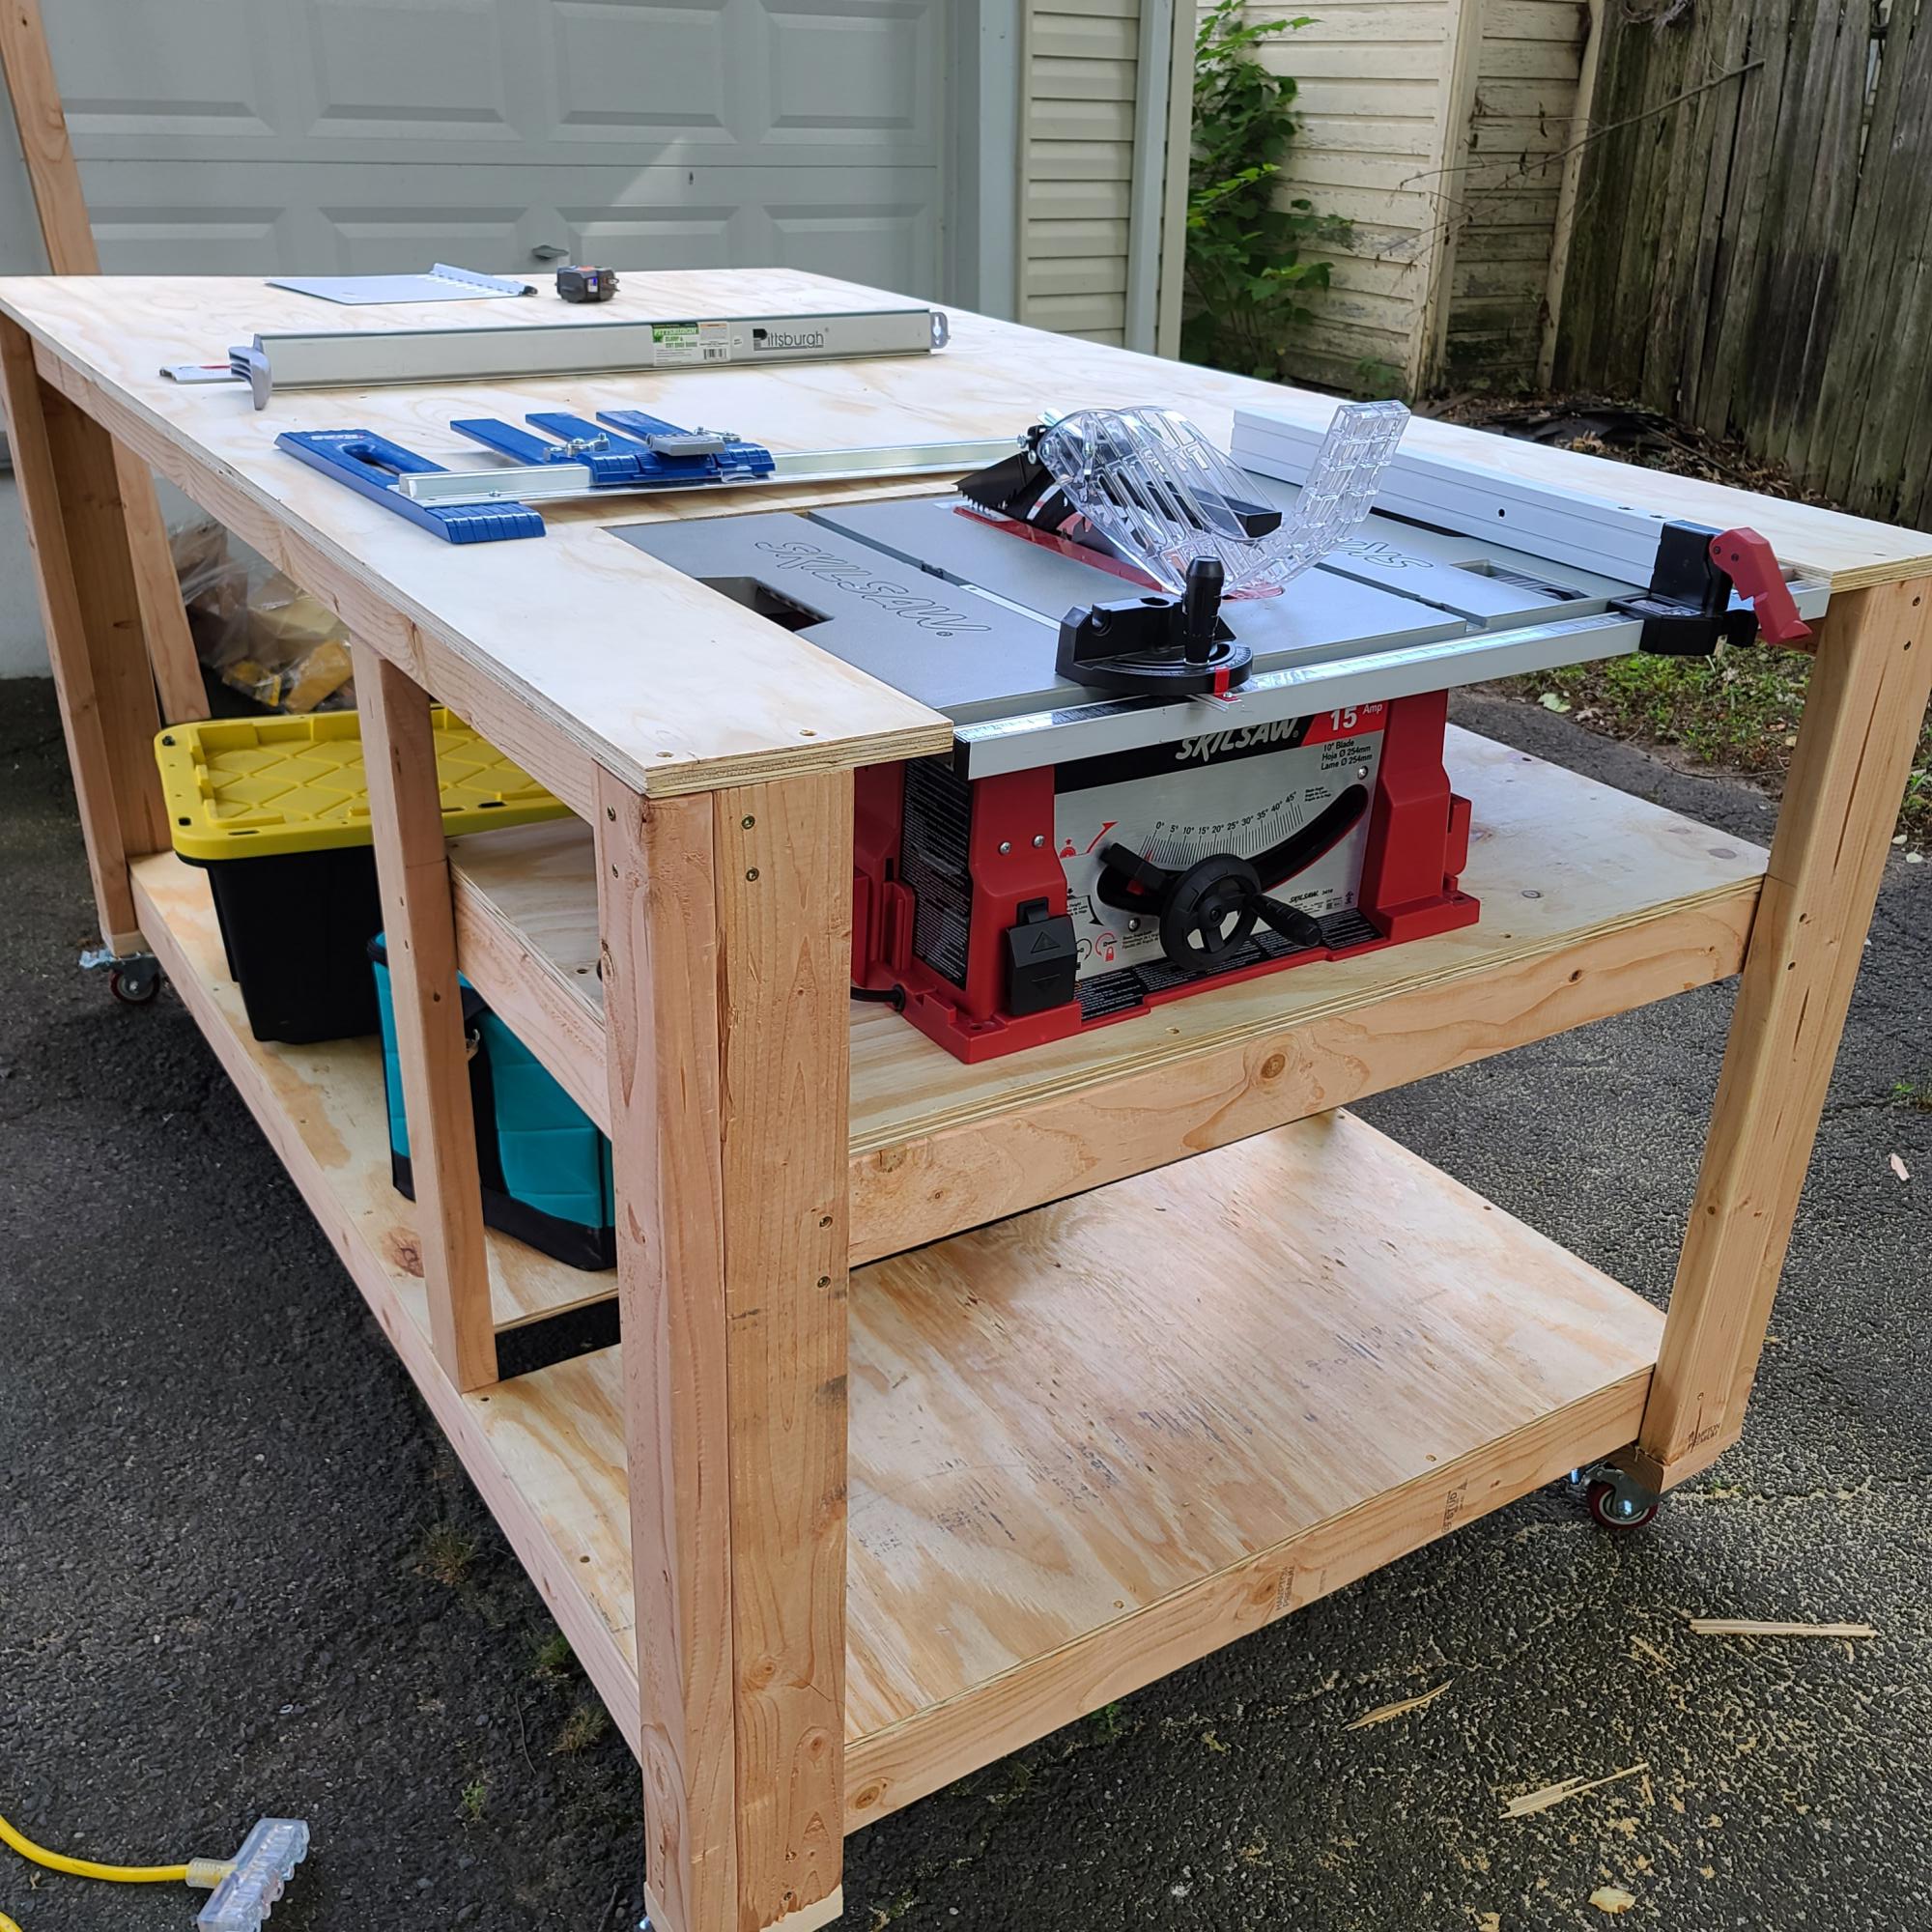
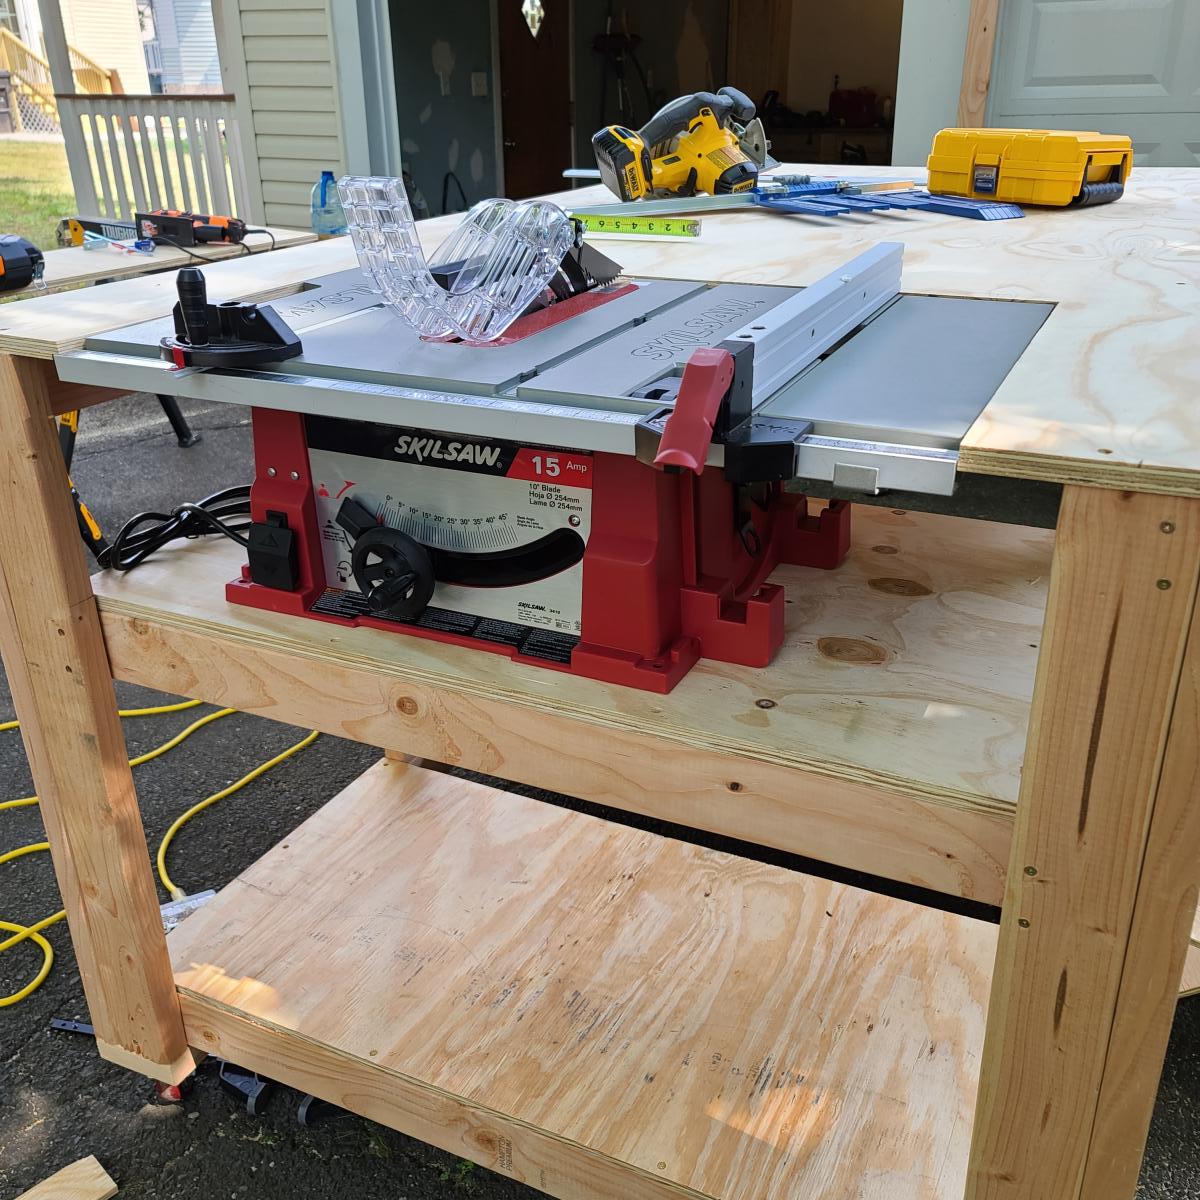
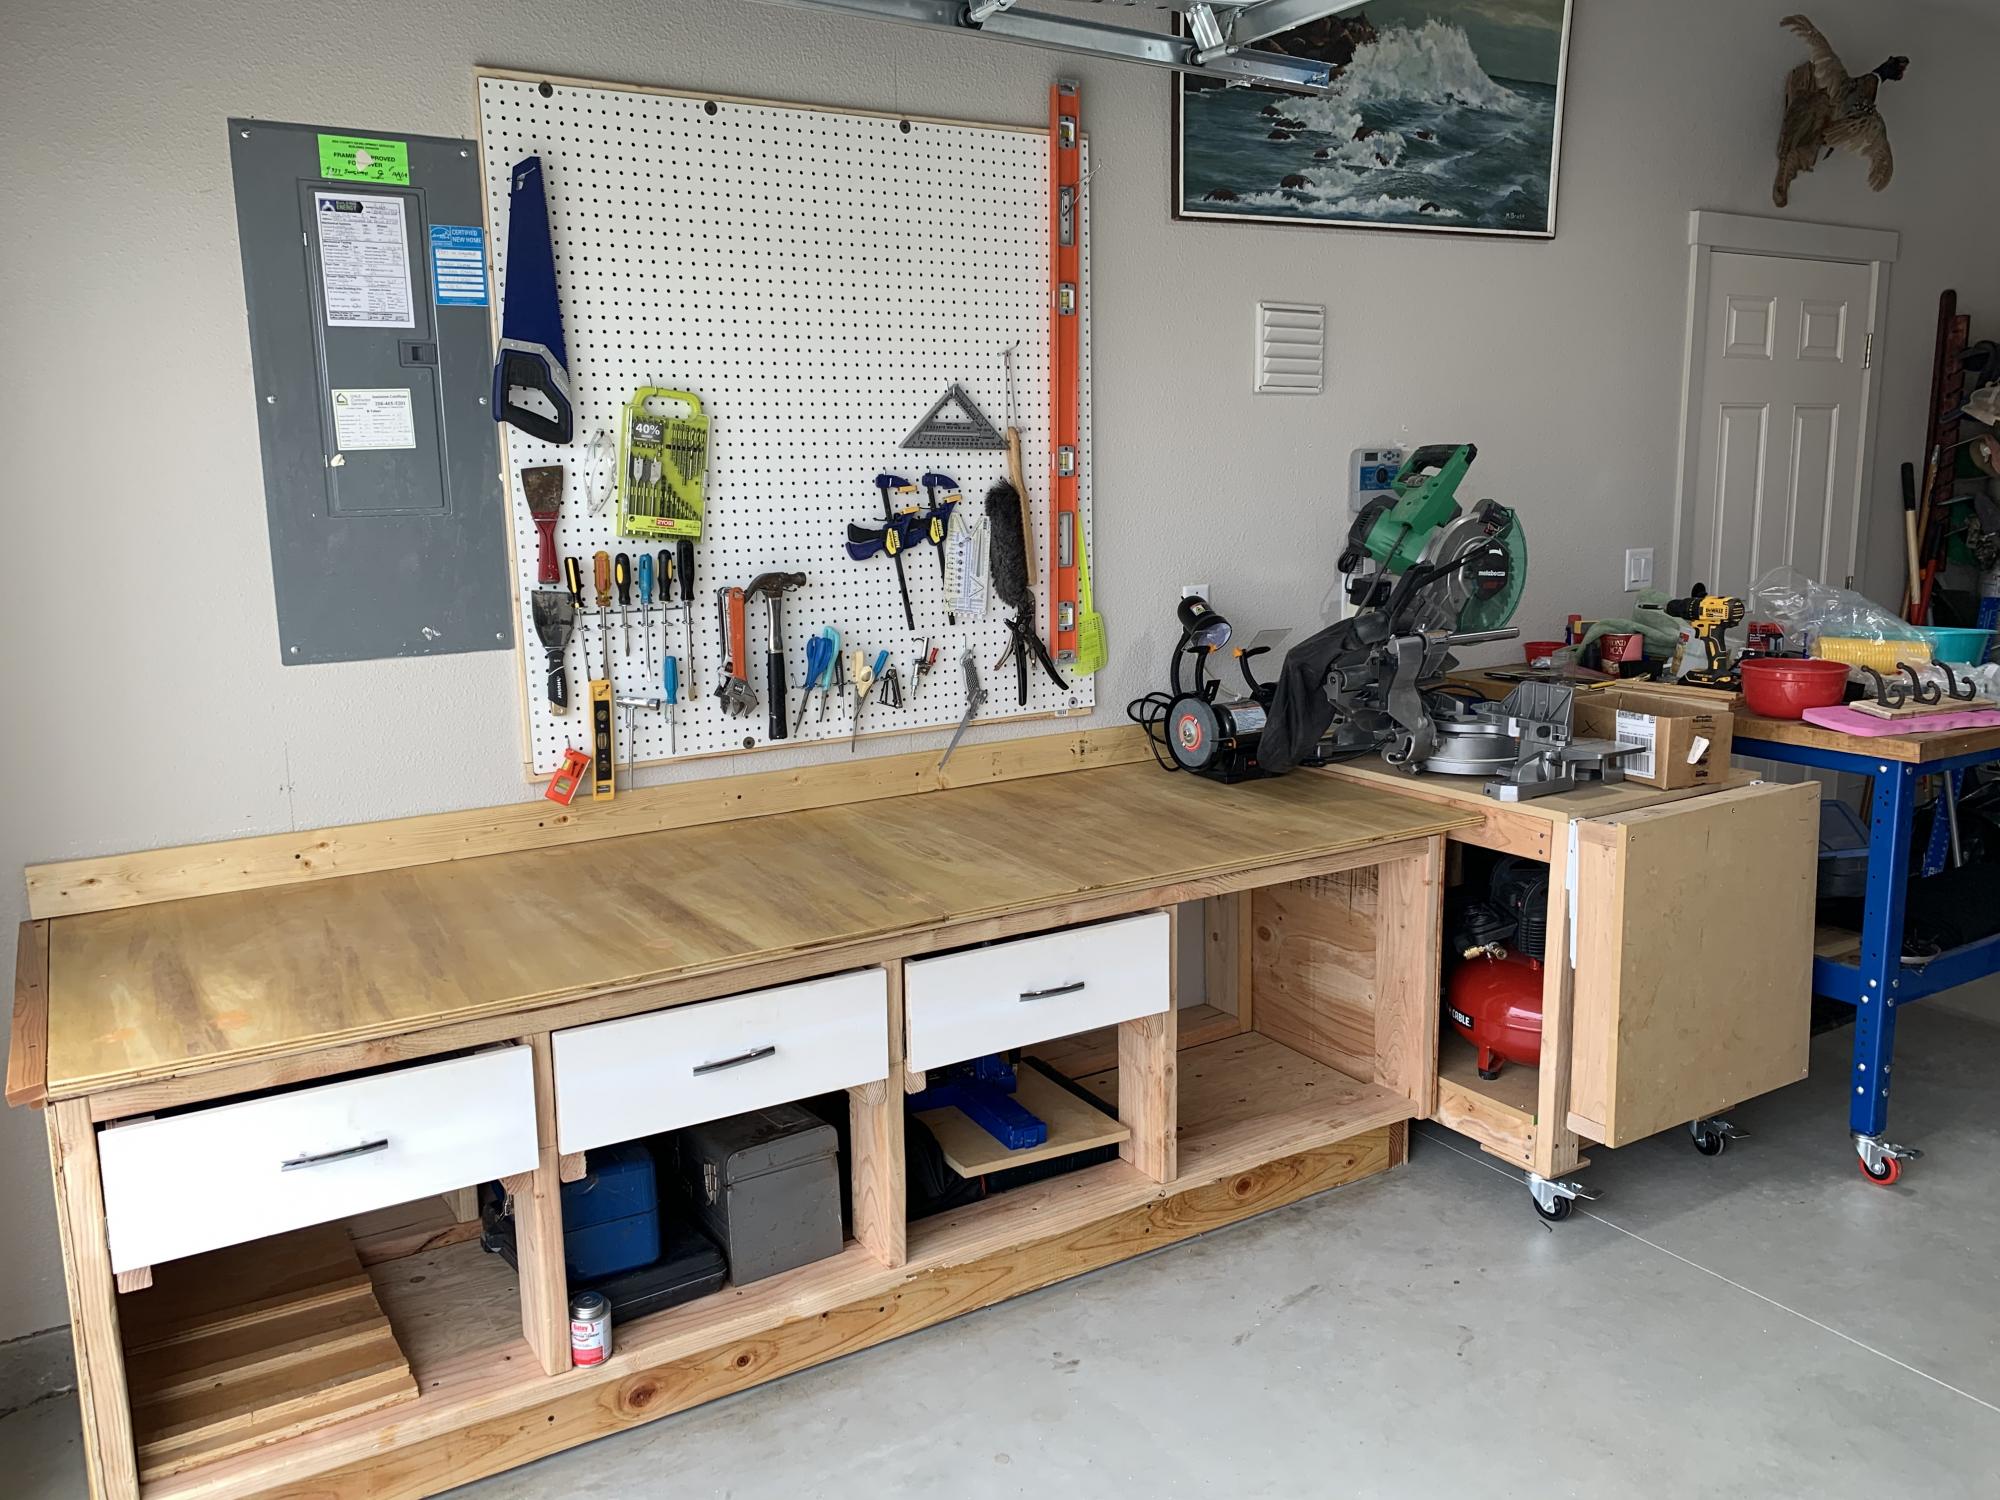
This is my first attempt and first woodwook project ever. I used the plans from this site for the workbench with space for a table saw. I changed the dimensions to 4'Wx7'Lx3'H (originally 3x6x2 1/2). It ended up bigger than I imagined though. But hopefully not bad for my 1st shot at a project of this scope. Next step is a polyethylene finish. It looks like the plan has been removed from this site though.
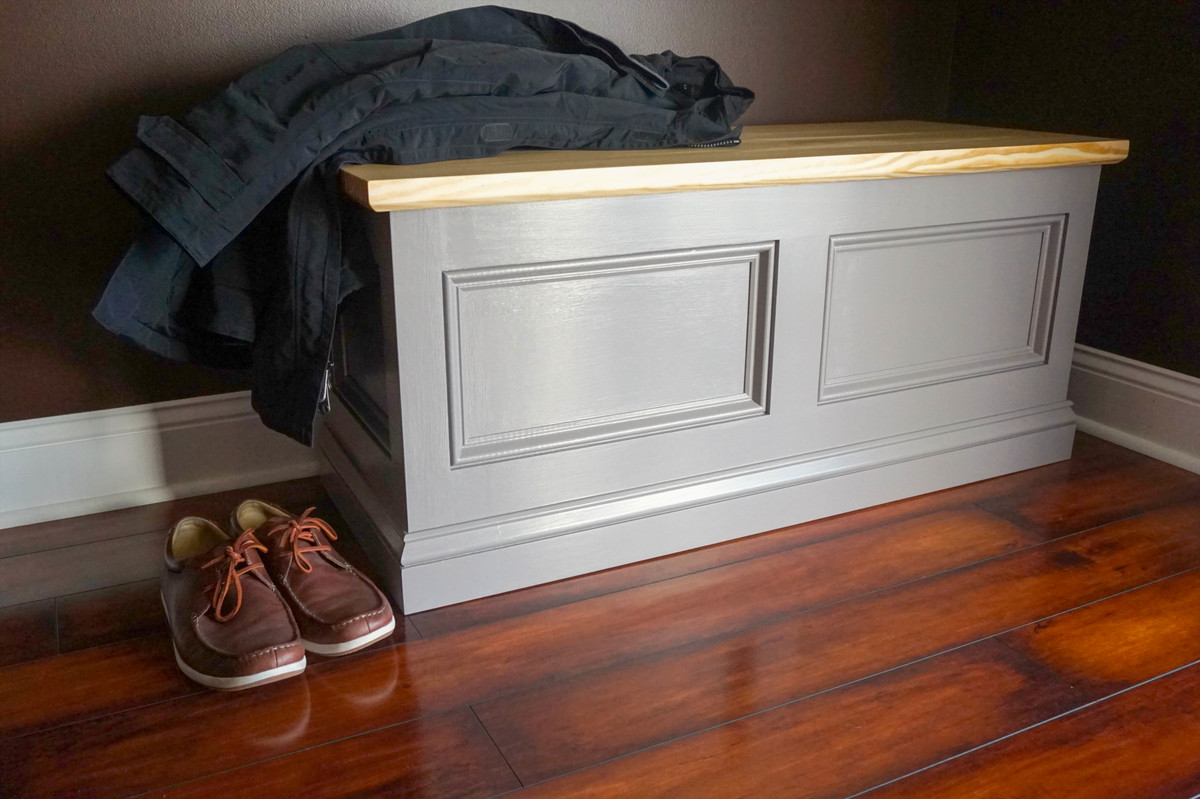
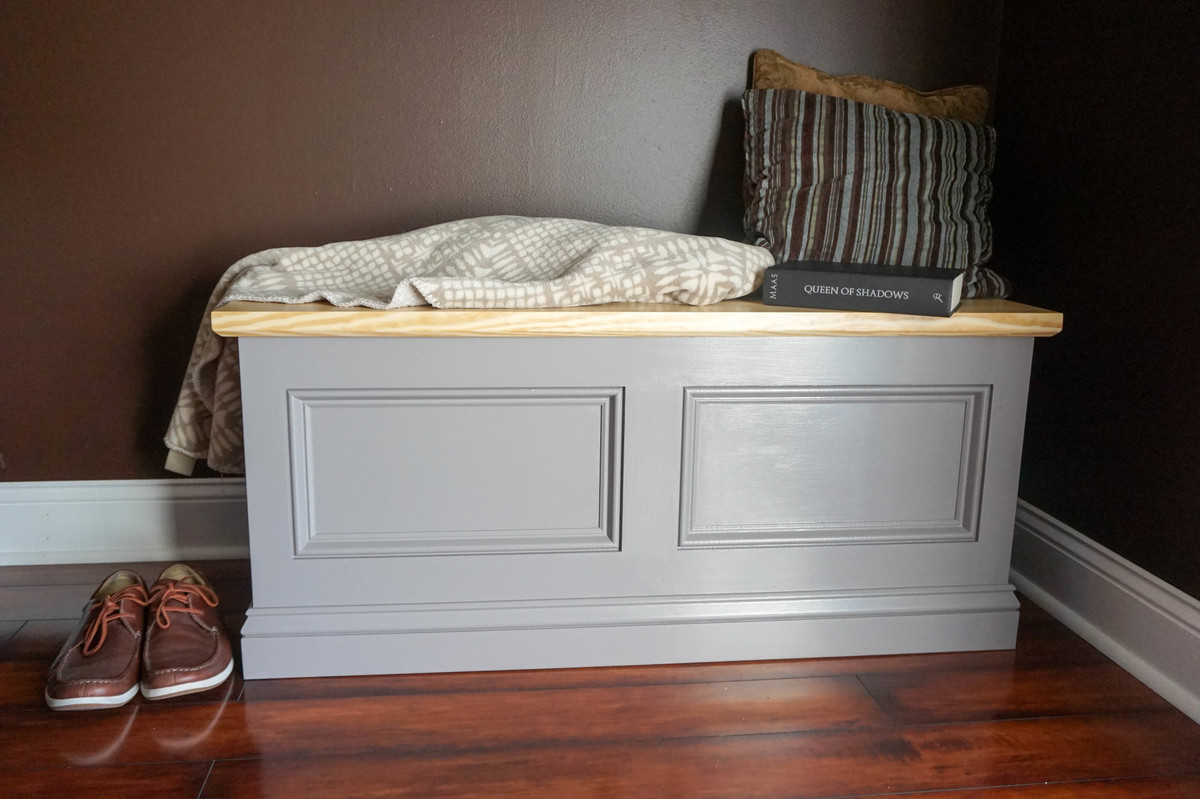
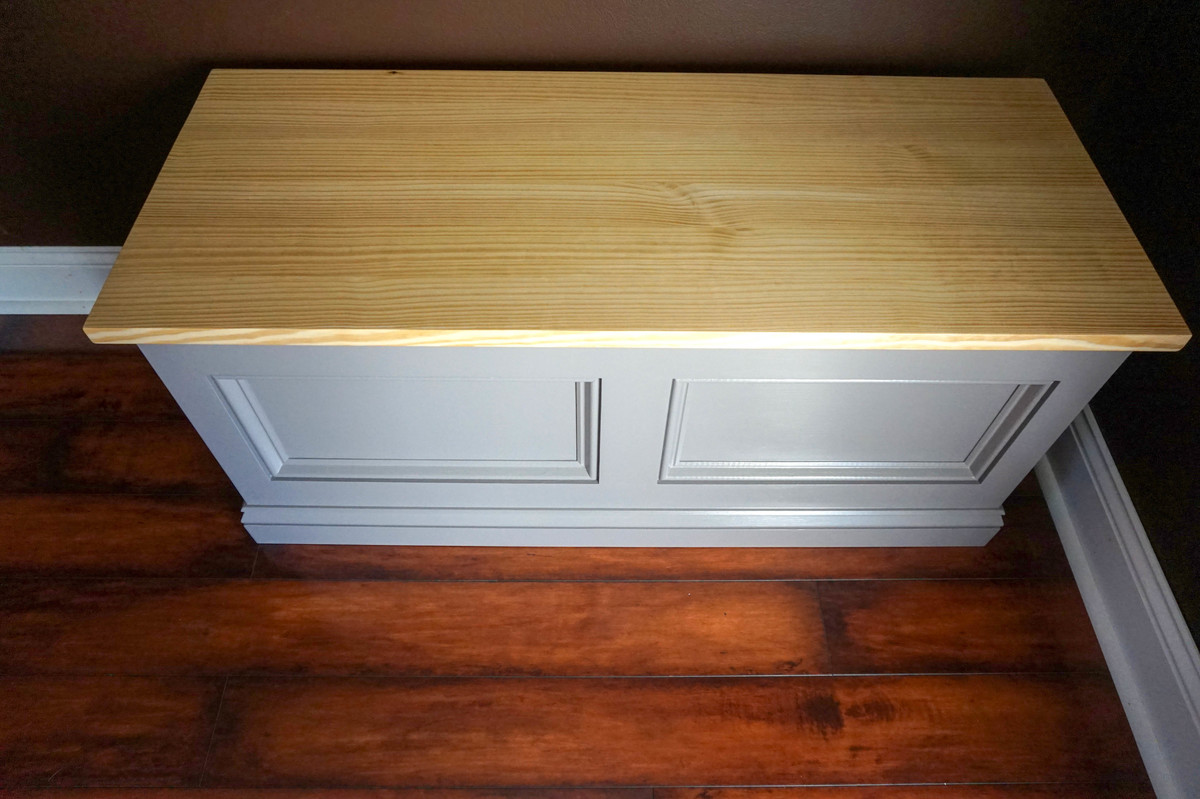
I've had this idea to build some sort of storage bench or blanket chest for quite a while now. I knew I wanted a classic look with detailed moldings and a solid wood top.
I have plans for this build avaliable HERE.
You can check out my detailed video tutorial :


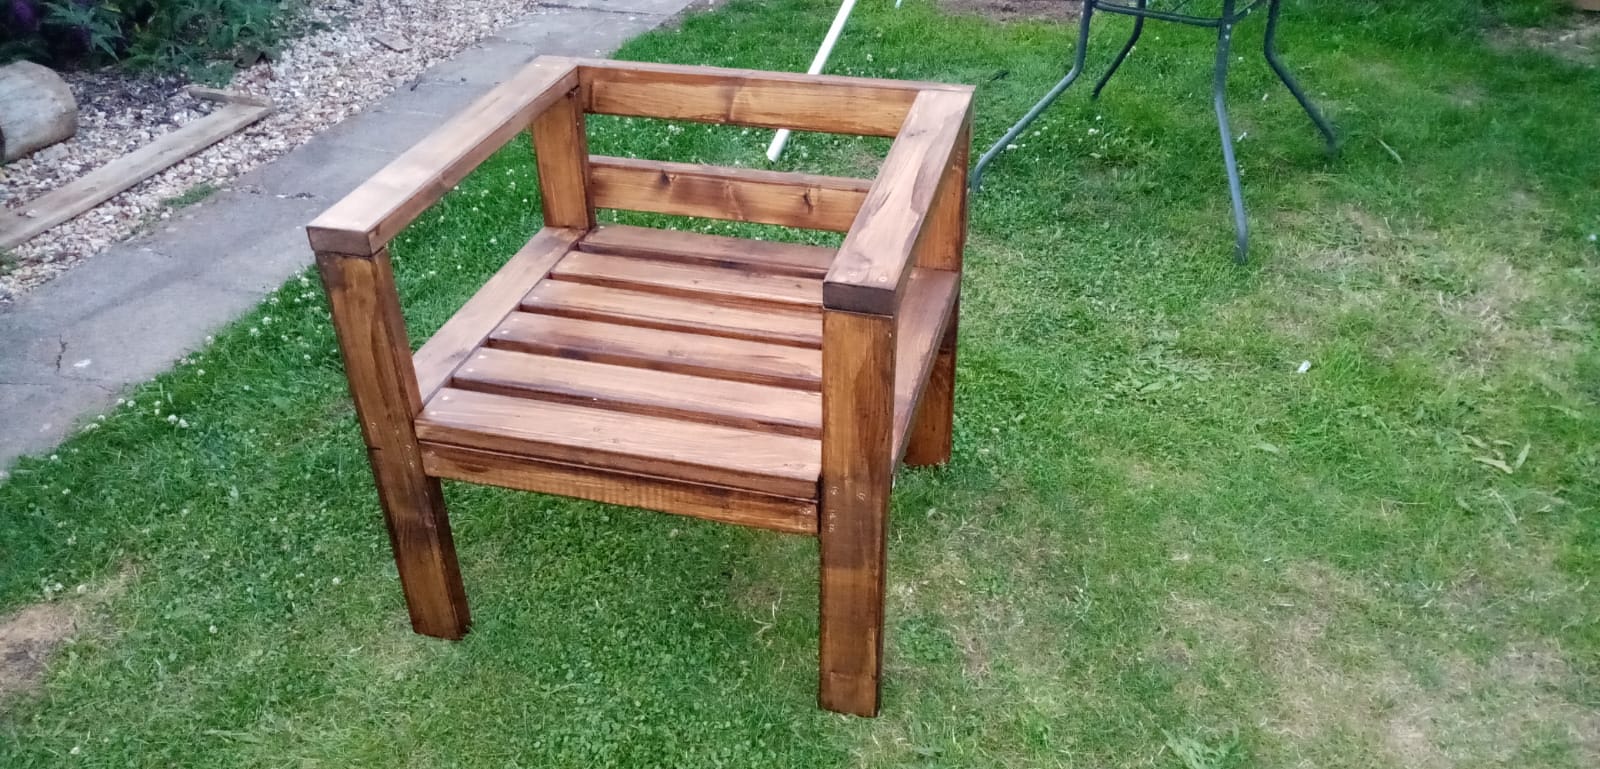
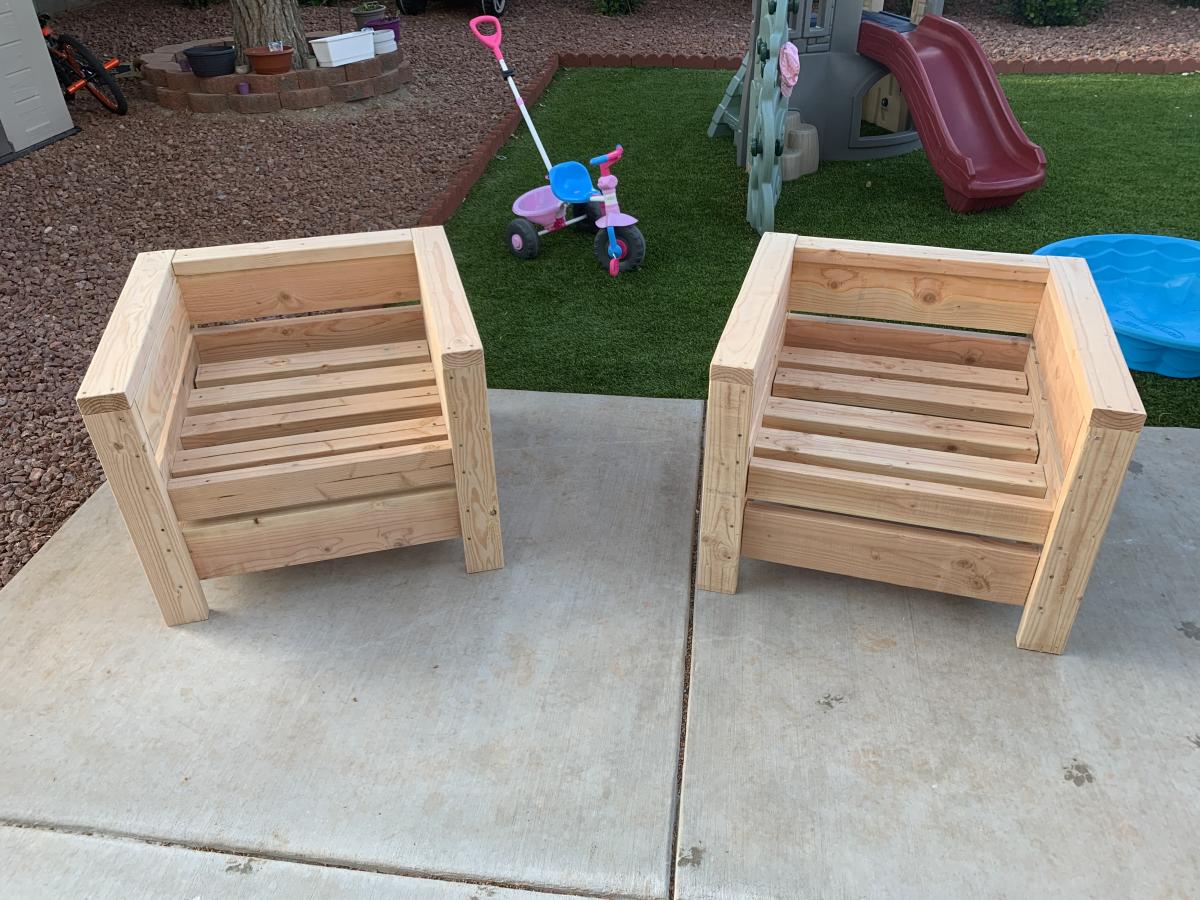
Single seater chair to match the sofa
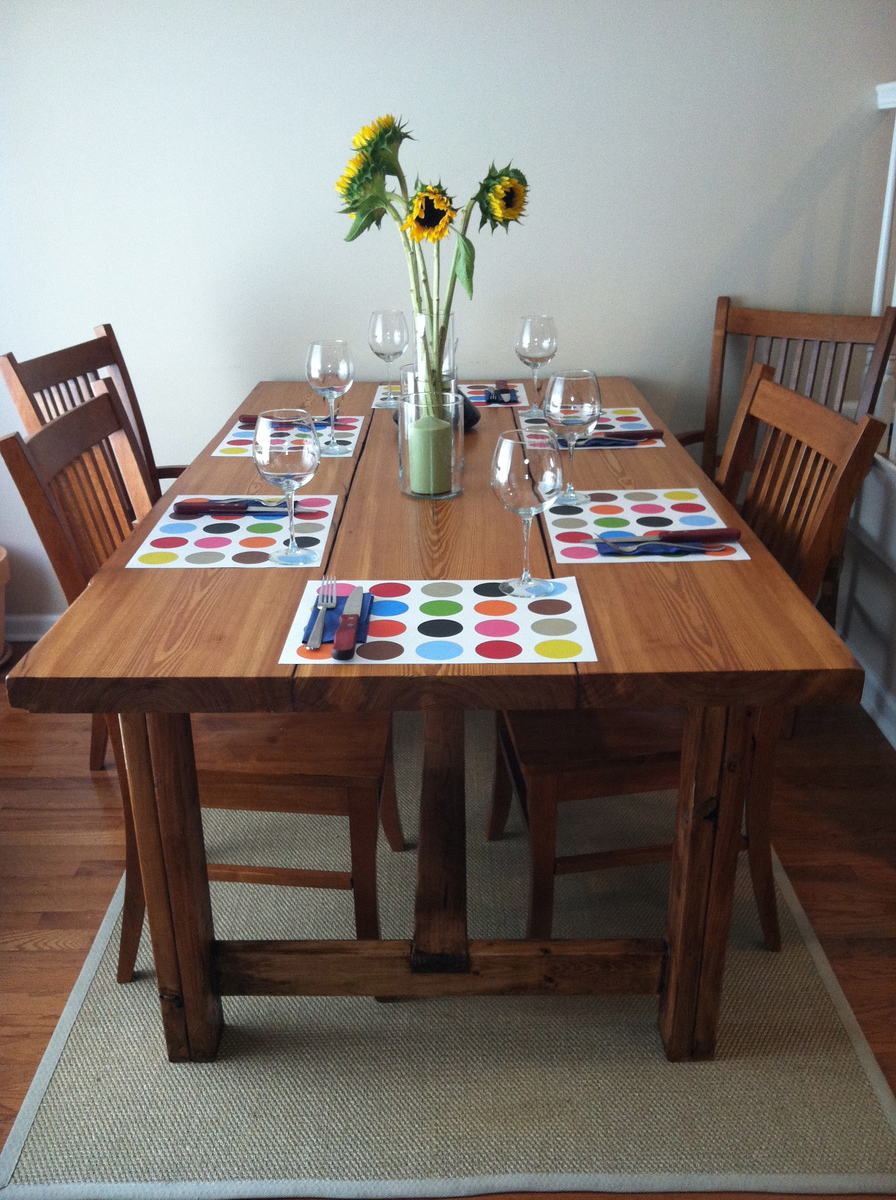
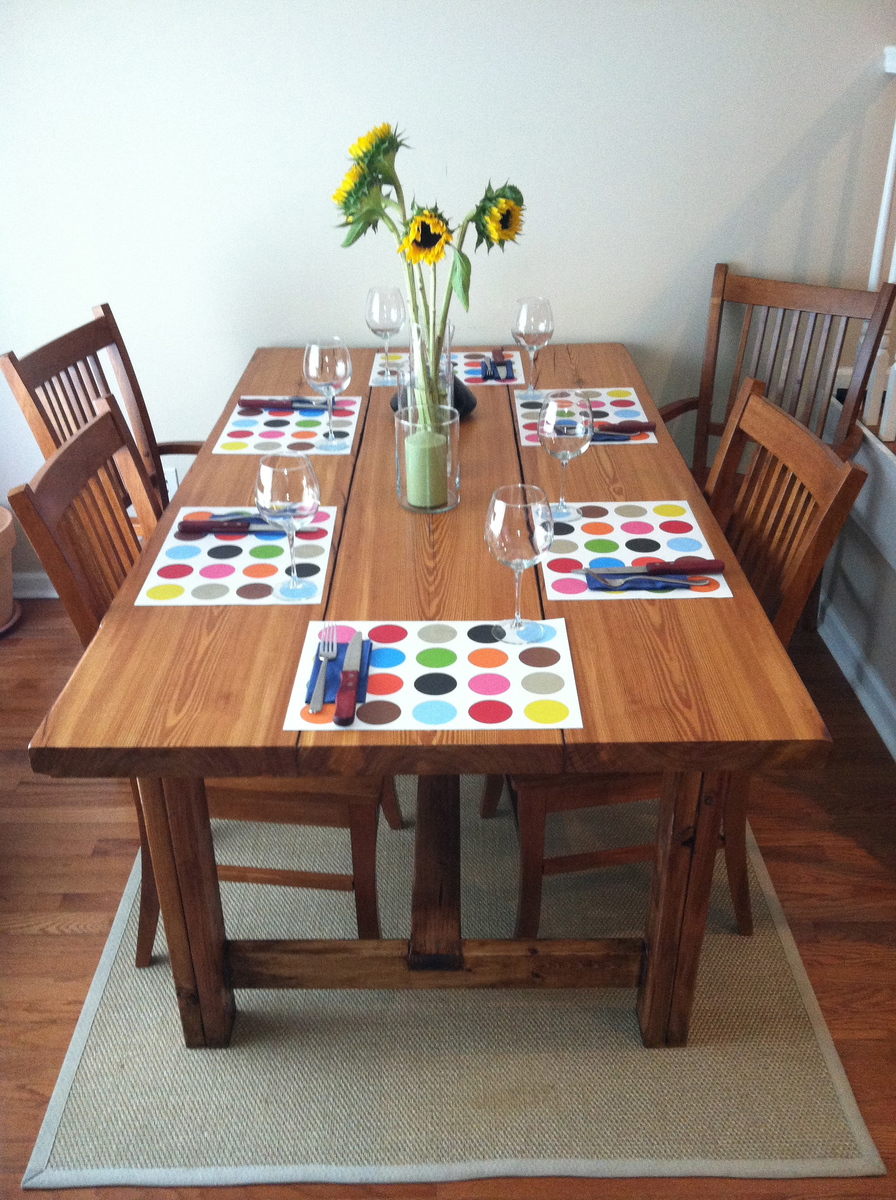
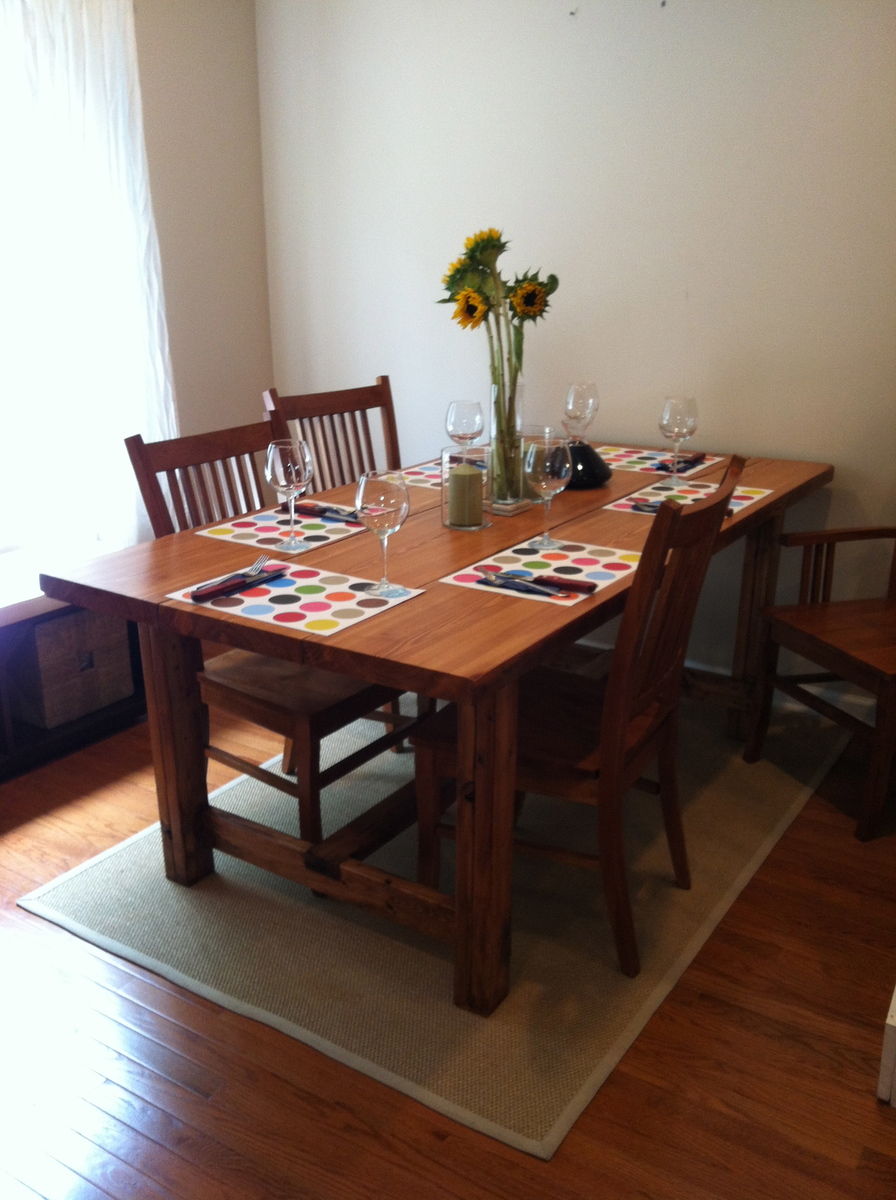
Farmhouse table. Tabletop is reclaimed from a church built in 1890 (bought at Manyunk Timer in Philadelphia). So glad we went that route (the knots, grain, etc match on the outer two pieces which you can see in the pic... it's really great, but it is expensive).
Top has only minwax polyurethane, there's no stain whatsoever. Frame is stained with Minwax "polyshades" (Mission Oak shade).
Chairs you see are the "Winslow" chairs from coaster. Highly recommend them. The match was luck.
Omitted the breadboard ends only because my tabletop pieces are 13 in (!) across: that would have been too wide for ends I thought.
Many thanks to this fantastic site for the plans. I am new at this and the table is KILLER; there's no possible way I could have expected it to turn out so well.
This was my first time DIYing furniture, so I definitely came up with a very easy design!
The dimensions for this sofa are modern as it sits low to the ground and has a squarish appearance.
Free detailed plan on Blog: www.MinimalistFarmStyle.com
Love your site. The 8’ pony wall I recently made was a great plan. I’m also going to build the outdoor storage plan you have. Thanks for your creativity!
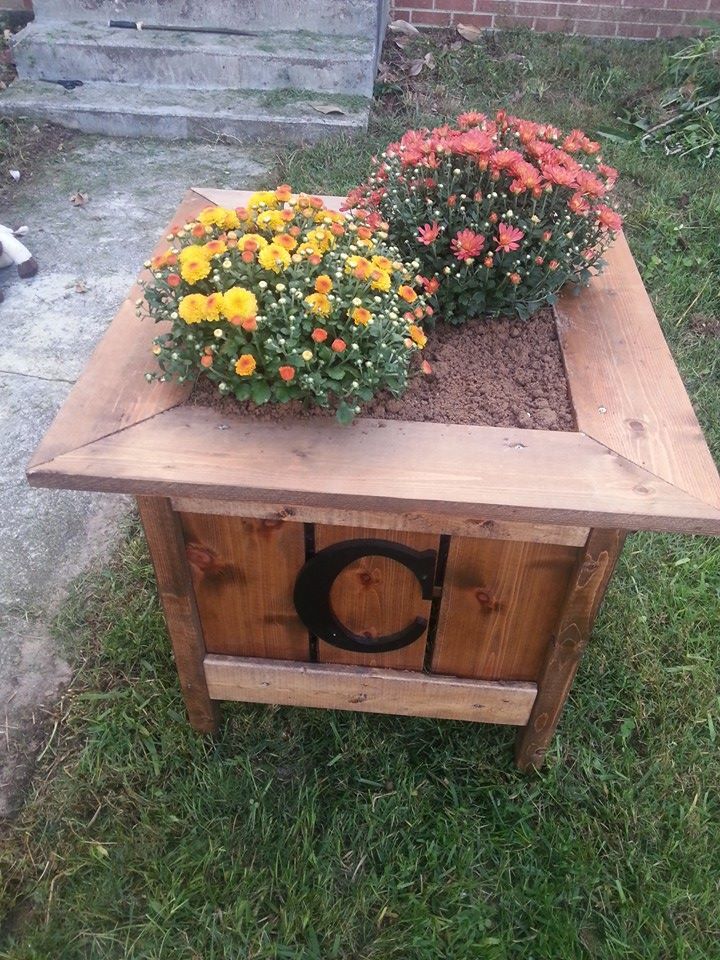
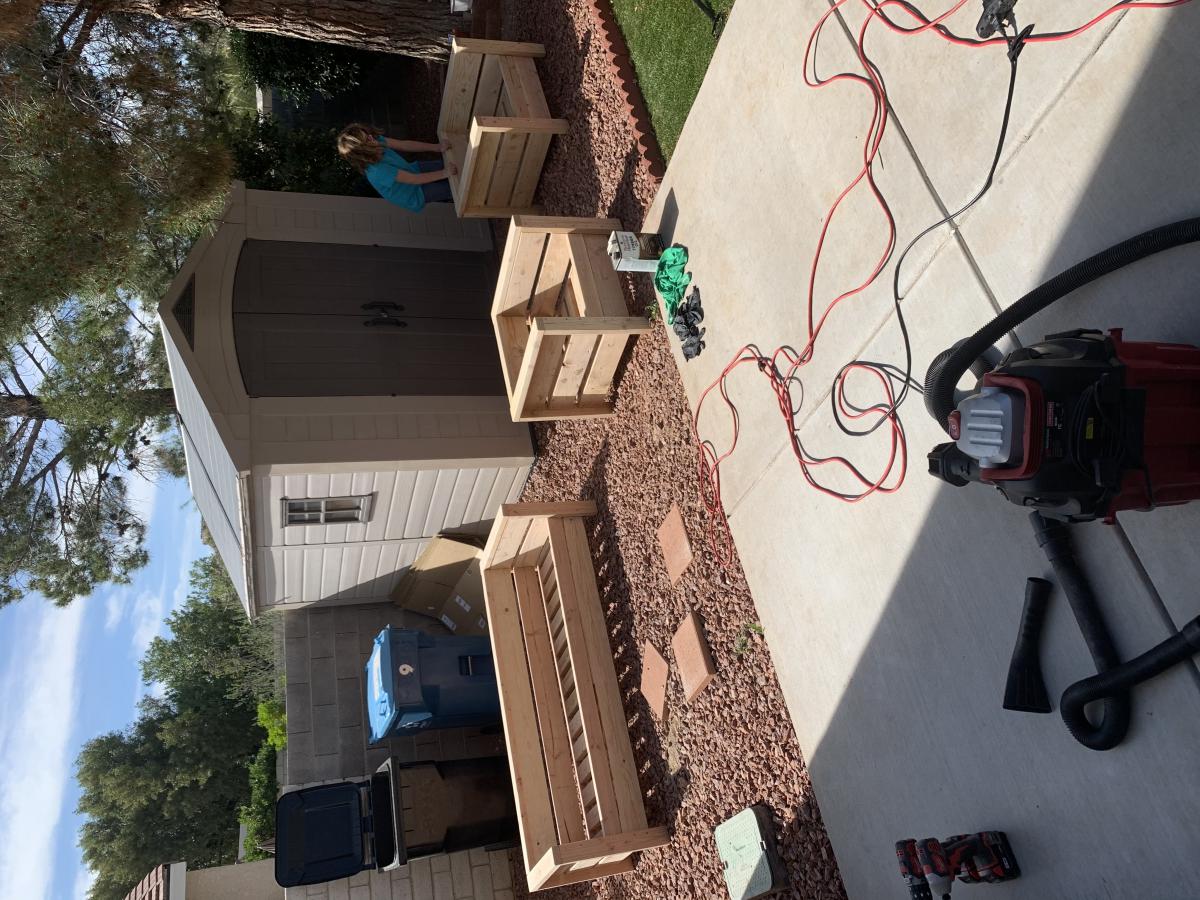
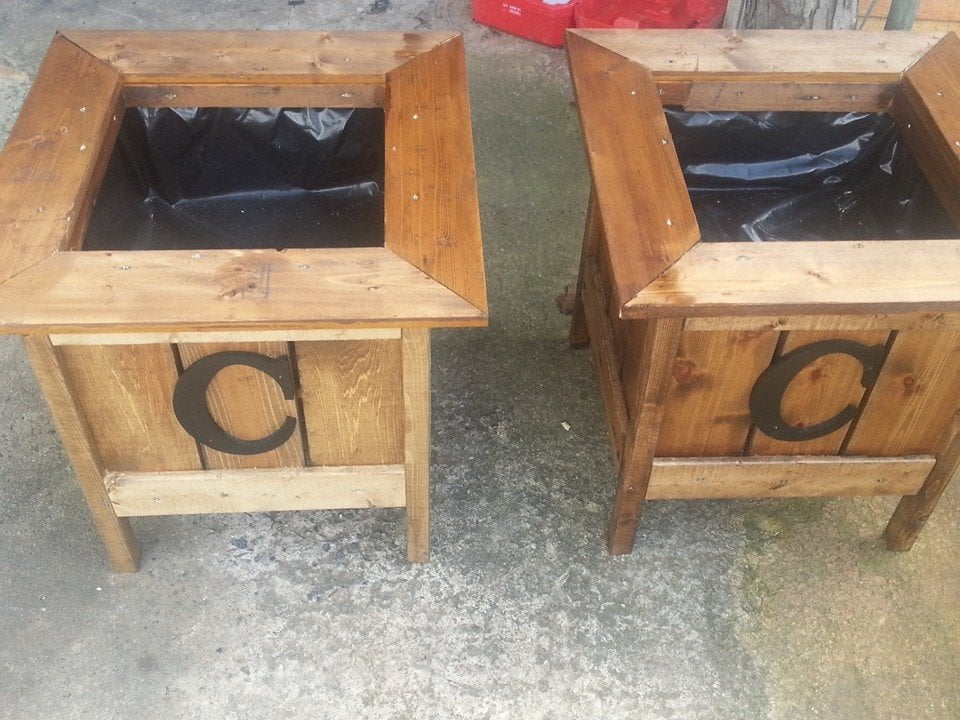
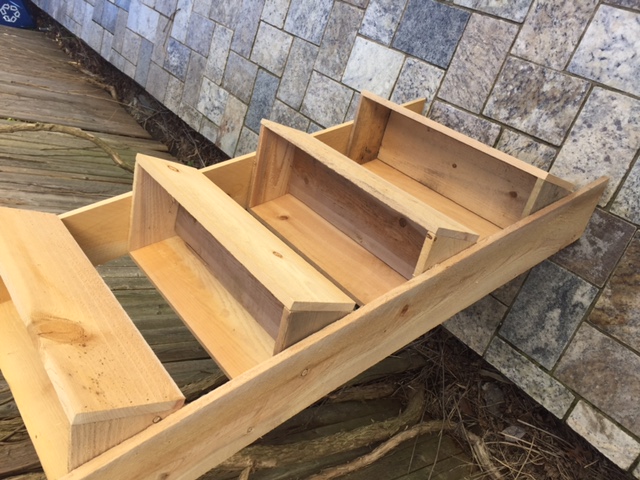
I used your "cedar planters for less than $20" plan and modified it to create two beautiful planters for my house. I framed out the top of the planter to give it a more complete look. Also, I added a "C" for our last name. -Shaye

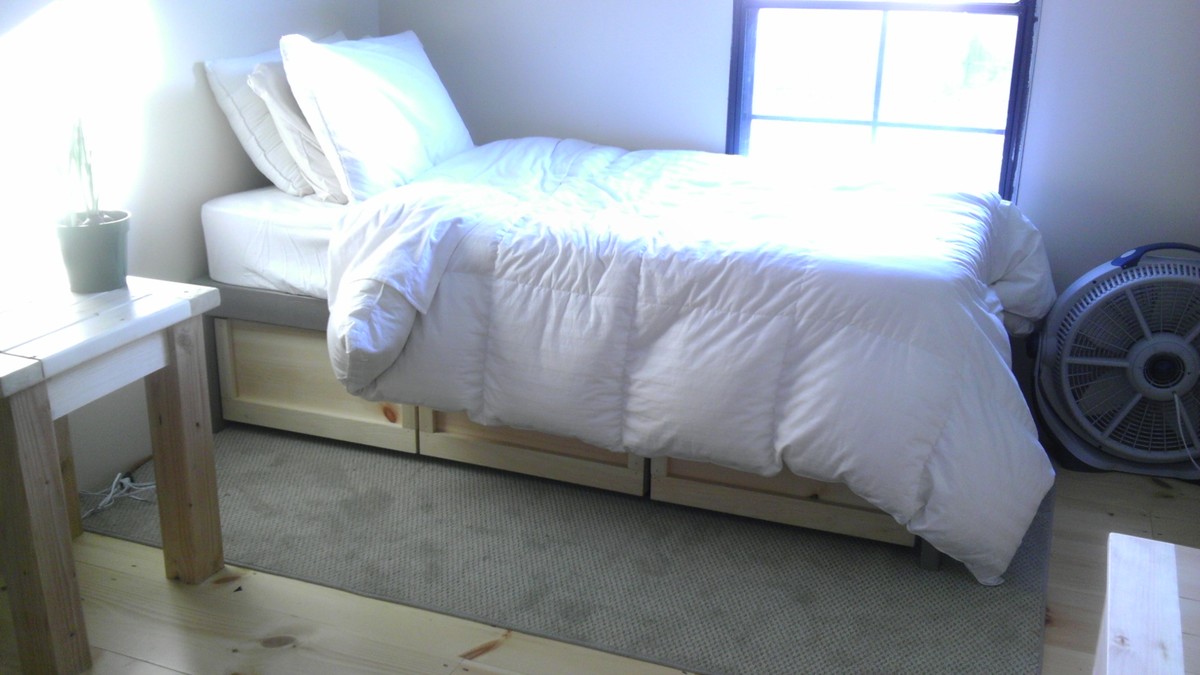
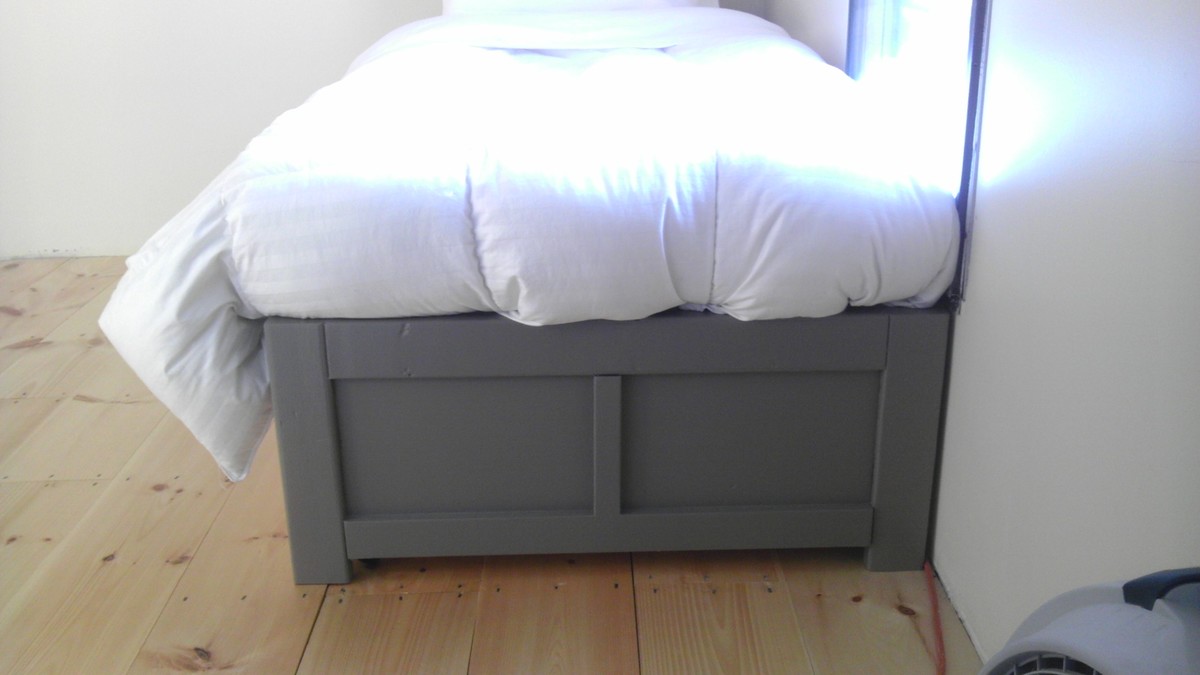
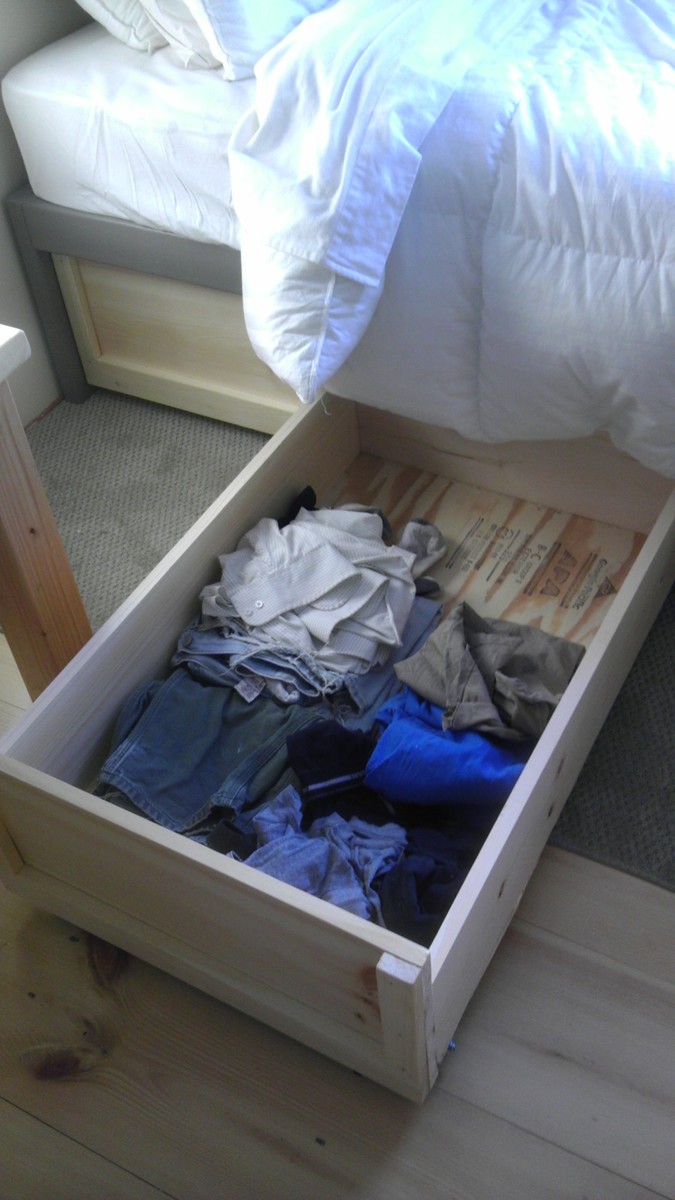
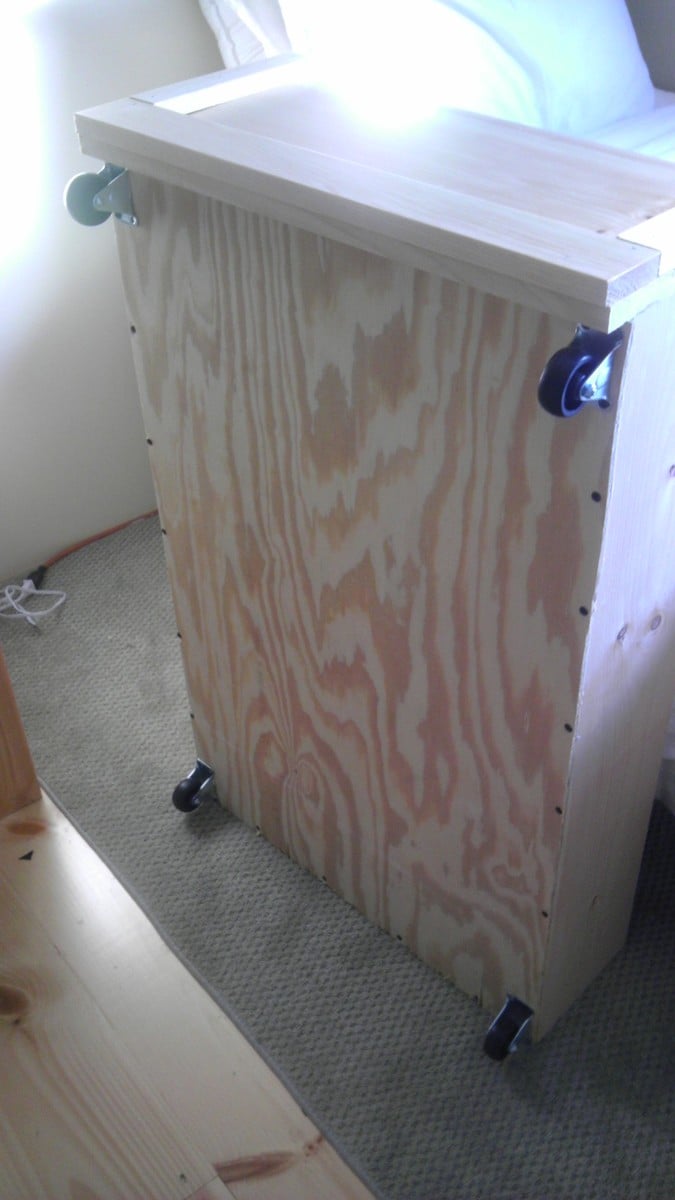
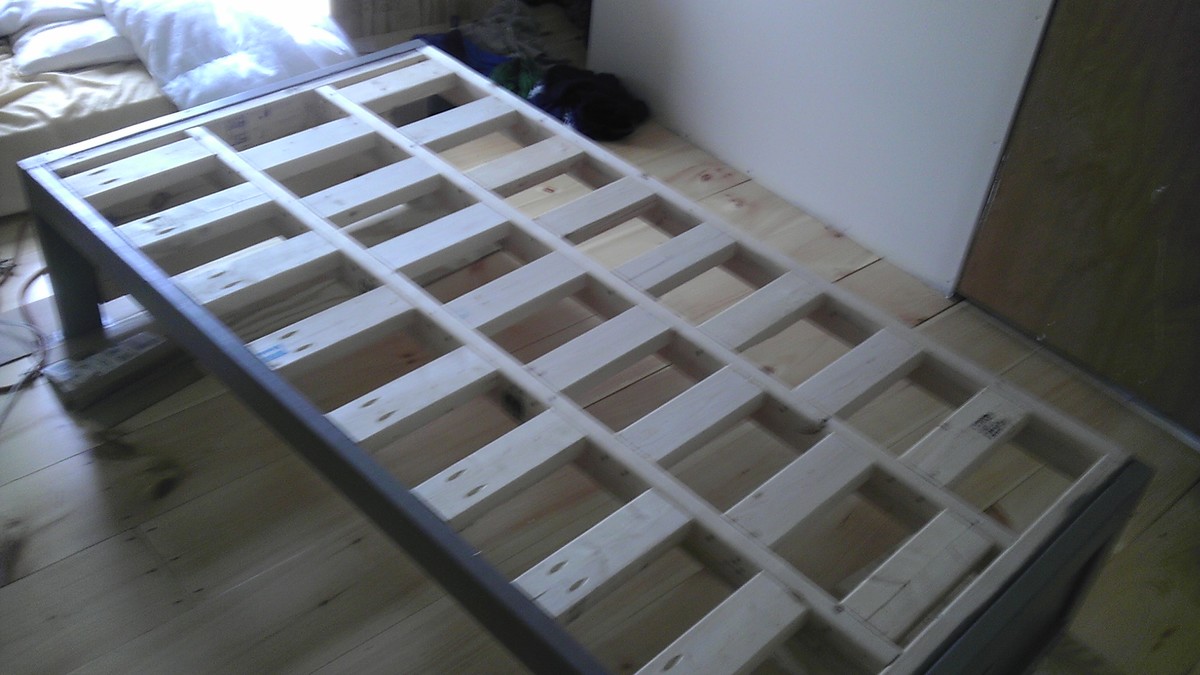
This was one of the first projects I've ever built, so I would put it at a beginner level. It's a great, sturdy bed, very simple. The drawers are huge, which is surprising, since you don't realize how much space you gain when you add the drawers until you see how much they store. Thought I'd fill in details that worked for me that I had to figure out. As the plan says, the drawers are on caster wheels and slide directly on the floor, so make sure you have an area rug down if it's going to be on bare wood (especially pine, like this one is on). As another reviewer said, use 2" caster wheels, 12 total. This gives it the right height on a wood floor. You can get those in bulk at a home improvement store. I would recommend a slat system and not just a piece of plywood for under the mattress, as I was warned bacteria and mold can grow when the mattress is not given a way to vent. You can see in the picture, I had a bunch of 2x4 scraps and simply made a slat system out of that. I pocket holed the slats into the front of the bed, so no screws would be showing. I only finished the sides that would ever show, so the entire back of the drawers and bed itself are unfinished. I like the look of the drawers without handles, and they are just as easy to pull out without them. The drawers can get off track easily when being pulled in and out, so be careful when you use them. Otherwise, no problems with the drawers. I used wood glue and cheap drywall screws to attach the drawer bottoms (plywood) to the drawers. If you want to put anything of any serious weight in these drawers, really consider supporting the middle of the drawers on the bottom with some 1x2s or 1x3s, as it is a bit weak in the middle of the drawers. One more thing: I noticed standard dimensions vary slightly between finishing wood (1x12s, 1x2s, etc) and structural wood (2x4 studs), so keep that into account. Things were not flush because the finish wood was scaled larger than the structural wood. This bed is all about the storage underneath, which is great.


Tue, 08/13/2019 - 10:38
What an awesome build! I'm so sad I did not see this brag post earlier!
We appreciate all the details, I love that you made this bed even better than our plans!
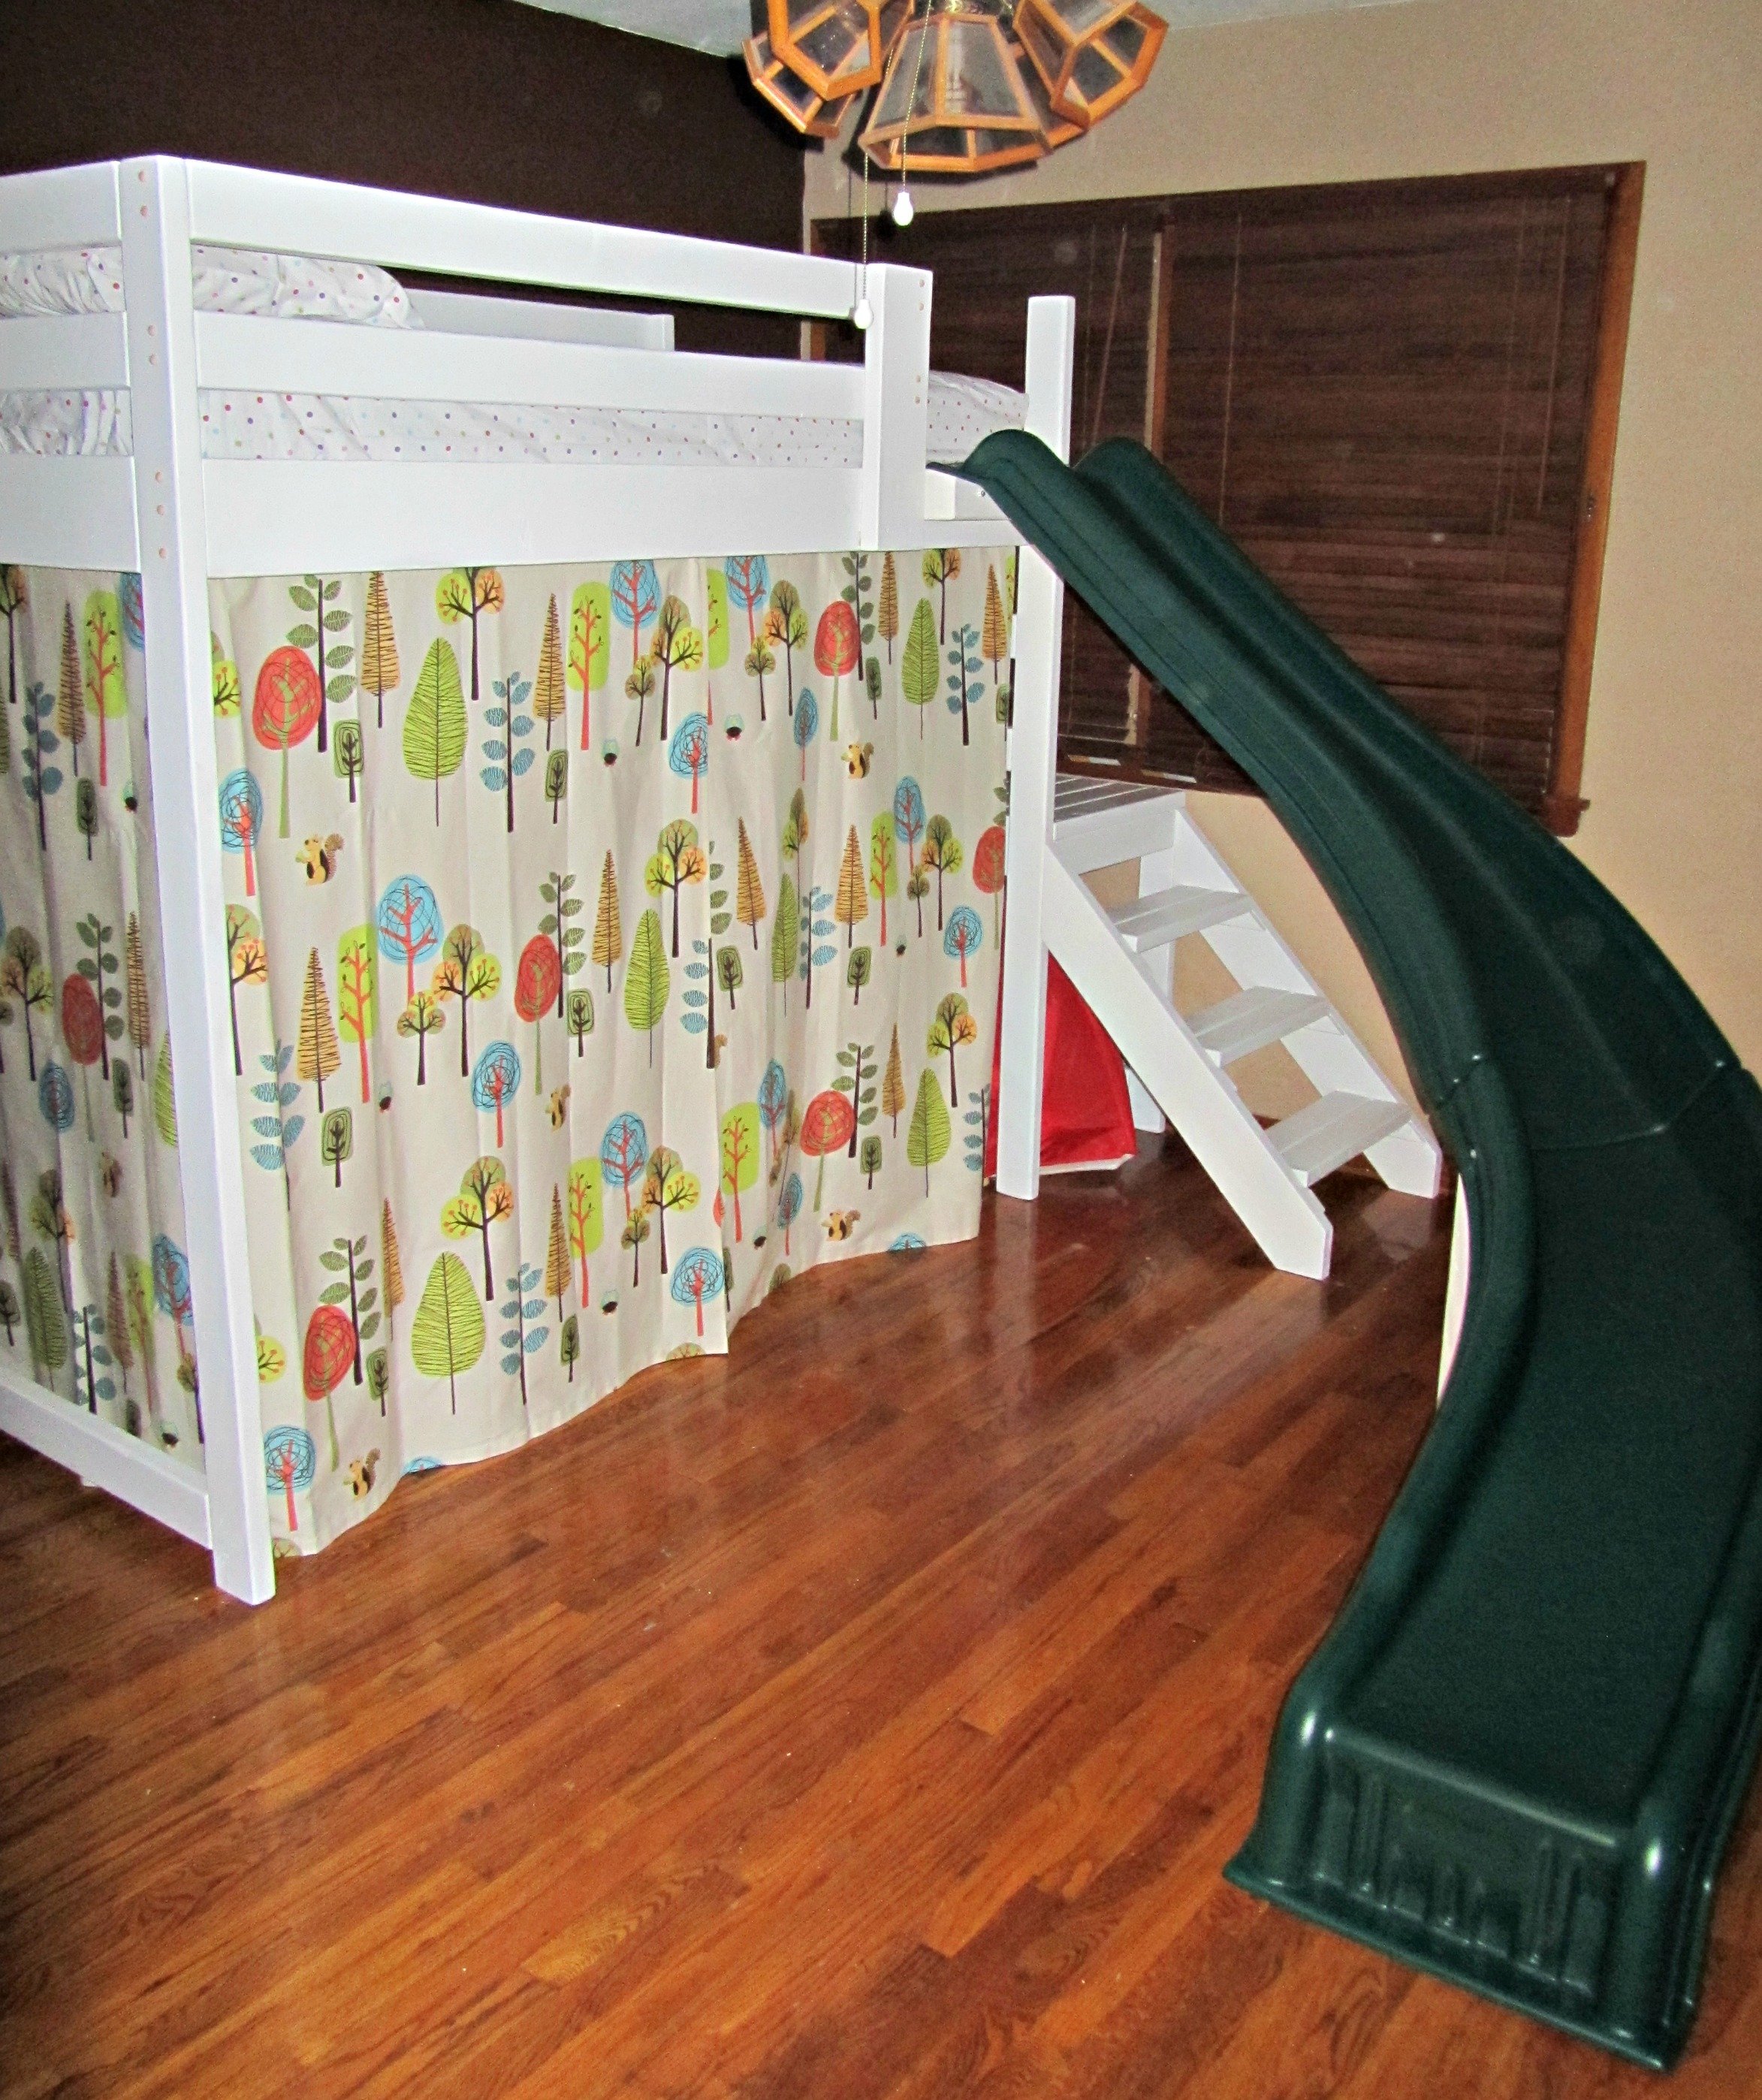
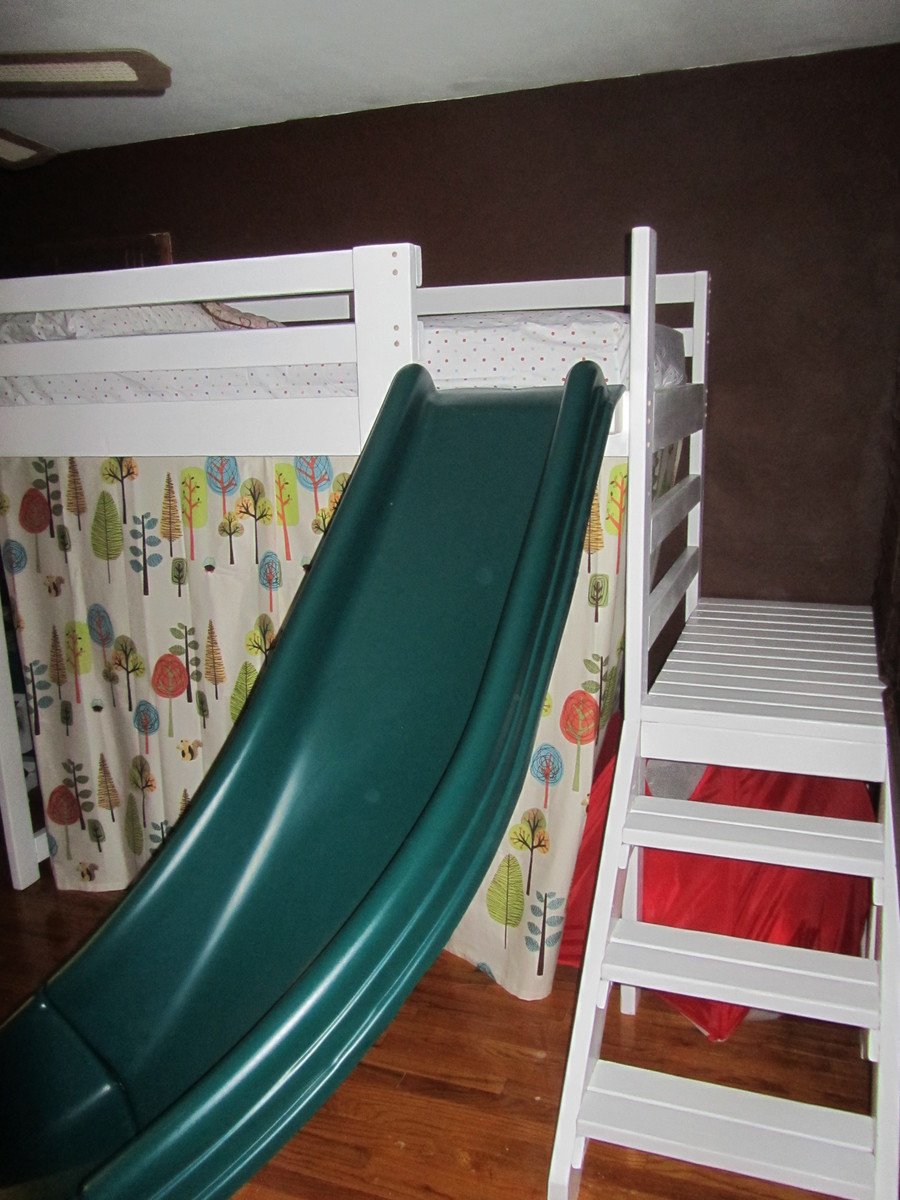
I'm a beginner at this, so for the most part I followed Ana's plans to building the Camp Loft Bed with Stairs. I made a few tweaks, including adding a slide to the front, putting the stairs on the other side, raising it by 7" (since there is a toddler bed underneath), and using hemmed shower curtain to create a fort underneath.
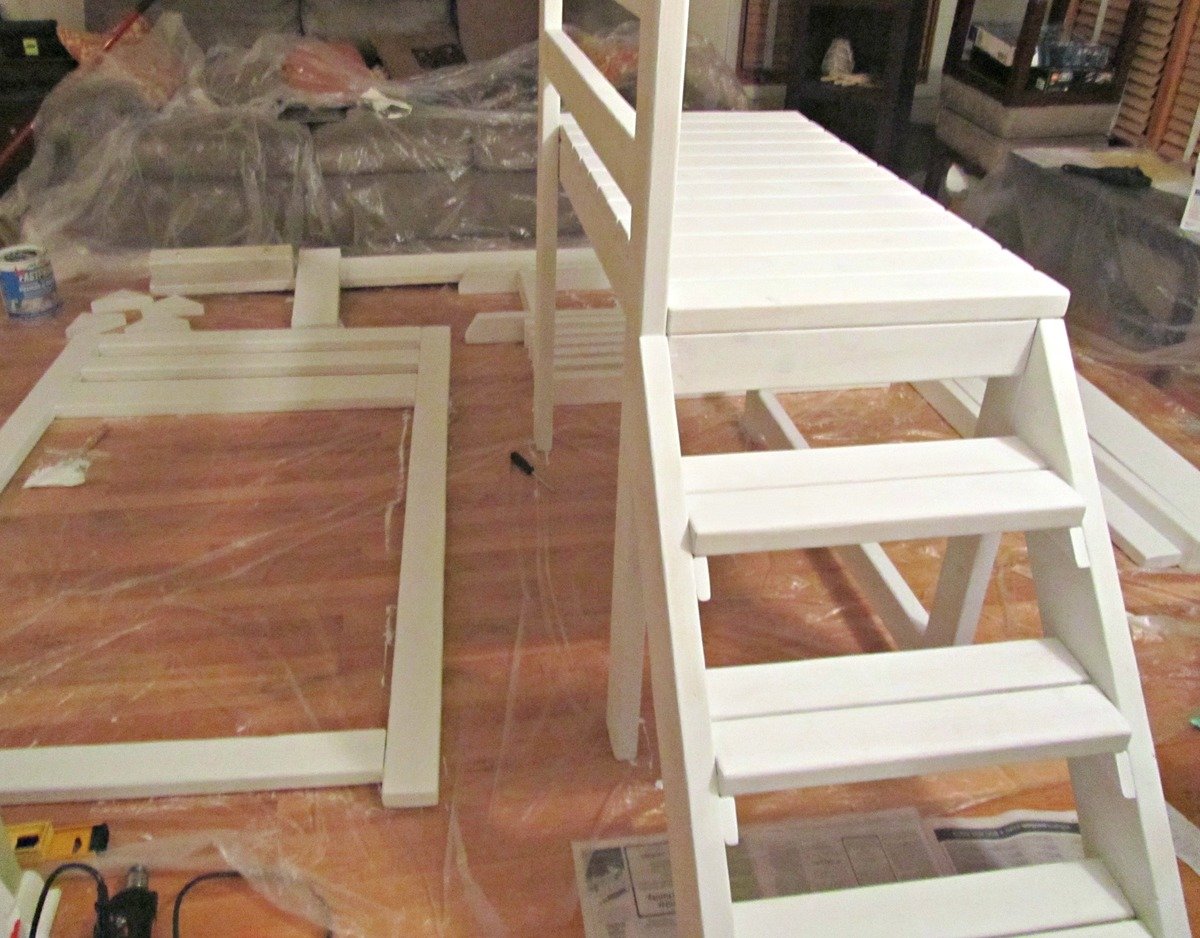
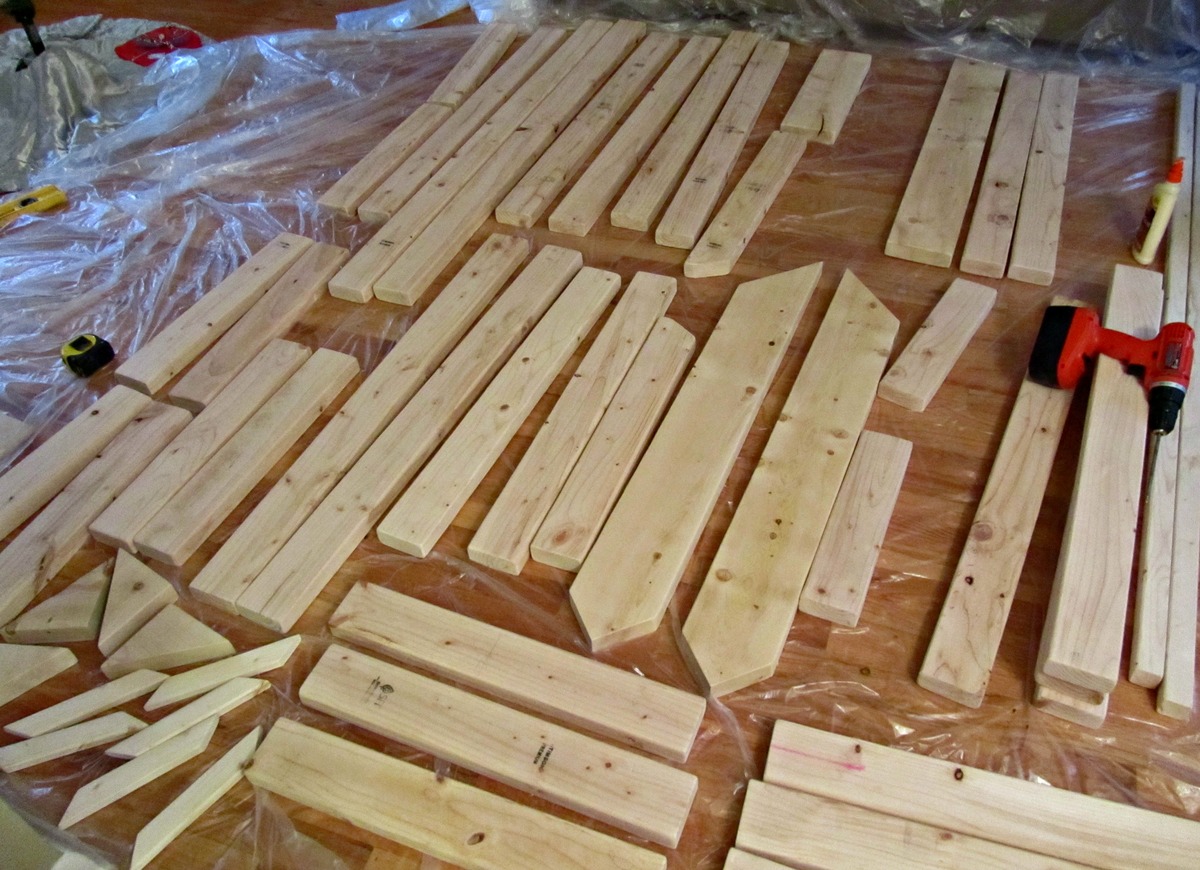
I made all the cuts with a miter saw and sanded all the wood down. I then glued and screwed the stairs, platform, and end pieces together. All the wood then got 1 coat of primer and paint. Then on Christmas Eve the bed was assembled in the kids' room. The sanding, priming, and painting took the longest. Cutting it and putting it together didn't take long.
For the railings, I did all screws from the outside to give a stronger hold than the pocket holes, and used 3 3/4" screws for the weigh bearing pieces. I counter sunk all the screws and added buttons to cover them (not yet painted in the photos). I also mounted the 45 degree 2x6 cuts in the 4 weight bearing corners to add extra bracing (not pictured). To brace the slide, I glued and bolted a 4x4 on the front of the bed. The curtains are just 2 off the shelf shower curtains that got hemmed to the correct height, and then were mounted using small teacup hooks. I plan to add an eyehole to each side, so they can be pulled back and hooked open.
Mon, 05/27/2013 - 13:35
Bmas, this is AMAZING! As we get ready to move to a new home, it's a great excuse to build the new kids bed and kitchen table I've had on the back burner.... Where did you get your slide if we wanted to go the same route?
Thanks,
David
Mon, 05/27/2013 - 13:36
Bmas, this is AMAZING! As we get ready to move to a new home, it's a great excuse to build the new kids bed and kitchen table I've had on the back burner.... Where did you get your slide if we wanted to go the same route?
Thanks,
David
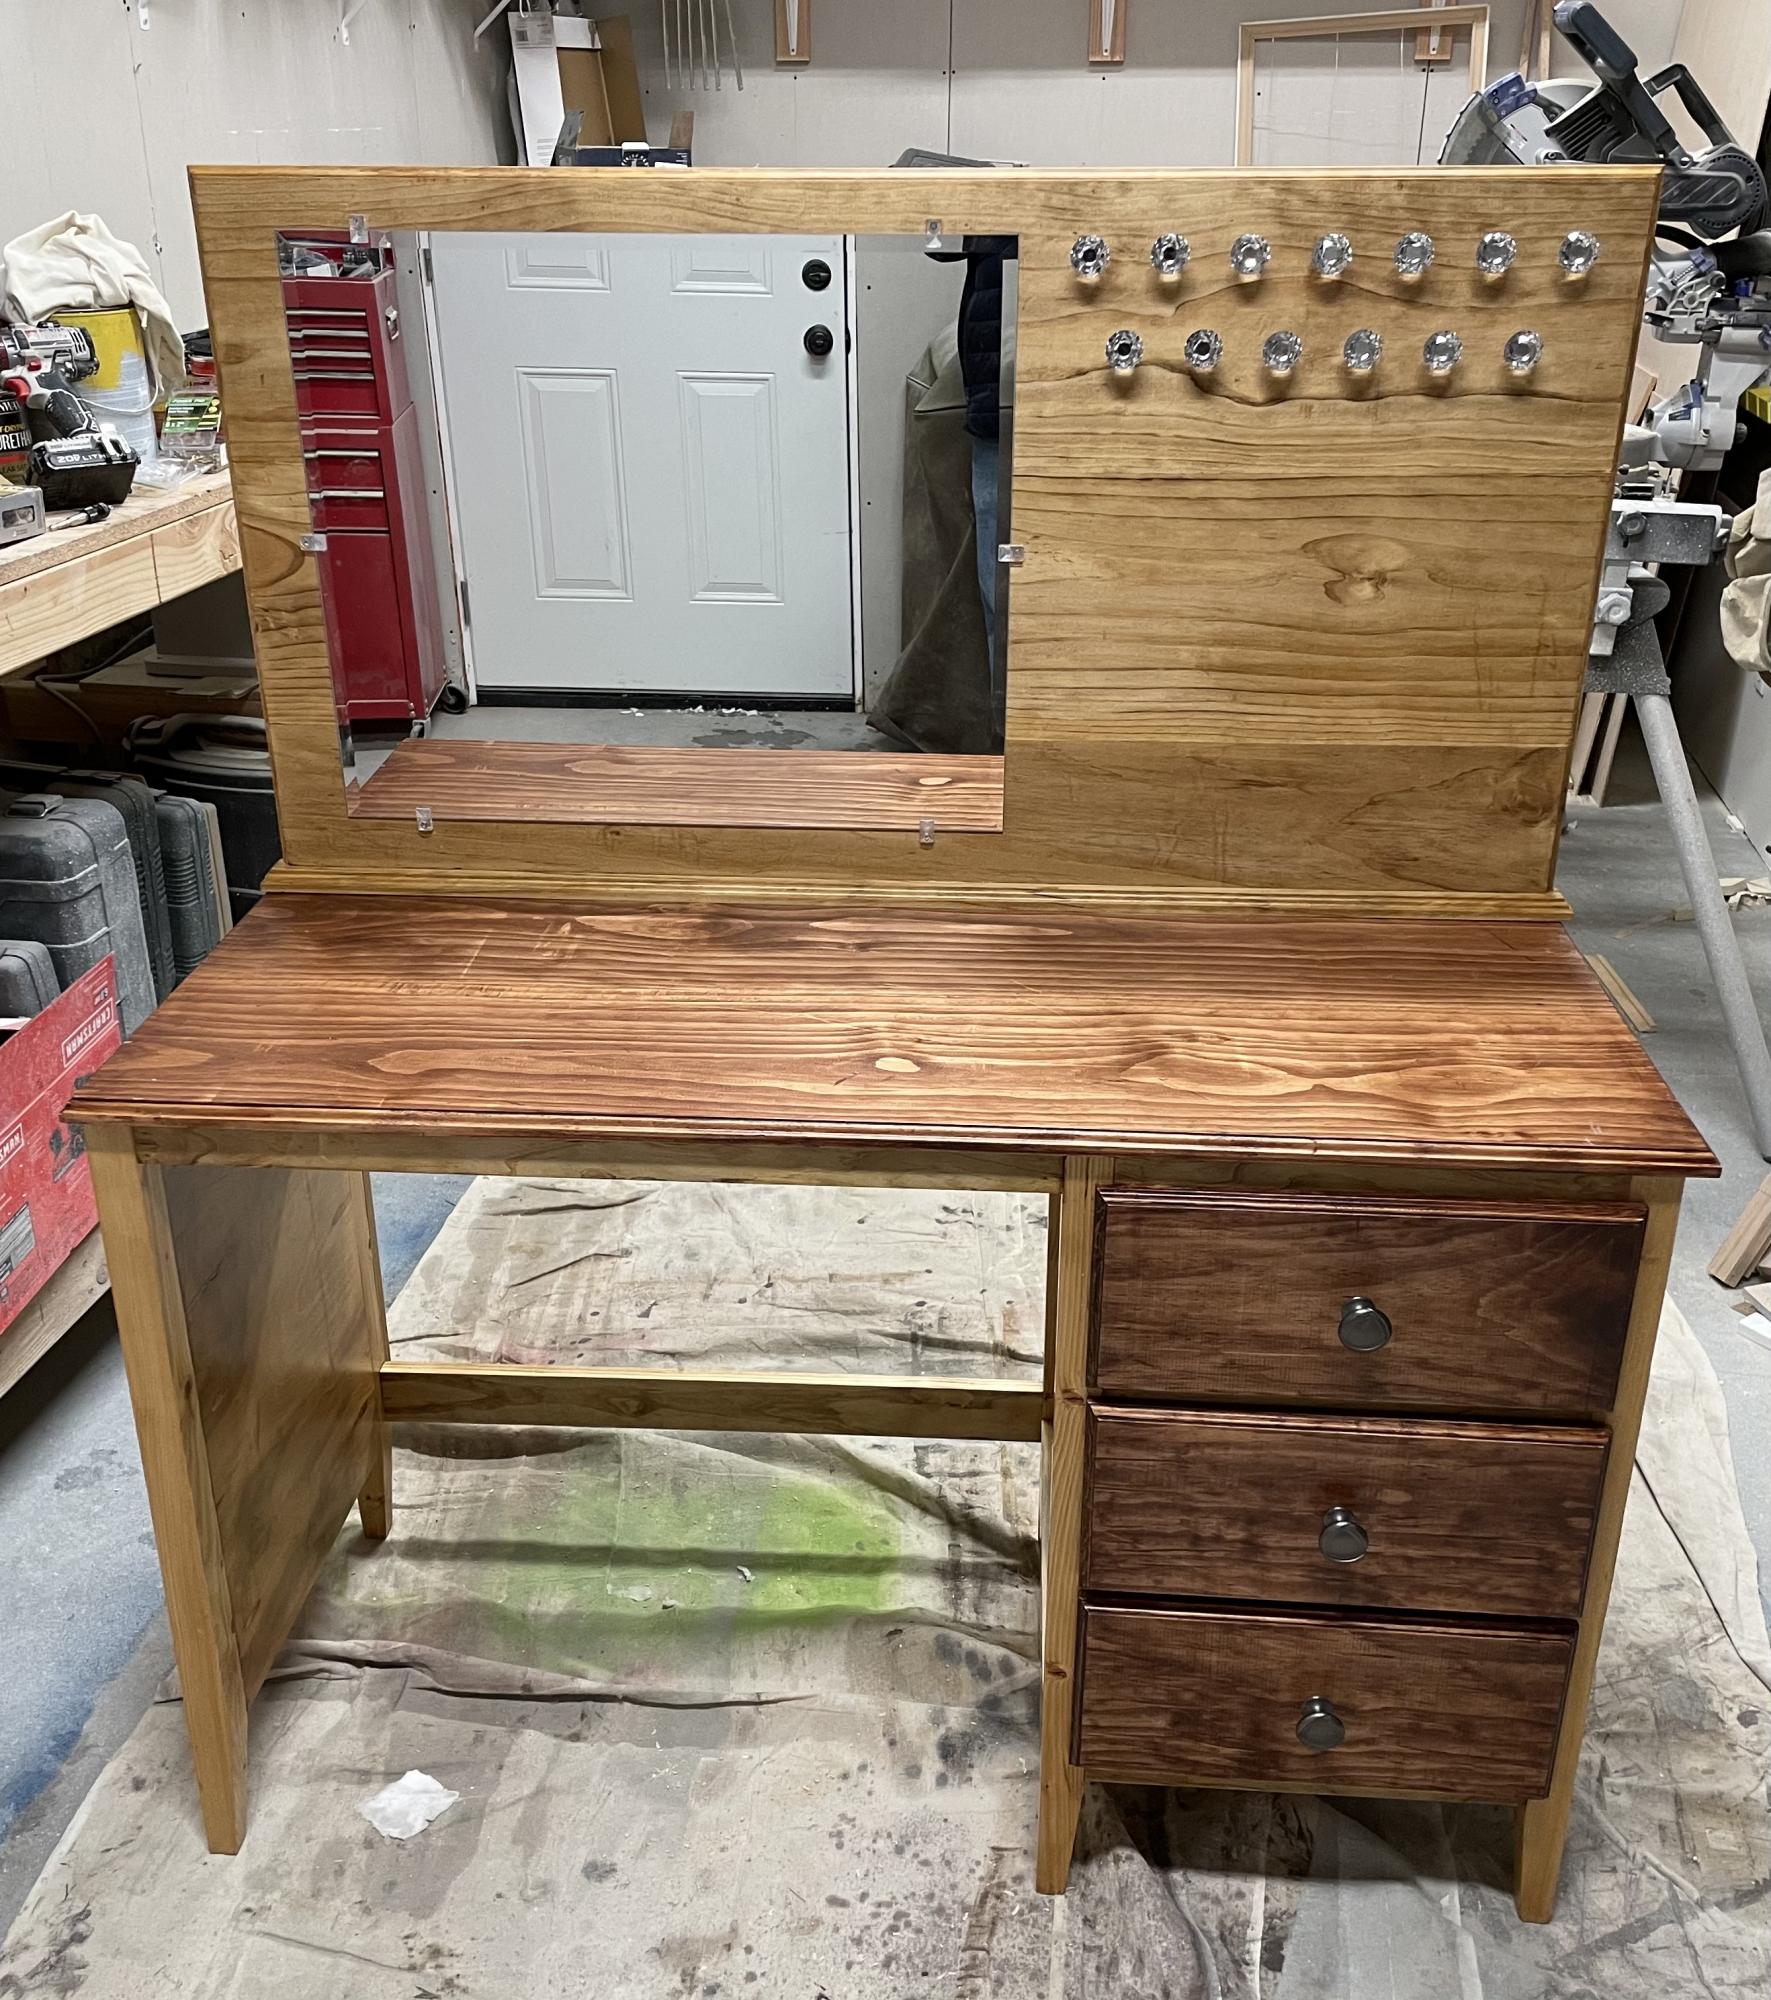
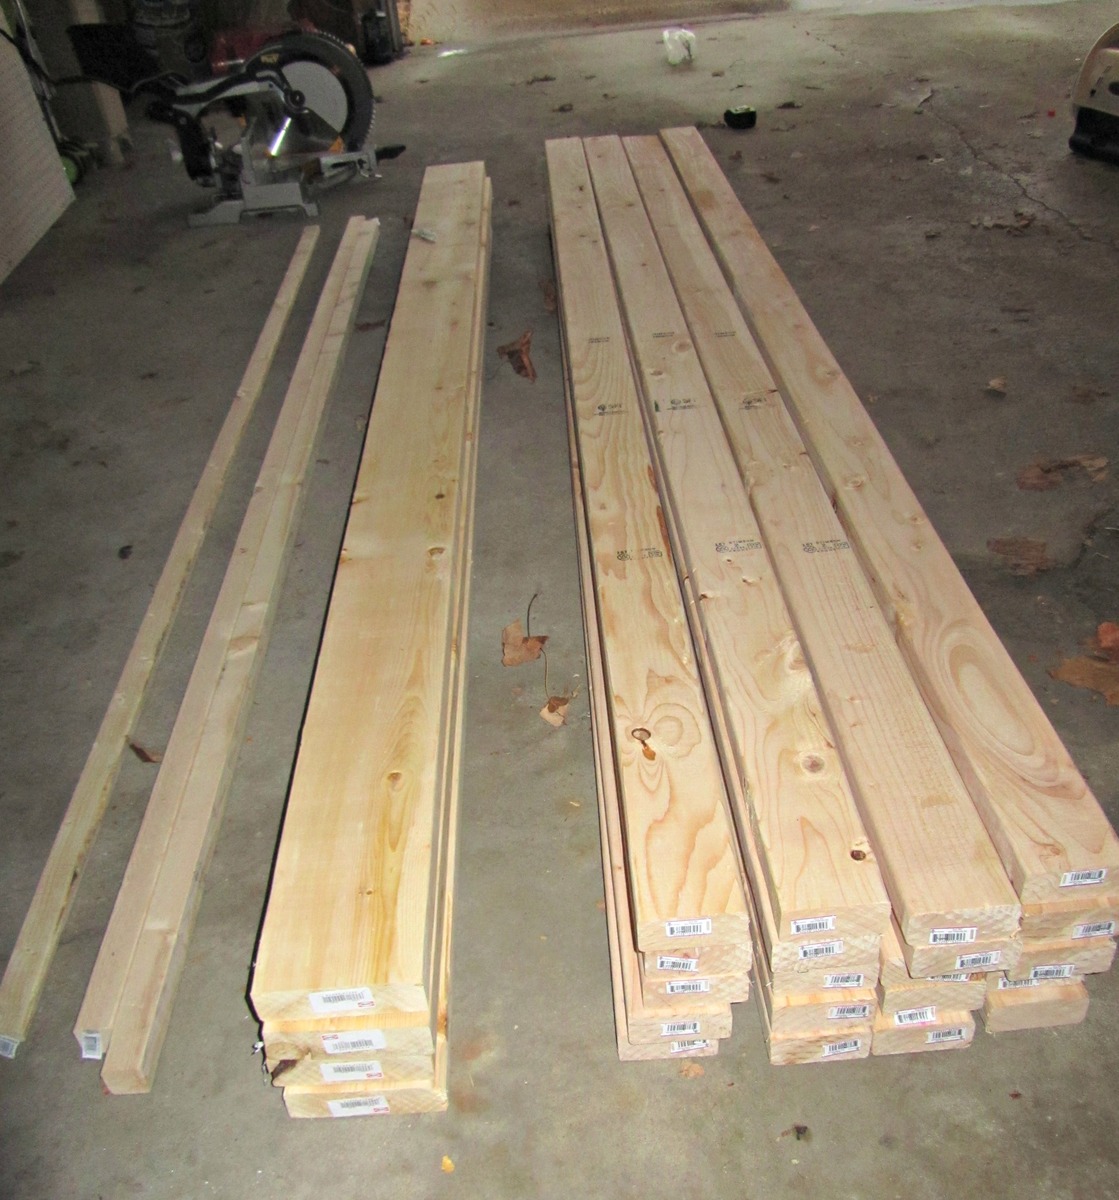
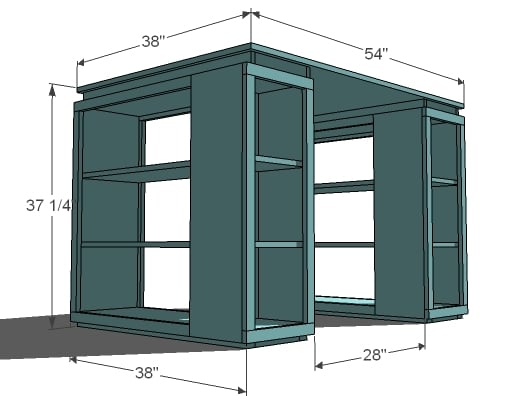
I built this for my adult daughter’s Christmas present. I modified the plan to have three drawers instead of the cubby. I also tapered the bottom of the legs. I added a back piece to hold a mirror. I also added door knobs to the back for necklaces.
The top and the back board are both 4 boards glued and clamped together. I finished the edges of the top, drawer fronts, and the back board with an ogee router bit.
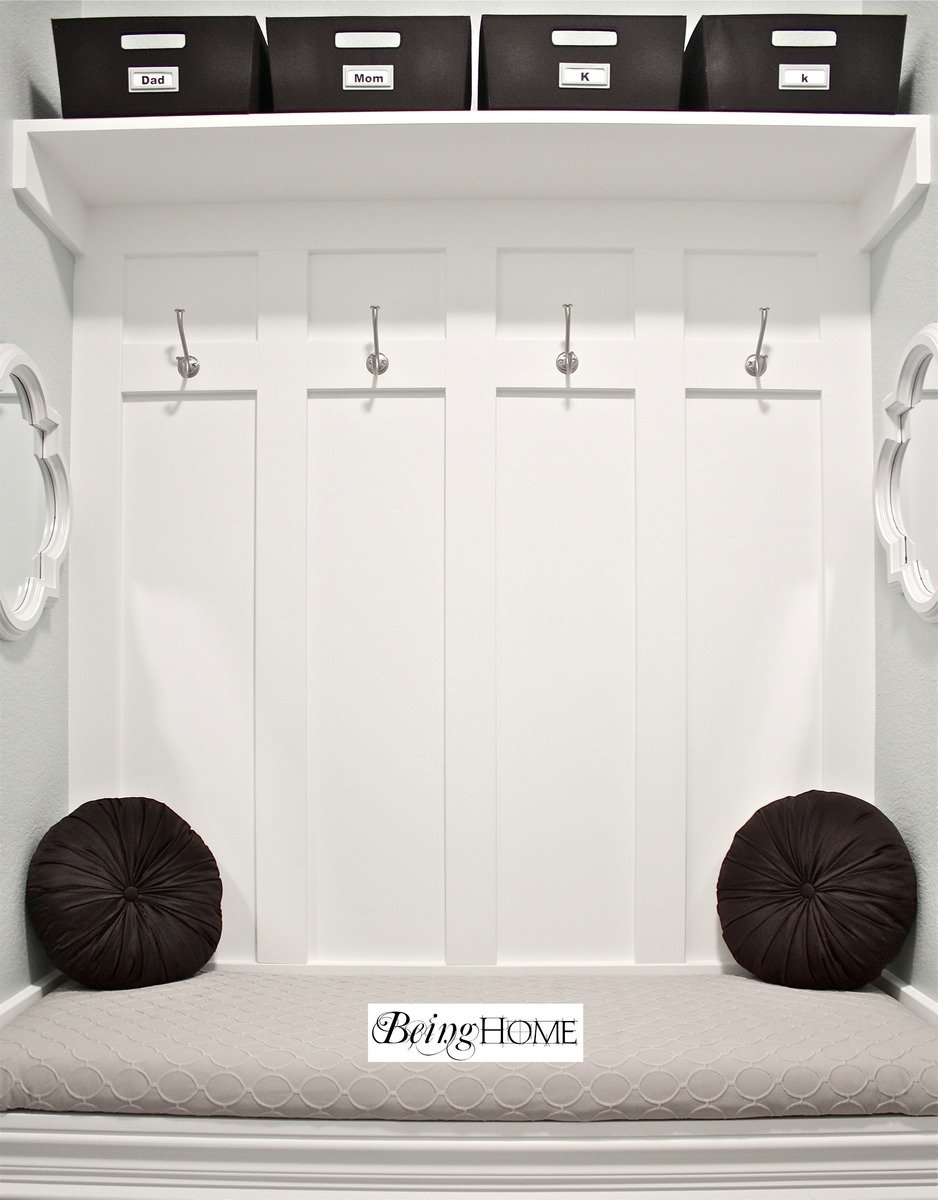
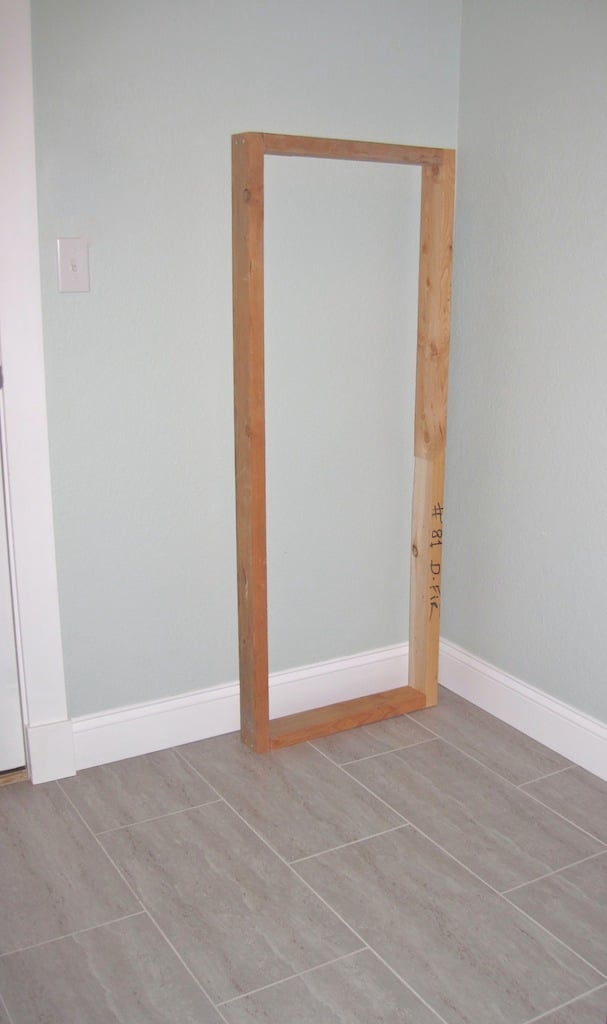
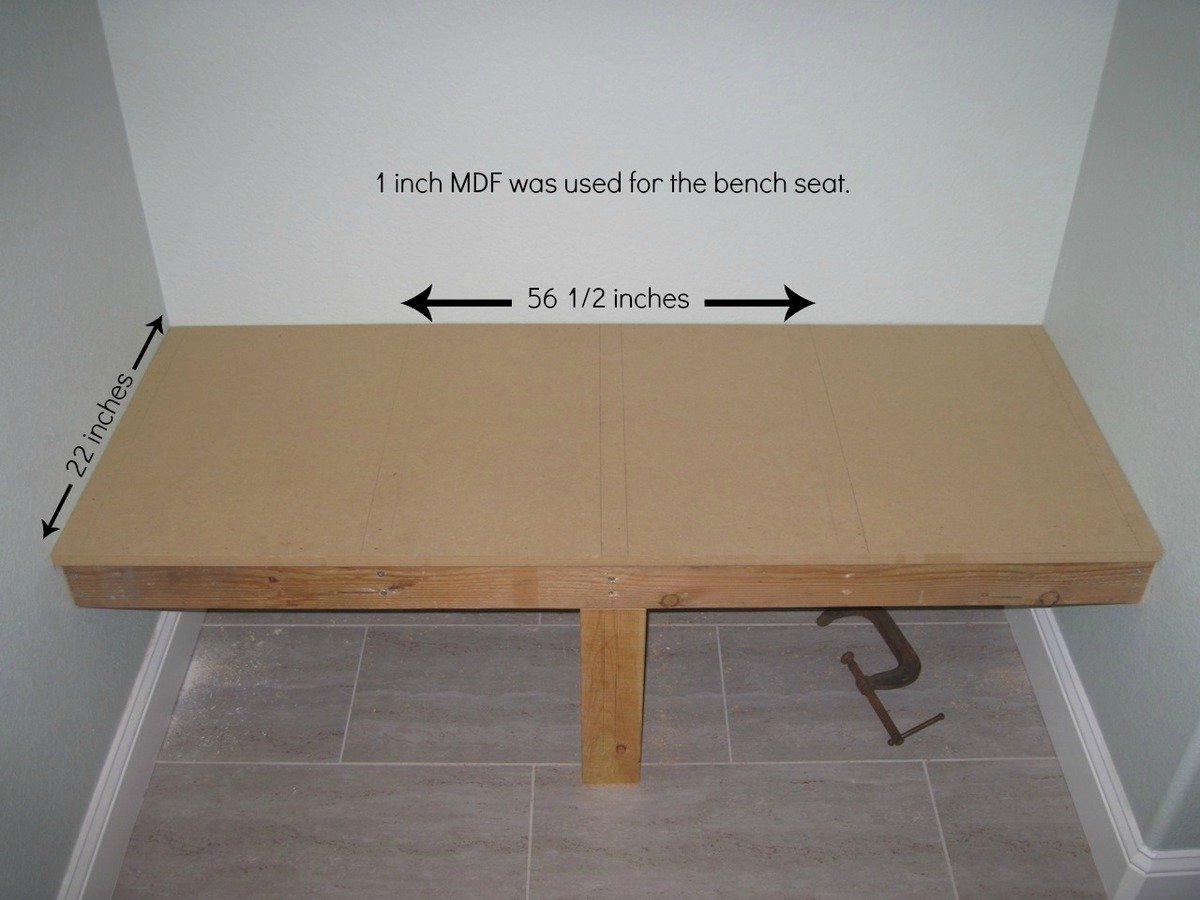
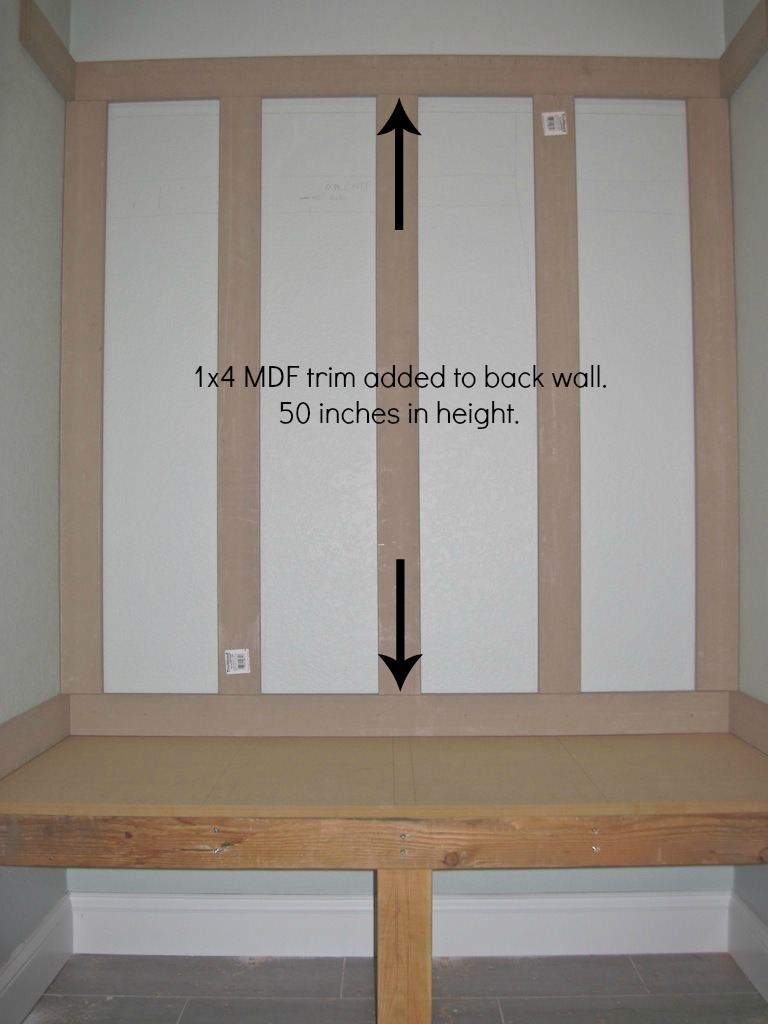
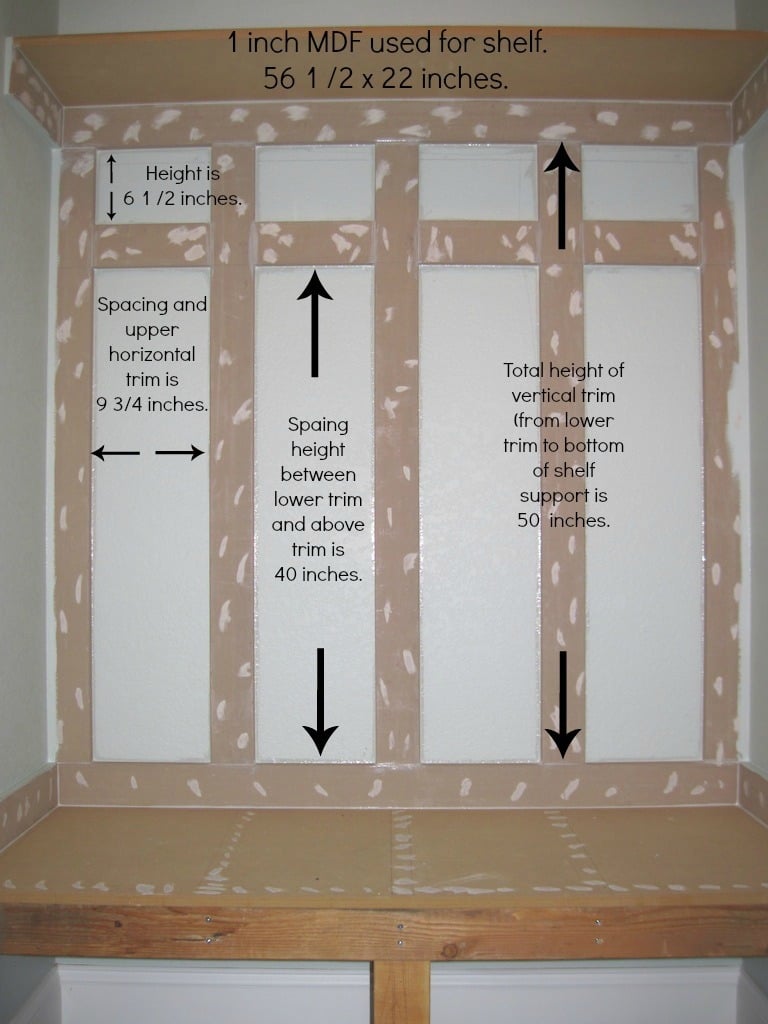
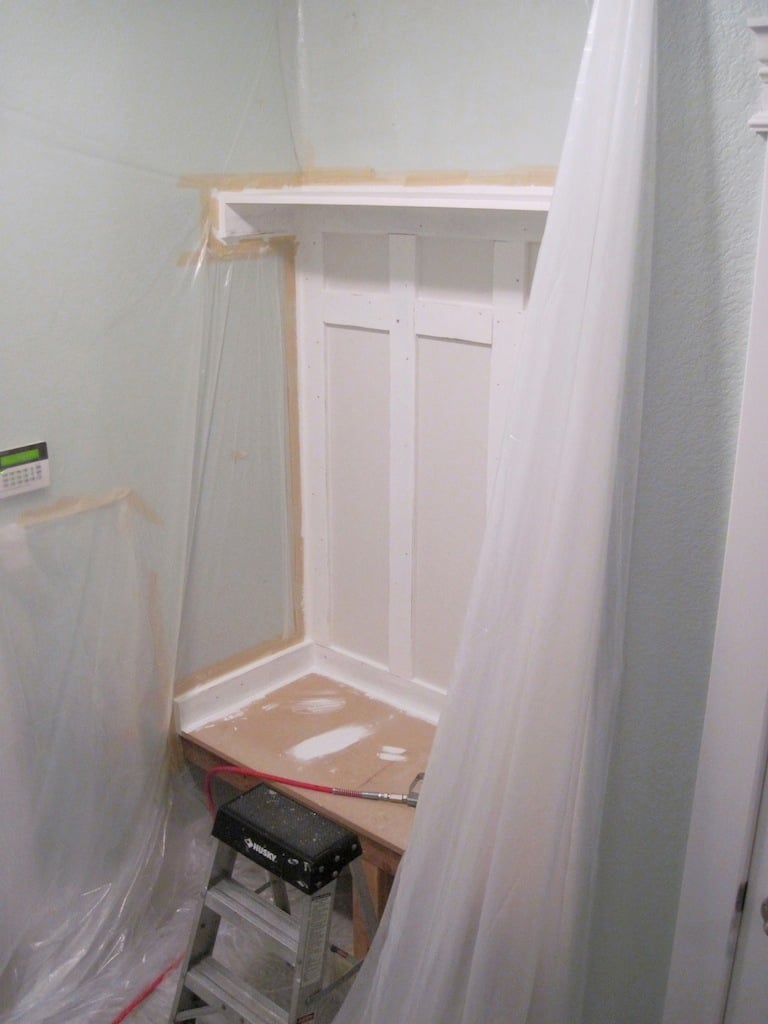
With much needed seating in the mudroom, an unused space (nook) was used to build a mudroom bench and shelf. No plans were used. I basically looked on-line and mentally drew up an idea of how I wanted the final product to look.
There were some setbacks such as not like the knock down textured walls (after partially painting the bench). I ended up covering the textured walls with hardboard and repainted.
A bench cushion was made for added comfort and style.
Complete tutorial for the bench is here and the bench cushion tutorial is here.
Thank you.
Julie
Thu, 05/16/2013 - 13:48
Thank you so much for the idea and plan. I used it to turn an extra laundry room that we have off of our garage into a much needed mudroom. The most challenging project I have ever done before is hanging blinds. But with your help and some from the Home Depot employees, I did it! Our family is more than happy with it. Thanks!!!
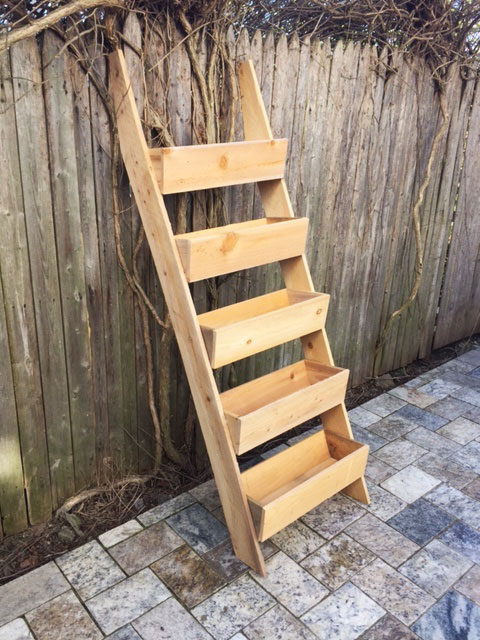
Instead of the 2X6, we used an additional cedar board to complete the sides and the ends of the planters. This was more cost effective and still provides enough support to hold the planters. This is a great alternative to the more expensive items we found online. We will be building multiple to put in an unused space in our yard. Great project!!

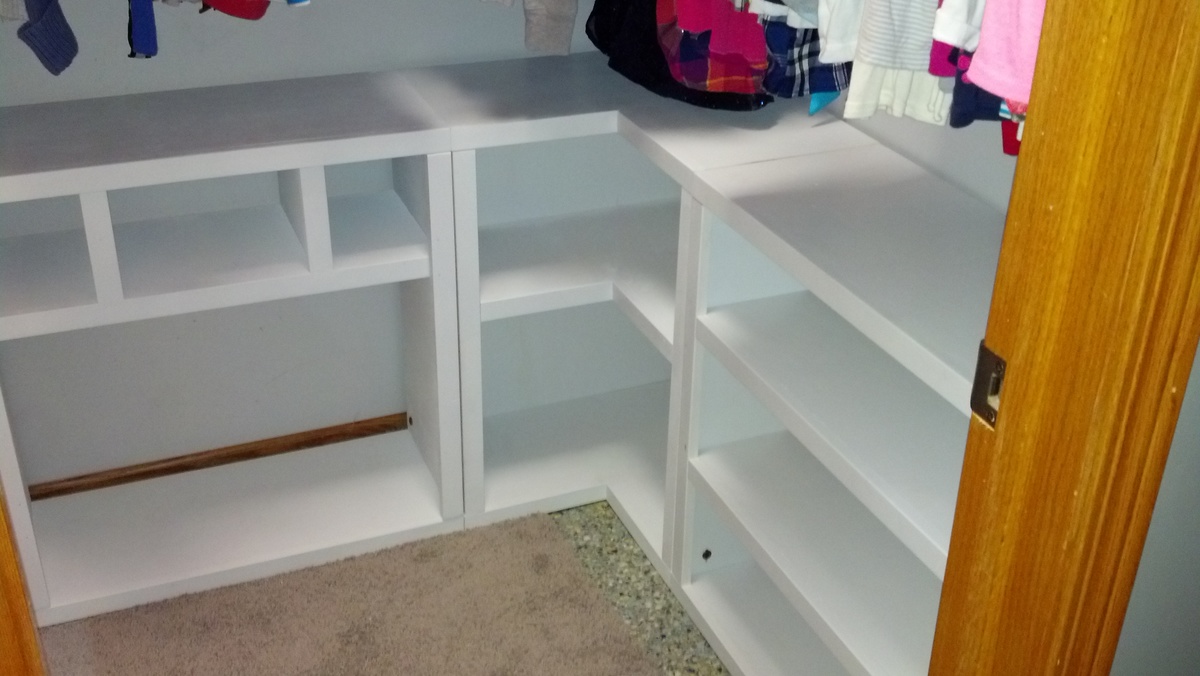
My daughter has a small walk-in closet, so I wanted to make some storage bases. I had a full sheet and half sheet of plywood each ripped into 4 pieces, with each piece 11 3/4" wide. I then built the sides and corner shelves separately and connected them with connector bolts. I have since added doors to the shelf on the left.
In reply to Wow! by Lady Goats
Fri, 03/08/2013 - 14:53
Good catch Gina - it's actually a sheet and a half of 3/4" ply, with some to spare. I forgot that I had to make another trip to get the extra half sheet (I made this a month ago). The corner unit also has 1/2" ply for the back, and since I was painting it, I bought the cheapest plywood I could. The vertical dividers are also made with scrap pieces of 1x pine I had lying around.