DIY Wood Bed Frame - A first woodworking project!
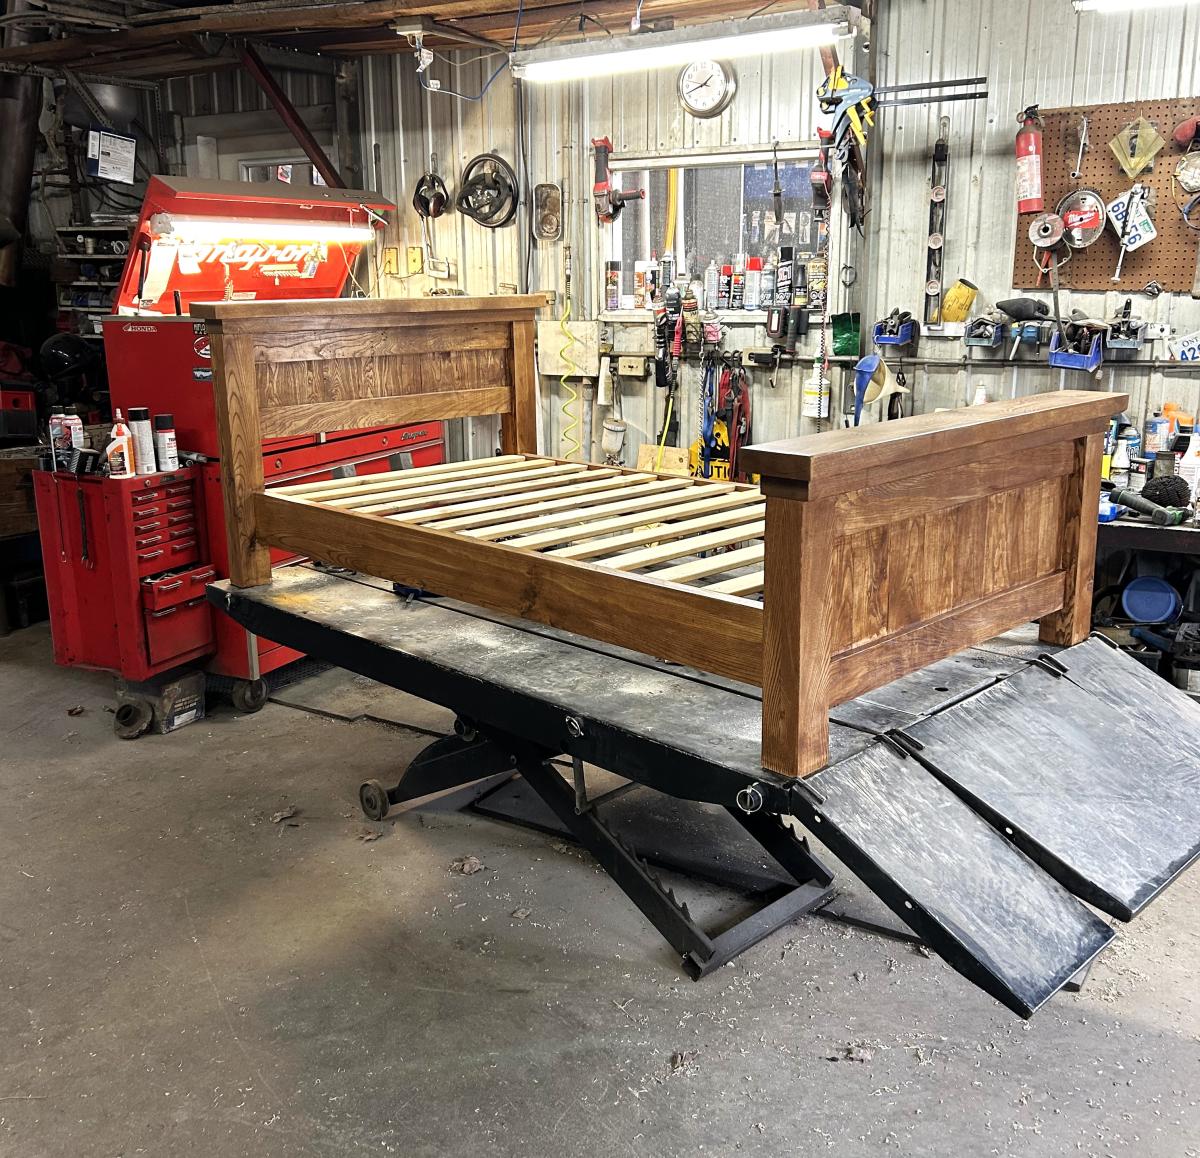
This was my first time building a pice of furniture. My daughter needed a bed and I had a bunch of ash lumber in my barn. Turned out great. Thanks for the great design.
Built from Plan(s)
This was my first time building a pice of furniture. My daughter needed a bed and I had a bunch of ash lumber in my barn. Turned out great. Thanks for the great design.
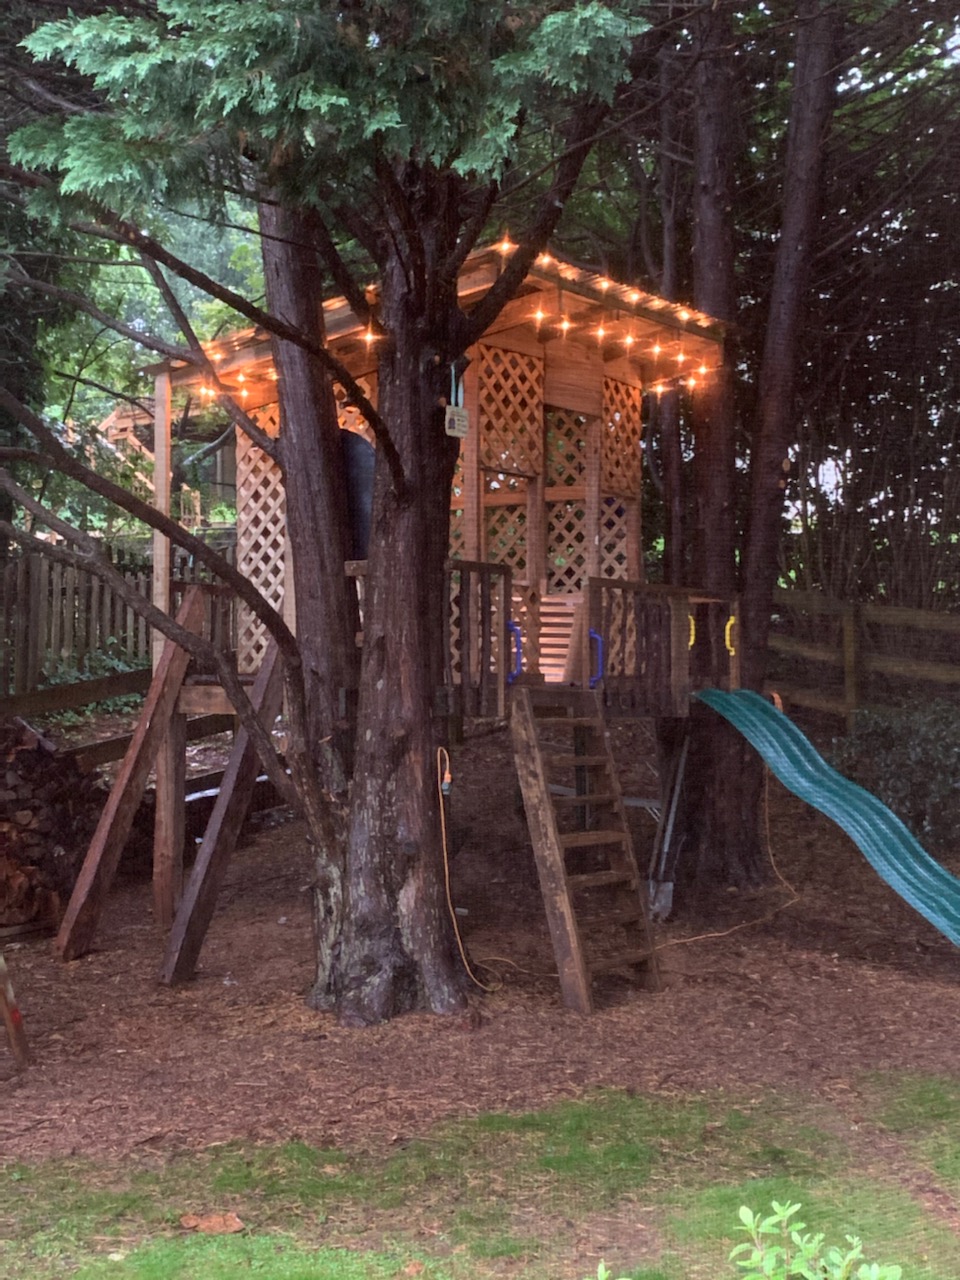
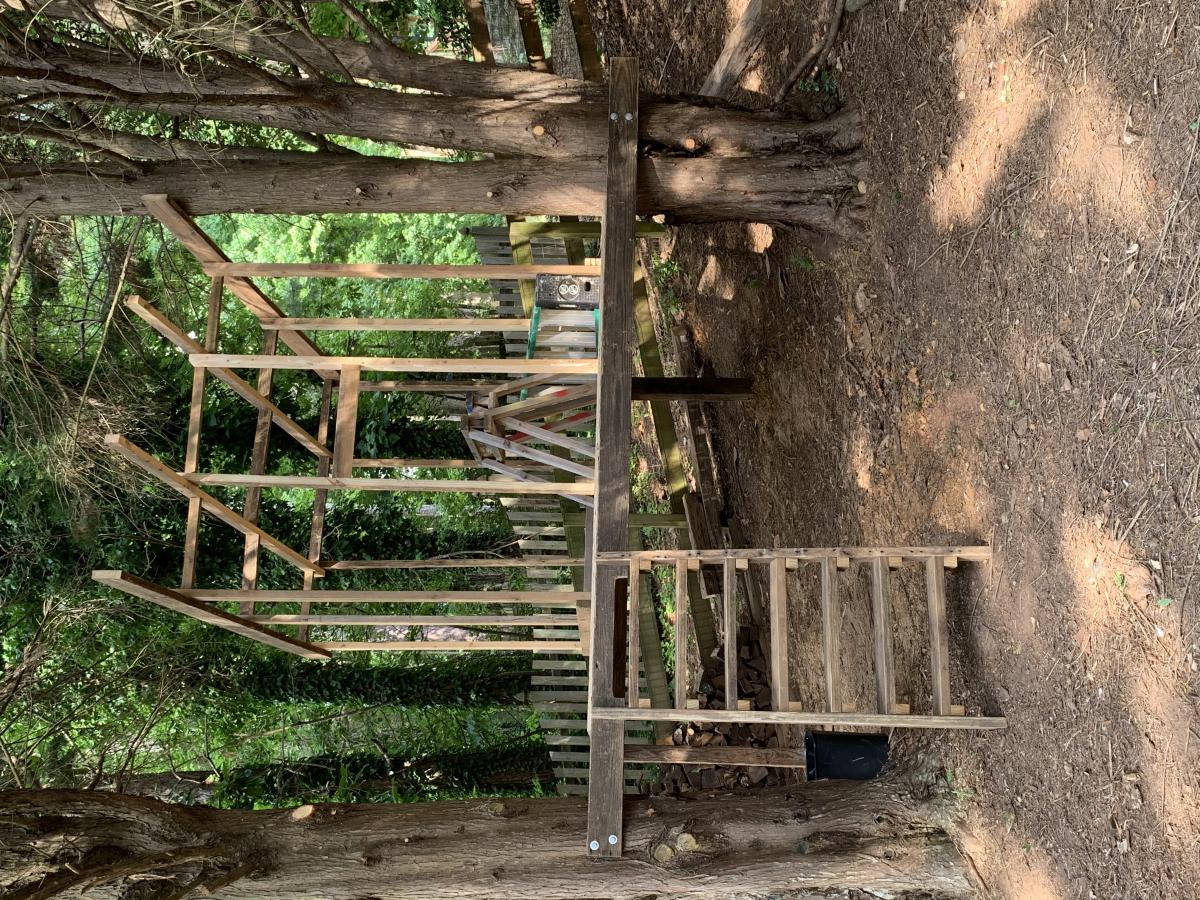
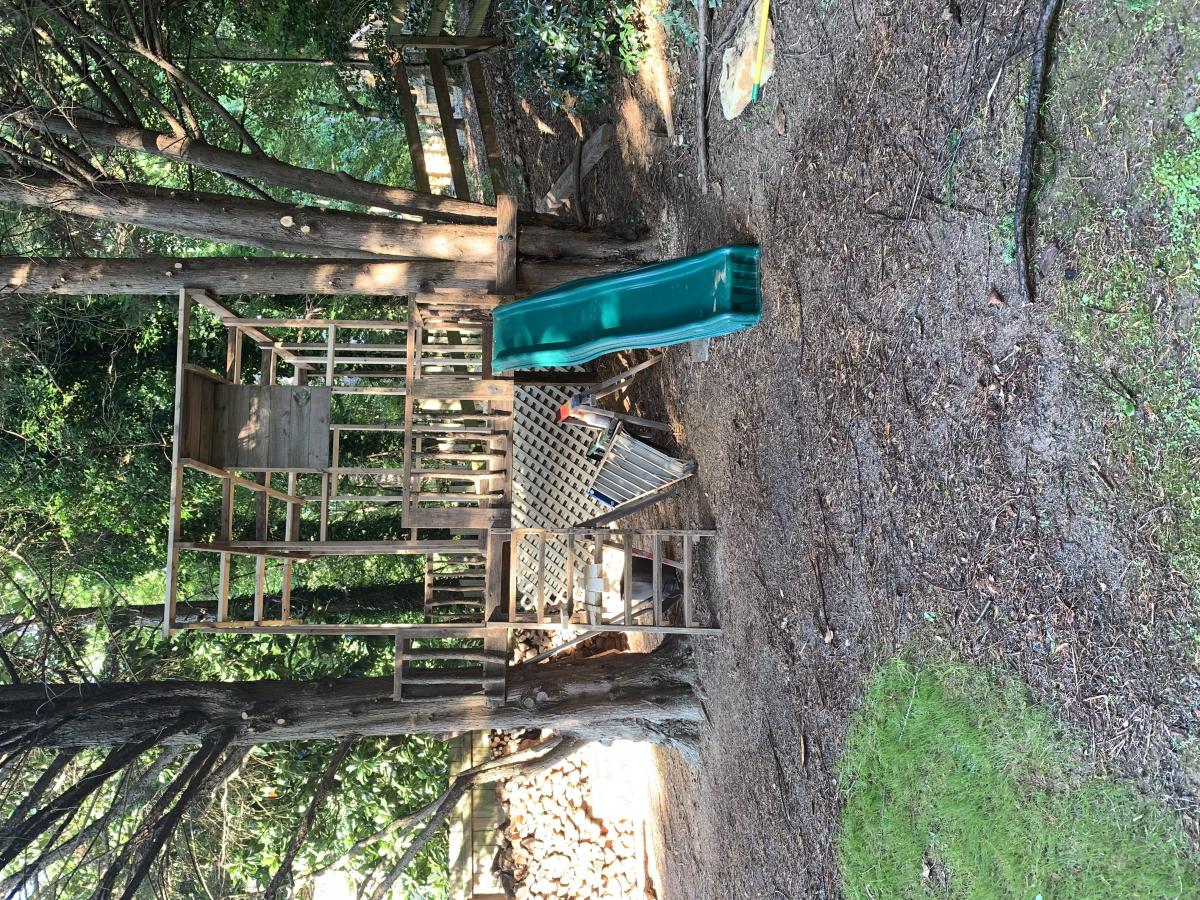
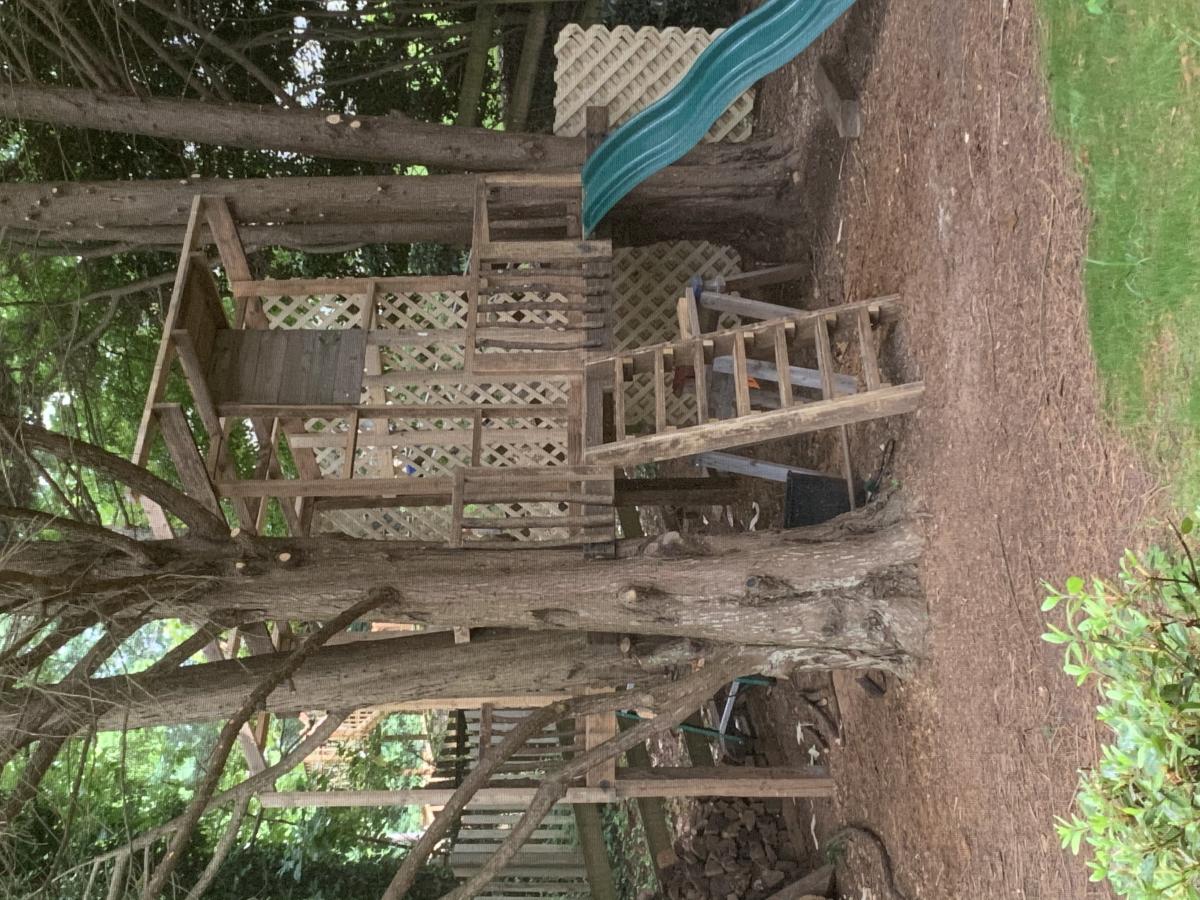
Have 3 granddaughters; 3, 2 and 6 months, so far 😉 Saw your treehouse video and made a modified version of your triangle platform using the trees I had available. Kinda went over the top a bit, but give you all the credit. Repurposed mostly old deck PT wood and rough hewn beams from neighbors.
Thanks!
Bill Magyar
Duluth GA
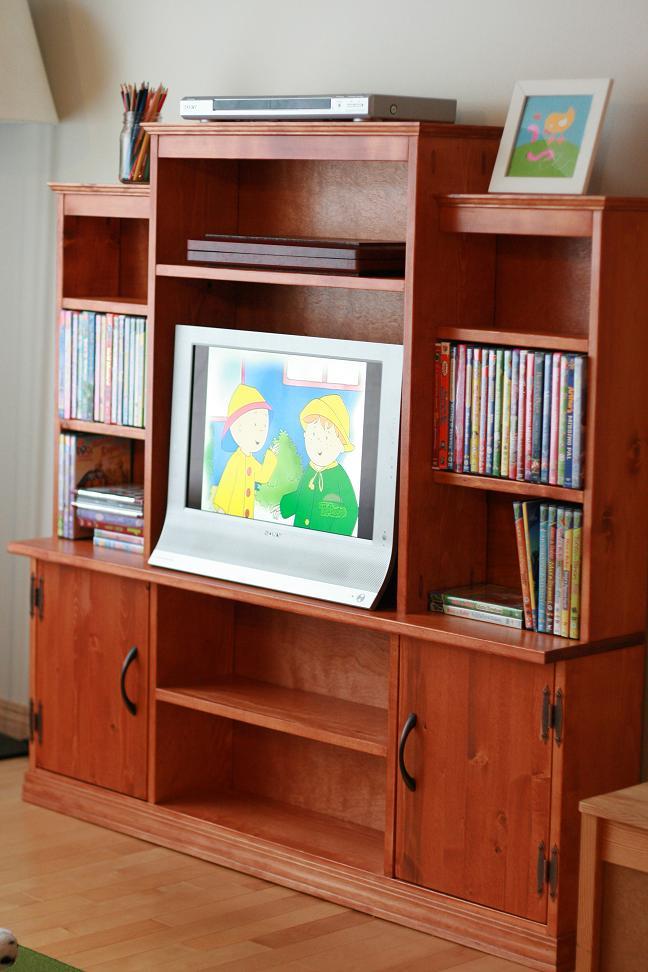
The minute I saw this mini media stand I knew that I would have to make it for our playroom. I tweaked the measurements slightly since my wood sizes were slightly different from Ana. This was a pretty easy build for me and I would consider myself a beginner.
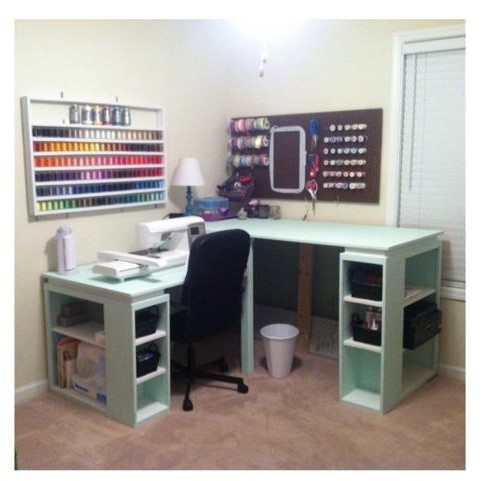
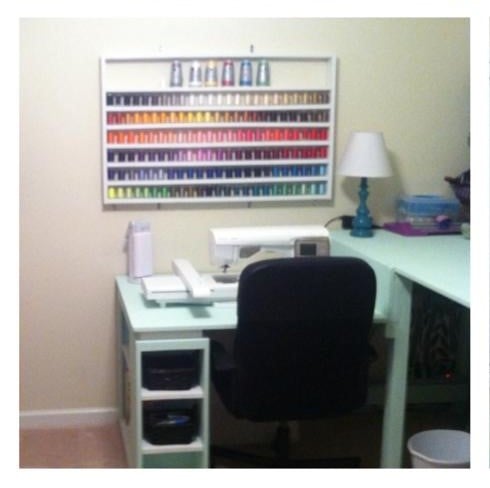
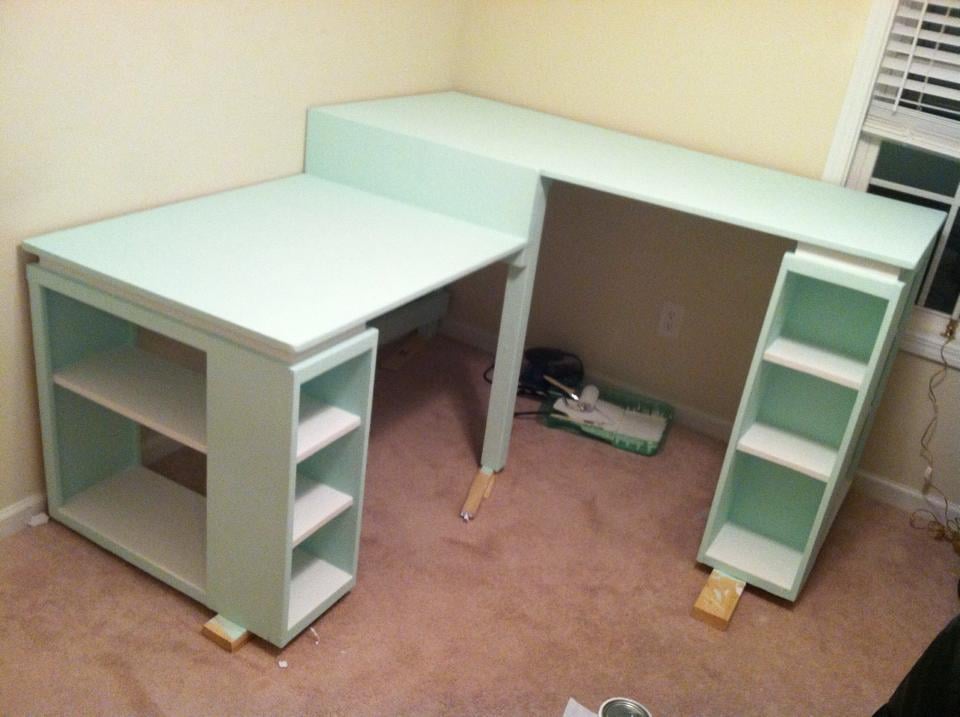
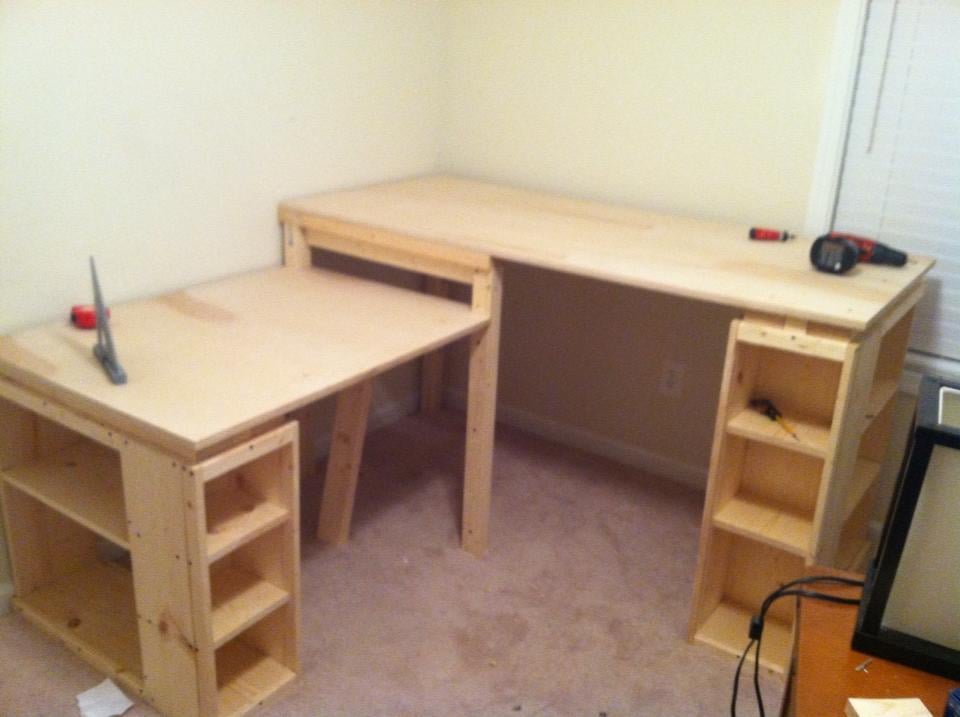
This has become my dream sewing/craft desk!! This project took about a week from start to finish (with work days in between). The shorter portion of the desk is used for my machine and sewing. The taller portion is used as a cutting table. The plans (dimensions) were tweaked some to get the perfect heights for me :).
Wed, 03/25/2015 - 06:31
Your desk is GORGEOUS!!!! It's exactly what I've been looking to build for my space. I would love to know how you modified the plan to make it.

Wed, 03/25/2015 - 07:21
I need to modify my home office/craft space and building a couple of these just may do the trick.
Wed, 03/25/2015 - 07:23
I also wanted to comment on the thread shelf you build, that is really awesome, you can see all your colors right in front of you. Mine are in a drawer and I have to pull the whole thing out to see what I need. This is really giving me ideas.
Fri, 09/04/2015 - 08:45
Would you please send the plan instructions (with measurments). It is perfect for me as I sew and embrodery both and have two machines.
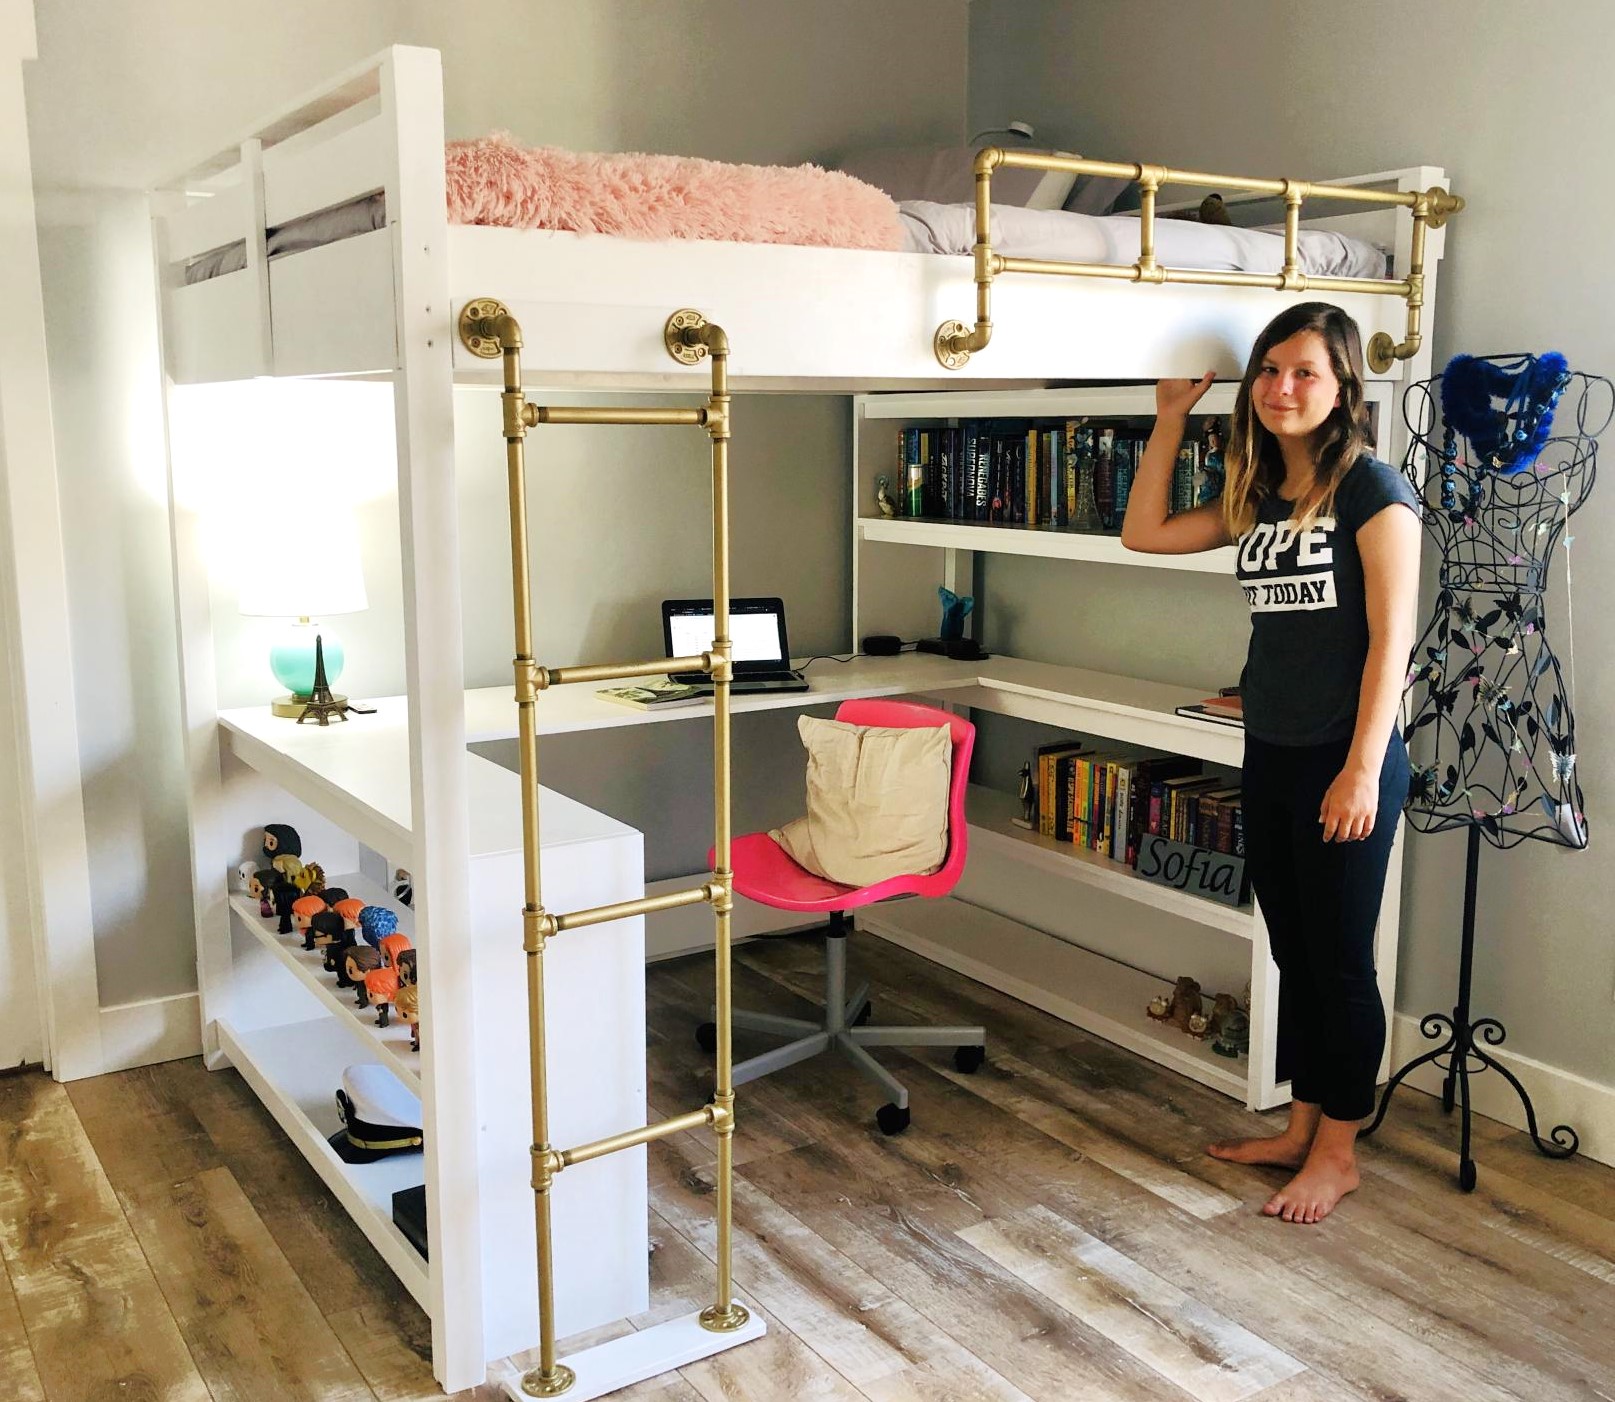
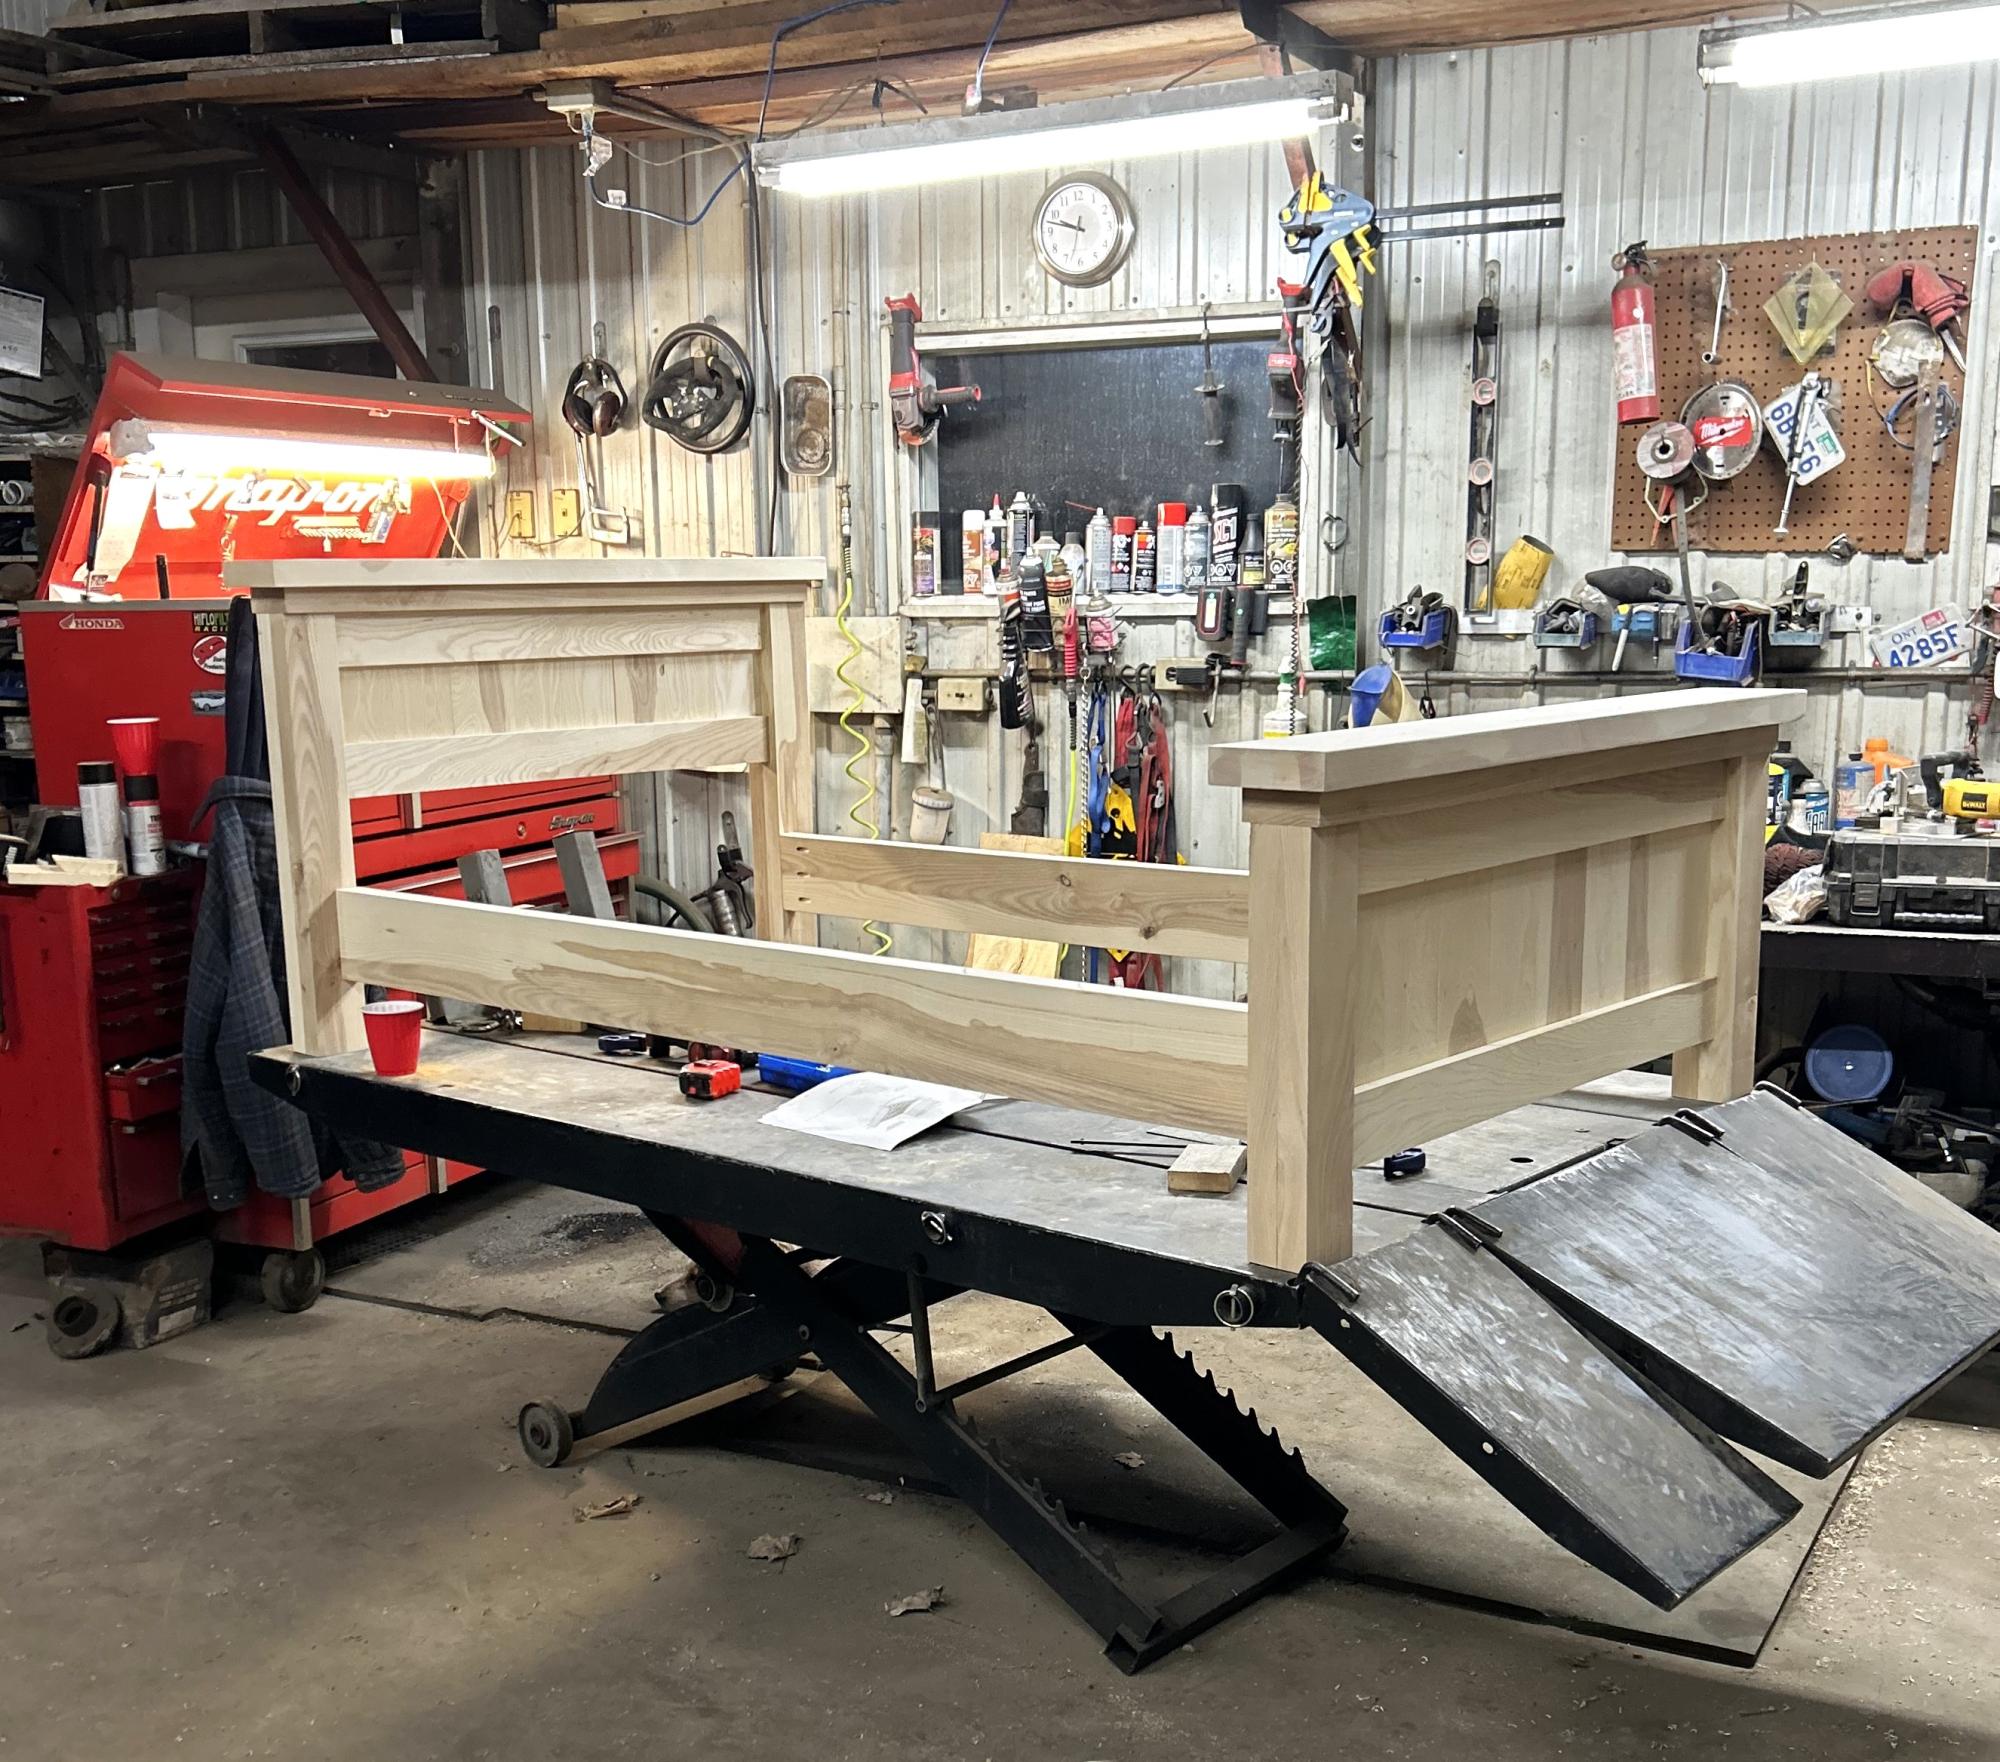
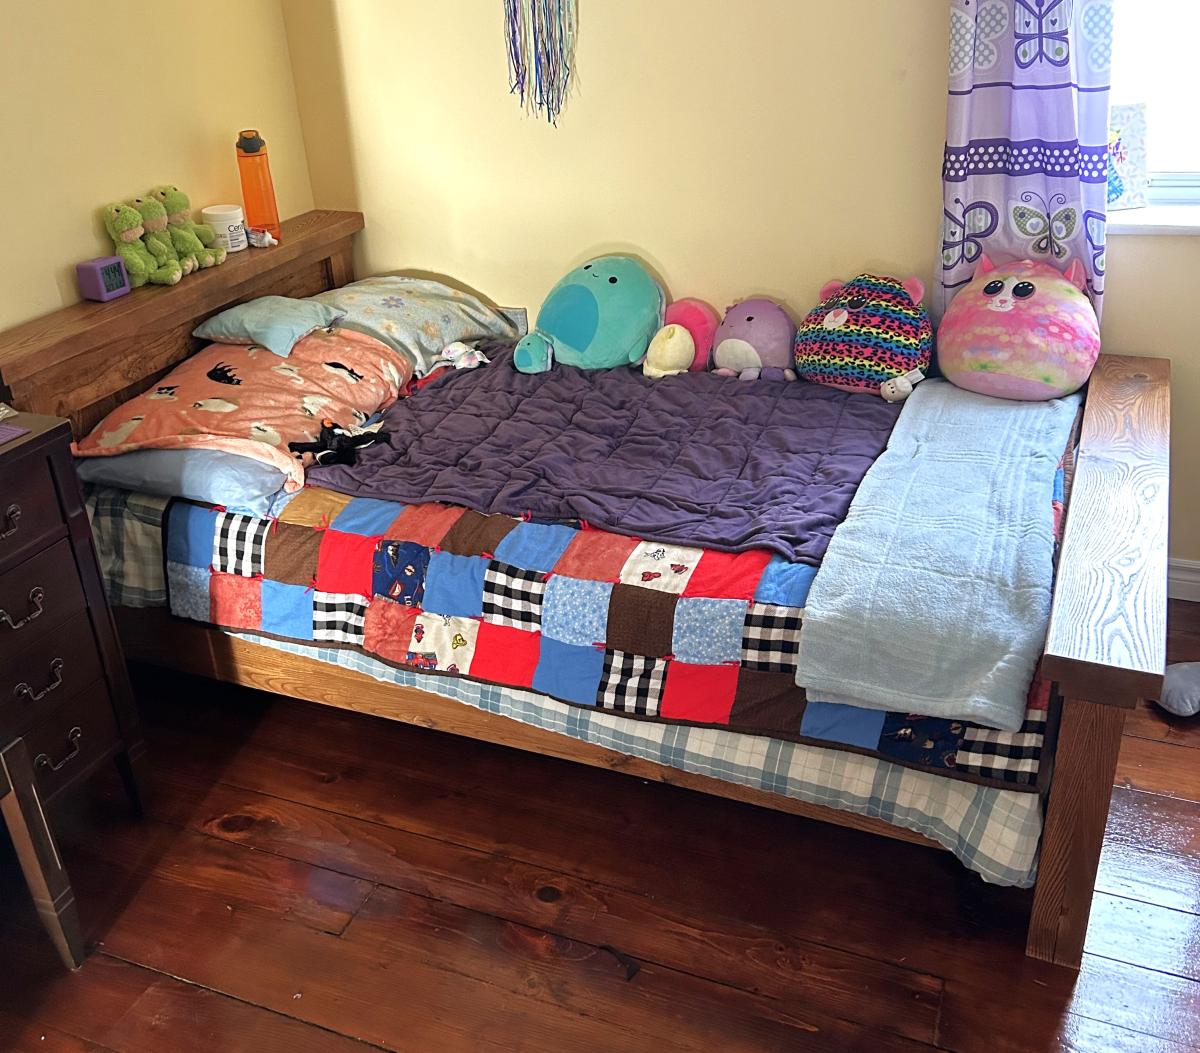
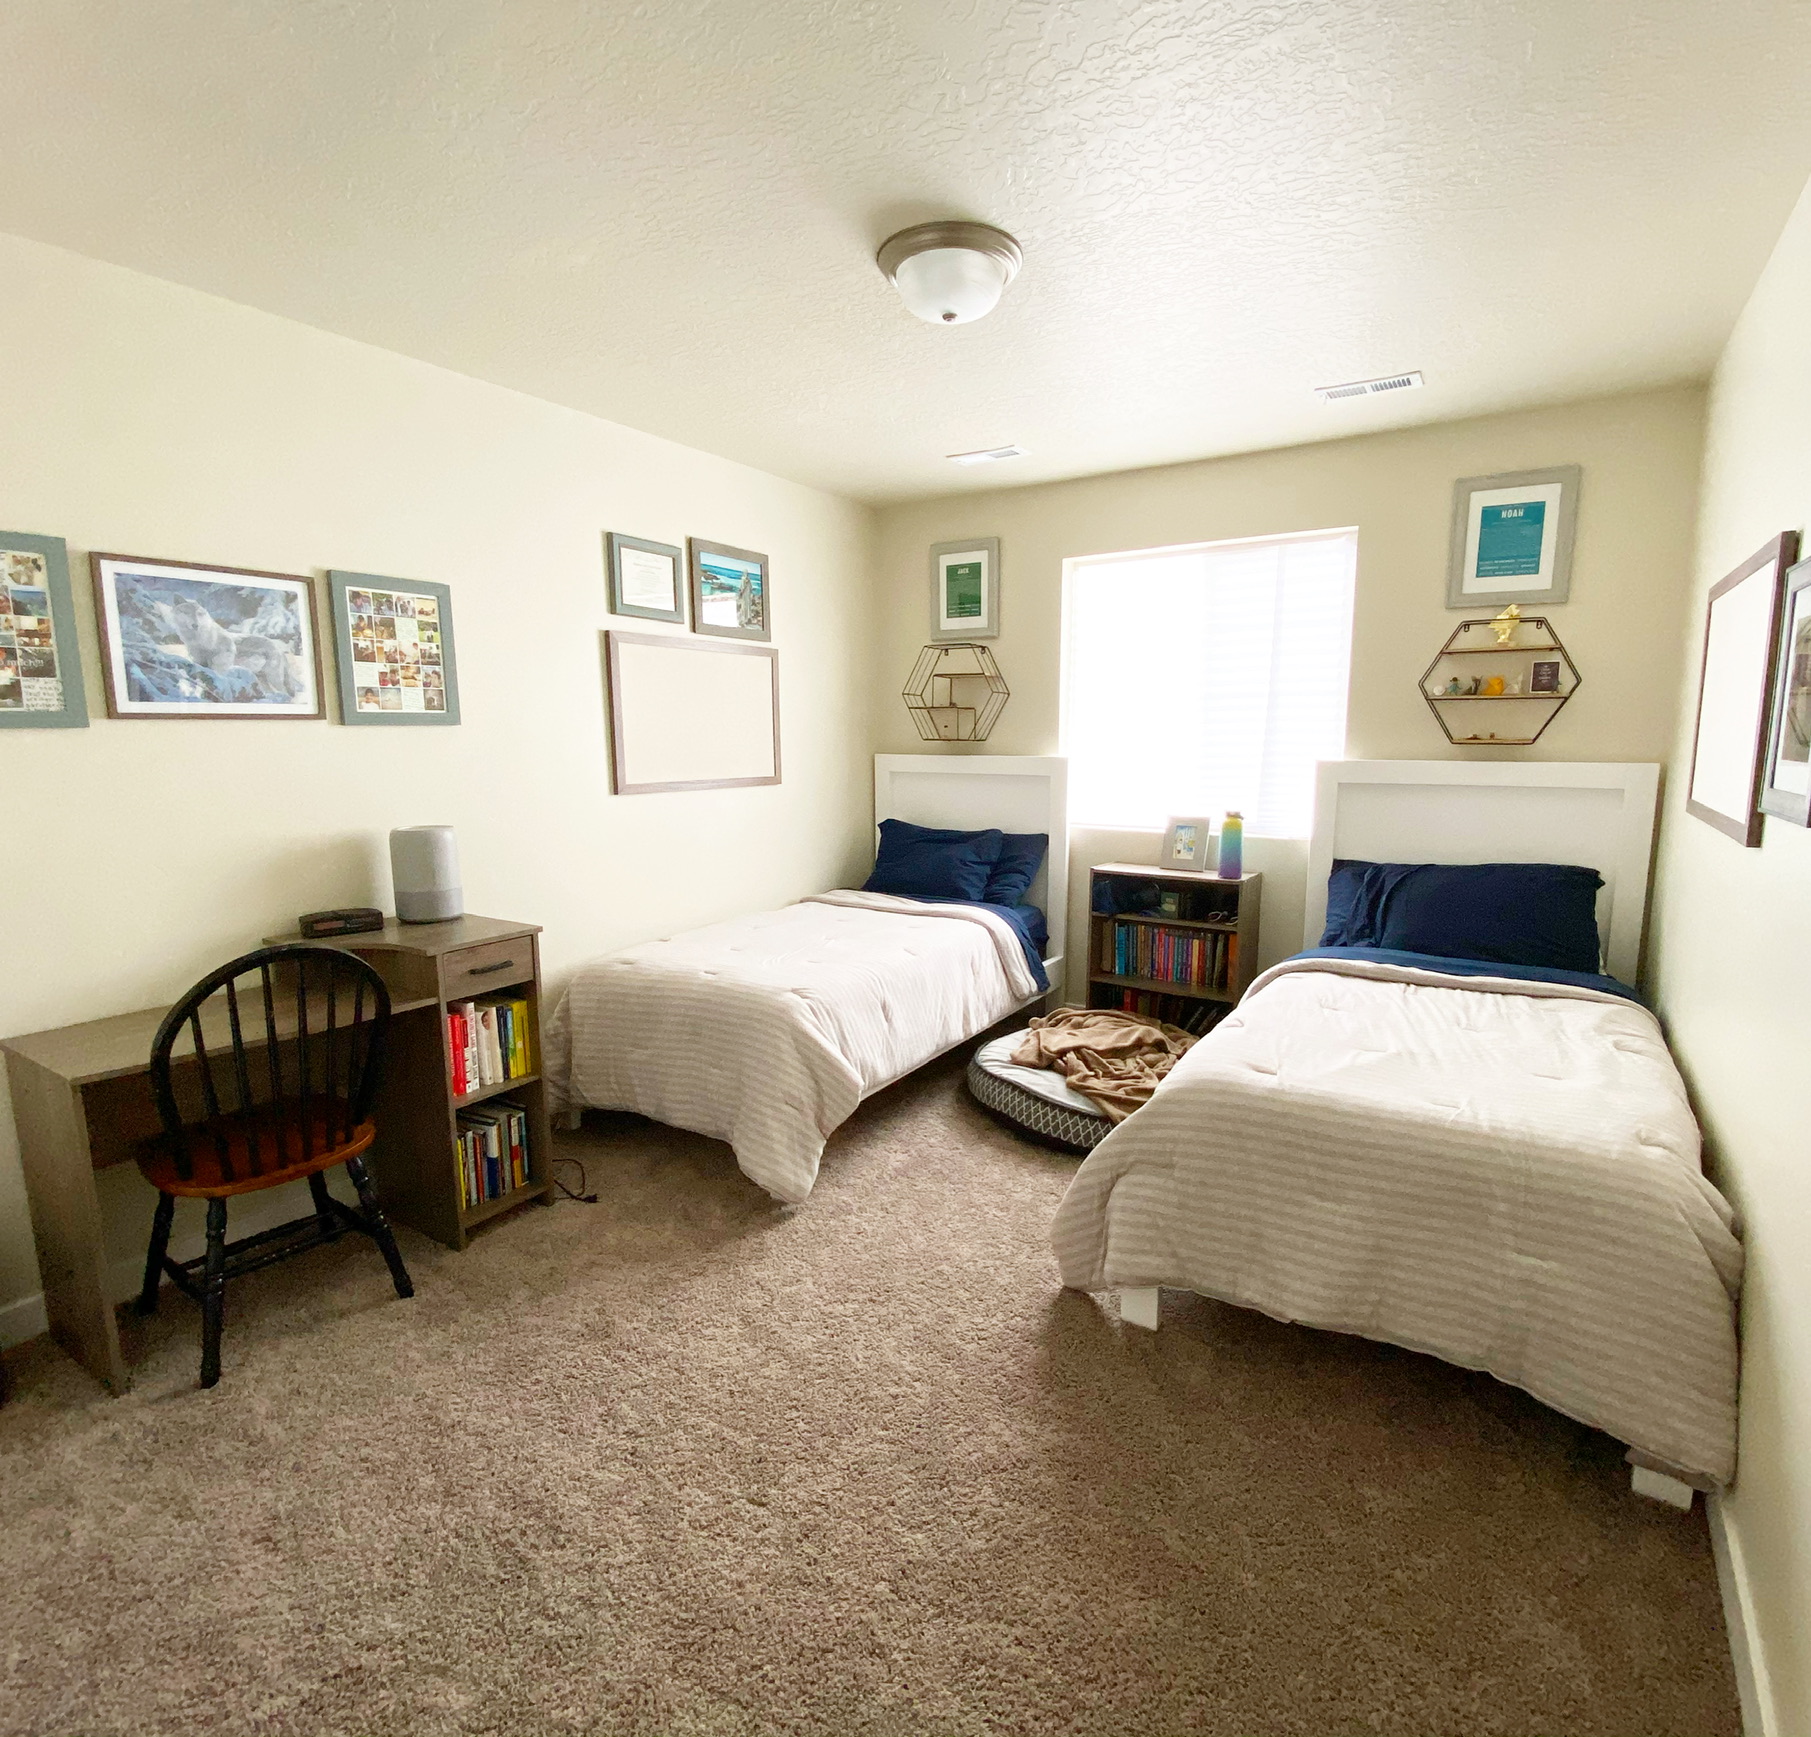
Thanks Ana White for the awesome plans! My daughter decided she wanted a new bed, so I told her I’d help her build one. I am not a carpenter, by any stretch, but I thought it would be some good dad/daughter bonding time. She tweaked your plans, did all the cuts, drilling, sanding, and painting (well, most of the sanding and painting anyway), and tolerated her father with great grace. It turned out pretty well. We couldn’t have done it without your plans! Thanks again! —Gabe
Mon, 04/05/2021 - 10:10
Thank you for sharing, what an awesome build! Love her vision and mods!

We live in the south so we opted for treated wood. We weren’t able to locate all the connectors to combine sink sprayer and water hose so we ended up just getting another garden hose and sprayer. Works just as well. We used Smokey Mirror exterior stain to add some color. Didn’t have all the tools handy so we opted for a farm style sink that sits on top of the wood. Kids loving it so far, they have been playing non stop. Thanks for the great plan.
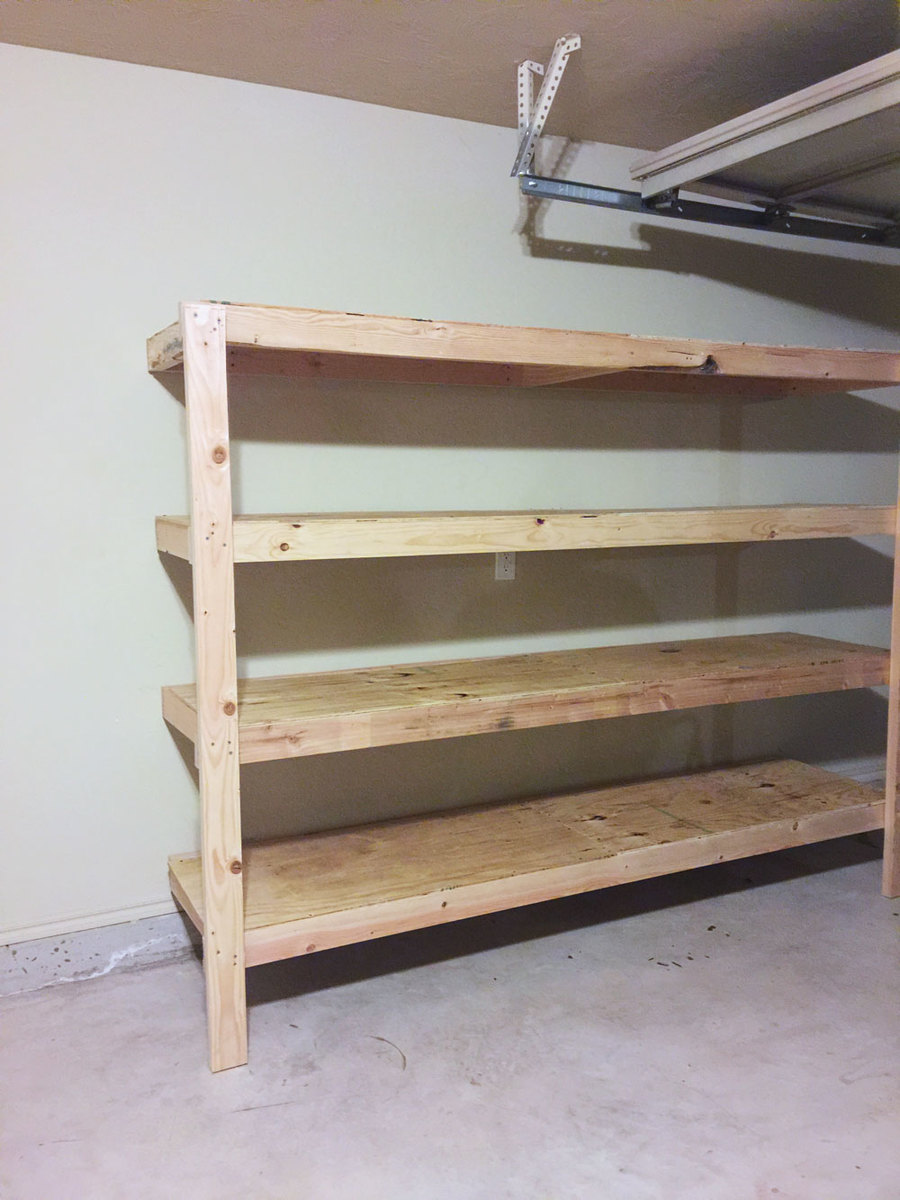
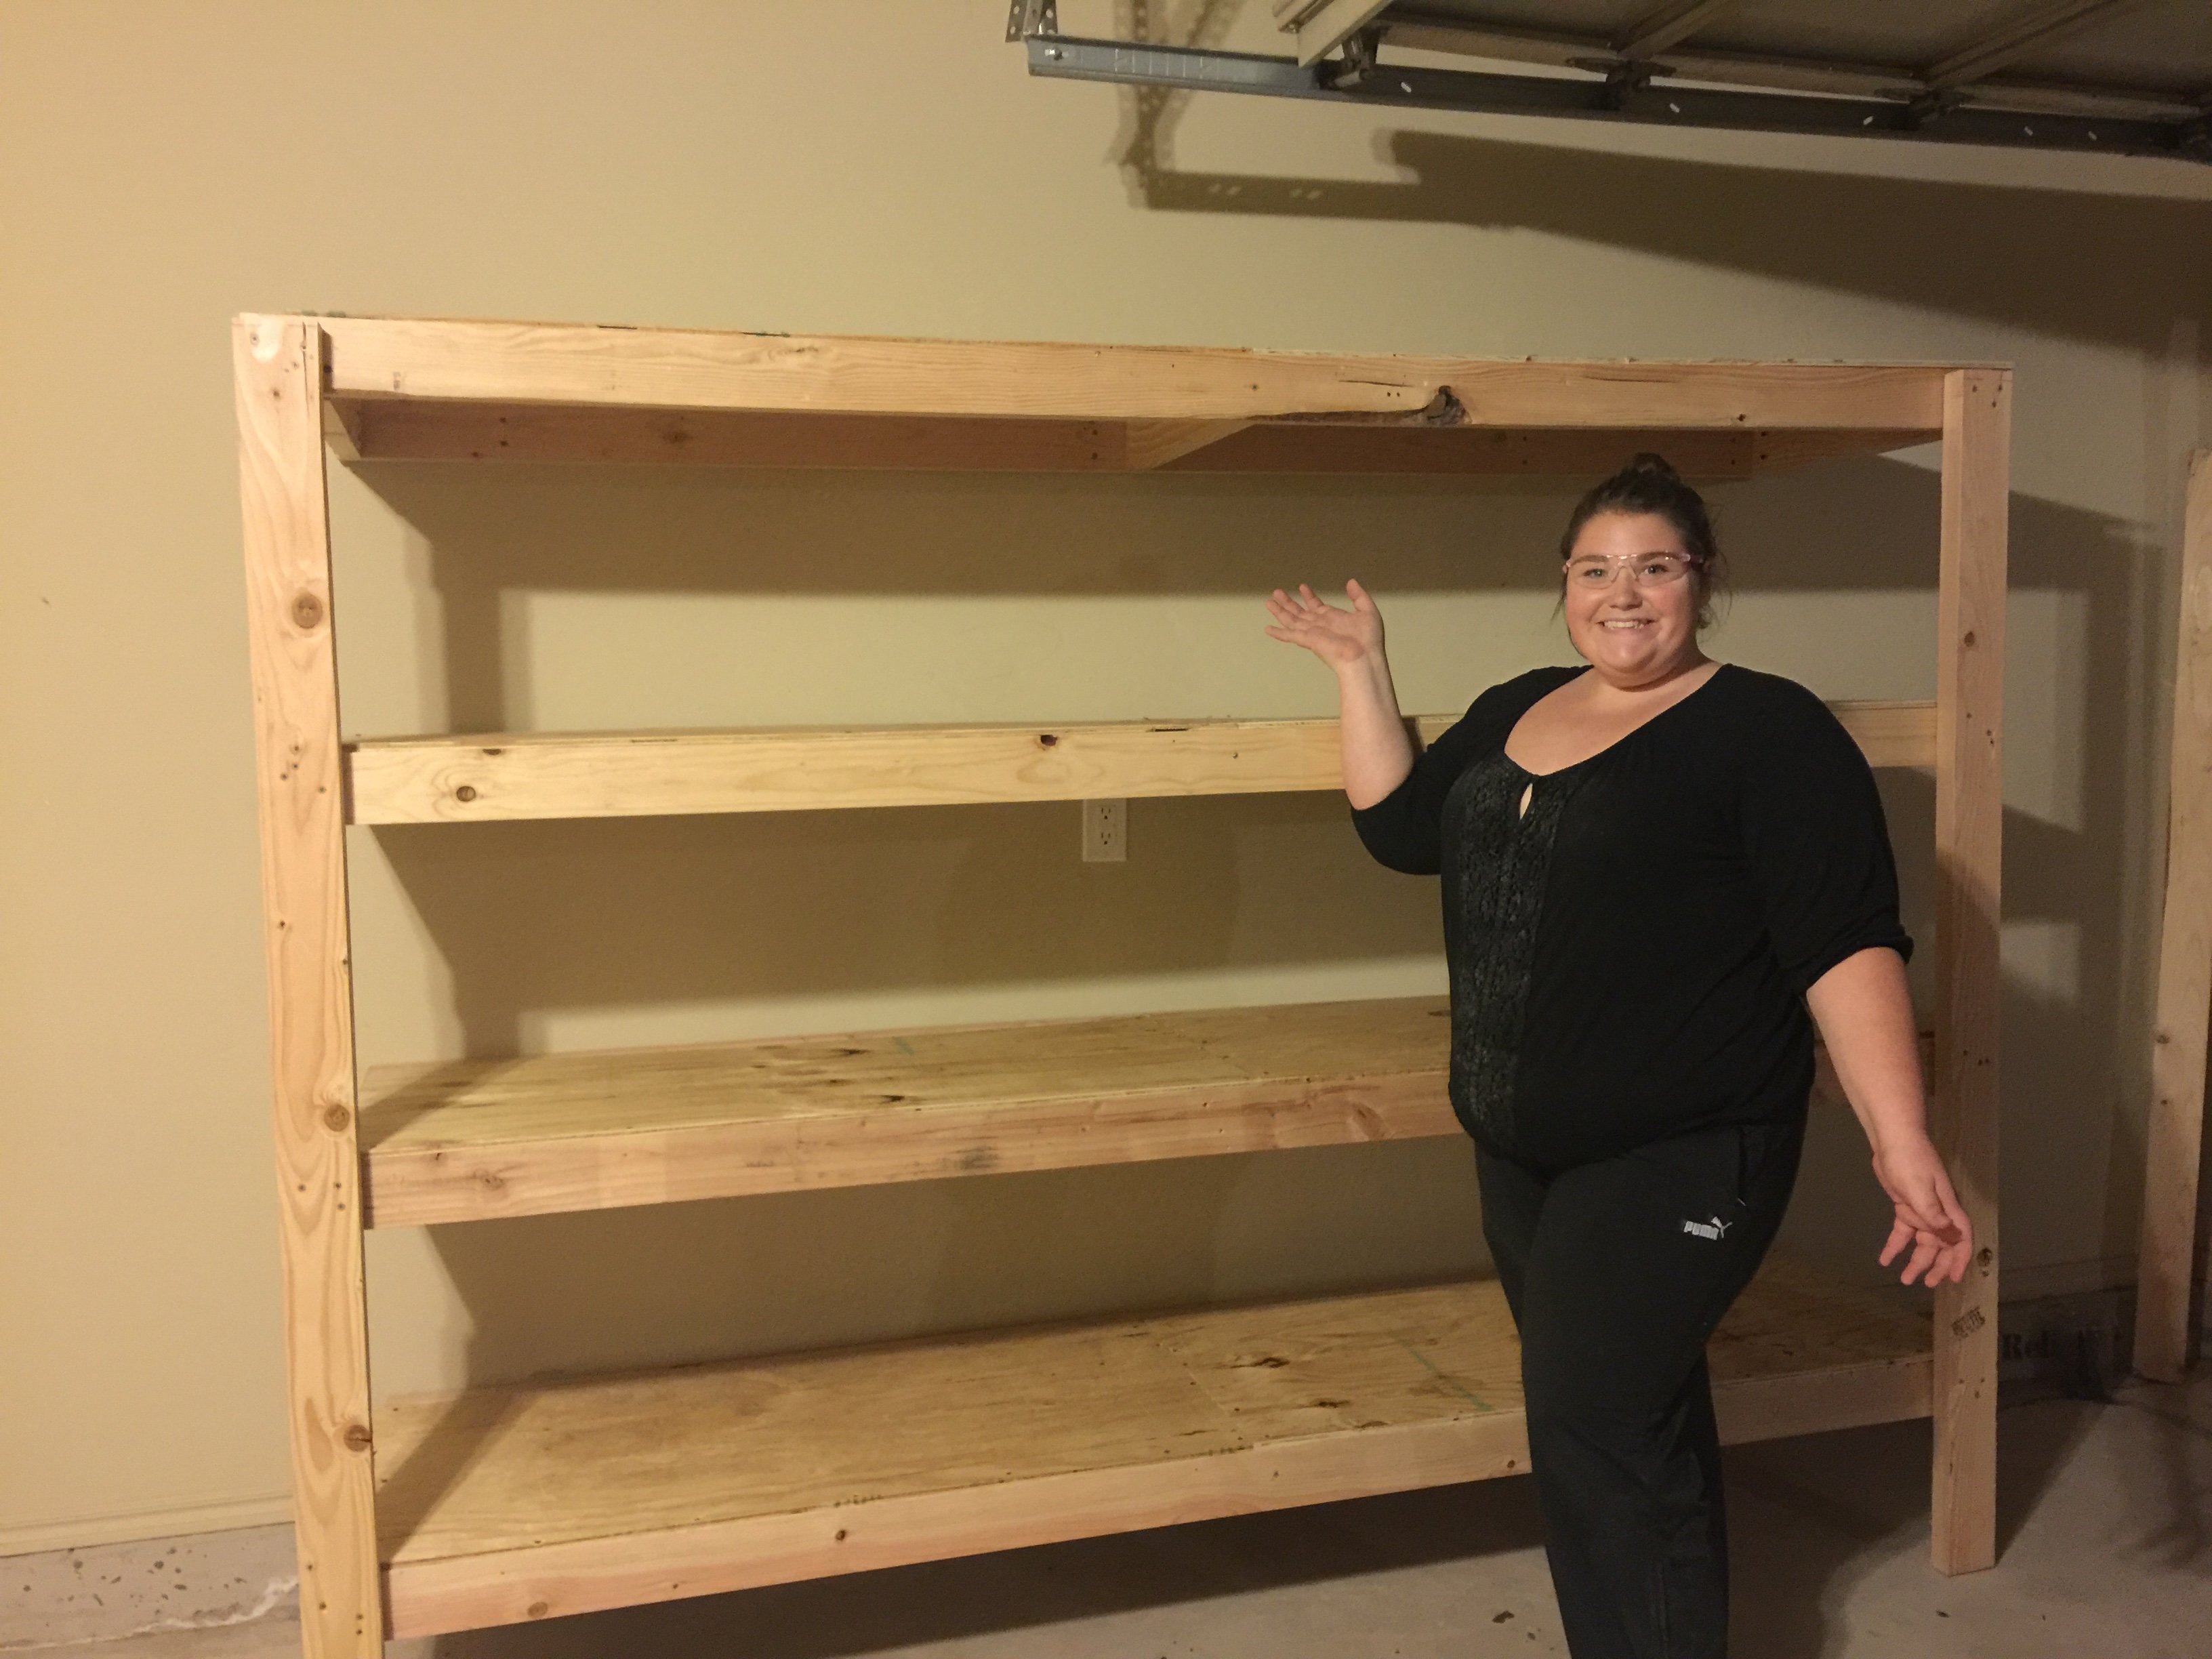
Wanted some easy storage shelving that didn't break the bank. These were perfect! $79 is what it cost for ours (which includes the $20 Kreg Jig). Lumber was only $58.68 and I bought and extra 8 foot 2x4, so it could have been slightly cheaper!
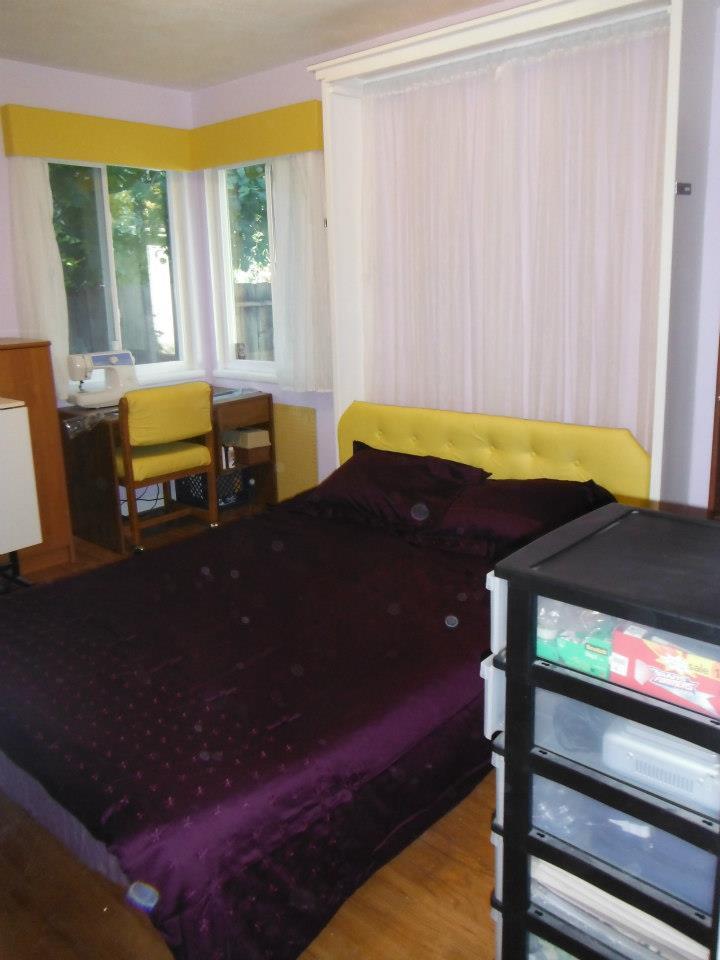
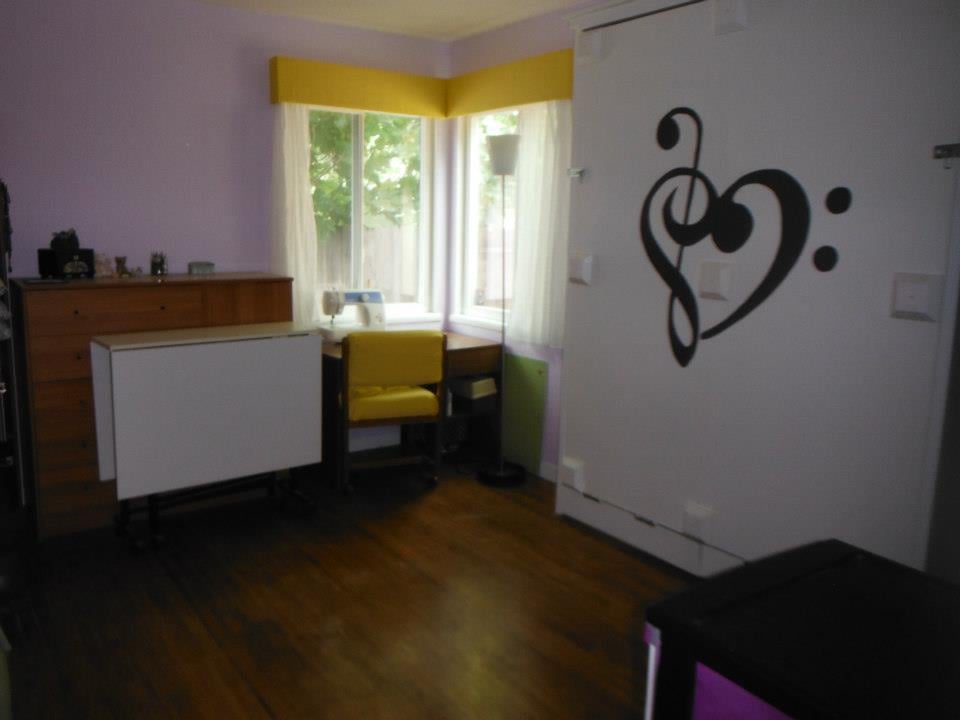
Taking the plans for the full sized Murphy bed (http://ana-white.com/2010/03/plans-a-murphy-bed-you-can-build-and-affor…) I added a few inches to convert to a queen and raised it off the floor 5 1/2 inches with removable fence post toppers.
The yellow head board lifts up and stores inside the frame when up. If I had it to do over again, I would sand and paint as I built. Thanks to Ana, I now have a guest room!
Mon, 10/08/2012 - 11:13
Holy smokes! Great job! I just got my early birthday present - a Kreg Jig Master System!!! One of the first things I will be building is a murphy bed, so thank you for the inspiration.
It looks great!
Fri, 11/30/2012 - 20:18
This is fabulous! What did you use at the backing of the box? Is that fabric? The whole thing looks so nice!
Wed, 02/13/2013 - 11:45
I just wanted to know if you used the jig required or if you used something else? Camille
Thu, 04/25/2013 - 11:44
The jig is not required but it sure makes everything fast and easy
Wed, 04/24/2013 - 19:55
I love your adaptation of Ana's plans. Would you be willing to share the dimension for the queen murphy? Thank you!
Mon, 04/29/2013 - 14:32
I am wondering what king of hinges you used for the bed. Did you use continuous (piano) hinges or regular door hinges? How wide are they? I am not sure what the acceptable width for the hinges is to be safe. Thanks.
Wed, 06/12/2013 - 16:35
What were the altered measurements and exactly how did you raise it? I really like Anas plan except that the mattress was so close to the ground. I want to make this for my apartment and I'm painting the outside like a tardis. (:
Fri, 07/26/2013 - 18:50
I raised it 5 1/4 " using fence post toppers from home depot. The fence post toppers unscrew for upright storage. You could leave them in for a more dramatic look but I liked the cleaner lines with them out until needed
Sat, 11/02/2013 - 15:33
Would you be willing to share the dimensions you used when building your queen murphy? Even if they aren't exact, it would be such a big help to me!
Sat, 12/28/2013 - 22:56
In that same picture, if you look at the bottom 6 inches of the closed bed (under the hinge) there is a storage section where I hide the legs when the bed is raised. It is otherwise dead space and made for an easy storage conversion at the last minute.
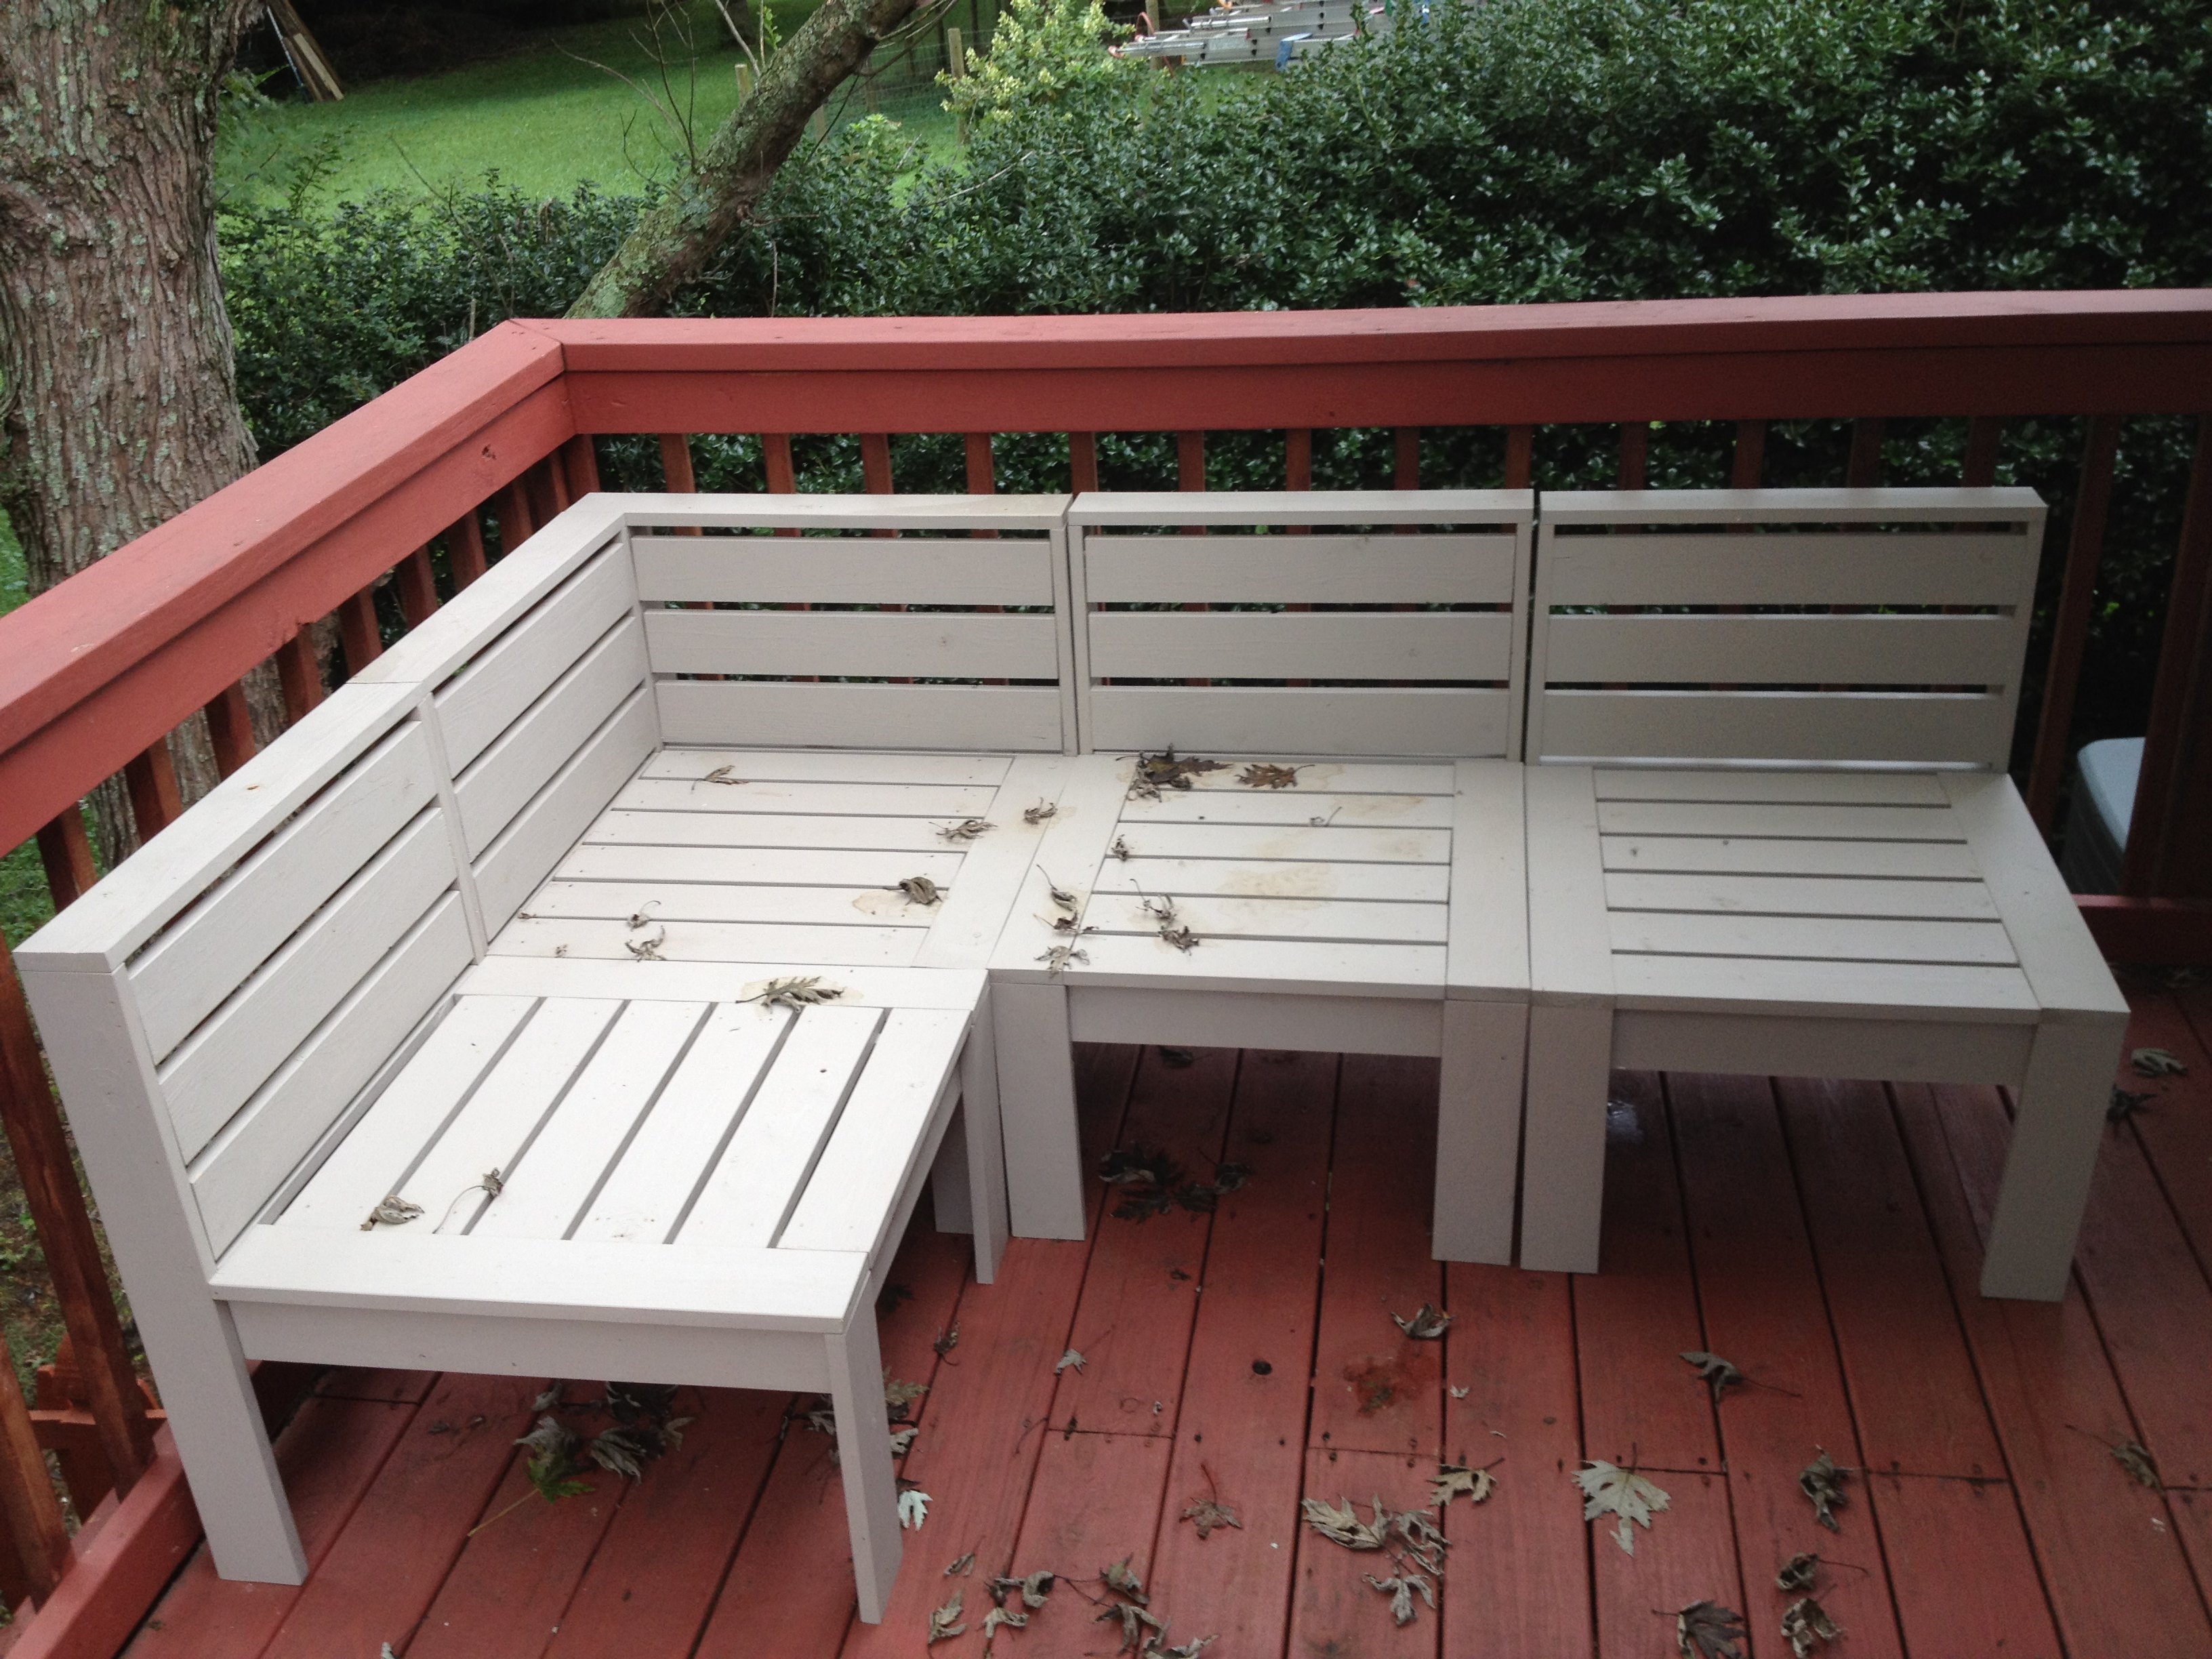
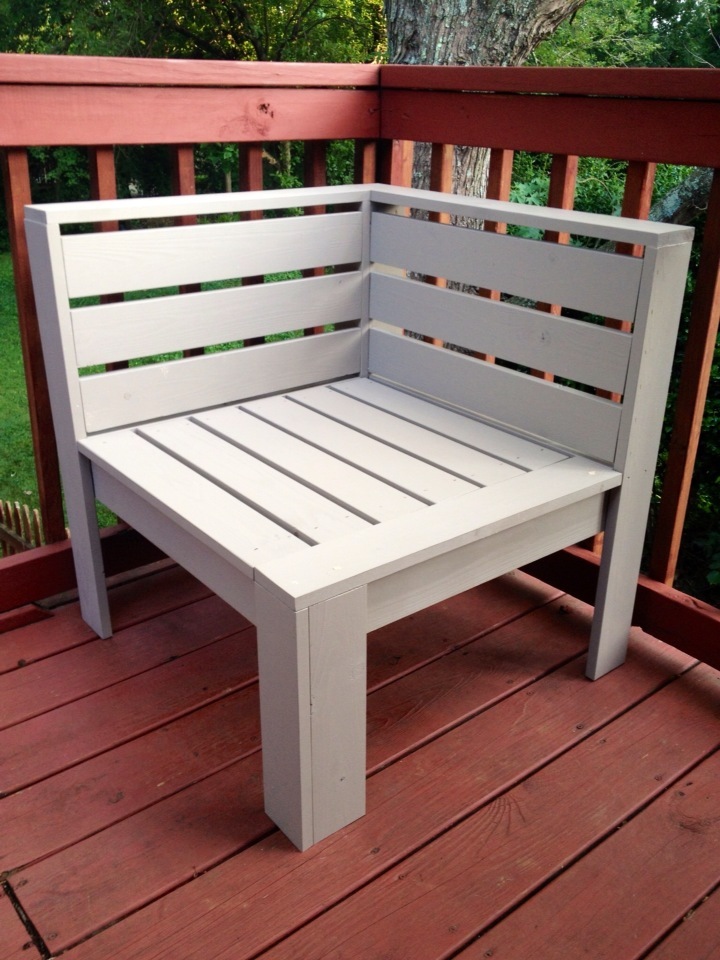
This project my husband and I started together. We live in a very damp and rainy area where cushions would just be more of a pain than a comfort outside.
We decided to add slats on the back so the sectional would stand alone without cushions.
Well, after the first corner piece, I got busy and every day my husband would add another piece to it.
I did do much of the sanding and painting. We sanded and painted these before assembly, made life tons easier.
It was white pine with out exterior house paint color. We really love them!
Thank you Ana!!!
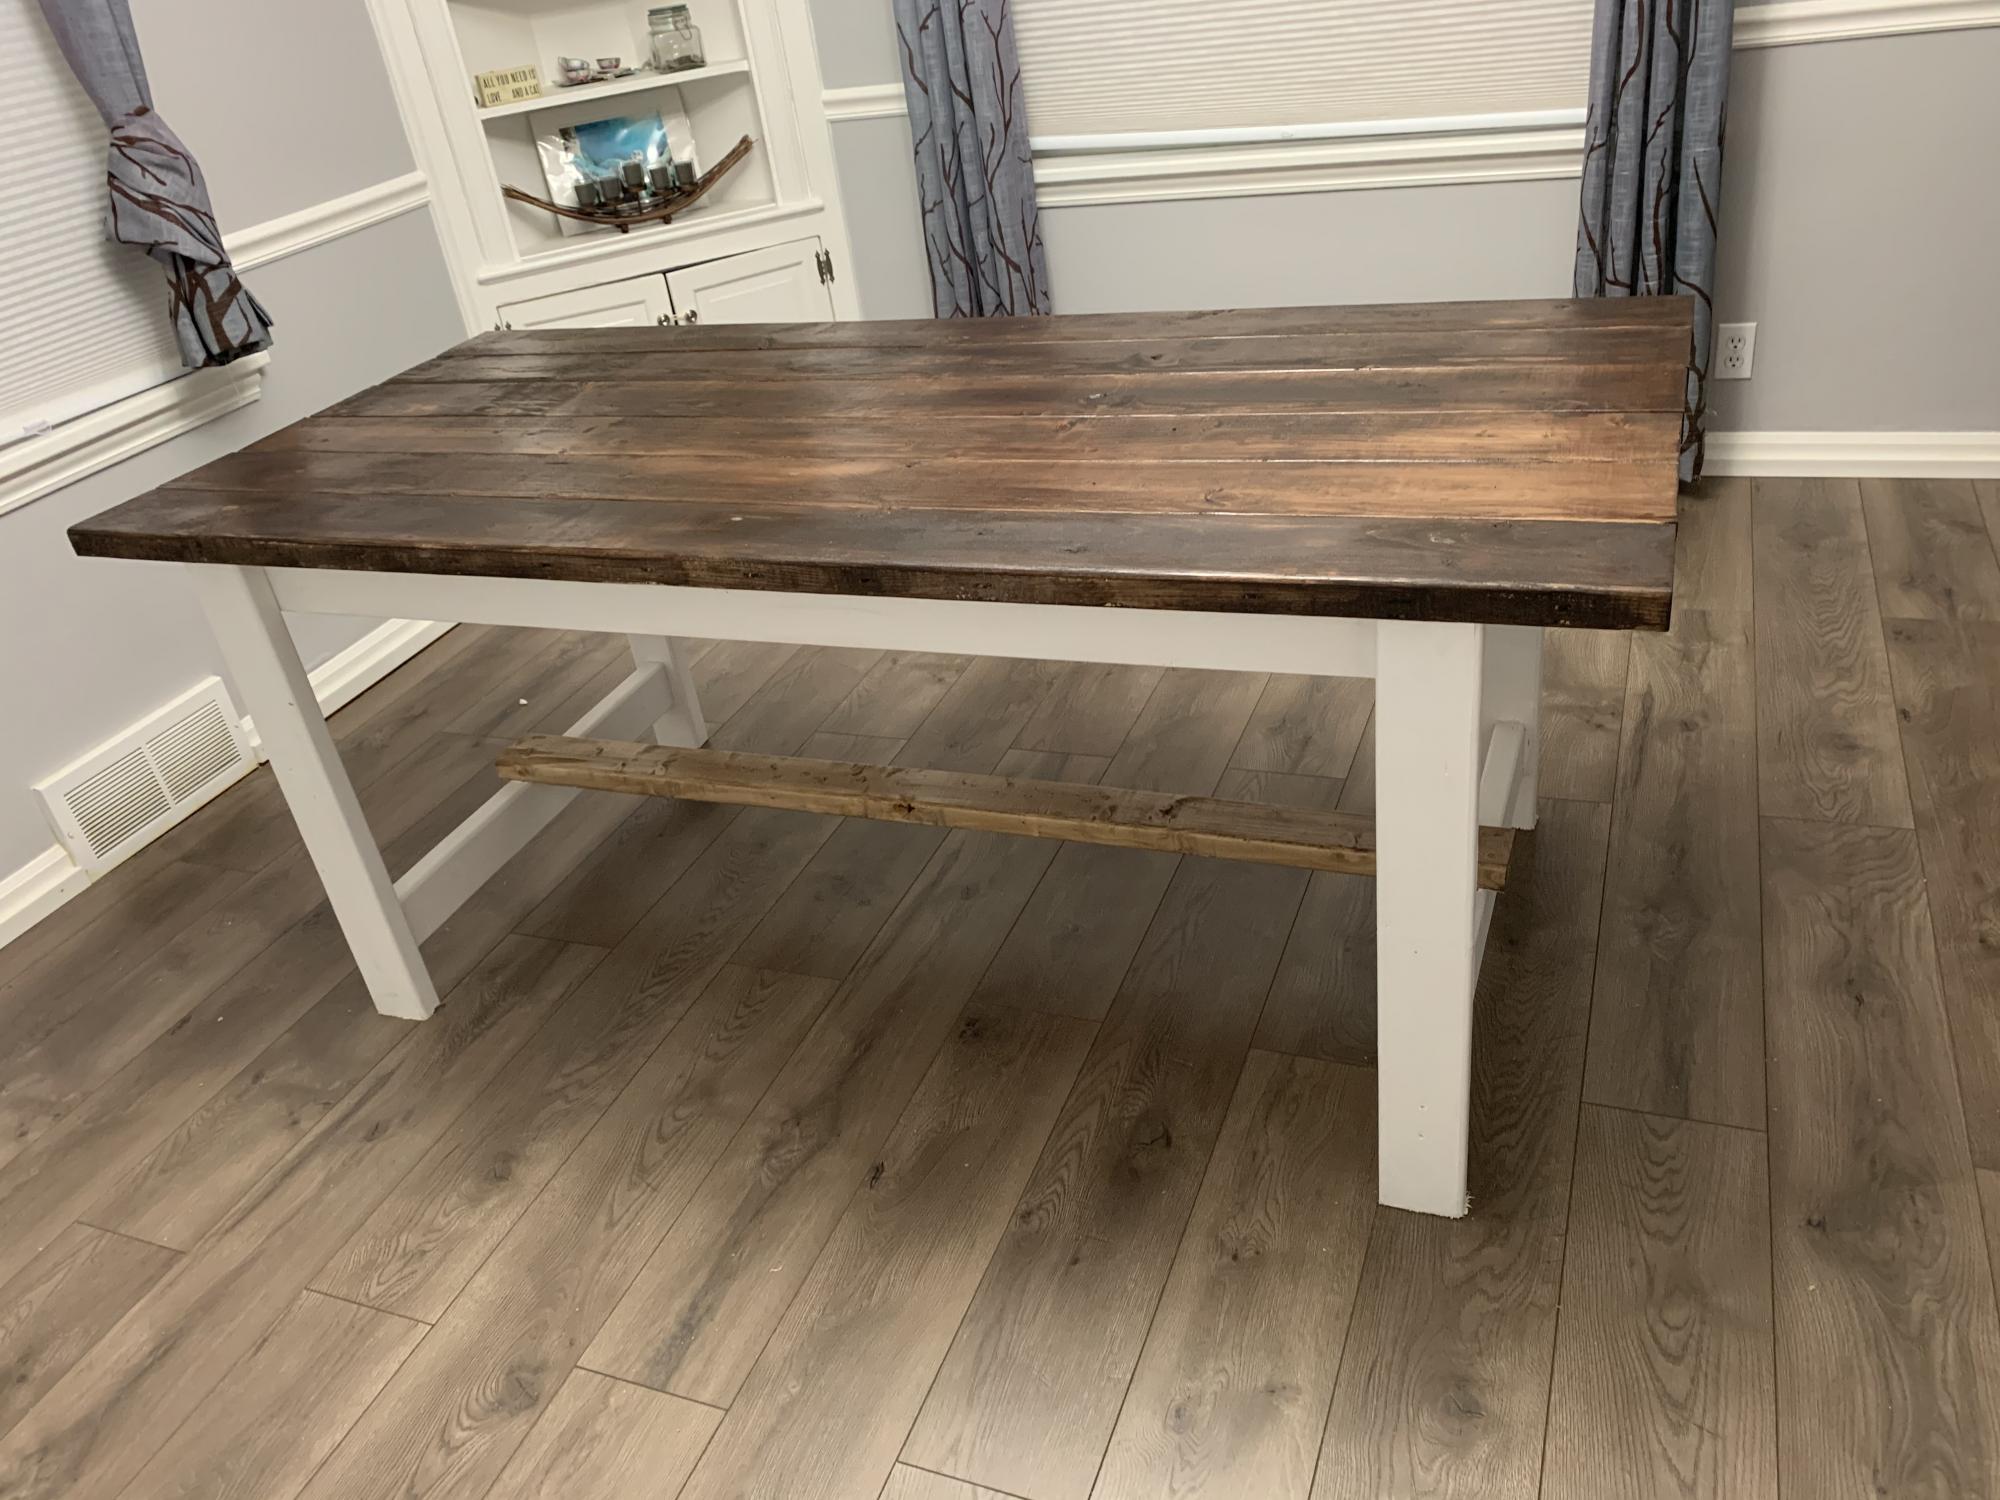
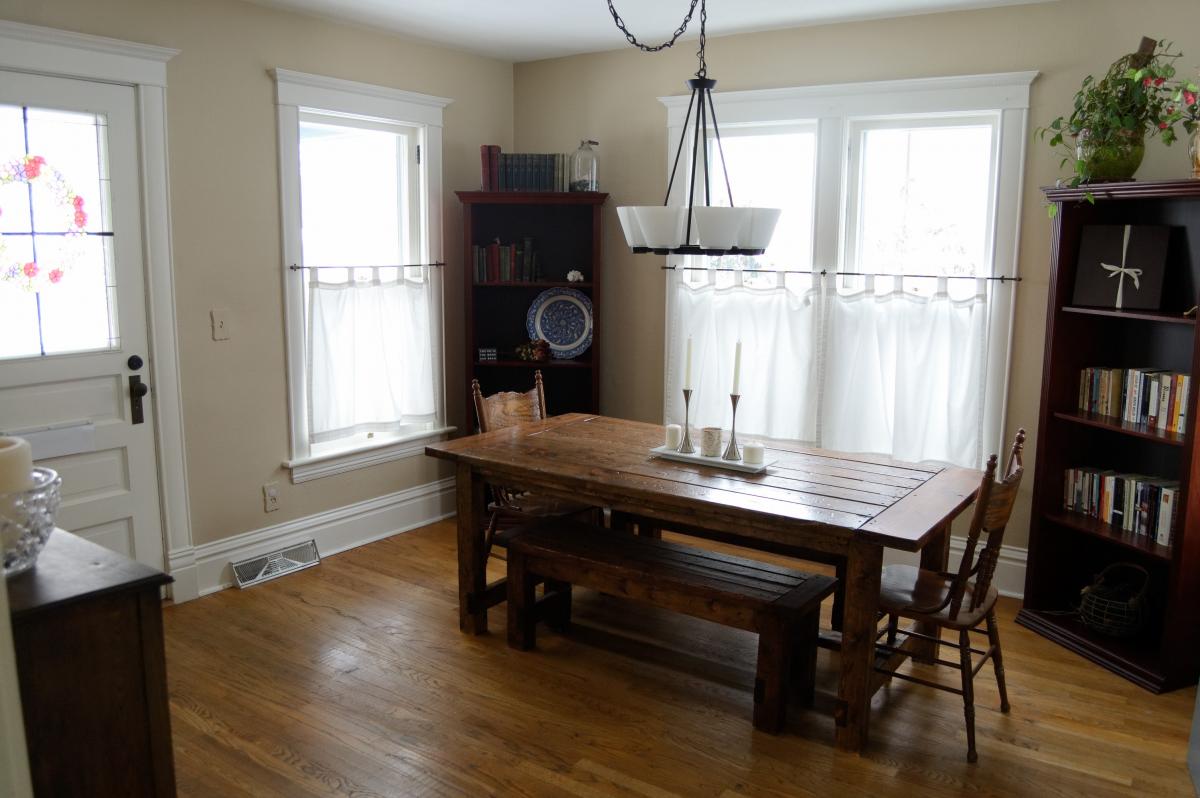
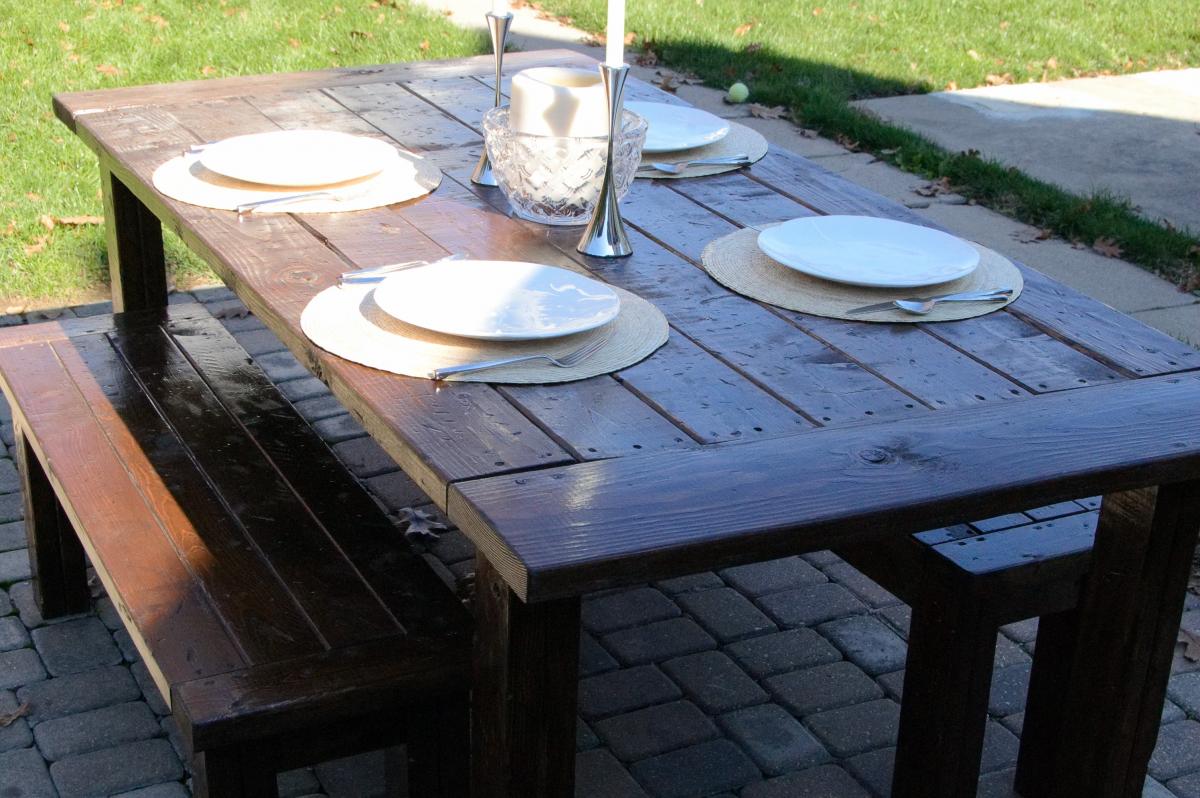
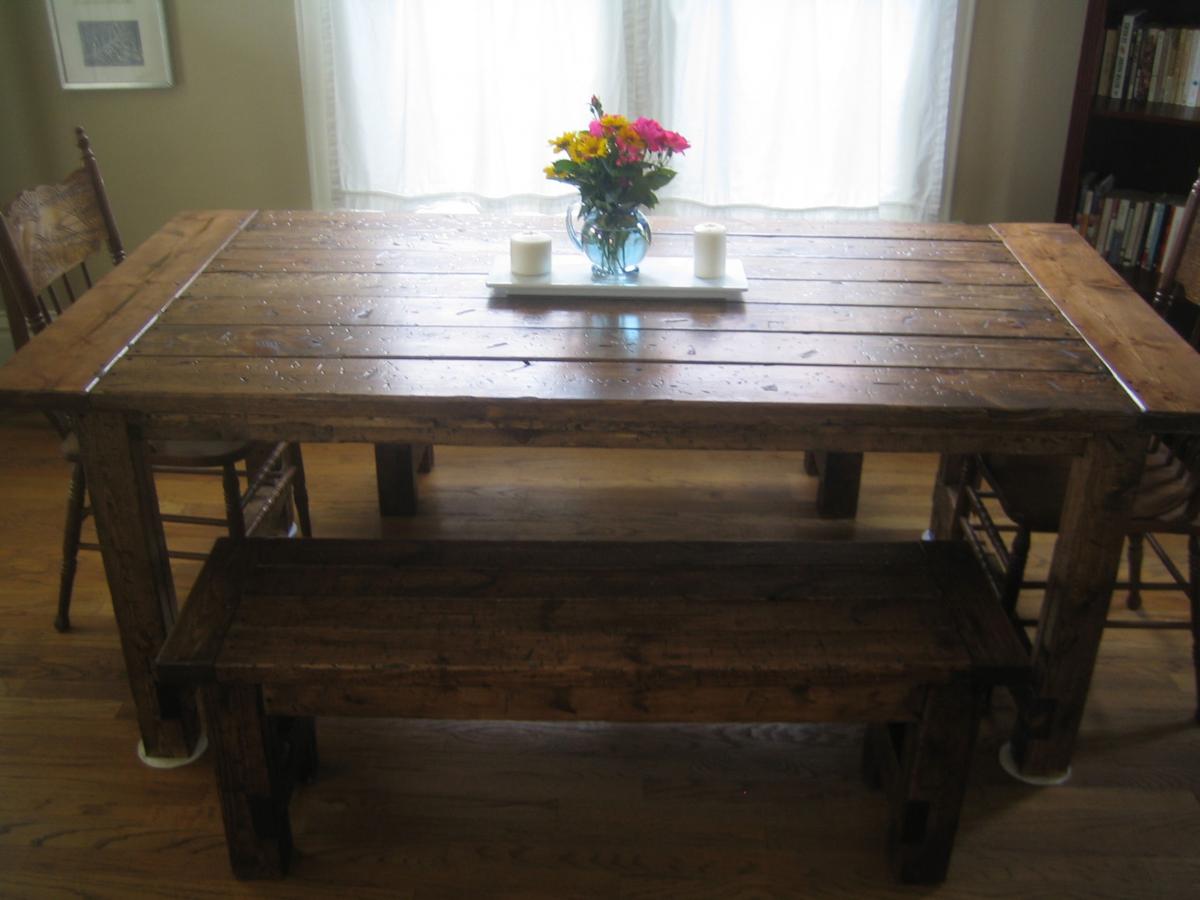
Diy farmhouse table
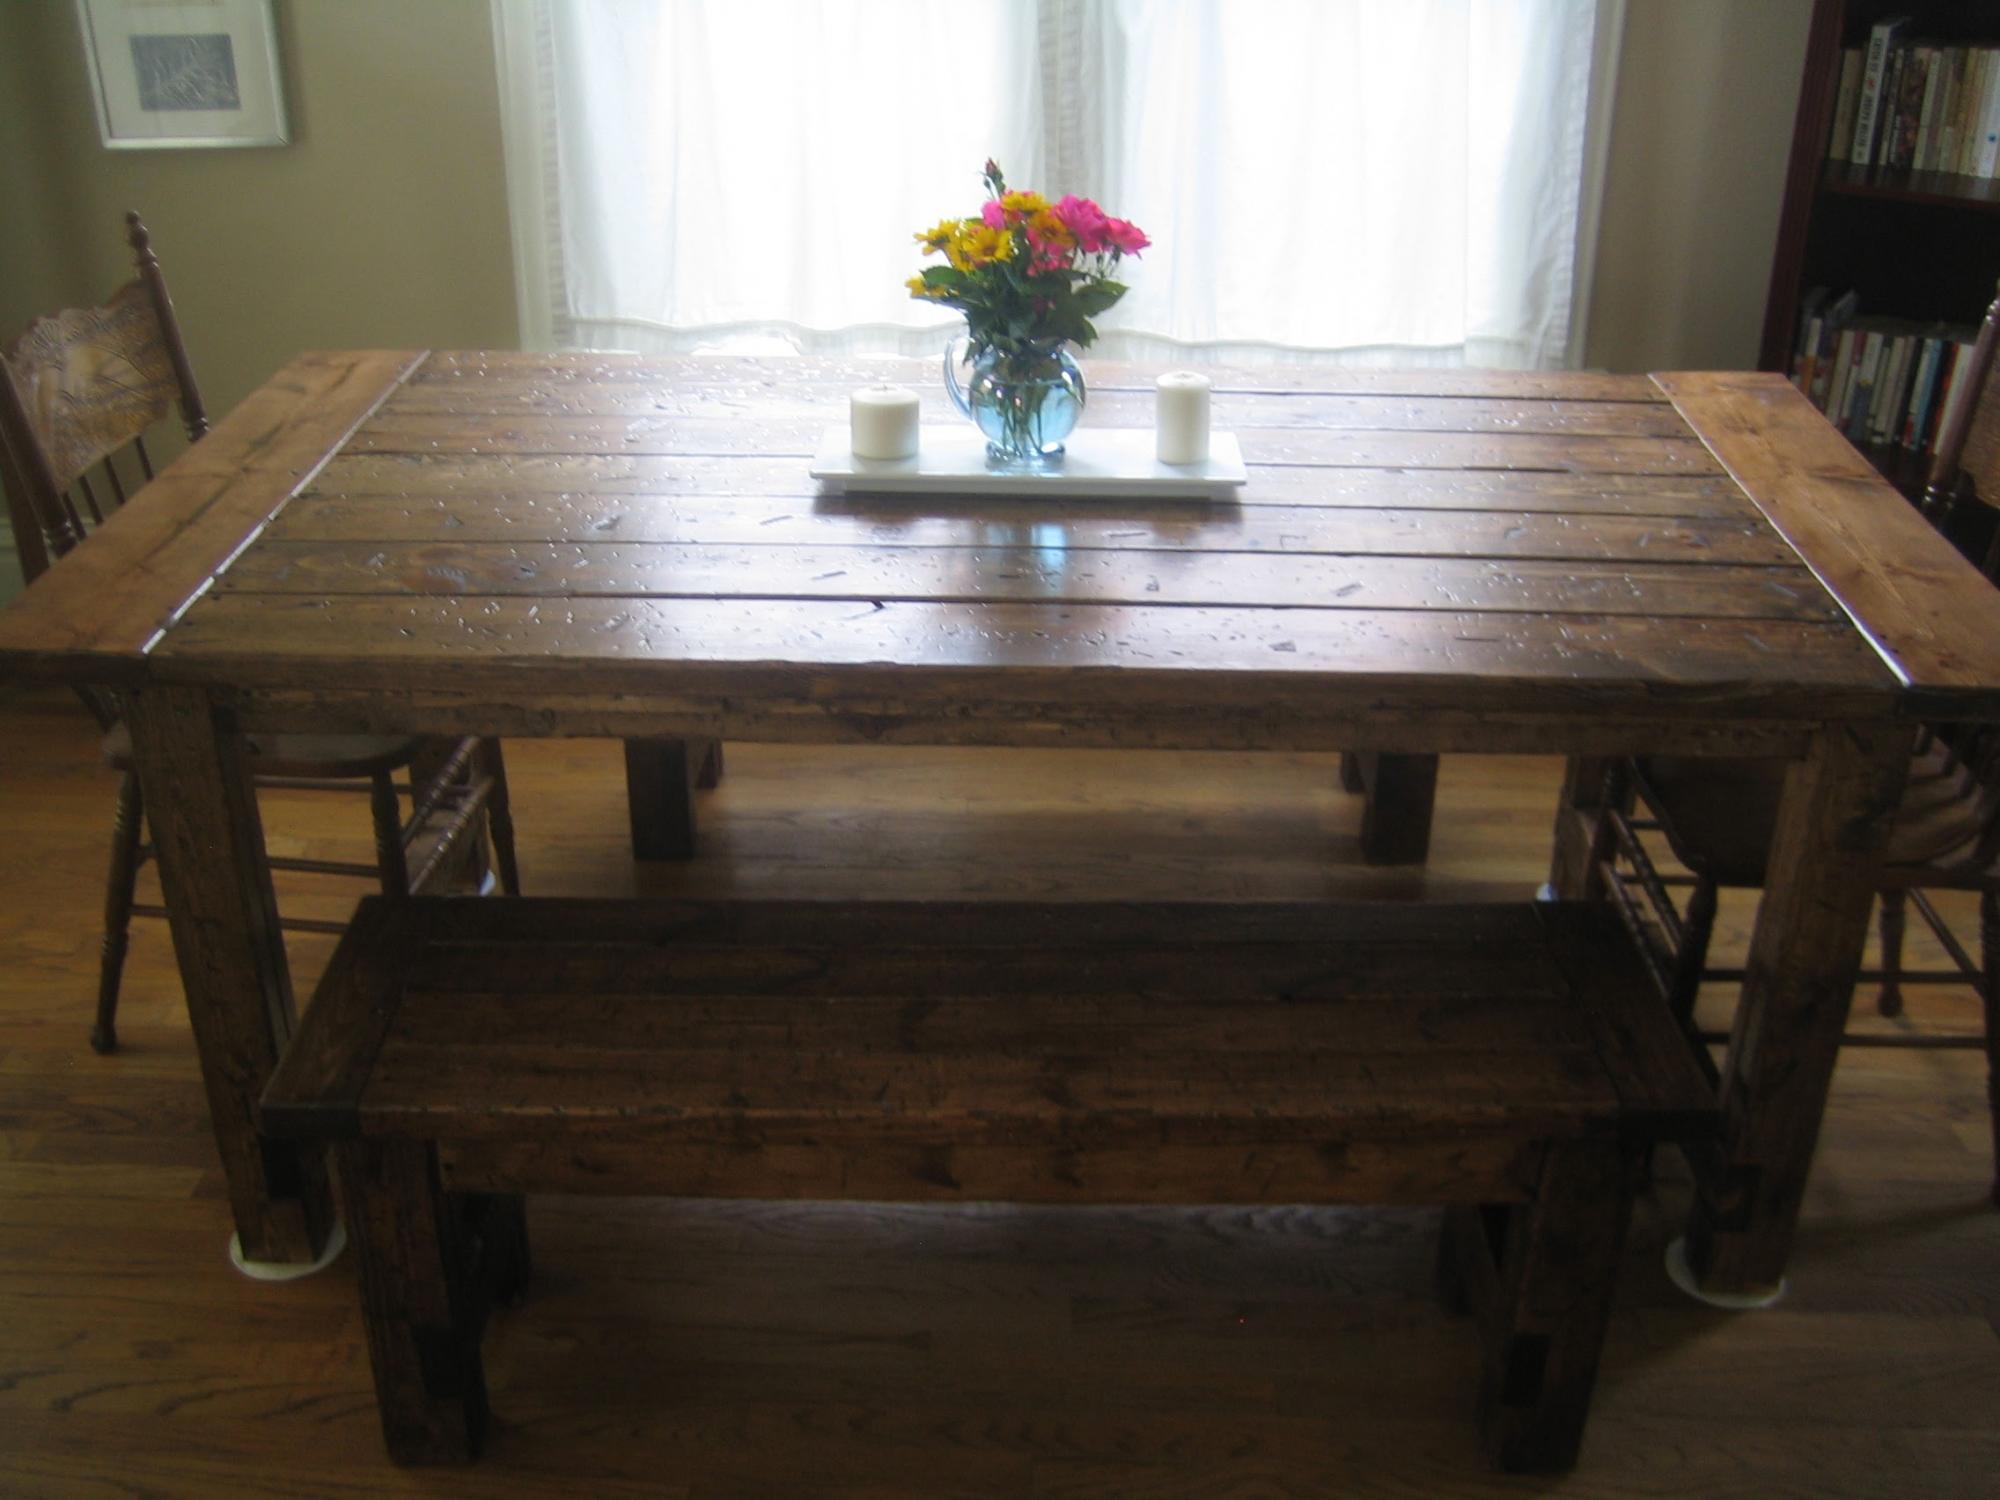
Made a vintage/rustic farmhouse dining room table with matching benches. Fairly easy DIY job. The notches were the most difficult. Quite heavy, so I suggest using less 2x2 for under-table supports. Turned out beautifully and very happy with it.
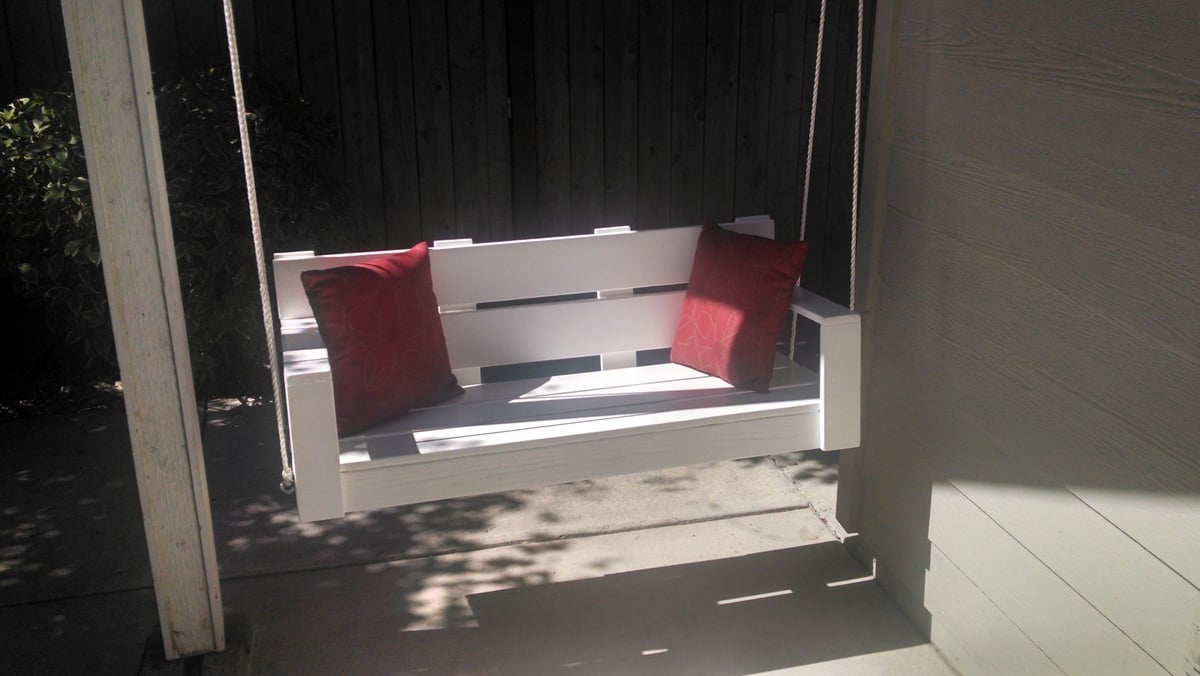
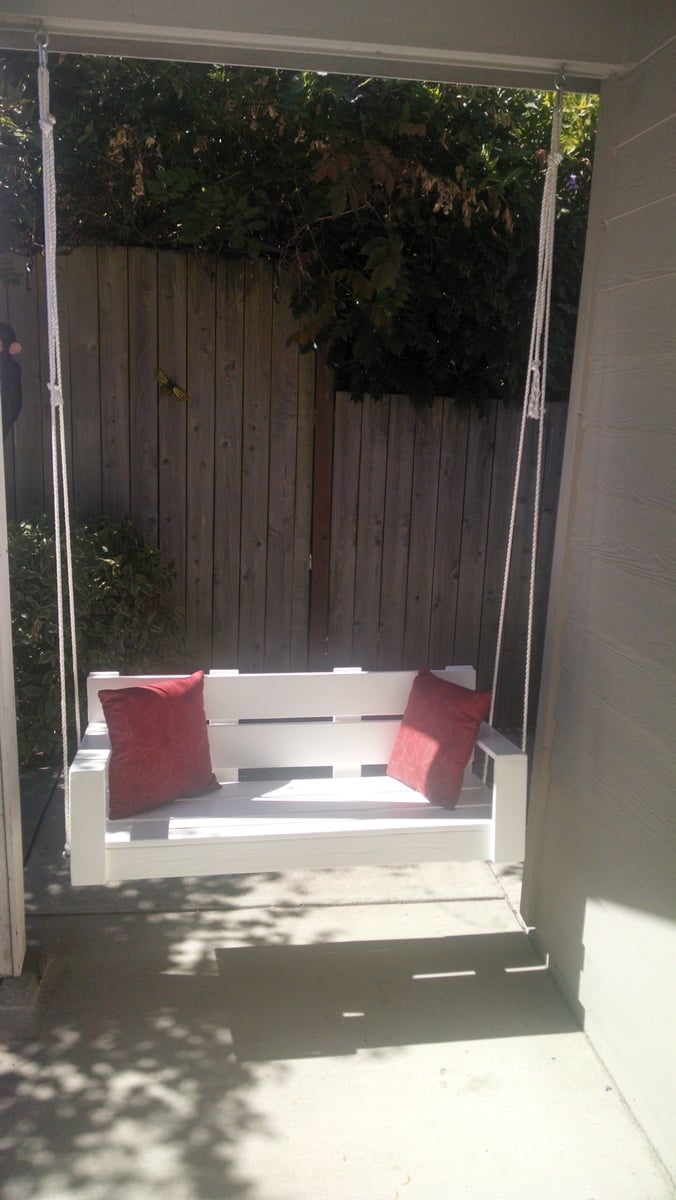
This bench is great! I was surprised how nicely it swings. I used rope with overhand loop knots to secure onto quick link hooks. Made it for my husband for his birthday but my whole family enjoys it daily!
This is my third project from Ana's website. I absolutely love to build and can't wait to do more!
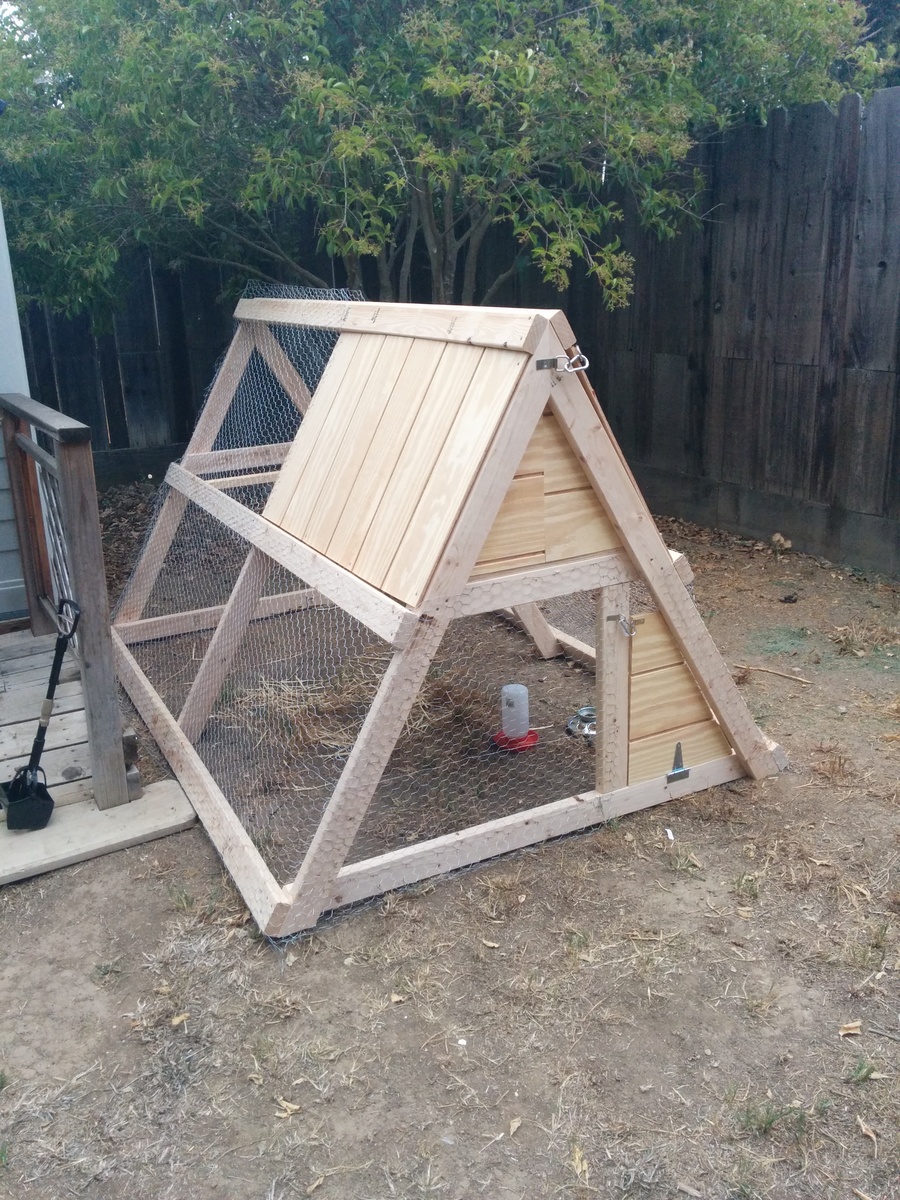
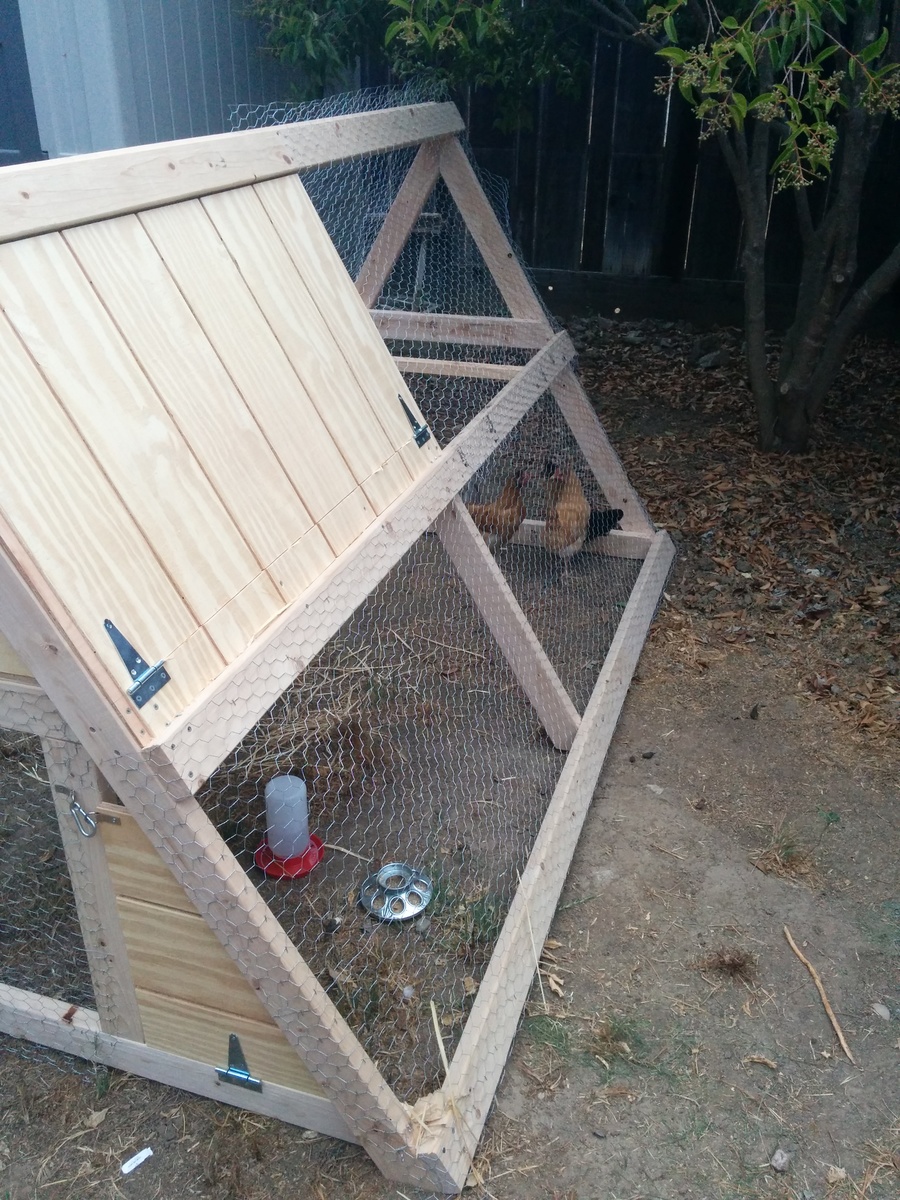
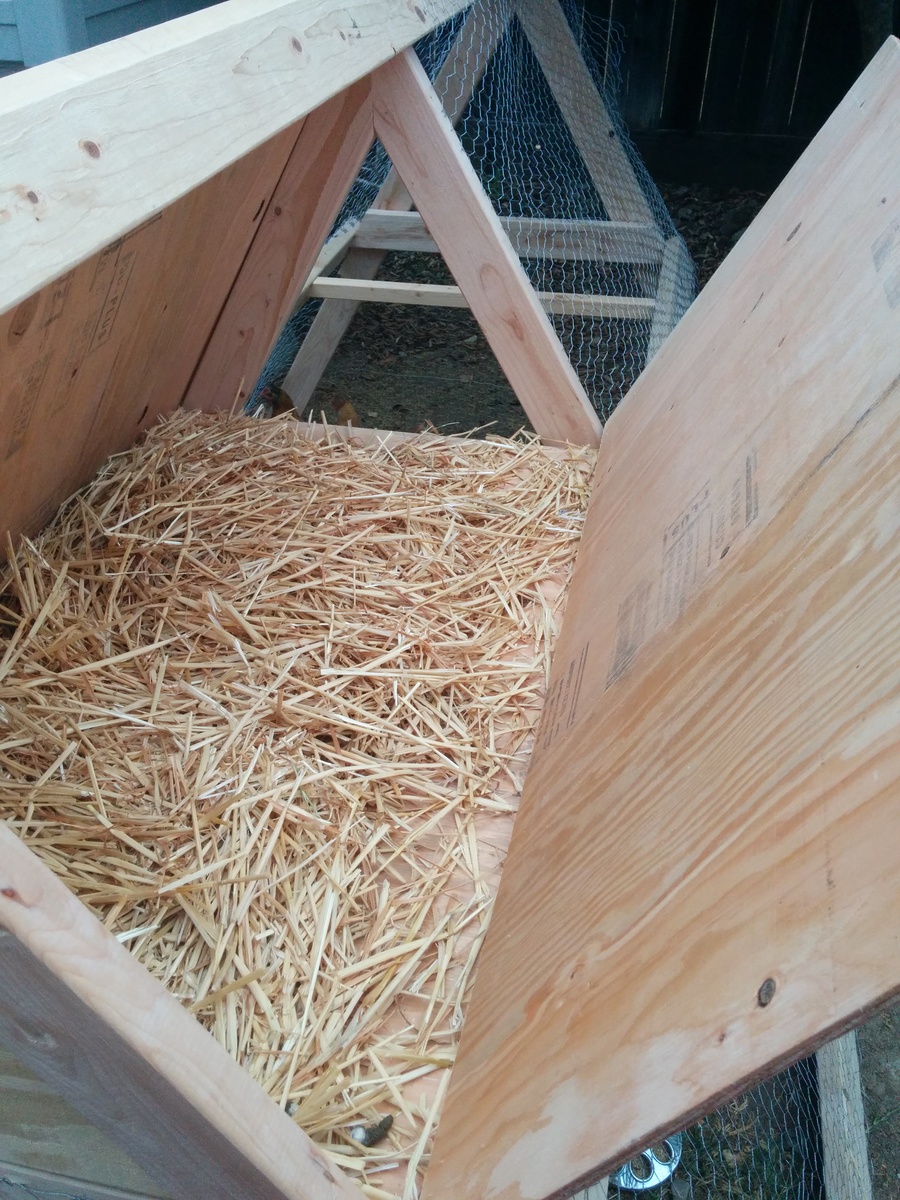
We followed all the original plans and added a few modifications. Chickens seem happy! We dropped the height of the nesting box down a little and made the roof only cover half of the coop. We live in California on the central coast so it doesn't get too cold. We also only made one side of the nesting box able to be opened. We added a little door on the bottom level with left over t 1-11 for easy access to their food and water and in the hopes that eventually we will let them roam our yard supervised during the day.
All in all the project cost us about $150 and took 4.5 hours to complete! Thanks for the great plans!
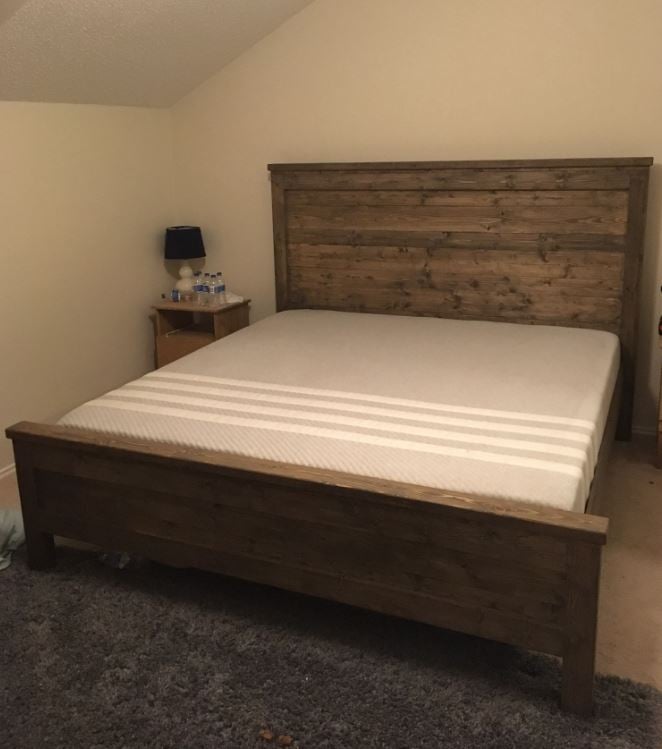
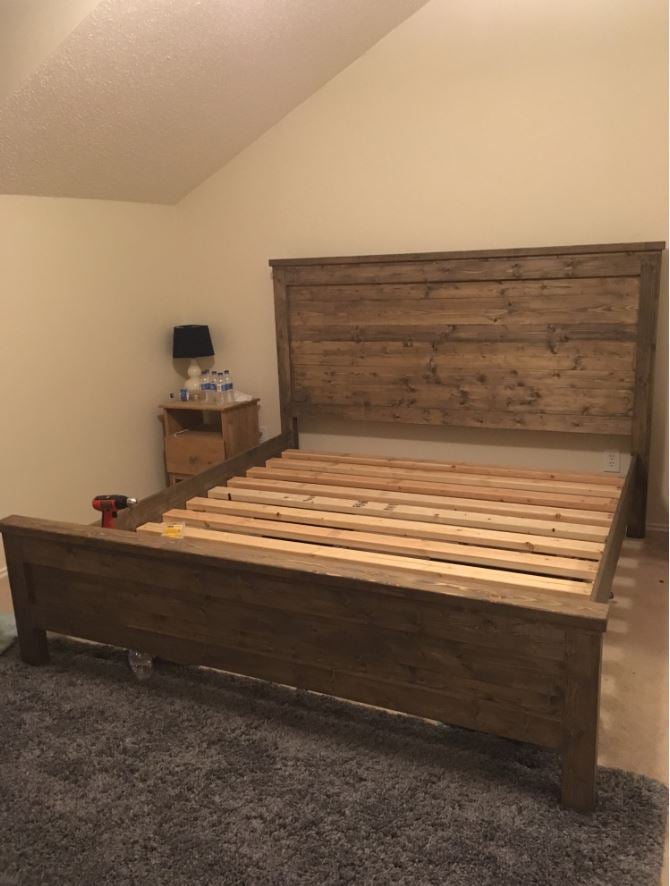
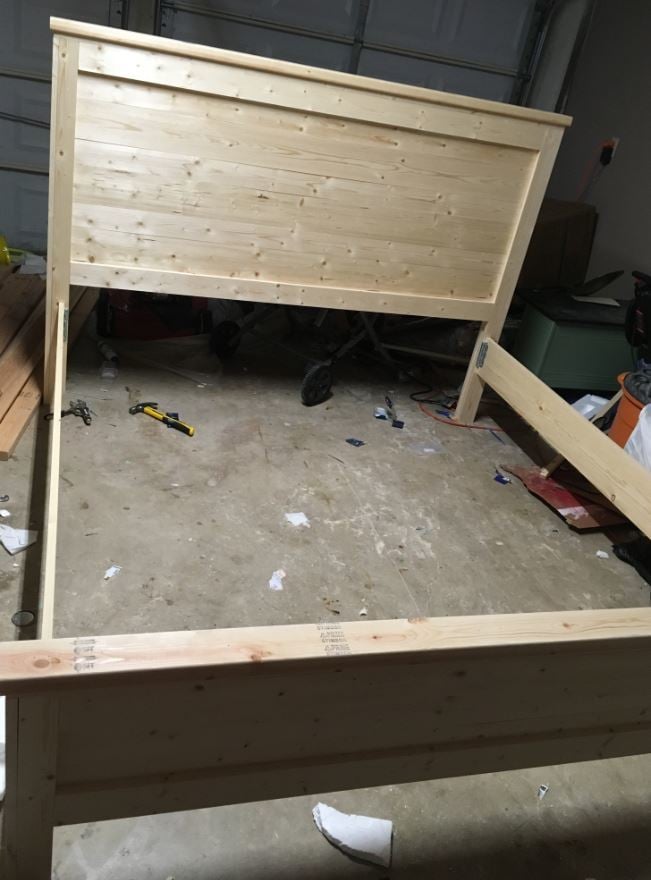
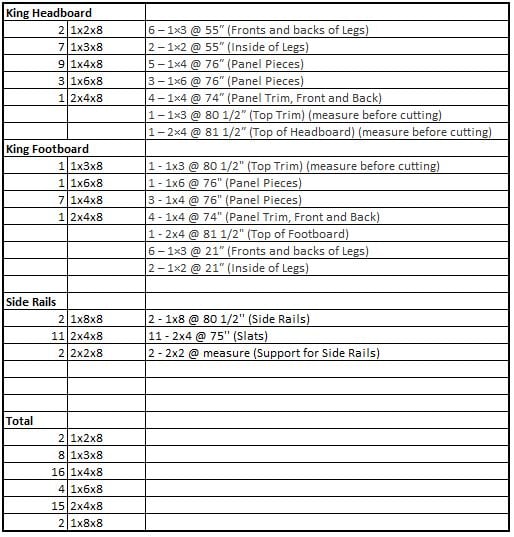
First of all, thank you to the site for this plan. The headboard specs were spot on. I was interested in making a footboard as well, and you actually will end up with a few scrap pieces that will help you build the footboard (the 1x3's and 1x2's). My footboard ended up being about 23 1/4" high. For reference, the mattress in the photo is 10". I included a picture of the total boards you will need to buy to do the headboard, footboard, and side rails (I used 8 inch boards for the side rails, not 10 inch, but those could be interchanged). One thing to note is the plan calls for pocket hole screws but these are not necessary. I used 2" brad nails, 1 1/4" brad nails, and 2" screws (for the slats and the support rails on the slats. You could use 2 1/2 inch for the slats but the support rails need 2".). Not included in the picture I included is another 2x4x8 that I bought that I placed three scrap 4x4 posts that I had under the middle of the slats for extra support. I also bought steel bed rail fasteners ($11.30 from Amazon) to attach the side rails to the headboard and footboard. They worked great and the bed is extremely sturdy. Can't budge it at all. I used the common whitewood boards from Home Depot, which are all the correct width - the fur boards are cheaper but are not the correct width, you would need to adjust the plans if you were to use those. Overall I am very pleased with the bed. Please ignore the half dozen water bottles in the photo.
Great beginner project. I needed minimal help from my husband. Everyone in the family now wants a bench like mine. Thanks a bunch for the easy to follow plans. Love your website!
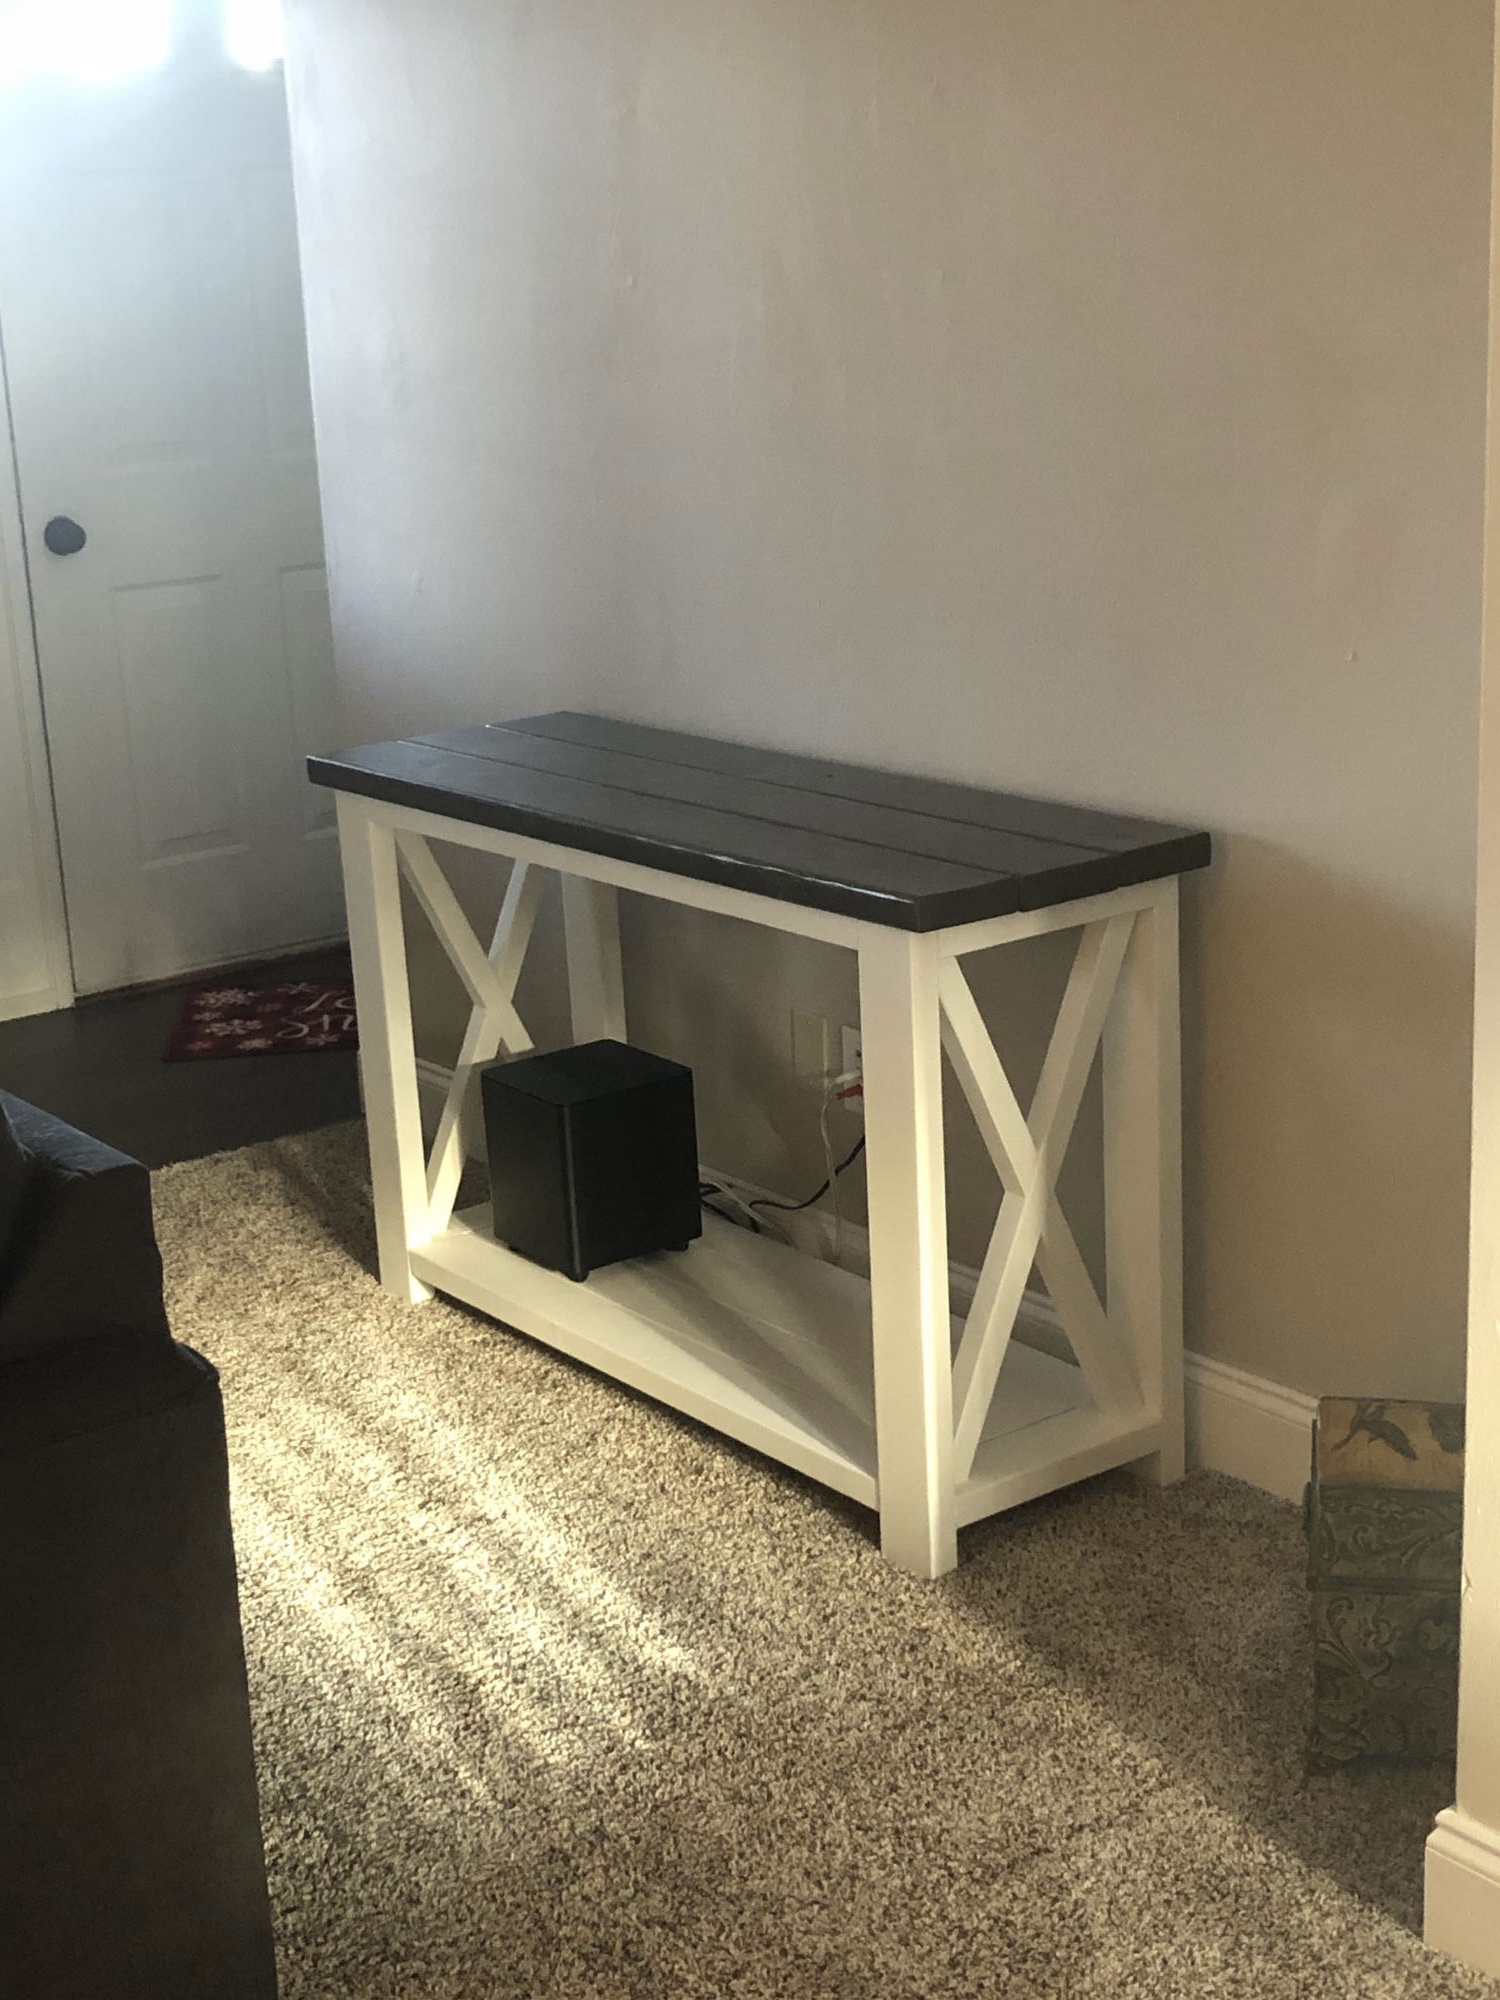
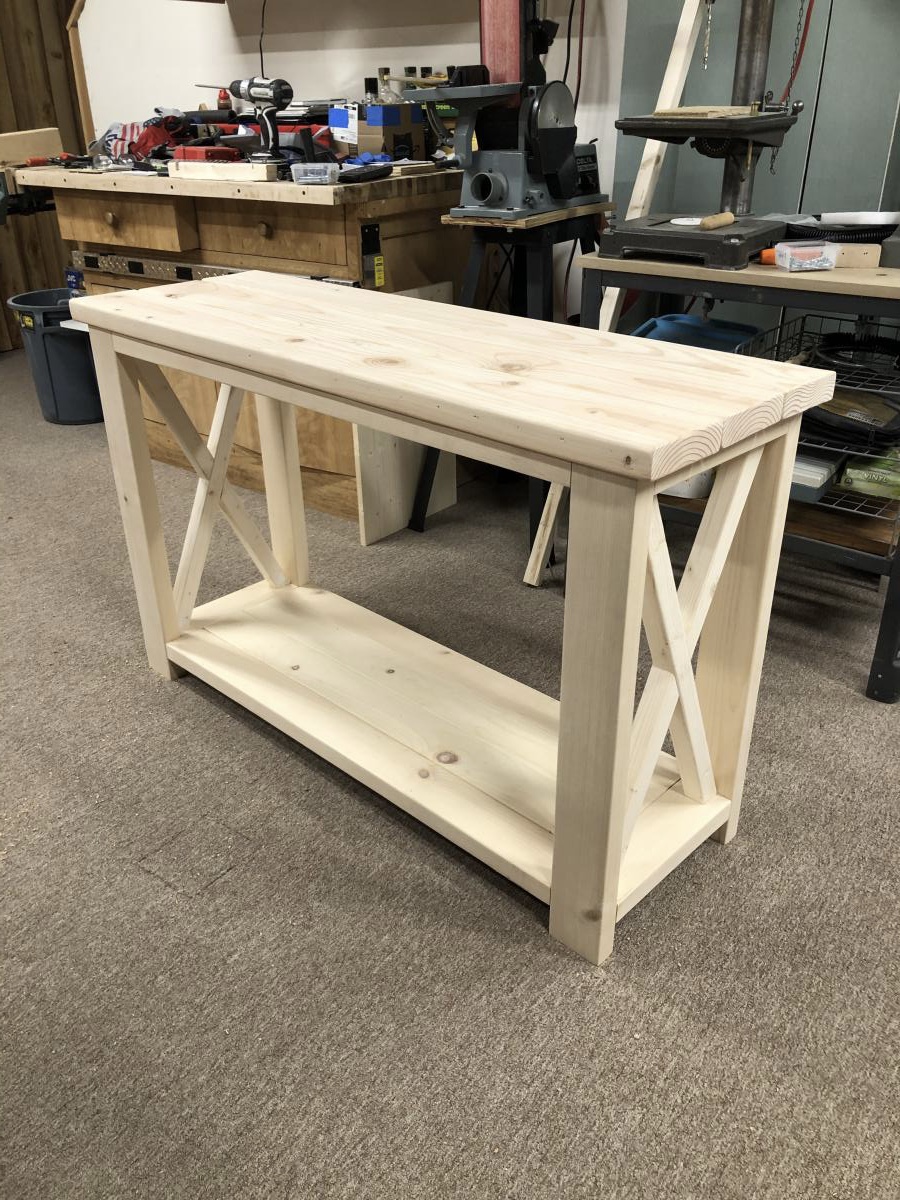
I built this console table modeled from other diy plans on the Ana White website. The construction took 1 afternoon, but the project start to finish was 3 days to allow time for finishing. The overall dimensions are 49”W x 16 1/2” D x 30” H.
Mon, 12/07/2020 - 09:47
Yes the finishing seems to always take the longest! It looks fabulous, thanks for sharing:)

I wanted to make a black and brown picnic table, this one turned out really nice and it gets a lot of compliments.
I, also, reinforced the 2x6s used for the seats by boxing in 2x4s underneath. I just cut 4 53" (probably could have been 54" honestly) and mounted them to the bottom of the seats and screwed them into the seat cross members. This should keep them from flexing.
Tue, 01/14/2020 - 08:29
I love the look of this, it is great. I'm looking at your estimated cost wishing that was the case where I live .
I submitted this build under anonymous on accident. Please assign it to my profile when posting if possible. Thank you.

Mon, 12/14/2020 - 12:51
These beds are awesome! Can you reply with your username so I can credit you for the build?

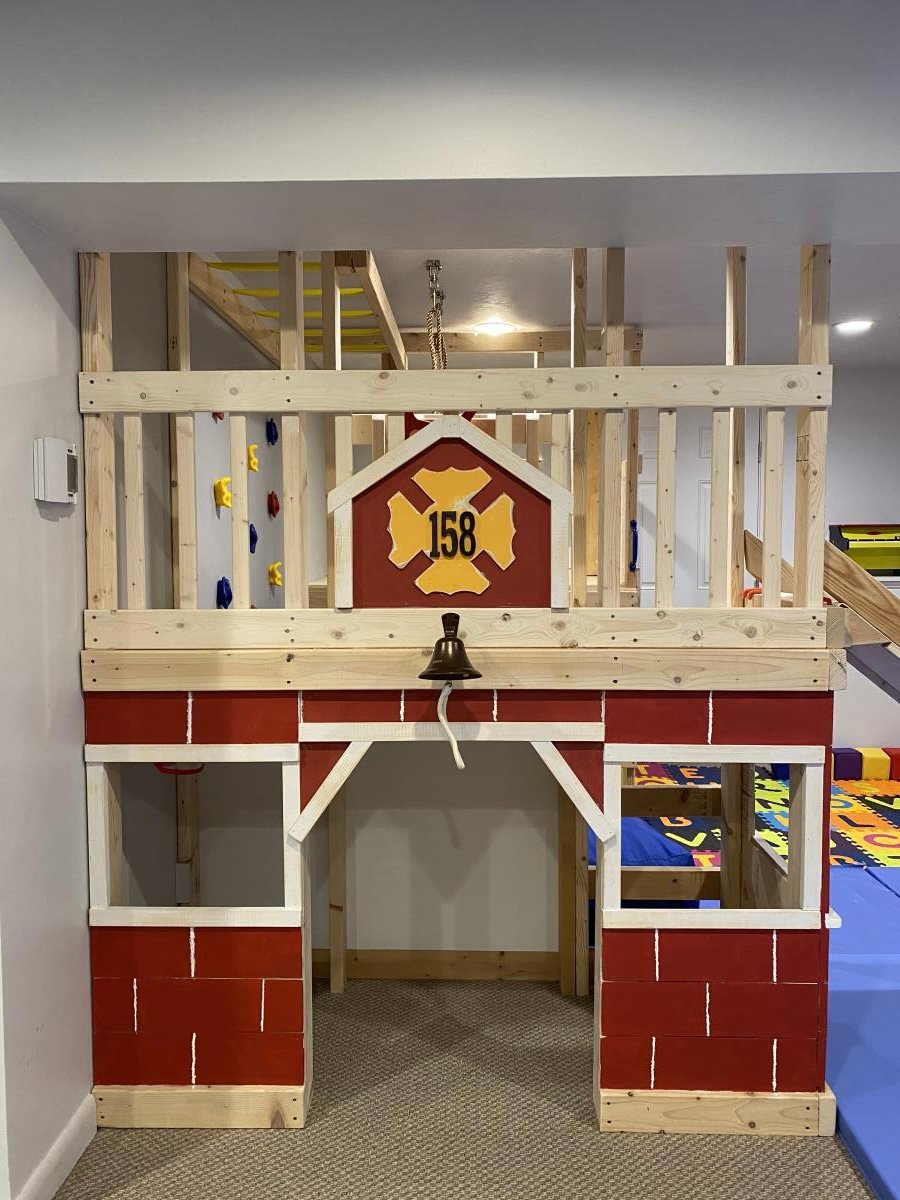
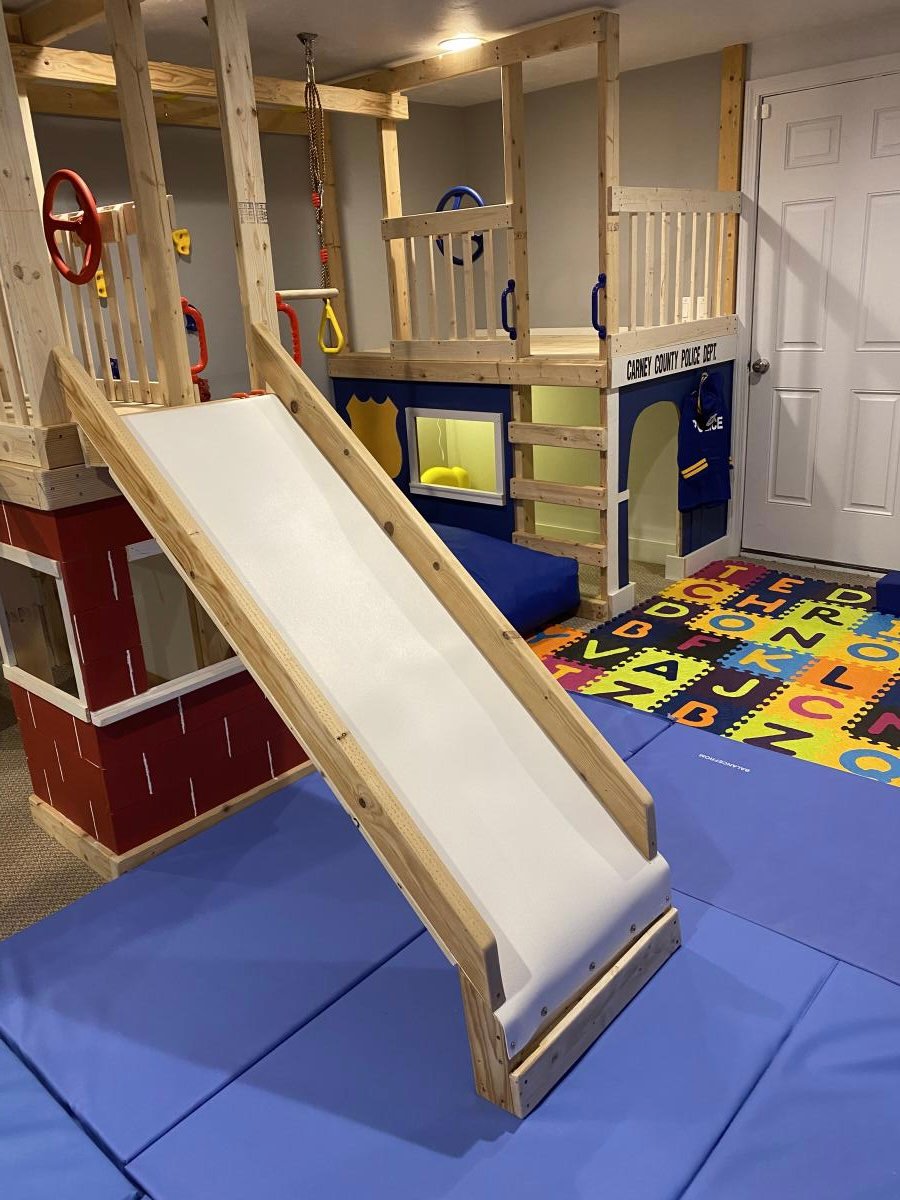
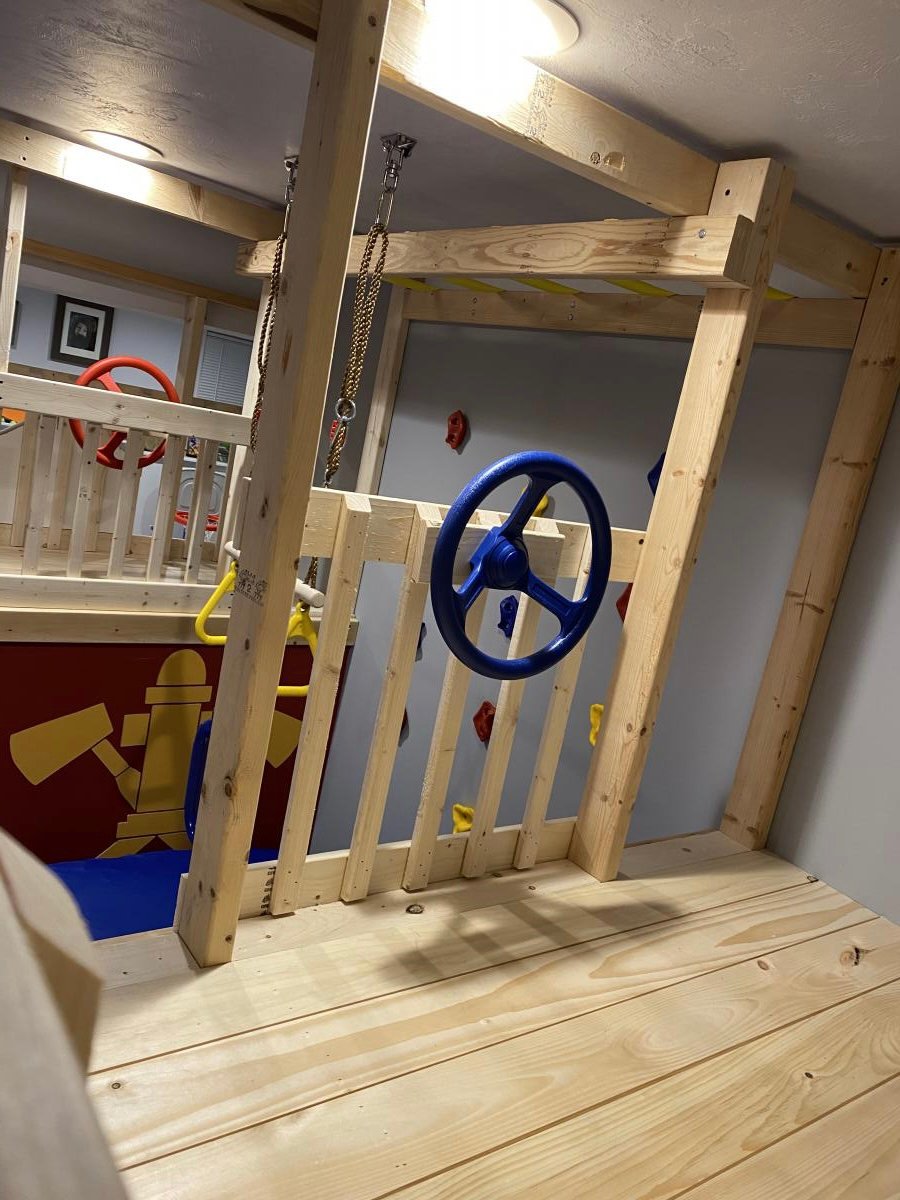
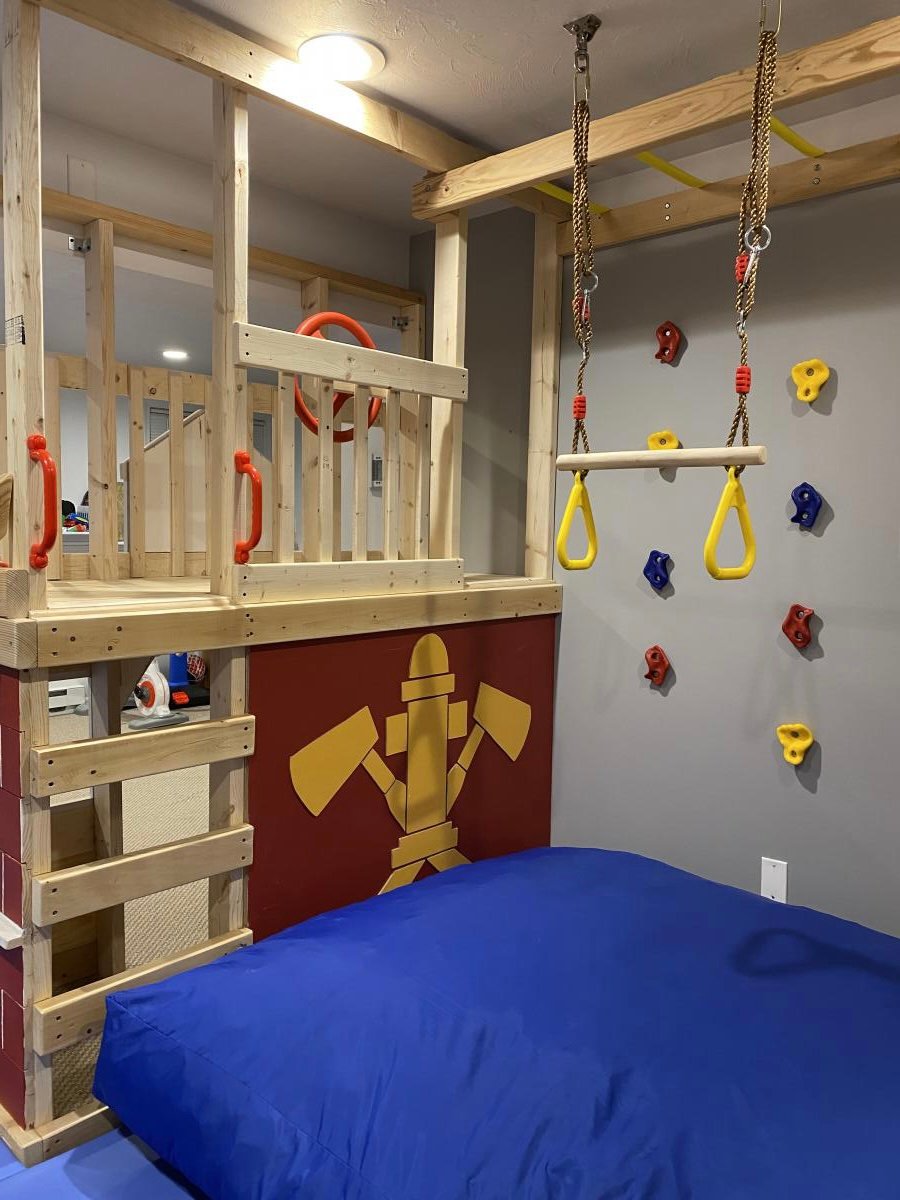
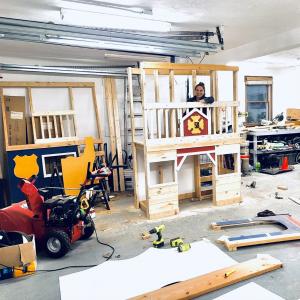
With Christmas approaching and the realization that my three young boys had way too much “stuff”, I enrolled the help of my dad to build this amazing basement play area. When I found Ana’s plans for the play gym with monkey bars, I knew we were in business. I modified the design to fit our space and we were off. Such a fun build and my boys absolutely love spending time down there. Thanks so much for your continued inspiration and the confidence you give us mamas to build with the big boys, Ana!!
In reply to Fabulous! by Ana White Admin
Fri, 01/08/2021 - 16:23
Thank you so much!! 🙏
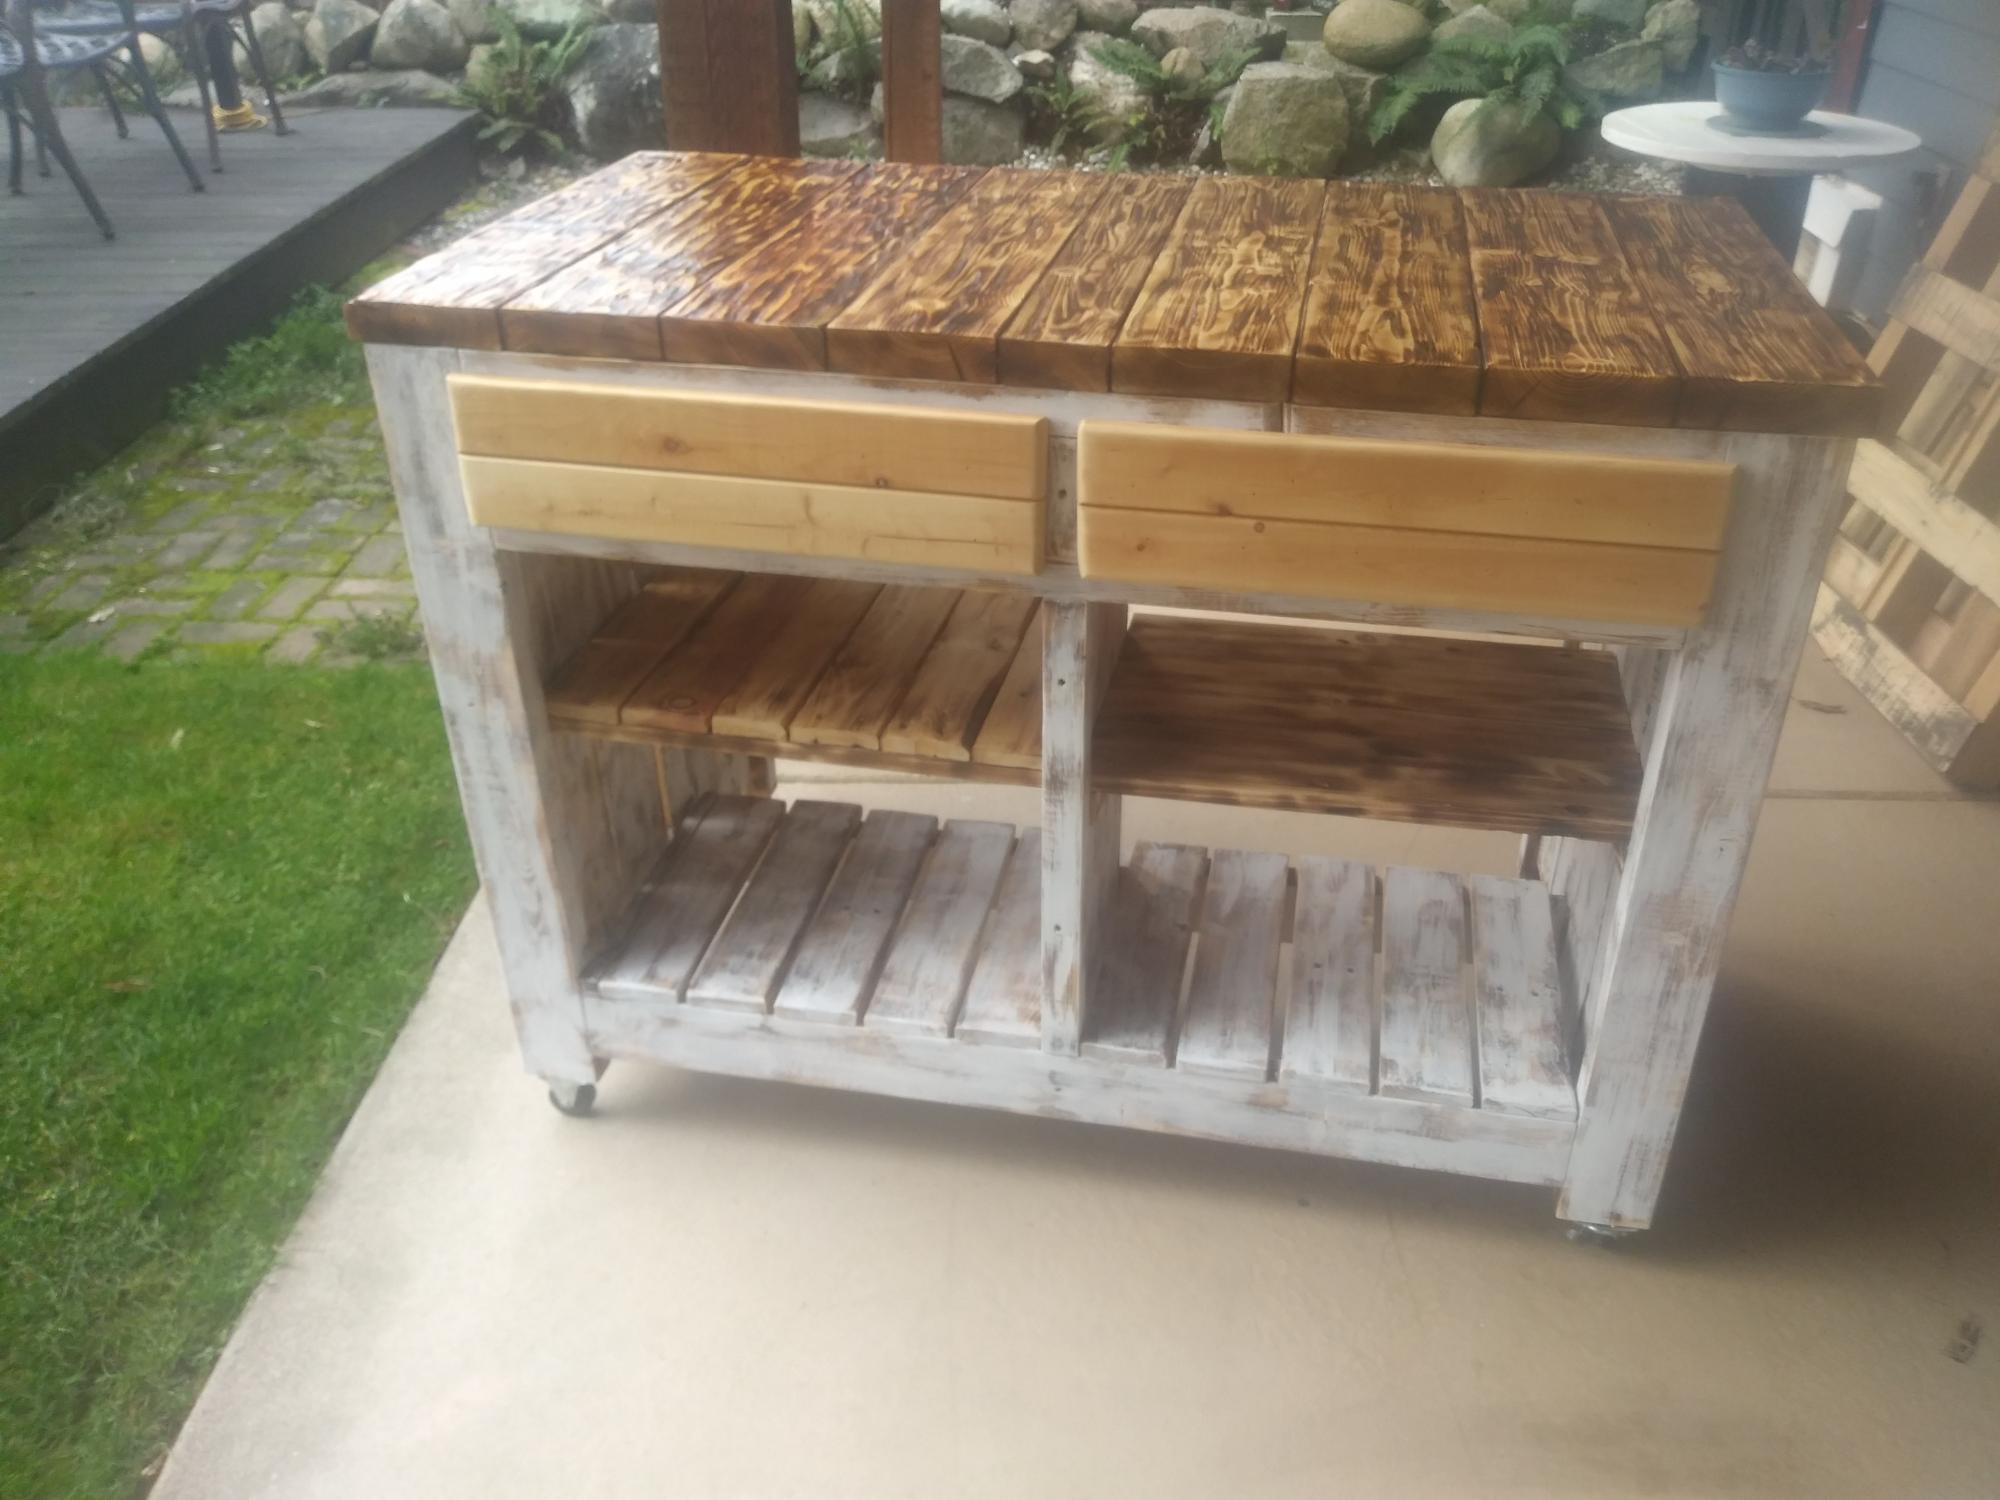
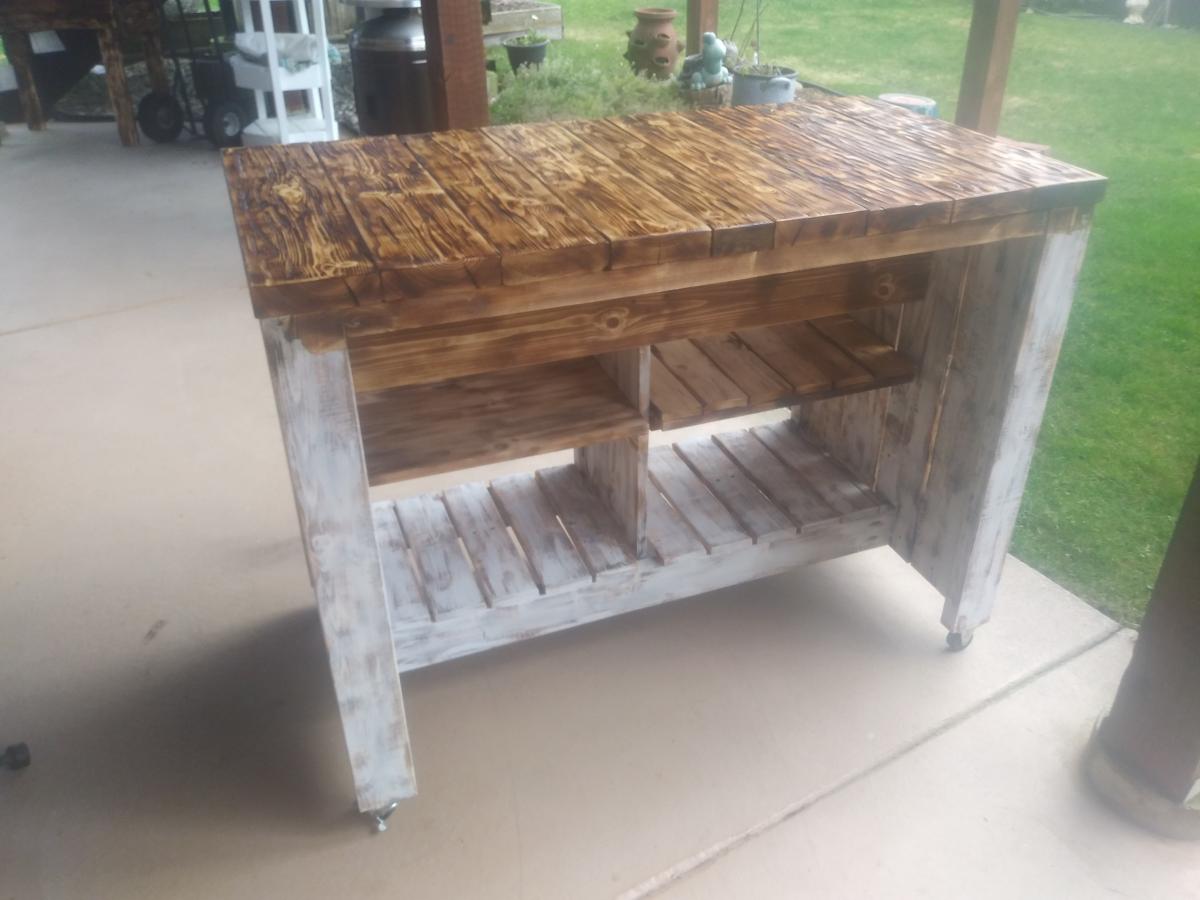
After following Ana Whit and other bloggers for a long time i figured my skills were at a level to try an advanced build like the Kitchen Island.. But i also wanted to challenge myself even more and was determined to make it from as much reclaimed wood as i could, mainly pallet wood.
With a lot of modifications to make it work i think I got a good result from these plans.
While i used as much reclaimed wood as i could, i still needed some clean 2x4's , 2x2's