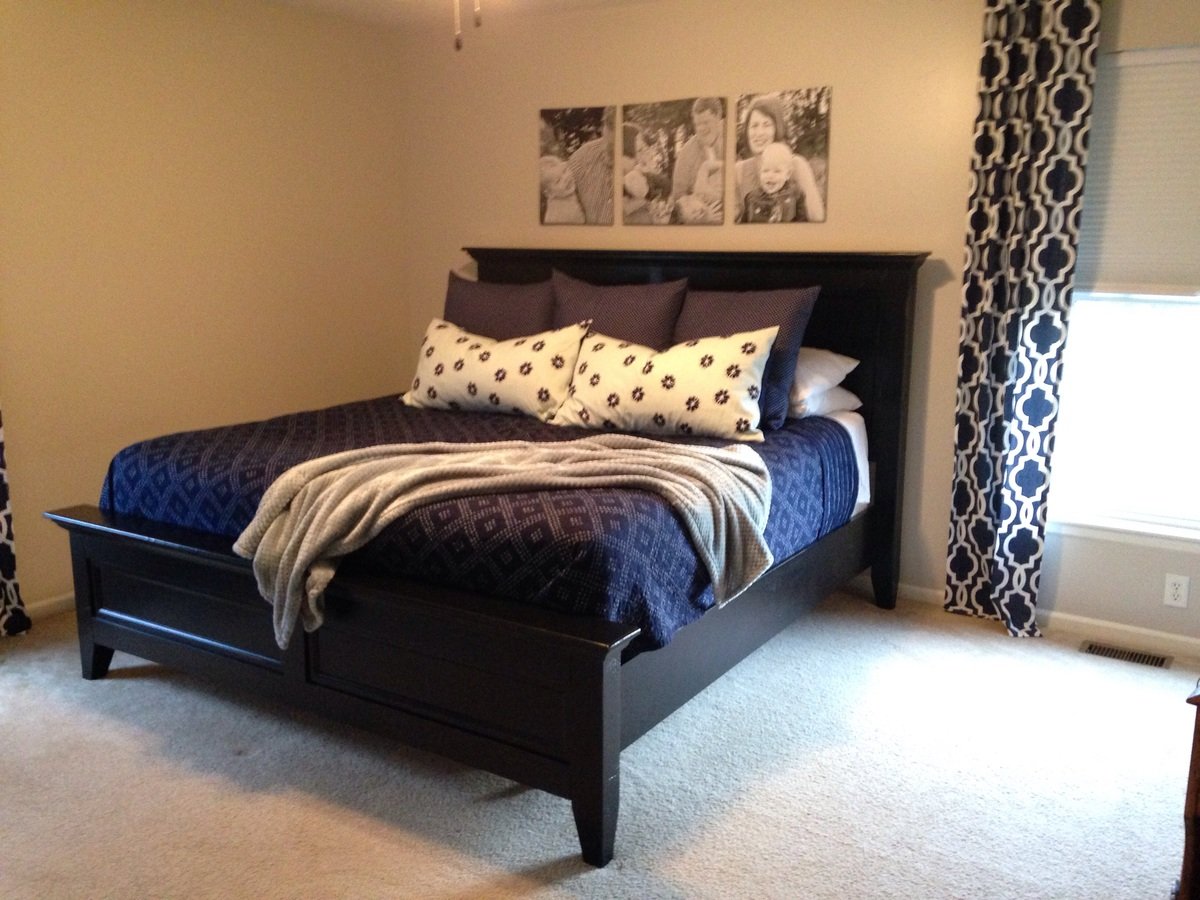
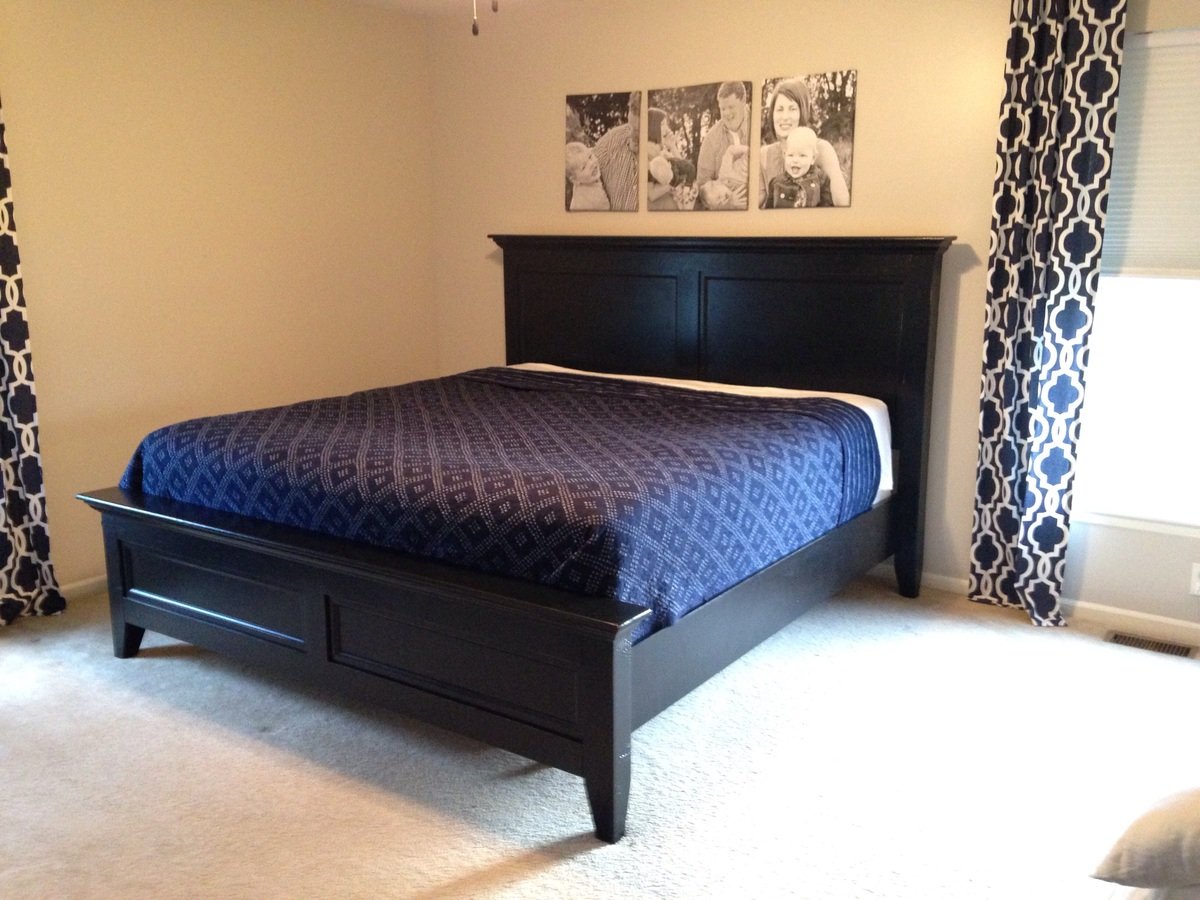
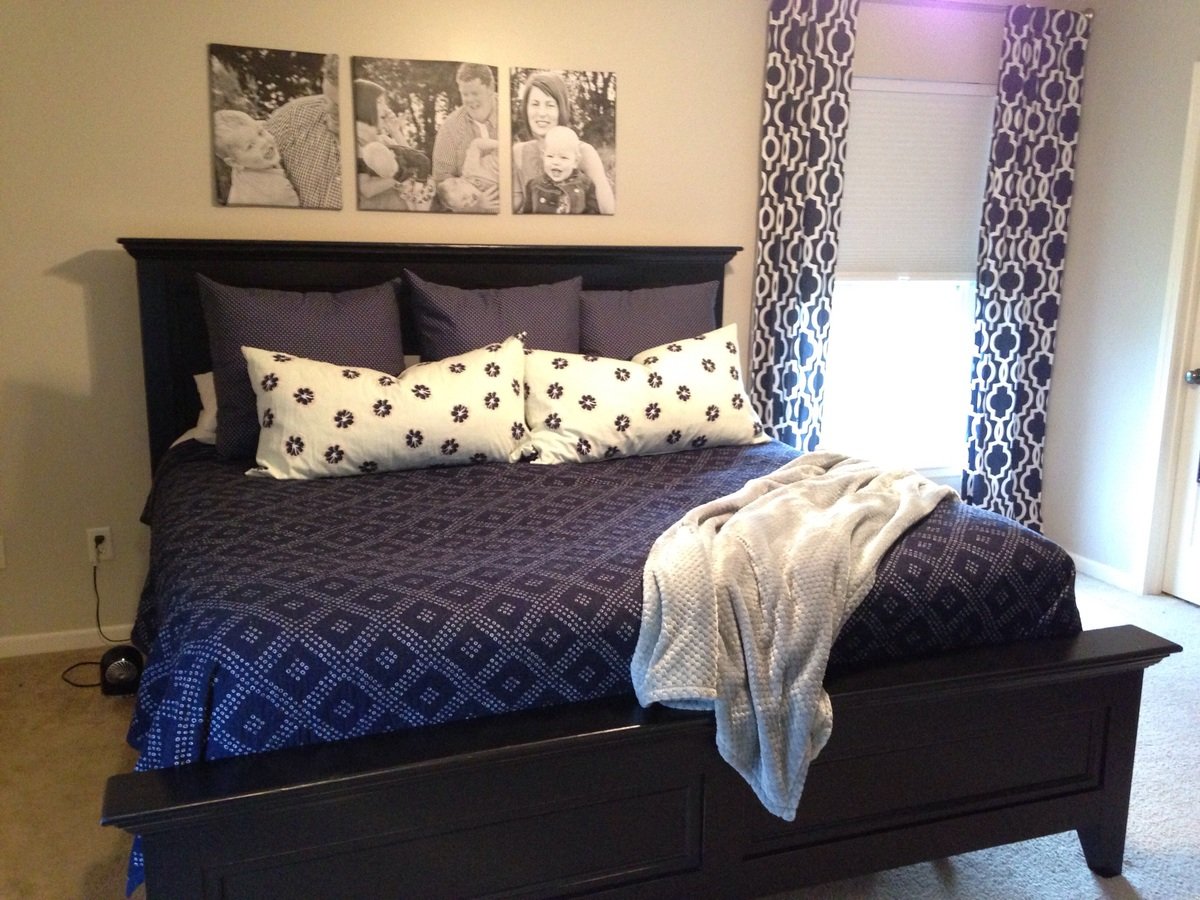
Farmhouse bed - King
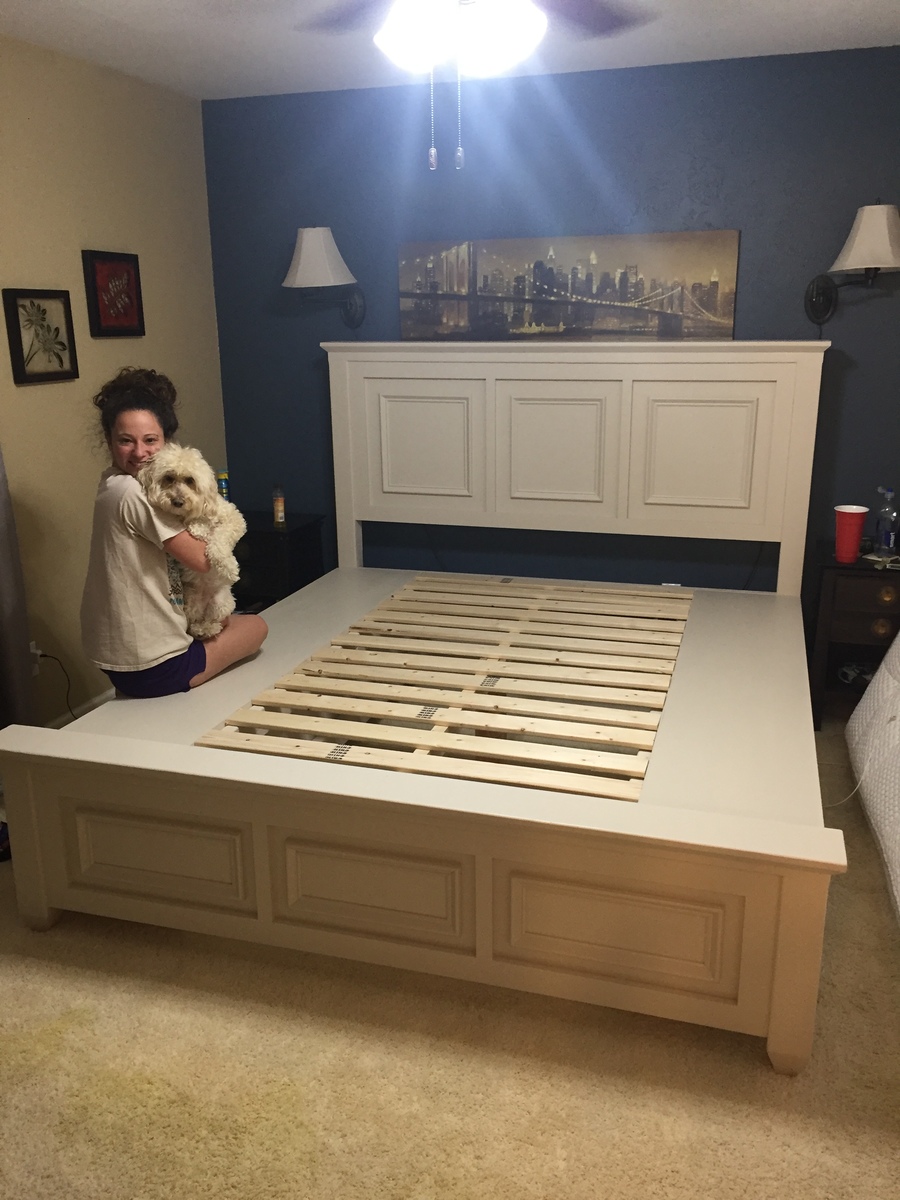
Farmhouse bed with storage sized up to a King

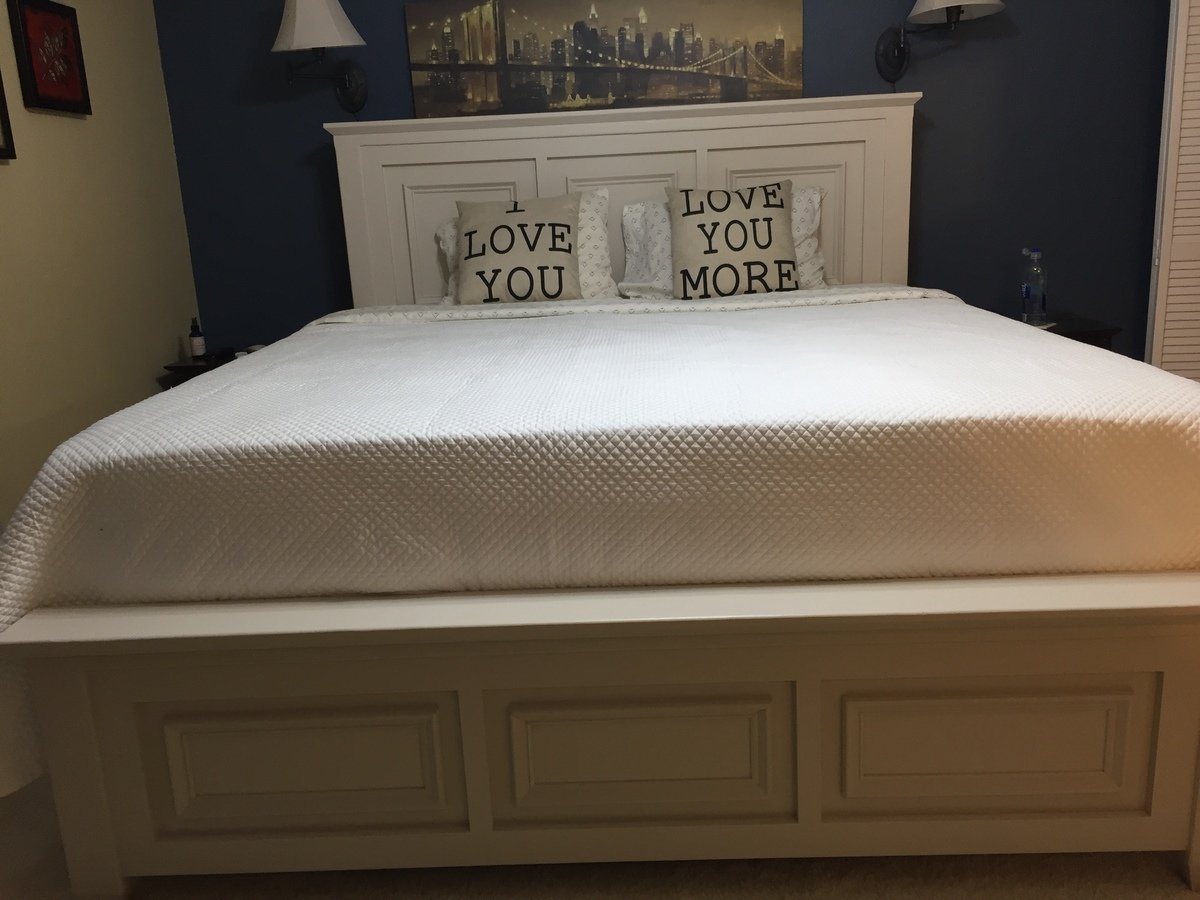

Built from Plan(s)
Recommended Skill Level
Advanced
Farmhouse bed with storage sized up to a King
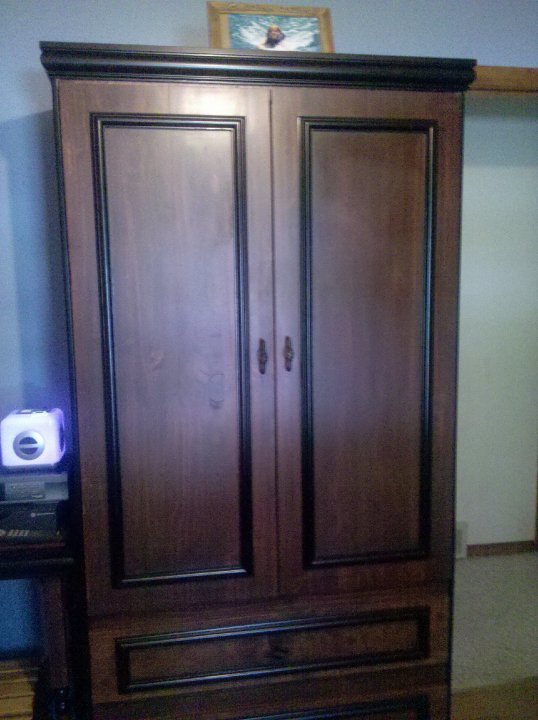
I built this wardrobe for my daughter. I wanted cubbies to keep her folded clothes neat and easily accessible, yet giving her two drawers for undergarments and accessories.
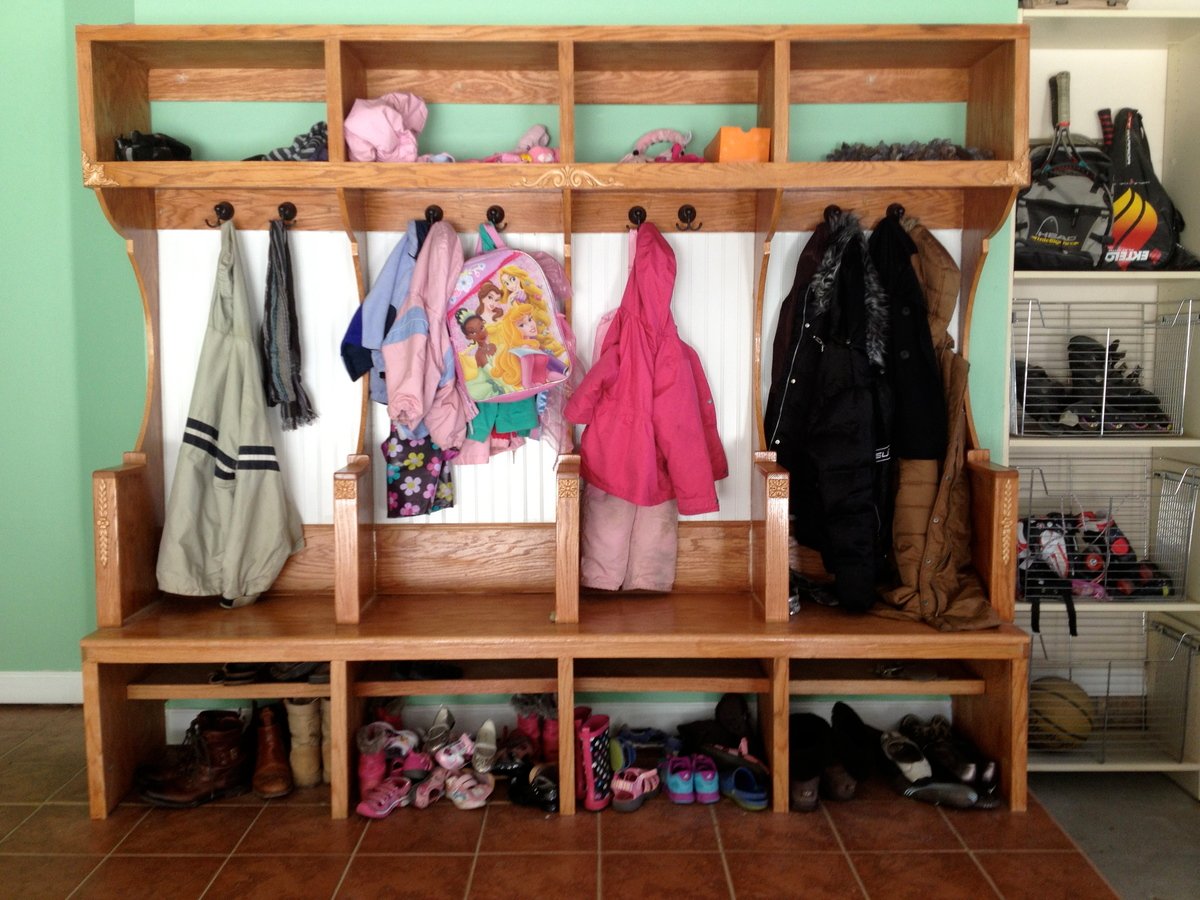
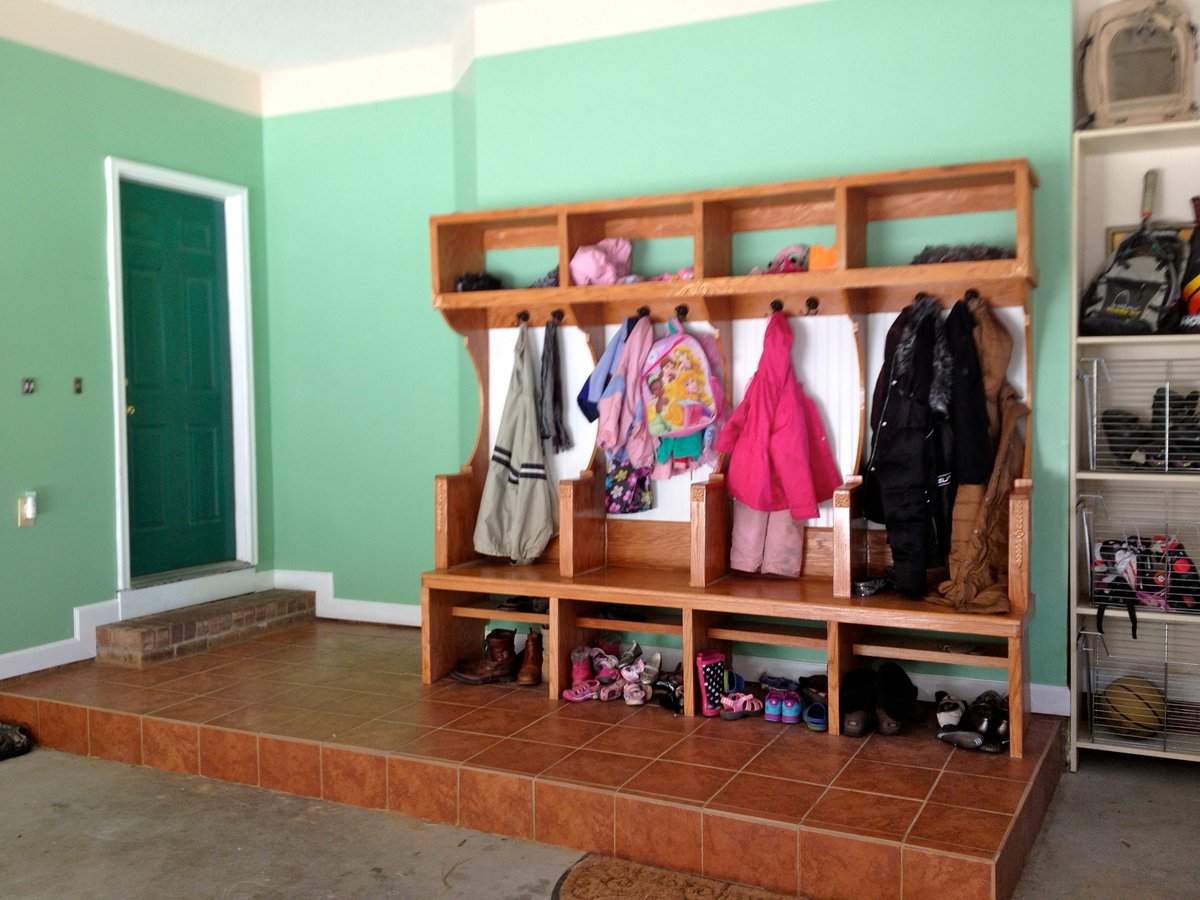
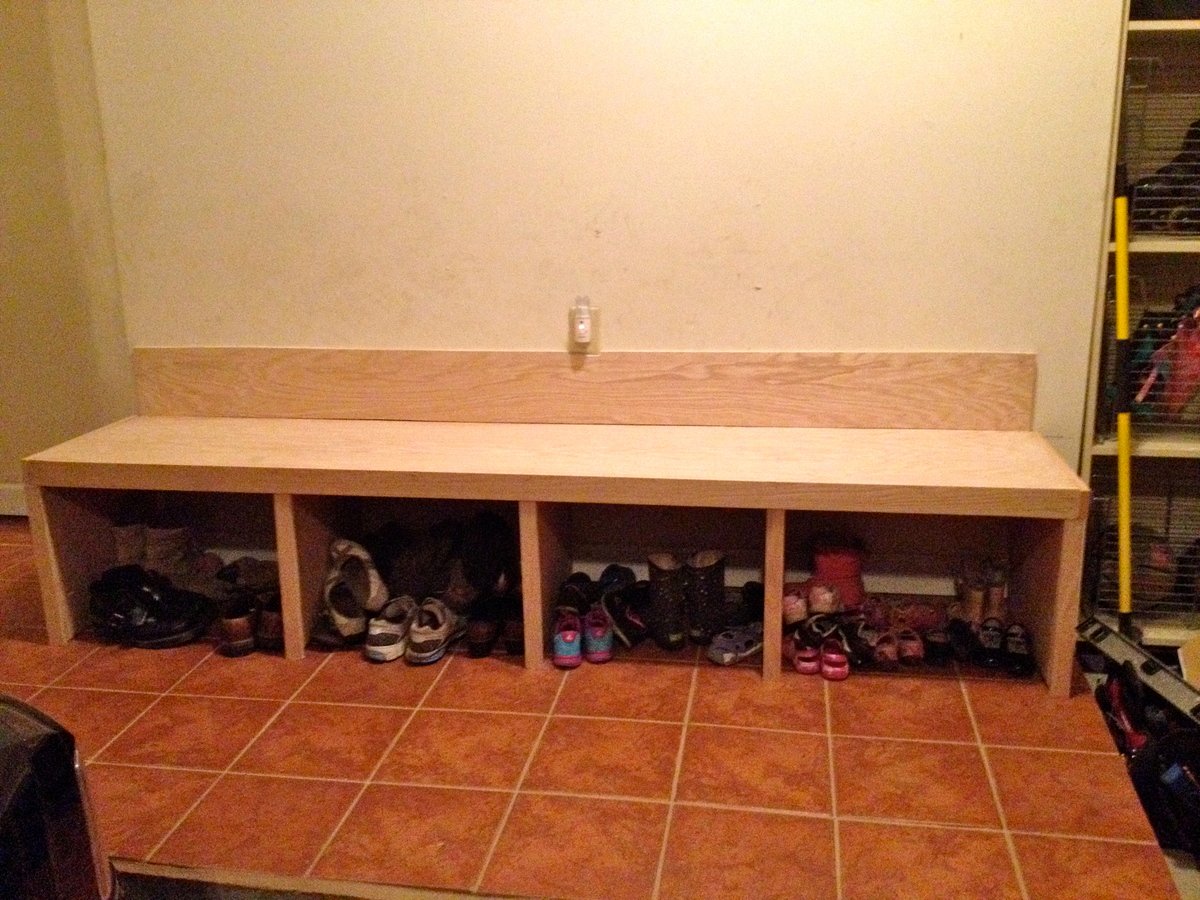
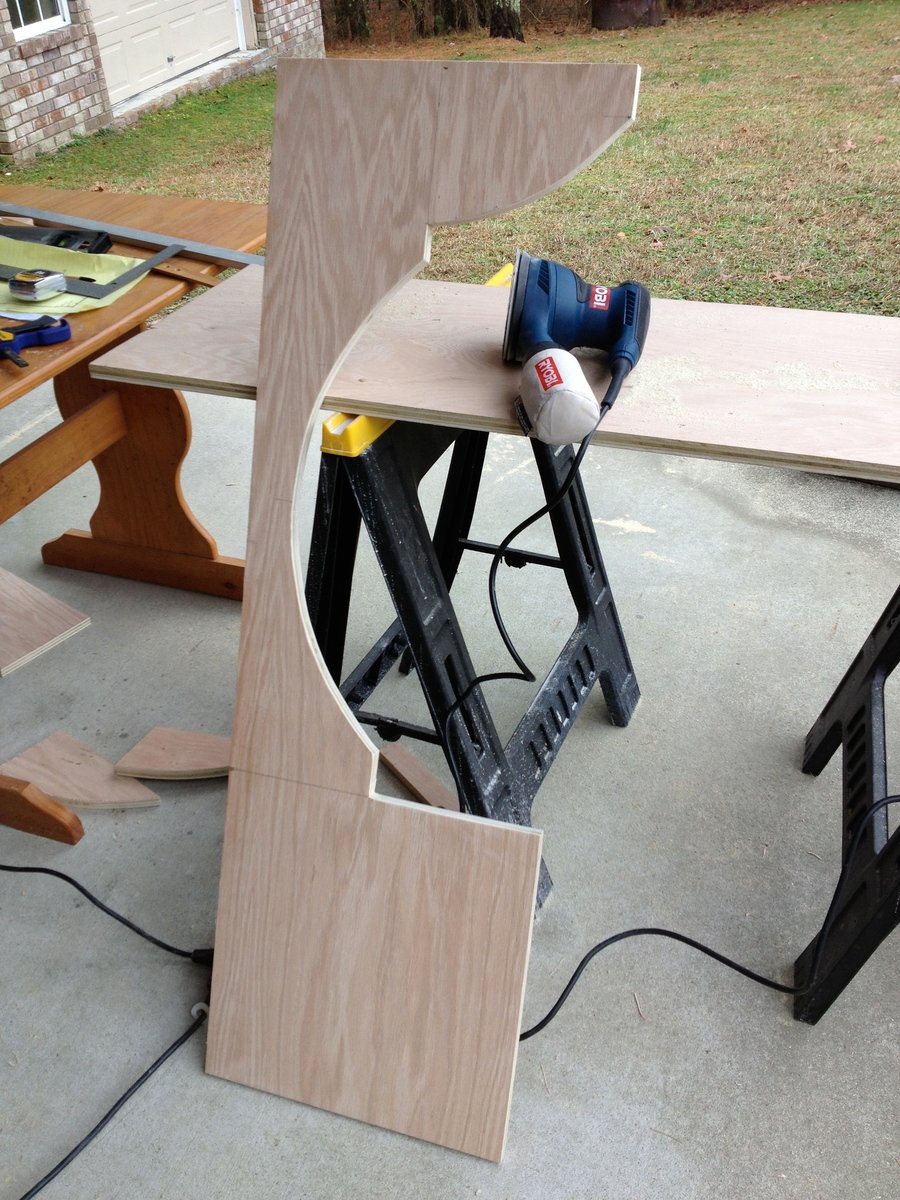
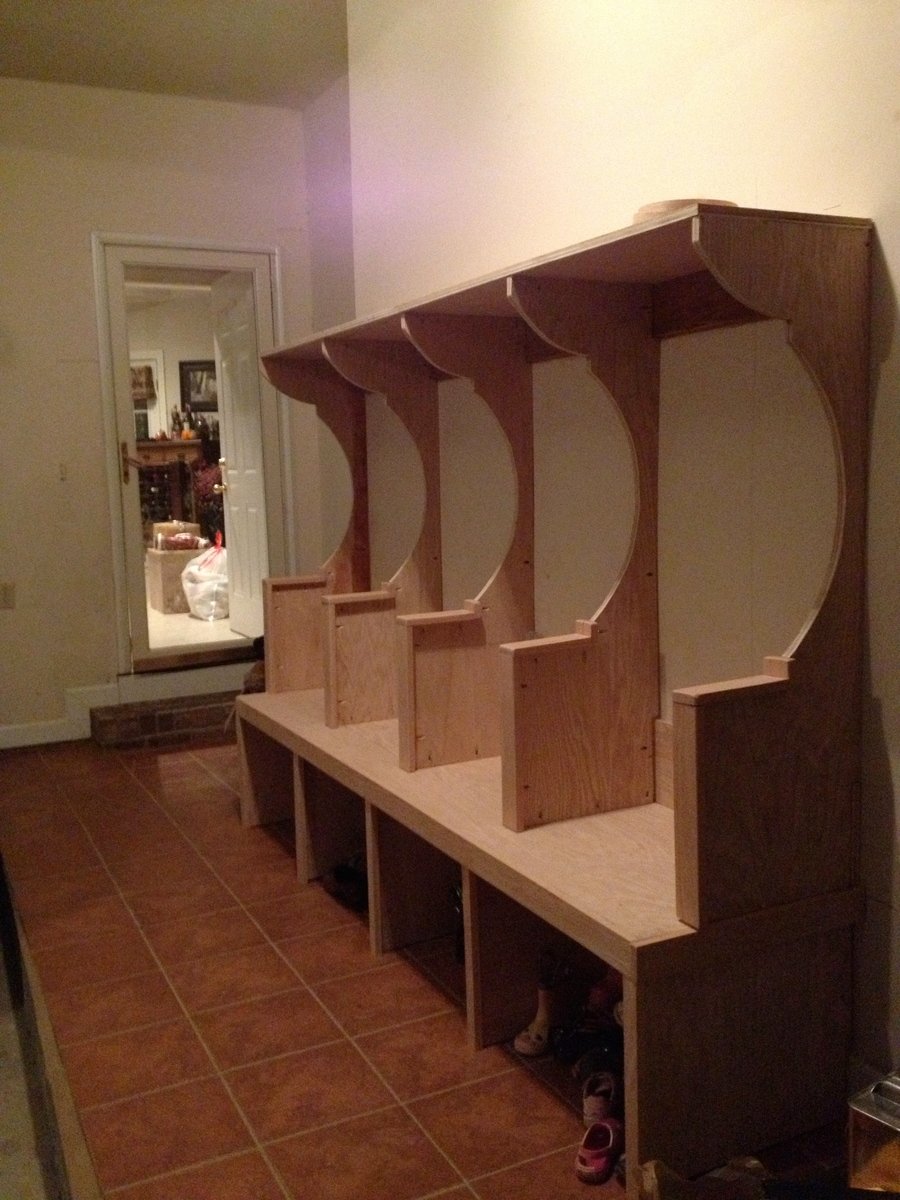
I followed Anna's plans pretty closely though deviated somewhat as well. Added additional length and one more seat separators & seat, increased depth by a few inches, changed design of seperators to allow for arm rests, added some additional trim, a second inset shelf w/in the shoe box area (for sandals and whatnot), and then inset wainscoting.
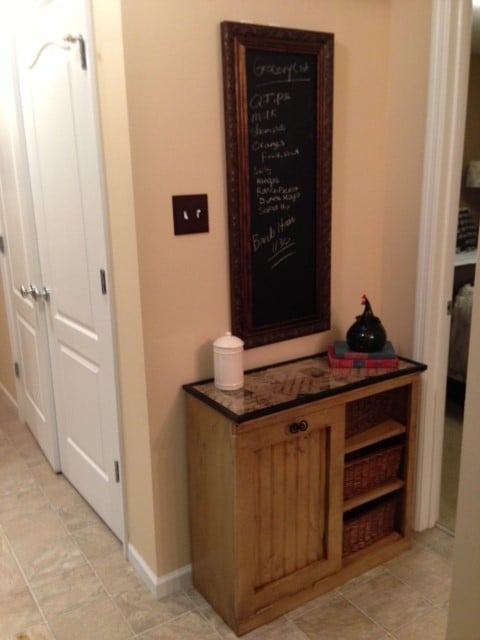
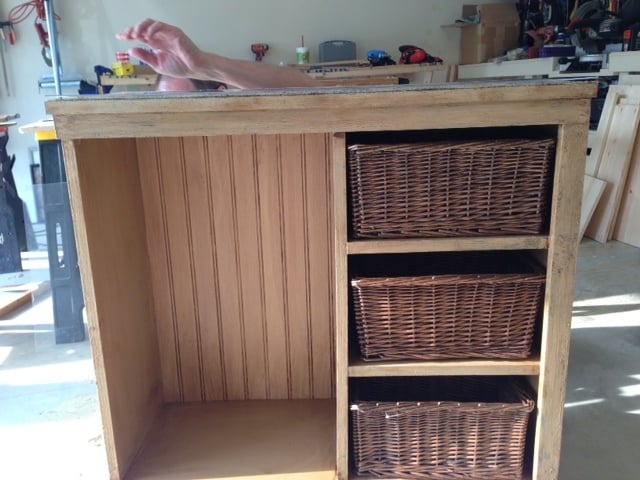
Recycle bin from Ana's Book. I mod poge glue on burlap to the top, placed on a piece of Plexiglas so I could wipe down, then stained the whole thing with an antique finish over the crackled paint. I also did an L molding around the Plexiglas to keep in place. Came out lovely! Added baskets for my veggies and done!

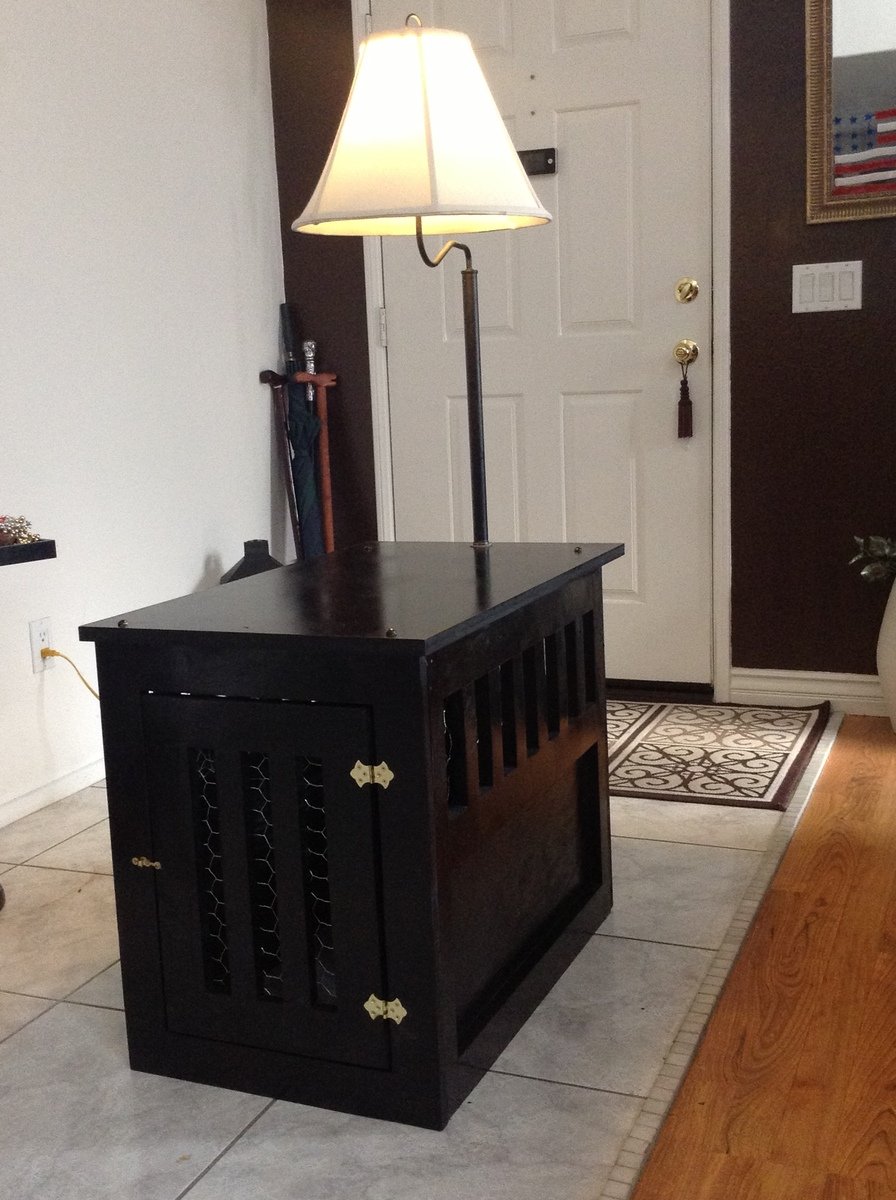
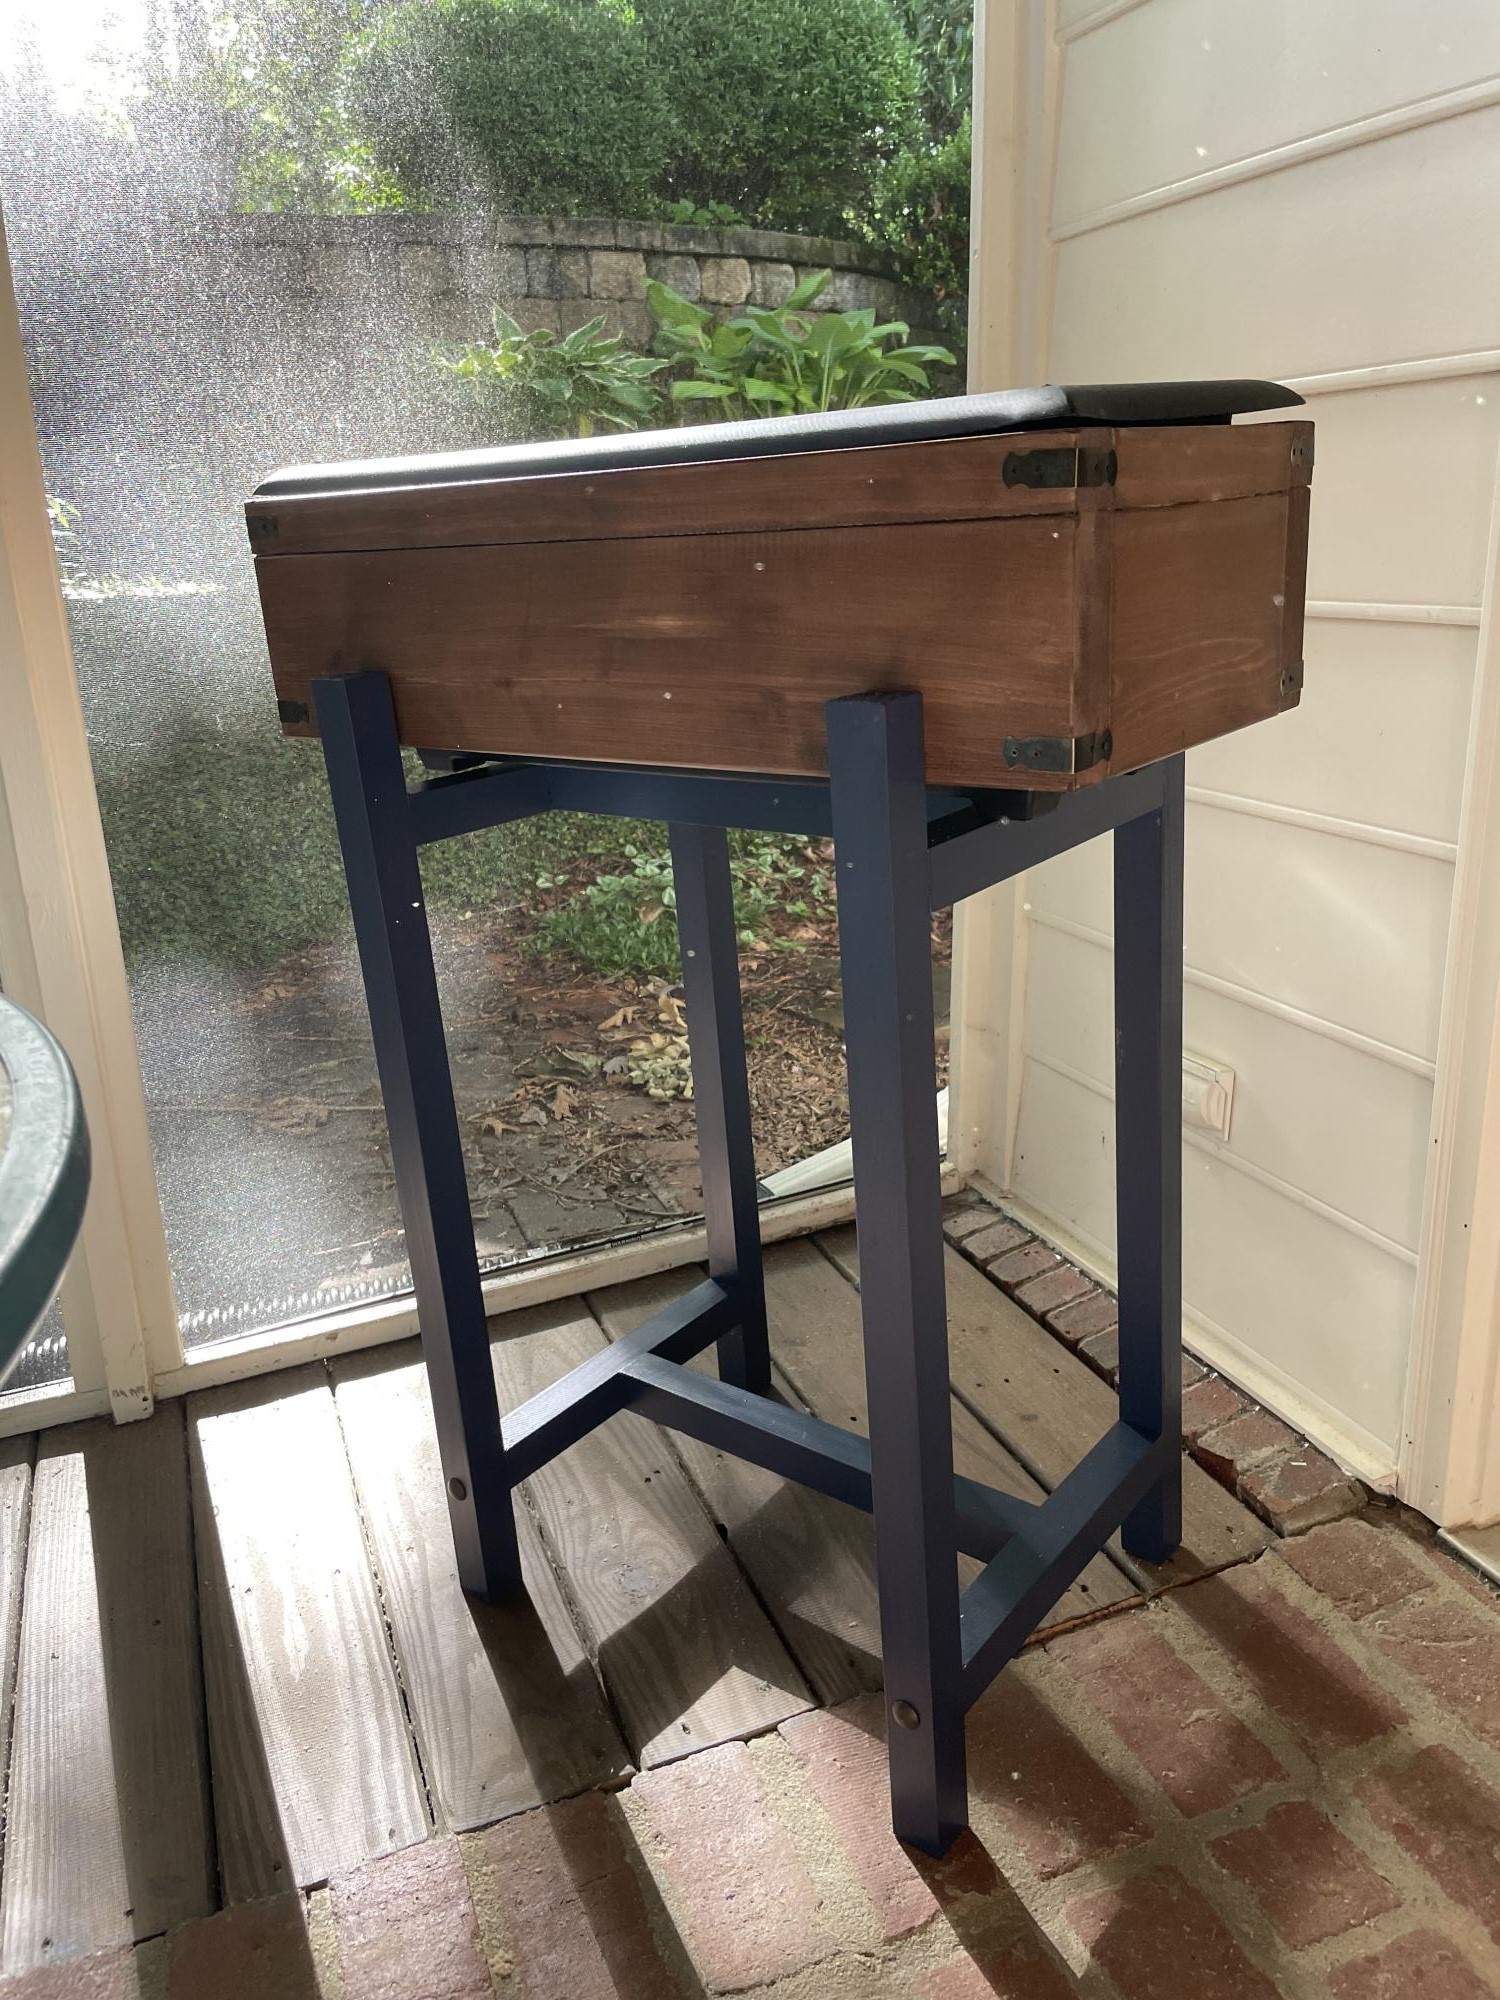
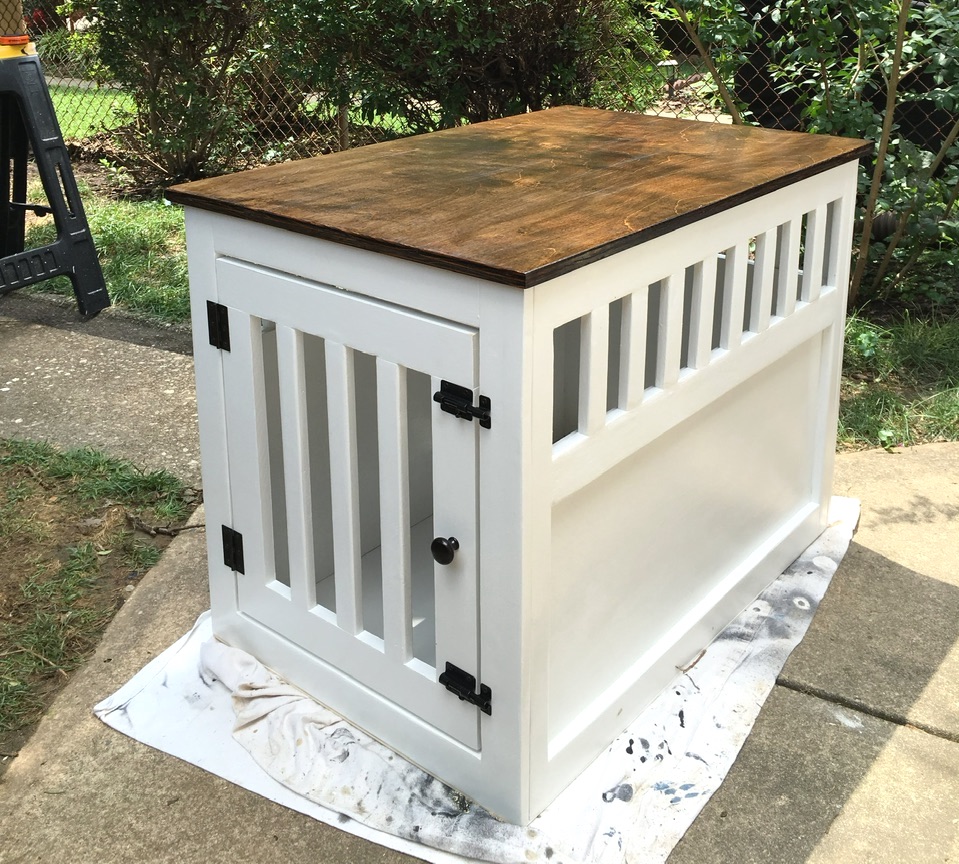
We loved Ana's plans for the large pet kennel / end table combo but we needed a medium-sized one for our Welsh Terrier, Watson. I reduced all the dimensions, ending up with a kennel that's 18"(W) X 24:(H) X 28"(D), perfect for Watson.
To prevent Watson from using the rails as chew toys, I lined the inside of those areas with chicken wire. I also extended the table top an extra 3" to accommodate a swing-arm end table lamp (with the cord outside of the kennel, of course). We painted the kennel black to match our other end table.
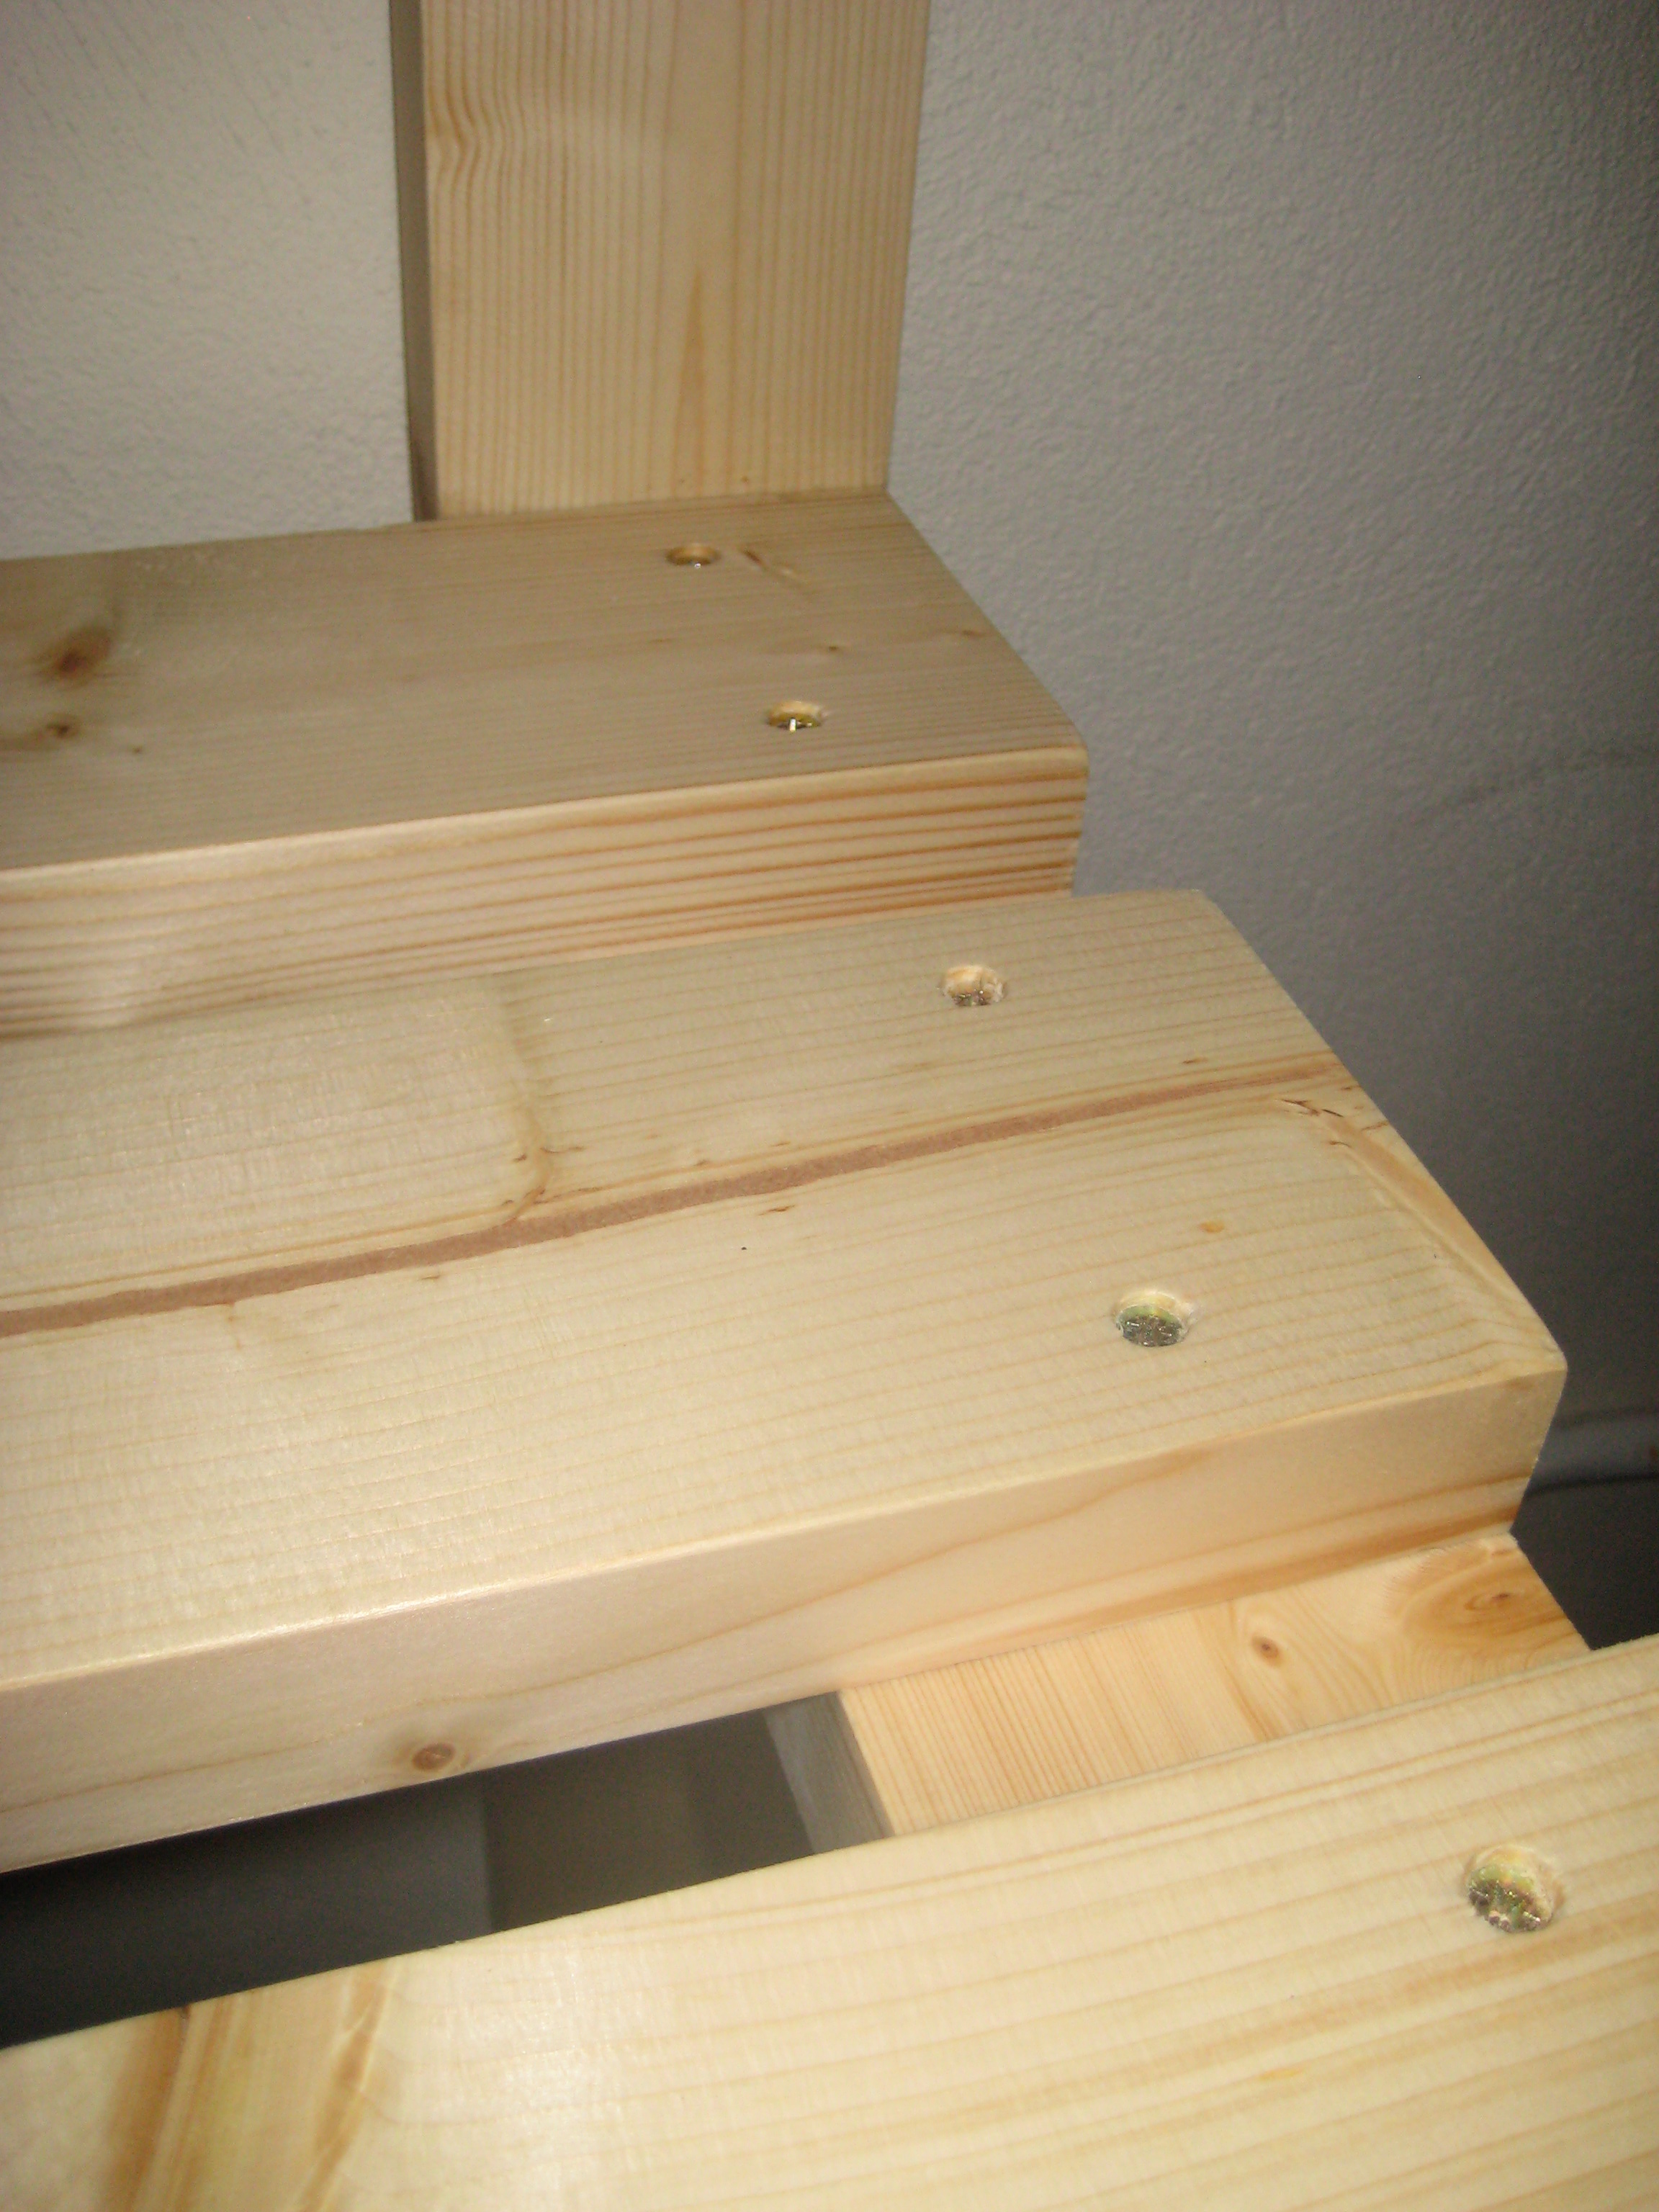
This was my first time using the Kreg Jig (80+ times on this project!) and I love it!! In fact, I'm looking for more projects that require the Kreg just so I can play with it some more. :-)

Fri, 09/15/2017 - 18:33
I was wondering if you still happen to have the scaled down instructions for this dog kennel and would be willing to share them through email?
Kathy
This was my first major project to build. I modified it to resemble Macy's Captiva bedroom set. I finished it with General finishes lamp black paint with some slight distressing.
We estimate that the cost of this project was right around $50, but we had a lot of tools and materials already. This was a fun project and a great piece for the cost. I would suggest staining as much as you can before assembling those legs! Staining and applying poly was a pain in the butt! We used a dark mahogany Minwax stain and 2 coats of Minwax poly. It took us a while to do it because we have a 11 month old that keeps us on our toes.
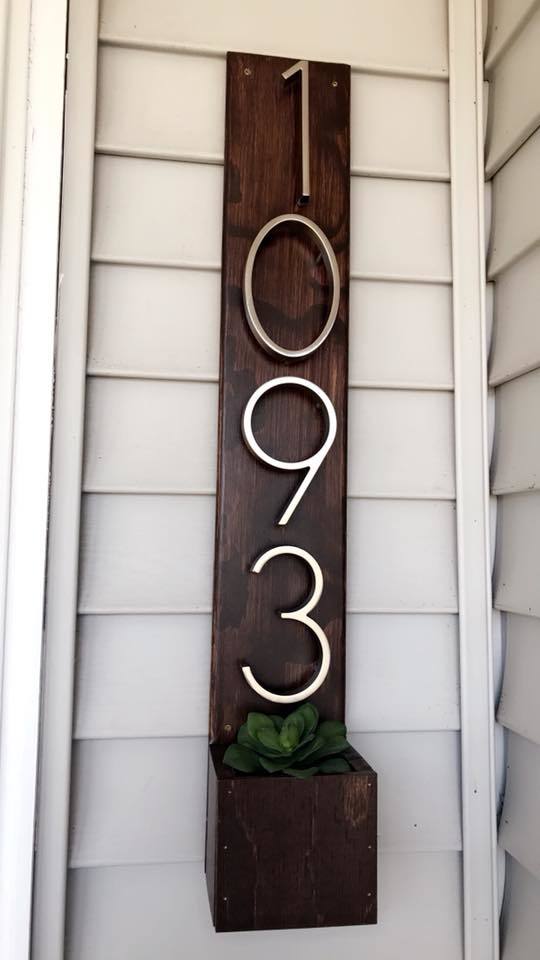
Address Sign
Thanks for the plans Ana!
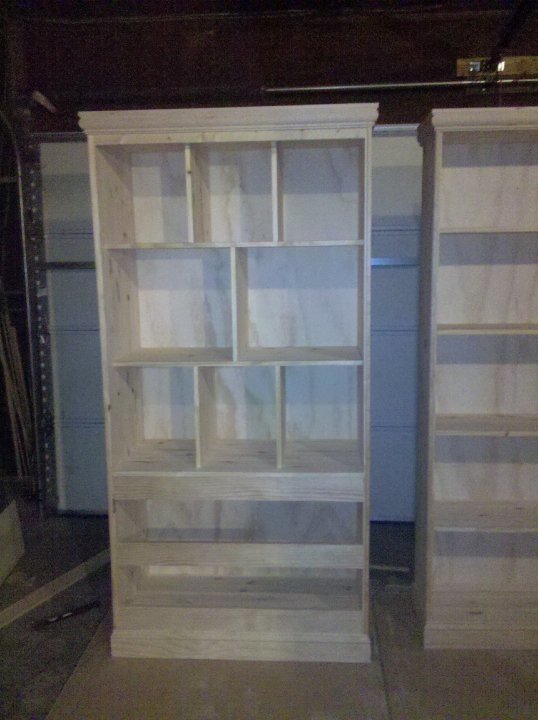
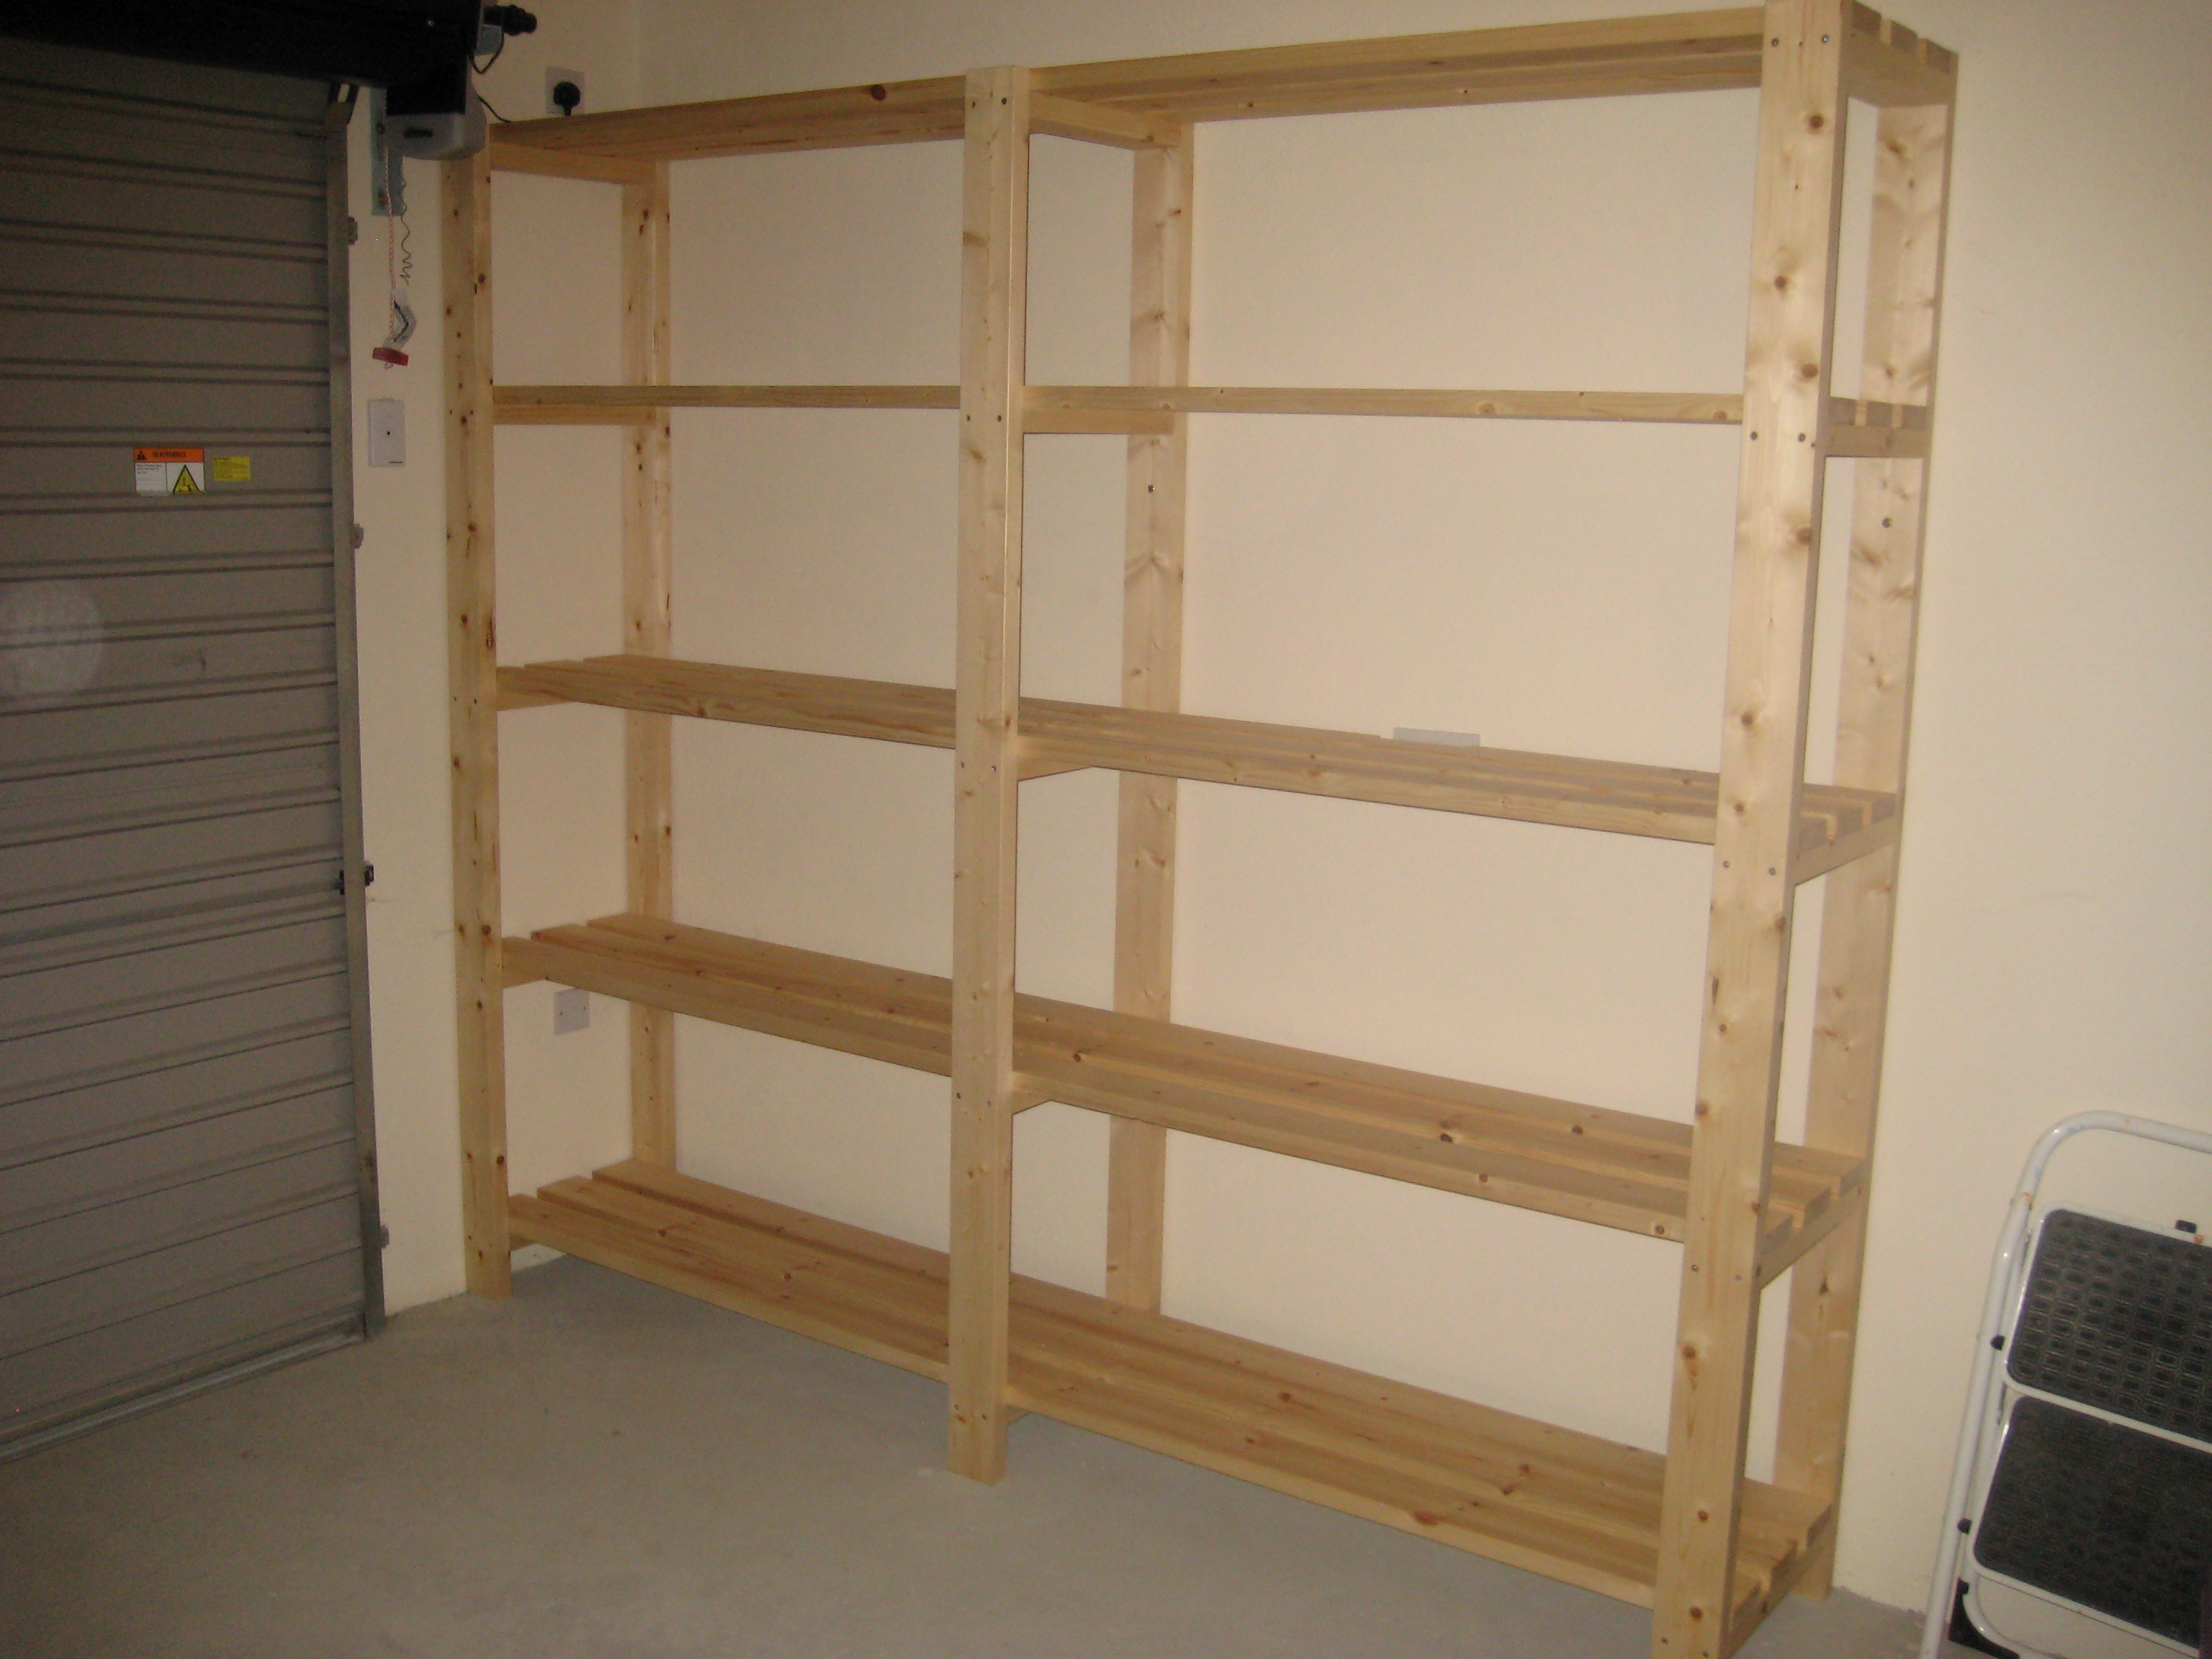
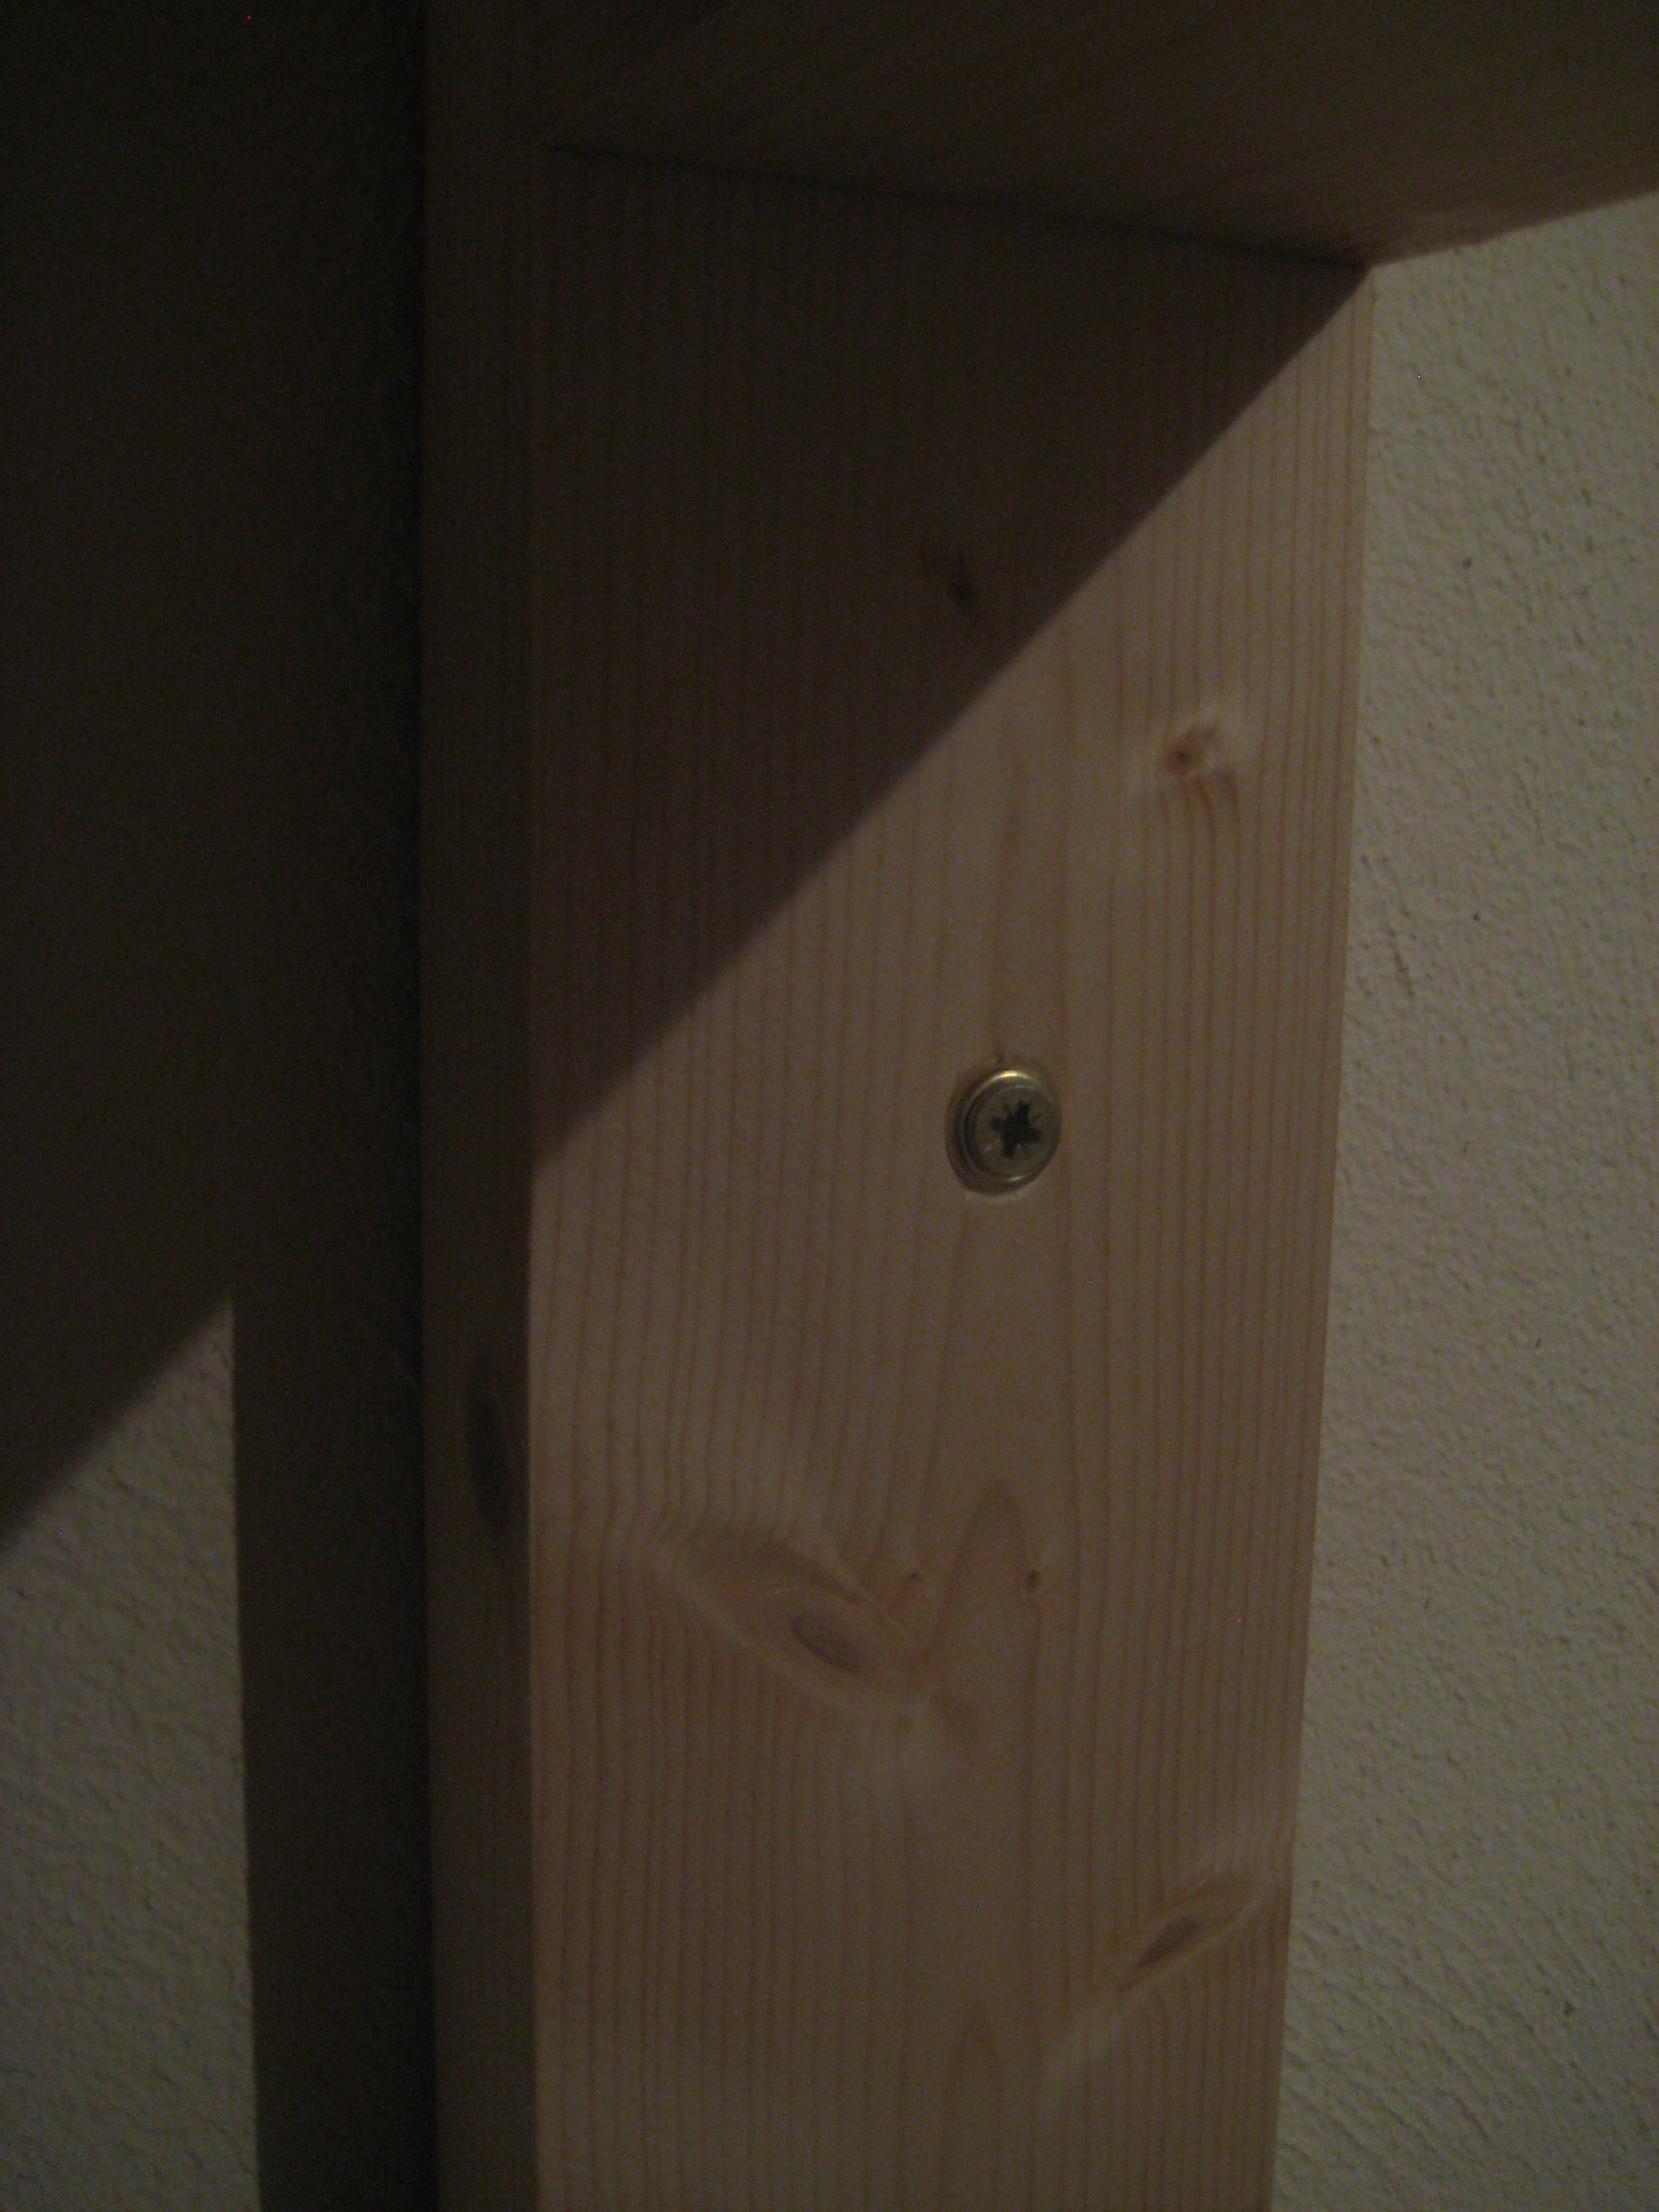
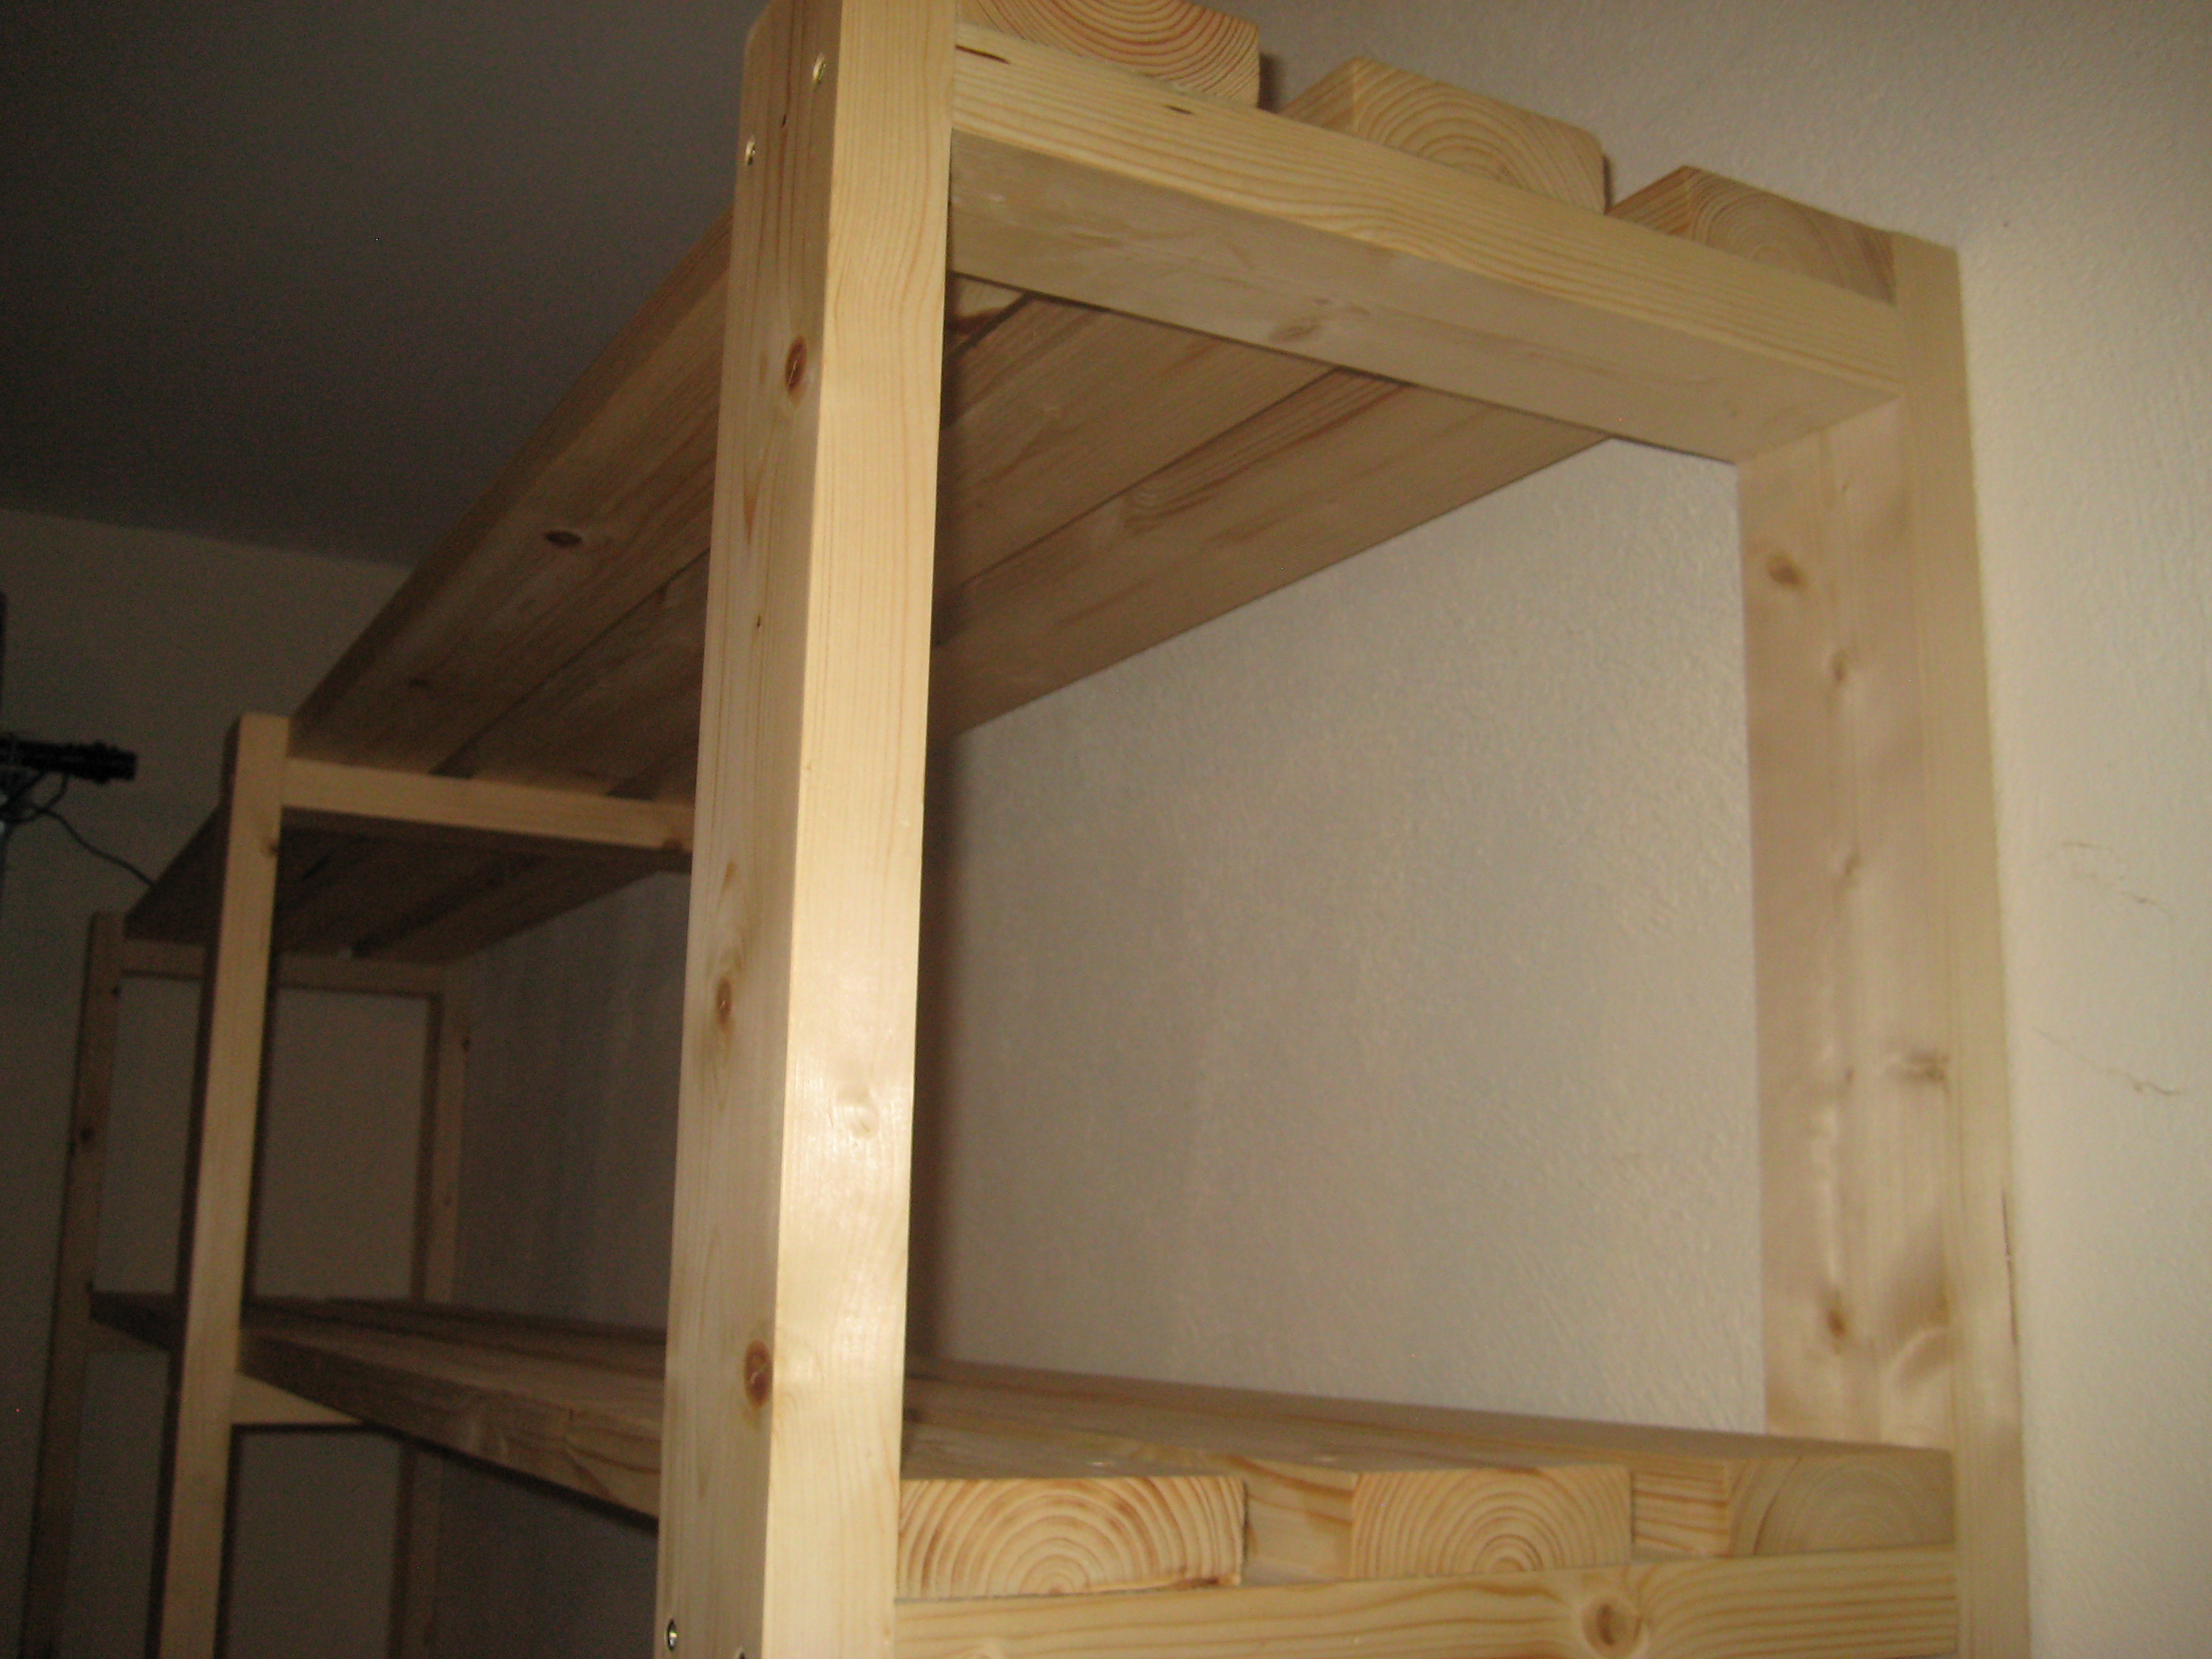
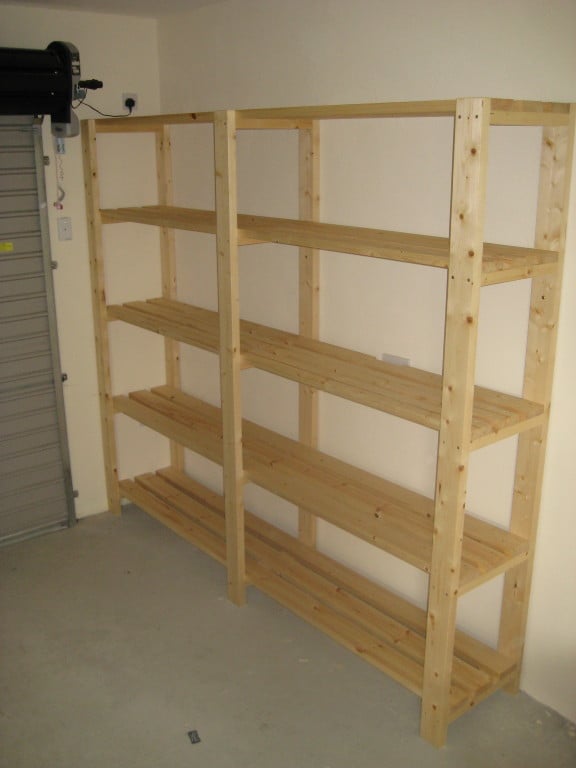
I stuck to the design but changed the dimensions to suit the space and the boxes we intend to store. This made the shelves 7.5 feet high by 8.5 feet wide. The timber was supplied in 17’ lengths so this also meant very little wastage. The frame is composed of 2x4’s, the shelves are 4.5 x 1.5’s - as I wanted the shelves slightly shallower this meant I could get away with three boards for each shelf instead of 4 as on the plans.
For the short cross pieces I used woodglue and screws – to attach the long shelf pieces I just used screws. I predrilled holes in the first piece for each of the screws, but I didn’t drill a pilot hole in the next piece, the screws were self-tapping and didn’t need one.
The back wall is concrete block and I screwed each upright to the wall using wall plugs and screws. I’ve 2 young children and as the shelves are quite high I was afraid they might climb on them and tip them over otherwise. The attachment to the wall definitely makes the whole thing feel much sturdier – the structure is completely rigid.
The only real issue I encountered was that some of the boards were slightly twisted or warped – and I had to apply some force to keep everything square when I was gluing up. Overall I’m very happy with the end product, and found it reasonably easy to put together. Now its time to put the shelves to good use and start tidying up the garage!
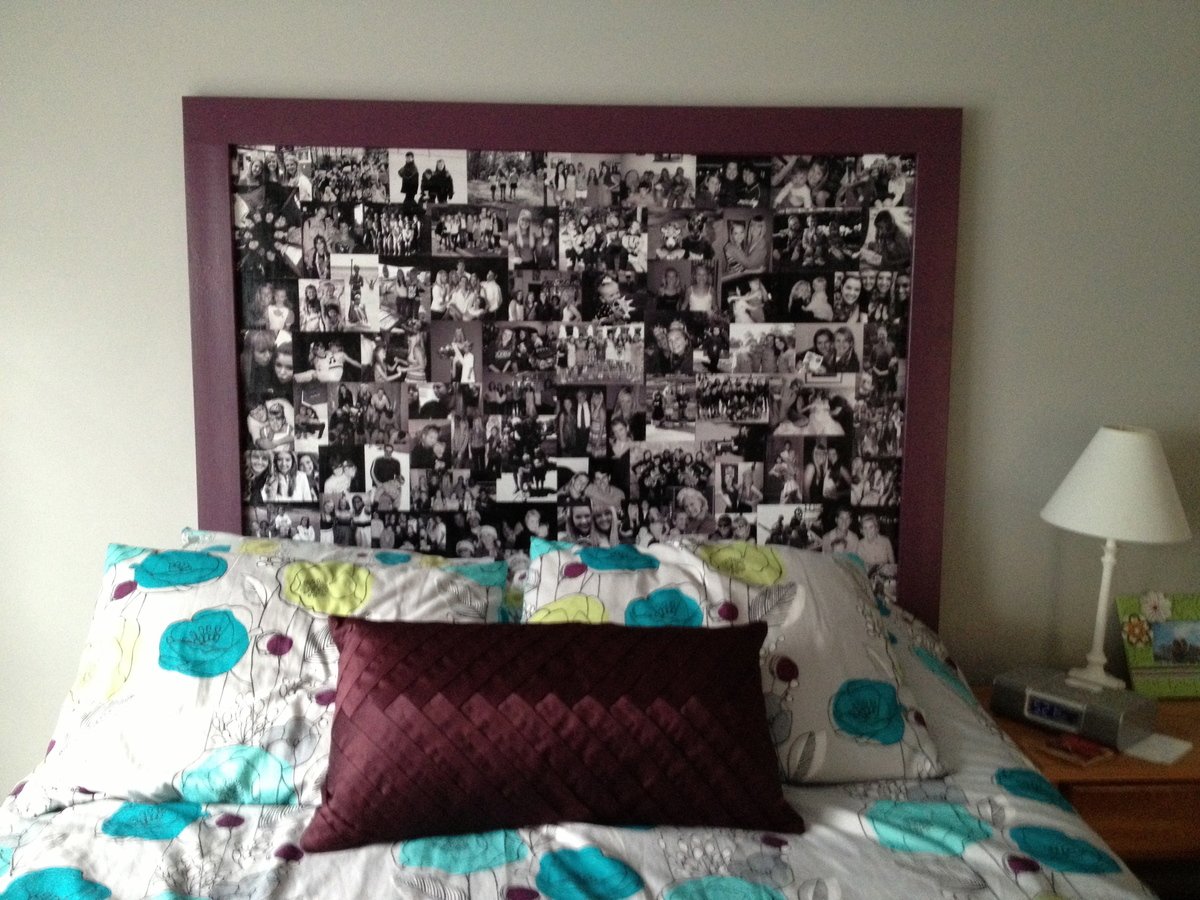
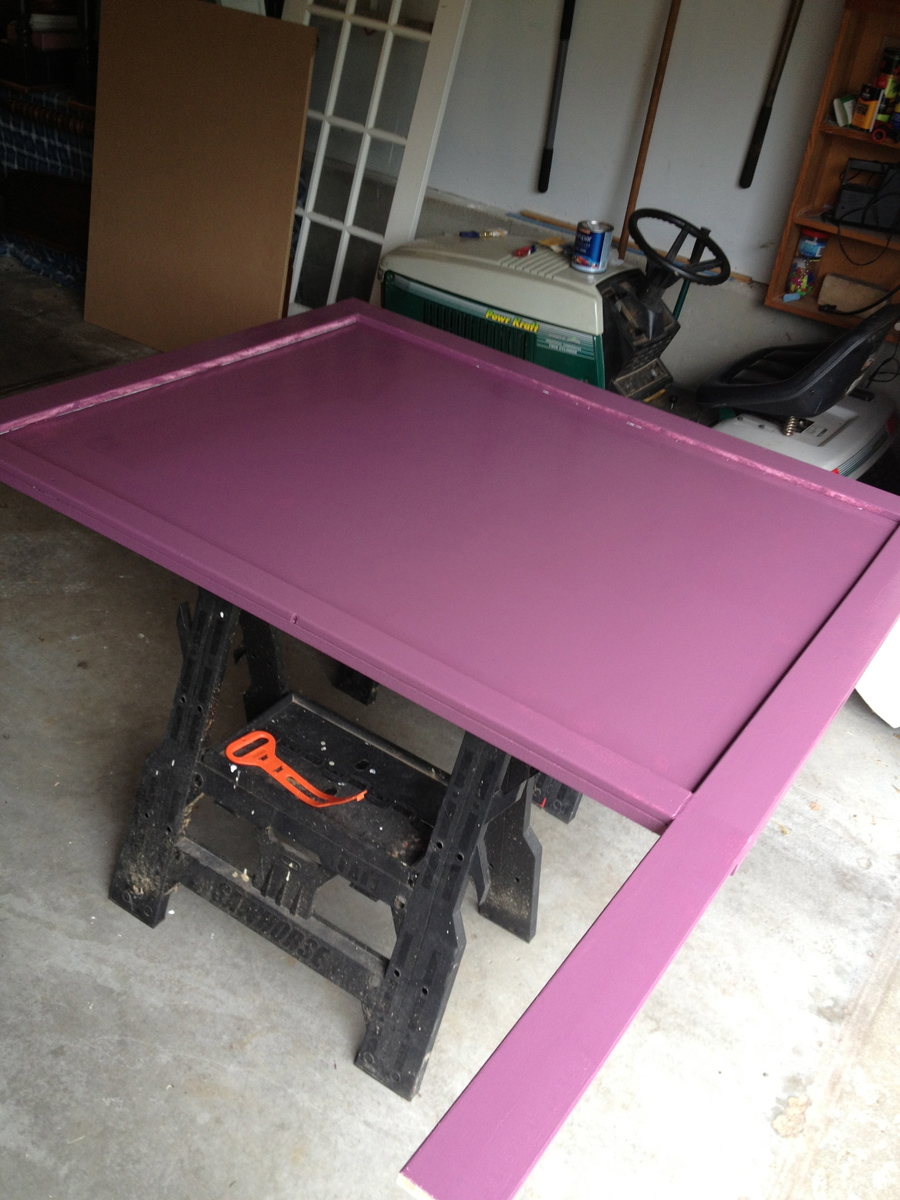
I chose to modify one of your headboards by only doing step 1-4.
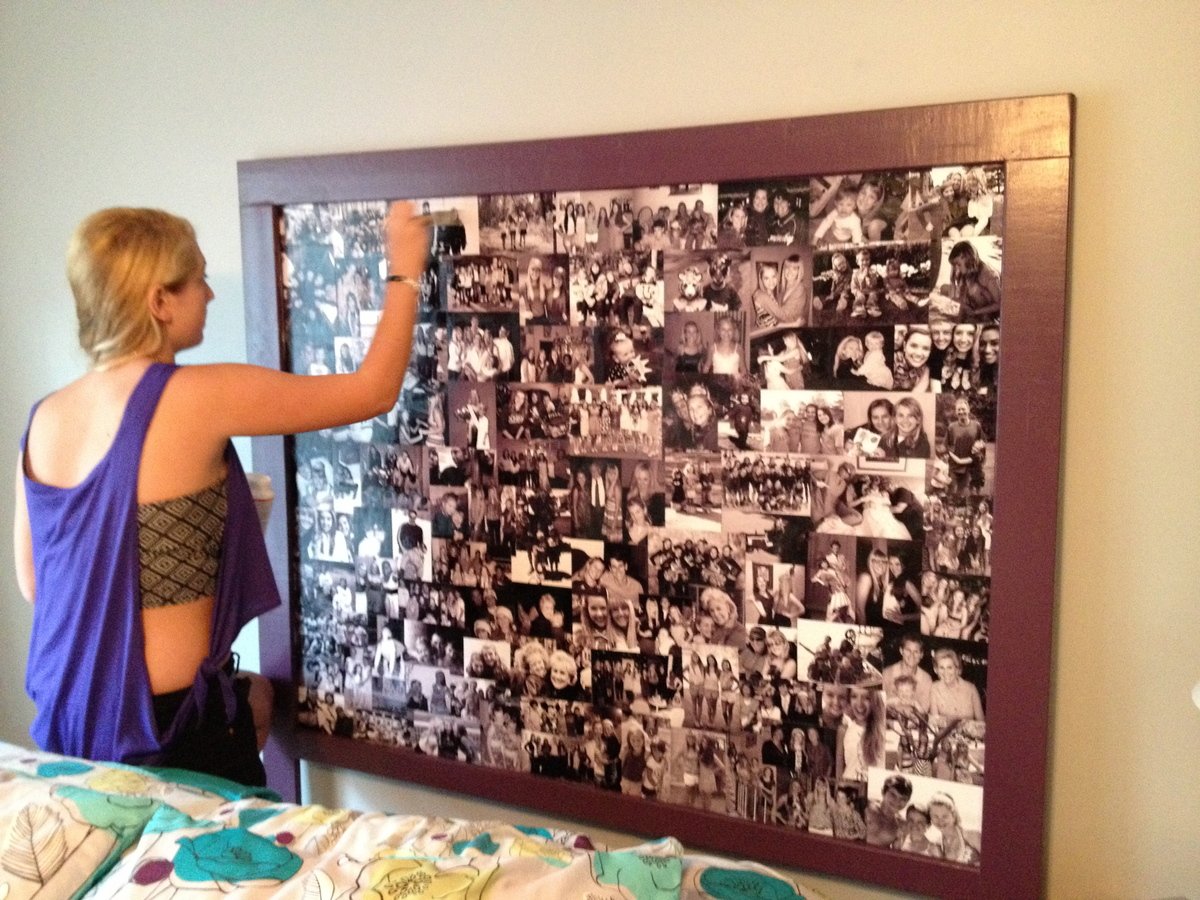
We made a queen headboard and I wanted it slightly taller than the plans suggested so I added 12". I used 3/4" MDF as the back cut 60" w x 48" H, 1x4s for the sides and top and a 1x3 for the bottom. I glued and nail gunned each piece to the edge letting the sides extend down for the legs of the headboard.
I filled the nail gun holes with wood filler. The piece was primed, then painted with 2 coats of color, and then the photos were Modge Podged onto the interior of the headboard touching and overlapping. As my daughter gets older we can add more photos or I can make a fabric insert to go over the photos. She loves it and I'm happy we could do something different.

Sat, 08/17/2013 - 16:23
I love how you made your daughter's headboard personalized. No one else in the entire world will have a headboard like hers! :) That's amazing! And the color coordination is great. =D
Plan to use as a cooler :) adjusted dimensions to fit a bigger planter box and added some decorative details. It came out great!
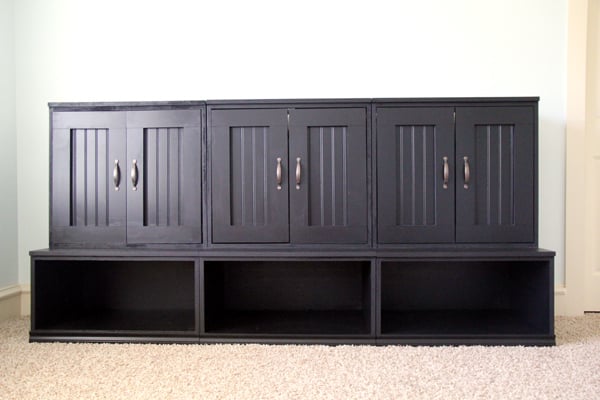
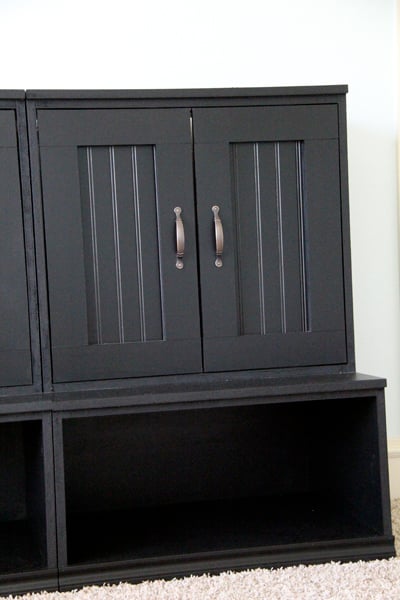
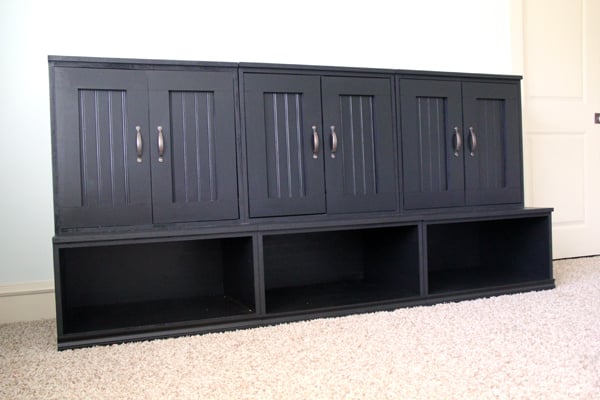
I used Ana's plans to build a Cameron Wall unit for my new nursery. I used 3/4" MDF and 1 1/4" brad nails with lots of Gorilla Wood Glue to assemble. I also used bead board on the doors. Great storage! You can read more at http://www.shanty-2-chic.com/2011/07/furniture-for-the-new-nursery.html

Wed, 07/20/2011 - 04:57
Very nice! I really like the beadboard on the doors.
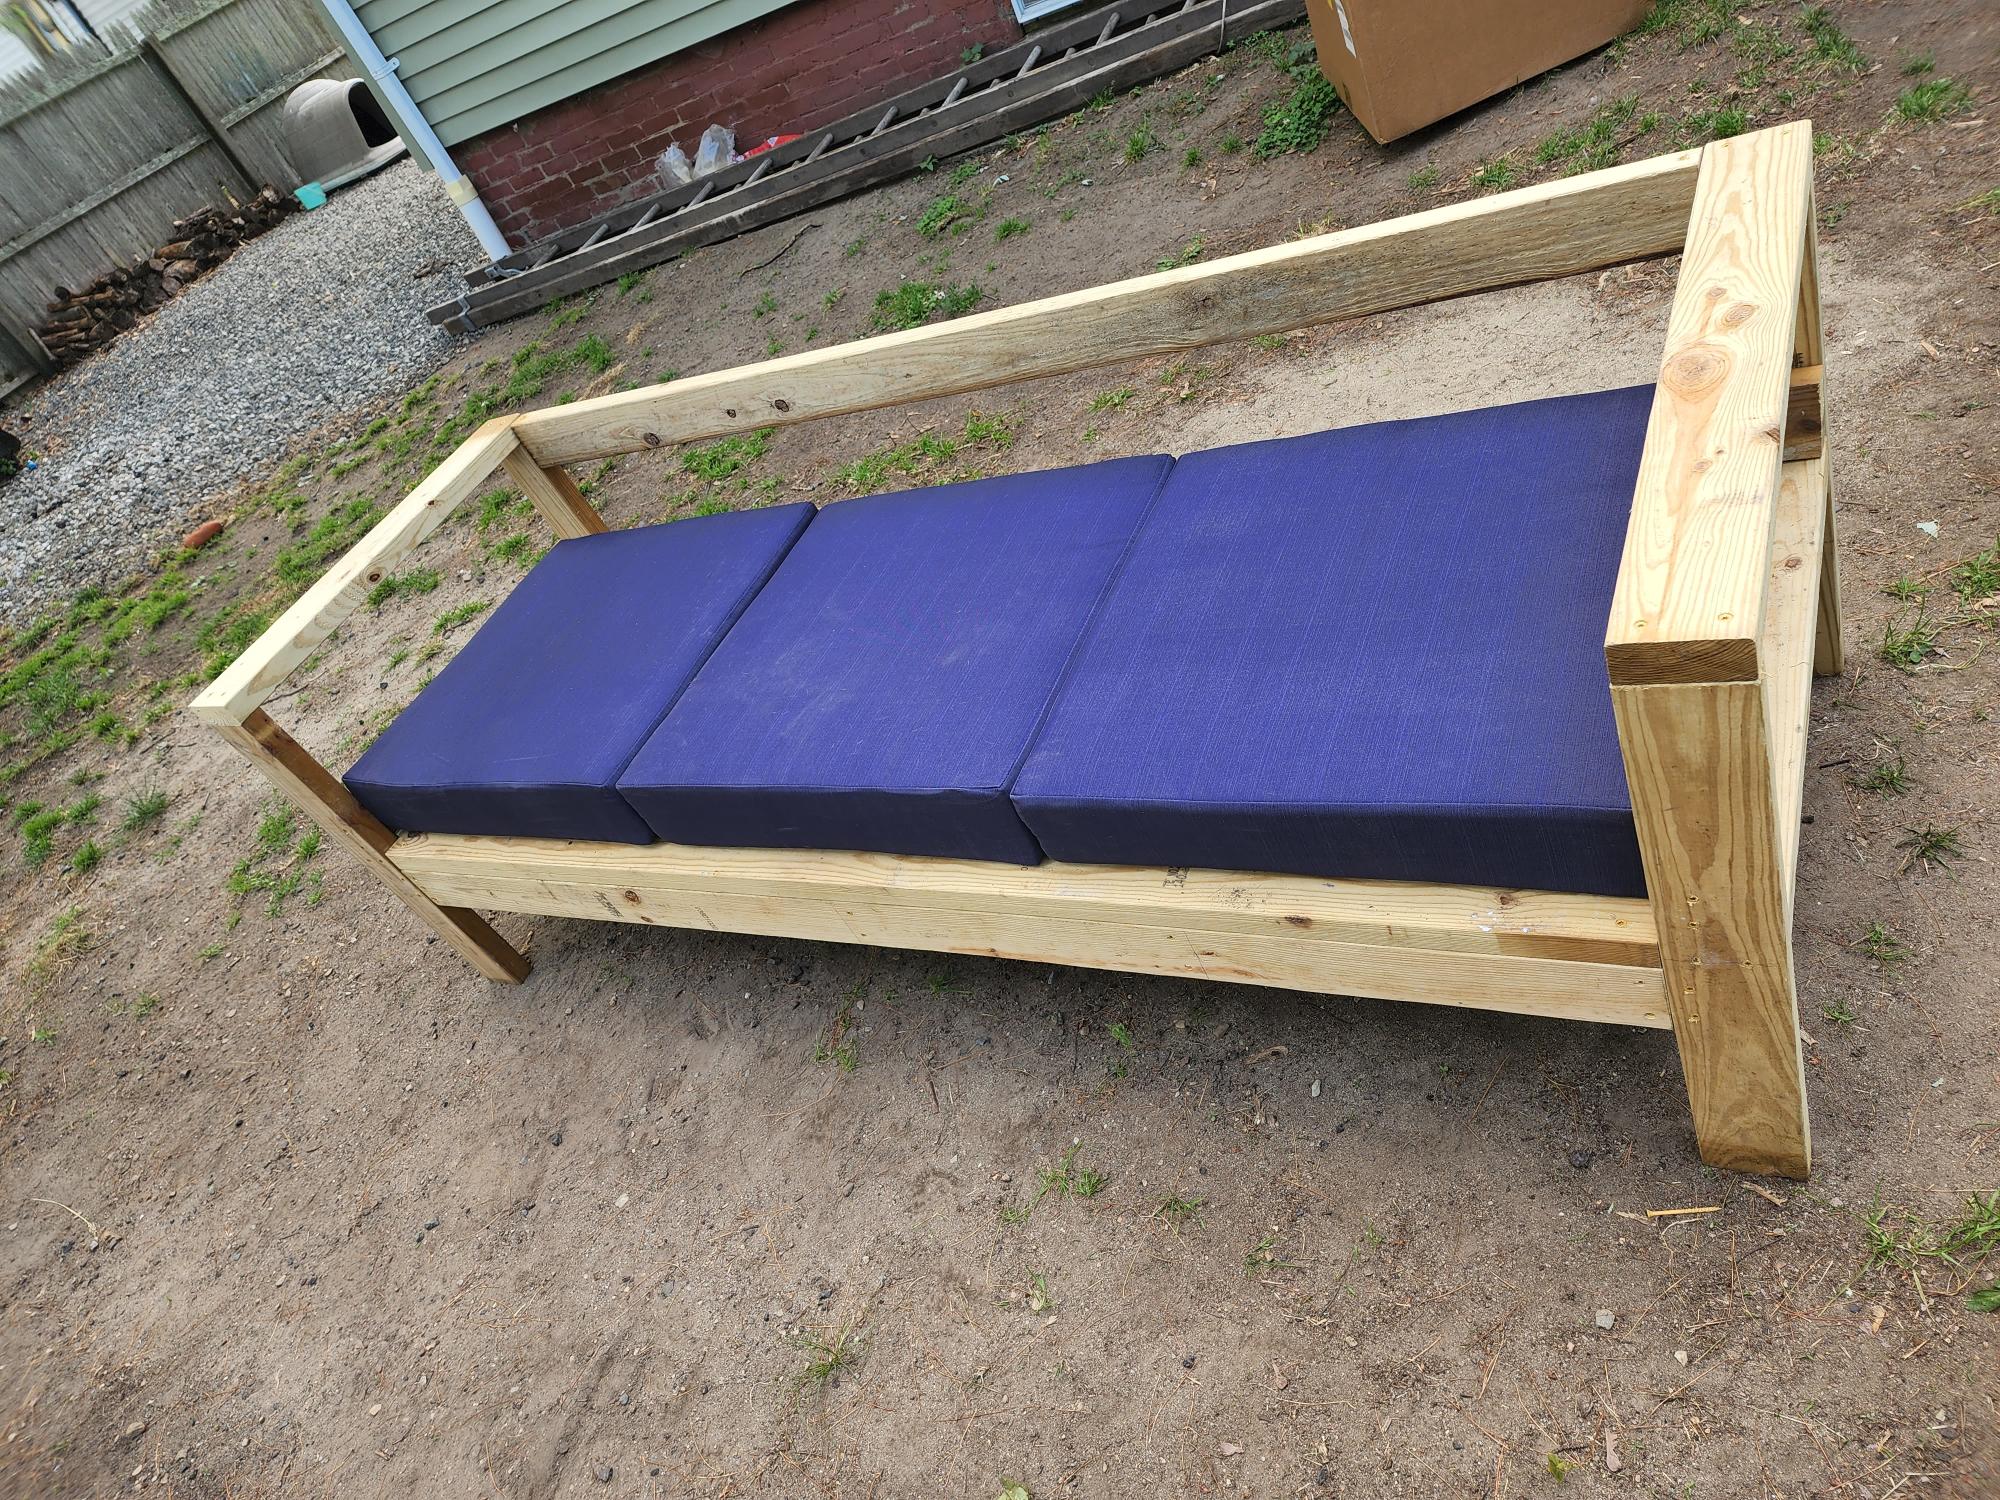
We built the outdoor sofa from 2x4 collection, me, my dad and my kids. Didn't take too long to put together, maybe 2 and a half hours from start to finish. It's my dad's gift for Father's day and we had a great time doing it together! We used pressure treated wood and sanded at the end. Just needs to be stained and get some throw pillows.
We did use an extra 10x2x4 (cut to fit of course) to box in the cushions. Which were 24x24 inches. Great project. 👍🏻 Thanks!
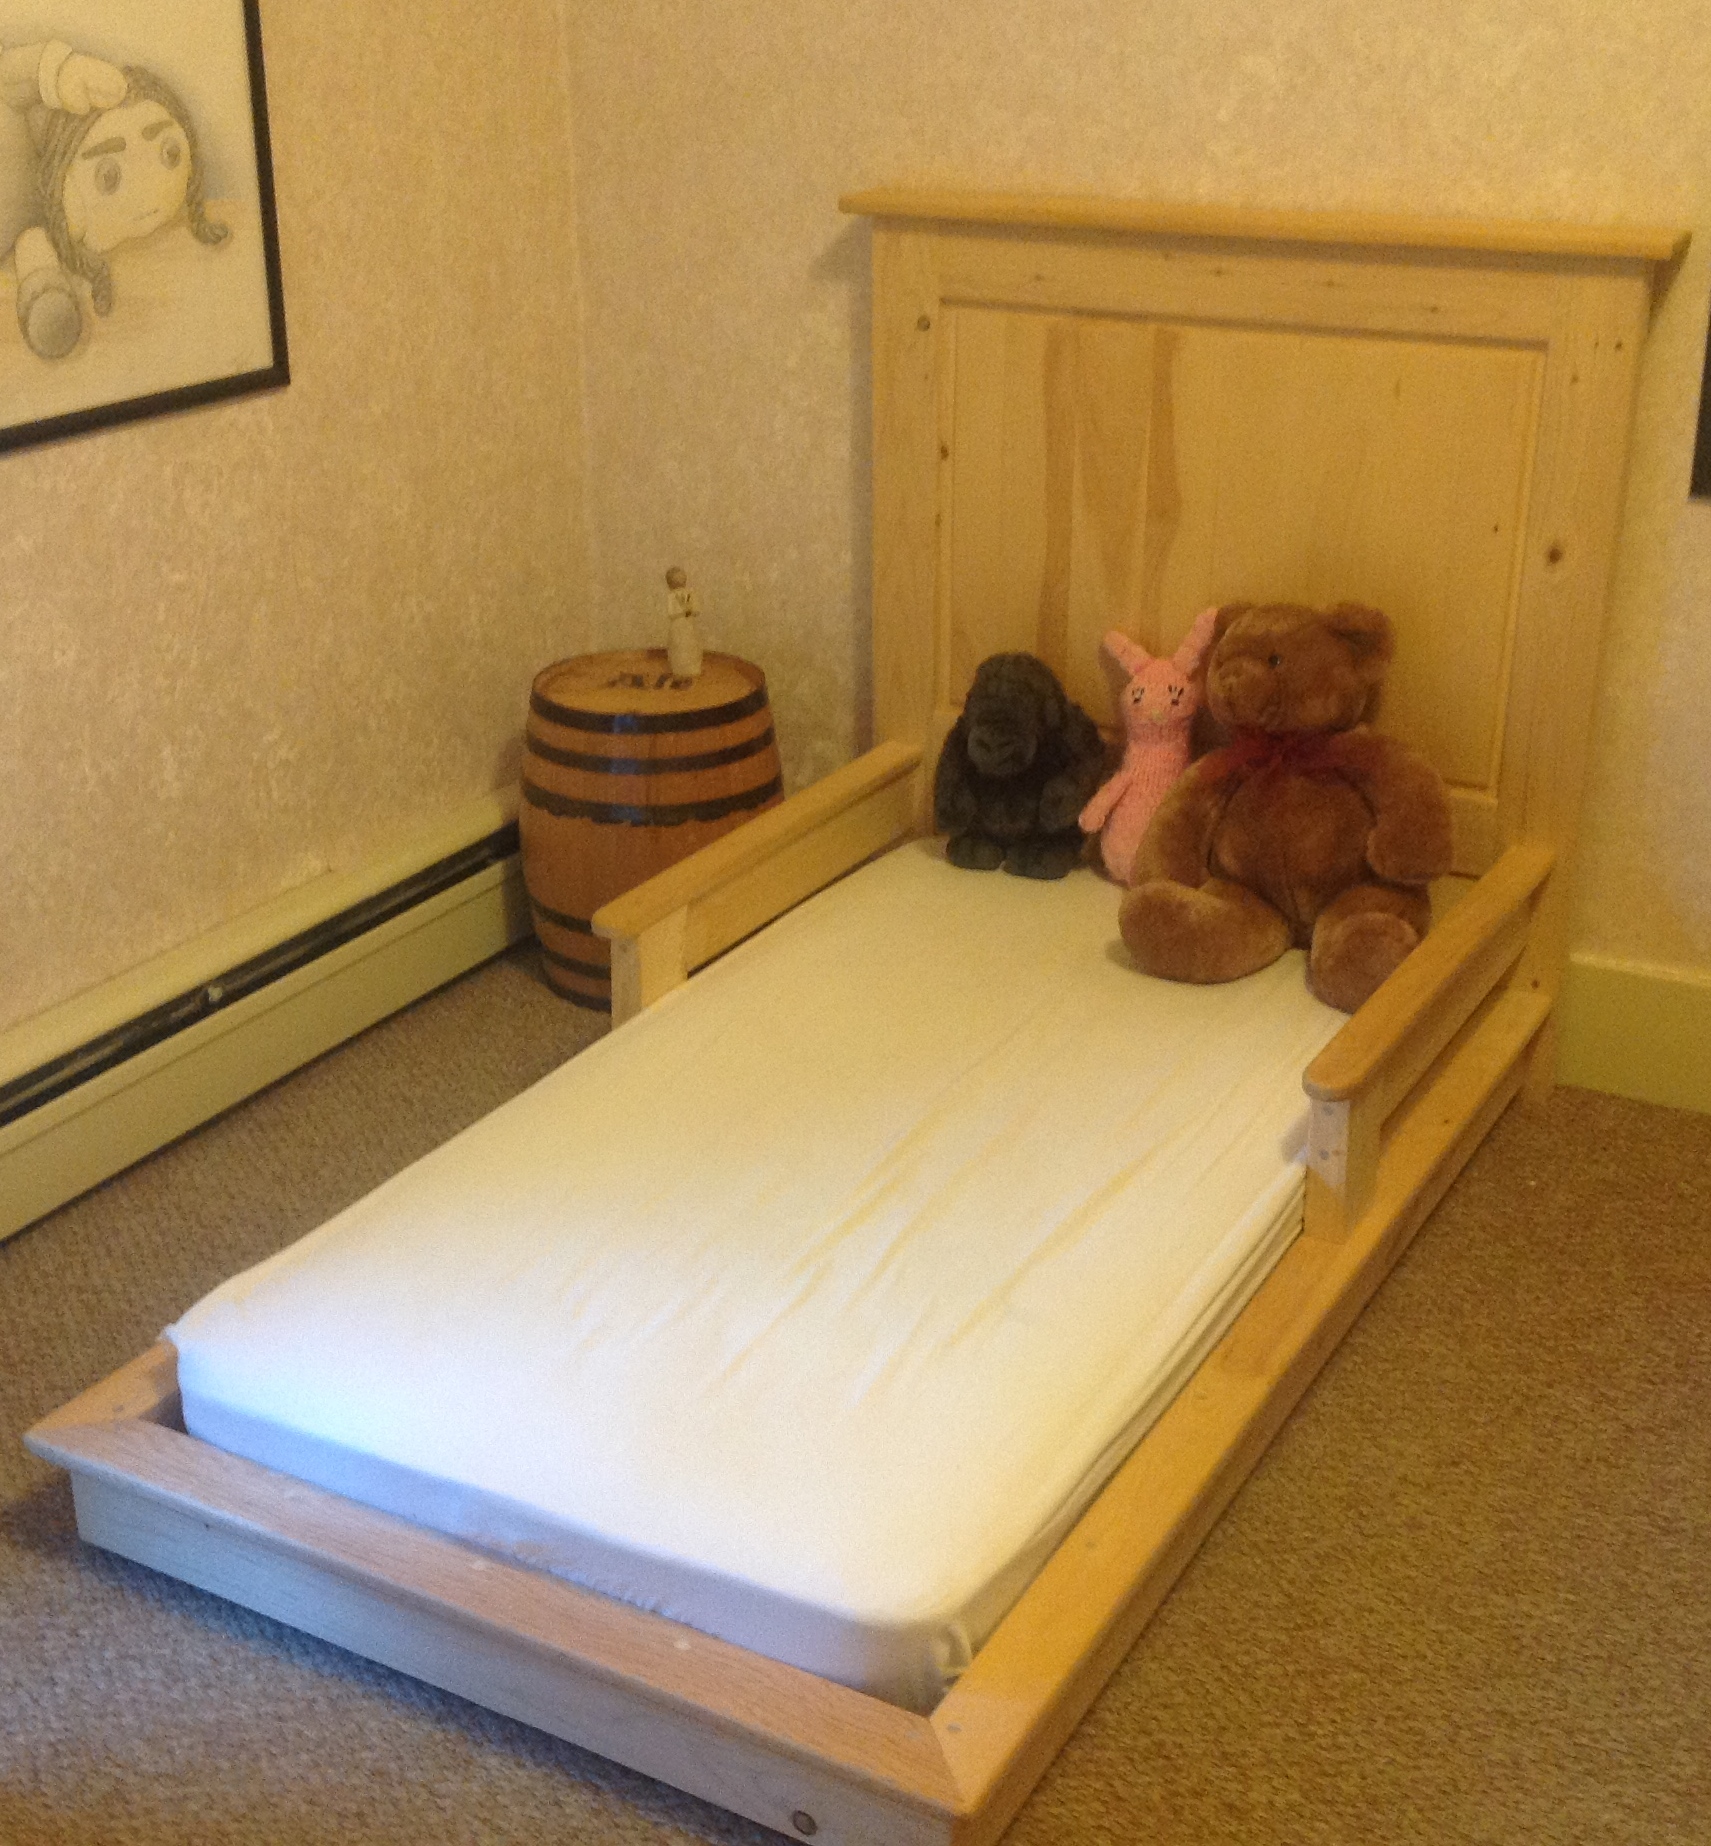
We reworked the plans for the pottery barn inspired bed into a toddler sized version. Arms were added near the head to prevent our child falling out in the first year. They ended up being something of a hazard in those early days, as our child kept hitting her head. If we were to recreate it, we would make the arms go up higher or without the finished top. The bed also was not lifted off the ground in as great of a proportion to the original.
The pine is left untreated and unfinished. The only glue used was homemade milk glue.
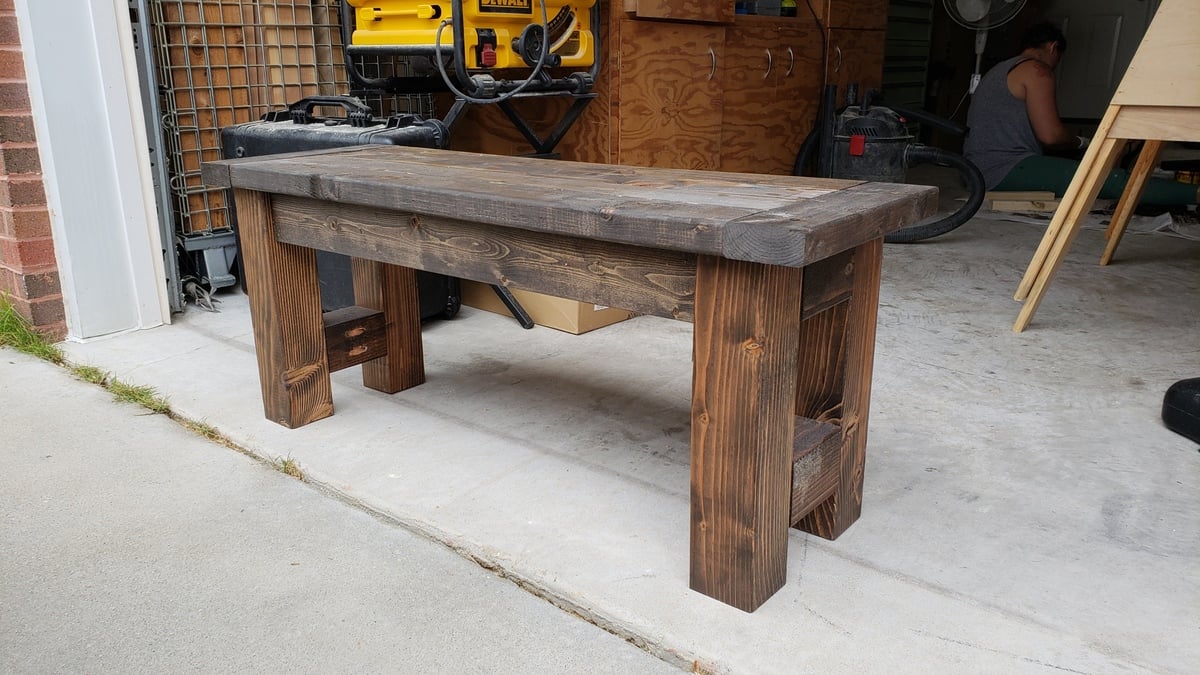
Made a 4 foot version of the farmhouse bench. I also used 4x4s for the legs instead of 2x4s. They work great, just makes the bench a little heavy.

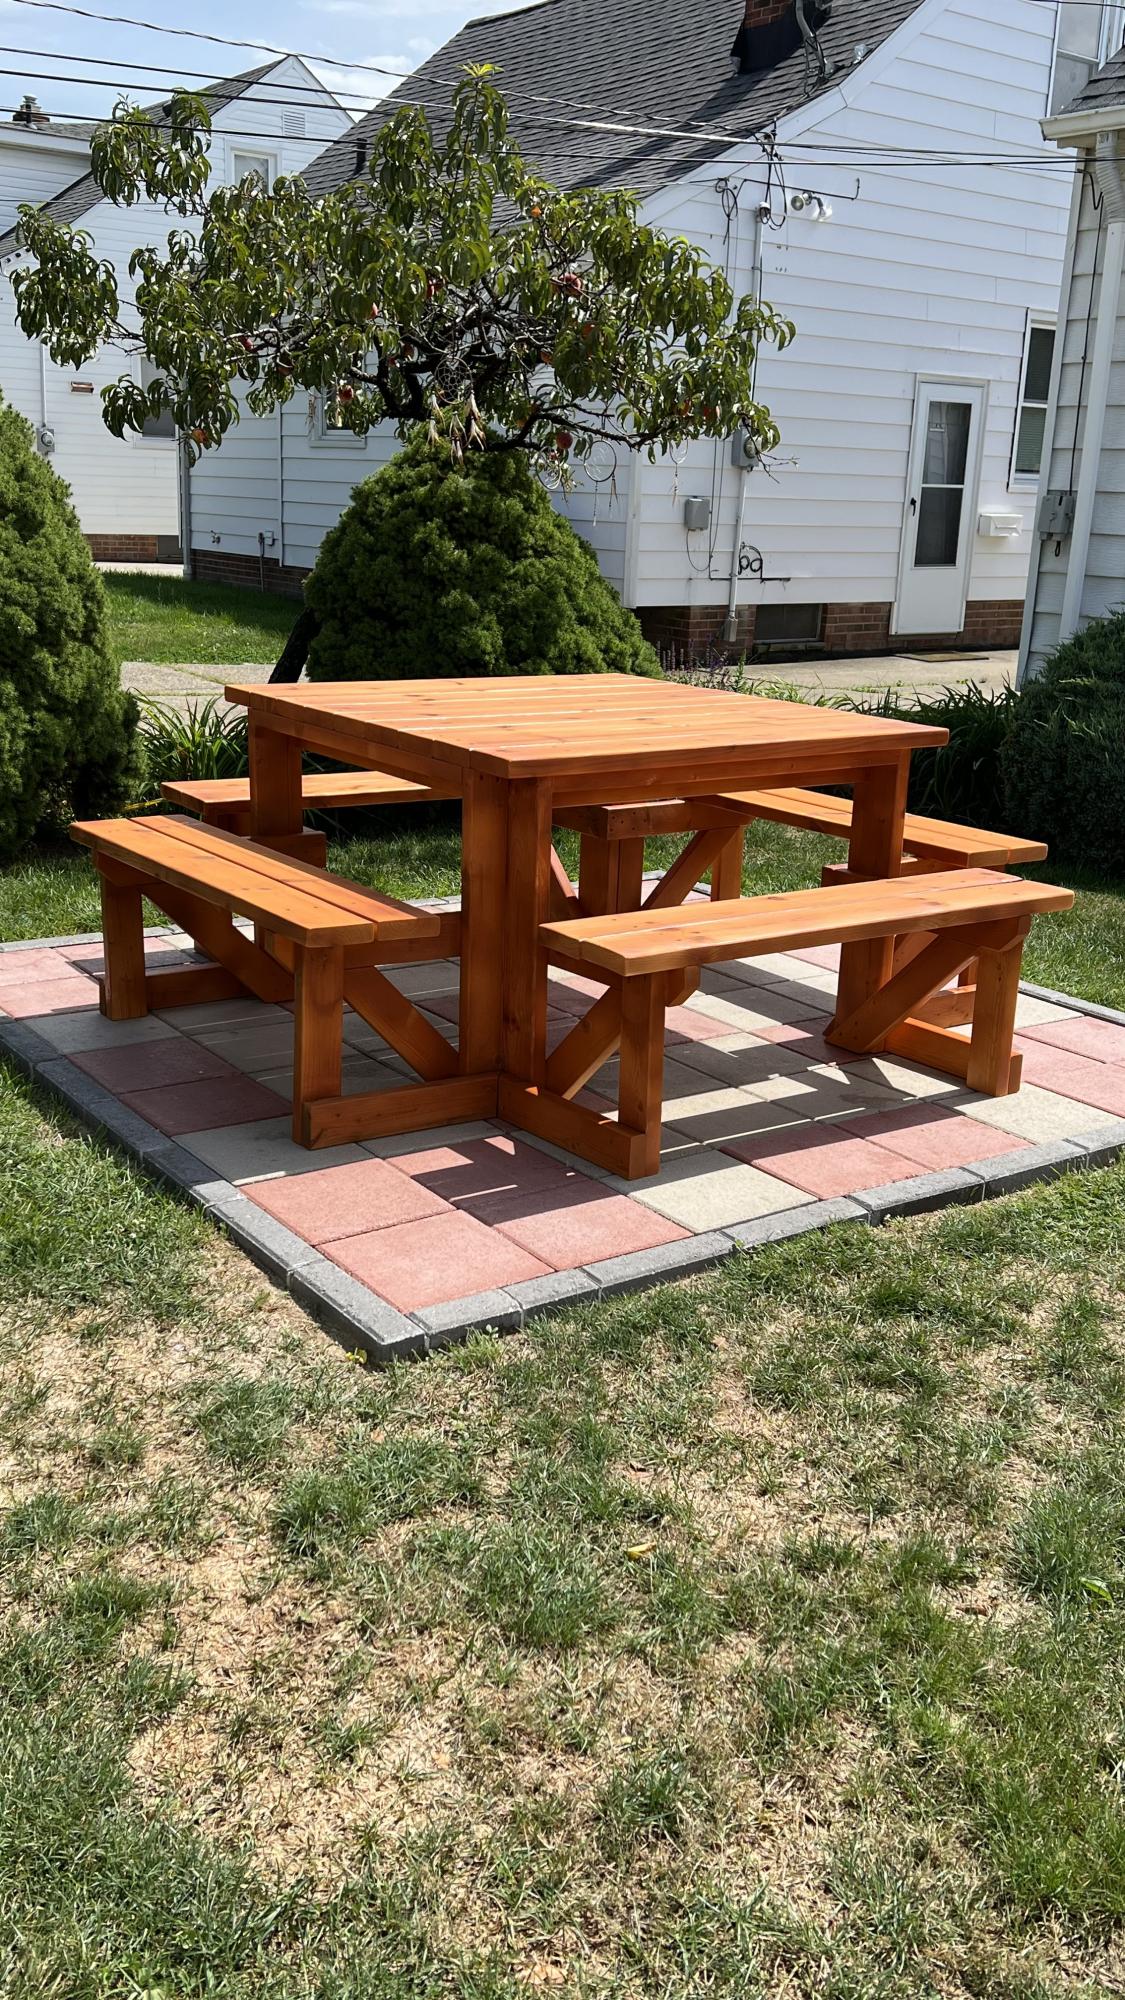
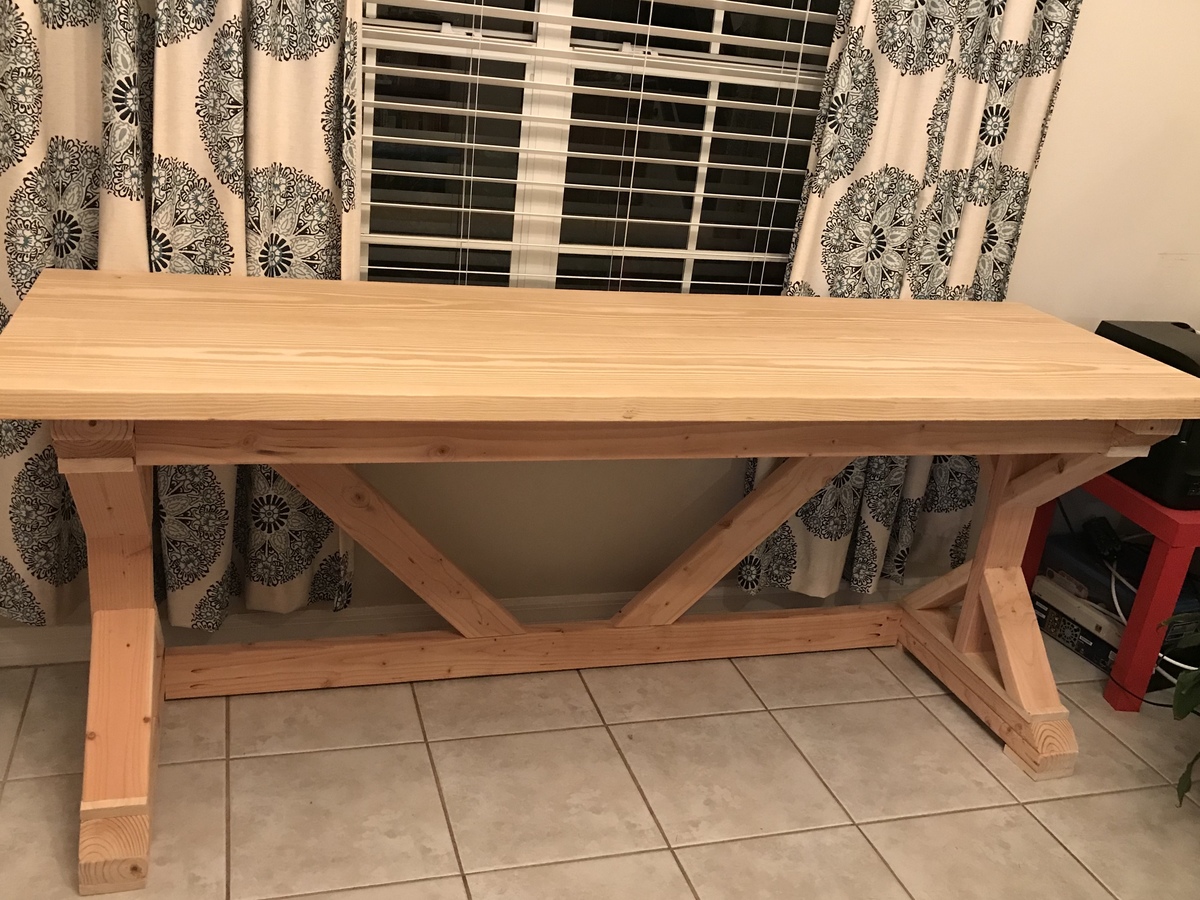
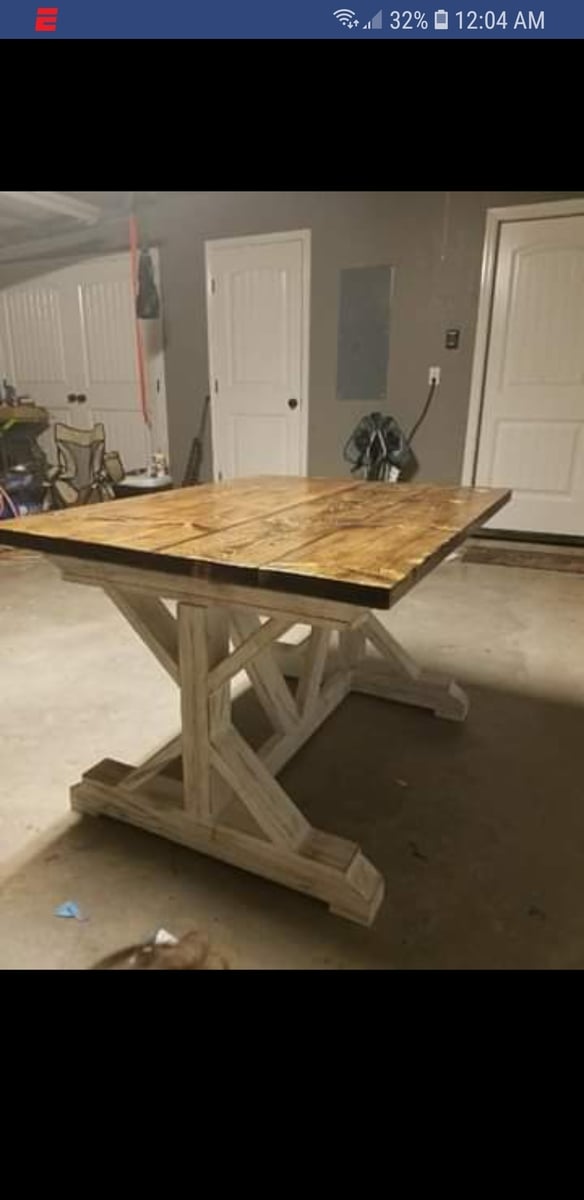
Made few modifications. Added a 9th board to the tabletop to make it larger, horizontal aprons connecting the legs, and seat support. For stain and sealer, I used Olympic semi-transparent redwood. Overall a great project. Thank you, Anna.
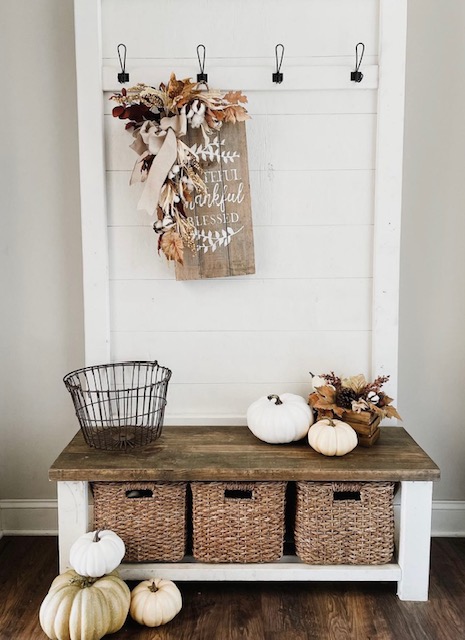
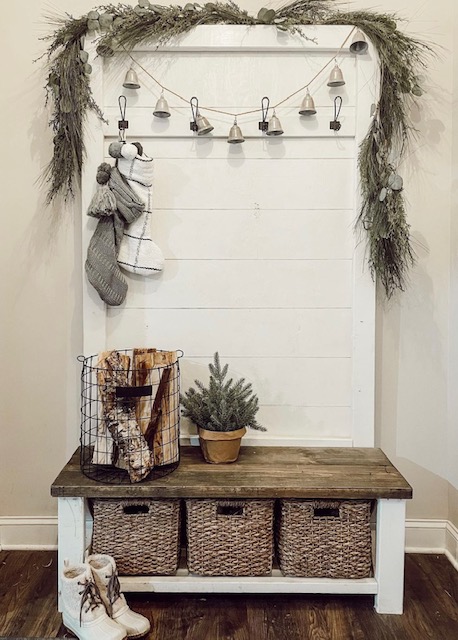
Same Beautiful Hall Tree - Different Seasons by Iron and Lace Design
Great project and fun to do. I've actually made 6 tables off this same plan, all different sizes,from 4ft. To 8ft..

Sun, 01/06/2019 - 16:46
Six! That's awesome!
Thanks for sharing a photo, love it! Ana

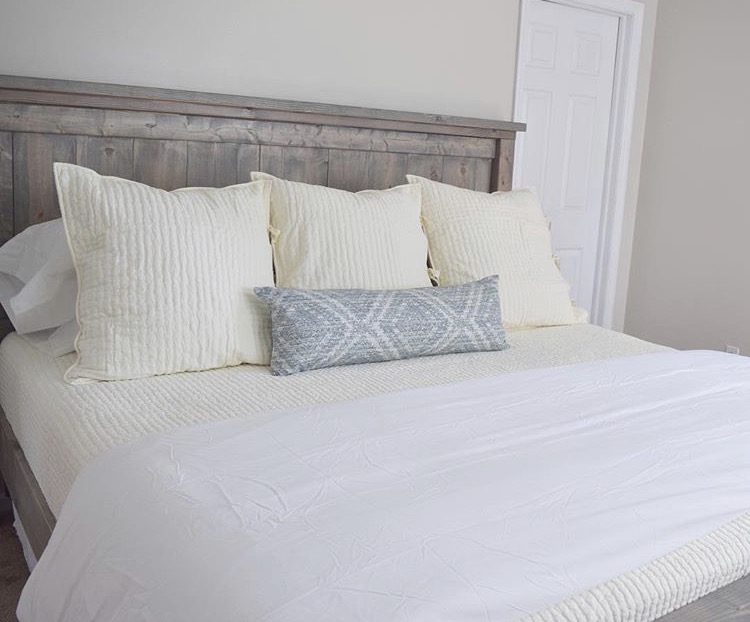
Such a fun project. This is the 5th piece my husband and I have completed by Ana White. This bed is by far my favorite piece of furniture in our home. So sturdy and only took a few hours (not including stain and poly). We have a love for knots, so we chose pieces of wood that had a lot of beautiful imperfections. We went very light on the stain, and it looks weathered with still some of the natural wood color shining through. We got our wood from our local Home Improvement store, and had minimal cutting to do. Neither of us are pro woodworkers by any means, and we completed this with ease.
Thanks for the plans!
I used my router and router Ed the edges. Love this!!
