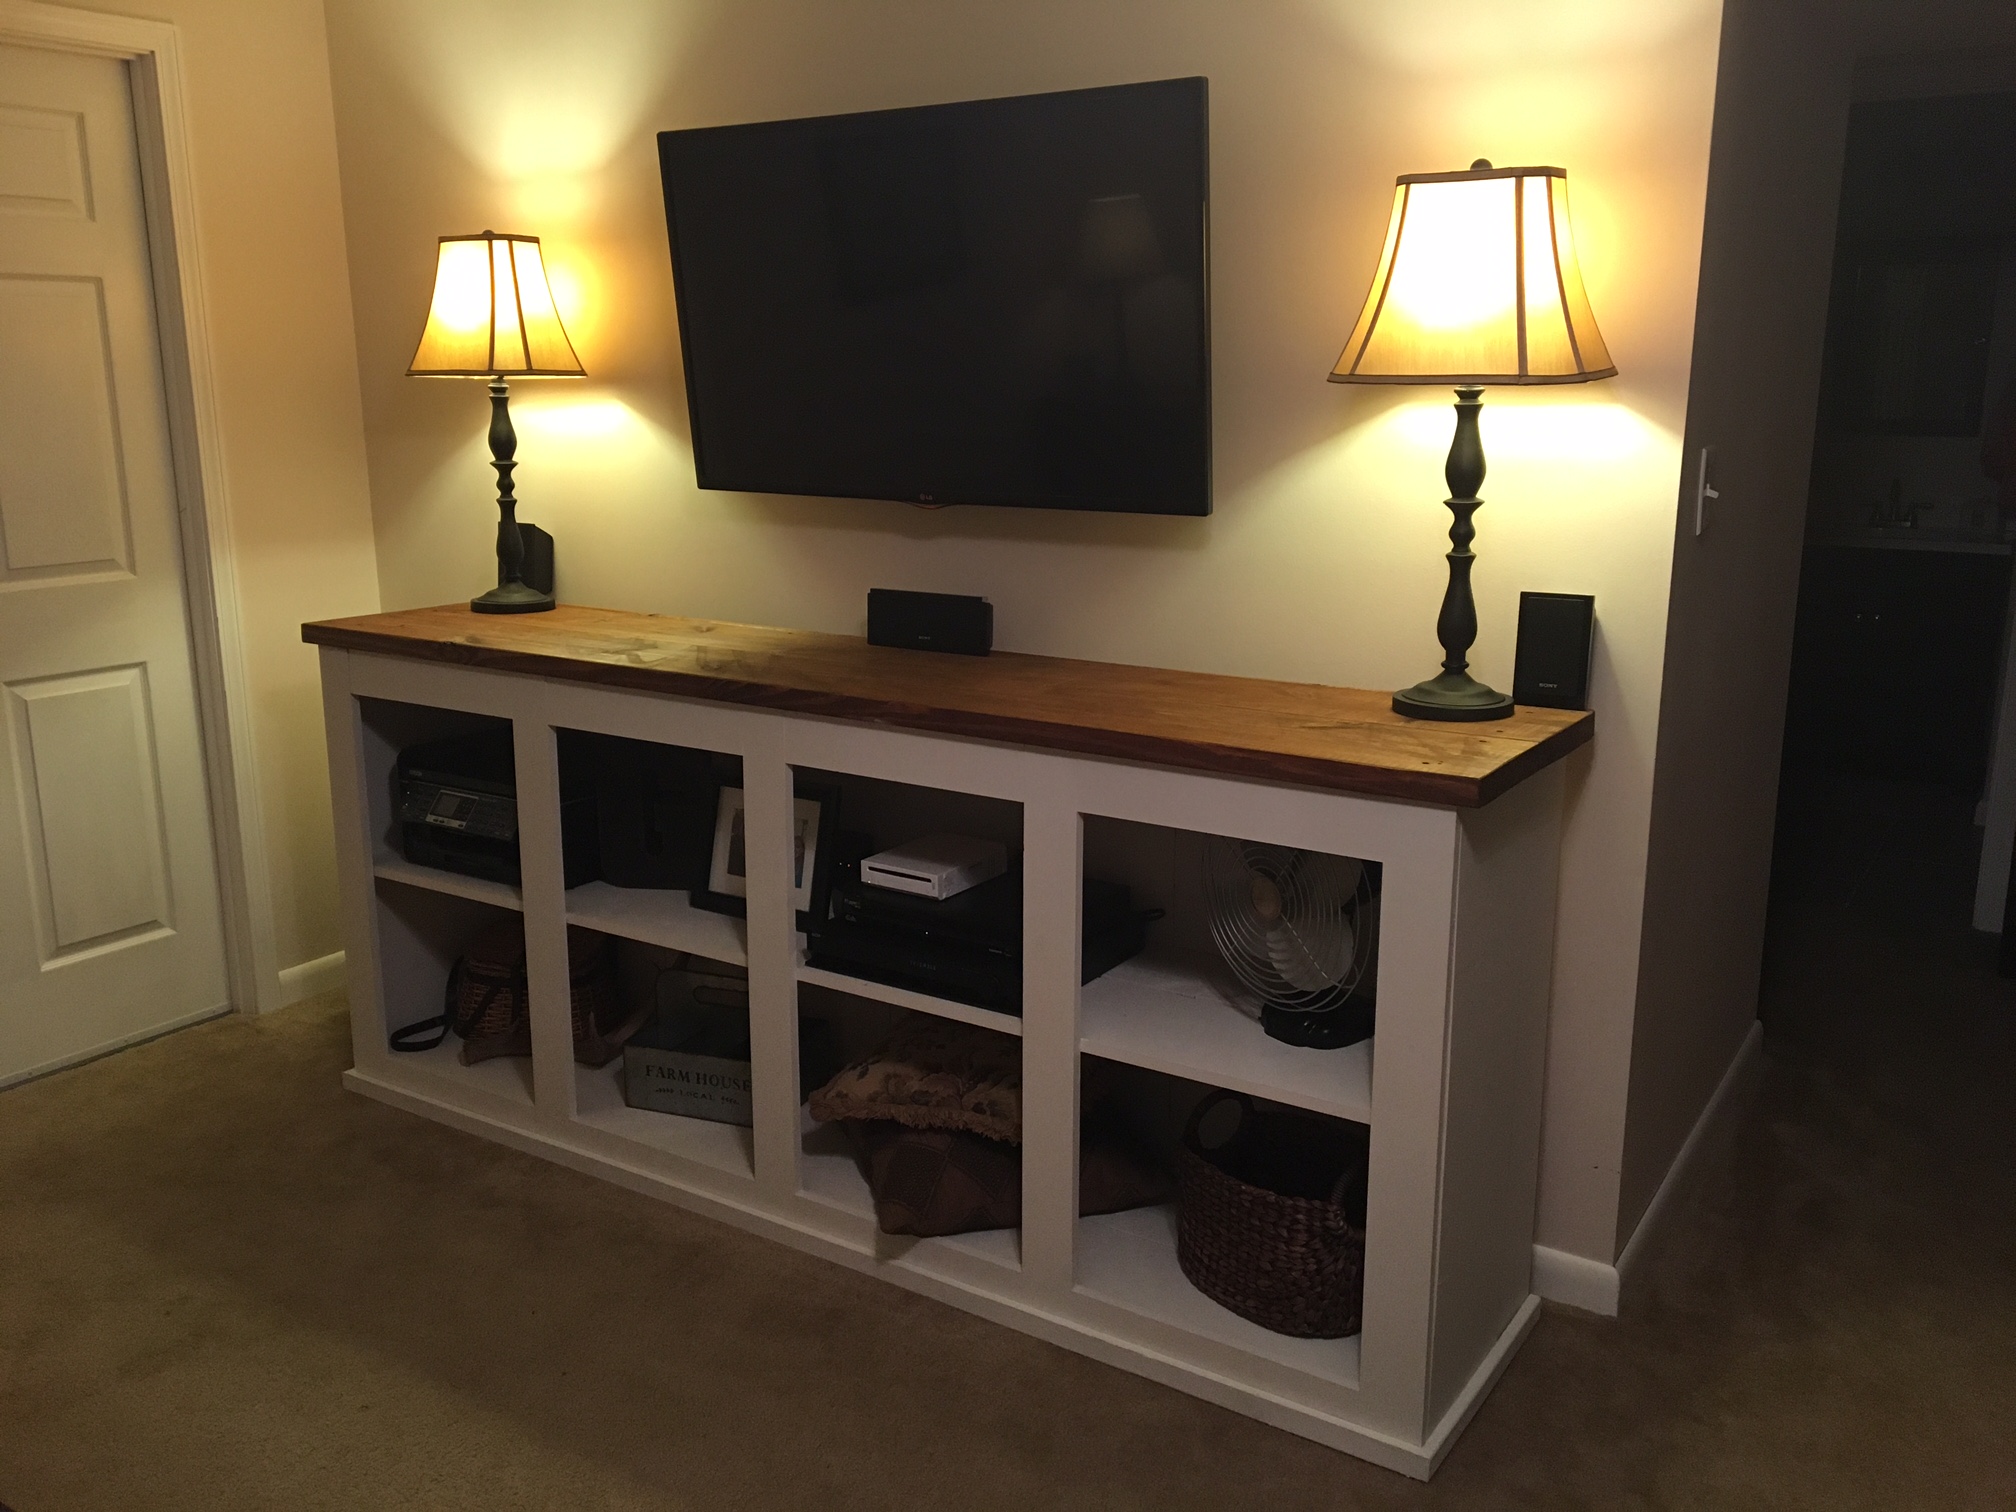
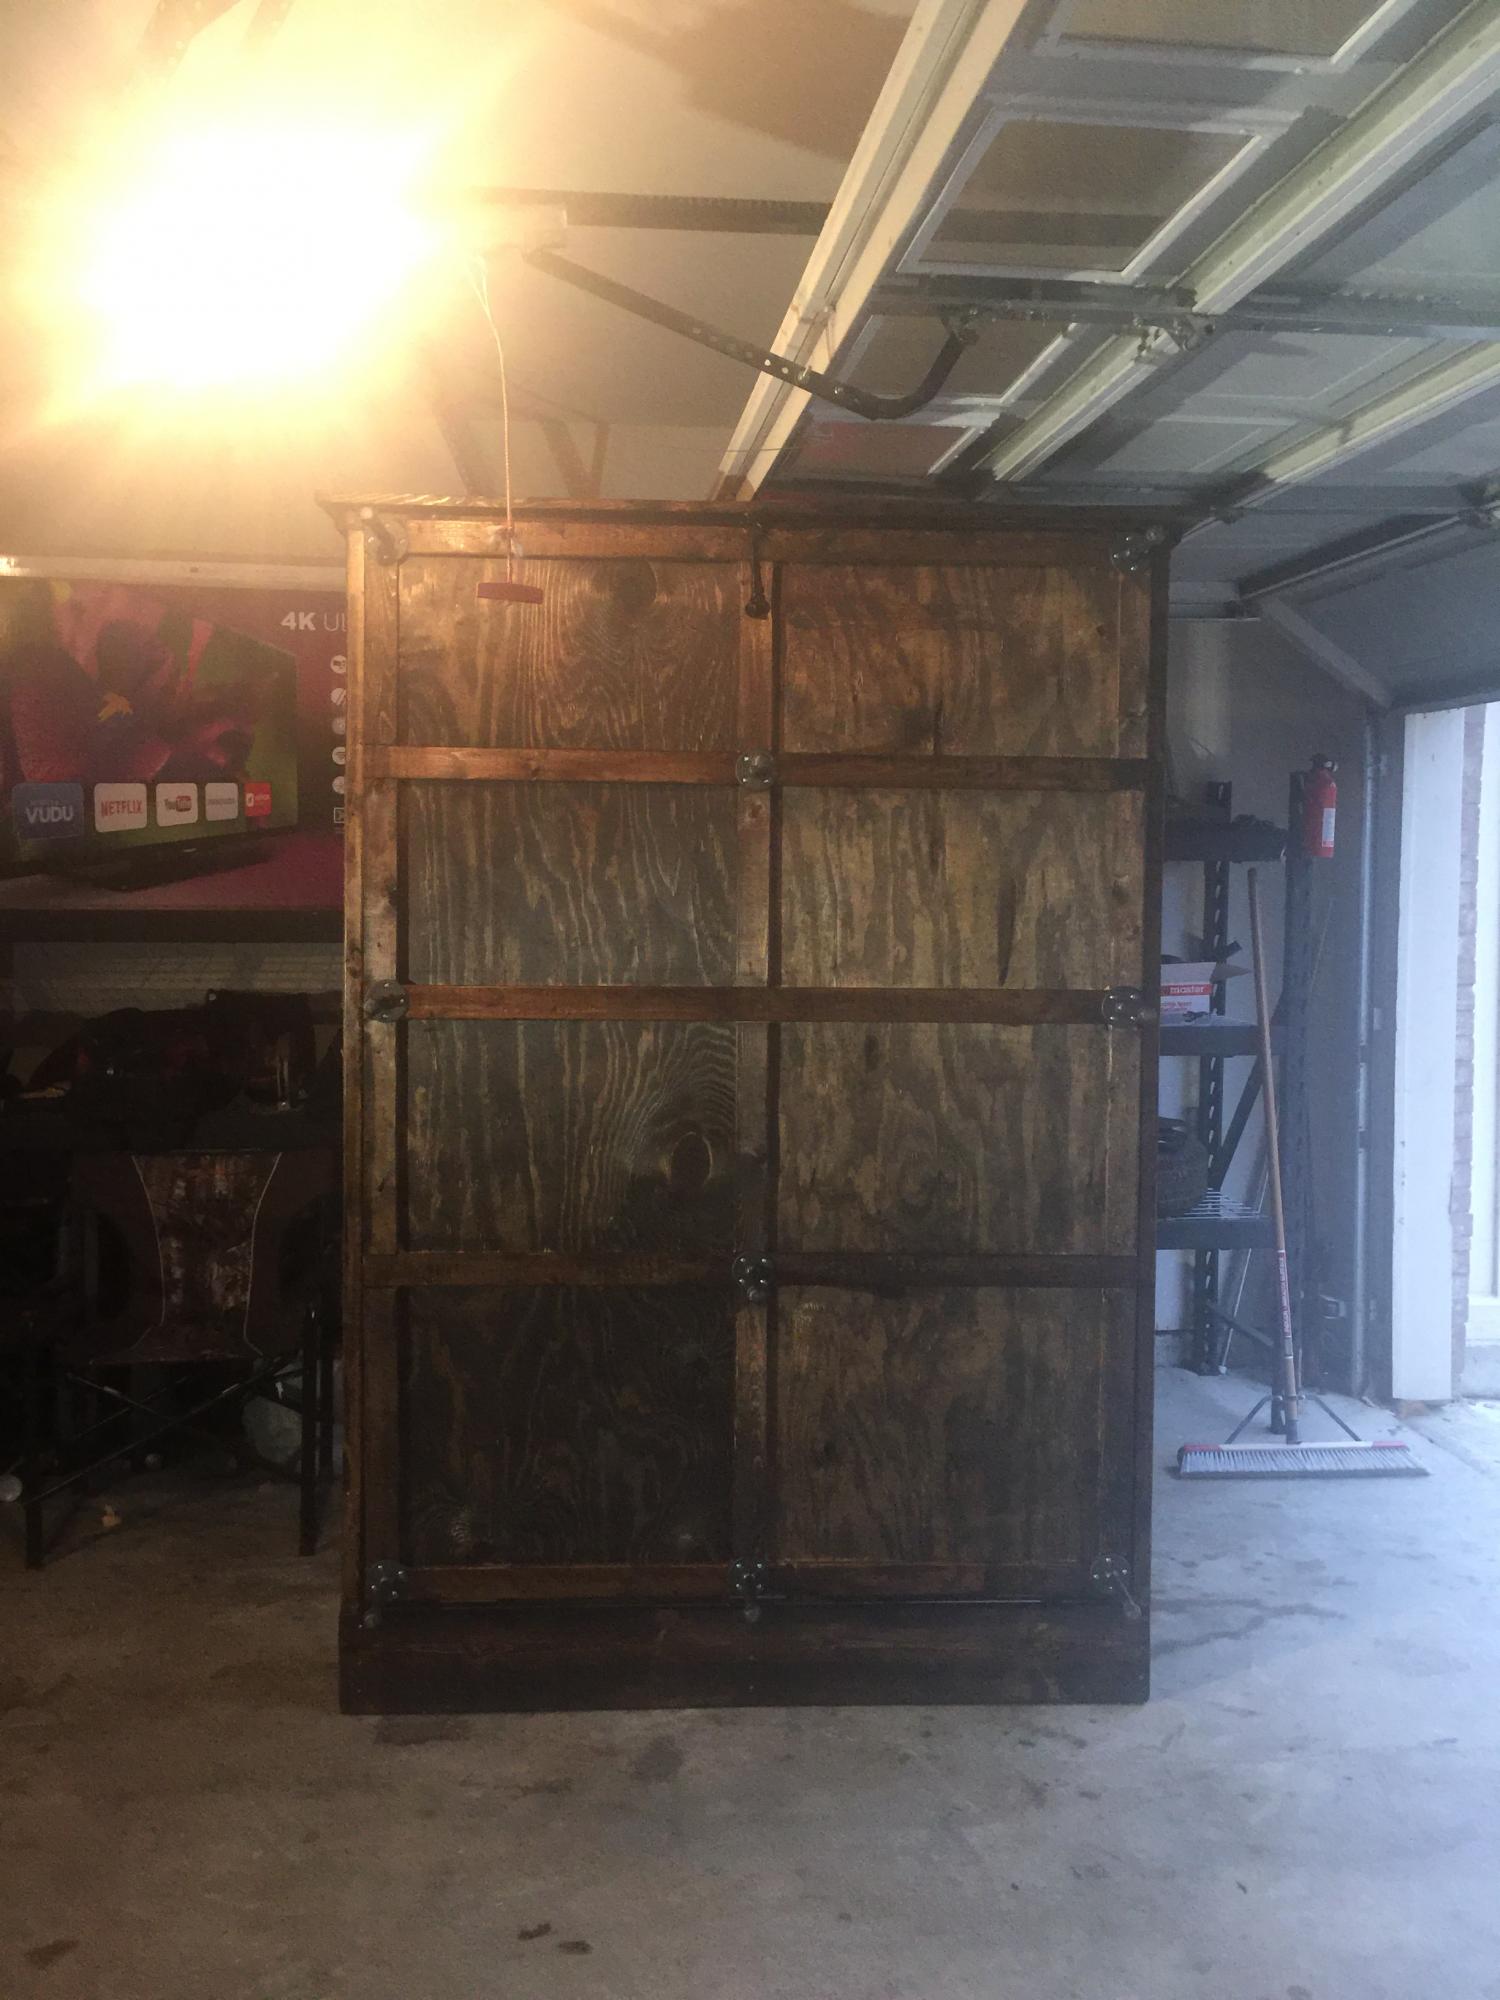
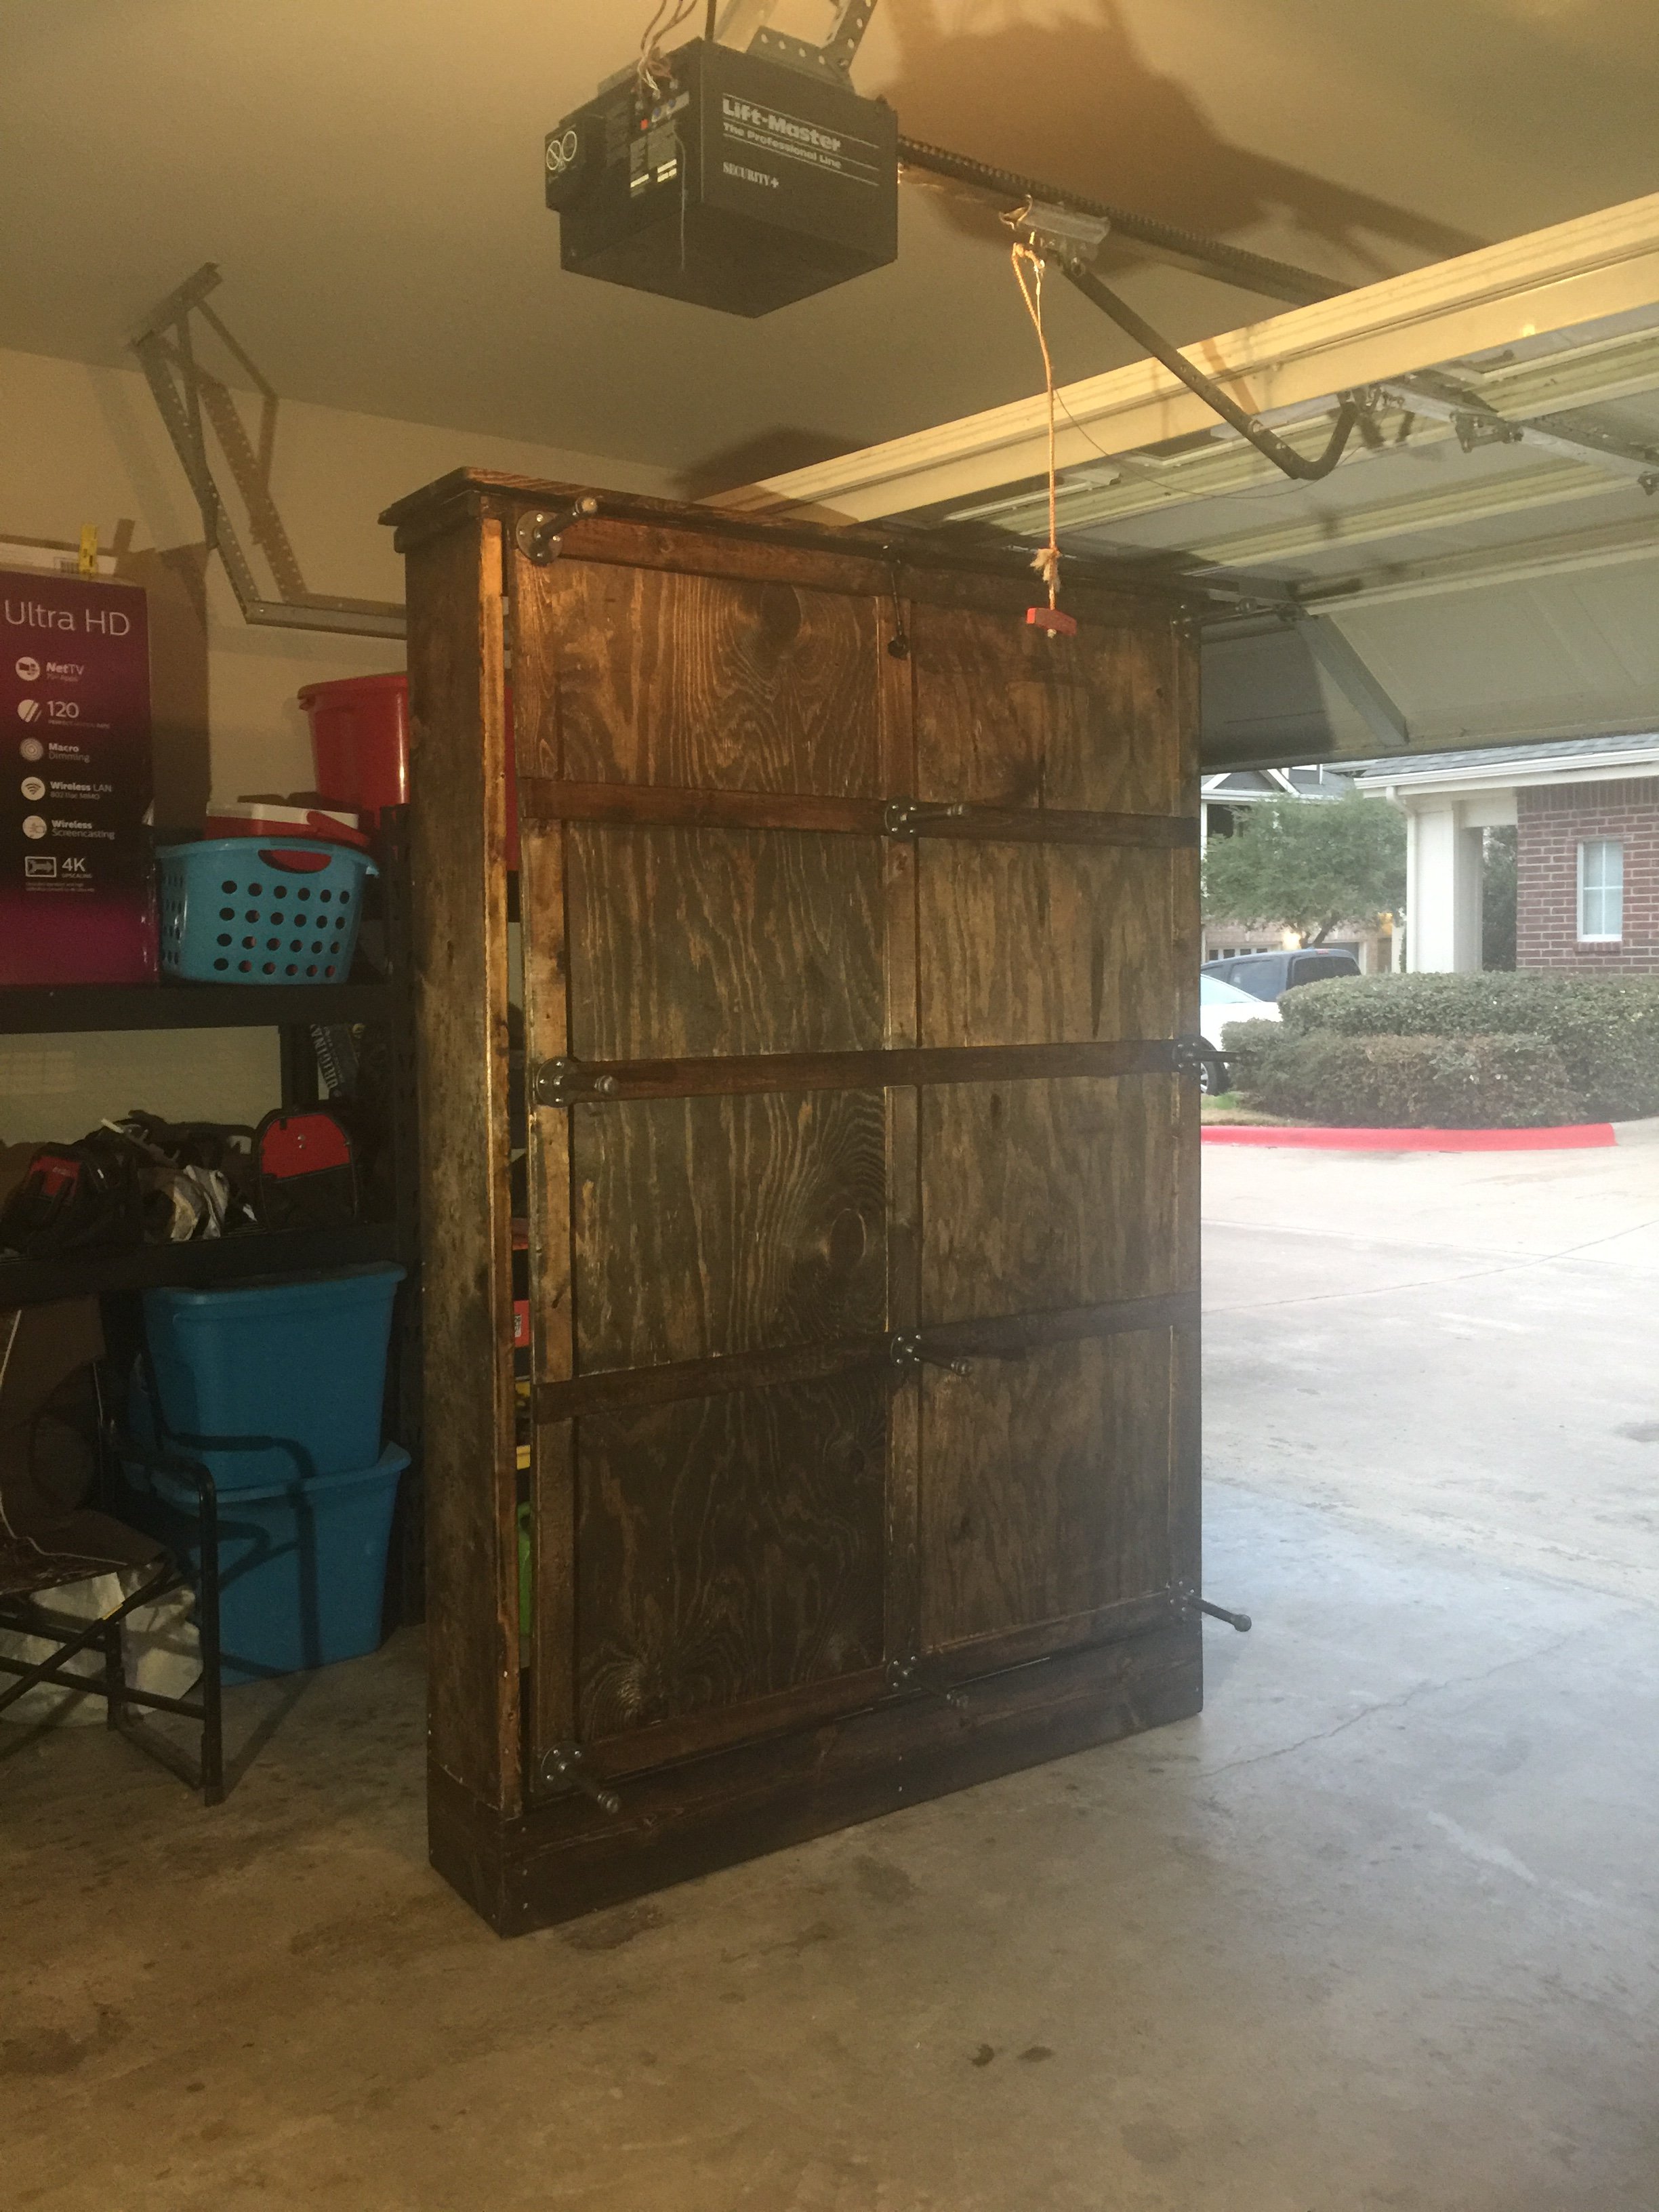
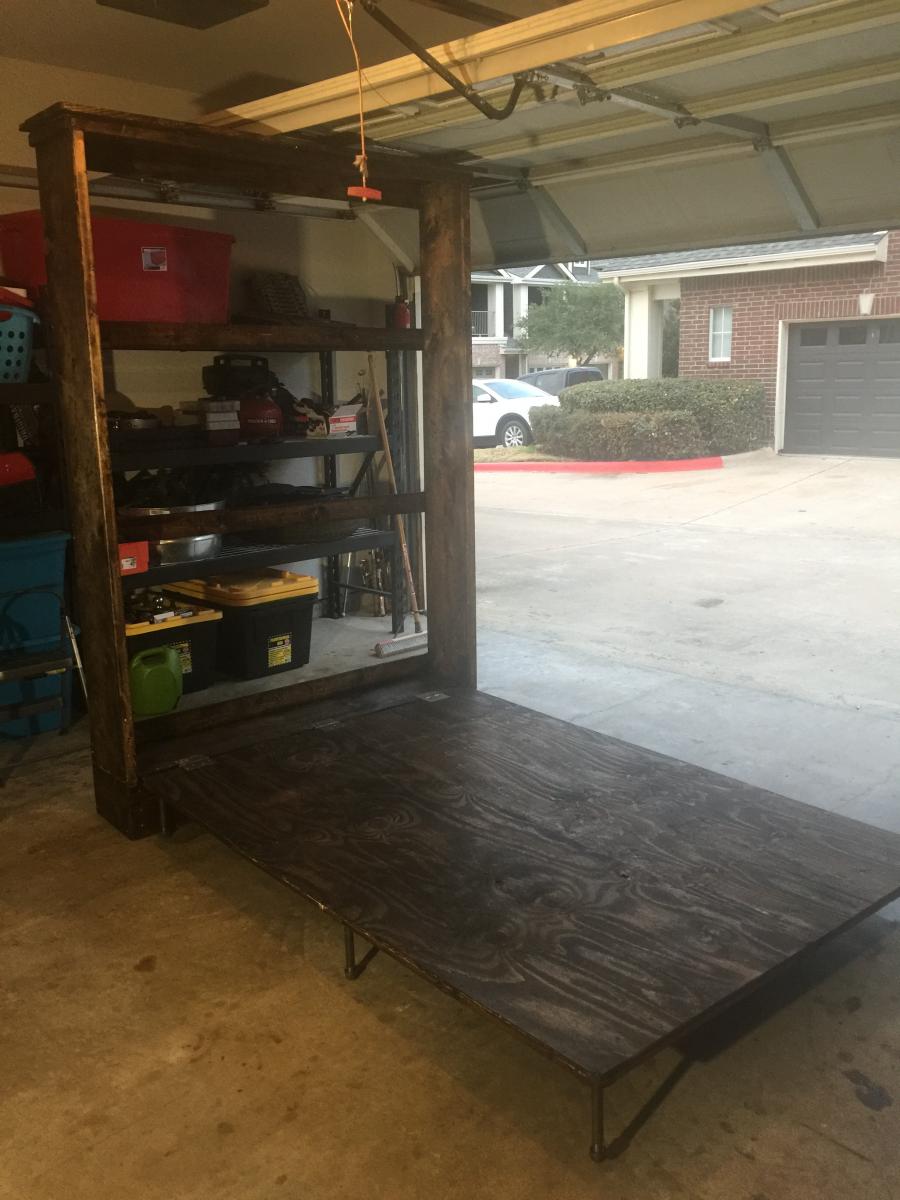
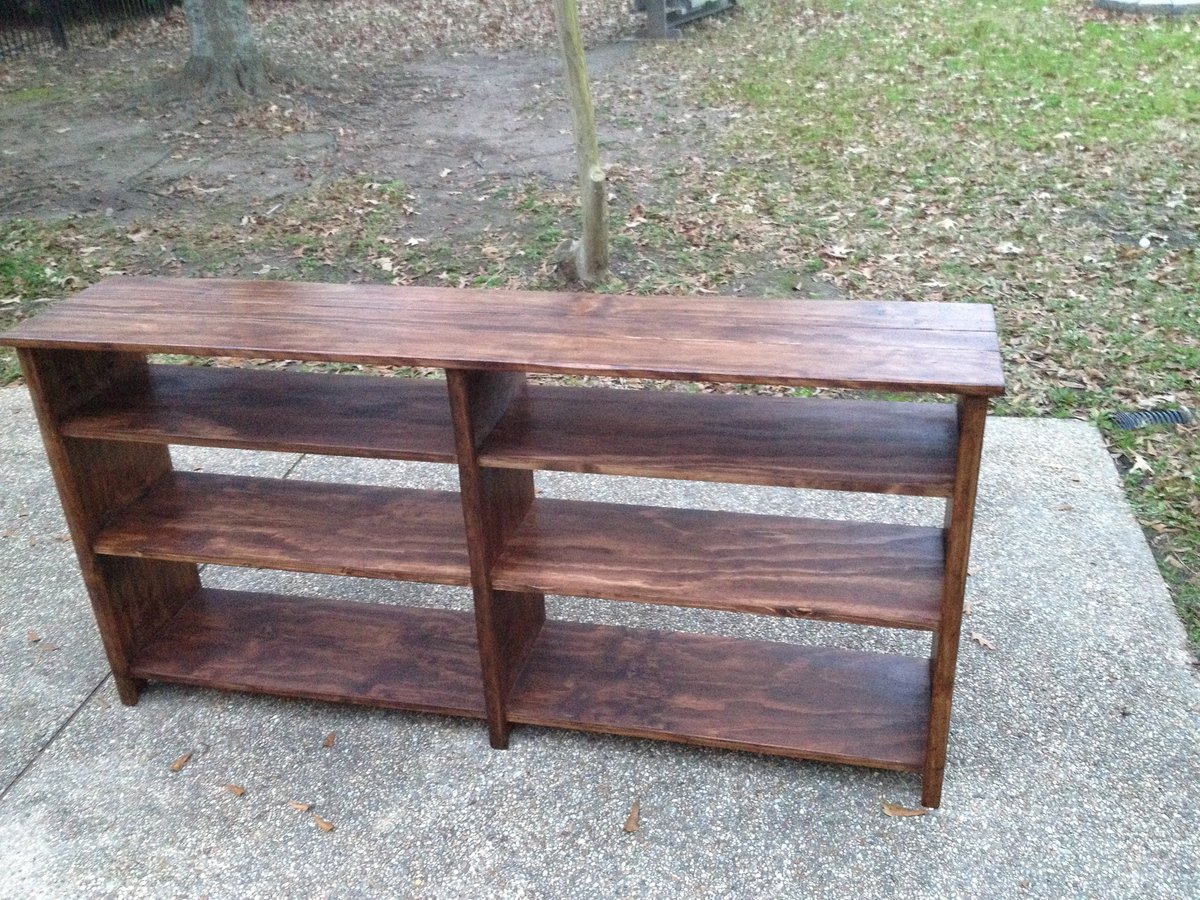
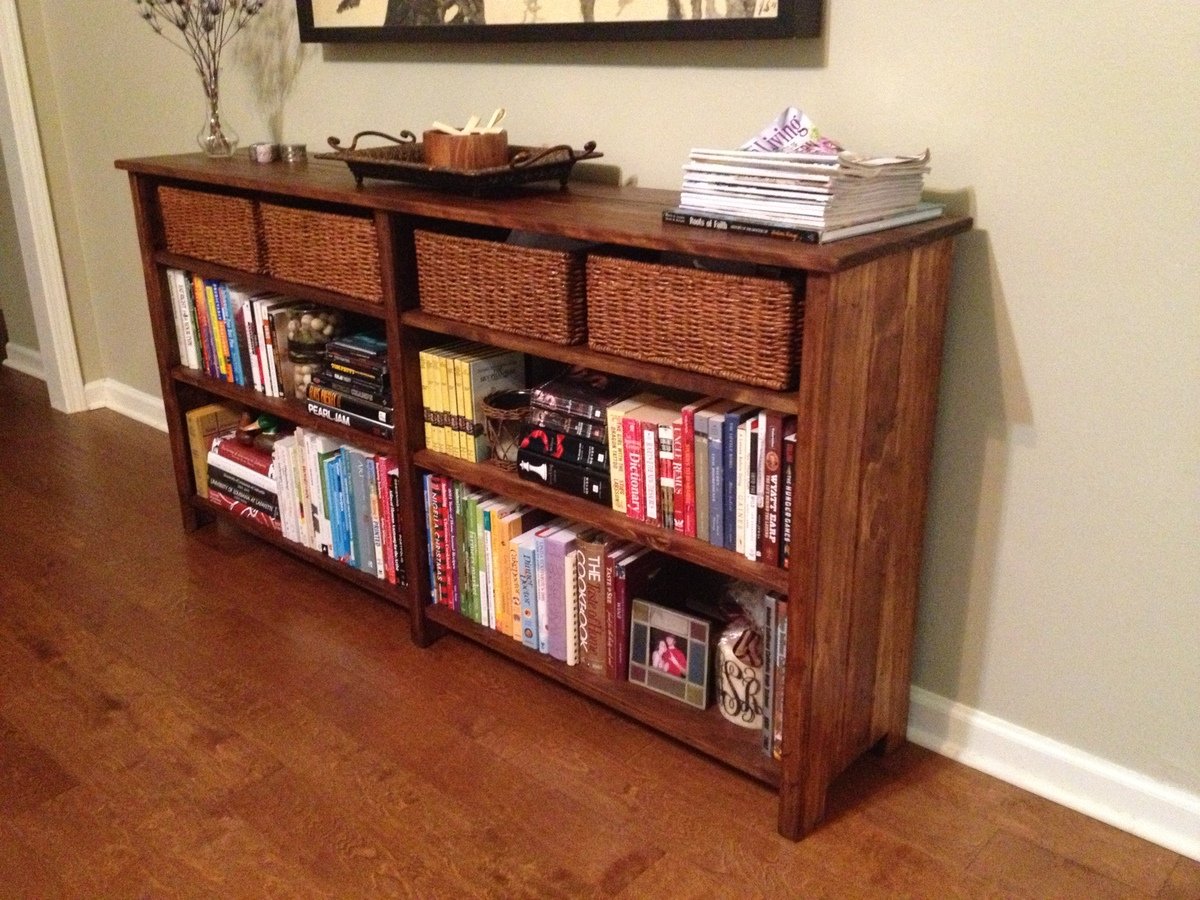
Community Brag Posts

Long Bookshelf

Submitted by Jon1985 on Mon, 06/23/2014 - 15:59

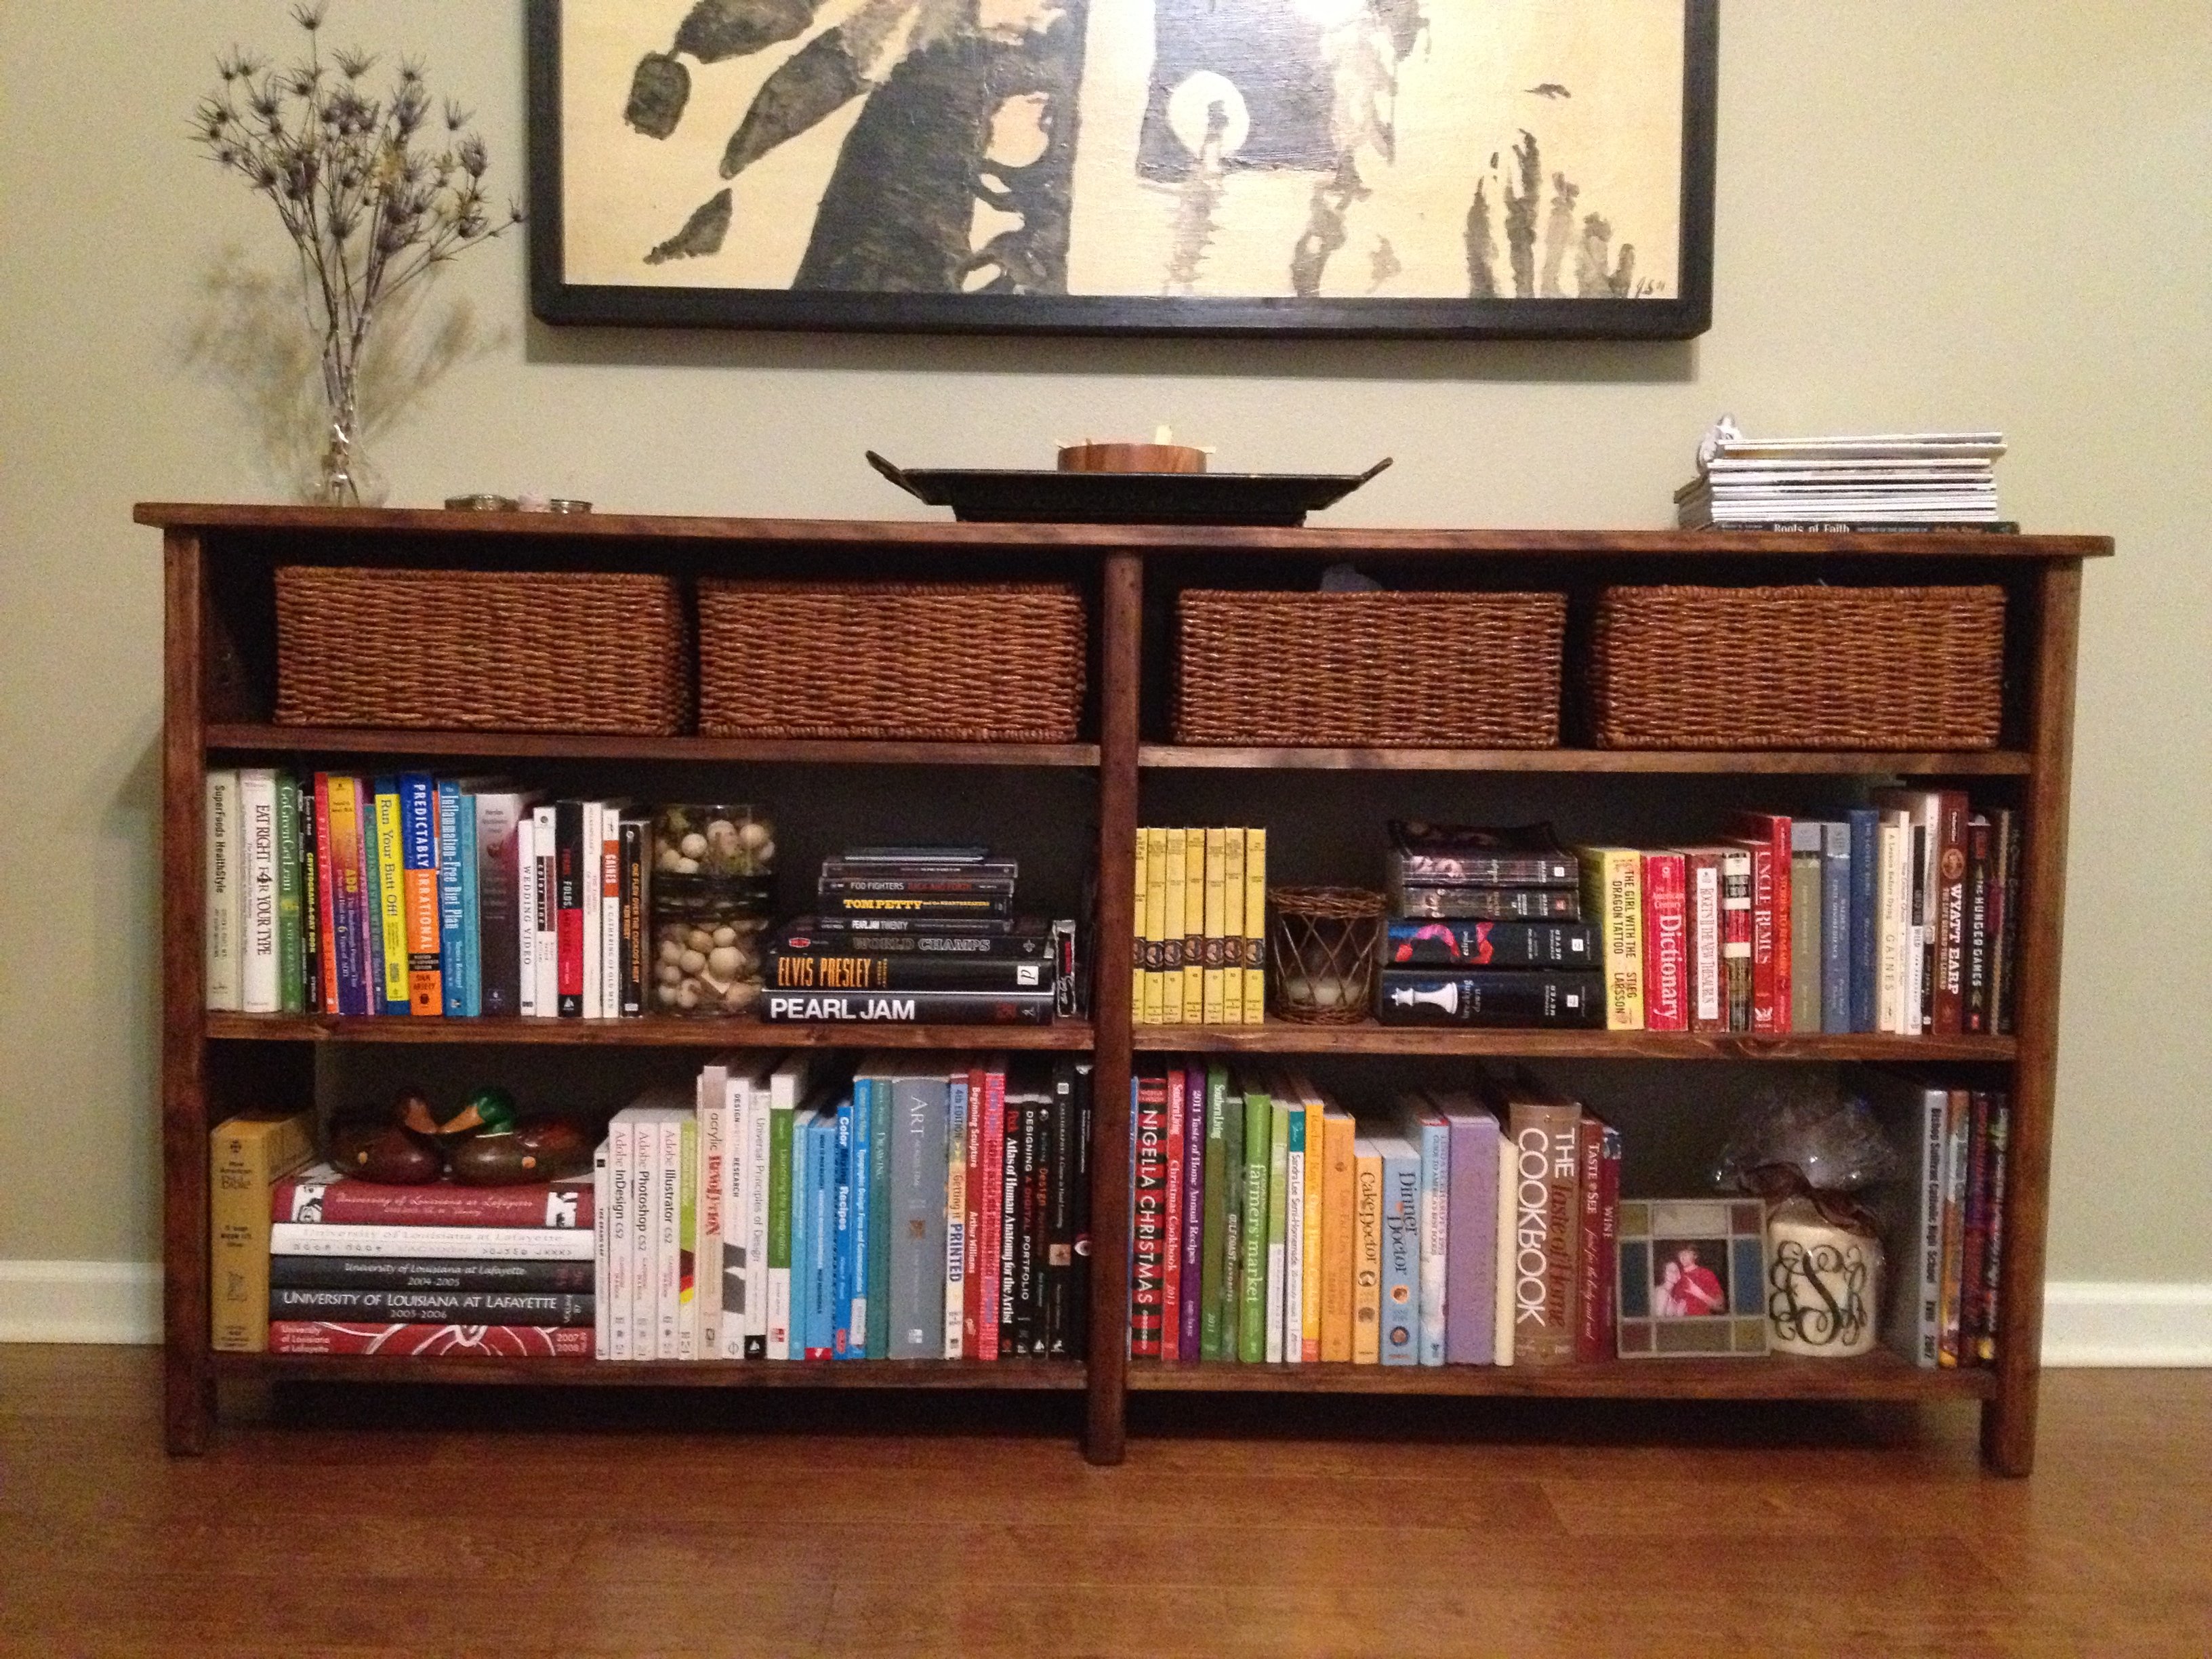
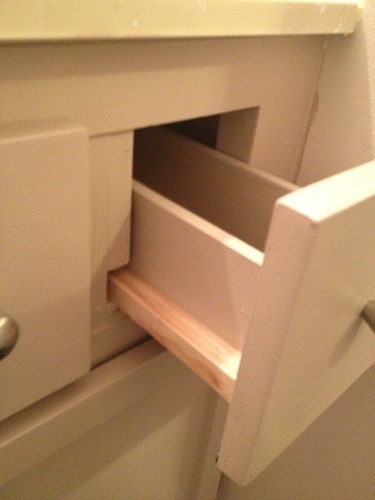
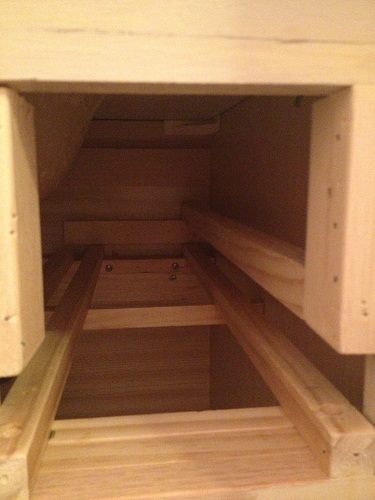
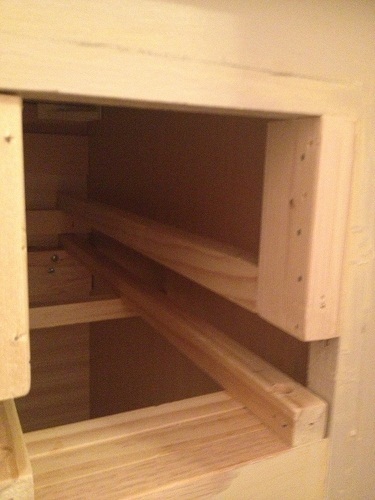
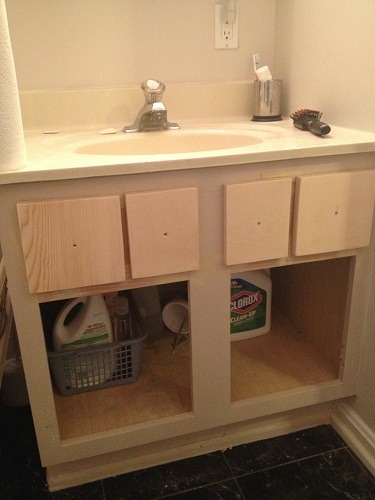
This is my first Ana White project and was a great learning experience. This project is a modified version of the 6 cube bookshelf plan.

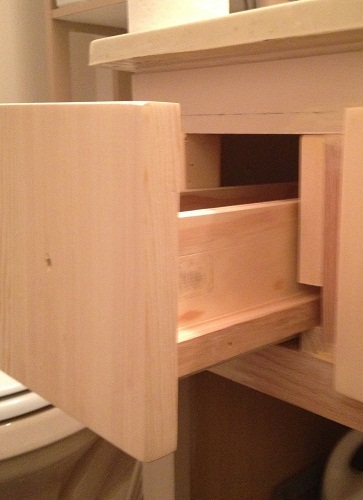
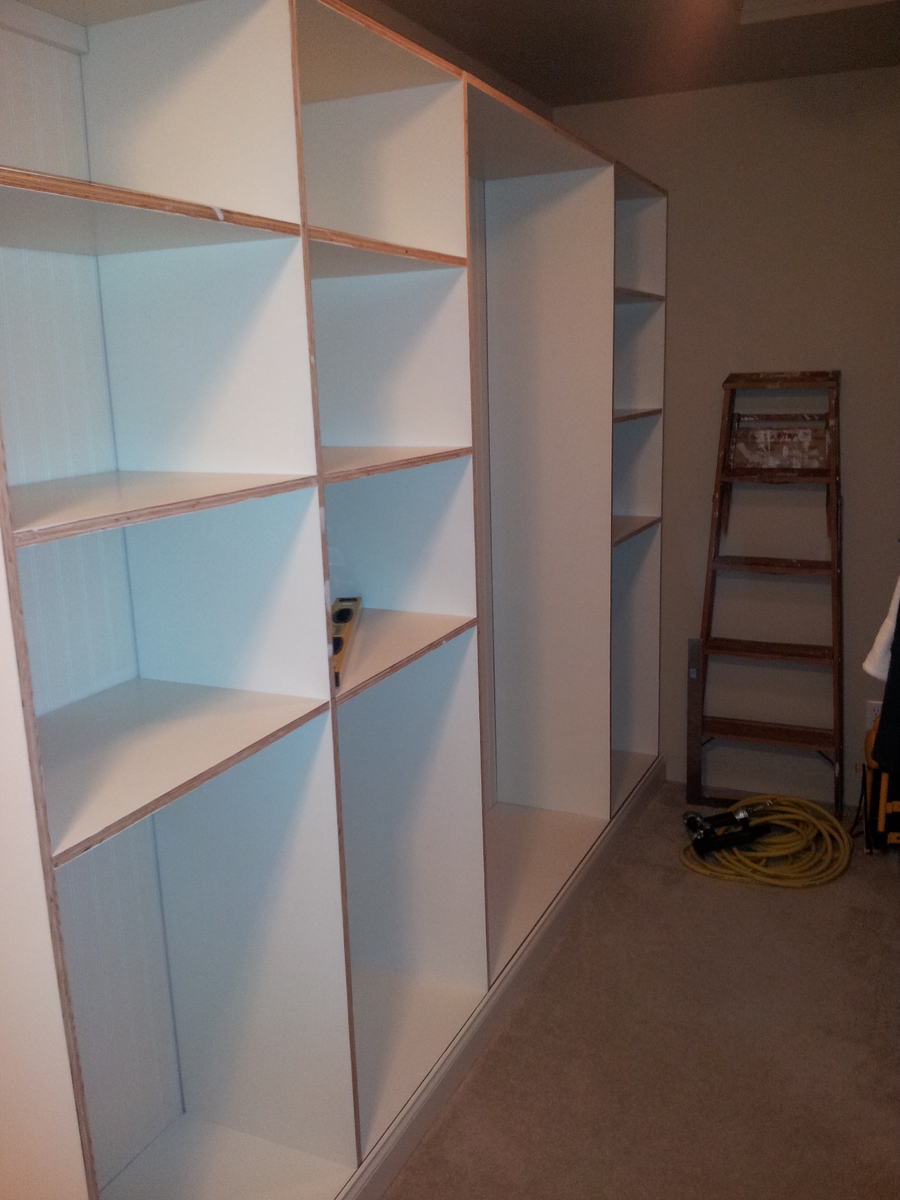
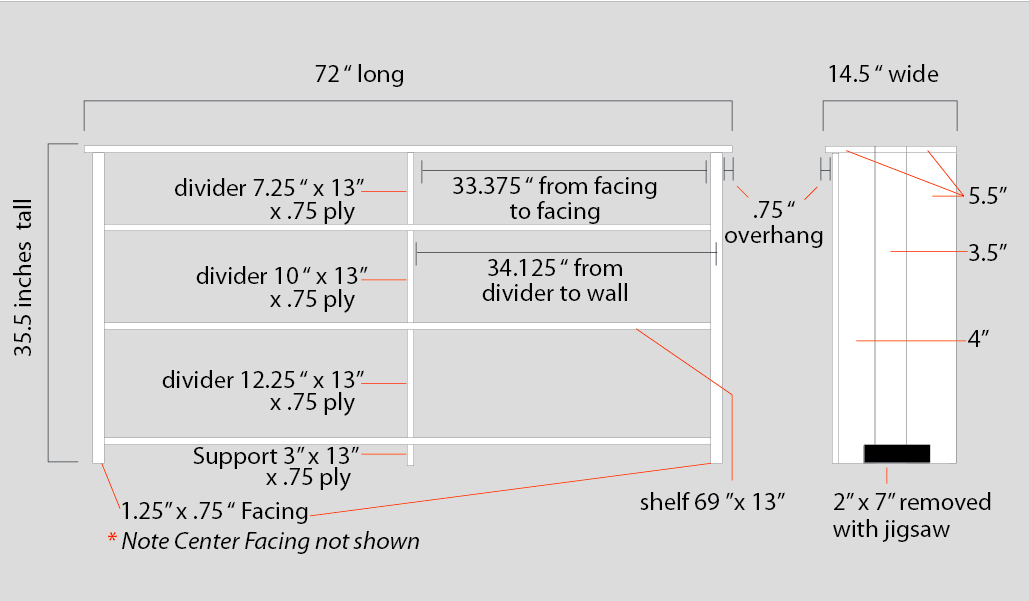
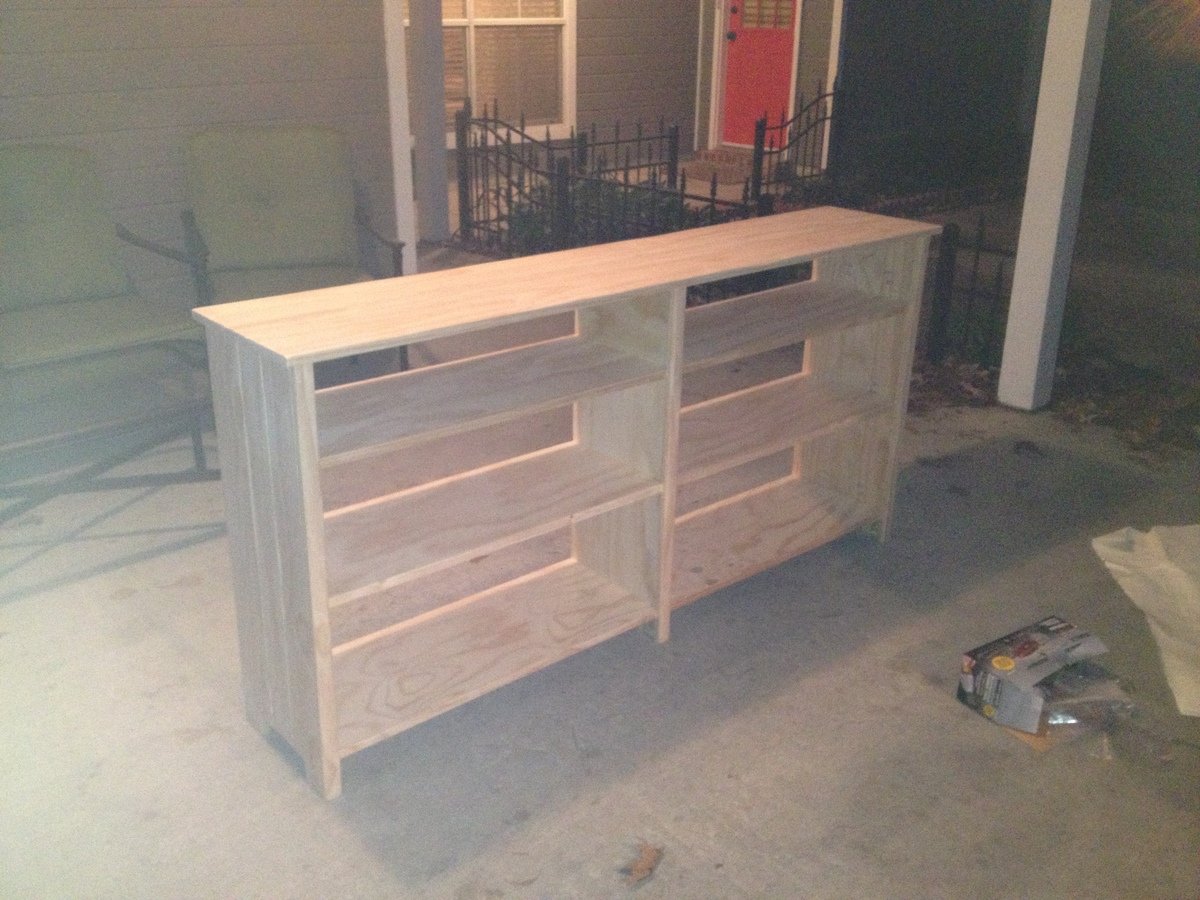
Rips of Pine were used for the top, sides, and facing. 3/4" Plywood was used for the shelf planks and the shelf dividers. The sides were also modified so they worked as the legs. Overall dimensions for this piece is 72"x14.5"x35.5".

Built from Plan(s)
Estimated Cost
$150ish
Estimated Time Investment
Week Long Project (20 Hours or More)
Finish Used
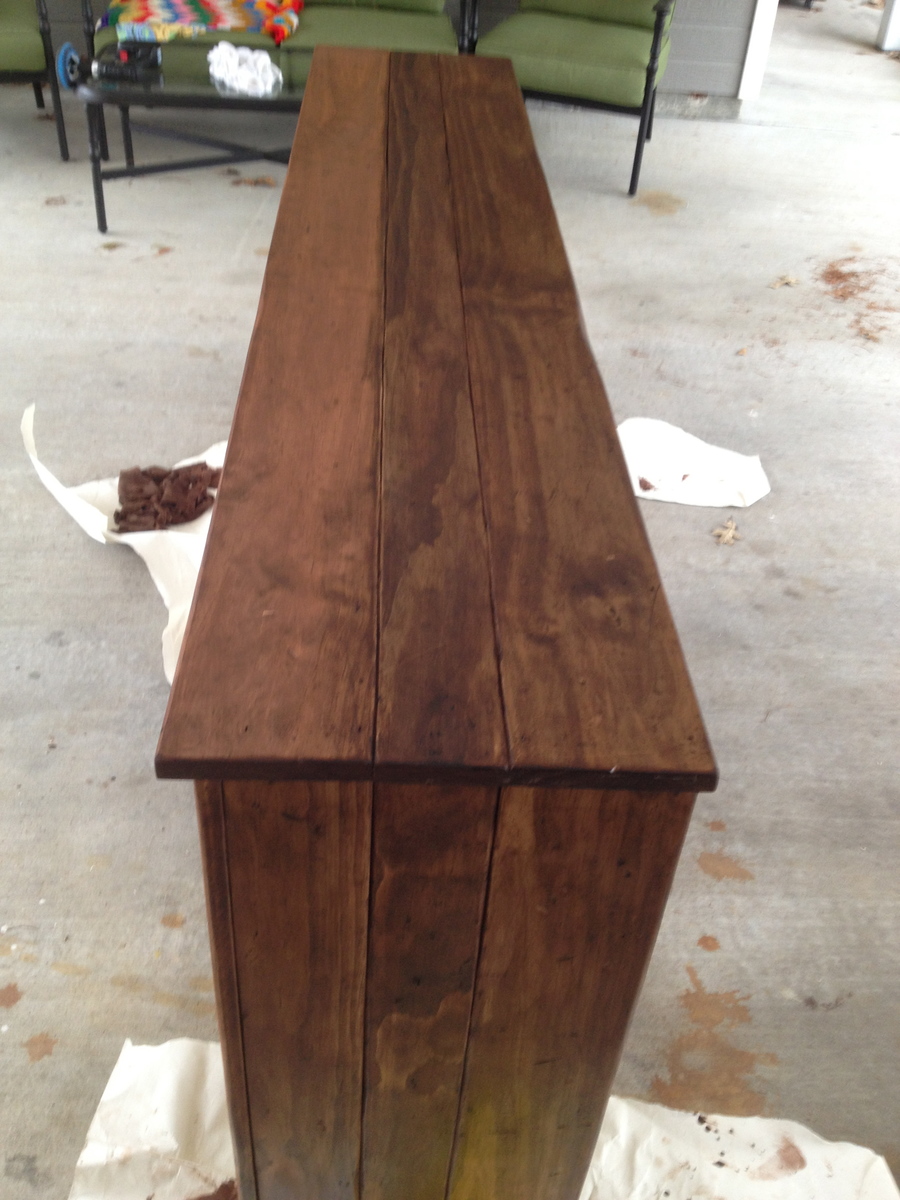
First I applied Minwax Red Chestnut Wood Finish Interior Wood Stain then Dark Walnut Briwax.
Recommended Skill Level
Intermediate

Cornhole Boards

Submitted by SaraLodise on Fri, 09/23/2016 - 13:15

Cornhole boards for friends and family :)       Used 1x4s for framing and legs, 1/2" ply for top.


"R" set:  Birch plywood tops w/ (2) coats of Miniwax Weathered Oak oil stain. Red stripe is Behr 'Cherry Cola.'  (3) coats of Polycrylic finish.


"AW" set:  Regular plywood tops w/ (1) coat of Miniwax Special Walnut oil stain & Glidden 'Clemson Orange' stripe.   (3) coats of Polycrylic finish.

Estimated Cost
$100/set (2 boards)
Estimated Time Investment
Weekend Project (10-20 Hours)
Finish Used
(see description)
Recommended Skill Level
Intermediate

Comments

Seasonal And Holiday

Den Console

Submitted by Anonymous (not verified) on Mon, 09/26/2016 - 09:16

Cool project!  My wife liked it without the doors!

Built from Plan(s)
Estimated Cost
$55.00
Estimated Time Investment
Afternoon Project (3-6 Hours)
Recommended Skill Level
Starter Project

Simple toy box

Submitted by Rcbaker on Tue, 07/29/2014 - 08:11

I followed the directions other than the hinges in the plans. Those hinges where $25 a piece so I went with a basic hinge and added the soft close attachment. Works just a as well! This was a mother day present and it turned out so nice I hated to give it up.

Built from Plan(s)
Estimated Cost
$100
Estimated Time Investment
Day Project (6-9 Hours)
Finish Used
I used a dark stain and sanded with 2000 grit sandpaper to smooth it out
Recommended Skill Level
Beginner

Comments

kulichka

Fri, 10/17/2014 - 08:38

Hi, can you give me the specific hinges and soft close attachment that you used? I'd love to make the box but can't spend the $50 on the hinges.

Looks great, by the way.

Thanks!

Simple Armoire

This project actually was a lot bigger than we thought it would be. Hubby and I are almost newbies, and we thought we could knock this off in a week or two! It actually ended up taking us 6 months to finish, although to be honest we didn't work on it consistently.

We needed a replacement for an old coat closet that was falling apart, and decided to tweak the design for the simple armoire to fit what we need, which is basically coats, table cloths, shoes, and just about anything else we want to hide away in our dining room. It's 18 inches deep by 36 inches wide. Since we couldn't find 18 inch wide wood planks, and aren't skilled enough to make them yet, we went with a hardwood plywood and covered the edges of the plywood with iron on veneer. It turned out very well; you can't really tell that it's plywood unless you know what you're looking for.

I will say that I couldn't find the kind of hinges called for in the plans, not even on the internet. So hubby and I went with 1 inch non-mortise hinges. They worked well, though they were a bit hard to hang for a couple of novices.

Built from Plan(s)
Estimated Cost
$300-$400
Estimated Time Investment
Week Long Project (20 Hours or More)
Finish Used
I brushed on Zar Provincial oil stain and finished with two coats of Minwax satin poly (three coats on the doors).
Recommended Skill Level
Intermediate

Fancy Jewelry Box

Submitted by JoanneS on Sun, 11/11/2012 - 17:37

12/16/14 UPDATE:  Posted a plan for this project, linked in this brag post

This is a variation of the Easy Jewelry Box plan. The completed measurement is 11” wide, 14 ½” high, and 7 ½” deep. This one has a center “tower” with 5 drawers 5 ½” wide, and a wide overhang on the top and bottom, which covers the 2 side doors that open out for hanging necklaces. The drawers are lined with embossed felt, and the drawer bottoms and insides of doors are covered with sticky-back felt. The 2 removable ring drawer inserts are some scraps of 1” foam, covered with scraps of the sticky-back felt, with slits cut into the foam with a utility knife (cut the slits into the felt first, attach it to the foam, then cut the slits into the foam). Cost breakdown: antique brass knobs: $28, sticky back & embossed felt: $14, hooks: $15, wood: $35, hinges: $7, paint: $5. (already on hand: finish nails, glue, sandpaper, left over stain & poly) . I worked on this a few hours a day over a long weekend, probably about 12 hours total. Finishing took most of this time, the build was actually only a couple of hours.

Built from Plan(s)
Estimated Cost
$104
Estimated Time Investment
Weekend Project (10-20 Hours)
Finish Used
Box and doors: 3 coats Benjamin Moore “Harmony”, sanded between coats, and 1 coat Minwax water based wipe on poly. Top and drawer fronts: 1 coat Minwax Express Color in Walnut, and 1 coat Minwax water based wipe on poly.
Recommended Skill Level
Beginner

Comments

jgg2006

Tue, 12/16/2014 - 00:43

Hello,

Can you please email these plans even if it is just a sketch up drawing

Chicken shed

Submitted by diegaeb on Wed, 10/07/2020 - 08:32

I had started this project last year in September and finished it finally 2020 in March because I get my chicken then.
I did modify the chicken coop a little bit due to the material I got.
The instructions and most of all the cutting list I like best!

Antje

Built from Plan(s)
Estimated Time Investment
Week Long Project (20 Hours or More)

Comments

Corner Table for stair landing

Project for corner of stair landing at my house. Made in an afternoon using poplar wood -- no finish, only water based matte finish polycrylic. No plan used, please let me know if you would like plan supplied.

Estimated Cost
$30
Estimated Time Investment
Afternoon Project (3-6 Hours)
Finish Used
Topcoat only - water based polycrylic
Recommended Skill Level
Intermediate

Comments

Murphy Bed

Submitted by Anonymous (not verified) on Mon, 02/13/2017 - 19:21

More difficult build then I'm used too. Modified it to fit a full mattress but I think it turned out great! It's a lot cheaper to build than most Murphy beds to purchase out there on the market. Enjoyed these plans. Thank you Ana!

Estimated Cost
$250
Estimated Time Investment
Weekend Project (10-20 Hours)
Finish Used
Dark walnut
Recommended Skill Level
Intermediate

18" Doll Wardrobe

Submitted by Anonymous (not verified) on Sat, 02/18/2017 - 07:33

I used the 18" Doll Wardobe plans! I decided not to do the Murphy bed. I loved how it turned out and the plan was easy to follow! Looking forward to more DIY projects

Recommended Skill Level
Beginner

Garden shed

Submitted by Anonymous (not verified) on Sat, 11/28/2020 - 13:19

Our take on the small garden shed. Ours is 4 1/2 by 7 feet. We used cedar fence pickets and 2x4 construction. Left over shingles from when our house was built. We are definitely not roofers or framers, also chasing around a 3 year old didn't make things easier. Turned out beautiful for what we want it for. Just rustic enough. Great intermediate project.

Built from Plan(s)
Estimated Cost
$400
Estimated Time Investment
Weekend Project (10-20 Hours)
Finish Used
Thompson's clear water seal will be applied this summer.
Recommended Skill Level
Intermediate

Comments

Seasonal And Holiday

Vegetable Rack with Slide Out Trays

Submitted by Anonymous (not verified) on Sat, 12/12/2020 - 05:12

This is the application of the "Vegetable Rack with Slide Out Trays" from Ana White.
I just added a door and some mosquito net, to avoid midges in summer.

Estimated Cost
100€
Estimated Time Investment
Week Long Project (20 Hours or More)
Finish Used
A mix of coconut oil and wax.
Recommended Skill Level
Beginner

Comments

Modified Farm Table

Submitted by Jscully825 on Wed, 02/06/2013 - 11:56

This is my modified version of the farmhouse table. I wanted to be able to sit 6 people at a 6' table, so I decided to go with a different style of legs. It is still very sturdy.

Estimated Cost
$85
Estimated Time Investment
Weekend Project (10-20 Hours)
Finish Used
Several coats of minwax water based stain in Coffee color.
3 coats of water based minwax poly.
Recommended Skill Level
Beginner

Comments

Linda7

Fri, 02/08/2013 - 09:40

Love the leg modification. My brother-in-law likes the farmhouse table look with the exception that he couldn't place chairs at the end, so he fell in love with this table. We may be following your modifications if we build him a table at some point in the future. Excellent job!

Bathroom sliding vanity

Submitted by Anonymous (not verified) on Thu, 01/21/2021 - 16:58

I don’t know anything about carpentry but my wife seen this and told me that I can do it and I said no way so she trusted me and here it is. Mirror was bought at the Goodwill $2.00 thank you

Estimated Cost
30.00
Estimated Time Investment
Afternoon Project (3-6 Hours)
Finish Used
Varathane classic penetrating wood stain classic gray
Recommended Skill Level
Starter Project

Comments

Napoleon Vanity retrofit

Submitted by JoanneS on Sun, 02/17/2013 - 14:35

This is our 20-year-old bathroom vanity, retrofitted to resemble the Napoleon Sink Console. This old cabinet is the standard builder size from the 90’s -- 30” wide x 29 ½” tall x 21” deep – fits a 31” x 22” sink top. The 2 outside drawers are working drawers, and the 2 inside are faux (just fronts). It was a weekend project. Since the sink stayed in place, I had to figure out something for the drawers to slide on. I had 3 sticks of ¾” x ¾” S4S in the garage, so I used these and fashioned a frame to hold the drawers, and also used it on the sides of the drawers as slides (figured the frame out as I went along). I used up some scrap 1x12 to cut the drawer faces and supports at the inside back of the cabinet. Since the space was so tight, I used some scrap 1x2 as bracing attached to the original frame, and attached the added face frame to that. The doors are ½” x 1 ½” craft board and ¼” birch plywood. The drawers are 3/8” x 3 ½” craft board with some ¼” plywood on the bottoms. I re-used the existing hinges and used some knobs from a multi-pack (available from Target) and some left over paint that was on hand. I bought about $30 of materials in addition to my scraps.
Now that I’ve got this one under my belt, it’ll be easier to do this in the other 2 bathrooms. I’ll probably use some 1x2’s instead of the s4s if I have to go out and buy the materials for the next one, it’ll just have slightly different measurements.

Built from Plan(s)
Estimated Cost
$30
Estimated Time Investment
Weekend Project (10-20 Hours)
Finish Used
Ace Royal semi-gloss paint, in Wishbone
Recommended Skill Level
Intermediate

American girl 3 story doll house and furniture

For my daughters 8th birthday I decided I would make her a doll house for her American Girl dolls. Then I decided to make all the doll furniture too. Then I started thinking that I might as well sew all the bedding and cushions. She loves it!! 

Estimated Cost
$220-250
Estimated Time Investment
Week Long Project (20 Hours or More)
Finish Used
A lot easier with the alloy wheels.
Recommended Skill Level
Beginner

Comments

Master Closet System for flipped house

Submitted by donnamarie on Sat, 01/03/2015 - 11:31

I built Ana's Master Closet System for a flipped house.  The closet was a large walk-in, approximately 6'W x 15'L.  I pretty much used Ana's plans as written, with some tweaking in shelf length for a custom fit.  I used beadboard in the back for a built-in look, and 1x1/2" boards to trim out the edges.  The entire closet was plywood, which was cut, primed, and painted before install.  The pictures are the completed project and before the trim was installed.

During the house sale, the closet impressed potential buyers more than any other feature.  This was my first build from Ana's plans, and now I'm hooked.  I am currently renovating a 1910 home and plan to use Ana's site for everything from built-in's to furniture.  Thanks Ana for such a fantastic site!

Estimated Cost
$400
Estimated Time Investment
Week Long Project (20 Hours or More)
Finish Used
two coats of primer followed by two coats of Sherwin Williams Dover White semi-gloss
Recommended Skill Level
Intermediate

Art Studio Loft Bed

Submitted by Auntie LAD on Tue, 02/26/2013 - 08:26

After I built my nephew's AT & T Park bedroom, I had to figure out what to create for my 5 year old niece, Maggie. She loves drawing, so I settled on an "art studio," where she can work and display her art.

The bed was created using Ana's Camp Loft Bed Plans. I narrowed the stairs by 4 inches as one of the other posts had done. I also put shelves under the stairs like another post I read on this site.

I built a small drafting-type desk for underneath using my new Kreg Jig (Man, I love that thing!). I also made some curtains to pull shut in case Maggie wanted to escape from the world. Chairs, storage containers, flower light, and leaf above bed are from Ikea.

I bought some cheap picture frames, and put a bulletin board in one and a chalkboark in the other for above the bed, and the string hanging across the front of the bed is from Target. It actually has clips to hang artwork.

I painted the bed using Ana's antique finish with the Minwax pen. It came out fantastic.

Estimated Time Investment
Weekend Project (10-20 Hours)
Finish Used
Antique White paint from Home Depot with Minwax pen finish.
Recommended Skill Level
Beginner

Comments

spiceylg

Tue, 02/26/2013 - 10:00

Your niece and nephew must be over the moon! Another awesome build!

Ana White Cabinet Builder Google Sheet converted to Microsoft Excel

I was trying to use the google sheets cabinet calculator that Ana posted and found that others were accessing and editing the master at the same time. I thought perhaps a Microsoft Excel version of the calculator to download may be useful.

I wasn't able to upload to this site so I've created a Brag Post to link to it on my site.

UPDATE: Ana's website has been updated and the file is now an Excel Spreadsheet which can be downloaded.

Estimated Cost
none, just converted the functions and calculations to work in excel
Estimated Time Investment
An Hour or Two (0-2 Hours)
Recommended Skill Level
Intermediate

Woven back bench

Submitted by JoshMonroe on Tue, 04/30/2013 - 15:30

I started building a different bench, but I decided halfway through that I didn't like my design. I found this, and loved it, so I modified my partially built bench to incorporate the woven back design. I substituted in a few mortise and tenon joints for strength, and used either kreg or waterproof glue for the non-structural joints. The seat bottom is made from 2x4's I resawed in half. I also rounded over the edges of the 'Y' pieces, which I think makes it look a bit more like they're woven together. Thanks for the plans, this is a great addition to my front porch!

Built from Plan(s)
Estimated Time Investment
Day Project (6-9 Hours)
Finish Used
None yet, will be painted.
Recommended Skill Level
Advanced

Comments

spiceylg

Wed, 05/01/2013 - 05:35

Beautiful build! I love the details such as the edges of the Y pieces as you said. It definite adds more dimension and the curves on the arms as well!

JoshMonroe

Wed, 05/01/2013 - 11:01

Thanks! I saw a cabinet in a book on wood finishing that had adjoining edges routed like that. It looked so good there, I decided to try it here, and I'm glad I did!