Community Brag Posts

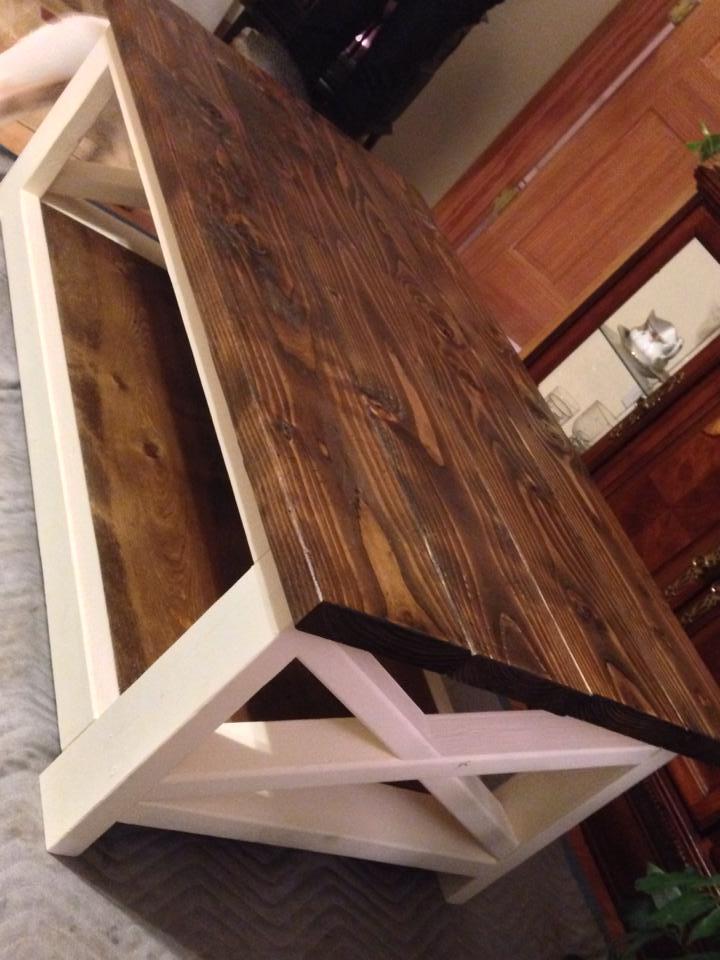
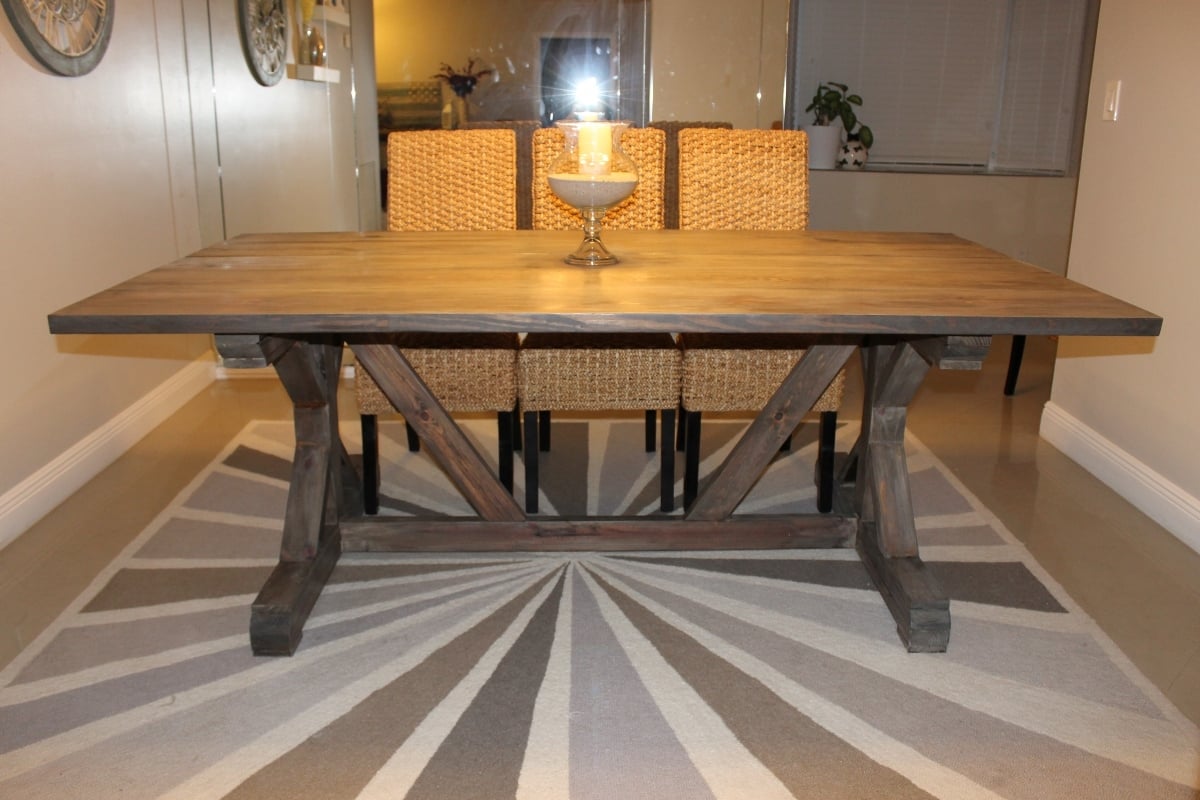
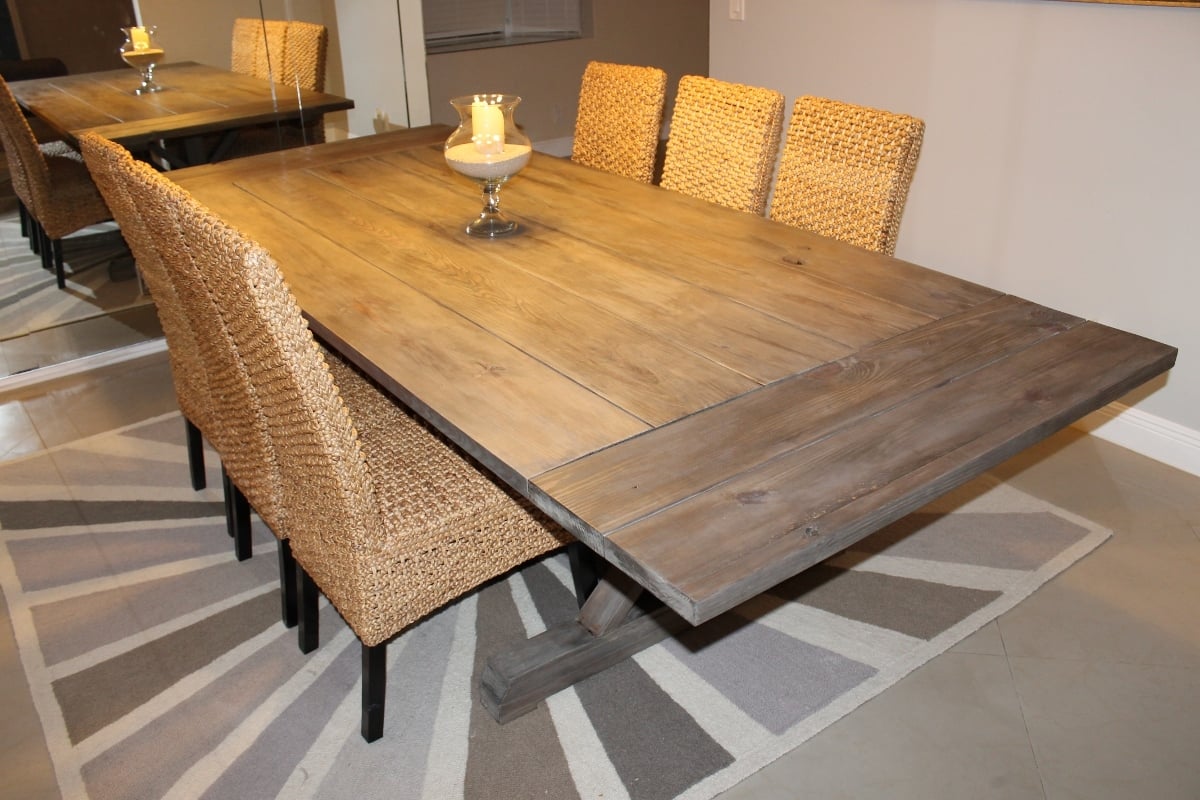
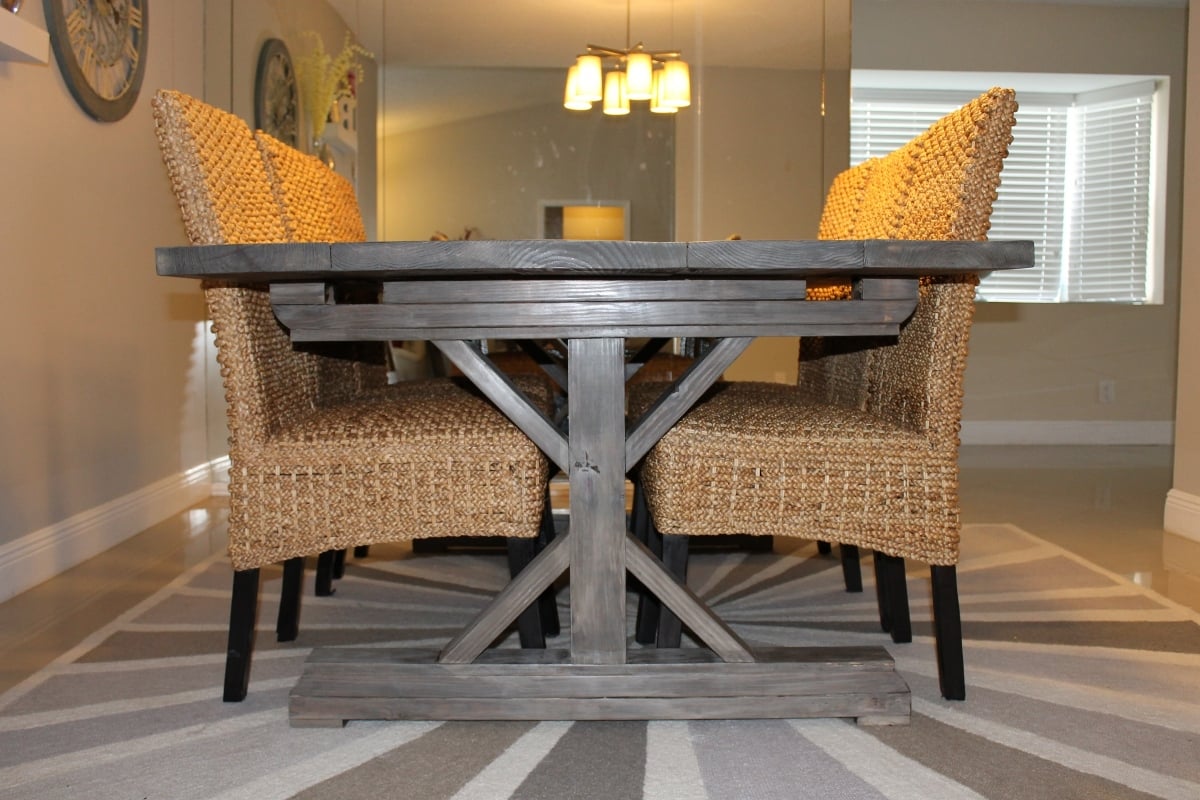
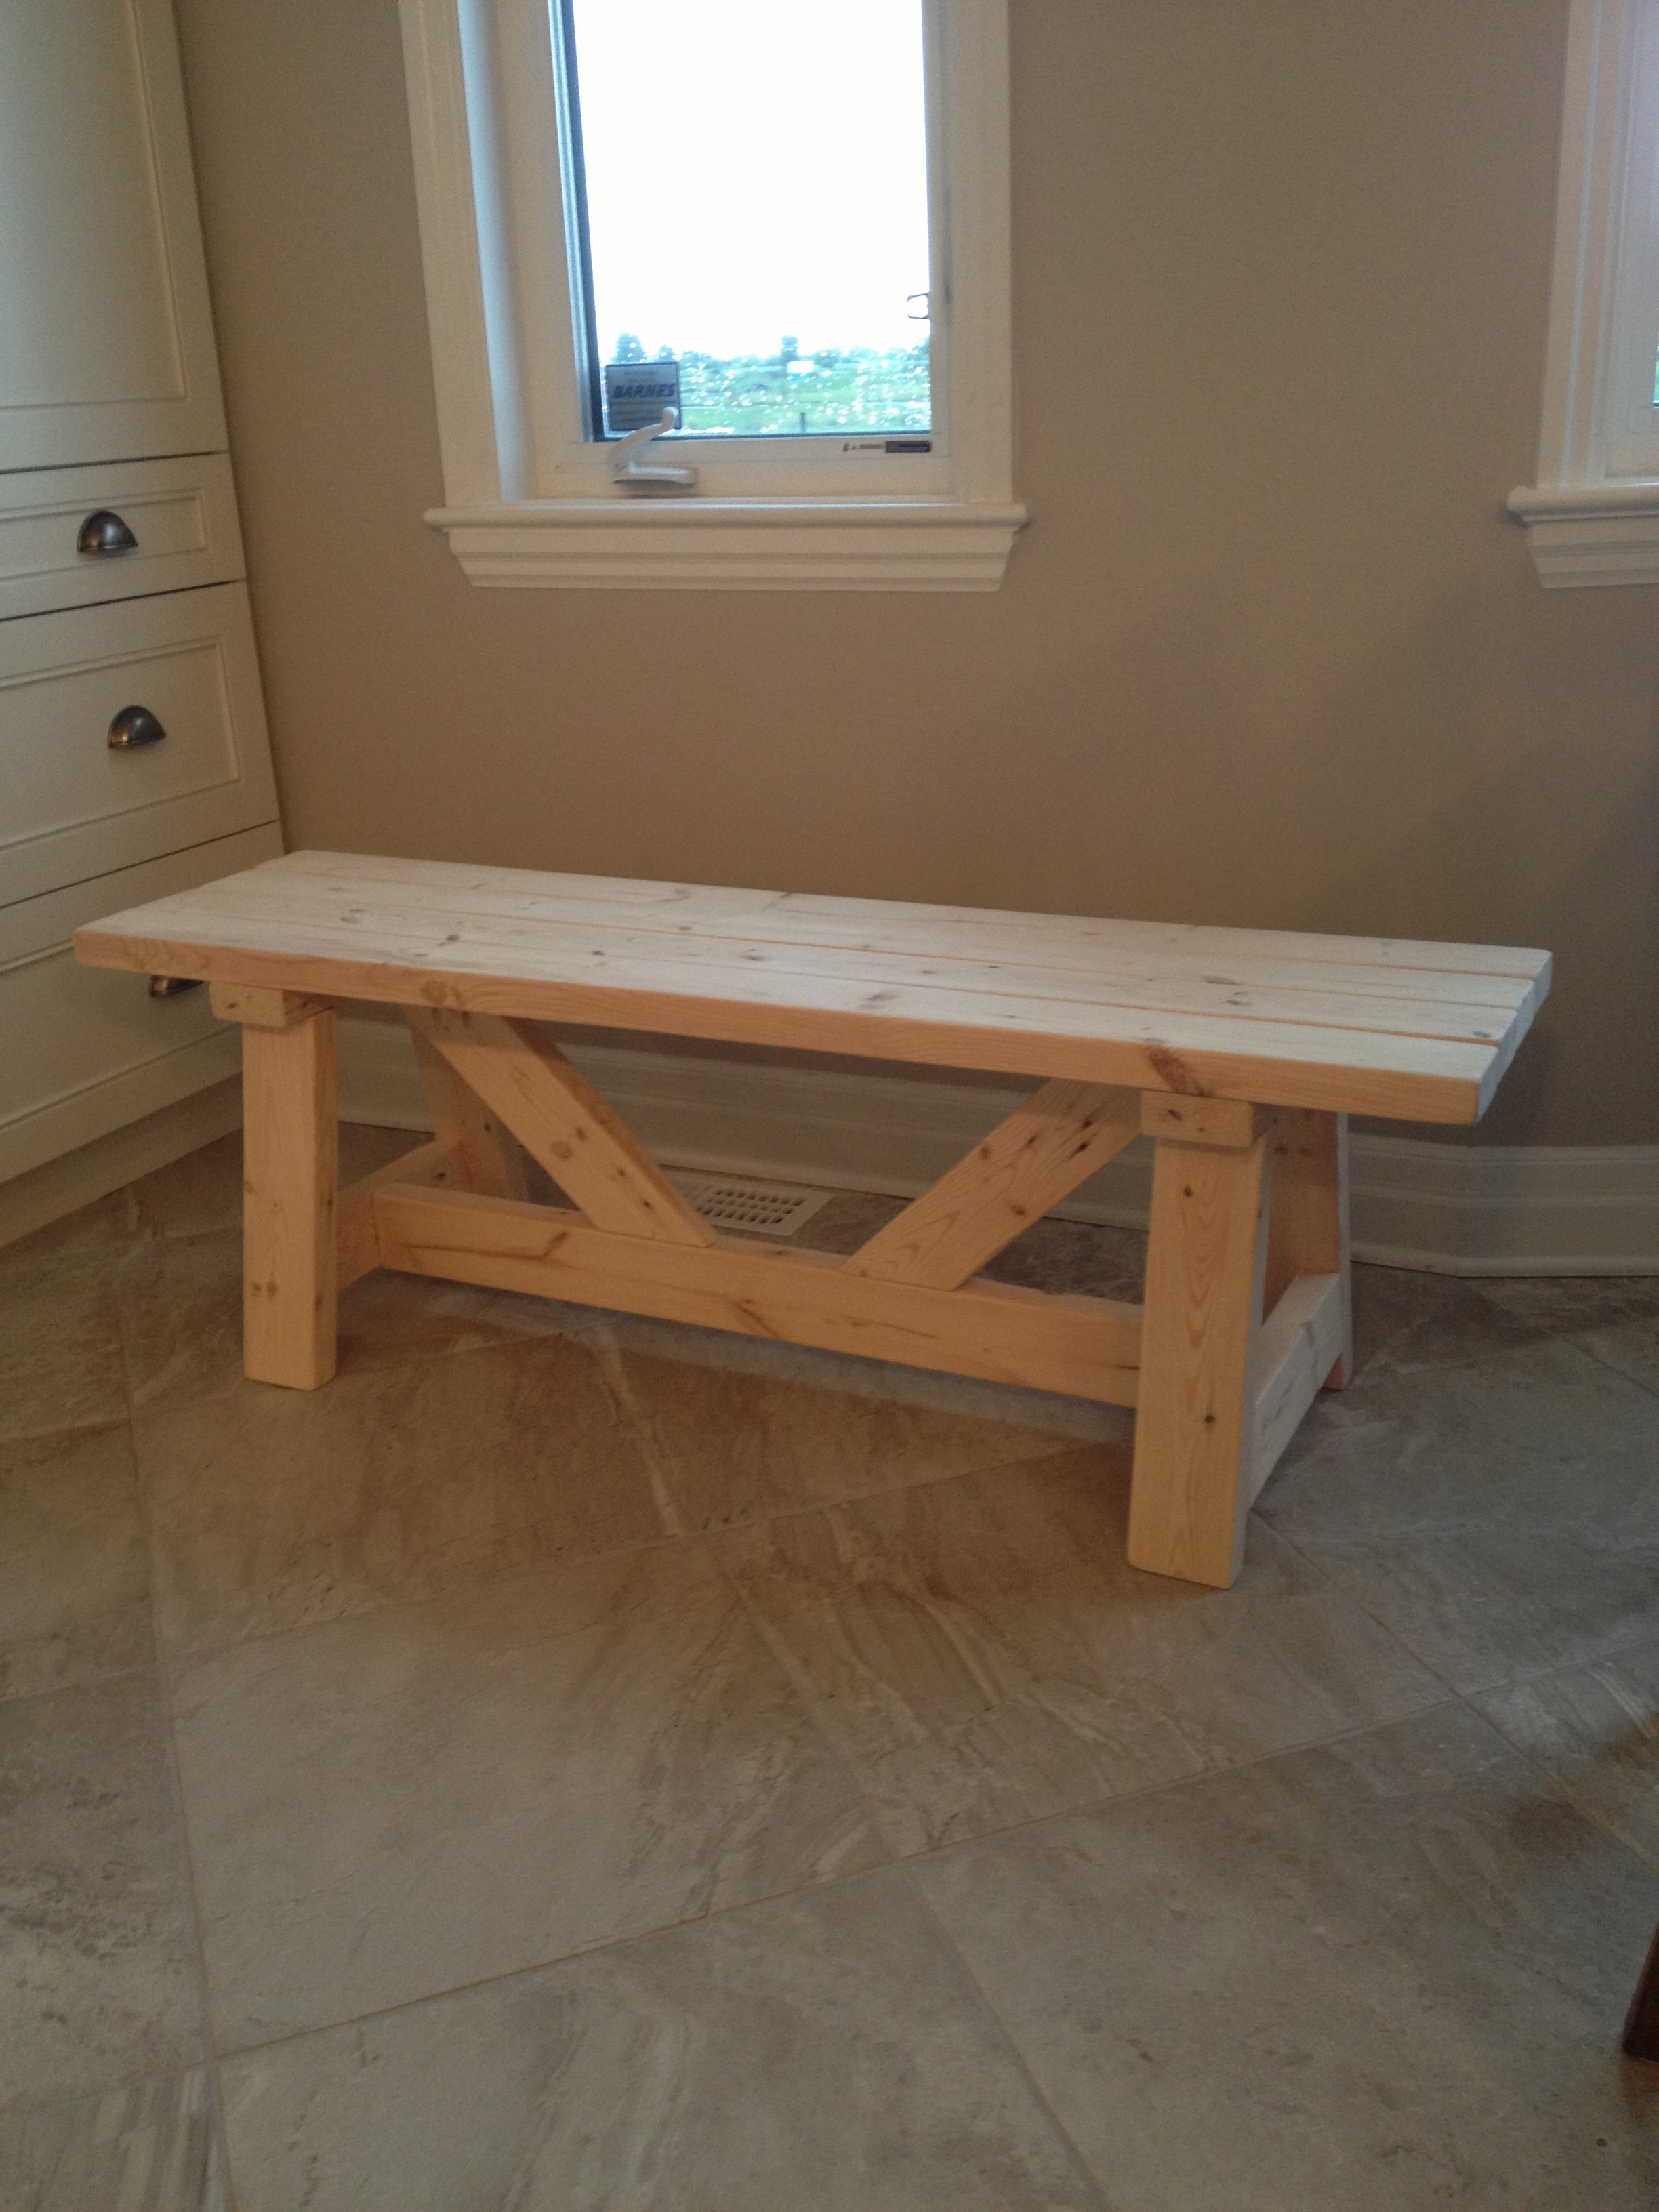
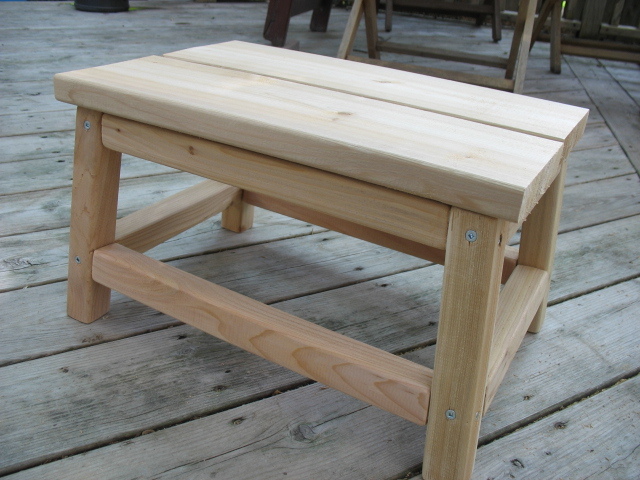
Rustic Coffee Table Success!

Submitted by Esquared34 on Thu, 01/30/2014 - 19:57

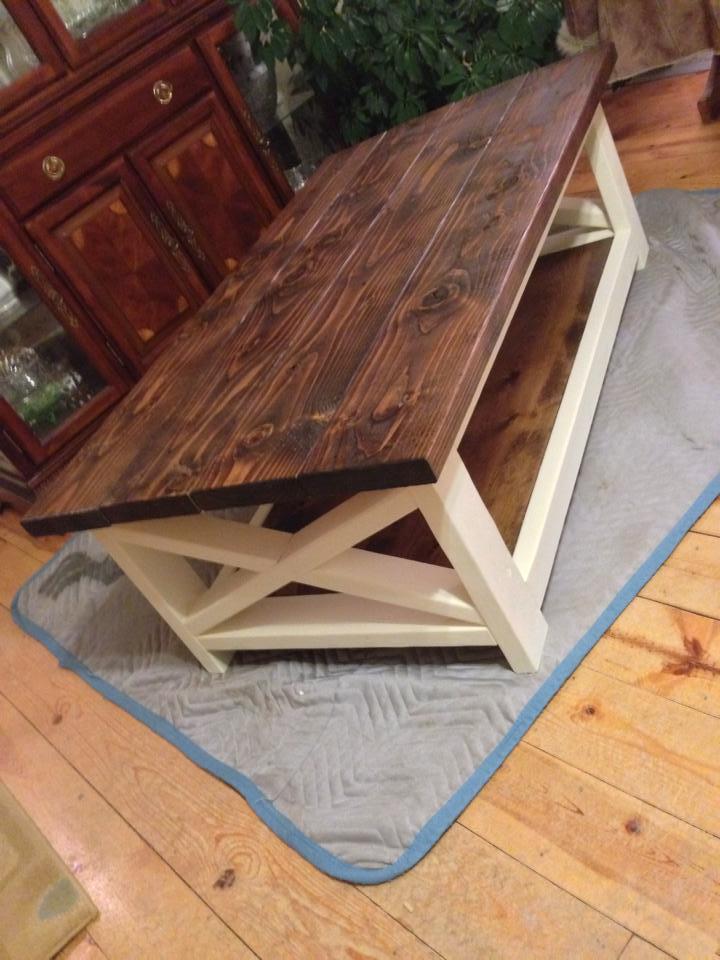
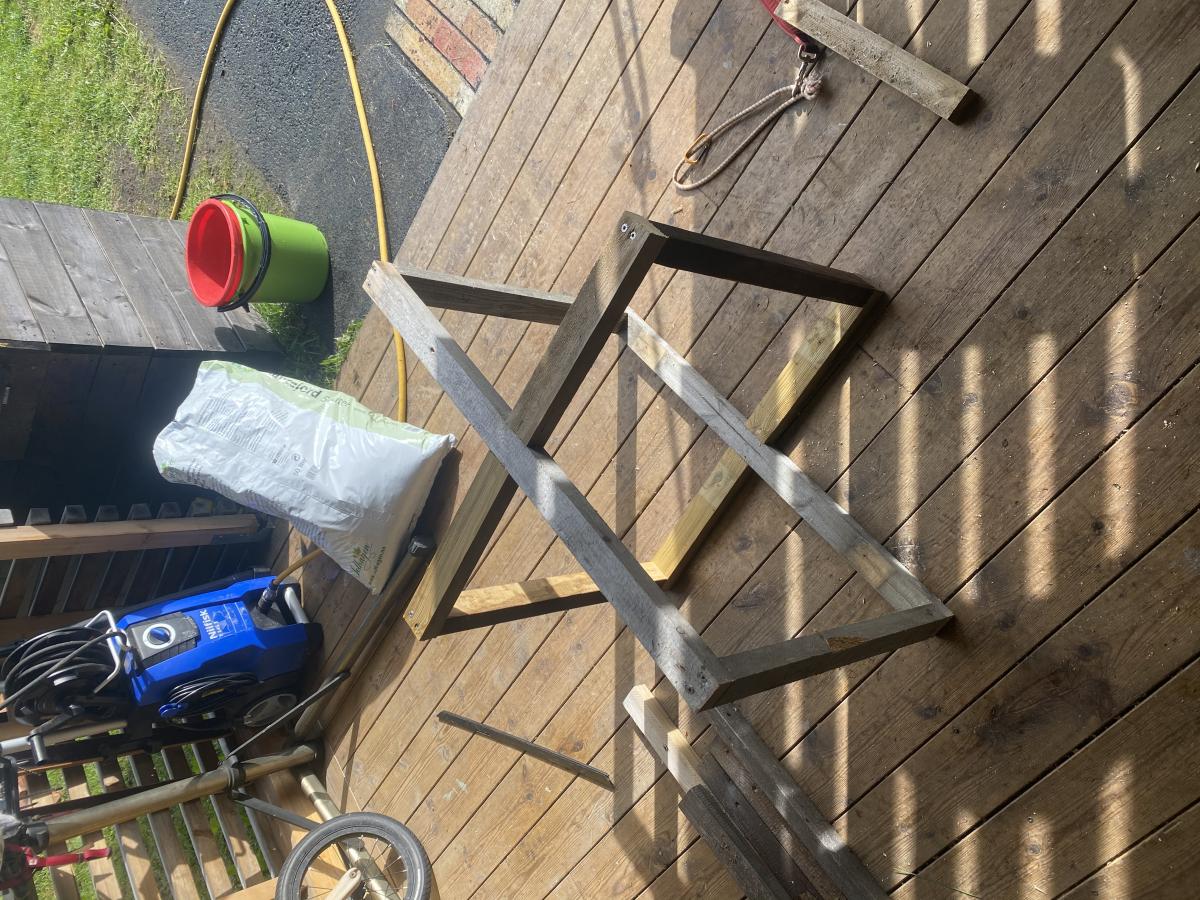
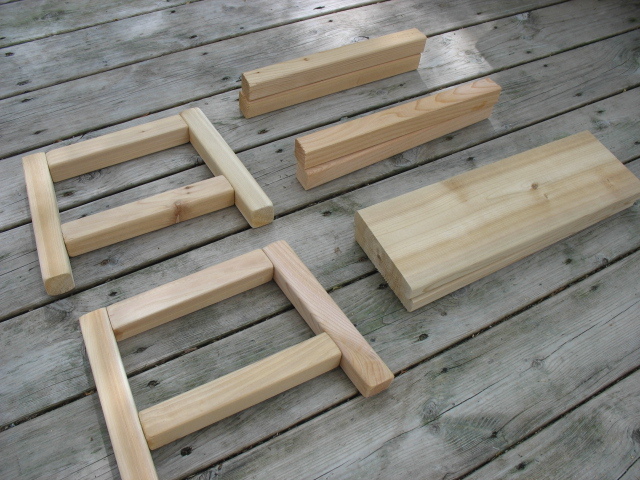
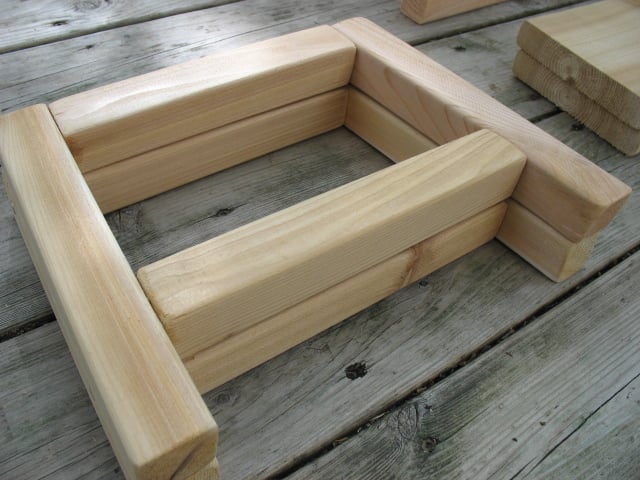
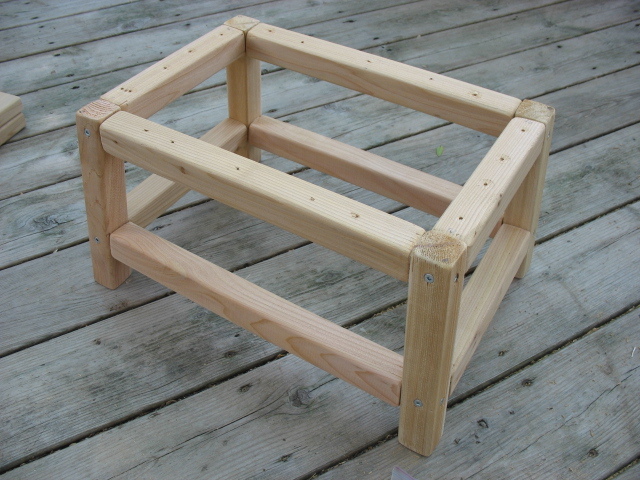
The plans were pretty simple to follow, I did change the way I set the bottom shelf in because it wasn't very stable and I was worried it would eventually dip in the middle. I screwed some pieces of scrap wood onto the back to hold it together better and then built a ledge for it to sit on around the bottom. After that I screwed it into the and BAM.. much more stable..

Estimated Cost
$85
Estimated Time Investment
Weekend Project (10-20 Hours)
Finish Used
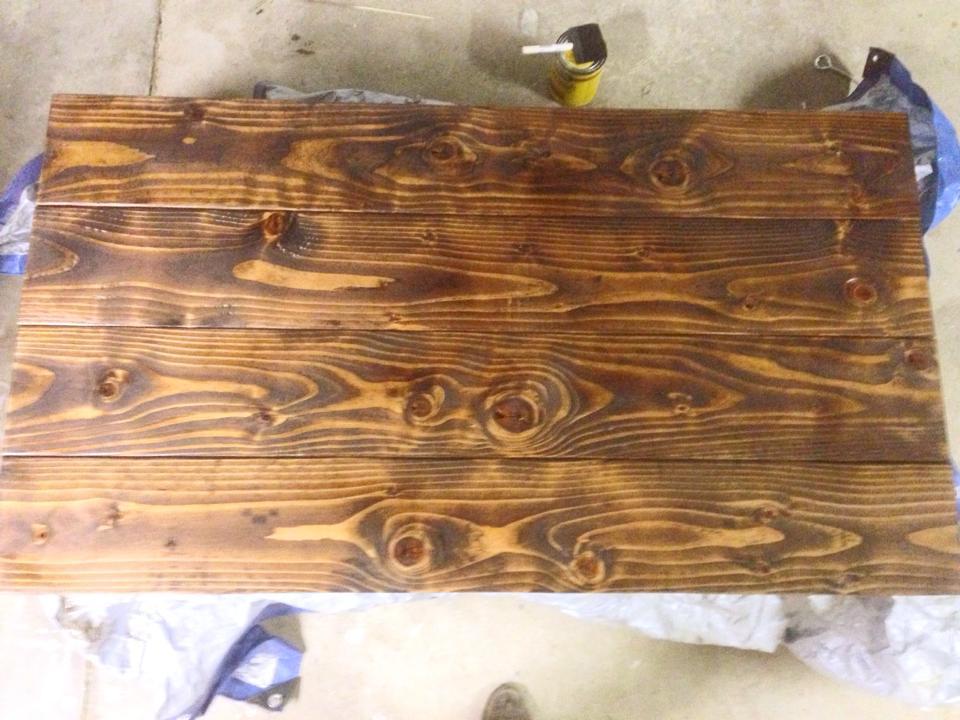
Minwax Provincial for the top(two coats) and shelf with a semi gloss finish(3 coats). Glidden Buttermilk matte(3 coats) for the frame.
Recommended Skill Level
Beginner

Comments

bwardwell02

Sat, 09/06/2014 - 05:41

I would like to have the detailed plans for this too!! I have looked everywhere for the perfect coffee table for my screened in porch and here it is.... I'm so excited!!! 

The Ironbolt Table

Submitted by susanshamp on Wed, 04/27/2016 - 22:22

This table was inspired by one from Restoration Hardware. It was constucted using Fir and black pipe fittings from the local hardware store. Please check out more pics on my blog (I had trouble uploading them here due to file size). Thanks for looking!

Built from Plan(s)
Estimated Time Investment
Day Project (6-9 Hours)
Recommended Skill Level
Intermediate

DIY Laundry Cabinet

Submitted by Anonymous (not verified) on Mon, 09/18/2023 - 14:56

Our laundry renovation with the cabinet loosely based on the Ana's kitchen cabinet plan. I used 7mm red oak plywood for the door and side panels with some with Baluster hardwood for the doors frame. 

The benchtop was all cut from my usual 200mm x 50mm pine landscaping sleepers.

Mark

Comments

DIY Nursery Closet

Submitted by Anonymous (not verified) on Mon, 10/02/2023 - 10:46

This project is based on the floating closet tower build. This is the first time I’ve attempted a renovation project of this size, and I feel satisfied with the results. I did not purchase my boards from shelf help, I cut mine from a sheet and a half of plywood. Thank you for providing your plans for free. They are very helpful for beginners like me!!

Charity P

Cubby Organizer (Pottery Barn Inspired)

This cubby organizer is great for storage, displaying collectibles or as an advent calendar. I'm using mine in my mini-workshop for storing tools and supplies I use frequently when woodworking. Tutorial can be found at my blog here: http://betweennapsontheporch.net/build-a-cubby-organizer-pottery-barn-i… Thanks Ana for supplying the plans!

Built from Plan(s)
Estimated Cost
$40
Estimated Time Investment
Day Project (6-9 Hours)
Finish Used
I used Sherwin Williams Dover White paint for a soft white. Stain would work great for this piece, too.
Recommended Skill Level
Beginner

Playhouse

We built this playhouse for our daughter's 6th birthday. She absolutely loves it! We were looking at purchasing one, but they were way out of our budget. Ana saved the day with these plans :).

Estimated Cost
$320.00
Estimated Time Investment
Weekend Project (10-20 Hours)
Finish Used
We painted the house with white Pittsburg Ultra Exterior Latex paint. The mailbox, door and shutters were all painted with Pink Viburnum Sherwin Williams Satin Exterior paint.
Recommended Skill Level
Intermediate
Seasonal And Holiday

Wood Headboard, Queen Size

Submitted by Anonymous (not verified) on Mon, 08/08/2016 - 08:11

This was my first building project. It was a easy build even for a beginner. Make sure you measure your bed frame and that it will fit into your headboard. 

Estimated Cost
75-100
Estimated Time Investment
Afternoon Project (3-6 Hours)
Finish Used
Minwax Dark Walnut
Recommended Skill Level
Beginner

Fancy X Farmhouse Table - modified

We used the wonderful Fancy X Farmhouse table plan with modifications. We needed the table to be shorter for our space, so we shortened it by 12" - this brought the angled pieces closer - we chose to do this instead of altering the angles. Also, we used 4 X 4 posts for the double 2 X 4's and also the cross pieces and angled pieces. I posted two blog posts about the process with lots of pictures, including how we rounded the ends per the plan. The finish is a equal mix of dark walnut and classic grey, finished with Trewax.

Great plan - we are so pleased with the results, and the price tag!!

Built from Plan(s)
Estimated Cost
$150
Estimated Time Investment
Weekend Project (10-20 Hours)
Finish Used
Equal mix of Minwax Dark Walnut and Classic Grey. Finished off with Trewax and buffing.
Recommended Skill Level
Beginner

Comments

Dananichols

Thu, 07/19/2012 - 07:45

Thanks Whitney - we are lucky to have access to untreated 4 X 4's at our local orange store. I tend to buy an extra one every time as I am afraid they will stop carrying them!

Barbara burns (not verified)

Mon, 07/23/2012 - 15:12

I am a newby to wood working and am in love with this table. I have all the pieces cut for the sides, will also be changing the length and will make those cuts later. I am a little insecure on the nailing/screw directions...placement, size, where to hide?, etc. would love to know where yours are placed and what you used. (I did purchase a Kreg jig for pocket screws).
Thanx for any support you might have.

Barbara burns (not verified)

Mon, 07/23/2012 - 15:14

I am a newby to wood working and am in love with this table. I have all the pieces cut for the sides, will also be changing the length and will make those cuts later. I am a little insecure on the nailing/screw directions...placement, size, where to hide?, etc. would love to know where yours are placed and what you used. (I did purchase a Kreg jig for pocket screws).
Thanx for any support you might have.

Dananichols

Mon, 07/23/2012 - 18:31

Barbara -

I posted a link above to my blog - I have two posts about the table and lots of pictures, including pics of where I placed the screws. The only place I used the pocket screws (great purchase by the way, have used mine so much!) was to attach the 4 X 4 cross beams (you can use them on 2 X 4's as well if you are following the plan). Hop over and have a look - lots of pictures - and hopefully that will help with you questions!

Thanks - and have fun!

Dana

Kristine Faldik (not verified)

Mon, 07/30/2012 - 03:37

Dana,

This table is just gorgeous! My husband and I are building a house and have been looking to find the perfect table for weeks now. Just stumbled upon yours and fell in love! We are going to try and use your modifications to the original plan as well, thank you so much for sharing. Hope we can do this too!!!!!

Thanks!

Kristine

valery (not verified)

Sat, 10/27/2012 - 06:45

NEED one of these...
I've NEVER done a project like this and i'm not even near crafty but this is the first thing I see on Pintrest that made me even want to attempt doing it!

Is it wide enough that the cross beams don't annoy you when you are sitting?

TammyLGK

Wed, 02/12/2014 - 11:20

Dana thanks to your informative blog detailing what you did for the rounded legs you have saved my project! I really did not want to resort to the the angled leg cuts. I just could not figure out the 30 & 45 degree cuts. I as well was originally trying to make them on the same piece. THANK YOU!

Weathered Gray Fancy X Farmhouse Table With Extensions

This is our attempt at the Fancy X Farmhouse Table. My husband and I built this over a weekend. We modified our table from the plans, making ours shorter and wider. We also added extensions and changed out a few boards for a bit of a different look from the exact plan. We created a custom finish with a few cheap and easy steps to get the look we wanted. Our table is 84" long by 46" wide. The original plans for the table called for it to be 96" long by 37" wide. We added a fifth board to our table top, thus making our tabletop 9.25" wider (since a 2x10 is actually 9.25" wide.) To account for this, we simply increased the width of the base boards by 9.25". As for the length, since our table was 12" shorter than the plan, we decreased the length of the two support boards running between the bases by 12" to account for that. We had to adjust the length of our decorative pieces somewhat, because of the wider base and shorter length. It was bit of trial and error but we were happy with what came out of it. For the center base post, instead of using 2x4's we used one 4x4 which was clean, square, and straight. We were happy with how things turned out for the base. Perhaps our biggest alteration was the fact that we added extensions to each end. To do this, we cut out 3.5" slots in the top of the base so a 2x4 could slide in. We then took two 2x8's and used pocket holes to bring them nice and tight. With the extensions in place, our table is nearly 10 feet long! As for the finish, we wanted a weathered gray color and were able to come up with it through a three step process. Its really beautiful in person! Thanks again for the plan

Built from Plan(s)
Estimated Cost
$80-$100
Estimated Time Investment
Weekend Project (10-20 Hours)
Finish Used
Custom!
Recommended Skill Level
Intermediate

Comments

Darcy Taylor (not verified)

Tue, 08/07/2012 - 03:10

Could you possibly give me a detailed explanation of how you finished this table? I love, love, love the color and want to replicate it.
Thanks!
Darcy

Jennifer Nealy (not verified)

Tue, 09/25/2012 - 09:06

Beautiful table, but I really want some information on the 3-step process you used to get the weathered gray look. Can you please provide that information? Thanks!

SawgrassHomeGirl

Sun, 04/07/2013 - 20:40

Thank you for your interest in the finish....we used regular pine from Orange and Blue. We used a mixture of steel wool and vinegar in a glass jar, let it sit for a night or two, then brushed it on evenly over each board. We then let that sit for a night or two and then proceed to whitewash the entire table (two parts water one part paint.) After that, we took Dark Walnut Stain and wiped it over each board, then quickly wiped/scrubbed it off after just a minute or two. That's how we did it!

Id suggest practicing first with some scrap , esp. with the steel wool mixture so you can see how the wood changes. :)

FLKS

Fri, 09/23/2016 - 15:24

Hi Emily! 


        I love your table. We are about to make one and love your stain. Would you be so kind to give me details of what you used to achieve the look? I read the above post, but could you give me brands and colors? I don't understand what is steel wash- is that the color? 

Thank you so much!


FLKS

ajdriscoll08

Mon, 09/09/2013 - 11:40

but when we brushed on the steel wool/vinegar mixture, the holes on the table top and base that we had filled in with putty didn't really stain...did you run across the problem? I don't see any areas on the top of your table where you can tell where the holes were??

rmf

Wed, 04/09/2014 - 09:05

I'm curious if you made the extensions permanent or if they can be removed and added as you need? I love this table!
Thanks,

Jenni2526

Wed, 08/13/2014 - 11:50

I am not understanding how you made the extensions from your description and then looking at the end pictures... Would you please explain this a little further and how they are stored and placed for use and how this works? Thank you!

Ren.K777

Tue, 10/07/2014 - 17:39

LOVE the finished product! I aim to get the hubby to make this one at some point!  But for now, we have just a bench in our kitchen that he made and I'd like to apply the same finish you did.  I've looked at a bunch of different tutorials but I like yours the best.  Here's the question...how long after I apply the paint/water mixture to I apply the walnut stain? Do I apply the water/paint and wipe off right away?  A few seconds later?  A minute later?  Do I allow the applied/wiped water/paint mixture to dry completely before adding the stain or do I want to apply the stain before it's throughly dry so that it mixes a bit for a softer look?  Thanks so much!  


Cedar planter boxes

Submitted by JavaJoe on Fri, 06/06/2014 - 20:00

I used the main plan for ideas, but opted to use 3.5 inch pickets instead, which allowed for a smaller planter that wasn't as big. Also chose to miter 1x3s for the top which I think really finishes it off. Sanded everything with a belt sander to 220 grit. Used min wax golden pecan plus three coats of poly inside and out. Finished size was about 17x17. Tile spacers work great to keep the gaps even!

Built from Plan(s)
Estimated Time Investment
Afternoon Project (3-6 Hours)
Finish Used
Min wax golden pecan
Recommended Skill Level
Intermediate

Comments

Modern round table

Extended round tanke with a middel section and a cross skapes leg structure. Loves working with the table top. I Sander down the old tanke top, jigsawed out the desired shape, brunt it with a blow torch, Sandnes and oiled with a stain. So satisfied.

Built from Plan(s)
Estimated Cost
5$
Recommended Skill Level
Advanced

Farmhouse Bench in 1 day

Submitted by vickitee on Wed, 06/25/2014 - 08:27

This was my first build from your site! Farmhouse bench.
I was a little confused with the miter saw instructions "bevel cut at a 10 degree angle off center". I had to google to figure out what you meant. In the end the bench looks awsome and I feel very empowered with my tools.
(still need to stain the finished project, bought all the wood and built in 1 day)
Thank you Ana for sharing your plans!! I love your site and I love my Kreg Jig!
Vicki
(Canada)

Estimated Time Investment
Day Project (6-9 Hours)
Finish Used
going to use walnut stain.
Recommended Skill Level
Beginner

Comments

Cedar Spa Bathroom Step Stool

Submitted by Tea Granny on Mon, 06/30/2014 - 20:44

After searching the town high and low for a 10" high wooden stool, I decided to make one. Ana had the perfect stool pattern to modify for our needs - A little shorter, a little wider.....et Voila!

It's the perfect height for little ones to reach the taps in the bathroom, as well as helping out in the kitchen from time to time. And, the cedar smells wonderful.

Finished height: 10"
Top measures: 11.25" x 16.5" (2 boards, cut 16.5" long + a space in the middle)
Footprint: 12.375" x 17.375"

I also lined up the rails (instead of staggering them), similar to the Harriet Higher Chair plans. The joint will be weaker, but I prefer the cleaner lines on such a short step stool.

Thanks Ana for the great plans!

Estimated Cost
less than $15 (cedar)
Estimated Time Investment
Afternoon Project (3-6 Hours)
Finish Used
No finish added, exposed screws.
Recommended Skill Level
Beginner

$12.00 Cedar Fence Picket Planter

I followed the plans exactly. The only difference is I used my Ryobi Airstrike brad nailer instead of stapler. Lowes was slightly higher in price than the $10.00 on Ana's post but at $11.97 it wasn't too far off!

Estimated Cost
11.97
Estimated Time Investment
An Hour or Two (0-2 Hours)
Finish Used
No finish
Recommended Skill Level
Starter Project

Fancy x farmhouse table

Submitted by Anonymous (not verified) on Thu, 10/13/2016 - 19:40

Barnwood fancy x farmhouse table.  

Built from Plan(s)
Estimated Cost
$100
Estimated Time Investment
Weekend Project (10-20 Hours)
Finish Used
Barnwood sanded down to achieve that golden brown, while leaving the aged texture in the cracks. Left natural.
Recommended Skill Level
Intermediate
Back